


rwiederrich
-
Posts
5,516 -
Joined
-
Last visited
Content Type
Profiles
Forums
Gallery
Events
Everything posted by rwiederrich
-
The dull-coat knocks down any sheen the tape produces, plus it permits me a dull surface and one with enough surface adhesion to permit me to draw on the panel lines cleanly. I'm always thinking and looking for ways to *cheat* my way around doing anything difficult....and if my methods are unorthodox and the materials and techniques used non-purist.....Well.....I can live with that. We are, in reality, MODELING the prototype...not actually making it. Loose, tricky, lazy and outside of the box...has been my modeling mantra for years. Rob
-
Fantastic wood work on the deck houses....this scale really allows you the room to add such detail....great job.... Rob
- 200 replies
-
- 1
-

-
- cutty sark
- clipper
- (and 1 more)
-
Thanks Keith...I wasn't sure if the texture or the shade would match between the paper and masking tape....but since the tape is actually rolled upon itself and wrinkled and folded then sprayed with dull-coat...it becomes quite convincing up against the paper sails. Thanks for the fine compliment. I've been so side tracked with adding a large garden building and working the garden that I've spent little time on the Glory in recent days. I hope to return very, very soon. Rob
-
To add sails or not? What is your preference?
rwiederrich replied to Bill97's topic in Masting, rigging and sails
Wonderful! First..if you want to add furled sails to the Constitution with her yards as they are...that would be absolutely perfect. If I may suggest one little item....furled sails area bit more rigorous to install, and when the yeards are mounted and fully rigged with foot ropes and such...to do so might be more problematic then anything else. Adding completely set sails would be far easier in this application....IMV One little tidbit...a secret actually,...that I have not divulged, is this...... the furled sails on my Glory of the Seas are not actually paper...as is are the set sails. Nope...for me to get the creases and folds I required, paper was going to be a tough road to hoe.....nope...I found a medium that could be rolled, crinkled, folded with little fuss and that was....plain ole 2" tan masking tape. Yep..just cut the correct width, reduce the length, taper out the ends and all was needed was to stick the tape to the yard, roll in the edges....fluff up the center and roll in the back so as not to expose the sticky side...then press and crinkle into form. Once done, you secure it in place with reef points, tied around the sail and yard. Then I drew in the panel lines...making sure to follow the accents and curves of the folded material. Once done....I sprayed on a coat of Testers Dullcoat to knock off the shine and to mimic the shade of paint I had already selected to match when I painted the paper sails. For further security, I played a small coat of white glue along the edge of the sail and the yard to make sure it won't separate. Yes I know....like I said earlier..try new things, experiment...... the final outcome is quite convincing and melds with the paper sails quite well....you'd never know unless I told you the secret....and now I did. Your Cutty Sark is wonderful, well executed and very clean. If I were to suggest anything, it would be to remove those brass chain sections and get some Blackening and blacken the chain first. It is a small touch that in the end has great benefits. It lends to greater realism. Your deck looks wonderful by the way. Sweet job for sure. Rob -
To add sails or not? What is your preference?
rwiederrich replied to Bill97's topic in Masting, rigging and sails
Oh goodness...don't throw anything away. One doesn't become adequately proficient if one gives up. I've been building sailing ships(Mostly clippers) for over 50 years, so I wouldn't even make sucha comparison. But if you will, permit me to be of assistance, if I may. Out of necessity, I have developed many means to accommodate my goals...and much of that stems from a history of machining and fabrication experience. My father taught me so long ago, that if anyone can make it(no matter what it is), you can make it. So, instead of buying what I need, I either re-machine someone else's design to suit my needs or I simply make it myself. Your Constitution build is very good and you are accomplished yourself. Don't belittle that...but add to it and always continue to further your skill set and imagination...by trying new things...new techniques....new processes. You'll only gain priceless experience...to apply on the next project. Rob -
To add sails or not? What is your preference?
rwiederrich replied to Bill97's topic in Masting, rigging and sails
Good question. Several things I take into consideration. First:.... The angle of the sails is directly attributed to the direction of the wind and the *tack* of the vessel. Most paintings you see of sailing ships, the sails appear full on...meaning the wind is leeward, or coming in from the side of the vessel. When the vessel is running with the wind, the sails will be perpendicular....some paintings of ships looking toward their bow,,,shows this inclination. Second:.... In many cases, when you reef your yards over to port or starboard..you need to make sure the yards do not impede or press up against the backstays or the shrouds. This can become quite evident on the shrouds of the tops. or the topmast shrouds. I chose a 20deg to starboard reef for the Great Republic,,,,but there is nothing that dictates the degree...but the desire and privy of the modeler. Also if you set the cant/reef to an extreme, you could adequately hide the rigging details of the sails and the yards behind the sails......IF... you do not allow viewing from both sides of the vessel. My Great Republic is in its case against the wall...preventing one to view clearly from the starboard side. But because I rigged my yards with only a 20deg...Cant/reef...the viewer can see all the detail of the internal rigging AND can see all the detail of the sail face rigging as well....without making the vessel look like it is running with the wind...or having the wind directly behind the vessel. Which is a rare thing indeed, under natural conditions. Hope this helps. Rob -
To add sails or not? What is your preference?
rwiederrich replied to Bill97's topic in Masting, rigging and sails
I hope you can find it and it helps..... Rob -
To add sails or not? What is your preference?
rwiederrich replied to Bill97's topic in Masting, rigging and sails
Interesting...I don't get it..you should be able to see just below every post I make a line then the list of current builds I'm involved with. Here...just go to the scratch built model thread and press page #7. The Great Republic thread is located there, several lines down. press that and then follow the previous directions. Weird...... -
To add sails or not? What is your preference?
rwiederrich replied to Bill97's topic in Masting, rigging and sails
Personally I do not think it is too thin for that scale...but if you are still questioning...simply get a hold of some thicker ply paper. Copier paper comes in all manner of thicknesses. Just go to your paper supply store and ask for a sample of some of their thicker stock to compare. For larger sails...you might consider getting some of the larger sheets used for official documents. Also remember, you will be painting the paper sail as well(both sides), so this will also add dimension. Keep me posted if you will...of your progress... Rob -
To add sails or not? What is your preference?
rwiederrich replied to Bill97's topic in Masting, rigging and sails
I'm sorry...just look at my sig line beneath any comment I make, you will see the models I am working on. the Great Republic's log is there to review. The sail making portion begins on page #17 post #505. If you follow along you will note that even my own knowledge and skill improves...and I made some revelations on the 3rd and 4 sails on page #19. I originally failed to take into consideration the amount of paper required to make the *Billow* of the sail. I needed to add slightly more material to the height of the sail to make sure it reaches properly down to the next yard and the sheets are well drawn through the sheaves of the lower yard. The error can be see on other folks examples of their own sails. It really isn't a big deal, but a fully set sail had its clue points drawn down snugly to the lower yard. Hope this helps. Rob -
To add sails or not? What is your preference?
rwiederrich replied to Bill97's topic in Masting, rigging and sails
The size 12~24 is referencing the size of the sail panels. Some sails utilized a 12" panel that makes up the sail and it gives the sail its vertical lines. Some sails used double wide panels...24. this depended on the bolt of material the sail maker used. Yes the lines I drew are representative of the panel lines. Yes you can copy each sail as it is on the plastic sheet....however the *stretch* of each sail must be taken into consideration when making them. As far as adding the top and side banding...(other then the belly band and the reef point band)... they are all I add. I tried to add the foot band...but because the sail must have that *Natural* curve along its lower edge...adding paper to this edge is quite difficult. so because of the scale....I left it off of all the sails. It's omission, hardly does noticed and having a wrinkled band is unacceptable...and cutting a curved band for each sail was far to argueous. Lastly...the belly and reef point band can be one in the same or separate, depending on the particular sail you are modeling. Just follow the design on your plastic sail sheet...you can also transfer the panel lines from the plastic sails to the paper ones. Let me know how it goes. Remember...experiment often if you desire to solidify your technique. Don;t forget to visit my Build log for the Great Republic...there I posted some images of the sails in stages of their construction. Rob -
To add sails or not? What is your preference?
rwiederrich replied to Bill97's topic in Masting, rigging and sails
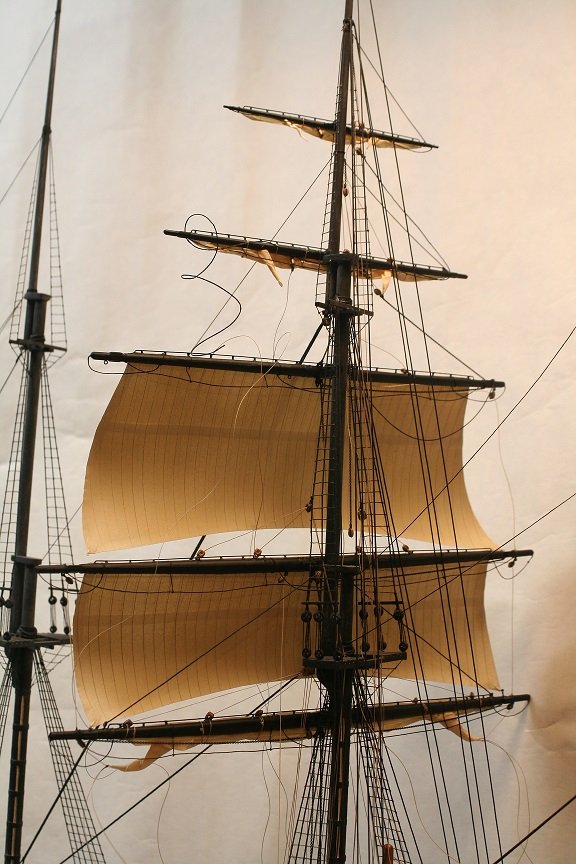
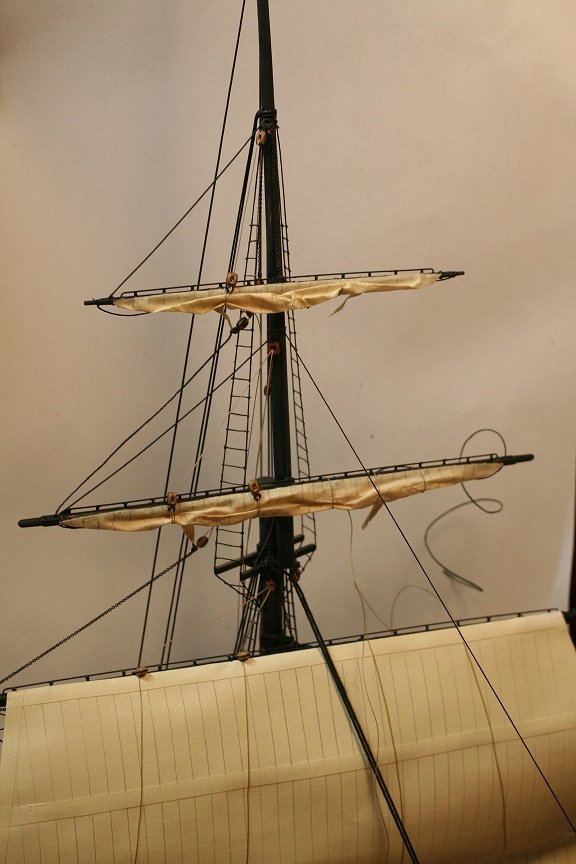
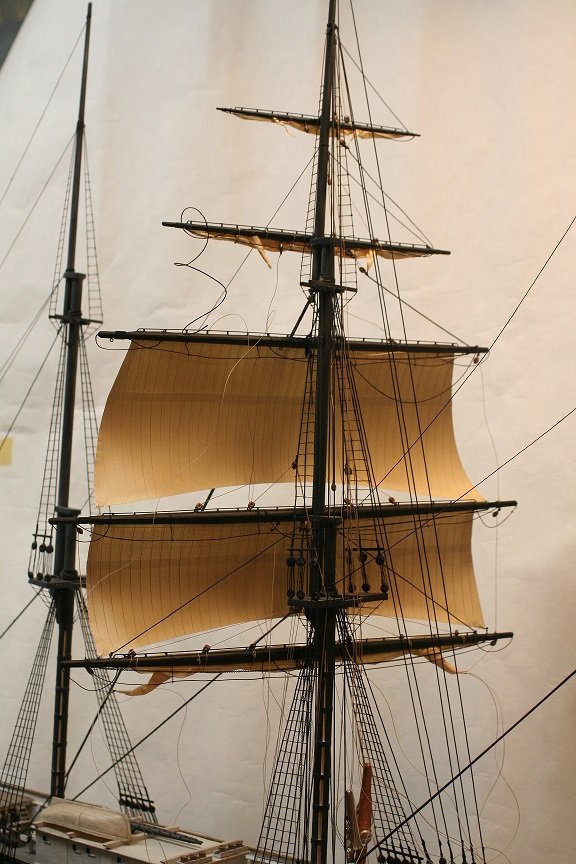
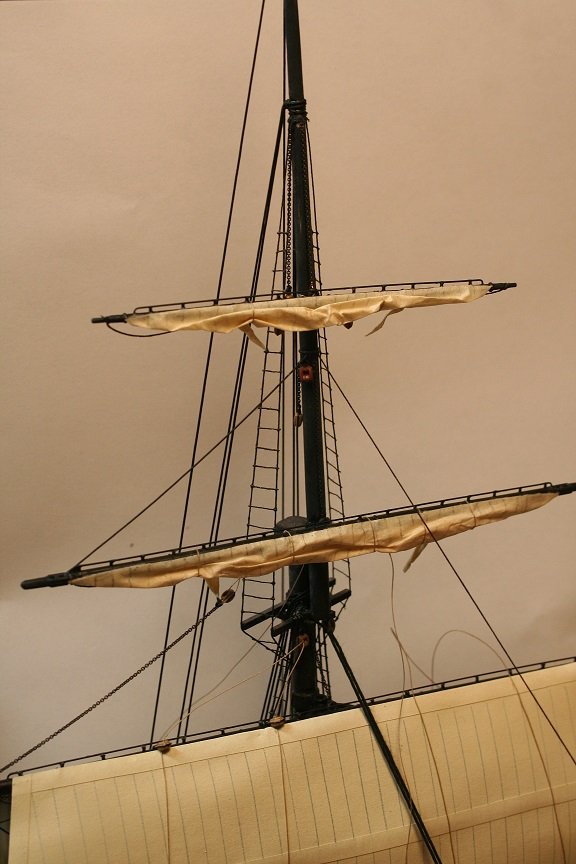
Bill, if I can assist in any way, please let me know. Here are some recent pictures of the sails on my current project, Glory of the Seas. A mix of furled and set. Trying to depict her in the only image of her under sail. Rob

-
Thanks Michael.....paper is amazing when its manipulated into convincing sails. Rob
-
I turned the model around and am getting ready to begin the entire port side rigging of all the yard lifts, halyards, buntlines and blocks and the sheets. Lot of stuff going on...but it works out better this way. Rob
-
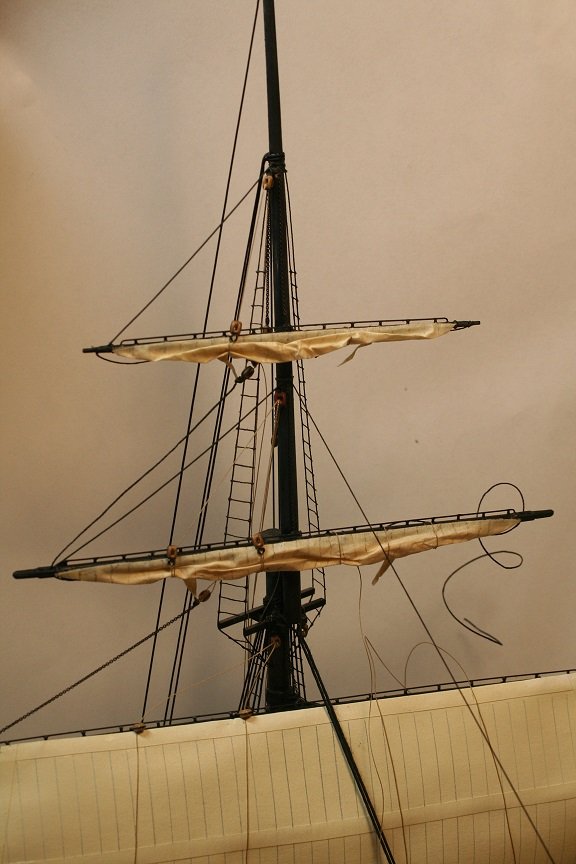
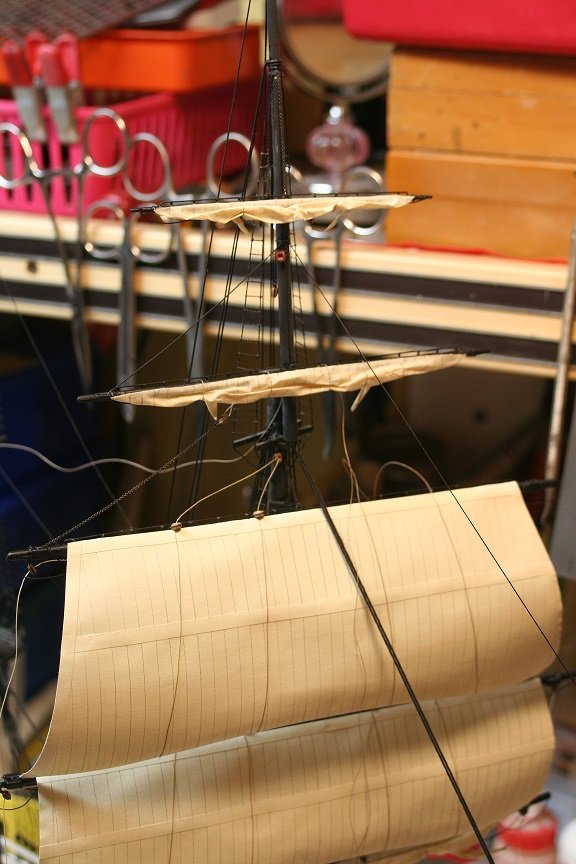
Thanks Druxey.. Spent a bit more time today working on the topgallant and royal rigging. Here I'm setting up for the lifts and sheets.
-
Here is a bit better image. You can see the lift on the topgallant...and the halyards on both yards. When things dry a bit I will add the royal lift and then rig up the sheets and the buntlines and their blocks.. Rob
-
Now the sail ir bent and the yard is fixed to the mast. I installed the lift and getting ready to work up the sheets and their blocks. I decided to work on one side at a time...so I don't have to keep flipping the model around. This is why you can see the topgallant still needs the port lines installed.
-
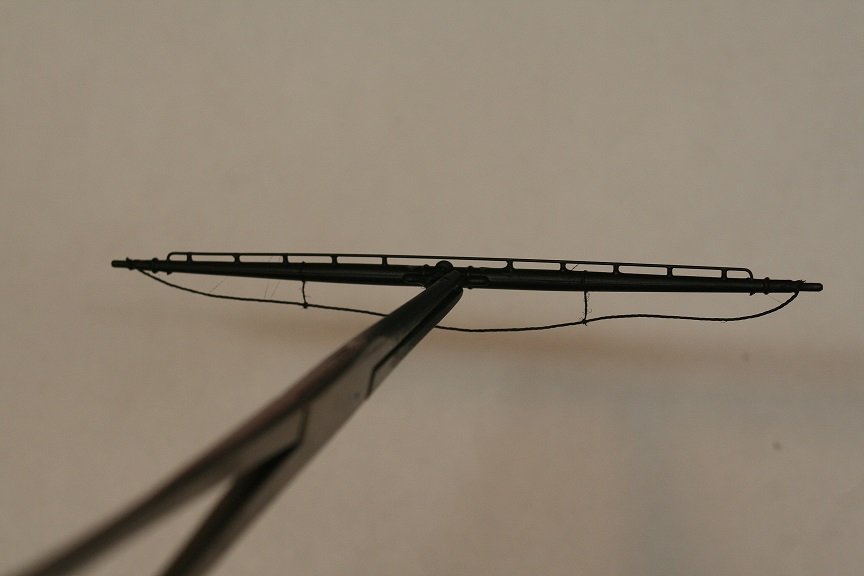
Spent a bit of time working on the Glory....I began the royal yard....here before the furled sail is bent to it.
-
Respect time and detail
rwiederrich replied to TheAuthorsDaughter's topic in New member Introductions
Thank Arina....I anxiously awaiting when he will want to meet. I have so much to discuss with him and it would be such an honor. I hope to hear from him soon when that will be possible. Rob -
Respect time and detail
rwiederrich replied to TheAuthorsDaughter's topic in New member Introductions
Arina...hello. I am missing your father...since this Corona nonsense. We never got to meet up. Everything hit hard and I'm hoping everything is well and Mike is well. I'm still planning on getting together with him...just don't know if he is able at this time. Please let him know I am still looking forward to our meeting. Rob(Glory fan) -
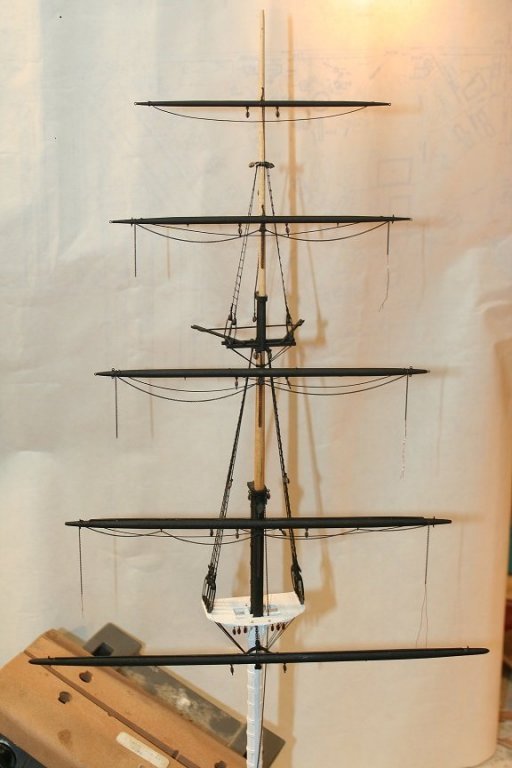
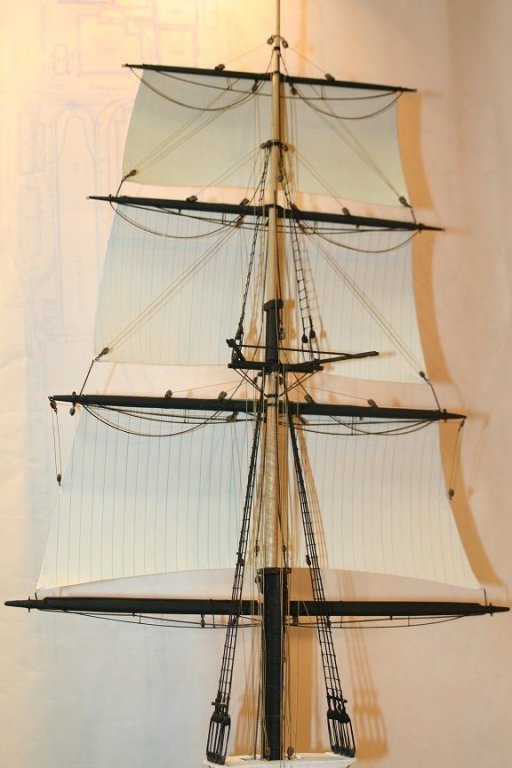
Pre-rigging the mast, and even adding sails to the yards before you set the mast in the hull is an extreme time saver, not to mention it allows you to get up close and personal, without having to fight existing rigging on the model. I adopted this technique for the mast/rigging construction for my 1/128 Great Republic slipper.
-
To add sails or not? What is your preference?
rwiederrich replied to Bill97's topic in Masting, rigging and sails
Formed and billowed.