rwiederrich
-
Posts
5,520 -
Joined
-
Last visited
Content Type
Profiles
Forums
Gallery
Events
Everything posted by rwiederrich
-
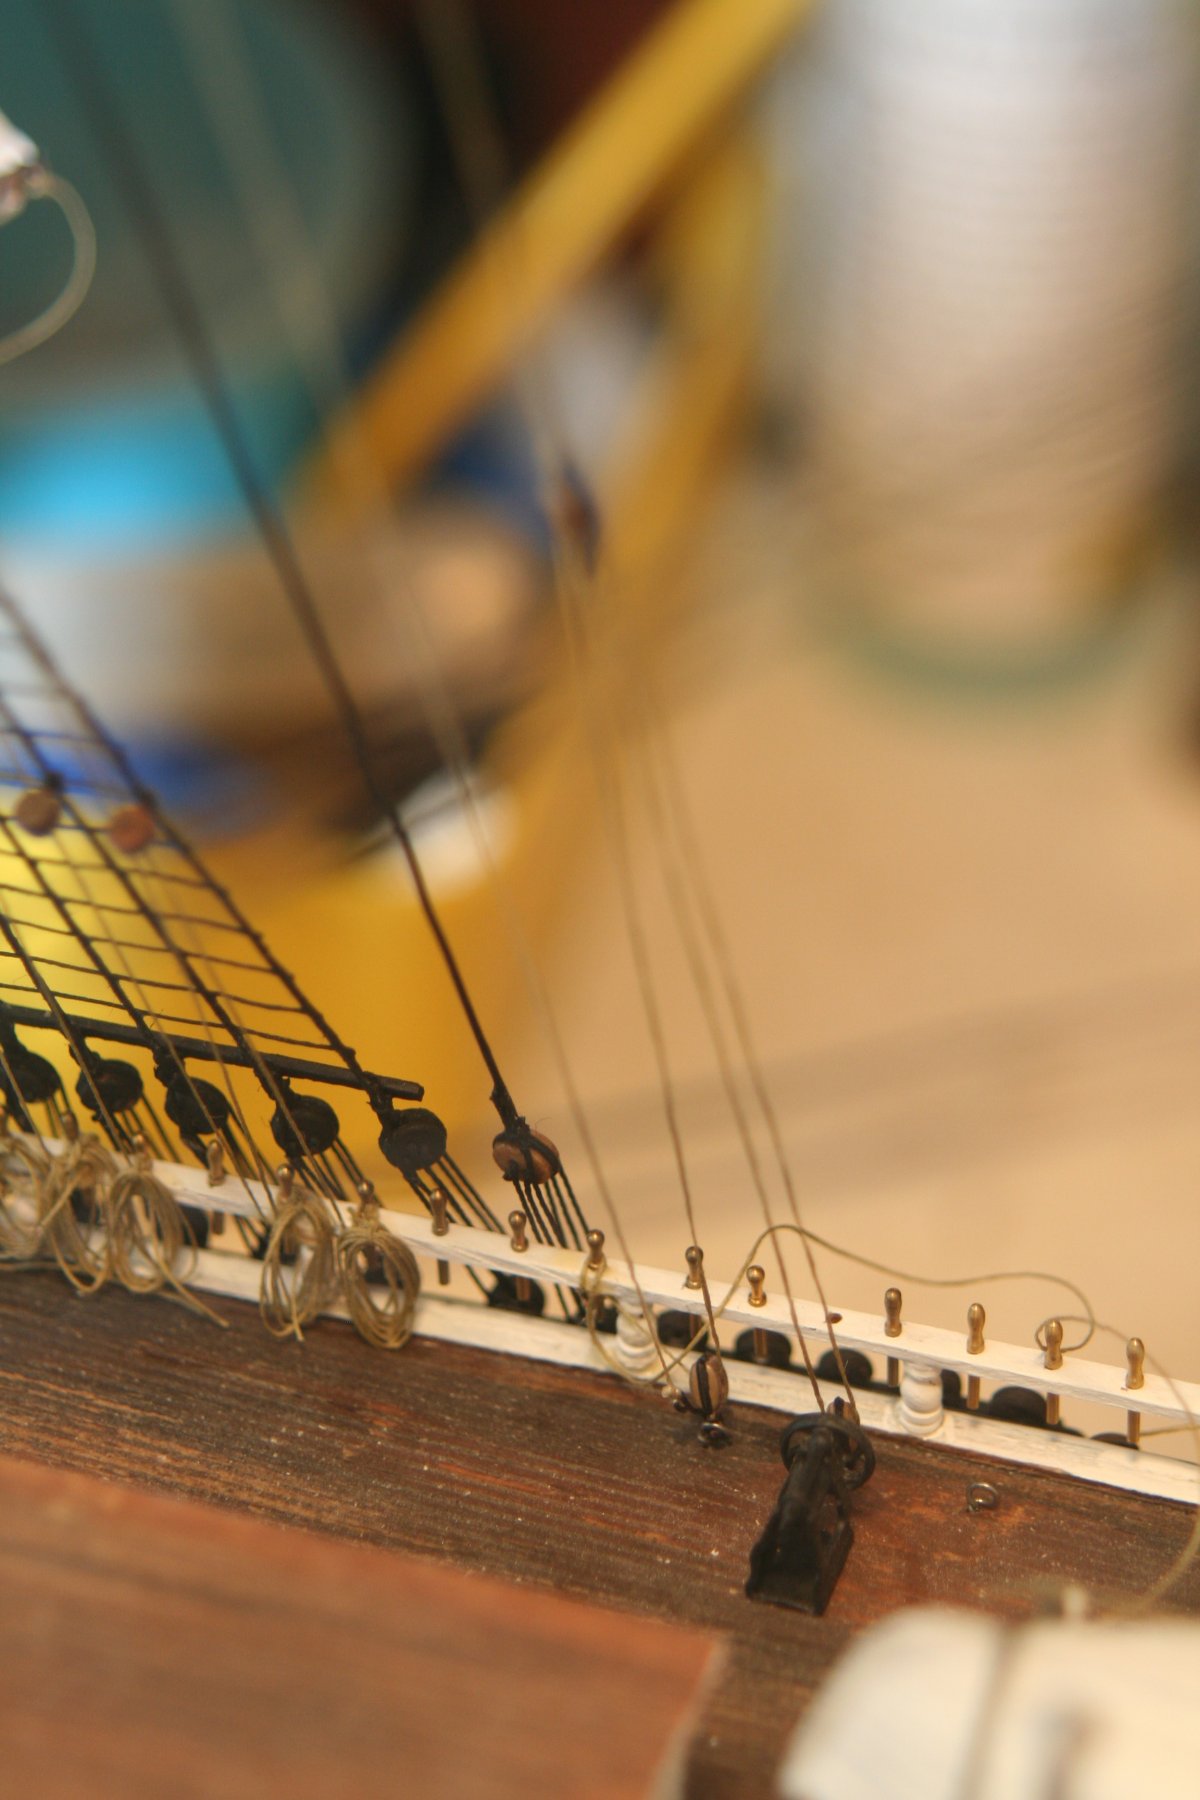
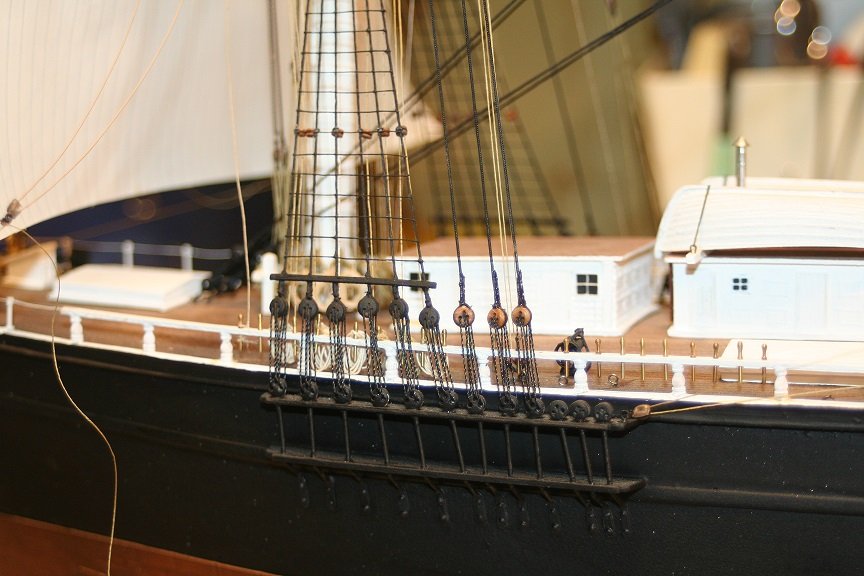
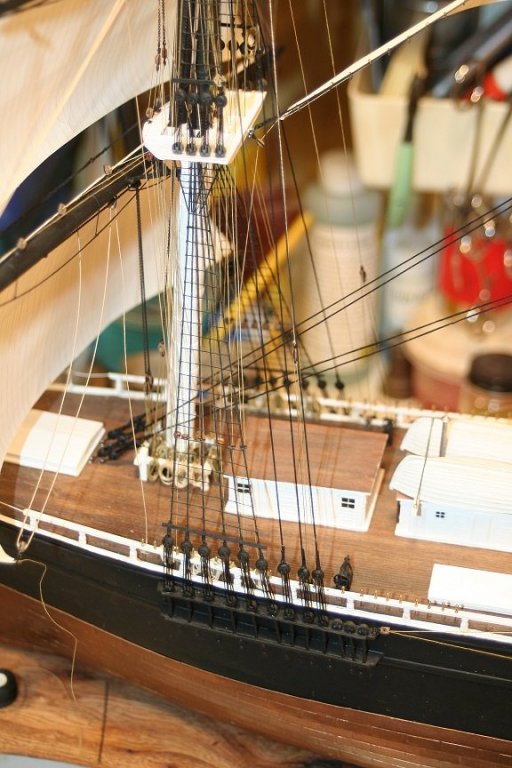
Spent a little time tonight adding some backstays to the fore mast...and finishing up the royal halyard purchases.

- 1,208 replies
-
- 10
-

-
- great republic
- clipper
- (and 1 more)
-
Very true indeed Bob. My father owned several old railroad lanterns that used blue lenses such as you depict and he explained it to me as the very reason you just explained. The light omitted was green. Yellow flame + blues lens= green light. Smart folks back in the day..... Rob
-
ancre La Salamandre by tadheus - 1:24
rwiederrich replied to tadheus's topic in - Build logs for subjects built 1751 - 1800
Pawel...how did you achieve the rolled eye on the end of the zinc strap....wonderful work! Rob -
Thanks a lot Popeye..very much. I too have traditionally rigged the standing rigging first, but because I added sails...I needed to install all the sail rigging first(running rigging). Once installed, I then began to add the stays and halyards/purchases. It has proven to be a very successful way to rig, both running and standing rigging. Small jobs are easier then one big gob. Rob
- 1,208 replies
-
- 2
-
-
- great republic
- clipper
- (and 1 more)
-
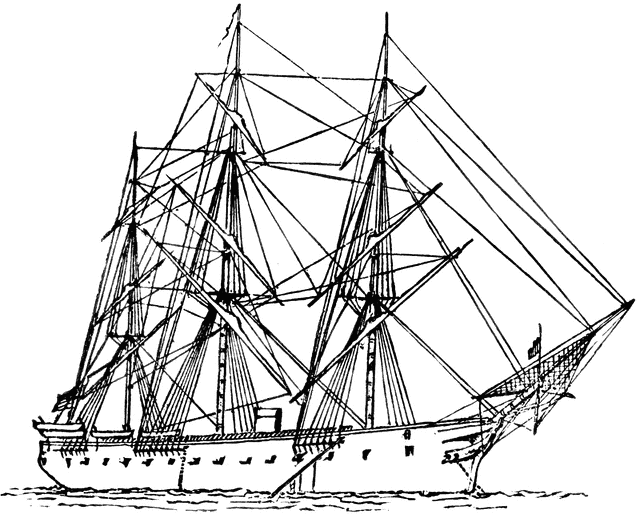
The Victoria is a magnificent model. I recall saving an image of her bow off line (google probably), because she has such clipper like bow proportions, long before I even knew her build log was on MSW. I enjoyed her lines. It is so true....once you begin to run the rigging and *feel* the direction and motion of each line....locating her winches will become far easier...especially when you have known deck furniture you have to work around. Secondly...once you know the function of the line and the mechanical/geometrical confines of that line...deducing its proper purchase and belay point will become quite evident. Smooth sailing. Rob
- 1,208 replies
-
- 3
-
-
- great republic
- clipper
- (and 1 more)
-
HMCSS Victoria 1855 by BANYAN - 1:72
rwiederrich replied to BANYAN's topic in - Build logs for subjects built 1851 - 1900
Wonderful work. I appreciate the ruler for scale purposes. You know....after searching the entire thread...I can't find the scale you are building her in...what scale is she? Rob(slow to catch a clew)- 1,021 replies
-
- 2
-
-
- gun dispatch vessel
- victoria
- (and 2 more)
-
Yes....Pat, sometimes images we have are not clear enough and tend to lead us in directions that were not factual. I too have seen images that made backstays look as if they ended in double block-n-tackle purchases. When through more study of the actual practice on board...it was made clear that the downhauls and halyards associated with topsail yards and topgallant yards was more apt to be the rigging that was causing the confusion. From knowledge of ship rigging structures it only took simple deduction to definitively recognize what I was looking at. In your case, you can deduce, by contrasting your vessel with other known vessel types. Also, it is not a stretch to gather that only one winch was indeed available for each mast..seeing that she was limited in her spar numbers. Knowing that the winch retained its cable, and used a shackle to connect to the halyard....it can be further deduced that these particular winches were dedicated to topsail and topgallant sail yard hauling. Rob
- 1,208 replies
-
- 2
-
-
- great republic
- clipper
- (and 1 more)
-
Thanks Pat You have any images of your Victoria? Love to see
- 1,208 replies
-
- 2
-
-
- great republic
- clipper
- (and 1 more)
-
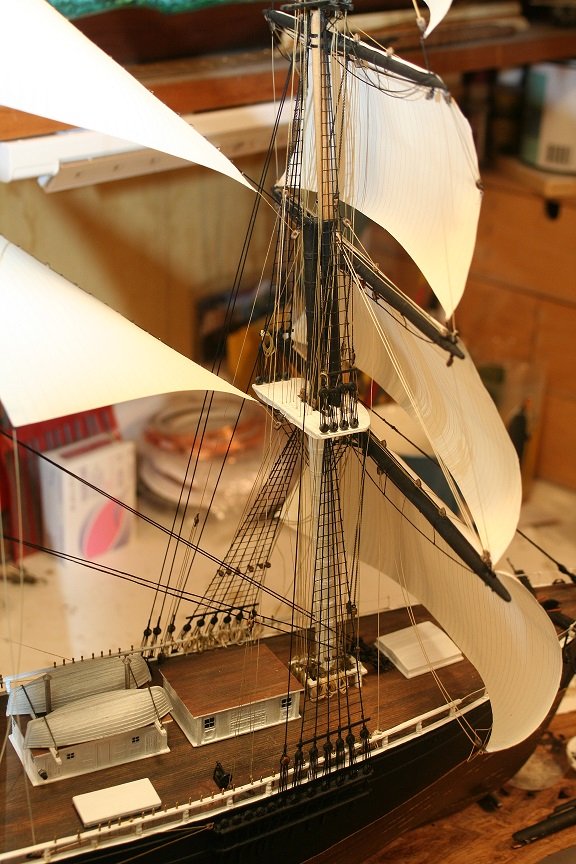
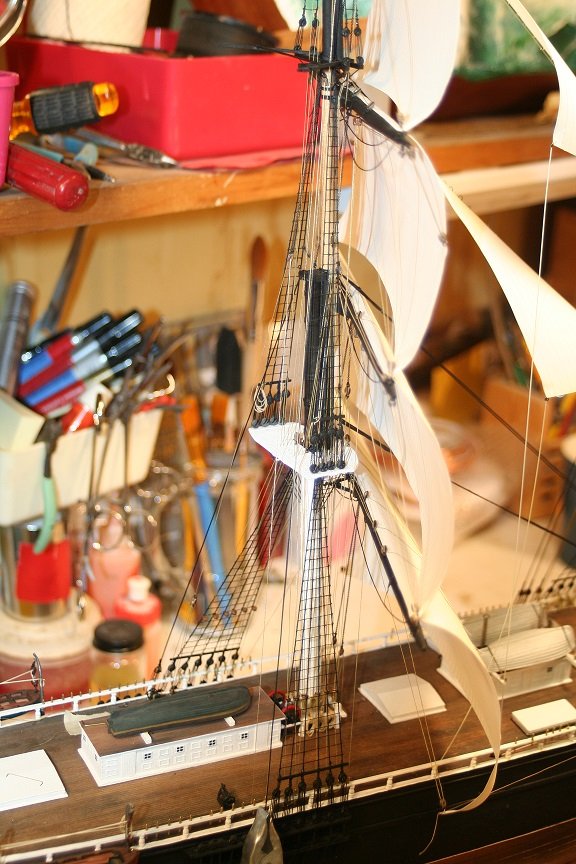
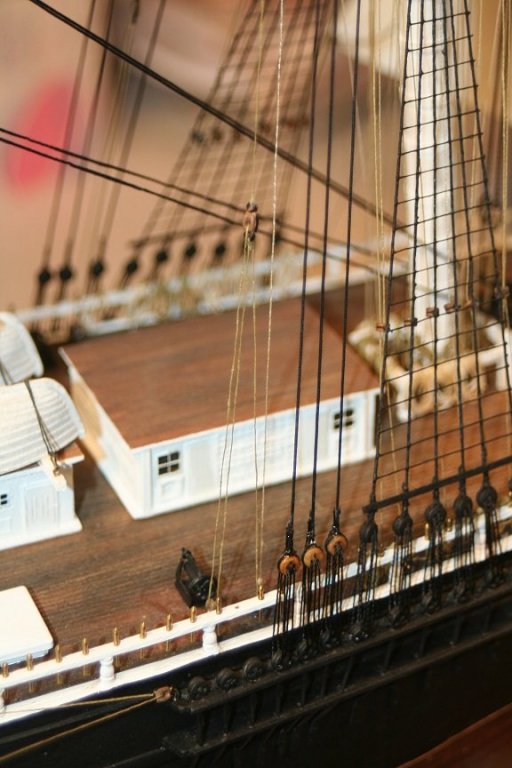
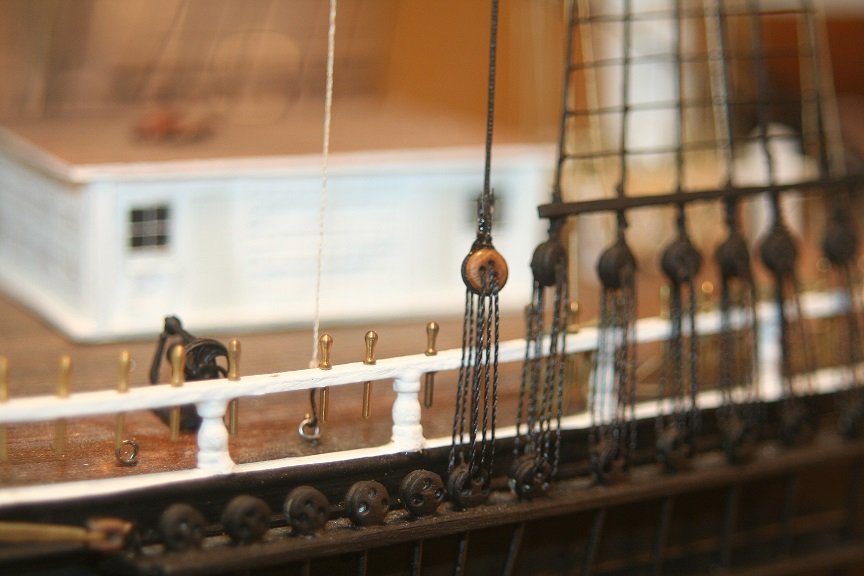
Similarly....the main topsail yard needed to have its halyards and purchases added as well in similar fashion...with one difference. I chose to represent the port main deck winch involved with the lift of the yard. All of this detail had to be added before the backstays were installed. It would have been a nightmare of the highest caliber, if these details had been overlooked and attempted to be added later.
- 1,208 replies
-
- 5
-
-
- great republic
- clipper
- (and 1 more)
-
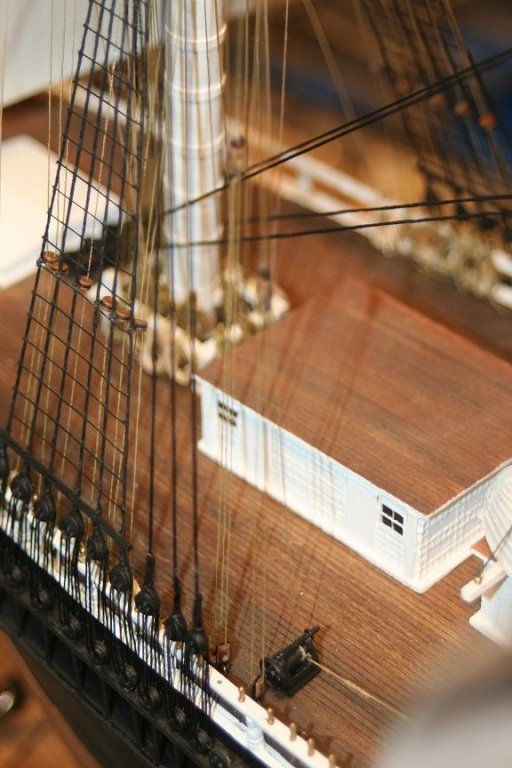
Prior to the addition of the backstays....I needed to finish adding the fore topsail halyard and the topgallant halyard and their purchases. With the addition of padeyes and blocks to accompany them.

- 1,208 replies
-
- 6
-
-
- great republic
- clipper
- (and 1 more)
-
While I manufacture additions to the bowsprit/jib boom....I continued along with the addition of the backstays that will support the masts as new stays are added. (Like I said....it is a back and forth process between addition of stays and backstays.
- 1,208 replies
-
- 6
-
-
- great republic
- clipper
- (and 1 more)
-
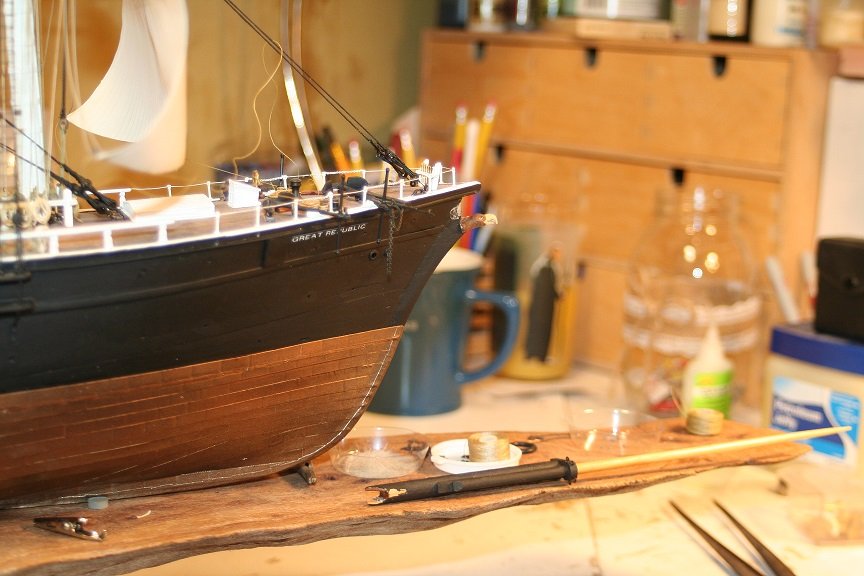
Today was a slow day for progress...lots of thought had to go into my next moves. It first began with removal of the bowsprit from the hull. Before I begin to add so much to the bowsprit and jib boom...I needed to add parts to it and many blocks and bull heads. so off she came. It would have make these additions go waaay easier. I know she looks weird without it but it is the best move forward.
- 1,208 replies
-
- 6
-
-
- great republic
- clipper
- (and 1 more)
-
Steam.... I appreciate that very much...sometimes I feel as if I'm a shackey mess...on the verge of breaking everything....quite stressful actually. Rob
- 1,208 replies
-
- 2
-
-
- great republic
- clipper
- (and 1 more)
-
I hope the images were adequate. My ramblings are not meant to be an indictment to those who use out of scale cloth sails...just my observations formed by 45 years of doing things against the current. Again..thanks to all who commented and for all the likes...... Rob
- 1,208 replies
-
- 2
-
-
- great republic
- clipper
- (and 1 more)
-
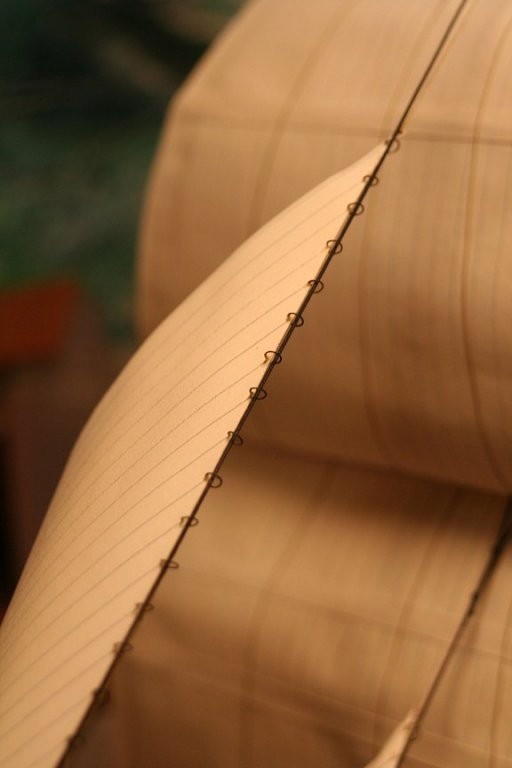
One thing I might point out....I purposefully set the sails at a 20degree cant so that sails never fully overlap. I also placed name plates of the model on both sides of the display base so that I could turn the model for a starboard or port viewing. If the model is at a port viewing stance, then you can see fully the running rigging and inner sail rigging detail very easily on all masts. The back side of the sails has just as much detail as the front with all its buntlines and reef points. The opacity of the sails adds to the realistic impression. I tried to adequately overcome many of the supposed pitfalls accompanied with sail addition to models, like, *sails block rigging detail*, *sails diminish overall detail*, *Poor sails lessen the overall model*, and many similar distractive criticisms. I only hope more builders become ambitious and try paper sails on their own models and that they can work past the dogma that over sized, out of scale sails is all they have to work with...so they opt out. A sailing ship is beautified by her sails....they are what make her what she is. So model them too. Rob
- 1,208 replies
-
- 5
-
-
- great republic
- clipper
- (and 1 more)
-
Bob...If I hadn't created these paper sails before on other models...and by that, gaining the necessary experience....I surely would have never put sails on this particular model using cloth. Large weave, heavy, un-naturally wrinkly sails that just hang lifeless on your model can be an extreme disappointing distraction. Much labor is even required to install such out of scale sails......labor that was needlessly expended IMHV. I agree with your assessment....I'm very pleased with the results... Since these sails are made of paper and not cloth, makes no difference. It is the final result not the material that draws the welcome compliments and admiration of the beholder, not to mention a far superior realistic sail that captures motion and action. It's definitely labor intensive...but also very forgiving. This is why I adopted *off ship* techniques. Add the sail details while the mast is off the ship so as much detail can be added without the general incumbrancers found while working on the model proper. I try to work smarter not harder, and as you well know clipper ships had an intensive rigging scheme. Ed on his Young America would be the first to agree....I'm trying to attain the same attention to rigging detail as he.....just in a much smaller scale. Thank you Bob for your extremely nice comments. Your encouragement means the world to me. Rob
- 1,208 replies
-
- 5
-
-
- great republic
- clipper
- (and 1 more)
-
Thanks so much Kieth . I’m doing everything I know to make them as accurate as possible within the limits of this scale.
- 1,208 replies
-
- 3
-
-
- great republic
- clipper
- (and 1 more)
-
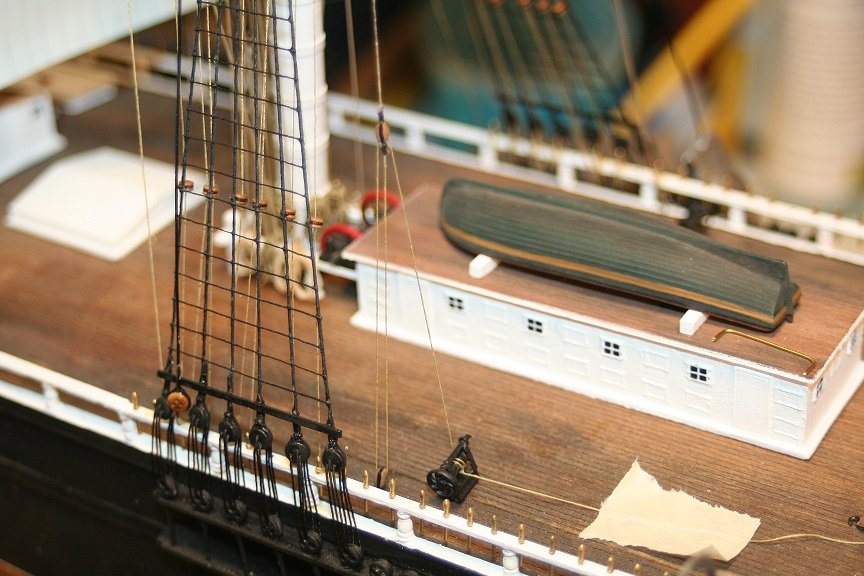
I also began the first of the backstays lanyards.......and off we go.....
- 1,208 replies
-
- 12
-
-
- great republic
- clipper
- (and 1 more)
-
Sure..here are some pics of the closest I have of the sails mounted. These little guys are about 1/16" diameter.


- 1,208 replies
-
- 11
-
-
- great republic
- clipper
- (and 1 more)
-
I make each one singularly.....paint them..then add them to the panel lines of the sails. Rob
- 1,208 replies
-
- 3
-
-
- great republic
- clipper
- (and 1 more)
-
I appreciate that....I've worked hard to make them as convincing as possible...both in detail as well as billow effect. Rob
- 1,208 replies
-
- 1
-
-
- great republic
- clipper
- (and 1 more)
-
Thanks Pat....I appreciate that. The stays need to be threaded through the cringles prior to install and that can be problematic...that is why I pre-make the stays with hooks and eyes so I can re-attach them after the stay sail/jib sail is installed. I've got the process all figured out...it just takes a while to perform. Rob
- 1,208 replies
-
- 3
-
-
- great republic
- clipper
- (and 1 more)