
HOLIDAY DONATION DRIVE - SUPPORT MSW - DO YOUR PART TO KEEP THIS GREAT FORUM GOING! (Only 53 donations so far out of 49,000 members - C'mon guys!)
×


rwiederrich
-
Posts
5,518 -
Joined
-
Last visited
Content Type
Profiles
Forums
Gallery
Events
Everything posted by rwiederrich
-
Excellent....but you will be modeling her with her original single topsail yards as you originally claimed? Rob
- 3,618 replies
-
- 3
-

-
- young america
- clipper
- (and 1 more)
-
Ed..it occurred to me..will you be treating the yards as you have with every other portion of this build and leave some incomplete to demonstrate the symmetry of the build, or will all the yards receive the detail you are placing on the main yards? Rob
- 3,618 replies
-
- 5
-
-
- young america
- clipper
- (and 1 more)
-
I too find it strange....and a bit frustrating. On one hand you have the data(or lack of it) and on the other hand you have logical application. The problem arises when your logical...reasonable application does not concur with what the limited known record shows. Some of the stunsail spars on some McKay ships rest on top of the main yard suspended above the jackstays with points of leverage at the yard ends, much like your example...but without the interior iron. I don't know.....without sails being bent, the detail is astonishing, and since none of us are true experienced experts in the actual rig of these vessels...your application might be the best and will have to fall within the parameters of every other *creative license* move we make...to try and replicate these magnificent ships. I don't recall off hand, but was the YA's cabins actually painted white....or *Pearl* or *Buff*? Your YA is stunning to say the least...any number of us would have done things differently on many points...but you have done it superbly. Rob
- 3,618 replies
-
- 2
-
-
- young america
- clipper
- (and 1 more)
-
Great job Ed...love it all. It appears the fife rail is pulling from the deck on that last image? Rob
- 3,618 replies
-
- 2
-
-
- young america
- clipper
- (and 1 more)
-
GAW is the metal whisperer....... Unbelievable workmanship. Rob
- 281 replies
-
- 4
-
-
- falls of clyde
- tanker
- (and 2 more)
-
Mind bending detail.....just amazing! Rob
-
Fantastic job Ed... really marvelous work. I have to make these little monsters in 1/128th for my Great Republic...I might go a different route..just too small. Rob
- 3,618 replies
-
- 4
-
-
- young america
- clipper
- (and 1 more)
-
Quite impressive Ed....very impressive indeed. Rob
- 3,618 replies
-
- 3
-
-
- young america
- clipper
- (and 1 more)
-
Ed...I have neglected my own Glory of the Seas and Great Republic builds in lieu of some major home remodeling, but watching you work so methodically and accurately on the YA encourages me to no end and in some small way gives me the endorphin high I get from engaging my own builds. Awesome and amazing work on the YA. Just beautiful. Rob(Thanks)
- 3,618 replies
-
- 3
-
-
- young america
- clipper
- (and 1 more)
-
Fantastic work Ed. I'm sure those line issues were evident on the real vessel...I can't imagine they were not. Rob
- 3,618 replies
-
- 2
-
-
- young america
- clipper
- (and 1 more)
-
Magnificent! Just beautiful. Rob
-
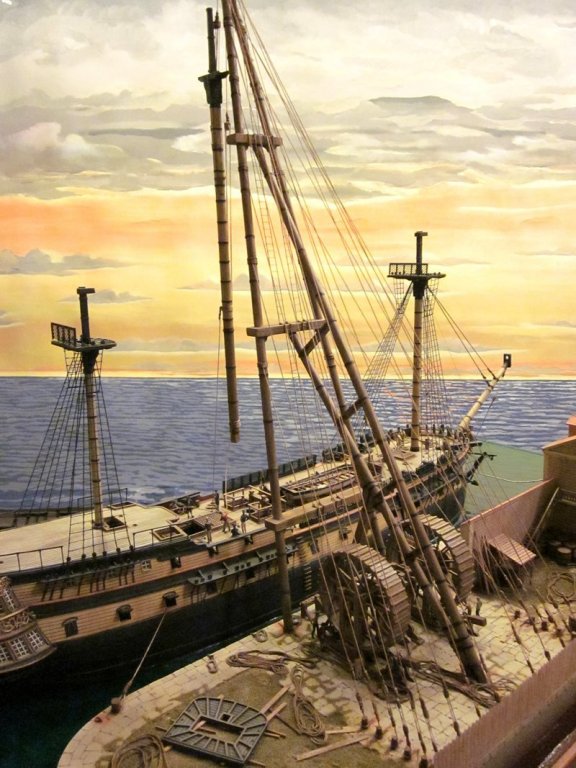
This model of a mast rig stepping a mast helps the mind grapple with the sheer will perpetuated by these men who did great construction feats with what they had, and they did wonders.... IMHV Though not an exact replica of what happened this demonstrates the idea Rob
- 3,618 replies
-
- 16
-
-
- young america
- clipper
- (and 1 more)
-
Wonderful work Ed....just wonderful. Will those spreaders be rigid enough? Rob
- 3,618 replies
-
- 3
-
-
- young america
- clipper
- (and 1 more)
-
Your work is considerably amazing.....to what they fabricated. Fantastic work as usual. Rob
- 281 replies
-
- 3
-
-
- falls of clyde
- tanker
- (and 2 more)
-
Fantastic work Ed as usual. I was wondering...I suspected the mast cap to be parallel with the tops..you opted to make it perpendicular to the rake of the lower mast. And you have that beautiful yard....do you have steps outlining its construction along with the truck build? Rob
- 3,618 replies
-
- 3
-
-
- young america
- clipper
- (and 1 more)
-
Truly amazing... Rob
-
I appreciate your application of twisted wire to simulate chain..I've seen this trick before, but you executed it smoothly. I've not posted too much lately..been to distracted with the total eclipse coming so I'm focusing on my astronomy. You're keeping my ship building fix alive though..... Rob
- 3,618 replies
-
- 3
-
-
- young america
- clipper
- (and 1 more)
-
It don't get gooder than this Ed........MMMMMMM. Great work. Rob
- 3,618 replies
-
- 6
-
-
- young america
- clipper
- (and 1 more)
-
Just wonderful Ed. I like how you wind the eye bolt with the chain pre-threaded. Rob
- 3,618 replies
-
- 2
-
-
- young america
- clipper
- (and 1 more)
-
Welcomed response Ed. I have found, that on several images I have of the Glory..there are significant changes. However these can be attributed to her recorded refits. Part of my original questioning found its origin in what I perceived from photographic evidence of YA...apart from any descriptions noted by Crothers. In short, your constructed version didn't match up to what I was seeing in the photographs(You, yourself noted a photographic inconsistency) I further understand the necessity to make things reliably repeatable for modelers wishing to follow your footsteps and build this wonderful model themselves using your fantastically written plans. I have to confess...being a machinist who builds precision refractor/reflector telescopes and their mounts...(Along with ship models), I have a tendency to be a bit overly observant. Please..no disrespect was intended. Rob
-
Thanks for your fine rebuttal Ed. It has become true that when photographic evidence is limited, you need to refer to the common practice as it was recorded. In my own research it is apparent that unlike Webb, McKay used a different *Common practice*...and the configurations of jib boom locations and that too of the martingale attachment were clearly different . Again...magnificent work. Rob
-
Beautiful work Ed, as usual, I like how you decided to make a plunge cut in the martingale to place a continuous cleat plate instead of separate side plates bolted to the martingale. I've wondered a thing or two......How have you derived at your final drawn depictions of these structures with such detail? And how did you conclude the jib boom terminated at the bowsprit in the location you ended it? Images..unless I'm seeing things differently, don't concur with this. Rob(Help me see the light, or tell me to shut up)
- 3,618 replies
-
- 2
-
-
- young america
- clipper
- (and 1 more)
