Check out our new MSW Sponsor Innocraftsman
×


rwiederrich
-
Posts
5,504 -
Joined
-
Last visited
Content Type
Profiles
Forums
Gallery
Events
Everything posted by rwiederrich
-
Your progress is amazing Ed. I've come to expect great images after a few days of not seeing any action.......sorry to say, I'll be sad to see the shipyard close for a couple of weeks. Hope you'll be refreshed and ready to go when you return. I'm so very impressed with your YA...she's beautiful. See ya soon. Rob
- 3,618 replies
-
- 3
-

-
- young america
- clipper
- (and 1 more)
-
What a fun project......I suspect you will reuse as much of the original as you can and fabricate any replacement parts. I'll be watching this log....good luck Rob
- 53 replies
-
- 3
-
-
- clipper
- restoration
- (and 1 more)
-
I love the precision in which you work.......fine craftsmanship indeed. Rob
-
Thanks for the likes everyone...I tried to take a complicated process/application and make it fast and easy. Rob
-
I see.... I wasn't sure if you used a ball fixture mounted in the tail stock....but the method used is what I would have done. Very nice..indeed. Thanks for the updates. Rob
-
Fantastic clean work....just wonderful. Rob
- 310 replies
-
- 2
-
-
- cheerful
- Syren Ship Model Company
- (and 1 more)
-
Great update Nils...exceptional. Rob
- 2,625 replies
-
- 6
-
-
- kaiser wilhelm der grosse
- passenger steamer
- (and 1 more)
-
Fantastic metal work... Looks like a spider band for the masts and with belaying cleats/pins affixed. Love it. Rob(Oh what was your method to keep the balls all the same size?)
-
Dang Nils......every time I drop in..you're working your magic. I love the extensive use of brass and all manner of metals...coupled with wood. You masterfully blend the media into a very convincing beautiful model. Sweet visit today...thanks and fair sailing. Rob
- 2,625 replies
-
- 7
-
-
- kaiser wilhelm der grosse
- passenger steamer
- (and 1 more)
-
Catching up with your log Popeye...very fine work on the Thermop. I too thought of using the turned toothpicks...and I did manage to find some smaller ones in bamboo, but they still didn't work. Had to order them. Those brass straps on the deadeye hoops are called chain plates(many were actually made of chain..or hooper iron looking like chain) The board the deadeyes are affixed to is the channel. Again..fantastic job. Rob
- 453 replies
-
- 4
-
-
- thermopylae
- sergal
- (and 1 more)
-
Good practical observation Gaetan.... Translation from engineer to mechanic sometimes requires the mechanic to adapt his technique to satisfy the engineering goal. In many cases the mechanic knows far better then the engineer..the tooling and *tricks of the trade* to accomplish the engineers vision. We have that scenario play out every day here at work. I truly love this build and will be watching and learing as you take us on this wonderful journey. Rob
-
Well Tom I think they look amazing and from what I gather from my 40+ years of study they are more accurate then tan lanyards. I always use blackened thread/rope as my lanyards. But to each his own. Glad you like the outcome.......I hope you don't feel like I swindled you into the change....... Rob
- 1,348 replies
-
- 2
-
-
- constitution
- model shipways
- (and 1 more)
-
Tom..they look amazing and are slightly lighter in hue then the shrouds themselves......giving the impression they are tarred with a thinner product. Wonderfully done... Rob
- 1,348 replies
-
- 1
-
-
- constitution
- model shipways
- (and 1 more)
-
Be careful with the *bump* button...that is how one gets 5 warning points. It is frowned upon to simply bump a subject. Rob
-
I stained an entire model once do to the improper lightening of nylon line...staining works and it gives you control of the color you are seeking. Good luck and great model. Rob
-
Hi Tom...This subject has become a thorn to some and I do not mention it to make it so for you. I posted a picture of the new Connie re-rig (and they used black rope for the lanyards) in Ed Tosci's Young America Log. And from all that I have gathered over my 40 years of building ship models..my research tells me that the lanyard though it is used to cinch up the shrouds and backstays it is more standing rigging then running. Some modelers think of the lanyard as running rigging such as a line through a block for sail control and thus rig them with running rigging. They are more then that...but an adjustable part of the standing rigging...which was tarred(In many fashions and with many concoctions). Tarring a lanyard does not prevent it from being tightened as in the fashion that was common place at the time with block and tackle(Drawing are present in Ed's log. Hemp running rigging turned grey.....now apply staining tar and it becomes even darker....even black. I'm shure the tar or treatment was not gobbed on, but painted on with respect to the notion the shrouds and backstays will at some point need tightening. Deadeyes are NOT pulley's...they are a simple locking means to cinch or tighten opposing line/structures. Then they are seized together to prevent twisting and movement. One last note.....if the riggers of the Connie thought through deduction and historical application that the Connie re-rig lanyards had to be black..don't you think they did so informed? Your Connie is magnificent.....thanks for posting her. Rob
- 1,348 replies
-
- 2
-
-
- constitution
- model shipways
- (and 1 more)
-
Bruce..you've been greatly missed. Glad your medical report is a happy one.....God bless. You have produced a model of the lightning that is unsurpassed. A tribute to the genius of Donald McKay. Rob
-
Indeed...The comparison was not the material but the habit of securing the lanyards. From what I gather, as I have stated..periodic adjustments were necessary. You make the point that evenly placed deadeyes as seen on models was probably not the case in reality....since shroud and backstay shrinking was expected....thus an uneven arrangement of deadeyes. Rob
- 3,618 replies
-
- 5
-
-
- young america
- clipper
- (and 1 more)
-
I have to find in my researched paperwork where I read that sailors who were given the job of tarring the rigging(called tar monkey's) would tar the shrouds and their lanyards...then wipe their hands on the cuffs of their uniforms. I gotta dig that up. In like manner the lanyards were seized off when the shrouds were taught...giving the fixture a fixed or standing configuration...when in this *fixed* state the lanyards would then be *tarred* for weathering because rot would occur easily if nothing was done for protection. (*Tarred* is a generic term for whatever they used to preserve) It is assumed(falsely IMO) the lanyards acted more like a block and tackle...moving with great frequency hauling the shrouds and backstays in and out as would be expected with a sail, causing modelers to use running rigging rope.....when in fact the deadeye and lanyard was the principal means to cinch and tighten the shrouds and backstays..securing the masts firmly(Like guy wires). Well once done, unless tragedy struck(a fractured or sprung mast), the system was permanent and maintained that way. This fact is evident in the larger Down Easters or windjammers made of iron. Their turnbuckle secured cable shrouds were painted over or otherwise permanently protected from weather without regard for continual adjustment. (Periodic, yes, but continual..no) There is much to be said on the subject and with that much personal referenced opinion as well. All in all, the modelers eye on aesthetics leads them in one direction or the other. Rob
- 3,618 replies
-
- 4
-
-
- young america
- clipper
- (and 1 more)
-
Thanks Patrick...I hope to have those pesky rascals finished completely tonight. Some other builders here are very meticulous in their install.......I just get it done and am not a perfectionist...As I've said before...OFTEN...I'm no purist. Rob
-
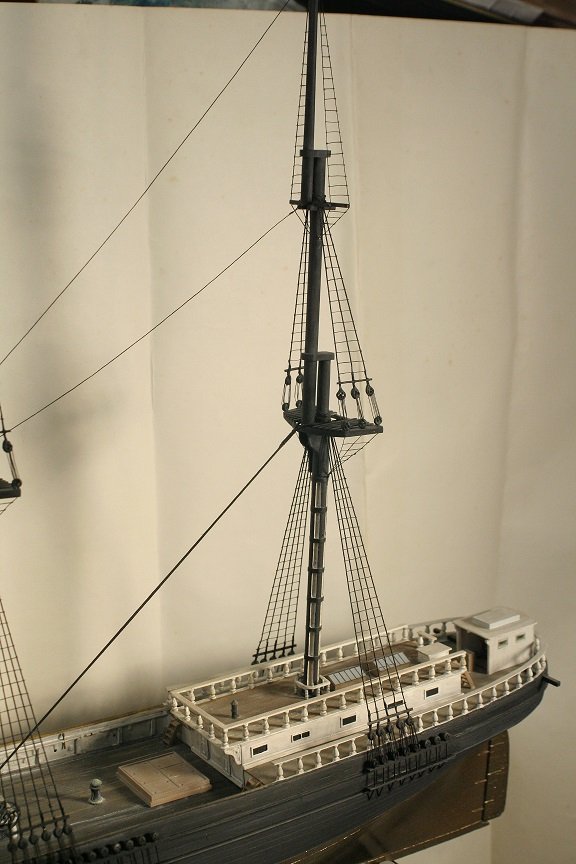
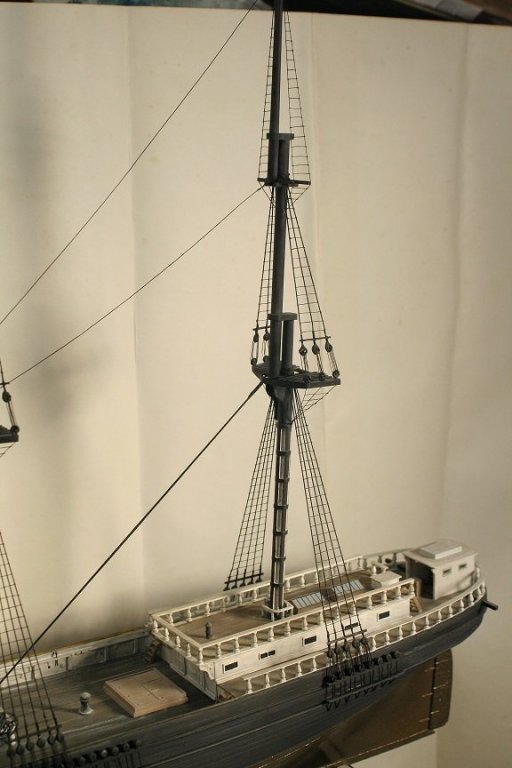
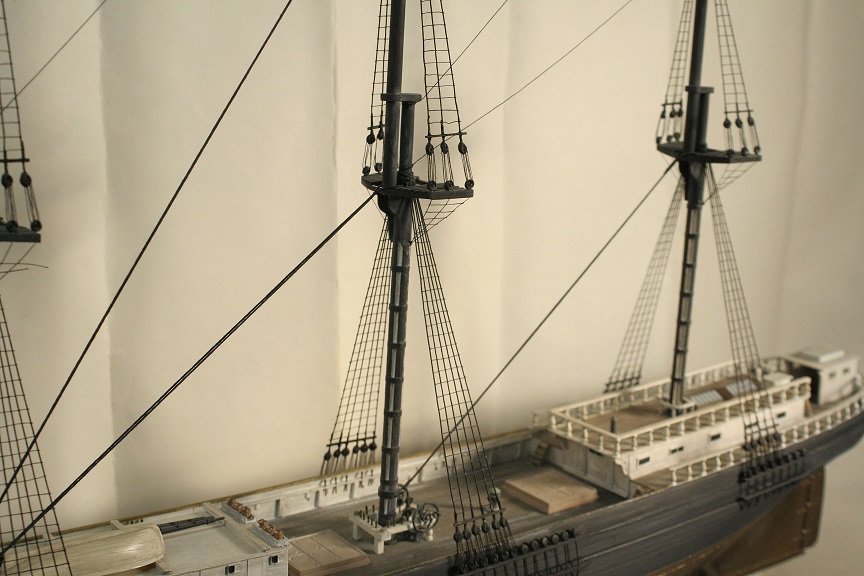
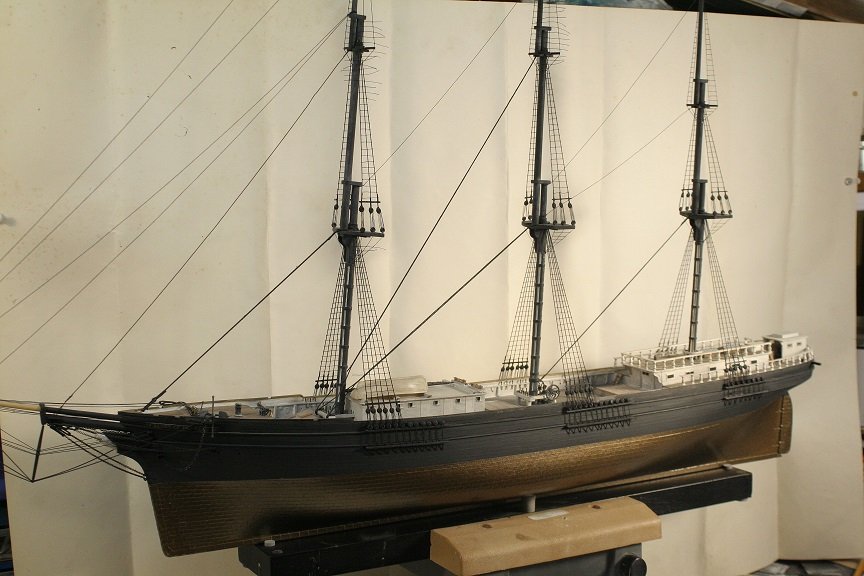
Spent an hour or so on the Glory of the Seas today finishing up the ratlines...here are some pics. I hope to begin the backstays soon. Rob

-
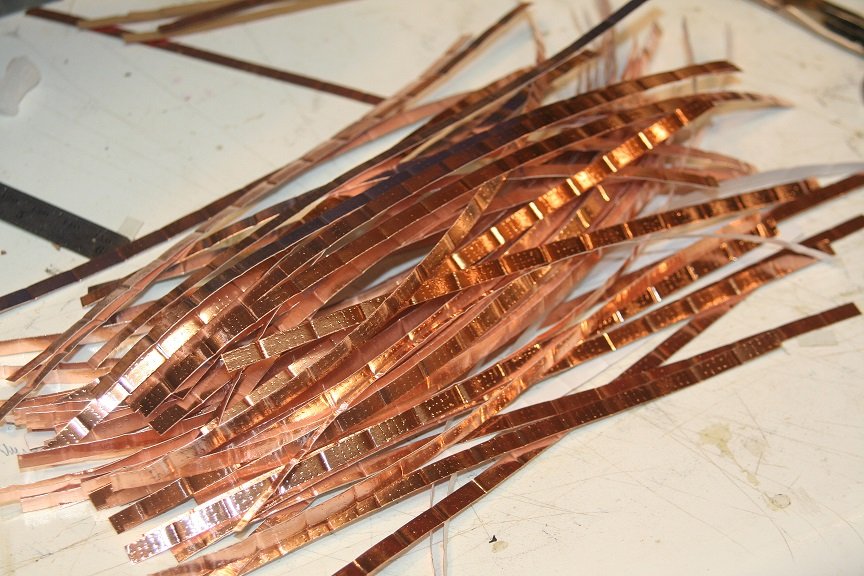
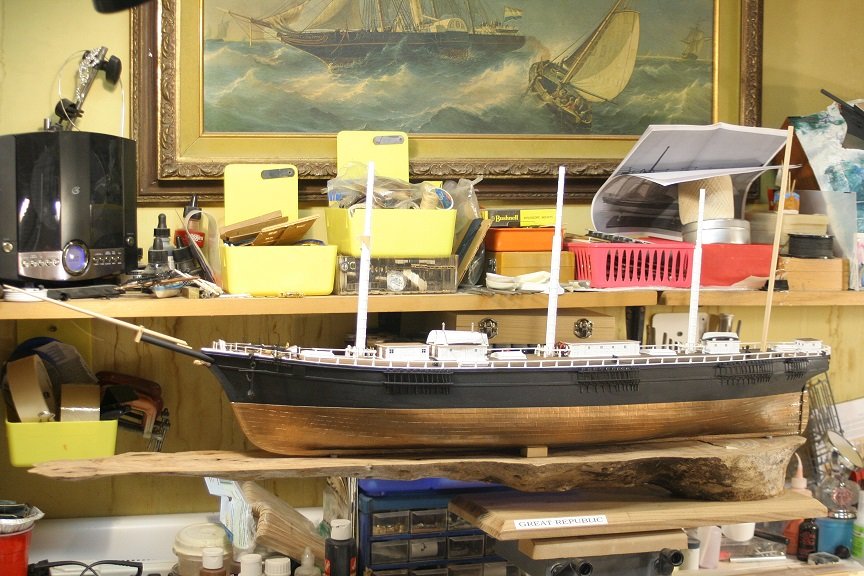
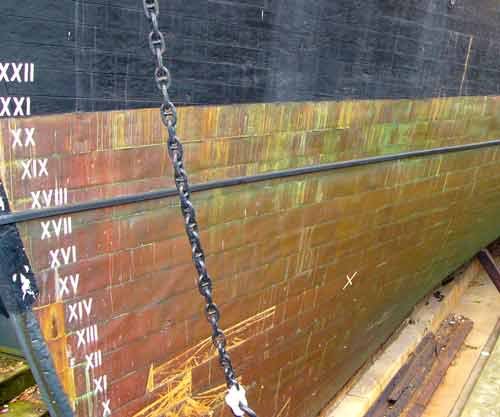
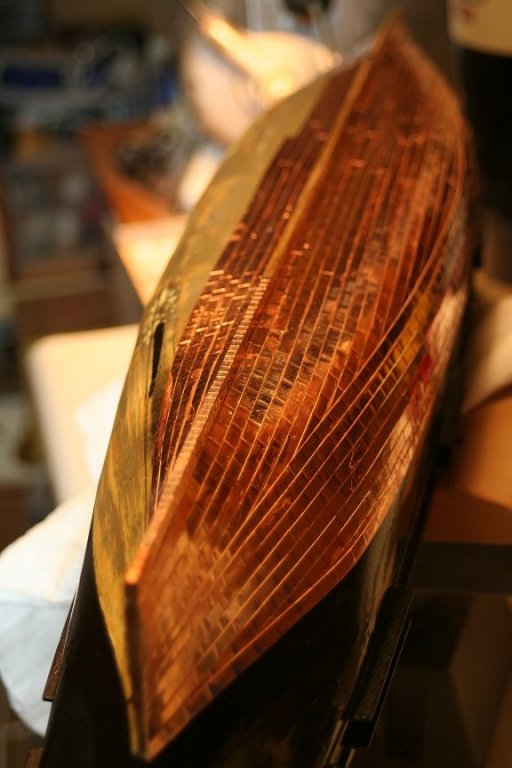
I simply build a roller gig and embossed copper tape then applied and painted with a brown metallic paint and then dull coated. To mimic the old plates on the Cutty Sark. Images show the effect I was looking for.
- 55 replies
-
- 10
-