
HOLIDAY DONATION DRIVE - SUPPORT MSW - DO YOUR PART TO KEEP THIS GREAT FORUM GOING! (Only 53 donations so far out of 49,000 members - C'mon guys!)
×


rwiederrich
-
Posts
5,518 -
Joined
-
Last visited
Content Type
Profiles
Forums
Gallery
Events
Everything posted by rwiederrich
-
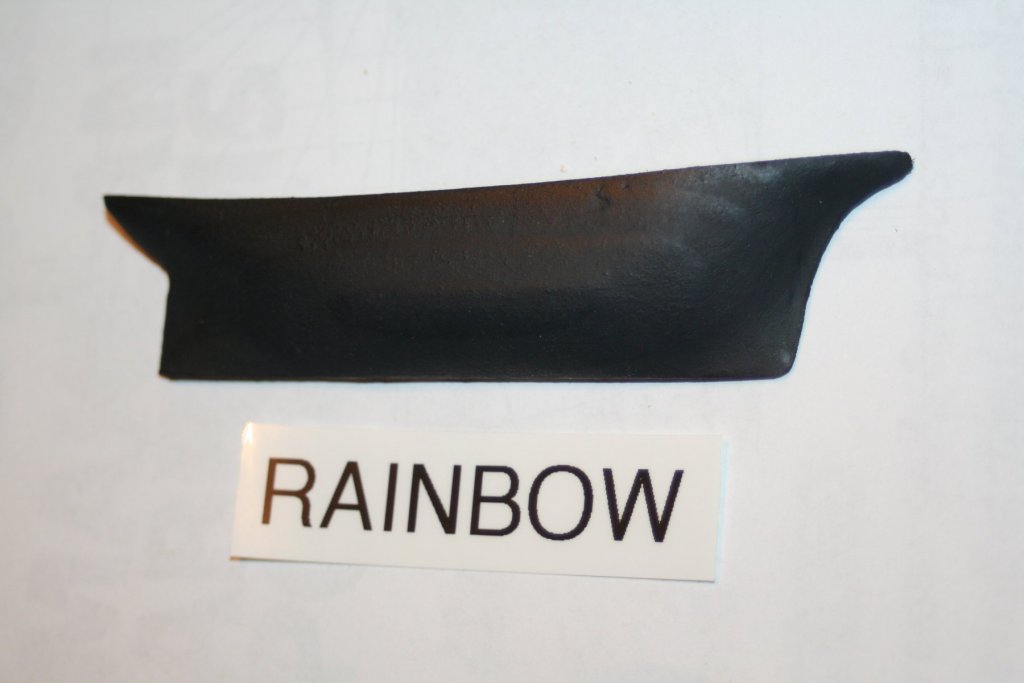
Next I'll post some images of the first three hulls already cut and primed. Here is the small Rainbow
-
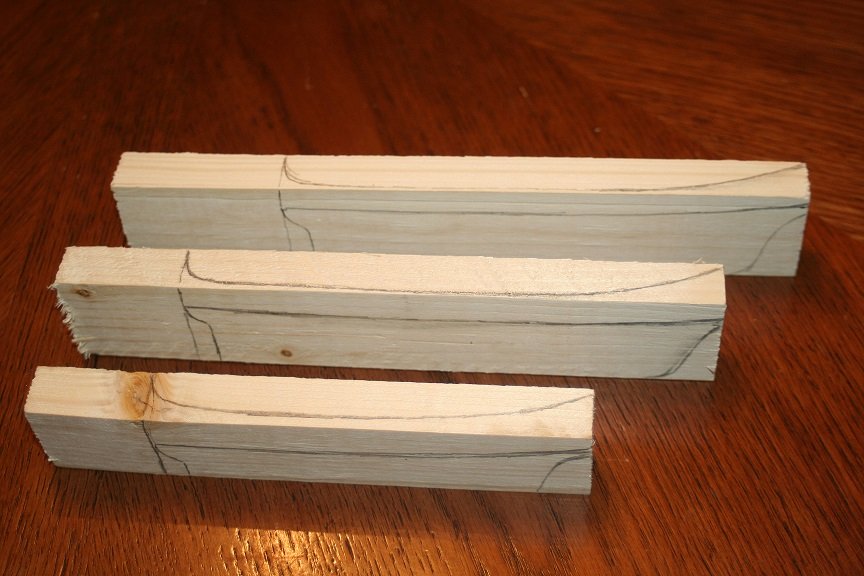
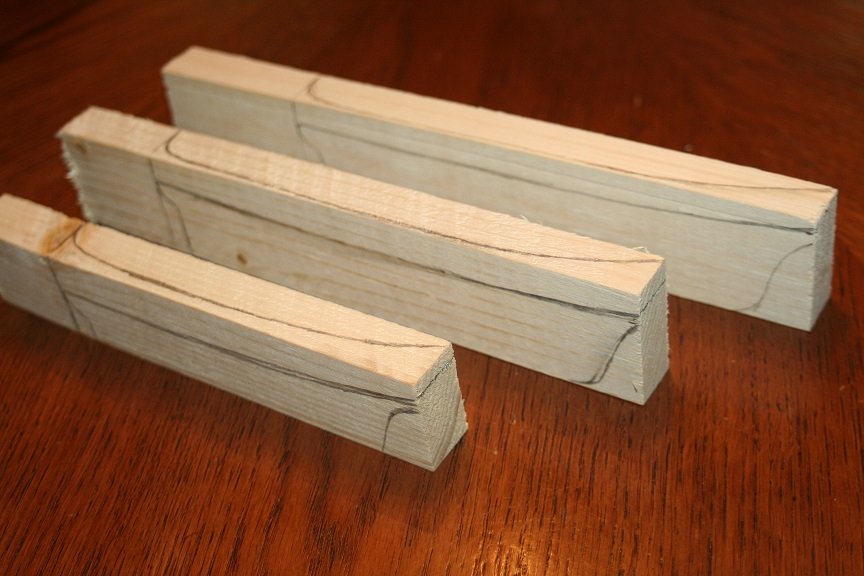
I'm A SHIPYARD. Well I took a few images of the blocks of wood for the next 3 hulls...the Sovereign...the James Baines and the Cutty Sark. Drawn on the wood in 3D...I'll go to the bandsaw and cut them out.
-
Searching for a good place to start this..and since I will be building wood half models of at least 8 clipper ships..this looks like the right place. I have several builder half models of several clipper ships..ie...the Lightning and the Cutty Sark. But my problem is, in all the clipper models I build they are all roughly the same size models..but do not represent the actual comparative size to each other. To keep the scale issue from being clouded as folks view my collection..and from misconceptions being formed that this ship was the same size as that ship; I am embarking on a new project. To scratch build from carved wood a plaque that will contain some significant clipper ships through the period from 1845 to 1869. A representation of the evolution of the clipper design. As far as I am aware...there is no such collectors plaque currently available...so I am taking it upon myself to design and build one myself, for my library. This means I will draft and scale 8 clippers...that I feel represent significant design changes and establish a visual representation of scale between these clipper ships. I'm first starting with the Rainbow..of 159 ft built in 1845. The Sea Witch of 170 ft built in 1846. The Cutty Sark of 212 ft built in1869. The Flying cloud of 229 ft built in1851. The Young America of 243 ft built in 1853. The Sovereign of the Seas of 258 ft built in 1852. The James Baines of 266 ft built in1854 The Great Republic of 335 ft built in 1853 Each one of these clippers represents different designs and sizes...just what I want to demonstrate. The average clipper's size fell between 170 and 260 ft in length....so I selected vessels that fell within that norm. Not to be eclipsed by the Giant of them all the Great Republic. I will be carving each of the half hull models from soft pine and the scale selected for rooms sake will be 1": 35'. So the Rainbow will be roughly 4 1/4" long and the GR 9 1/4". All will be situated in row on a nicely detailed plaque of wood(Painted antique green) with gilded trim. Lets get started. Rob
-
I read the article and the author did do some nice tricks with his approach. I did like his application of wire edging to support the natural bow and billow of the wind filled sails. I do agree the stitching he used was slightly out of scale...but his sails were far better then any unmodified vacuum formed sails one may use....and a mile better then the bulky outta scale cloth sails some use. Rob
-
Fantastic job Ed...really. Just to let you know..I made some of these myself..almost exactly like yourself..however I only needed one solder joint. I compressed the tubing like you did..but I then only cut out the two corners of the compressed tube on the end and had a *T*... which I then added the bolt eye and soldered, then I made the final bottom cut and there you go. My blocks were a bit bigger, but basically the same. Your's are very nice. Rob
- 3,618 replies
-
- 2
-

-
- young america
- clipper
- (and 1 more)
-
MONTAÑES by Amalio
rwiederrich replied to Amalio's topic in - Build logs for subjects built 1751 - 1800
Absolutely magnificent! Just Extreme fabrication..... Rob -
Thank you....if it ain't one thing...it's six other things. I have so many conversion models I'm working all at the same time...I feel exhausted. Which one to work when I have so little time to give to them ? Glory of the Seas...needs finishing up on backstays and yards(running rigging). Donald McKay...needs Fore and main masts and yards(Rigging). Great Republic...needs shrouds,backstays, yards(rigging) Ferreira...needs(running rigging)
- 1,208 replies
-
- 3
-
-
- great republic
- clipper
- (and 1 more)
-
Yes..the flat head punch concentrates the force and makes very nice flat portions to the wire. Rob
- 1,208 replies
-
- 3
-
-
- great republic
- clipper
- (and 1 more)
-
Doug...when smashing wire..use a flat head punch to contact the wire and strike it, instead of the wire. This way you can have more control of what the wire does under compression. Then you can return to them and use a moto tool and grind/file them to make them all similar.
- 1,208 replies
-
- 3
-
-
- great republic
- clipper
- (and 1 more)
-
Steve....I'll try to add more pages so you can have something to follow. Thanks for your attention and comment. Rob
- 1,208 replies
-
- 4
-
-
- great republic
- clipper
- (and 1 more)
-
Well Pat..I can be relatively fast when I'm actually working on the models. As of late, time has been precious and that tends to keep my modeling hours to a severe minimum. Thanks for the comments. Rob
- 1,208 replies
-
- 3
-
-
- great republic
- clipper
- (and 1 more)
-
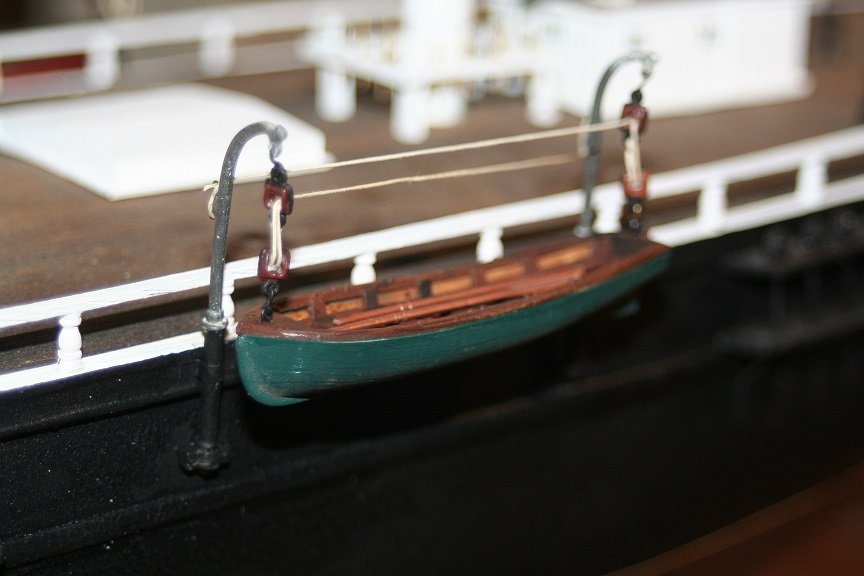
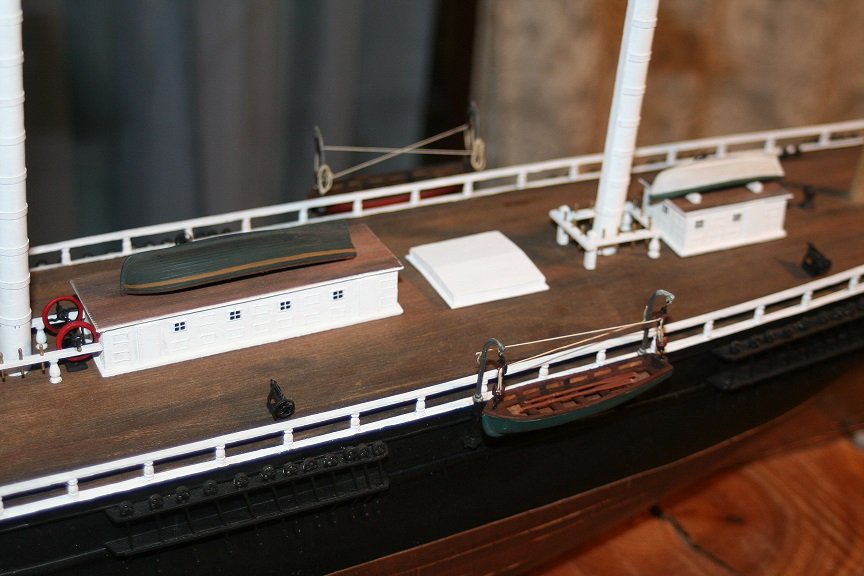
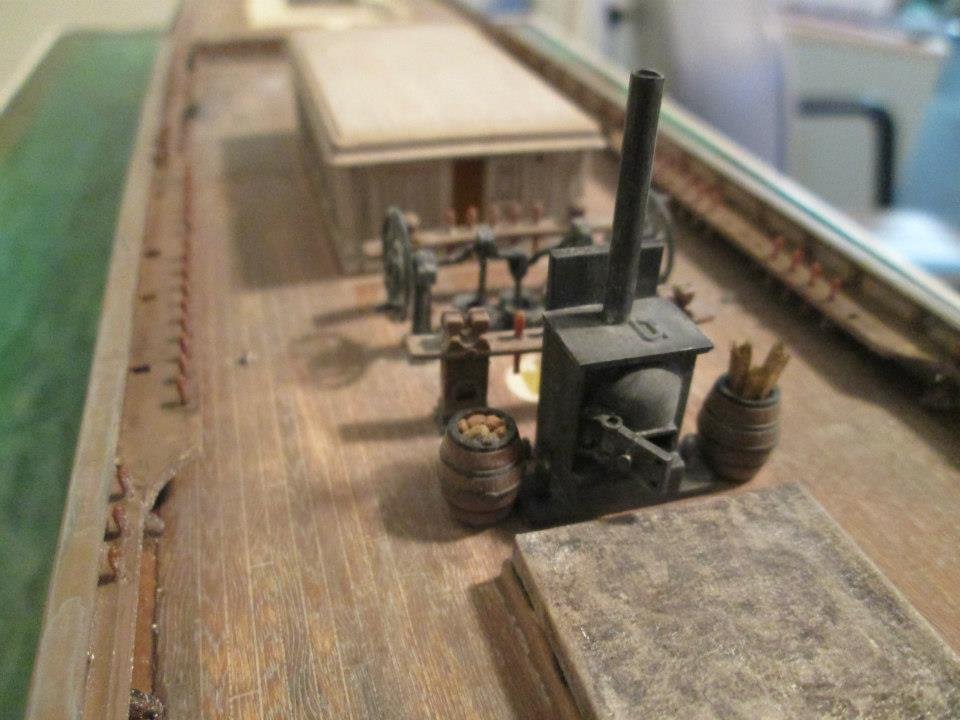
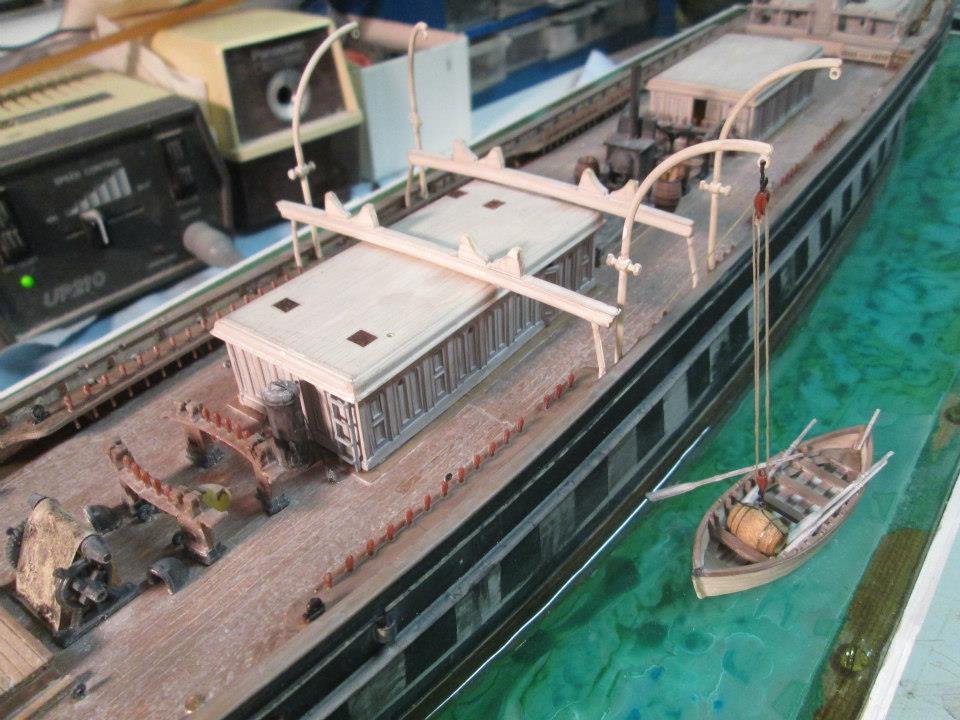
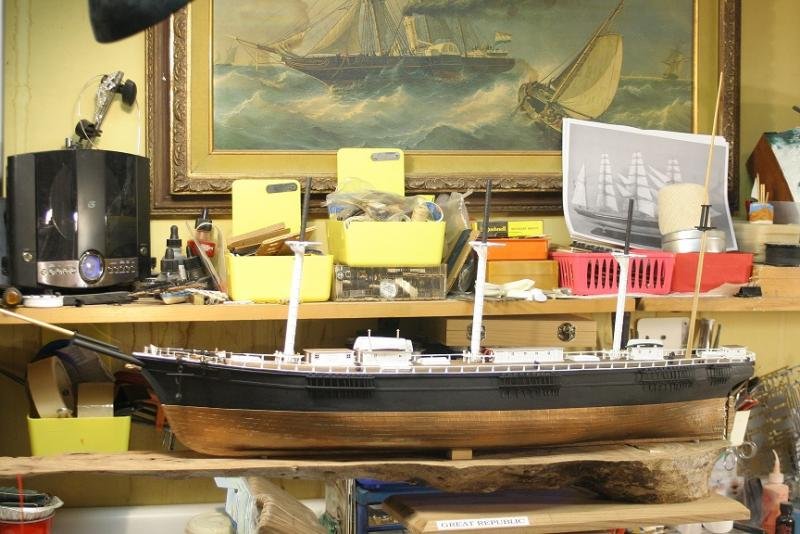
A couple images of the new boats and their davits. Rob
- 1,208 replies
-
- 11
-
-
- great republic
- clipper
- (and 1 more)
-
Boy it has been a while, hasn't it? I've only just now installed the port and starboard davits and rigged the boats to them. I've had much family issues as of late..new grand babies, in-laws passing away...so I've not been doing much. But to answer your question. I didn't use brass strips...I used soft metal rod wire about 1mm dia., cut them for convenience sake(bout 1.5"long) and then using a hammer and anvil smashed one end to represent the chainplate mounting plate. I then cleaned the smashed area up and evened them...bent them in the correct locations and pressed them into pre made slots in the channedl. Leaving just enough of the metal exposed on top of the channel to secure the dead-eye to. Then I covered the recesses with a finishing strip. I then secured several finishing rivets on the plates. Thanks for asking. Rob
- 1,208 replies
-
- 3
-
-
- great republic
- clipper
- (and 1 more)
-
From what my study has revealed , unlike men of war, clippers were heavily spared and generally had taller masts to accommodate those spars. Double channels simple allowed the stresses of the shrouds and backstays to disperse their loads over a greater surface. Double channels allowed such forces to be fixed as have been mentioned earlier, over a greater area of strength on the hull...plus more points of contact for the chainplates allowed for greater retention against the pull or force applied against them. Enormous lateral stresses were placed upon the shrouds and backstays and many captains who were bent on *DRIVING* their ships in extreme conditions, far beyond what would be expected in ordinary ships relied upon well built *STRONG* vessels to *Do the Impossible*. these ships had to be extremely strong to endure what they were expected to do, in the hands of a driving captain. Rob
- 3,618 replies
-
- 5
-
-
- young america
- clipper
- (and 1 more)
-
Wonderful job indeed. I appreciate the sentiment for the one you care about. I plan on making a half hull model of the clipper ship Sovereign of the Seas for my study/library. I did, however, make a half hull model using one half of a broken model of the Revell 1/96 Constitution. It worked out very well and it was nice to detail out the chain plates and deadeyes with metal and wood parts. I have no images of this build because it was so long ago and I never thought to take images. It was given to a friend. I'll enjoy following your log. Rob
- 23 replies
-
- 1
-
-
- constitution
- frigate
- (and 1 more)
-
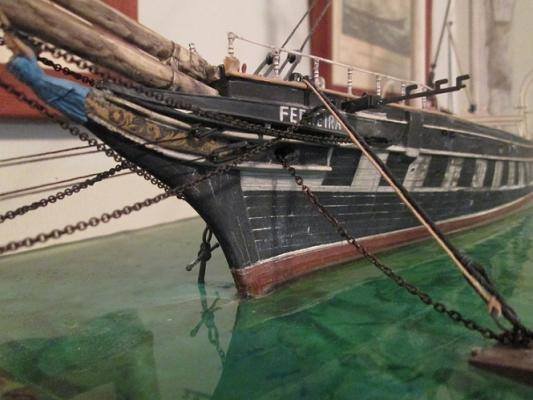
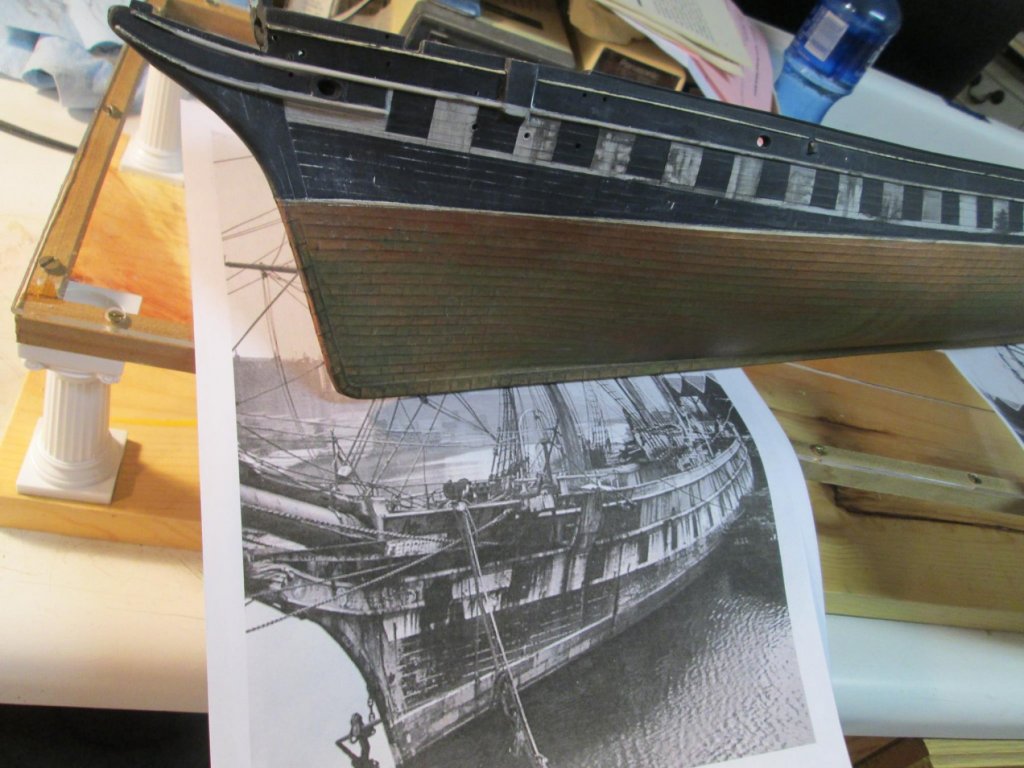
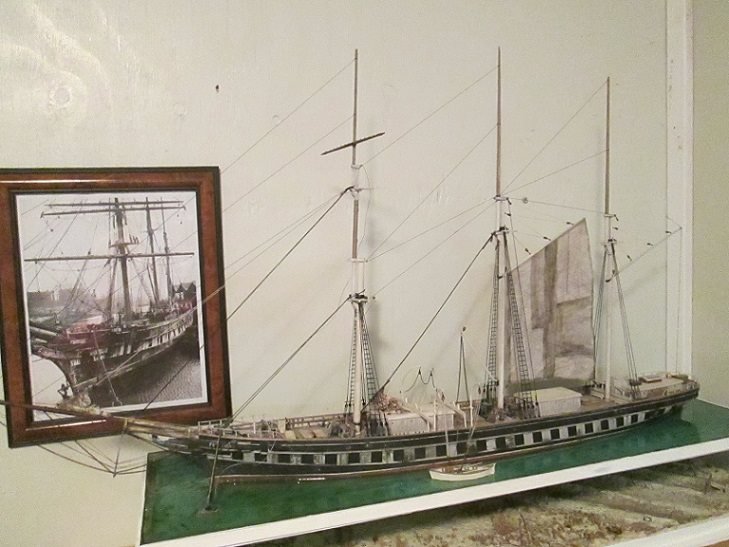
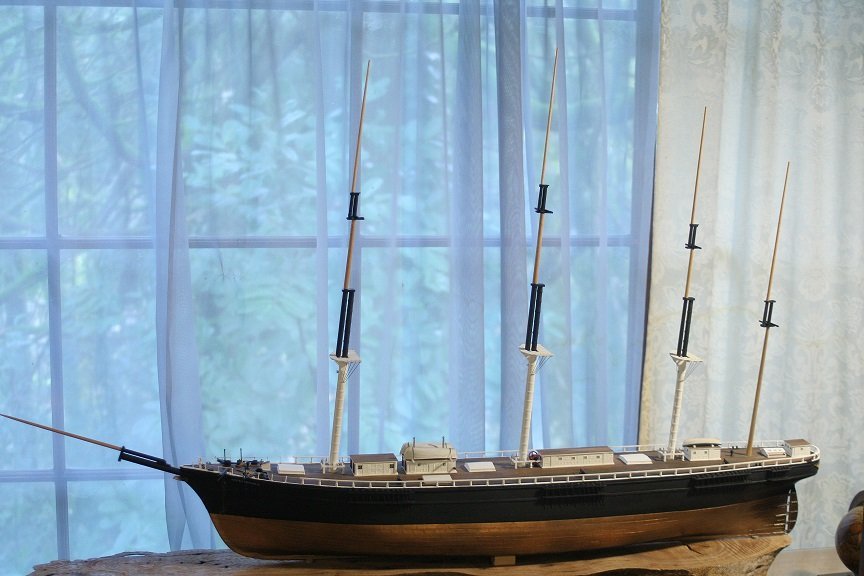
Pat the technique works on any thing you want to weather. You can substitute brown Ink for the black if you like. Here are some images of the Revell Cutty Sark I converted into the Portuguese Ferriera. This is modeled when she was at her lowest, rotting in some backwater. before she was purchased and rebuilt to her original glory. I applied the alcohol technique to everything and then applied cerium oxide(which is an extremely fine(5 micron) powder to dust and add further ageing. Rob


-
I think we are digressing from the OP's original question. How do you age a deck to look.....weathered? Personally I use extremely diluted India ink in 90~100% Isopropyl alcohol sprayed on from a spray bottle. The ink is spread along the cracks and creases using capillary action and then the alcohol evaporates and leaves a nice *Weathered* surface. The extent of the Weathering depends on your ink dilution and your application. Rob
-
In my experience..it is like taking a piece of greyed pine(weathered) and then plane it down to raw wood...it becomes much lighter..hence the *whiteness* mentioned and referenced. Fresh planed wood cannot be made any whiter then it is already is...not unless you bleach it with chemicals. Even as you mentioned..tar stains and the like that came from dirty feet that have been climbing tarred ratlines and similar fixtures needed to be removed from the deck...I'm sure holystoning made the deck lighter. Buffing a high traffic area (In a tiled public building) with a buffer today is probably the modern equivalent. Rob
-
I feel weathering is dependent on the theme or state of the model/vessel you are modeling. Even in brand new vessels a certain amount of weathering is expected if not avoidable. Sun, salt water is caustic to wood and metal and to eliminate the effects entirely is, IMV not representing the vessel accurately.
-
Or *Sheer v. sheer*...that one always trips me up. Heehee. Ed...Your work is a model for all who are serious about improving their own skill. Happy new year! Rob
- 3,618 replies
-
- 2
-
-
- young america
- clipper
- (and 1 more)
-
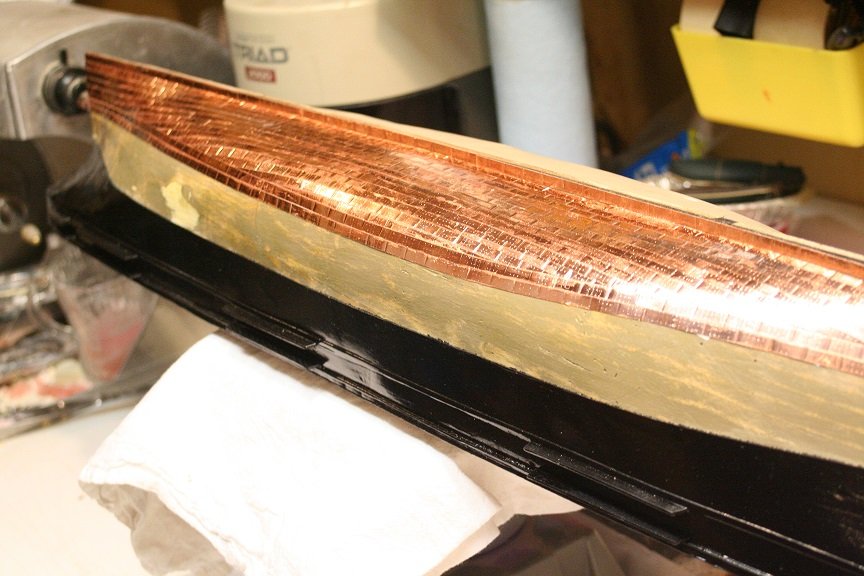
It depends on the era of ship you are building. Copper oxidizes whitish green..Muntz metal turns a metallic/brown when oxidized. Rob
-
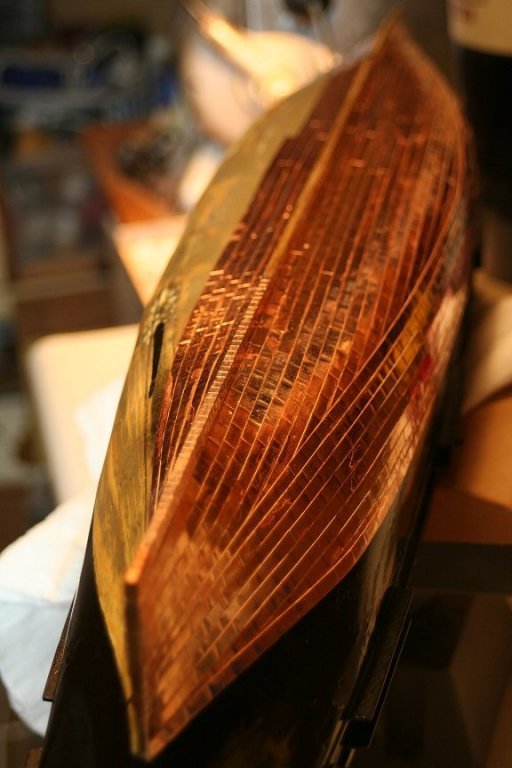
I originally left it shinny copper..it looked awful. Painting/sealing it with metallic paint created the desired oxidized muntz metal look. Rob
-
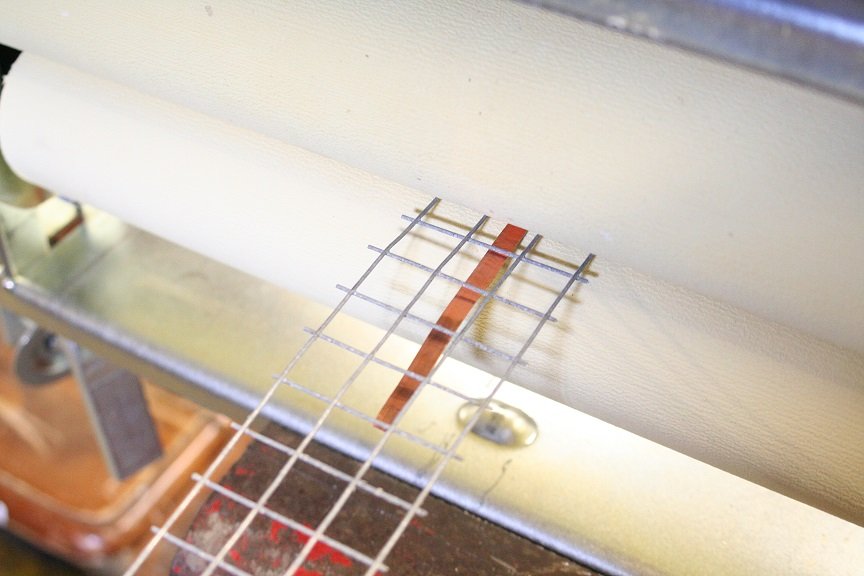
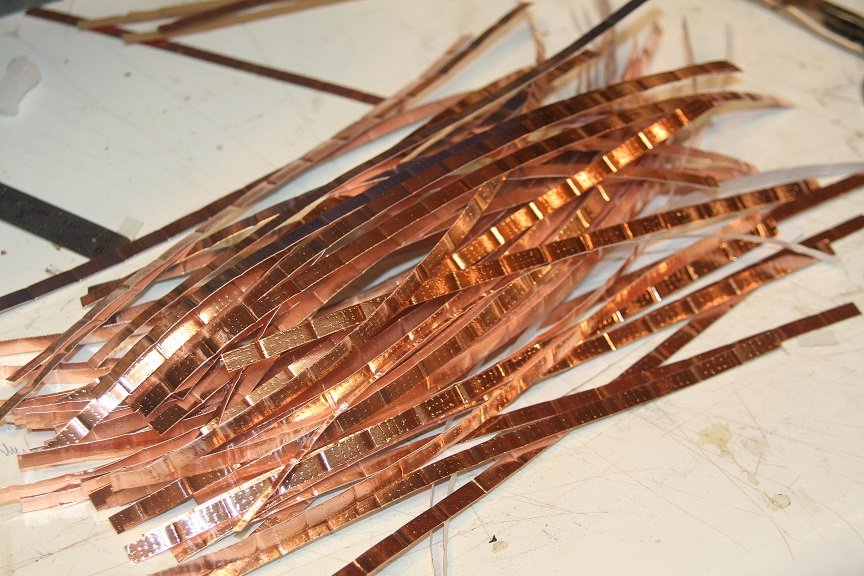
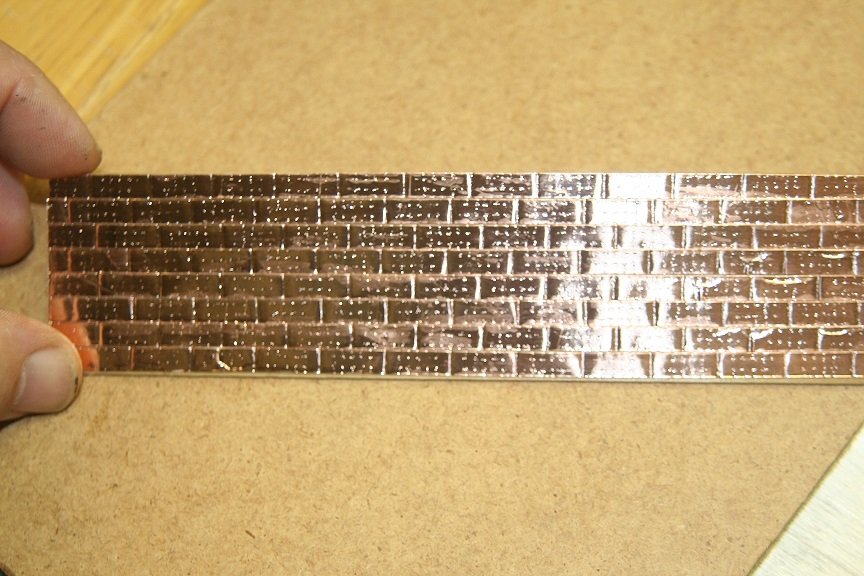
I used a roller with wire mesh and a strip of sanding matrix...all compressed in the roller and out comes the finished plates. For my scale it worked.
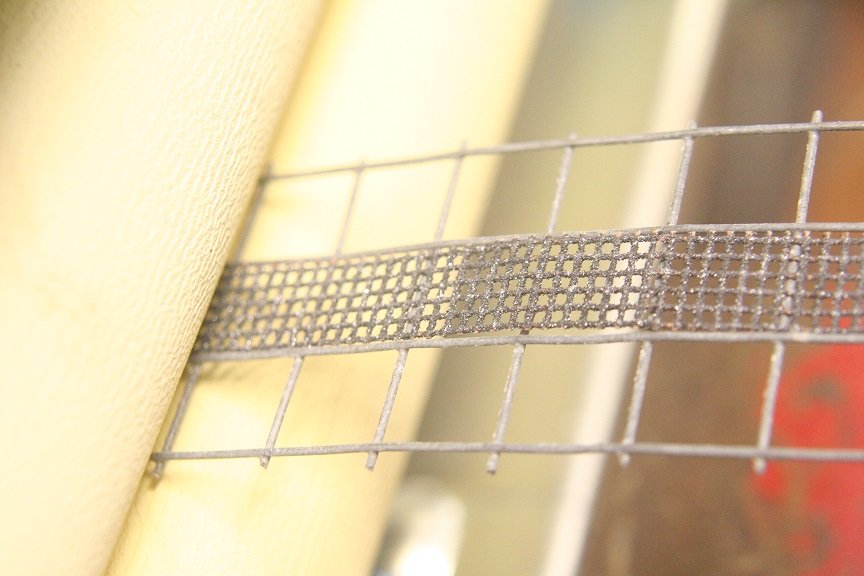
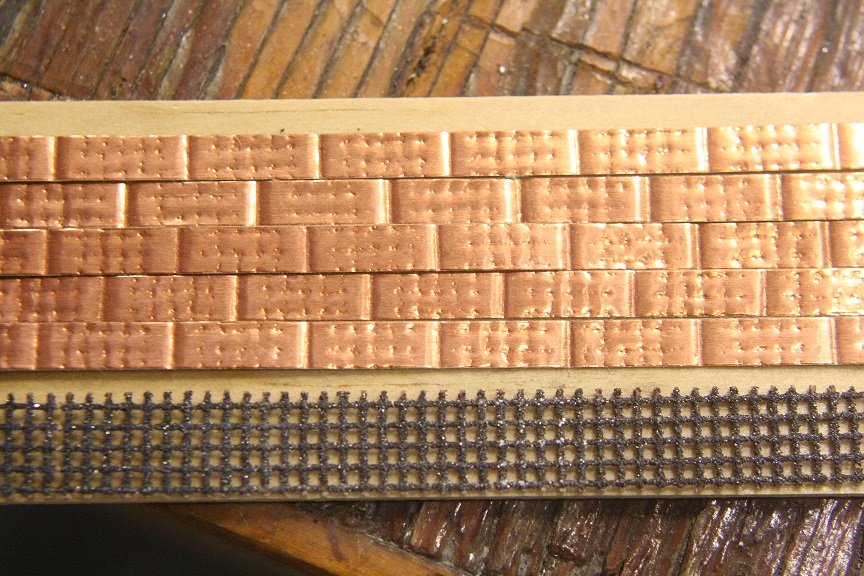
-
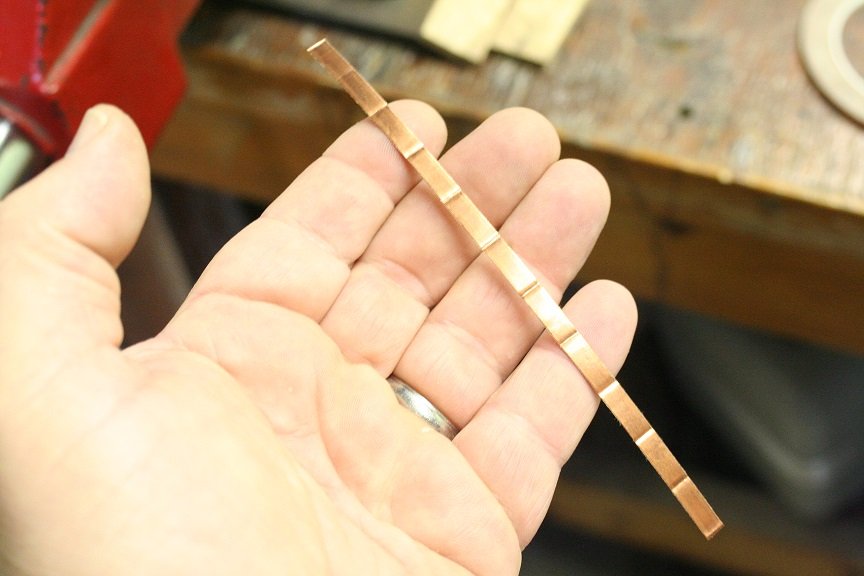
Goat Locker shipyard? I built a rolling gig that I simply rolled foil sections with imprinting material to form the individual plates in 6 inch sections. I then painted the finished copper with metallic paint to seal them and to age them to look like oxidized Muntz Metal. Rob
-
Good job Jim. Plating is a tedious job and your work paid off...looks great. Copper tarnished with a green/white film...were Muntz metal that was used on my clipper ships turned more of a metallic brownish color. Supper job! Rob

