king derelict
-
Posts
3,295 -
Joined
-
Last visited
Content Type
Profiles
Forums
Gallery
Events
Everything posted by king derelict
-
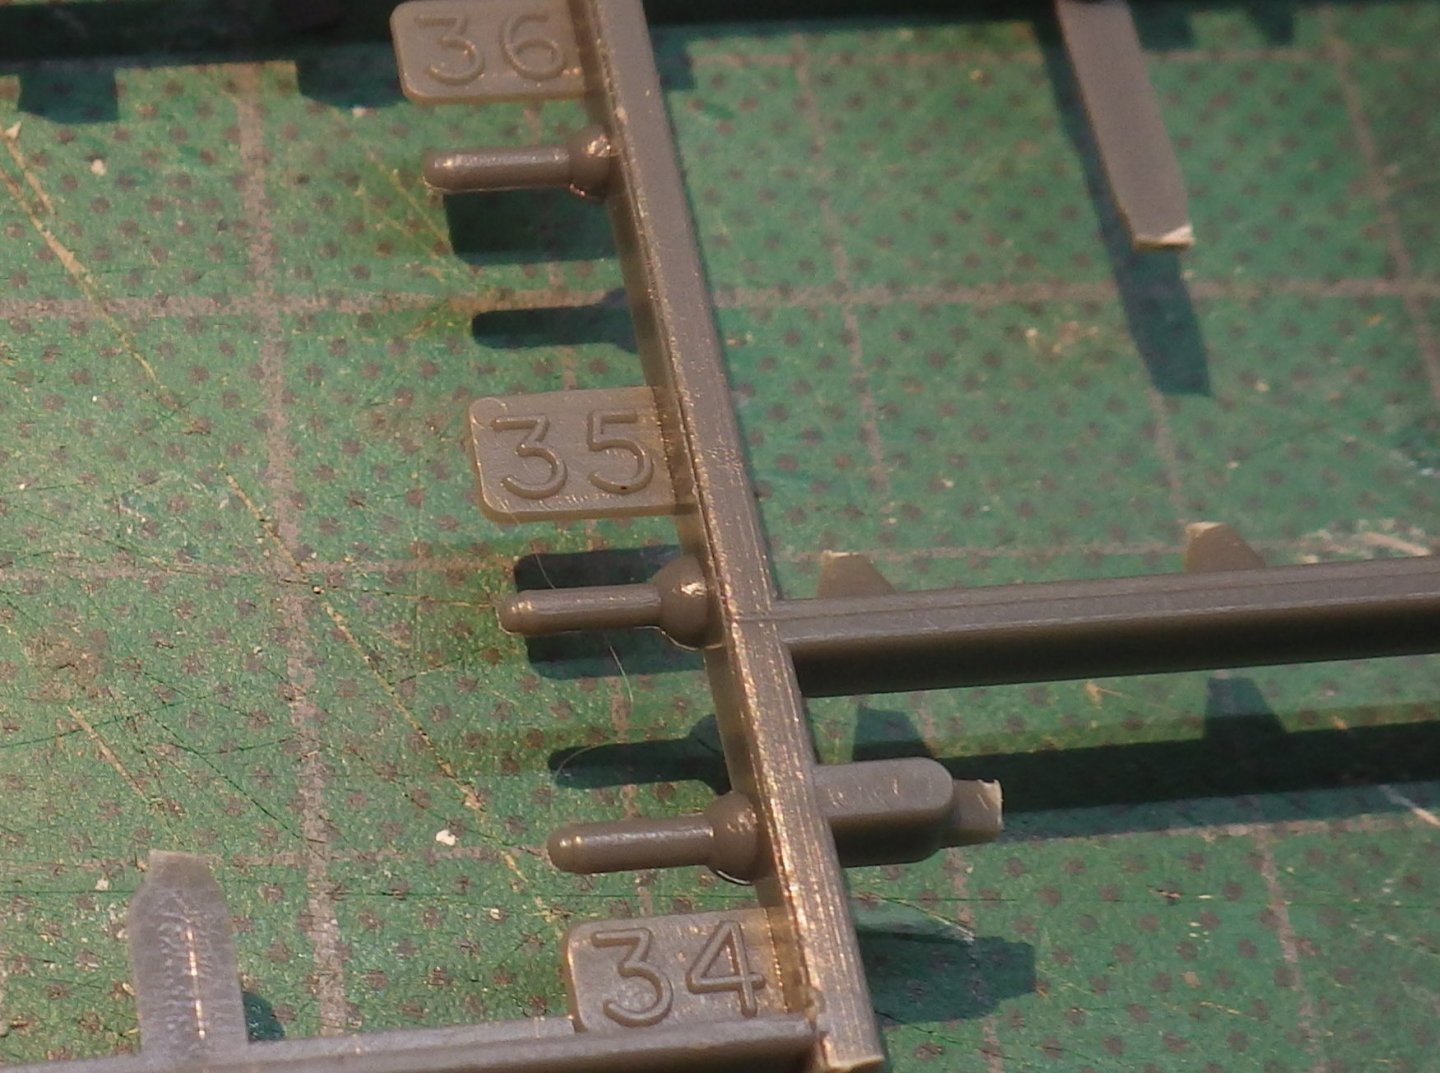
It seems the balance of power needs to be redressed for the Entente Powers so I had added the Mark IV lit to the pile. On Sunday afternoon I opened the box - just looking you understand. There is quite a bit more to this kit than the a7v. More parts and three pages of instructions. Tracks are a rubbery fold around type. Detail is quite nice of the parts and not too much flash. Then the glue came out - just to check the fit on a few parts you see Sponsons assembled and the lower hull and inner skins mated. The fit is actually quite good. No positive locators but its all pretty obvious so far. The outer skins and drivers cupola are in place and now the bit I was not looking forward to - the tracks. I have memories of dealing with the rubber track on Airfix tanks fifty years ago and they rarely went well. The instructions say that the plastic can be bonded using normal styrene glue which I was a bit cynical about. I tried a test piece gluing two bits of the sprue together and got a solid bond so on we go. I worked a bit at a time gluing and holding each section to get a good bond. Got a bit generous with the glue at the sharp radii to sften teh track and it wrapped around the corners and held very nicely. The short section was added at the bottom. I was expecting the long piece to be deliberately long and provide some spare to cut back to fit. In the event the exact length is provided. Actually it is just a whisker short but I think it will fill and be unnoticeable Looking through photographs of Mark IVs the kit has an error with the external fuel tank. The kit has the hatch and filler on the side rather than on the top where real life (and logic) places it. I sanded off the hatch and built a new one from card and some scraps of PE and added it to the model The exhaust and rear structure has been added. It needs to be softened with some adhesive to bend it down the rear wall and across the top of the tank. The sponsons have been added and I was impressed at how nice the fit was after a touch of flash had been cleaned off. The remaining parts are the ditching beam rails which look a bit fiddly and then its back to the air brush. So far this has been very pleasant. I am rather disappointed with teh kits rendition of the Lewis guns They are parts 34, 35 and 36. I am reluctant to use them and think it might be possible to do better with some thin plastic or brass rod inserted into the dome at the base of the kits effort. I see resin options out there but it seems a bit profligate to buy those and discard most of the gun Thanks for looking in. Alan
.jpg.65de1815702dccda244267bba430f465.jpg)
.jpg.3bb862b475c7323b4784e0661857d2a8.jpg)
.thumb.jpg.27d71fdeb4c573faa7c86abd28778e45.jpg)
.thumb.jpg.bffc2fd3682ca3c1c9643672408ef392.jpg)
.jpg.778f20aa65b436e88ca6f171420648ab.jpg)
.jpg.e199c29be22e9ca966e8537e9d1e752b.jpg)
.jpg.b8f24a593a38515b86b8b32ecddcb52a.jpg)
.jpg.5ee62ee17eb03d4129dbaca8088fac31.jpg)
.jpg.8990f8c1424adb3c80fbdde25ab68ae7.jpg)
.jpg.76c2173b8f6be01aa07d454d393eafa9.jpg)
.jpg.fc131a5c958063cea893fa78a7dfd4b8.jpg)
- 57 replies
-
- 12
-

-
1/48 Italeri Hawk T.1A (On Hold)
king derelict replied to Old Collingwood's topic in Non-ship/categorised builds
Thats about my ratio; far more time cleaning than spraying but I think the air brushed paint is so good that its well worth it. I usually finish a cleaning by spraying some cleaner into a paper towel. It proves to me that its running clean and the flow is good. I pull the needle, nozzle guards and work cleaner through it all. I tend not to pull the nozzle every time because it has a very small o seal which deteriorated if you mess with it too much and I can't find a source of replacements. Having said all that I went to spray the a7v the other day and the paint just would not spray. I ended up pouring the paint into my other air brush (I have two cheap ones) and dumped the first one into a container of water. The second air brush worked fine and I cleaned both afterwards without finding anything untoward and they both work fine again. Voodoo Alan -
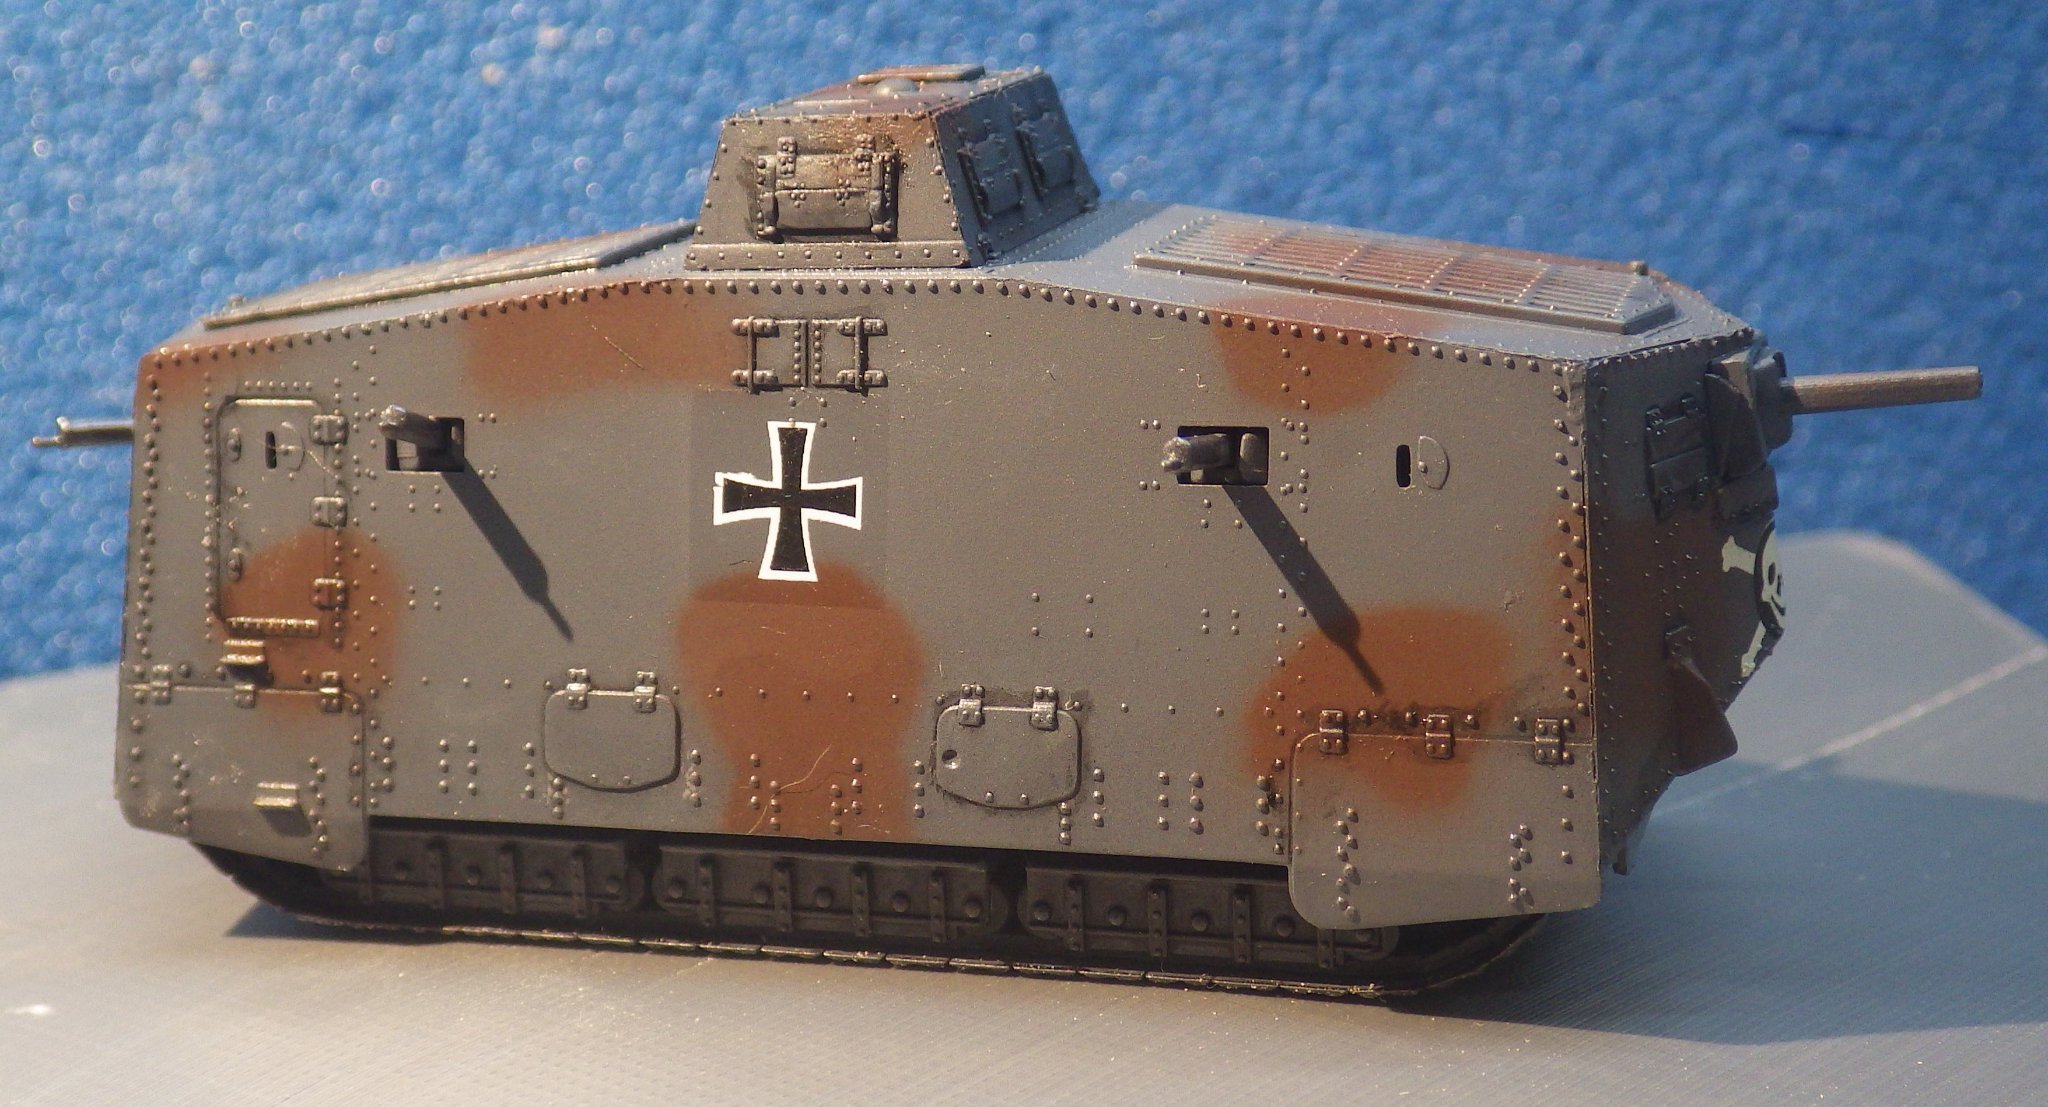
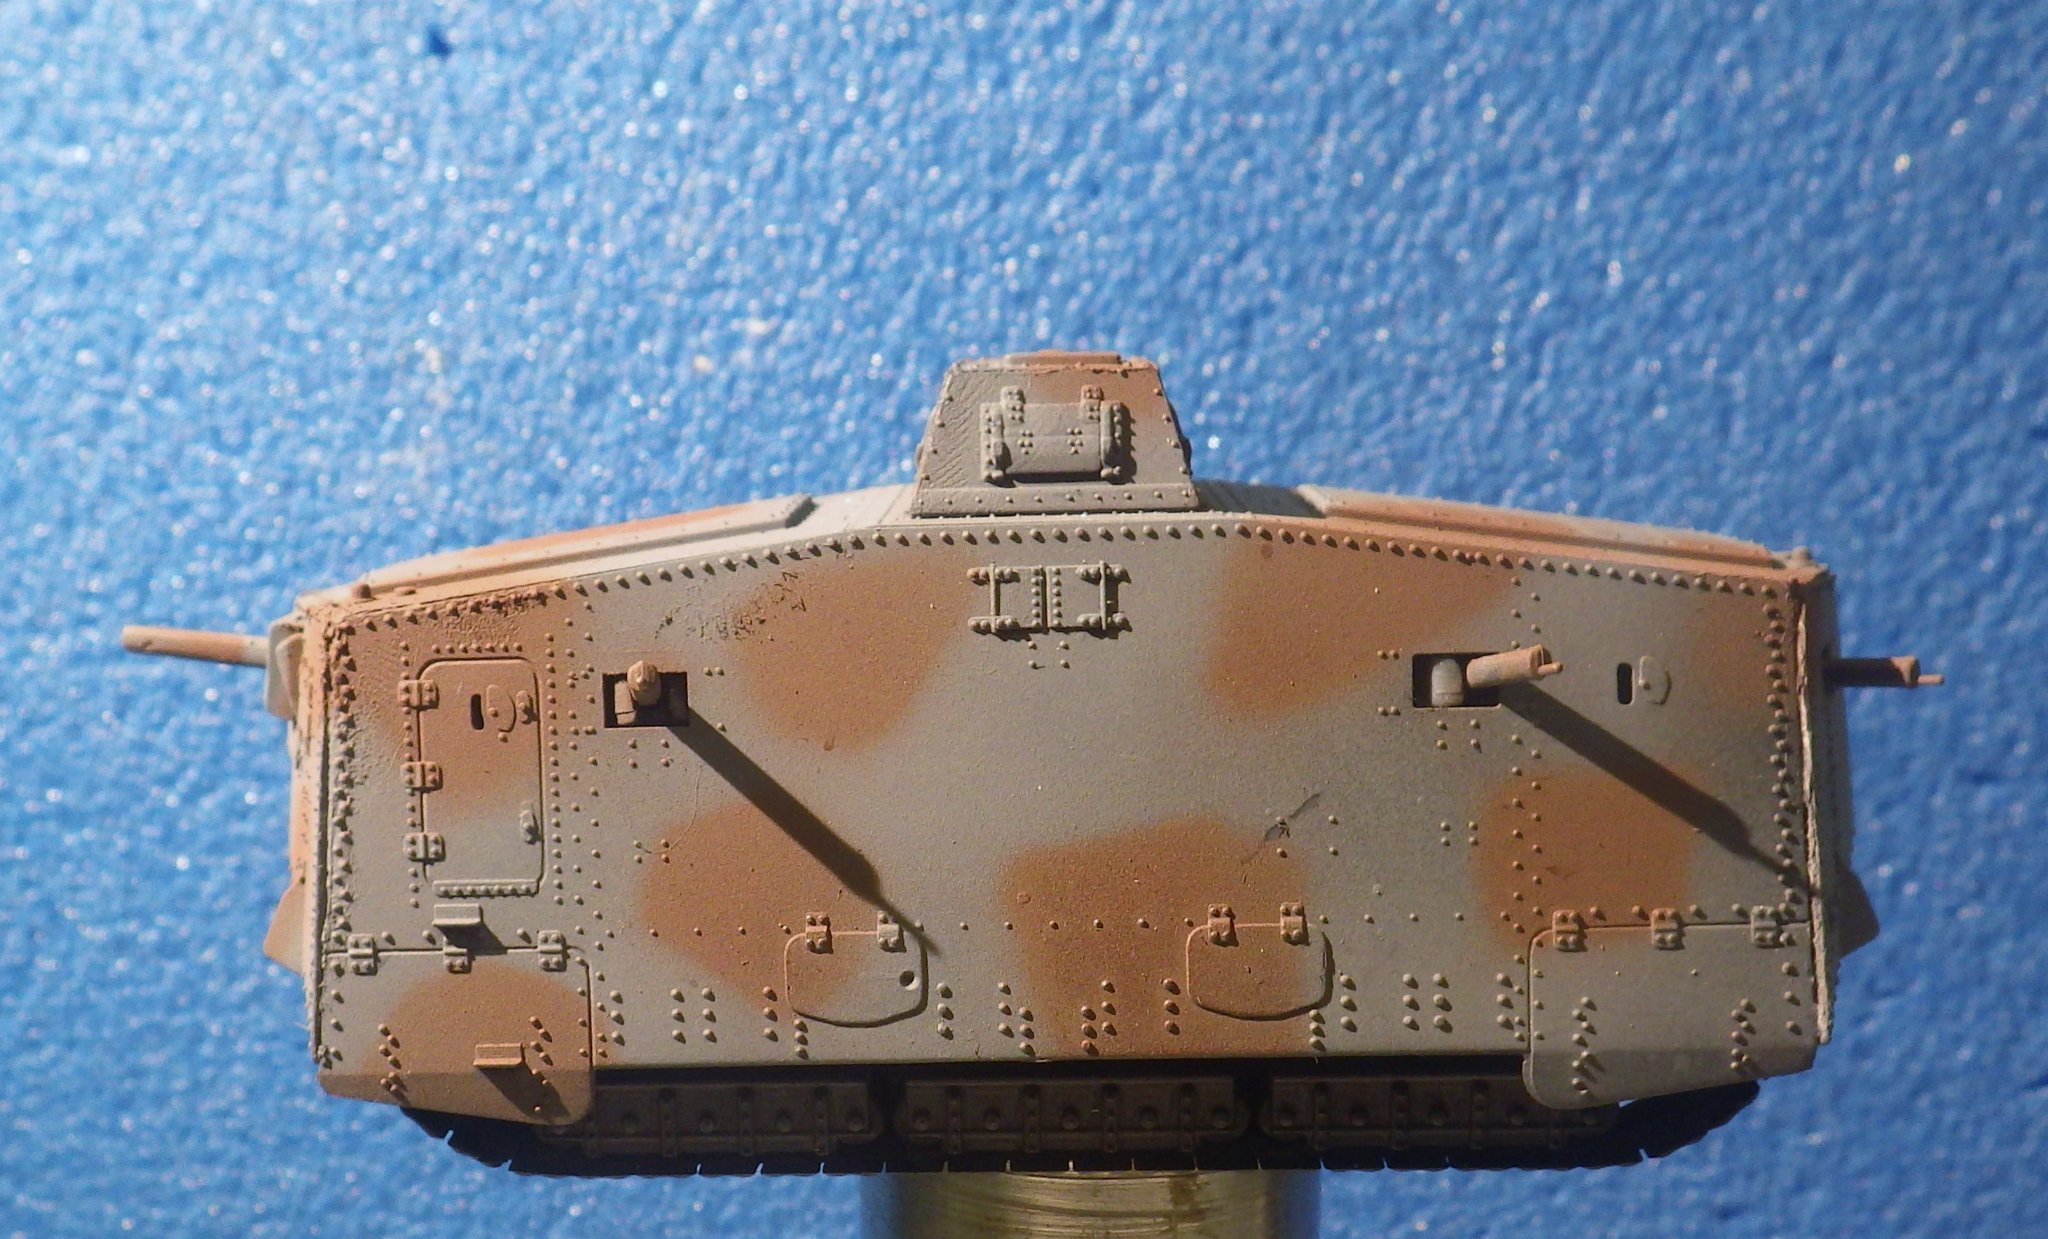
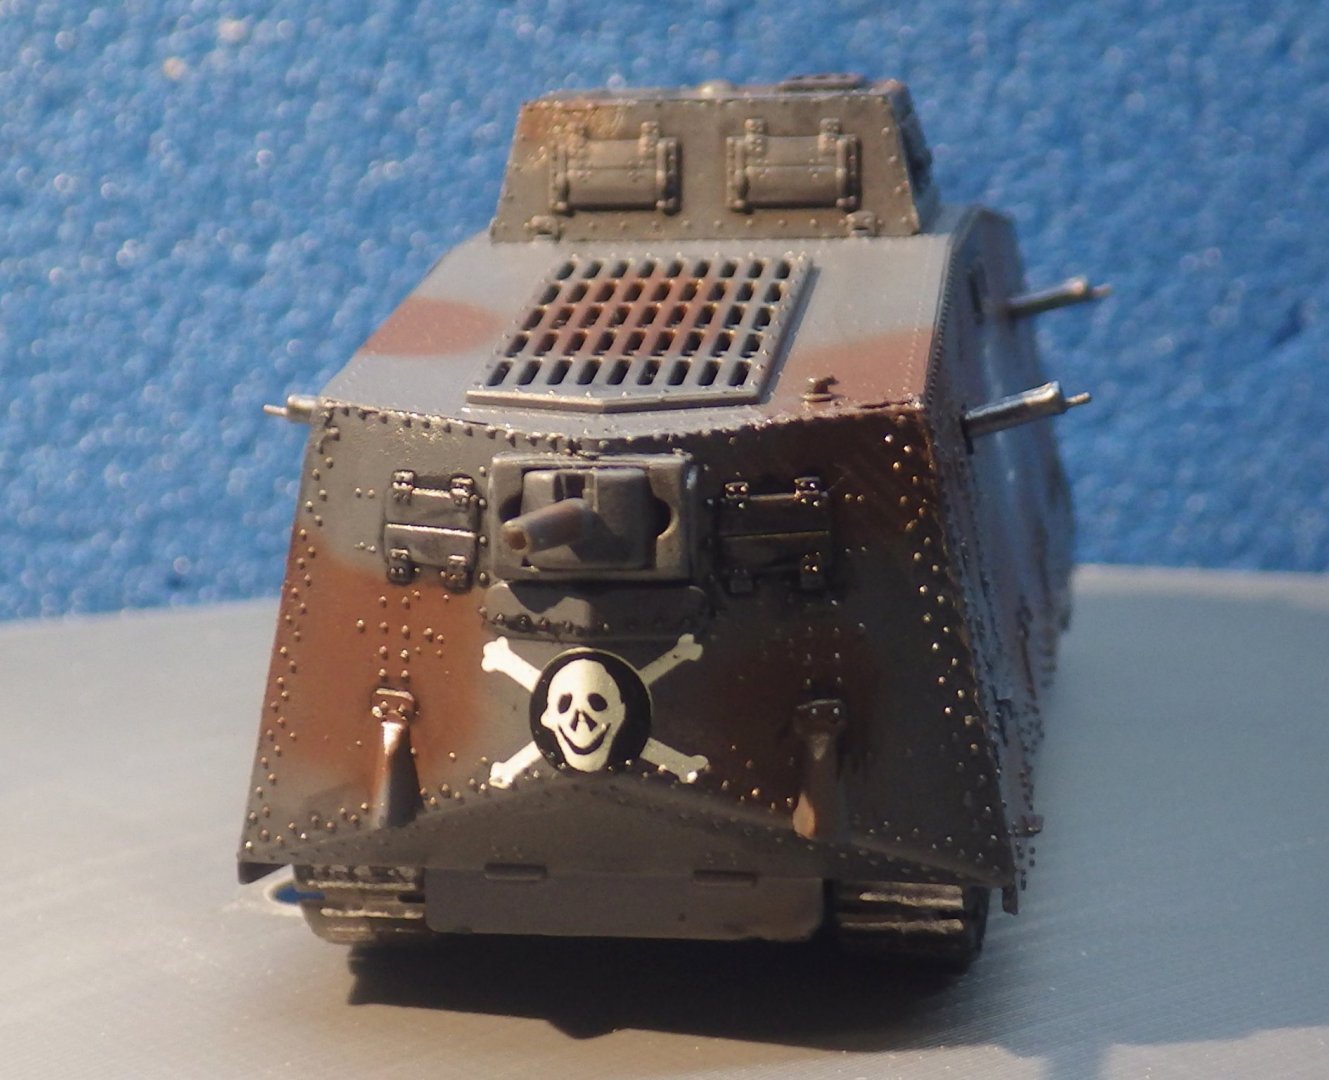
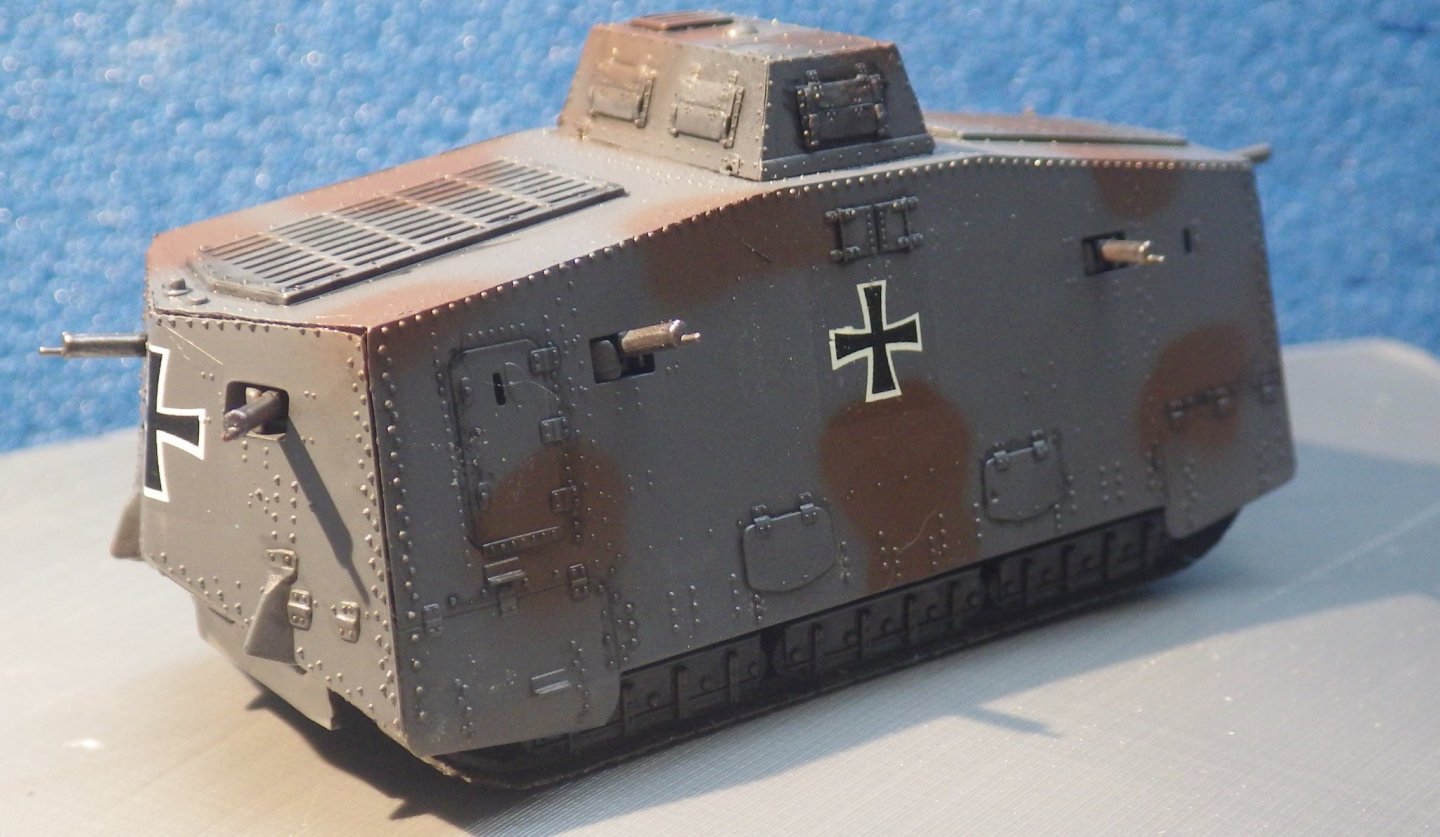
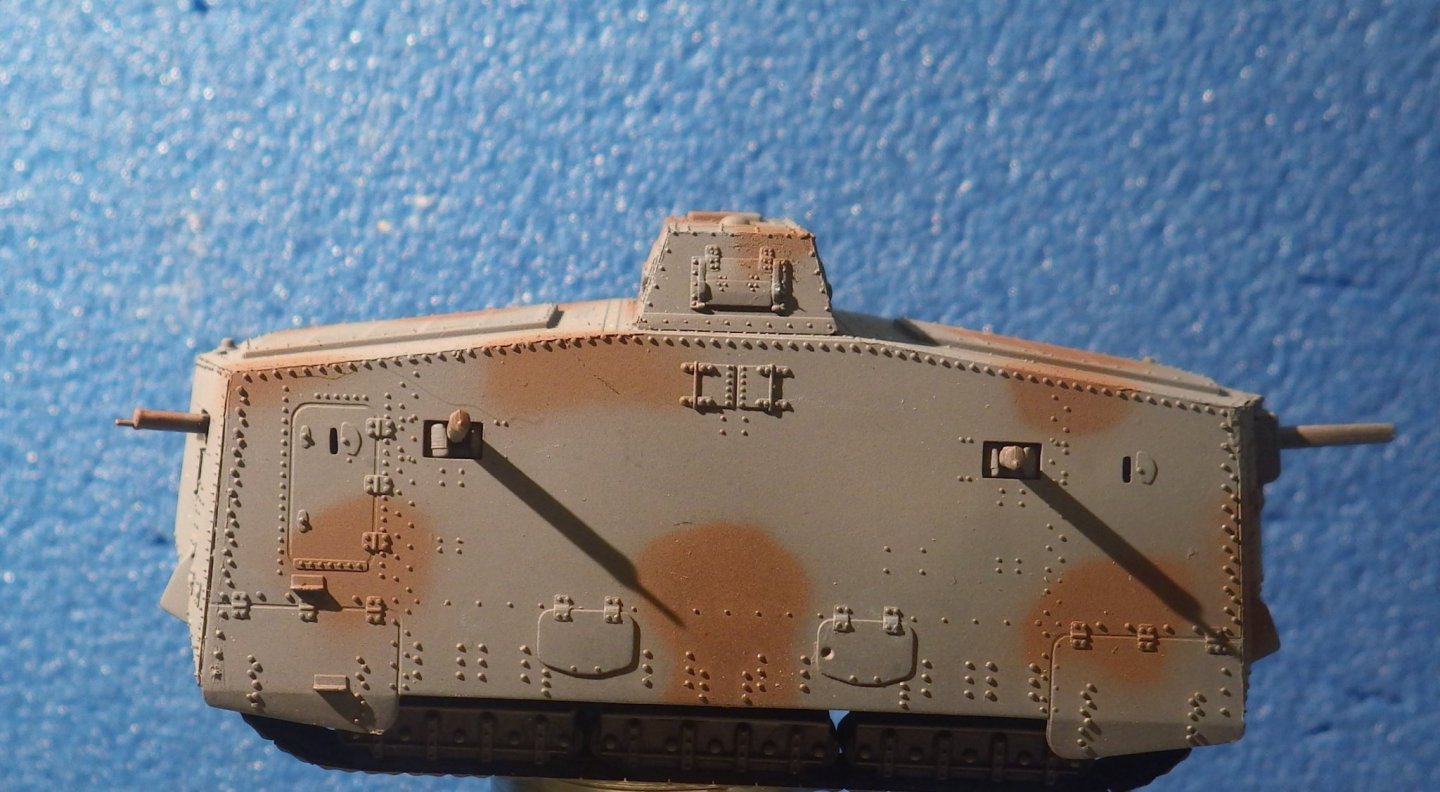
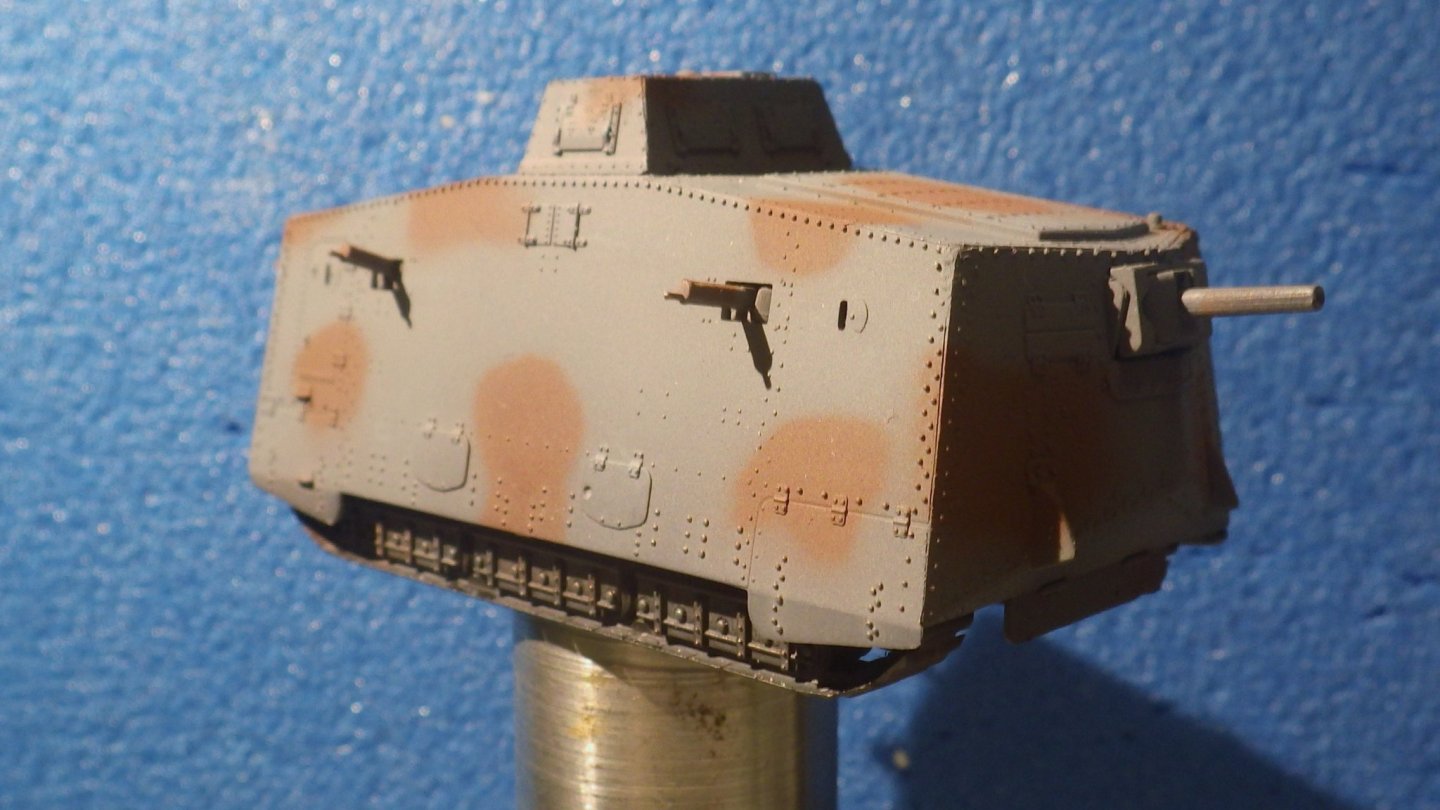
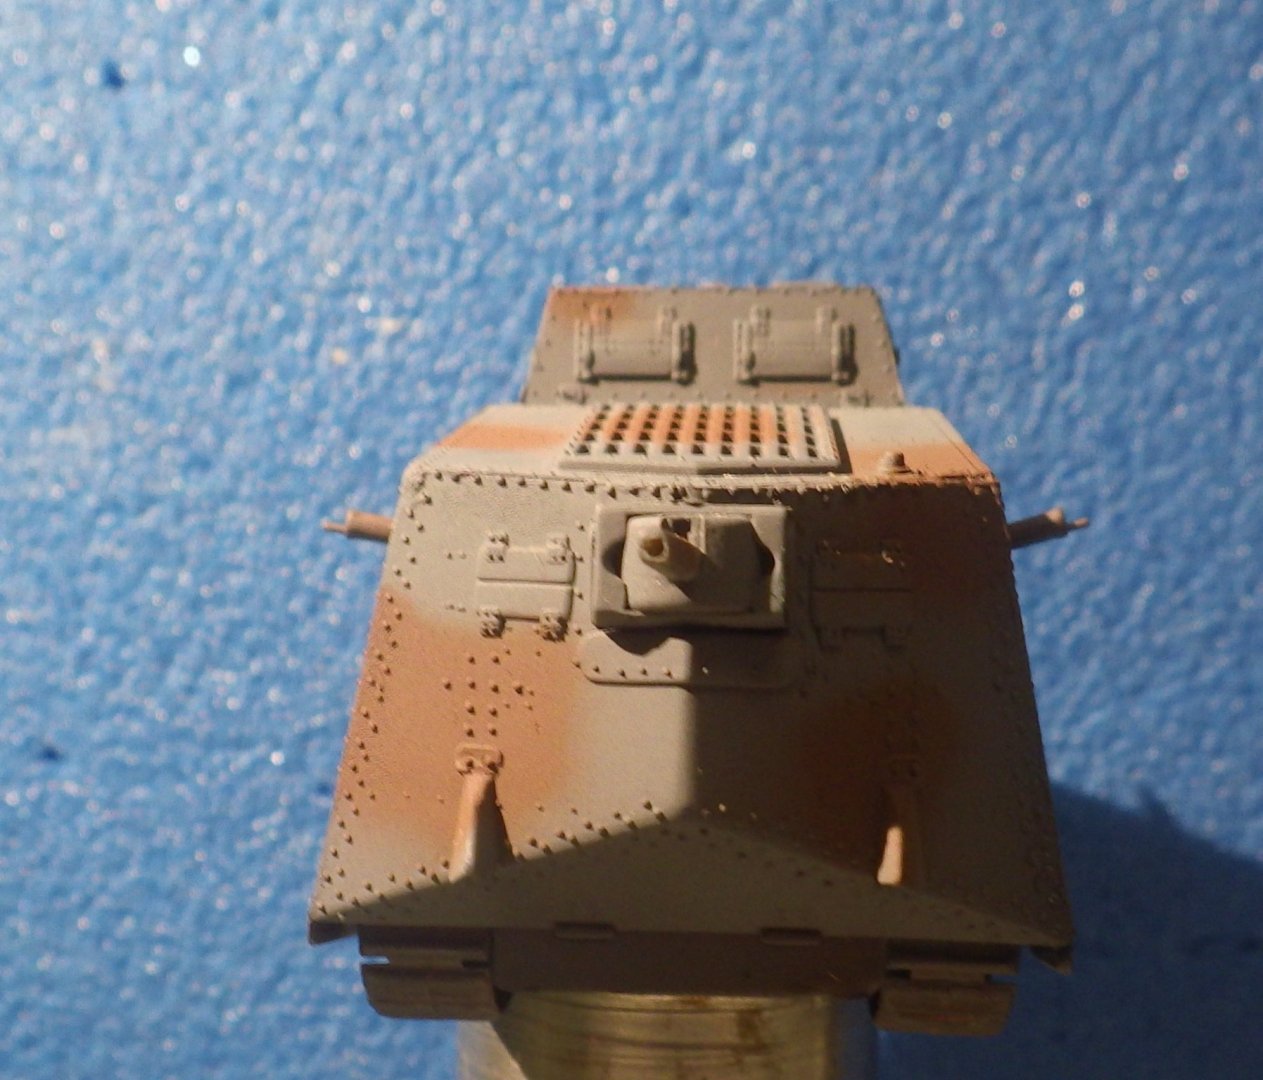
I decided on some very mild weathering. I don't really know what a realistic level is. Some models seem to have been an exercise in adding as much weathering as the model would hold and that seems a bit too much for me. I can see vehicles on long campaigns bashing cross country are through rubble are going to get pretty beaten up but it seems the WW1 tanks would not have that sort of life and would be dirty in use and relatively tidy when in the rear. So I decided to add a little rust to the running gear, tracks and the edges of the lower panels. I currently using the Vallejo product and like the effect of the dark and light rust colours provided. I used the dark rust colours at the edge of the lower panels and then a touch of the light rust within the dark rust and then diluted it and spread it with a wet brush. After it dried I air brushed a mist of buff onto the lower hull and running gear. I'm trying to emulate OC but its not as good. Finally a matt coat was air brushed to lose the gloss applied earlier. Lastly the point of this build - to meet the Renault FT17 to compare sizes. Oh my Can't we just get along? Thanks for looking. all the kind comments and helpful advice Alan
.jpg.378267fd0605d723b25546ce84eed8f2.jpg)
.jpg.800f0ba5b2b257dd55e82a2929d5a064.jpg)
.jpg.3936a70f3a4b00526cee4edf2da72a78.jpg)
.jpg.c573114681c3609bcc330901cefa9b62.jpg)
.jpg.4312382d1e4e63a3a4d42b59a58732f4.jpg)
.jpg.3ede4e673a410fe802f2eb102fbcb2ce.jpg)
.jpg.cf0a1506350c726dbab8f415cd6c516c.jpg)
.jpg.bef184add7e2668ec55b7a88be3ca82d.jpg)
-
Thank you for the kind comment. The masking looked a mess but it worked out OK. The Mark IV is in progress - I made the mistake of opening the box - just to look. Alan
-
Thank you kindly Lou I'm glad you enjoyed the build. I had a lot of fun with it and it actually came together quite nicely. And PE - free too😄 Alan
-
Thank you Patrick Thank you again for your help with the research Alan
-
Thank you Mark. I think I'll be building a few more WW1 tanks as lightly relief from the corvette.I Alan
-
Thank you very much OC. Its not a Flyhawk standard kit but it still makes a very nice model. I enjoyed it enough to buy a couple more Emhar kits; the Mark IV tank and the Whippet Tank. Alan
-
That is a spectacular model OC. You did a great job. The dusty finish and the details really make it stand out. It sets a standard to aim at. Alan
-
I wanted to add a black wash to bring out the panel lines and hatched. In the past I have used a very dilute acrylic wash straight onto the surface. It has worked quite well but it tends to end up all over the various surfaces and darkens the base paints. I decided to try a different approach and air brushed a coating of Future floor sealant and when it was dry ran a dilute wash of artists oil black paint. I used Q-tips to clean up the surplus. I maybe should have made a stronger effect but I like the result. The decals were applied. Not the kits strong point, lots of backing film but they went on quite nicely. I will add a dust film over the running gear and lower hull next. I don't plan to weather too much. I don't think these were around too long to get heavily corroded. Thanks for looking and hope everyone has a great weekend Alan


- 47 replies
-
- 10
-
-

-
Probably felt nice and invulnerable until it got bogged down and the artillery started getting the range. Alan
-
Many Thanks Egilman. I feel quite pleased with the result. Alan
-
Not only moving but spitting rounds in all directions too probably. I guess its a military thing. Salute it or paint it. Alan
-
Thanks for the nice comment Ken, something that will be useful in other builds. I might try some aircraft soon. Alan
-
Thank you for the kind comment OC. I think I learned a new technique with this. I'm happy with the result Alan
-
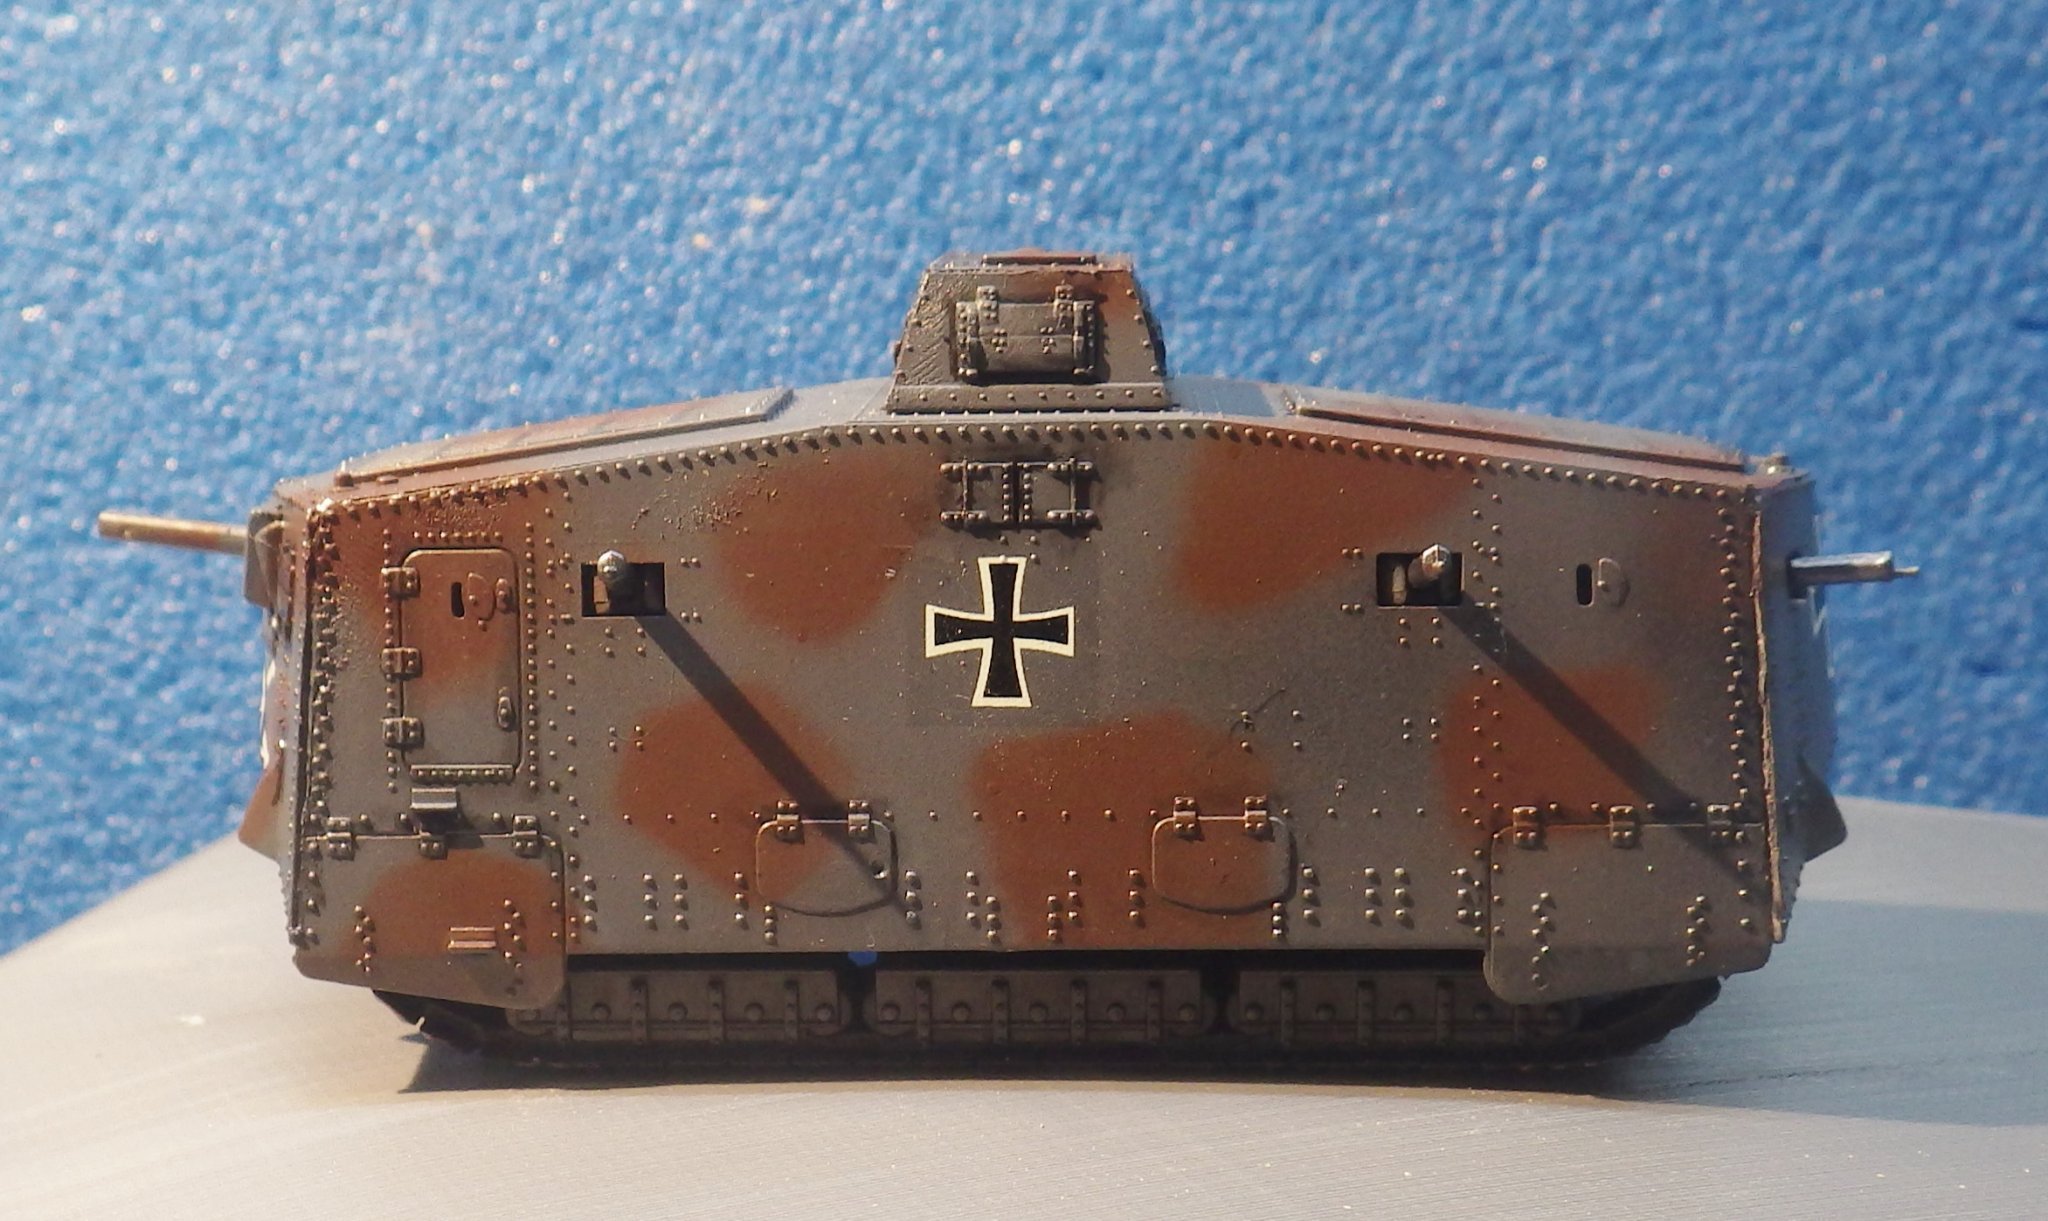
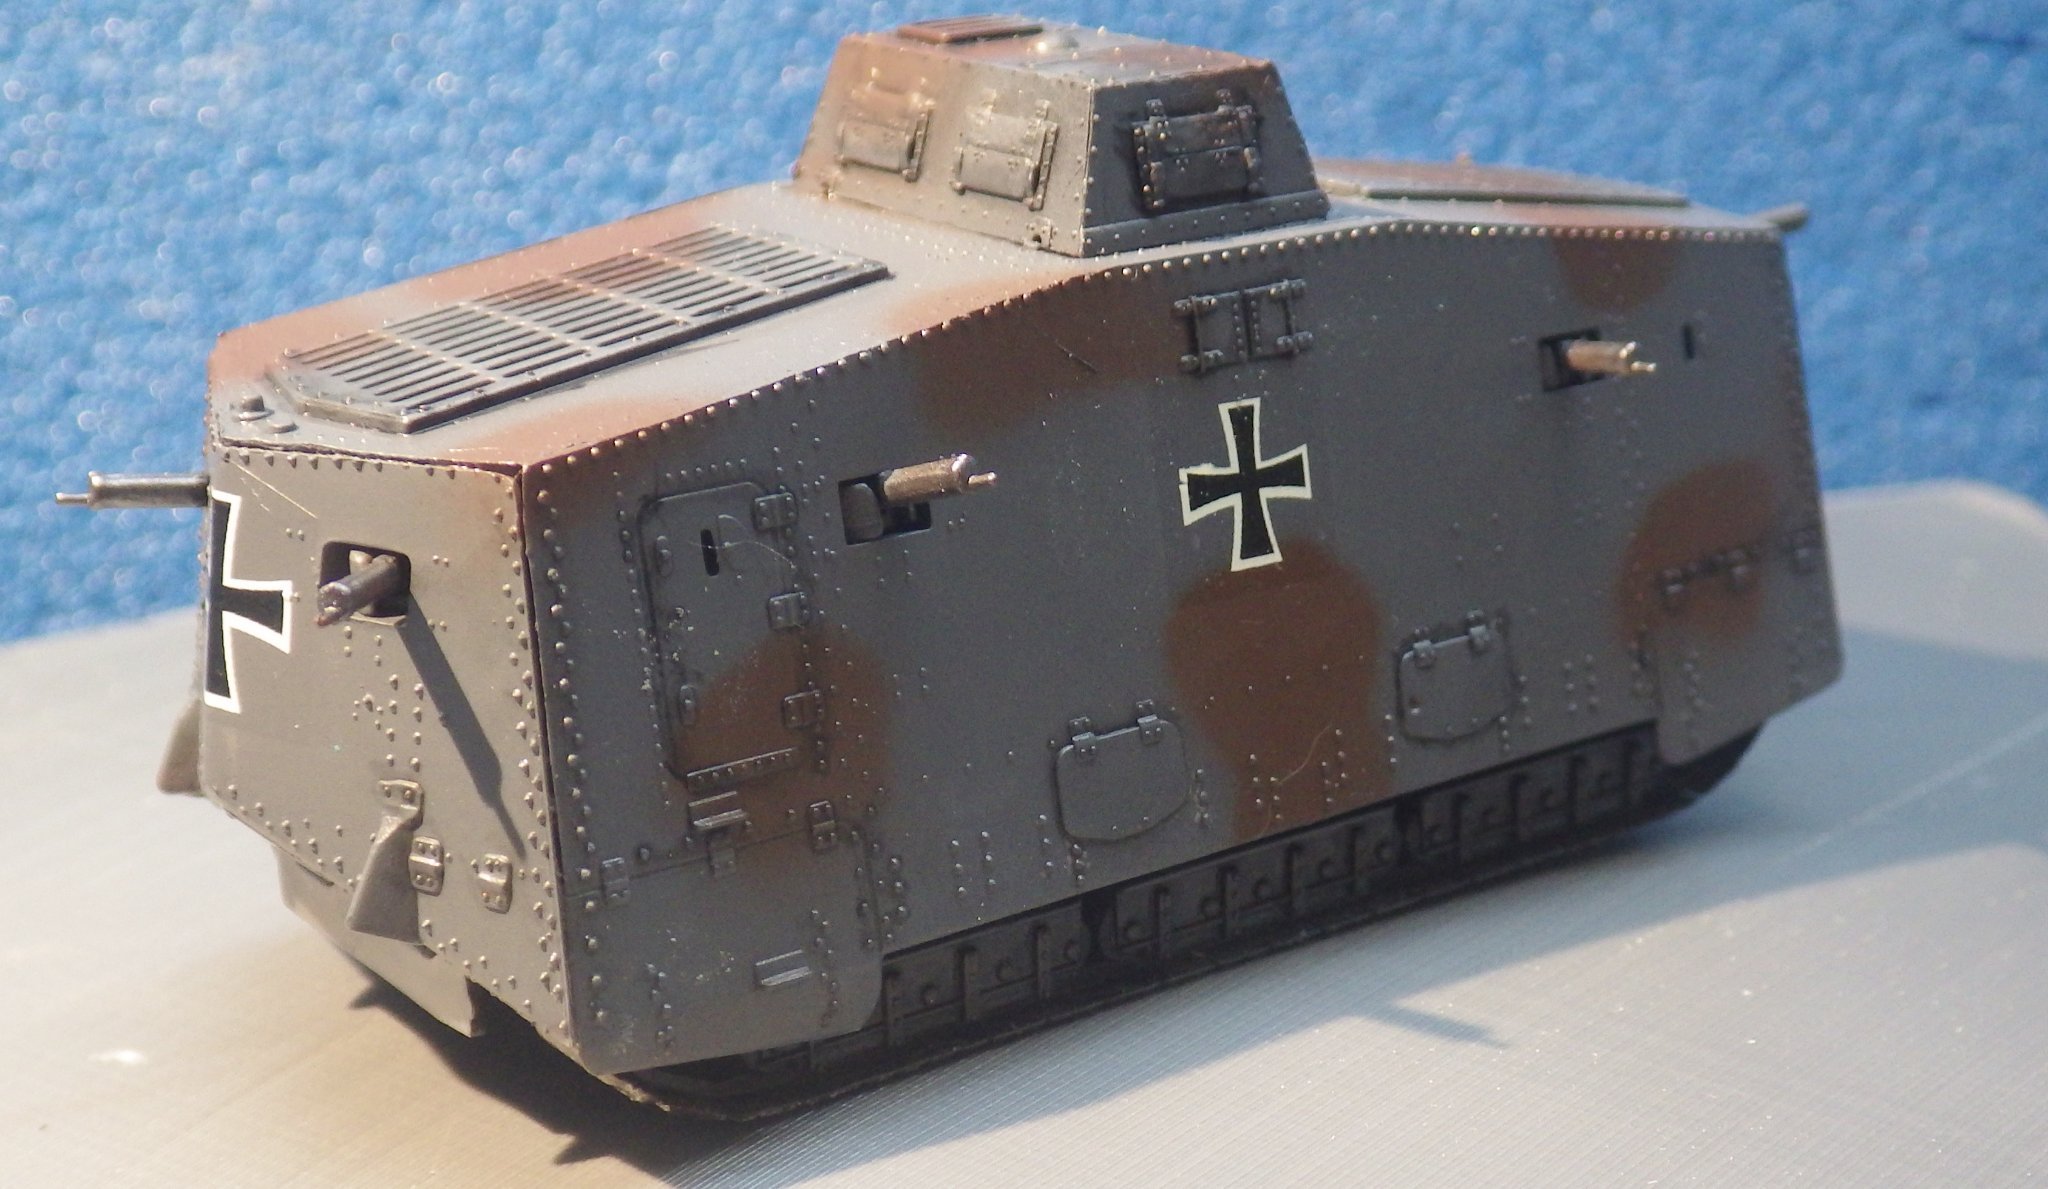
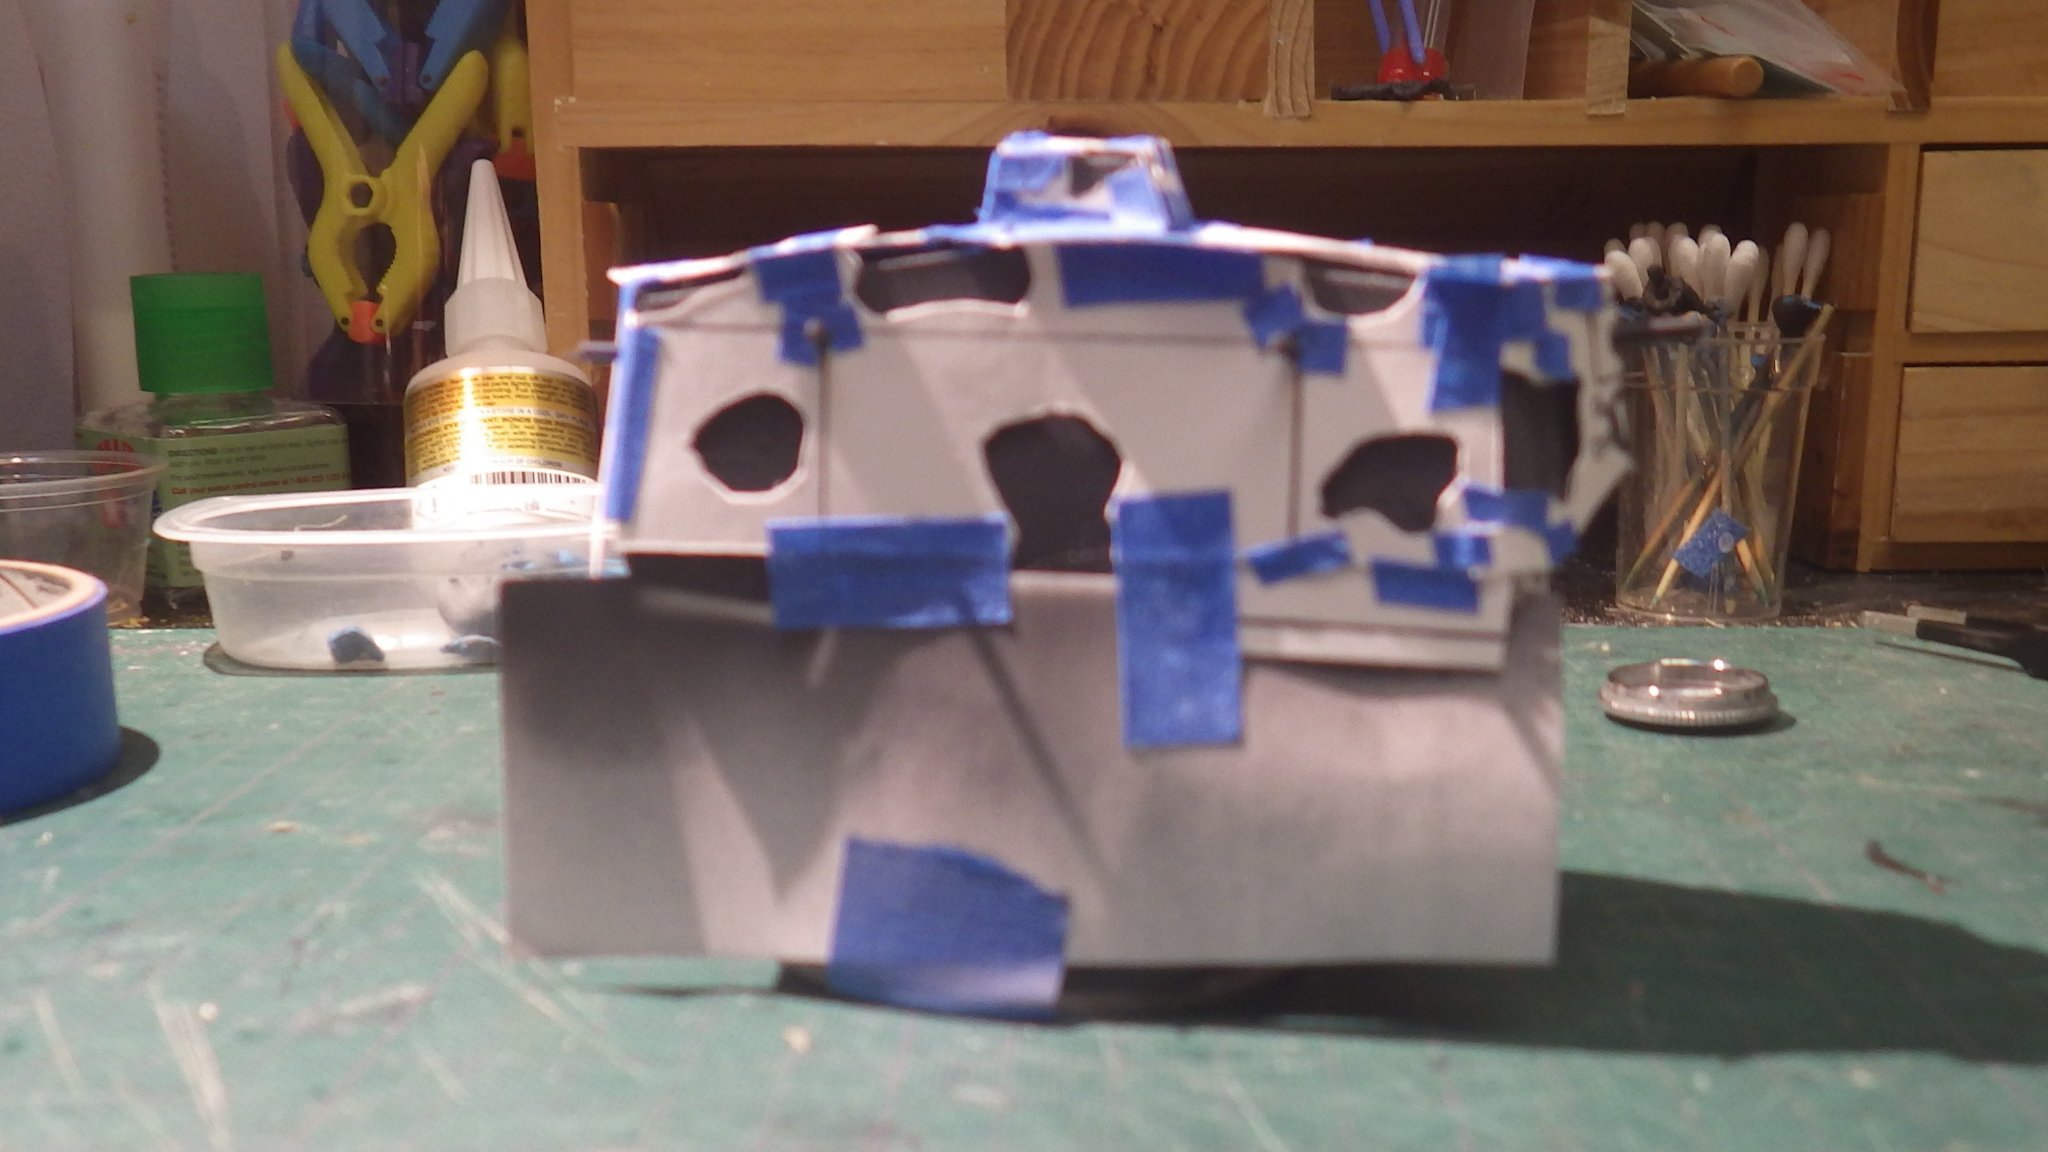
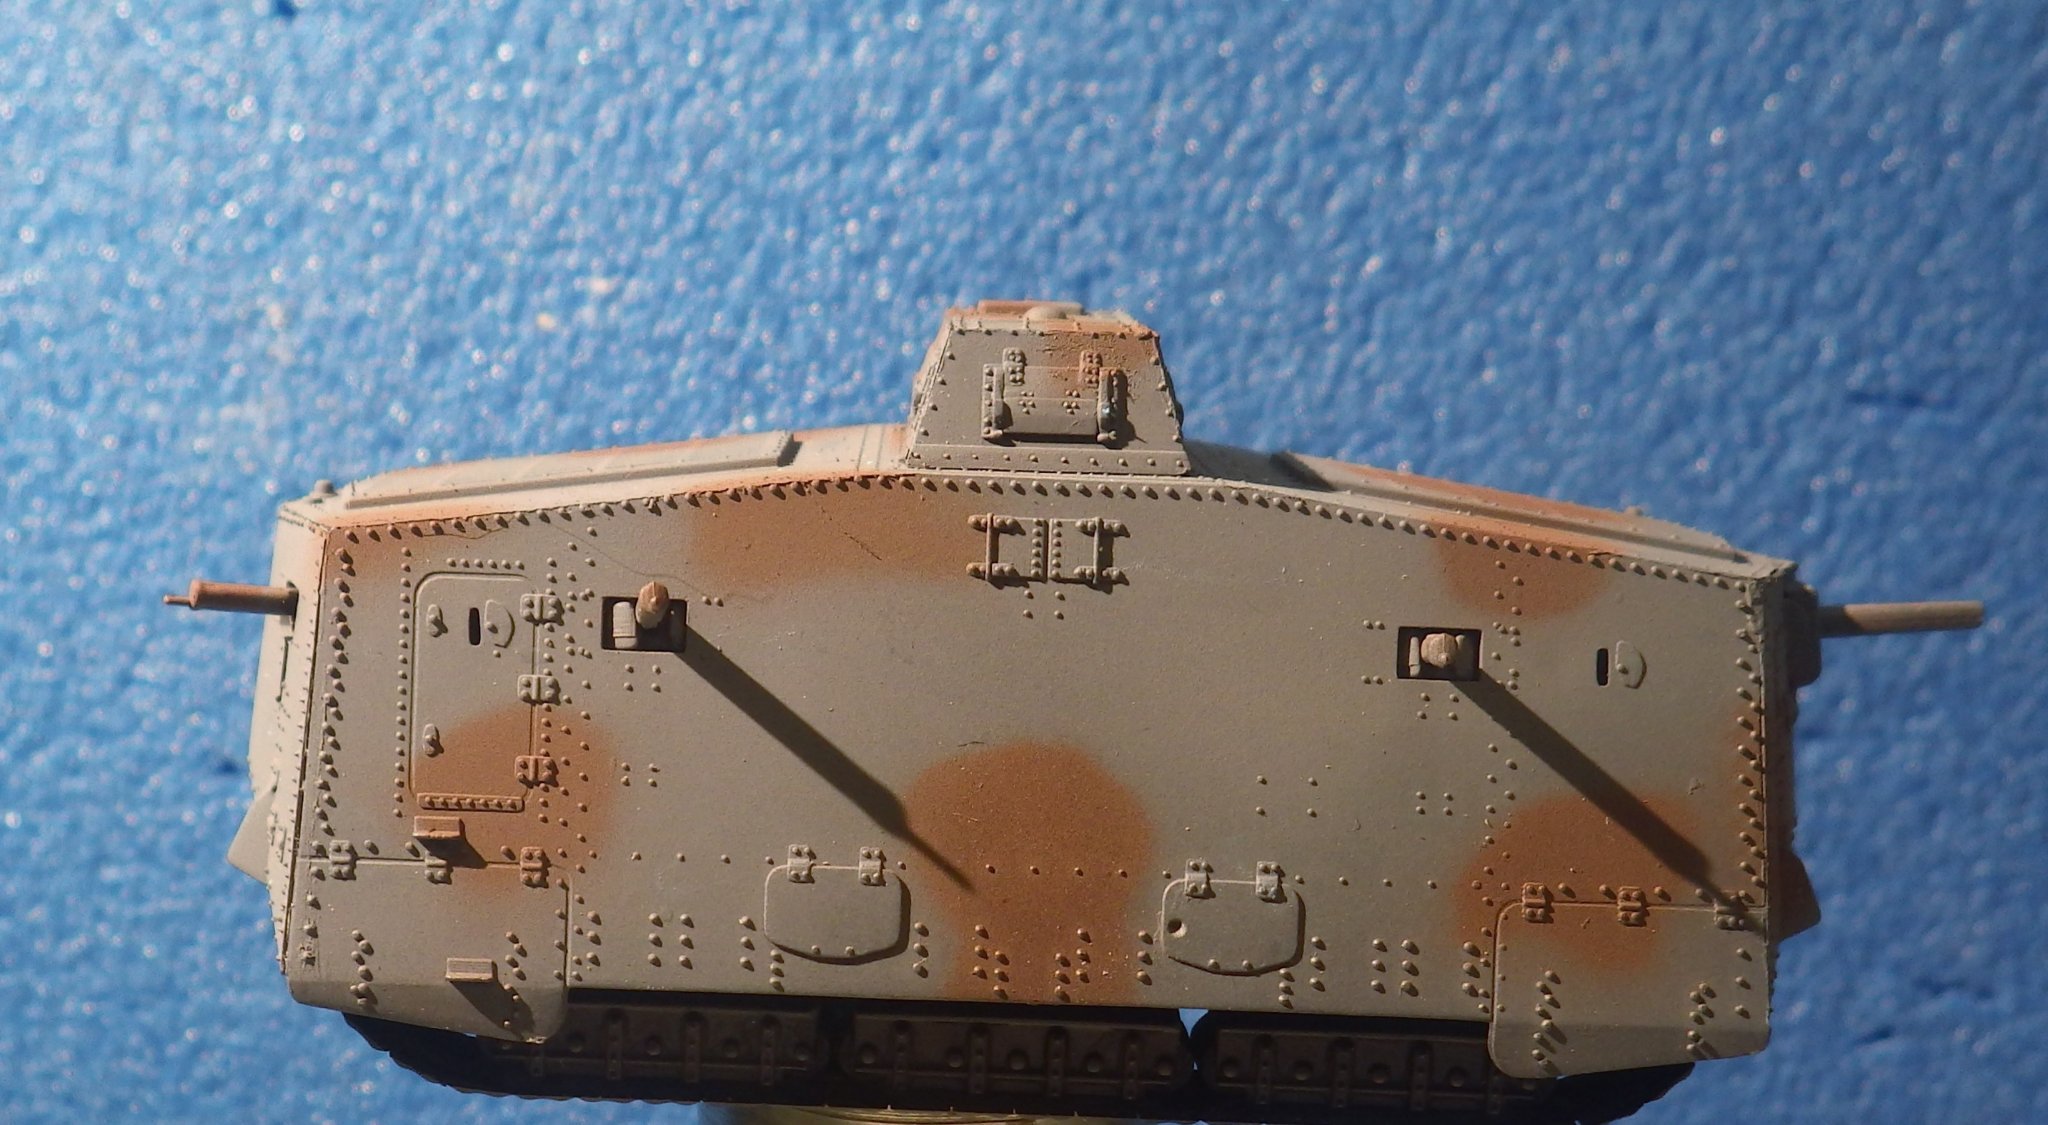
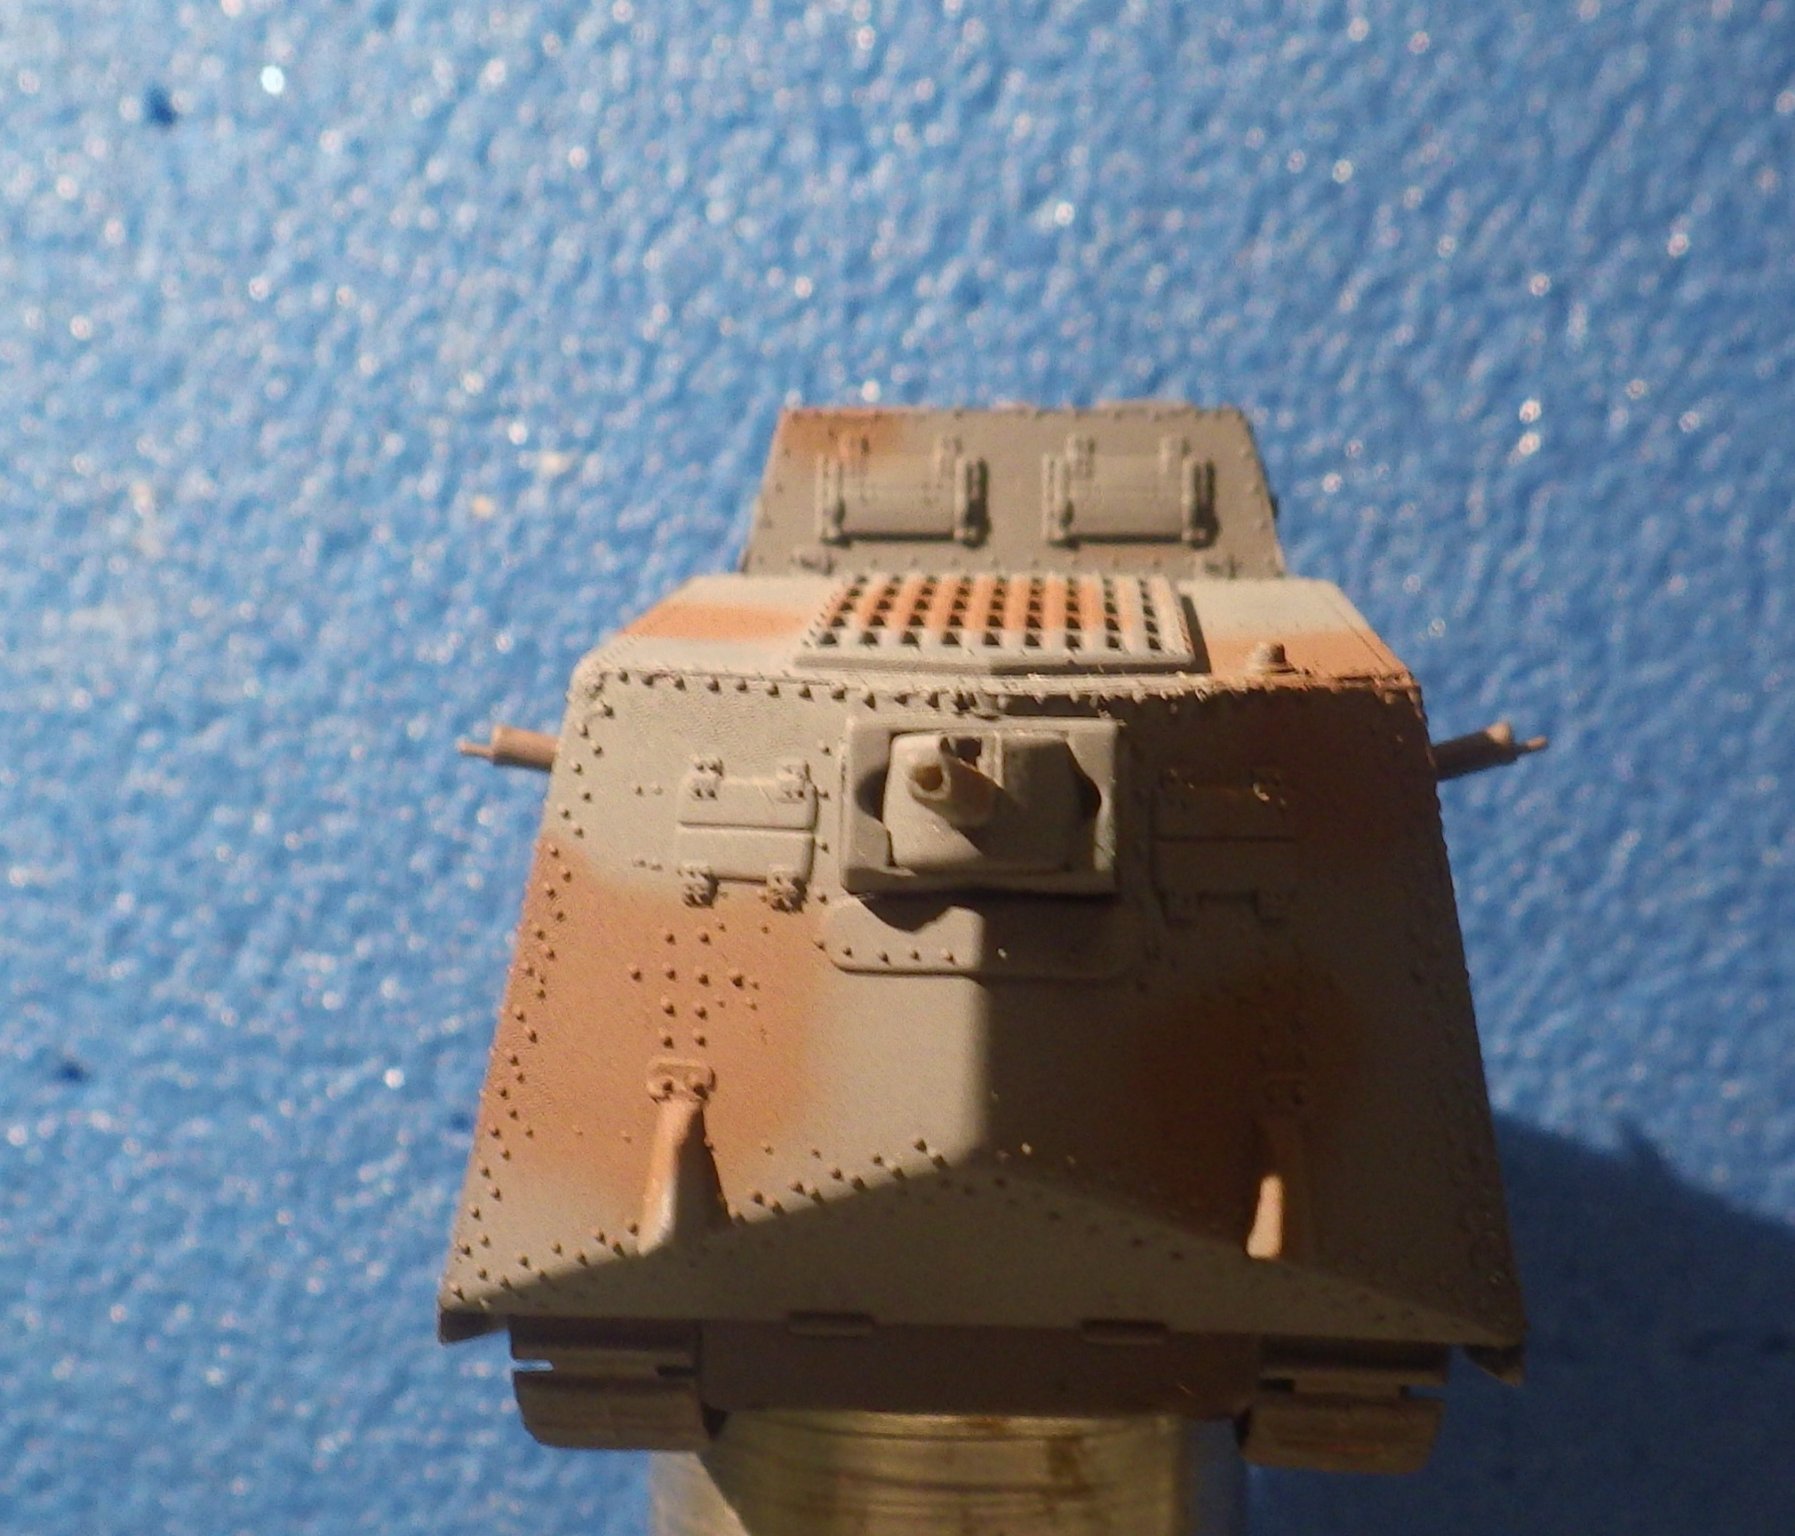
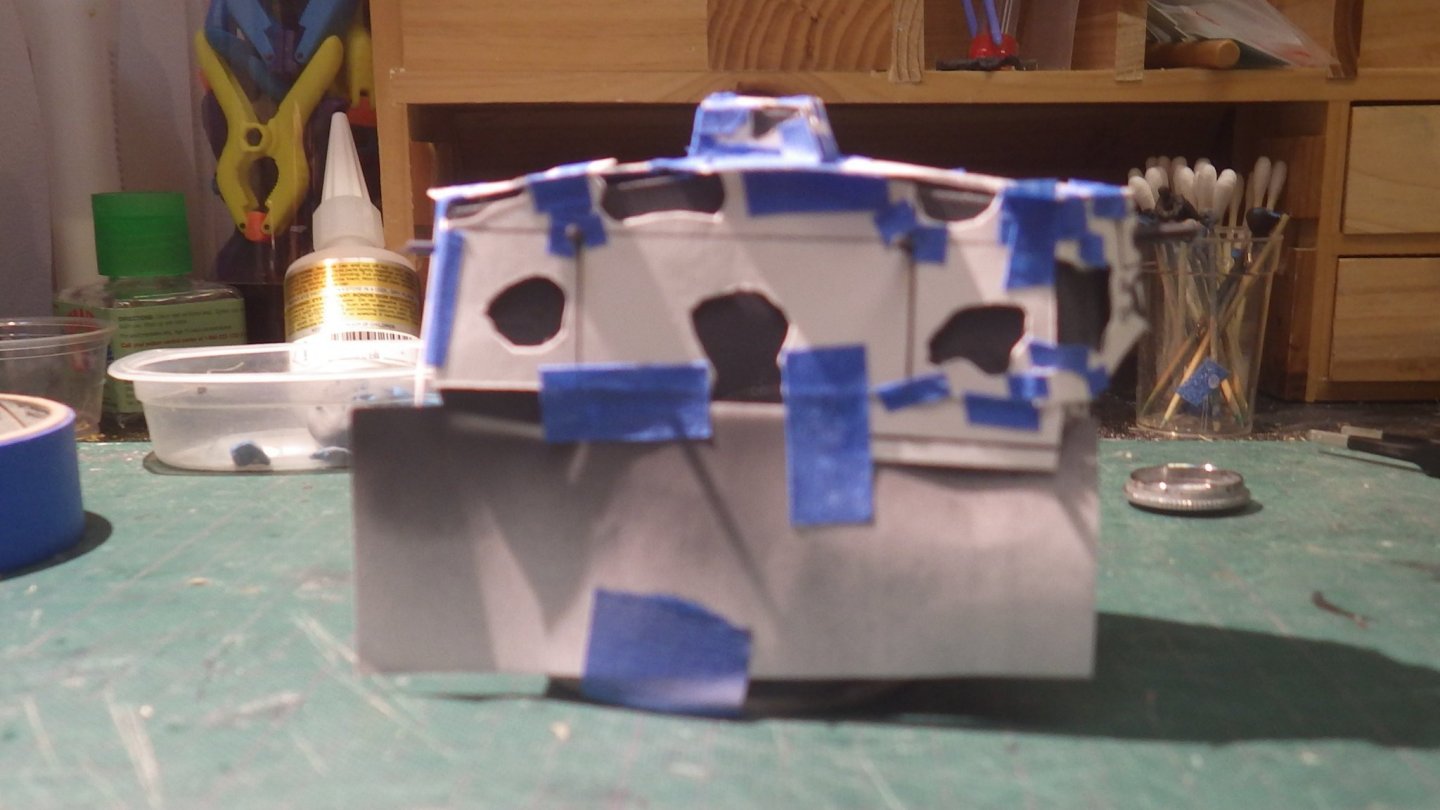
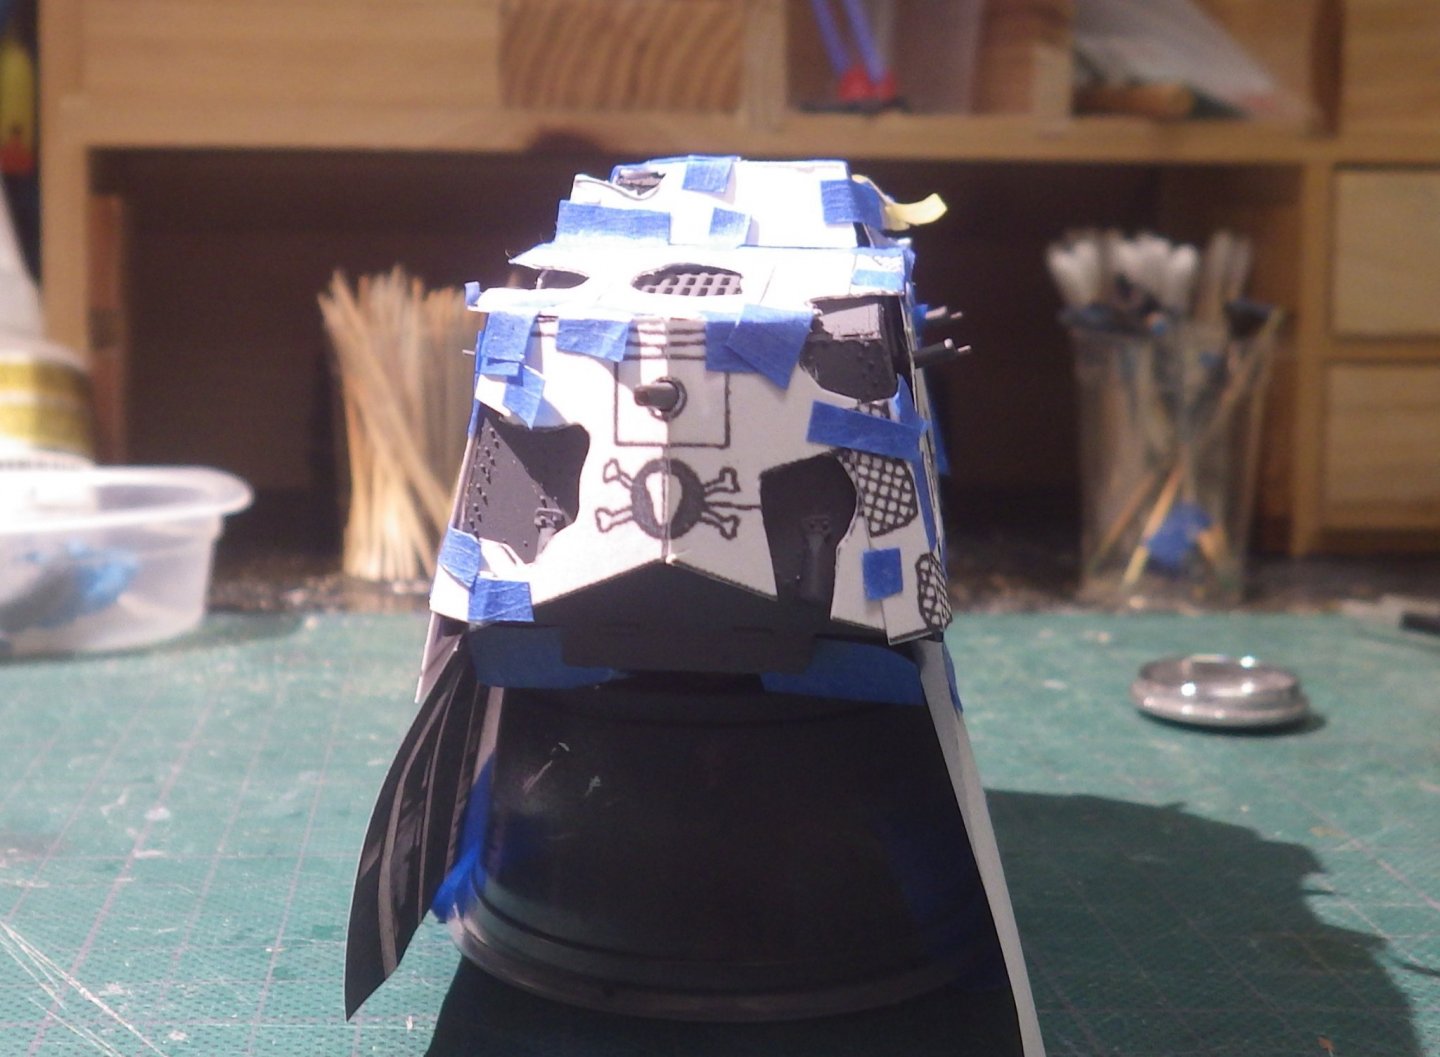
I thought a bit more about the camouflage scheme and scanned the paint scheme illustrations from the kit. I then printed them on light card stock scaled up to the kit dimensions. I cut out the brown sections on the card and created some similar patterns for the side not shown in the art work or paint scheme. I rolled out some blue tack to about 1mm thick and cut slices which I used to space the card masks off the model. Tape was used to seal the corners and hold it all together It looks a bit of a dogs dinner but I think its functional I airbrushed Tamiya Flat Brown in light coats and then removed the masks I am happy with the soft edges of the brown areas but I think the shade of brown may be a little light. I quite like the look so it may stay that way. If so I will begin the detail painting, some washes and weathering. Thanks for looking in Alan

-
Thank you Lou. It feels like its been stalled for a while. I think you are onto something with the camouflage. This could have a devastating effect on the Allies Alan
.jpg.a4dd2a91b9ce00751b64d0c9757cbad4.jpg)
-
Mike It looks great. The details are beautiful. I like the 1 inch thick extruded foam. Extruded foam is a bit .more rigid than expanded foam and doesn't disintegrate into beads when you attempt to cut it. It cuts nicely with a hot foam cutter or a sharp knife (including kitchen knives - don't ask me how I know). You can buy it in one foot squares at Home Depot at a $1 each. Currently it seems to be light green. Alan
- 154 replies
-
- 11
-
-
This build inches forward at glacial speed. I find myself doing a lot of reading and planning on each step; much more than I would for a regular kit model. Partly I think its trying to decide how much of the generic Flower Class corvette can be tweaked to be a specific ship and then how to achieve it. The historical record is also quite patchy when it comes to detailed deck shots of a particular Flower. I think this may be nearer a scratch build for me than I am used to. Its very enjoyable but I'm not breaking any records making progress. I planked the wooden foredeck and once the glue had set I scraped the planks smooth with a glass microscope slide. It is far too clean and now needs to be weathered with some grey and brown dilute oils. I have filled the portholes and painted the steel decks. The 4 inch gun bandstand has been assembled and painted. Next task is finally shim the foredeck elements and build up some more details prior to placing them permanently. Thanks for looking in Alan
.jpg.d793c1edc33fe3b818cf3356f007c9ca.jpg)
.jpg.87b25524b801d0503b738e3db2e37e49.jpg)
.jpg.2d05a5f4b0cbc9a53f5b205ea5da47fa.jpg)
- 460 replies
-
- 10
-
-
- Finished
- Flower-class
- (and 1 more)
-
Hi Mike I'm so sorry for the slow response. I used Mig matte clear coat and slightly diluted it with water. It seems to have been working well so far. It hasn't left any discernable edges. Alan
- 460 replies
-
- 3
-
-
- Finished
- Flower-class
- (and 1 more)
-
I've been getting bogged down with the corvette build so progress has been slow here. I decided that I like the box art paint scheme in spite of the historical evidence to the contrary. We will assume that it is in its initial field grey and there was only time to break it up with a brown pattern. So the basic grey has been added. I'm playing with masks for the brown parts but I want to get a soft edge to the paint so I'm thinking I need to stand the mask off the model. Thanks for looking in Alan
.jpg.aacfdadf55422ad8e711883d05838922.jpg)
.jpg.2038f10877fb5a2edbe33340c73959b5.jpg)
-
1/48 Italeri Hawk T.1A (On Hold)
king derelict replied to Old Collingwood's topic in Non-ship/categorised builds
Its looking very nice OC. What do you think of the Italeri kit? I'm thinking about their F-35B model. Alan -
Its going to be a spectacular model Craig but the port holes are a significant piece of work. And now I know what Kentucky windage is Alan
-
Hi Patrick Thank you very much for the paint information. It sounds like the Queensland museum got it right I think. That is a huge help. Thanks again Alan
-
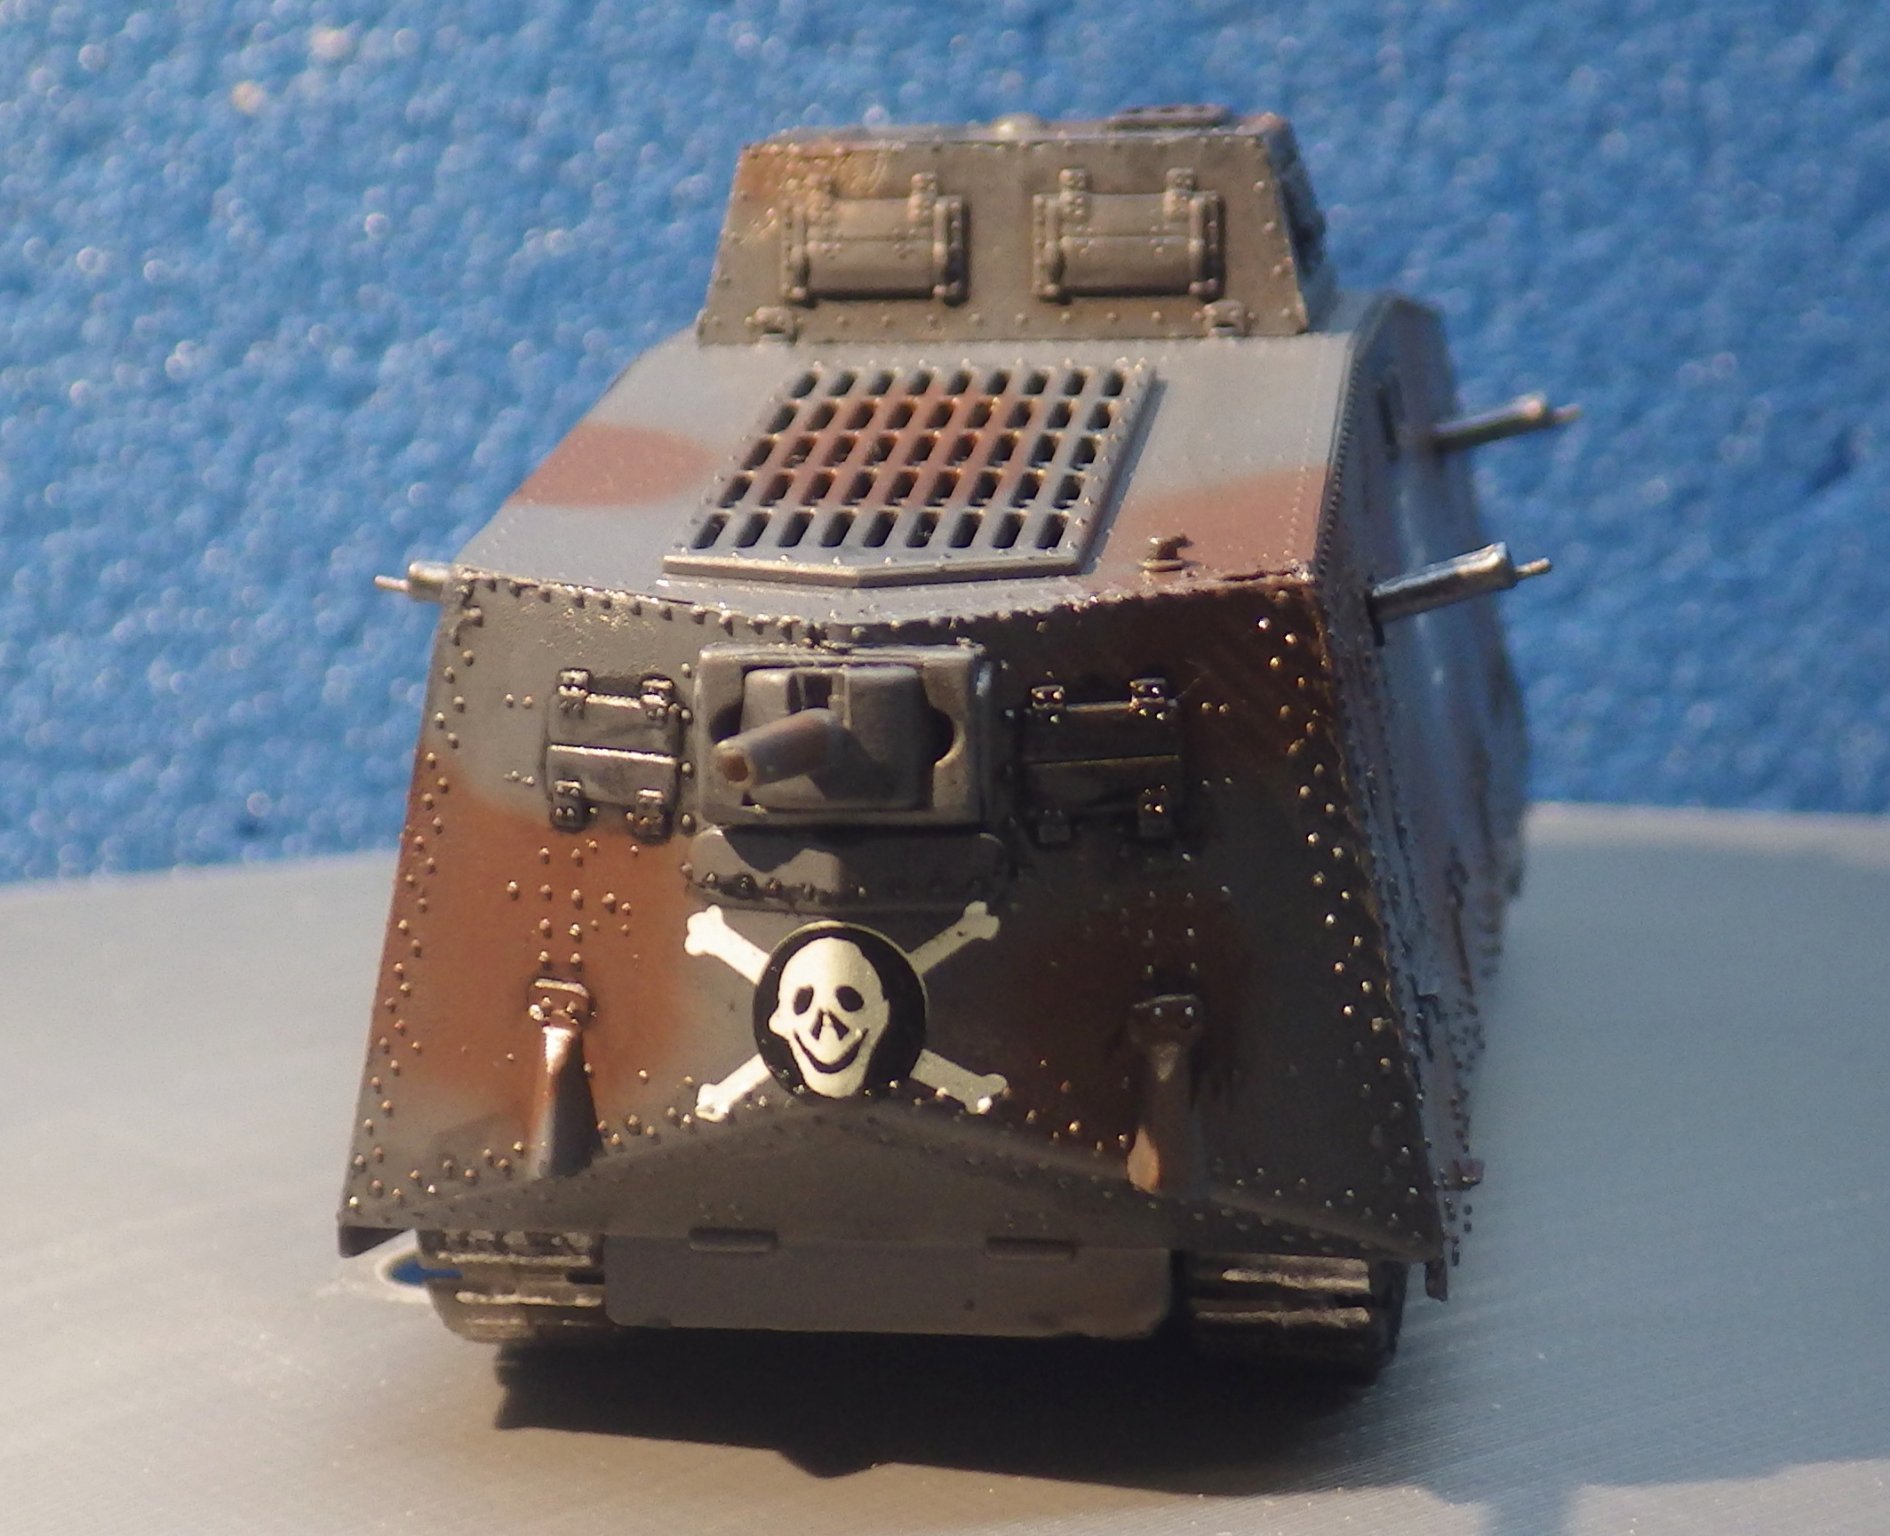
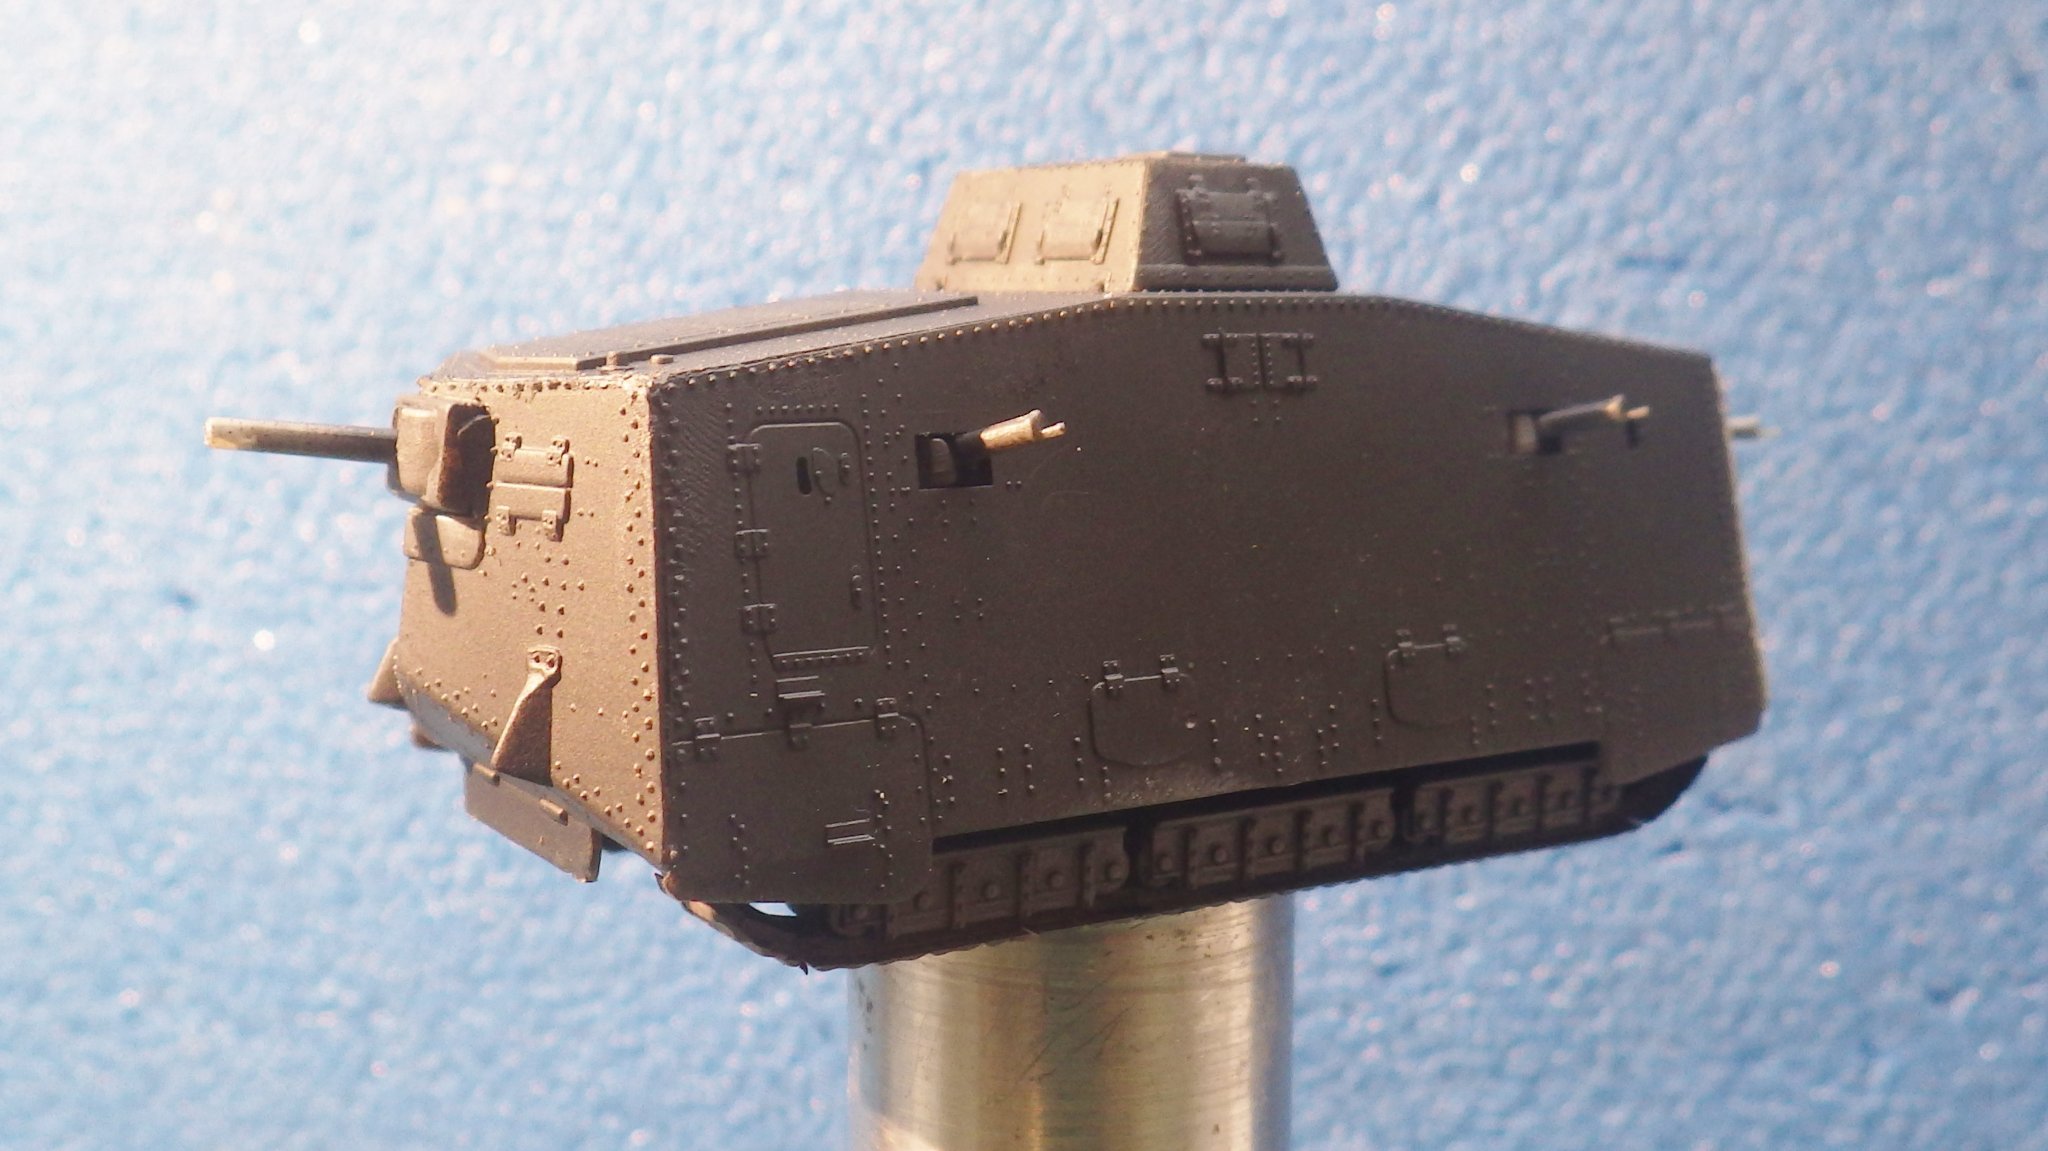
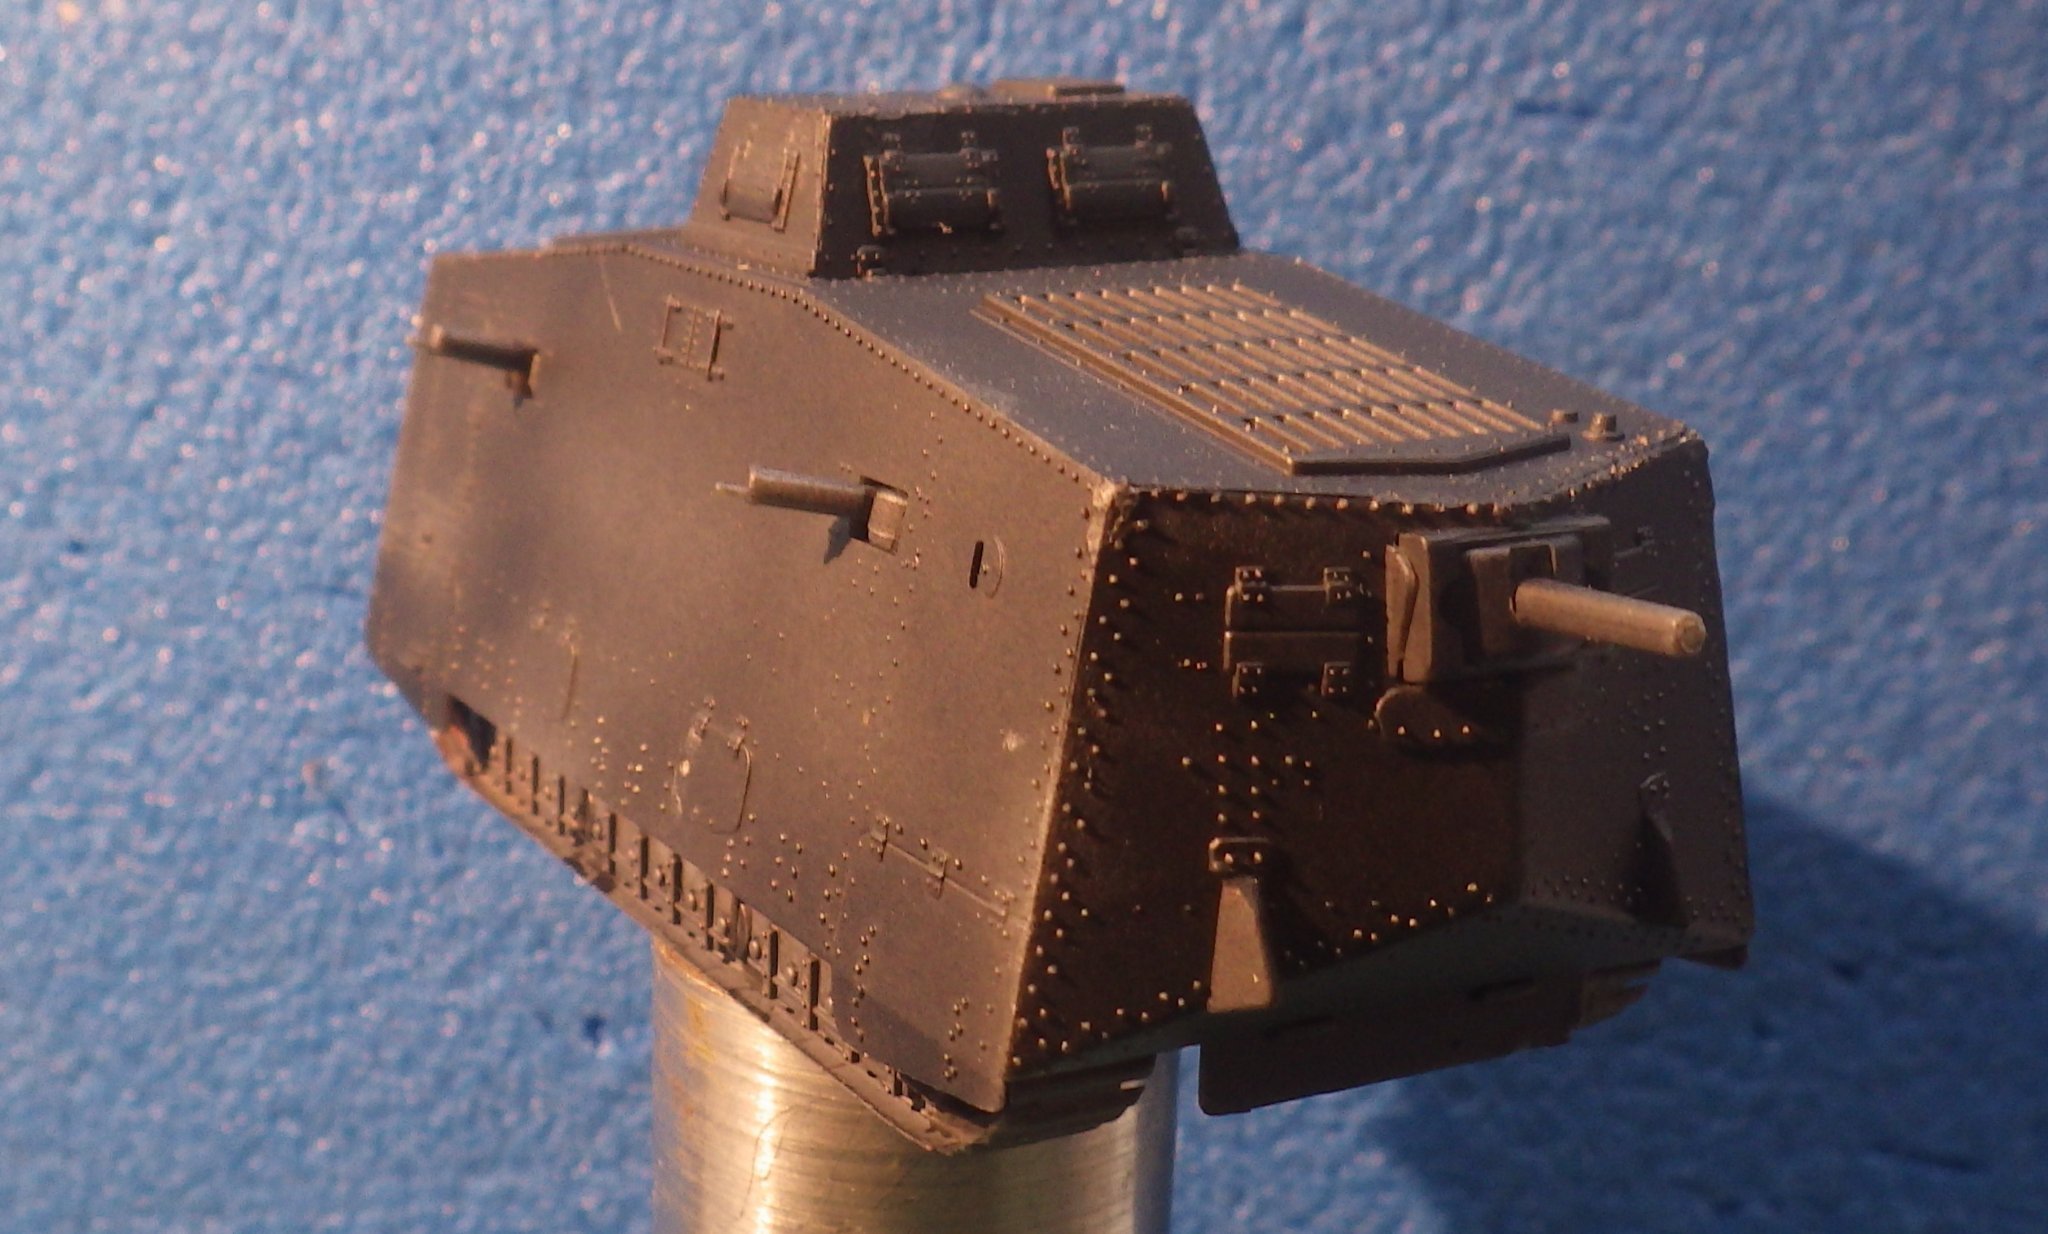
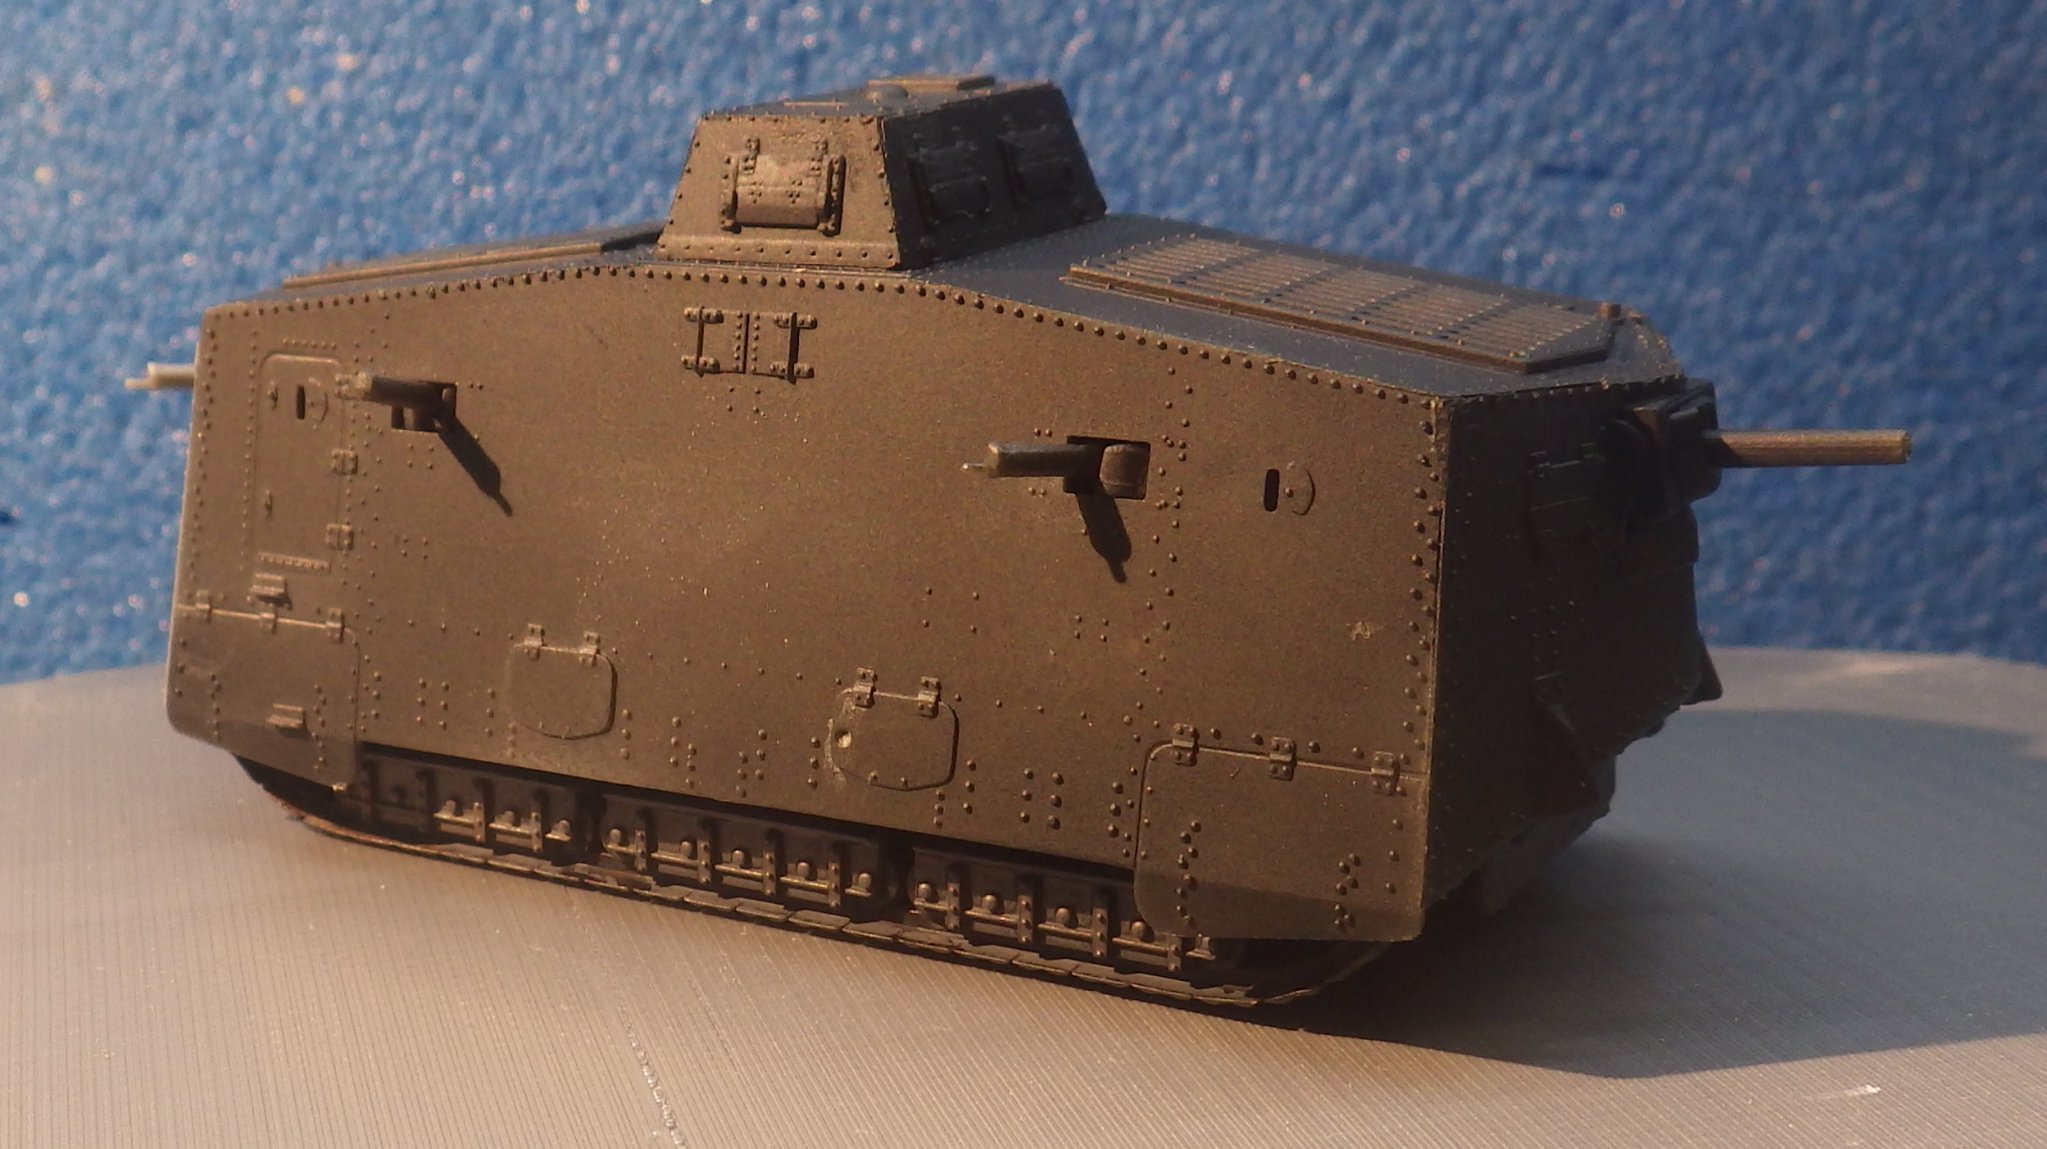
I found this interesting section while searching for paint colours for the hull of Mephisto, the tank I plan to model I'm sure the mechanics role was a highly sought after post. I painted the tracks, added a black wash and then some basic weathering. The running gear is pretty much covered by the hull so thought I would get it started before adding the hull. The hull was added and the rear part pf the hull put in place. A little putty is needed at the top corners; the mould seems to have rounded the corners leaving a slight gap. That completes assembly of all the parts. The painting of the hull should be fun. I'm trying to decide how much weathering is appropriate. It seems like they weren't around long enough to be really rusted and their limited clearance kept them out of the muddiest fighting.


- 47 replies
-
- 11
-
.jpg.9b00e09b9625adaee5758459e5ee7a91.jpg)
.jpg.1c370d05a97a39ddac6fe56b505ae4bf.jpg)