


king derelict
-
Posts
3,292 -
Joined
-
Last visited
Content Type
Profiles
Forums
Gallery
Events
Everything posted by king derelict
-
I'm enjoying looking at the build on my big laptop screen. The detail is very good and your PE is very well done. Its starting to get busy and its going to be a spectacular model Alan
-
Great job Patrick Looks like a nice kit I added it to the "want" list Alan
-
I always loved that car. You did a great job of it Alan
-
As far as i could see the spring providing the tension in the extruder gear and roller was fully extended so at its softest grip. The new one definitely is. A friend suggested that it could have been a soft gear so we will see how this one holds up. The fact that there are so few upgraded gears out there might suggest that wear is not a serious issue. Alan
- 460 replies
-
- 5
-

-
- Finished
- Flower-class
- (and 1 more)
-
Thanks Craig Its good to be moving forward again Alan
- 460 replies
-
- 3
-
-
- Finished
- Flower-class
- (and 1 more)
-
Thanks Mike It got very close. I was trying to decide between buying a whole new machine or dumping the Ender and the part-built corvette in the bin. Its good to have found a clear solution - and for $20 Alan
- 460 replies
-
- 4
-
-
- Finished
- Flower-class
- (and 1 more)
-
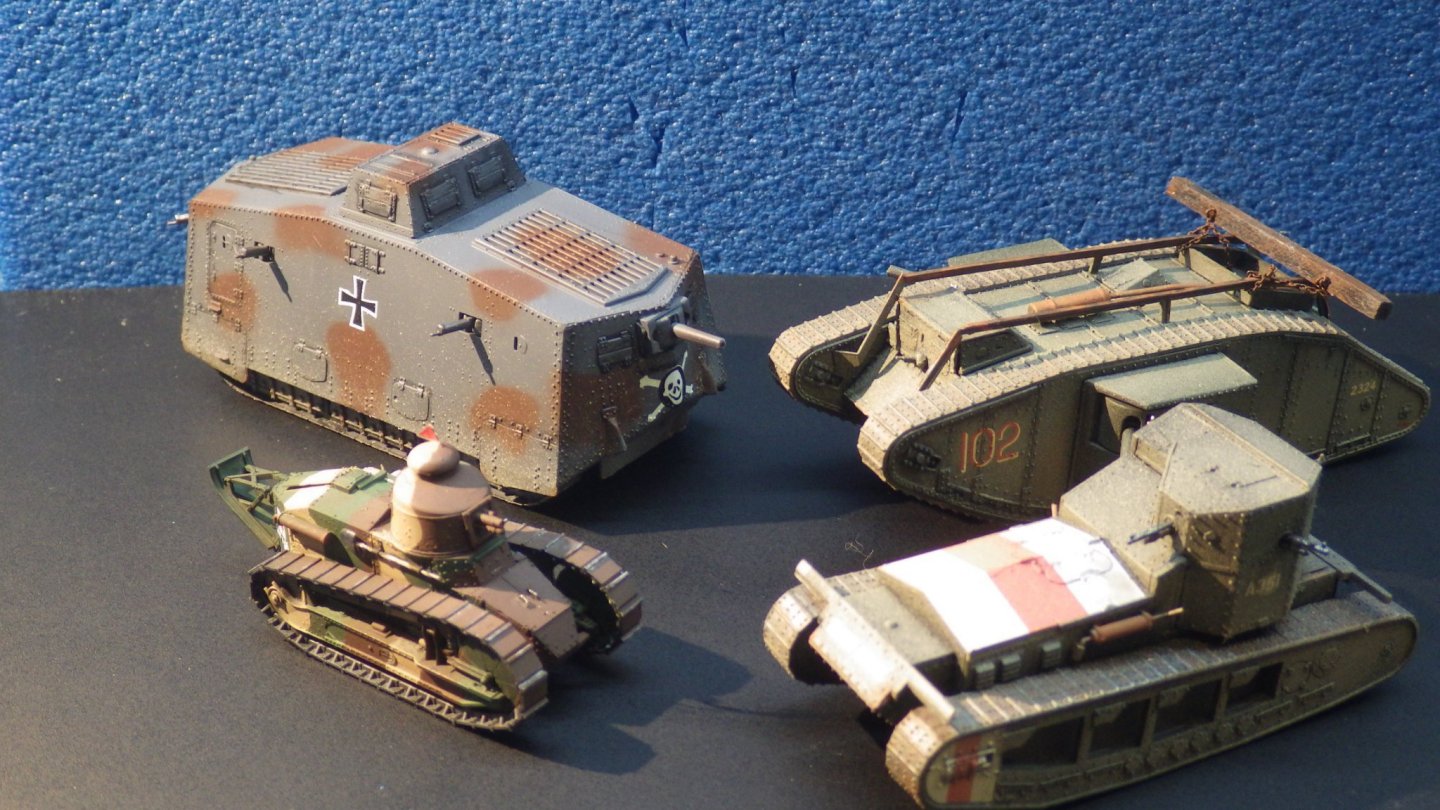
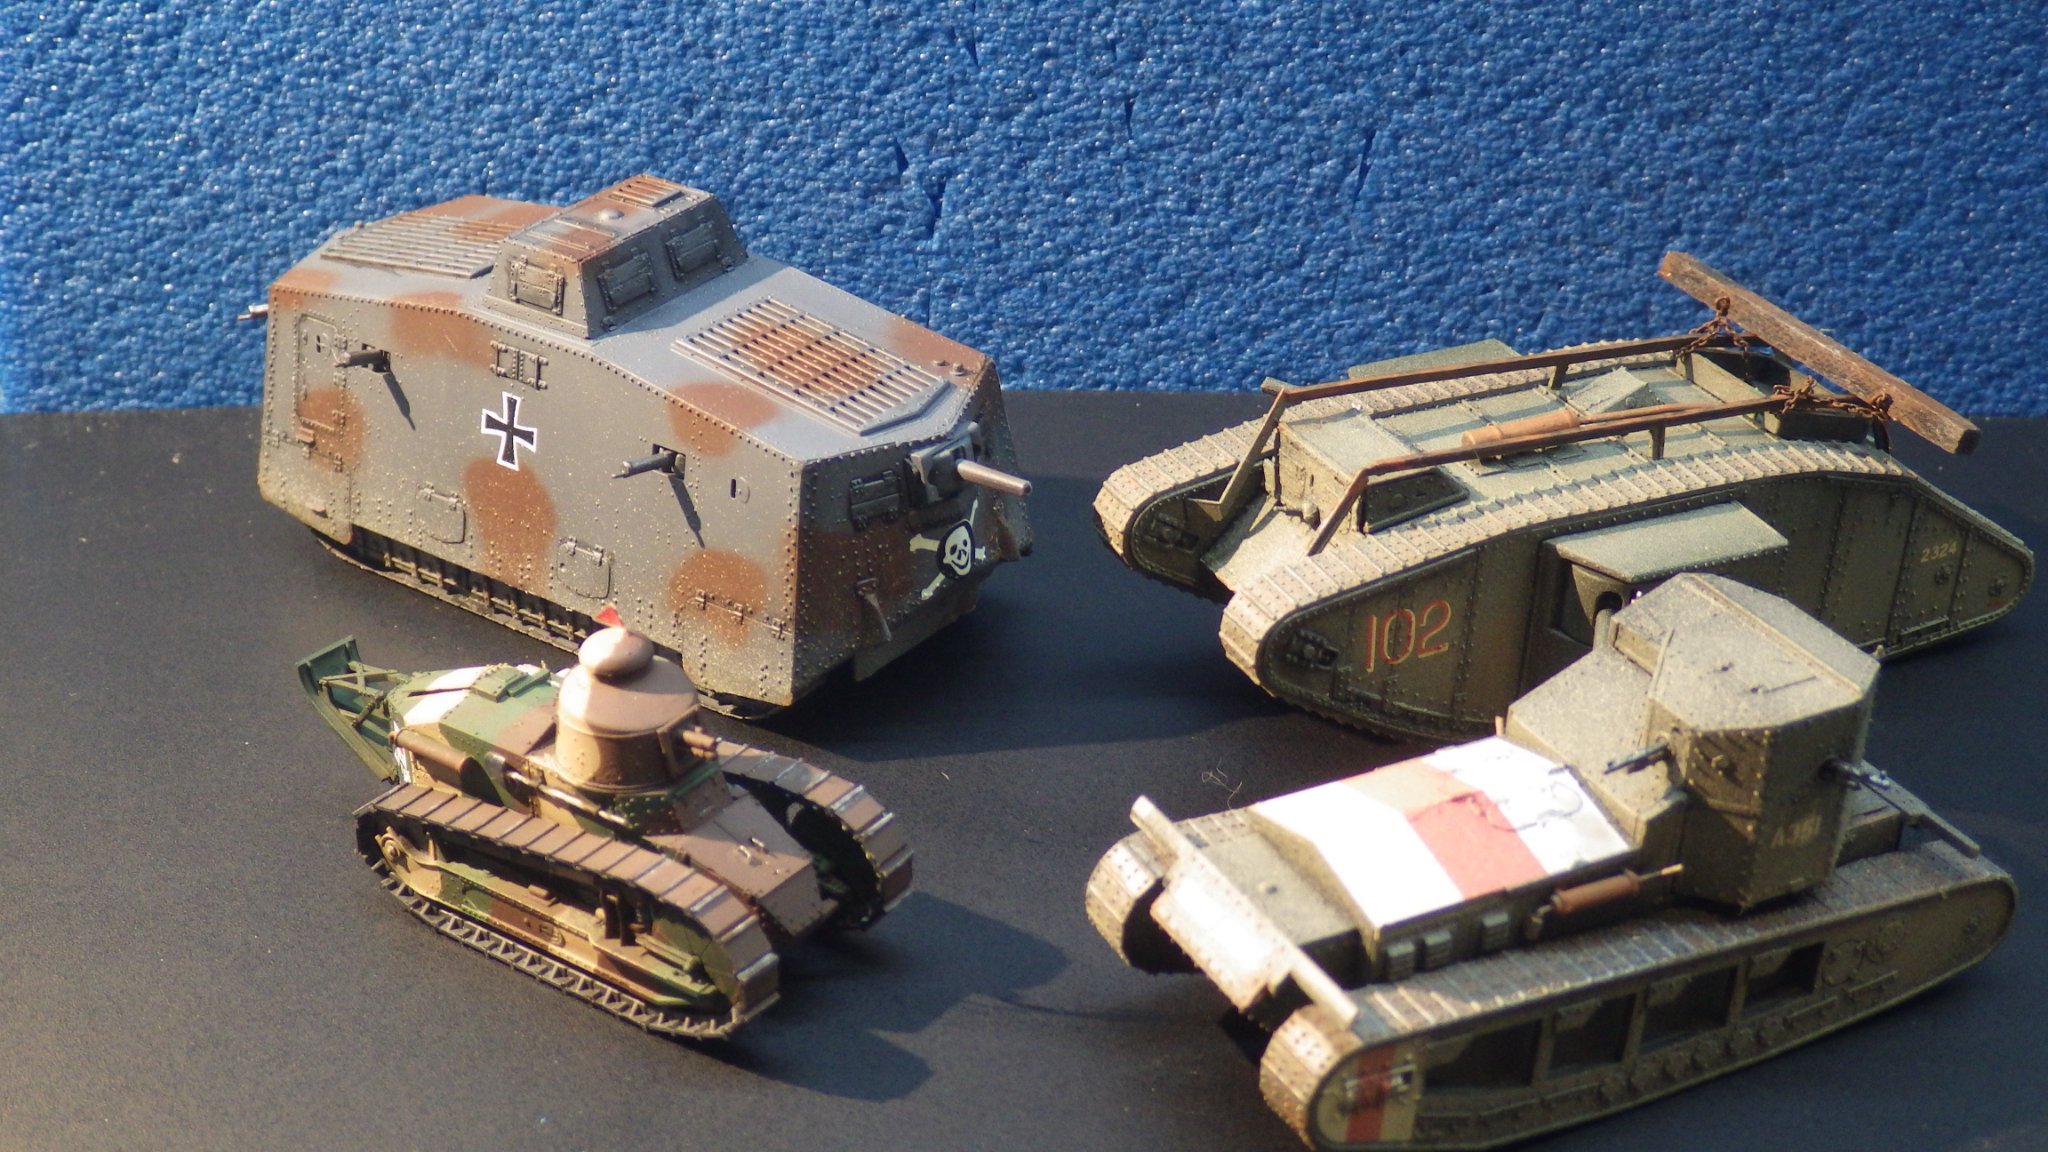
Thank you Patrick I am happiest with the Martk IV but they were all fun to work on. Alan
-
Thank you for the kind comments OC I learnt a lot building these even though they are simple models. Alan
-
Thank you so much Mark. A trench diorama would be an interesting exercise Alan
-
Looks great. The panel lines are so neat; a skill level to aim for Alan
-
Thank you for the very kind comments OC I think it's time to get back to the ships now Alan
-
Thank you Mark. I think it would make a nice setting; kind of a domestic setting. I need to find some suitable figures. Alan
-
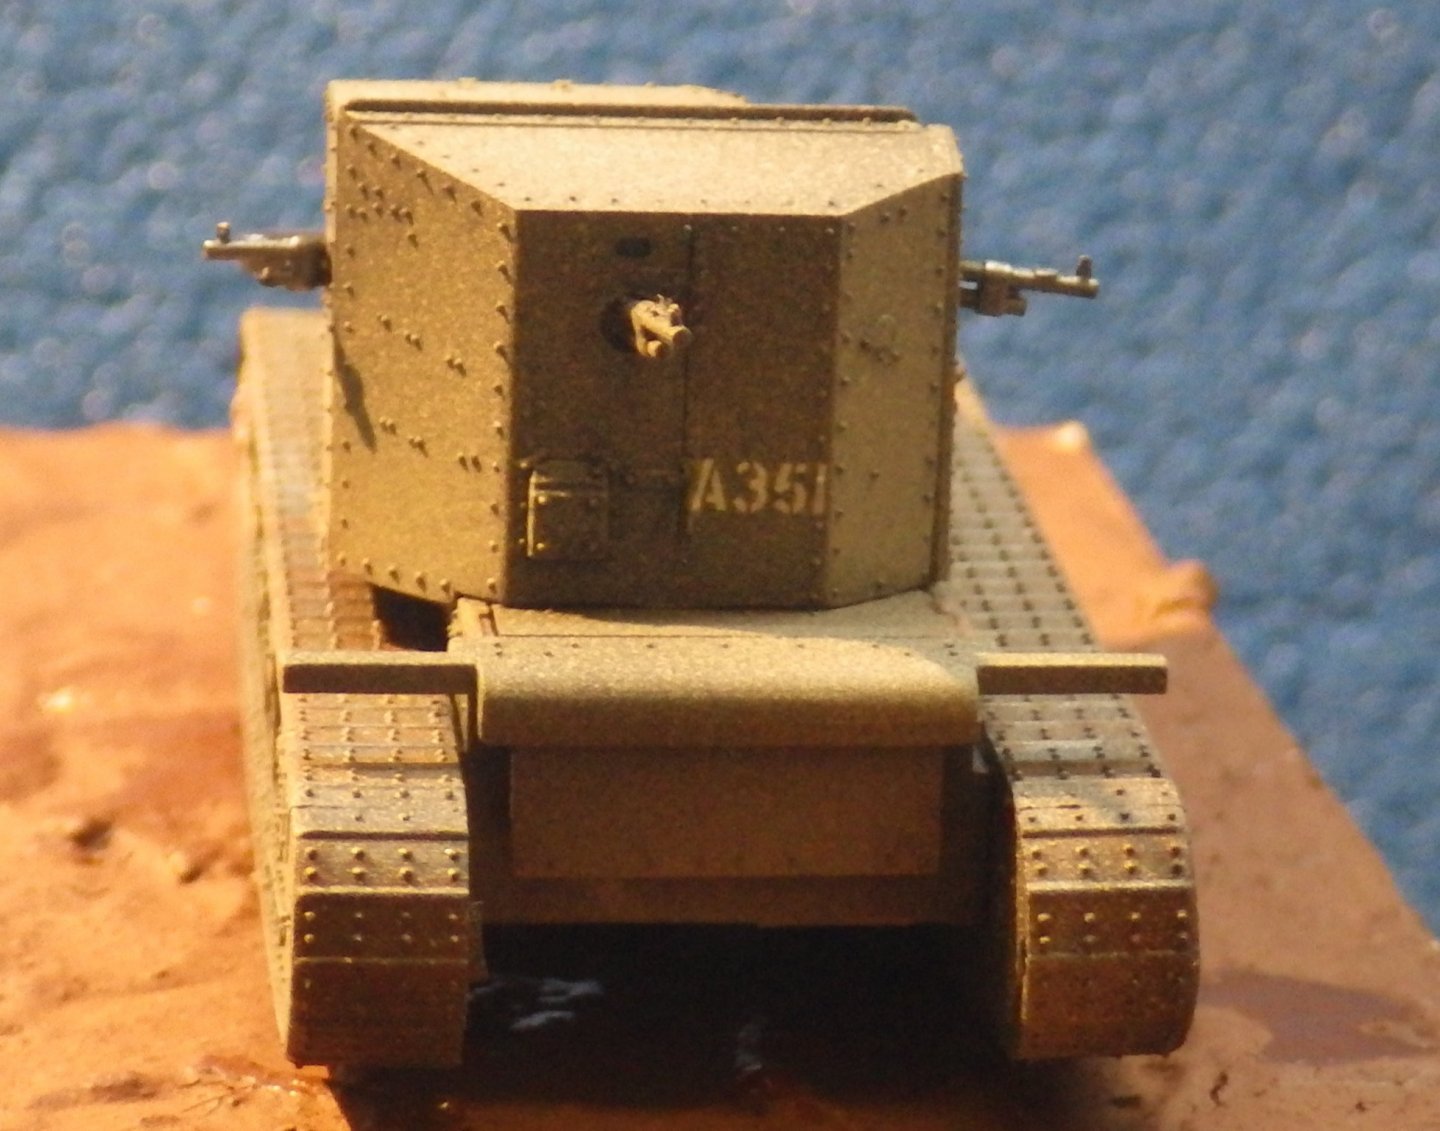
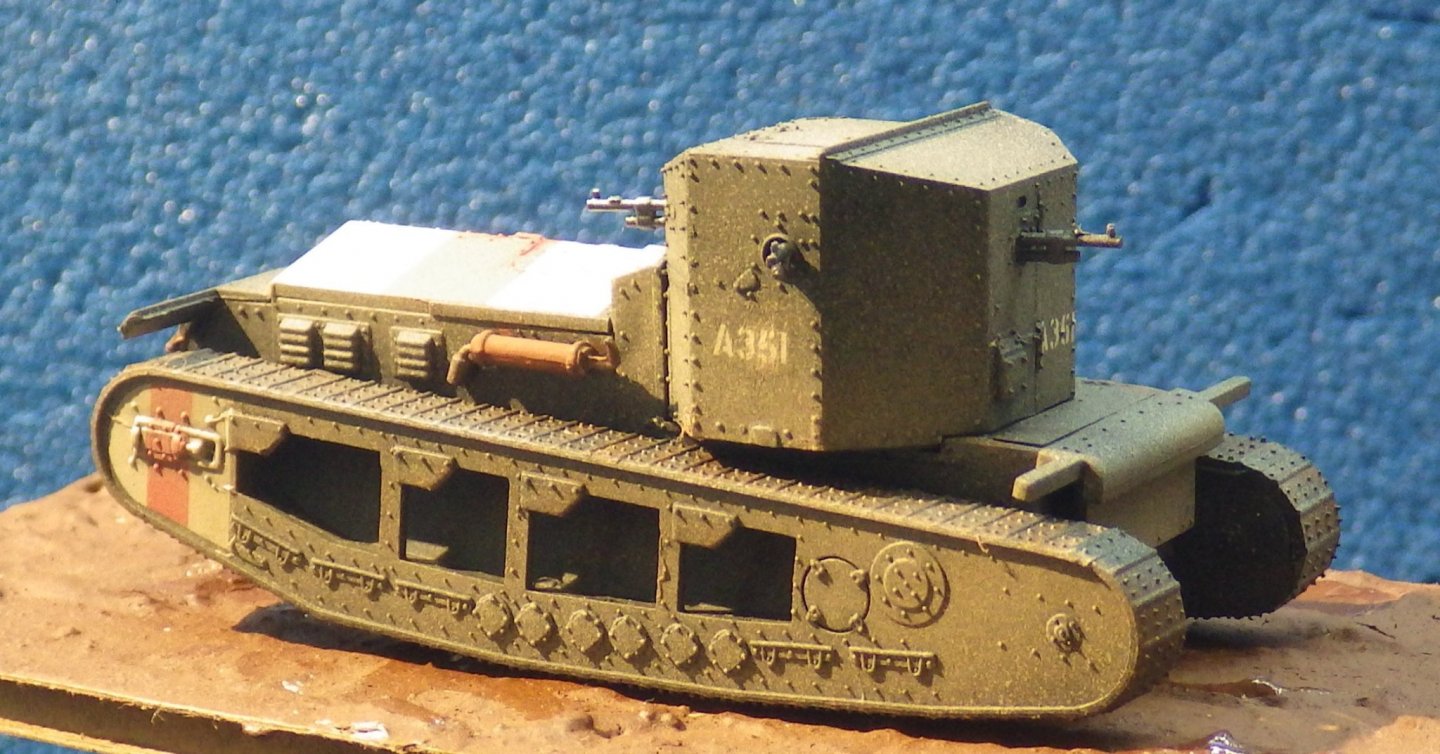
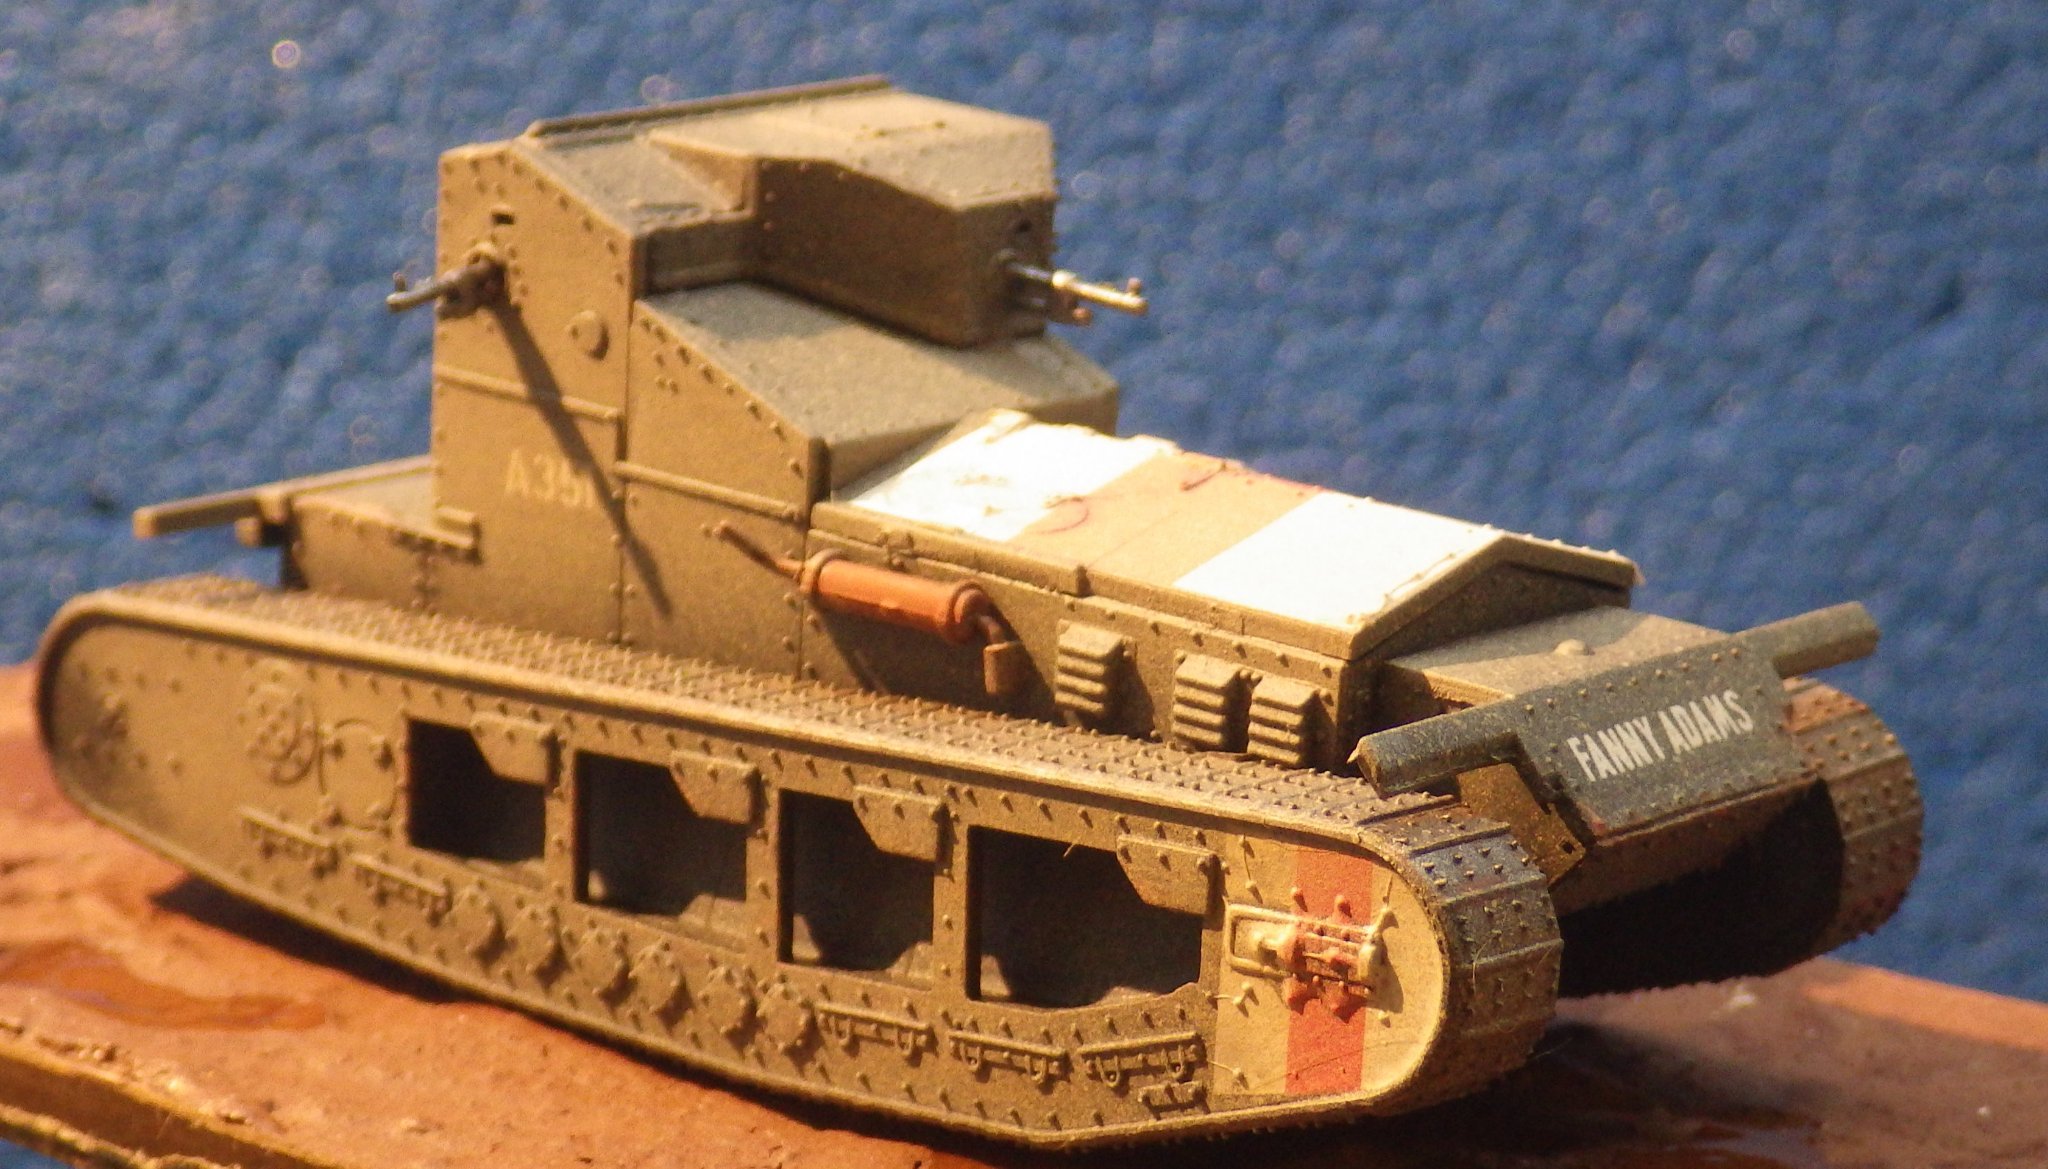
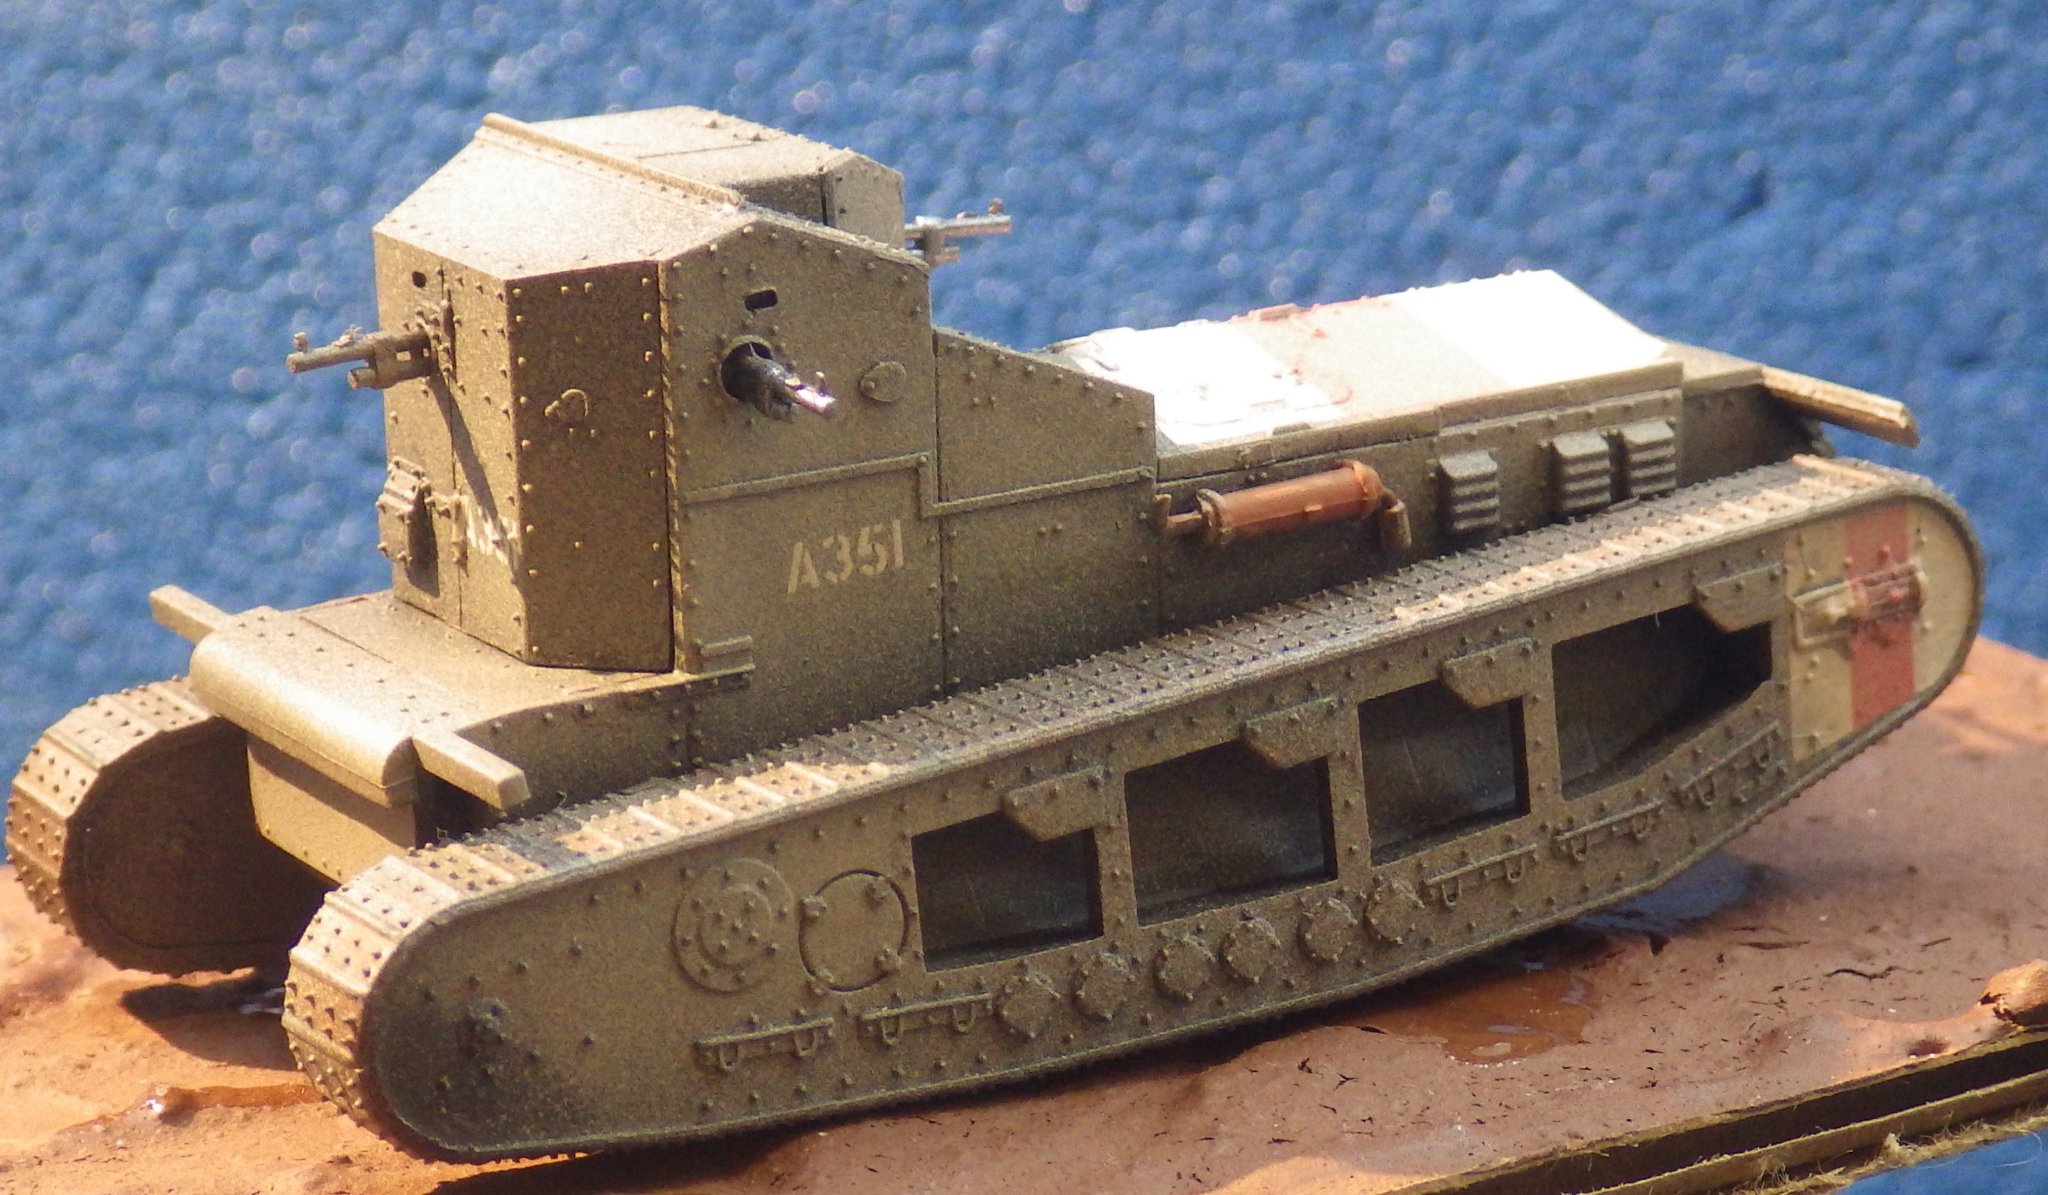
Thanks for the kind comments, Lou It's not really visible in my photos of the model but you can see it in OCs photo of the real thing. There is a metal flap that hinges down leaving a slit for the driver to see through. I hadn't realised how limited visibility was in a locked down tank even relatively recently. I was reading about the Glosters at the Imjin. They were supported by a couple of Centurions which were operating with all hatches closed and they managed to get themselves stuck in ditches and the like a few times because they couldn't see well enough to avoid them Alan
-
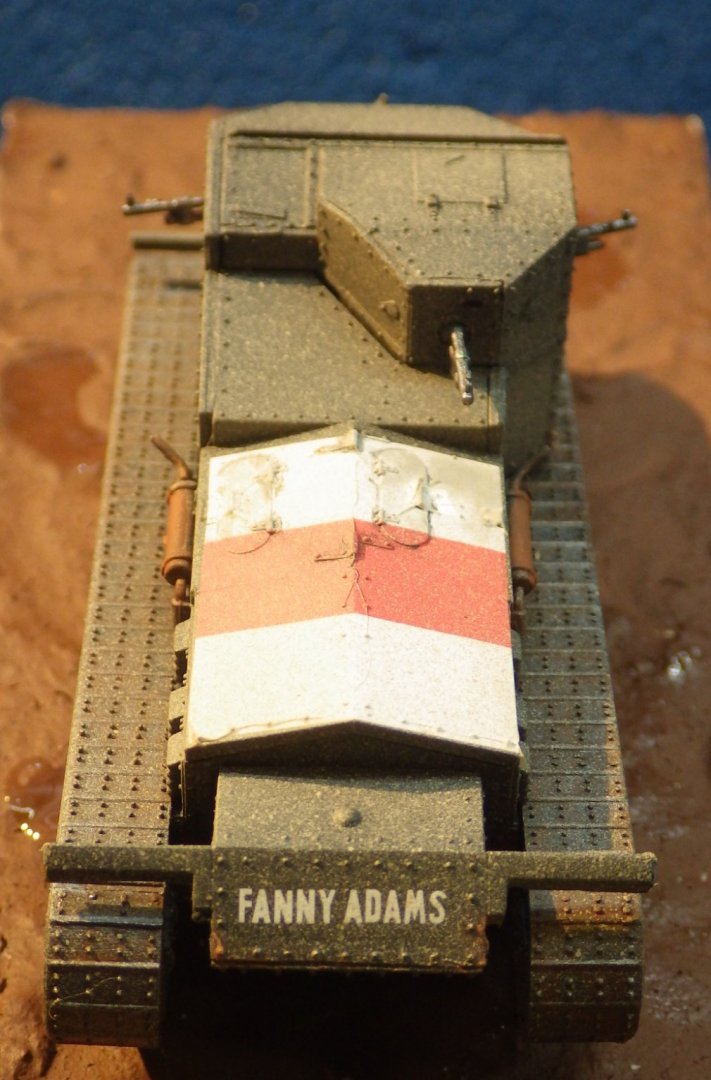
I painted the matt varnish onto the Whippet and then touched up the rusty exhausts and the machine guns which had been dulled down too much by the dust layer. I think that finishes this one. I would like to get another kit and attempt a diorama based on the photo that Bruce provided. I think it would make an interesting scene. Thank you all for looking in and providing help and comments Alan


- 29 replies
-
- 11
-
-
Thanks for the kind words Mike It has been a great distraction from frustrations with the printer Alan
-
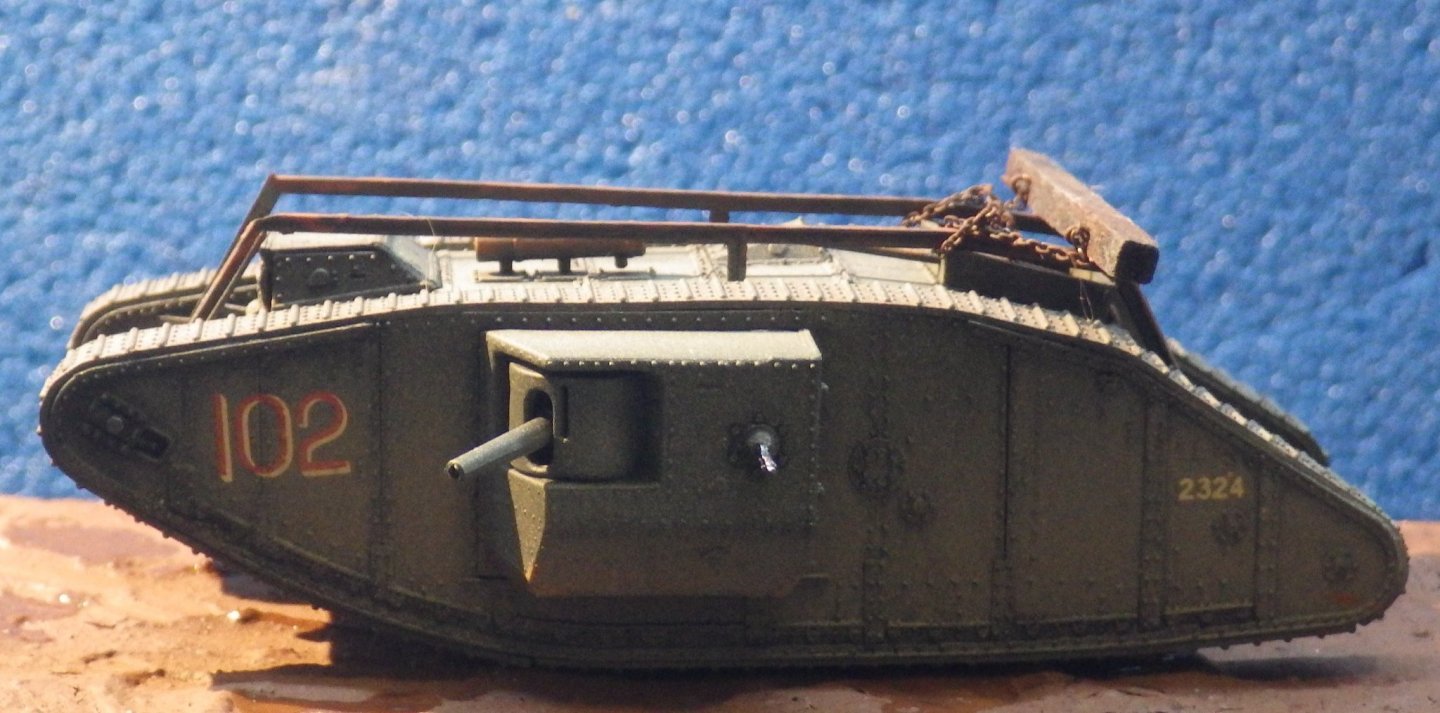
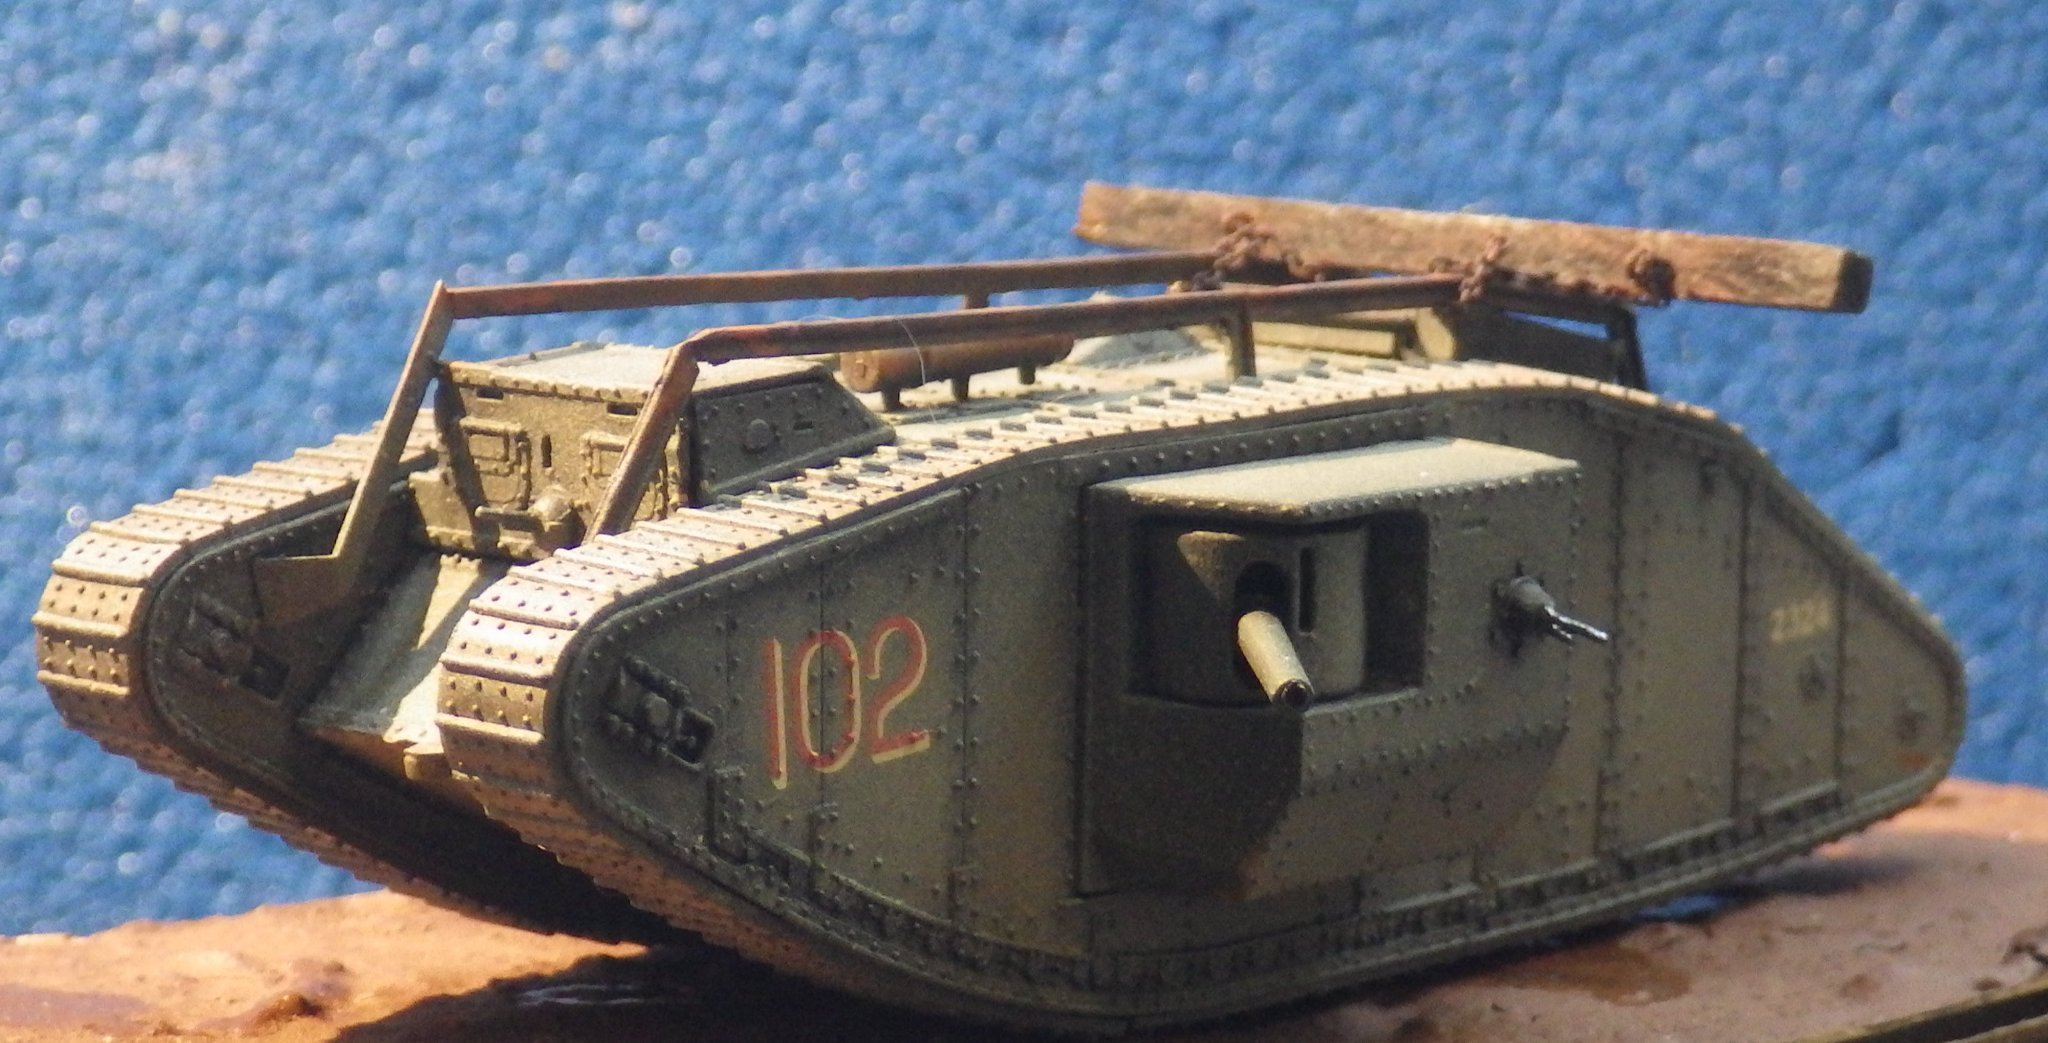
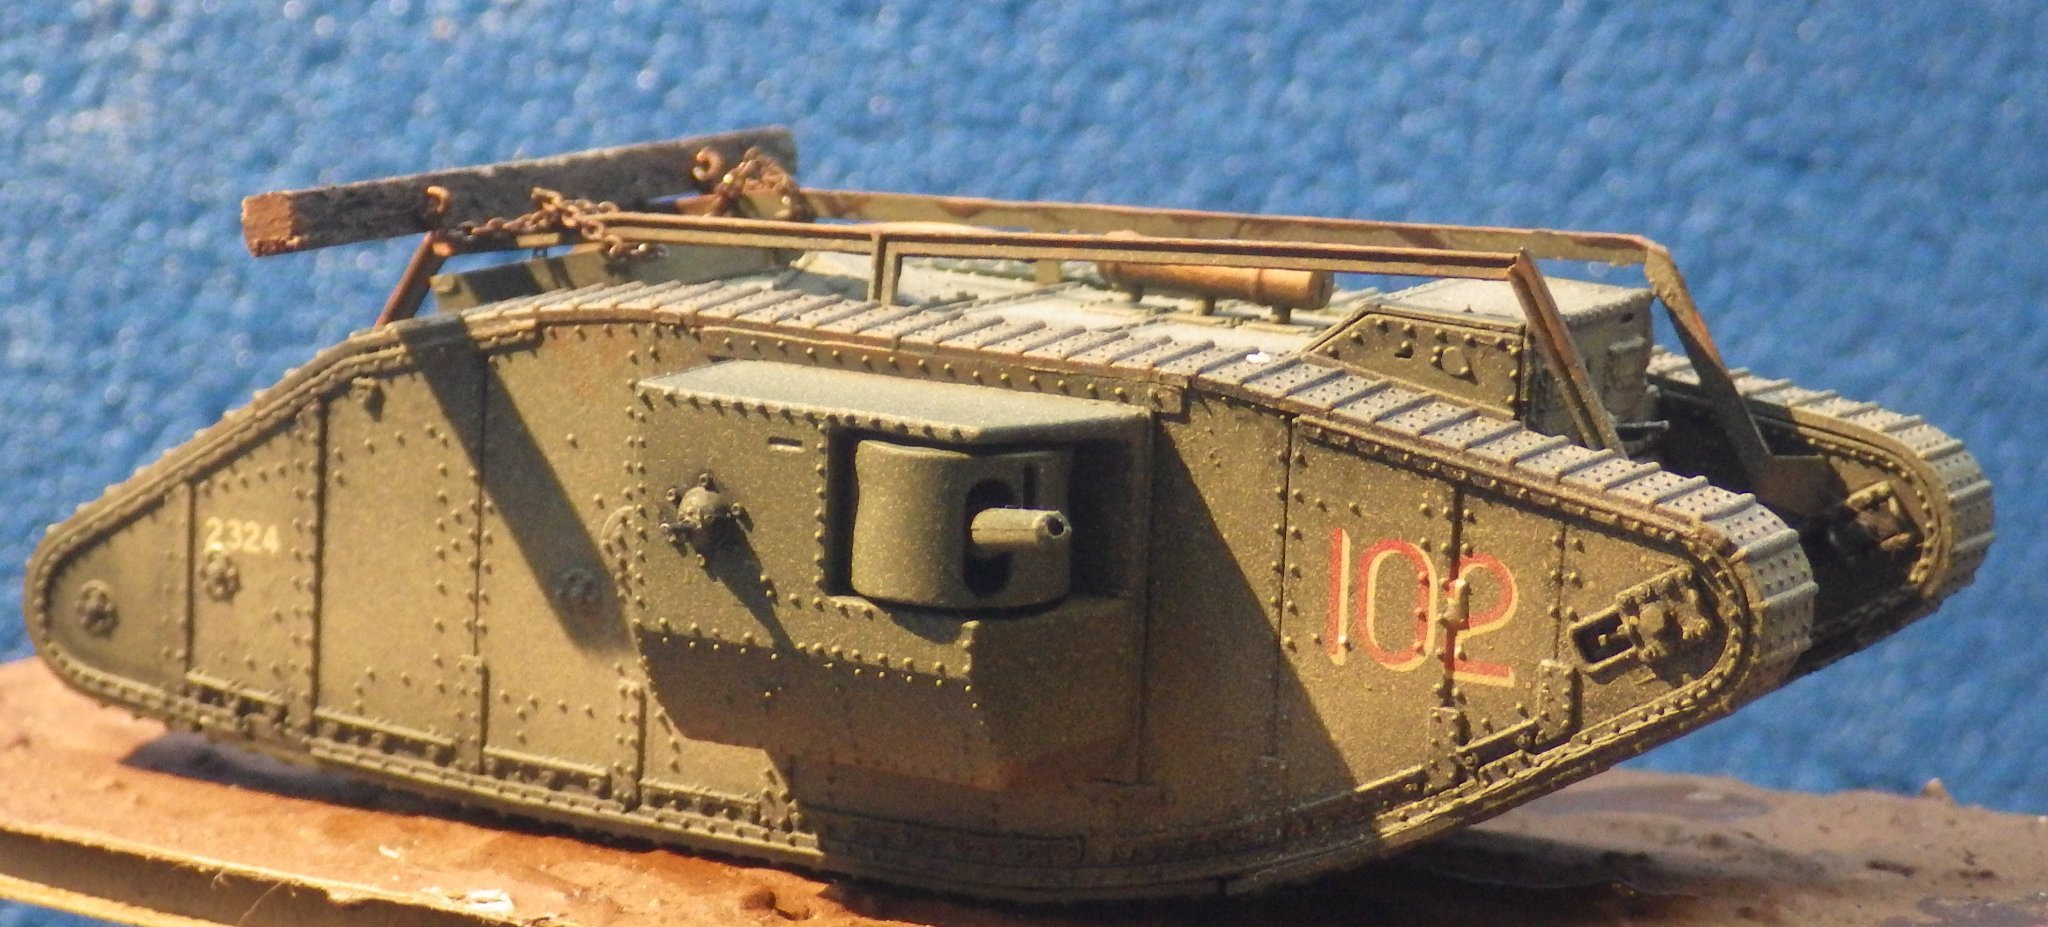
I air brushed the matt coat and tidied up a few details and installed the ditching beam and chains. I think this is complete. Its been a lot of fun and I am tempted to get another one and make a small base / diorama to show it rearing up on the lip of a trench - and then I could get a bit wild with the mud effects. Thanks for looking and commenting Alan And to show the Mark IV and the Whippet with the Renault and the AV7


.jpg.949e110836e15578a24cb46288cb6e94.jpg)


- 57 replies
-
- 13
-
-
Thank you, Mike. It's been a lot of fun working on these Emhar WW1`tanks and learning a lot as I have been building them. They are simple to build but interesting paint and try new ideas out. Alan
-
Thank you, Andrew, I'm glad you have found it useful. My intention was to try to share lessons as I learnt from my mistakes. Out of the chaos I have developed a bed levelling routine that works for me and which I check regularly. As a result of the extruder gear issue, I will be checking the filament extrusion rate if prints start to lose quality. I'm trying to knock down the unknowns in printing. Alan
- 460 replies
-
- 3
-
-
- Finished
- Flower-class
- (and 1 more)
-
I think one of the hardest parts of a build like that is working out the flow of work; especially with cross referencing the kit instructions, the PE instructions and when to fit the wooden deck pieces. I got it wrong on the Geisenau and built up over one of teh decks that needed to have the wood deck installed but luckily I was able to retrieve the situation by cutting the wooden deck and installing it in pieces. All a bit nerve wracking. Good Luck Alan
-
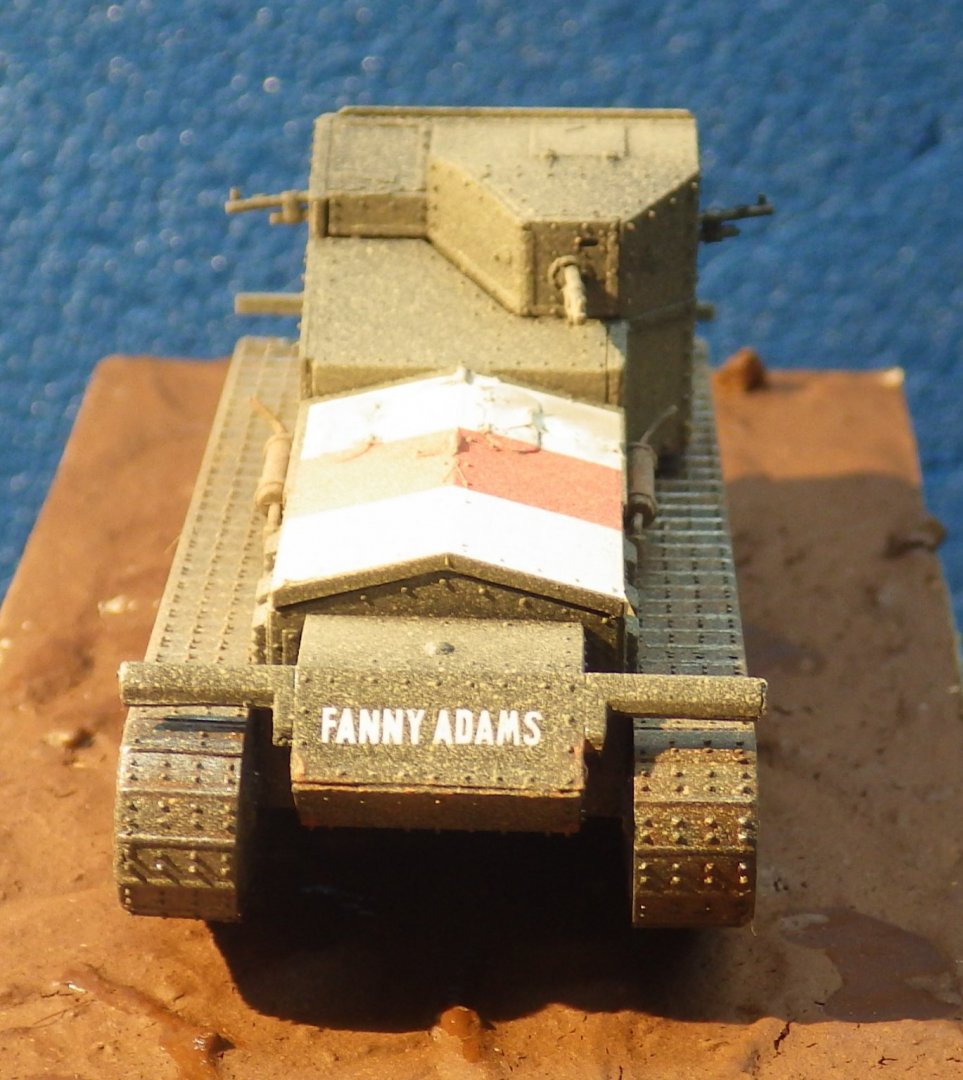
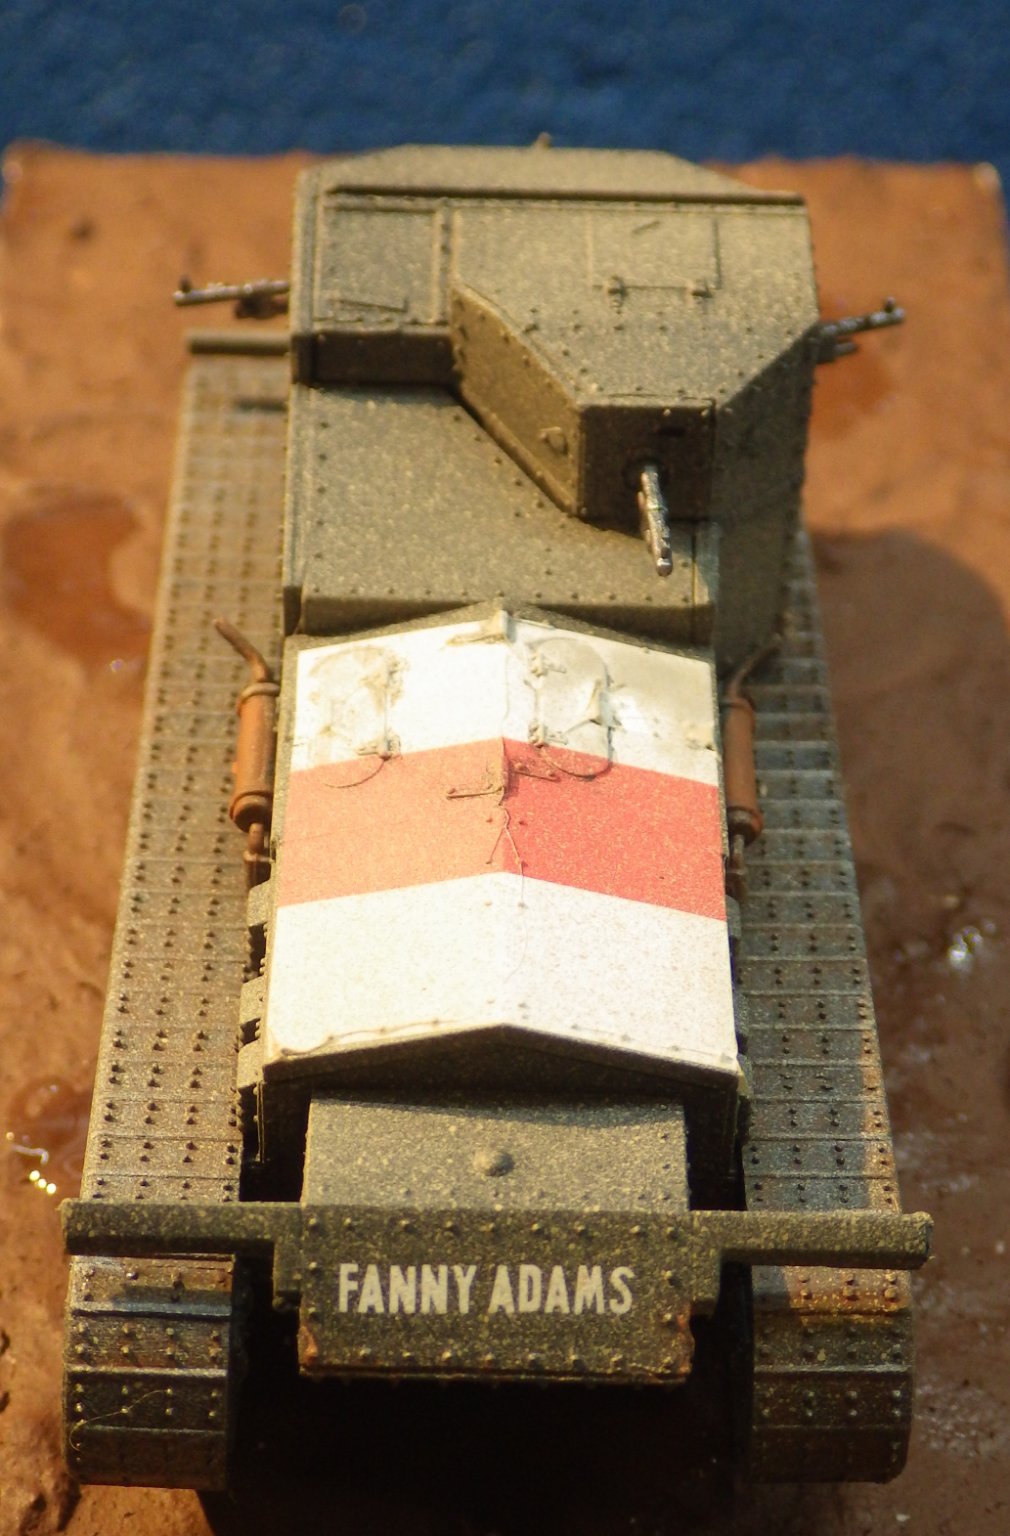
The Whippet has been duly dirtied up after adding a small amount of rust around the corners that might get banged. I was having trouble with the air brush so I may have gone a bit too far in places but overall, it's generated a dusty tank and toned down the marking nicely Some detail painting and the matt coat will finish this nice little build Thanks for looking Alan
.jpg.3000971802c4479ccf0cc0f6be1184ea.jpg)
.jpg.b9dc93012707cbef55cf83fe1d9e4d47.jpg)
- 29 replies
-
- 11
-
-
The information provided by Egilman was very useful and drove some minor changes. The ditching beam was shortened to be more like those in the photos. I also darkened the beam and added rust and paint chipping to the ditching rails with a slight dry brush of gun metal to suggest some scraped bare metal. I added chains to the beam using the photo to gauge the length and made a trial stowage on the rails. Thanks for Looking and Happy Thanksgiving to those in the US. I'm thankful that teh turkey looks like its defrosted on time. Alan
.jpg.66fa6cfb076904acd17e8b0df510610d.jpg)
.thumb.jpg.11f19dbbb9ac9d2bb8a7d0b282853449.jpg)
- 57 replies
-
- 11
-
-
Many thanks for the kind words OC. It's starting to come together. Alan
-
Many Thanks Egilman. That is great information and this photo finally explains to me how the ditching beam worked. I had assumed it was placed manually (like sand ladders) but now I can see that the tracks carry it under the tank and then back over to the front - explaining what the ditching rails are for. I thought the rails were just for securing equipment. I did find this video showing the ditching beam in action. I have to caution that some viewer may find the gritty representation of WW1 trench life in the early part of the video to be unsettling https://m.youtube.com/watch?v=Okahfp3GrWM As always, your research is a huge help. I have shortened the beam to look more like the photos and I have distressed the rails now that I know what they are for Alan
- 57 replies
-
- 10
-
-
Many Thanks OC Its good to be able to print the smaller deck fittings and see a useable result. Alan
- 460 replies
-
- 4
-
-
- Finished
- Flower-class
- (and 1 more)


.jpg.5b8c78c79c5d514a887ecf568eda7640.jpg)