king derelict
-
Posts
3,291 -
Joined
-
Last visited
Content Type
Profiles
Forums
Gallery
Events
Everything posted by king derelict
-
Thank you for the information. If the Derfflinger goes together well, Lutzow will not be far behind. Alan
- 78 replies
-
- 3
-

-
- Derfflinger
- Flyhawk
- (and 2 more)
-
Thank you for the video clip Jack. That looks like an exhilarating sport on a crisp winters day. Beautiful. Alan
- 78 replies
-
- 3
-
-
- Derfflinger
- Flyhawk
- (and 2 more)
-
Thanks Mike. The evil demon on my shoulder is pointing me at the Lutzow Gold edition which looks like it has the wooden decks, metal barrel and lots of PE. Well it’s Christmas and I don’t think I bought myself a gift! alan
- 78 replies
-
- 3
-
-
- Derfflinger
- Flyhawk
- (and 2 more)
-
Ice sailing sounds like a great thing. I hope you get the weather. alan
- 78 replies
-
- 2
-
-
- Derfflinger
- Flyhawk
- (and 2 more)
-
Welcome Andrew. The hull has lovely lines. I have the Iron Duke for WW1 RN. I’ll be interested to see how it builds up. alan
- 78 replies
-
- 4
-
-
- Derfflinger
- Flyhawk
- (and 2 more)
-
Welcome Jack, glad you are there. Hope you are having a great Christmas period alan
- 78 replies
-
- 4
-
-
- Derfflinger
- Flyhawk
- (and 2 more)
-
The cloth sounds like a good idea. I suppose you could use a diluted dab of toothpaste if you needed a bit more “bite” alan
-
Thank you Phil I hope I can make it an enjoyable read alan
- 78 replies
-
- 5
-
-
- Derfflinger
- Flyhawk
- (and 2 more)
-
I think it was the beautiful job RGL did with Seydlitz ( I think) that made me think about deploying the nets so I’ve been planning to read his log again as I work through Derfflinger but I do recall some seriously complicated rigging for the nets and I think he was working in 1/350 i have a Takom Derfflinger / Luetzow kit on the shelf so I can always revisit the thought. alan
- 78 replies
-
- 4
-
-
- Derfflinger
- Flyhawk
- (and 2 more)
-
Sober reflection says you are right, especially as my rigging skills are less than stellar and I think deployed nets would need a cat’s cradle of cables. I think I can find other ways to embarrass myself Alan
- 78 replies
-
- 3
-
-
- Derfflinger
- Flyhawk
- (and 2 more)
-
Thank you very much Andrew. I have Illustrious lined up with a box of PE to add. I may be overreaching. Your Sparkler looks a lovely kit Alan
-
I see quite a few people on another forum that only use brushes and do planes like Lancasters and seem to get a smooth thin finish. I don’t recall whether they thin the paint, probably depends on the make it would be great to see this one back in work. Good luck with the primer. alan
-
Welcome OC, glad to have you along. This one might be a bit curious alan
- 78 replies
-
- 4
-
-
- Derfflinger
- Flyhawk
- (and 2 more)
-
Good point! The kit has something that might be rolled nets so I can defer the decision for a while. The crazed part of me is contemplating a small diorama / vignette with the nets down. alan
- 78 replies
-
- 5
-
-
- Derfflinger
- Flyhawk
- (and 2 more)
-
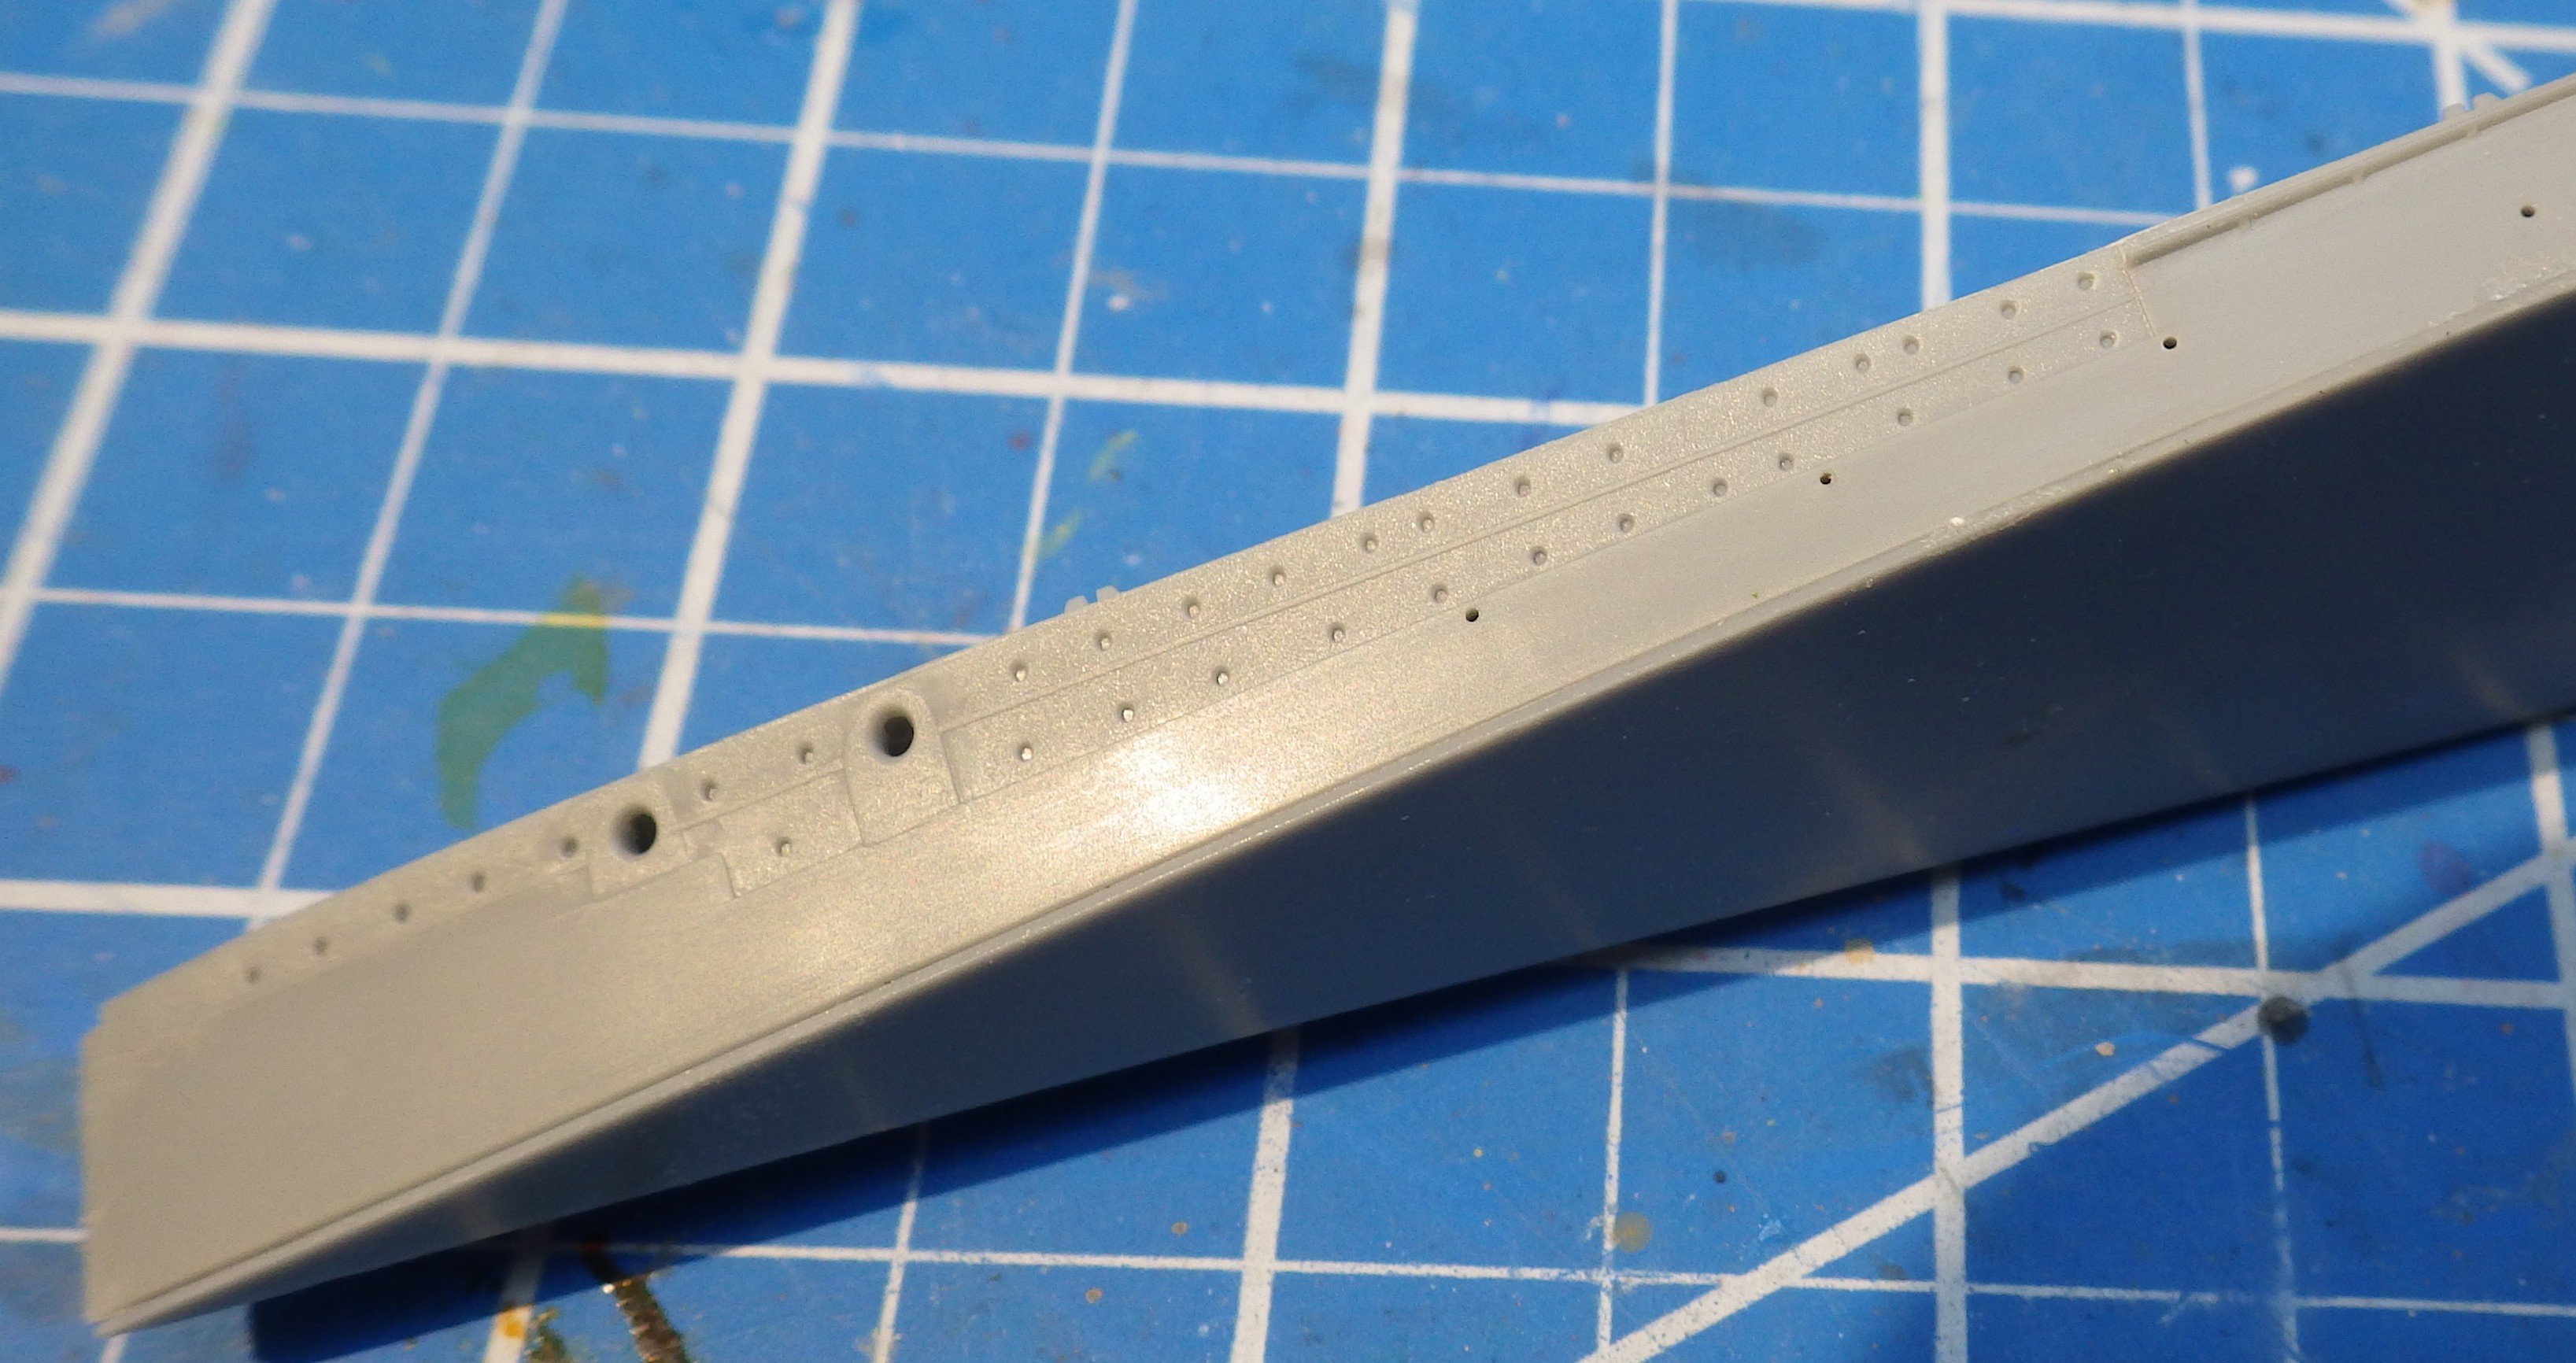
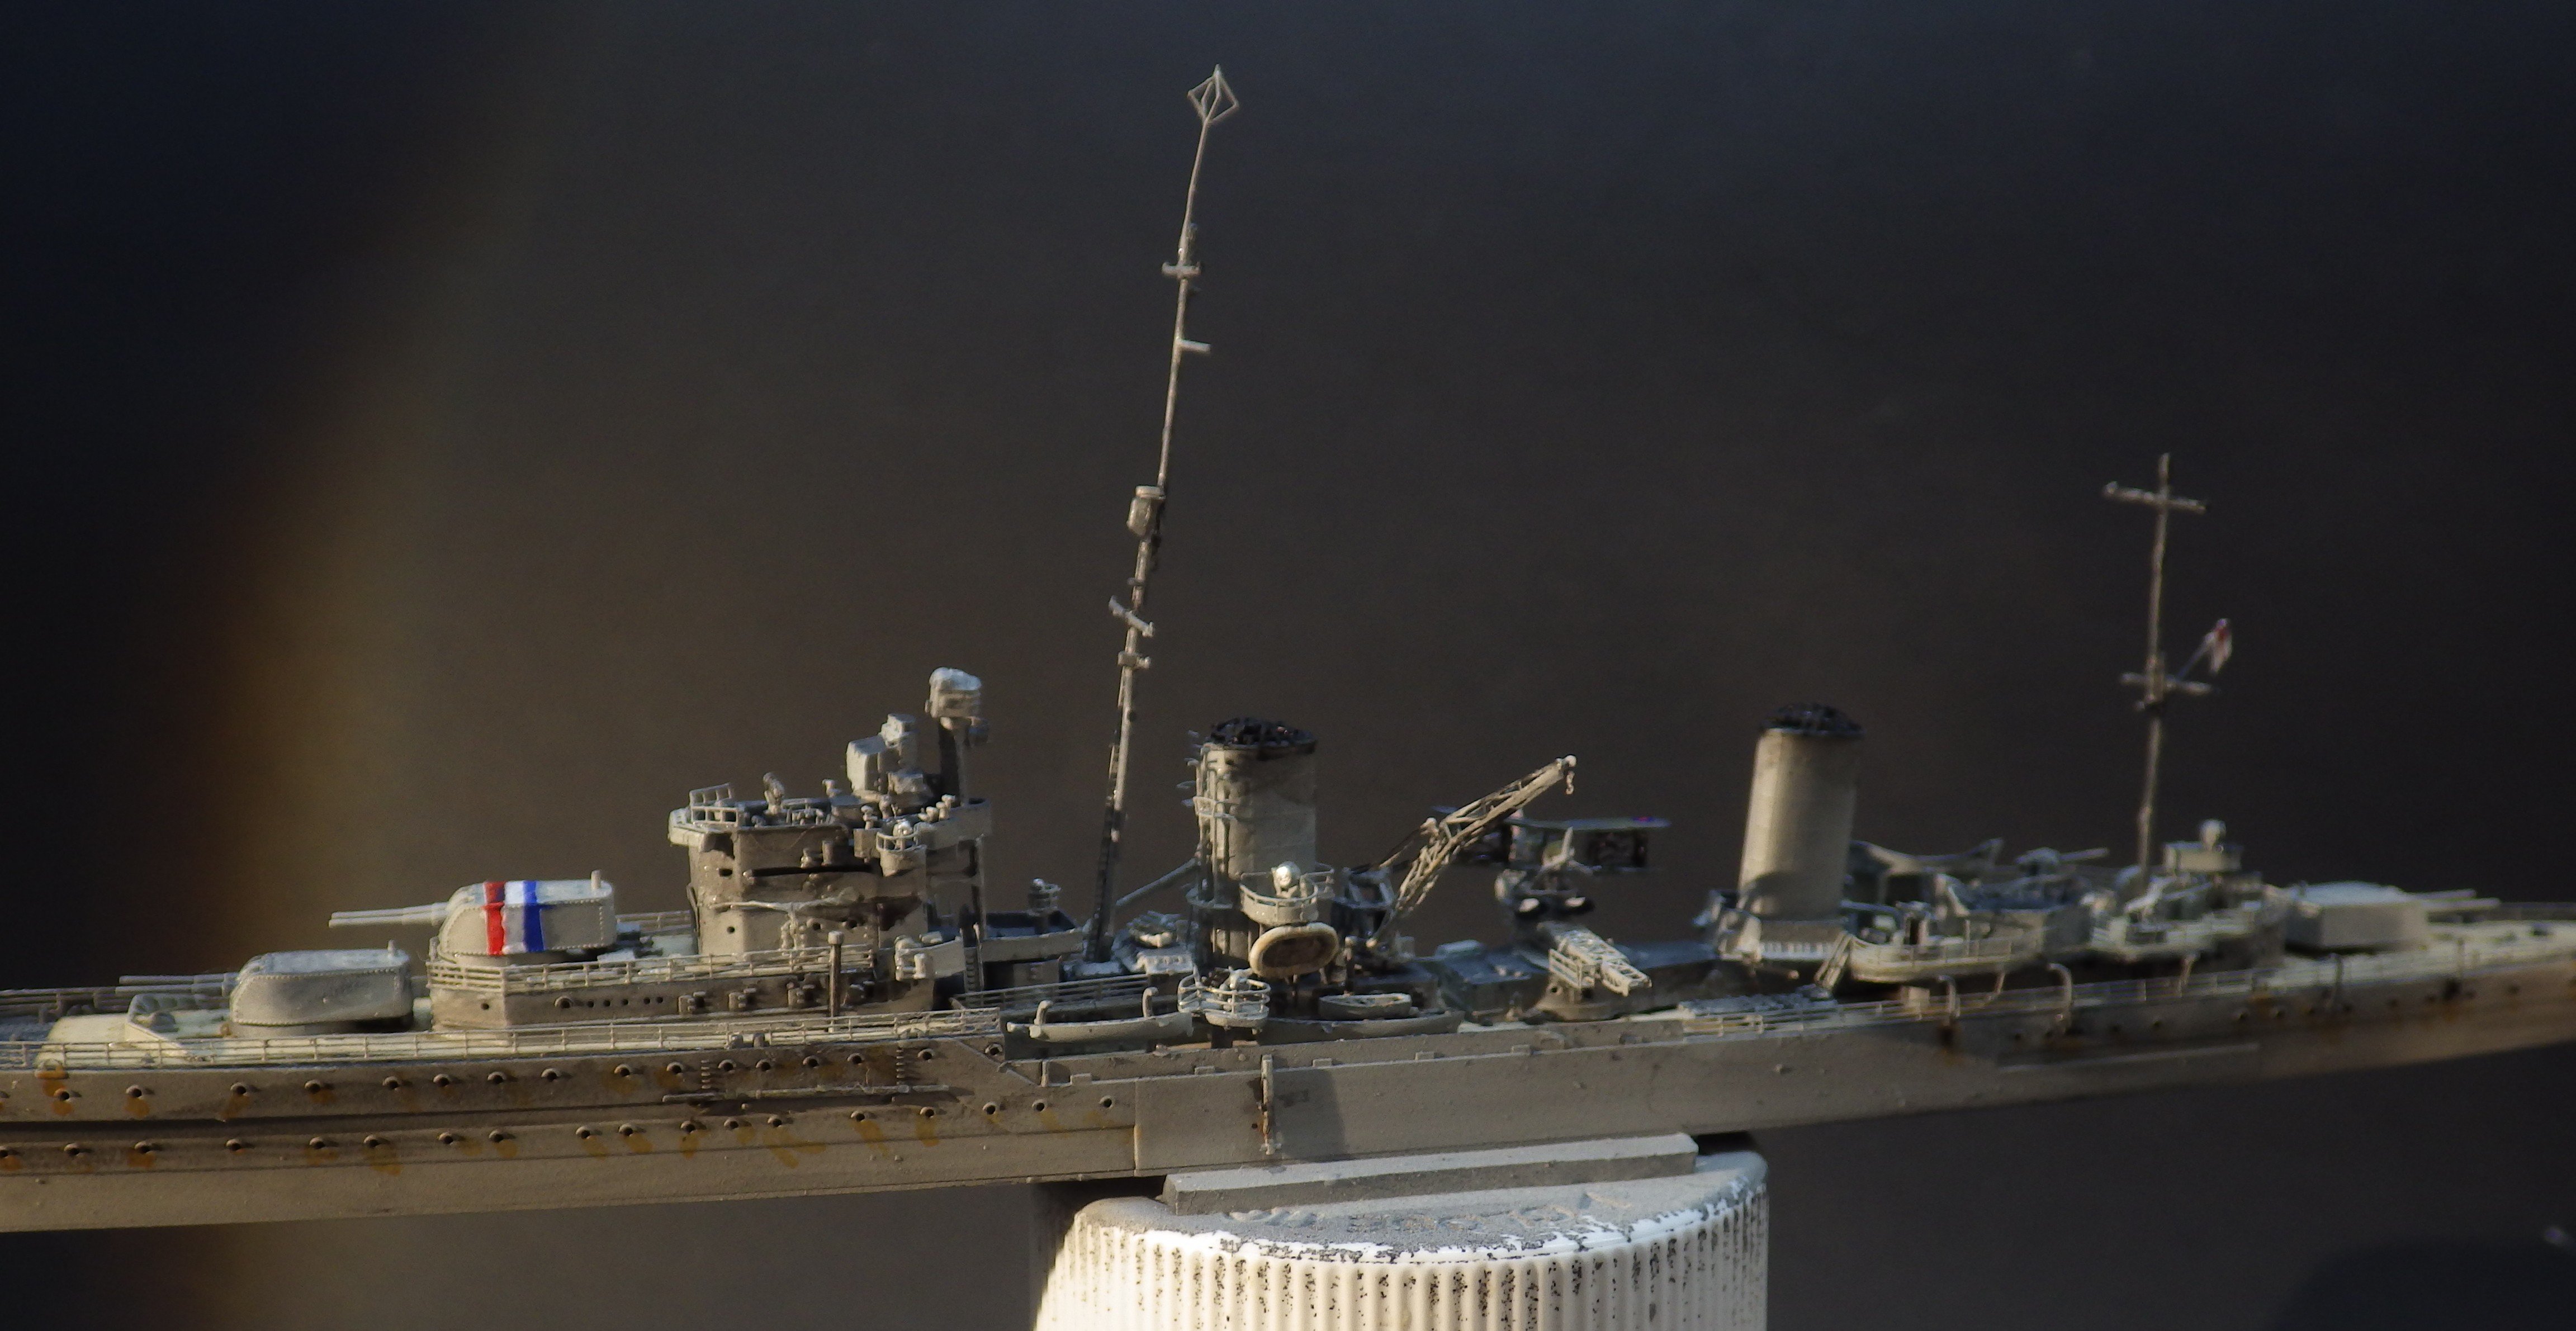
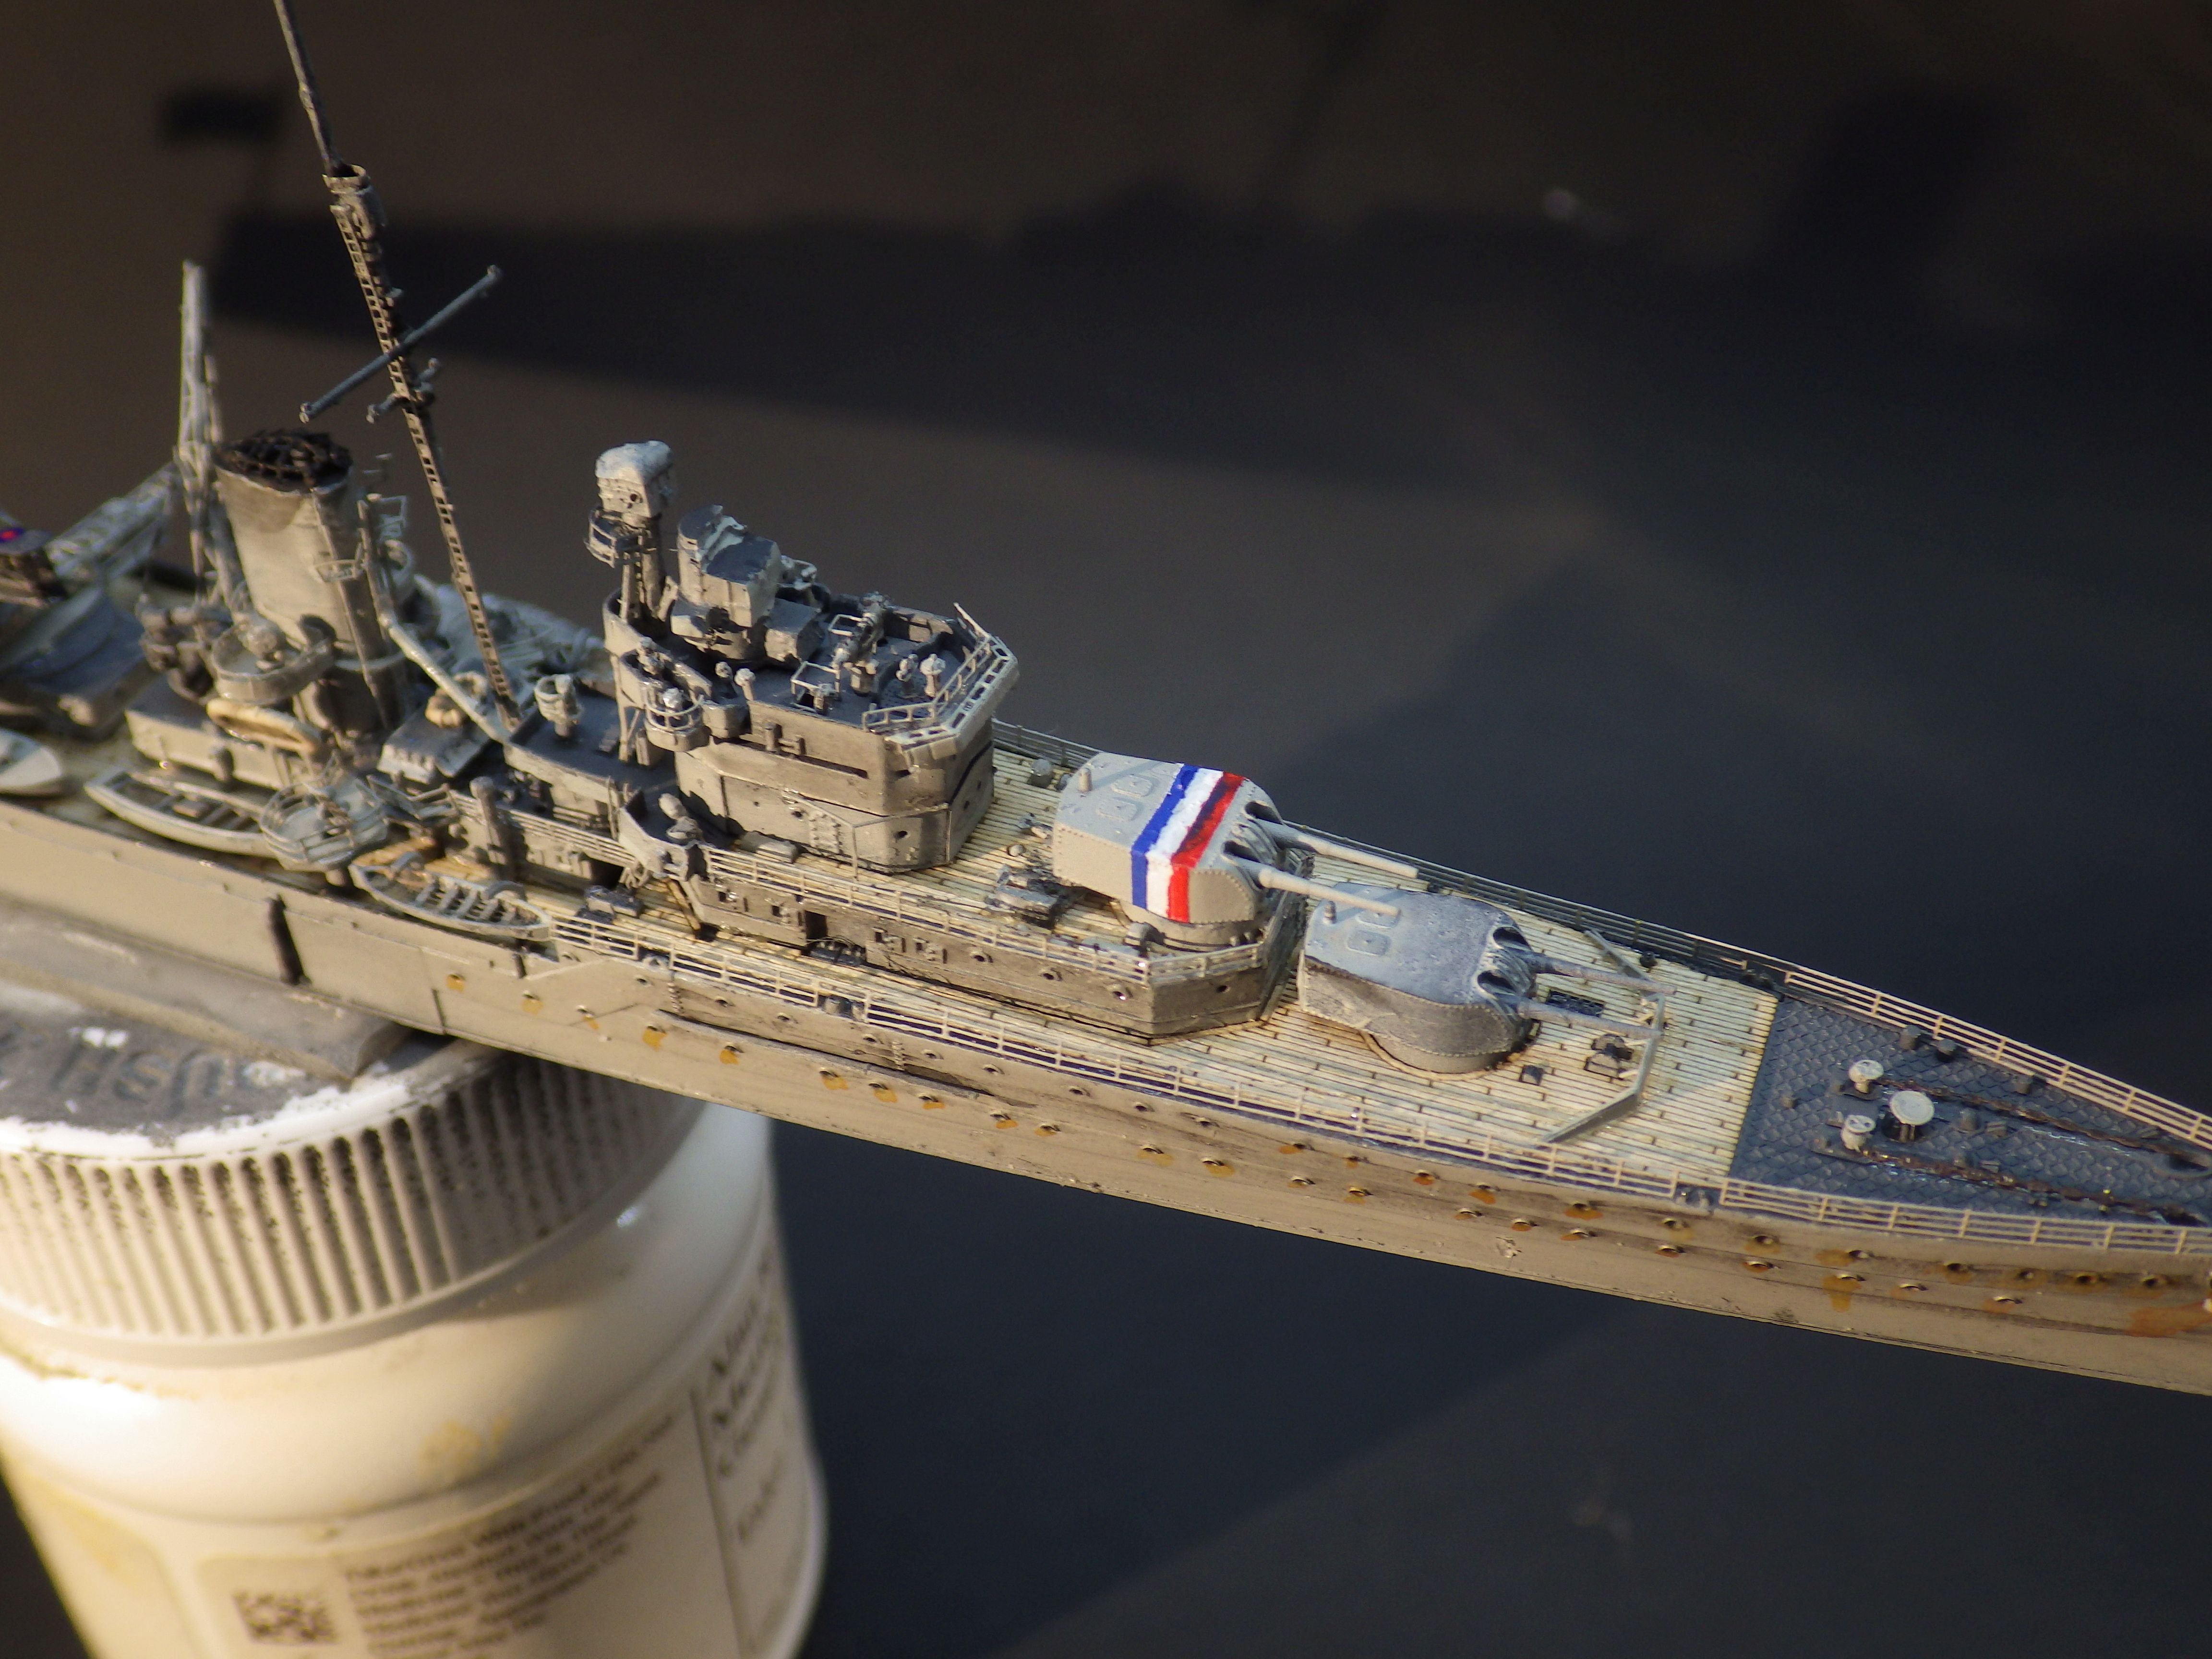
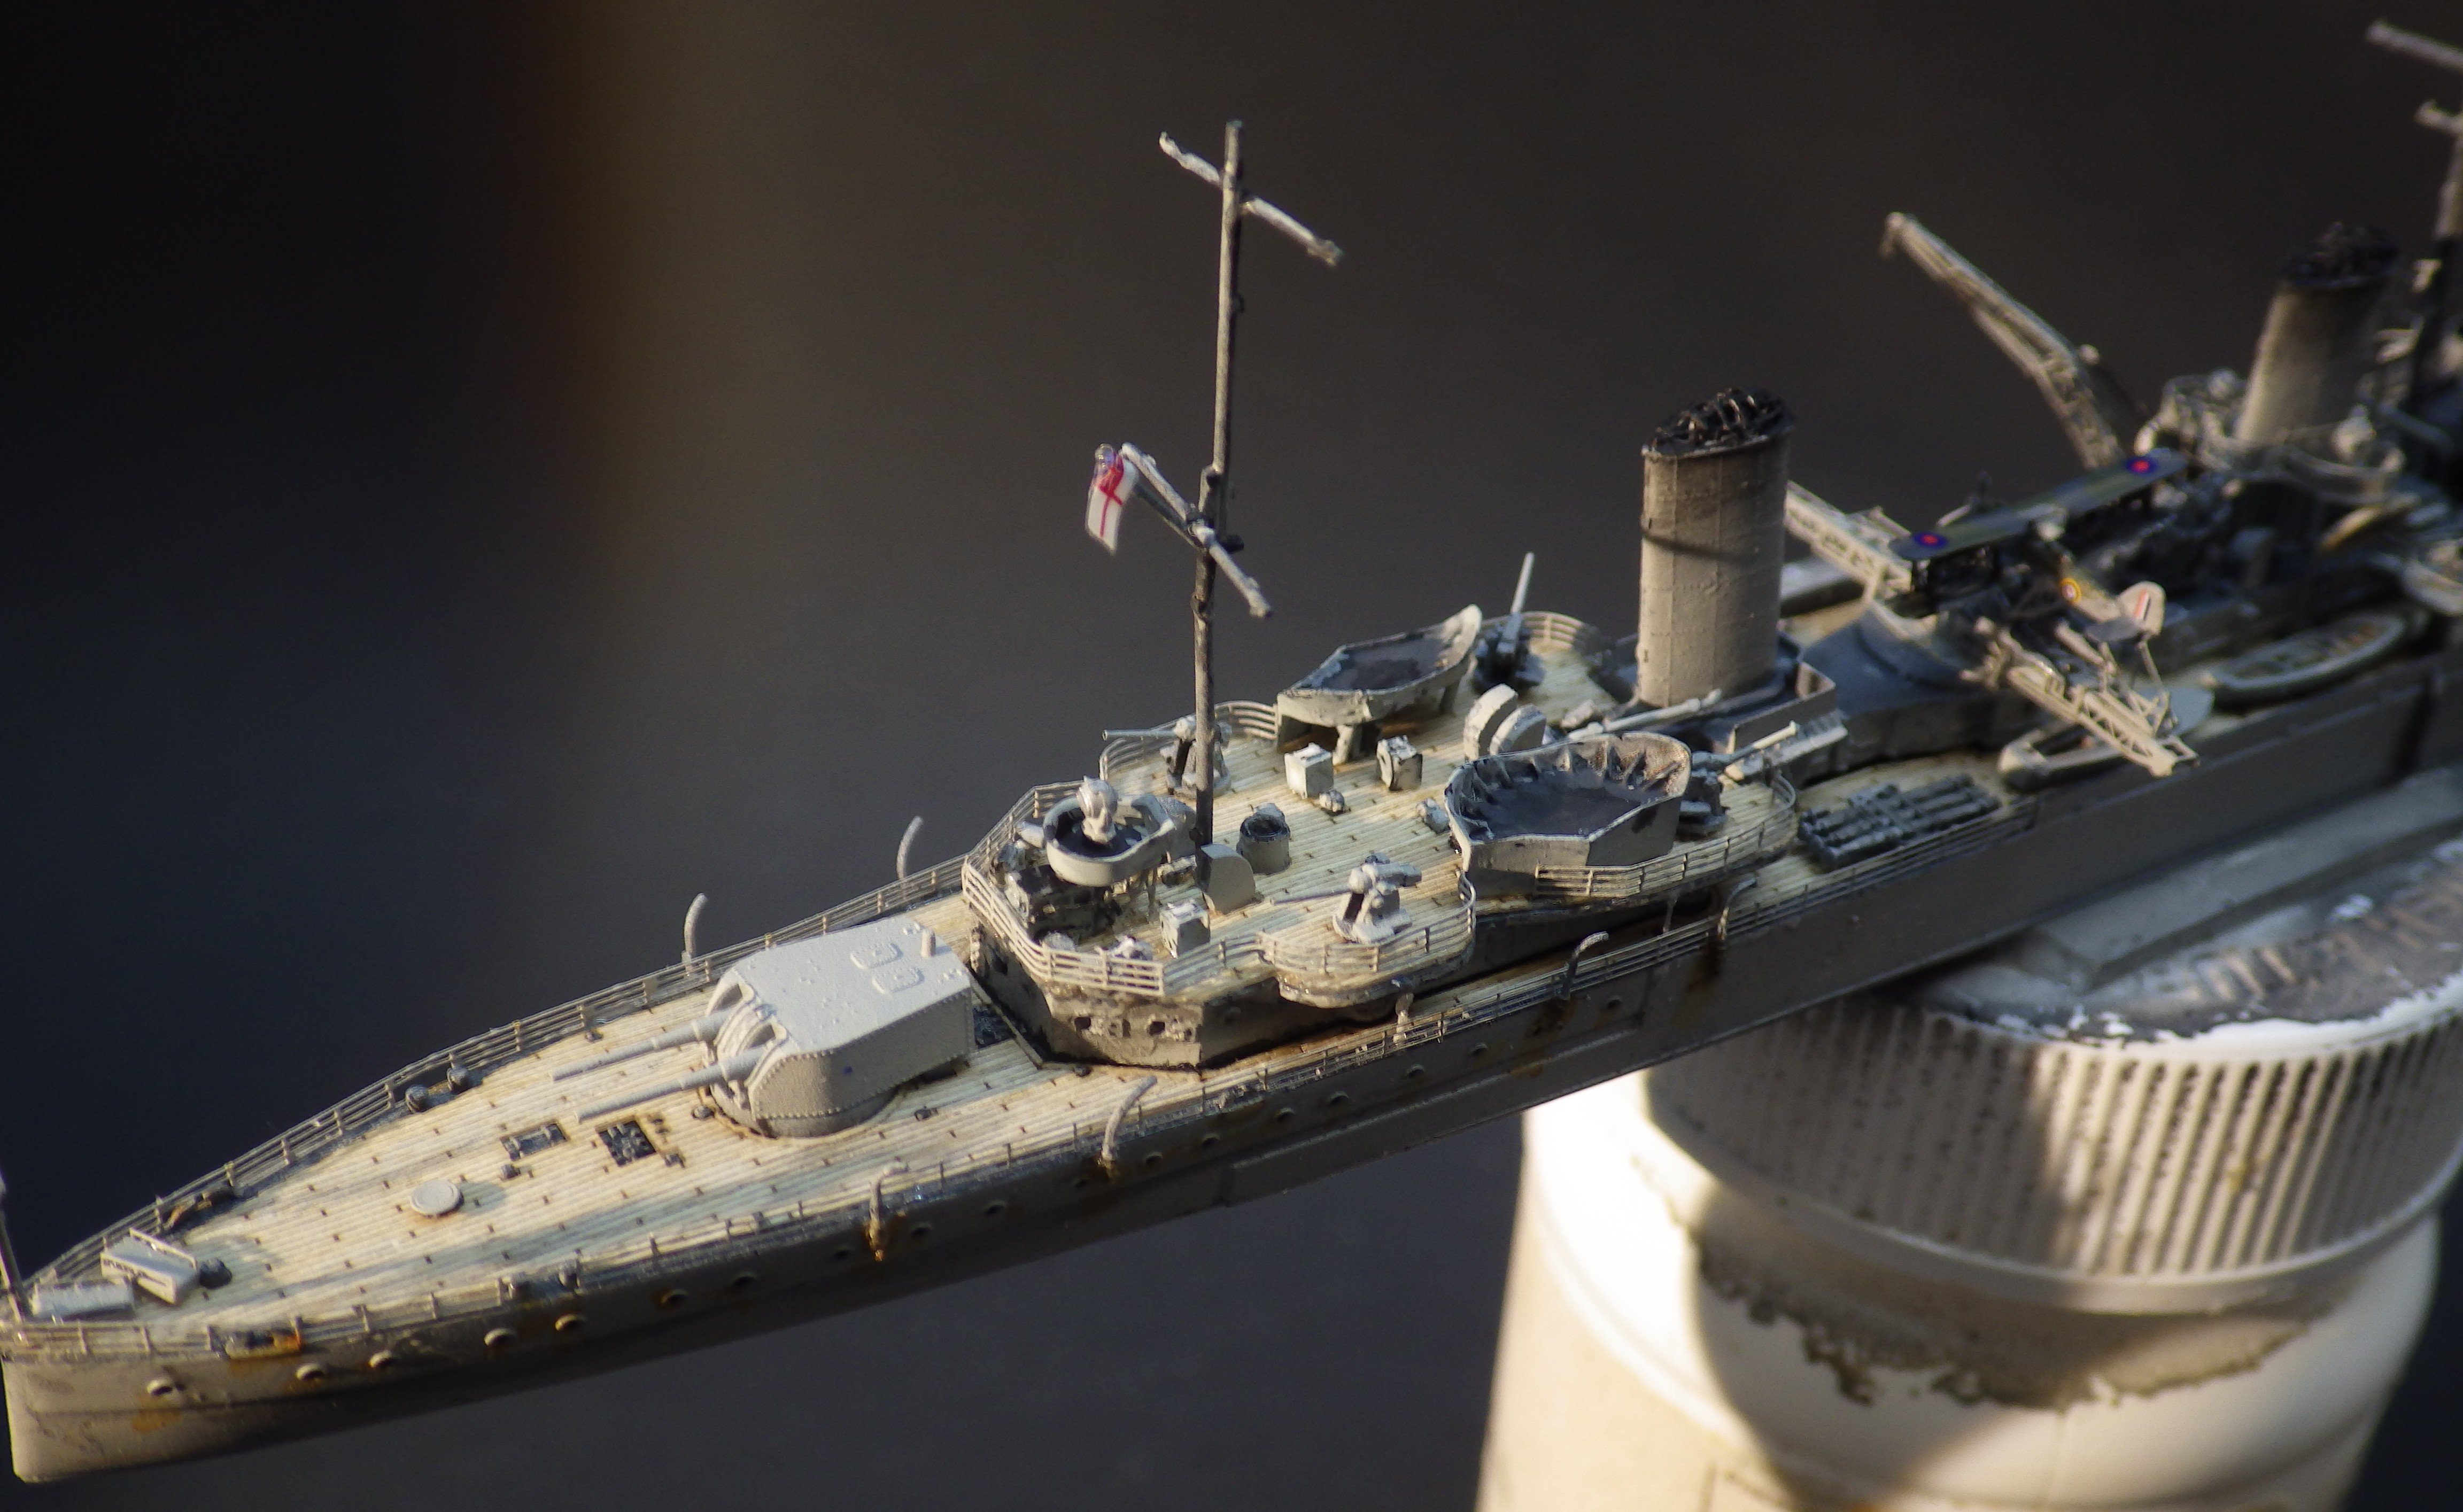
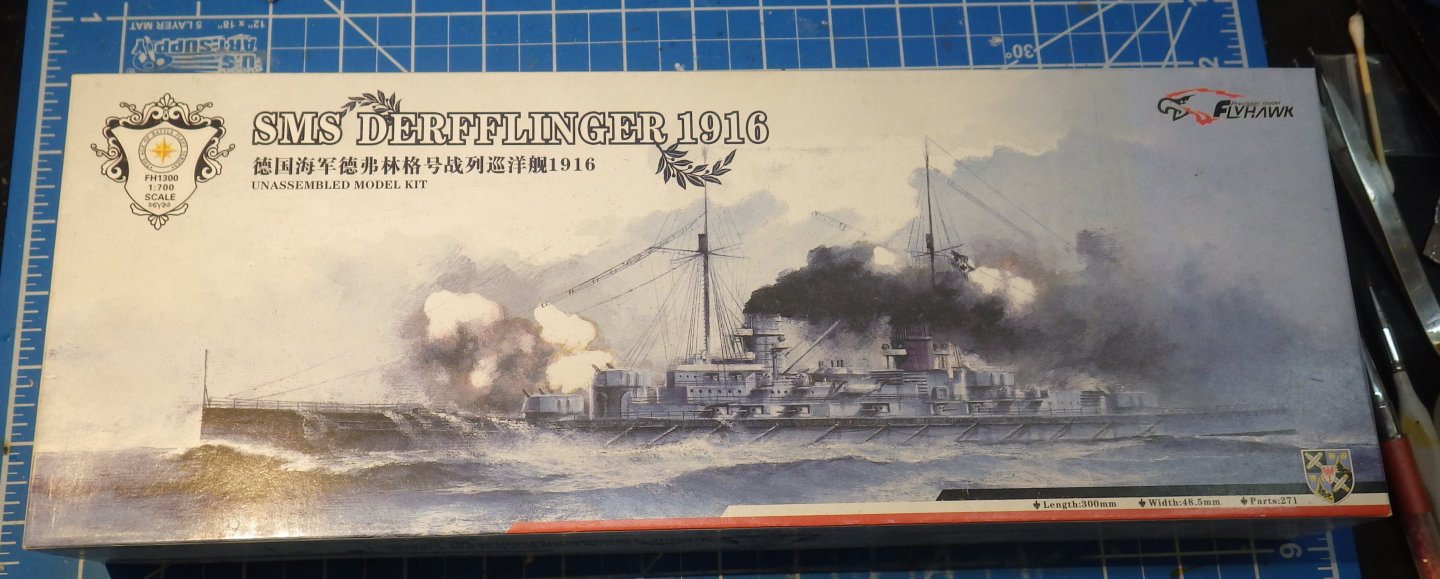
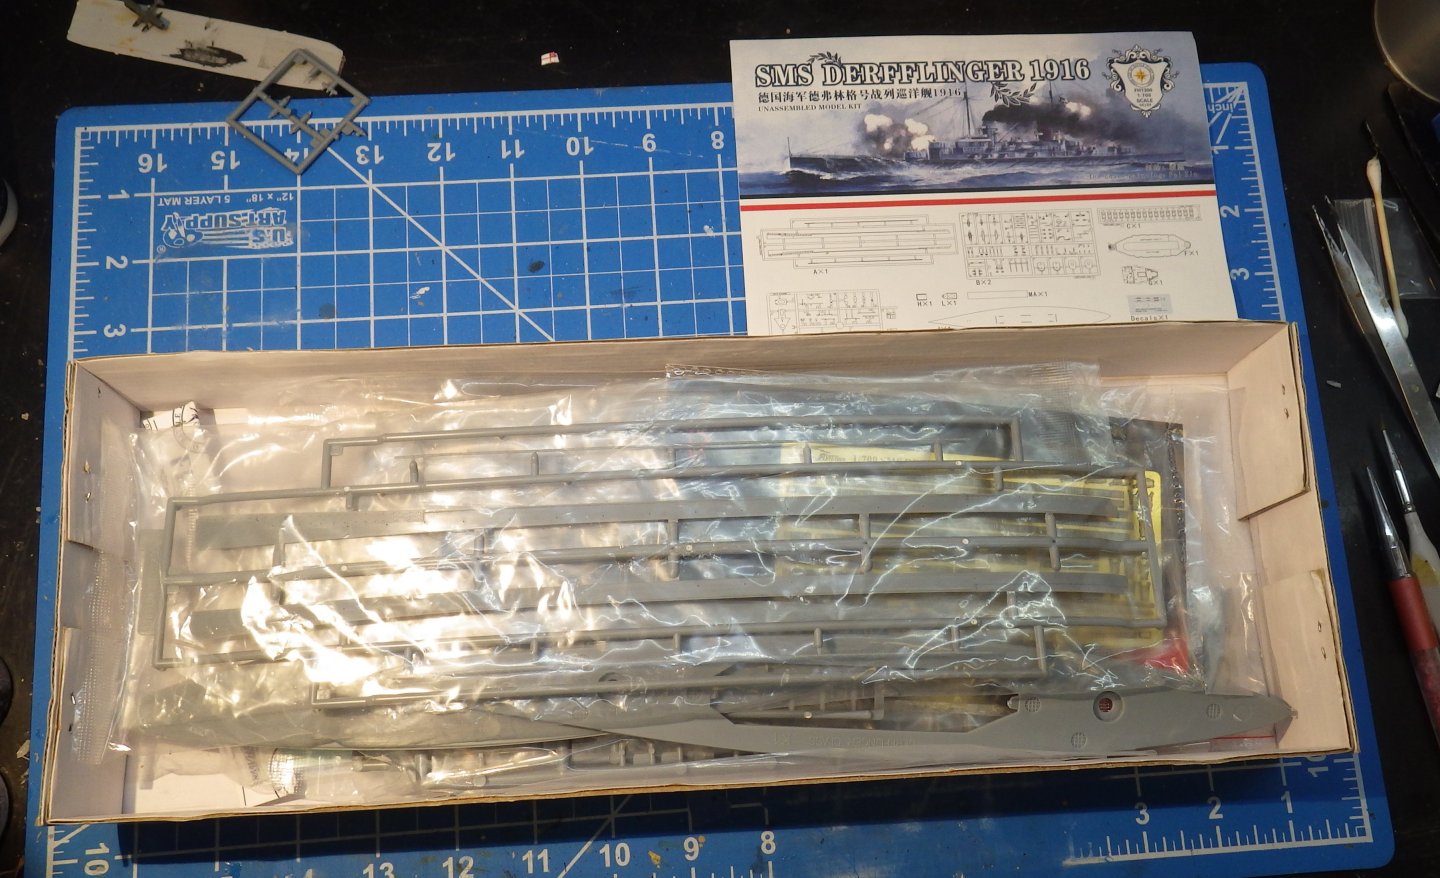
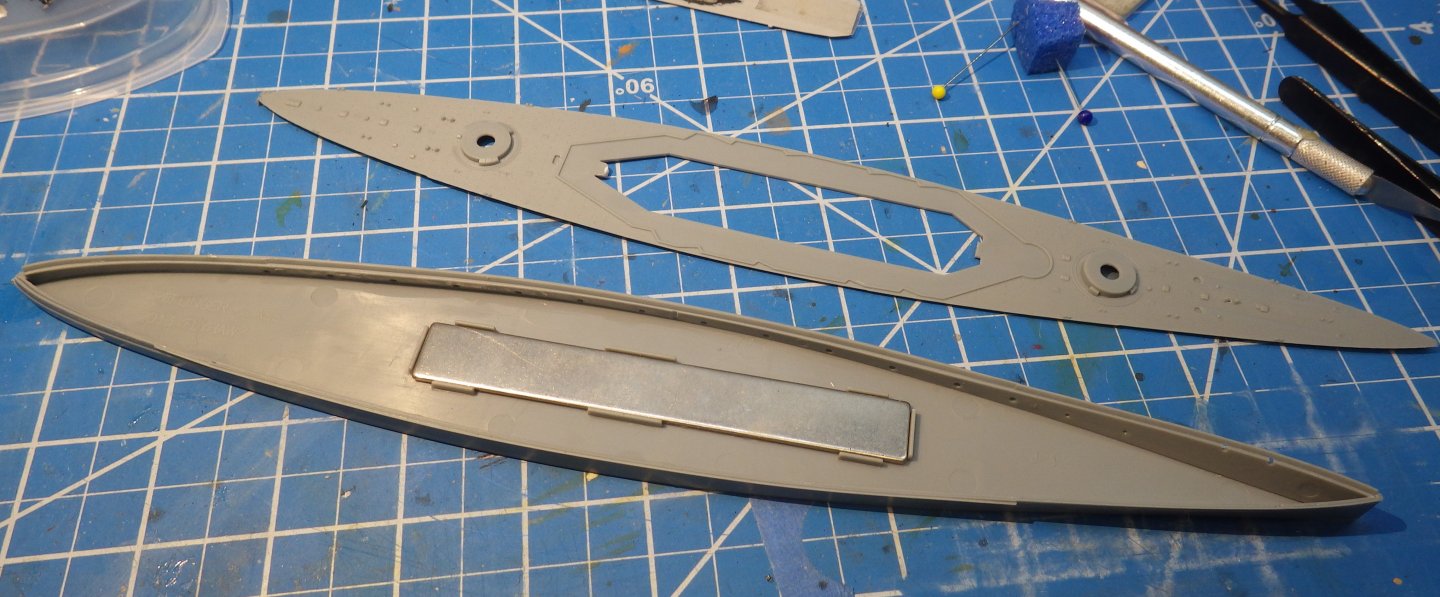
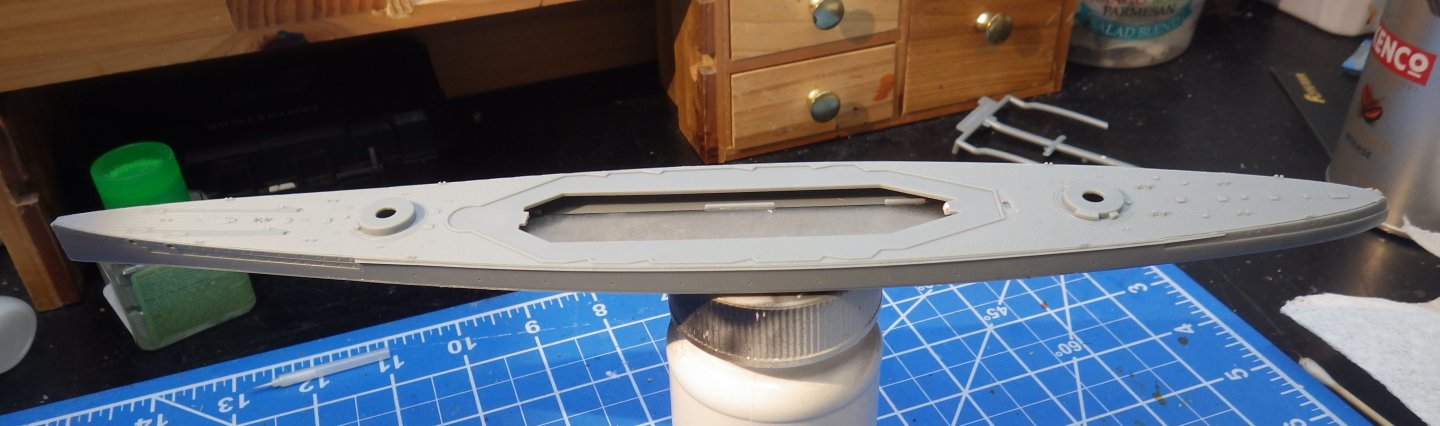
Another Flyhawk adventure kicks off. This time the Imperial German Navy of WW1, SMS Derfflinger. No tiny biplanes, no fiddly secondary armament what could be easier? Well, it has belatedly occurred to me - the torpedo nets. I'm not sure what to do with those but anything but stowed will be a serious exercise at 1/700 - at least for me. I haven't found any upgrade sets for this apart from a wooden deck set and I think I am going to paint the decks this time. This Flyhawk kit is a little different to others I have worked on. The plastic is softer and detail is less well defined. Still quite a lot of small parts but only a small fret of PE, mostly railings and the cranes. So I think this will be built as per the box of bits. Instructions are the usual Flyhawk folding pages (that get all over the place as you try to read them. For Flyhawk the bxs is not as stuffed as usual Its a waterline kit so the two hull halves were fitted to the base plate with no problems. Everything fits nicely. The main deck well on without the need for violence. As noted earlier the detail is a bit soft by Flyhawk standards. I think I may try to drill out the portholes, something I don't usually do for 1/700 scale. And then everything goes off for a coat of Mig Ammo One Shot black primer. Thanks for looking in. I hope this will be interesting. Alan

- 78 replies
-
- 8
-
-
- Derfflinger
- Flyhawk
- (and 2 more)
-
Thanks very much Ken Fiddly but enjoyable and everything fits and nothing needs massive filing and sanding. Alan
-
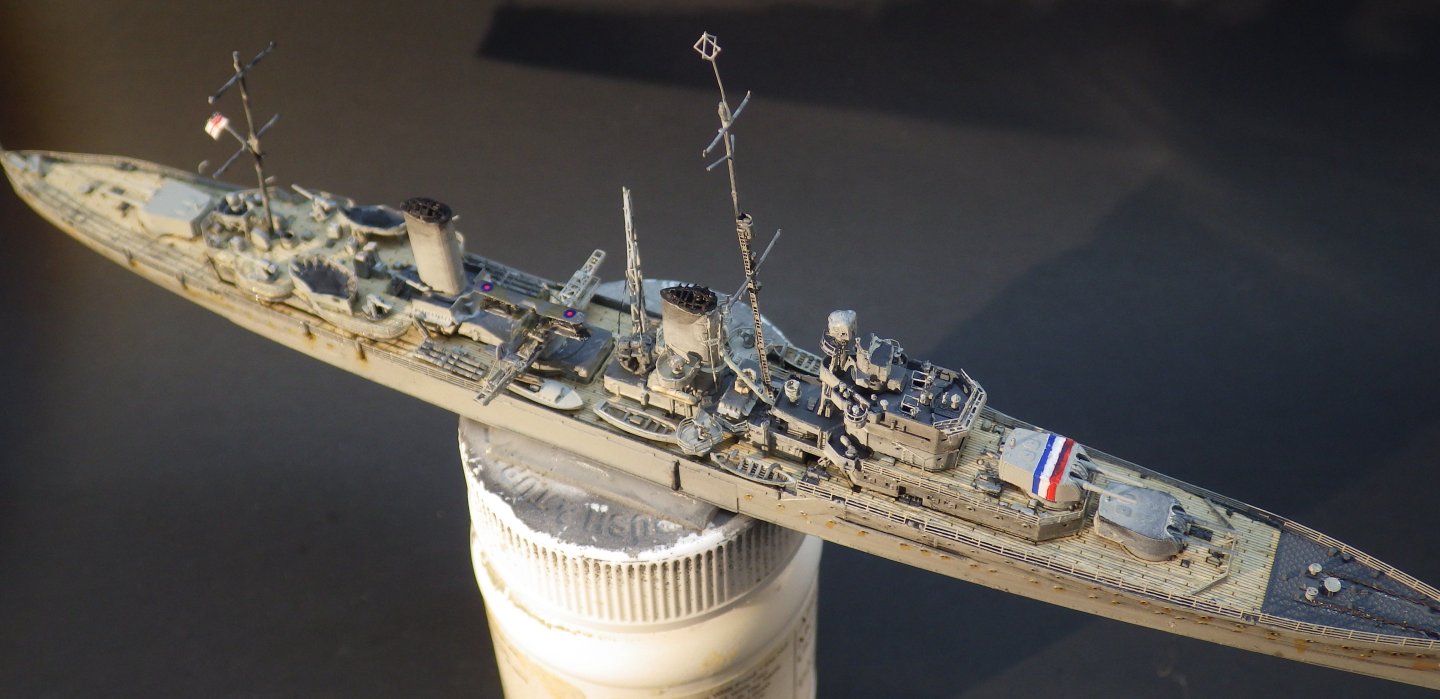
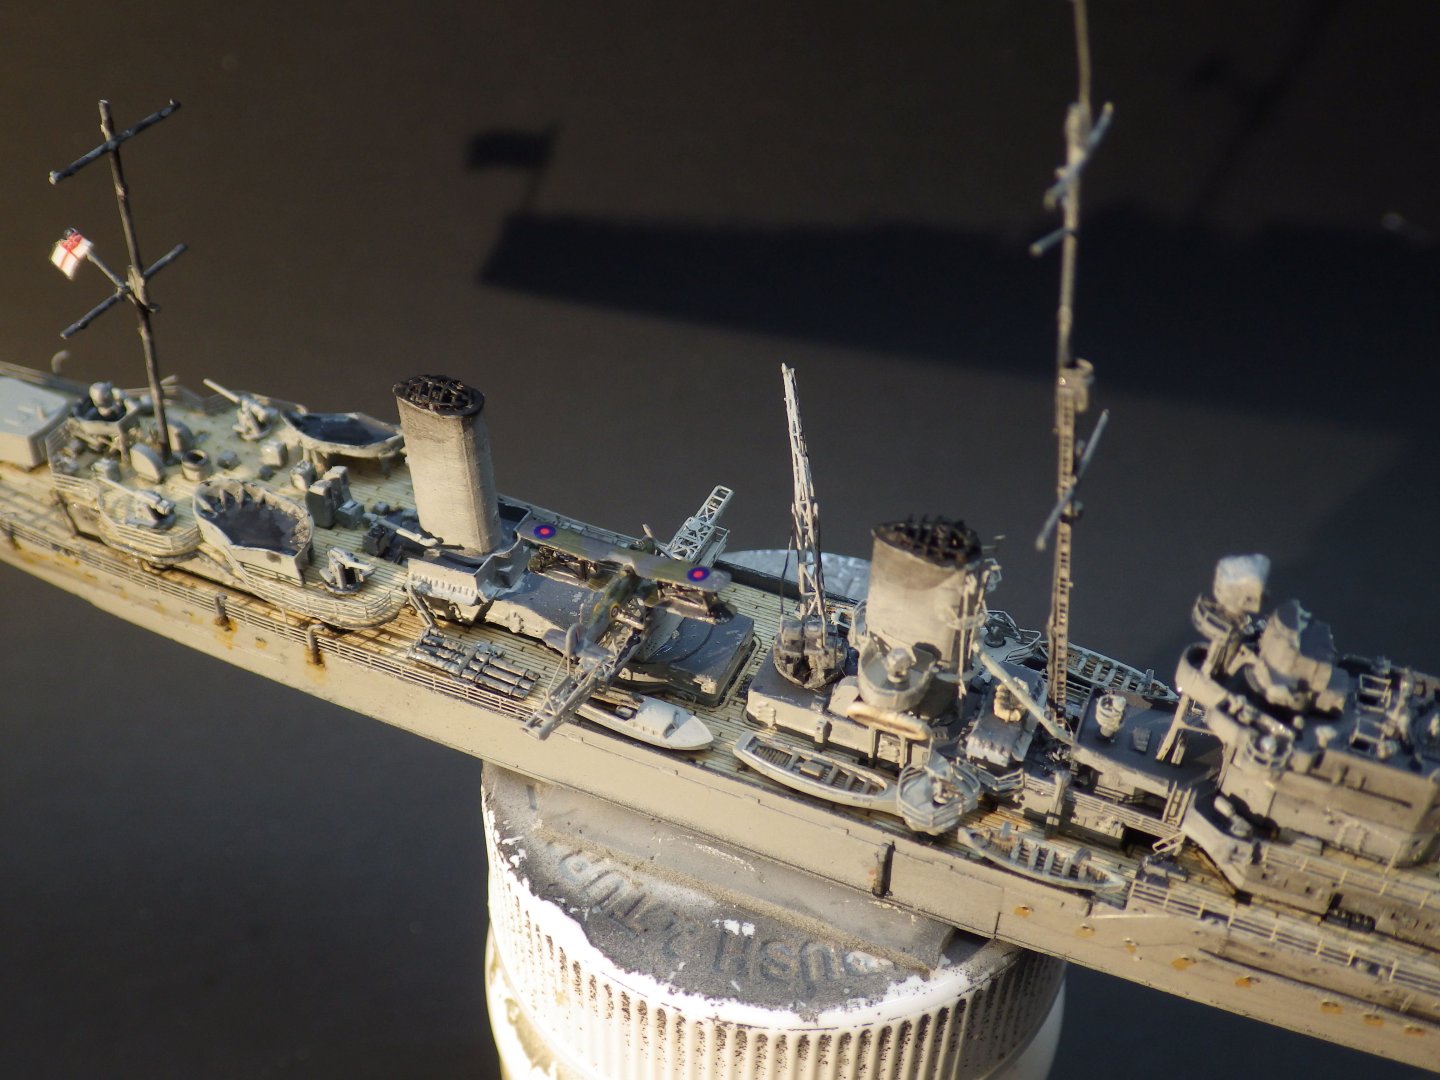
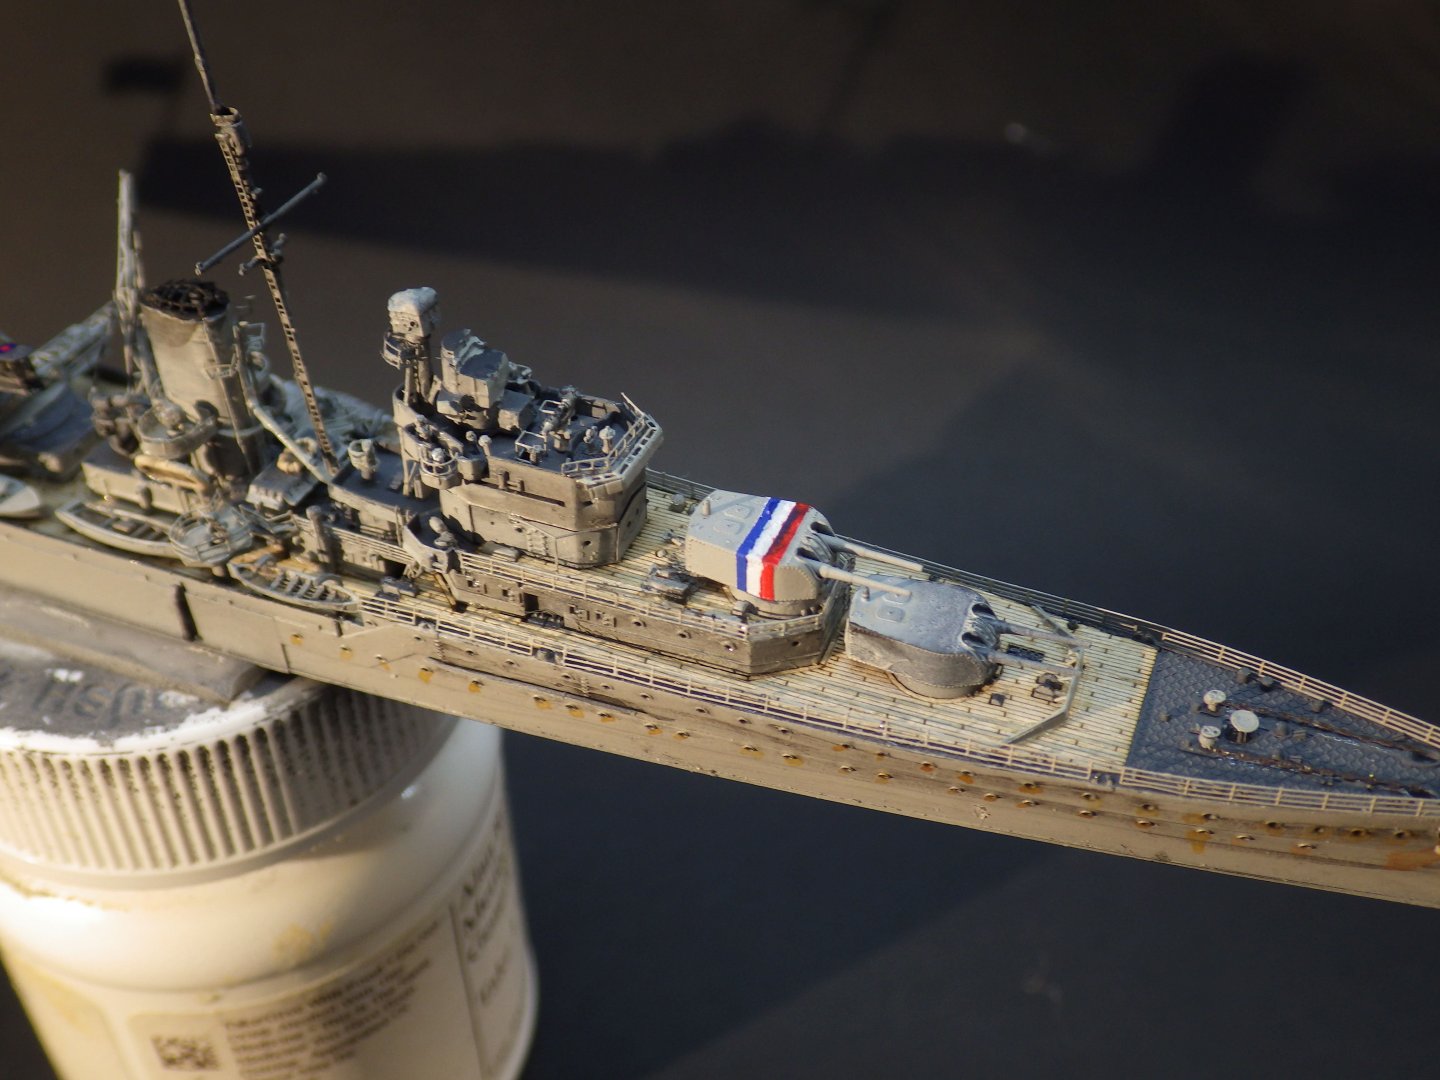
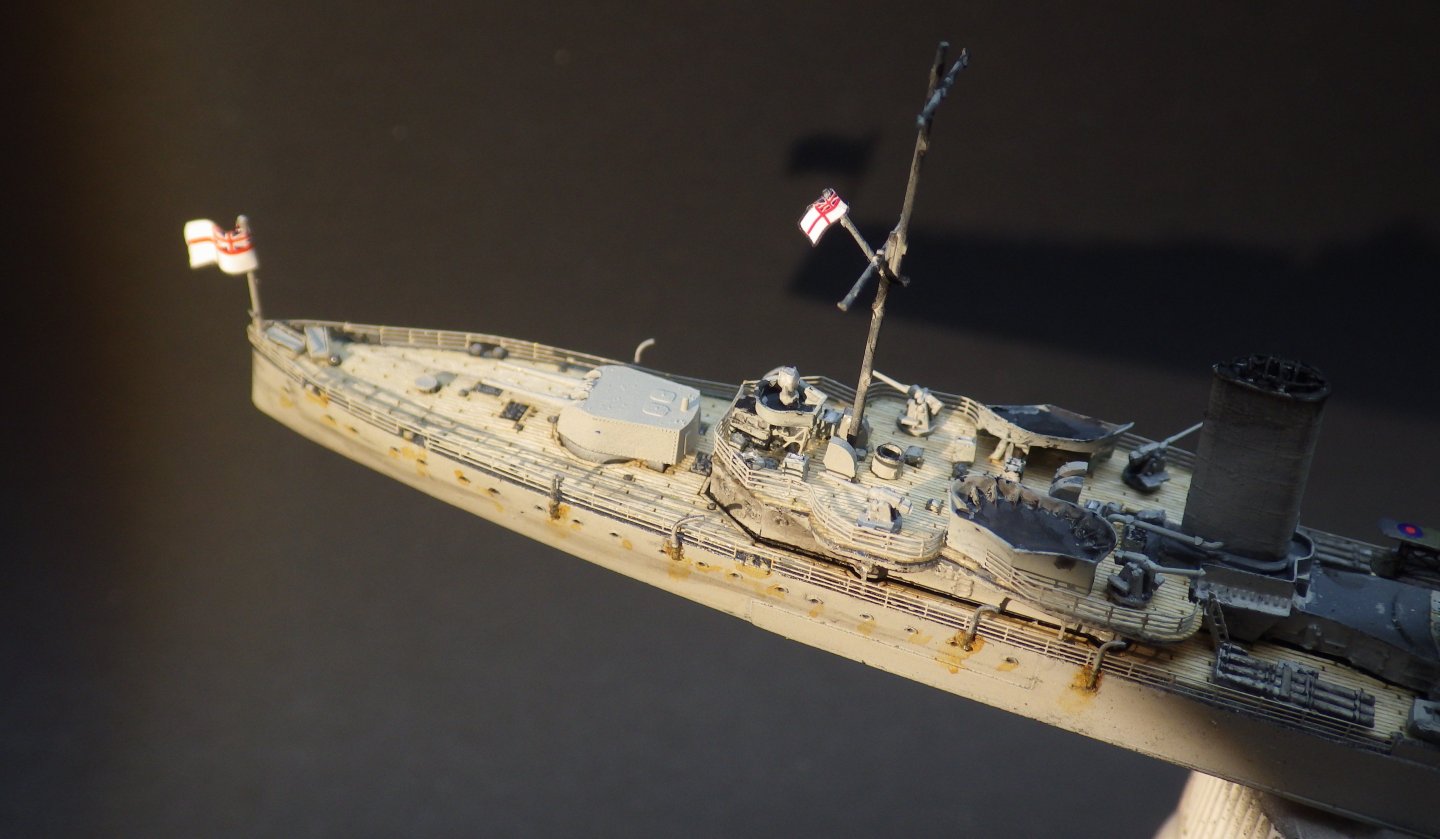
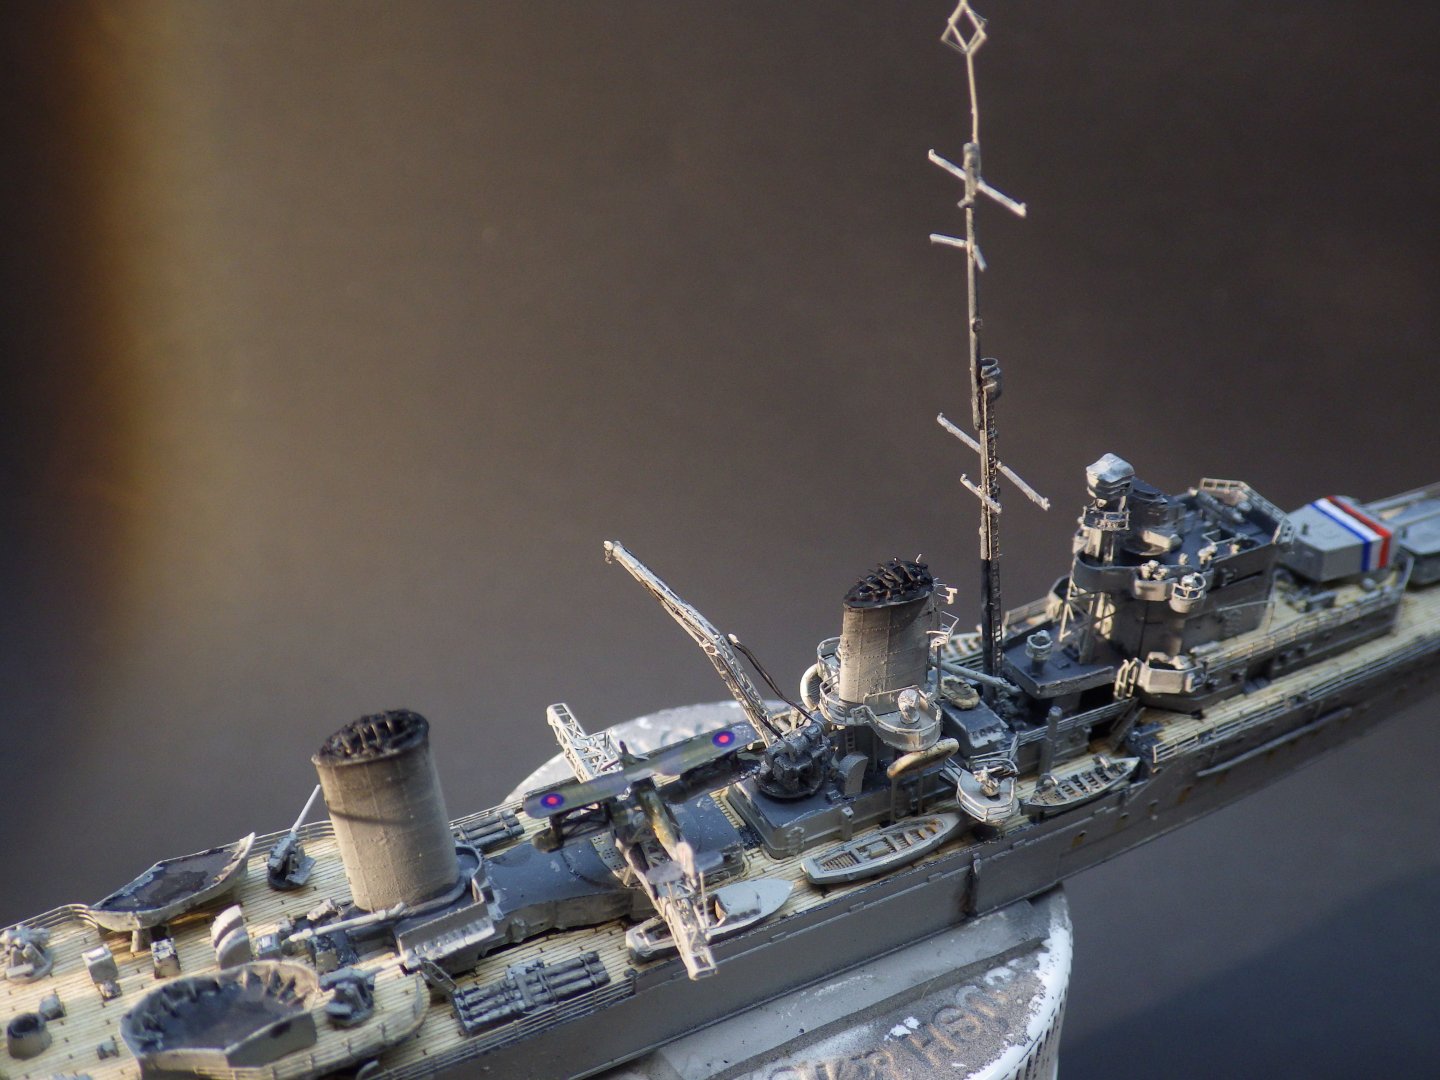
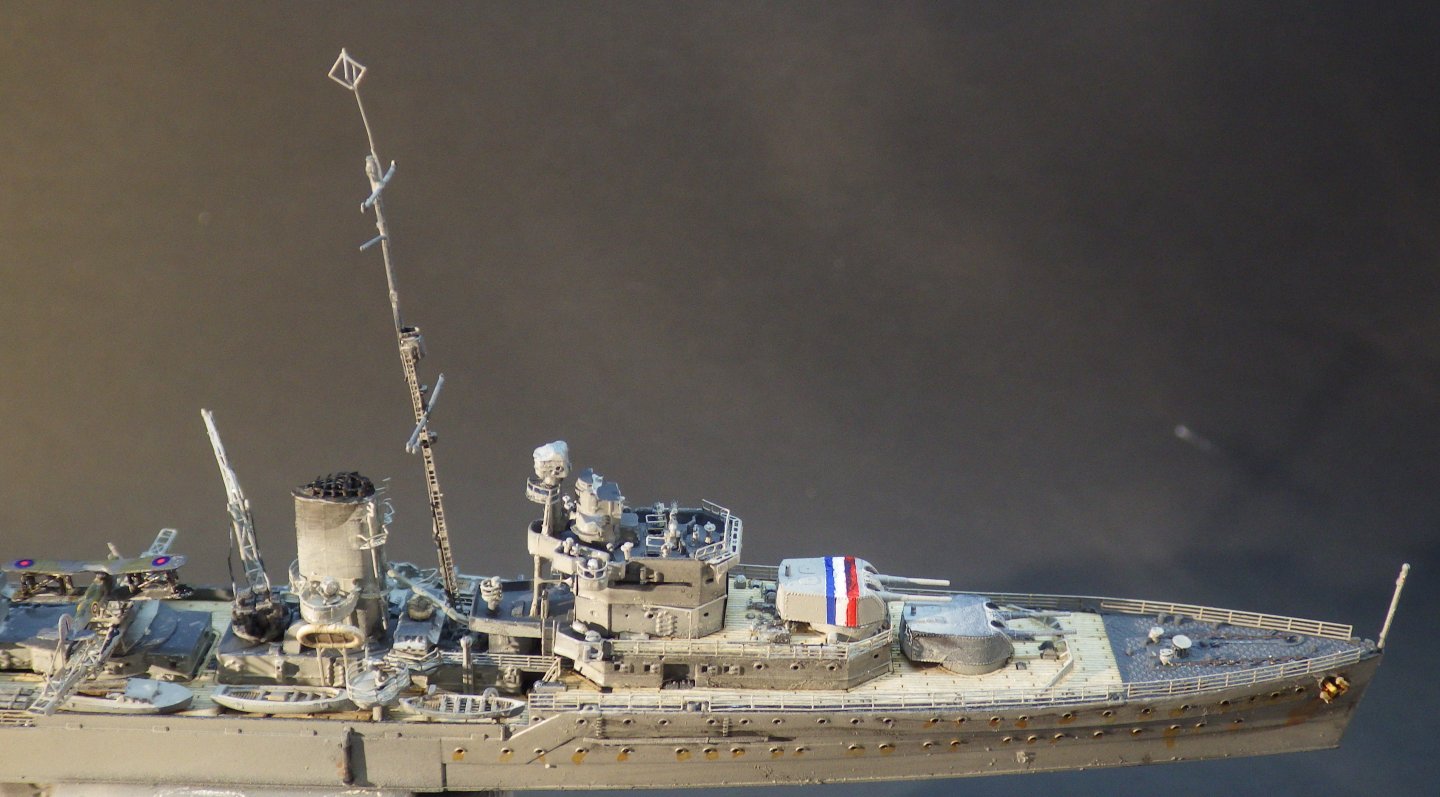
Thanks Andrew. I have one or two Flyhawk kits that I open and look at and put them back out of sight. Some of the tiny detail is just off-putting in large quantities. Thank you Mike. I thought the mast looked too big but it seems to match the period photos and the box art. It definitely looks like it was borrowed from a larger ship. Alan Thank you very much OC. Nearly there now Alan After a day tussling with the Sea Fox I think this one is complete. I painted the Sea Fox and added the decals which make it look a lot better. I painted the bracing wire PE flat black and then dry brushed some silver onto them and it had the effect of making the wires look a little more in scale. Of course you can't really see any of it now. I finished the weathering with some rust washes on the hull and finally attached the Sea Fox to the catapult. A bit of matt varnish to cover some spots of extra glue and I think that it for this one Thanks for looking in, the likes and the encouraging comments. I hope everyone is enjoying a great day. Alan


- 55 replies
-
- 11
-

-
-
The winches are incredible. I’m in awe of your skill. I feel proud when I get a piece of PE to come together. Great work and happy Christmas. alan
- 288 replies
-
- 5
-

-
-
- Card
- Pre-Dreadnought
- (and 3 more)
-
Happy Christmas Dan. Best wishes for the new year alan
-
Happy Christmas Graham. This is a fascinating log and you do great work. This will be a wonderful place to work Alan
-
She looks stunning. Beautiful work. alan
-
Amazing skill. Tiny pieces and card into the bargain. alan
- 288 replies
-
- 5
-
-
-
- Card
- Pre-Dreadnought
- (and 3 more)