king derelict
-
Posts
3,294 -
Joined
-
Last visited
Content Type
Profiles
Forums
Gallery
Events
Everything posted by king derelict
-
This has seemed a massively complex model from the start and it’s been inspiring watching you knock down the challenges one by one. I know that feeling when dry fitting damages stuff you already did. I usually find having successfully dry fitted a part as soon as I apply glue somehow everything changes and it won’t fit. I think MFH will go on the list of kits to admire watching others build but stay well clear of myself. I class you as one of the heroes of this site. I’m the kid in the corner eating the glue. alan
-
A very nice result Andy. The paintwork is excellent especially with the difficulties of using yellow. You did great with masking the greenhouse. congratulations alan
-
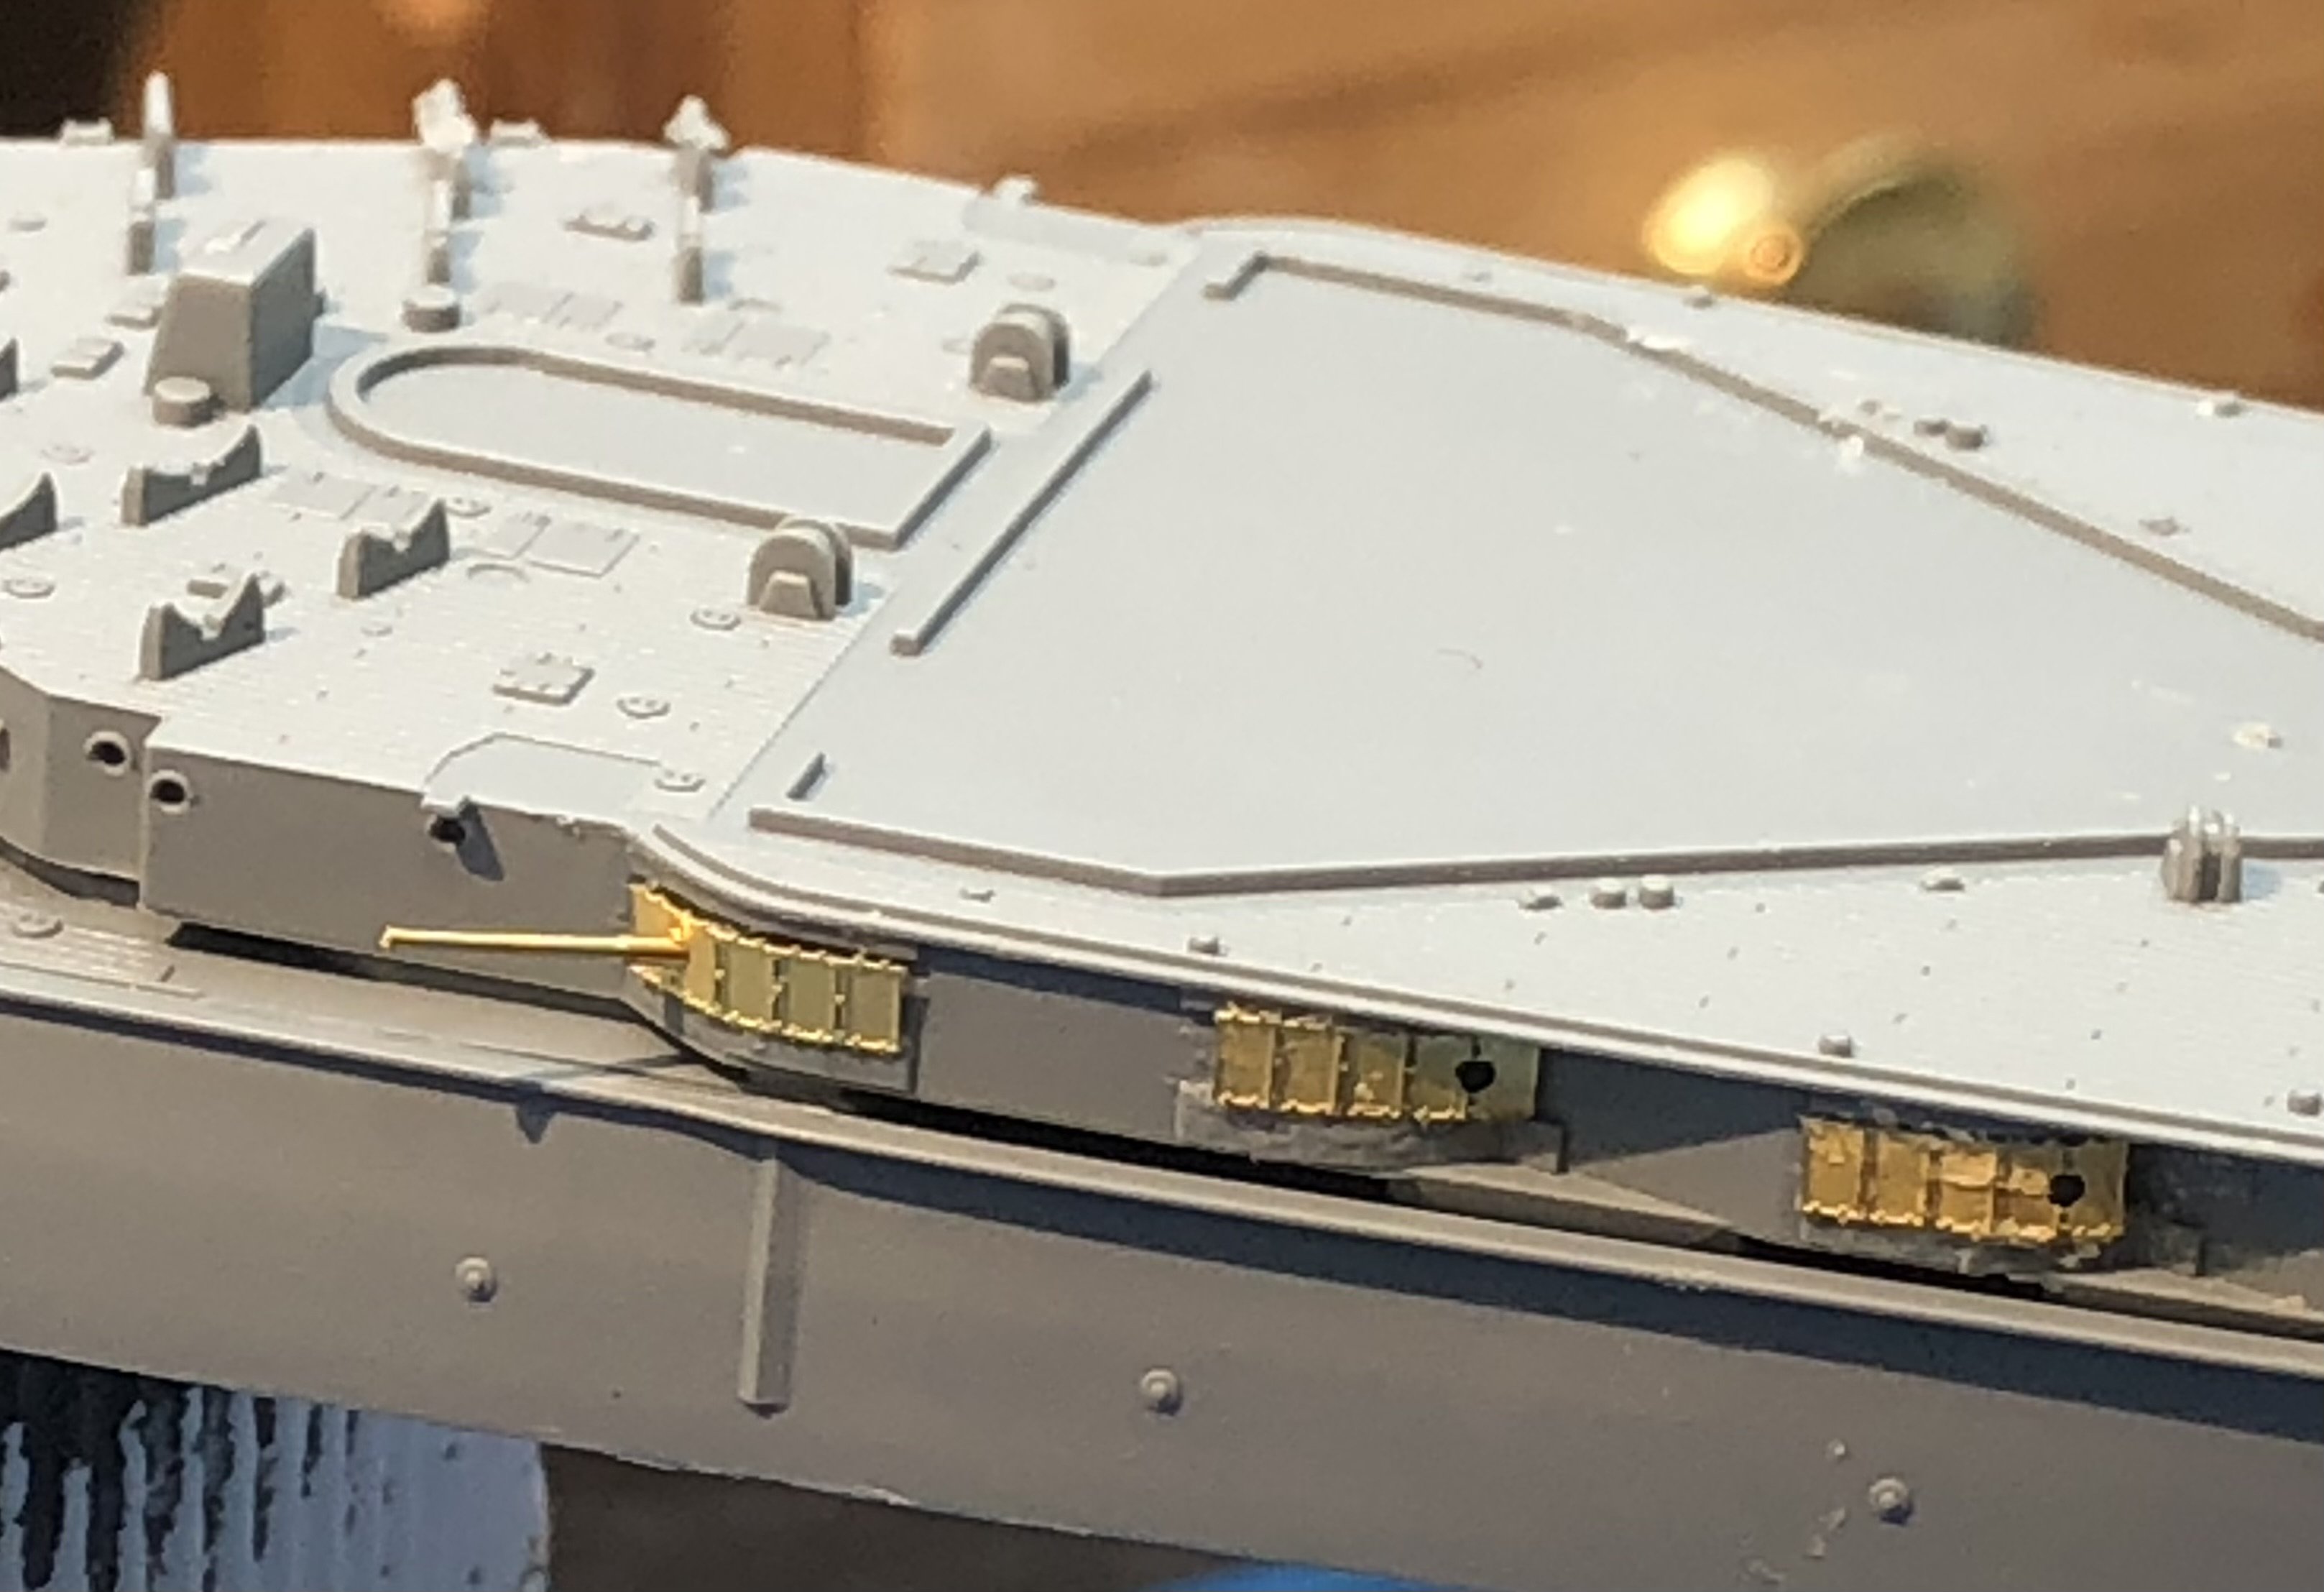
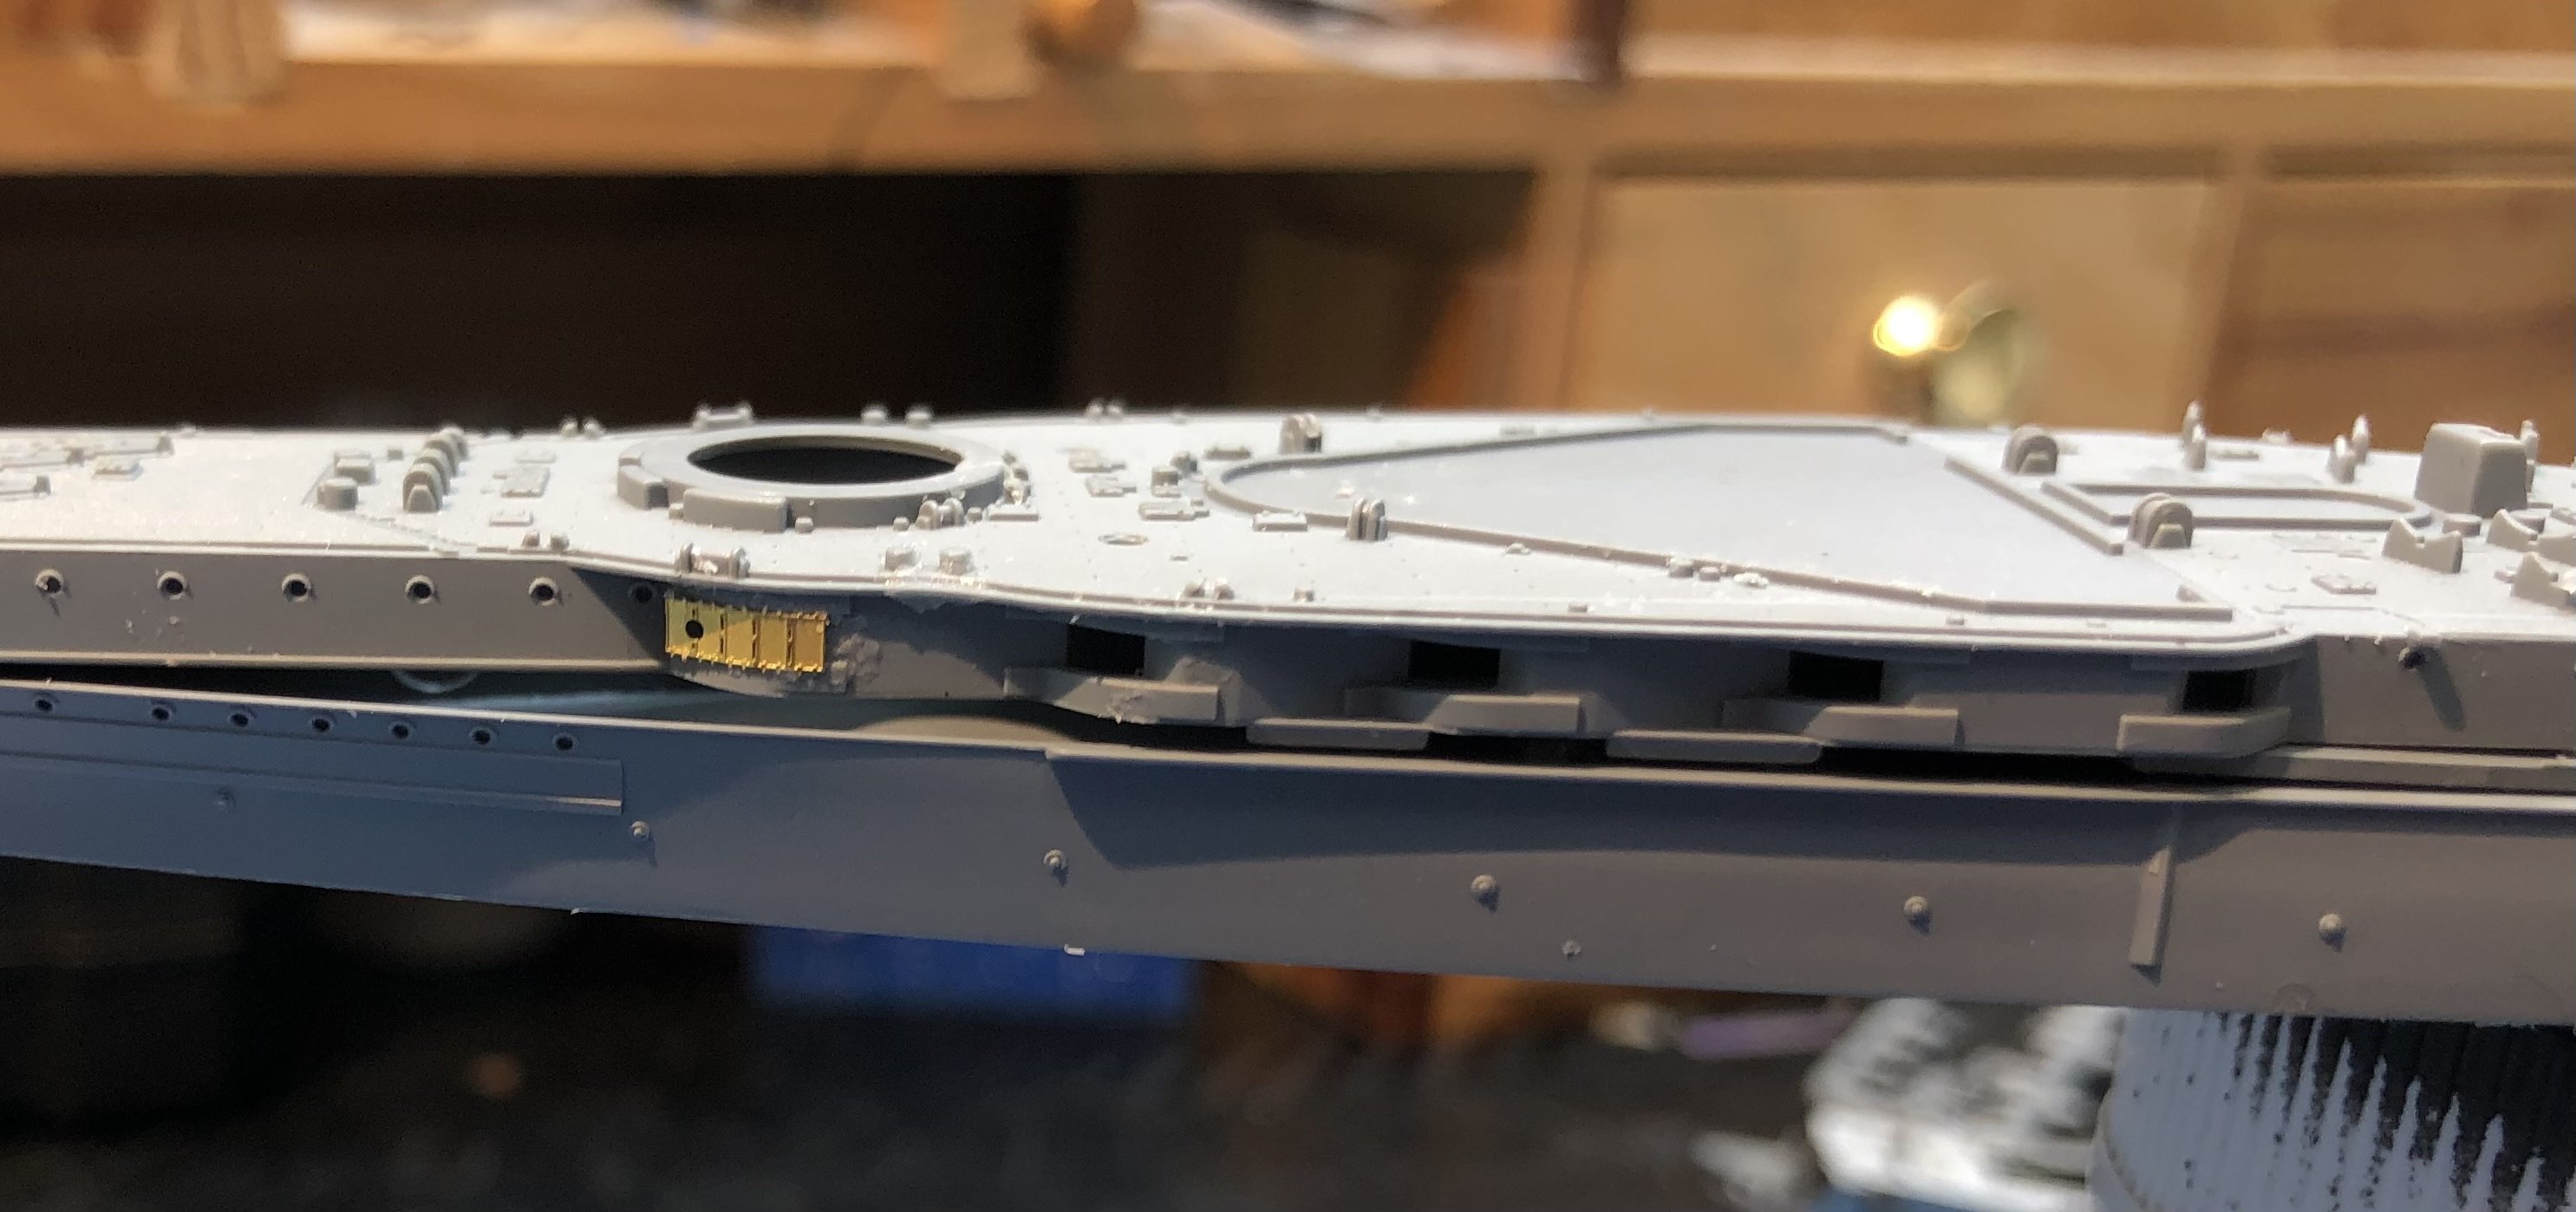
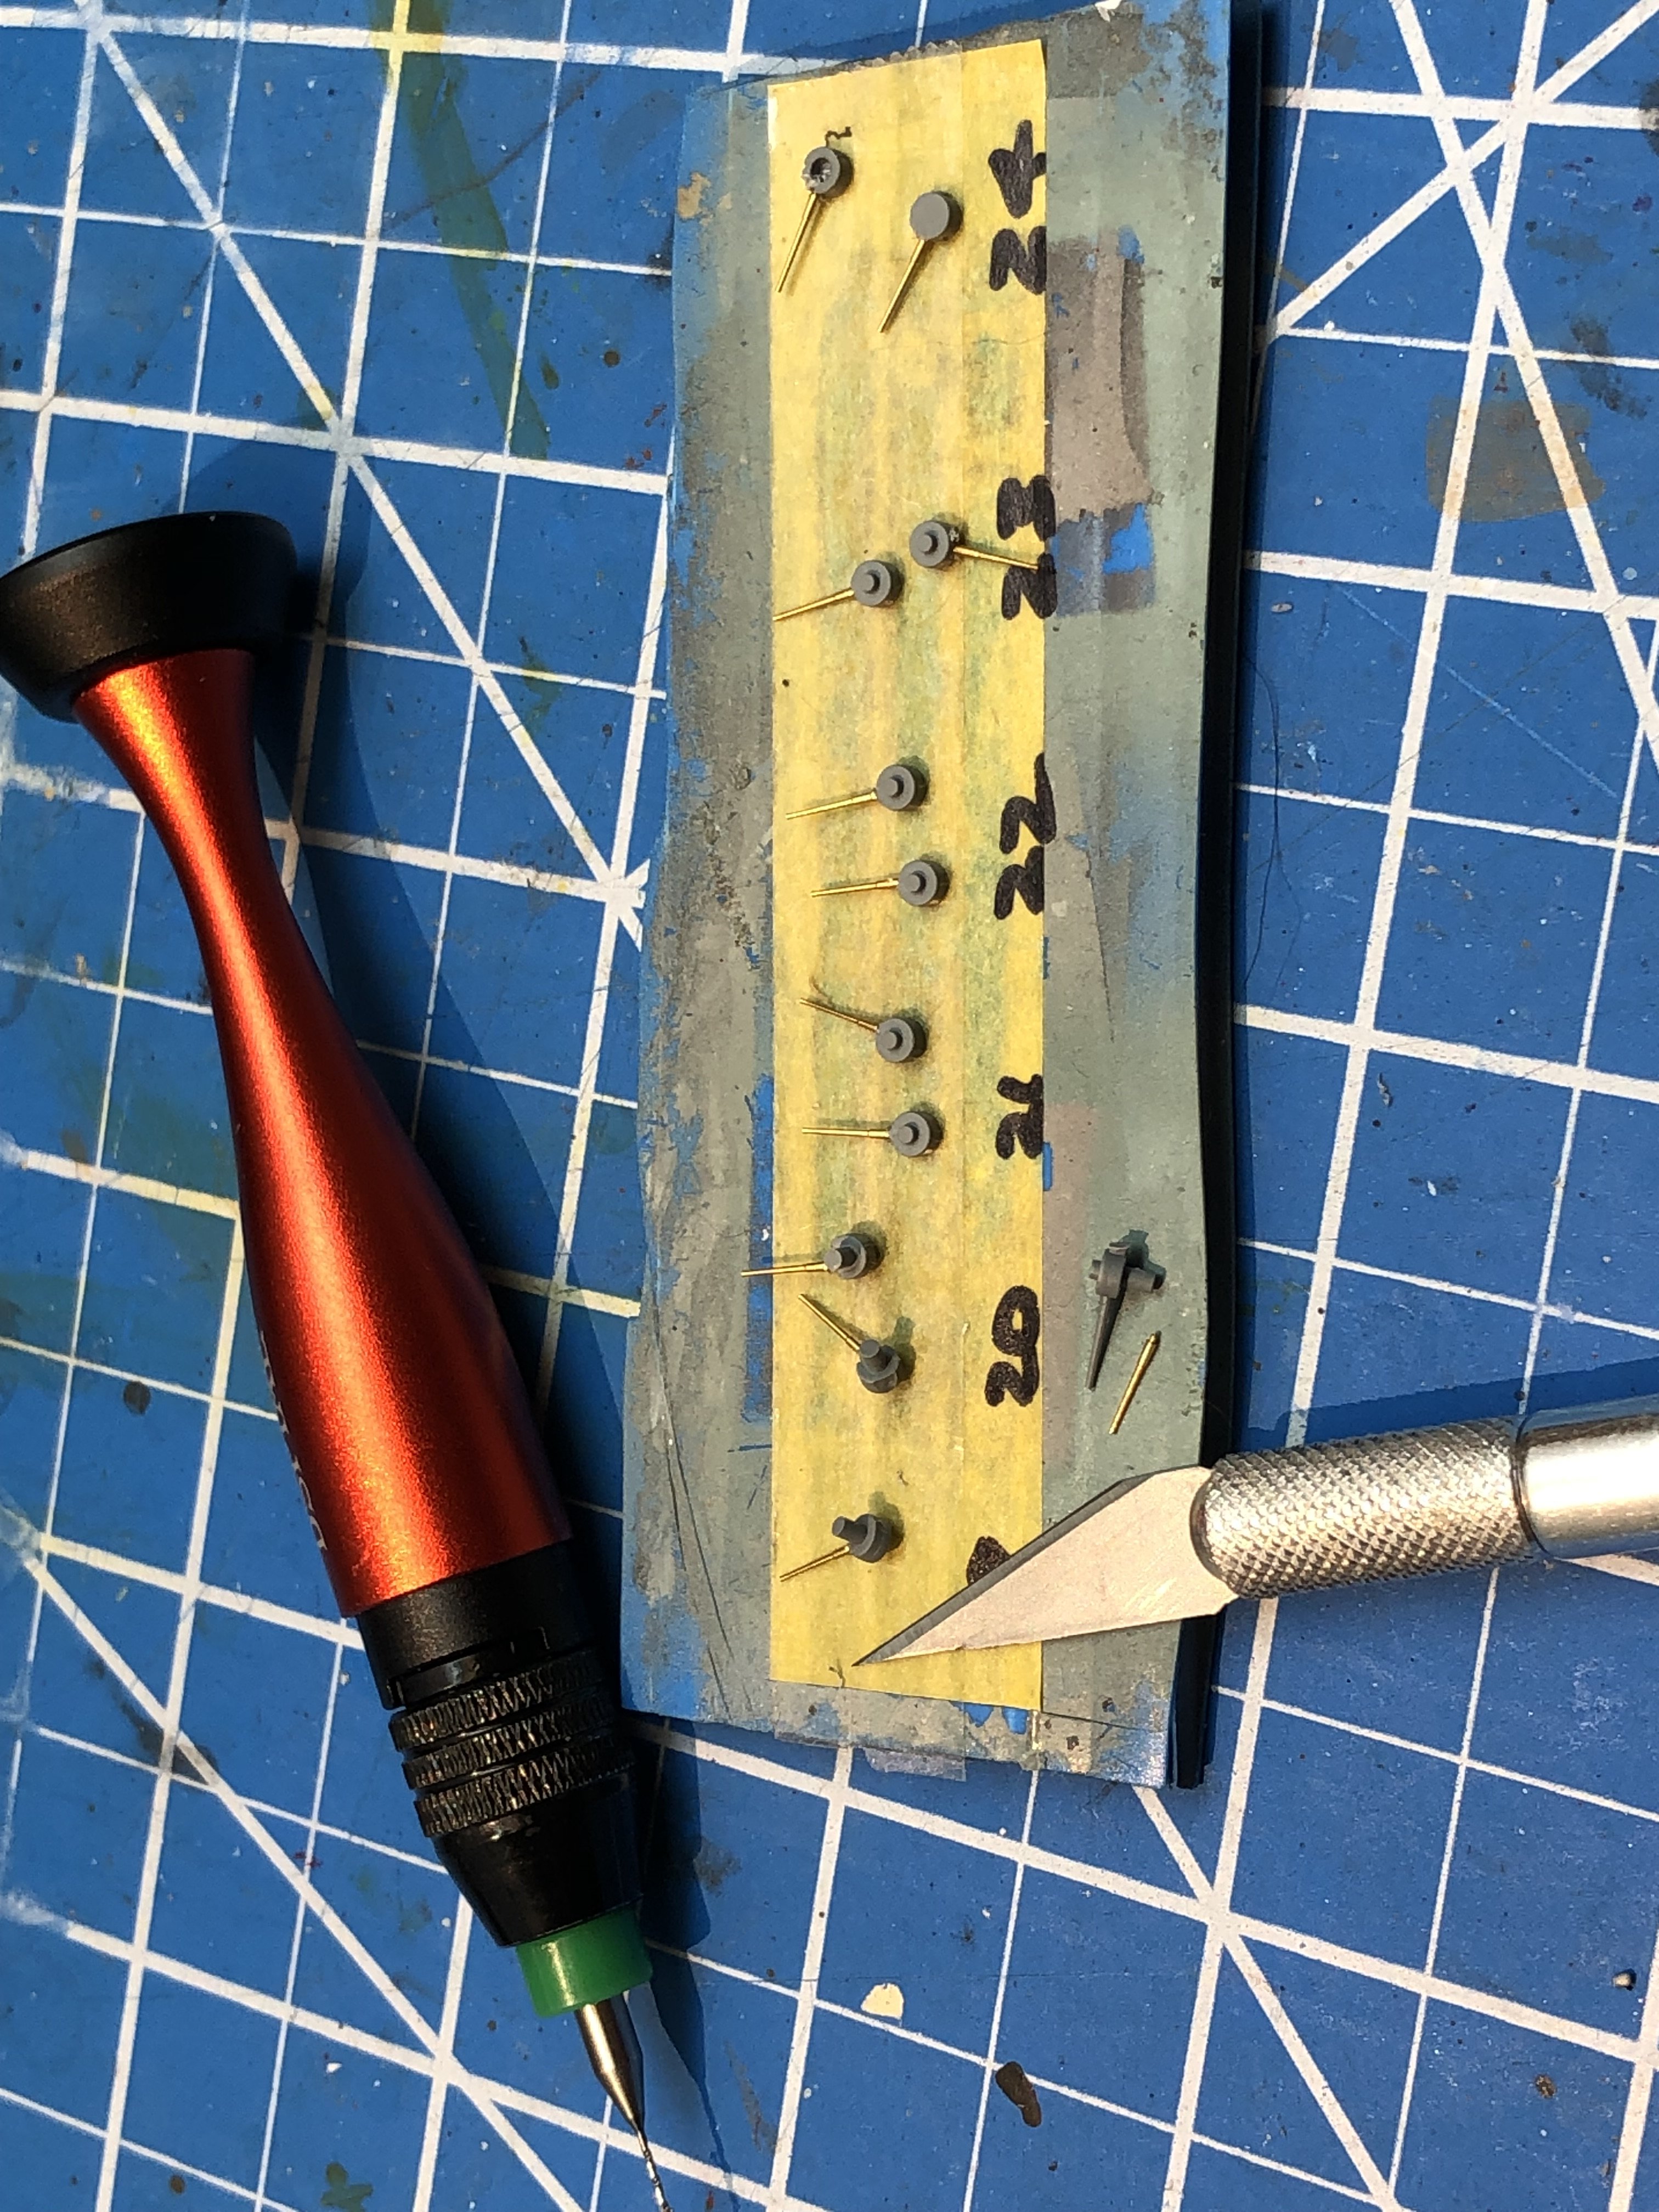
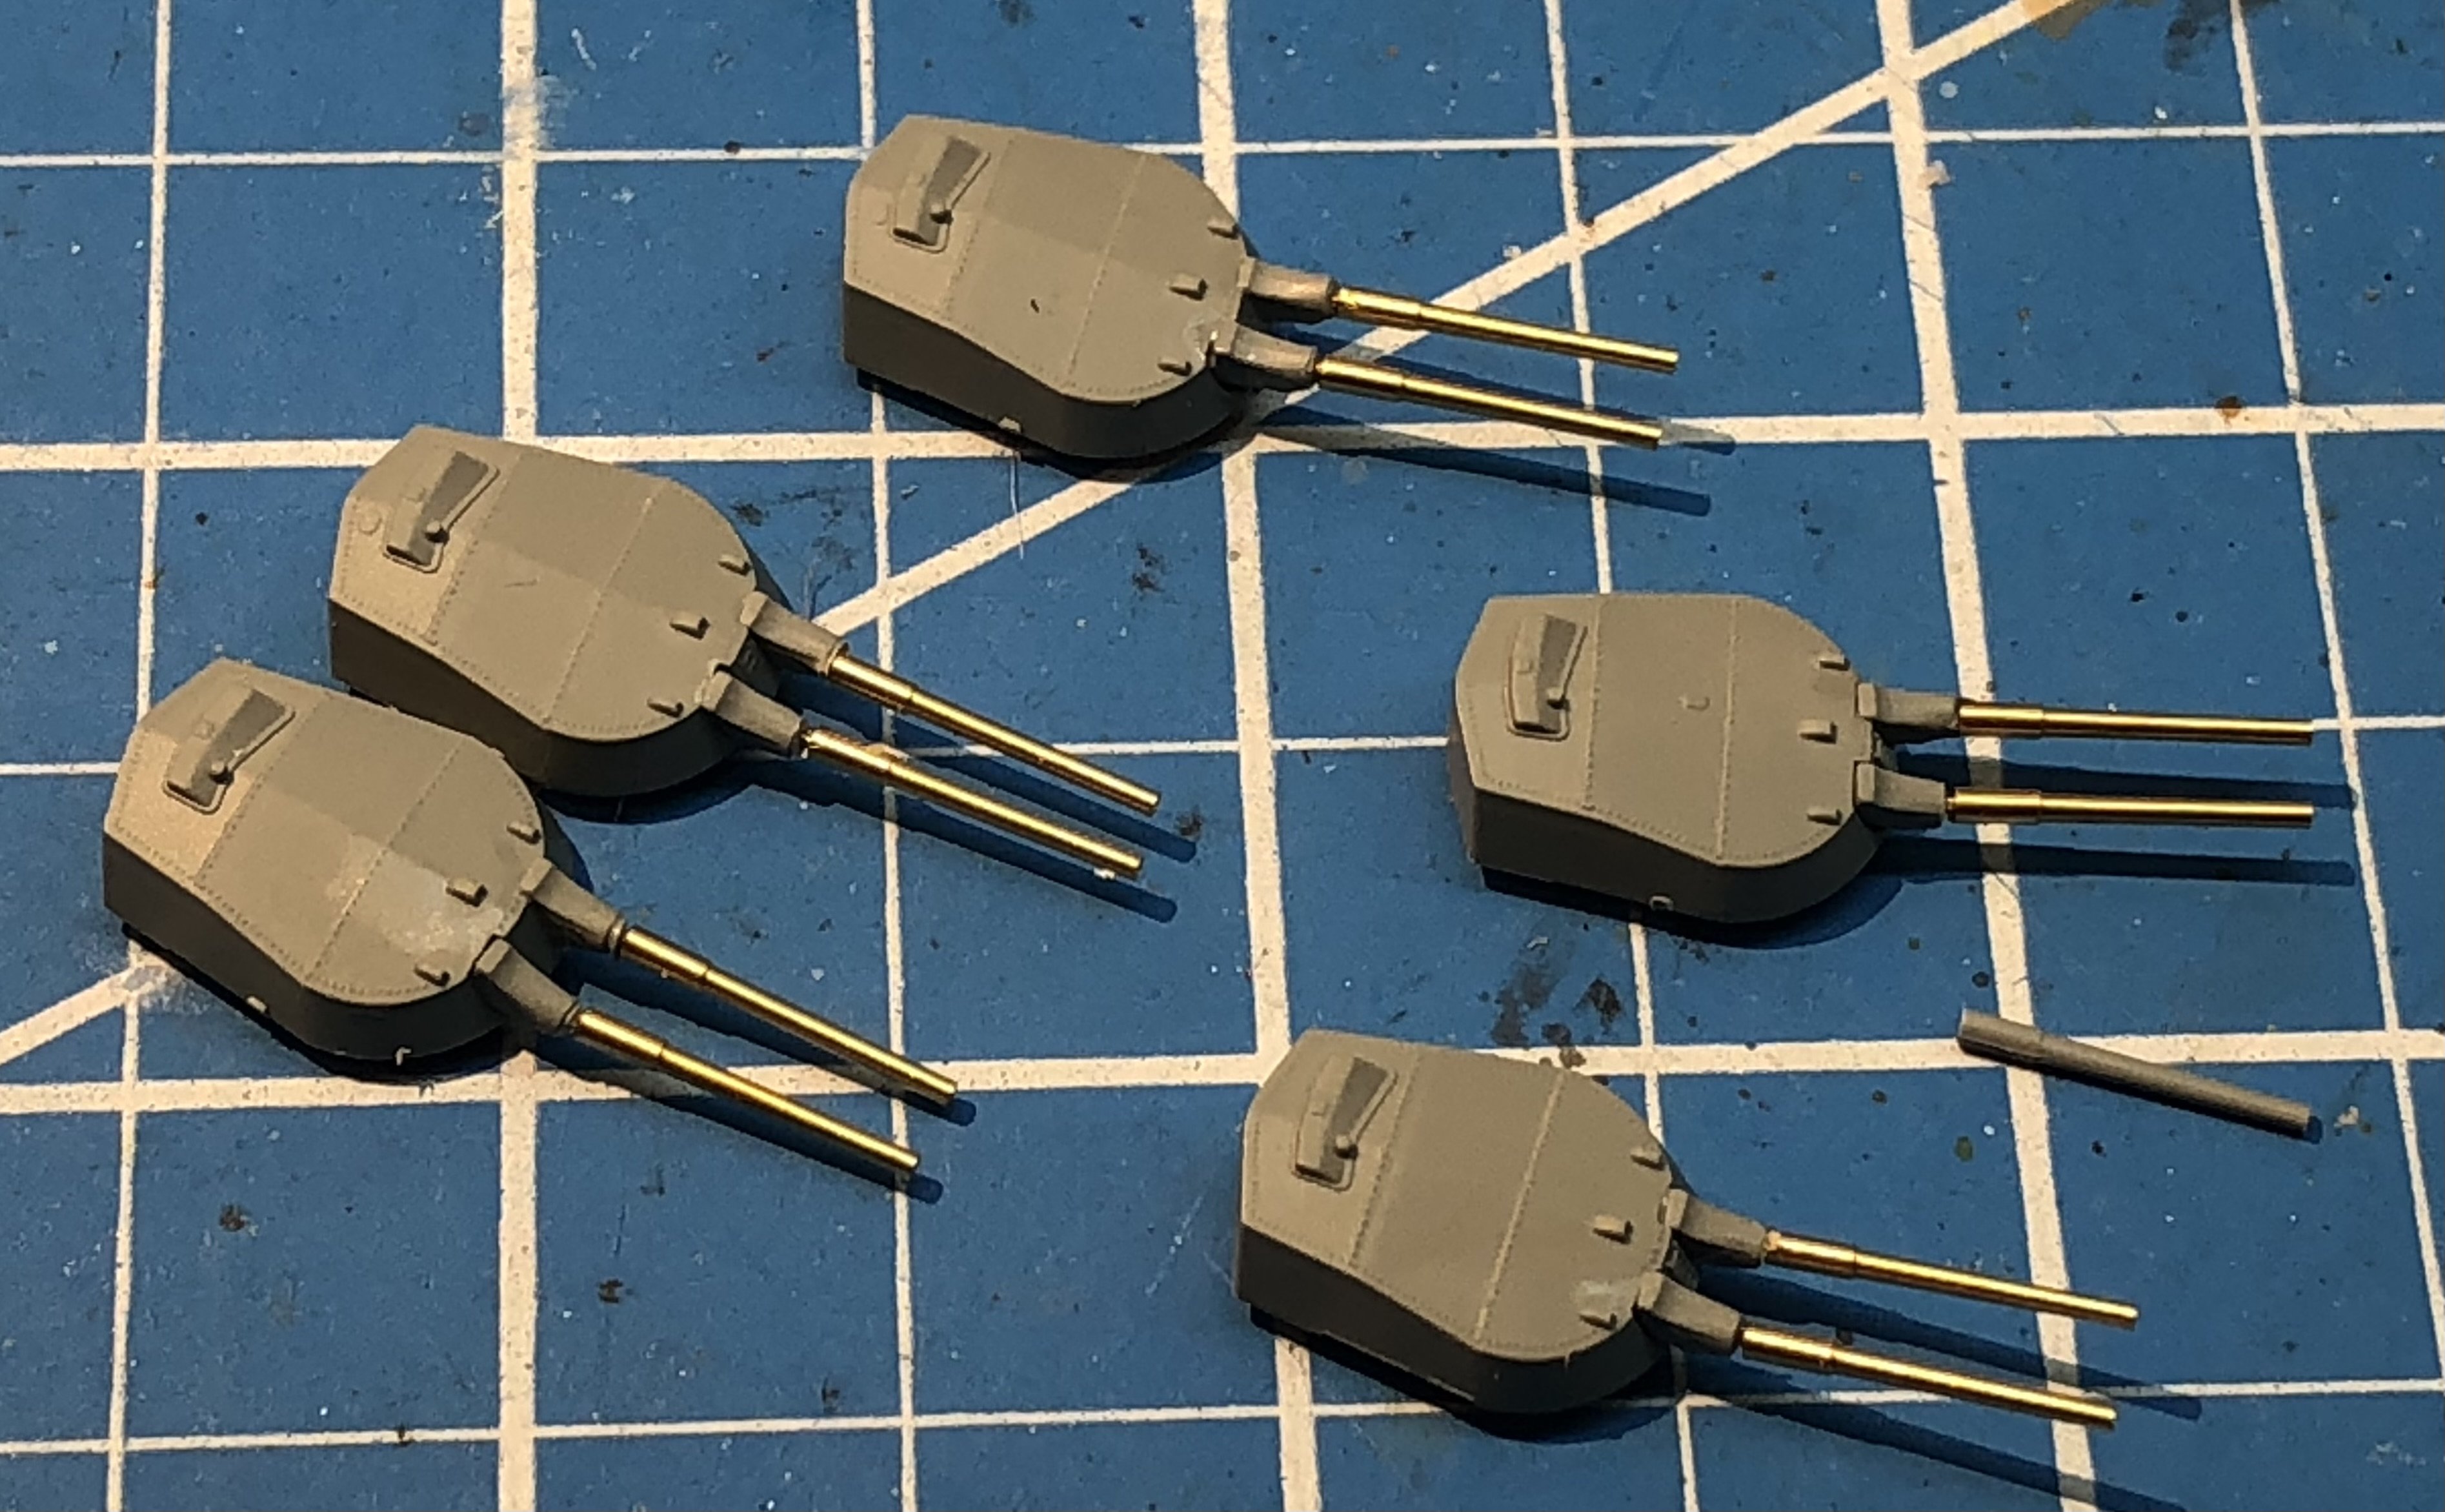
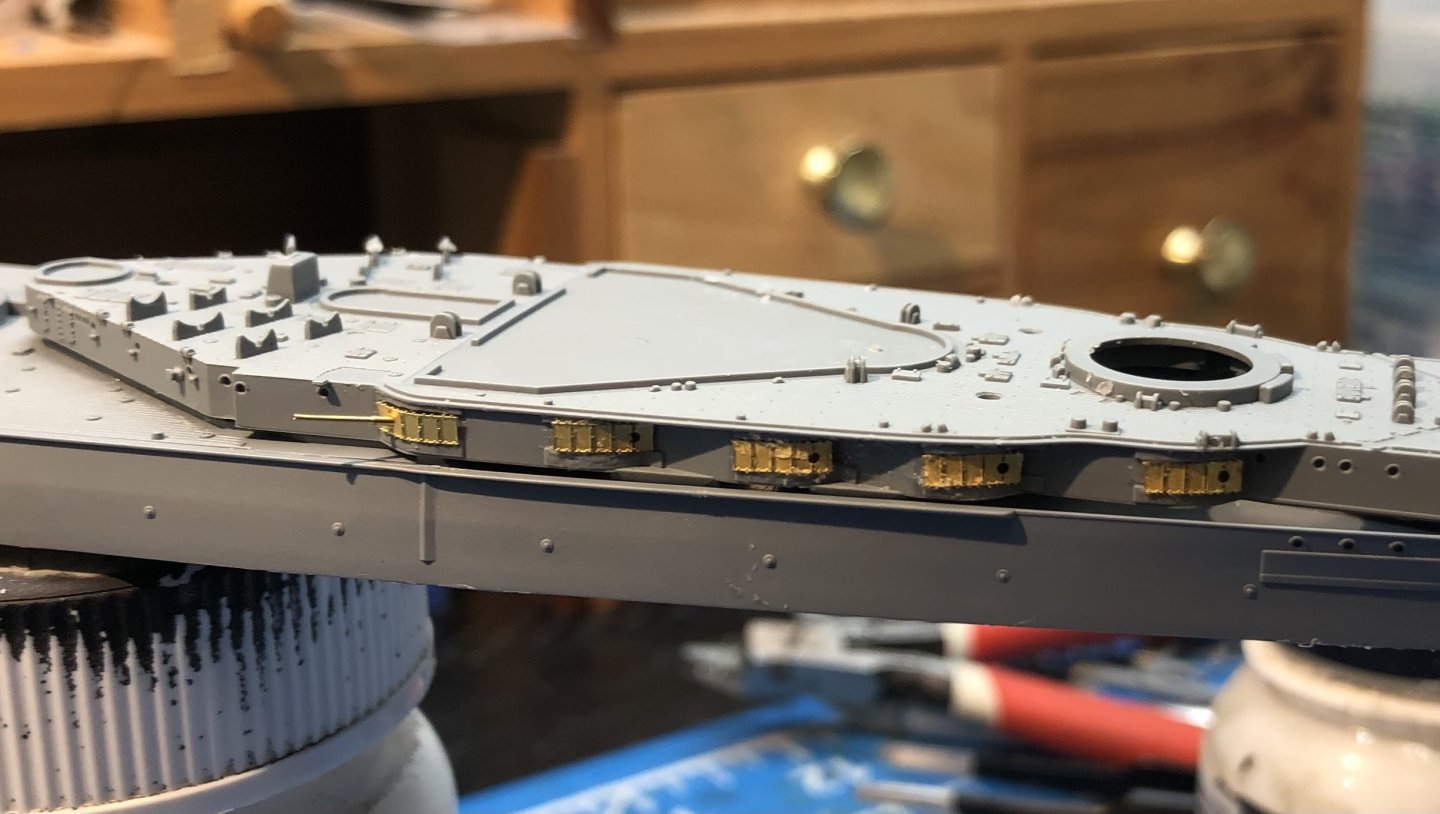
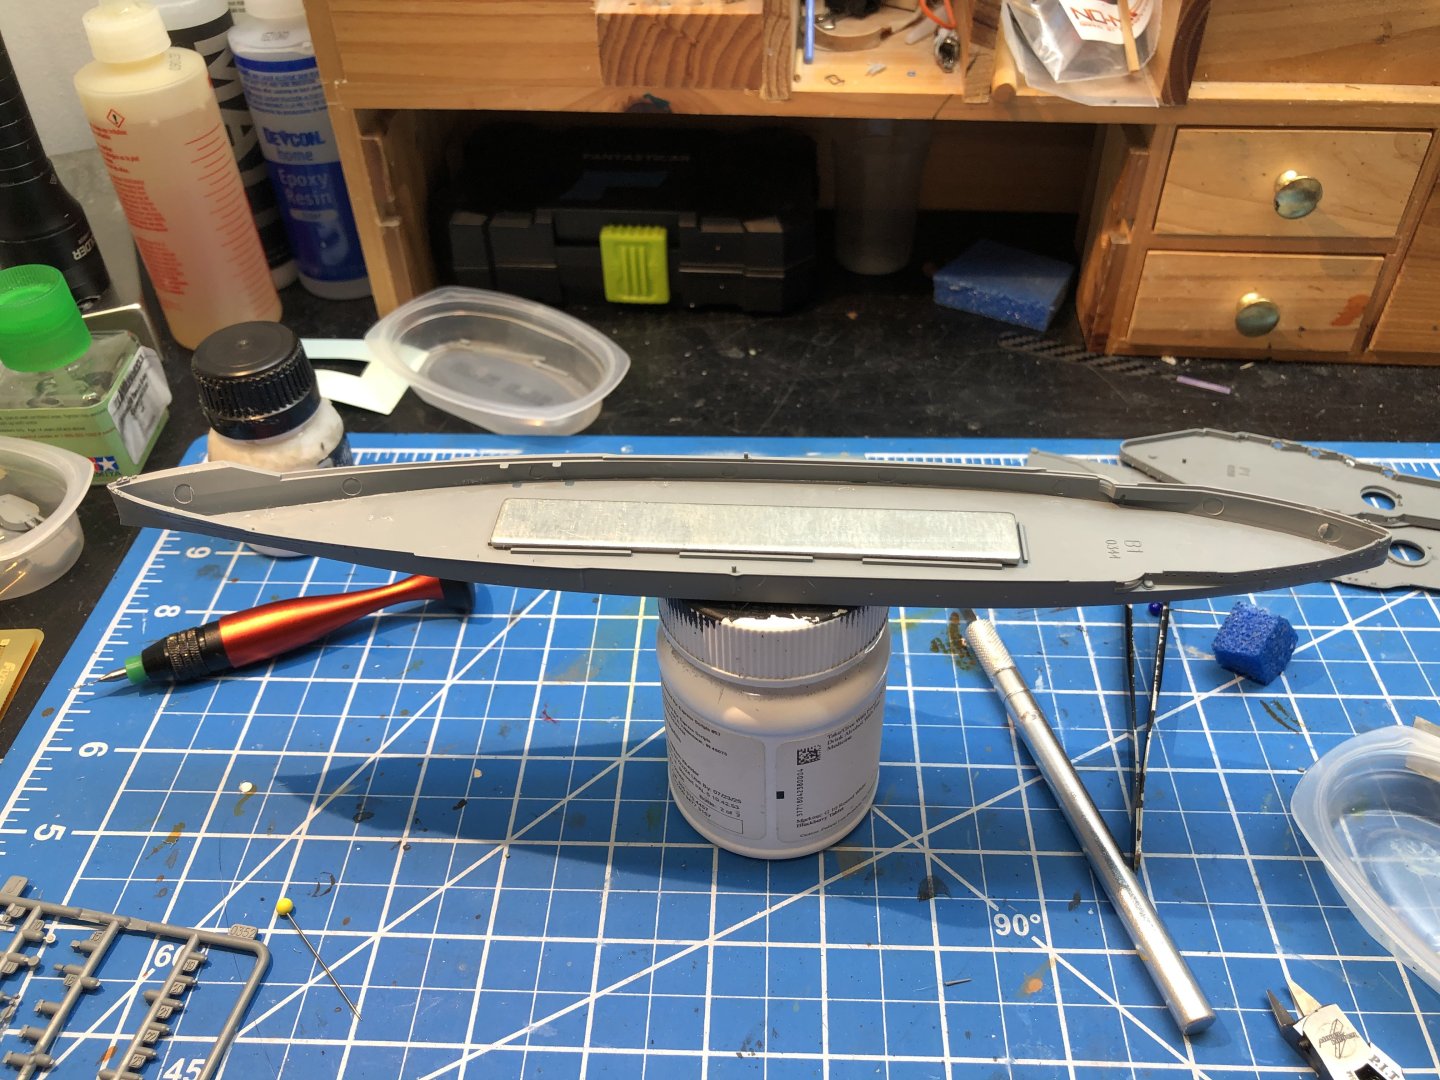
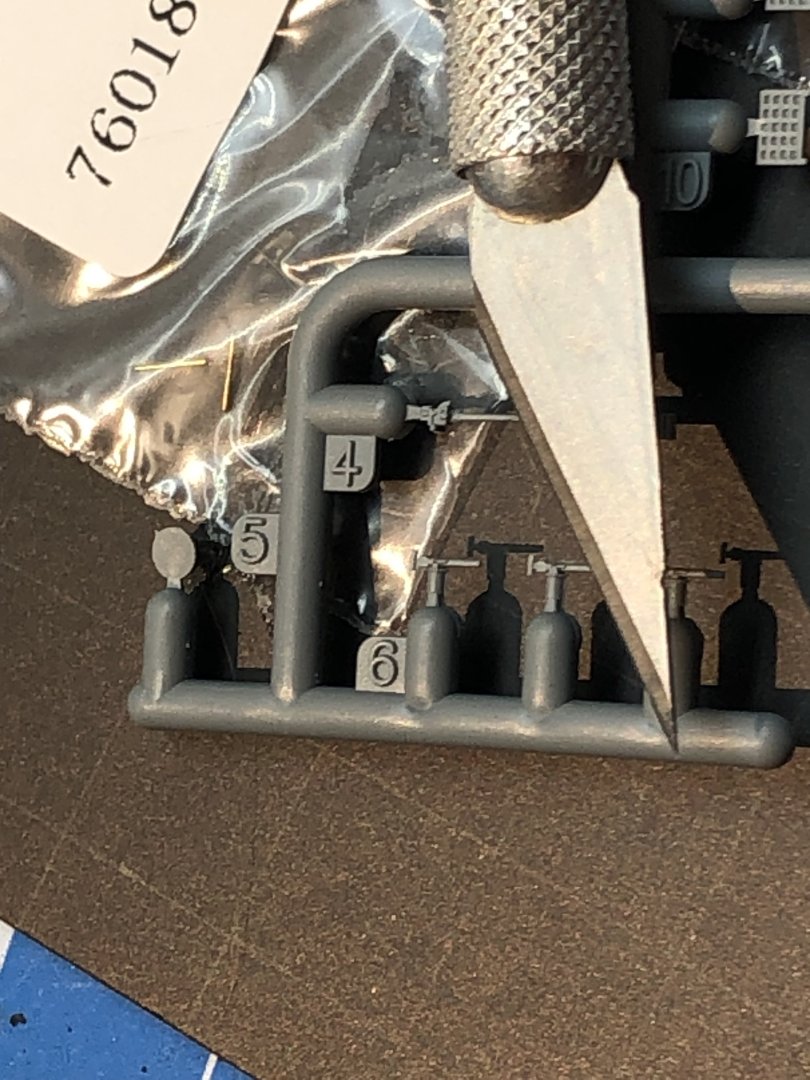
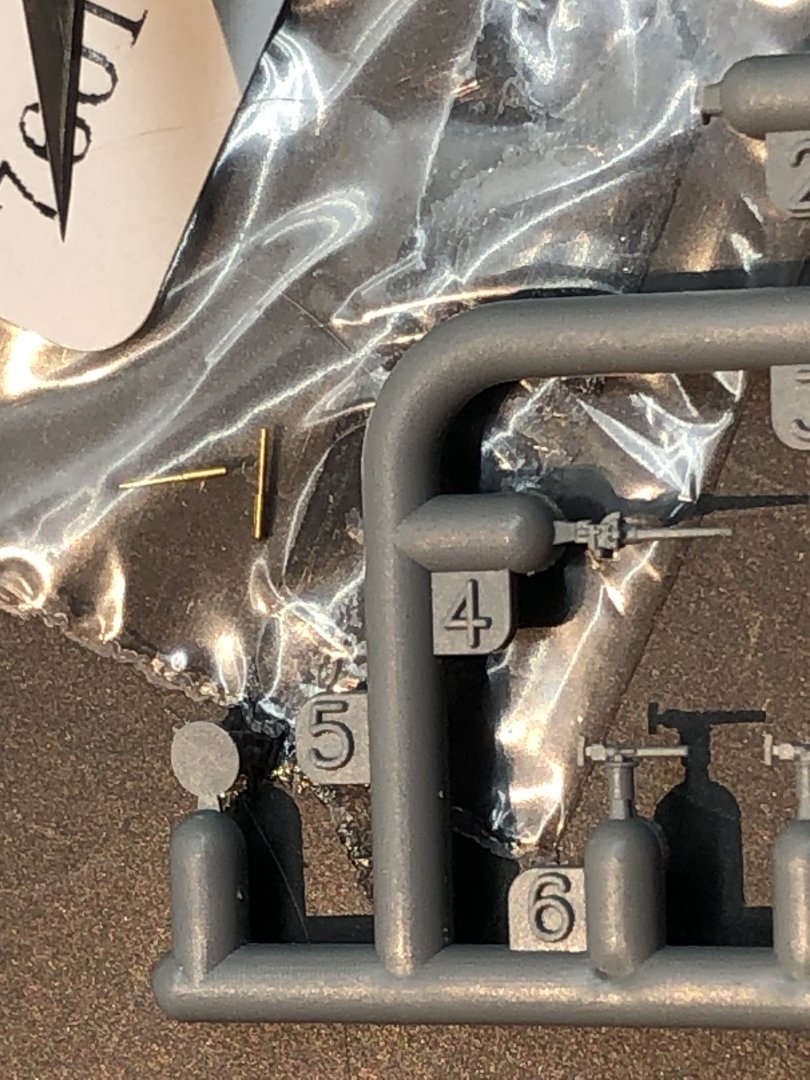
The first hesitant steps into the build. The hull halves have been fitted to the waterline base. It took a bit of fiddling to get the two halves lined up properly on the base but by gluing the bows together and then inserting the base and gluing it up a short length at a time it went together fine and everything fitted together without gaps. I’ve spent a fair amount of time working out the most effective build sequence. While I have been pondering I decided to tackle the metal gun barrels. I always get a bit nervous about this step. I find it hard to get the barrels correctly aligned after adding the metal ones. The plastic ones look quite good until you look at the brass ones so I took a deep breath and started snipping off the plastic ones. The 13.5 inch guns went quite well. A plastic barrel is shown for comparison So I contemplated the barbette guns. Again the metal does look better so I did some irretrievable snipping I used a dressmakers pin to mark the spot to drill and stop the drill skipping and after a few pin pricks I got them done. There are six flavors of barbette guns hence the numbered spots on the double sided tape. The brass barrel and the plastic ones are shown by the knife blade. I decided that was the limit of my skill for this and decided to leave the 3 pounders well alone. They are tiny. The plastic parts are numbers 4 and 5 on the sprue and the brass barrels are in the plastic bag. The triangle at top left is the tip of a #11 blade. first photo etch has been added. The doors for the barbettes are provided in two versions. I’m not sure quite what the difference is between them but the first one was duly added Both sides are now complete and I added the first barbette It does look nice enough to justify the extra work. Slowly forward is going to be the nature of this build. Thanks for looking in, the likes and all the kind comments. Alan


-
Gosh Rob, you really push the frontiers. It’s completely worth it and us mortals look on in amazement. alan
-
Thank you Per, it’s a great looking kit, I hope I can live up to it. alan
-
Welcome Ken. Some of that detail looks a bit intricate. I’m busy reading and comparing the instructions for the plastic and the upgrade. If it’s “ measure twice and cut once” this definitely “ read the instructions ten times and glue once” alan
-
I’m glad you are here Andrew and I hope this will be an enjoyable read. I’m officially in over my head now. alan
-
Thank you OC. I think this will be quite a long build so I hope you enjoy it. The plastic details are lovely. The judgement will be with using the PE, the plastic is already quite good. At least this kit has the option to drop back to the plastic if the PE gets too difficult. With Derfflinger there was no alternative to the PE. So this kit has the PE instructions separately so you have to read two sets of instructions in parallel. I think I’m going to build up as much PE as I can before assembling the major elements. alan
-
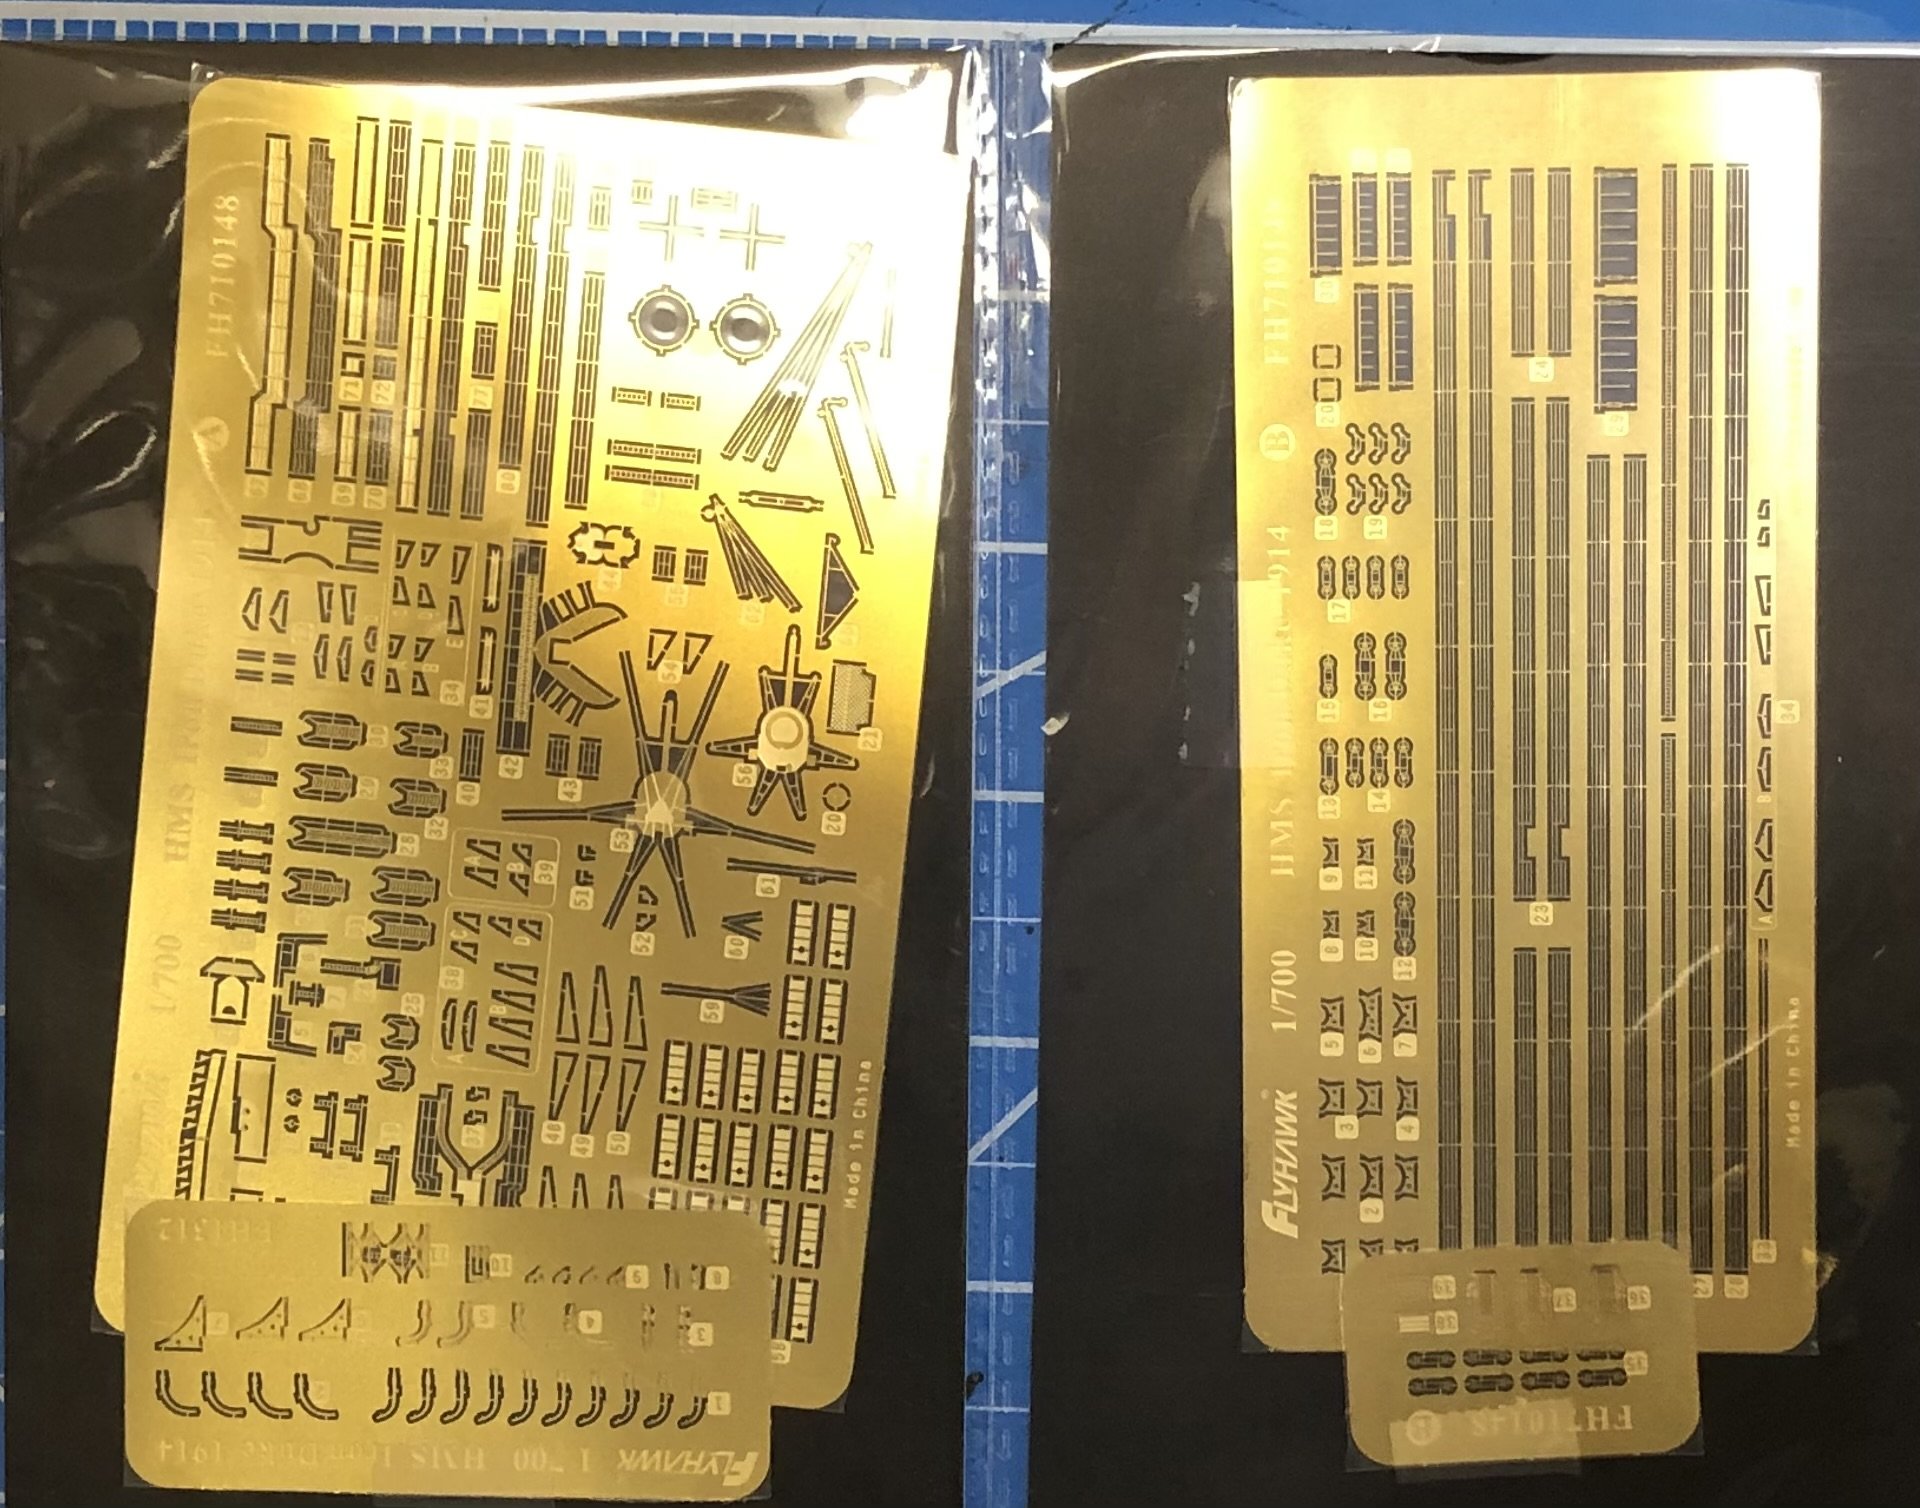
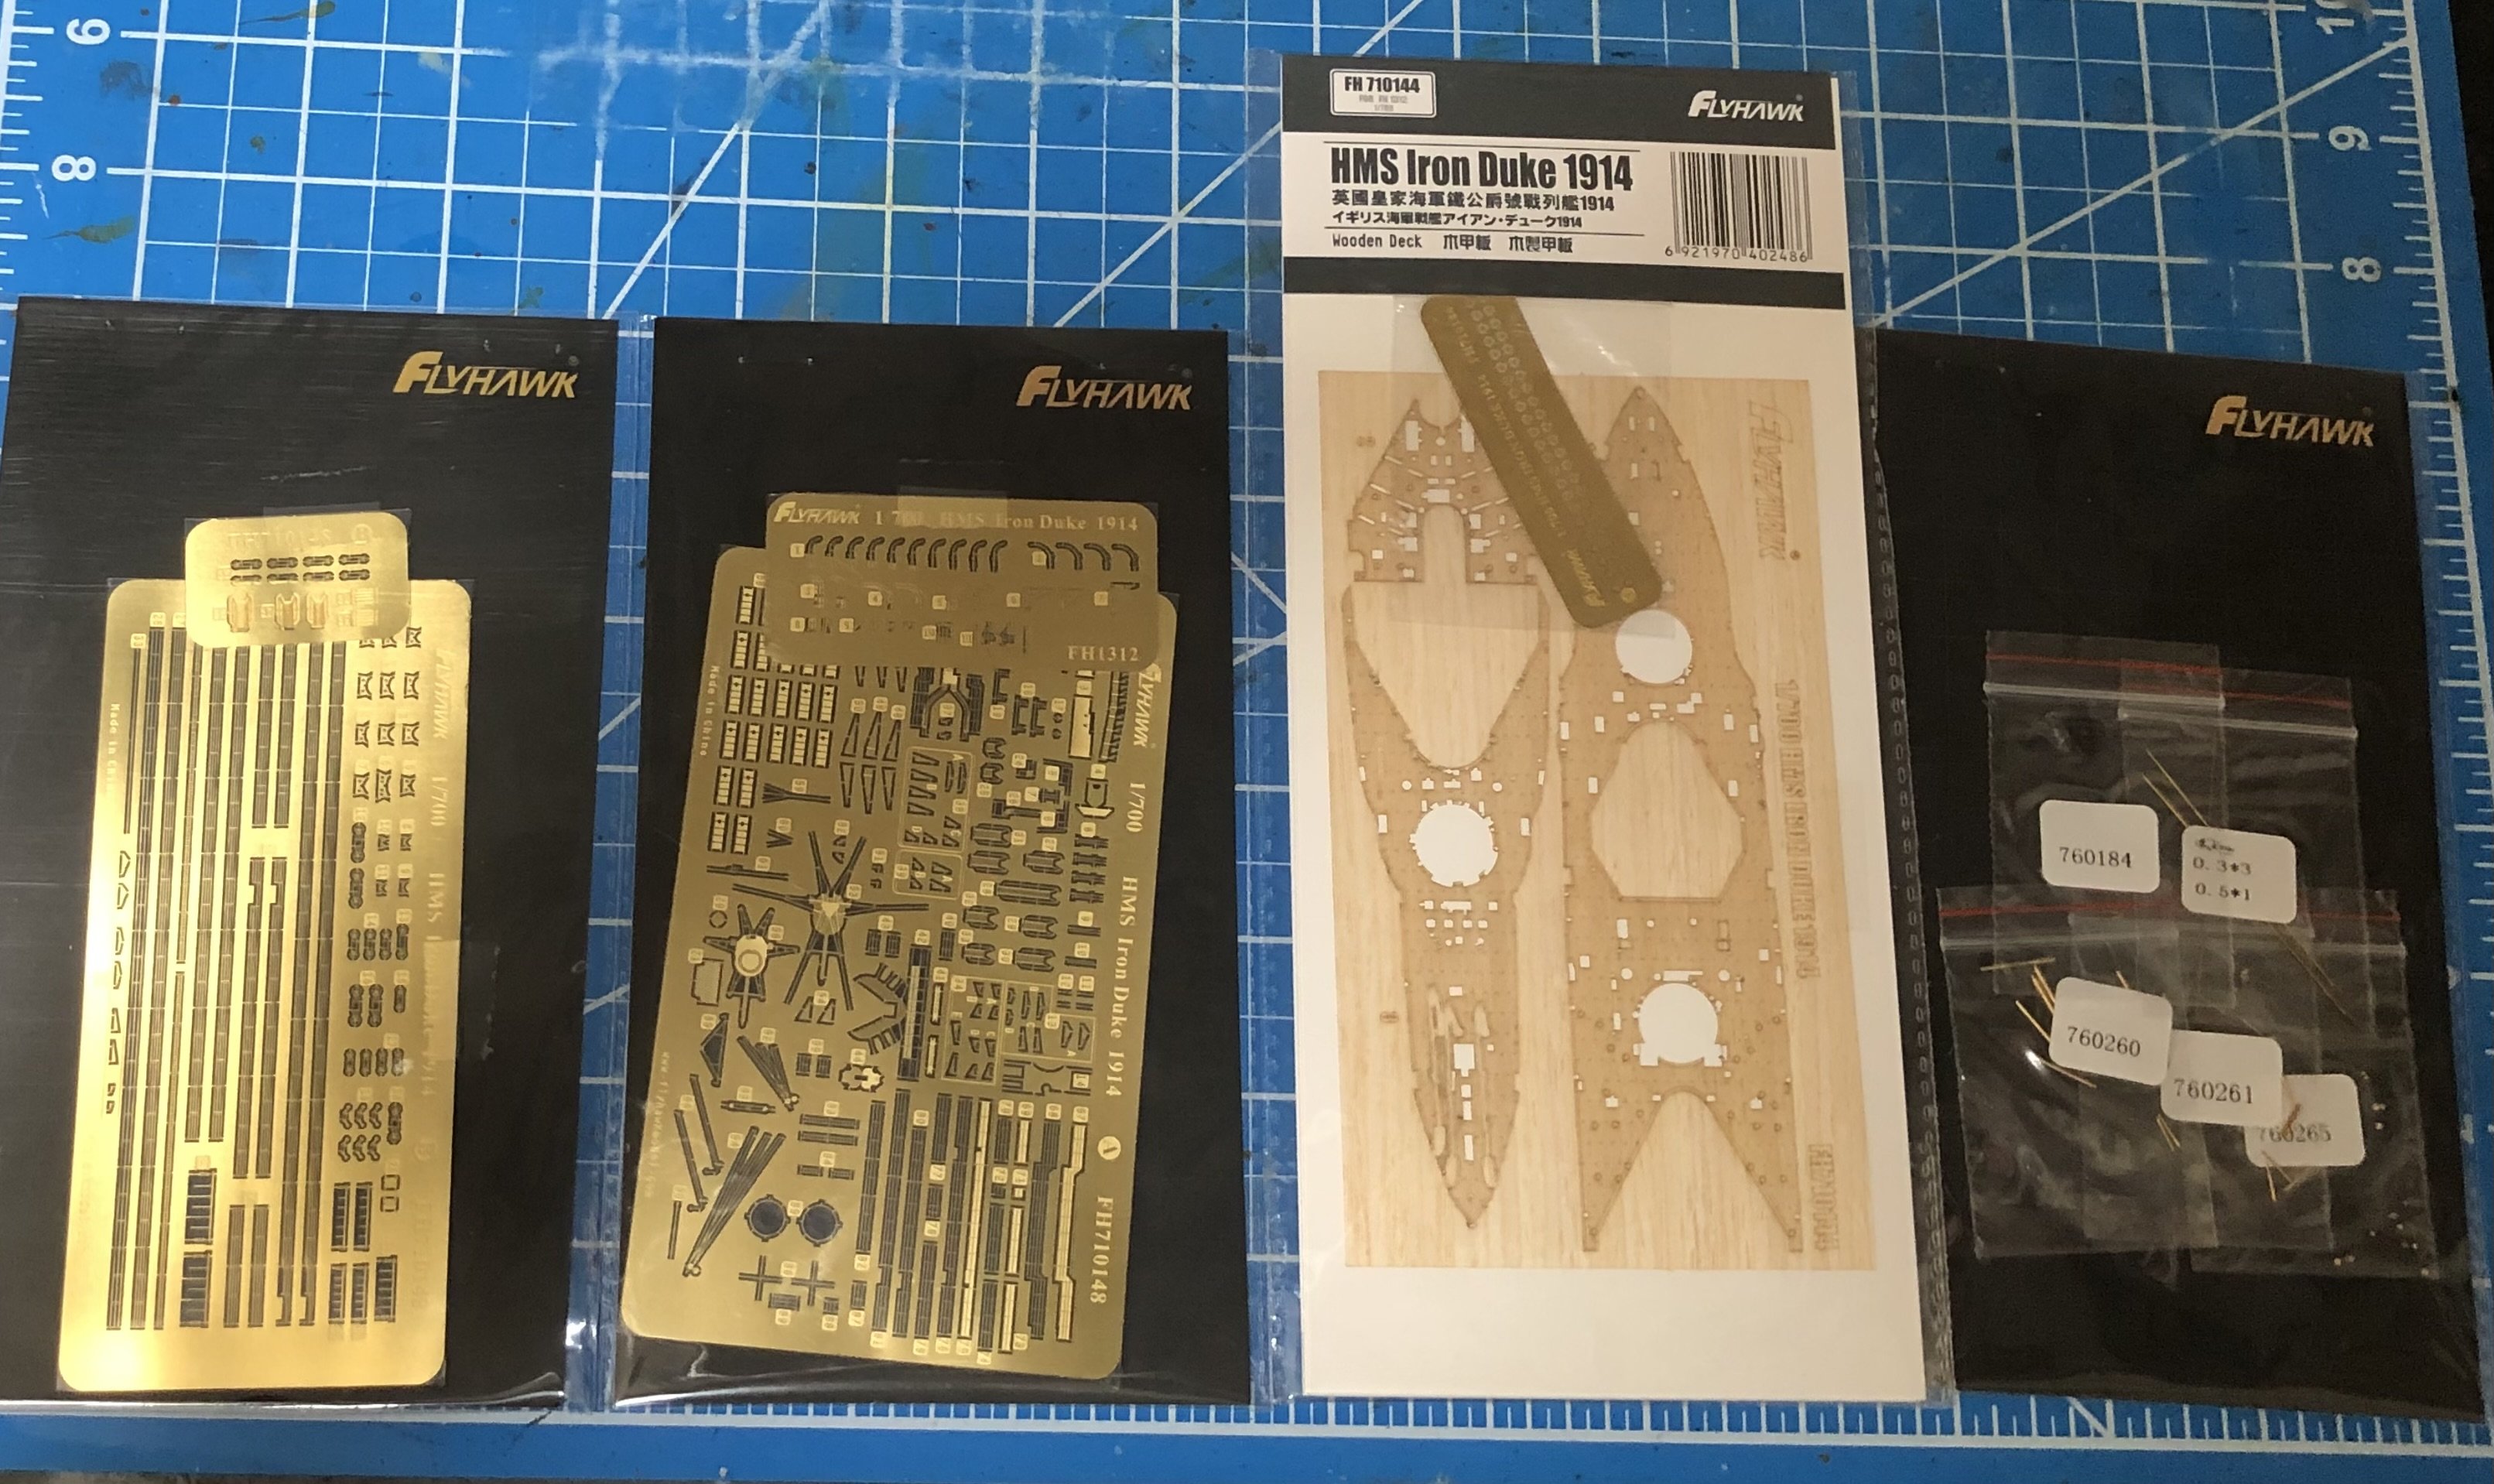
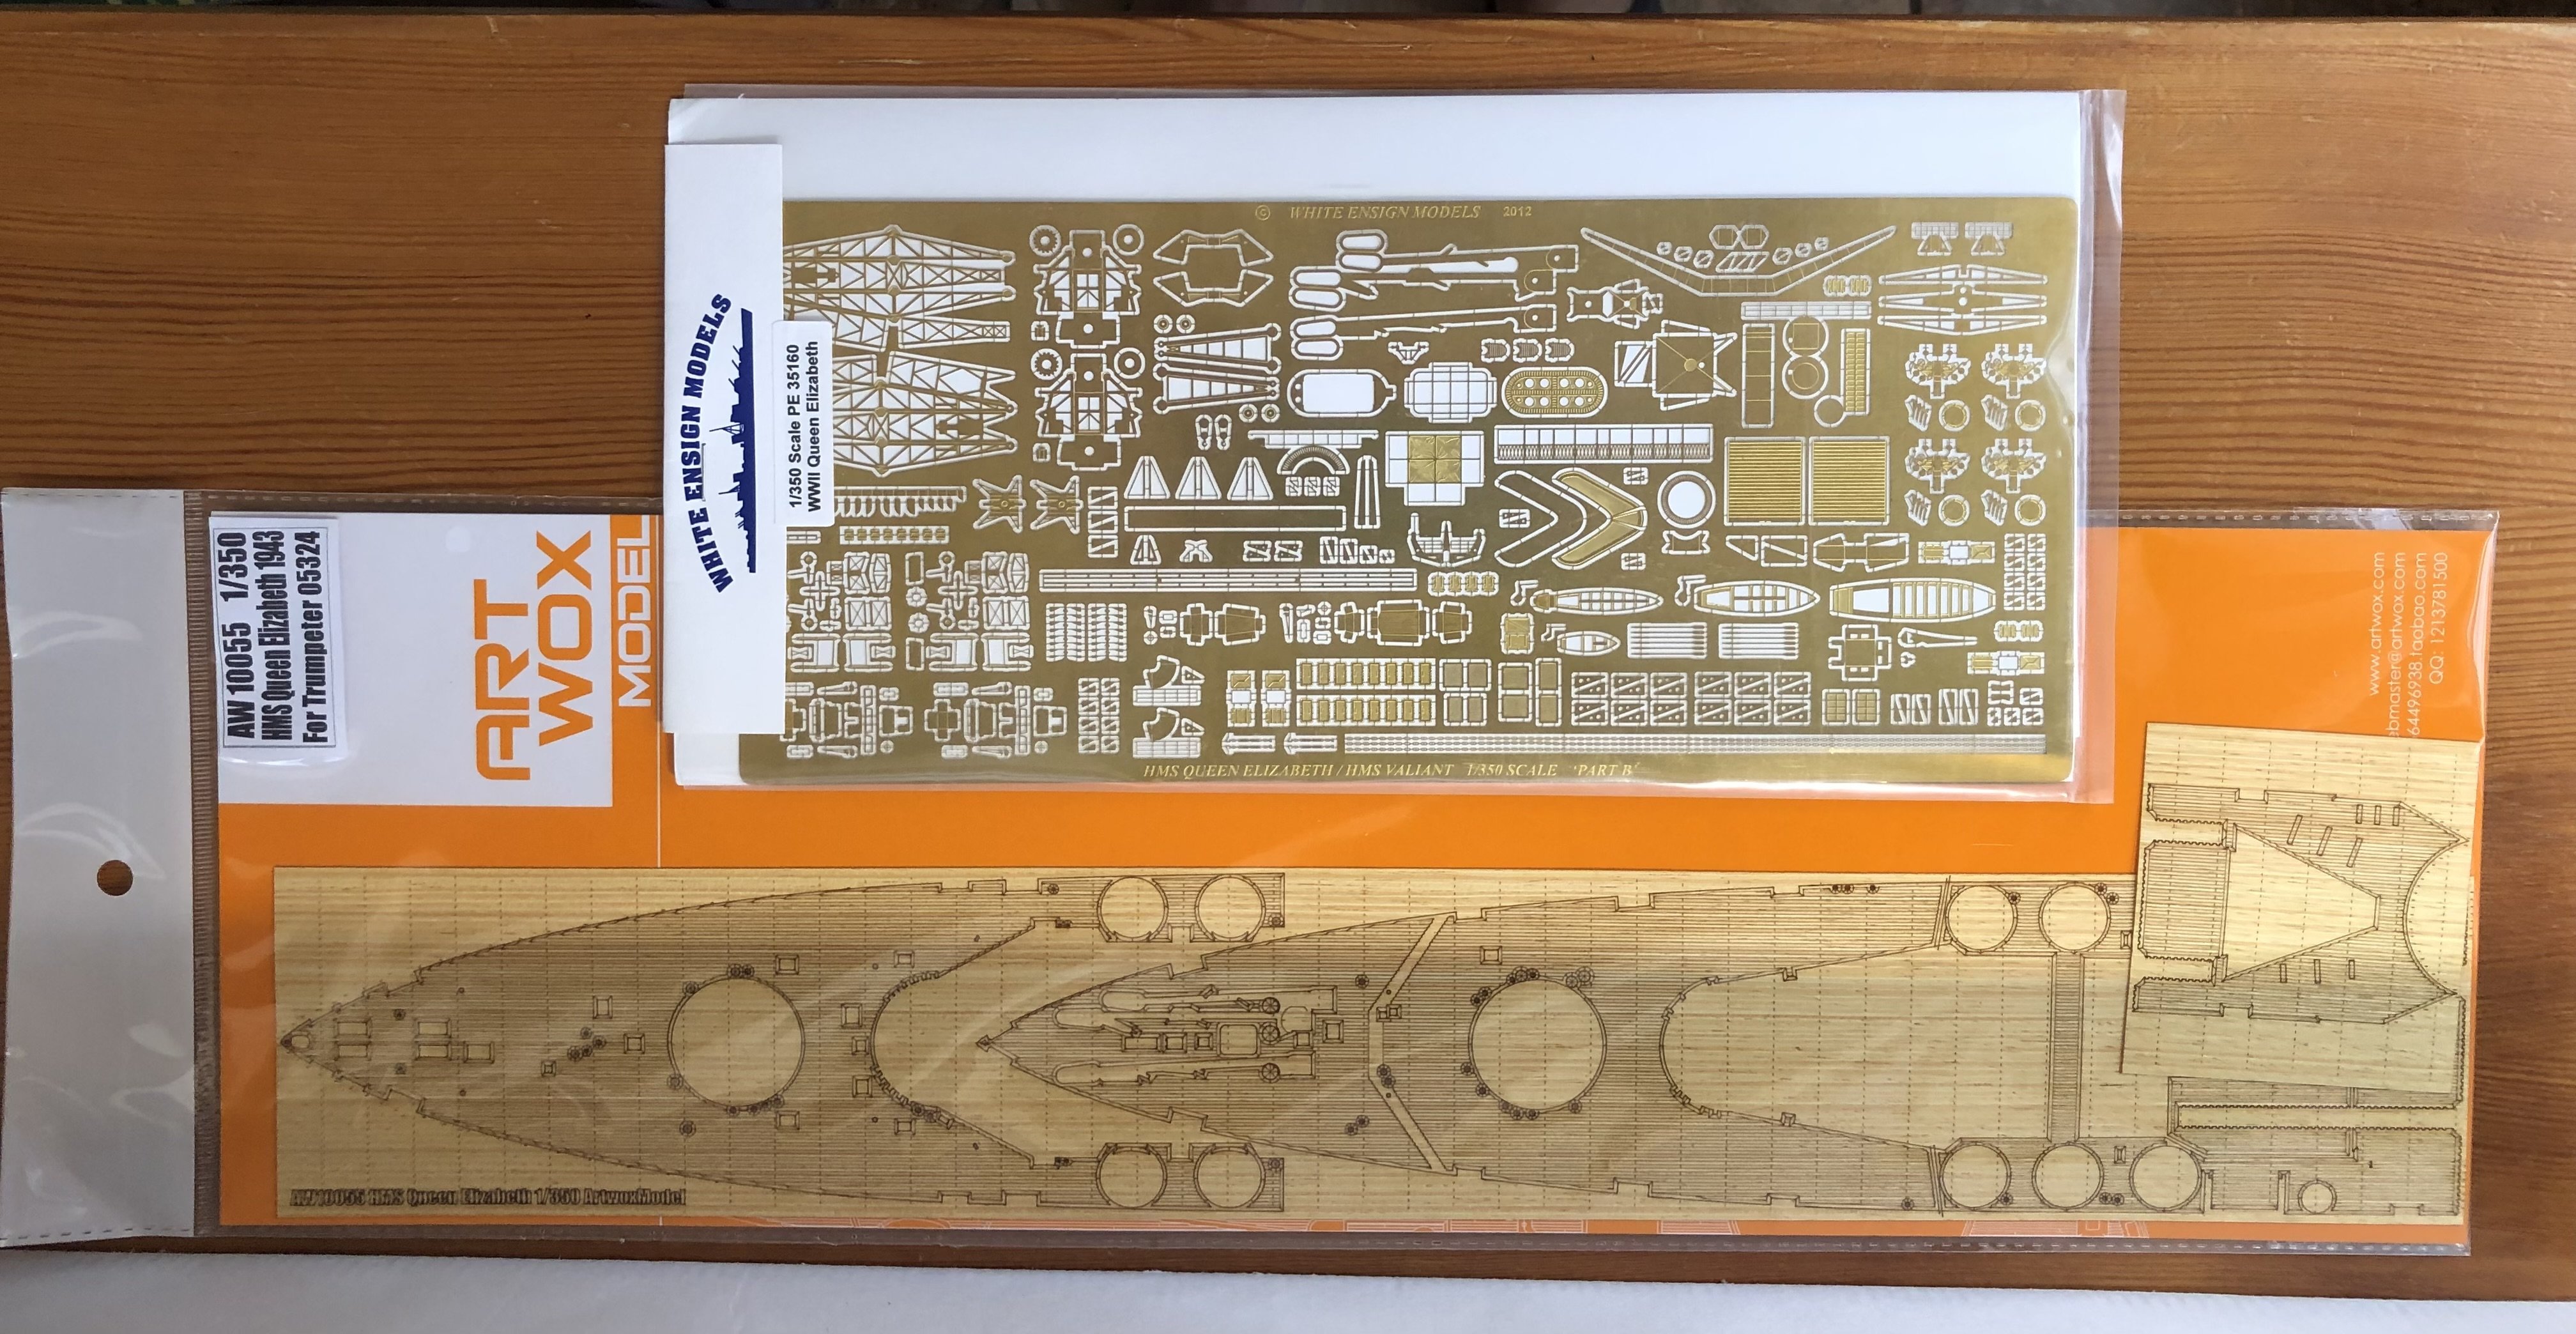
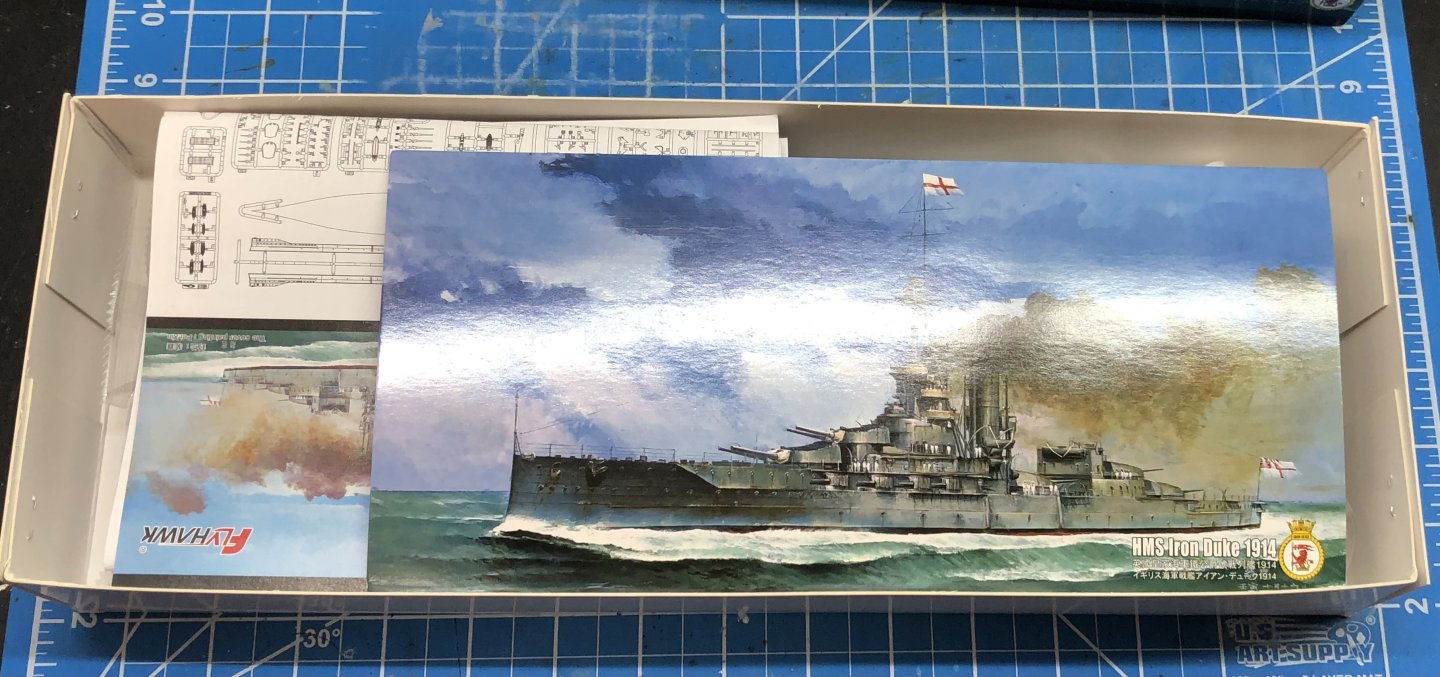
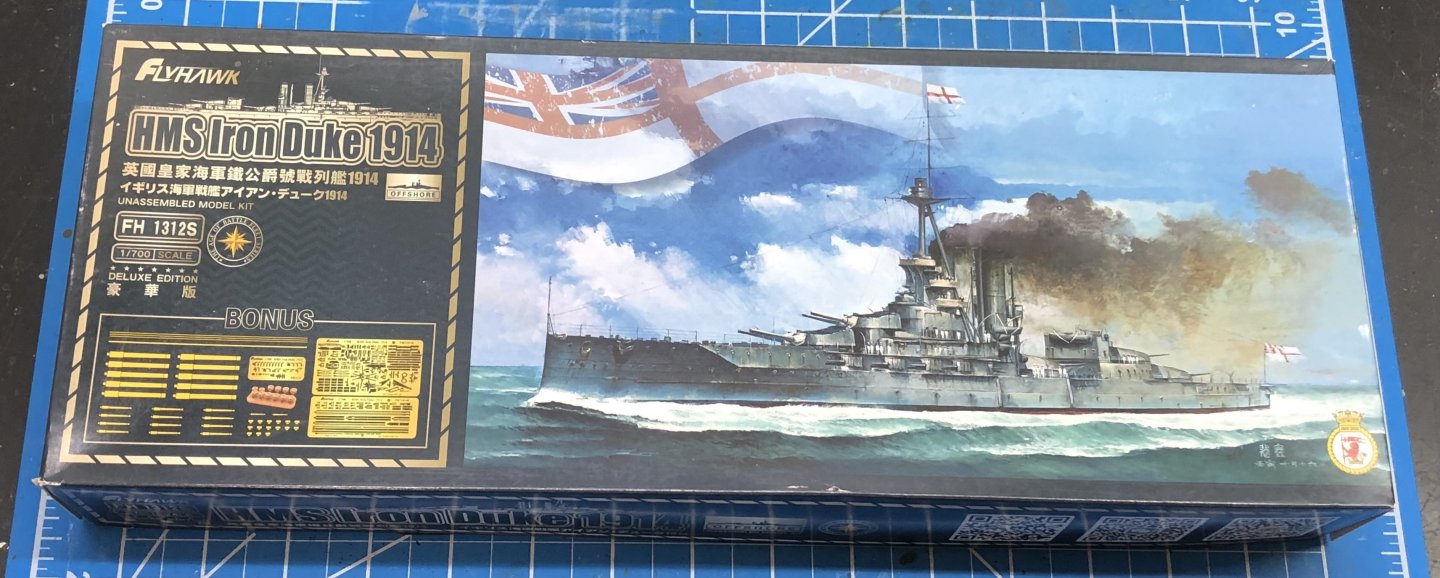
The potential for another brush with insanity. Another wonderful Flyhawk kit with lots of tiny details and extensive photo etch. The kit comes with photo etch, metal gun barrels and some brass rod for the masts and some resin bollards. The box is nicely packed with a lot of material and an illustrated card with a summary of the ship’s career. I added the wooden deck but I think I will see if I can pull off a decent painted version first. It removes the long term worry about the wooden decks lifting at a later stage. The photo etch is comprehensive and intricate. I’m not sure how much I will use. Some of the plastic pieces are well detailed and delicate and also have a better sense of three dimensions. Similarly the metal gun barrels. The metal barrels for the 13.5 inch and the 6 inch will definitely be used. I’m not so sure about the 3 inch and 3 pounder ones. There looks like there will be plenty of areas to work on. The plastic is the usual Flyhawk crisply molded dark grey plastic. This should be a lot of fun. Thanks for looking in. Alan


-
Thank you very much OC. It was that pose that made me want to paint this figure. I have trimmed the free end of the rapier to bring it into line with the historical information for length. He’s now tucked away with all the other figures and I hope he behaves himself. alan
-
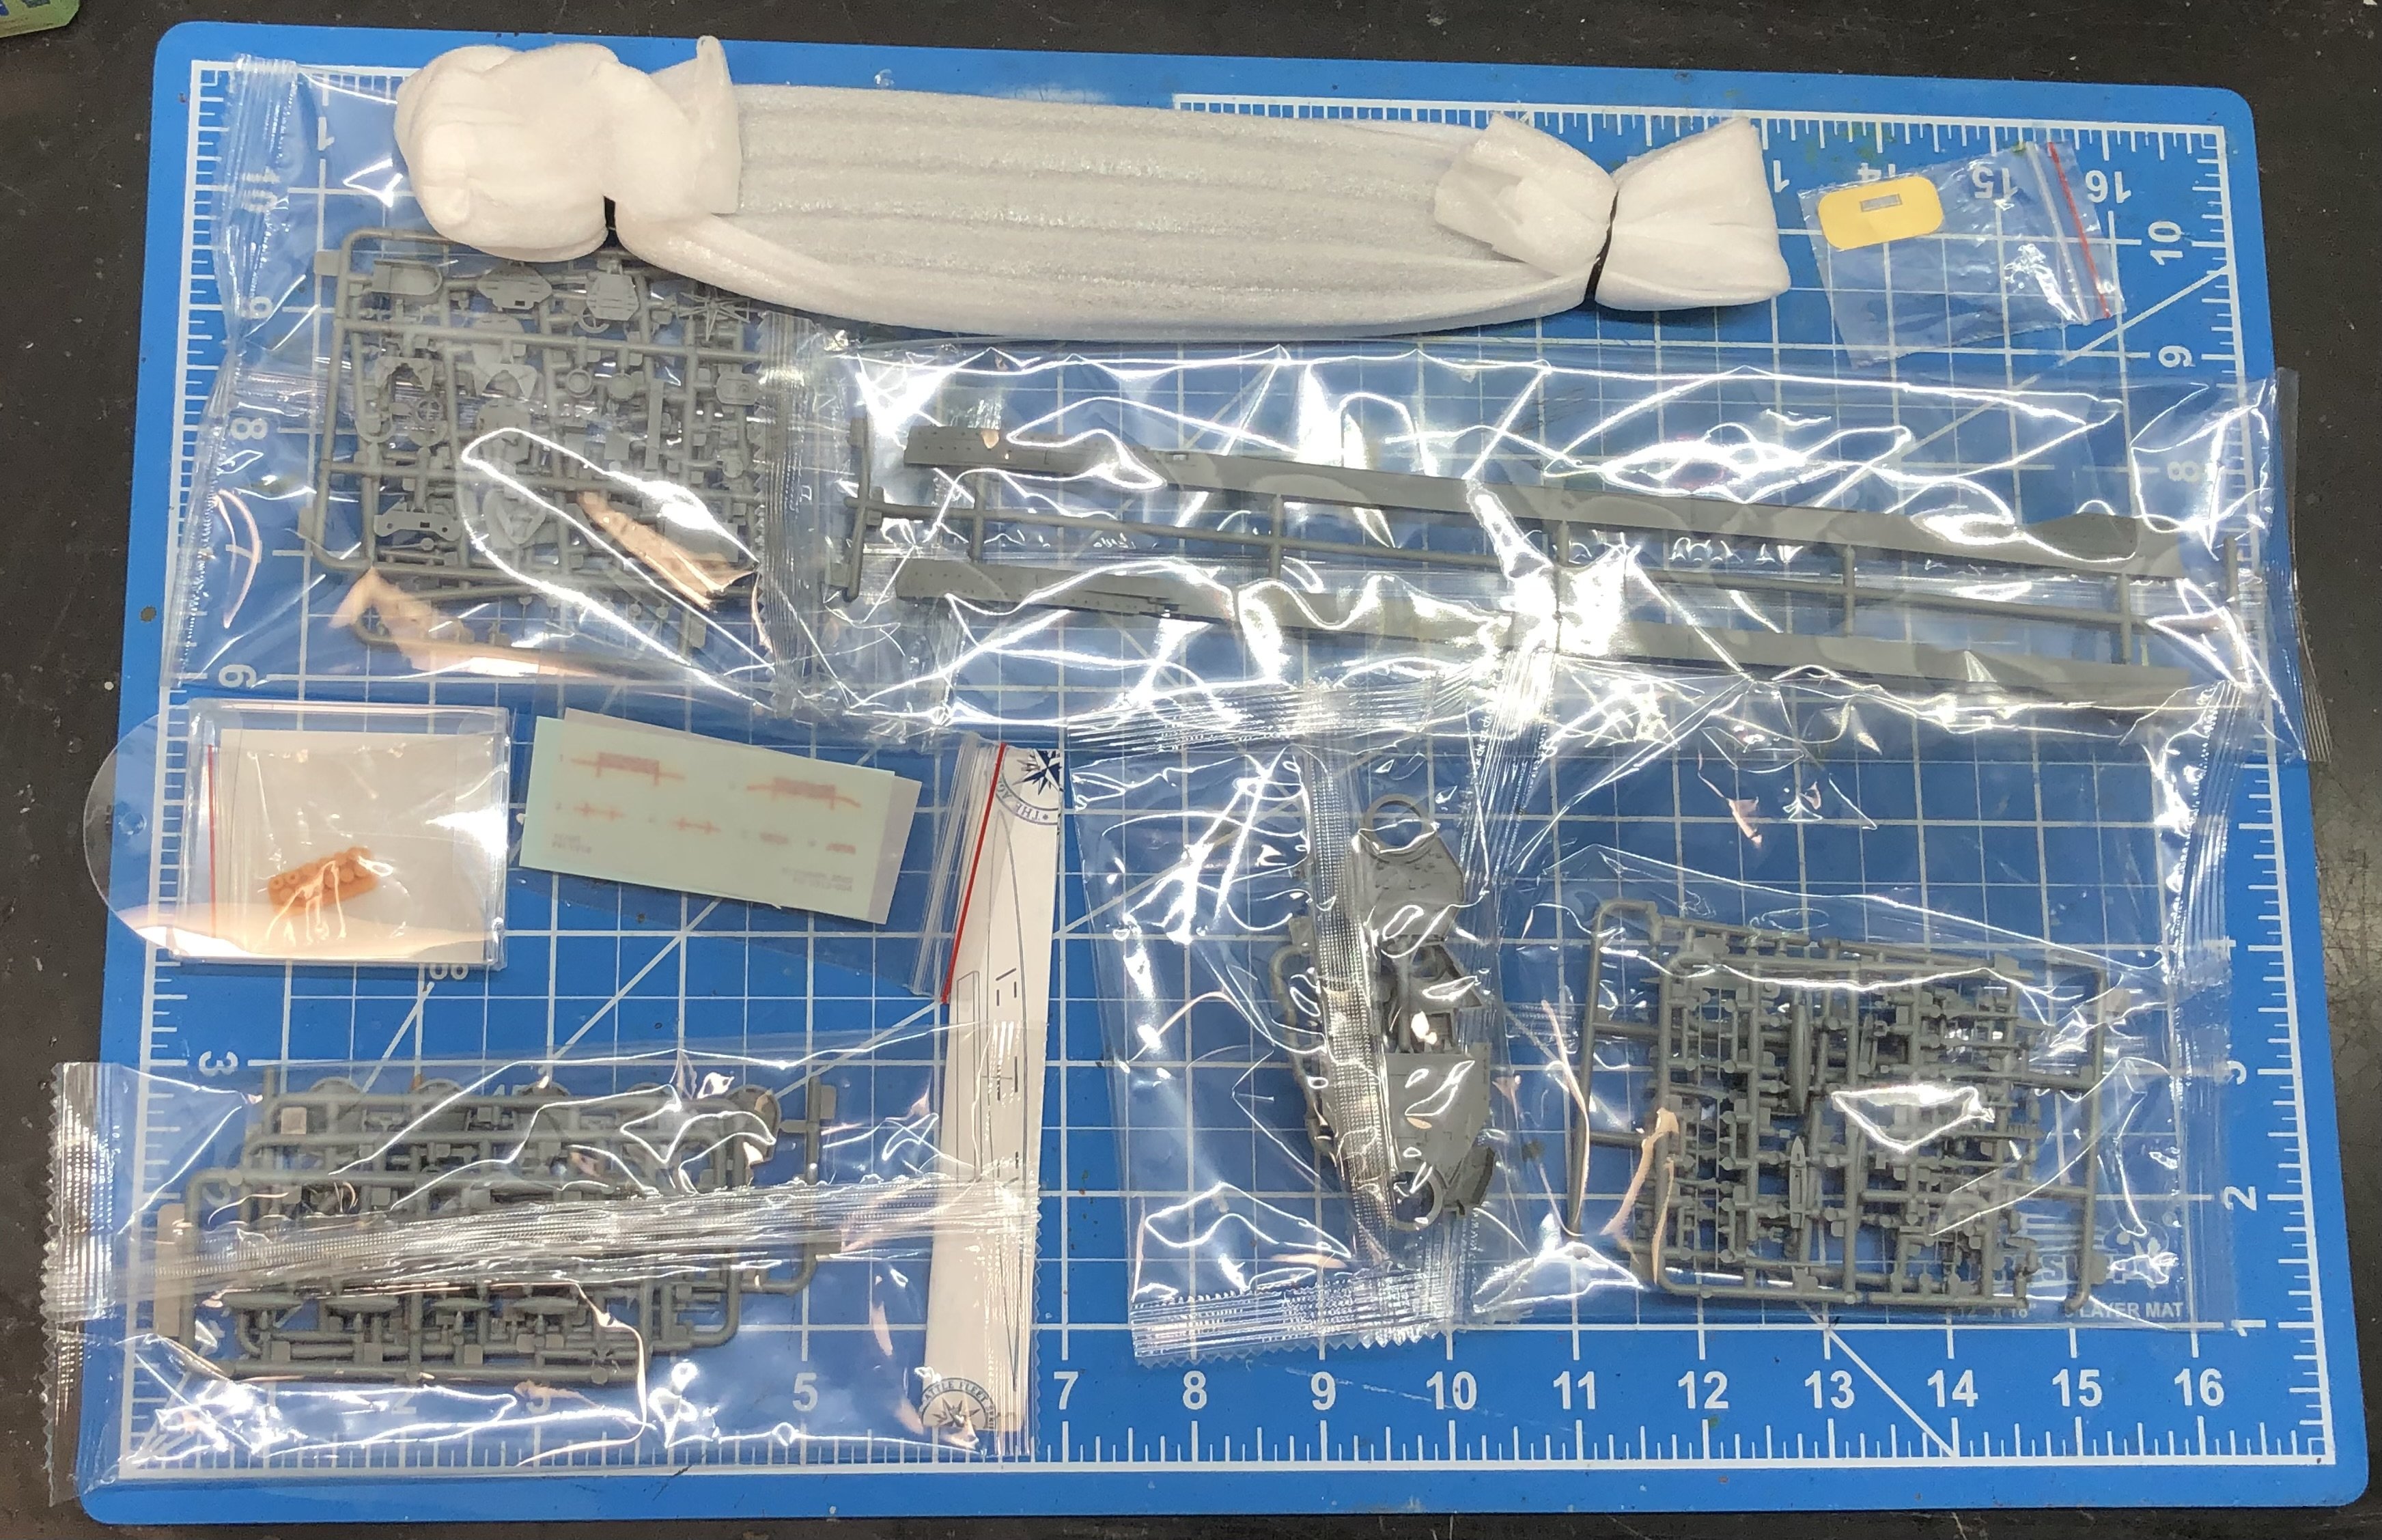
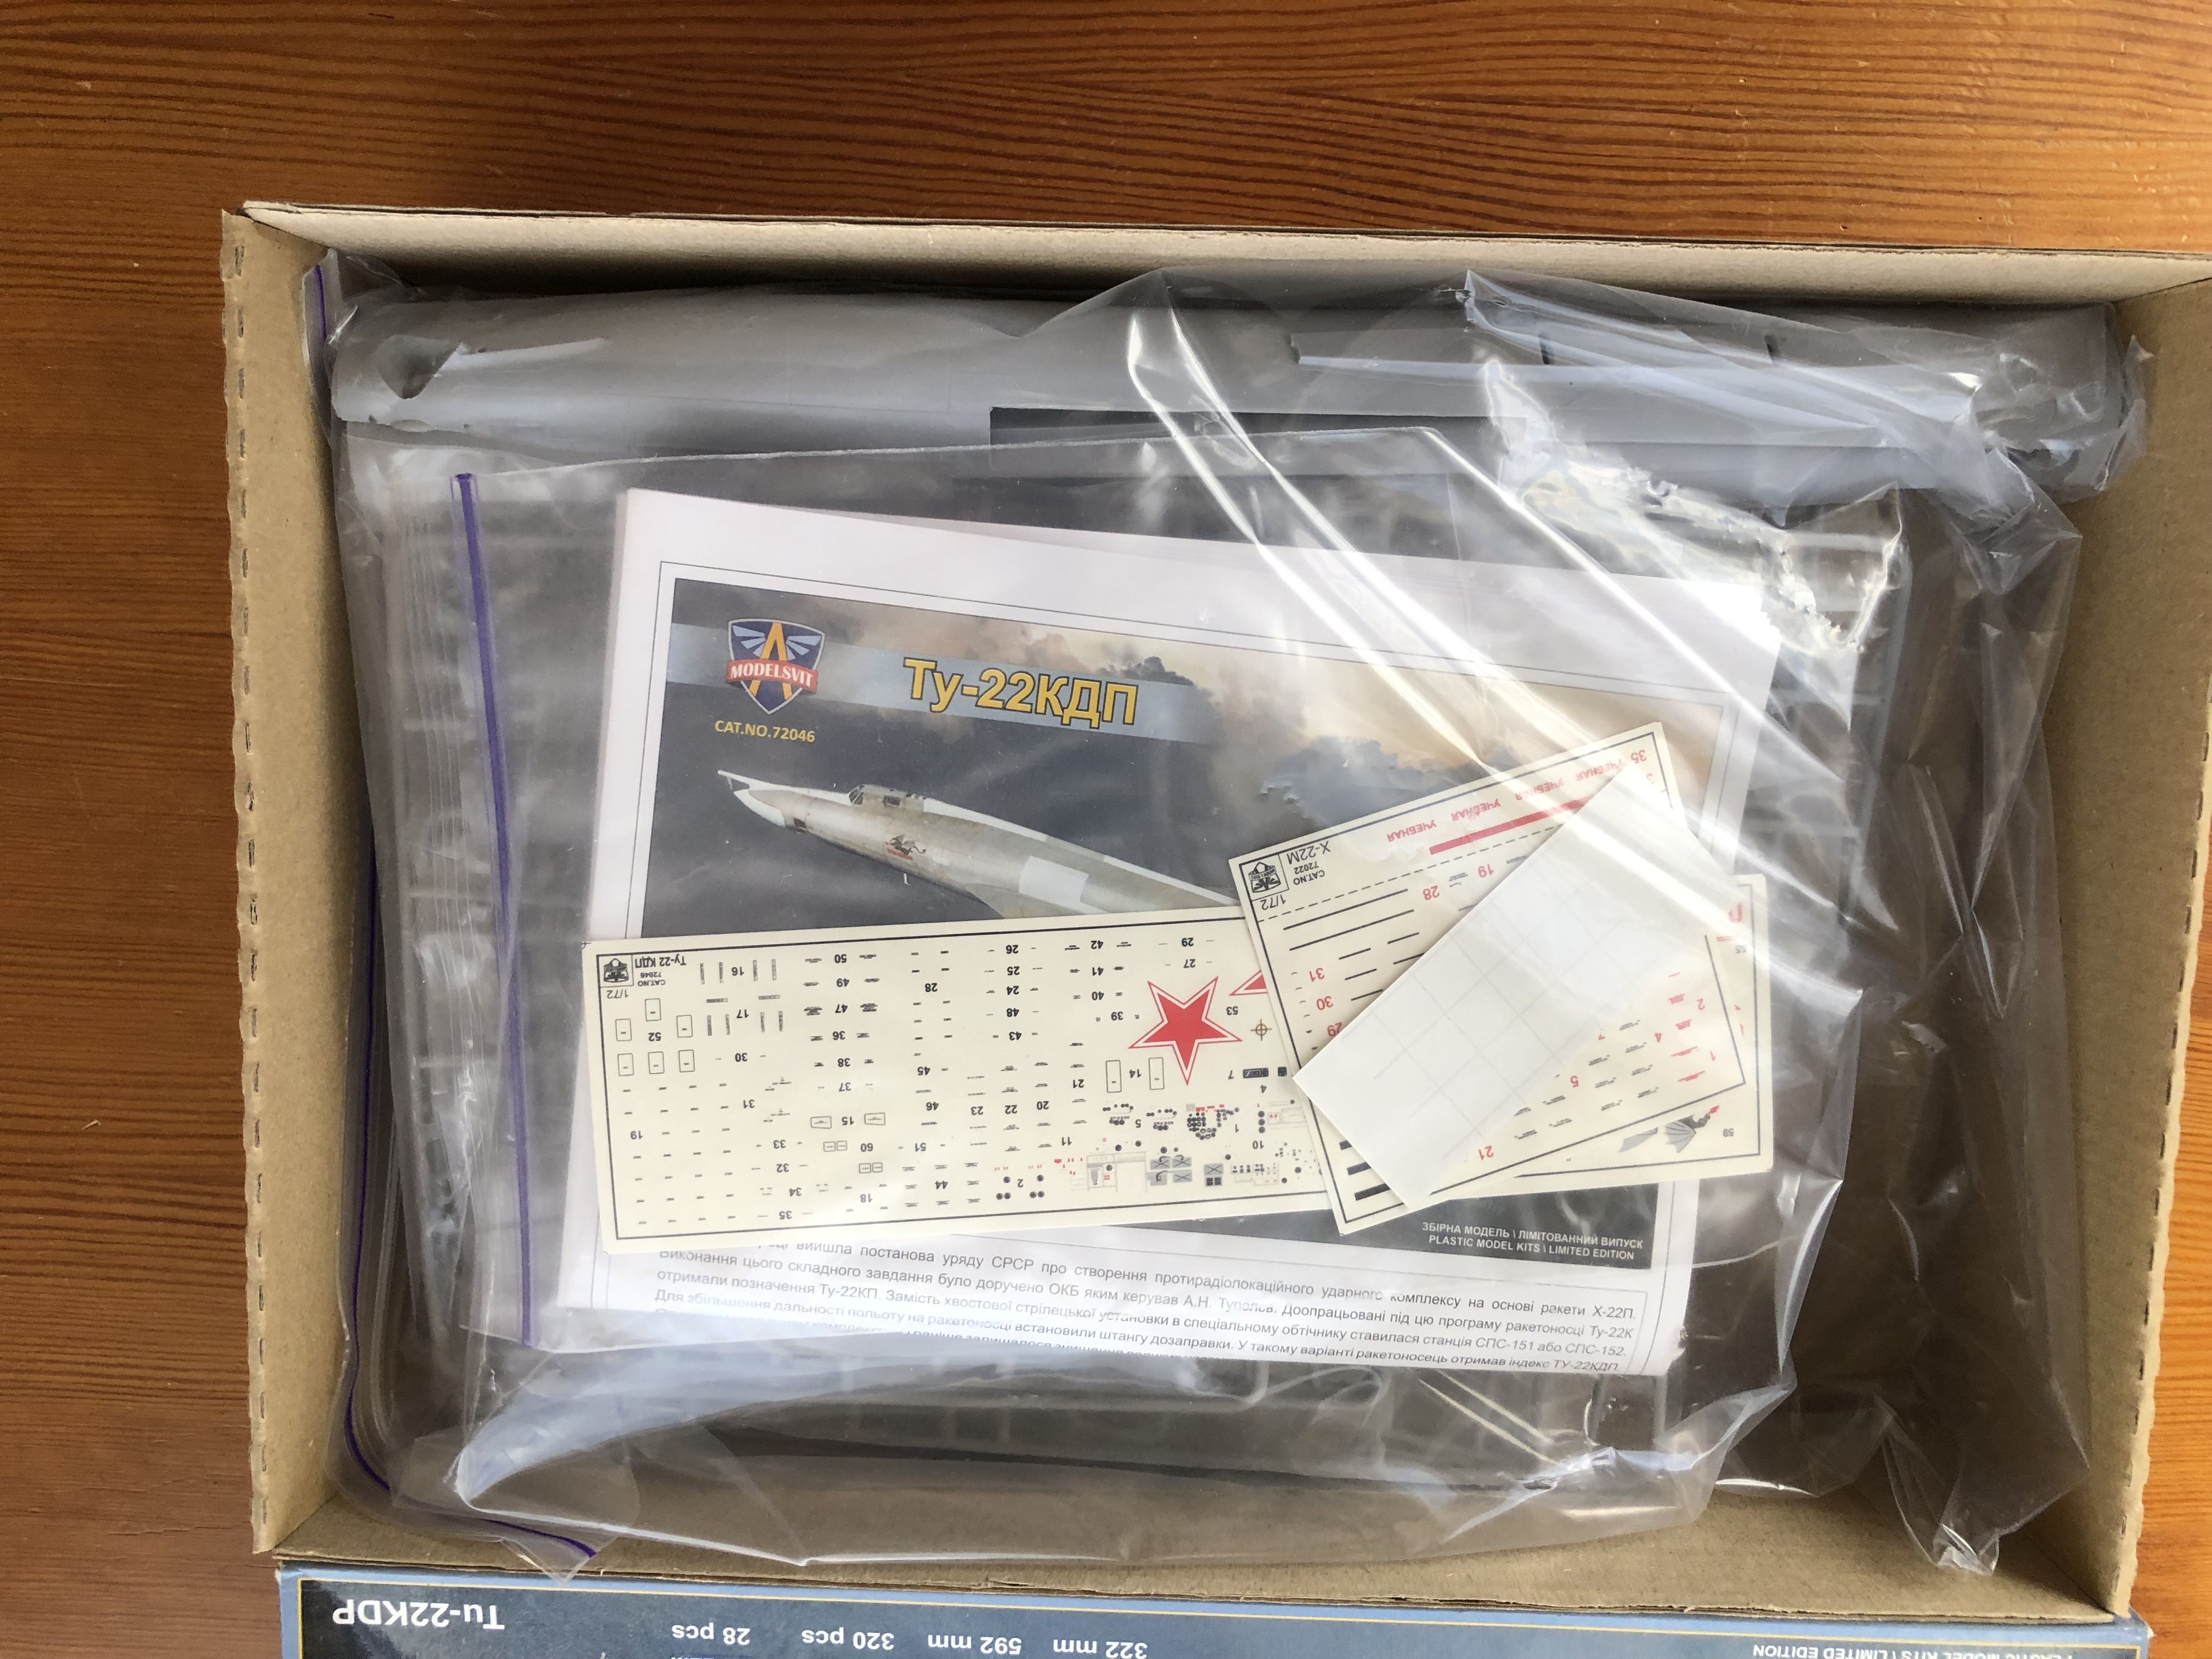
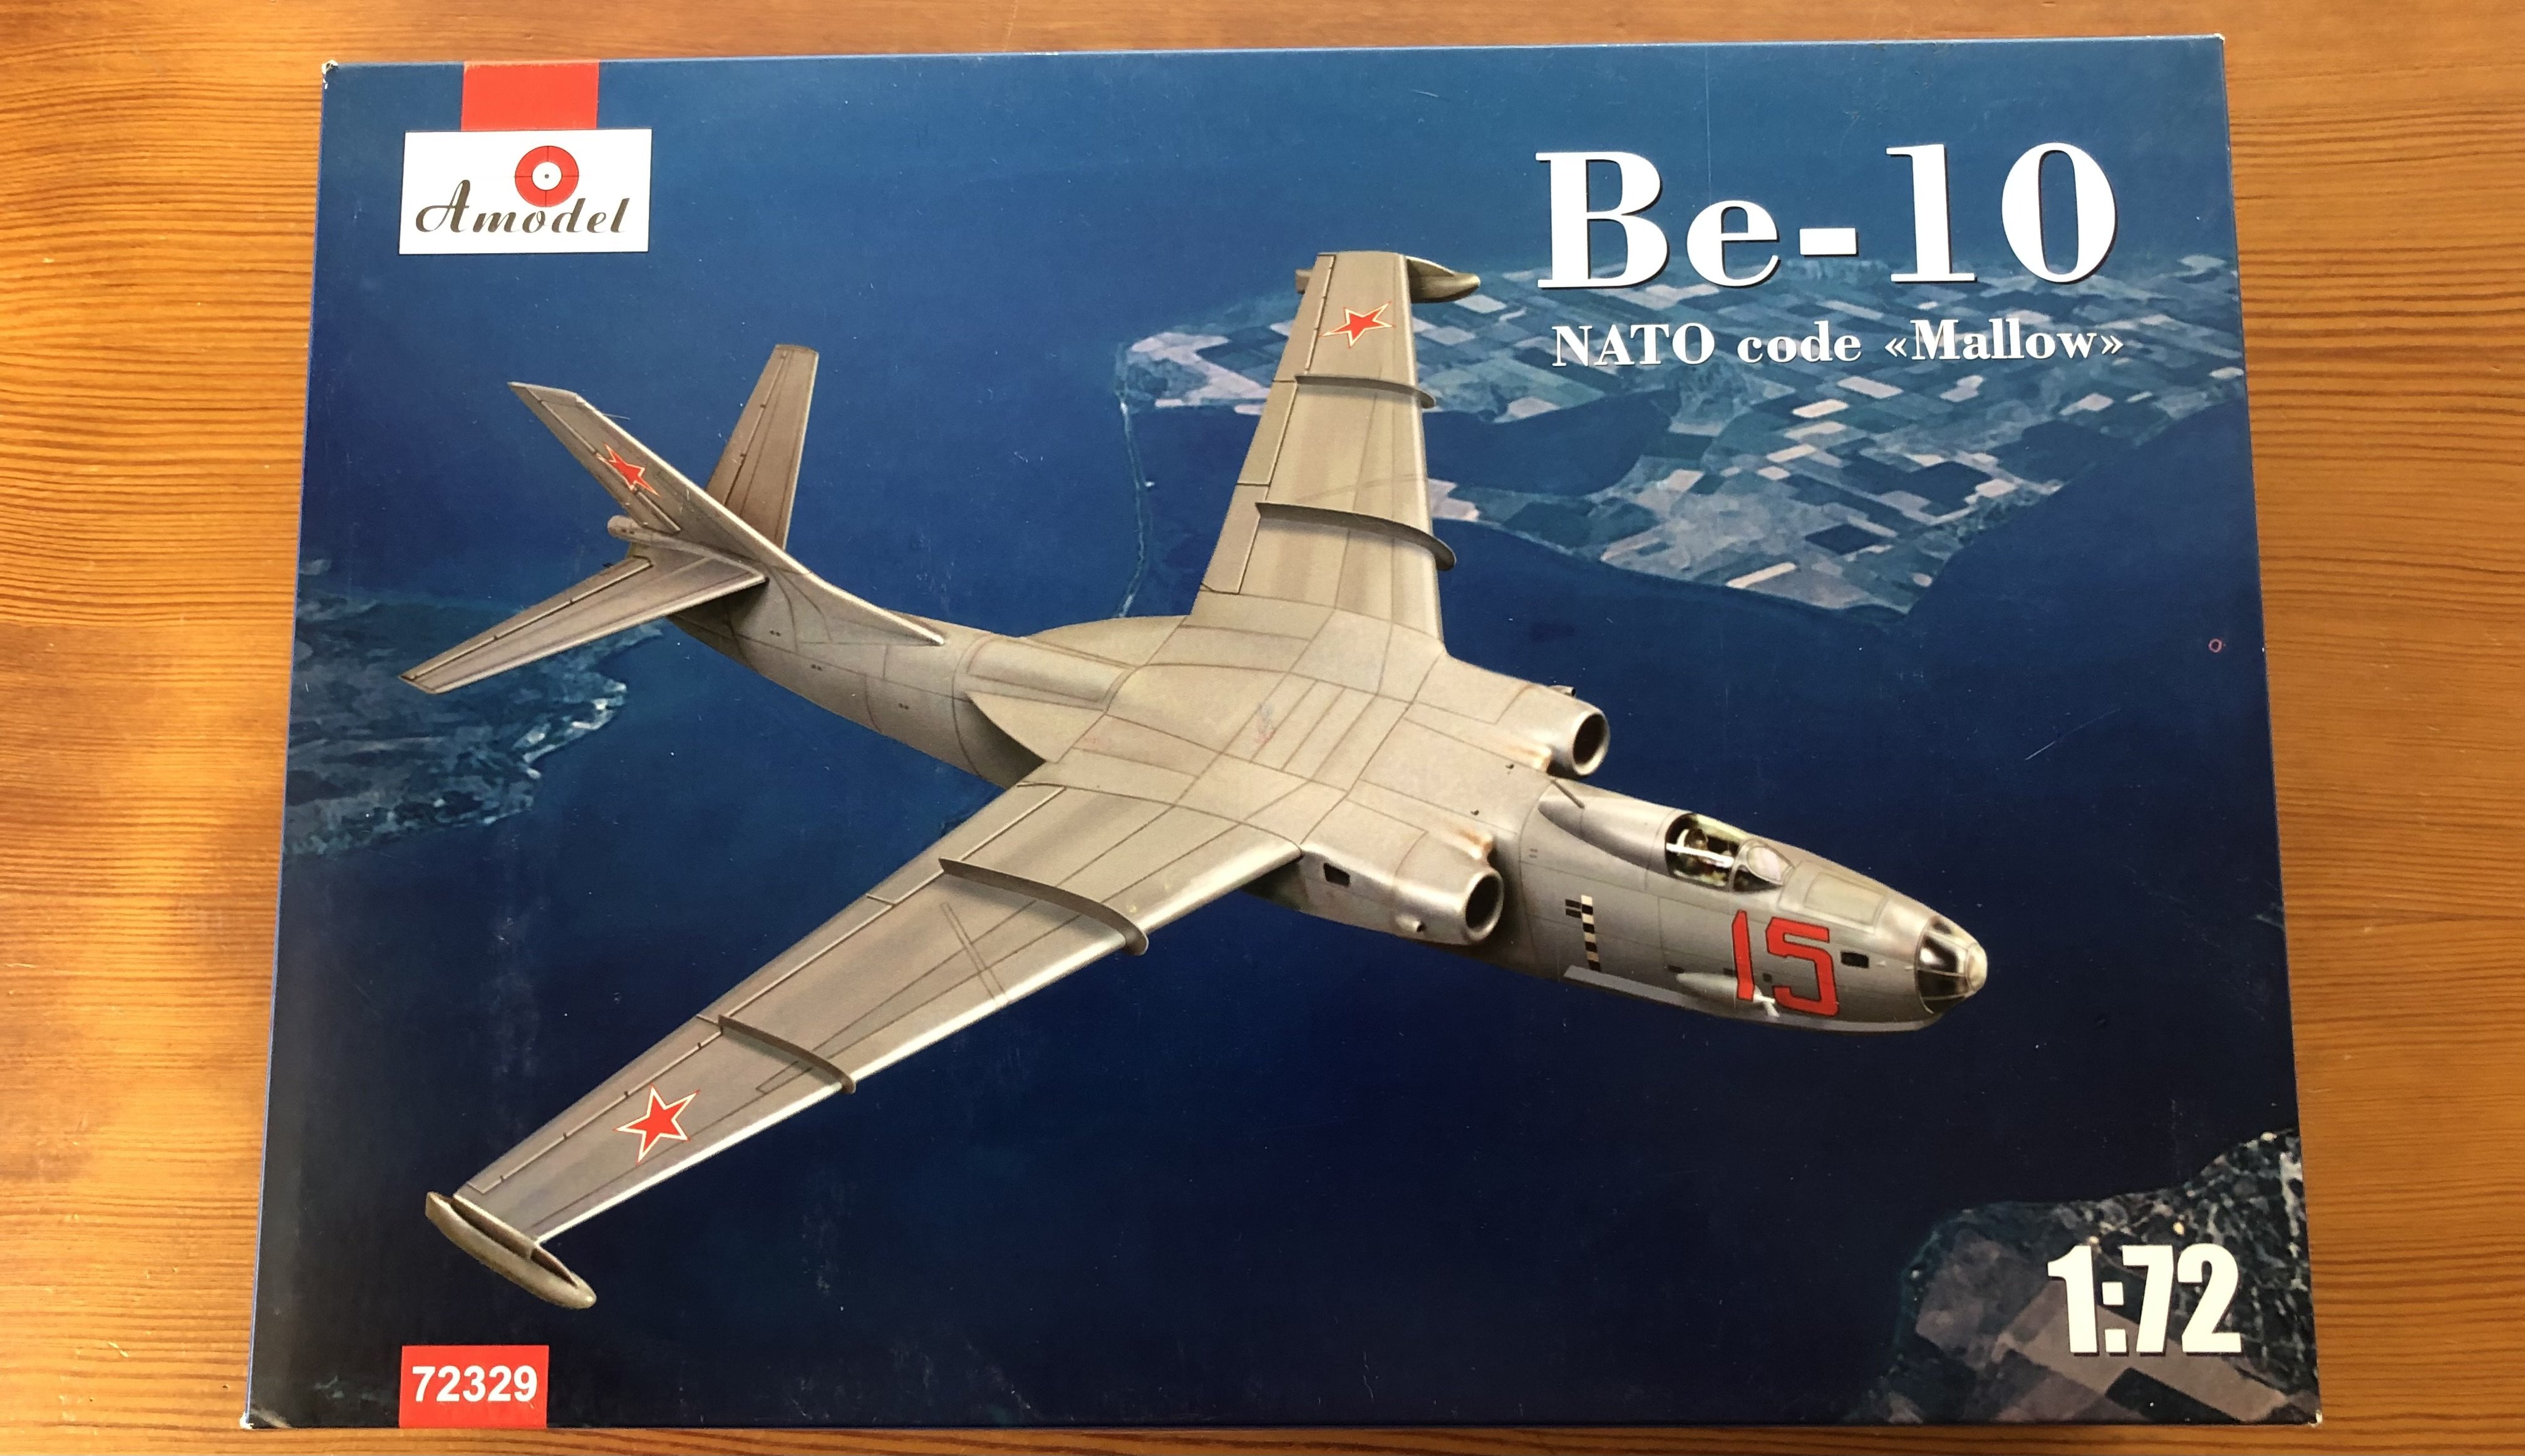
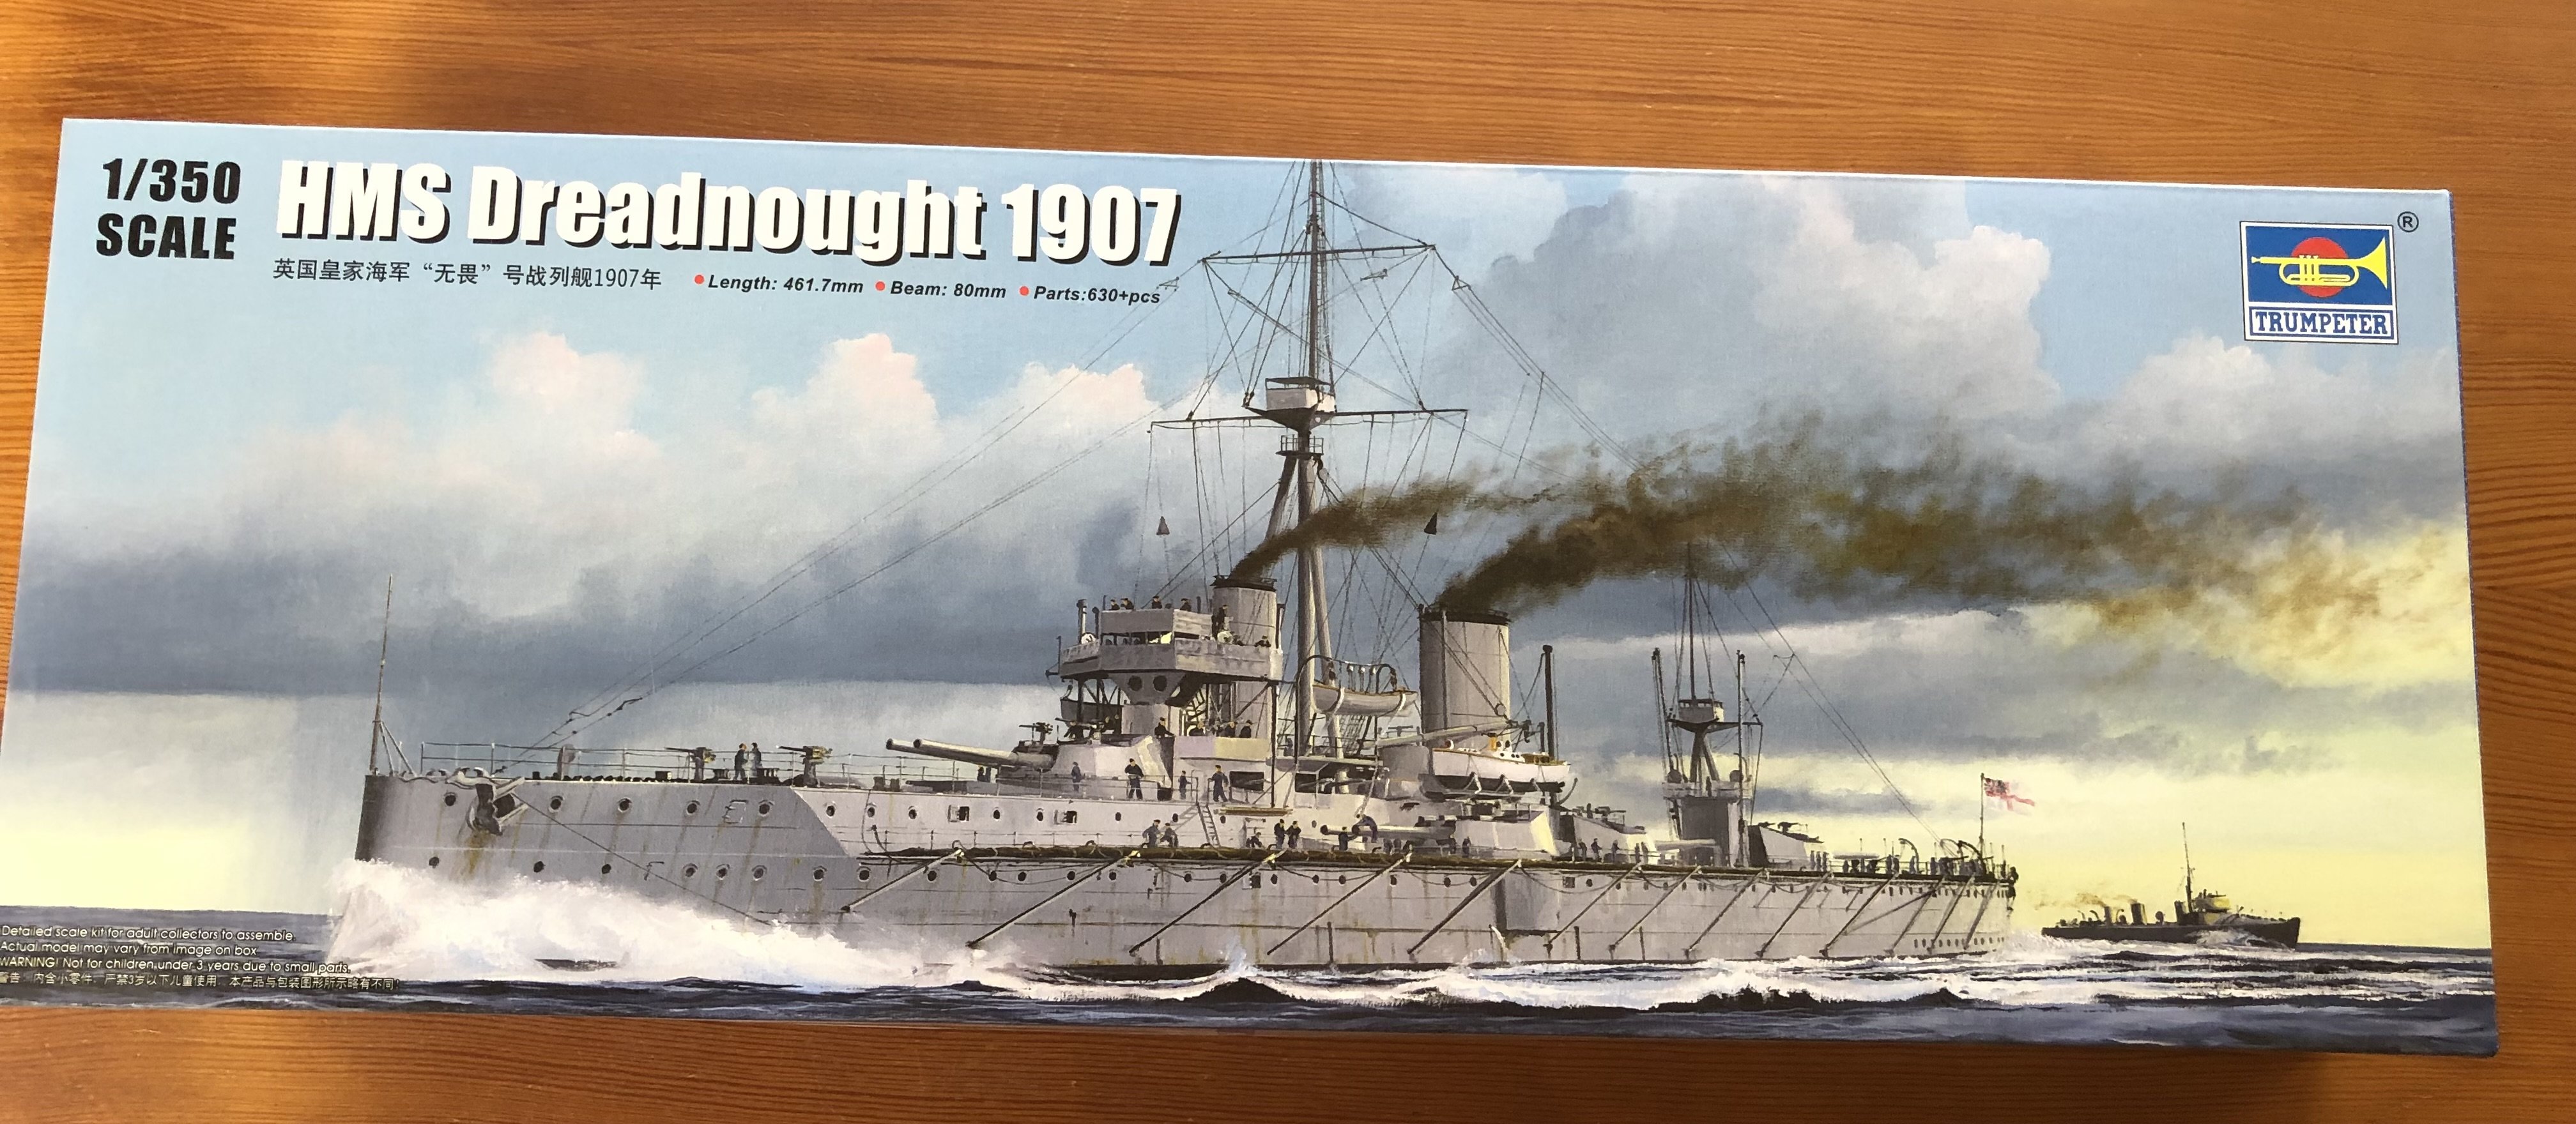
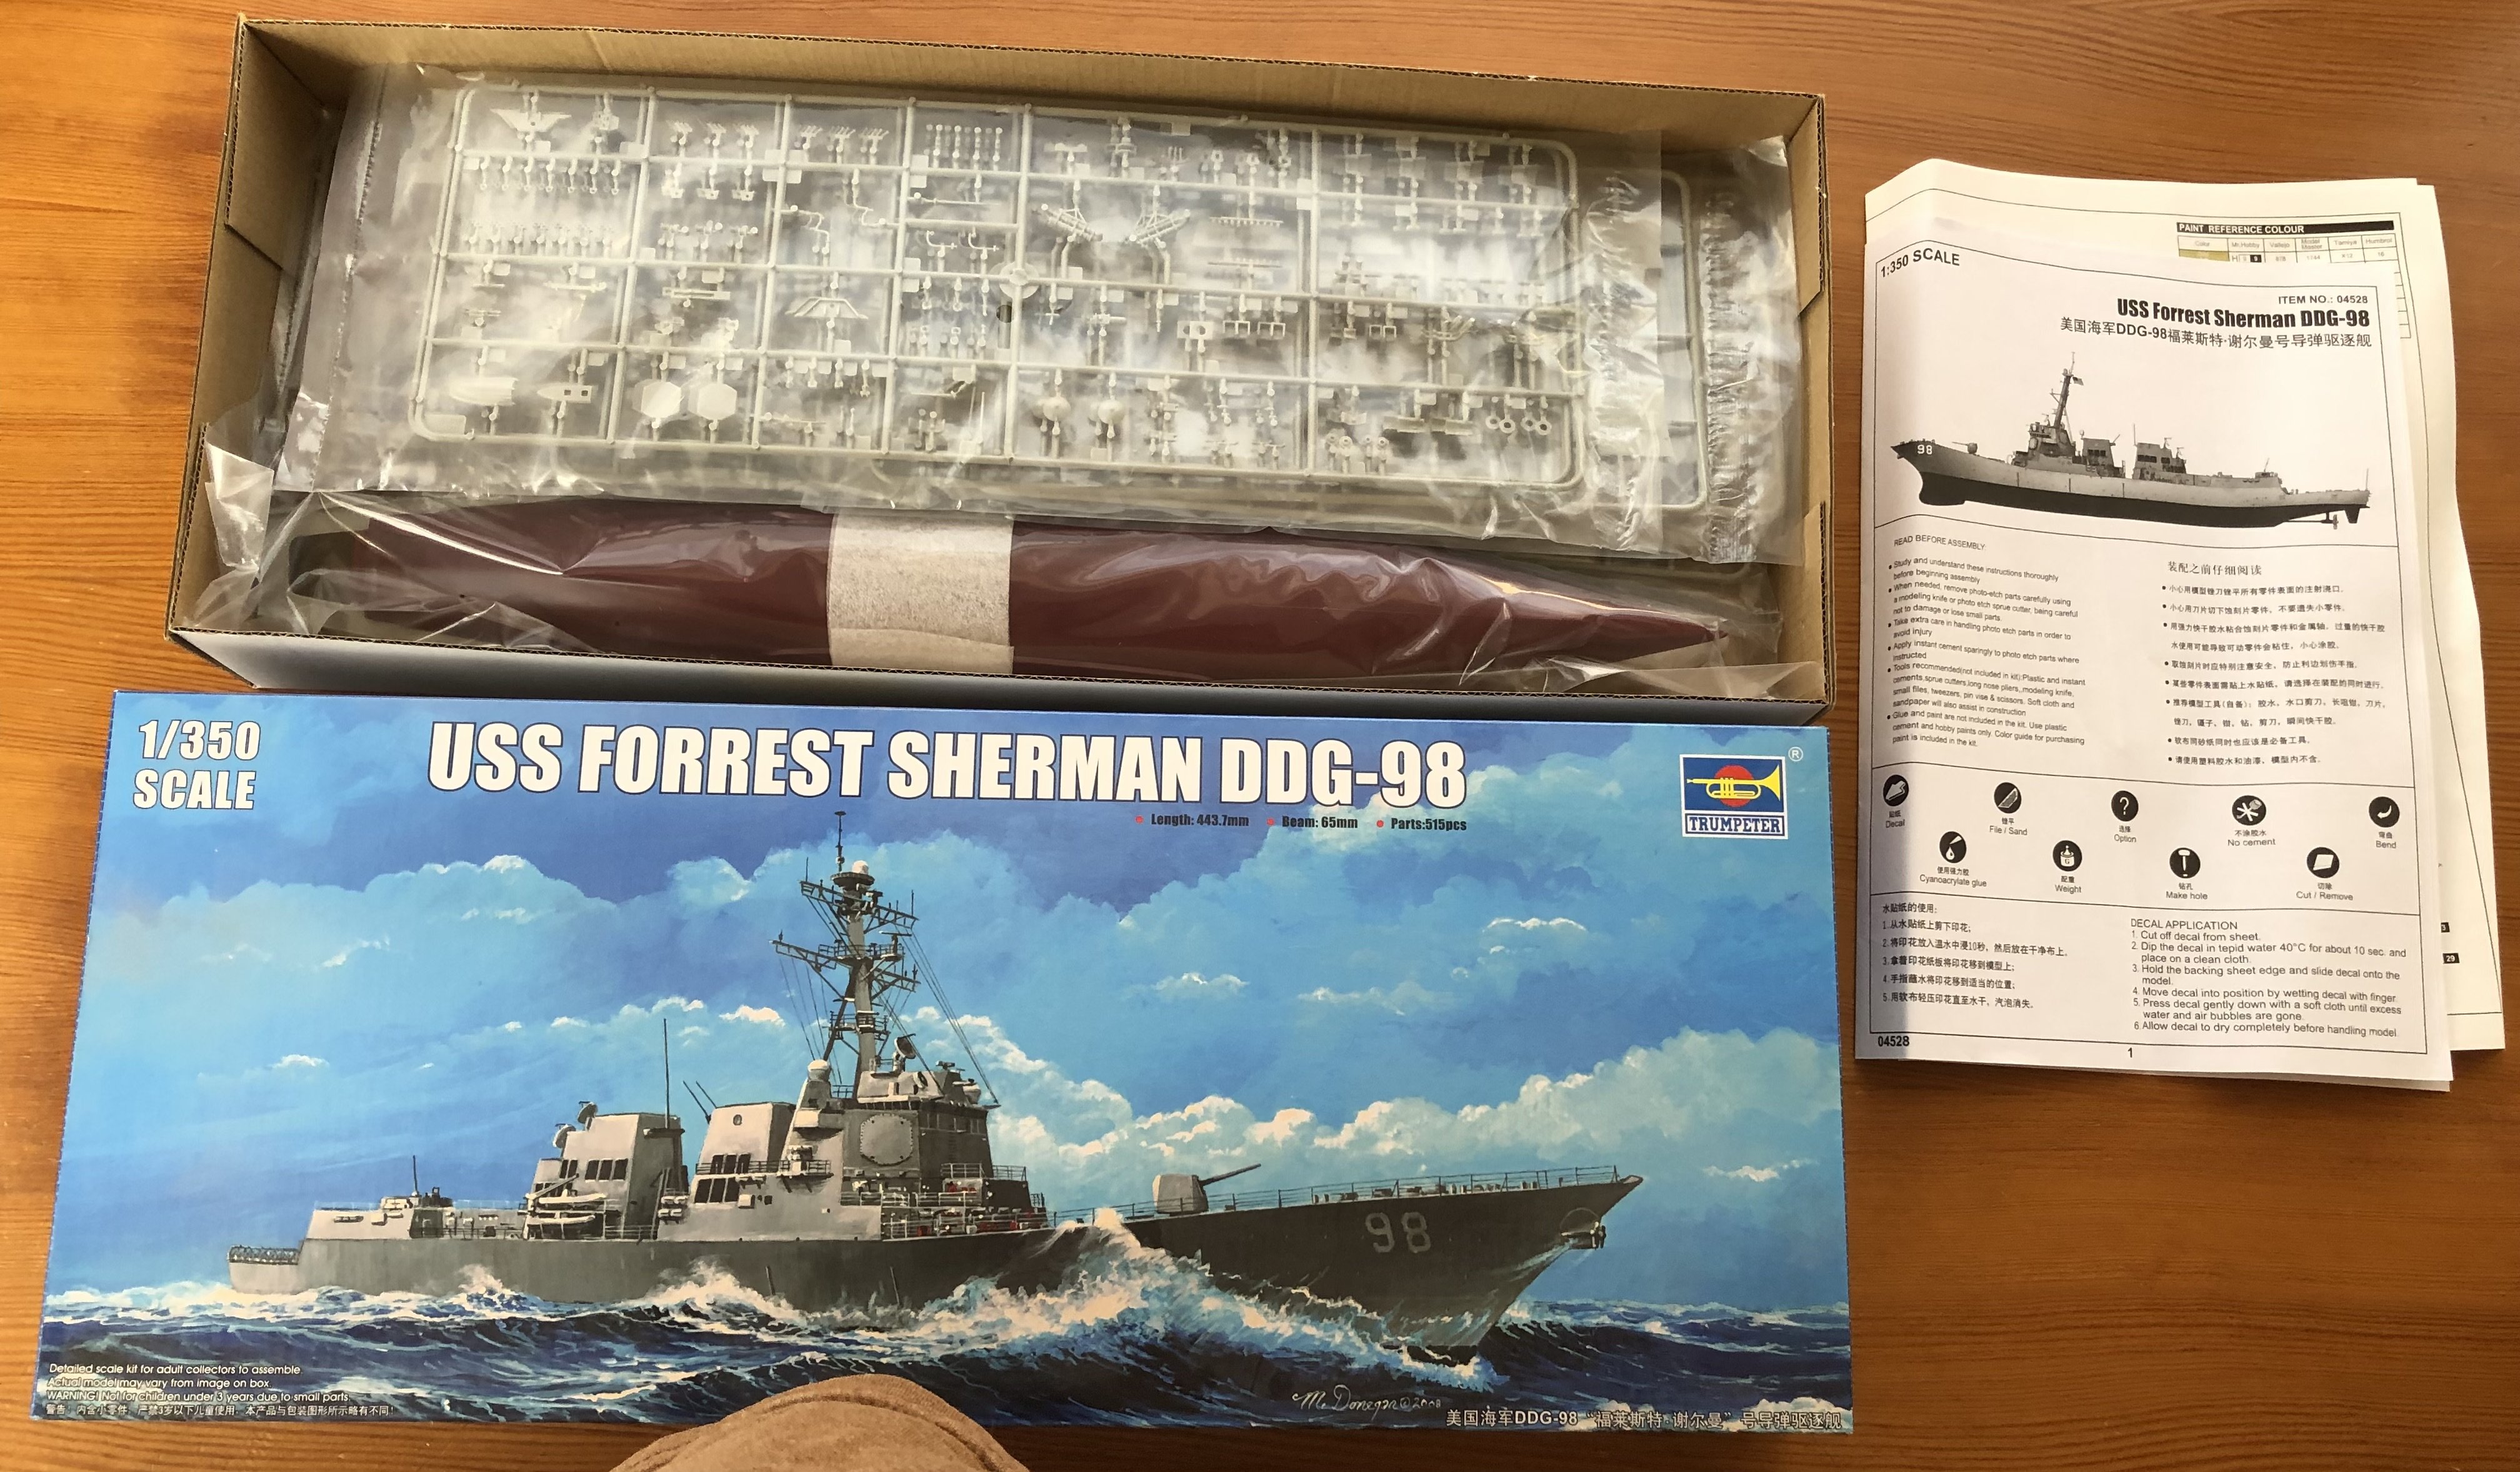
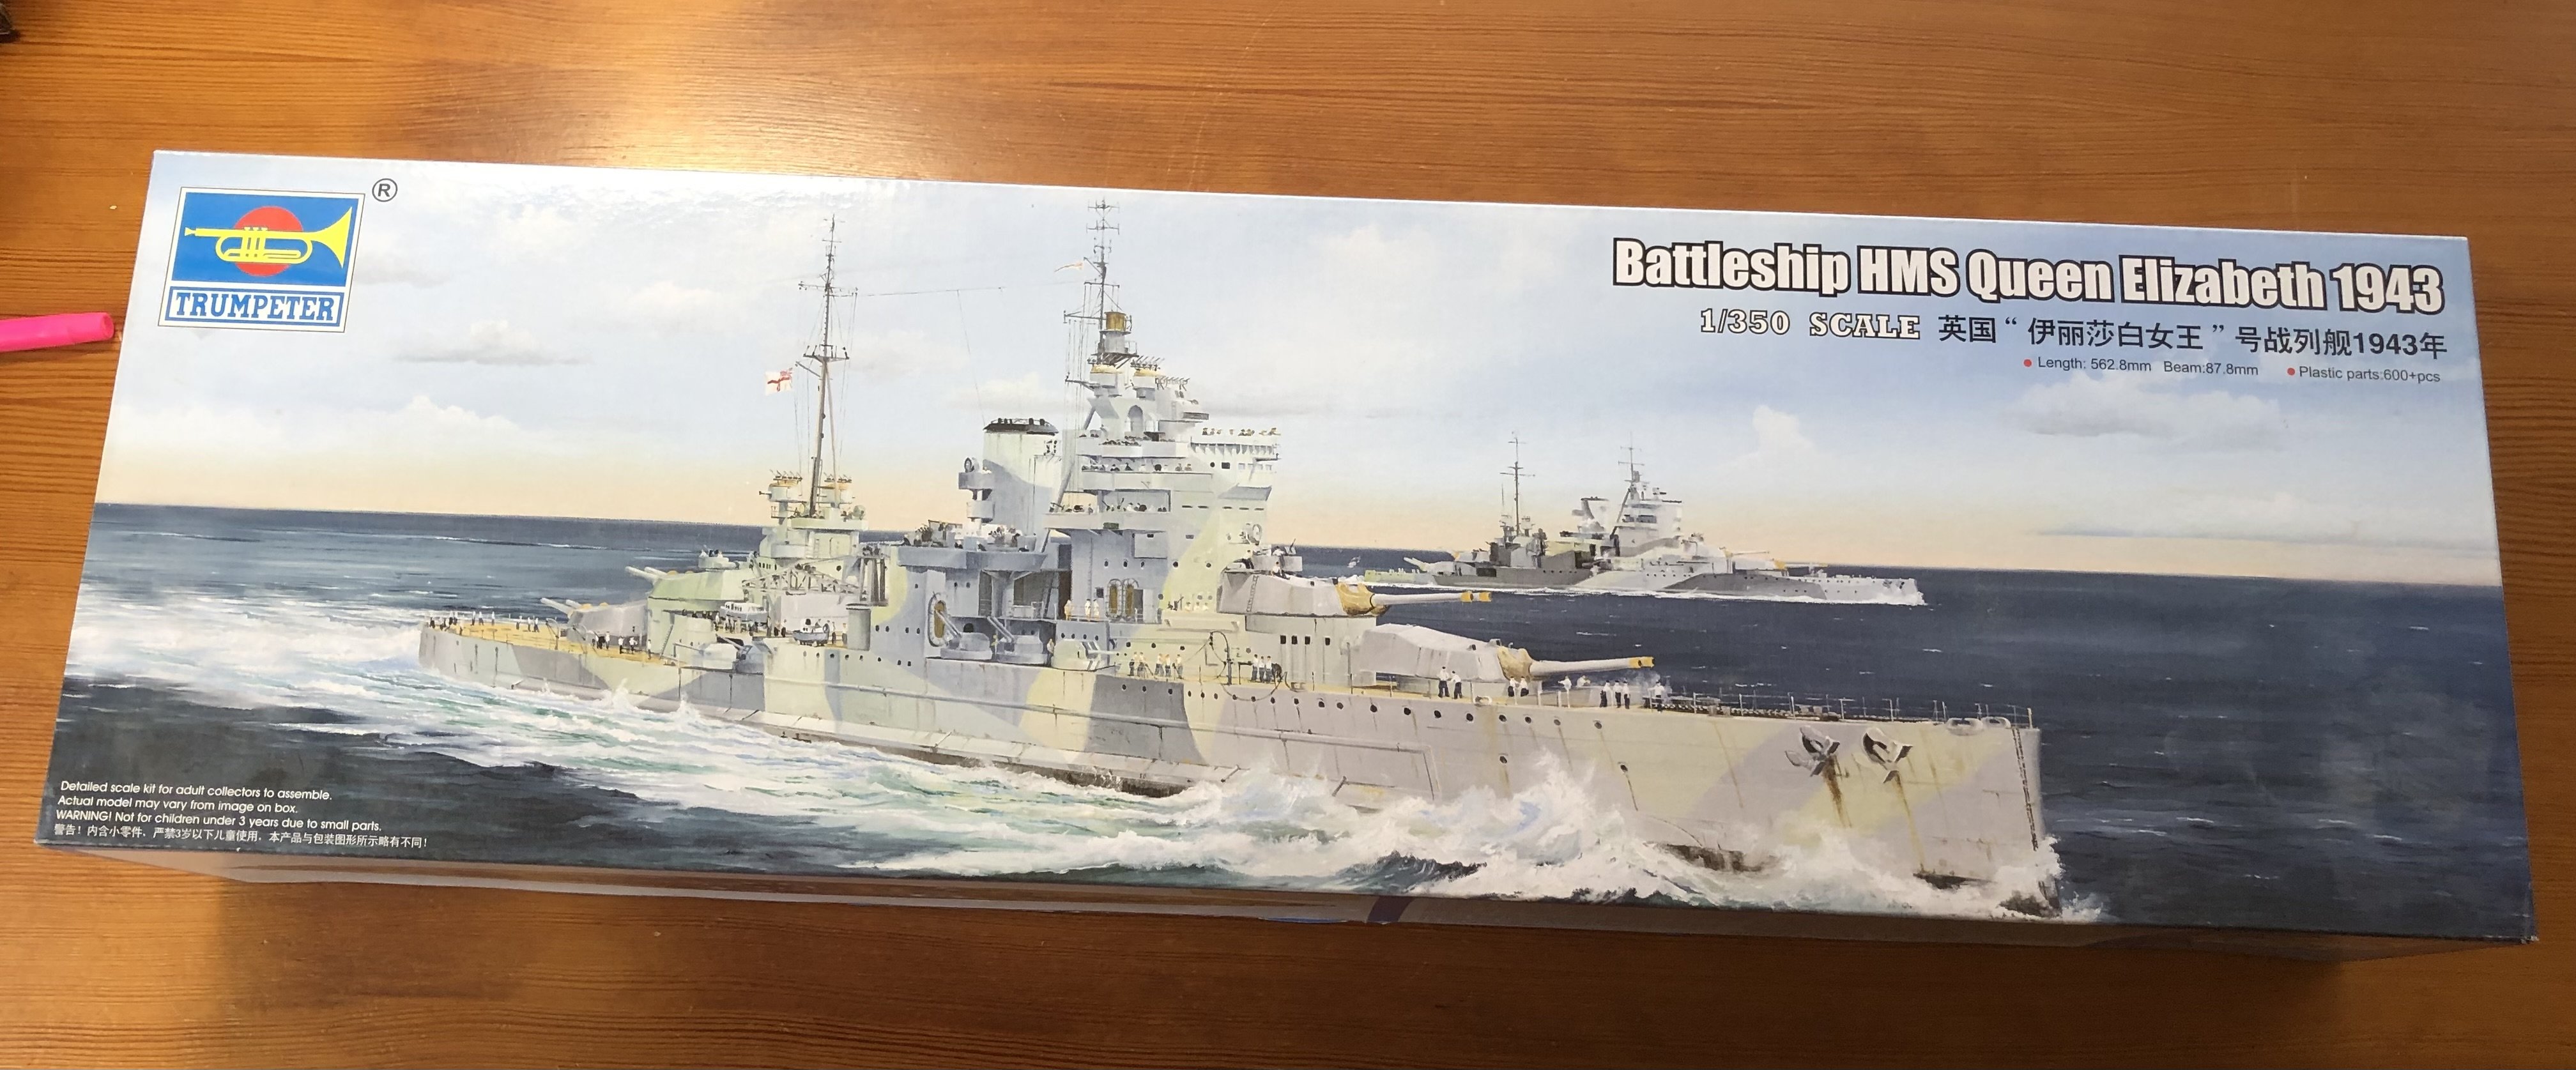
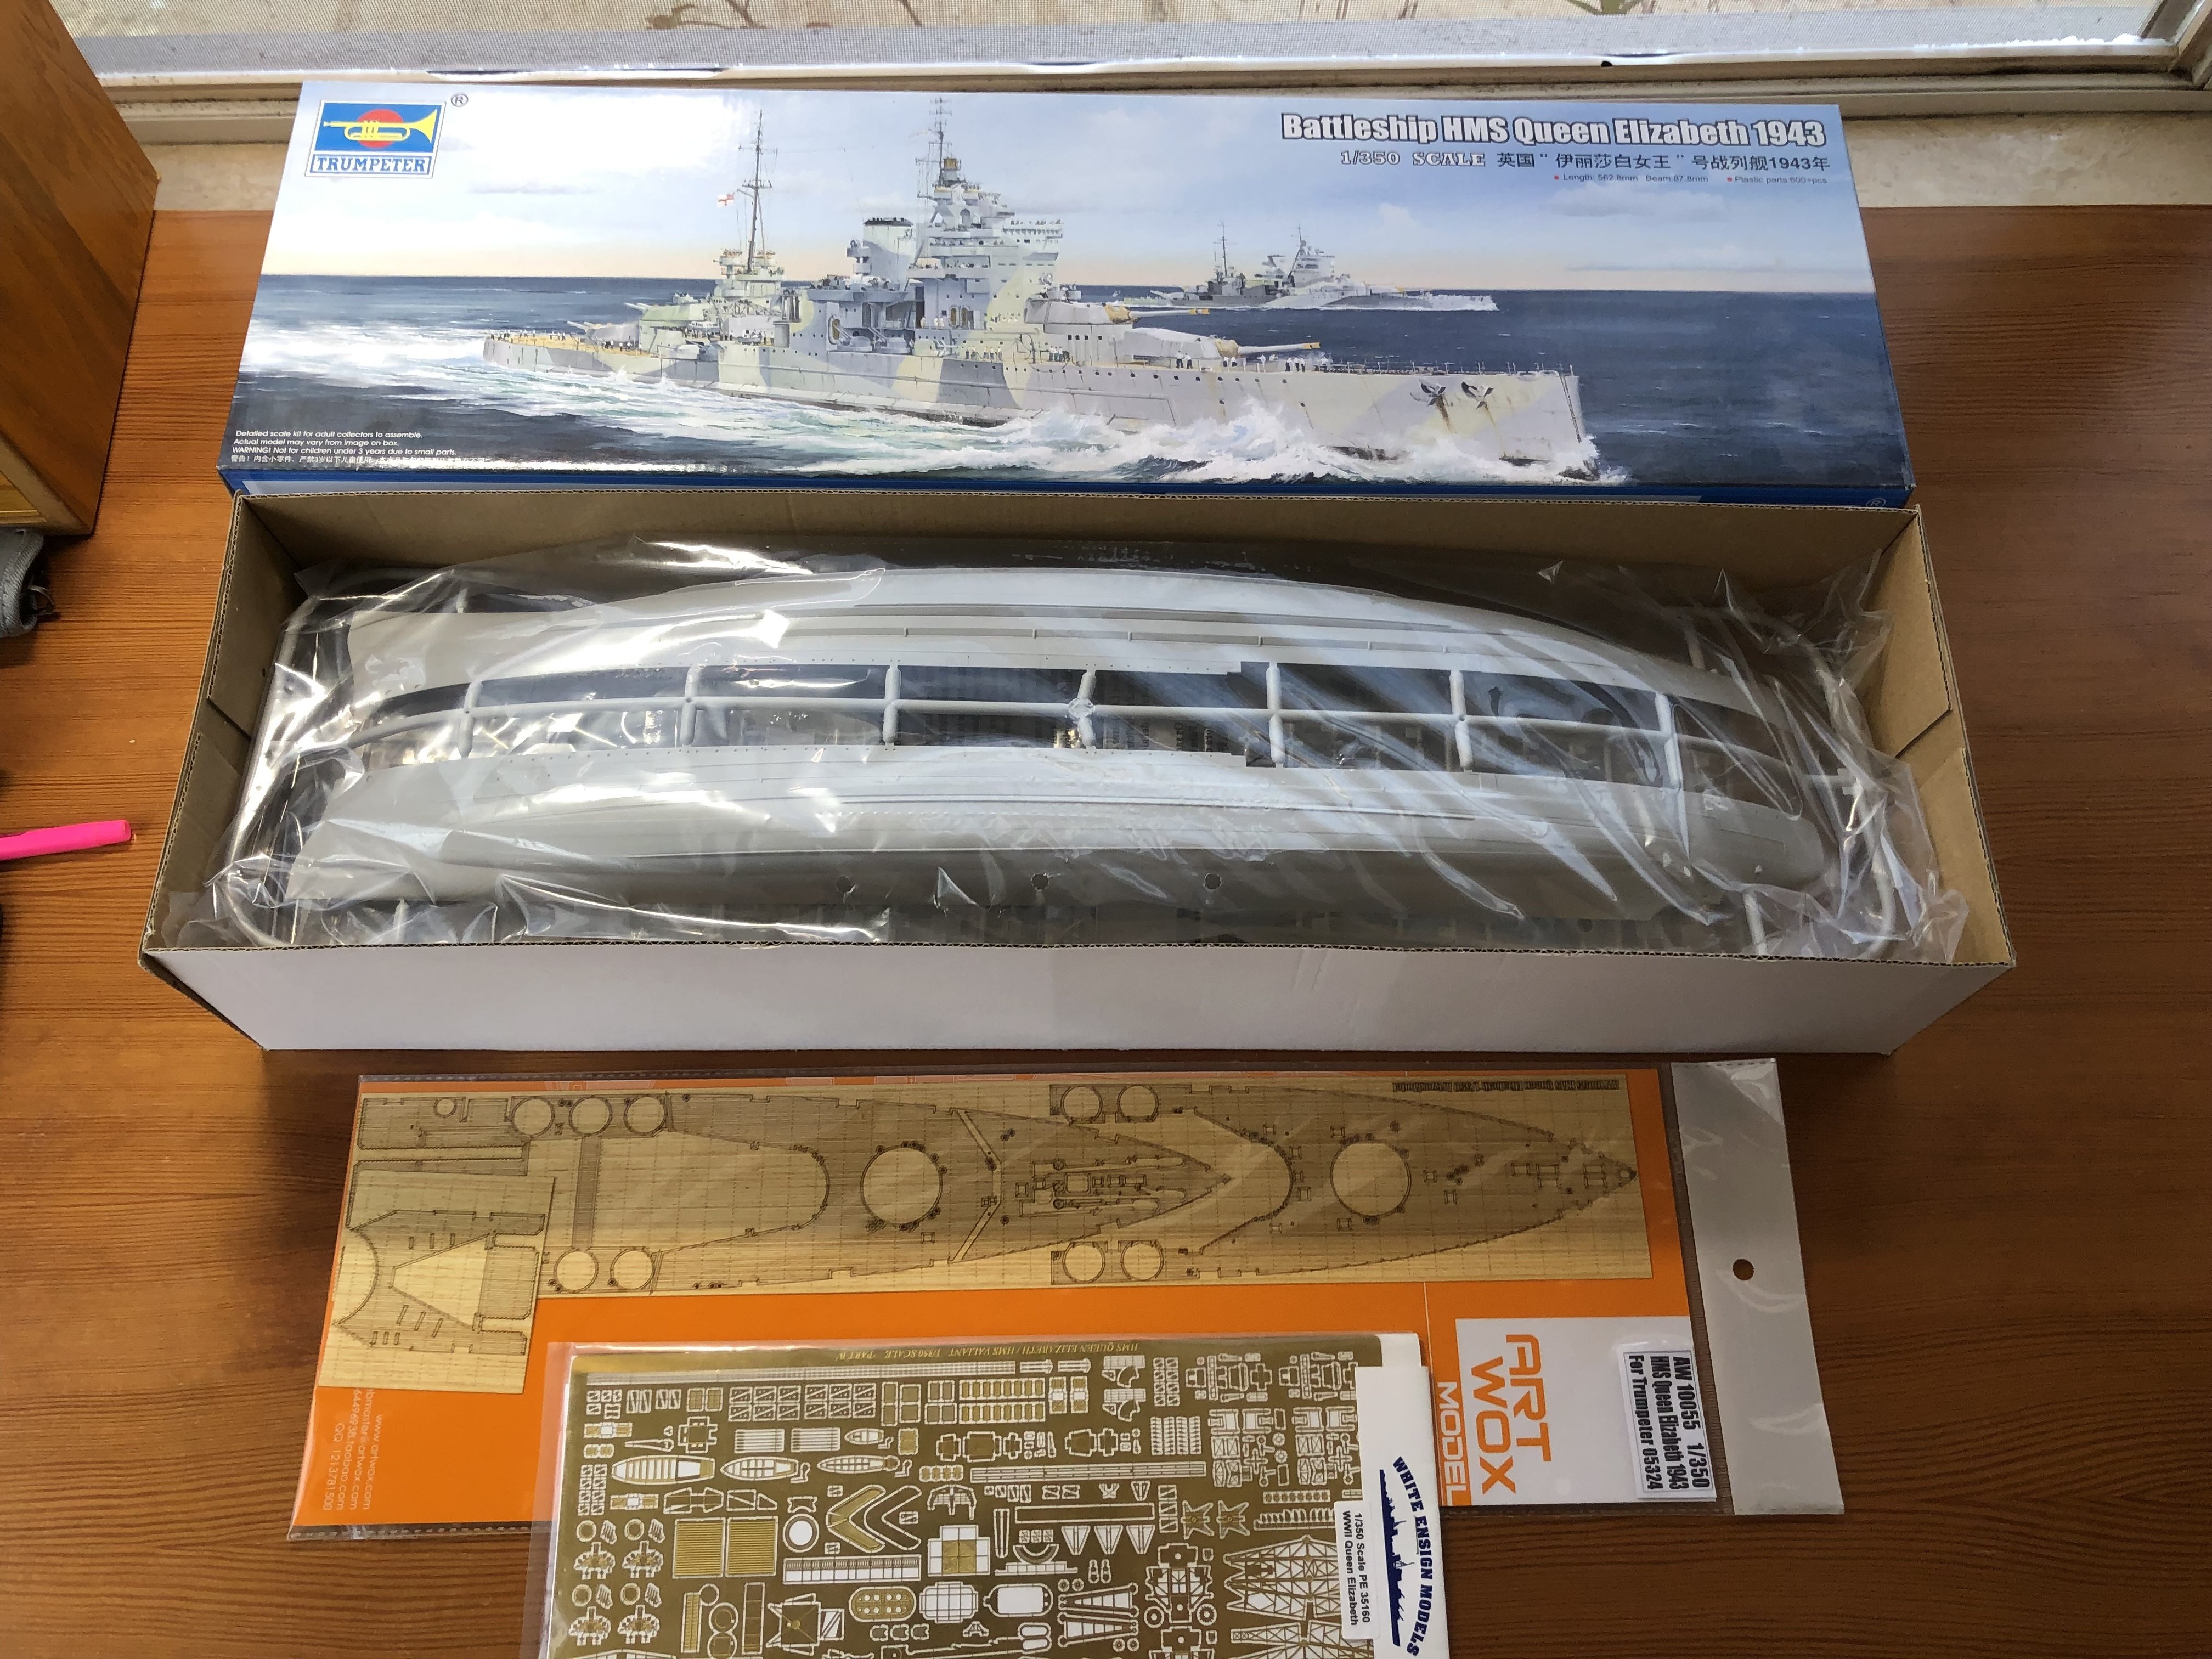
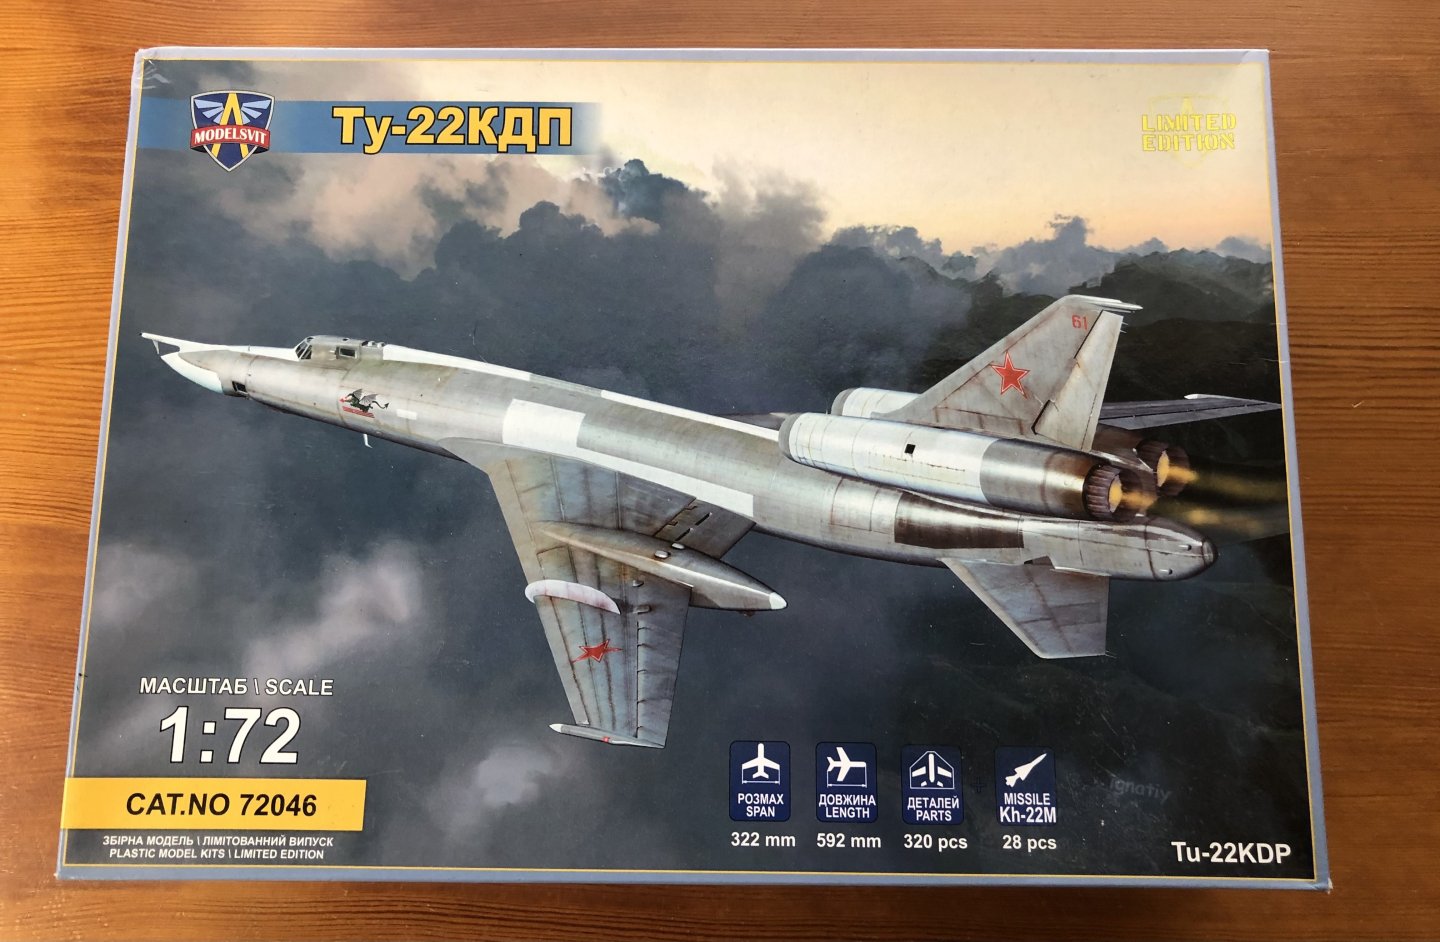
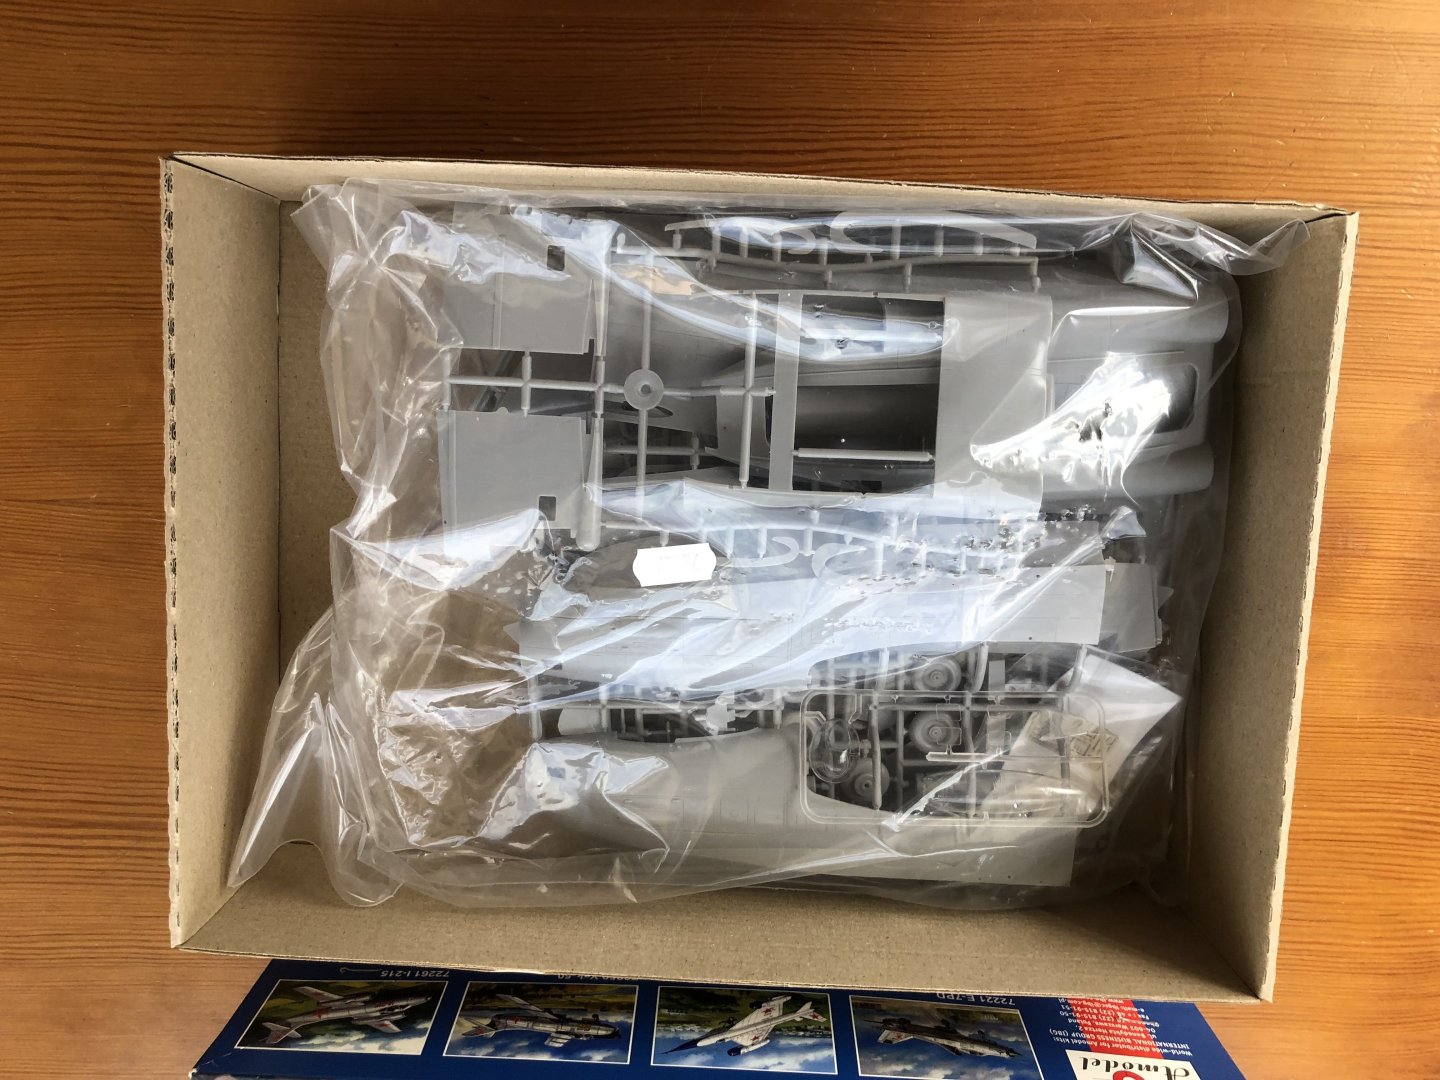
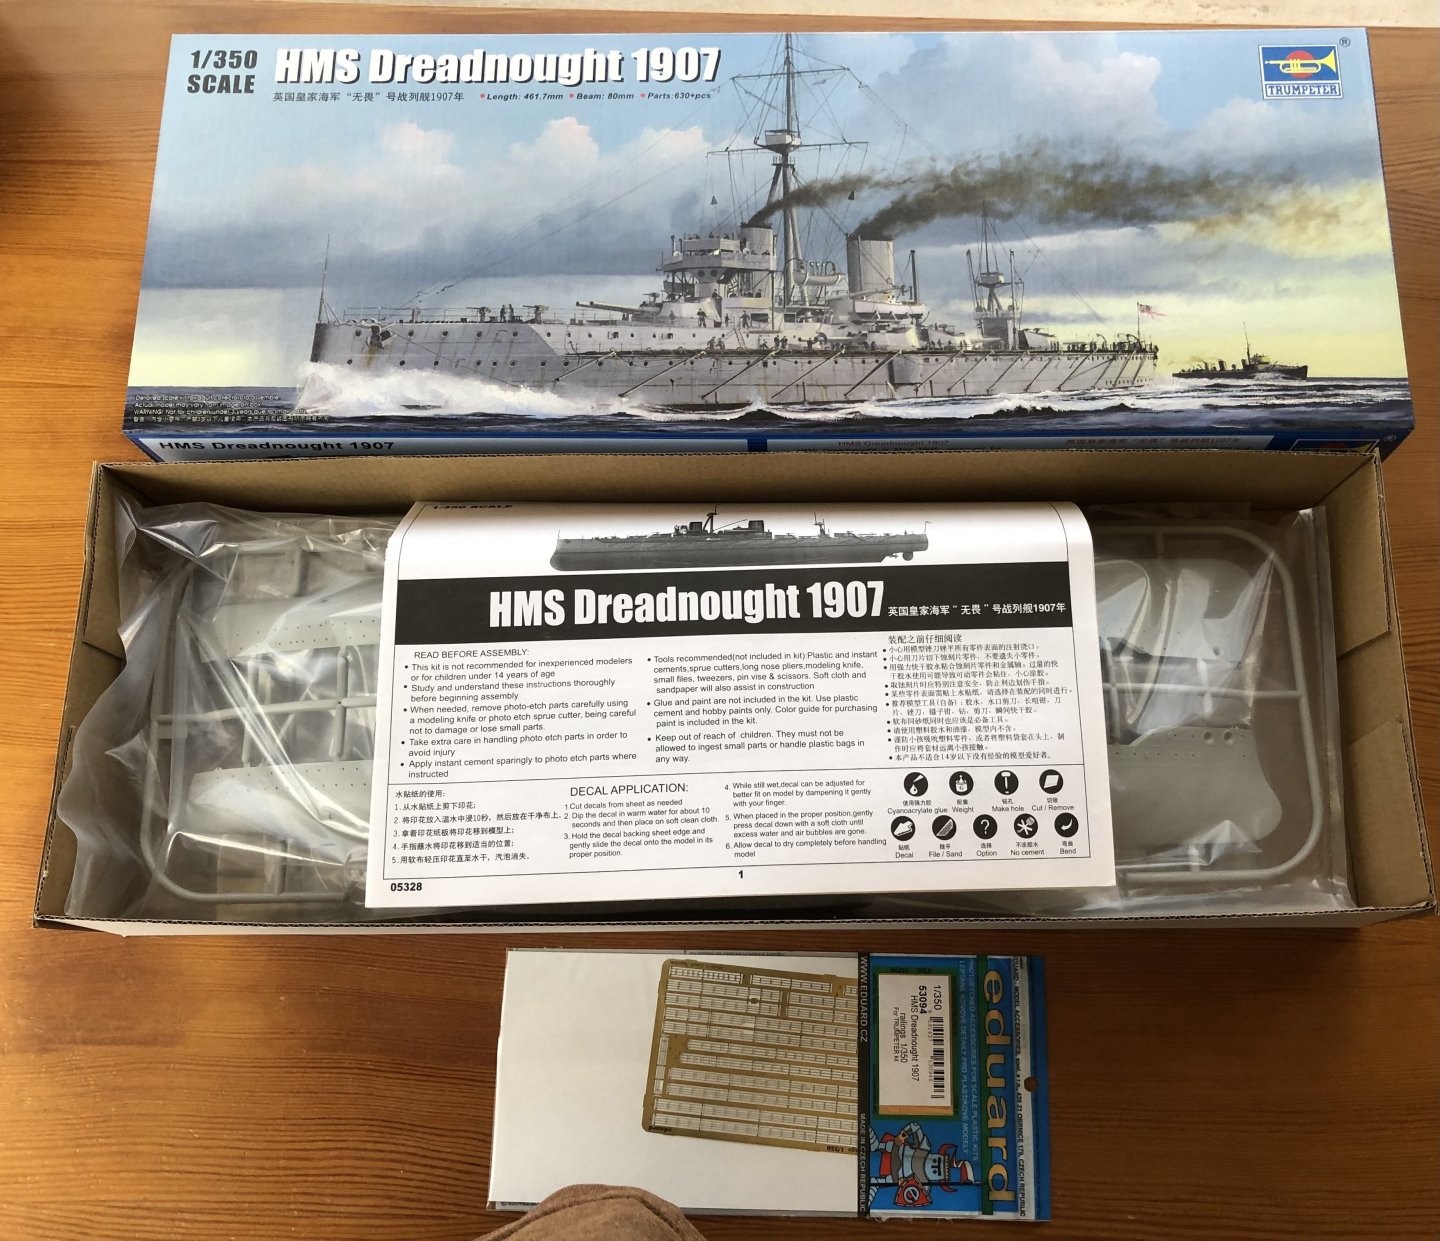
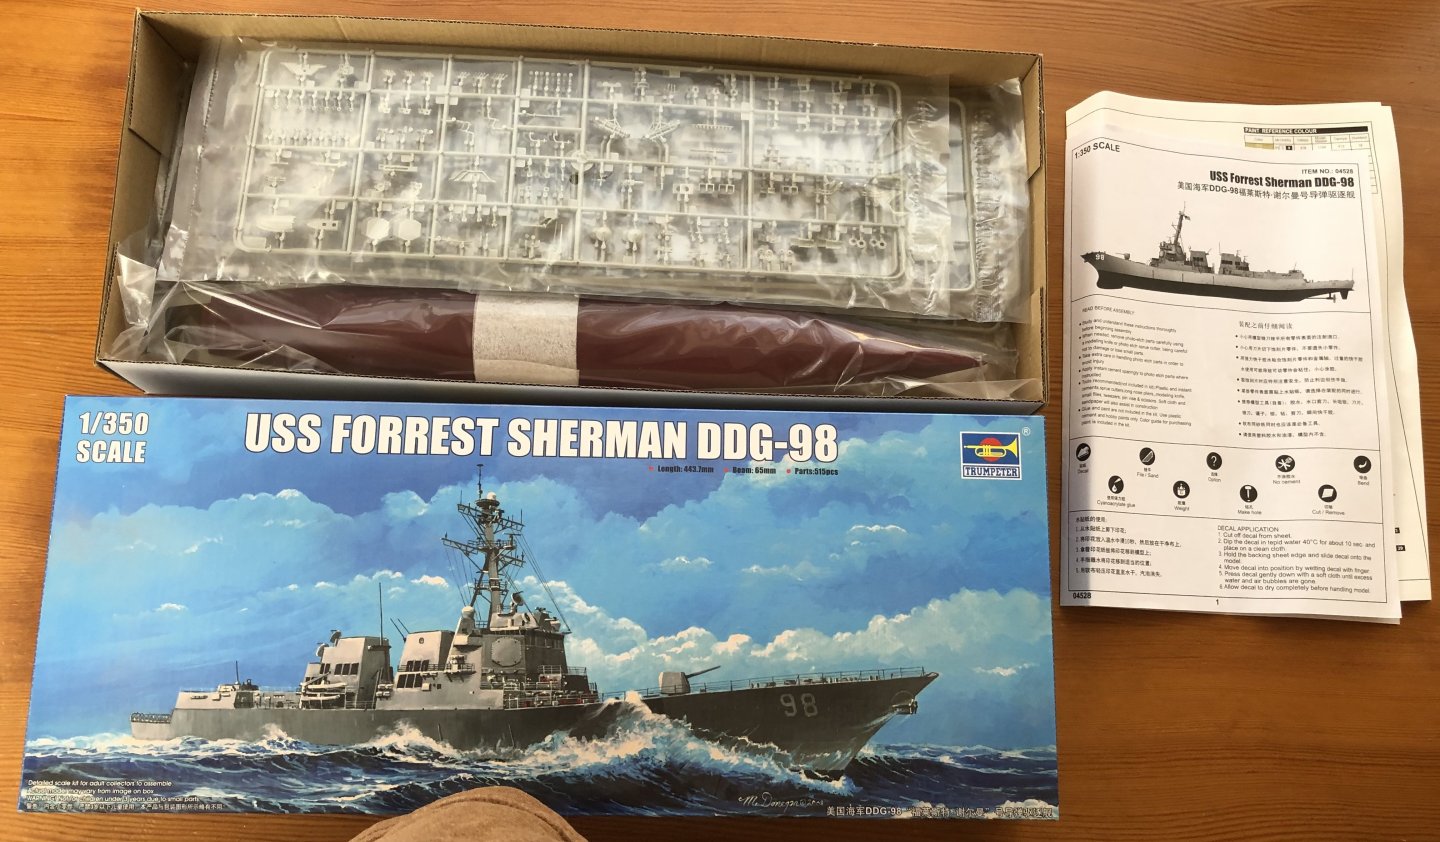
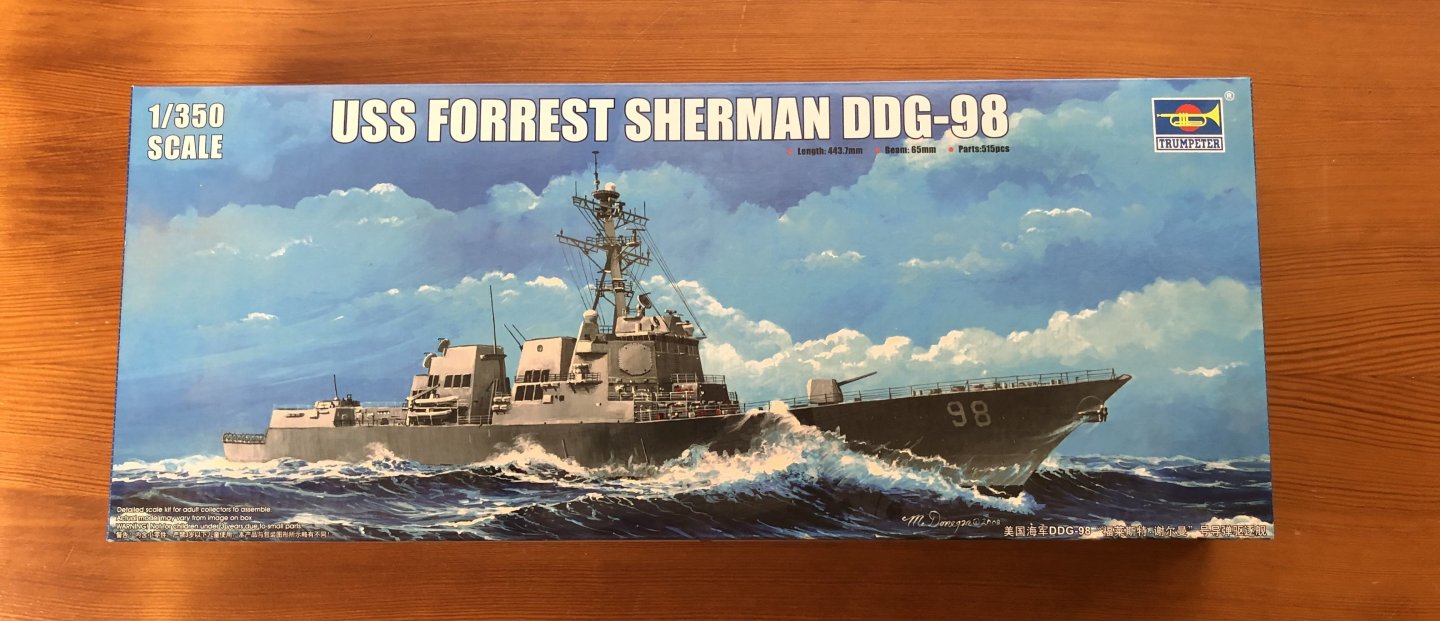
I’m finding it challenging to build and display my larger kits. Initially I thought I would settle on 1/350 ships but I find them unwieldy on the workbench and my vision problems make it hard to work on the model without damaging other parts of it. So, ive decided to sell off my collection of 1/350 kits and other model kits that are going to pose a problem for me. All kits are not started with parts still bagged. The box has be opened to check condition Trumpeter 1/350 HMS Queen Elizabeth 1943 #05324. Comes with White Ensign PE #3510 and Art Wox wooden deck #10055. Total price $130 Trumpeter 1/350 USS Forrest Sherman DDG-98 #04528 $30 Trumpeter 1/350 HMS Dreadnought 1907 #05328 with Eduard PE railings # 53094 $50 Amodel 1/72 Be-10 Mallow #72329 $50 Modelsvit 1/72 Tu-22KDP #72046 $65 Buyer is to pay via Paypal goods and services. Shipping costs will be actual USPS cost. If you want this deal, PM me your complete mailing address so I can quote you the shipping price. I can ship to the continental USA only. If we agree on a sale, I will send you a Paypal invoice.


-
- 6
-

-
Gorgeous finish Rob and a just reward for all the hard work to achieve it. Congratulations alan
-
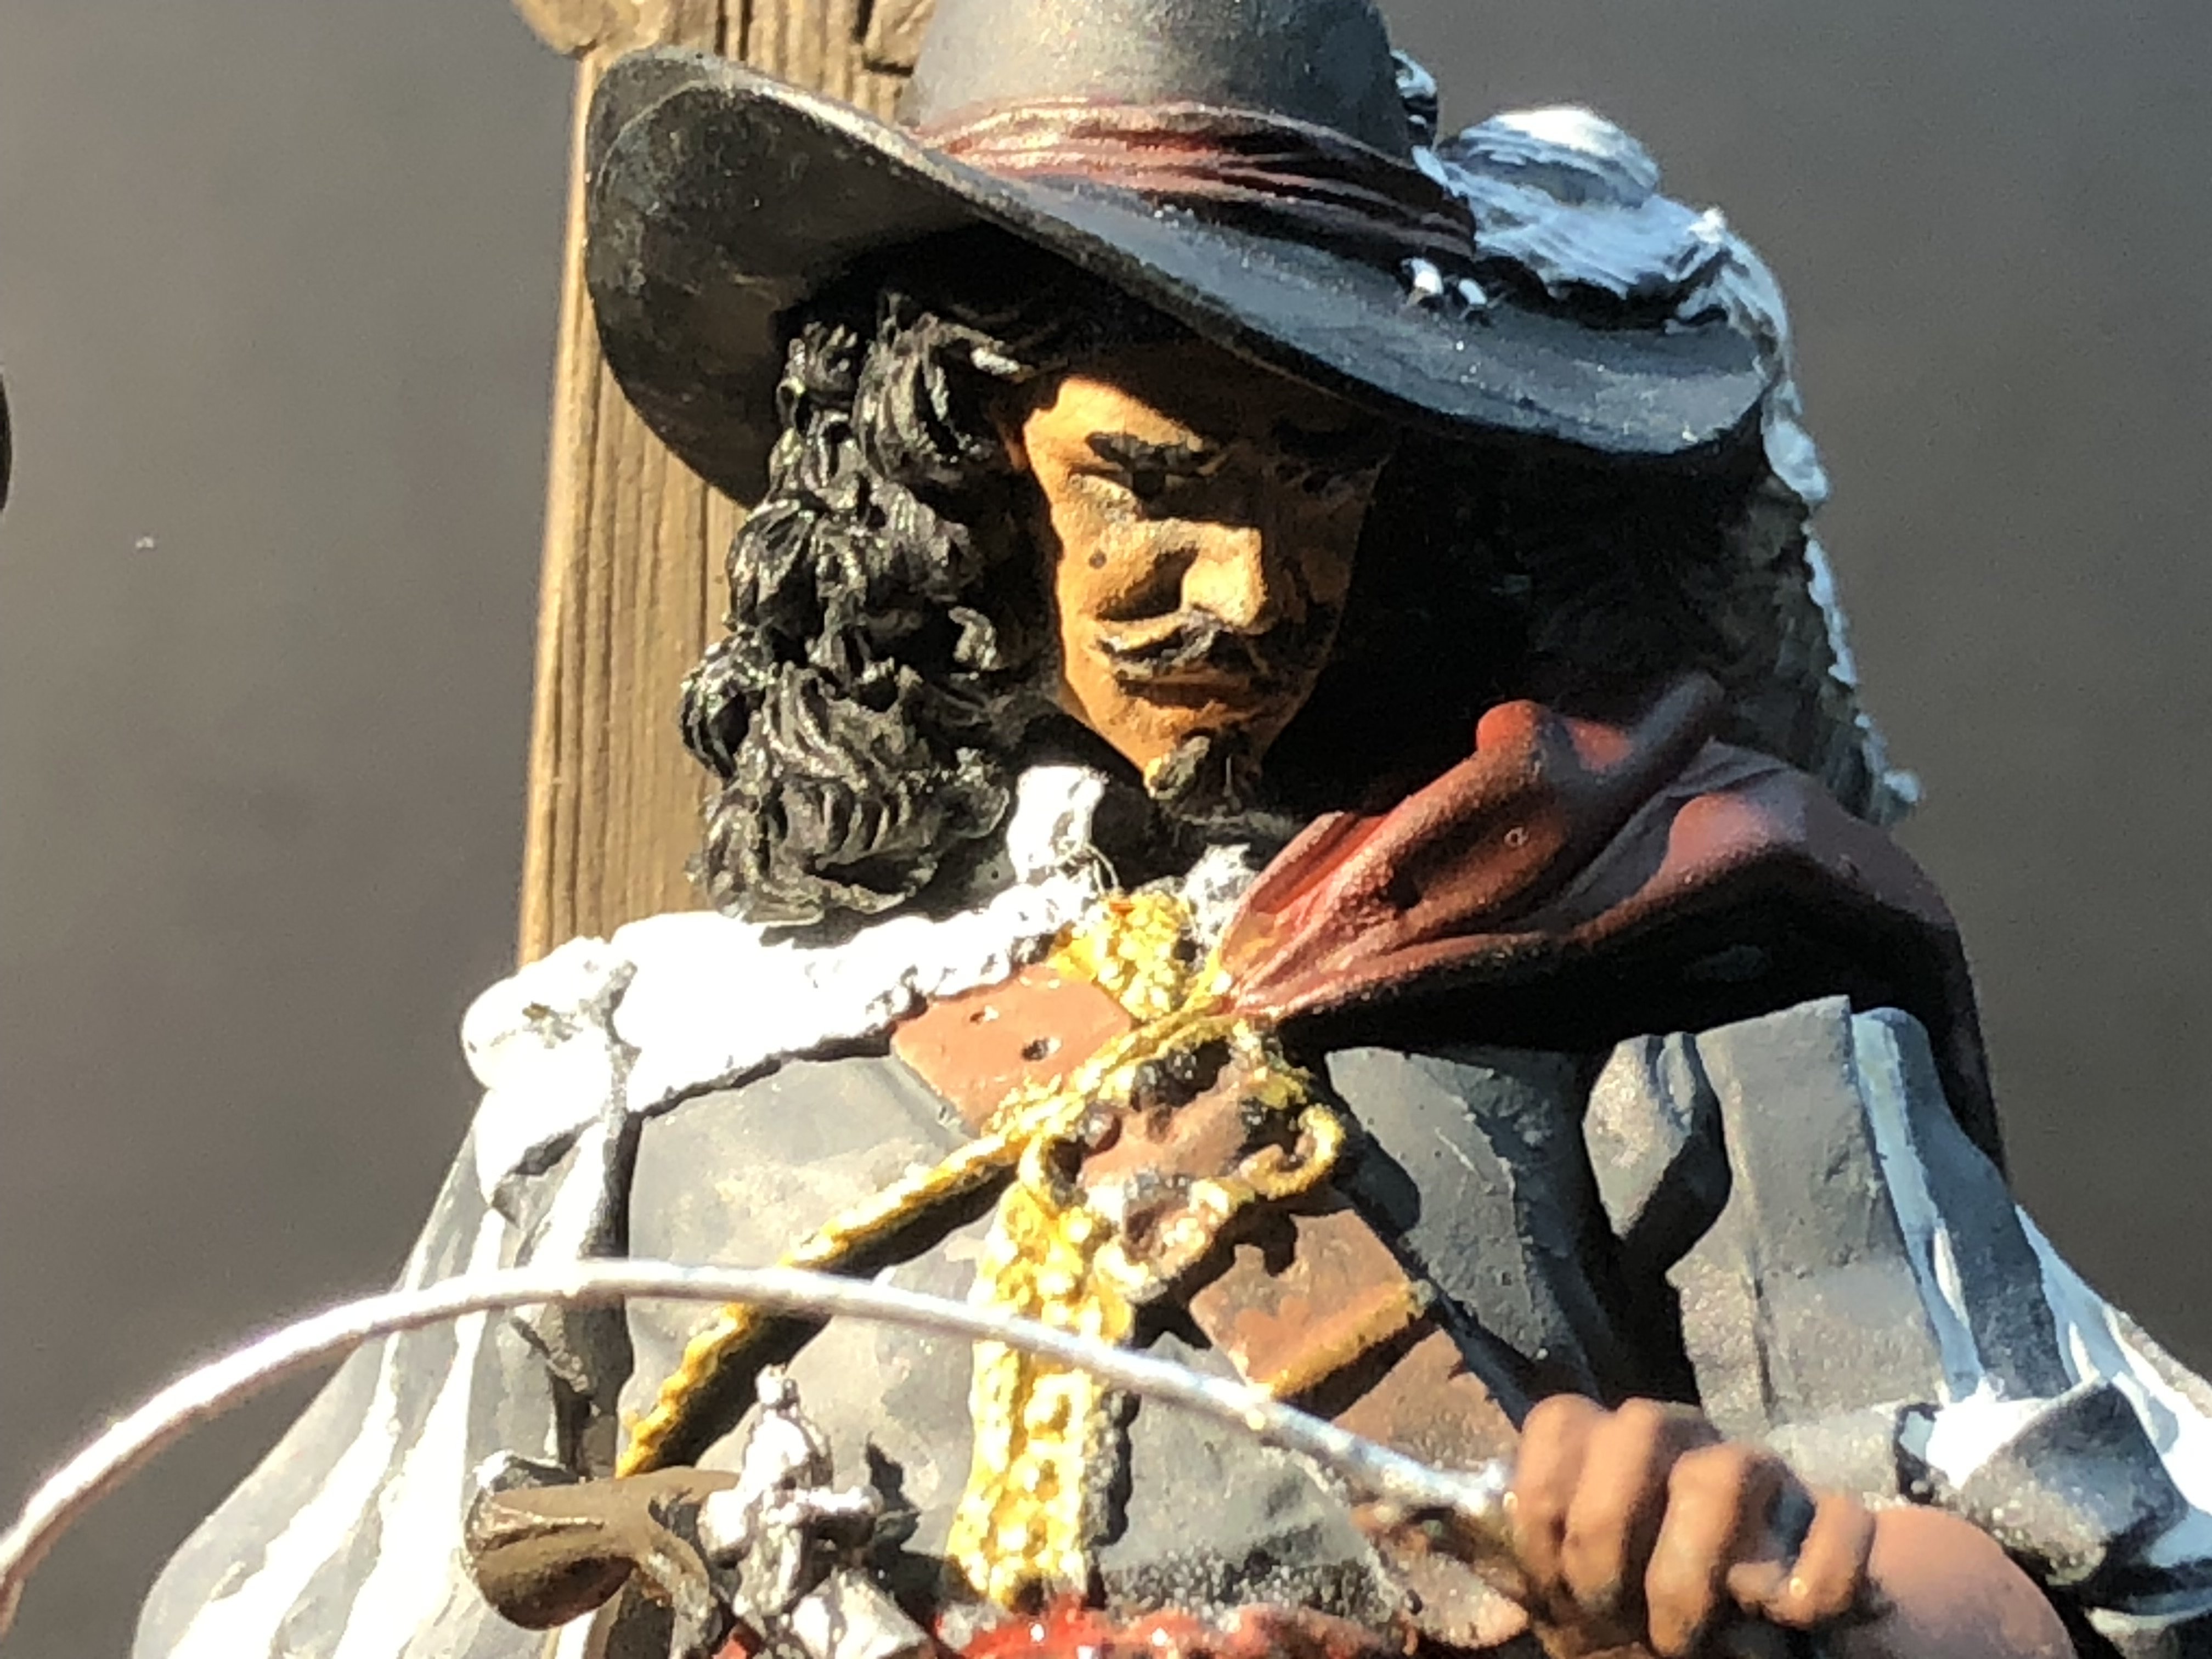
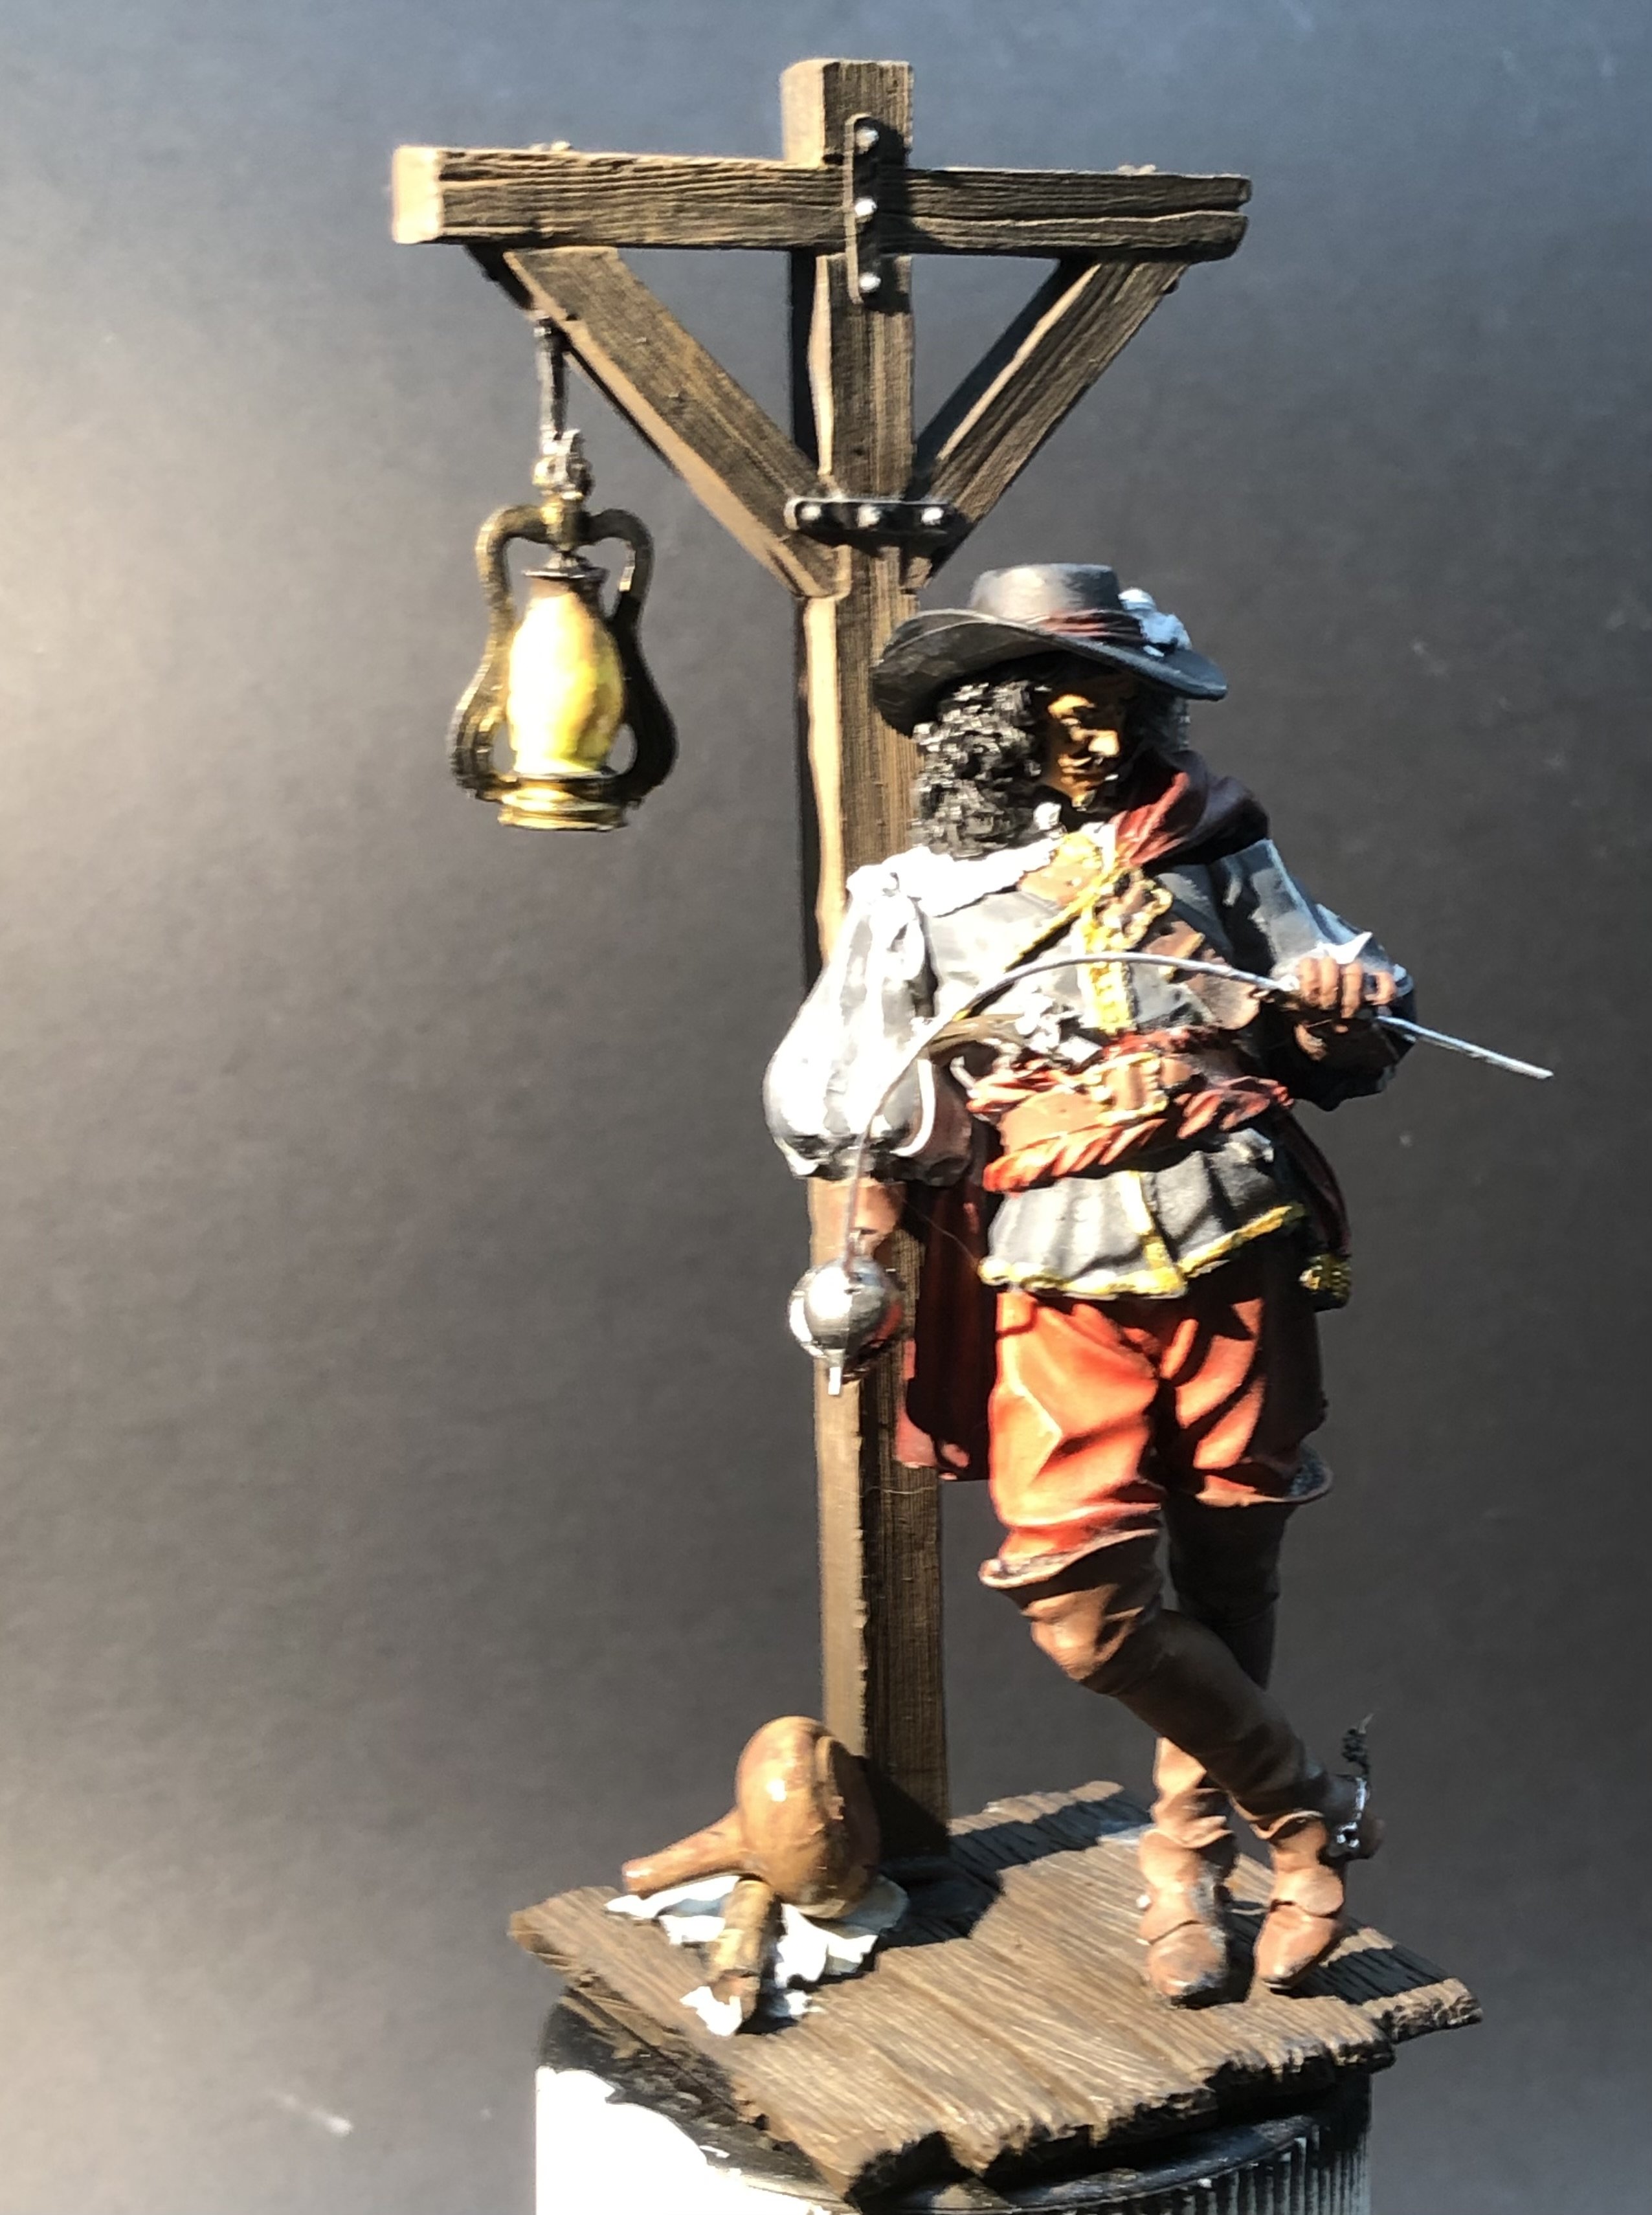
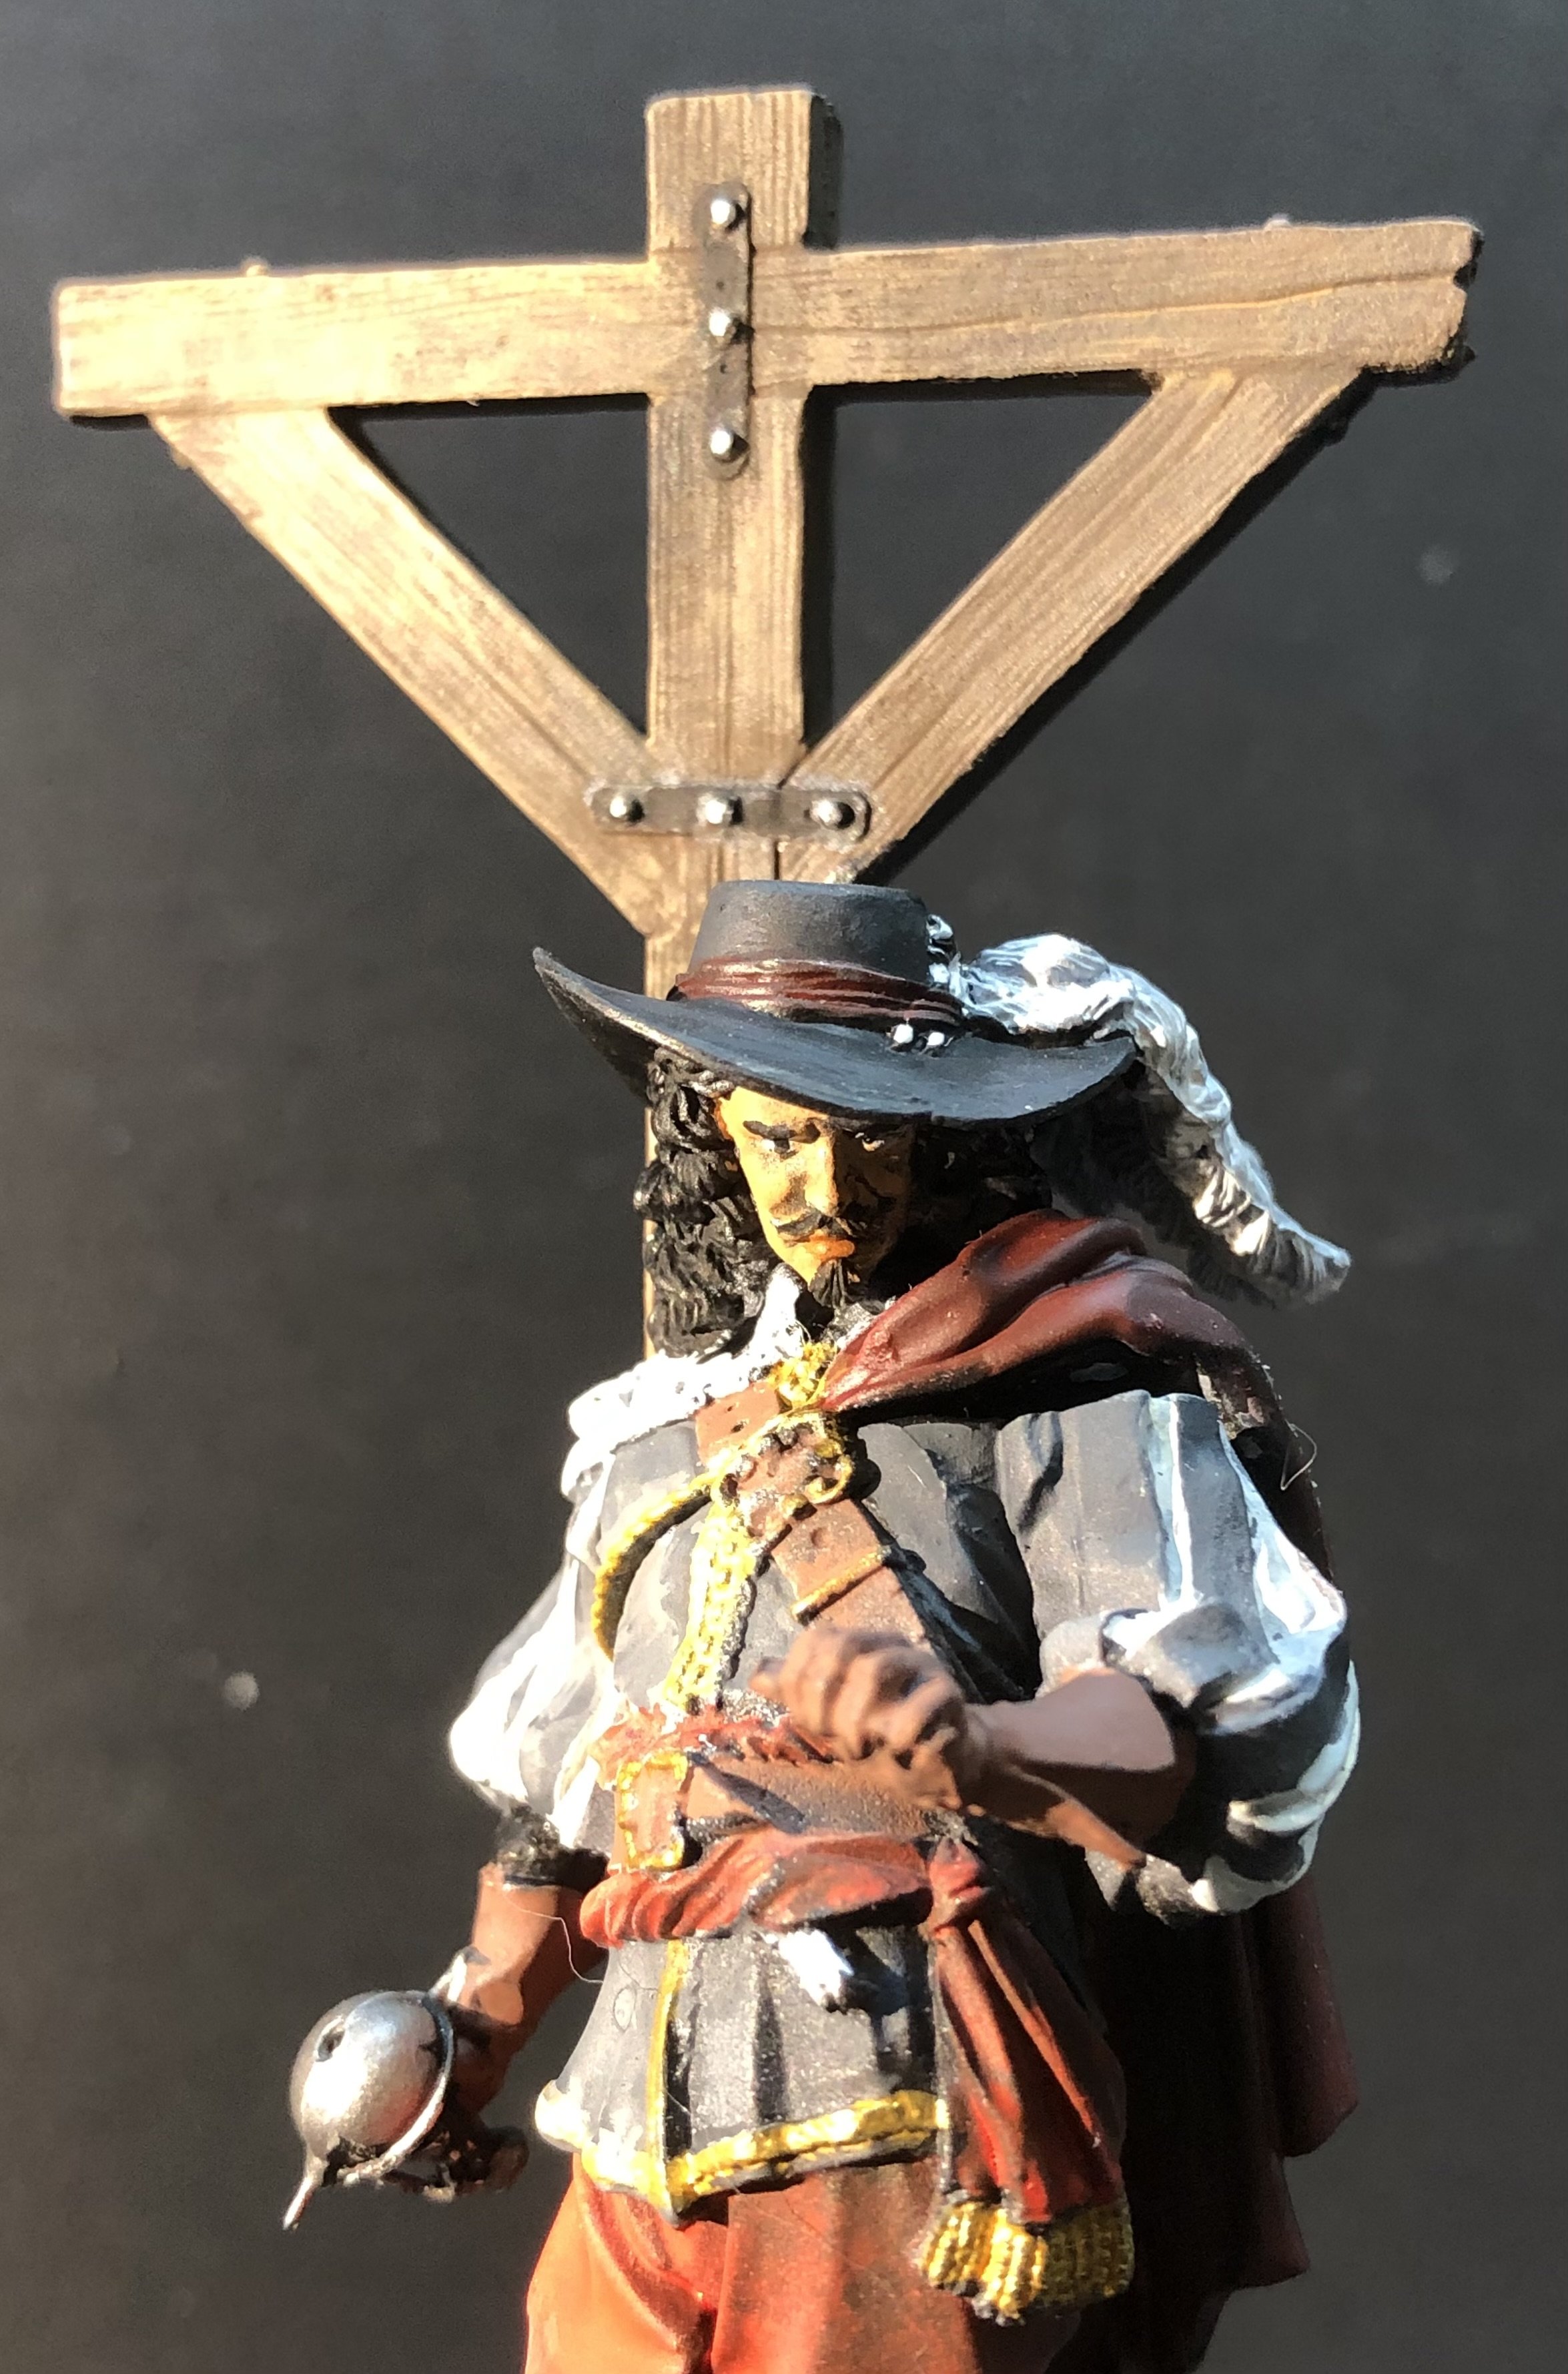
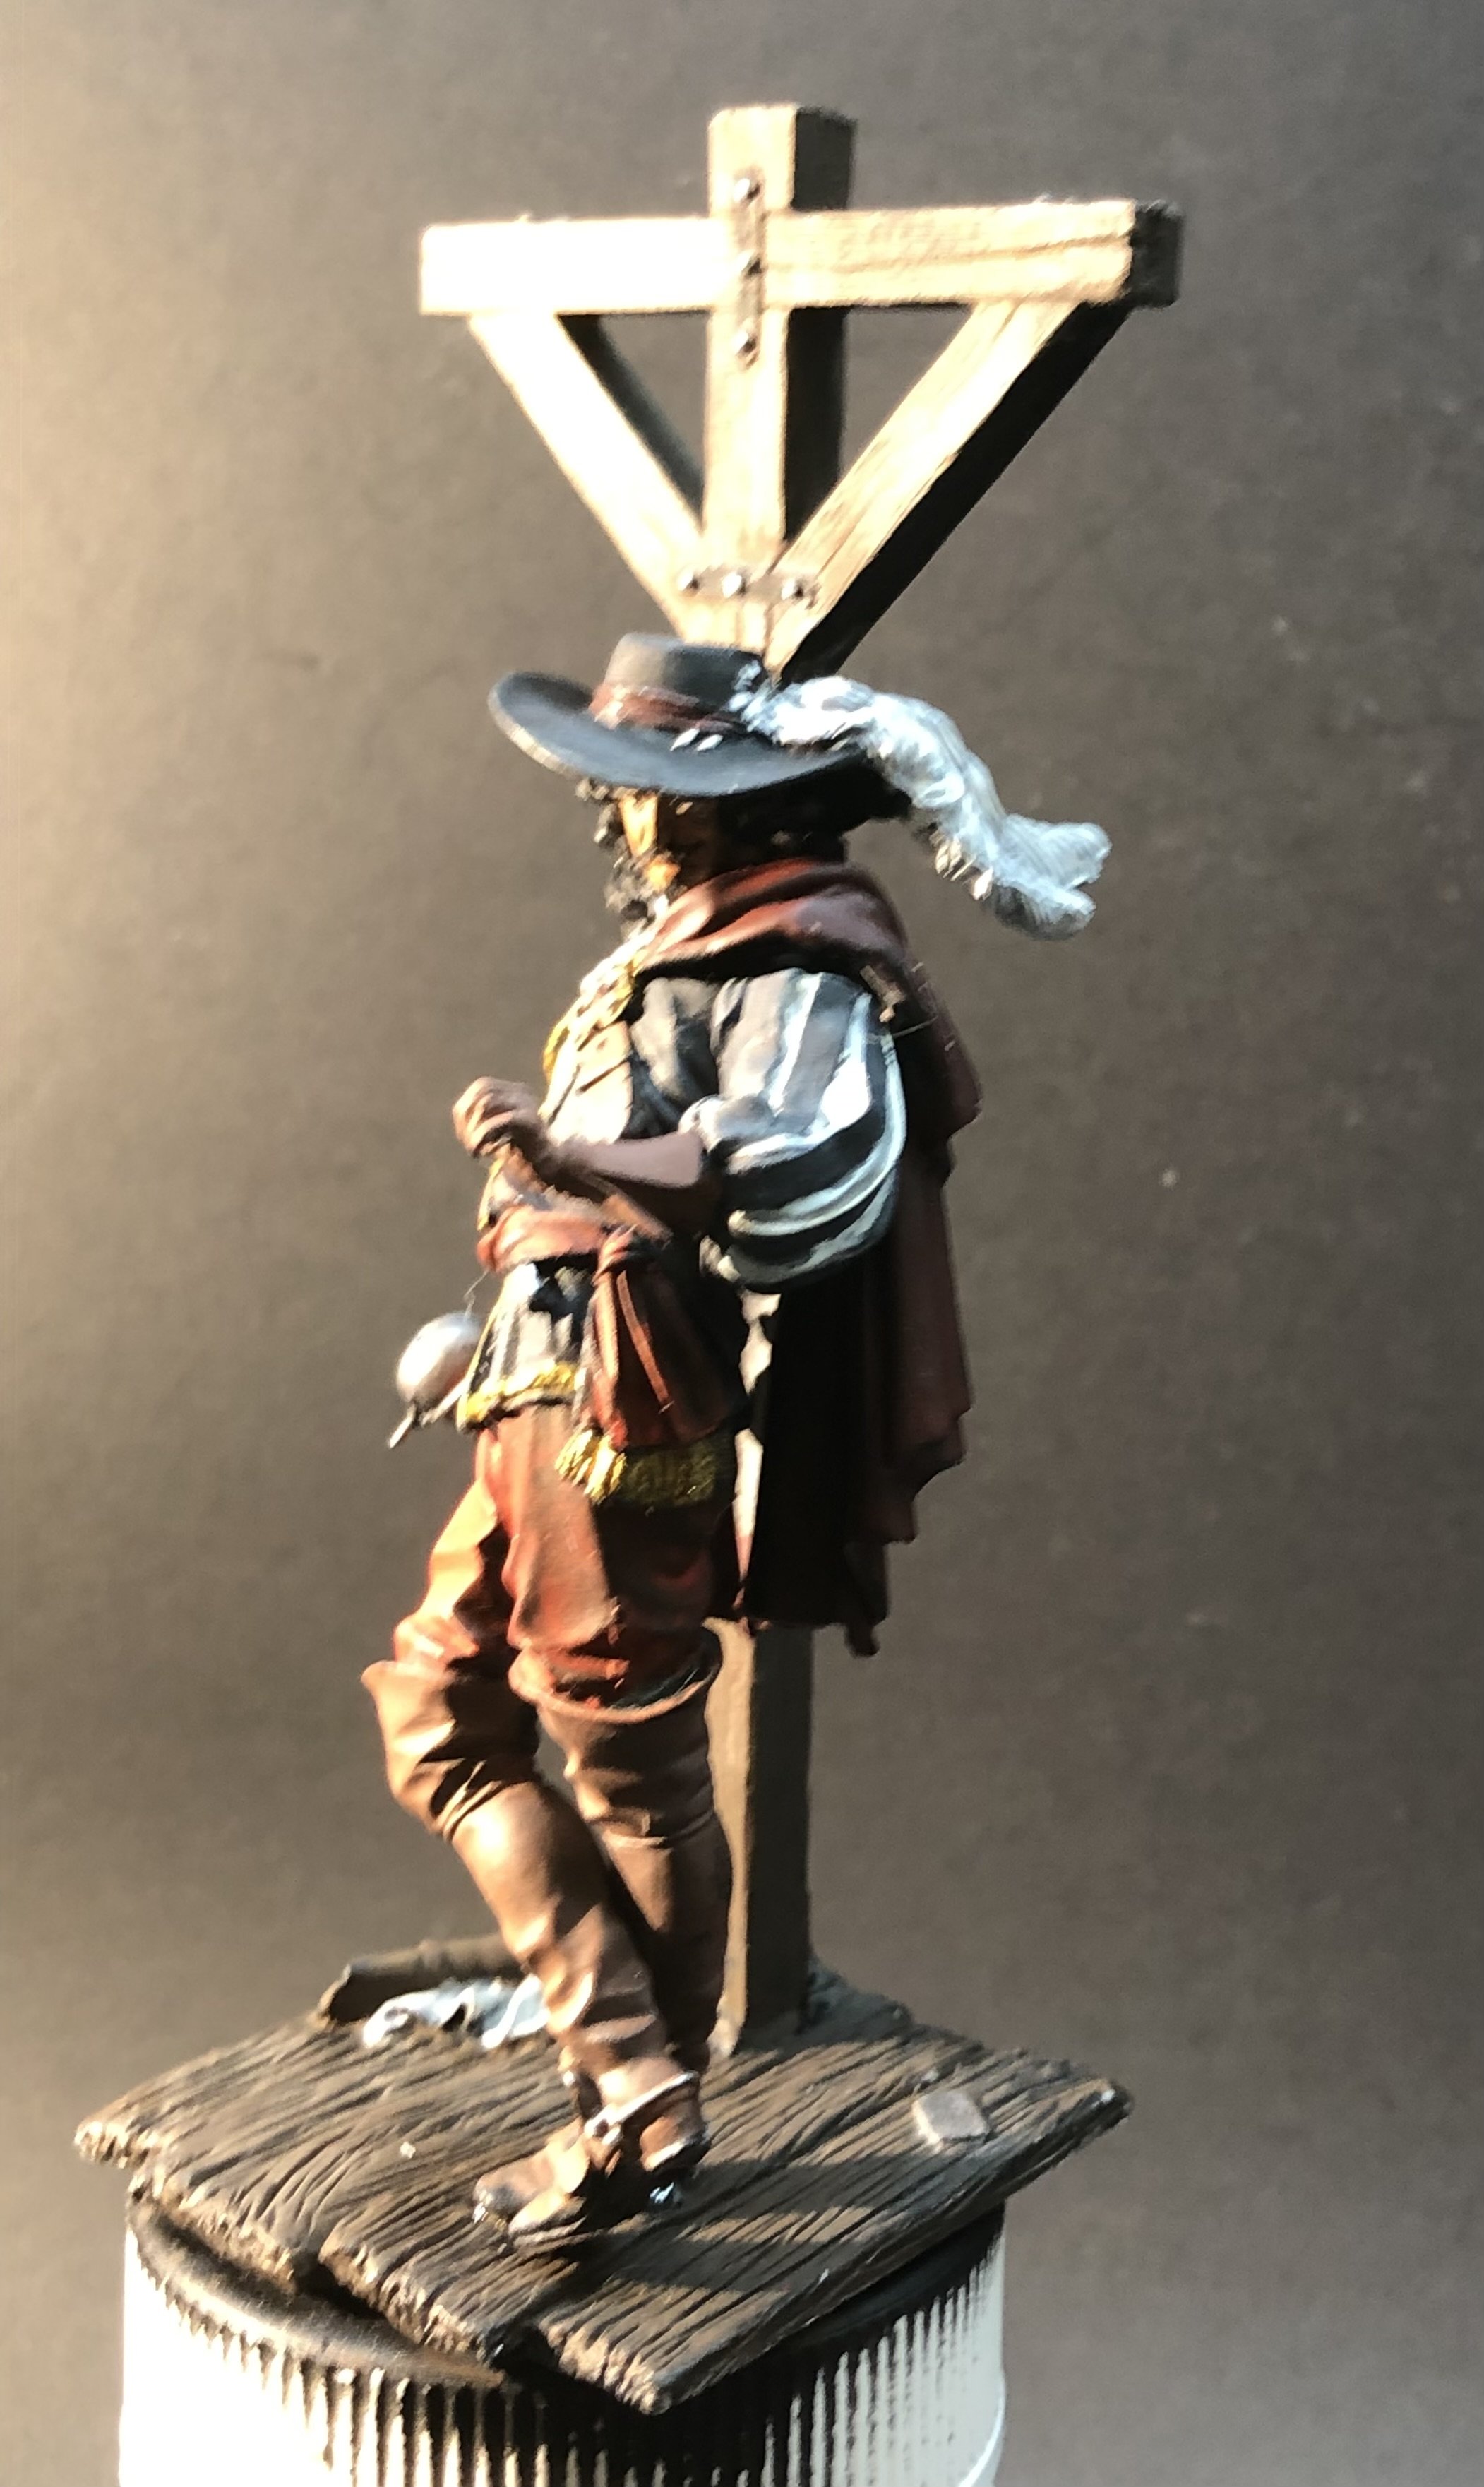
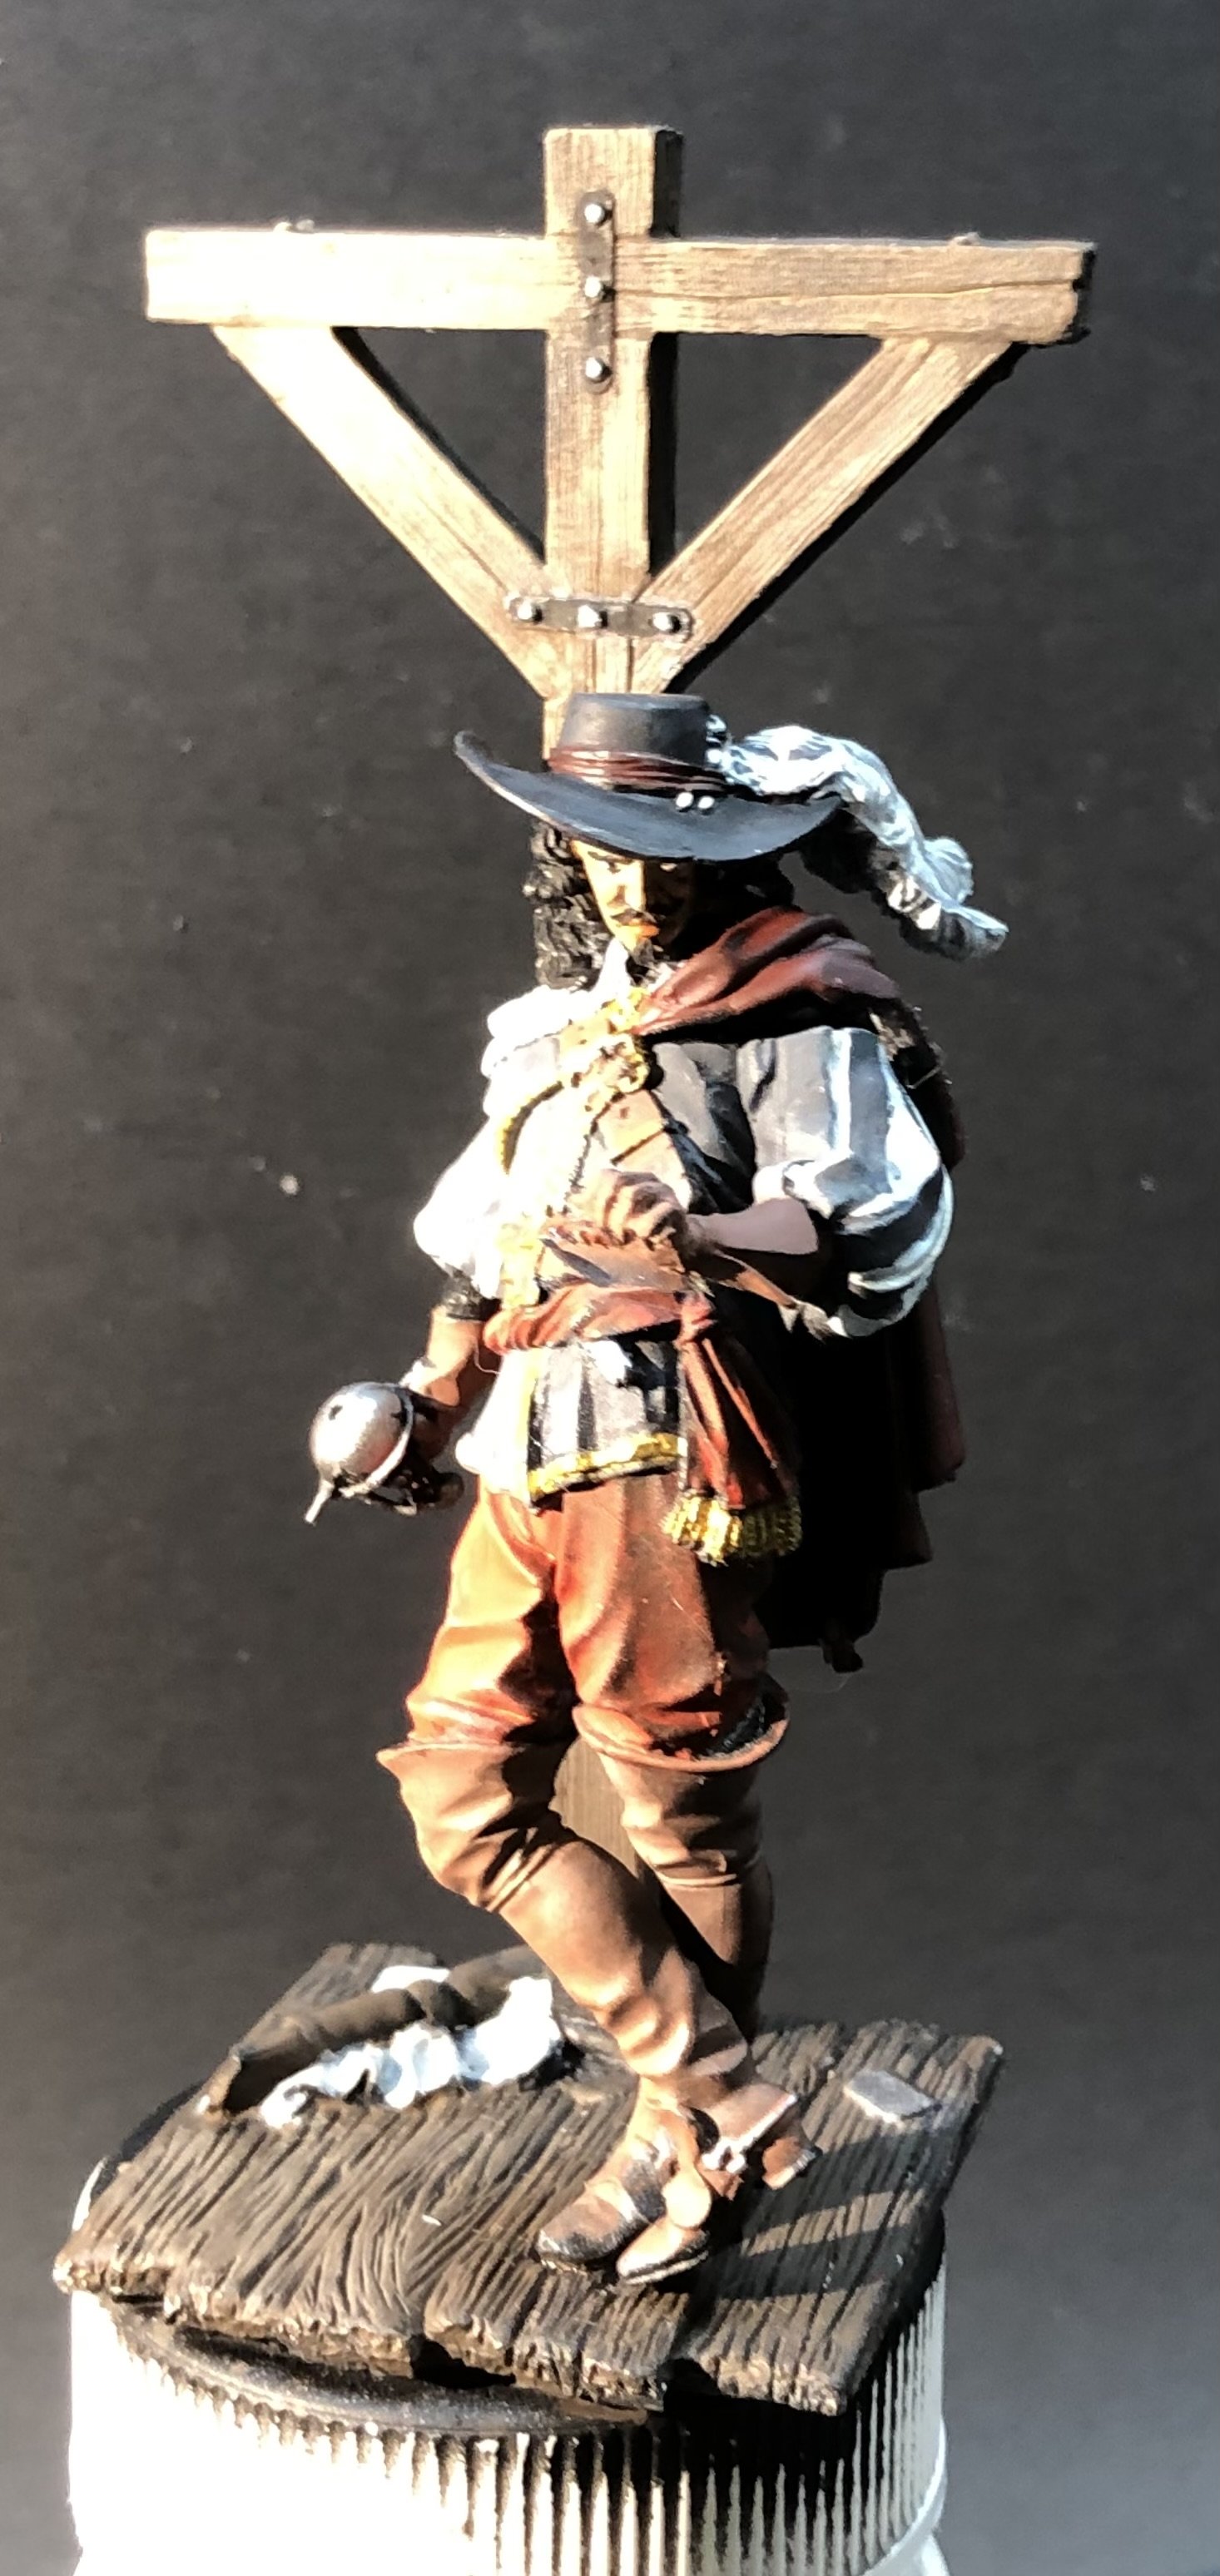
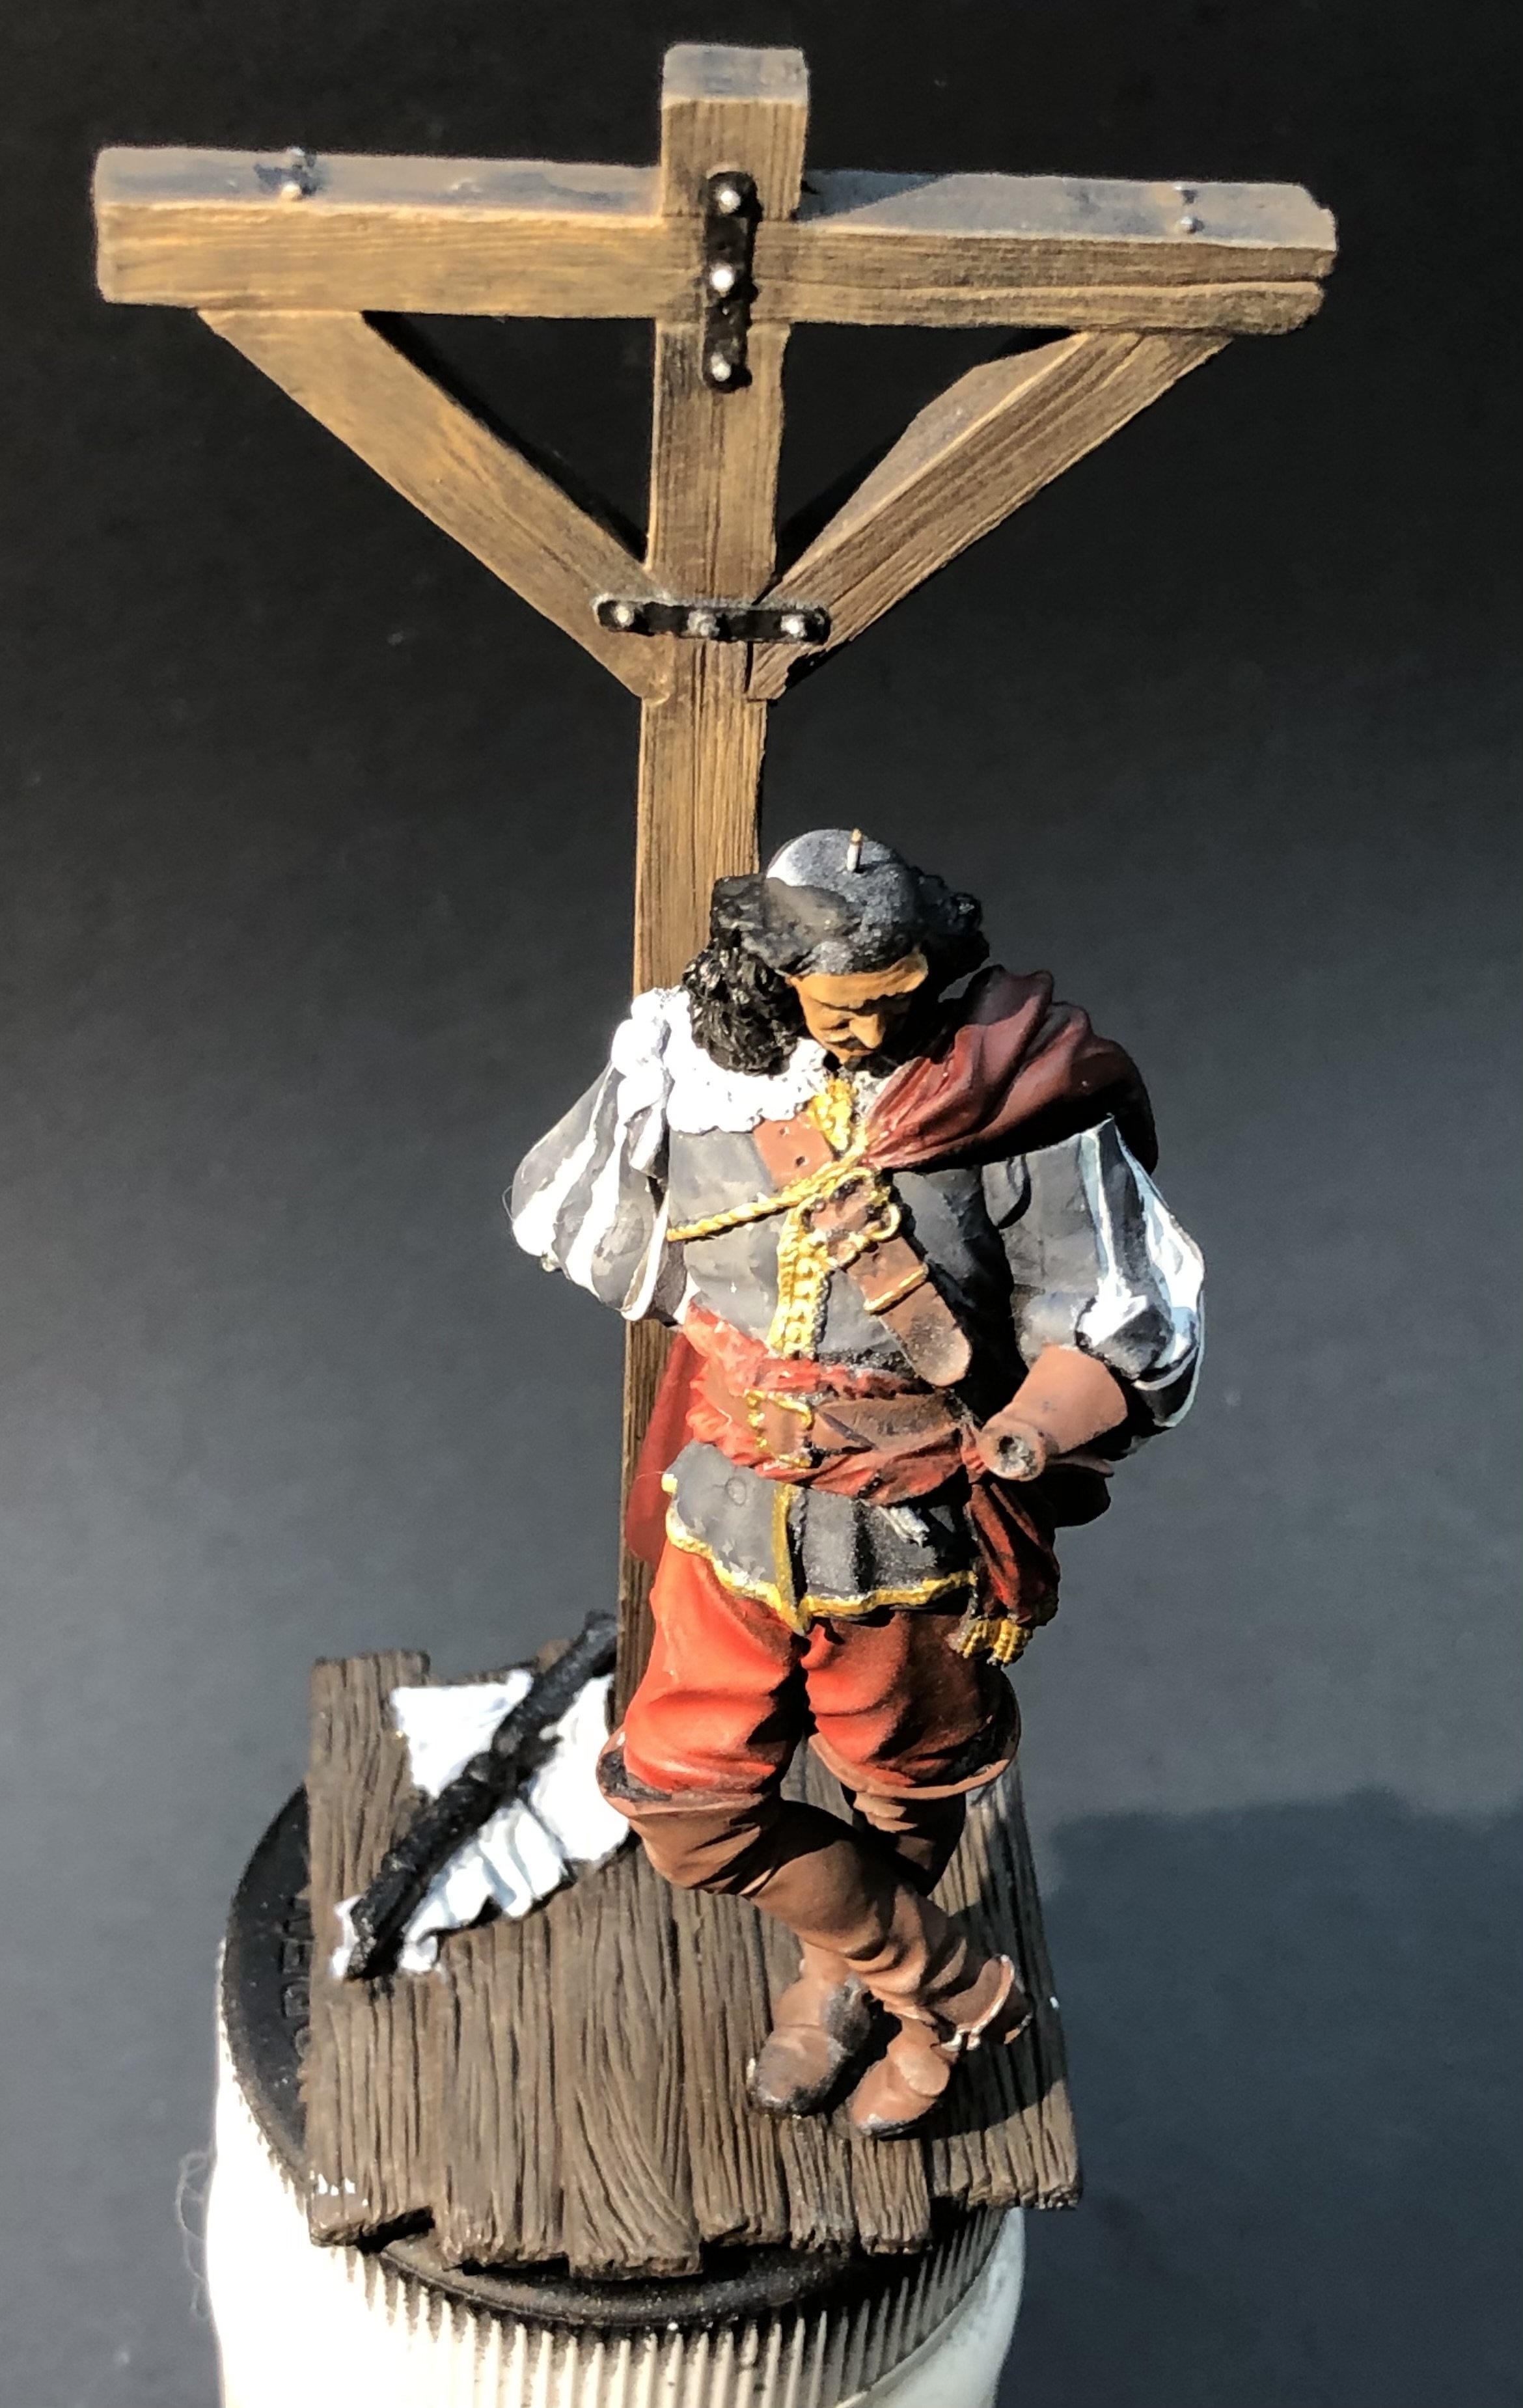
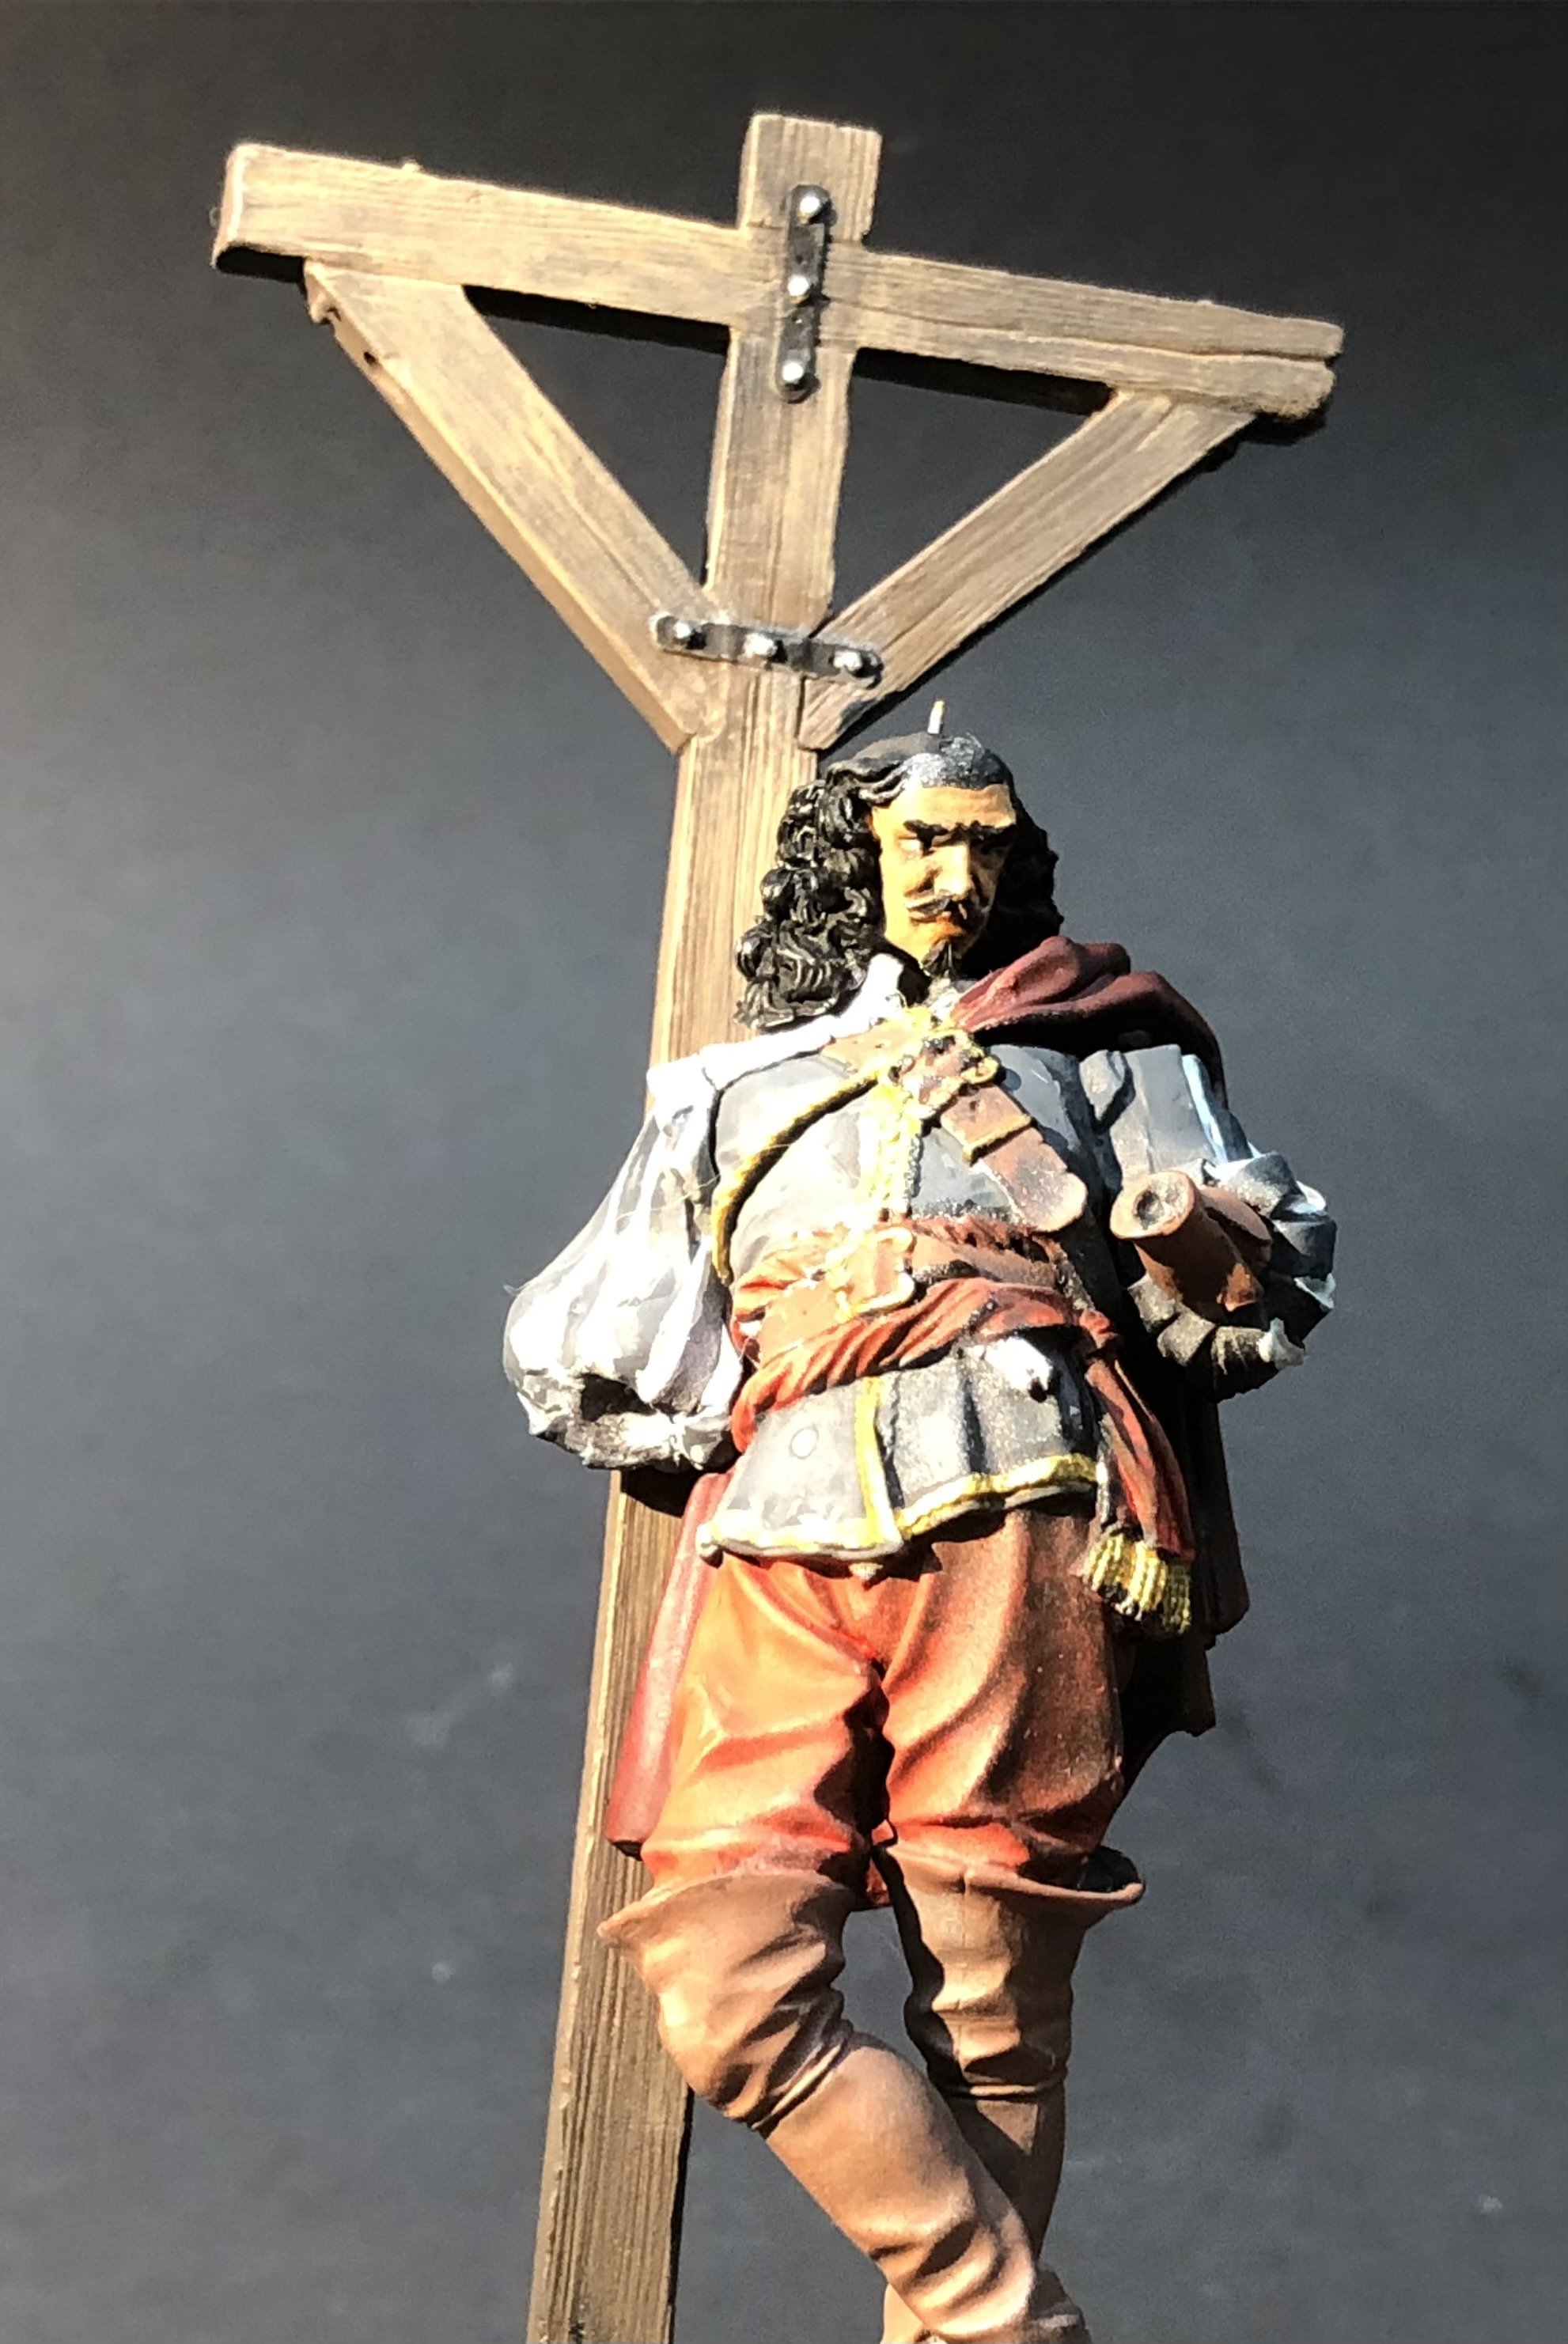
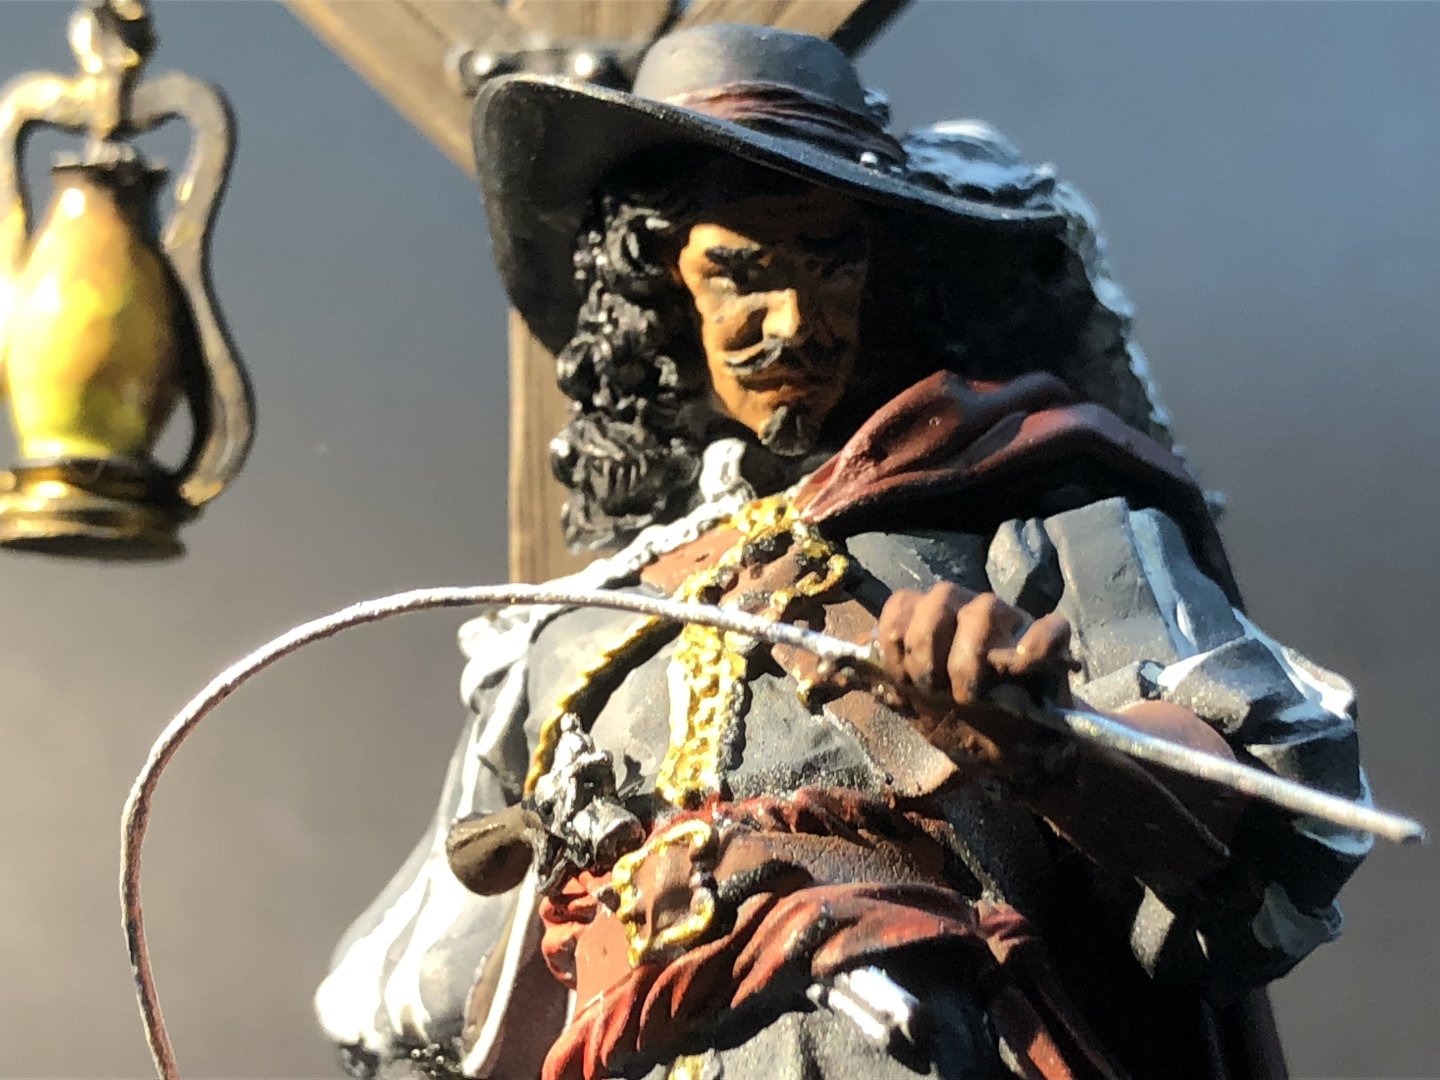
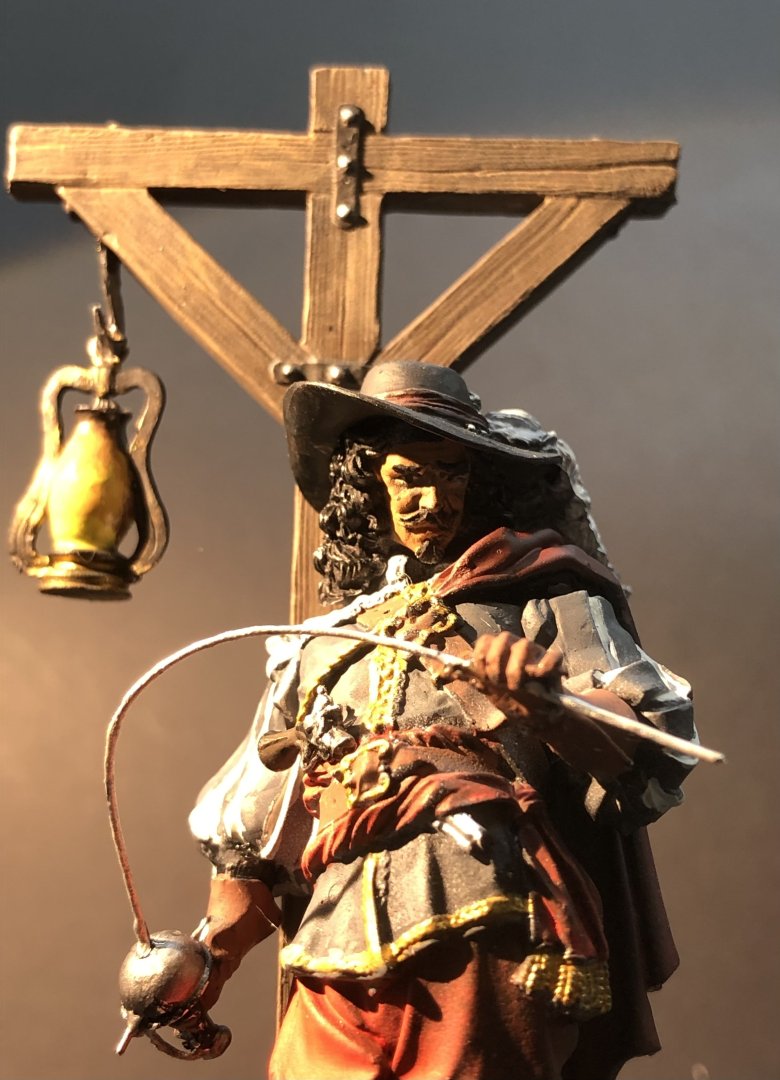
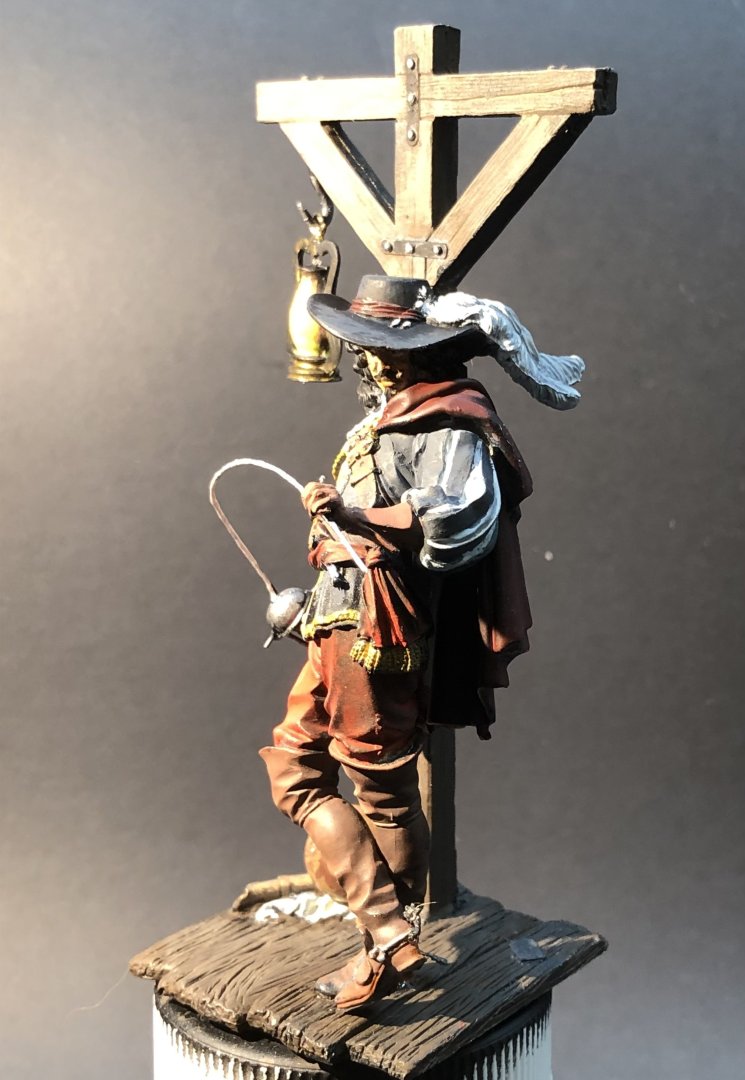
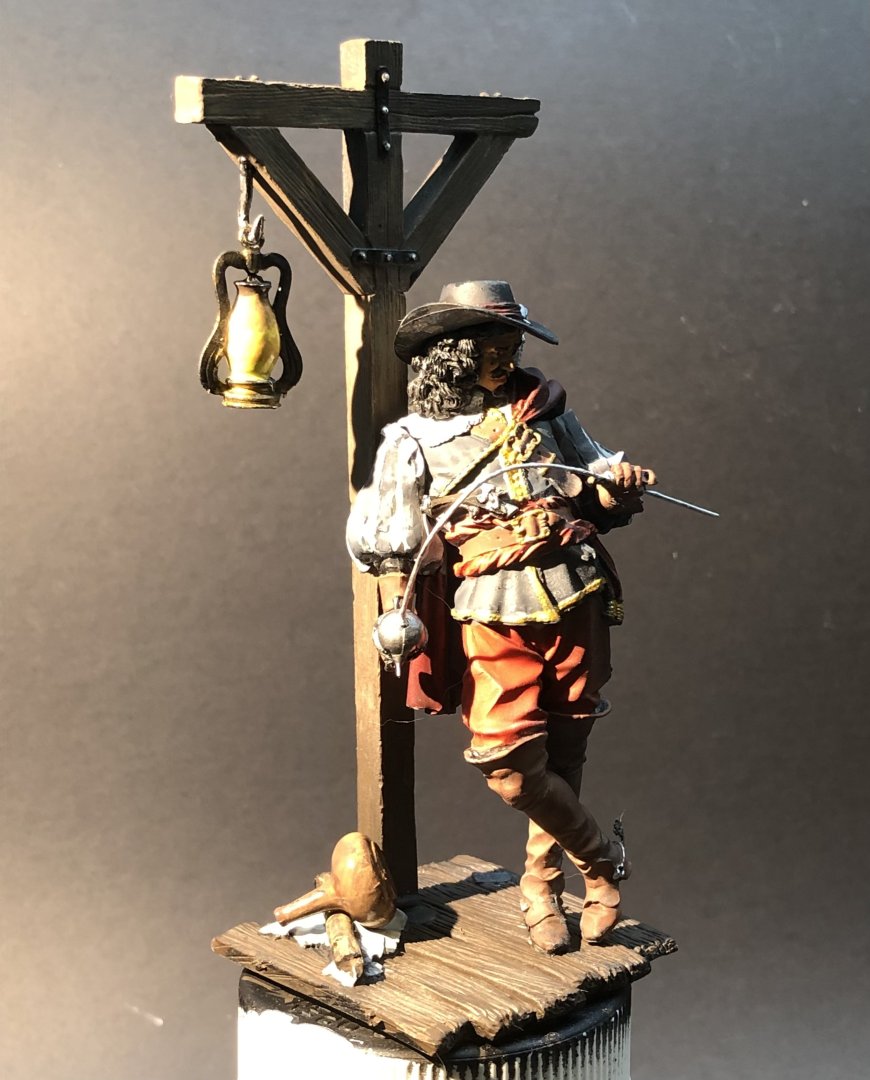
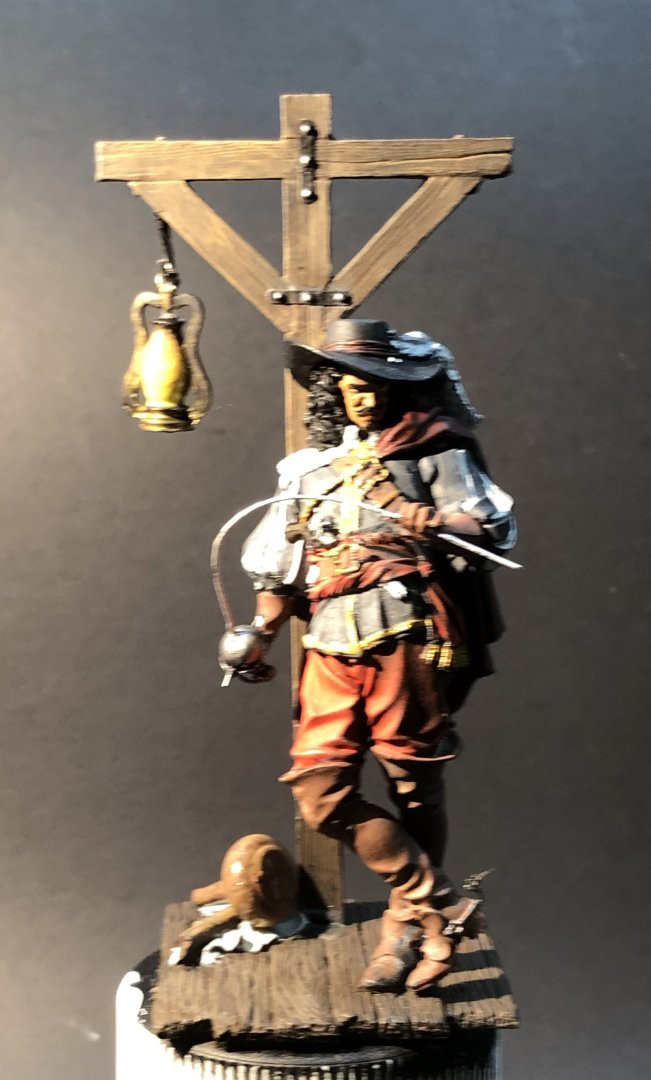
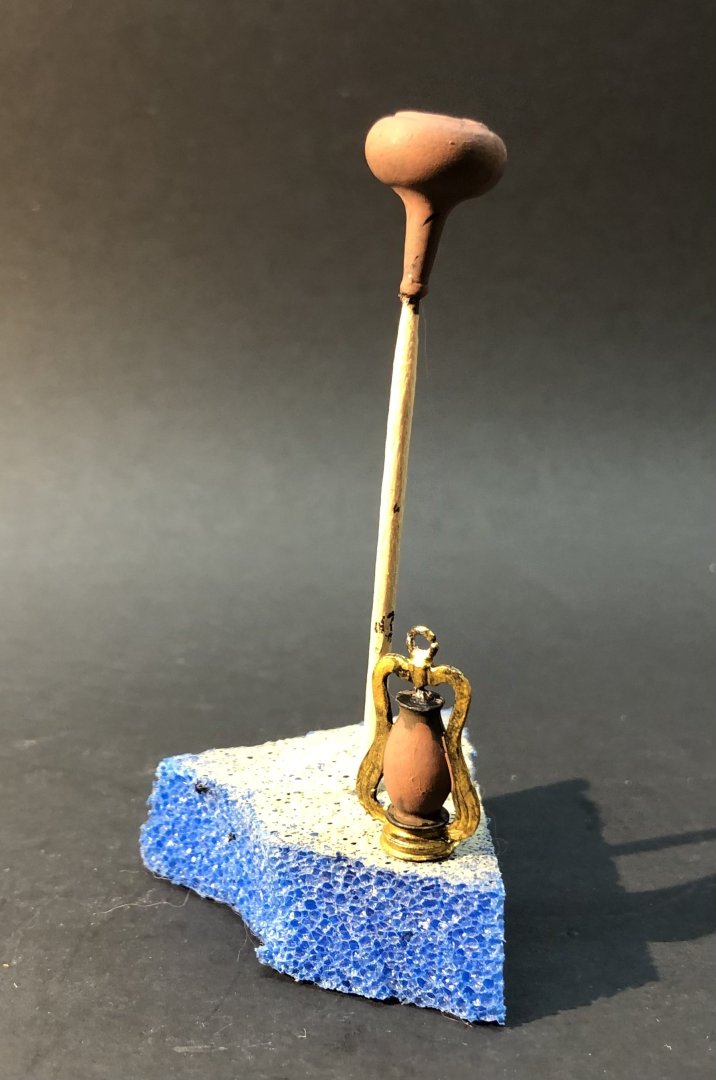
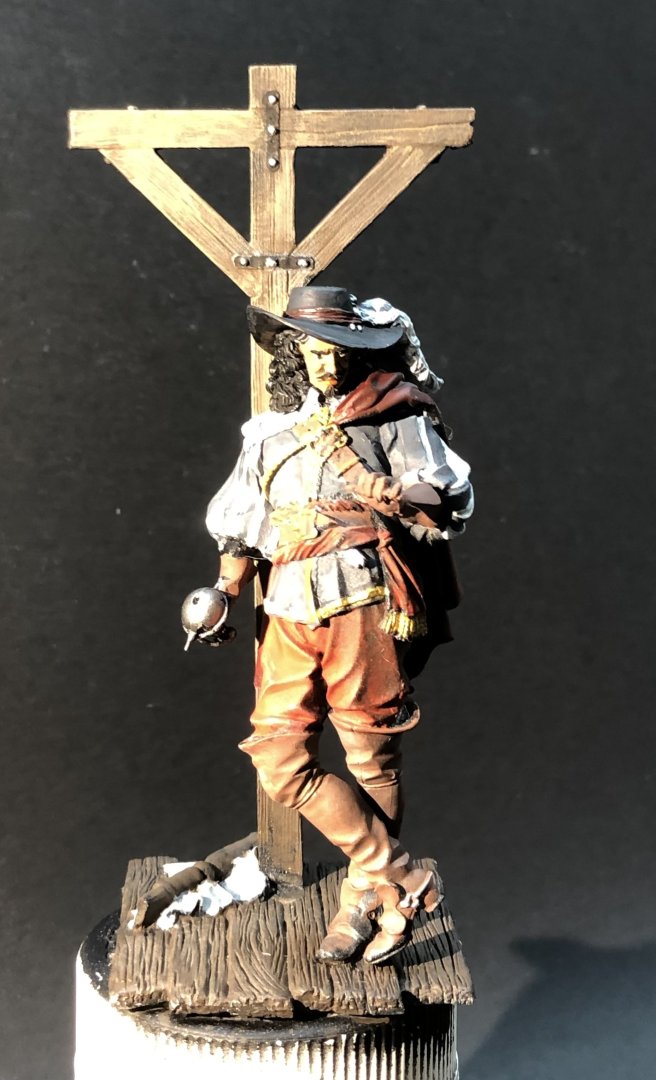
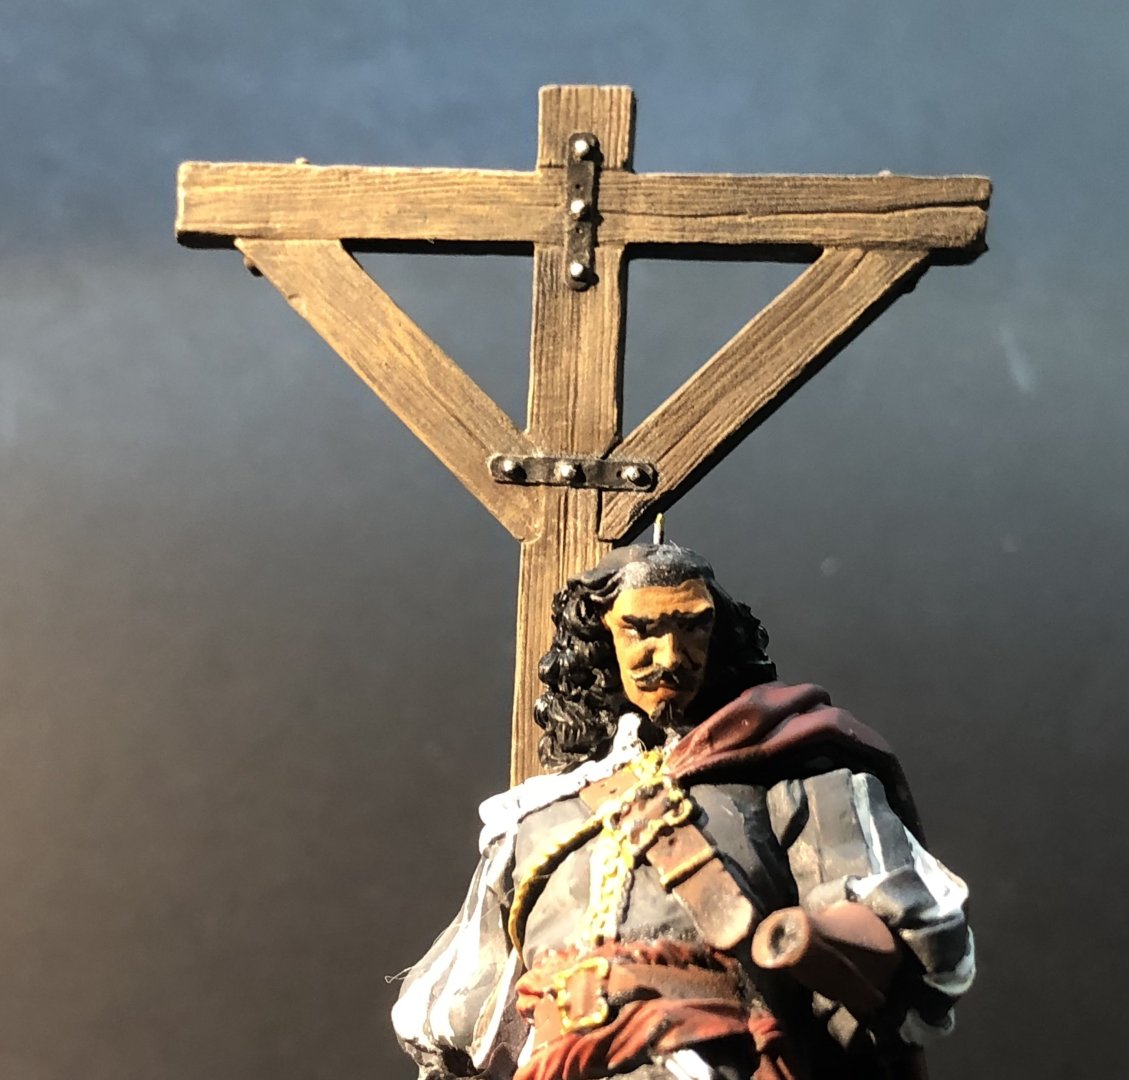
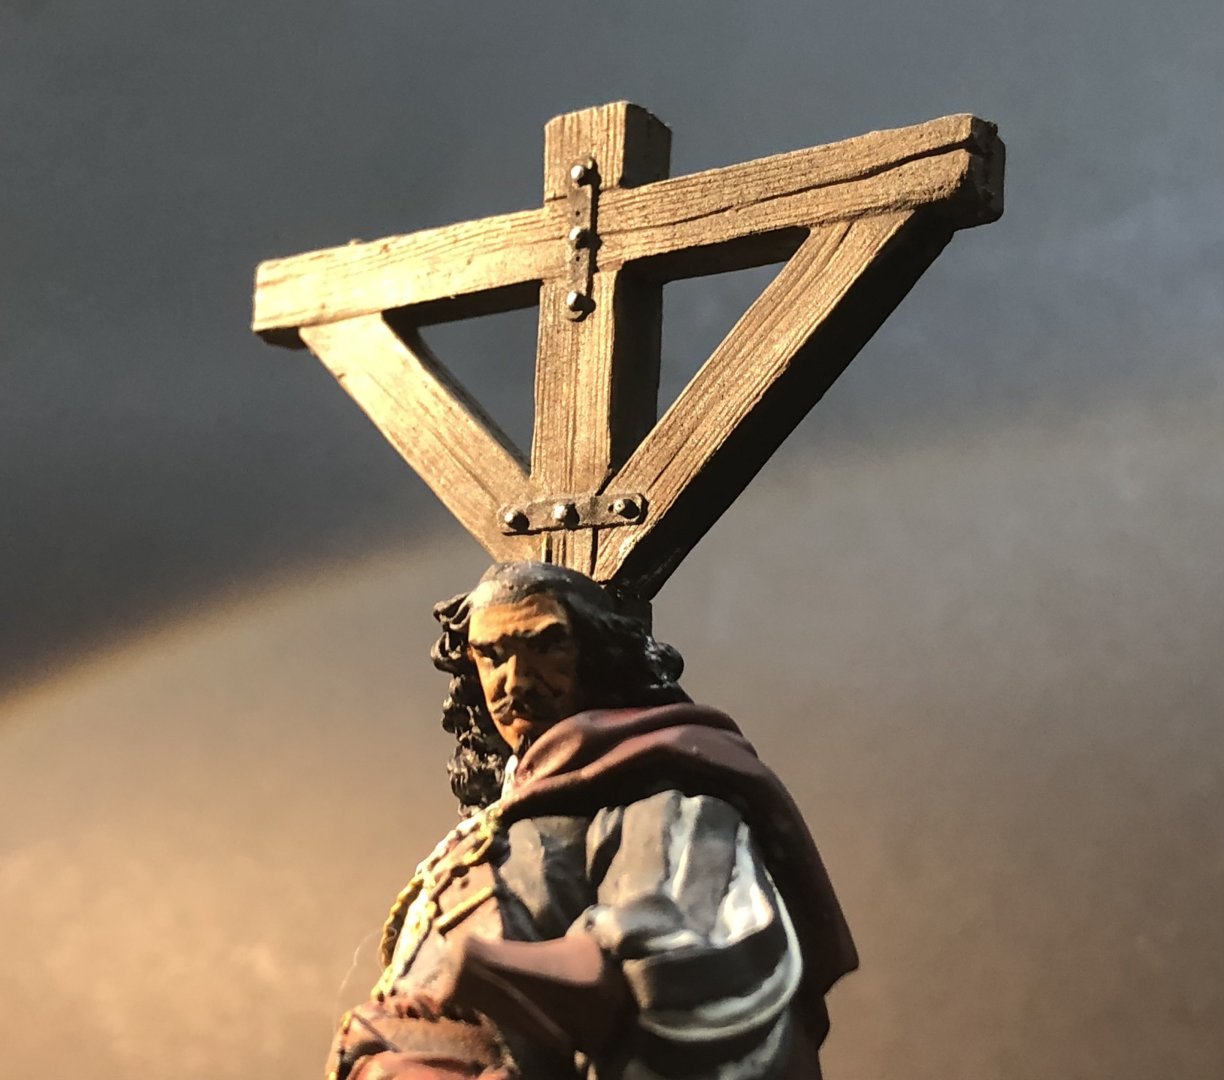
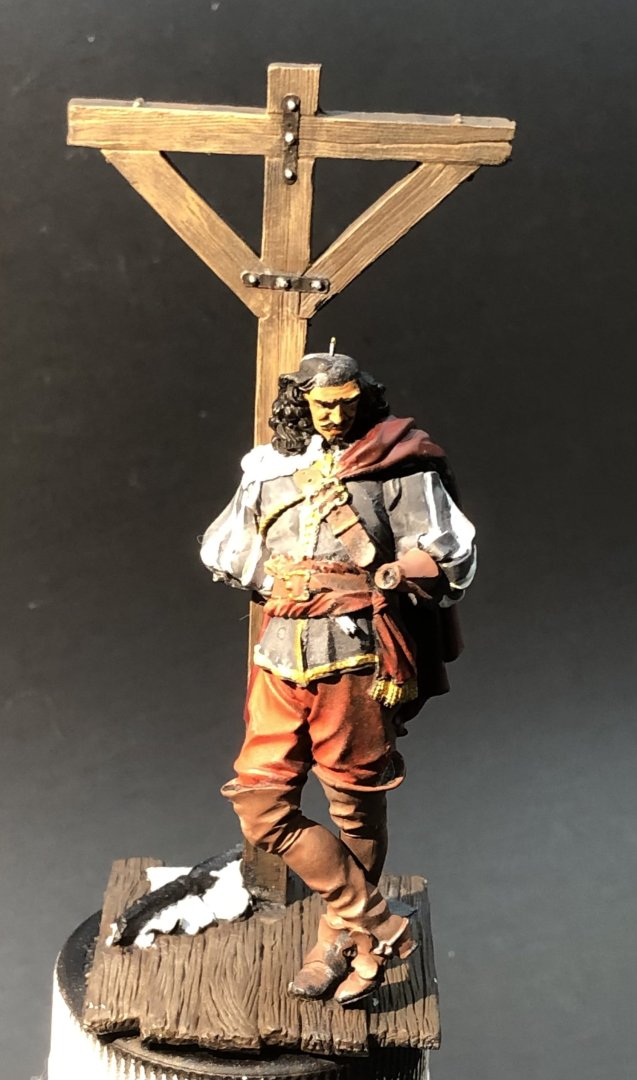
Nasty Jack got his rapier today. I used a piece of 0.5 mm brass rod which is close to the scale thickness of a rapier. I managed to knock his hand off trying to get the rapier to bow but it all went back on again. The bowed rapier has bit of a look of menace there. Someone’s been a naughty boy. I painted the lantern with a series of yellows and light brown and then gave it several coats of gloss. In the right mood I think it looks fairly convincing. The flask got a wash of lighter brown and the gloss treatment. Both were added to the base. Ive also added his spurs although I’m not sure what a buccaneer needs spurs for but what do I know. I’ll give the rapier a coat of gloss and there are a few more bits to touch up and then I think this one is done. Thanks for looking in, for the likes and kind comments. I have a couple more Pegaso figures to start on between the ship models. Alan


-
Folland Gnat T.1 by AJohnson - Airfix -1/48- PLASTIC
king derelict replied to AJohnson's topic in Completed non-ship models
A lovely model Andrew. It looks really good. It’s amazing how aircraft have grown. I looked at the Gnat at the Cosford museum and was staggering at how small it is compared to a Hawk. The same thing with the A-4s at the NAWC Patuxent River museum. They are tiny compared to the modern stuff. Even the Harrier is small compared to the F-35 alan- 1 reply
-
- 3
-

-
-
The paintwork looks very nice Andrew alan
-
The mast and crane looks superb Mike. It came out really well and I share you dread of soldering. alan
-
Yep, once you get inside the point with an edged sword he’s toast. alan
-
Thank you very much OC. Not far to go now alan
-
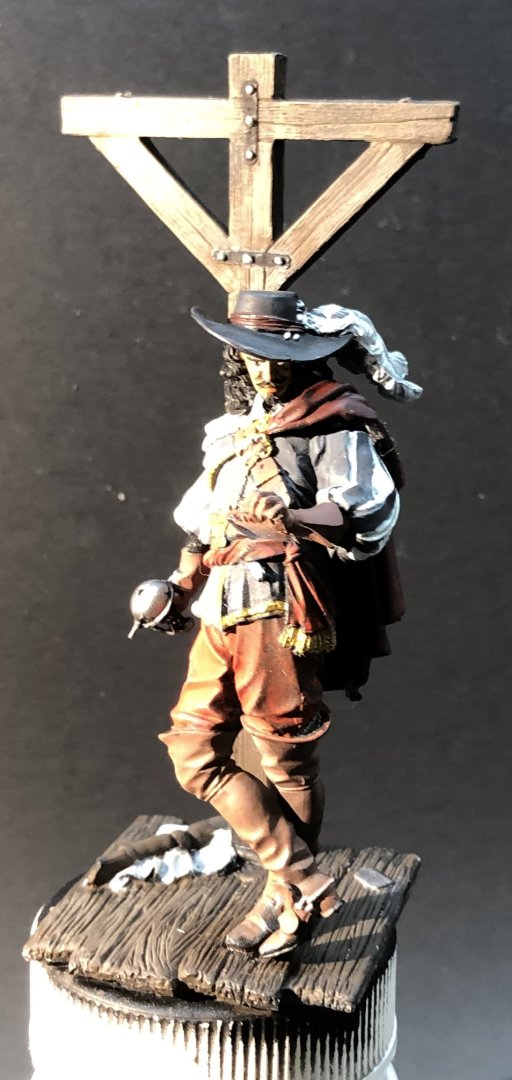
Ive started adding bits and working on the accessories. The wine flask and the lamp have been given some basic coloring. The trick now is to see if I can make it look like glass and lit in the case of the lamp. I’m hoping that yellow and white shading will work for the lamp and some lighter brown on the flask and then gloss finish on both. Jacques now has forearms and hands. His left hand doesn’t want to match perfectly so a little putty will be needed, otherwise it assembled well. I decided that the white metal rapier needed to be replaced. It is too flat and wide and it also doesn’t hold the curve I want. So I cut and filed it off and I plan to use suitable brass rod in its place. I’m not really sure about the context of the rapier. I think I would have preferred something with an edge like a saber or cutlass but rapiers do seem a firm favorite for swashbuckling and it never slowed Zorro down. Making that Z with a saber would be messy too. The hat make the the man as they say and he just looks more suspect. Thanks for looking in, the likes and kind comments. Alan

-
Your exceptional detailed work is going to result in a spectacular model. It’s quite a puzzle seeing how the aftermarket stuff integrates with the kit and you have done a masterful job of conquering the inadequacies. alan
-
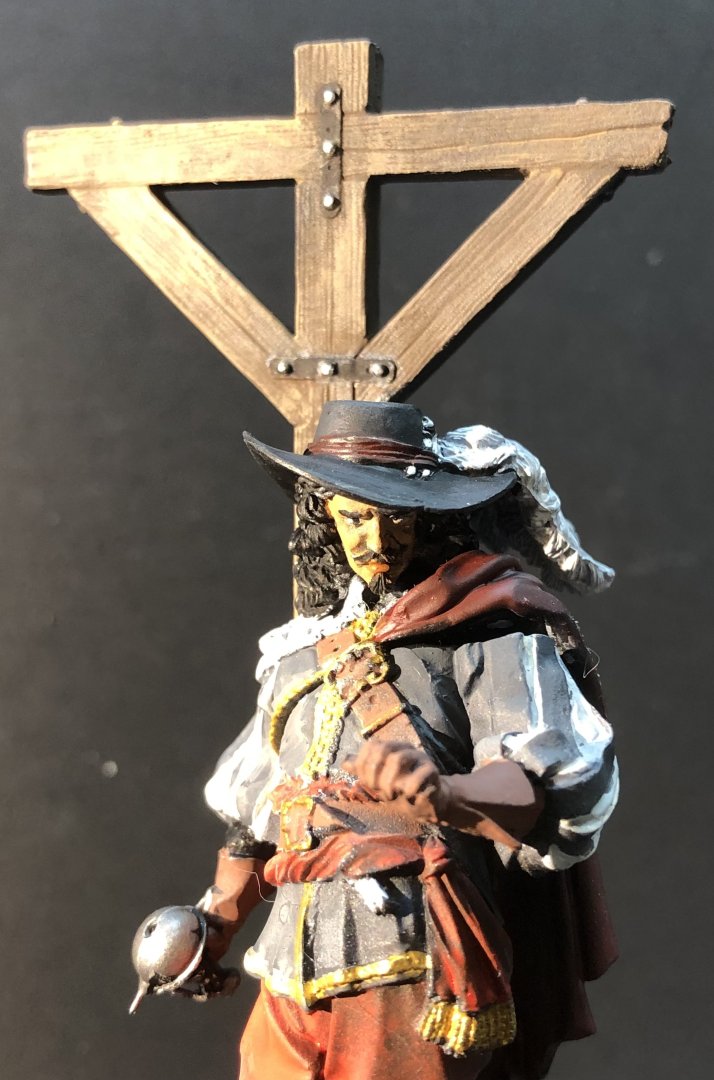
Thank you very much OC. I’m still trying to darken the colors as they transition from the lighted side. I used off white for the left iris and pale grey for the right. I’m not sure if it’s all going to make a difference though. alan
-
Thank you very much Jeff. Whatever he is planning I somehow doubt it’s the orphans summer picnic. alan
-
I’ve been working on the face, trying to get a somewhat nasty cast to Jacques features. Unfortunately I think his hat will obscure quite a bit but I’m fairly happy with how it turned out. I’ve added some gloss to his hair using a stiff bristle brush apply it on the high points of his curls. Matte varnish has been painted on his cloak and it looks considerably better. I've started painting the accessories which are going to be interesting. The lantern and the flask are going to require giving the illusion of glass and for the lantern also the illusion of light. New challenges. I’ve started fiddling with whatever it is that’s lying at the base of the post. I used ivory for the cloth, sail or flag, or even curtains. The cylinder looks wooden so I’ll paint it in a similar way to the base. Thanks for looking in and the likes. alan


- 28 replies
-
- 11
-
-