king derelict
-
Posts
3,292 -
Joined
-
Last visited
Content Type
Profiles
Forums
Gallery
Events
Everything posted by king derelict
-
Amazing skill. Tiny pieces and card into the bargain. alan
- 288 replies
-
- 5
-

-

-
- Card
- Pre-Dreadnought
- (and 3 more)
-
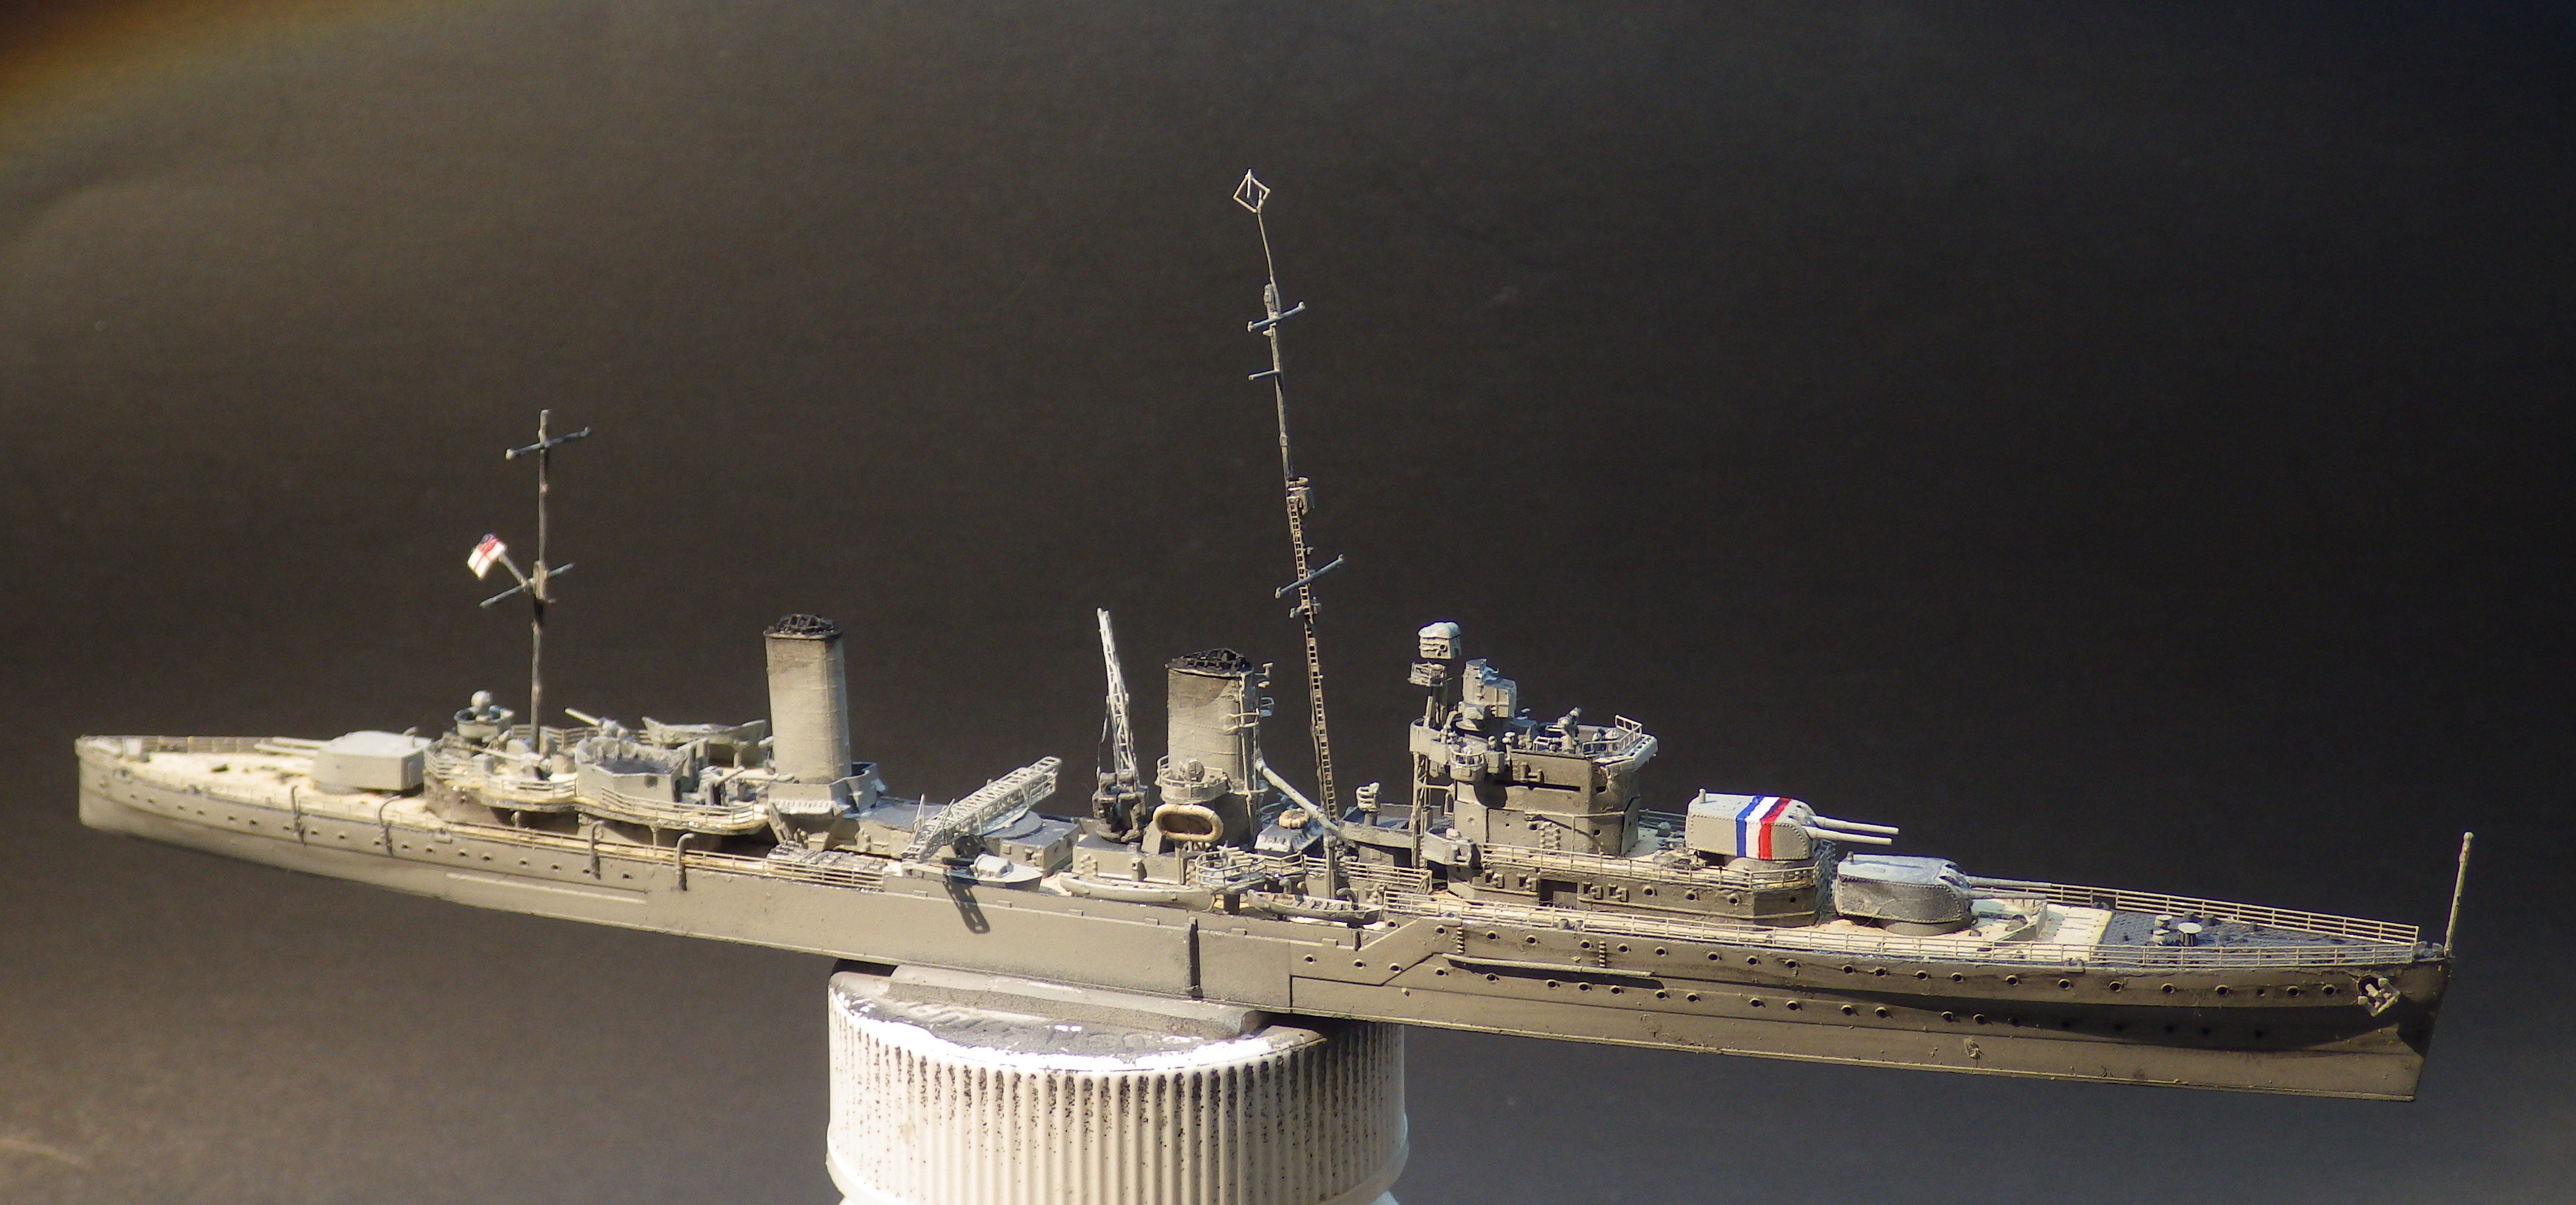
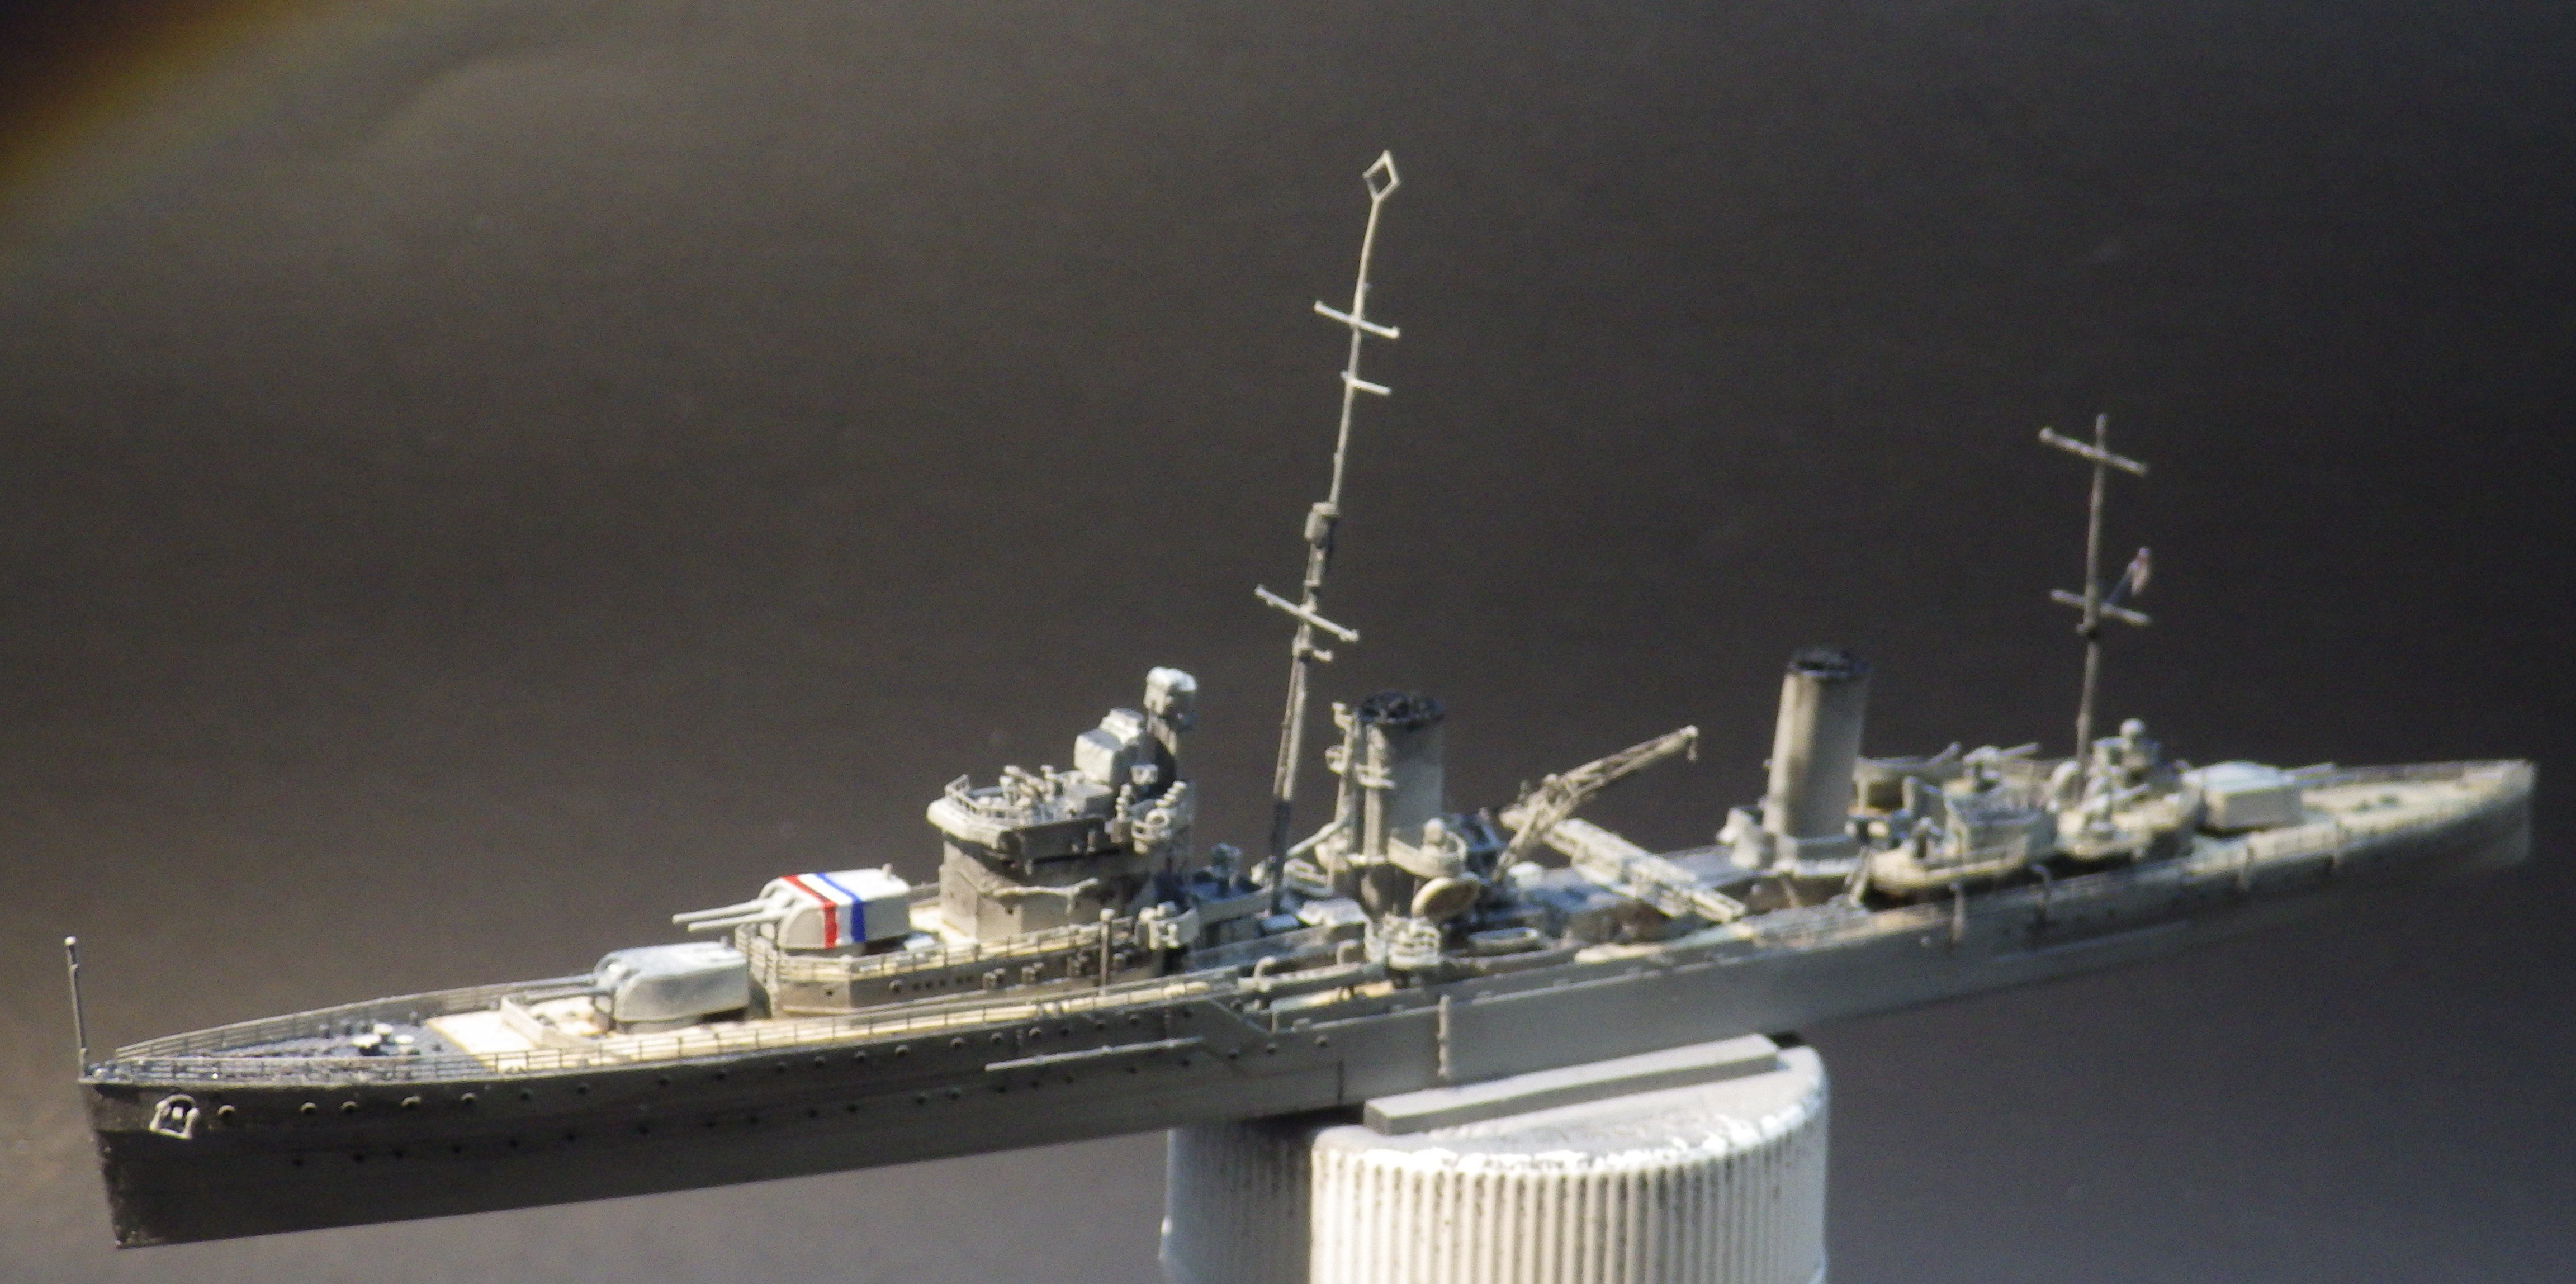
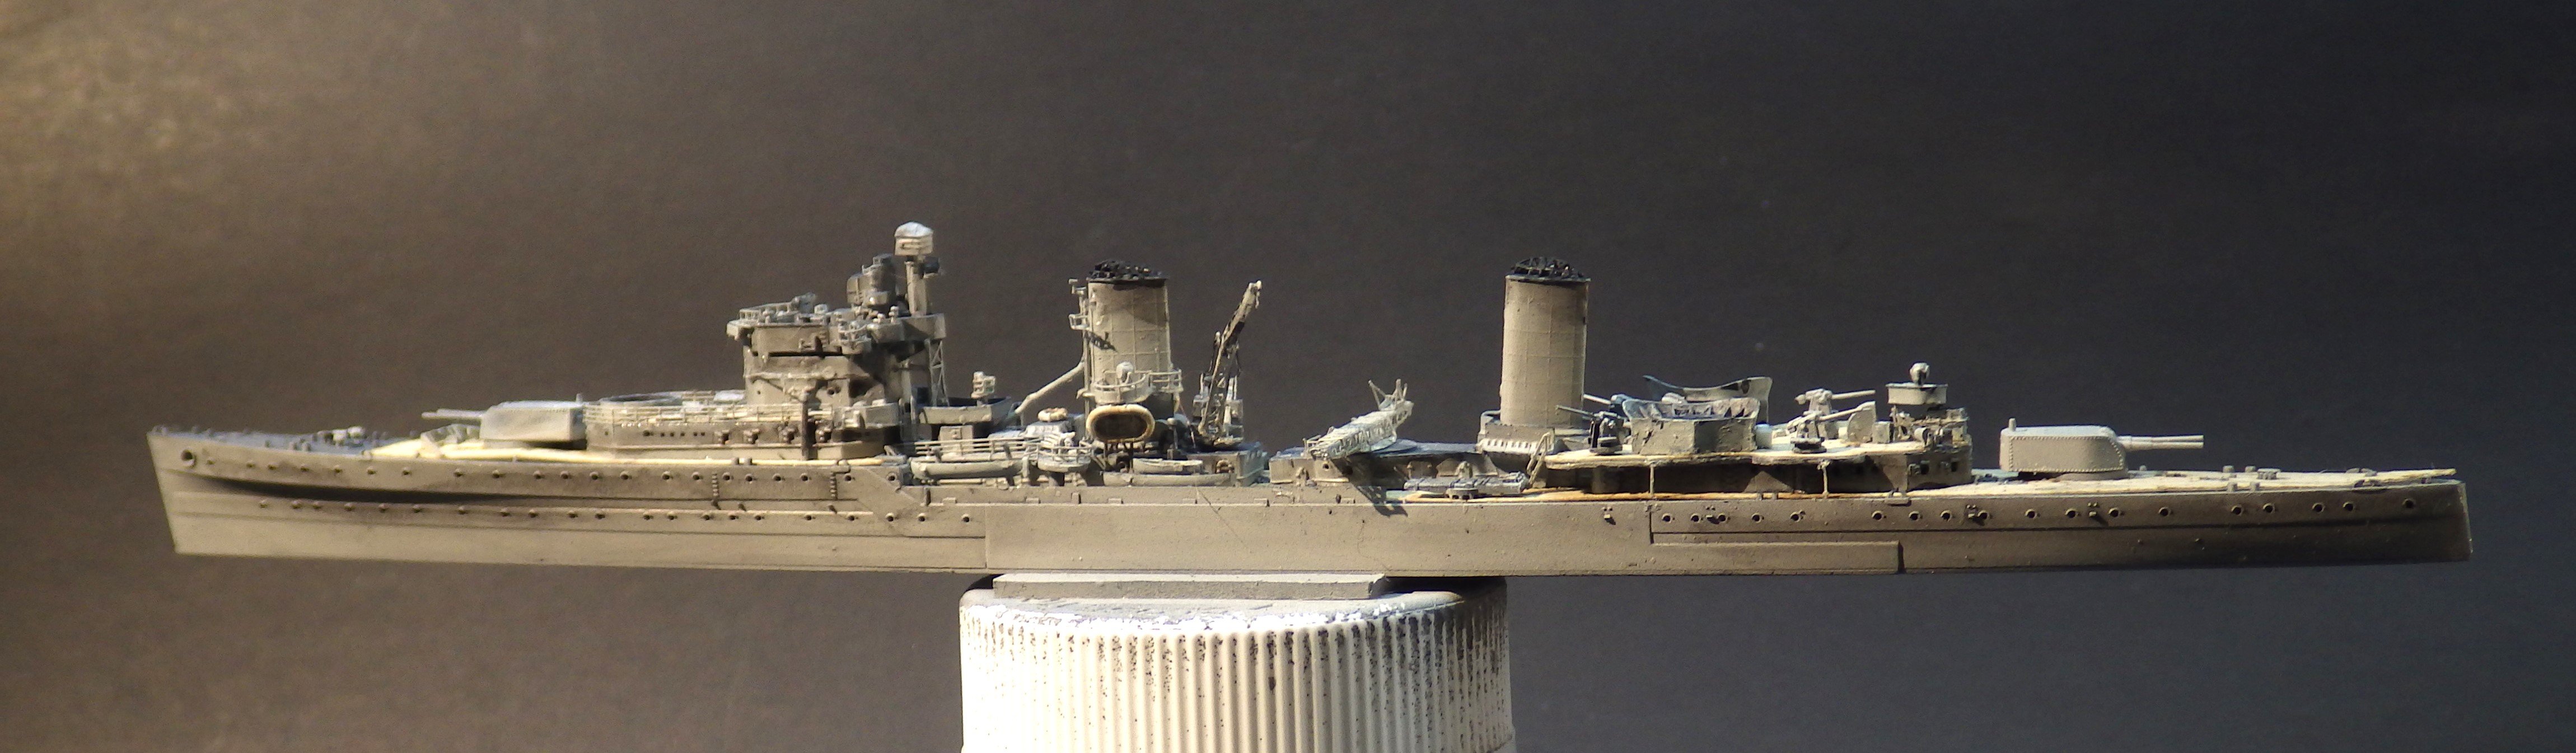
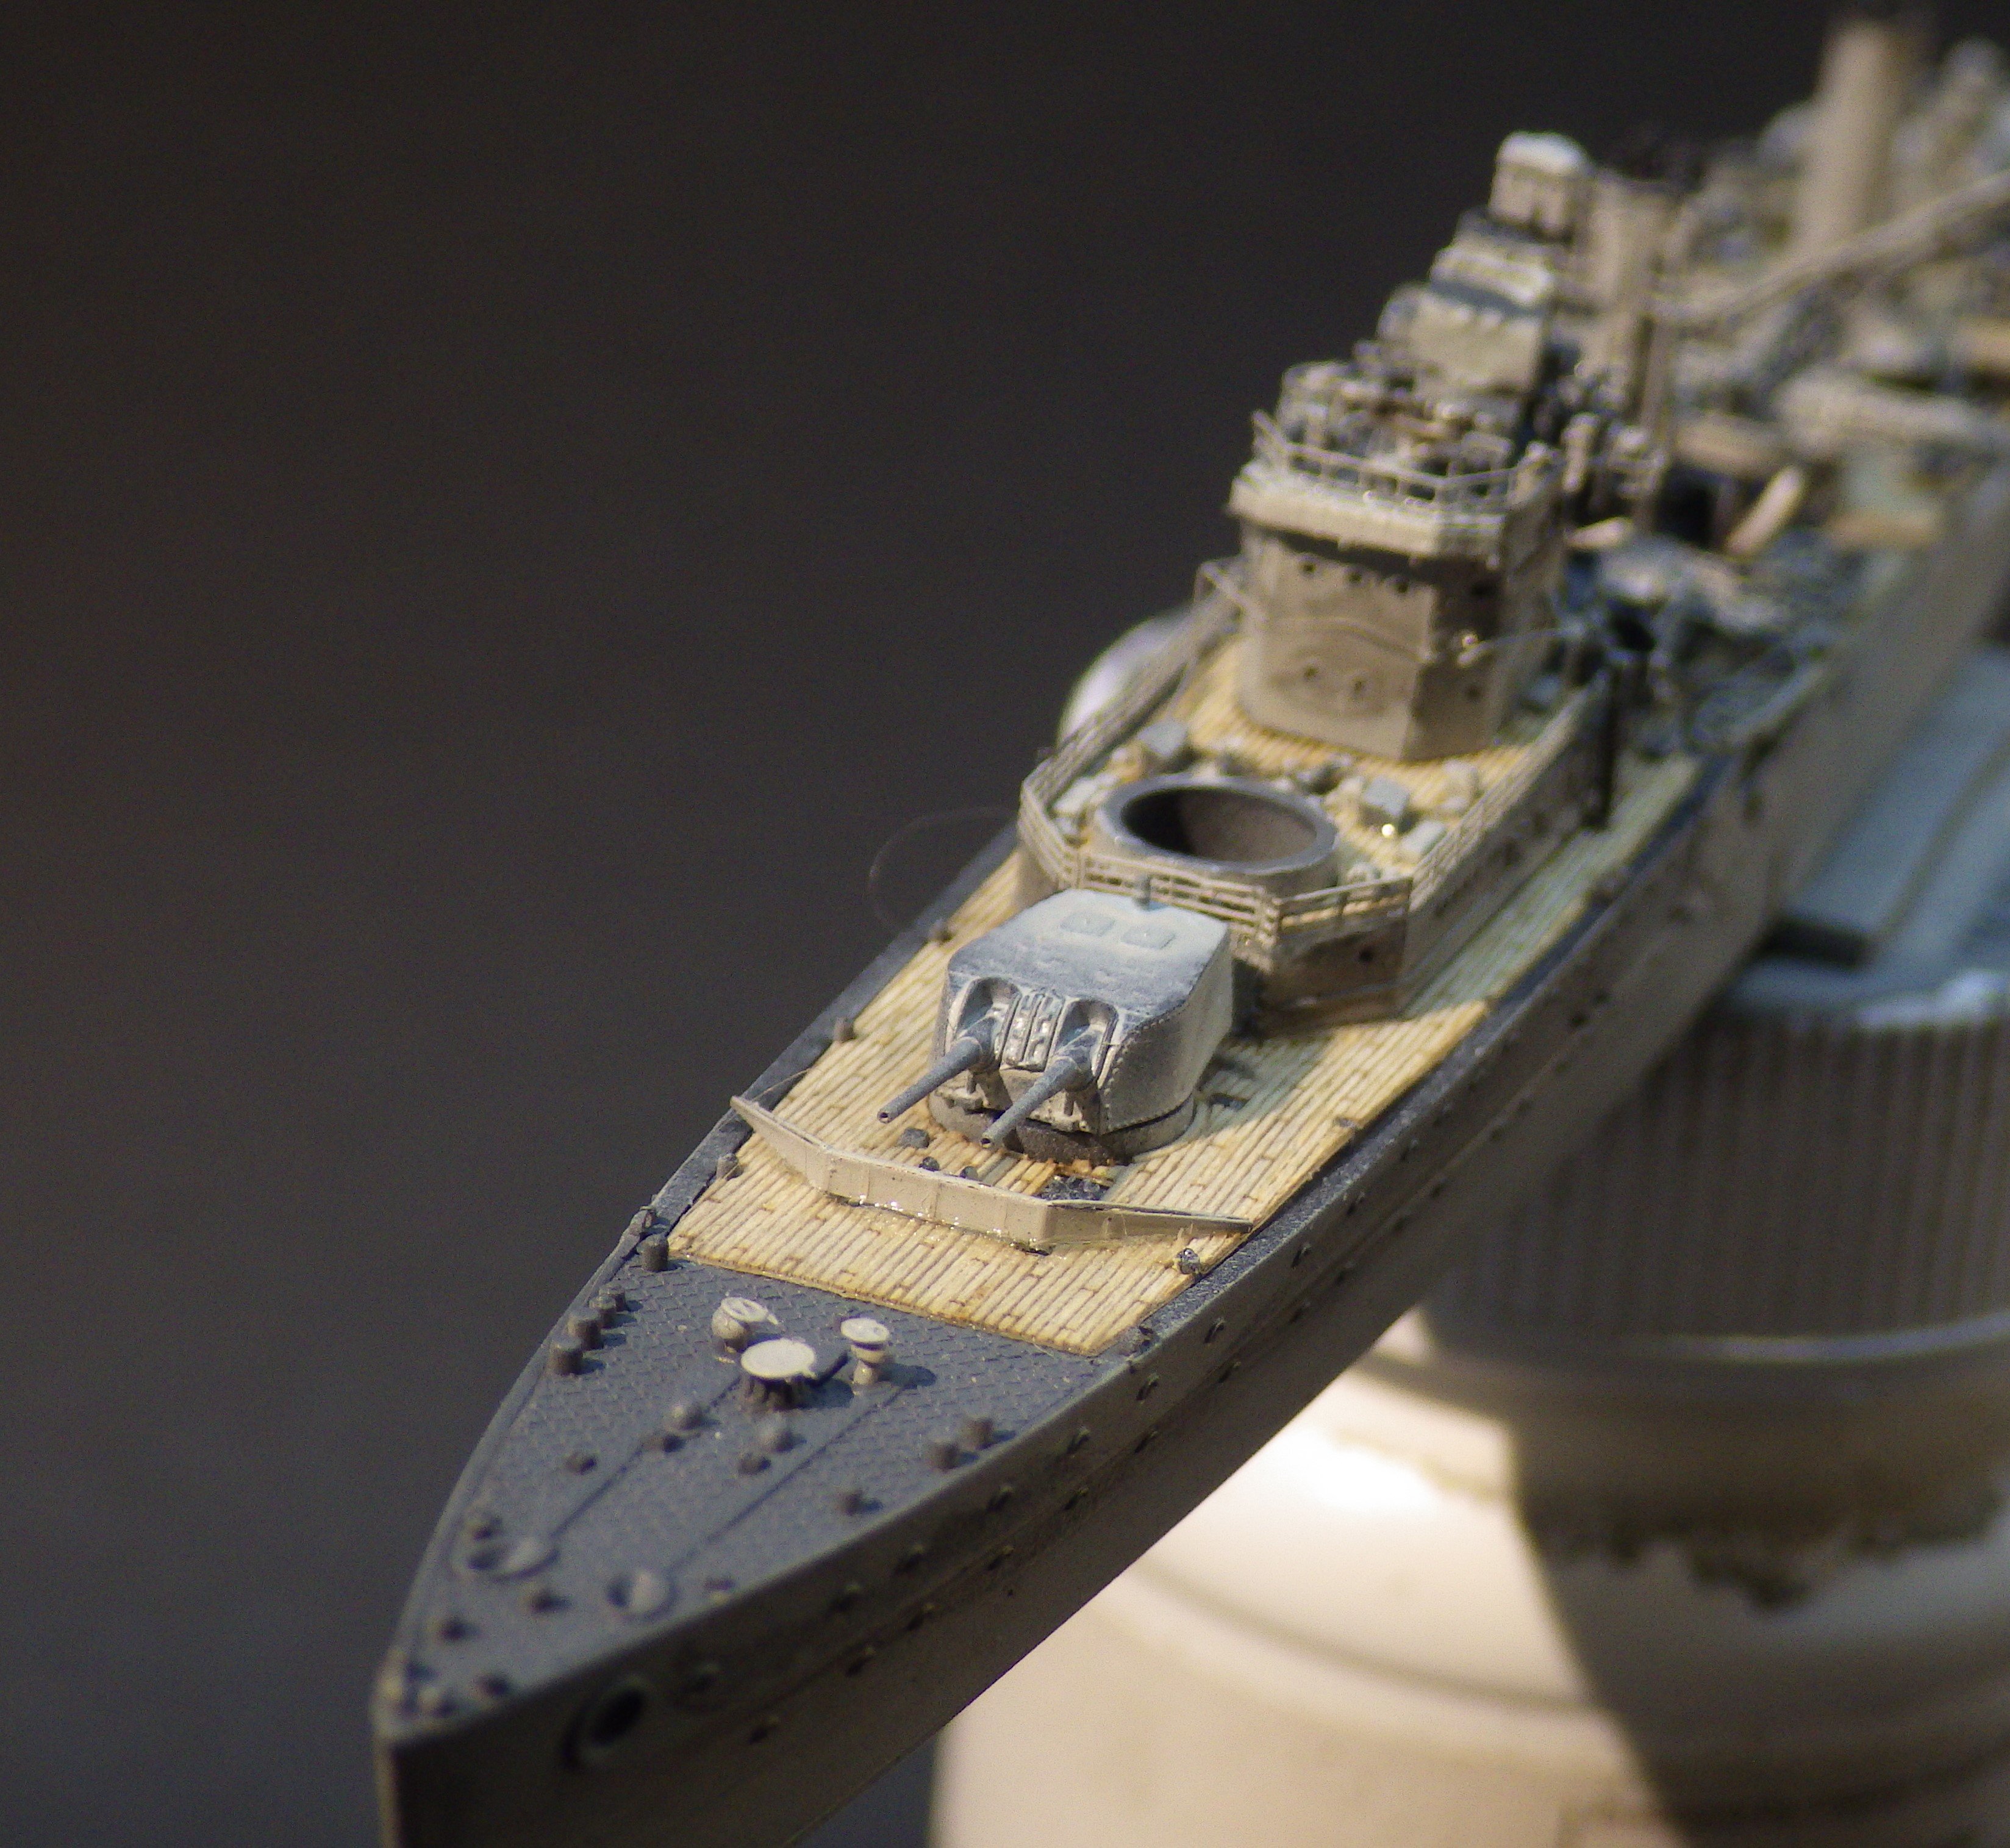
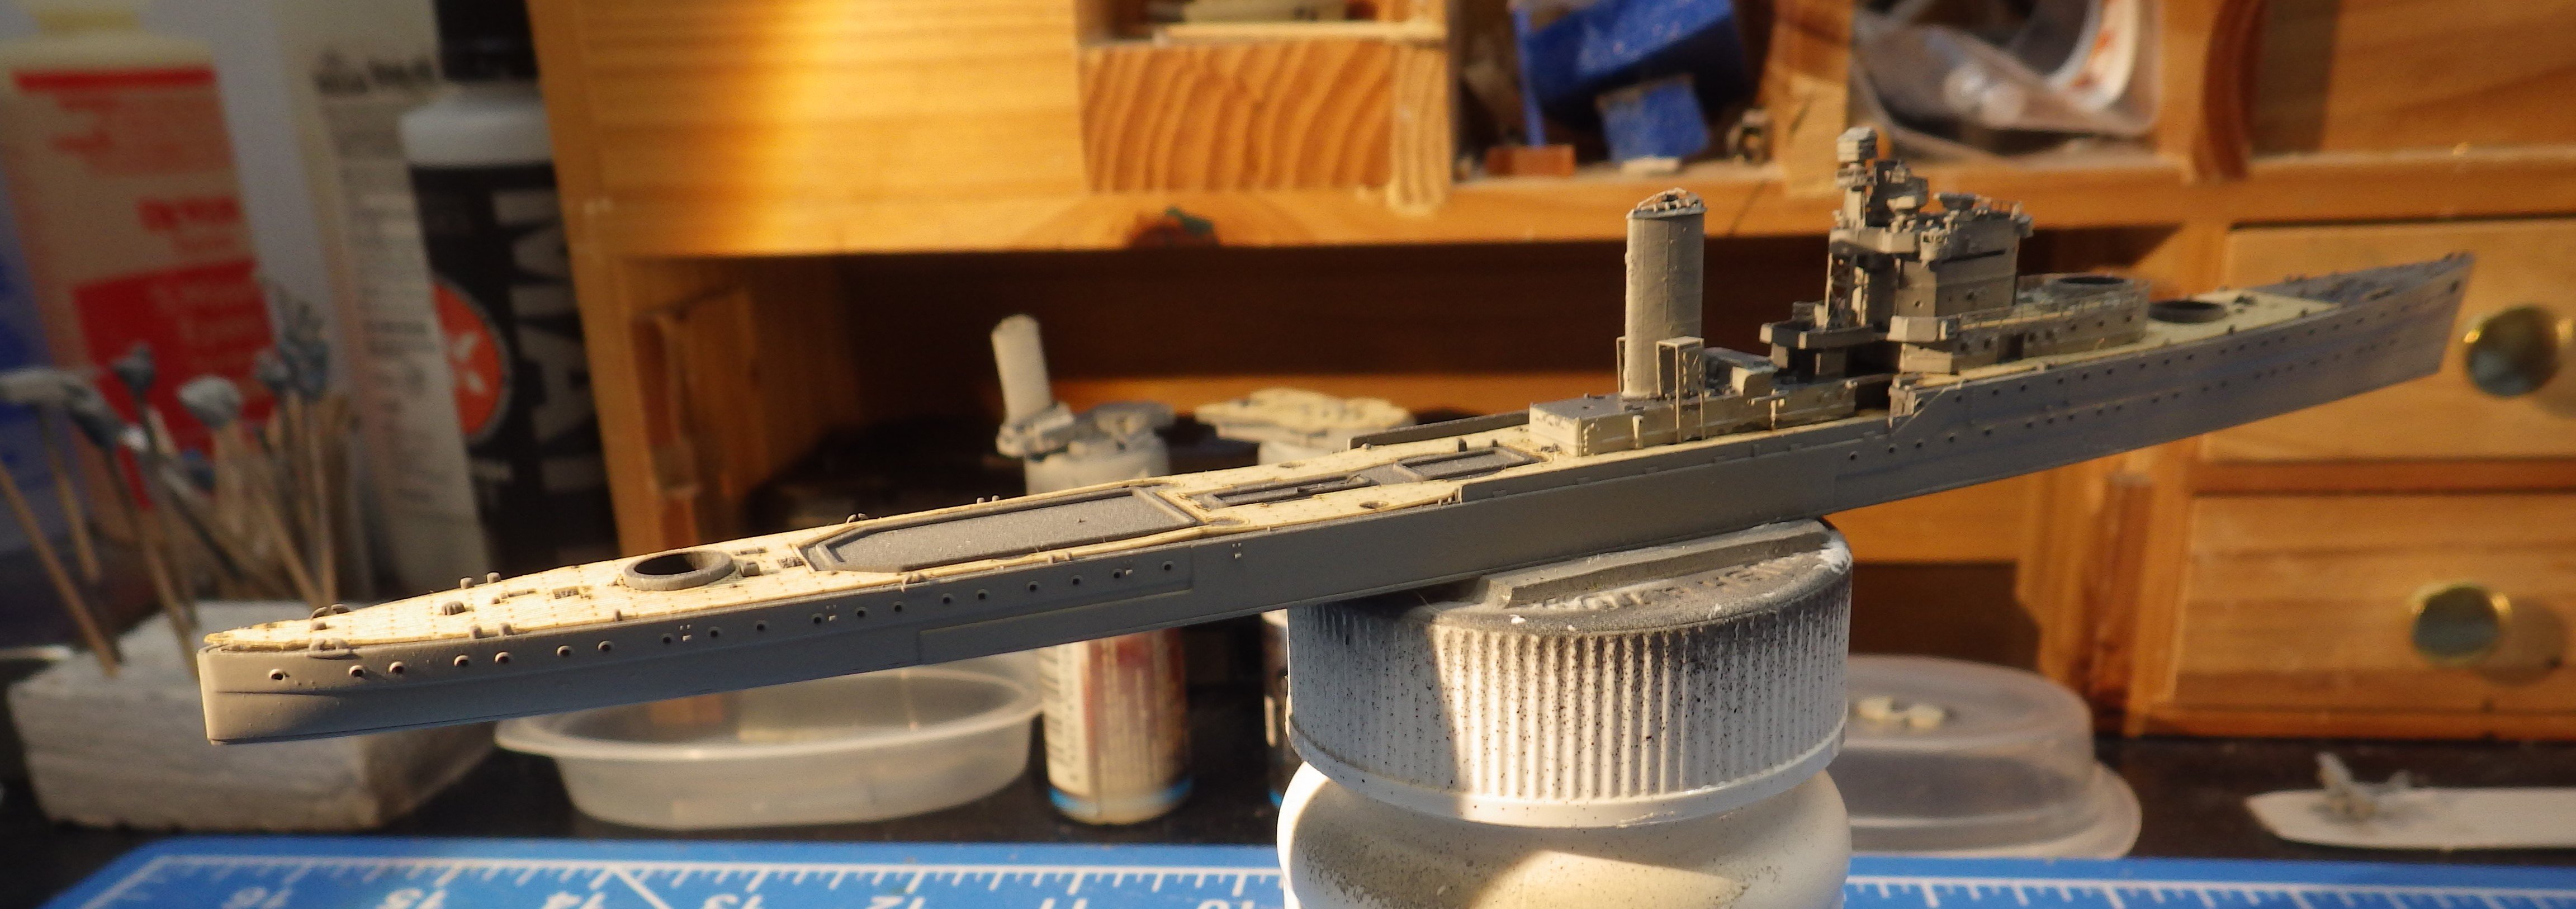
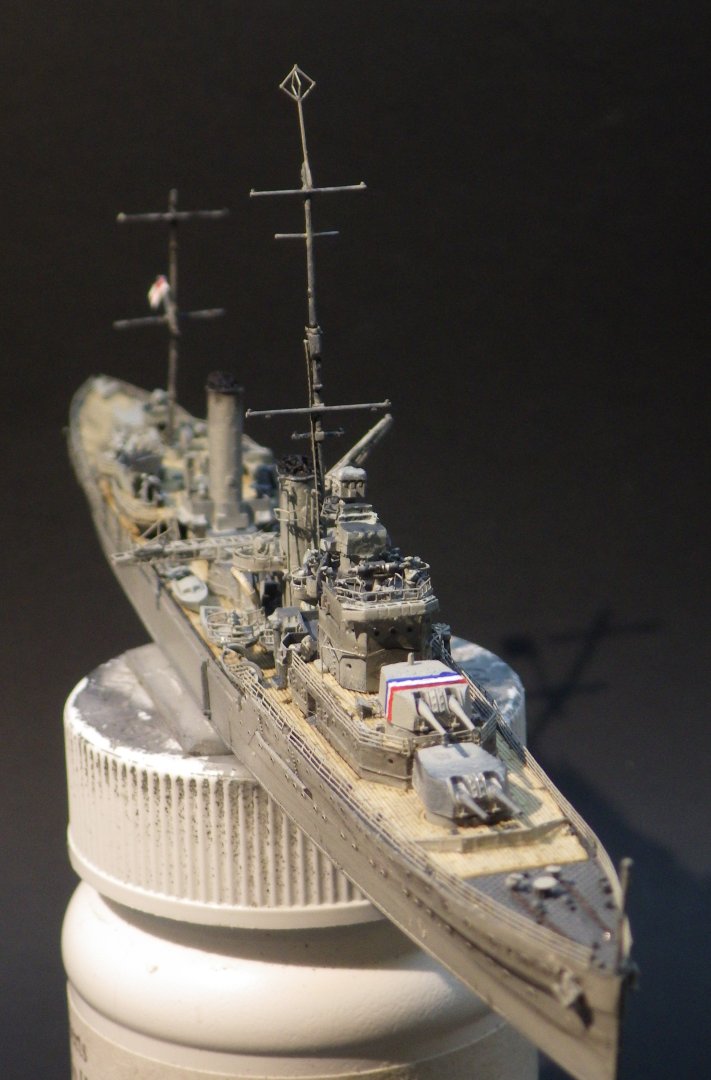
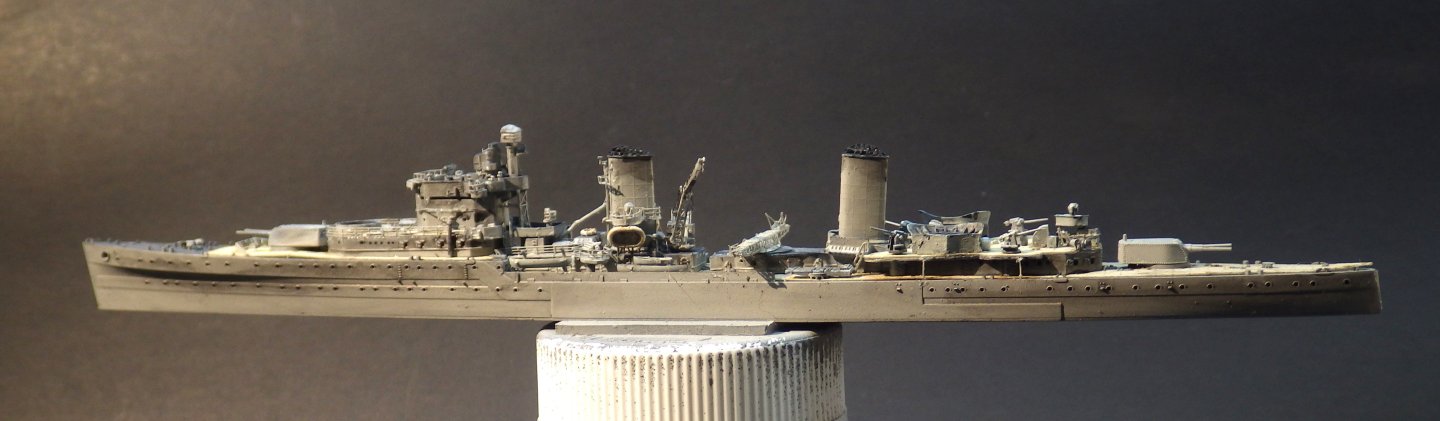
A big day for dealing with the scary stuff today. The masts were added and the main deck PE railings. The model is officially delicate. The PE went on reasnably well, using the Mig Ammo Ultra glue which is like the Gators Grip. I work in sections on the long pieces on for and aft decks, letting the glue tack up a bt before trying to place the railings. No real curves to set into the railings before mounting them. The railings really do make the ship for me! gun turrets are in place and the recognition marking painted onto the B turret. The last of the hull details and anchors are on. The ensign has been put on the aft staff but I'm letting it set so I can fold some billows into it before adding it. I need to paint the Sea Fox, touch up some brass showing on the railings and I think that will be close to finishing. I'm not going to try to rig this one. At 1/700 my rigging is not neat enough and the masts are very fragile. Thanks for looking in, the likes and kind comments Alan


-
Thank you very much Phil. The PE tends to get worked in small amounts and then I have to focus on something else. Alan
-
At least this one doesn't have lots of anti aircraft weaponry. That usually adds lots of tiny PE. Getting close to the end now. Alan
-
You are doing a great job of improving the kit to something more like real life Alan
- 6 replies
-
- 1
-
-
- runabout
- riva aquarama
- (and 1 more)
-
Thank you very much Mike. Funny, you seem to plod along adding parts without seeming to get anywhere and then suddenly there’s just the railings to do and final weathering. Alan
-
Thank you very much OC. It’s at the limit of my vision even with magnifiers but I do like the Flyhawk kits. I’m not even sure the PE is necessary in a lot of places, the plastic parts are so detailed. Railings, girders, catapult are better with PE but the rest not so much. alan
-
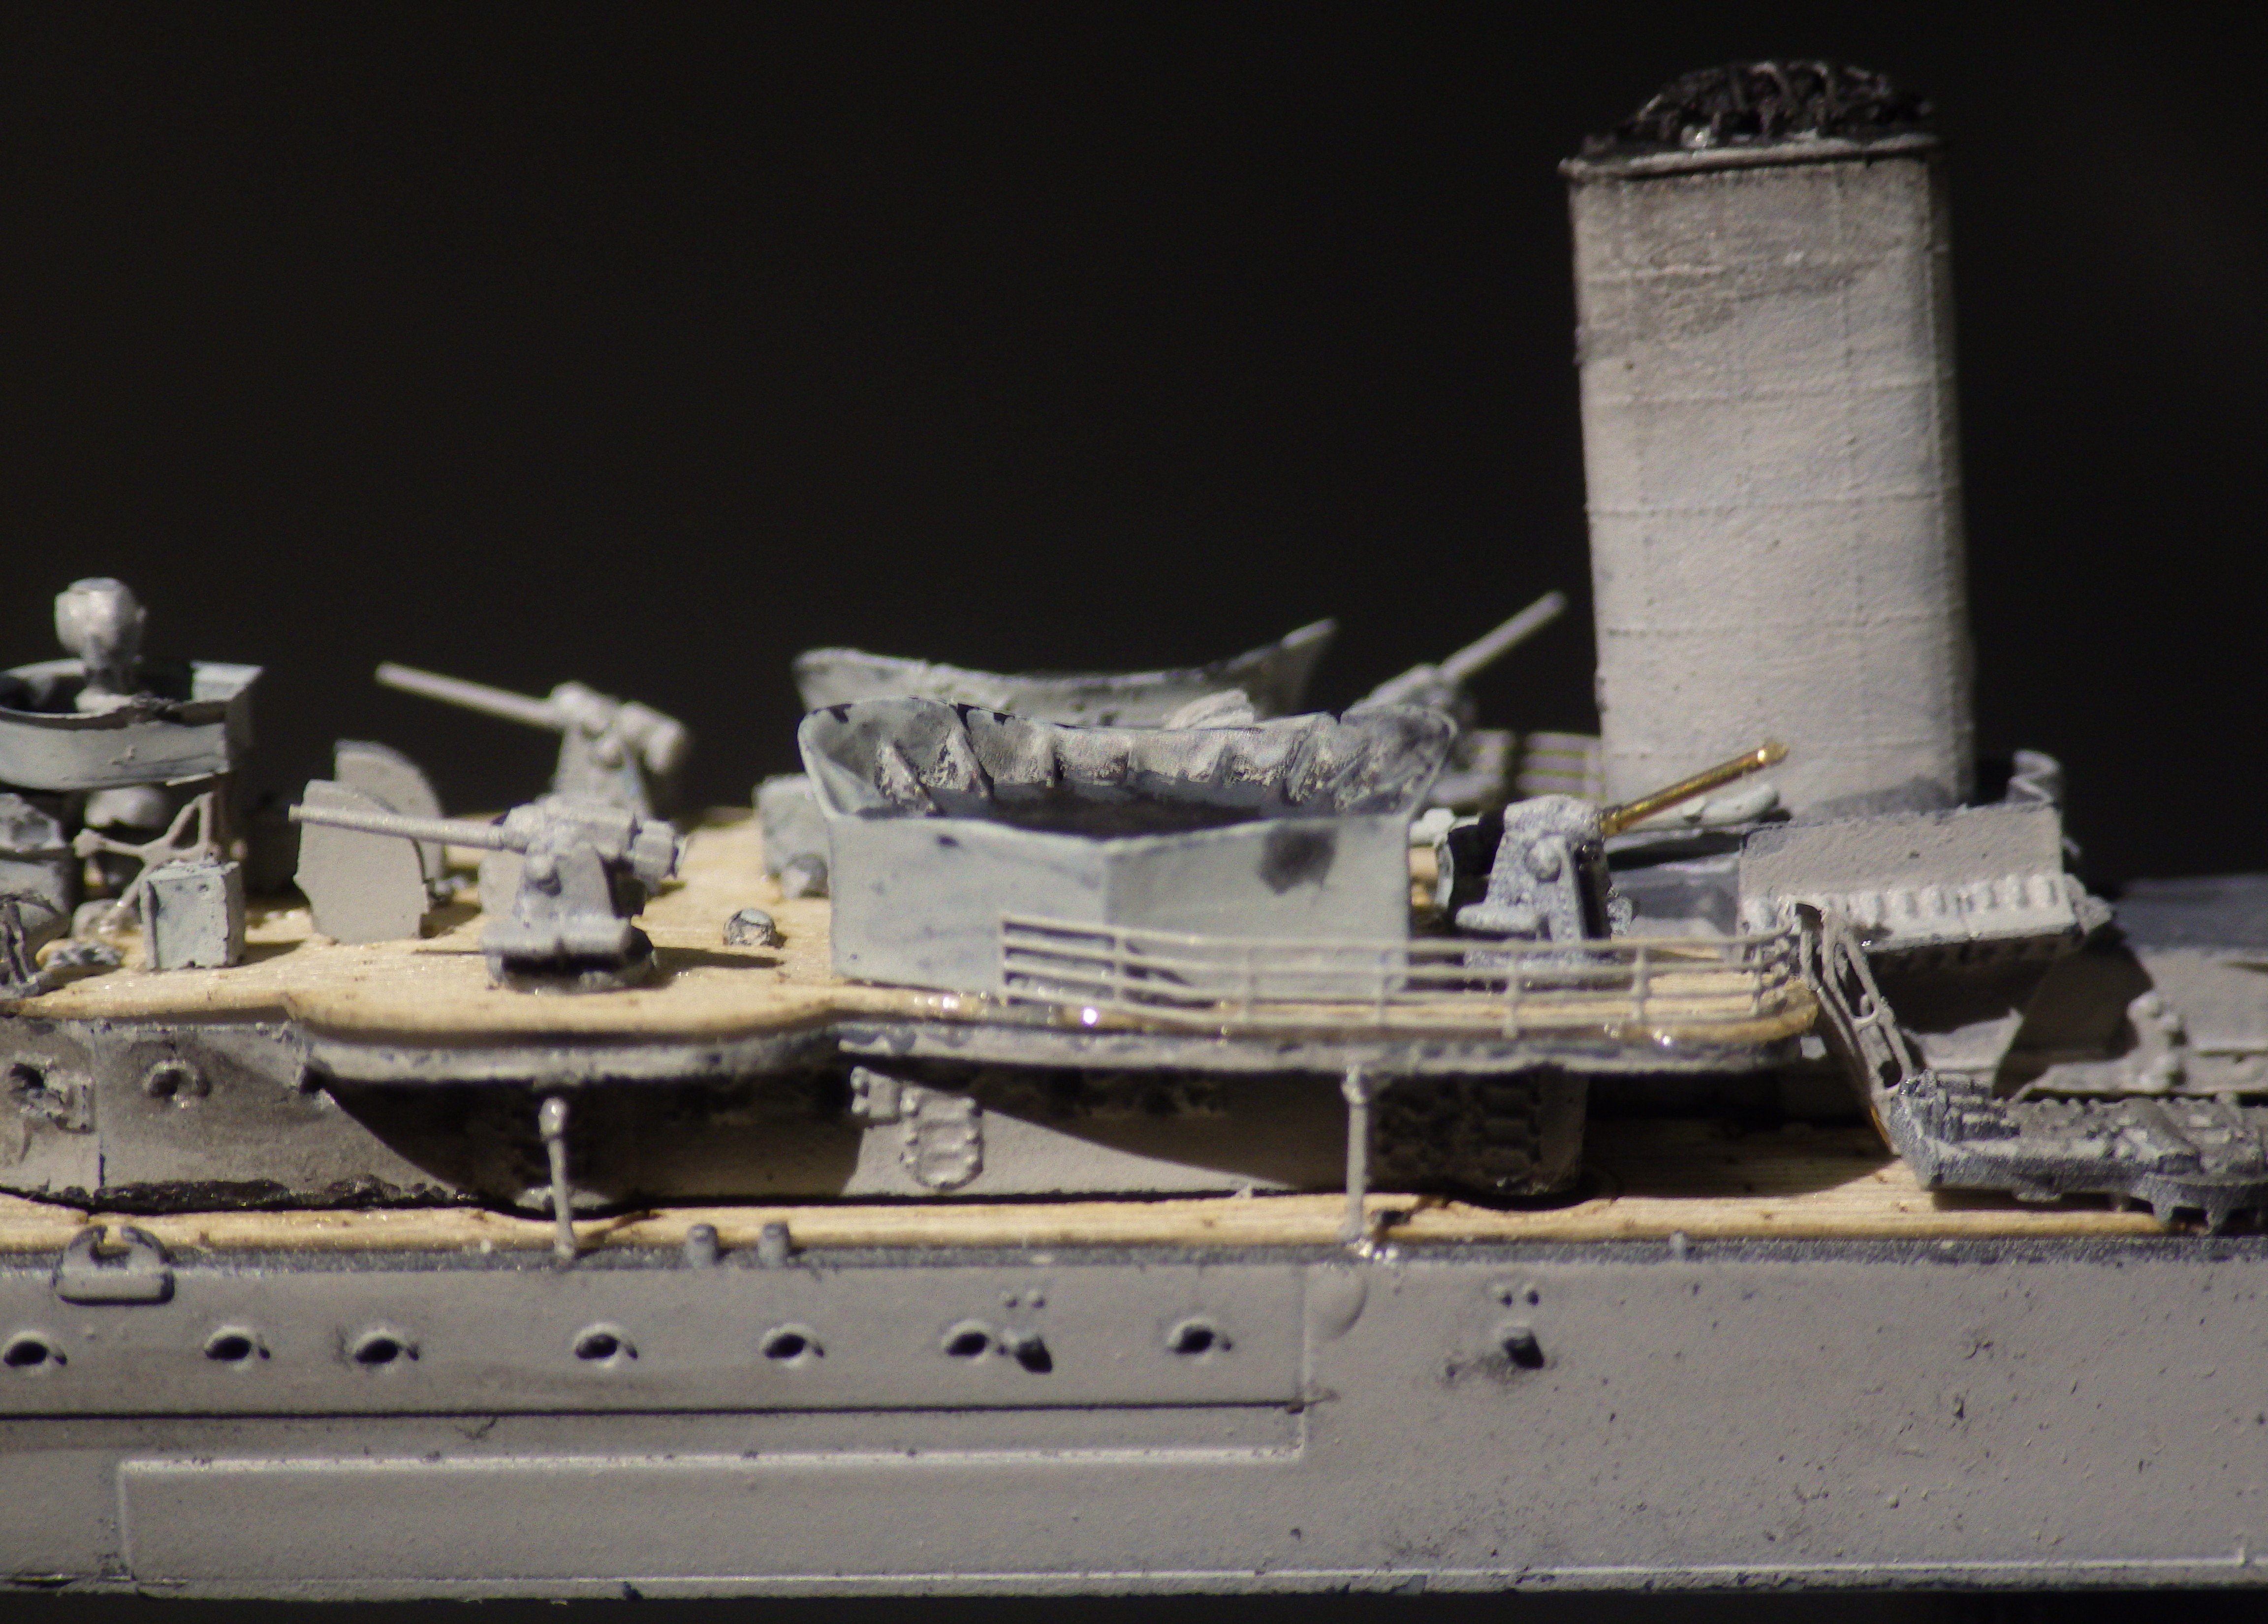
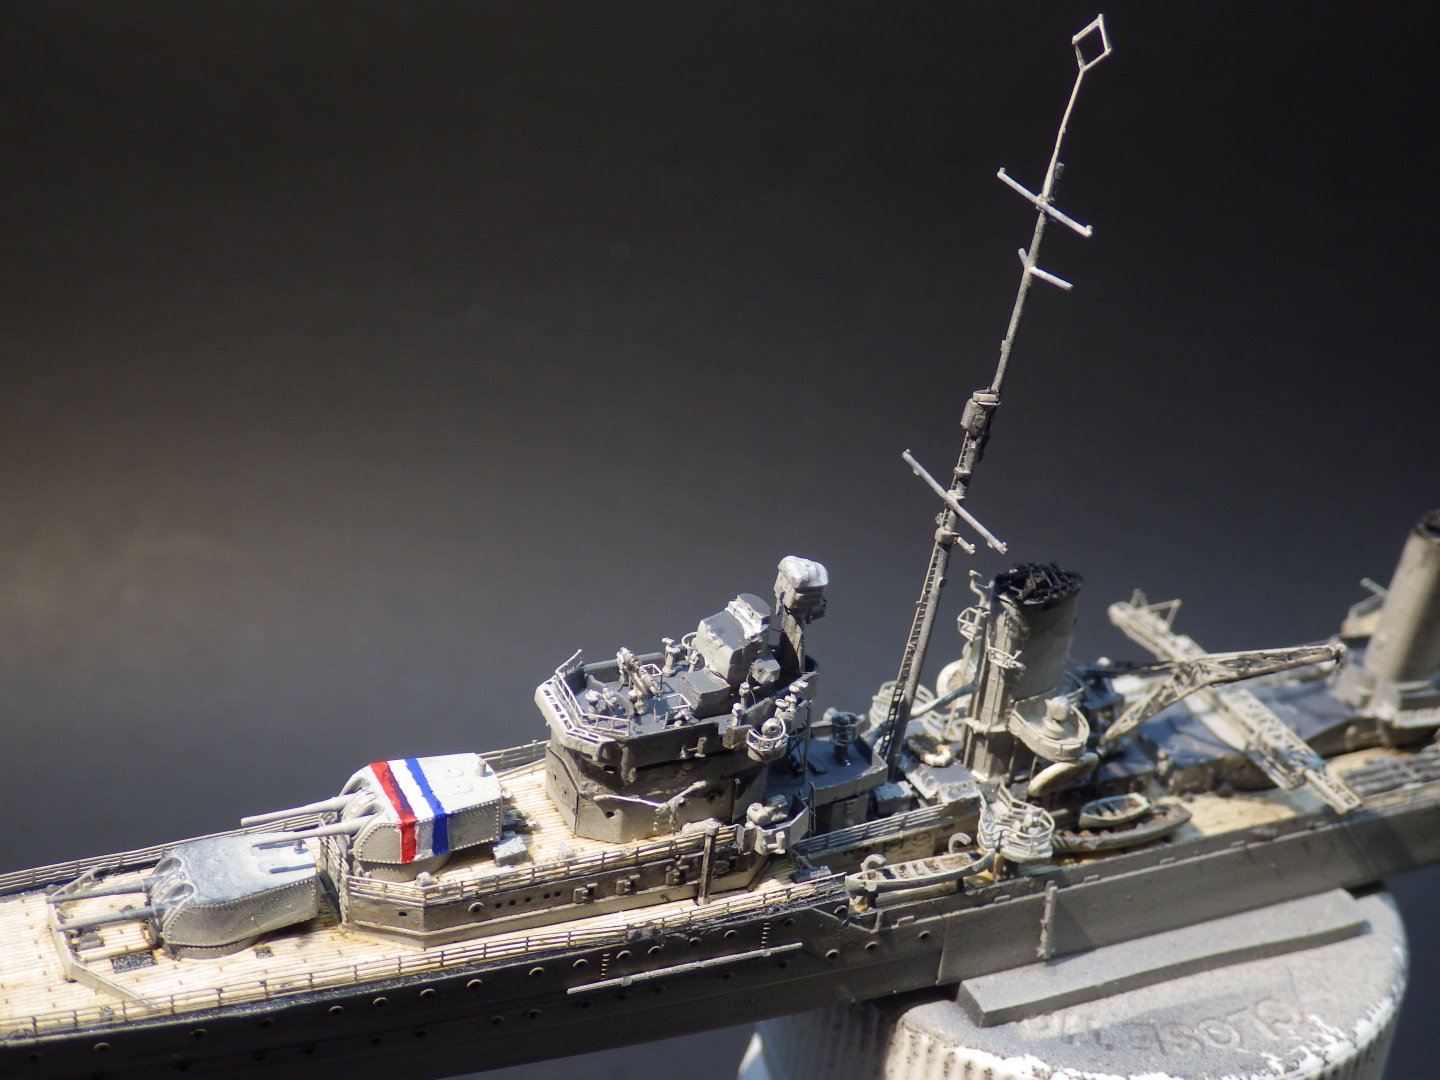
Lots of little details today. I pulled the Sea Fox apart without damaging anything and I think the rebuild is a bit better. I'll see how it looks with some paint on it. Railings are being slowly added, requiring a lot of bending, checking and repeat before fitting. I think the remaining pair on the aft deck will need to be cut into two parts to make it easier to get a good fit. In the course of fitting one railing I touched the barrel of the forward starboard gun and broke the brass barrel loose. As I tried to reinstall it the tweezers had a "ping" moment and the barrel disappeared into another dimension. I have substituted a length of brass rod which I hope will pass once painted. If not I will look for some barrels online The railings are not long enough to reach the end of the platform, possibly another quirk of the kit departing from the initial subject. I think I have some spare railings and can add a section in. A few more days down in the details, touching up and painting things like the spotlight lenses. Thanks for looking in, the likes and comments Alan


-
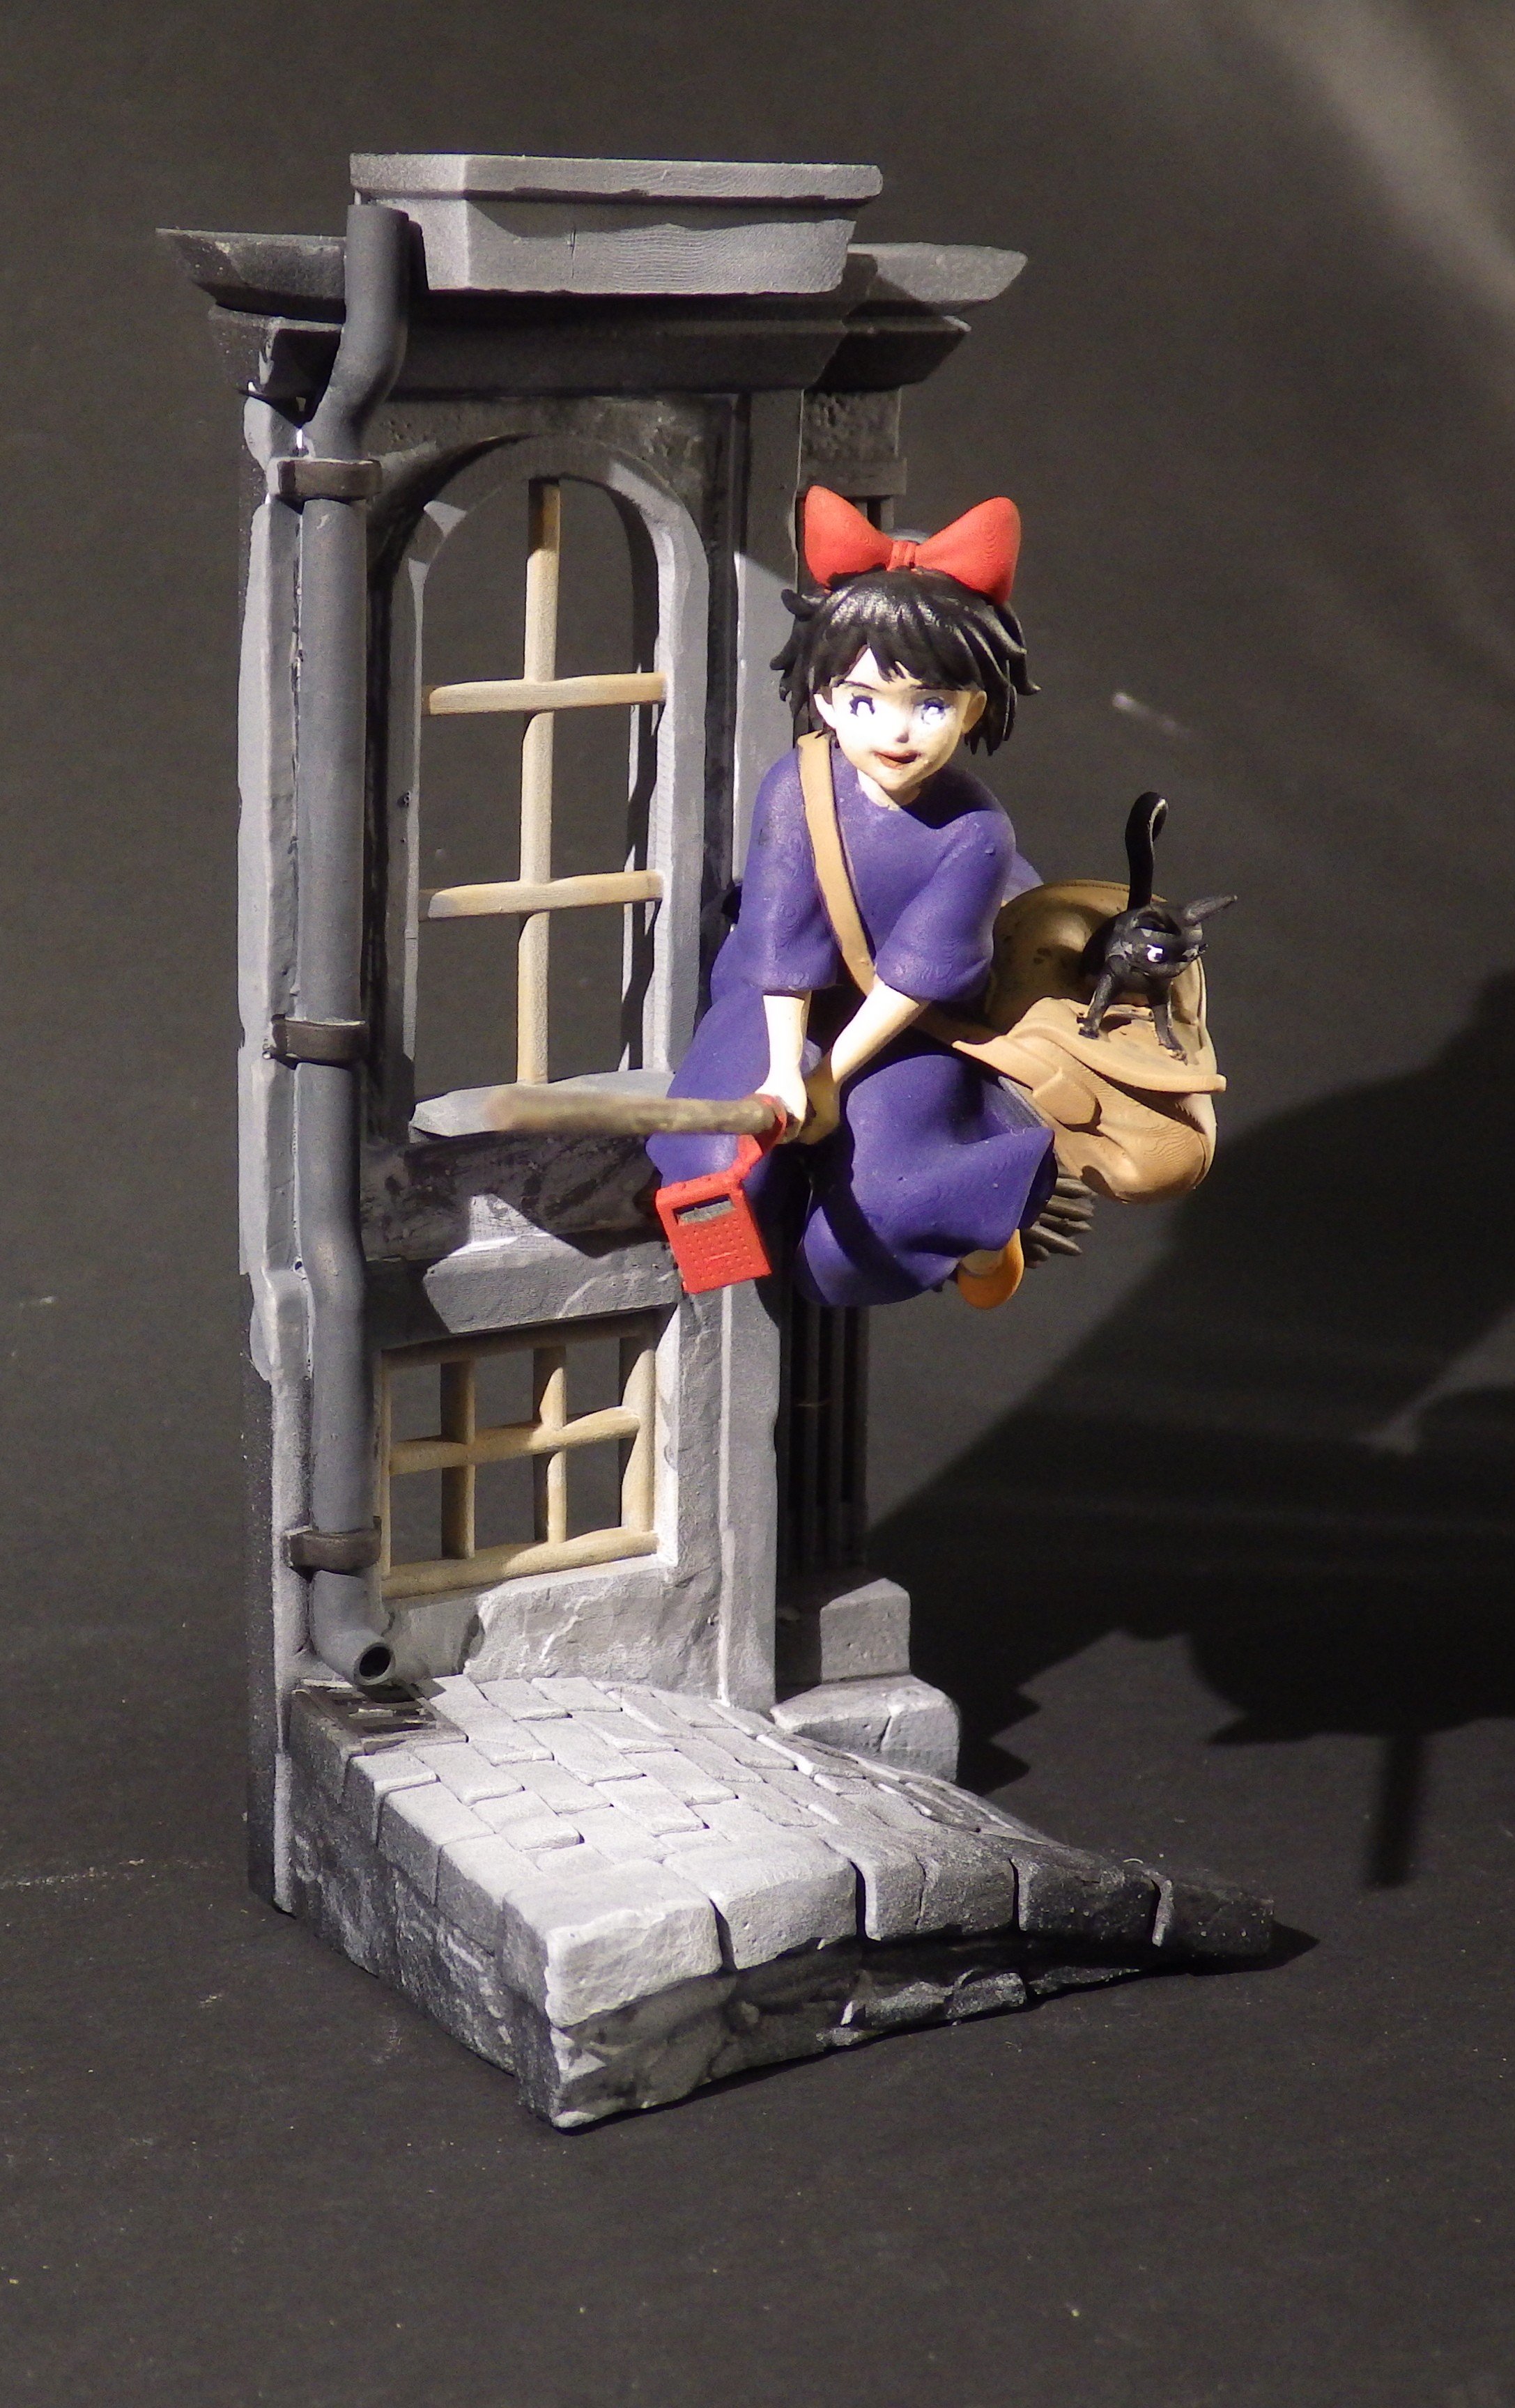
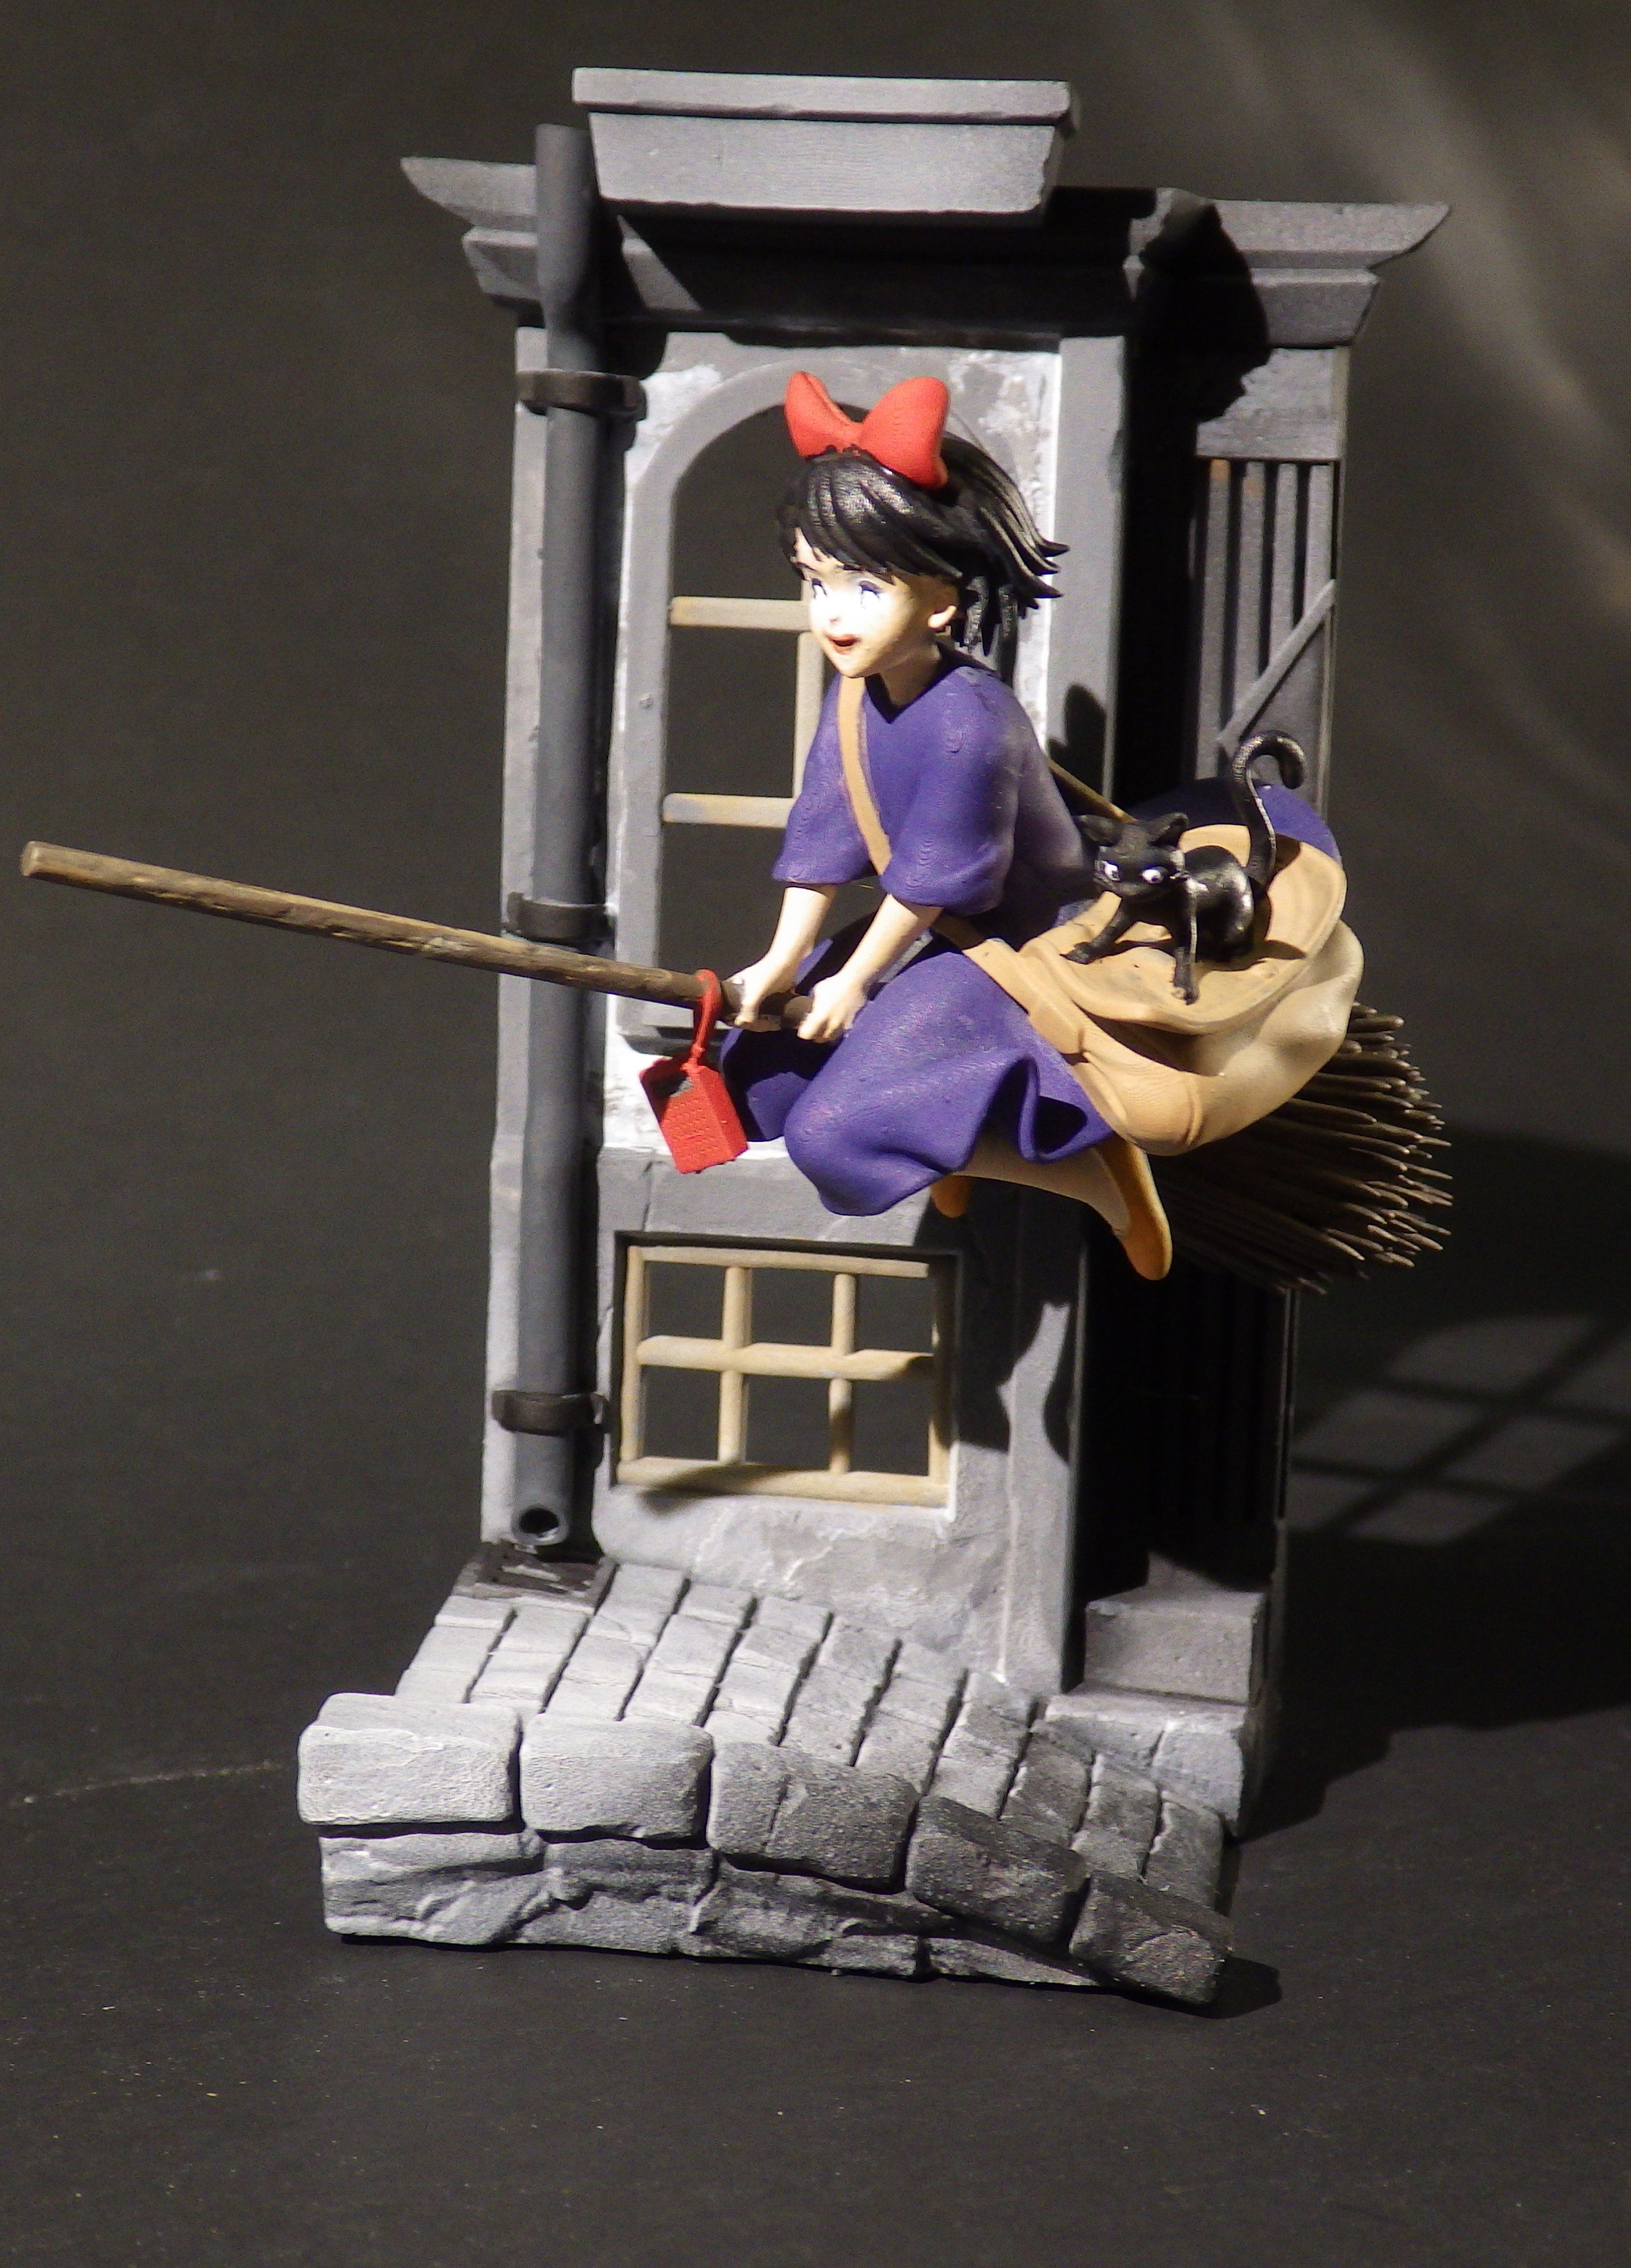
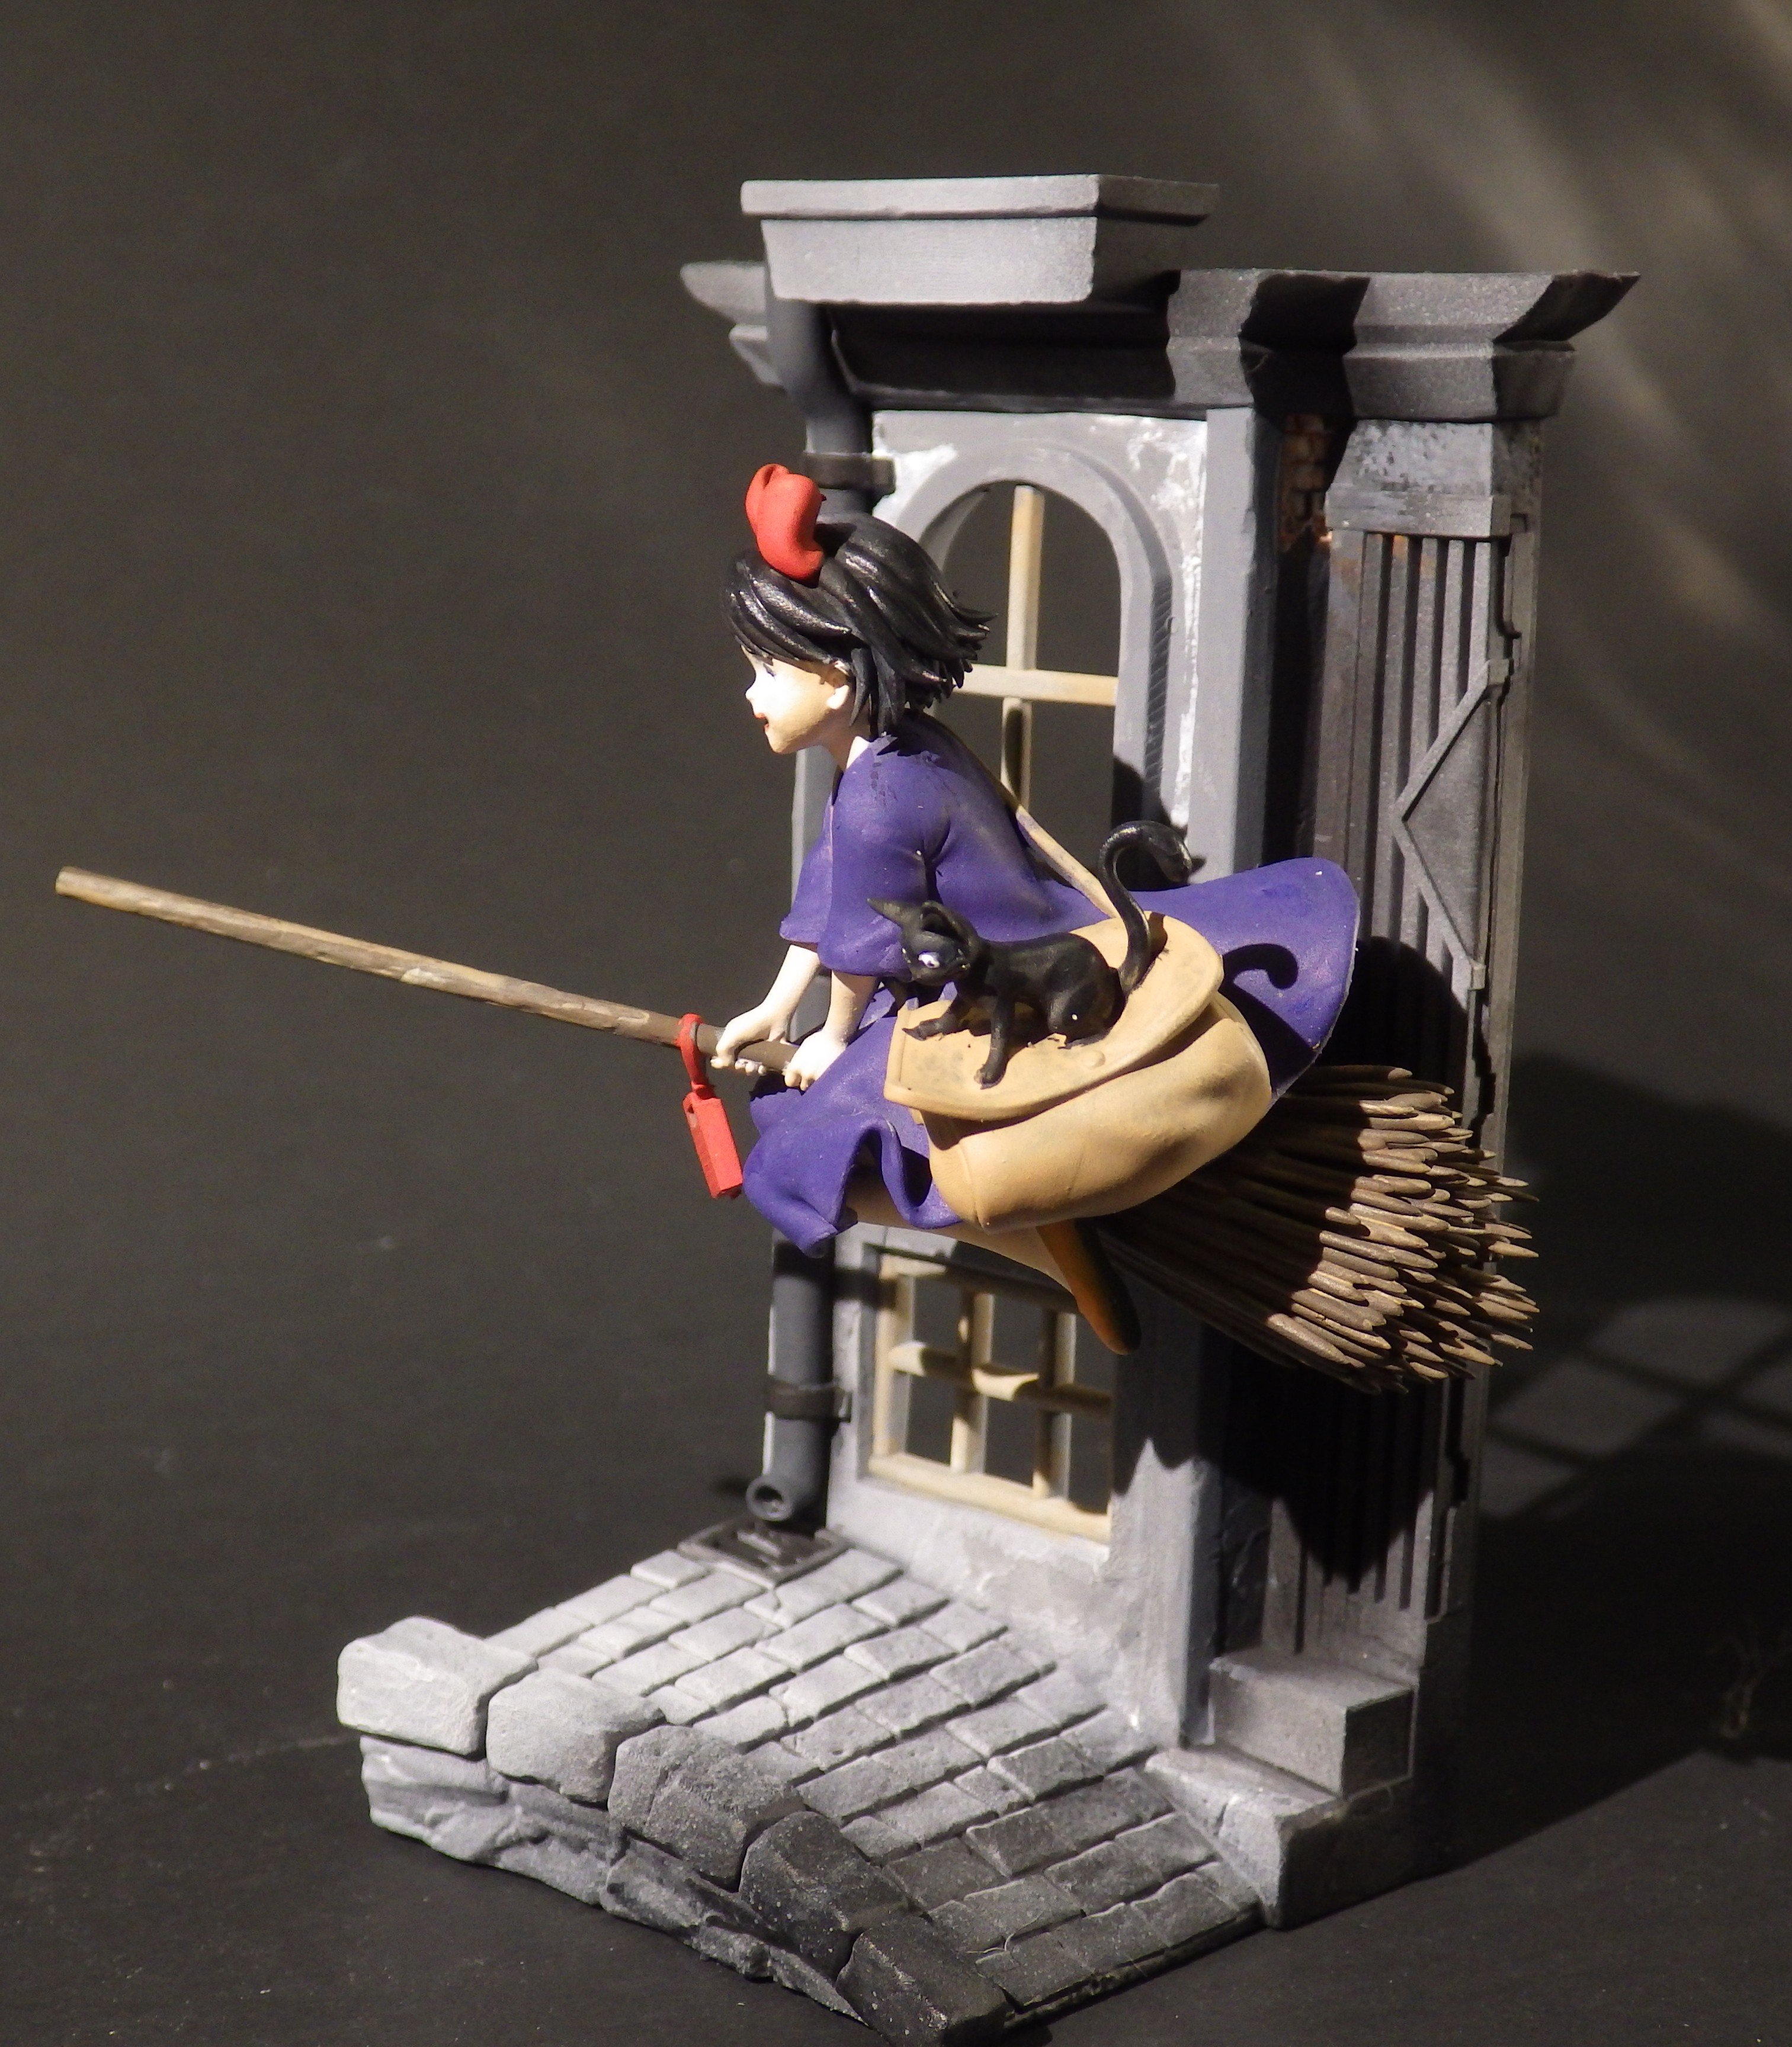
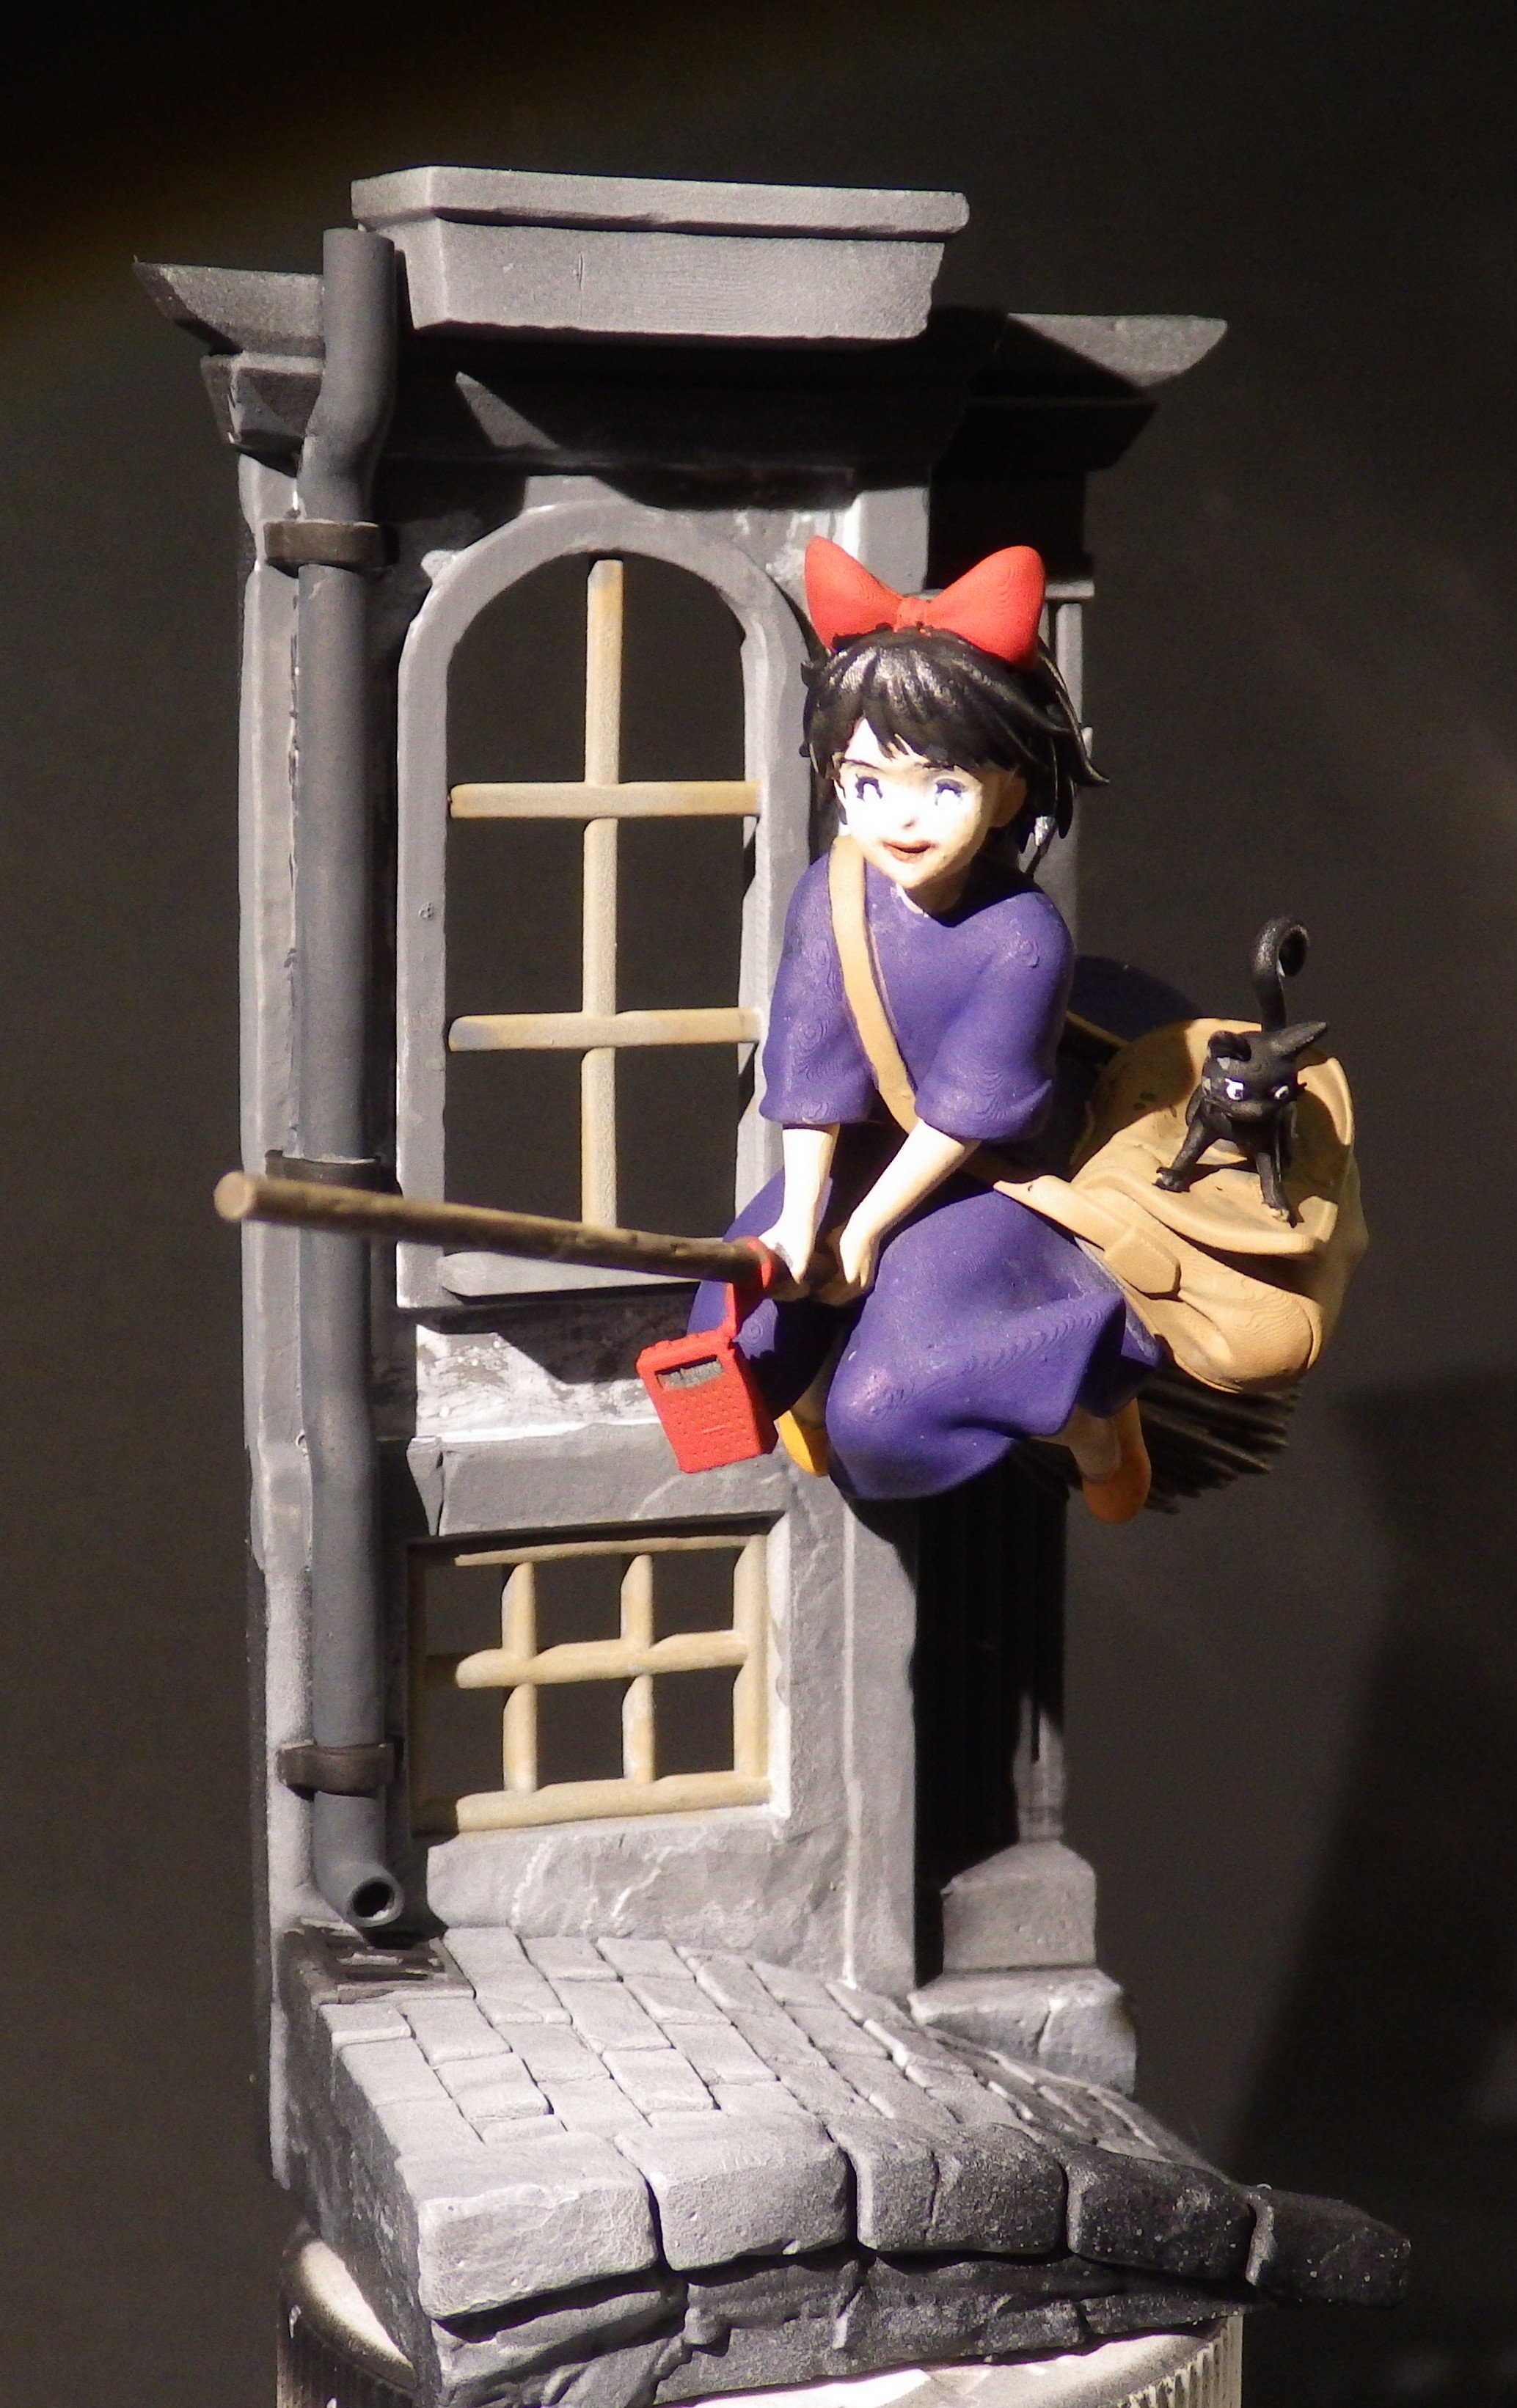
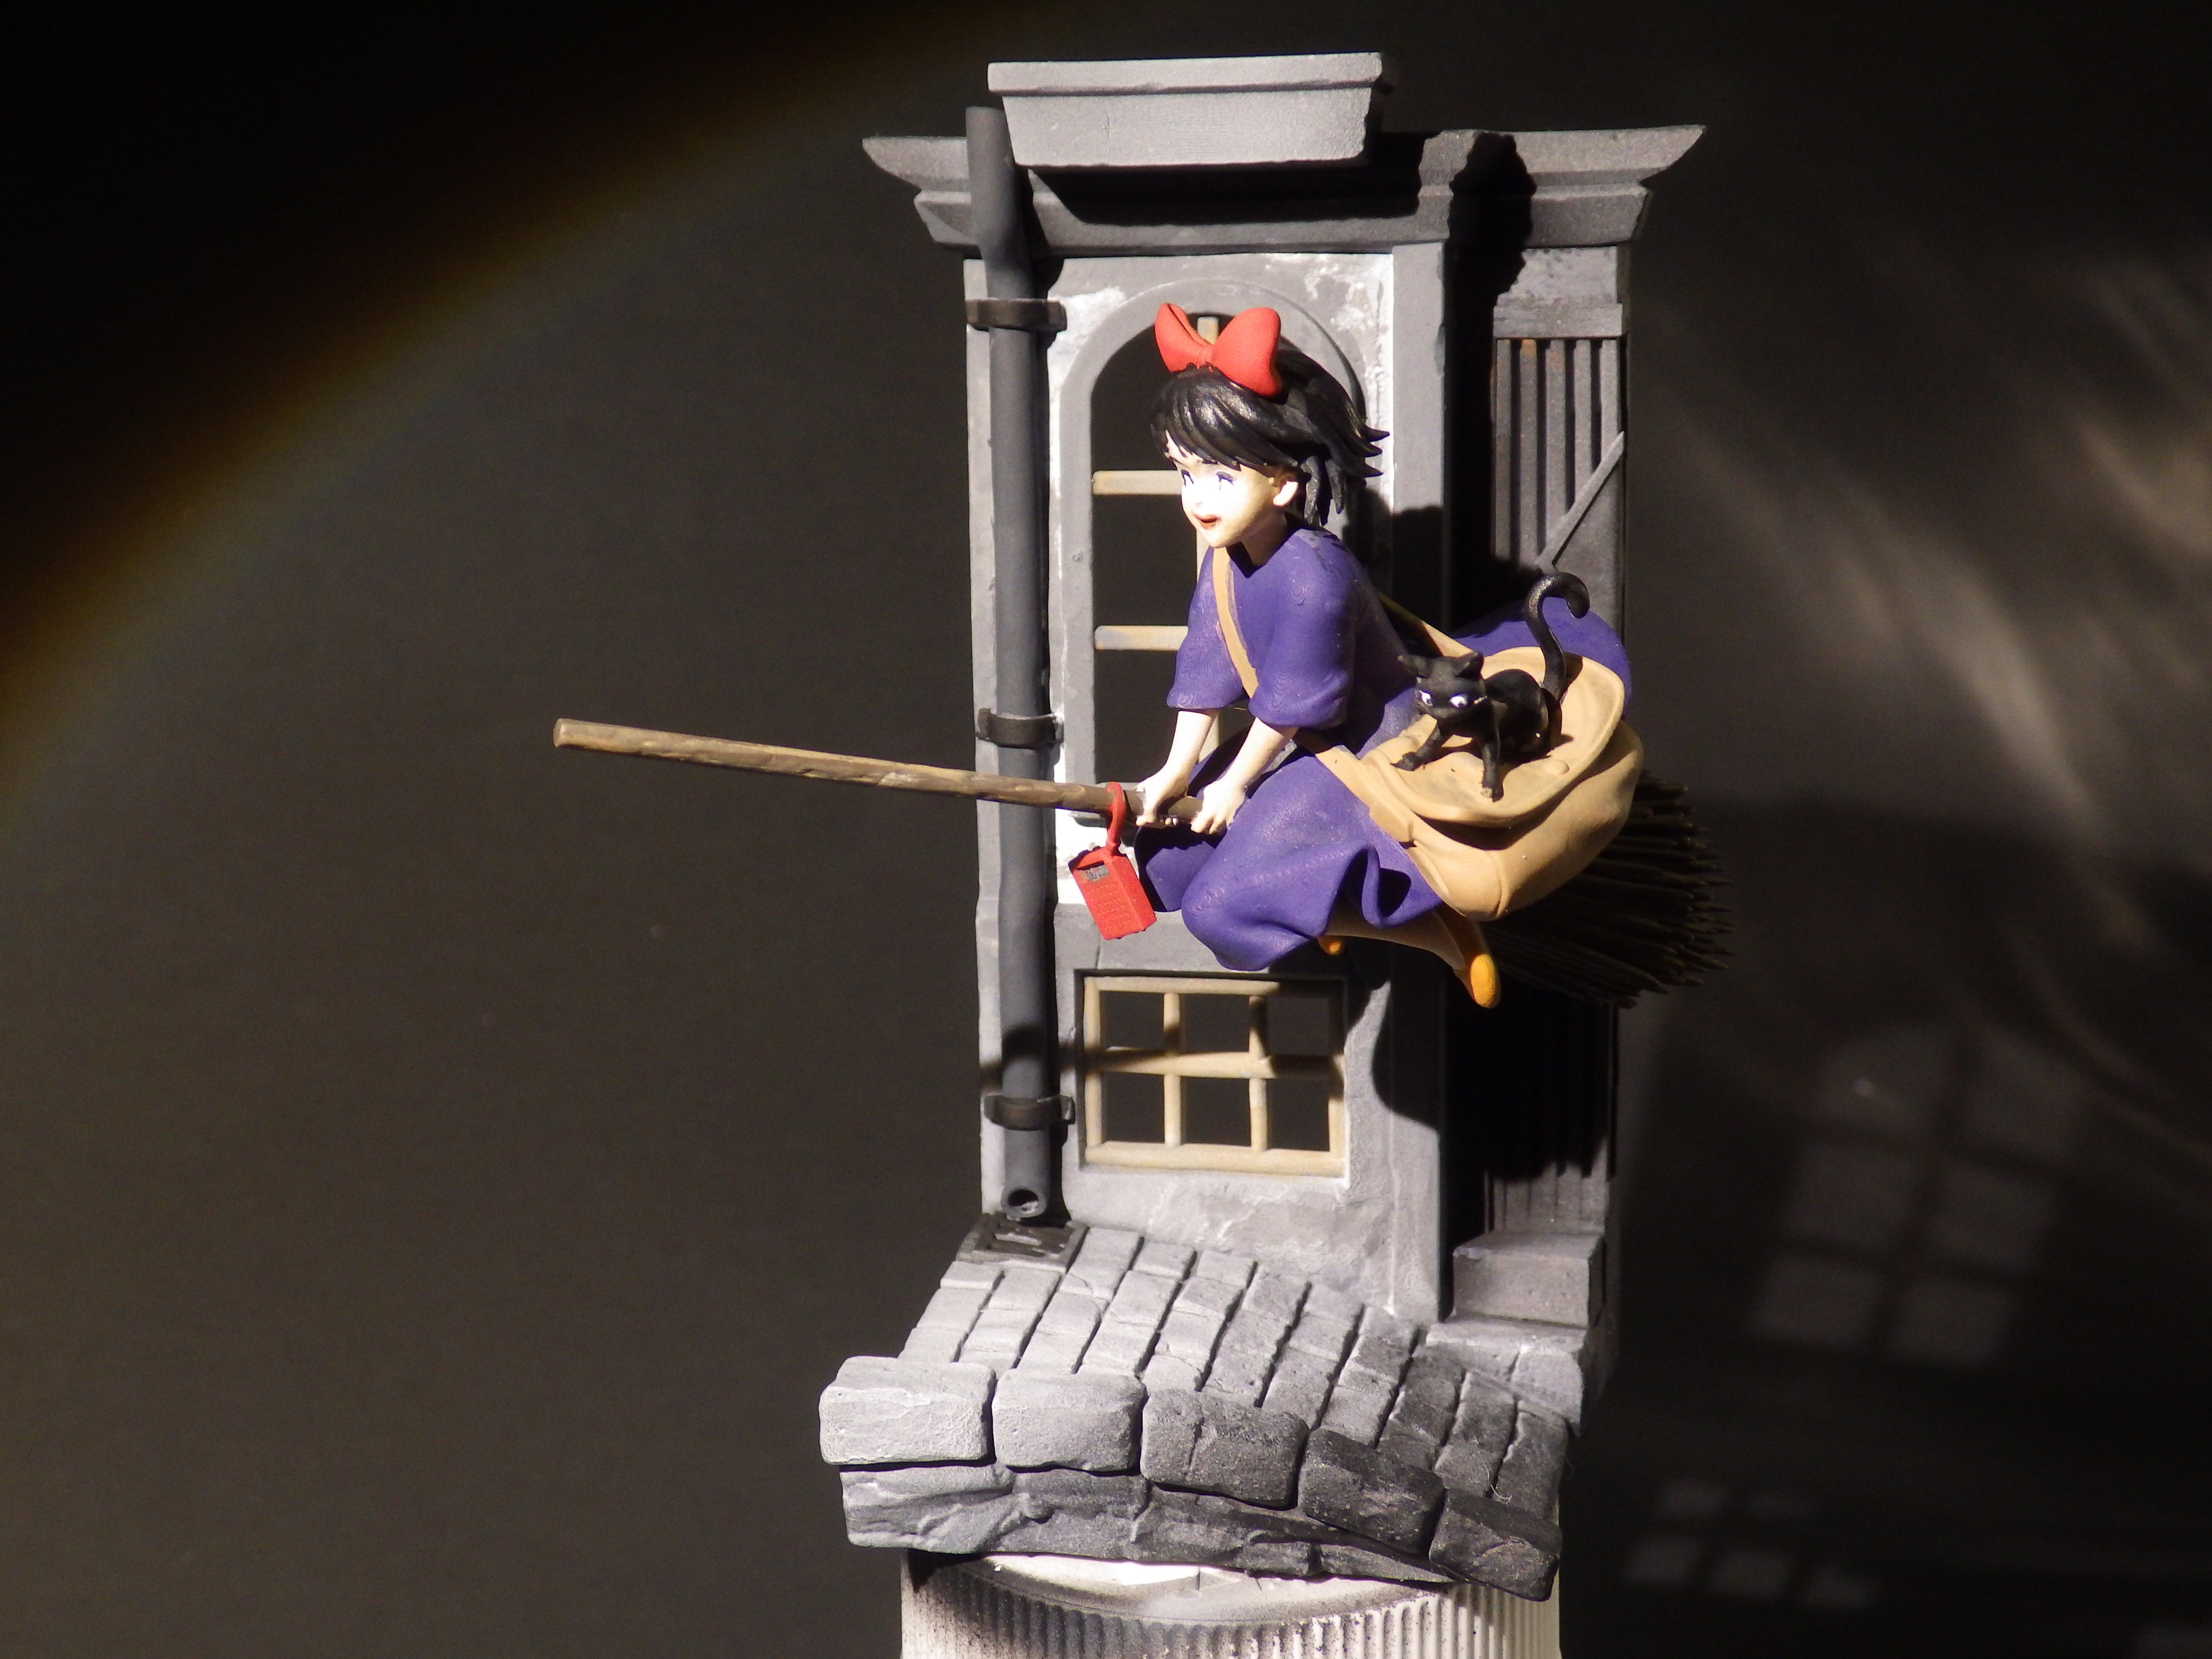
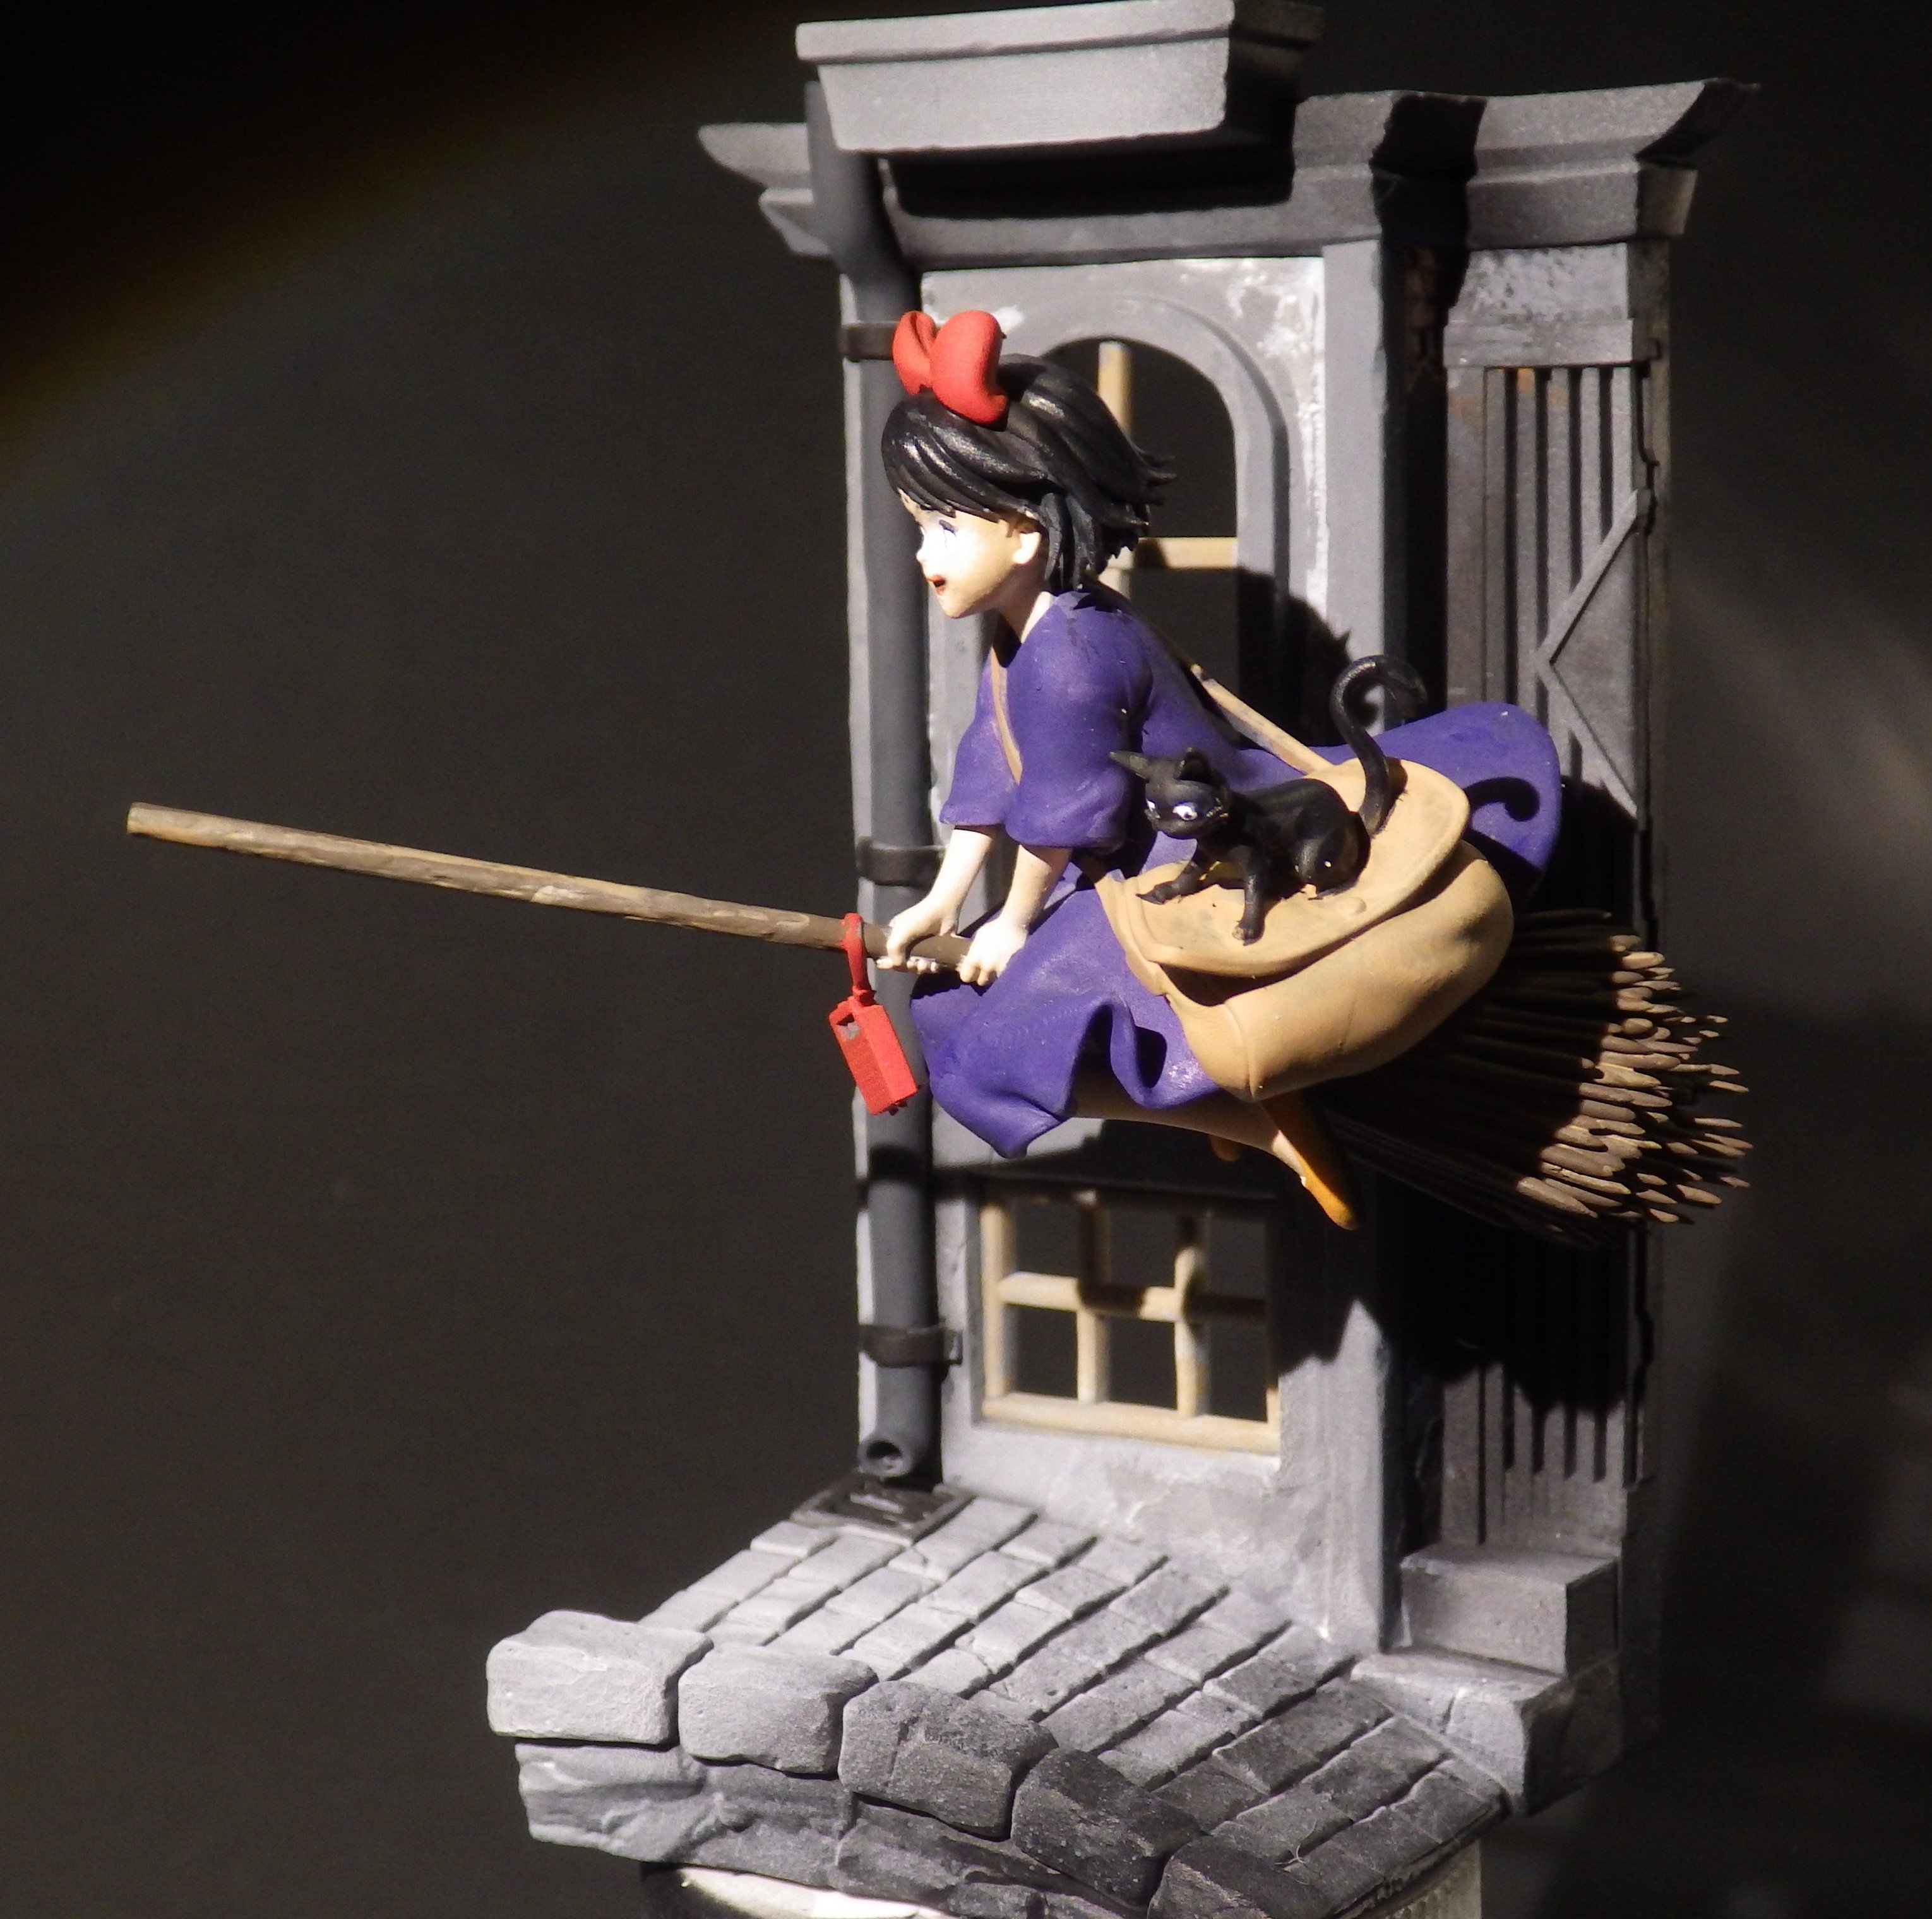
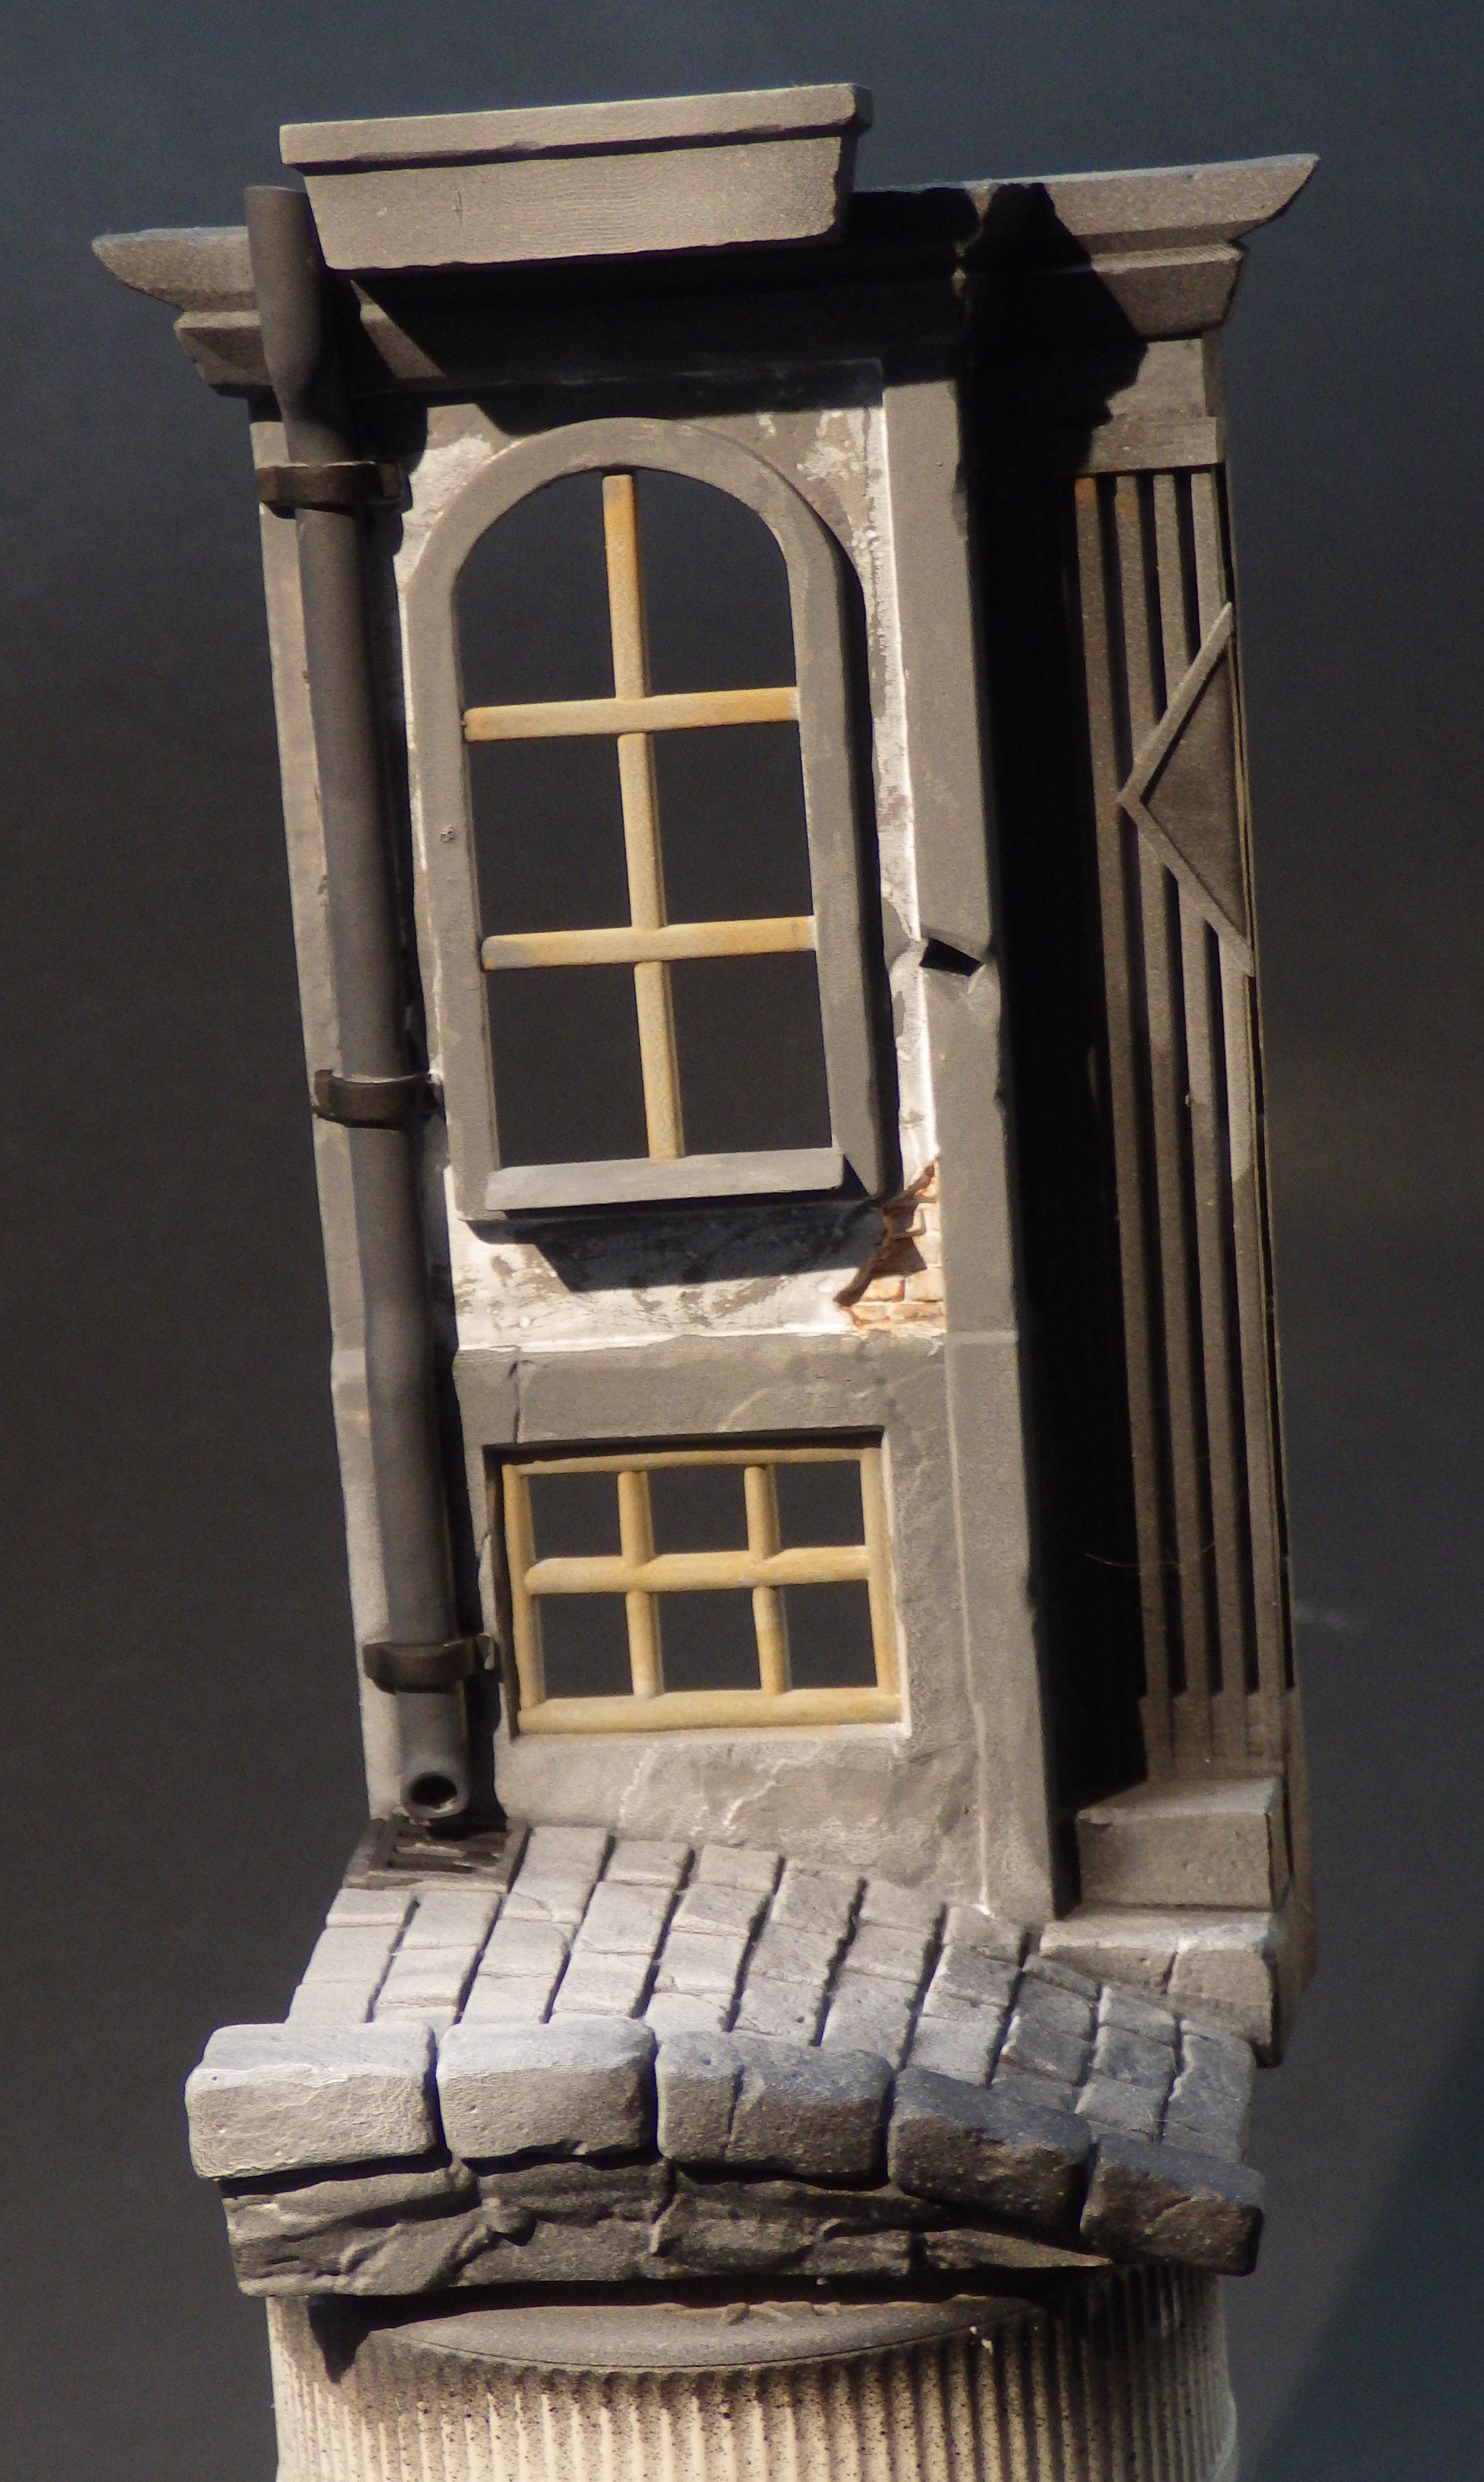
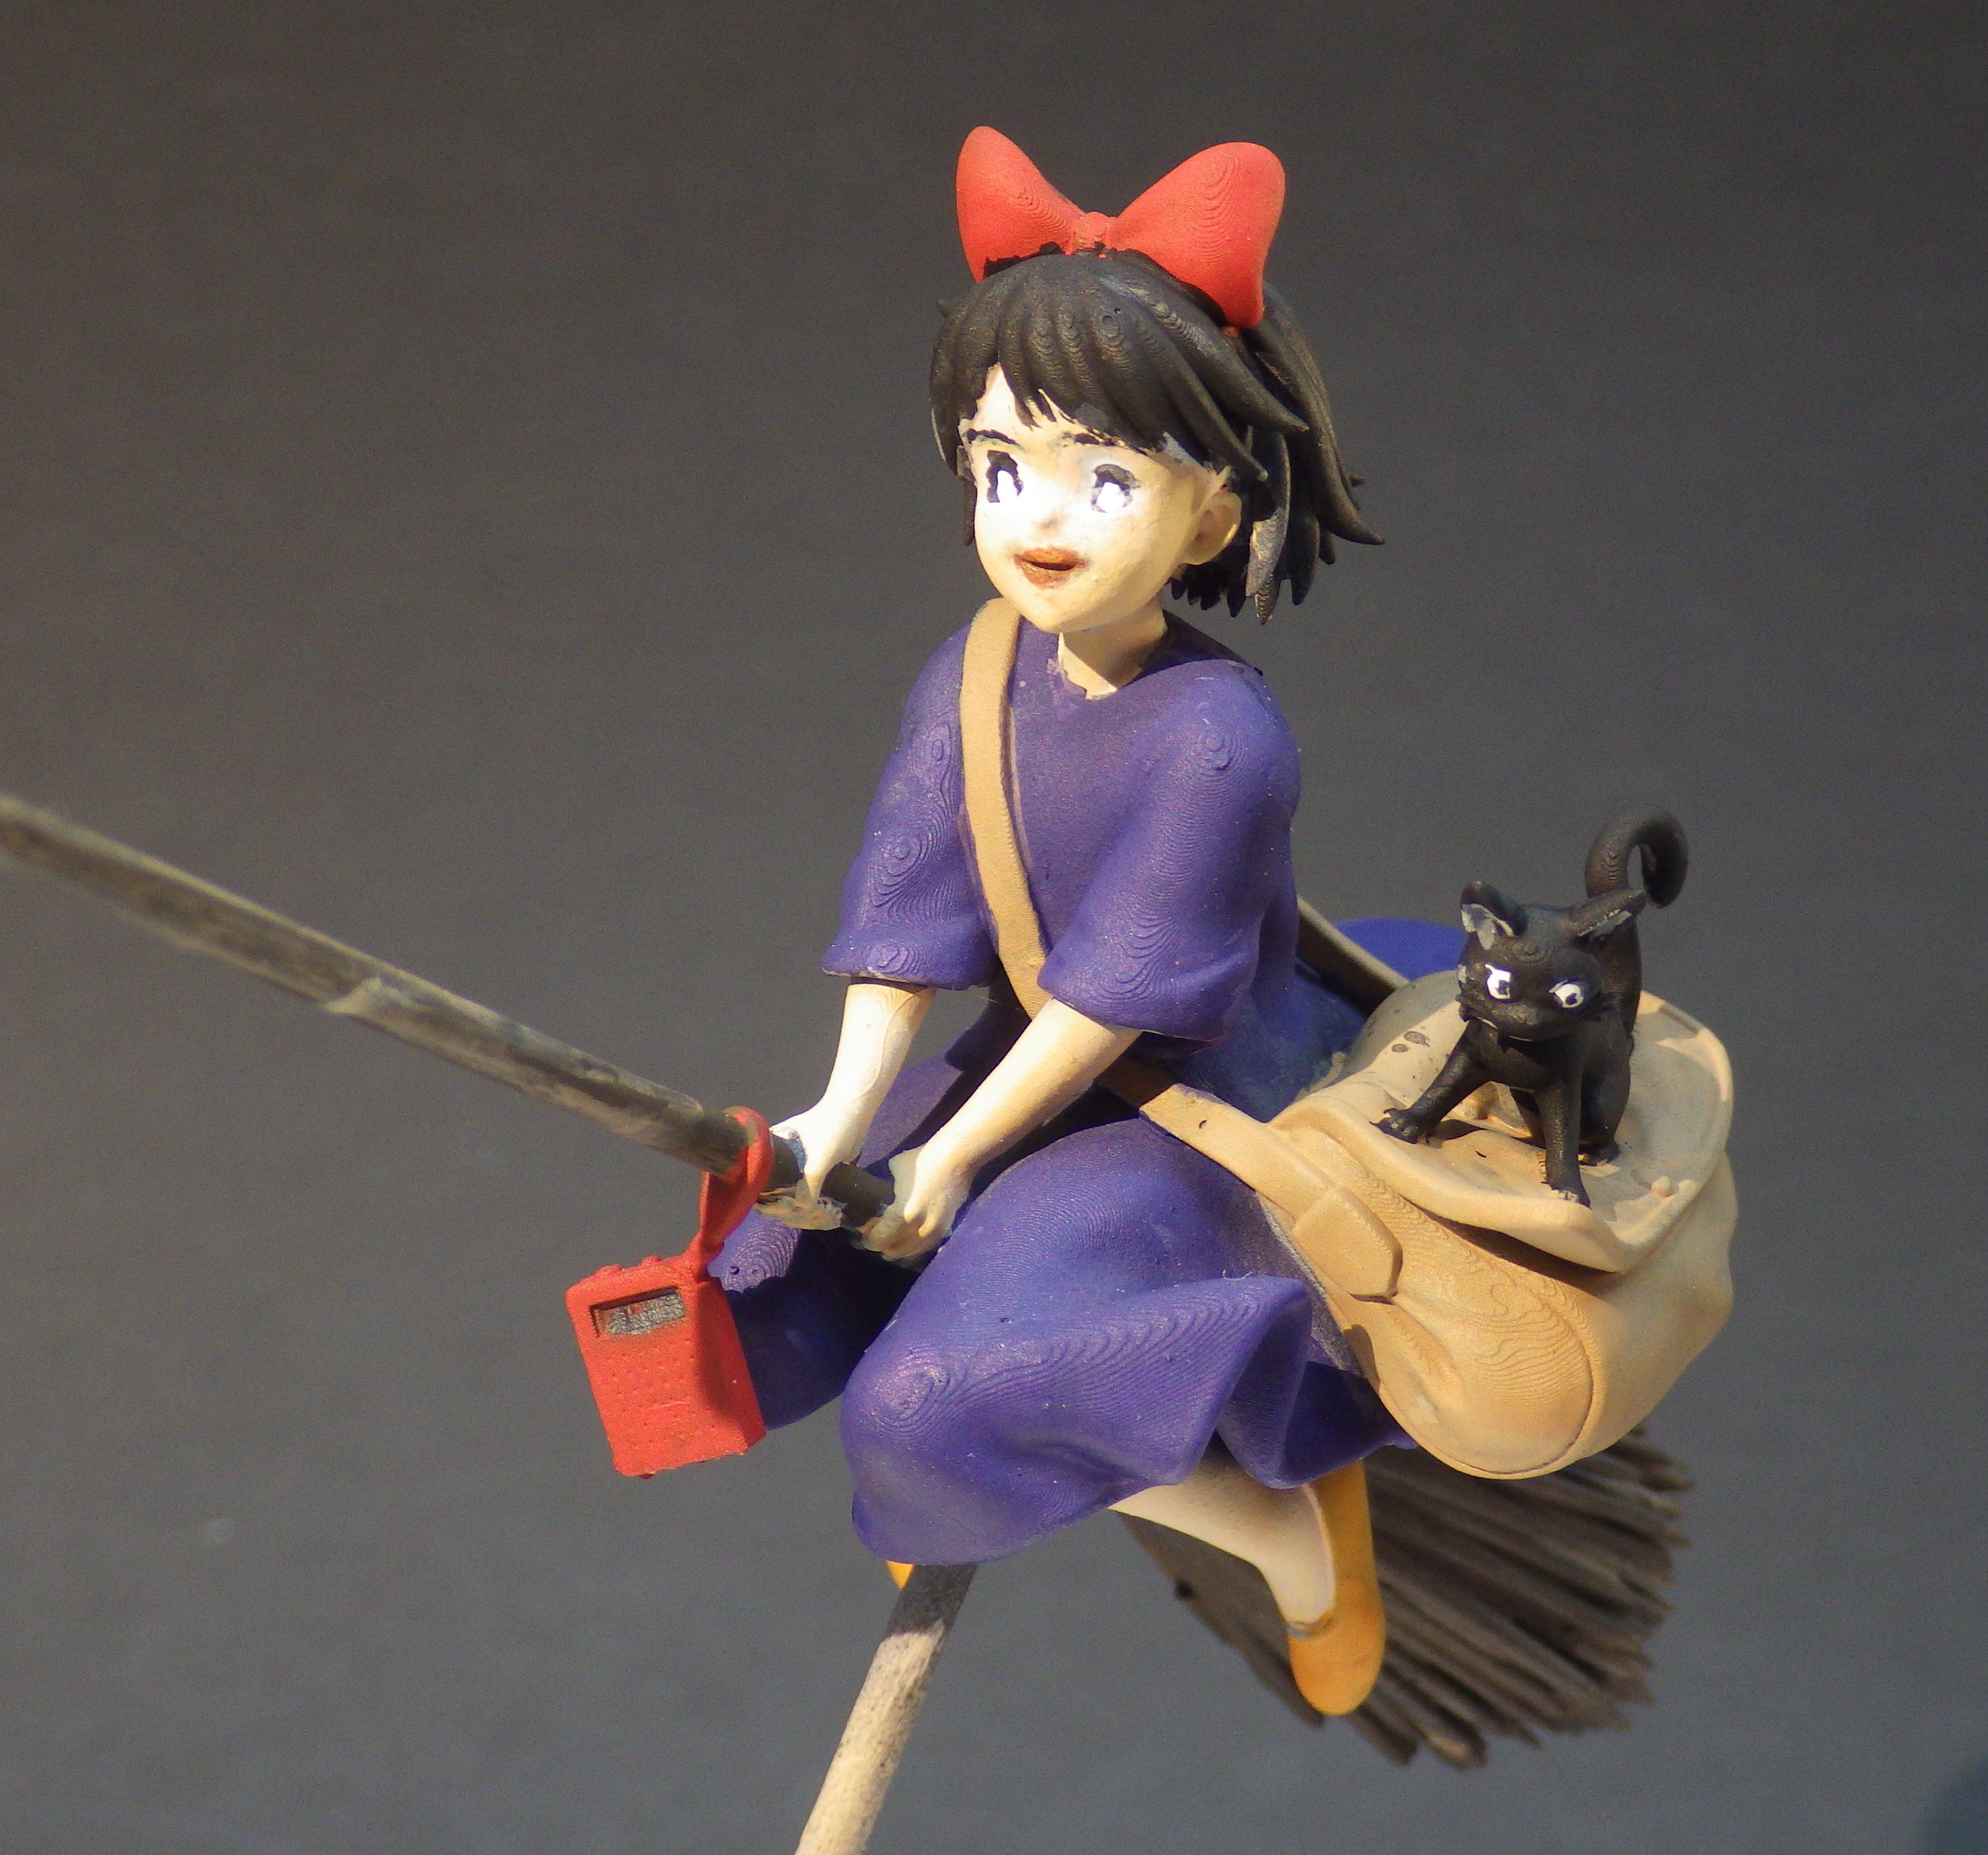
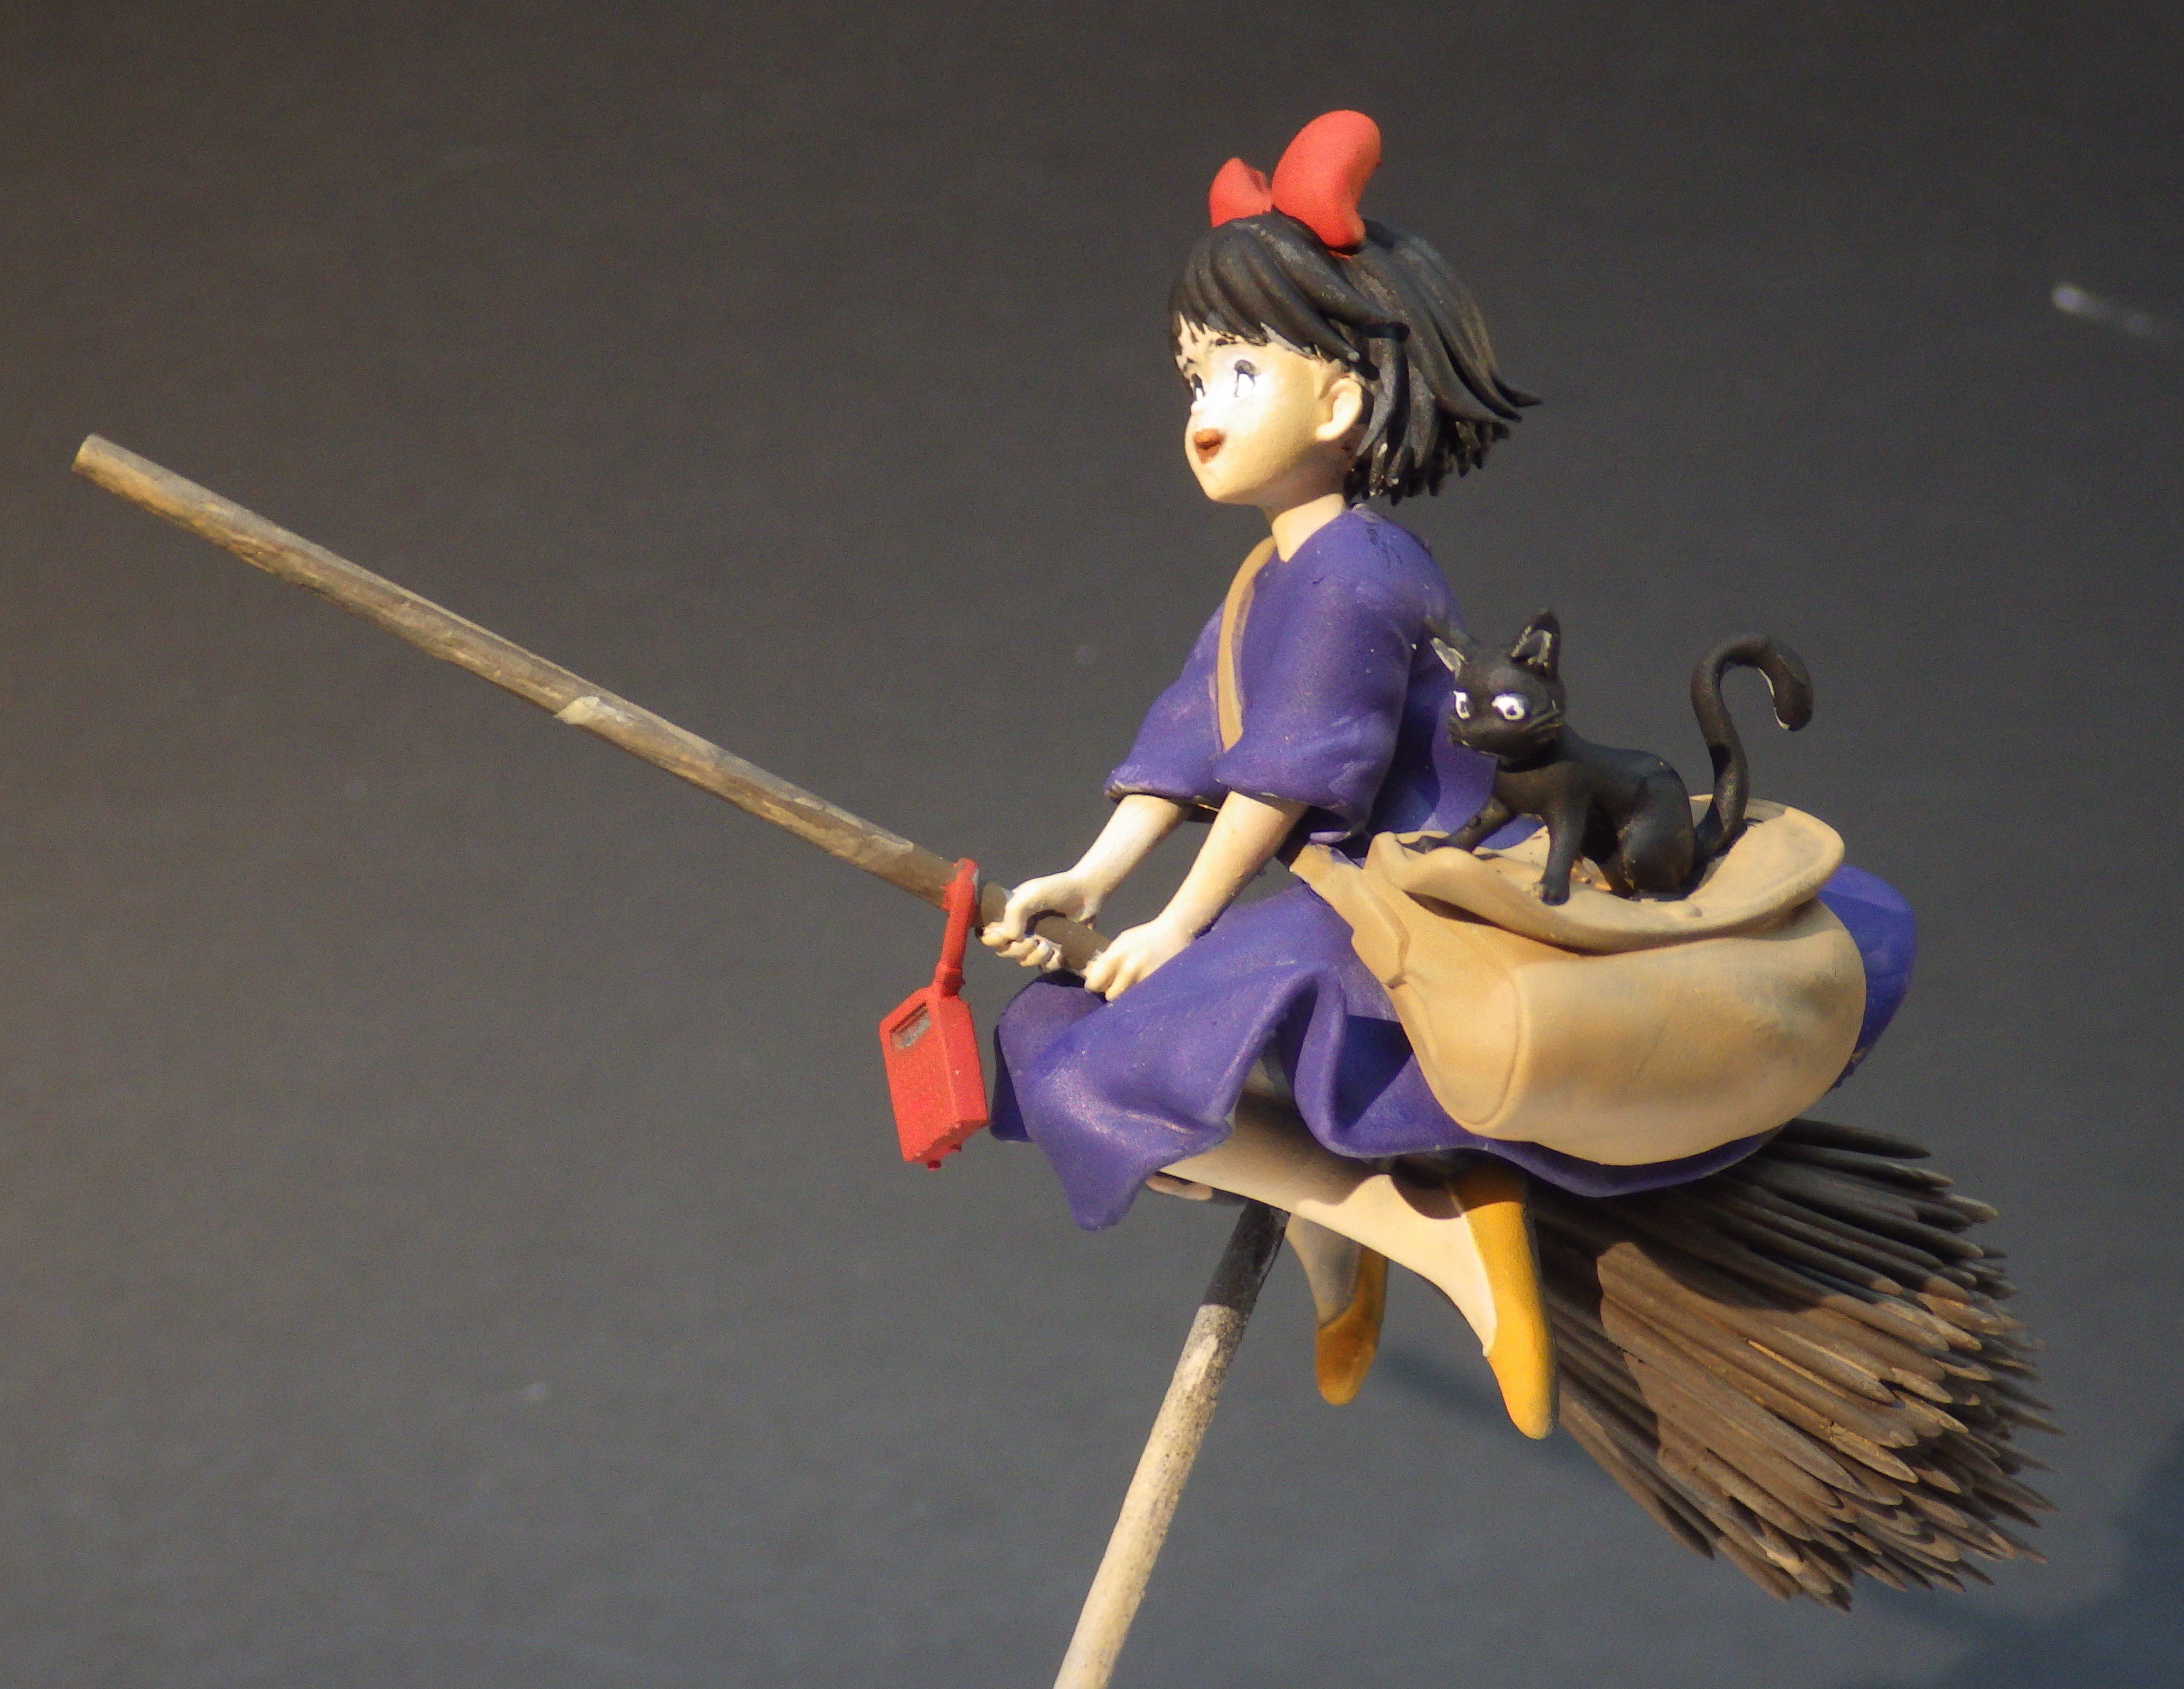
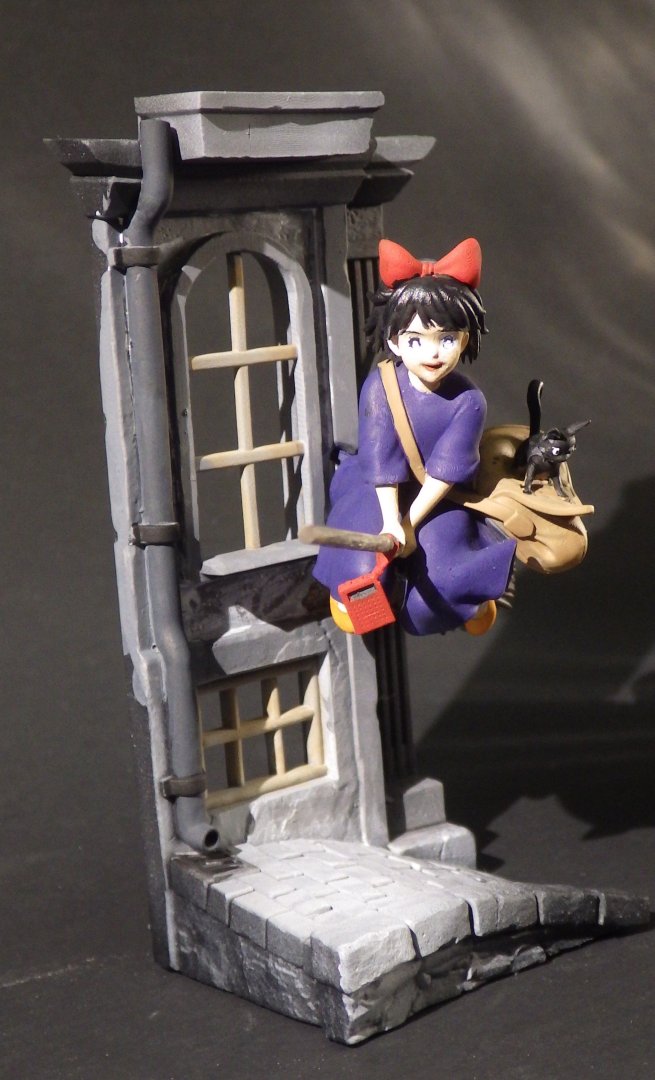
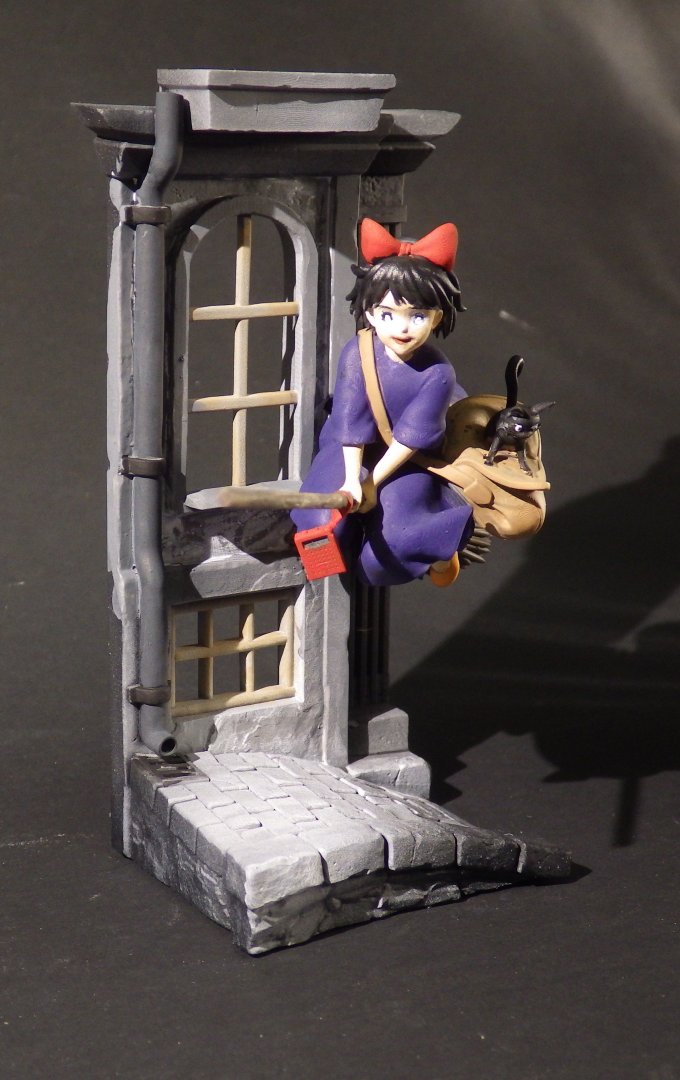
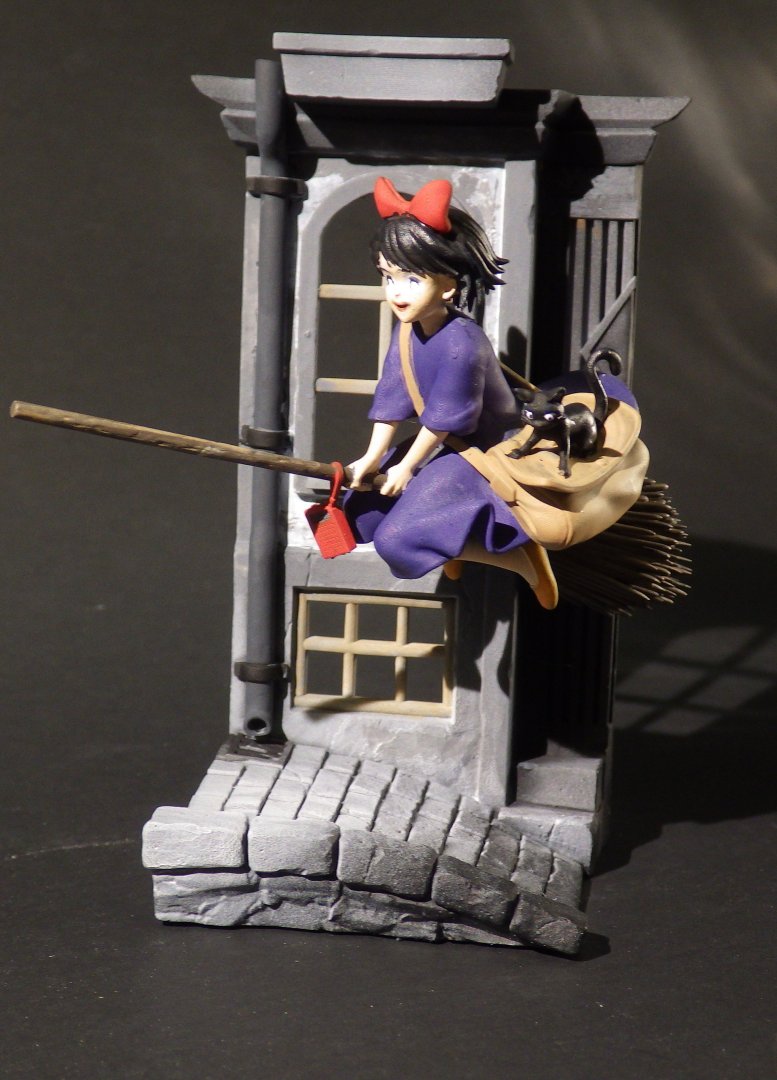
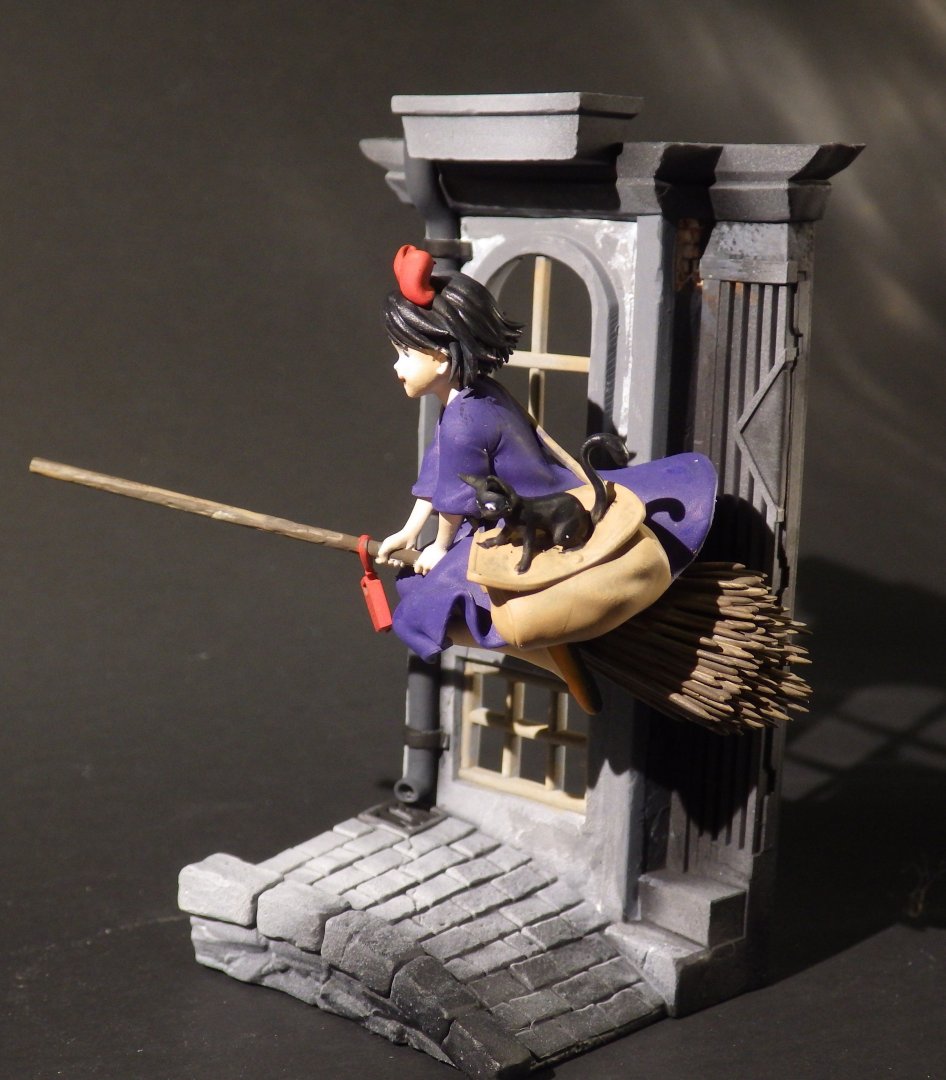
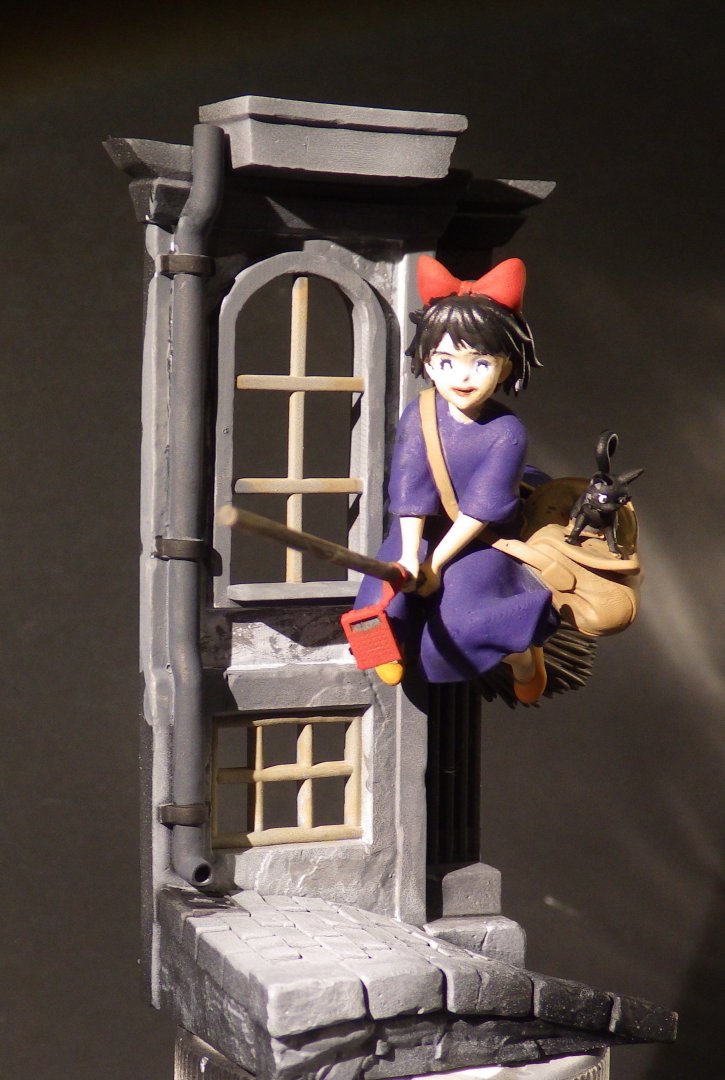
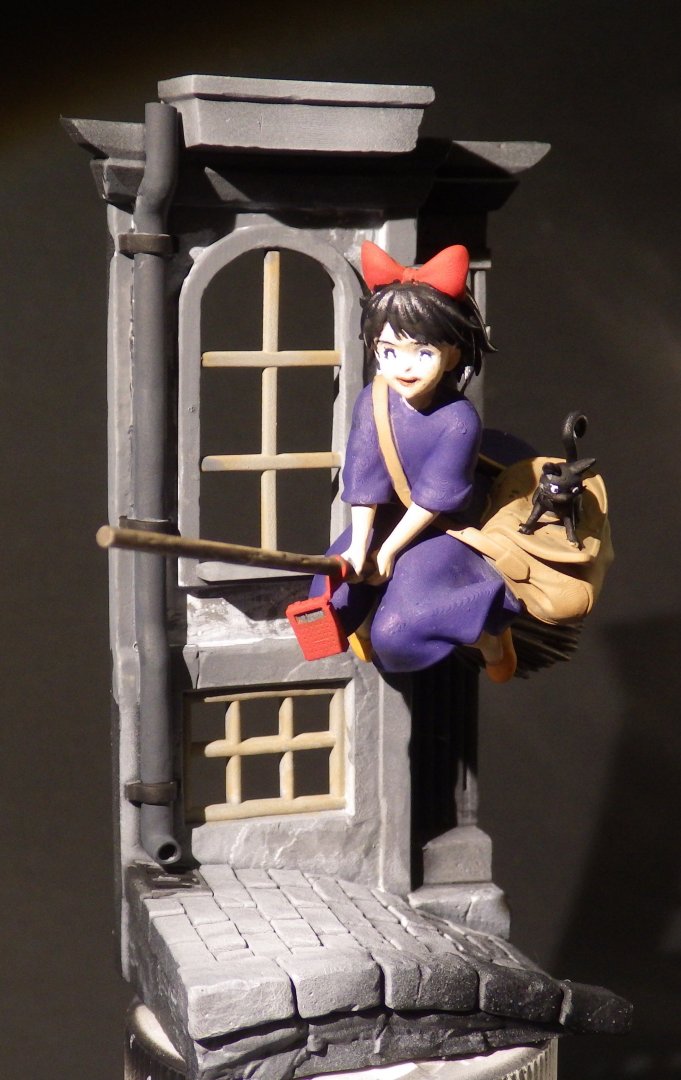
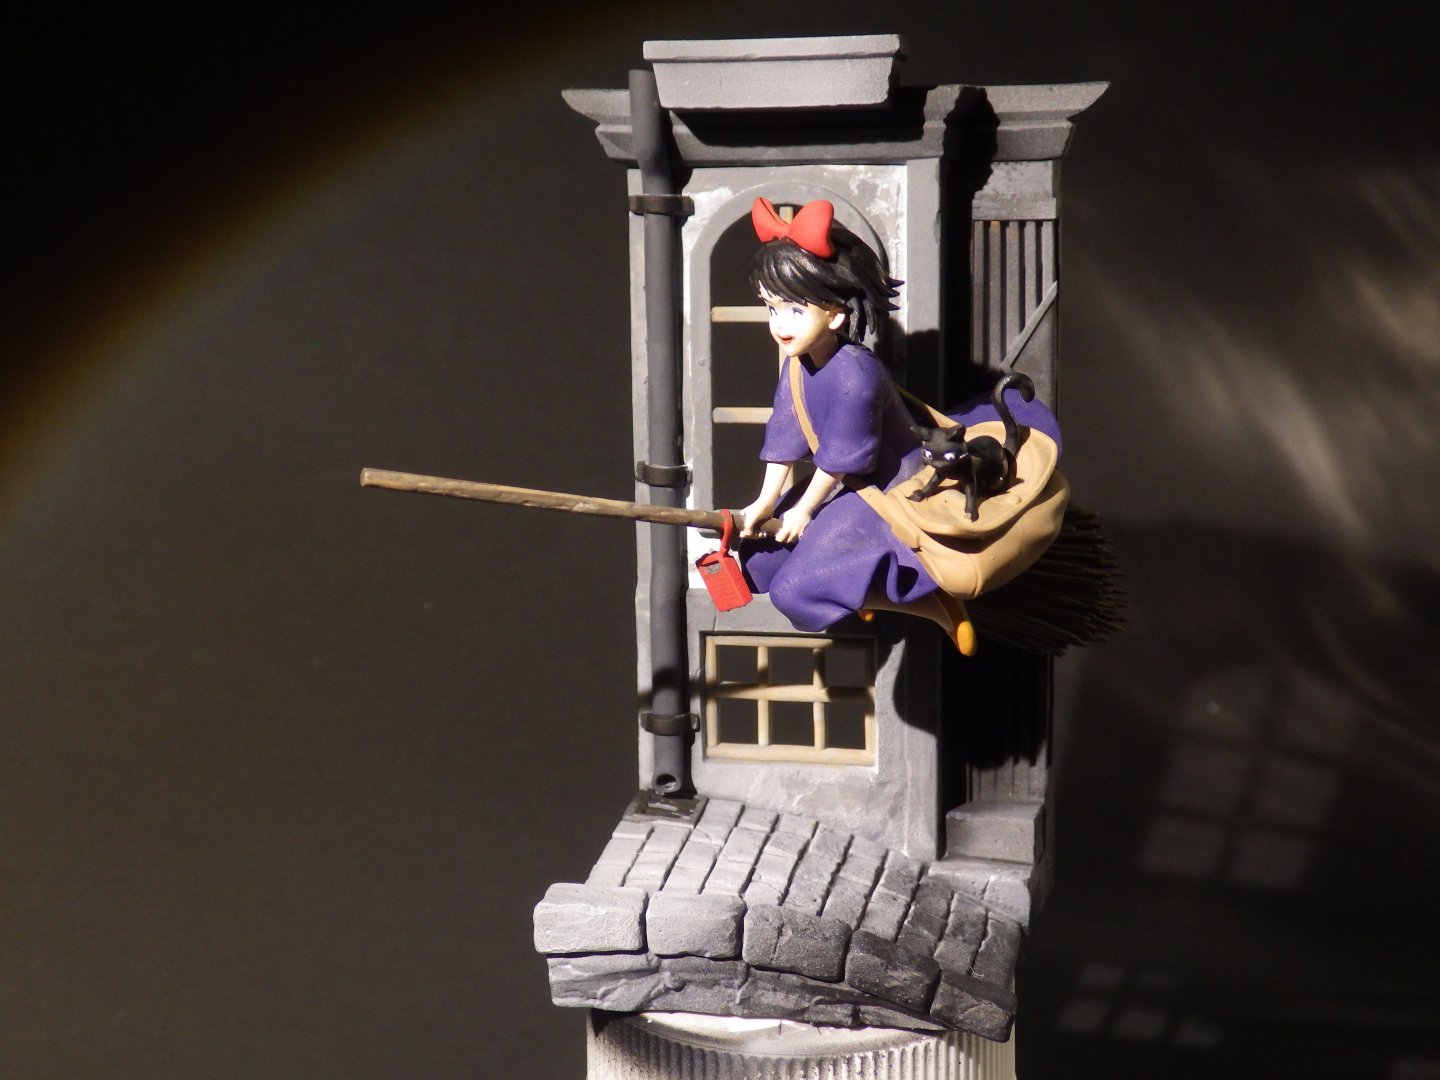
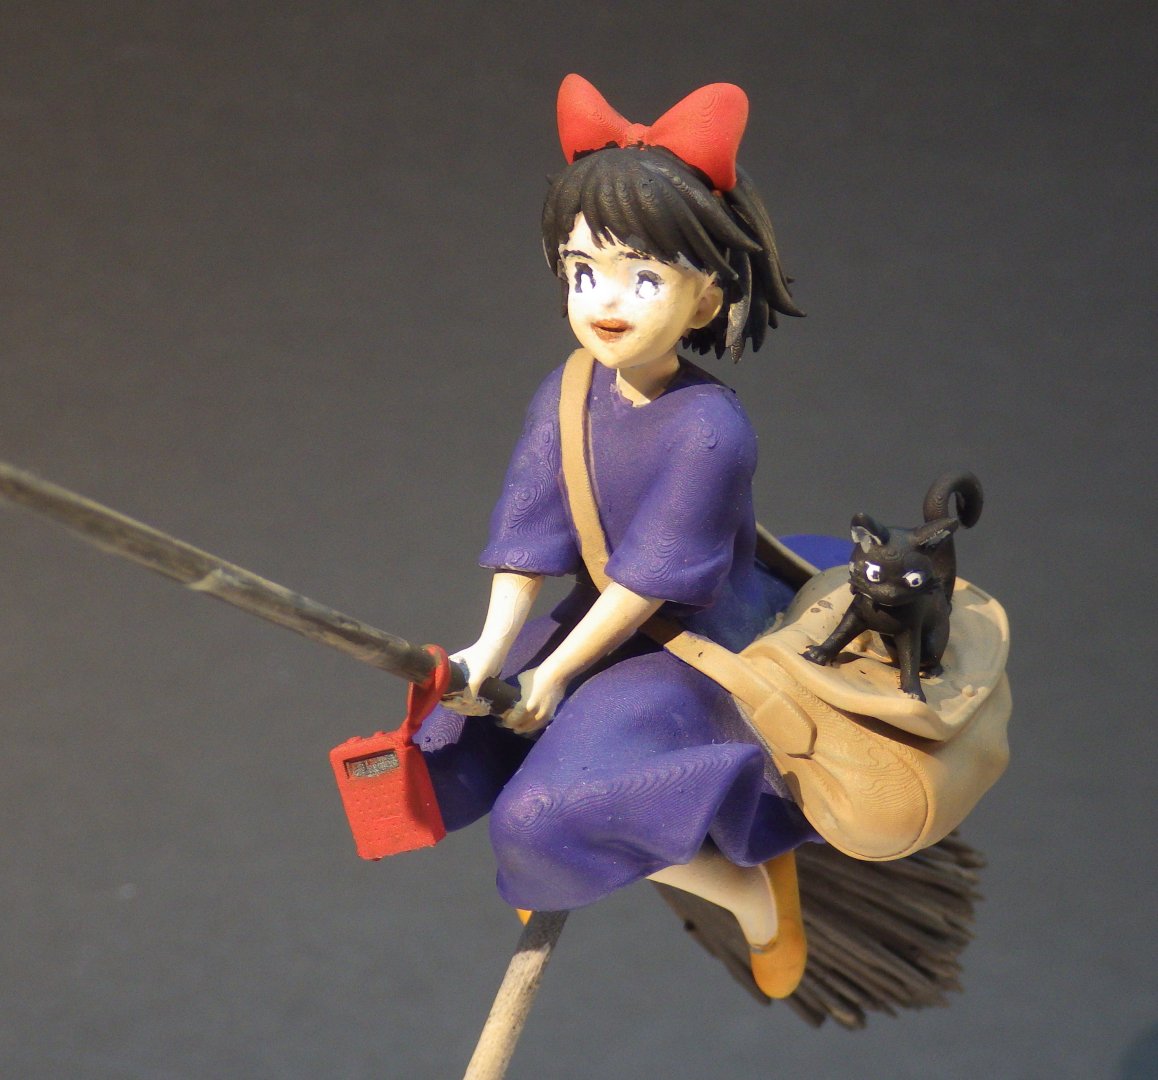
I worked on the face a little with some paler flesh tones and tidied up the lips and eyes. I added some gloss to the hair and glued Kiki onto the background building . And here we are Its been a fun diversion and a not-so-serious foray into the world of 3D resin printing. That looks like a whole new rabbit hole to disappear into but I am not sure two long haired cats and resin are a good mix. They contribute quite enough to the hobby as it is. Thanks for looking in and for the likes and comments. I think another miniature will be along soon. I have a few choices from Art Girona, Pegaso and another resin kit. Alan

- 7 replies
-
- 10
-
-
Thank you OC. It’s a relaxing little project. There are some weird and wonderful things on Etsy alan
-
Thanks Ron. A fun little figure alan
-
Hi Andrew. Flyhawk really pack in the details. Sprue after sprue of tiny pelorus, lockers, binoculars, and they even manage to detail hinges on the front of the lockers. It’s crazy but does make the finished model look really busy. My limited experience of ships is real estate is really at a premium and there is equipment installed in every available space. Alan
-
Really beautiful Rob. Congratulations. The color scheme really pops. Alan
-
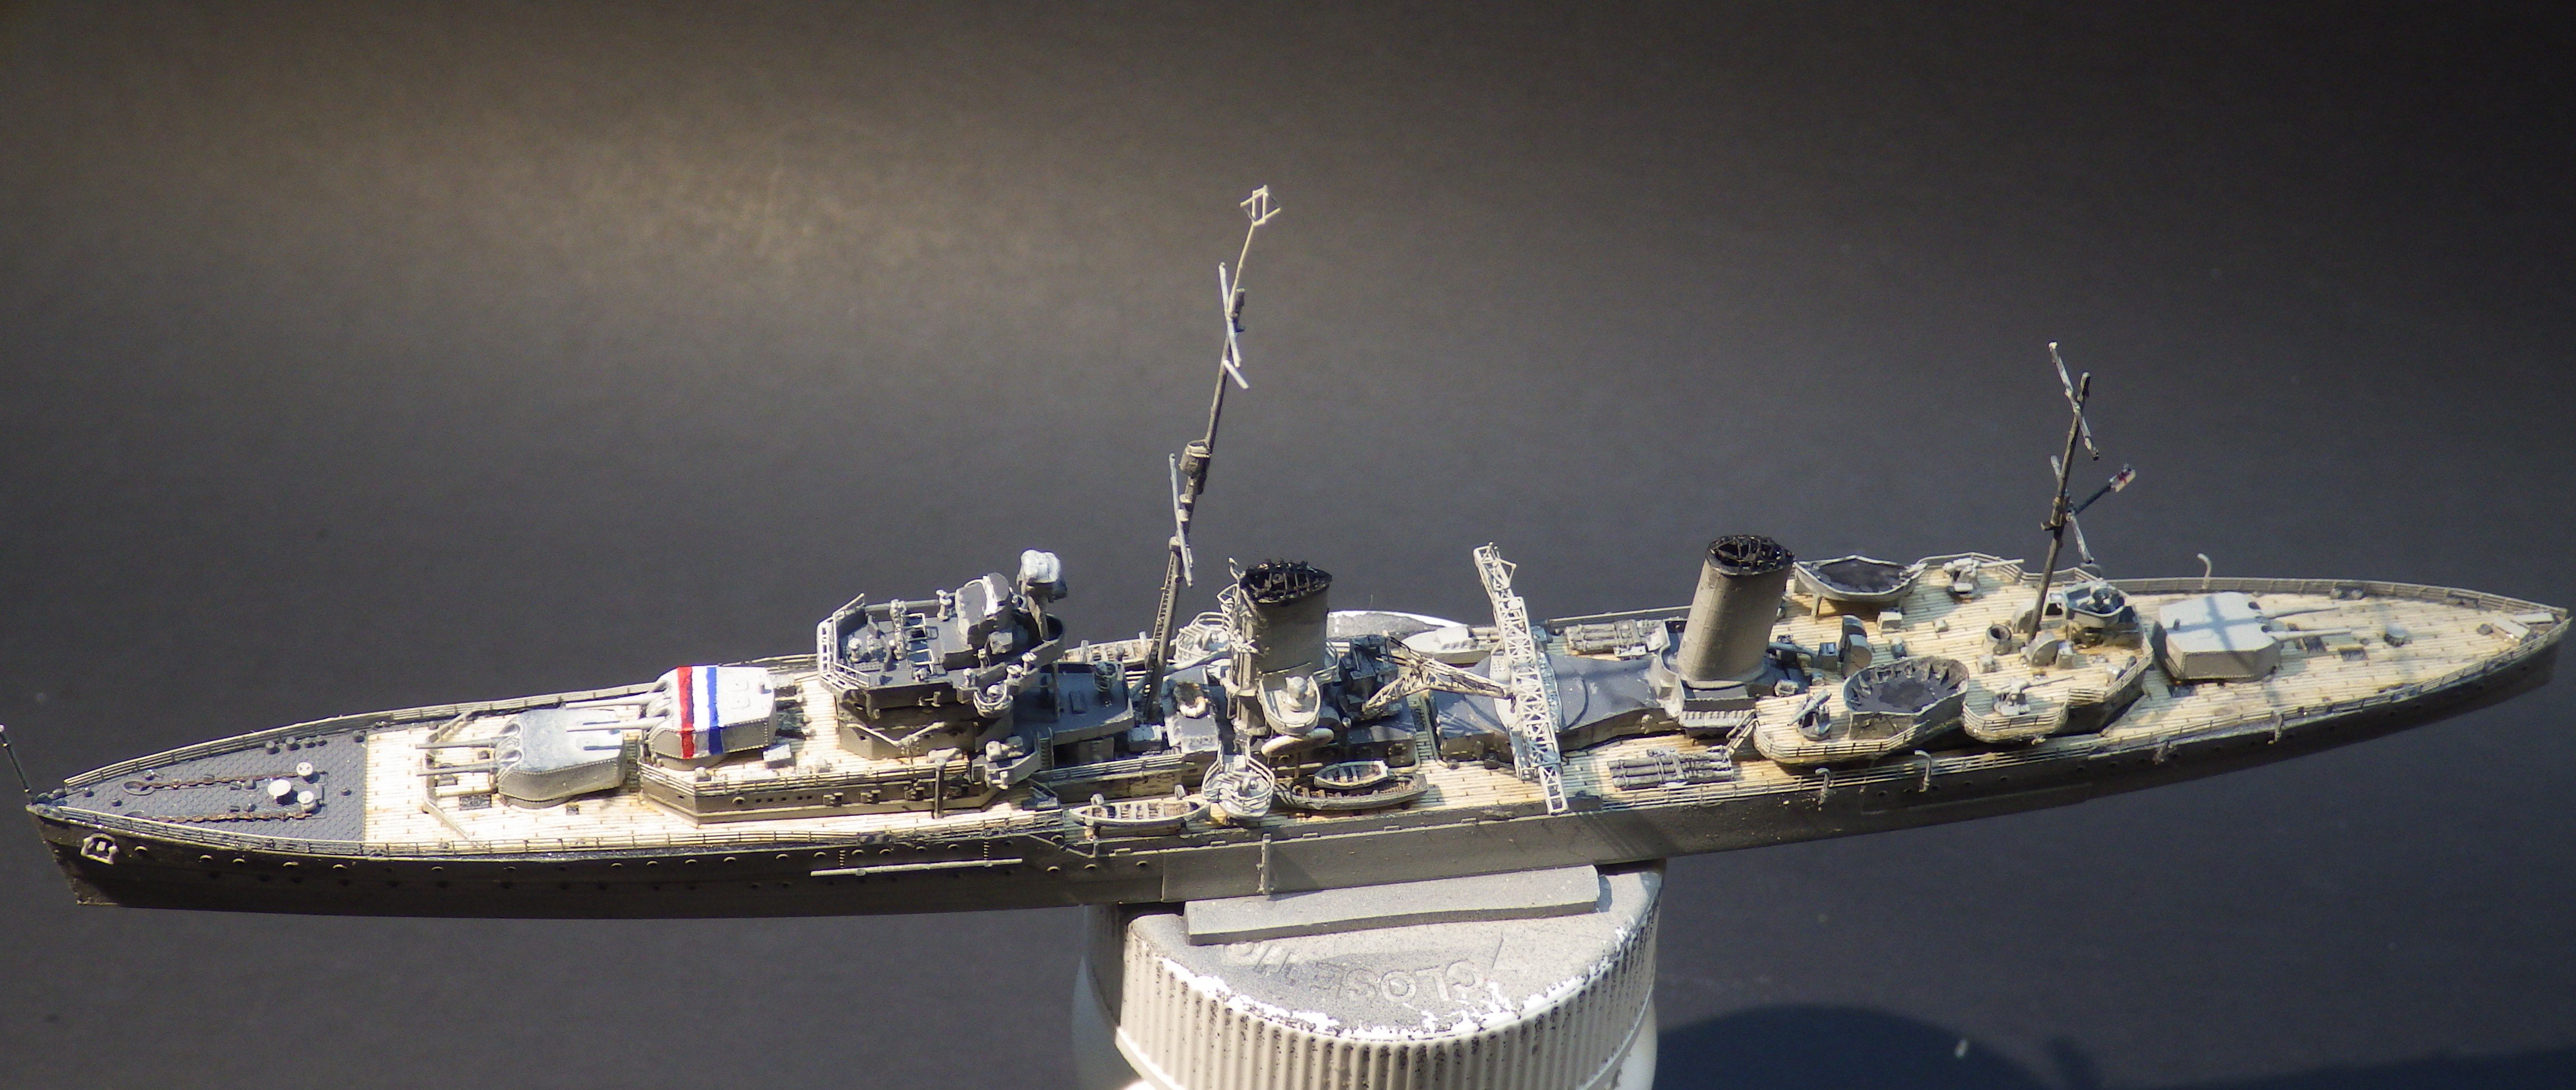
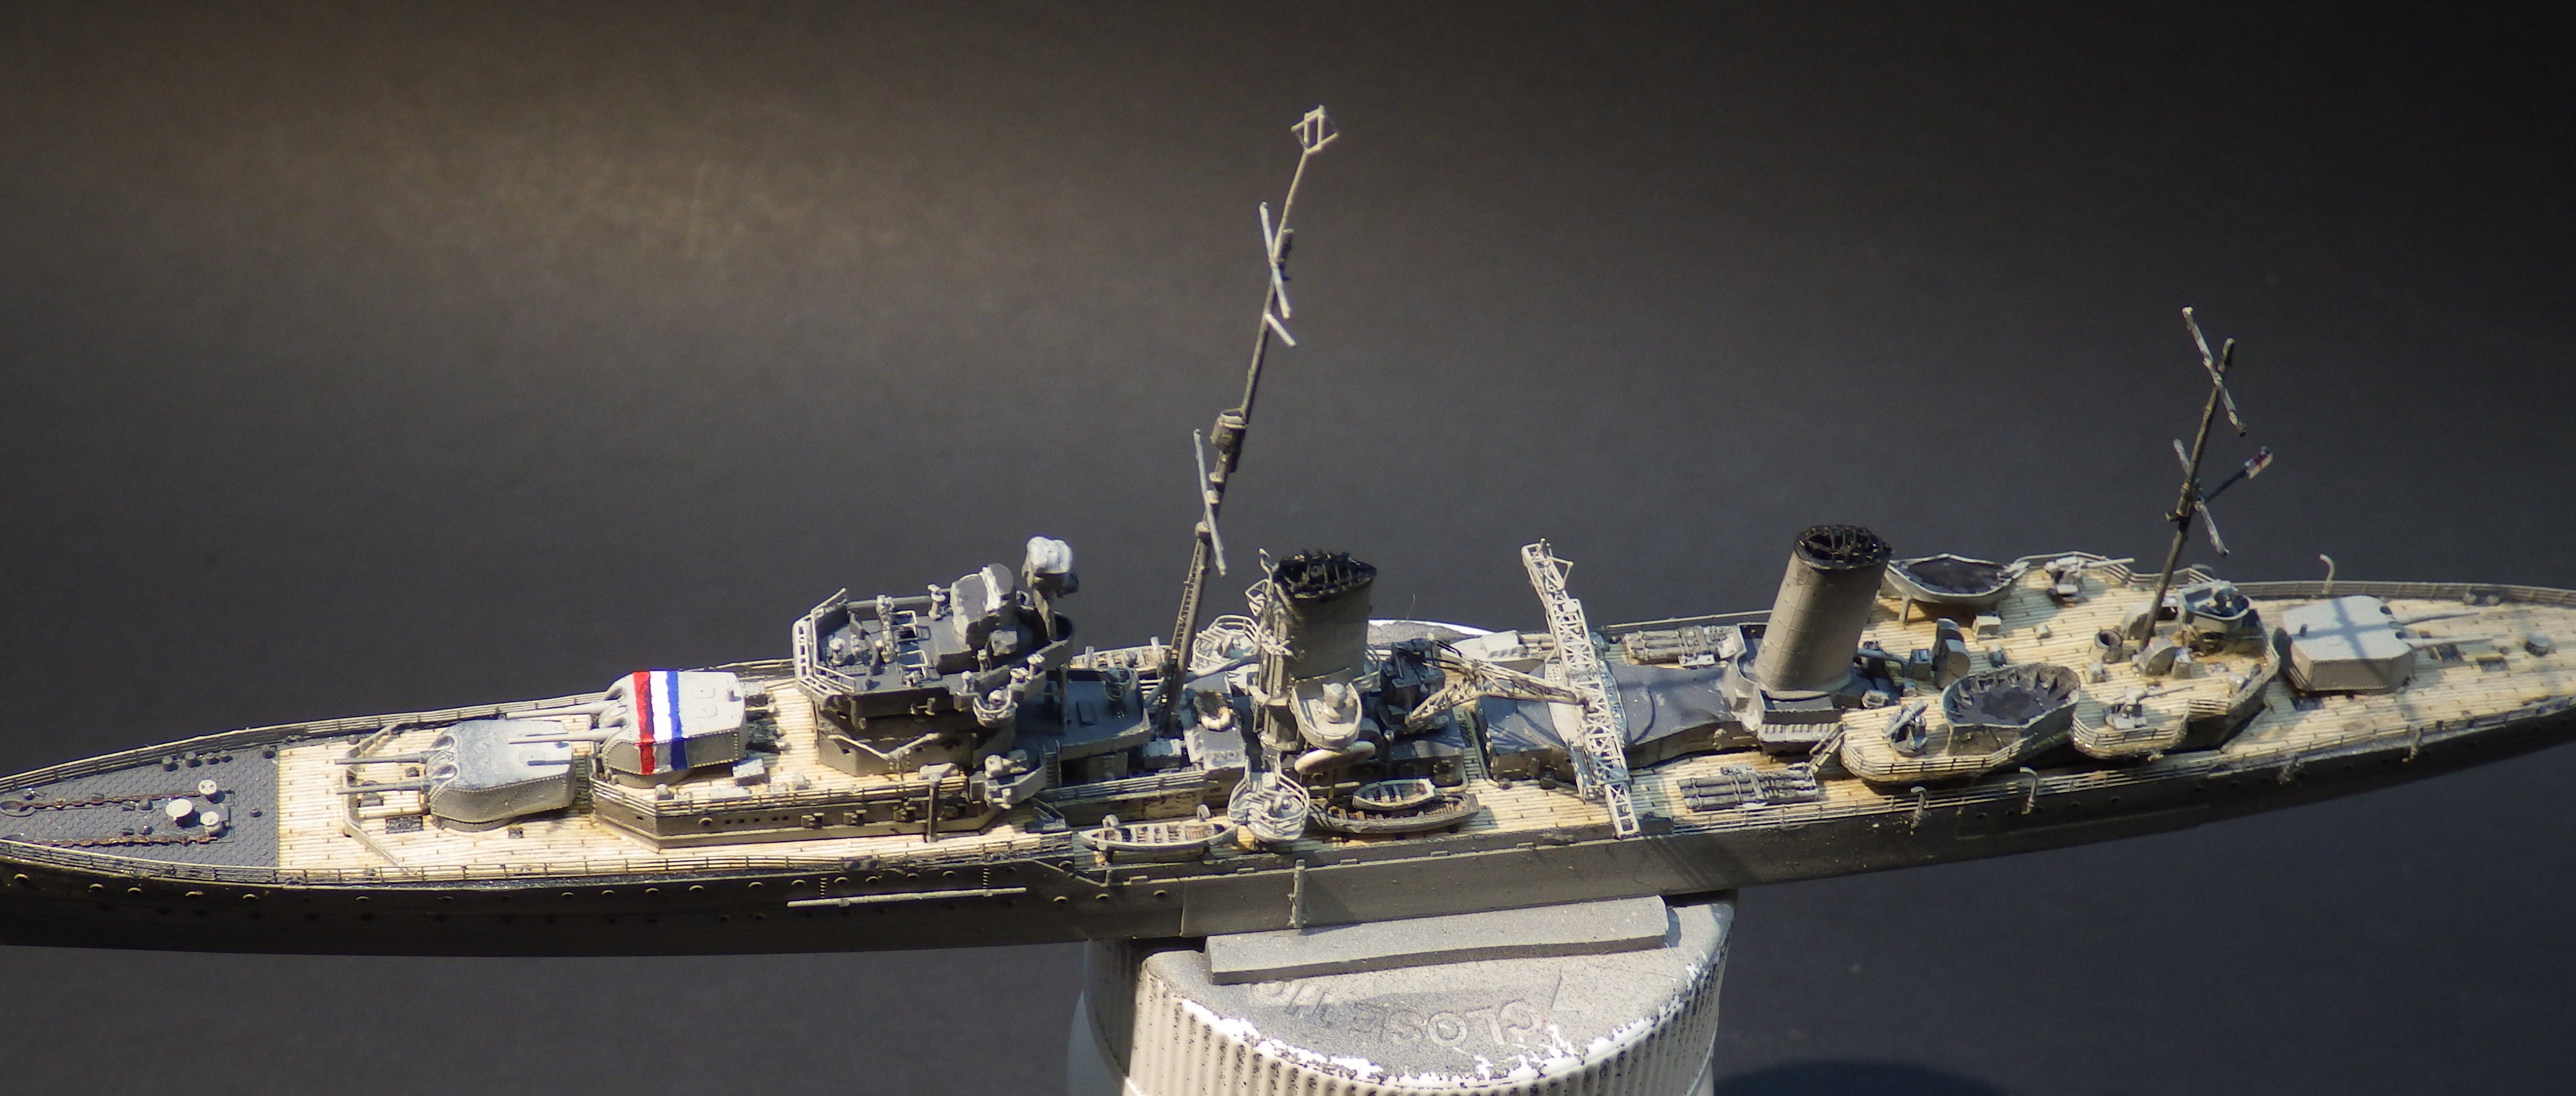
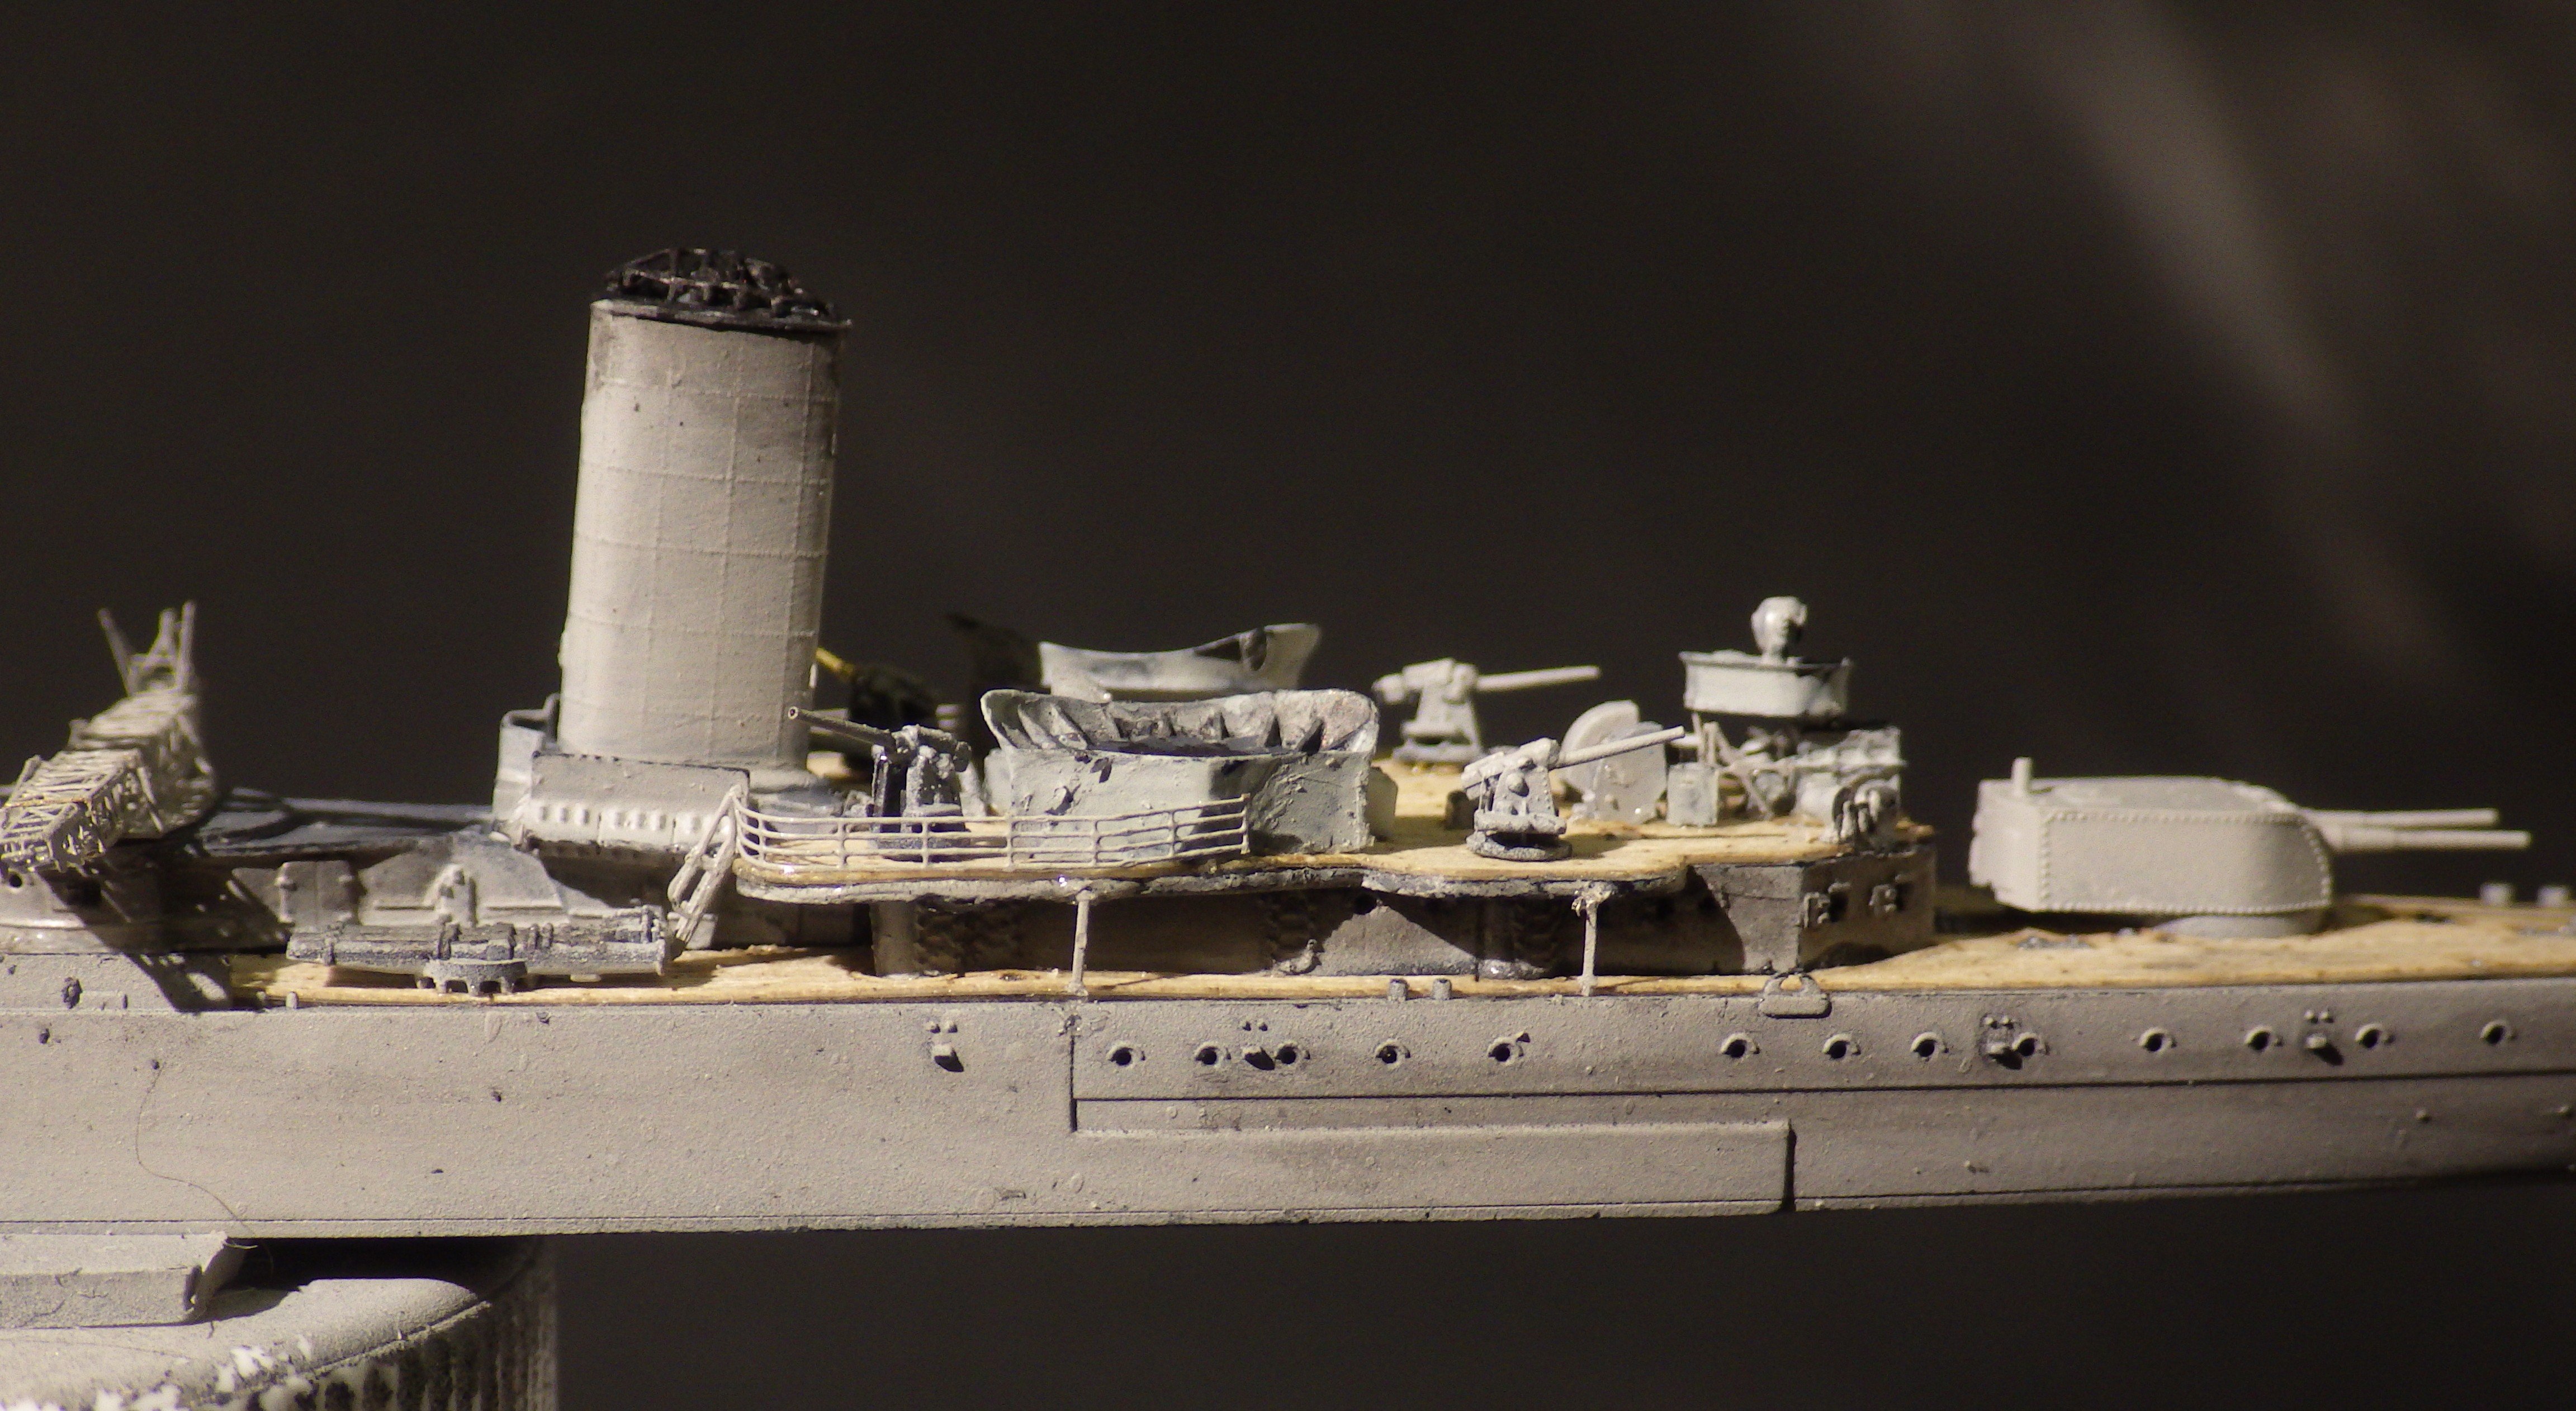
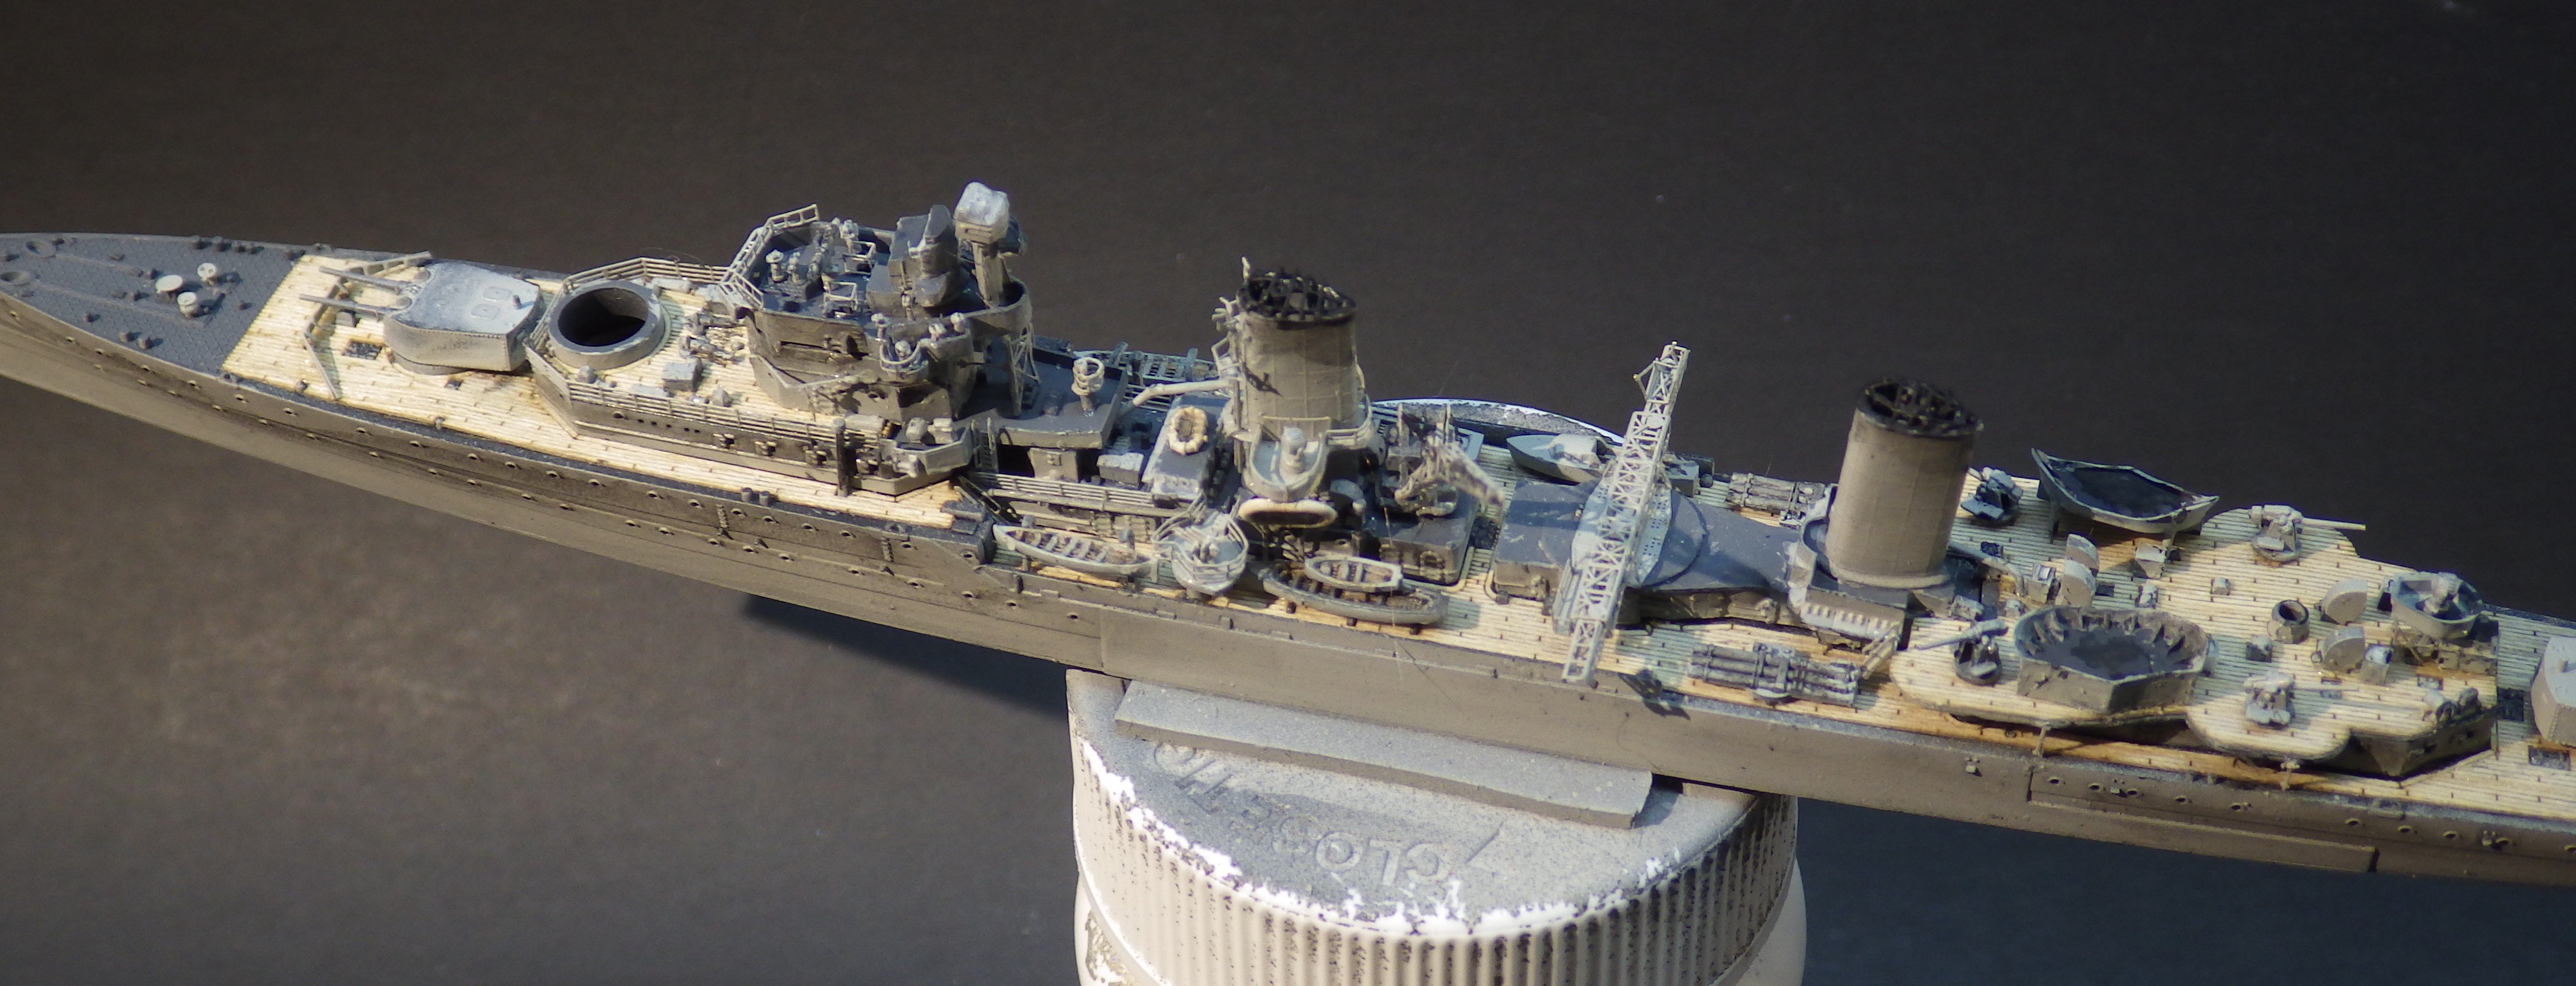
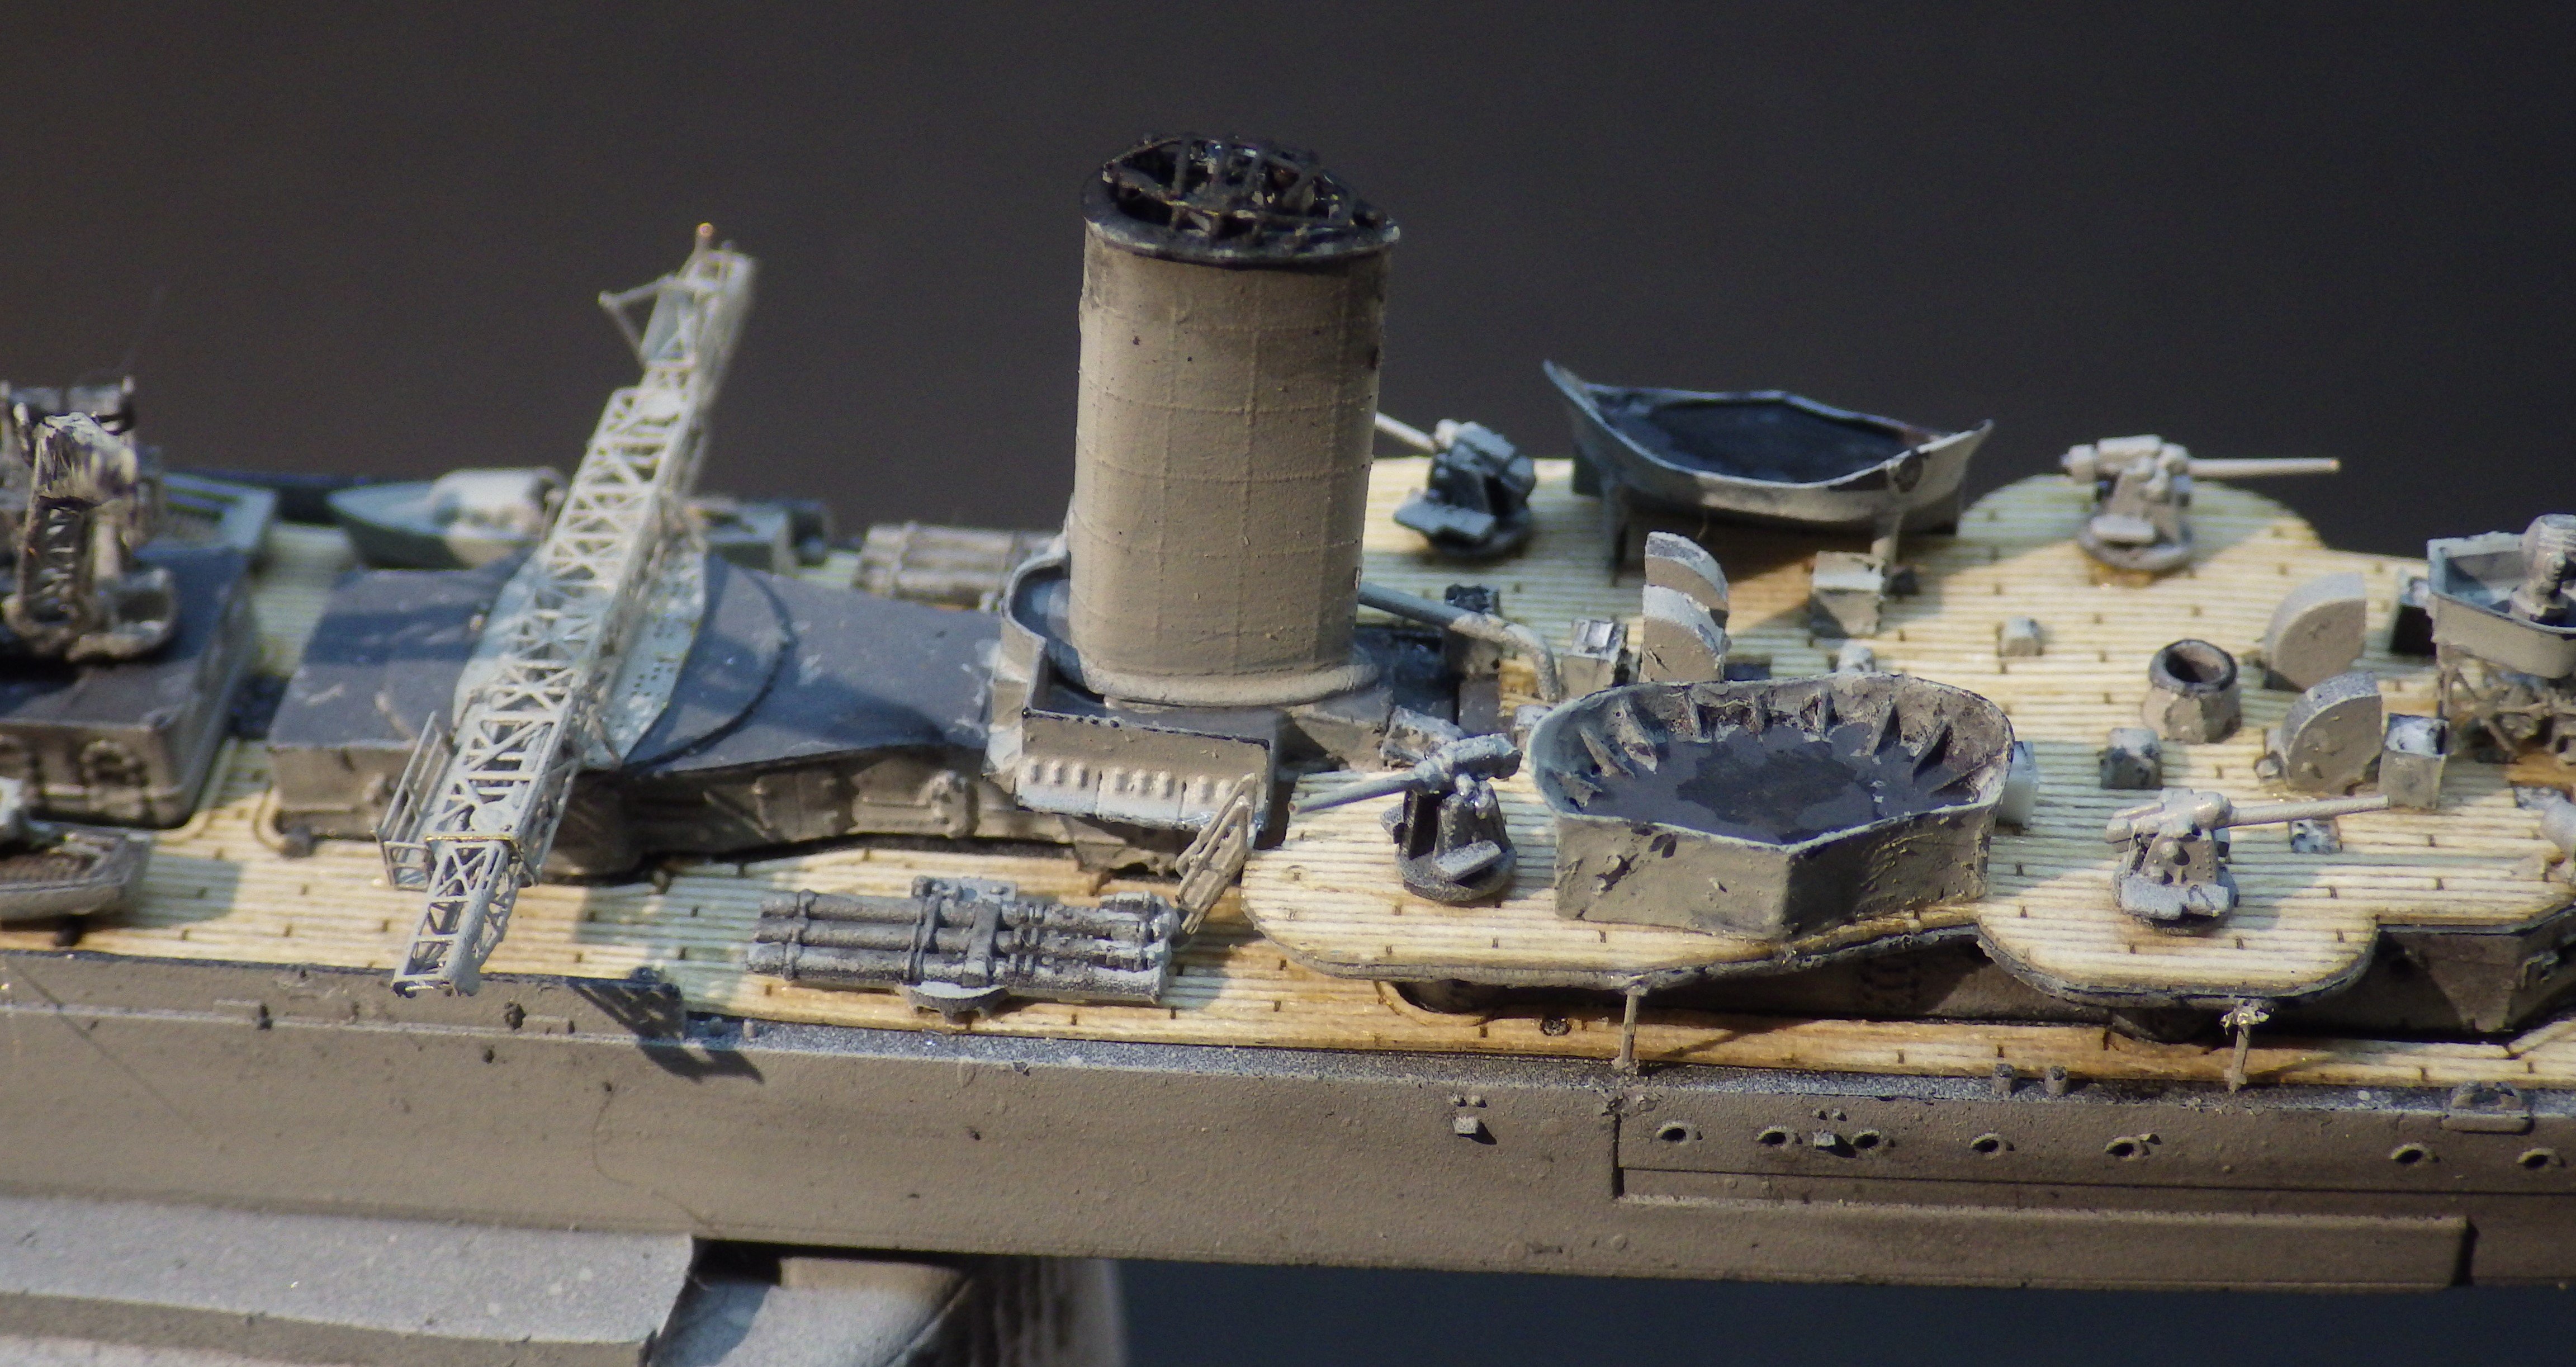
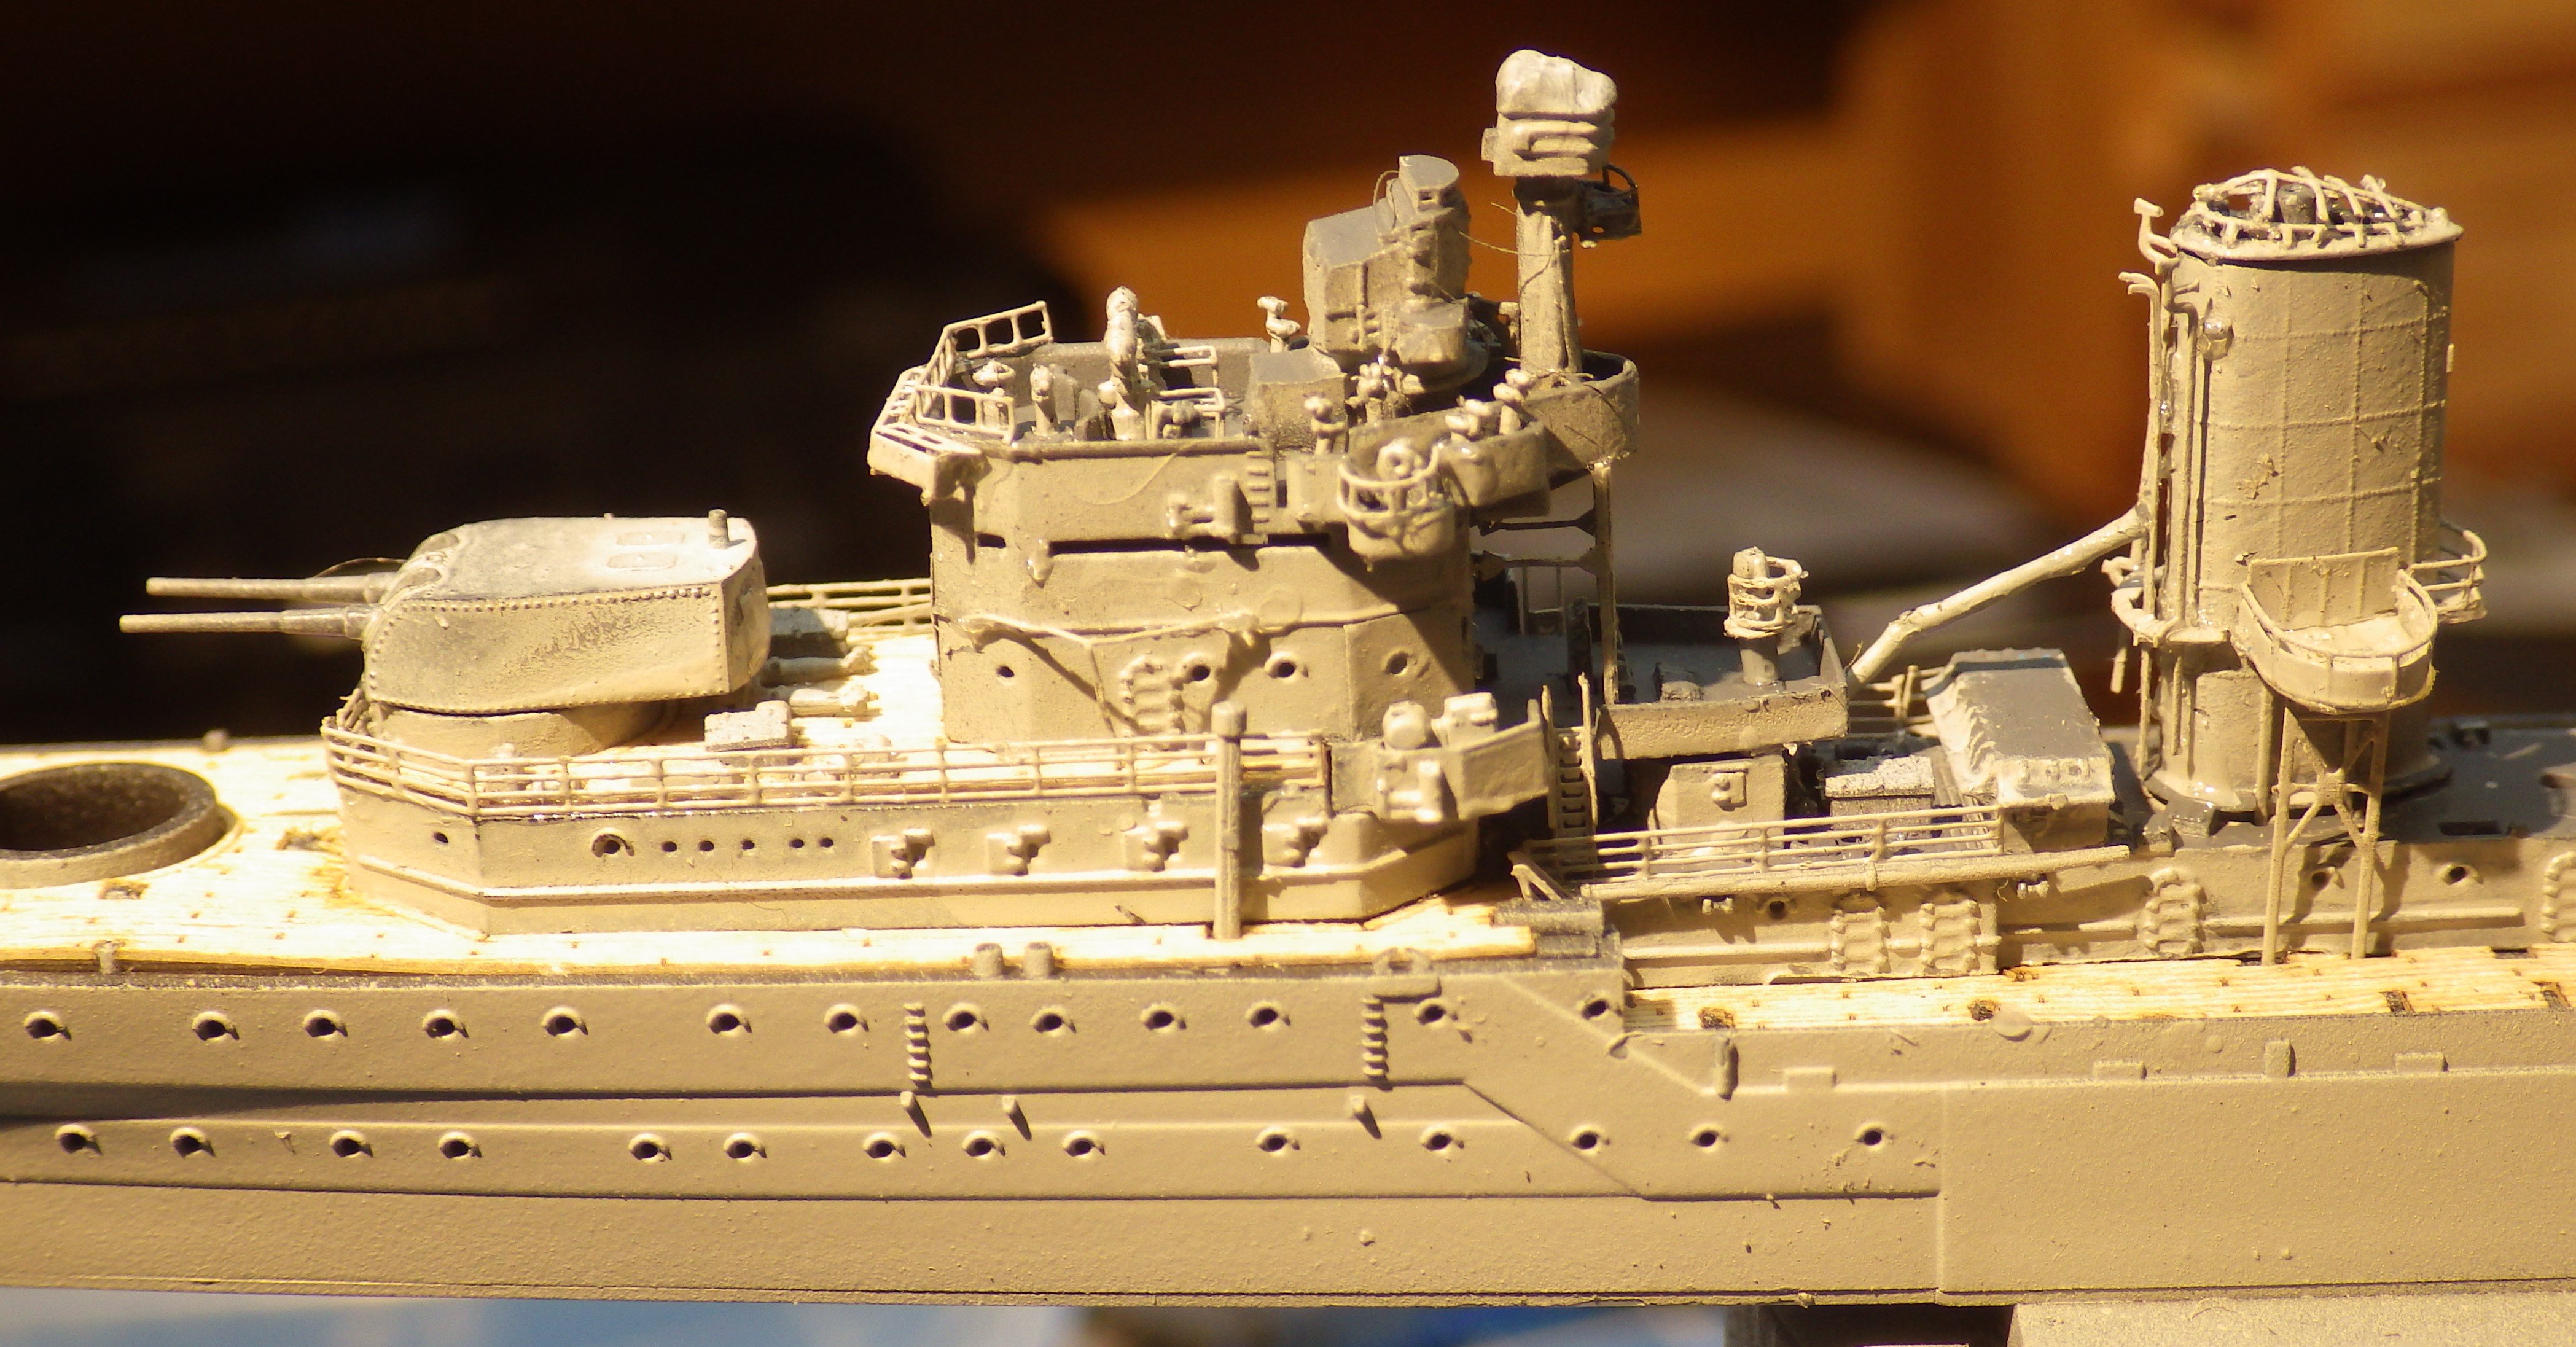
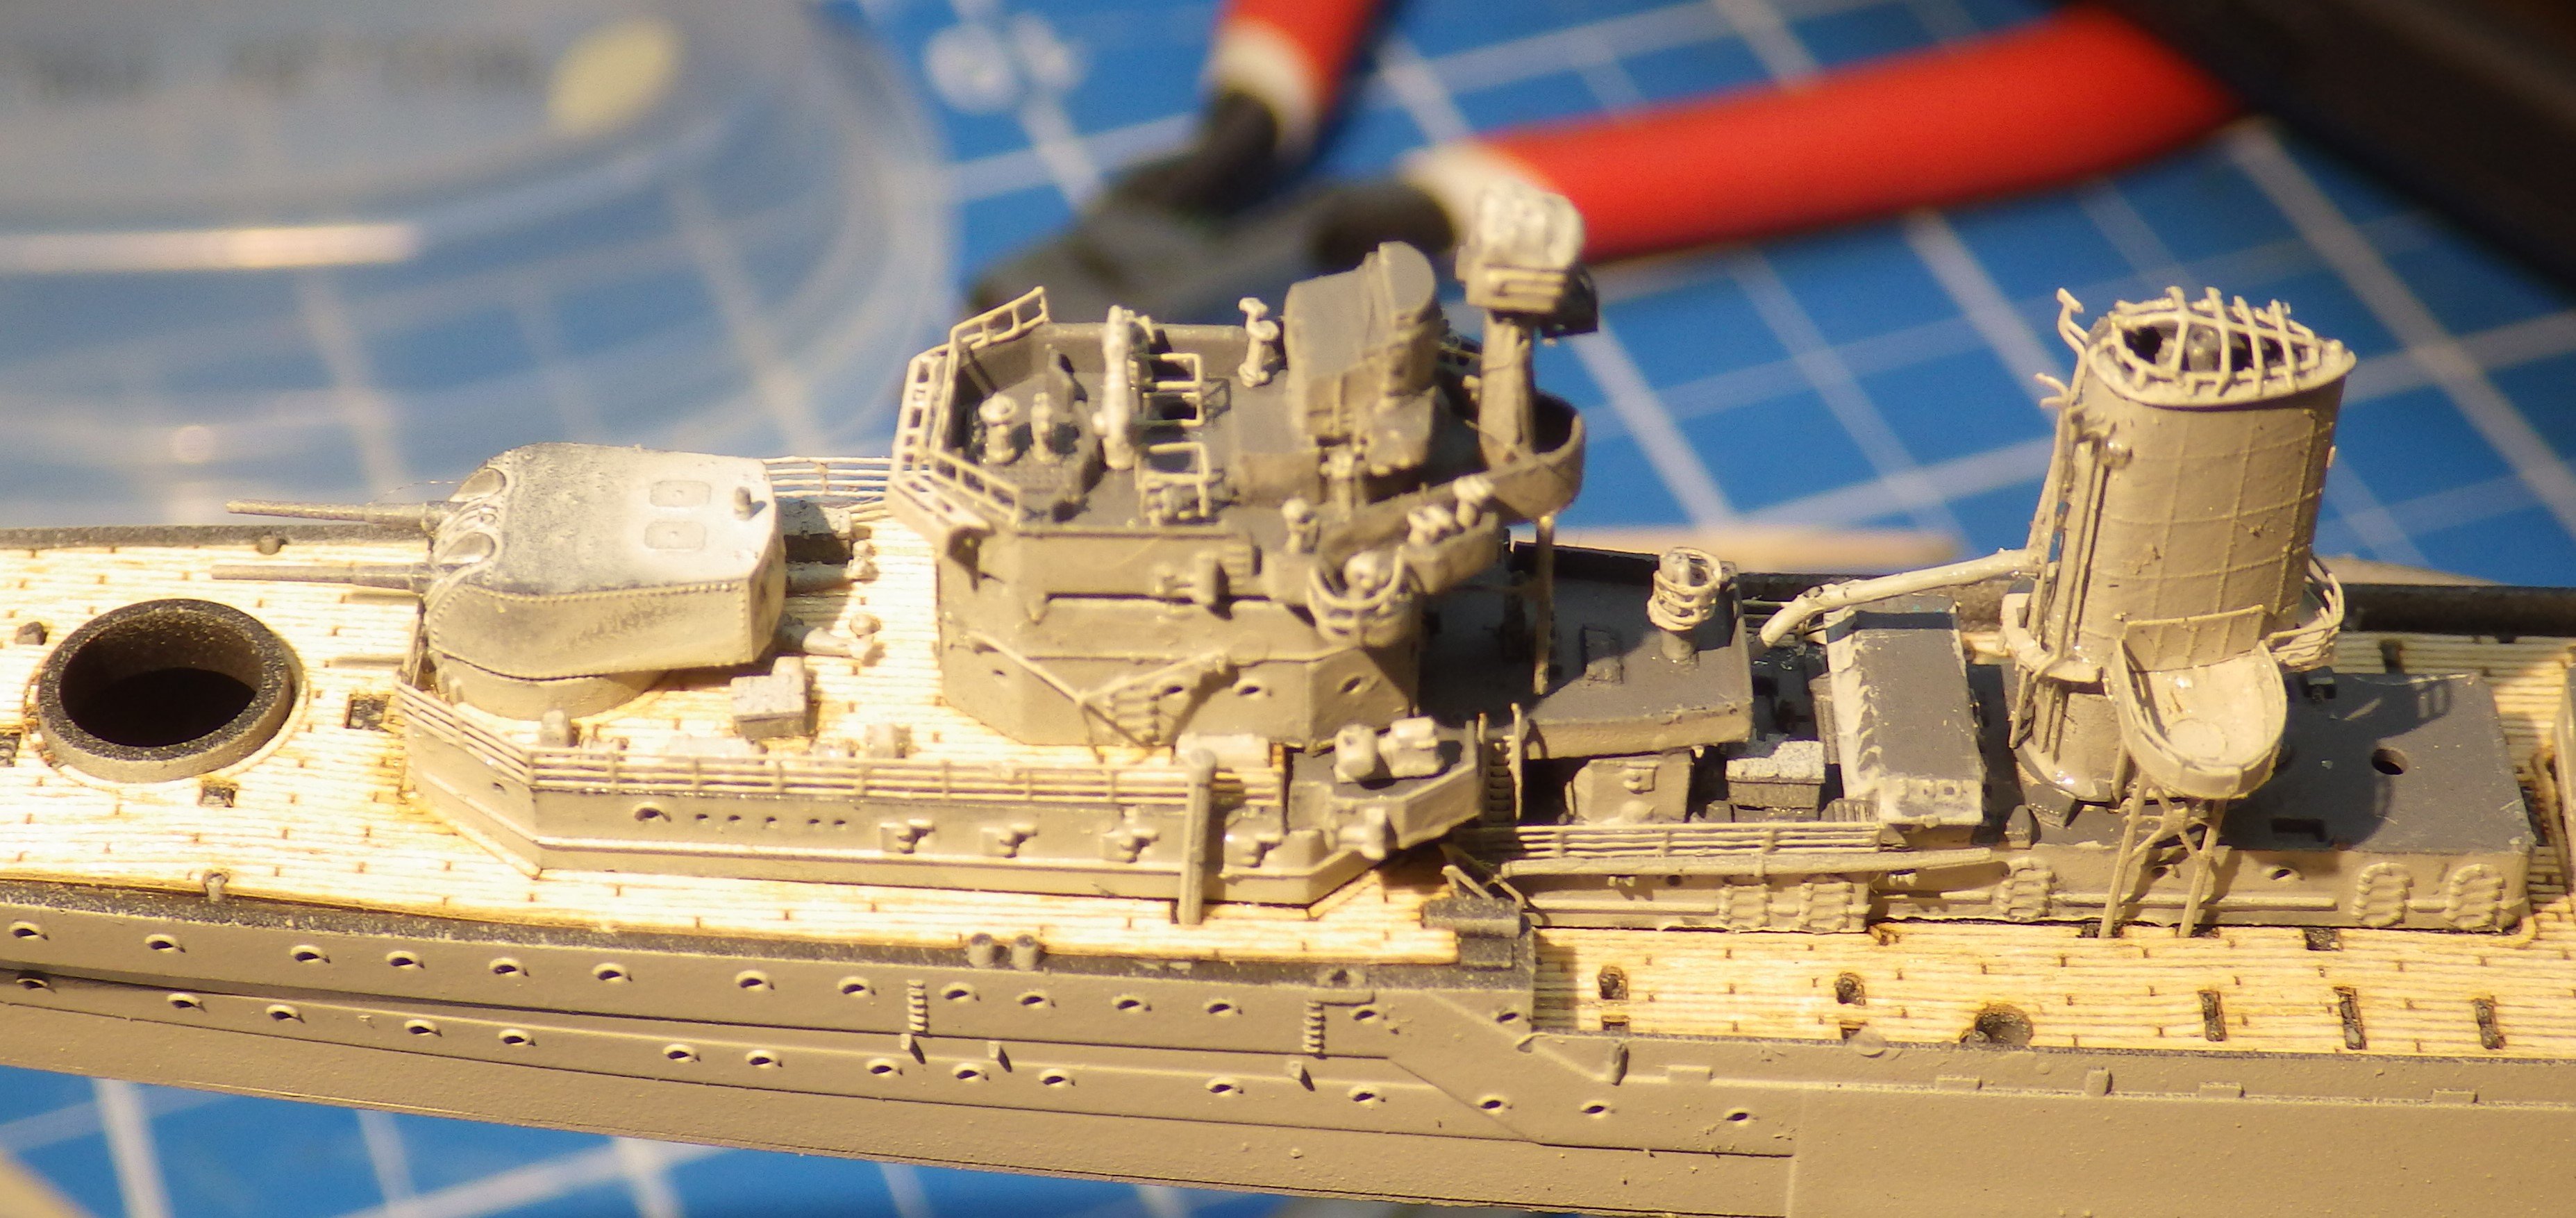
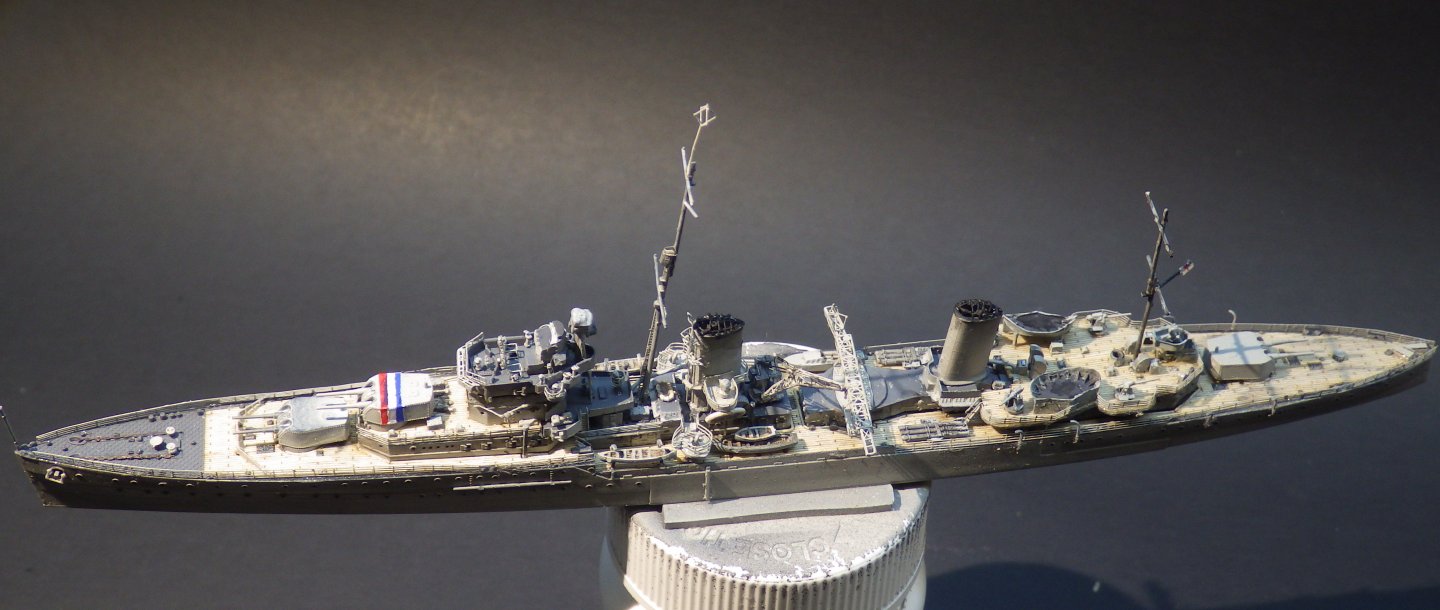
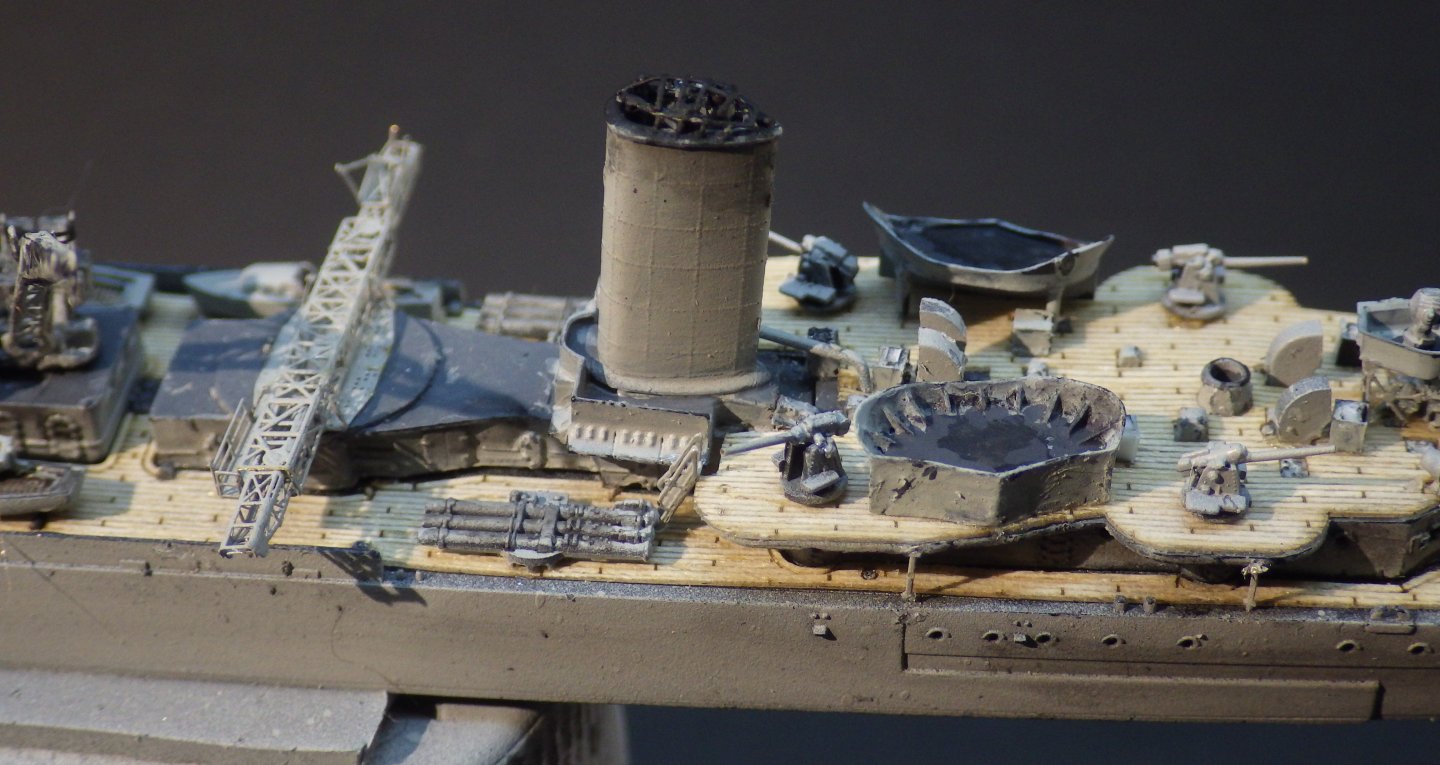
The last week or so has seen progress slowly as details get added and PE gets folded. The ship now looks busy; I still have a pile of sprues but according to the instructions and space on the decks I think we are almost complete. I've done some basic shading and weathering before the railings go one and make a lot of the ship inaccessible. I used my homemade wash of black oil paint heavily diluted with thinner. Its very tolerant and seems happy over acrylic paint. I try to be restrained with weathering on 1/700 models; its easy to overdo it. The hull will get some rust streaks when the railings are finished. I have elected to use the kit plastic boat davits, they are actually finer than the PE and are 3 dimensional. Likewise the masts will be the plastic kit parts (as long as I don't break them by clumsiness). They are very finely moulded and I think I would fail to make brass ones as delicate. So still to go. Railings Anchor chains Paint the identification markings on the B turret. Hoists on the aft deck Try and improve the Sea Fox Thanks for looking in and the likes and comments Alan


-
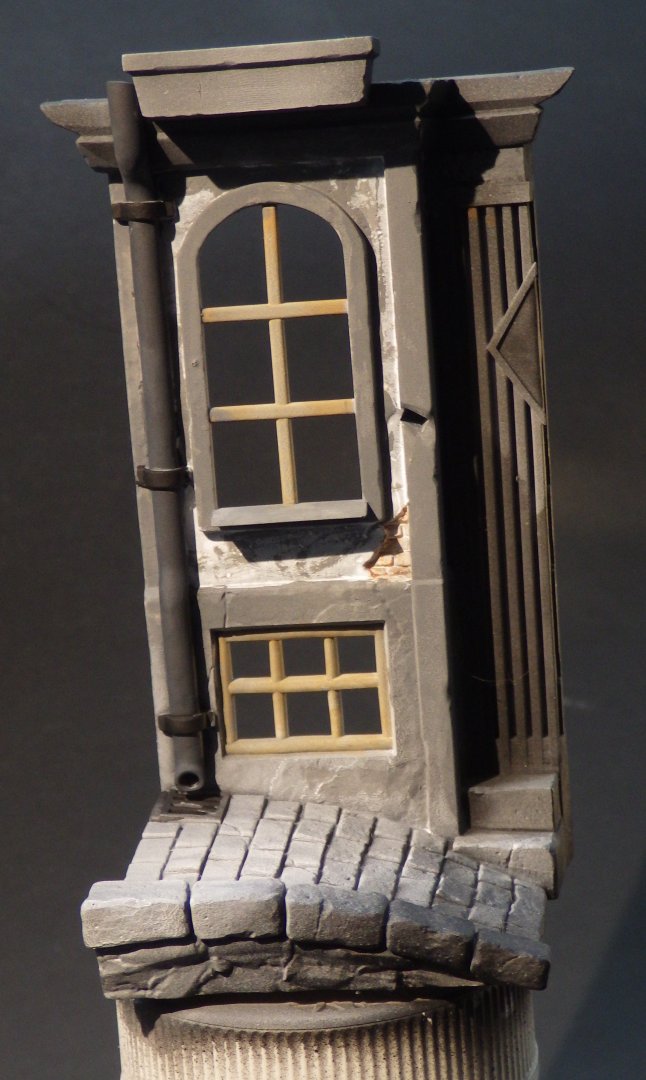
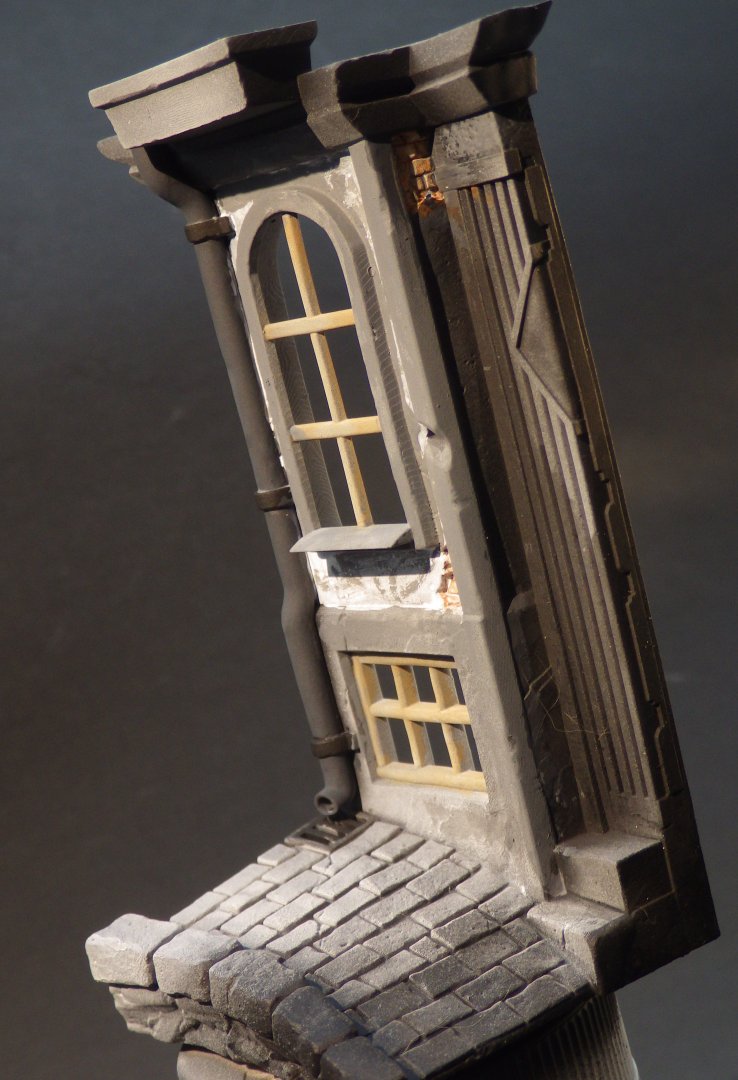
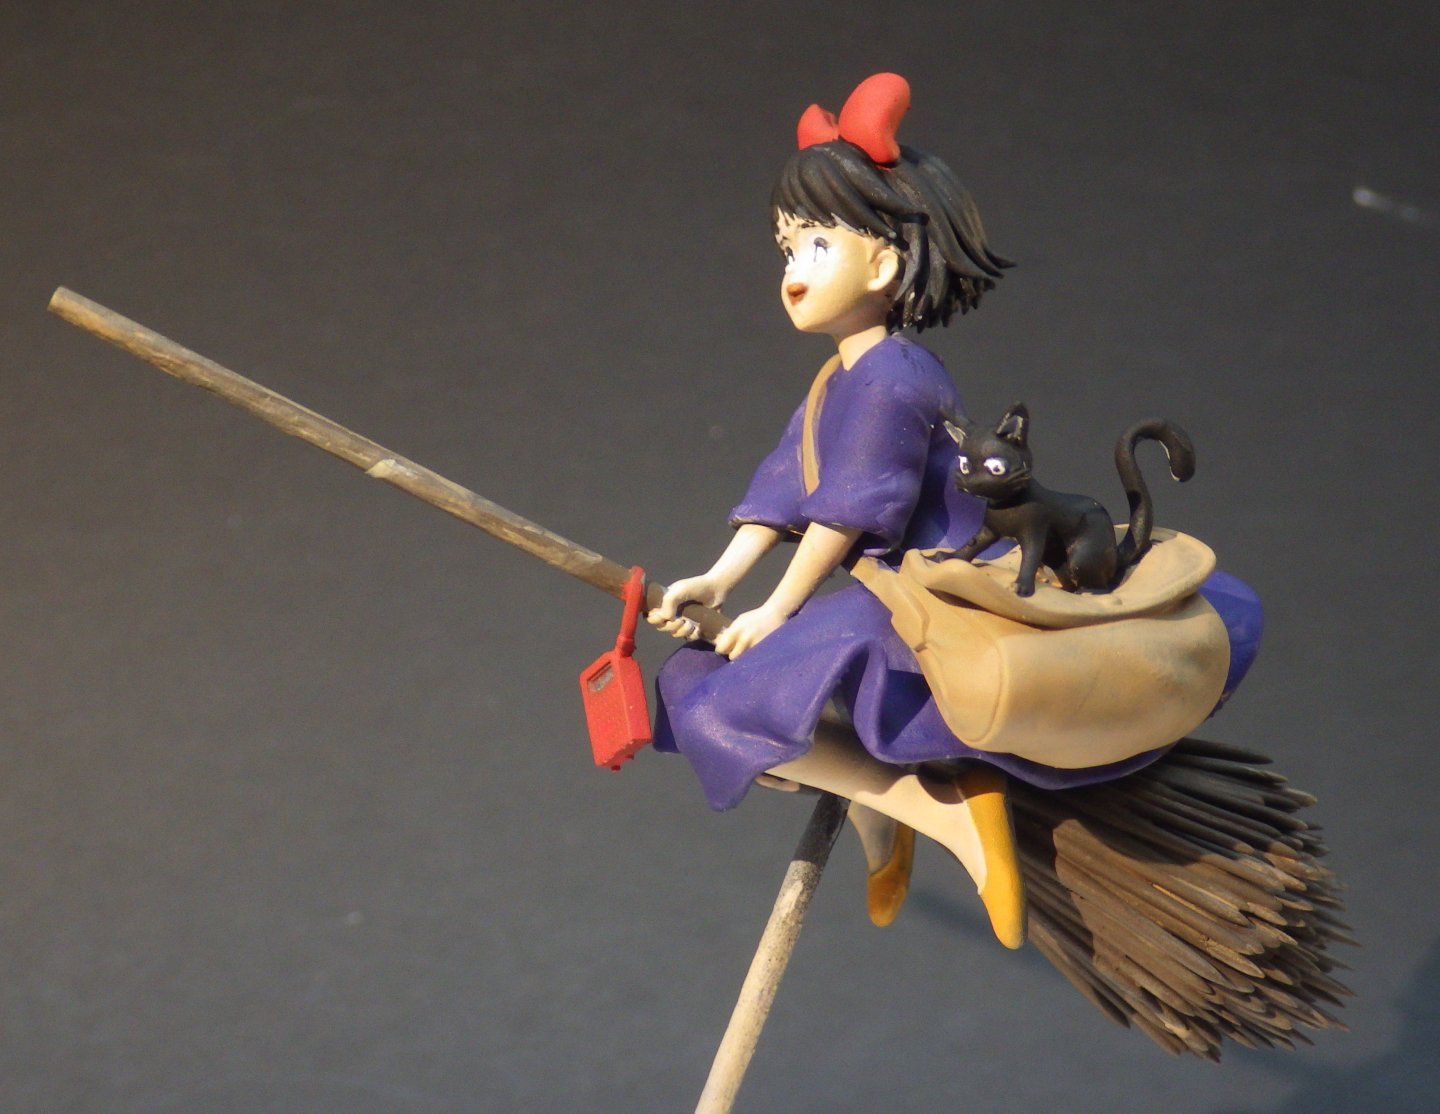
I've been adding a bit of colour here and there as a relief from being tweezer deep in the tiny world of HMS Galatea. Suddenly it looks like I have Kiki mostly complete. Its been an interesting exercise because she doesn't really have the human face I am used to with the white metal figures. She is based on an anime (if I have that right) so my painting methods have gone out of the window a bit. I need to tidy up the lips to get them even and a touch around the eyes. Maybe some satin gloss on the hair but otherwise I think I'll call it done. The cats eyes I am quite happy with given they are a cartoon style. The figure comes with a background building section to mount the figure on. I decided to paint the building in very subdued colours to allow the colour of the figure to contrast. I'm not sure whether that's a good idea but we will find out shortly. A nice print. The damaged plaster revealing the bricks underneath is very well done. Thanks for looking in and the likes Alan

- 7 replies
-
- 10
-
-

-
It does do that. One of my early efforts resulted in half the poured resin leaking out onto the top of the clothes dryer.
-
The Flyhawk kits have an eye watering level of detail. I’ve just finished adding what seems an inordinate number of tiny lockers to the decks of HMS Galatea and it’s hard on the eyes. They do make fine models in the end. I haven’t worked up the courage to take on HMS Hood yet but you are making a great job of yours alan
-
The body paint and finish is spectacularly good. Superb work. The fluorescent red really pops. alan
-
The 3D printing is excellent and the painting is superb. Congratulations alan
-
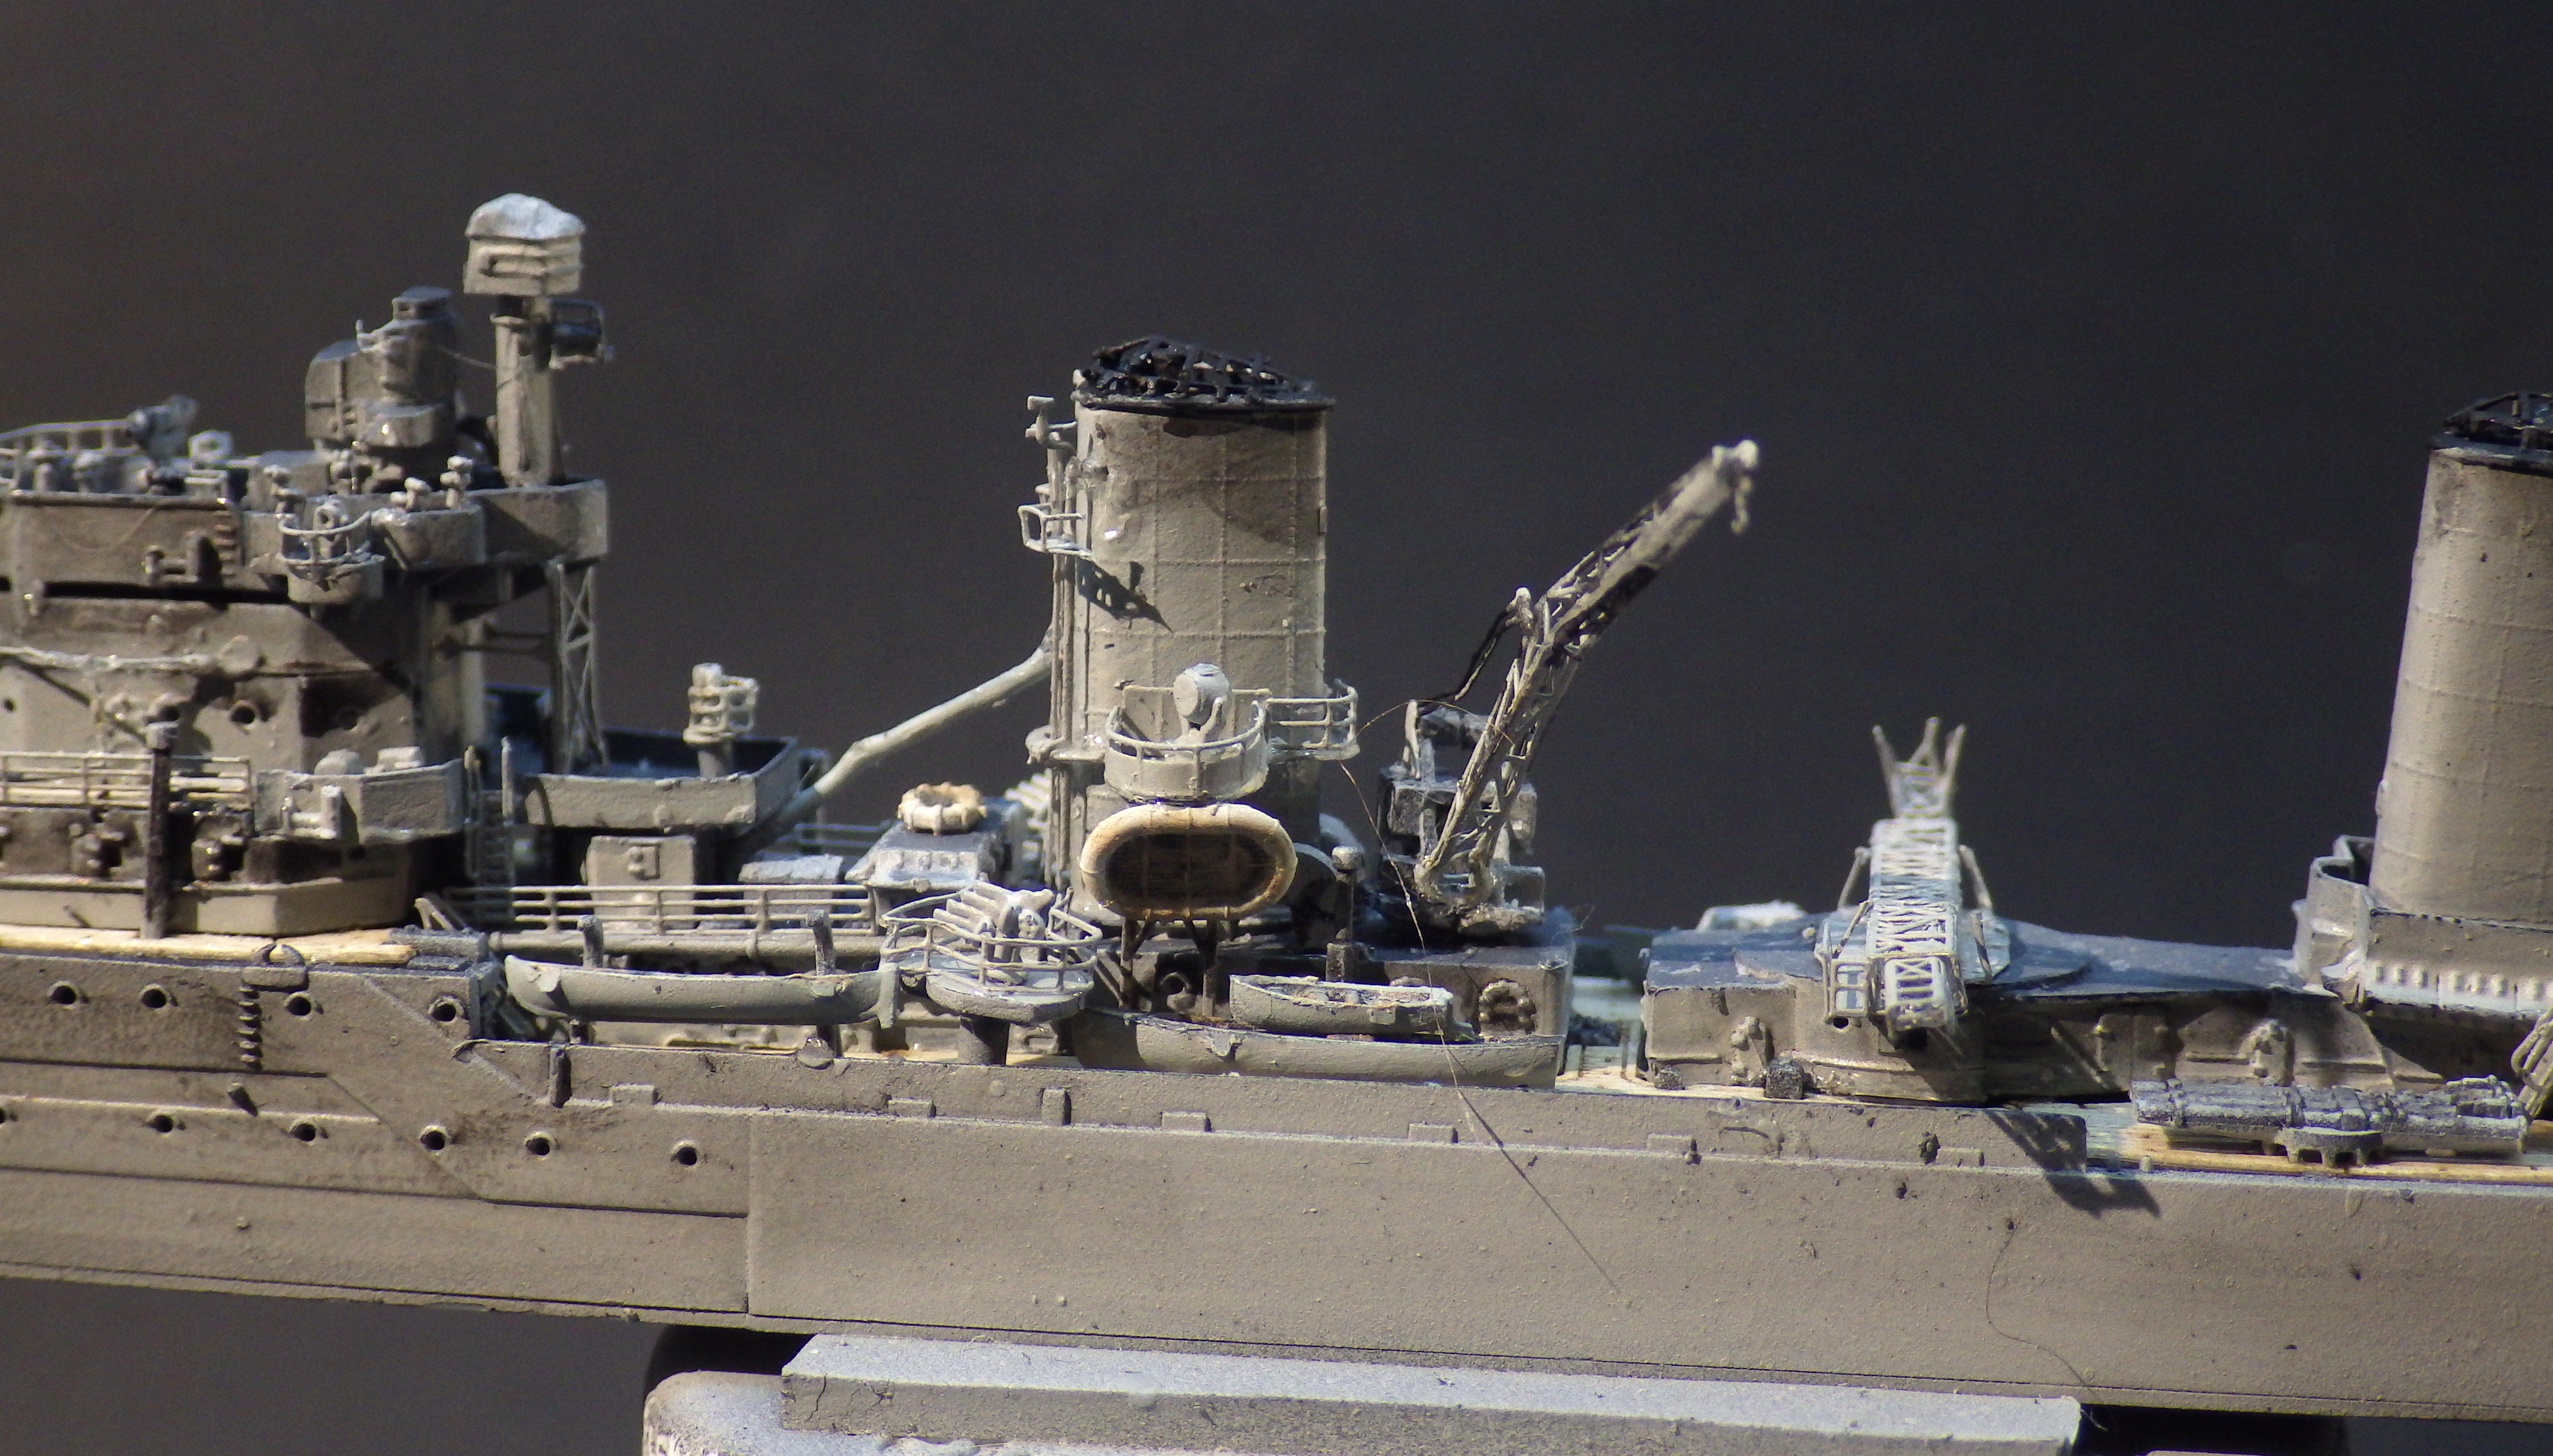
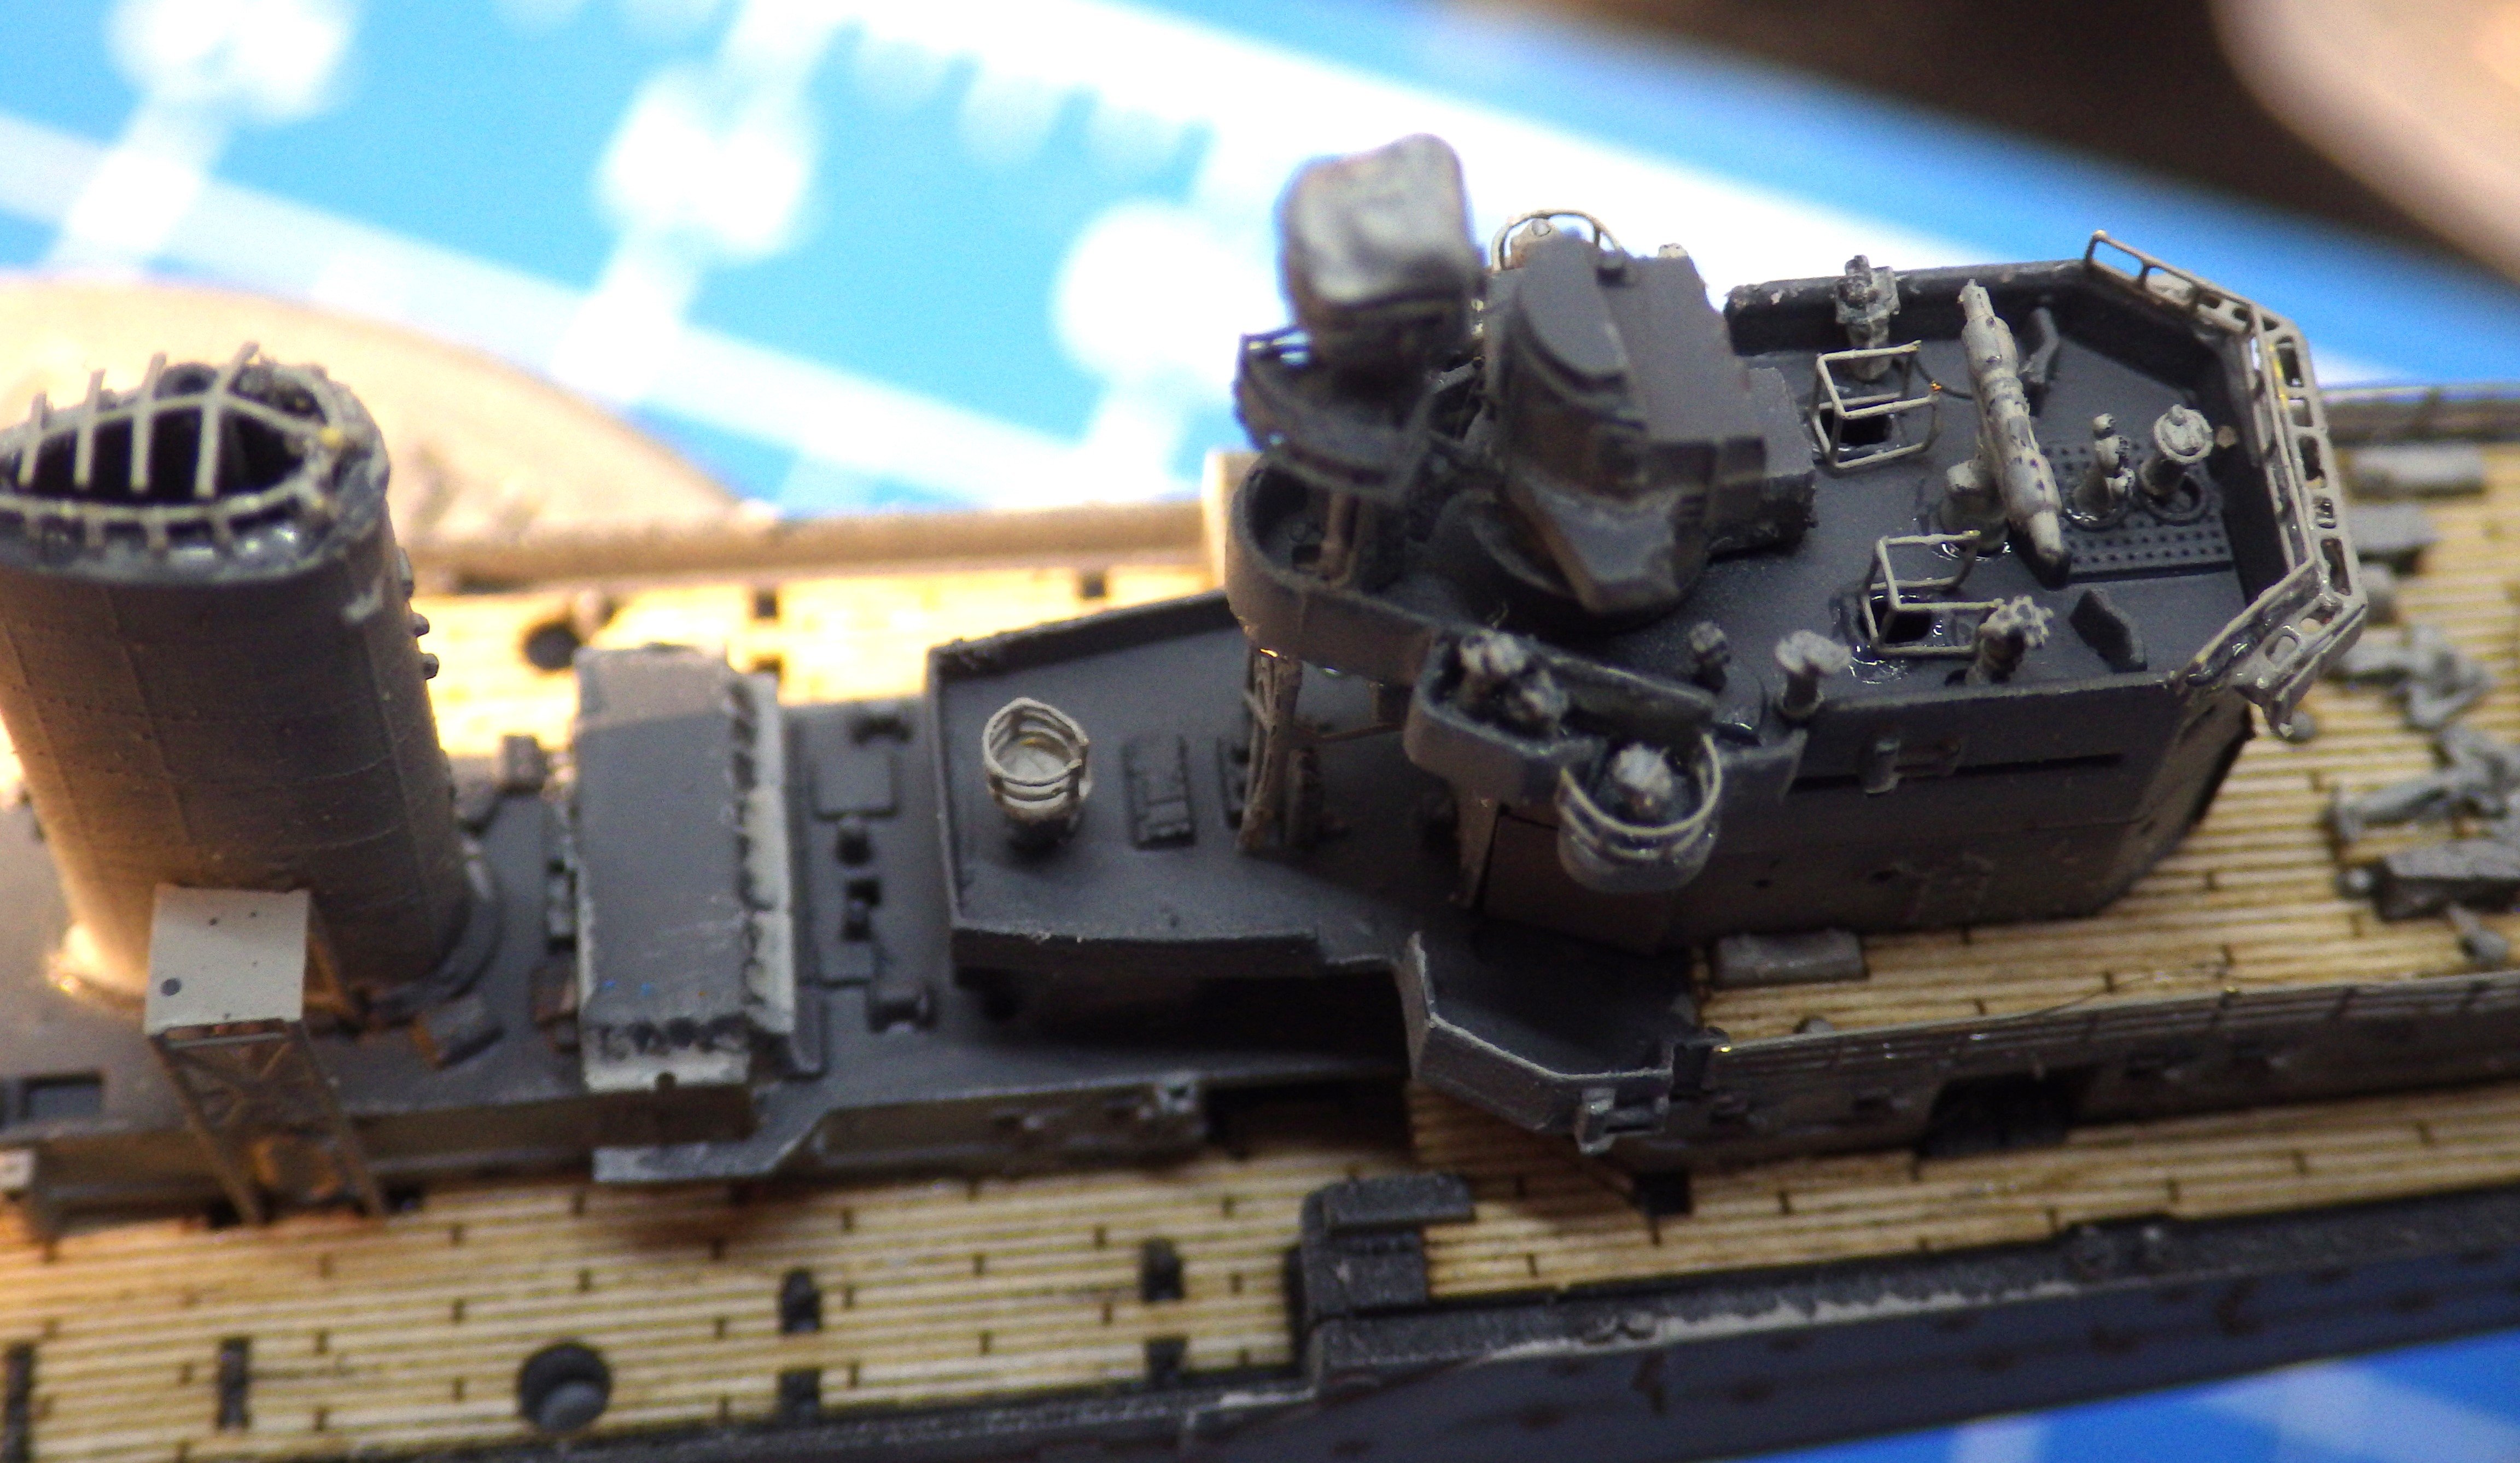
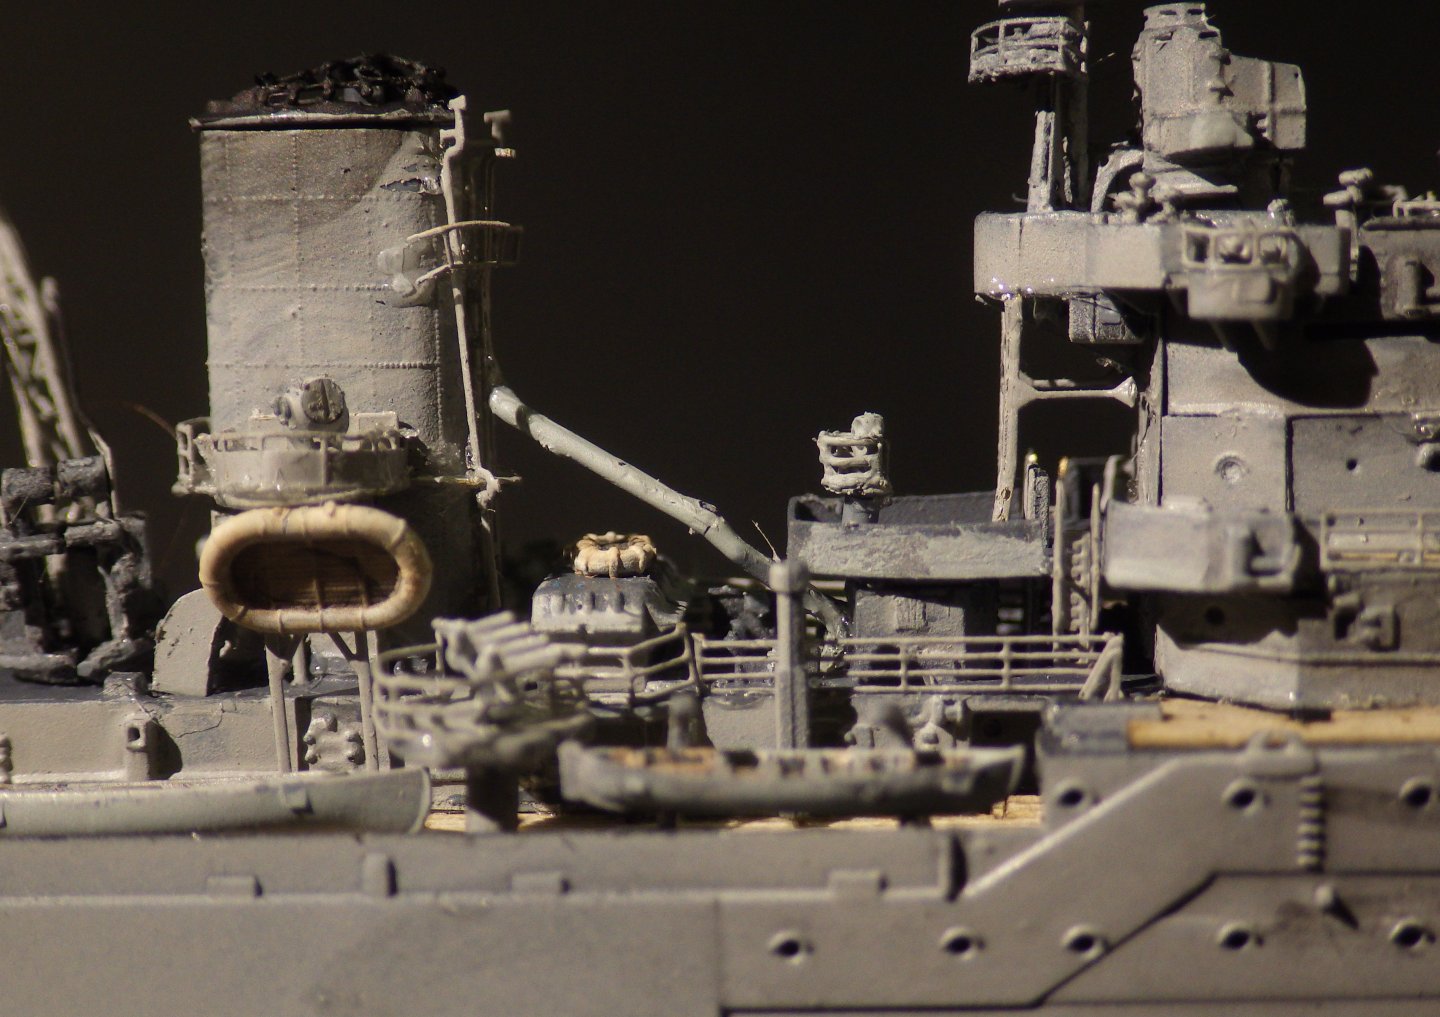
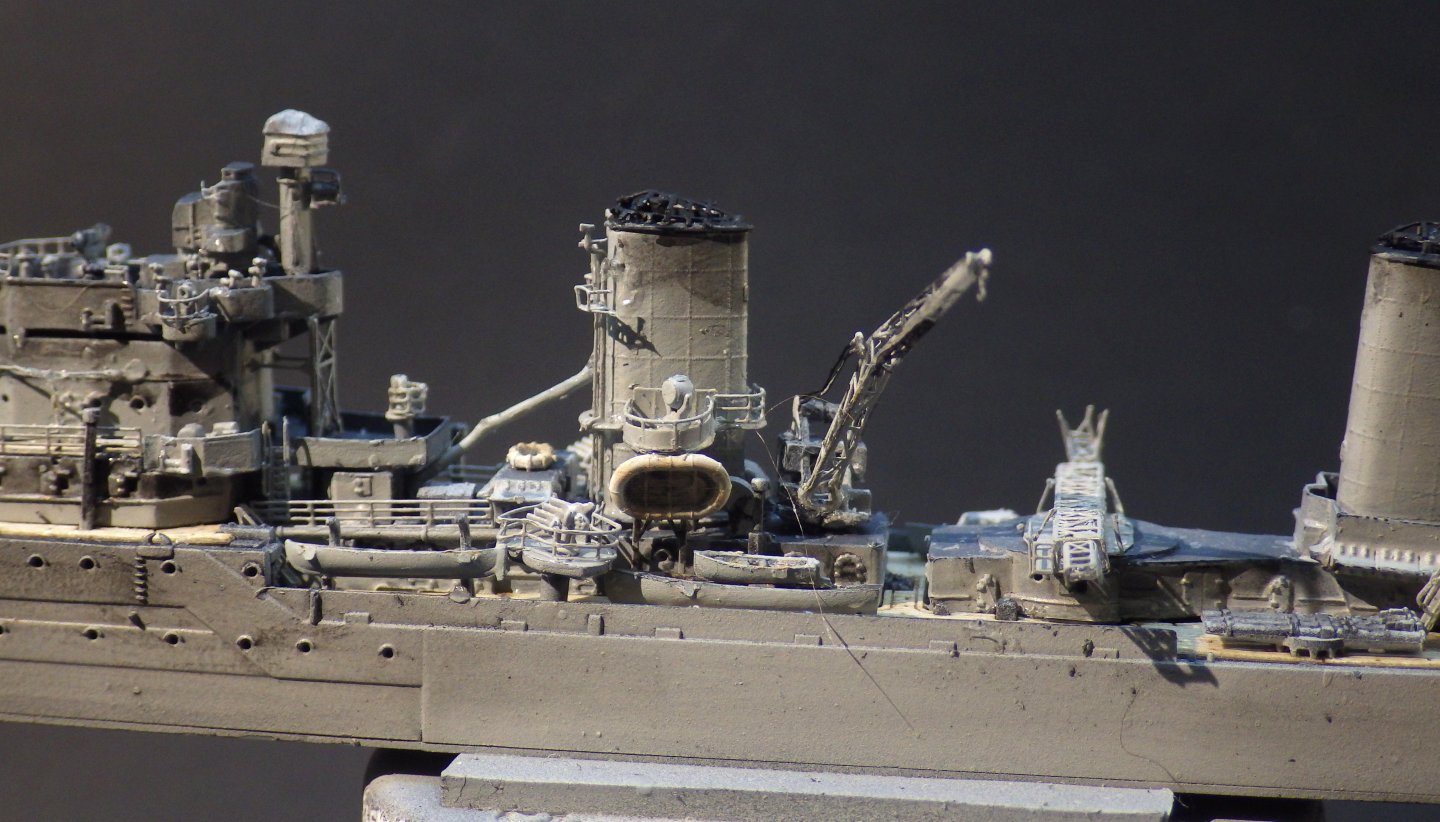
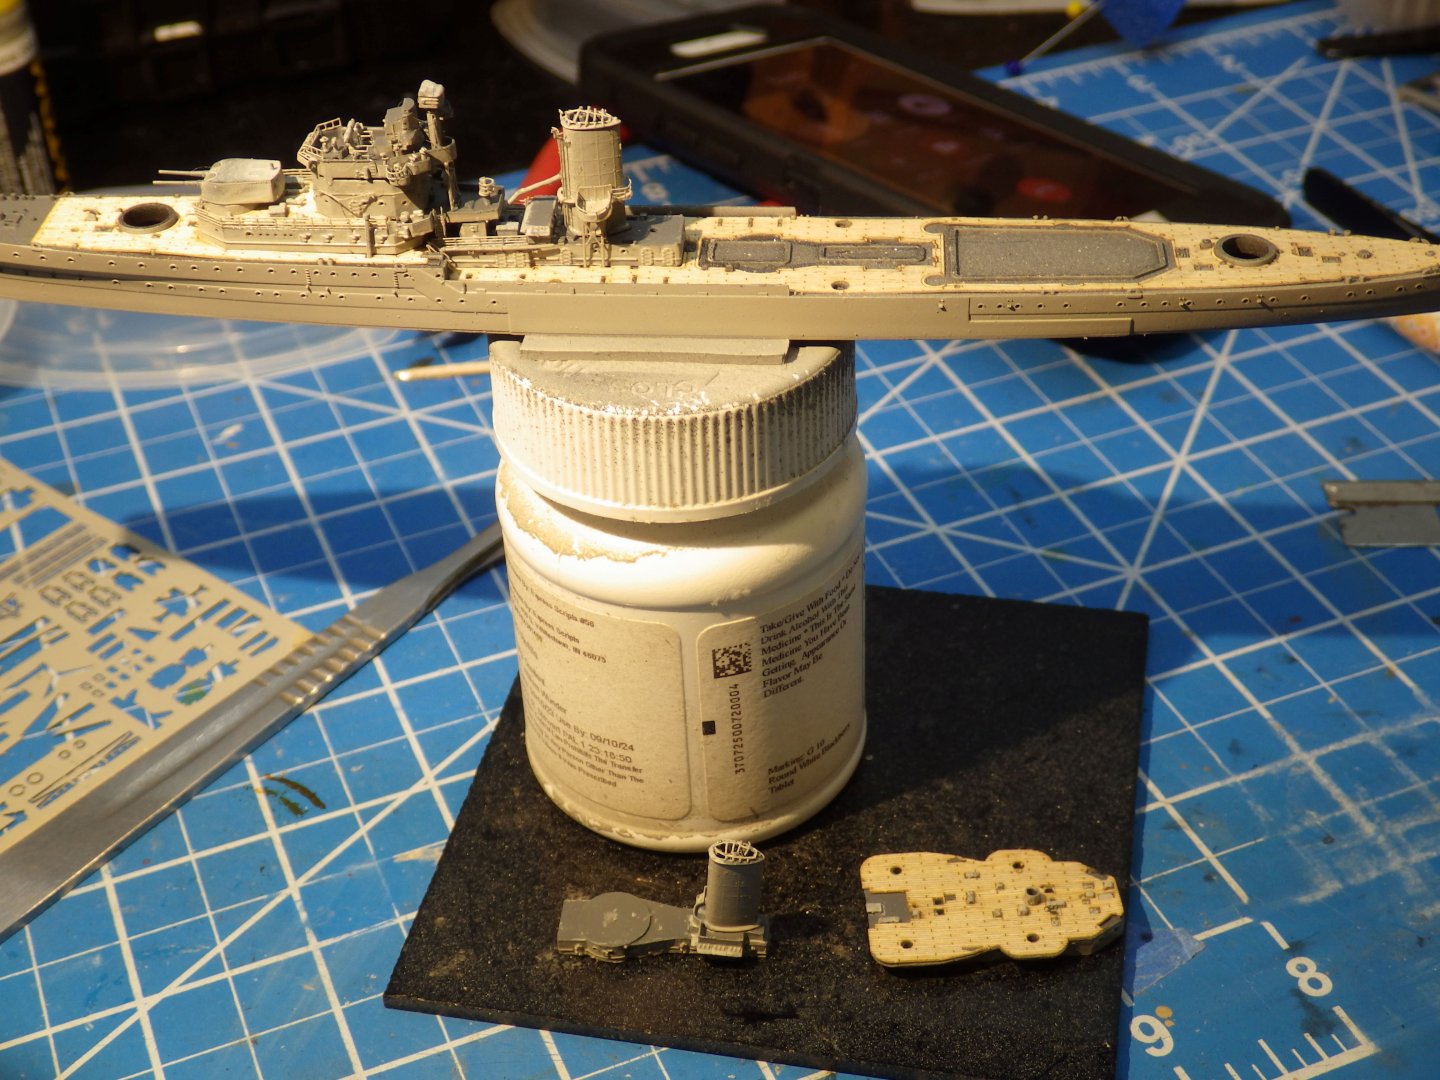
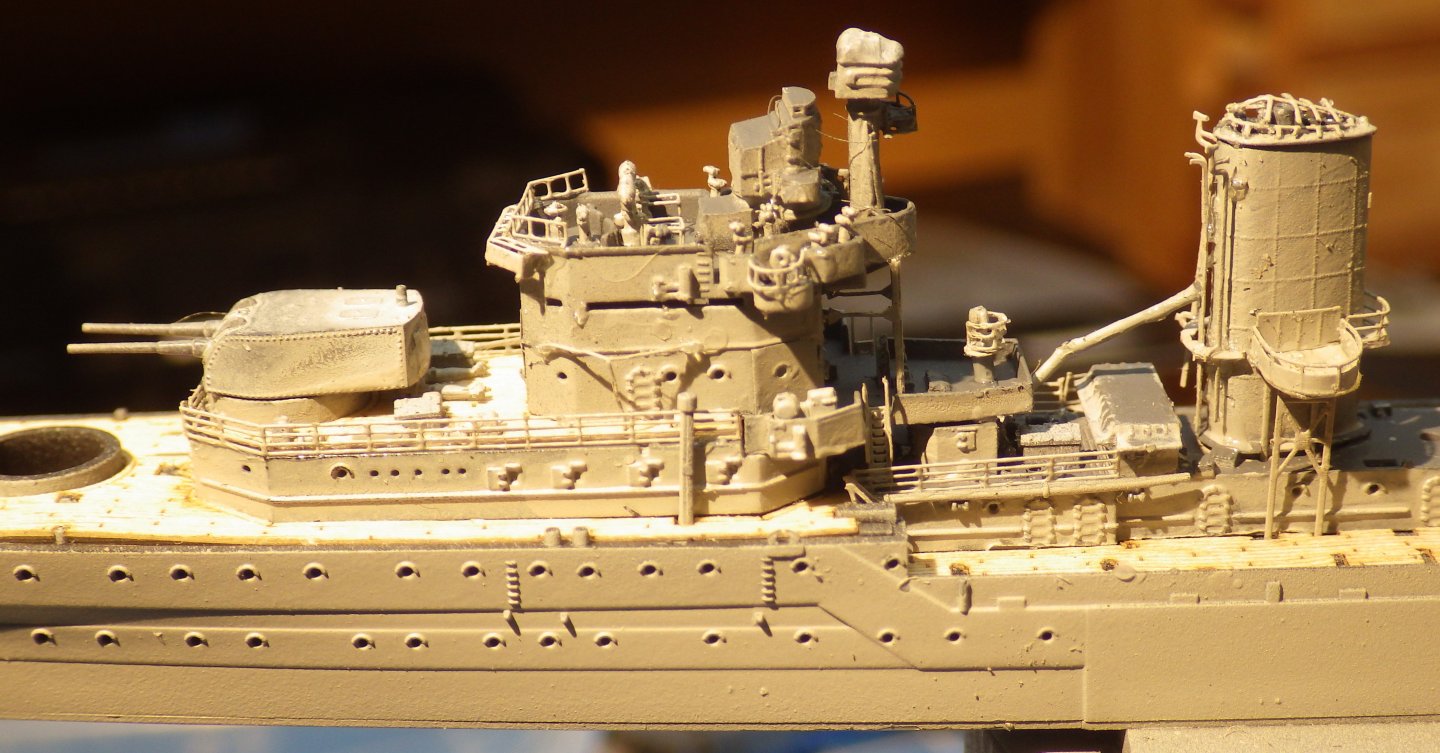
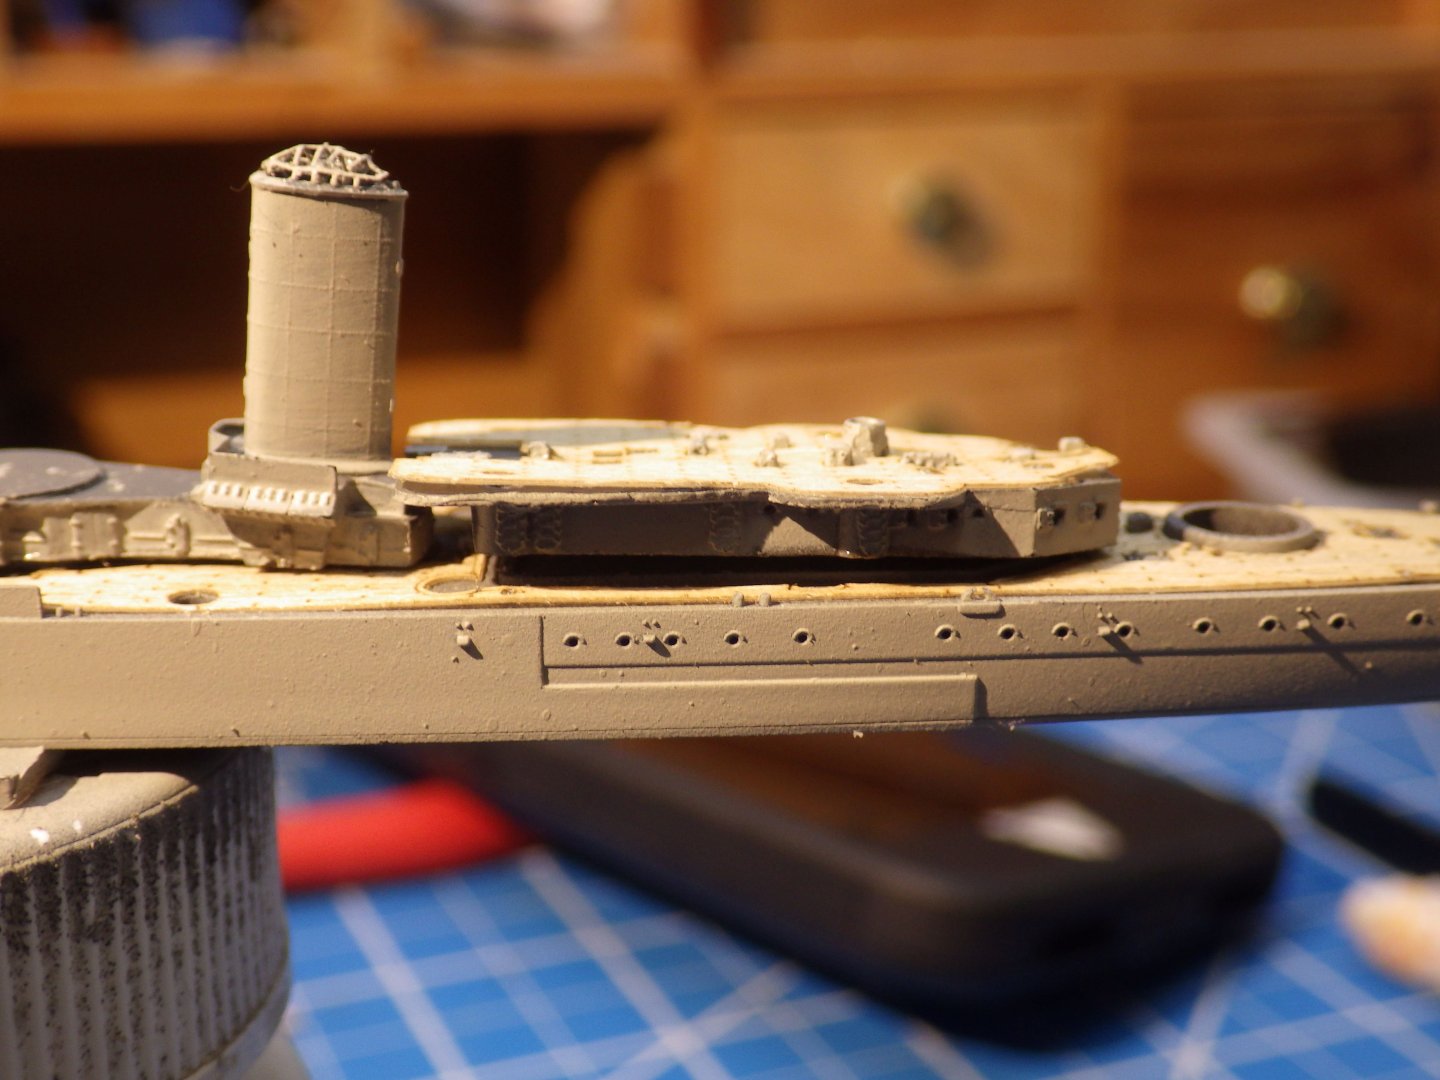
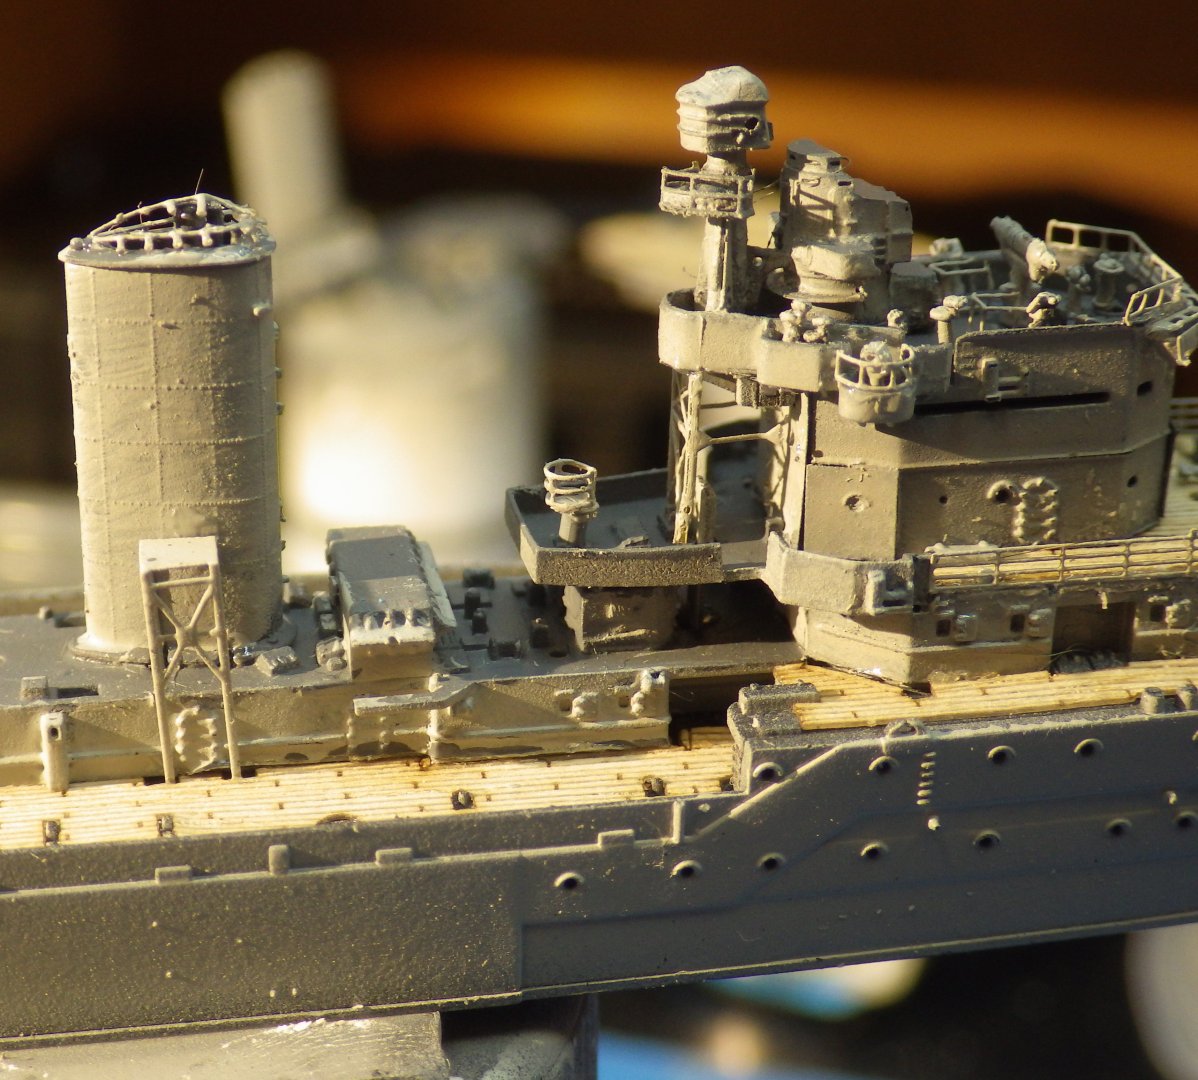
So deep in the madness of tiny bits of PE. Ladders added and (for me anyway) the pipes and details on the forward face of the funnel. Trying to hang the pipes over the walkway resulted in the whole assembly falling apart a couple of times. A major relief to have that out of the way. I decided to add the rest of the structures, I don't see any advantage to leaving them off now and its easier to press them down onto the deck without the tiny details and railings in place. This turned out to be a lucky decision because I hit a snag with the two aft pieces. THey don't fit together. The decked piece on the right is supposed to fit behind teh piece on the left but there is insufficient space. There is nothing addressing this in the instructions but I think I am going to have to cut the grey steel deck piece out of the aft structure even though it has some detail in it. That is a resin part so presumably is a departure from the base kit but the need to modify it was missed out of the instructions. I'm glad I found that out now. There are still a lot of bits in the box but its feeling like progress now. Thanks for looking in and for the likes and comments Alan

-
Thank you Mike. Its a challenge but each bit you add makes it look so much better. Alan
-
Thank you very much OC. Its the tiny details that really make these Flyhawk kits so challenging and fun. Alan
-
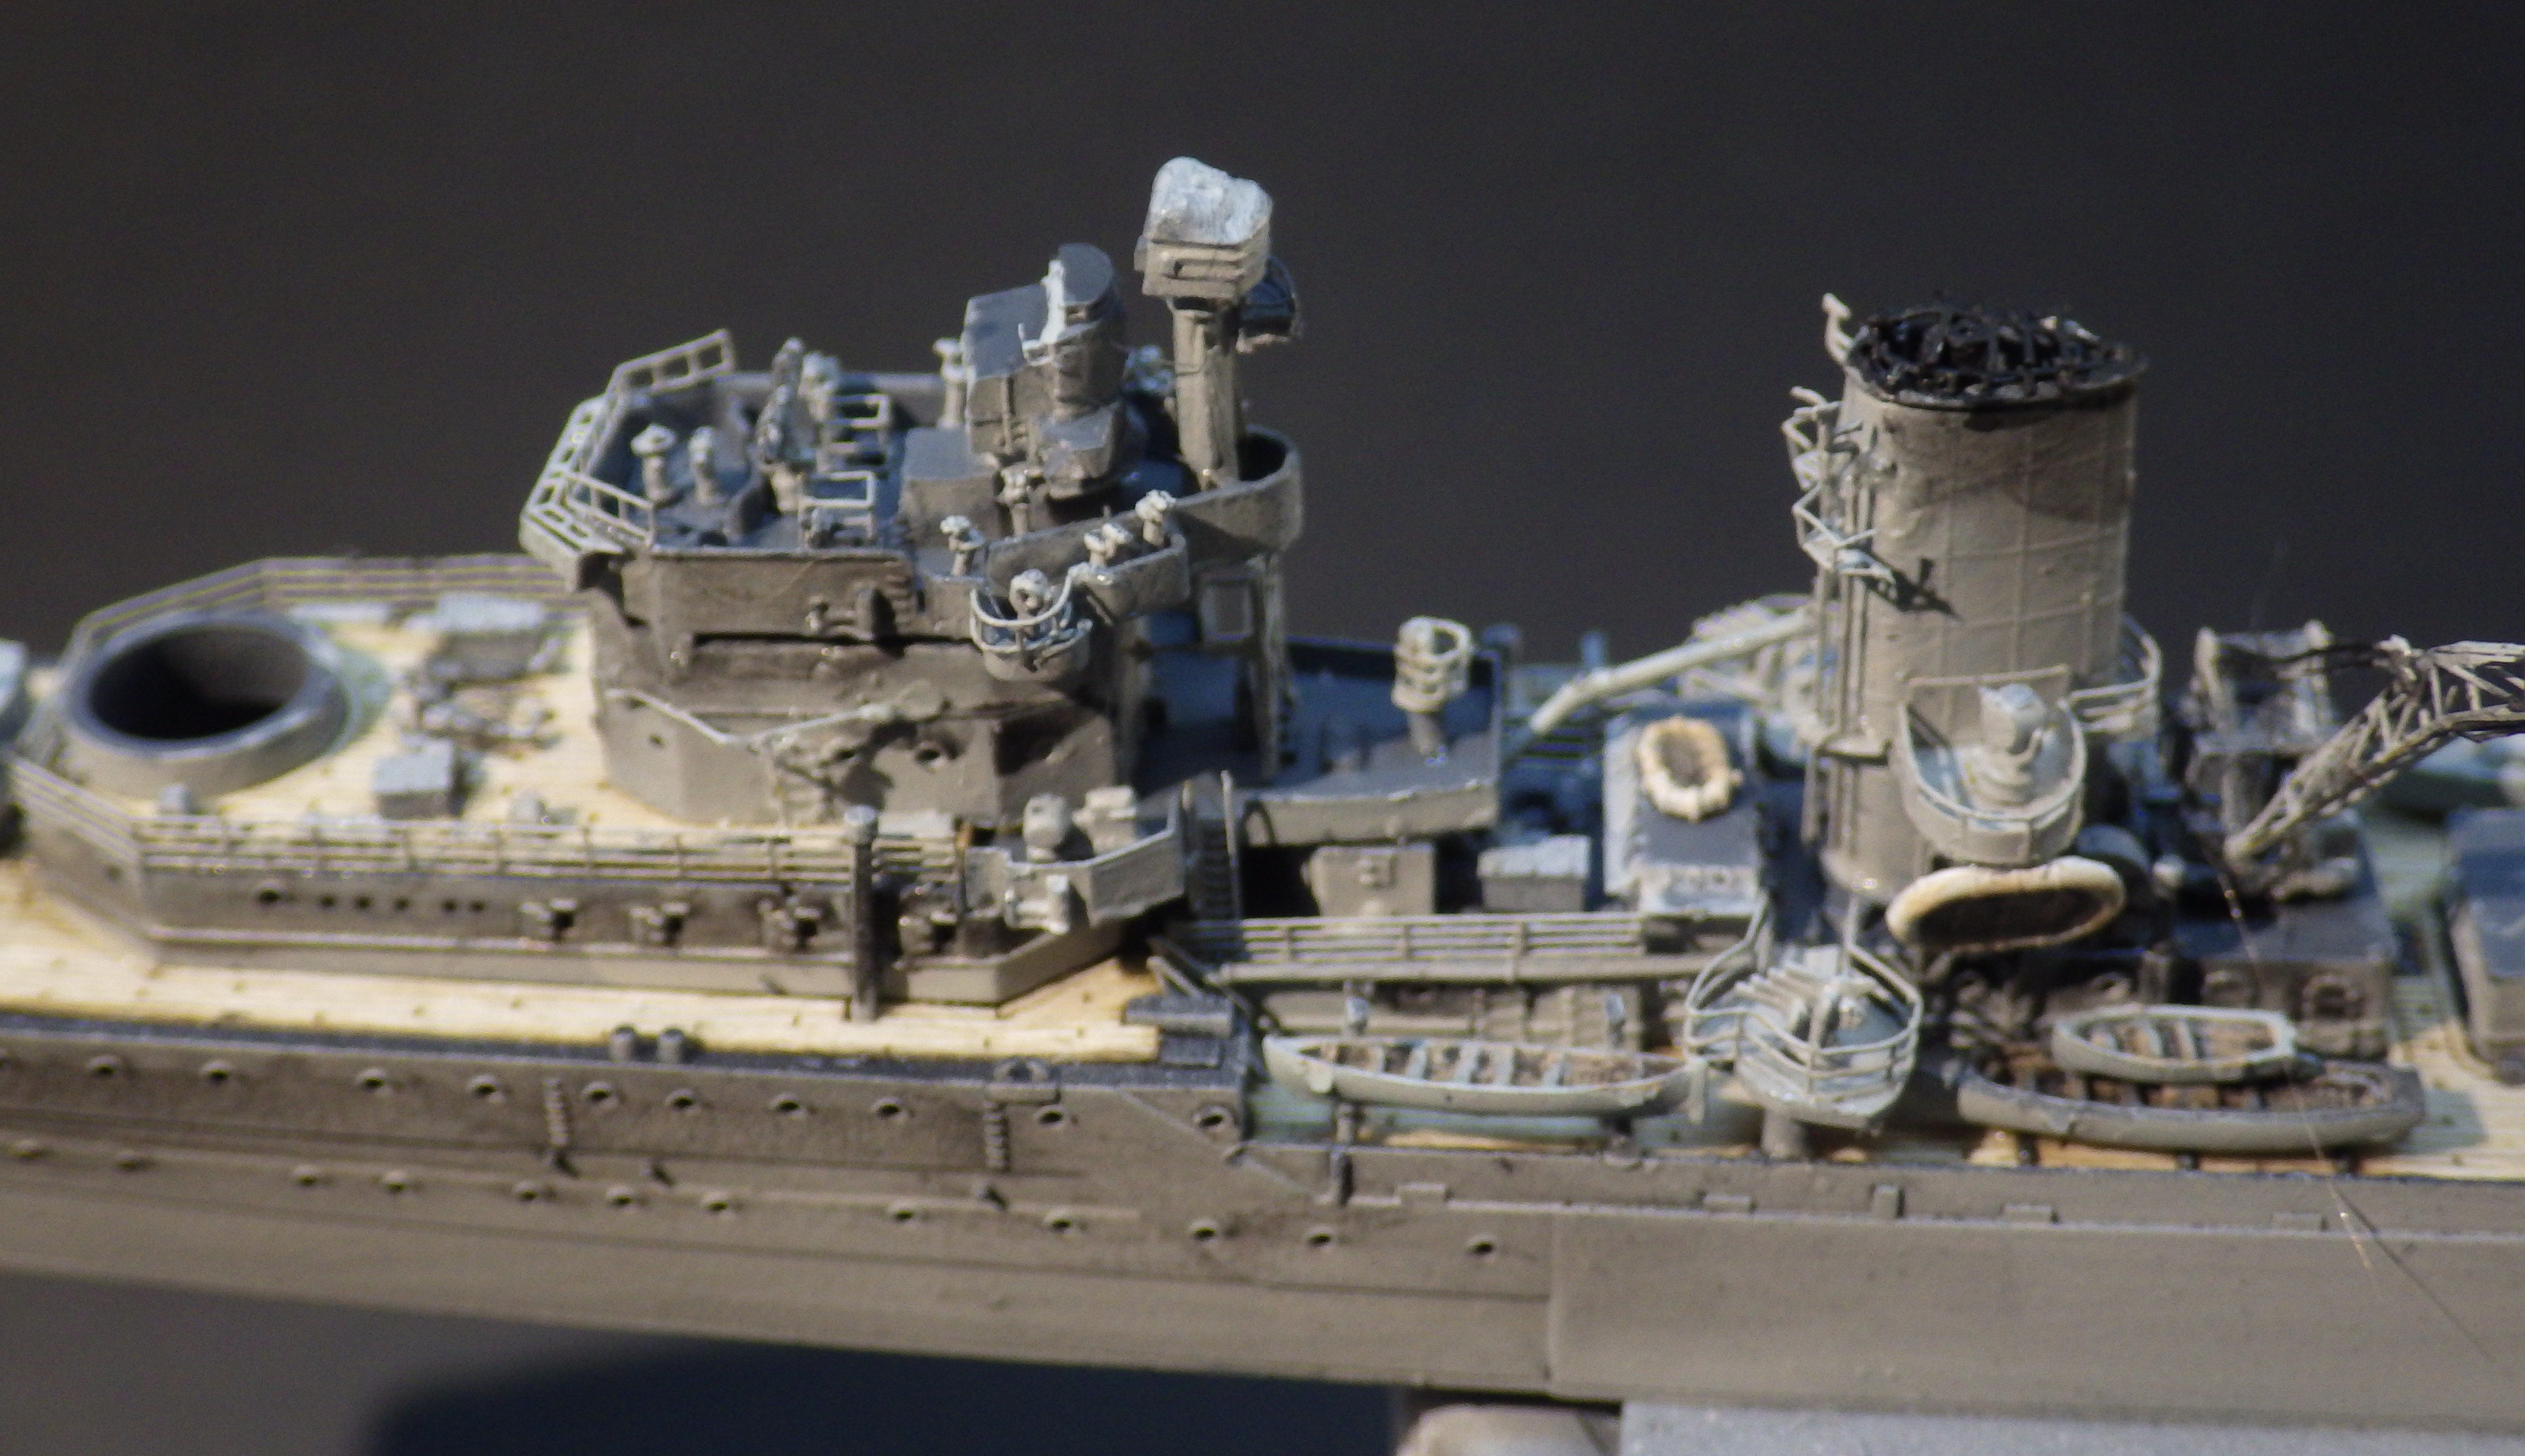
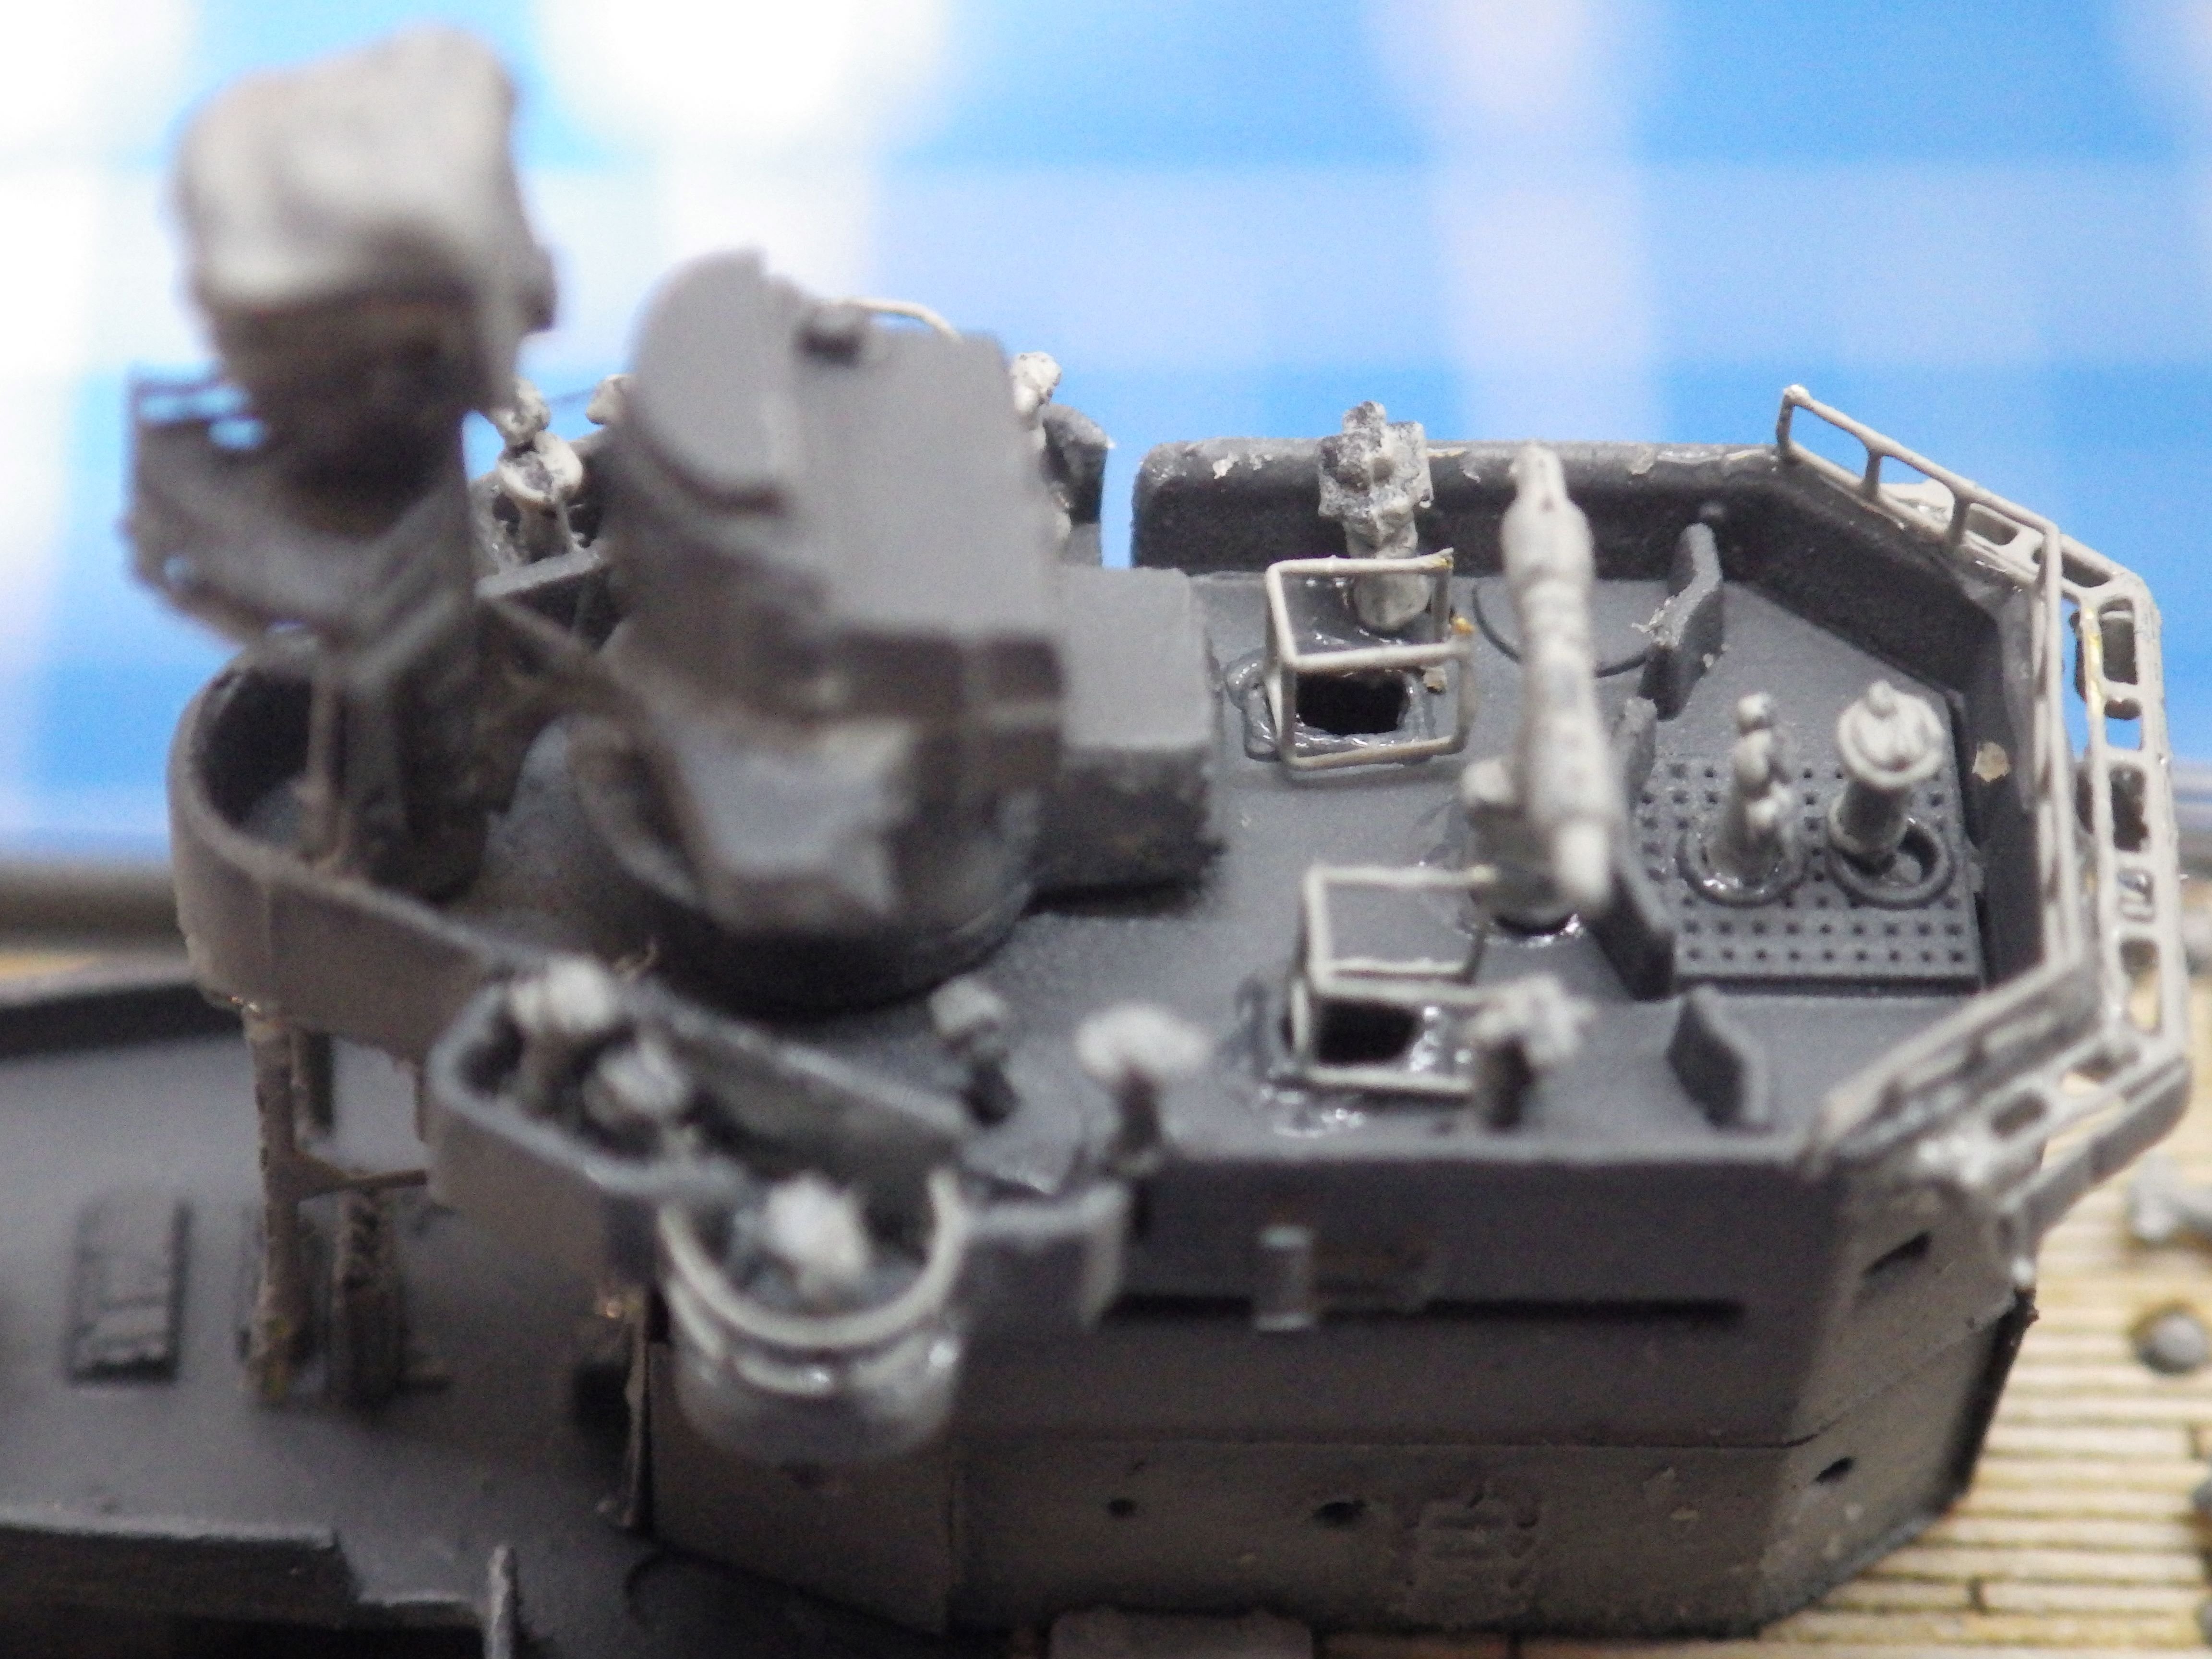
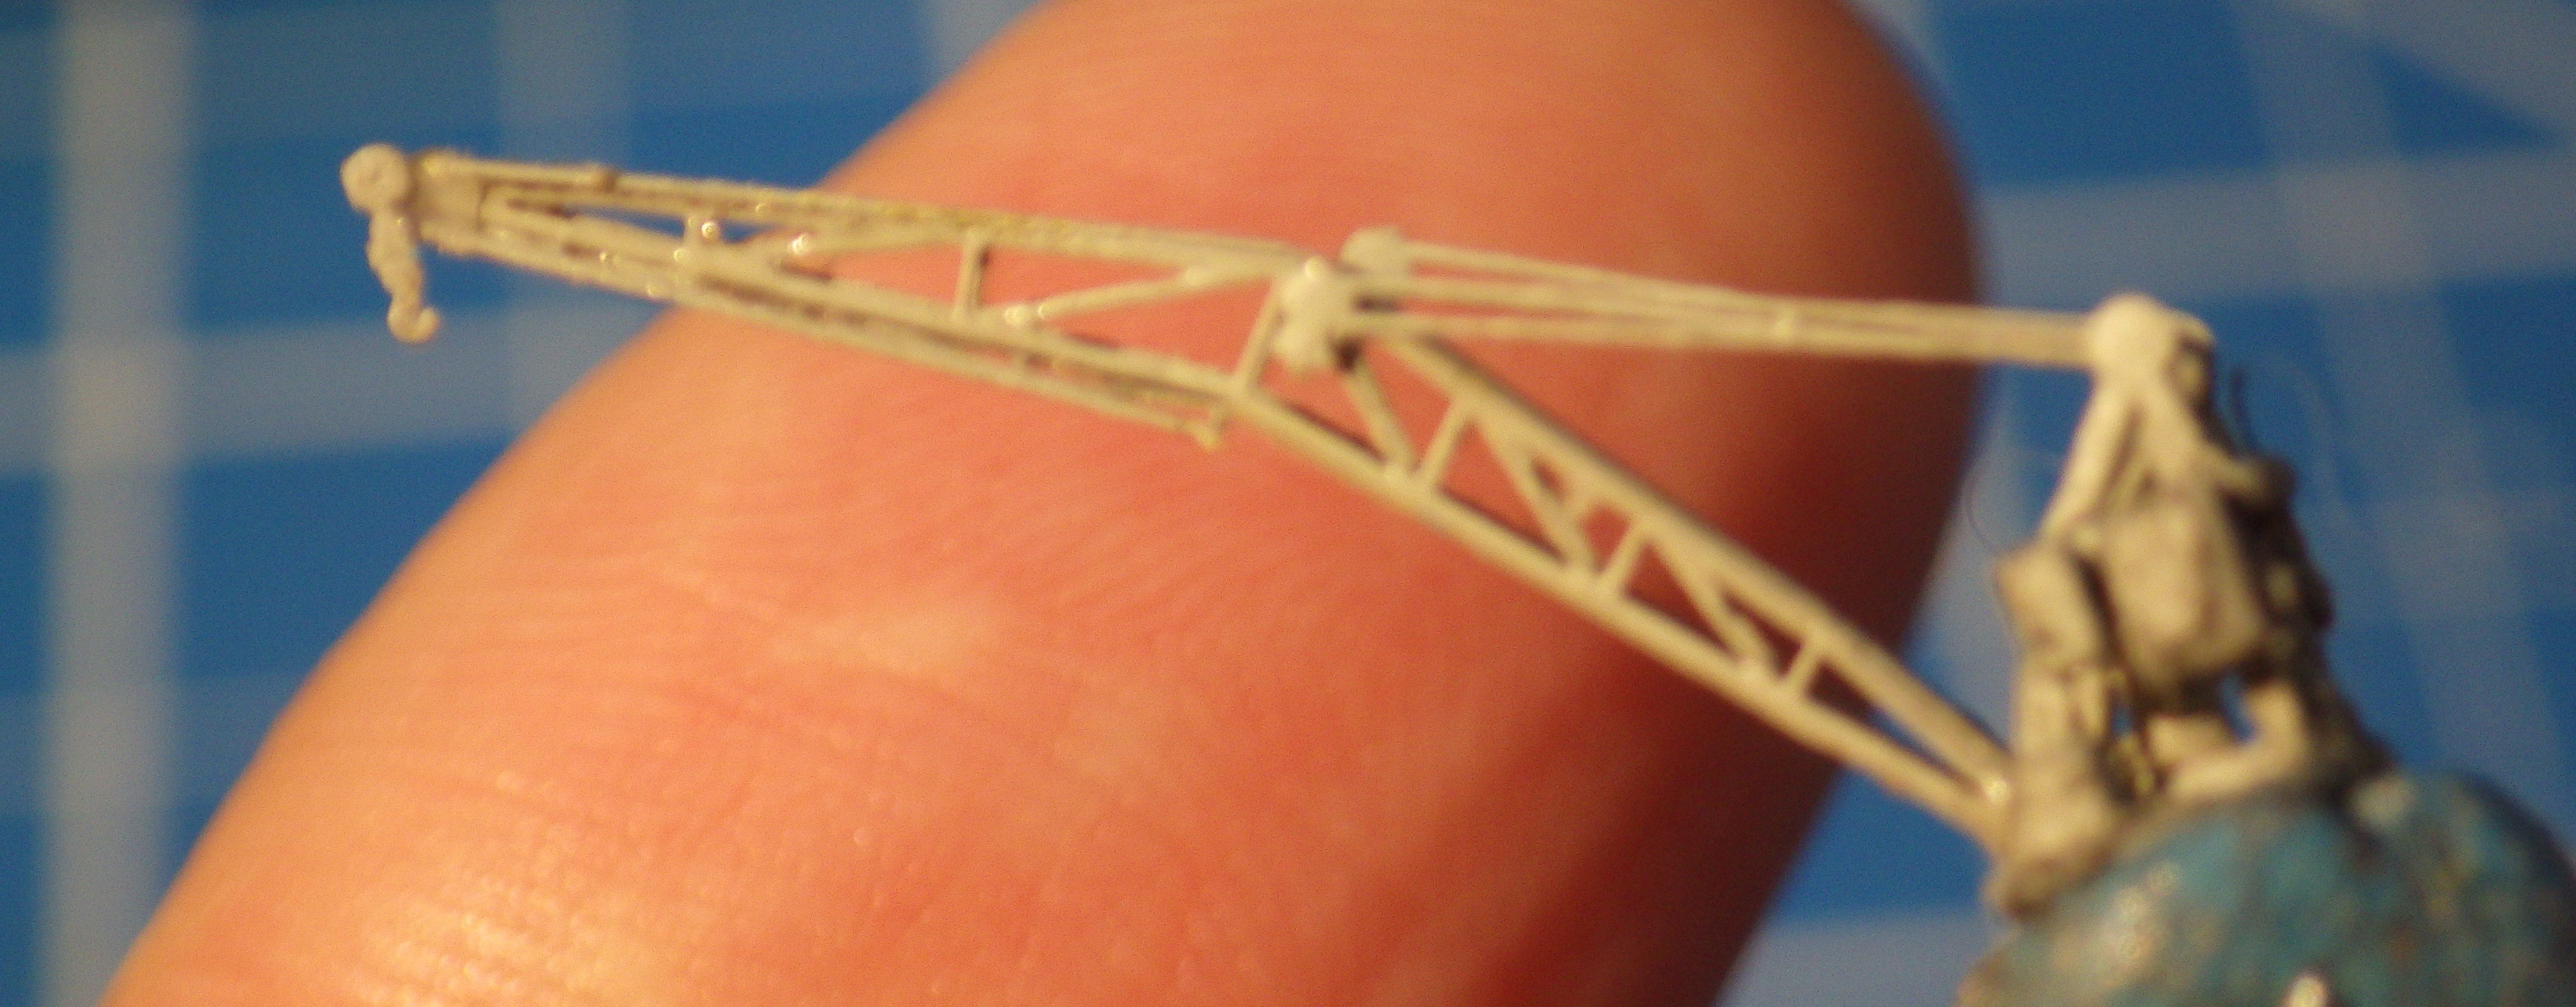
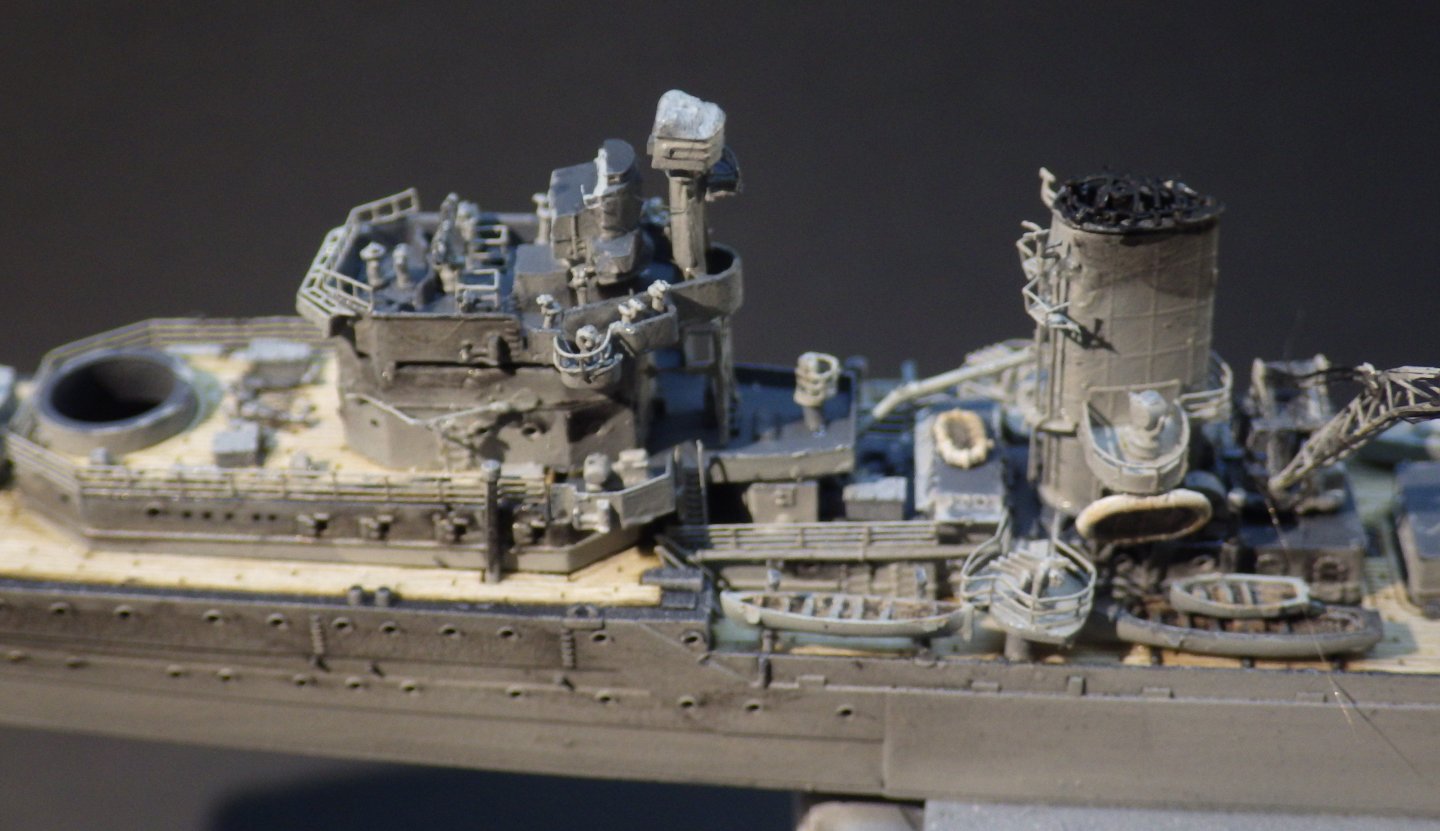
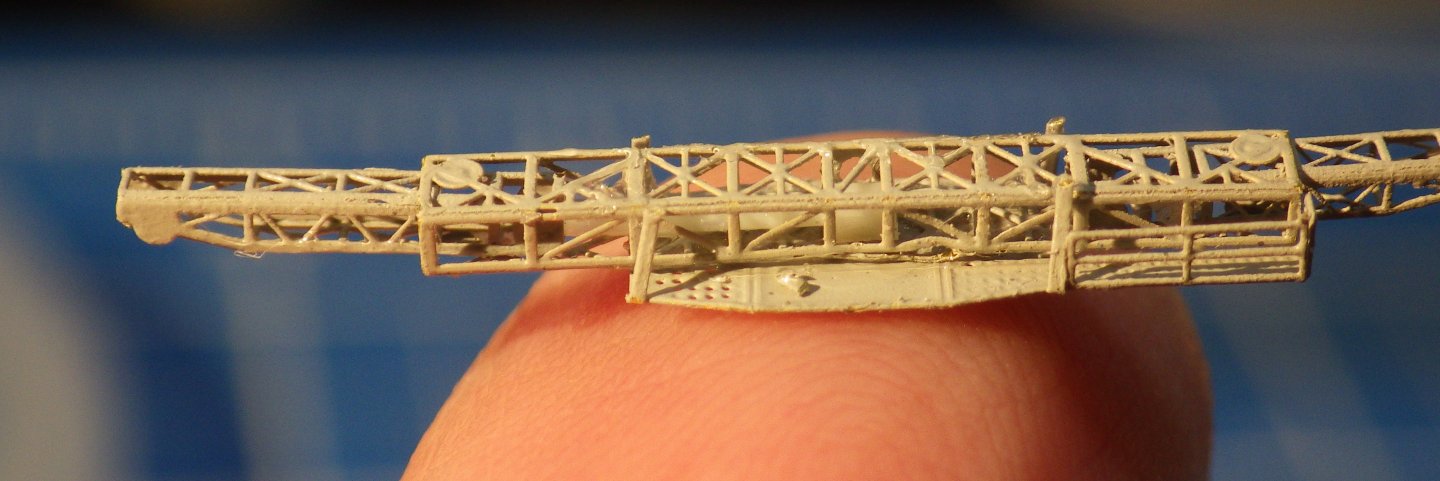
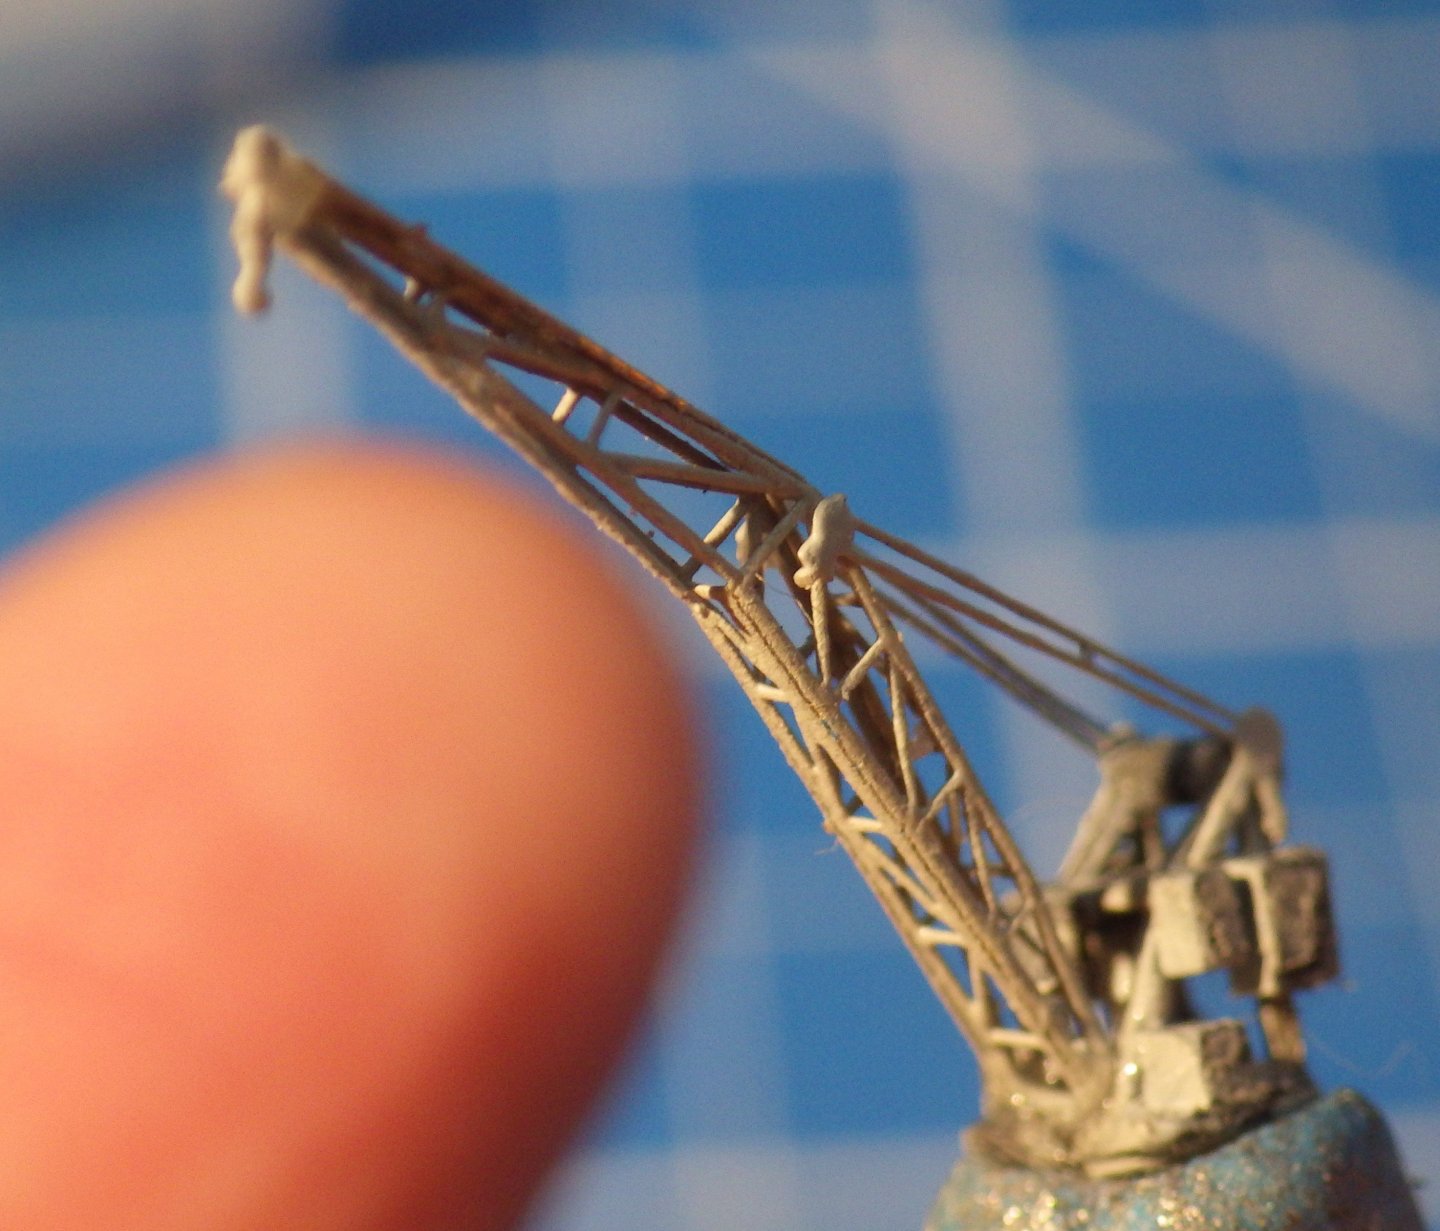
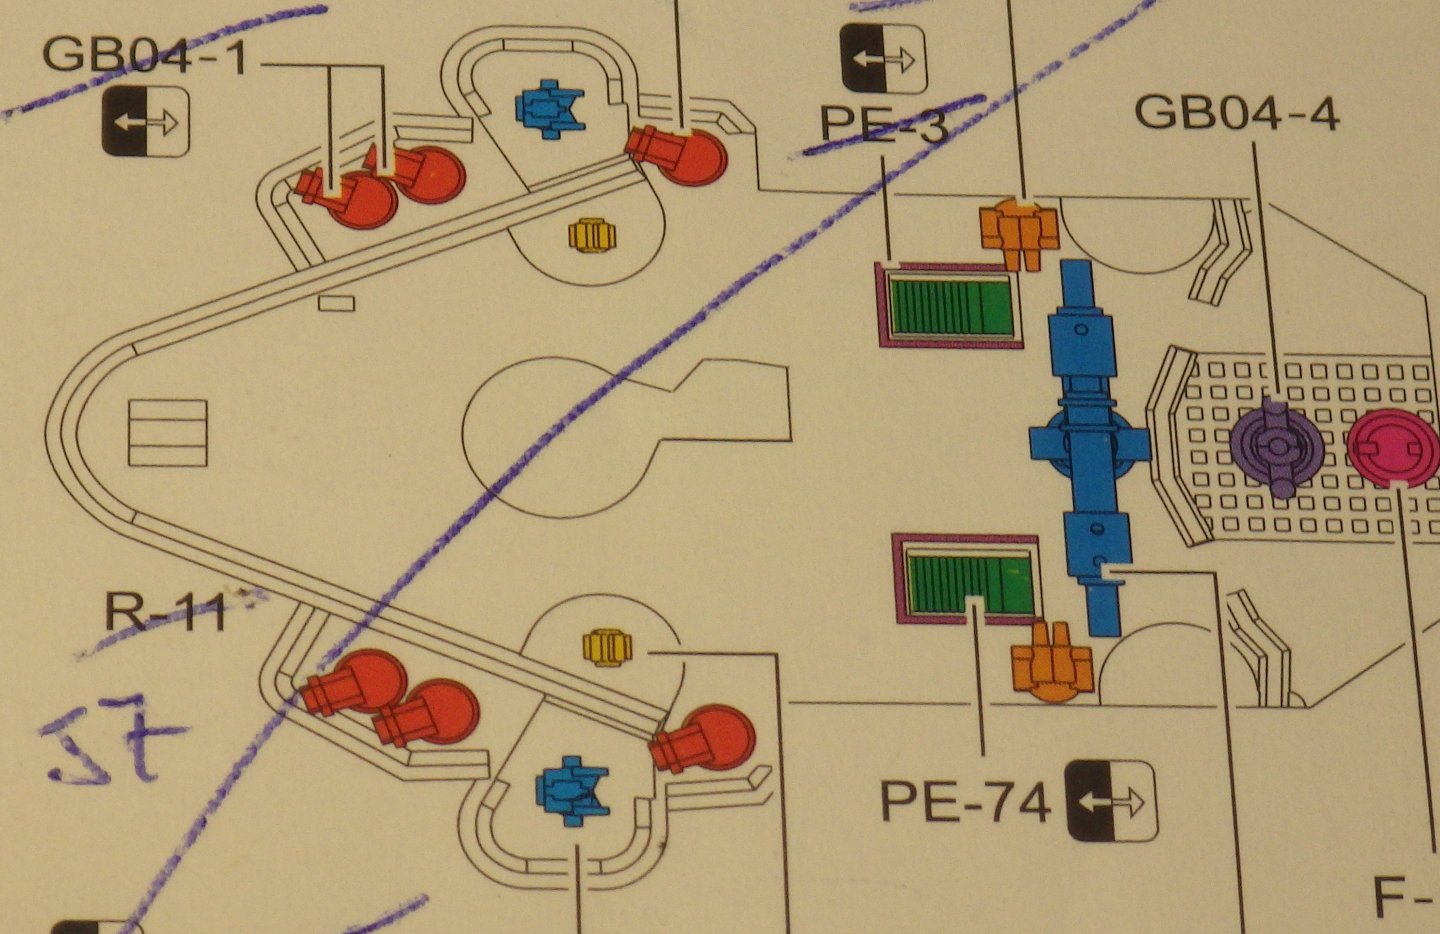
I added the forward superstructure to the hull. It all fitted well. Then it was time to add the tiny details that Flyhawk provides. The bridge has fifteen pieces, six pelorus, six searchlights, a binnacle, radar. And then there is the PE. This is one of the (ten) vertical struts that are assembled into the bridge venturi below the screen. And I did lose one. The PE is thin and a folding tool really helps. I did find two faults as I progressed into the PE details. The catapult is lovely, made up of four pieces of PE and a resin detail. However the end pieces do not fit into the centre section as shown in the instructions. The sections are rectangular rather than square so the end pieces can only fit one way and that is 90 degrees out with the centre piece which has a pin that will fit into the deck. I have really looked at the pieces and they appear to have been folded correctly. The PE is prescored for the folds so you can tell if it is folding in the correct place. Also the problem exists on both sides. So the pin has been cut off and the catapult will be installed on its side. So sue me. The plastic sections that make up the structure of the crane appear to be injected short and I had to add a piece of thin plastic (the discarded plastic gun barrels) to the sides to allow the PE boom to be fitted. The crane hook is miniscule and luckily they give you two because the first one evaporated. I'm getting back to understanding the Flyhawk approach. There are lots of fiddly small parts and the PE is fragile but its so enjoyable to see the details grow. Thanks for looking in and all the likes and comments Alan


-
Thanks Ken I seem to be spending a lot of time on hands and knees under the bench with a bright flashlight looking for tiny parts.. I've lost a couple but so far thjere have been spares. Alan