king derelict
-
Posts
3,292 -
Joined
-
Last visited
Content Type
Profiles
Forums
Gallery
Events
Everything posted by king derelict
-
Welcome OC, the shield has raised details but the cloak doesn’t. I may be using a simplified approach there. Alan
-
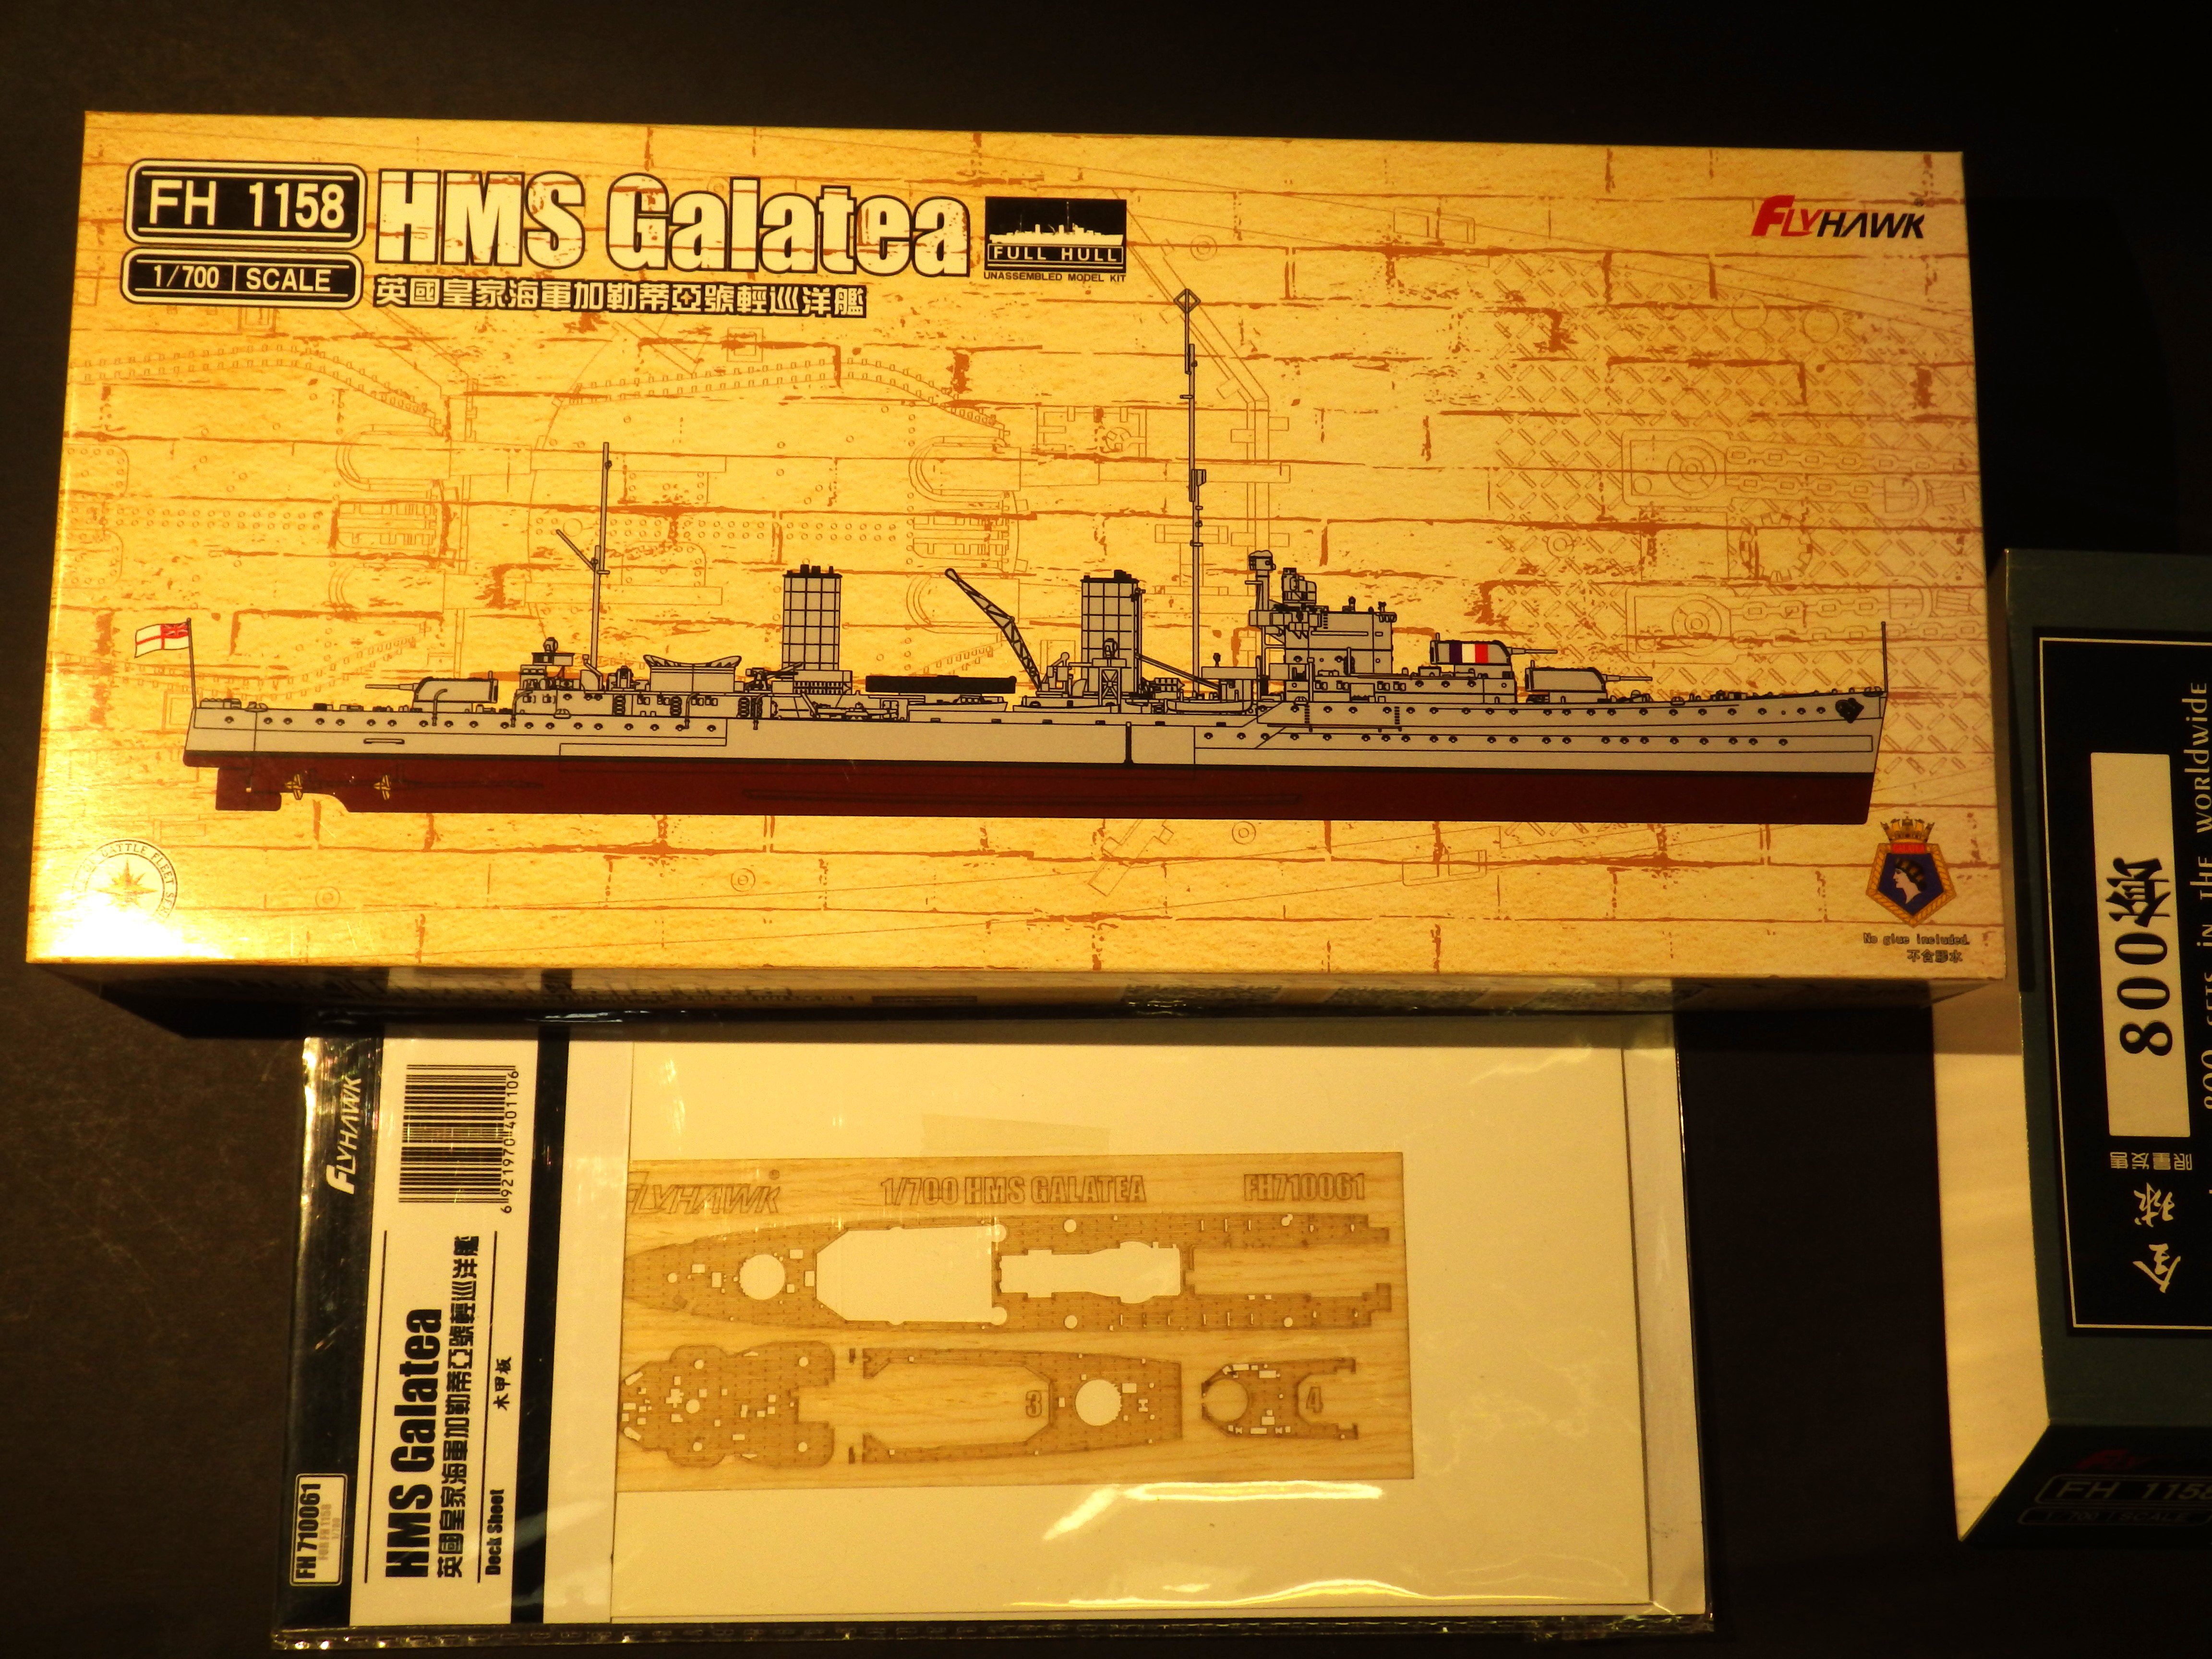
This will be the next major project. After the Amodel kit and its shortcomings a Flyhawk model seemed like the best antidote. This is a limited edition kit. I'm not sure what that brings to the kit but we will see. I have added a wooden deck set. I'm not sure if I will need anything else. Time to get my eyes recalibrated to 1/700 again Thanks for looking in Alan

-
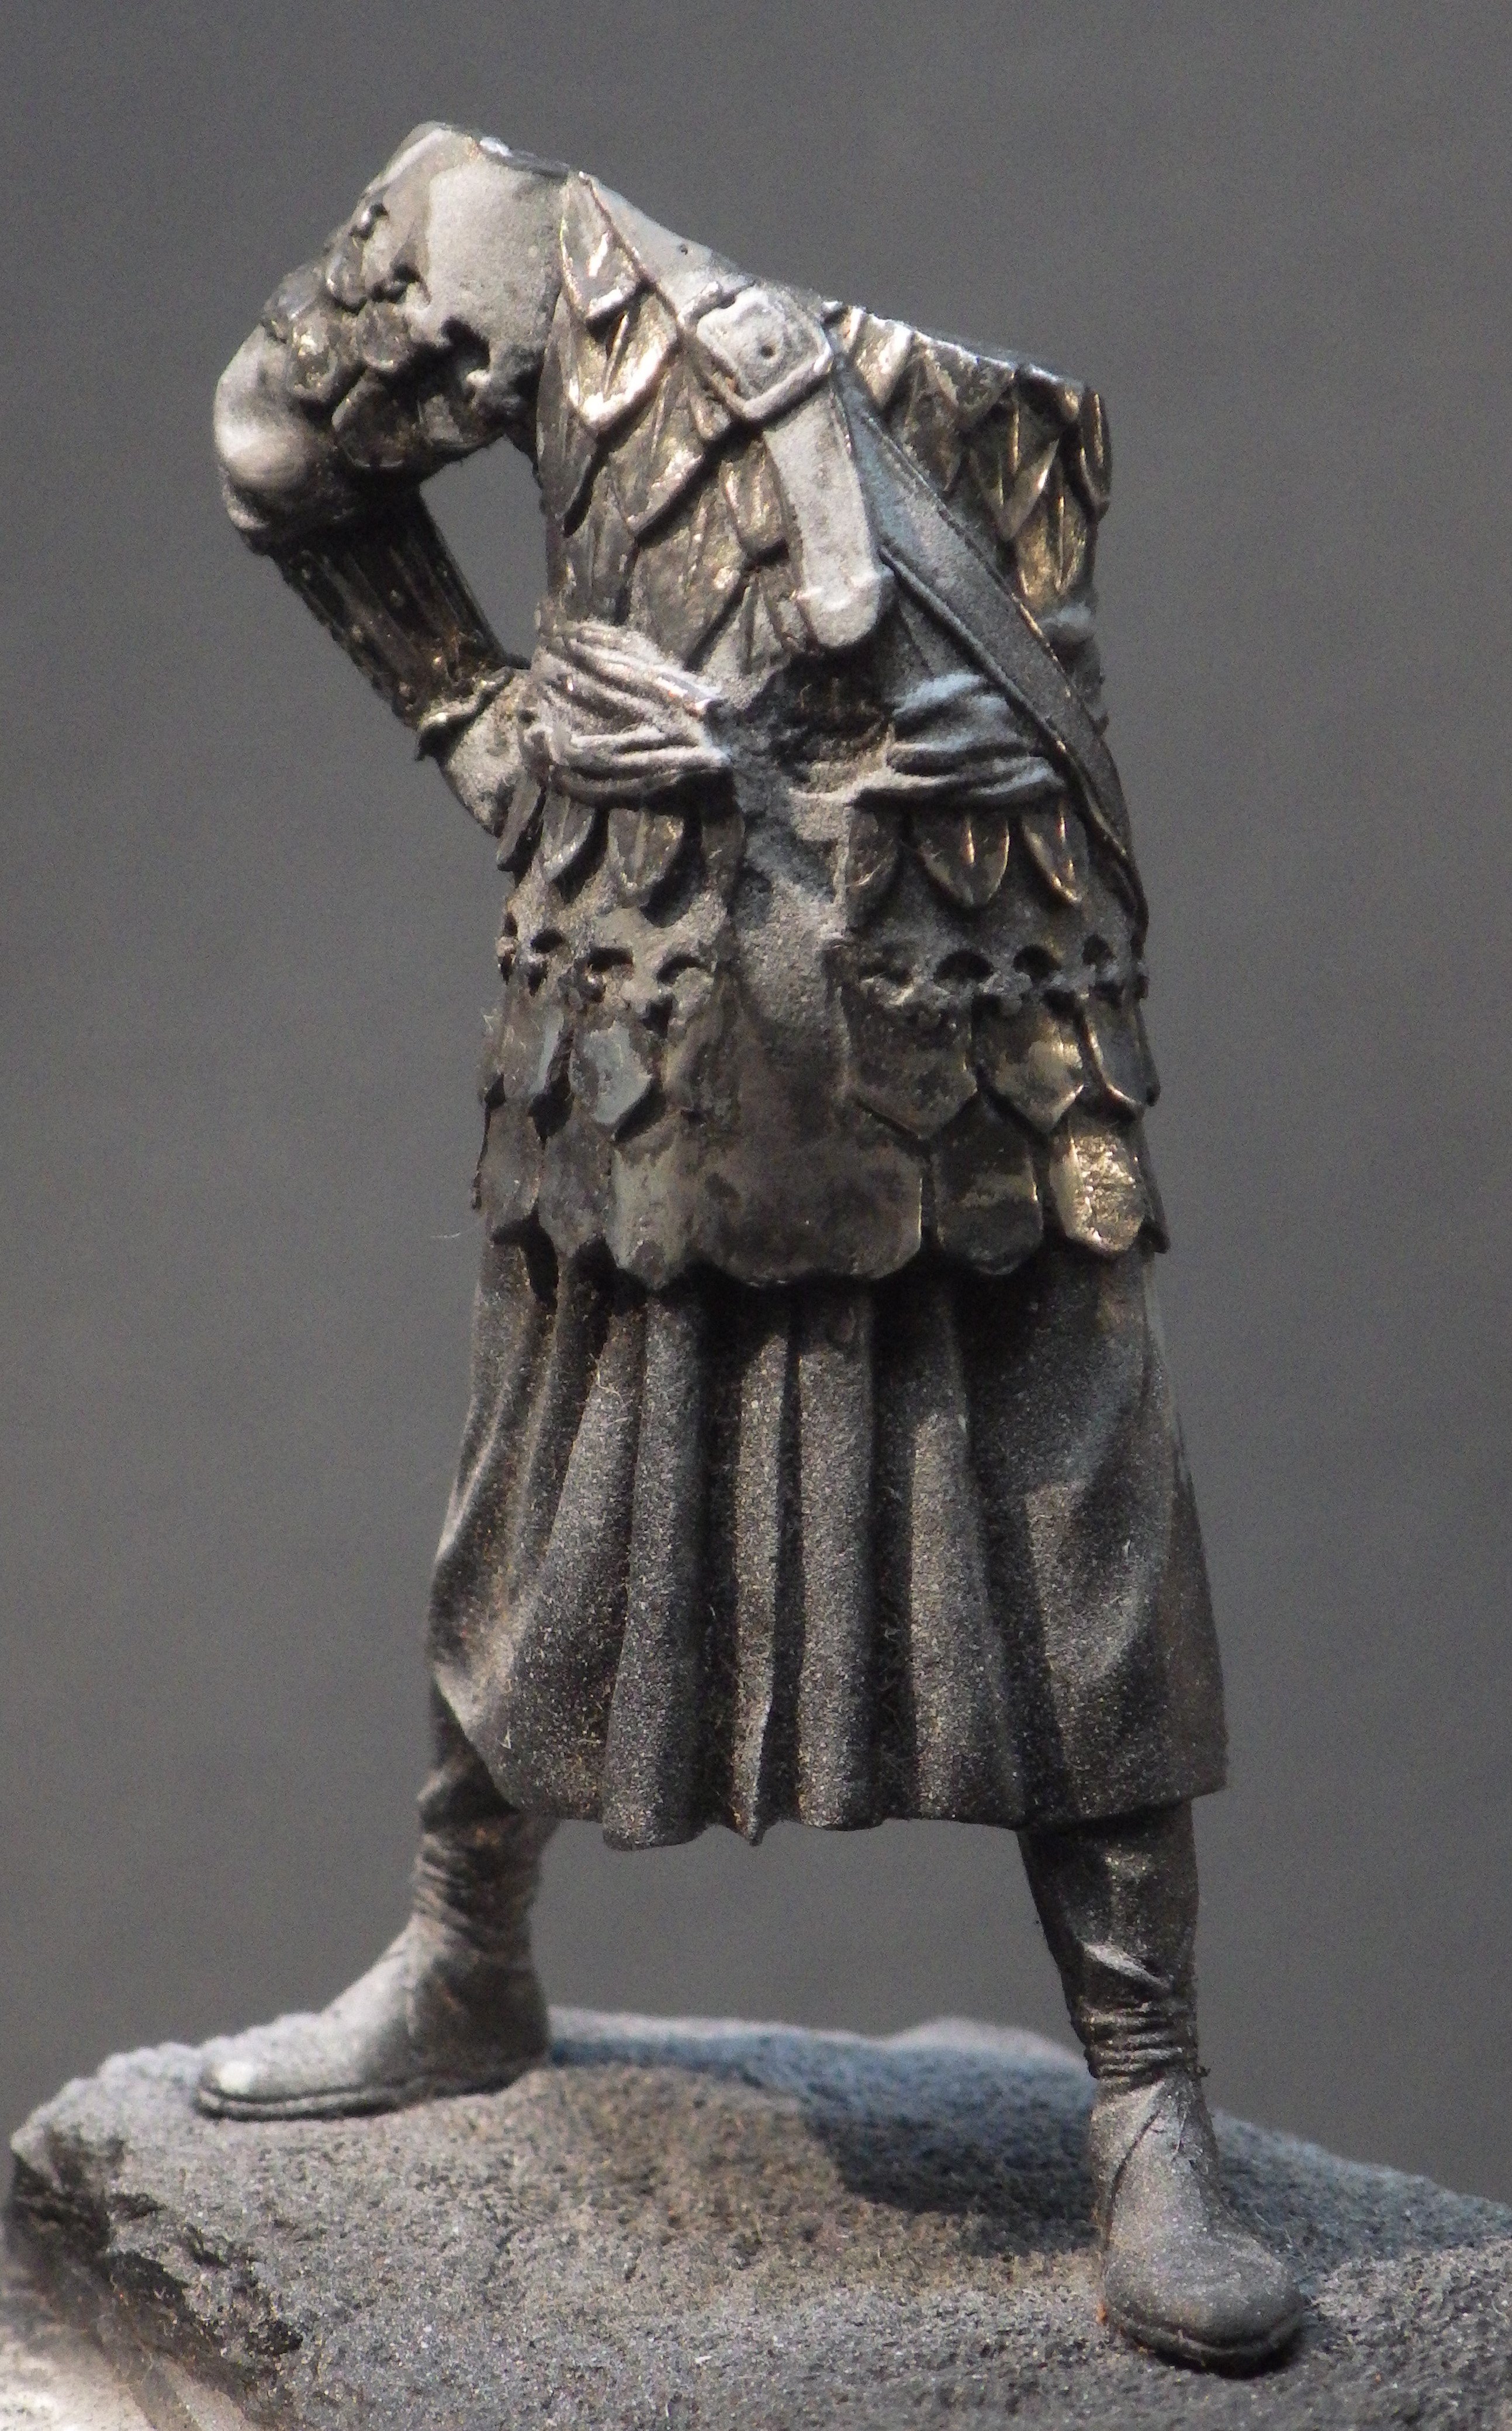
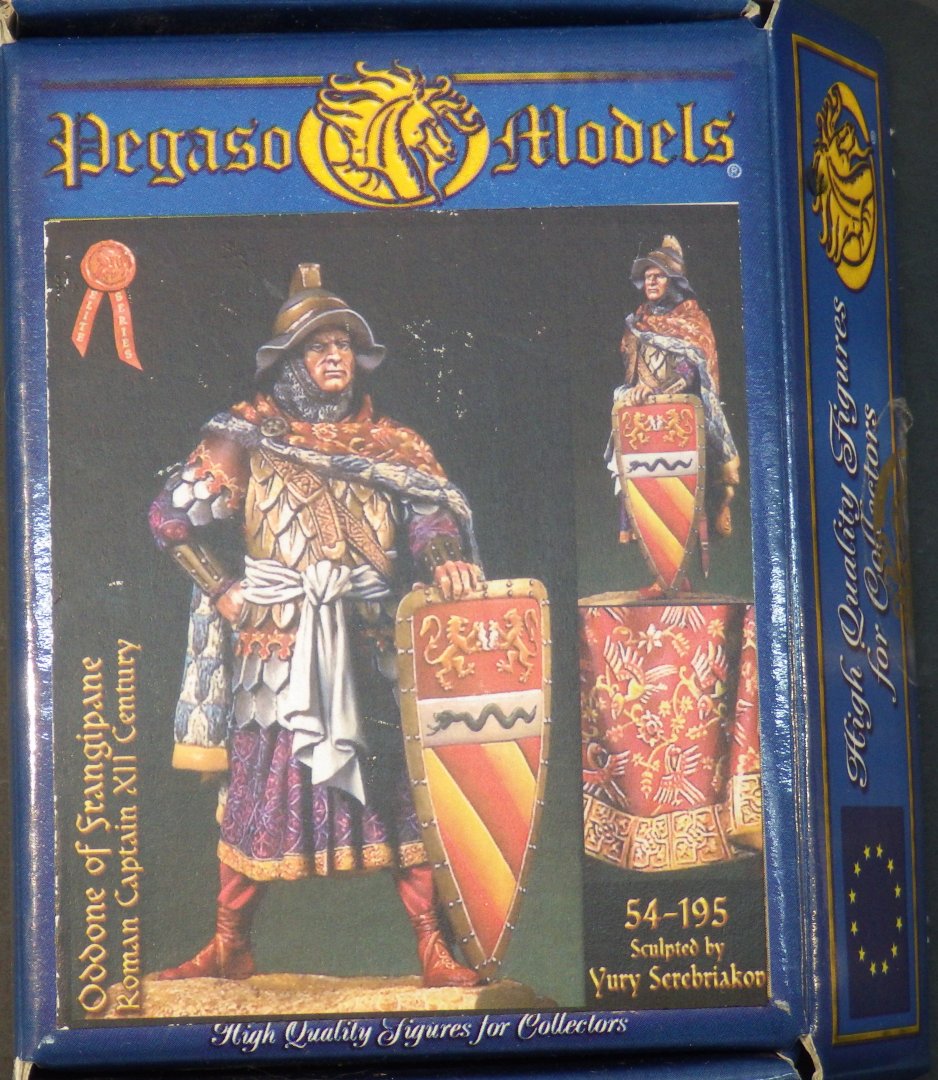
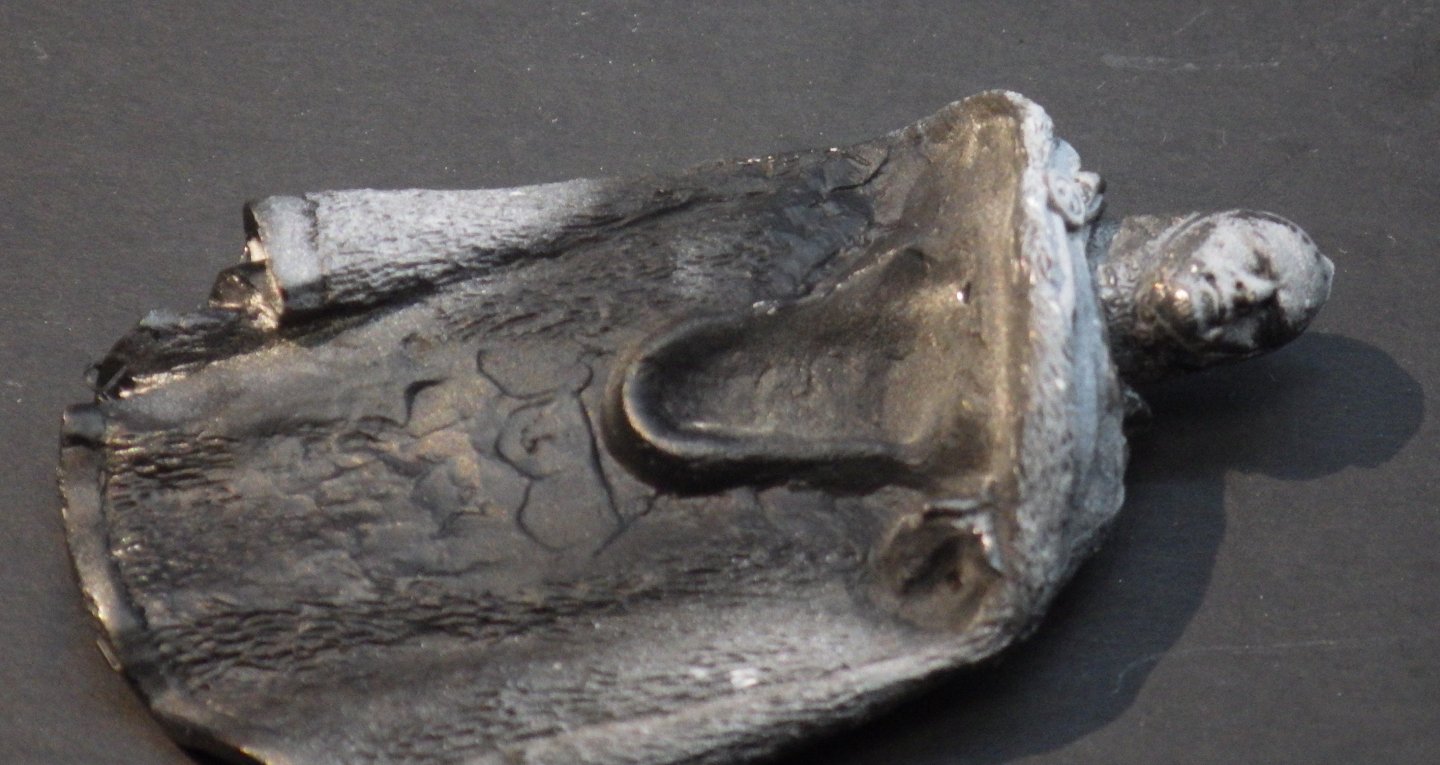
I thought it was time to broaden my horizons and try a figure from someone besides Art Girona History (well Wiki) tells us Oddone Frangipane (also Oddo or Otto, Latin: Odo Frajapanis[1]) was a Roman lord and military leader in the service of the Papacy in the 12th century. He was the son of Leo and grandson of Cencio II of the Frangipani family. Oddone had another brother named Cencio. During the middle of the twelfth century, he was the most influential aristocrat in Rome. His career began sometime around 1130. He supported the legitimate popes and opposed the Ghibellines and their Senate. His family acquired the fortress of Tusculum from Ptolemy II somehow before December 1152, when he sold his rights over Tusculum to Pope Eugene III. In 1155, he acted on behalf of Adrian IV in negotiations with Frederick Barbarossa. In 1156, he was at Benevento to accept the submission of William I of Sicily to the pope. This submission resulted in the confirmation of the Treaty of Benevento. After the papal election of 7 September 1159, Oddone wrote to Louis VII of France exhorting him to support Alexander III. When Alexander was arrested by supporters of the imperialist Antipope Victor IV, it was Oddone who freed him and sent to safety in Campania. Oddone took over the military leadership of the city of Rome during the absence of Alexander and even afterwards. His son Leo was captured in battle with the emperor's troops in 1167 and he himself led the largest army of Roman citizens since the days of the Roman Empire into battle at Monte Porzio, where he was defeated by Christian I, Archbishop of Mainz.[2] In the spring of 1170, Oddone remarried to a woman named Eudoxia, a Byzantine princess. He had a son by her named Emanuele. He died some time not long after. It was a chance to try a bit more armour and some intricate work on shield and other details which I may regret. The figure is nicely cast; the details are good and everything seems to fit well. I started fiddling with it while trying to get the Yak to sit on its wheels properly and the photos got left behind a bit. I've primed the figure and then added the directional highlights in white. I have then started polishing the armour plates and the chain mail. The chain mail will get a black wash to add some detail and the plates are supposed to be a gold colour so will get a coat of Tamiya clear orange. Thanks for looking in Alan

-
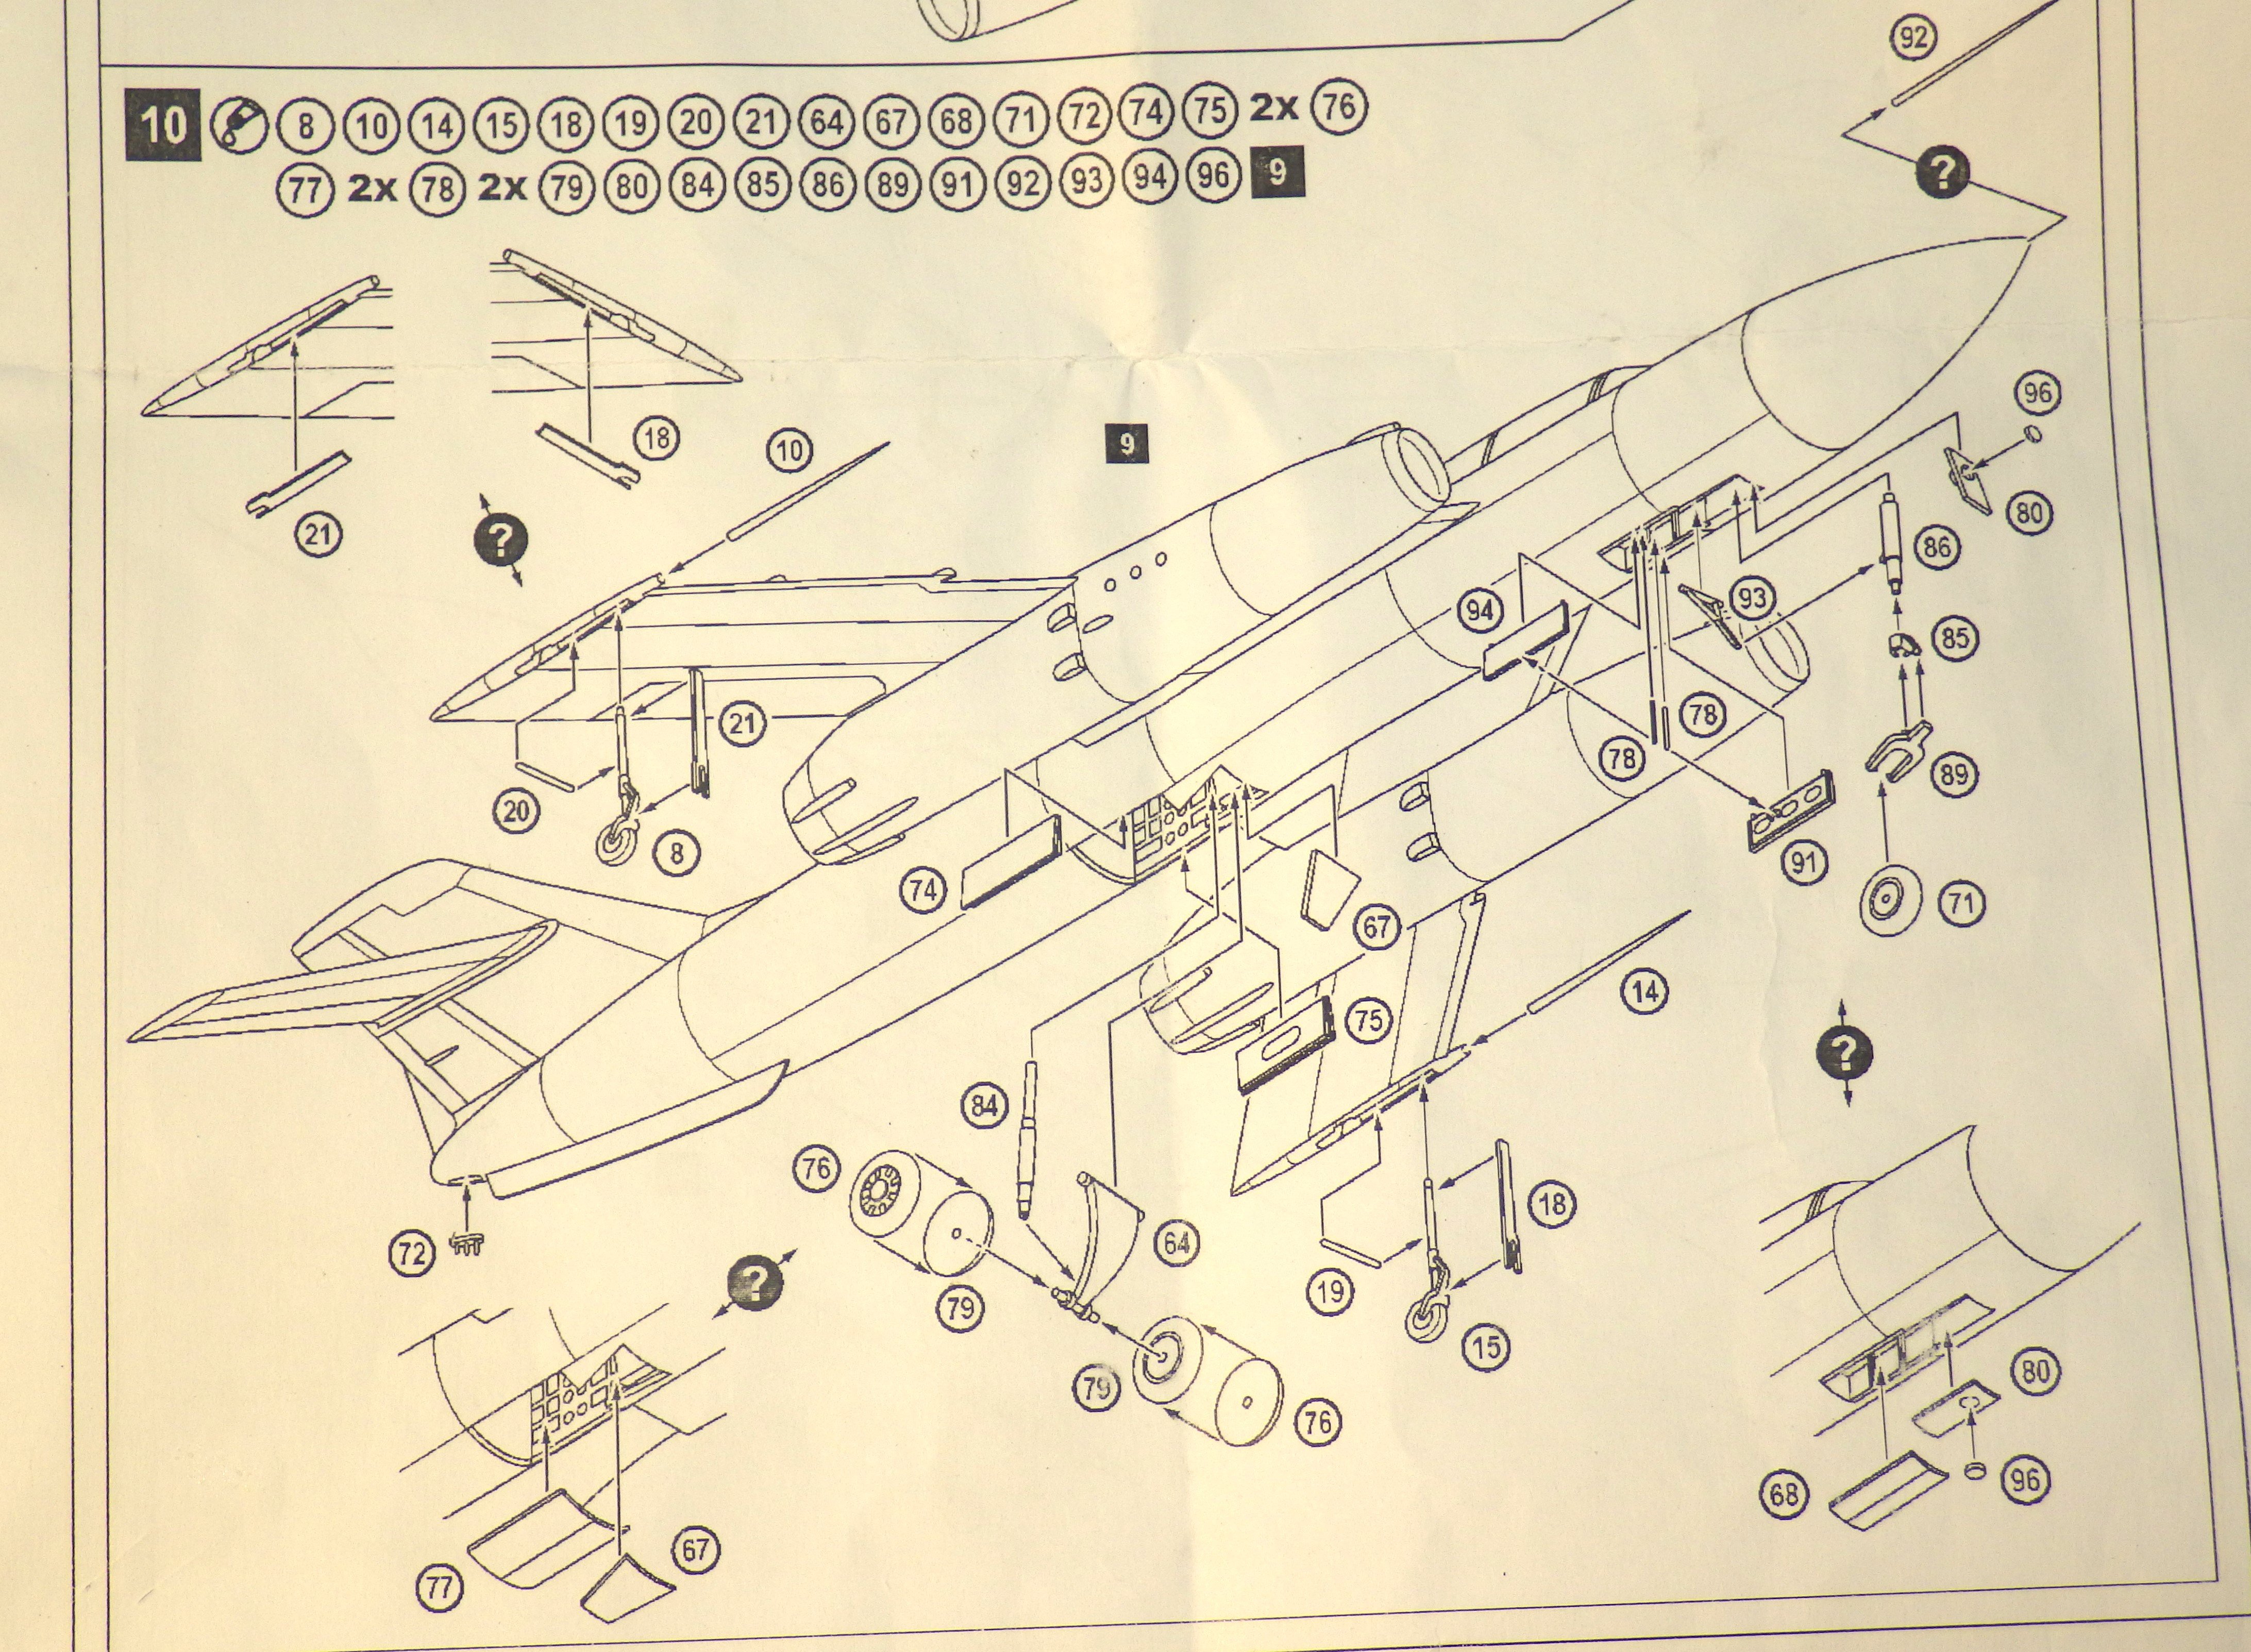
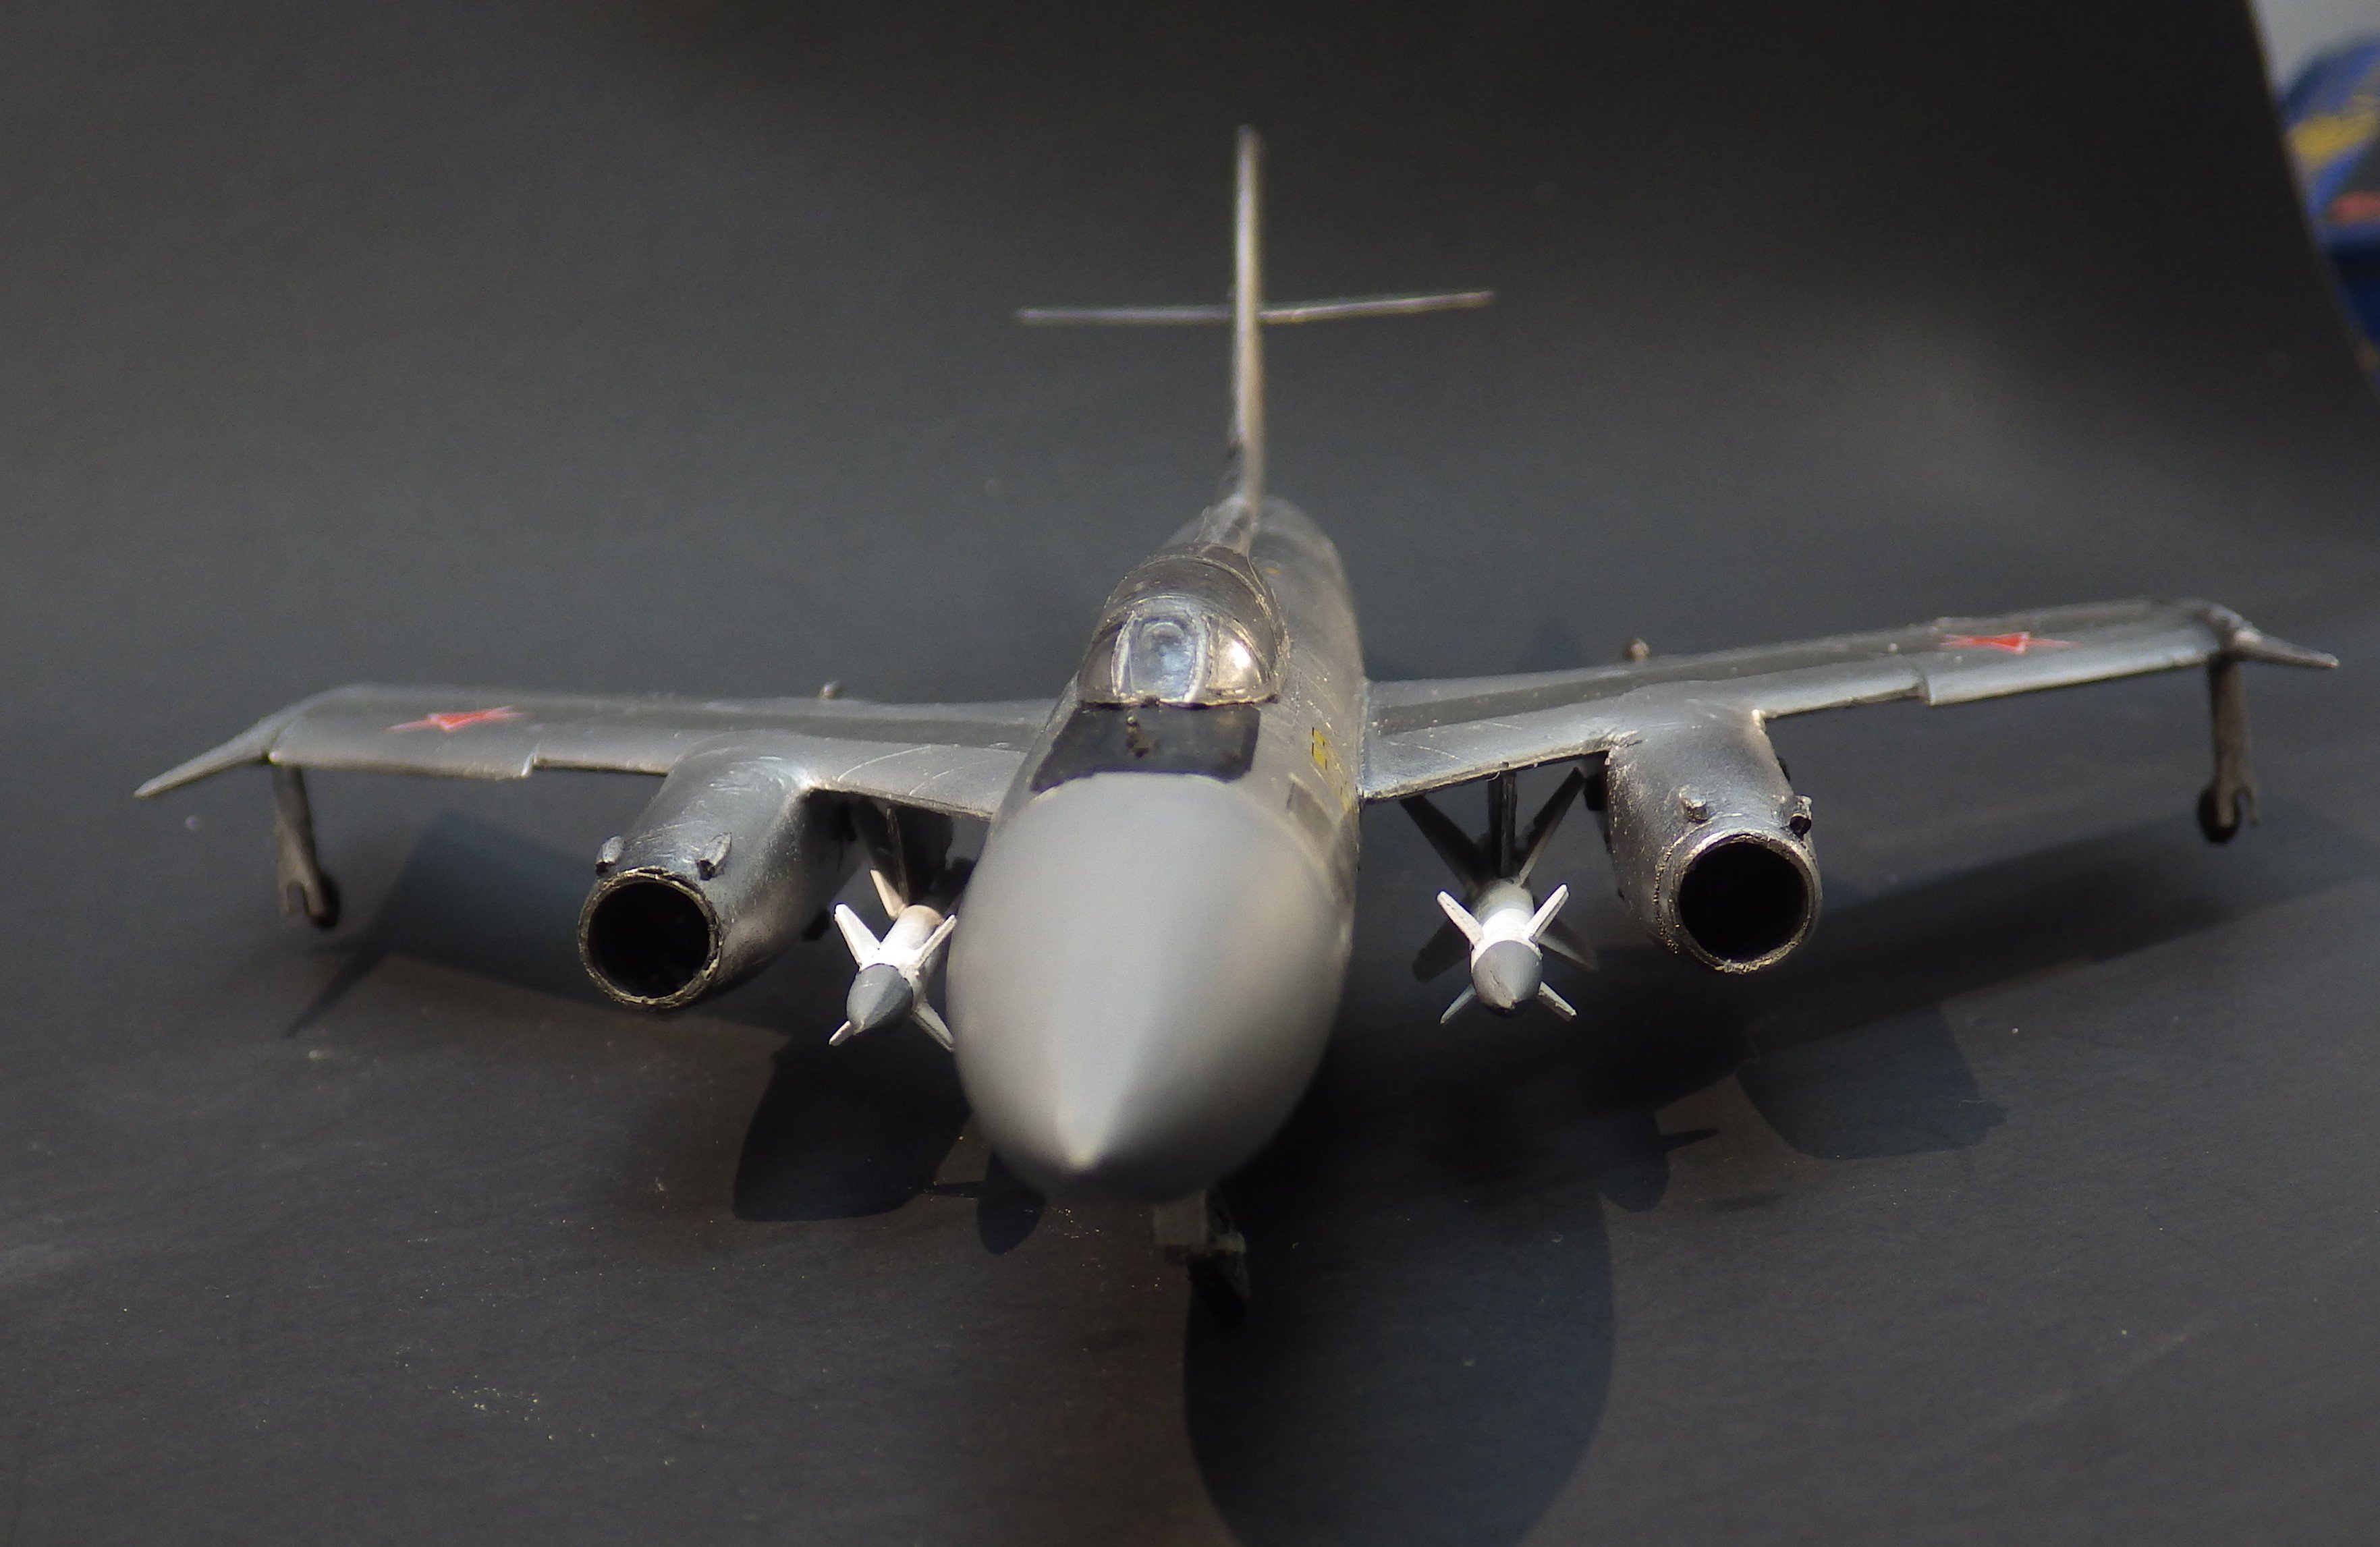
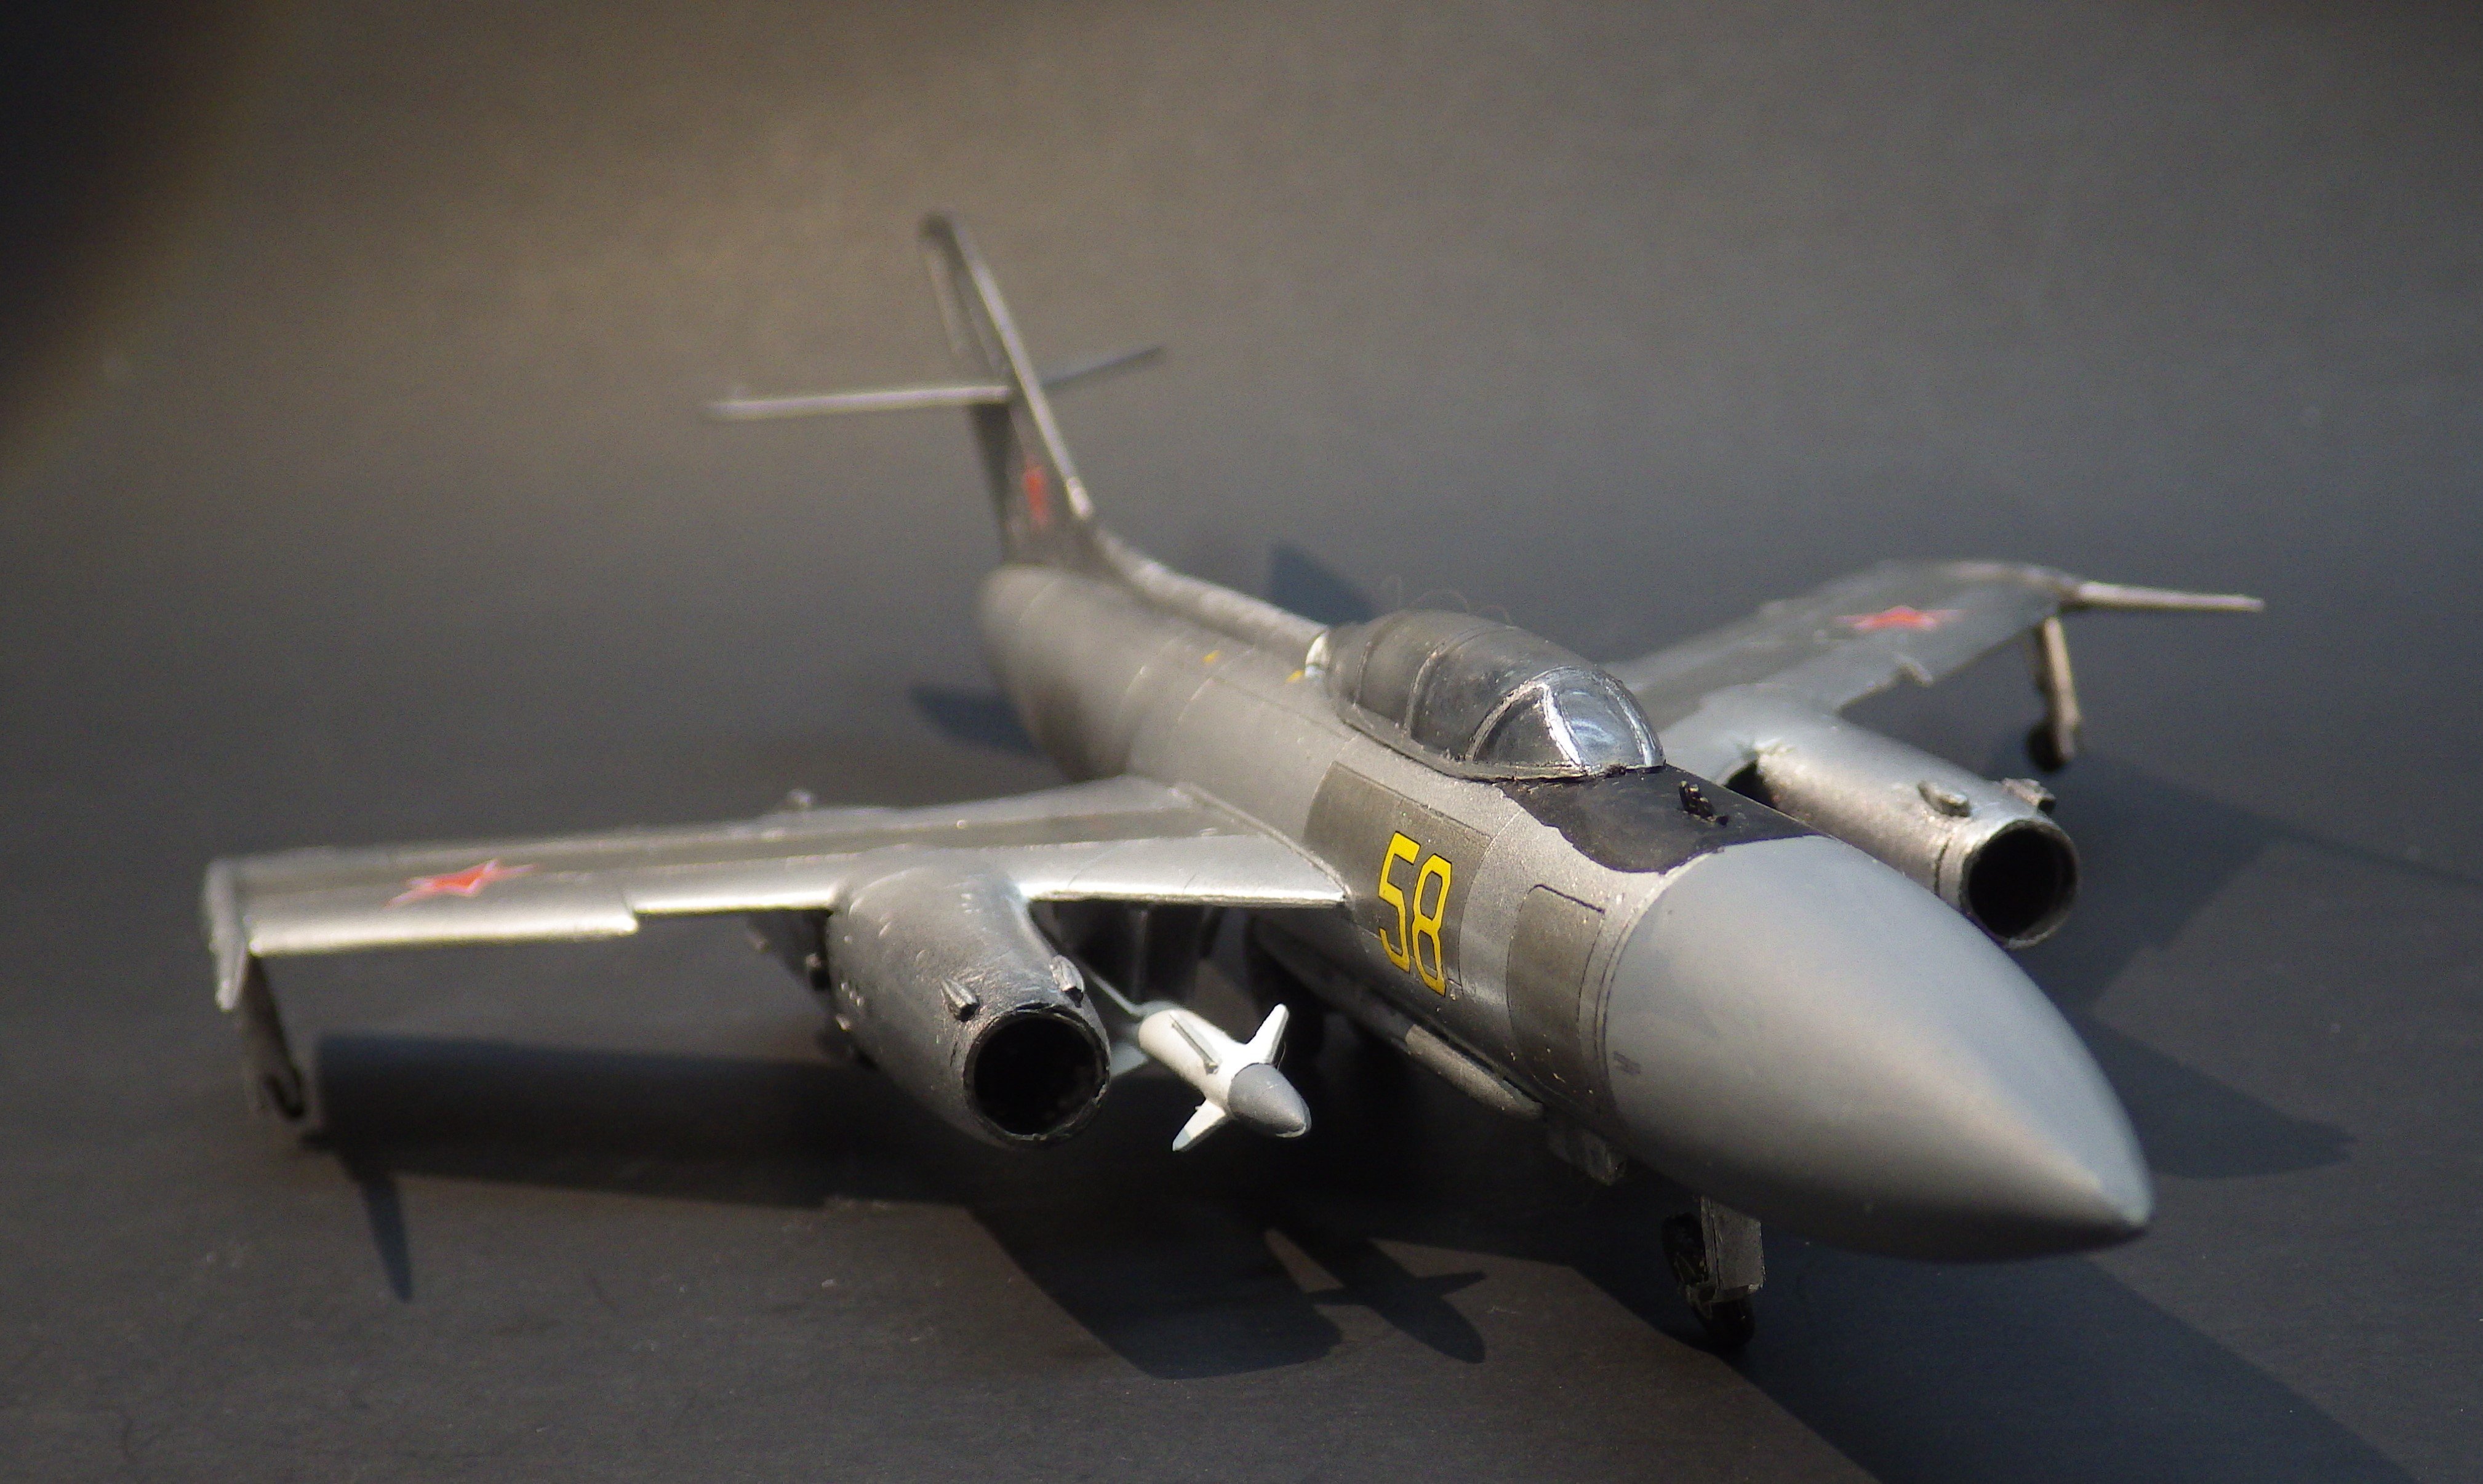
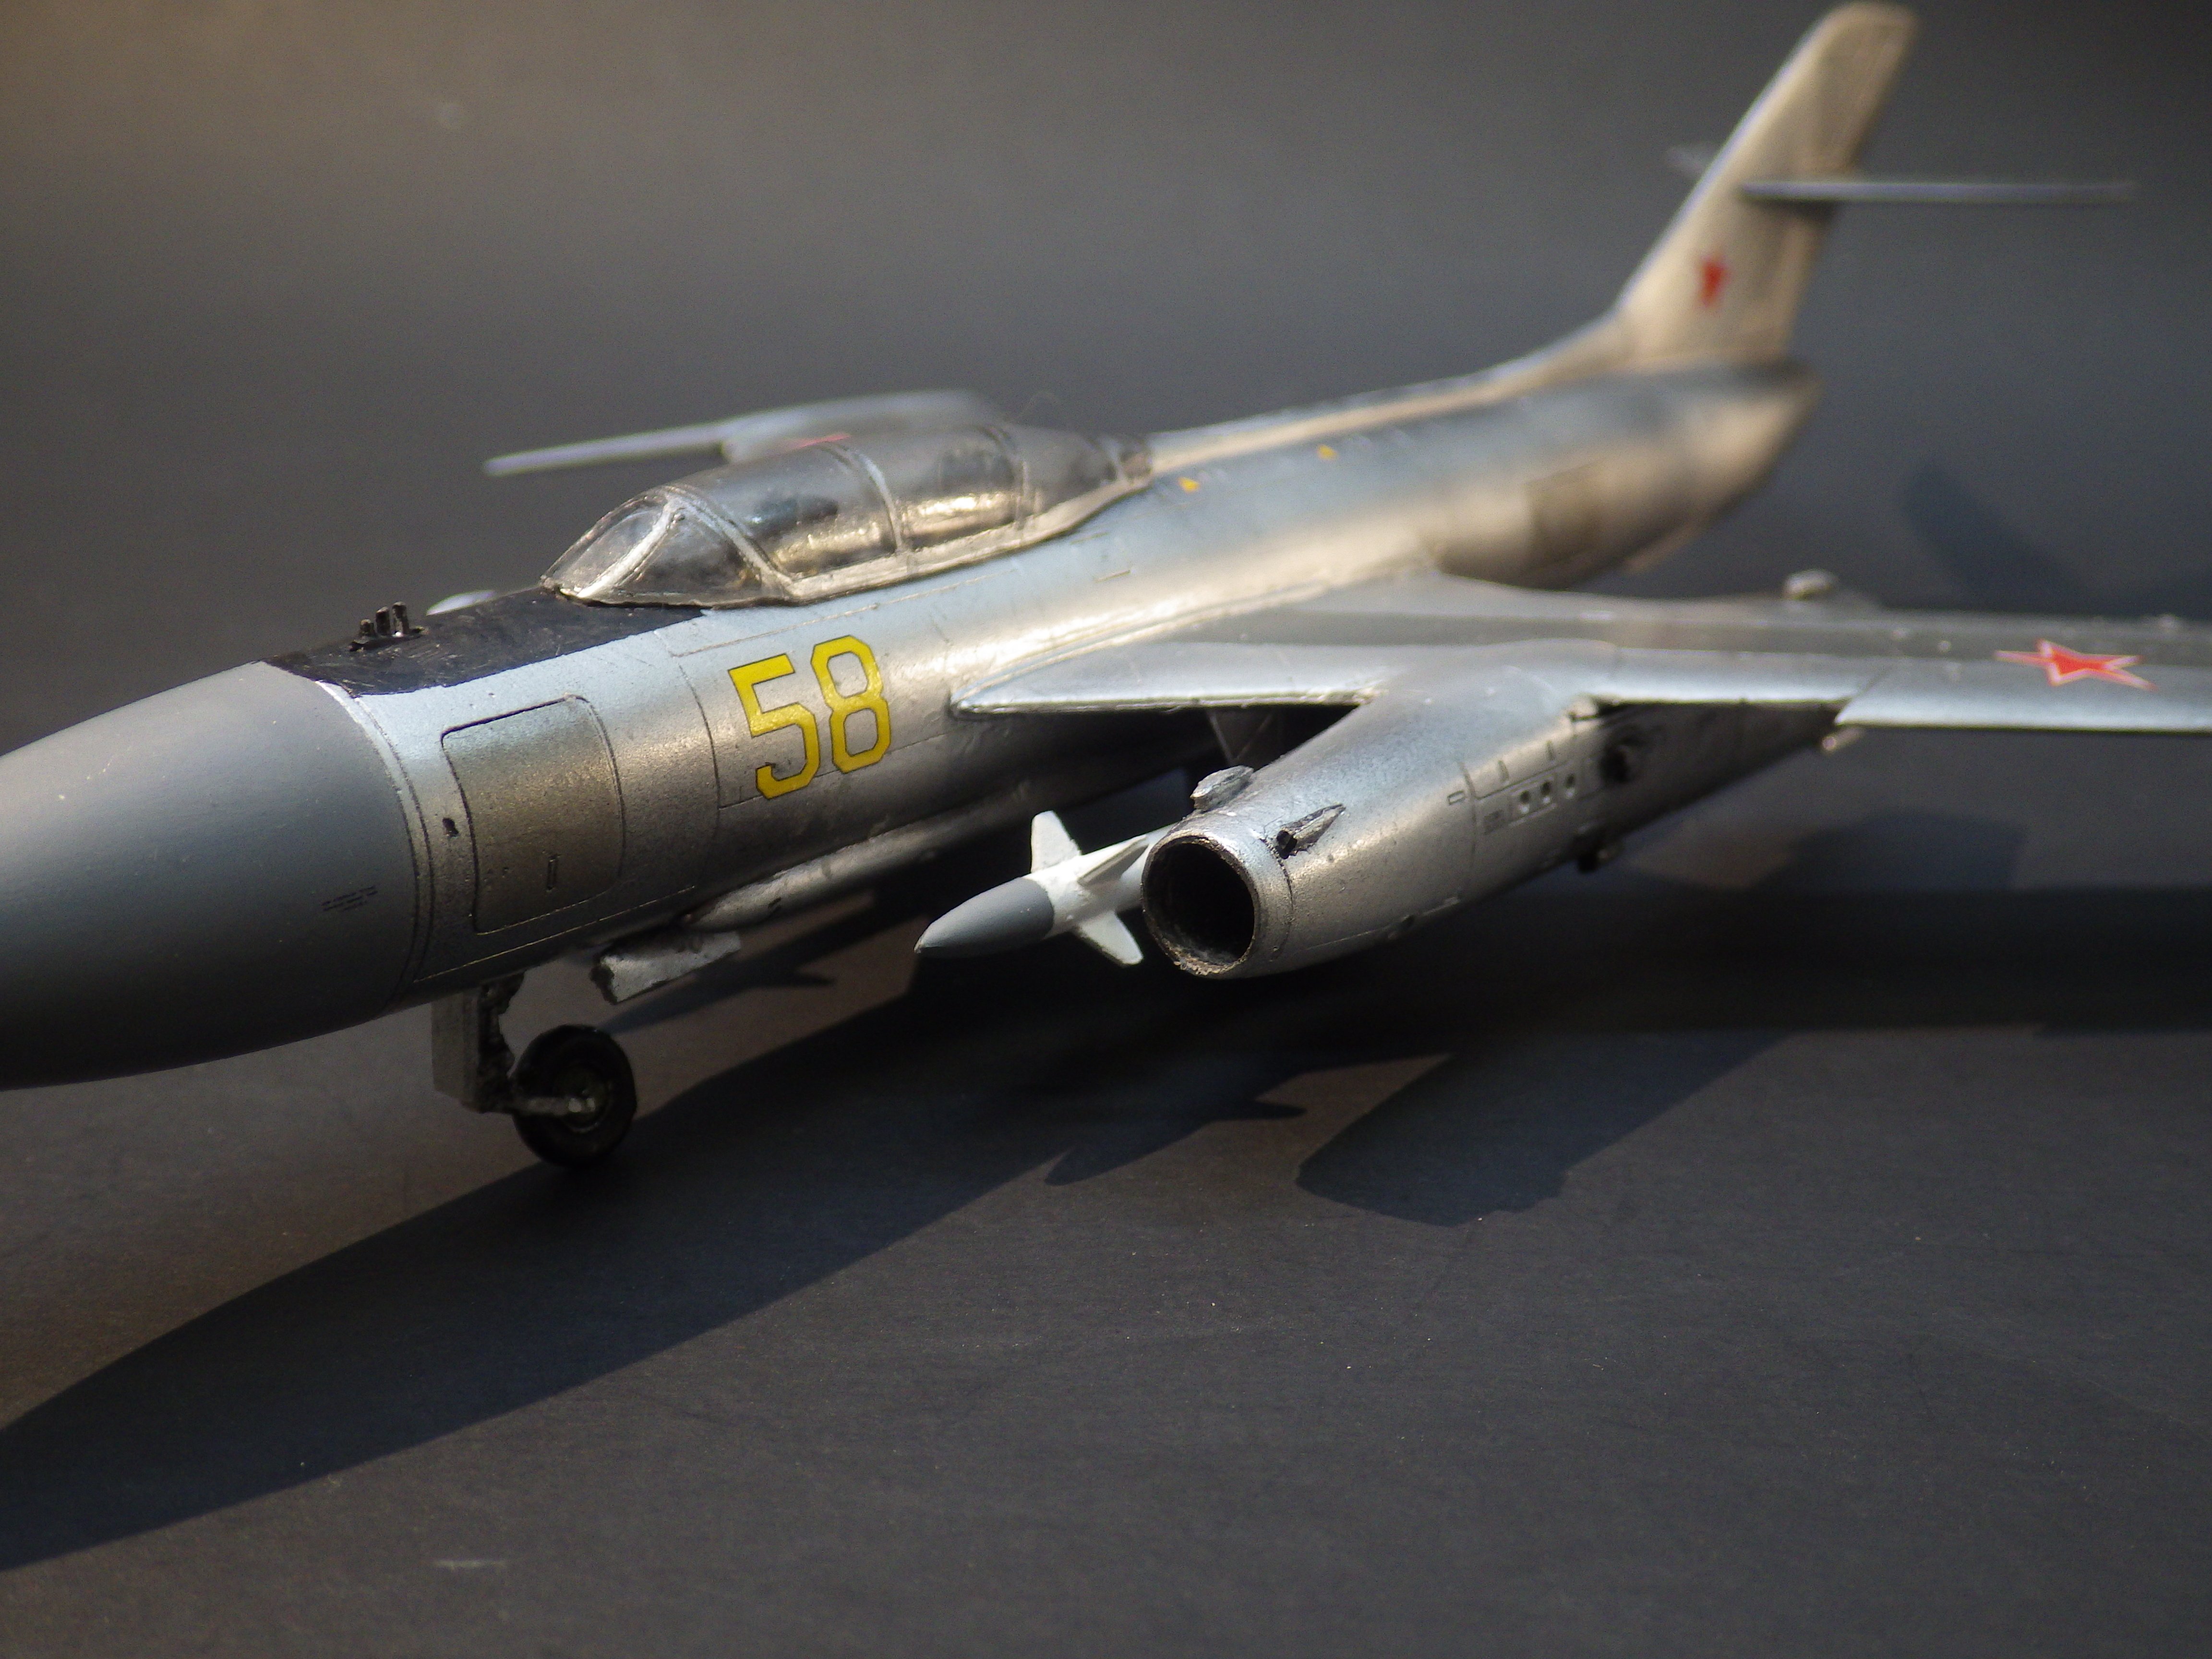
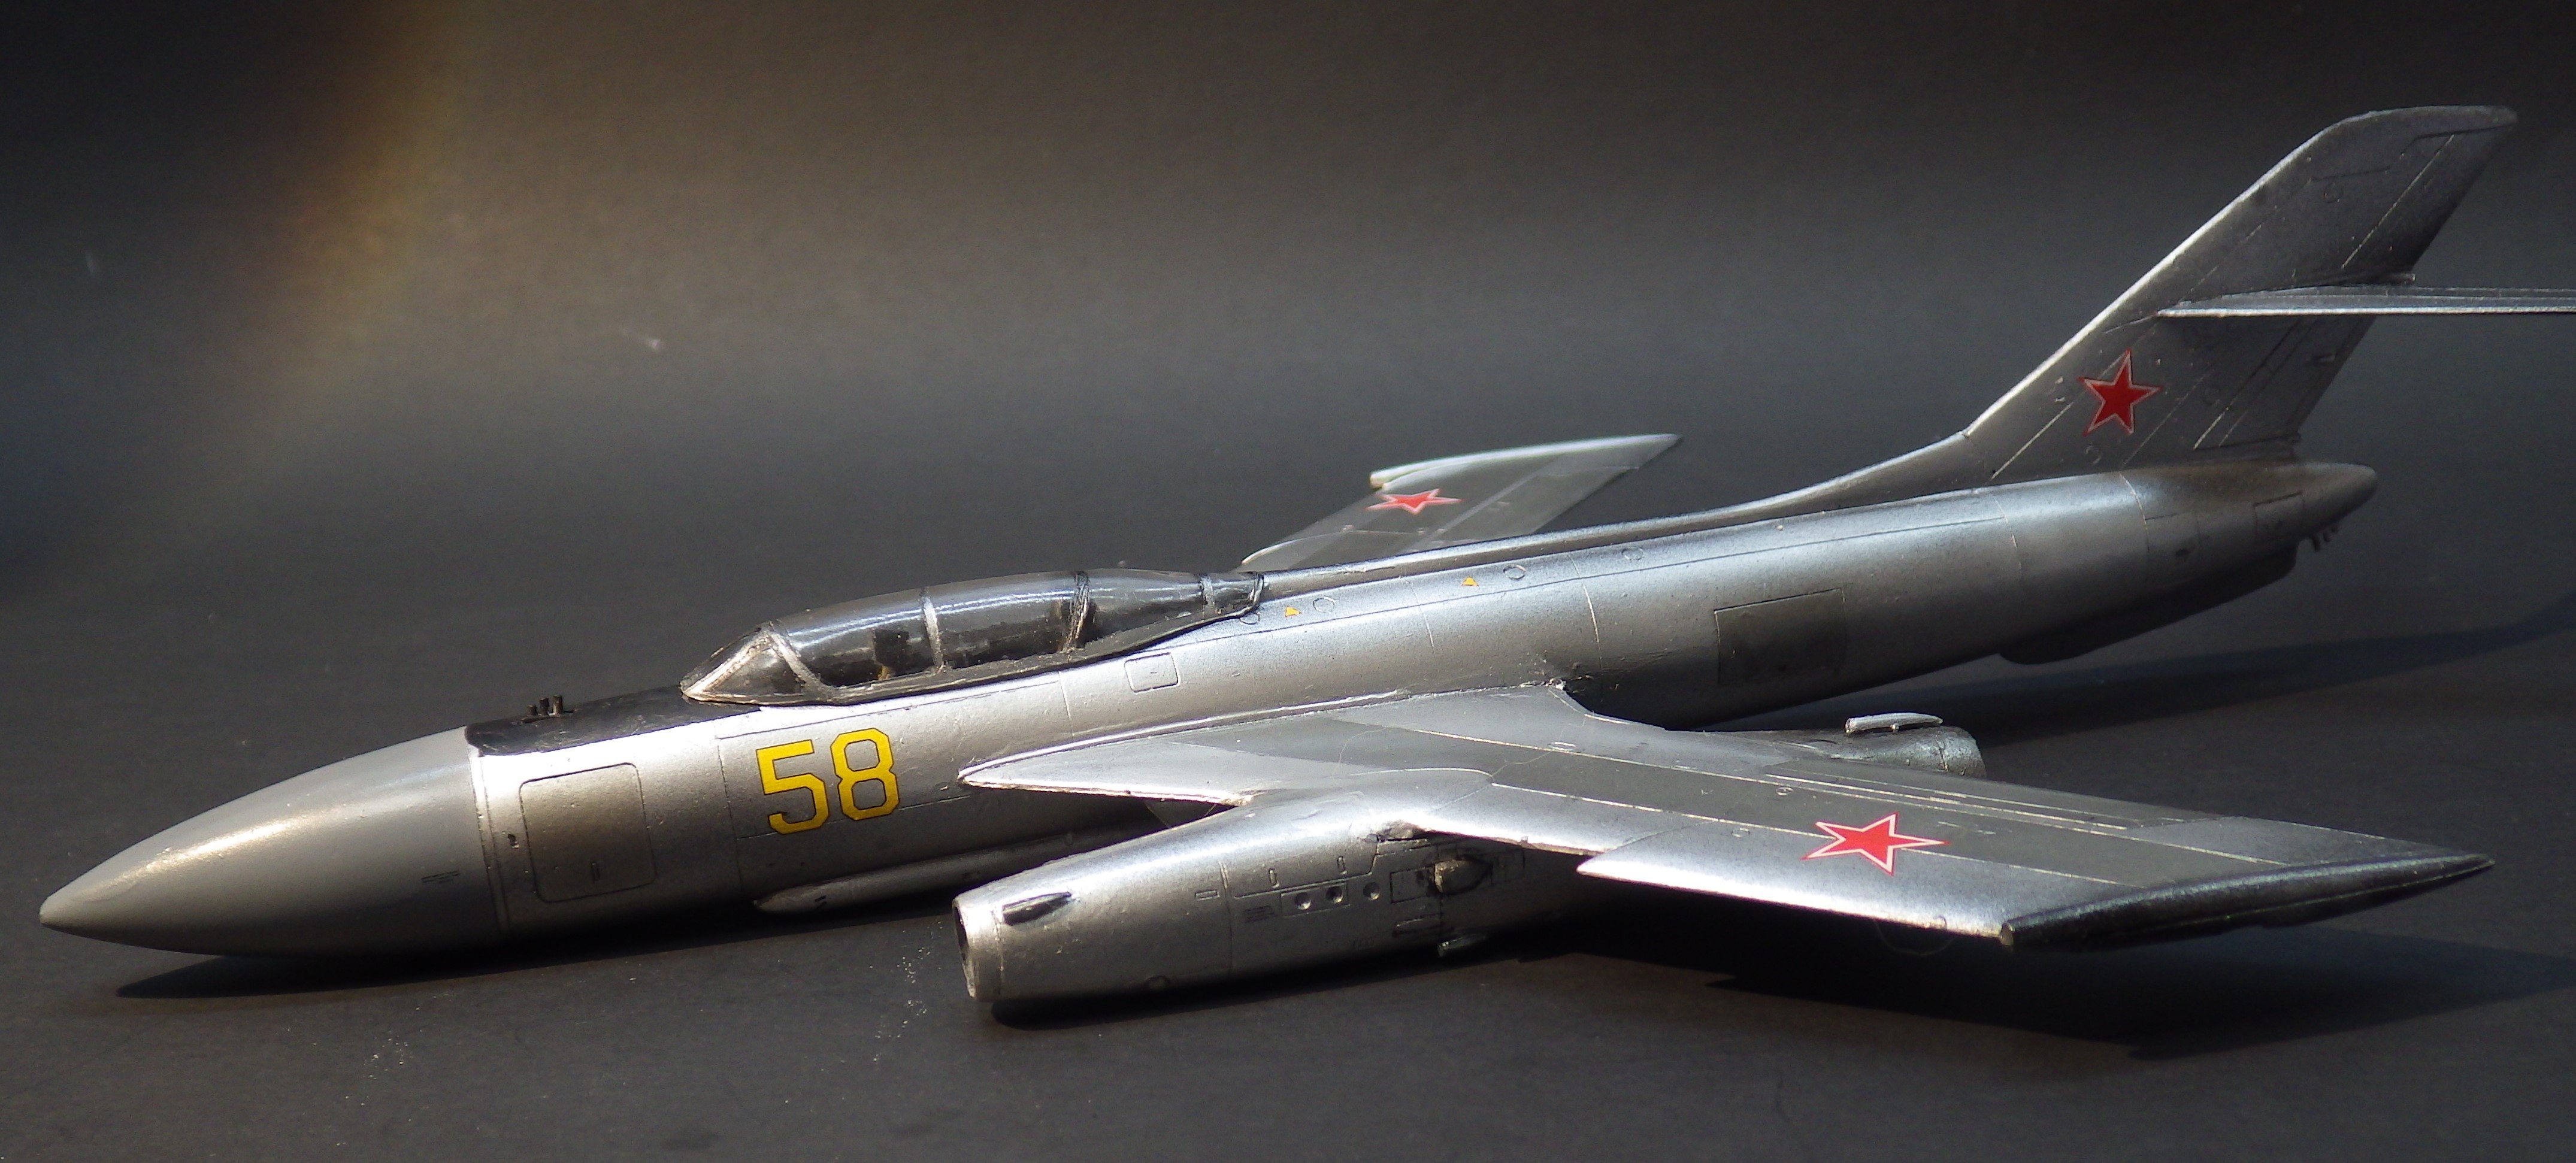
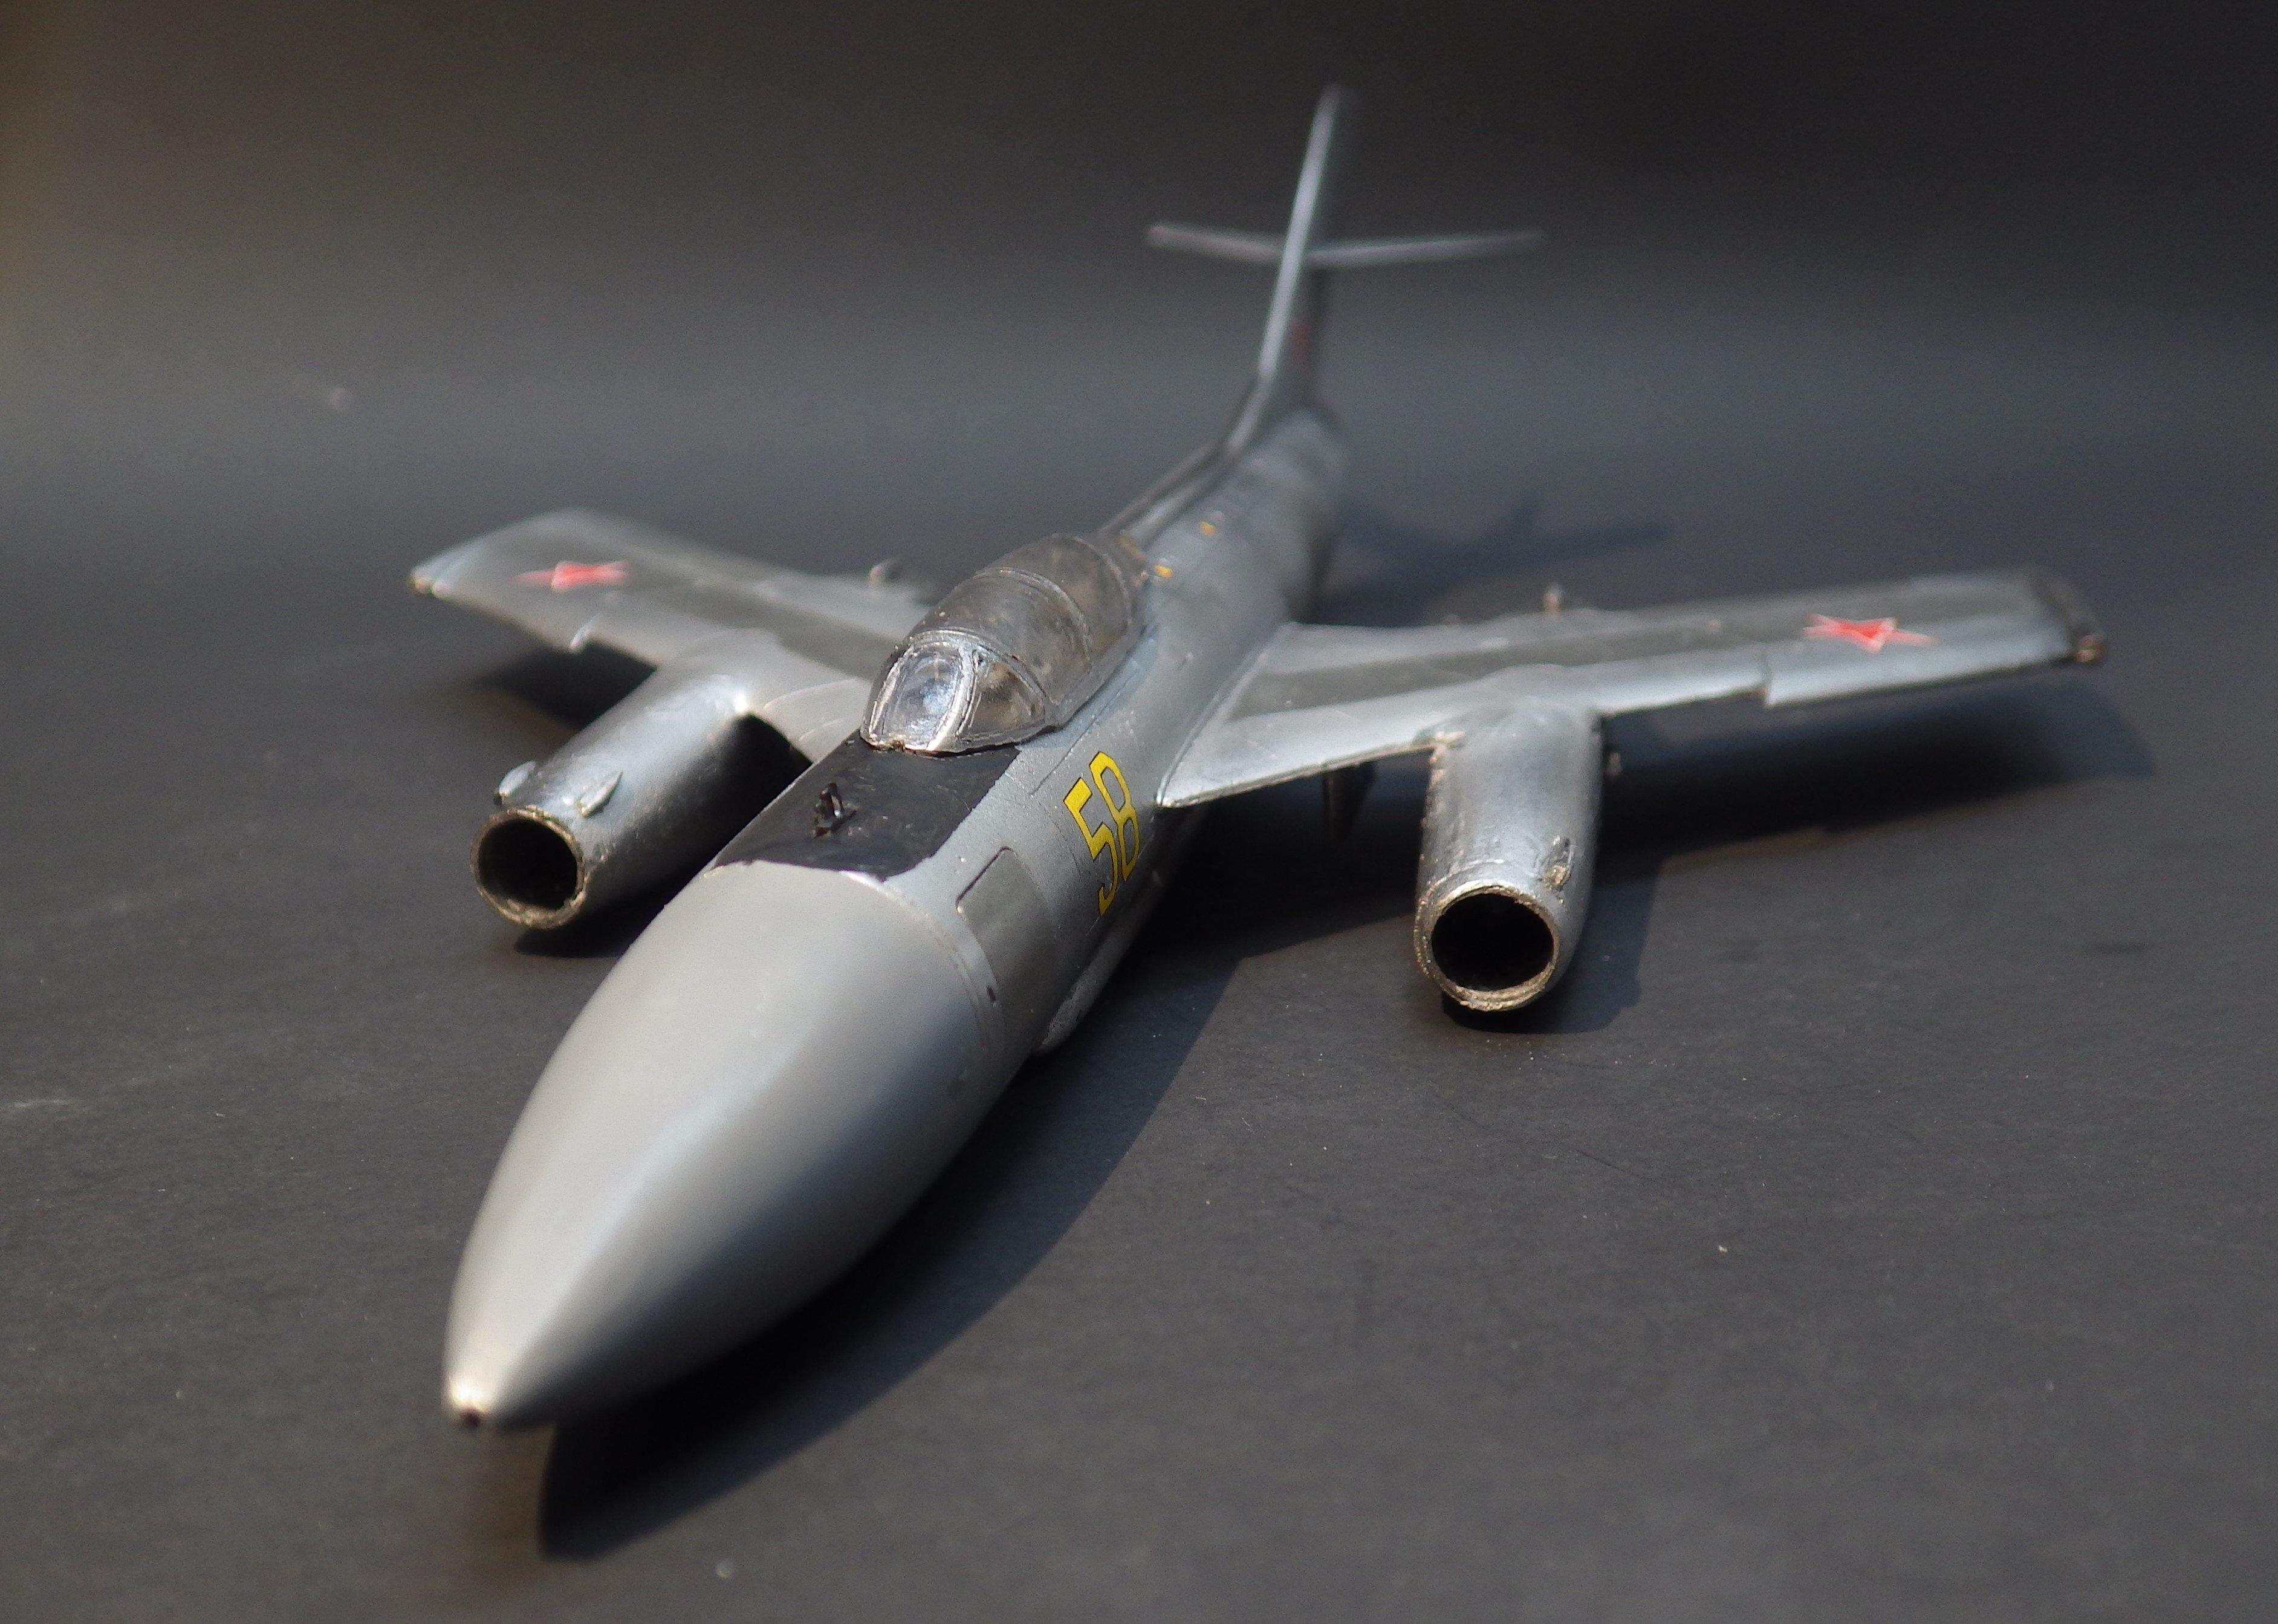
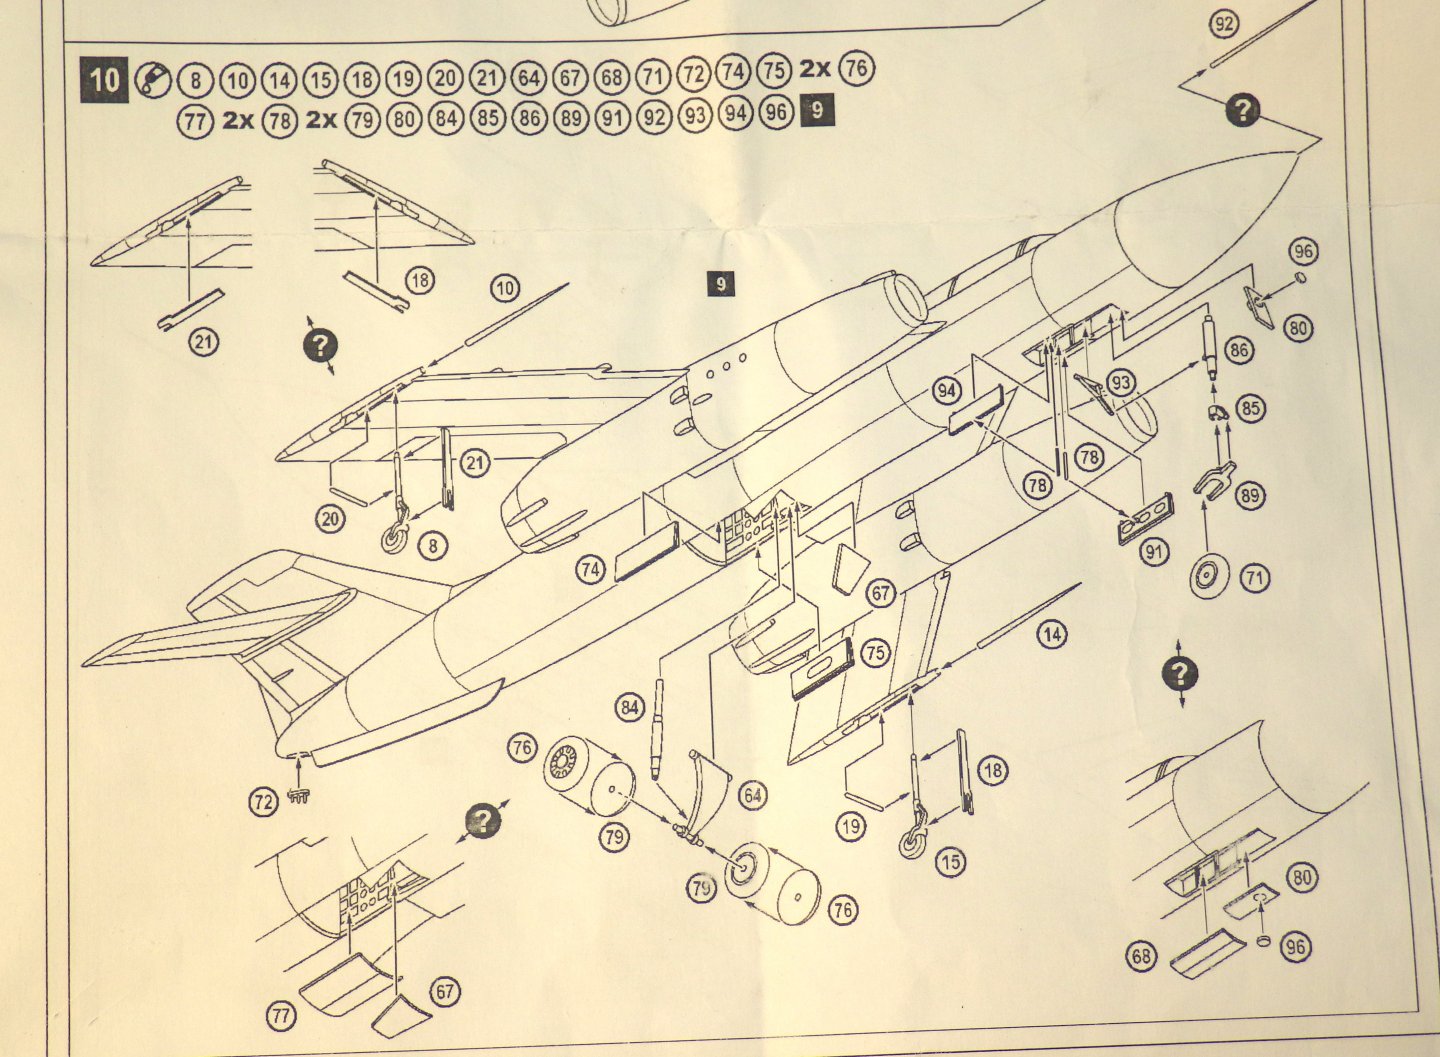
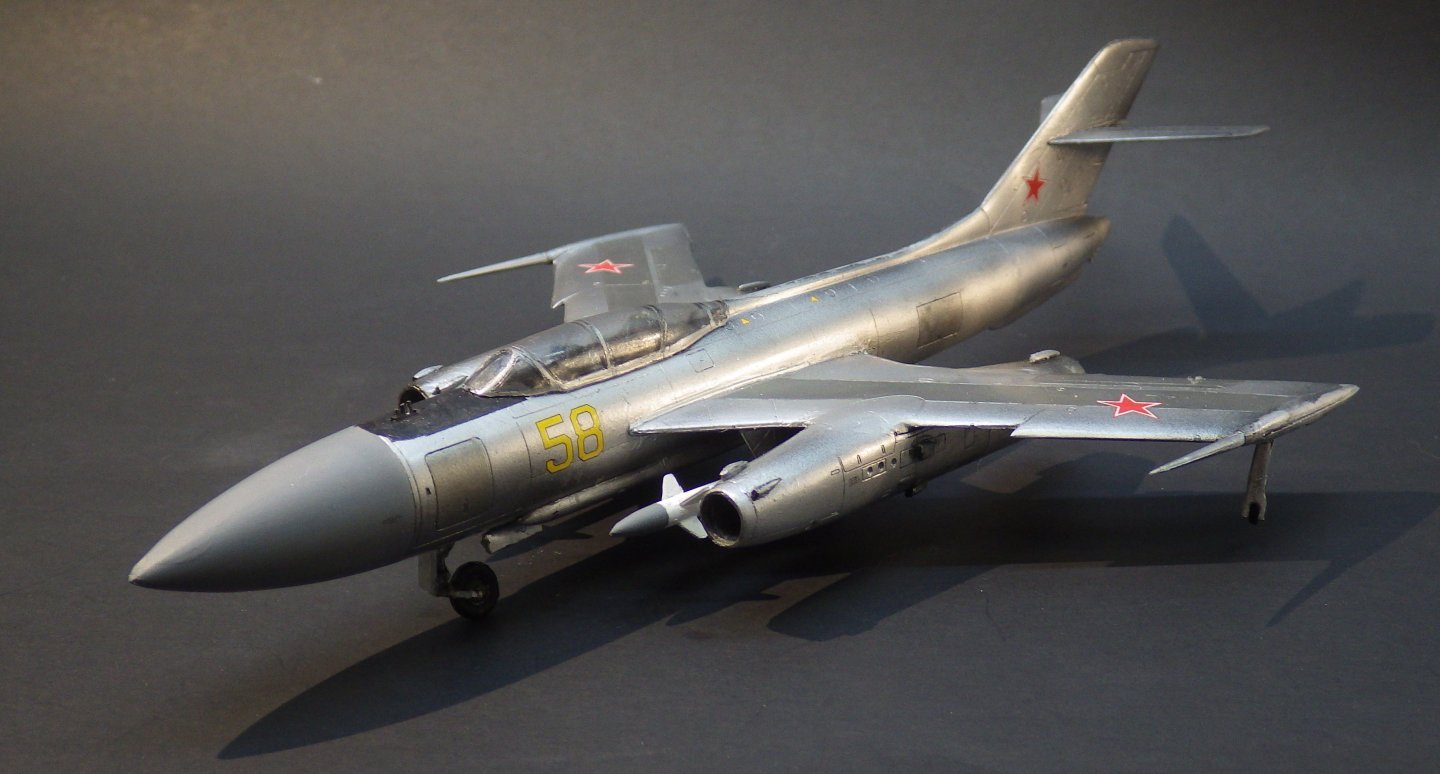
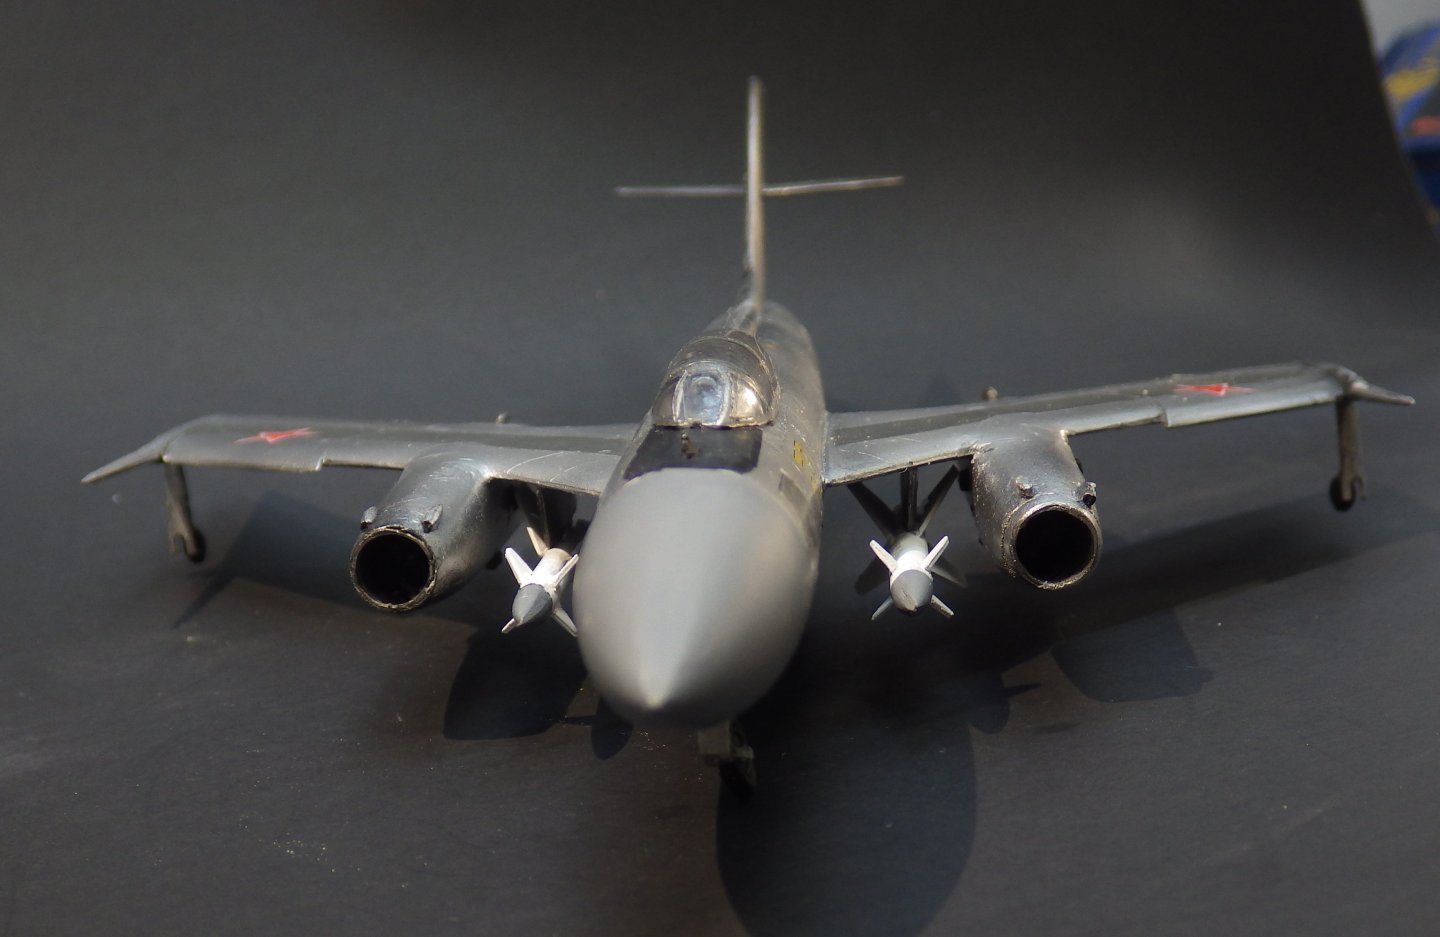
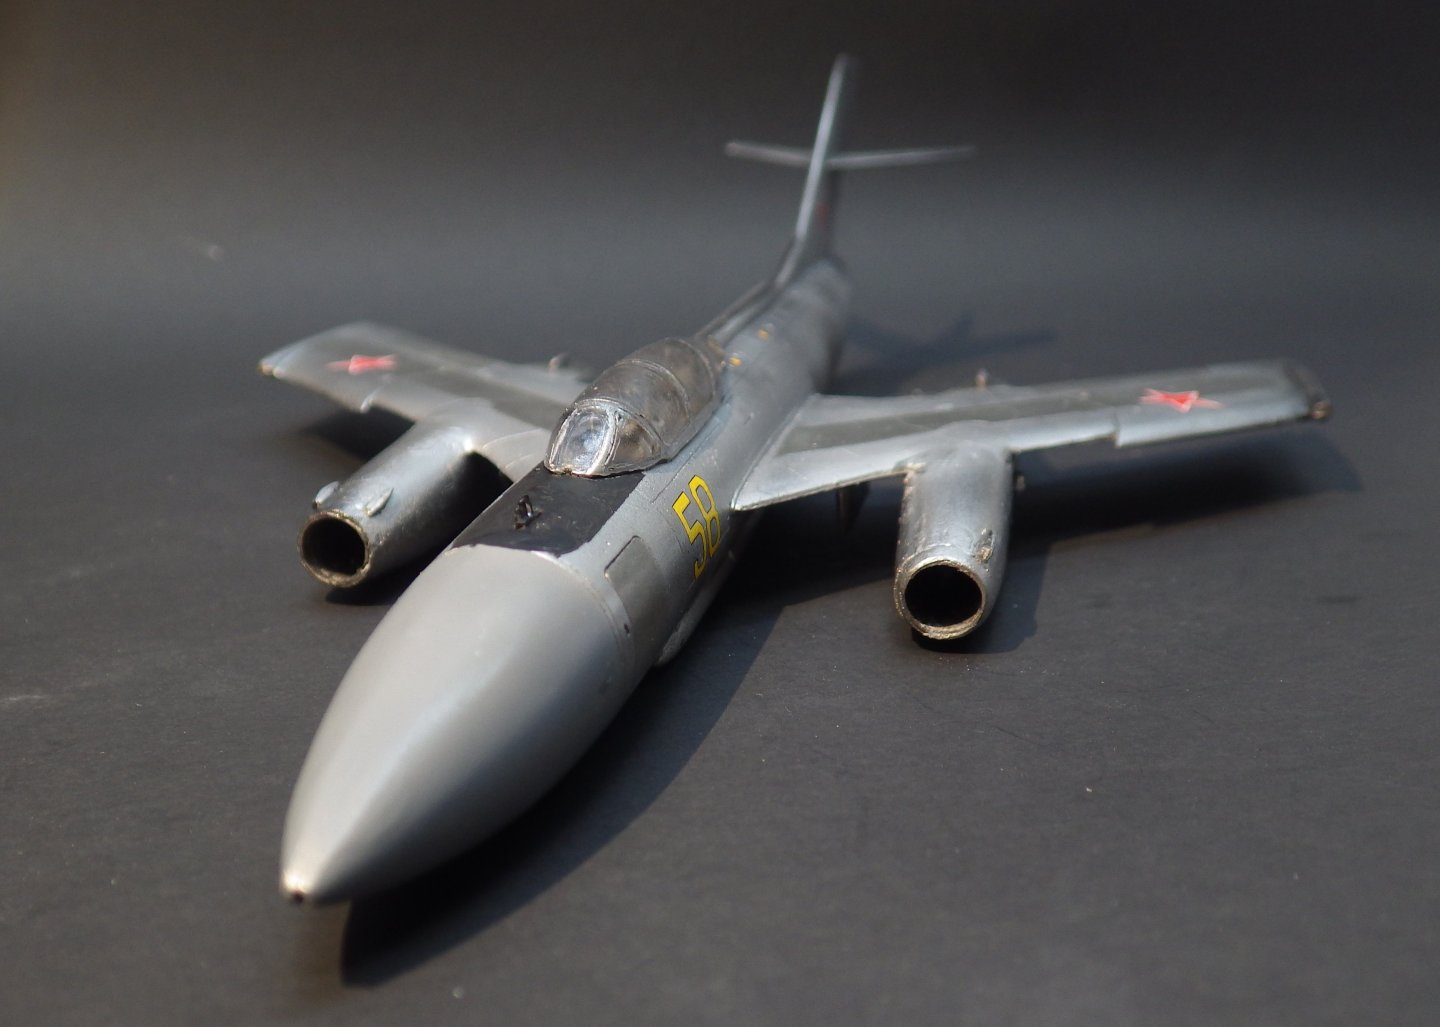
Yesterday the last of the window repairs were completed which is a big help towards feeling "normal" again. Neighbors still have a long way to go. I've been working slowly through the last elements of the Yak and it hasn't got much easier. The major remaining work was the landing gear. And we finally encounter some locating pins. On pieces 93 and 64 for the nosewheel and main gear. Unfortunately the pins would have needed to be trapped when the fuselage halves were joined together all the way back in the build (and yes I should read ahead but .......) The assembly of the nosewheel strut was not exactly clear and it seemed to be missing pieces which I made from scratch. The wing outrigger wheel struts were replaced with brass rod. The kit parts were a mess of flash and looked awful even when cleaned. And, of course, once the gear was assembled it took two days of adjusting and fiddling to get the plane to sit on the mains and nosewheel with the outriggers clear of the ground. The wingtip booms have been added and the missiles have been dug out of the flash and assembled and painted. I think I am going to call it finished. This one has been annoying at times but it does have the fifties space age look which makes me happy. Its been a useful exercise in learning about NMF treatment and I think i can do better with the Vallejo acrylic metals next time I still have a couple of AModel kits on the shelf including a Mallow flying boat I was very taken with. It is likely to sit for a while before I work up the courage to start it. Thanks for all the likes, good wishes and helpful comments Alan


- 89 replies
-
- 13
-

-

-
Thanks Mark For a simple kit its been a rough ride. Alan
-
Very nice. Such a lot of really great detail in that kit. I’m going to have to try another Roden kit. alan
-
Ferrari 250 GTO by CDW - Model Factory Hiro - 1:12 Scale
king derelict replied to CDW's topic in Non-ship/categorised builds
That looks like a great book Craig. Haynes have come a long way since my oily 1972 copy for the Ford Escort alan -
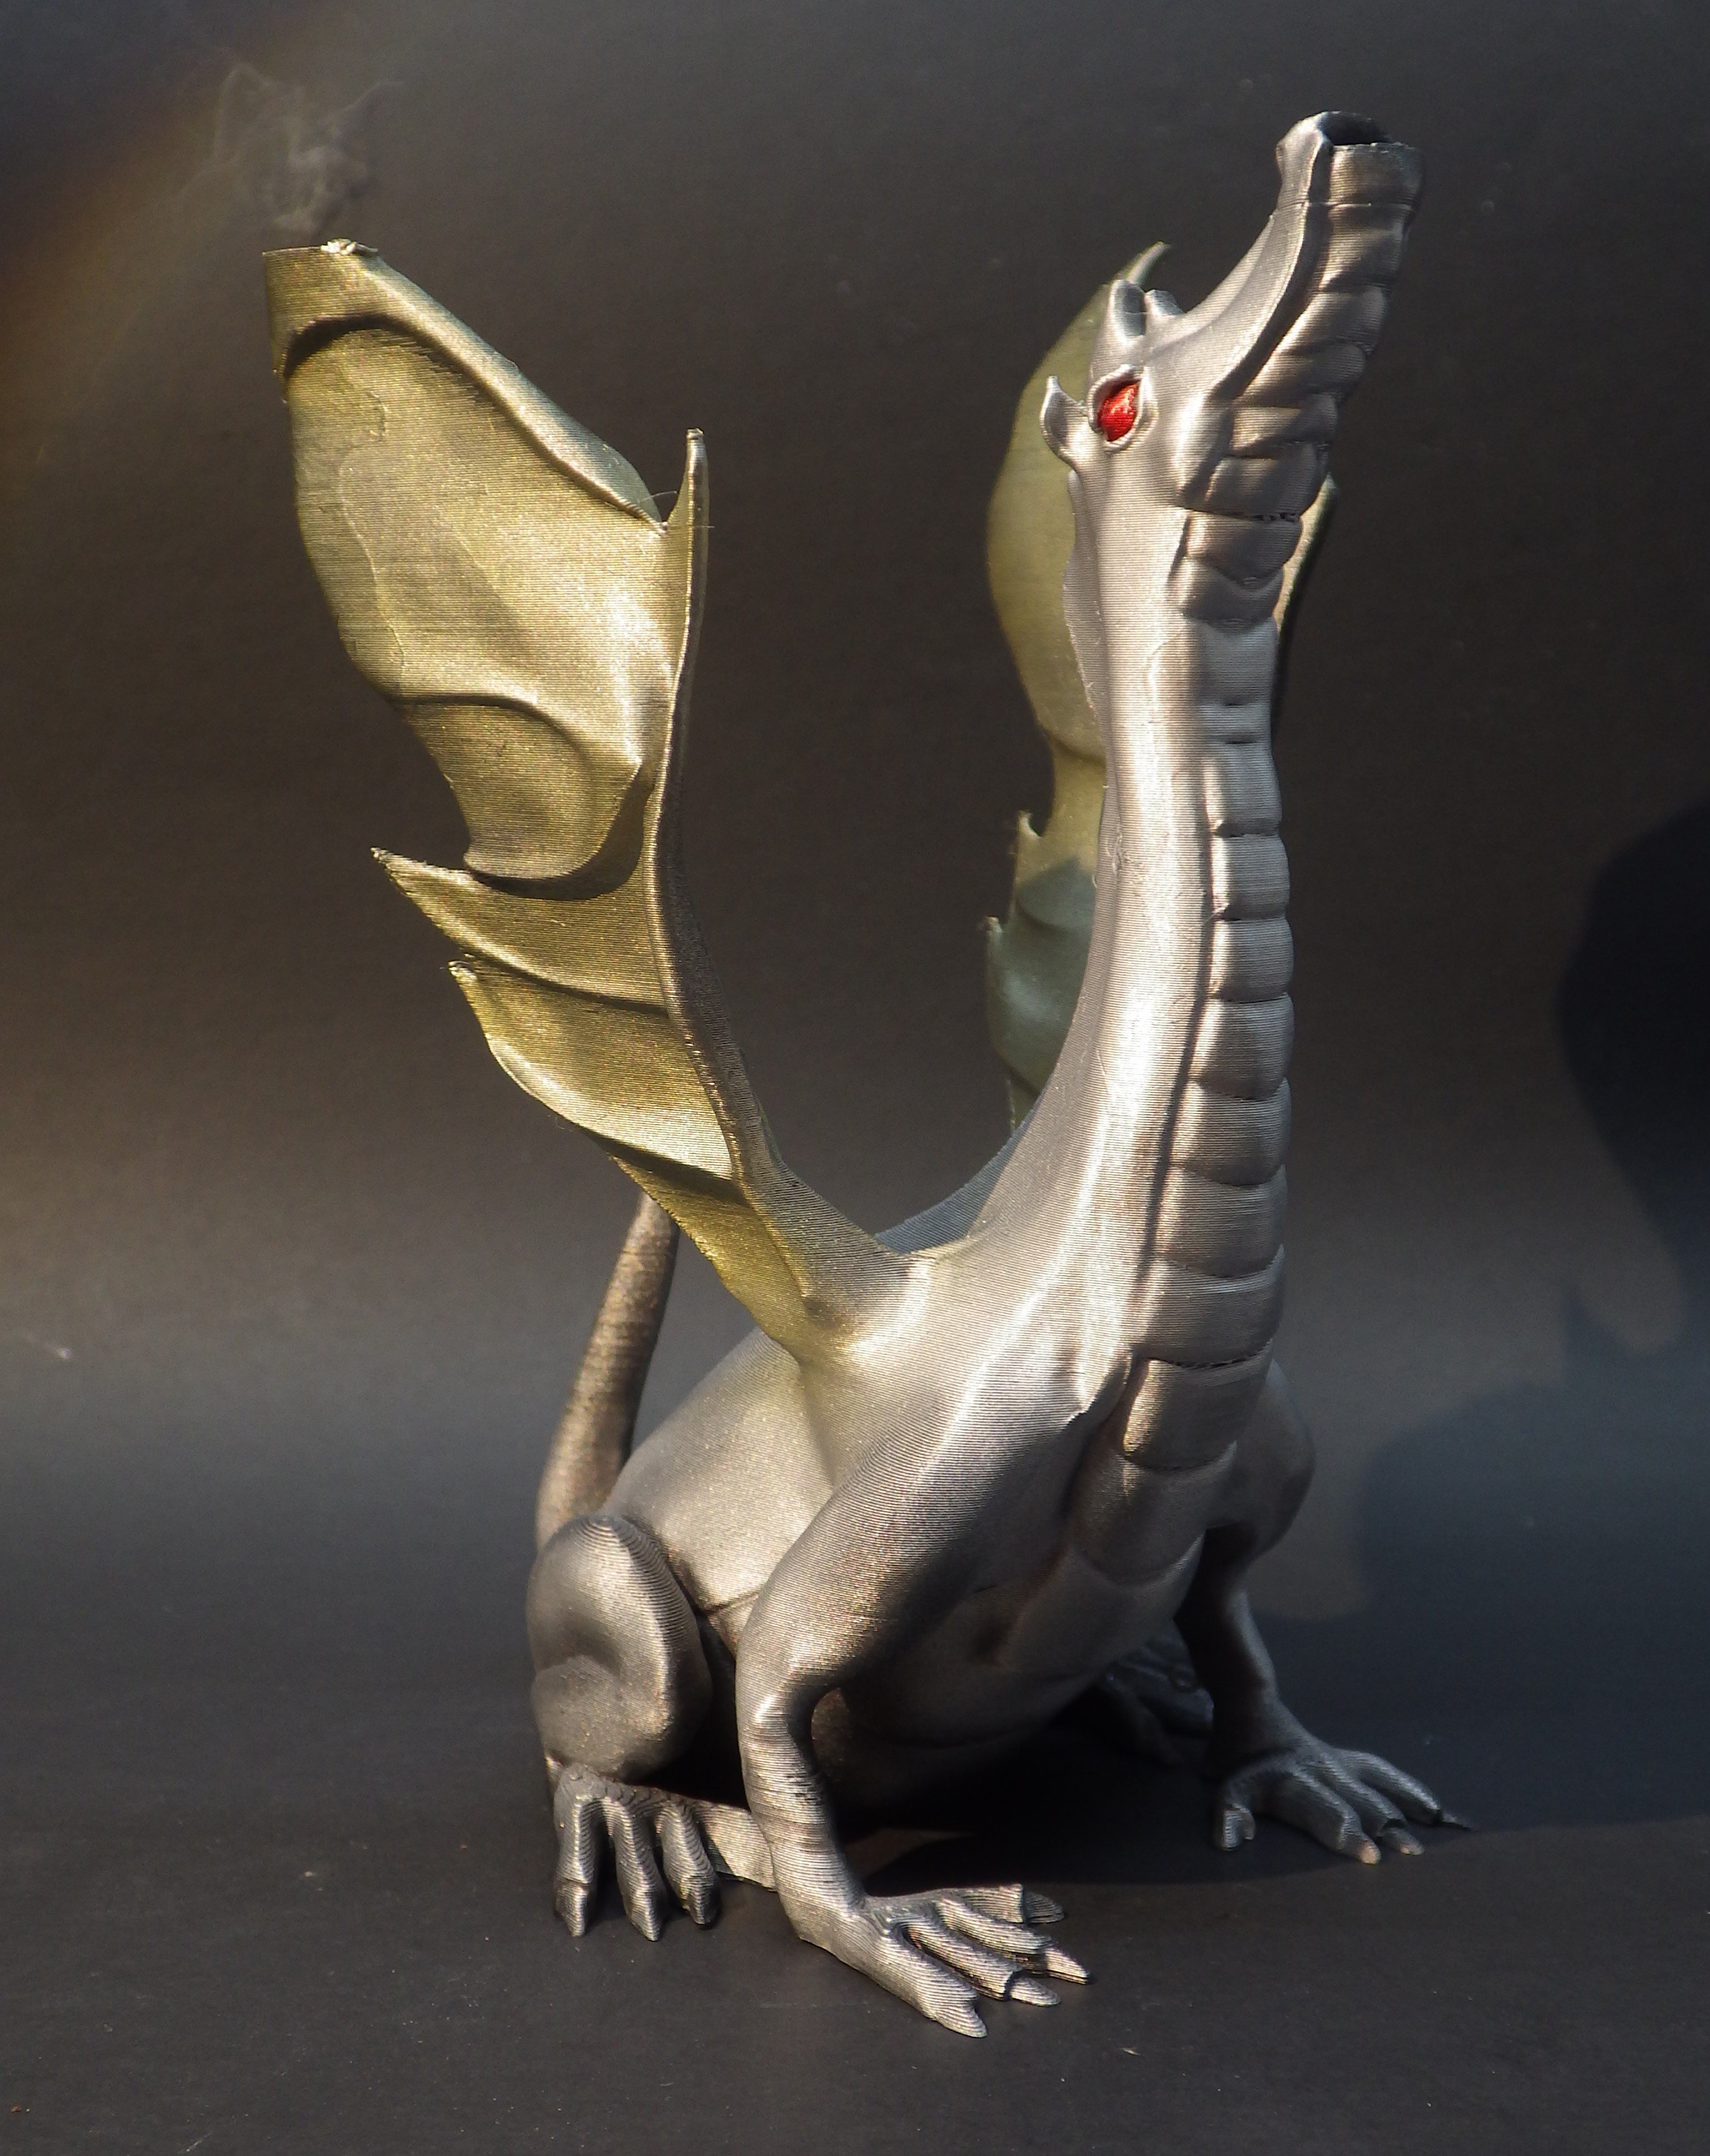
The dragon was a FDM 3D printer test piece that I was reluctant to throw away so it’s been used to get a bit more comfortable with the Vallejo Metal acrylics and my air brush. I like the result so it can go and sit with the Welsh dragons scattered around the house alan
-
Thank you Ken. Having a weatherproof roof helps the morale too and I feel less distracted. The Yak model is quite a struggle. The gear is annoying for a relatively simple set of bits. The nose gear especially so. Yes the set up is very similar to the AV-8B too. Double main and wing tip dollies alan
-
Great work Jav. You really did an excellent job on the finish . It really shows what a bruiser the Tempest was alan
-
Thank you very much OC. This kit is going to fight to the end Alan
-
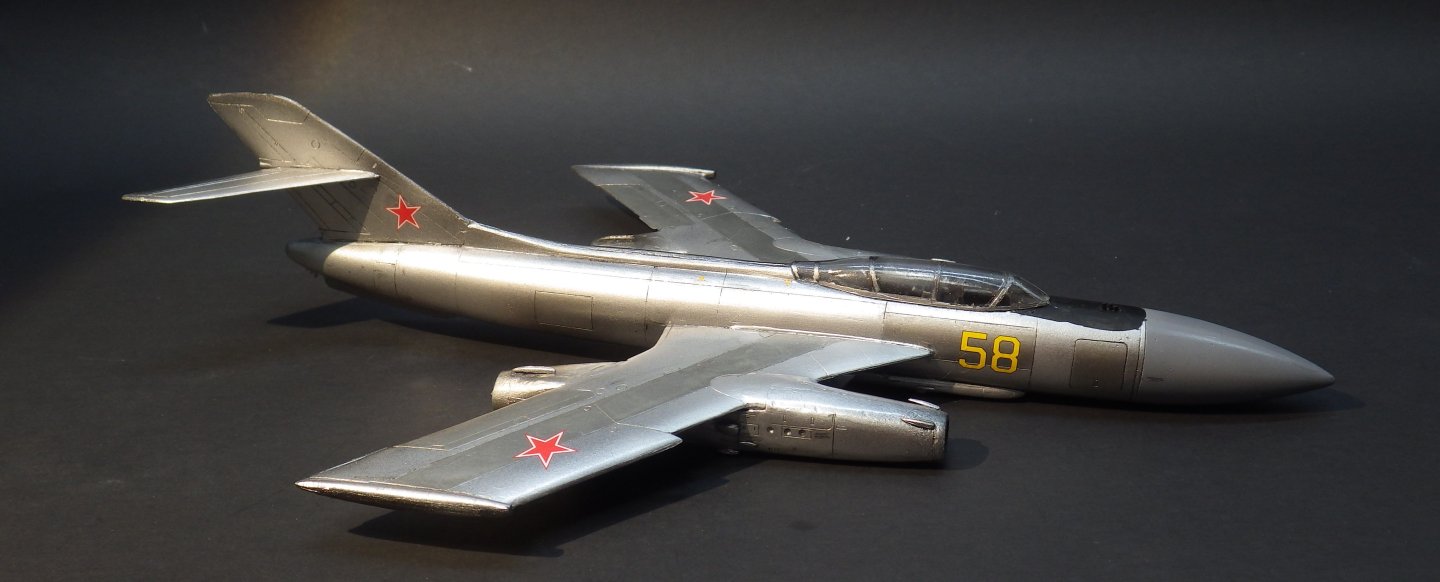
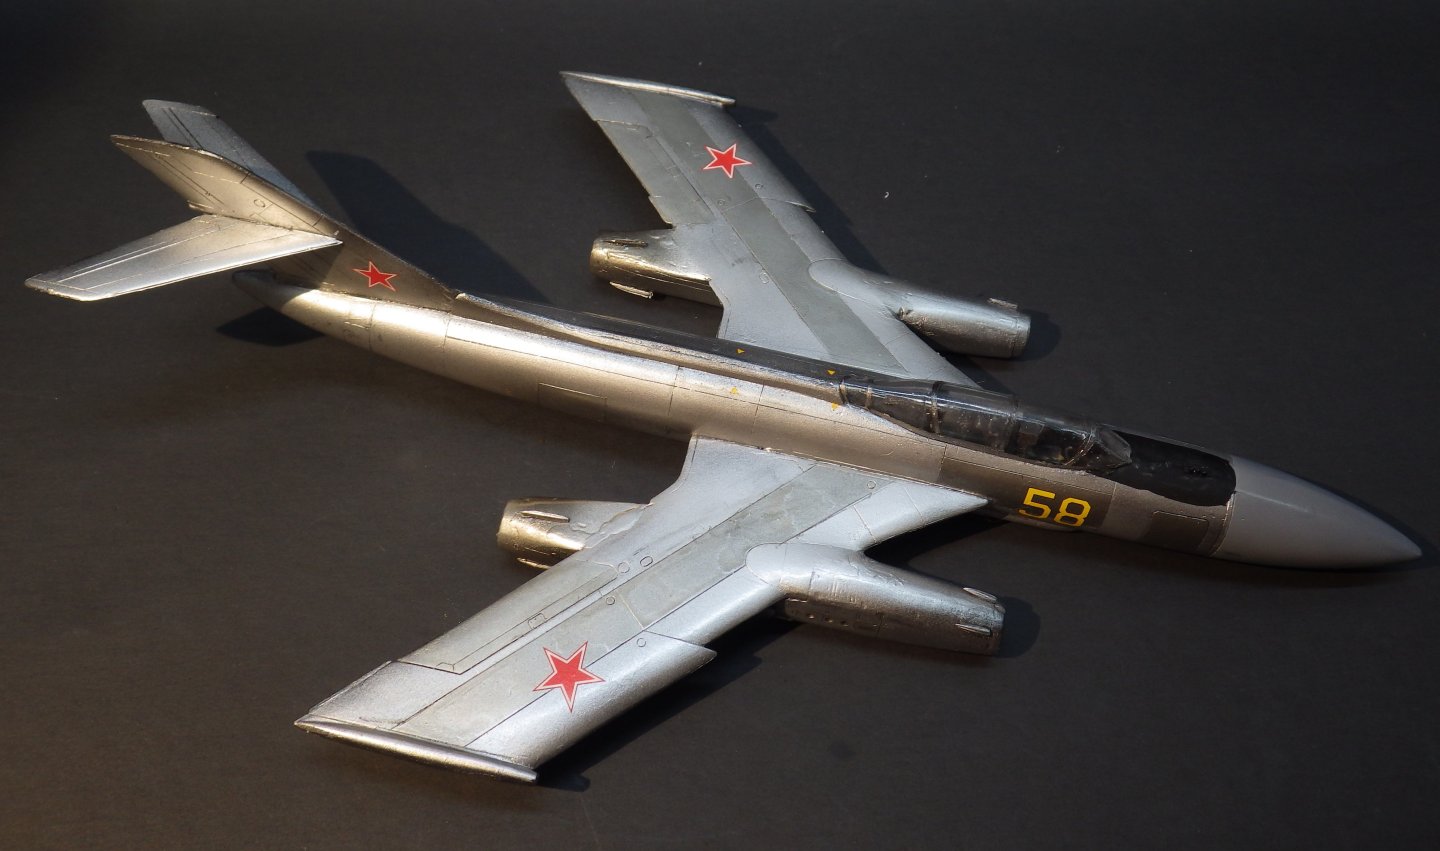
So. here we are slowly creaking back to life. The roofers were here at last and repaired all the damage to the roof. Thankfully its been mostly dry weather since the tornado came through. The glass company has promised Tuesday to replace the broken windows. I've started picking the Yak up and moving one although it may not be the best model to get back into gear with. I added the various nacelle details which required a lot of clean up. There were two fences for the upper surface of the wings which were shown as optional. They were a mess of flash so I opted not to use them. I gave everything a coat of gloss clear and worked on the decals. They were exceptionally nasty to deal with. They didn't release easily from the backing and were difficult to position. The majority were tiny warning labels which were dutifully applied but are almost invisible. This is probably the biggest. In some cases extra decals were provided and in others not enough. The identifying number 58 is shown as only being applied on the starboard side but photos show them on both sides. A second "58" is thankfully provided. The photos suggested that the heat staining may extend further forward than I have applied. I may try to mask and add a little more. I have tried a panel line wash using a black wash from Mig Ammo. I don't really like it. It seems a bit thick and didn't flow along the panel lines and also took a lot of cleaning from places it shouldn't be. It worked better after I had diluted it but I think I will go back to the homemade brew of very diluted oil paint. The landing gear and the wingtip probes are all that remains. I think I will need to get the brass rod out to make the landing gear struts look better. And here is a NMF dragon which has a lot less stressful to play with Thanks for looking in, the likes and helpful comments Alan


- 89 replies
-
- 11
-
-
-
Ferrari 250 GTO by CDW - Model Factory Hiro - 1:12 Scale
king derelict replied to CDW's topic in Non-ship/categorised builds
Ahhh, that would explain why all my shipments from Art Girona required signature on delivery. Thanks for that. alan -
I was a young test engineer at RAE Boscombe Down in the early seventies and in the summer of 1973 Boscombes long runway was under repair so everything was using the short one. It made quite an impression watching a Lightning do an ab takeoff, clean up the gear just after getting airborne and then almost stick the aircraft on its back and climb. Always loved them after that. Thanks a lot for the link. XP693 was our test aircraft and was F6 standard then but didn’t have the overwing tanks for the work we were doing. it would be great to build that aircraft. Alan
-
Thanks Ken, that’s a good choice. I think the F2 kits are better than the F6 which I had been contemplating because that was the aircraft I worked on in the early seventies. alan
-
Ferrari 250 GTO by CDW - Model Factory Hiro - 1:12 Scale
king derelict replied to CDW's topic in Non-ship/categorised builds
I must confess I have one had one bad experience buying off eBay and none as a novice seller. I used to be interested in watches and some of the forums have scary stories about sellers selling a watch and the buyer complaining about it, the money being refunded and the buyer returning a substitution leaving the seller empty handed. probably a highly unlikely eventuality with a Trumpeter Queen Elizabeth or similar 😃 I use PayPal quite a bit to limit exposure online. Thanks for all helpful information I need to sort out what is on the sale list. alan -
Thank you for the kind thoughts Rob. I consider tornadoes ticked off the life list. But we were lucky, the cats are settling down again we are fine. The repairs will get done soon and hopefully we can enjoy the best season in Florida. Thank you regarding the Yak, hopefully the details will come together, they are a bit of a mess of flash. Thank you also for the recommendation for Mr Surfacer. I have put an order in for a selection and the leveling thinner. I thought the hit and miss results from the Vallejo primers was down to me or my airbrush but I did switch to MiG One Shot and things have improved. Cheers Alan
-
Thank you, its slowly coming together. The county is supposed to be starting on debris removal next week. There’s actually an outdoor hot tub piled up on the kerb. I suppose the rain and low pressure popped it out. Thank you very much regarding the Yak, I’m shamelessly borrowing from your experience. I think I would like to try a quality kit in NMF, maybe an EE Lightning, my first test aircraft. alan
-
I hope they are an improvement for your eyes and then ease back into the painting when comfortable alan
-
Thank you very much Yves. I like the subjects of soldiers away from the battlefield. Art Girona make some very nice subjects. I have another multi figure French napoleonic diorama waiting. Les Bourres. Should be fun. alan
-
Thank you very much Dan. For some reason it didn’t occur to me that I could mix the various metal colors. I’ll try that next time. I found that the dark aluminum although dry was rather fragile initially and I used a cotton bud in places to shade the color down a bit. After 24 hours it was a durable finish. Alan
-
I hope the new glasses are working out well and painting is possible. Yes dad did all his jumps from a Dakota . He thought it was much more civilized than going out of the hatch in the floor of a Whitley Alan
-
Ferrari 250 GTO by CDW - Model Factory Hiro - 1:12 Scale
king derelict replied to CDW's topic in Non-ship/categorised builds
Thank you very much for your comprehensive answer. I tend to agree about eBay. There are some horror stories out there about dishonest sellers and buyers. I’ll try some of your other suggestions. many thanks alan -
Ferrari 250 GTO by CDW - Model Factory Hiro - 1:12 Scale
king derelict replied to CDW's topic in Non-ship/categorised builds
I’m not aware of any particular problem with Royal Mail. I just received a letter from the UK which arrived four days after shipping. It was a bill of course 😃 I also bought merchandise from the Royal British Legion as part of the Armistice Day commemoration and that arrived four days after ordering. The Art Girona orders from Spain turn up in about ten days. I’ve not lost anything in the mail yet - even from Ukraine alan -
Very nice work on the wooden decks alan