HOLIDAY DONATION DRIVE - SUPPORT MSW - DO YOUR PART TO KEEP THIS GREAT FORUM GOING! (Only 66 donations so far out of 49,000 members - Can we at least get100? C'mon guys!)
×


Derek C
-
Posts
333 -
Joined
-
Last visited
Content Type
Profiles
Forums
Gallery
Events
Everything posted by Derek C
-
 Thanks Tom lol "spider web" I didn't think I'd ever get that deck done , next one should go a bit smoother and no mast on this cross section.. Derek
 -
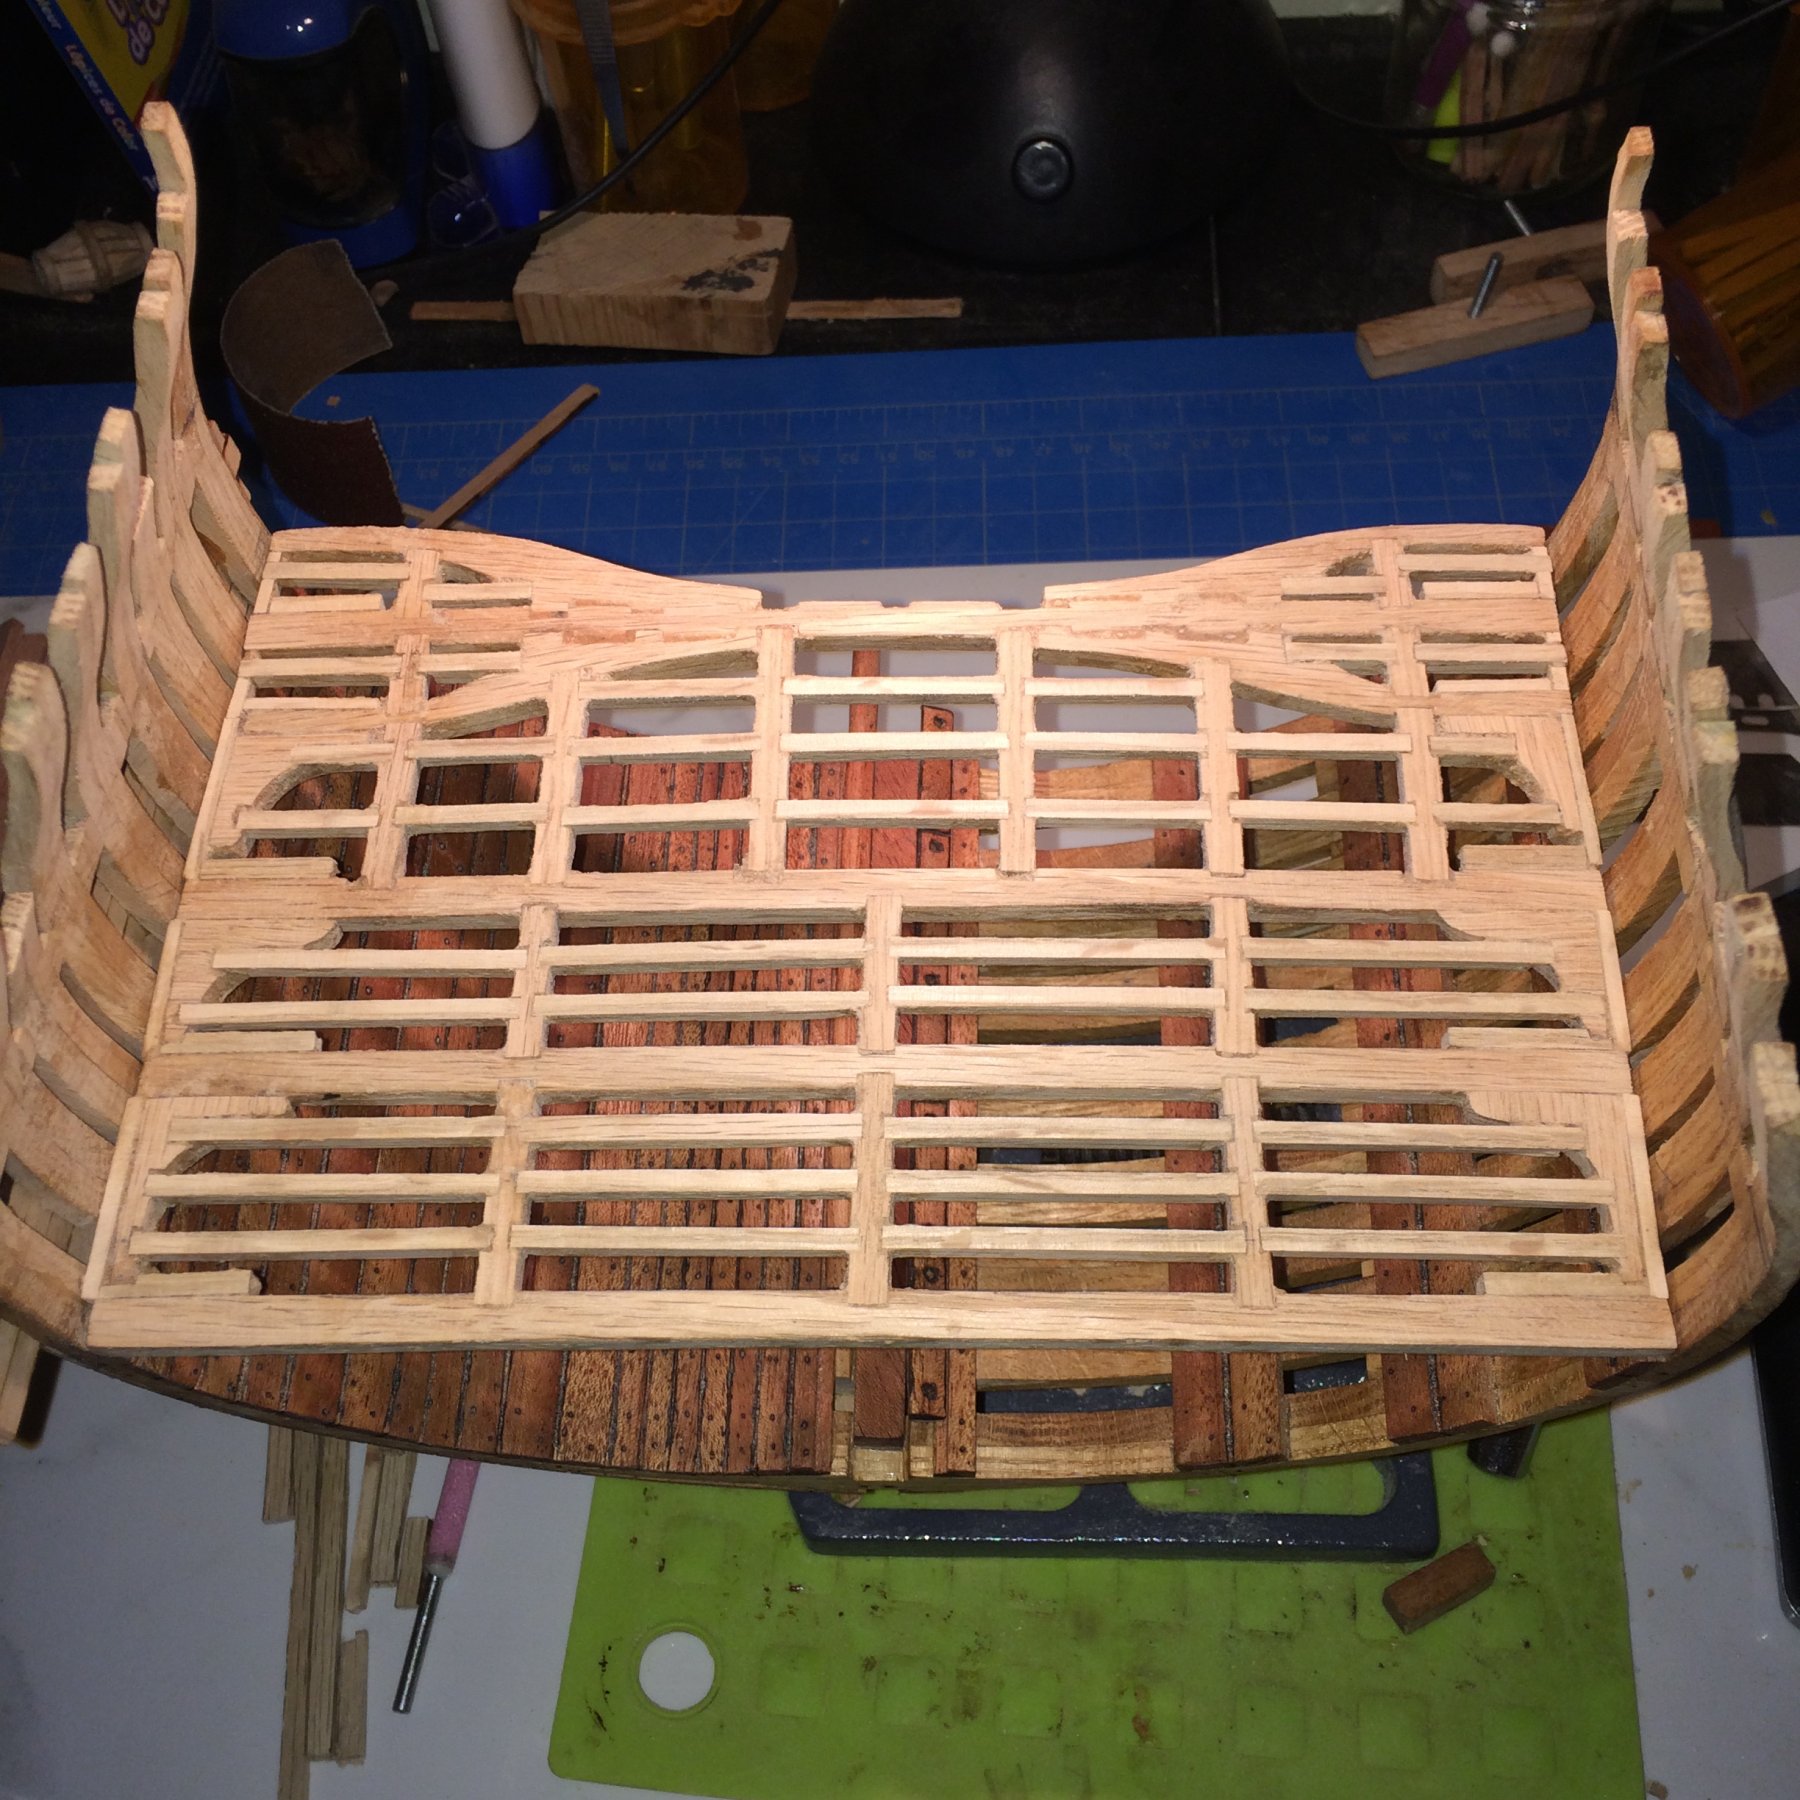
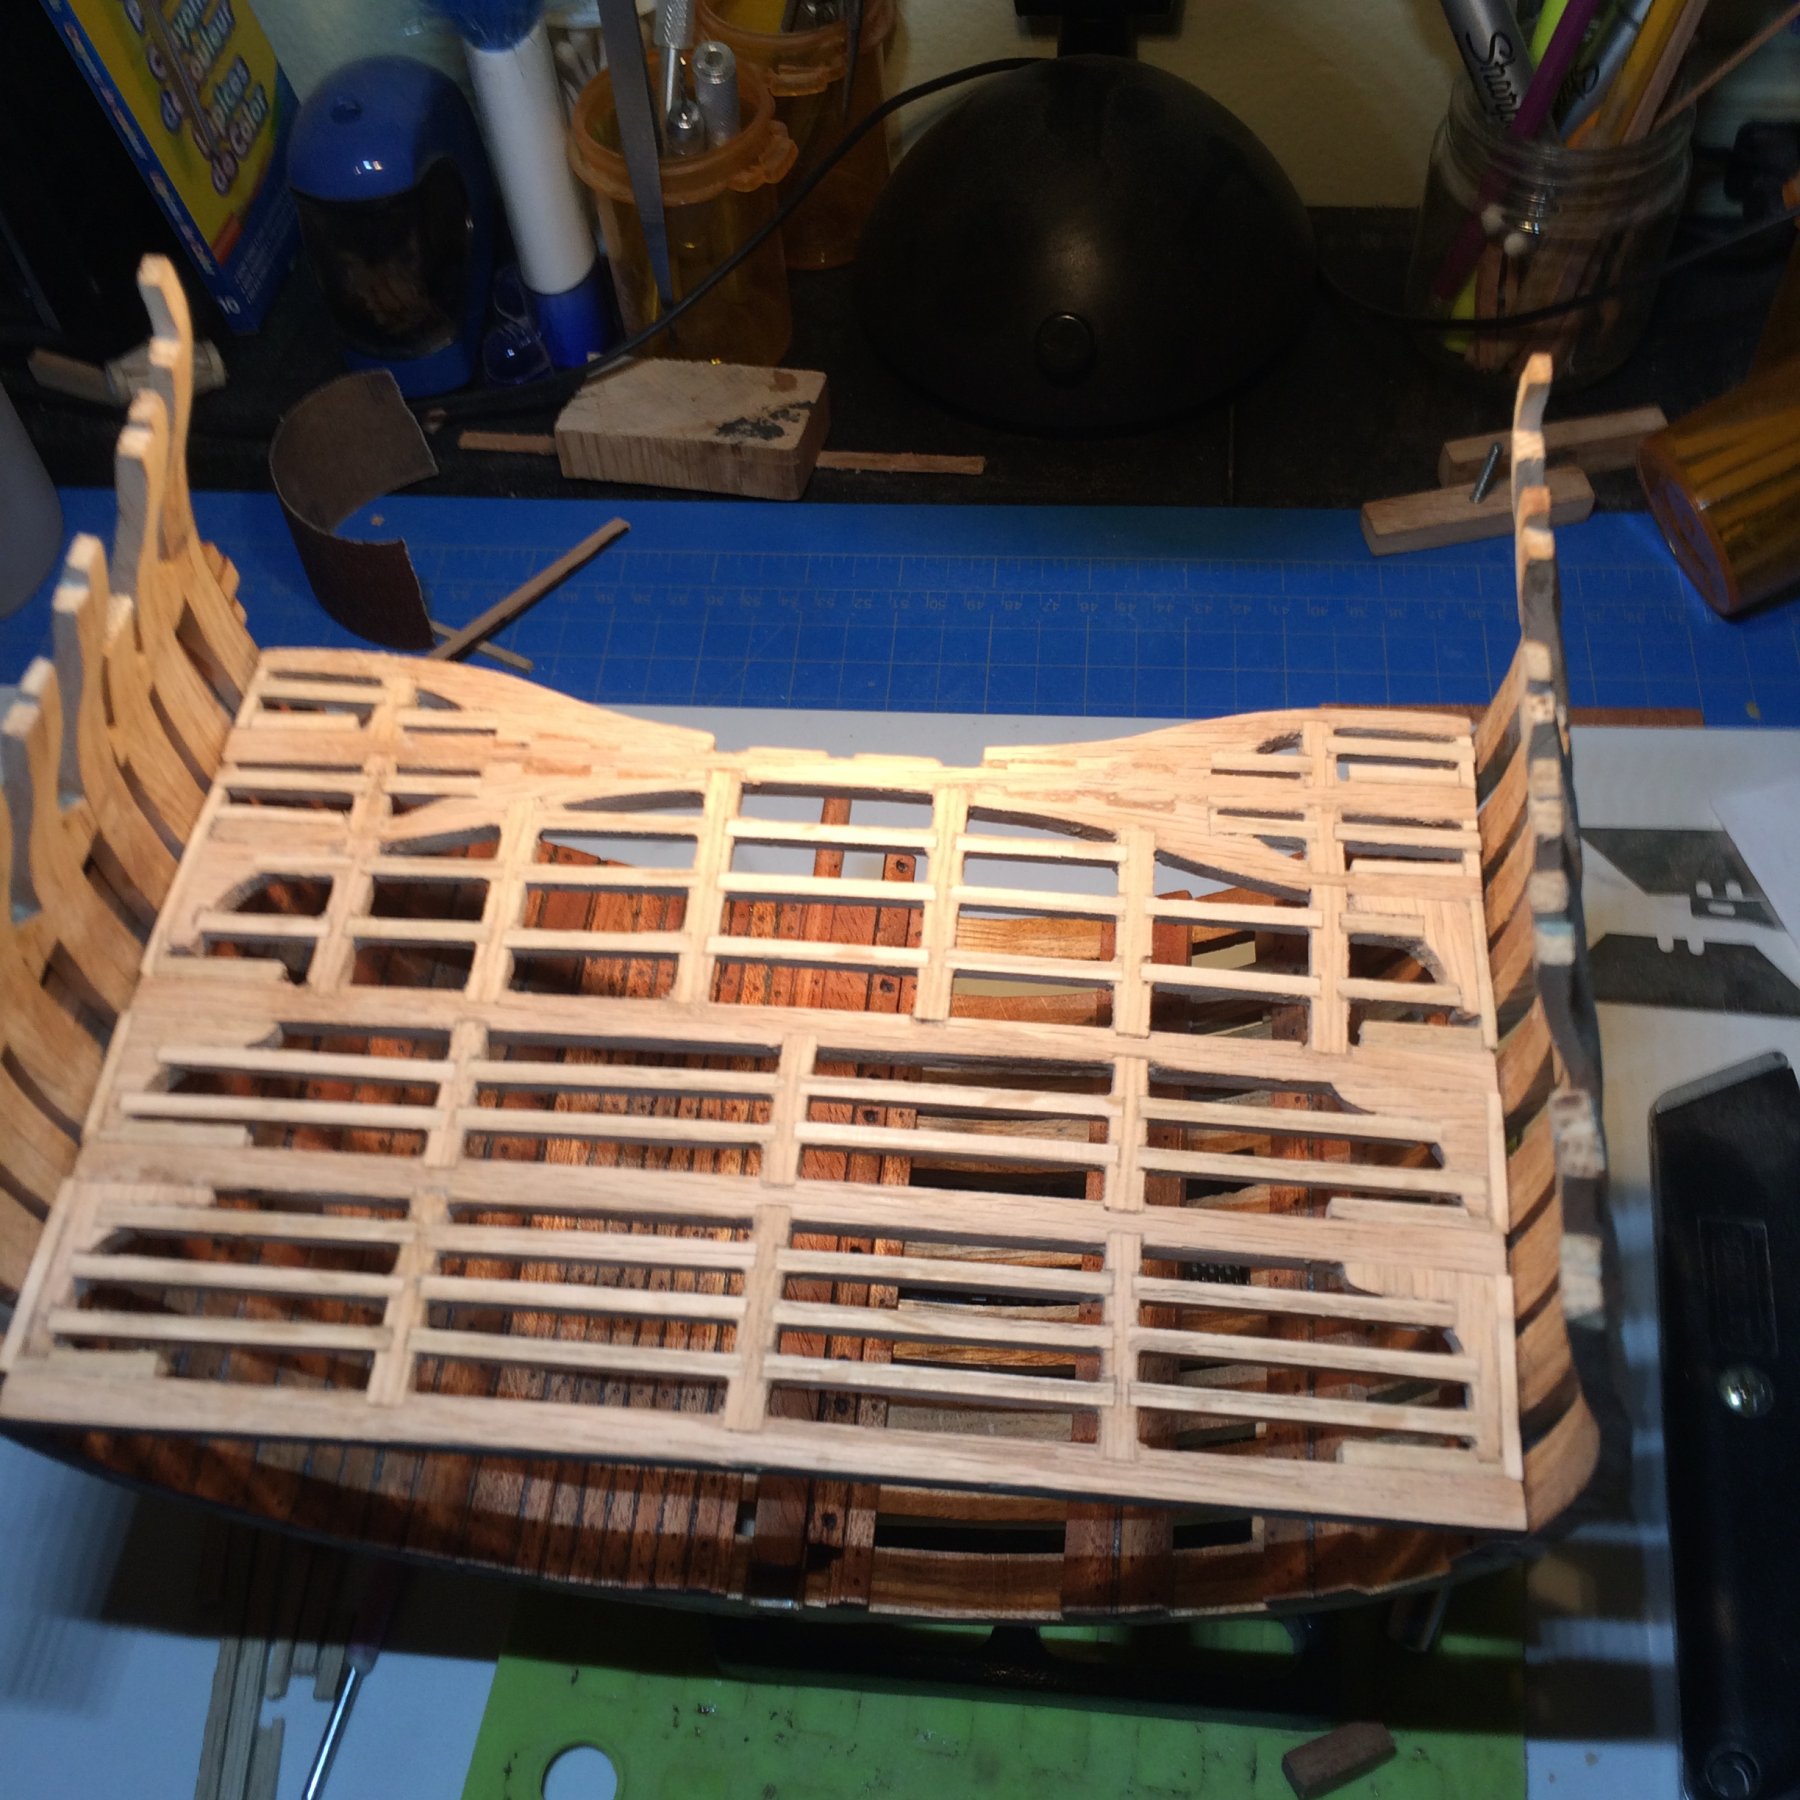
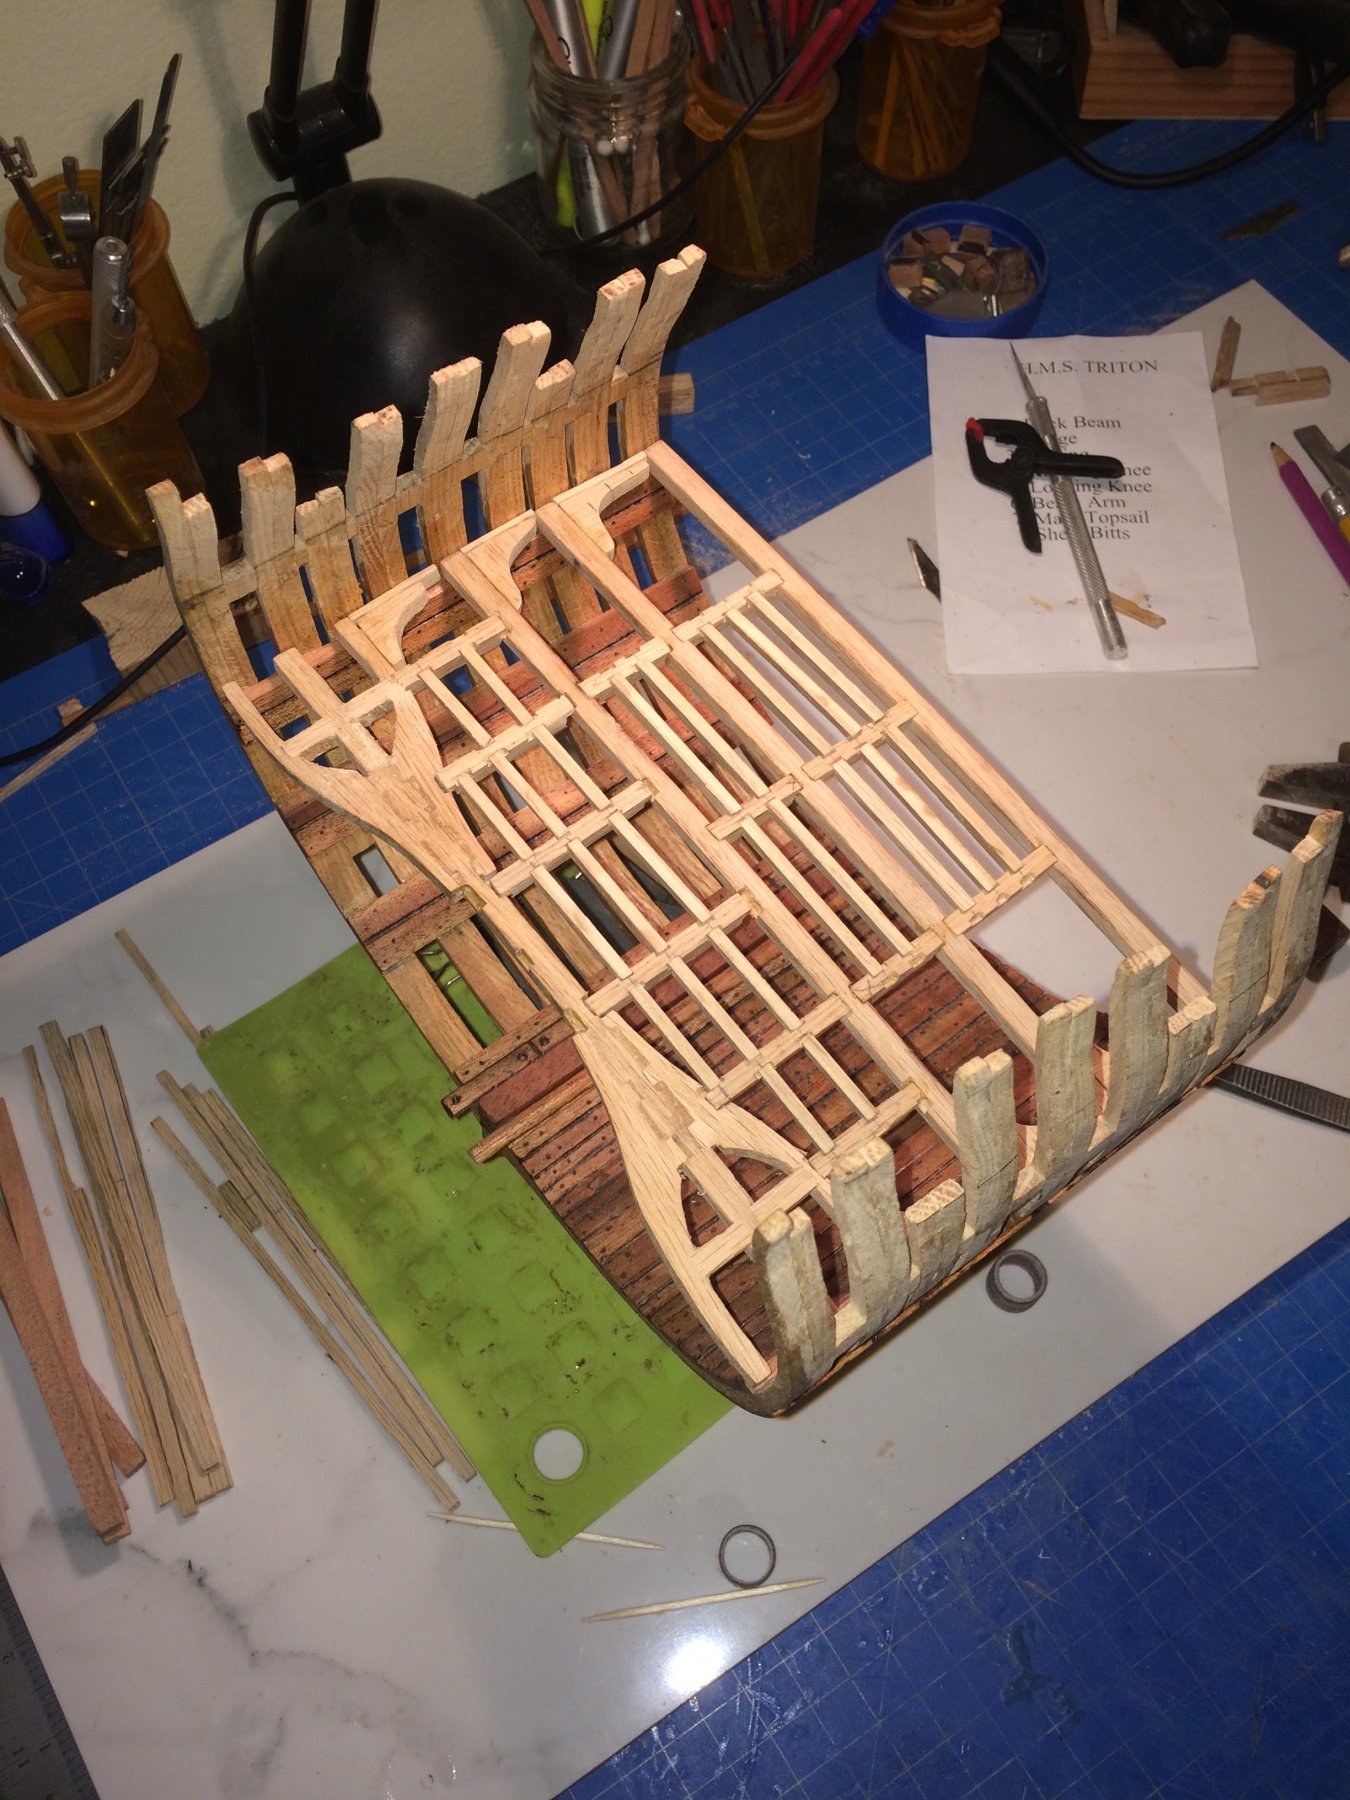
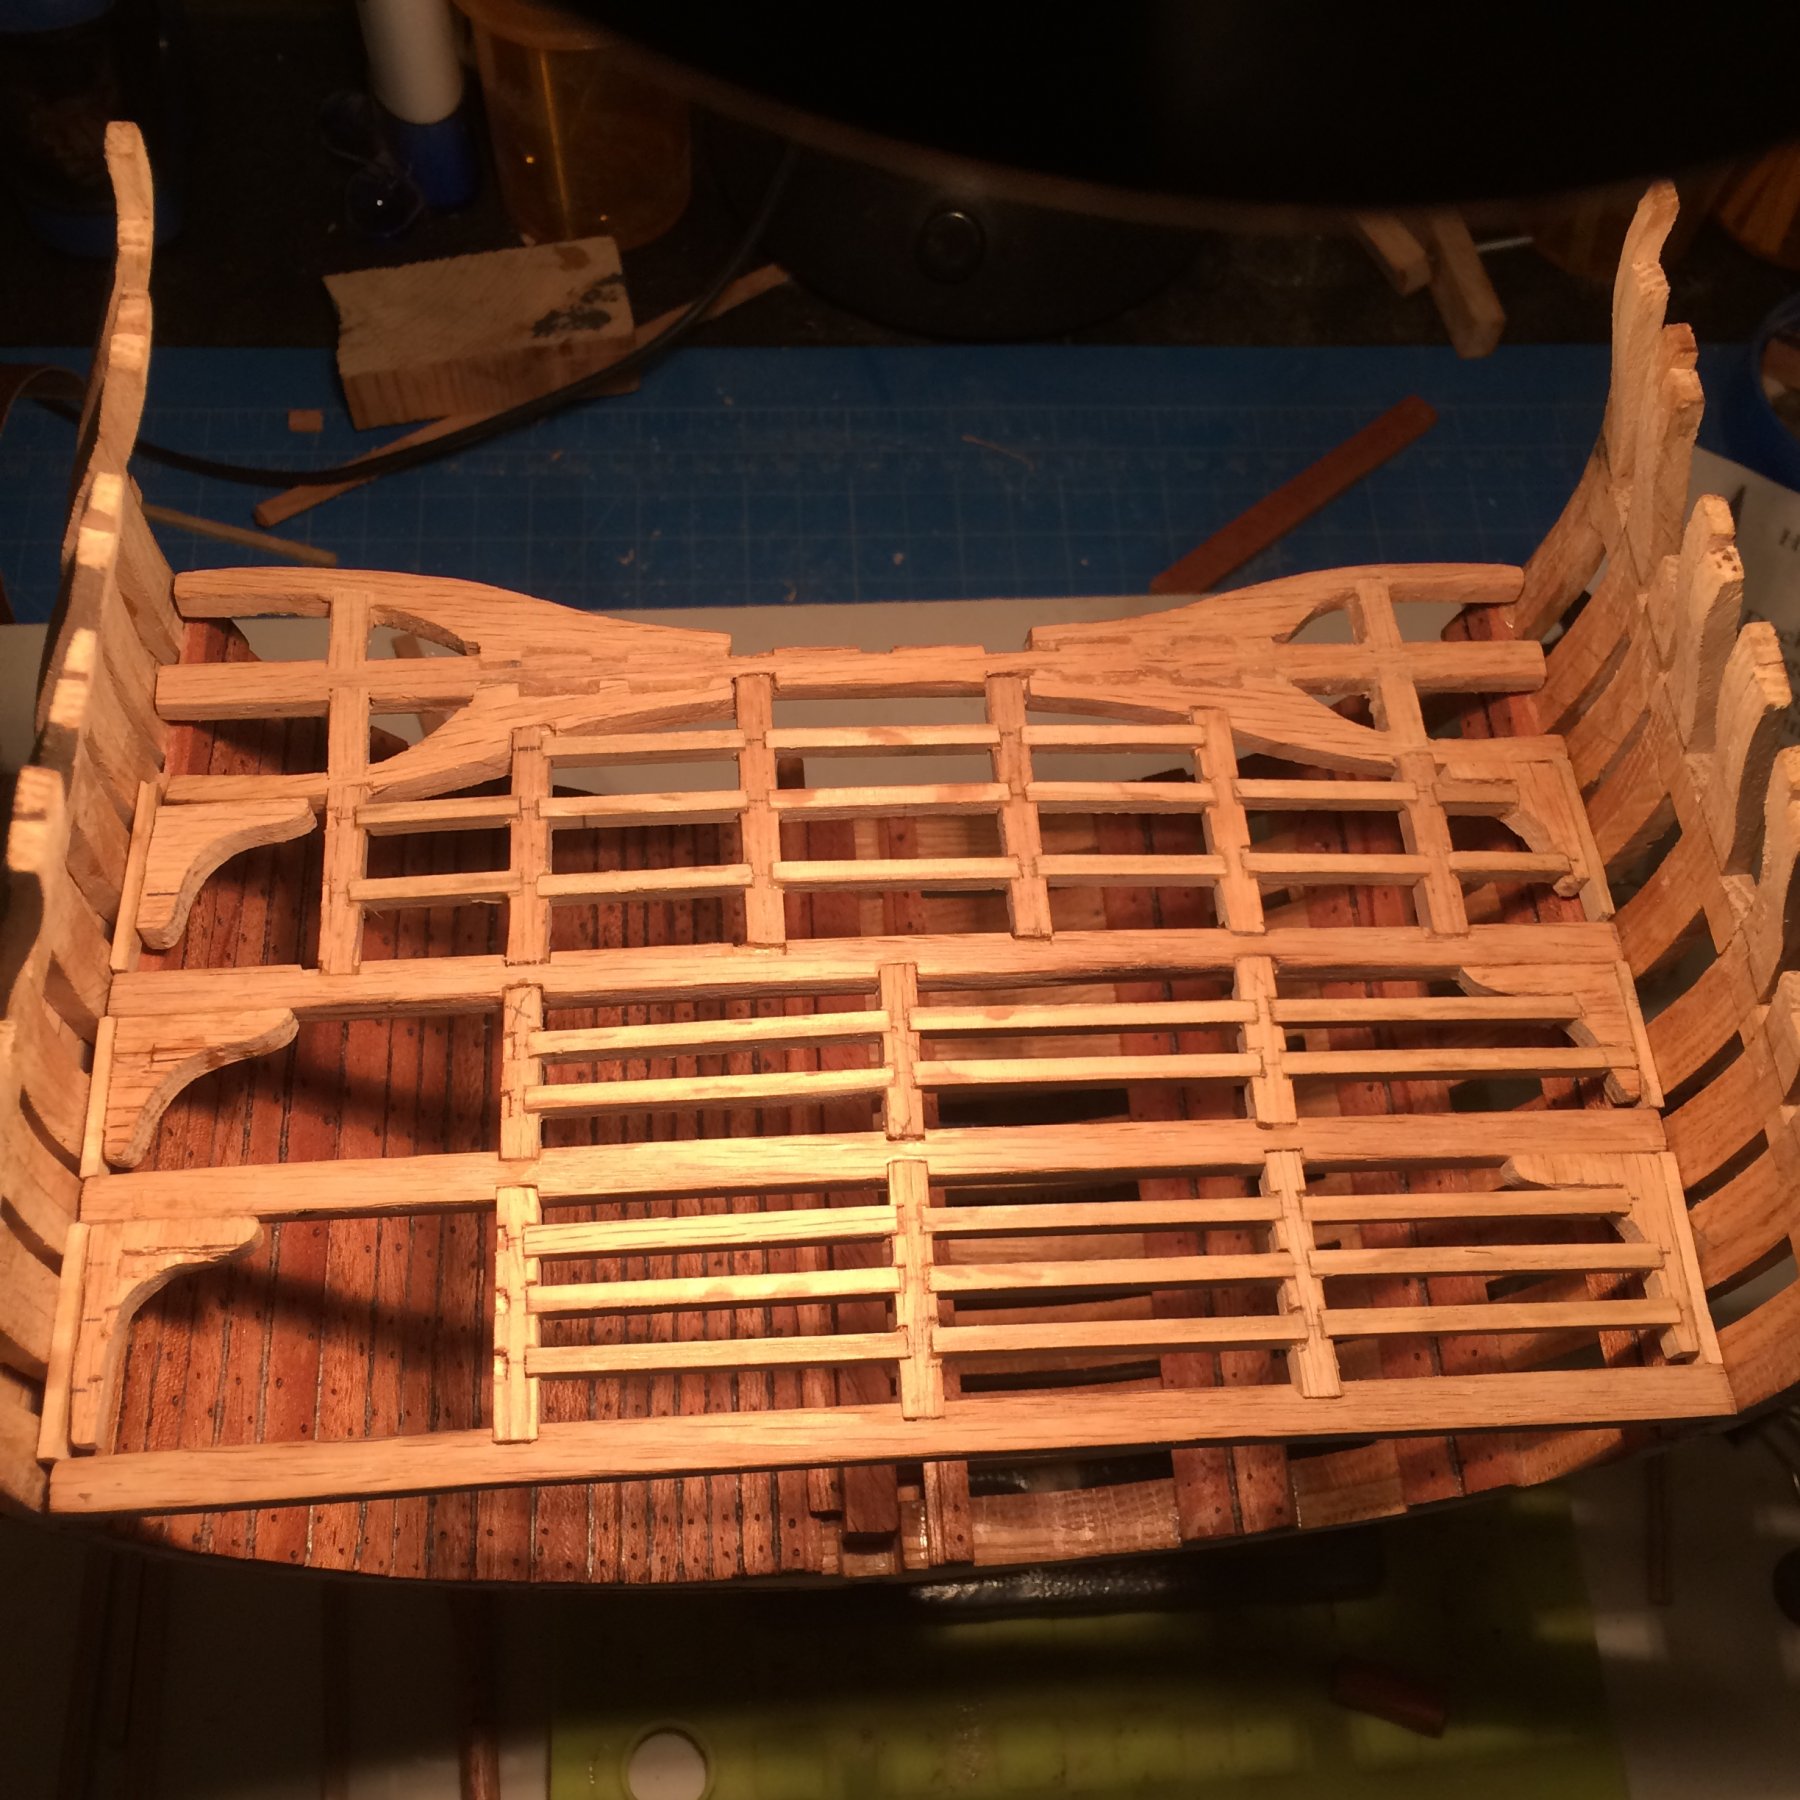
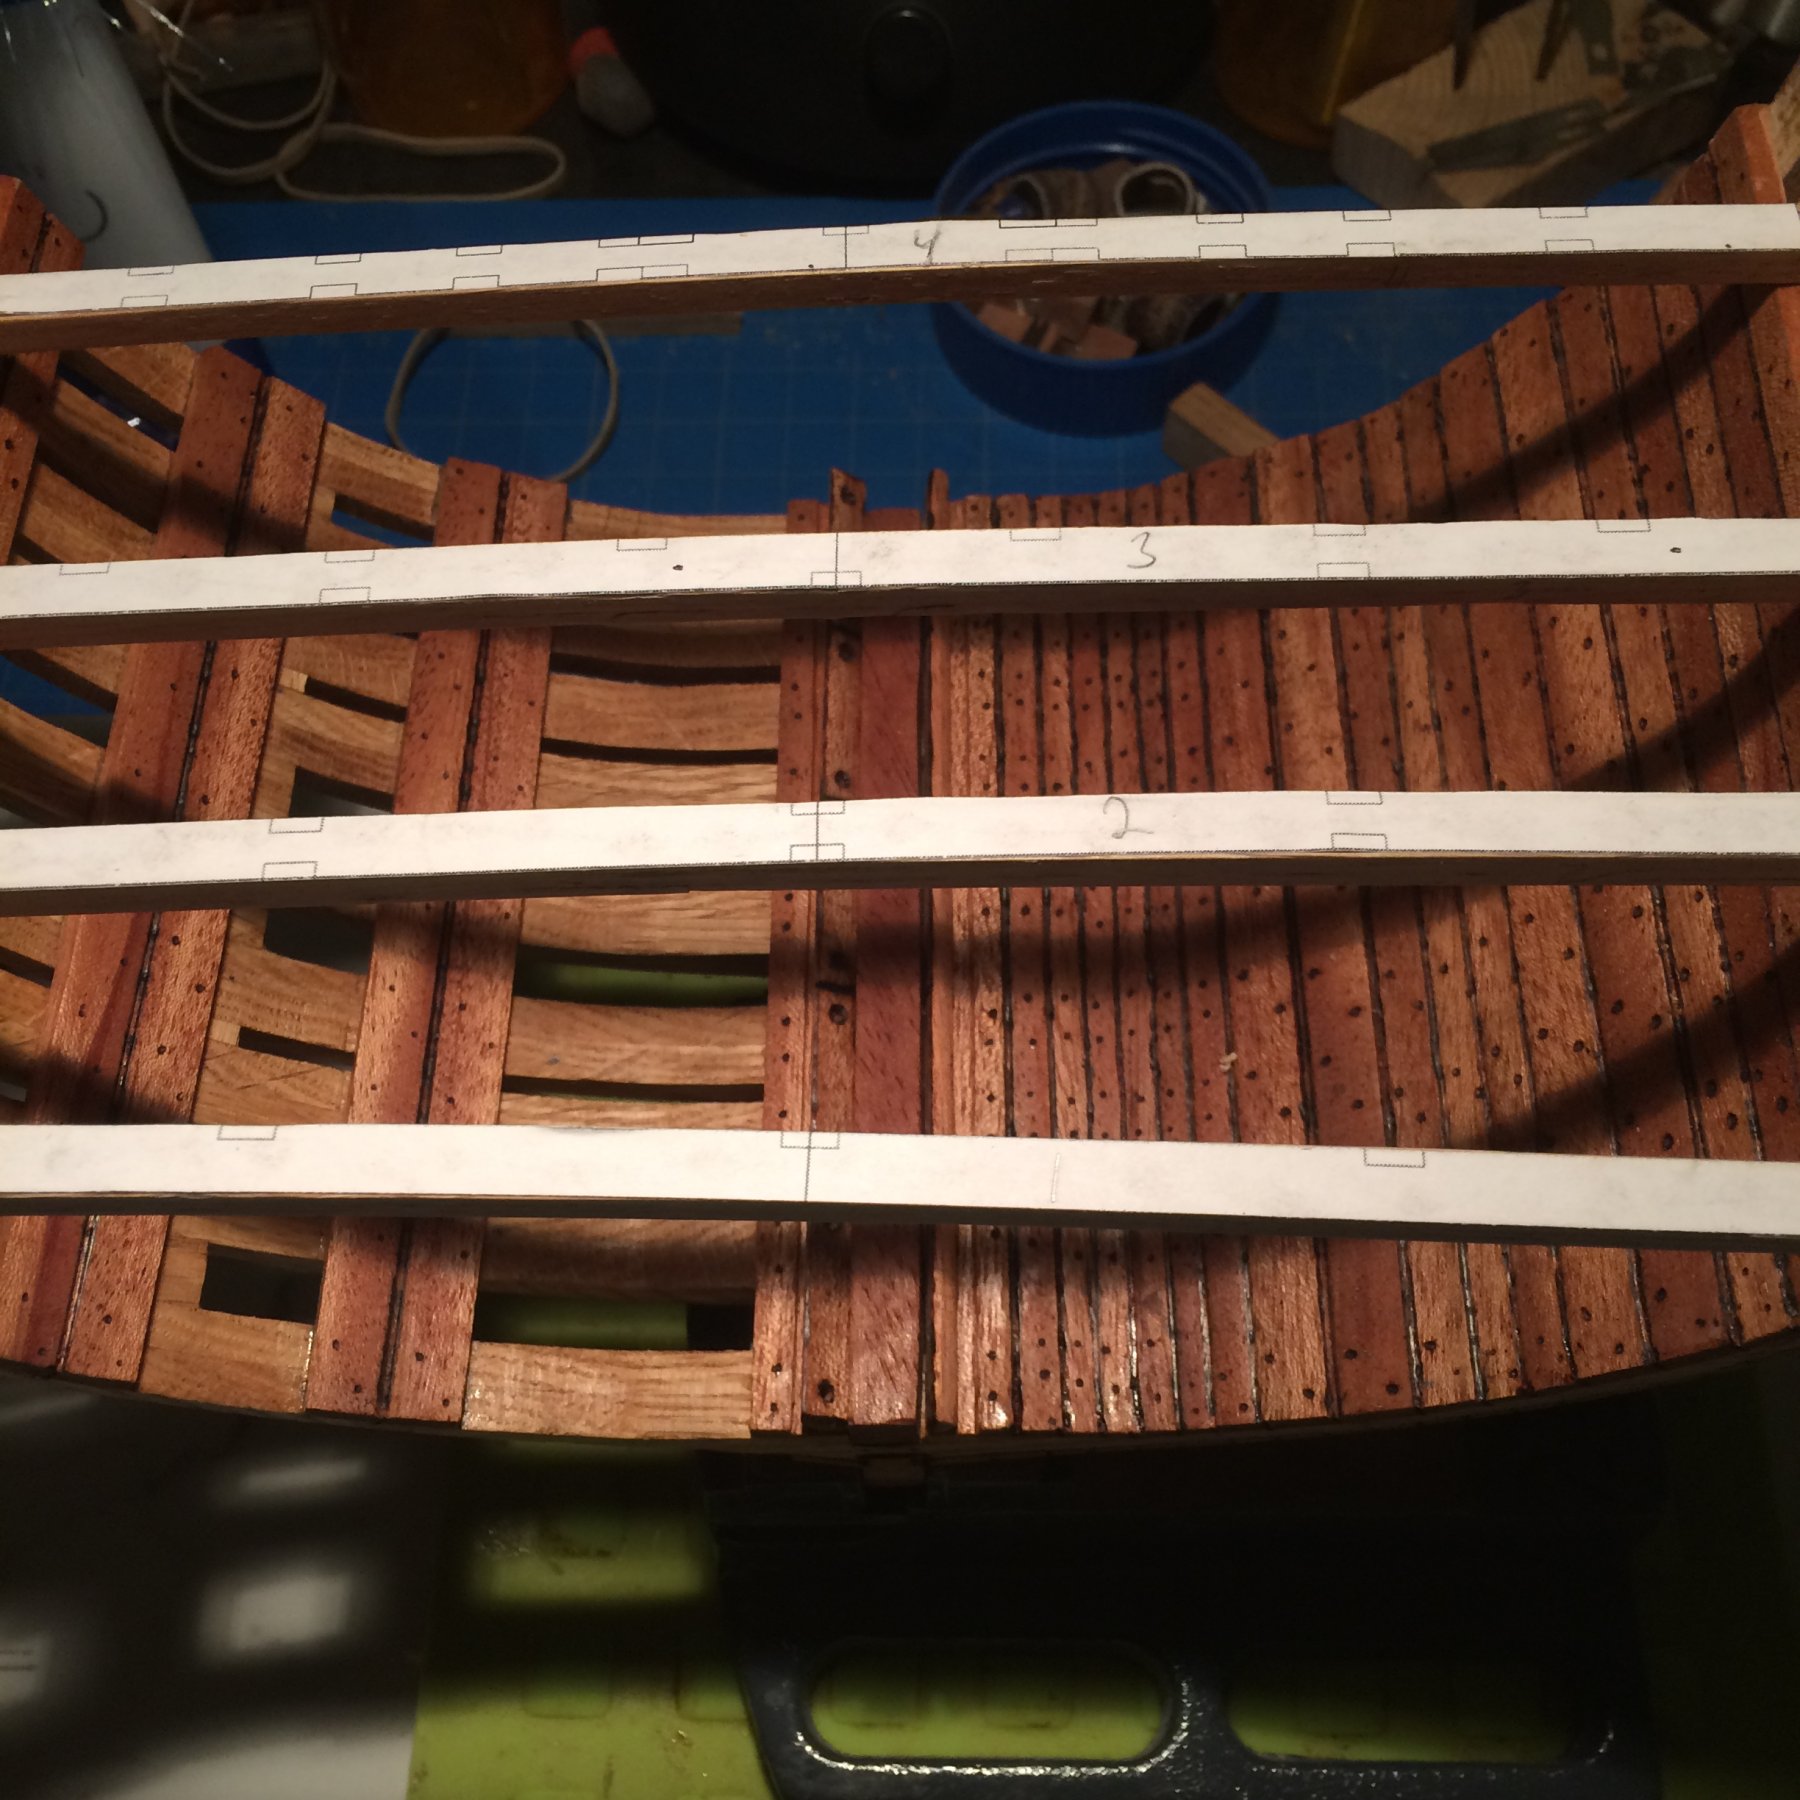
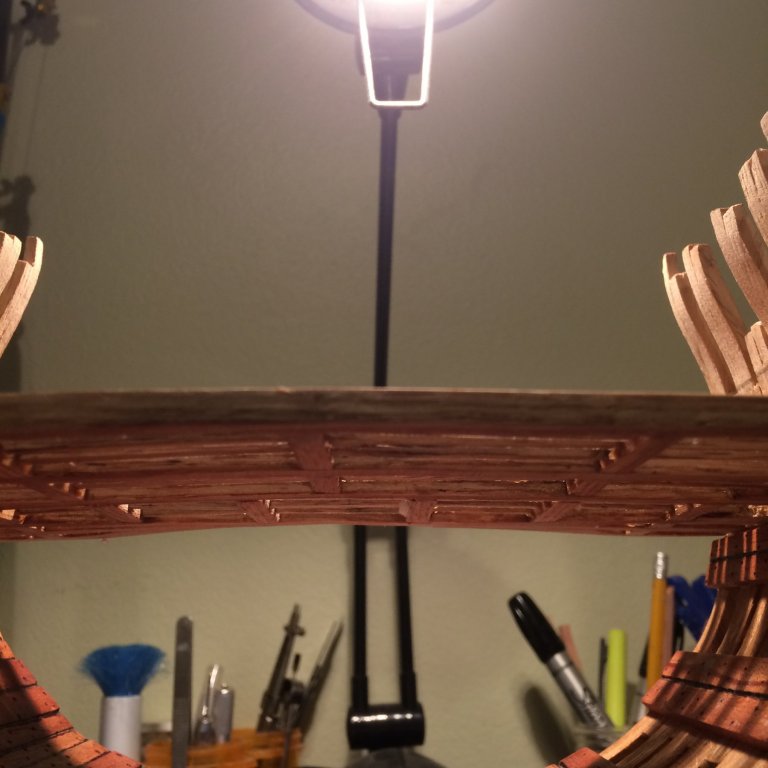
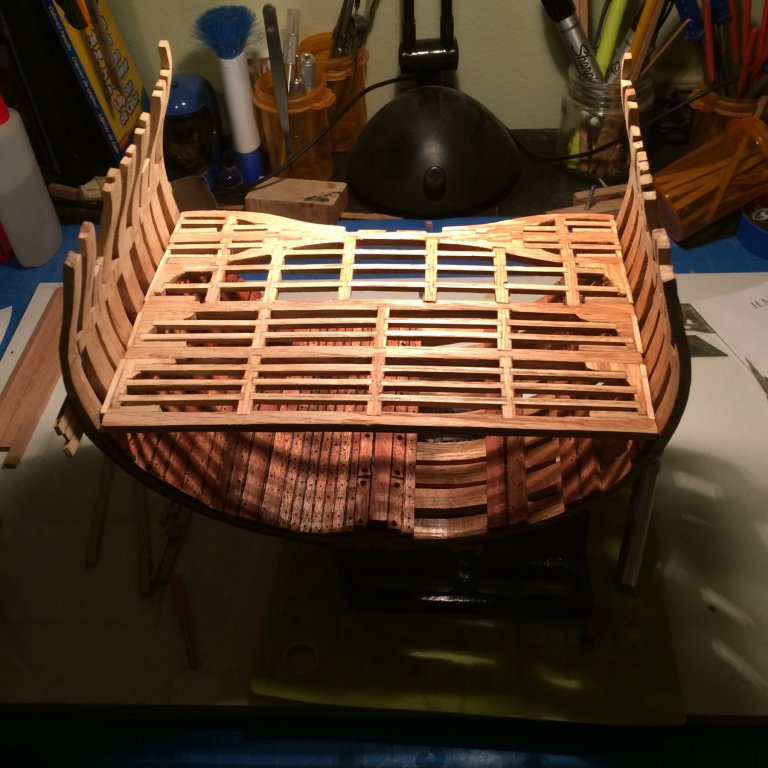
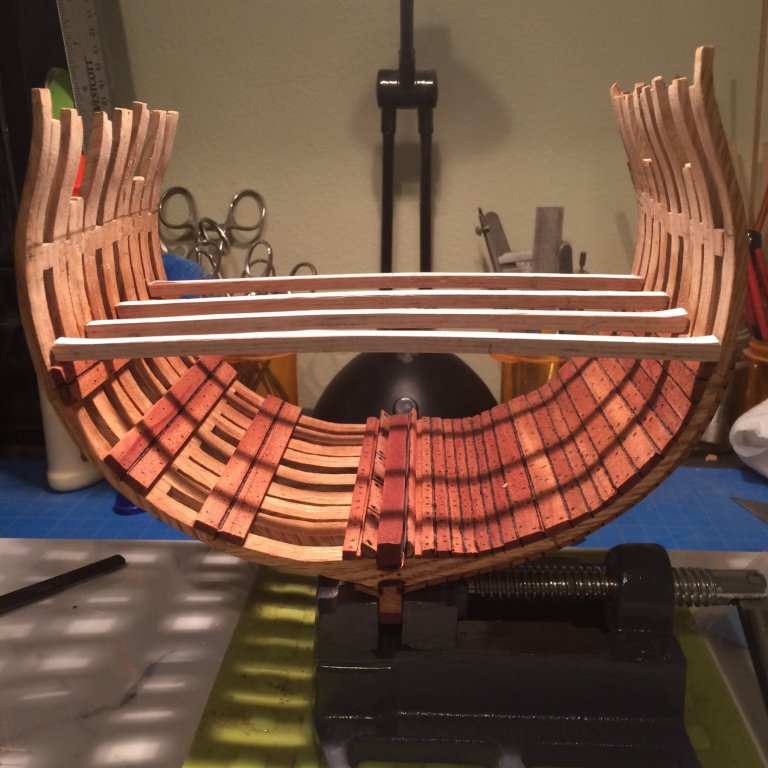
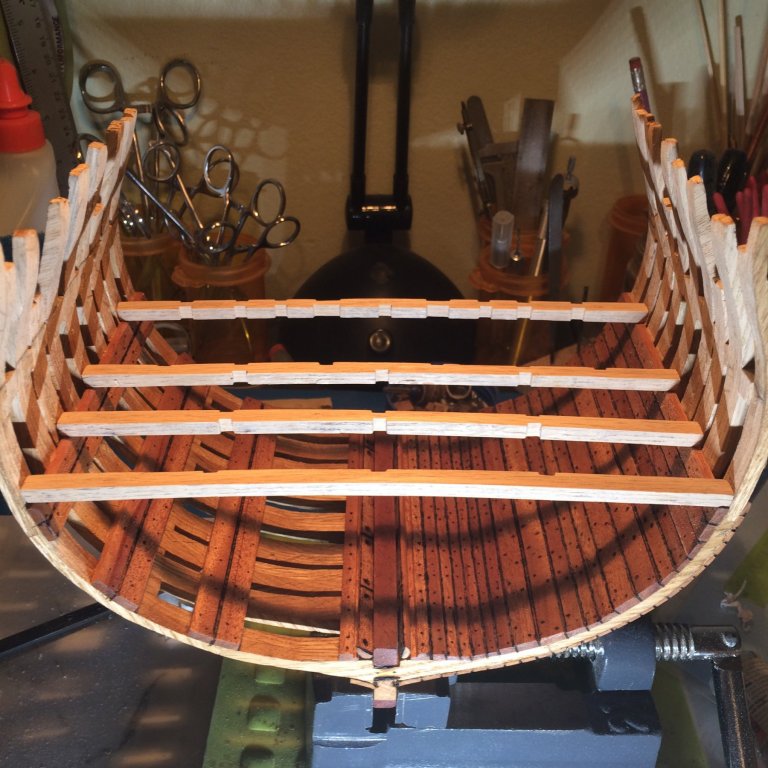
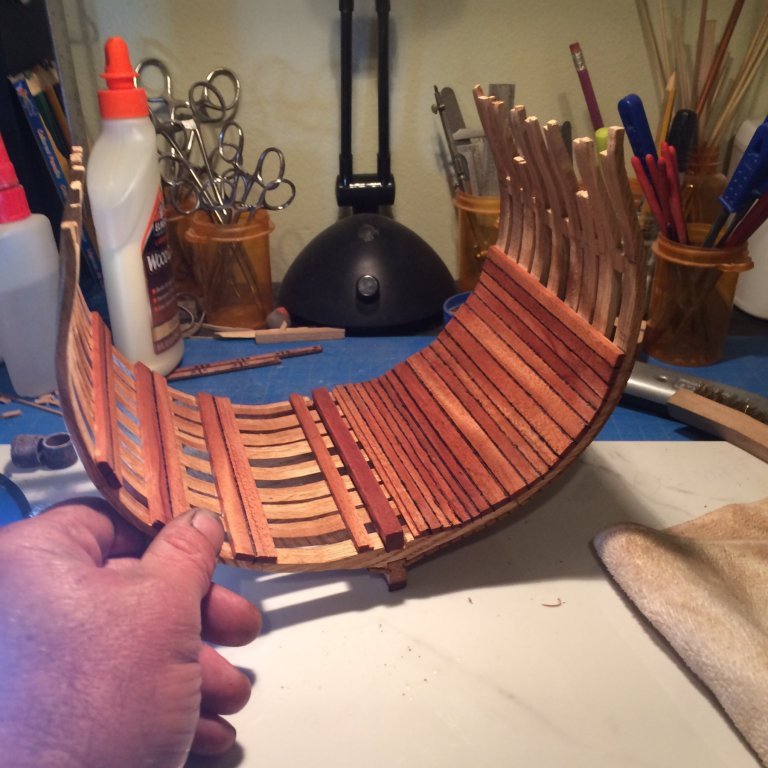
Thanks G.L. I appreciate that . I have finished the lower deck . And added a coat of clear poly to the underside and half the top side , leaving the side that I’m planking bare. I have not glued it in place yet . I want to set the center support beams in first then I will glue it in .here is a few pictures pics of how she is looking. The First two are without the poly. The next two are with the poly I tried to get a shot of the under side while it sat in place ....I’m no photographer Next will be the supports , Thanks for checking on my progress. Derek

-
Tom she is coming along nicely the cannon look good and I think will be a easy to get the height your looking for . Derek
-
I am slowly making progress on the lower deck cutting and notching each piece as I go I should be adding planks soon .o will be using a nice white aspen for the planking. Thanks for looking in Derek


-
G.L. You do fine work ,thanks for the detailed log and thanks for getting me straight on my beams and carlings Derek
-
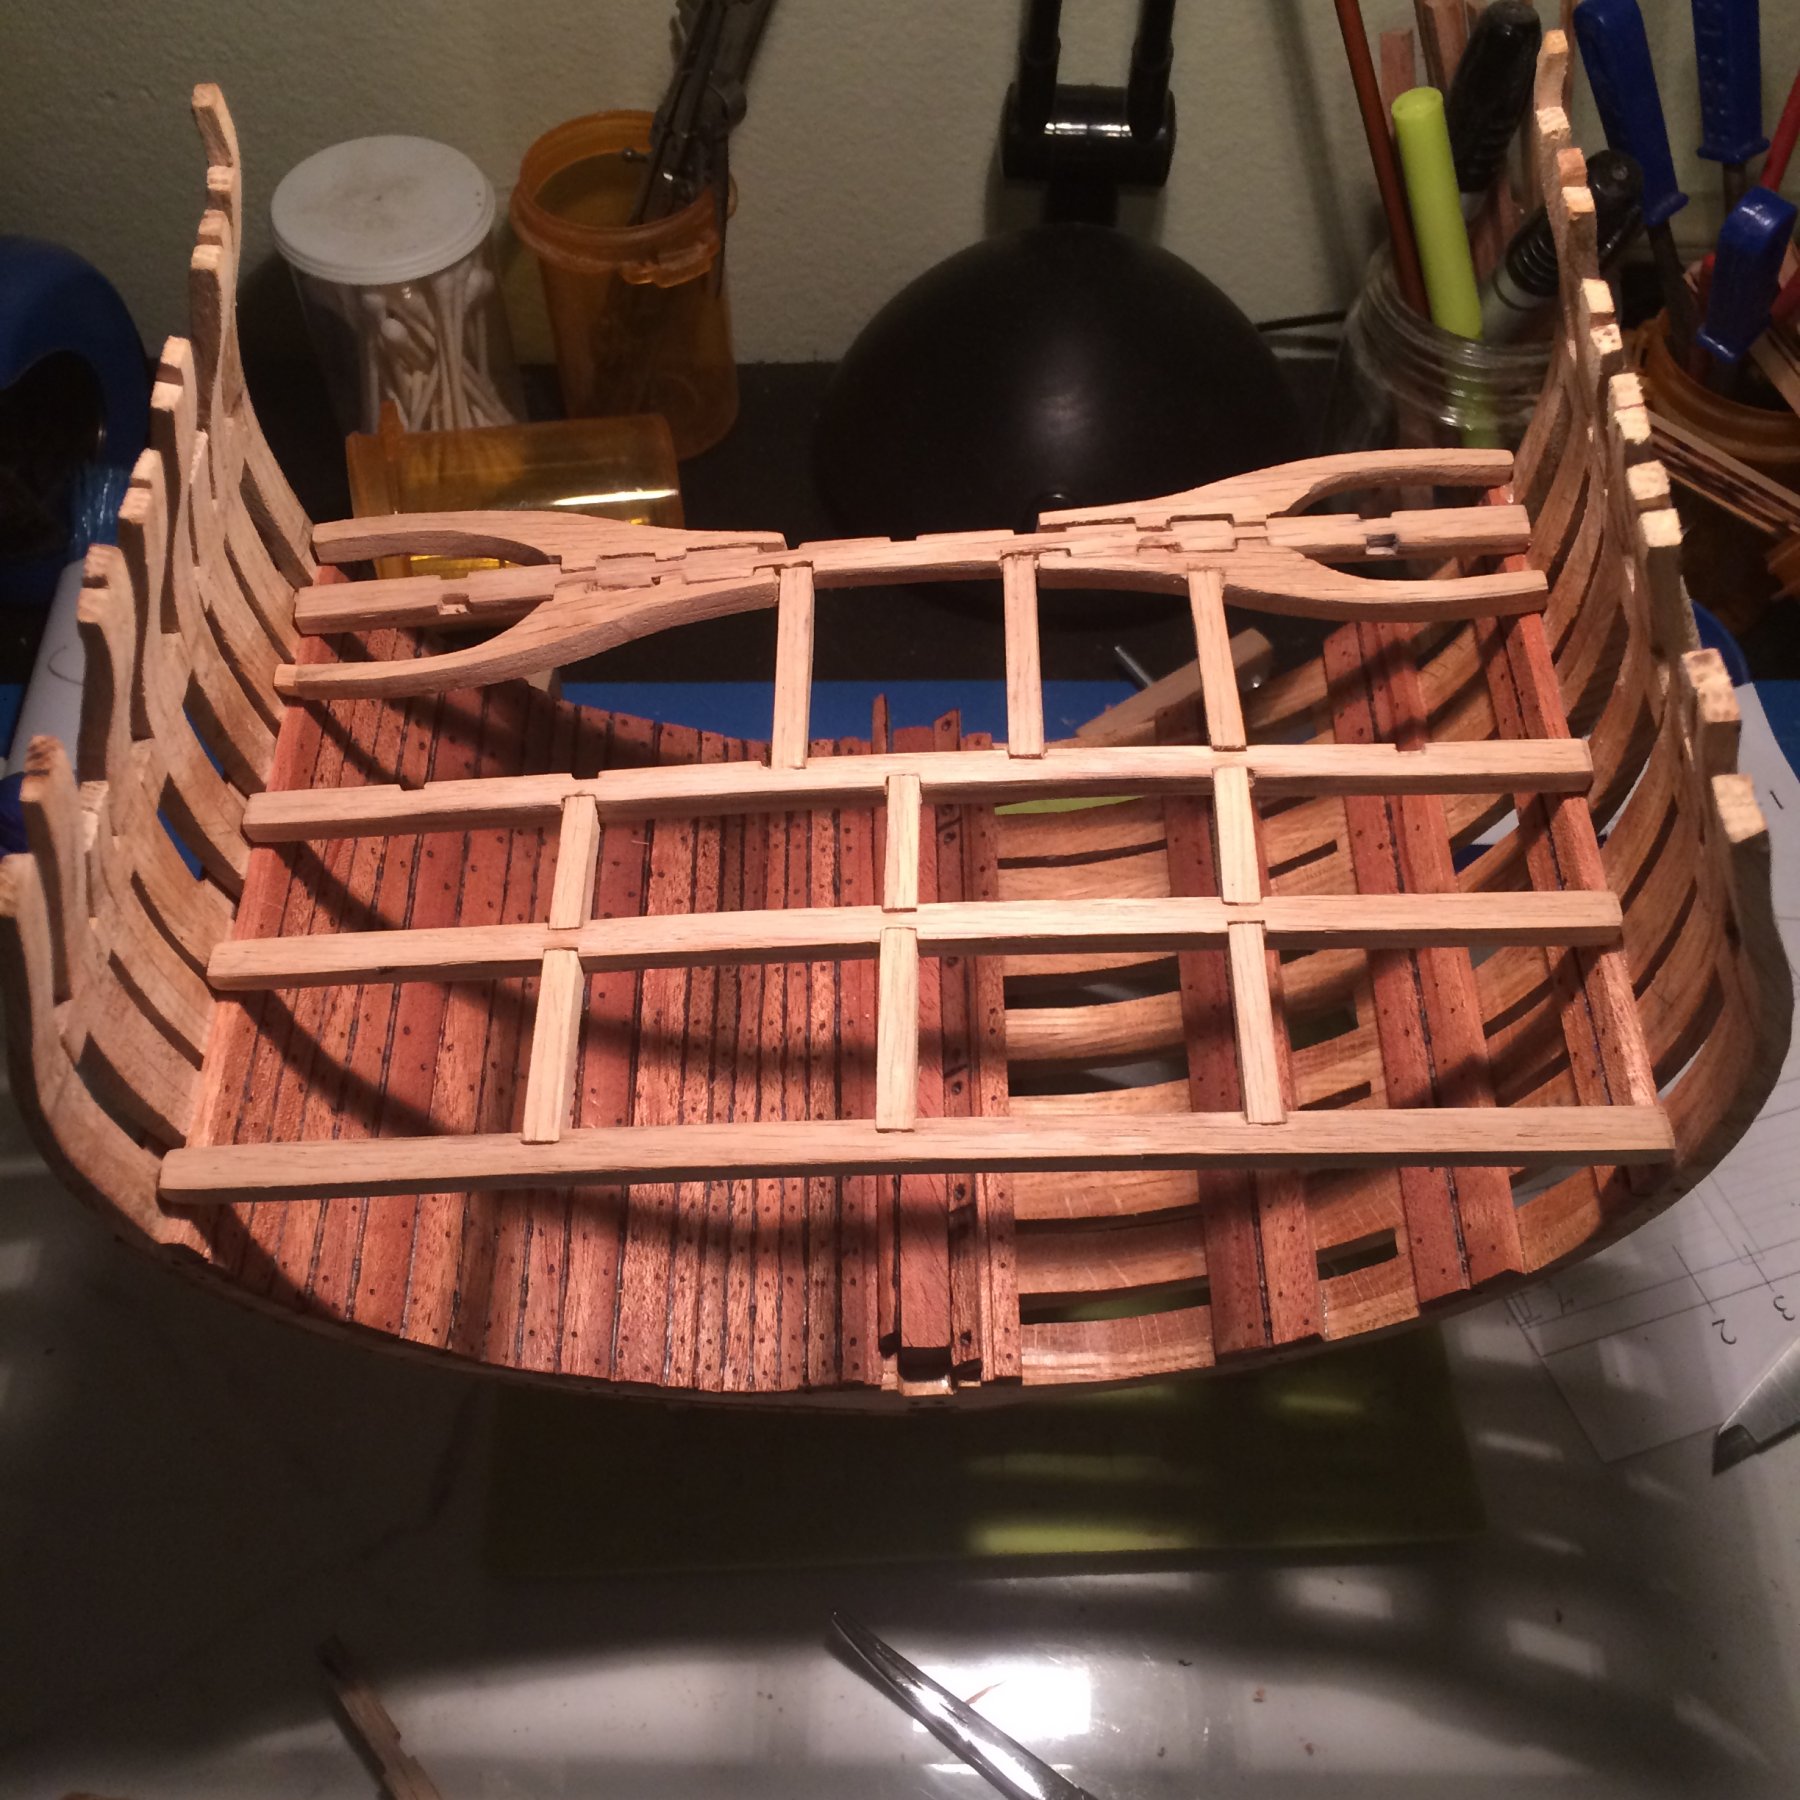
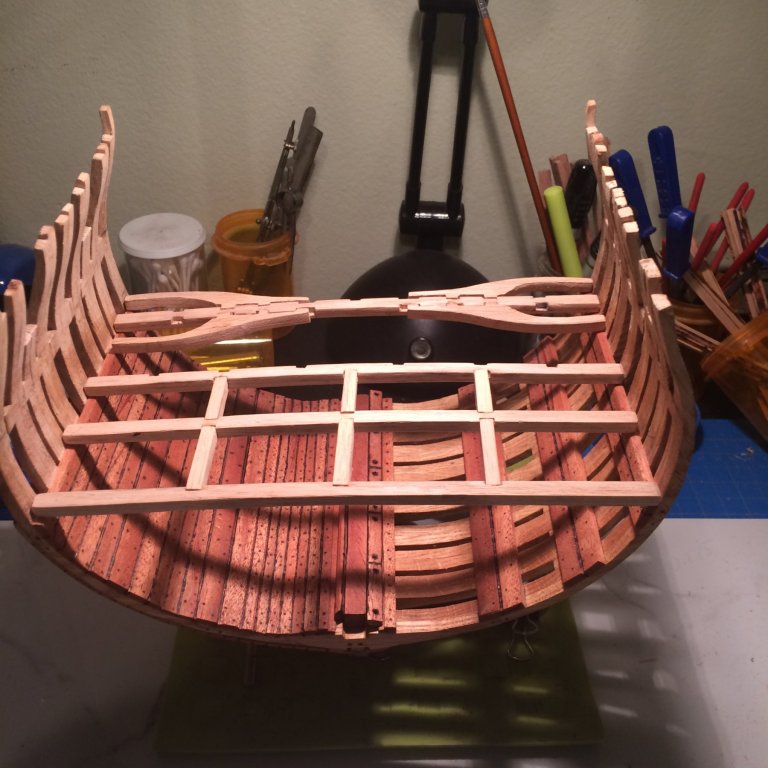
Now that the holidays are over , here is where I’m at on my build . I decided to scrap those deck beams and make new ones , after G.L. got me back on track . then s started cutting the and dry fitting the other pieces for the lower deck Thats where I’m at so far . I have quite a bit more pieces to install, but with the holiday season moving on I should have a bit more time to dedicate to my build. Thanks for looking,and hope you have a happy and prosperous New Year. Derek


-
Thanks for the inquiries G.L. I cut the keel ,false keel 3/16 shorter to better show how the frames set in place . And the notches cut all the way through the main deck beam is purely a oversight. I did not realize that the Carlings where thinner. Guess I will have to try to repair or toss them and start over . I try to follow the plans a bit ahead of what I’m working on but for some reason I couldn’t find info on the thickness of the carlings or I overlooked them . Thanks for bringing that to my attention. Derek
-
Hello Zuco I am pretty new at this hobby as well ,so I can tell you from experience just read your plans carefully and always read ahead of your build .Jump in it , have fun ,and if you hit a rough patch MSW members can definitely get you through it. All the best Derek
-
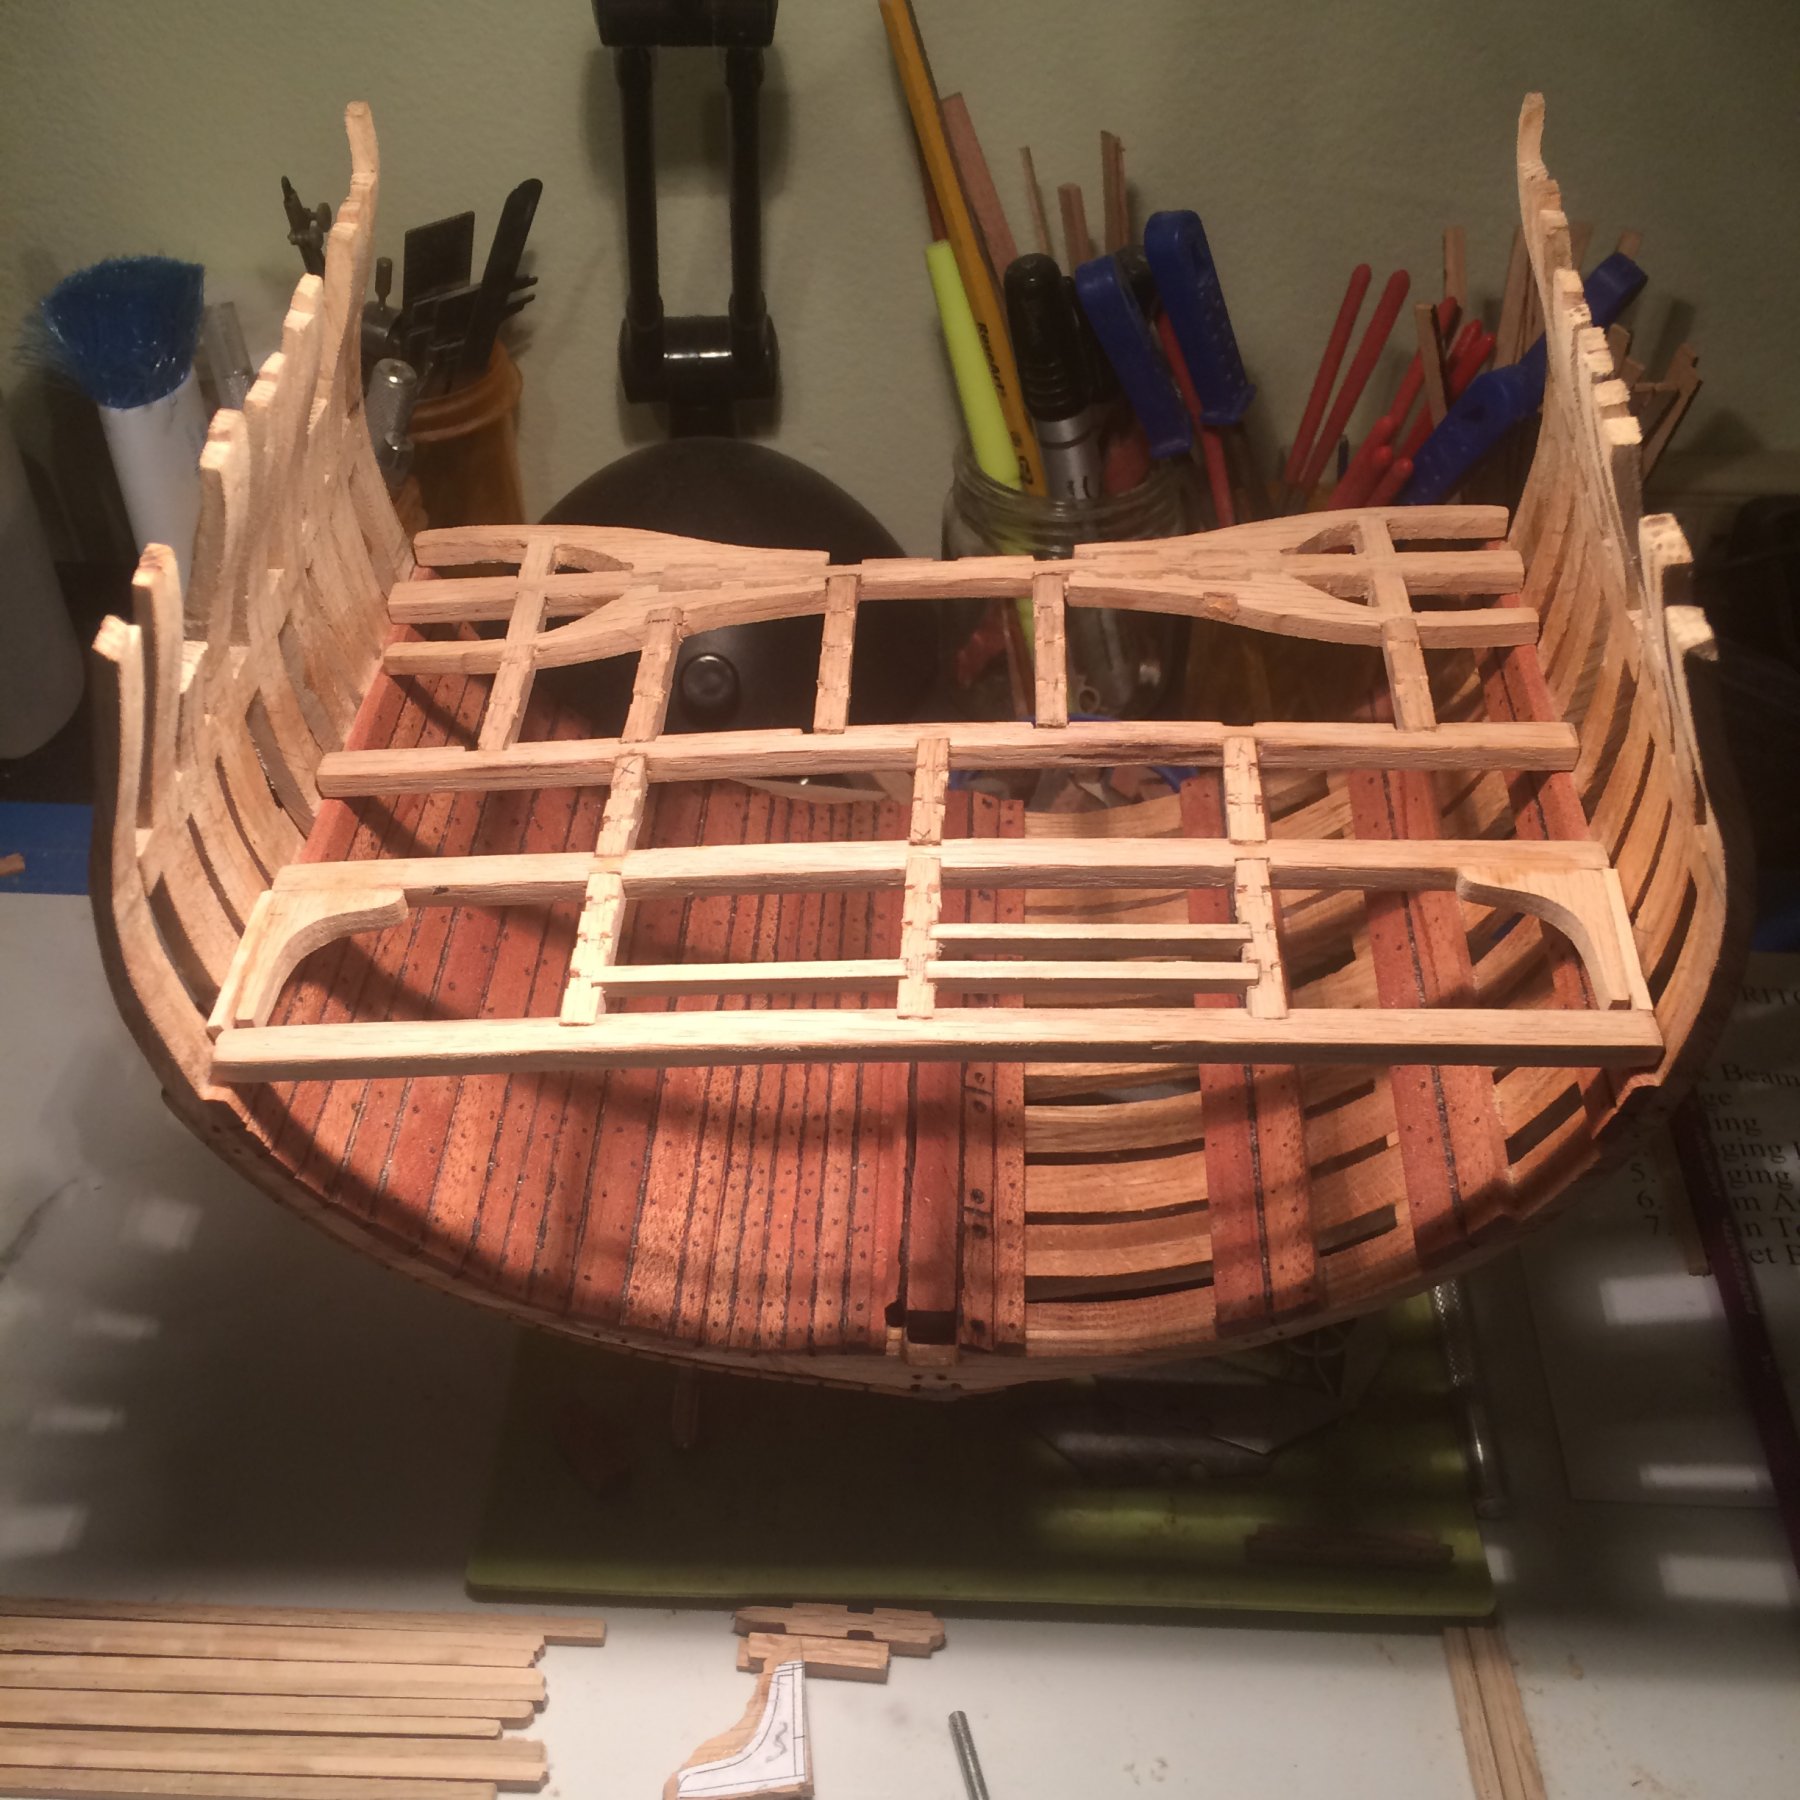
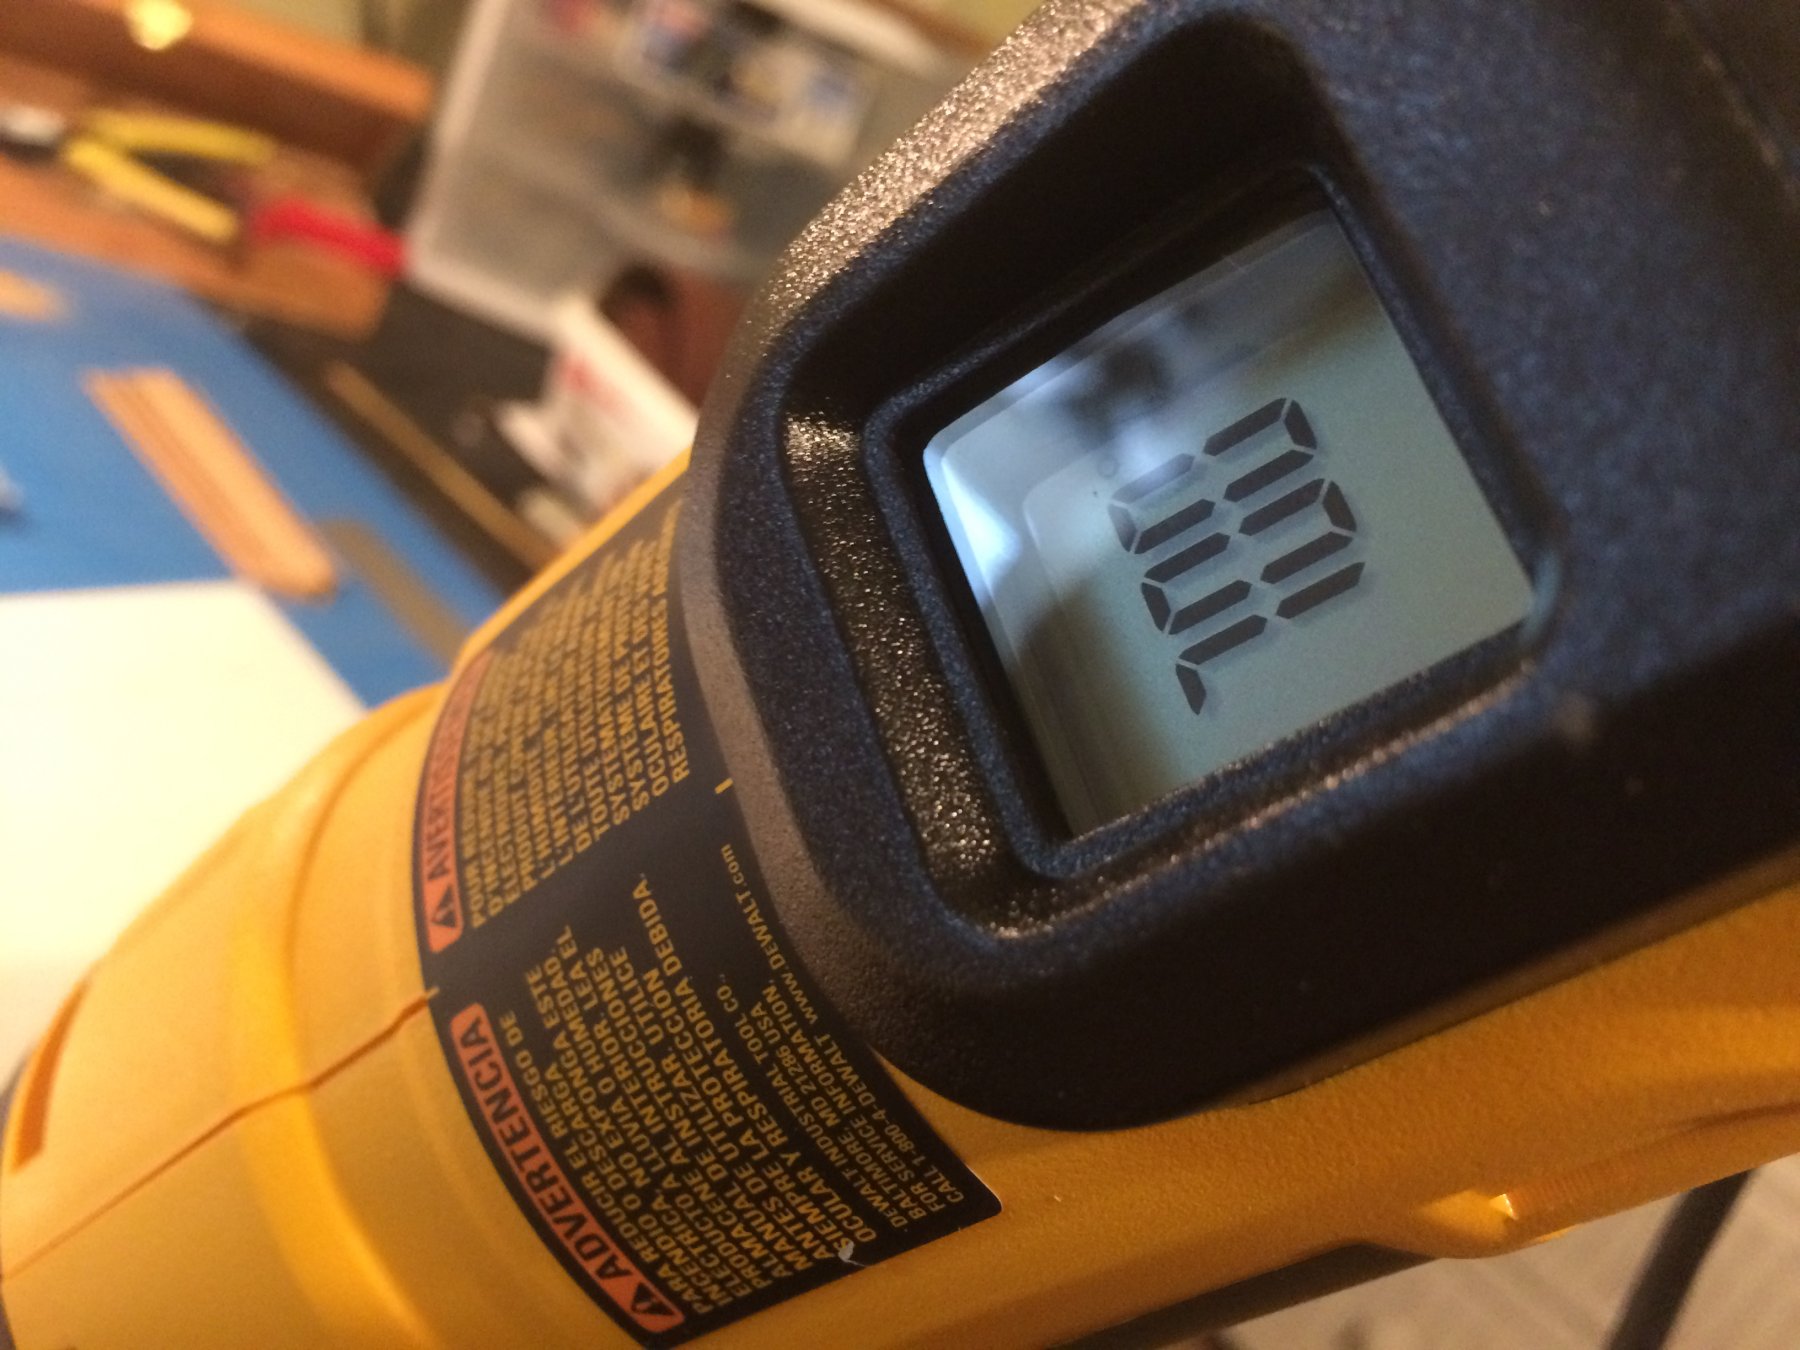
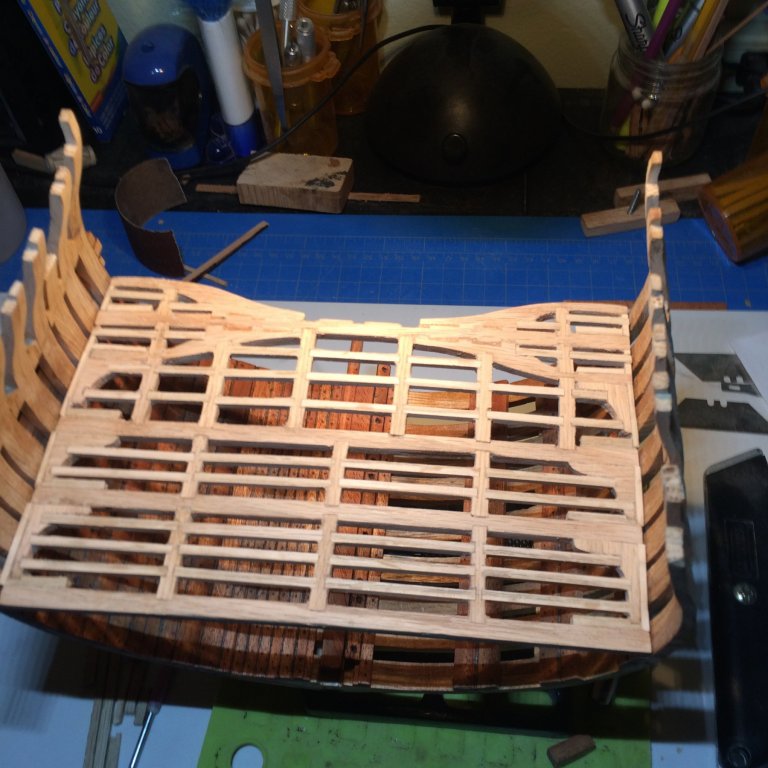
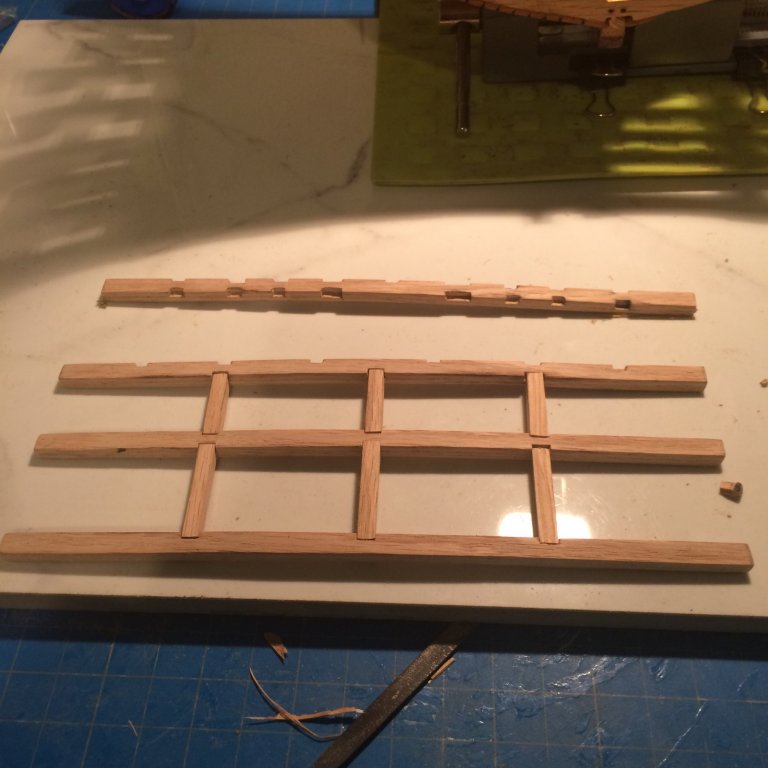
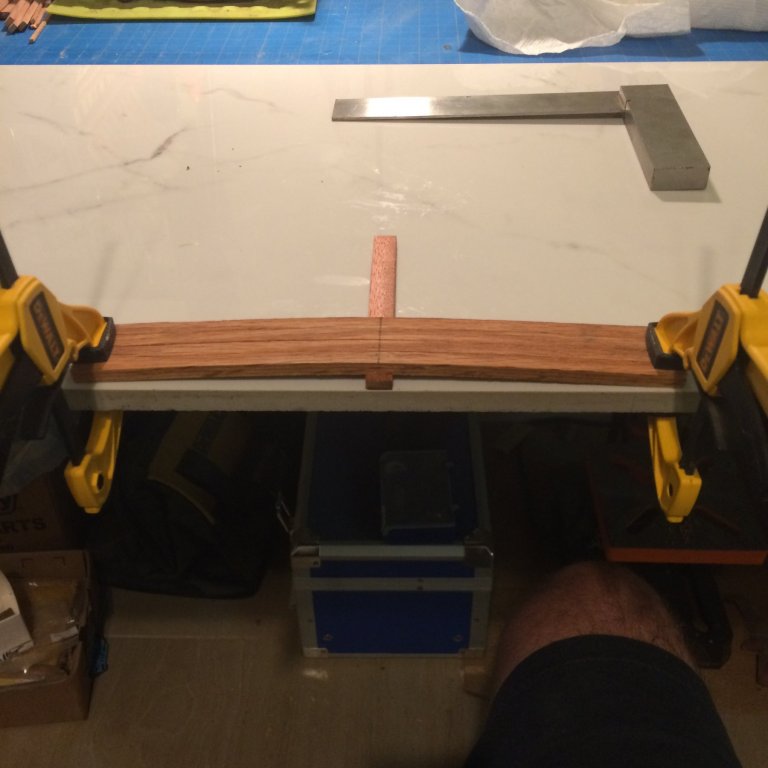
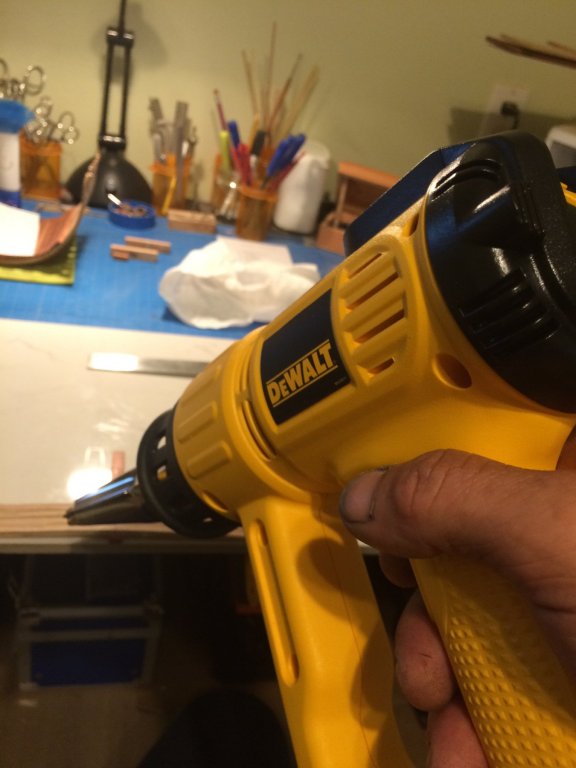
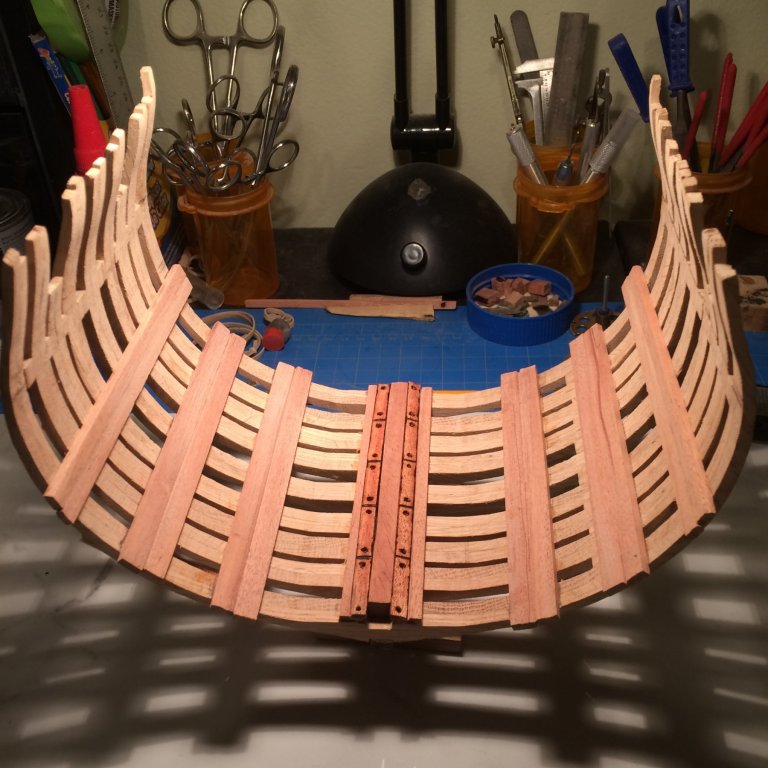
I got the deck beams clean and true then soaked them in hot water, for approximately a hour . Then I used a piece of 1/4 inch board under the center of the beams and clamped them down . I decided to dry them quickly with my Dewalt heat gun , Once they dried I cut out the template for the beams to know where my notches needed to be ,and then glued them . Then I broke out my files and started cutting in the notches . Here they are dry fitted in place . thanks fir looking in ! Derek


-
I also need some white wood glue , so pick me up a bottle while your out as well ! Lol in all seriousness she’s looking good bud Derek
-
Lol sticky fingers , can’t tell you how many times I went to set something down to realize it was glued to my finger. Your doing a great job , she will be a fine looking. Vessel when your done. Derek
-
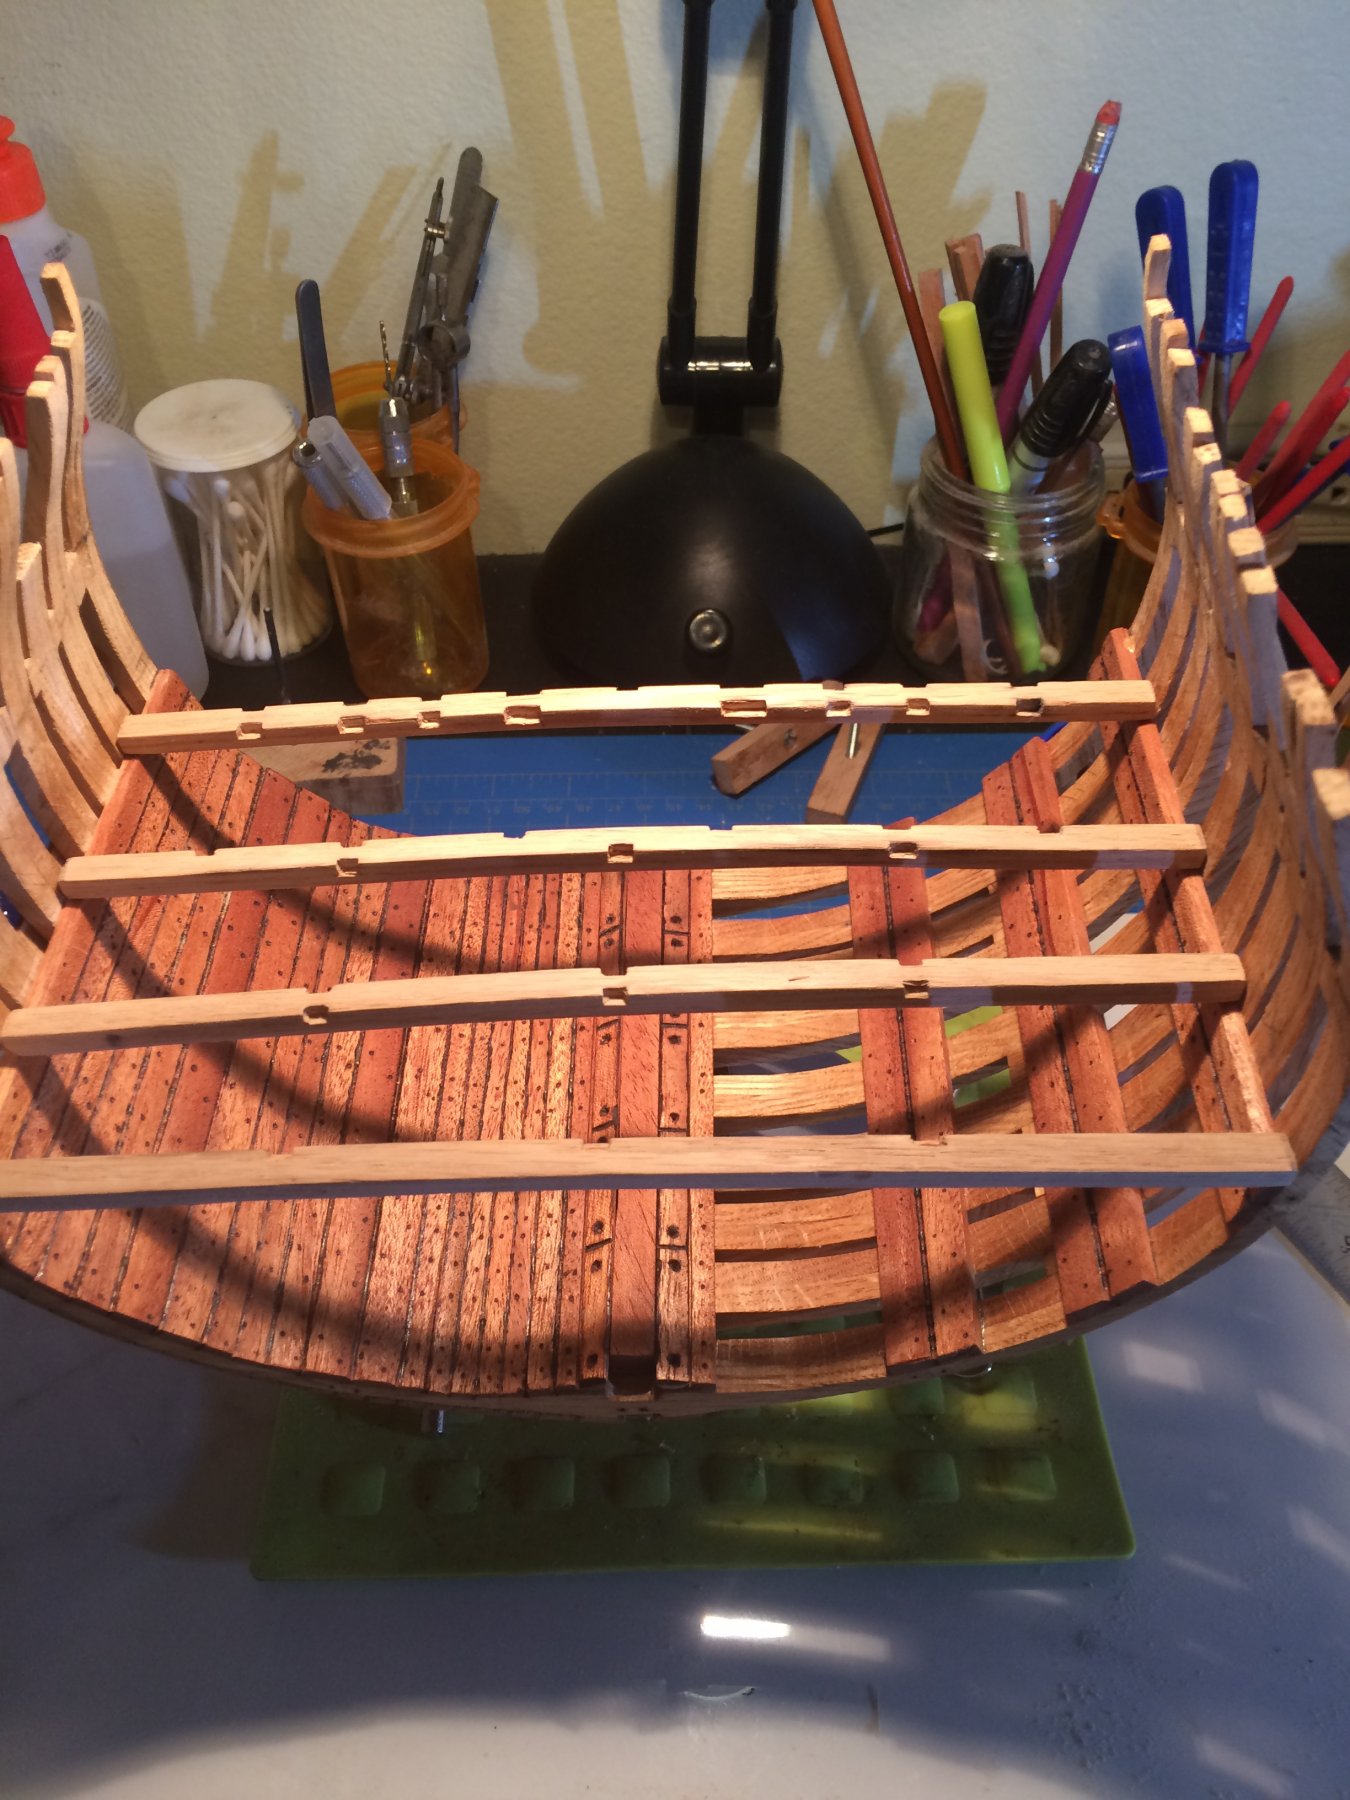
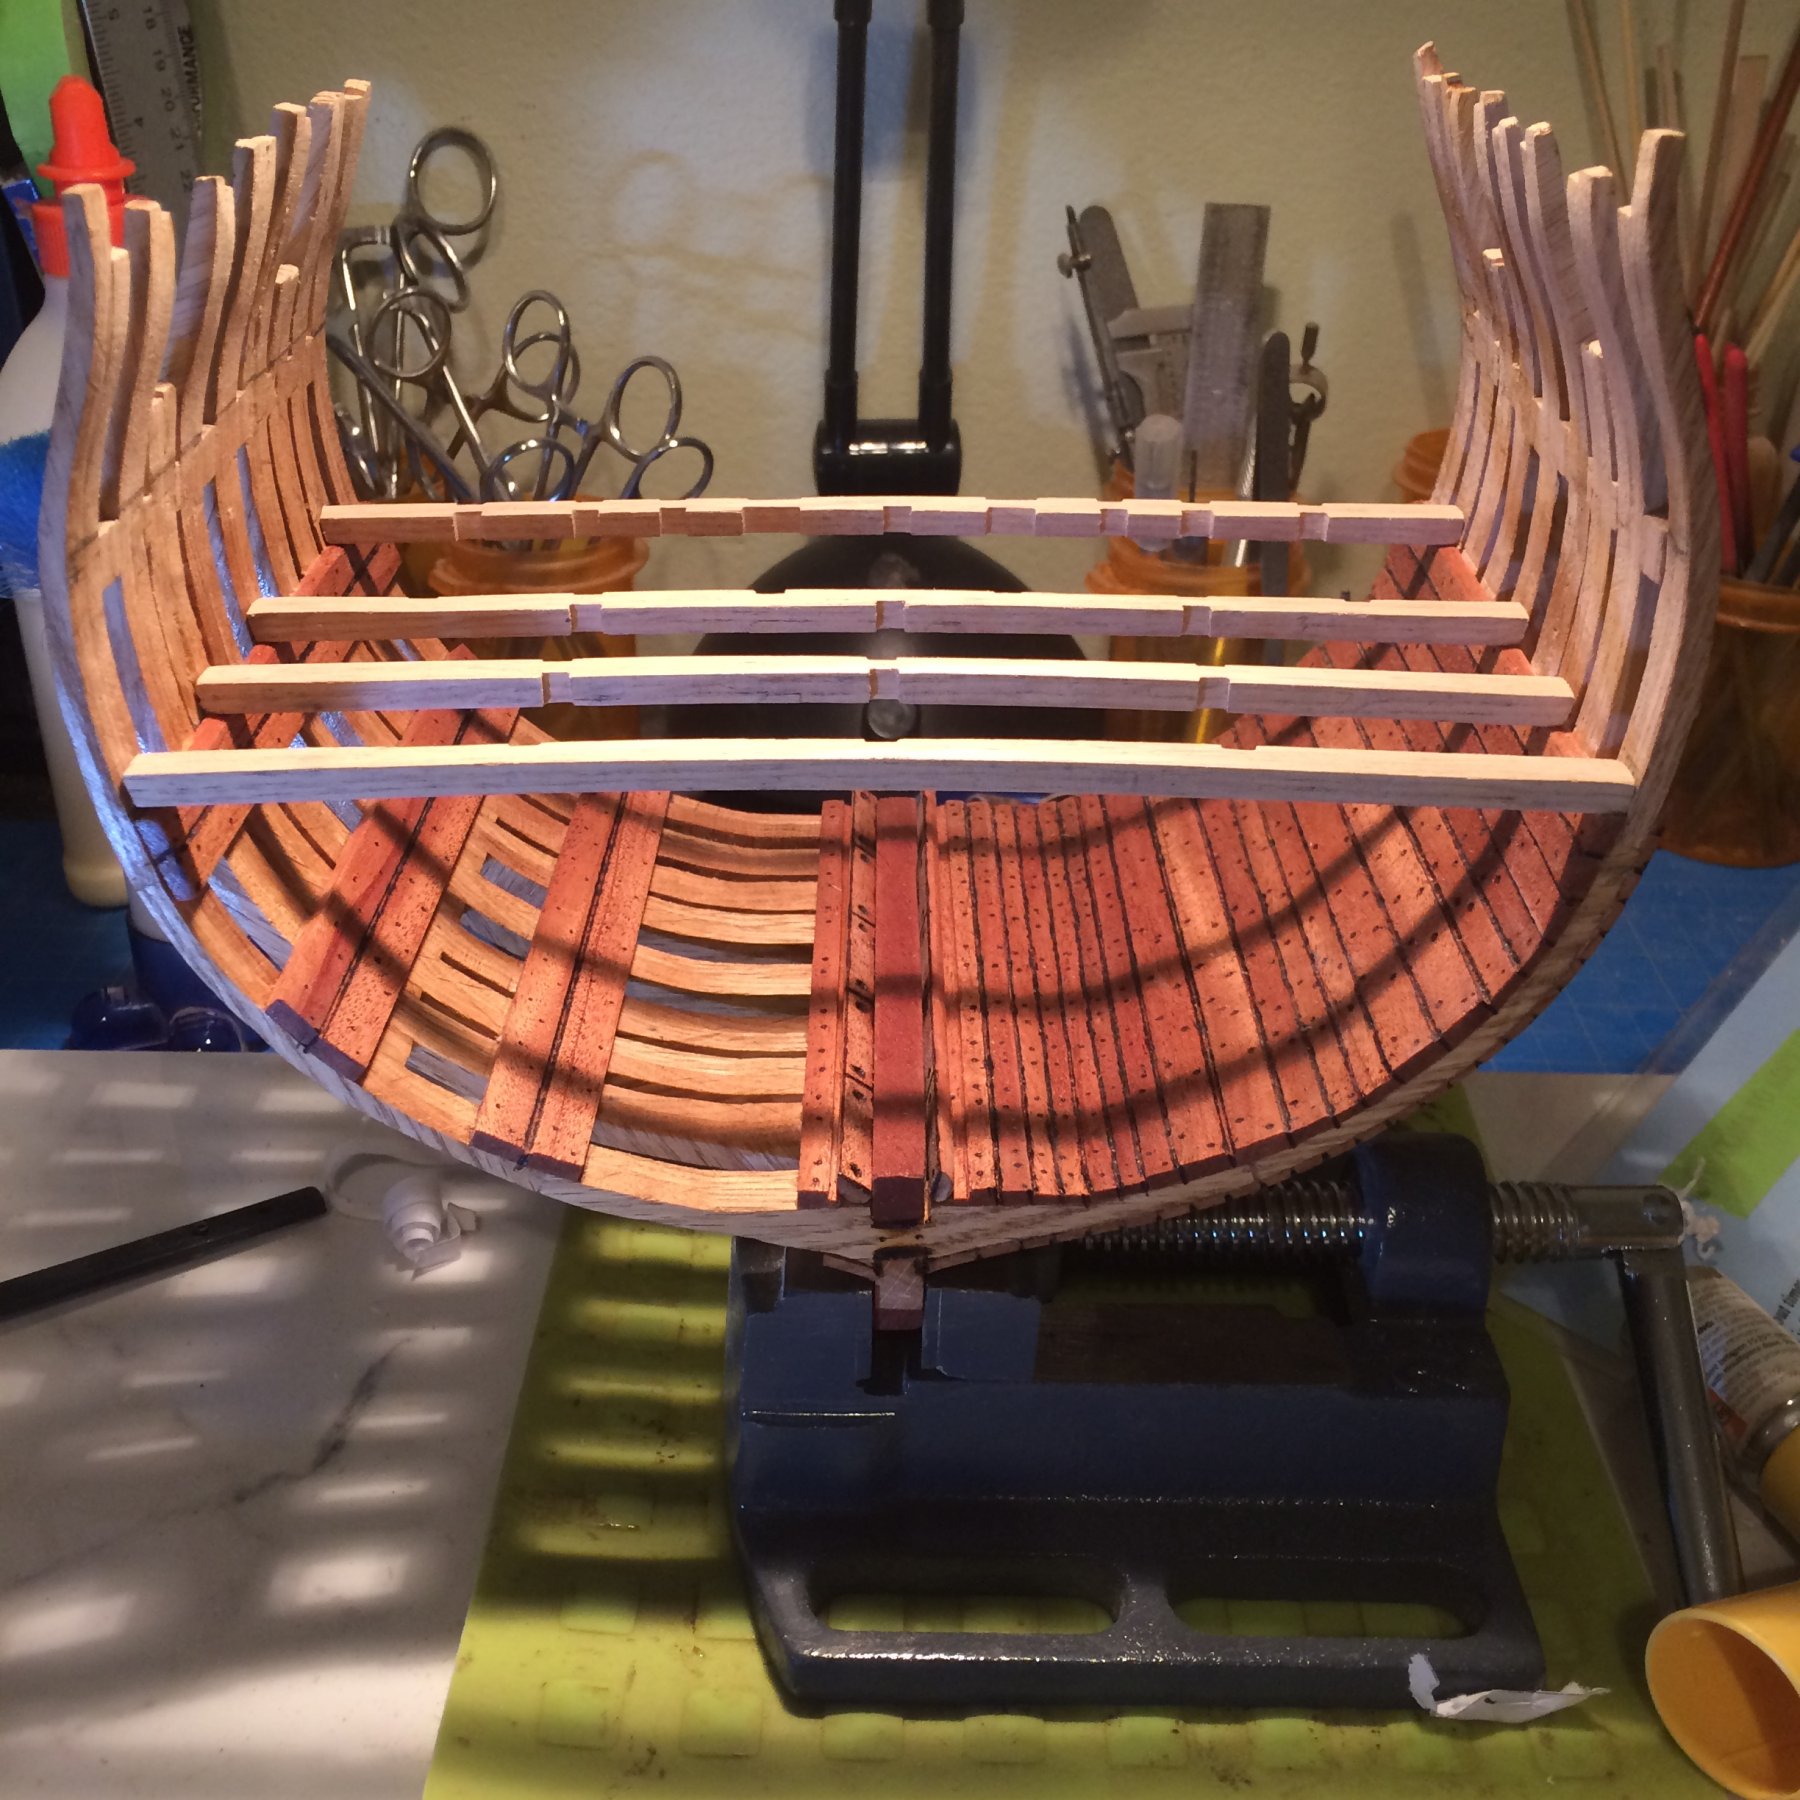
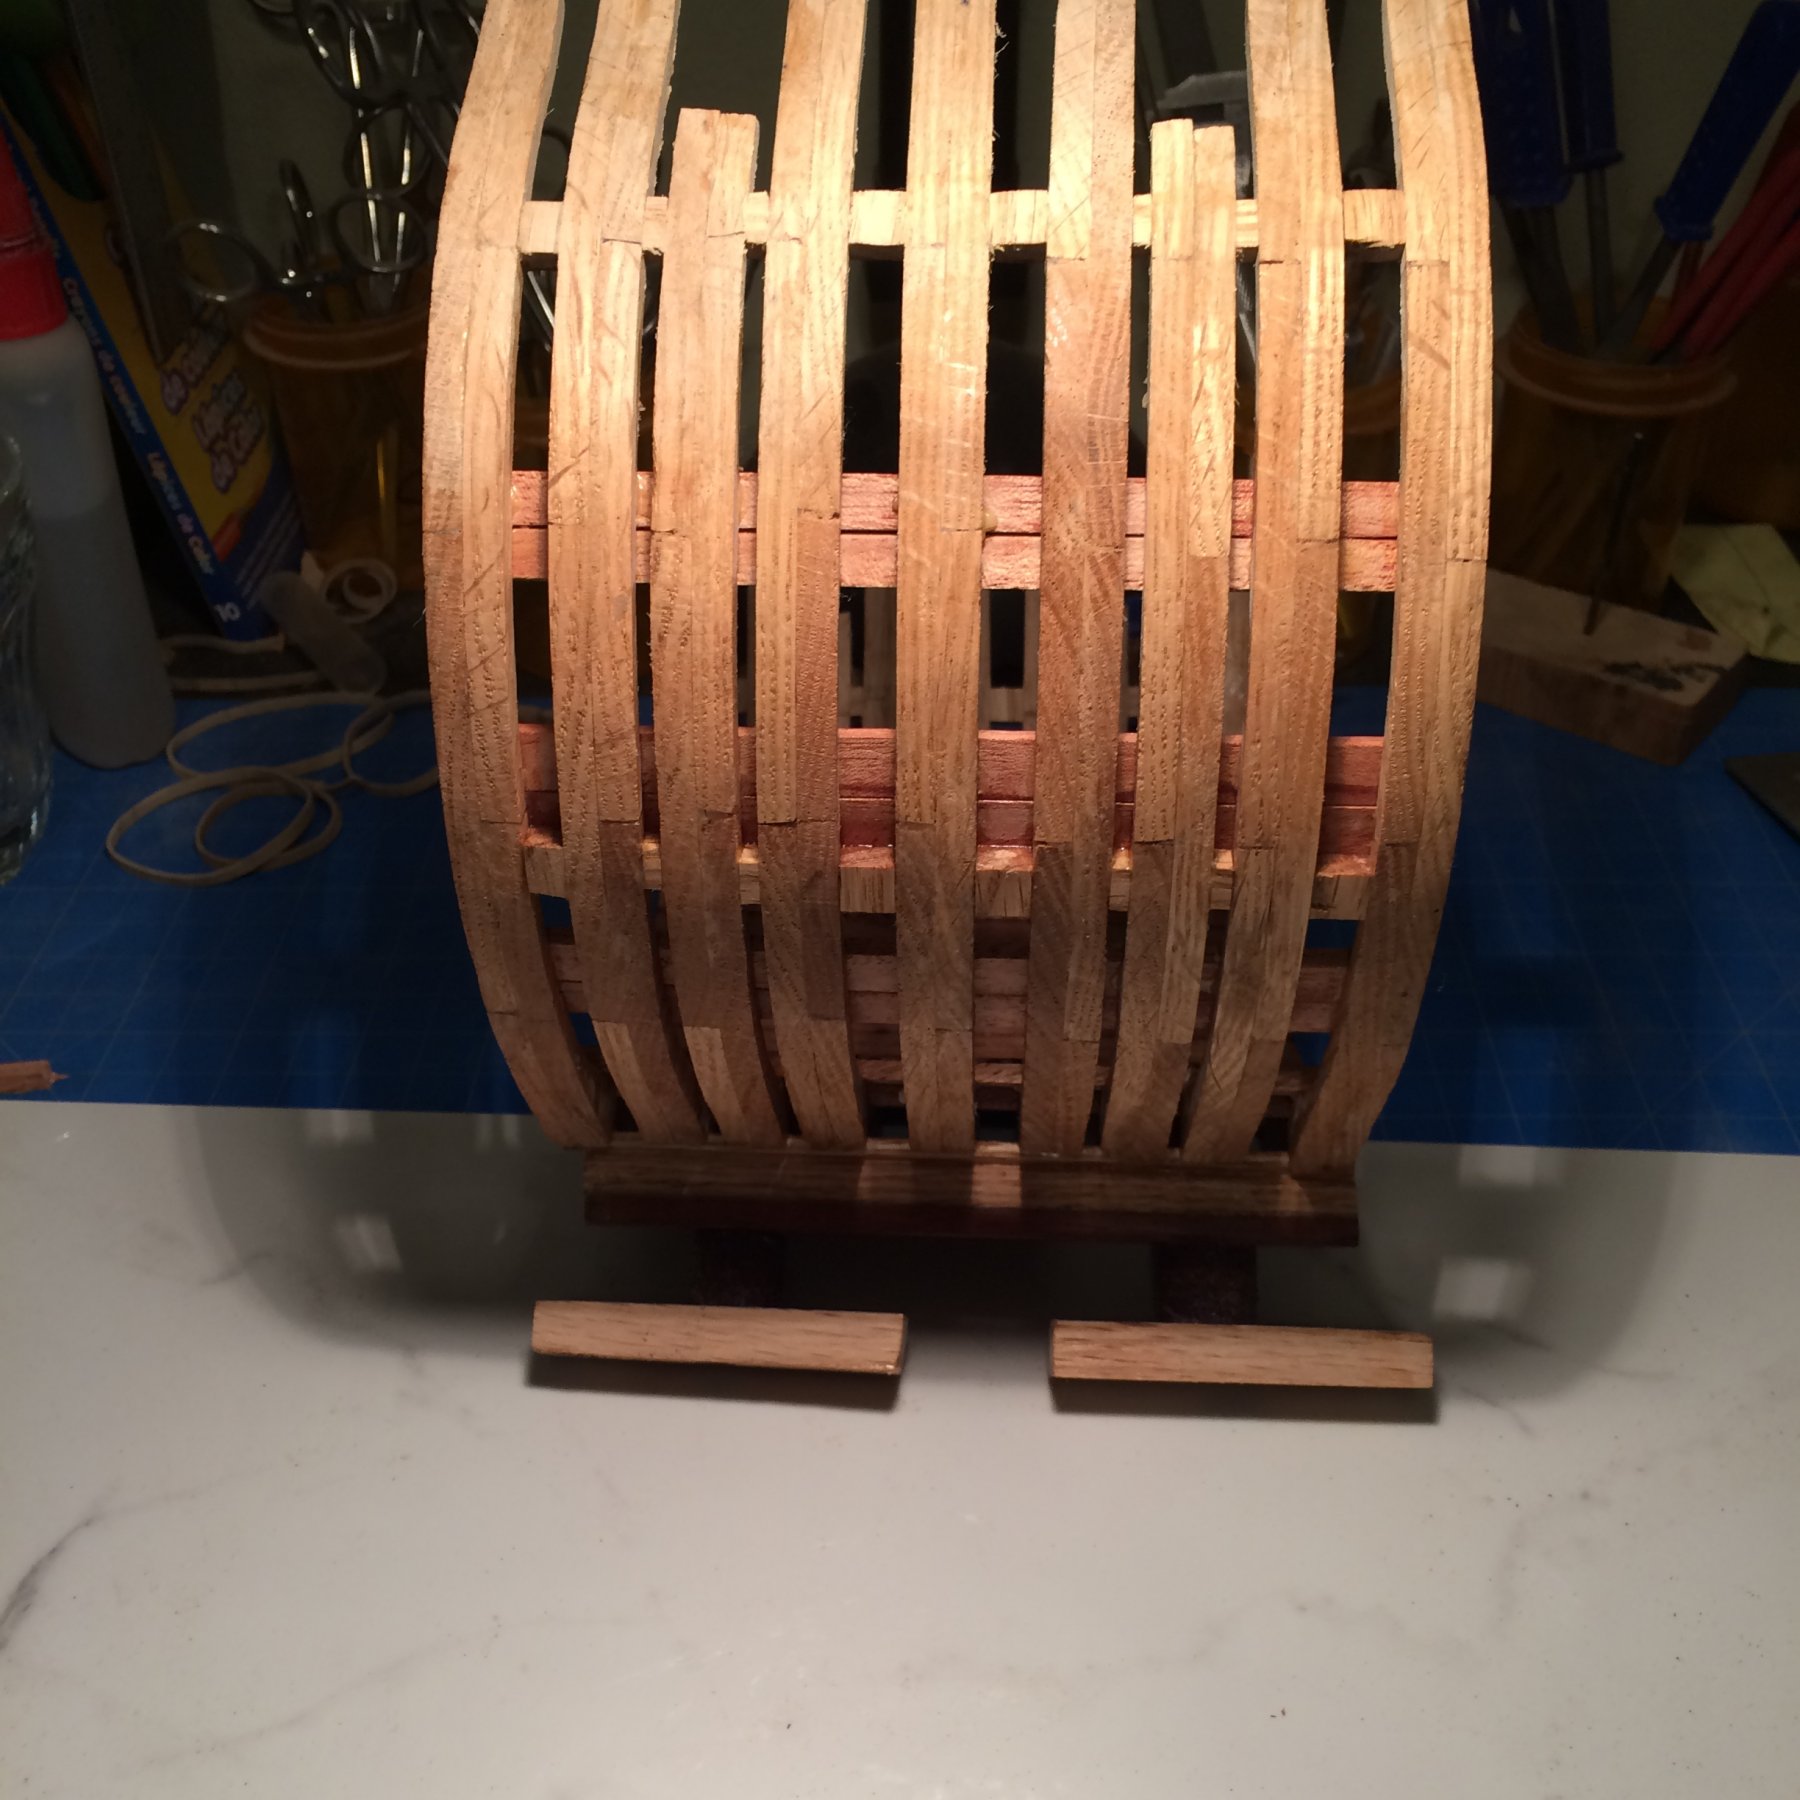
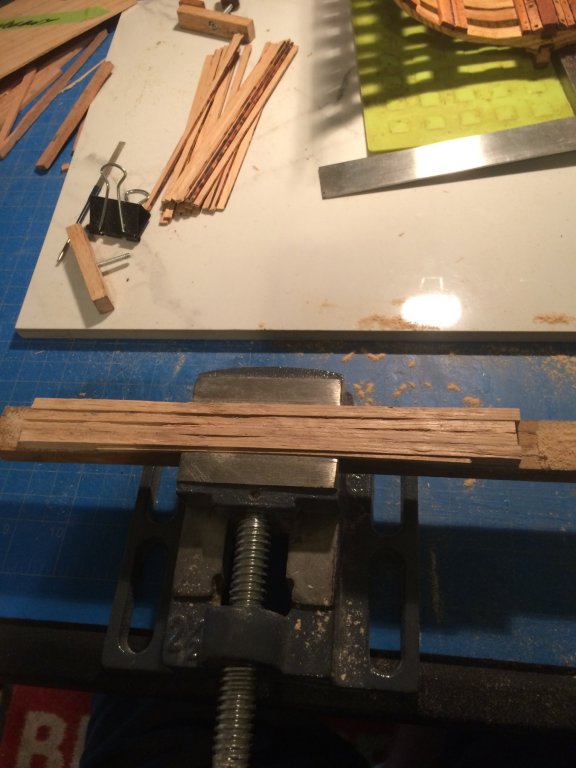
I woke up today with a cold , not much energy , but I did get the faux tree nailing on the lower section of the inside . I figured I better get it done now before I start on the lower deck . Then I cut out the four pieces of red oak to make the main deck beams and placed them in the vice to start cleaning ,and sizing before I soak them . thats it for now I hope to make a bit more progress today . Thanks Derek
-
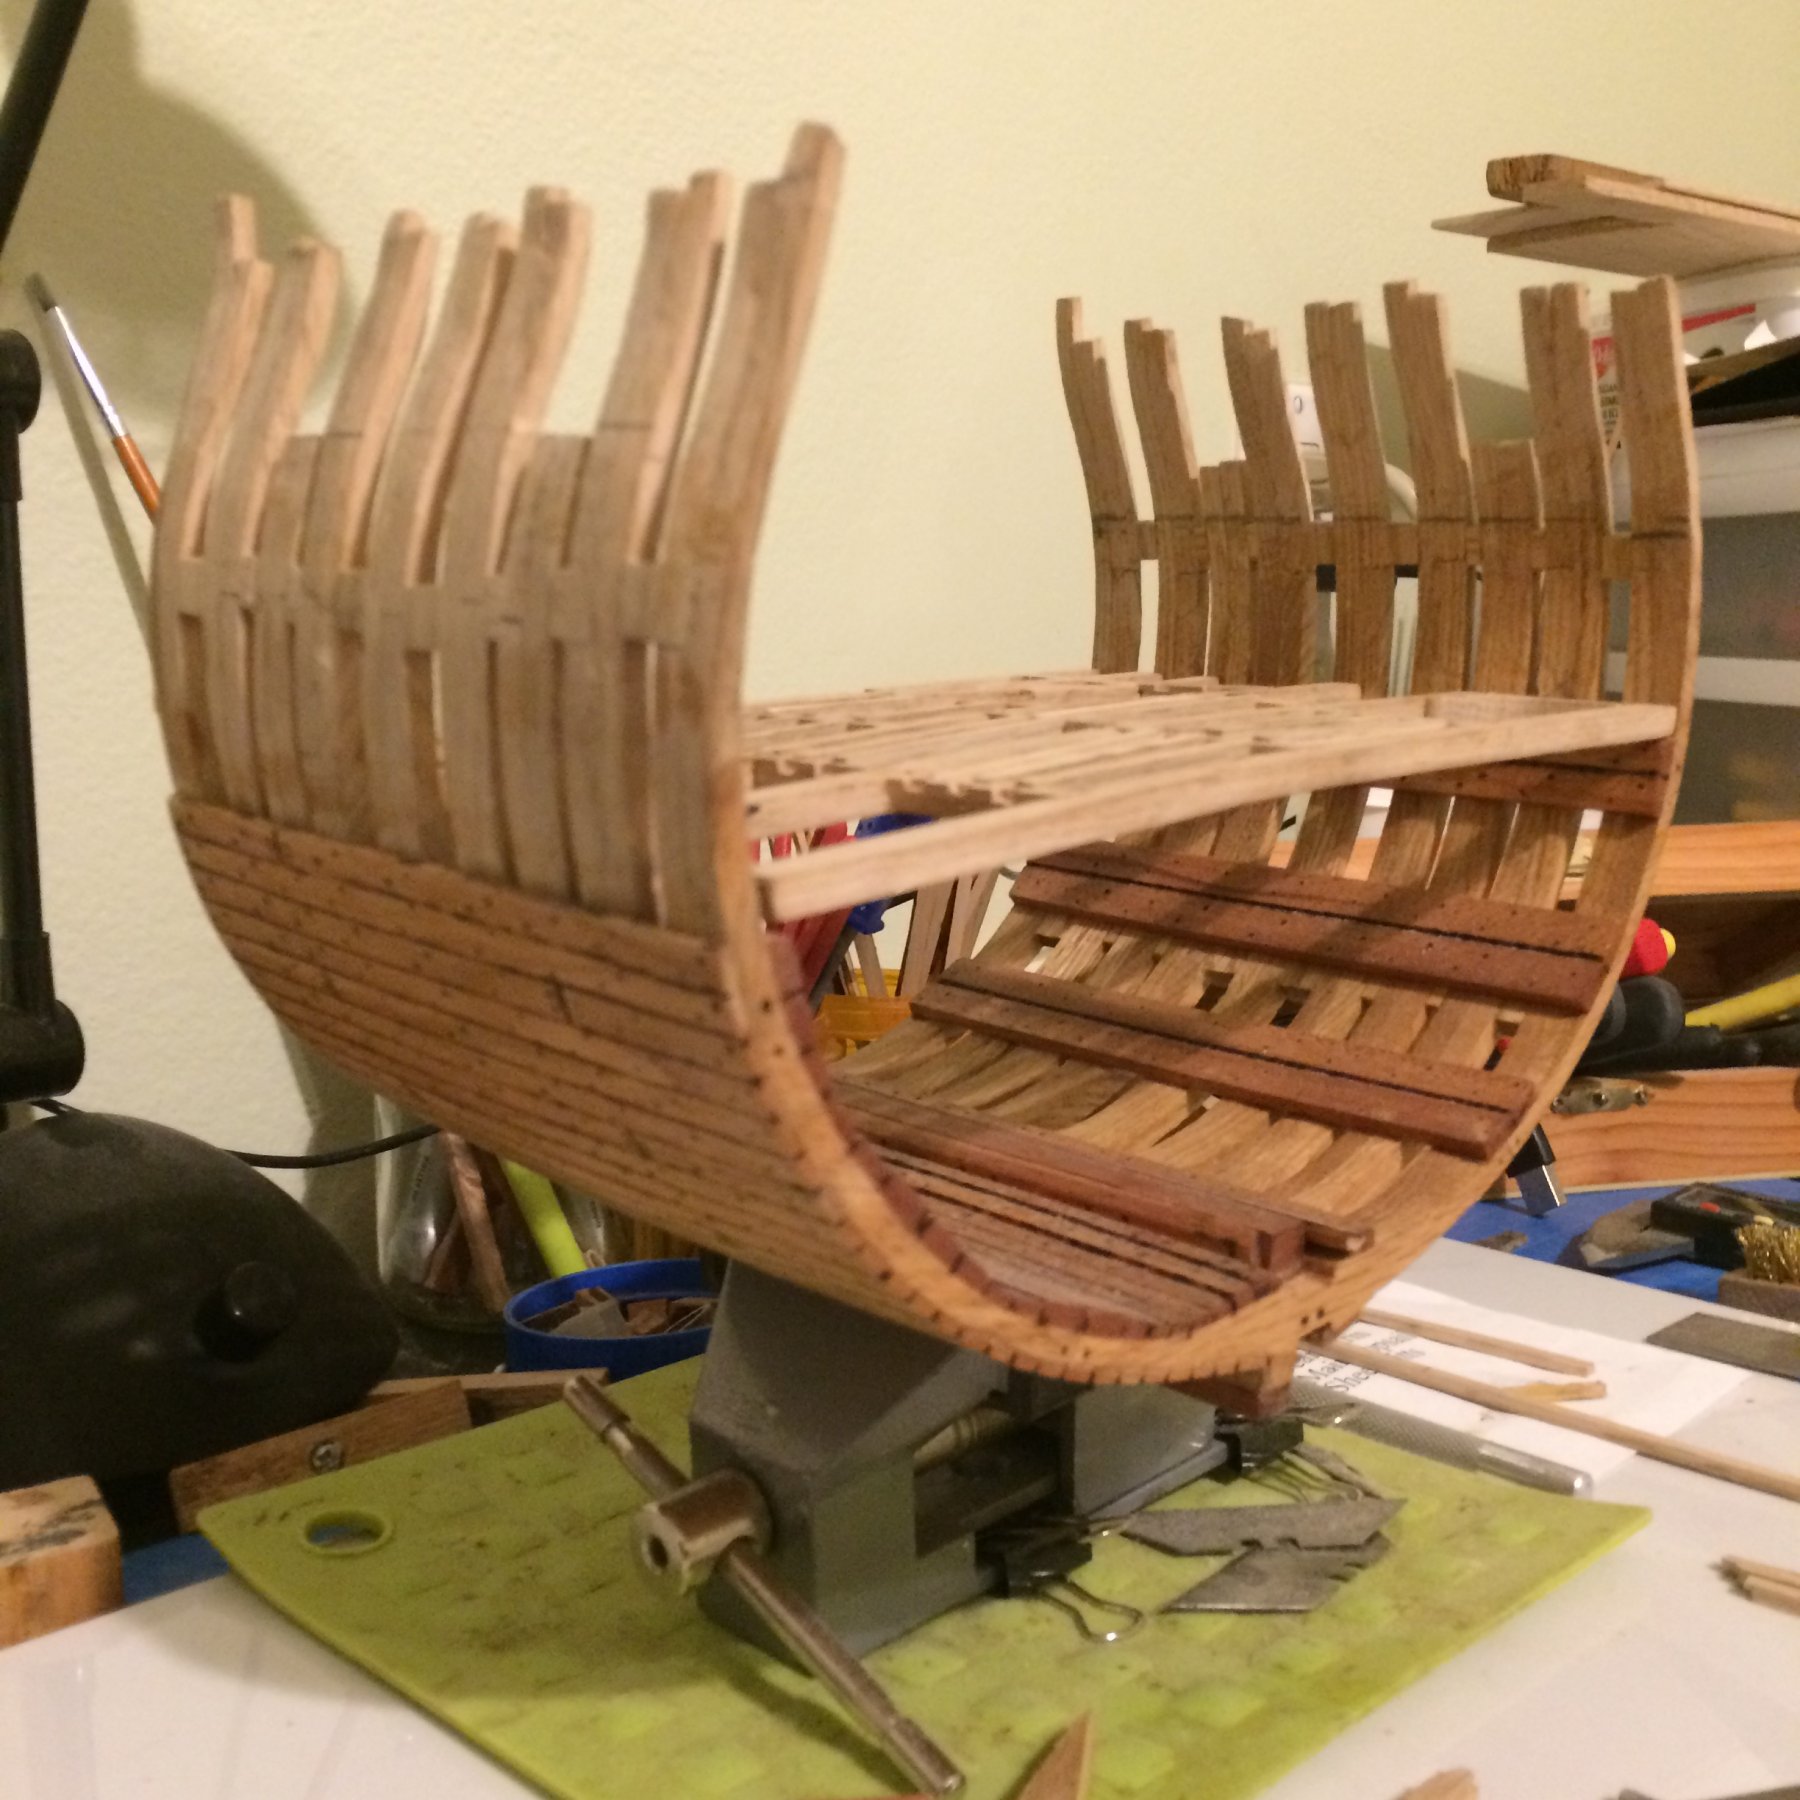
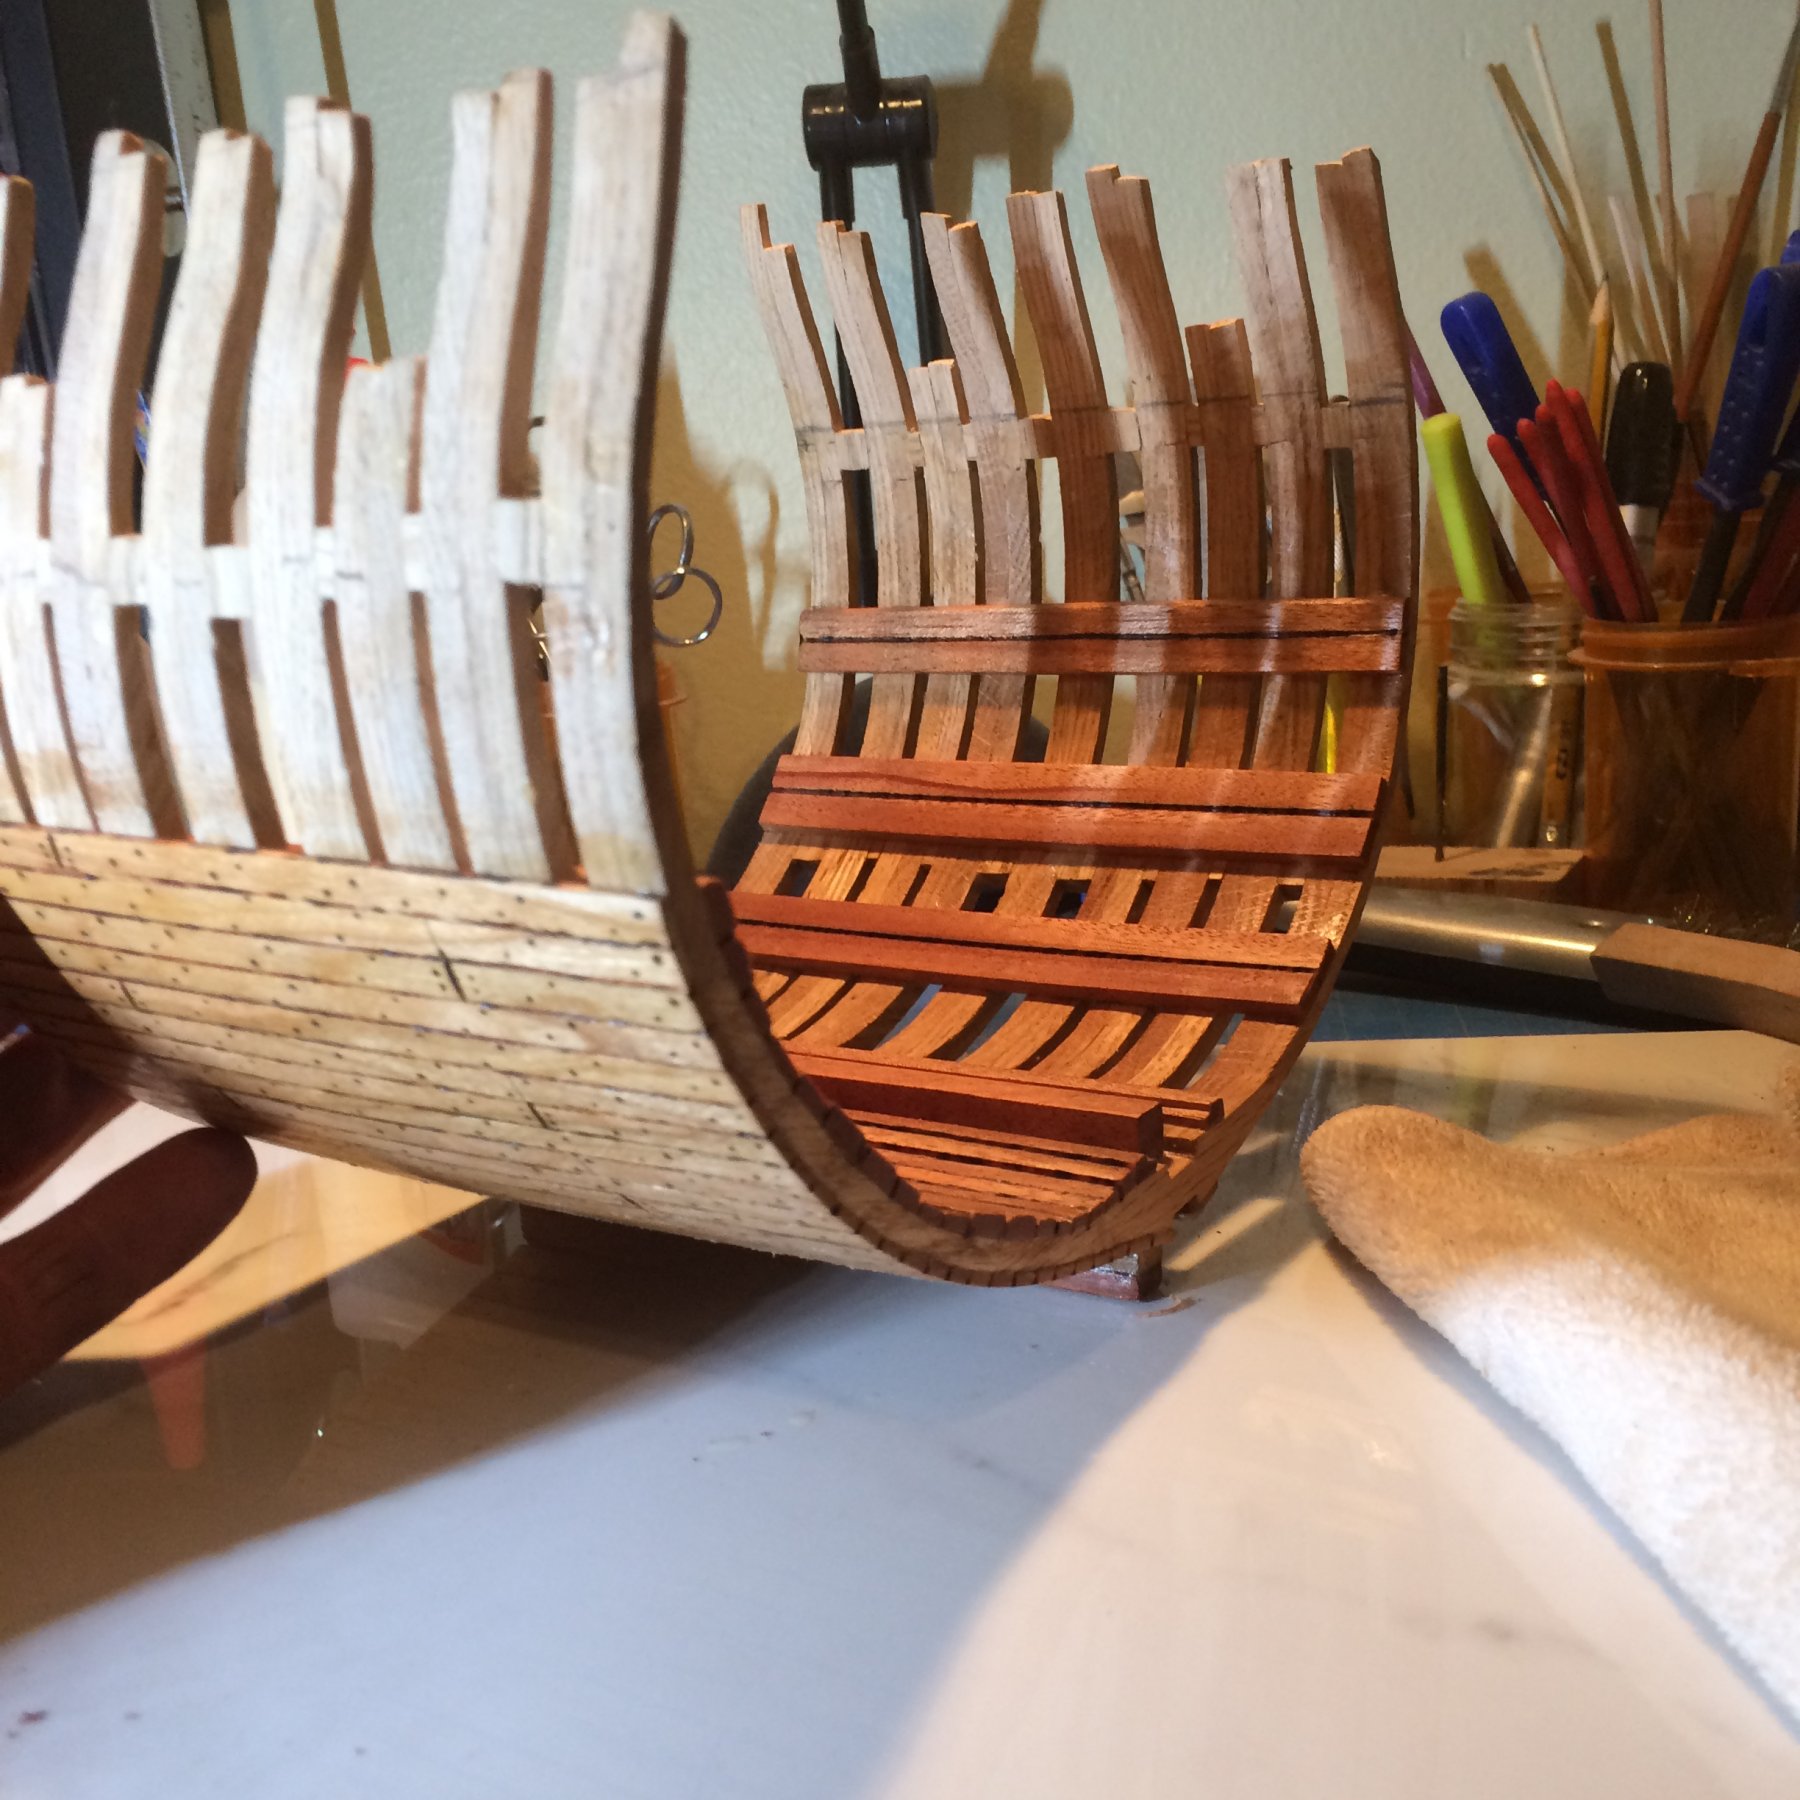
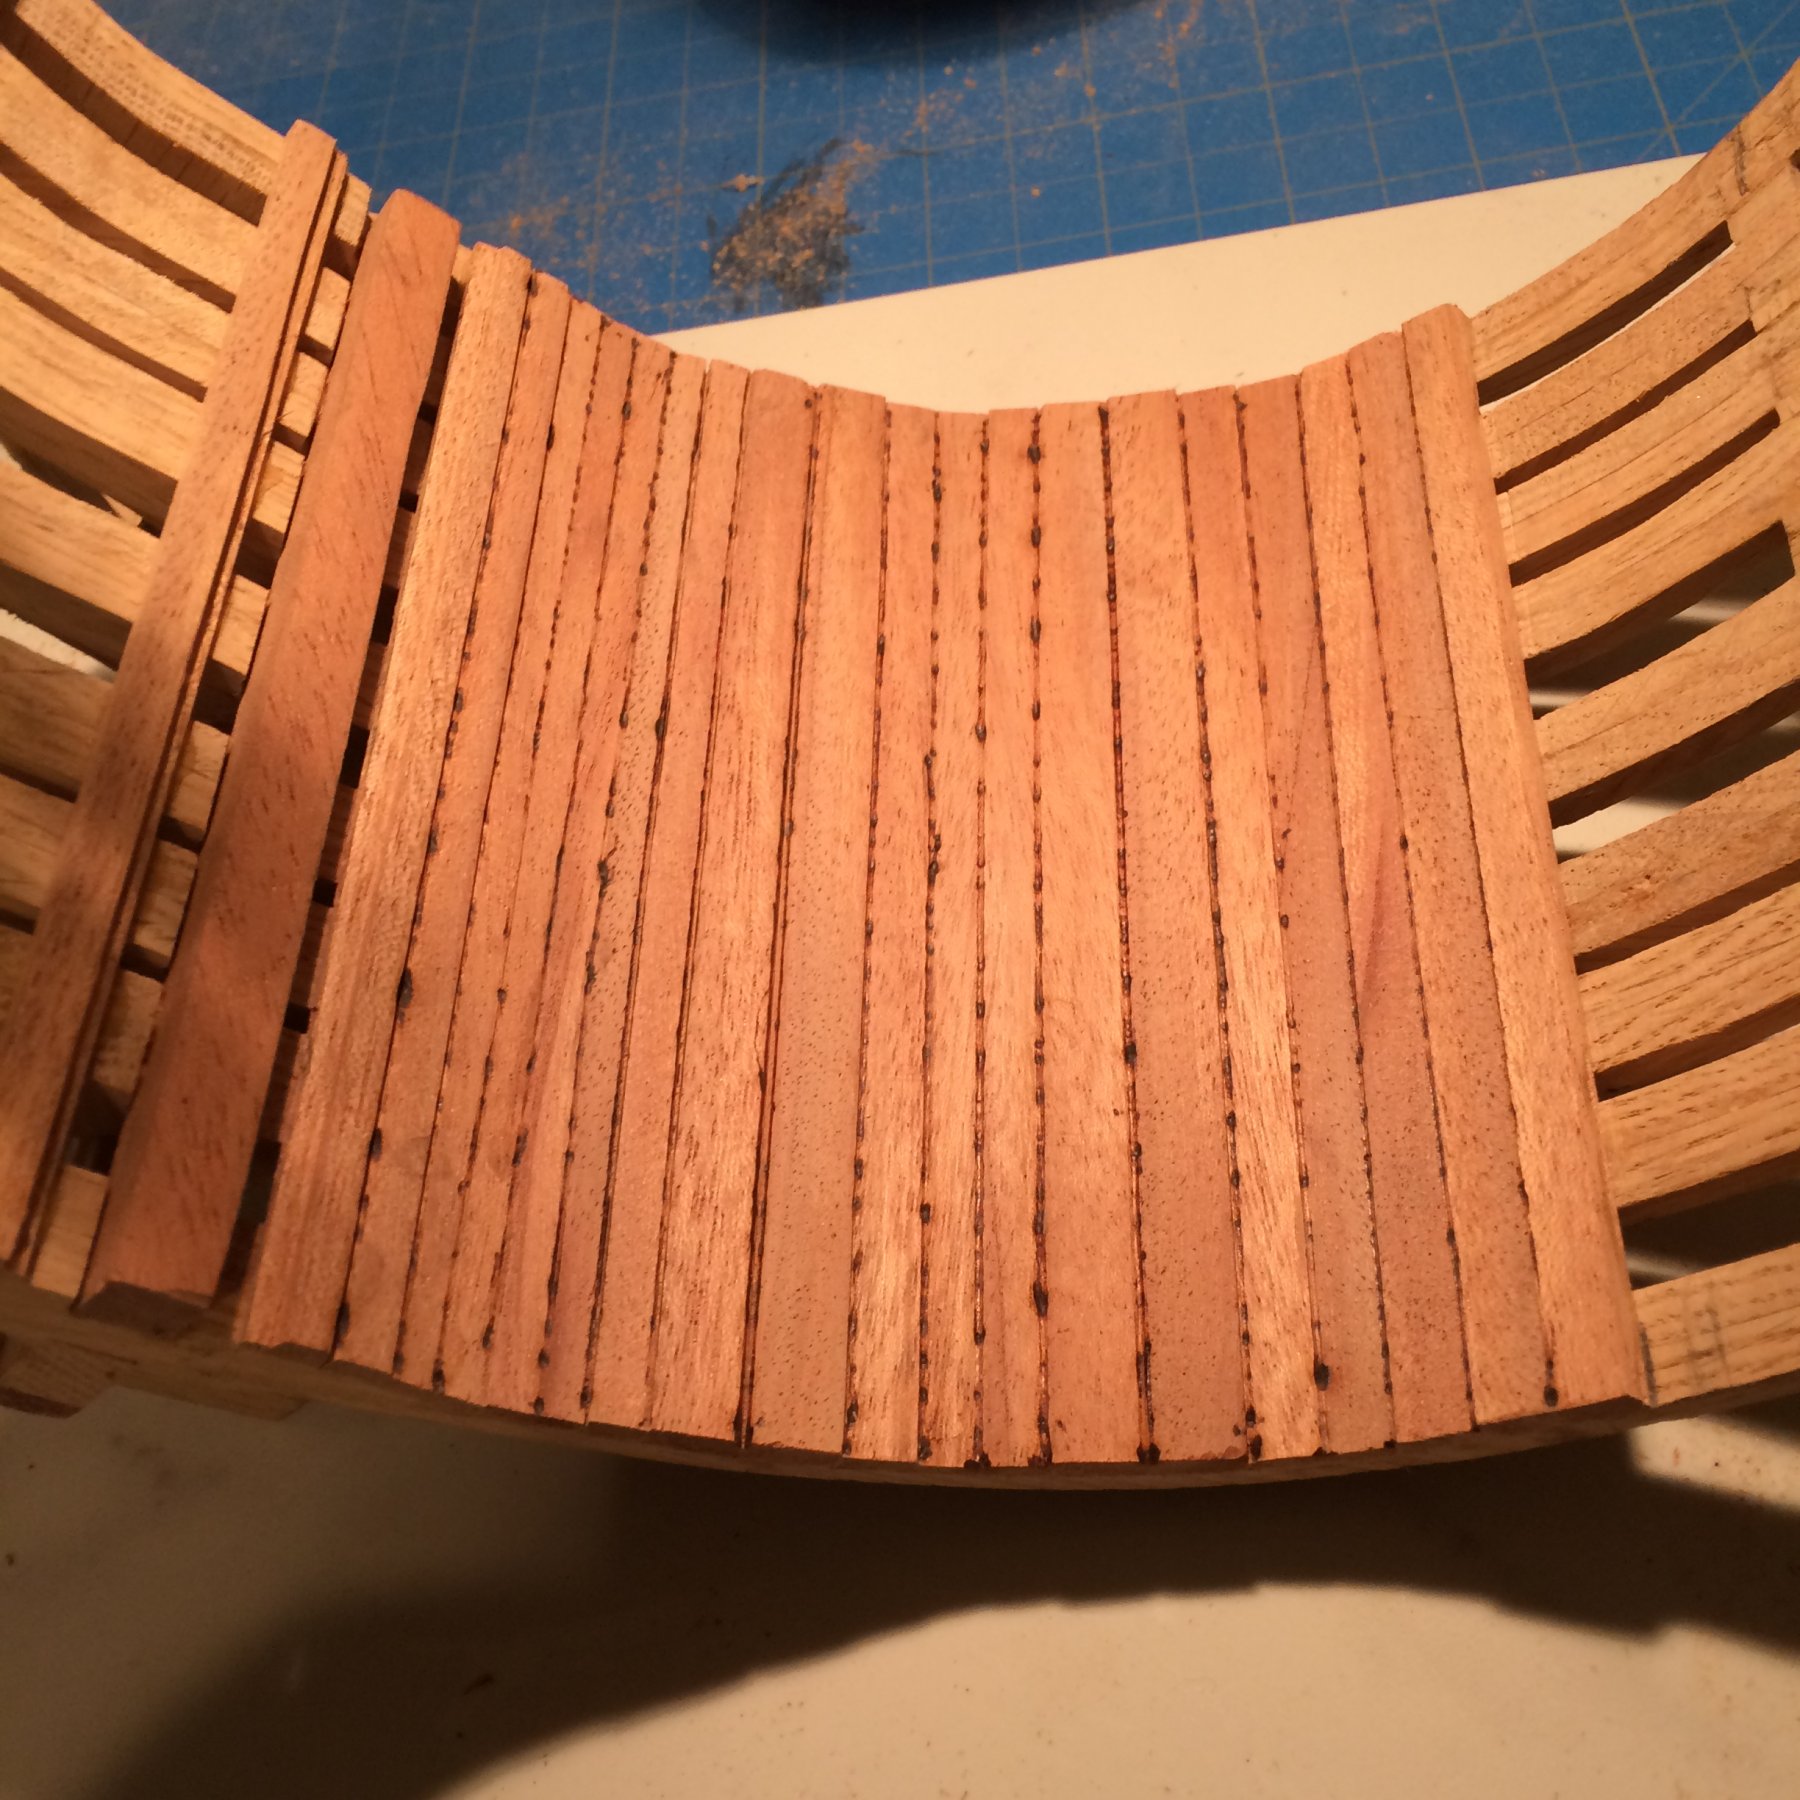
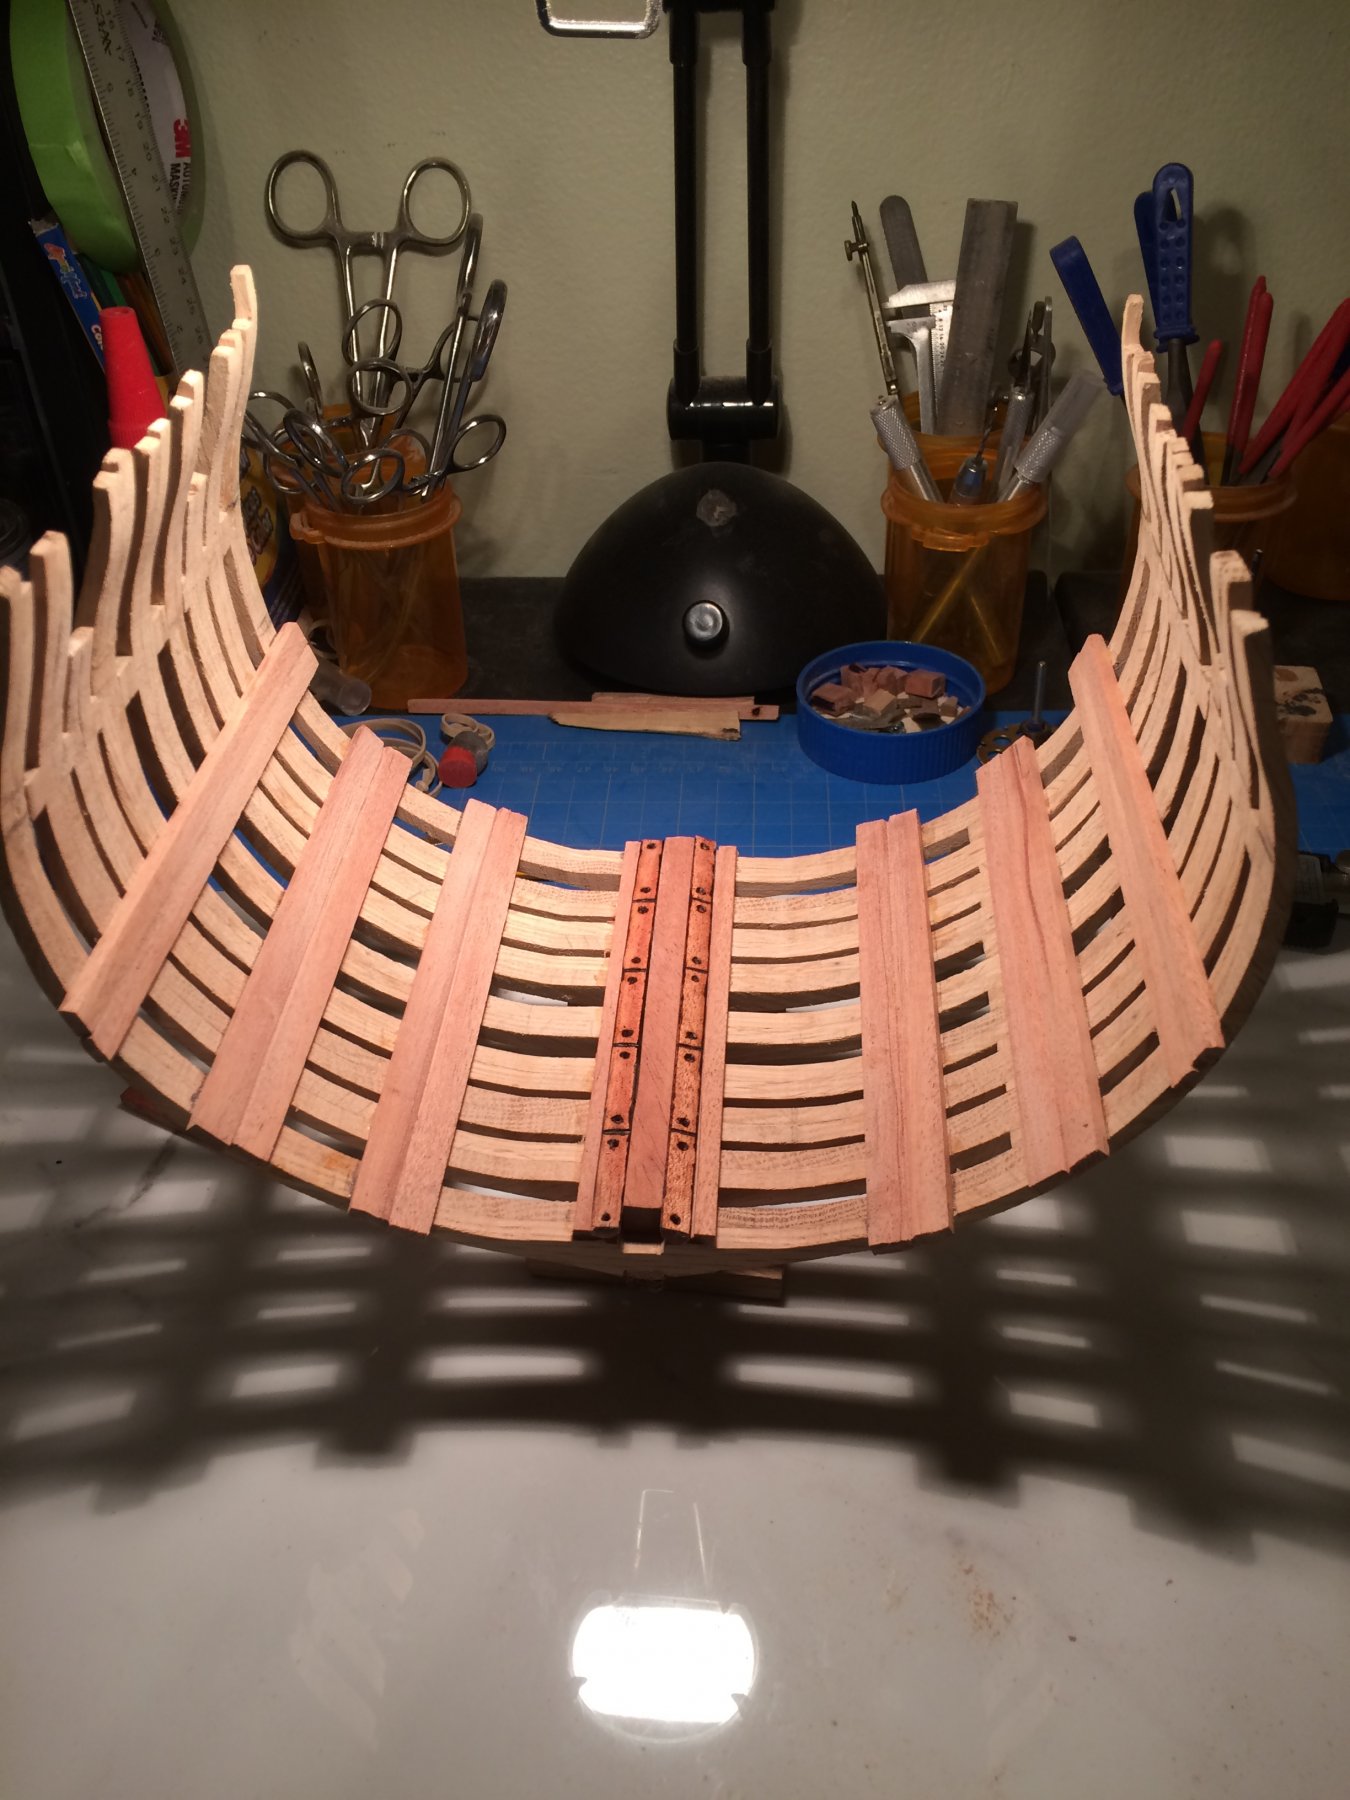
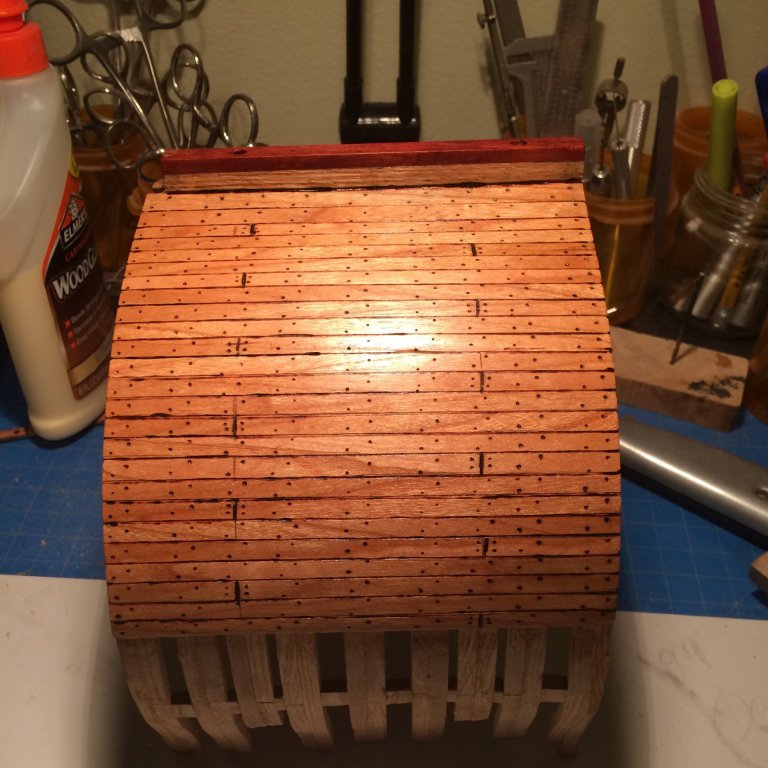
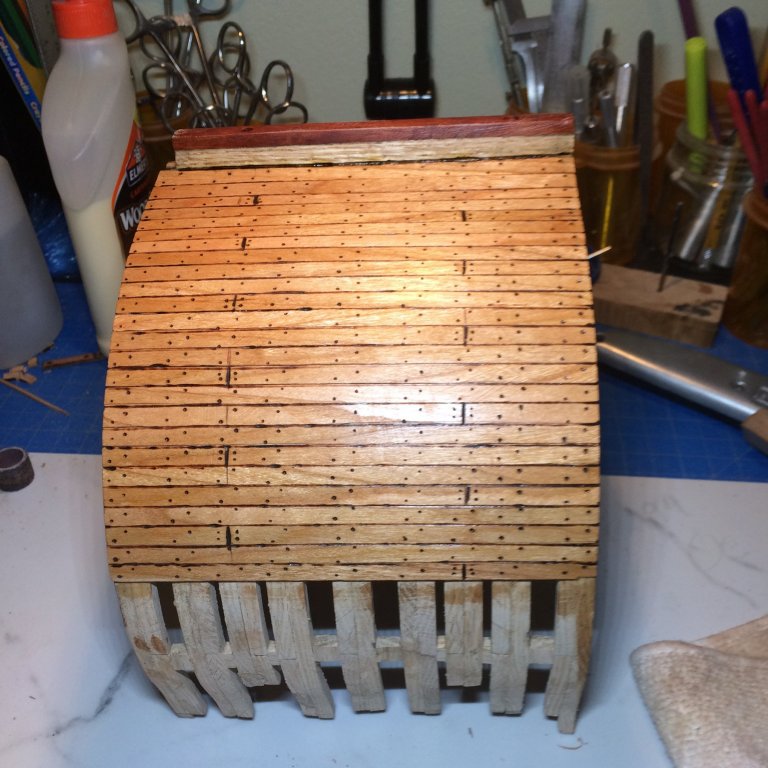
I layed down the planking up to where my lower deck will be placed . I used my soldering iron to blacken up all sides of the planks and then glued them down . I then marked out where I wanted my butt joints and nail holes and used my iron again to mark them out. I then rubbed it with 220 grit then 1000 grit paper and rubbed on a coat of clear poly. This is how she is looking , She is coming together slowly but surely ,I believe I will start on the lower deck tomorrow . Thanks for checking in Derek

-
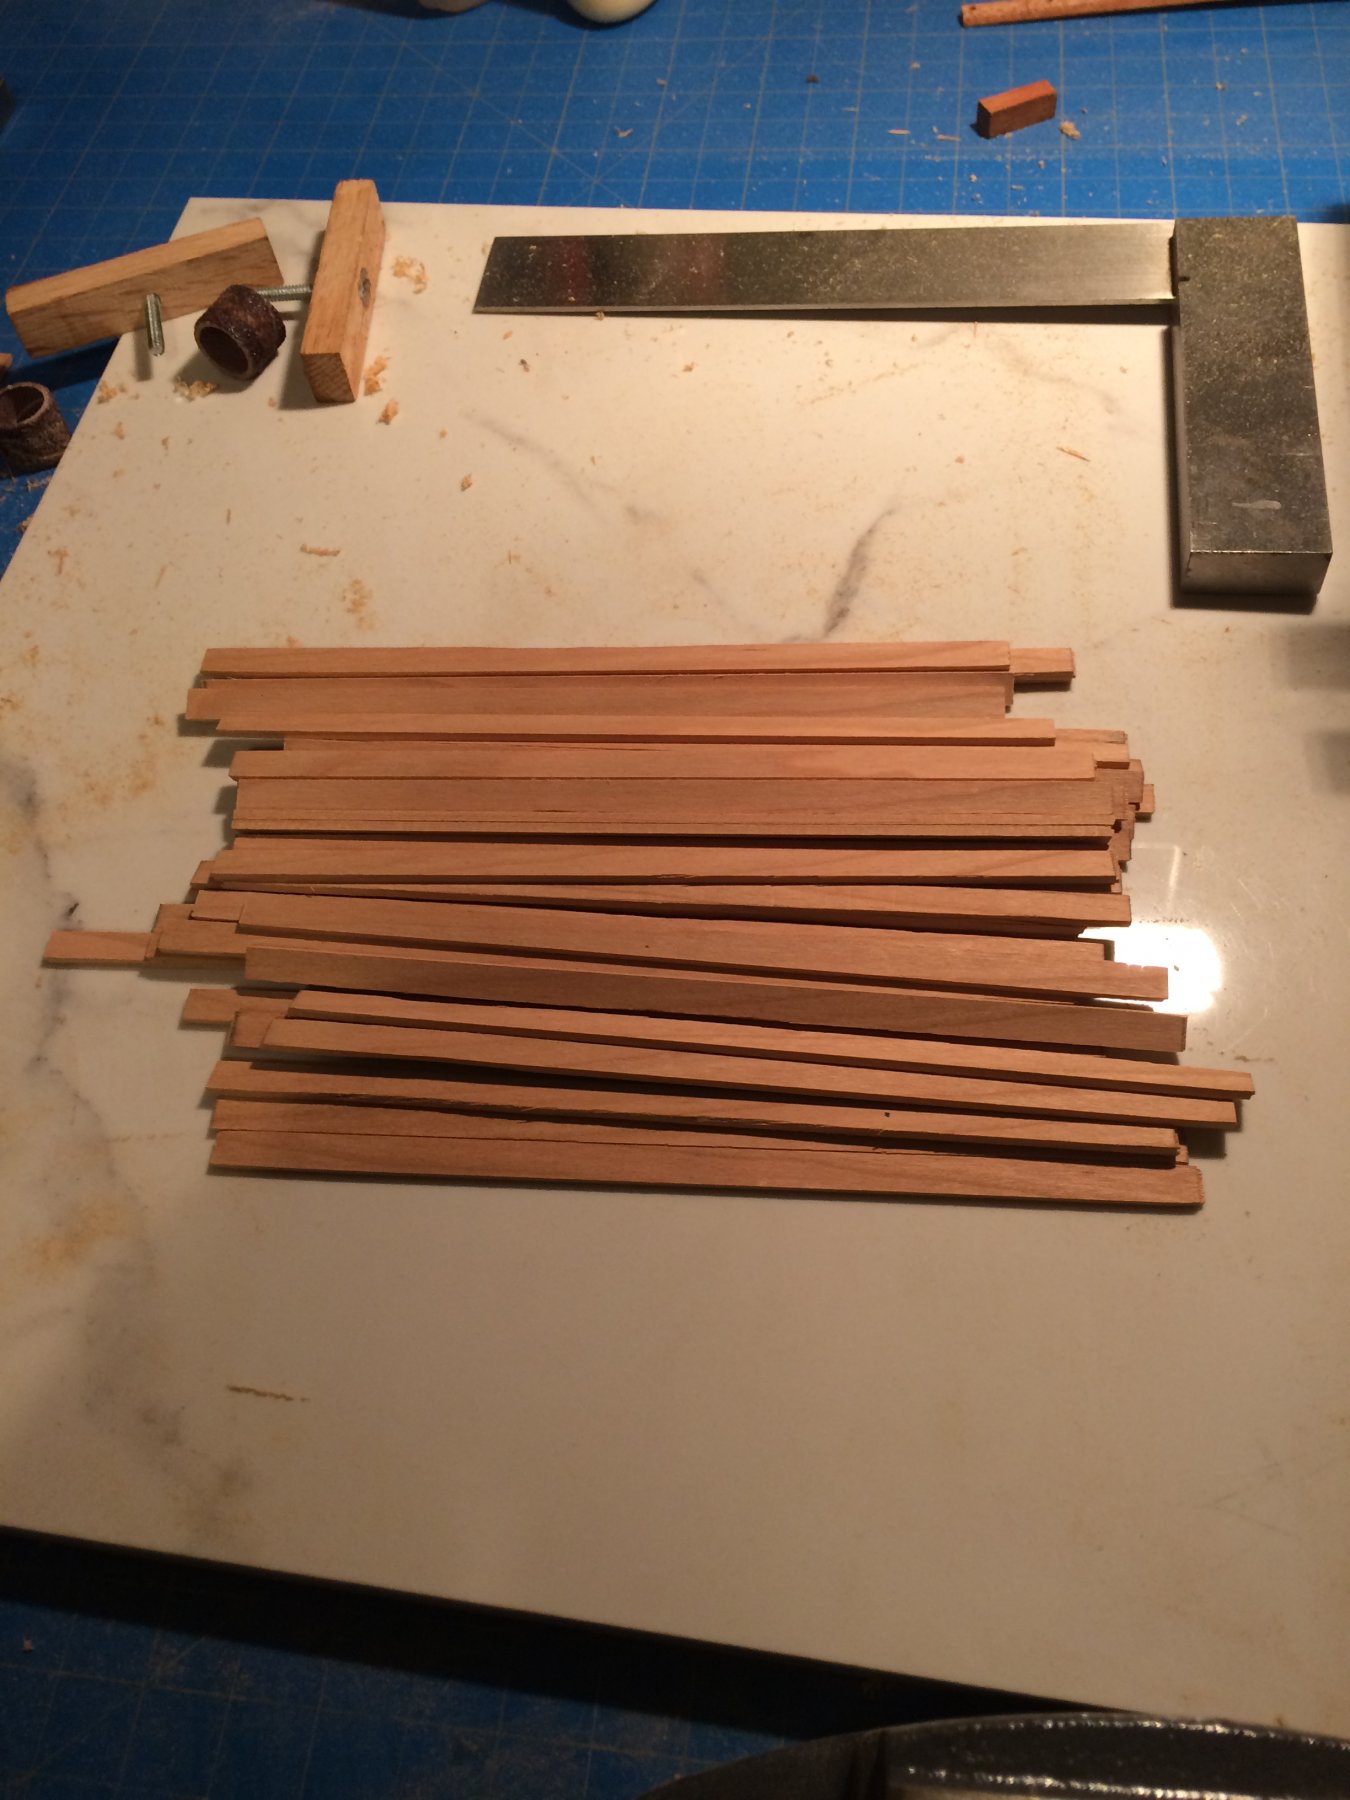
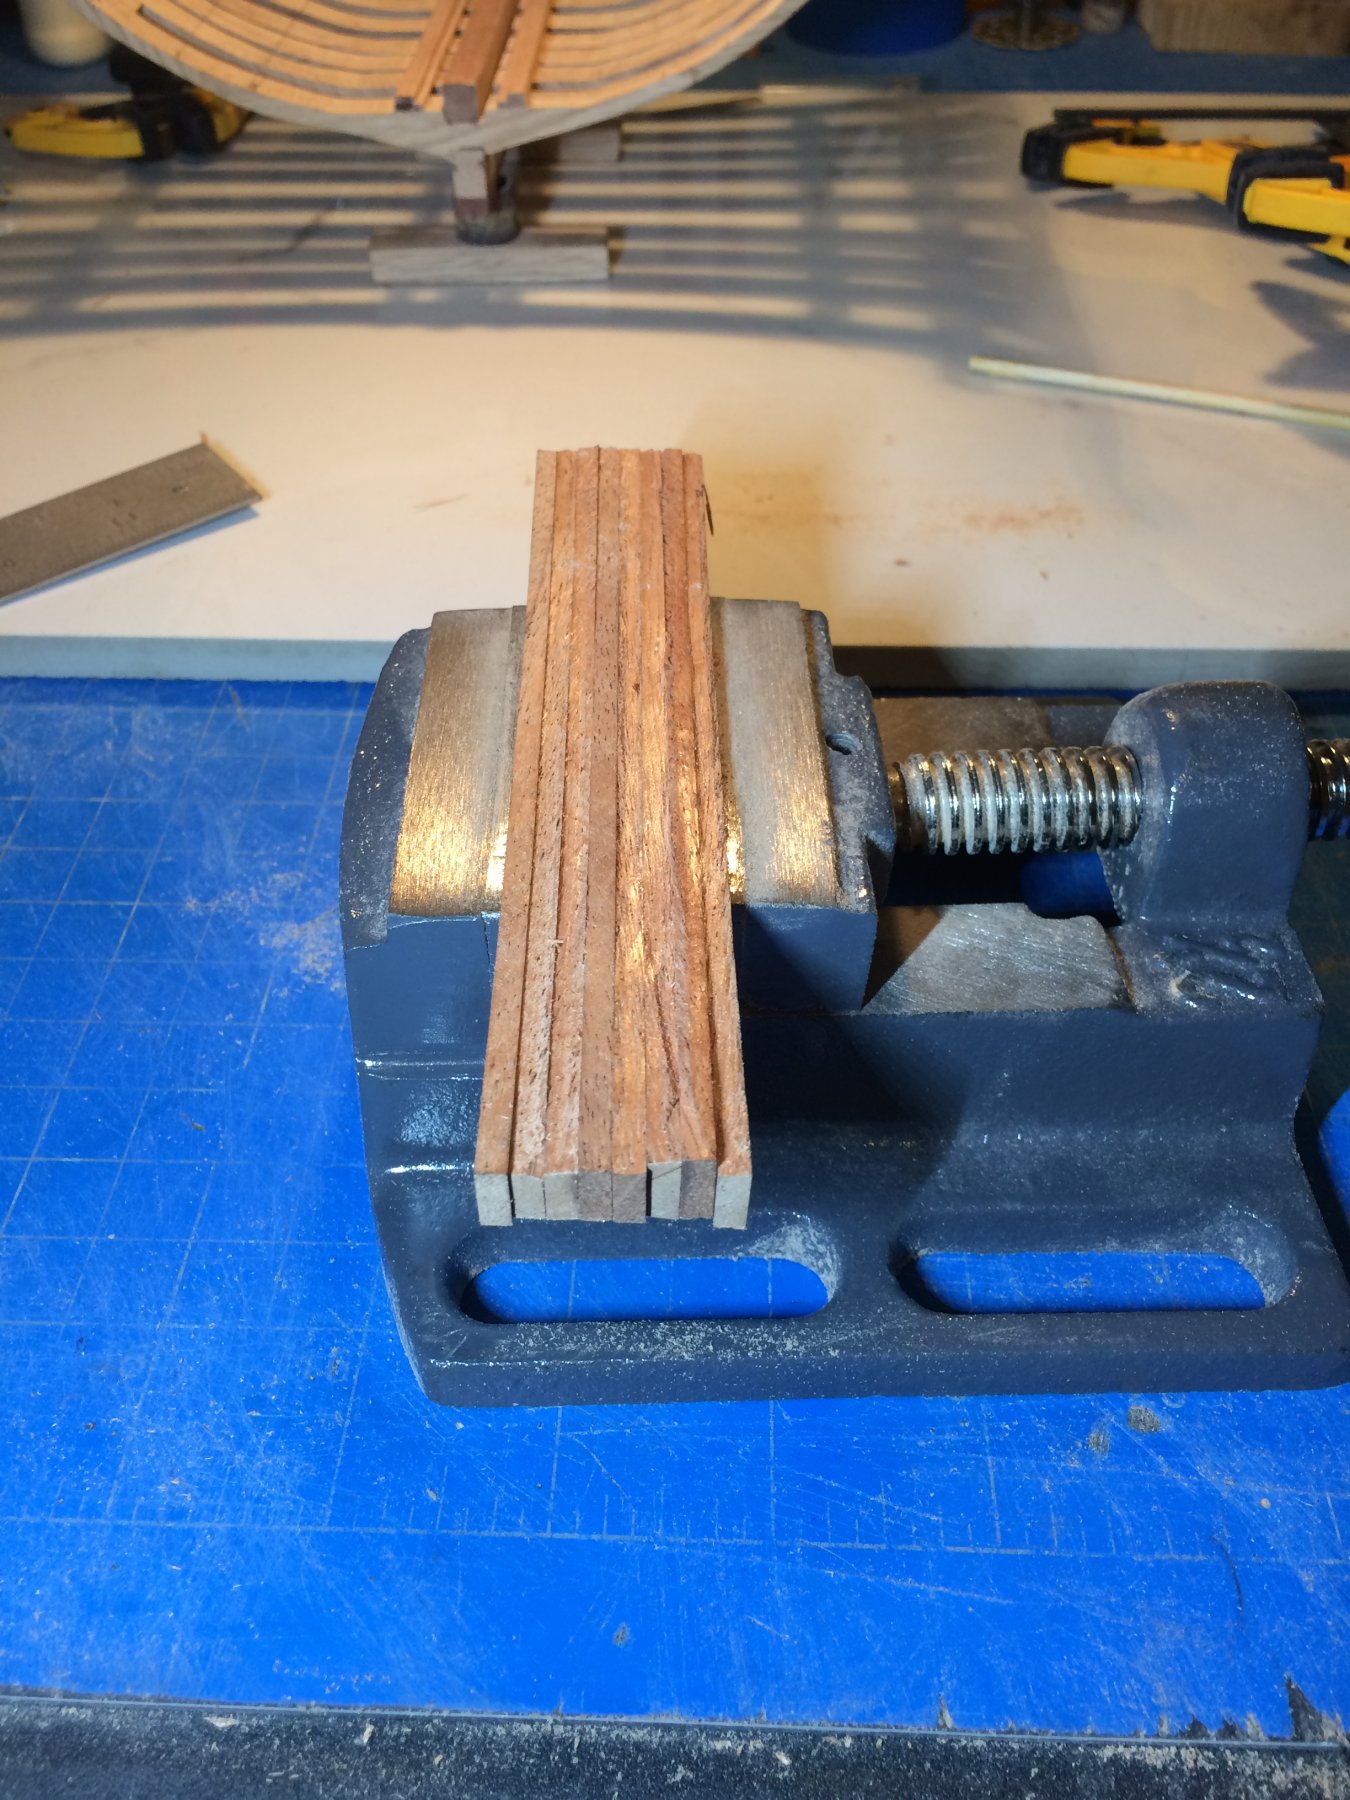
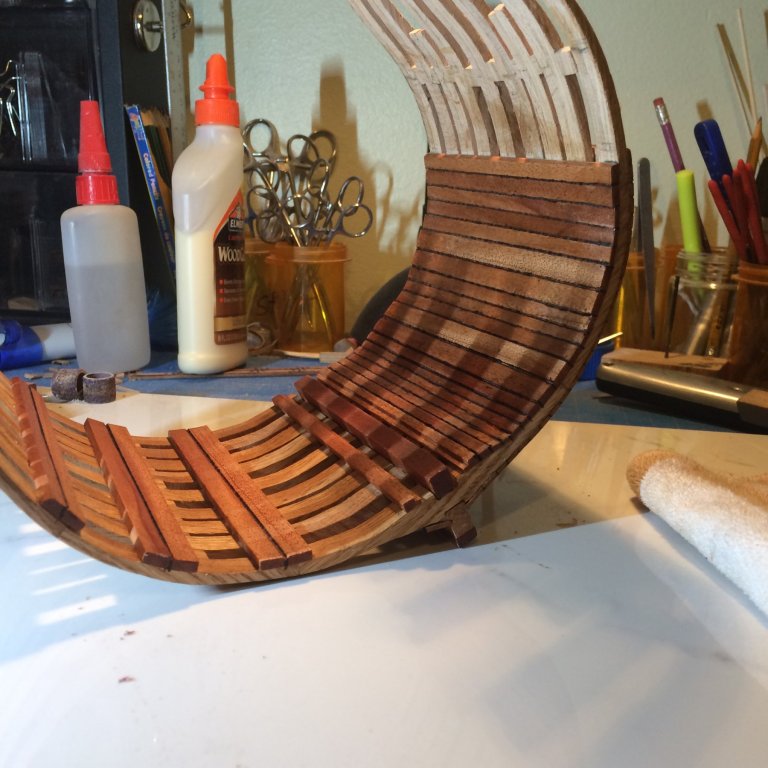
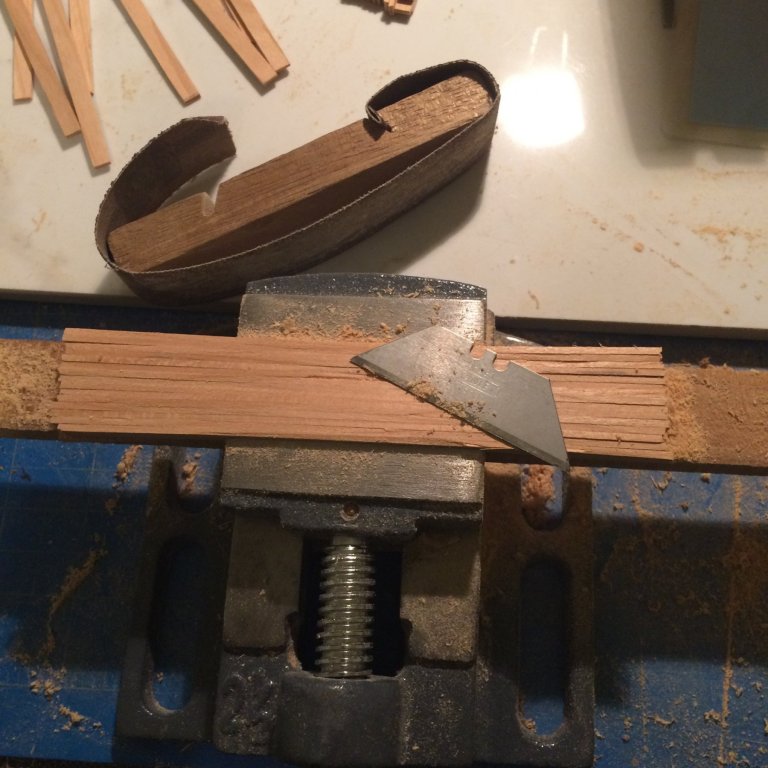
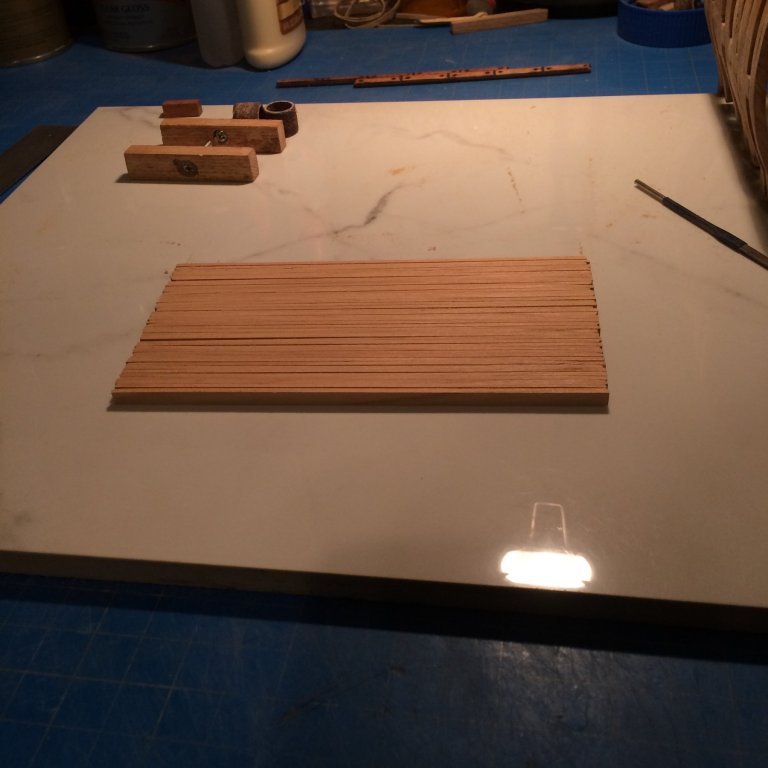
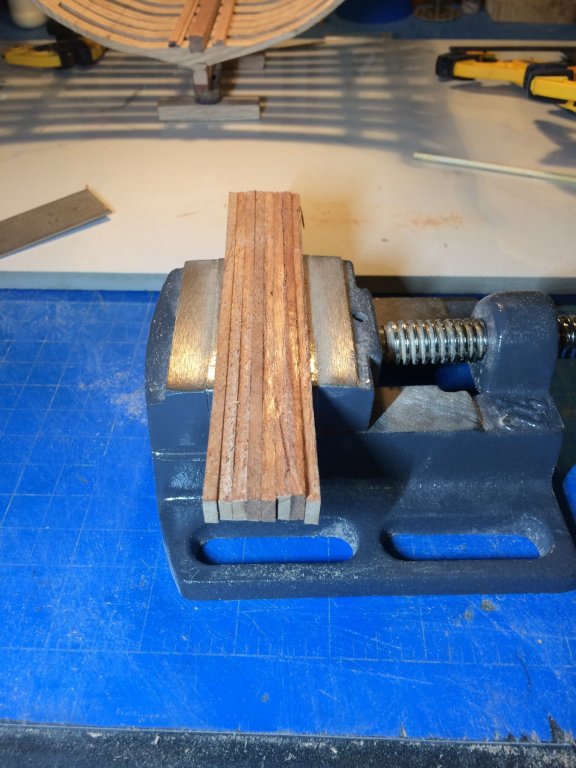
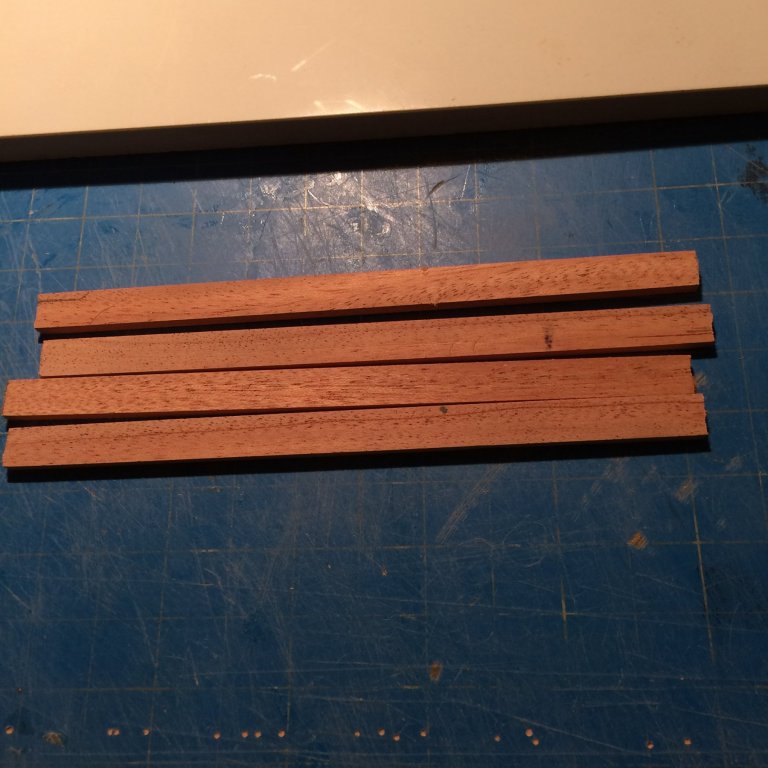
Thanks Chad ! the last few days I have been cutting Mahogany for the outer planking . I marked each on and then used a utility knife to cut them out . Then I clamped them in a vice using a random piece of teak I had laying around to bring the planking above the jaws of the vice.Using a razor blade and sanding block I got them uniform. Here are the sanded planks I cut and prepared 41 planks I will make all final adjustments to them when gluing. Thanks for Checking in. Derek


-
Looks real good
-
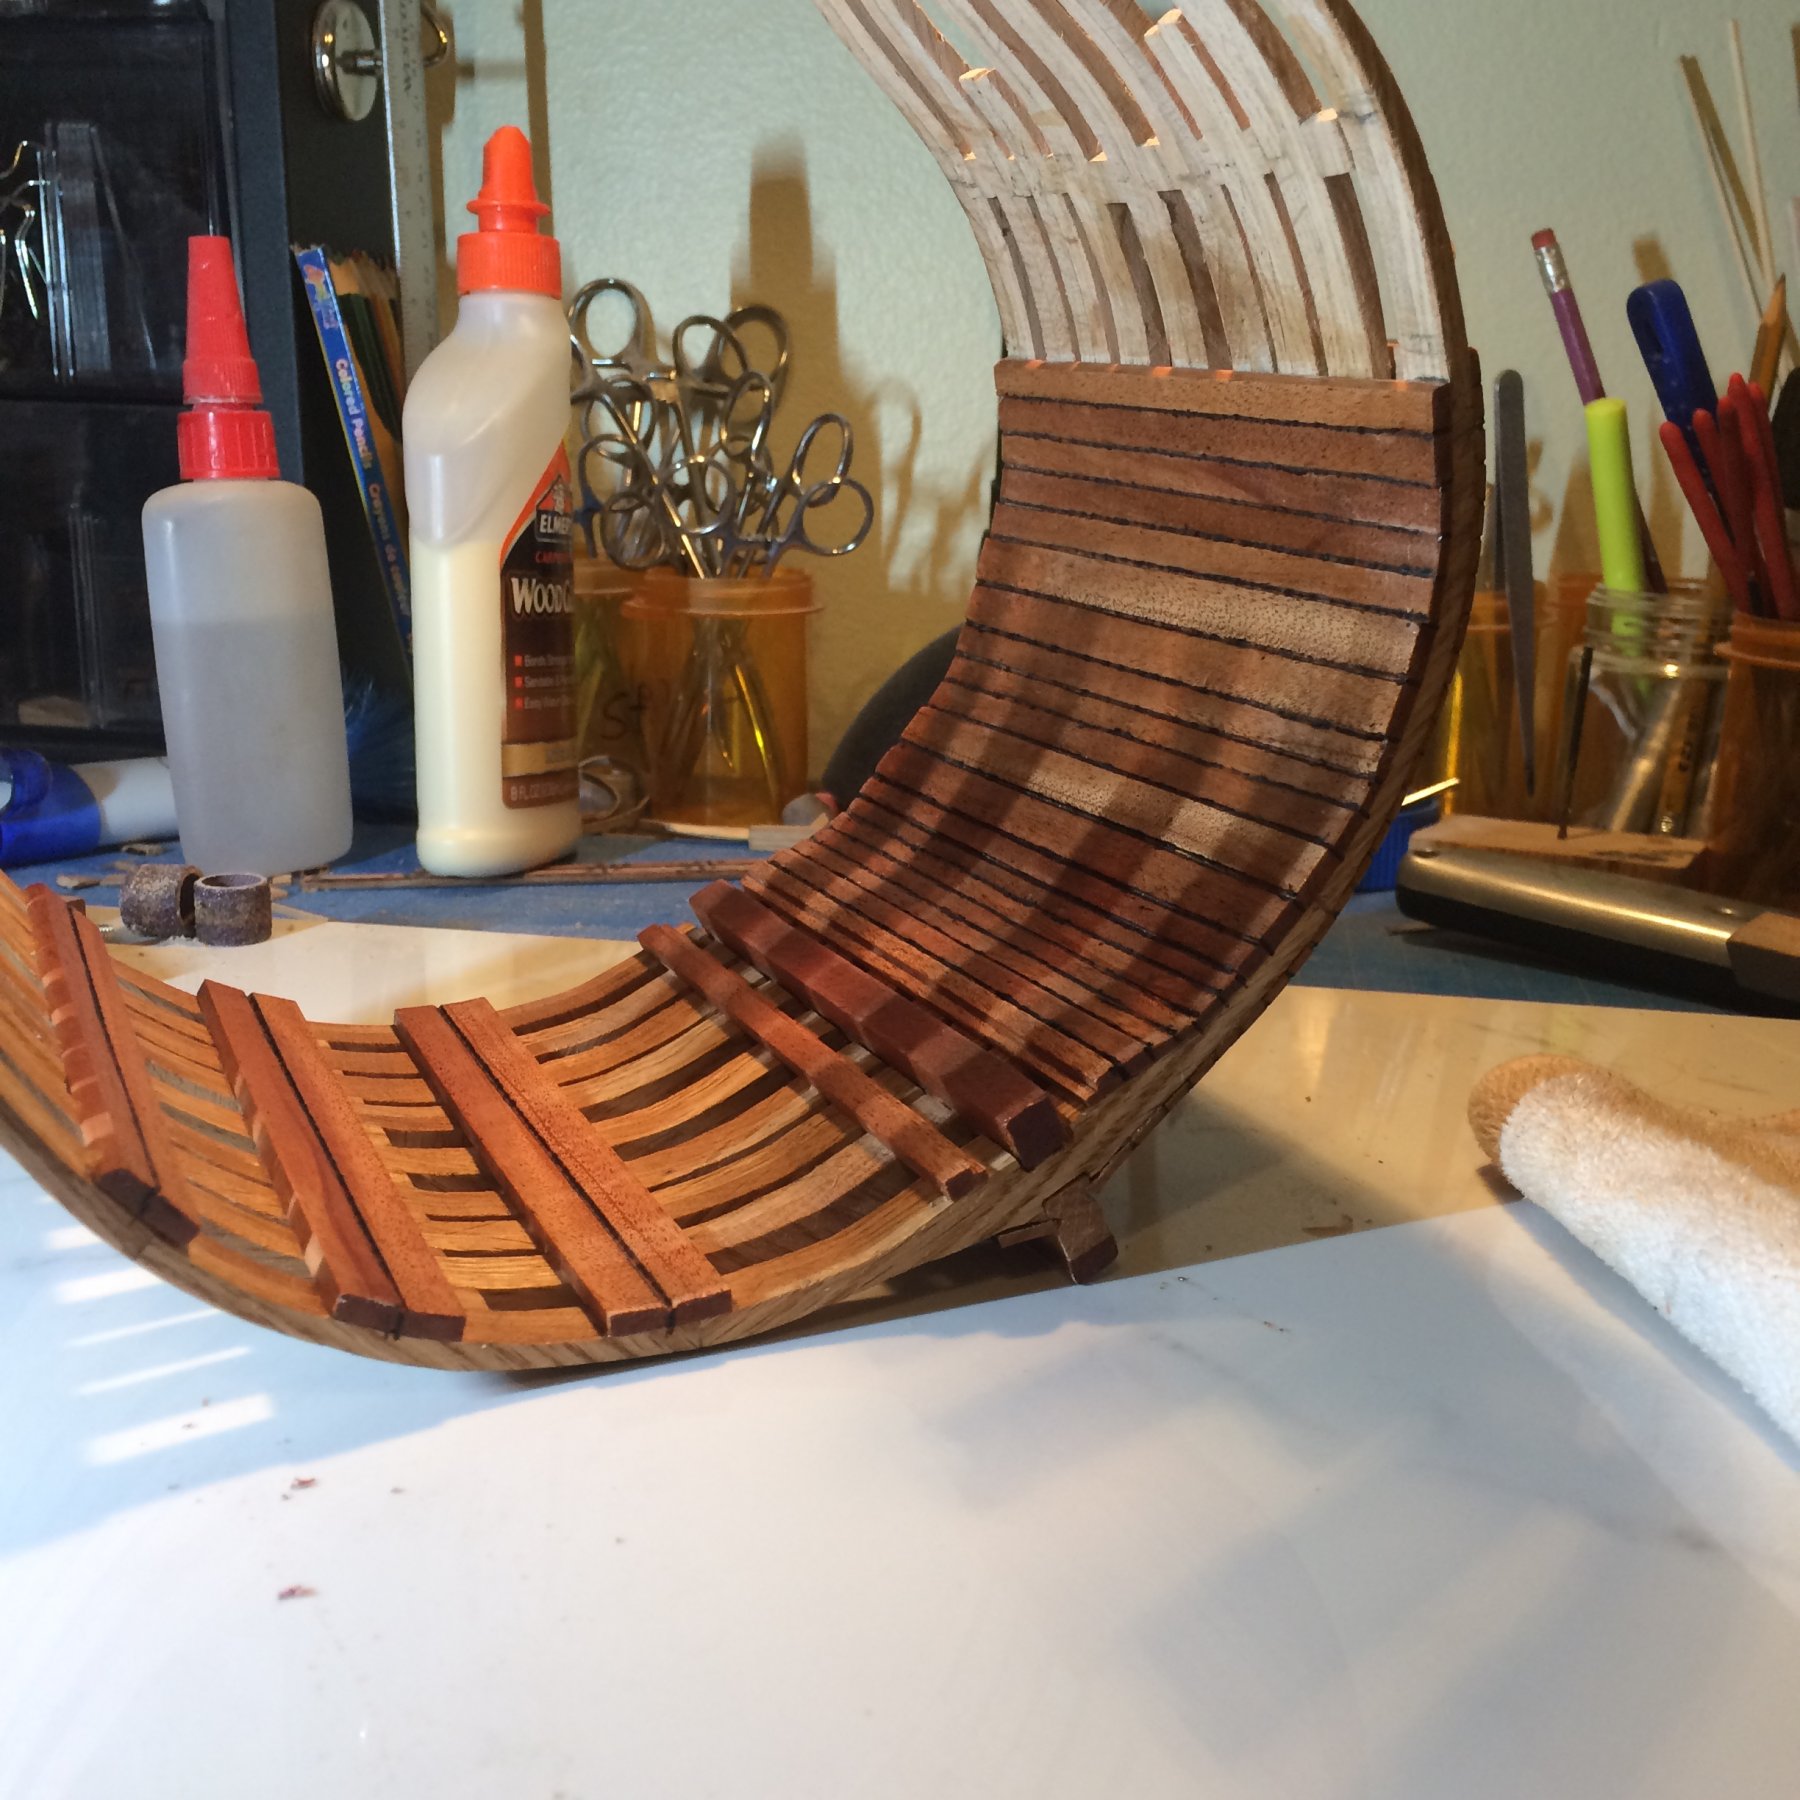
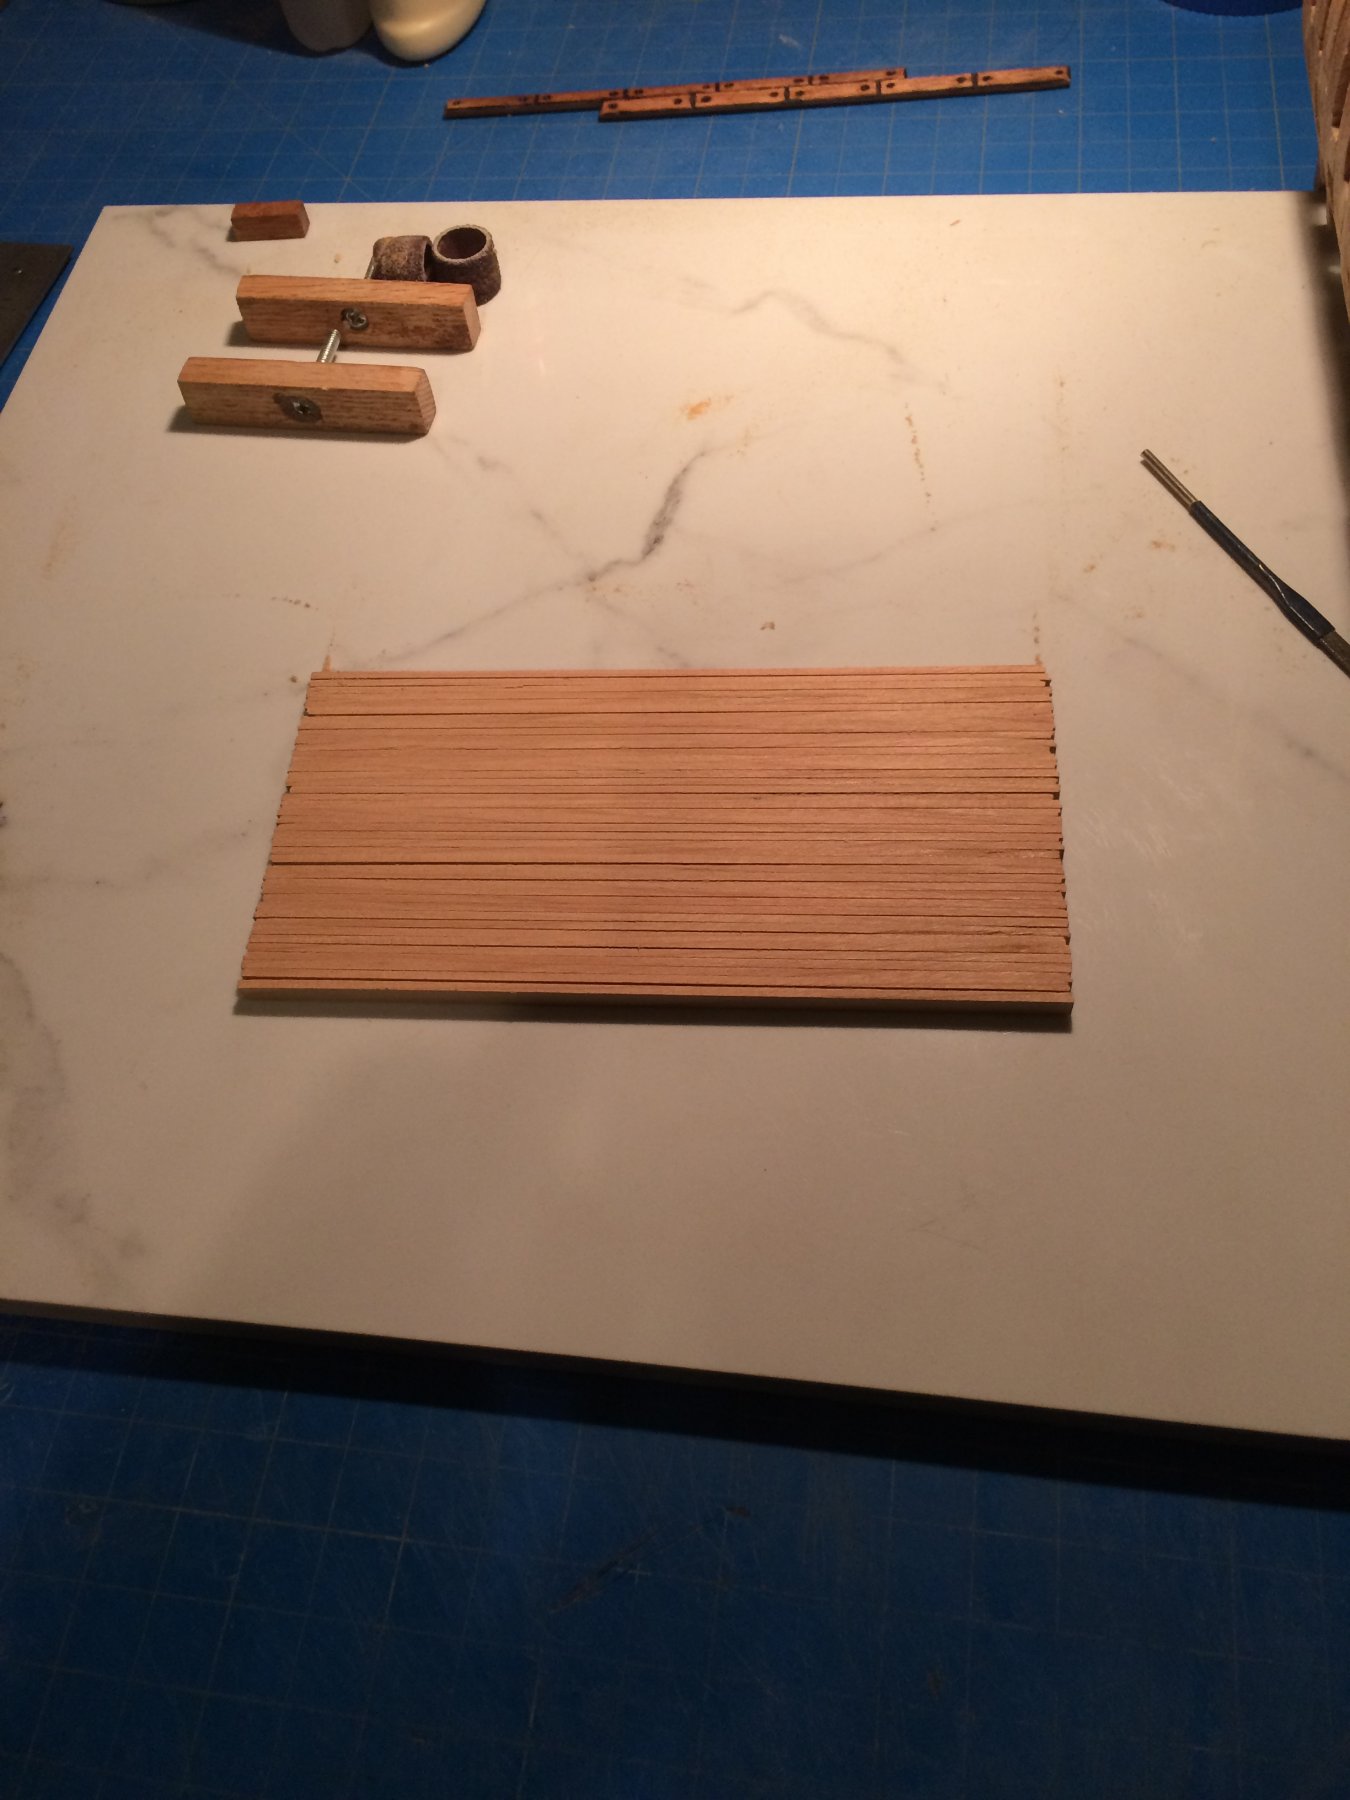
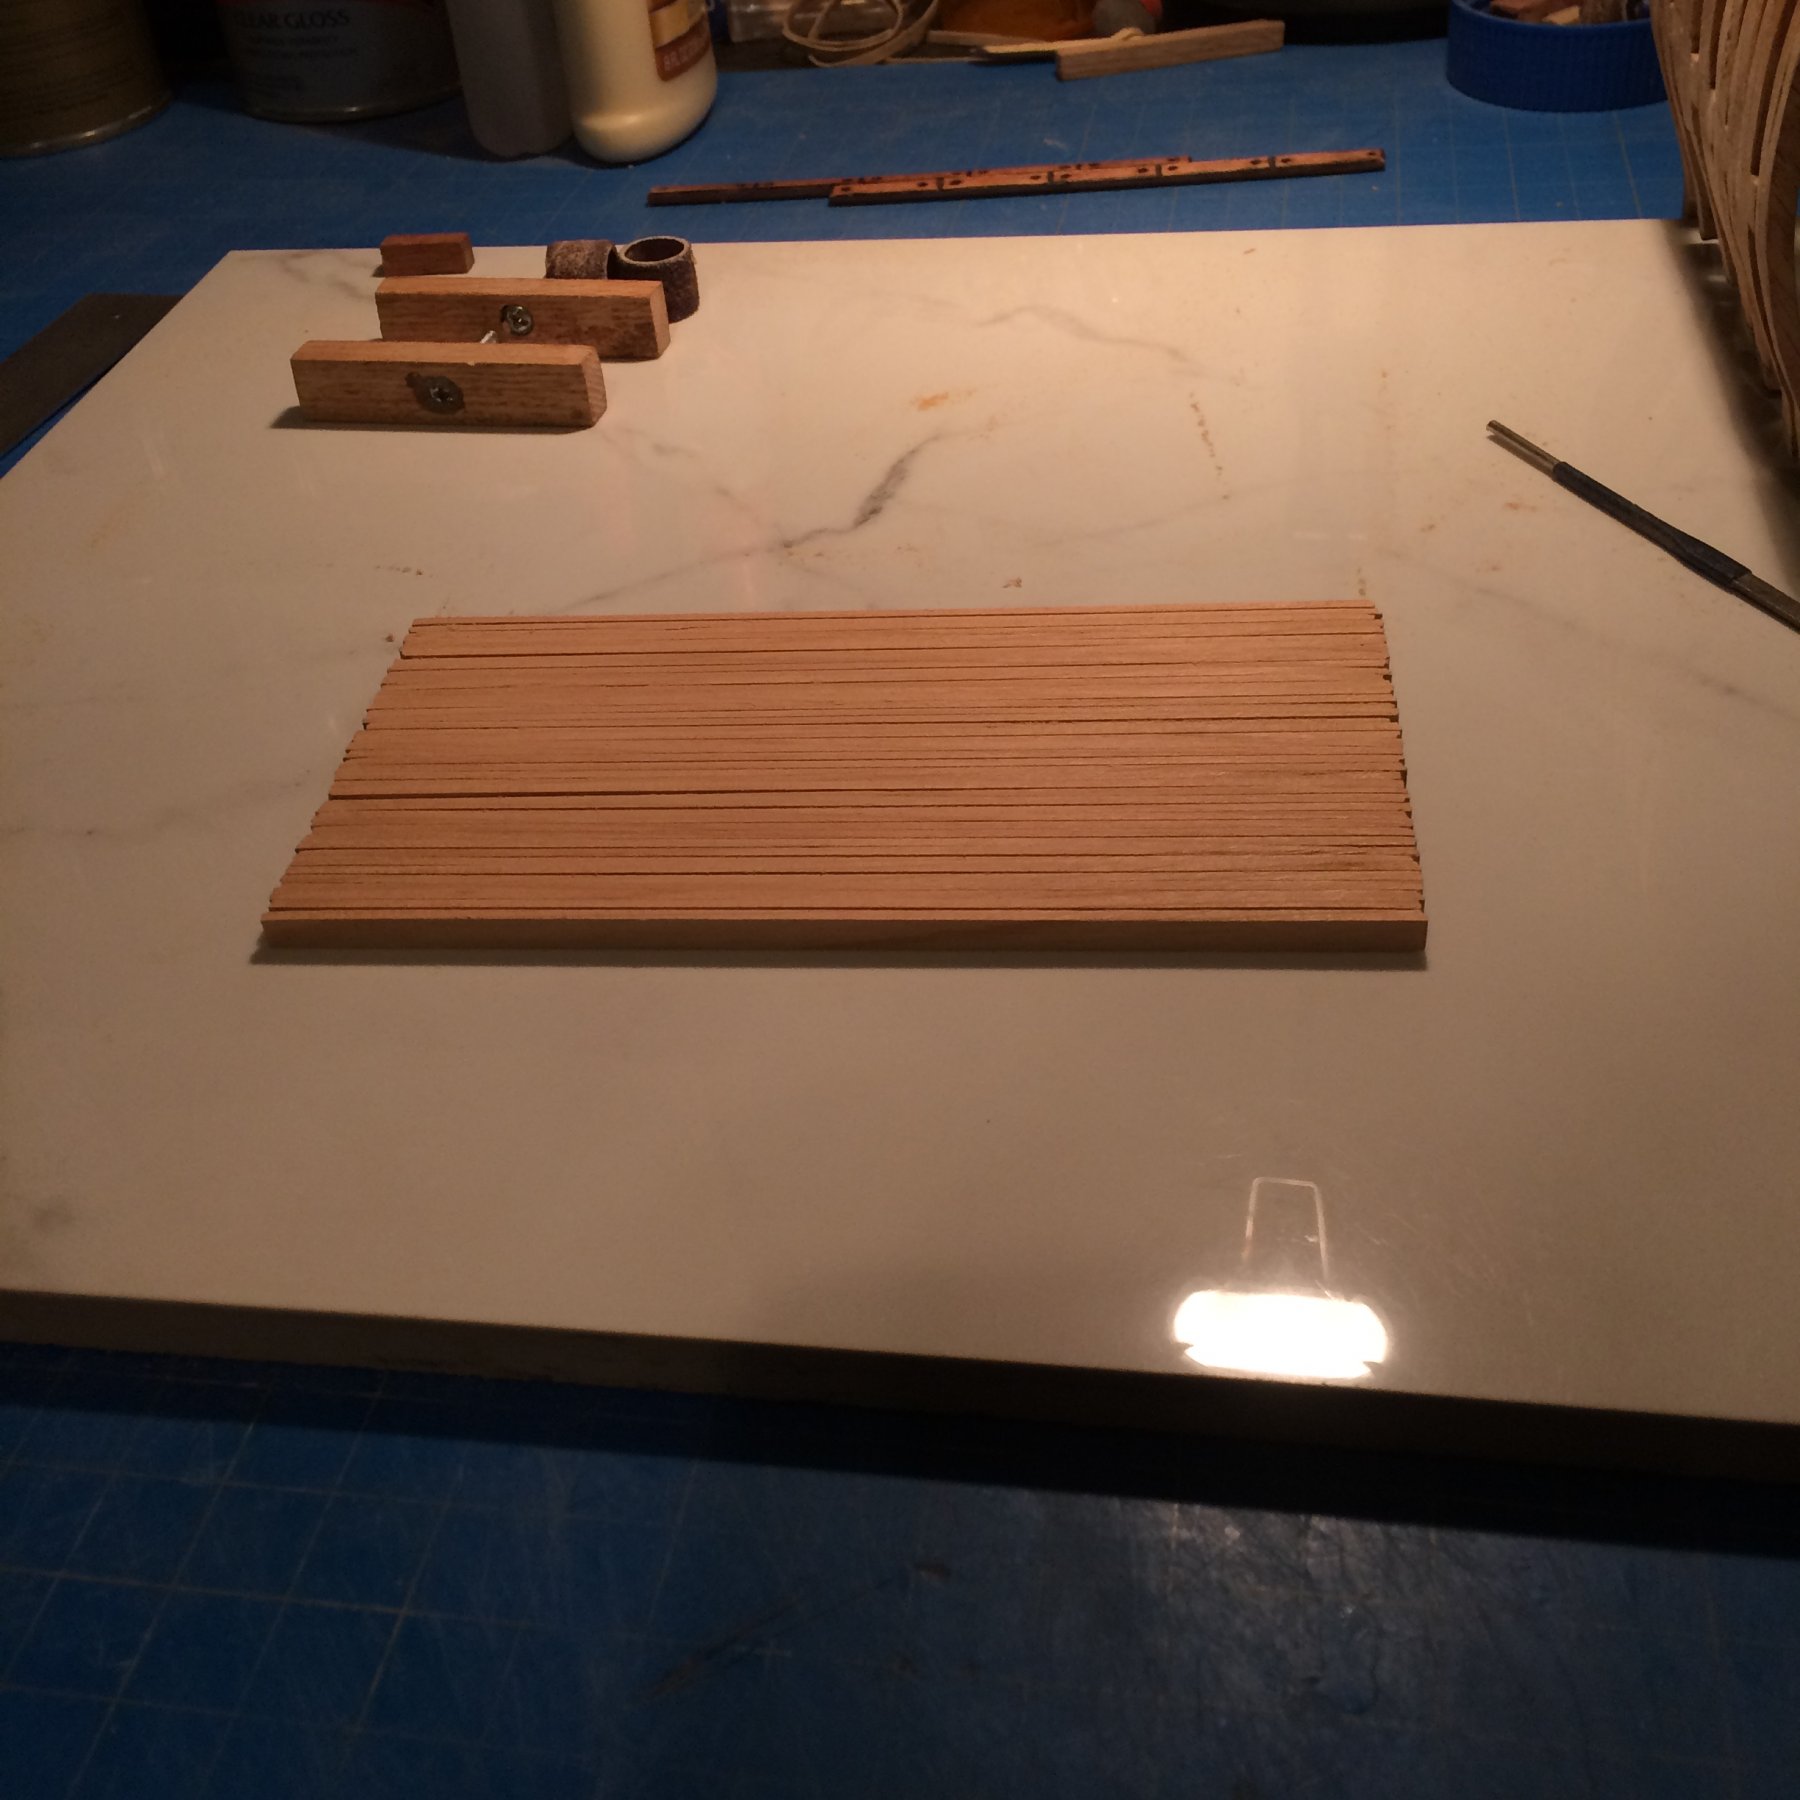
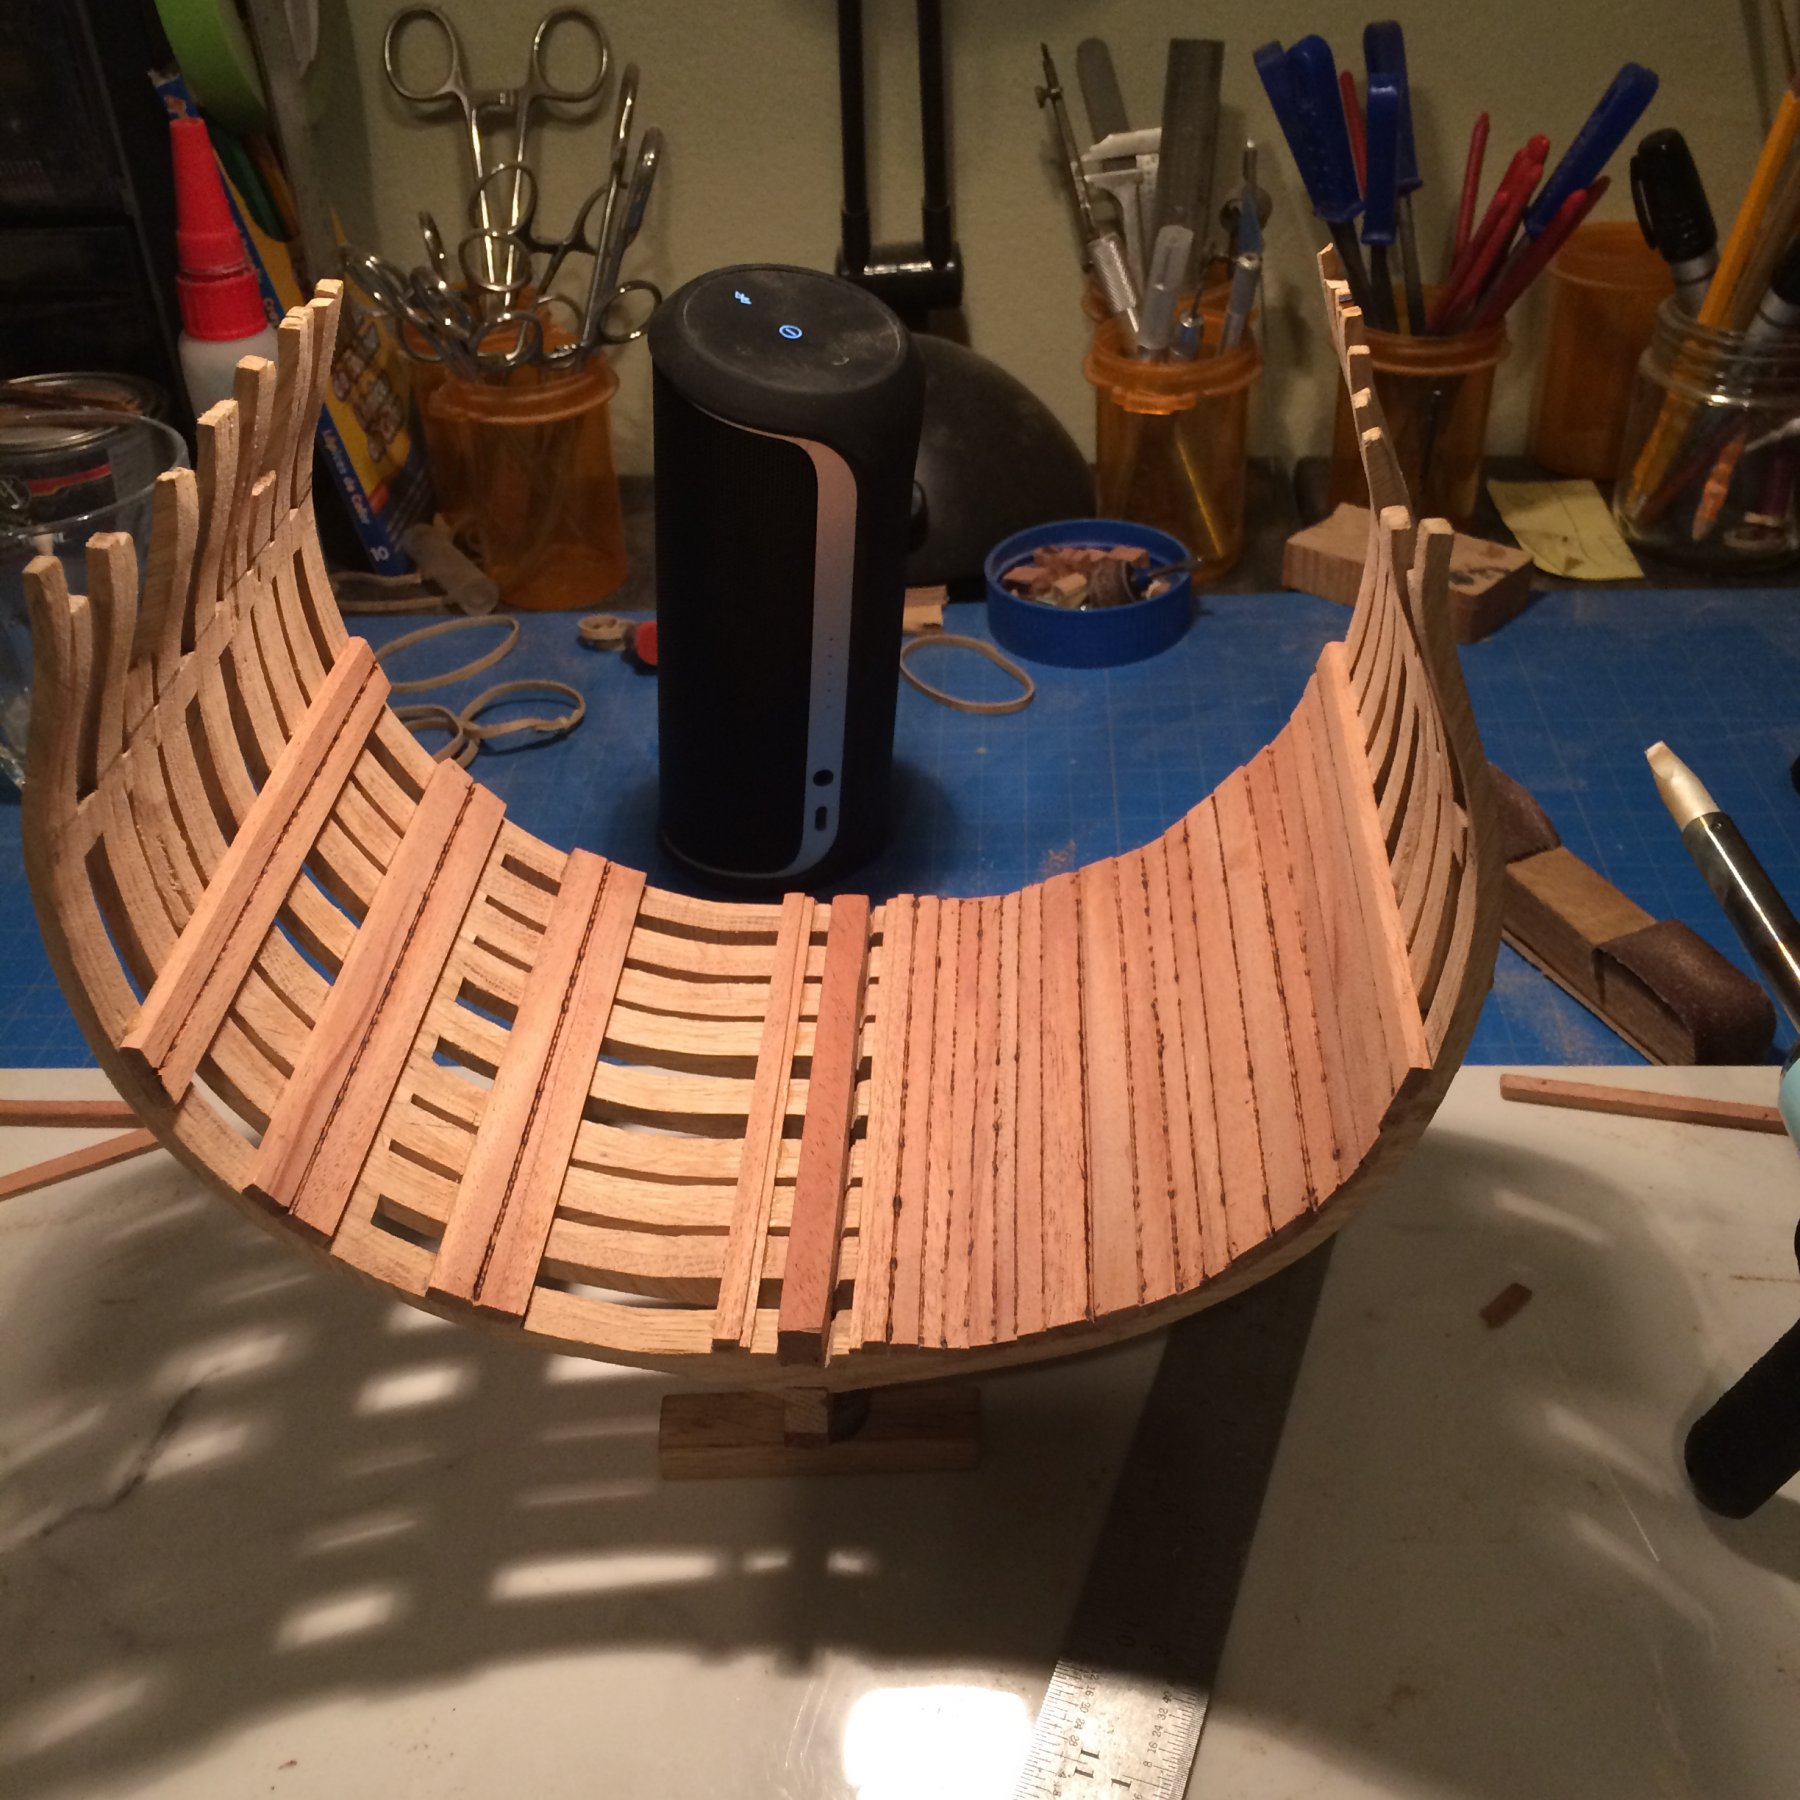
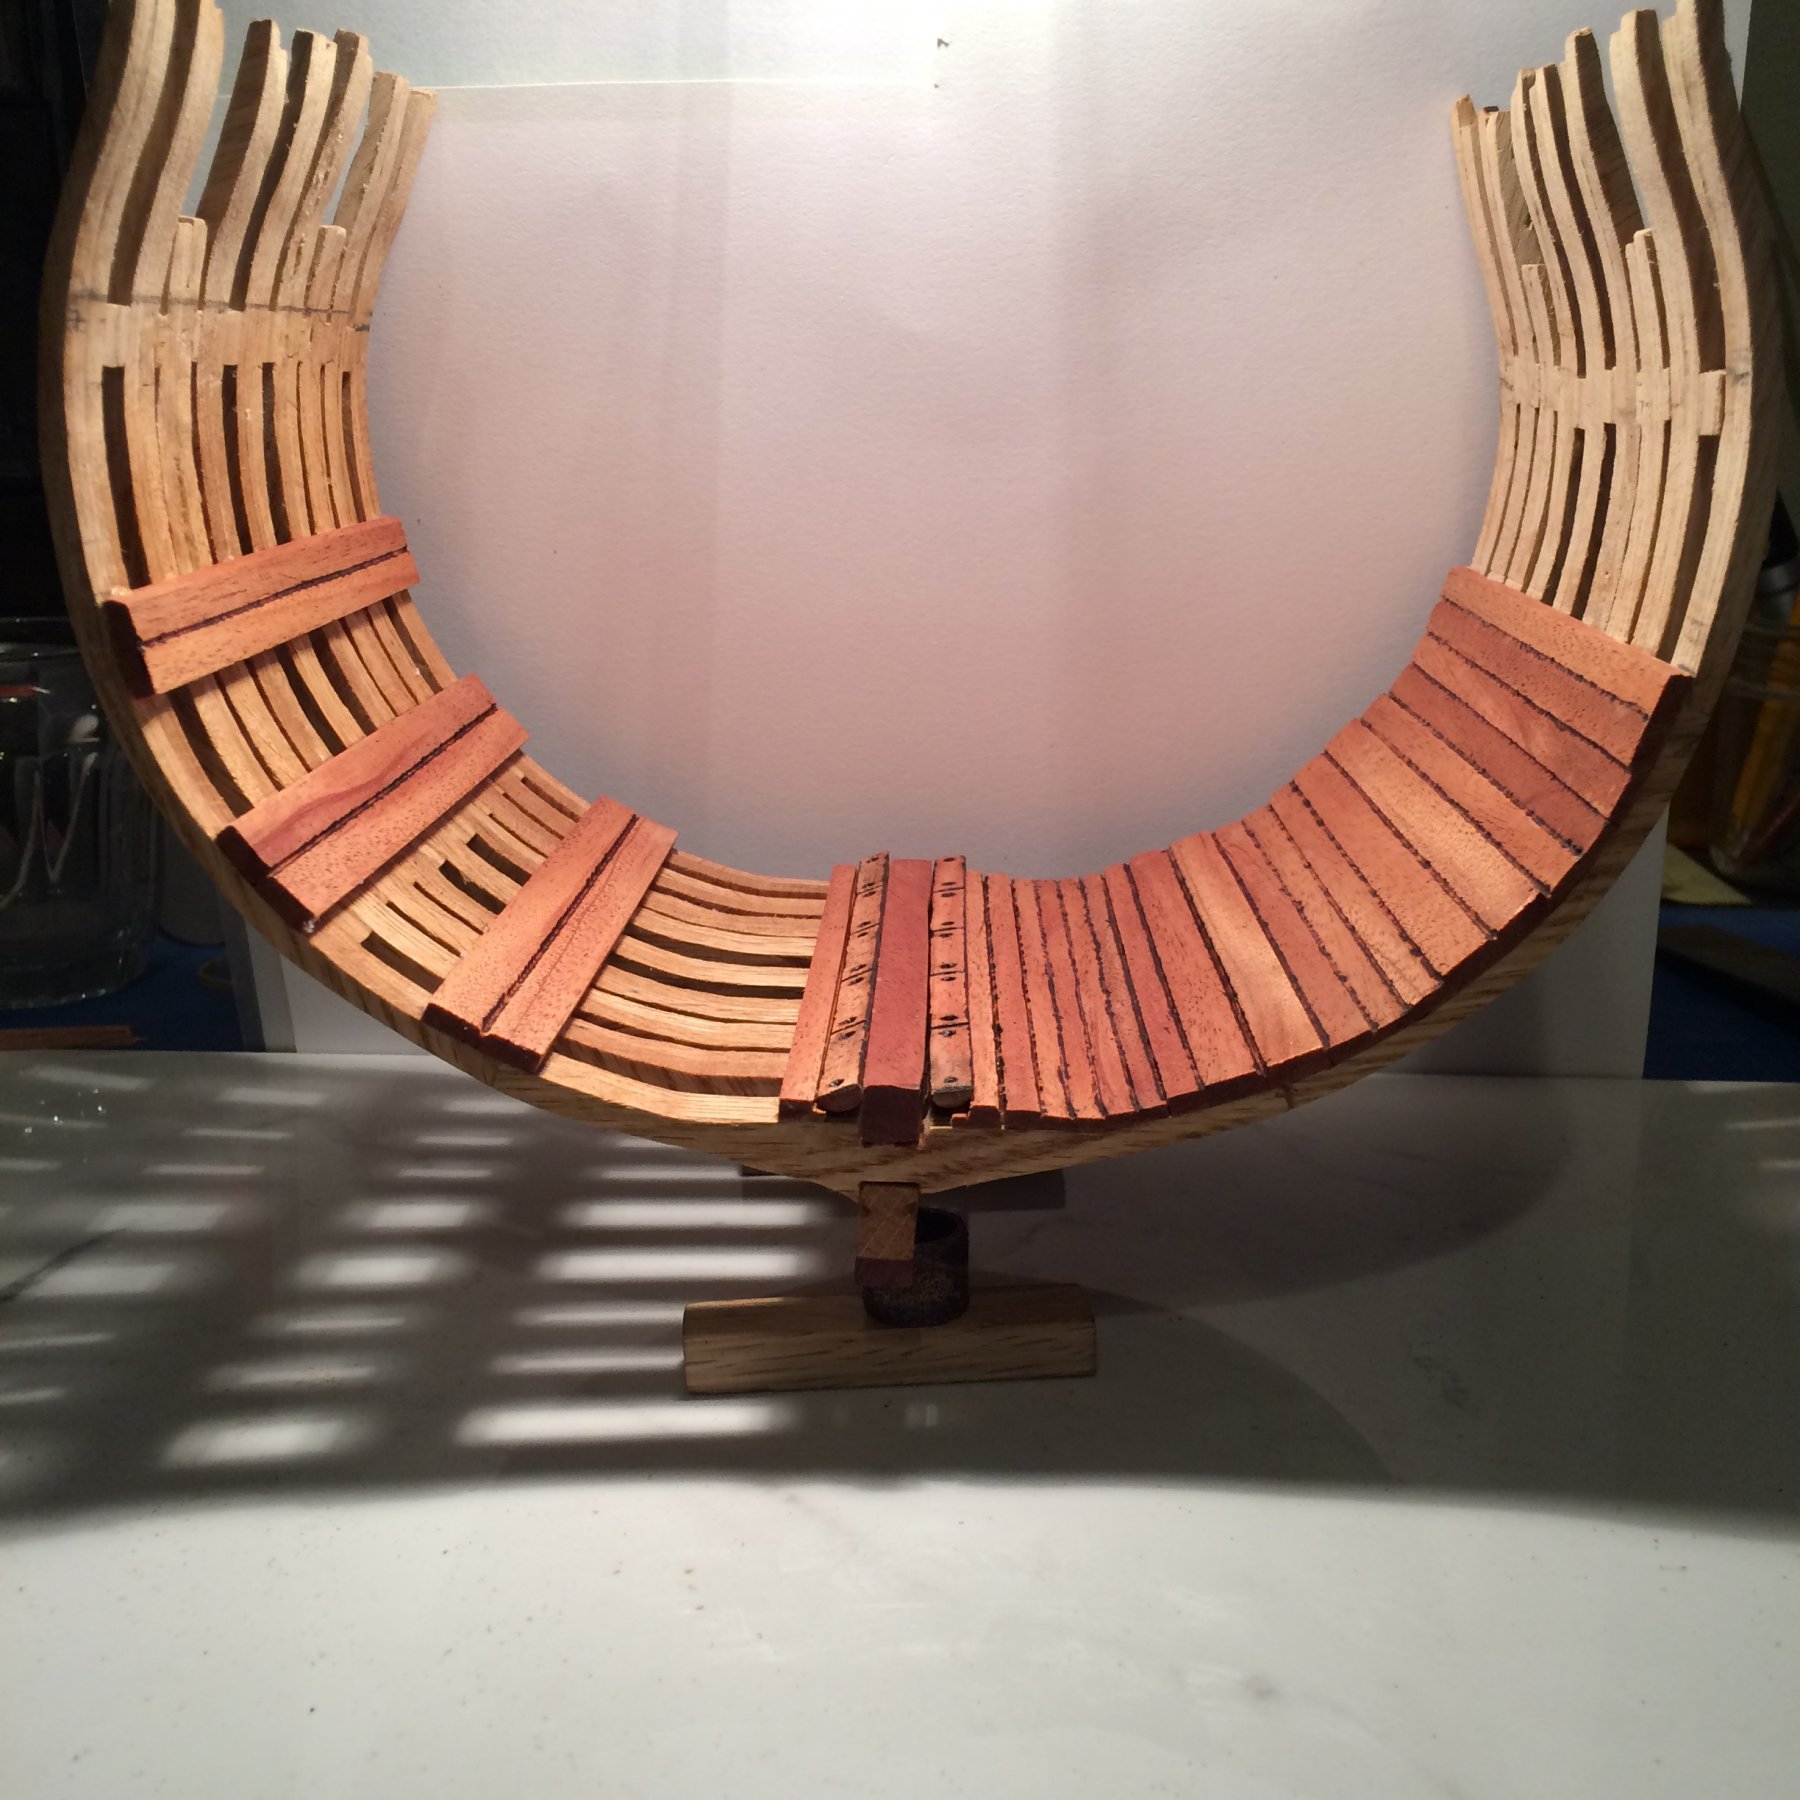
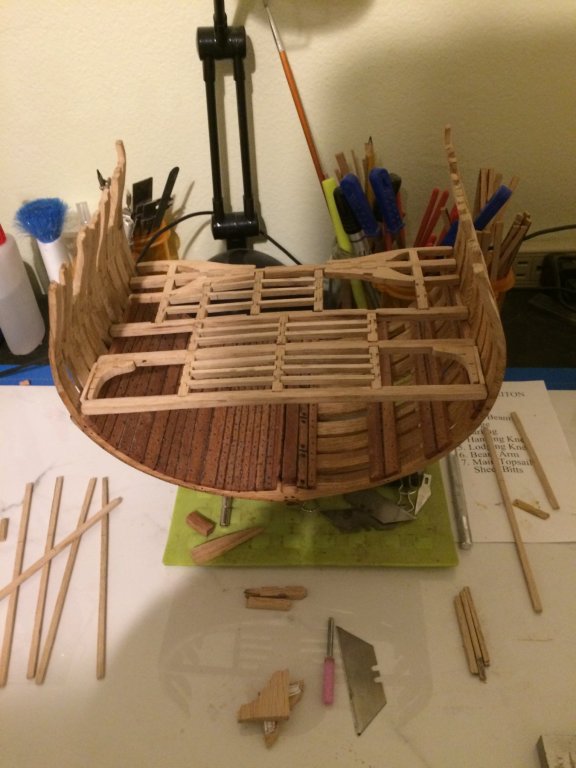
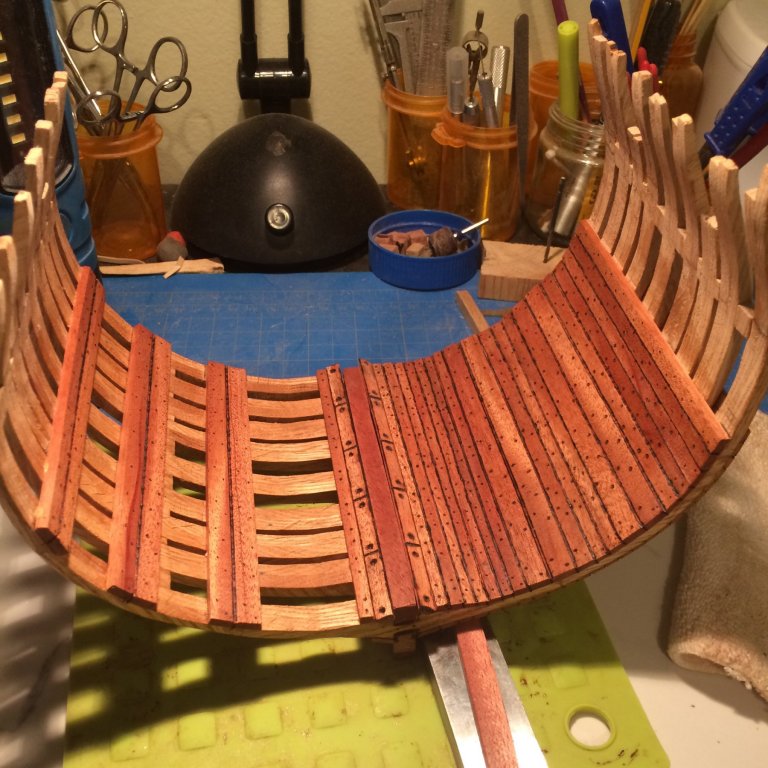
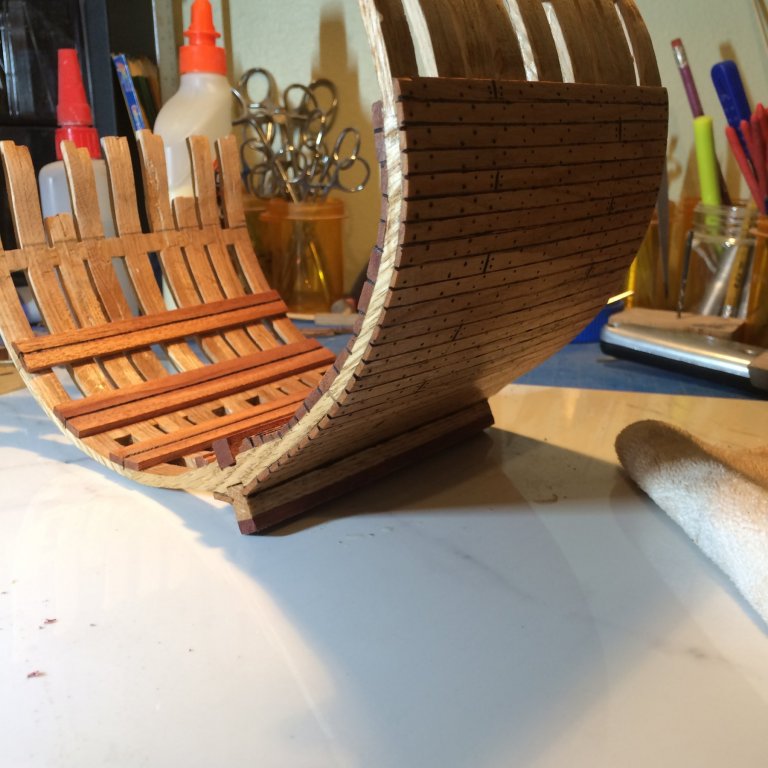
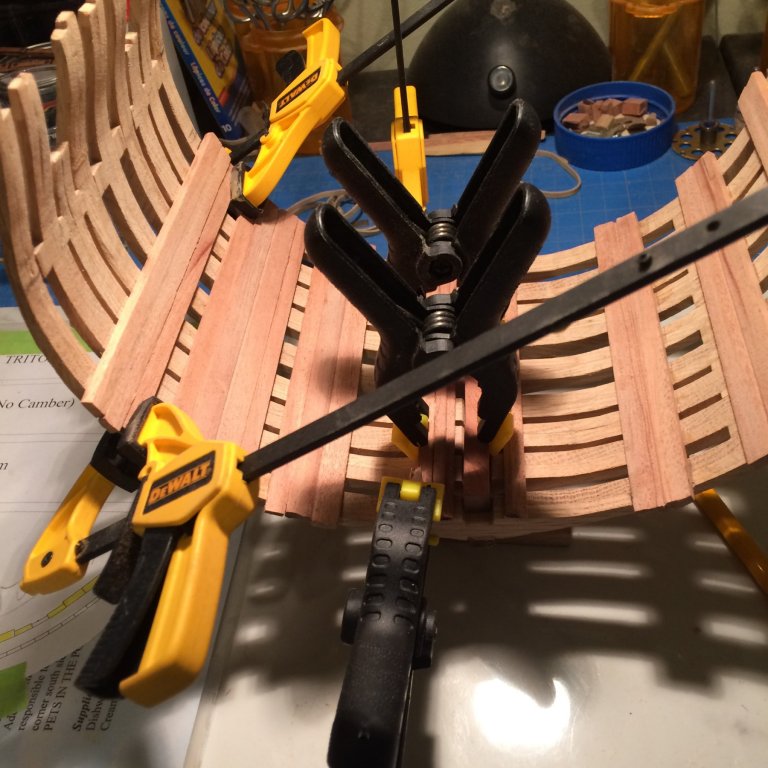
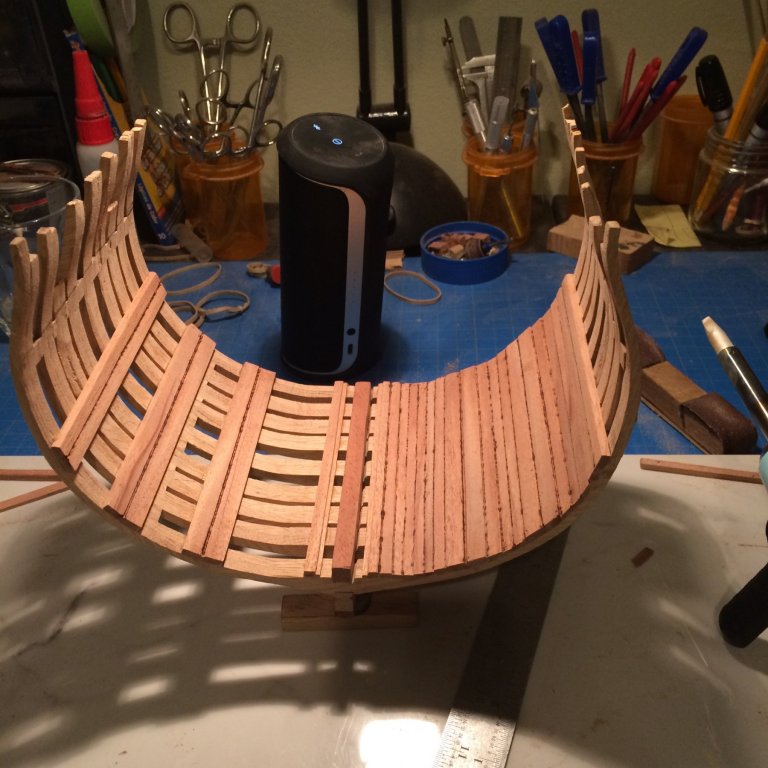
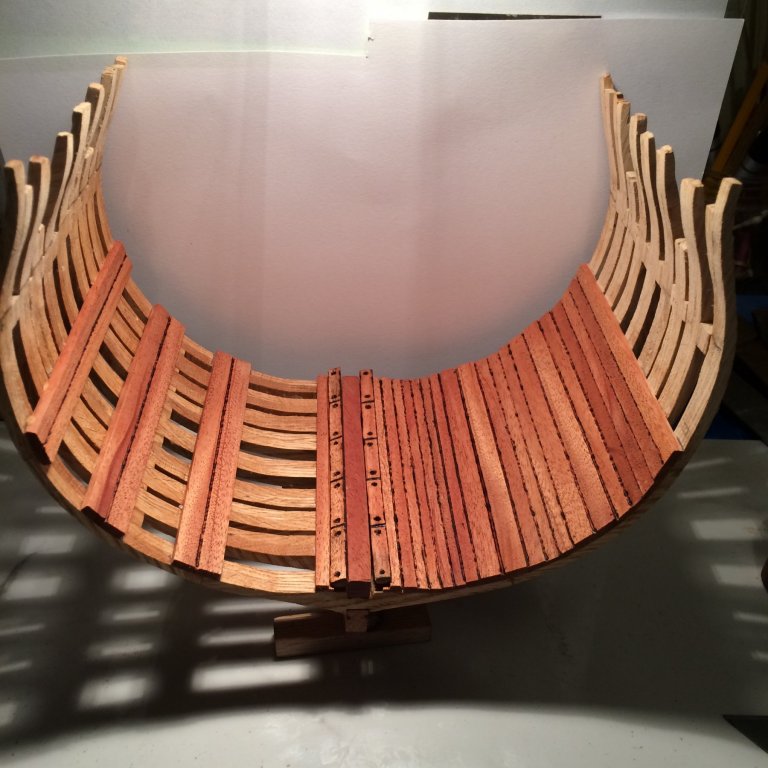
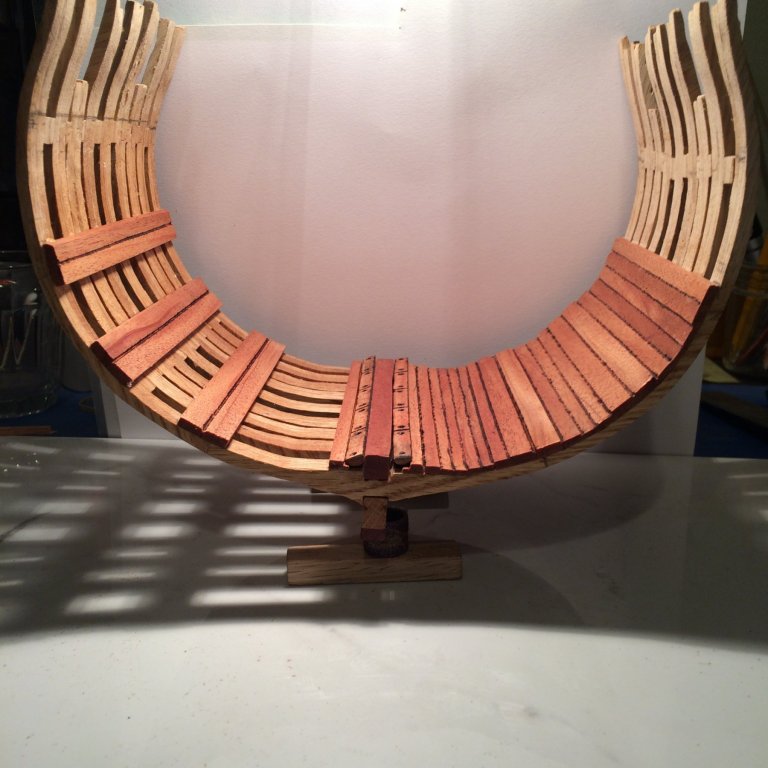
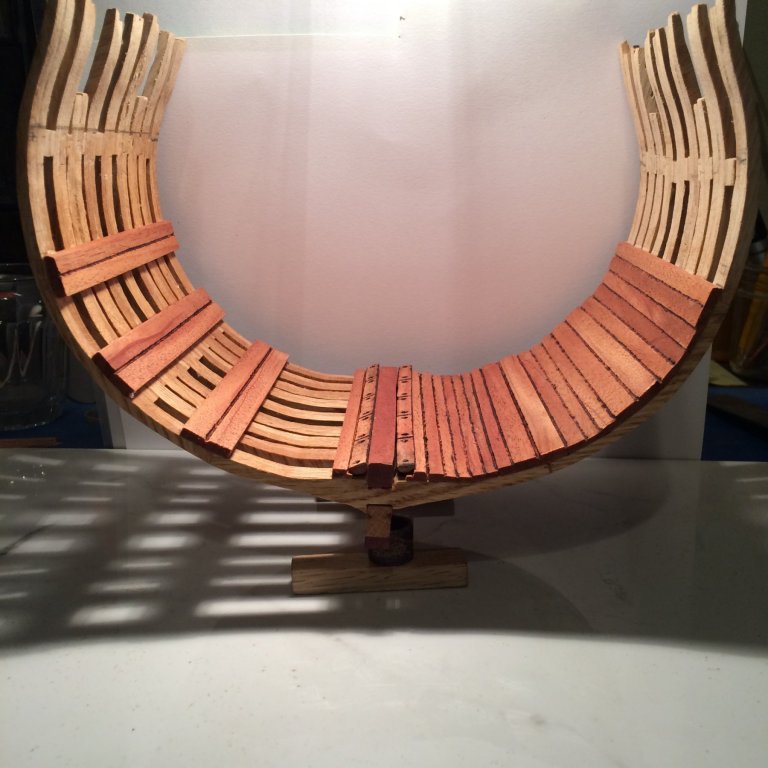
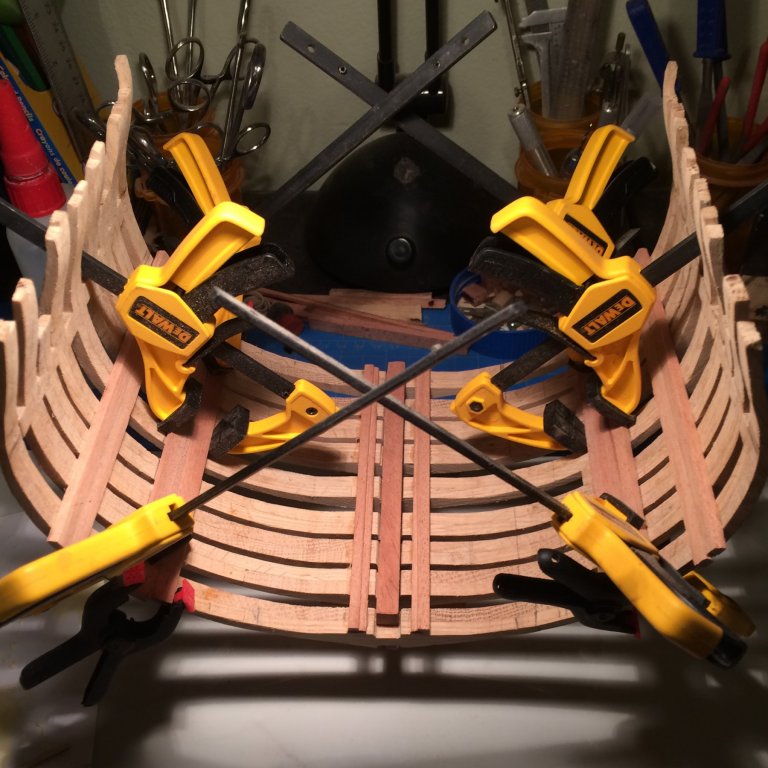
I cut , sanded , and prepared the rest of the planking dry fitting each plank as I went to ensure a proper fit.Then I got out the clamps and started gluing them down. once i had all the planks down I trimmed ,and sanded both sides of the cross section to give it a nice edge .and again I used the soldiering iron to enhance the planking. Once I got the look I wanted I decided it was time for a coat of wipe on poly clear ,satin finish . well thats How she’s looking so far. The next step I will work on is the Wales and deck beams. Thanks for checking in !! Derek


-
Definitely Helping me , Thanks Chad
-
I started cutting the planks for the thickest inner planks. I used a box knife to cut the pre milled sheets to the approximate size then clamped them in my vice . Then sanded them to the correct dimensions I then proceeded to glue and clamp them down. Here is what she’s looking like at this stage . Thanks for looking Derek

-
Hi Peter All the best Derek
-
Hello Art Congrats Geoff !!
-
Thanks Mark , I just needed to come up with a plan , or the next step lol.I believe I will put up the thicker planking for the deck beams next , then the wales. I feel like im all over the place on this build . looking through the logs it seems there is no real set in stone approach , so im just going to kick back and let the build tell me whats next . Derek
-
Thanks Pete and Doc . Slowly making headway , at times I feel like im headed straight into the wind . Derek
-
Hi Larry You will definitely get help if you get stumped. Follow Kurt’s instructions , to the logs and you will get your log set up I no time Best of luck Derek