HOLIDAY DONATION DRIVE - SUPPORT MSW - DO YOUR PART TO KEEP THIS GREAT FORUM GOING! (Only 68 donations so far out of 49,000 members - Can we at least get 100? C'mon guys!)
×


JpR62
-
Posts
699 -
Joined
-
Last visited
Content Type
Profiles
Forums
Gallery
Events
Everything posted by JpR62
-
 Excellent tool. Thanks for sharing !
 -
HMS ROYAL KATHERINE 1664 by Doris - 1/55 - CARD
JpR62 replied to DORIS's topic in - Build logs for subjects built 1501 - 1750
This ship is a little gem ! Thanks for sharing your wonderful work. Happy Christmas !- 1,035 replies
-
- 4
-

-
- royal katherine
- ship of the line
- (and 1 more)
-
Superb work ! This rigging work is a wonderful example to follow ! Merry Christmas and good wind for 2020 !
- 231 replies
-
- 1
-
-
- model shipways
- armed virginia sloop
- (and 1 more)
-
The same opinion for me. Choose the simplest solution for you. You are already doing an absolutely remarkable job with the videos 😍
-
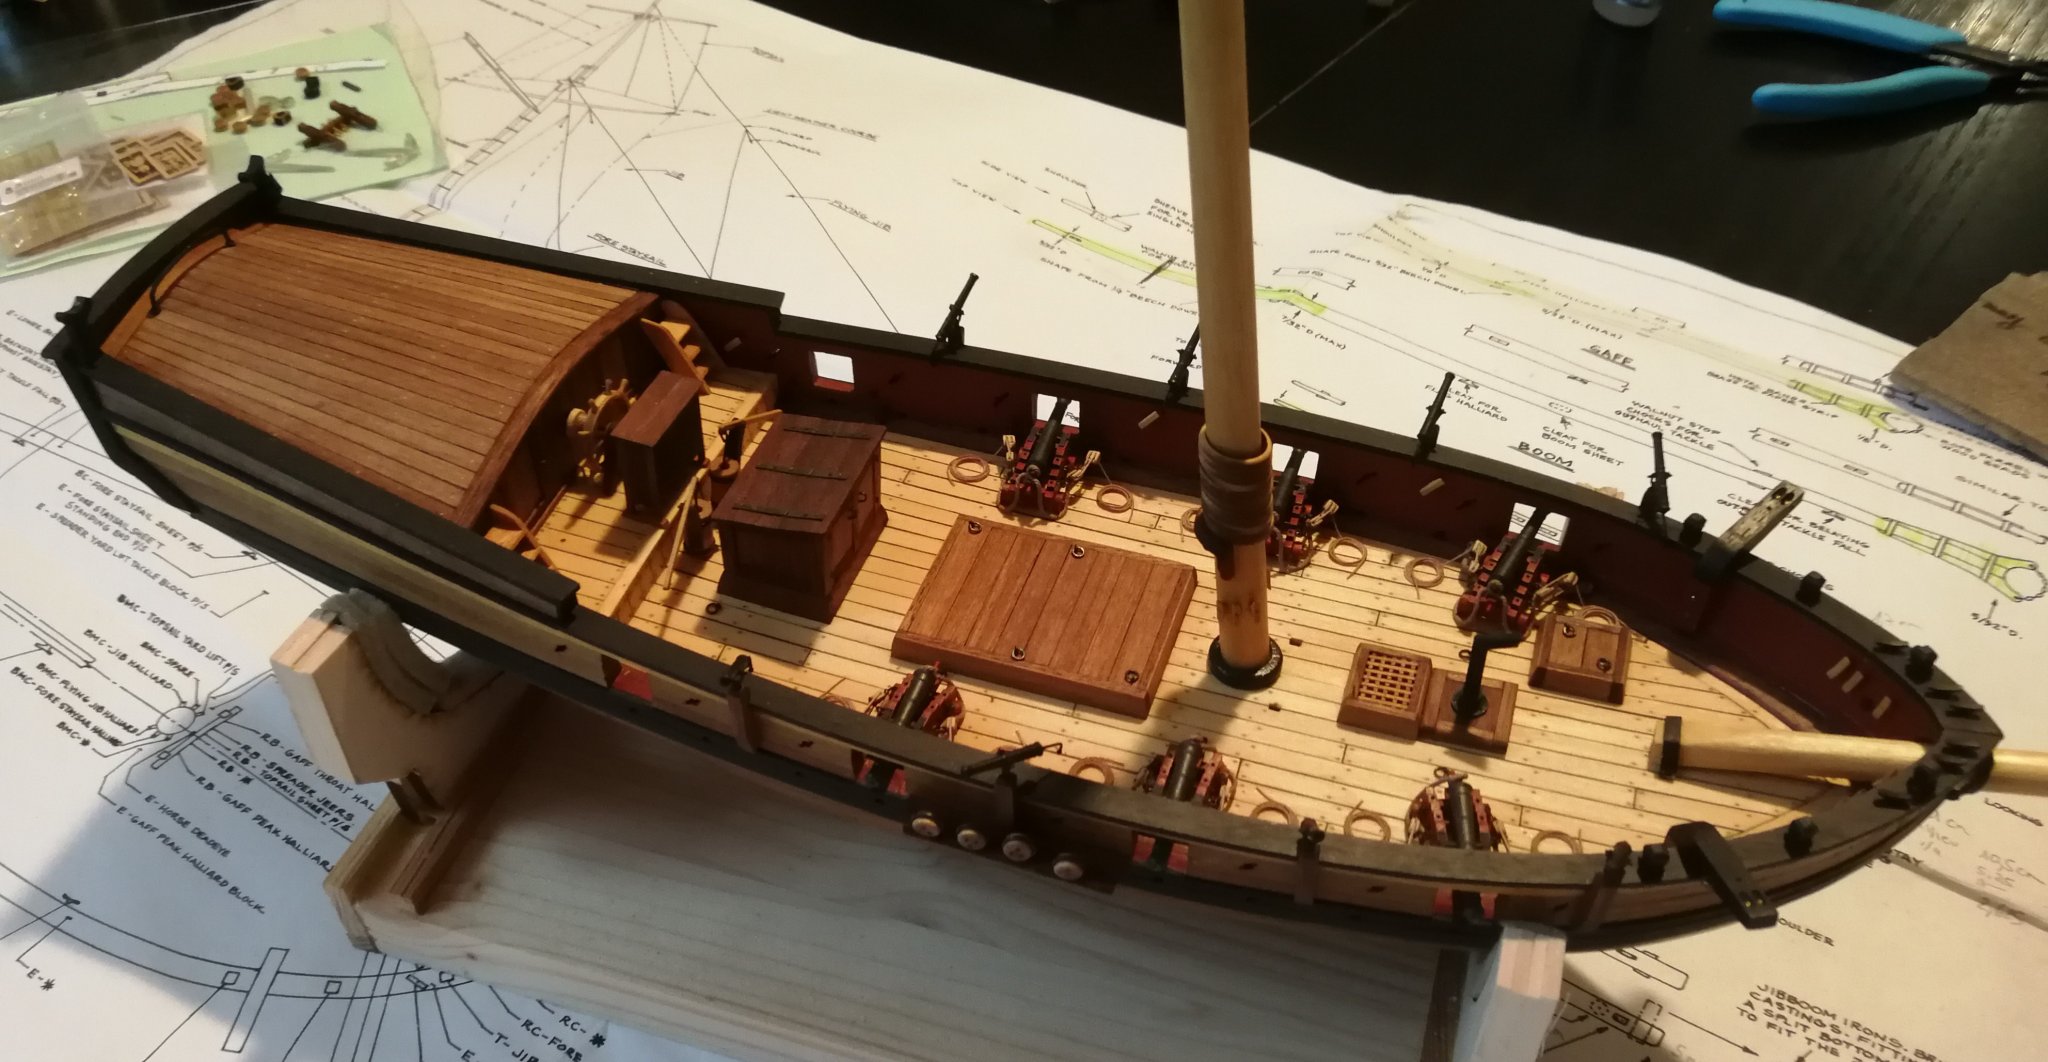
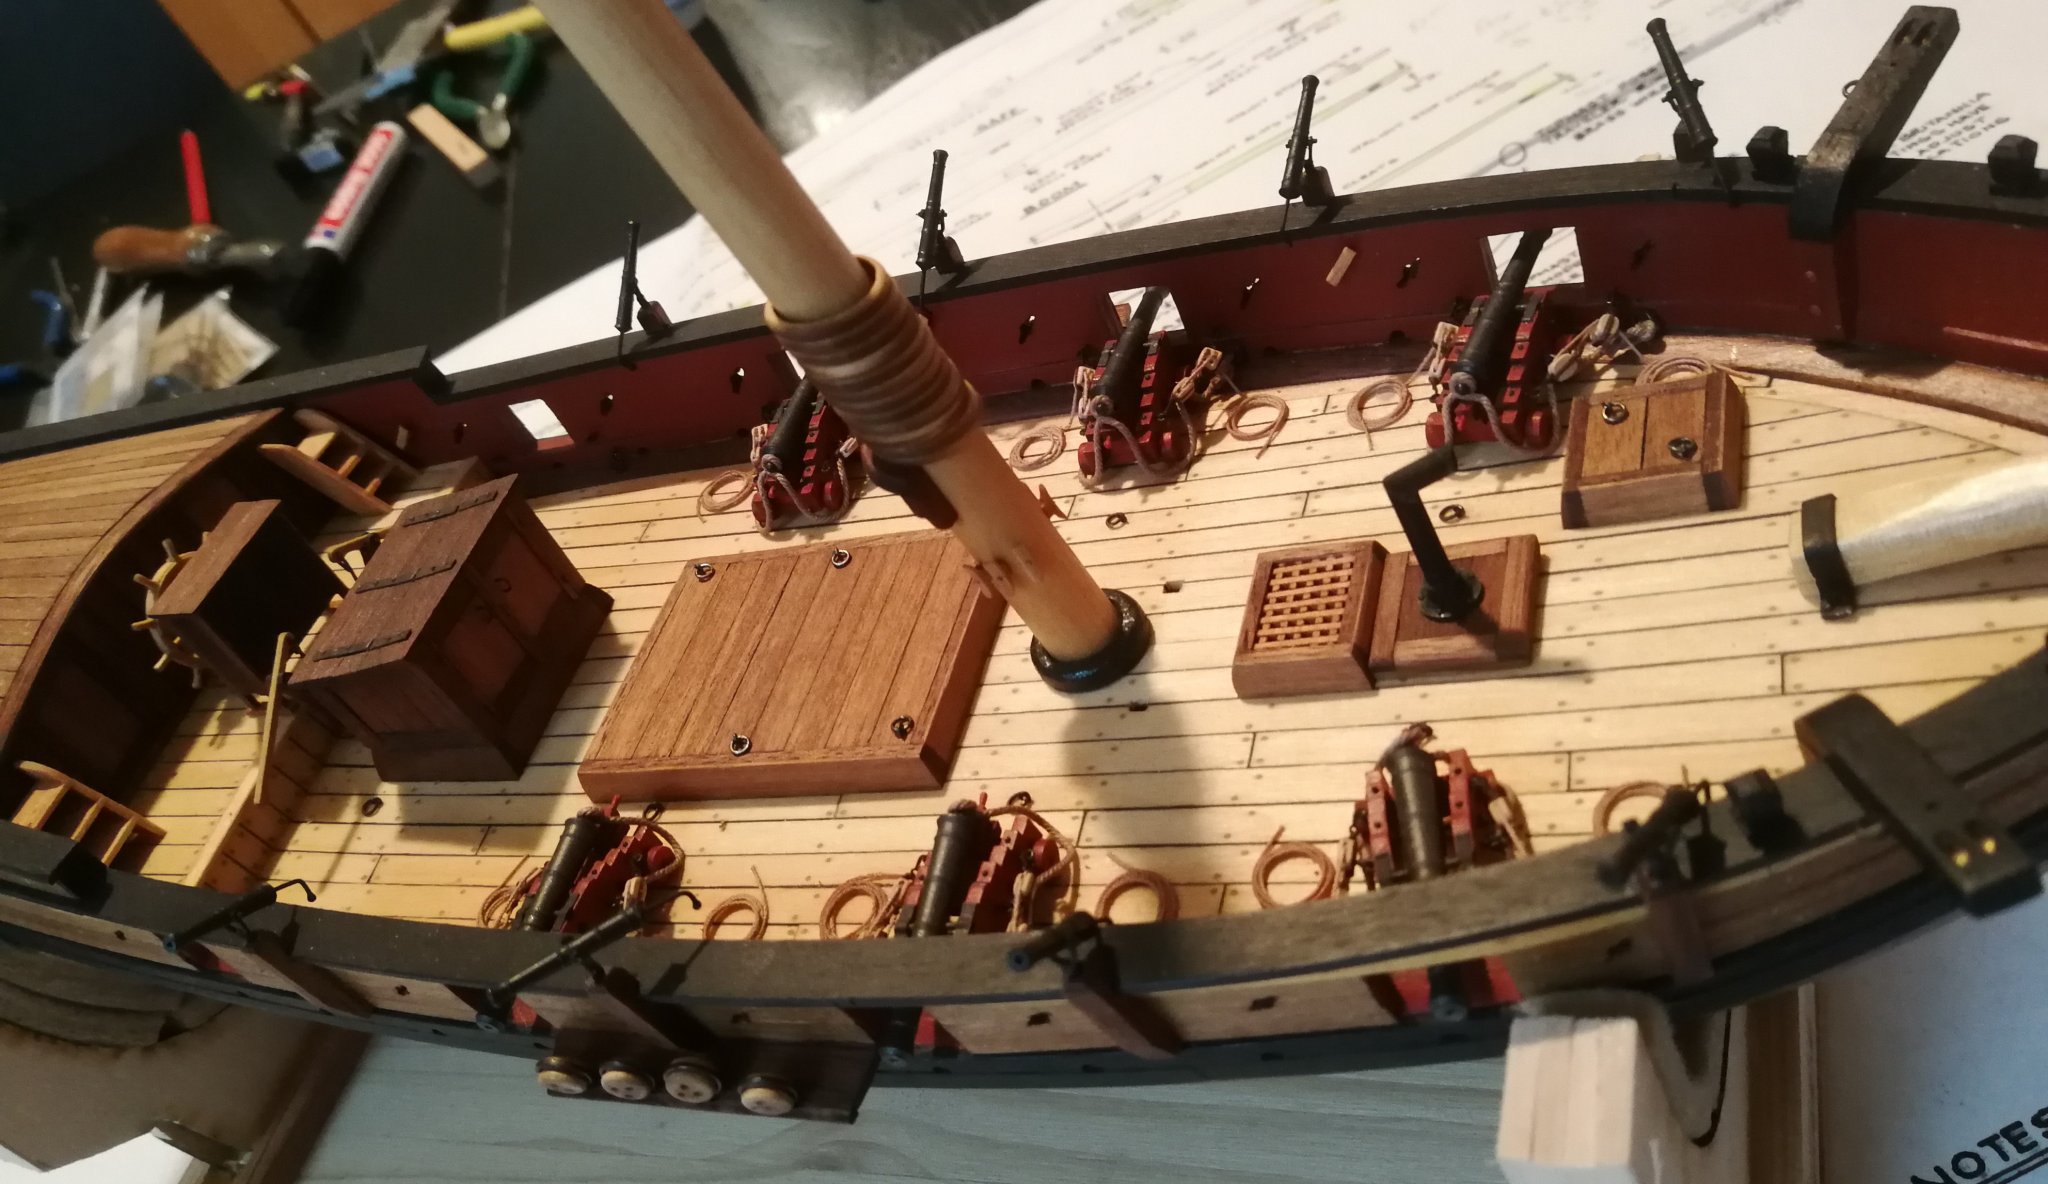
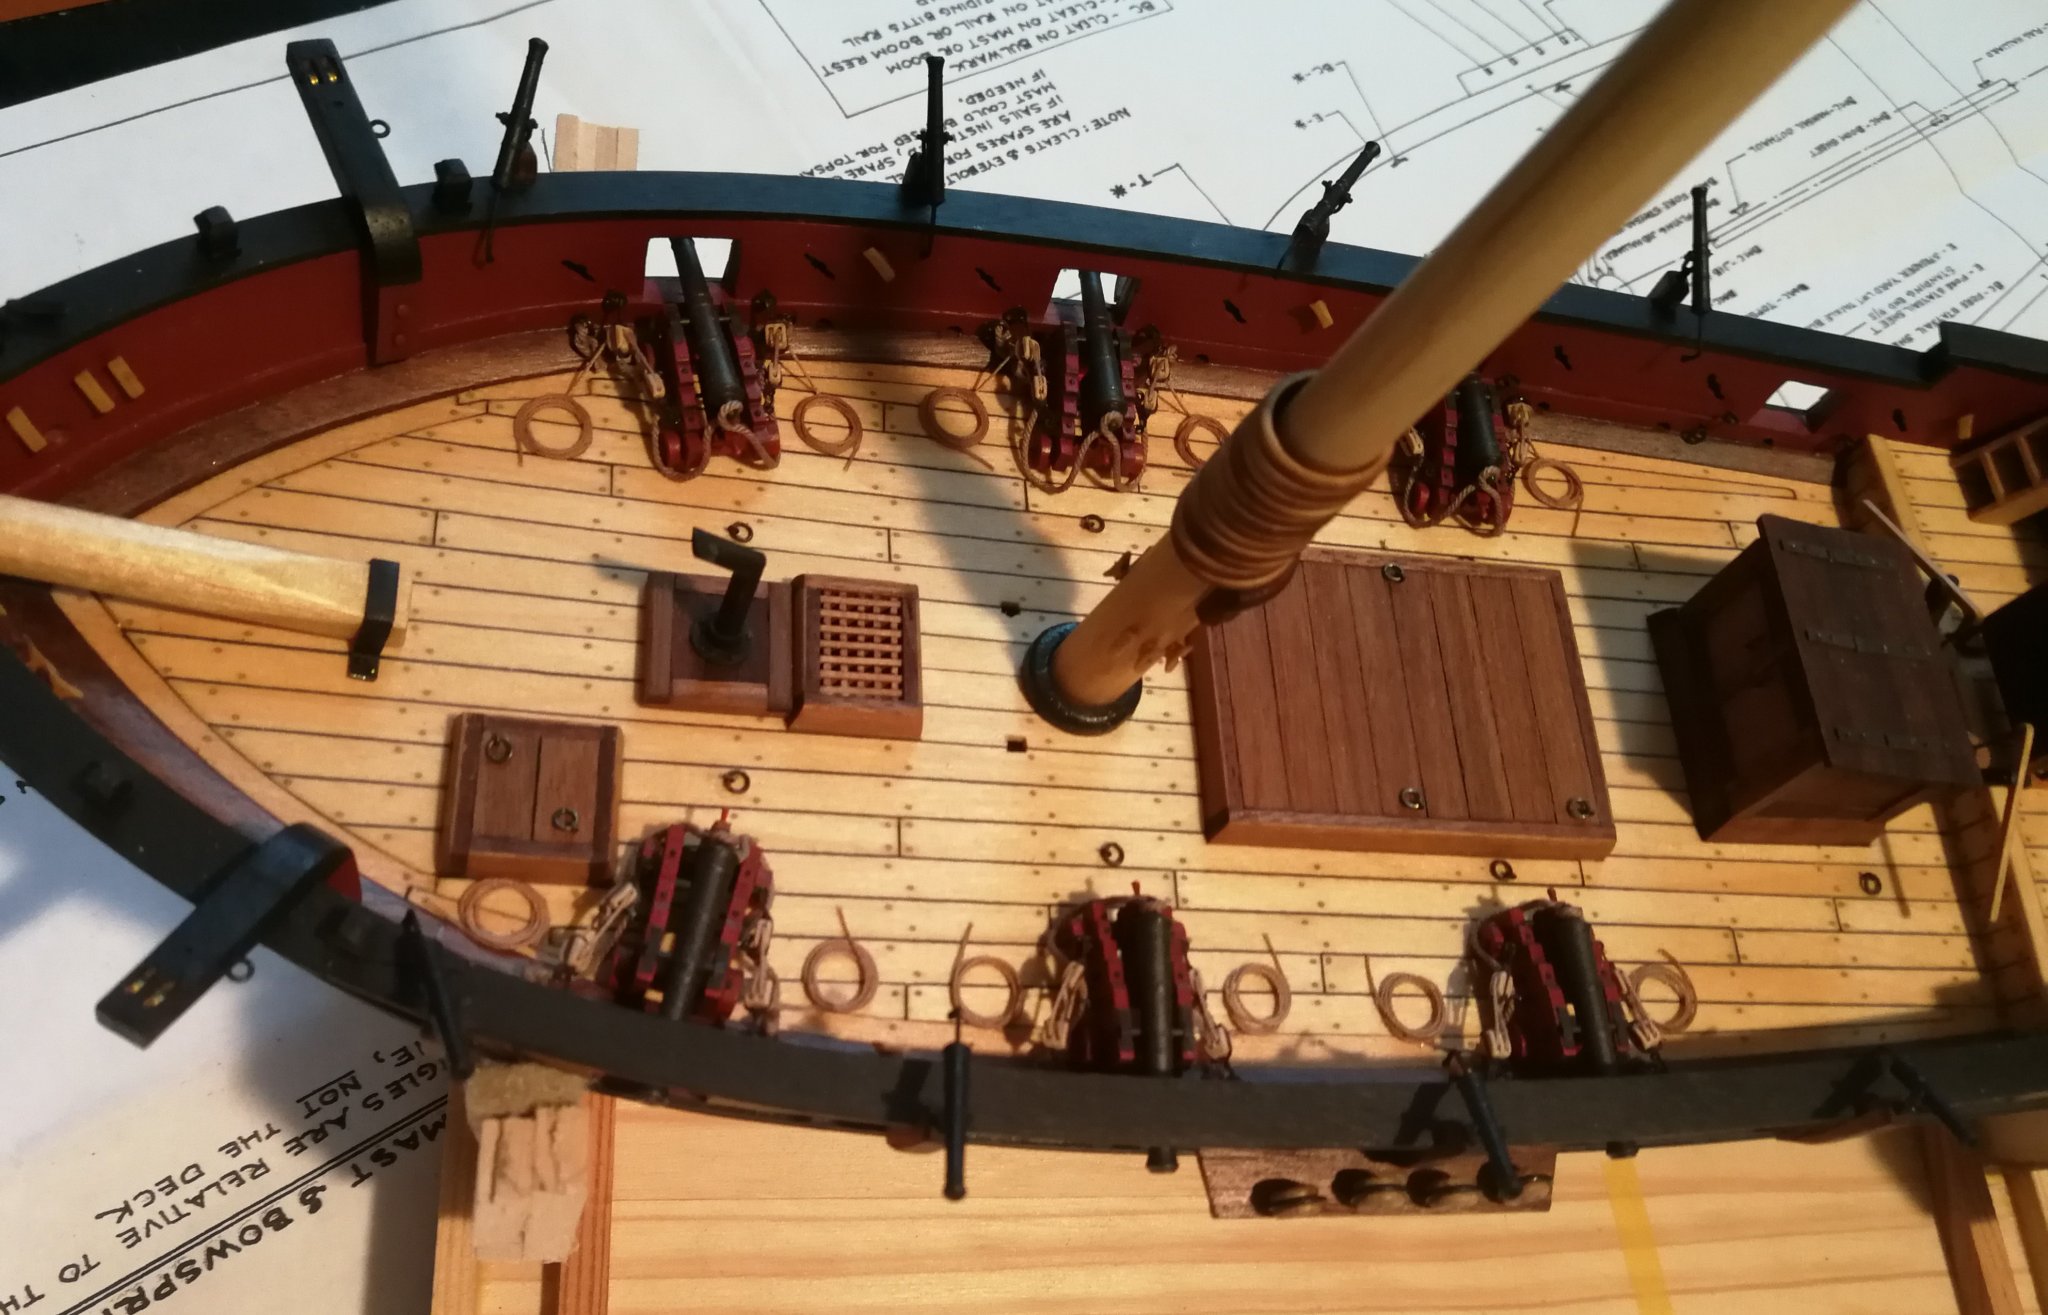
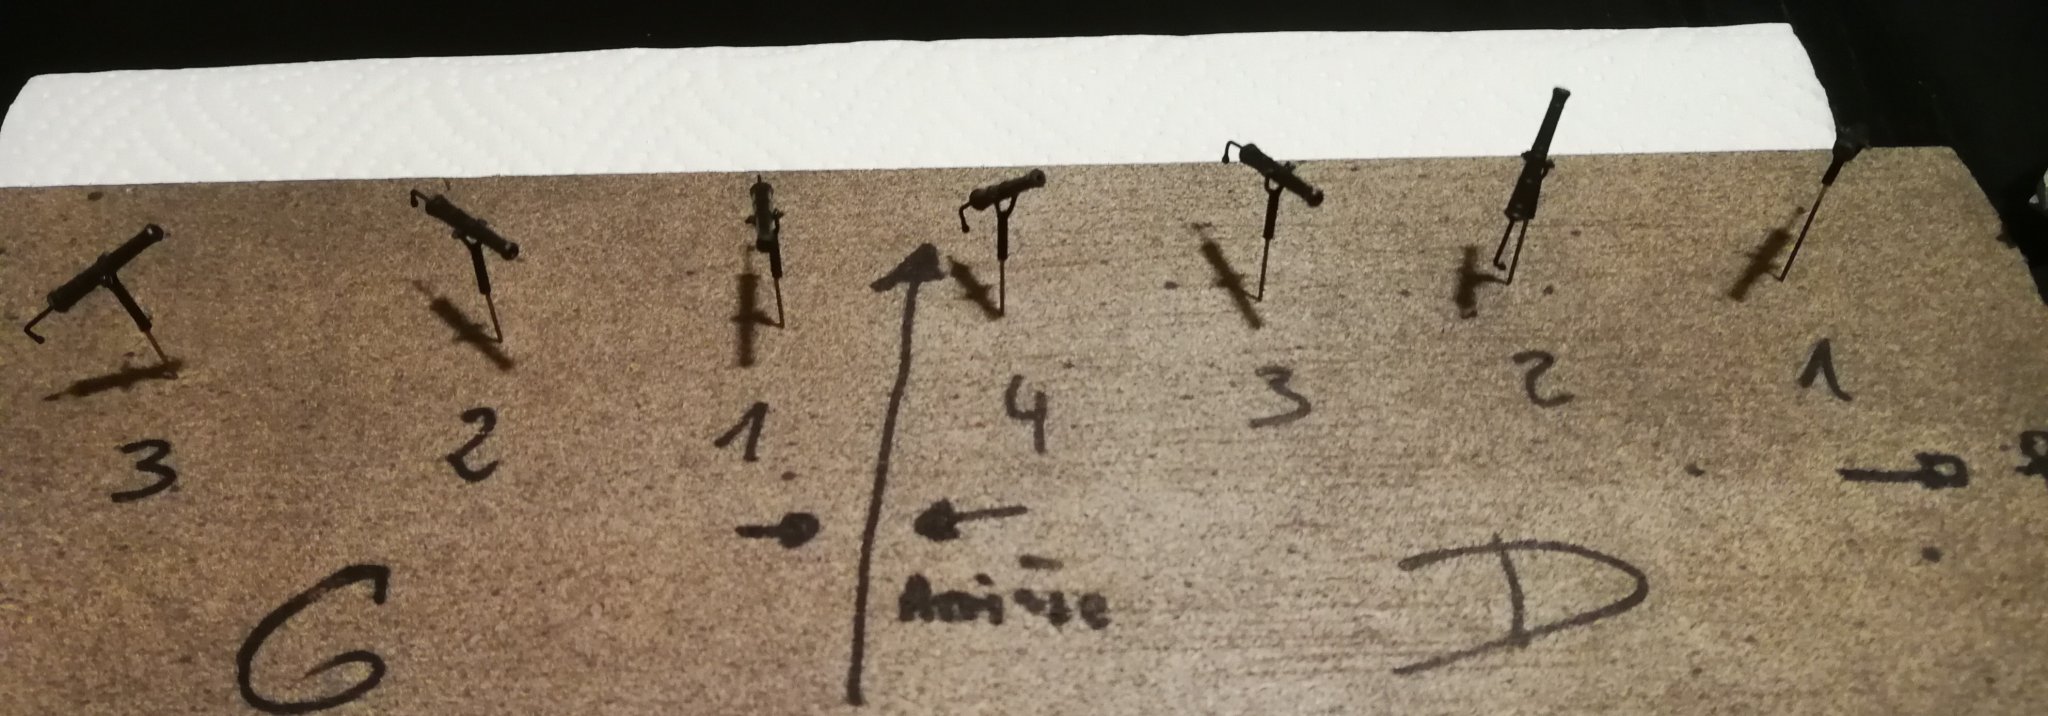
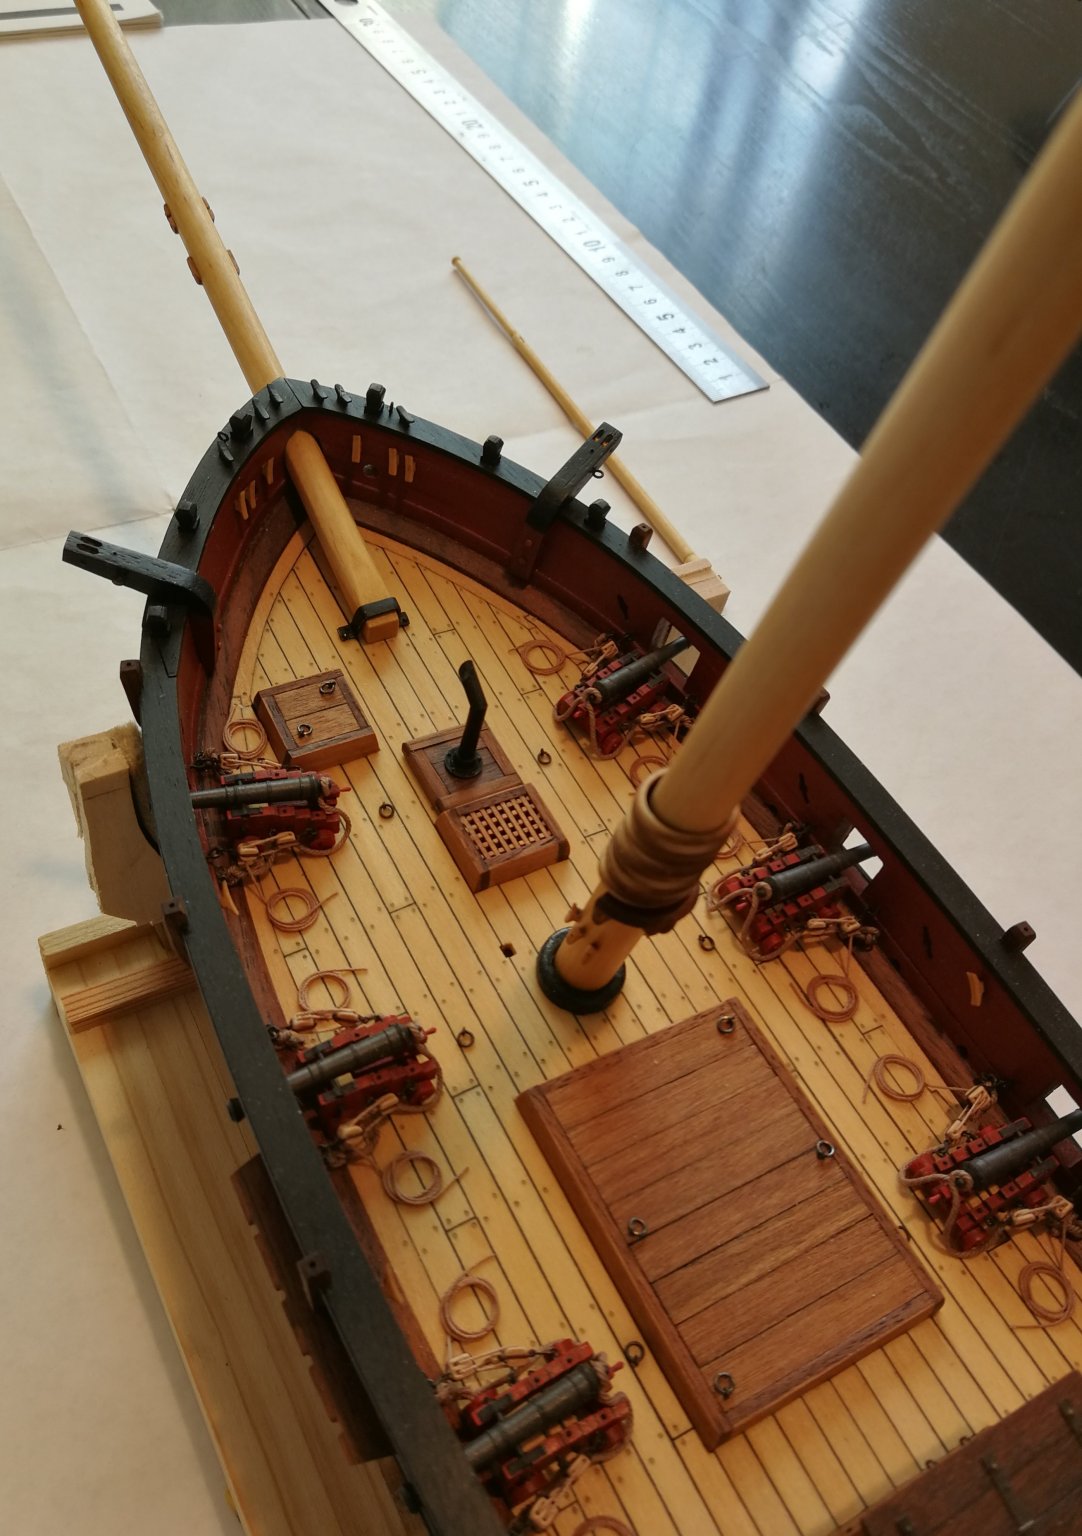
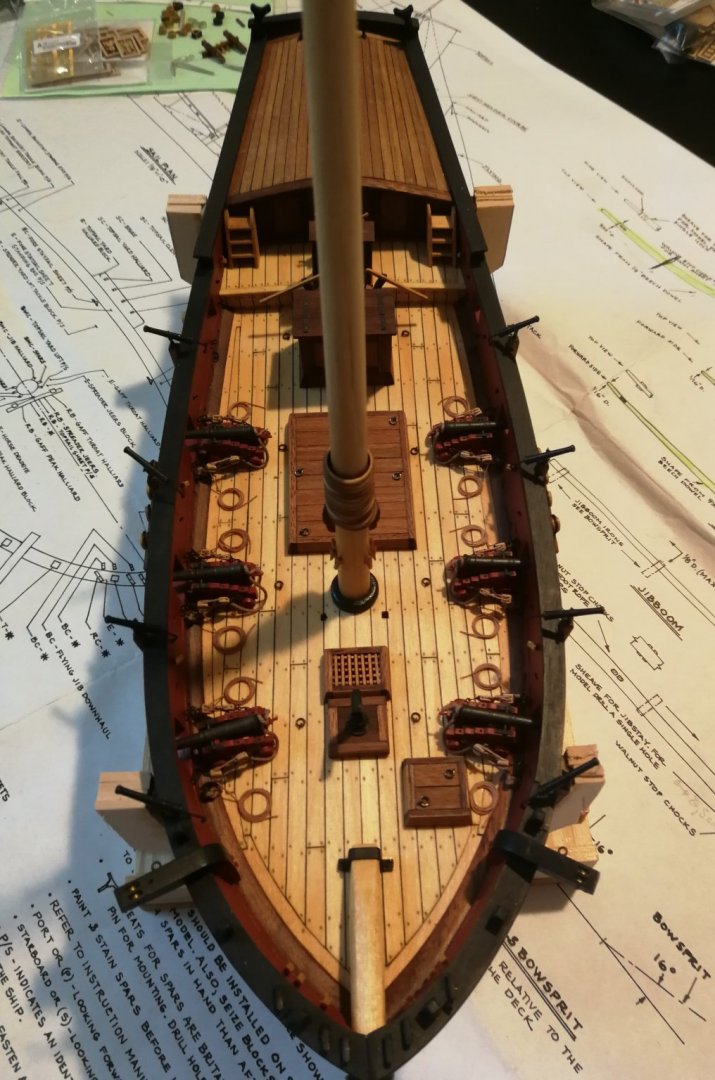
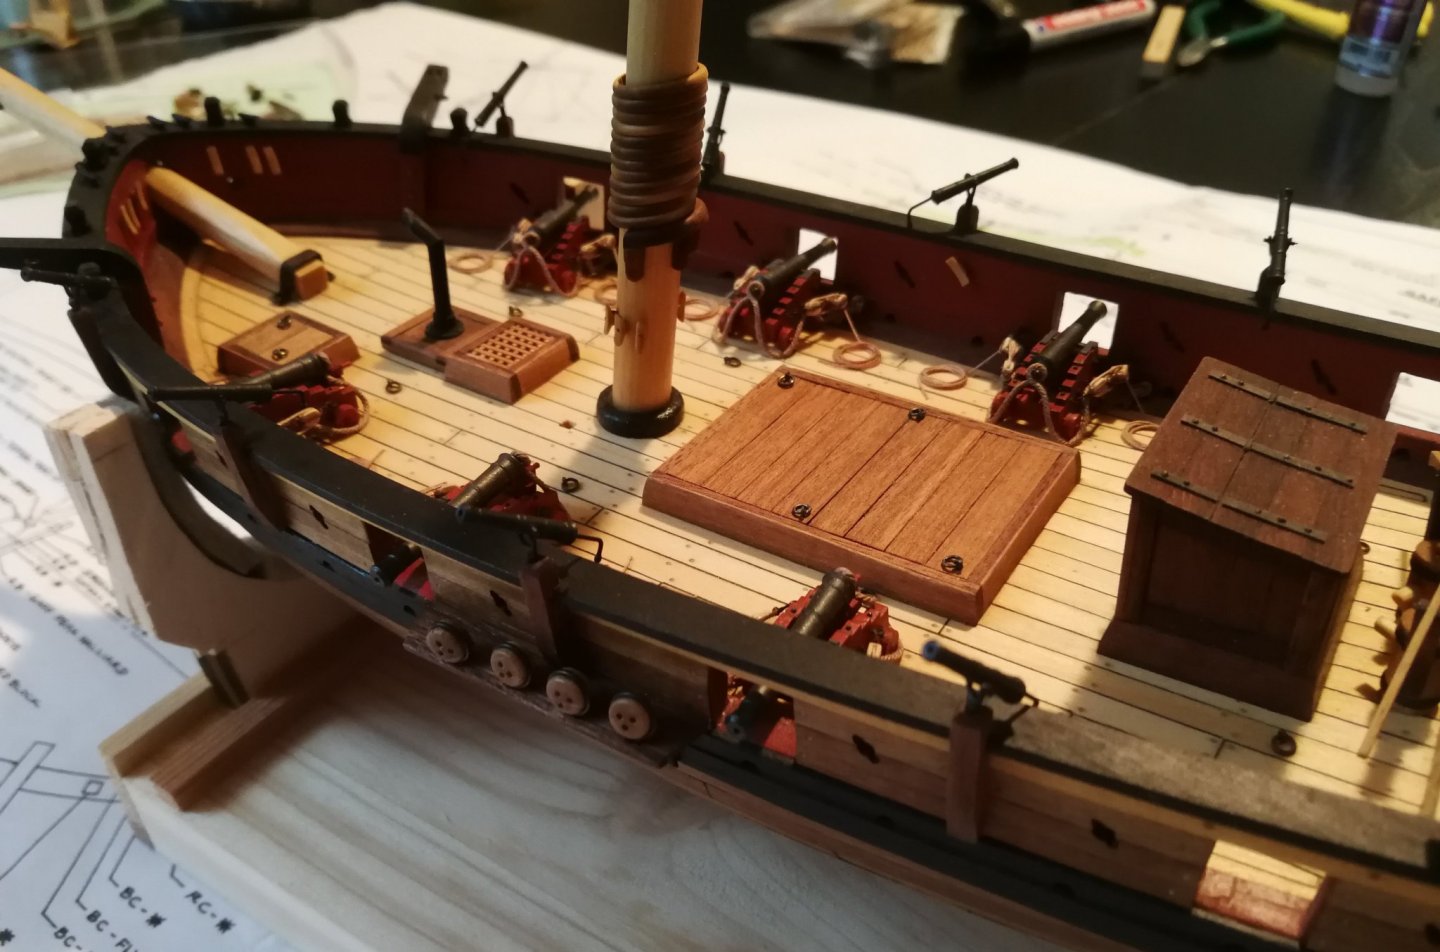
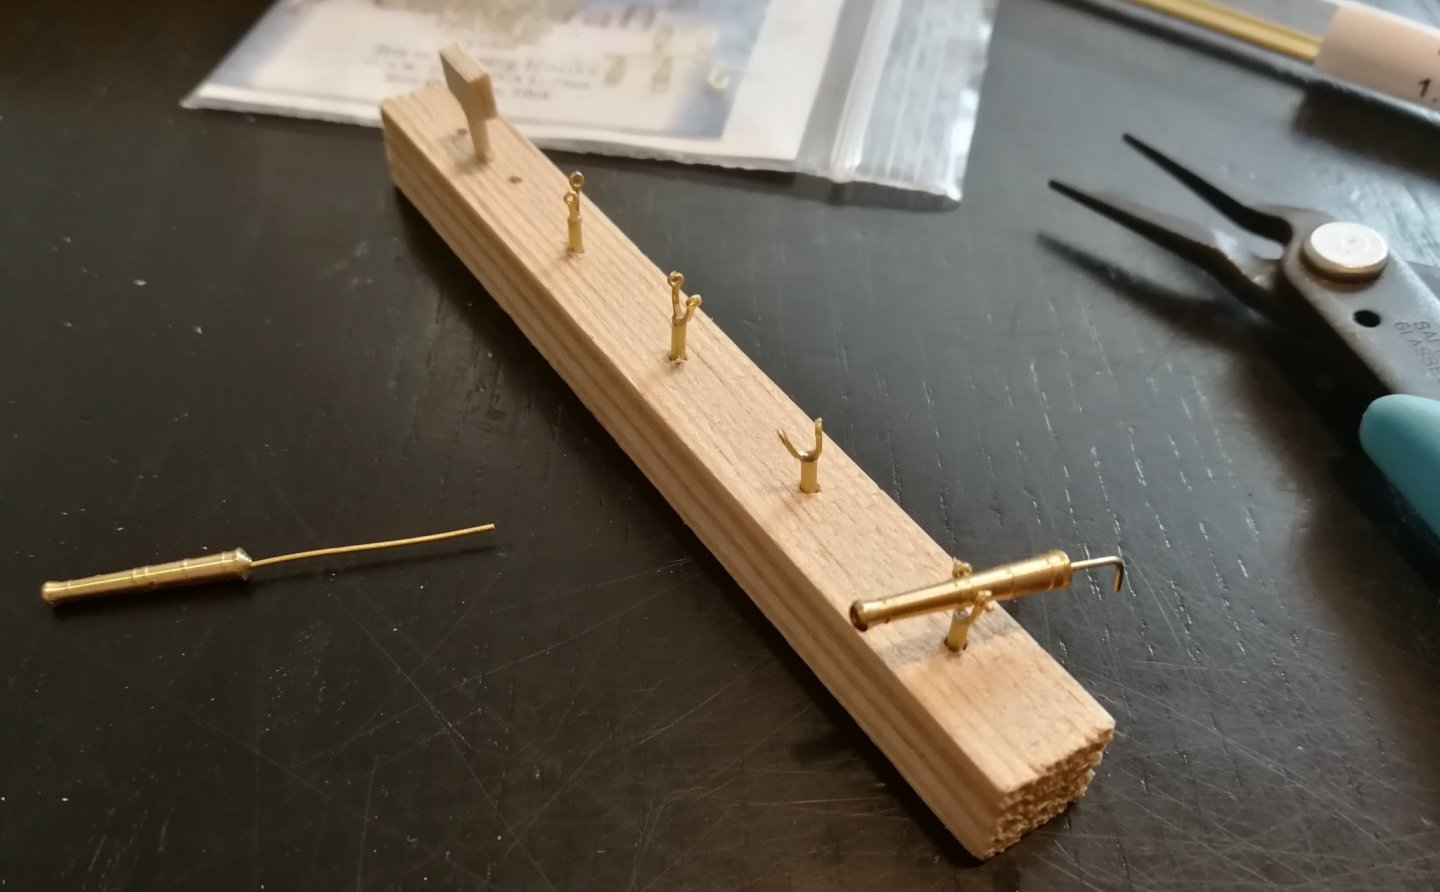
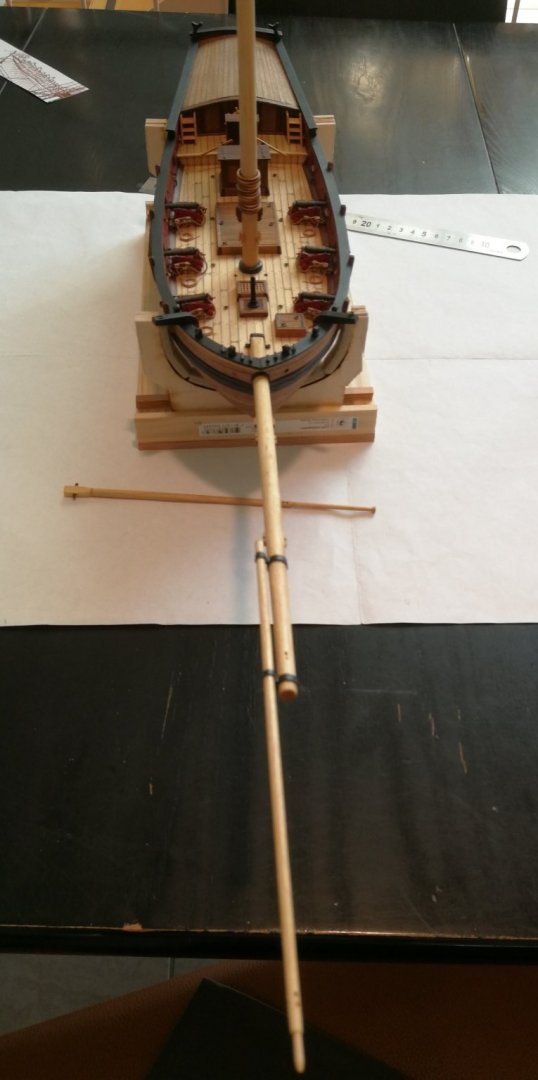
Thanks Dave. All is now in place. The swivel supports are not glued. The tube is just inserted in a hole previously drilled in the wooden support. The guns can thus turn. Time to work on the last piece before starting the rigging job : the anchors.


- 164 replies
-
- 9
-
-
- first build
- model shipways
- (and 2 more)
-
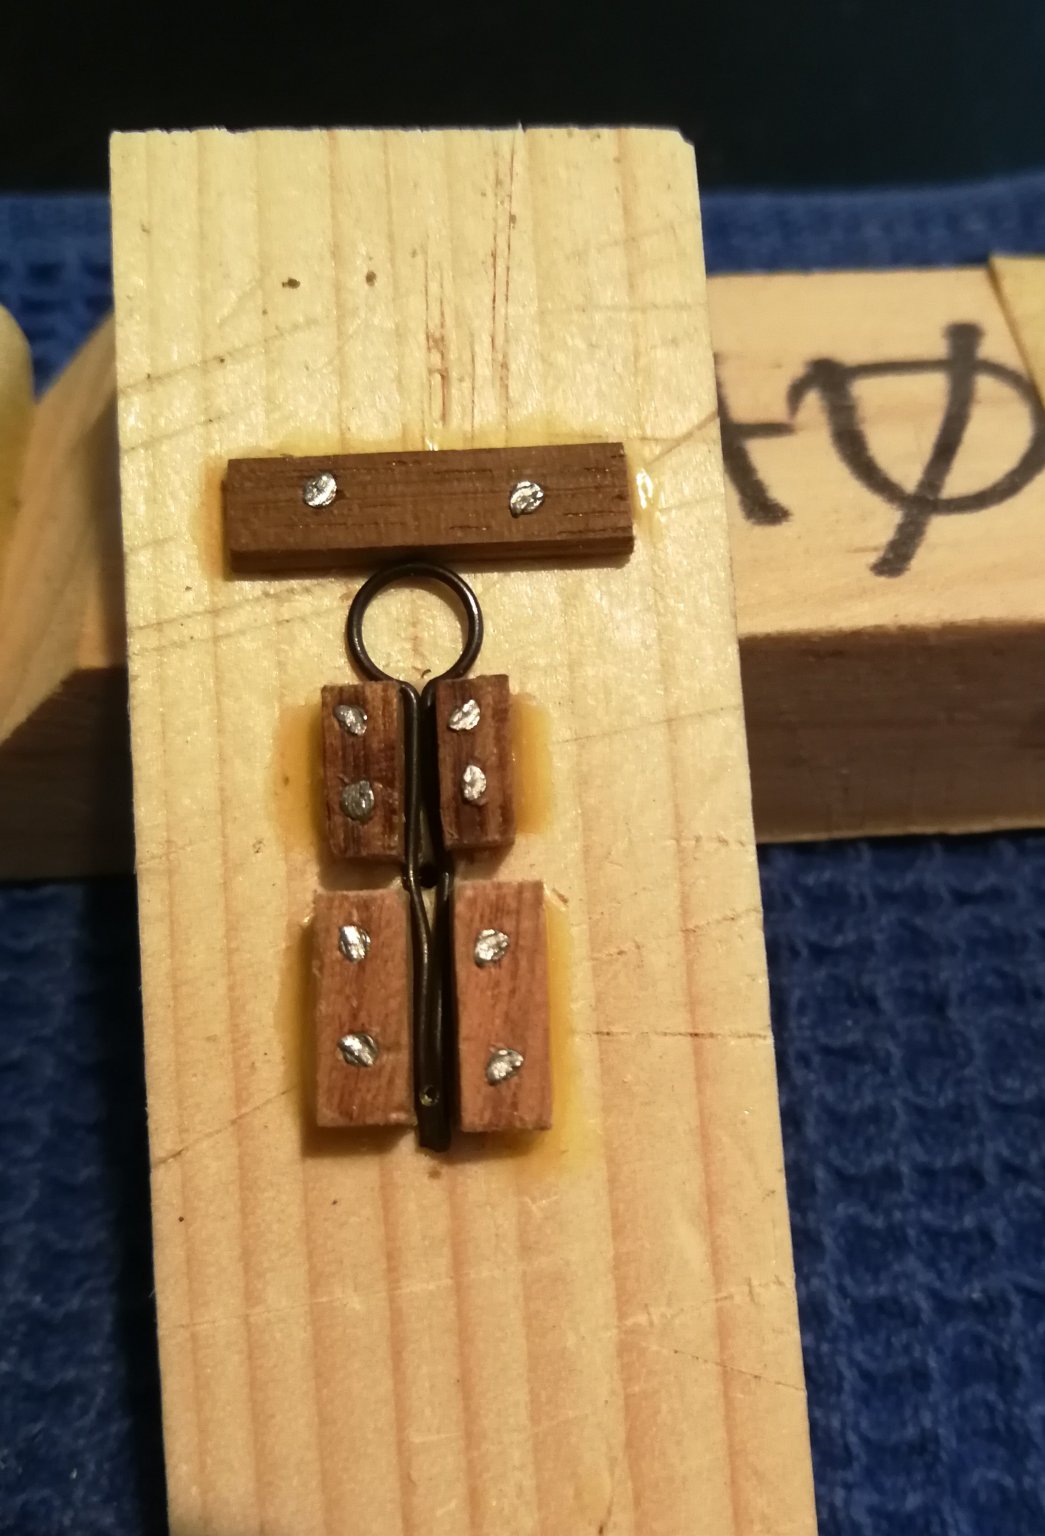
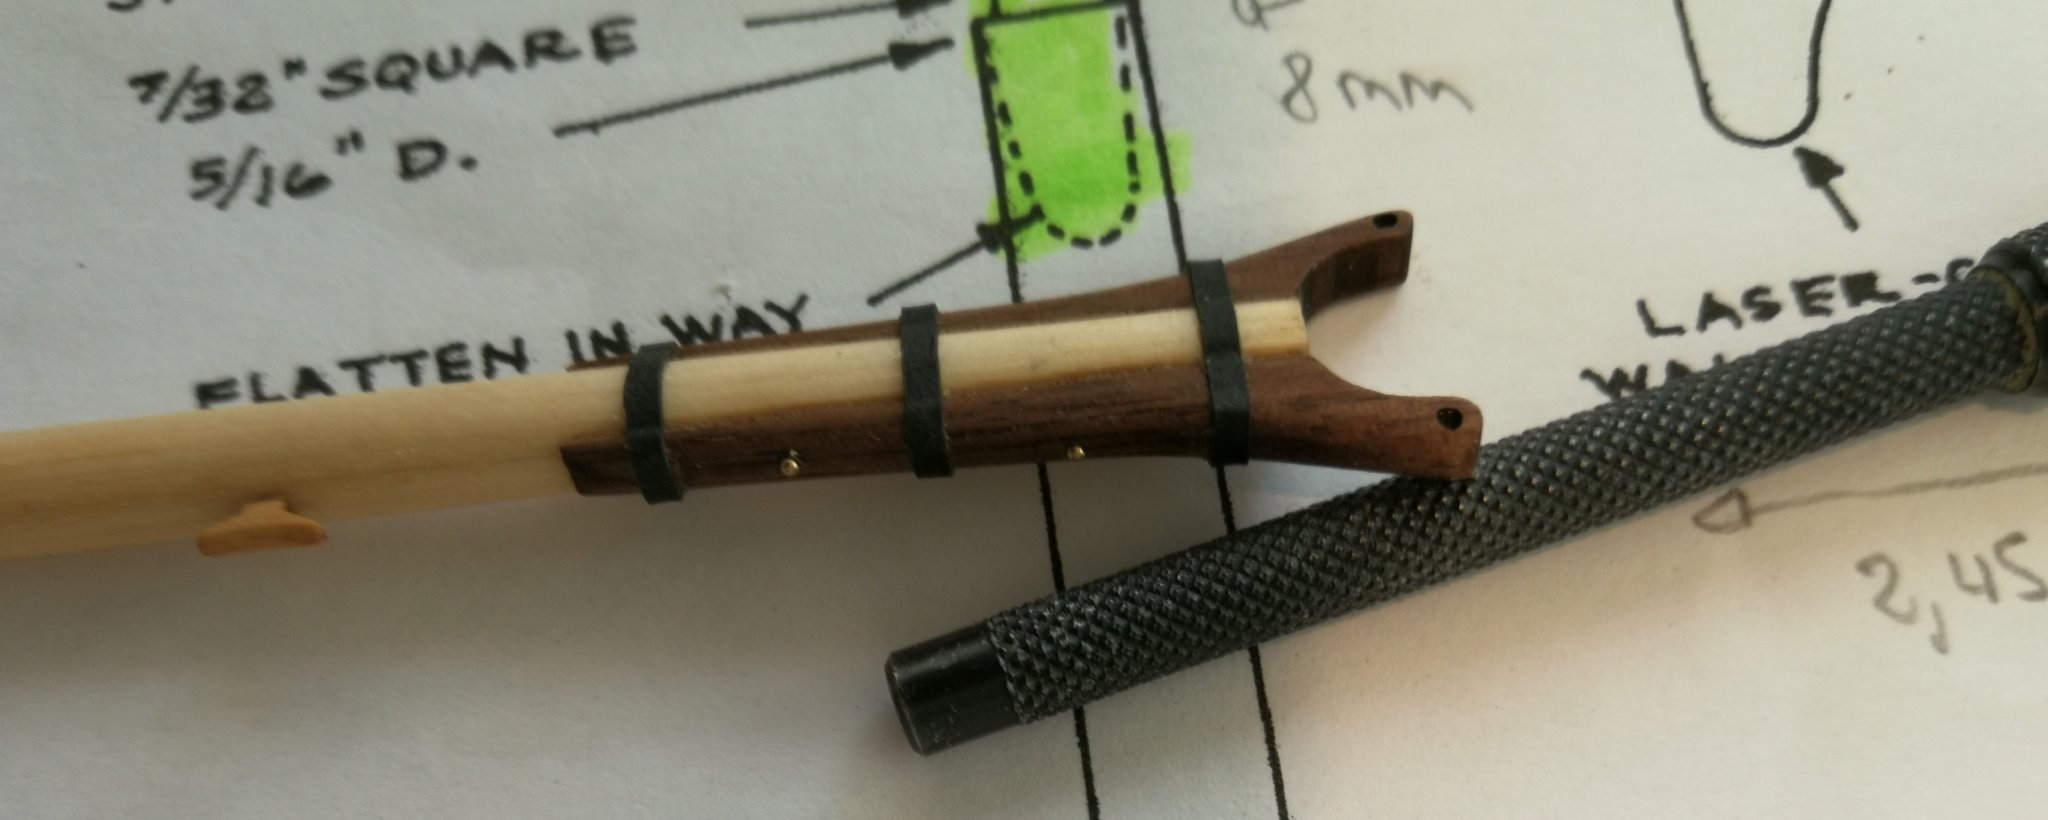
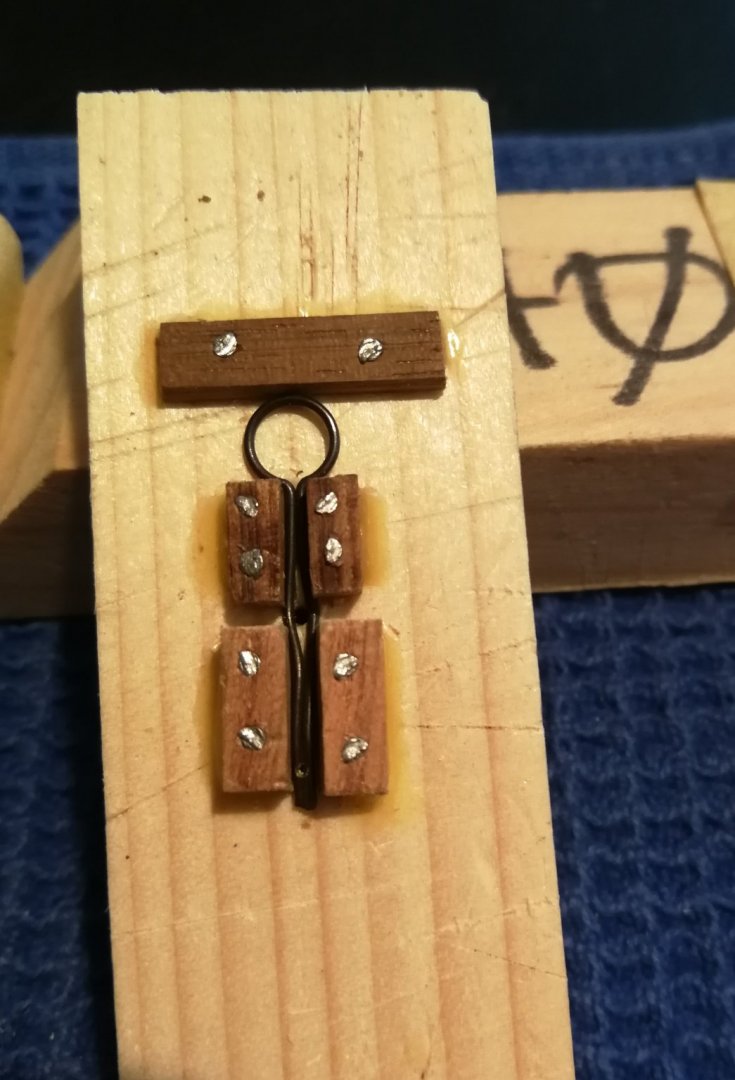
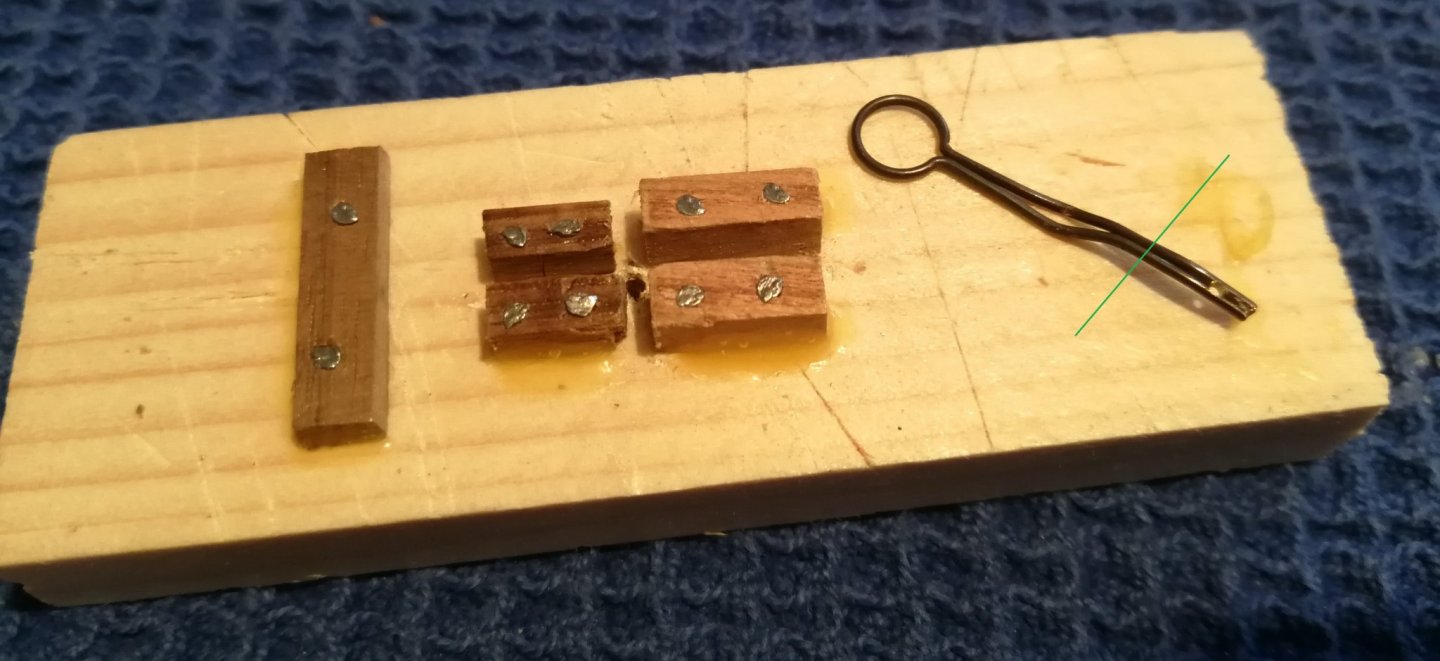
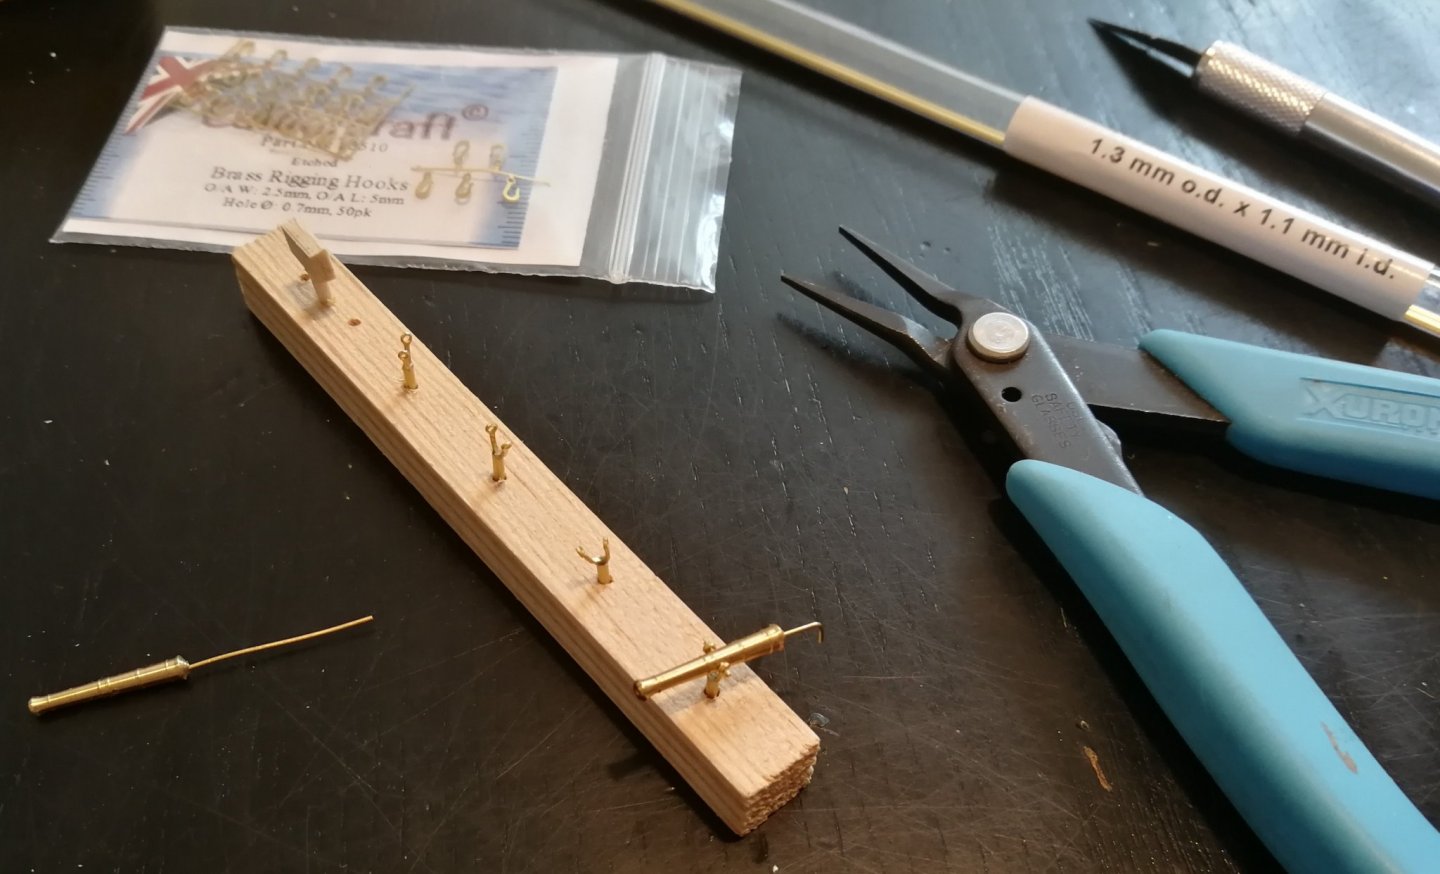
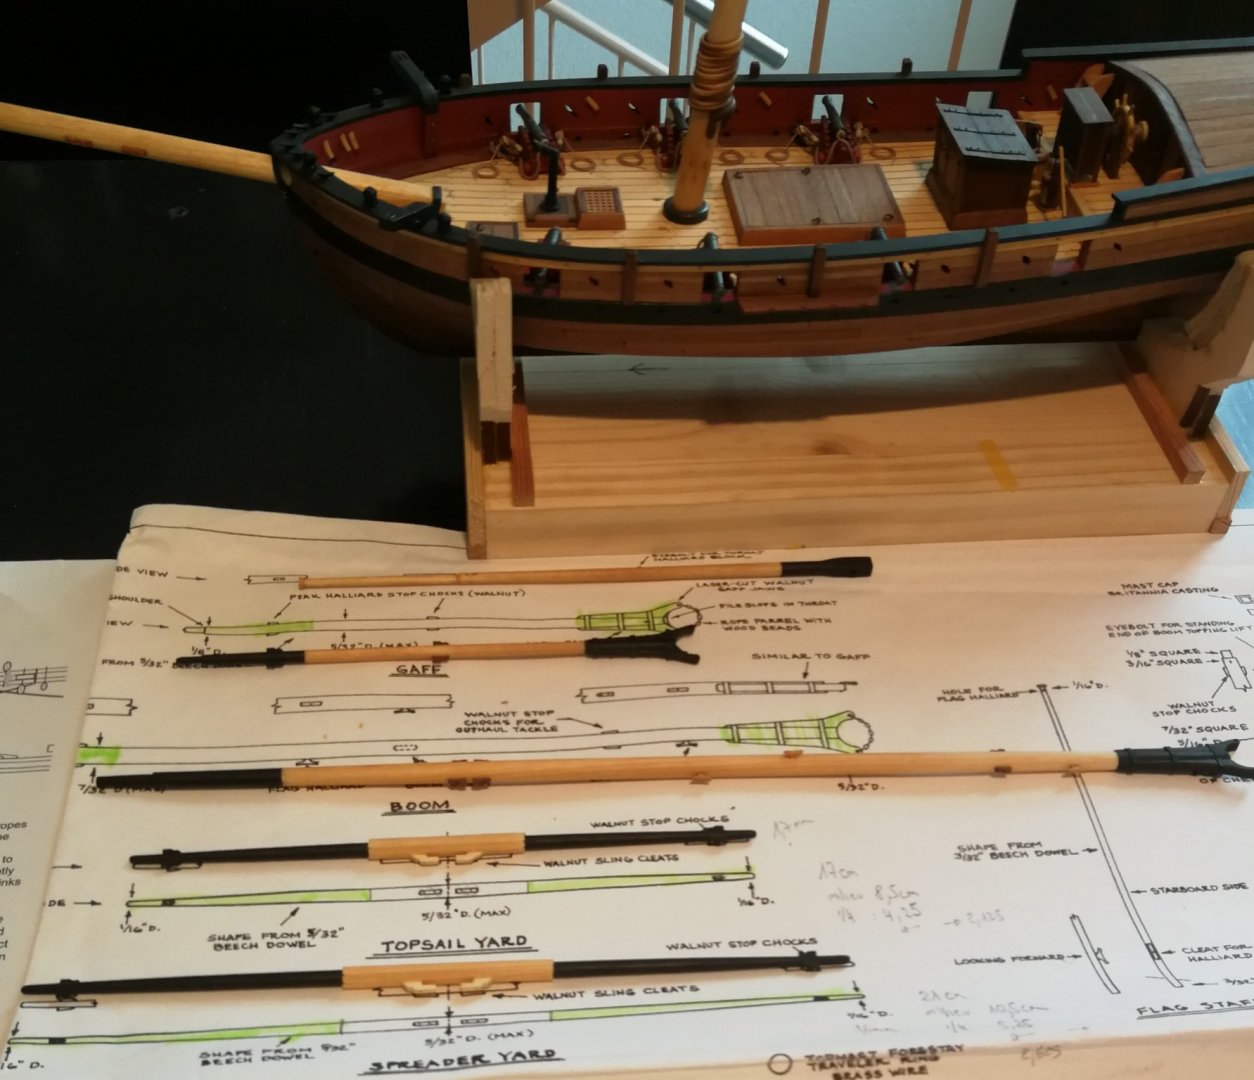
Thank you to everyone who follows my work. The boom sheet traveler has been added. For the chain plate, I encountered problems with the brass wire provided in the kit. He was too soft and I did not get a regular result. Also I turned to a set of chain plates from Corel. They were just a little long. I made a little jig to open the hole for the pin. The green line indicate the future length of the chain plate. Finally I worked on the swivel cannons. I followed the method used by Blue Ensign for its cutter Alert. The guns are turned brass swivel guns from Syren. The hooks are from Caldercraft and the 1.3 mm brass tube from Albion Alloys Ltd. The swivel guns were blackened and some grimy black Doc O'Brien's weathering powder was gently rubbed with a brush. I still have to install all that..


- 164 replies
-
- 6
-
-
- first build
- model shipways
- (and 2 more)
-
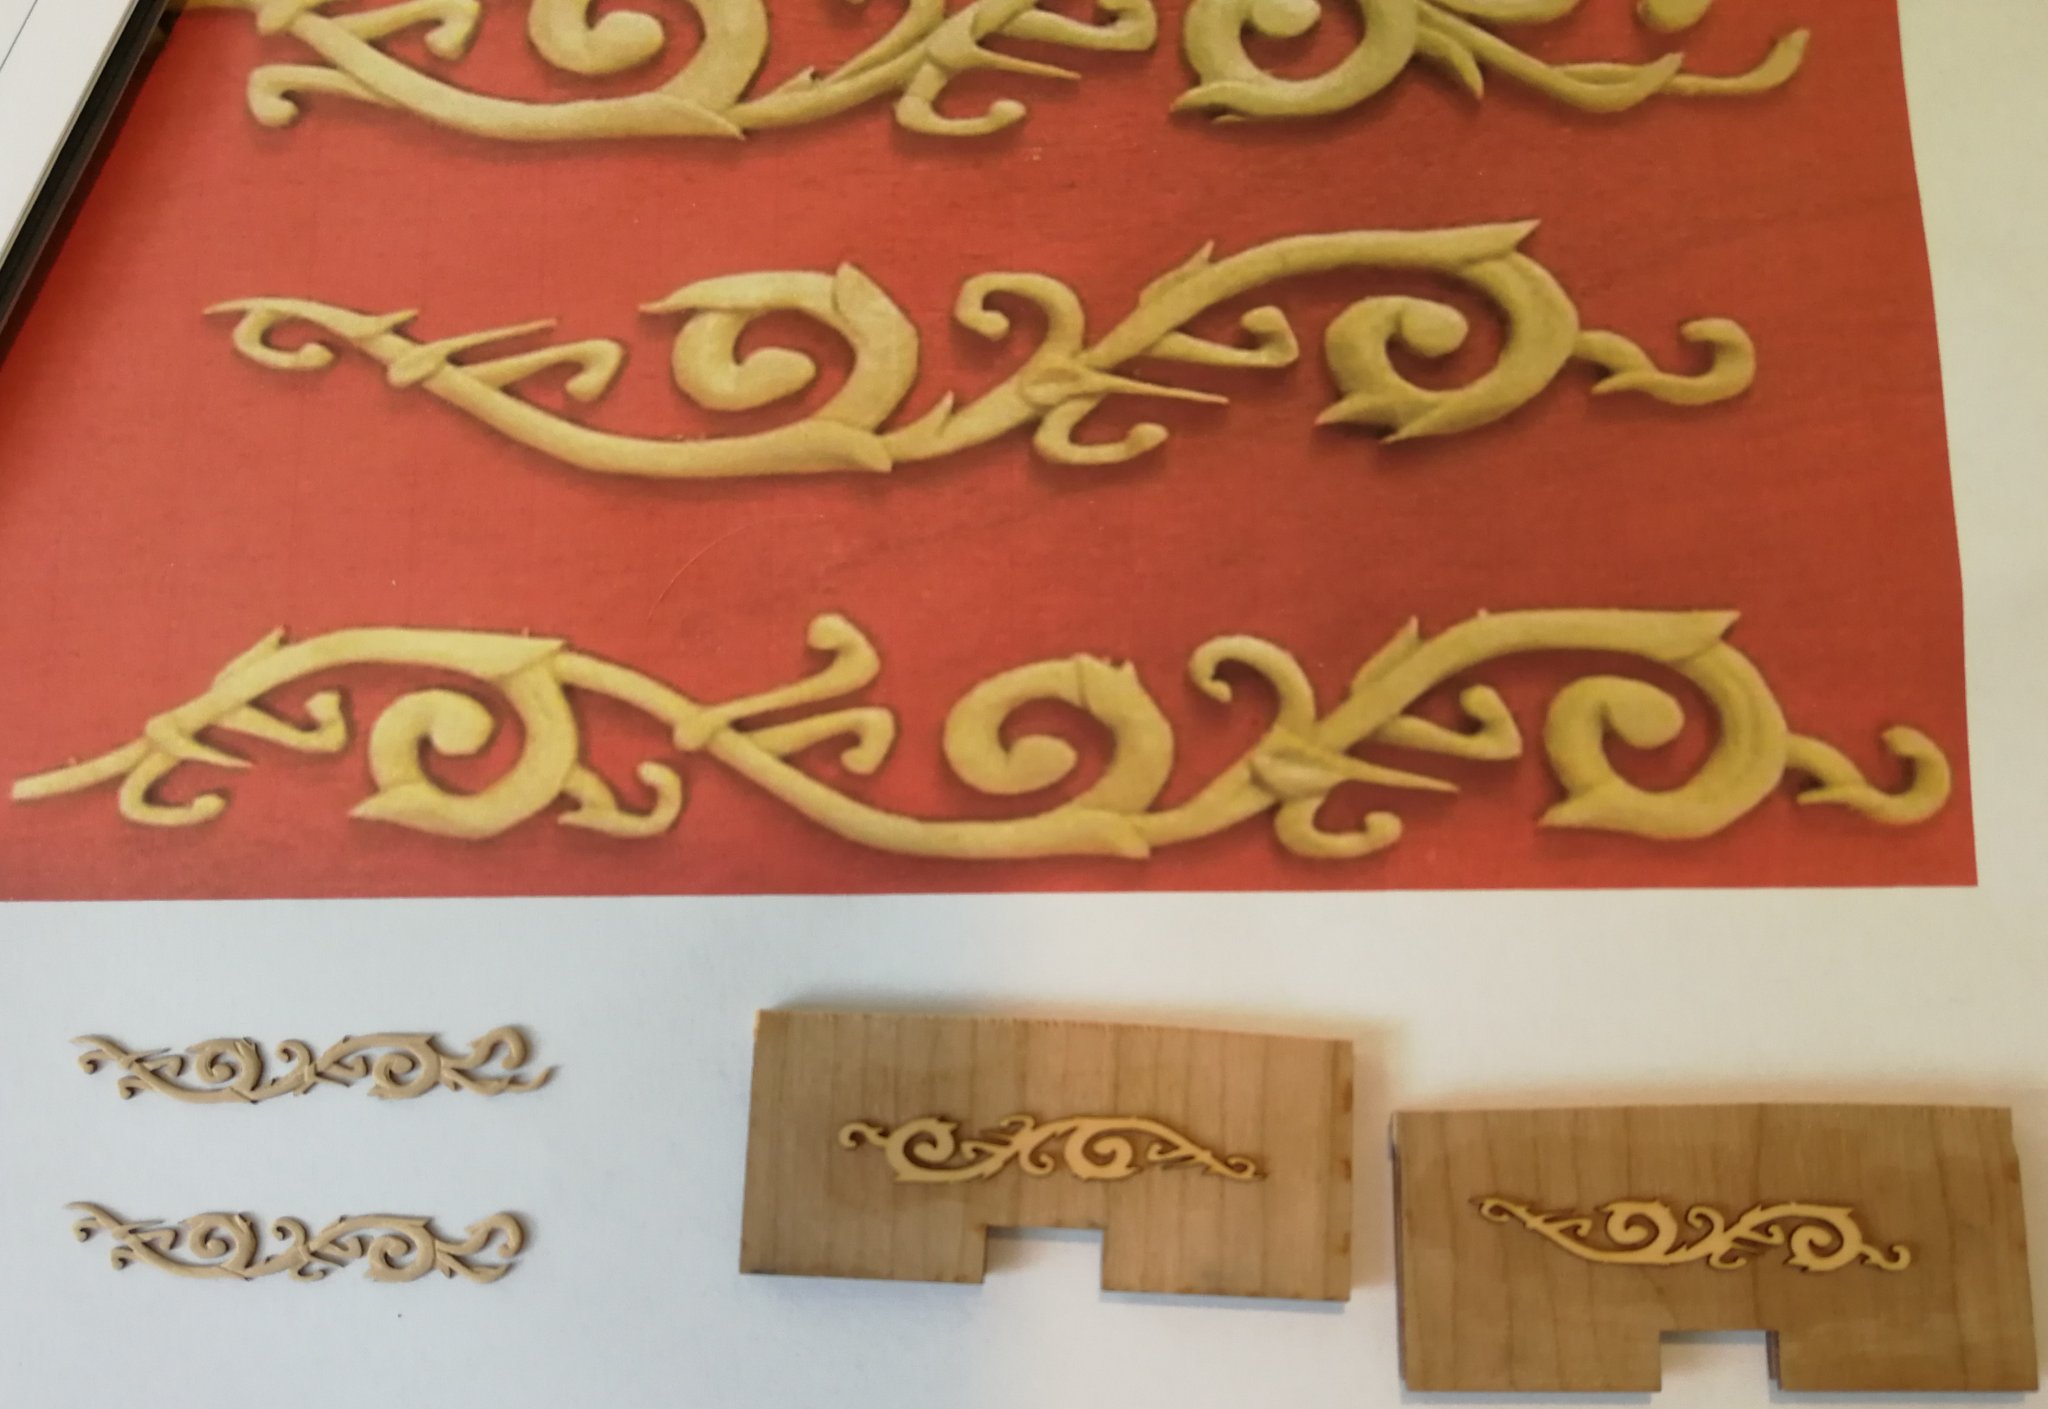
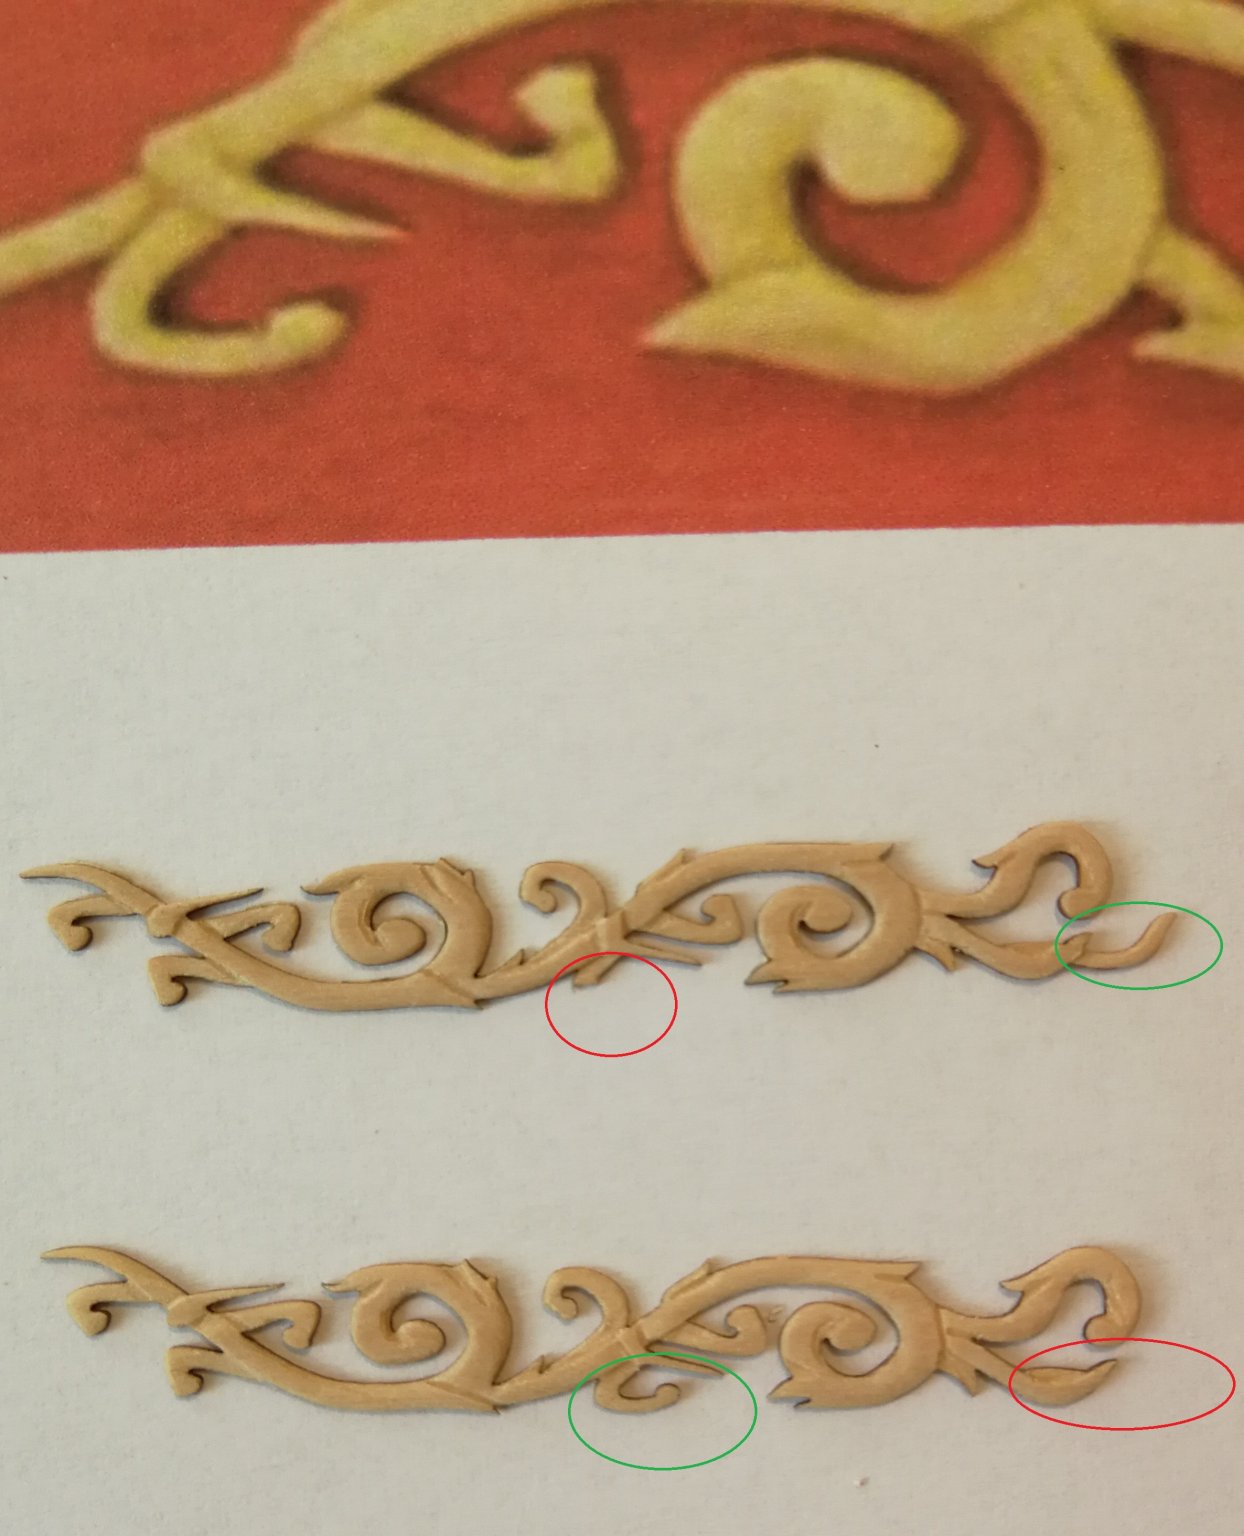
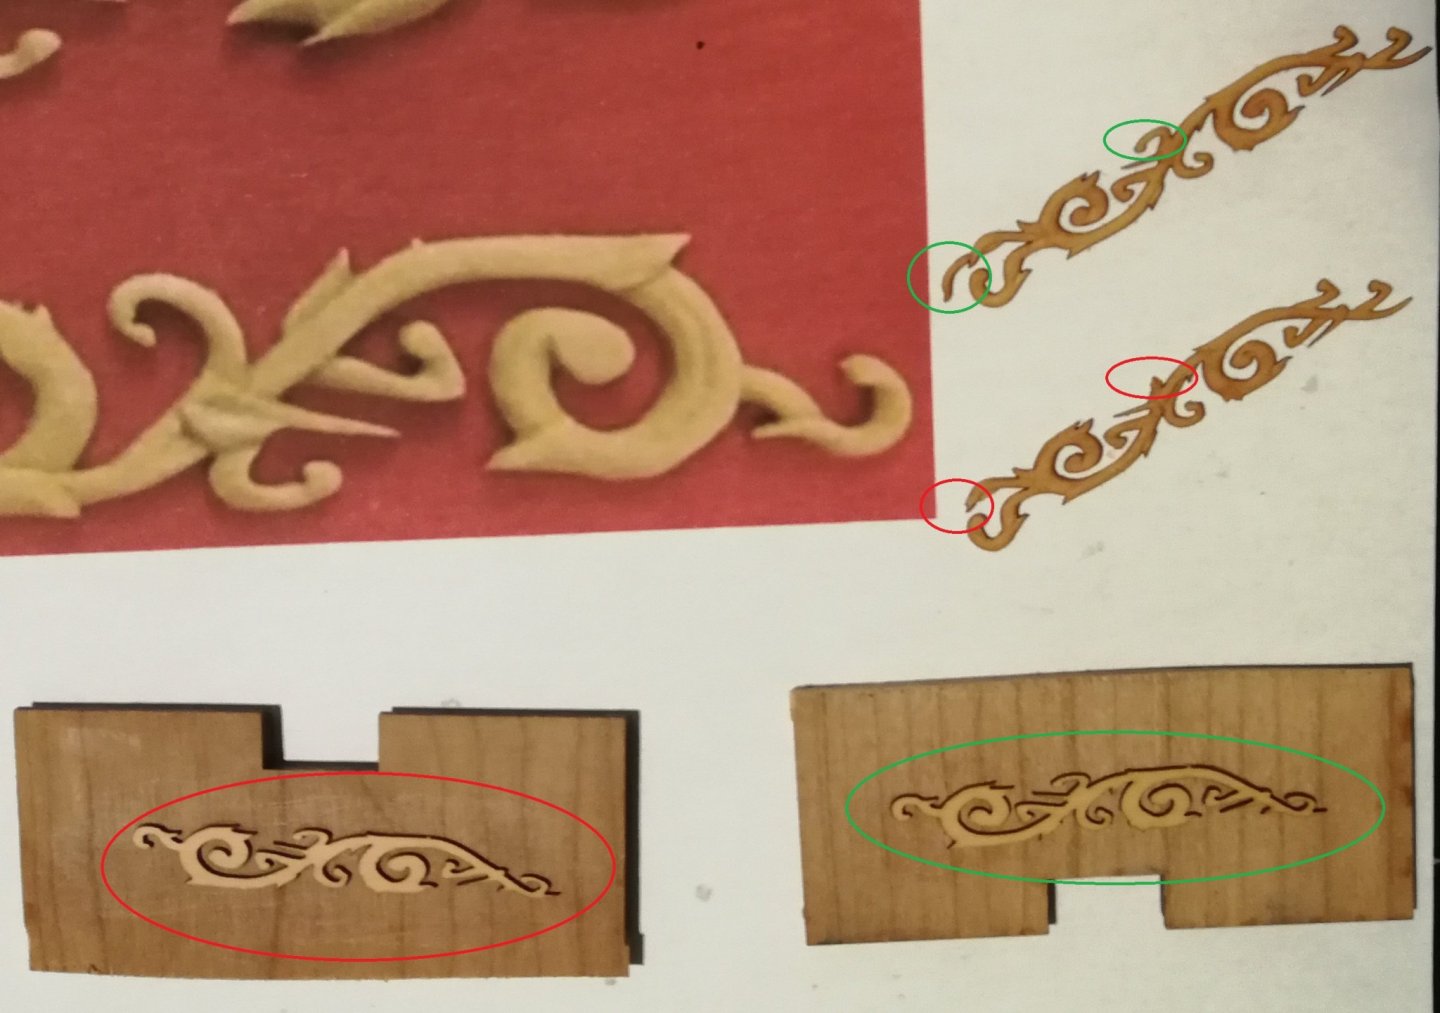
Time has passed since my last message. As I have a very specific idea for the base and it requires the use of a table saw (which I have not yet ...), I move quietly on the sculpture of the decorative carvings. For construction of the base, the table saw (a Proxxon FET, shipping costs to Europe for a Byrnes table saw is unfortunately too high... 😪) will be delivered by Santa Claus, so I have time to finish the carvings quietly until Christmas. Having finished the first 2 carvings, it was at the time of the setting up on the barge that I realized my stupidity 😲 The decorations must be symmetrical and should not be carved on the same side.... So I have to start one of her again ... The good news is that each carving had a small piece of broken and I could not find any more broken parts that I had yet set aside.... I was able to repair one of the broken elements by sacrificing the second carving (which anyway was unusable because carved on the wrong side) 😀 The second good news is that I reproduced the same mistake in preparing the second part but as I just started to sculpt one of them, I'll be able to glue the second piece on the right side. 😂 A second set of extra boxwood carving blanks should arrive shortly from Syren...


- 103 replies
-
- 13
-
-
- queen anne barge
- Syren Ship Model Company
- (and 1 more)
-
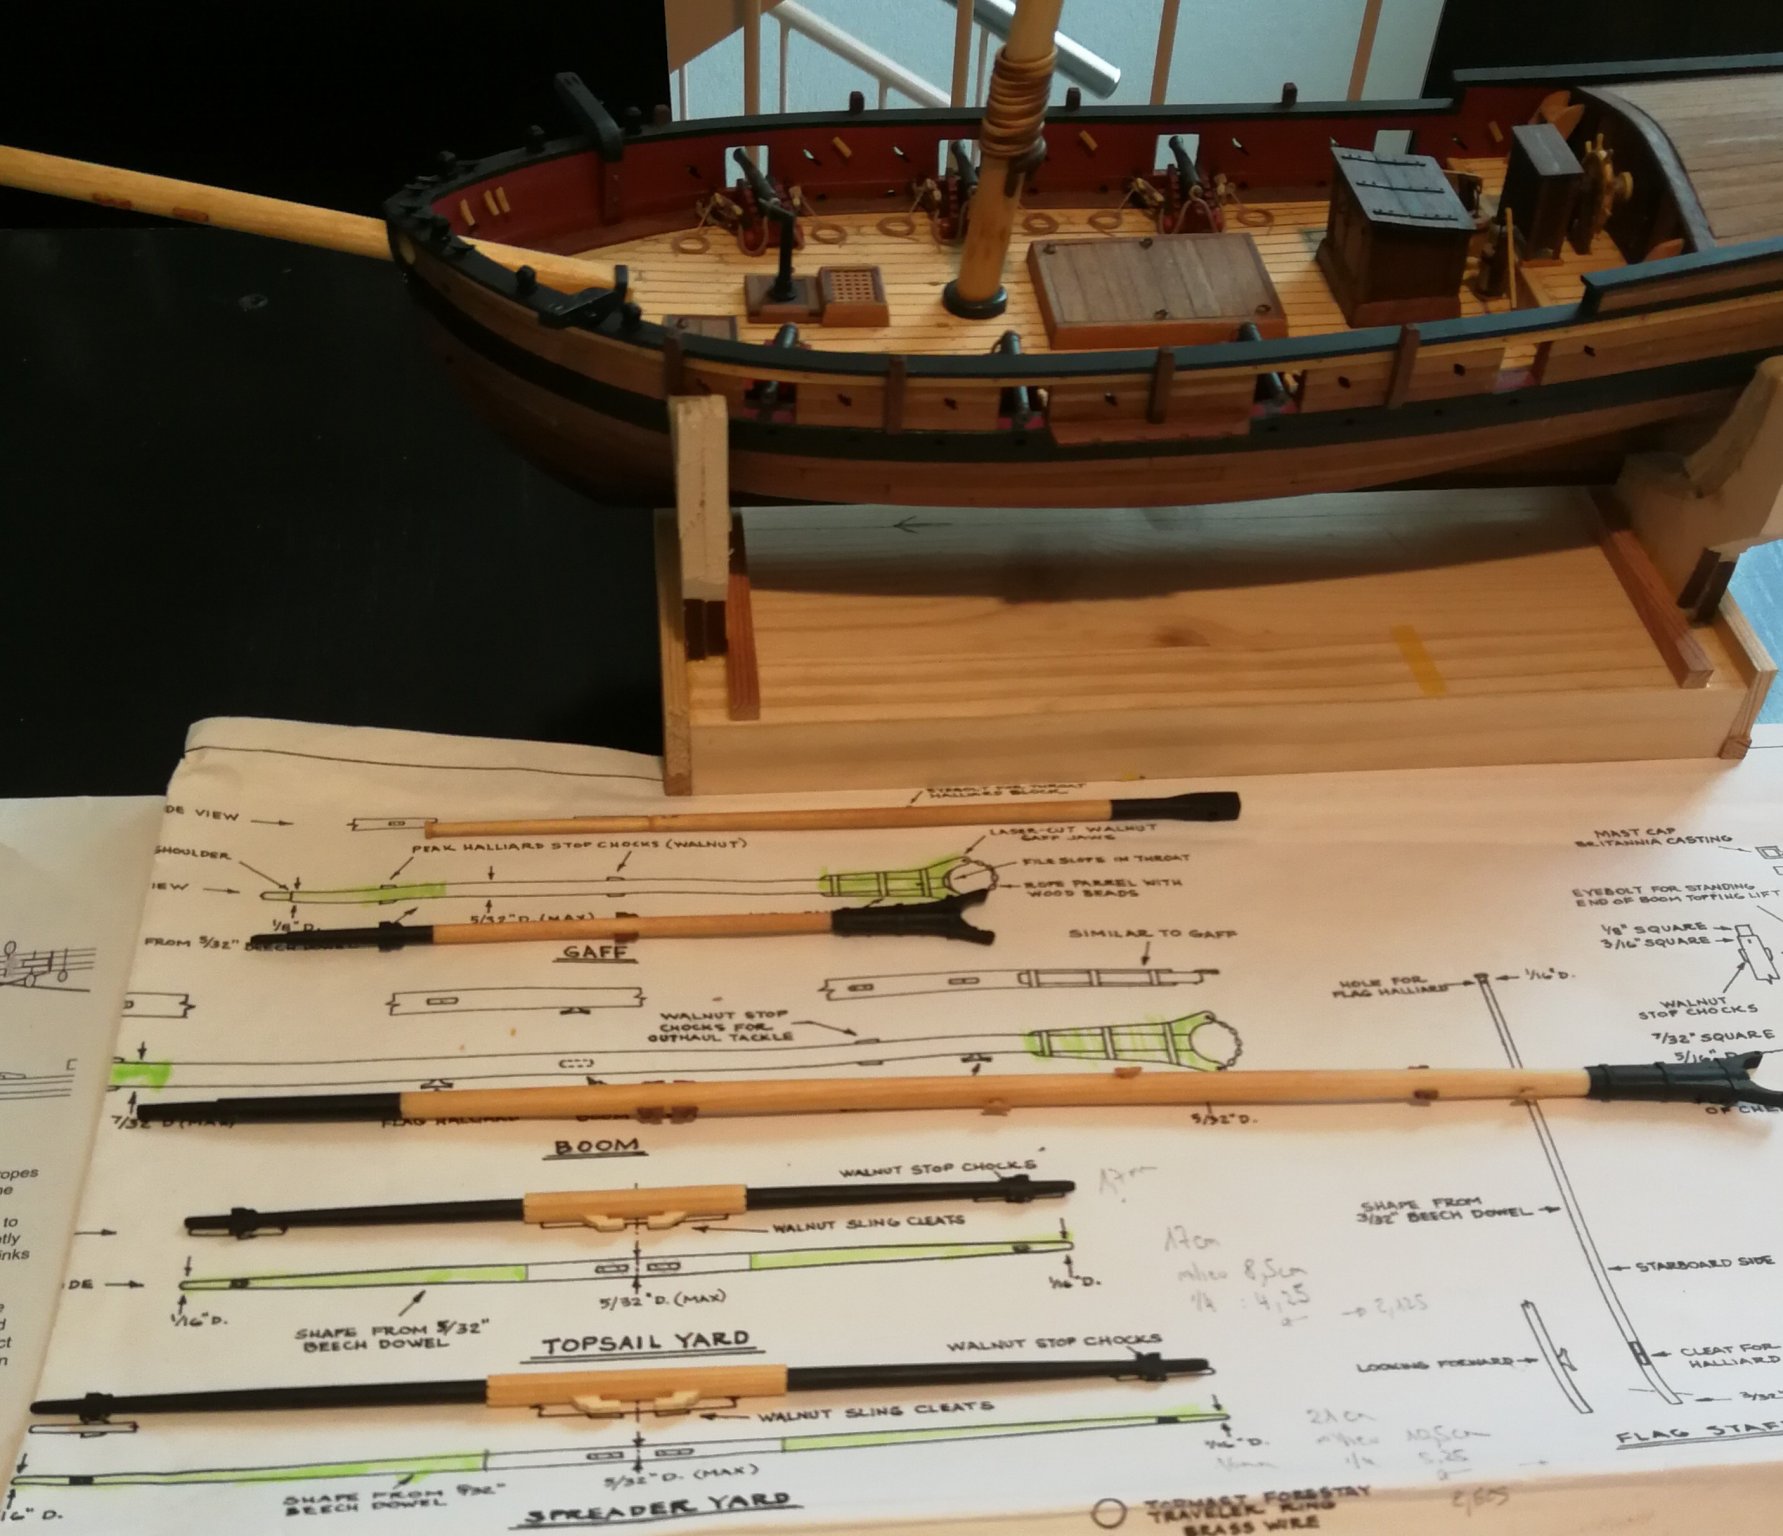
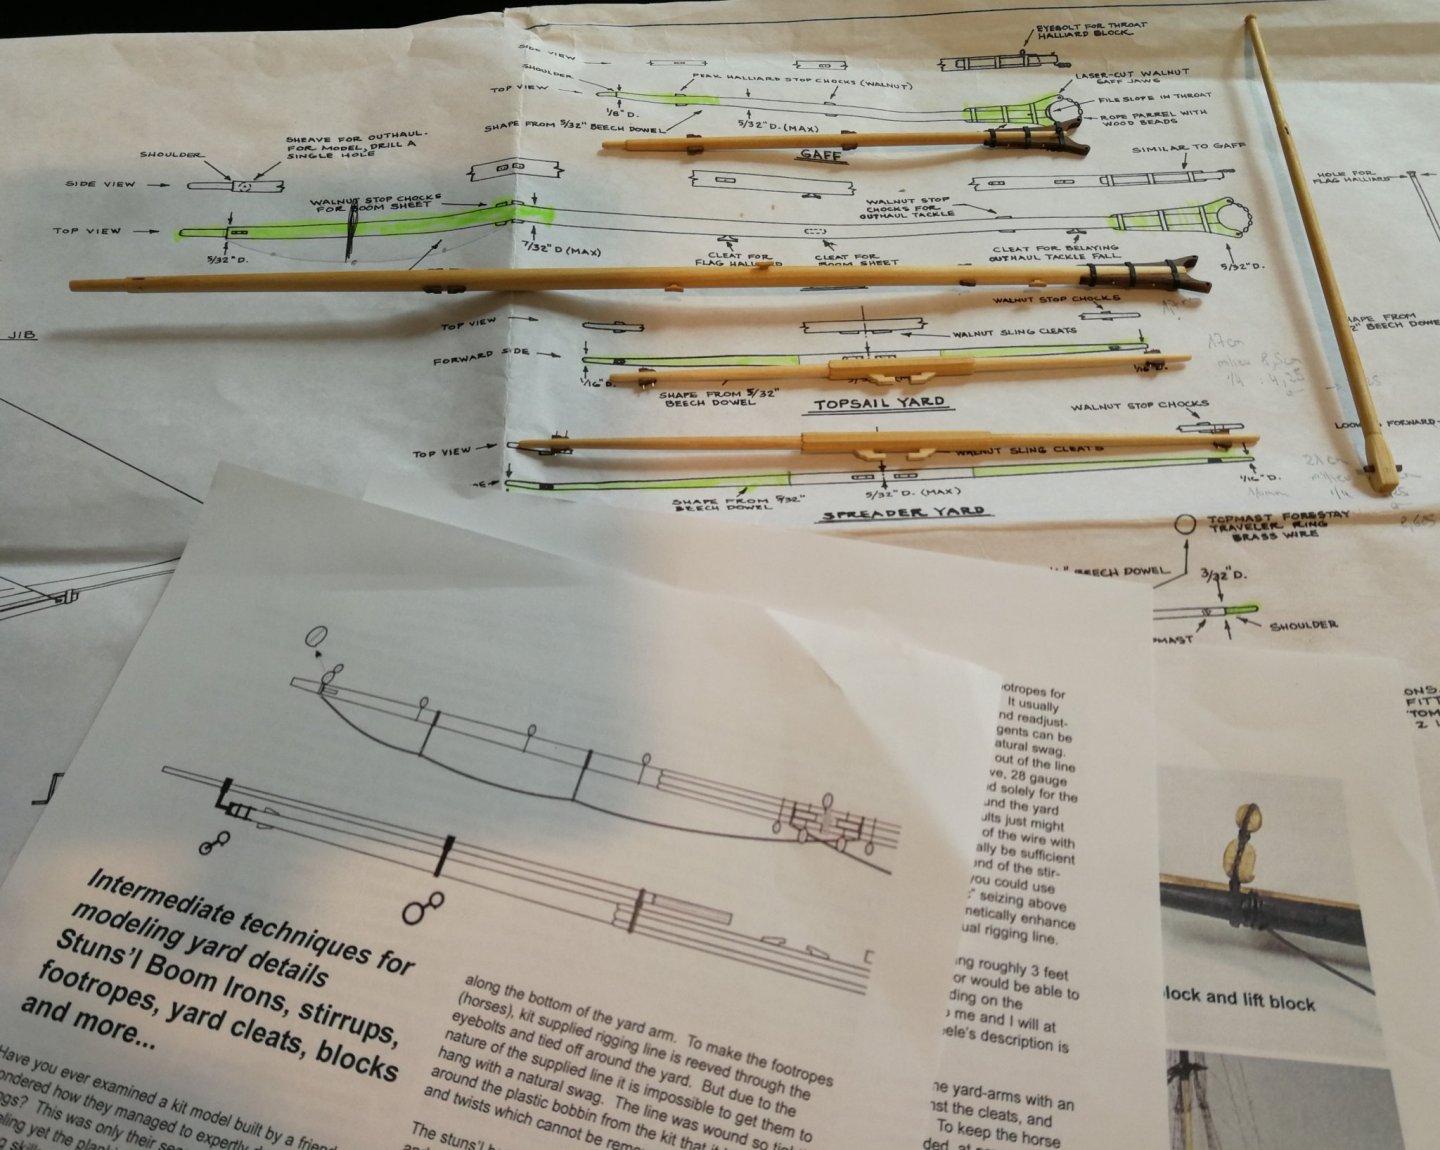
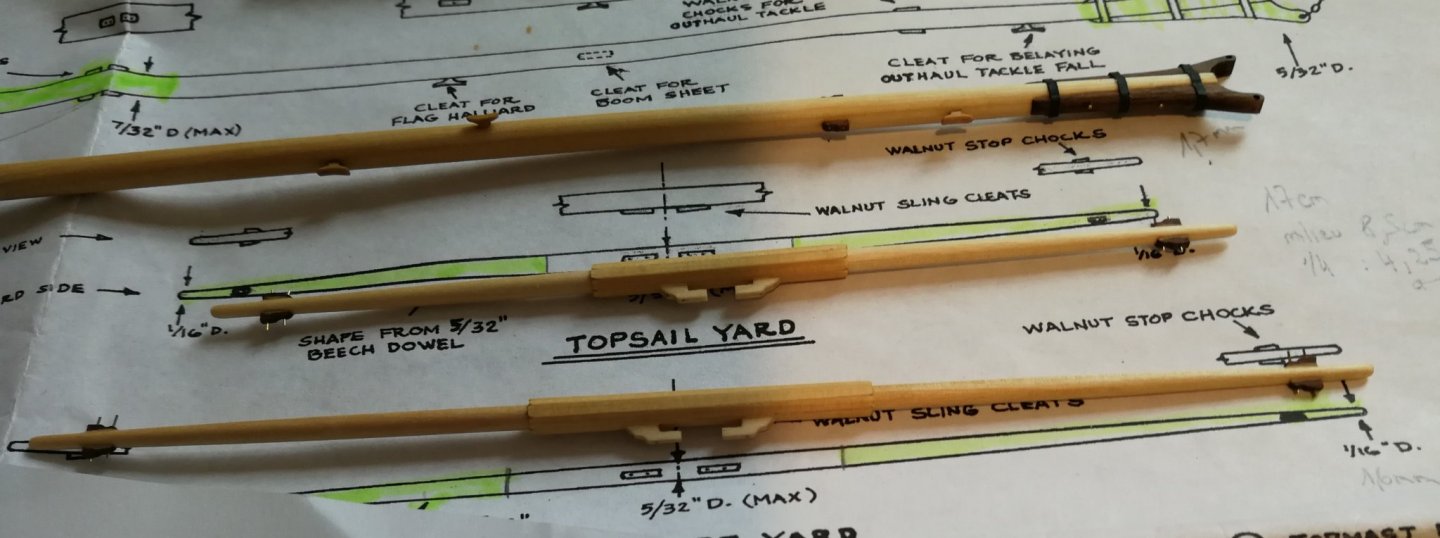
Thank You to all the 'Likes'. This week I worked on the two yards. I have the chance to found an excellent article written by Chuck Passaro on how to improve the details of the yards. This 6 pages article entitled 'Intermediate techniques for improving yard details' can be downloaded from the 'Club-resources' section of 'The Ship Model Society of Ney Jersey' web site. It is very informative and full of interesting techniques. All the different elements were the painted black. Time to work on the chain plates.


- 164 replies
-
- 15
-
-
- first build
- model shipways
- (and 2 more)
-
Always a great admirer of your work. The Winchelsea is really a superb frigate. Wait to see more.
-
Superb work. This frigate really has beautiful lines. Thank You for sharing.
- 642 replies
-
- 1
-
-
- winchelsea
- Syren Ship Model Company
- (and 1 more)
-
Beautiful work. Really a very nice version of this Longboat. Well done.
-
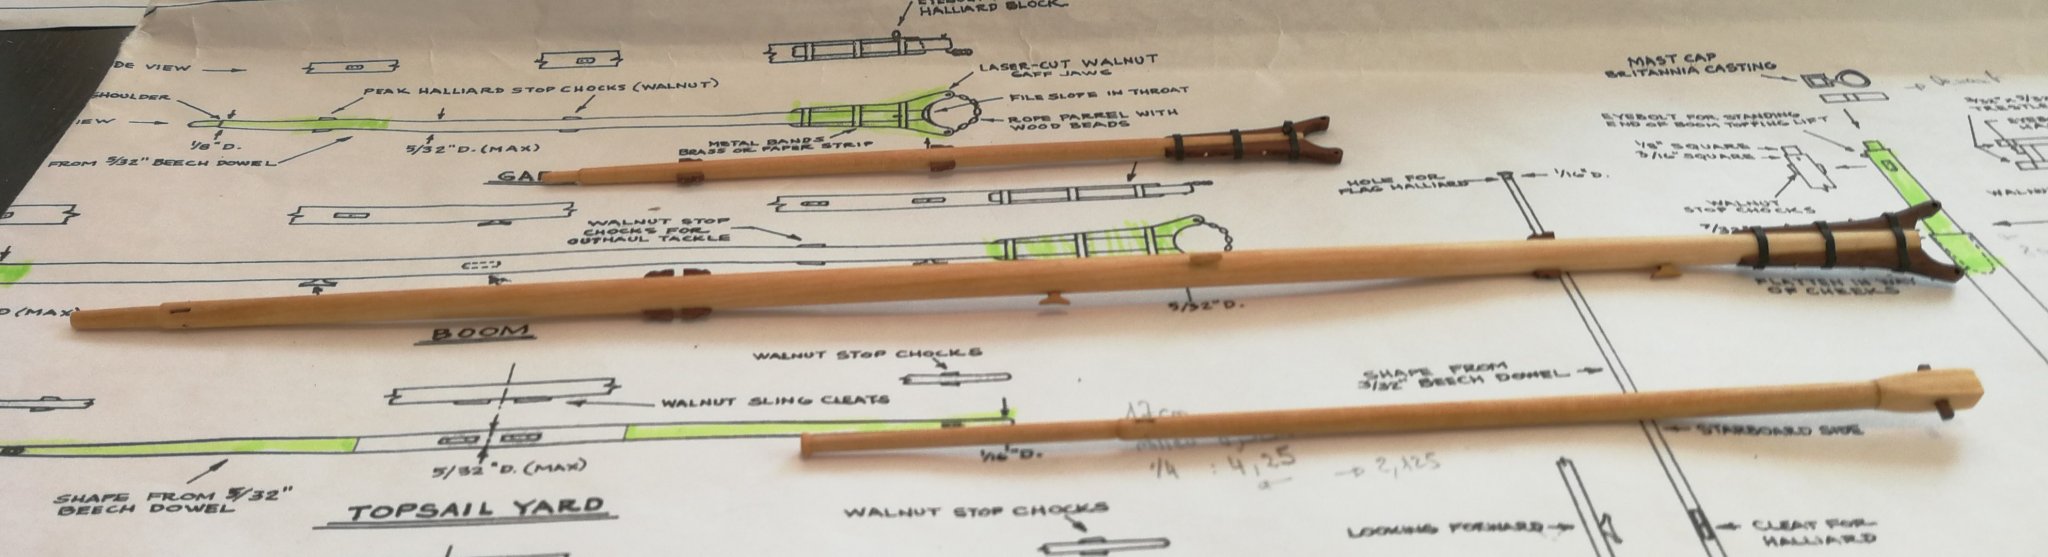
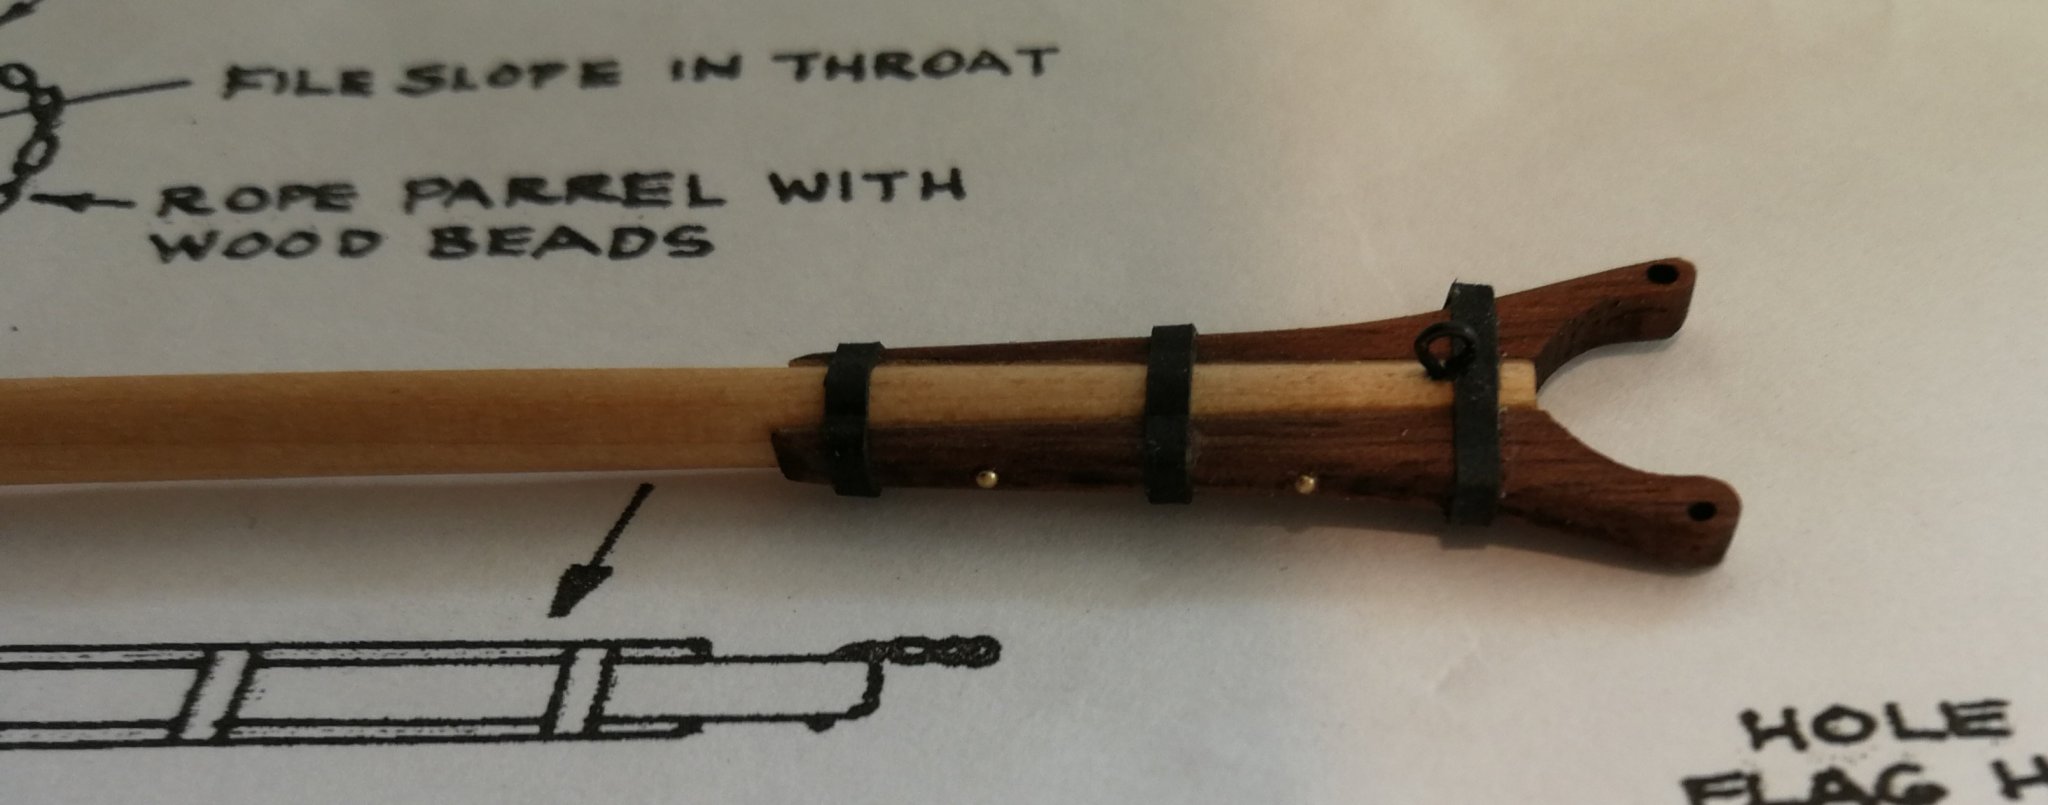
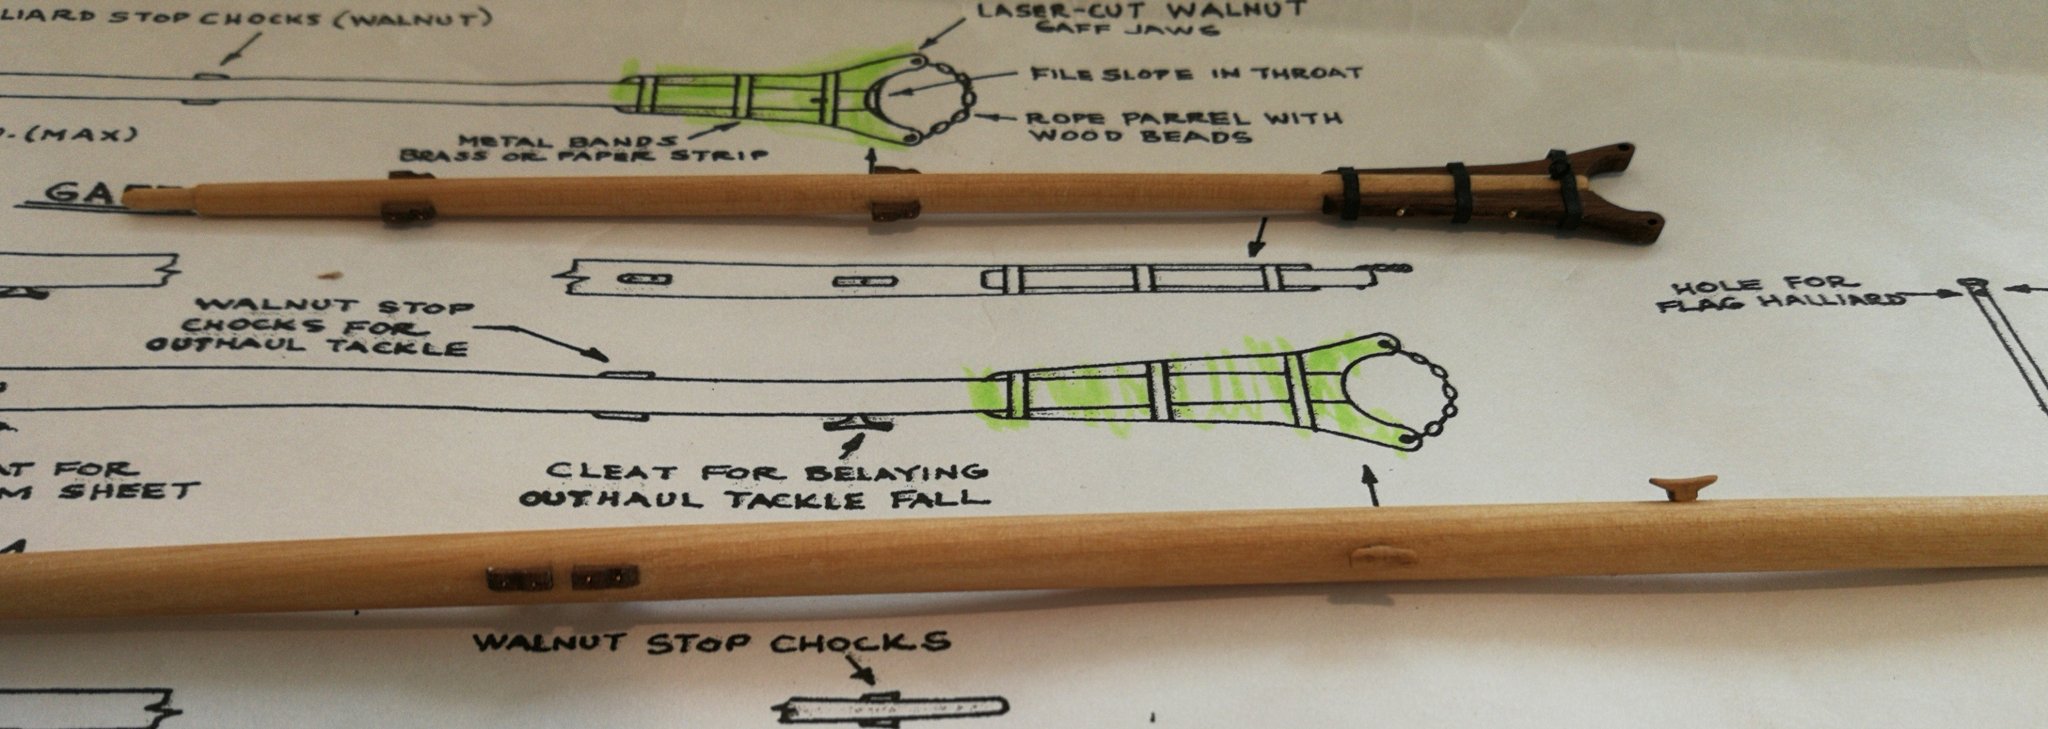
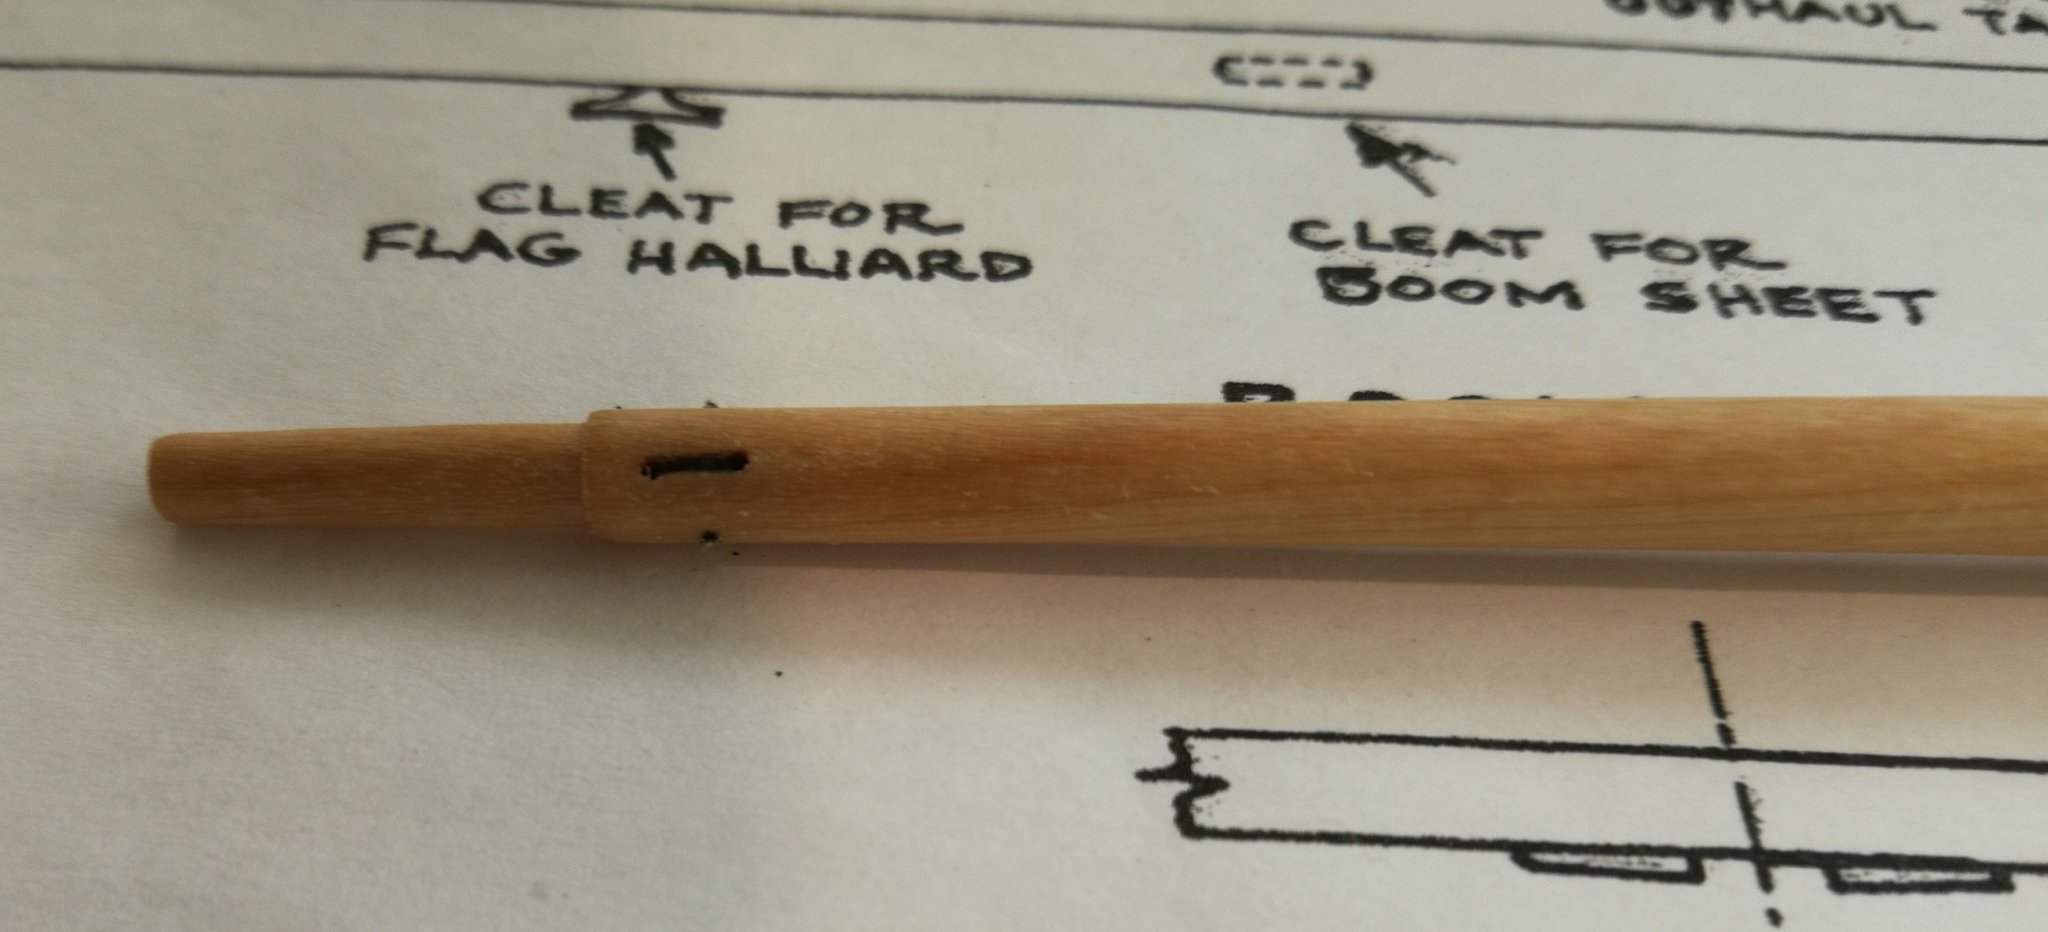
Thanks to all the 'Likes'. This week I worked on the gaff and the boom. The parts highlighted in green on the plan will subsequently be painted black. Inspired by Dubz's wonderful job on his HMS Sherbourne, I could not resist adding some details. I will now start assembling the spreader and topsail yards before moving on the painting phase of all these elements.


- 164 replies
-
- 11
-
-
- first build
- model shipways
- (and 2 more)
-
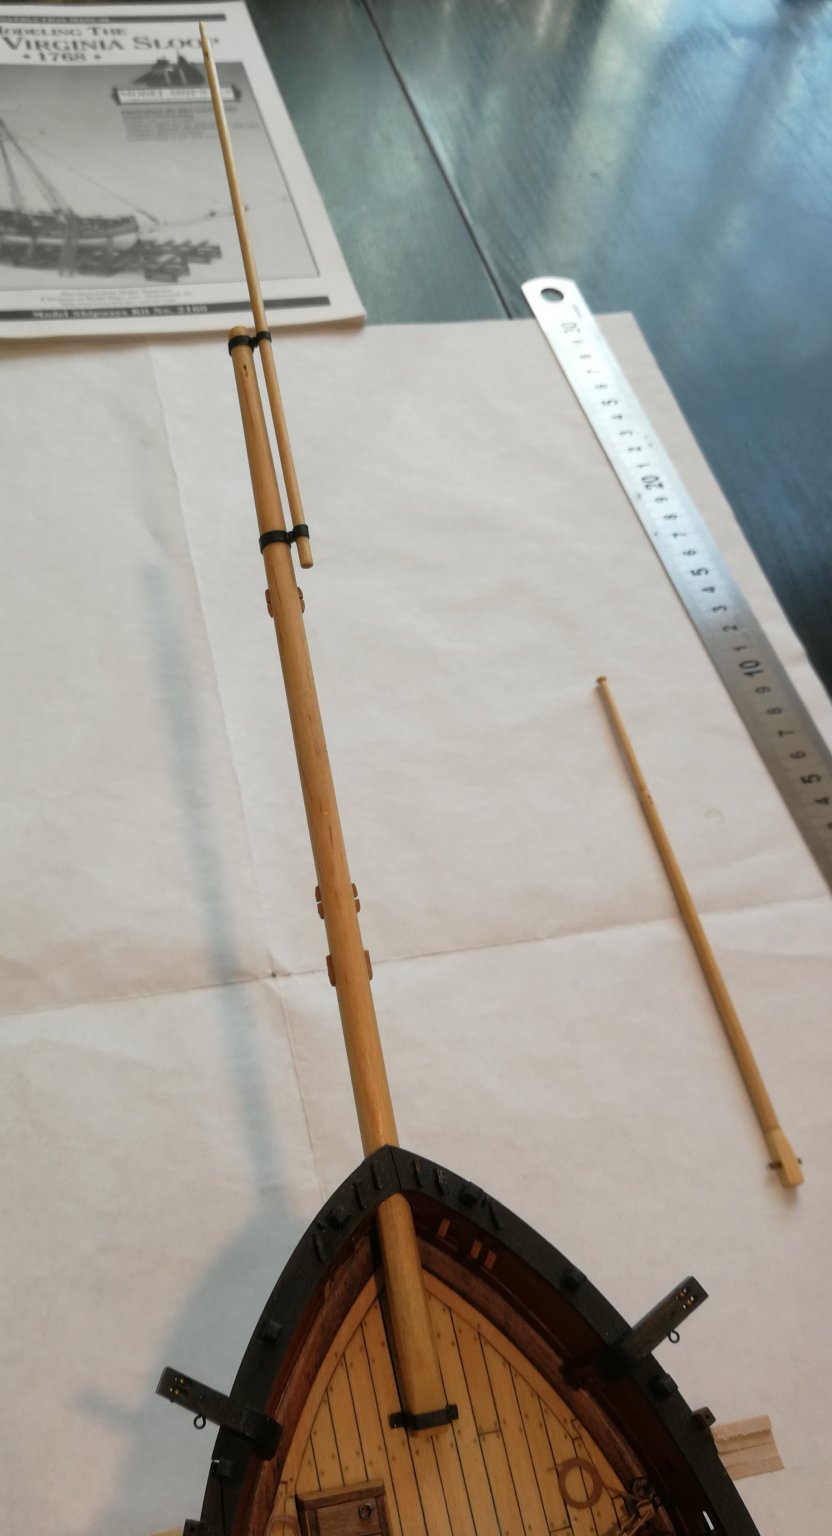
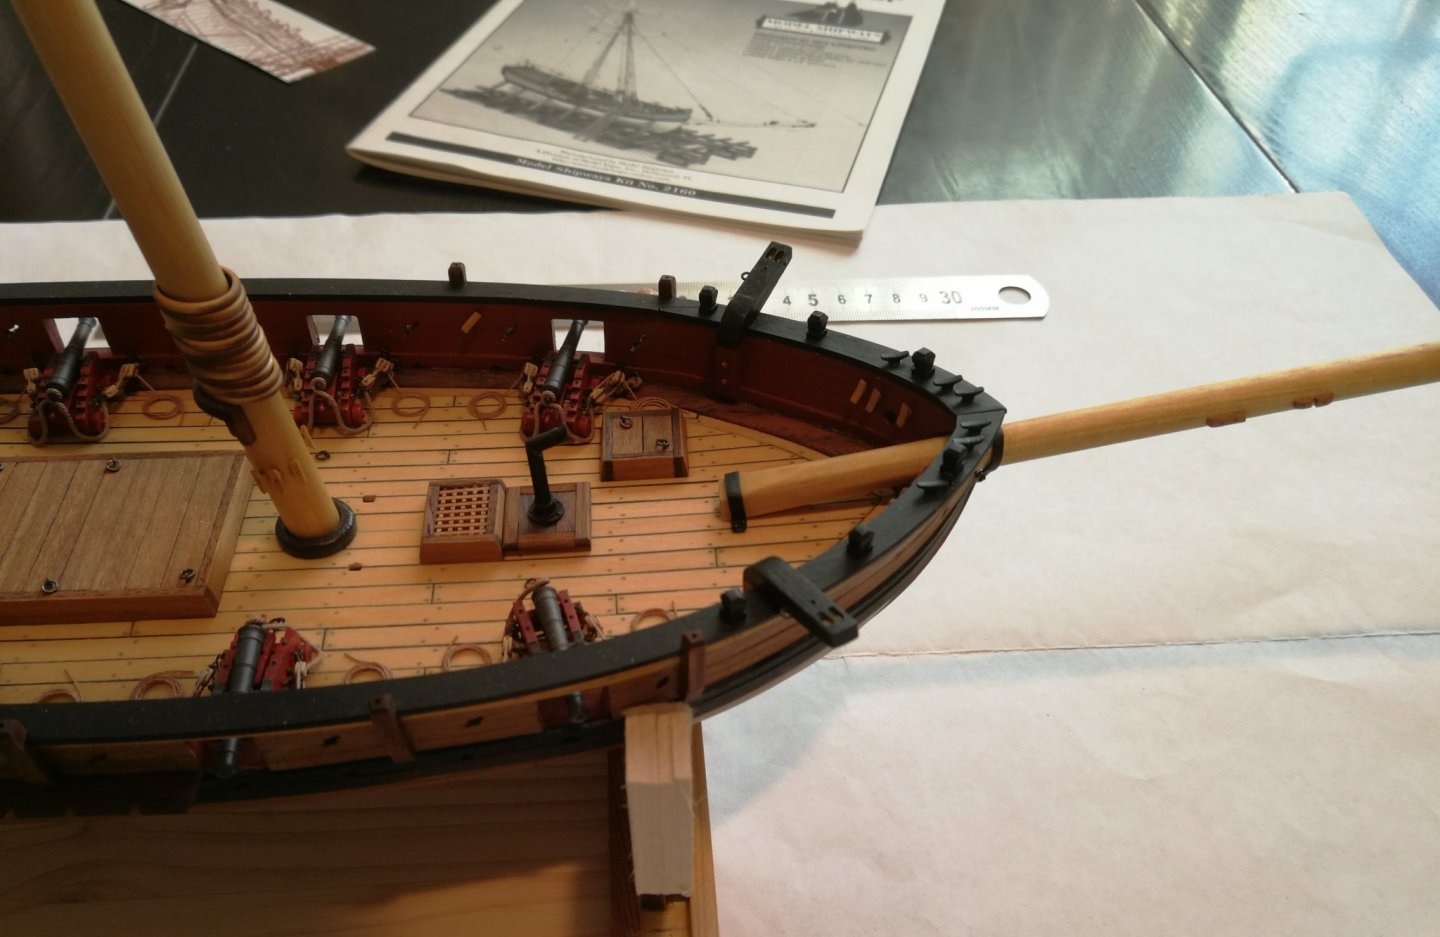
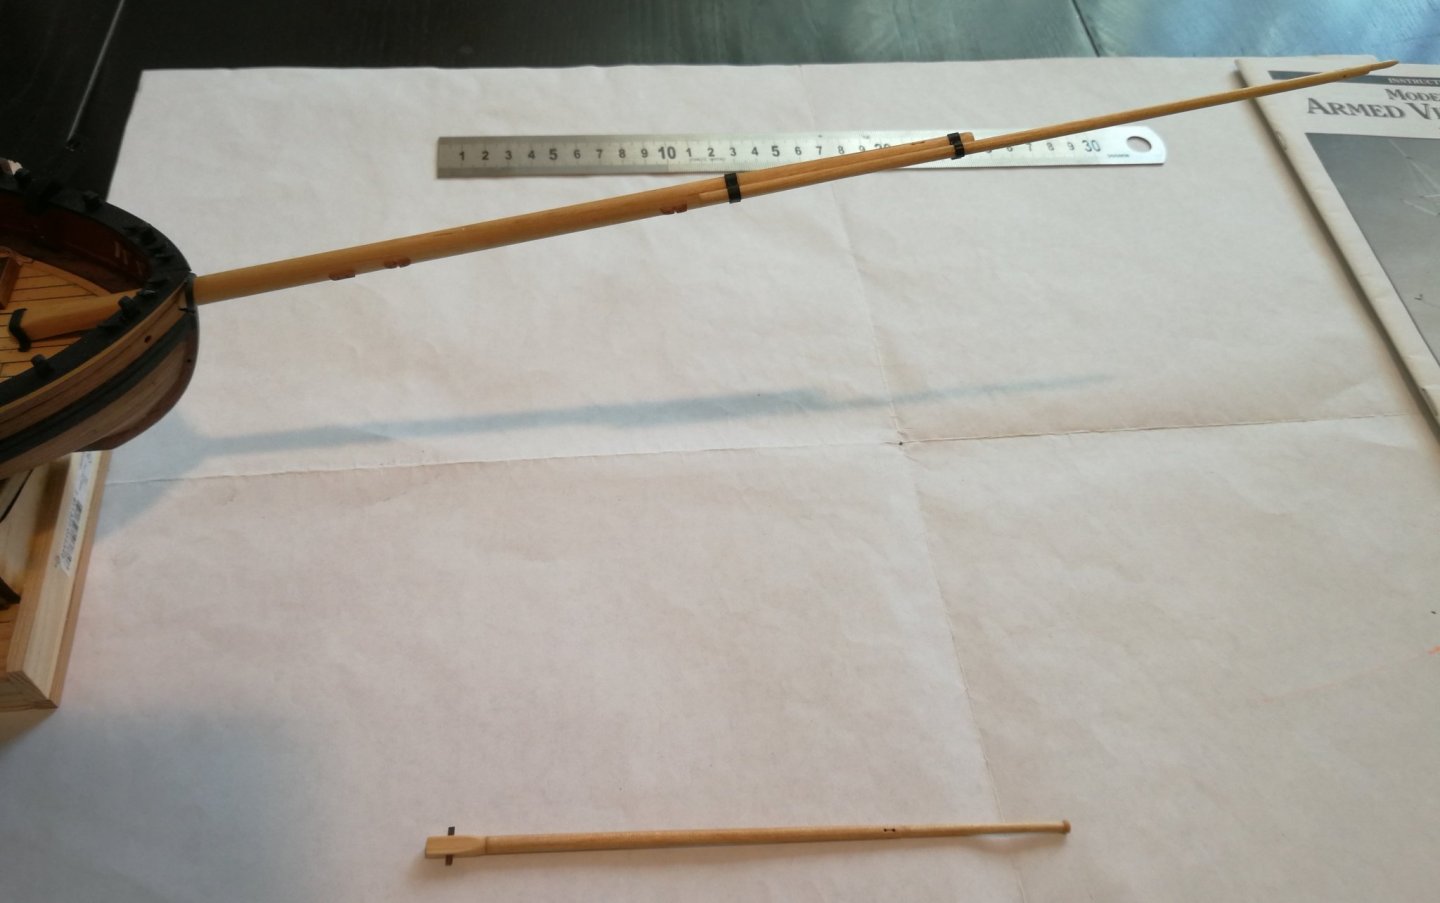
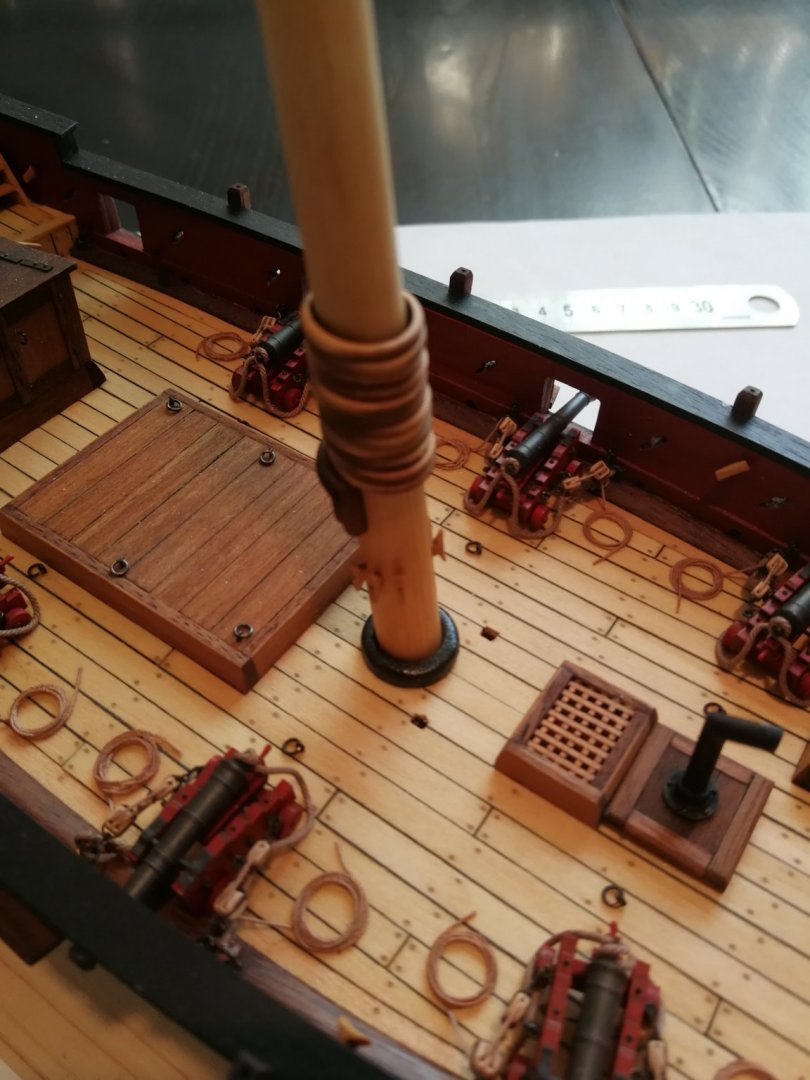
Thanks to all the 'Likes'. The lower mast was glued in place. The bowsprit and jibboom built and installed I tried to simulate the mast coat by covering the mast wedge with a fine paper dipped in white glue diluted with water. The whole thing is then painted in black acrylic. Time to work on the channels and chain plates.


- 164 replies
-
- 11
-
-
- first build
- model shipways
- (and 2 more)
-
A big big thank you for this project. This step by step is really very instructive. And seeing the progress of the work using photos really helps to understand the process. Looking forward to seeing more 😉
-
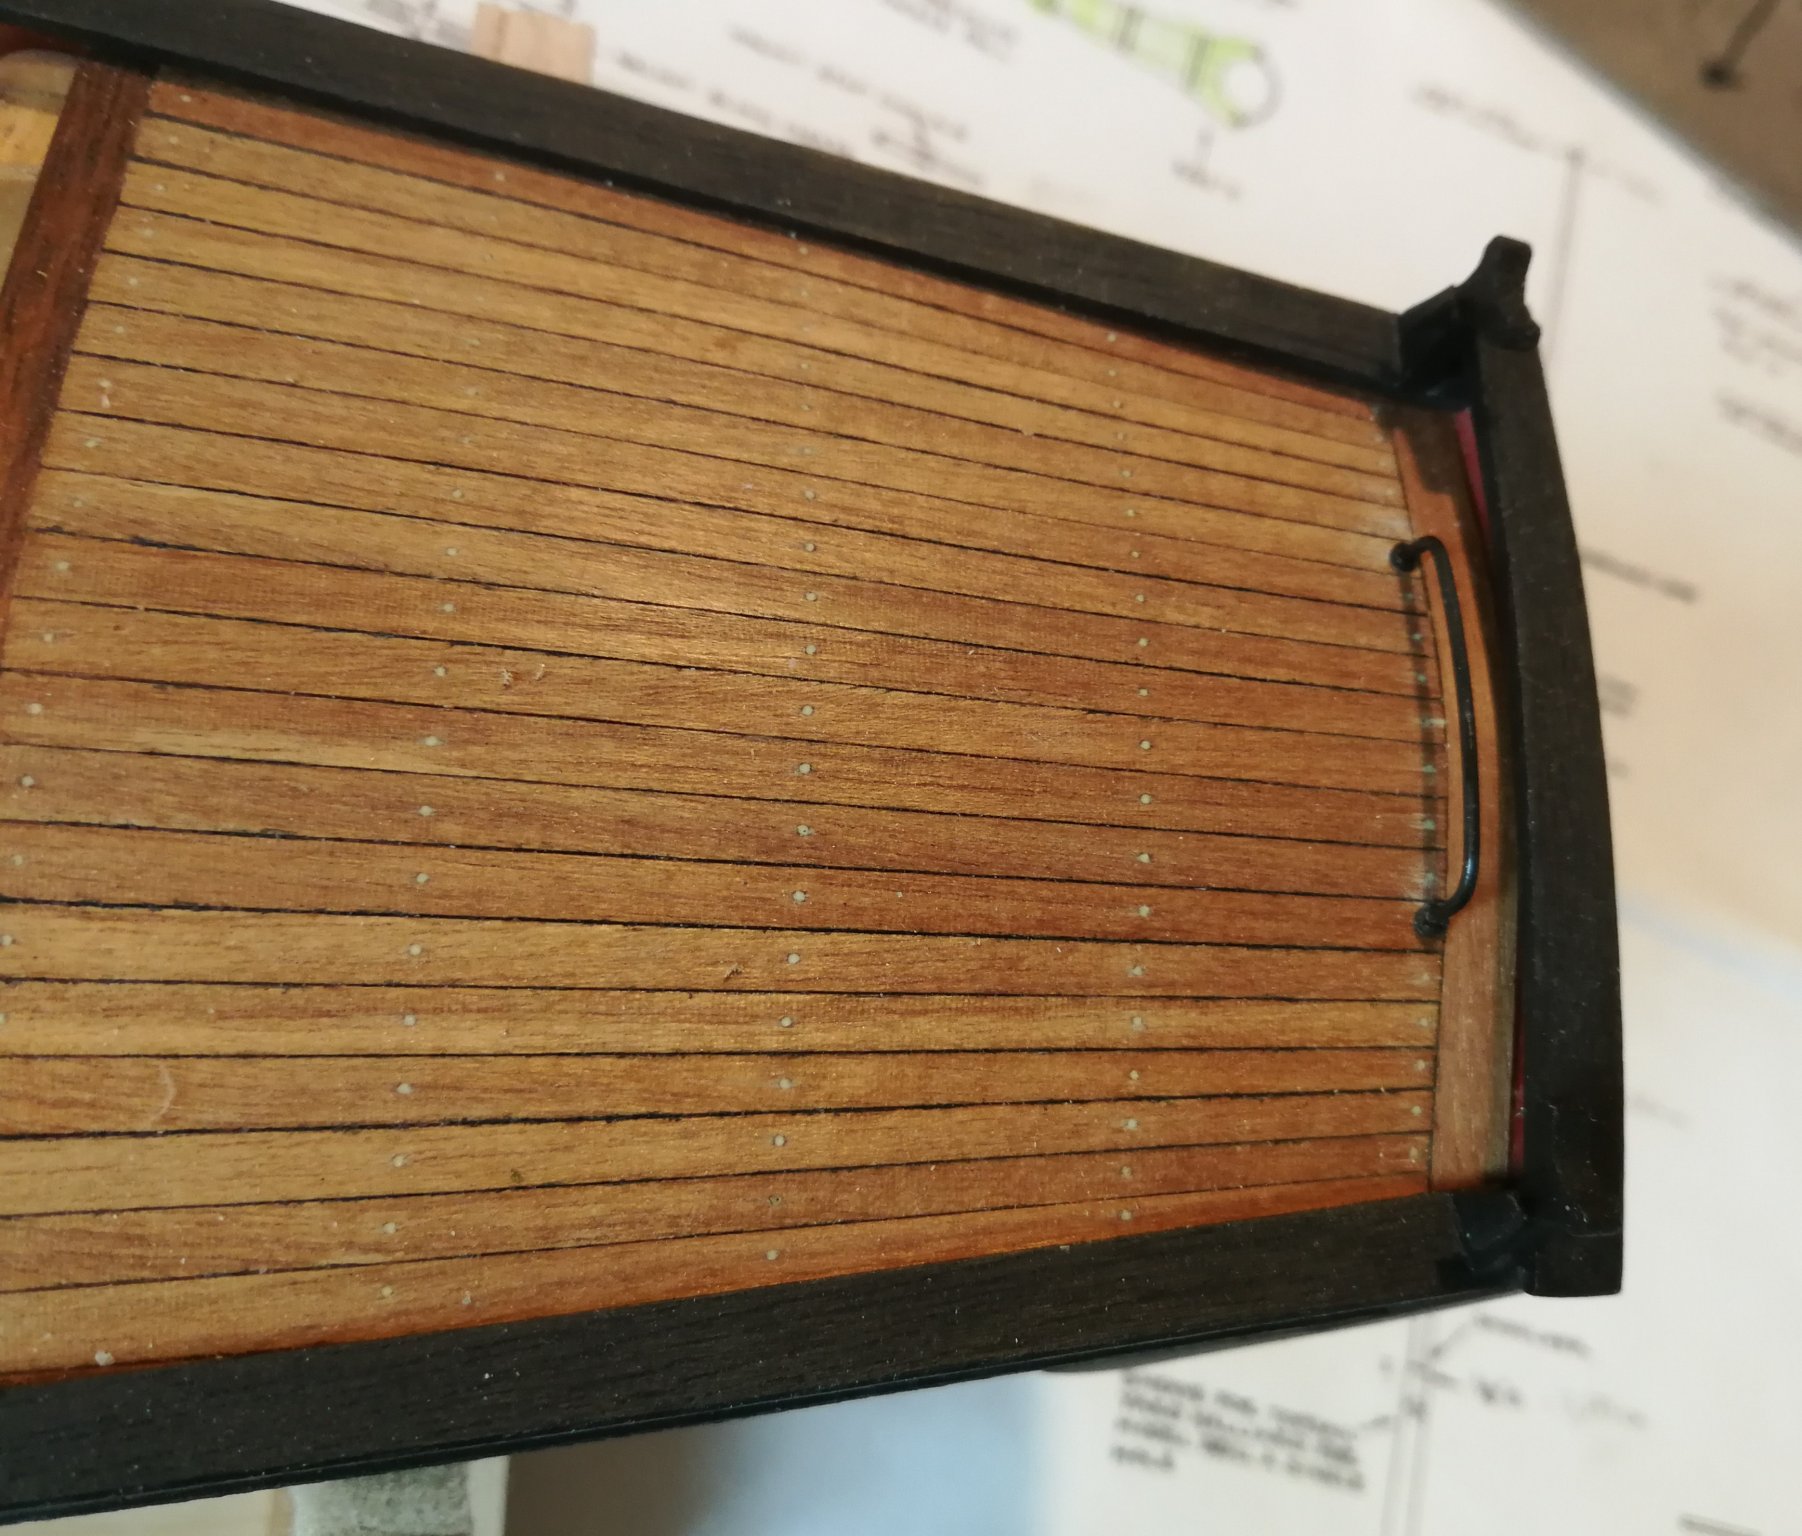
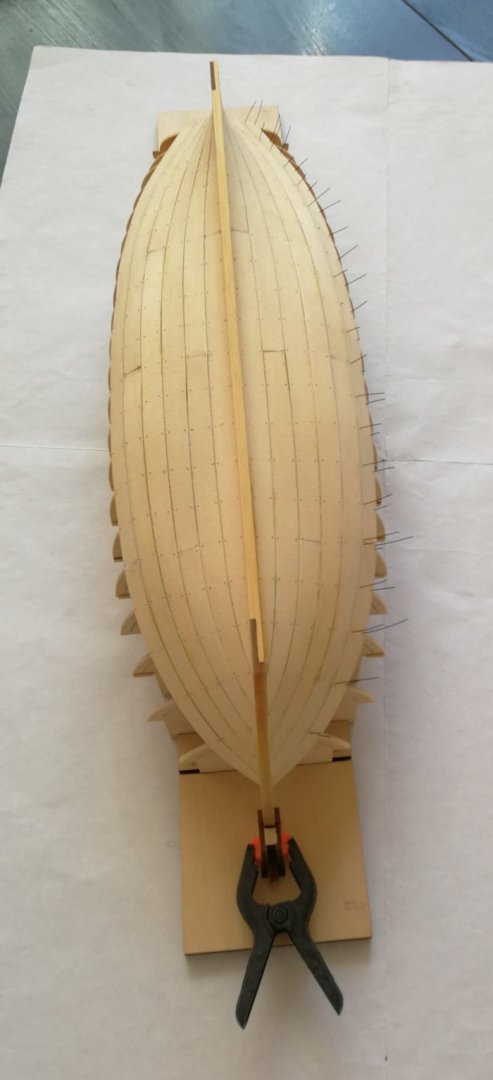
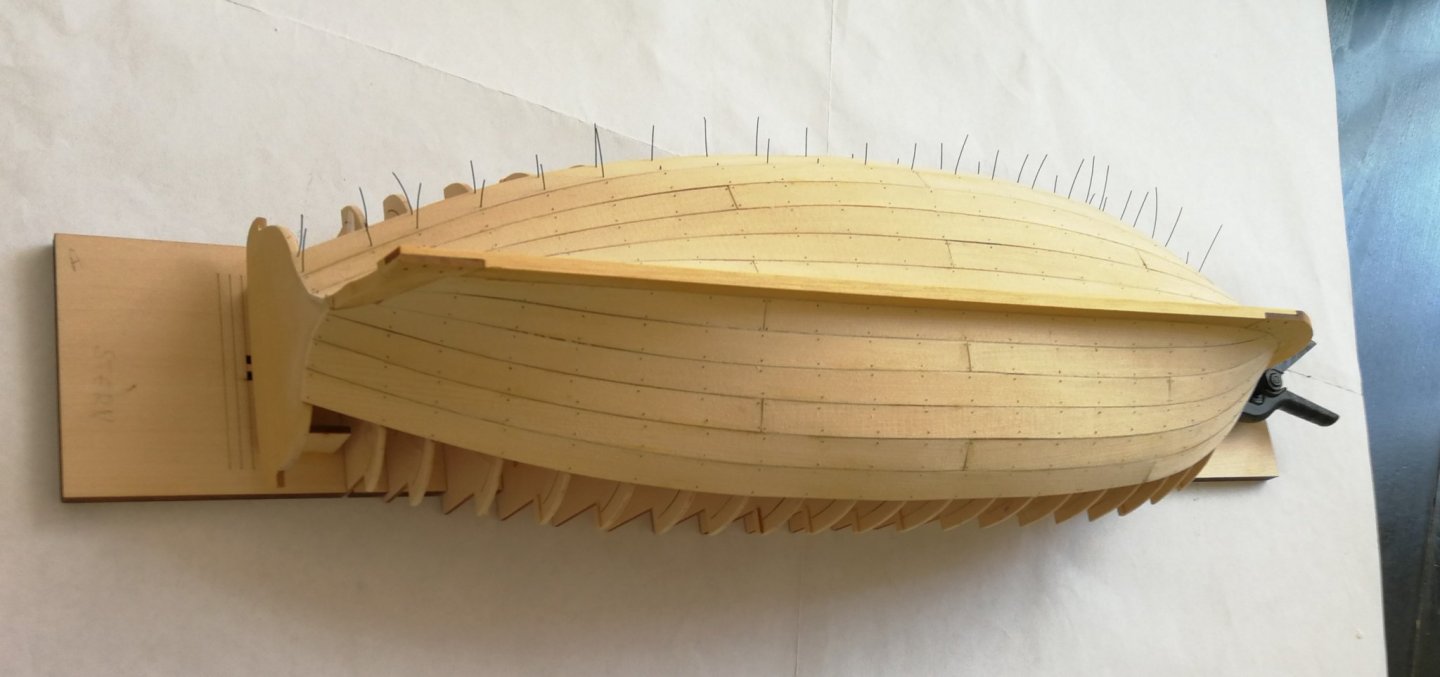
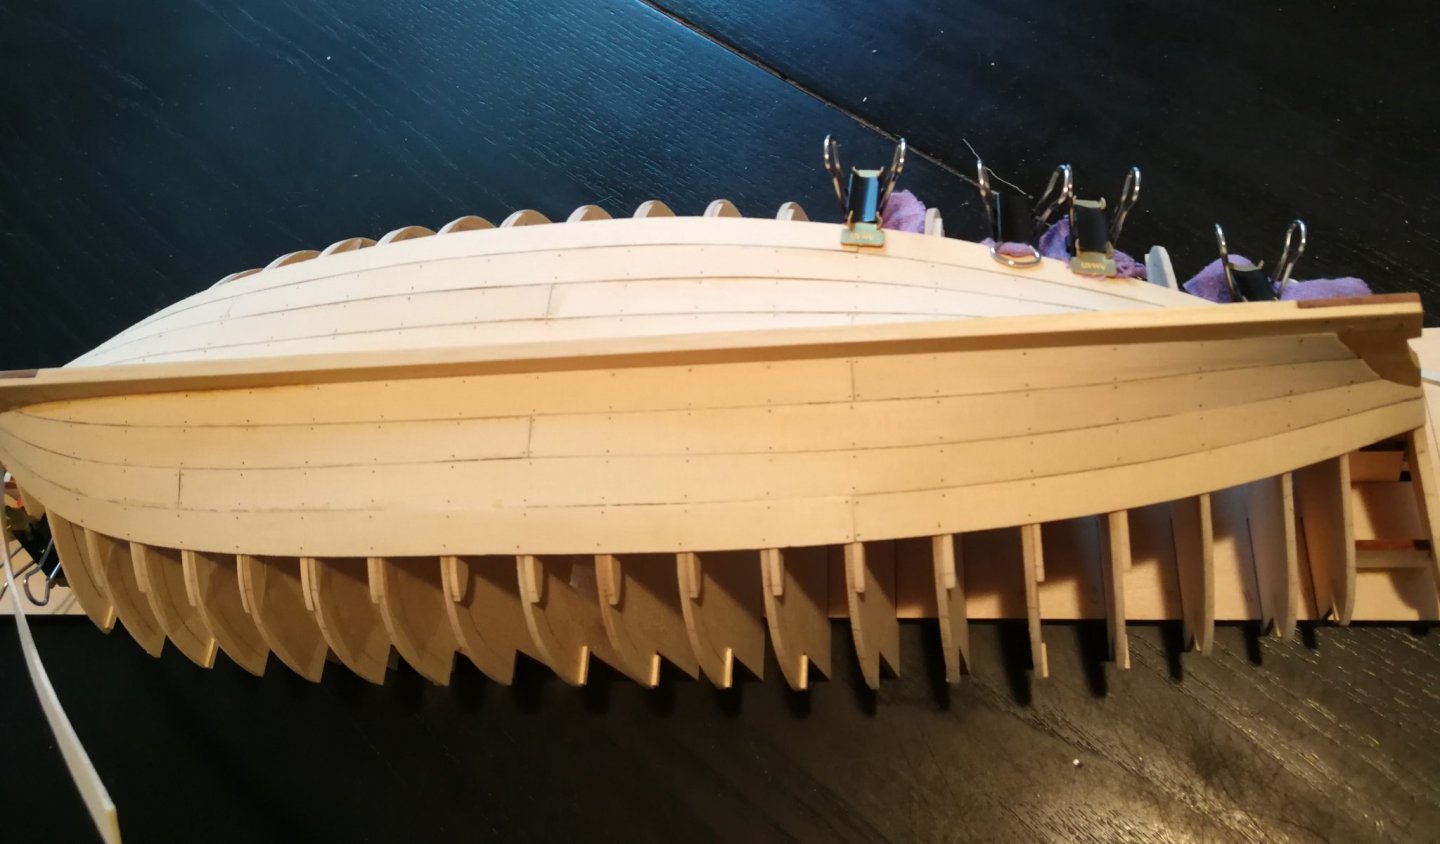
The planking step continues. Two additional rows were made. Only 3 rows

-
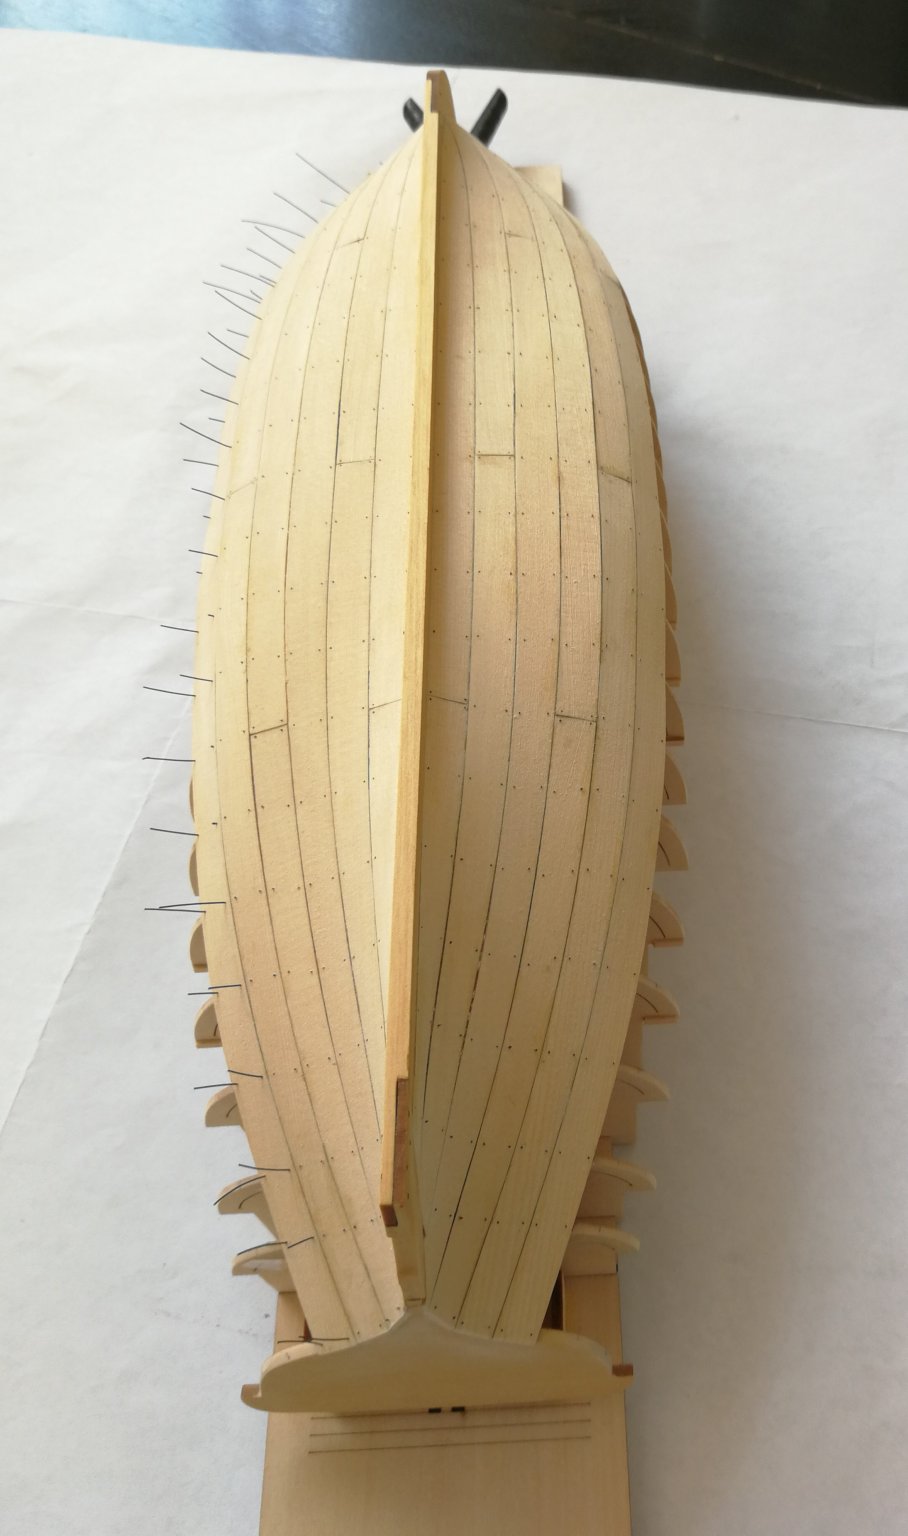
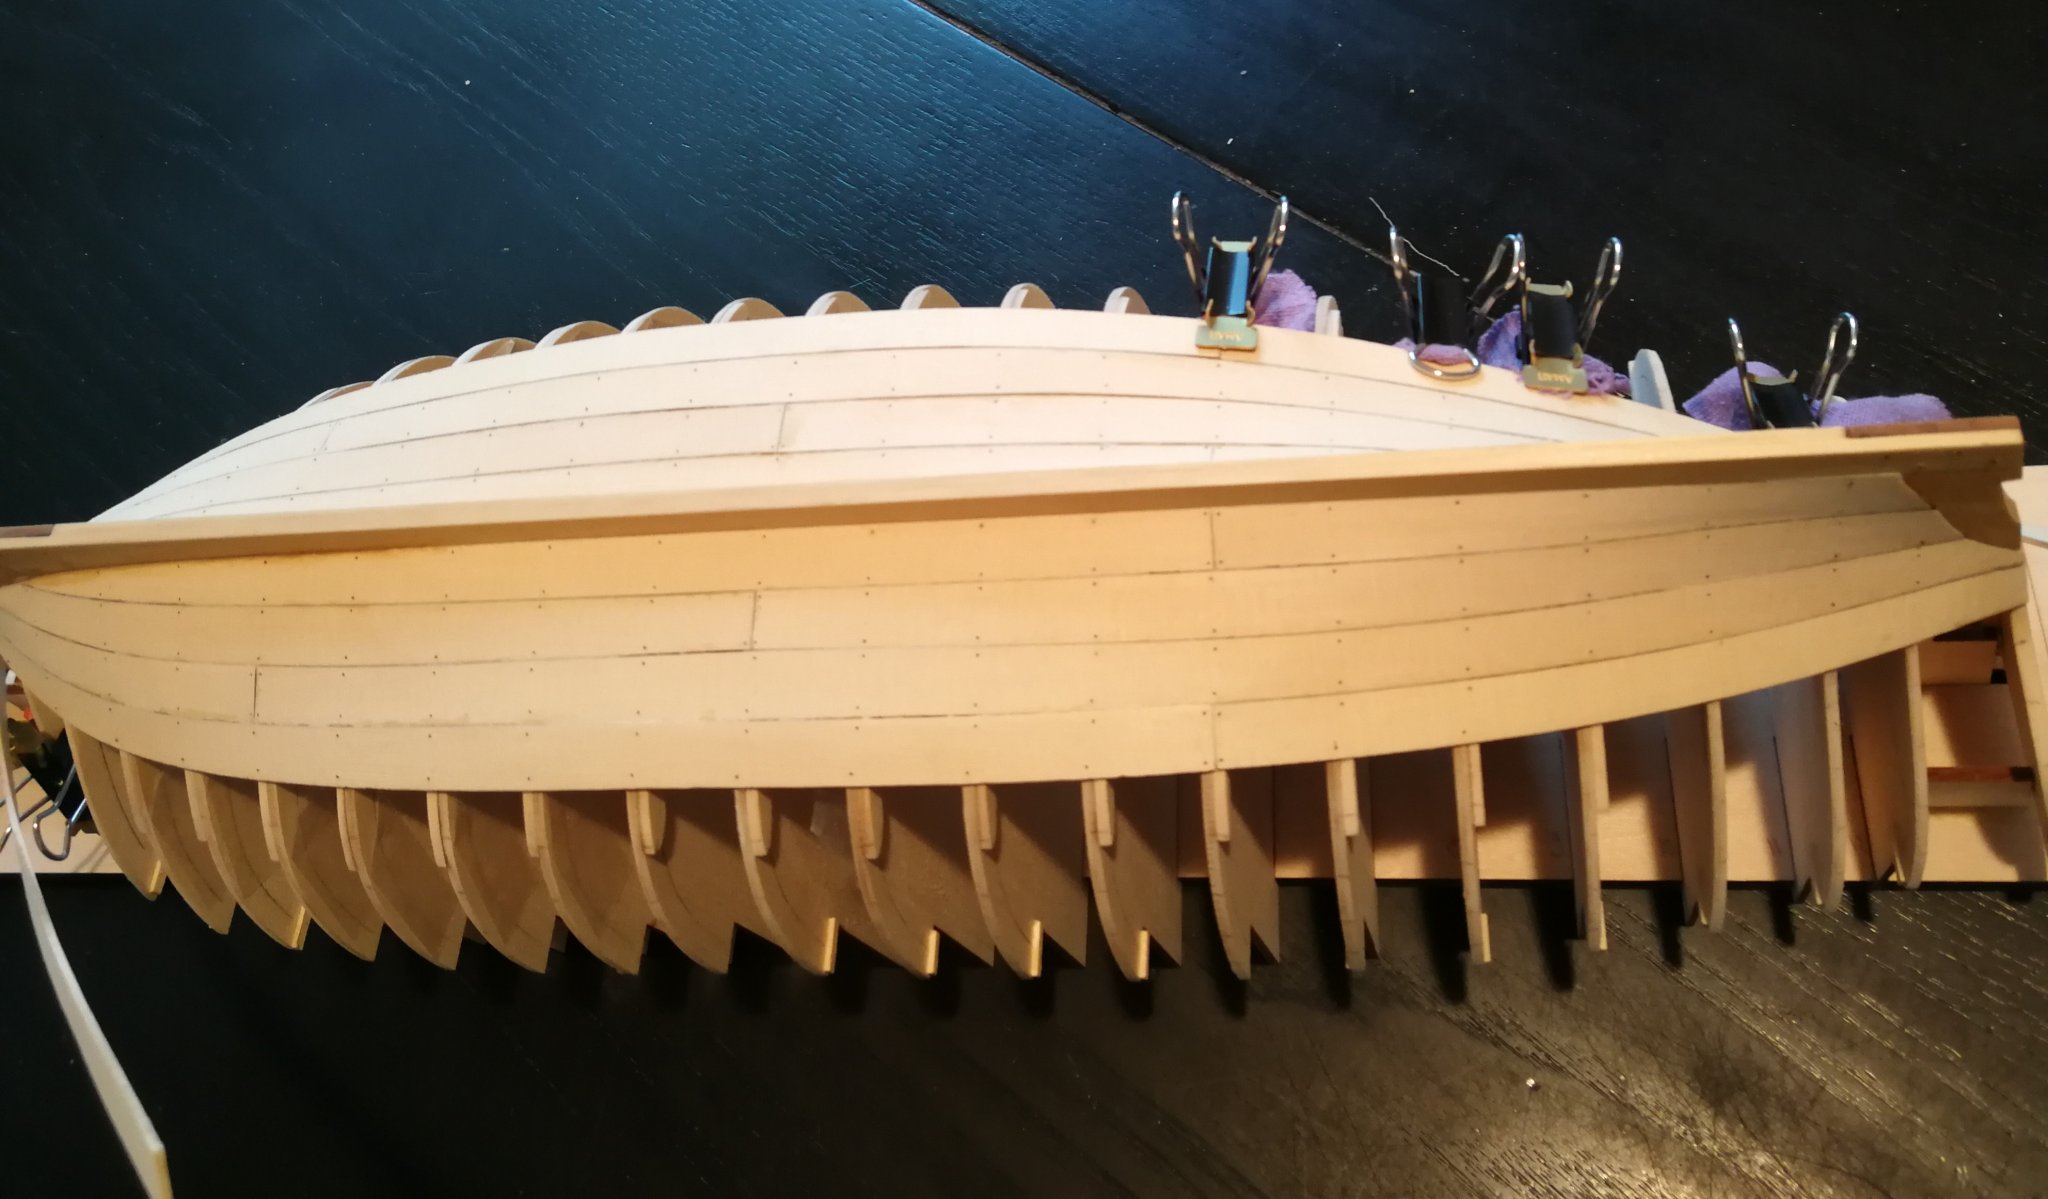
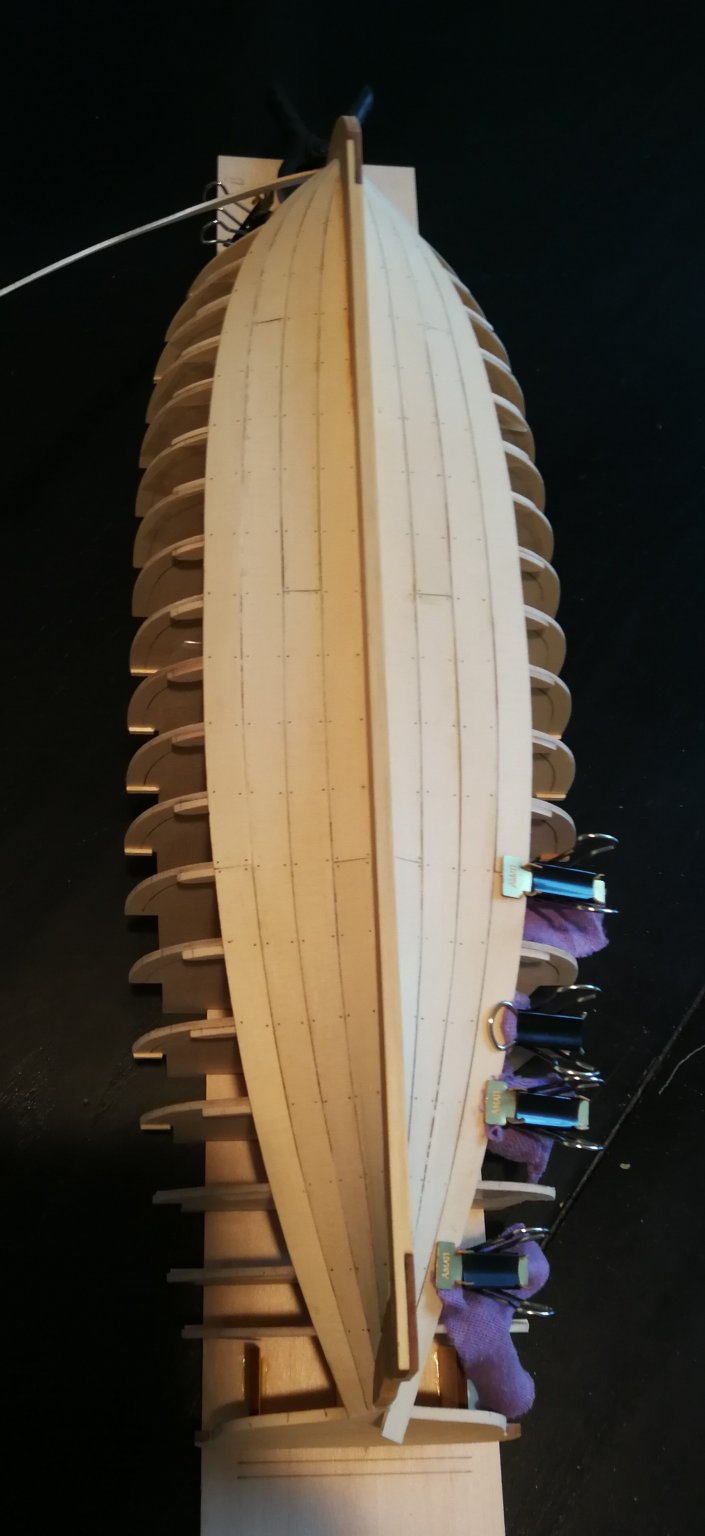
Thank You to all the 'Likes'. I continue quietly laying the planks. Four rows are now glued. As I only work with wood glue (Titebond), it is necessary to use clamps. To avoid marking the wood, I slide a small piece of cloth between the wood and the clamp. The treenails are simulated after laying each row. Nothing is sanded yet and some small gaps will need to be filled... Still five rows.


-
Great videos. Thank you Chuck. It is always easy to understand by the image than by a text 😀
-
Received my copy yesterday. What a wonderful monograph ! The 215-pages book also contains 30 pages of color photos of the two existing 'L'Egyptienne' frigate models, models found at the French National Maritime Museum in Paris (one from the Museum's reserves and is therefore not visible to the public). And what about the 39 plates at 1/48th ! A must to have. A big THANK YOU to M Delacroix for this excellent job !
-
ancre La Belle 1684 by Oliver1973 - 1/36
JpR62 replied to Oliver1973's topic in - Build logs for subjects built 1501 - 1750
Very informative. Thanks for sharing this method. -
Thank You Chuck and Gary for your kind words. The kit is a real gem and very pleasant to build. Thanks to all the 'Likes'. The garboard is in place. As you can see, before to begin the planking, the hull has been lined and tick marks have been reported on each frame. Finally, I decided to simulate the treenails at this step. It's easier to position them now.

-
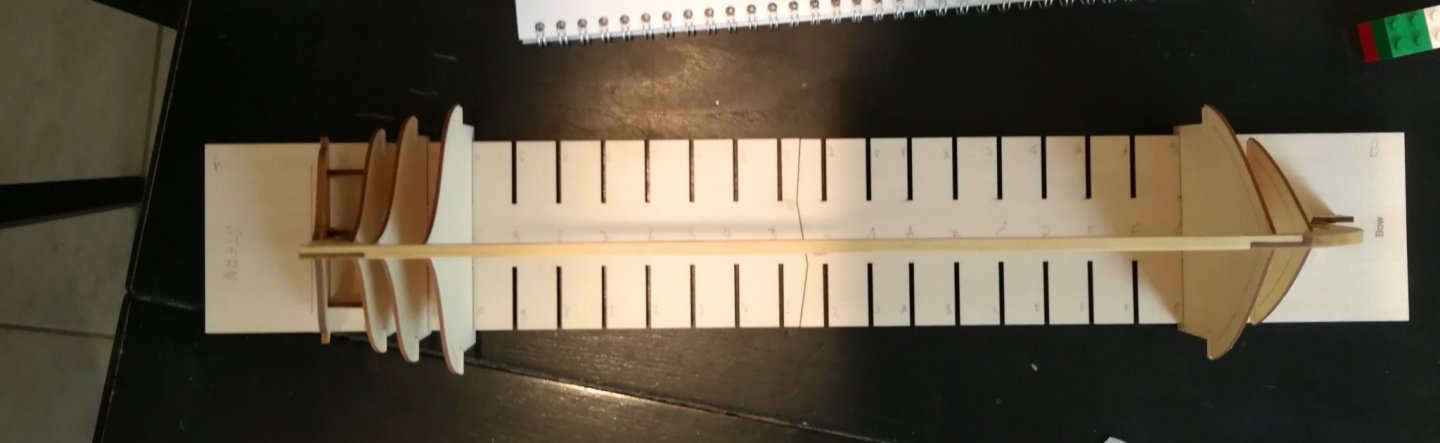
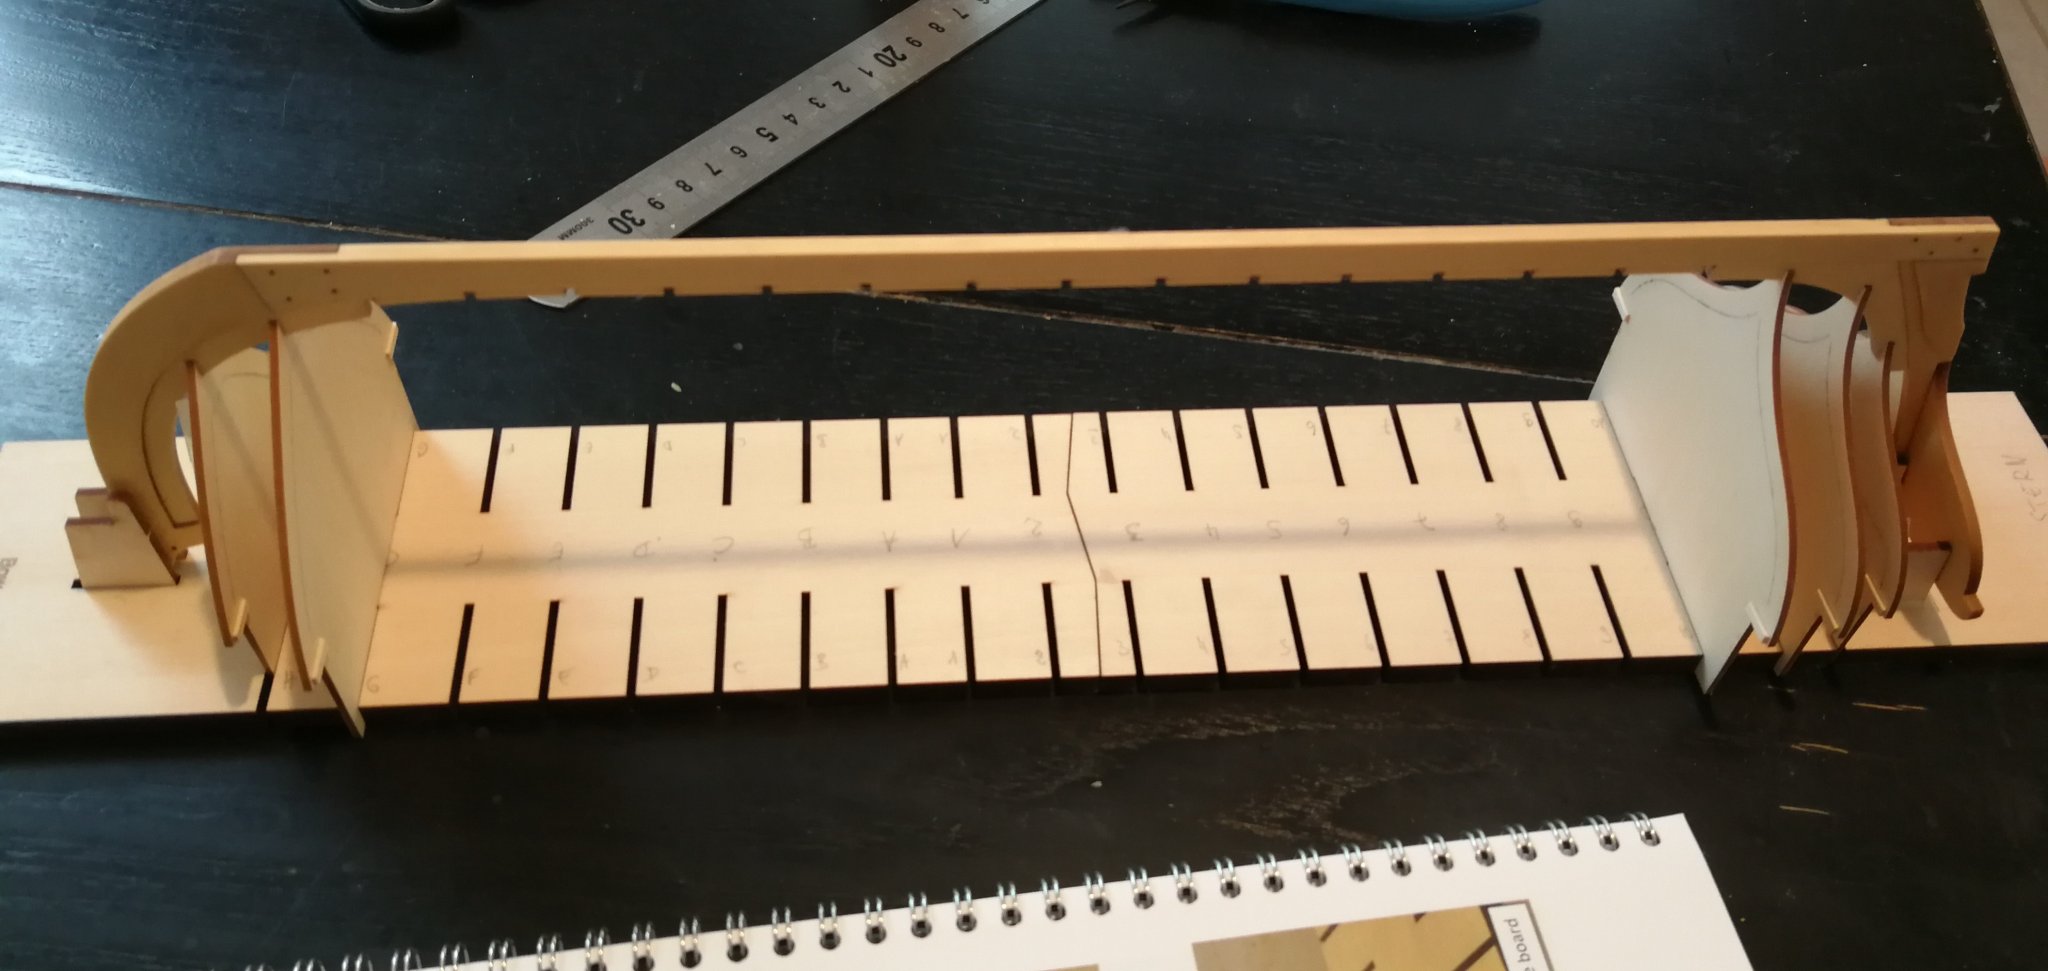
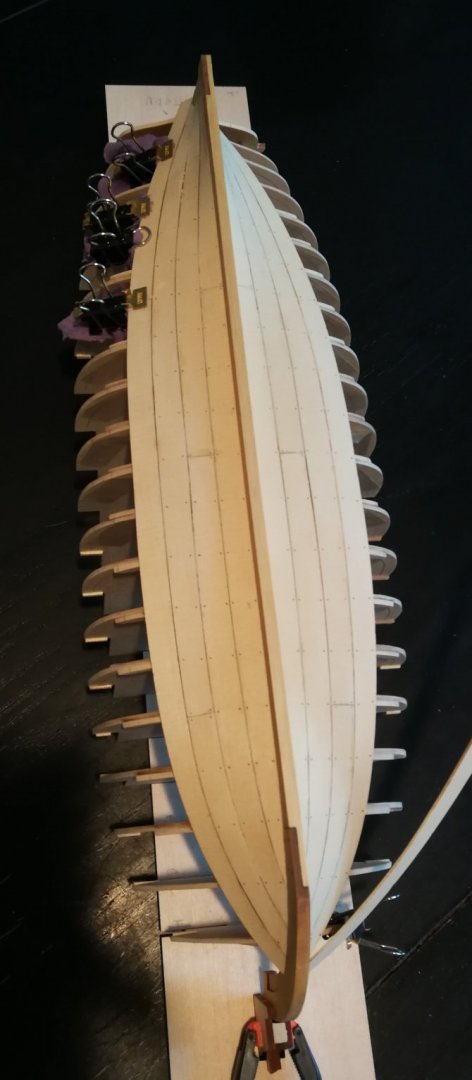
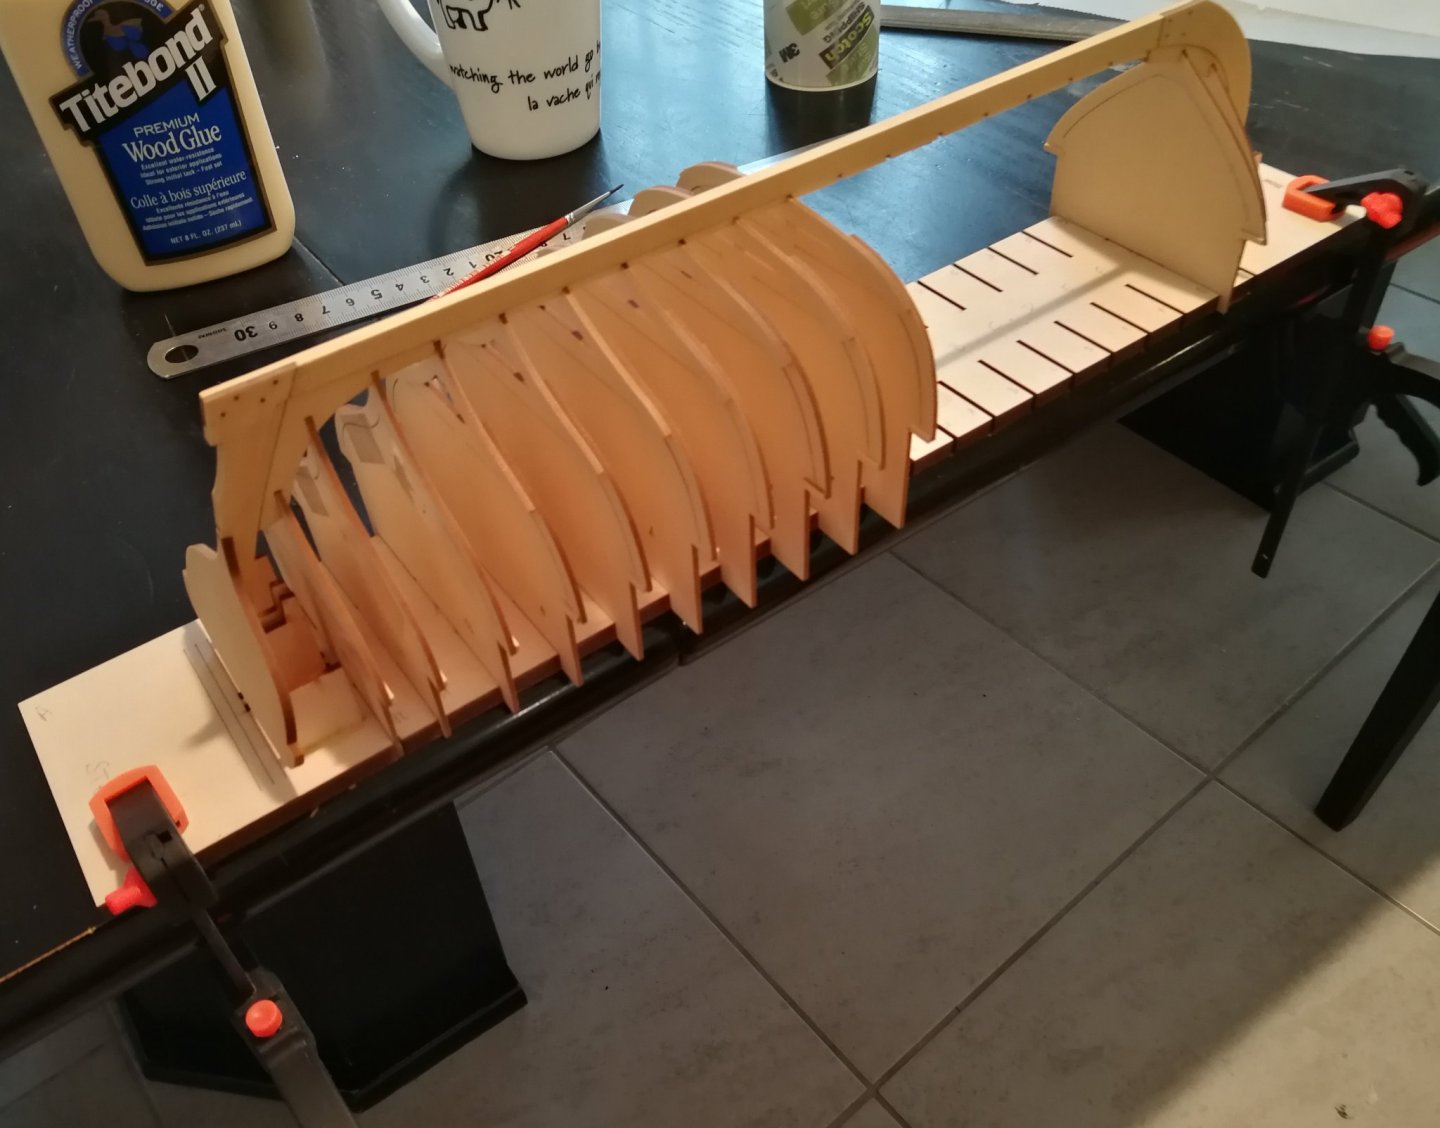
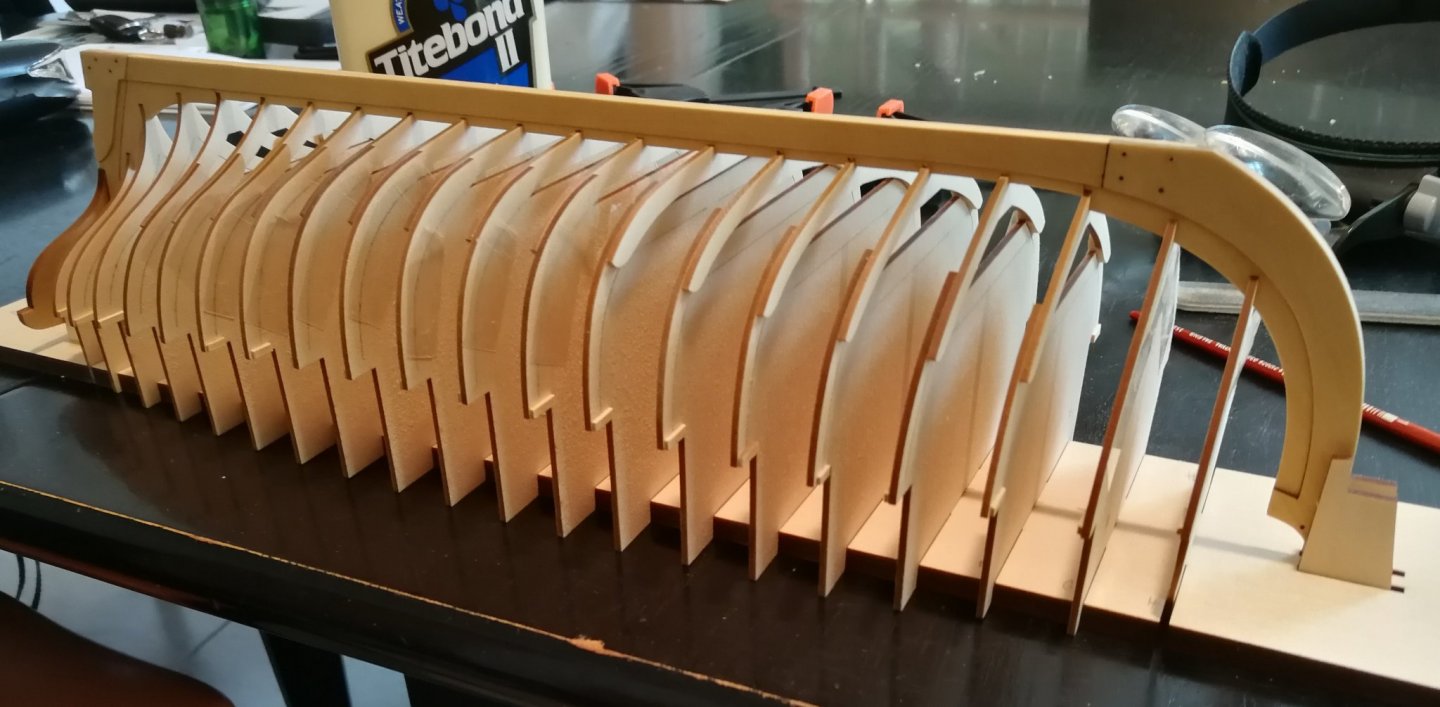
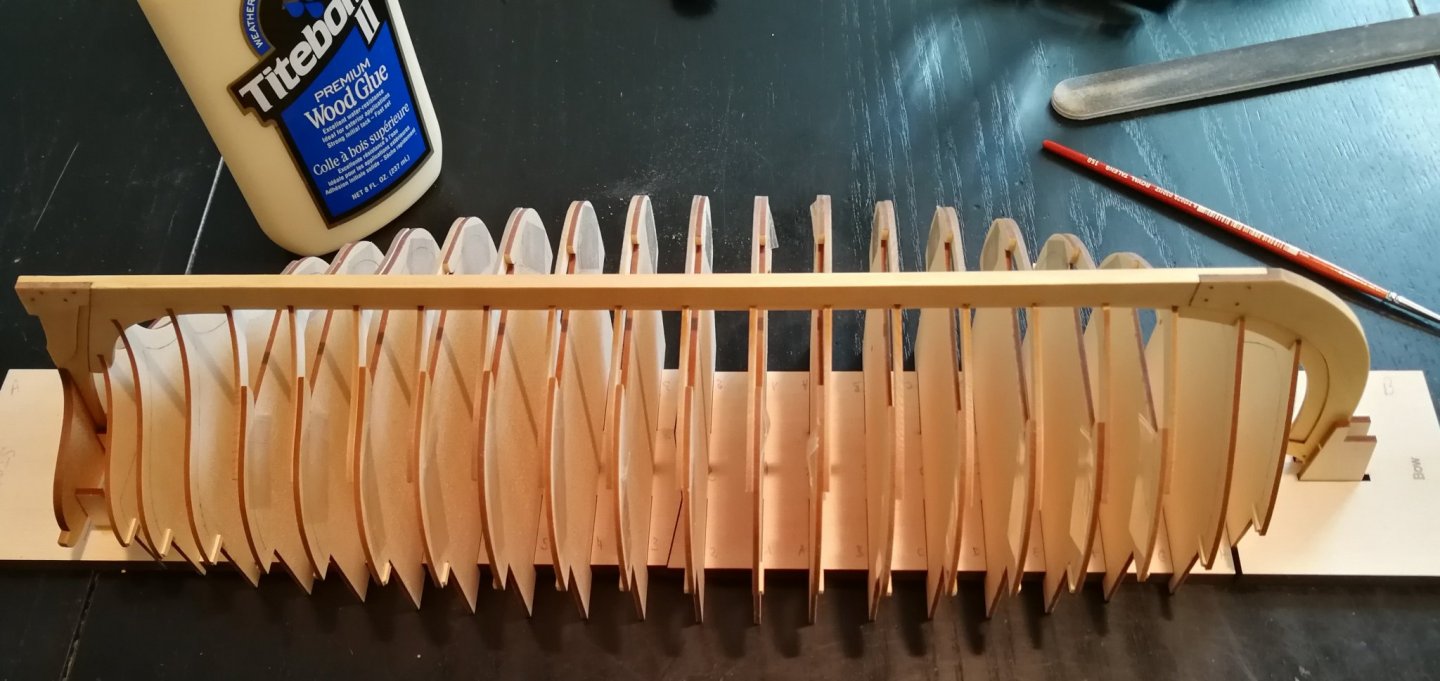
Thanks to all the likes. I finished to fair the hull. I can begin to plank the hull.

-
Nice demonstration. Instructive and detailed. Thanks Chuck. I will also adopt this technique. Just to buy this little iron travel 😉
- 1,784 replies
-
- 1
-
-
- winchelsea
- Syren Ship Model Company
- (and 1 more)
-
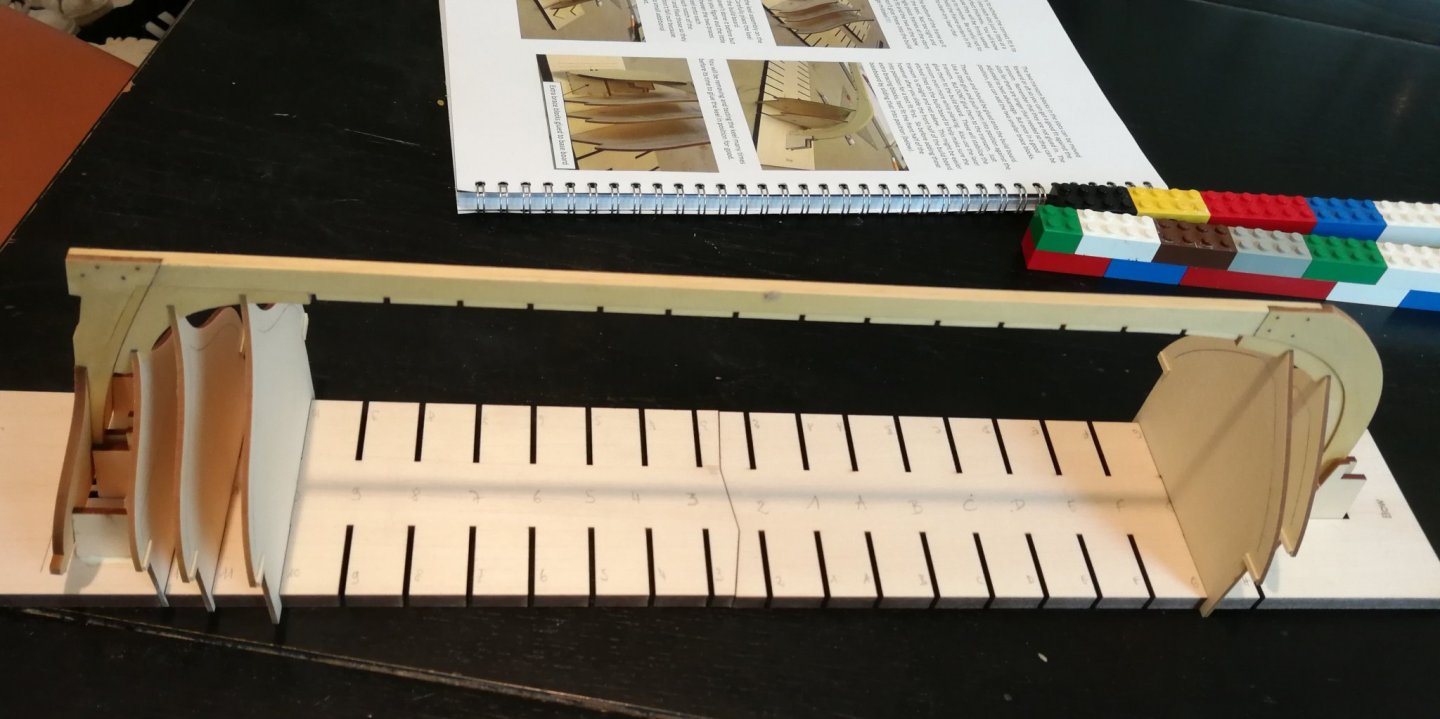
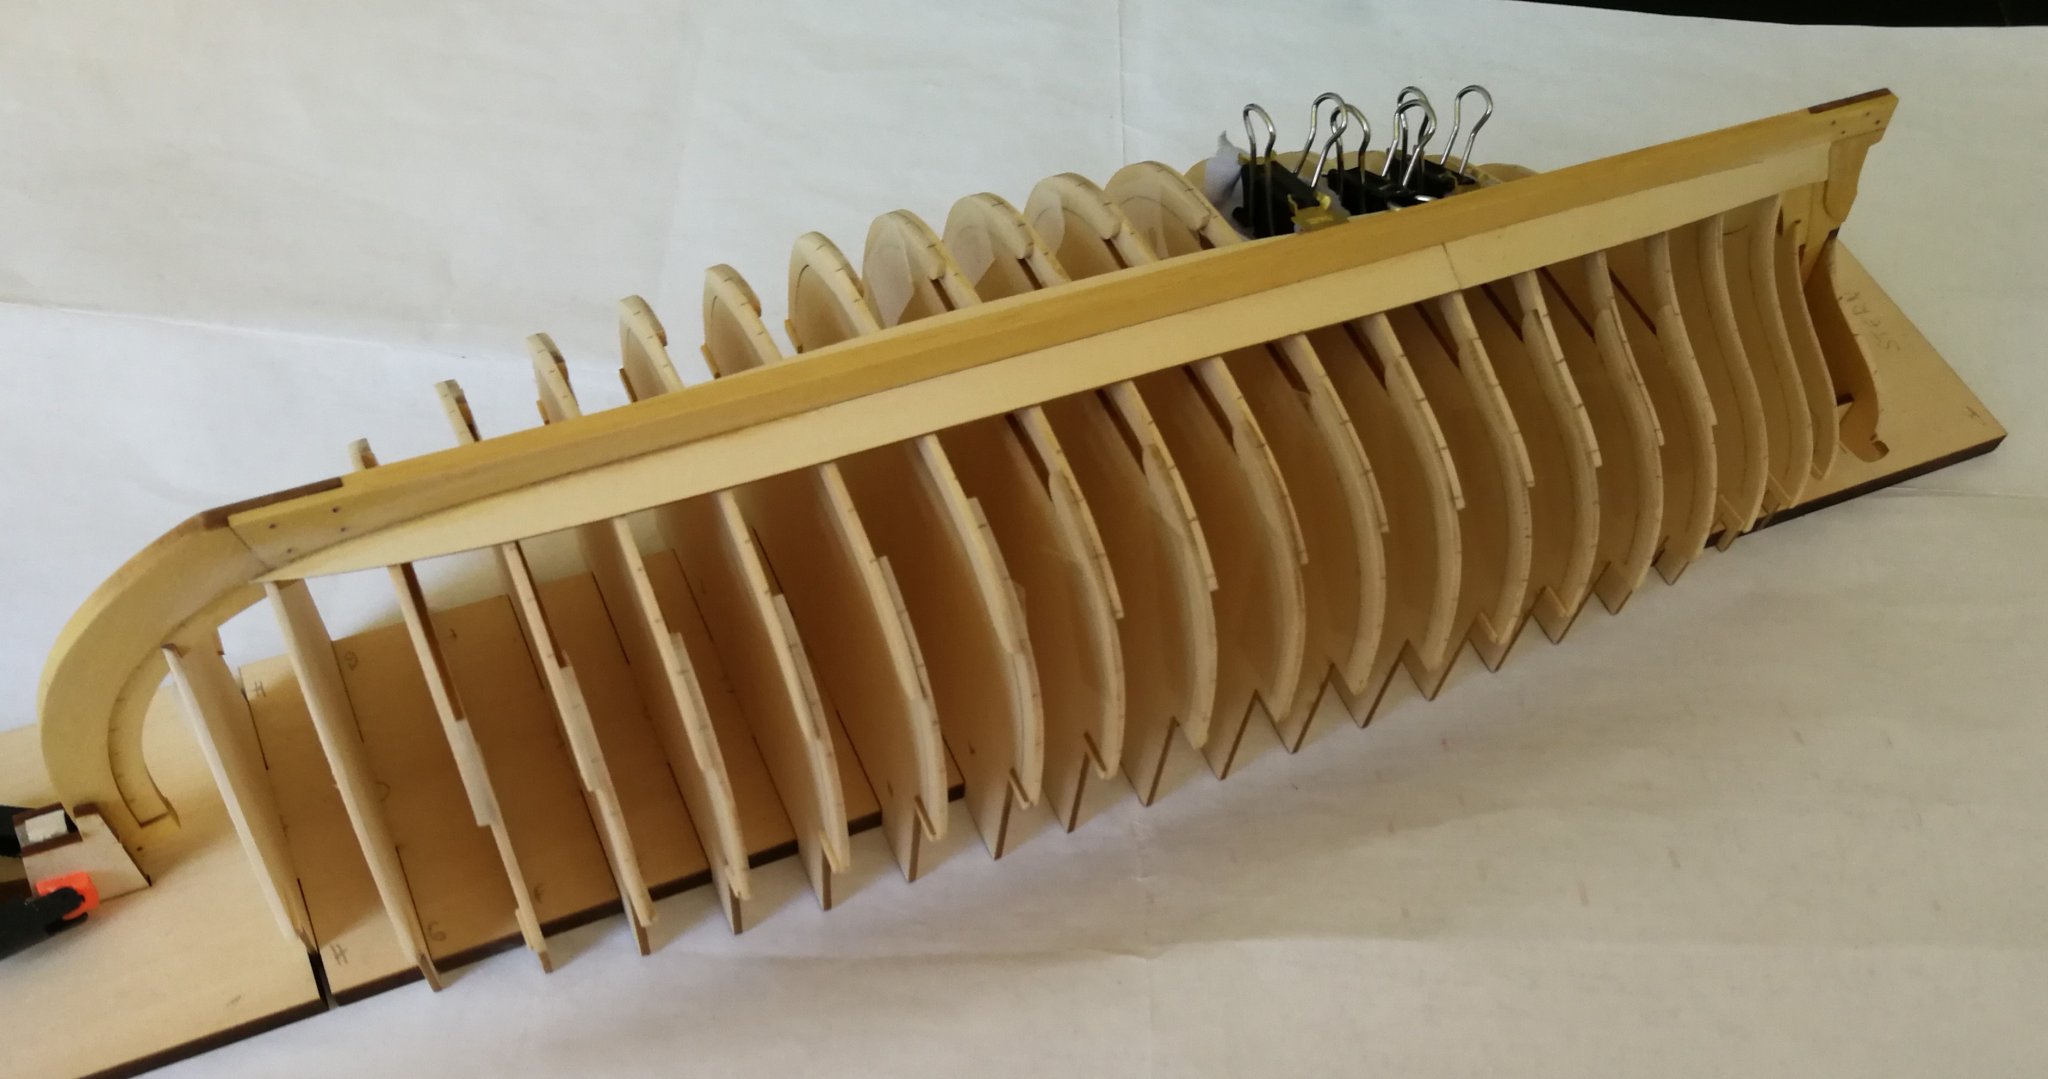
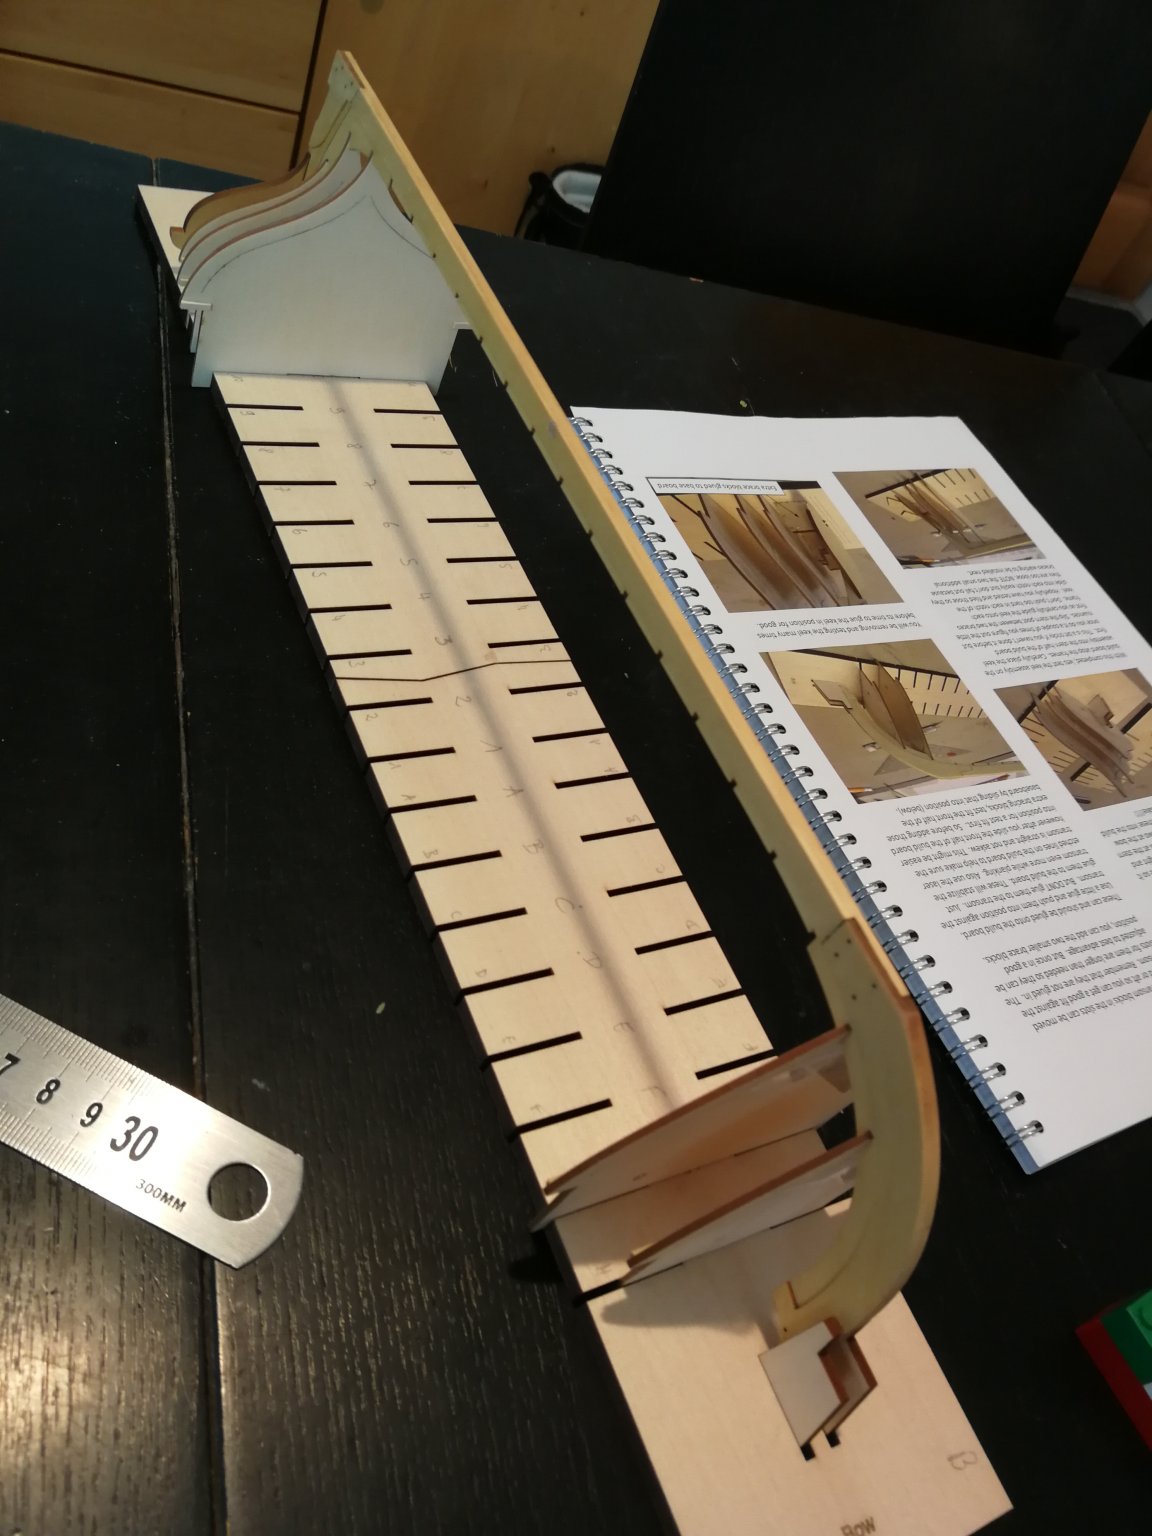
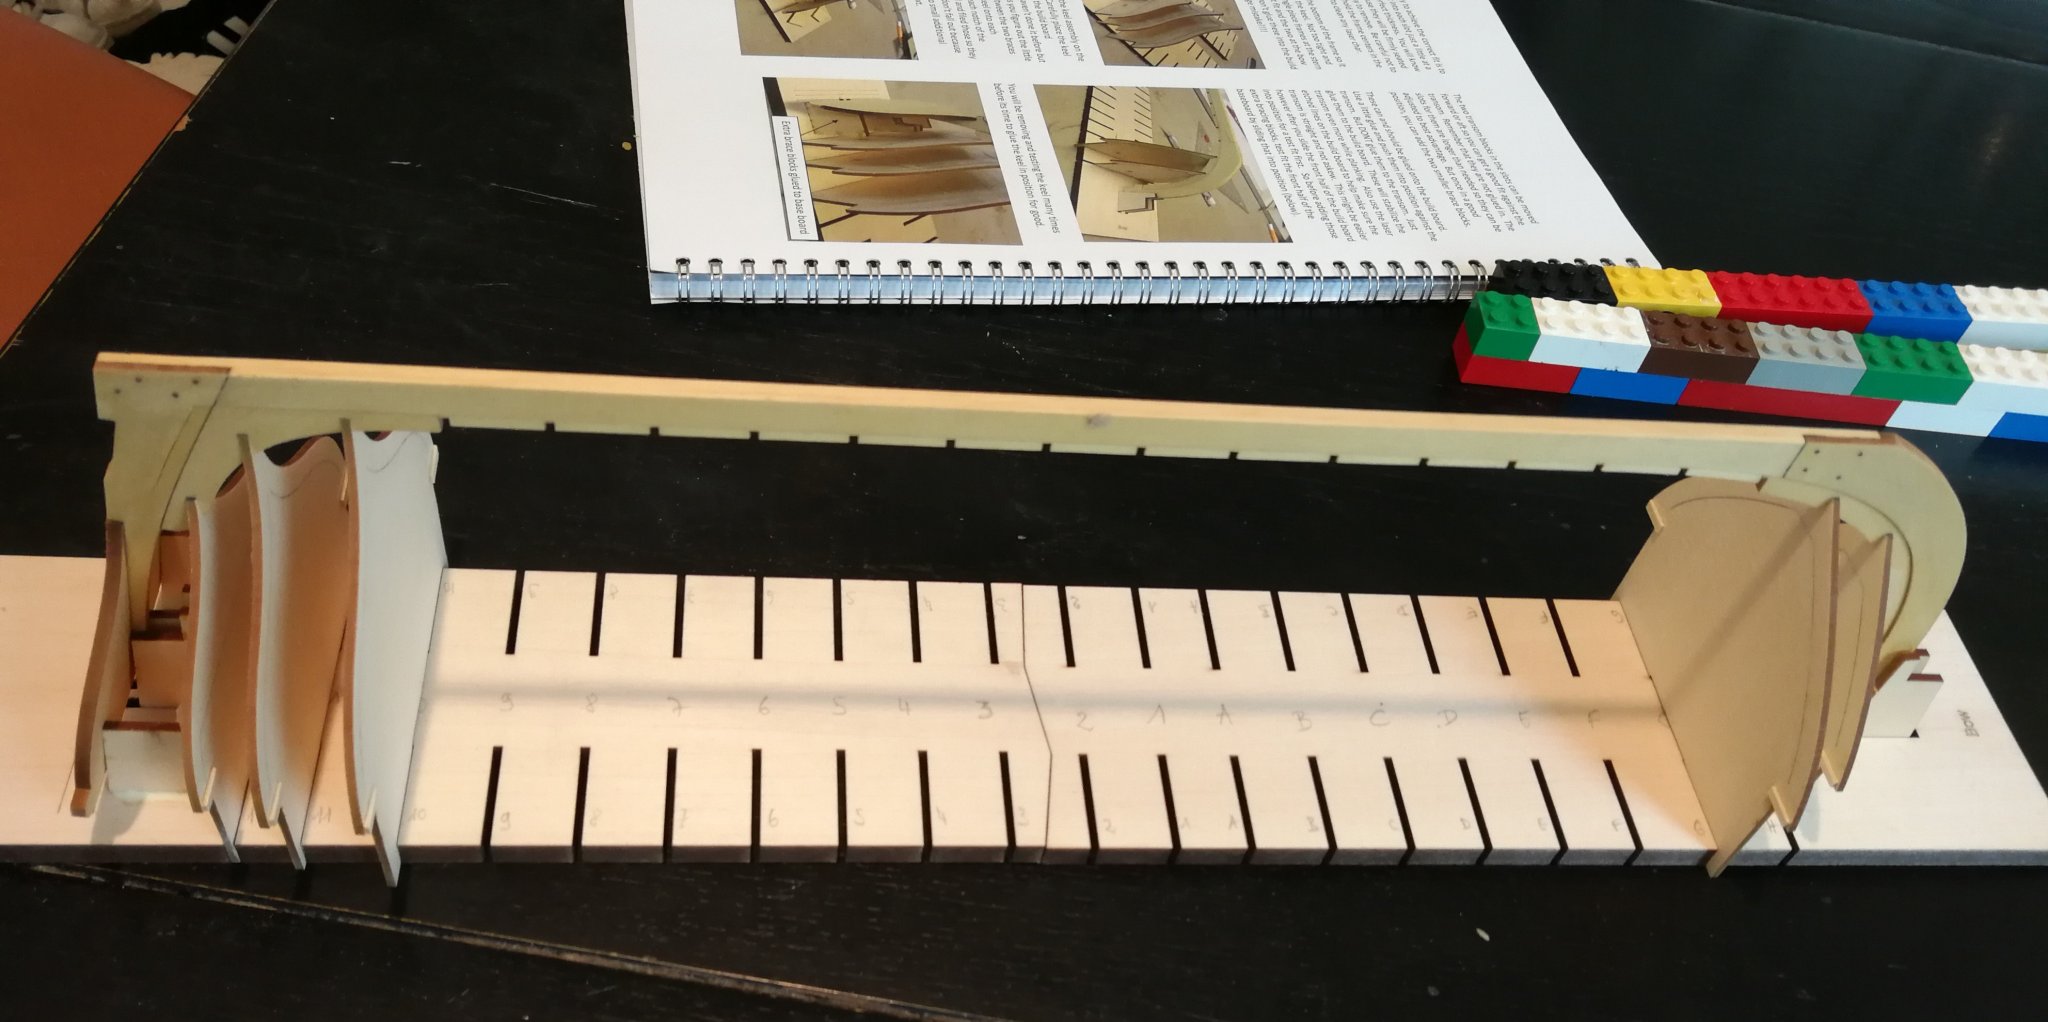
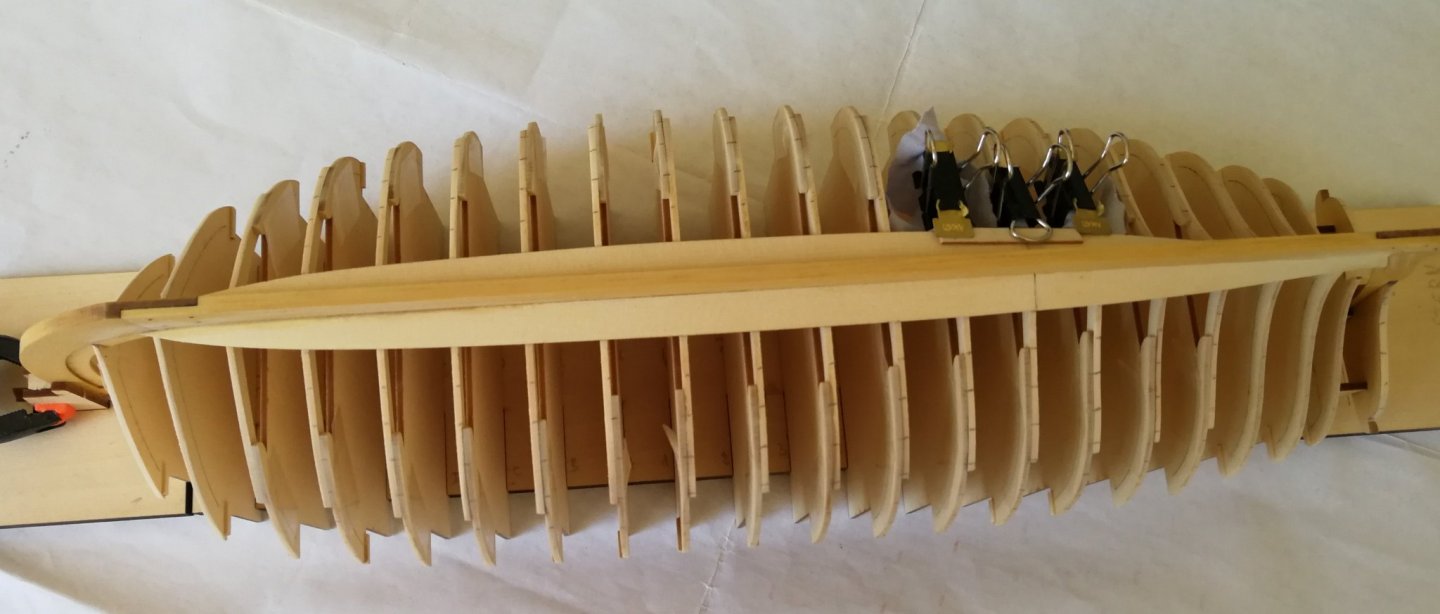
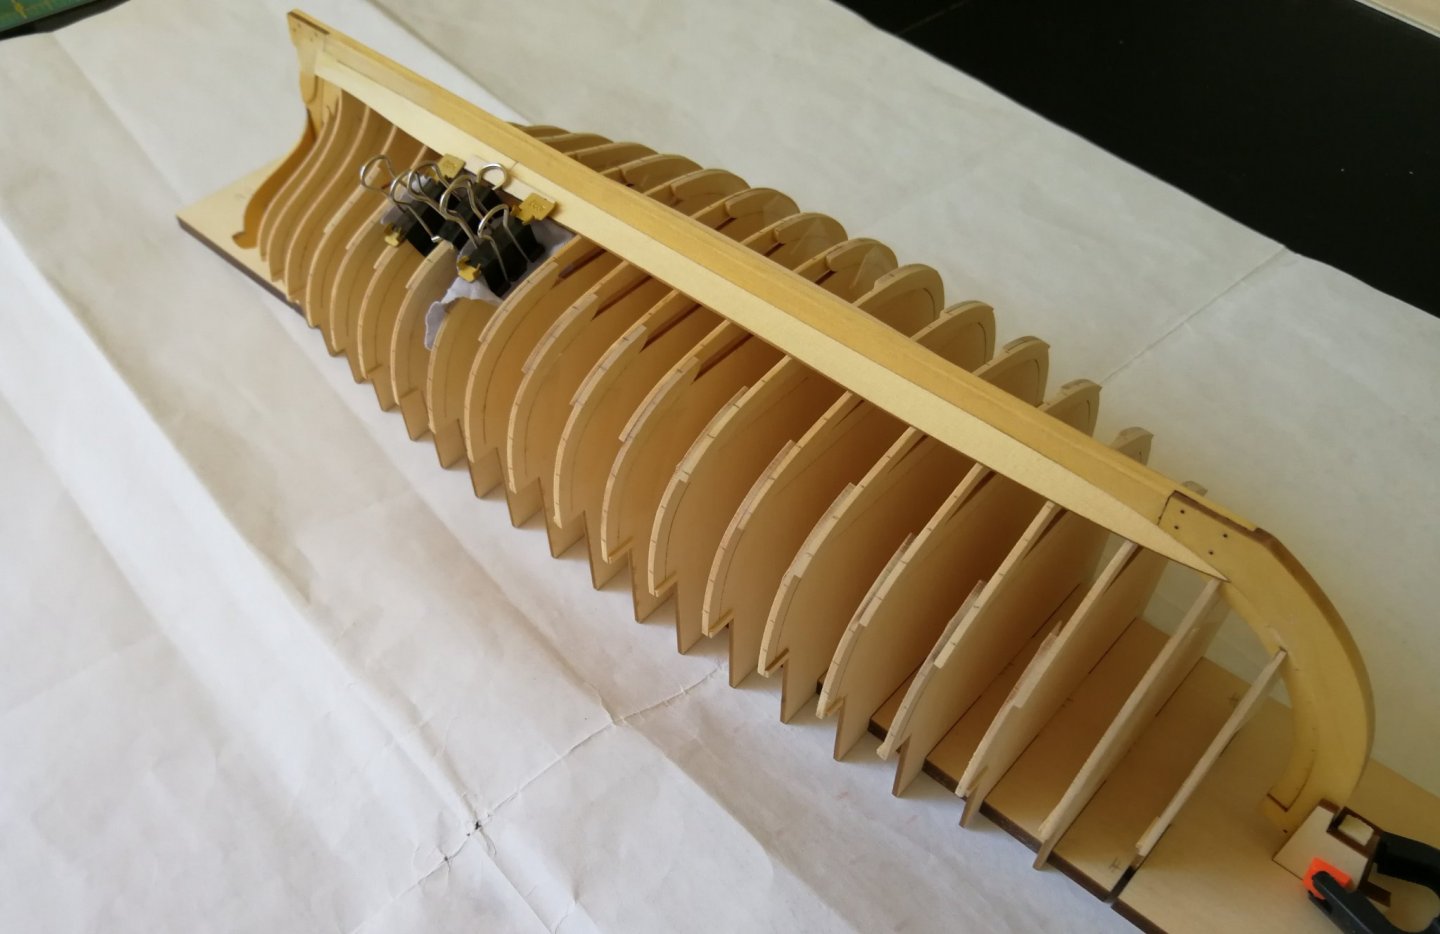
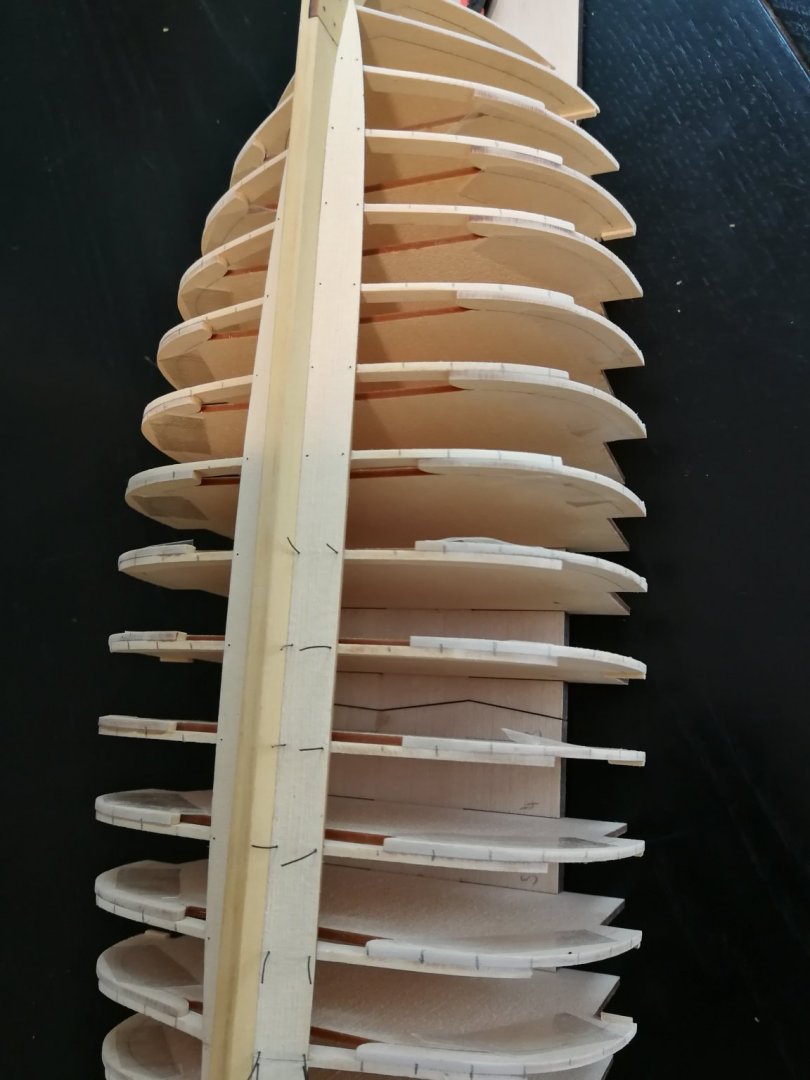
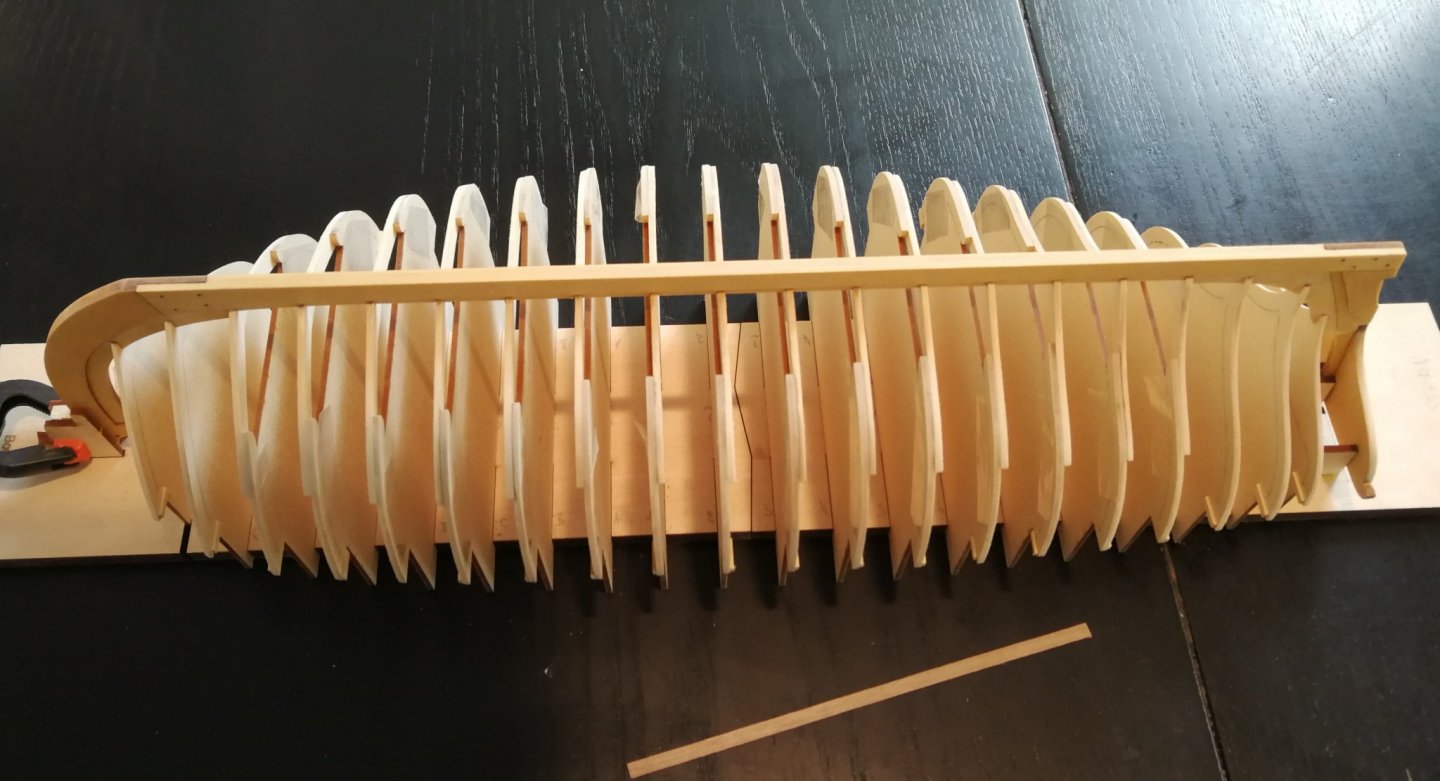
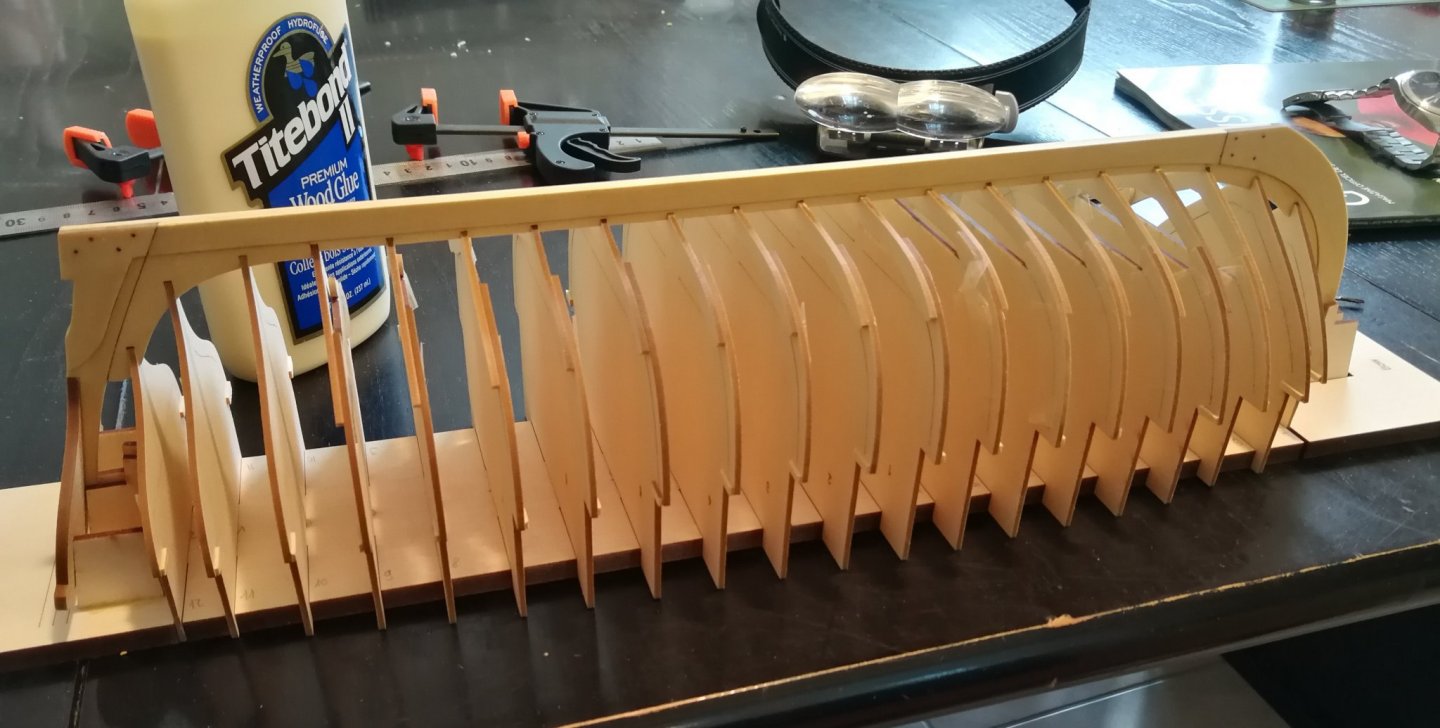
Thanks to all the likes. All the frames were now glued. Just take your time and perform several dry tests before performing the real step. I fixed the bases temporarily at the table to facilitate the task, Time to fair carefully the hull.
-
Welcome to MSW You will learn a lot of tips through the different build logs. A wonderful forum !
-
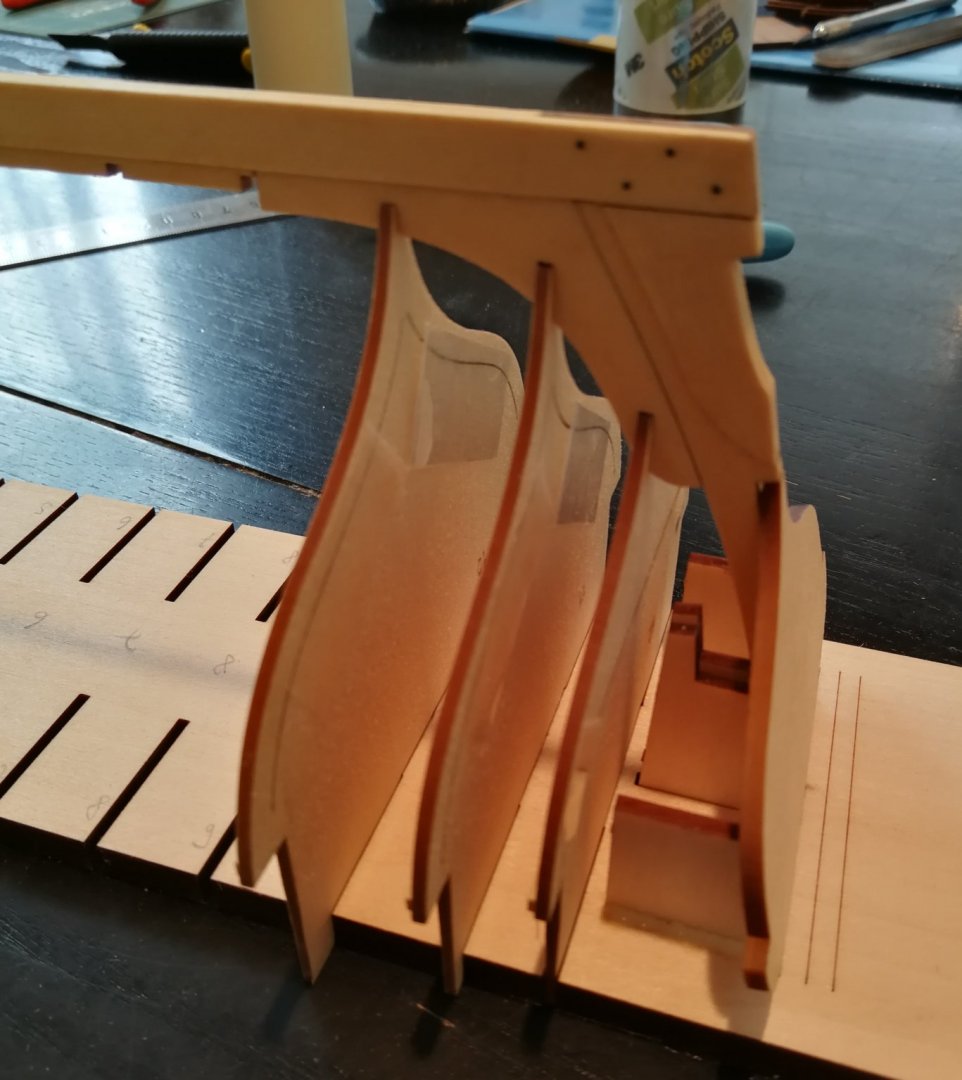
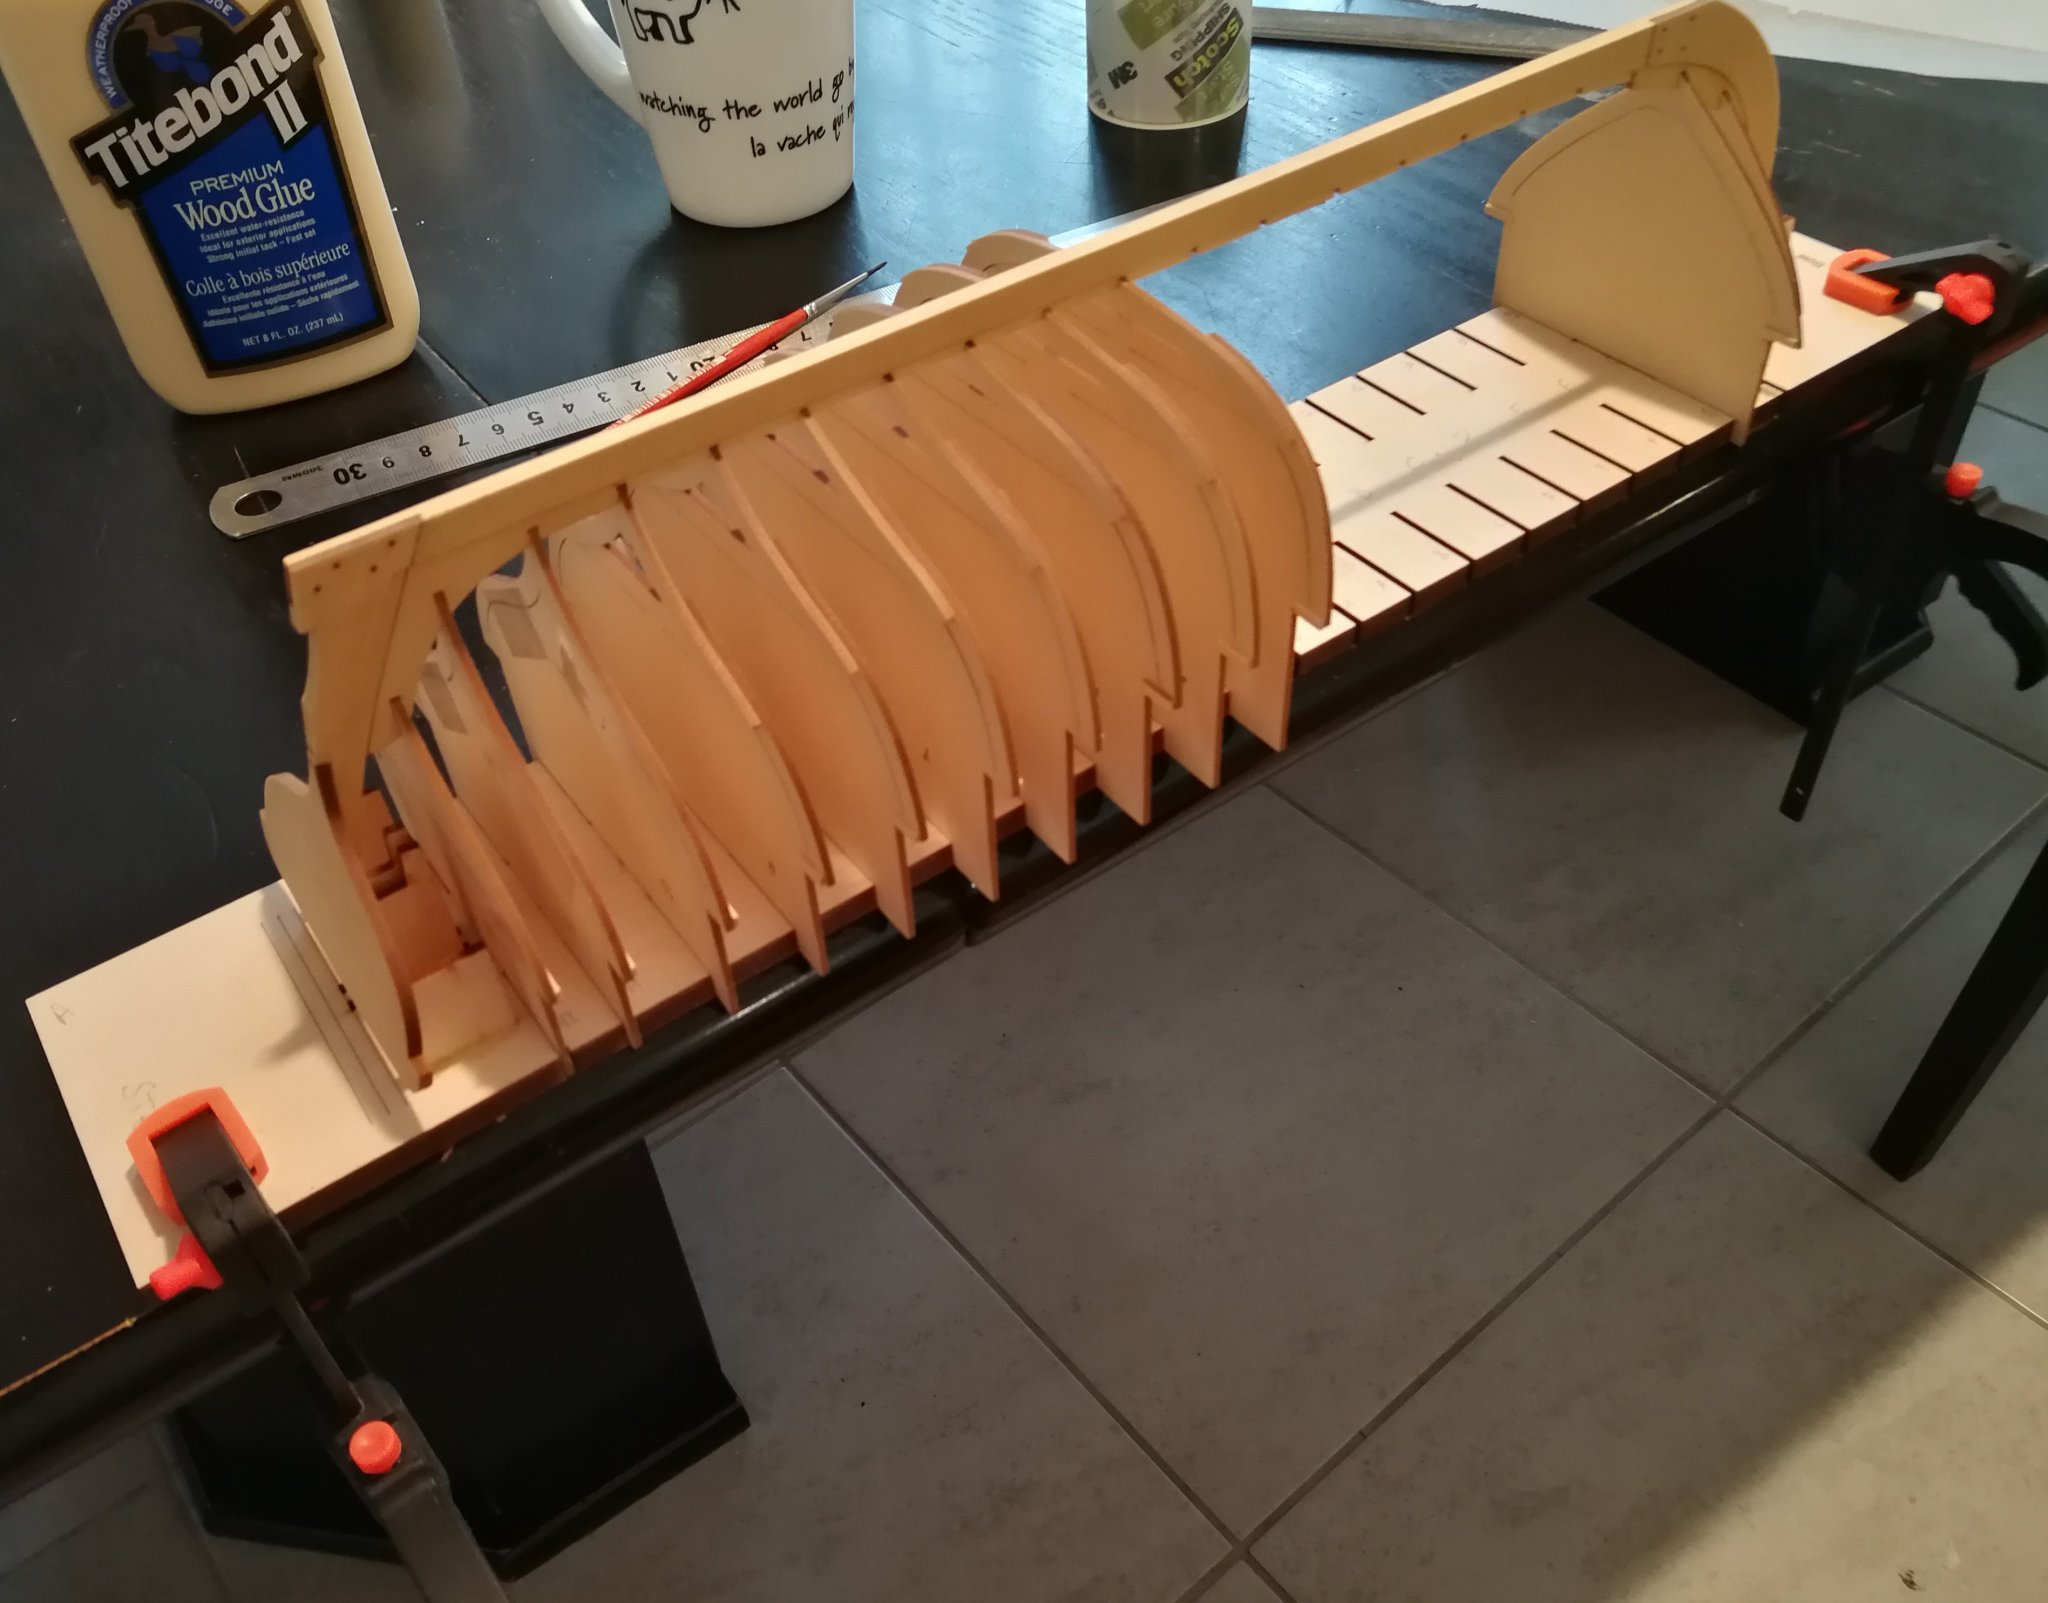
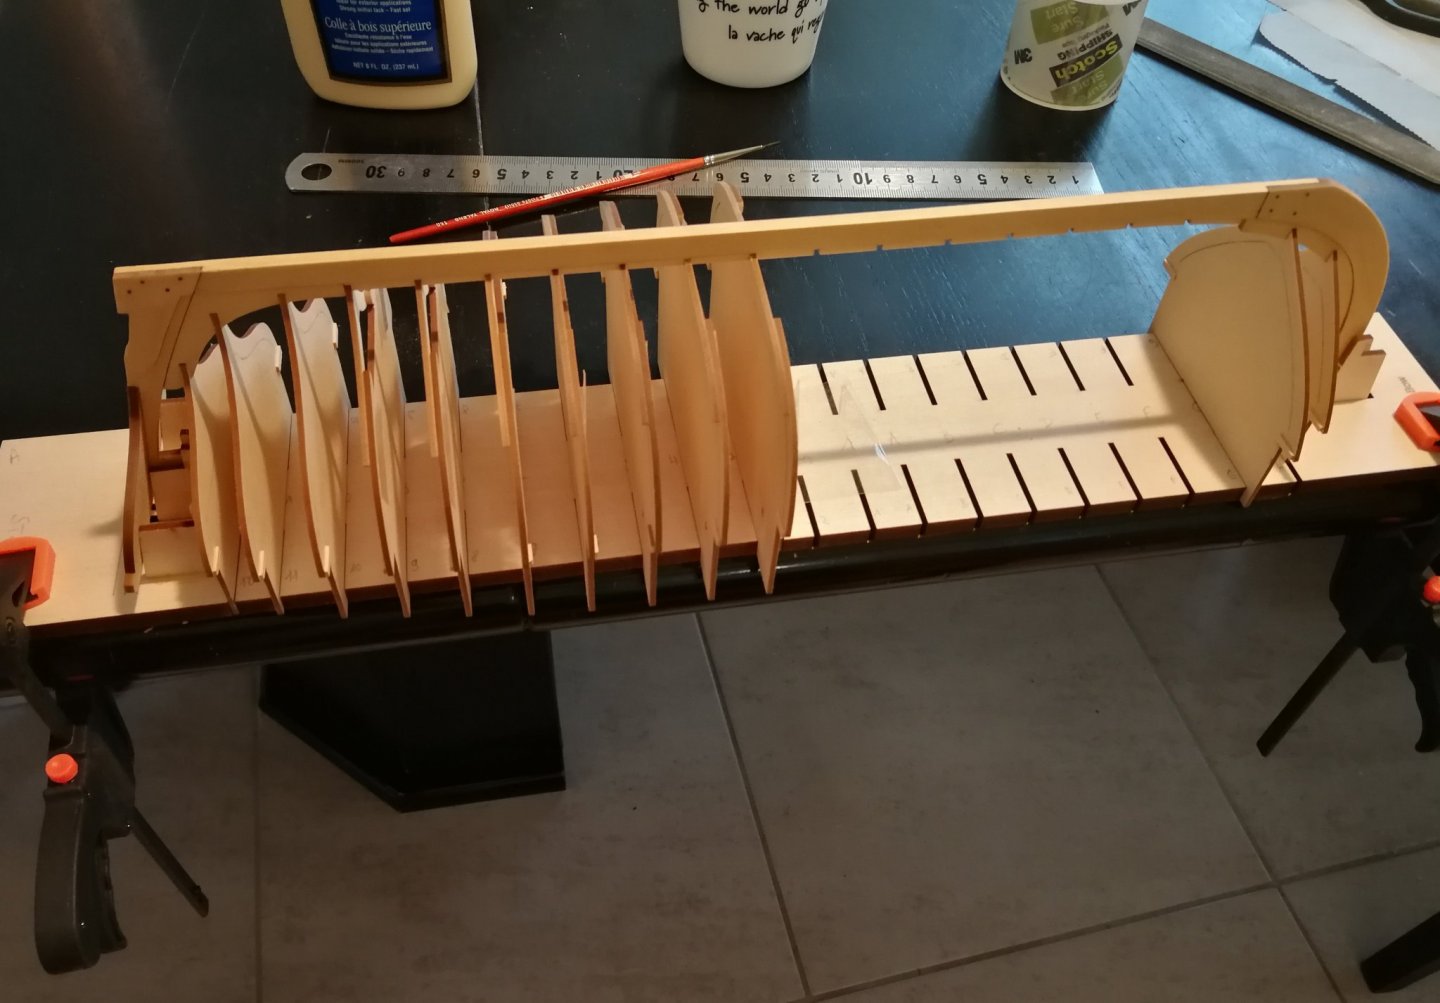
Thanks to all the 'Likes'. I test the five single part frames. A great kit from Syren. Everything goes perfectly and the instructions are again a model of pedagogy. Thanks Chuck for your wonderful work !