HOLIDAY DONATION DRIVE - SUPPORT MSW - DO YOUR PART TO KEEP THIS GREAT FORUM GOING! (Only 13 donations so far - C'mon guys!)
×


hamilton
-
Posts
1,931 -
Joined
-
Last visited
Content Type
Profiles
Forums
Gallery
Events
Everything posted by hamilton
-
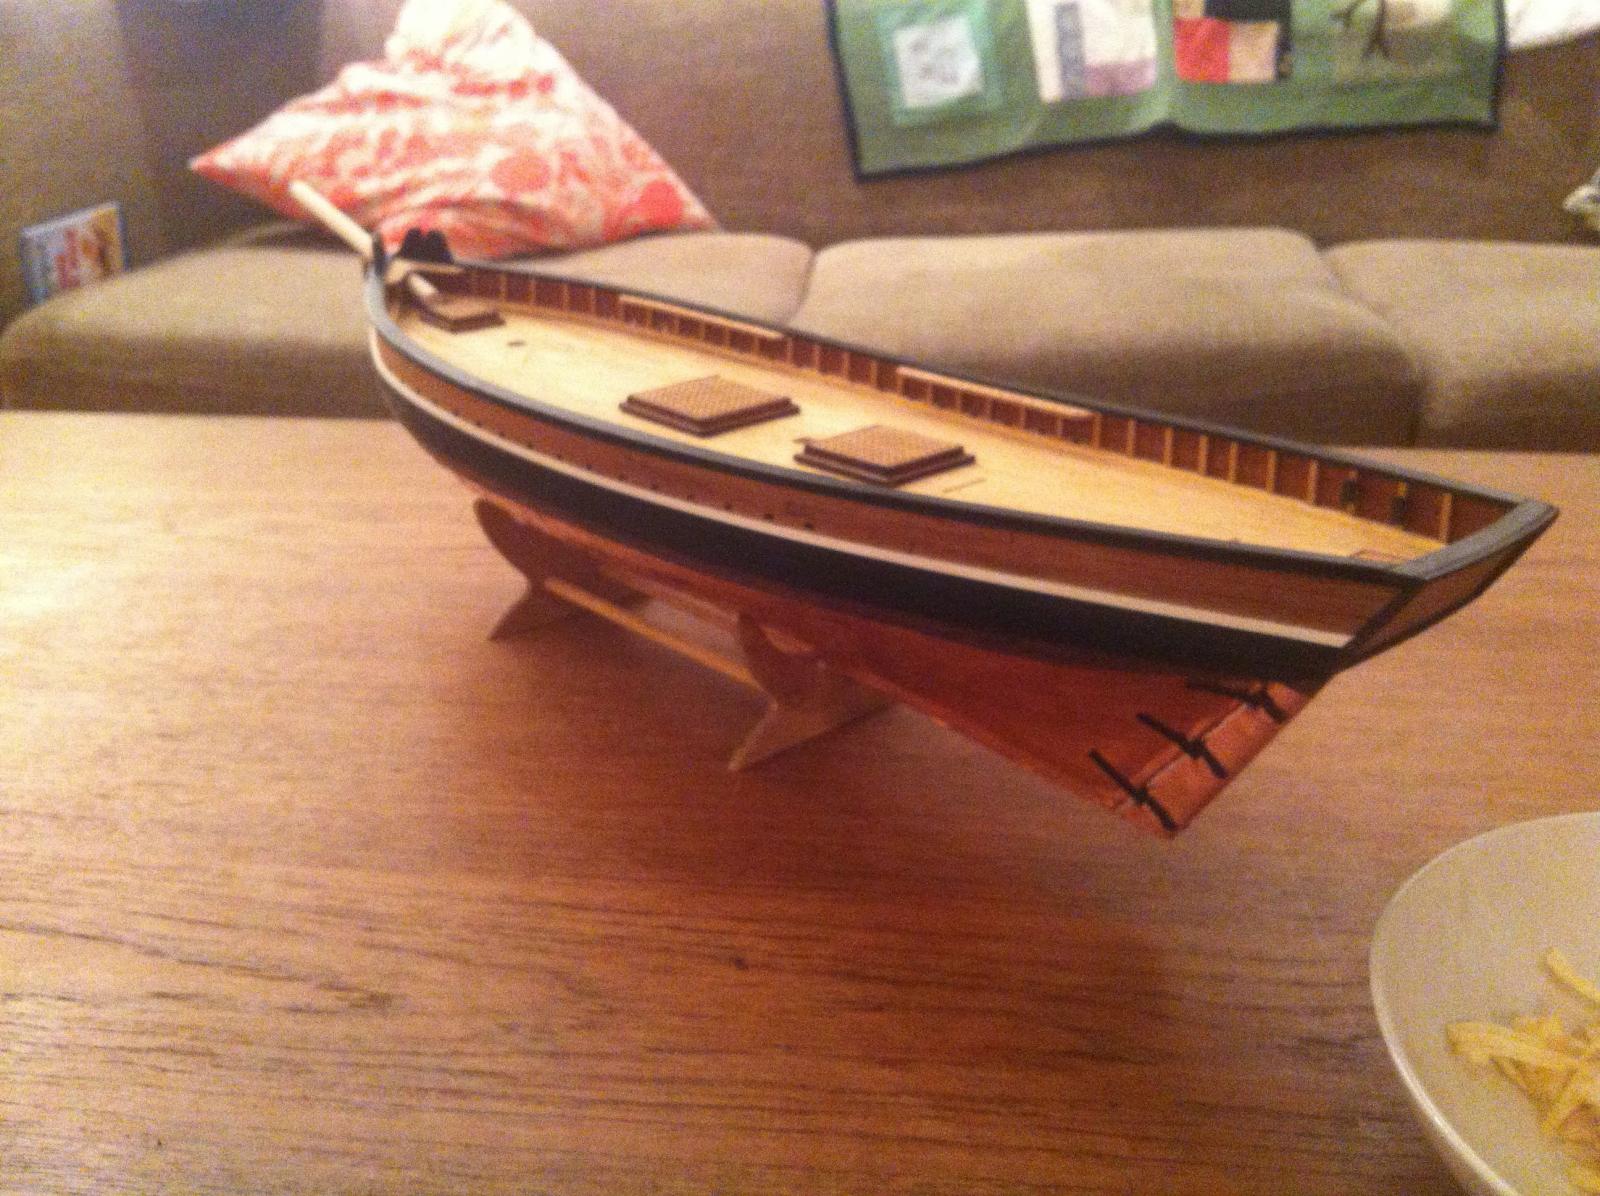
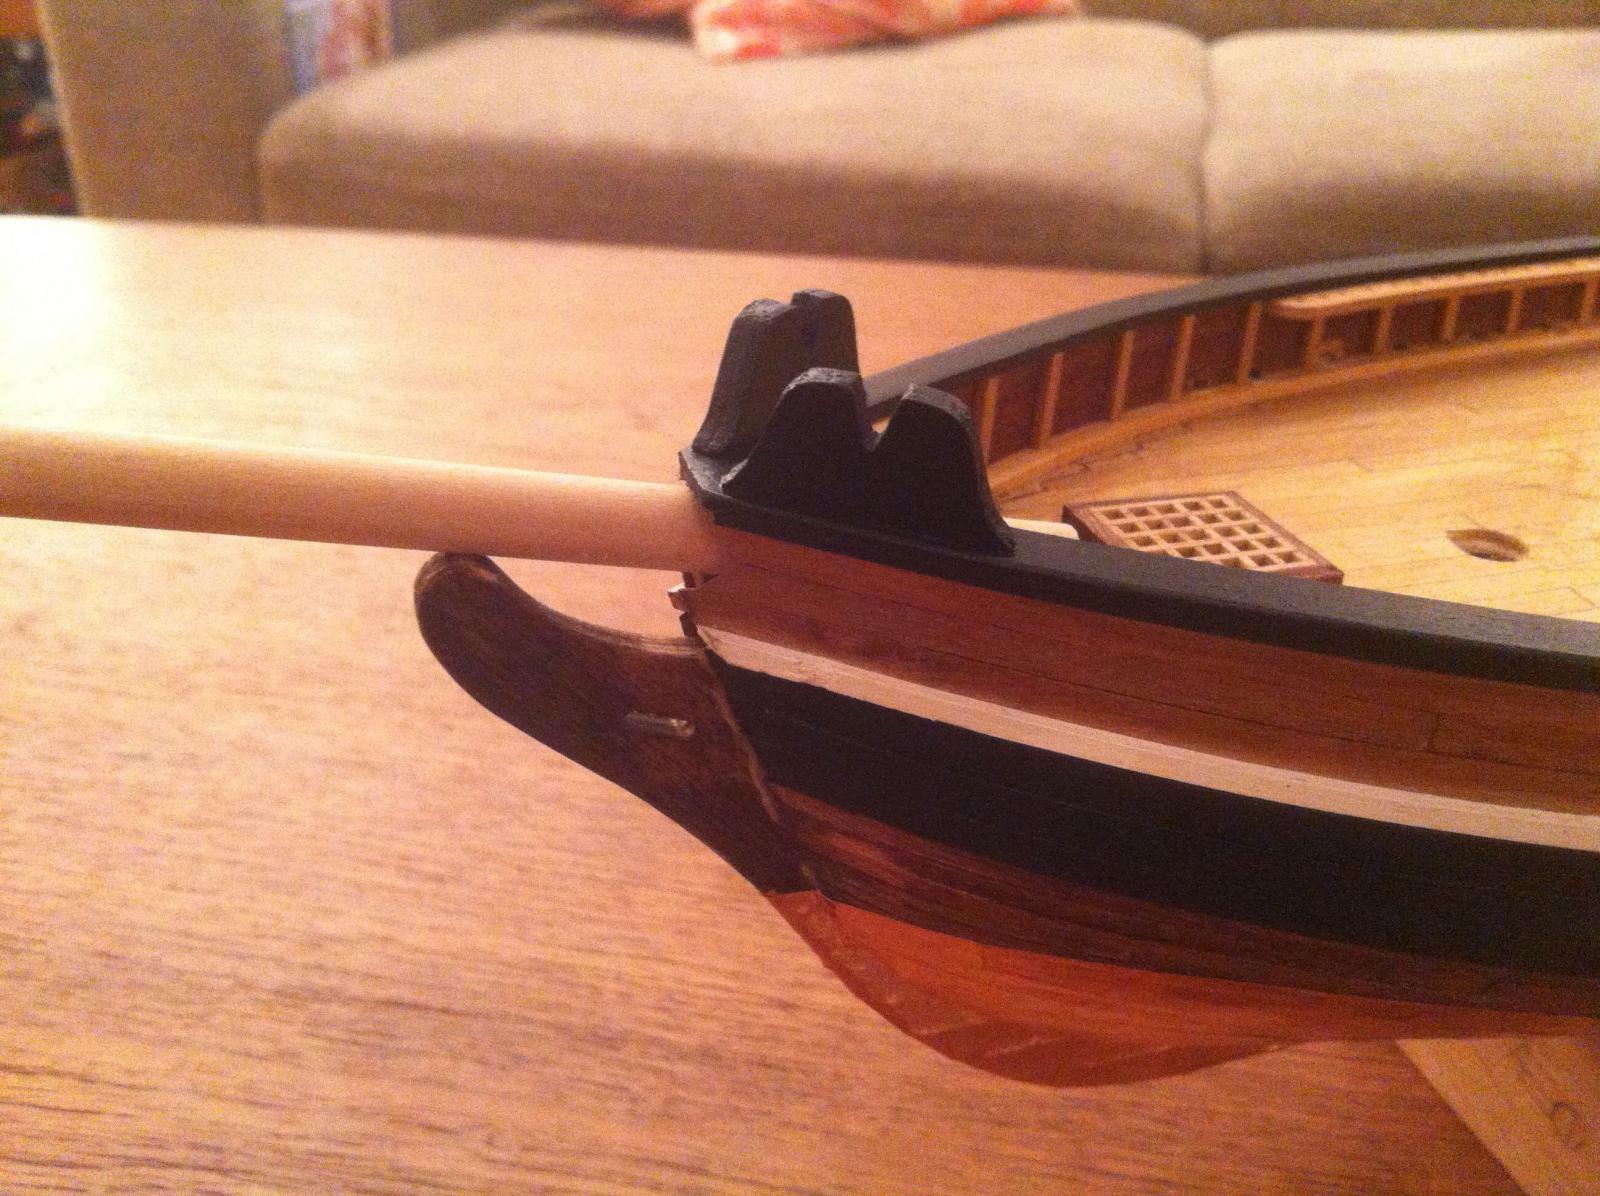
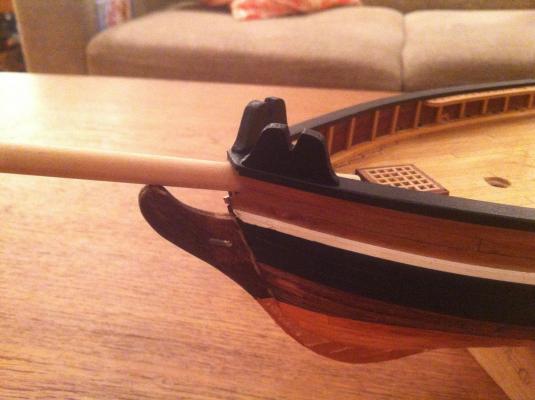
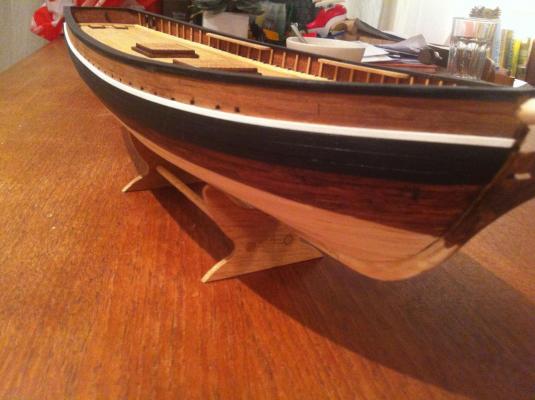
 Well I still haven't decided about the finishing on the coppered hull - I guess I'll have to make a decision soon, but for now I'll leave it as is. I've had precious little time for working on the model these days.....a very busy time at work and continuing on now till Christmas. I worked pretty much all weekend to get one night off (tonight) to work on the Fair Rosamund. Managed to install the rudder after much frustration....also put on the bow fairleads, which to my eye seem grossly out of scale now that they're on......For some reason as I was testing them they didn't seem too bad, but now that I look at them I'm not so sure.....you can decide for yourselves. I may try to whittle them down a bit once the glue cures..... Anyway, here are the photos - enjoy! hamilton
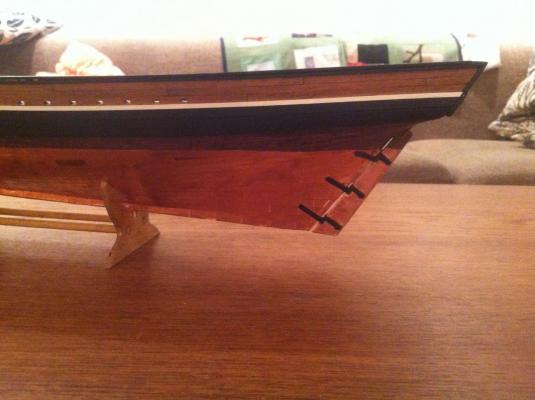

- 69 replies
-
- 5
-

-
- fair rosamund
- occre
- (and 1 more)
-
Looking great Bob! hamilton
-
Beautiful planking Jason - the nibbing is perfect hamilton
-
Been a while since I stopped by here - lots of beautiful work Augie! hamilton
- 2,191 replies
-
- 1
-
-
- confederacy
- Model Shipways
- (and 1 more)
-
Looks great Simon - I built this same kit a while back an modified it somewhat - but it looks really nice the way you've approached it - well done! hamilton
-
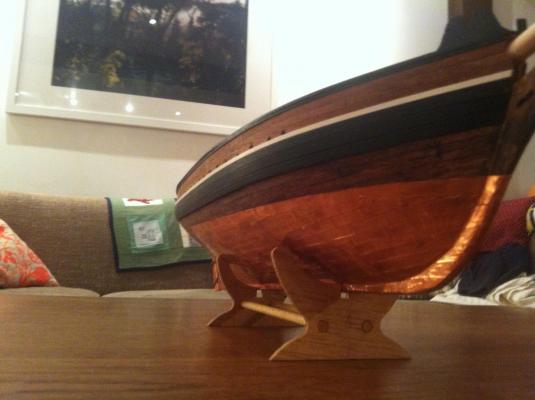
OK - a very brief update. I've started coppering the hull, using copper adhesive left over from the Kate Cory. Some of it had begun to tarnish and you'll see that in the photos. I want to try weathering it and I've been looking through other areas of MSW and started comparison shopping for techniques. I know I probably won't be using Alistair's! Though his results were great....I still have the port side to complete (and I'll definitely have to cannibalise my Syren copper tape in order to do this) so I have some time to consider finishing. I was looking at my Kate Cory the other day. I built it back in 2010 and the copper plating has aged very nicely in that time.... Question - if I put a coat of something on the plates to protect them I'm assuming this will slow or prevent the natural weathering process, right? Anyway...enough. Here are a couple of photos for you. Bye for now hamilton
- 69 replies
-
- 10
-
-
- fair rosamund
- occre
- (and 1 more)
-
I do promise Mobbsie! And I have been lurking around in your aggy log - very near completion now and looking great - as is your Essex, Bob, where I've been lurking too... I've been so busy this last month that I've spent way too much time jealously watching others' builds progress and little time on my own or on contributing to this community.....sad! Hopefully there will be opportunity to change this....though if I keep saying yes to things and signing contracts, who knows? hamilton
- 69 replies
-
- 1
-
-
- fair rosamund
- occre
- (and 1 more)
-
Not at all Alistair - I'm glad you pointed it out so I can be more careful in the future! Cheers hamilton
-
By gum, you're right Alistair! I thought I could pass this error by, but I should know by now that there are far too many hawk-eyes on this forum! Unfortunately, this error is not to be corrected now.......they're fixed..... hamilton
-
Thanks Mark & Gunther! Gunther - the finished model looks to be quite nice on the packaging, but I have to say that I'm not too impressed with the quality of this kit overall. The ply is particularly spongey and the wood stock is splintery and (some of it anyway) unattractive. I replaced all the thin stock supplied for both the second planking and the deck planking and completing the first planking with the kit-supplied 2mm thick wood strips was an exercise in saint-like patience. Of course, after all my blaspheming during the process I'm definitely no closer to sainthood.... I think if you are ready for some bashing this kit is a good one - but there are probably better ones out there in this same category (Baltimore Clipper). I wanted to build this one after heavily bashing Corel's Greyhound into a semblance of HMS Blandford, and thought I could build it right out of the box.....NOT SO!! Anyway, if you do choose it, I'll be happy to try and help if you ever run into any problems. Thanks again for stopping by hamilton
-
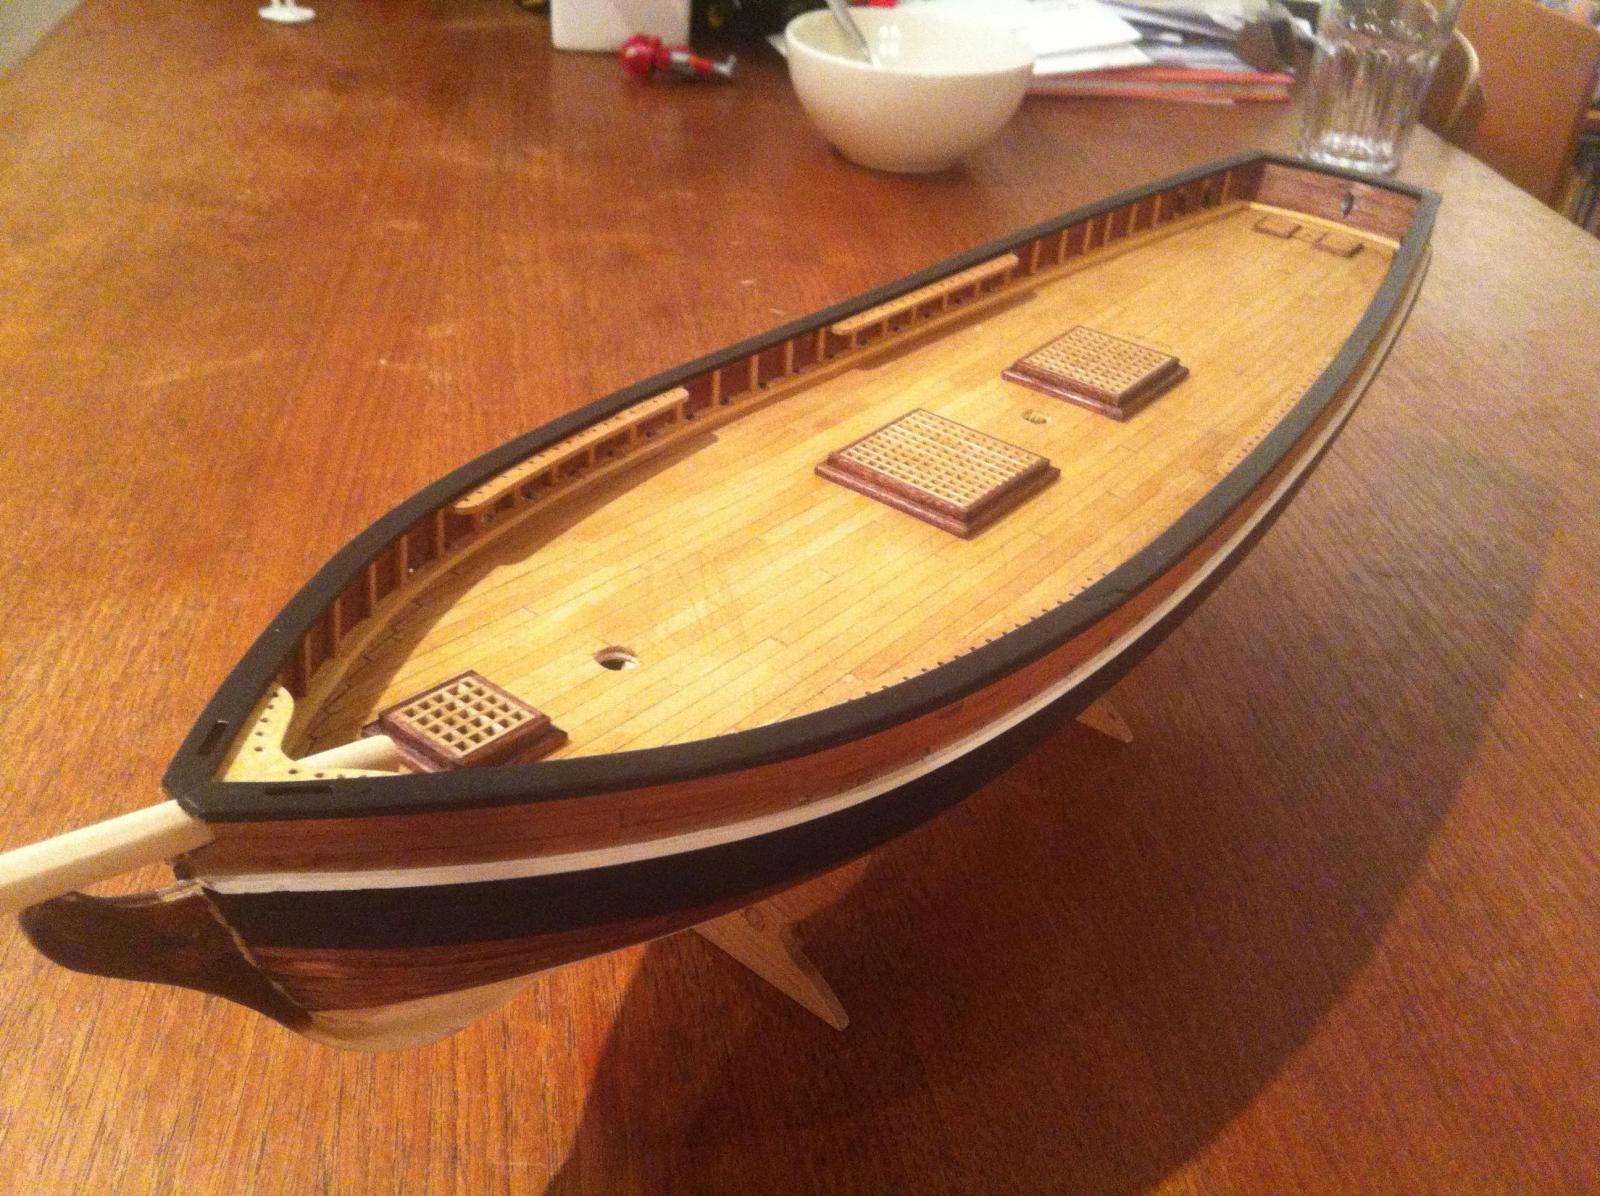
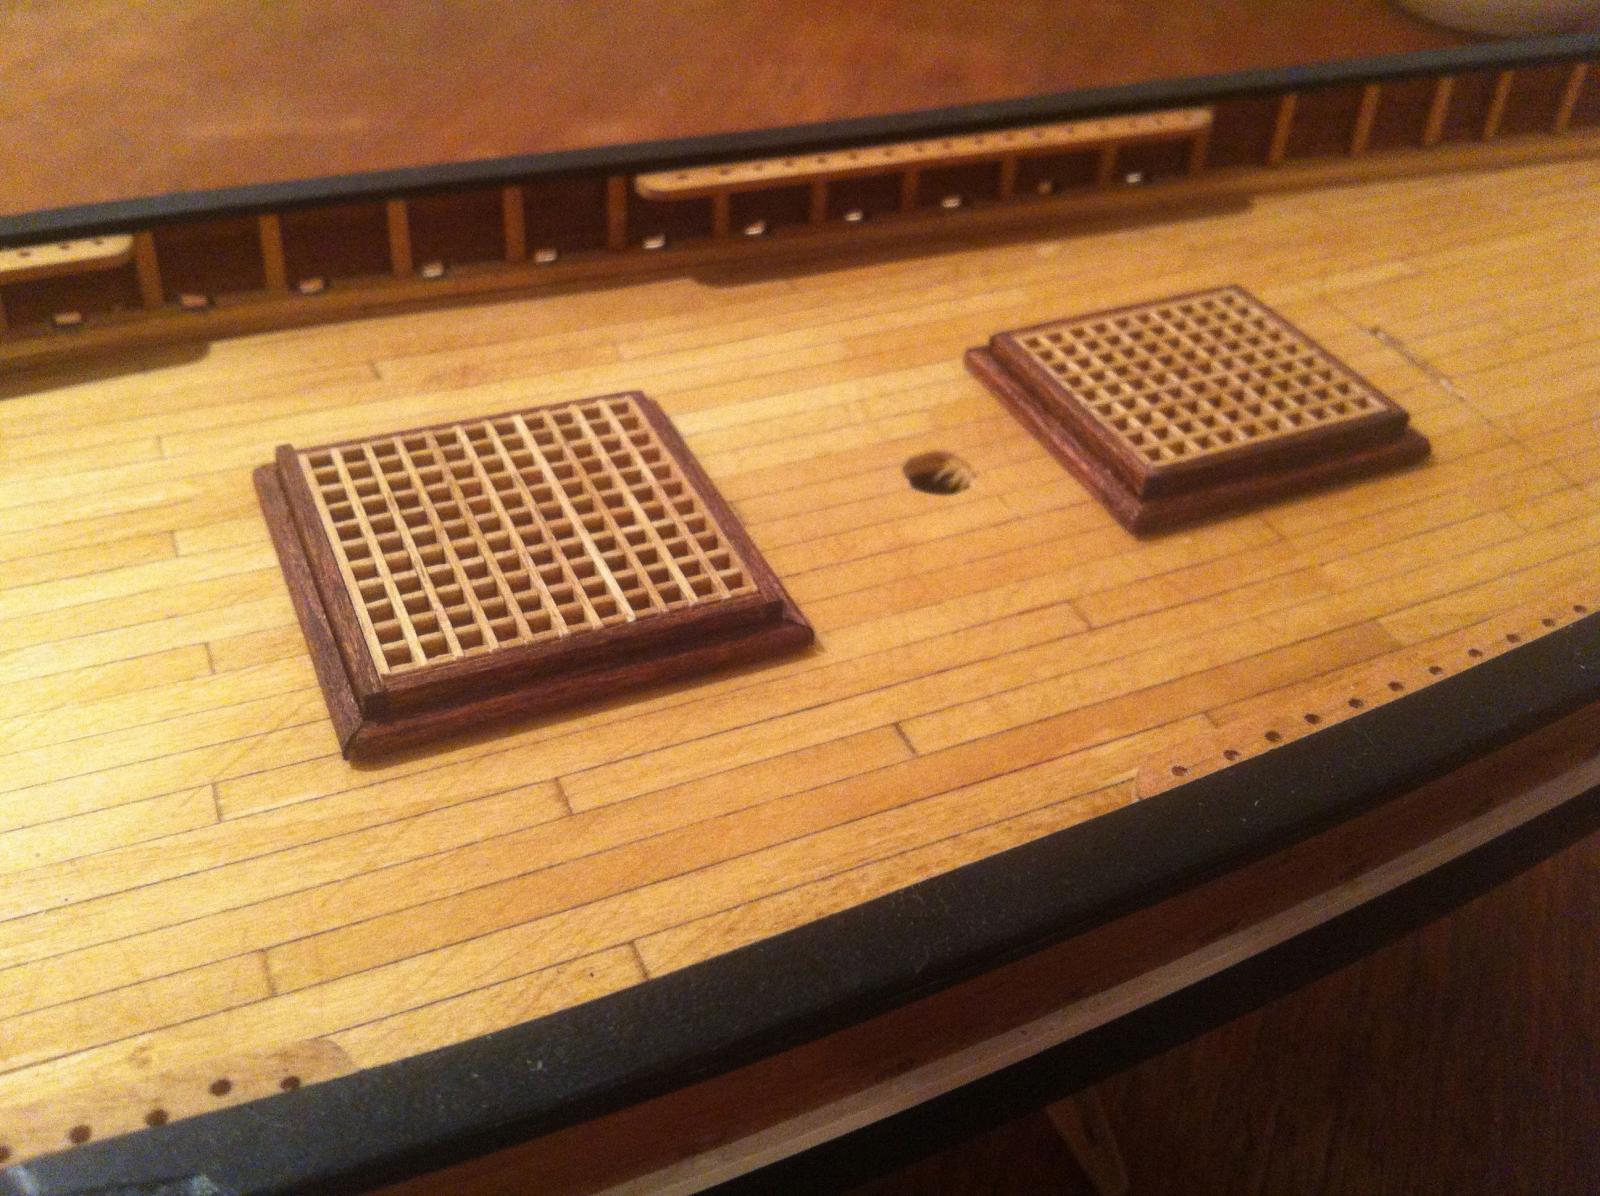
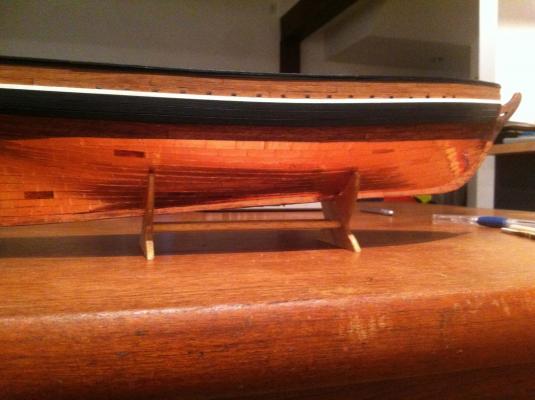
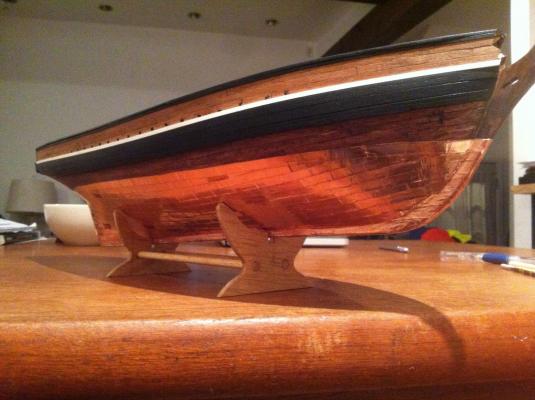
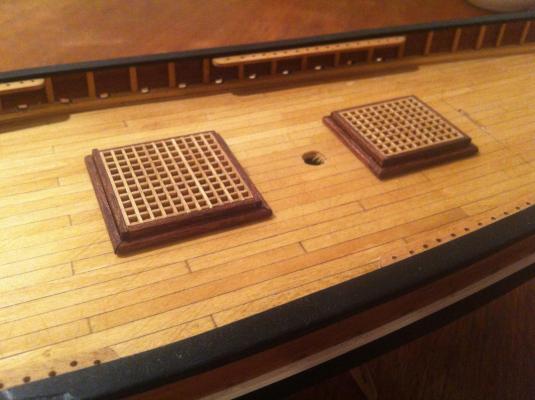
Well it seems that my last post was in August and my last real update was back in July - 3 months ago!! Not good! I have plenty of excuses, but I won't bore you with them here. The build has progressed, of course. My last update showed the bulwark strips installed. Since then I've planked the inboard bulwarks, added the waterways and bulwark stanchions, finished the first planking, installed the keel, stem & sternpost, installed and finished the wales, completed the second planking (spiling more or less every plank, which partially explains the long silence), installed the bulwark and bow pin racks, put on a few bulwark cleats, done the transom outboard and made the hatches (last night and the night before). So now that the planking is done, I'm about to embark on another repetitive and tedious task - coppering the hull (following Meredith's lead). I have some left-over copper adhesive from my Kate Cory build long ago and this should be enough to do the job (I hope). I'll update again once I'm finished that, though I'm heading into a very busy time at work, so.....who knows when that will be! Enjoy the photos. hamilton


- 69 replies
-
- 11
-
-
- fair rosamund
- occre
- (and 1 more)
-
Hi Mark! I was saying the exact thing you began this thread with to my wife just last night! I too have absorbed the planking tutorials here and though they are great, there are always some questions lingering. The thing that made everything click for me (but only in conjunction with the planking tutorials, and really only just very recently) was Ron's (RLB) Oneida build log, which apart from being amazing in and of itself, contains a very useful set of photographs illustrating the spiling process. It clarified the whole thing for me. The process of lining off the hull is explained in one of the planking tutorials here and that is an essential first step - you'll also need some good calipers, a set of french curves (for tapering), a compass (for marking the curve of each strake) and some bristol paper (for making templates). It slows the planking process down quite a bit, but I have to say I'm much happier with the results than I ever was trying to get 0.6mm x 5mm strips to behave themselves on the hull. Check out RLB's log and cycle through till you hit the spiling demonstration - you won't regret the time it takes you to find it. In any case, adopting this process has led me to scrap the strips supplied with the kit and buy some 3" x 1/32" basswood sheets to spile planks with. I've been making the planking individually using a baseline of 5 1/2" at scale (1:53). When I lined off the hull atop the first planking (which I did without caring about the look only the overall hull shape) I marked imaginary lines where frames would be on the ship. I then staggered the butts on the hull planking with some planks at the bow and stern being shorter than 5.5". As I said it's very time consuming making the planks individually, but the result is a set of planks that fit nicely on the hull. Well worth the $10 or so I paid for the basswood sheets.... hamilton
-
Thanks a lot Bob! Soon I promise! hamilton
-
Hi Tim: Thanks for commenting on the log! I have been a very bad diarist on this build, I'm afraid - while my last post shows the bulwarks installed the build is actually at a much later stage. I've completed the first hull planking, inner bulwark planking, installed the bulwark stanchions, planked the outer bulwarks and wales and begun the second planking! Yet none of this is documented. I have to say it is largely because the tail end of the summer is always a very busy time work wise, and around the house, battening down the hatches while I still have a bit of spare time..... Anyway, my modelling time has been spent....well, modelling! So sorry for the lack of updates. Strangely, once the new semester begins I will have a bit more time for documentation....and some updates will follow. As for the keel, Tim - yes the building board, combined with support beams placed between the bulkheads, combined with the straightening & stiffening effect supplied by the sub-deck has cured the bowing. My experience with a couple of bowed keels (notably on the Toulonnaise, which was considerably worse than this) has shown me that it's not impossible to correct a bow using the kit parts at hand. Anyway, some day I will post again on this log....until then I'll continue to admire everyone else's builds! hamilton
- 69 replies
-
- 1
-
-
- fair rosamund
- occre
- (and 1 more)
-
Joking aside - would US naval practice have differed significantly from the construction methods used for merchant vessels? I would imagine the answer is yes in many areas of construction, but perhaps not in the area of the wales..... hamilton
-
Some whales als taper at the bow.... hamilton
-
Looking great John - the planking is very well done. hamilton
-
Thanks all for the considered responses. Alan, I was speaking about the width - sorry for lack of clarity....I figured that there was NO taper in the width of the wales because it would reduce the structural strength at the bows.... Anyways - thanks again all! hamilton
-
The subject says it all, but just to clarify - on most source material I've seen (admittedly most of this has been kit plans) the wales are shown as untapered thick strakes. But did it ever occur that wales were tapered at the bow (or stern) to maintain a fair run of the planks? Just curious...... hamilton
-
Nice looking pins, Meredith. As for the mast top - I think you're right - I don't know why they included that strange triangular metal part....I think the topmast trees should be as you built them, slightly smaller than the main trees... hamilton
-
I have Brian Lavery's Anatomy of the Ship Bellona, which contains a couple of nice shots of the contemporary copper-plated Bellona model - BE's account of the model is accurate to Lavery's description - that is, it was a demonstration of a concept. The date Lavery gives for the coppering is March 1780. I guess the concept worked, as I believe coppering became standard practice in the late 18th and 19th centuries....though undoubtedly not a universal one either by nation or by vessel type hamilton
-
Hi Meredith: She's really looking great! As for your questions, here's my opinion: 1. I think you can leave them natural, but I might darken them a bit for my own taste (as if that matters!!). I was planning on using the brass ones supplied with the kit and blackening them, but I've stained the pin racks in Golden Oak. I think blackened pins on the blackened racks might look a bit odd....but it's your choice, unless someone has a more expert opinion. 2. My feeling is yes - what gauge of rigging line are you using now? I would definitely go a bit bigger, though again, clearer heads may have a different idea... 3. Hard to say, but again my feeling is yes. Are these 4mm? I would go smaller myself....then again, I'm stuck with a bunch of 4mm OcCre blocks with no Chuck blocks on the way!! I might have to order some of those too, just so my build doesn't look even poorer next to yours! Anyway, beautiful work! Looking forward to seeing your rigging hamilton
-
Hi Meredith: These experiments are great and truly inspiring! I hope you will at least use some of these (despite potential contract with Chuck's blocks). A quick question - OcCre only supplies 4mm blocks with their kit - how did you determine the variable sizes of blocks to be used at various points of the rigging for this model? I couldn't find any detailed rigging info for this vessel, though I imagine there must be published sources of such.....any hints? I'm thinking those 4mm blocks will look awfully clunky up on that fore royal yard! hamilton
-
Hi Craig: There are two secrets to speedy modelling - first, don't care particularly about the results; second, shirk as many other responsibilities as possible without destroying your livelihood. The first tends to make you unpopular with other modellers. The second makes you unpopular with everyone else! In any case, the photos of your Emma are clarifying a lot that seems very vague in the plans/instructions - especially as concerns the well...Looking forward to more.... hamilton