texxn5
-
Posts
2,473 -
Joined
-
Last visited
Content Type
Profiles
Forums
Gallery
Events
Everything posted by texxn5
-
Hi Bob, welcome aboard. Thanks for the kind words. I'm glad someone else has built this. Did you have a build log, or photos that might be available? I am enjoying the build, however, the plans and instructions get vague which is why I am trying to construct this log with a lot of photos and discriptions for future builders that might access this. Maybe they can avoid my mistakes. Thanks again, John
-
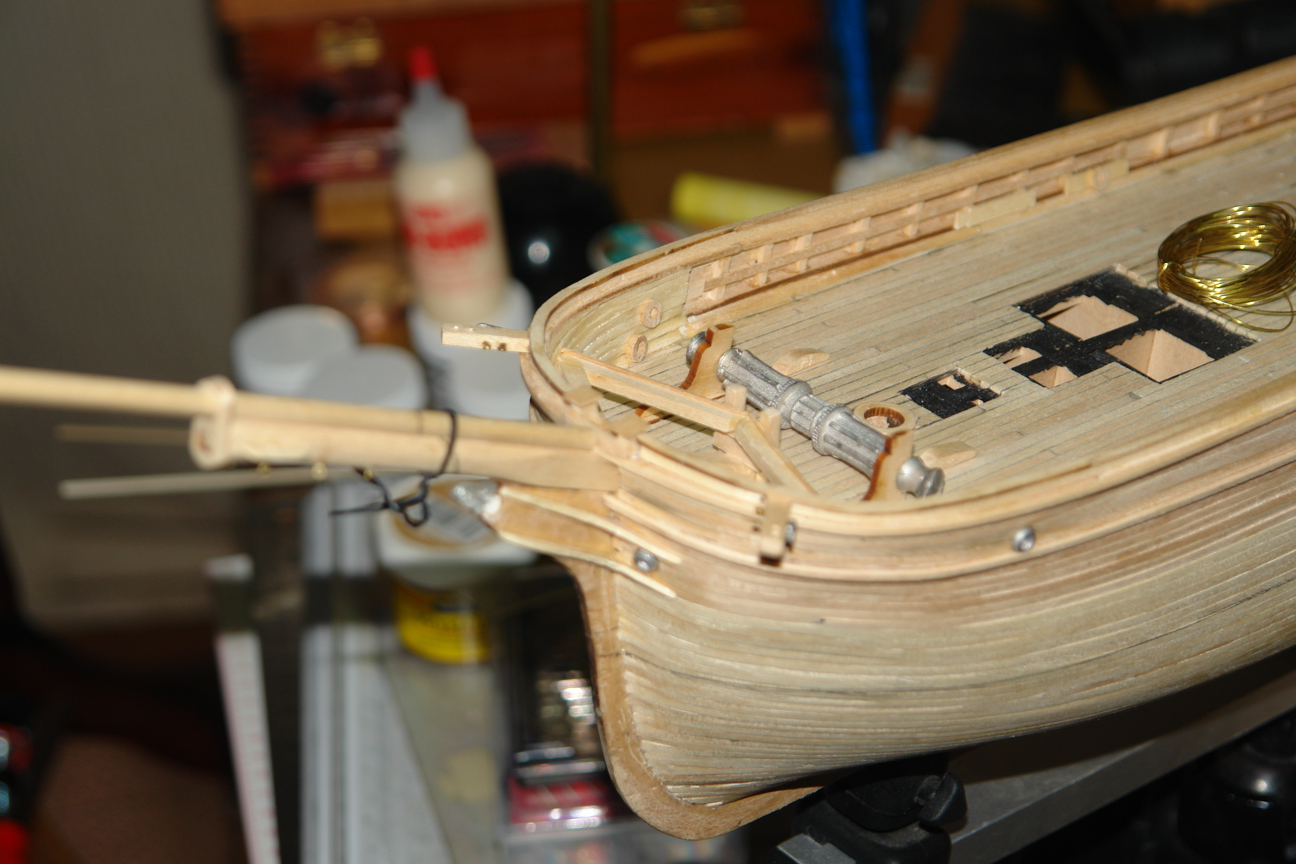
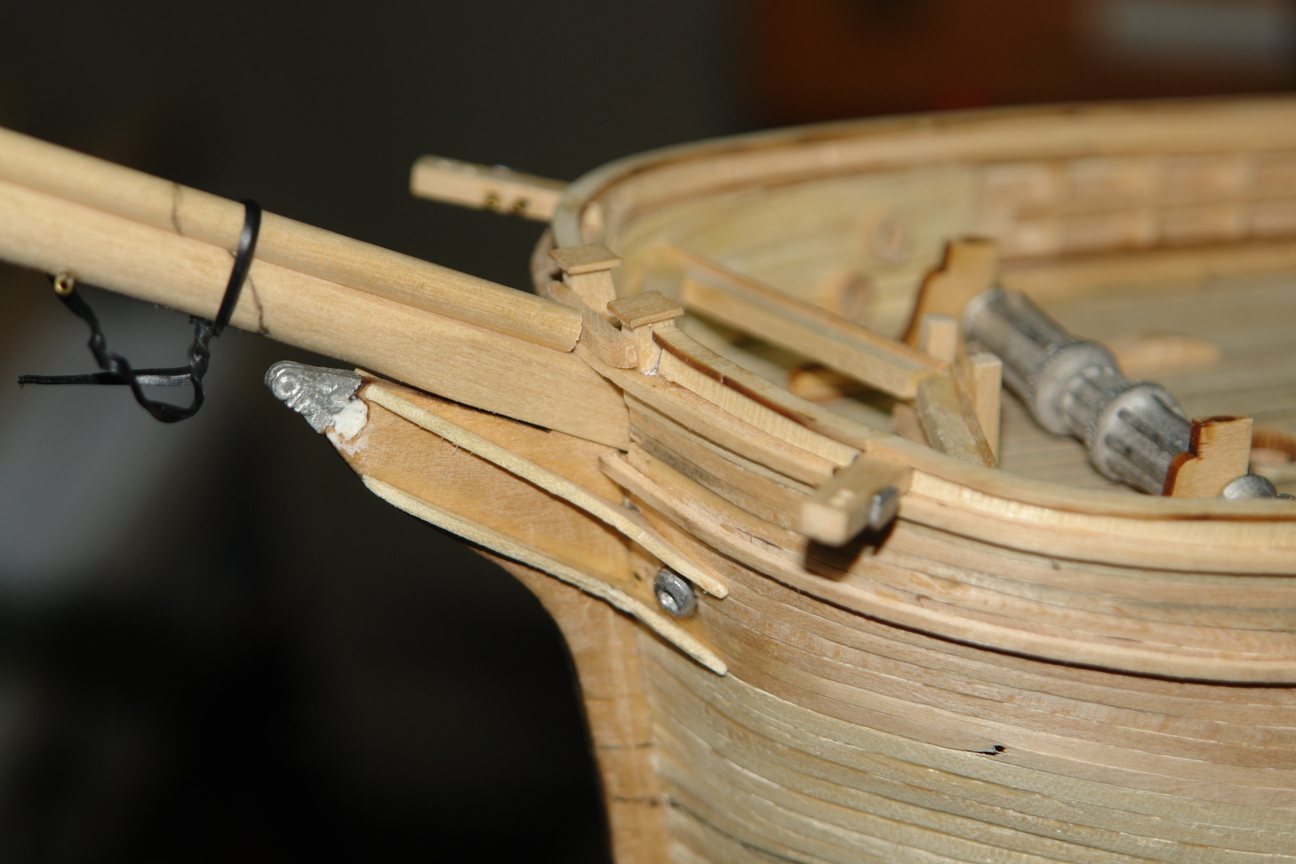
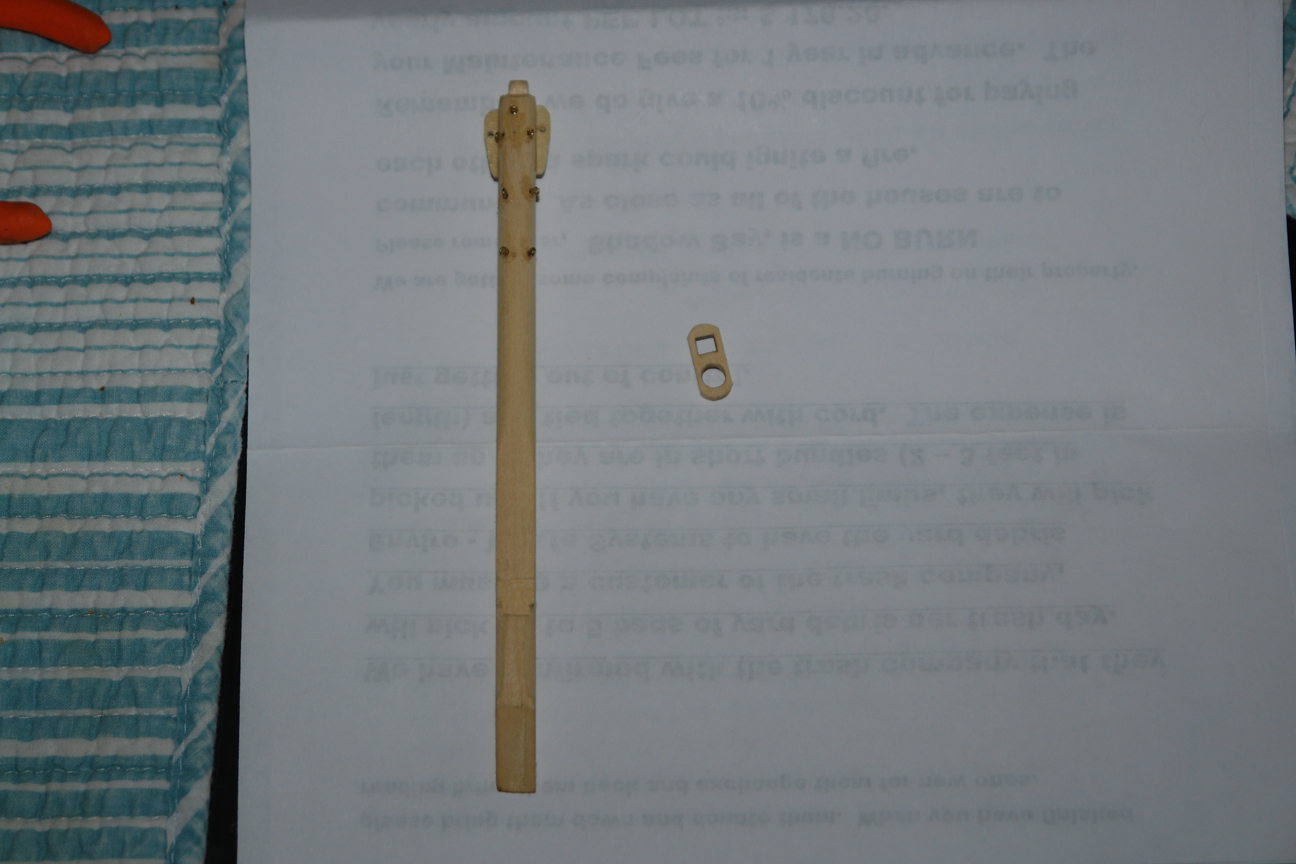
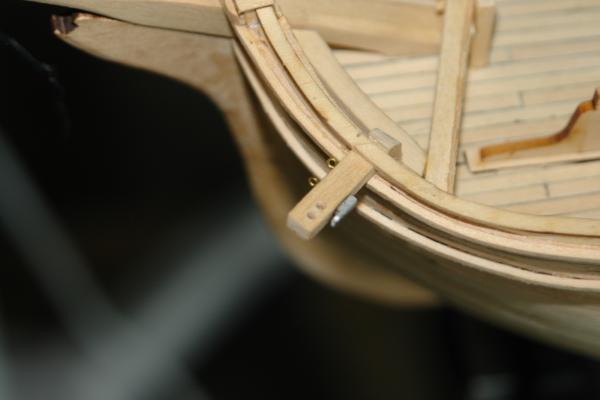
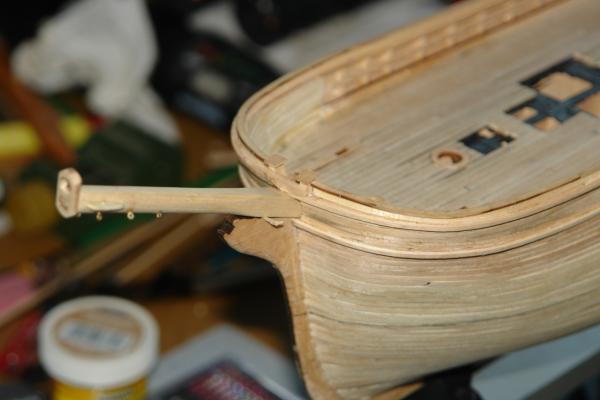
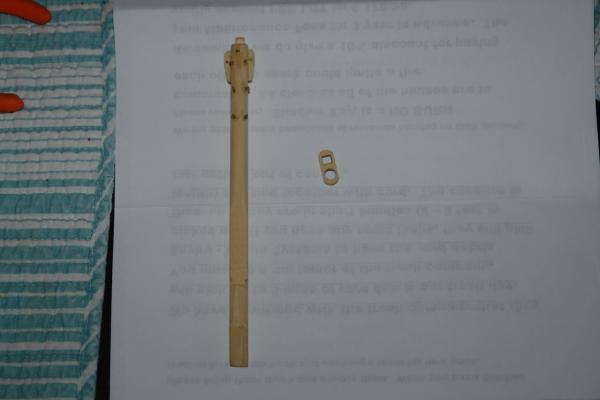
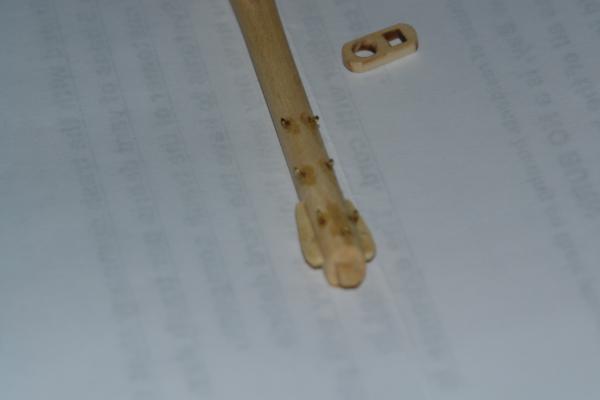
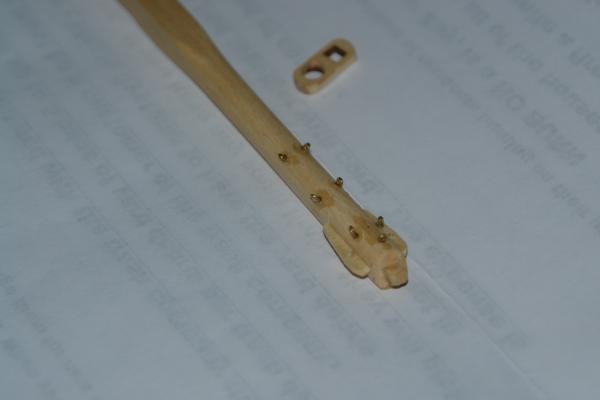
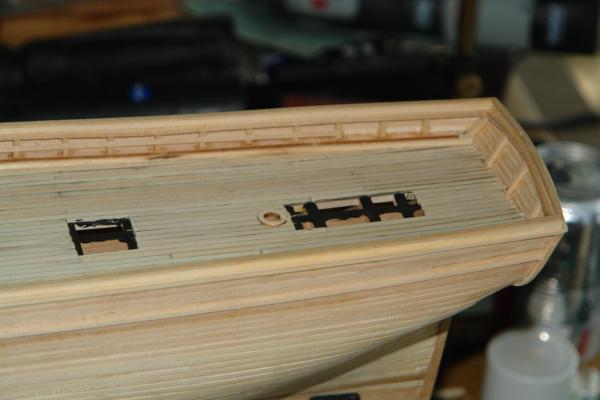
I drilled out a dowel to make the insides of the chocks since these were not provided in the kit but look unfinished if not installed. Not as good as laser cut, but are ok. Moved on to the Head Trees and Cheek knees as well as installing the Anchor Hawse Pipes. Got everything in then saw something suspicious and identified a small piece of wire that is supposed to be in the back of the Catheads. This is only a line on the plan with no identification at all. I had to tear out the catheads to drill the hole for them since there was no room once they were installed. Frustration is occurring, becasue it would be very easy for the designer to simply add an arrow and say "small black wire", instead of letting you discover it when it's too late. If the anchor deck had been in I would have really had a disaster. The small wire eventually will hold a wrapped chain around it which holds the anchor in place when stowed. I will photo this tomorrow once I regain composure. Beware for future builds. Here's todays finale. I'm quitting for the night.


-
Hi Dave, yeah, it becomes more than a chunk of wood. This is starting to get fun instead of rote construction. It's all in the details. Thanks, John
-
I'm surprised someone hasn't translated that. At least you have some pictures, I only have some vague drawings. I have found another build on another site, but the pictures for the most part are distant and not close up, and when they are close, they seem to be in shadows where detail is involved. It is much better than nothing though. The log was 7-8 years ago, and never finished. Sounds like you do have it worse than me. Maybe decifering these things educates us more....myself, I'm having a huge learning curve. John
-
Thanks Sjors, I'm trying to document everything as I go, especially since the instructions are very vague. I spend more time trying to figure out what something is than actual construction of the ship. Your welcome for the pictures. Your build is coming along nicely also.
-
A few more for reference.


-
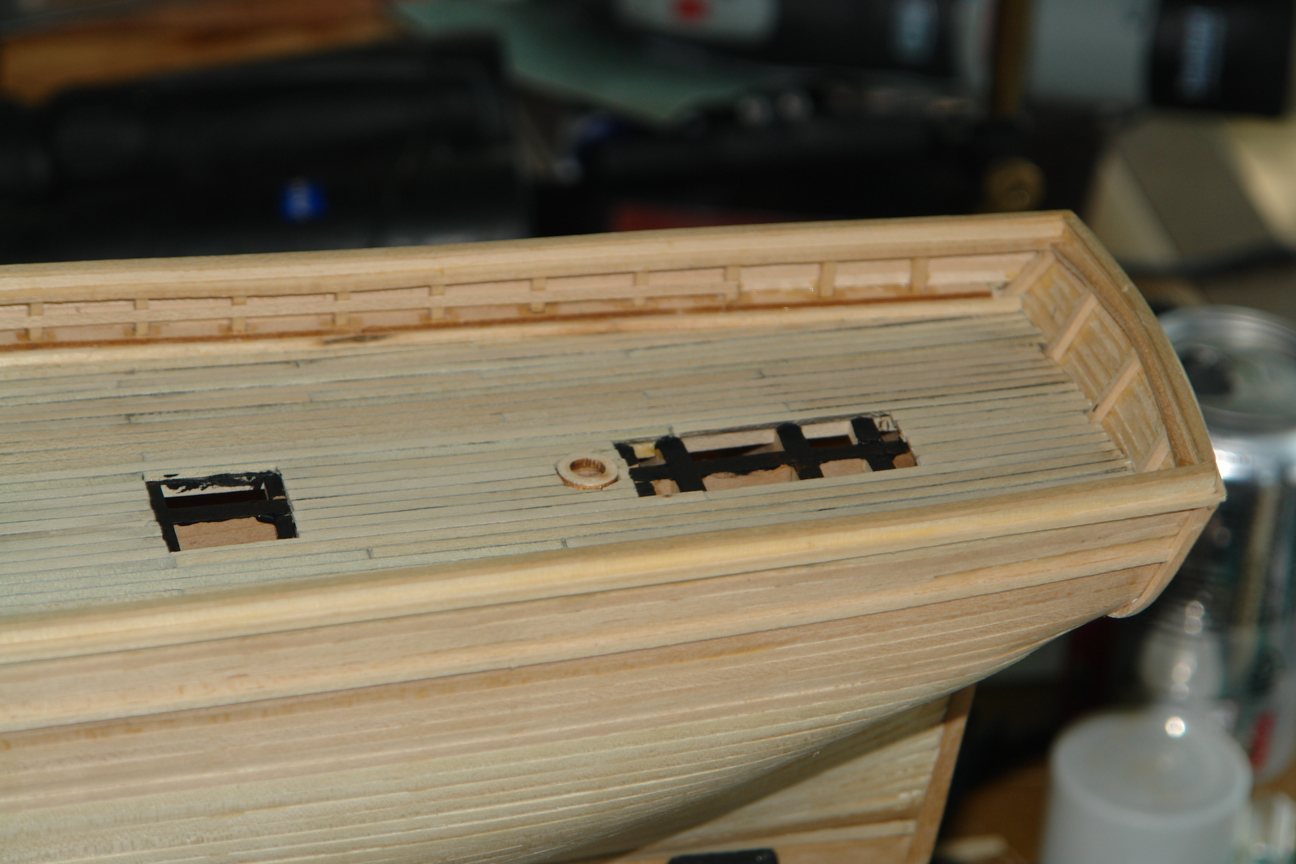
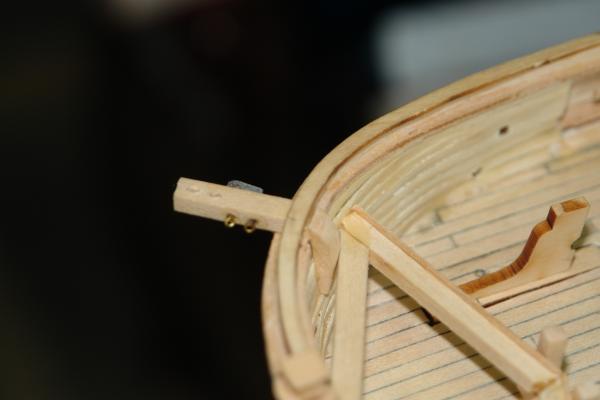
Today, I got the catheads in, and the mooring chocks, and head chain chocks, and finsihed bracing the platform for the anchor deck. It will be planked later on. On the catheads, if you don't study the plans thoroughly, you can miss the eyebolts for the jib boom shrouds. I photographed it for anyone in the future. The Thumb Cleats are not discribed or shown well in the plans, as well as on the parts list they are identified as Longhorn Cleats for Davits. So I eventually figured out which ones were to be used. None of the Brittainia parts are discribed well, so careful matching to drawings is necessary for identification. It was cool to start using the metal parts and to begin the details.

- 2,250 replies
-
- 1
-

-
- model shipways
- Charles W Morgan
- (and 1 more)
-
Yes, I love seafood. I grew up near Corpus Christi, but learned to really eat seafood in Hawaii about 35 years ago. I've also lived in Costa Rica and lived on seafood. I even opened a seafood restaurant while I was there, called La Cebechera, and love Ceviche, so needless to say, I'll be eating a lot of seafood.
-
Hi J.Pett, yes I've been busy. I haven't left on my extended trip yet. My RV keeps getting delayed and at last check it should arrive here tomorrow or Monday. So then it will be about a week before we hit the road. Headed to Maine, then back down the east coast to Florida then back home sometime in February. Just meandering down the road with no agenda. Thanks for your input. John
-
Thanks Wayne, yes things are moving right along much to my surprise. The deck is definitely looking like a working ship, and back in the day the decks were a mess, even with cleaning and they always smelled bad as probably did the crew.
- 2,250 replies
-
- 1
-
-
- model shipways
- Charles W Morgan
- (and 1 more)
-
Hi Sjors, thanks for the comments. I plan to leave the deck natural, and paint and copper the Hull. The inside of the Bulwarks are a light yellow ochre, which I intend to use.
- 2,250 replies
-
- 1
-
-
- model shipways
- Charles W Morgan
- (and 1 more)
-
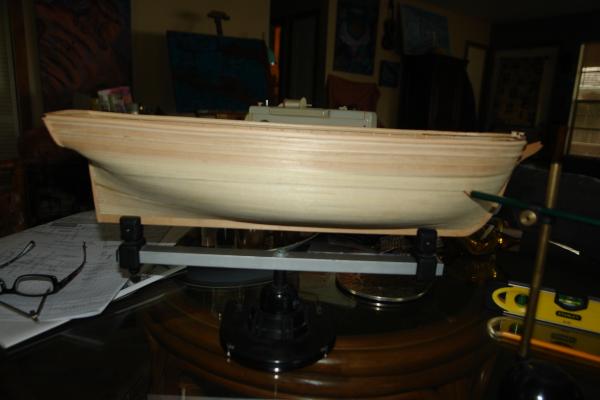
Starts to get really fun once it starts to look like a ship instead of a bunch of crude wood.
- 2,250 replies
-
- 1
-
-
- model shipways
- Charles W Morgan
- (and 1 more)
-
Managed to get a little more done last night.
- 2,250 replies
-
- 1
-
-
- model shipways
- Charles W Morgan
- (and 1 more)
-
Well put Grant....that's a good one. Gotta love Larsen. This old dog is definitely learning new tricks.
-
The plating is coming later, but I'm trying to learn my lessons and refer to the tutorials that are available. I'm realizing they are here for a reason. Dang, you can teach an old dog new tricks.
- 2,250 replies
-
- 1
-
-
- model shipways
- Charles W Morgan
- (and 1 more)
-
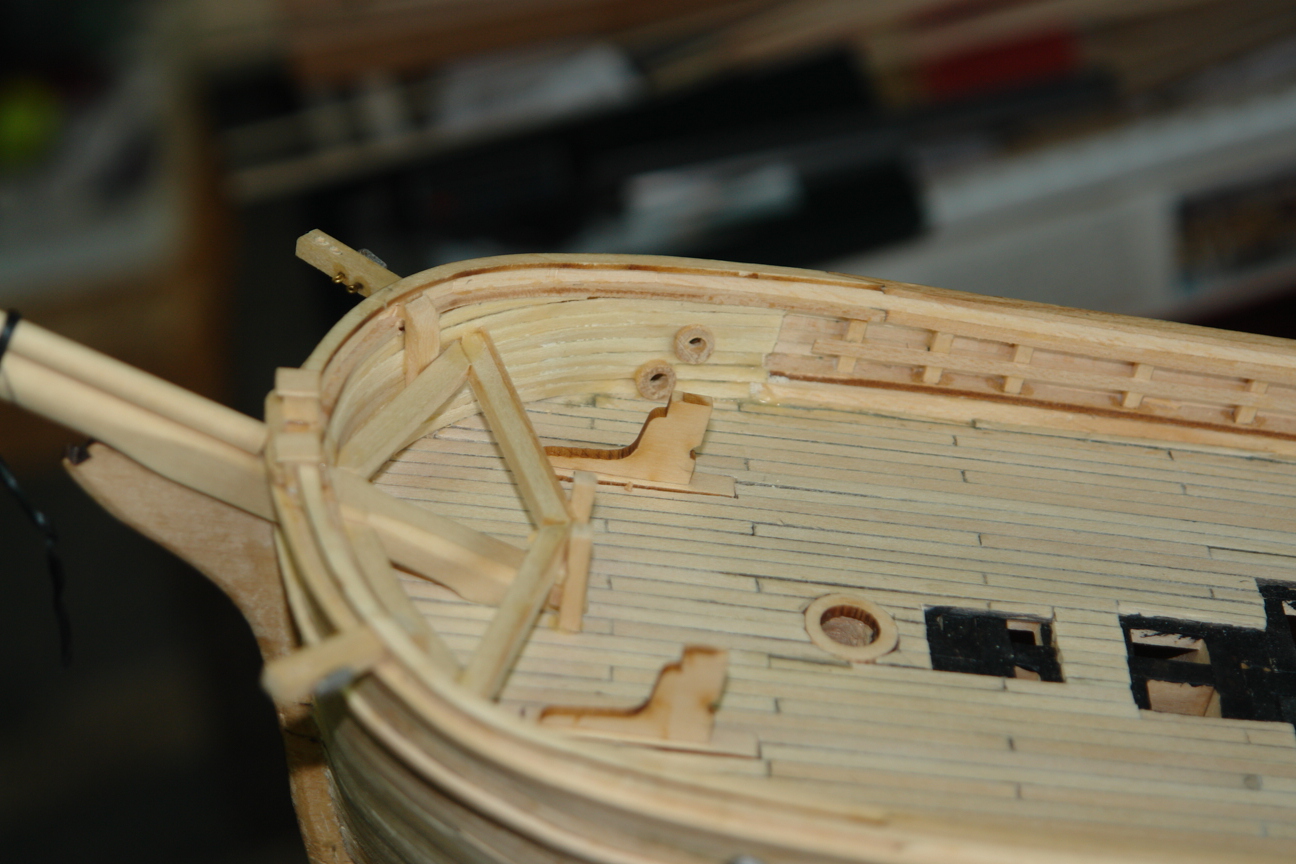
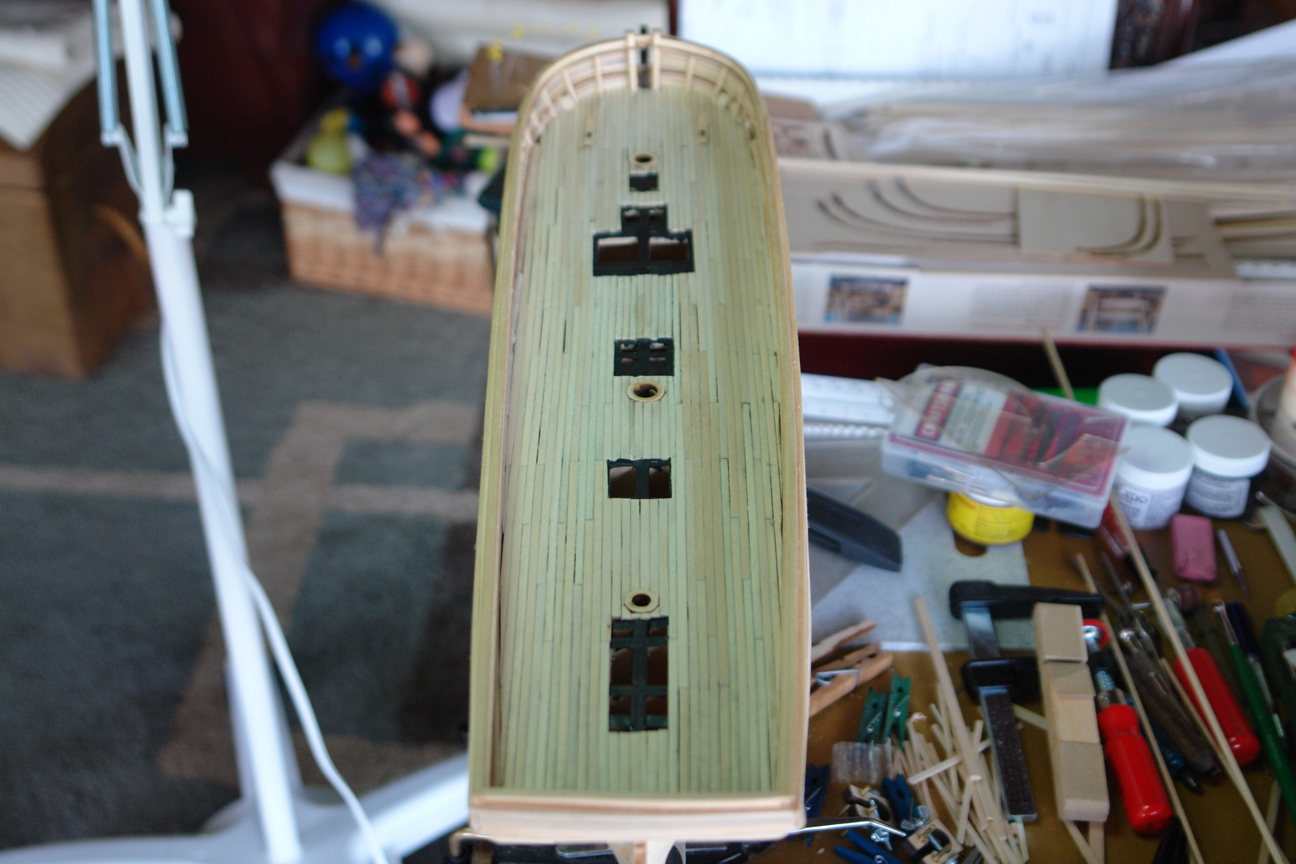
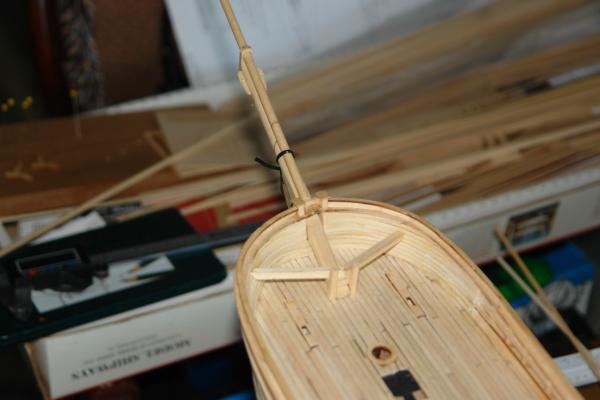
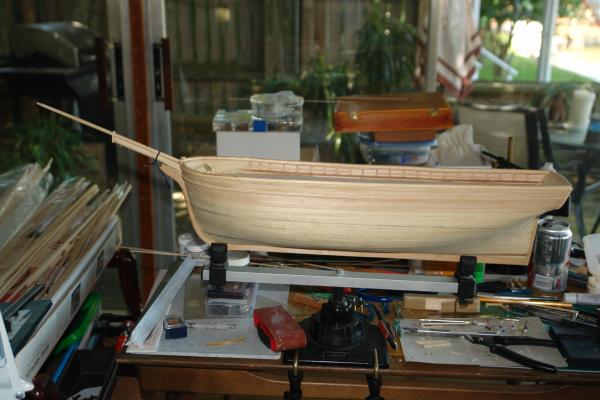
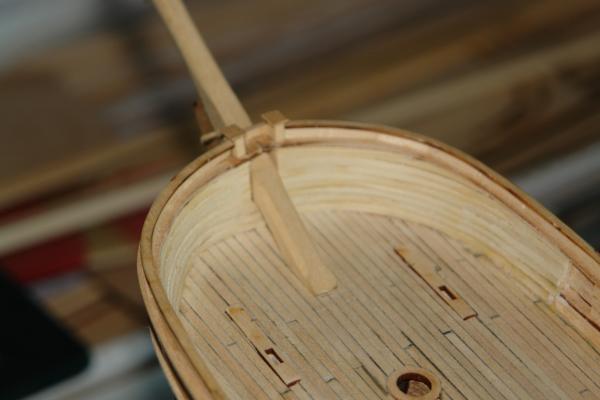
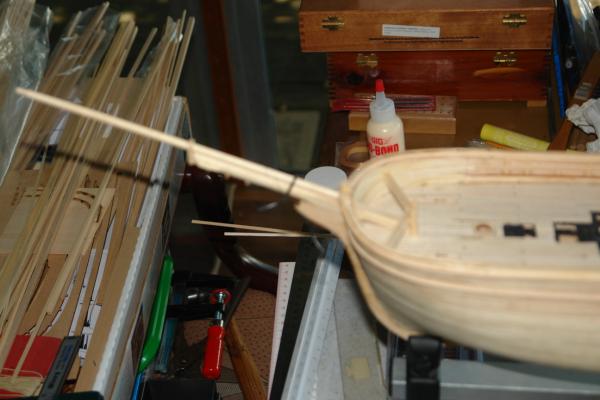
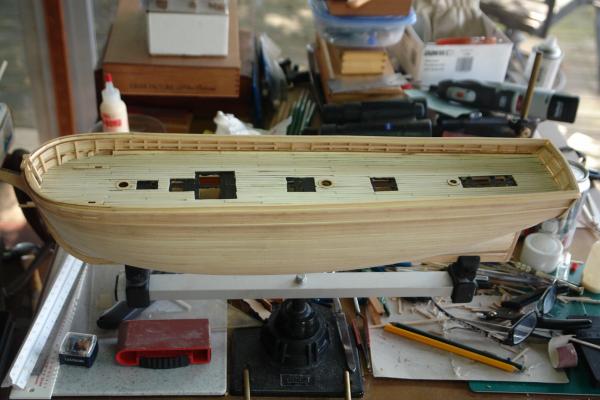
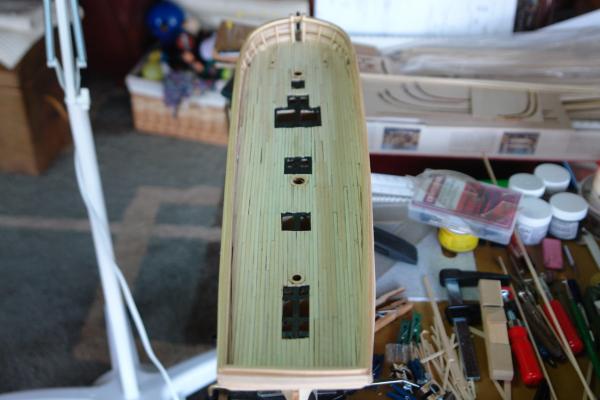
As I have studied the plans and tried to decide where to go next, I decided to work on the bow, and prepare to paint the bulwarks, which requires some parts and pieces on the inside, such as lashing rails, cavils, mooring chocks, and other pieces. First, it is necessary to preframe the anchor deck , which is held in place by the Bowsprit bits, so in order to get the Bowspirit bits properly located you need a Bowspirit. So I started constructing the Bowspirit, which is made from a 5/16" square board. It has unusual shapes as you can see from the pictures. From there I constructed the frames for the Anchor Deck above the Bowspirit which will be installed later in the build.
- 2,250 replies
-
- 2
-
-
- model shipways
- Charles W Morgan
- (and 1 more)
-
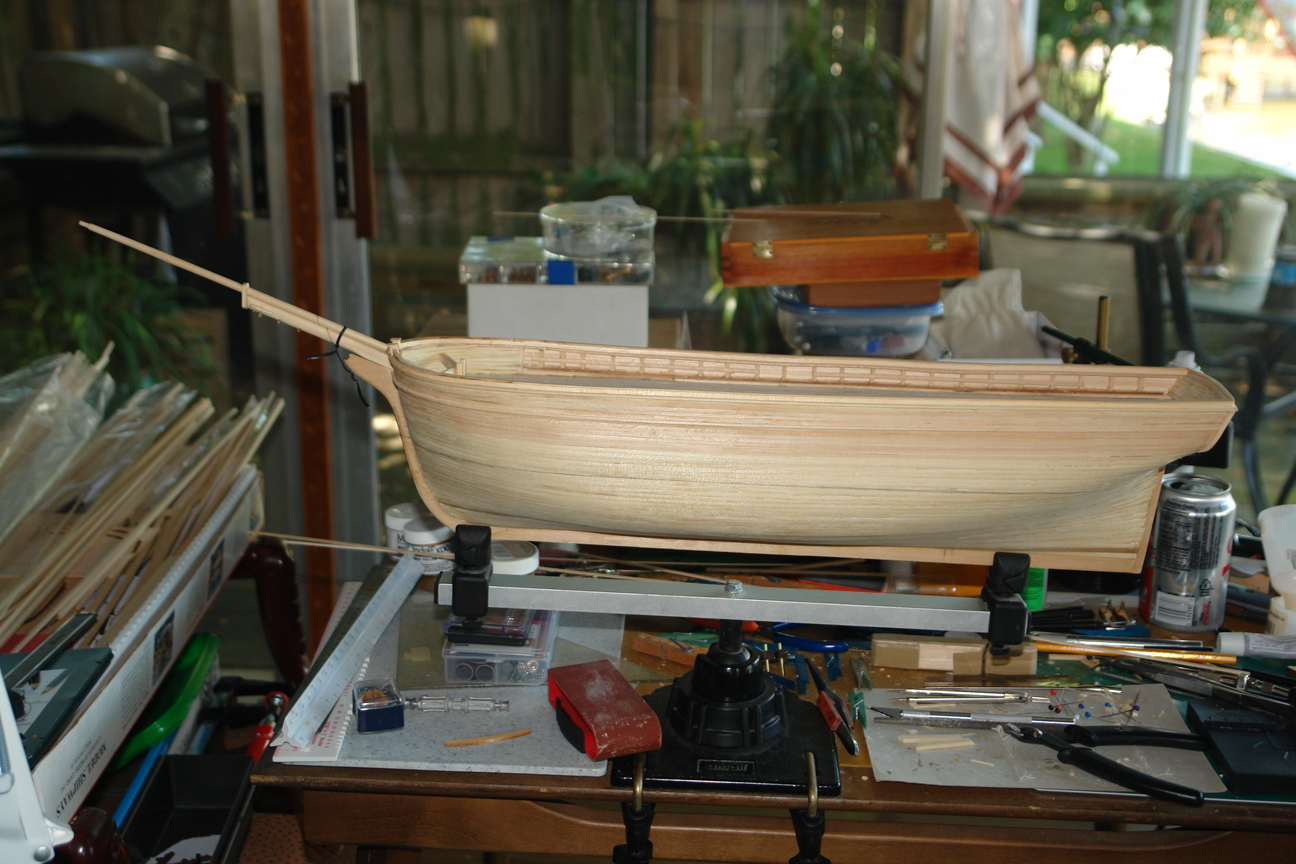
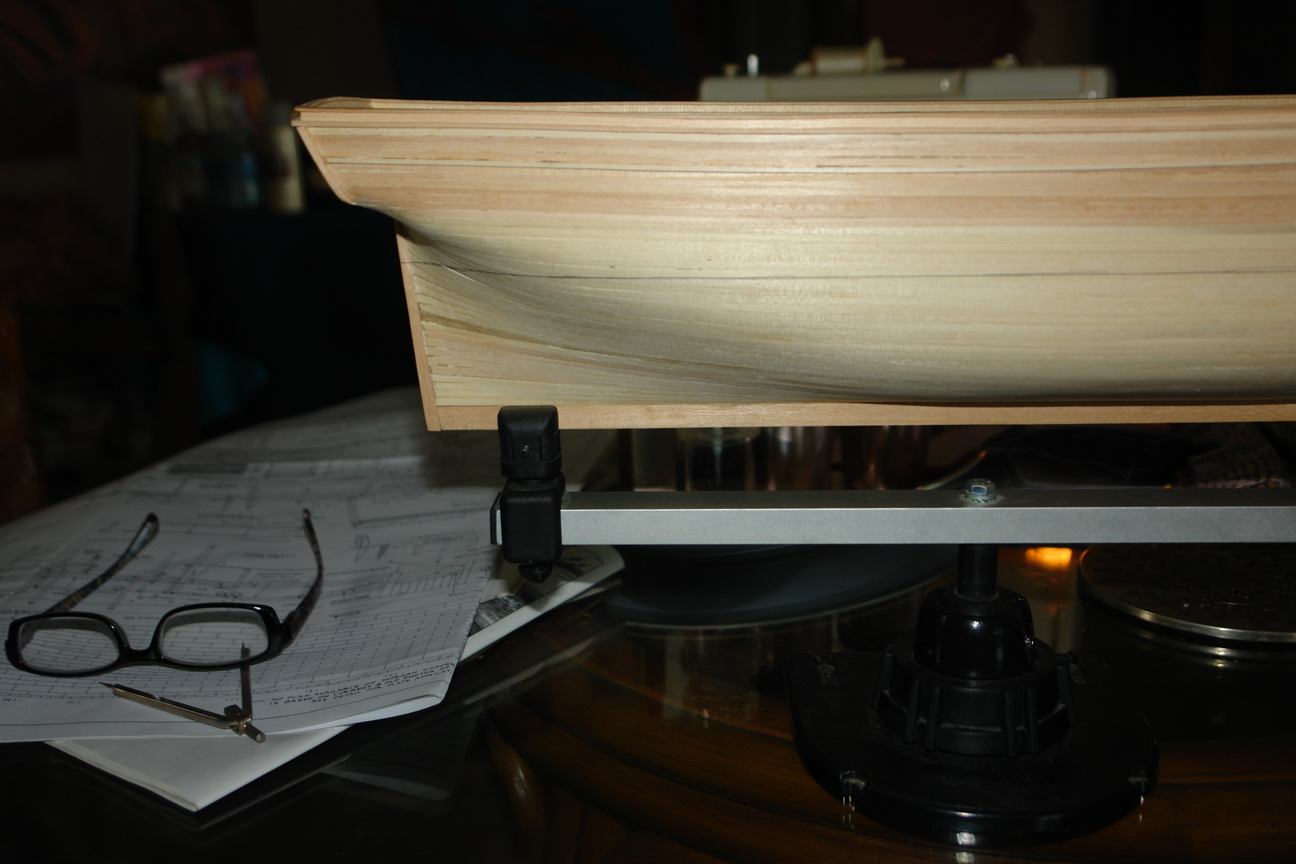
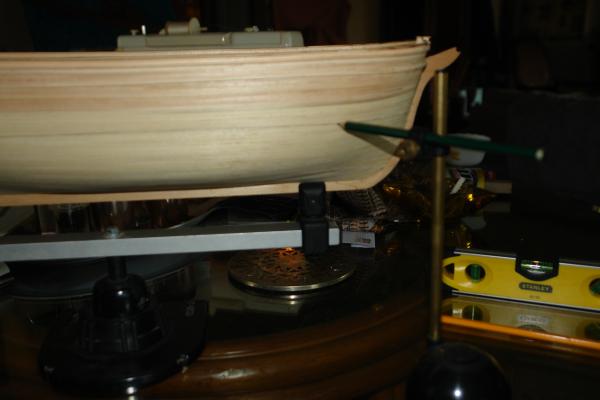
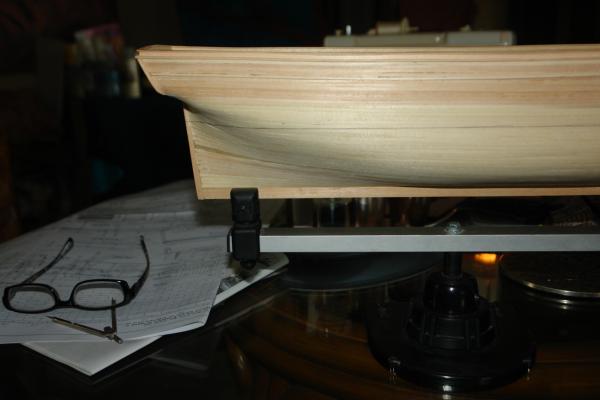
I decided to go ahead and mark the copper/paint line on the hull. I bought this tool a couple of years ago, and now finally got a chance to use it. It was easy to use, once the boat was level. I leveled the keel, then marked from there. This sets the stage for an eventual copper job. I'll be sure and read the tutorials on this prior to embarking on this quest.
- 2,250 replies
-
- 1
-
-
- model shipways
- Charles W Morgan
- (and 1 more)
-
Thanks Mark, that's definitely a thought, and also true. I will have plenty to do once I'm on the road, but probably won't have much time to do it, so I'm trying to be where I can paint the bulwarks, paint the upper outside hull before we leave. Then I'll plan on doing the copper plates, and deck houses, tryworks, windlass, and then any other things that need to be done prior to the masts and rigging. This being a working ship, has a lot going on with the deck area. And, yes, I know this is moving along quickly. Luckily I'm retired. lol
- 2,250 replies
-
- 1
-
-
- model shipways
- Charles W Morgan
- (and 1 more)
-
yeah, I know what you mean. I've flown some back when I had a friend that a Cessna 182. I never got licensed and never put in enough training by any means, and now I wouldn't trust myself, so I guess those days are over but sure was a lot of fun. Got to go up in an F-4 Phantom when I was on board the JFK back in '70, getting launched off a carrier is a wild experience. Time of a lifetime. Big ship --- that is until you have to land a jet on it....then it becomes a postage stamp.
- 2,250 replies
-
- 1
-
-
- model shipways
- Charles W Morgan
- (and 1 more)
-
Looks fantastic Augie, your spiders have really been busy, must not have been a union shop! lol.....I hope I didn't start something here....oops....go fishing, and stay out of the fish markets! John
- 1,668 replies
-
- 1
-
-
- syren
- model shipways
- (and 1 more)
-
yeah, I would definitely buy my lumber from Hobby Mill. I just had extra sanding and trimming to do. I guess some of my problem, was that I had bought some additional sizes of basswood from Hobby Lobby and it was far superior though expensive than the kit material. I tried to use the best available in the kit on the deck since I wanted a natural finish, then it turned green or was green before I started, and I didn't notice until it was too late to change. Oh well, live and learn. This whole wood boat is a learning experience for me which by the way is most enjoyable and I do love working with the wood. The strength of the wood and scratch build challenge is great.
-
Hi Augie, Thanks for the suggestions. I had thought about the testing first, especially after Grant's almost disaster with finishing. I actually think I have some Minwax Light Oak that I used on My Sopwith Camel. I don't have Natural though, but the 50-50 mix sounds good. The tint I think shows up more with the flash on the camera, however there are color inconsistencies in the wood strips. Actually it is one of the dissapointments I've had with the kit, in that the quality of the wood strips for the hull and the deck is quite poor. It is basically rough cut "lumber" with a lot of thickness variations as well as being rough and showing saw blade marks. If I had realized it earlier I wouldn't have even used it. I have not complained to Modelshipways, since I bought the kit on eBay and it's about 8 years old but I probably won't use the rest of it. Some of it isn't even usable anyway because of inconsistent width's and thicknesses. Much of it when measured on digital calipers you really can't even figure out what it's supposed to be - either a thcker or thinner piece than what the instructions call for since it isn't either one only somewhere in between. Otherwise I'm very happy so far, with another exception in that the Brittania metal parts are difficult to identify, and place. There is no reference in the instructions or plans whether the parts are metallic or not. Anyway, sorry to ramble here, but perhaps this will help someone else building or contemplating building this ship. I will try to identify and photograph these parts as I place them on the ship for future reference. Thanks again Augie, that is exactly what I'll try. John
-
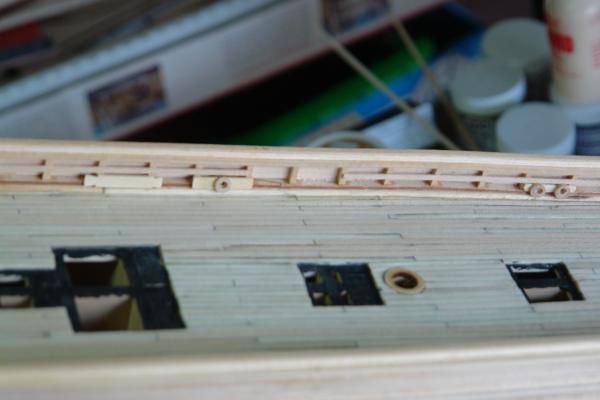
I have noticed that my deck has a greenish tint to it. I plan to use a matte finish varnish on the deck and am contemplating a bleach wash prior to spraying the deck. Any suggestions from anyone? Or perhaps a very light stain prior to spraying. Any input would be greatly appreciated. I'll post some more pictures of my progress shortly.
-
More progress as the decking comes together
- 2,250 replies
-
- 2
-
-
- model shipways
- Charles W Morgan
- (and 1 more)