HOLIDAY DONATION DRIVE - SUPPORT MSW - DO YOUR PART TO KEEP THIS GREAT FORUM GOING! (89 donations so far out of 49,000 members - C'mon guys!)
×


niwotwill
-
Posts
596 -
Joined
-
Last visited
Content Type
Profiles
Forums
Gallery
Events
Everything posted by niwotwill
-
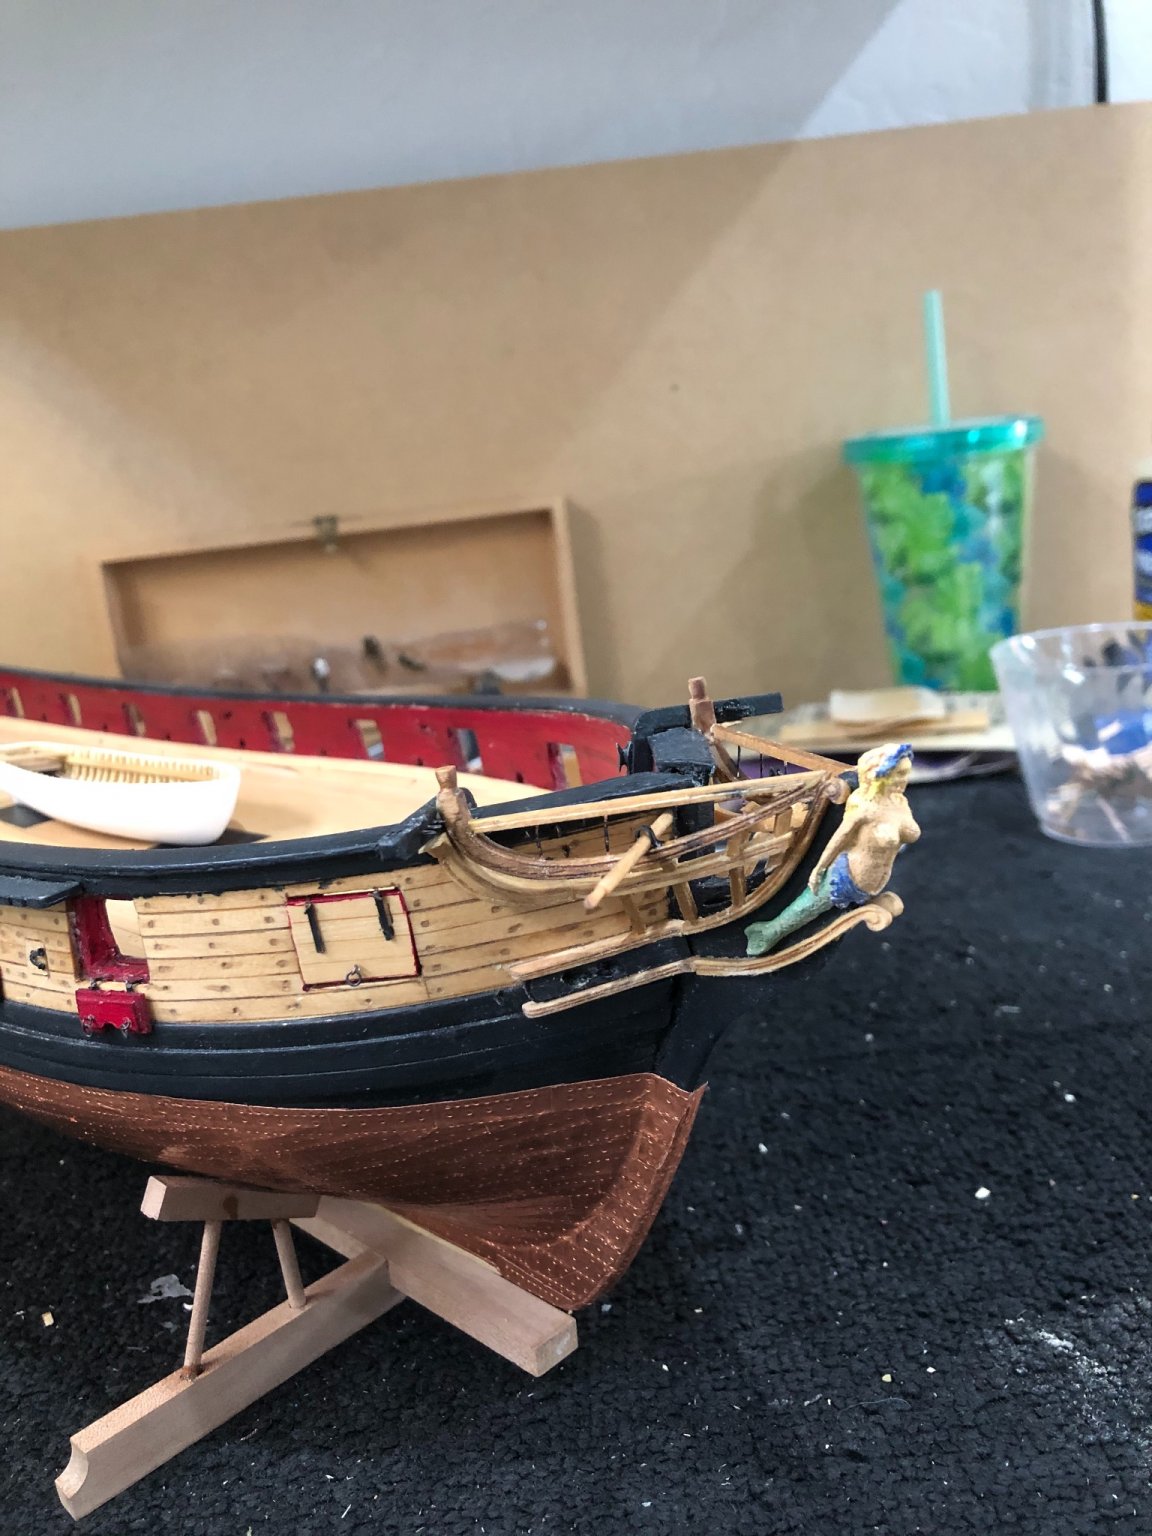
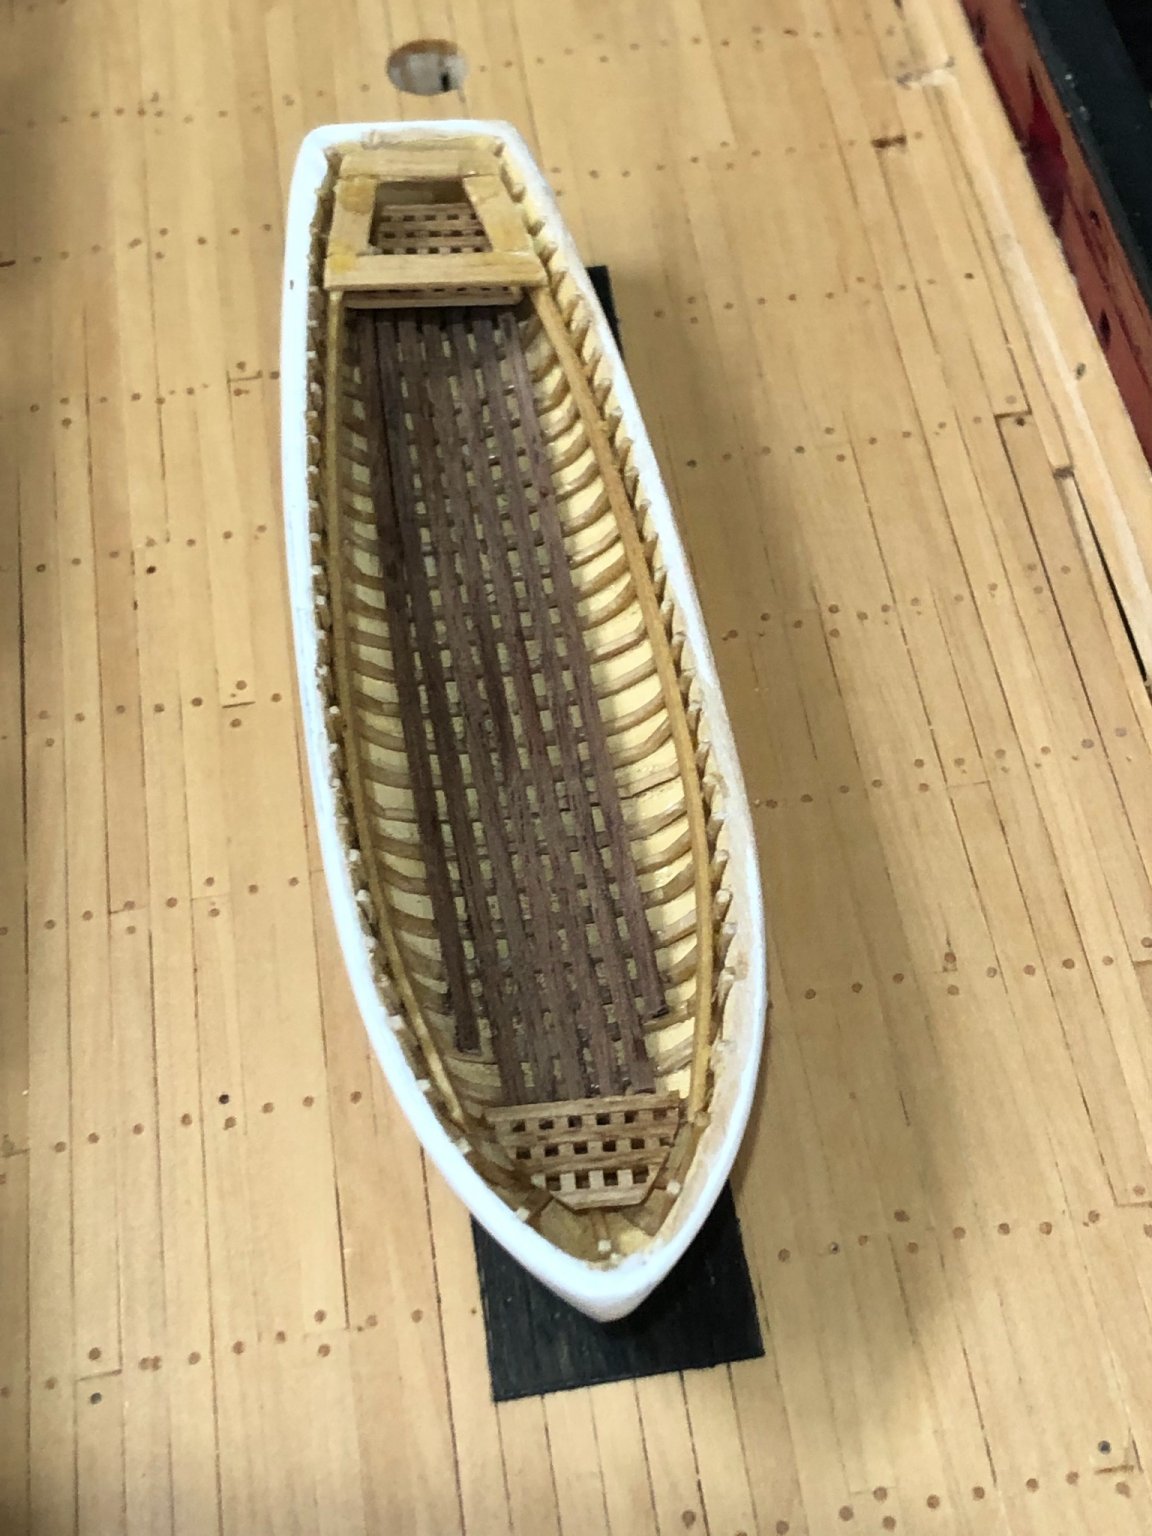
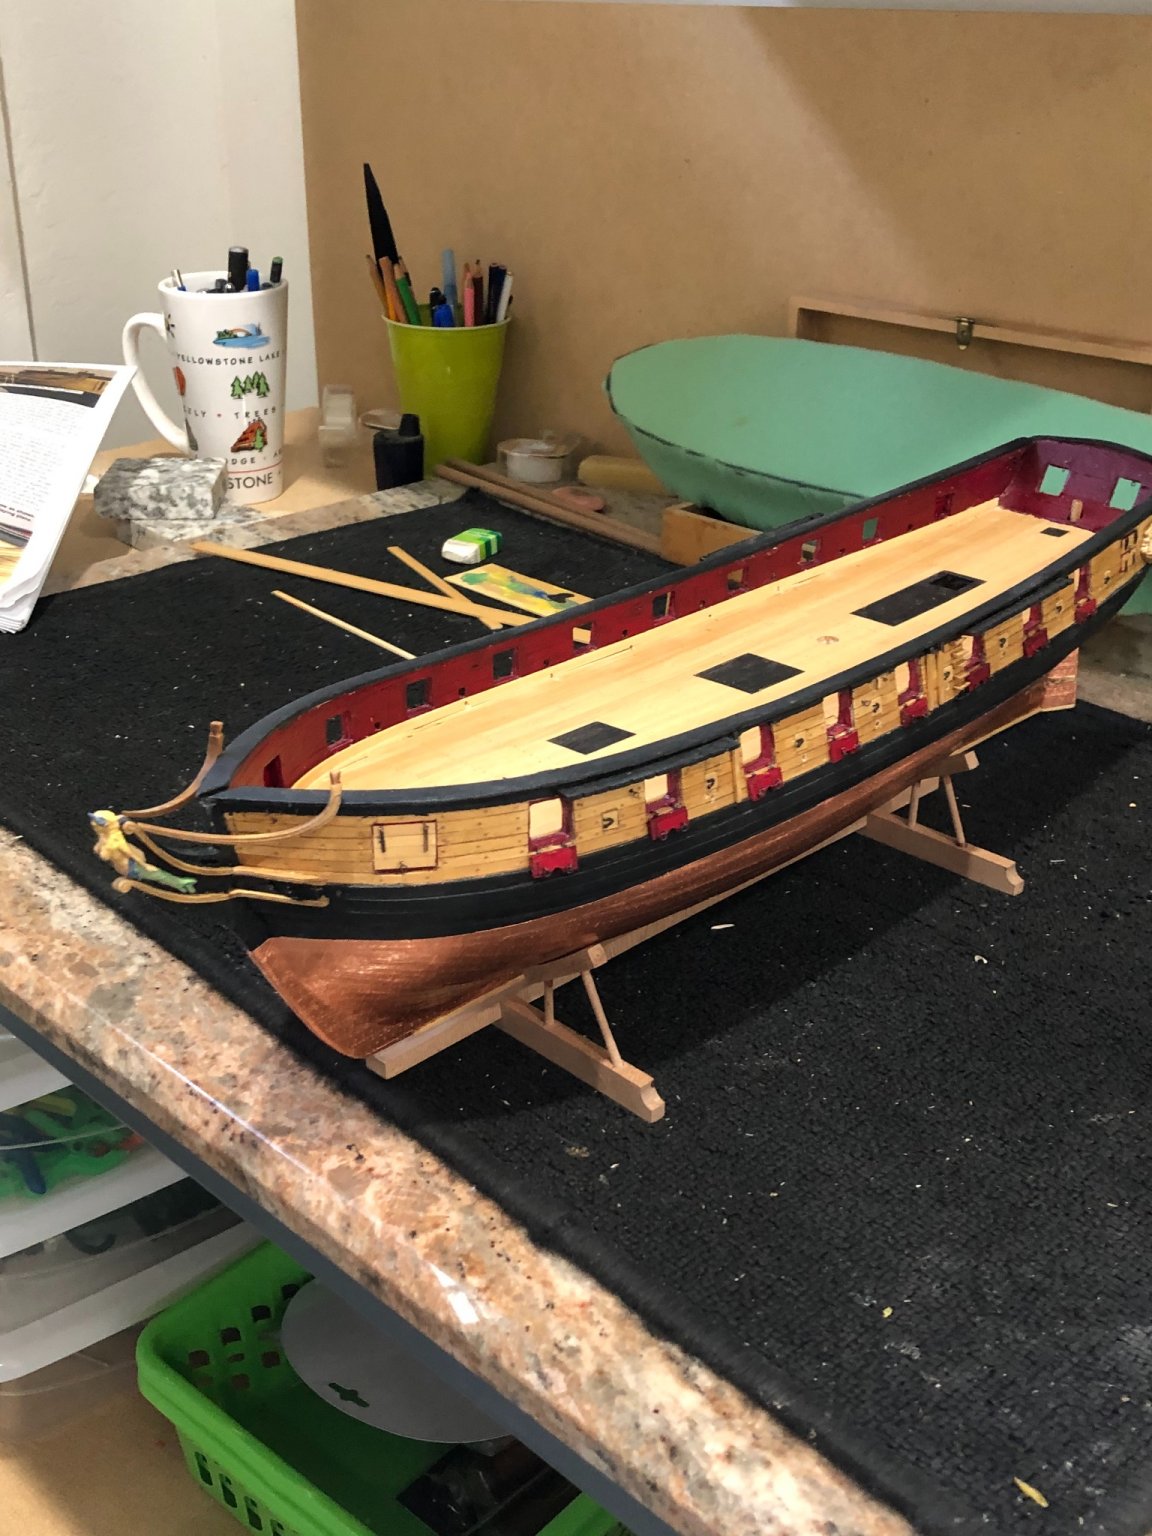
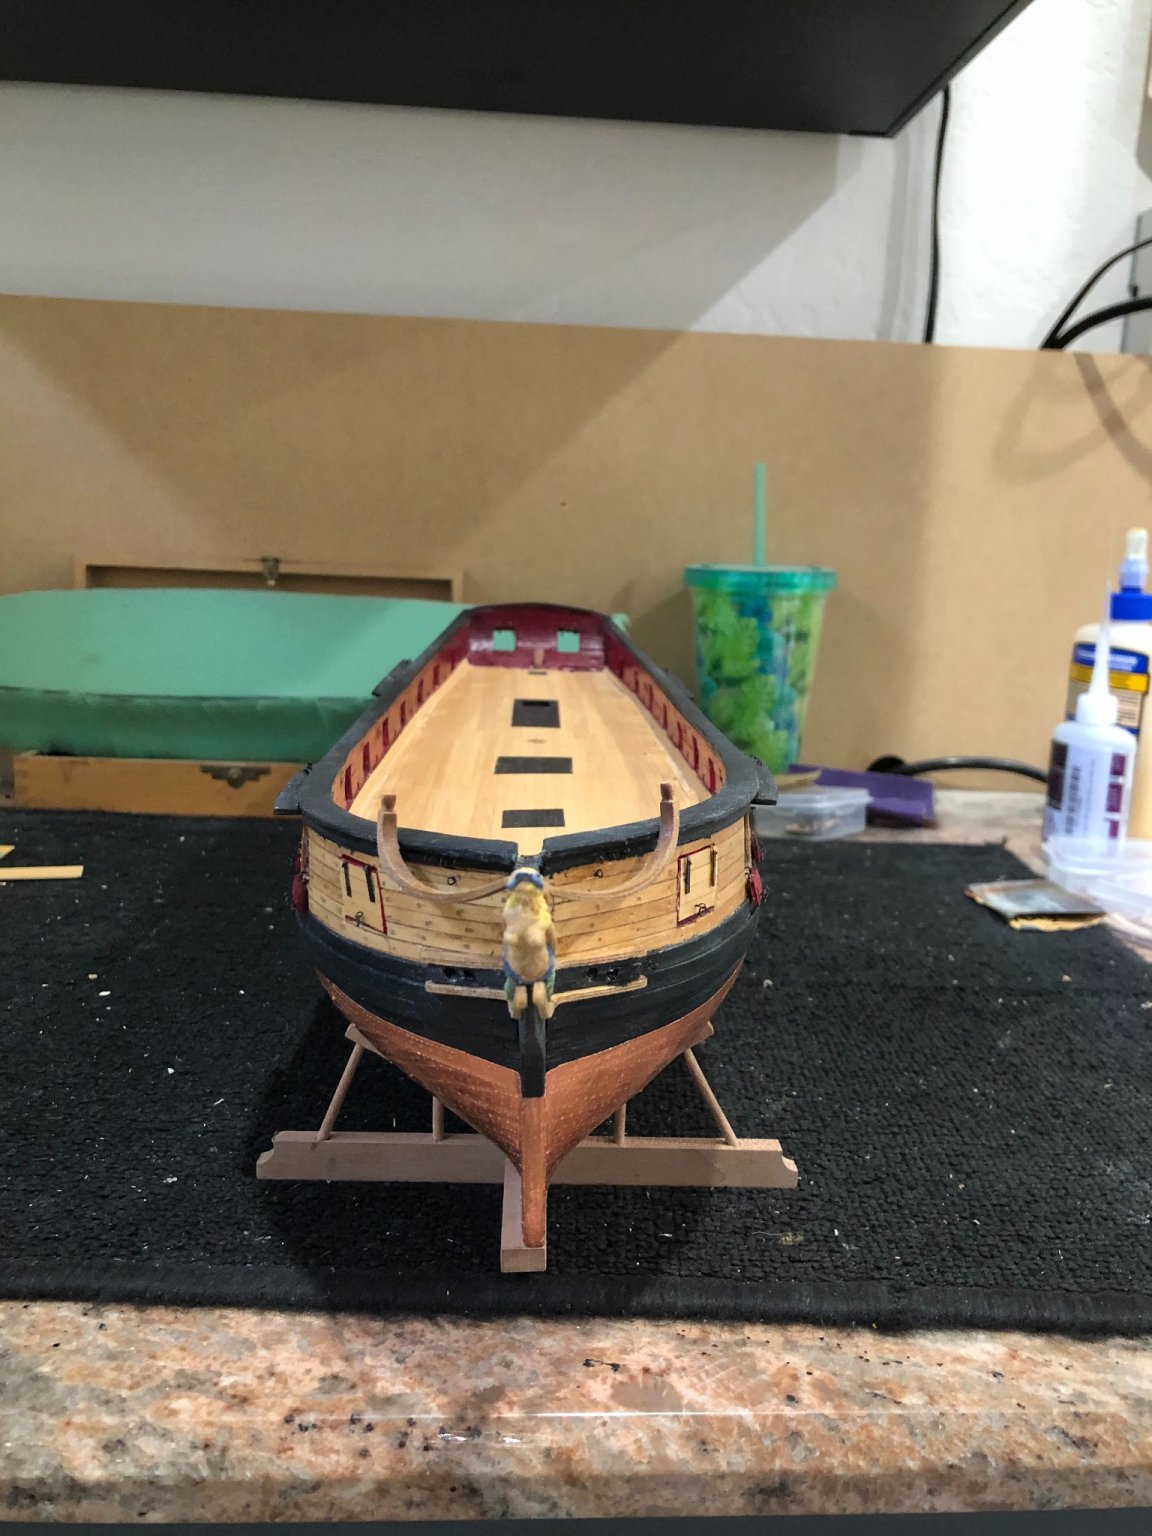
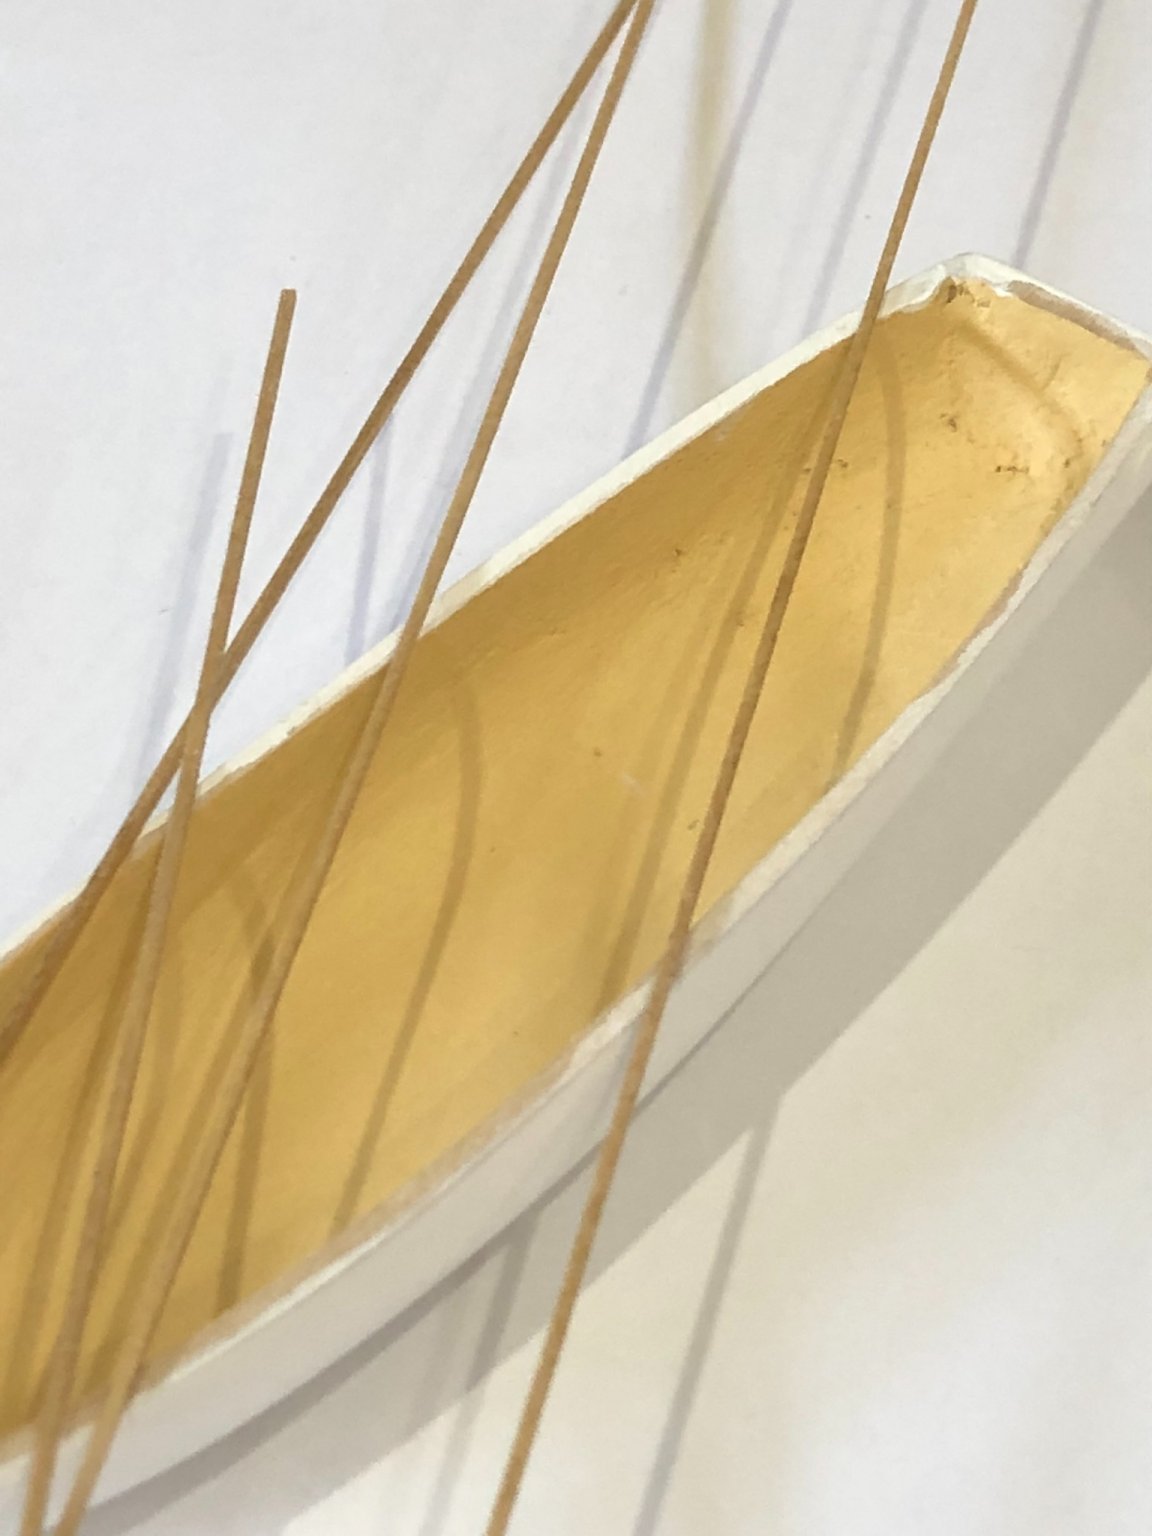
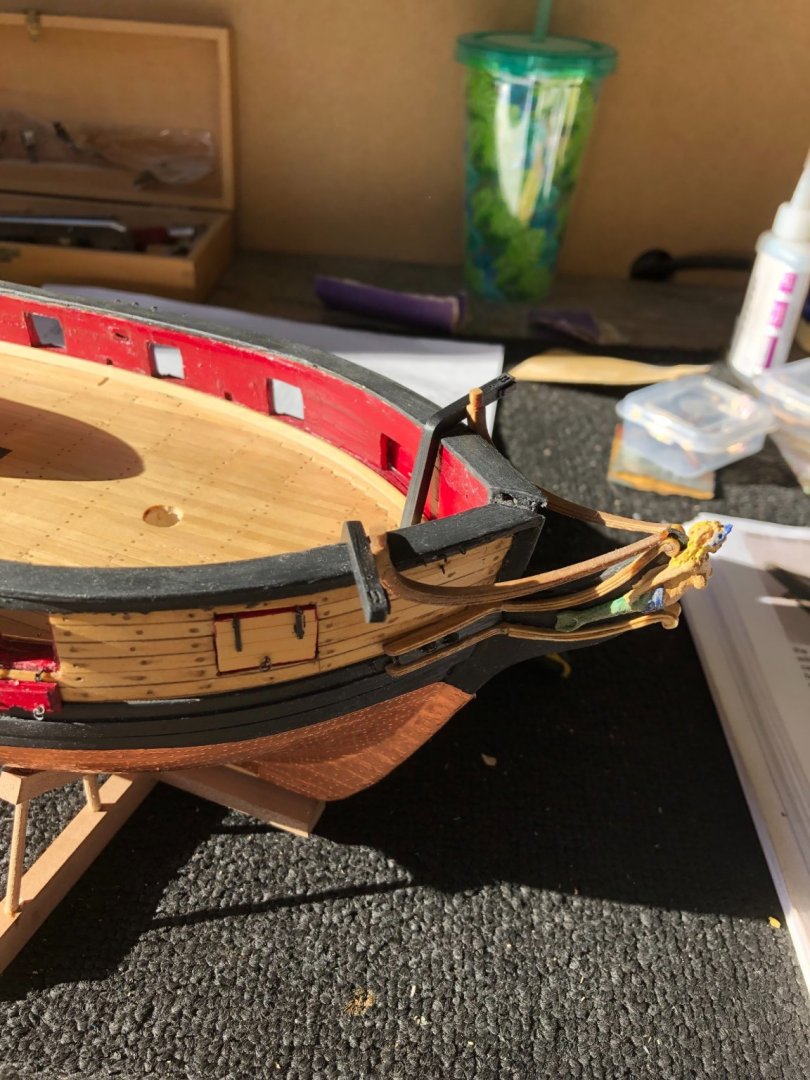
 Finished chapter 10 and started chapter 11 today. I used a toothpicks to make the bumpkins working very well and took the golden oak stain perfectly. For the bumpkin support irons I used a piece of connecting brass from the photo etched pieces using the toothpick as a mandrel I bent them to shape and glued them on the upper rail. Chapter 11 started with removing the sled brackets and getting them ready to paint. I painted the brackets and will start assembling them tomorrow. In spare or rest time I work on the longboat getting the grates made and the rear thwart made ready to add the balance of thwarts. I also started making belaying pins out of toothpicks using Thomas Gahms method using a Proxxon lathe too turn them with files and sanding sticks. Need 100 of the buggers but 10 or so a day and we will be ready. Longboat as of today Thats it for progress Stay well and Stay safe Will


-
Tiller looks fantastic. I'm still admiring the wheel though as Thomas said star of the deck so far. It might be pushed from stardom when you rig the steering lines to the tiller. Will
- 950 replies
-
- 1
-

-
- syren
- model shipways
- (and 1 more)
-
Thanks Thomas I'll give it a go this afternoon. Stay well and stay safe Will
-
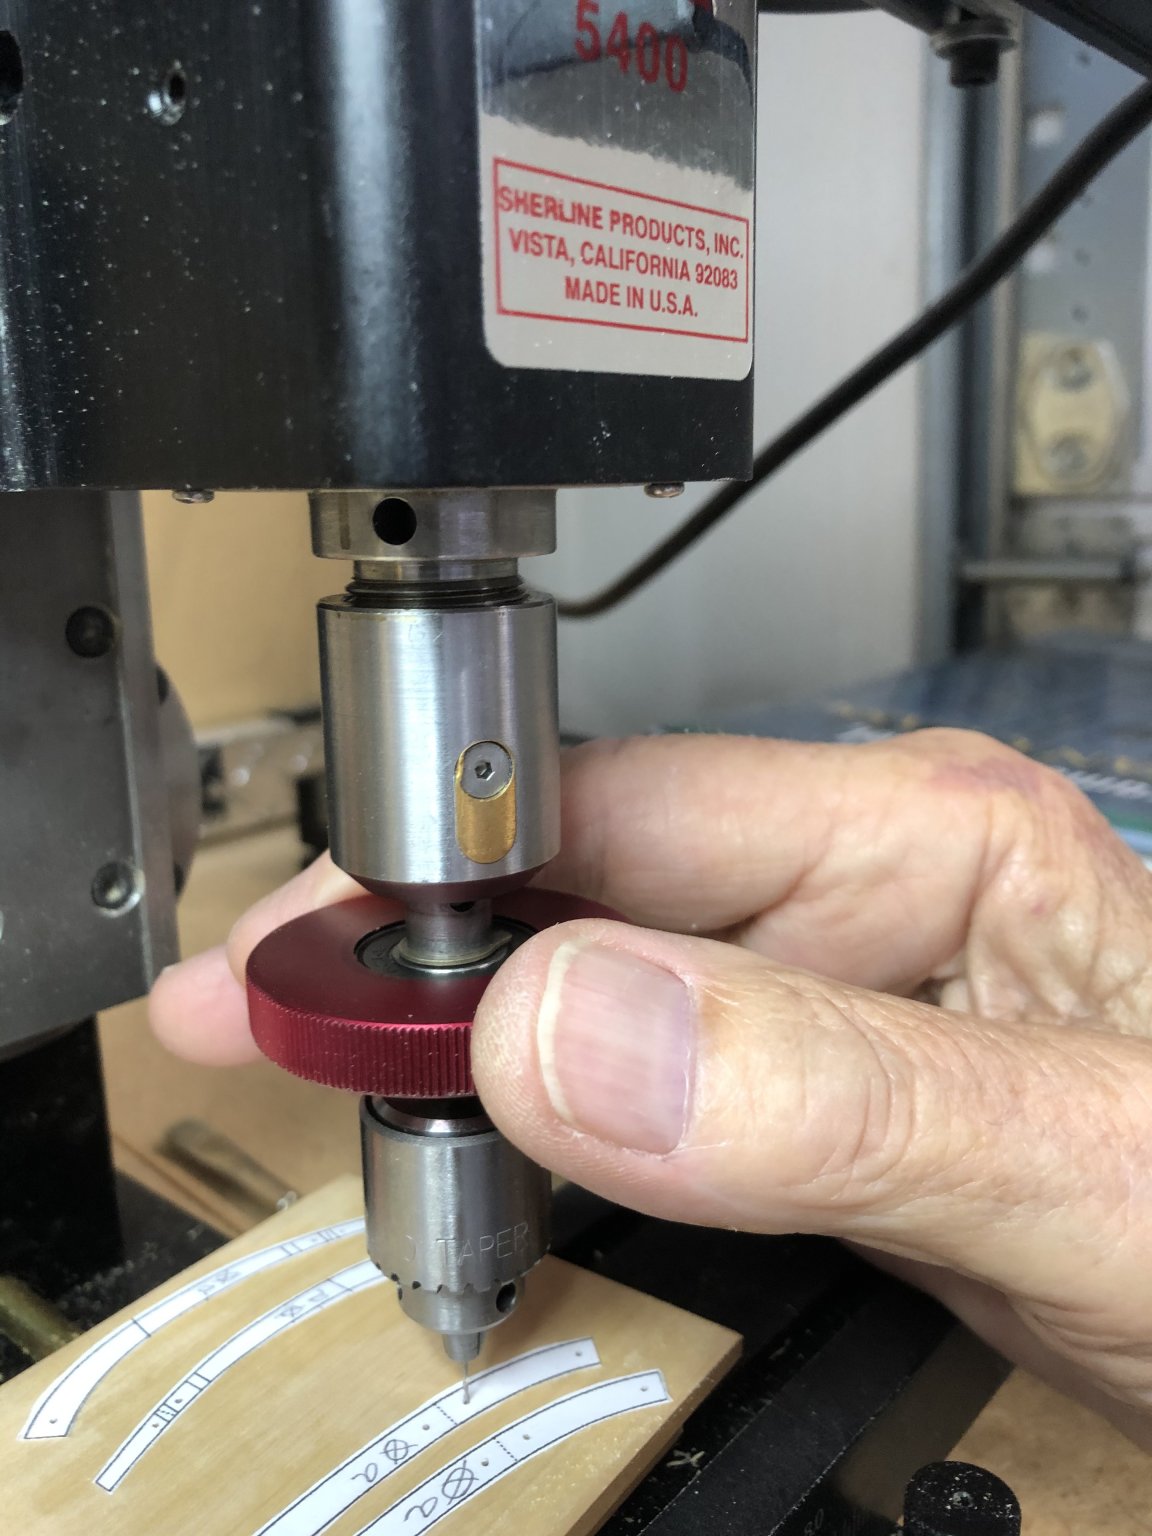
Thomas I'm with everyone on you work. Reading Patricks comment I decided to go the loo before reading your log. Awesome. Back too belaying pins and the lathe. Looking at the photos leaves me wondering how you repeated the pattern. Do you use a pattern follower or some other method? I'd love to make my pins but just don't know how I'd repeat the pattern for the necessary uniformity. Stay well and Stay safe Will
-
Been awhile since I checked up on your progress, boy a lot has happened. Its looking really good. I like you method of making the breech lines droop as they would been so heavy. Great Job Just a note about laser cut parts. The kit parts were cut from one side so the result is the hot side will be burnt more than the cool side meaning the line sides are angled. Your Passaro parts don't exhibit this because Chuck tunes the laser better and cuts from both sides is what I've been told. Stay well and stay safe Will
- 950 replies
-
- 1
-
-
- syren
- model shipways
- (and 1 more)
-
Patrick you are a poet for sure. She's looking really nice I like the bare wood look to see the construction time and patience you put into your building. Im retired so keep in mind that during these times of pandemic you still have chums to talk to at work. I go into the shipyard and only come out to have lunch with the wife. So being slow is a benefit when I see the wonderful work you're doing. Will
-
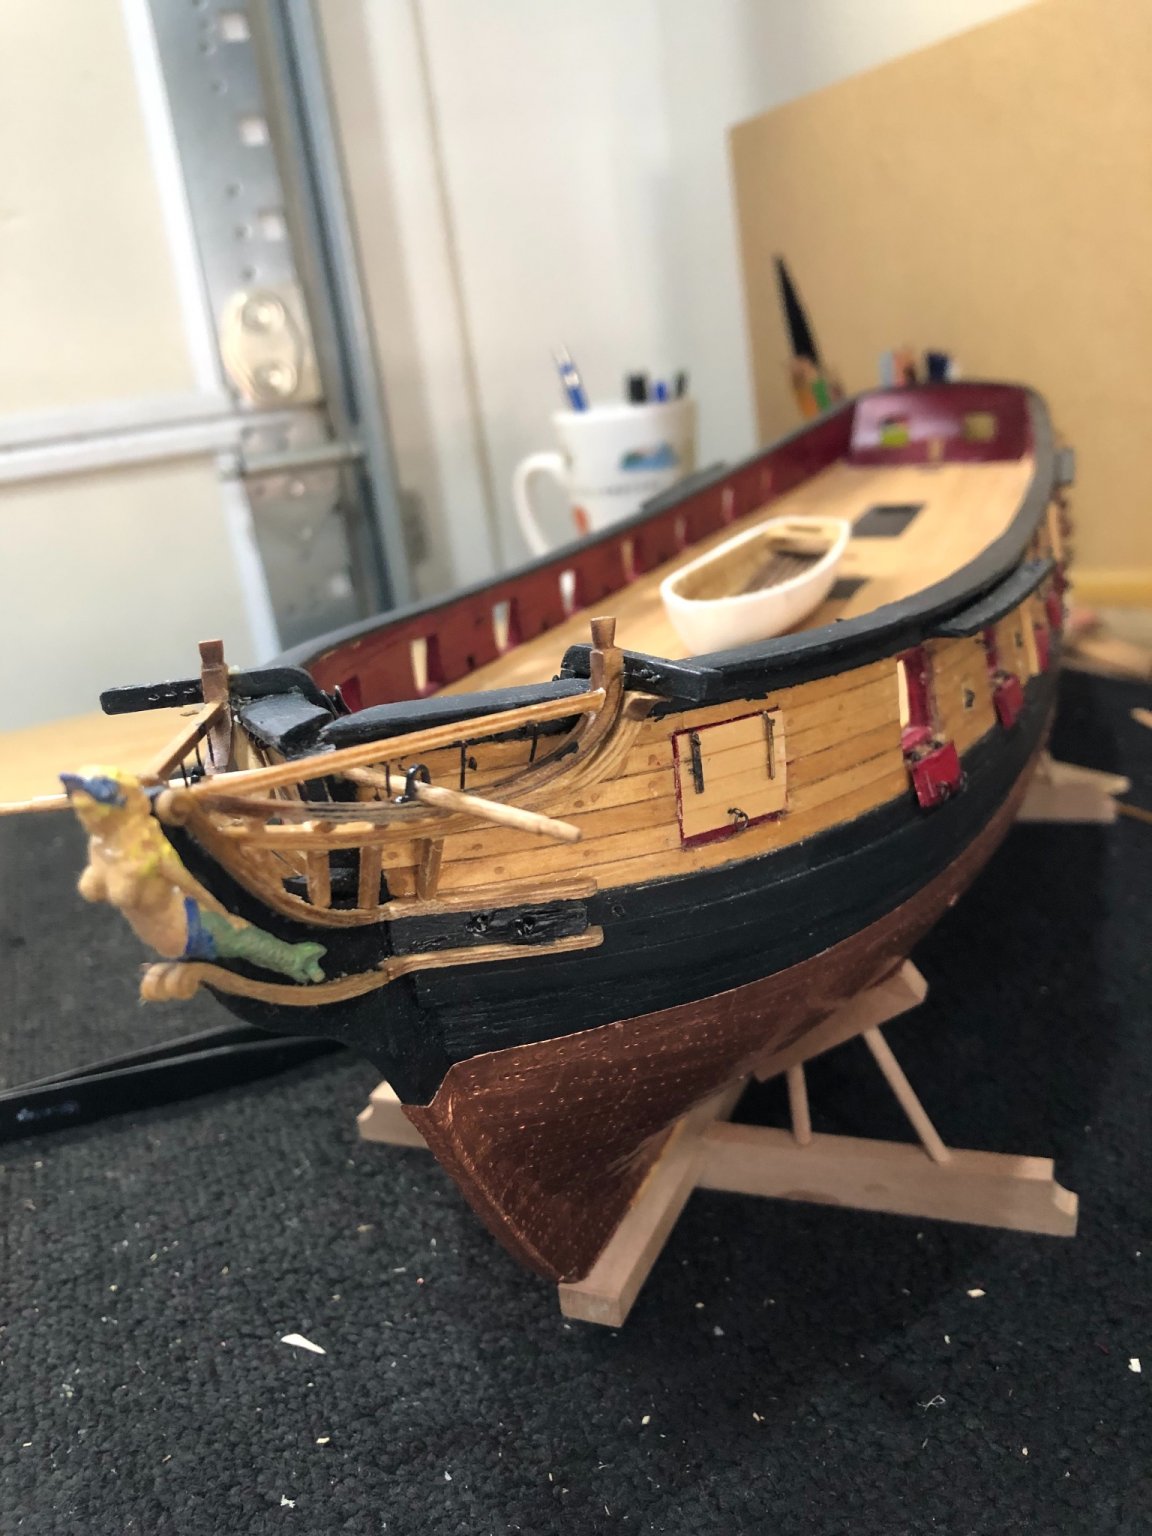
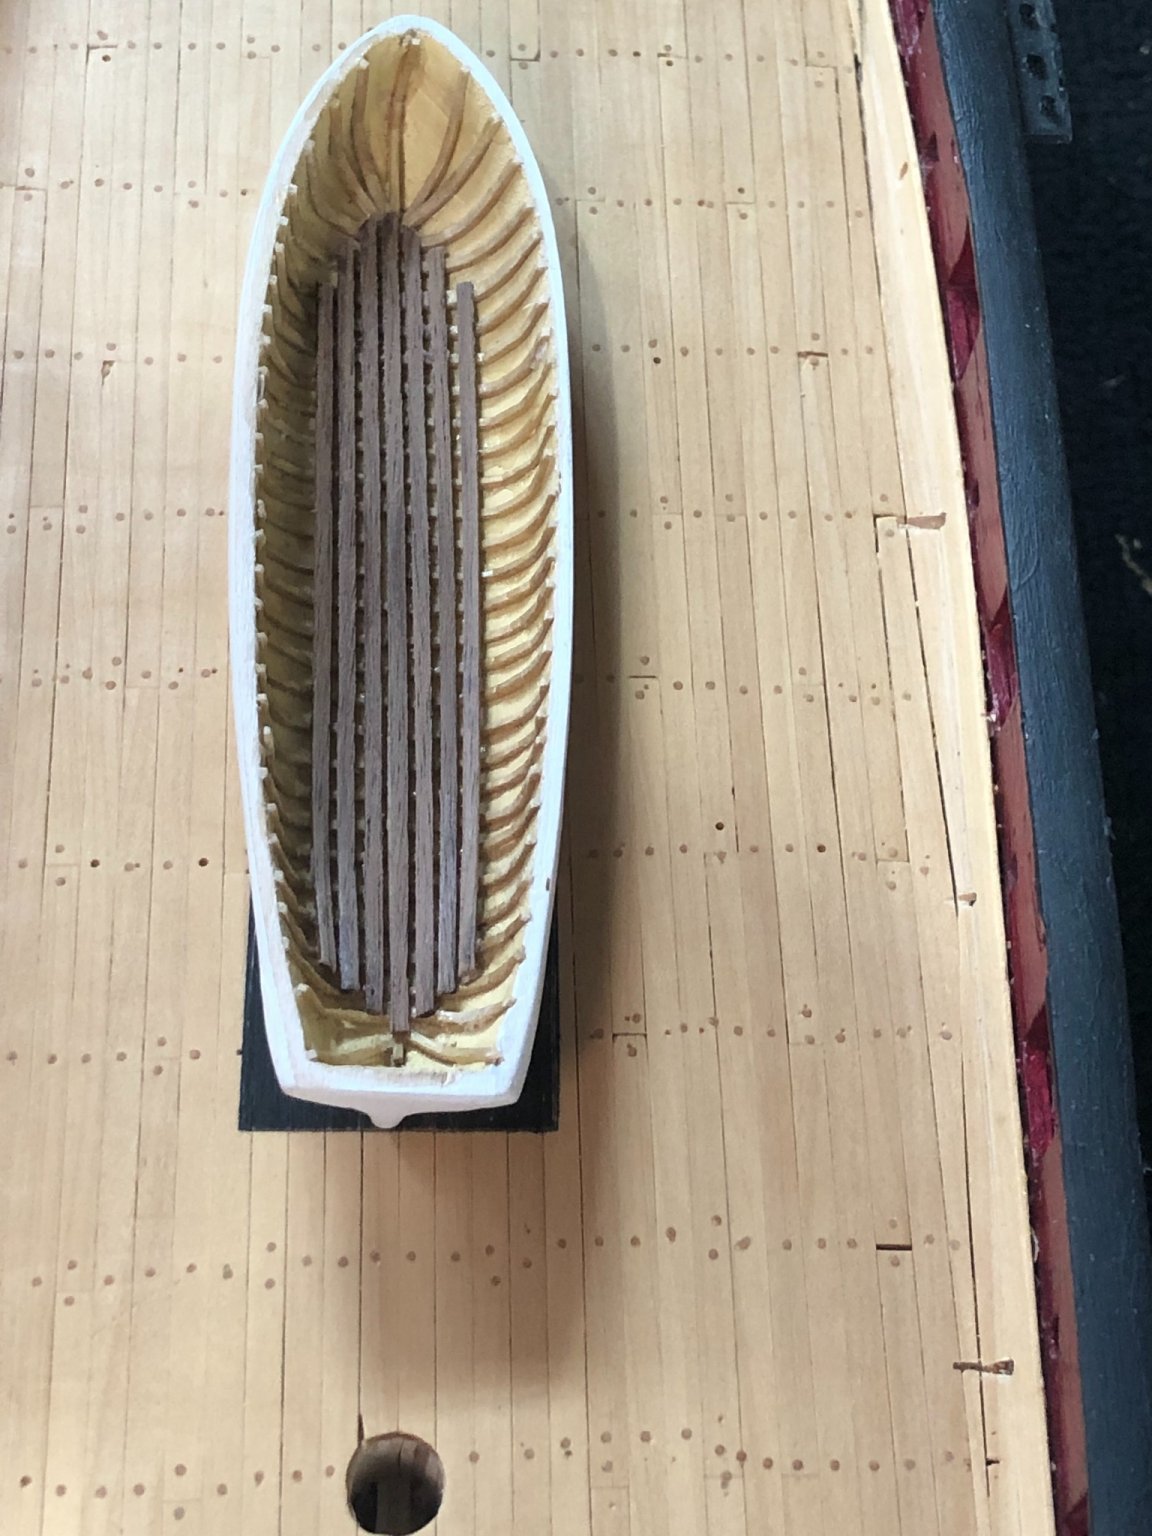
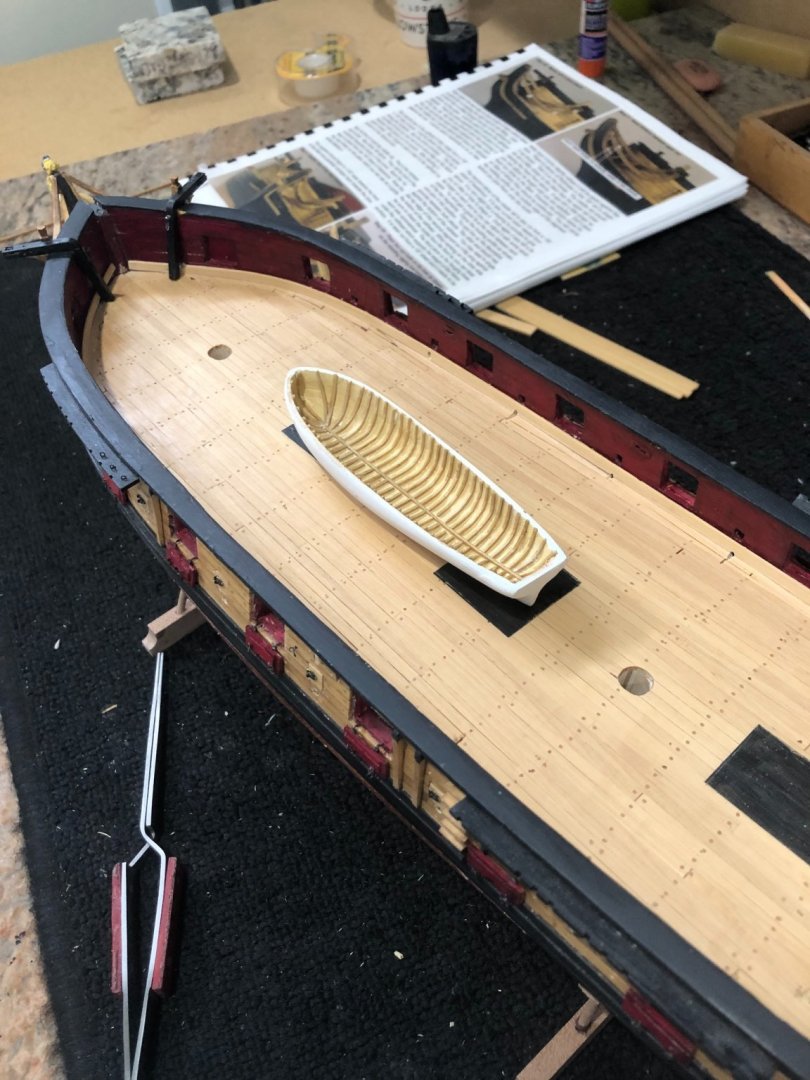
Quick update I got the uprights on the are between the cheeks and middle rail and middle rail and top rail on the port side. Long day of fiddle work. In-between drying time I put the walnut floorboards on the longboat. Next is the gratings and twart support. It feels good to see fast progress when working on the small size of the longboat. The unfinished dark walnut gives an aged weathered look to the floorboards More soon Stay Well and Stay Safe Will

-
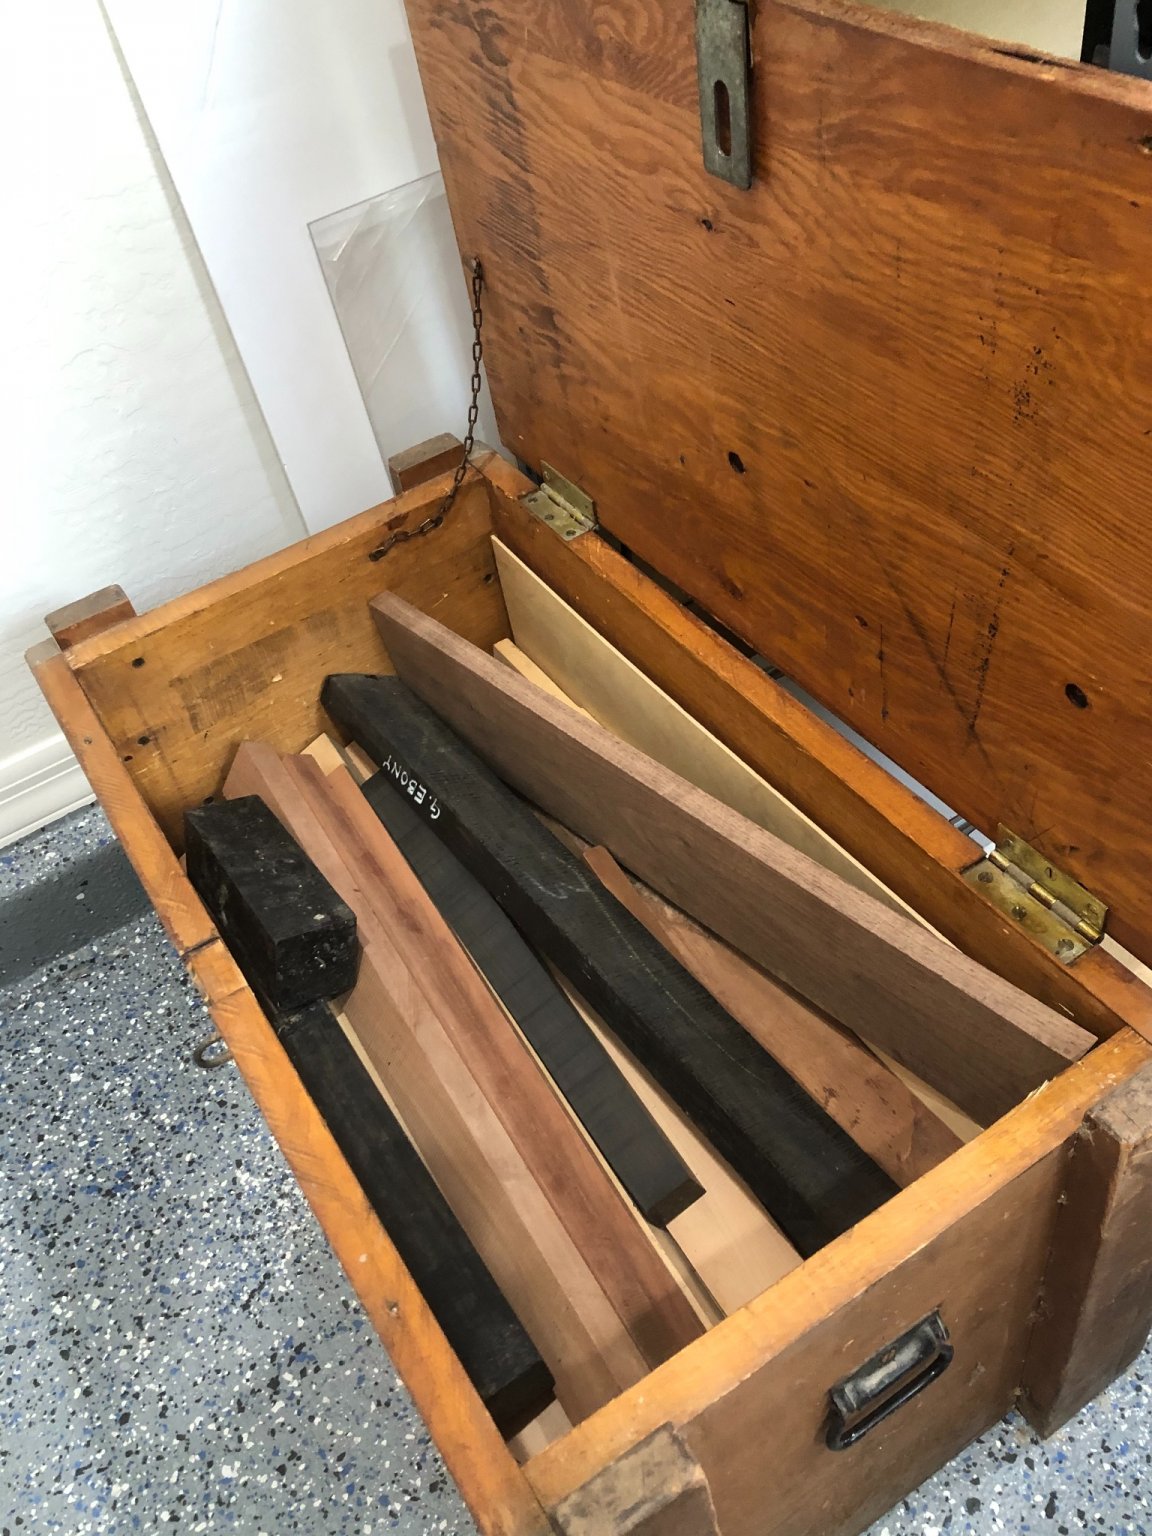
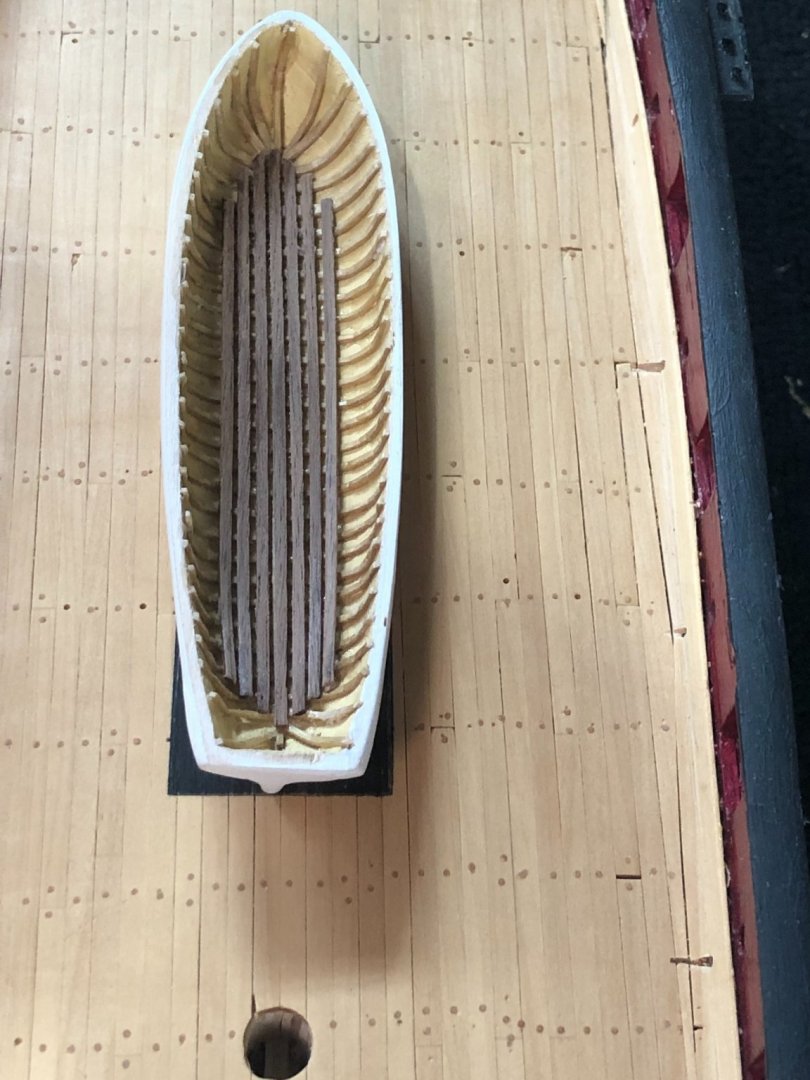
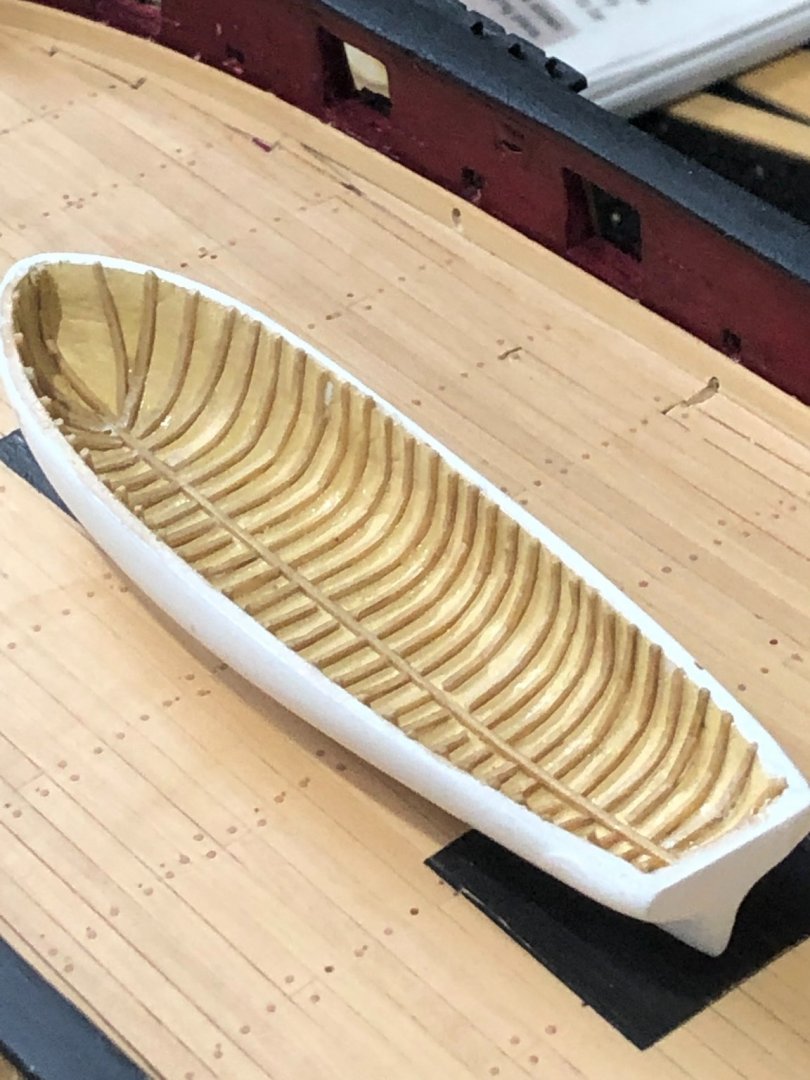
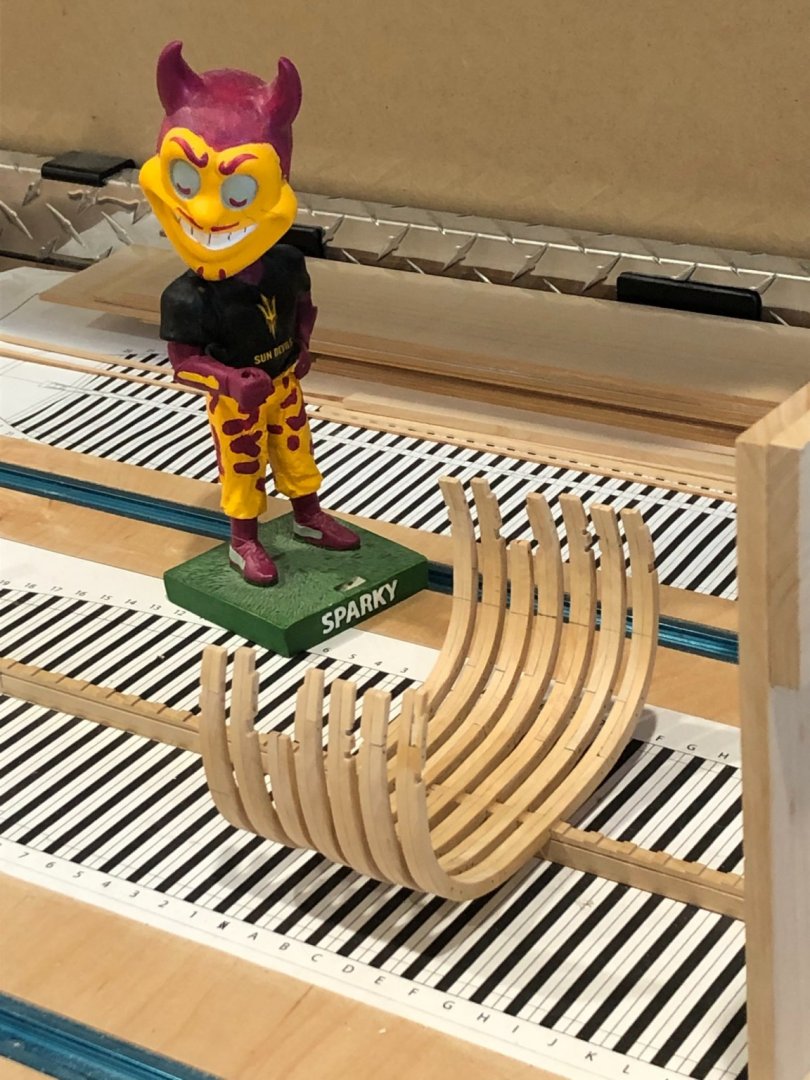
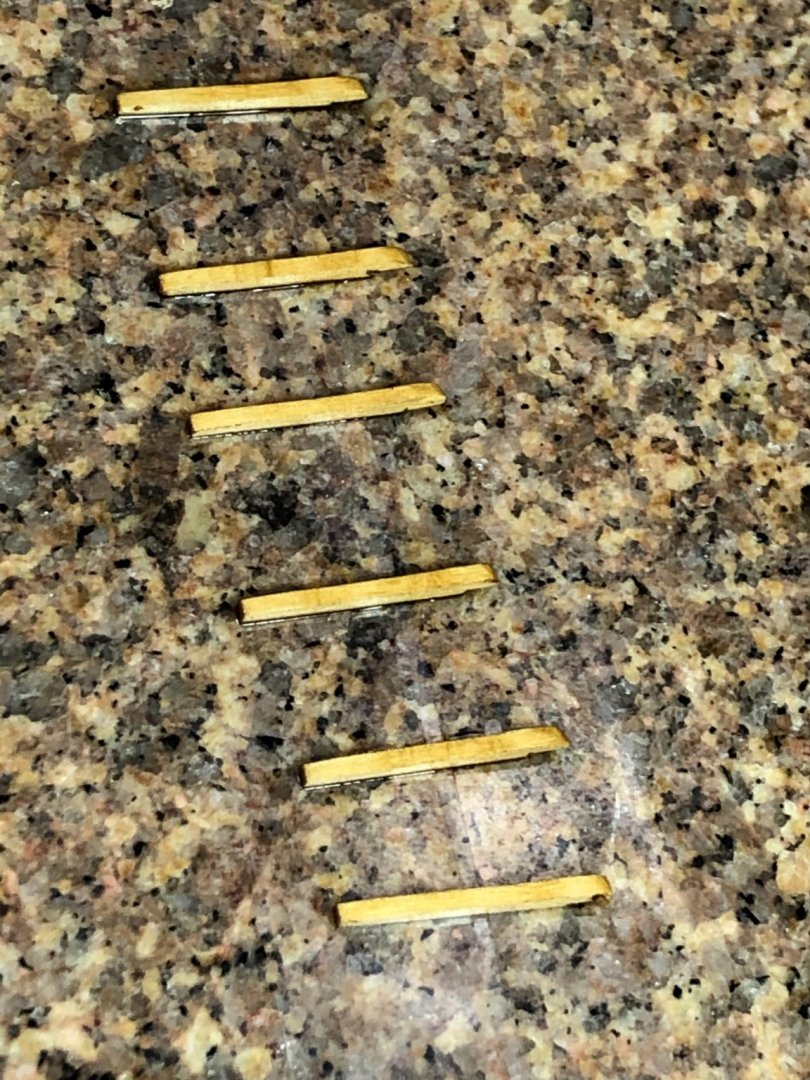
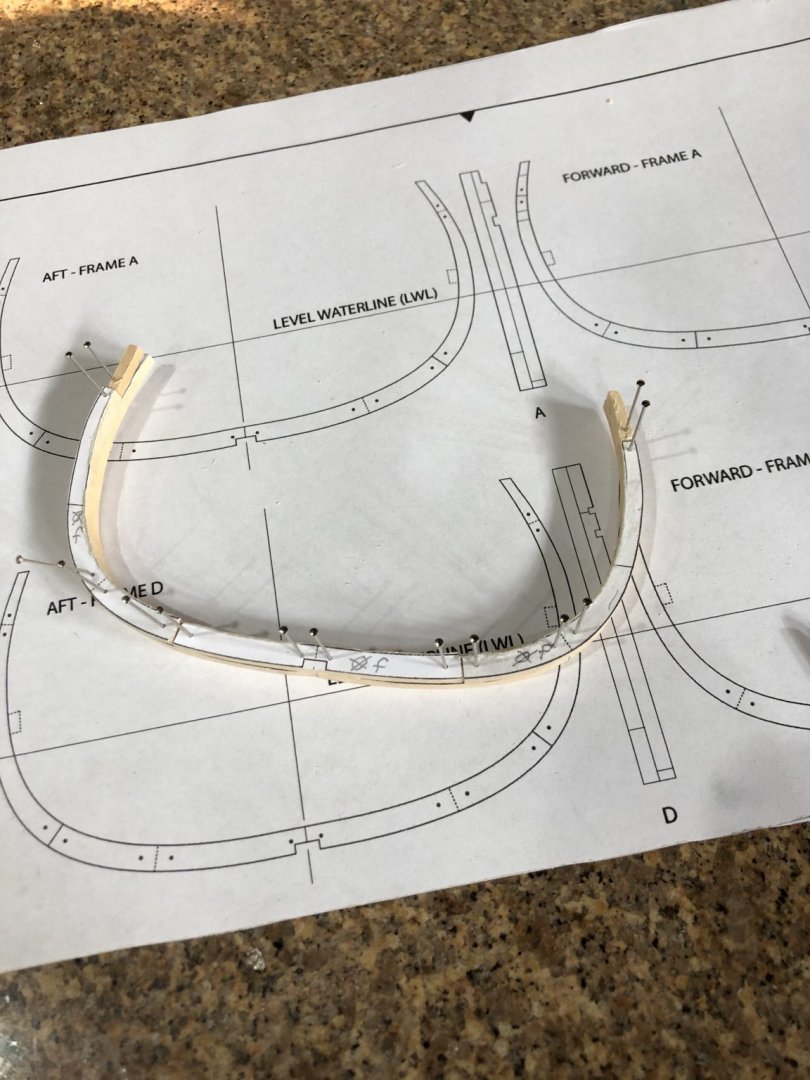
Been awhile since last post but I've been busily working on the middle rails and have finally put them on the ship. I'm not really happy with how they've come out, but for now I'm leaving them on the model. I first tried to you the laser cut basswood but had the same results as before when trying to carve the details. The basswood is very soft and picky that if I pushed just a little to hard the wood fuzzed up and didn't look like a clean cut especially after staining. Next I made a set from the yellow cedar using the cutout image left from the laser. These came out better but were to small/thin after tracing the cutout and cutting the part from the wood sheet. The last set are made from cedar but without a pattern I just carved them using the plans as a guide. The shape is good but still not sure about the curves but we will see as I keep looking at them. This is the last version I had a lot of time to work on other things while trying to make the middle rail so I went back the longboat that I had made the hull shape. I ripped some 1/32 by 1/32 strips from cedar, stained them a dark oak to give contrast from the tan paint inside the longboat. Putting those frames inside was a long slow process. soak one, fit one, glue one, wait till dry, cut top off, soak one, fit one etc. Finished the frames and started the floor boards. Awhile back I met an old scratch modeler who was selling his equipment. I bought his Sherline long bed lathe and accessories while loading the lathe in the car he said I left a crate of wood at a common friends house has he told you about it. One day visiting our common friend the friend said he had the crate of wood left by Peter, did I want it. The wood was in a large wooden crate and it was beautifully full of all kinds of hard wood. (pau margin, swiss pear, walnut, mahogany, holly, ebony carbon, cherry and beech to name a few} So having this I decided I'd use the walnut for the floor boards since unfinished they will look like weathered wood. Now I just need to figure where I can use this gift. Thats it for now onto the uprights and top rail. Stay Well and Stay Safe Will

-
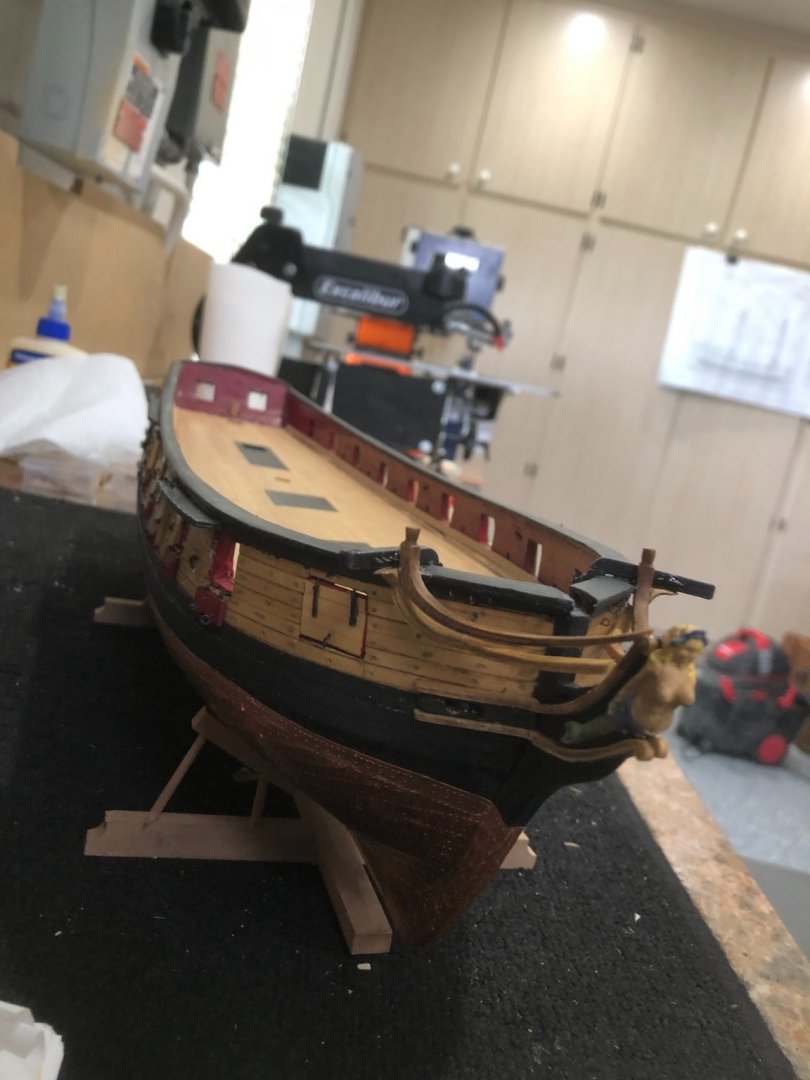
Catheads made and fitted to bulwarks with the appropriate reliefs in the top rail and sheer now just need to add eye bolts, cleat and finish painting. Making the the cathead stopper cable sheave was challenging milling a piece of wood to 1/64" and then cutting, glueing and sanding. The actual sheave was made using a circle template and a very sharp 6H lead repeatedly drawing a 1/16" circle until it came free. Not sure of the value of this since you can't see it once it mounted. Spent about an hour cleaning up the cleat castings of flash and shape. Now there ready to drill a small hole in the bottom for a 22awg copper wire to fit into a corresponding hole in the cathead. I have too many cleats etc come off during rigging so the pinning is what I do to prevent this. Tomorrow I'll drill the holes and mount the cleat. Looking at the picture I have more work to do on the right cleat. The camera shows everything. All done for today Stay Well and Safe Will


-
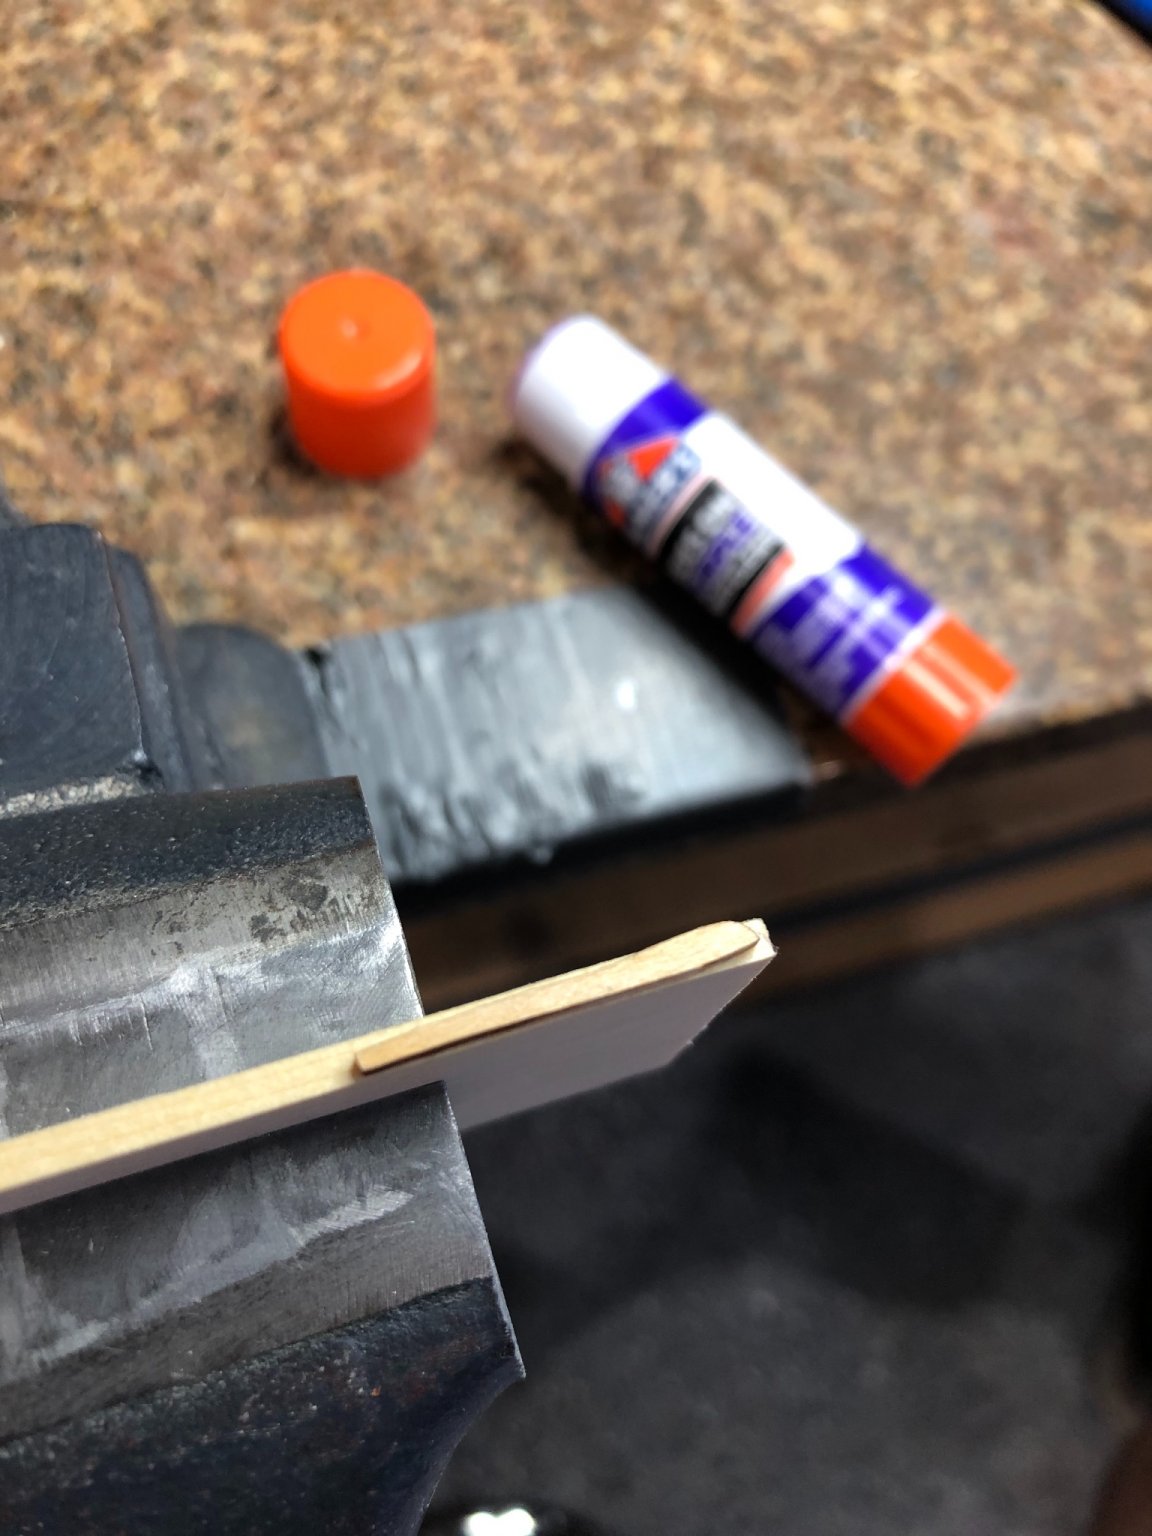
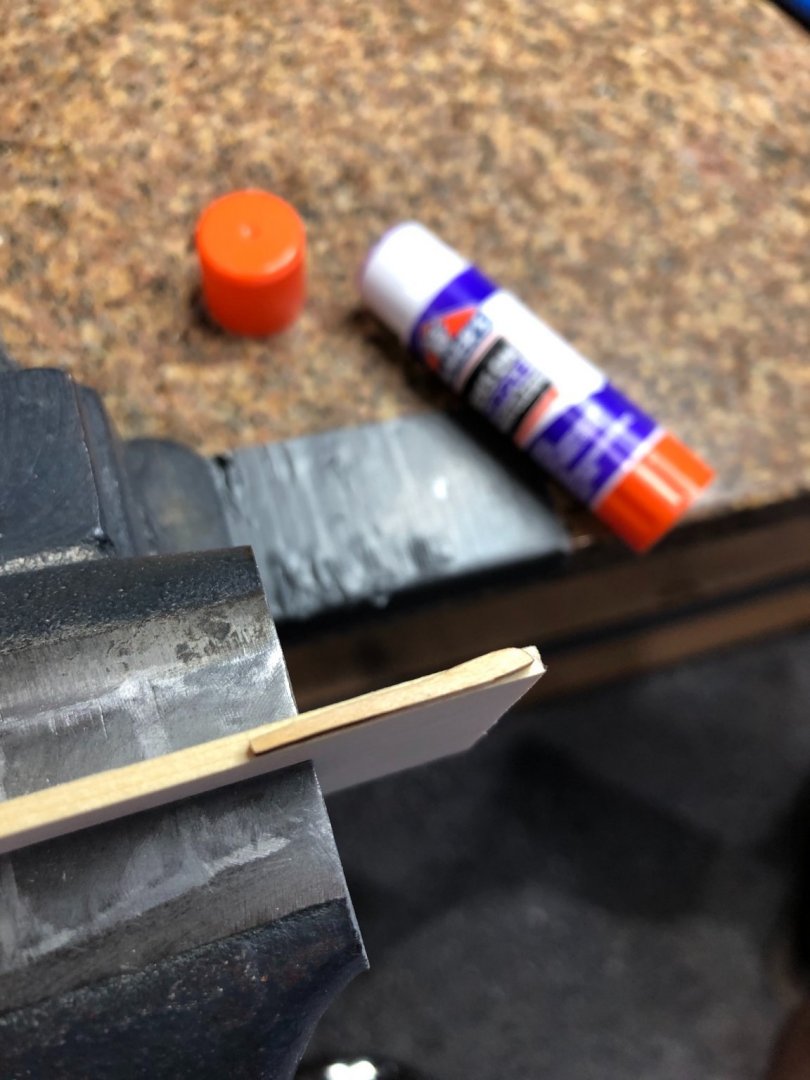
Thanks Patrick for the nice comments and thanks to everyone for the likes. Started the top rails by sanding off all the laser char (that was very deep) and smoothing all the surfaces. I found the best way to smooth the basswood was to use very fine sandpaper with a very light touch. Actually I used 600 grit wet-n-dry but only without water and it almost made a surface nicely prepared to carve the lines. Shaping the timberheads was a problem with the soft wood and I broke one off, thank goodness the kit gives you extras. That all done it was time to stain them. I used the prestain conditioner and then stained them with golden oak. Measuring the mounting position was somewhat problematic as I couldn't hold them and measure at the same time then I remembered the glue I use to glue the Washington frame patterns unto the wood to cut. I use elmers glue sticks as kids use in school. Elmers worked great and allowed me to measure and visually make sure that both side were symmetrical and the beauty is it is water soluble. I carved the line using the same tool used with the cheeks and whiskers. Next on the catheads and middle rail. Yippee Stay well and be safe Will

-
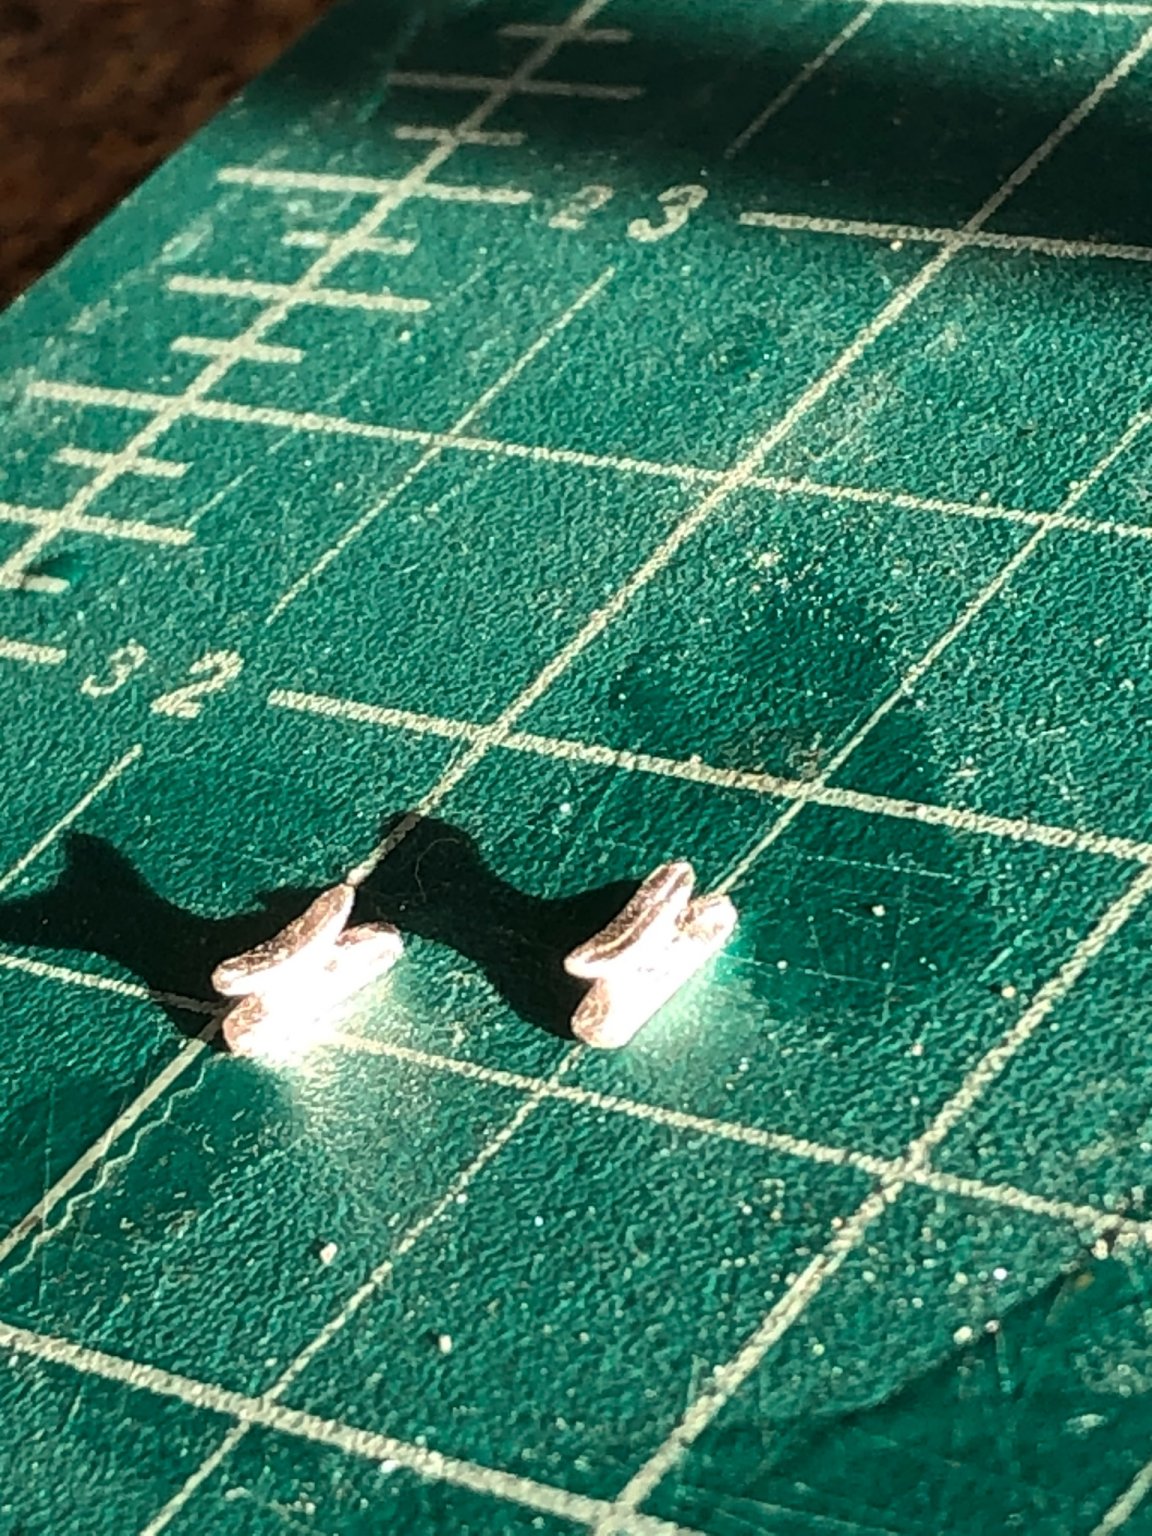
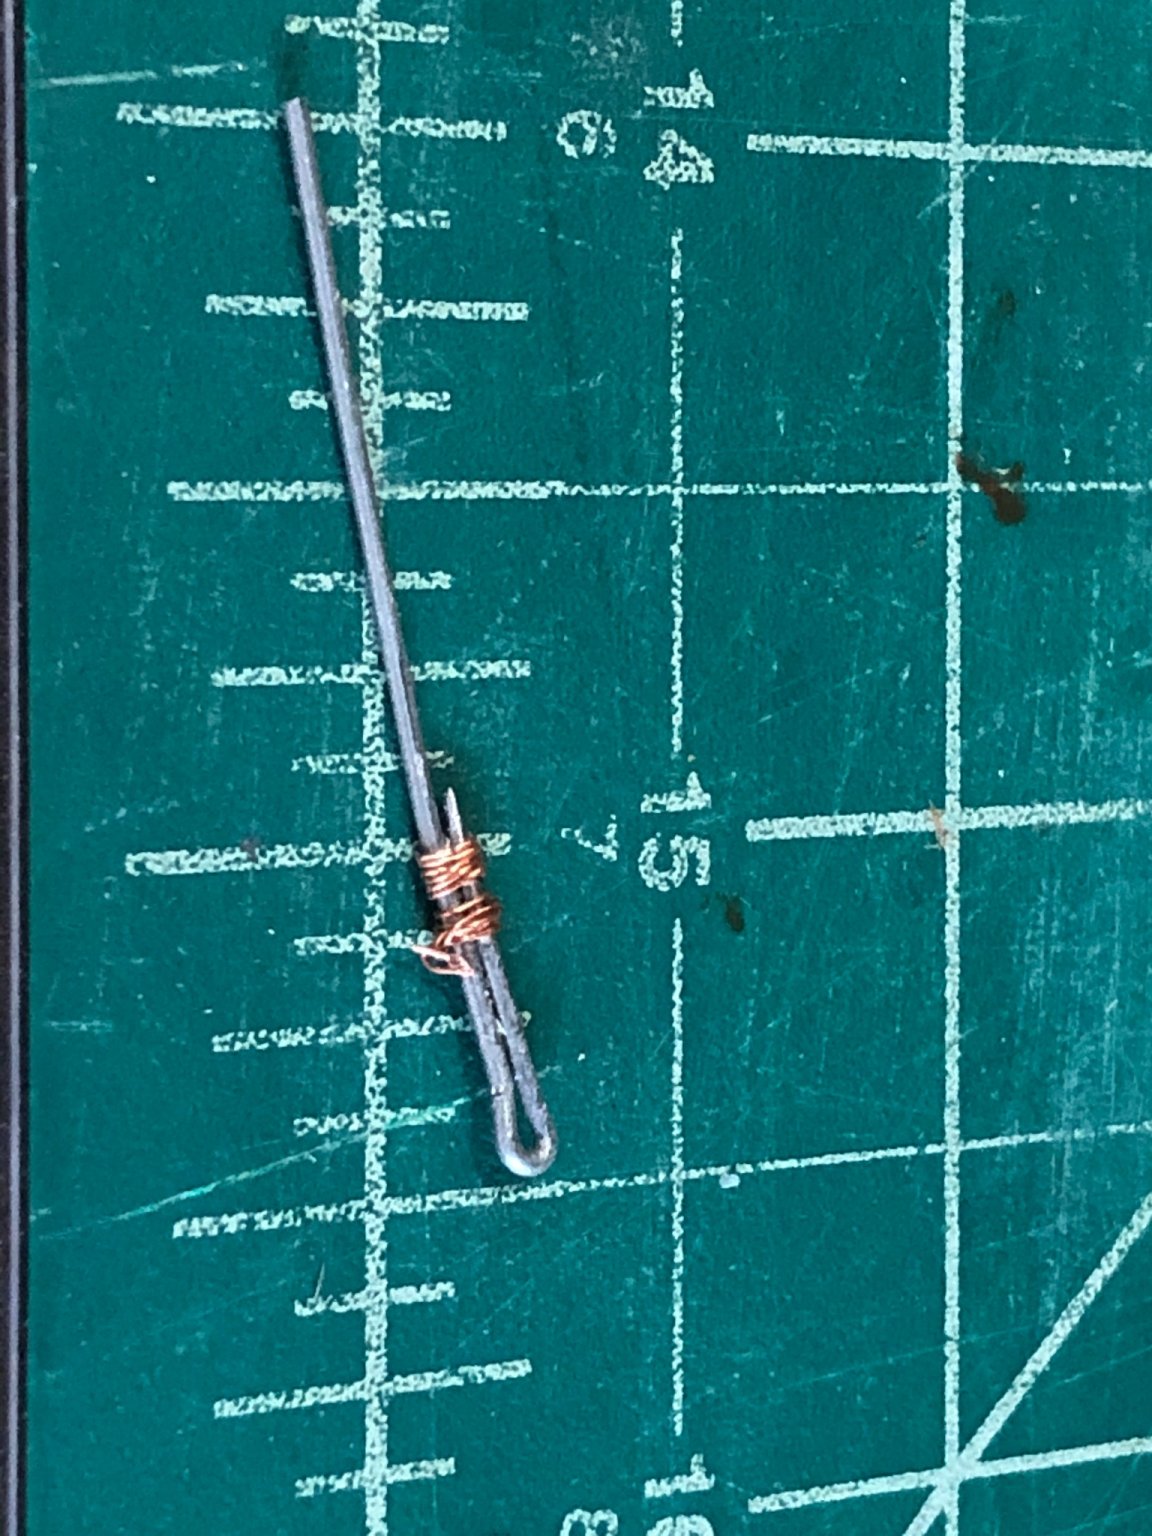
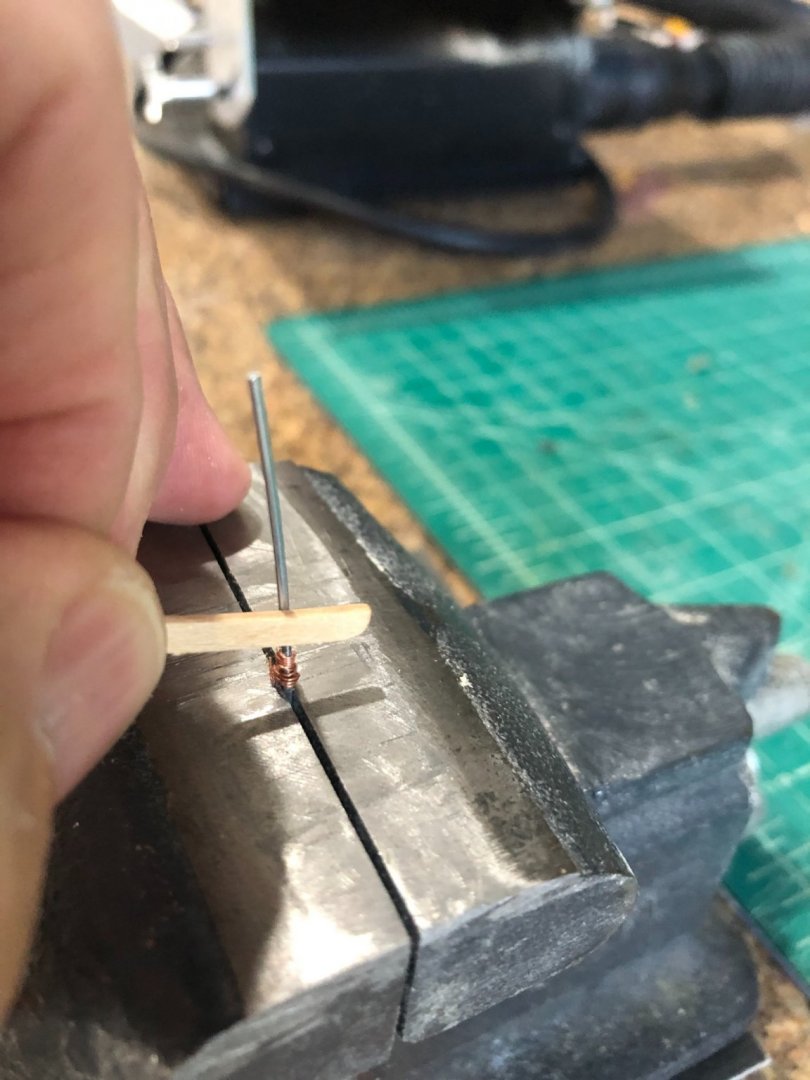
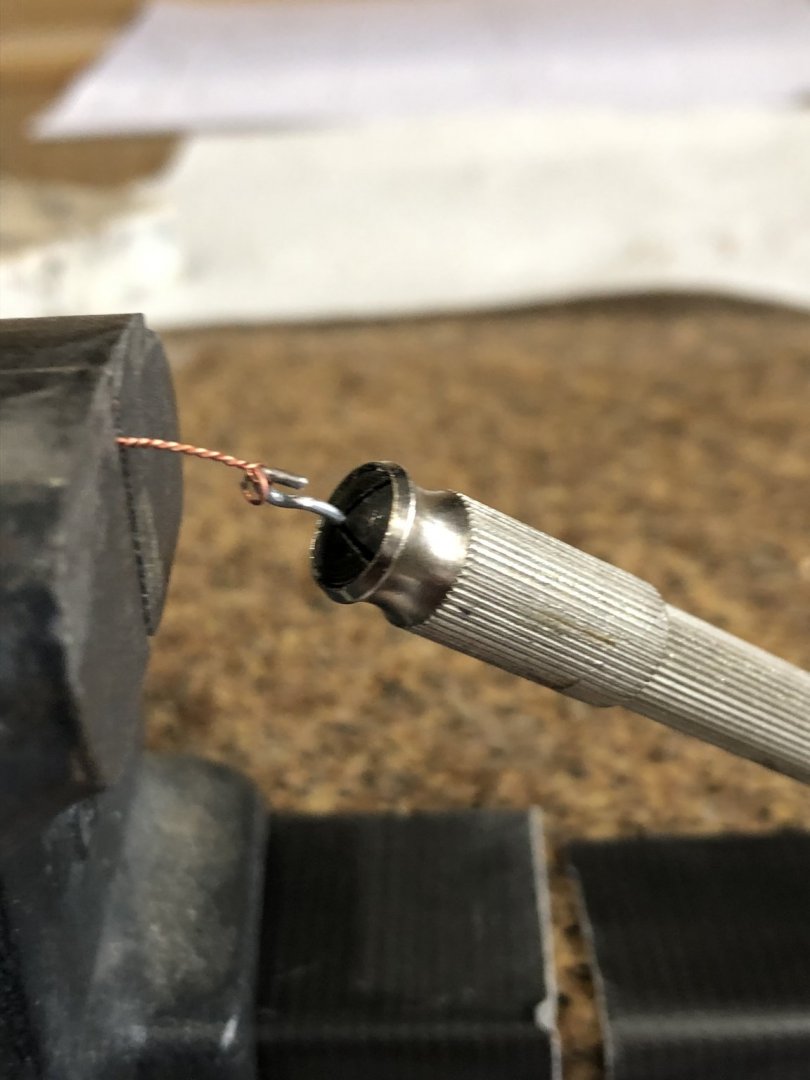
Started the dreaded chapter ten and it started as I feared, difficult. Snapped out the cheeks and whiskers and tried the carving method described in the instructions without any success. I made new cheeks, out of cedar, using the panel as a template. Tried Chucks carving method again with better results, not sure if its the cedar or I was getting better, but I still didn't like the look. I remembered from a log how they'd made a wire tool to carve small parts. I made a tool out of .031 diameter steel wire. The end of the wire was rounded and polished to the shape of a dull pencil point. I bent the wire in a "U" shape with on side longer to use as a guide. To keep the form while using the tool was wrapped with a thin copper wire keeping both sided aligned. s Securing the tool in a bench vise and then dragging the part across the point repeatedly with light pressure made very nice lines in the cheeks and whiskers. Reversing the process made a line parallel to the first giving a nice finish. The cedar was nice as it didn't fuzz up as the basswood did with the same tool. Parts made and stained were assembled without any drama. Now the hawse holes and the .031 plates. Next the top rail but before I do that I decided to put the ring bolts in place. Stay well and be safe Will


-
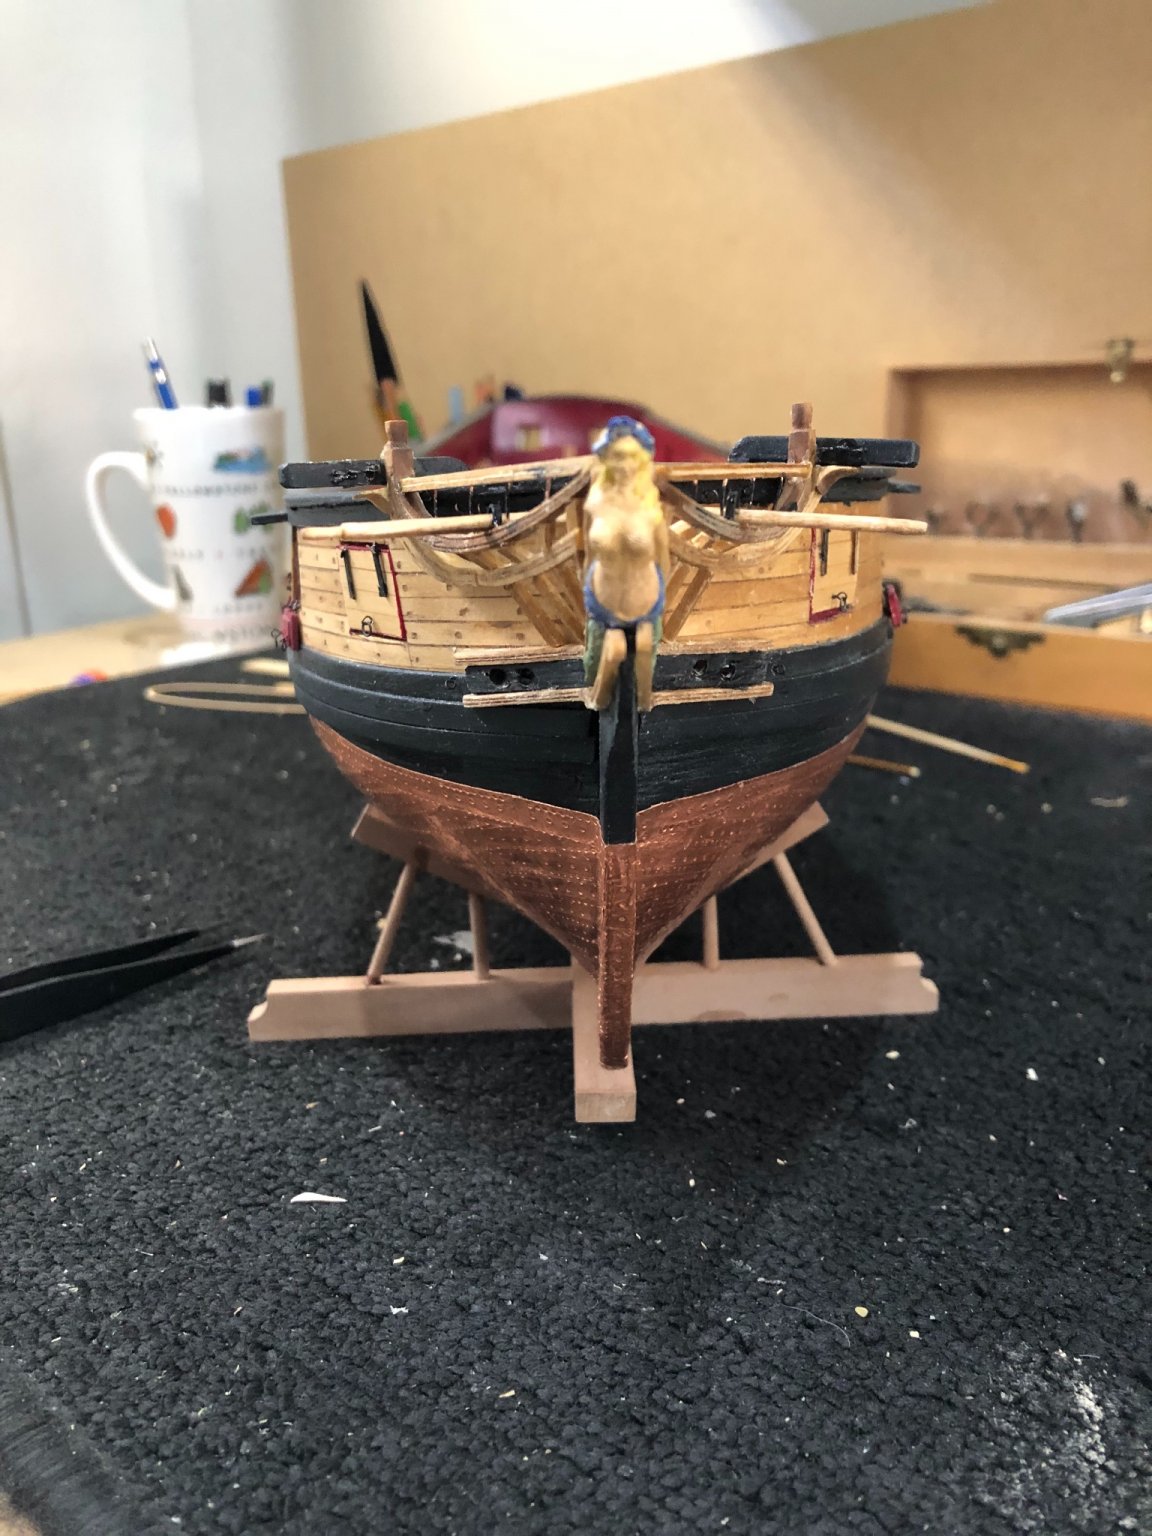
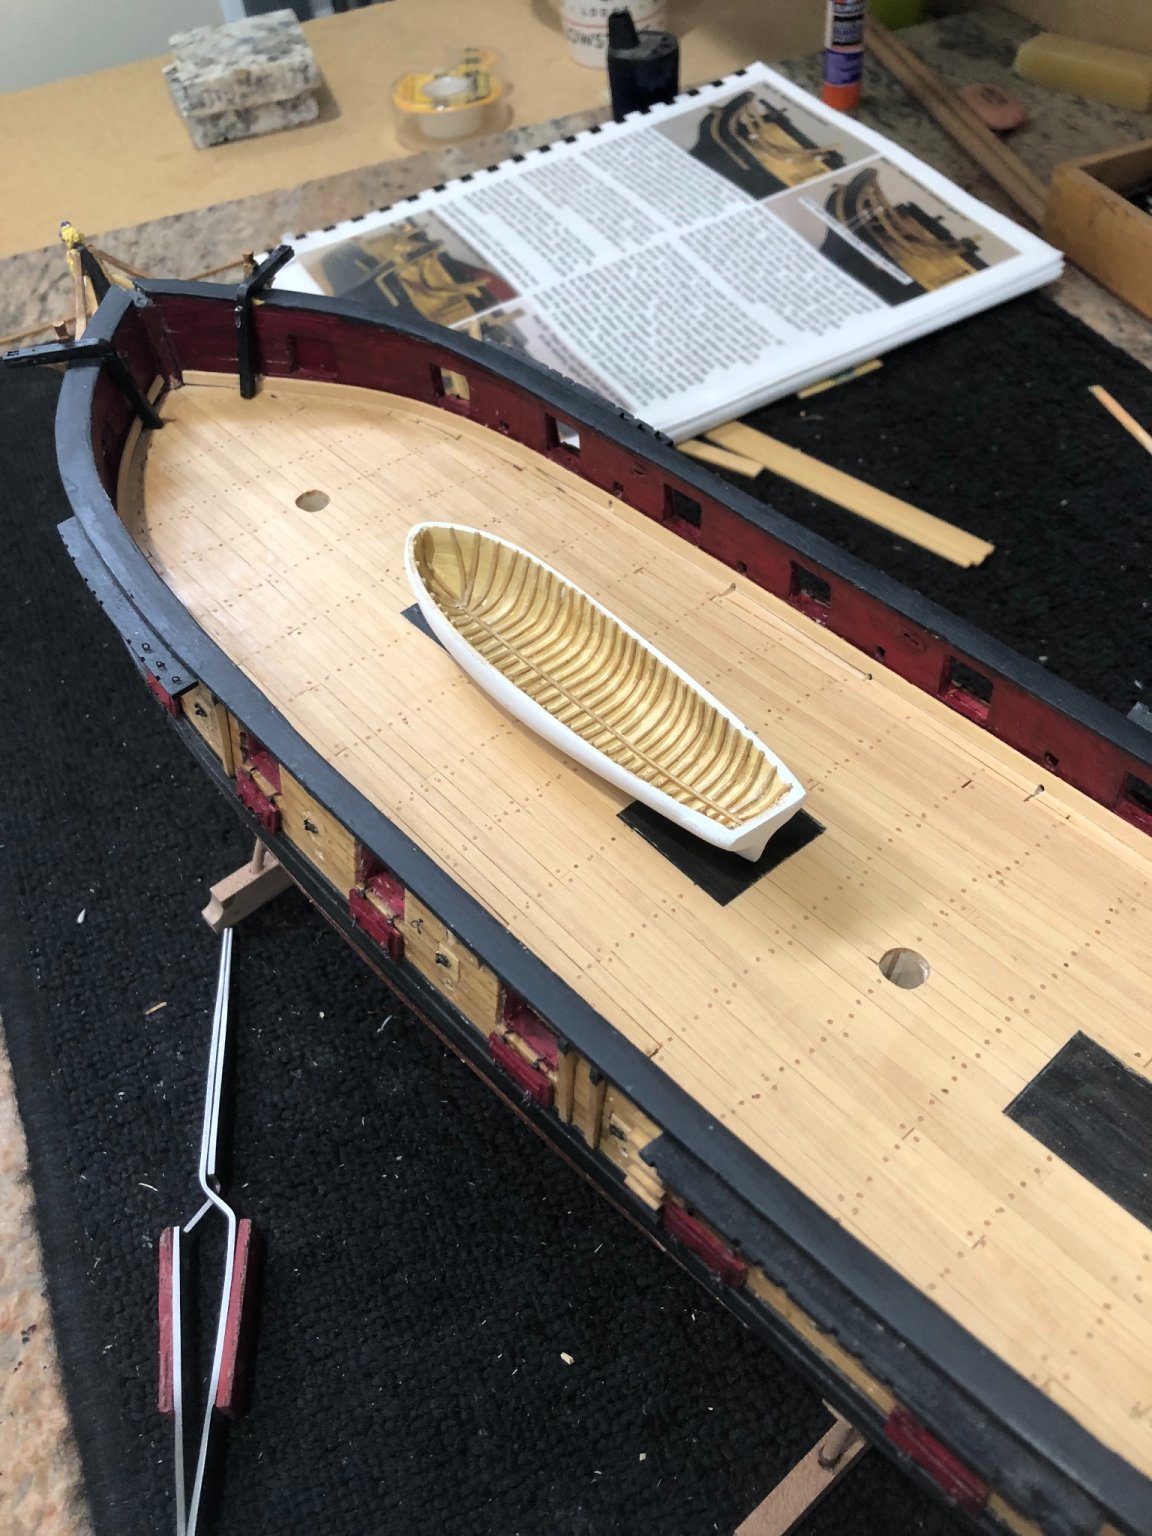
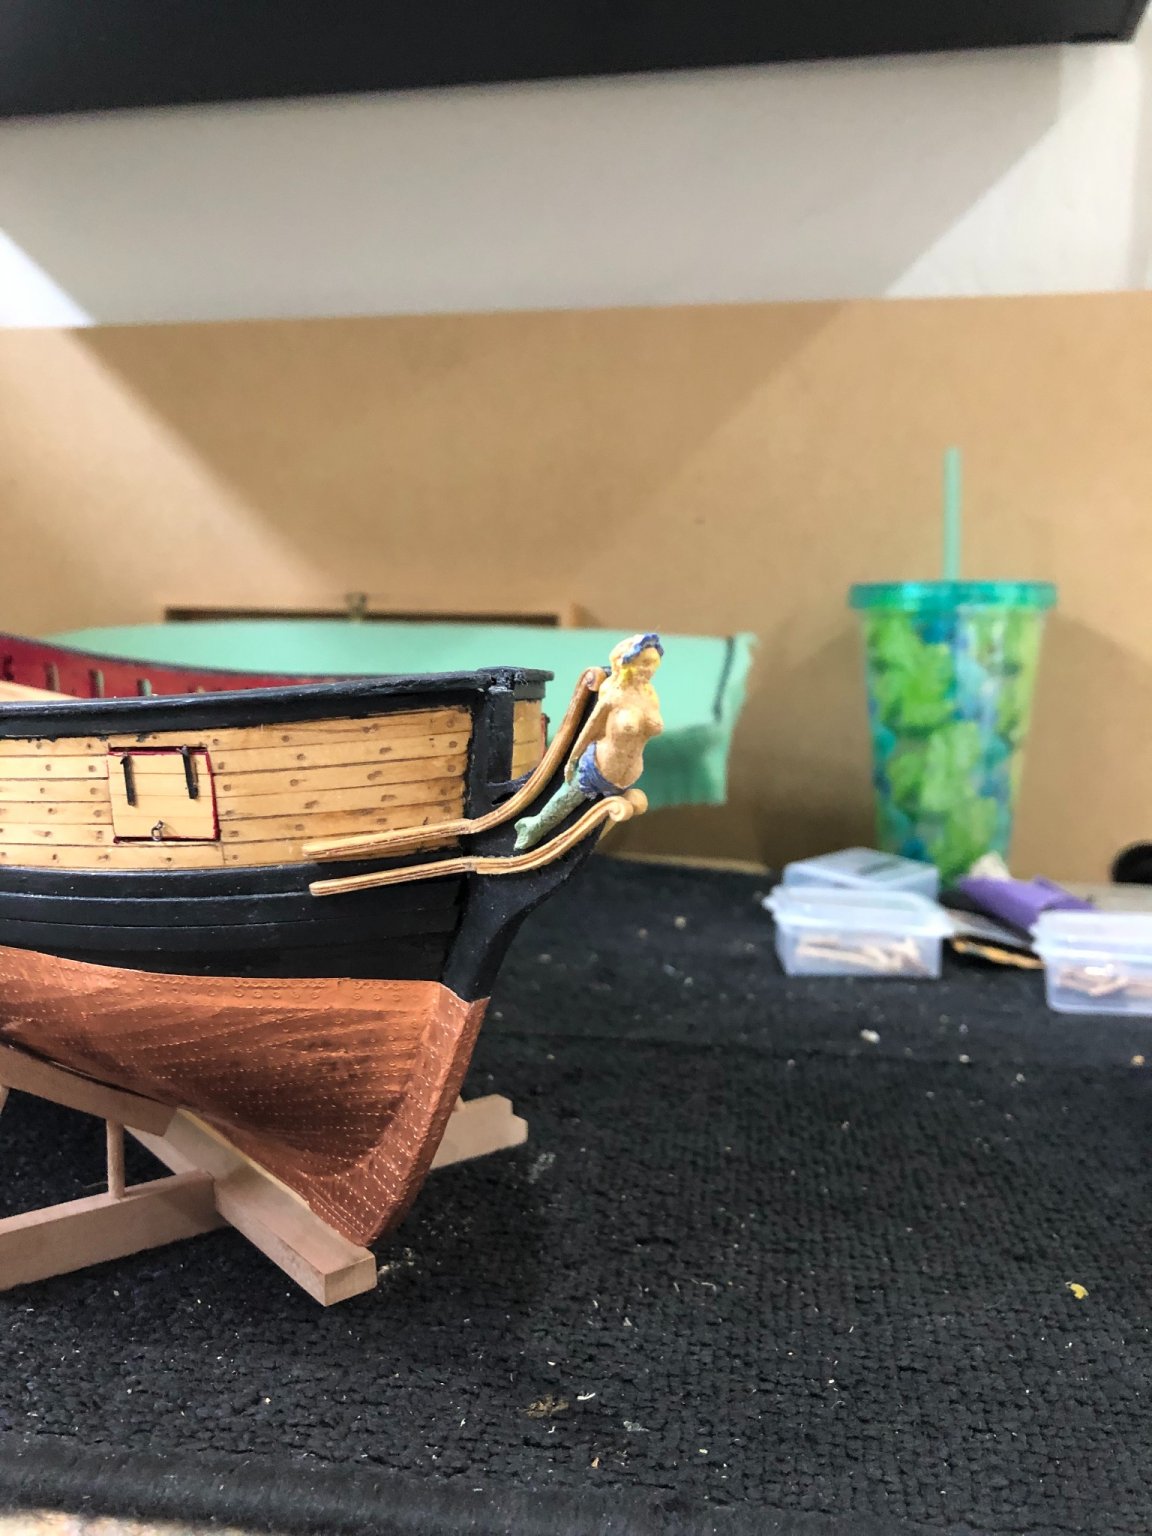
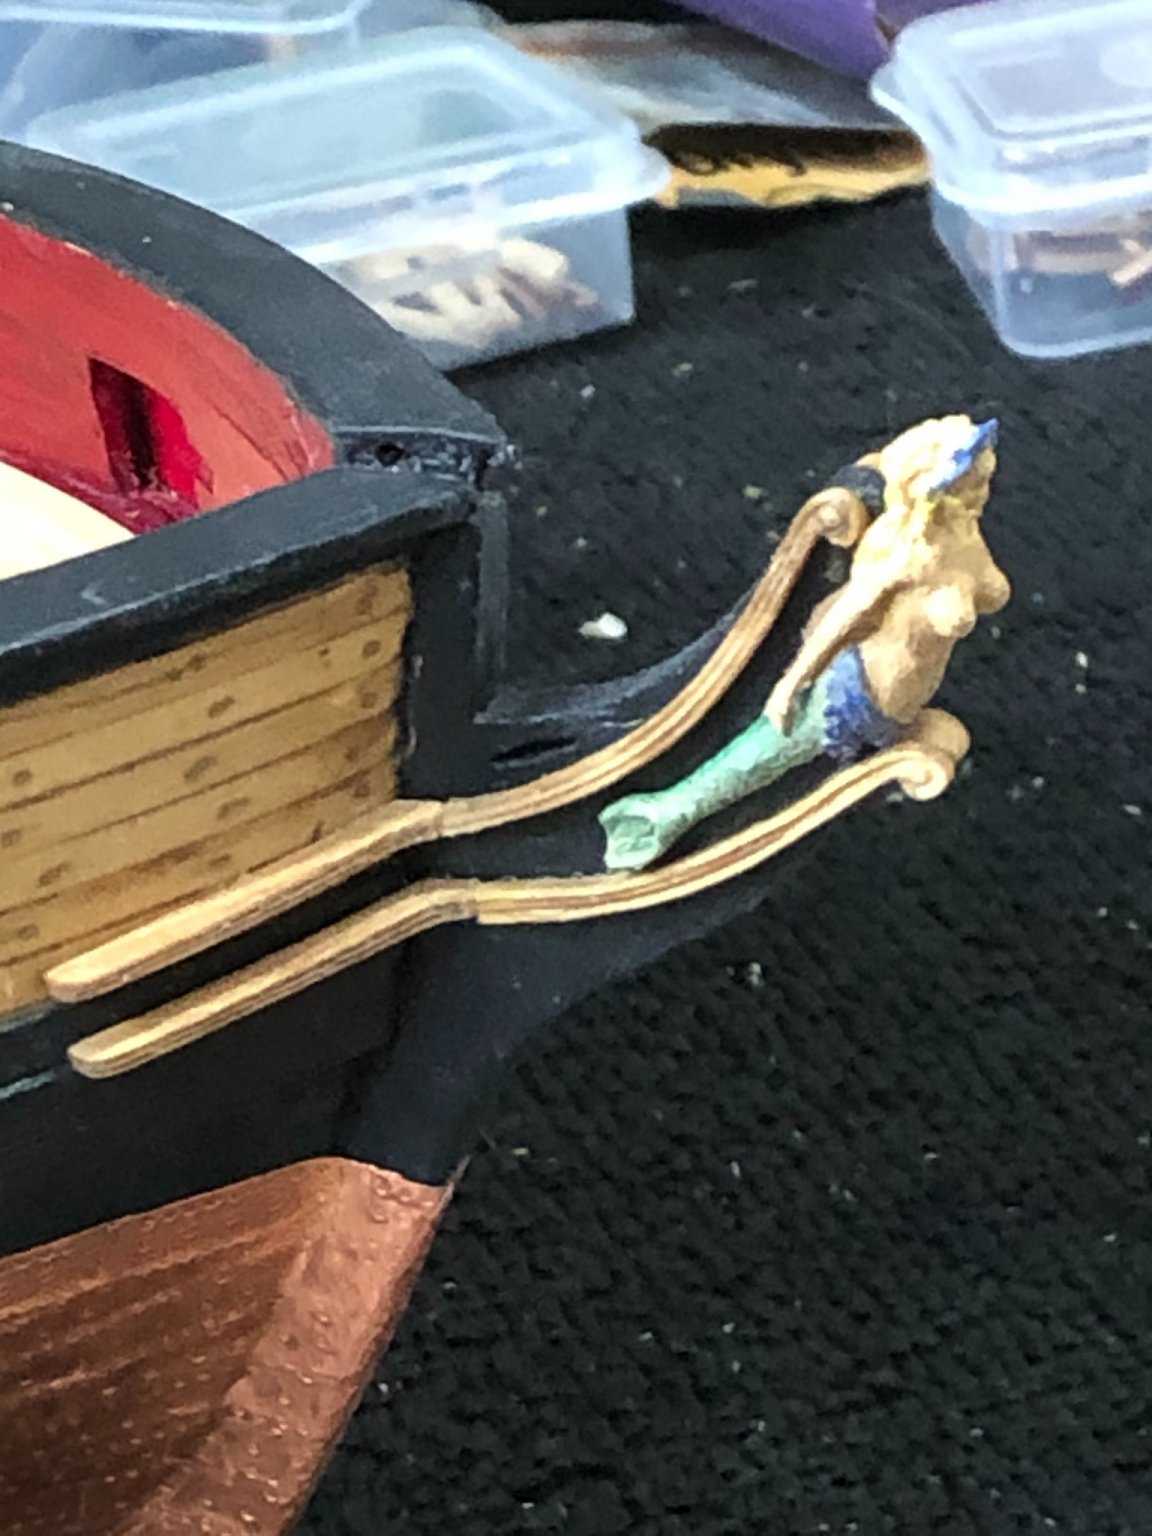
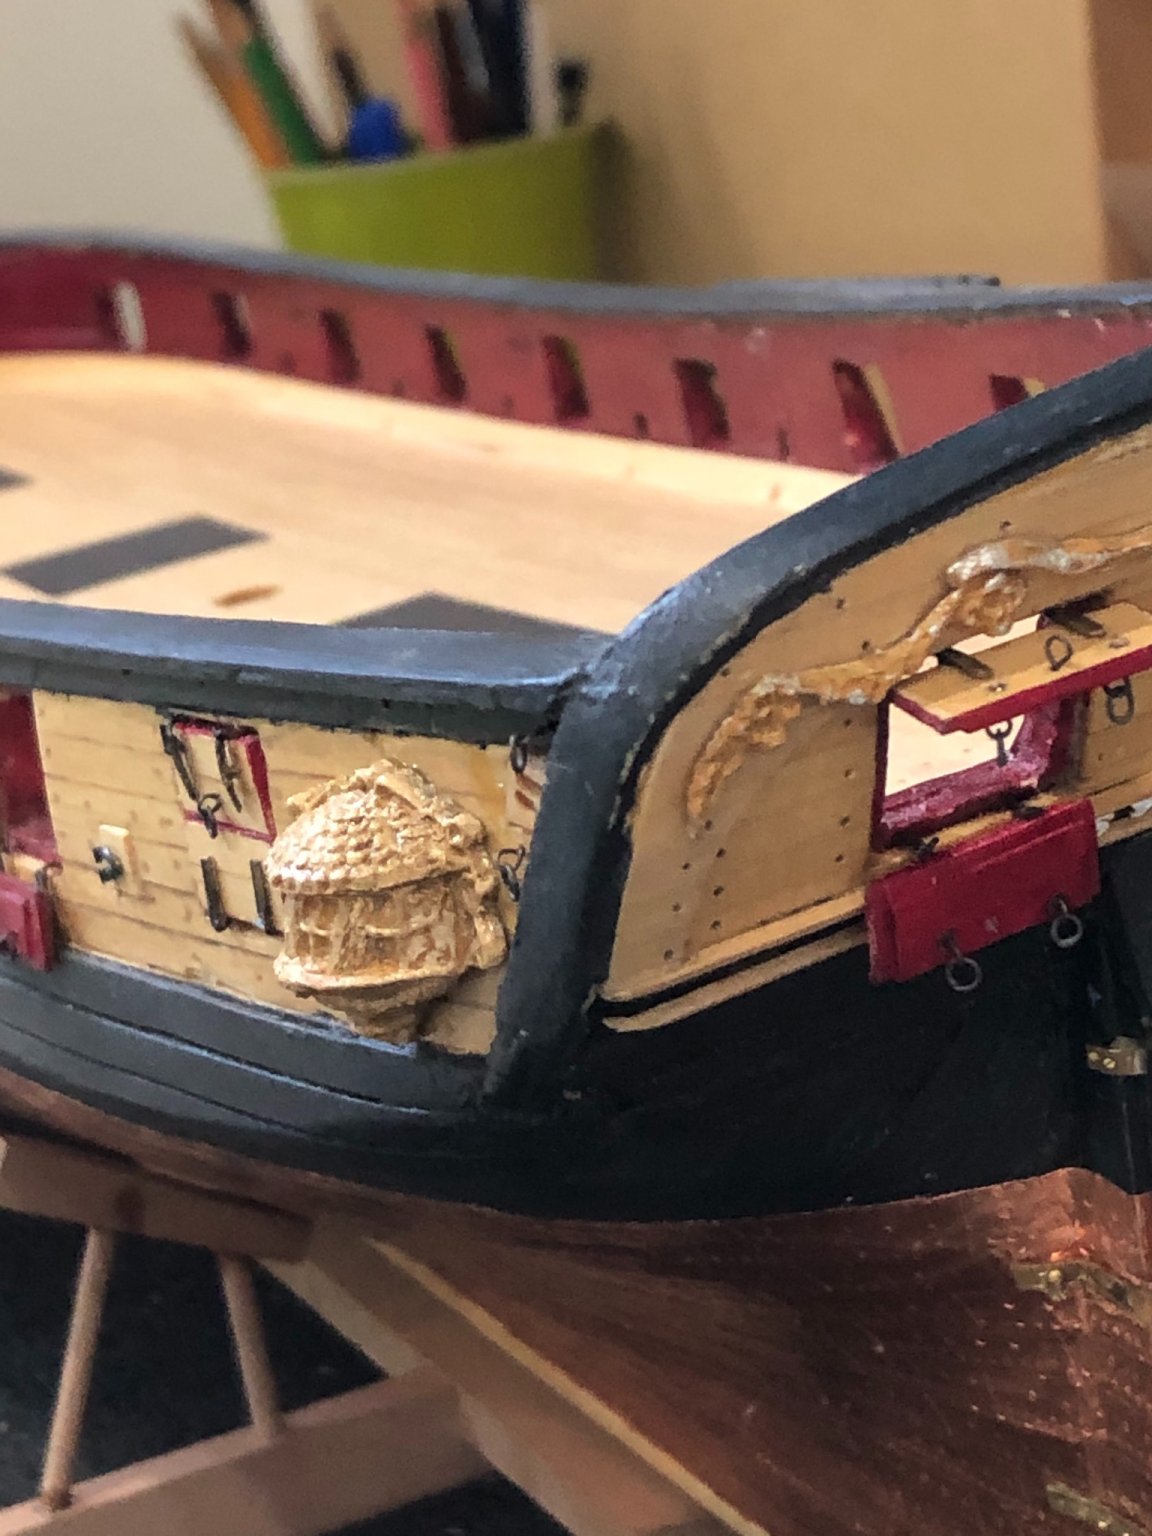
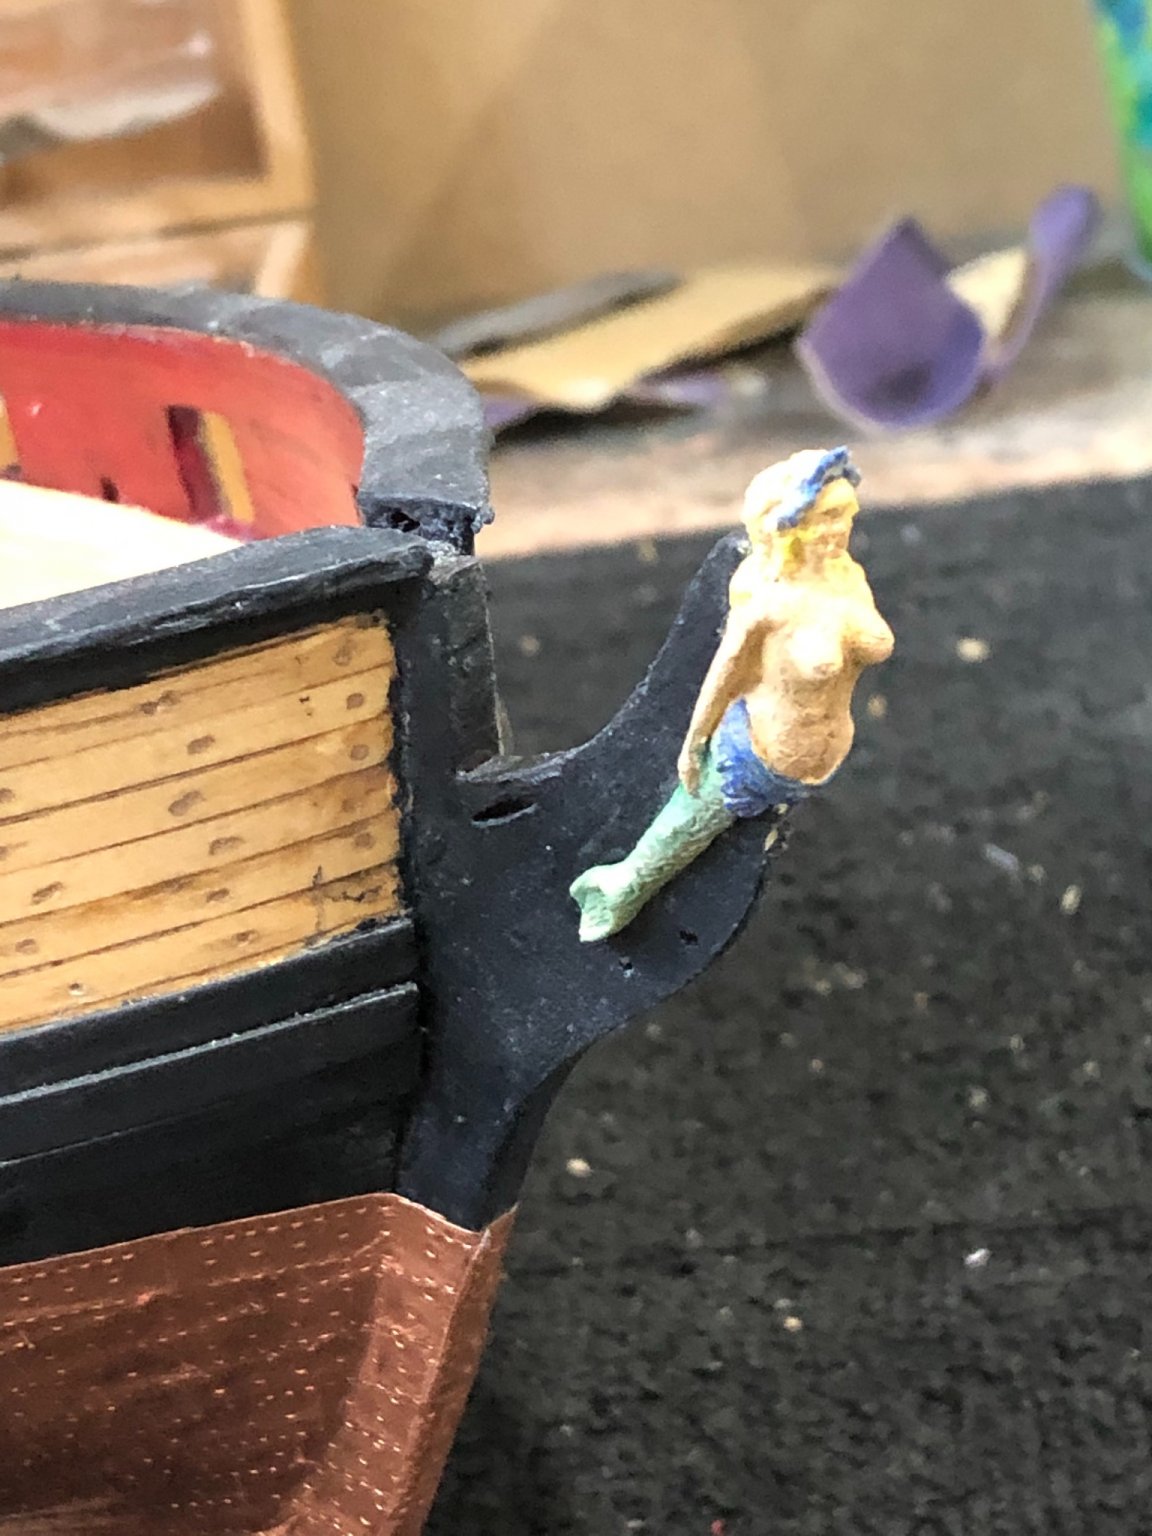
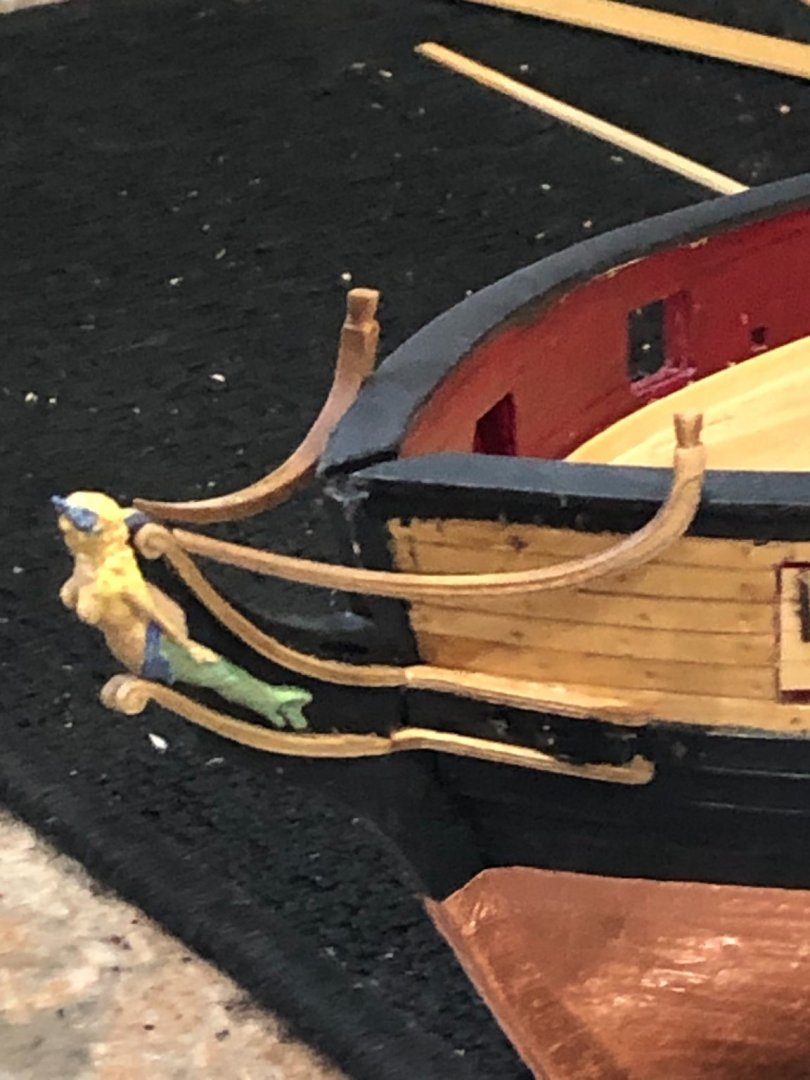
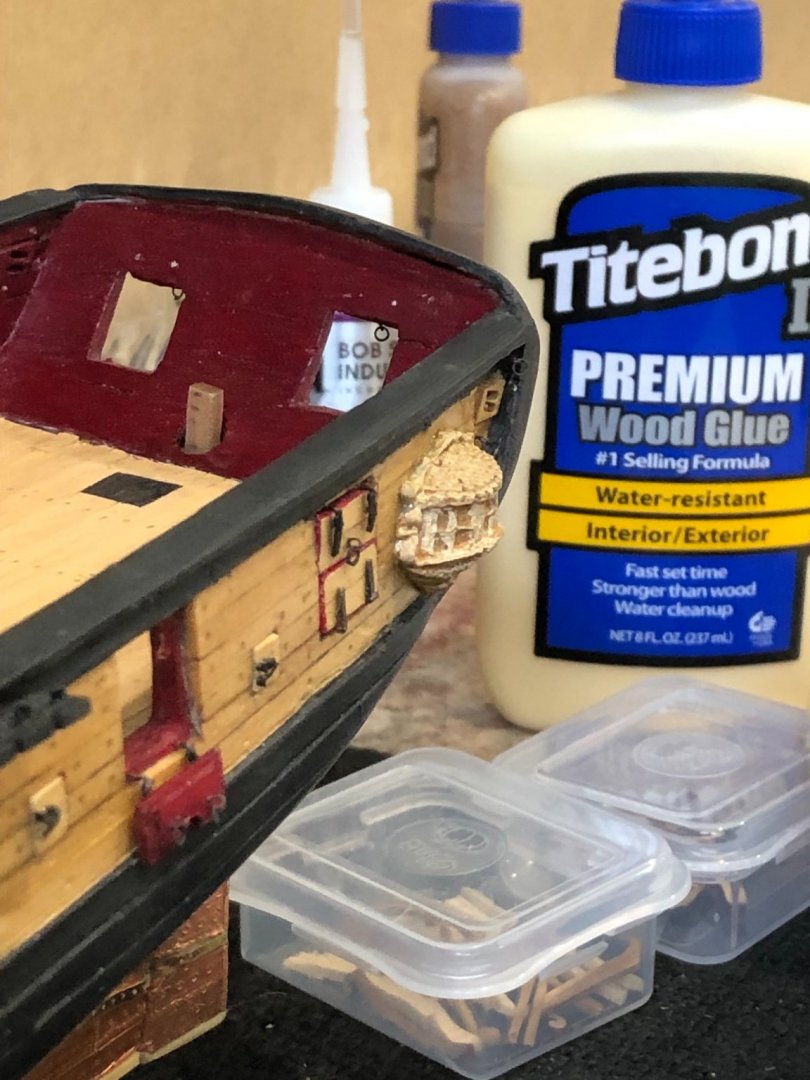
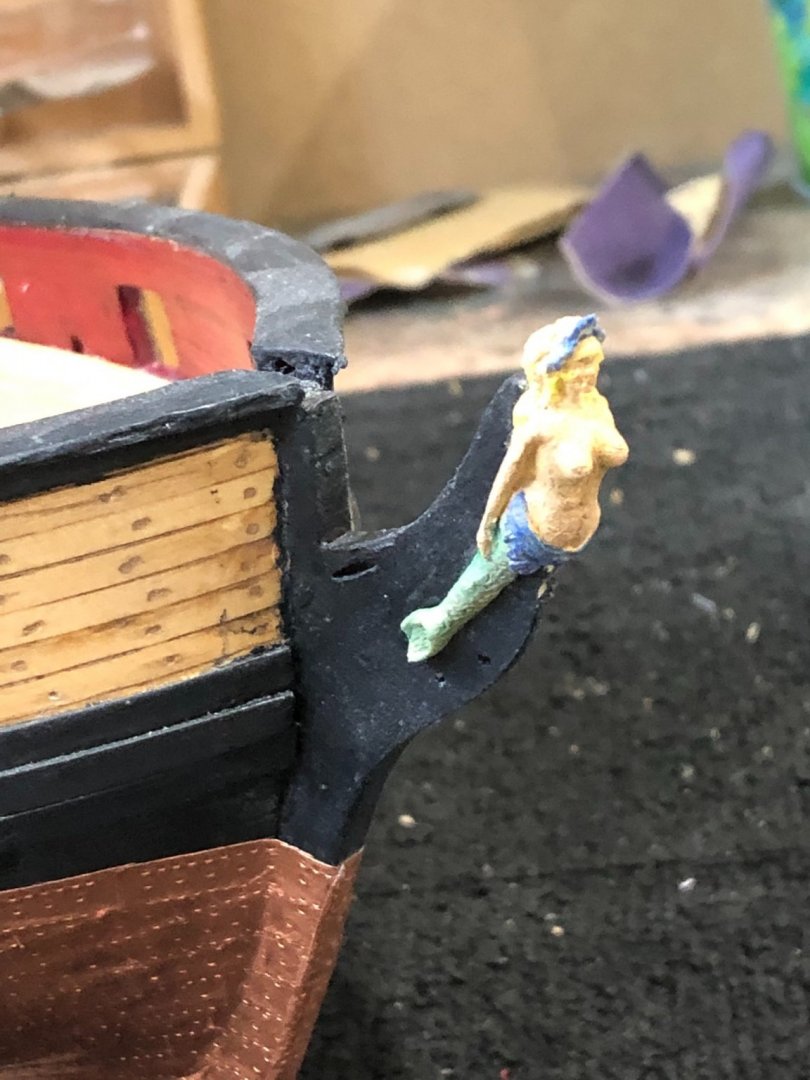
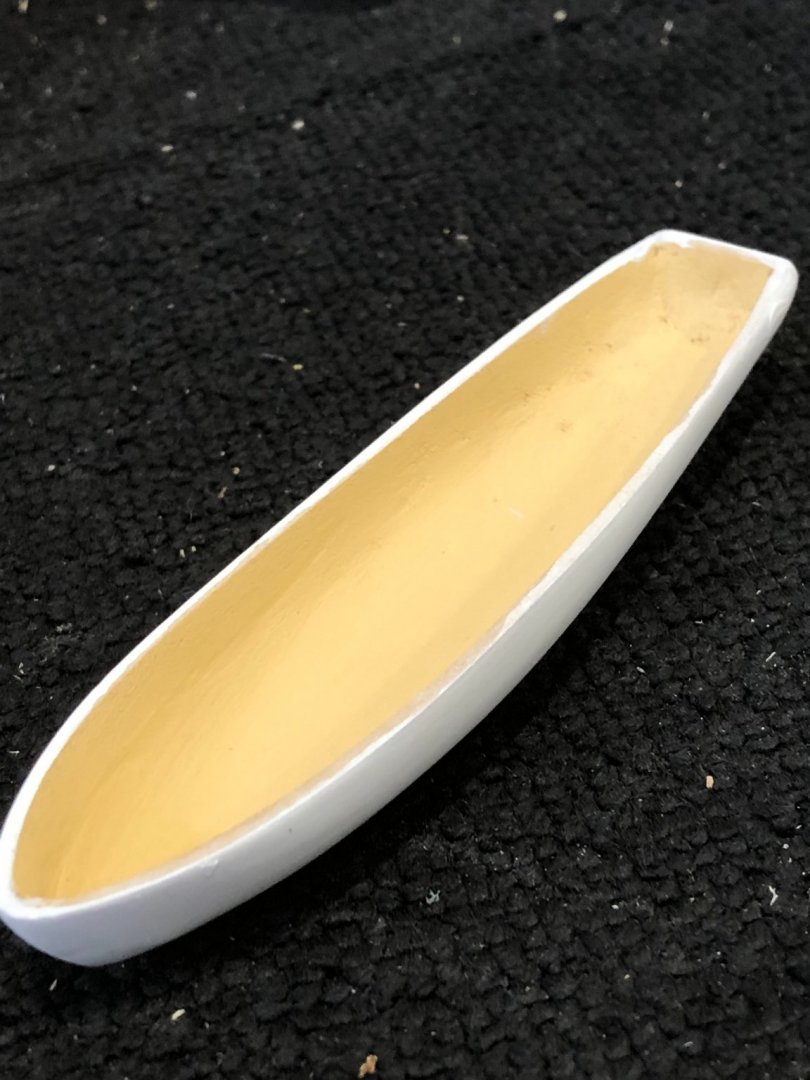
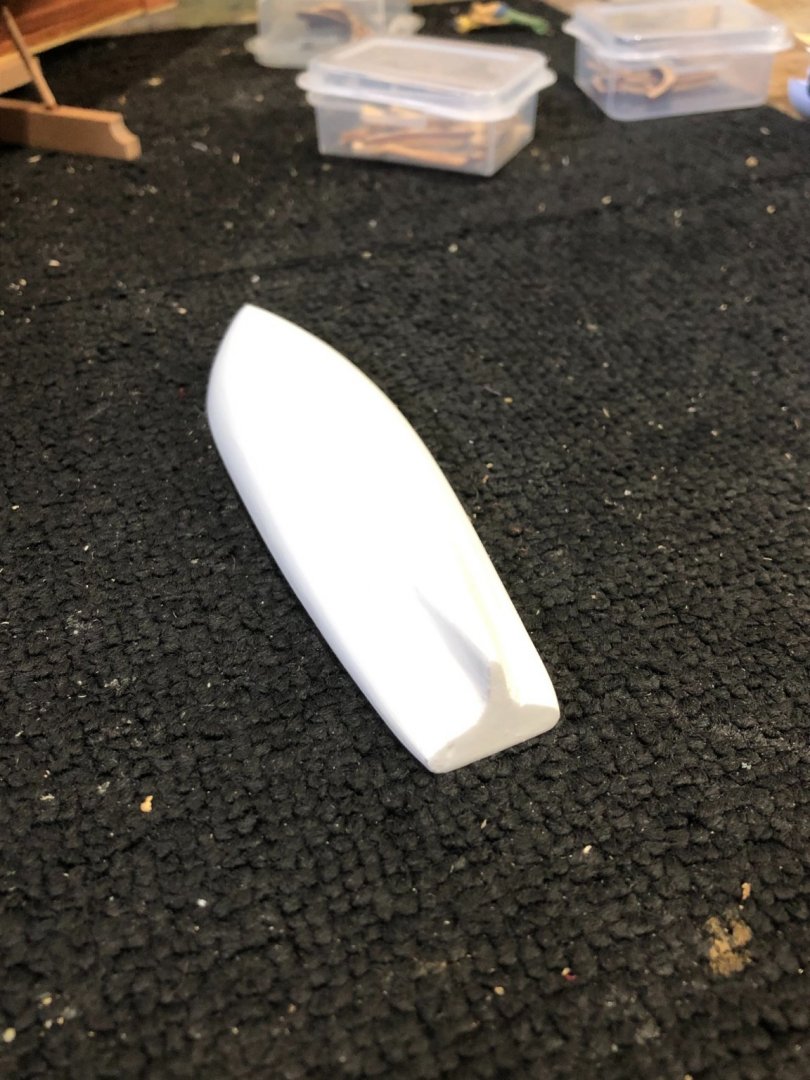
Before starting the cheeks I decided I'd finish the stern galleries. I'm still trying to make my own as others have done, but my skill on carving needs more improvement so I decided to use the cast metal ones until I'm happy with a set of mine. Spent quite a bit of time mixing paint to get a color that closely matches the stained bulwark planking. I got a color that matched but it still didn't look the way I wanted so I started trying to add washes and finally found that a wash of dark oak stain gave me the look and feel I wanted. Still delaying the dreaded chapter 10 so I started the longboat. Now that the outside and inside are finished I can start assembling. I milled down a piece of Alaskan Yellow Cedar down to 1/32" thick and then ripped 1/32" strips. Stained the strips dark oak stain so they'd have contrast when against the tan of the inside. That being done I wanted to dress up the mermaid so I cleaned up the casting flash and etc. I painted her flesh body, green fin, blue waist and tiara with yellow hair. It was very garish so I had to do something, ah back to washes. Finally settled on a tan paint & oak stain mixture. I like the result. Let me know what you think. I can't put it off any longer so onto the cheeks. Kinda cheeky eh! Stay and be safe Will


-
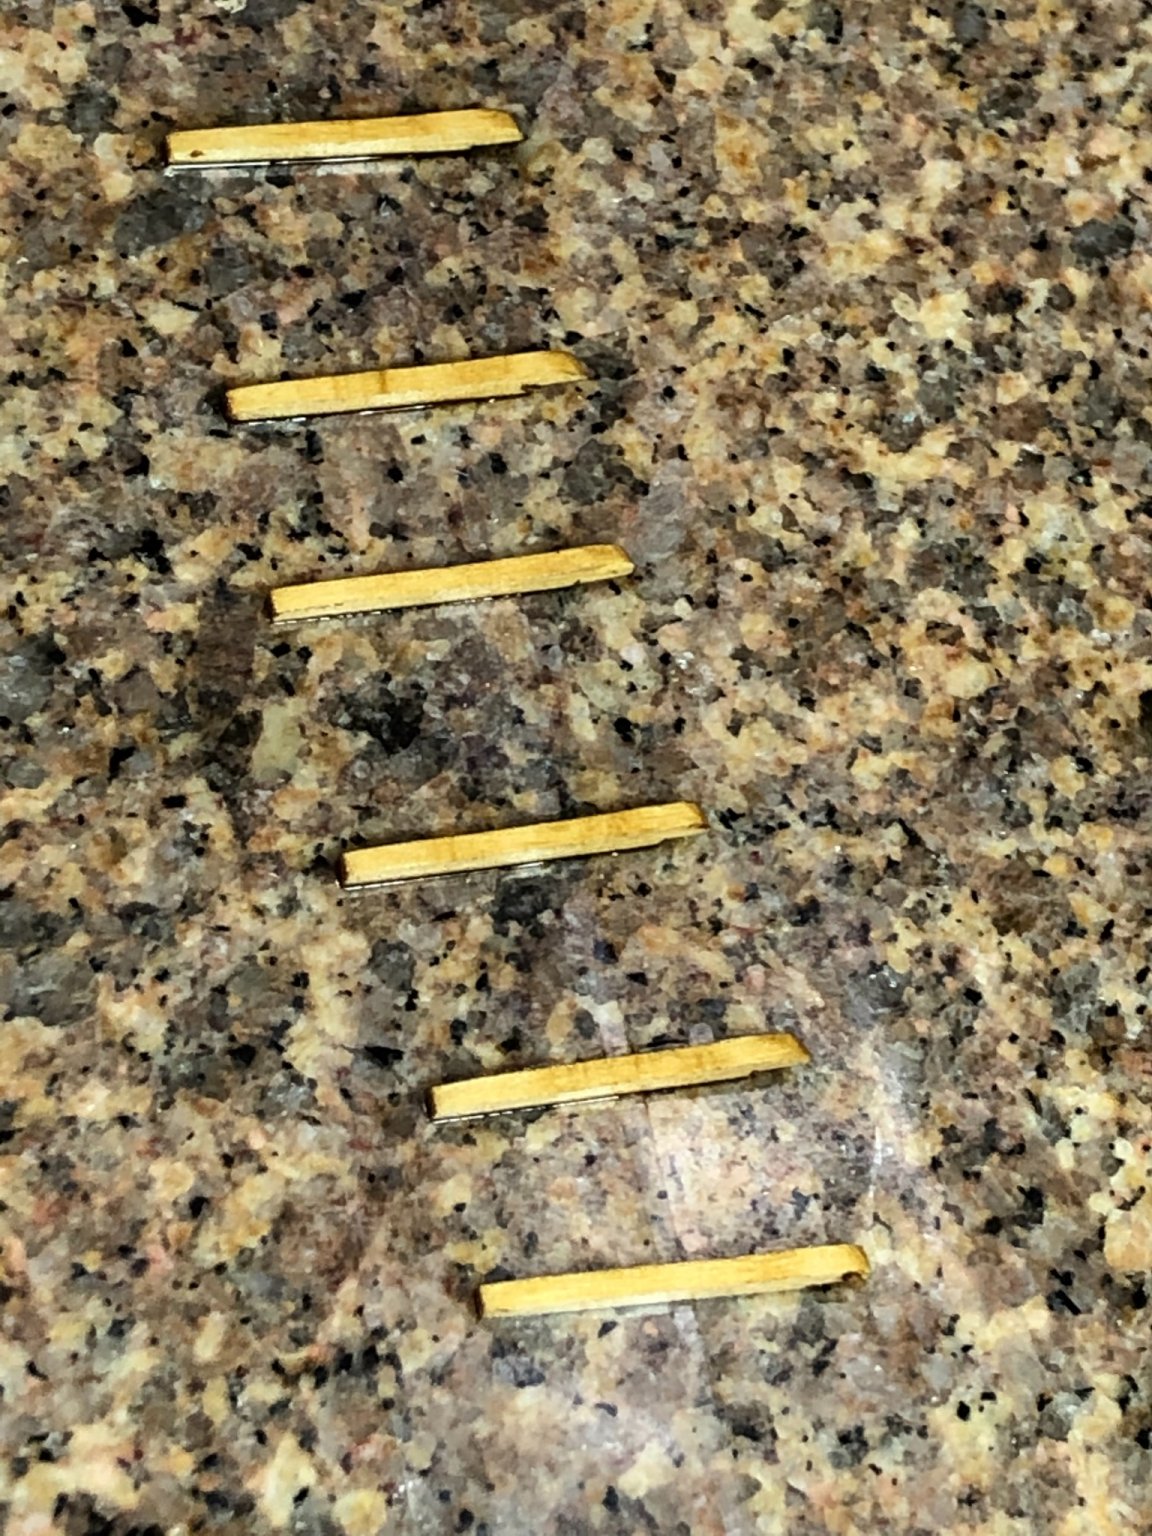
Thanks Patrick and all for the likes and comments. The fenders were make from yellow cedar as the basswood didn't stain to match the bulwark planking it gets dark on the cut edges as it works like a sponge and soaks up the stain to almost black. Stay well and be safe Will
-
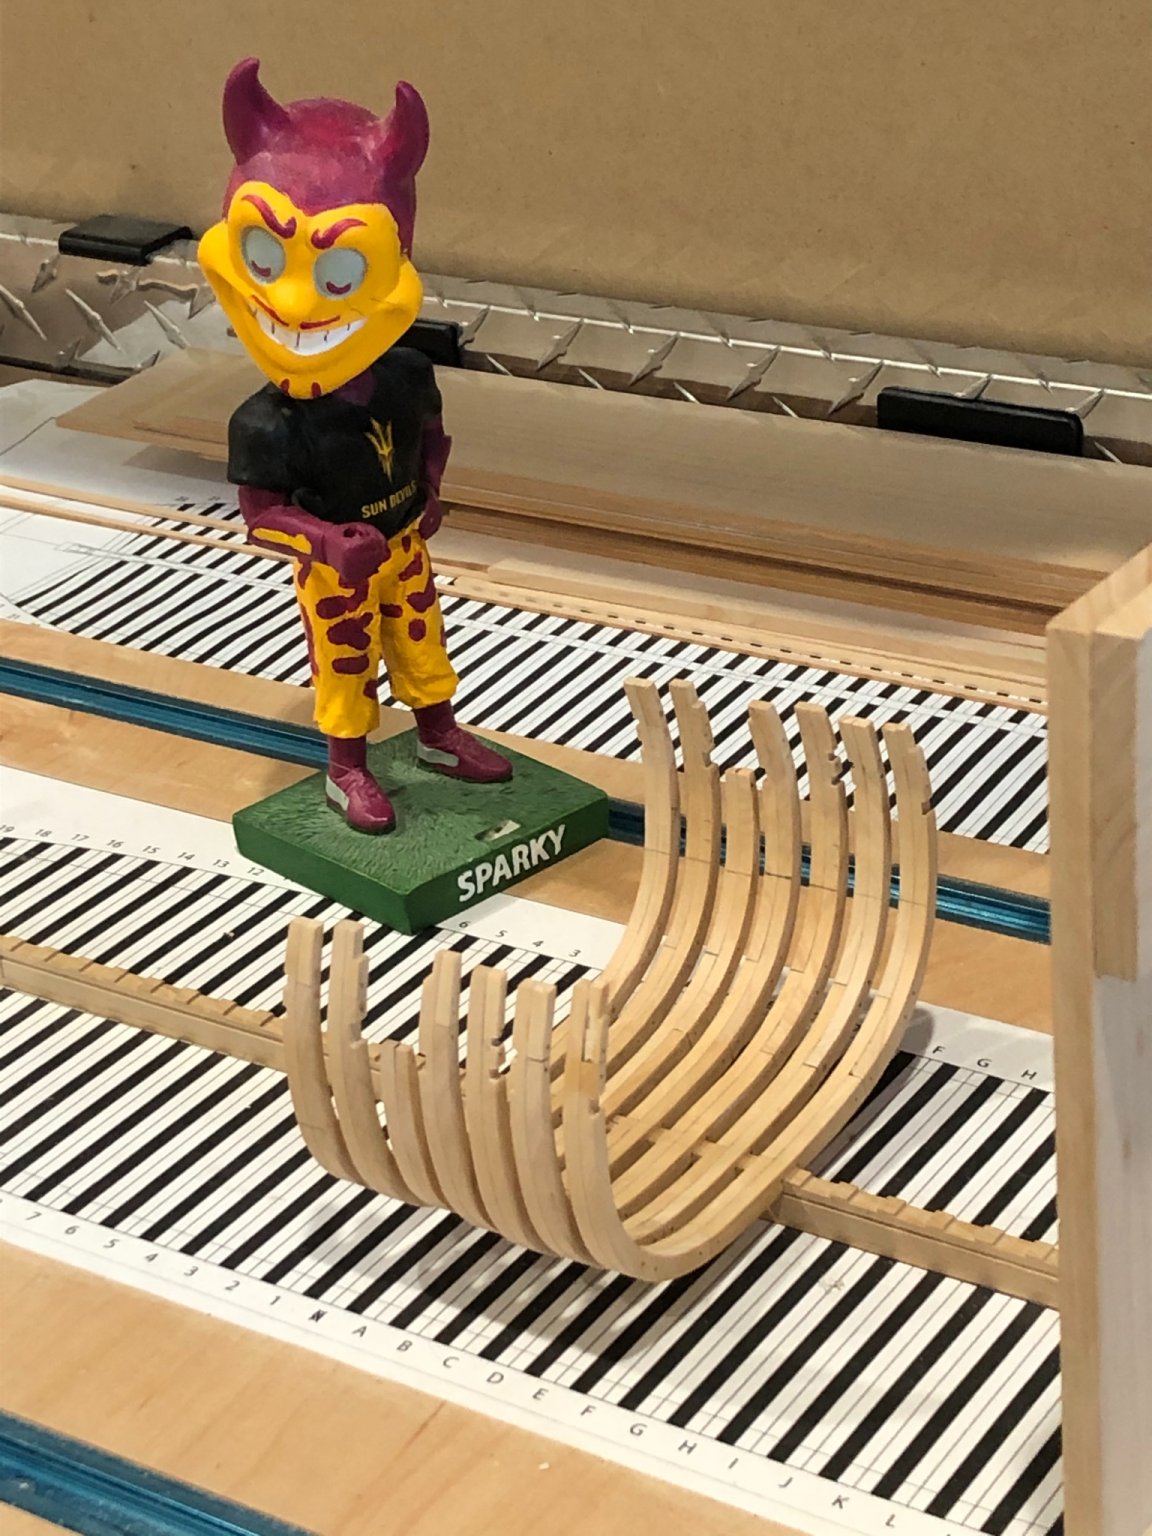
Thanks Mike for the words of encouragement. This is my first scratch and I'm learning how to use my new tools especially the scroll saw, but you are right it's getting faster and not so much going into the scrape bin. Just a brief update more to let all know I am still here working on frames in my spare time. Today I stepped "G" and cut and getting ready to assemble "H", "I" and "J" so tomorrow I'll be ready to step "H" since I can do one a day waiting for glue to dry. A picture of the current status I just realized this is the status up to "F". I don't know if I mentioned that I'm using 22 AWG bare copper wire and then blacken them with liver of sulfur which does not stain the wood. You can see the joints with the colored glue showing nicely to simulate the "goo" they used to seal the open ends of the frame pieces. I'm using Ed Tosti's method of using raw umber pigment powder mixed into Titebond II. More in a coupe of days Stay Well and Safe Will
-
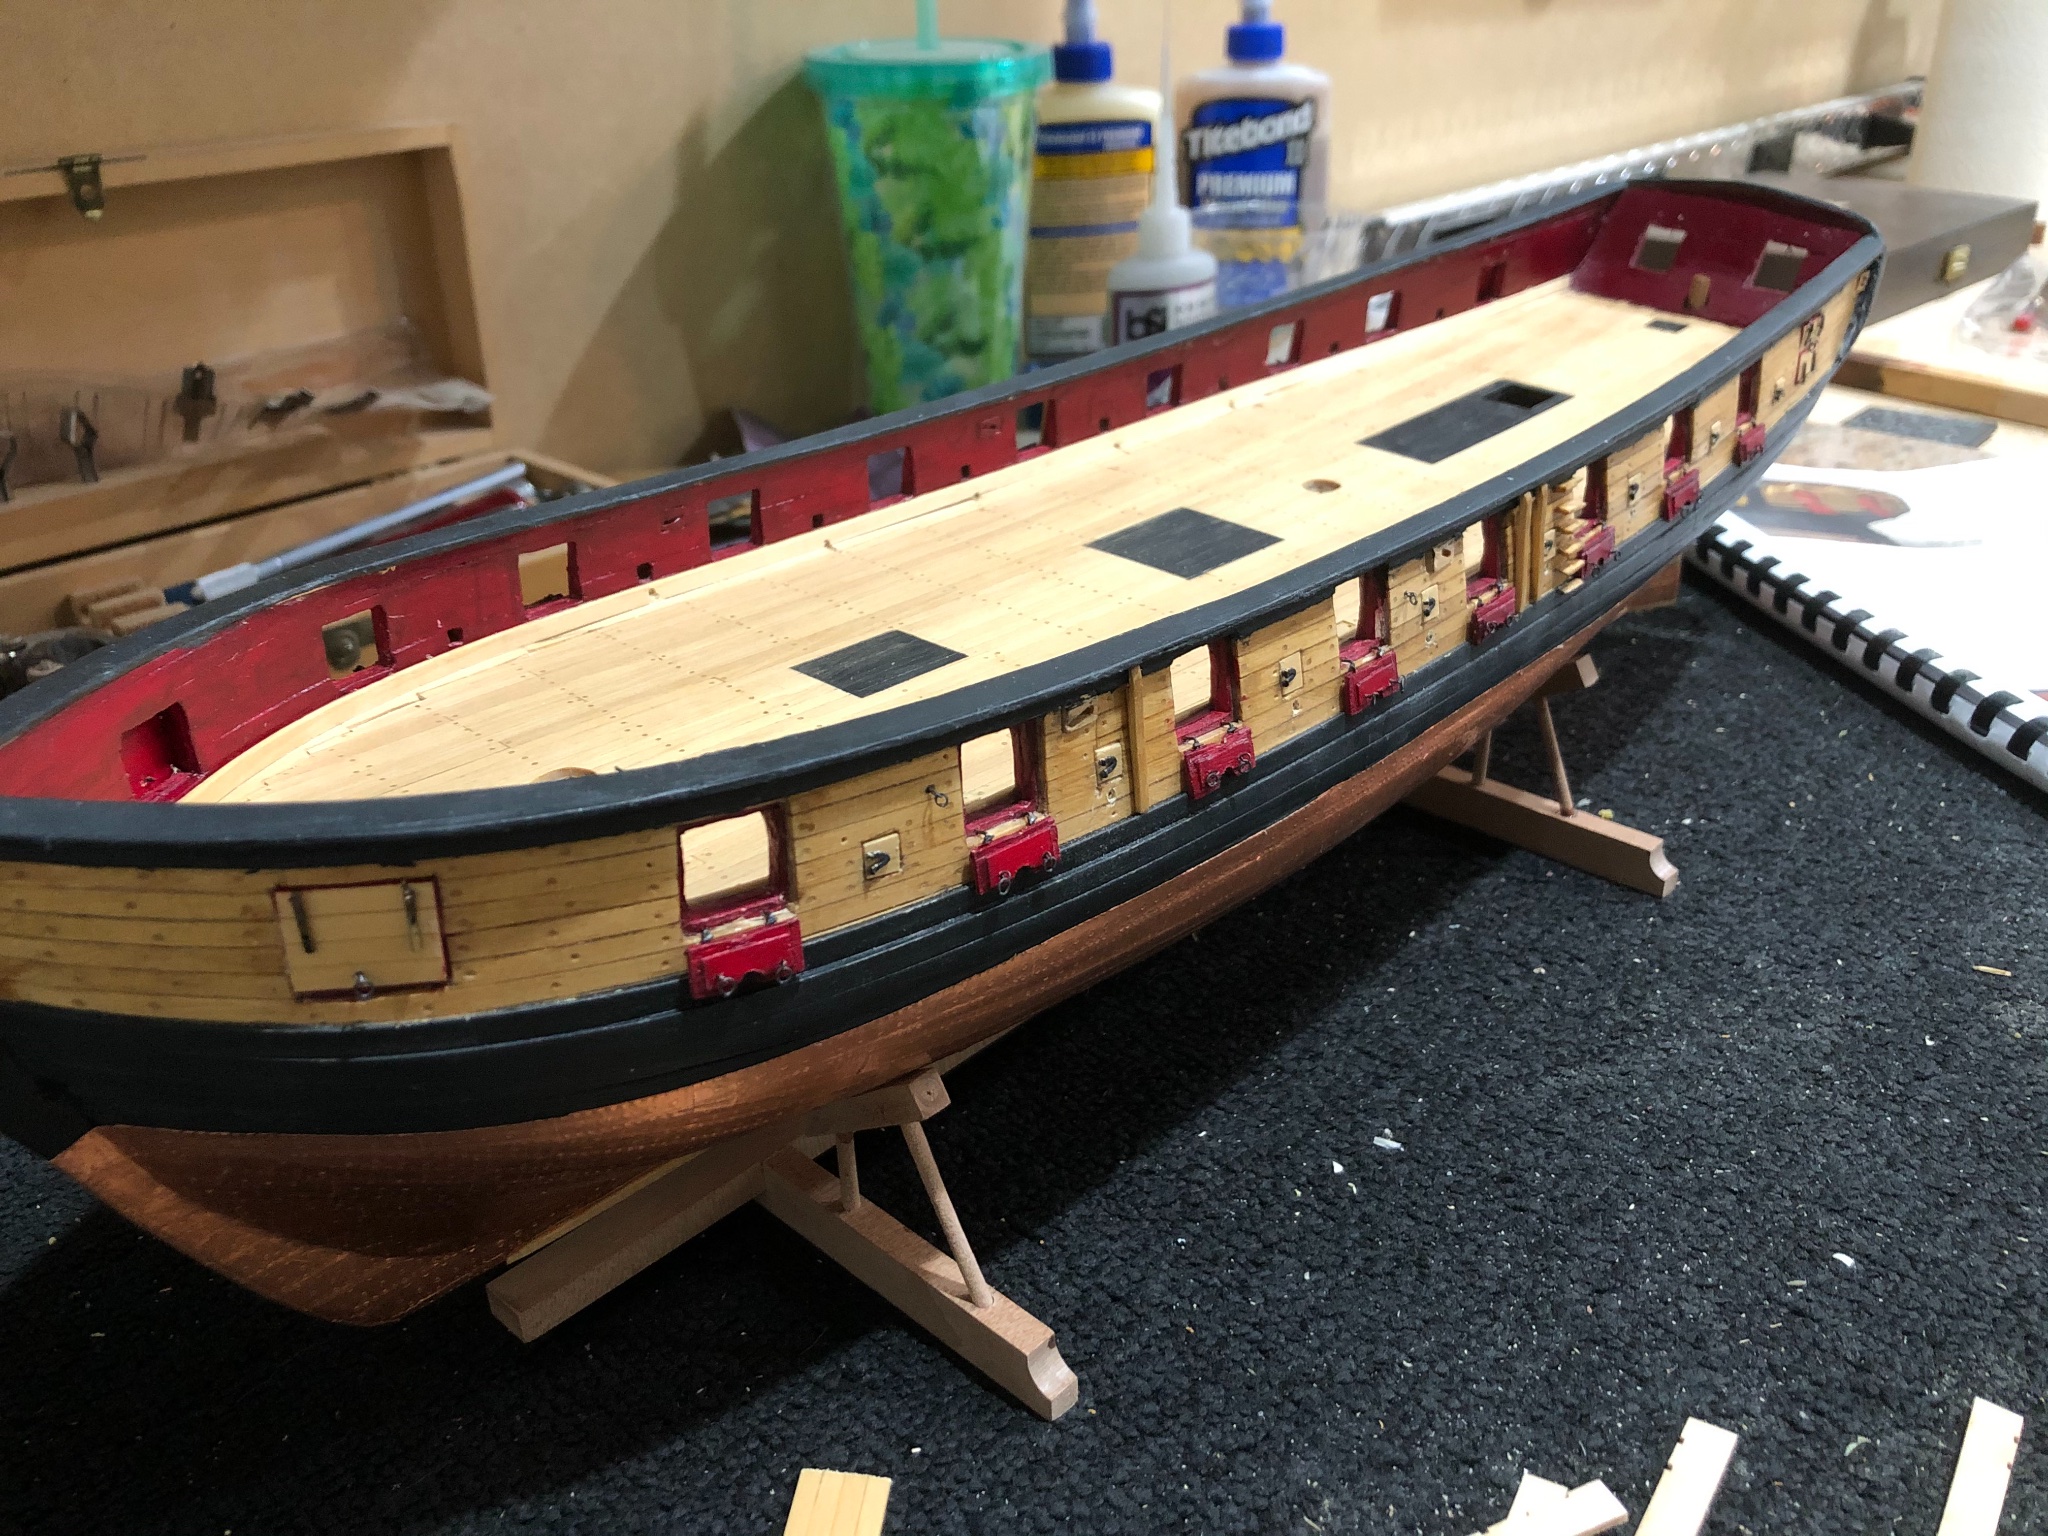
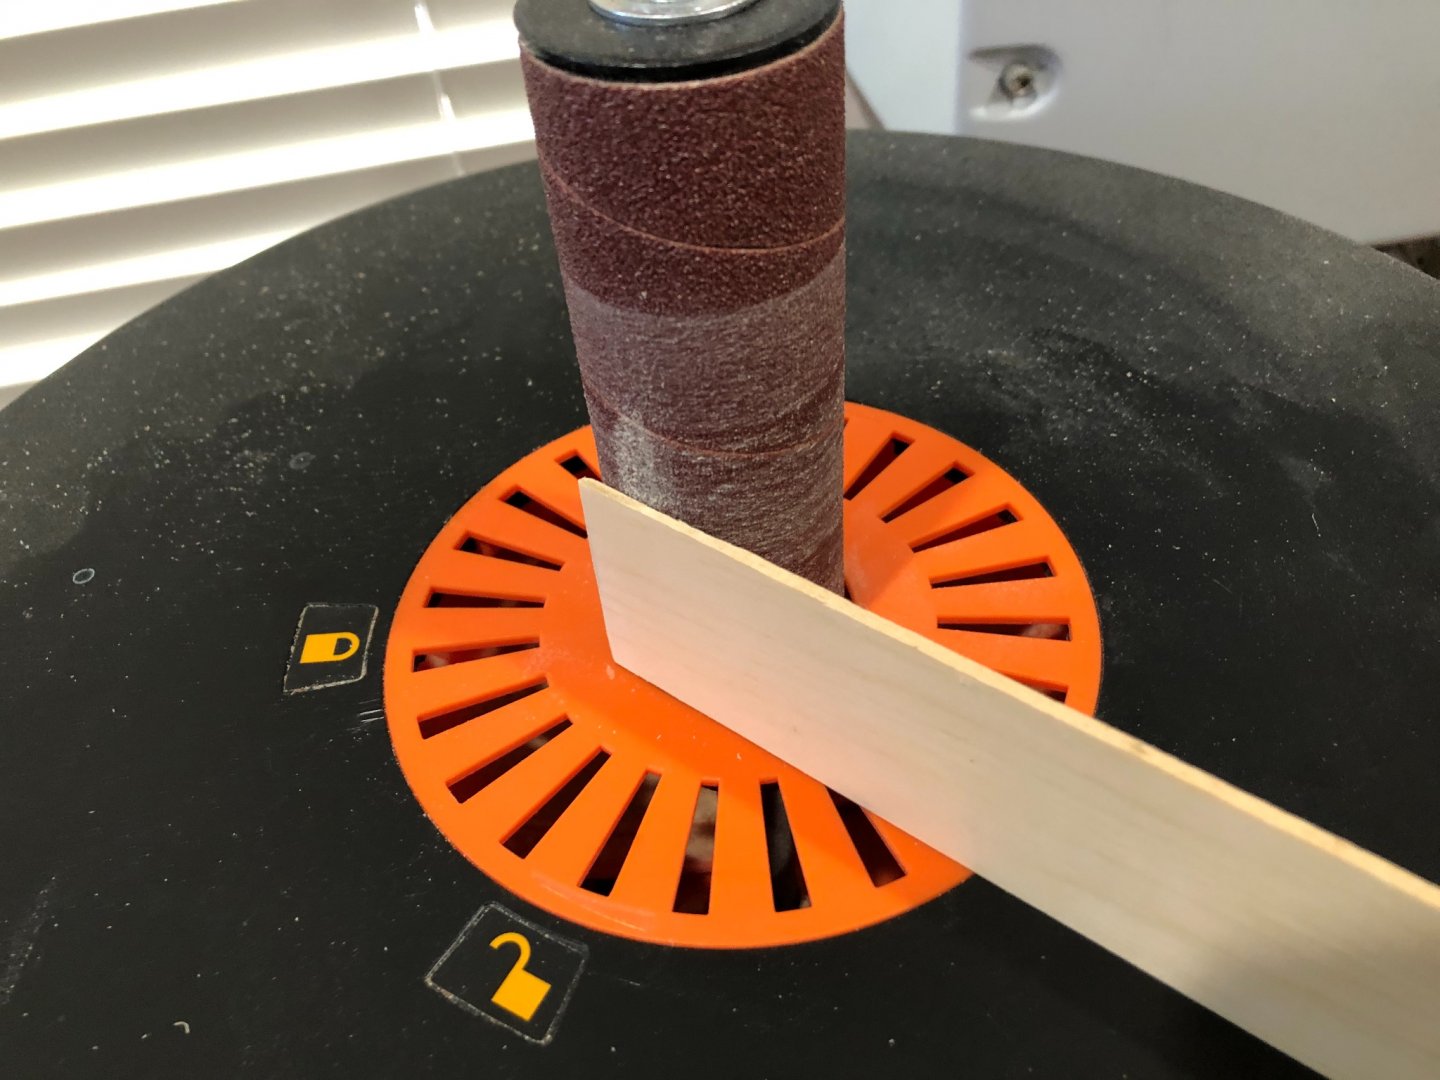
Well chapter 9 is finished gun port and sweep port lids made and mounted. I tried to use the basswood fenders and chesstree but the stain didn't come out well and was way off in color/texture against the cedar stained bulwark planking so I made new ones of cedar. Making the parts was a straight forward process where I milled a piece of cedar to the fenders width and then glued a basswood fender to the edge of the cedar to use as a pattern and sanded the cedar to shape then using a slitting blade sliced off the new parts. Using the glue stick works great enough adhesion but water soluble to remove Using the drum sander to get uniform shape the width of the cedar Stain the parts on double sided tape with the edge to be glued against the tape The channels were straight forward to make and mount I did drill a hole into the channel and a corresponding one in the bulkhead with a 22 AWG copper wire to make them very sturdy. The Syren after chapter 9 Now on to the dreaded chapter 10 (Head rails and Cheeks) not looking forward to this chapter. Thats it for now Stay well and safe Will


-
I finally took some time out from other models to work on the Washington. Patterns for frames 0, A, B, C, D, E, F have been cut and frame 0 was glued to a piece of timber. Cut all the pieces and fit them together with just the junction points finish sanded. Using a modified Ed Tosti pinning method to assemble the frames. First take the glued patterns and drill a hole in each spot where the pattern had a dot. I drilled a .026 hole the created a snug fit to a #9 silk sewing straight pin. Then dry fitting the parts with the pins as alignment registration. When all fit you take the parts apart and glue them with the previously darkened Titebond glue. The darkened glue makes a very nice line at the joints simulating the tar substance used in 1776. (To darken the glue I use raw umber artist pigment power mixed into the glue. Empty an 8 fl oz bottle of titebond and mix in 2 teaspoons of pigment stirring until completely mixed and the color of chocolate milk. It'll darken as it drys) All the done and the first frame has been raised. Yippee. Now on the the next six. Drilling alignment holes will have copper wire placed after assembled Dry fitting parts after drilling and scroll saw First frame raised yipee Now back to the scroll saw for more sawdust and parts to assemble. I hope making frames gets quicker as I progress. I'll get back to the Syren for awhile and then make more frames when I get tired of the Syren. Stay Well and Safe Will


-
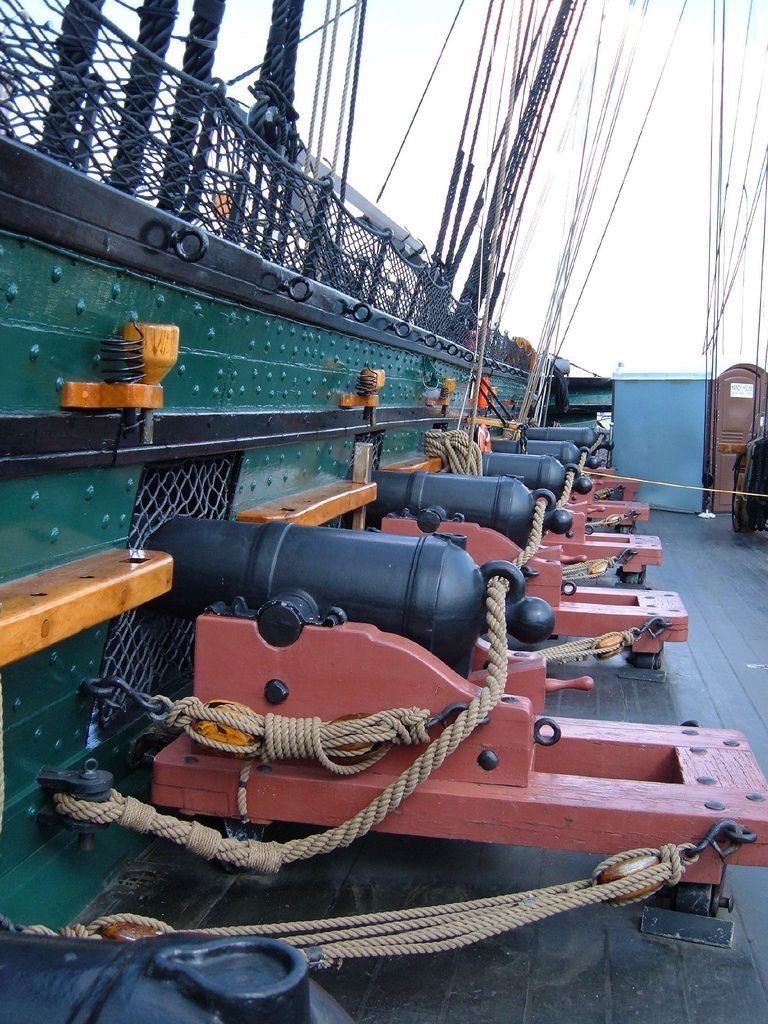
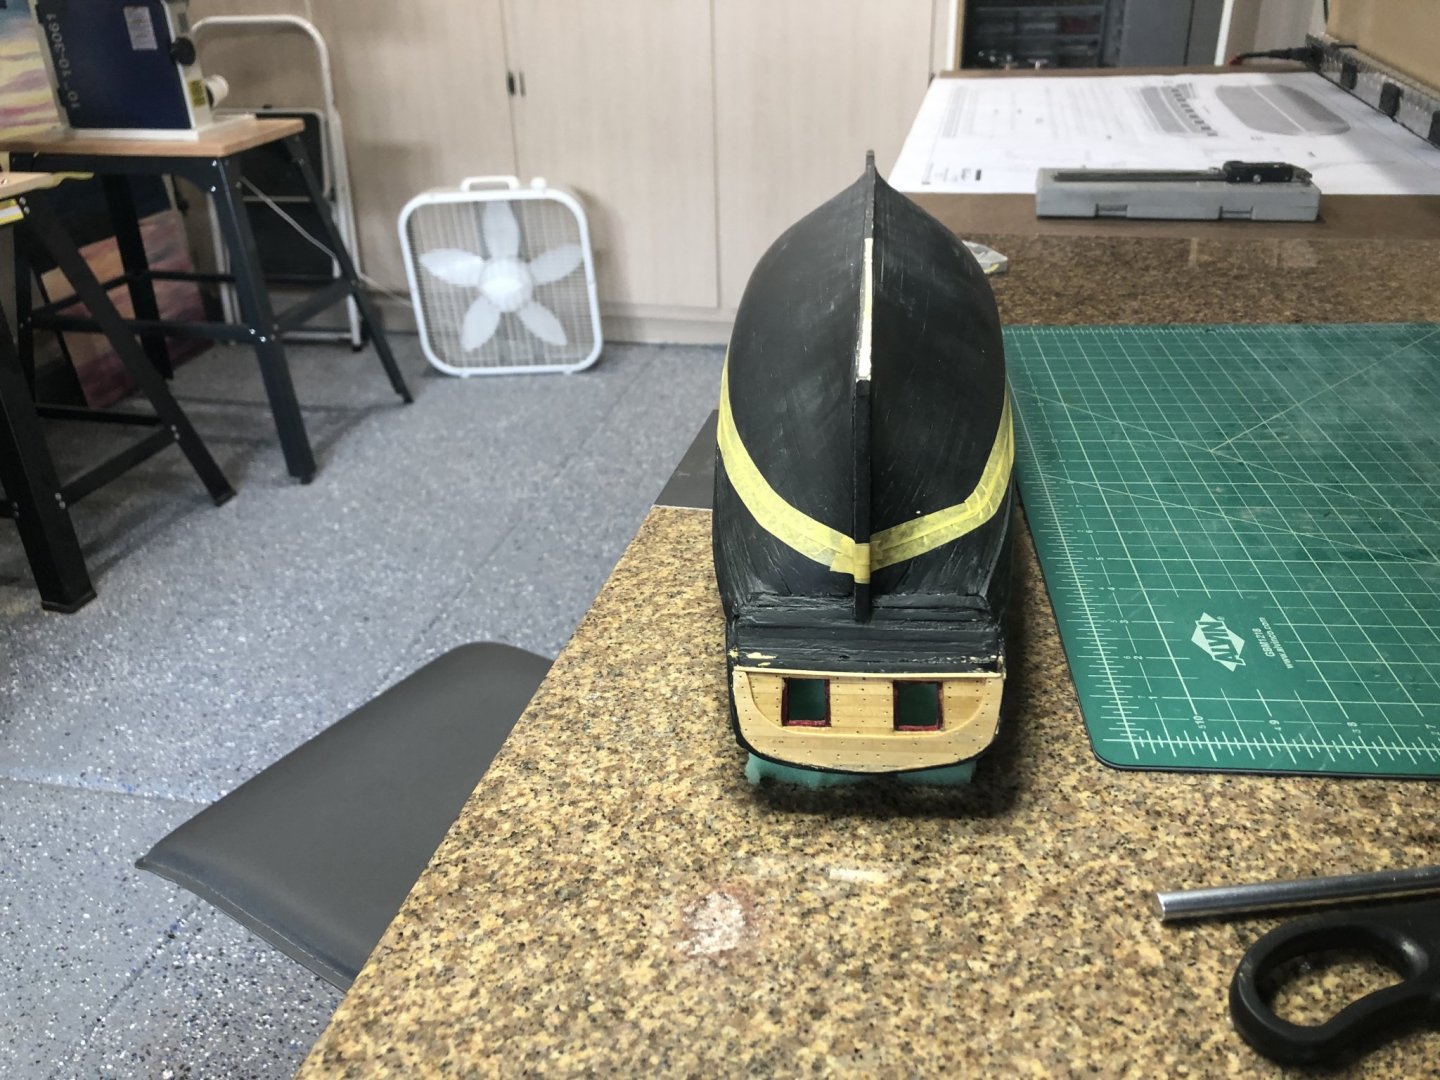
Here is another photo that may help it is of the US Brig Niagara Stay well and safe Will
- 950 replies
-
- 5
-
-
- syren
- model shipways
- (and 1 more)
-
I just read through your log again to refresh my memory and now i'm more impressed by your work, its looking fantastic. I now have a target for mine to achieve. Stay safe and well Will Good luck in grad school, it'll be a breeze based on the Syren. One of my daughters is getting her masters degree in biomedical engineering so I can relate to what your grad school will entail.
- 950 replies
-
- 1
-
-
- syren
- model shipways
- (and 1 more)
-
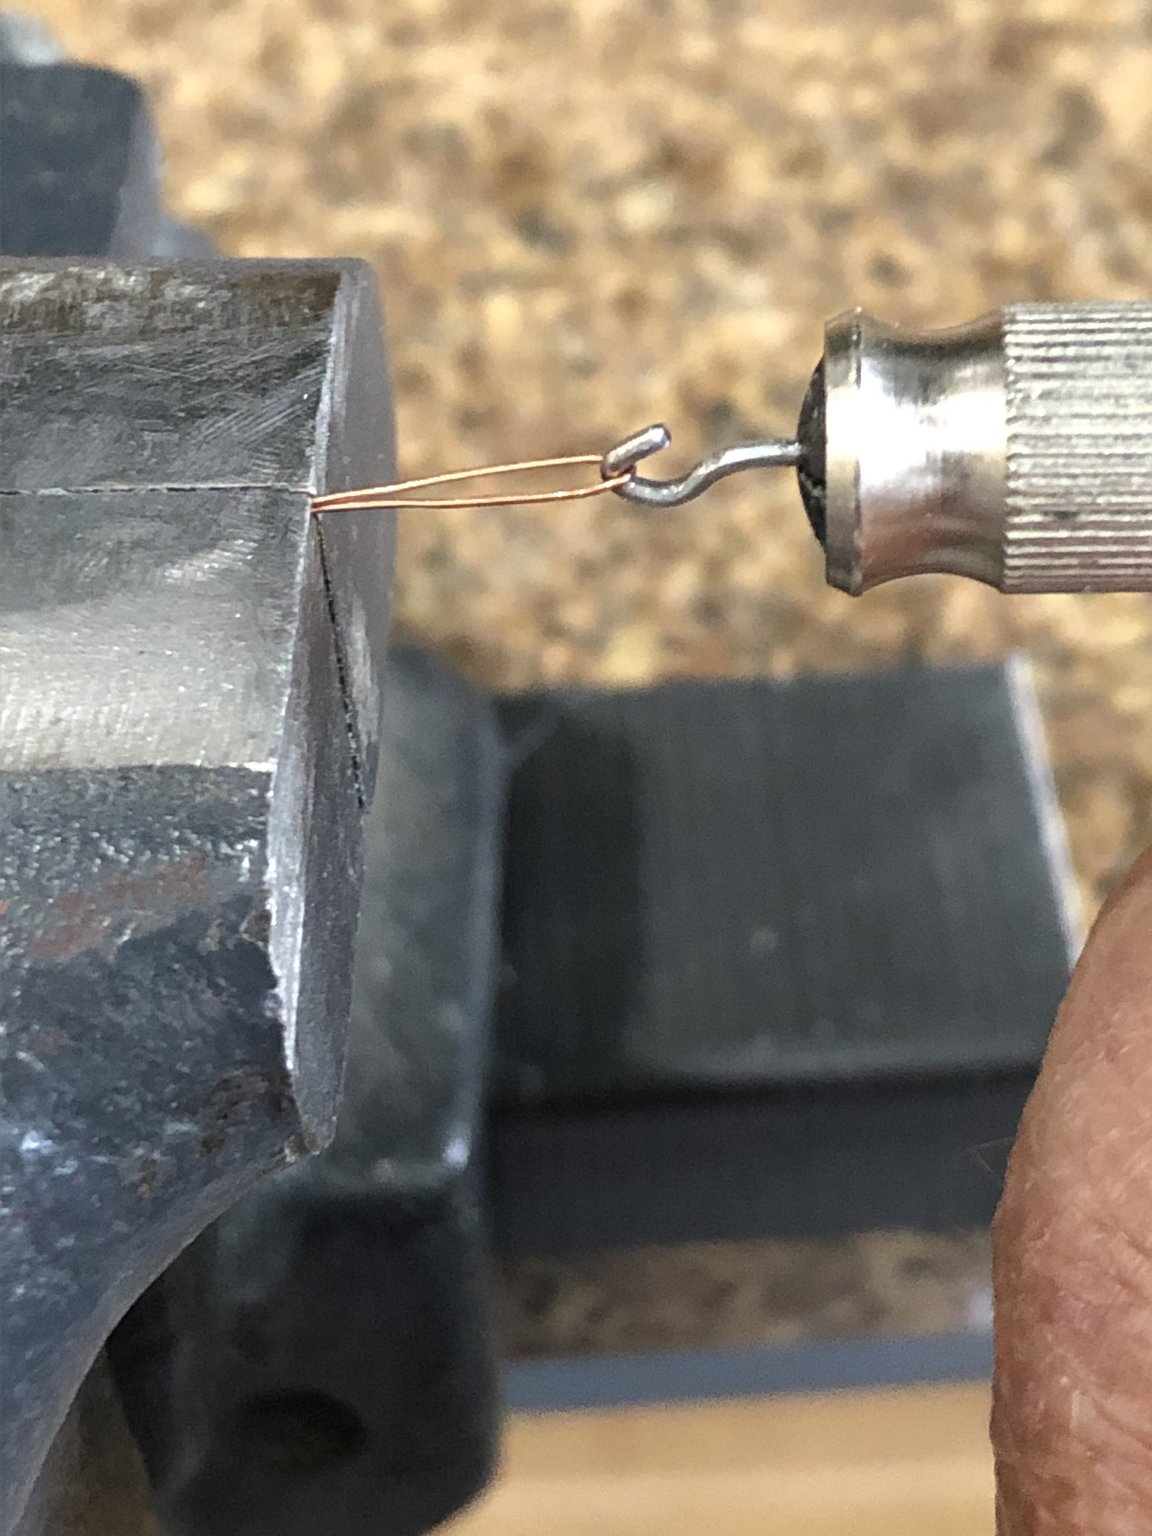
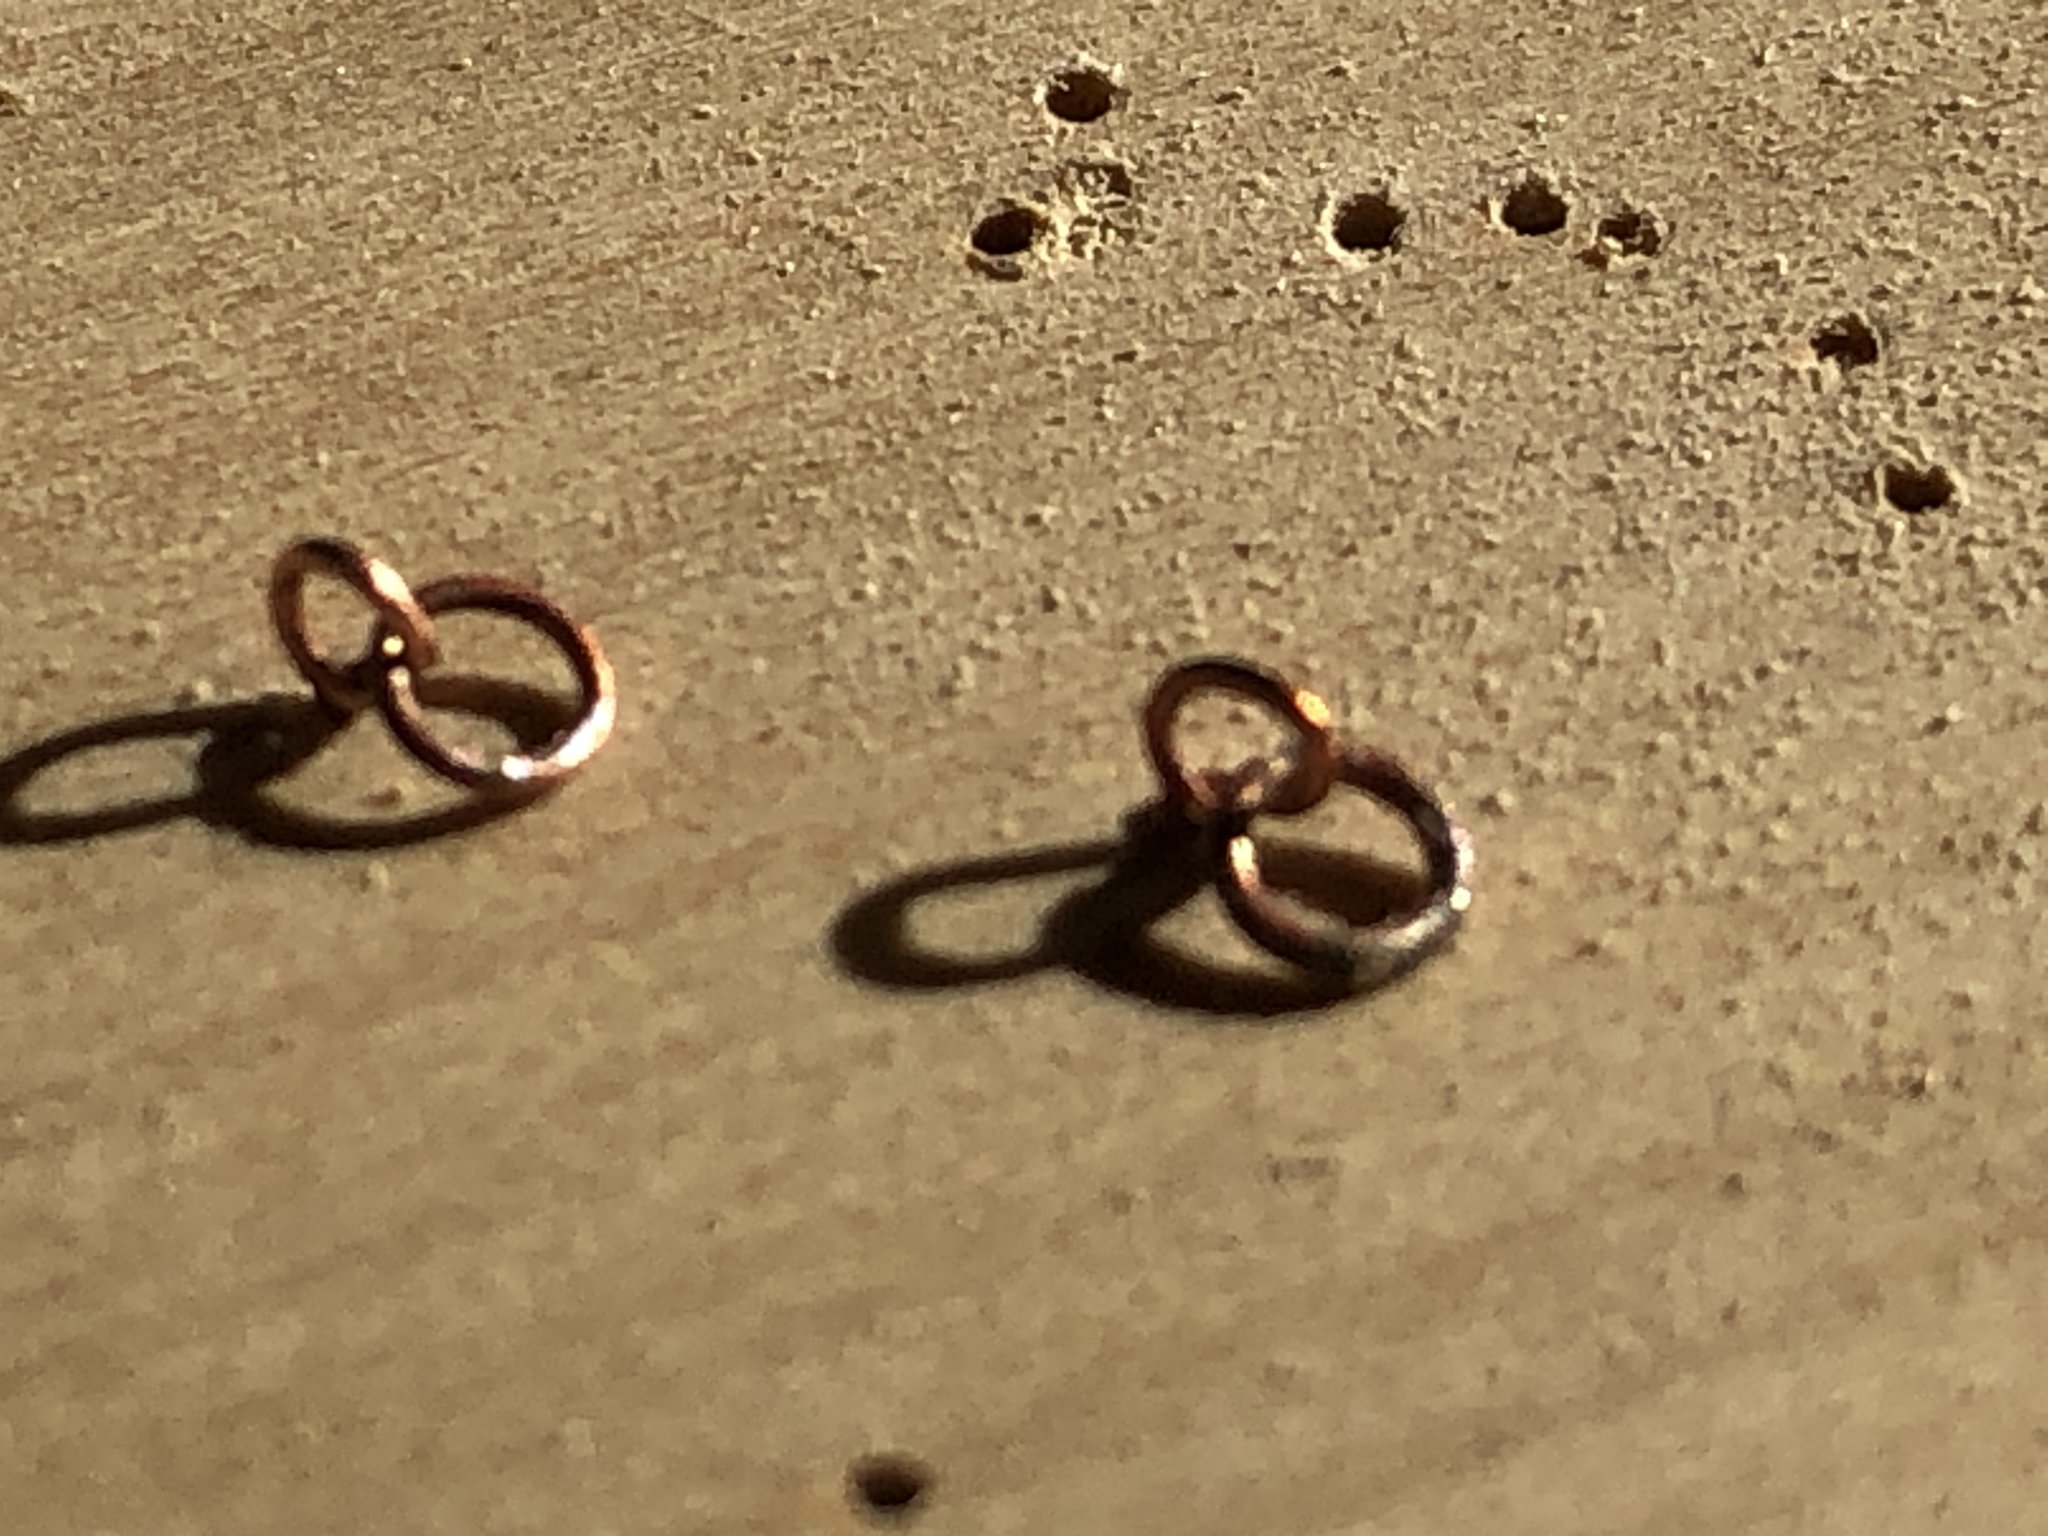
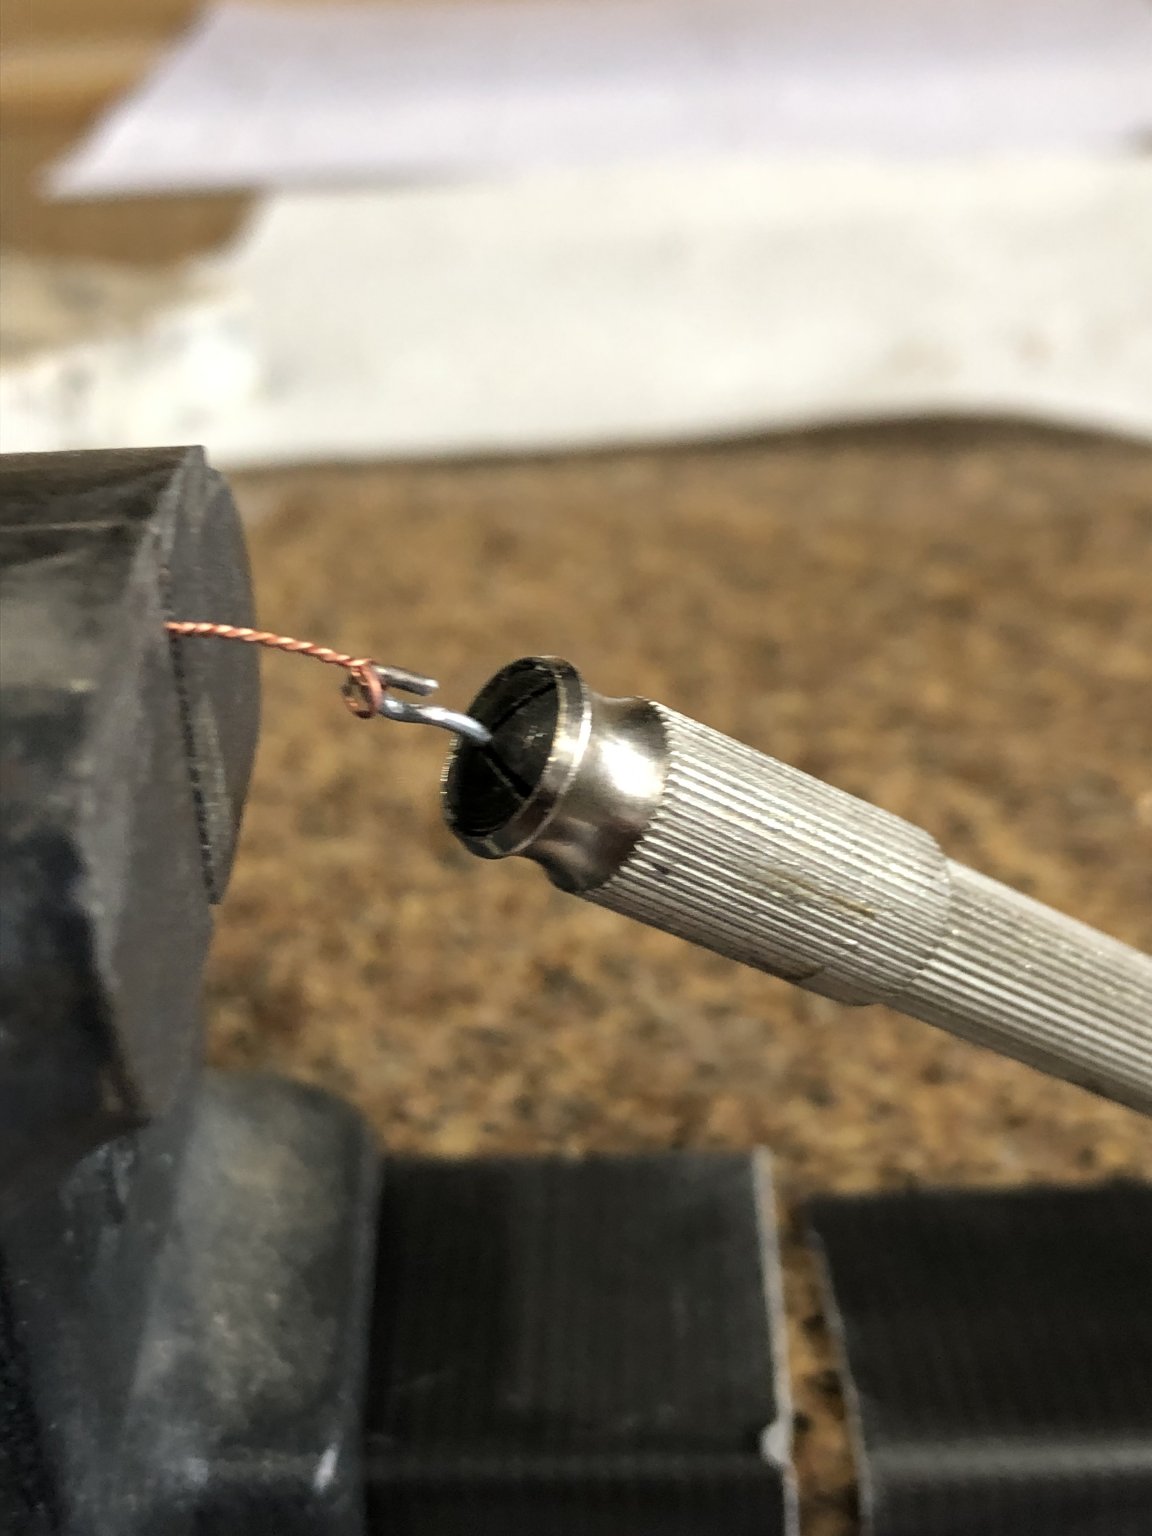
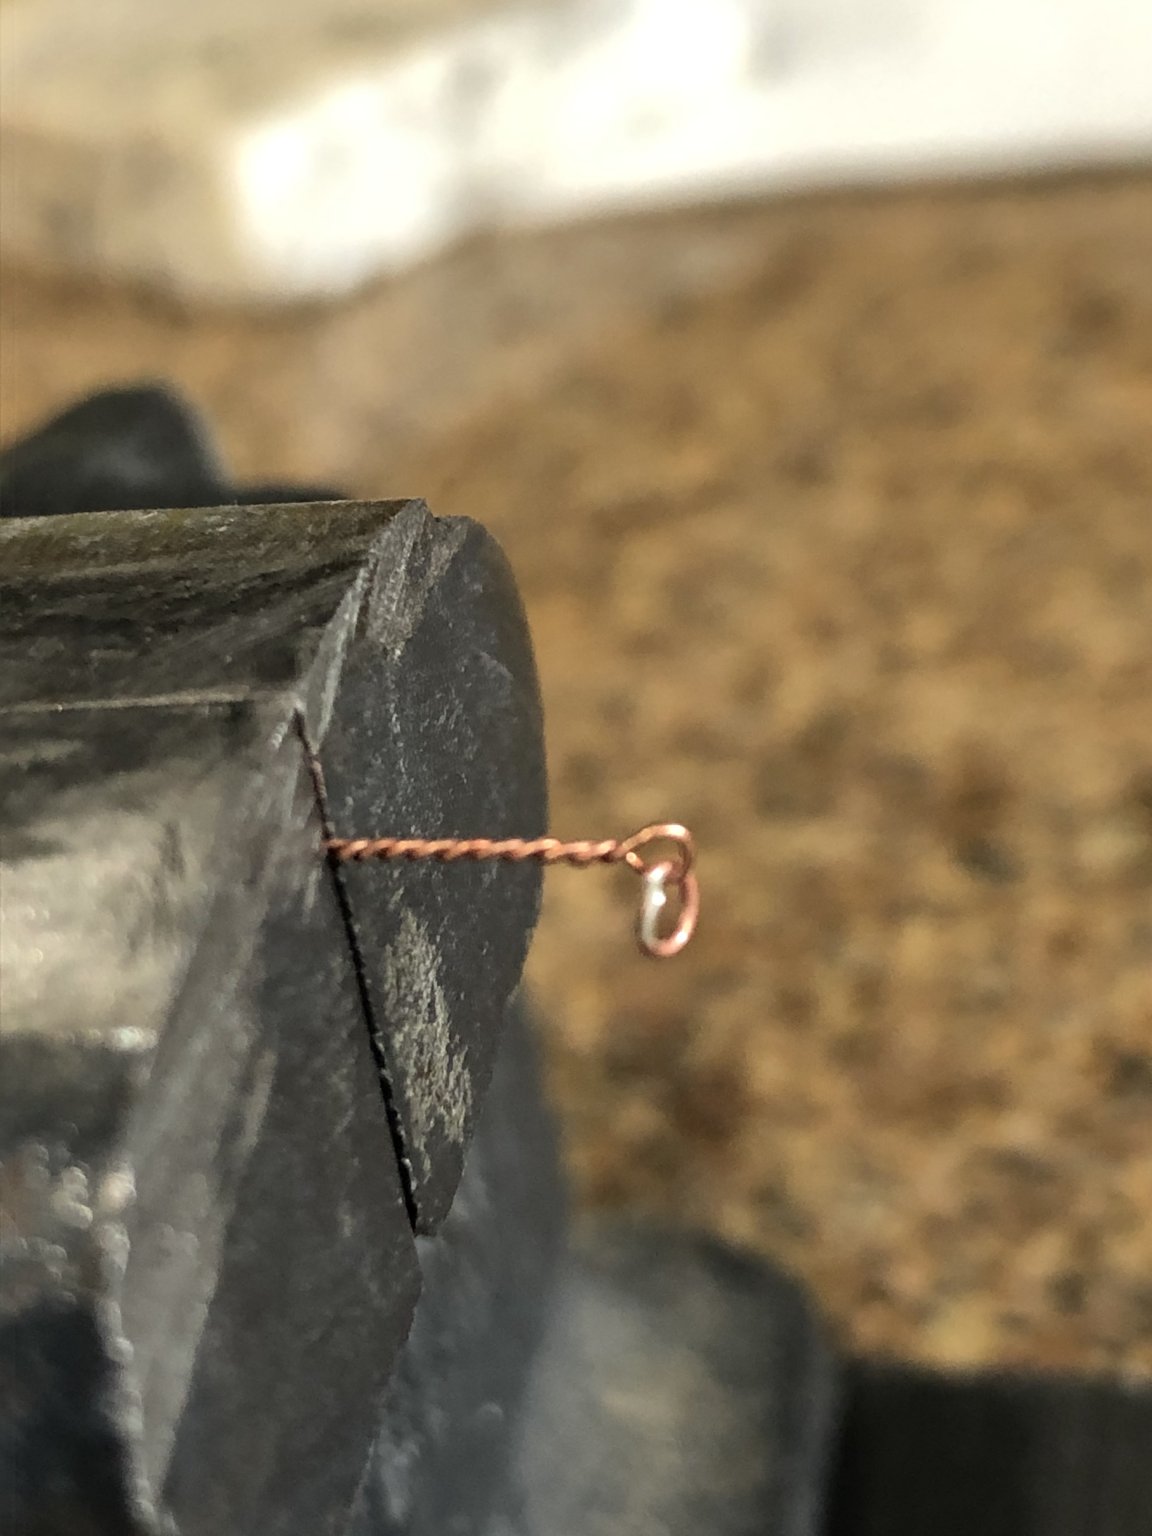
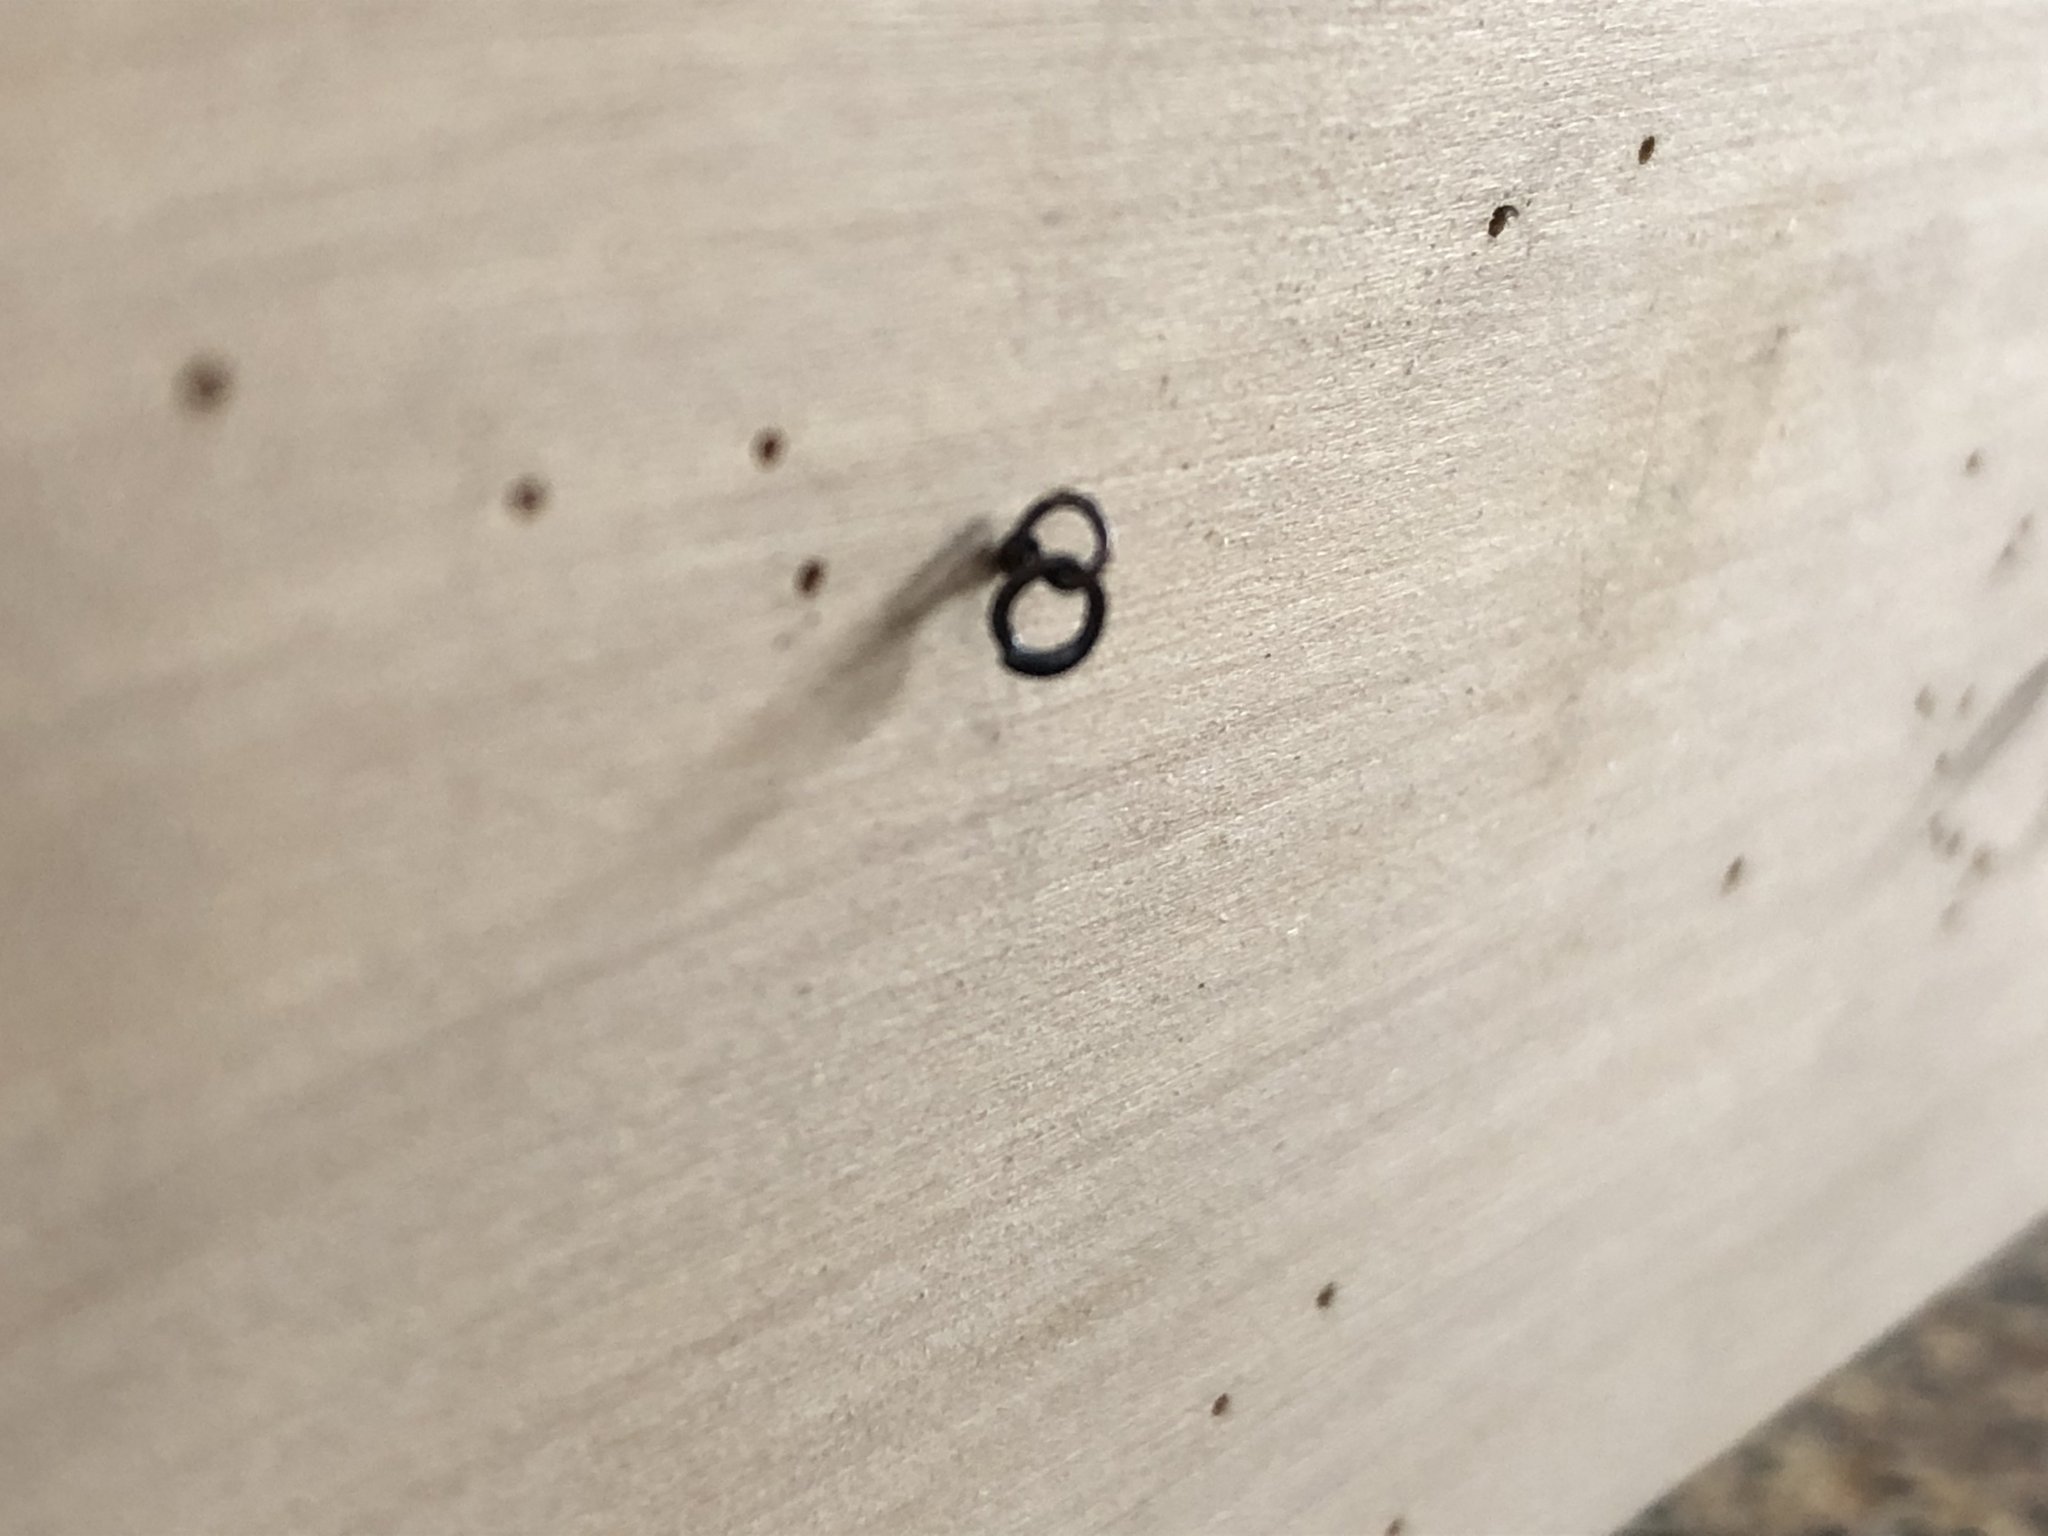
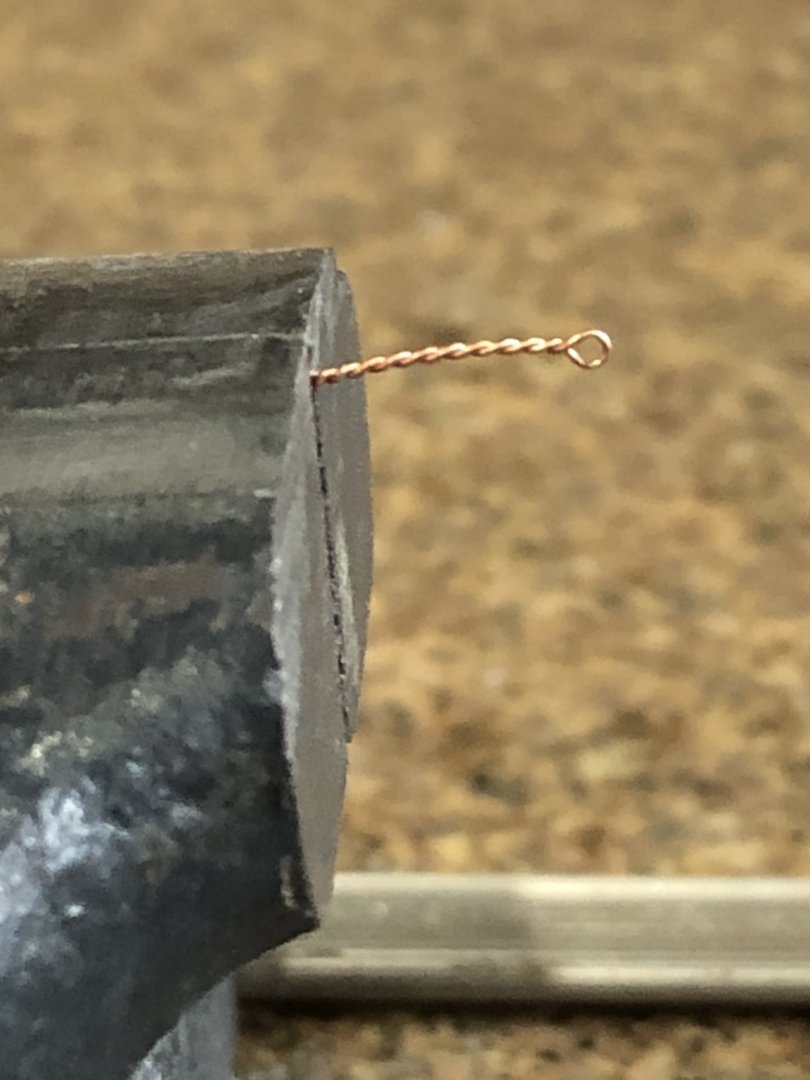
Not much to show for todays work. I made 100 eye bolts and 50 eye bolt with rings. The old saying apples hear "a picture is worth a 1000 words" so here goes. Spinning wire with a hook mounted in a pin vise. eye bolt with ring attached method to attach a soldered ring first place the ring on the wire to spin place in a vise and spin with the pin vise finished eye bolt and ring blacken with "liver of sulfur" and a finished eye bolt Using silver soldered rings allow the liver of sulfur to blacken the assembly and the soldered ring is strong enough to withstand the tension of rigging. Like I said not much to show but tomorrow I start on gun port lids and bulwark eye bolts. Oh yea, more work on the castings. Take care and stay well Will


-
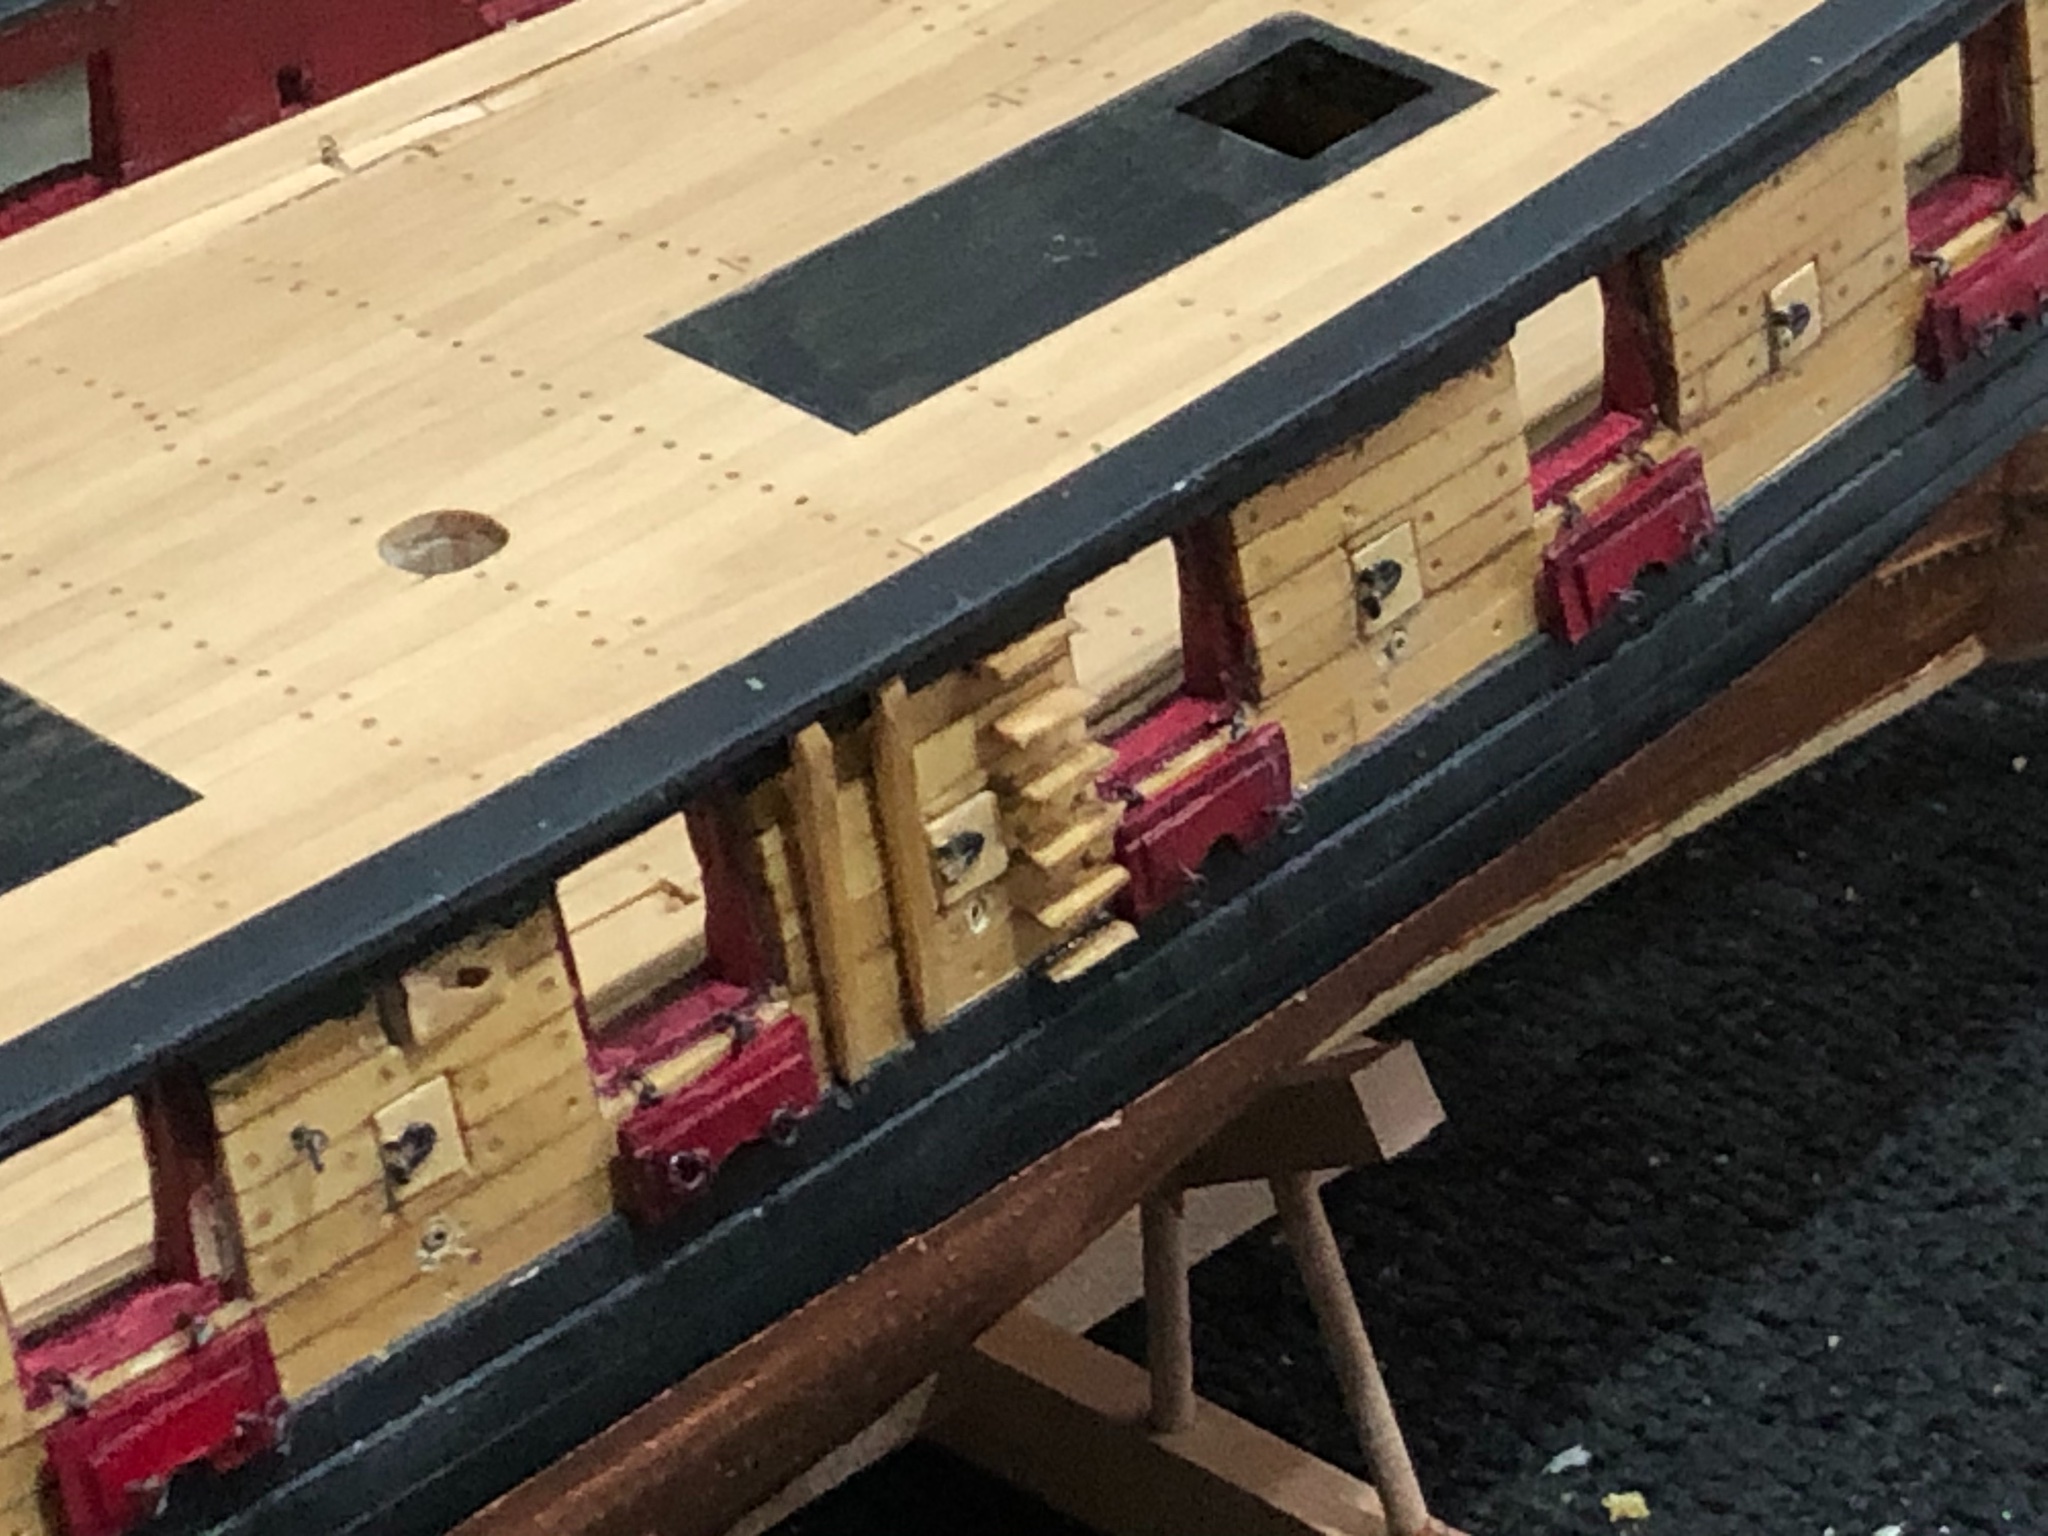
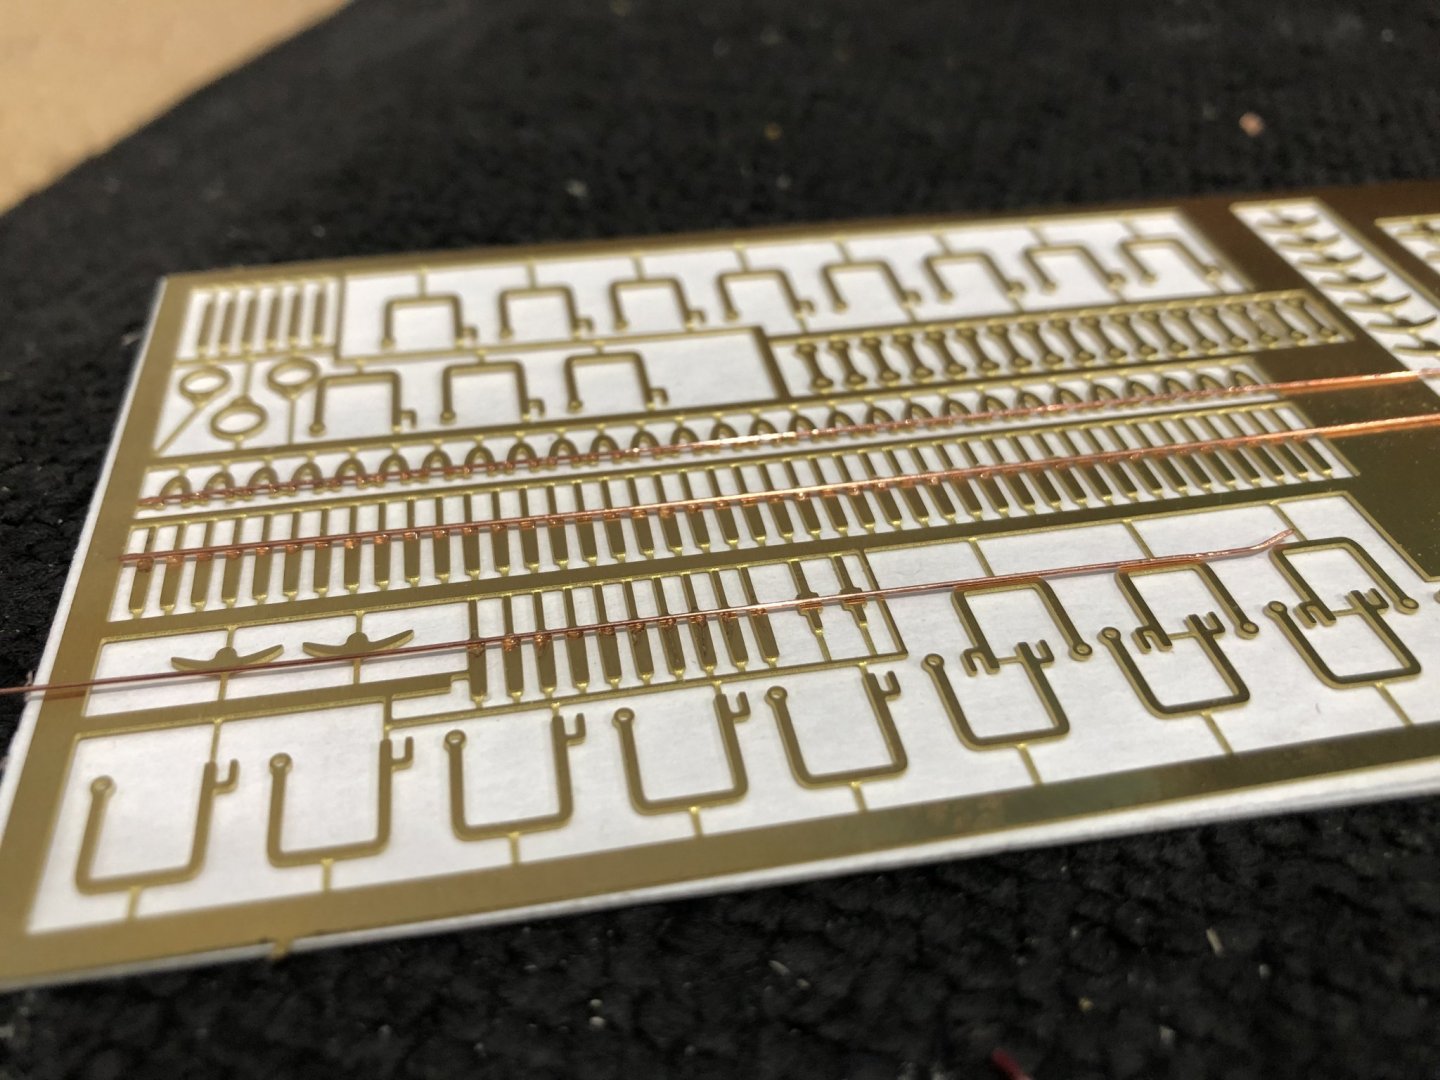
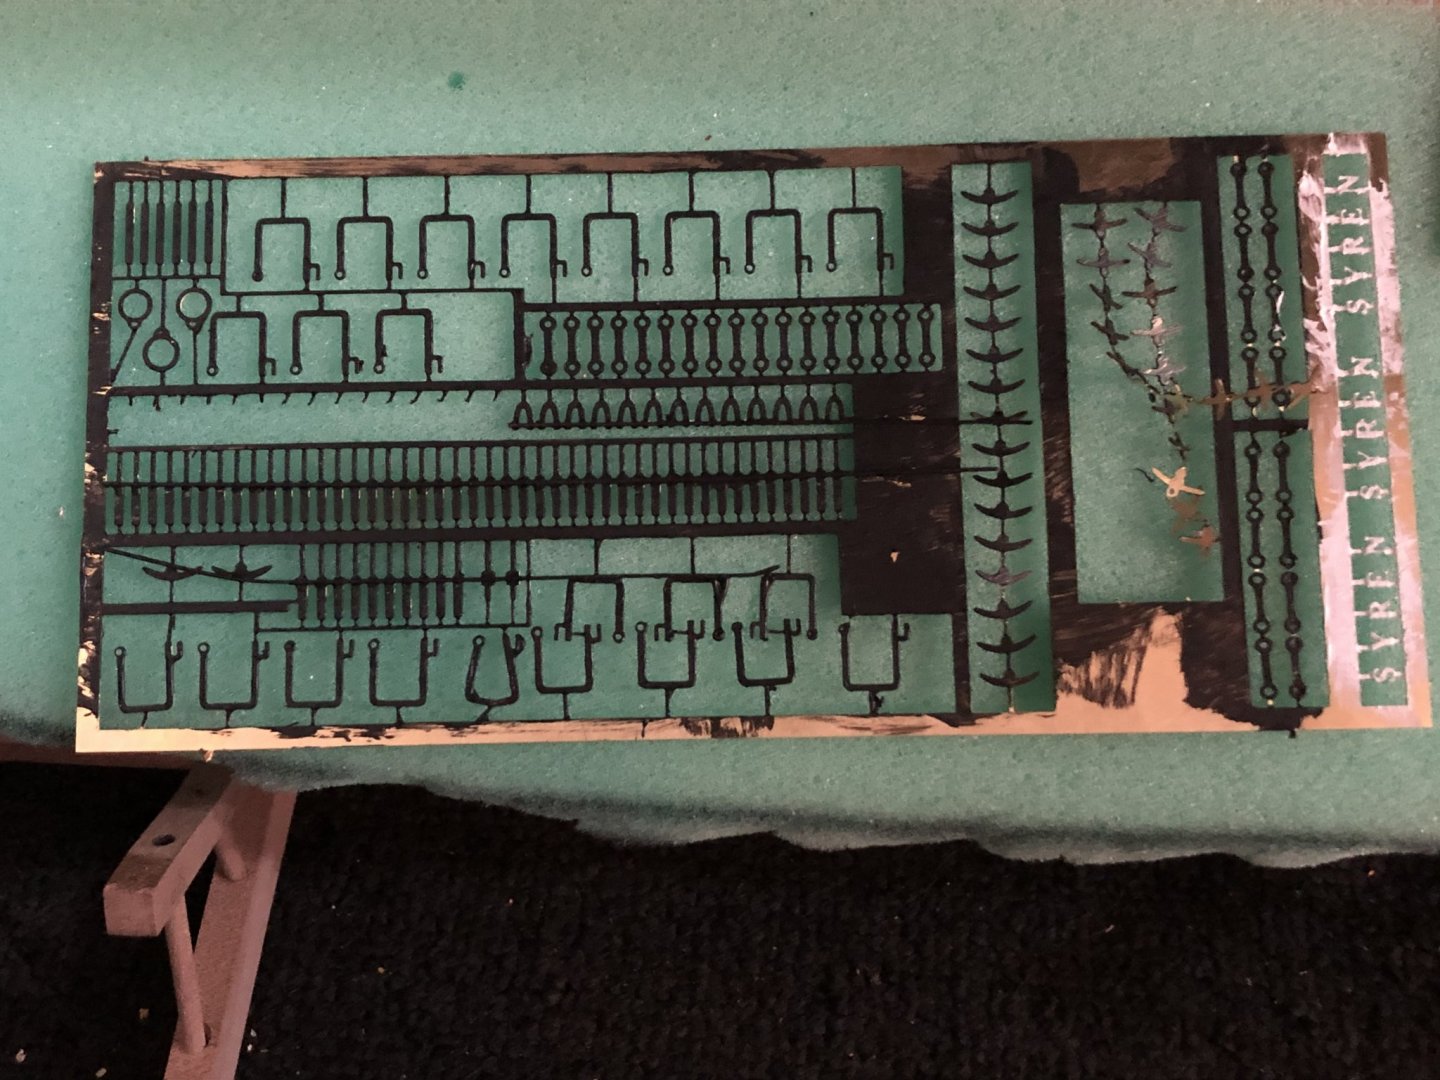
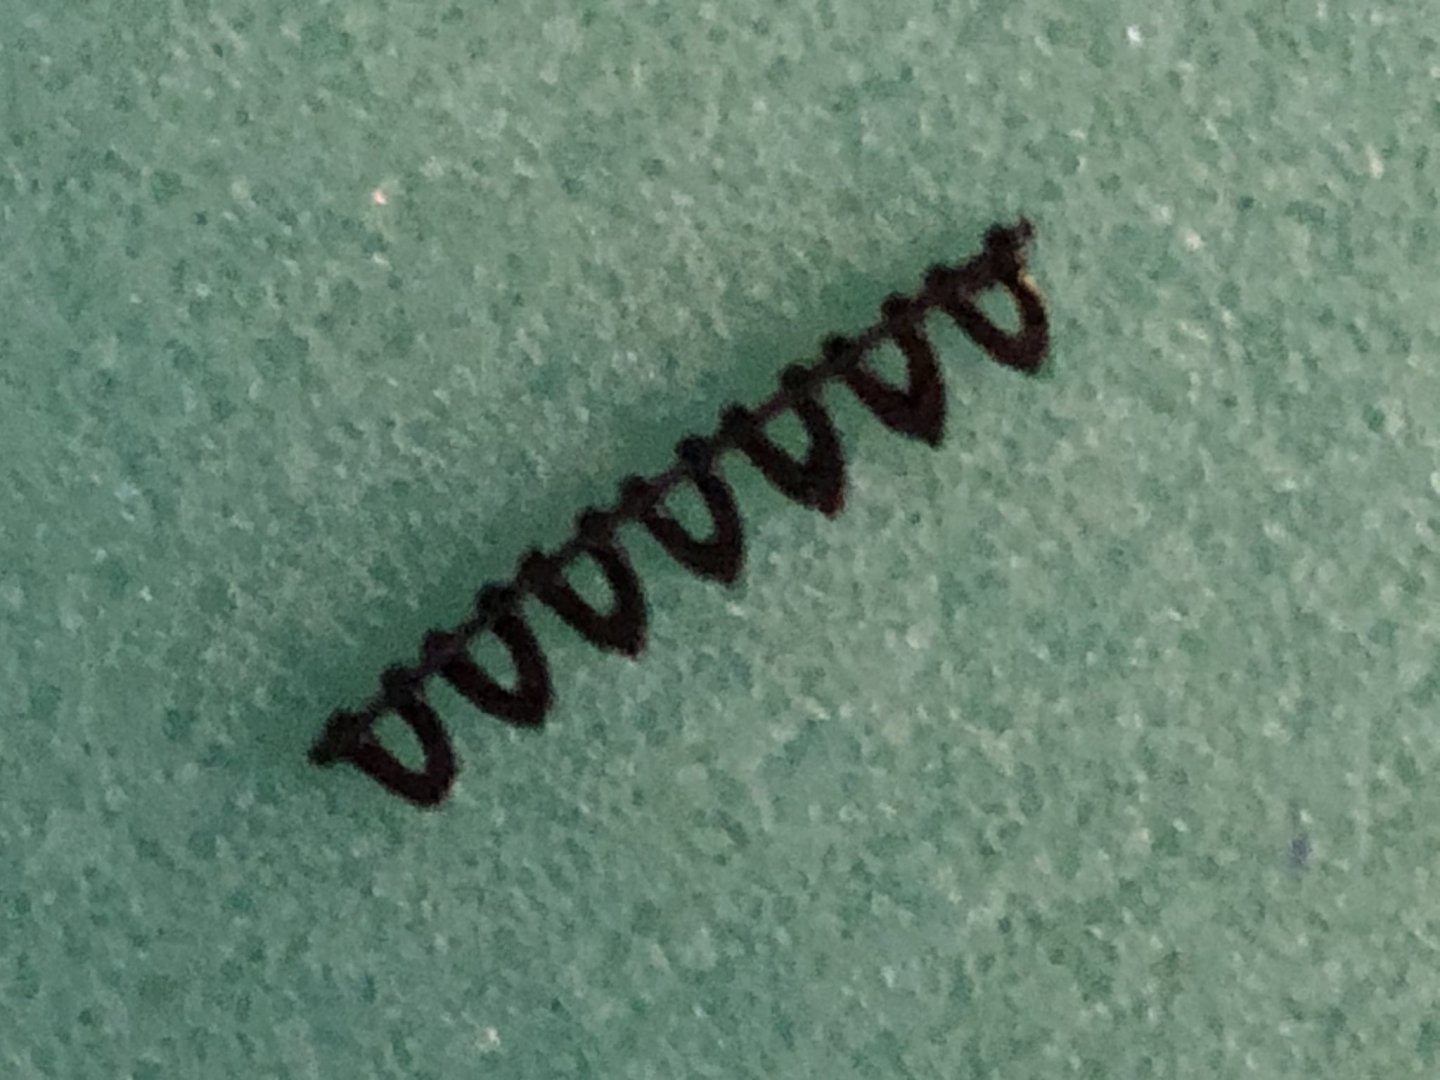
Started the next chapter about hull finishing. First thing was to decide rather to use the gallery castings or to make my own. I mounted the casting on a piece of wood and started cleaning up the images with my Micromotor. Its a work in progress and they are starting to look better with the features being more clearly defined. I'll post more about them as I progress and what decision I make to whether to use them or make my own. I looked at the photo etched panel specifically the sweep port hinges and thought I'd never be able to place the black wire for the hinges as described so I tried another method. I measured the black wire in the kit and found it to be .028 diameter, 1.792" in real scale, and the port doors are .125", 8" in scale, so I felt the wire was much too large. I straightened a length of 26 awe copper wire and attached the wire along the hinges where the simulated hinge pin were to be placed. Clear JBWeld was used by applying it on the parts with a toothpick. I then painted the photo etched panel black and let it all dry to set up for a couple of days. I then make the sweep doors staining and wipe on poly ready to mount. After mounting the sweep doors I snipped of a hinge as I needed. A quick look a the doors assembled. next I'll make eyebolts and eyebolts with rings for rigging and gun port lids. Stay Well and Safe Will
-
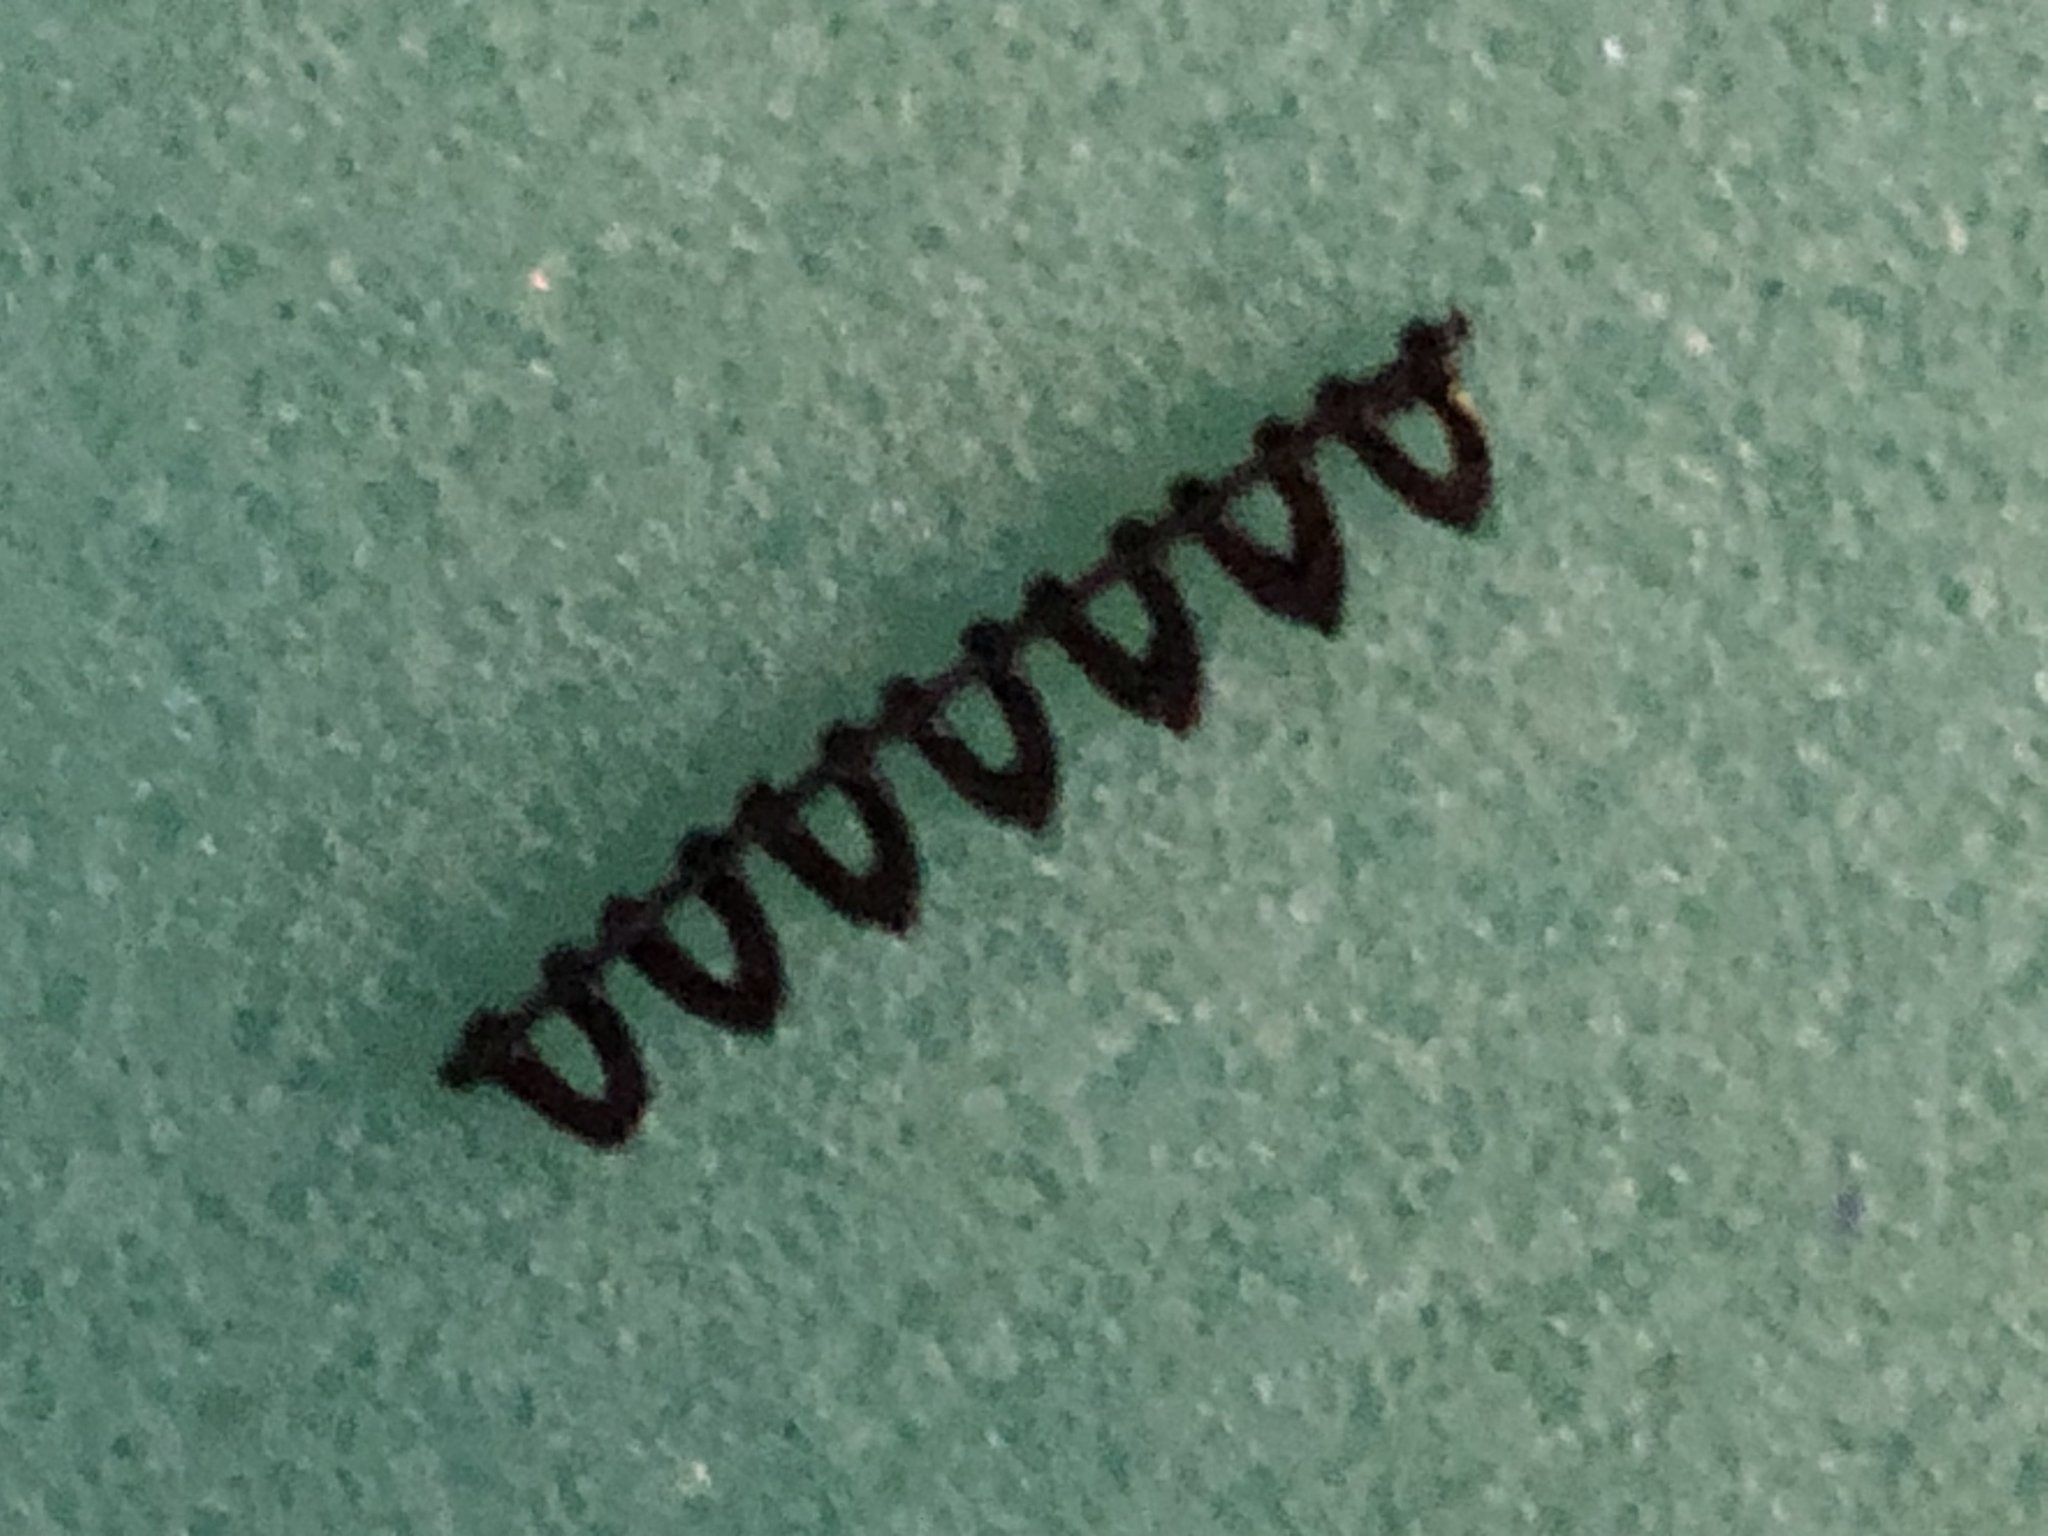
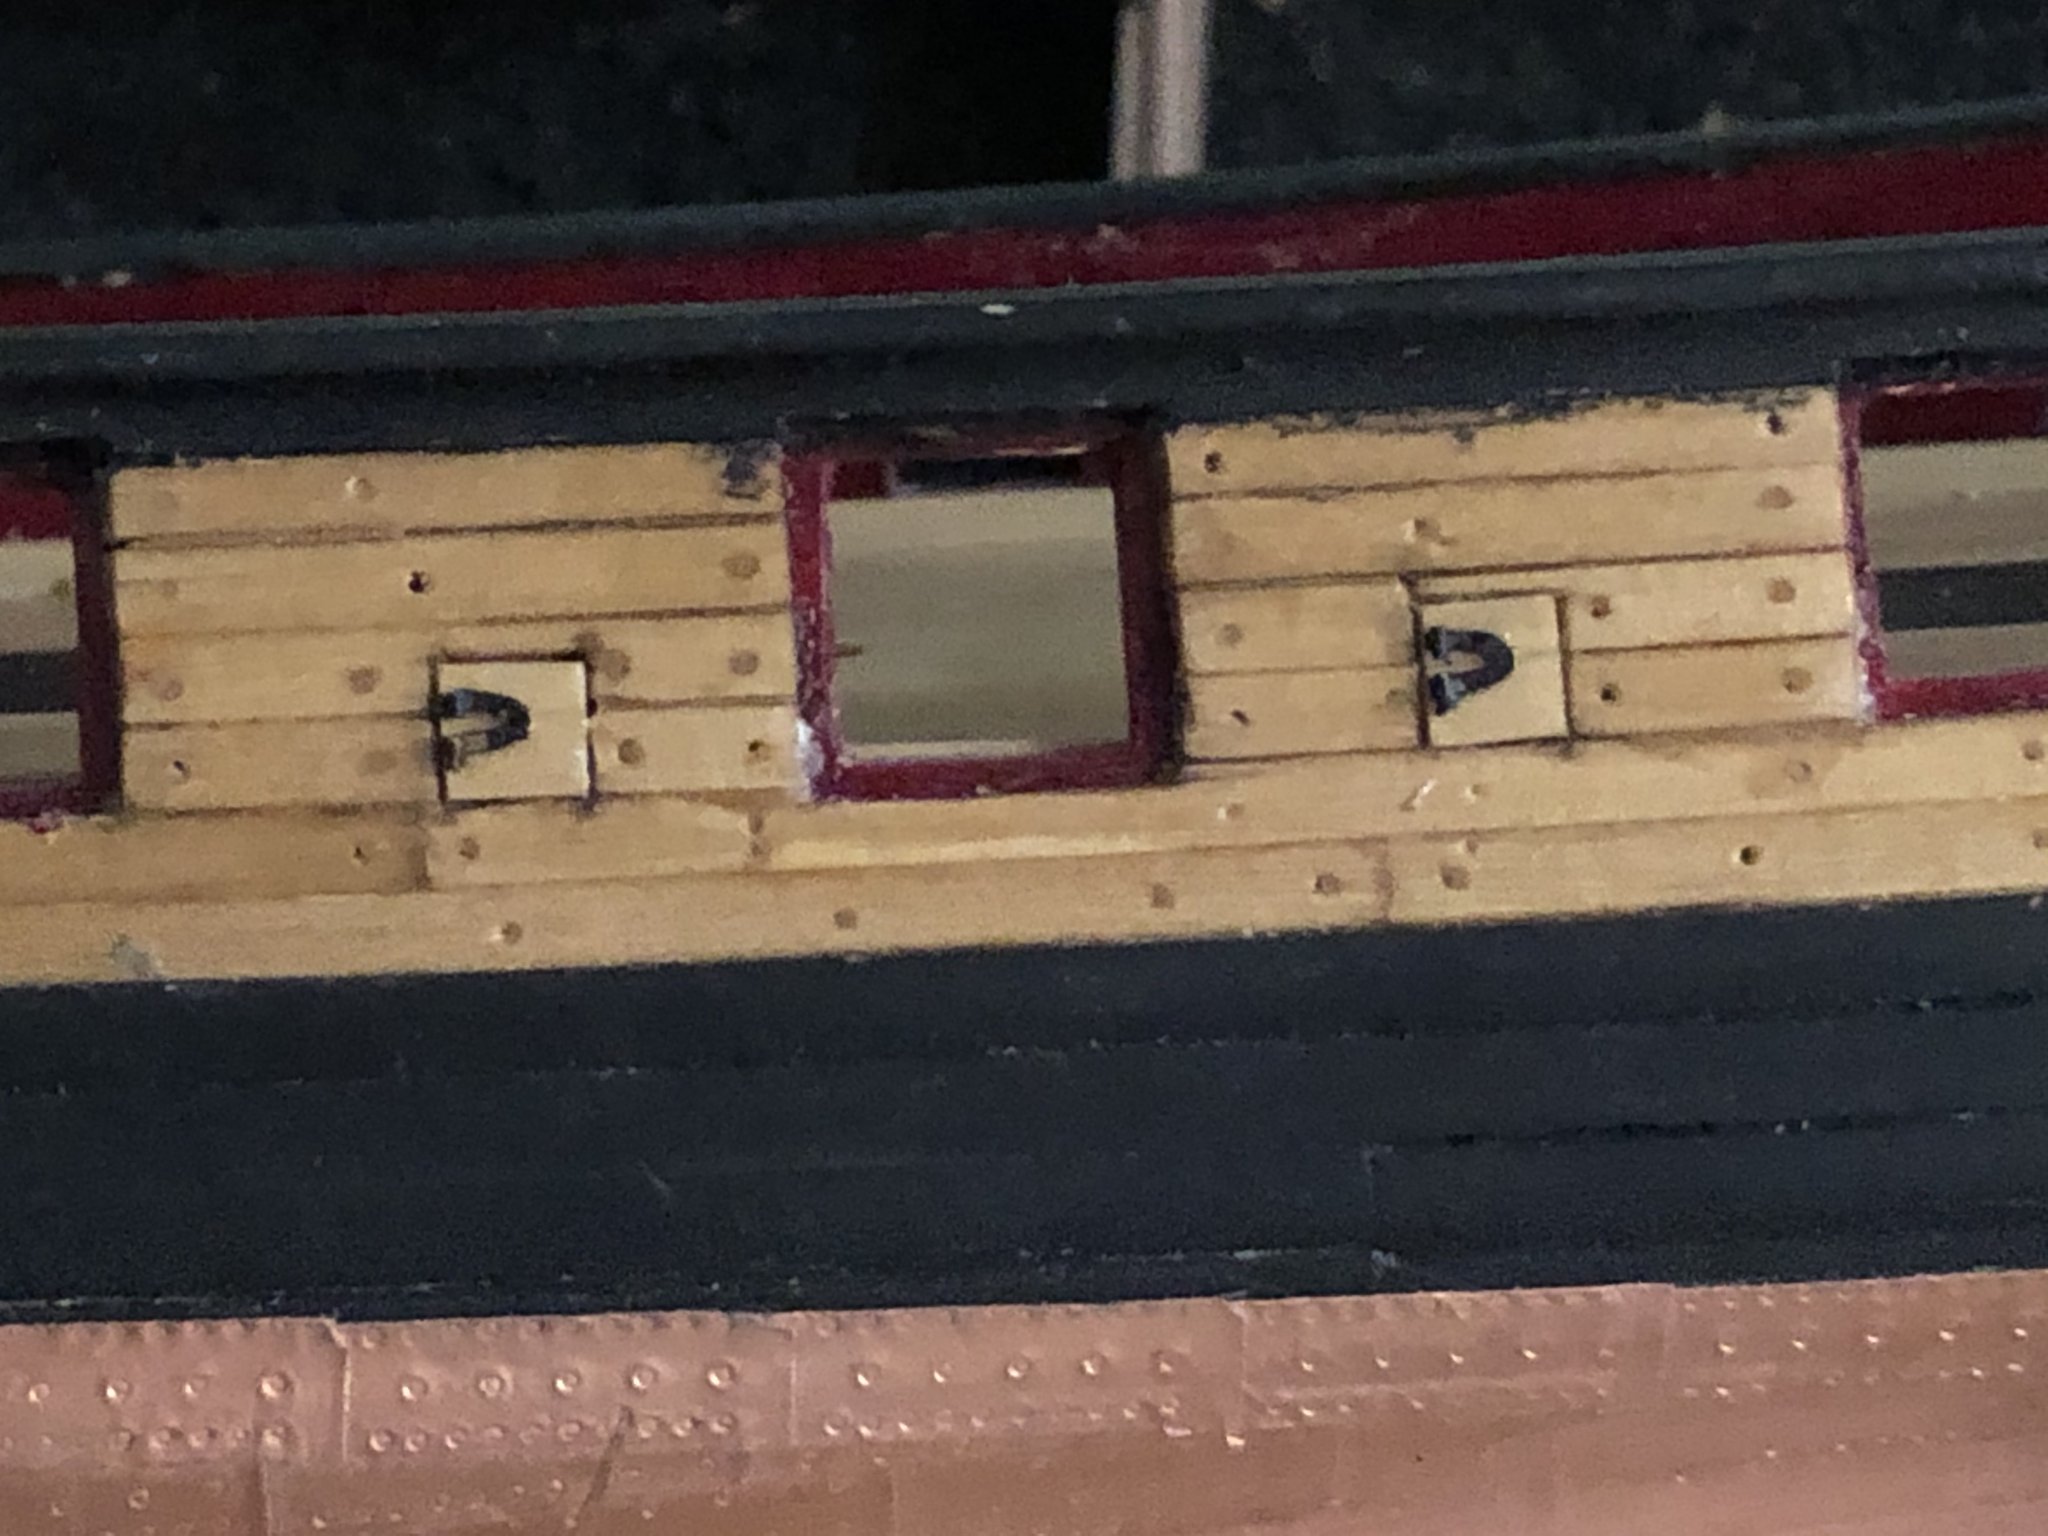
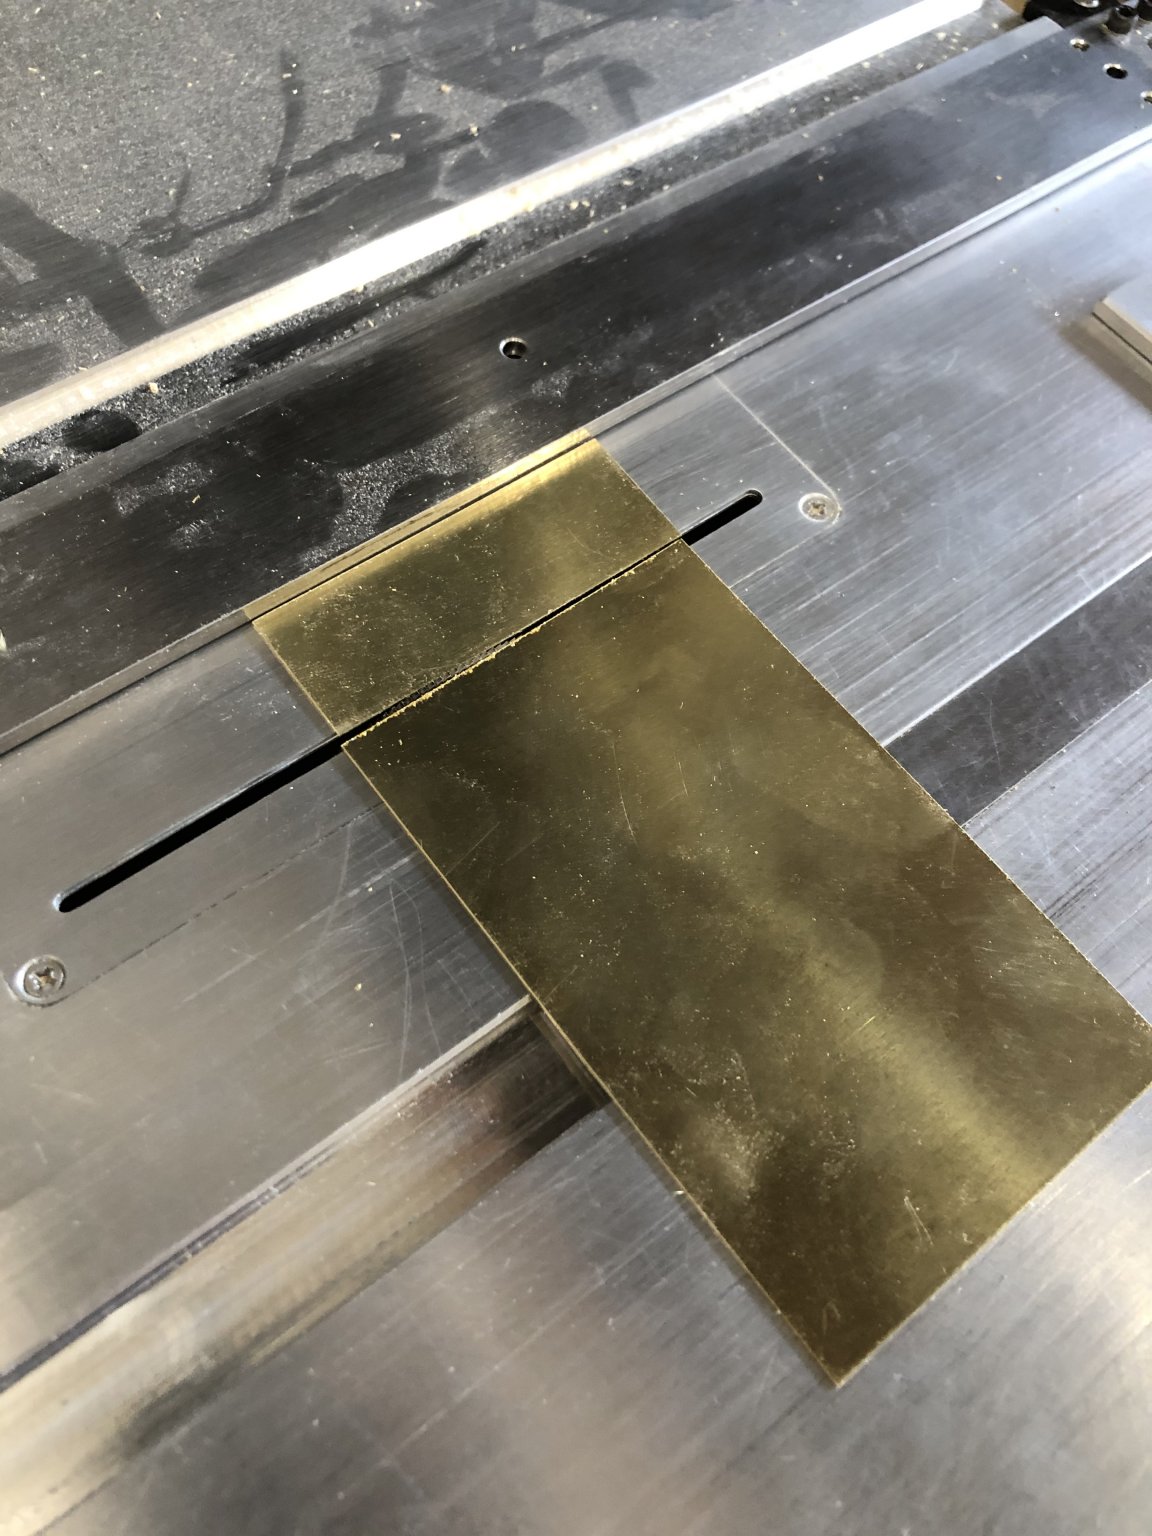
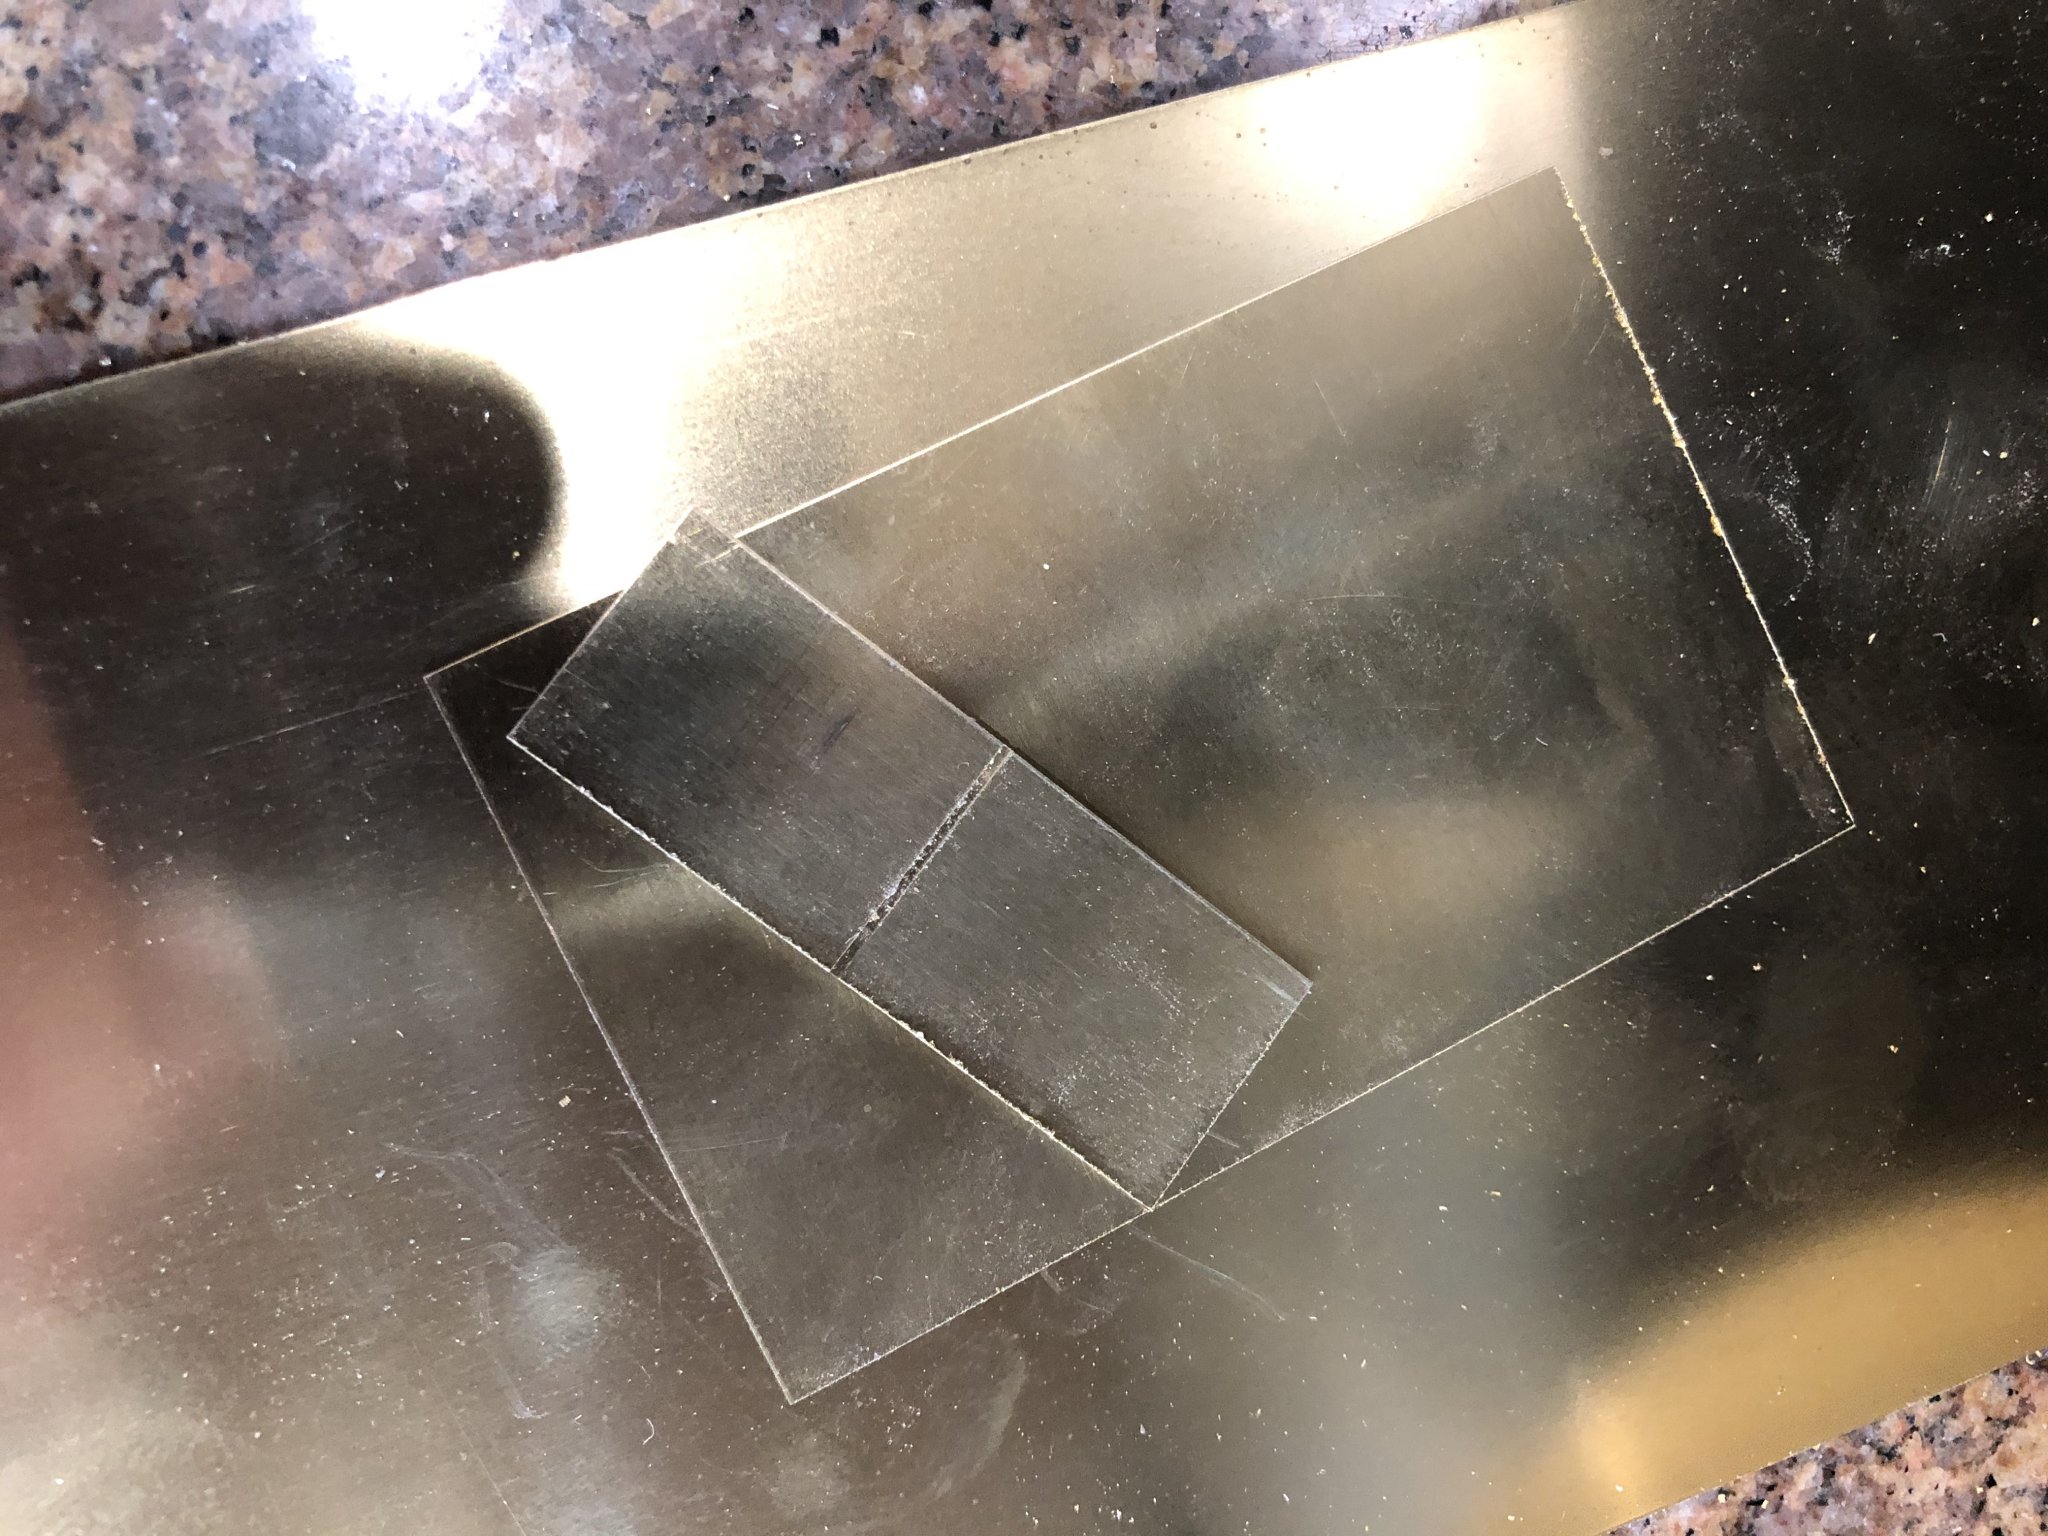
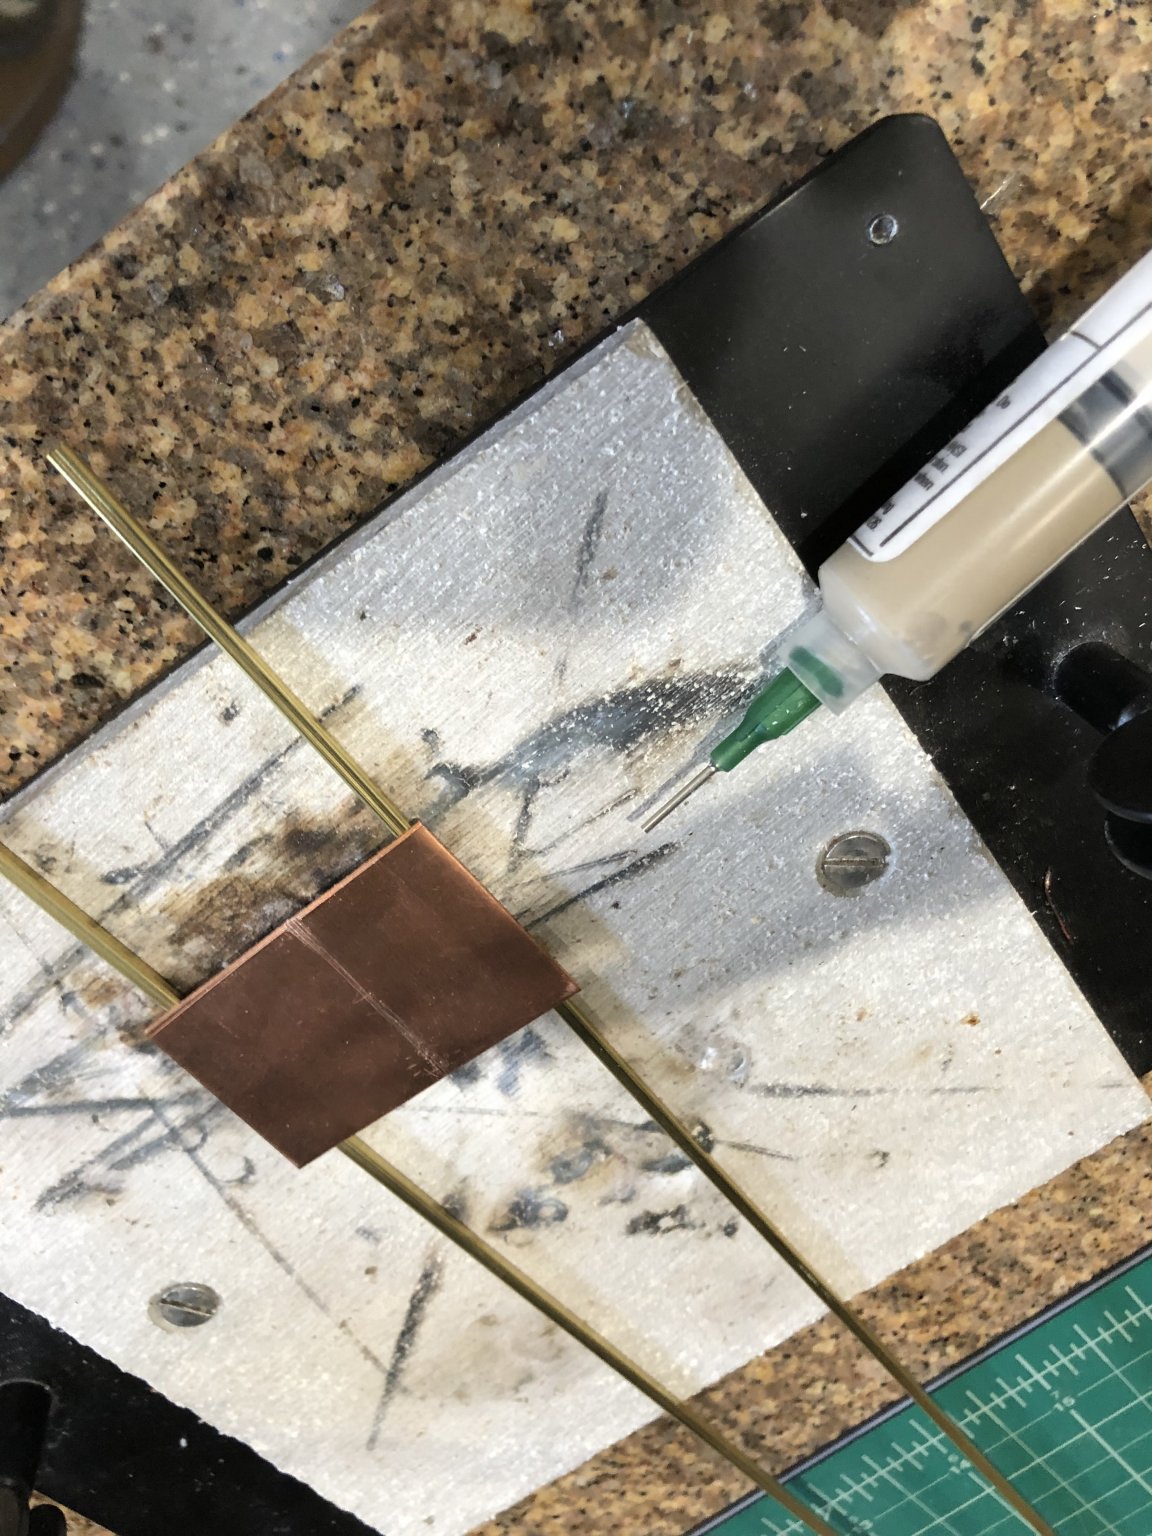
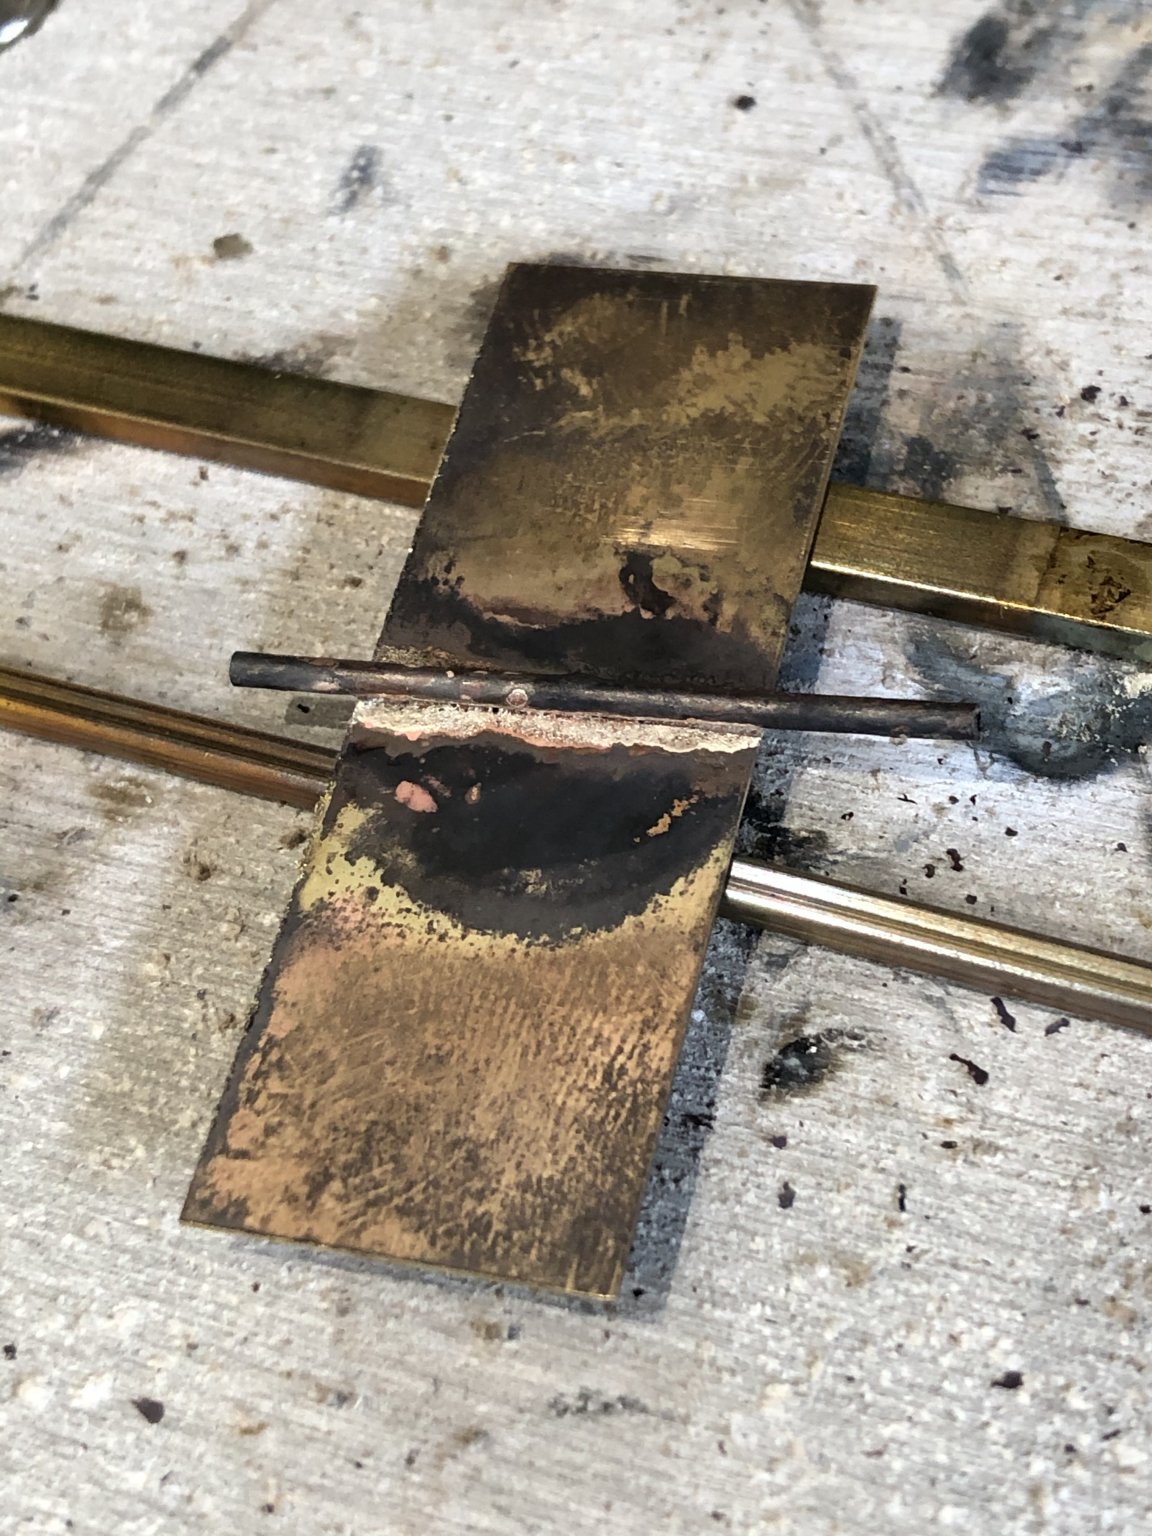
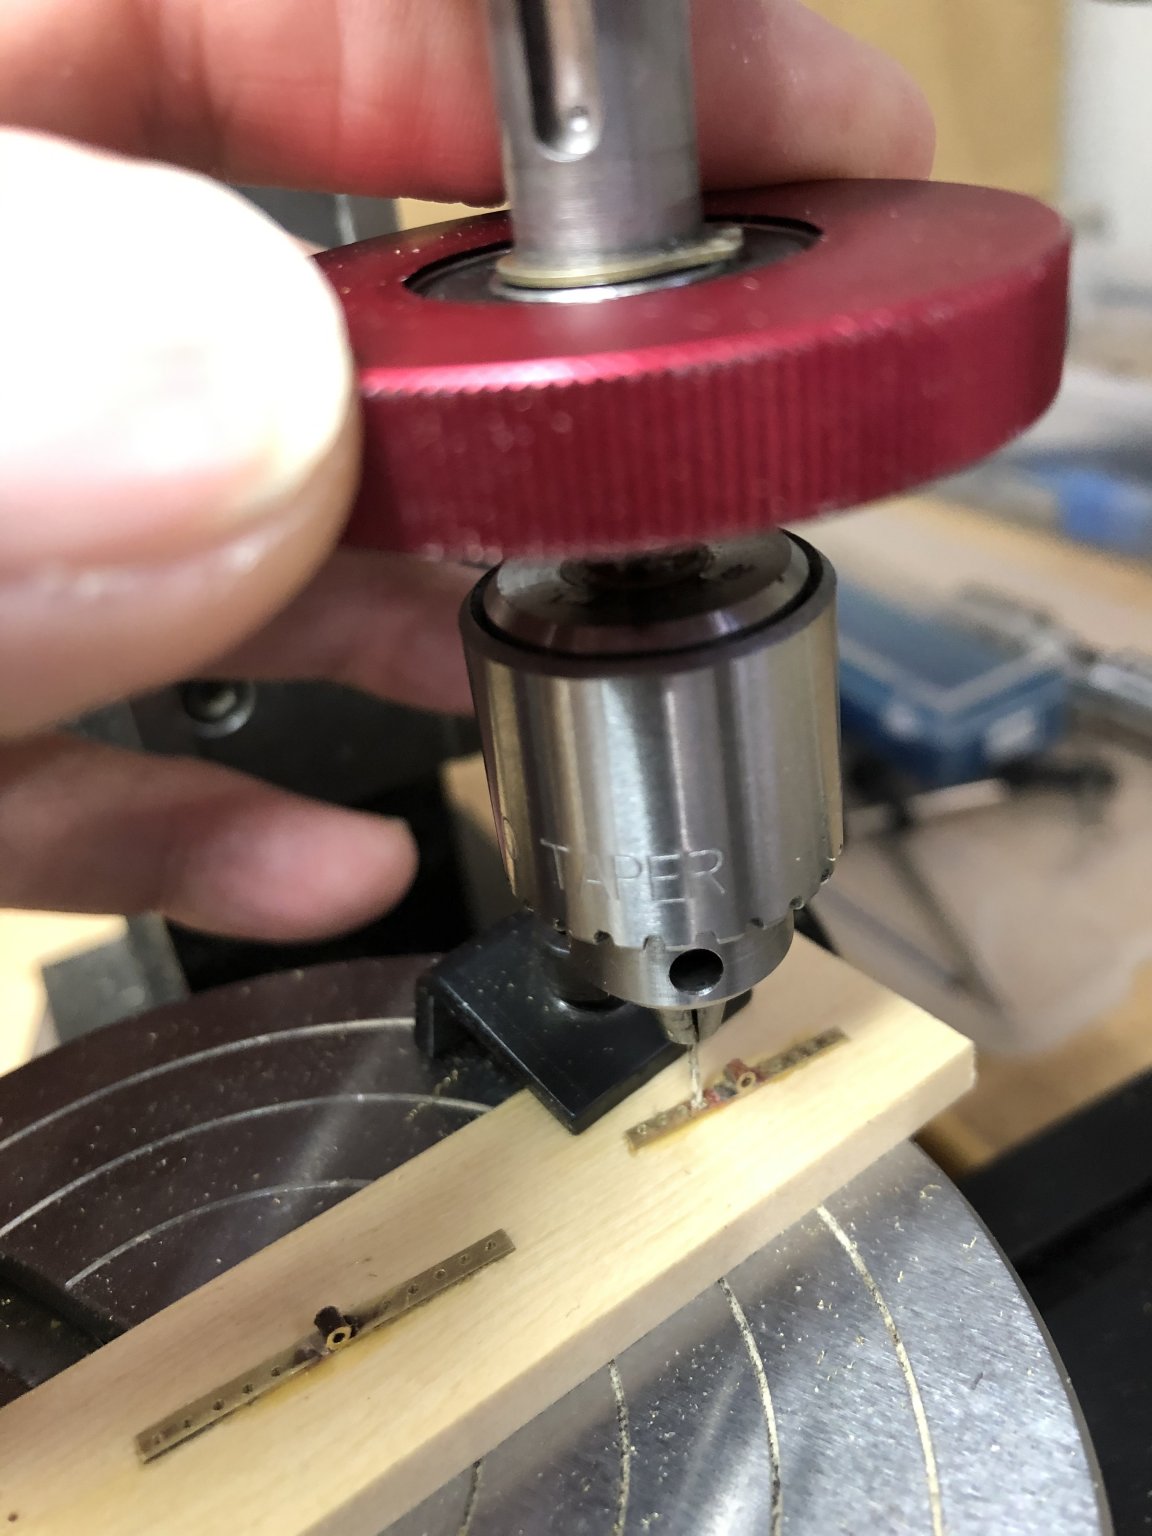
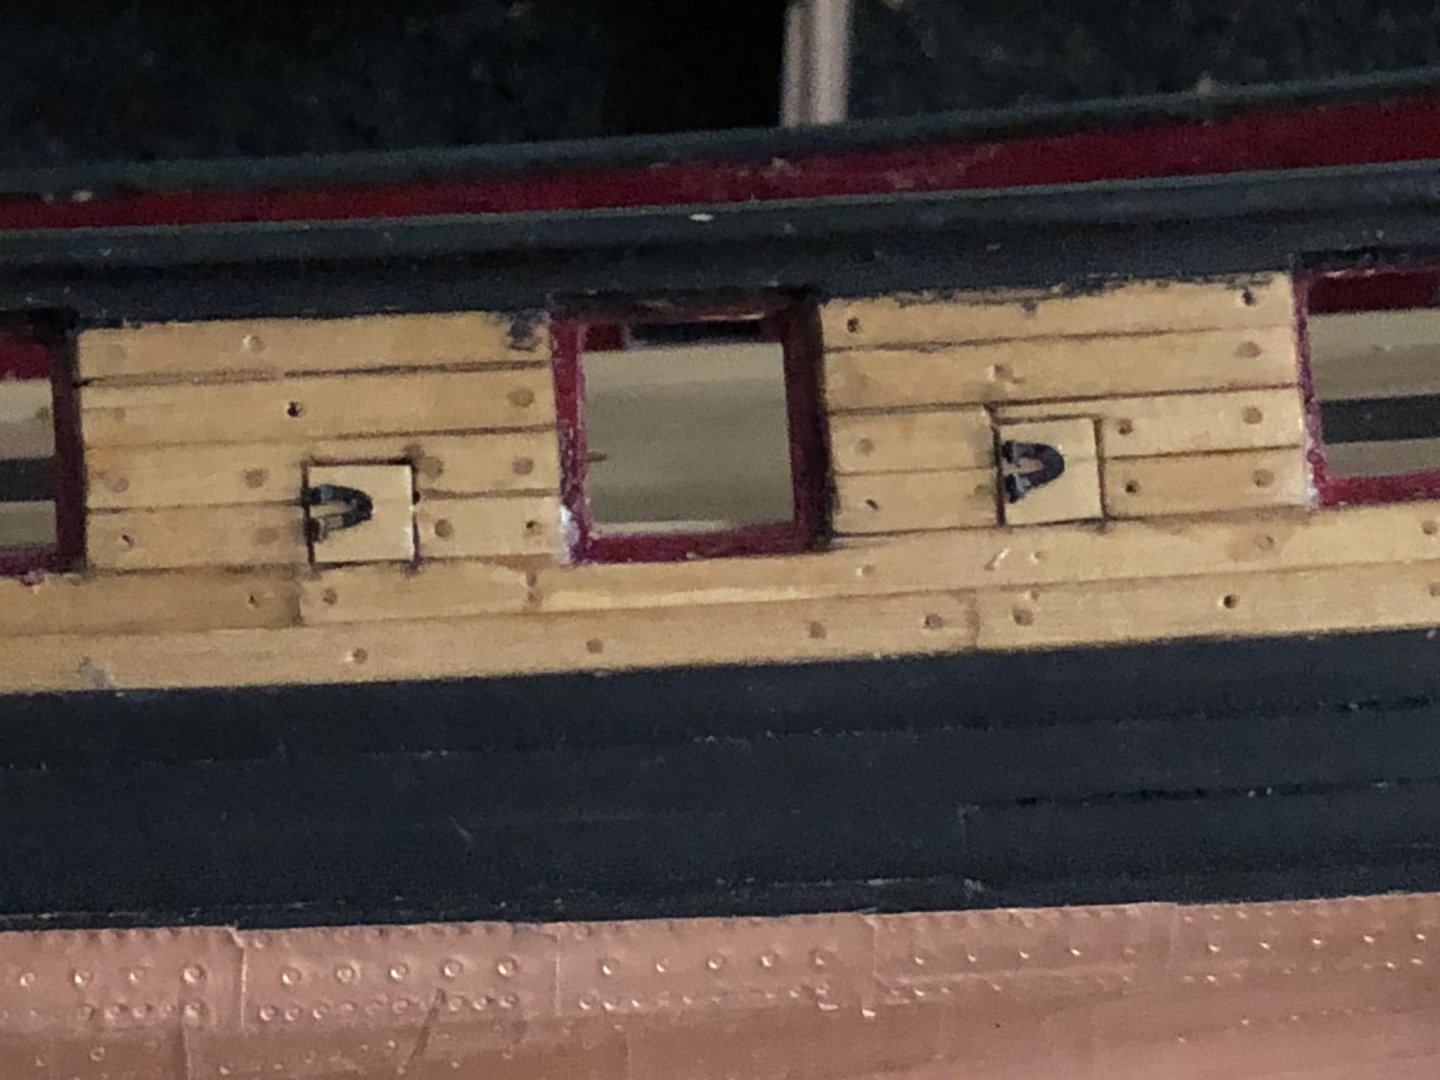
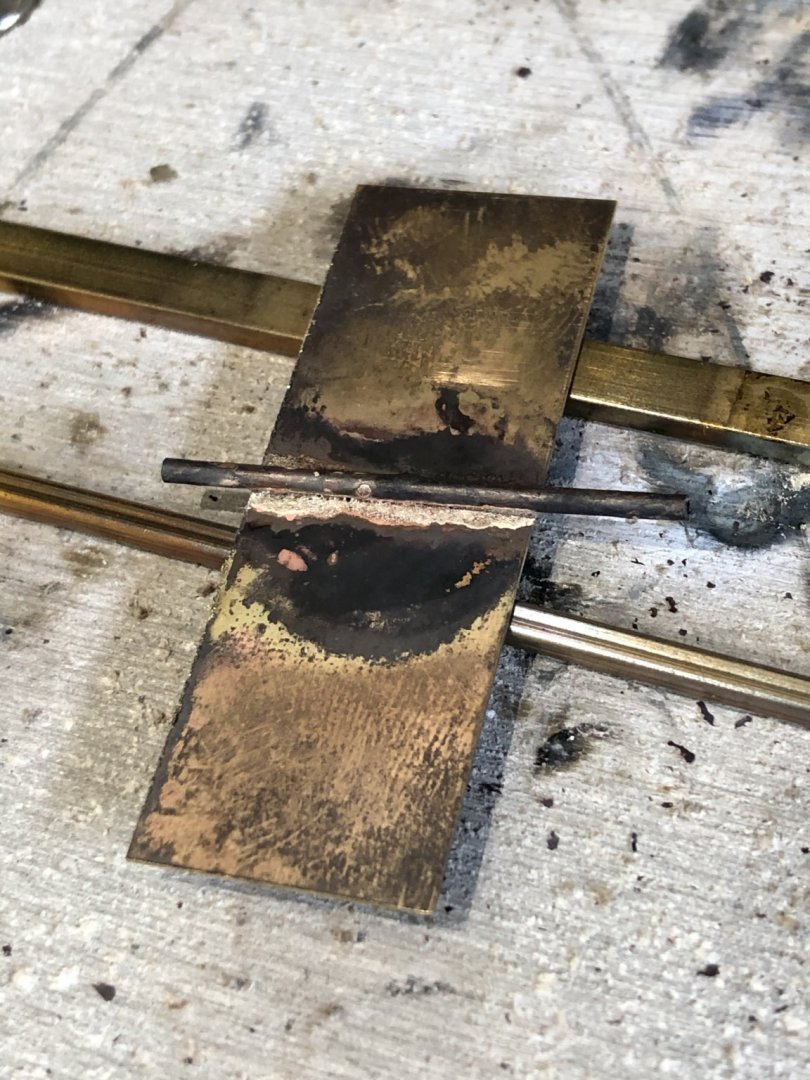
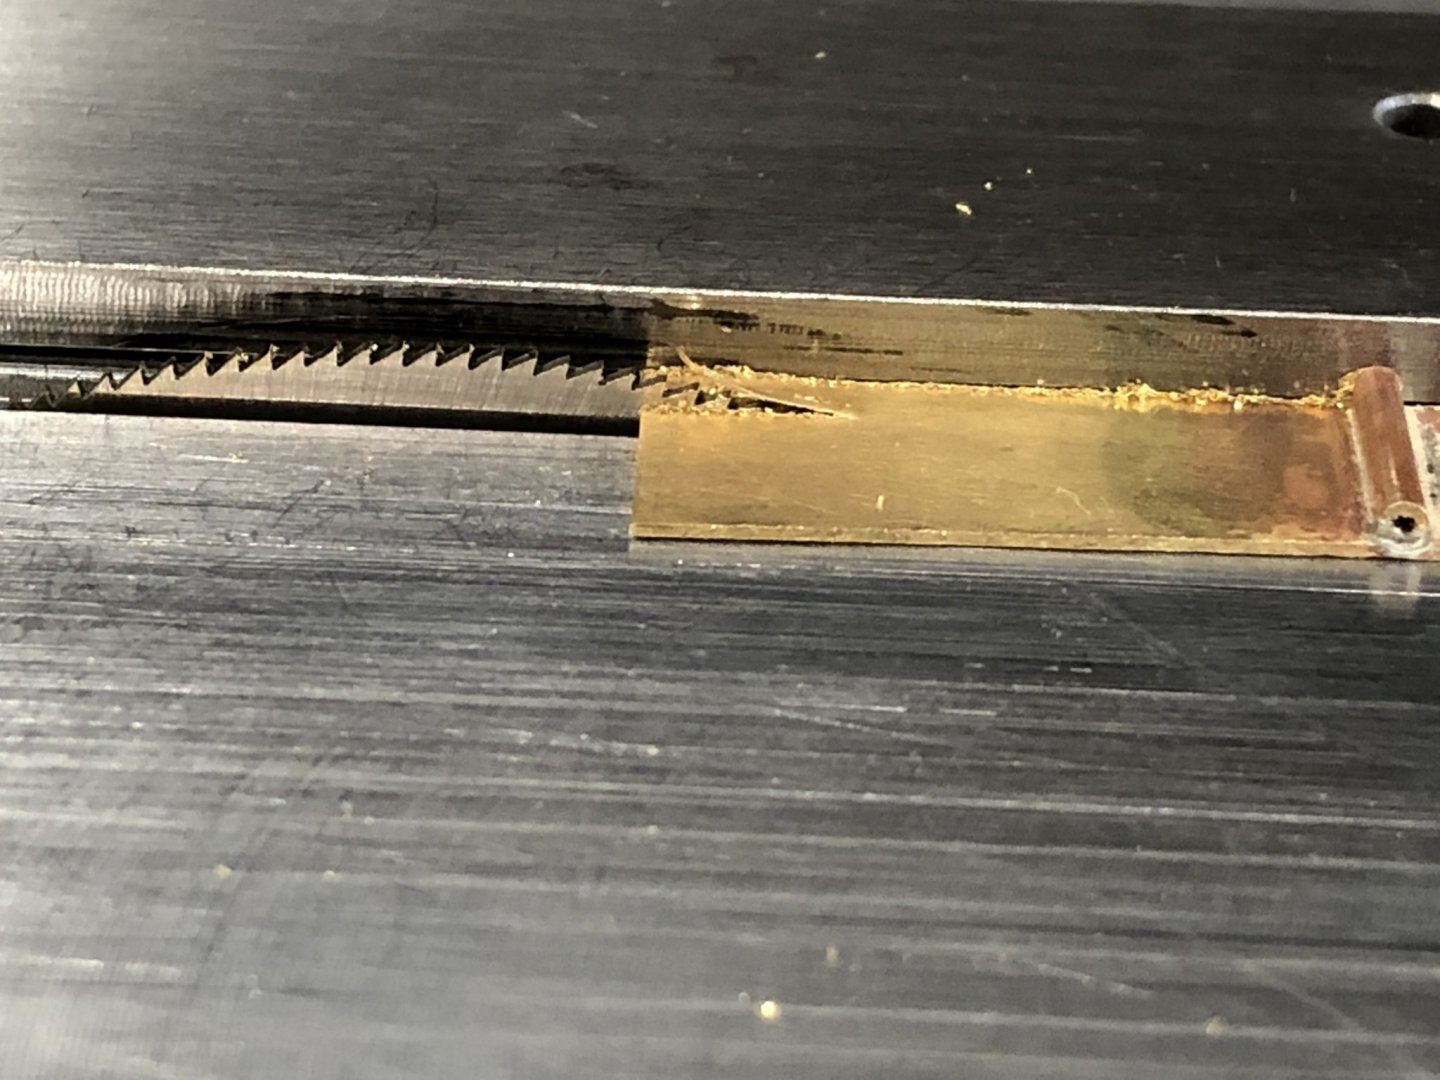
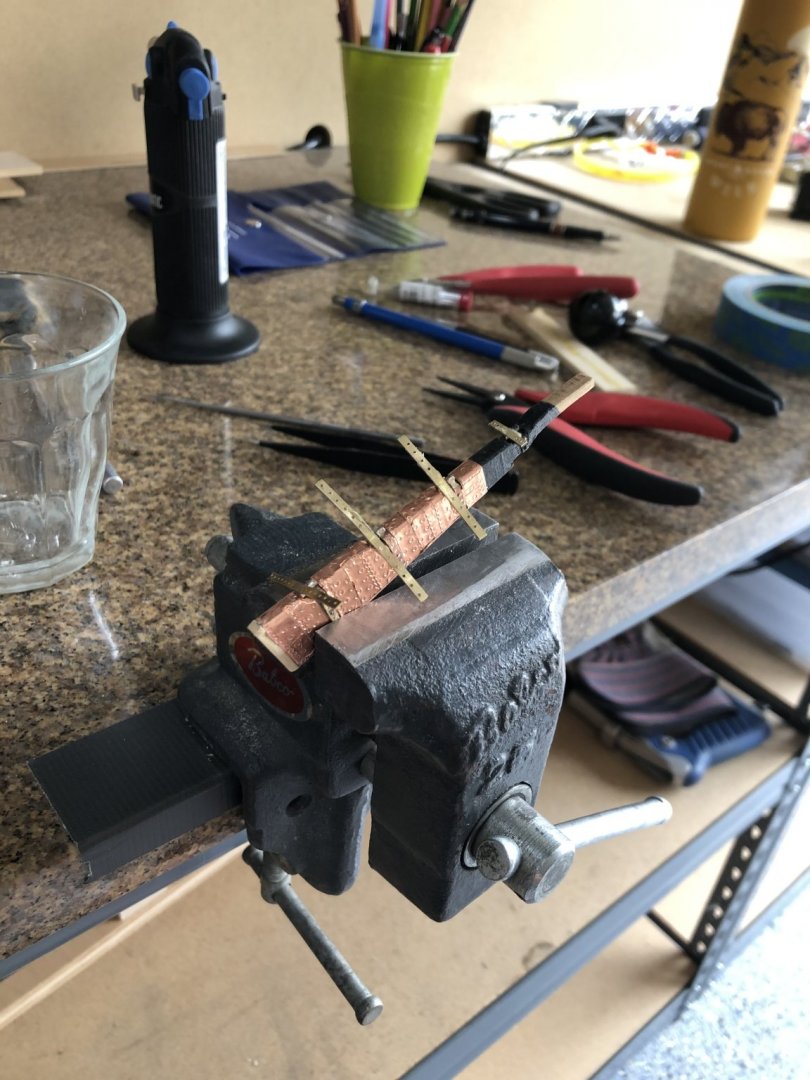
Pintles and gudgeons made and rudder attached is the current update to the Syren. I used Ed Tostis method to make the pintles and gudgeons as he describes in his book "Young America" pages 192 through 196 and the results were excellent. Tho make the parts I took a piece of .03 brass sheet cut to the maximum length required to make the parts and wide enough to make the 8 pieces .06 wide when finished. as show in the picture below. I then used the mitre saw (.03 kefir) to scratch a line across the piece and the used a round swiss file to make a channel that the .06 dia tube would lay into. Next I layed a length of the .06 turbo into the channel to hold it in place while being soldered. Using silver solder paste of the medium hard variety so when the pins are soldered using easy solder paste (lower temperature) the harder (higher temperature) paste wont melt. As ugly as the piece is it cleans up nicely when I pickled it in 91% alcohol as you can see in the next picture. Using my table saw with a .023 kerf slitting I just sliced off the pieces to make the pintles and gudgeons. When all the pieces had cooled and had been cleaned smooth I glued them to a piece of scrap wood to hold in place while drilling. The finished rudder and the finished rudder on the Syrene This method worked really well for me and I'll use it again on the next model. I hope this will help anyone considering how to make pintles and gudgeons Stay Well and Safe Will


-
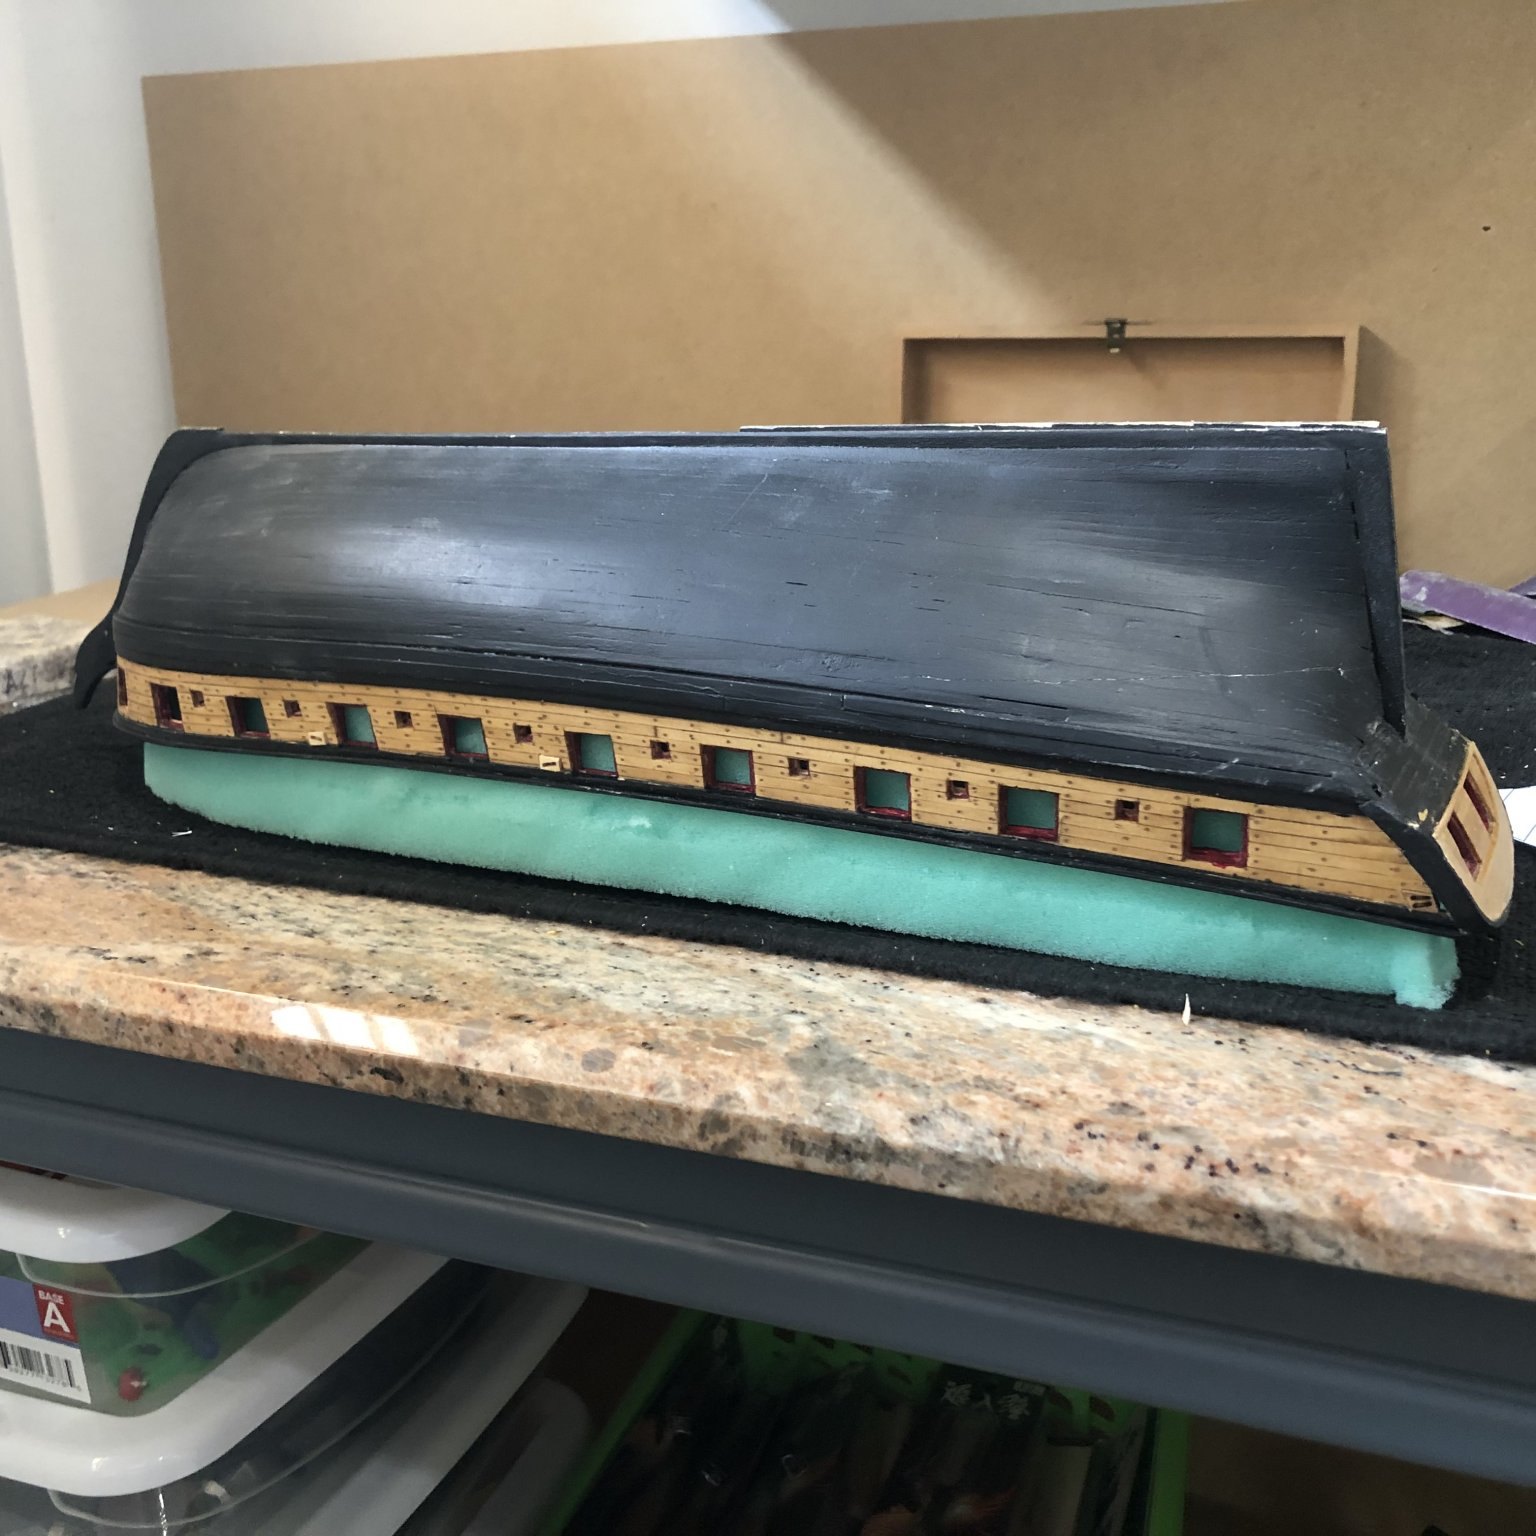
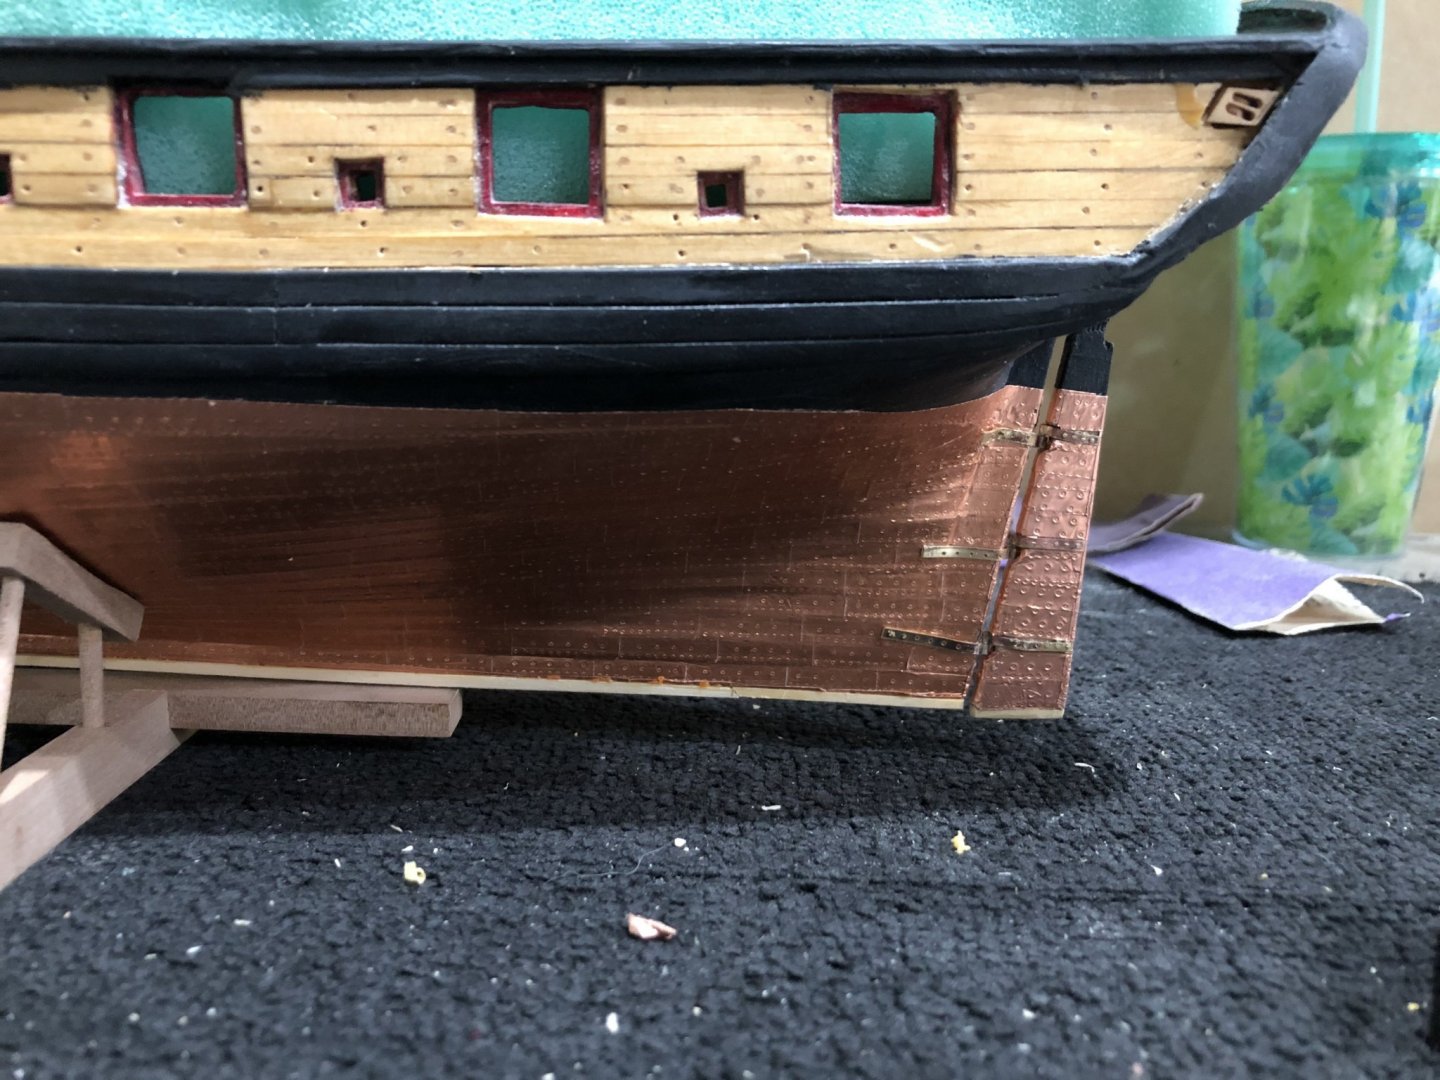
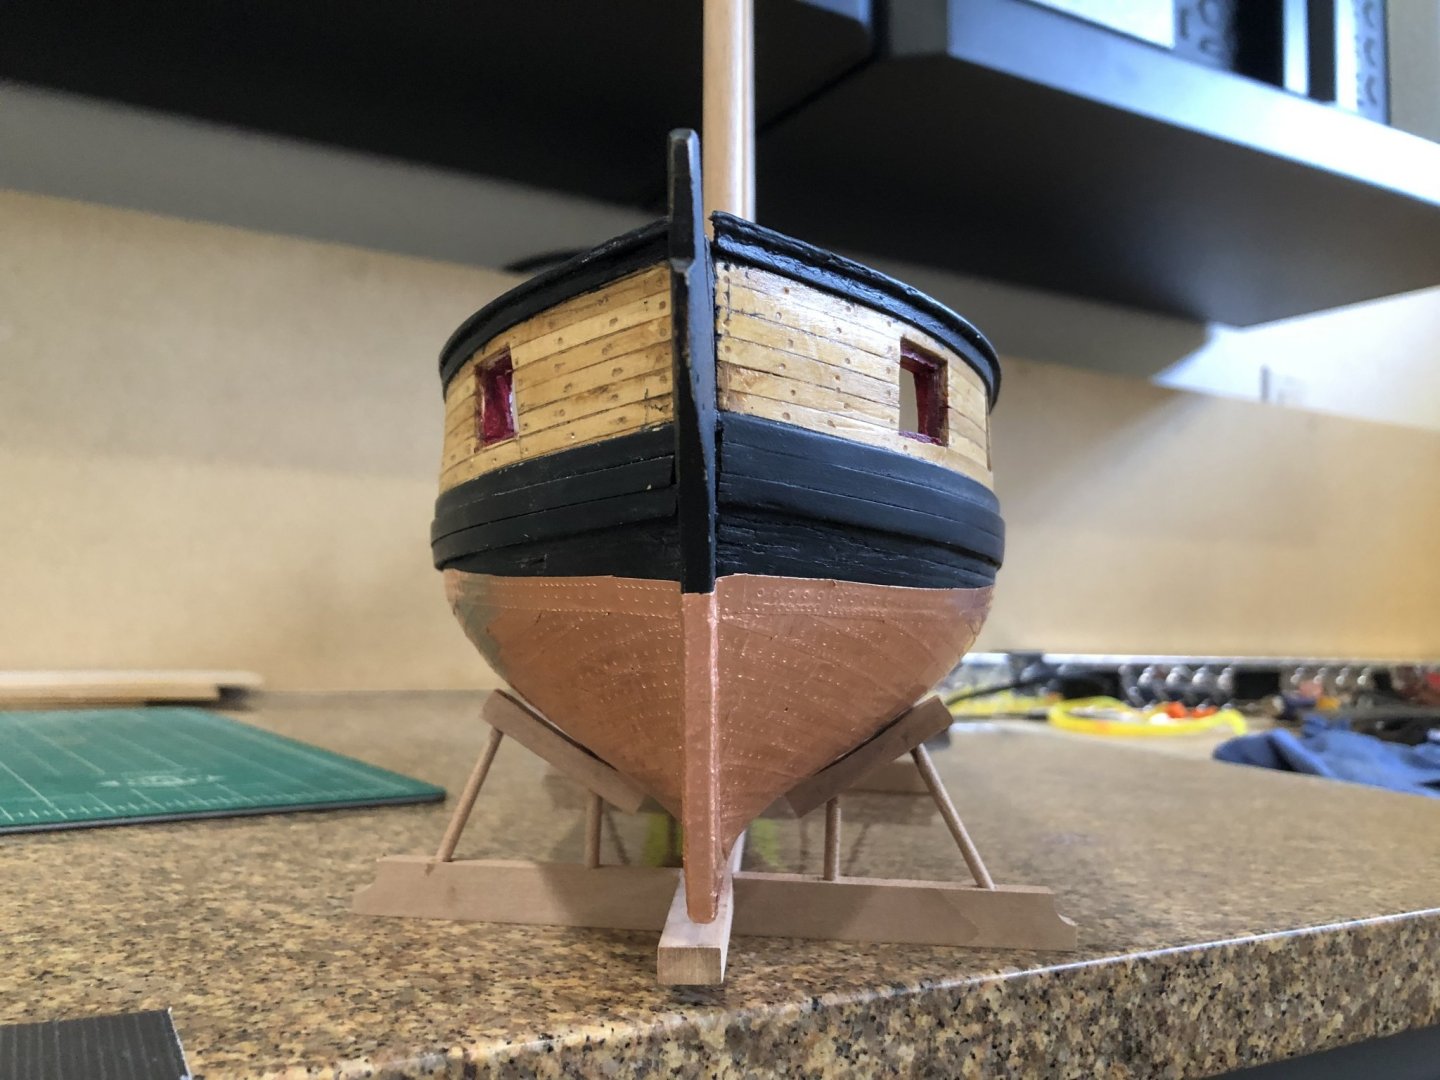
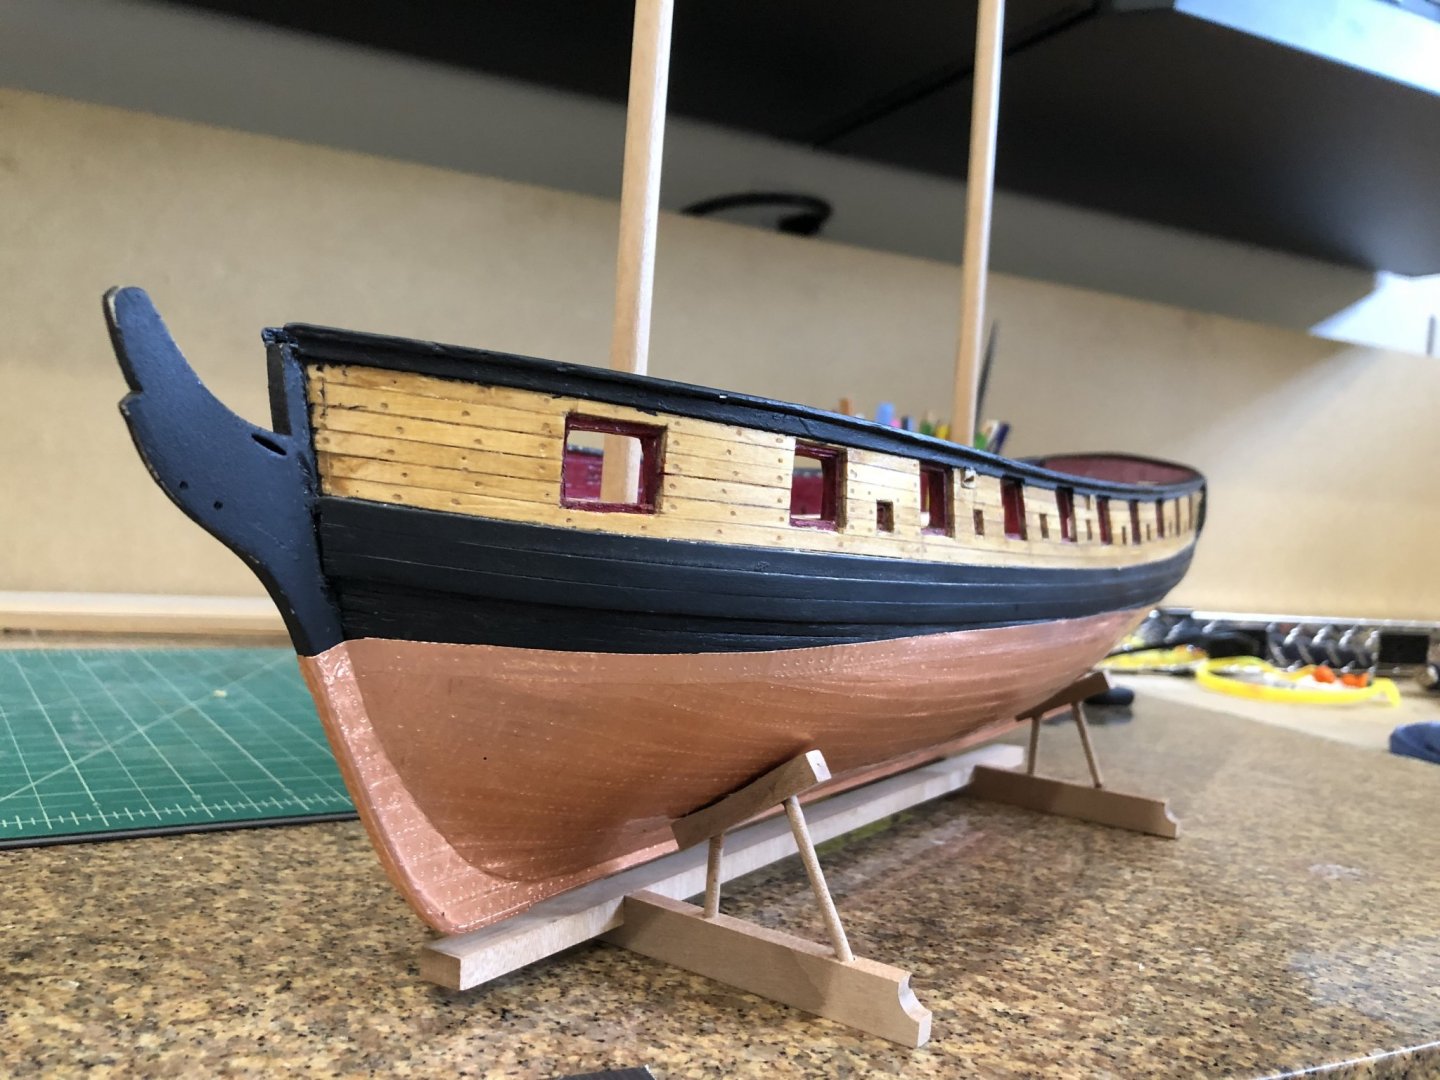
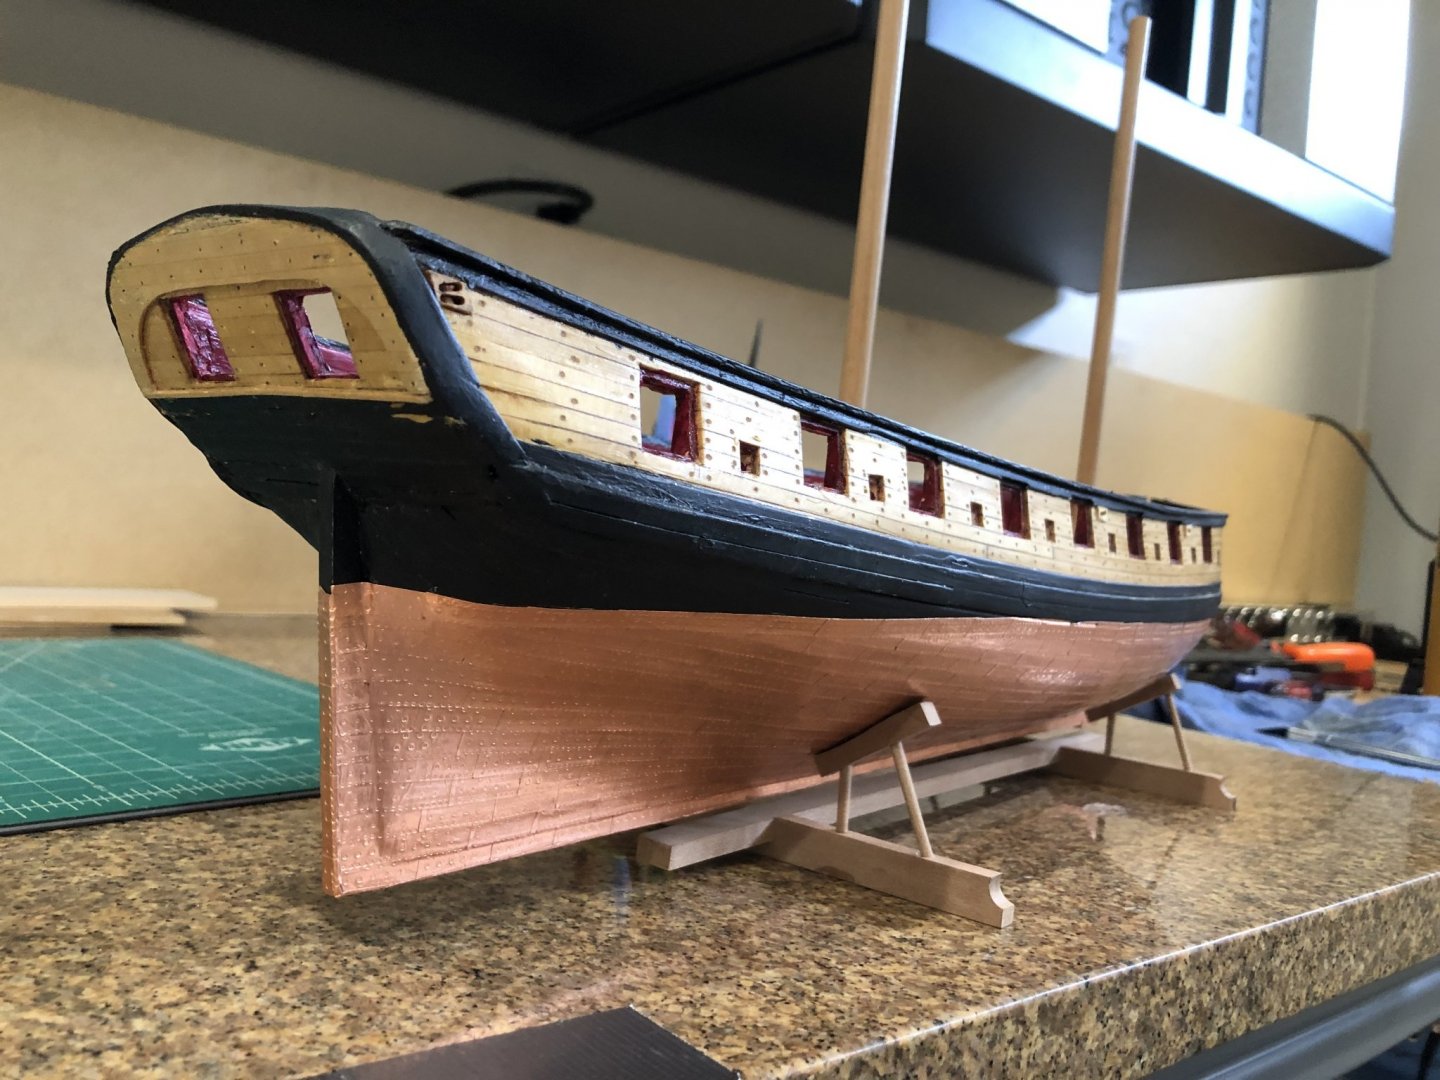
Well tomorrow stretched into a week and a half. We took some time to go visit some friends in the northern mountains and spend some time in Prescott. Had to get out of the heat its been above 110 degrees and up to to 118 one day. Summer has got to end. Came home and made all the plates all three patterns and plated the ship. Completed the plating today and added the false keel. I made the keel out of 4 pieces which simulated 3 pieces being 24' and the last 8' added the false keel and is now drying. Just some pictures of the completed plating. Tomorrow onto pintles and gungeons Stay Well and Safe Will
-
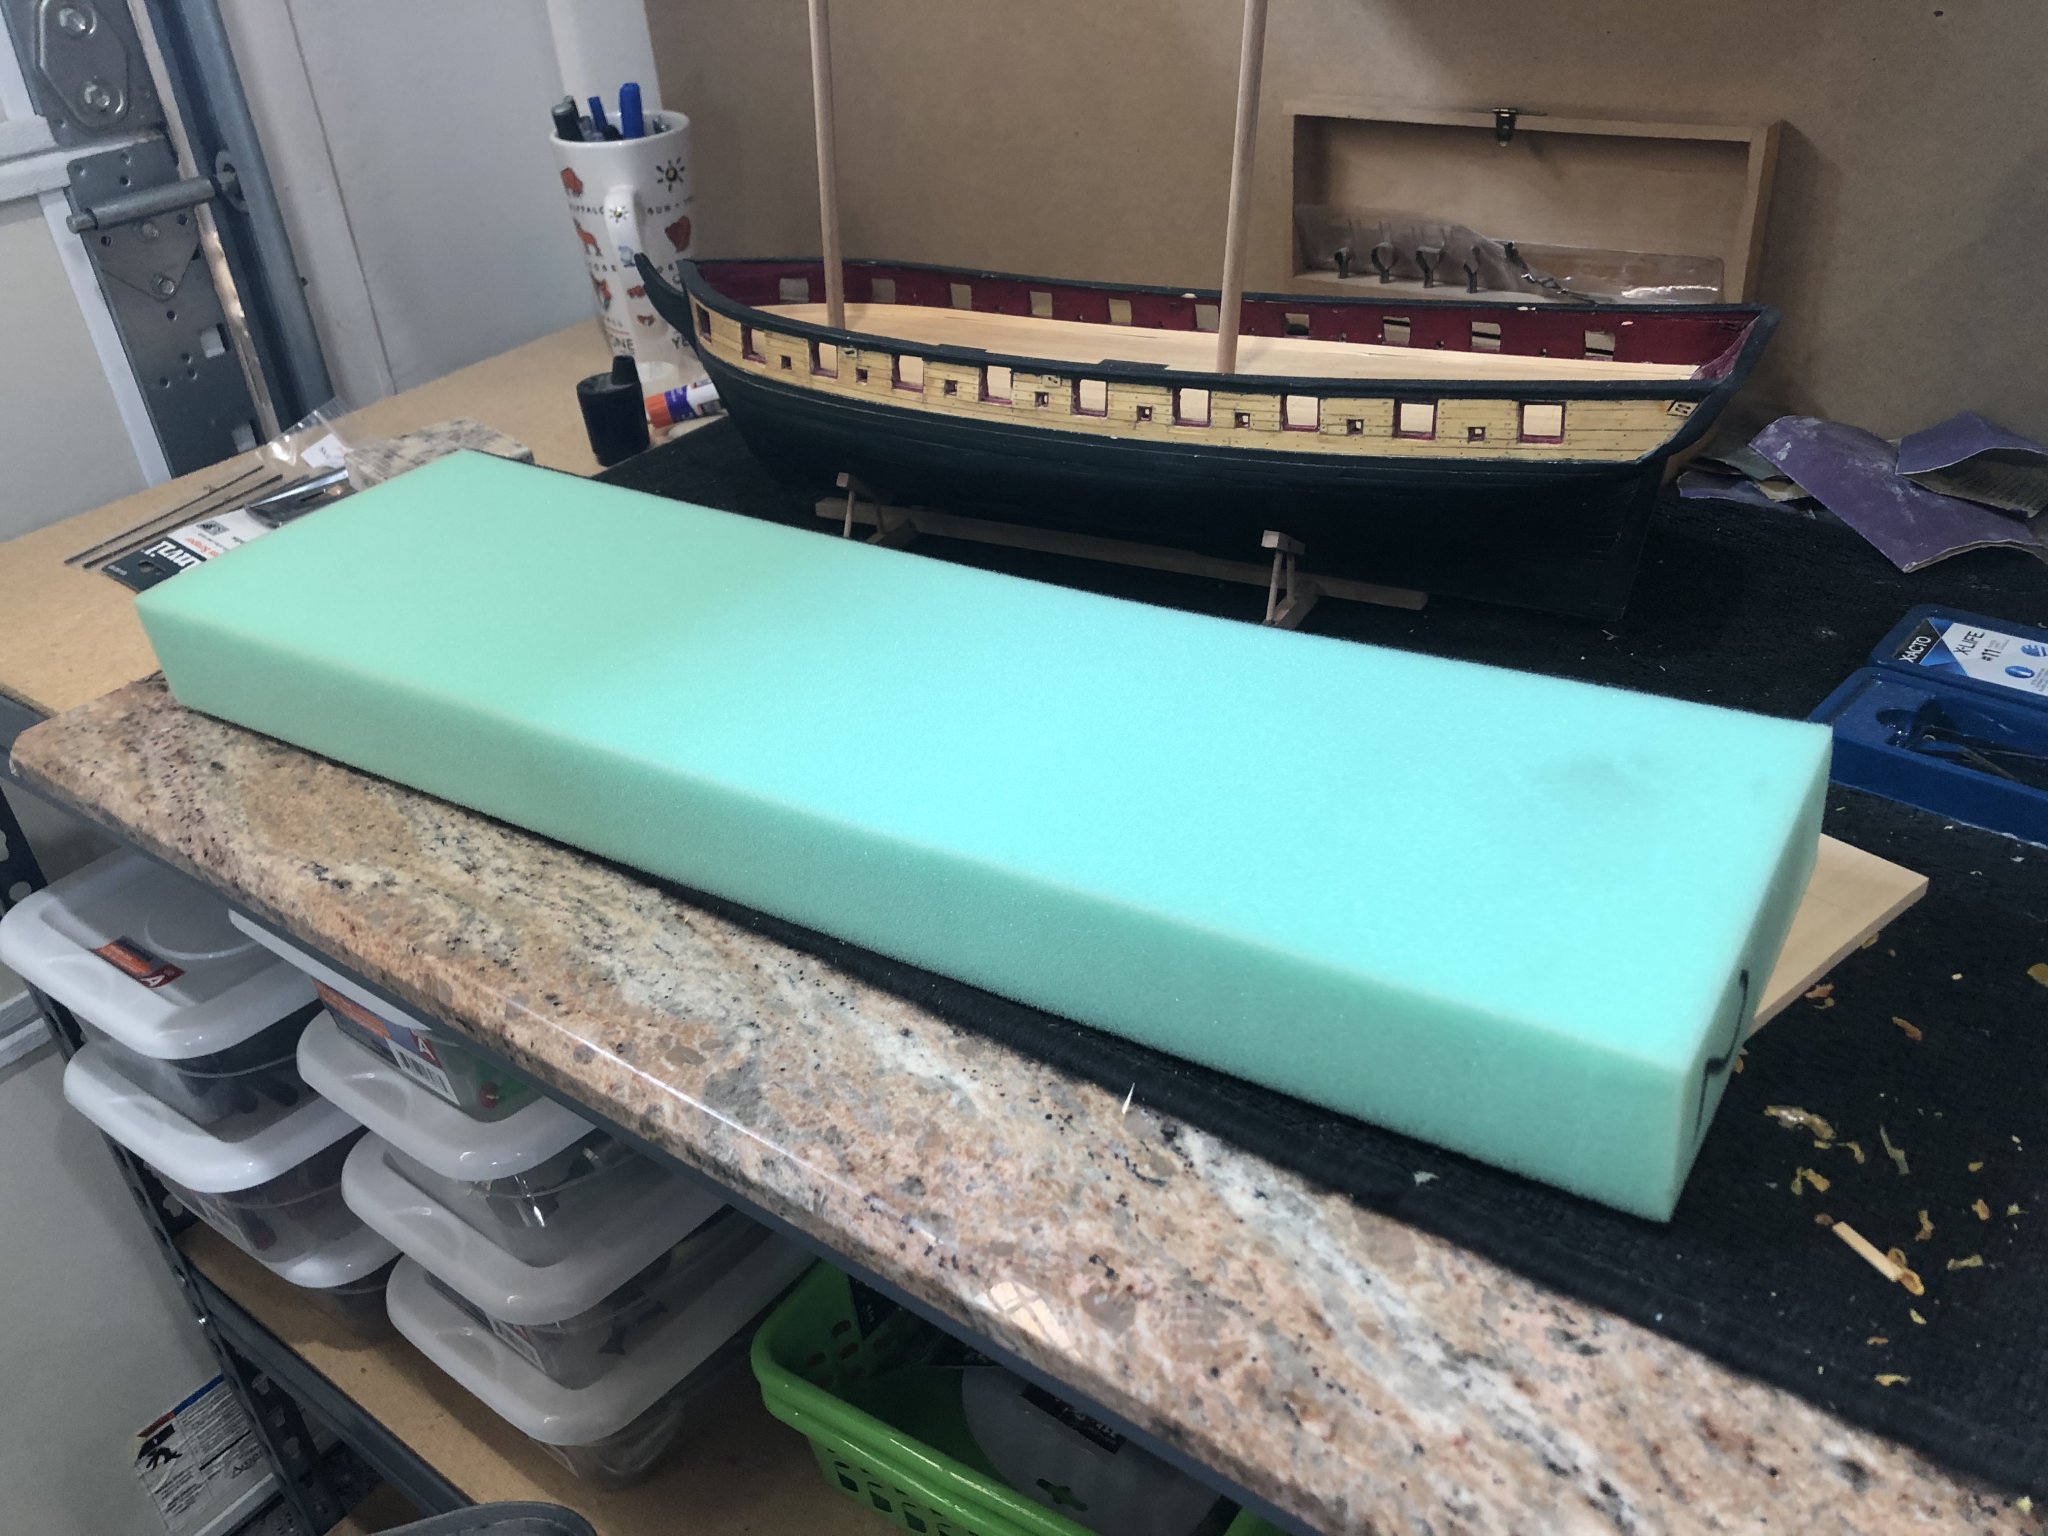
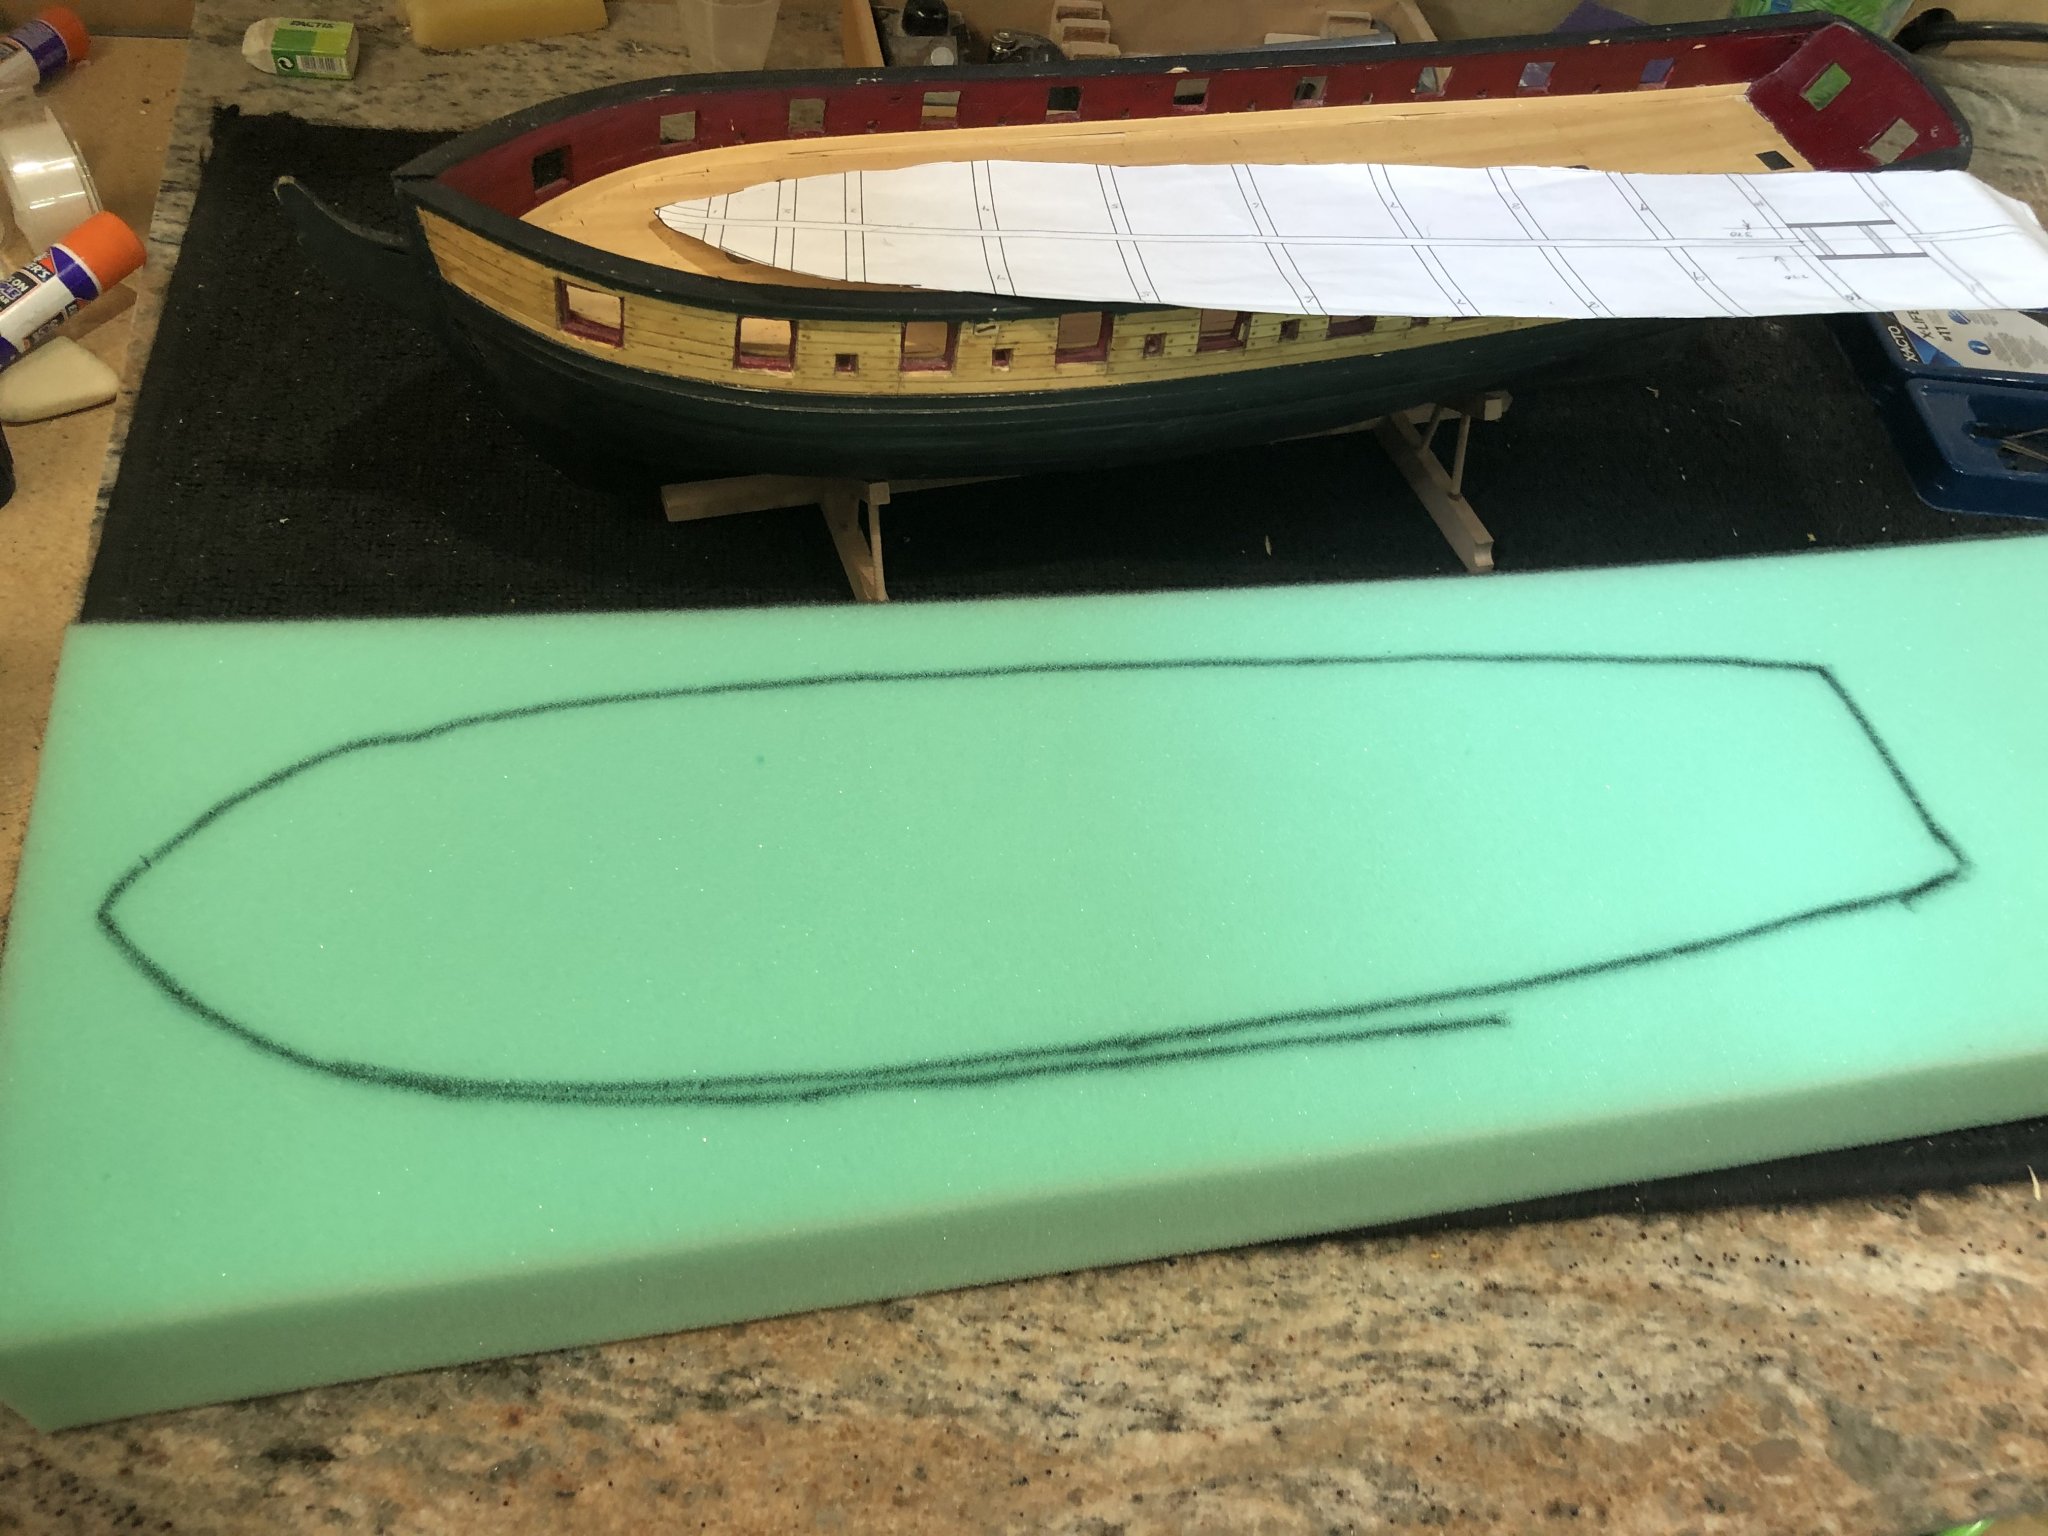
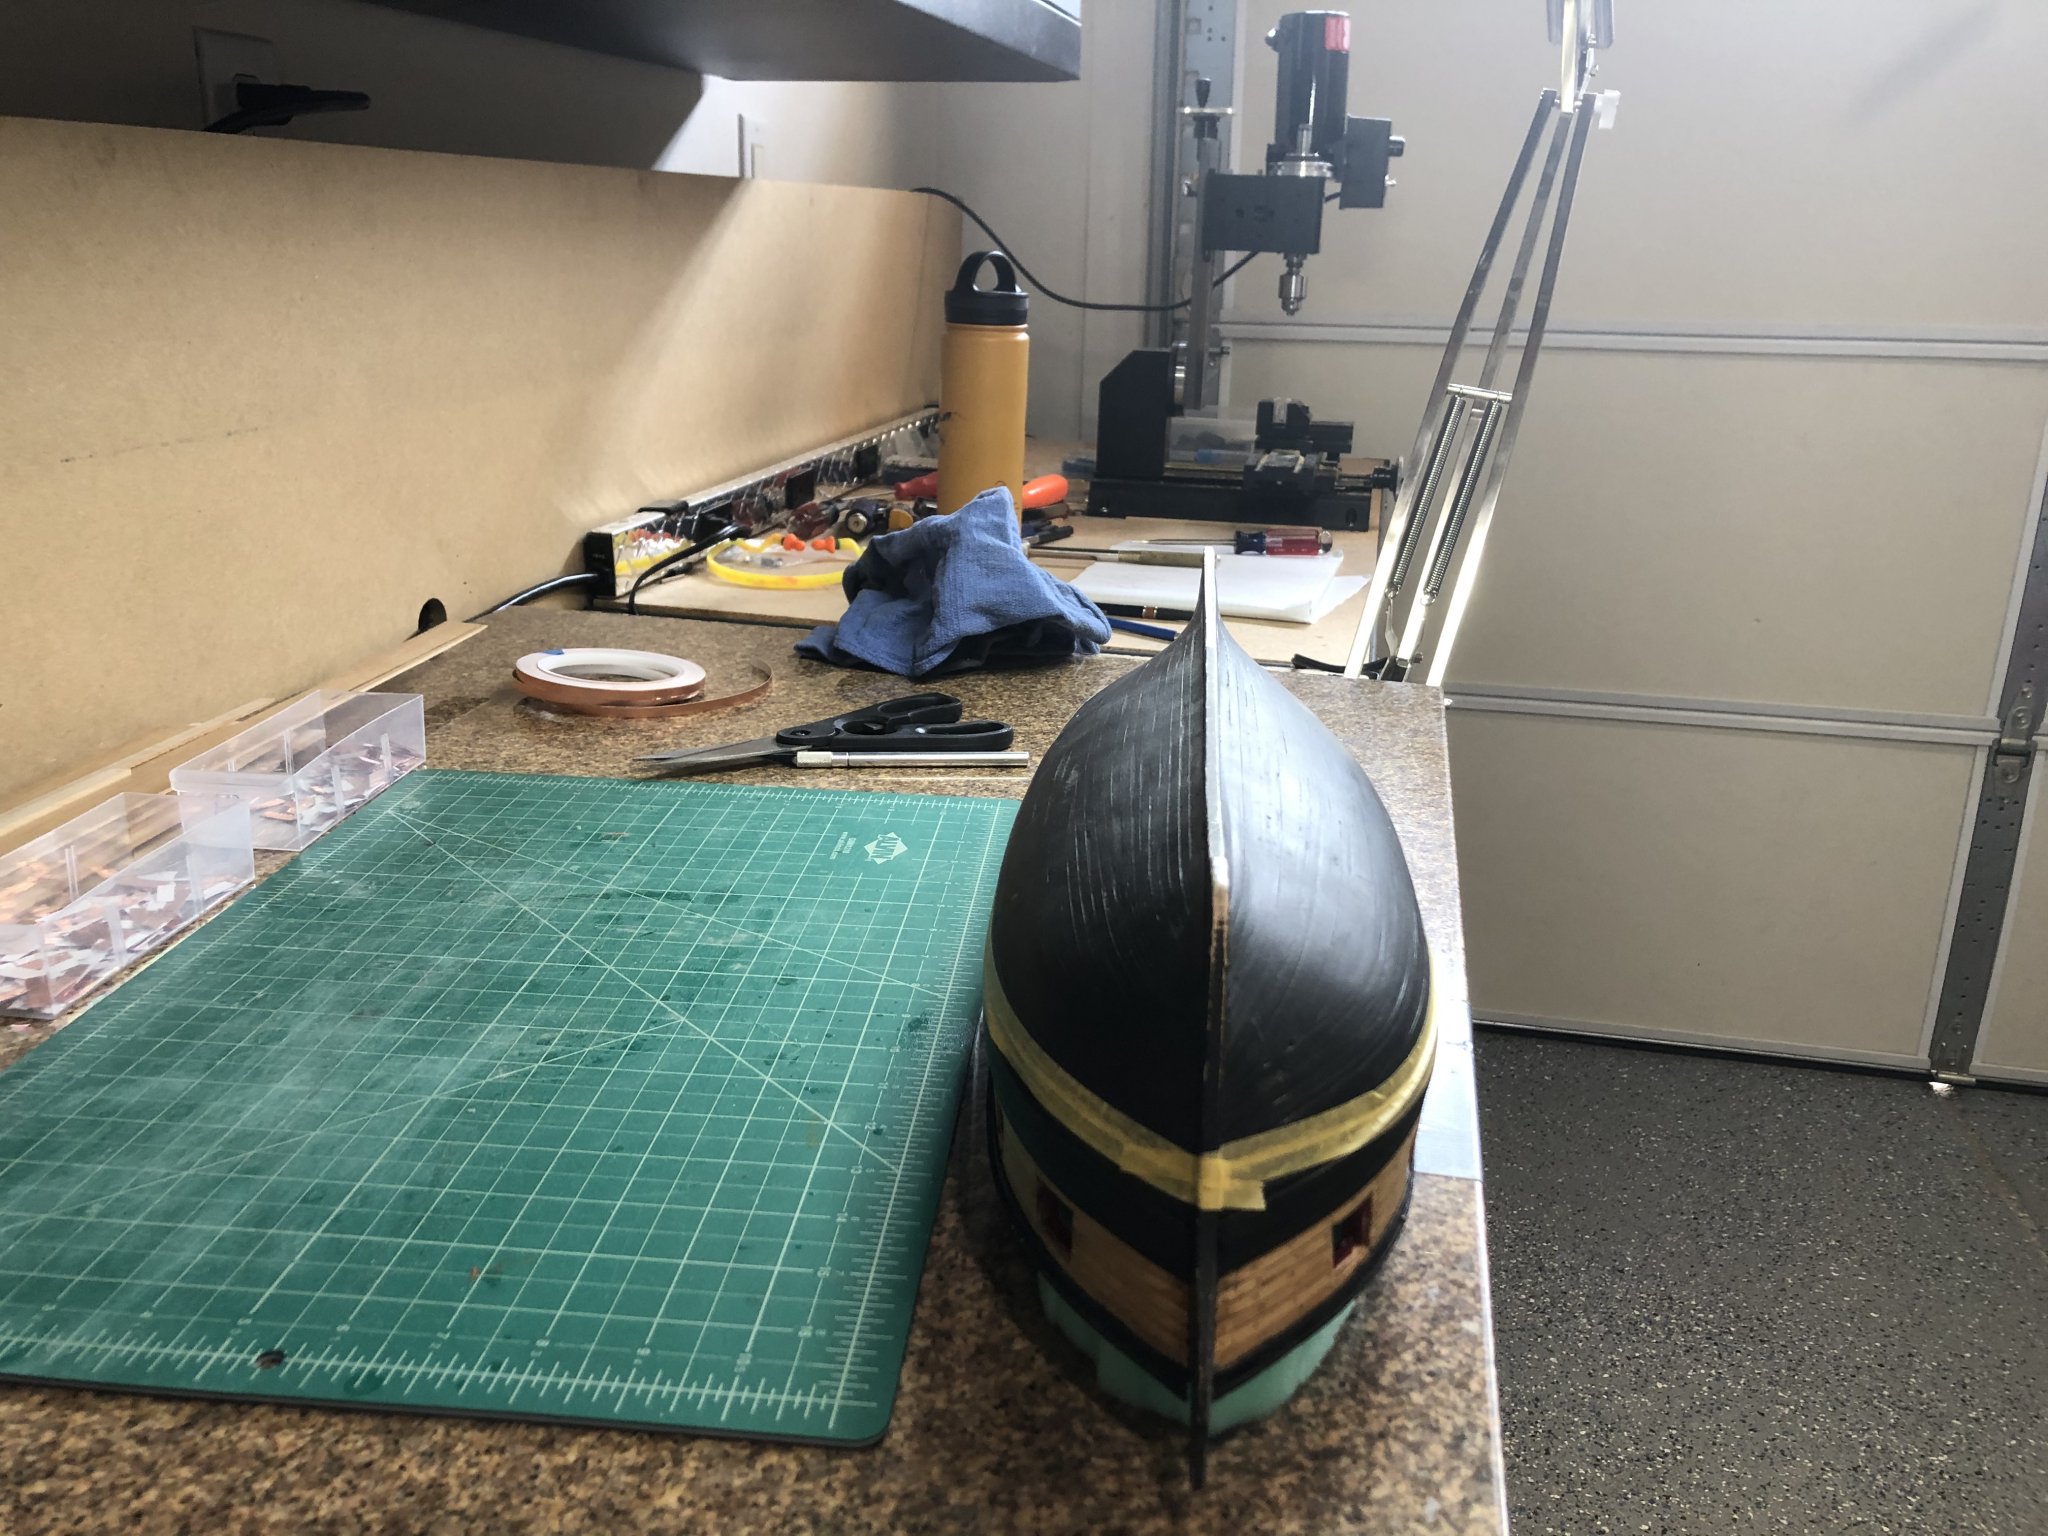
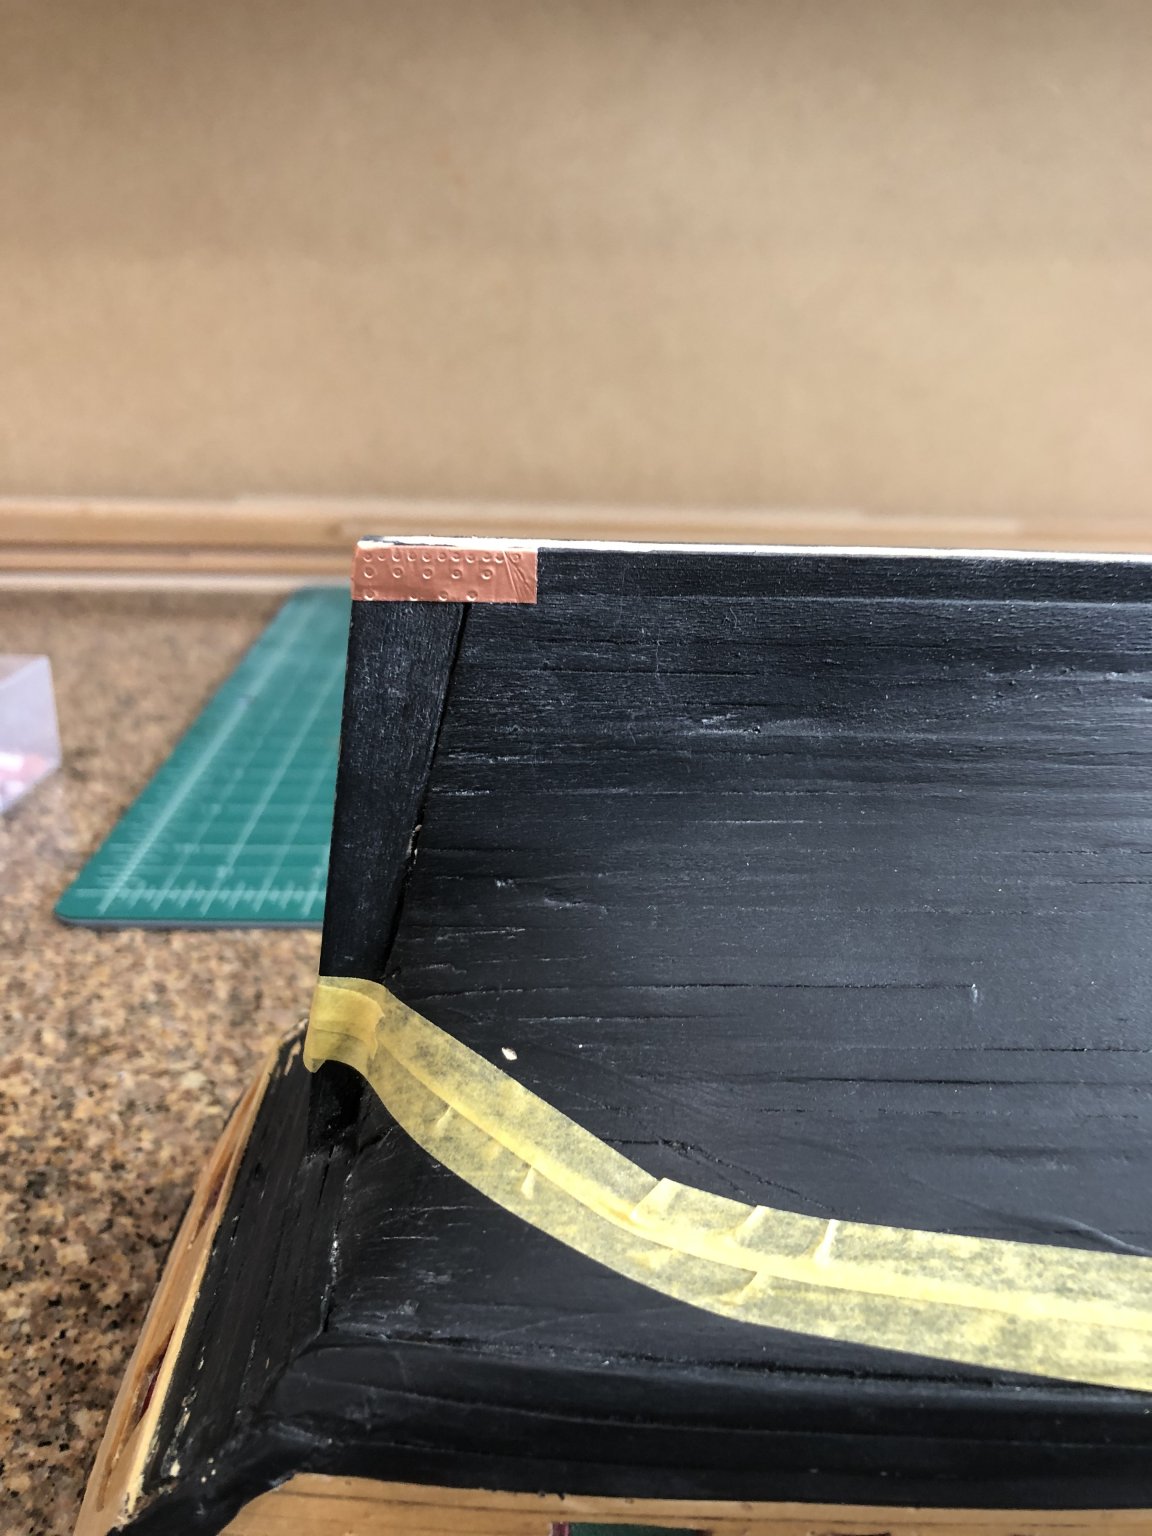
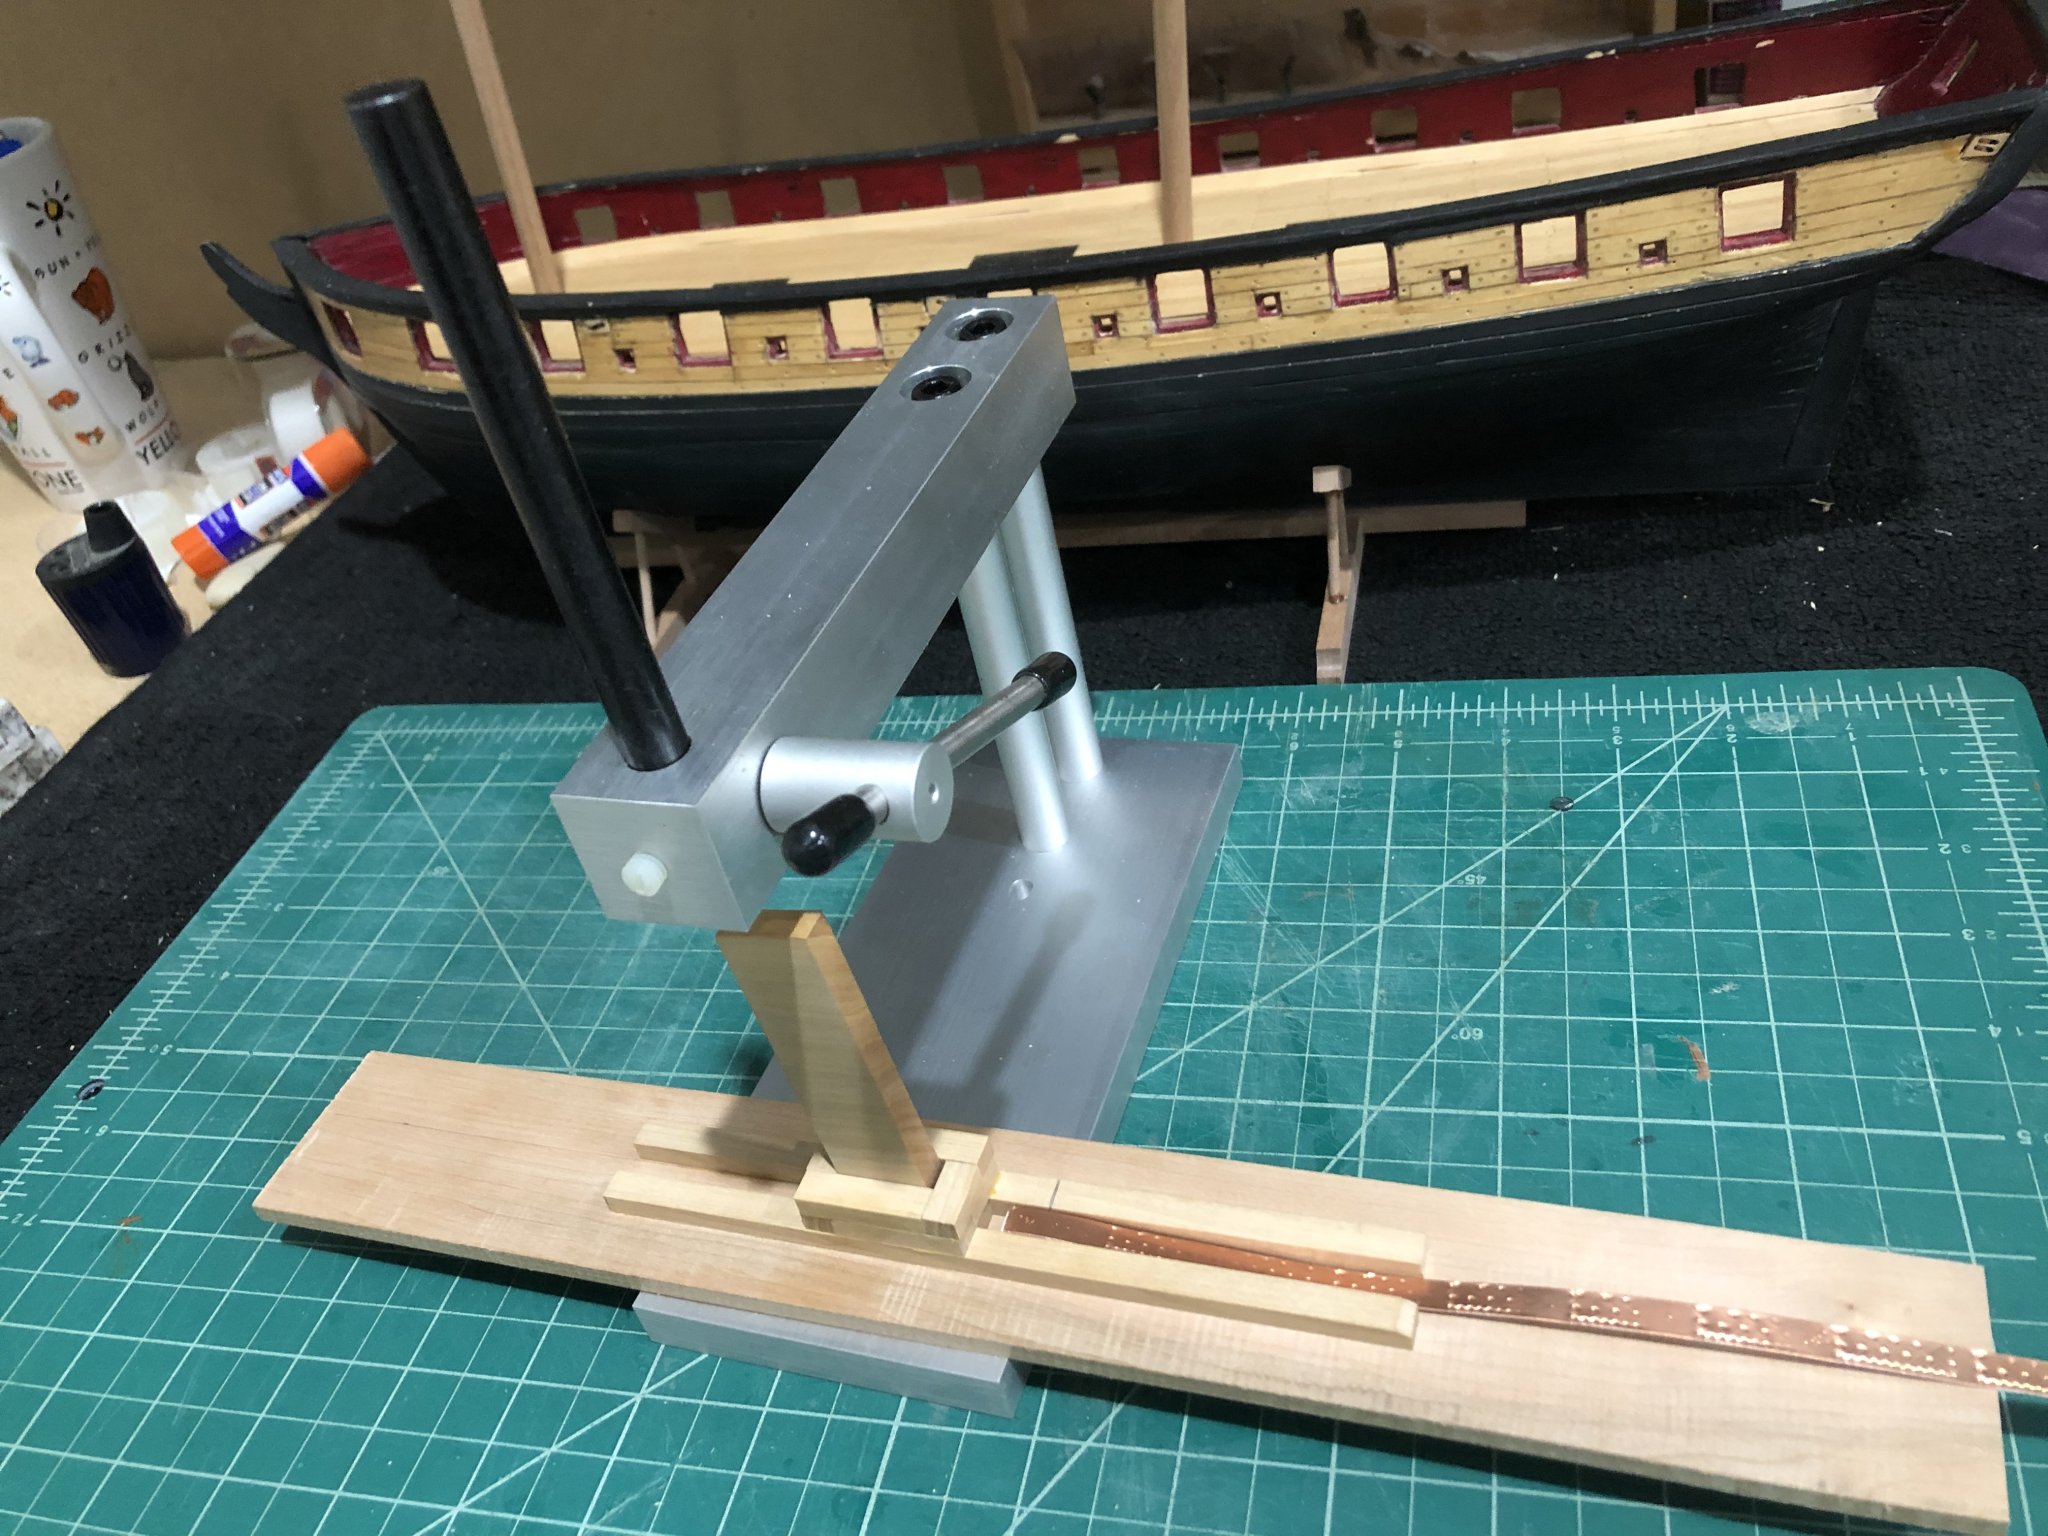
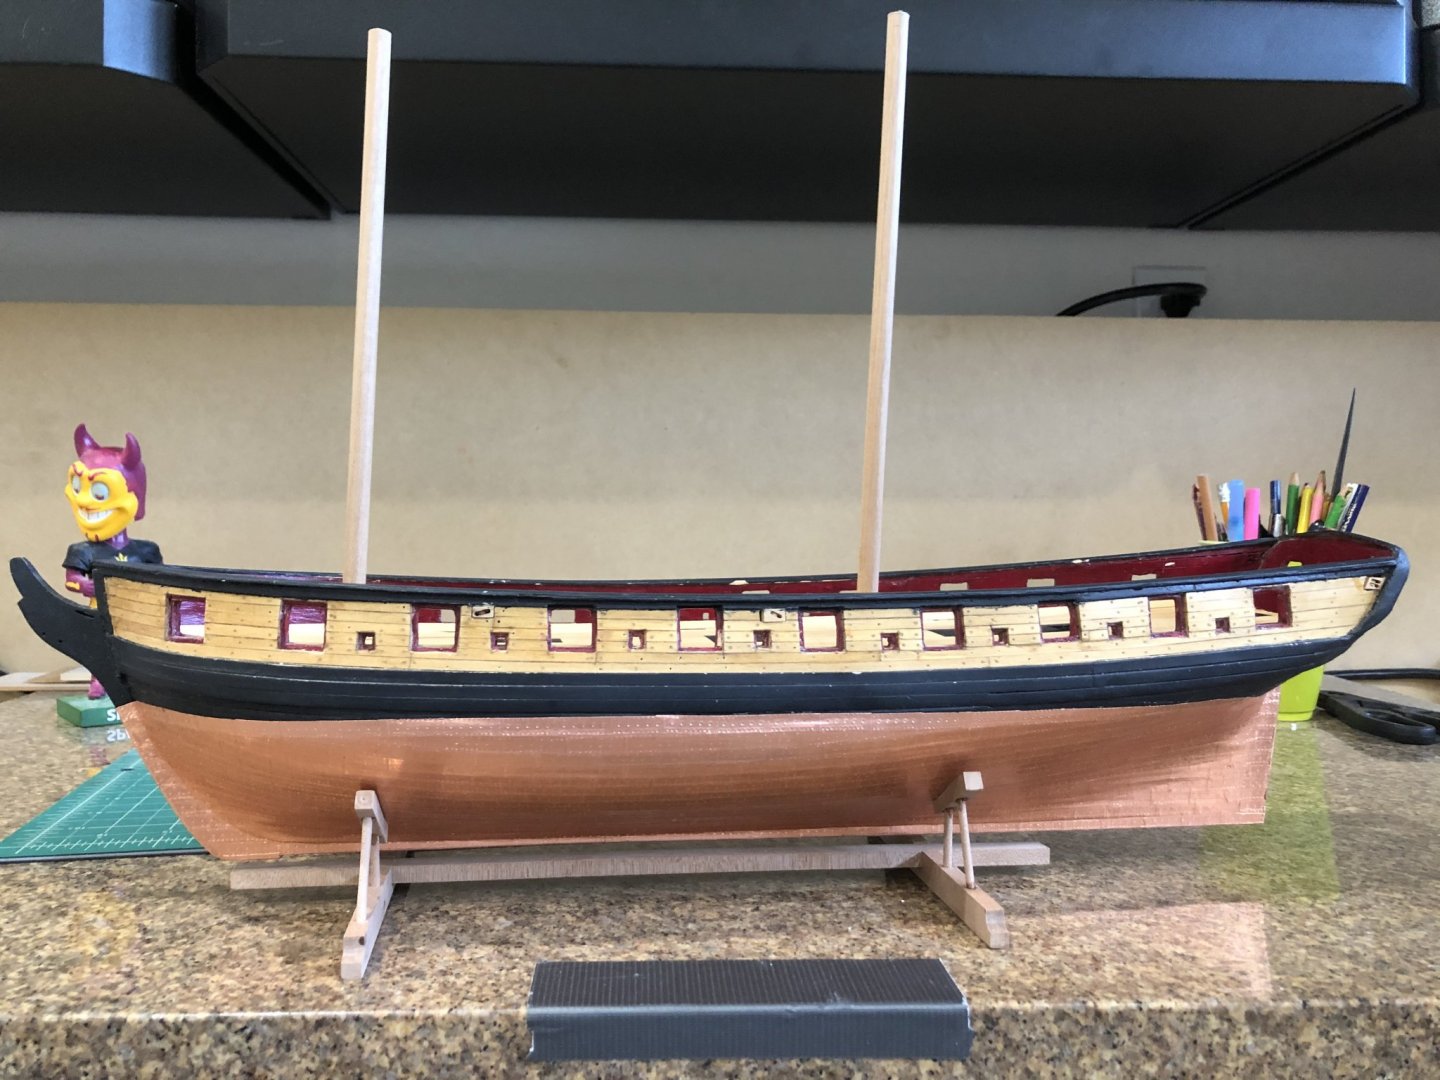
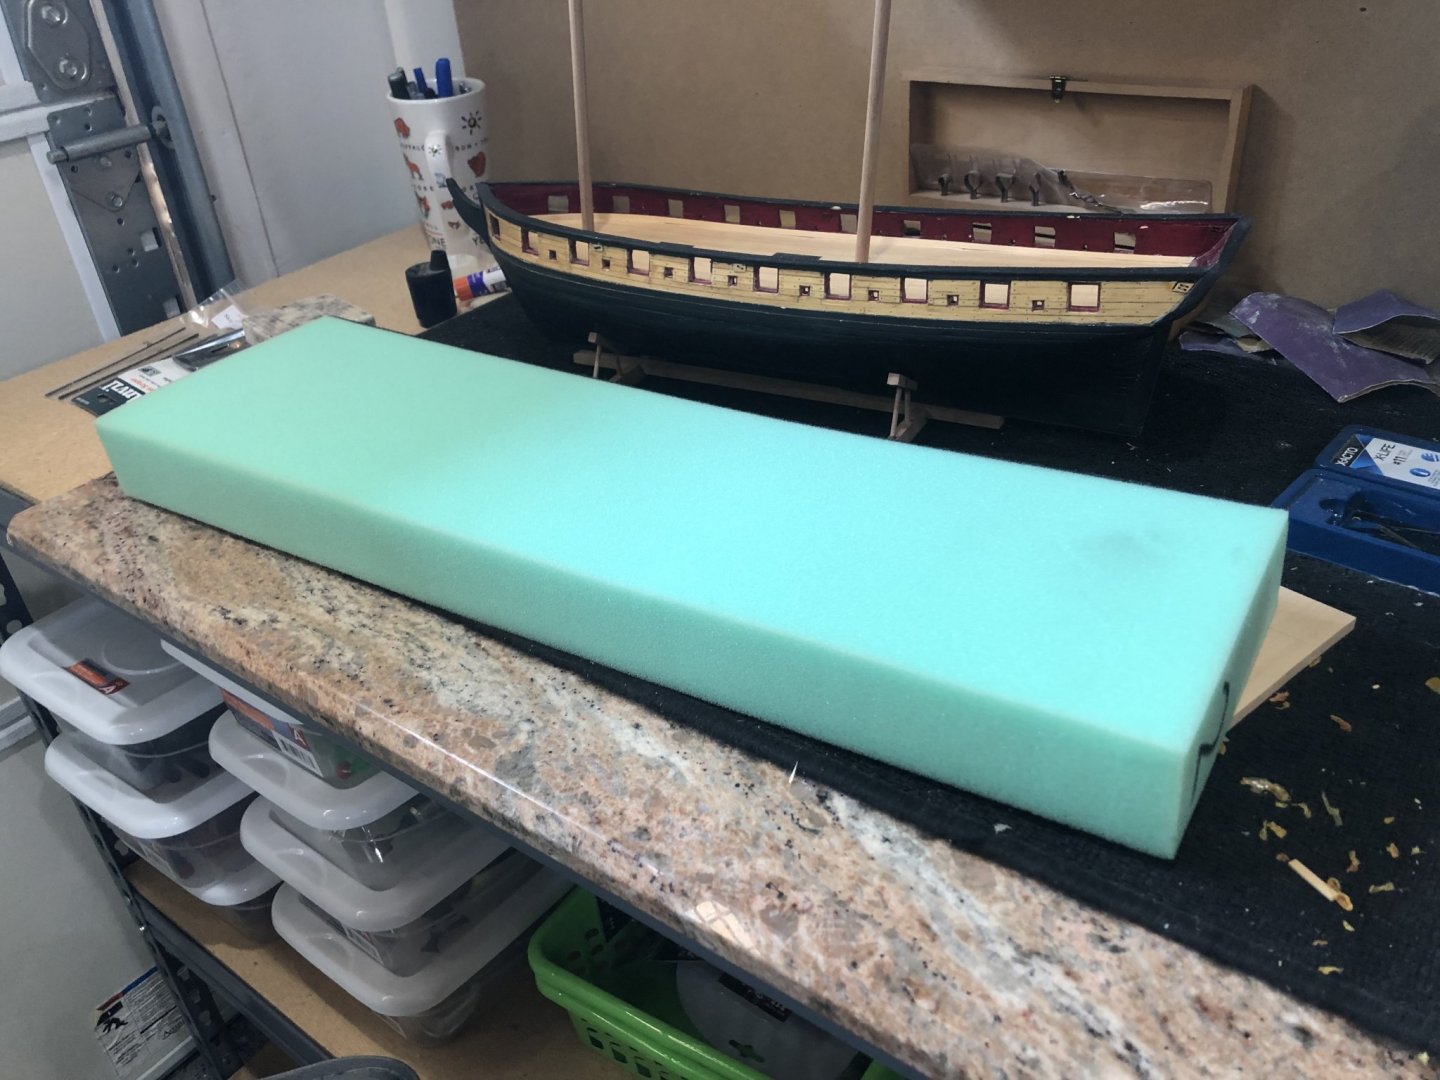
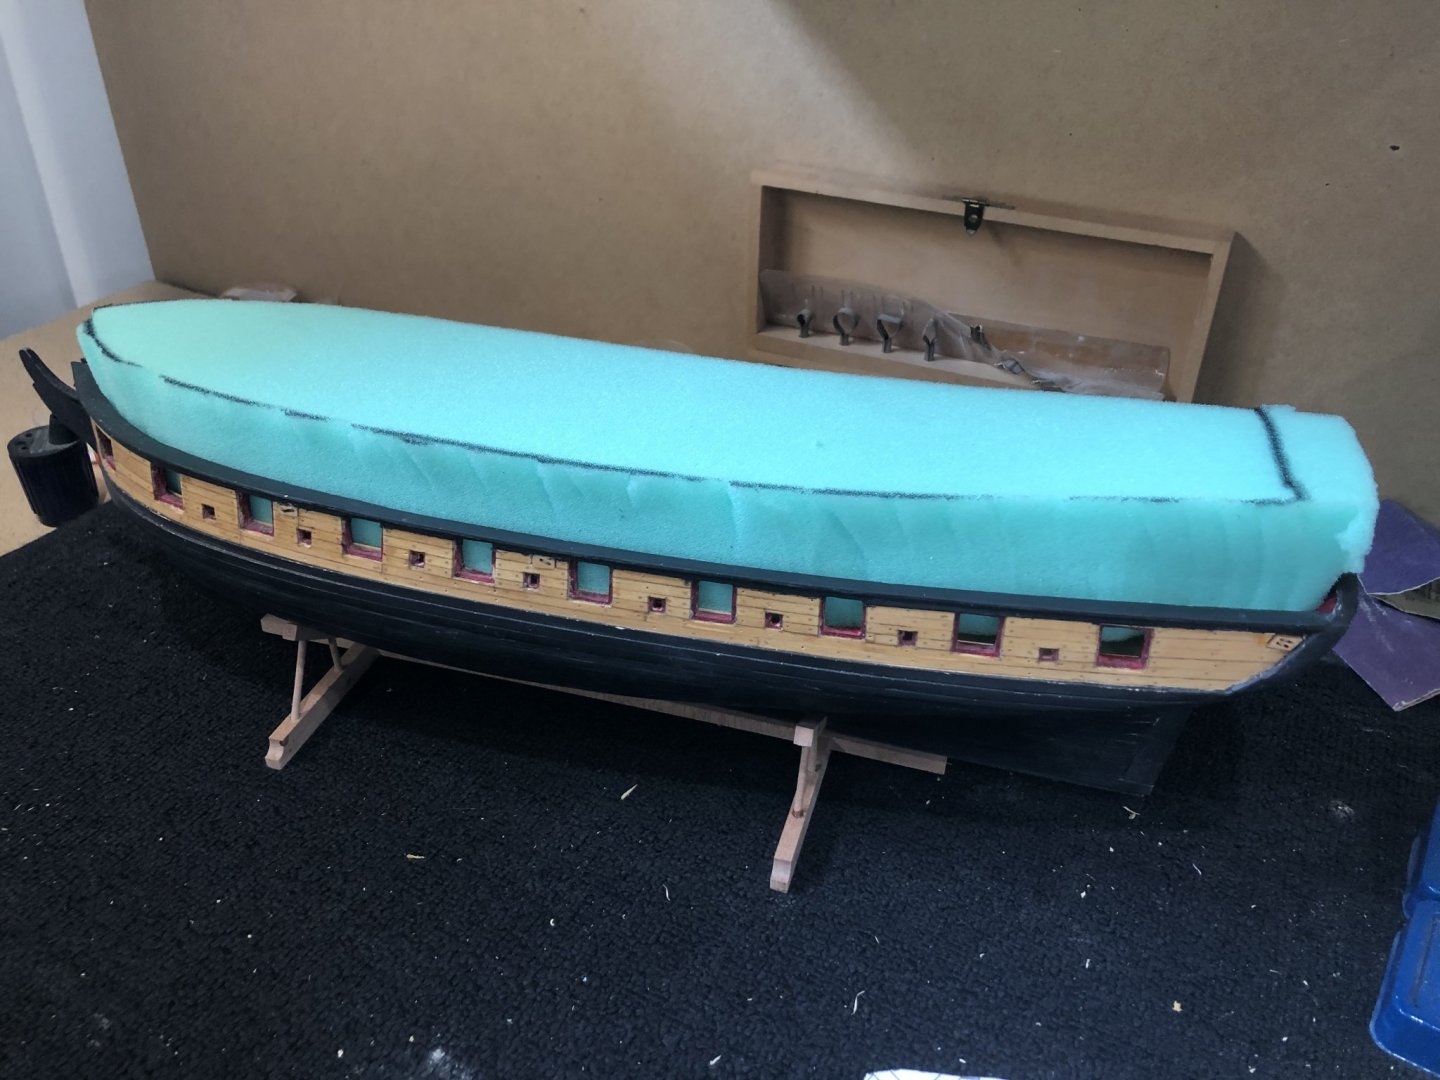
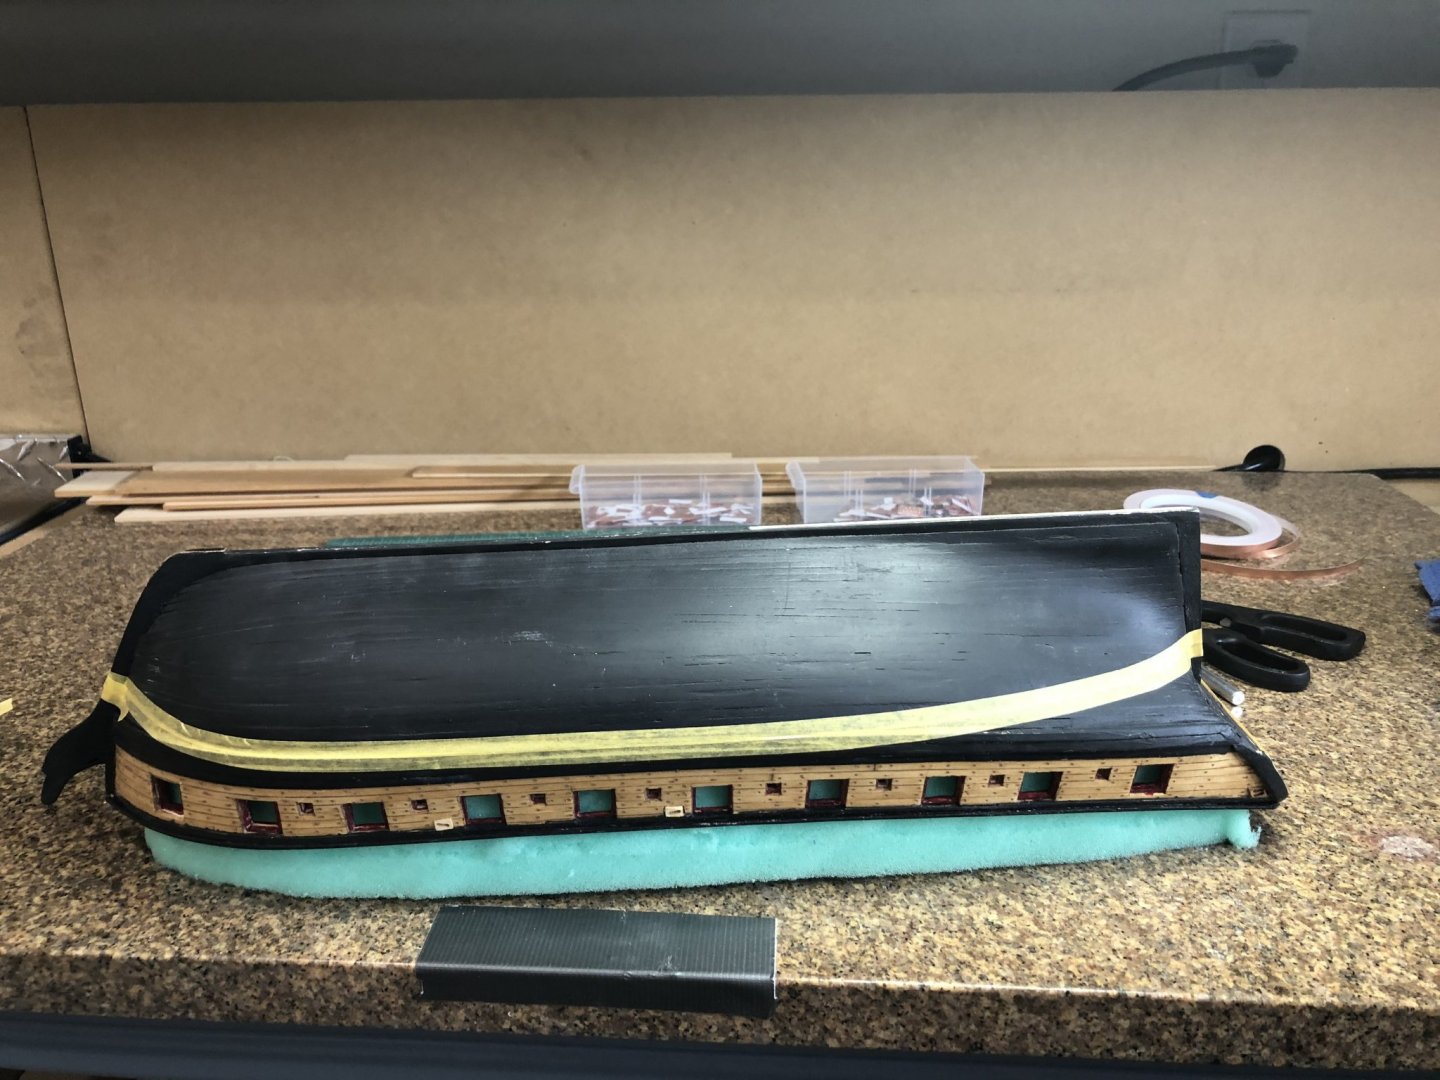
Started copper plating today. First thing was to make plates so I spent some time making 400 starboard and port plates. Punch and tape worked nice together and it went very smoothly. Next I made a foam pad to protect the Syren on in the inverted position while I added the plates. I went to a local sewing/hobby store and bought a piece of 2" think foam to make the pad then I used a view of the deck from the plans and cut the foam to shape and simply installed the pad between the bulwarks. 2" foam Next I traced the deck pattern onto the foam Then simply cut the foam with a hobby knife and put it on the deck between the bulwarks I read Dubz log and am impressed with how he made the finishing plate pattern using 6mm tape and decided to use the same method to end the port and starboard plates and then add the finishing plates right against the waterline mark. and now it begins Tomorrow is plate day. I figure I will make plates as I need them since I don't know the total number required. Stay well and Safe Will


-
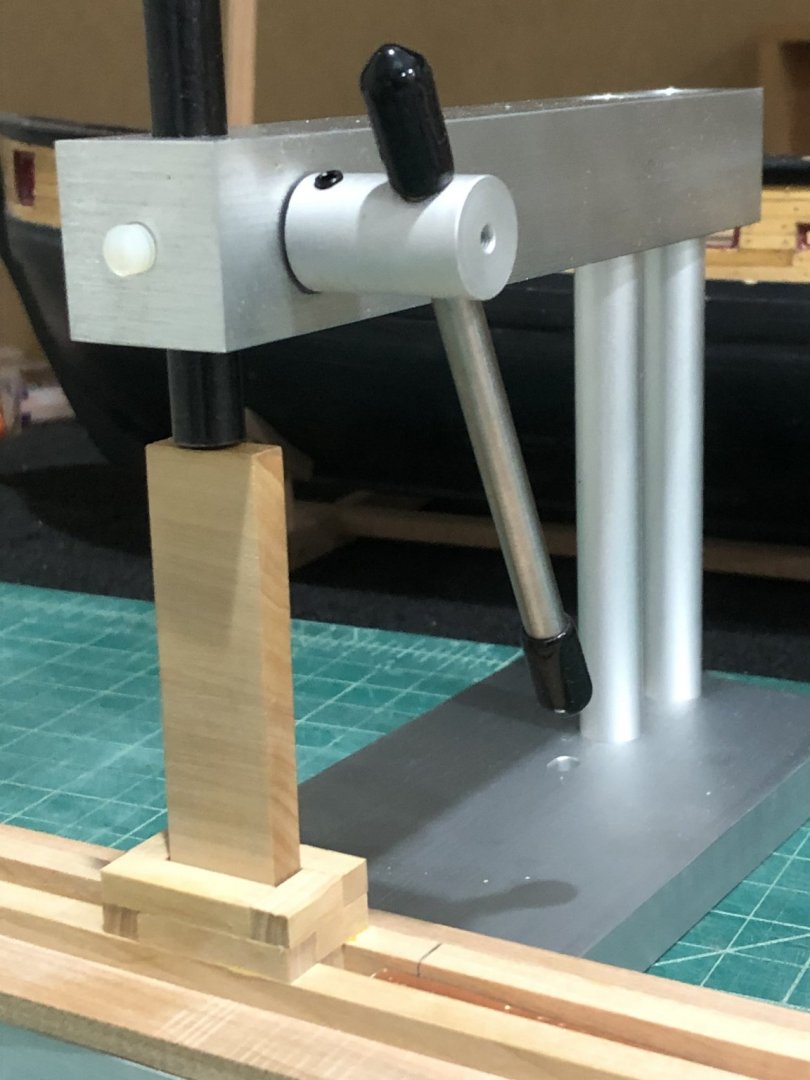
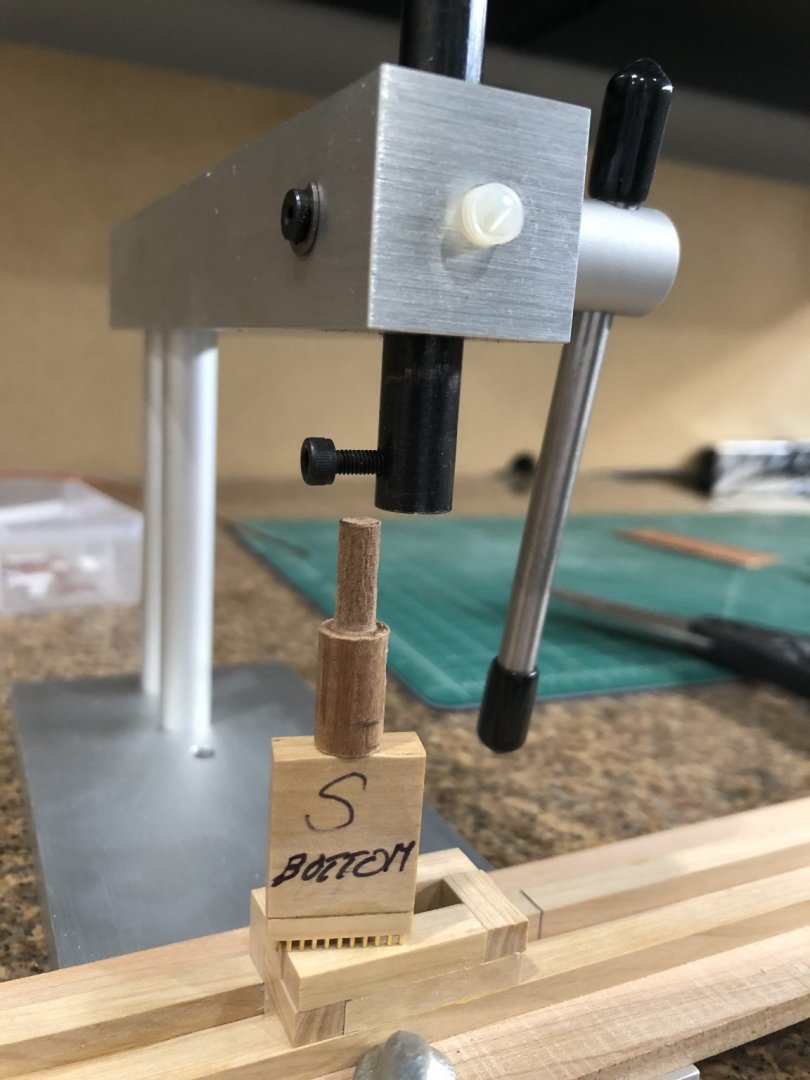
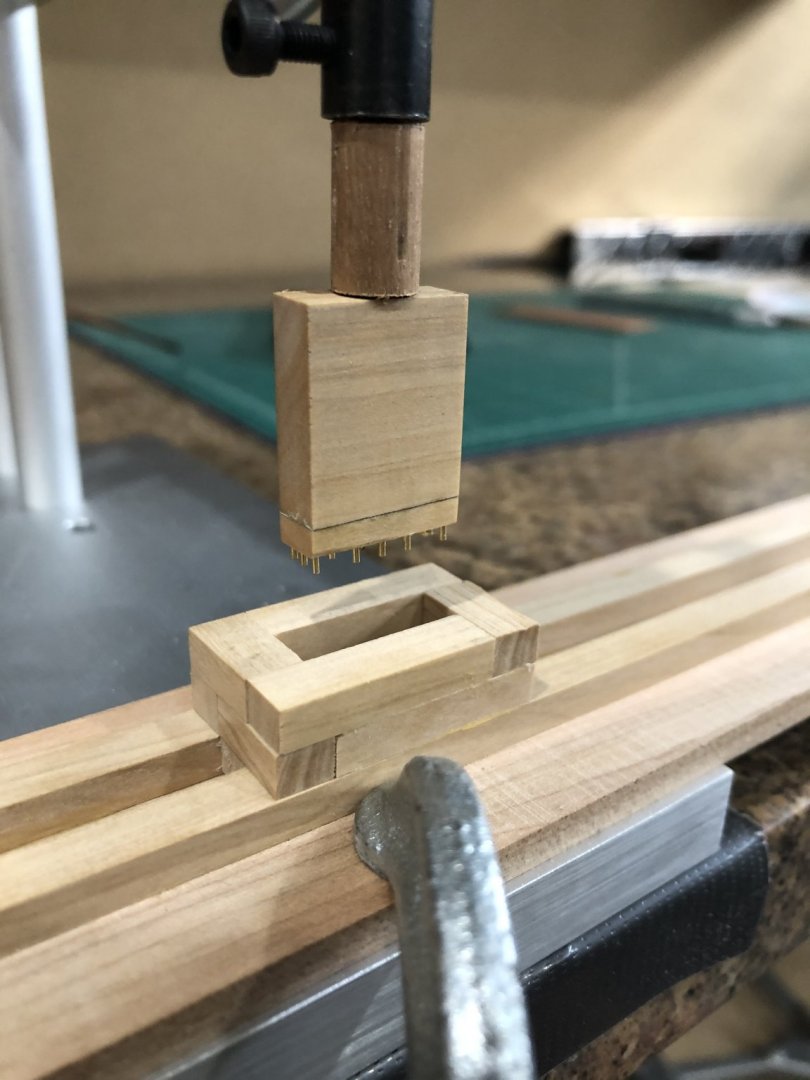
Had a productive day working on my die for the press and making plates for the starboard side. Took time to make some test pieces on installation of the plates trying to develop my skills. I might say the first were very rough but the placement pattern improved as I progressed. While examining my test piece I realized that my punch pattern was wrong, I had placed nails on the forward edge so when I placed the plates overlapping as the should it made too many nails on the forward edge It was an easy fix as I just snipped off the offending nails and the pattern now allows overlapping without the extra nails. I modified the press as I described in the previous post with the results I'd hoped for. I took a scrap 5/16" mast dowel cut it to 1" long and put it in the lathe. The end for the ram was turned to 3/16" to fit into the hole on the end of the ram. Reversed the dowel and turned the opposite end to 1/8" by 1/4" long. Drilled a 1/8" hole in the die and covered the 1/8" stub of the dowel with CA glue and pressed it into the die. Really happy with the results and the way it works. Spending tomorrow making port, starboard, and finish plates and then onto putting them on Syren. A couple of photos Stay Well and Safe Will
-
Well I've finally got the 3 stamps made and started testing. Did I say tricky. I tried to use a hammer method but a small hammer didn't have sufficient force and regular carpenters hammer was very unwieldy so I started using my little press with much better results. Now that I'm using the press I can shorten the punch to make it less unwieldy. The other thing I need to do is mount the press on the table top and attach the rod to the punch to lift the punch while advancing the tape. I plan to drill a hole in the top of the punch placing a metal rod in the hole and attached to the ram on the press so I can press down to imprint and lift to advance tape. I let you know in the next post after I make some plates and attach them to test panels. Thats all folks Stay Well and Safe Will