HOLIDAY DONATION DRIVE - SUPPORT MSW - DO YOUR PART TO KEEP THIS GREAT FORUM GOING! (89 donations so far out of 49,000 members - C'mon guys!)
×


niwotwill
-
Posts
596 -
Joined
-
Last visited
Content Type
Profiles
Forums
Gallery
Events
Everything posted by niwotwill
-
 Patrick I vote for "B" I like the pattern. A lot of holes to fill though. The stain on the cedar treenails darkened them too much for my taste. They seemed to obvious and with so many on the deck it might be too much. Have you tried to stain, drill, install treenails and just use wipe on poly it might keep them from getting to dark. Love you idea of cutting thin sheet metal when a shear is unavailable. I'll use your method on my metal work. I tried knifes with questionable results and too many blades. She's looking really really good!!! Stay Well Will
 -
I just read through your log of Syren and am truly impressed. Outstanding work. I really like your throw description of making the quarter gallery's. Many of the things you point out during your build left me wishing I had used similar techniques. I can't wait to see you stern carvings. I know I'll be reaching out for help with my quarter gallery's as I'm going to start tomorrow. Stay Well Will
- 950 replies
-
- 2
-

-
- syren
- model shipways
- (and 1 more)
-
Thanks Edward I'll read WalrusGuy's log tonight. Really appreciate the look into. Will
-
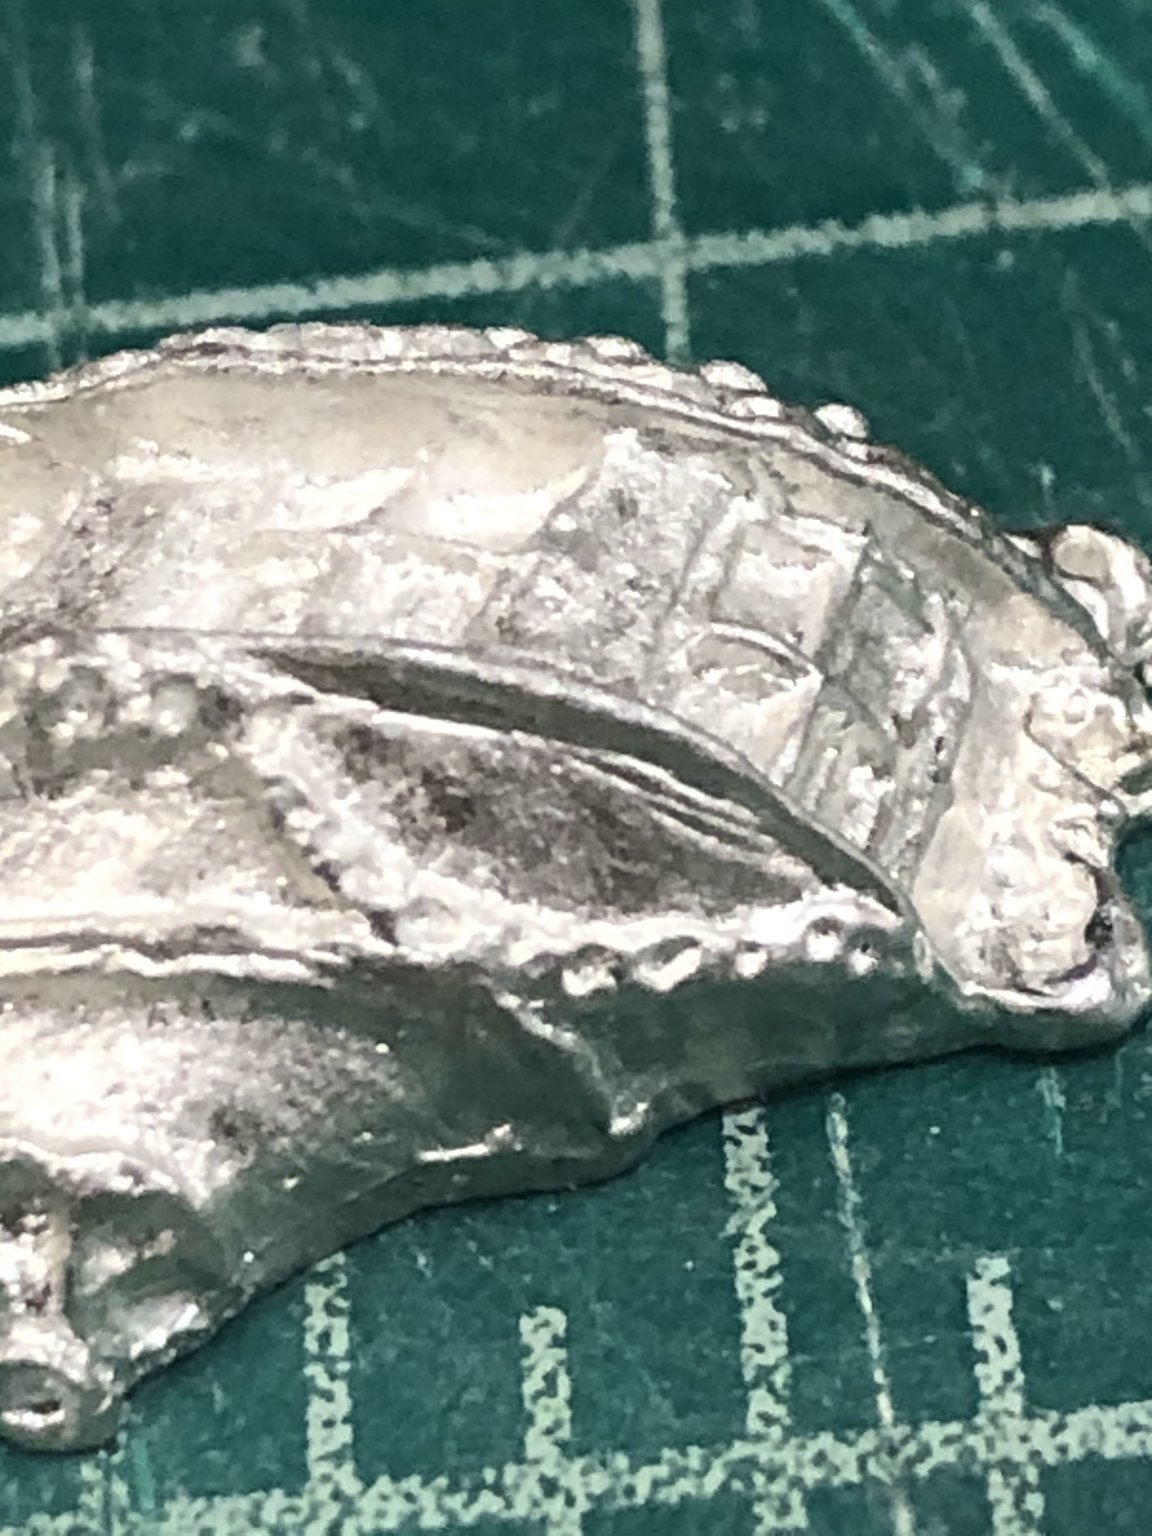
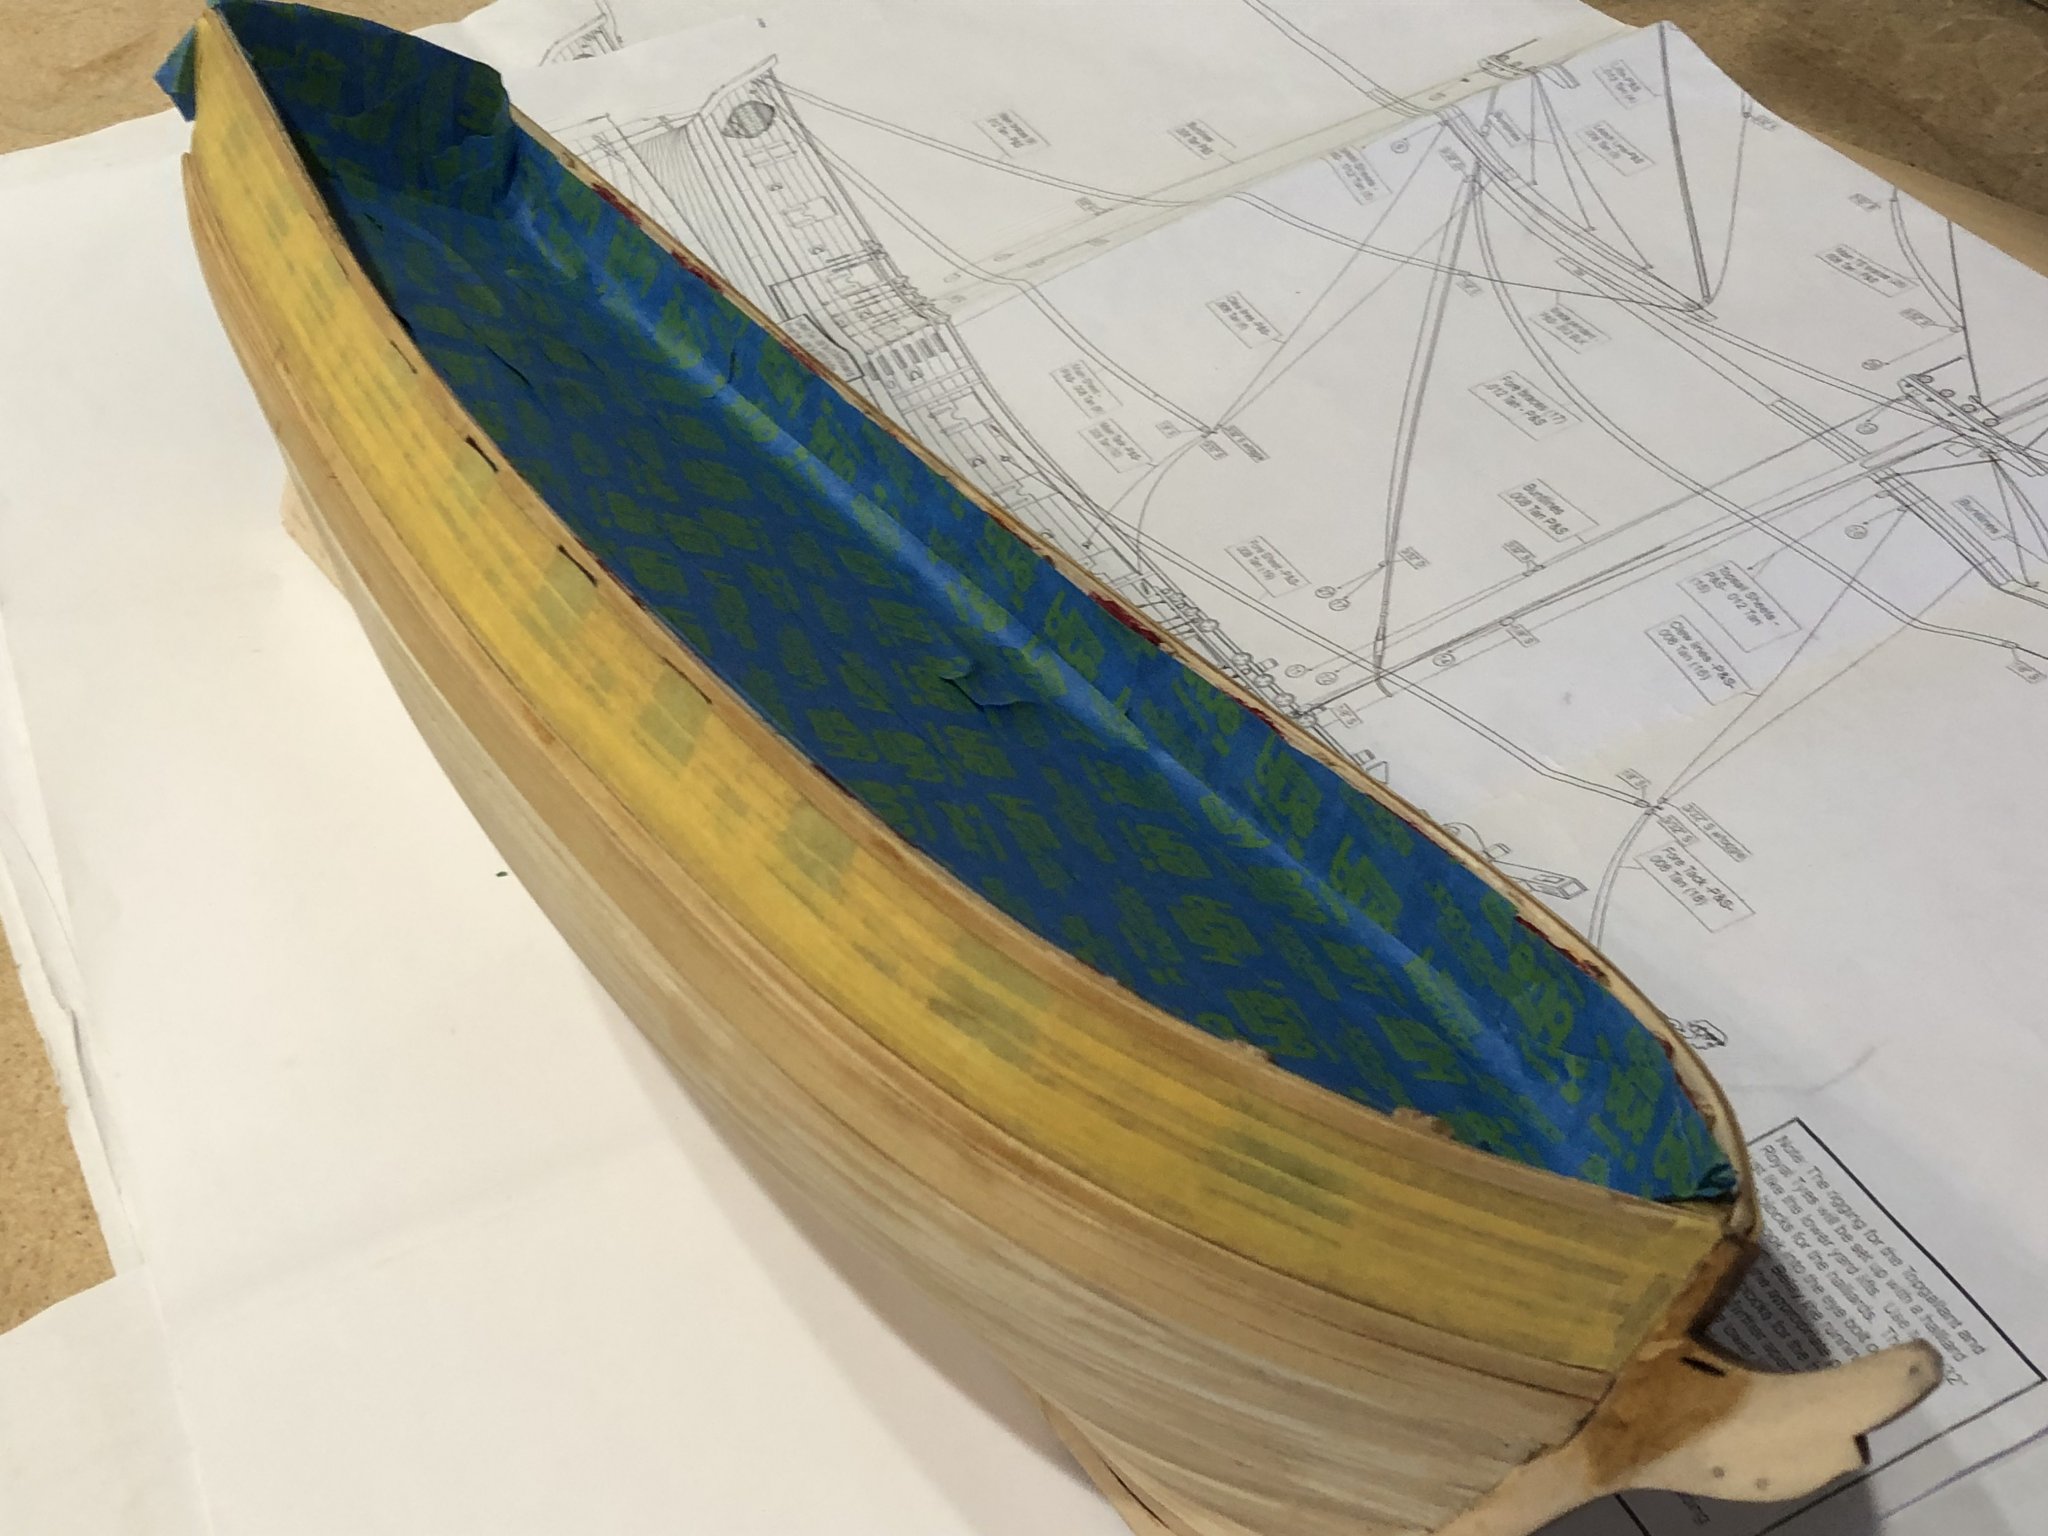
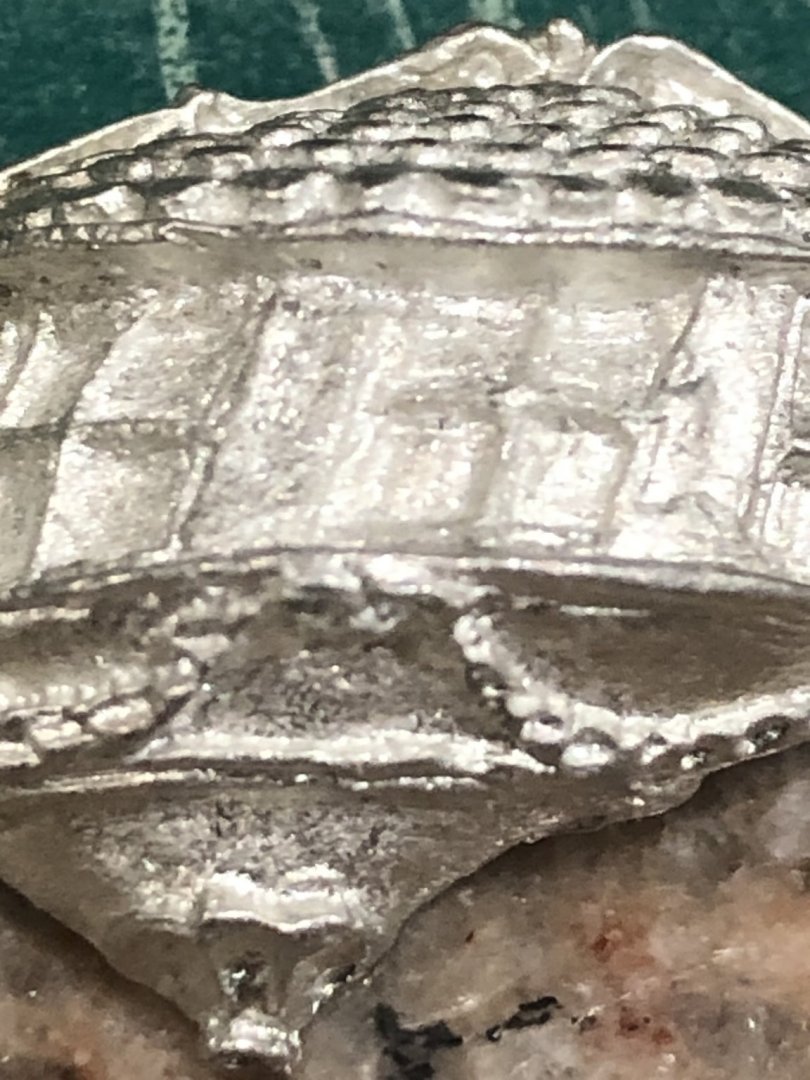
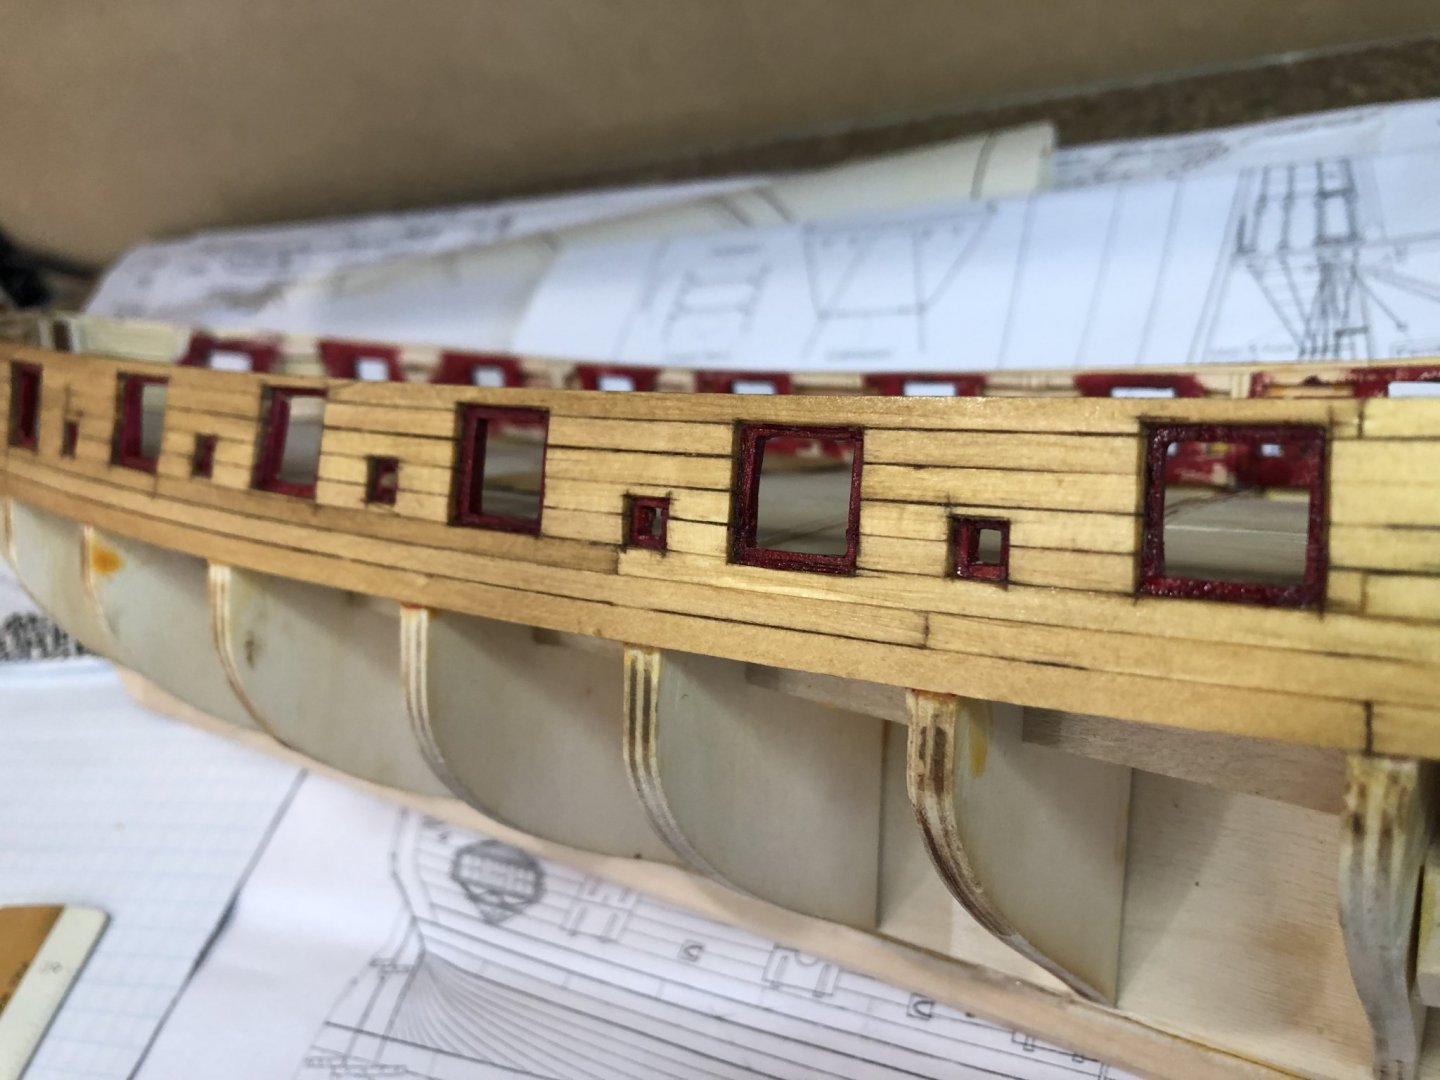
I got back to working of the model and completed the bulwark planking and sanding without much ado. Spent a quite a lot of time one the gunports and sweep ports getting the edges even and square. I've started painting the bulwark planking with a quick picture of the first coat. I keep looking at other logs looking at peoples carving of the galleries and the stern carvings thinking of how I might attempt mine. Looking at the gallery castings in the kit it became apparent that the quality was not up to the kit. The port and starboard have pieces missing in different places and the definition of the window and roof detail is filled in with casting material. No sharp edges. a couple of photos to explain. I moved on the the longboat to keep me moving ahead while I try to figure out the castings and how I'm going to carve them. Do I use wood or some other media. All ideas would be welcomed. Stay well Will


-
Yes the cedar cuts much easer than the basswood as we can see in you photos showing your excellent craftsmanship. The plank spacing is amazingly straight. I think the cedar edges really help with plank to plank fitting. Really looking good your doing wonderful work. Stay well Will
-
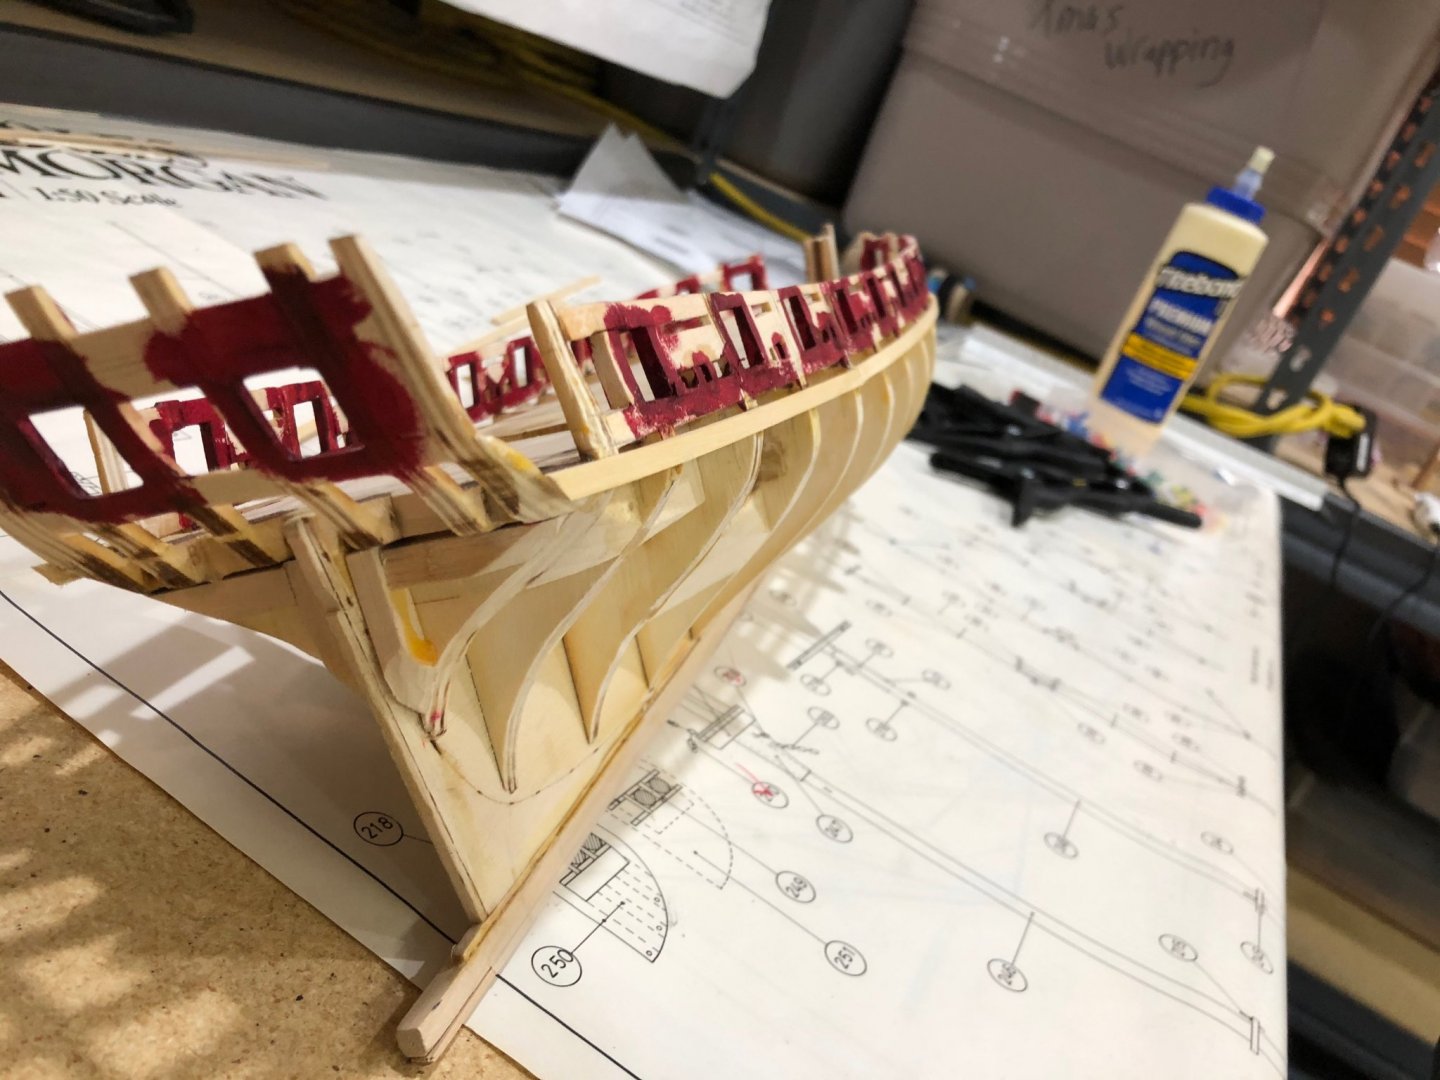
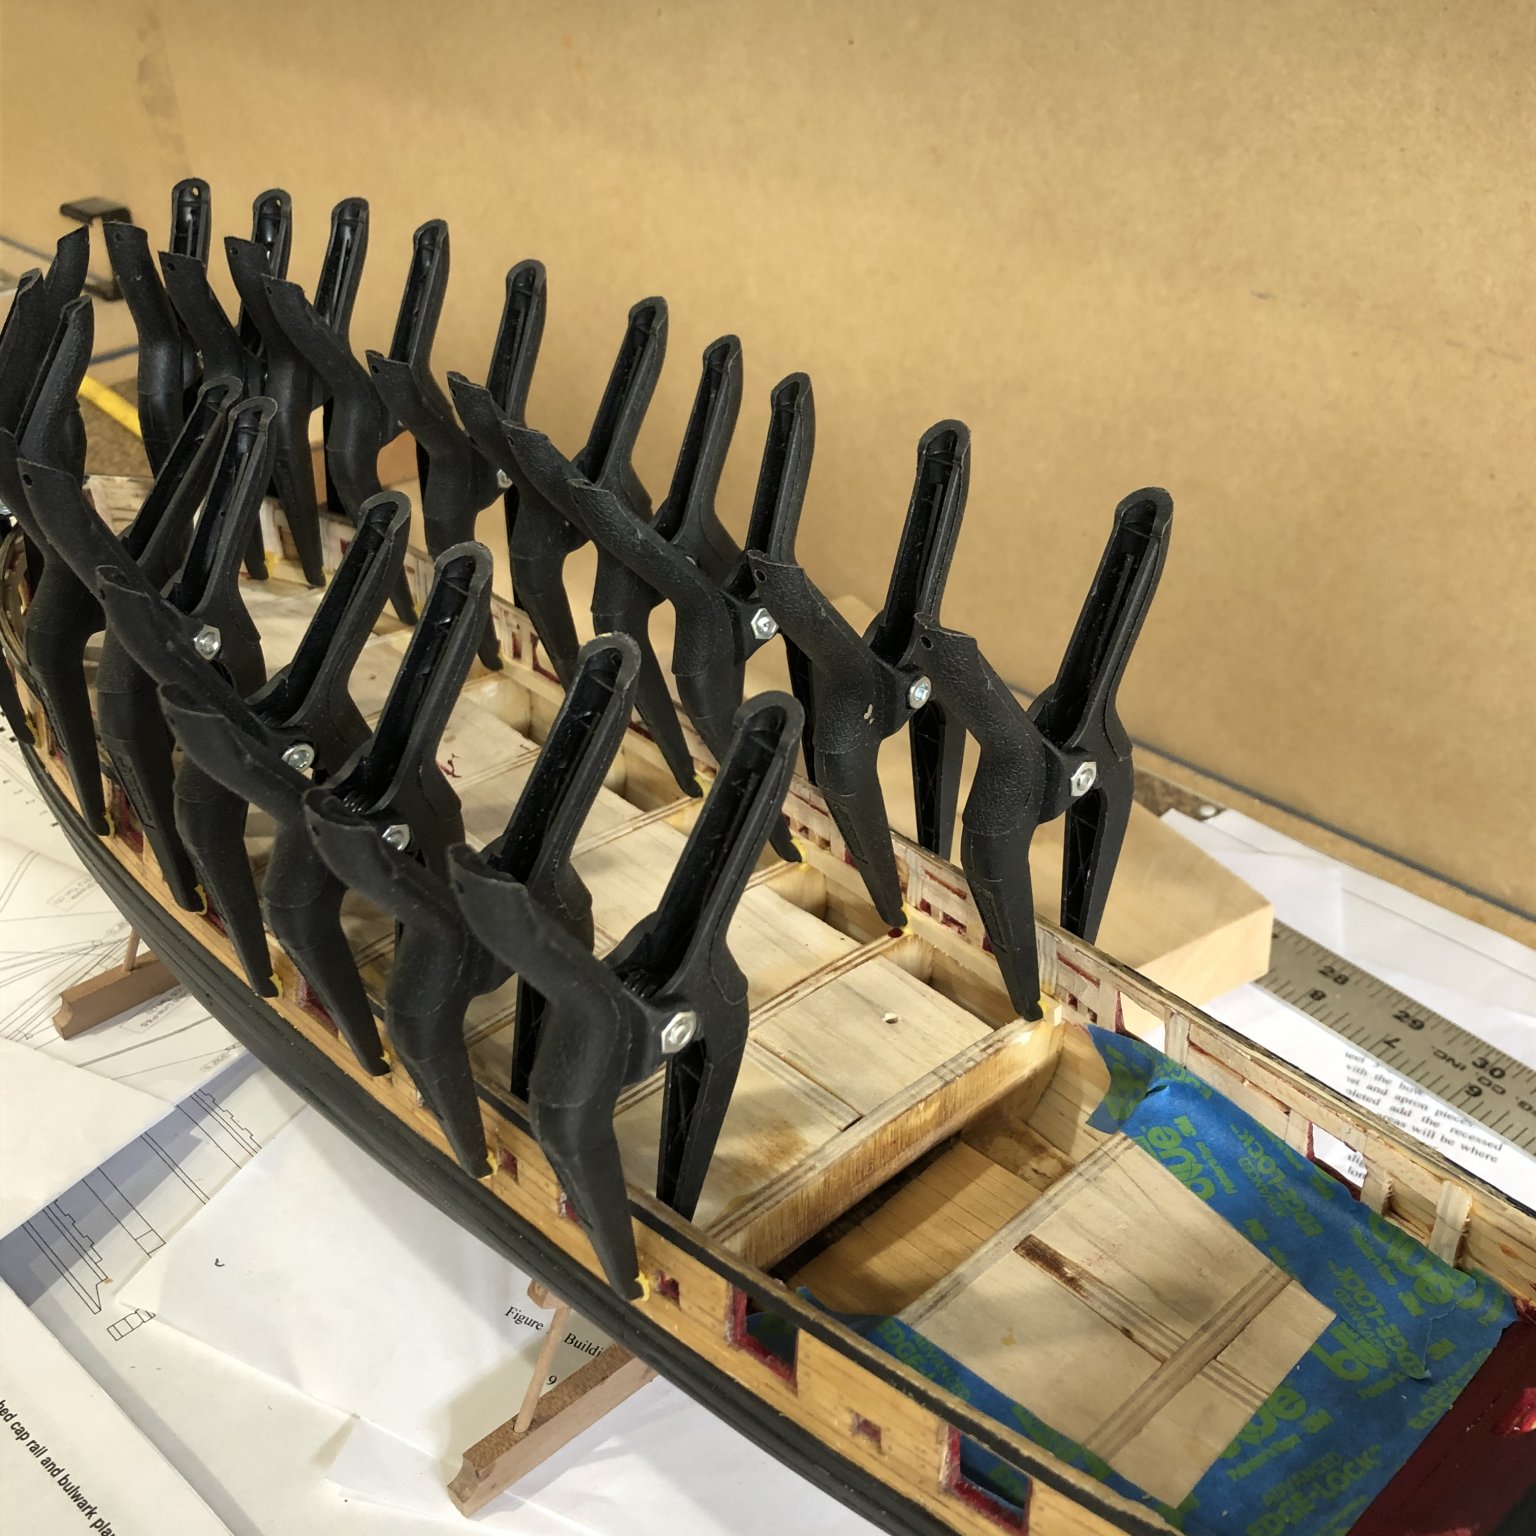
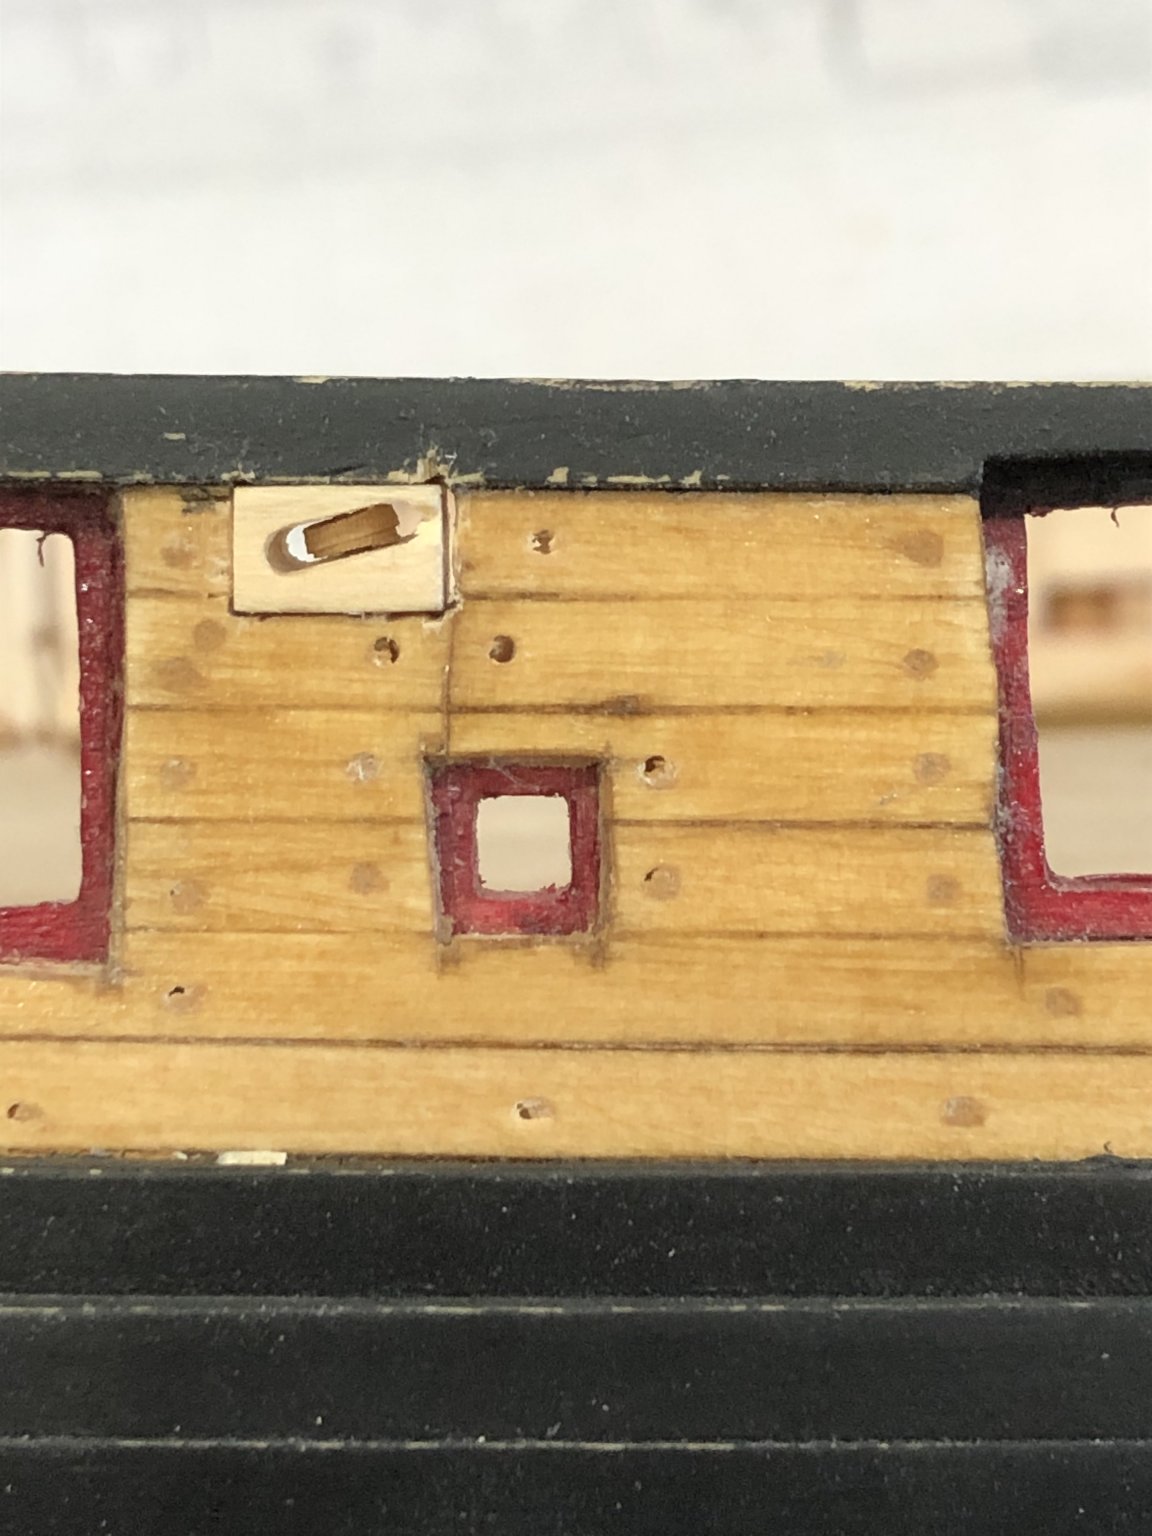
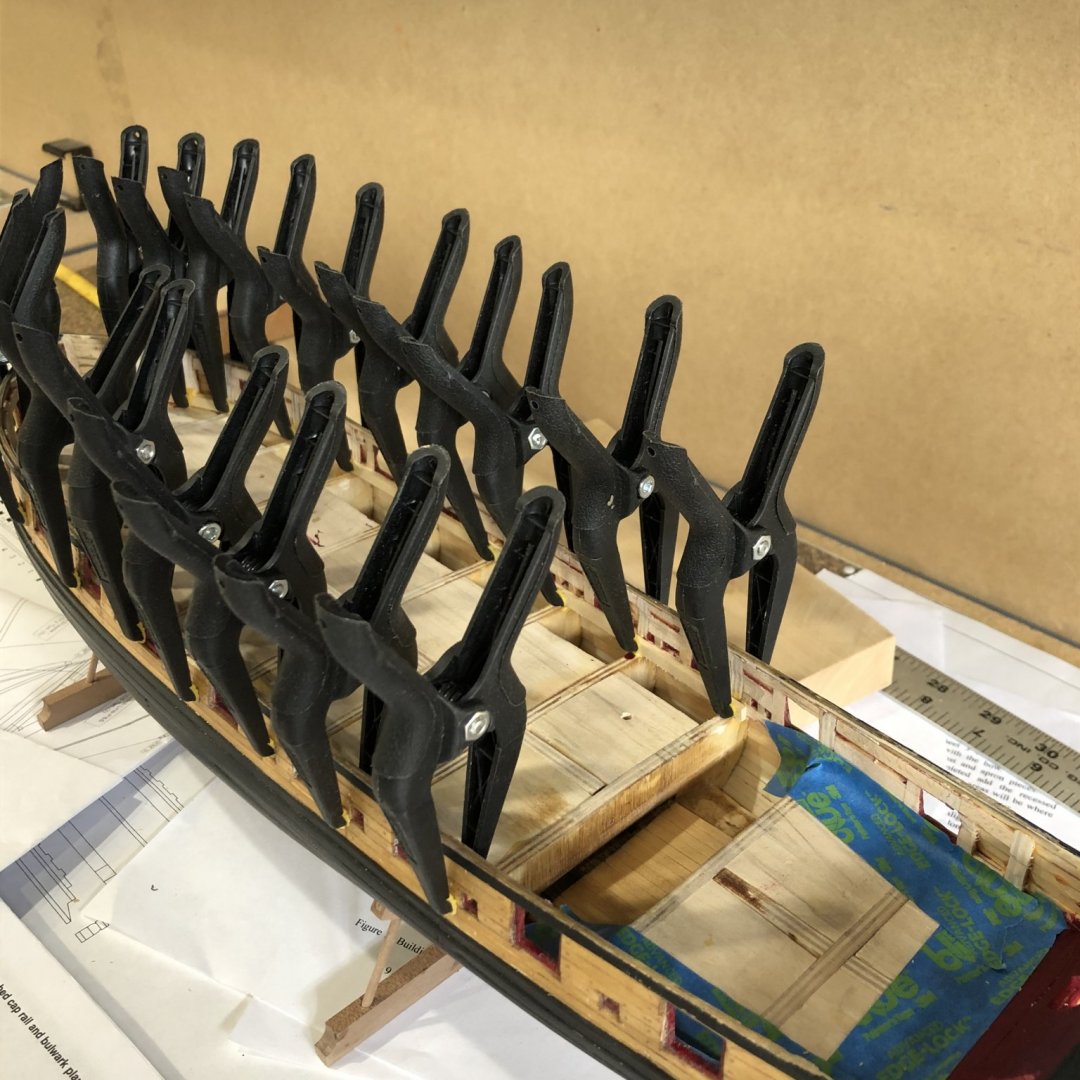
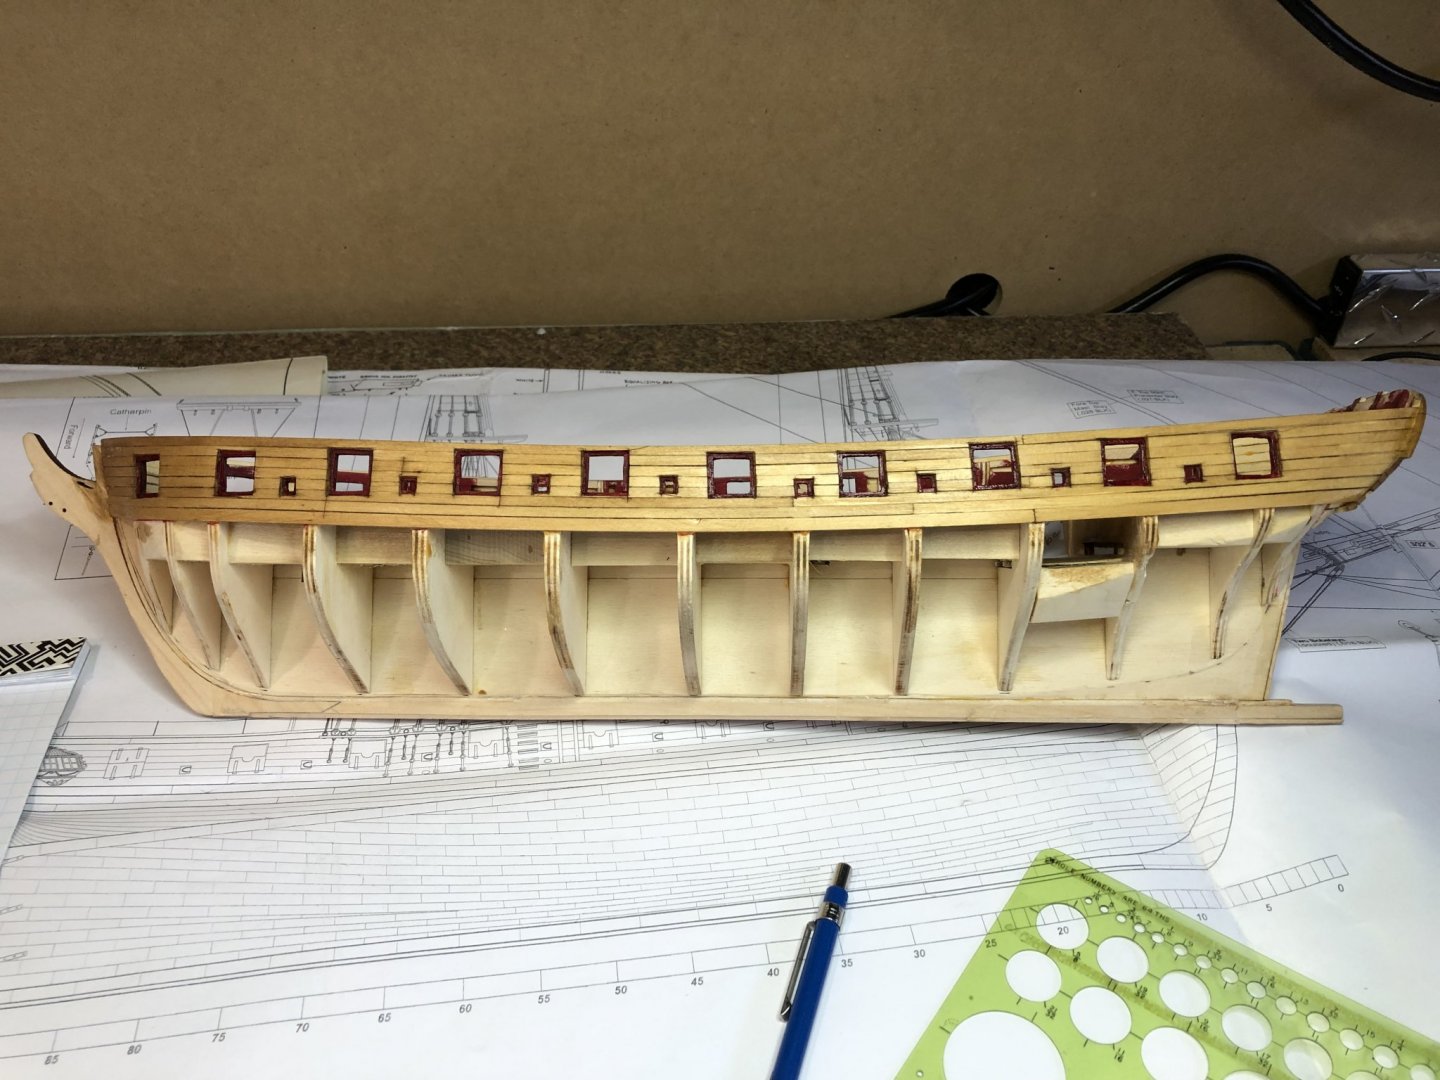
Well I finished the bulwark thinning. The top is at 1.8" around the entire perimeter and 5/32" around the deck level perimeter. While examining the bulkhead stanchions I noticed a small radius from horizontal to vertical so I spent several hours using a chisel and #11 blade making the corners square. I then took a triangular swiss file to finish off the corner now the the planking sits on the deck surface correctly. I didn't have a 3/16" piece of yellow cedar so I had to surface plane a 5mm piece to 3/16" and then rip the 3/16" vy 1/16" strip for the first plank. Placed the port and starboard forward planks on. They sit very nice I very happy with the fit after all the work the frame/bulwark runction. The Koreans had the turtle boat but my Syren (with clamps) looks like a porcupine boat. I cut the fixed block holes in the bulwark planking and then I stained the blocks golden oak. I put the in the slides after the stain drys tomorrow. Closeup views show everything all though I do have a lot of touchup to do. Thanks for the likes Will
-
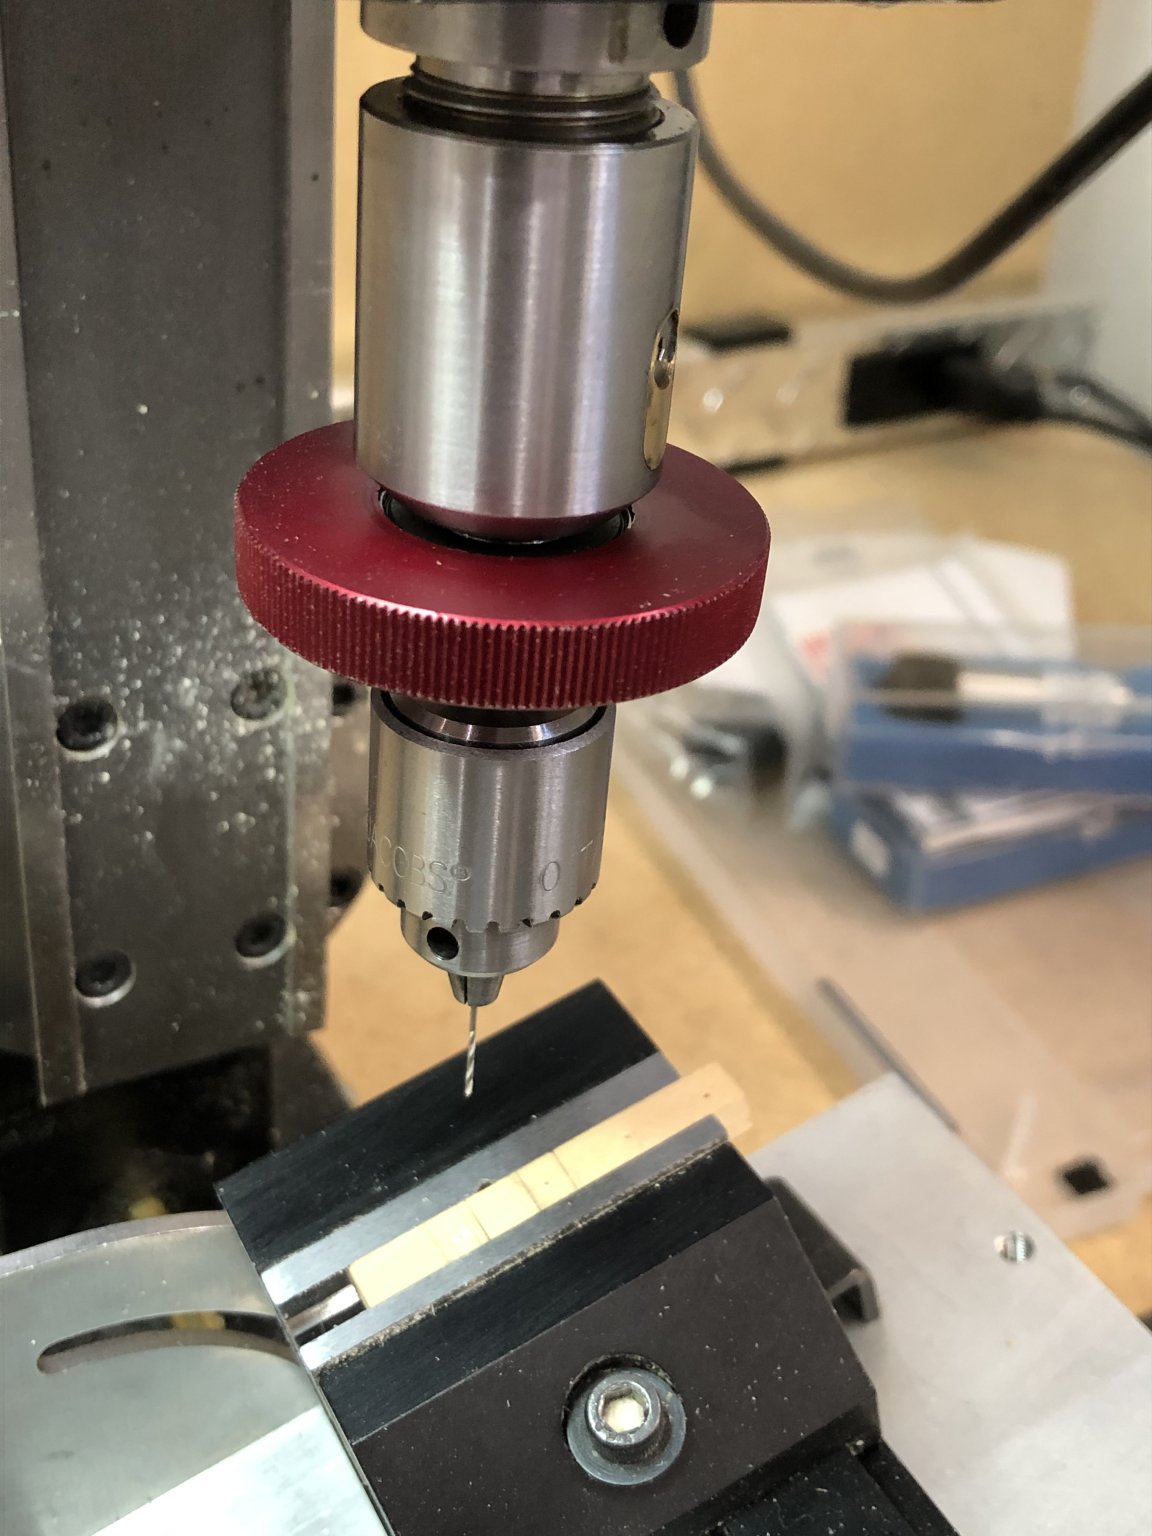
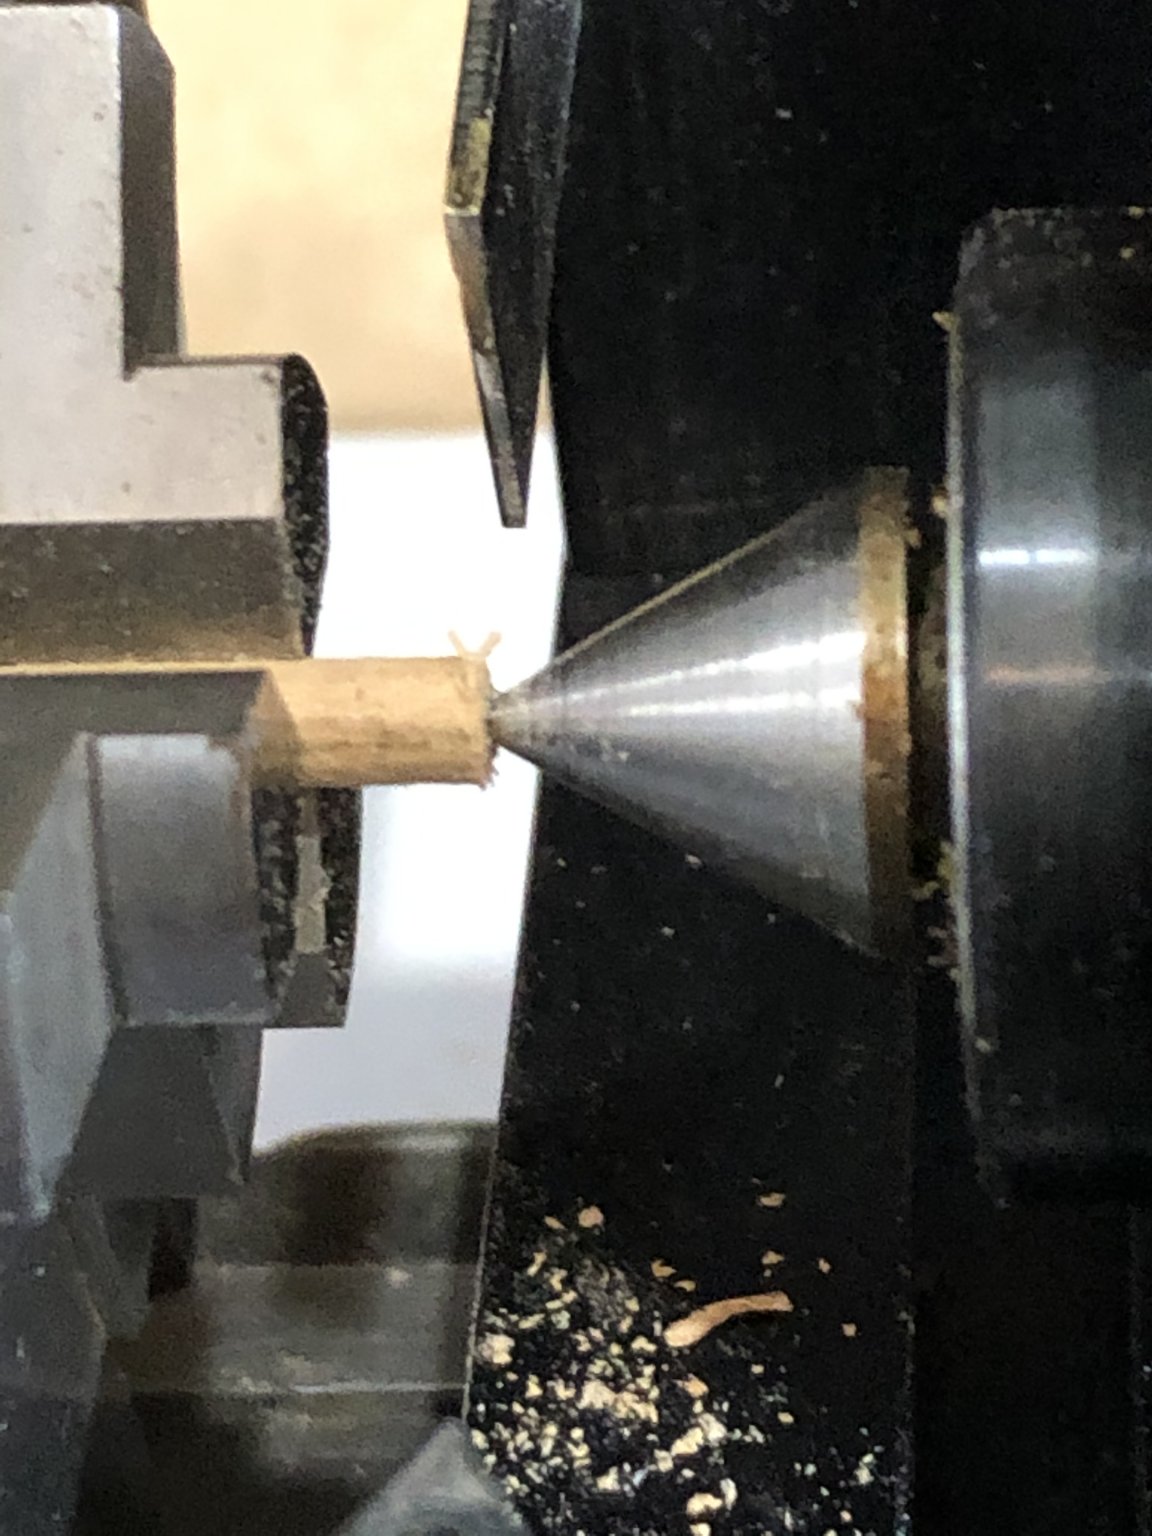
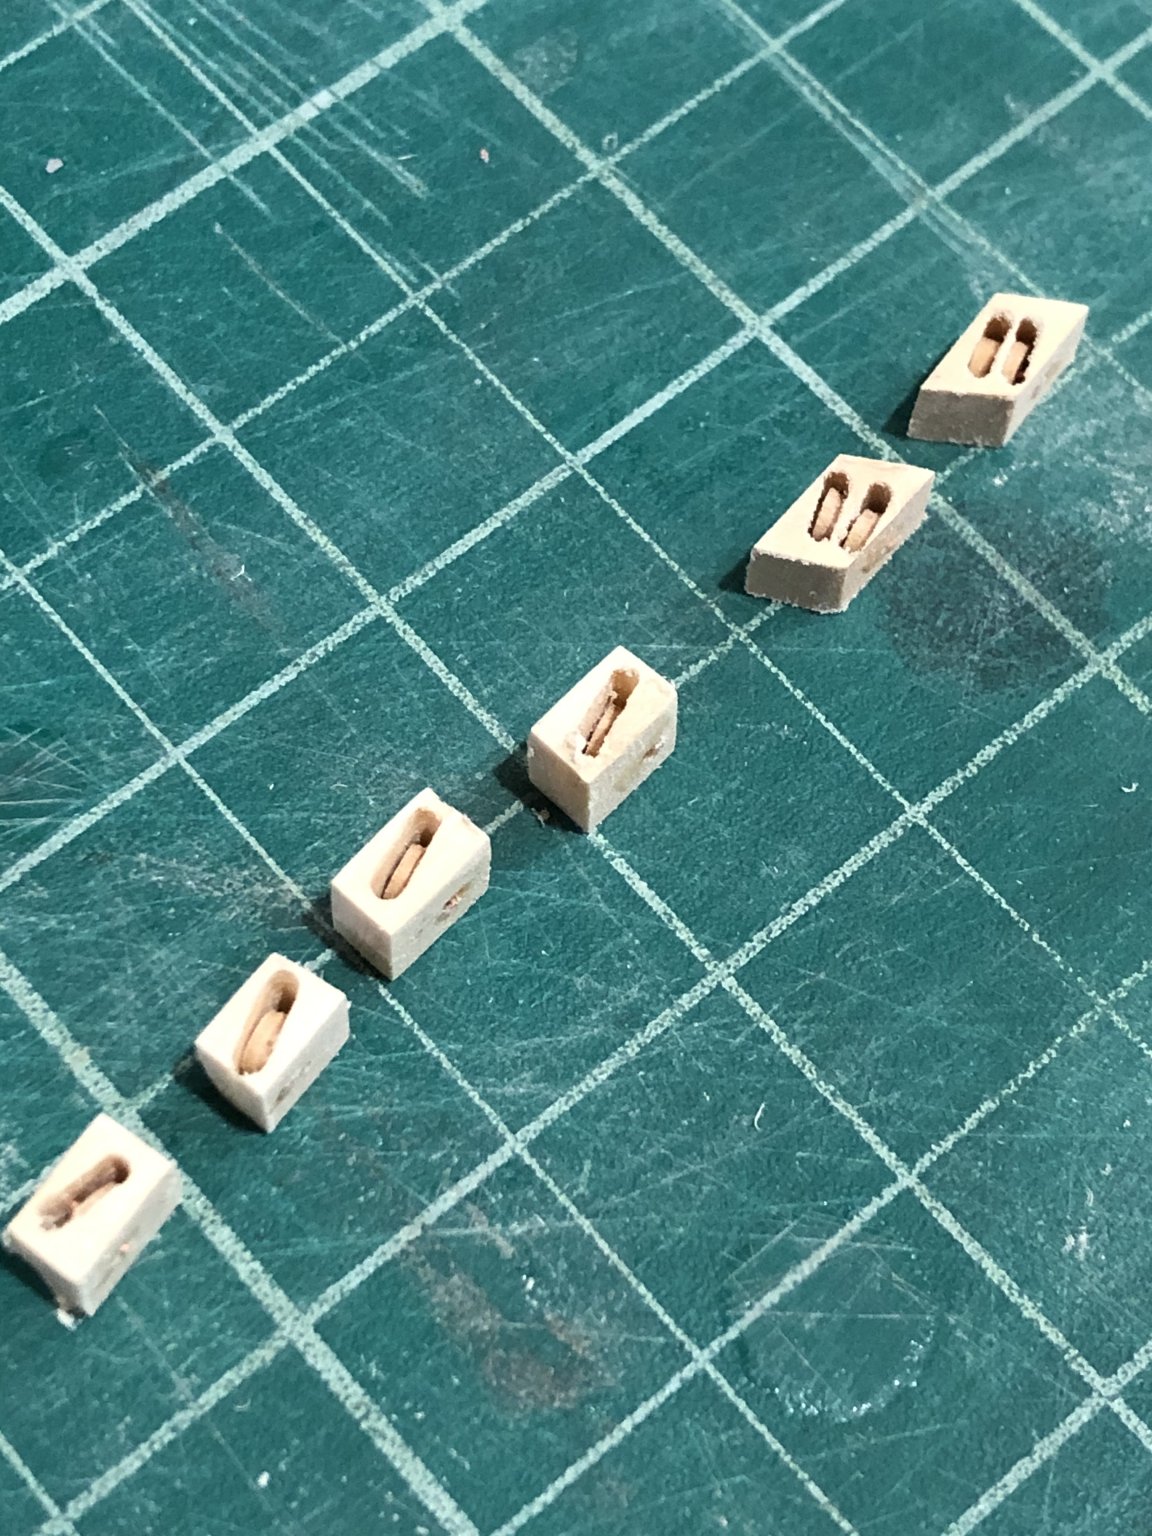
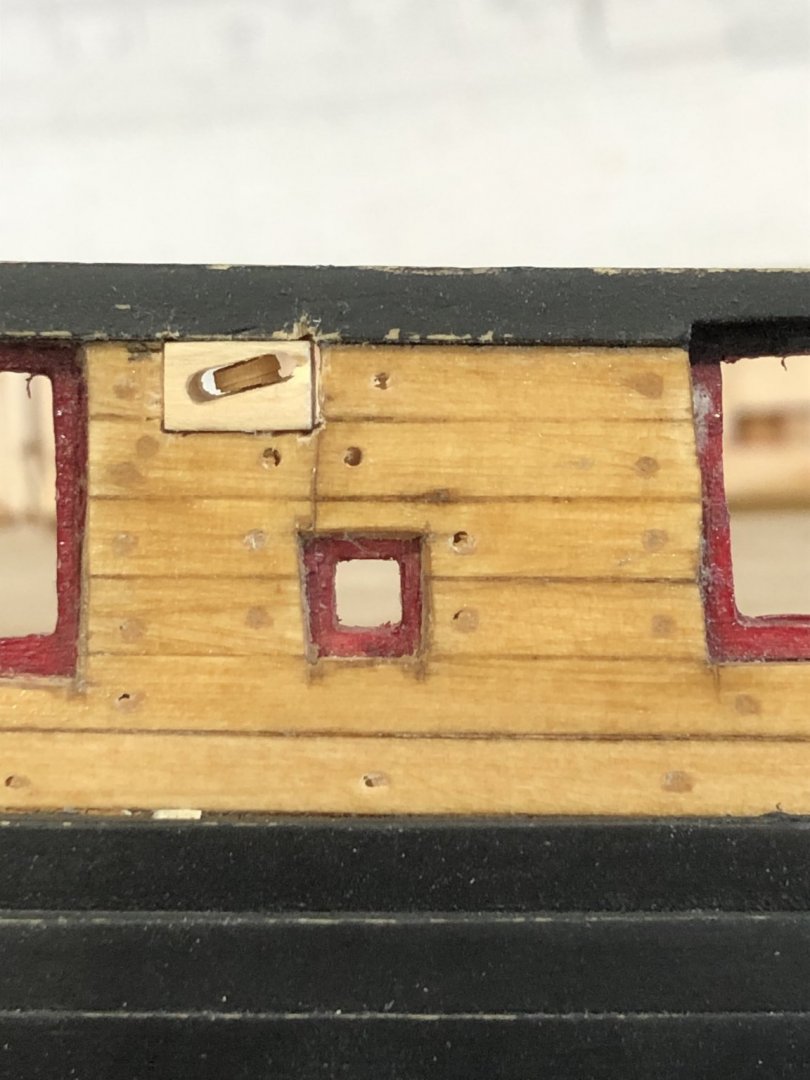
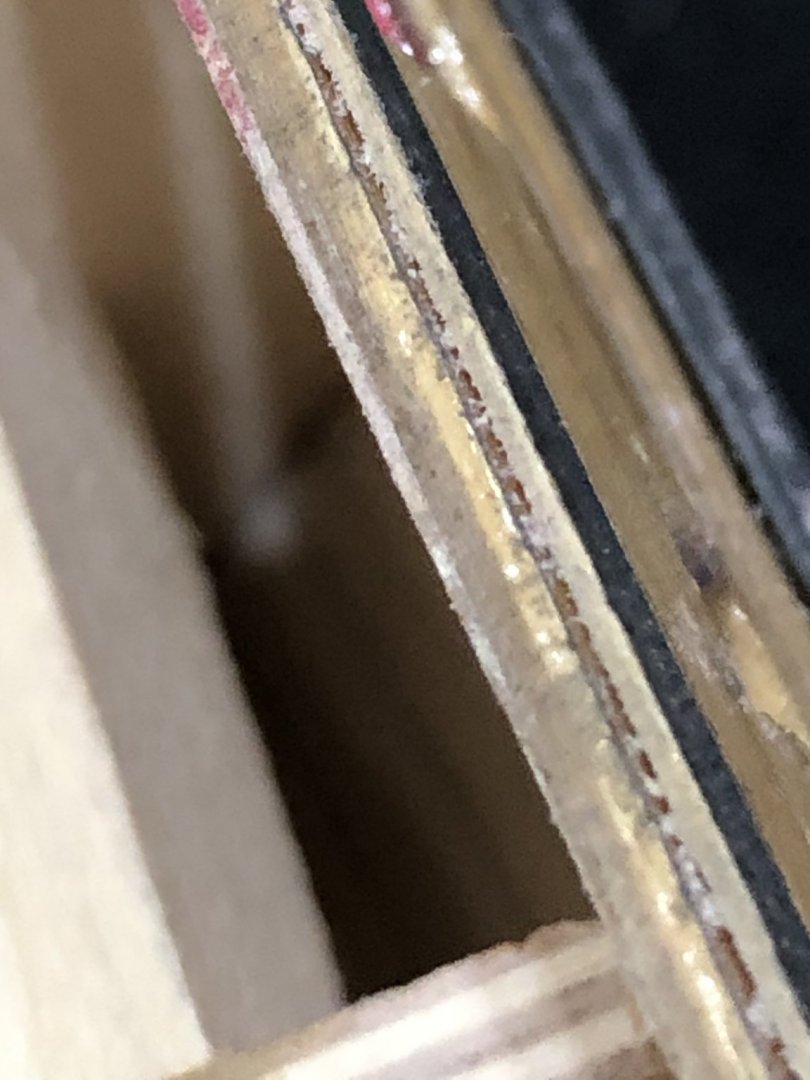
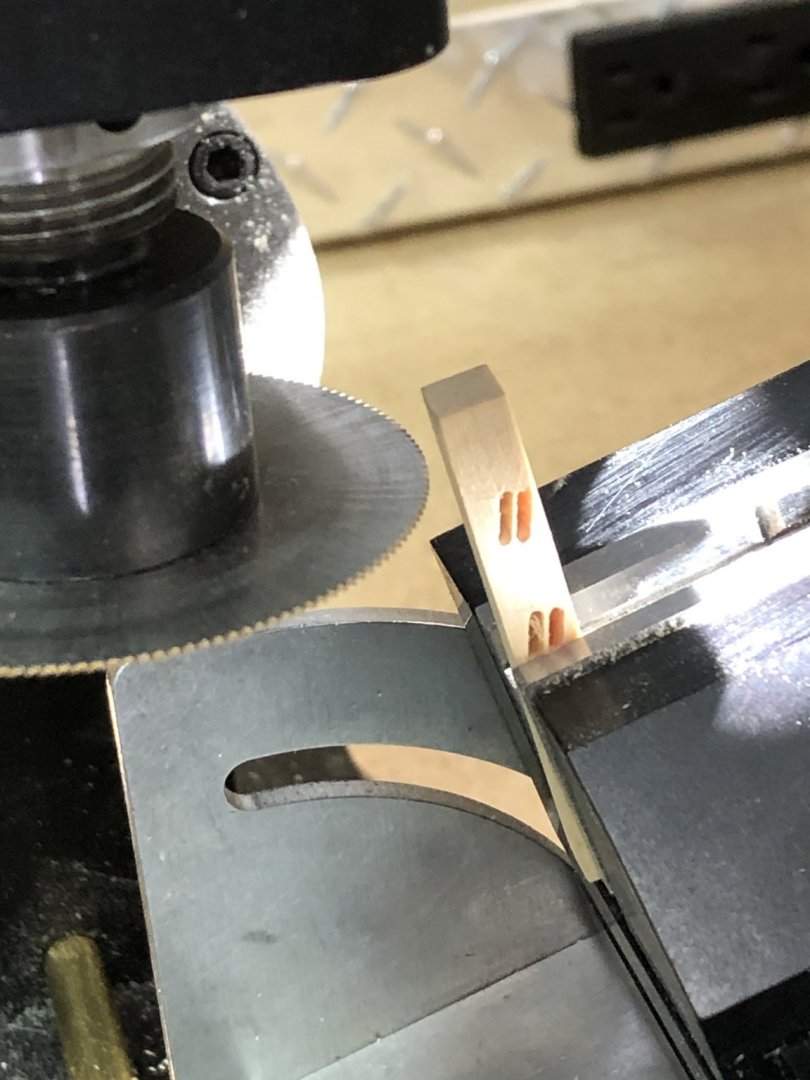
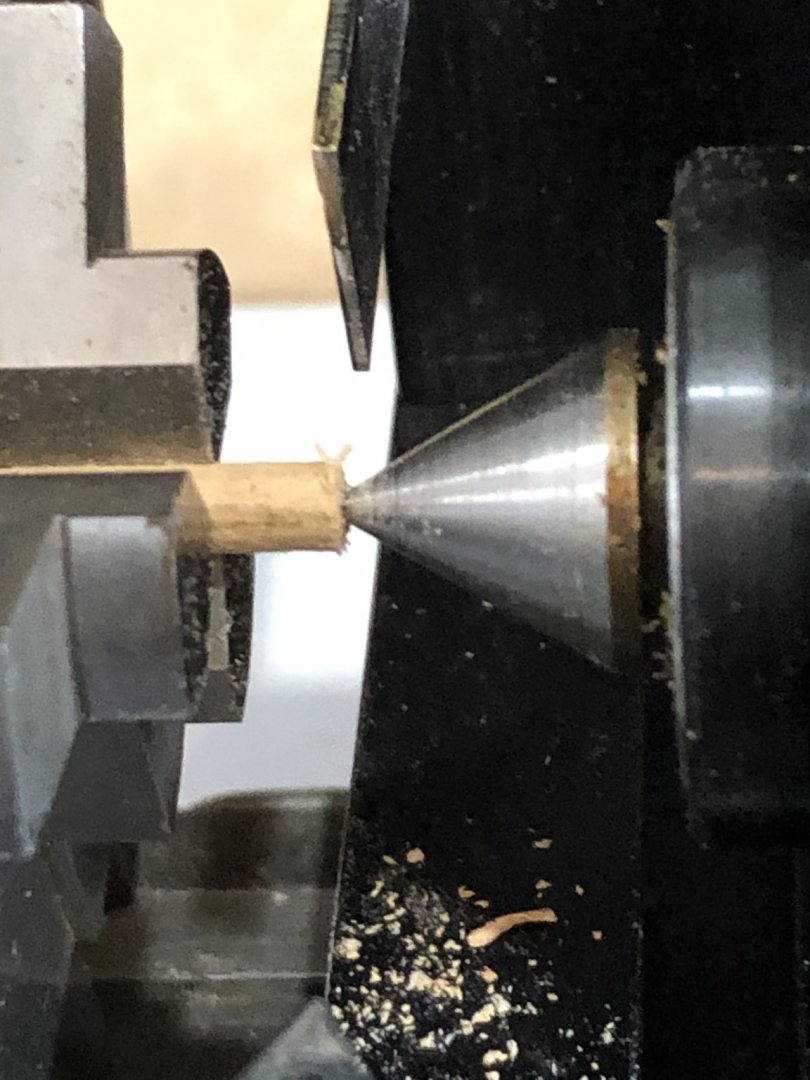
Started chapter 7 today. Not very exciting sanding and sanding the bulkwarks, I got the top of the bulkheads down to 1/8" and to deck level down to 5/32".BTW the bulwark is really strong now with all the planking. I'm hoping this is enough but we'll see as I'm going to sit on it for a couple of days, measuring and thinking. Chuck mentioned the up front by the bow It will get a little thicker but this will be ok, not sure what he meant by that. Any ideas? I could you some direction. Here's a picture of one area as a sample of the thickness. Finished up the fixed blocks the go into the bulwark for the main braces, fore sheets and main tack. Where I originally planned to use 3/32" dia rod I discovered that with a part .04 thick using the partoff tool on the lathe was beyond me so I switched to wood. Turned down a square dowel to 3/32" dia dowel, drilled a .031 hole in the center and used Ed Tosti's method of parting off the disk. Used a #11 blade in a craft knife and it worked great making a clean smooth surface of the cut. I then cut the pieces apart and inserted the disks with wire as the axle. Parts are ready to install when I get the inner planking done. My wife thinks I'm crazy as no one will be able to see the parts. I tell her I'll know that they're there. Drilling the holes Cutting off the parts Turning the rod down Finished fixed blocks ready for staining, tomorrow, and installation after planking completed. Thanks for the likes and views Stay safe and well Will


-
Your carved pieces look much better than the kit cast ones, keep going. Looking at the cast galleys it is apparent that they are not even the same as sections are missing from each in different locations. I'm going to carve mine as my cast cast ones look as bad as yours. I can only hope the my first carving looks as good as yours. My two cents is wait for the wood and treat the carvings as a separate project and move on with the build. They look good Will
- 950 replies
-
- 4
-
-
- syren
- model shipways
- (and 1 more)
-
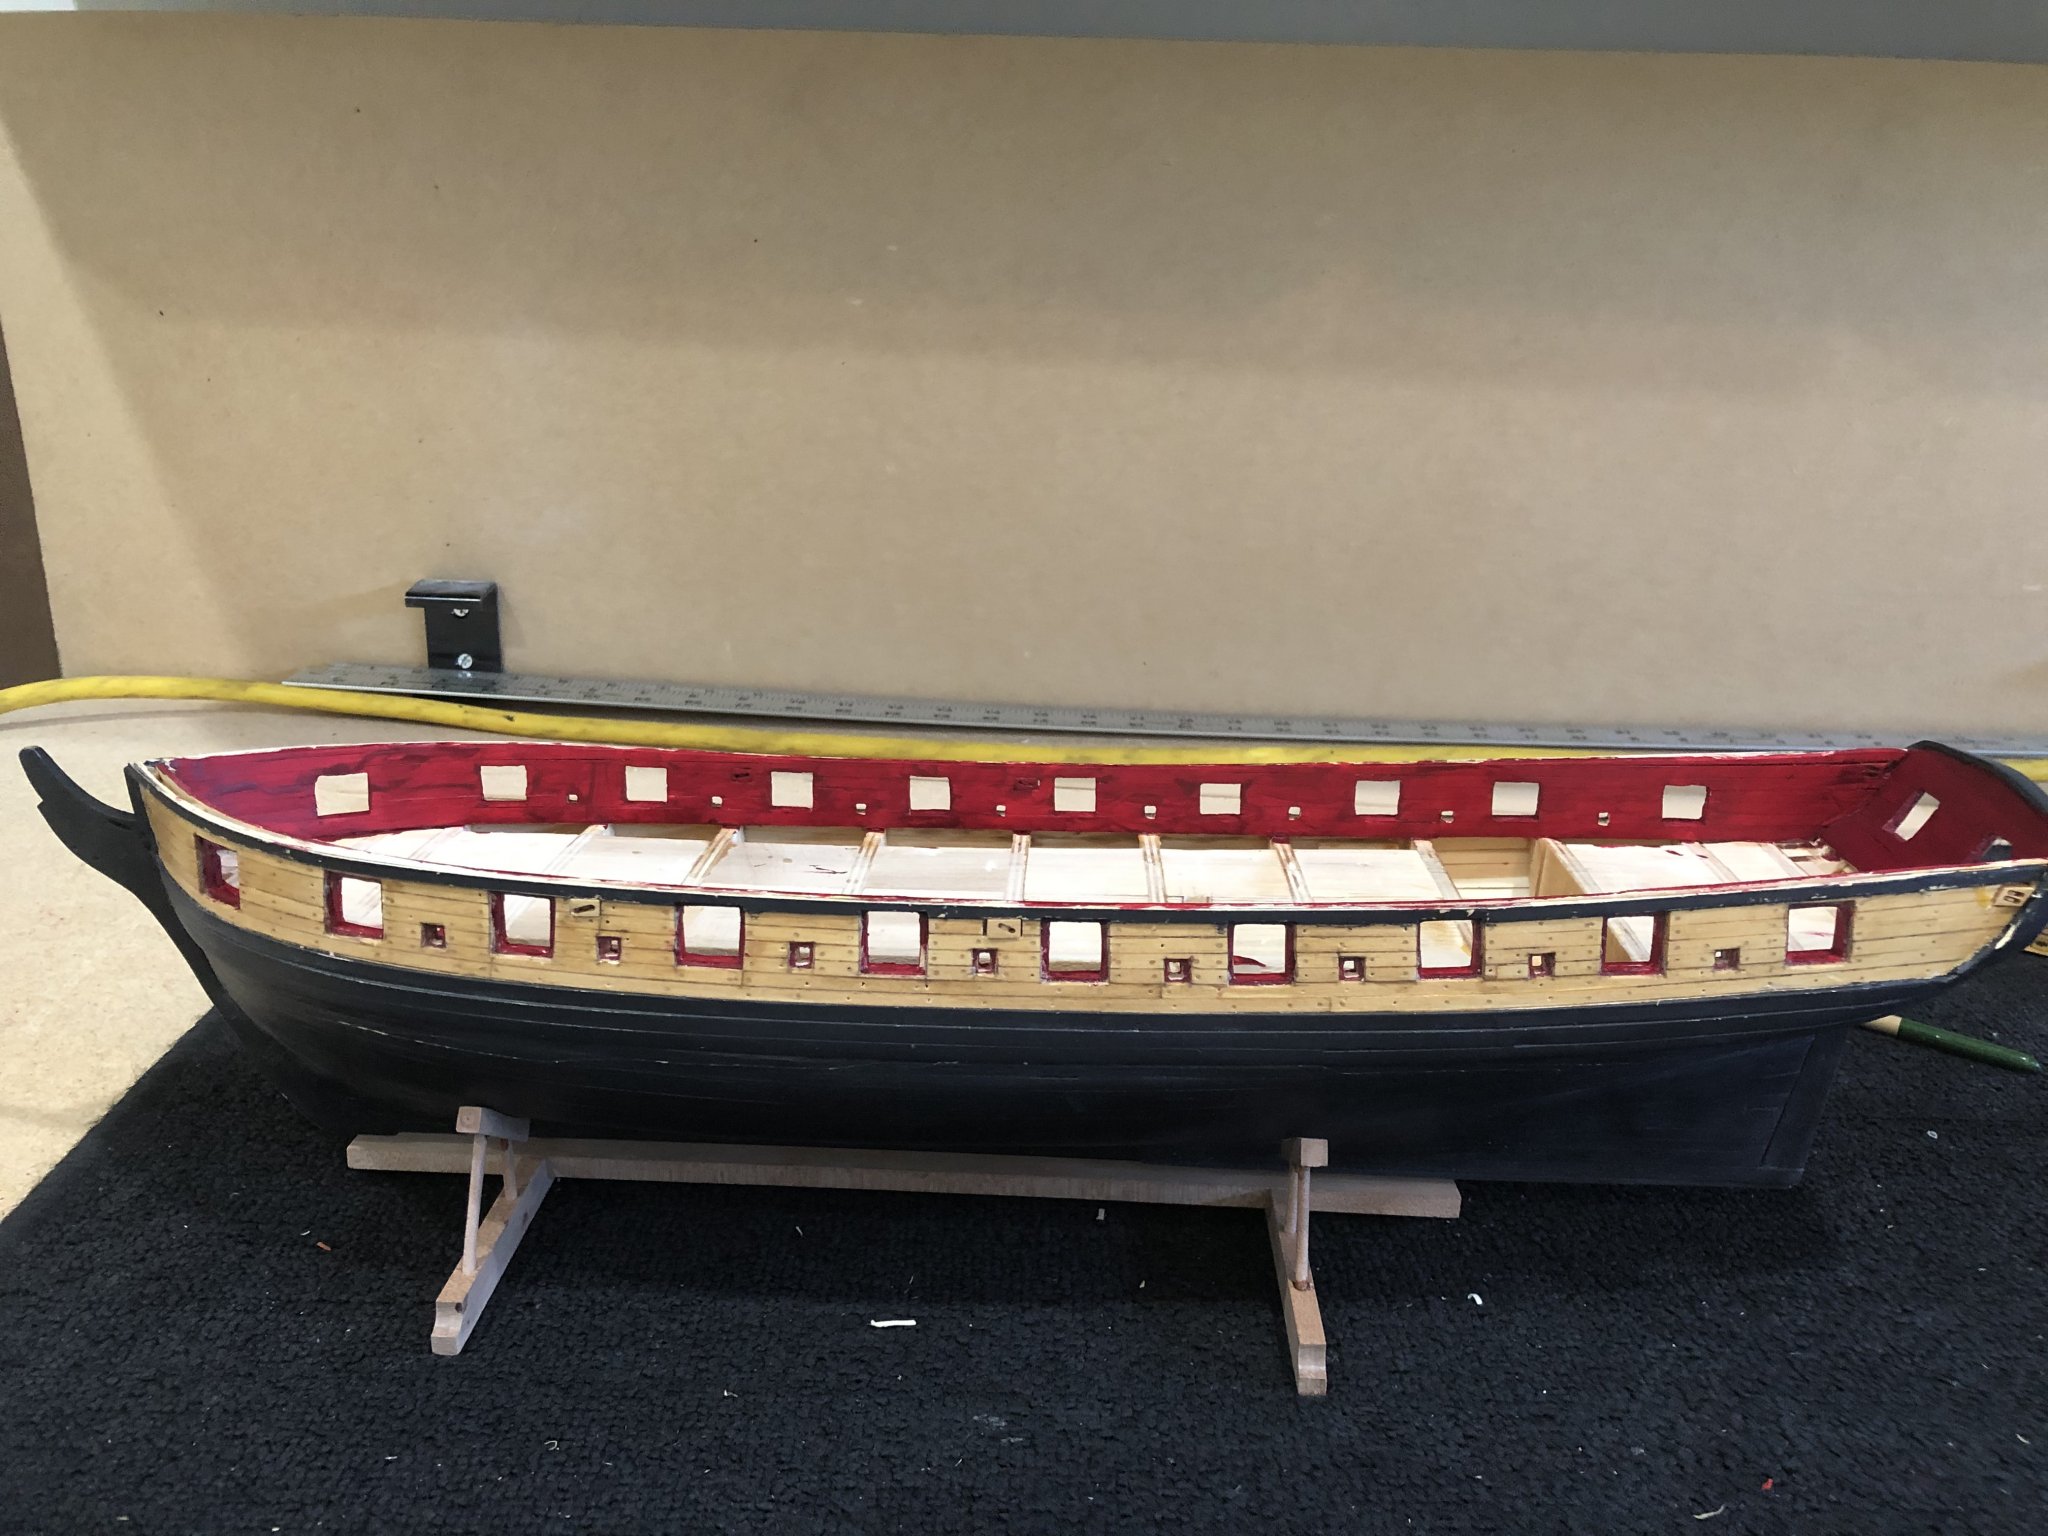
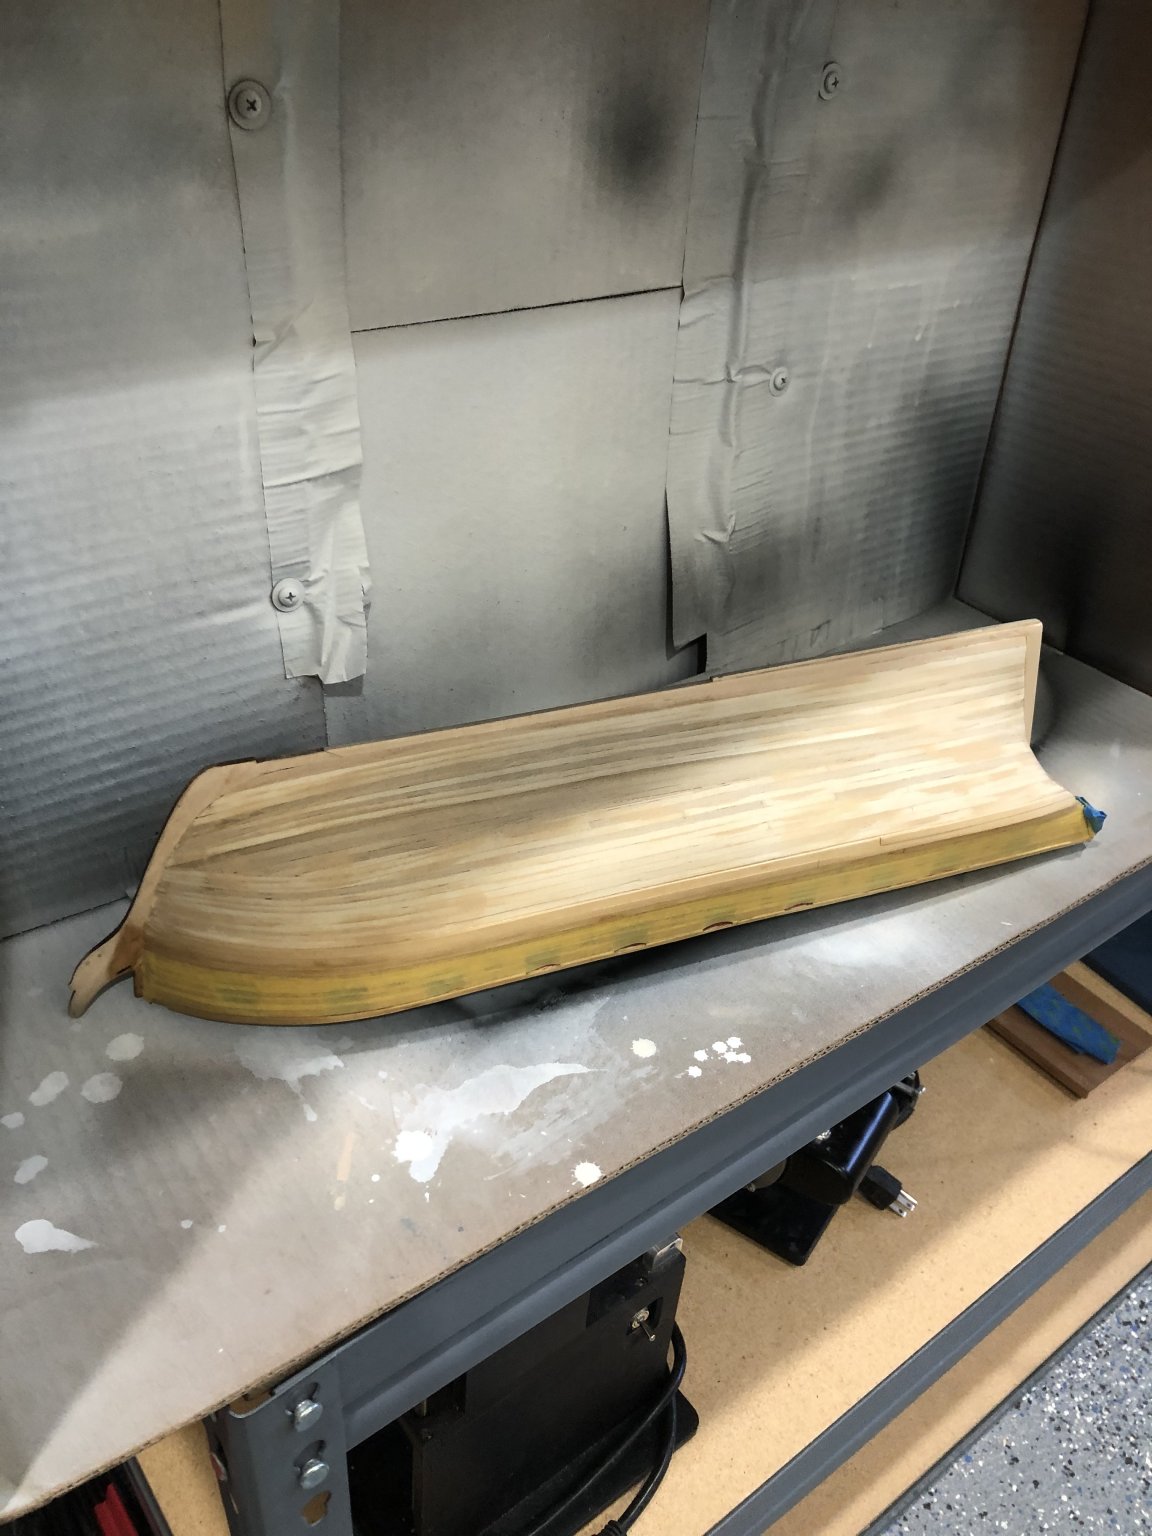
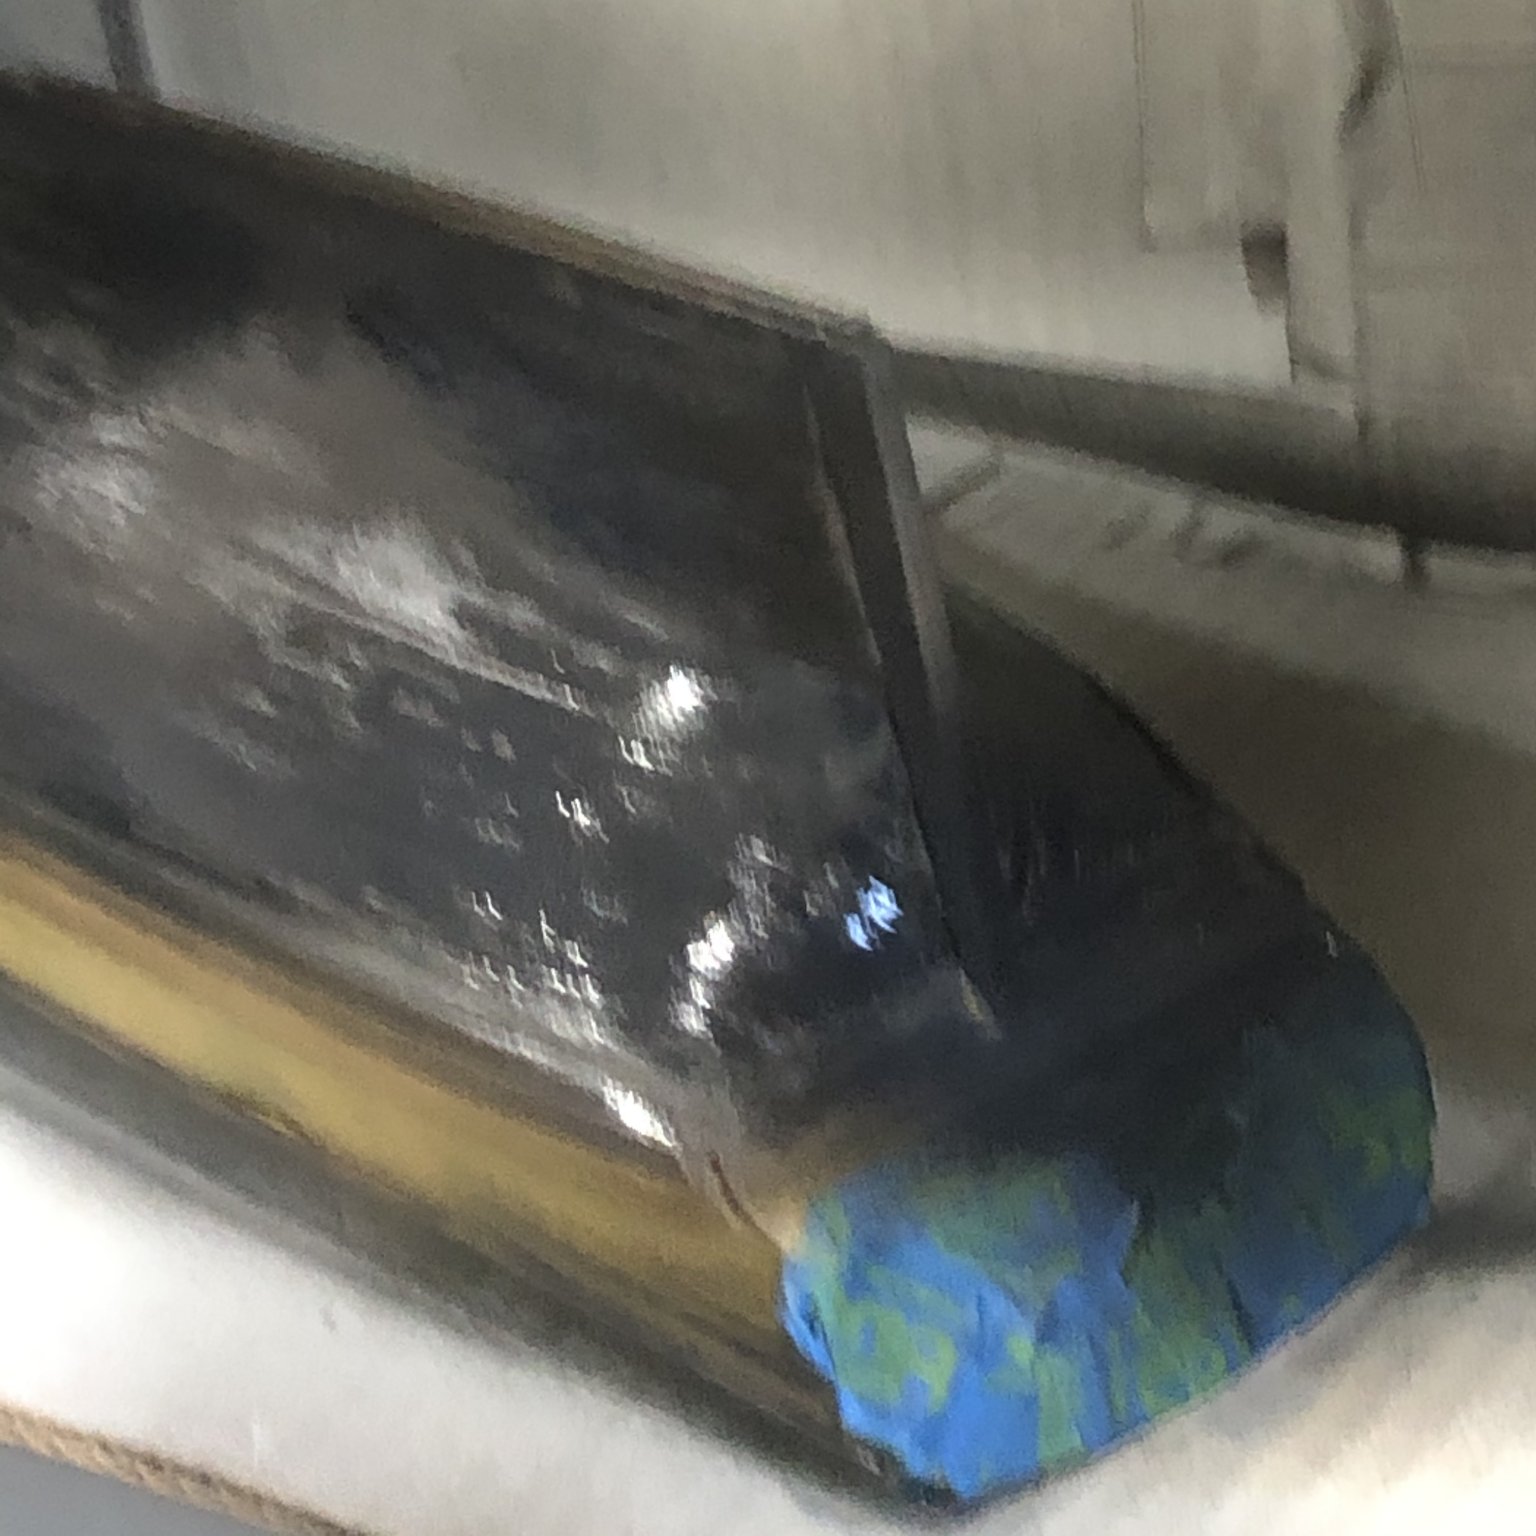
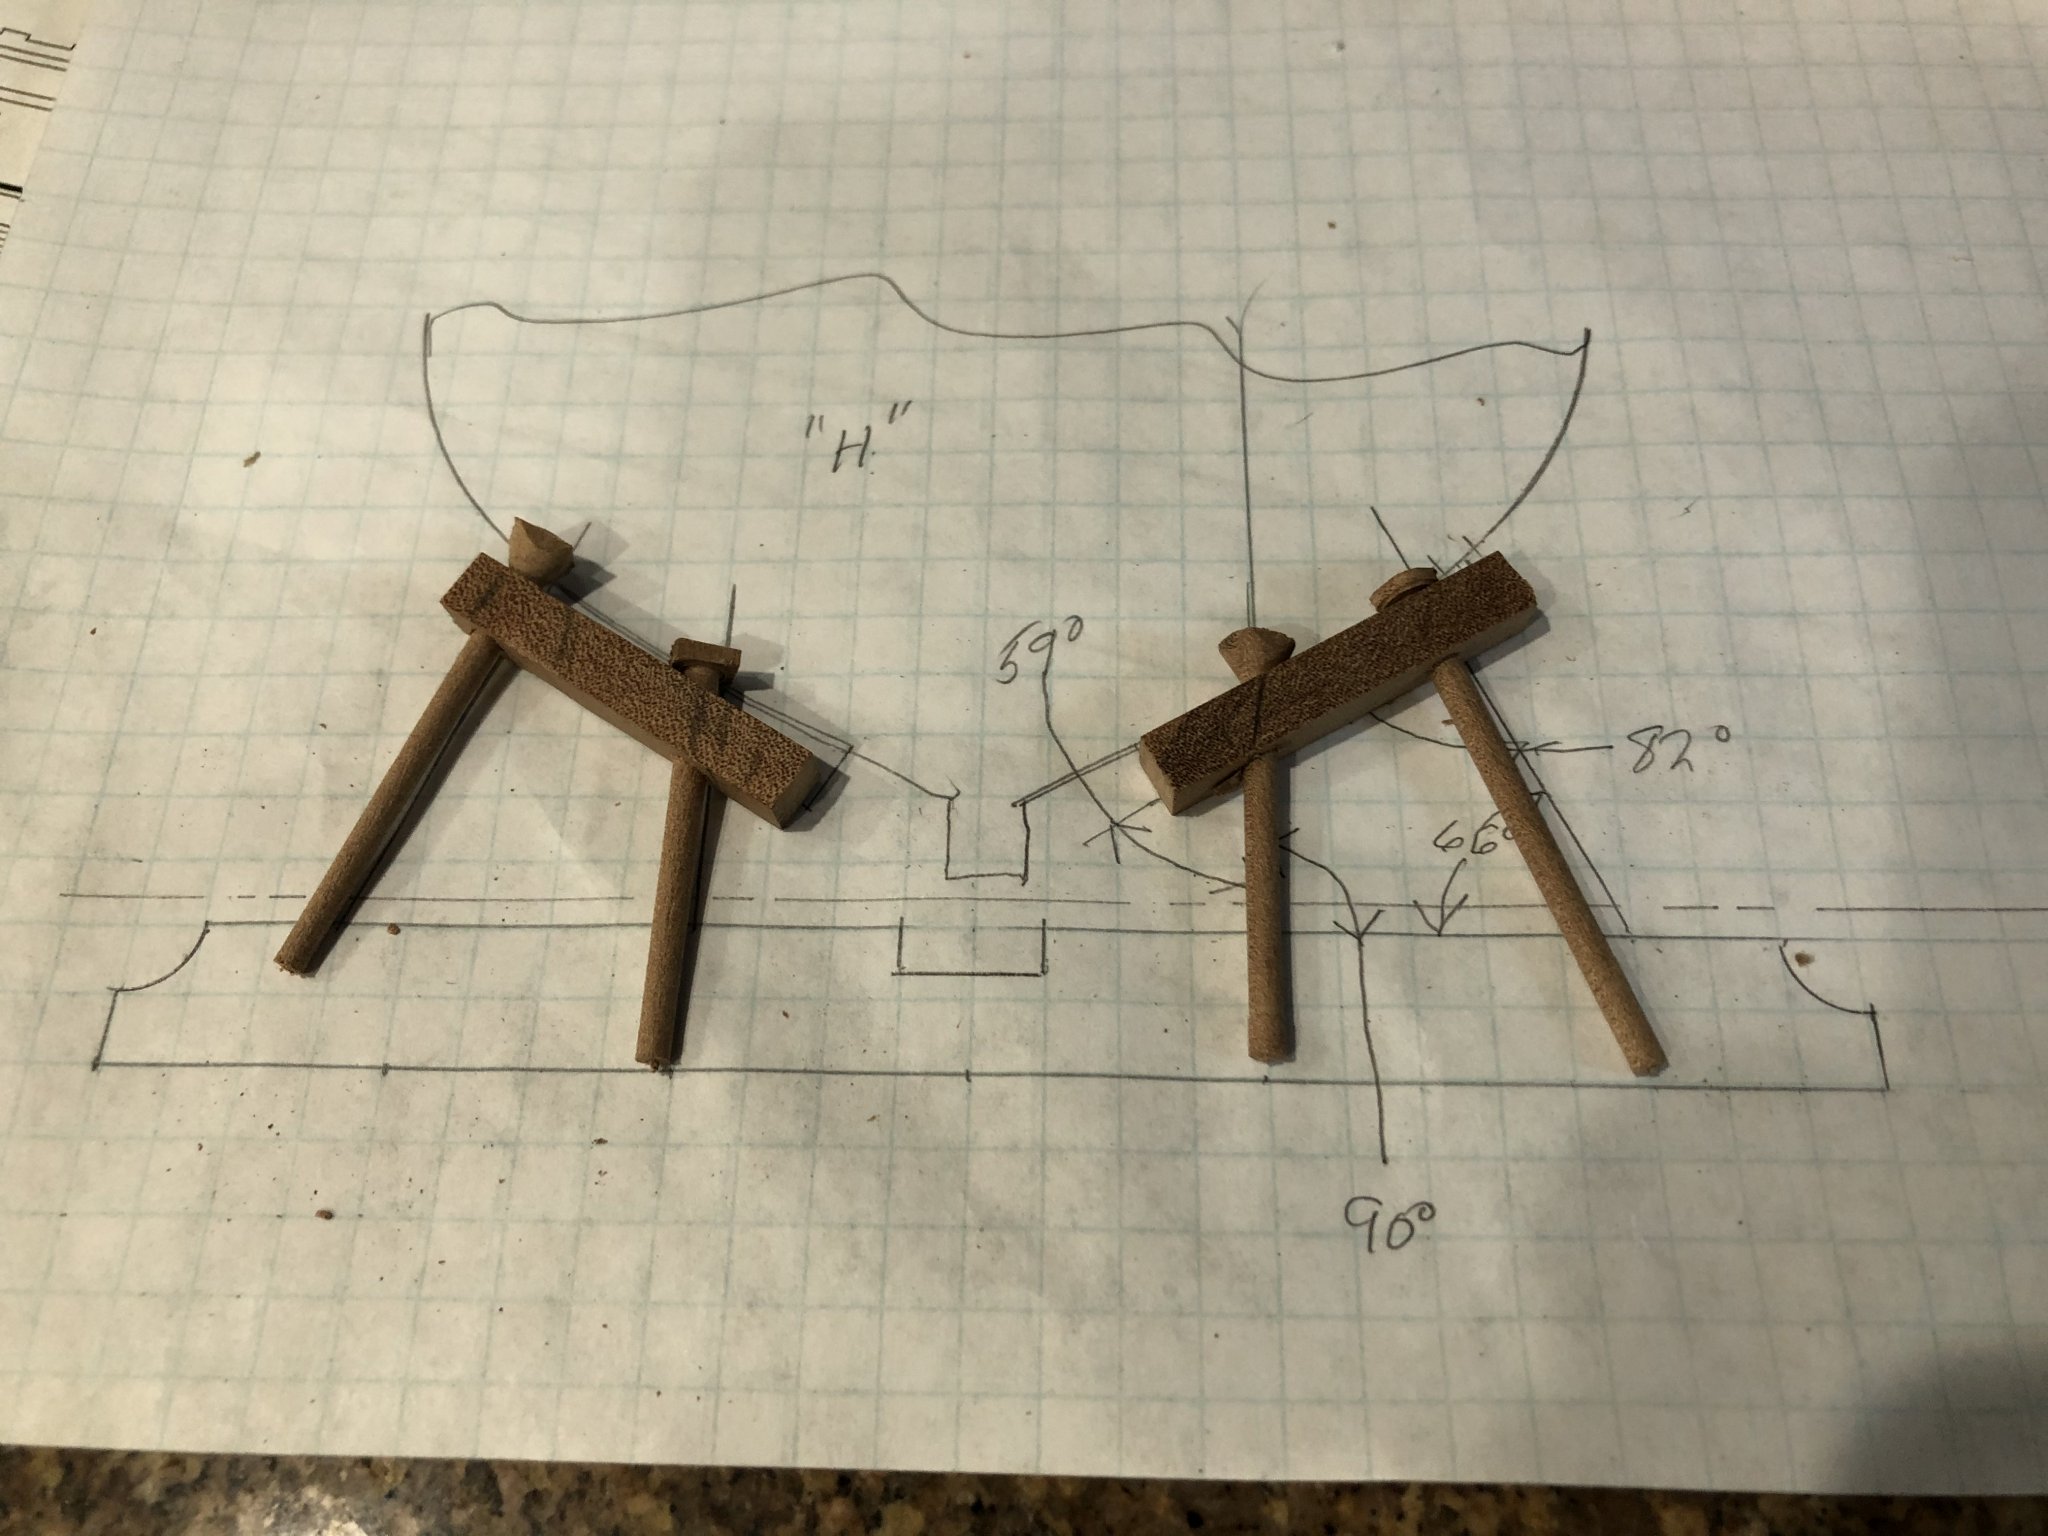
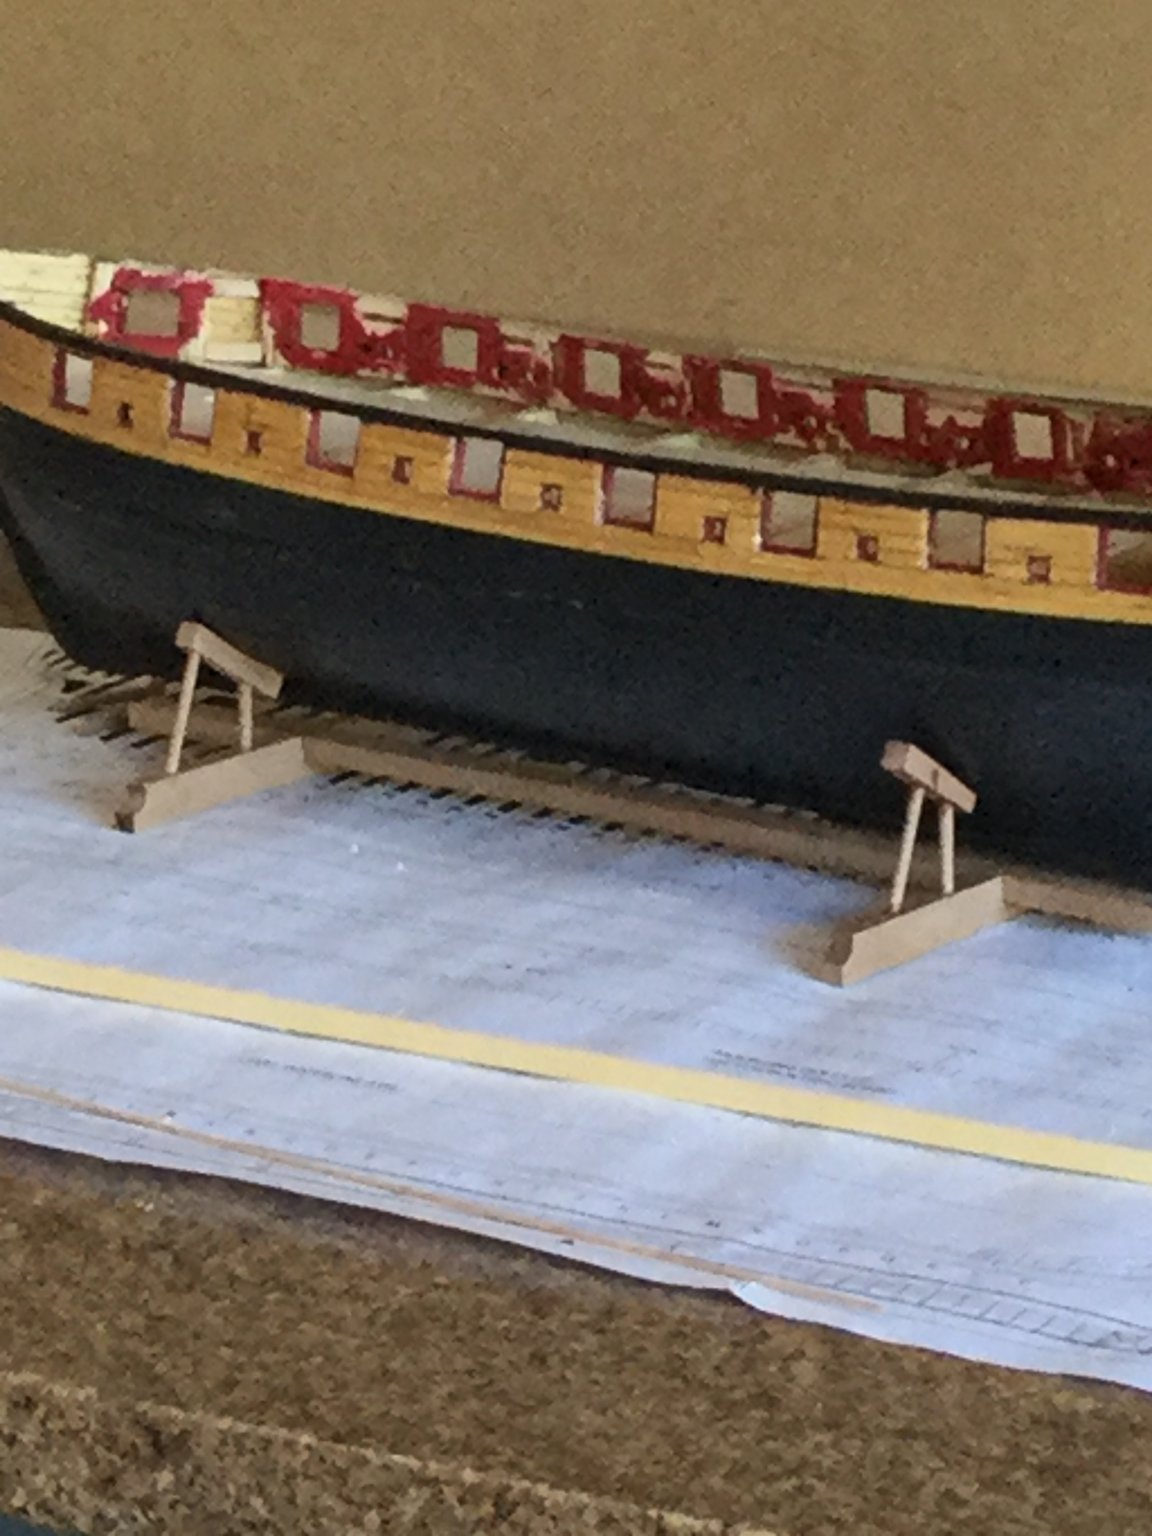
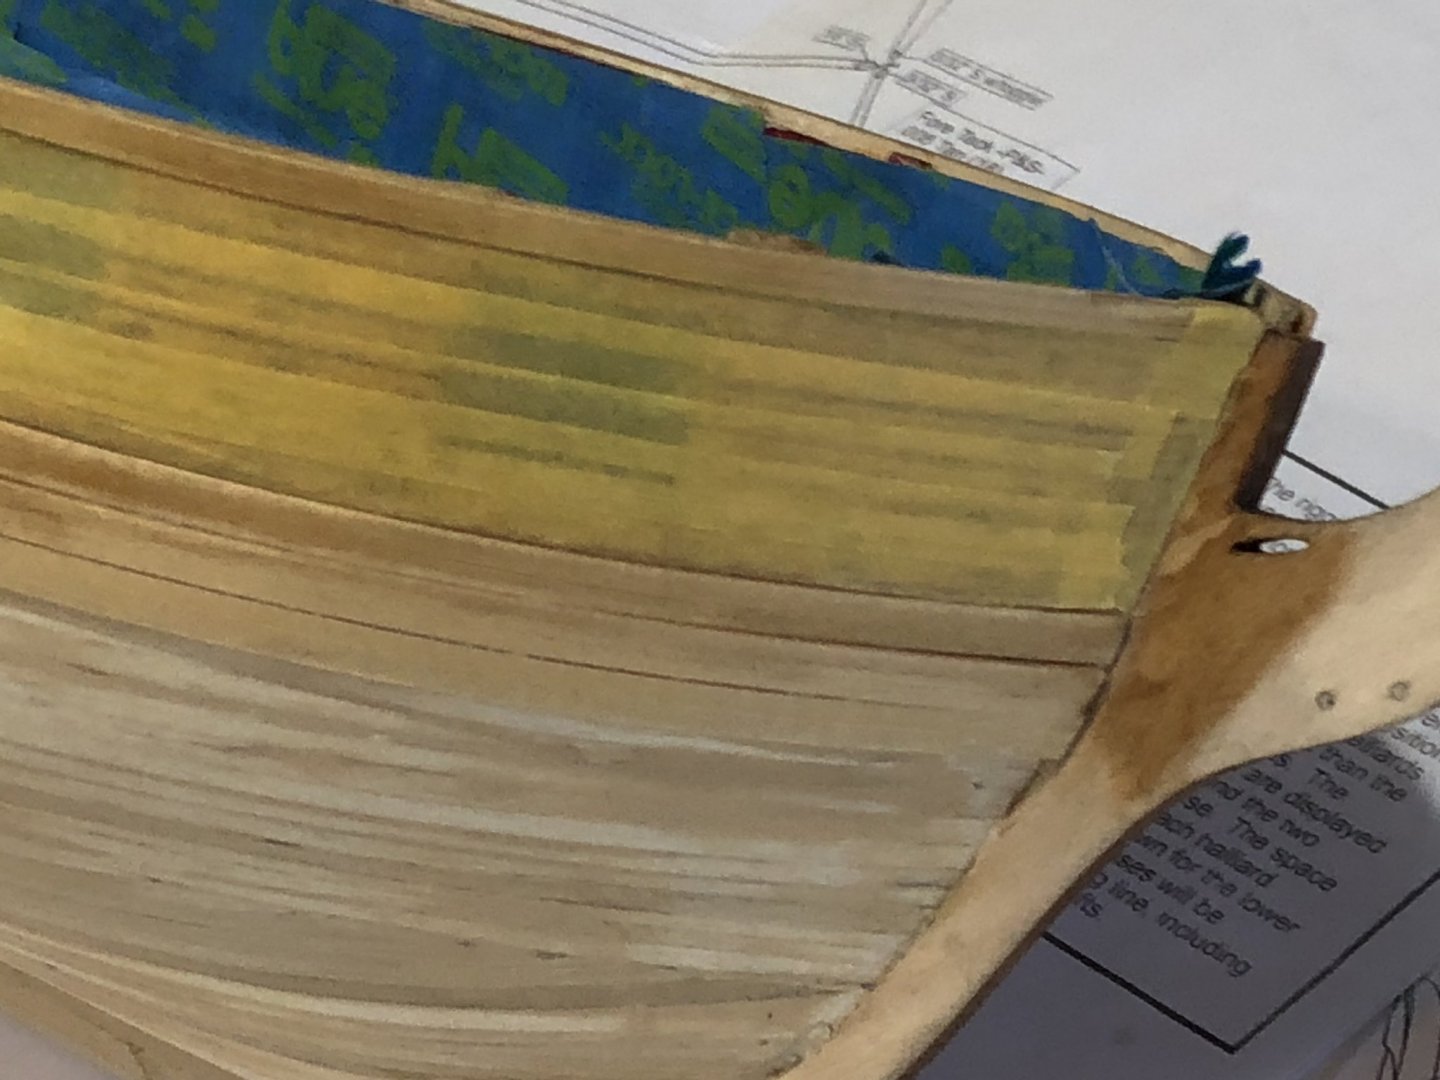
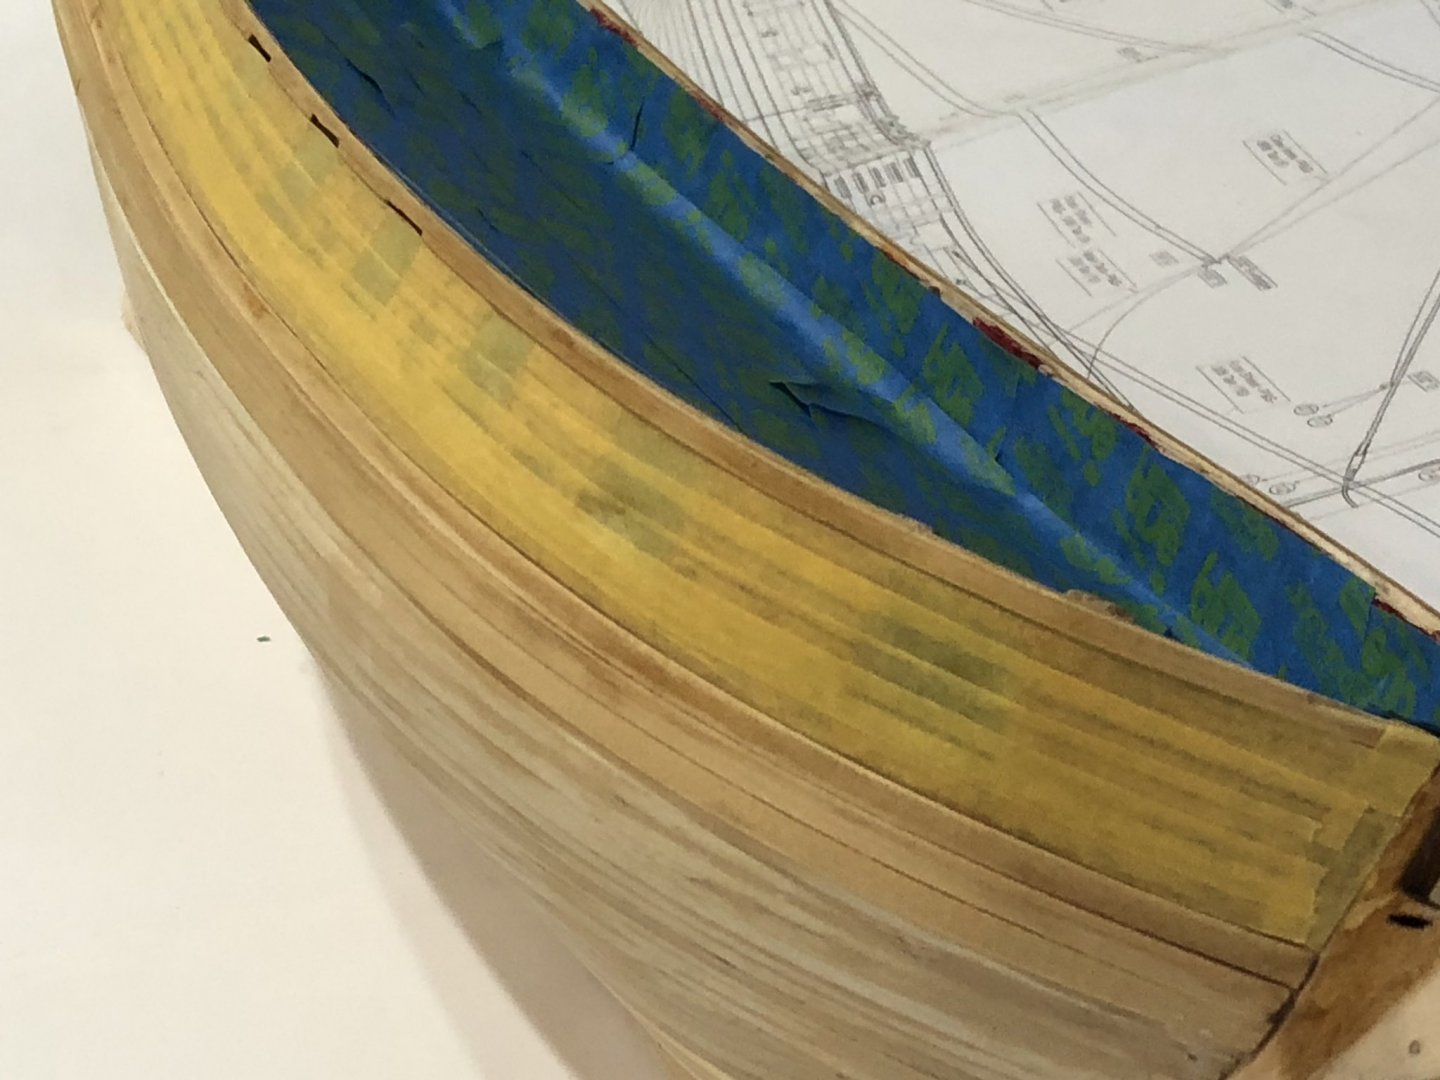
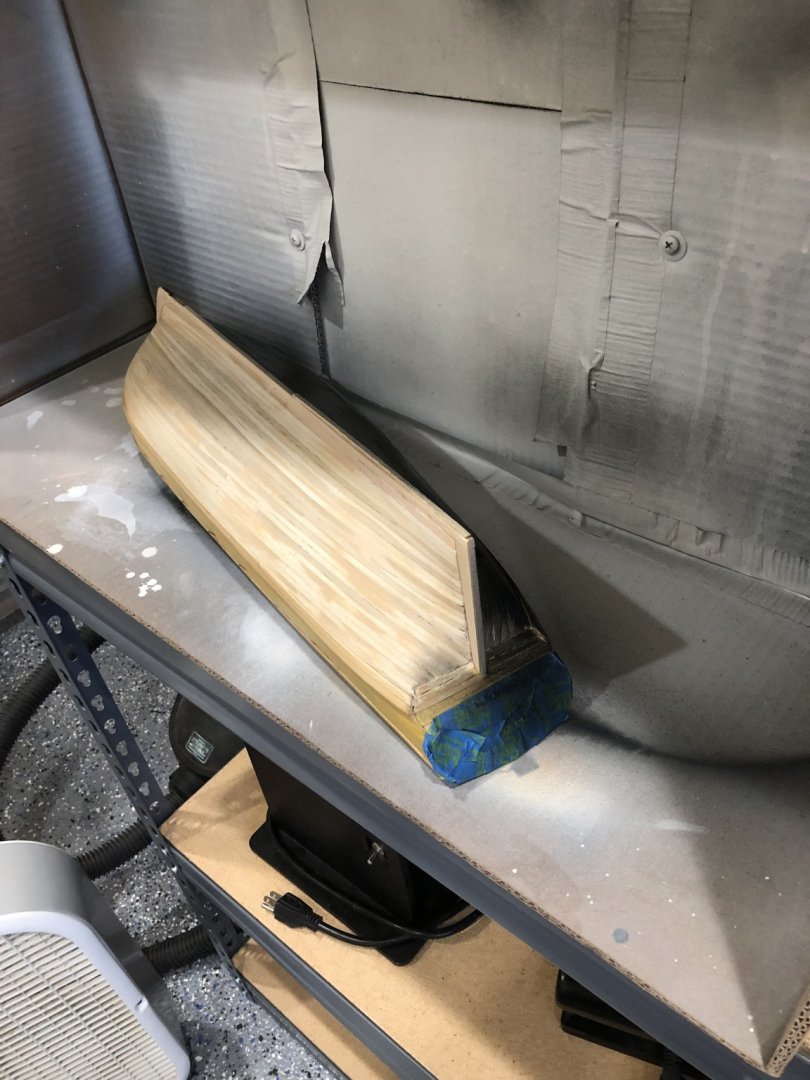
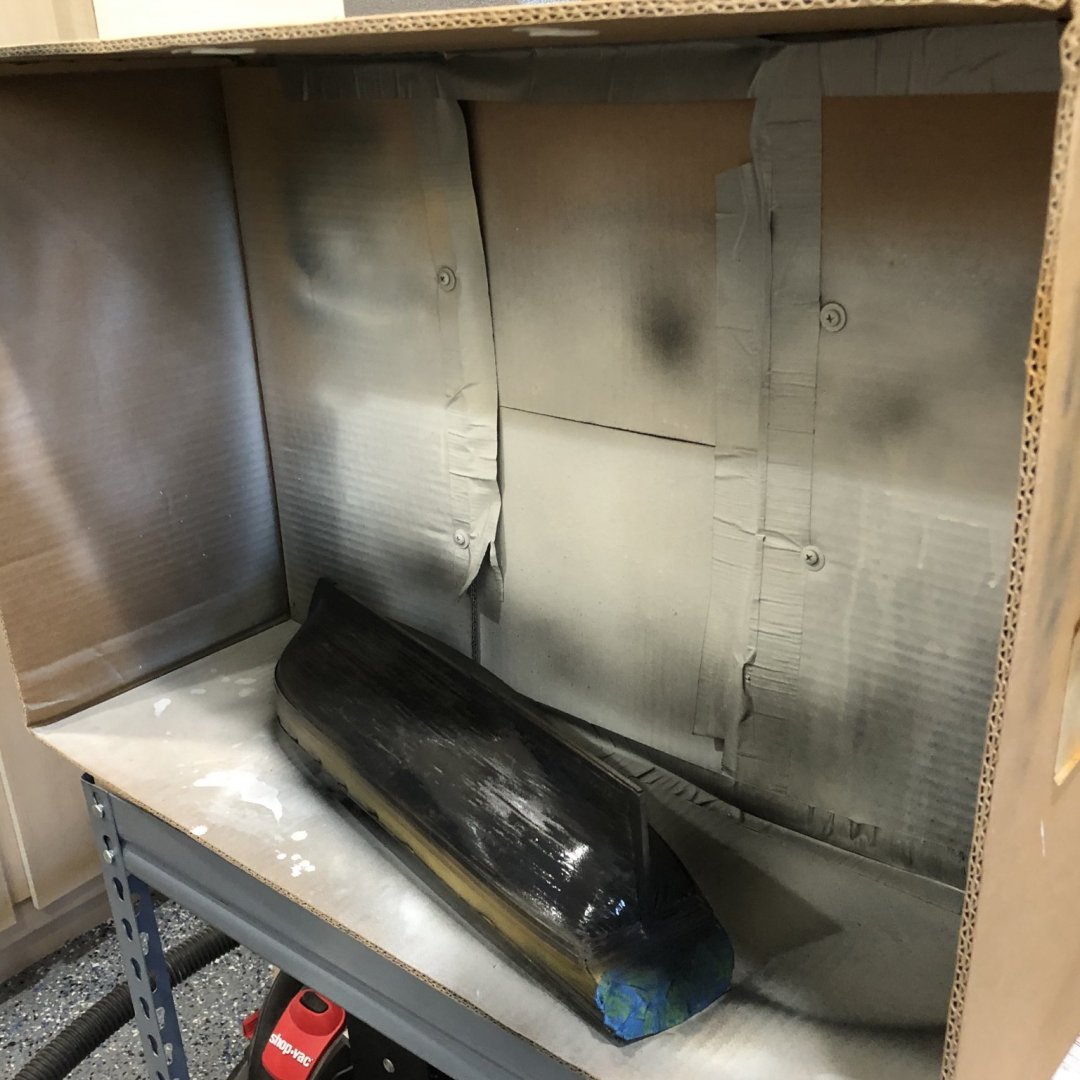
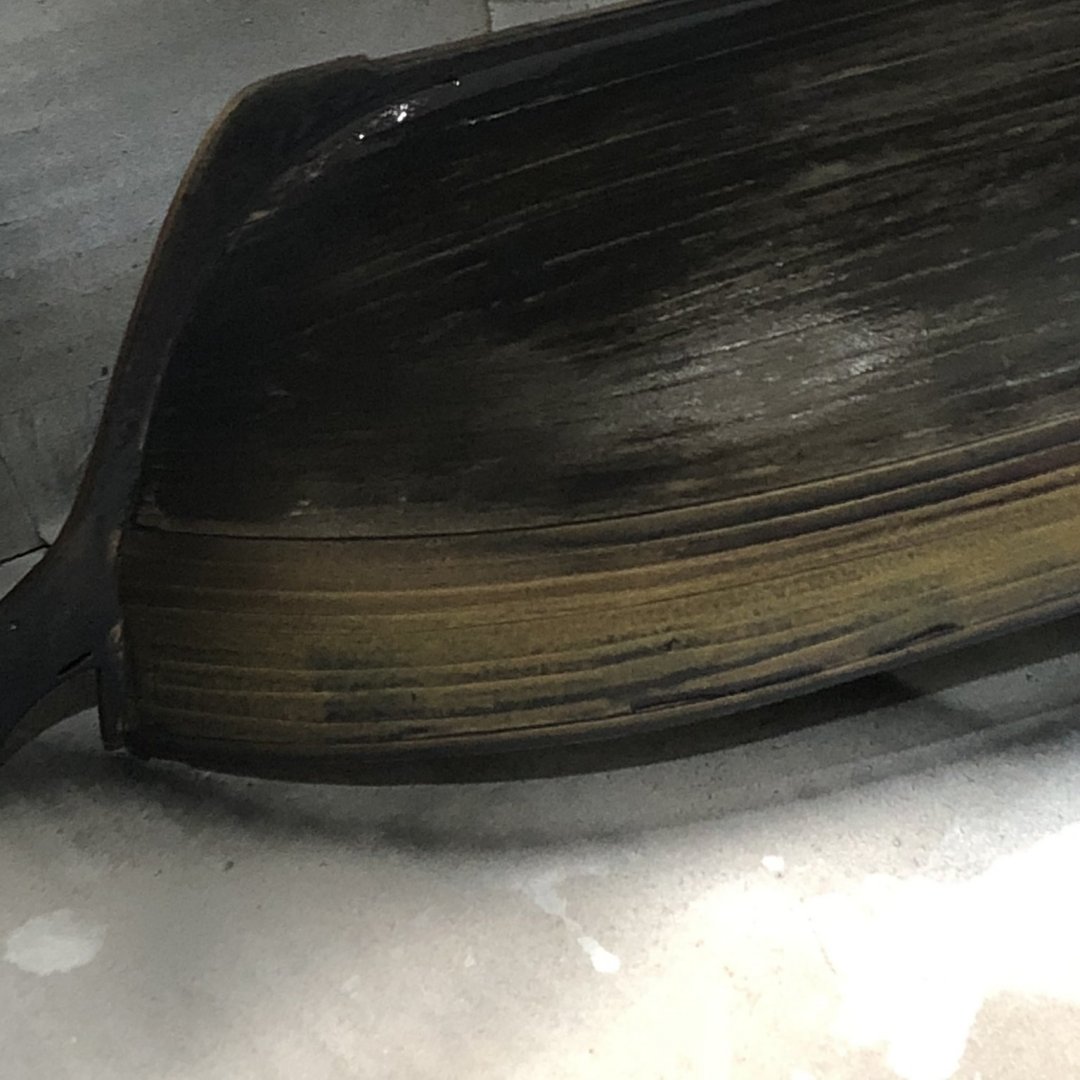
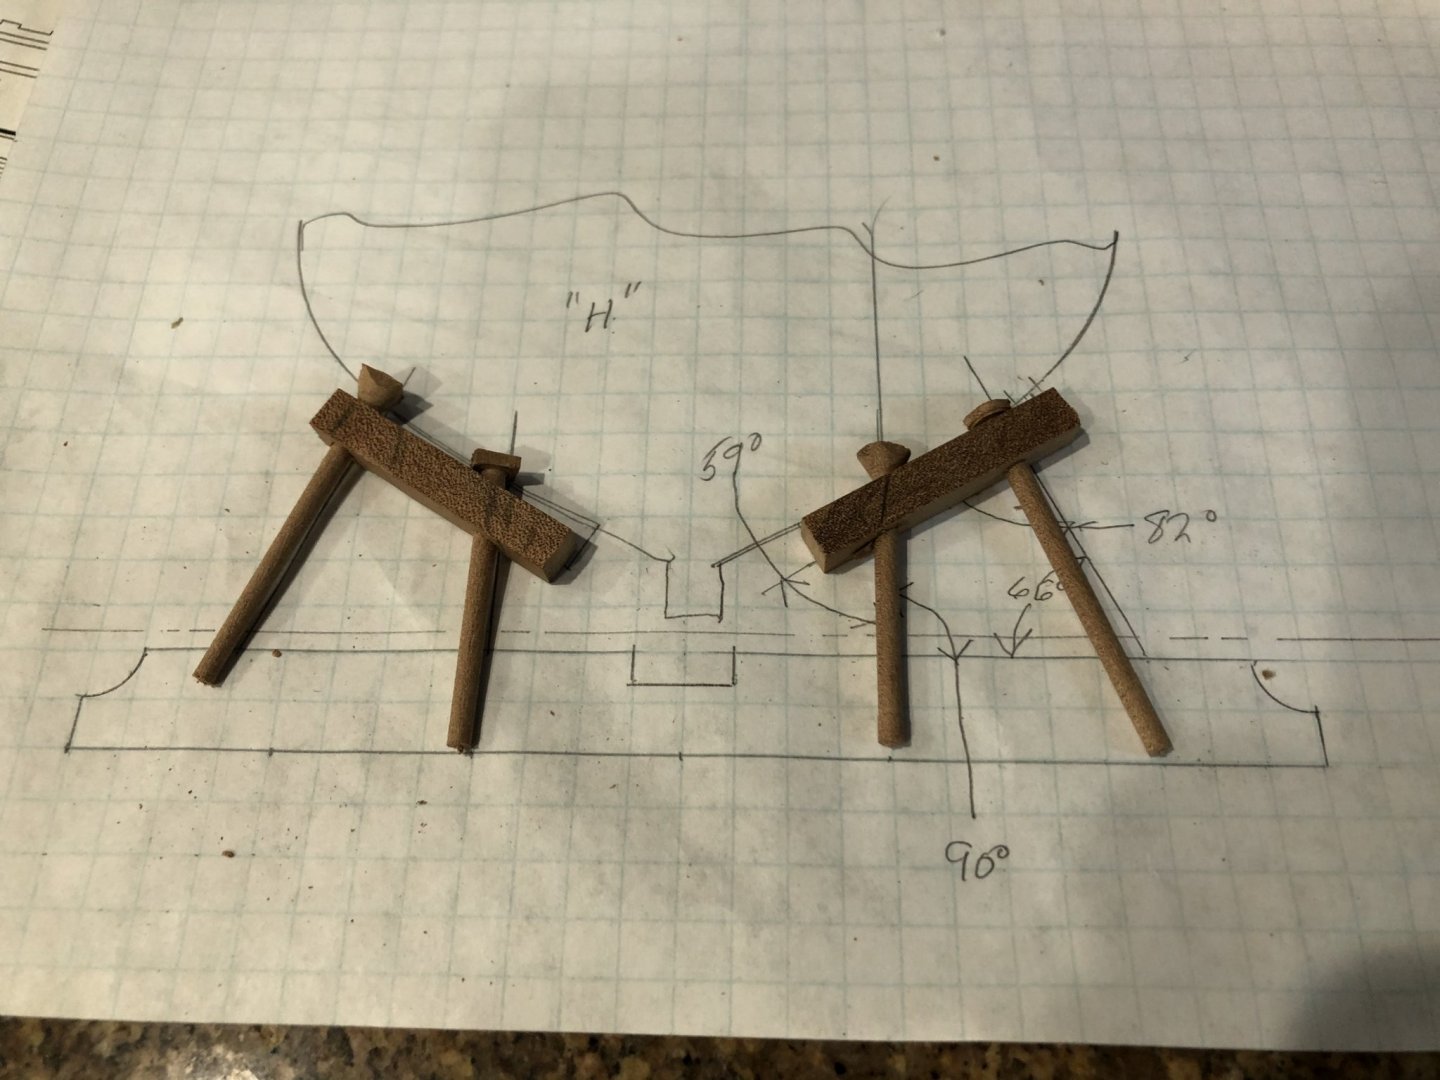
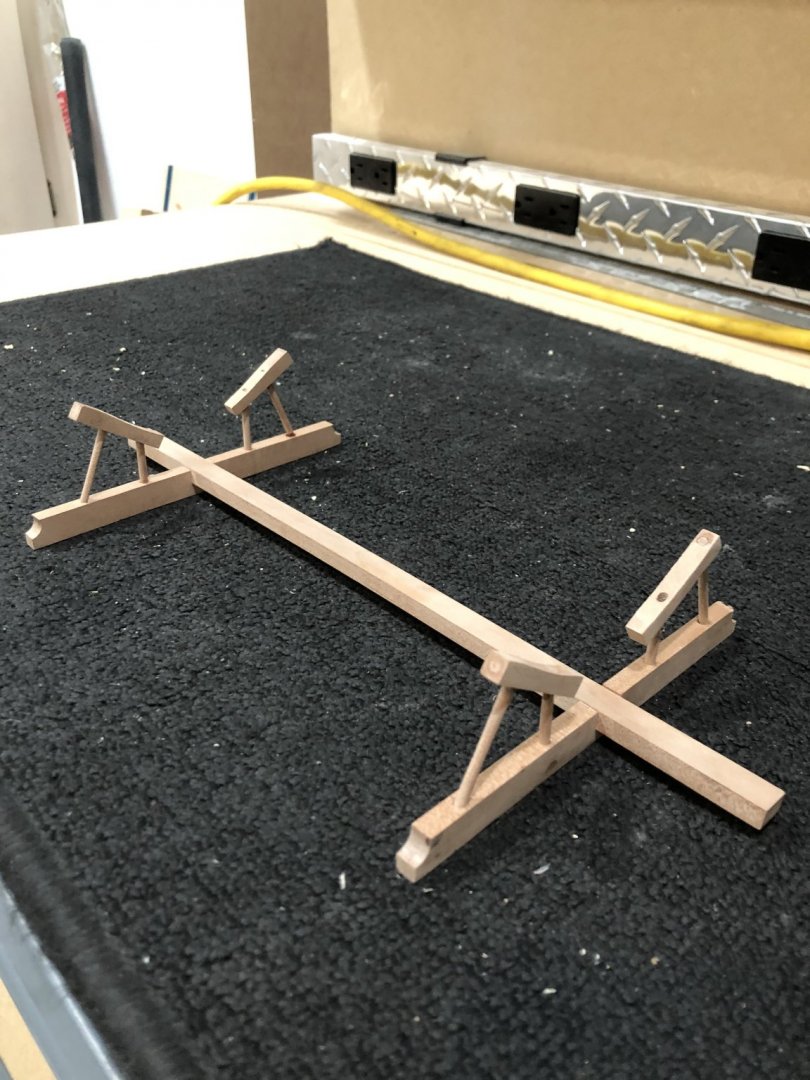
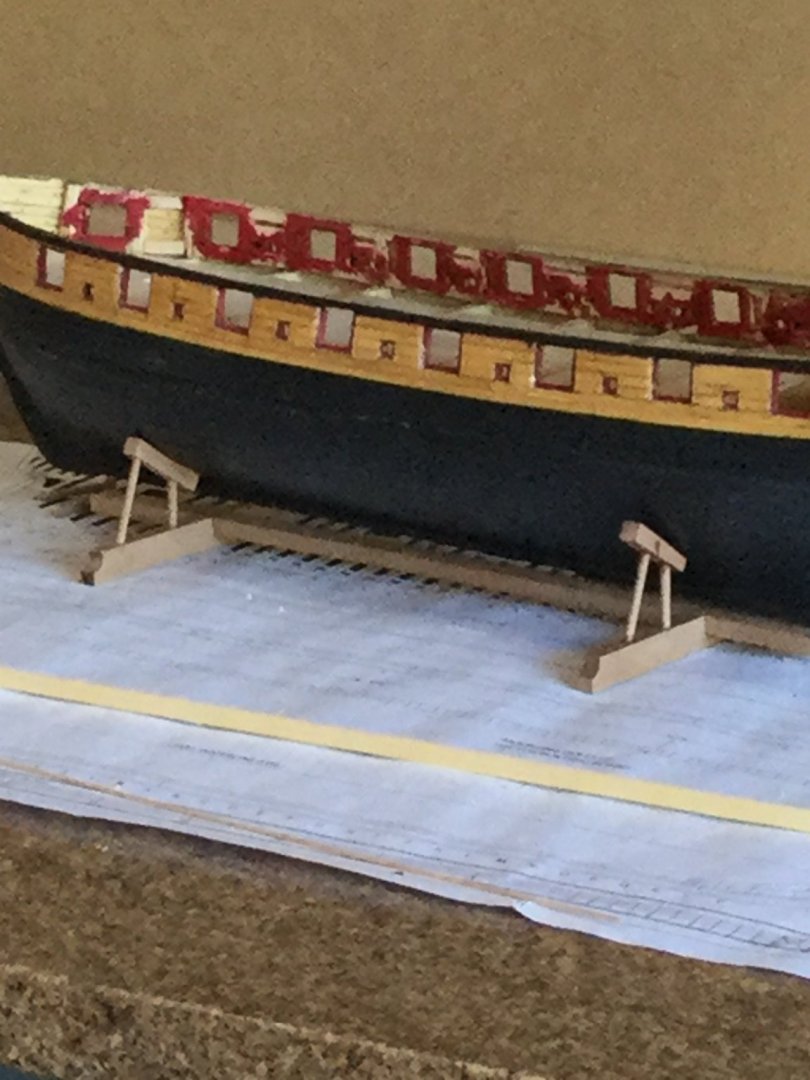
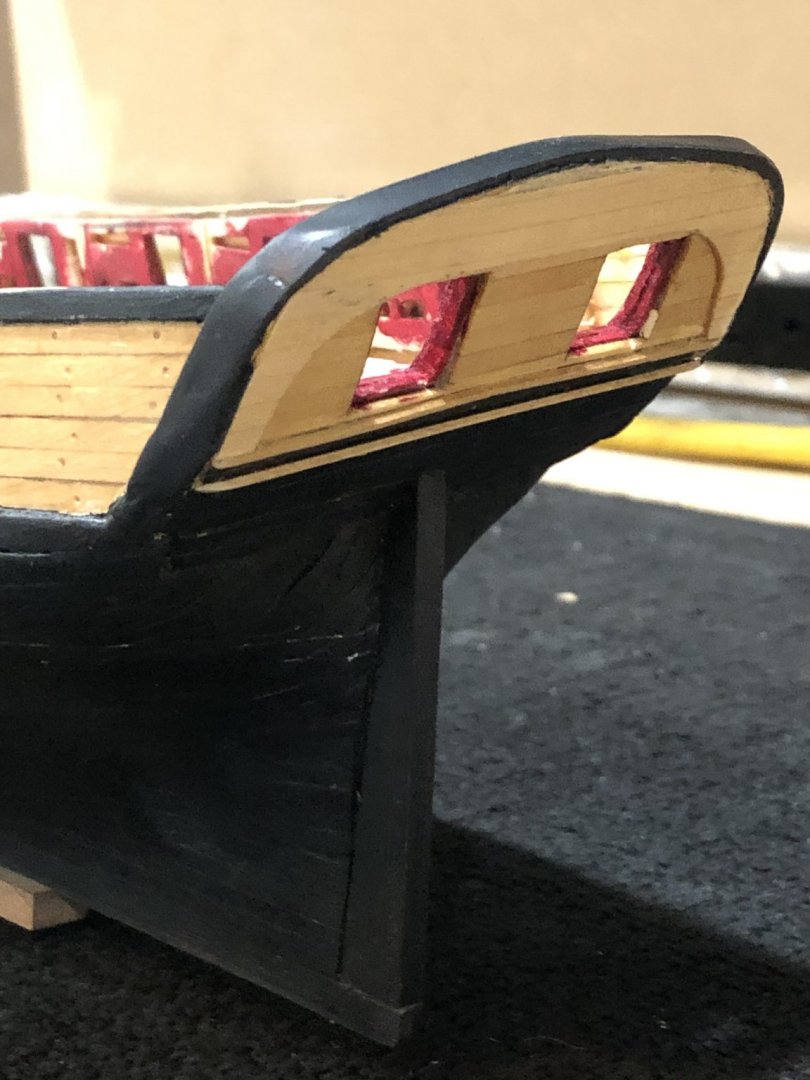
Thanks everyone for the likes it really helps me overlook my oops and keep moving ahead. Slow but steady as Patrick says. Been a while since my last post and after finishing the planking I sanded it smooth and filled are the cracks with putty and sanded some more. More putty more sanding. I finally was satisfied with the shape and smoothness without voids or cracks. I started getting ready for painting by masking off all areas not to be painted black. During taping of the transom to wales intersection looked very rough so I studied and studied and came to realize that the fashion pieces will cover this area so it won't be seen. I sprayed the hull with 8 coats of hull black paint with a light rub with 400 wet-n-dry paper between coats. The painting process took a week and in-between coats I built a display stand. painting came out very nice and gave me an excellent finish to look at the fairing that I had done which was smooth with no hills or valleys. Sitting in my spray booth an old box. One side done let it dry and turn around to the other side. Last coat whew Closeup of starboard bow Closeup of the starboard stern I paint the hull black for a couple of reasons first is I use a machinists surface gauge pointer to scribe the water line into the paint giving me a fine permanent line. second as I said it gives me a good look at the fairing shape and lastly I think it gives a better surface for the copper plates to adhere to. This is the display stand I made while waiting for paint to dry. Two of the supports laying on the drawing to compare. I turned the dowels from some square swiss pear. You can see the square ends before being cutoff. This the completed stand dry fit still needing sanding staining and some poly. A view of the Syren resting on the dry fit stand. I finally got the fashion pieces and transom cap rail. It was pretty eventful make fit remove make fit remove and then after 3 attempts the 4th fashion pieces looked as the should. I had to make the cap rail 3 times as no matter how much I soaked it and how slowly and carefully I bent them they split in the corners. On the fourth attempt I tried to lay a wet paper towel on it as the wood was drying and whew again it worked. I should have used Gahms method of build a jig and saved me all the work. But here it is: A little touch up of black paint and treenails in the transom planks an on the chapter 7. Its coming along slow and steady. Thanks Patrick Everyone stay healthy and well during these trying times. Will


-
The batten line looks very nice and my Syren has the same upturn in the bow so no worries. Sllow but steady is the correct coarse to take ship modeling in not a race. Your point a great job. Will
-
Patrick loving the way you're progressing it going to be a great model your an artist. You'll be forever glad you've decided to use the yellow cedar. I make a test panel to look at using it for decking and liked that way it looked but I think I'll make another three or four panels to experiment with stain colors trying to get a more weathered look, we'll see I might one suggestion for staining I've use pre stain conditioner and it helped dull the color differences between grains on the strakes. Looking really good keep it up Will
-
The copper pattern looks really nice when the plates are in such neat rows. Greet work. I like your approach to the punch using steel wire as I've read where some people use syringe needles which scared me. Looking forward to your progress. Will
- 950 replies
-
- 1
-
-
- syren
- model shipways
- (and 1 more)
-
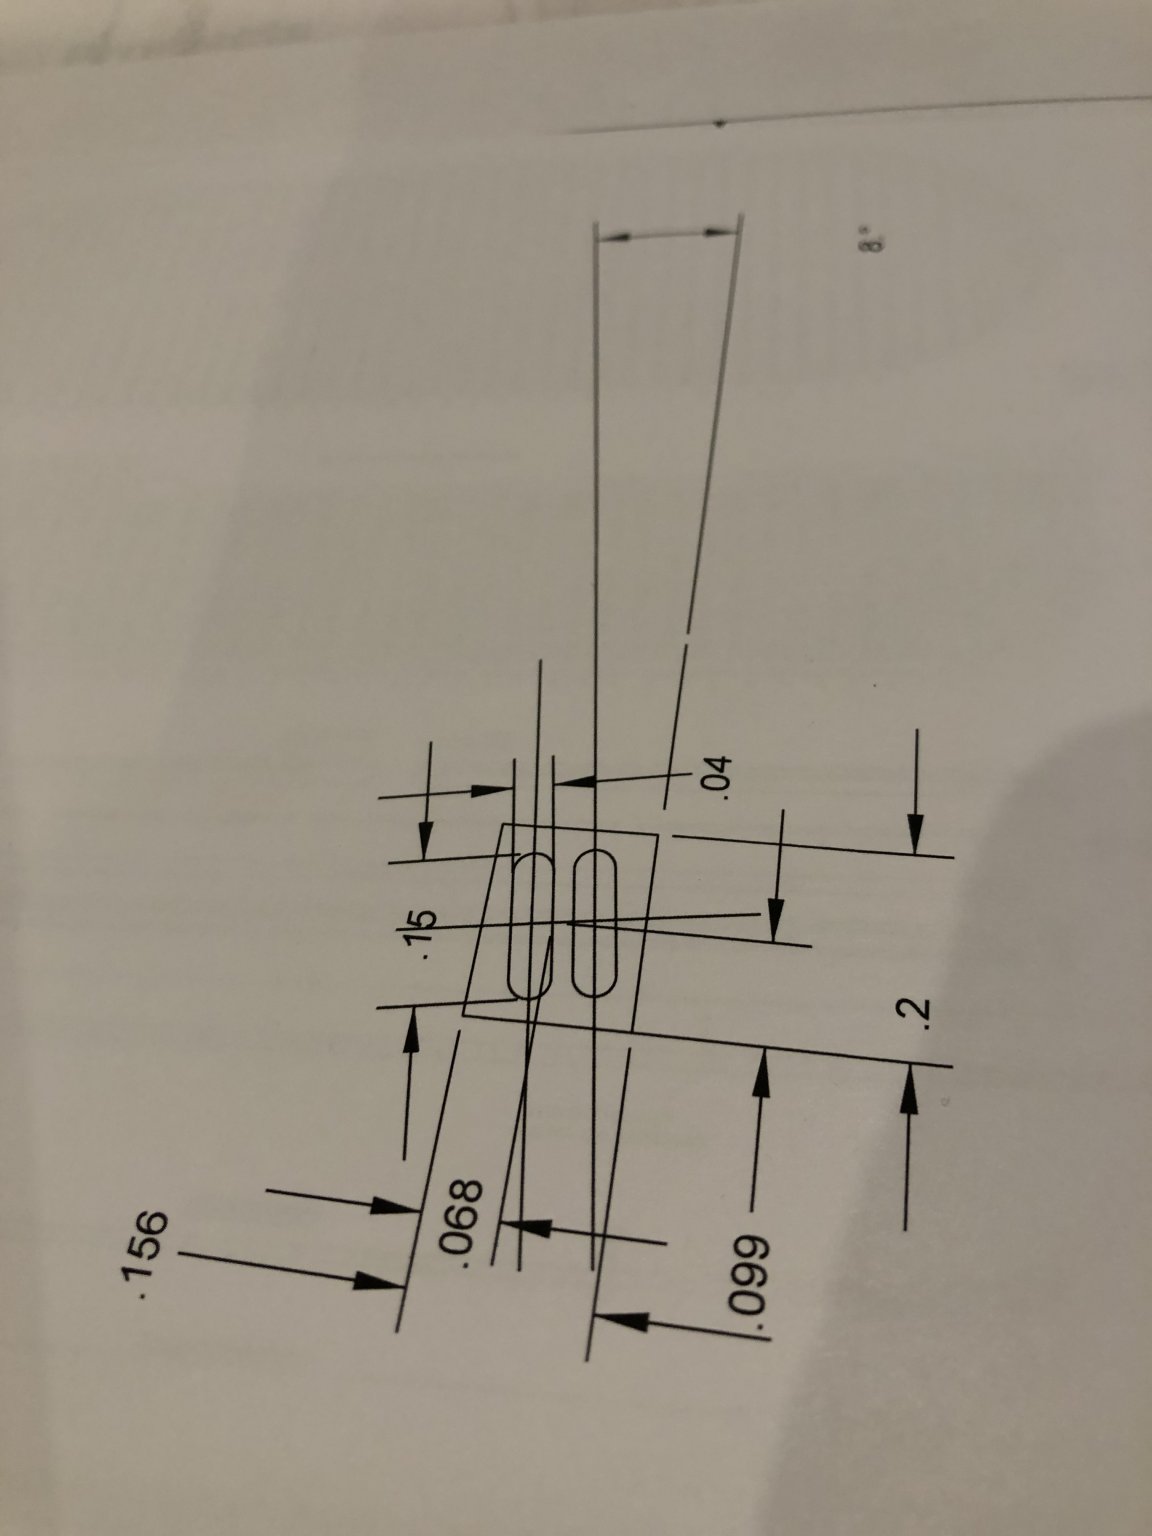
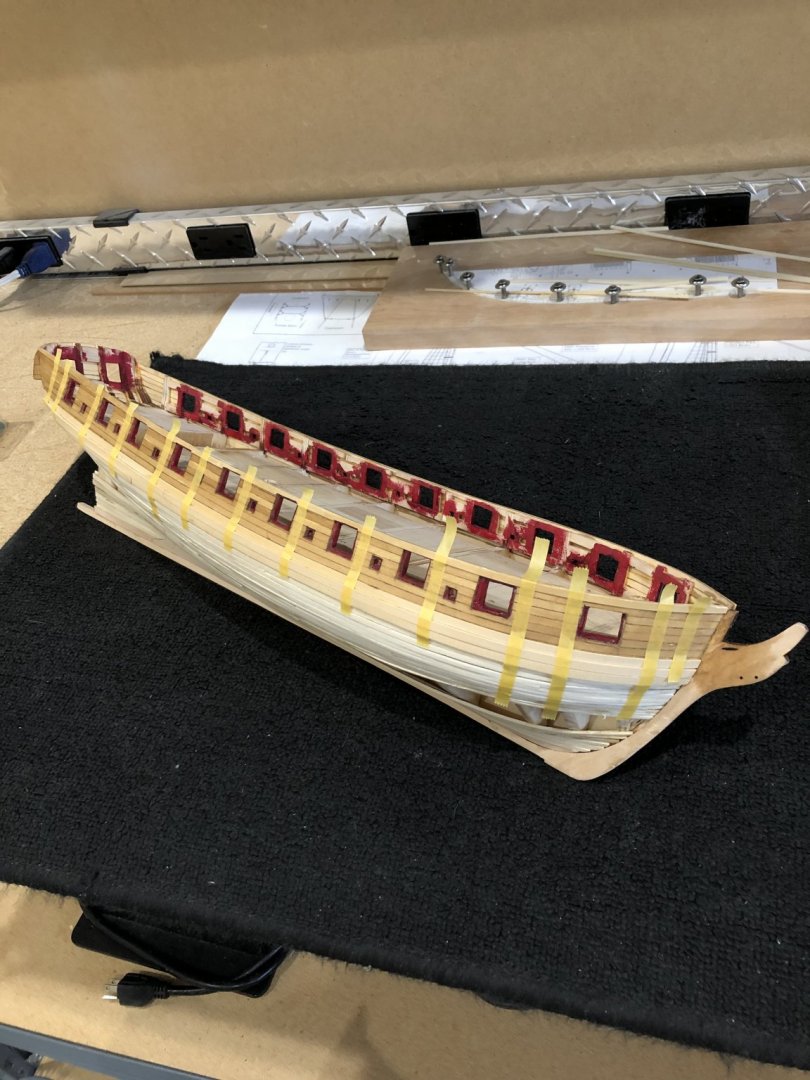
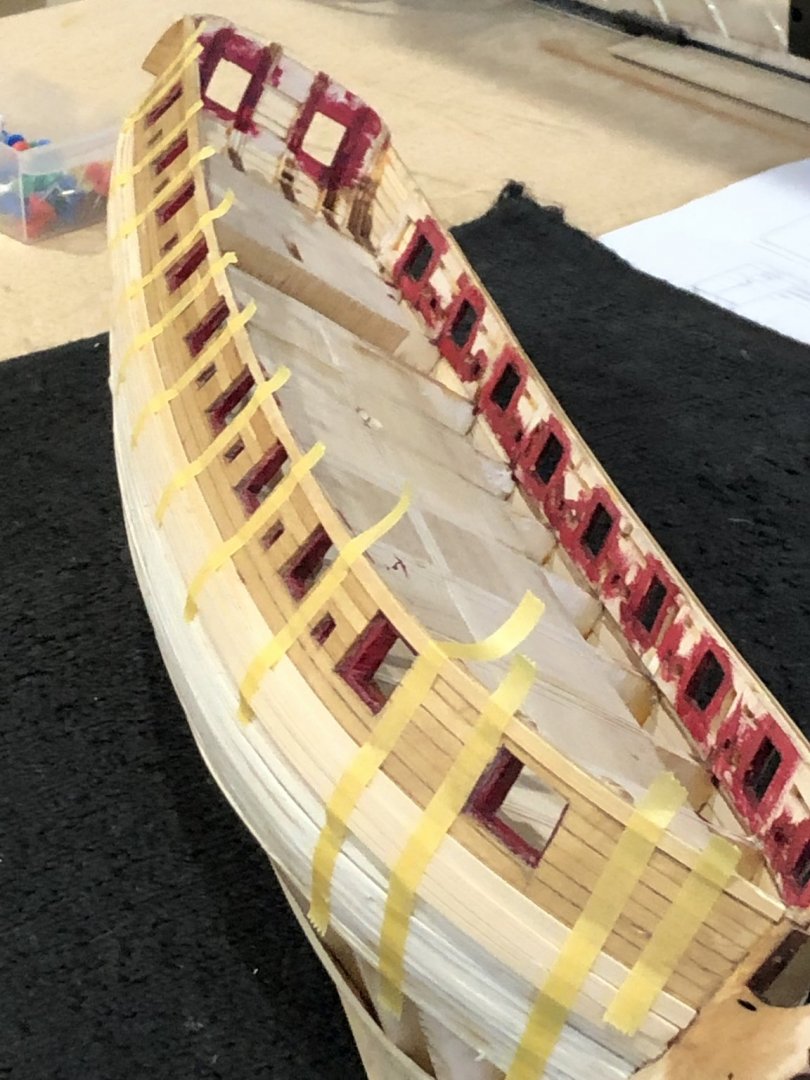
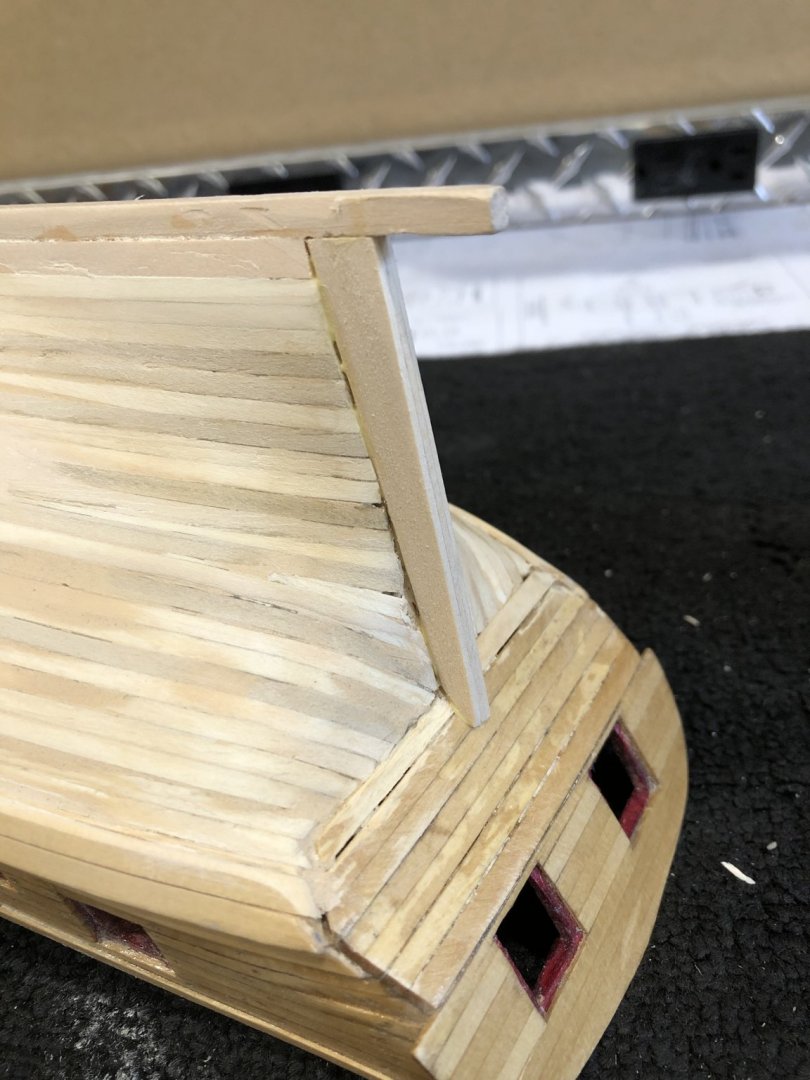
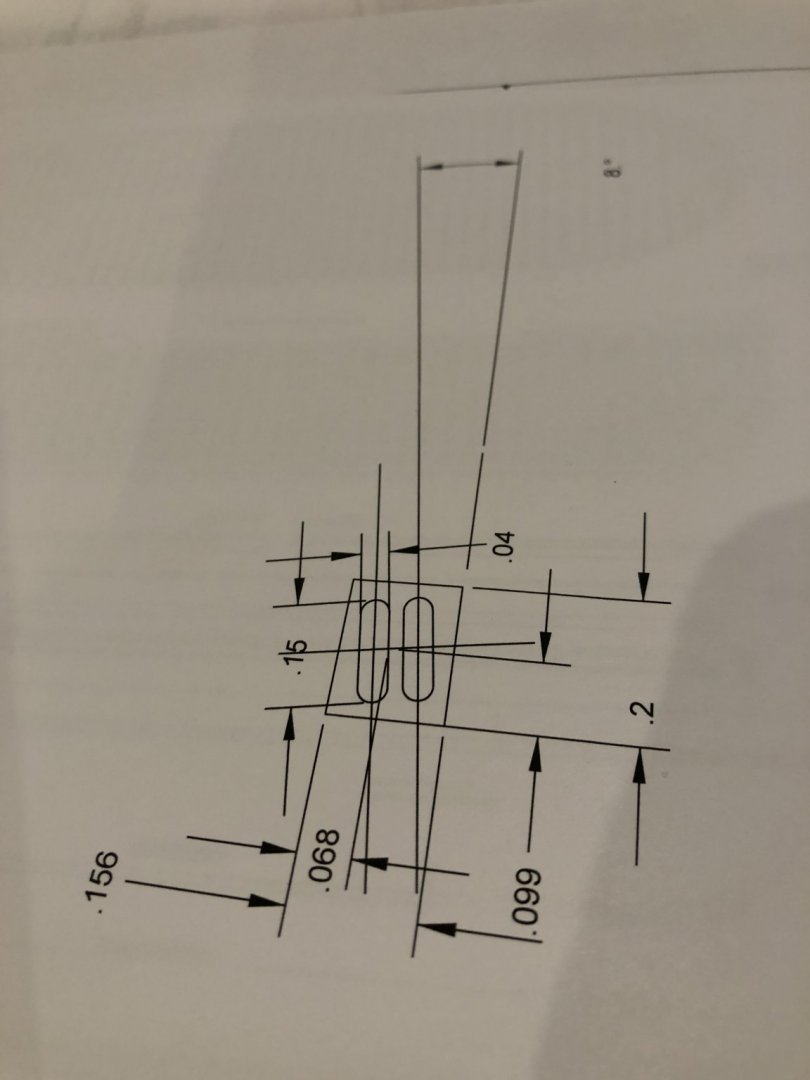
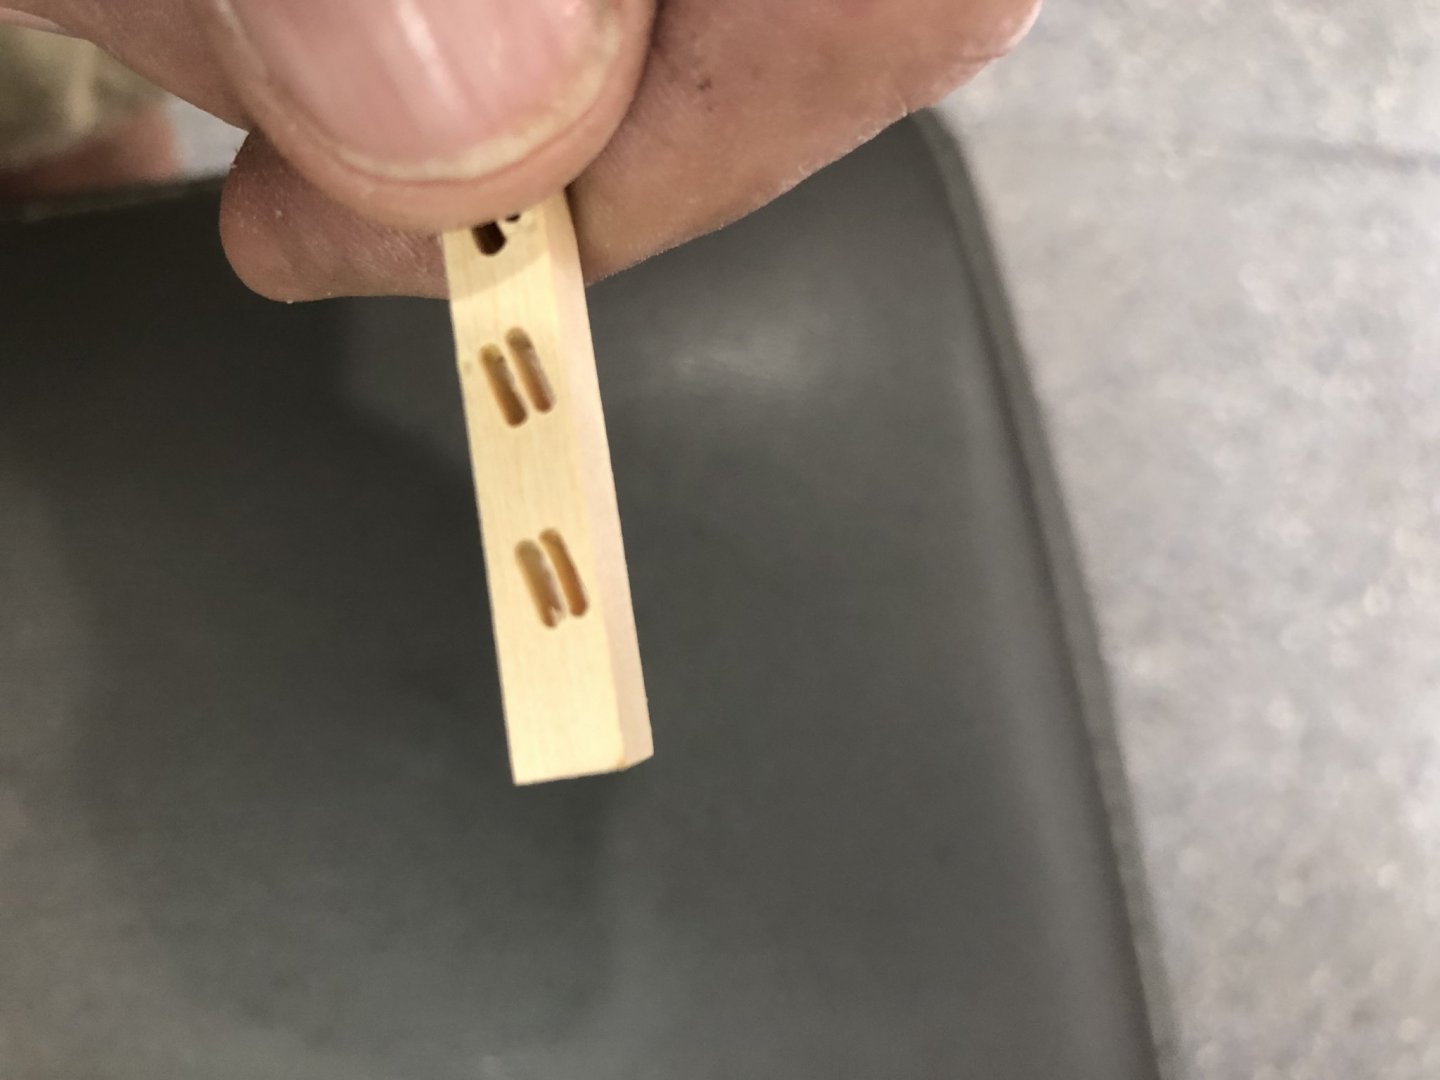
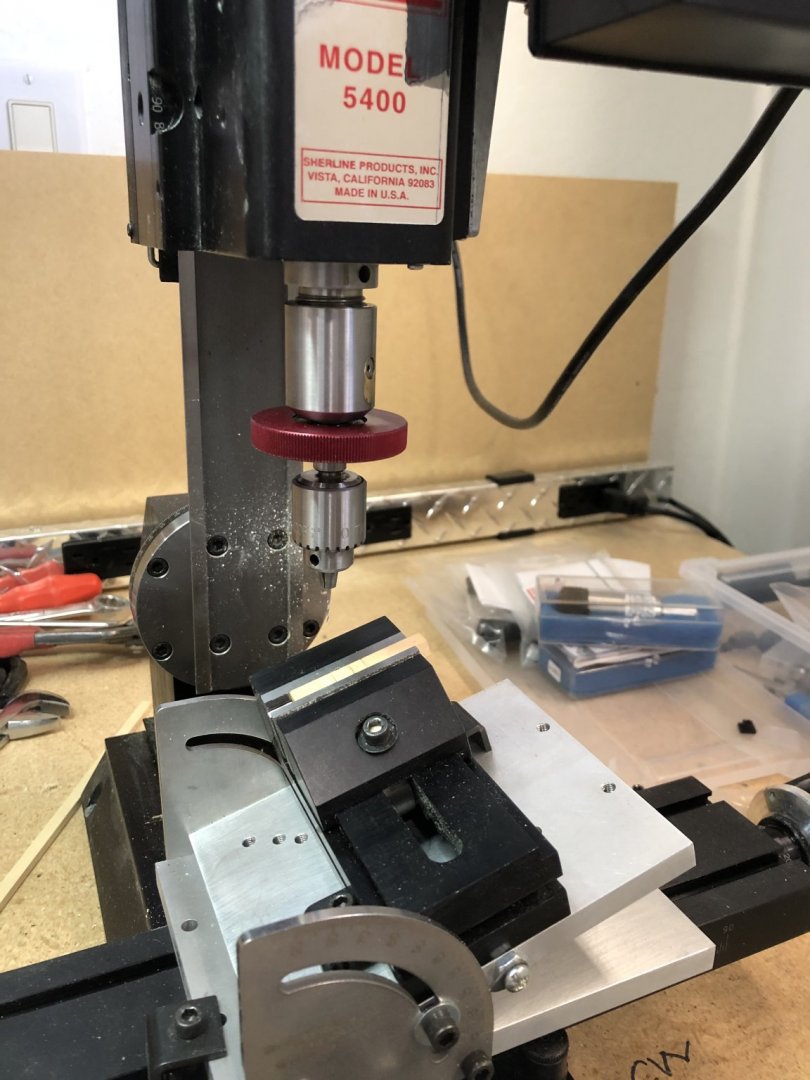
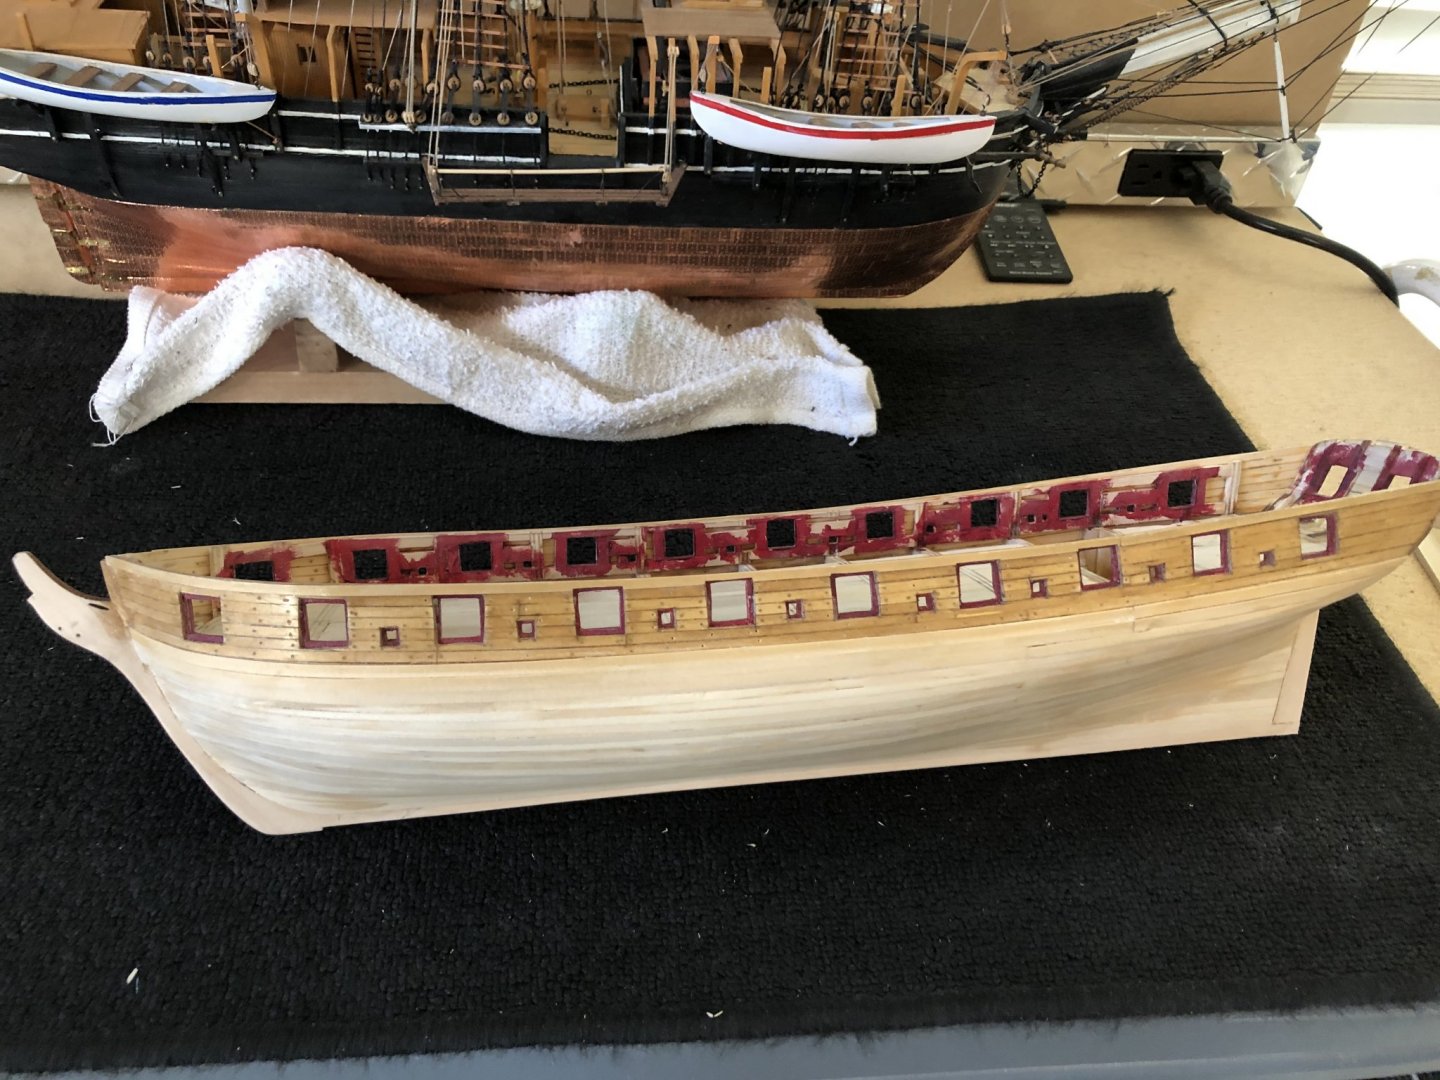
Thanks Patrick and everyone on the likes. I spent the last week planking and finished today. When half finished I marked off the frames with tape to located where to drill for the simulated plank nailing on the bulwarks. Then I finished the planking's and sanded to a smooth even surface. Covered planking with putty and sanded and sanded more putty more sanding more sanding what a mess. Spent an afternoon cleaning the shop. This afternoon I spent working of my idea of how to make working sheaves. Was able to prove that I can make them as I envisioned so now I'll start making them in boxwood (easier to machine). In this photo you can see the work I did to get the counter into proper shape. Doesn't look pretty but it'll be covered with black paint and copper plates. You can see the tick marks on the frames which tell me how much to shape and if I'm staying on the marks. Plank symmetry is looking very good. I guess I'll press ahead. Here the tape shows where the frames are behind the bulwark and this allowed me to make the pattern. Planking finished and the bulwark nailing clearly visible. I had stained the alaskan yellow cedar with golden oak and applied a coat of satin wipe on poly. View of finished stern planking before sanding and putty. I had also attached the stern most to see how much filler i would need. I sanded the stem so the mermaid fits as she should. I'm not a carver but I have to do something about this casting its quality is right in order with basswood. Sorry another gripe. I'll try to do better. My double sheave plans IMG_0812.mov Short video of how my setup works on the mill. I used a 1mm dental burr in the mill and made many .030 passes and you can see the slots. Notice the fuzzy edges with basswood. Drill setup using the adjustable angle plate with the vise mounted. The plate is set at 15 degrees which should give the main braces lines the correct angle. I drilled a .021 hole through the part and thens used a .020 copper wire for the axel. I'll turn .093 dia brass rod for the sheaves with a .031 dia hole through which the copper wire will pass making a working sheave. One last photo of the Syren sitting in front of the Charles W. Morgan that I just finished. All is well here everyone stay healthy Will


-
Just jumped on and am very impressed. Great work. I've got copper plating to come so I'm very keen on how you manage. Keep up with the great posts and pictures. Will 😎
- 950 replies
-
- 2
-
-
- syren
- model shipways
- (and 1 more)
-
Patrick I'm building the Syren and just a little ahead of you. I finished my planking today. Your work looks really good. I like your idea to fair the lintels as you go but not to to the stanchions. Nice work I look forward to you progress. Will😎
-
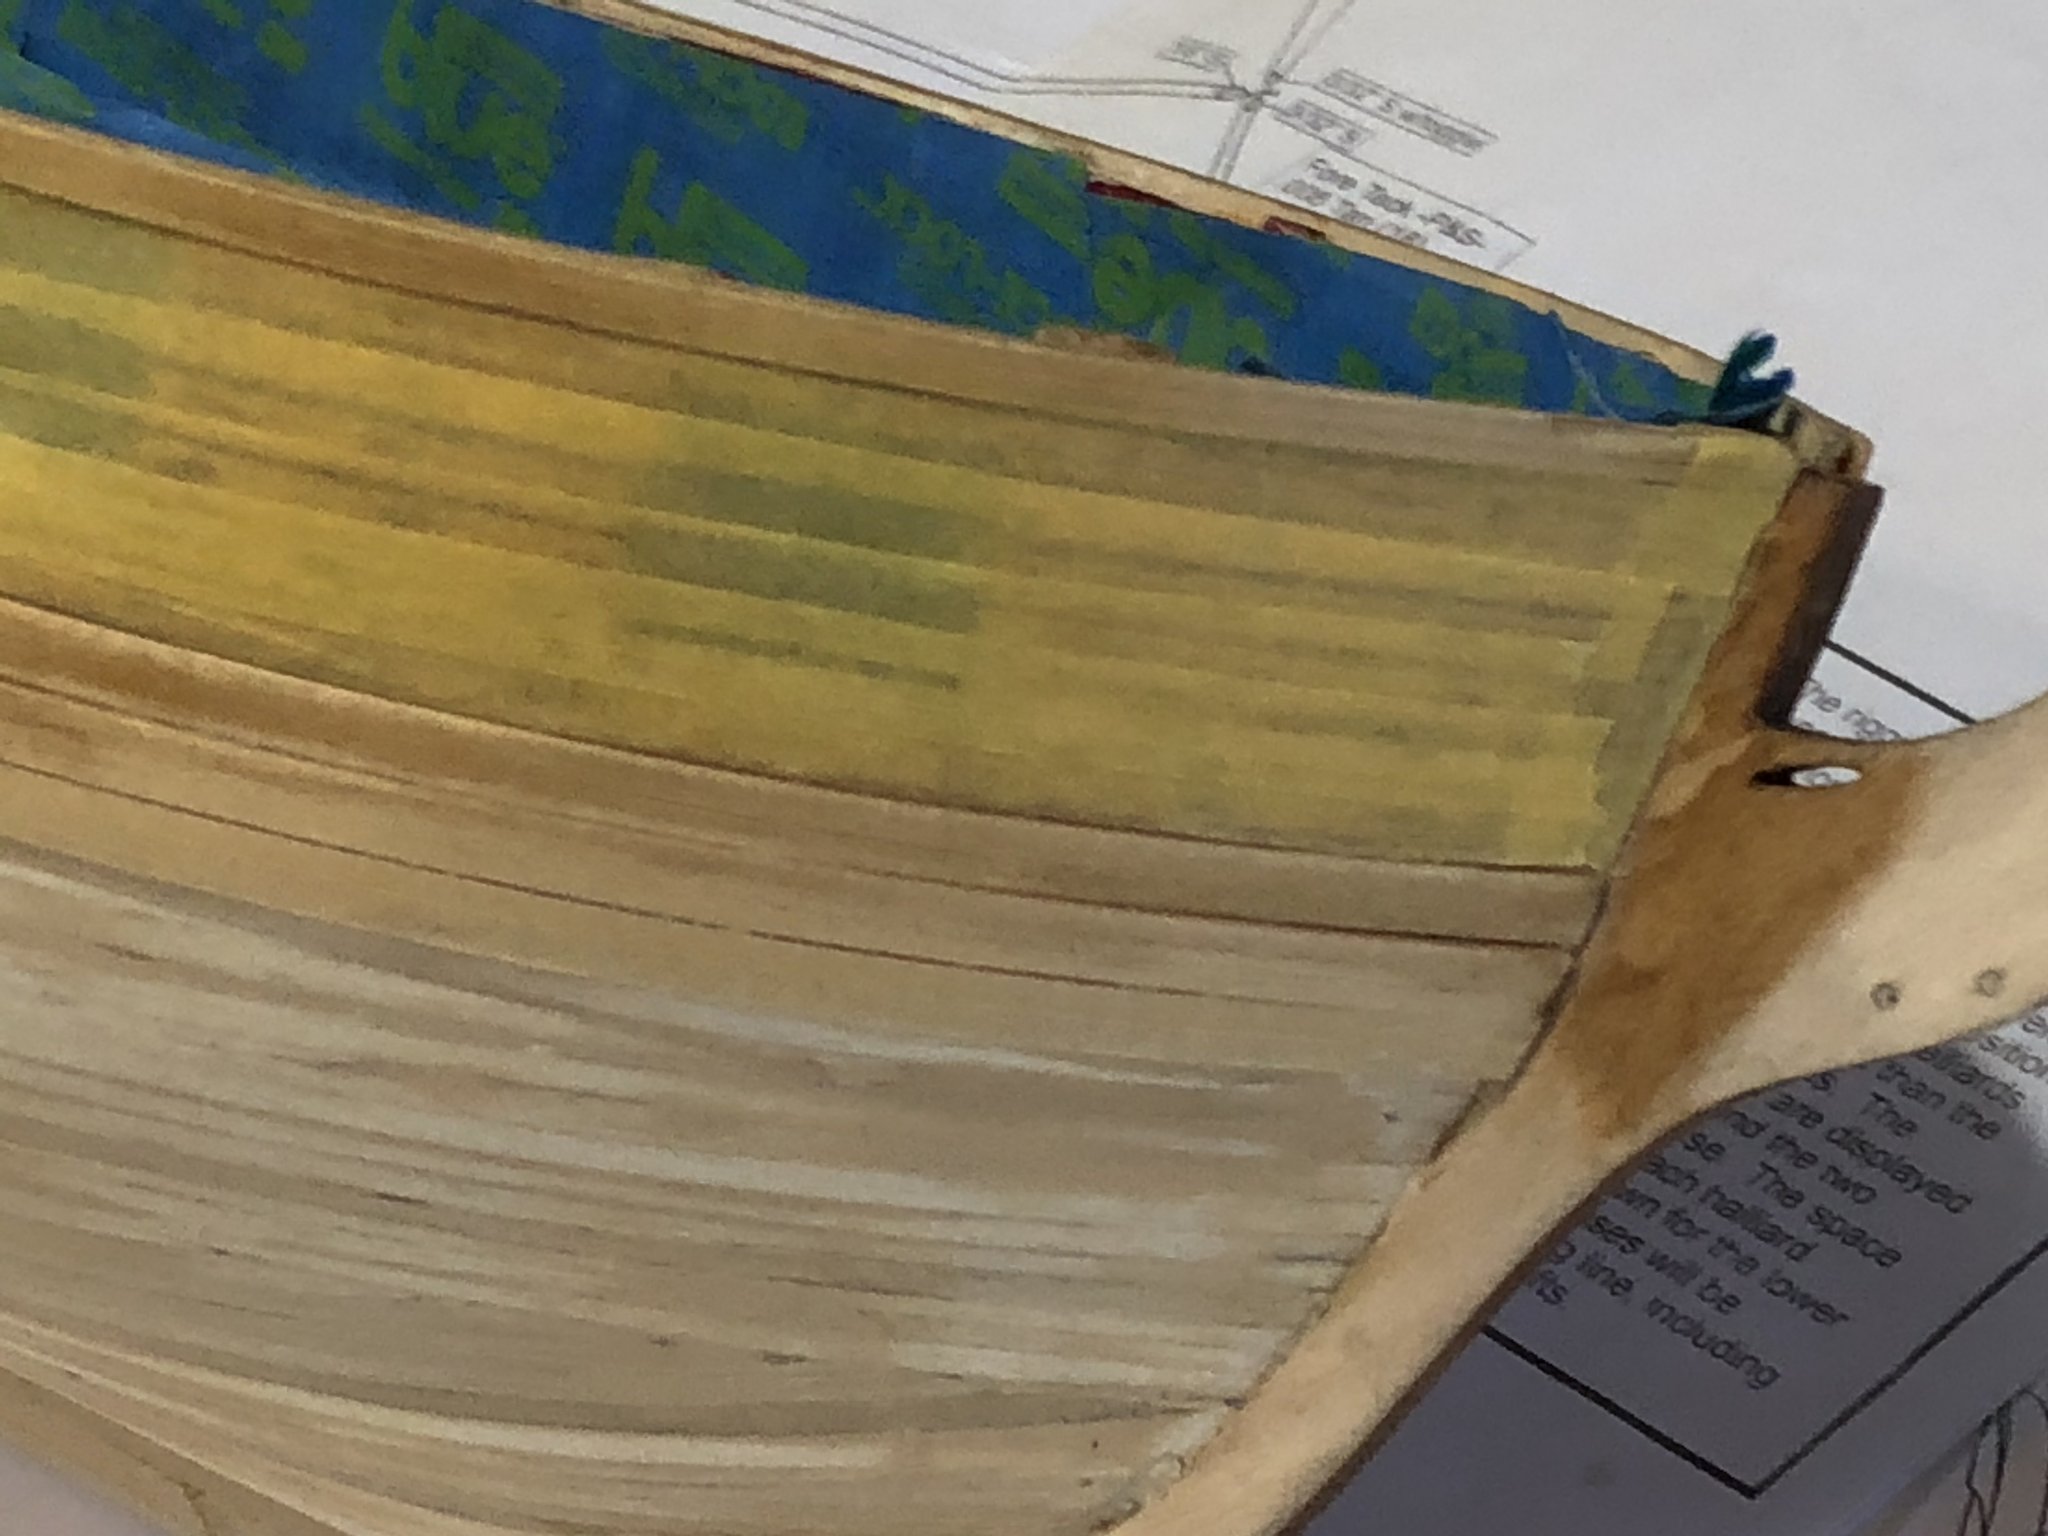
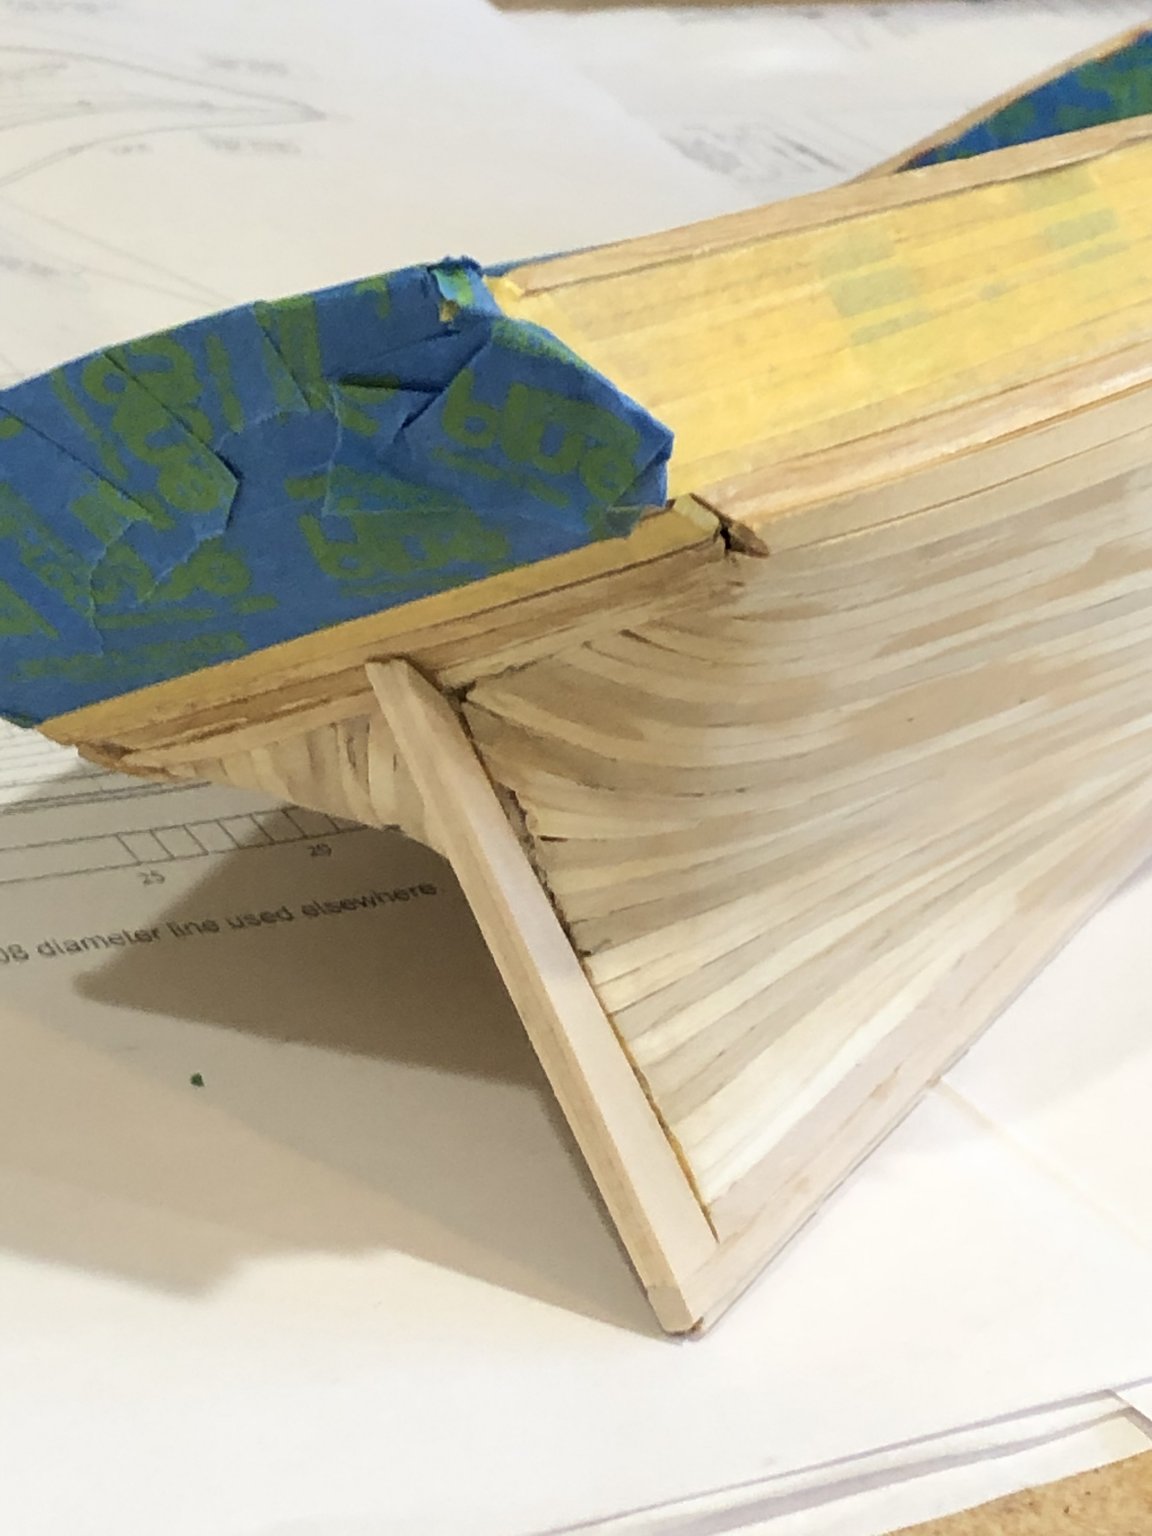
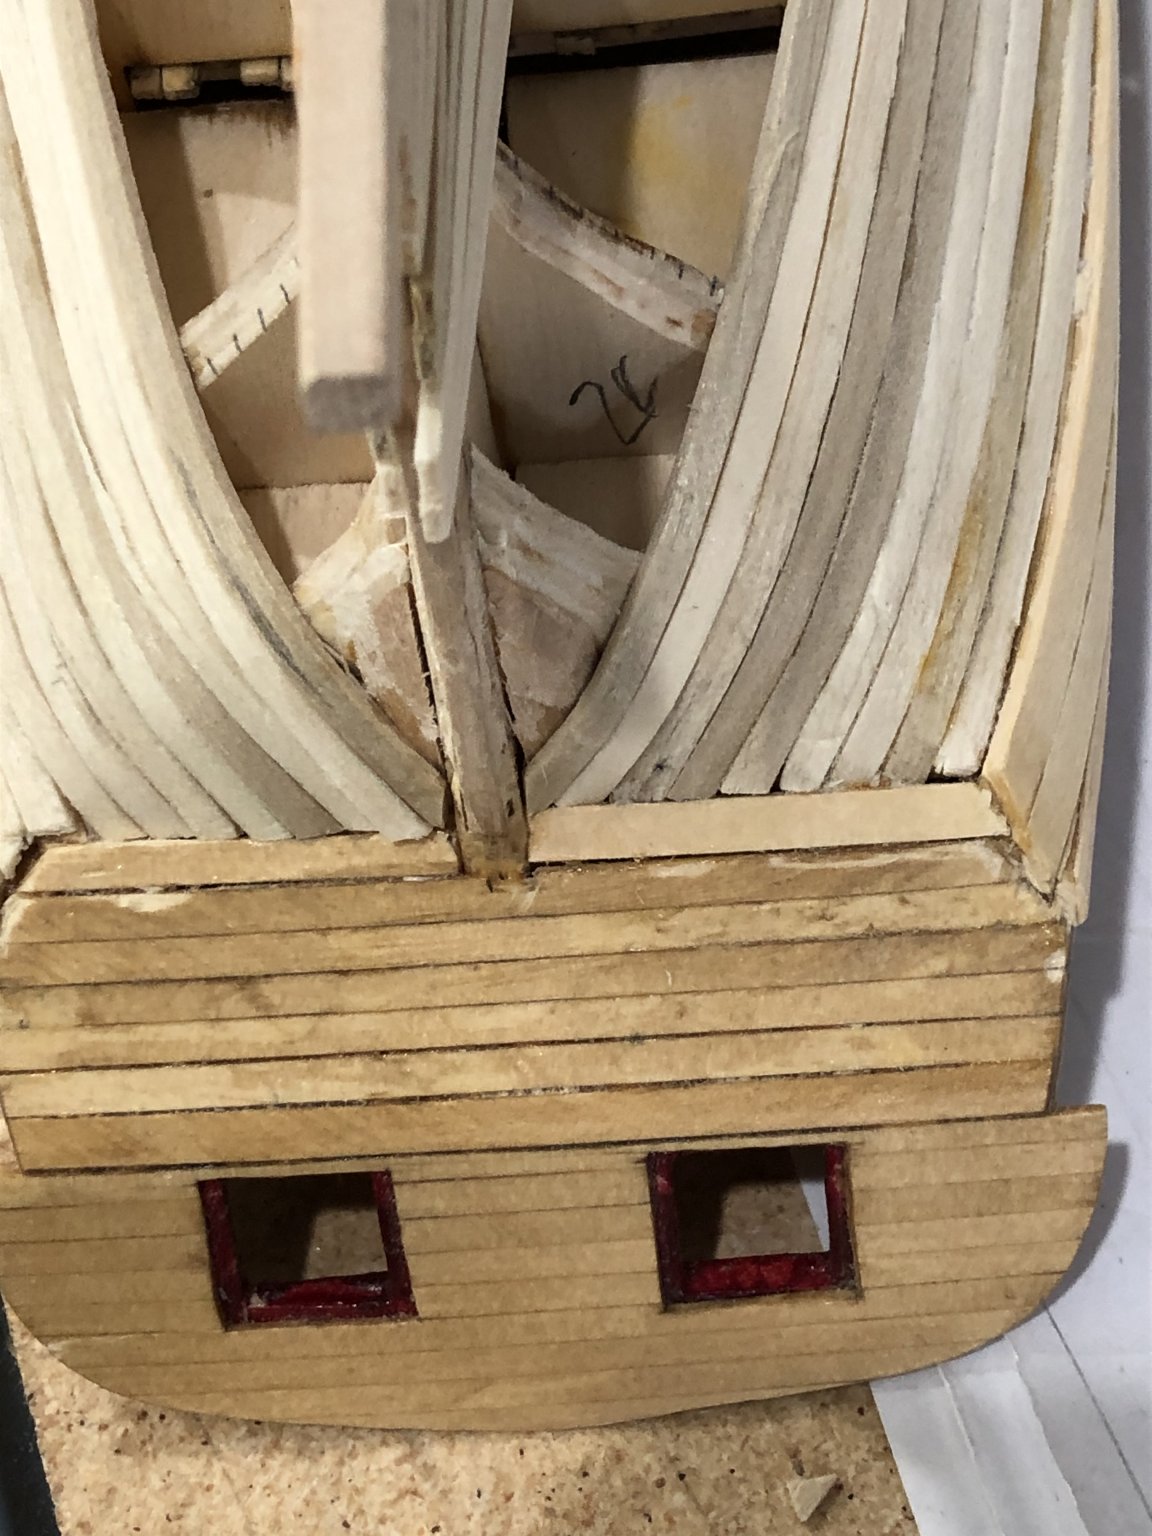
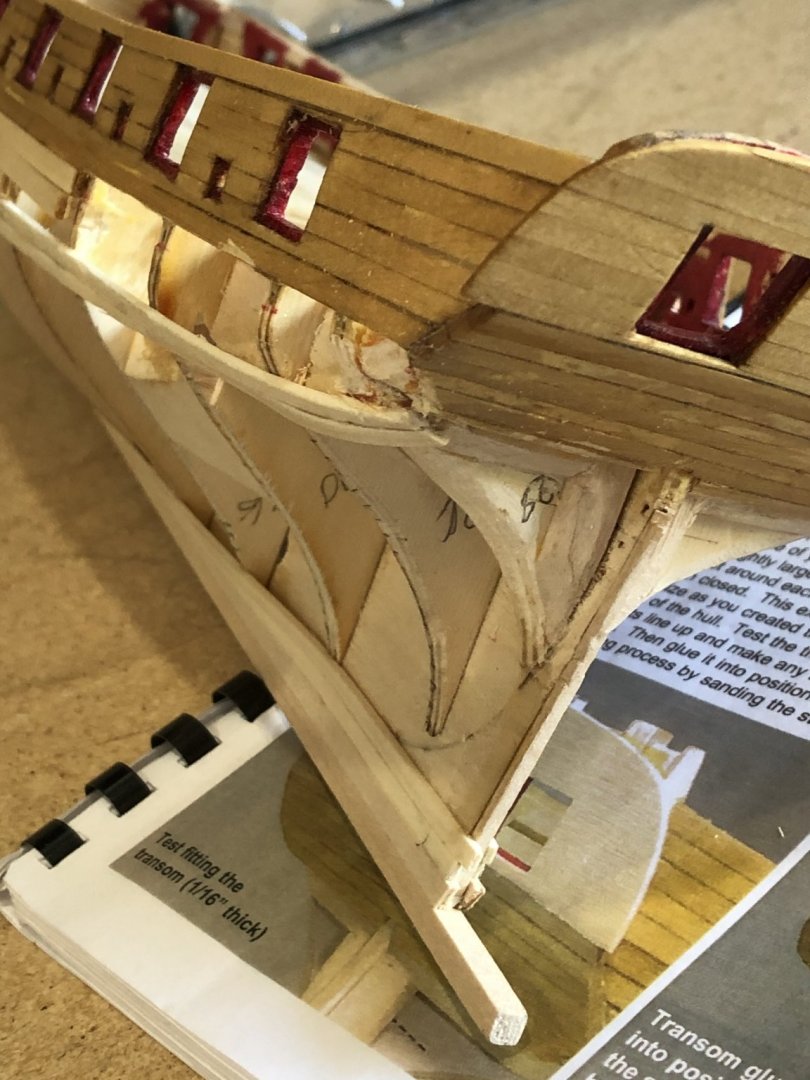
`I've finished my Morgan and now can concentrate on the Syren. The next thing will be the wales and sheer strake. Discovered a big OOPS after getting the wales on I have the last frame and filler pieces not faired properly which was causing the joint between the counter and wales tone misaligned. I took the wales off back to frame middle and the four frames aft of this. You can see from the photos how the counter meets up with the filler pieces which caused the wales to land to high. So I then went and removed the filler pieces and started aggressively fairing the last frame. I then made new filler pieces and during the fairing process I could see the the counter had also taken the wrong shape when I faired the transom frames for the counter planks. I had to remove the counter planks and add some strips on the transom frames so I could then reshape them to correct the counter to frame and filler geometry. All's looking much better so I went ahead and removed the two strakes the were also offending the stern shape. Tomorrow I'll start adding wales, so we'll see how it turns out. This has been the largest mistake Ive had to fix and a very good learning experience.. Good Night Will

-
Jesse Lee I started following your log just the this last weekend to learn more as I'm building a Syren. I'm up to hull planking. I've learned many things to use on my Syren and want to thank you for your wonderful build and log. Really enjoyed reading and looking at the photos. Can't say enough about how wonderful the ship looks you've done an amazing job creating something to strive for. Willdf
- 1,306 replies
-
- 3
-
-
- syren
- model shipways
- (and 1 more)
-
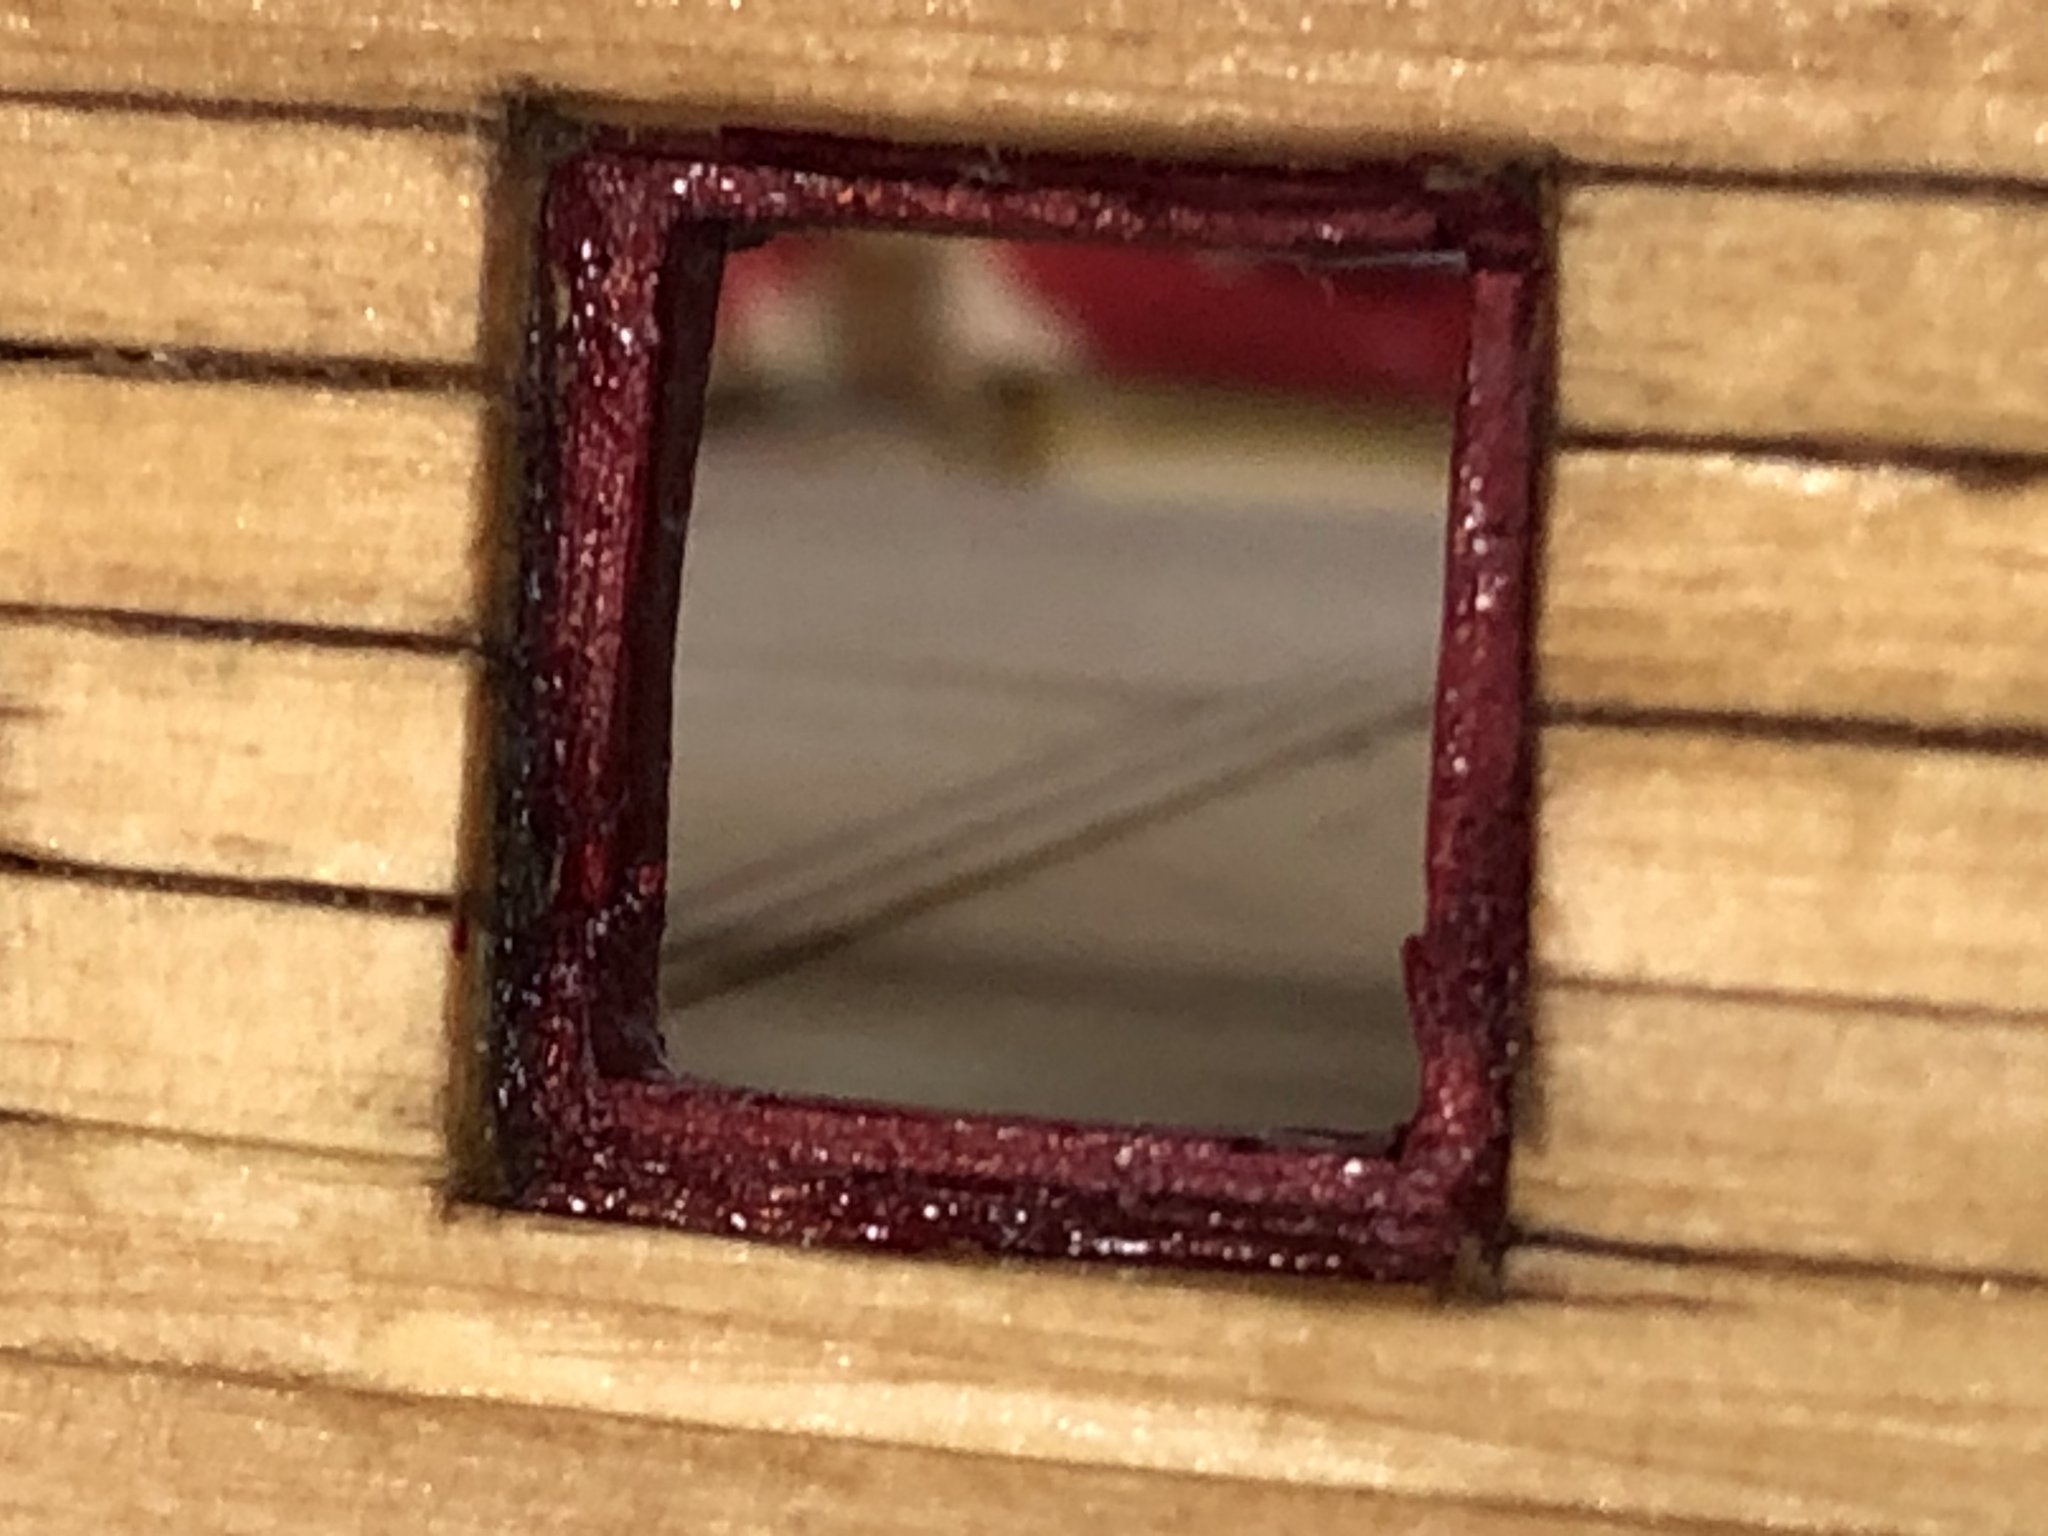
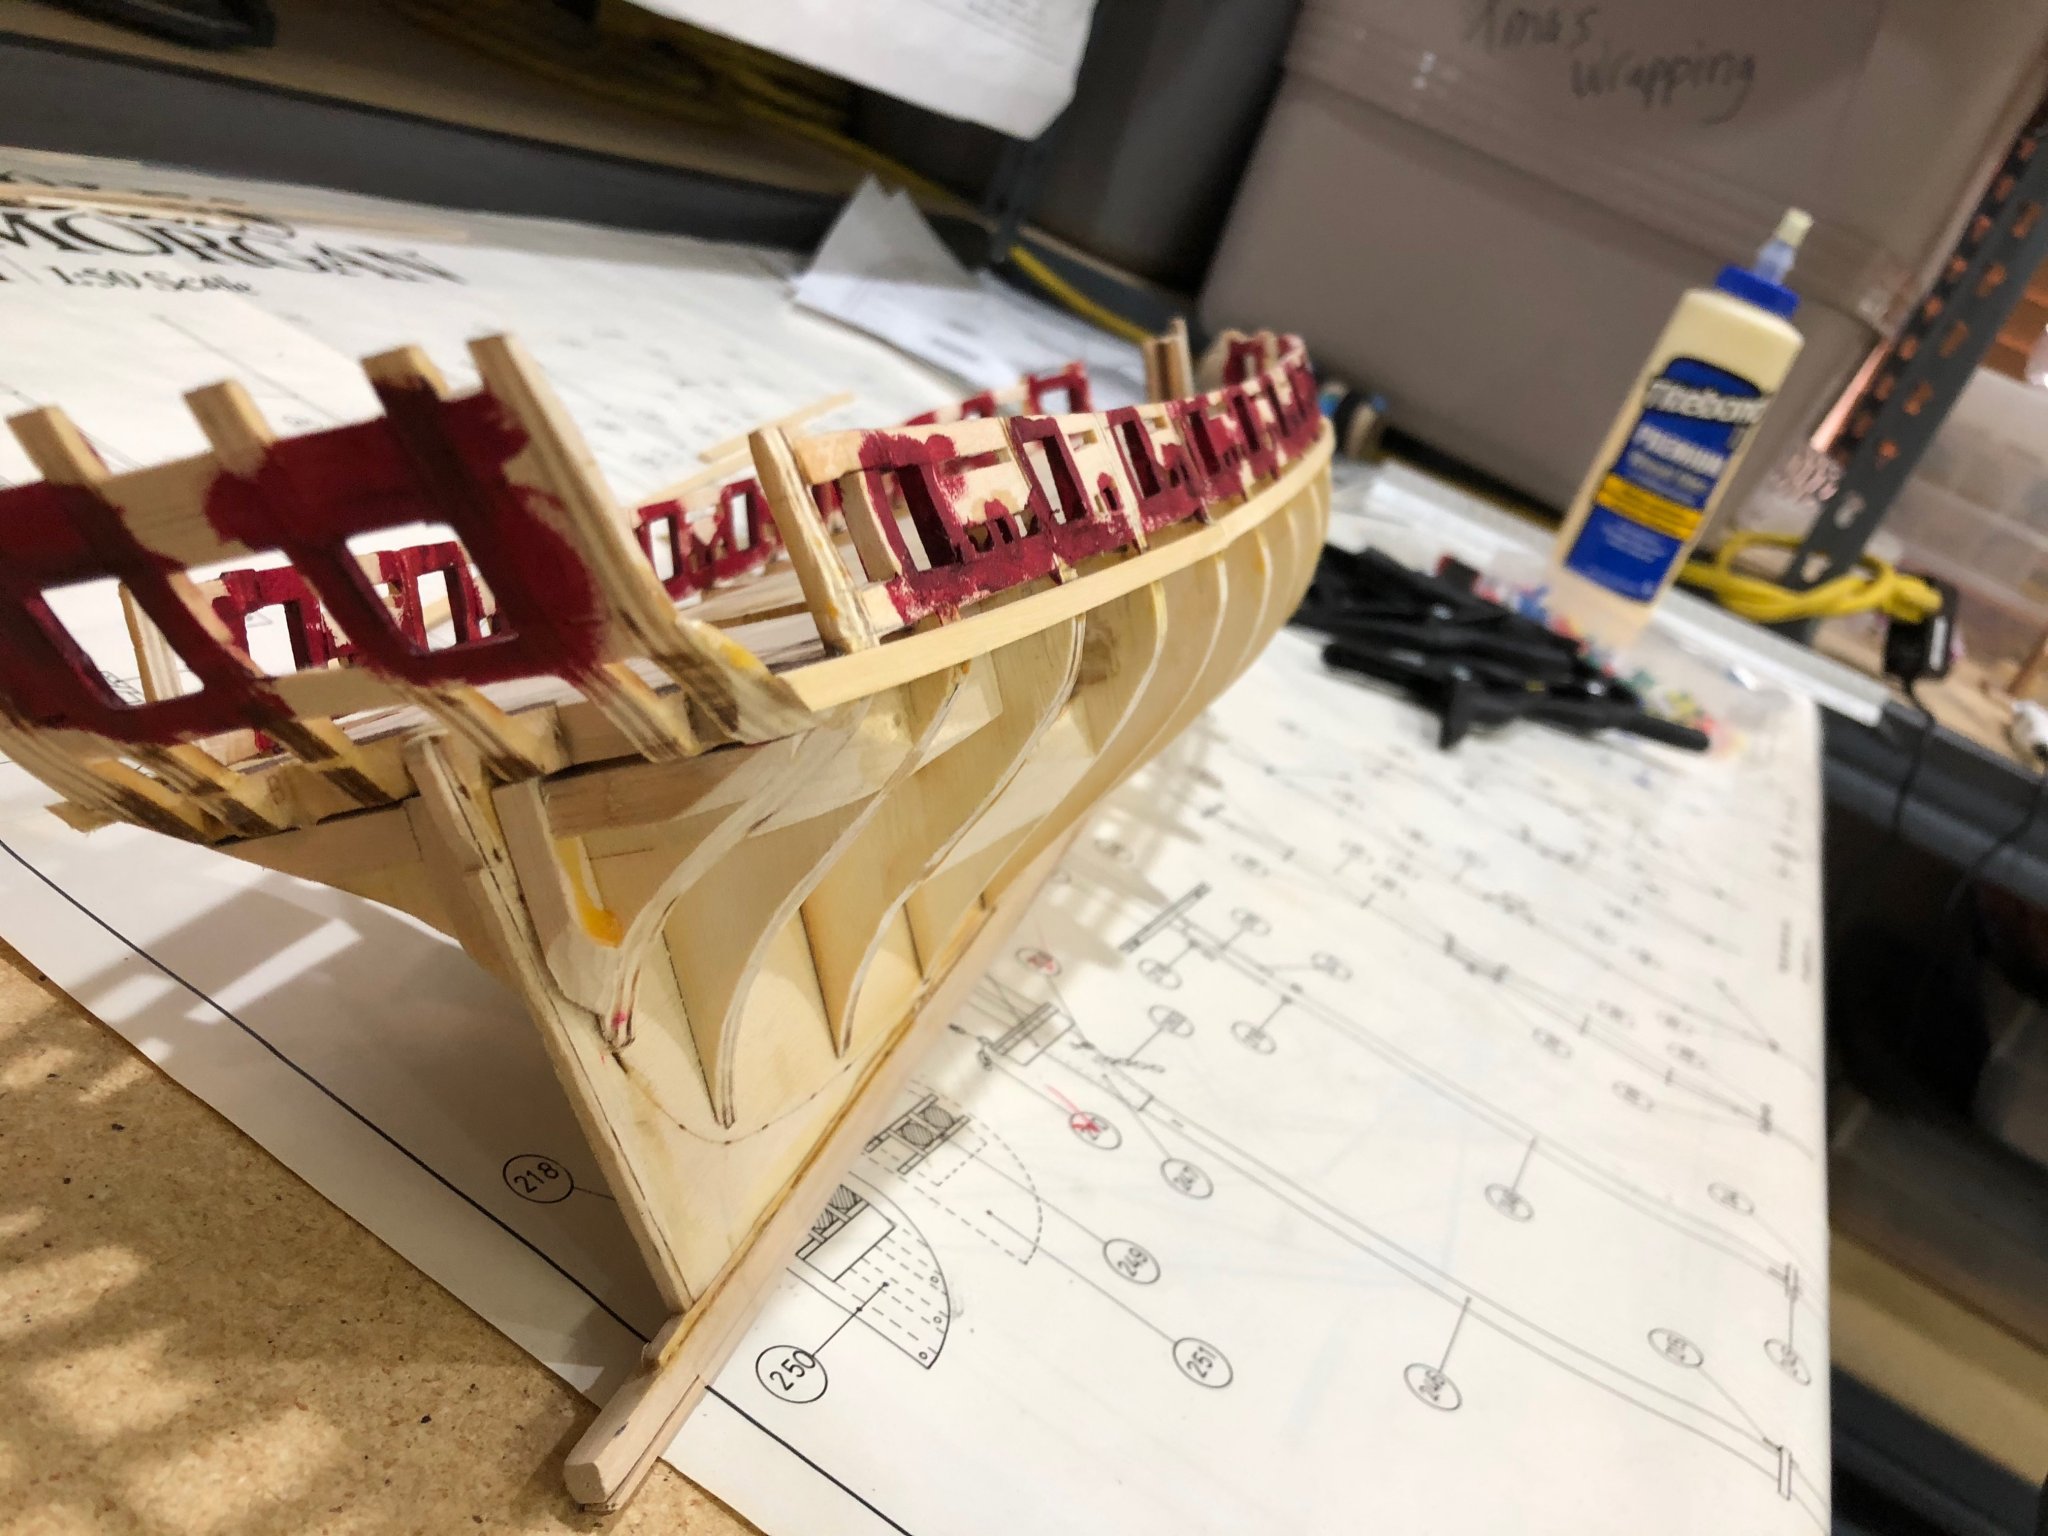
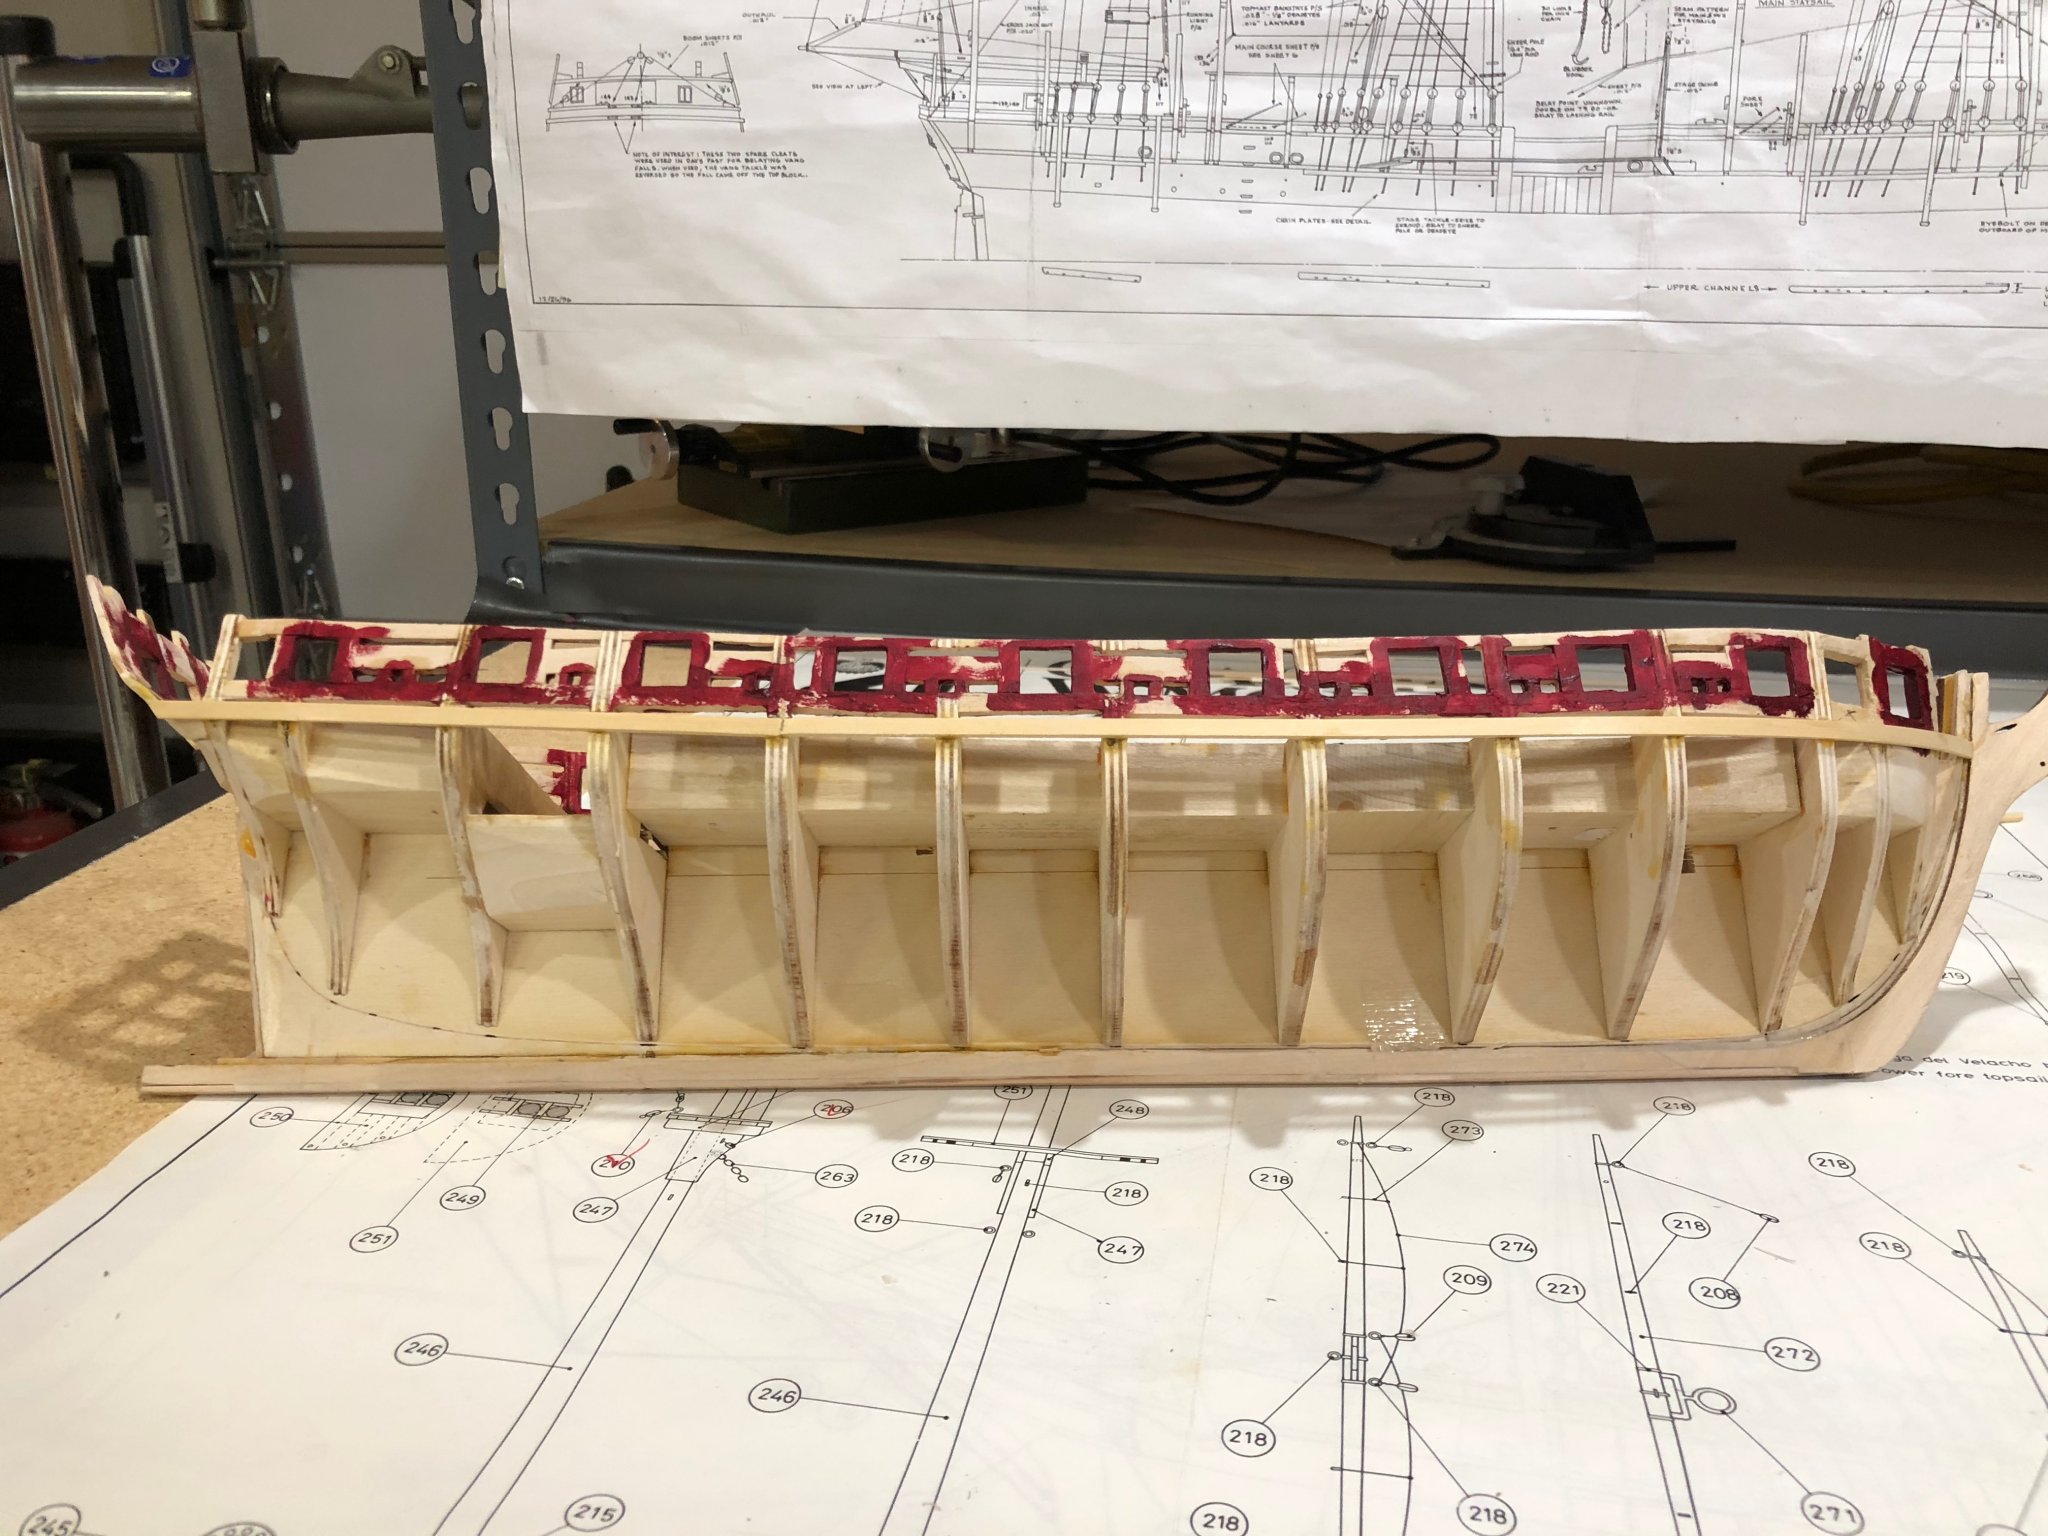
Well I'm back after a long break. Finished rigging my Morgan. Moved to a new house and now during the quarantine I've been able to get some work done on Syren. Finished up the ports and planking along with the transom and counter. I followed Gahms transom planking to give a more detailed look. Thanks Thomas for your posts. I used a darker vermillion as I wanted a different contrast between the planking stain and the red vermillion. Now I'm off to starting hull planking and trying to make real sheaves for the back stay to pull through.

-
Thomas your work is an inspiration to me of how to make a kit artwork. Many things you've done have shown me how to improve a kit. Thanks for your posts Will
-
Been following your build throughout the process and its looking very very very nice. Im designing the Pungy Amanda F. Lewis, plans from Smithsonian, on TurboCad and you've given me many ideas. While reading your last post I remembered I.ve made similar parts using brass beading wire, hobby lobby, of .02 did wire which results into .96 dia. For the small i.d. I wrapped the wire around a #56 (.043) drill bit held in a vice and made a loop of the wire held in a pin vice and twisted the wire forming the loop. The wire work hardness during the twisting. Again model looks great really enjoy your posts. Will
-
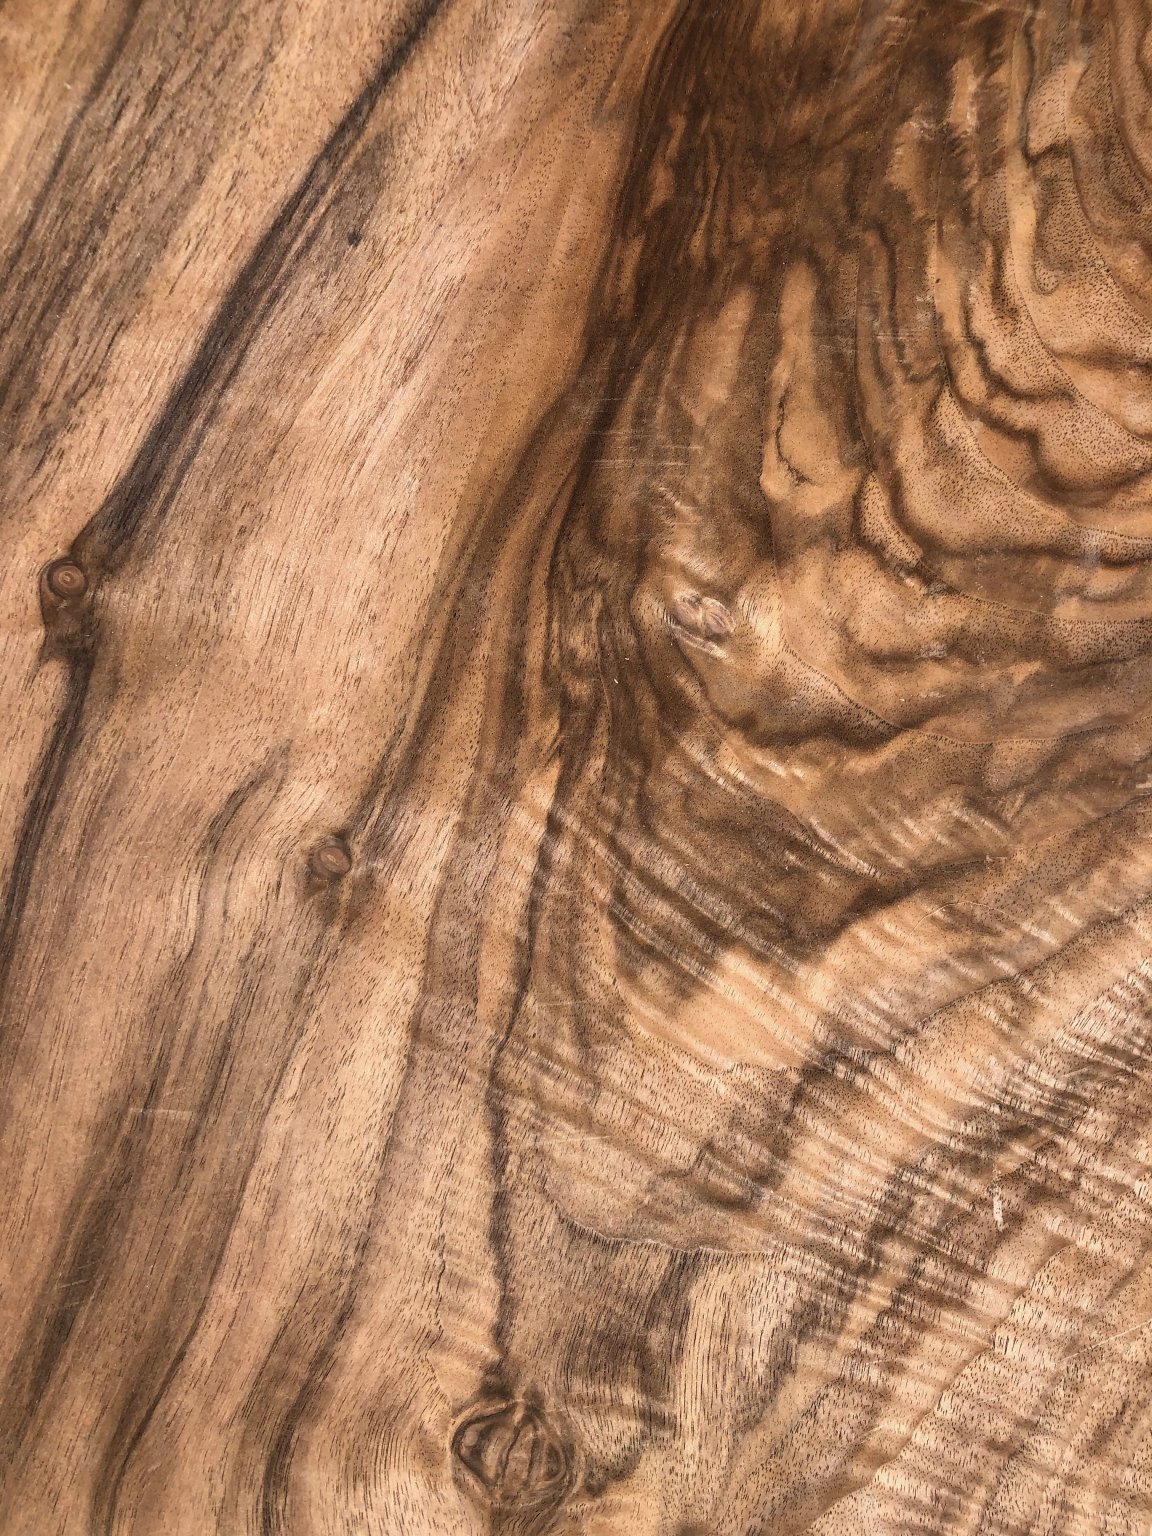
I was given a foot locker full of many types of wood, but one is particularly unknown to me so does anyone have ideas of the type? These are .5mm veneer 12" X 18" and there are 10- sheets. The image is approximately 2/3's of a sheet. Any Ideas Will

-
Thank you Ed for the quick response, I checked online and found 1/2" X 2' X 4' at Menards for $11.96 and they will ship to my home in Queen Creek. Home Depot & Lowes carry a sound barrier foam board but they are not the same as Homasote. Again thanks now I'll continue with my TurboCad database of the schooner Lettie G. Howard from the HAER drawings. I'll use your approach to test my lofting and your assembly methods before I get too far down the road. Will
- 3,618 replies
-
- 1
-
-
- young america
- clipper
- (and 1 more)
-
Ed I just finished going through your Young America log and found the work and log to be truly amazing and I can't thank you enough for your contributions to the MSW. There is so much information in the log that Ive made a excel spreadsheet to use as an index to help me find any particular item I need to review and am using it now to review your frame making tutorial, but have one question What type of board do you use to pin the frame pieces too? I tried MDF with no results. Again thank you for all you do. Will
- 3,618 replies
-
- 1
-
-
- young america
- clipper
- (and 1 more)
-
I like you stanchion alignment very ingenious for drilling the turned stiles you bought. For your reference I'm building a pattern follower for my lathe using David Antscherl's plan on HMN Swan Class Sloops volume 1 page 288 I'll let you know how it works. C. Chase is looking really great and I especially like the centerboard. Will
-
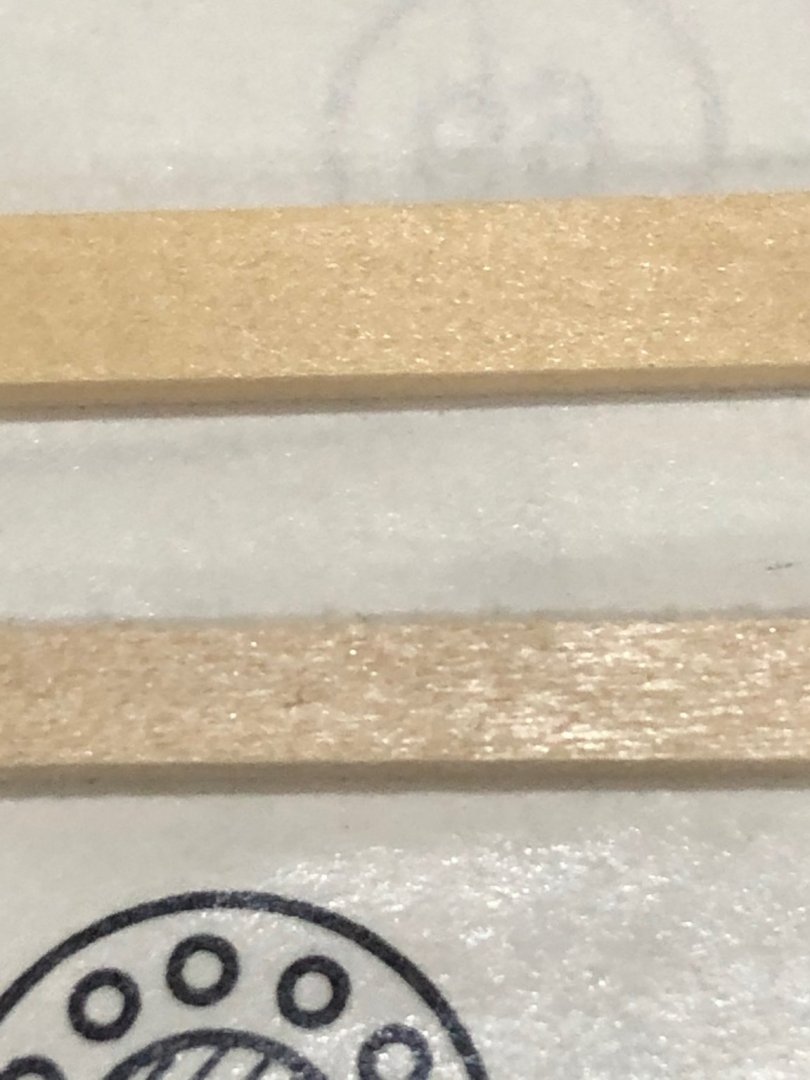
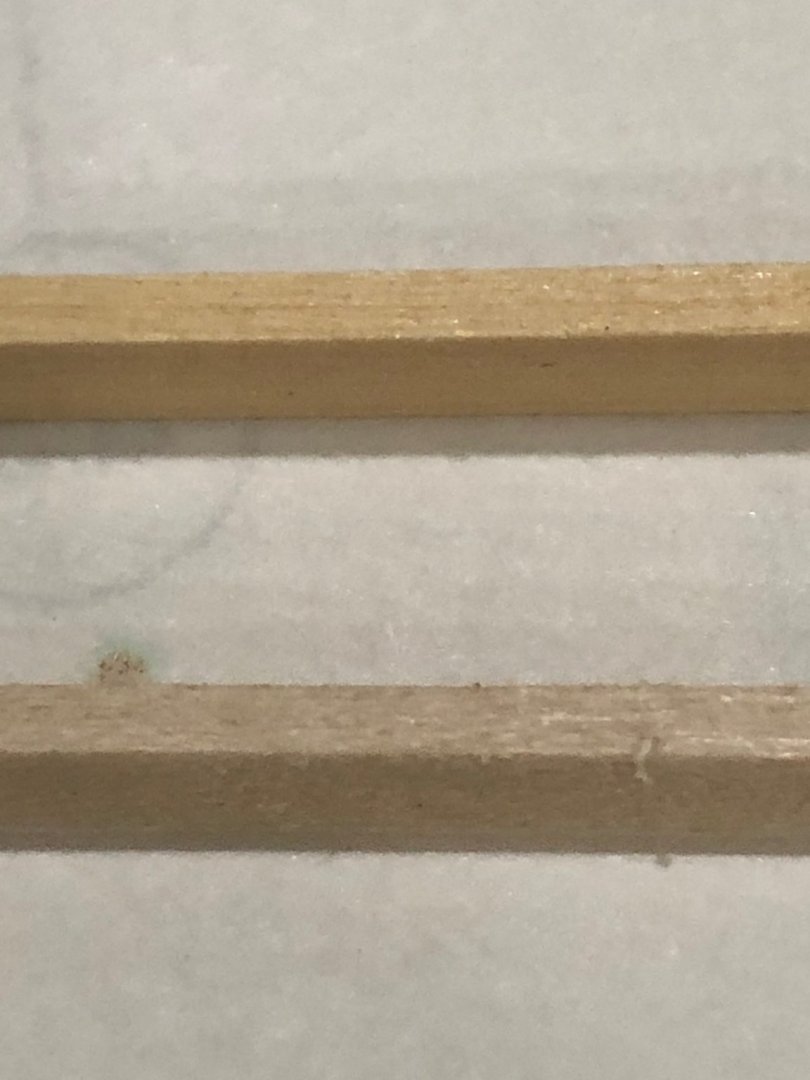
Yahoo! I got my wood late yesterday and inspected and measured each piece for imperfections, grain, color, size and flatness. I am very happy with the quality of the wood the grain is very tight and straight and the color is very uniform so after ripping and milling the sorting for planking uniformity will be very easy. I only milled enough for the wales, bulwark, and deck planking so now I started installing the first wale layer and next will be the acid test as I start the bulwark planking and fitting/trimming the sills around the gunports and sweeps. Once the wale glue is dry I'll start the bulwarks. Now I'd better get back to rigging the Morgan. Its getting close so I need to stay after it. Oh yeh, I've posted of the alaskan yellow cedar and basswood strips for you comparison. The cedar is on top Still more glue left from removing the planking done earlier. Just a lot of fine sanding but the old glue comes off fairly easily and leaves the surface ready for the new pieces. I really had no problems getting the surface ready for the wales hoping the rest goes as easily. Till next post Will