HOLIDAY DONATION DRIVE - SUPPORT MSW - DO YOUR PART TO KEEP THIS GREAT FORUM GOING! (89 donations so far out of 49,000 members - C'mon guys!)
×


niwotwill
-
Posts
596 -
Joined
-
Last visited
Content Type
Profiles
Forums
Gallery
Events
Everything posted by niwotwill
-
 Spent the day assembling the capstan after cleaning the char from the pieces. Tomorrow I'll finish the wedges and sand preparation for staining. Have the top piece painted and just need the final coat of paint before glueing the whole assembly together. The wedges are another matter that will have to be made and fit individually and I do this after I complete the prep sanding prior to staining. Stay Well and Stay Safe Will
-
OOPS! on the last post I mentioned using Holly for the capstan planking but I used Alaskan Yellow Cedar for the capstan planking. I got confused as I was sorting wood for the Emma C. Berry next in line and Holly will be used for the deck planking. Sorry about that, my bad. Stay Well and Stay Safe Will
-
You're almost to the fun part where the model really starts to take shape so all the detail work done here will show when planked. Its looking good keep up the post it will be good for those that follow. Nice work. Stay Well and Stay Safe Will
- 52 replies
-
- 1
-

-
- Model Shipways
- muscongus bay lobster smack
- (and 1 more)
-
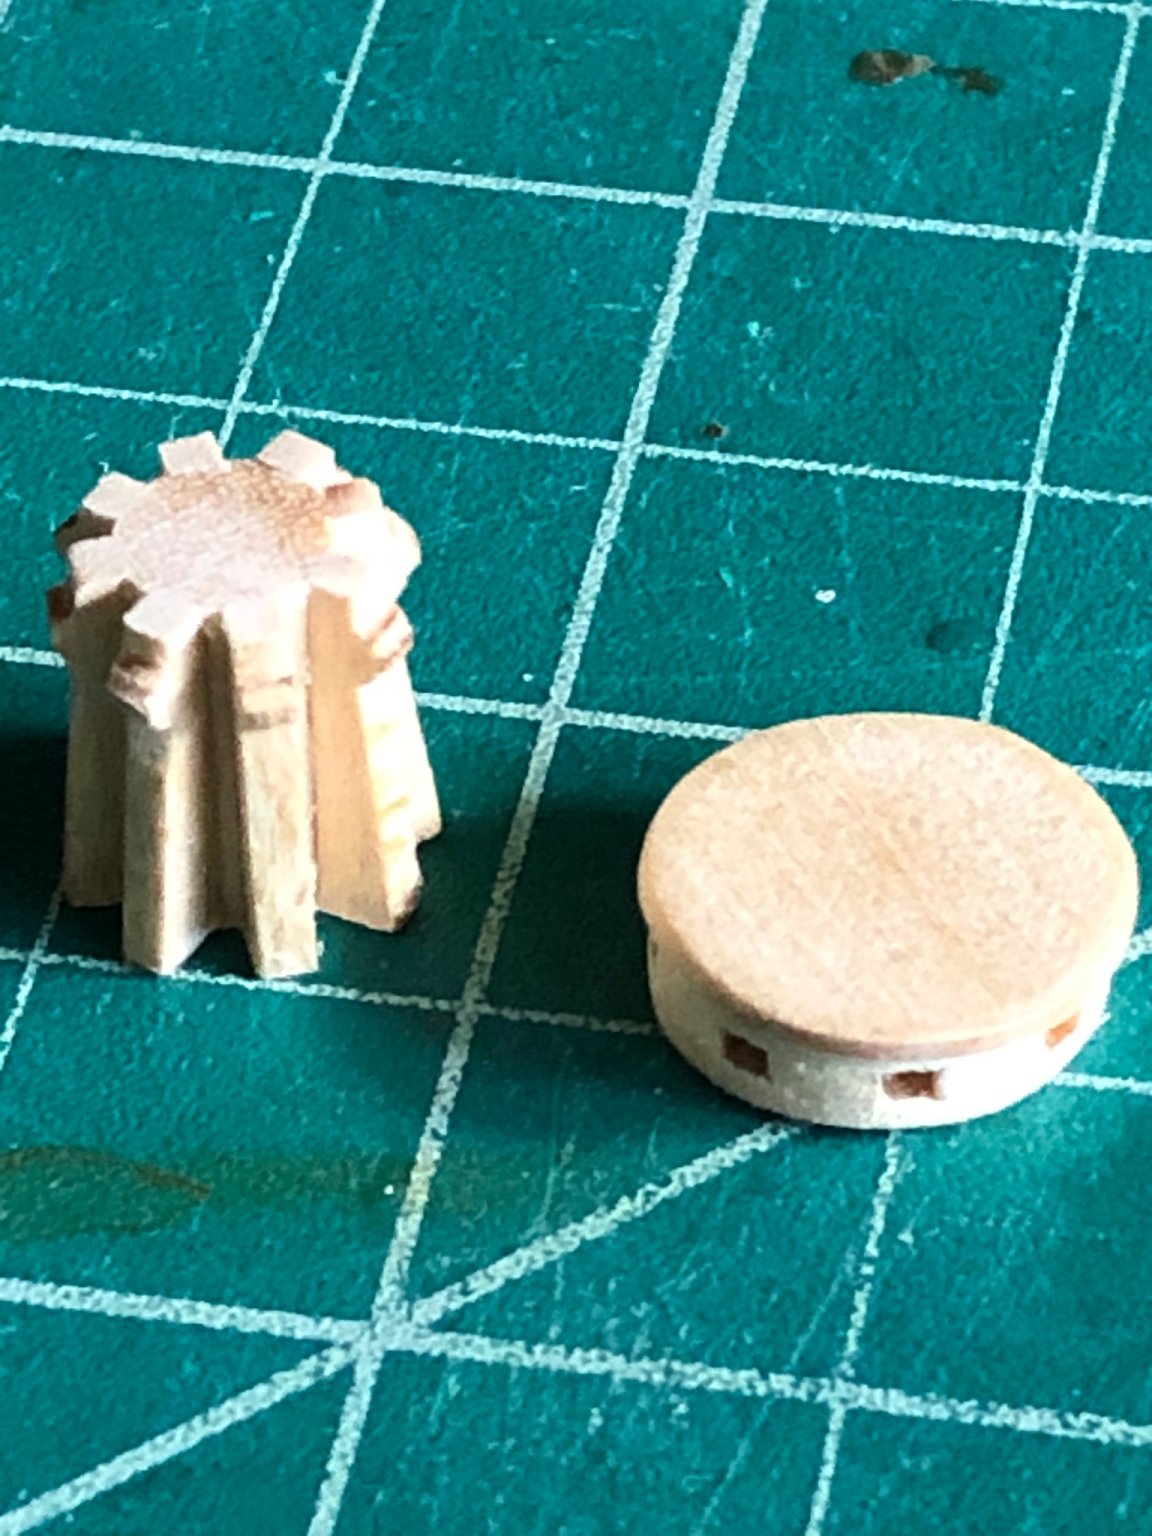
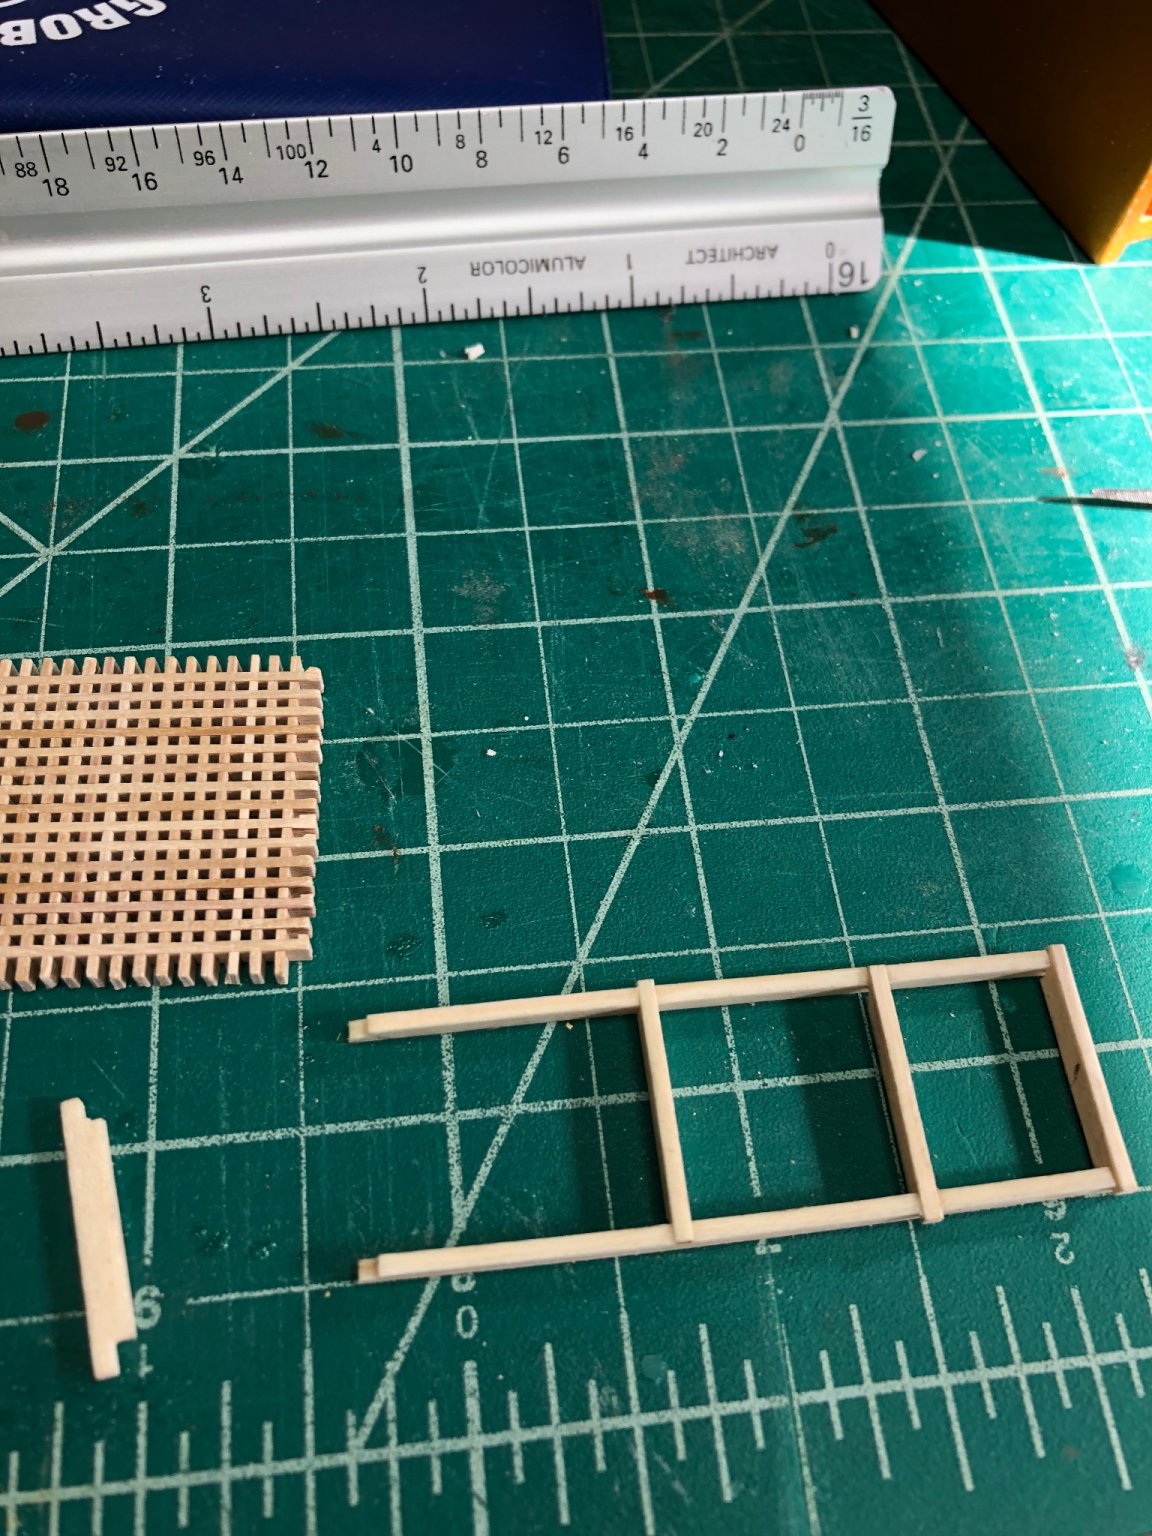
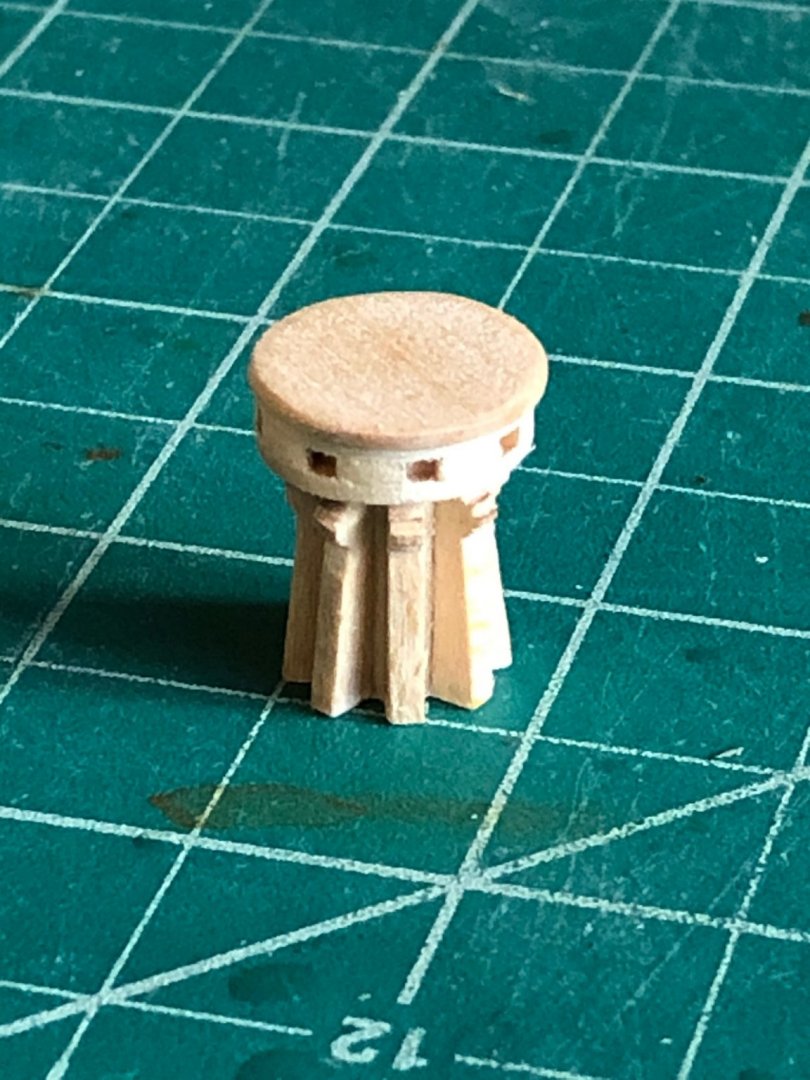
Spent the day making the coaming, cannon ball rails, planking for the capstan, and grate got everything done for staining tomorrow. To make the cannon ball rests I used a burr in the mill and bored a depth 1/3rd of the ball diameter. These are the finished ball rails Glued the the coaming together and then softened the outside edges with a 5 degree bevel . (hard to see but it does soften the piece) I used holly for the capstan planking to match the deck planking which is also holly. Glued the 6 pieces together and sanded to fit the coaming and the surface of the decking. Assembled the grating and sanded to fit the opening and carefully glued to bottom with diluted white glue. Dry fit everything together ready for staining and glueing A few small gaps the are filled when the assembly is pushed together. Staining tomorrow and start the capstan, companionway, and ladder. Probably next week to complete. Stay Well and Stay Safe Will
-
Its looking real good and the planking remember this is a working boat for 155 years and not a pretty boy yacht. I like the planking don't clean it up too much. Did you follow the instructions on what planks to leave off? Stay Well and Stay Safe Will
-
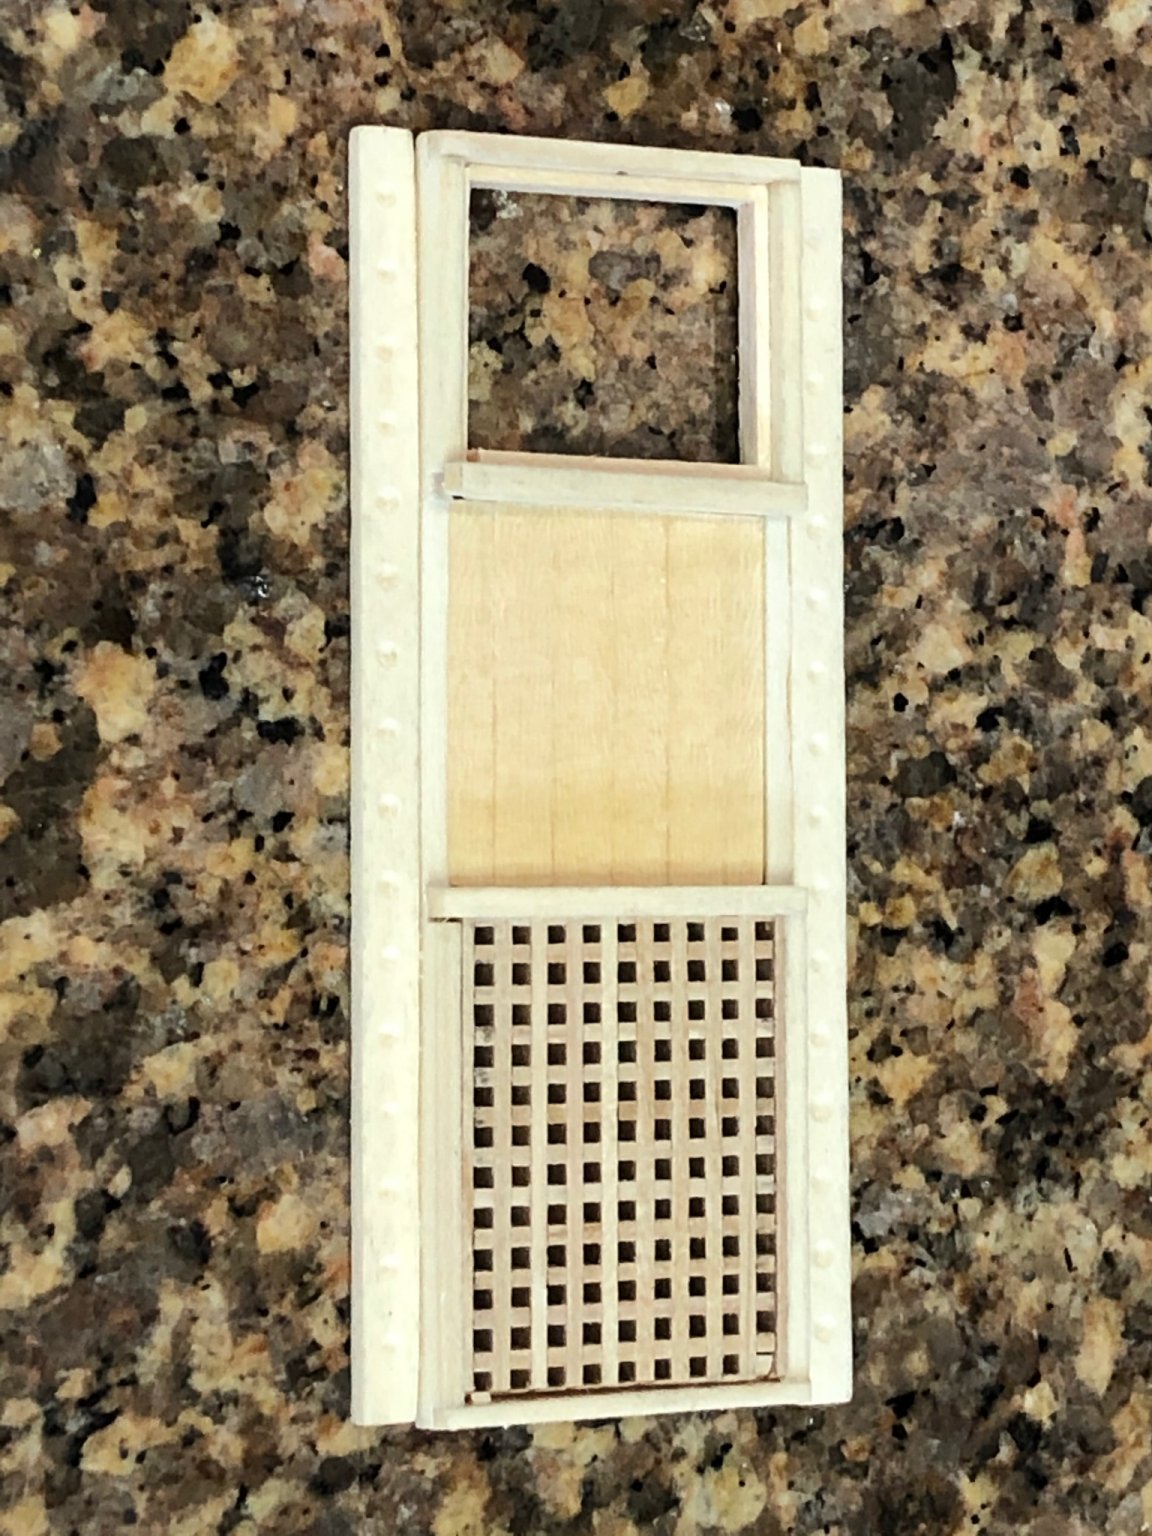
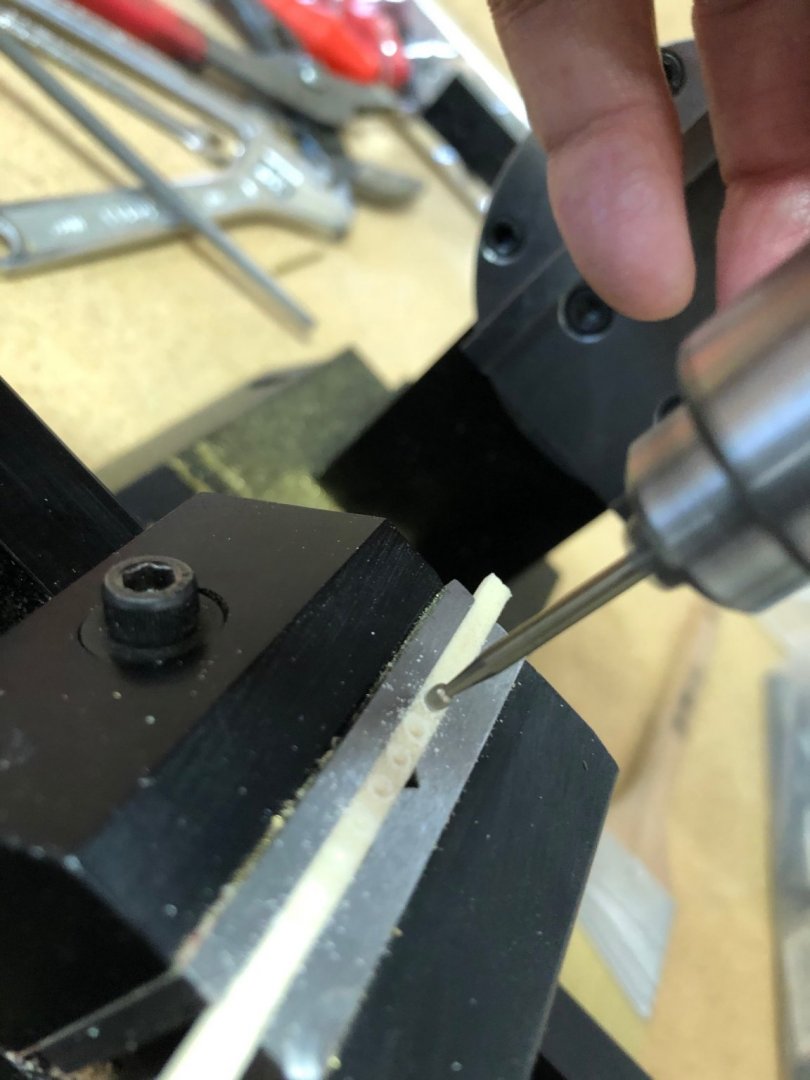
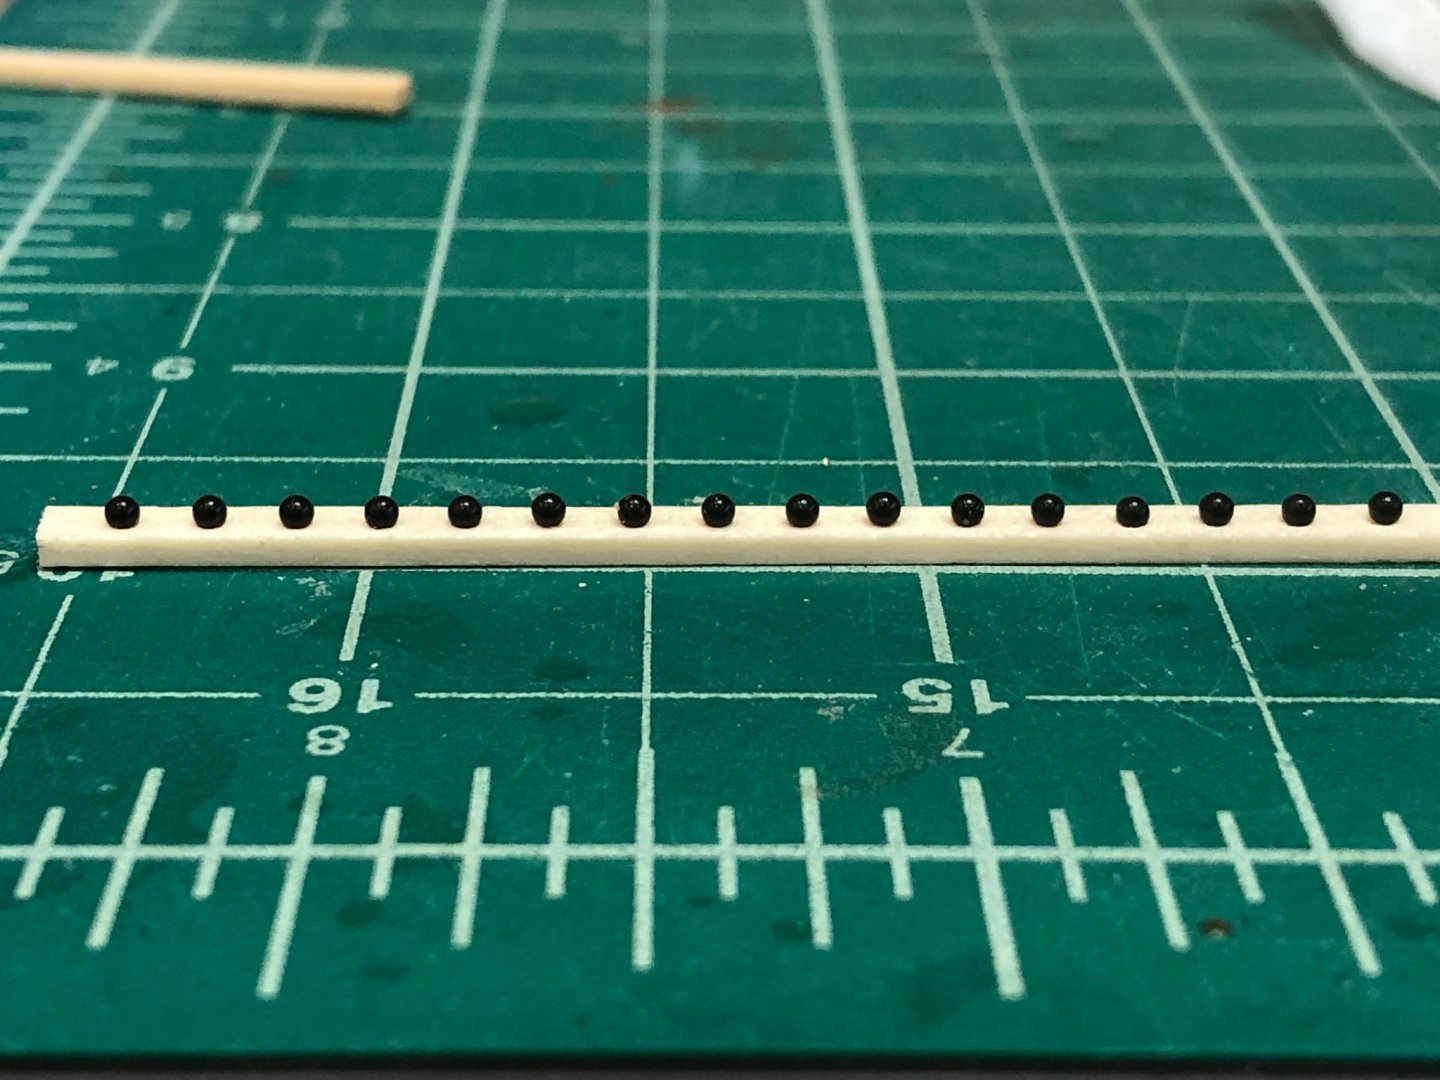
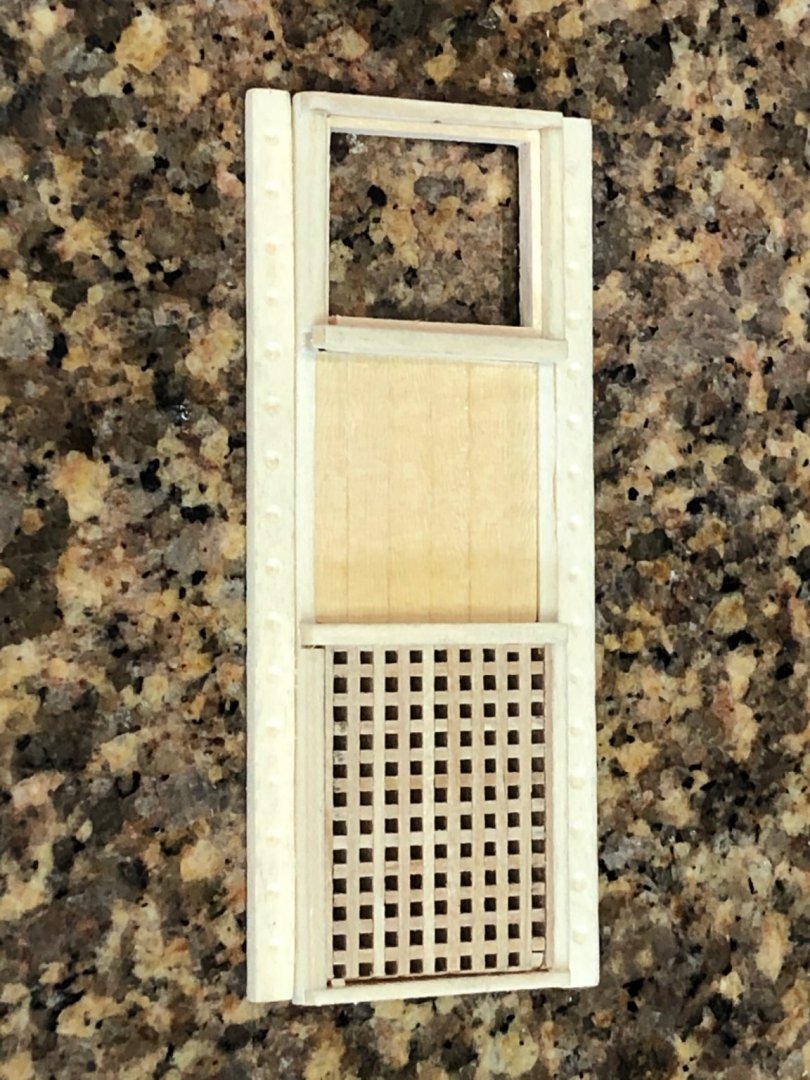
Started with the aft grate and companionway measuring the plans and then measuring the furnished 1/16" x 1/8" strip. Measured print dimensions were not very practical sizes so I then measured the strip and found it to be undersized not much but enough to cause issues. Then I used the print as a pattern and cut the coaming and lap joints. It seemed to work nicely so I dry fit them and then overlaid the coaming upon the grating. Major surprise the grating opening is 10 x 13 grating ribs so I'm going this direction. Reading Chucks caution about staining before glueing seems to be problematic because of the deck radius and softening the coaming sides would require sanding after staining. Looking at the plans and dry fit parts I think if you carefully glue all the residue will be under the whole assembly so tomorrow i'll start assembly. Using the cutting mat as a square reference the coaming appears to be square and ready for tomorrow. Stay Well and Stay Safe Will

-
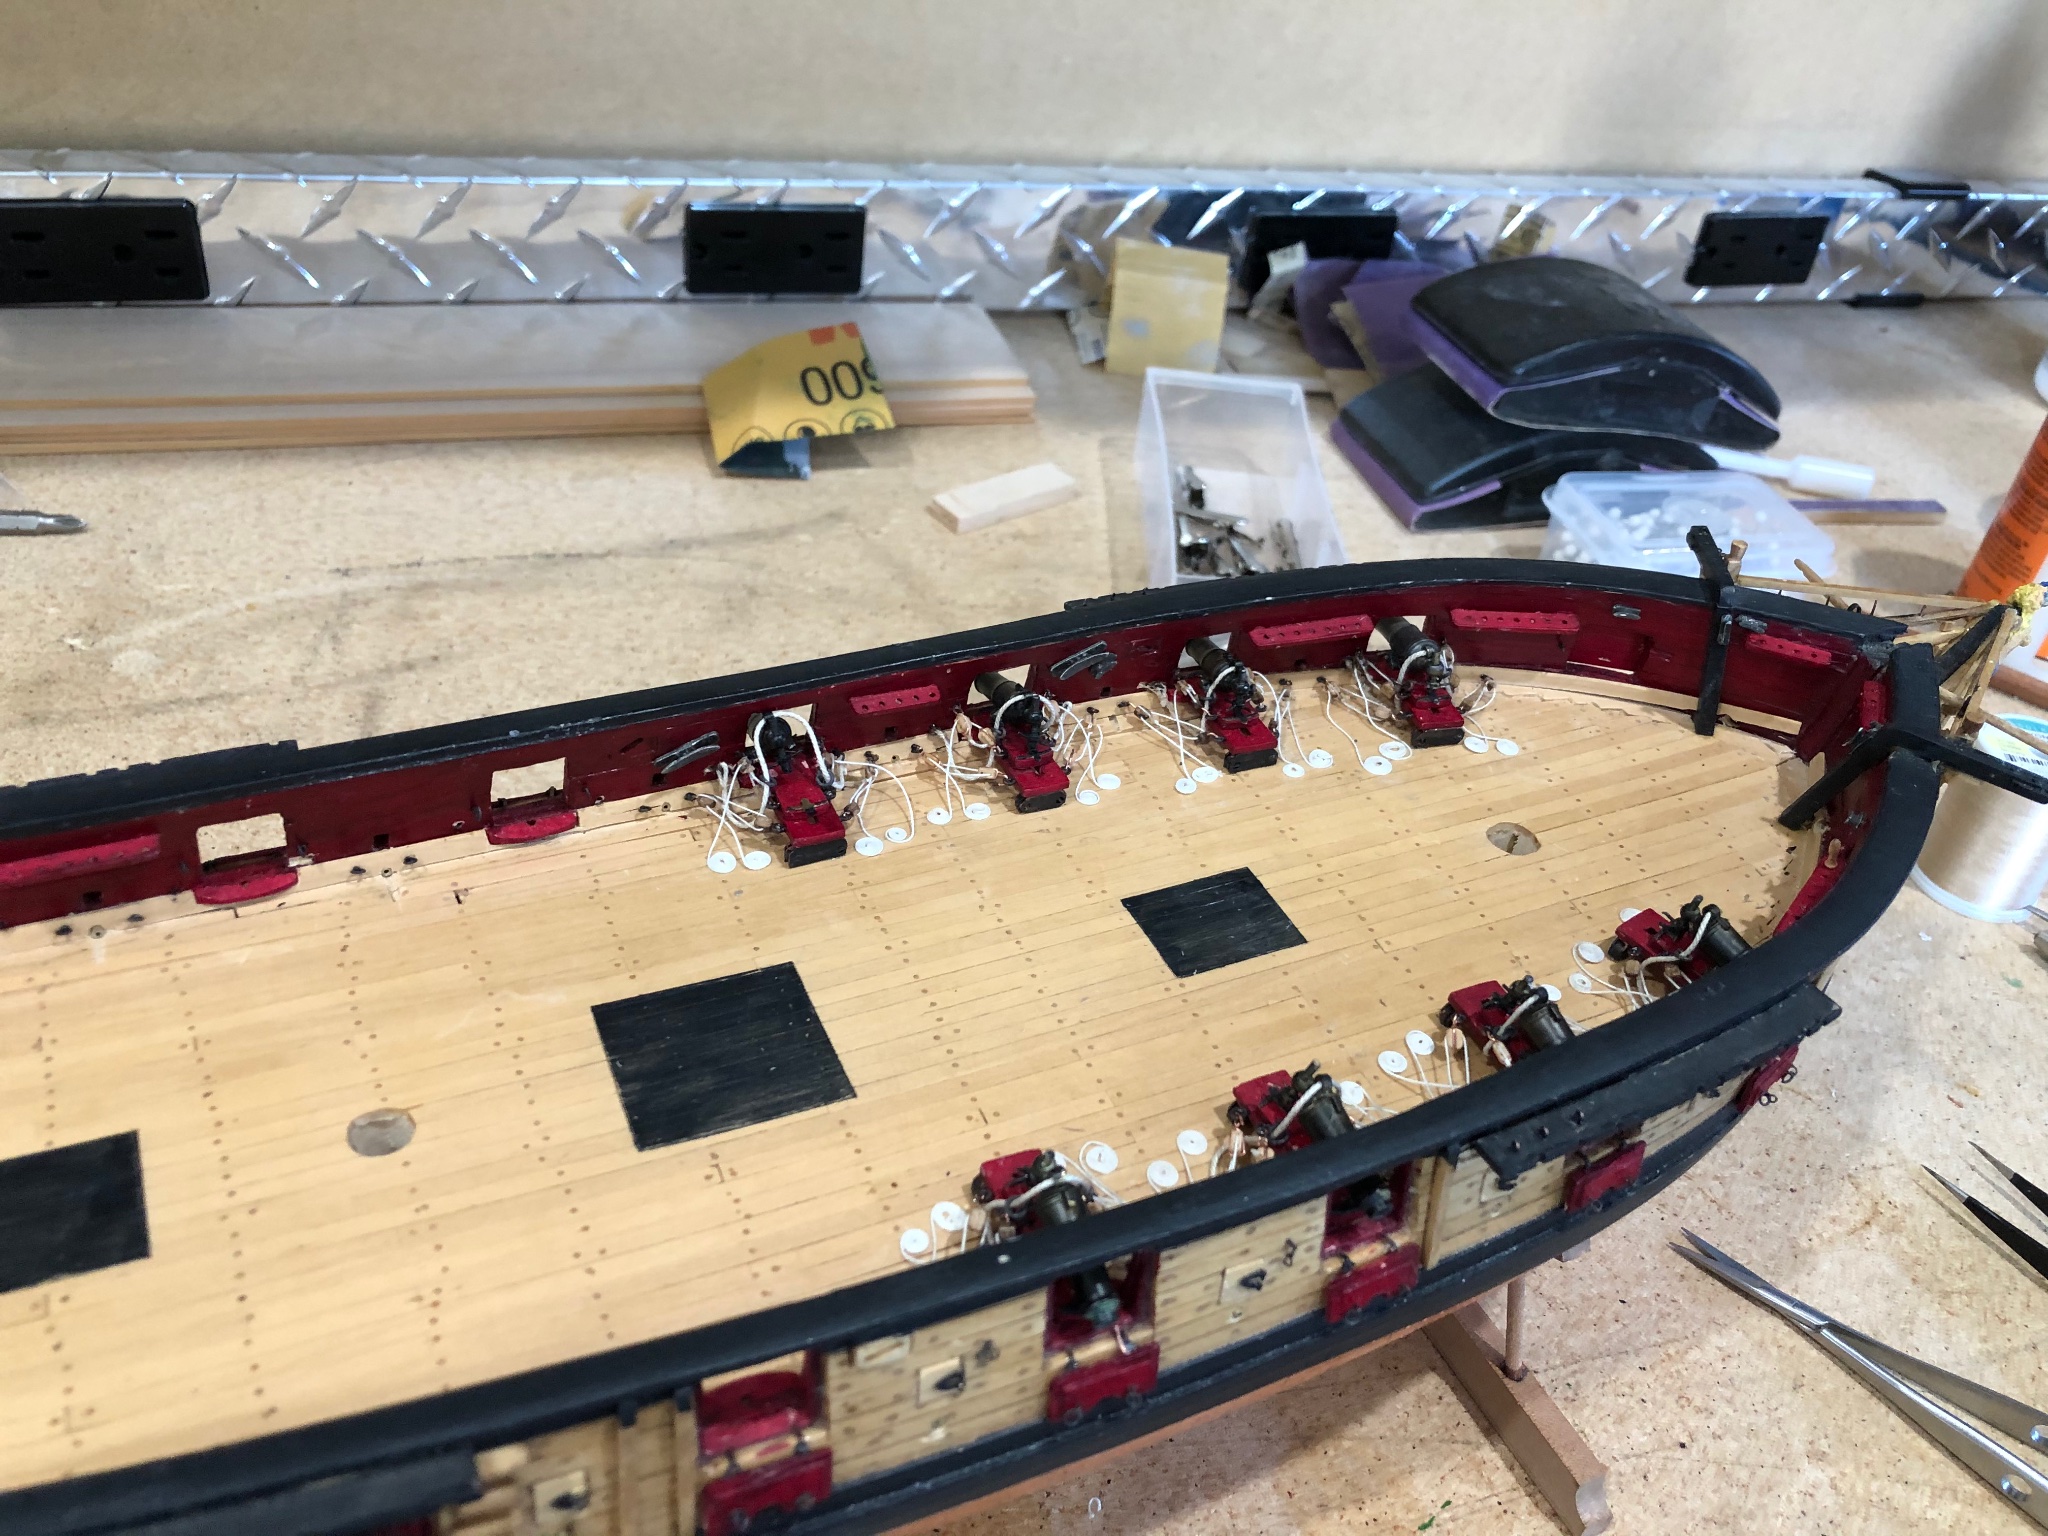
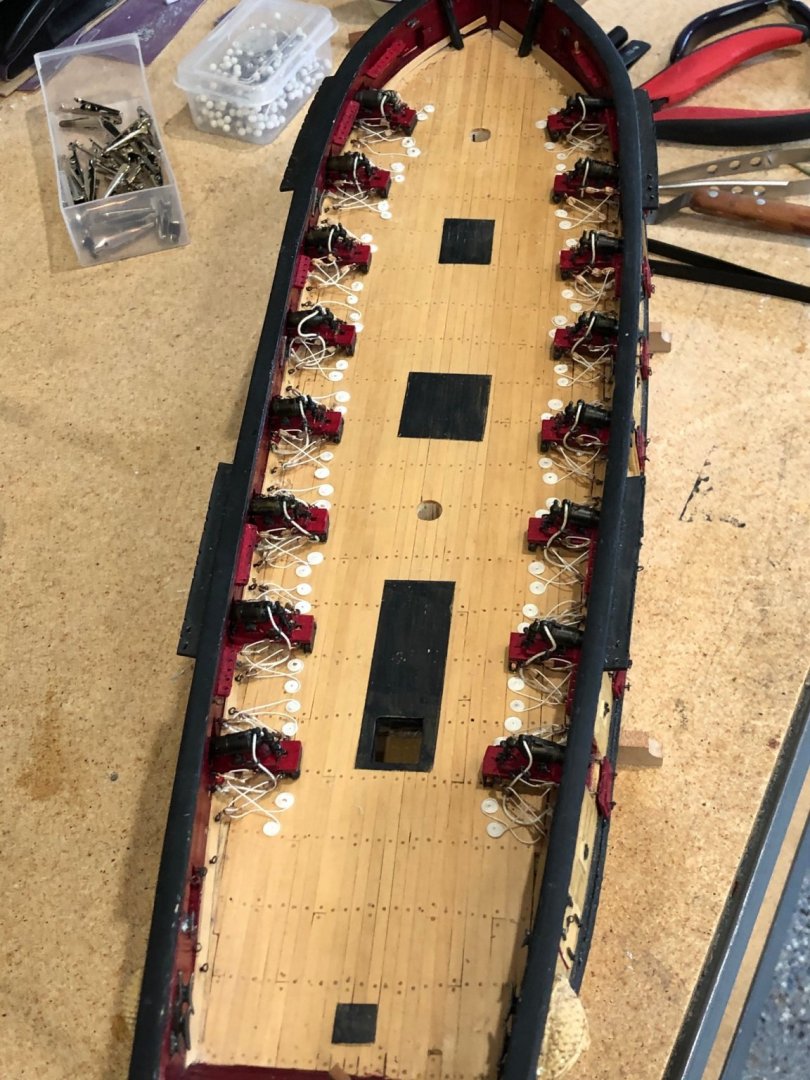
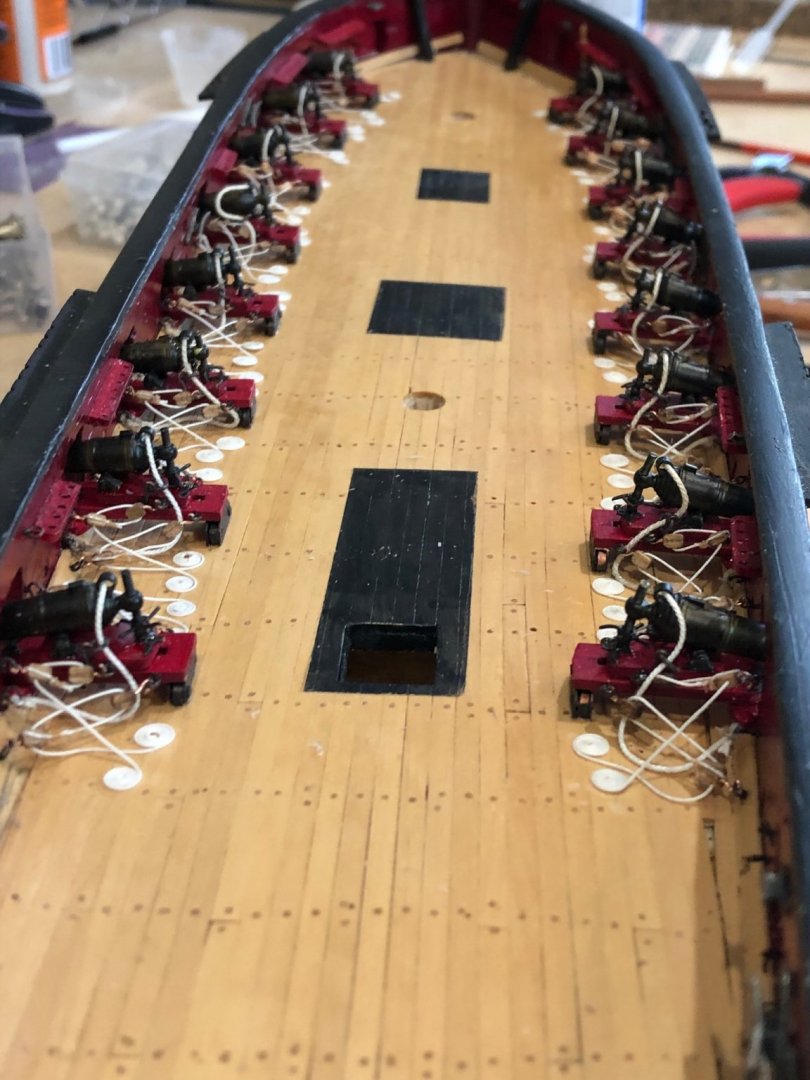
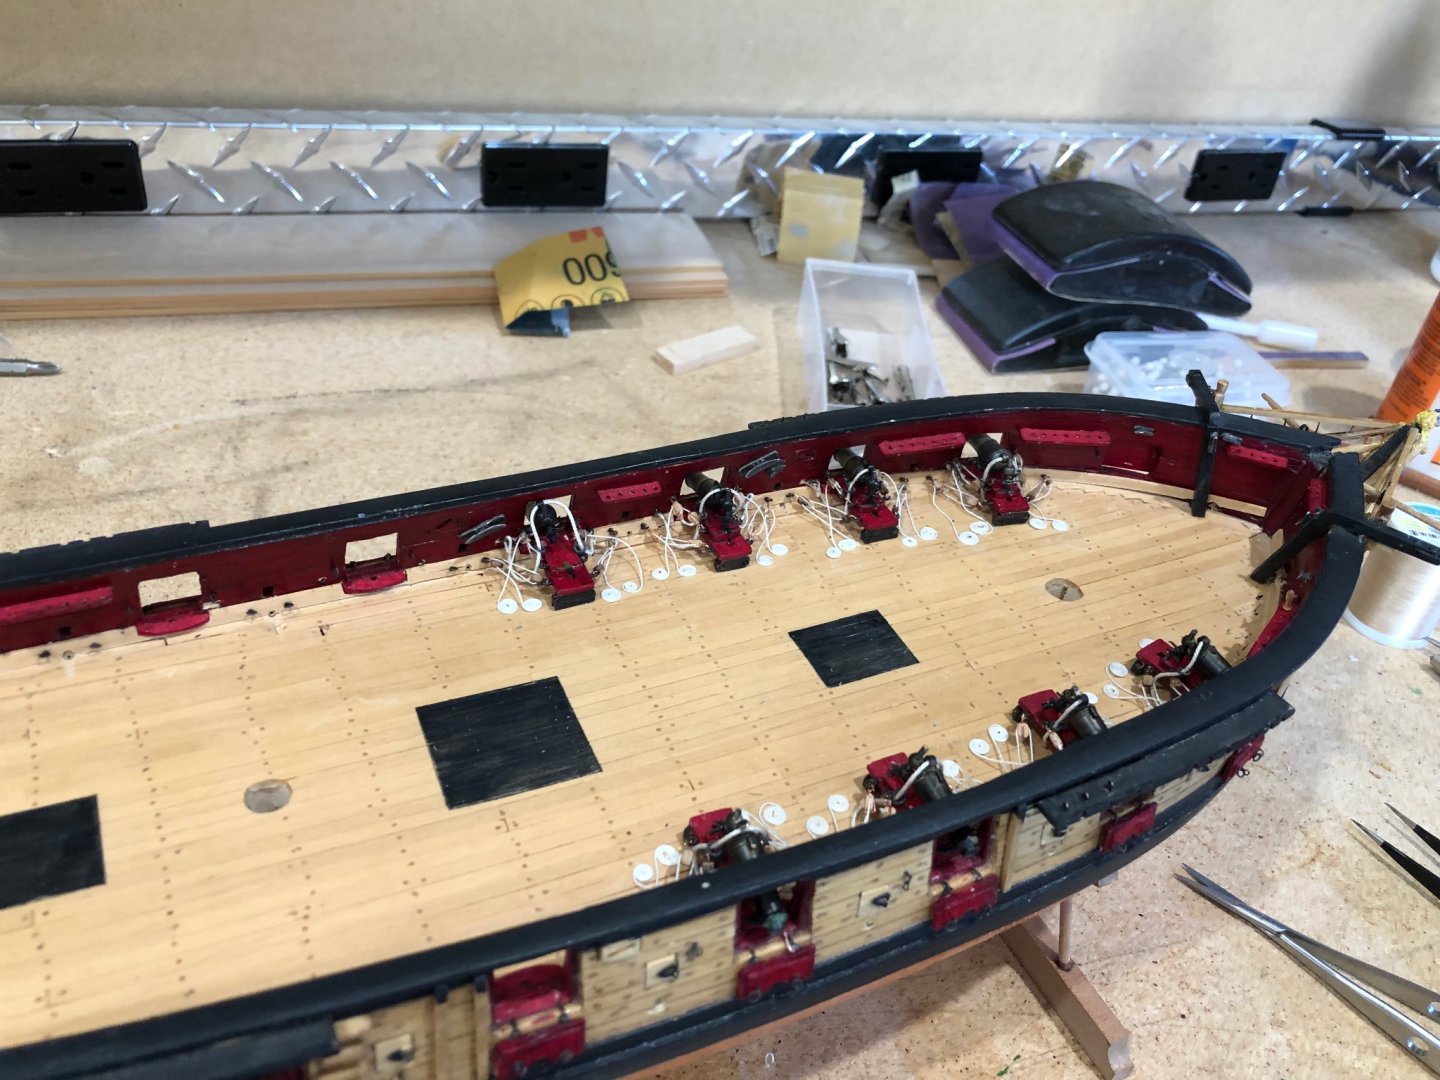
Yeeha!!! on to chapter 12. Got all the carronades rigged and the deck looks better now on to filling the rest of the deck. On to fun stuff CONSTRUCTION Stay Well and Stay Safe Will
-
The iron bands make the spars. The small deviation adds the detail making them visually stunning. Great work what did you use for the bands? Stay Well and Stay Safe Will
- 950 replies
-
- 1
-
-
- syren
- model shipways
- (and 1 more)
-
Just started following and admiring your work sofar. I have an ECB on the shelf and will start in the next month or so and your log will be a big help. Stay Well and Stay Safe Will
-
She's looking good. The lashing rail and tiller add a lot of interest to deck can't wait to see the paint. Great method using the 5 minute epoxy on the whelps, I'll put that in my memory box for future use. Stay Well and Stay Safe Will
-
Gotta watch out for places like Lee Valley they have so much stuff that I need/want, but a good set of chisels are a great investment. Its even fun to sharpen them between usages. Oh the yard and gaff look great also. Stay Well and Stay Safe Will
- 950 replies
-
- 1
-
-
- syren
- model shipways
- (and 1 more)
-
Coming along nicely. Pictures really help show the squareness of everything. Great idea making a sanding sled I'll be making mine before I start remaking my Washington frames. Stay Well and Stay Safe Will
-
Its looking good and square 👋 👍. I dry fit the deck pieces to make sure frames are at the same heights forward to aft and athwartship. Just a thought. Stay Well and Stay Safe Will
- 52 replies
-
- 1
-
-
- Model Shipways
- muscongus bay lobster smack
- (and 1 more)
-
Started following your log beyond building I'm amazed at your tenacity to repeatedly put it down and pick it up years later. 👋👋 Its looking good much better hull shape that the kit I used. Stay Well and Stay Safe Will
-
Looking good Bob and you're right about the centerboard rod coming loose mine did during the build. The hole in the centerboard became oversized due to work and boy is a bit** to get it back. The other day it came loose while moving the model and I just left it off. I'll glue the rod permanently someday. Stay Well and Stay Safe Will
- 52 replies
-
- 2
-
-
- Model Shipways
- muscongus bay lobster smack
- (and 1 more)
-
SkiBee Your planking looks about like mine prior to finish. Sorry I didn't take photos while building the smack. The dent you mention is similar to the dent I have on mine. I believe the dent is caused by the frame fairing of Number 9. I didn't fix it on mine as I just didn't want to remove the planking so its still there. On mine after number 8 the planks have to rise to meet number 9 causing the dent/recess. I used David Anscherls method of gap filling to great success. Mixed sawdust with white glue and filled the planking gaps, works wonderfully. Putty will fill between the planks but!!!!!!! the distance between frames and thiness (not sure if its a word) of the planks caused the gaps to crack over and over until I tried Davids method. Youre on a good path it's looking very nice. Stay Well and Stay Safe Will
- 62 replies
-
- 2
-
-
- muscongus bay lobster smack
- Finished
- (and 1 more)
-
You're off to a great start. It makes a fine display model and fun to build. Looking a center frames and dagger board brings back memories of trying to get full movement of the dagger board. I'm going to pull up a chair and follow along if you don't mind. If you need some help don't hesitate to ask. Stay Well and Stay Safe Will
- 52 replies
-
- 8
-
-

-
- Model Shipways
- muscongus bay lobster smack
- (and 1 more)
-
Absolutely fantastic longboat. The details you have put into the thwarts leading edges takes this to another level of modeling. I think I'll call your work "artwork" not modeling. How the rear thwarts fit around the frames makes wonder how many you had to make to get perfection. Thank you Thomas for sharing this with us mere mortals. Stay Well and Stay Safe Will
-
I'm really enjoying following your build and find your ideas and log very informative and will be helpful when I start my ECB. Its looking very nice and now I have to wait to see the stanchions and planking. Stay Well and Stay Safe Will
-
Looking at the photos makes me excited to get started but I must be patient and finish what I'm in the middle of. I got a tip from David Antscherl about filling up glue seams prior to painting it is to mix some sawdust with glue and use it like putty. It sands like the wood and makes a beautifully hidden seam unlike putty. Just a thought Stay Well and Stay Safe Will
-
A very out of the box solution to a difficult problem and it looks as if it will work. WELL DONE Patrick. I had forgotten about the kit parts as I did not use them so I went back to look and you were right UGH!!! I haven't been spending much time on Syren but now that I'm caught up on honey do's i'm starting up again. Yours is looking very good I'm anxious to see the carronades mounted. Stay Well and Stay Safe Will
-
Just checking in your build. I love to go back and admire the photos of your work. Stay Well and Stay Safe Will
- 950 replies
-
- 1
-
-
- syren
- model shipways
- (and 1 more)
-
Finally got back to working on the Syren. Completed half of the carronade rigging and made the balance of the breech lines. Slow progress but I think I will be able to work more steadily and get more done. At the half way point its beginning to feel like the end is in sight. Stay Well and Stay Safe Will
-
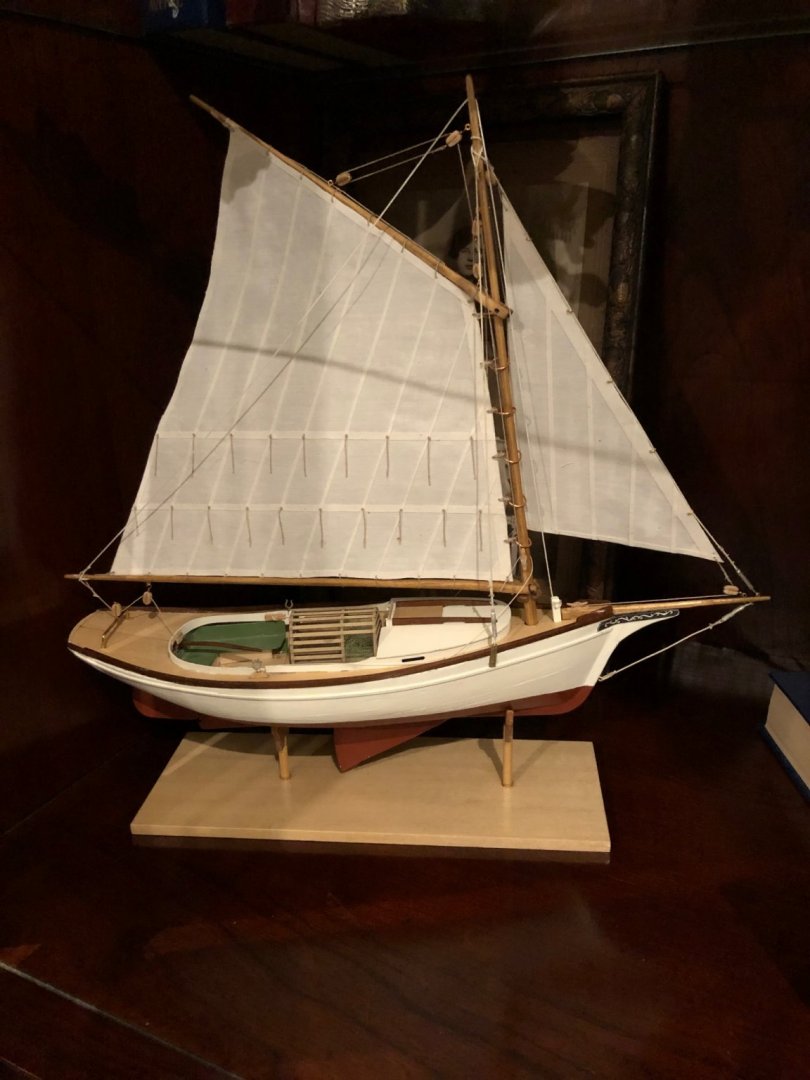
I've built this kit along with the number 2 and 3 as a learning exercise to improve my modeling. The dory makes a wonderful display piece and you're off to a great start. Looking at your log brought back the memories of building this kit and a wonderful time. Hope you enjoy ship modeling. You're doing a wonderful job and its looking very good. Stay Well and Stay Safe Will
- 11 replies
-
- 3
-
-
- Lowell Grand Banks Dory
- Model Shipways
- (and 2 more)
-
It looks very good standing with the rigging. Your speed is amazing. Stay Well and Stay Safe Will
- 950 replies
-
- 1
-
-
- syren
- model shipways
- (and 1 more)