niwotwill
-
Posts
596 -
Joined
-
Last visited
Content Type
Profiles
Forums
Gallery
Events
Everything posted by niwotwill
-
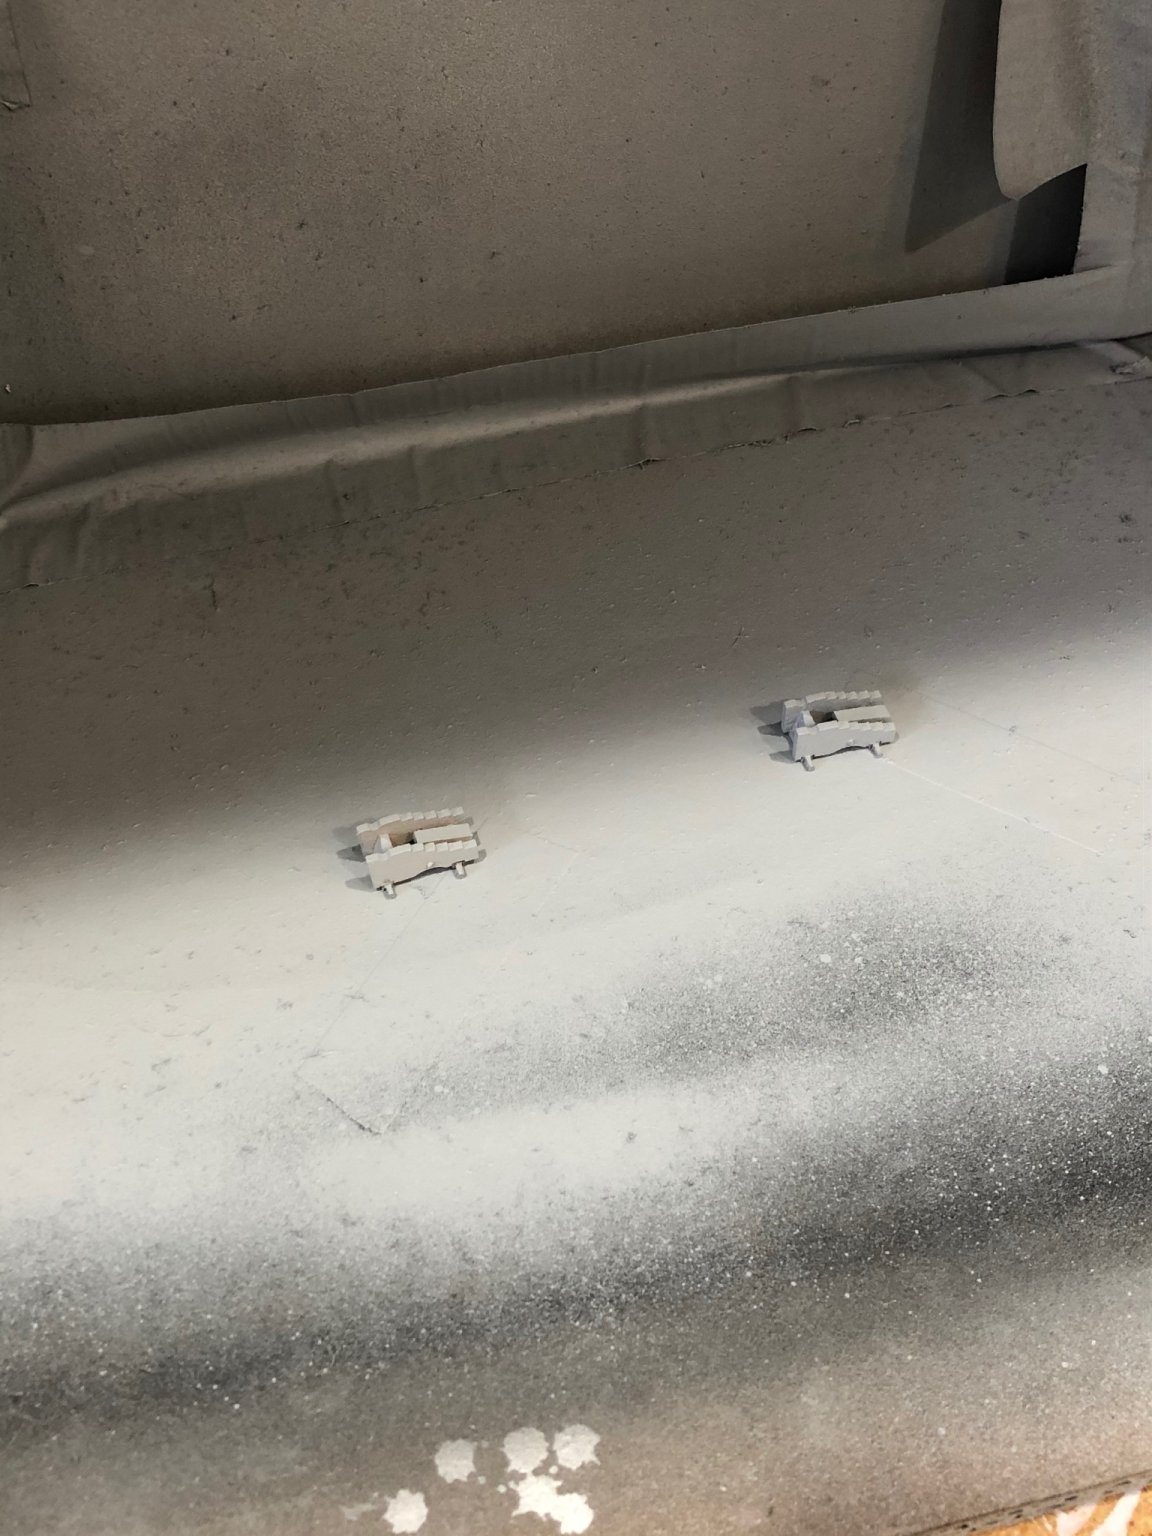
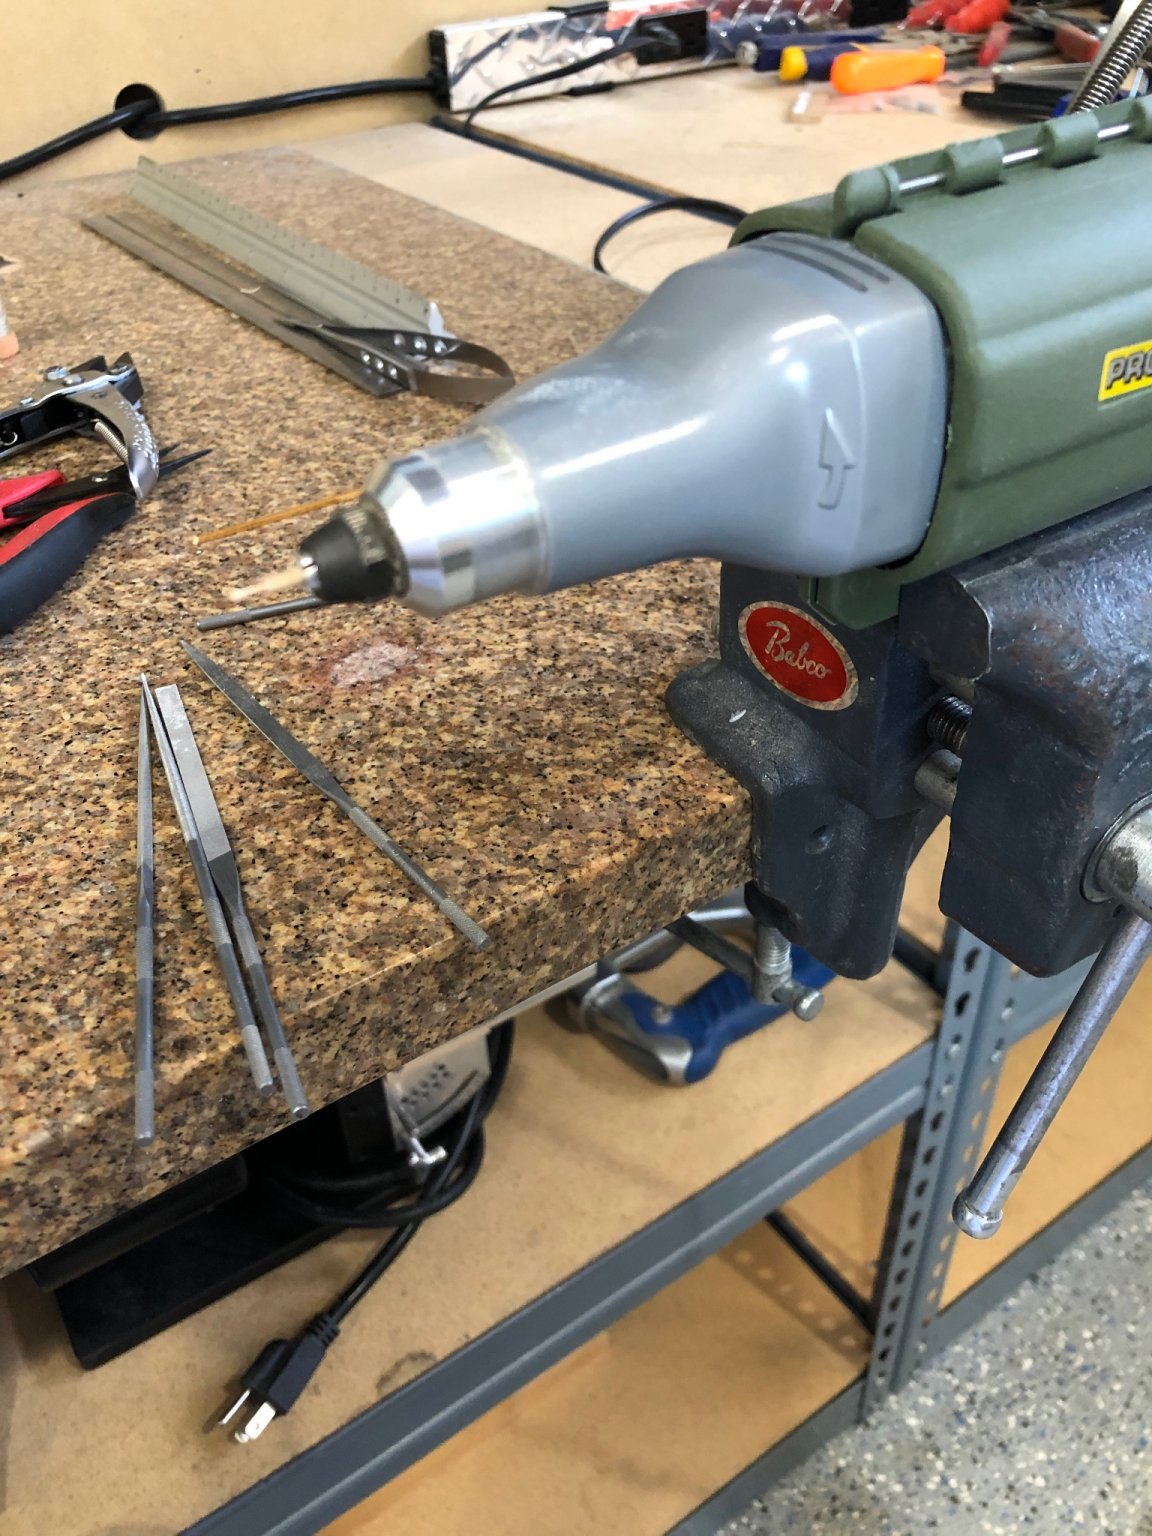
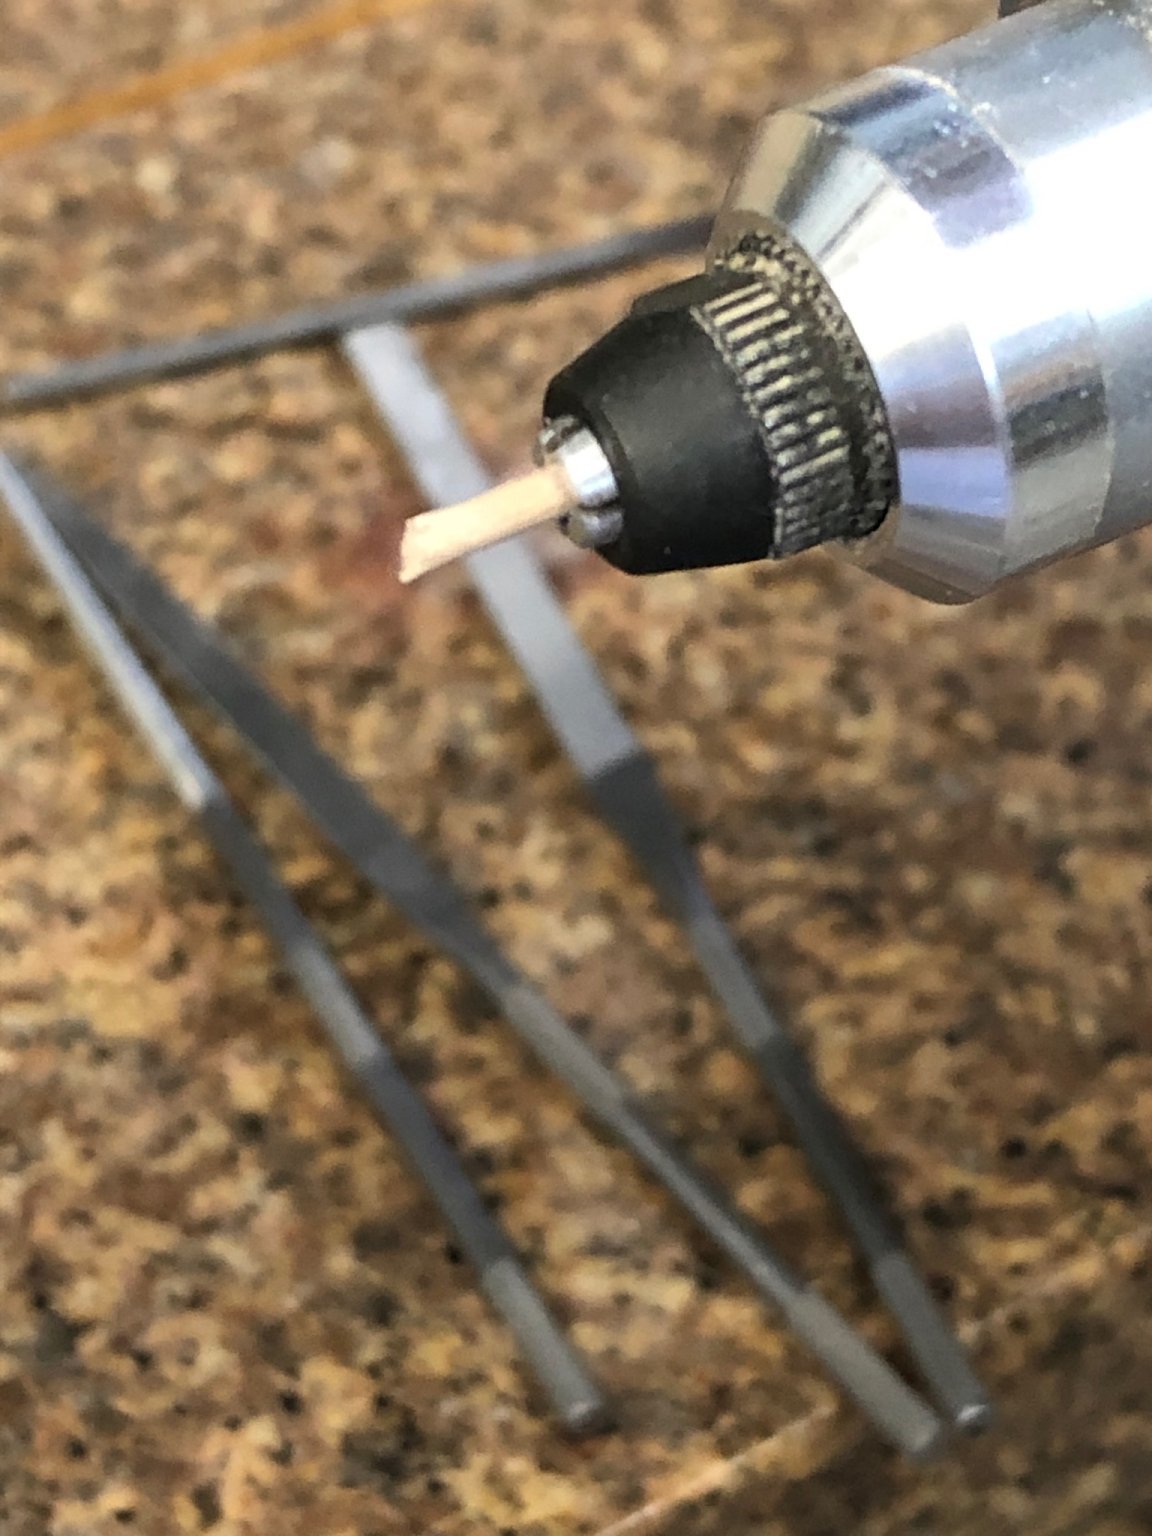
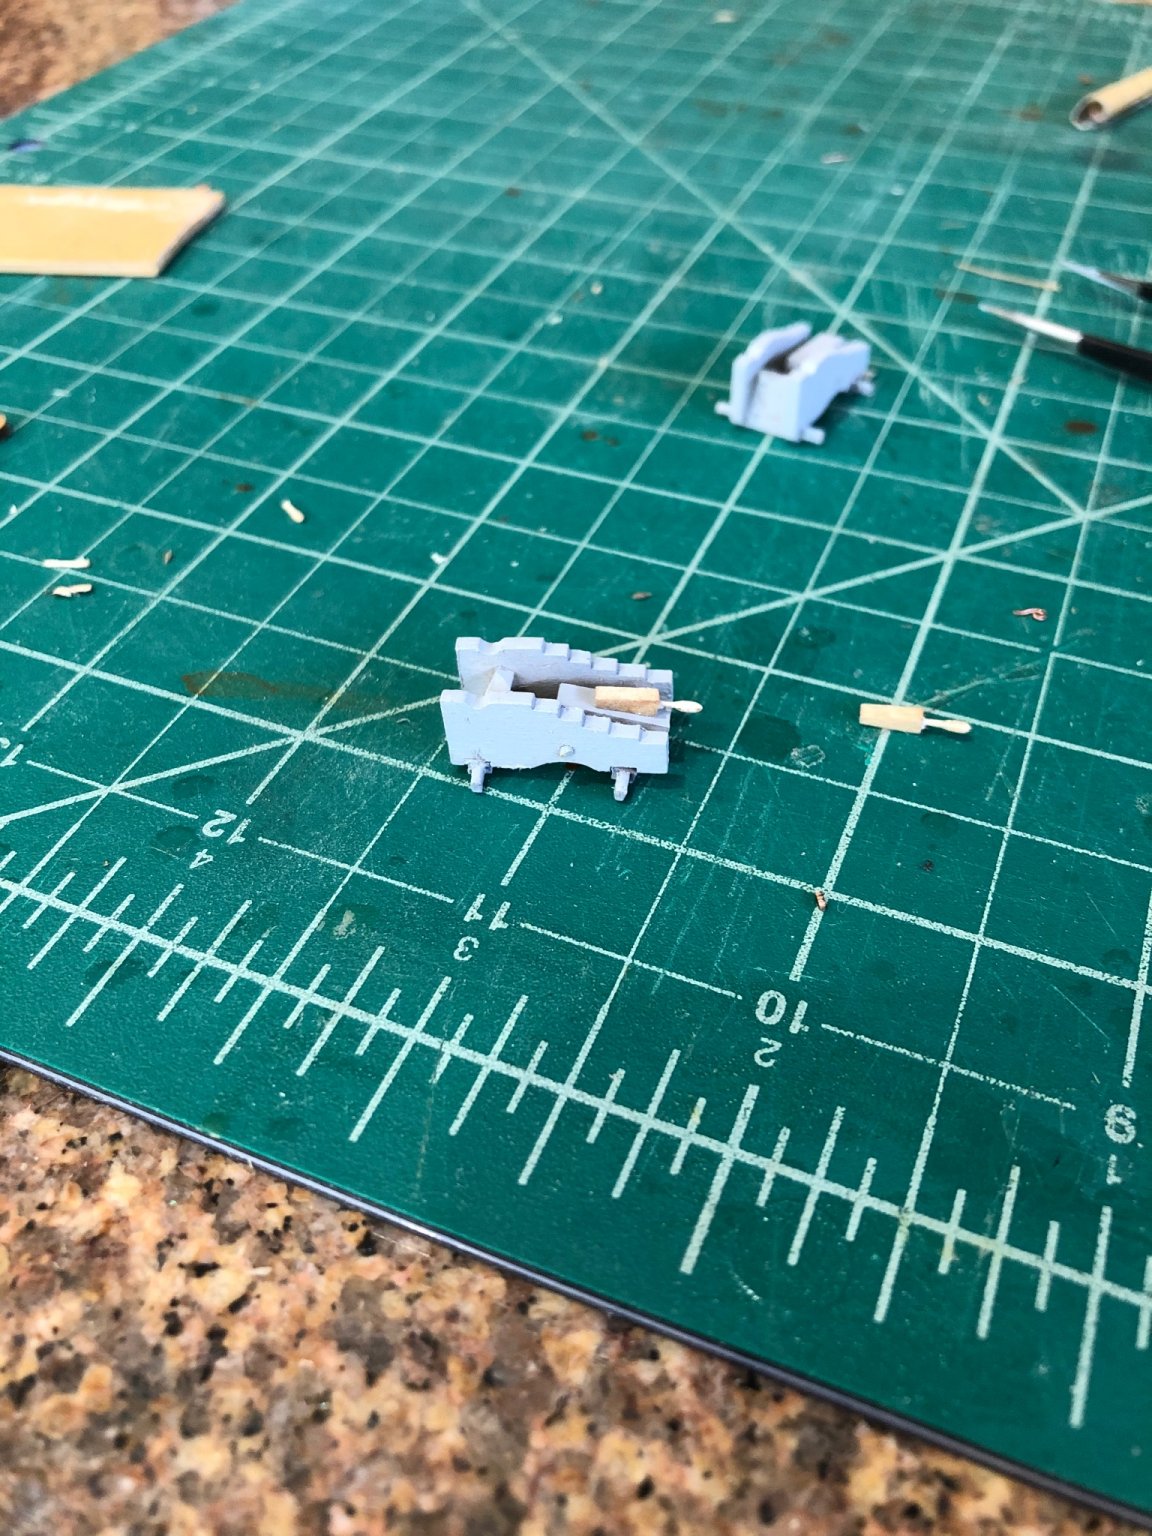
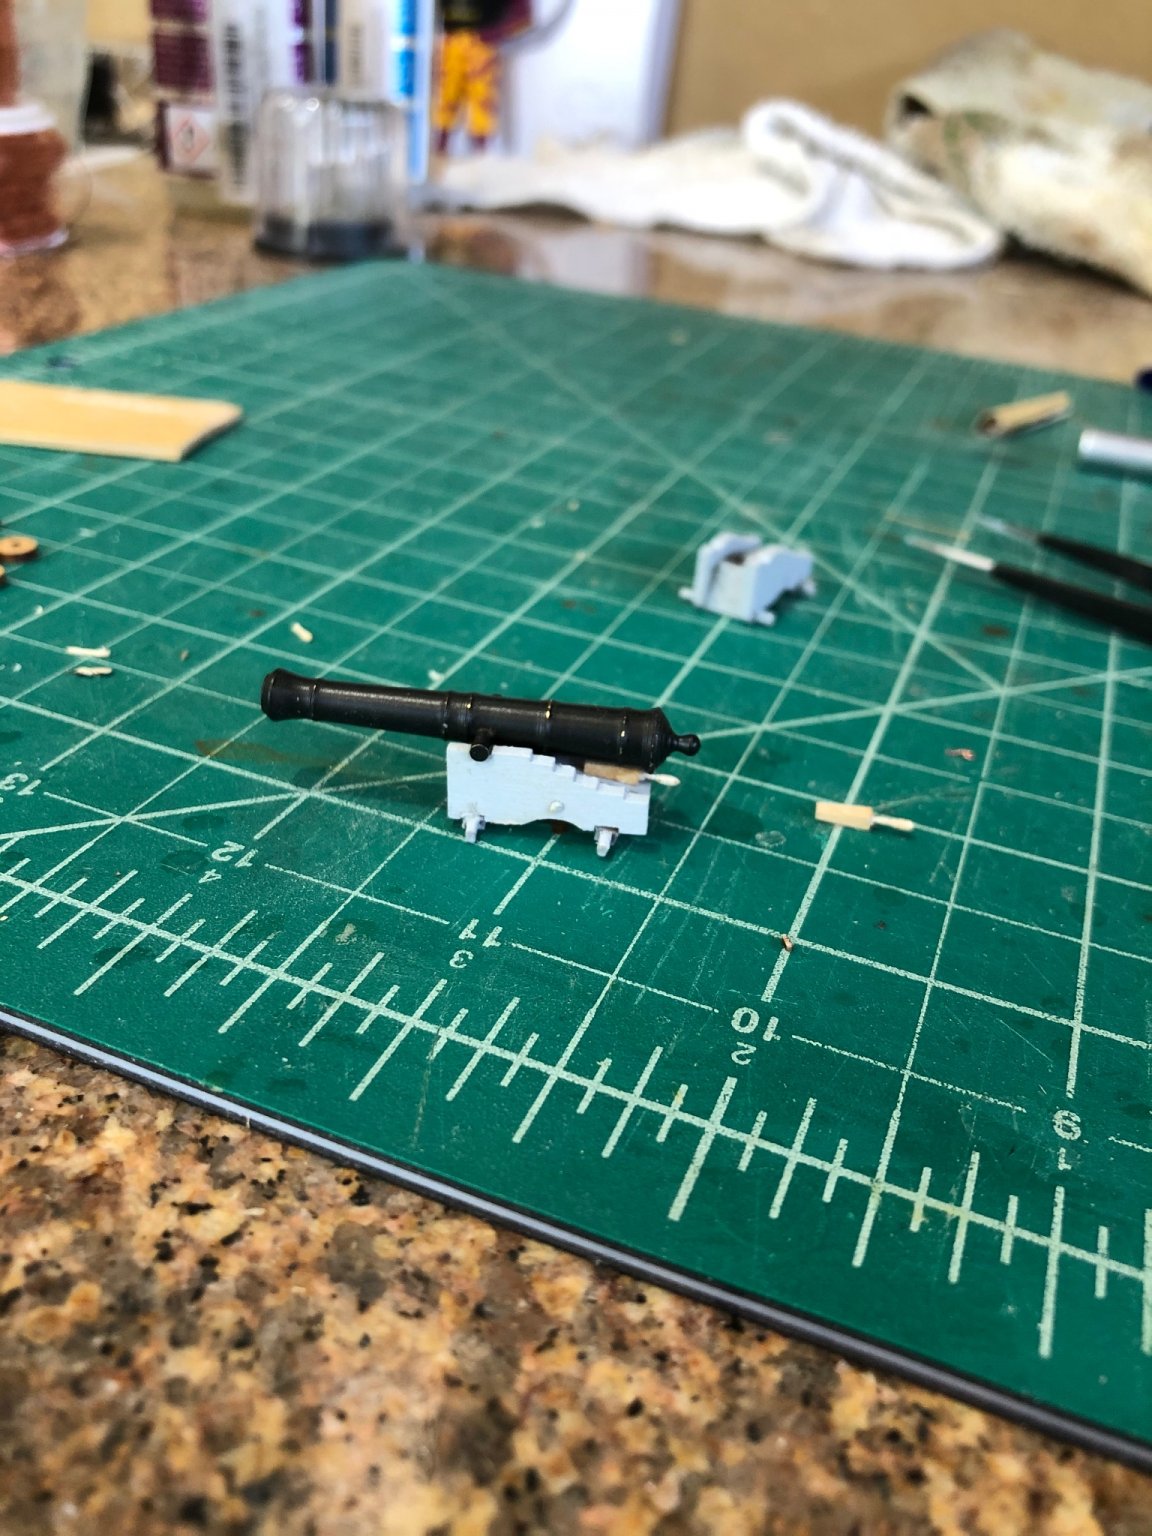
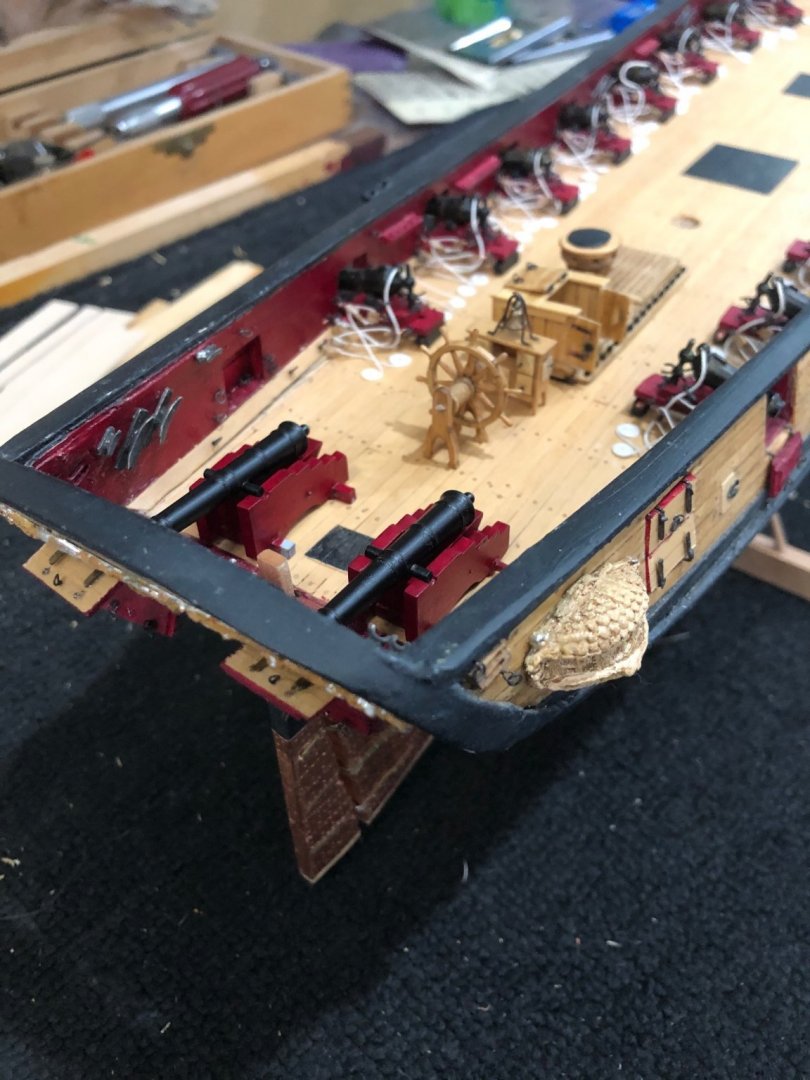
 Thanks for the comments and likes it keeps me motivated. I discovered a problem with the cannon carriages from Chucks kit. They are too big and intrude into the tiller rigging area so i've gone back to the kit pieces. First step is to remove everything from the boards. I glued the sides, axles, transom and bolster together making the basic shape of the carriage. This made it easier to remove and smooth the char from the edges. In the closeup you can see the char stutter (my description) and assembled it was easier to keep everything evenly smoothed. The char removed and the axles rounded for the wheels to be fitted. Next I glued the stool bed (there description) and inserted a 1/32th brass rod. When all this had dried it was time to paint the primer. I borrowed using automotive rattle can primer method from David Antscherl. It makes a nice surface for the paint to adhere. Sprayed the parts in my makeshift spray booth (cardboard box outside) and left to dry. While drying I made the quoin handles again using toothpicks. (great wood) Paint dried had to see how everything looked While paint drying I removed the char from the trucks again using toothpicks. The manual says the trucks are two sizes larger in front but trucks in my kit are all the same size so I might use the trucks from Chucks kit. Red paint starts tomorrow Stay Well and Stay Safe Will
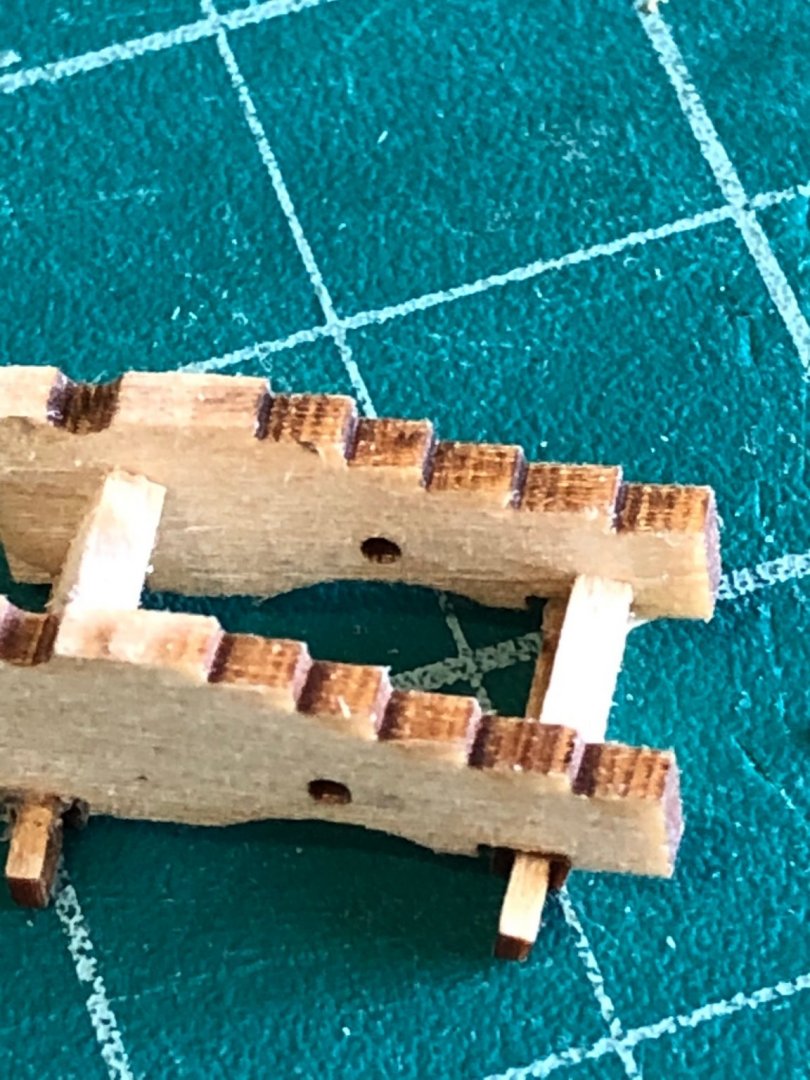


-
Glenn I can't stop reading its like spell binding novel so I'll pull ip a chair and follow along as the story develops with all its twists and turns. Now I'll go back to page 7. Thanks for the wonderful narrative and photos explaining your work. Which is amazing by the way. Stay Well and Stay Safe Will
- 778 replies
-
- 3
-

-
- cheerful
- Syren Ship Model Company
- (and 1 more)
-
I feel like I just read the last page of a book. She's fantastic. Great work. I'm following along but I started reading the log and have gotten to page 7 so that's the feeling of reading the last page. Looking Great I have the starter kit on order waiting for delivery so I really enjoy your log and read the monograph as I go along. Stay Well and Stay Safe Will
- 778 replies
-
- 3
-
-
- cheerful
- Syren Ship Model Company
- (and 1 more)
-
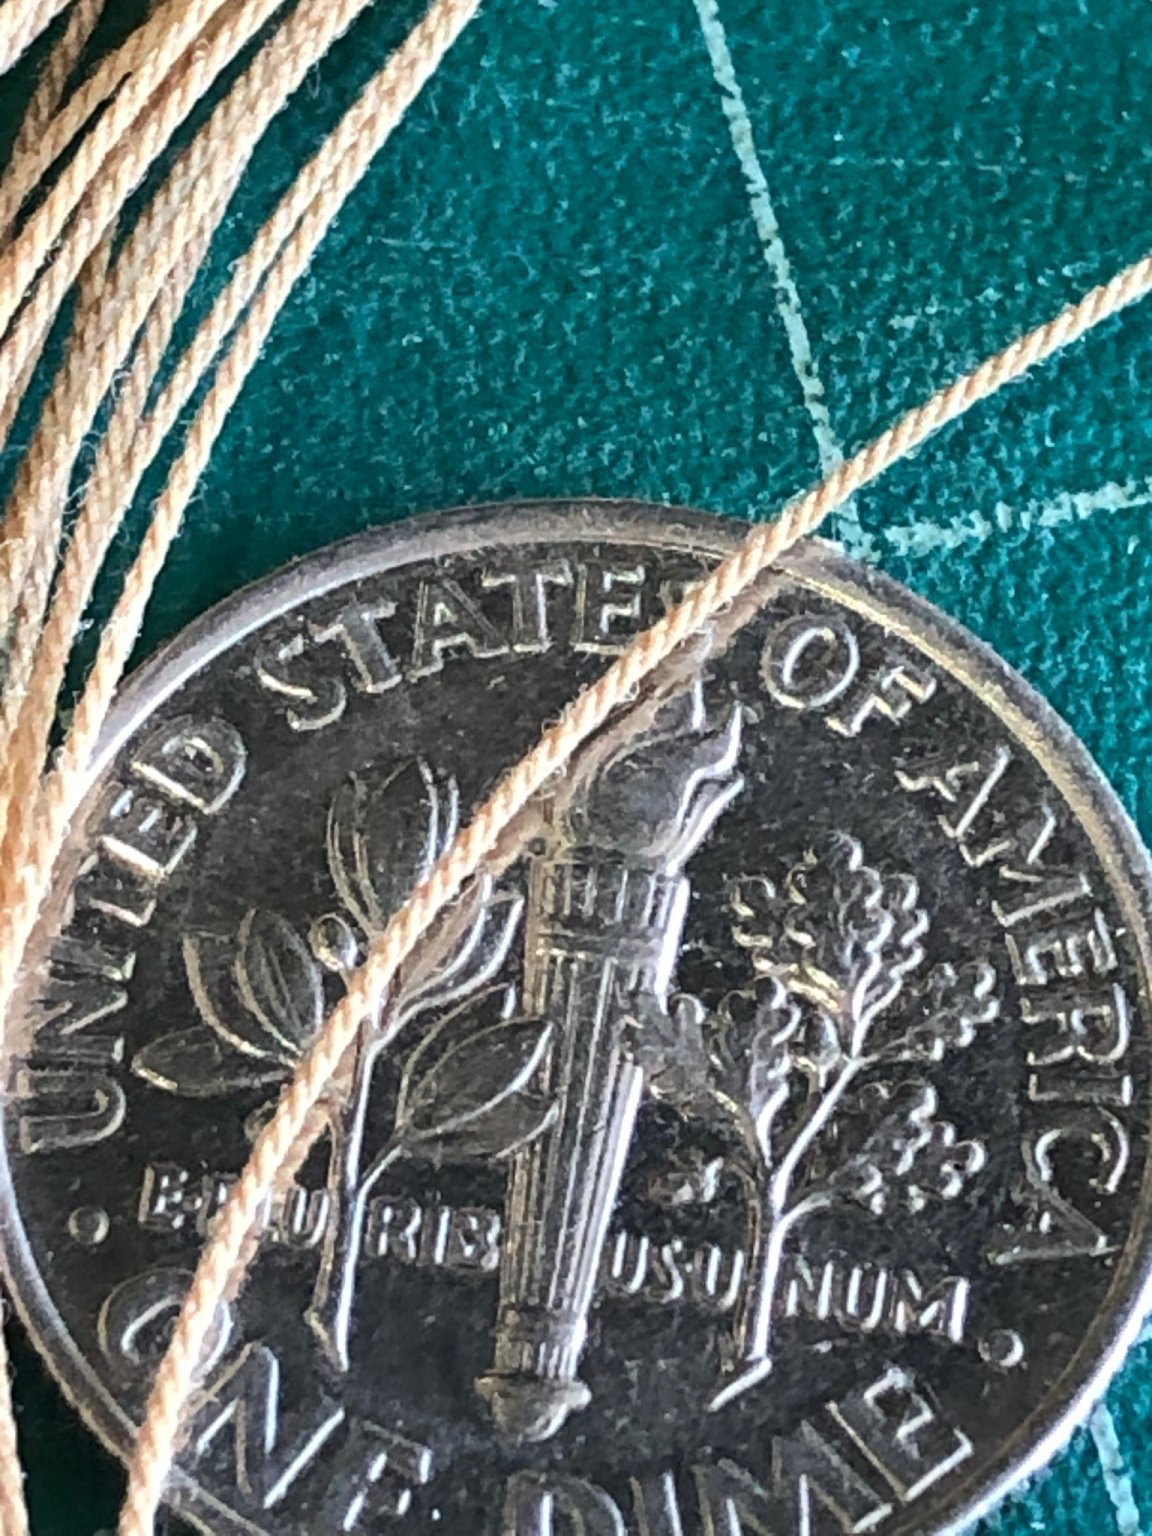
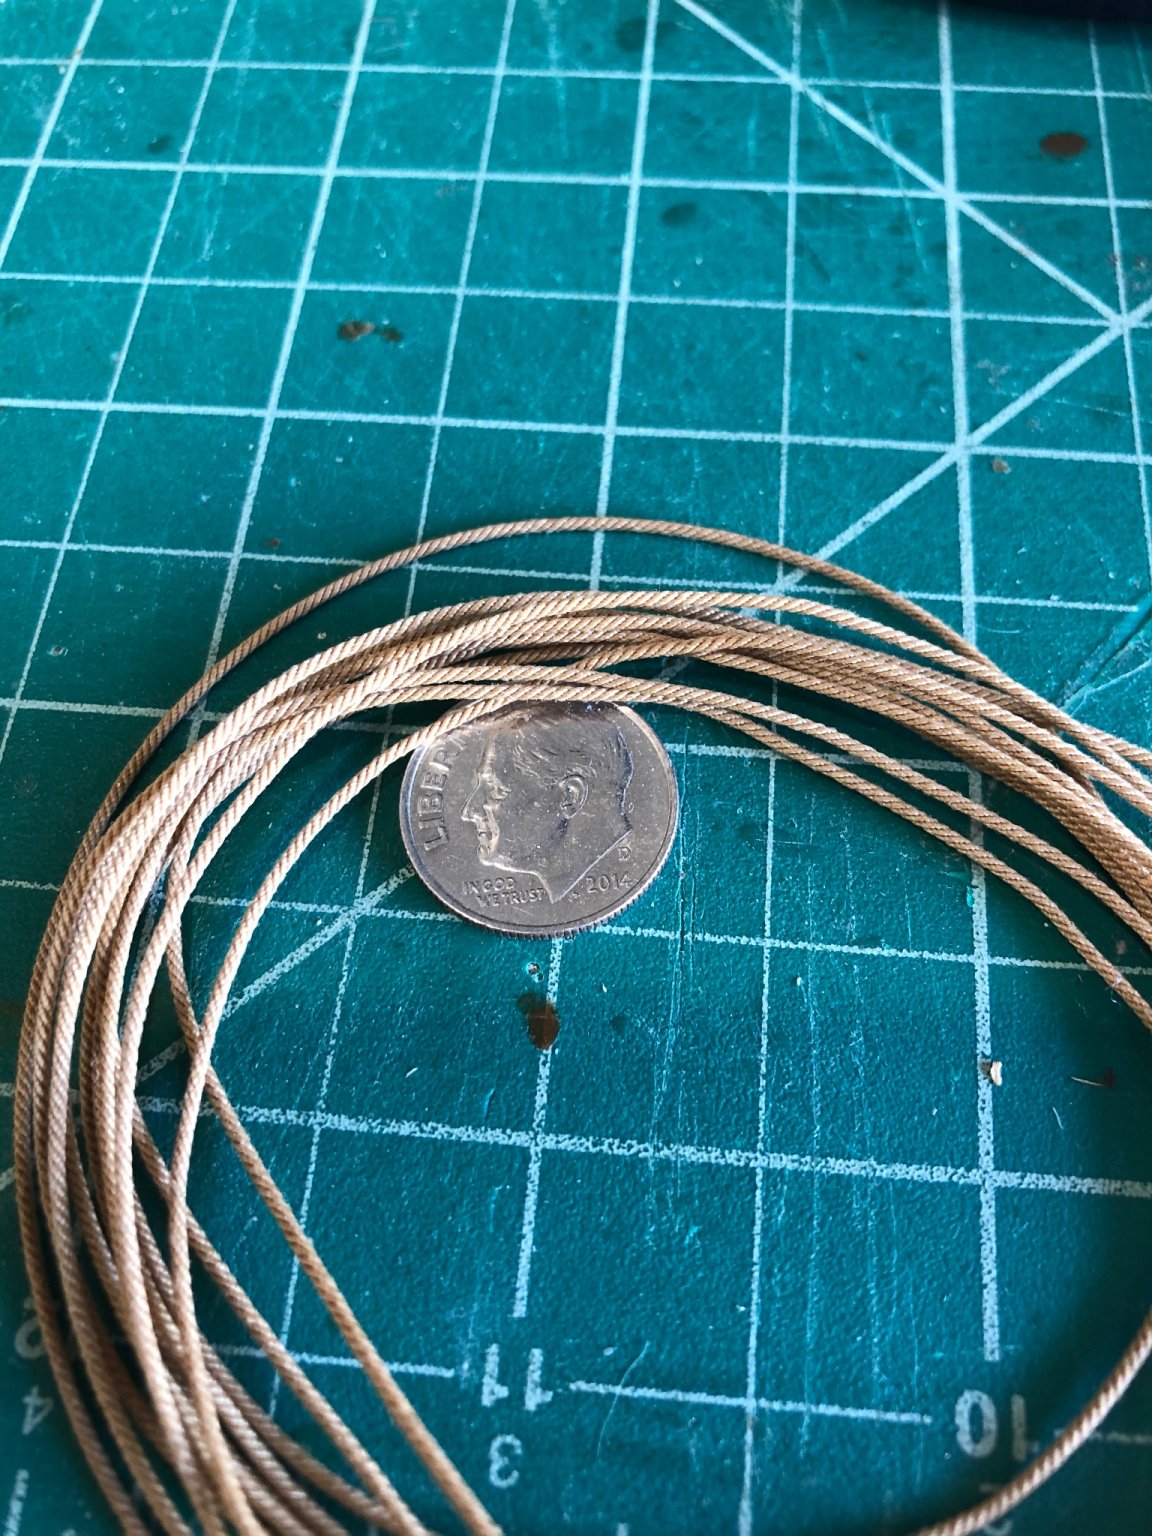
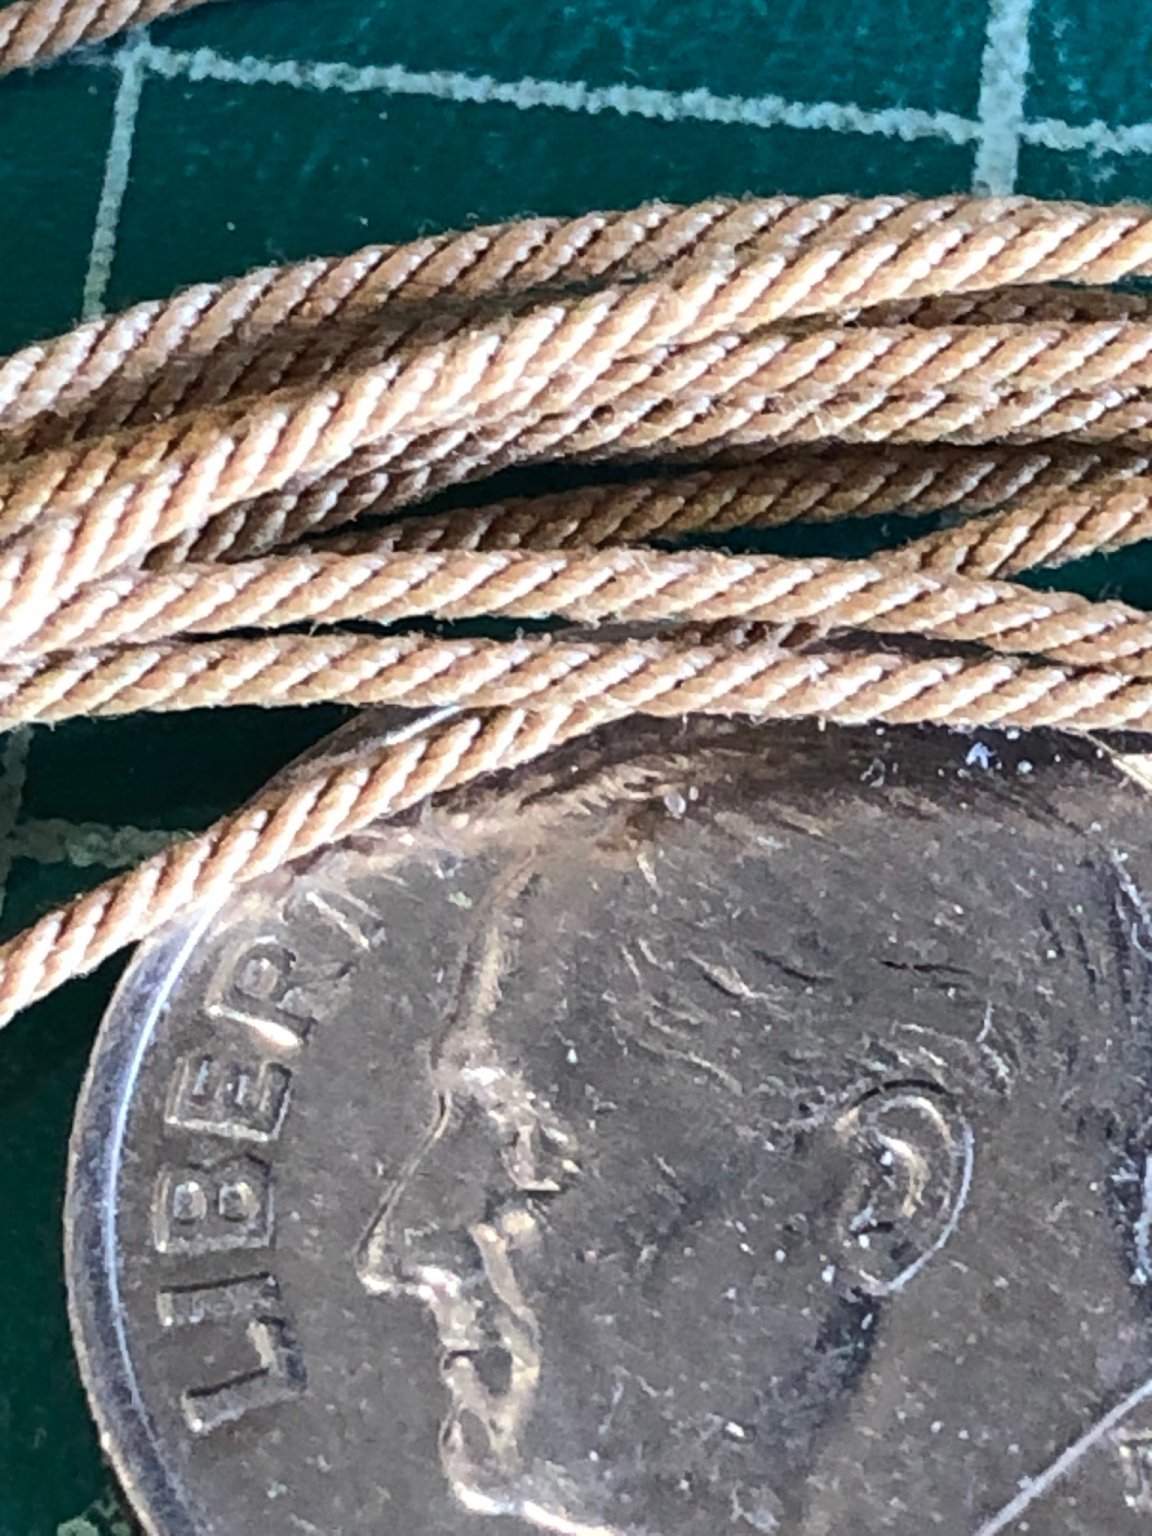
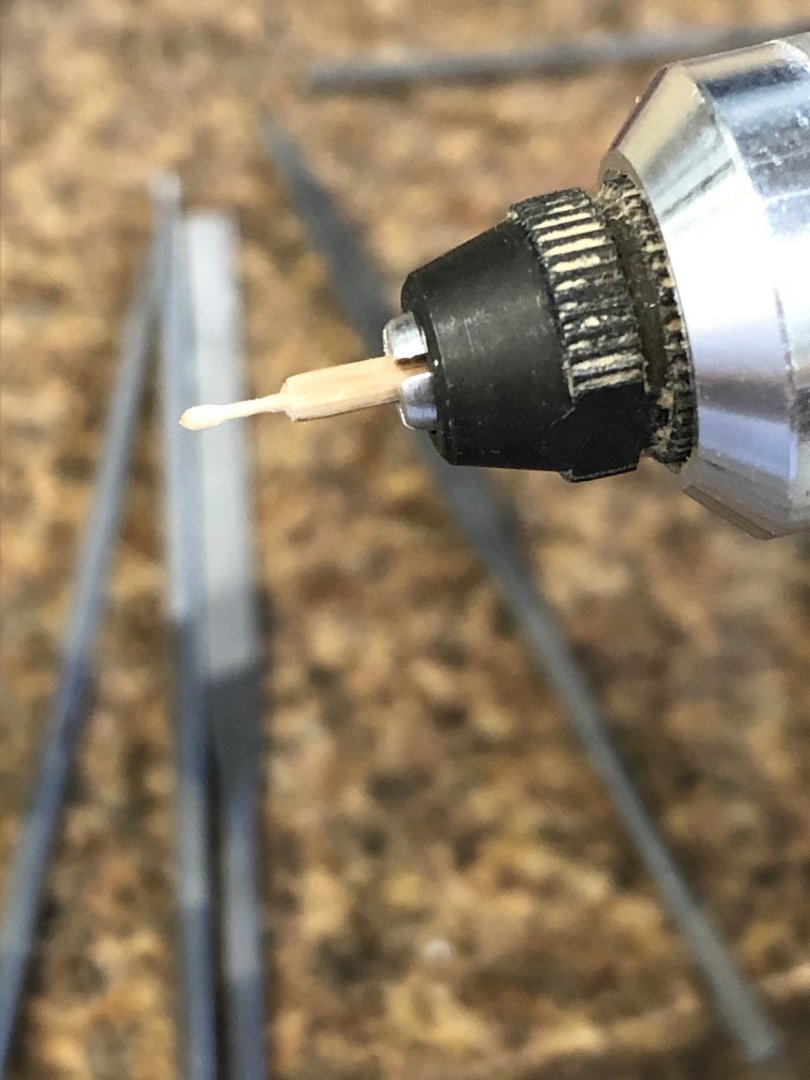
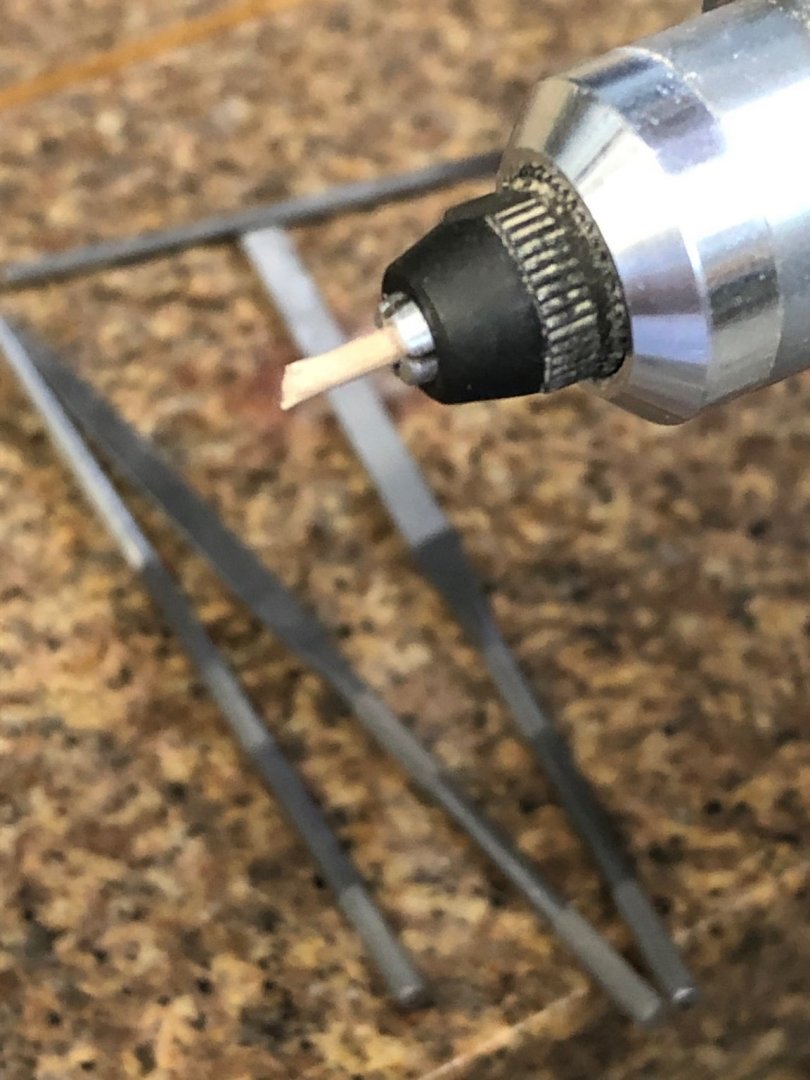
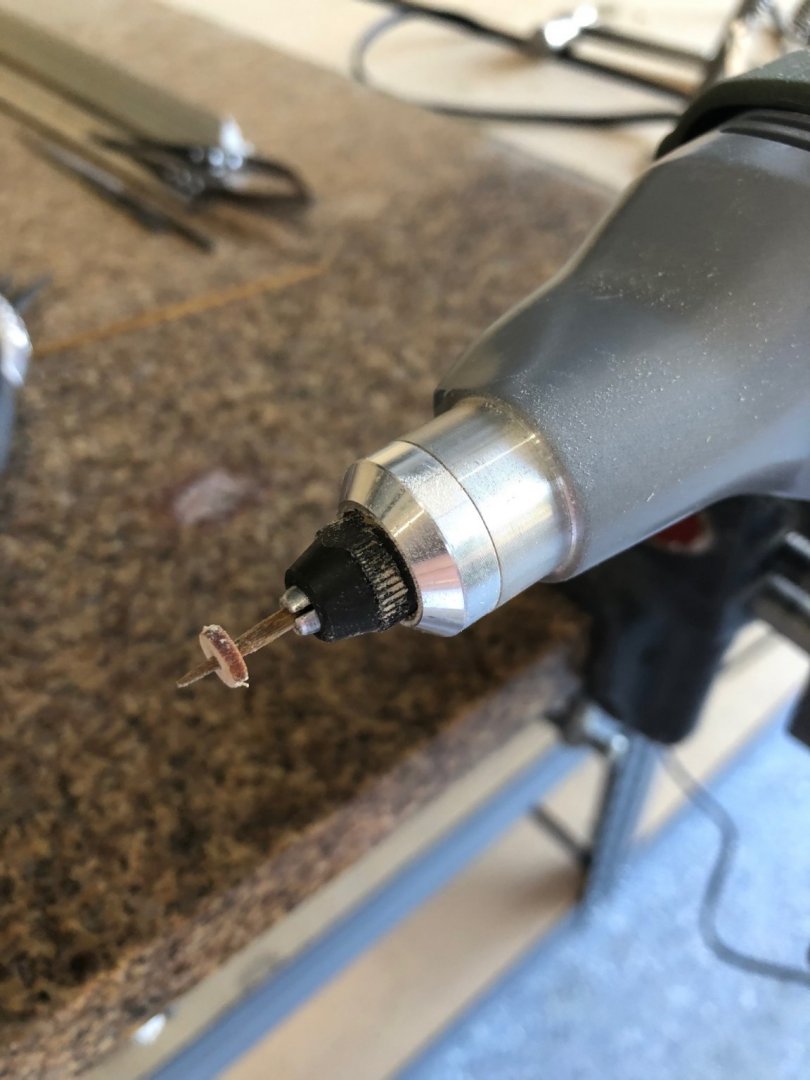
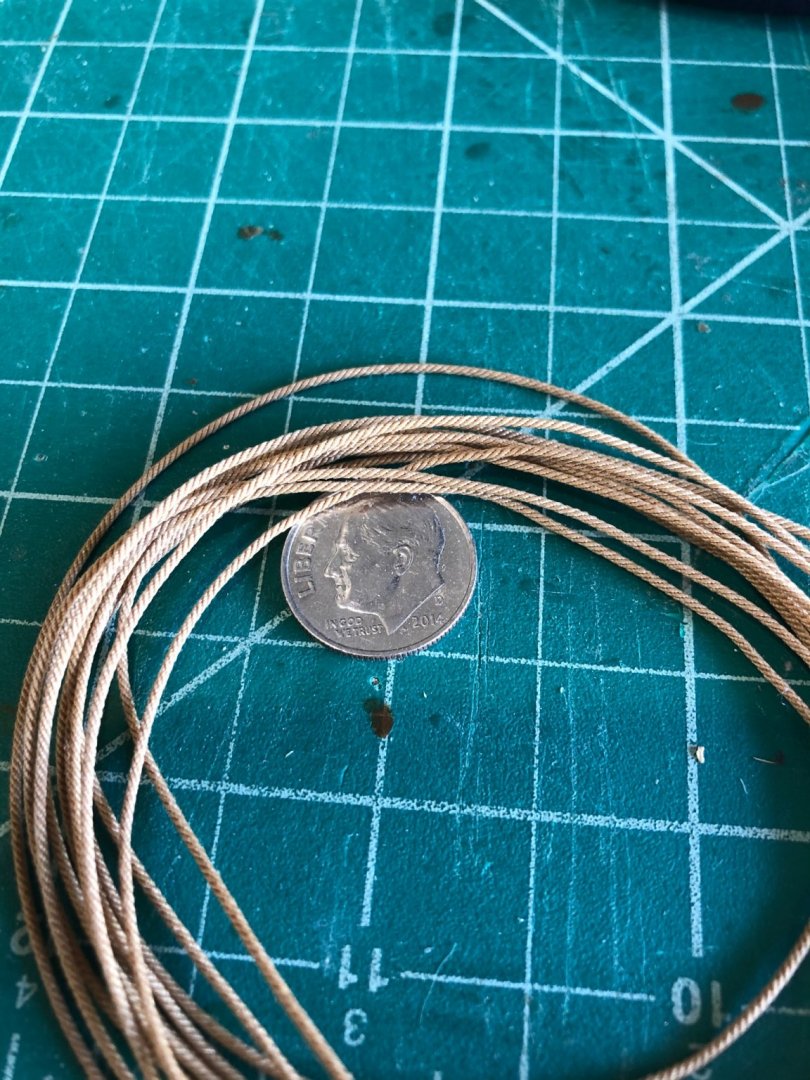
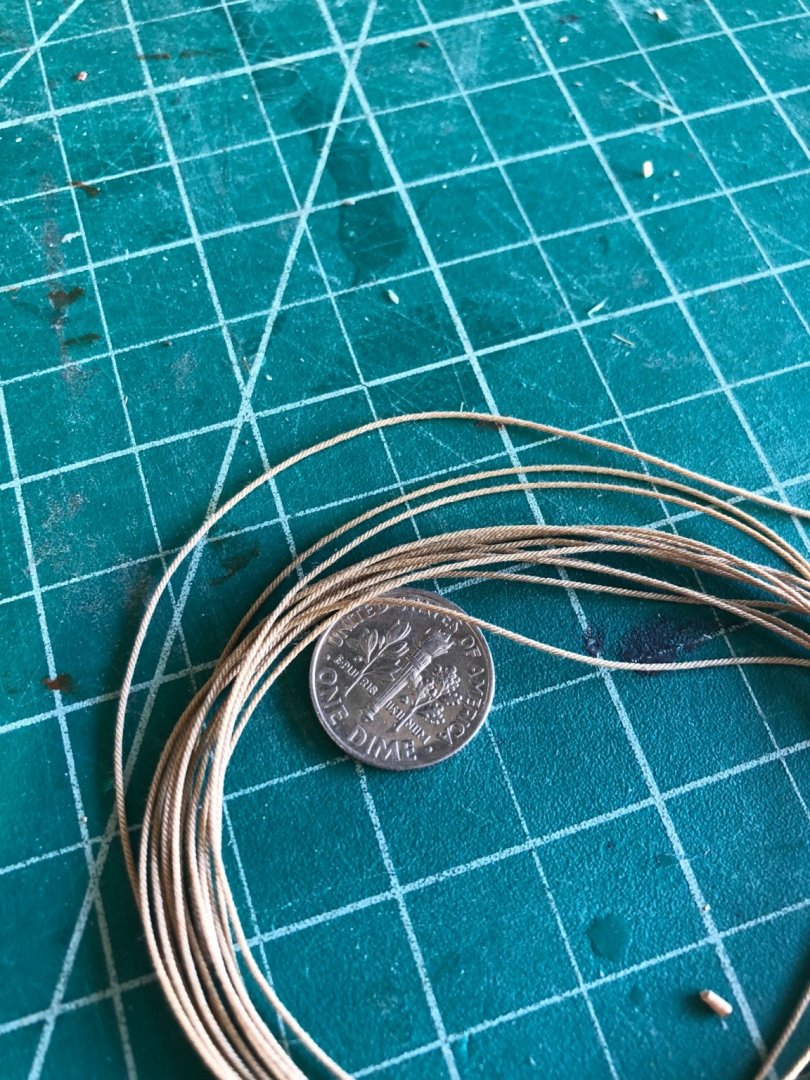
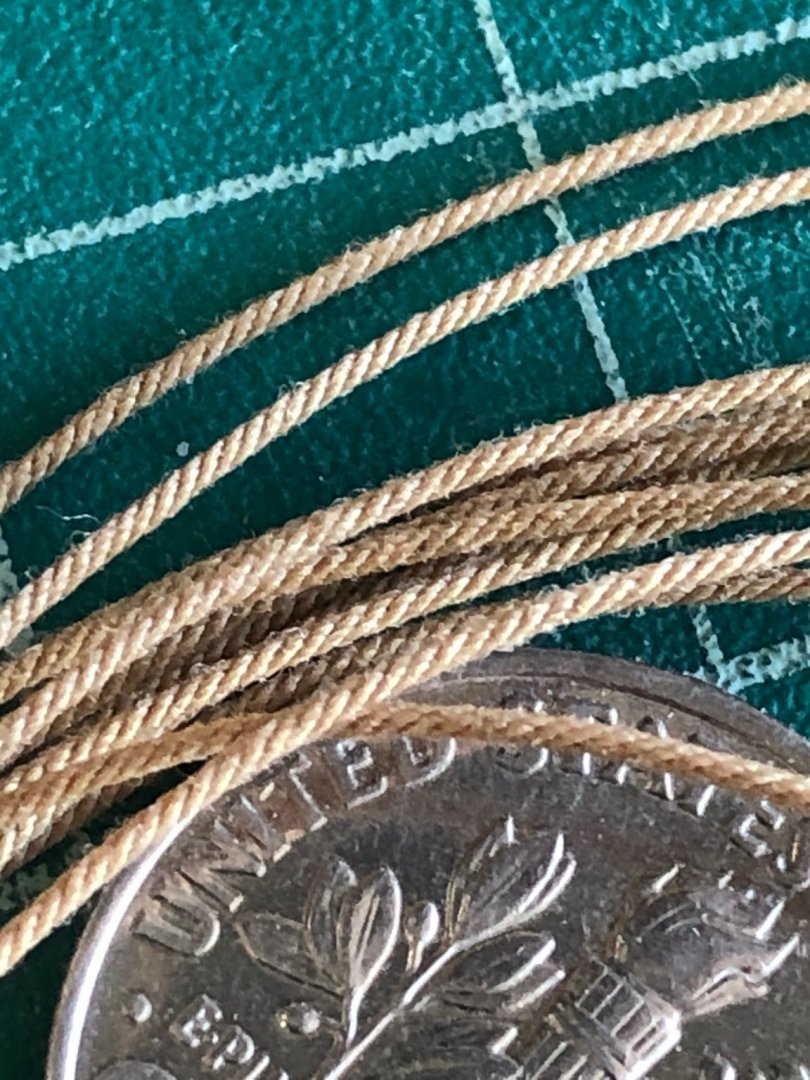
Made some sample rope using the Mara polyester thread and Chucks recipe for sizes and baking. I had to bake at 375 degrees in my toaster oven to get a fixed rope. Many thanks to Chuck Passaro for the Rope Rocket and Serv-O-Matic. I can't recommend them enough they are great tools to have. I made 3 sizes of rope The first used 3 strings of Mara 120 to make .008 rope The second used 3 strings of Mara 70 to make .020 rope The third used 4 strings of Mara 30 to make a .028/9 rope This rope is fantastic to handle keeping a shape and no fuzzy. I'll be using this in the future. Stay Well and Stay Safe Will


-
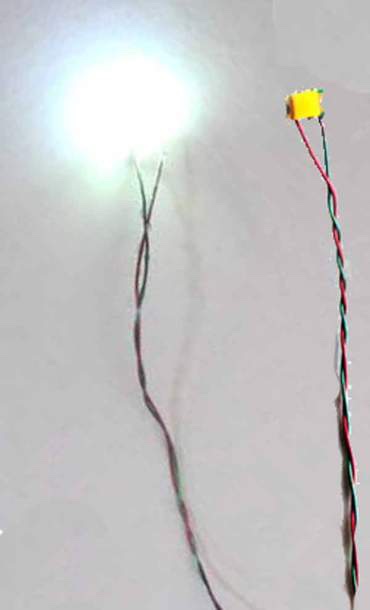
Its looking good except for those holes in the bottom 🤔 hee hee. What are you building in the backyard? Also back to the leds did you ever find how to dim them? If you still need to work on the lights I found this at a HO railroad shop and they were really great being used as street lights etc. They are micro chips all the way down to a nano size and their web site is www.evandesigns.com Stay well and Stay Safe Will
- 101 replies
-
- 1
-
-
- emma c berry
- model shipways
- (and 1 more)
-
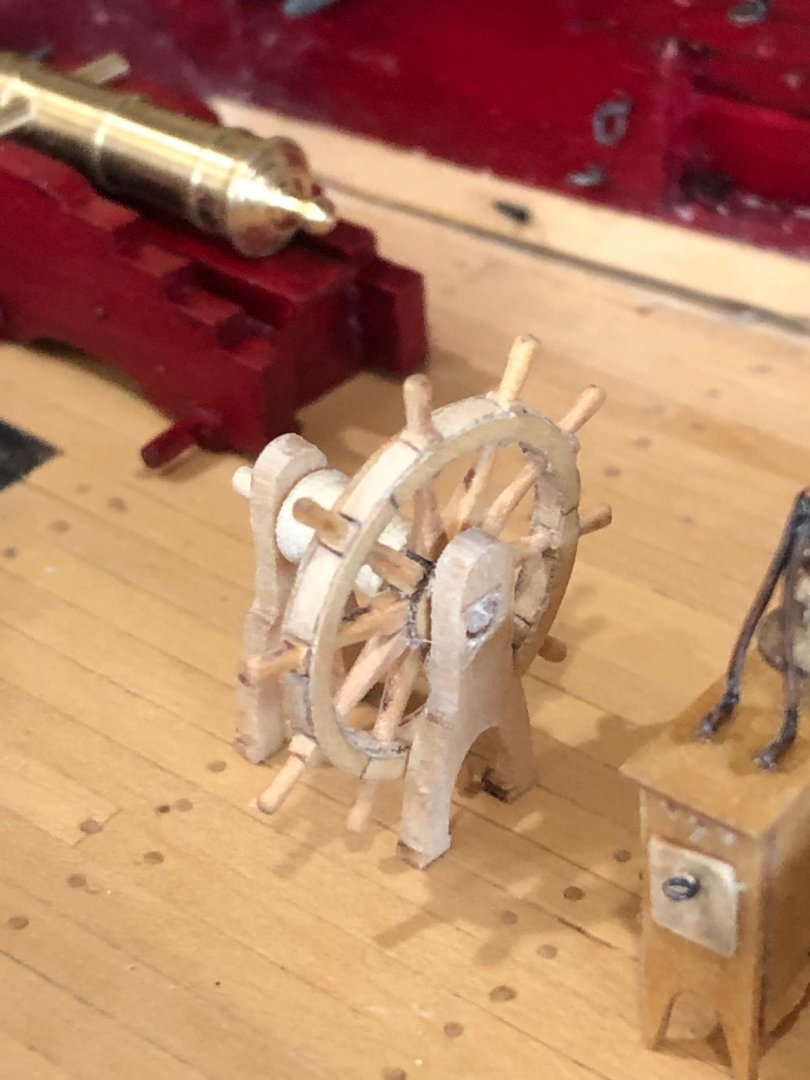
Completed the wheel assembly, cannon carriages and cannons. I must say that the Syren steering wheel mini-kit is fantastic. I really enjoyed working with this wonderful project all the parts fit perfectly without and modifications except removing the char. The hardest part was turning the spokes but with so many extra I made them all and the last were better than the first. Spent a large amount of time sanding the wheel so the stain would be a consistent color. Finished painting the cannon carriages now only need to radius the axles on one more carriage. Need to make the pinion straps holding the cannons in the carriages and the rigging rings. Painted the cannons and letting the paint harden before any handling. Stay Well and Stay Safe Will

-
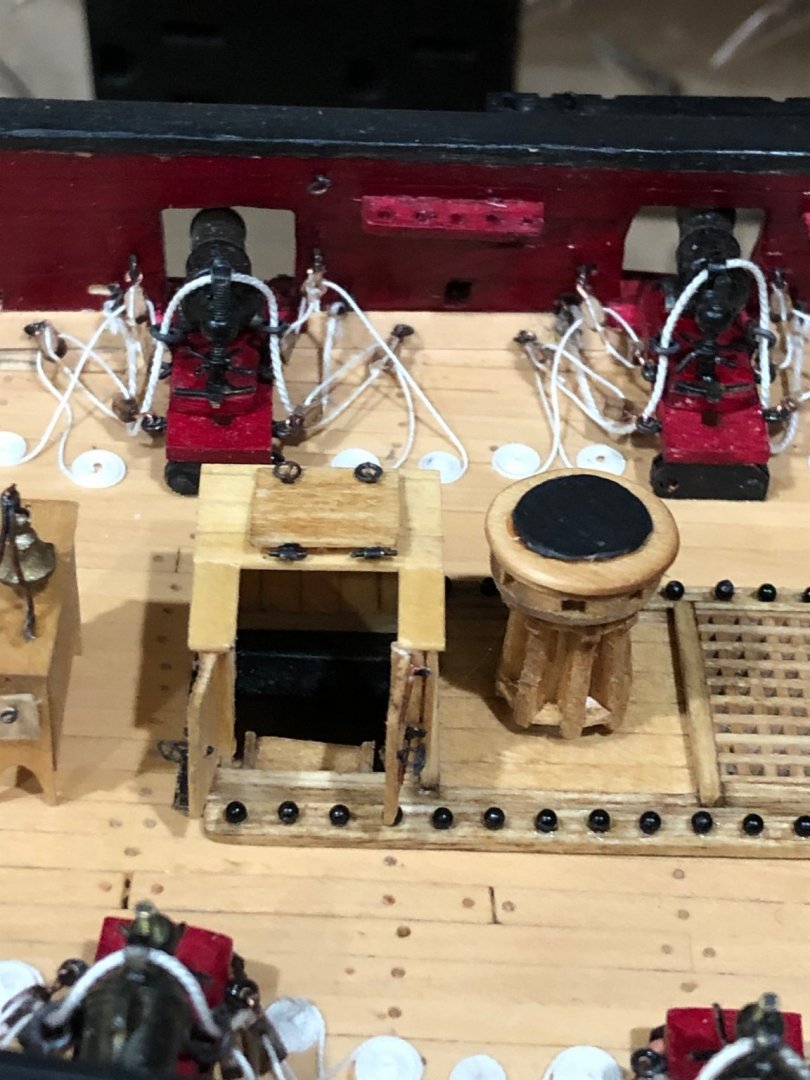
Well I couldn't wait for tomorrow to see if the companionway door was crooked. It was the camera angle and slightly off to the left on the bottom. I removed the door and reattached in the correct orientation. Cameras never lie. 🥵 Again cameras don't lie Stay Well and Stay Safe Will
-
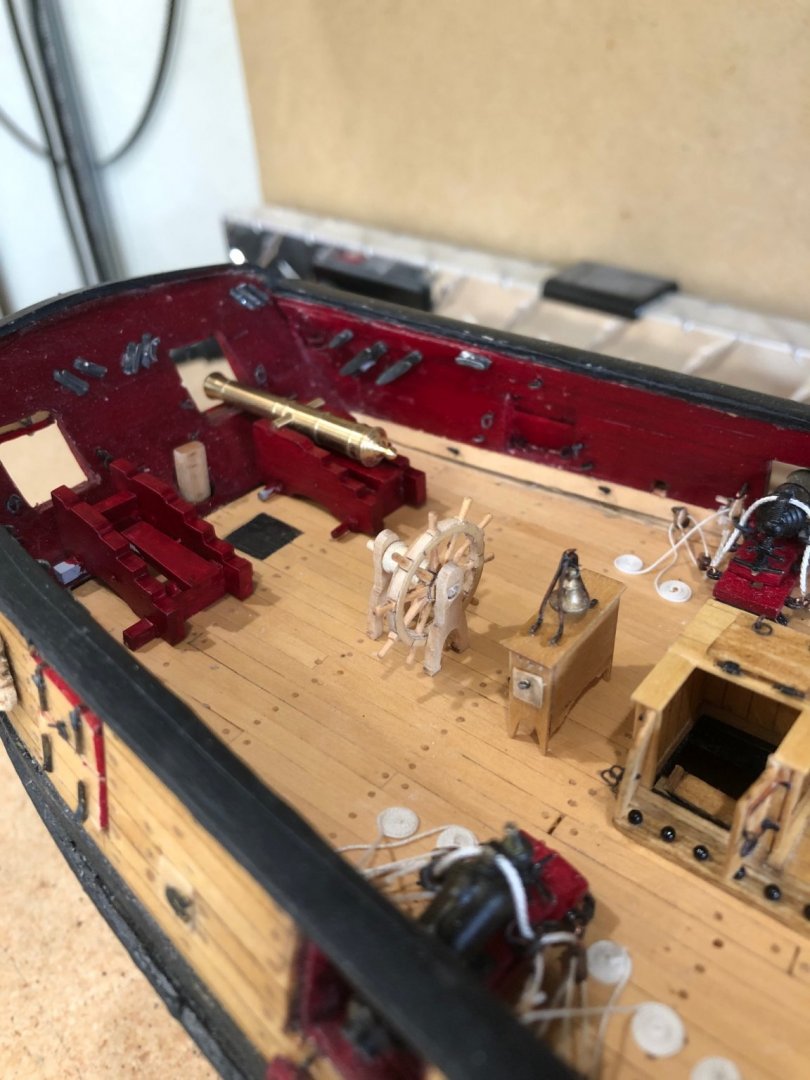
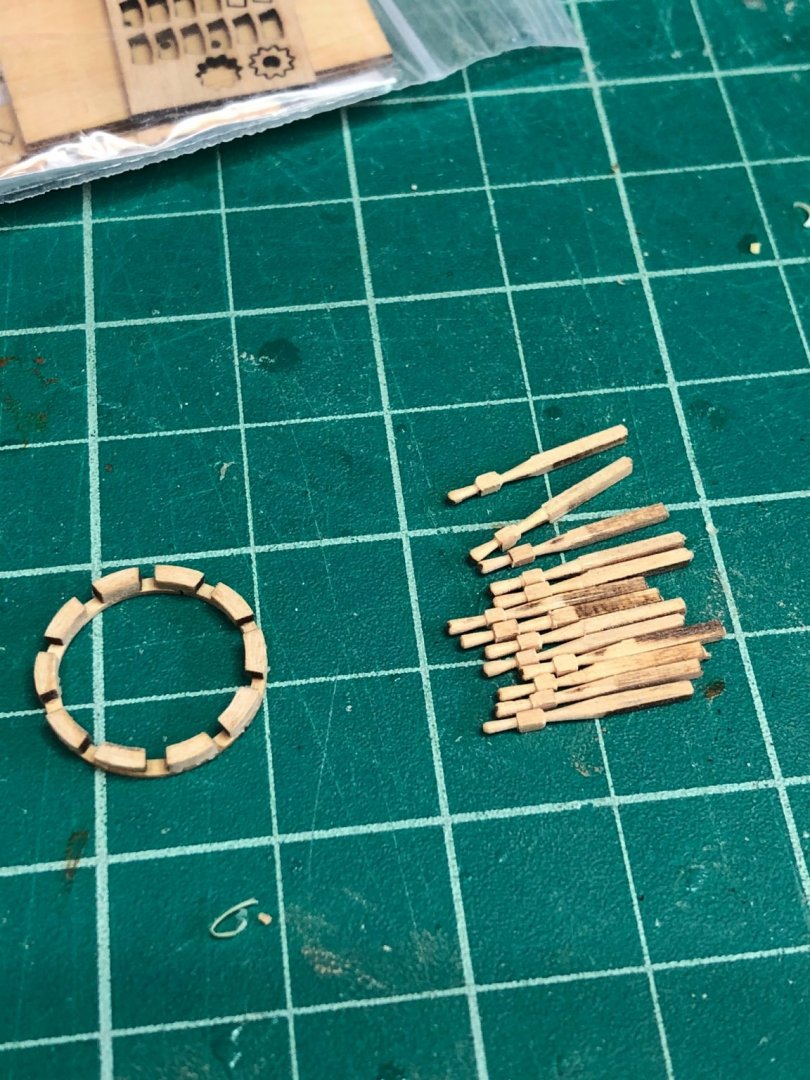
Thanks everyone for the likes and looking in on my progress. Finished the ships wheel assembly and the basic sanding getting ready for staining. All the worry and trepidation about putting the spokes in the center hub and the outside ring was for naught. Having so many spare spokes I decided to try my 80 year old eyes and hands a go to assemble the wheel. I sort of followed Gahms method but didn't use paper instead I glued the outer ring to the jig with lepage white glue. It's water soluble so it came right off with just a drop of water and 5 minutes waiting. Used a pointed toothpick to hold the center star in place with the jig hole. Went in and had lunch. When glue dried turned over the wheel and glued the outer ring sections and again the toothpick for the center disc. A lot of delicate sanding and more to go. Cleaned the char from the wheels' support legs and sanded them for staining, still need to soften the edges of the supports before staining. I used a 3/16" rod to turn the rope drum to 5/32" leaving the ends at 3/16" rather than centering and glueing the furnished discs. While in the lathe drilled a hole in the center for a toothpick to press into with the wheel and drum able to rotate through the support legs. Dry fit everything and set on the deck to admire my work. My hands still work on these tiny pieces but I did learn I need new/better tweezers my old ones keep twisting on the part being held. I gotta go back and check the companionway door I know its straight maybe the camera angle but I will go check tomorrow. More finish sanding but I'm pretty happy with the results. Stay Well and Stay Safe Will
-
Again the foot ropes drape is great and thanks for the liquitex medium formula. Stay Well and Stay Safe Will
- 950 replies
-
- 1
-
-
- syren
- model shipways
- (and 1 more)
-
Nice job on making shackles Stay Well and Stay Safe Will
-
Your bands look amazing I like you method of halves and soldering them together. I'm anxious to hear about the jewelry bits you ordered. Looking good mate. Stay Well and Stay Safe Will
-
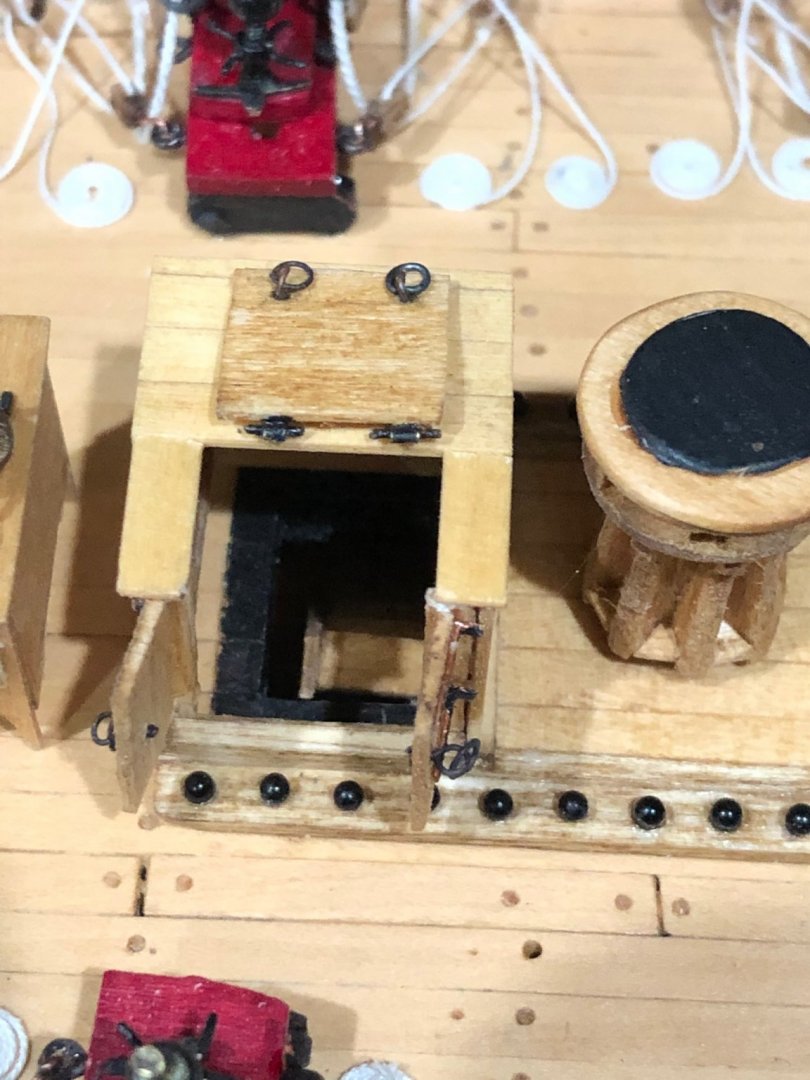
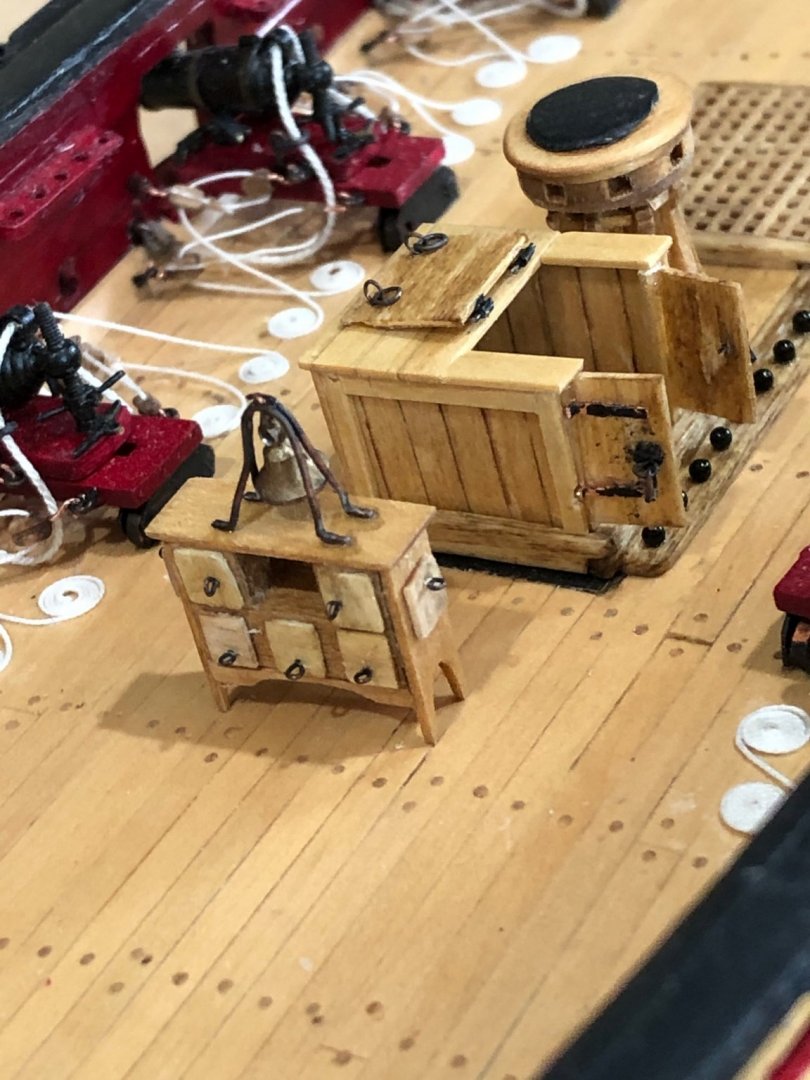
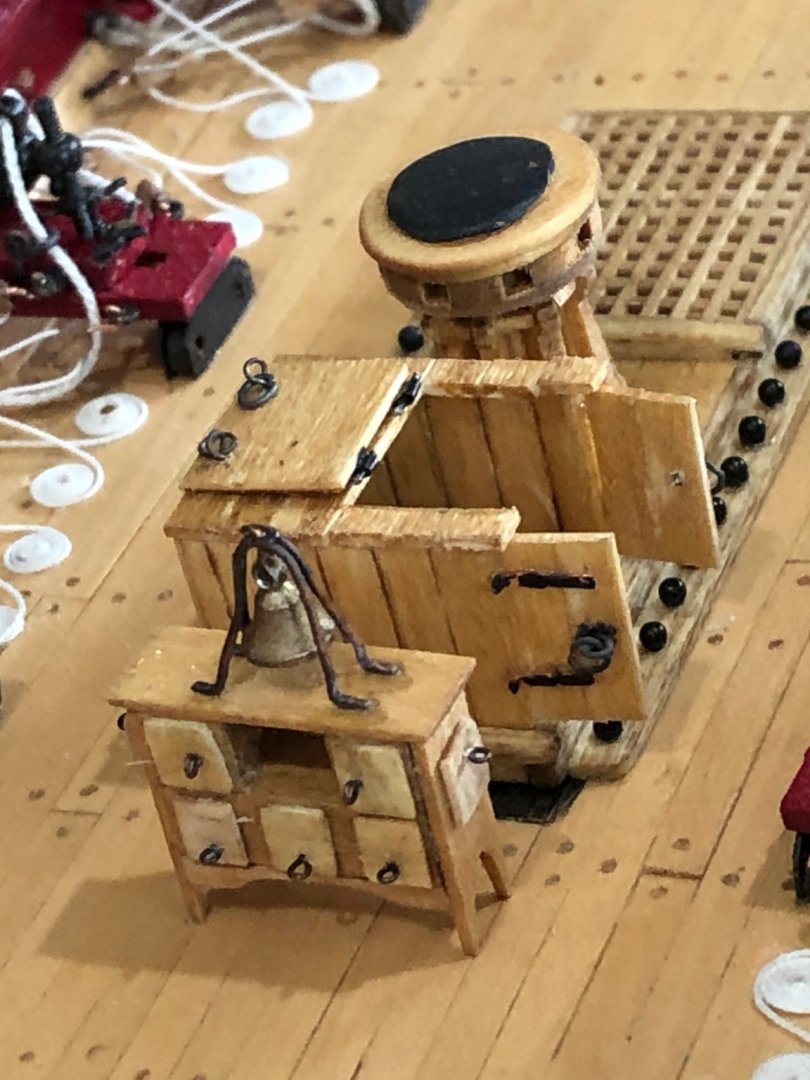
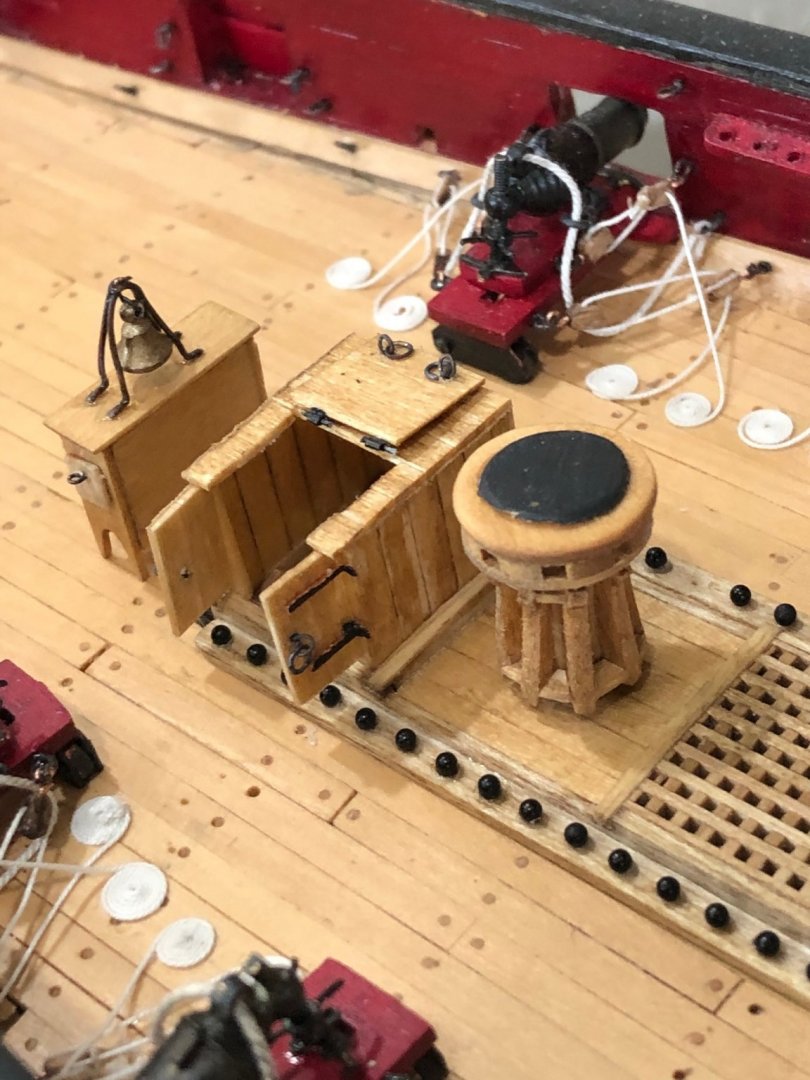
I wasn't happy with how the companionway looked the planking appeared to big and the stain was mottled in color so I went back and looked at several logs to see how others had made their companionways and decided to make modifications to mine. I didn't like how the roof edges were finished so I took the roof off and made a new roof out of alaskan yellow cedar. The plans call for planking of 1/8" wide but at scale that would be a plank of 8" wide so without changing the side I added a moulding framework around the perimeter as others had done. It visually took away for the wide planks so I was happy with the result. Here is the new companionway with modifications and cleaned up stain. The photo tells all and I also finished the binnacle with the bell I started the long gun carriages from Chuck. They are a pleasure to put together as the laser cutting on the hardwood is much better than the basswood. I got the primed and the first coat of paint a little sanding and more paint tomorrow. With all the waiting for glue, stain and paint to dry I started the wheel mini-kit from Chuck. I went together easier than I had thought it would. Nice surprise. After turning all the spokes I realized that cutting them to the same length will require some sort of a fixture to lay them in while cutting. I think I have an idea of how to mill out a slot with a perpendicular slit to cut in. We will see tomorrow. I also will have to make a fixate to hold the center hub and outside ring in place while glueing the spokes. Not sure about this yet. More to come Stay Well and Stay Safe Will

-
Great idea! Stay Well and Stay Safe Will
-
Andrew what a great catch and recovery. The planking looks great and seeing the results of your efforts tells me to follow you method of planking. Thanks for your tip about not using a straight taper and following the planking pattern instead of the straight taper. It looks really good before sanding. Stay Well and Stay Safe Will
-
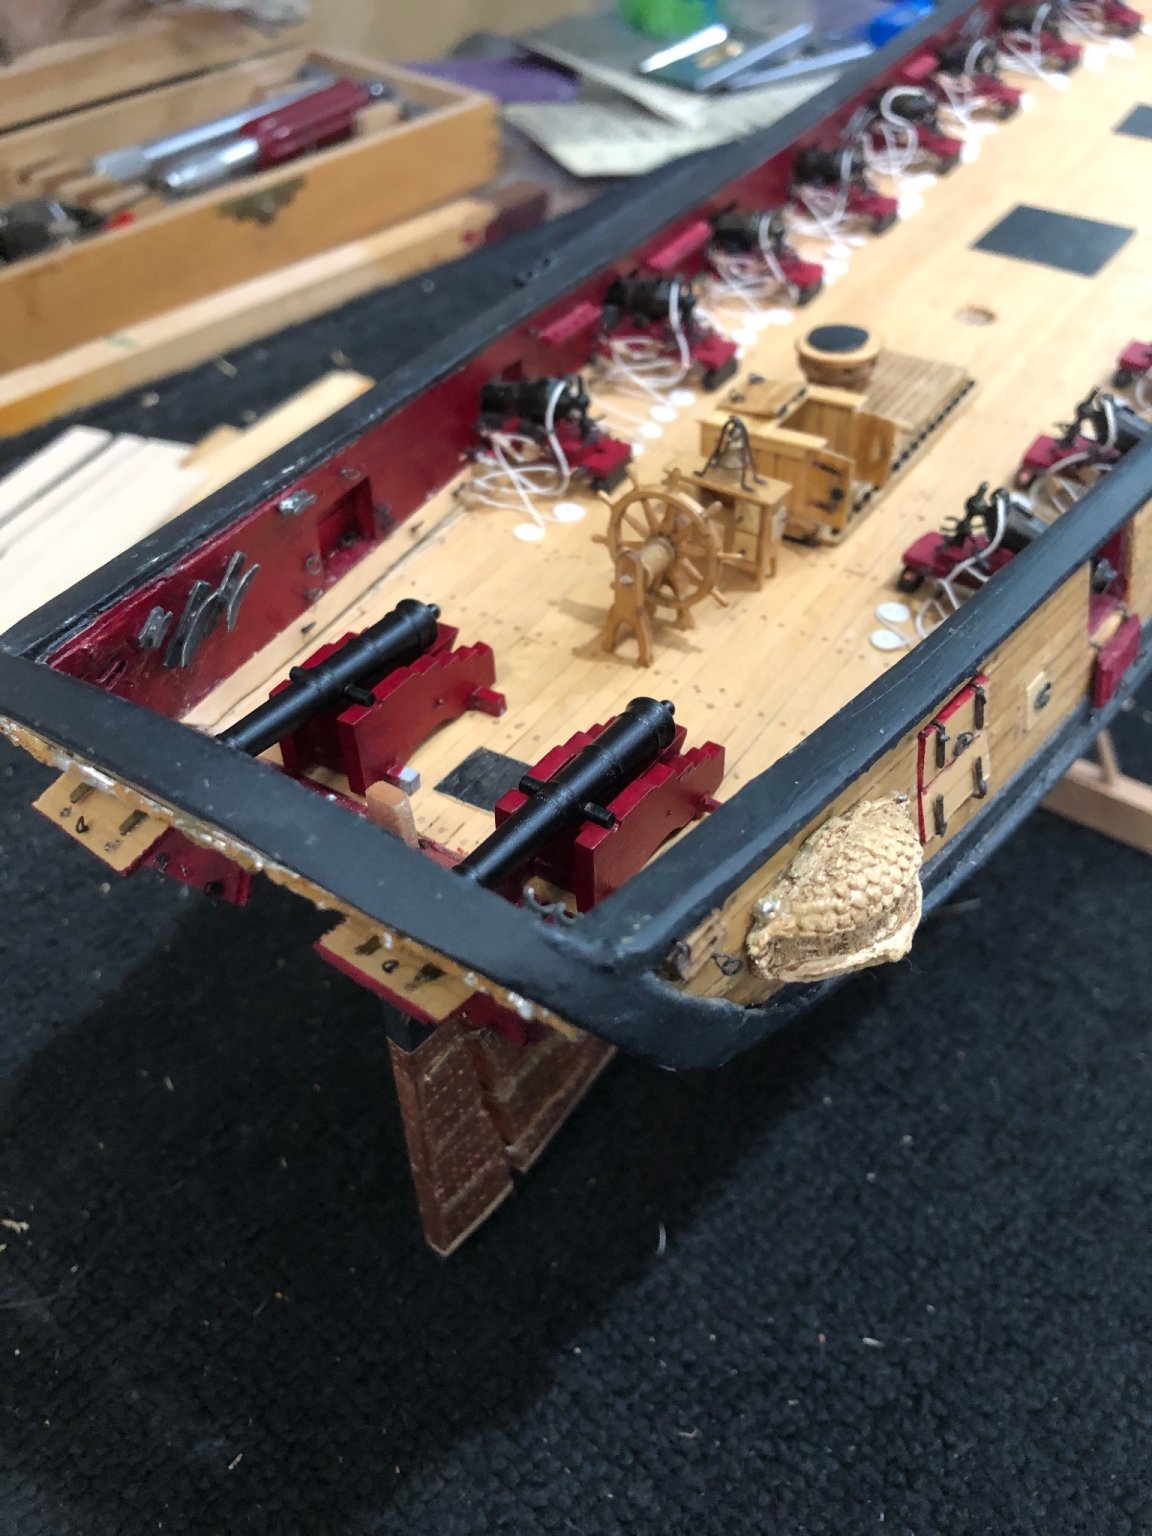
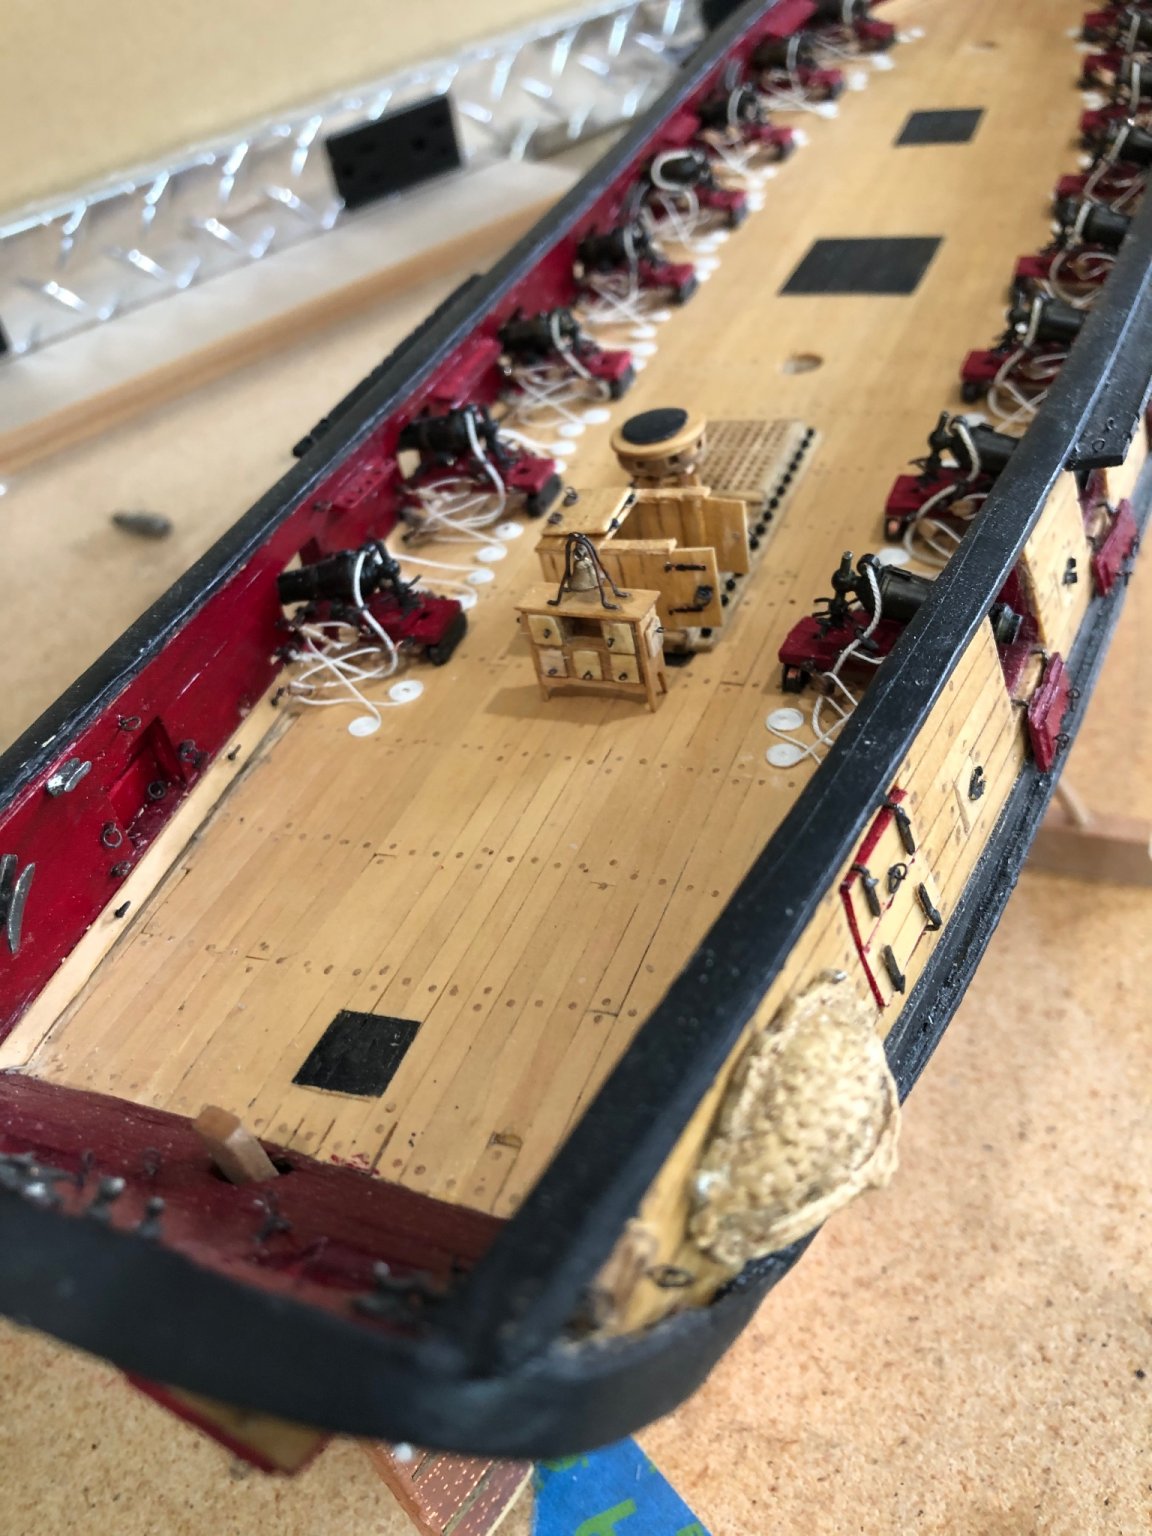
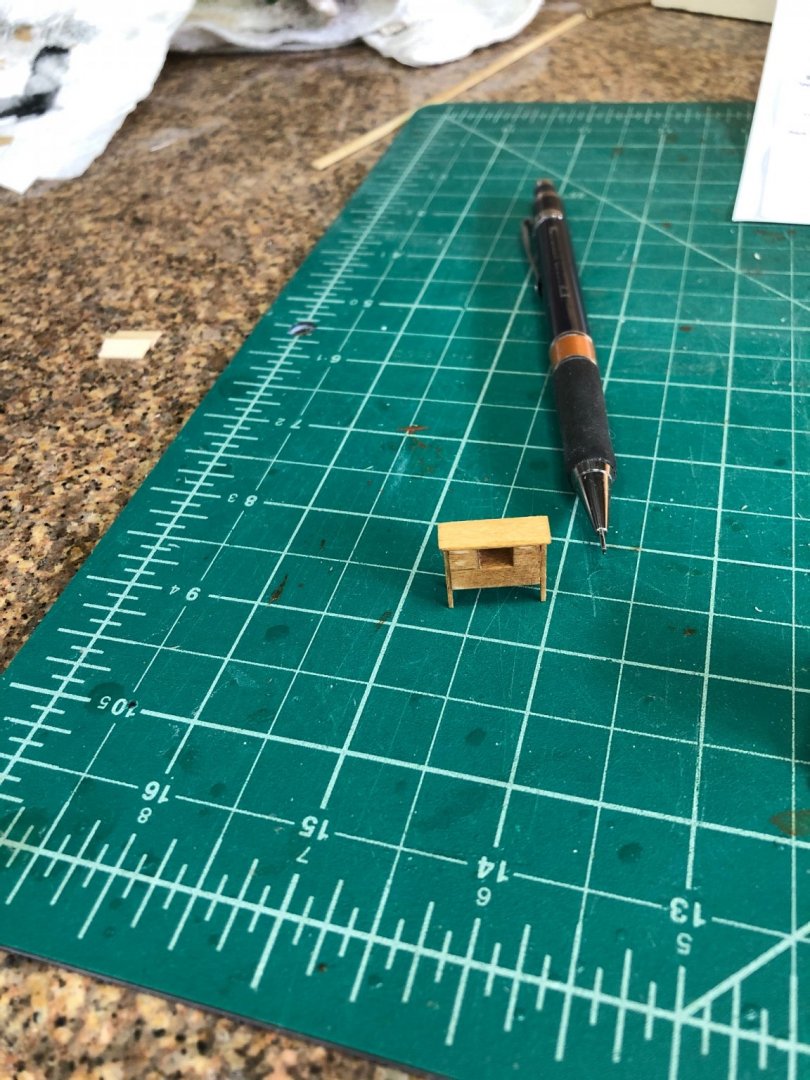
Completed the companionway and binnacle and haven't glued them to the deck. I'm trying to decide to wait until the long guns and steering are complete and rigged. It seems that it makes more sense to have the deck empty while doing the rigging, not sure so i'll wait until the cannons and wheel are done to get a clear picture of how much room there will be left. My kit didn't have the cannons so I bought Chucks cannons and carriages. I got one done ready for painting and tomorrow i'll put the other carriage together. I need to research if breech rings are required or was the breech line around the cannons end ball. Completed companionway and binnacle Stay Well and Stay Safe Will

-
Looks great I like the natural drooping hang on the foot ropes. The stirrups look fantastic. The wire is a great idea to hold the shape while drying. 👋 Stay Well and Stay Safe Will
- 950 replies
-
- 2
-
-

-
- syren
- model shipways
- (and 1 more)
-
Hope all goes as planned and a good as new in a timely fashion. All my best Stay Well and Stay Safe Will
-
Welcome to MSW and enjoy the ride. I learned from doing the Grand Banks Dory and take a break from a larger model. One of the things I learned was to save my sawdust and mix it with glue as a filler paste (David Antscherls hint) and I have started using it almost daily. Again Welcome aboard Stay Well and Stay Safe Will
- 85 replies
-
- 3
-
-
- Lowell Grand Banks Dory
- First Build
- (and 2 more)
-
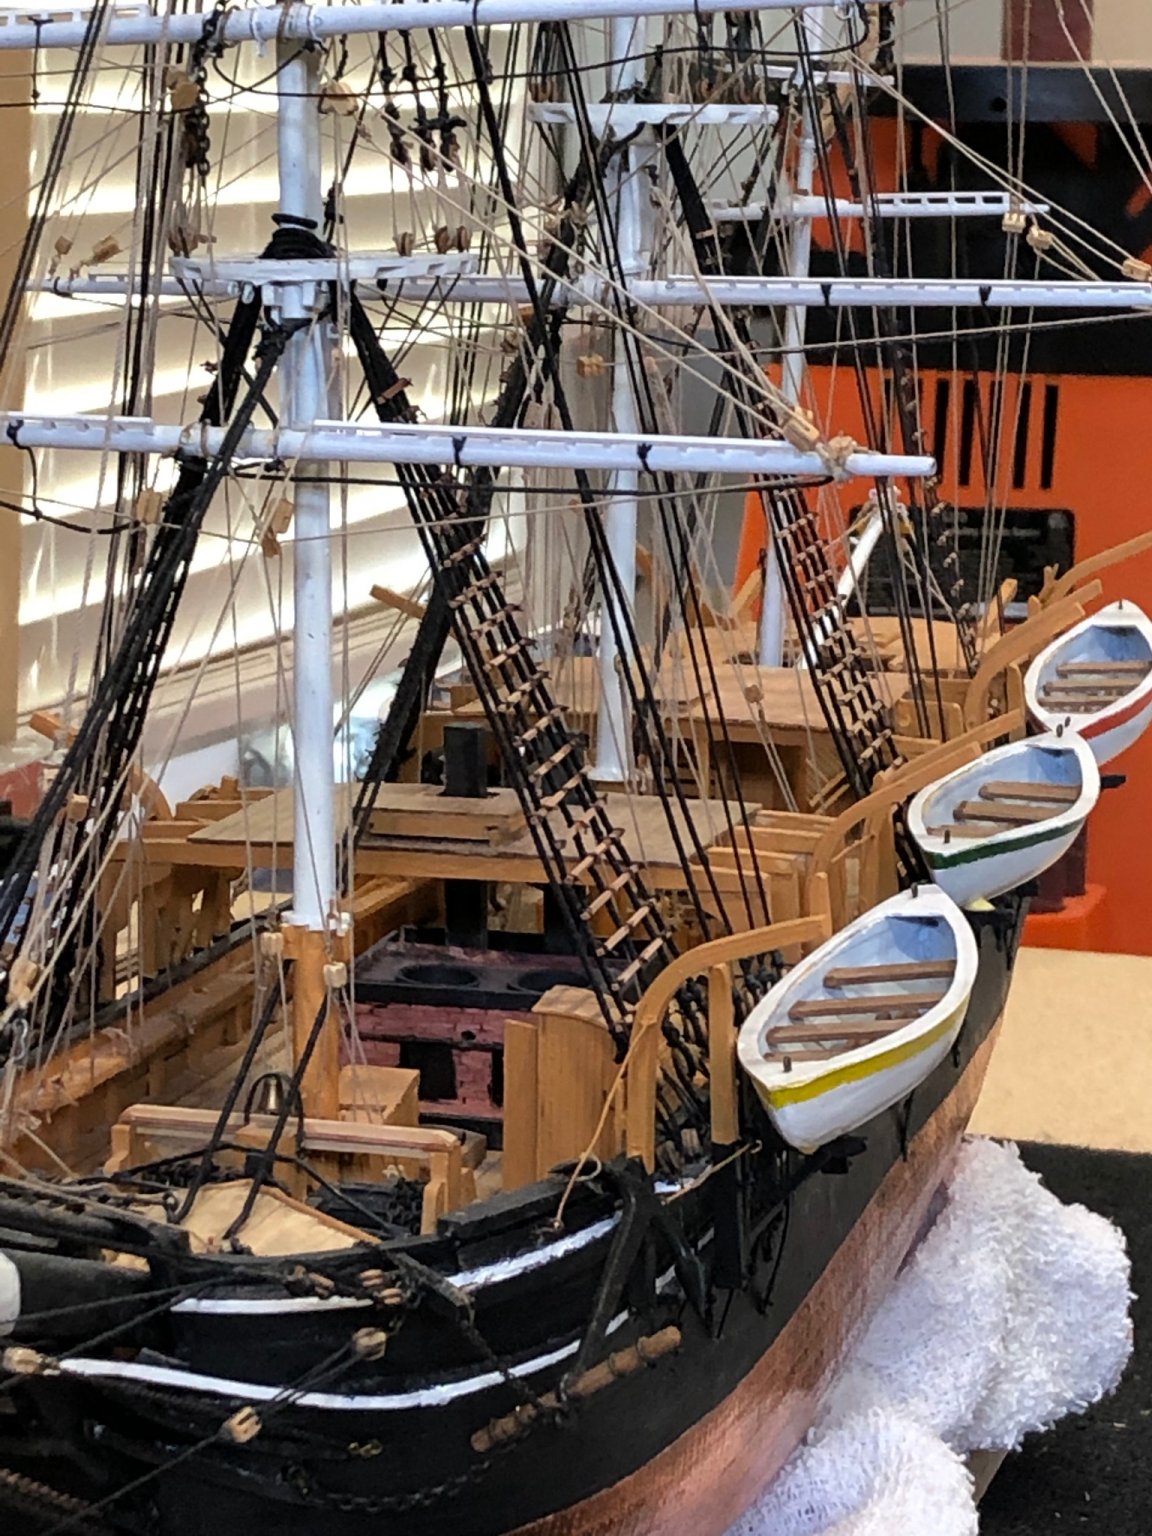
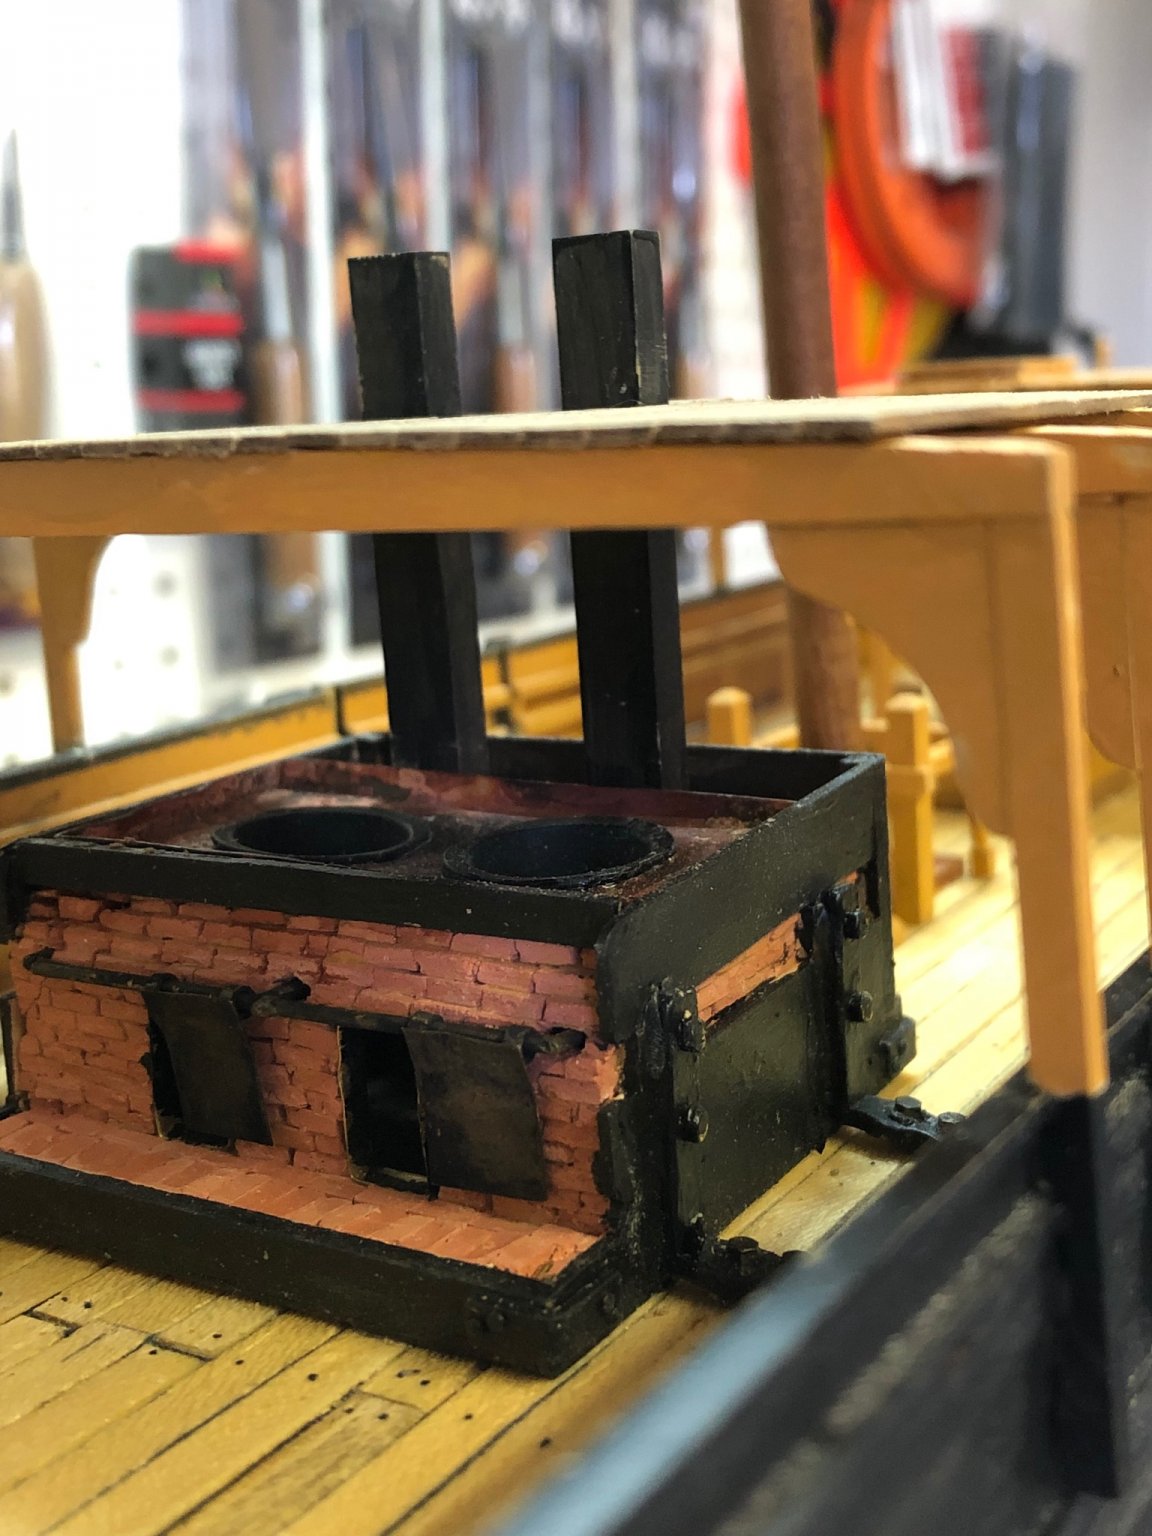
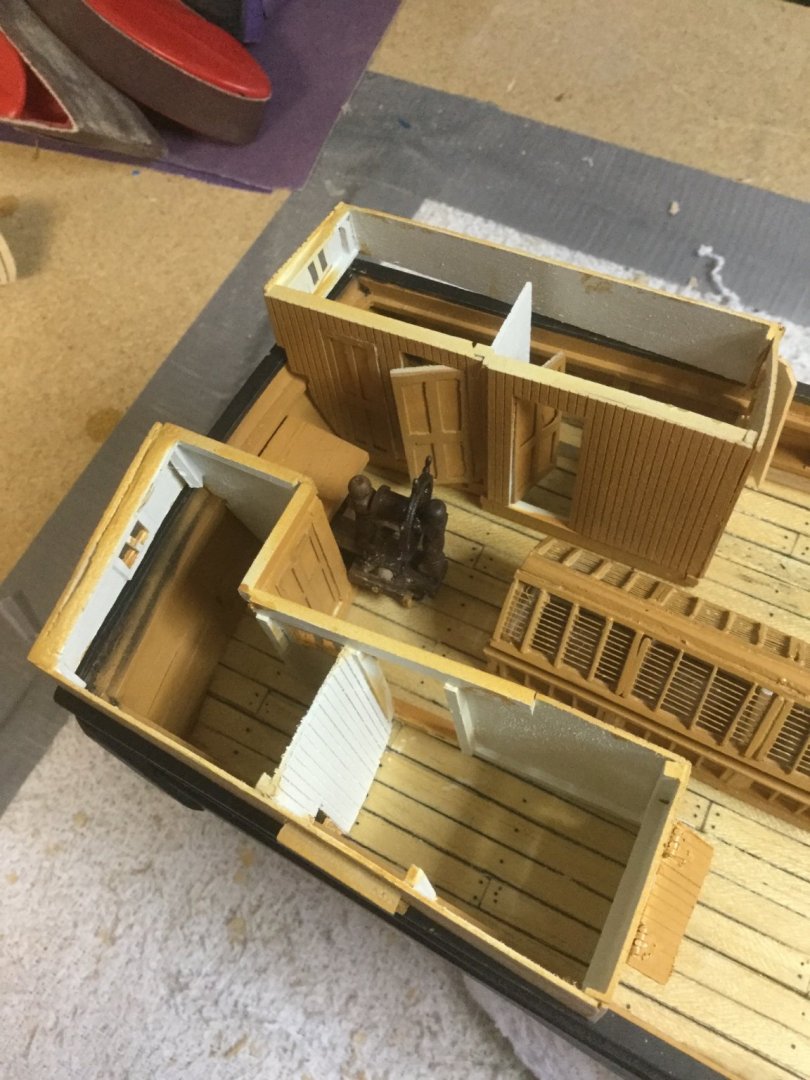
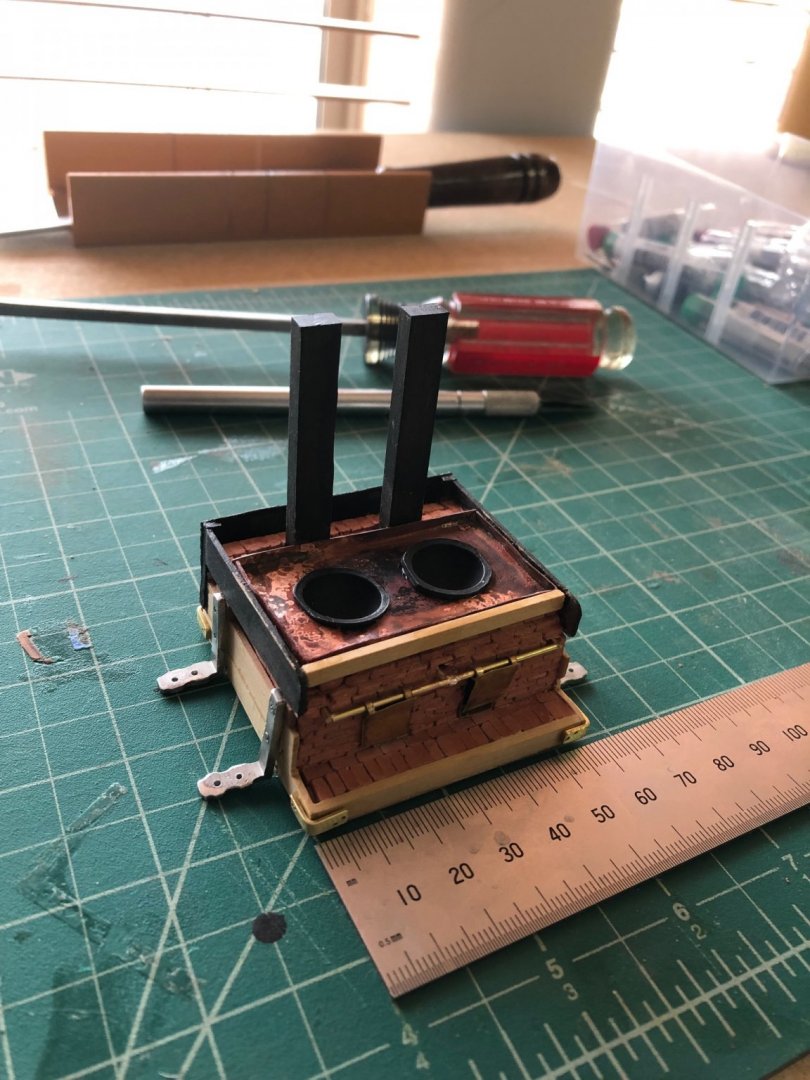
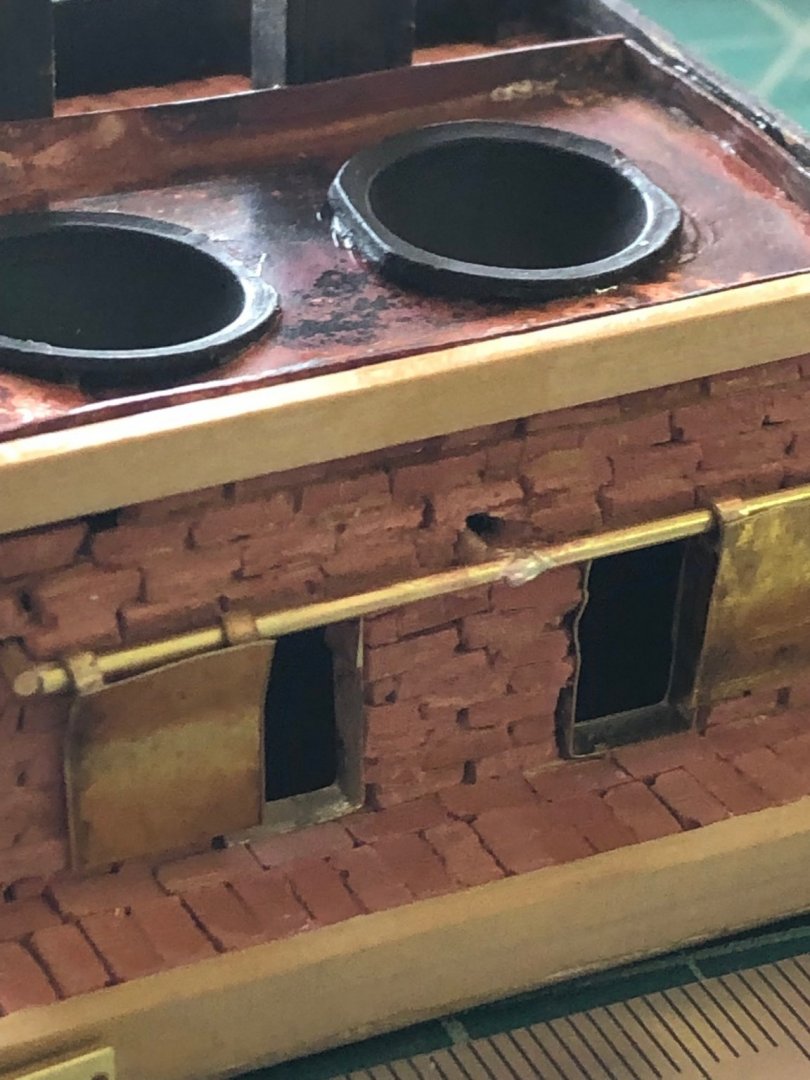
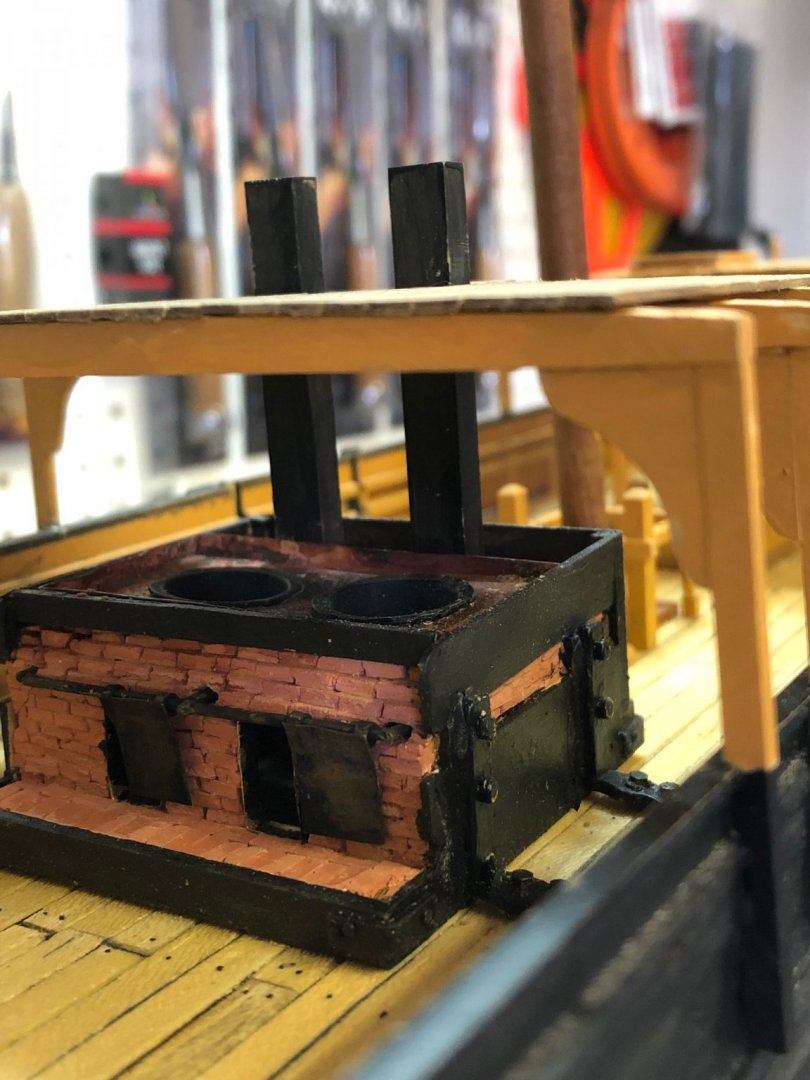
Well Rookie I built the same model a couple of years ago and found some the same problems. I bought my kit from garage sale on eBay. The blocks of wood left me cold so I decided i'd scratch build everything from the deck up. My research found that Mystic Seaport library and research have many drawings of the Morgan so I bought them. I have the hurricane house, skylight, aft cover, tryworks, tryworks cover (which the original had), forward head and the winch. I built my tryworks out of sculpey making my own bricks as the drawing had the coarses spelled out. I put in a couple photos for reference Hurricane House, skylight and wheel My first attempt at being a brick mason Almost finished just fitting out the whale boats. Let me know if I can be of help It does make a great model being larger the Model Shipways although the Model Shipways is a better kit. Some things to think about Original plans Model Shipways plans (your can purchase them) A website with wonderful description and photos of a Model Shipways version. https://www.charleswmorganmodel.com NRG home page resources tab then resources for ship modelers articles and how toos has great instructions for tryworks Again pm if I can be of any help Stay Well and Stay Safe Will


-
completed companionway only need to mount doors (stain drying) handles then glue to the deck and not sure if I should put ladder in before glueing the companionway and coaming. Any ideas will help. Started the binnacle cut up parts and stained then assembled the basic structure. Spent the day and it sure doesn't seem like much was done with the time spent staining & glueing. I had purchased Chucks long gun carriages awhile back and since the is next after the binnacle I opened the bag and started the assembly. Never worked on laser cut Alaskan Yellow Cedar but it has a very sharp line. No stuttering steps in the cuts. Kit is going together smoothly and I think it will look good painted. More to come Stay Well and Stay Safe Will
-
I think you are right about the spaces Maury. It doesn't look as if the glue joints at the keel will withstand the sanding vibrations. Do you have the drawings that are included in the Model Shipways model? Just thinking it might be worth taking off the frames and fairing per the drawings if you have them. Just a thought. The framing is really nice you're coming along very quickly. I'm waiting to see how you build the transom. (solid or built up) Congratulations it looking very nice. Stay Well and Stay Safe Will
-
Bill I found what you are looking for: NRG home page resources page articles and how too furniture and you will see the document you want. Also I made my tryworks bricks out of sculpey red color and then backed them. I did not highlight the mortar as I thought it was to much and did not represent the actual ship. Tryworks photo I also built the tryworks shelter from Mystic Seaport library and research department. Stay Well and Stay Safe Will
-
I ordered the original try works drawings from Mystic Seaport Library and research department. They have all the dimensions and brick coarses in fact everything you need to build the try works. I have the drawing if you are interested pm me and I sent it to you. Stay Well and Stay Safe Will
-
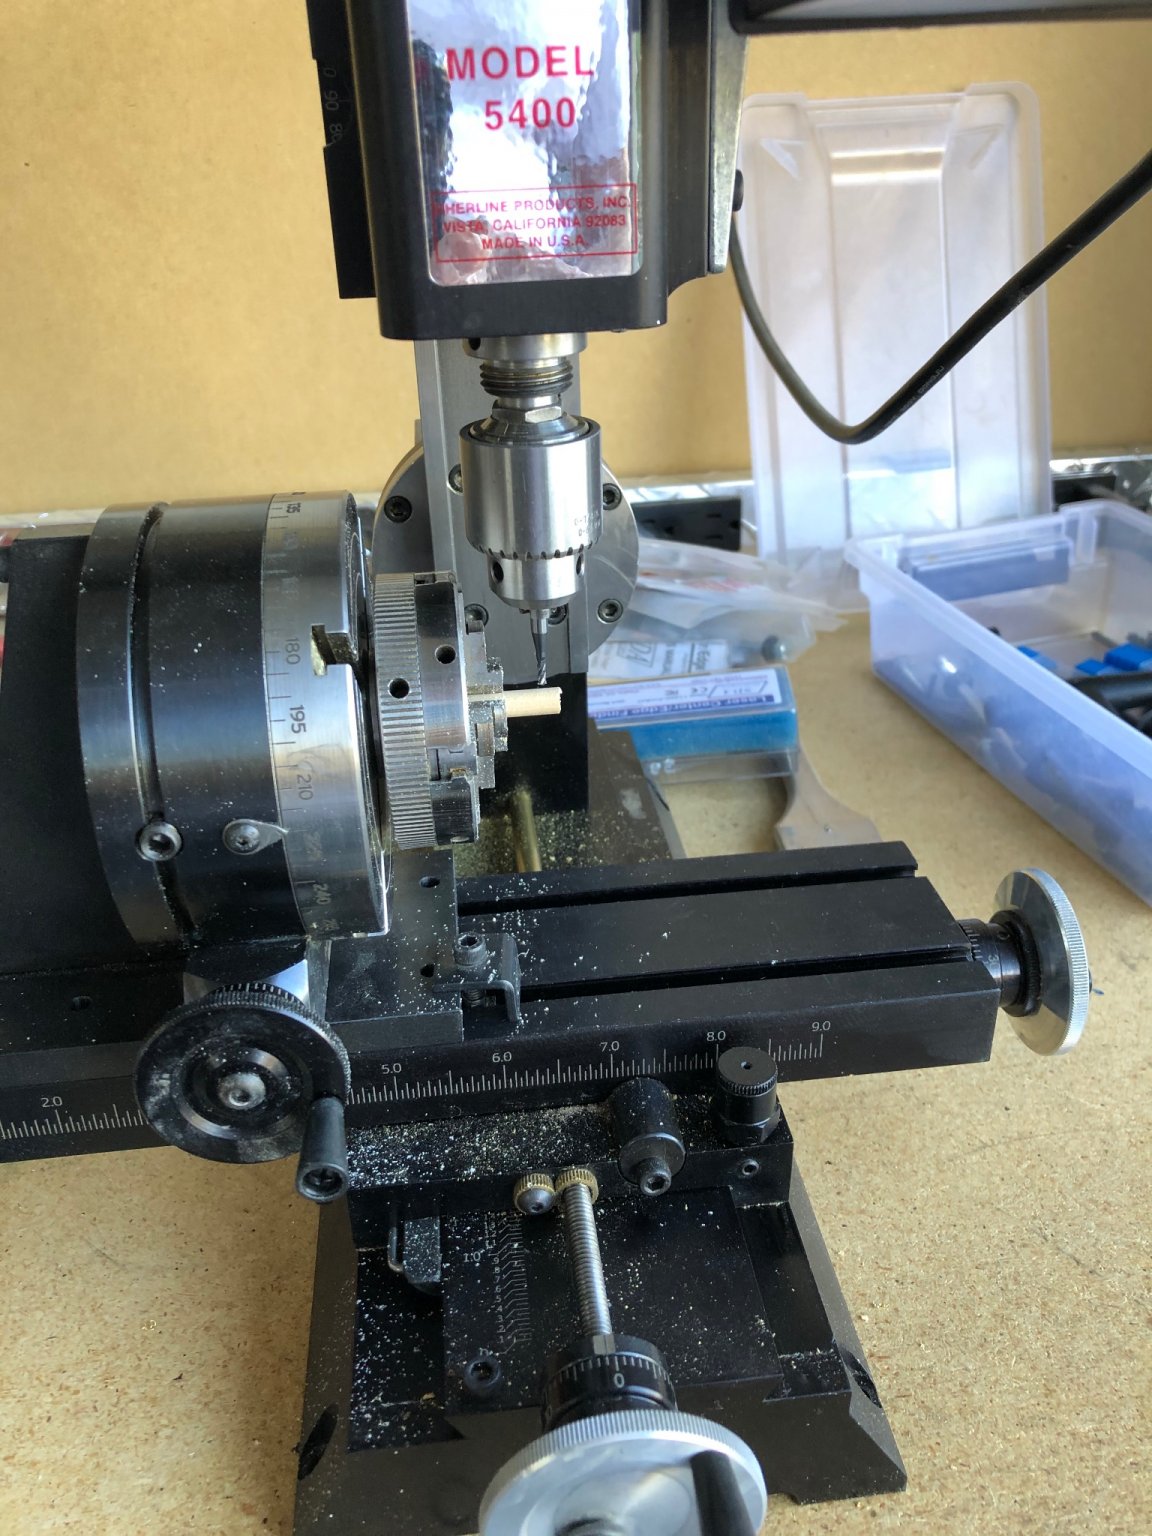
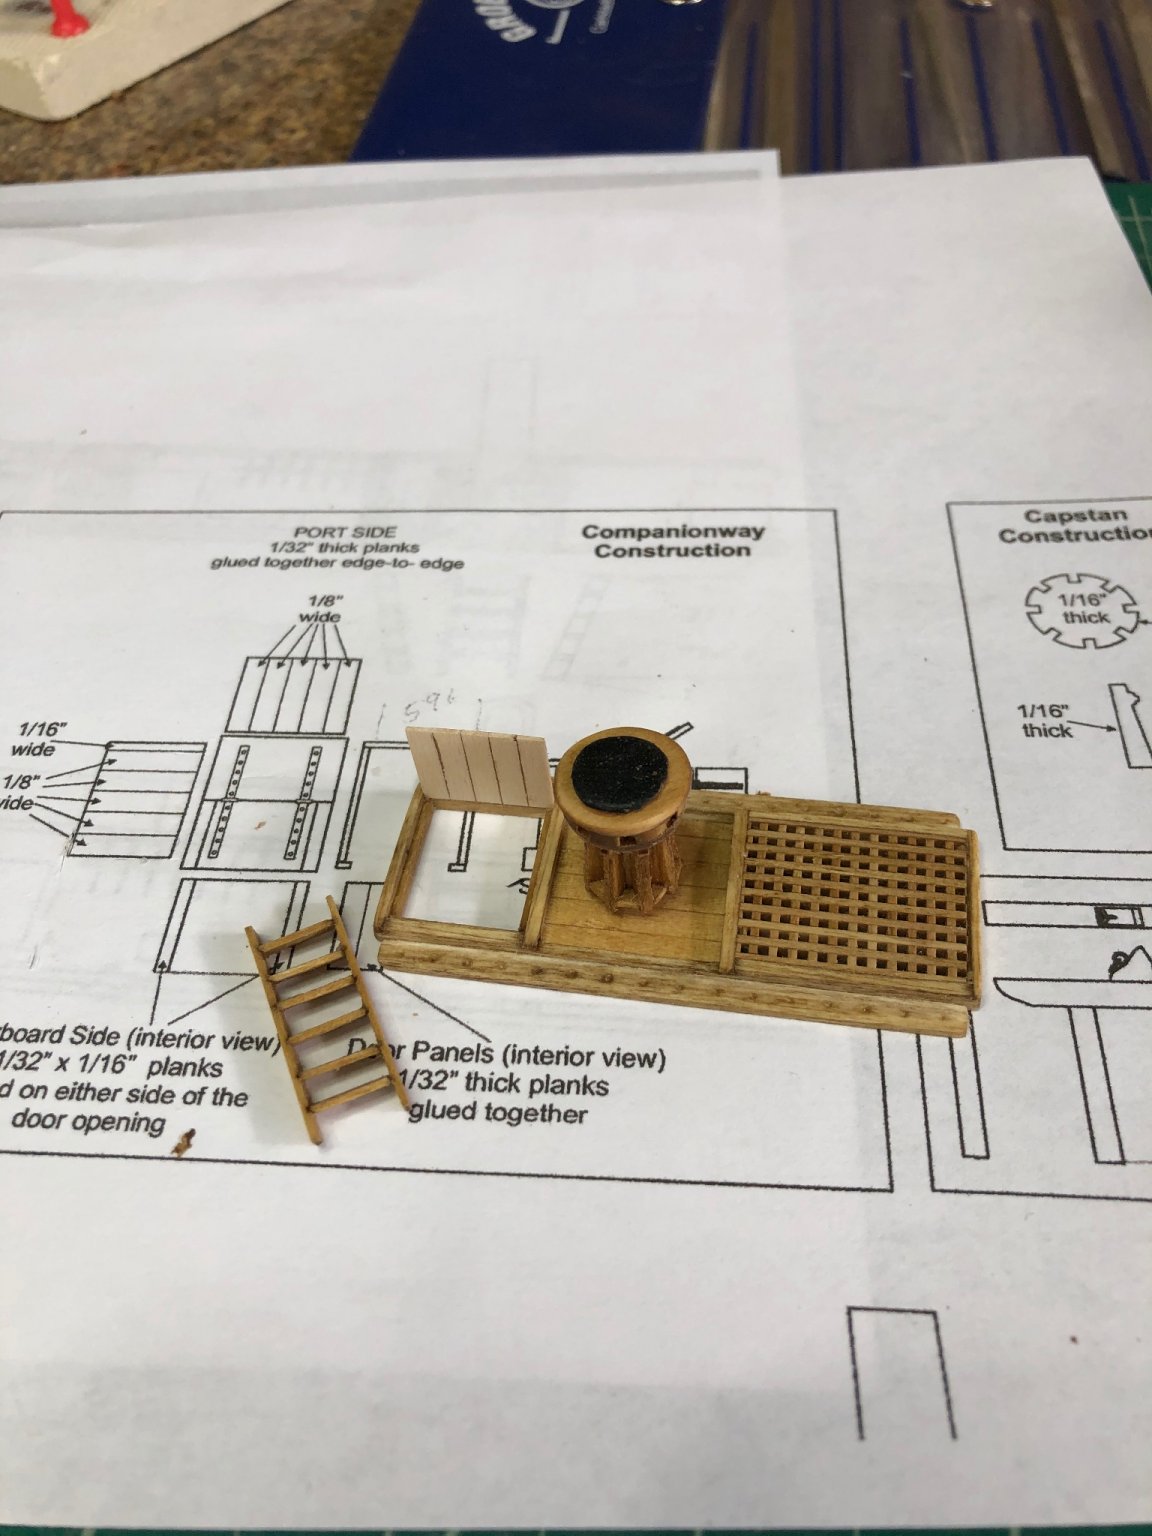
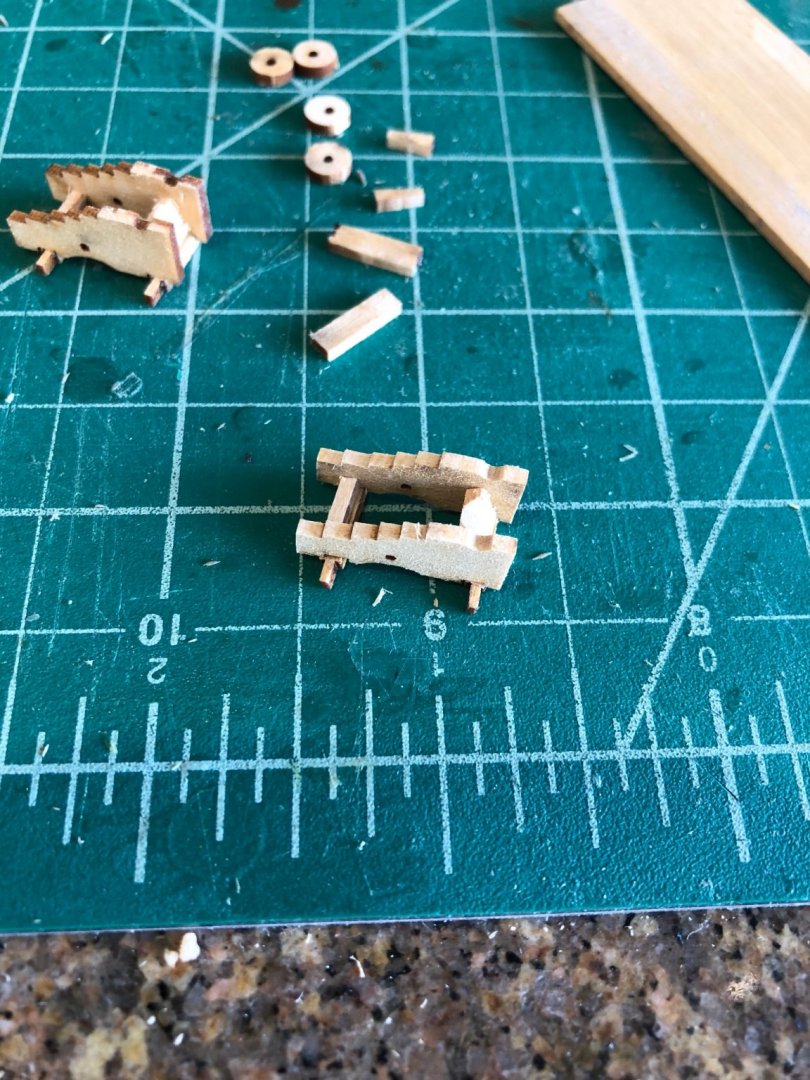
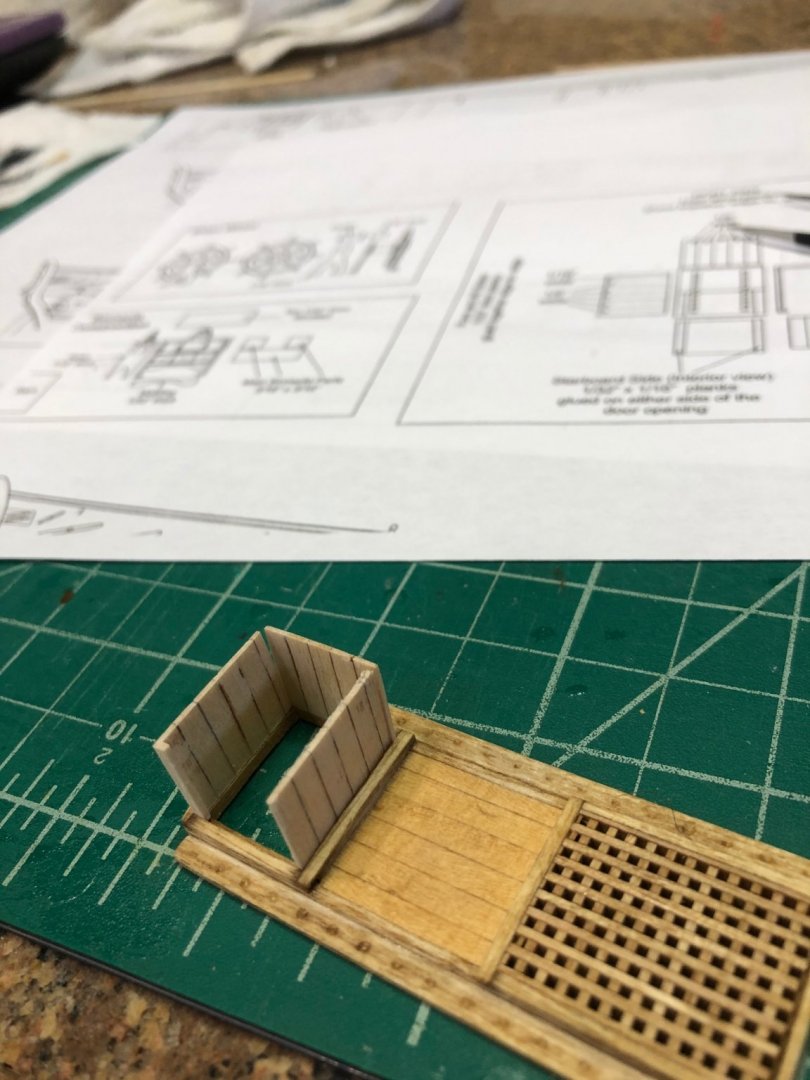
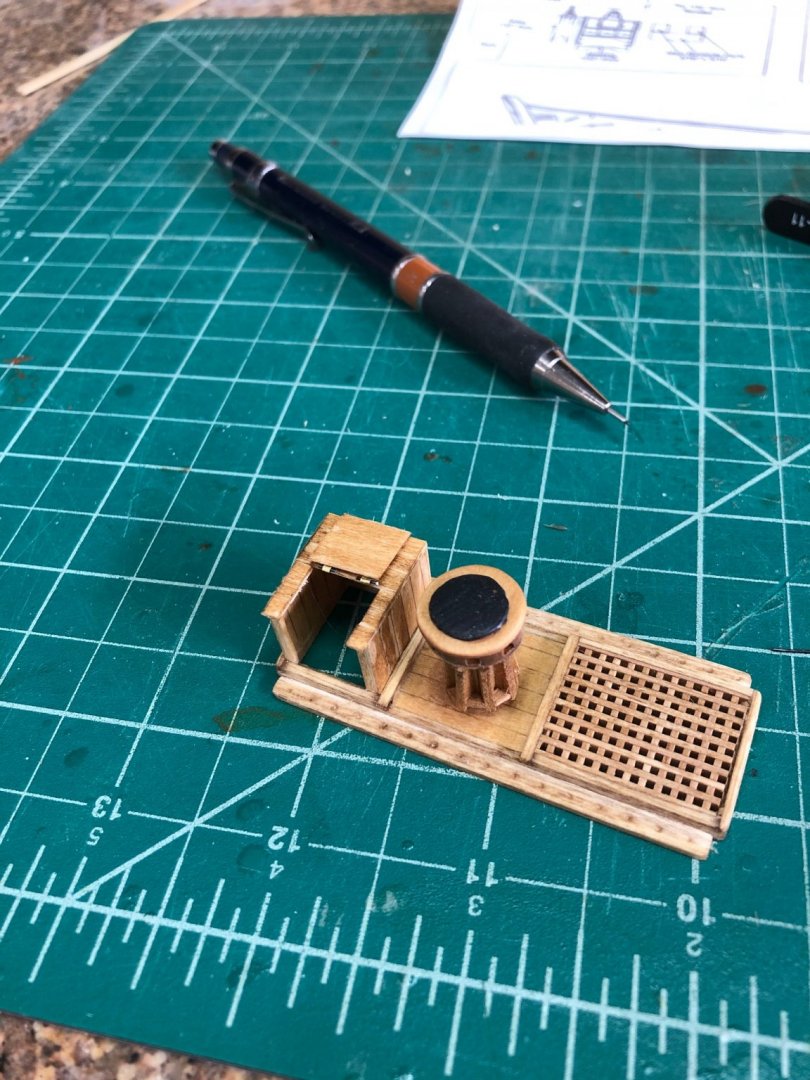
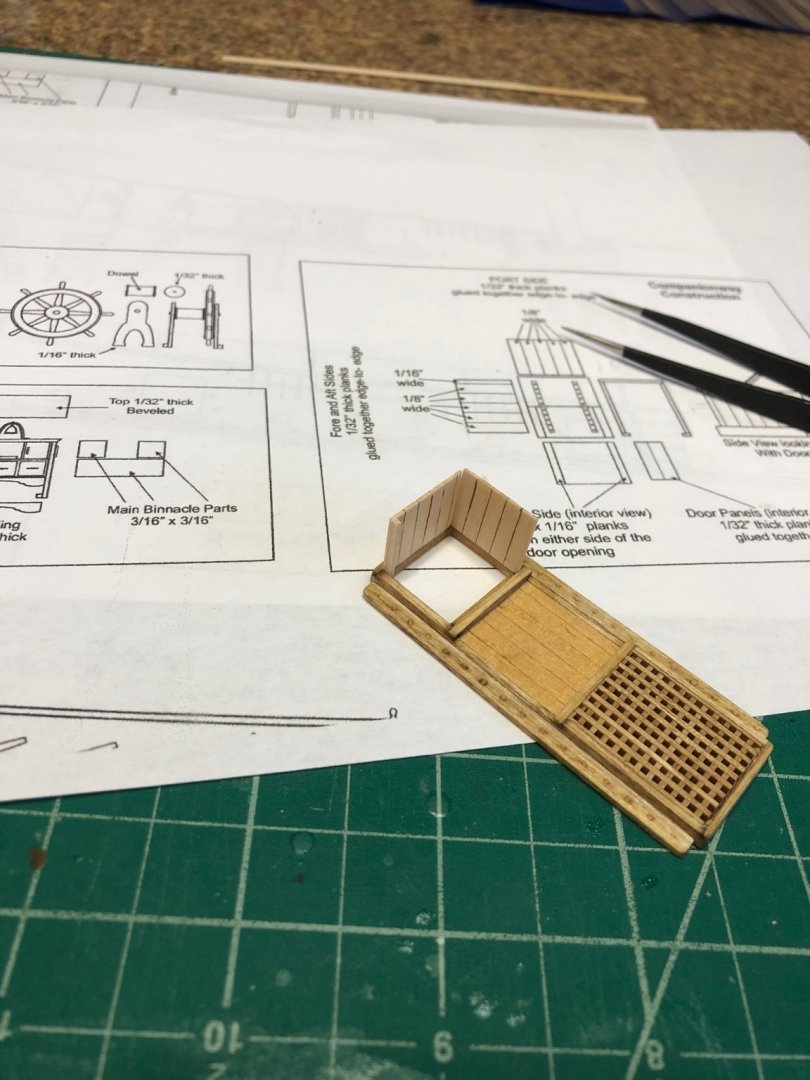
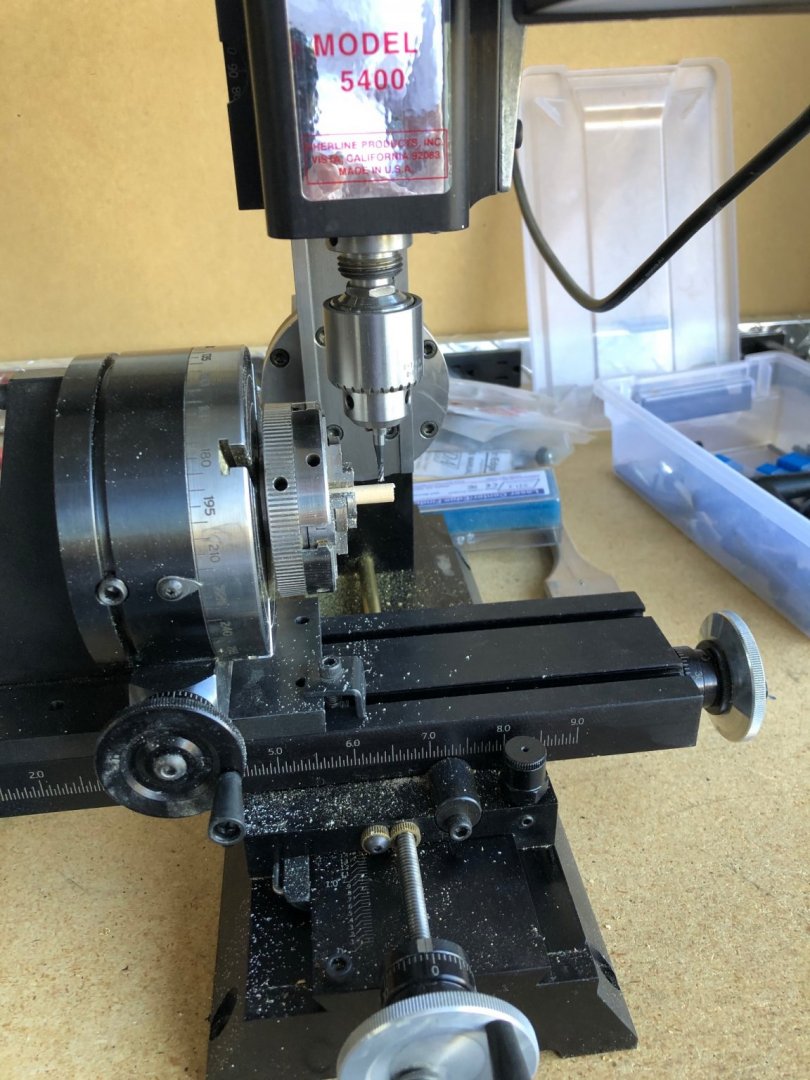
Another day and more parts made. I wasn't happy with the whelps spacing so I ripped it apart and started again. The good news is the kit had extra whelps as a couple didn't come off cleanly. I cleaned up the whelps and started again but trying to get the spacing and parallelism was driving me crazy is I gave up and cheated. I took the 1/4" rod and put it in the rotating vice mounted on the mill an cut 8 .010 deep grooves using a 1/8" cutter. This gave me a flat equal distant parallel surfaces onto glue the whelps. Whelps done I could then glue everything up and stain the capstan and move on to the companionway and ladder. I decided to use the Basswood on the companionway just for uniformity. I cut up the wood for the companionway sides and glued them together using brown glue to highlight the seams. The ladder was pretty straight forward as I used the plans for a template. I scored the sides where the step mount with a knife and then filed a triangular groove using the score. The ends of the steps were lightly sanded to a 45 degree angle slipping into the groove. Pretty happy with the result for my first ladder. Quick photo of the finished coaming, grid, capstan, ladder and one side of the companionway. Stay Well and Stay Safe Will


-
Great idea of the sacrificial wood backup. What kind of glue did you use? That Artesania Micro Scraper is a great looking tool, all this time I've been filing shapes onto hacksaw blades. Cannot tell you how many skinned knuckles that has caused. Looking really good Maury, looking real good Stay Well and Stay Safe Will