HOLIDAY DONATION DRIVE - SUPPORT MSW - DO YOUR PART TO KEEP THIS GREAT FORUM GOING! (89 donations so far out of 49,000 members - C'mon guys!)
×


GrandpaPhil
-
Posts
6,141 -
Joined
-
Last visited
Content Type
Profiles
Forums
Gallery
Events
Everything posted by GrandpaPhil
-
Steam Dredge by Crow River Products in 1:48 scale
GrandpaPhil replied to Keith Black's topic in Plastic model kits
Very cool! -
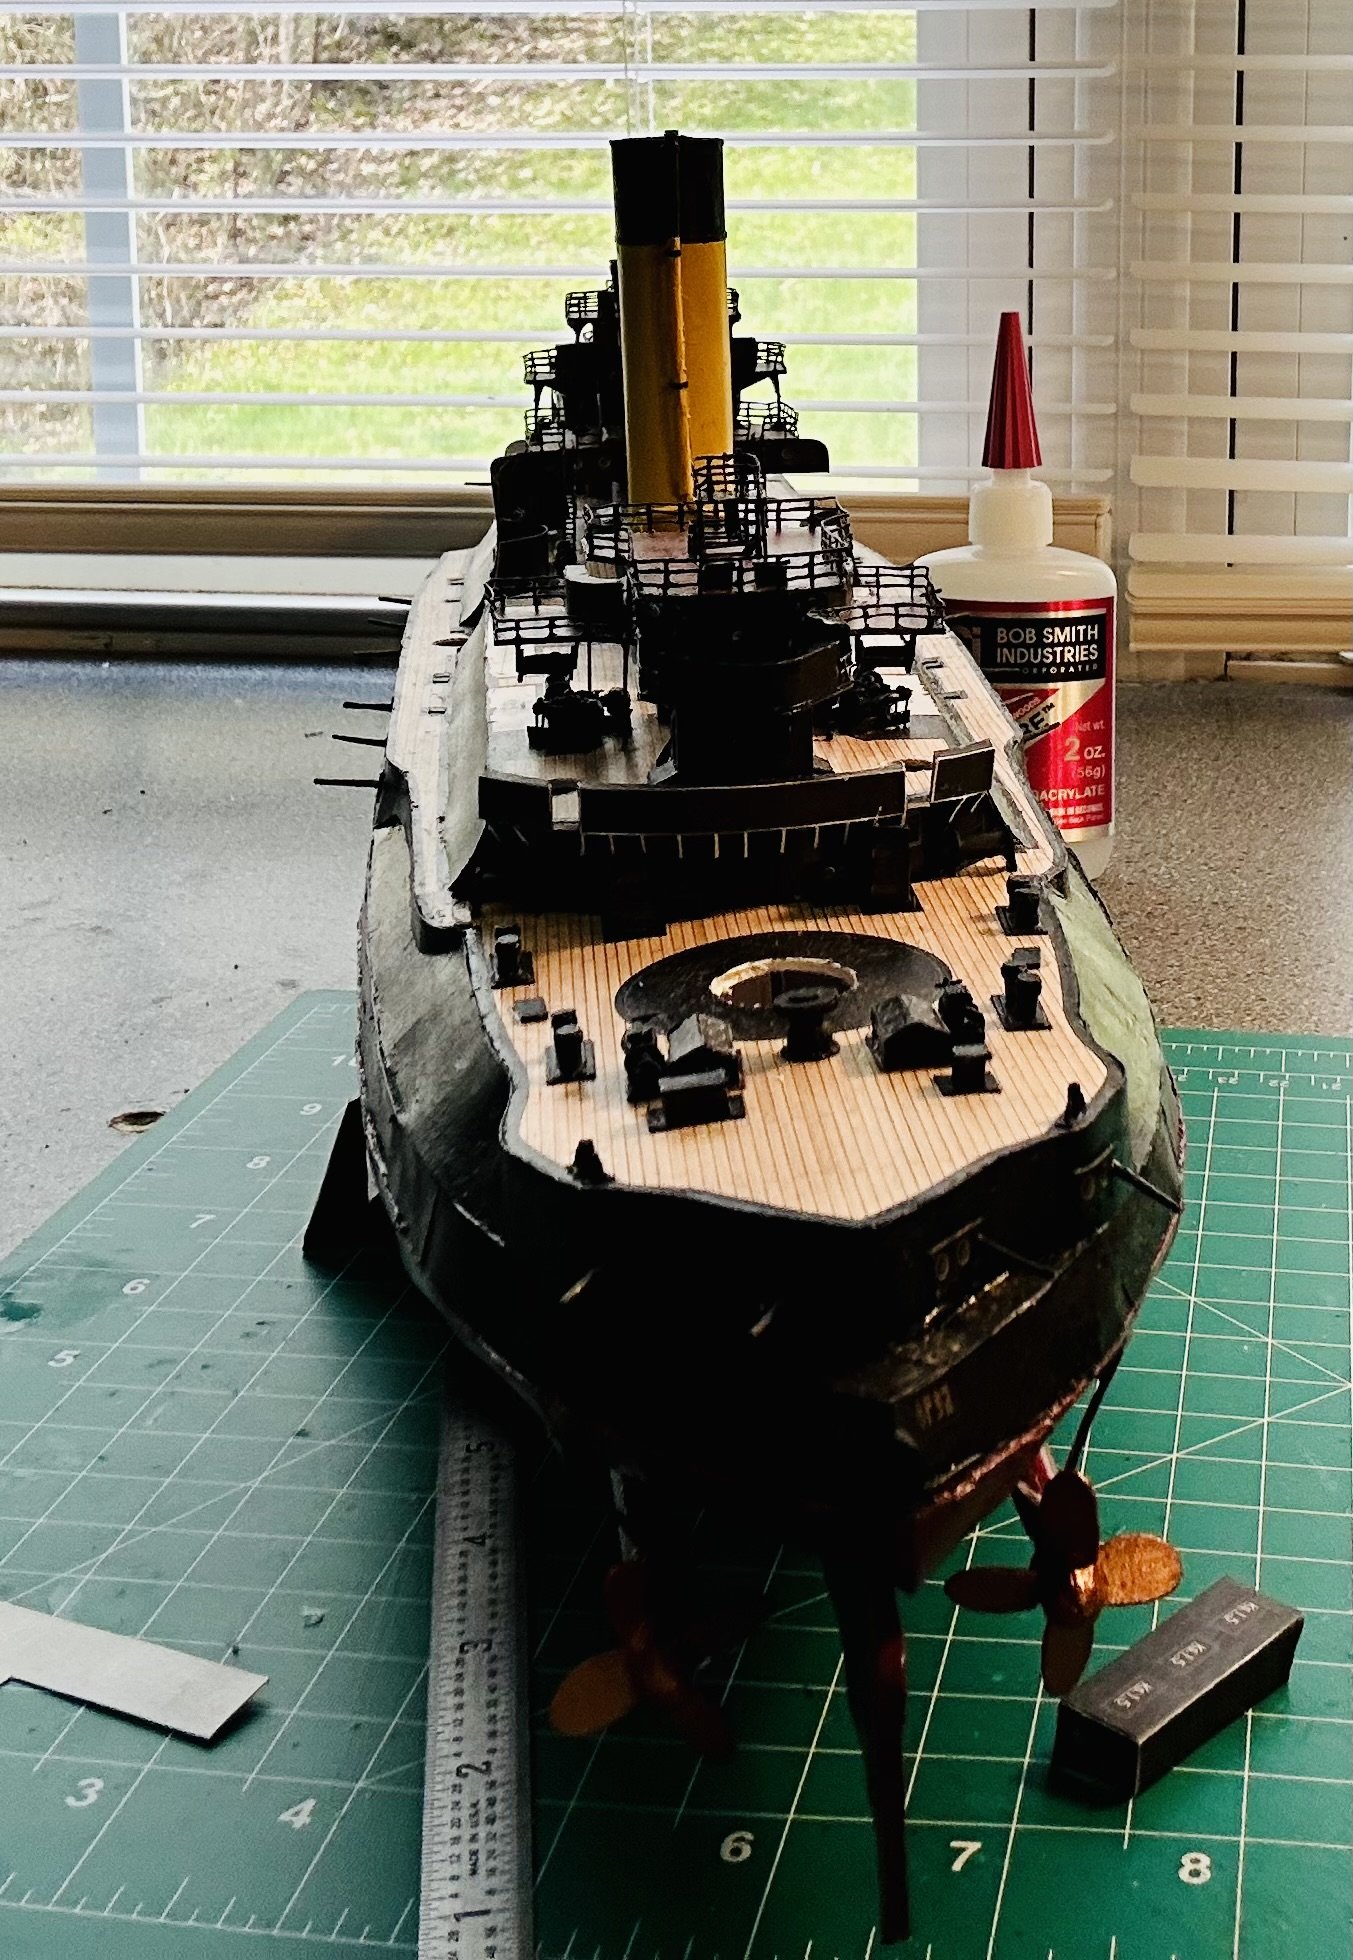
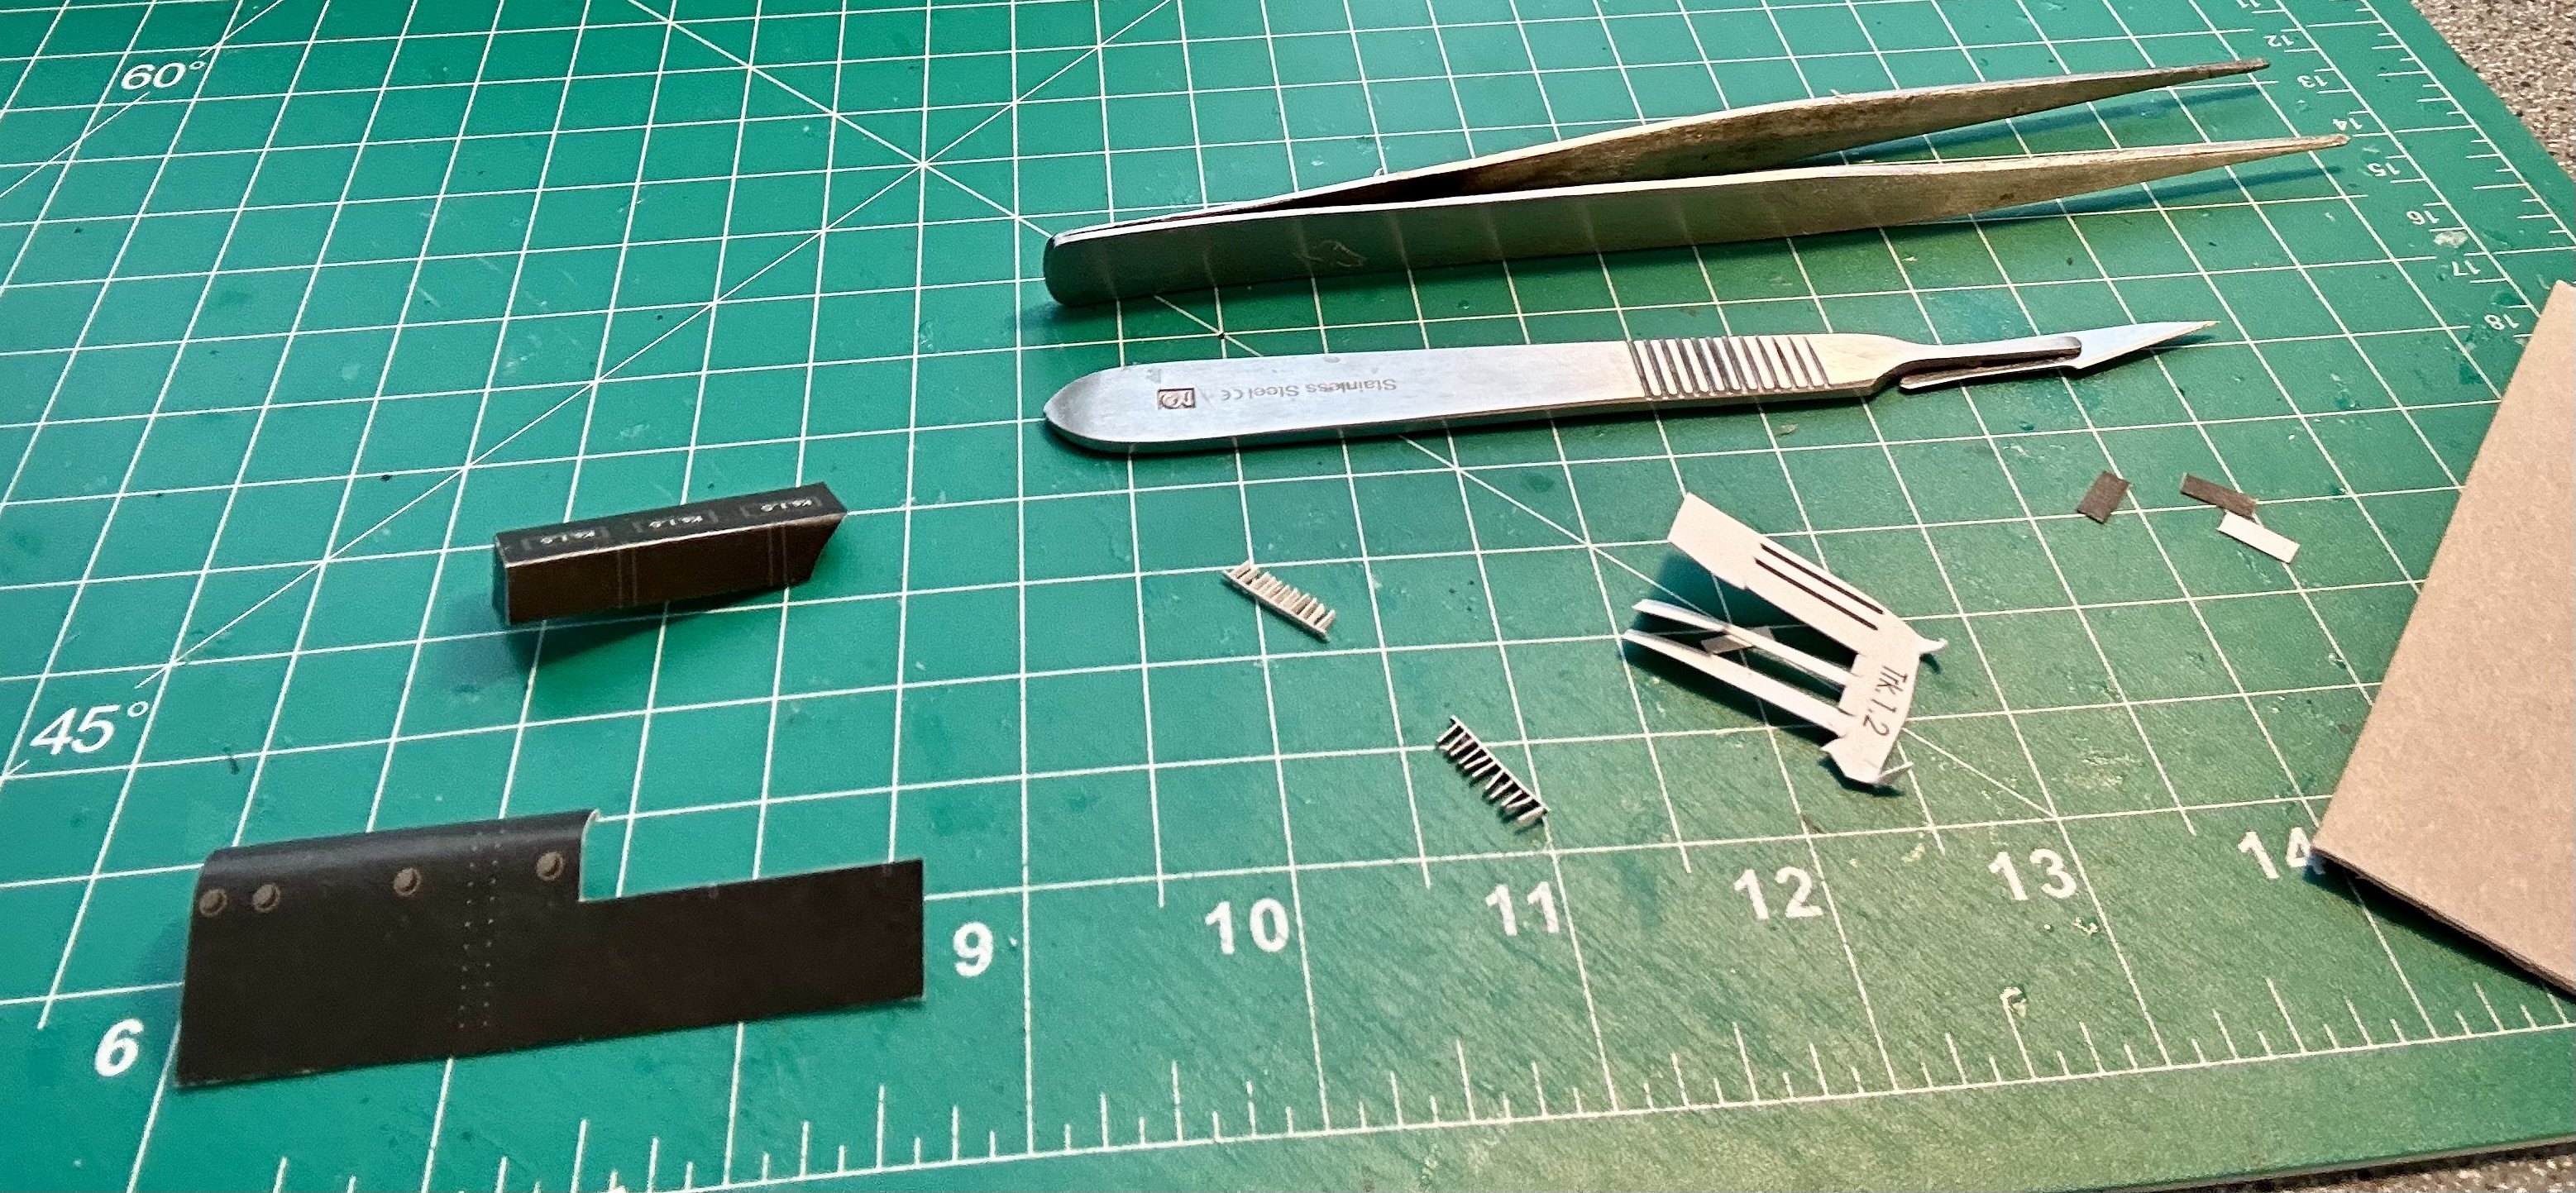
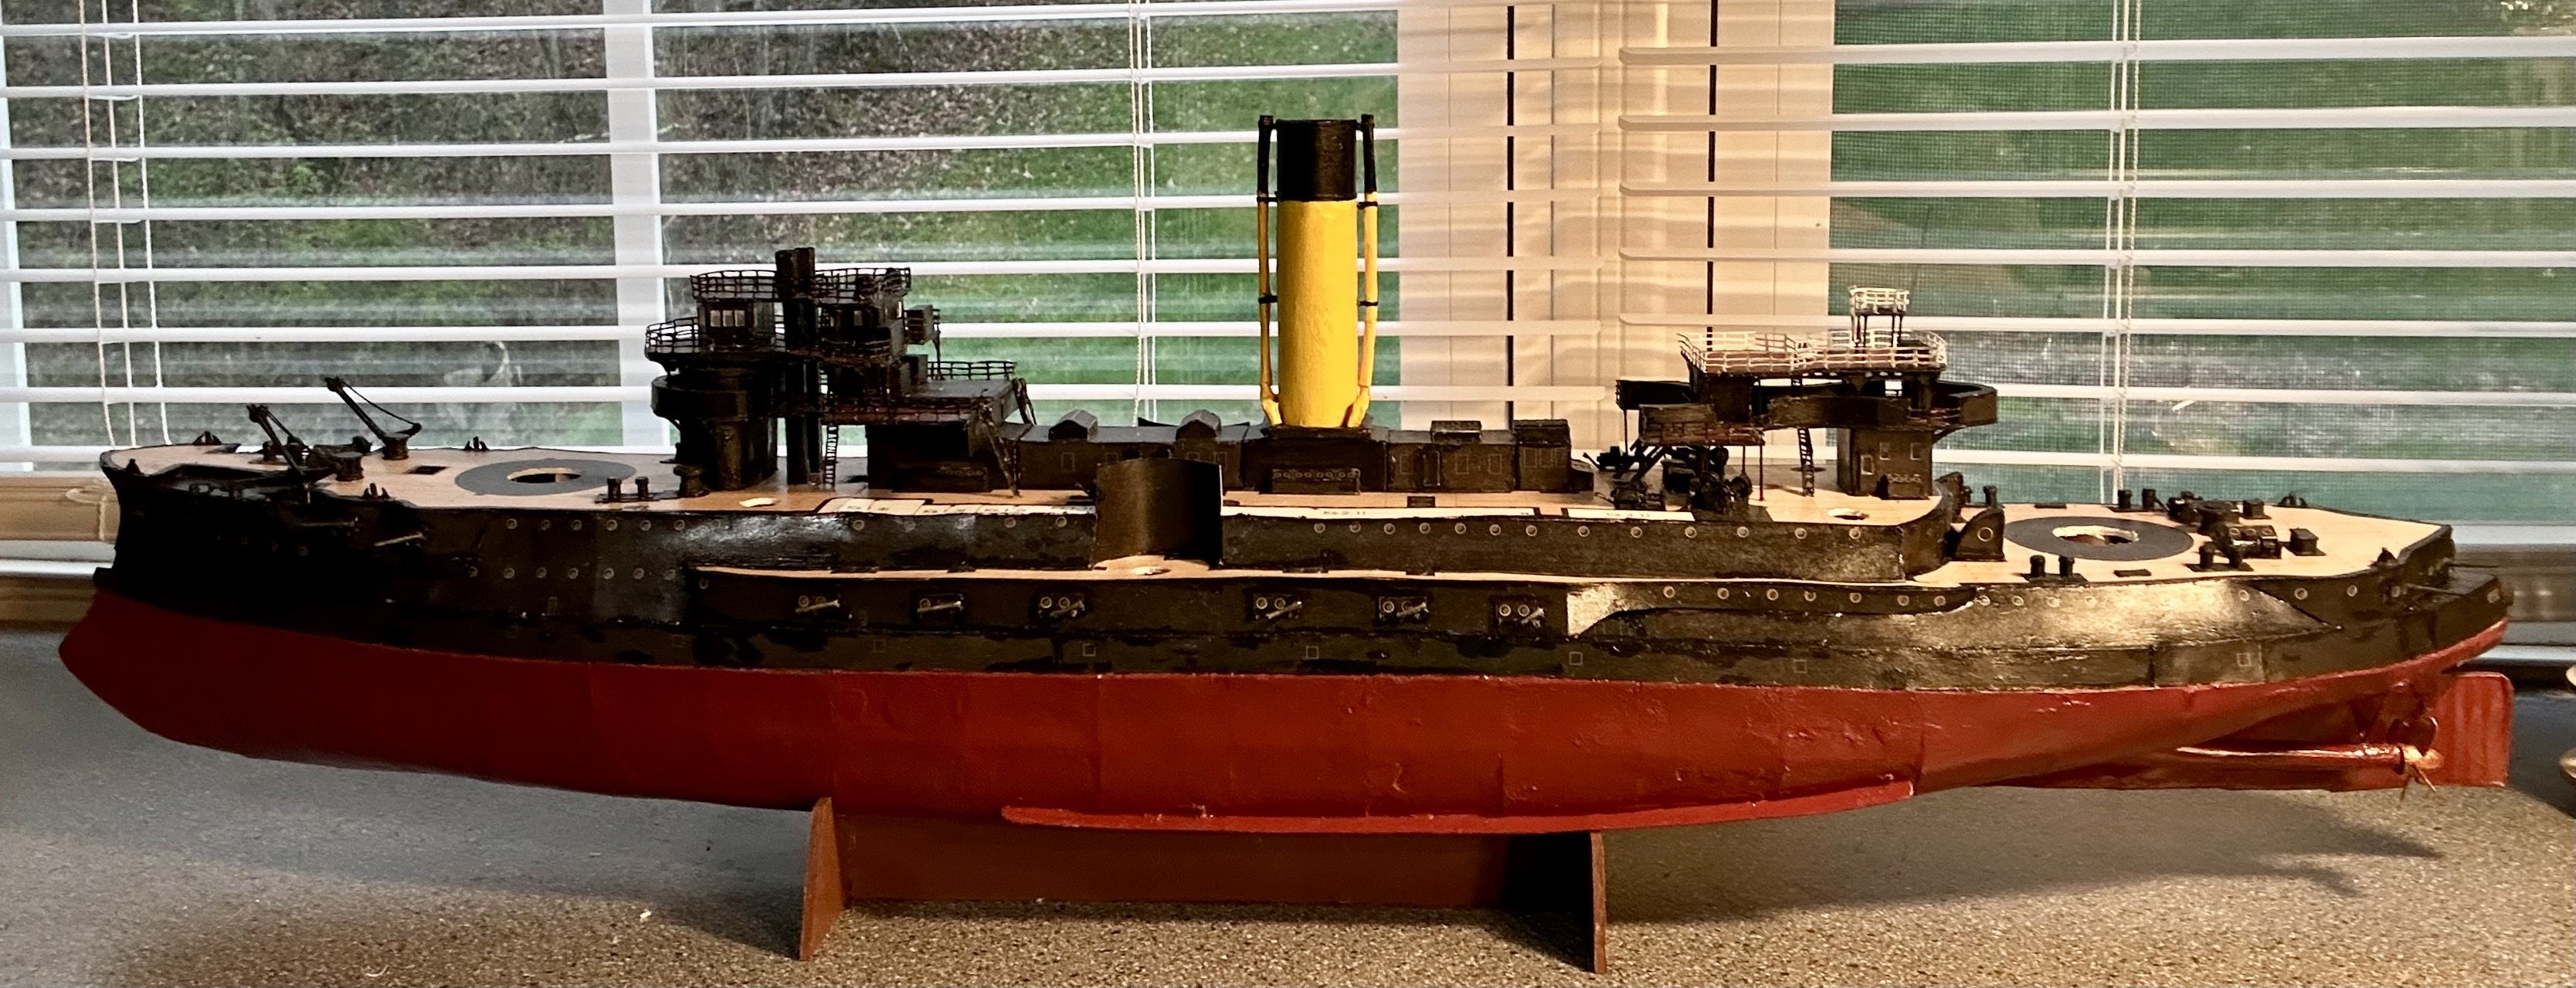
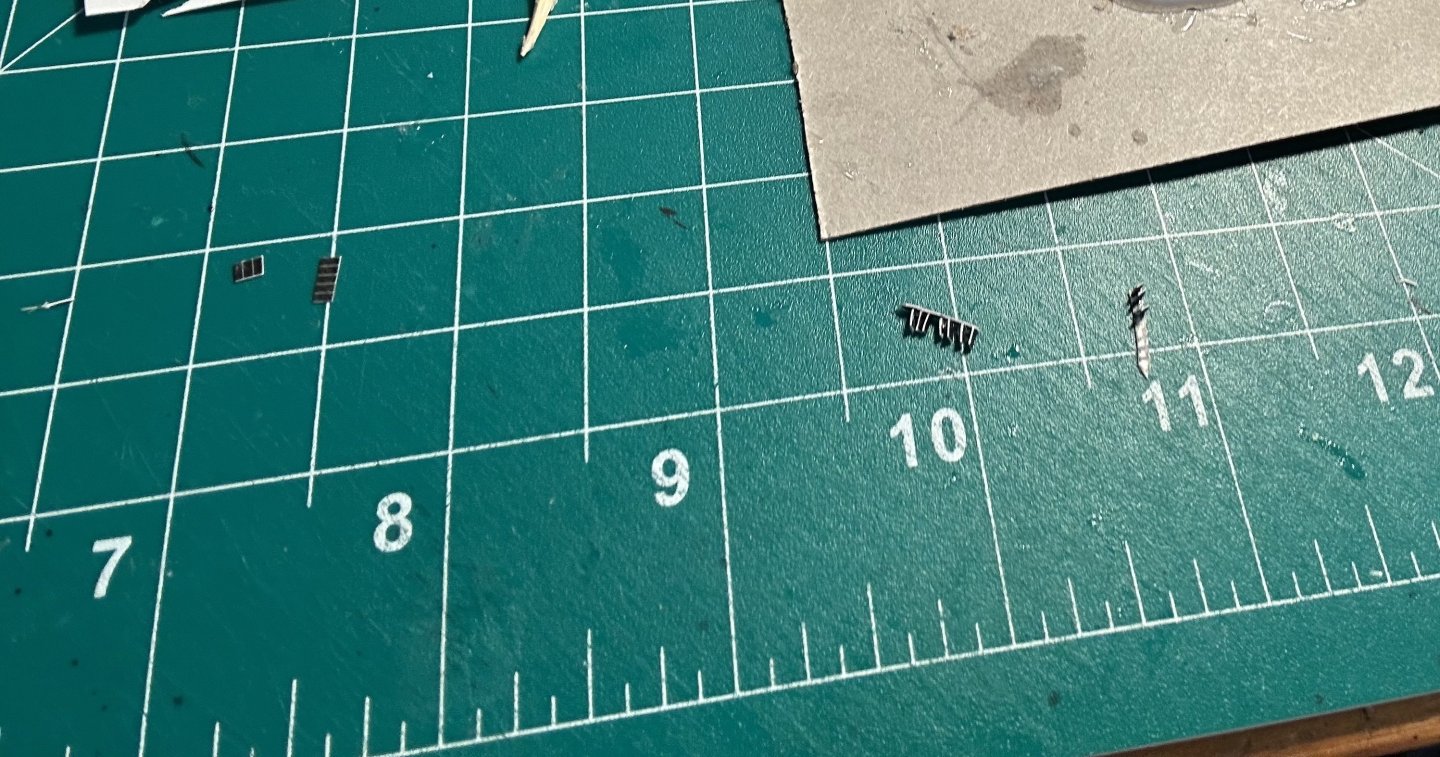
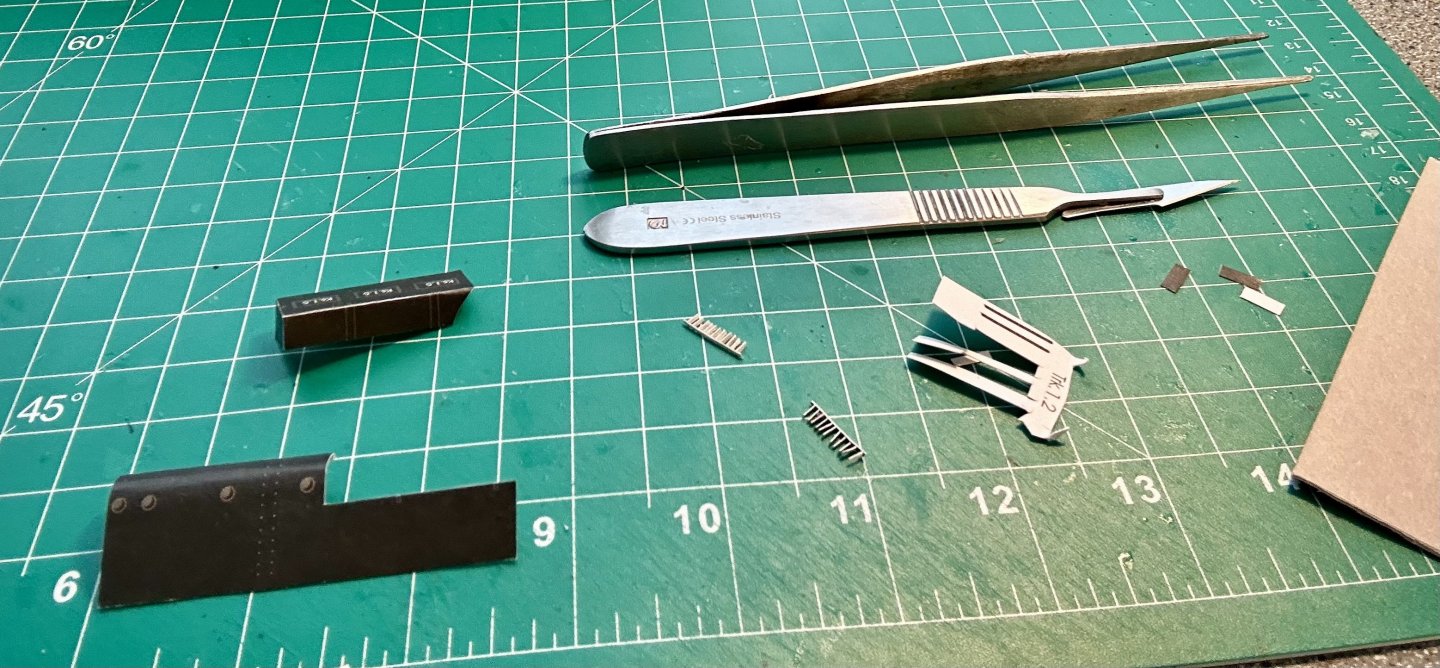
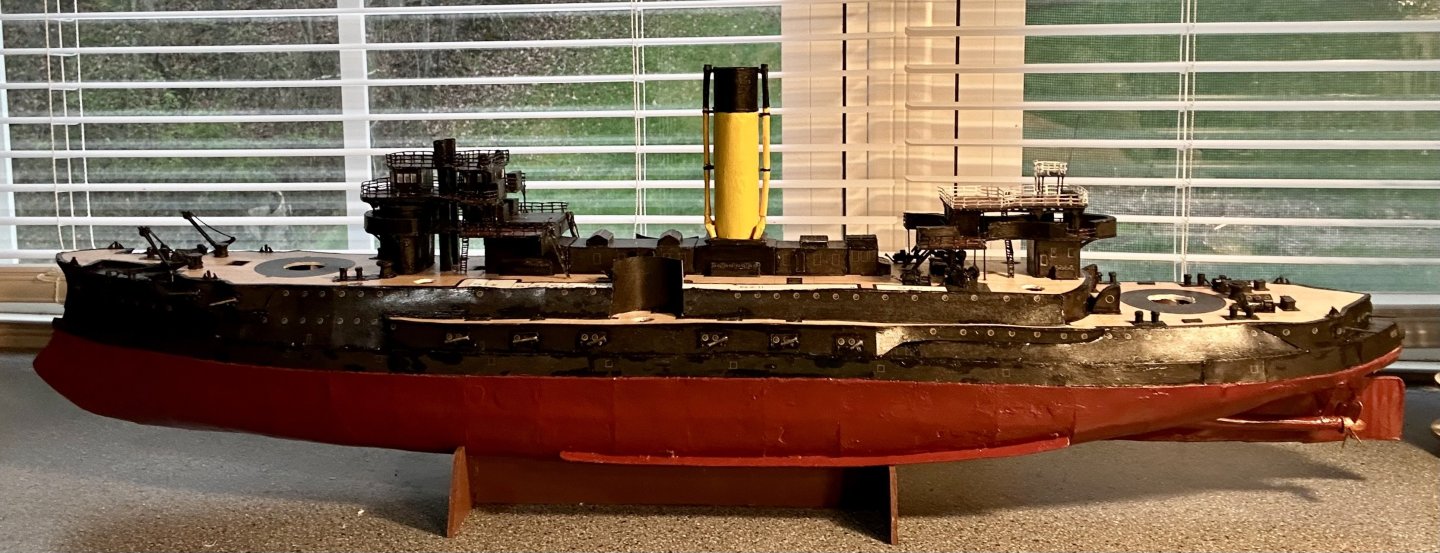
Mark, Thank you very much! Yes, she is looking like a battleship now! I have the middle platforms made and installed. I am taking a step back. I lost a ladder. It went flying and disappeared into lost part space so I am scratch building another one. I am sure that the other ladder will appear in plain sight tomorrow, long after I make the replacement!
- 288 replies
-
- 11
-

-

-
- Card
- Pre-Dreadnought
- (and 3 more)
-
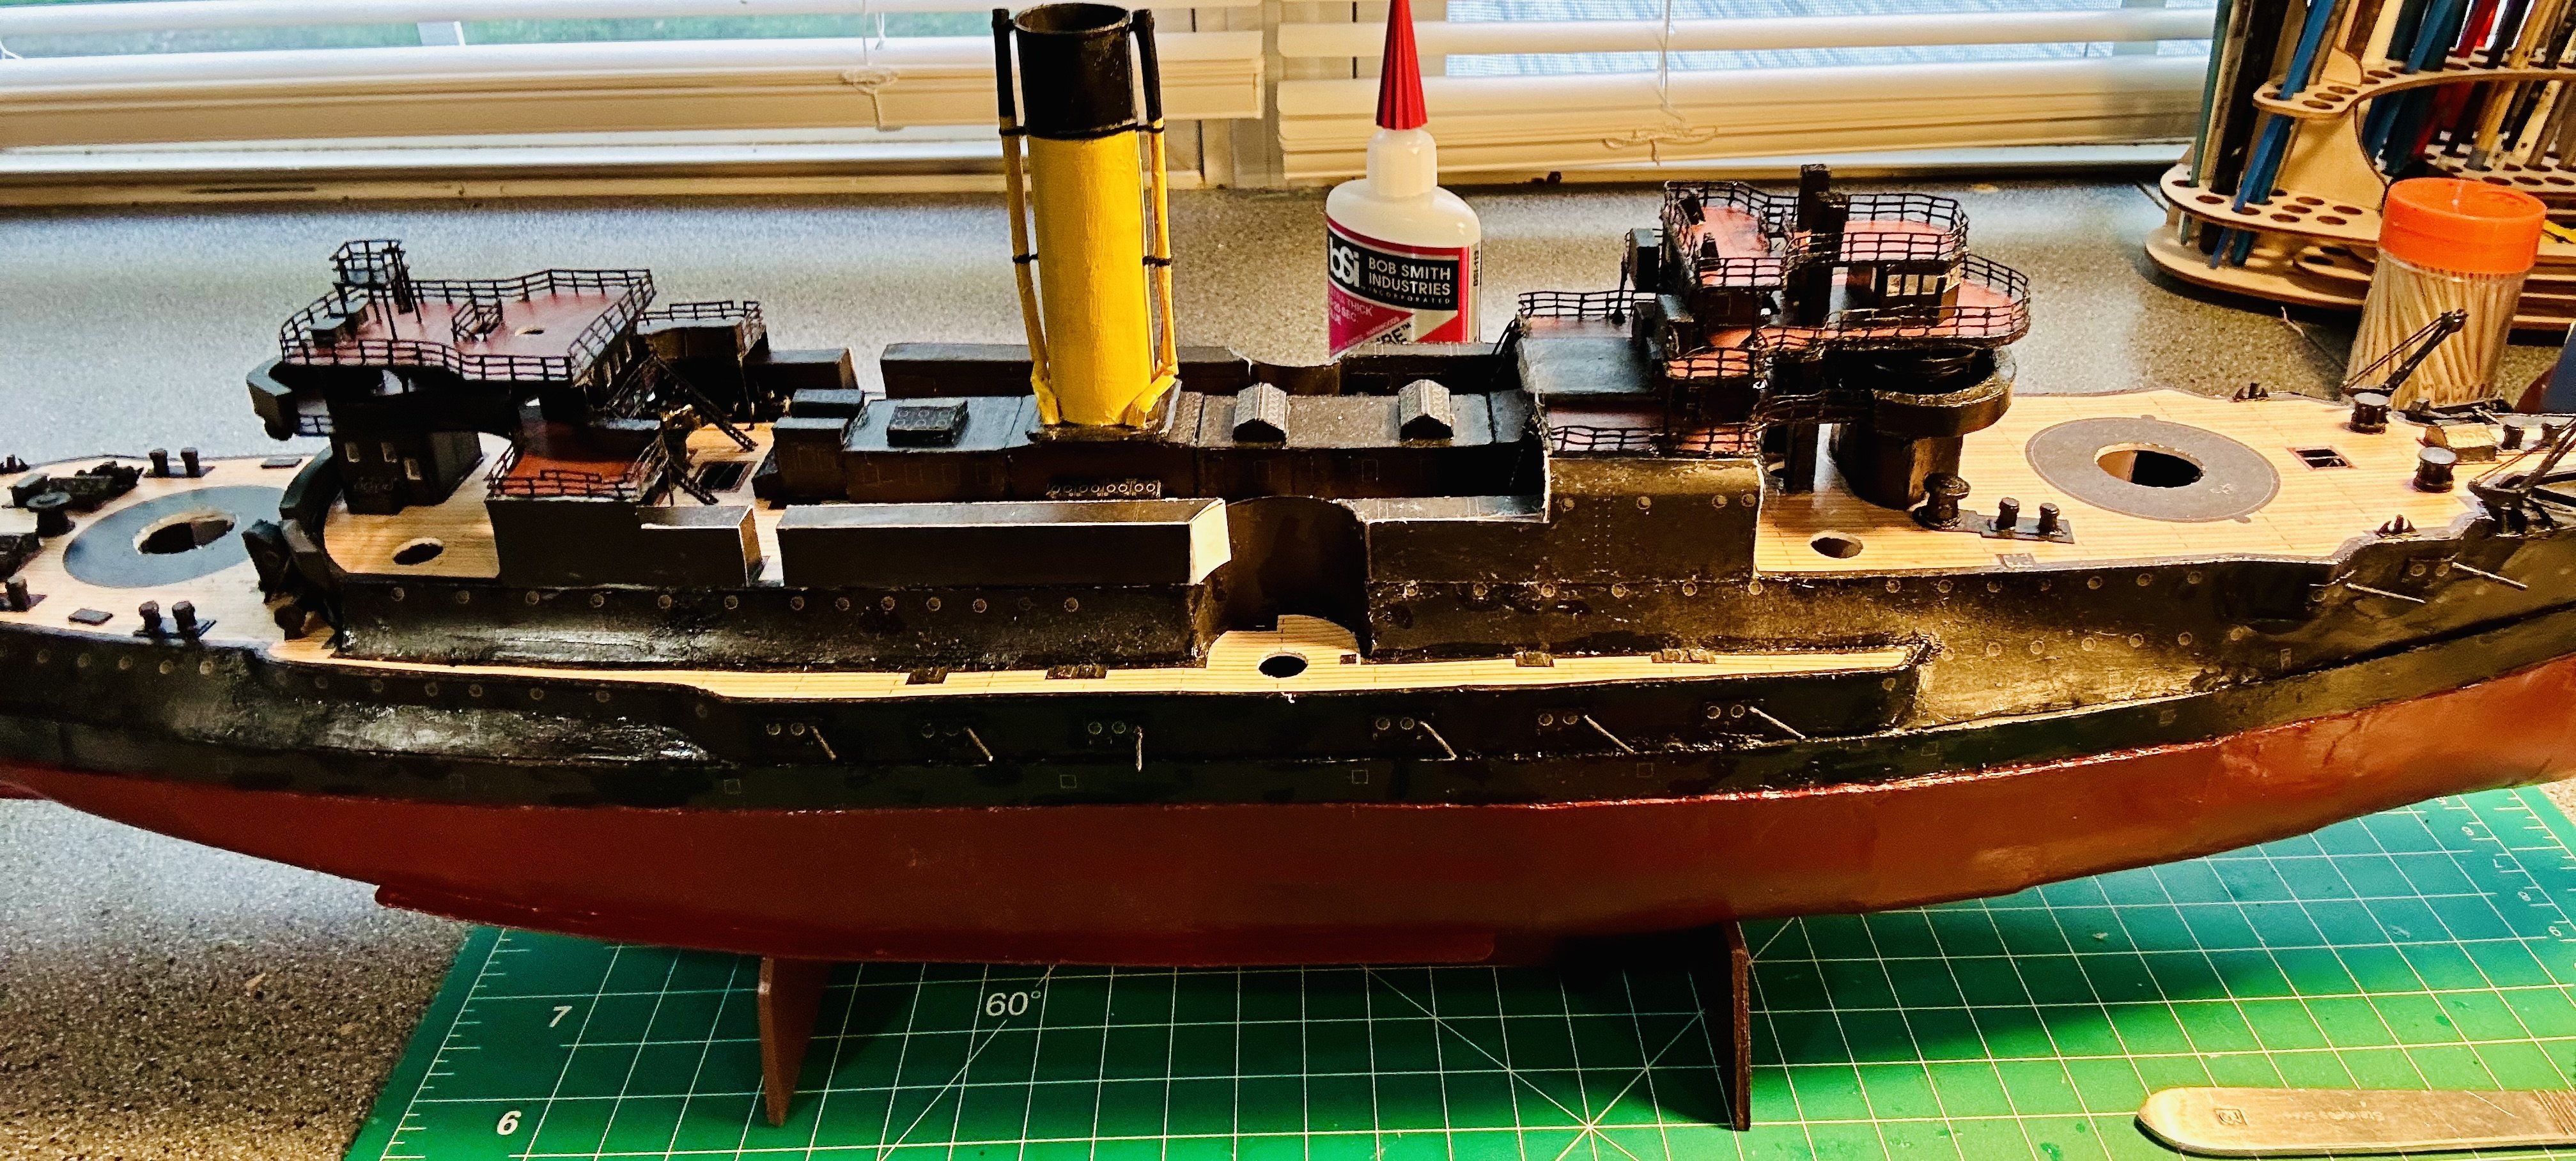
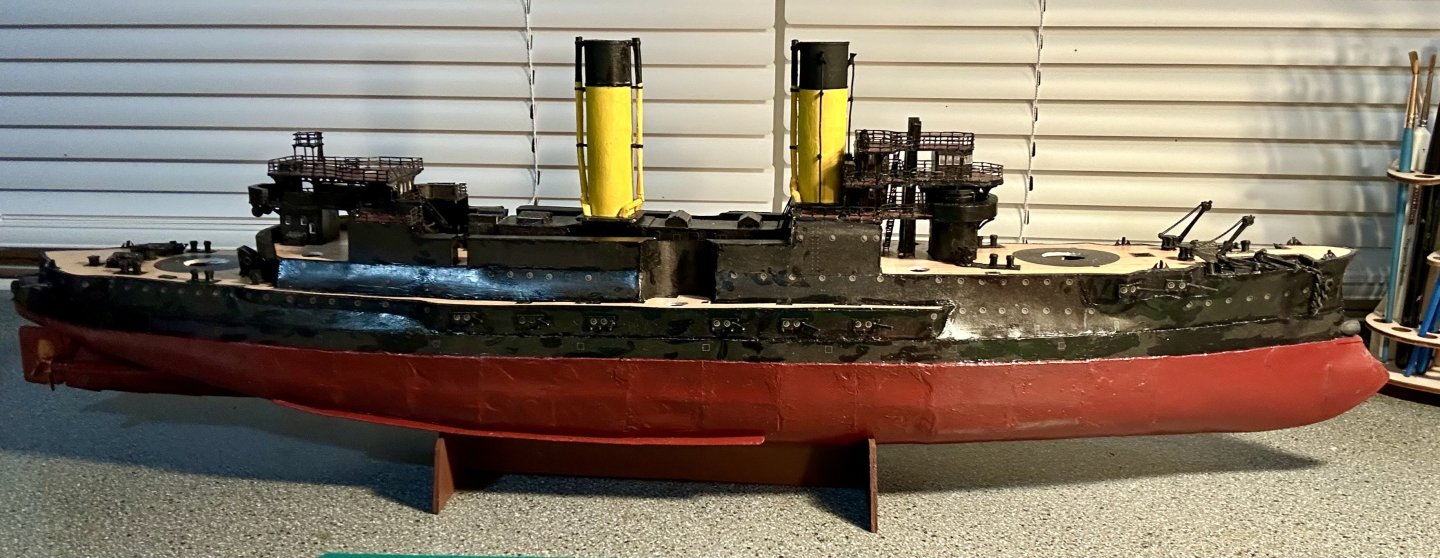
Keith, Thank you very much! Keith, Thank you very much! This one has been a fun learning experience! All bulwarks are now installed, painted and sealed! The forward stack is now on too! Waiting on the amidships platforms to dry so I can finish cutting them out and assemble them!
- 288 replies
-
- 16
-
-
- Card
- Pre-Dreadnought
- (and 3 more)
-
Welcome!
-
Congratulations! Very nicely done
-
I’m looking forward to this one! The Golden Hind is another of Drake’s ships (along with the Revenge) and is one that I have had a strong interest in. I actually used pictures from below decks on the reconstruction of the Golden Hind in London as part of my reference material regarding gun carriages for my Revenge.
- 46 replies
-
- 2
-

-
-
- Golden Hind
- airfix
- (and 2 more)
-
Welcome!
-
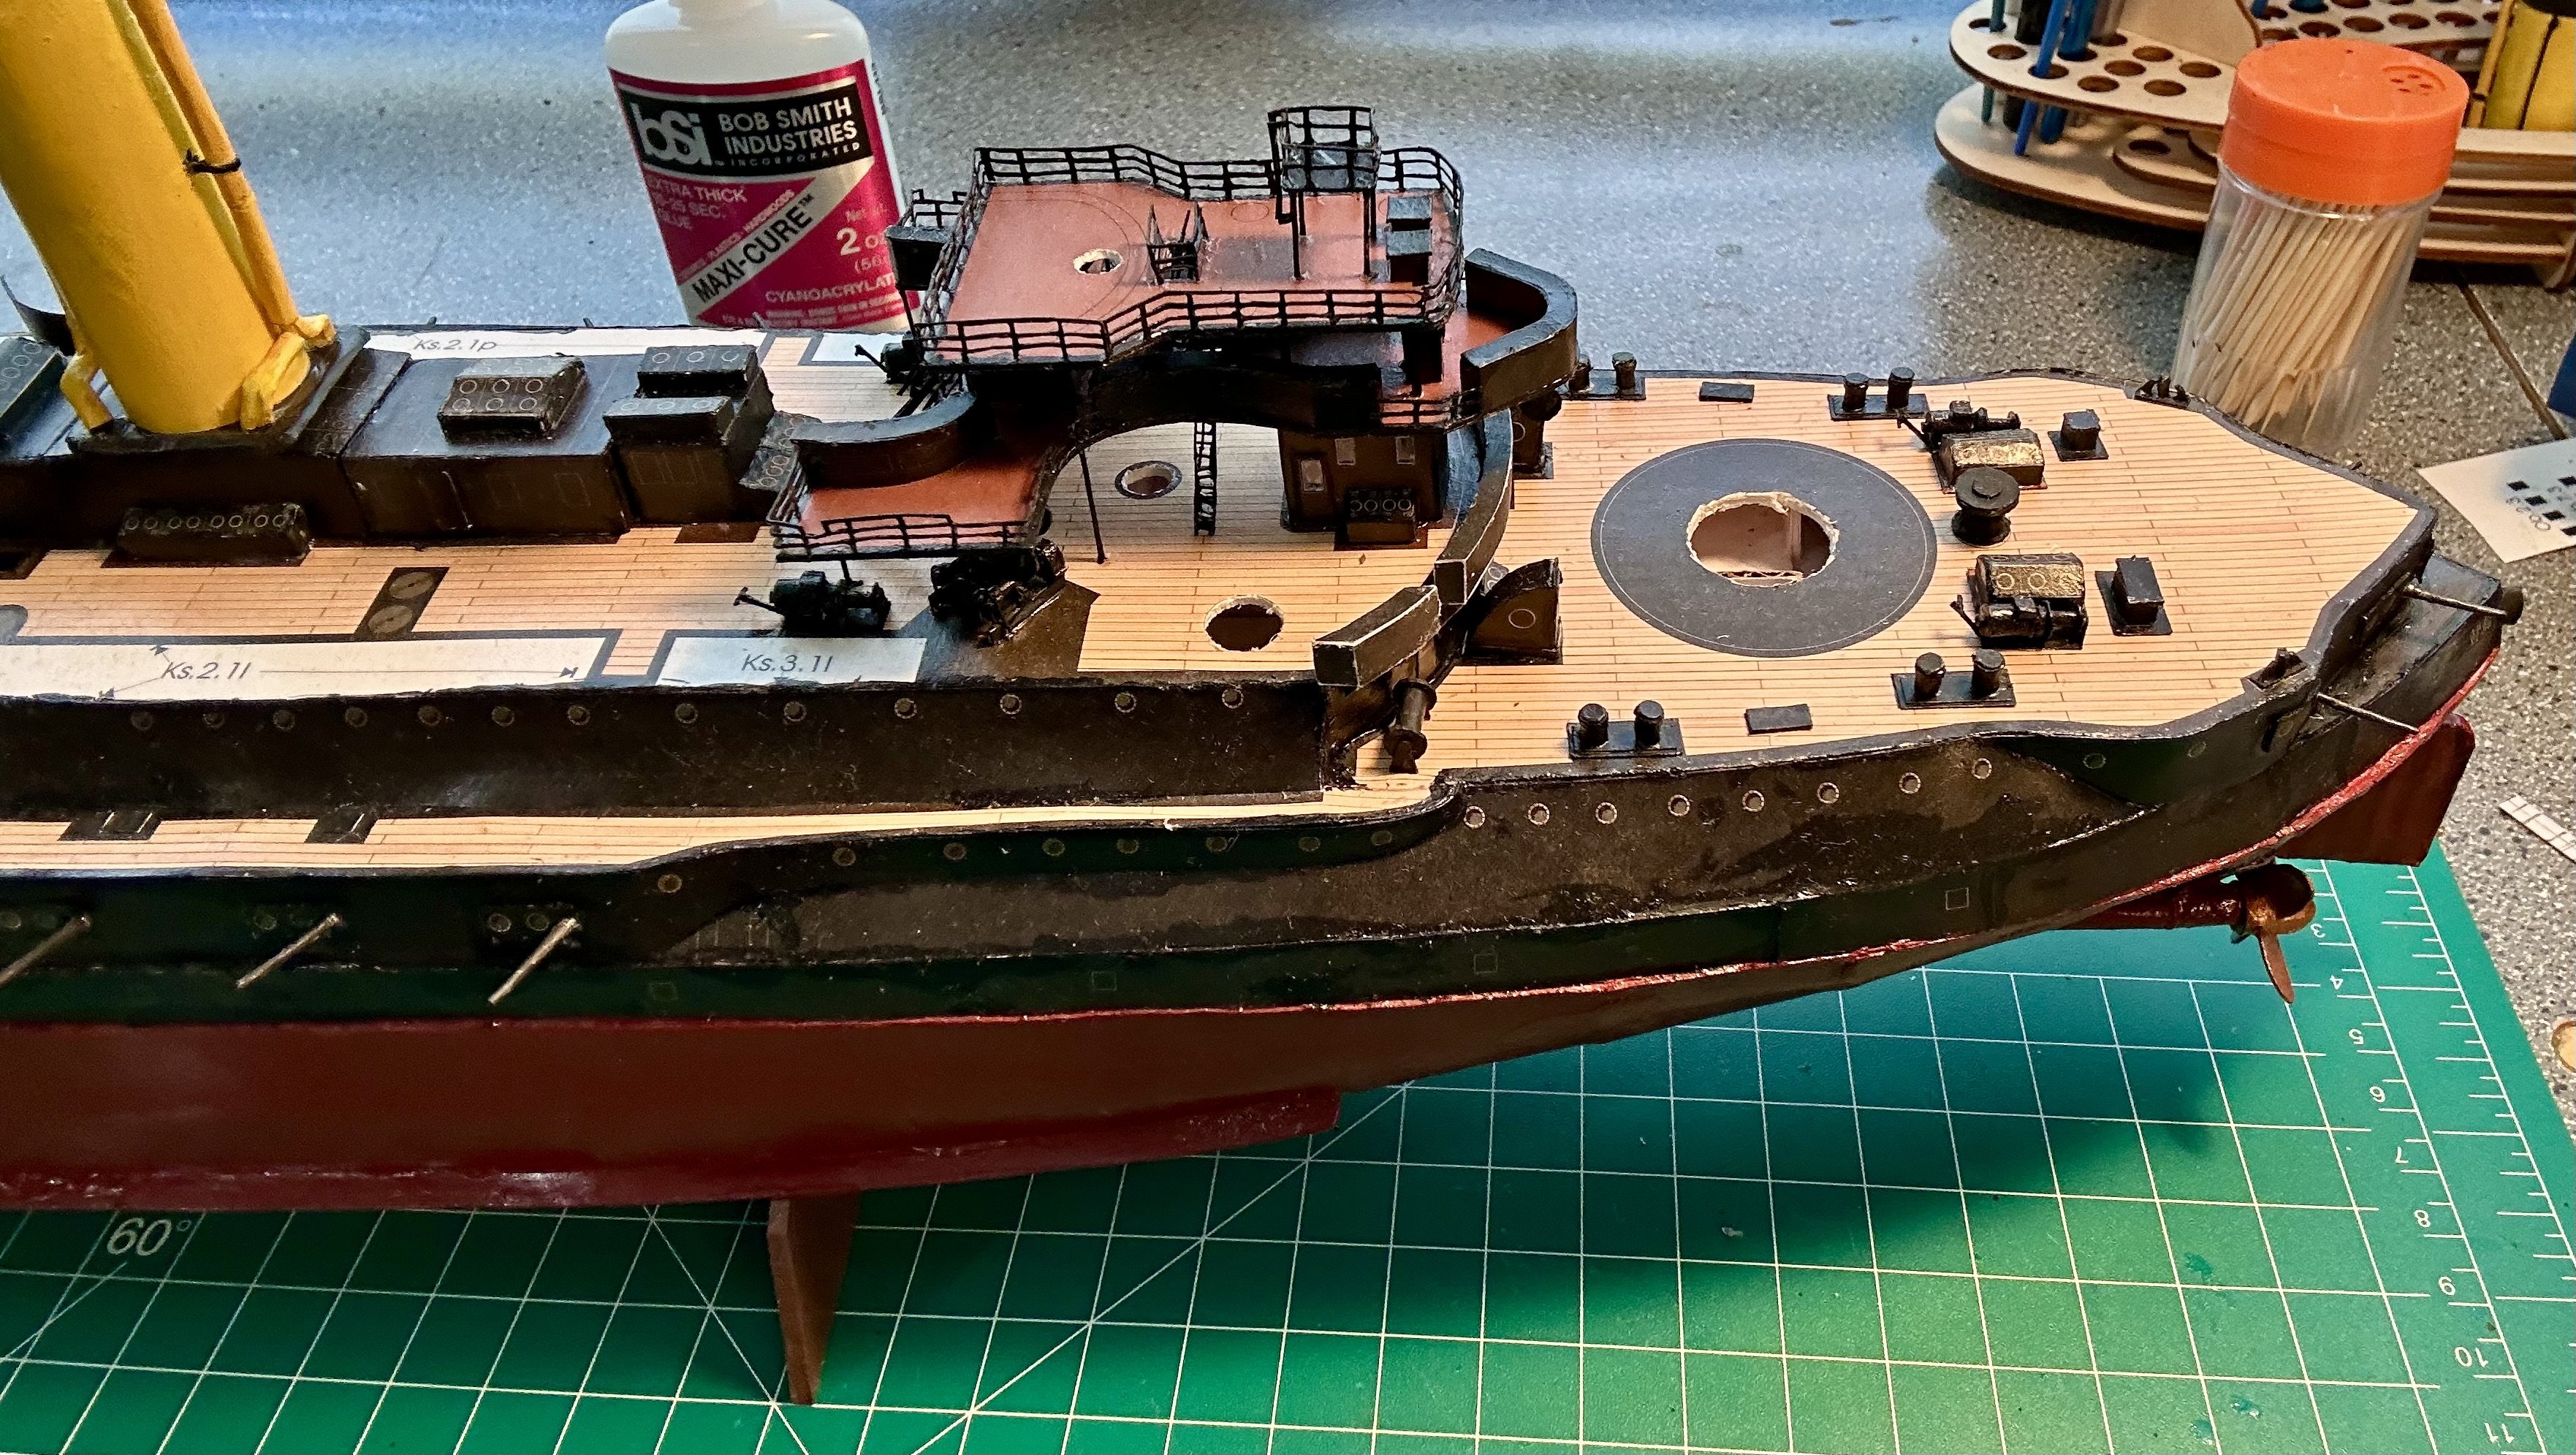
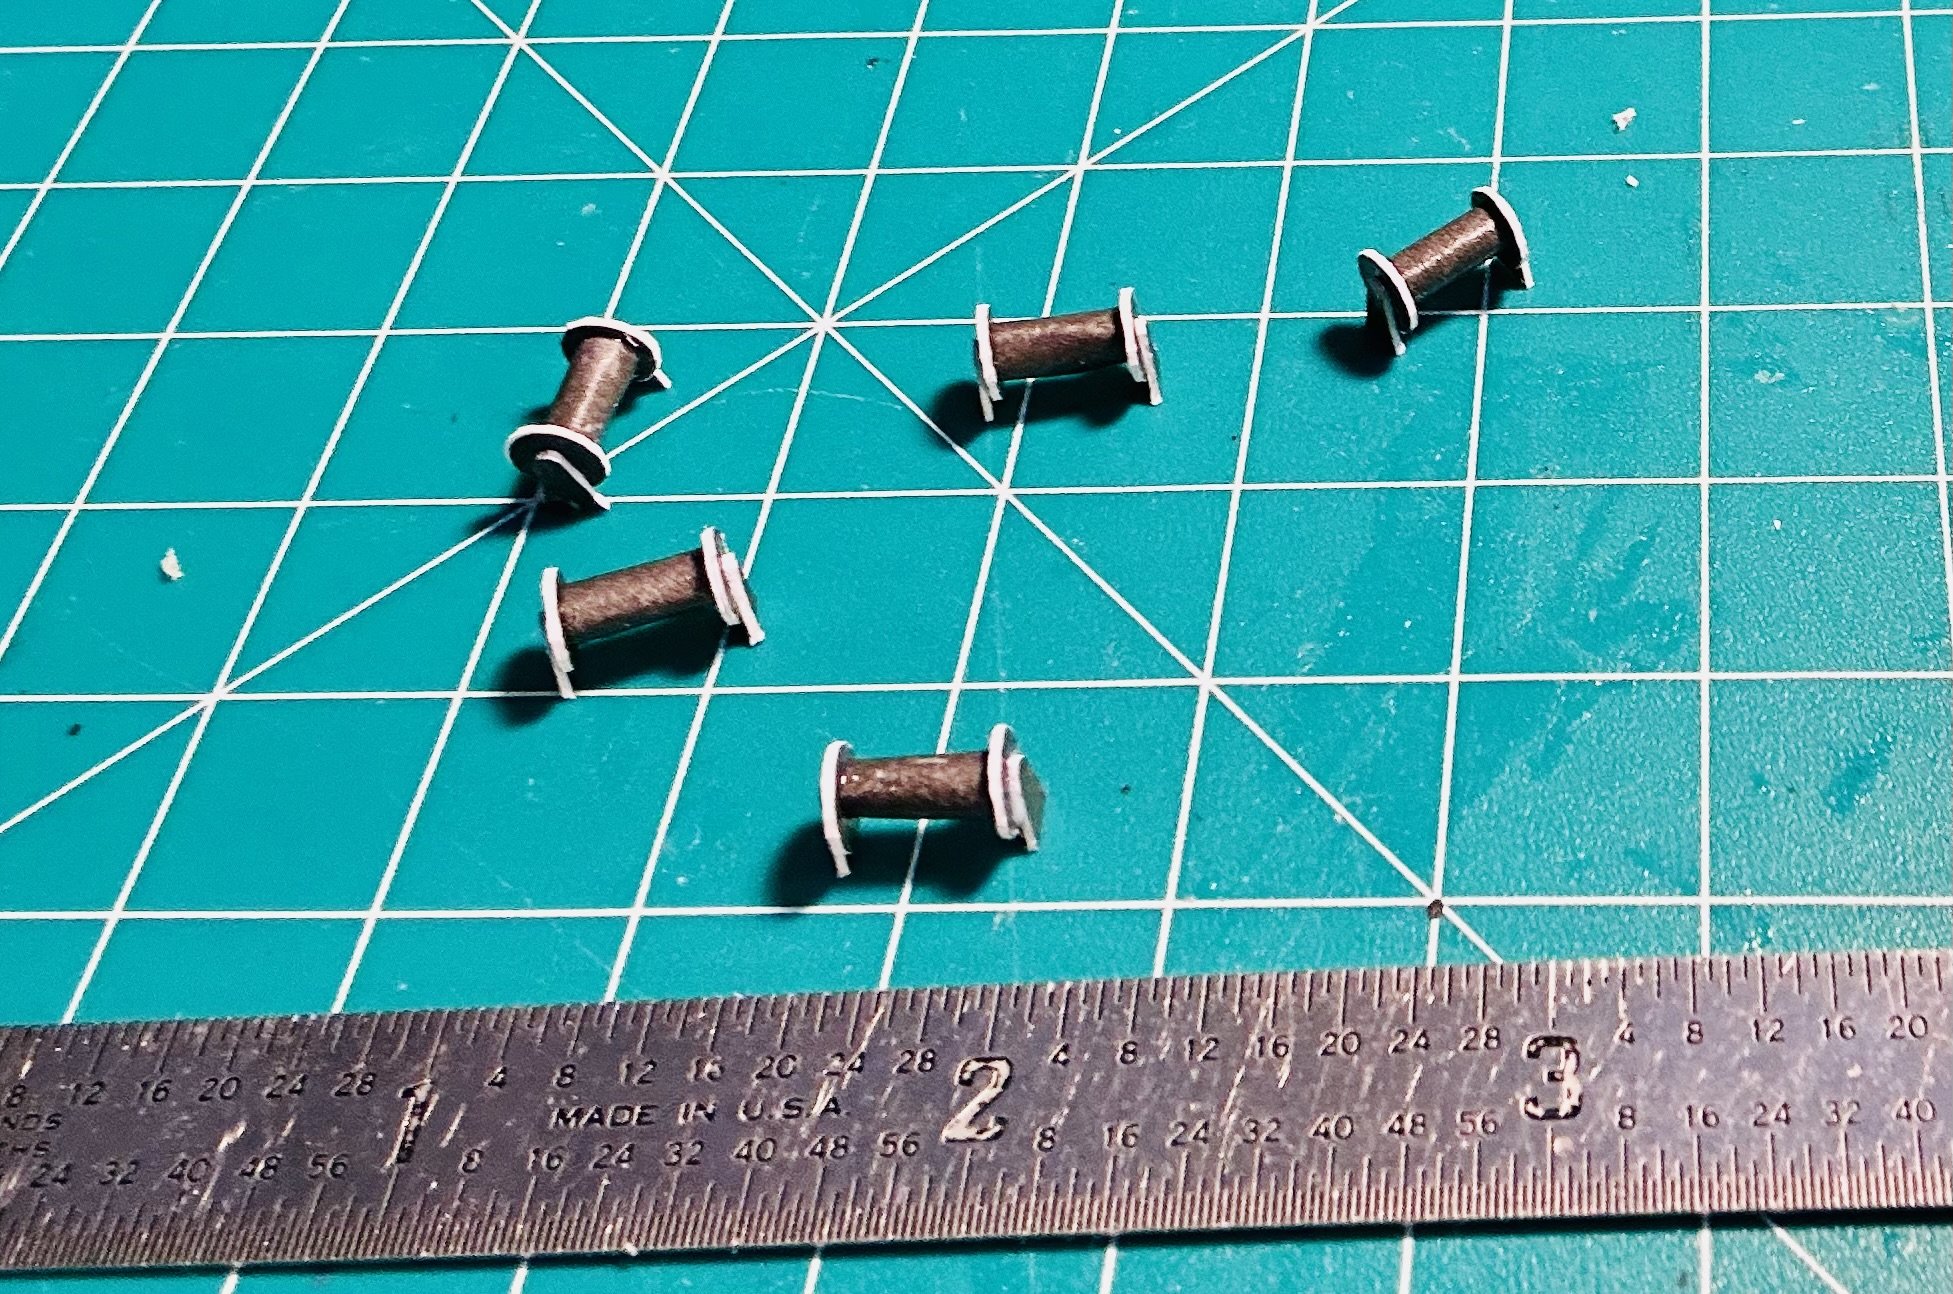
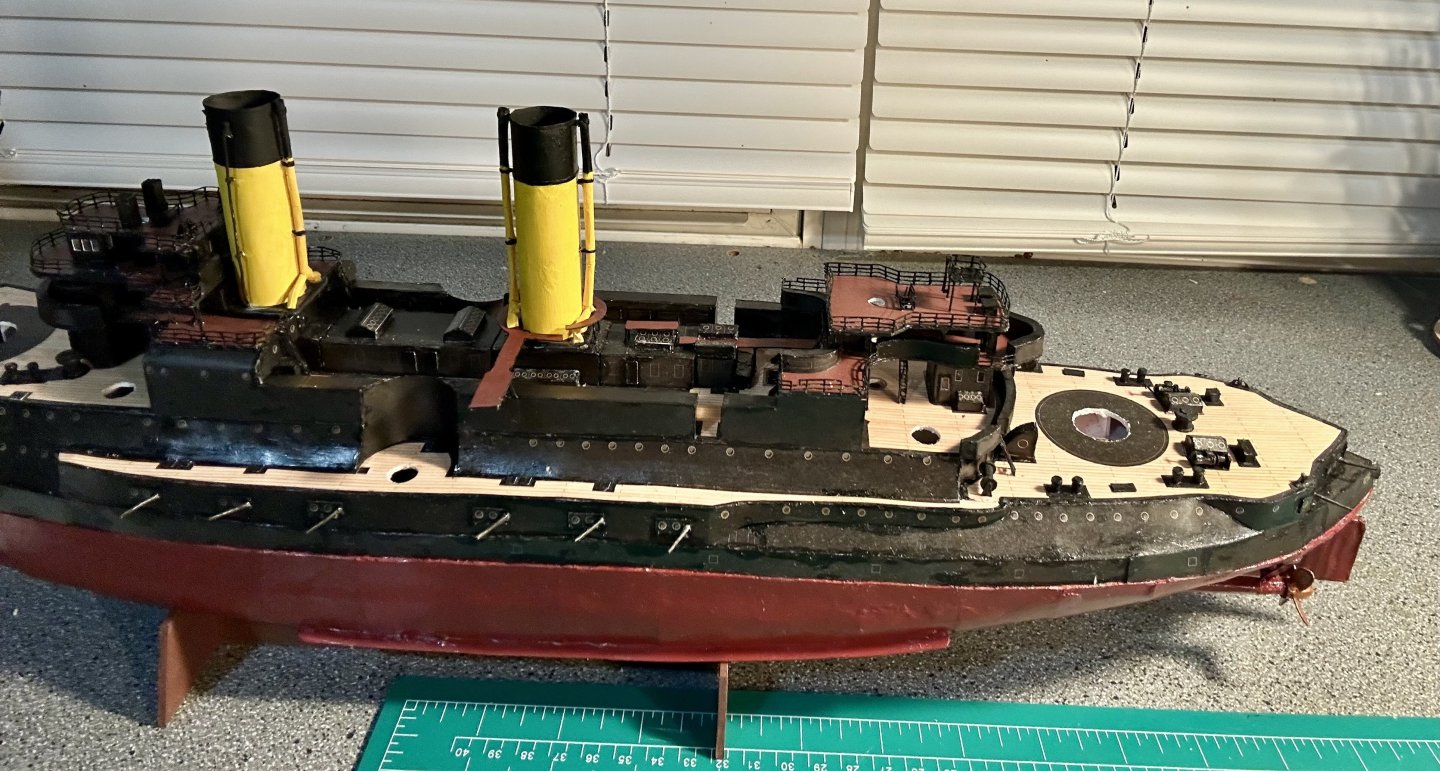
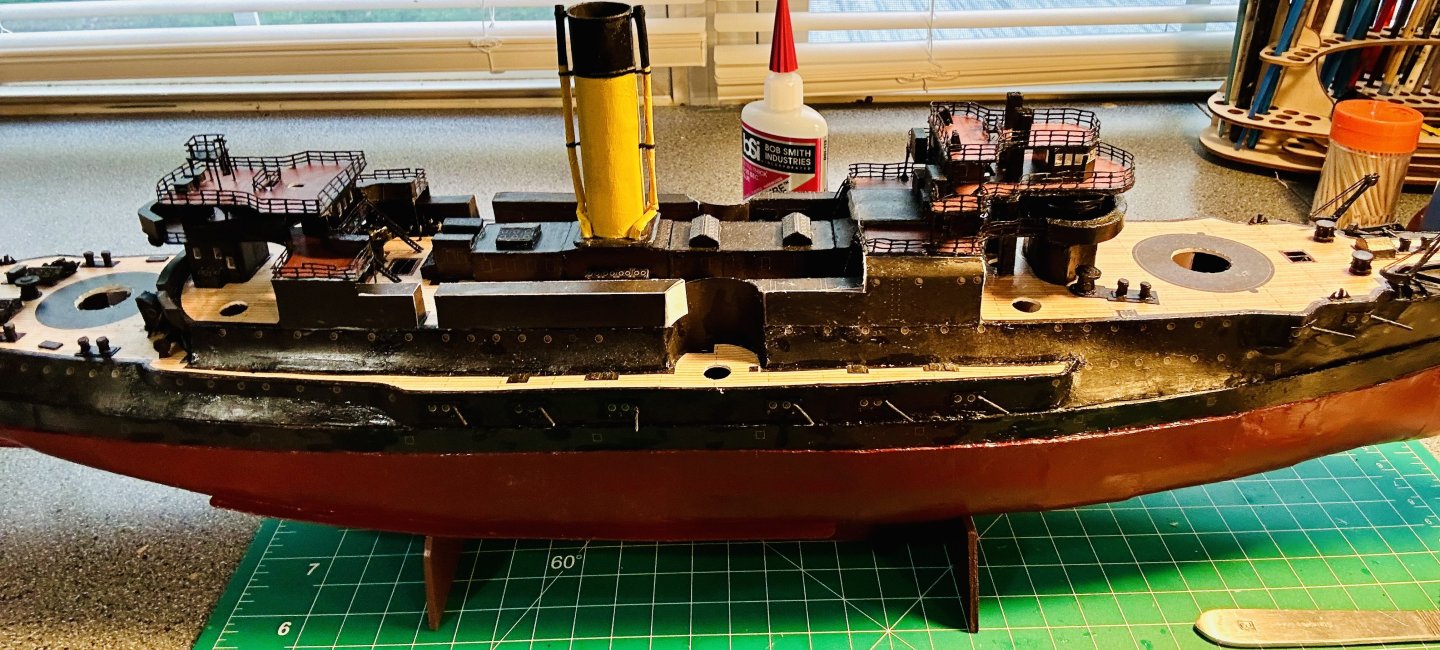
Steve, Thank you very much! Oryol is starting to look mean! This has been a very neat project for me! Alan, Thank you very much! Jeff, Thank you very much! I greatly appreciate the compliment. I used thread with steel pins on my Solferino and they worked well. Your Baltimore looks amazing with all the 3D printed upgrades and the railings! I can only cut these out because I have a special pair of glasses specially ordered for this hobby. Mark, Thank you very much! I am learning and continually improving! OC, Thank you very much! I have finished making the amidships bulwarks: They still need edge painted and some touch up painting to cover repairs on mistakes made early in the build.
- 288 replies
-
- 10
-
-
- Card
- Pre-Dreadnought
- (and 3 more)
-
Welcome!
-
Alan, Incredible work!
-
Keith, I hope all goes well. You’re in our thoughts and prayers too! Also, Lula looks fantastic!
- 732 replies
-
- 3
-
-
-
- Lula
- sternwheeler
- (and 1 more)
-
The Baltimore is looking really good!
-
Incredible work, both on the Royal Caroline and the rest of your collection!
- 883 replies
-
- 2
-
-
- royal caroline
- ship of the line
- (and 1 more)
-
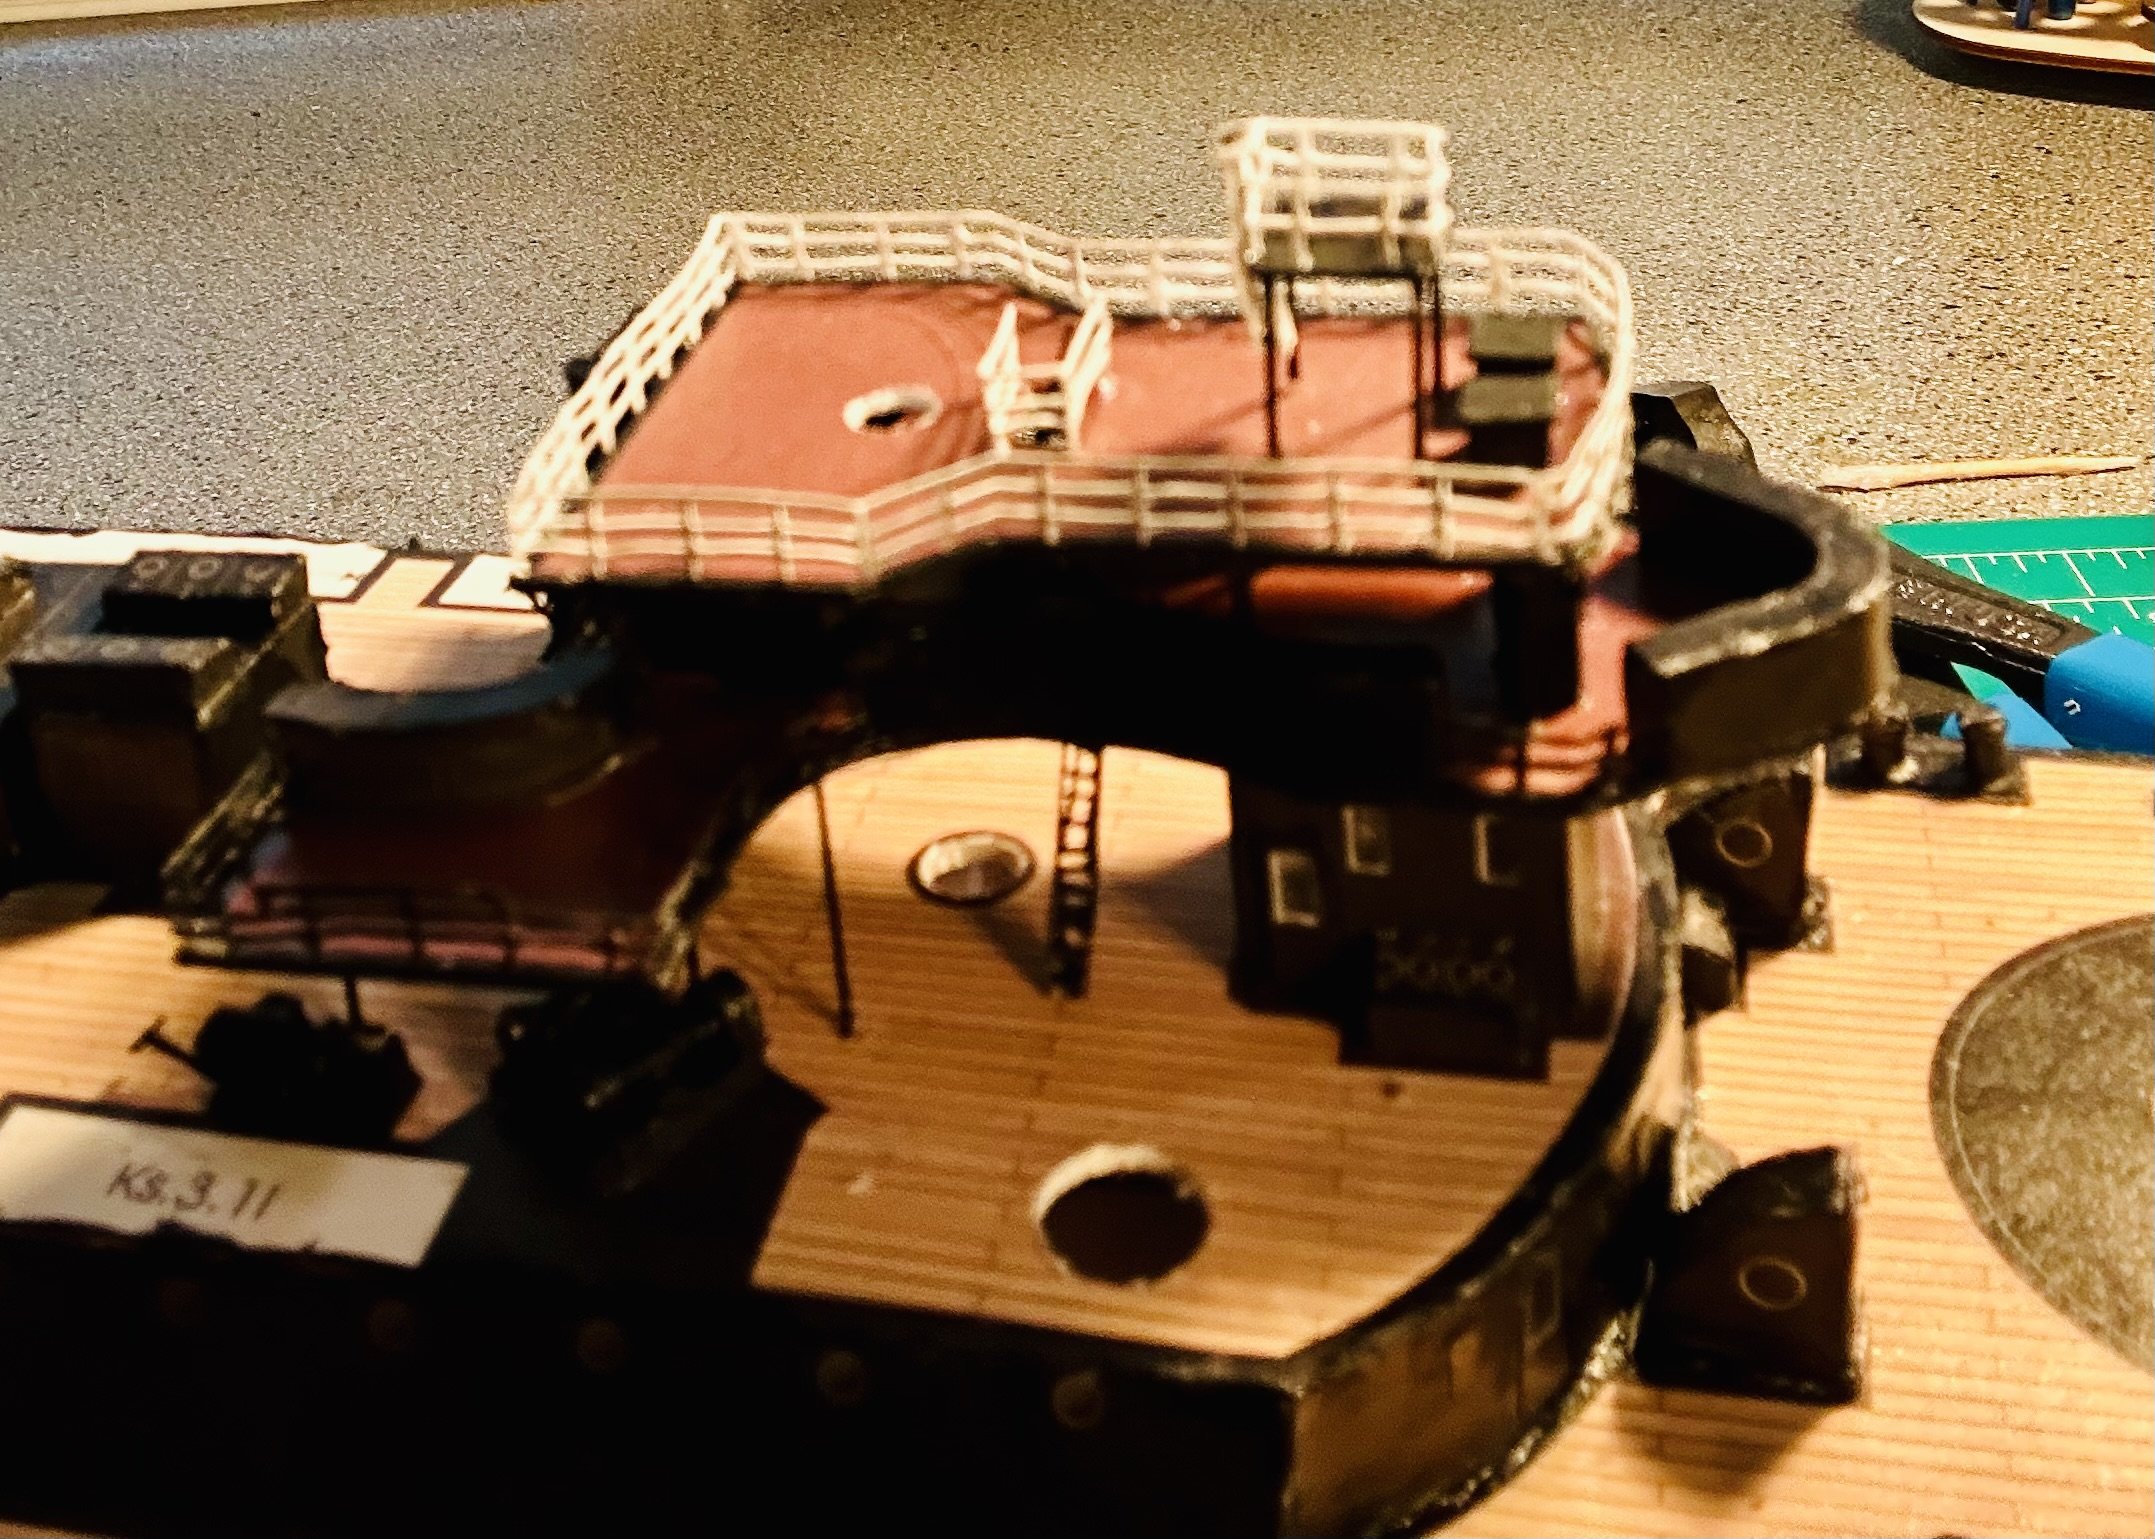
I made some progress! The aft tower is complete except for the 47mm guns and the search lights: I have the aft bulwarks installed: I am working on the port side bulwarks and the aft ladders: The paperwork that came with the model would have you install the middle platforms first, but the middle platforms partially sit on top of the bulwarks so I figured that I’d follow my own experience and install the bulwarks first to save what I see as potential aggravation later.


- 288 replies
-
- 15
-
-
- Card
- Pre-Dreadnought
- (and 3 more)
-
De Zeven Provincien looks amazing!
-
Greeting from Weston-super-Mare
GrandpaPhil replied to JonVonWeston's topic in New member Introductions
Welcome and nicely done! -
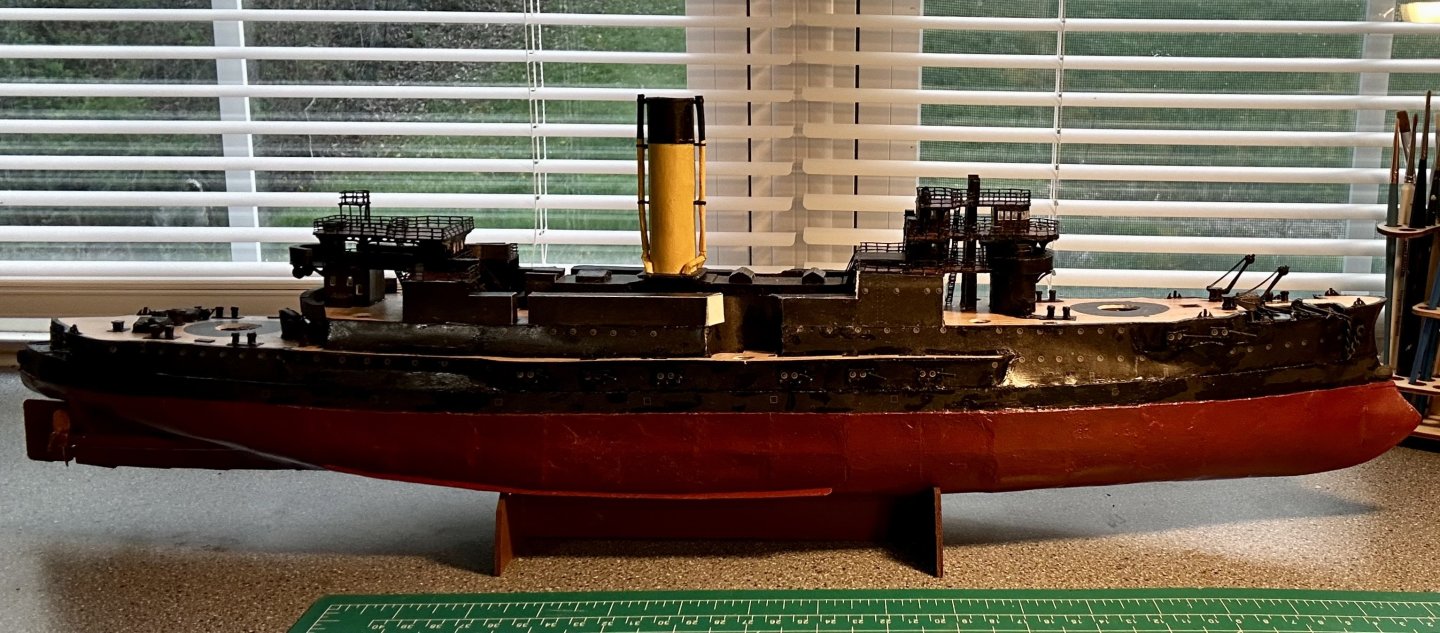
Alan, Thank you very much! They have been a learning curve, but I am getting better at making them! OC, Thank you very much! Mark, Thank you very much! I am very happy with how this model is turning out! The upper deck has railings and an observation platform now! I’ve working on the winches that hang from the bottom deck of the aft tower. I know where three of them go, but haven’t been able to locate the other two on the drawings of the model. Here’s a side shot of the model:


- 288 replies
-
- 12
-
-
- Card
- Pre-Dreadnought
- (and 3 more)
-
Jeff, Very nicely done on the longboat! The sail looks amazing!
- 27 replies
-
- 1
-
-
- Slavic Longship
- Falkonet
- (and 2 more)
-
Did I ruin my brush?
GrandpaPhil replied to MBerg's topic in Painting, finishing and weathering products and techniques
Brushes will stain. Especially with a flat brush, that is just fine. -
Incredible work!