GrandpaPhil
-
Posts
6,167 -
Joined
-
Last visited
Content Type
Profiles
Forums
Gallery
Events
Everything posted by GrandpaPhil
-
Hello with first question on my first build
GrandpaPhil replied to Ratdude's topic in New member Introductions
Welcome! -
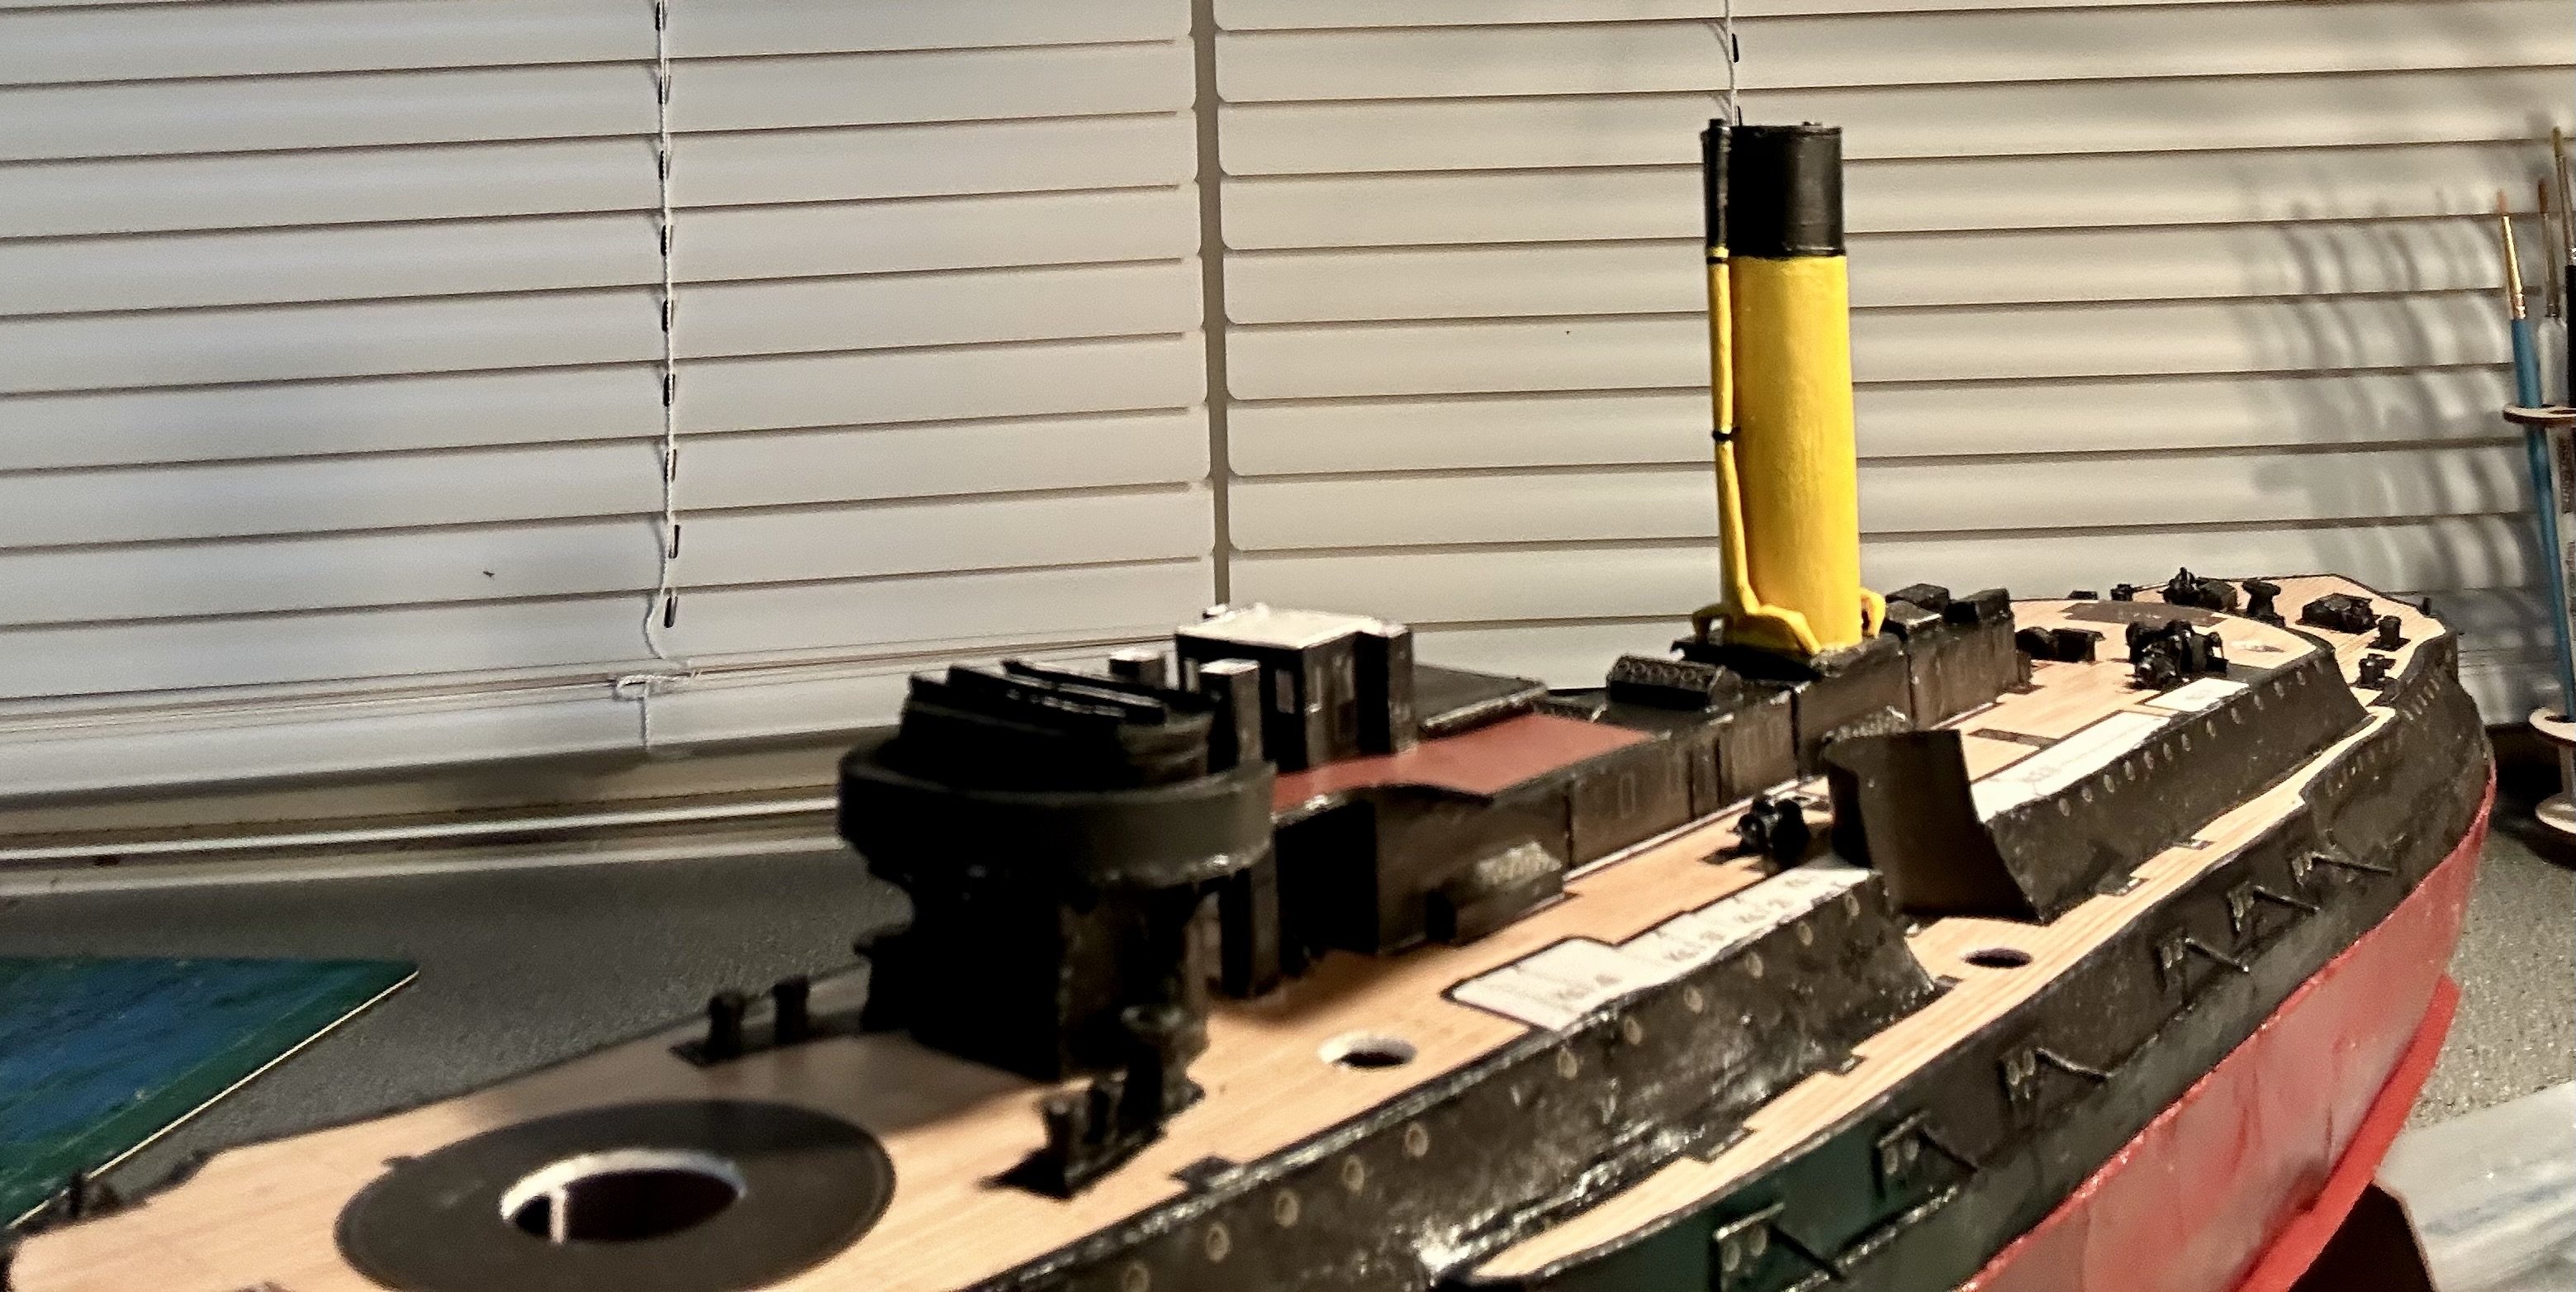
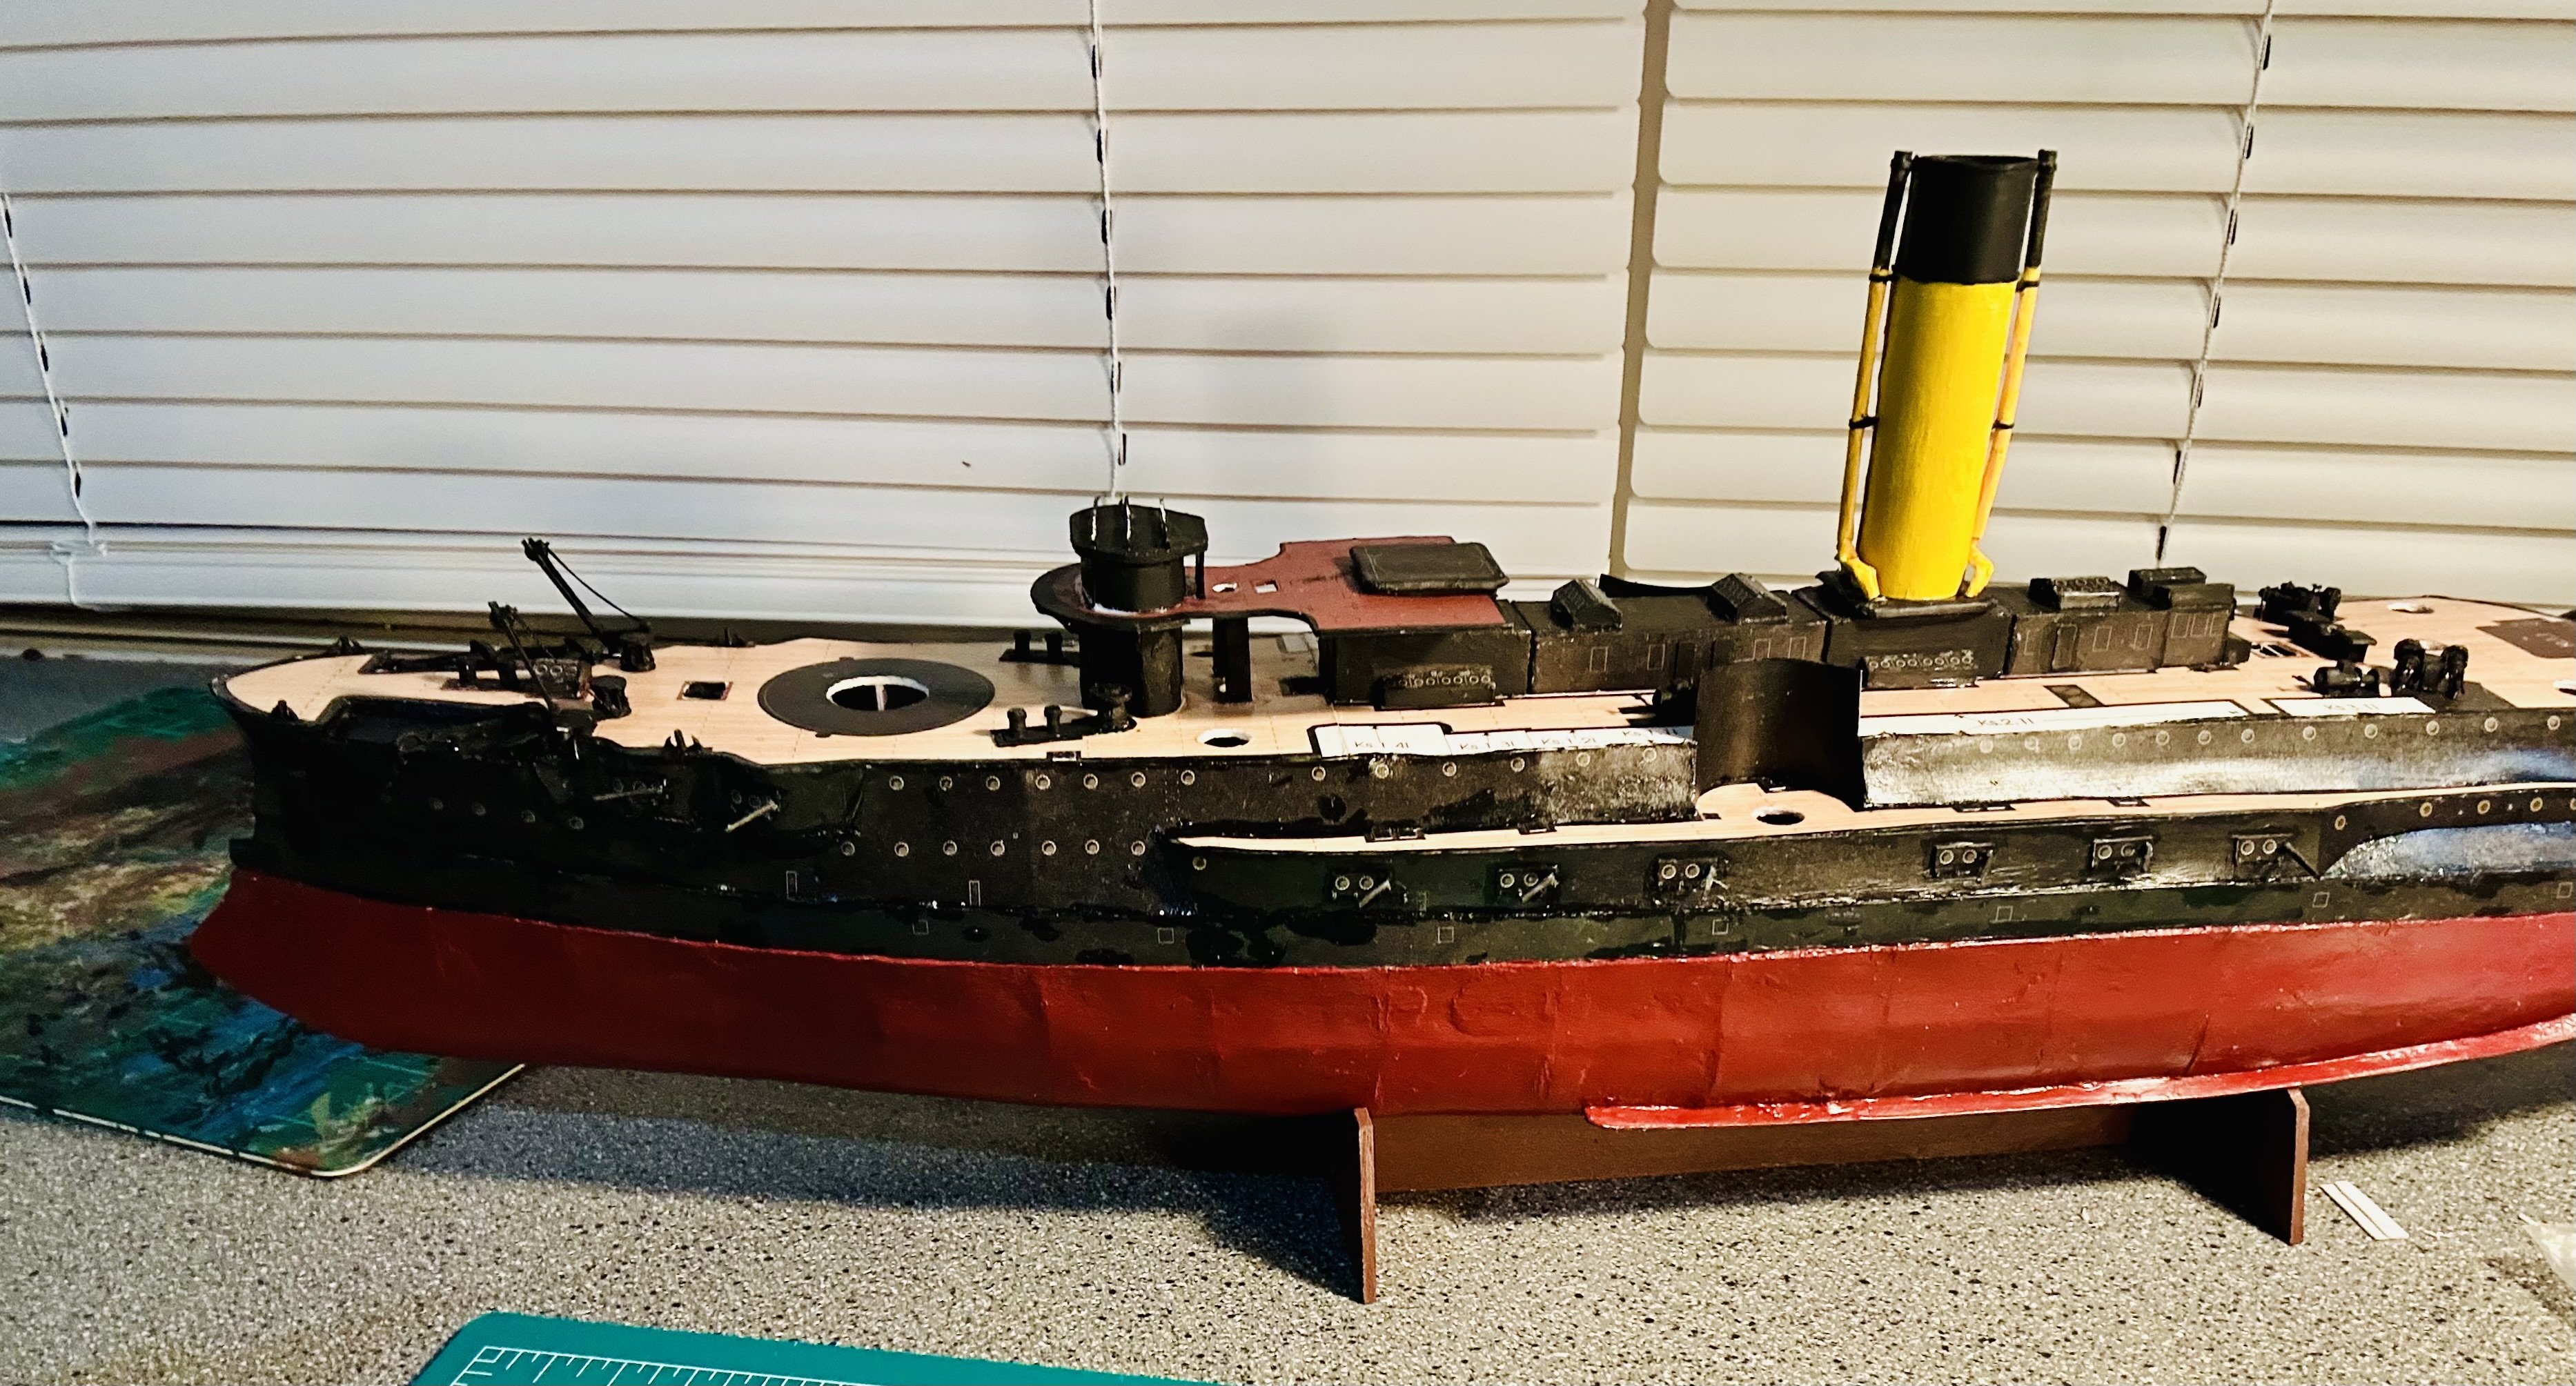
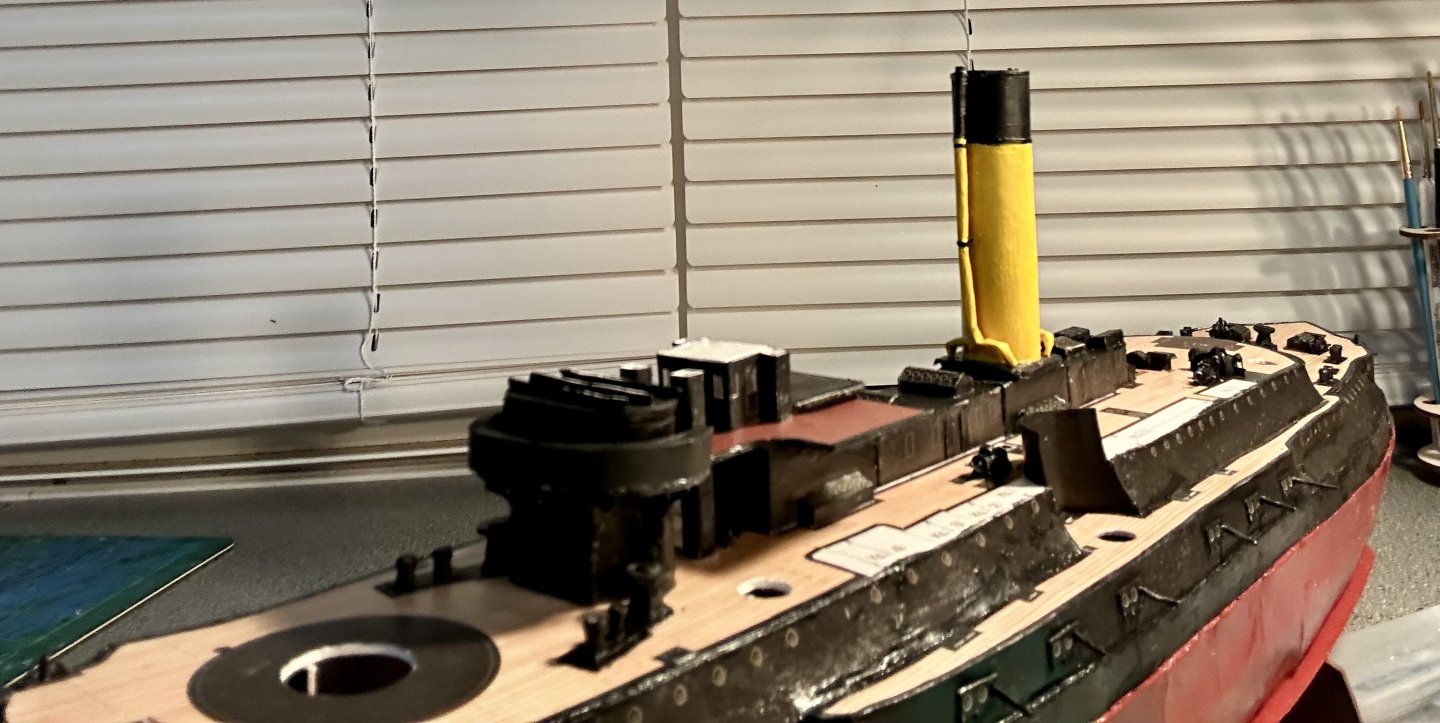
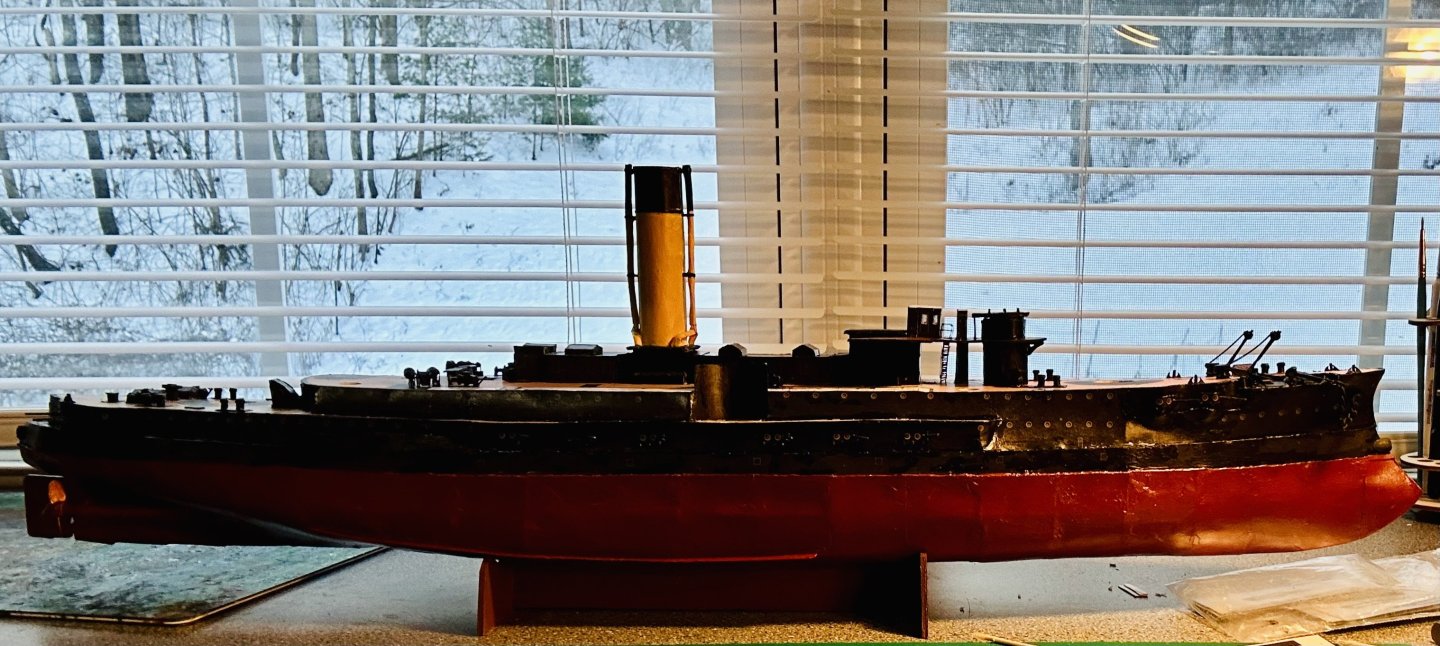
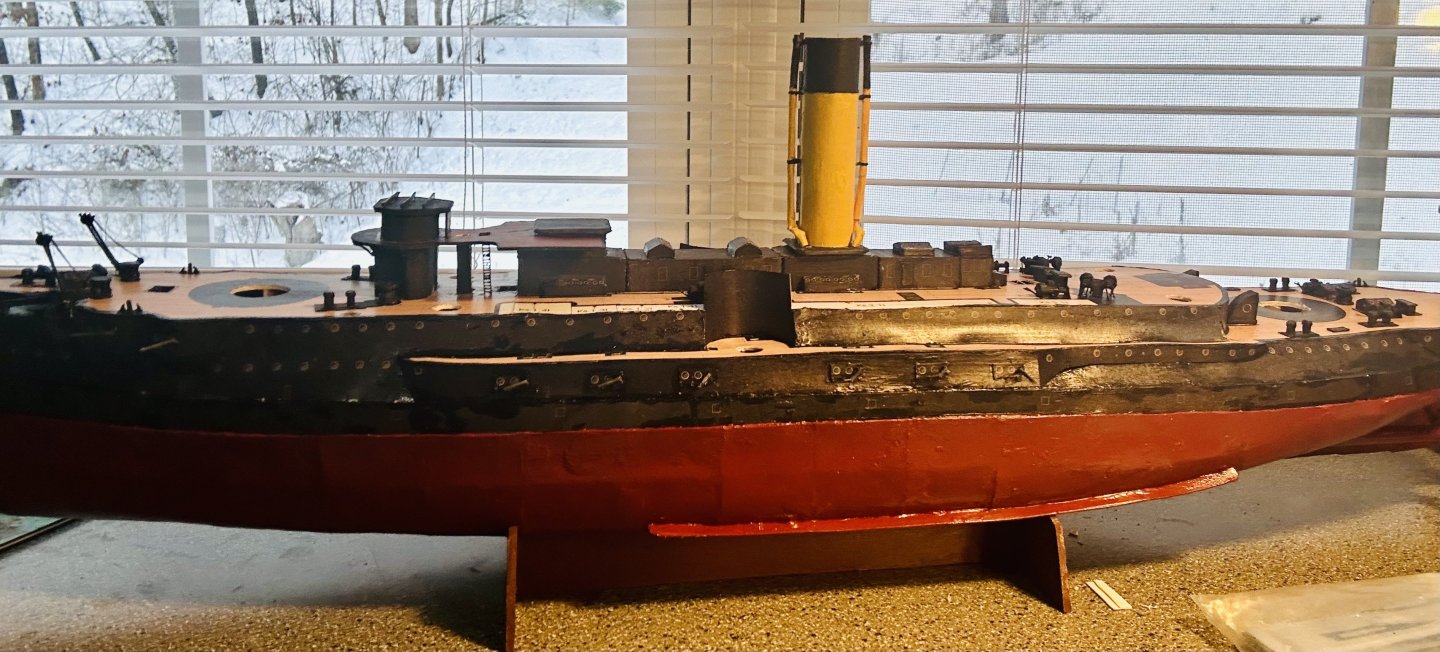
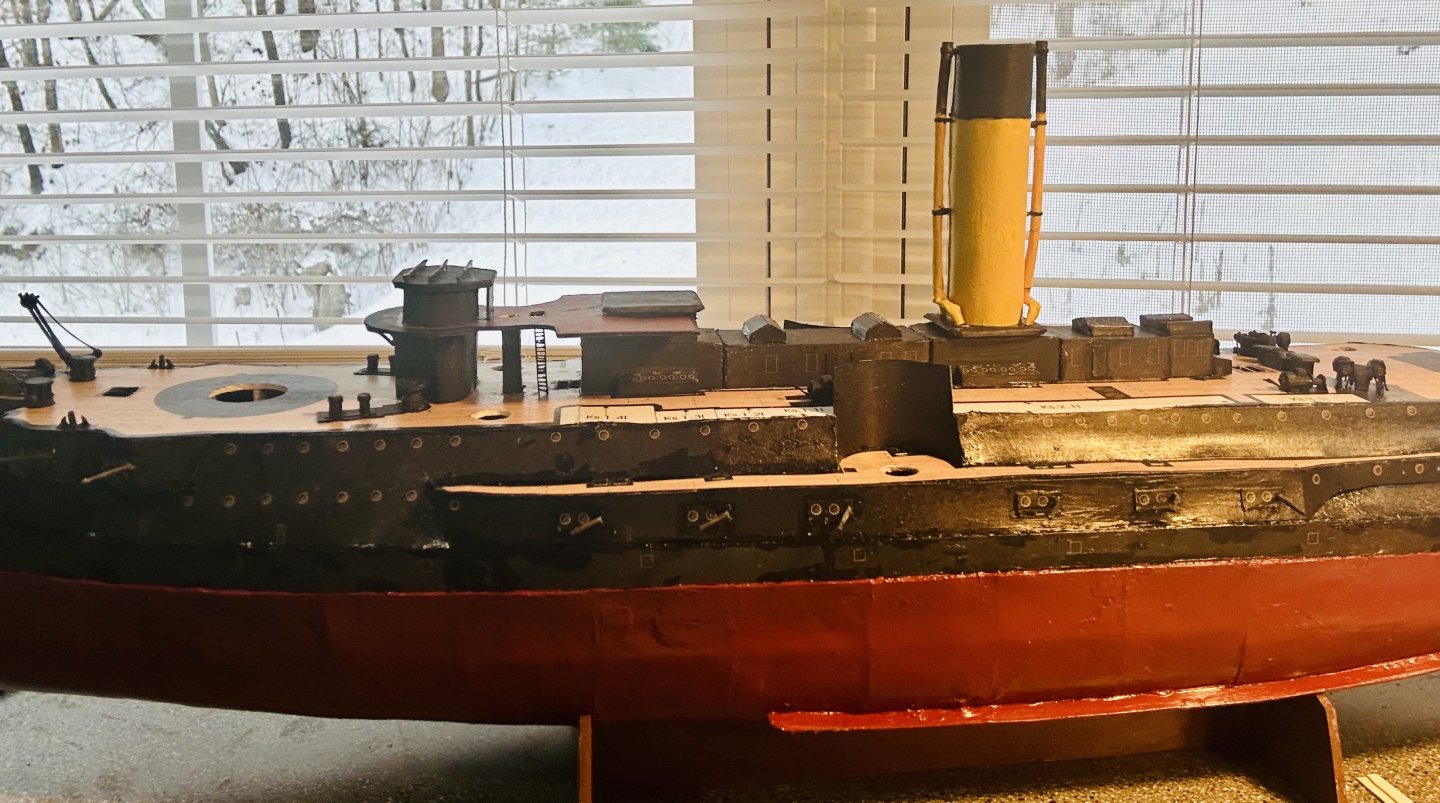
Thank you very much! I really like that view out my workshop window! I learn from each mistake! As long as I keep getting better, I’m happy! The front armor shield is on, in front of the conning tower! Oryol is starting to look really good!

- 288 replies
-
- 12
-

-
- Card
- Pre-Dreadnought
- (and 3 more)
-
Very nicely done!
-
The Artesania Latina Bounty Jolly Boat is a nice little kit. I built one many years ago. It was my first fully planked model boat that I actually finished.
-
The hardest part of first making pieces, and then entire models, from scratch, for me, was deciding to try. It seems really complicated and difficult, but once you get into it, you realize that it isn’t all that different than any other model making. The line between a wood (or card) kit and a scratch build is really blurry anyway. The difference to me anyway, is just the mentality behind it. The hardest part of any task is making the decision to try. I have seen your work. You will do just fine.
-
They aren’t too difficult to make either.
-
Welcome!
-
Welcome!
-
Welcome!
-
8 inch heavy gun MkII by RGL - FINISHED - Resicast - 1/35
GrandpaPhil replied to RGL's topic in Non-ship/categorised builds
Very nicely done! -
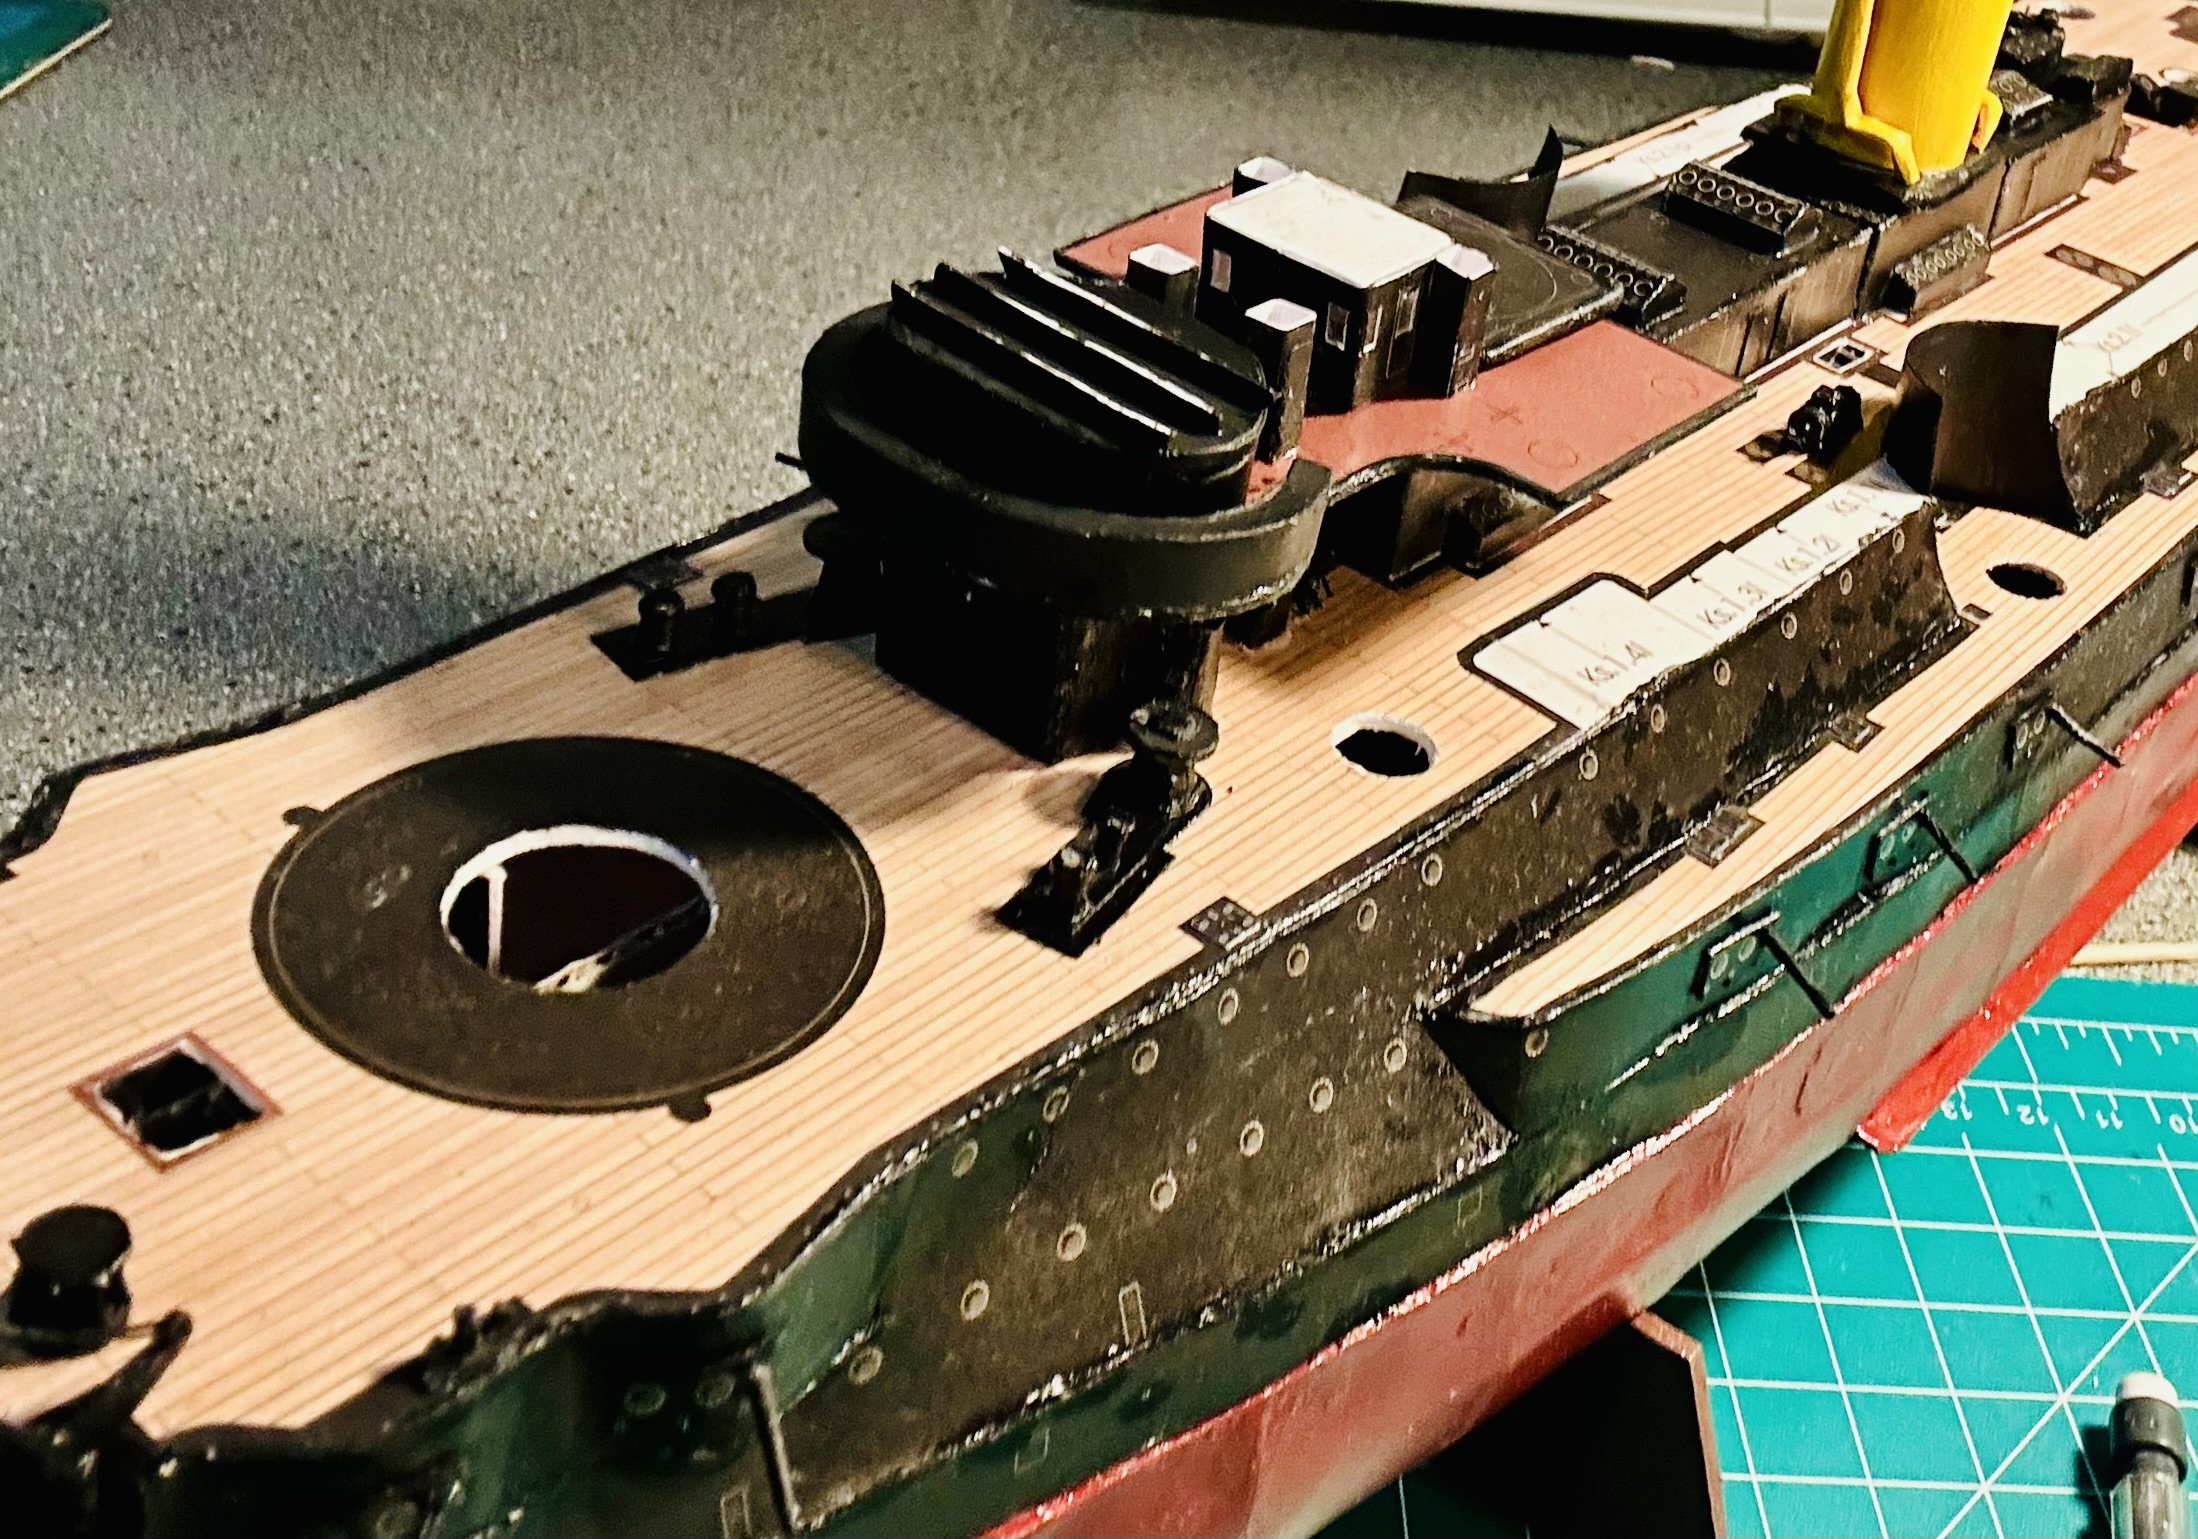
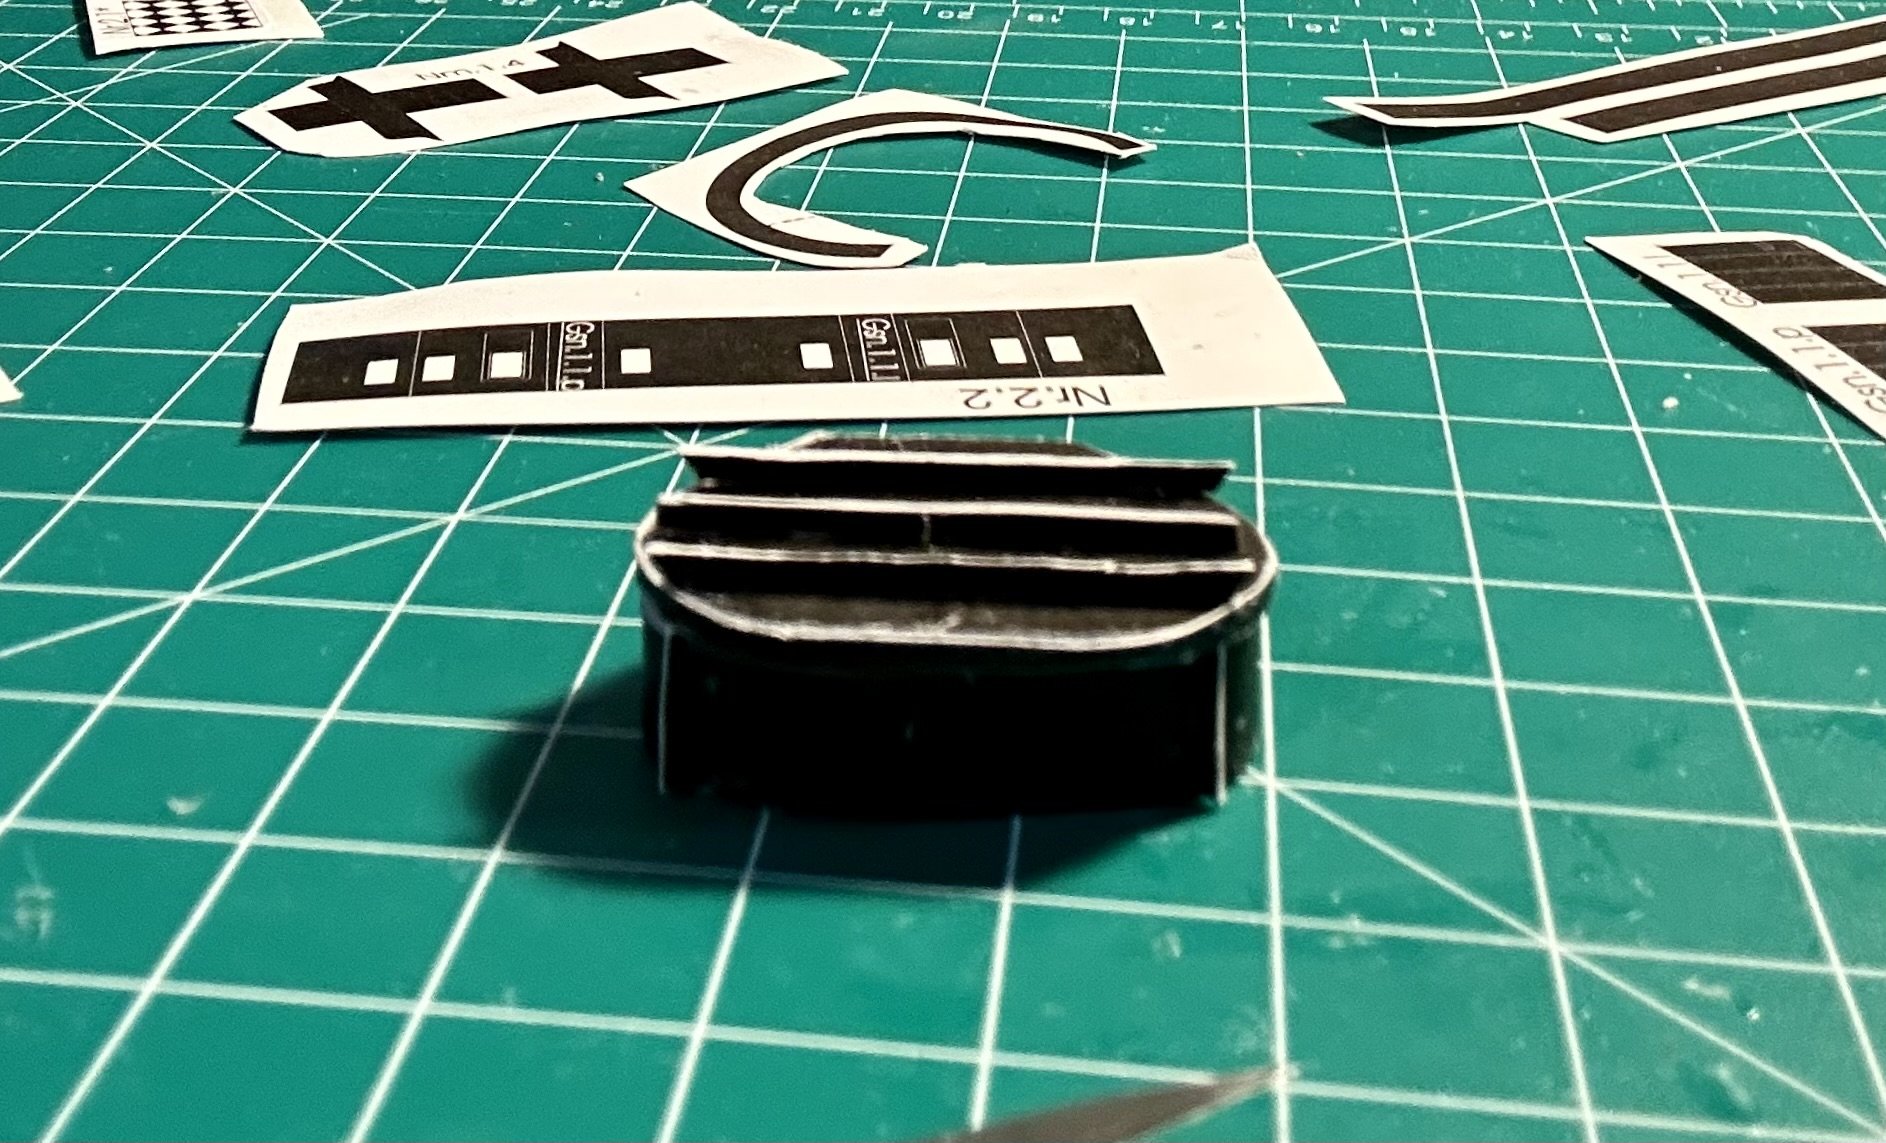
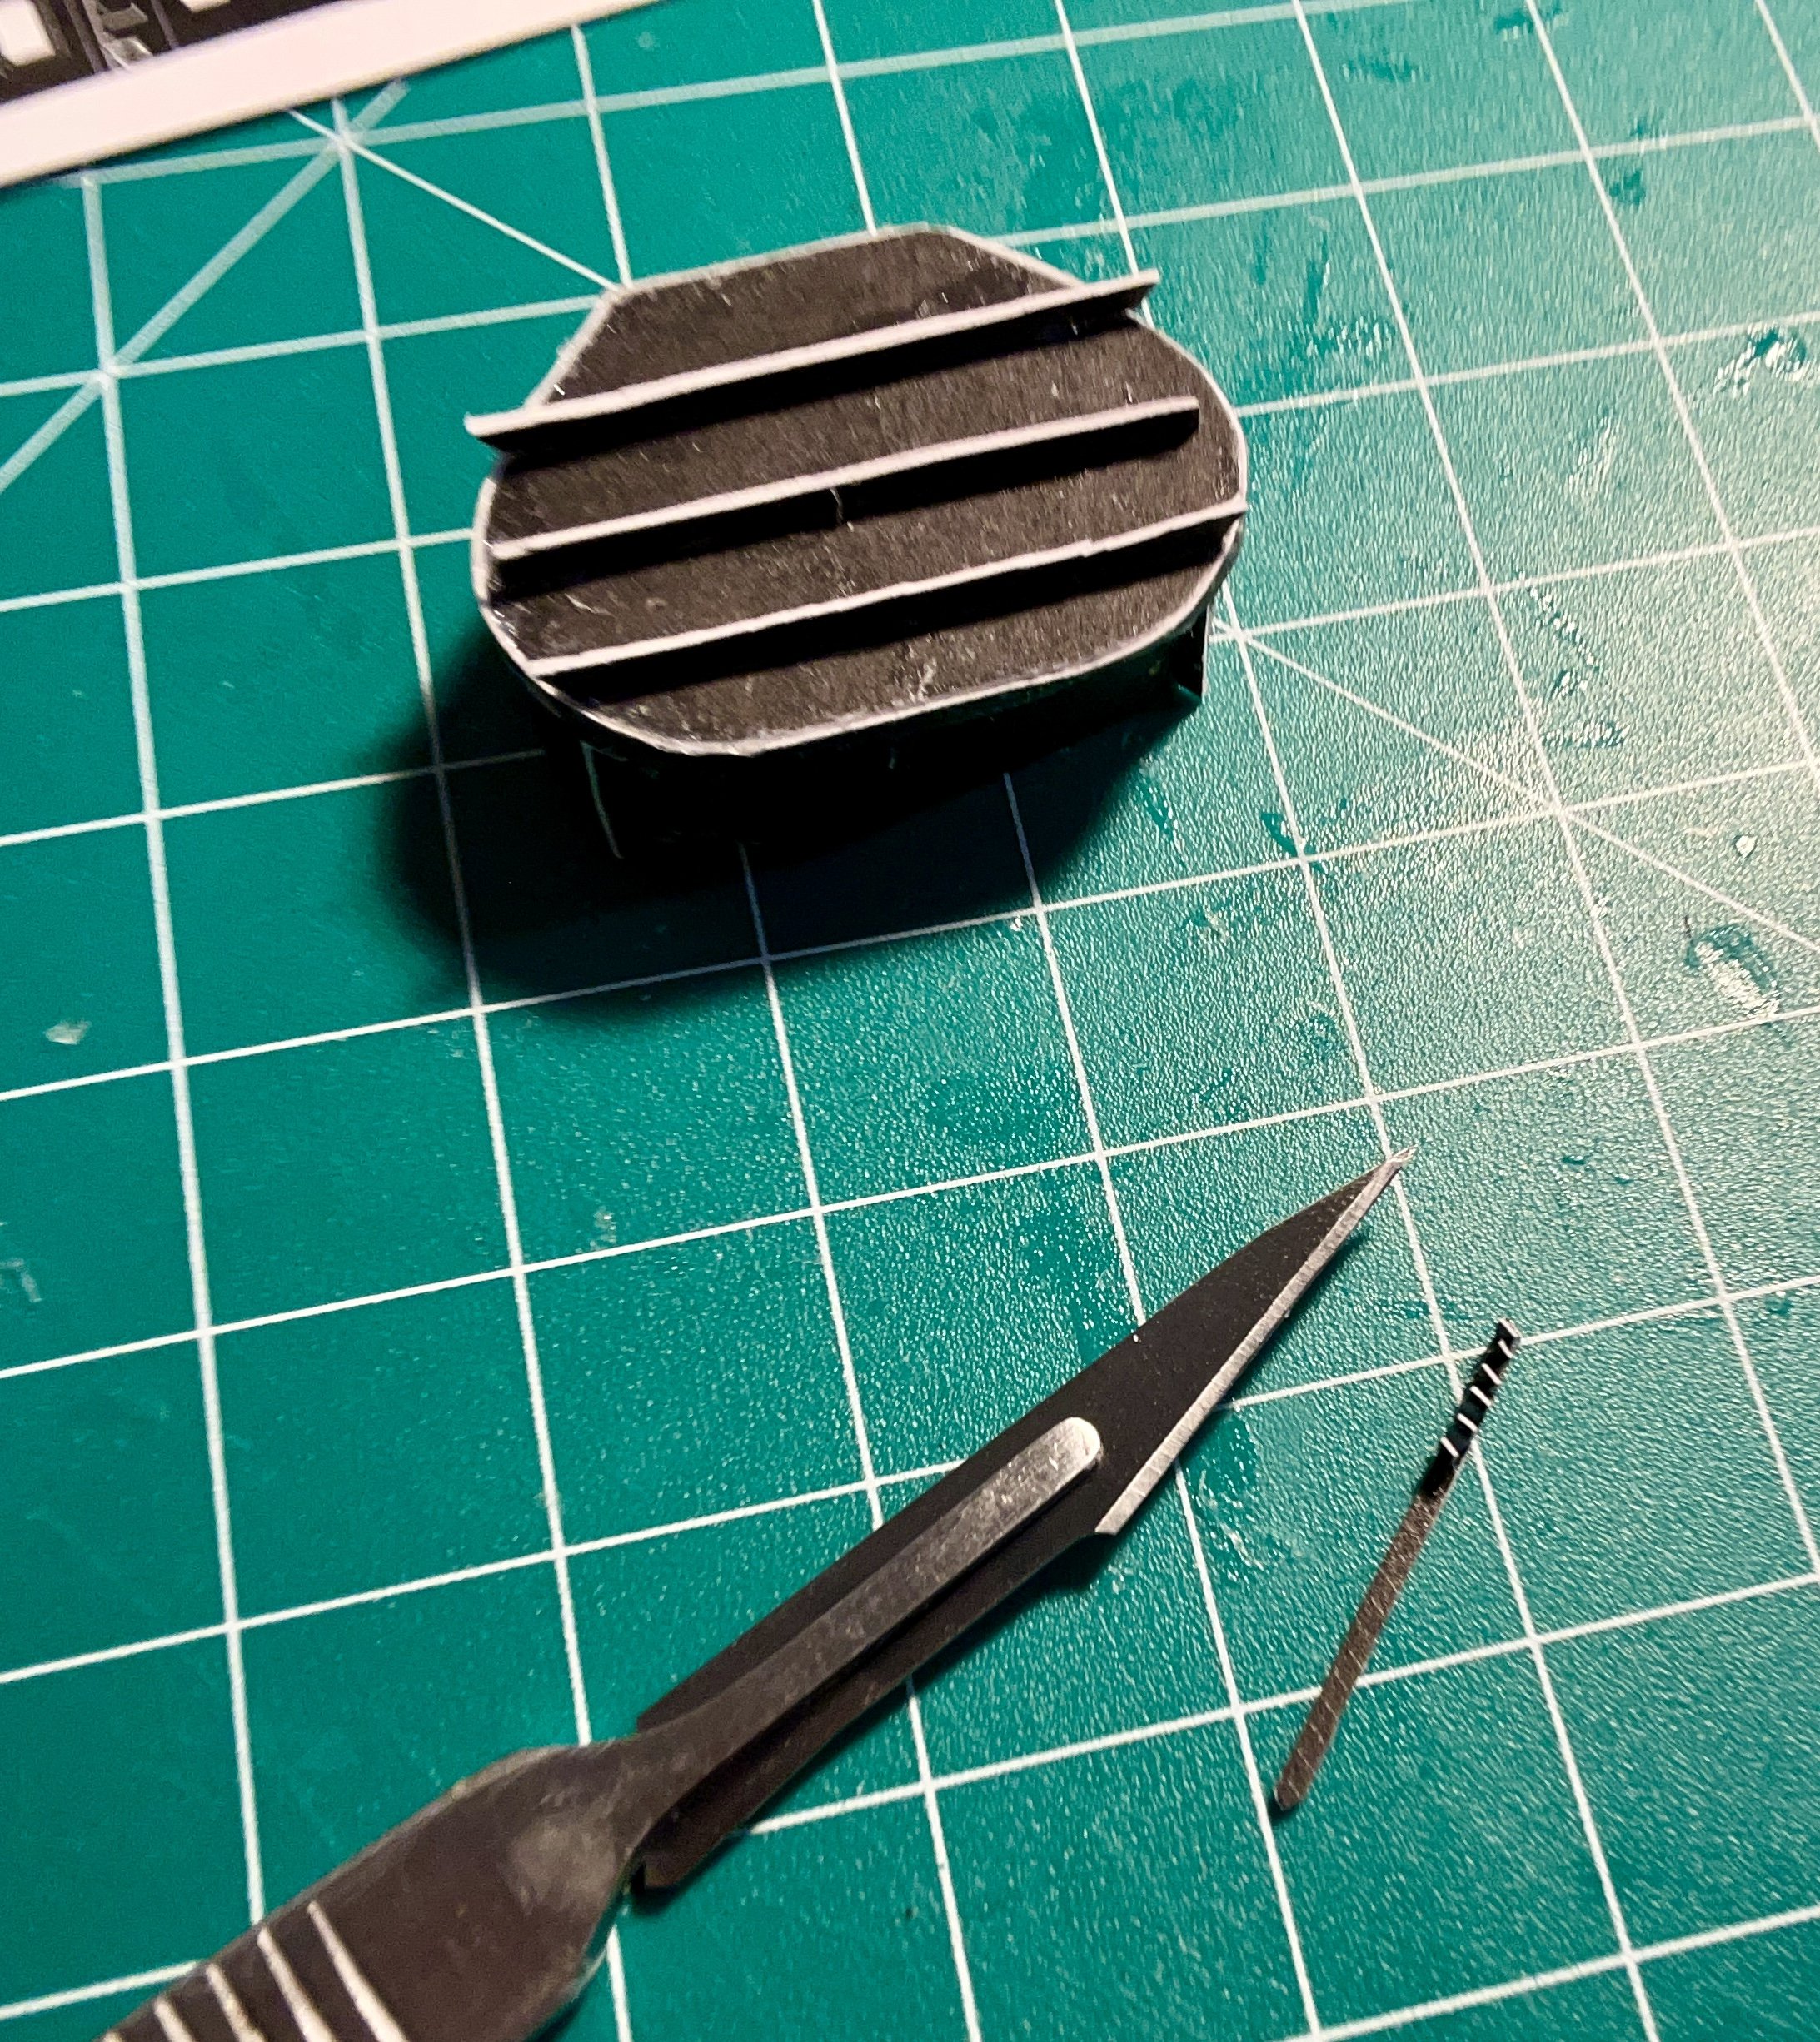
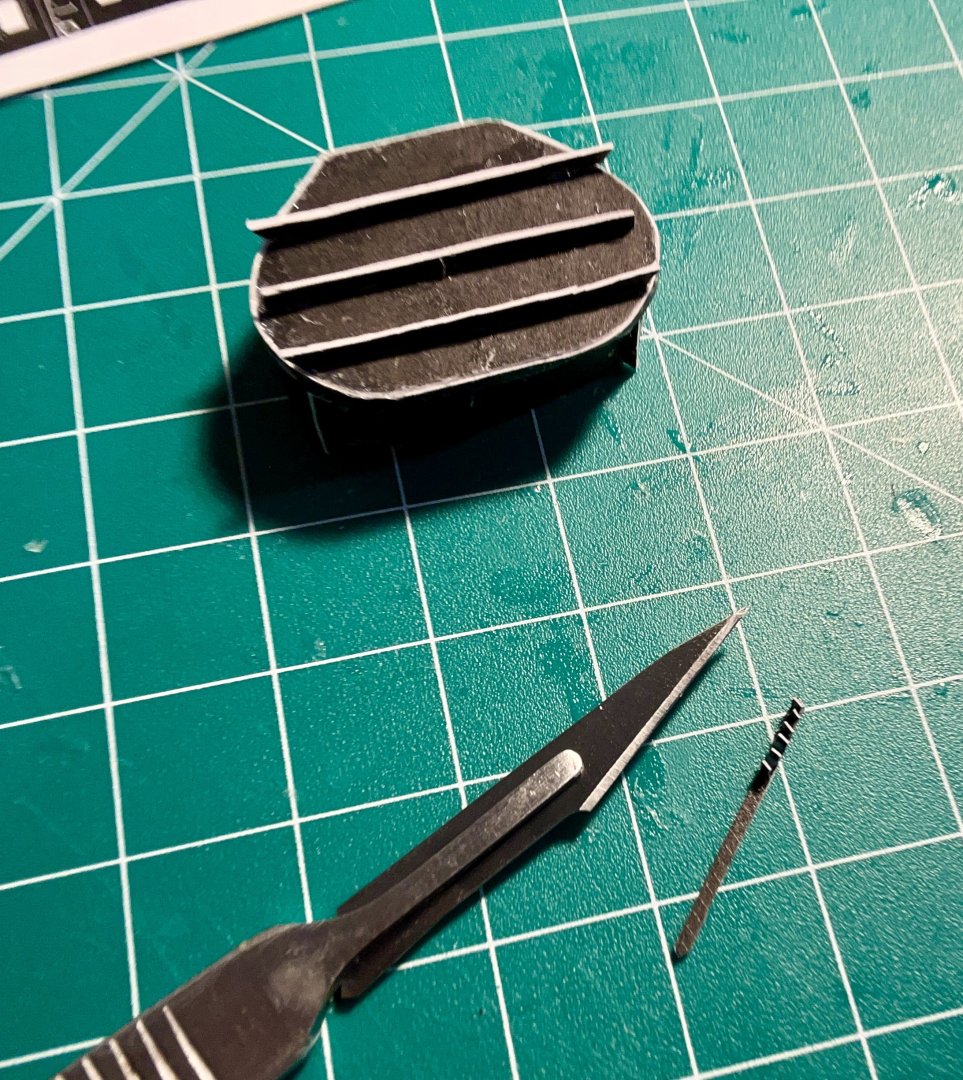
Steve, Thank you very much! The superstructure continues to grow: I have been using @Captain Slog’s Borodino build log as a reference to figure out the forward bridges. I need to make the forward part of the next deck up about 1mm thicker to fix a slight dip in the forward deck. Using paper as photoetch railings worked beautifully once I figured it out. Preshape the part as a block. Seal both sides before cutting out the railings and then when you paint, don’t lay them on something that the paint will stick to. Wait until the paint dries completely before handling and installing the part.

- 288 replies
-
- 11
-
-

-
- Card
- Pre-Dreadnought
- (and 3 more)
-
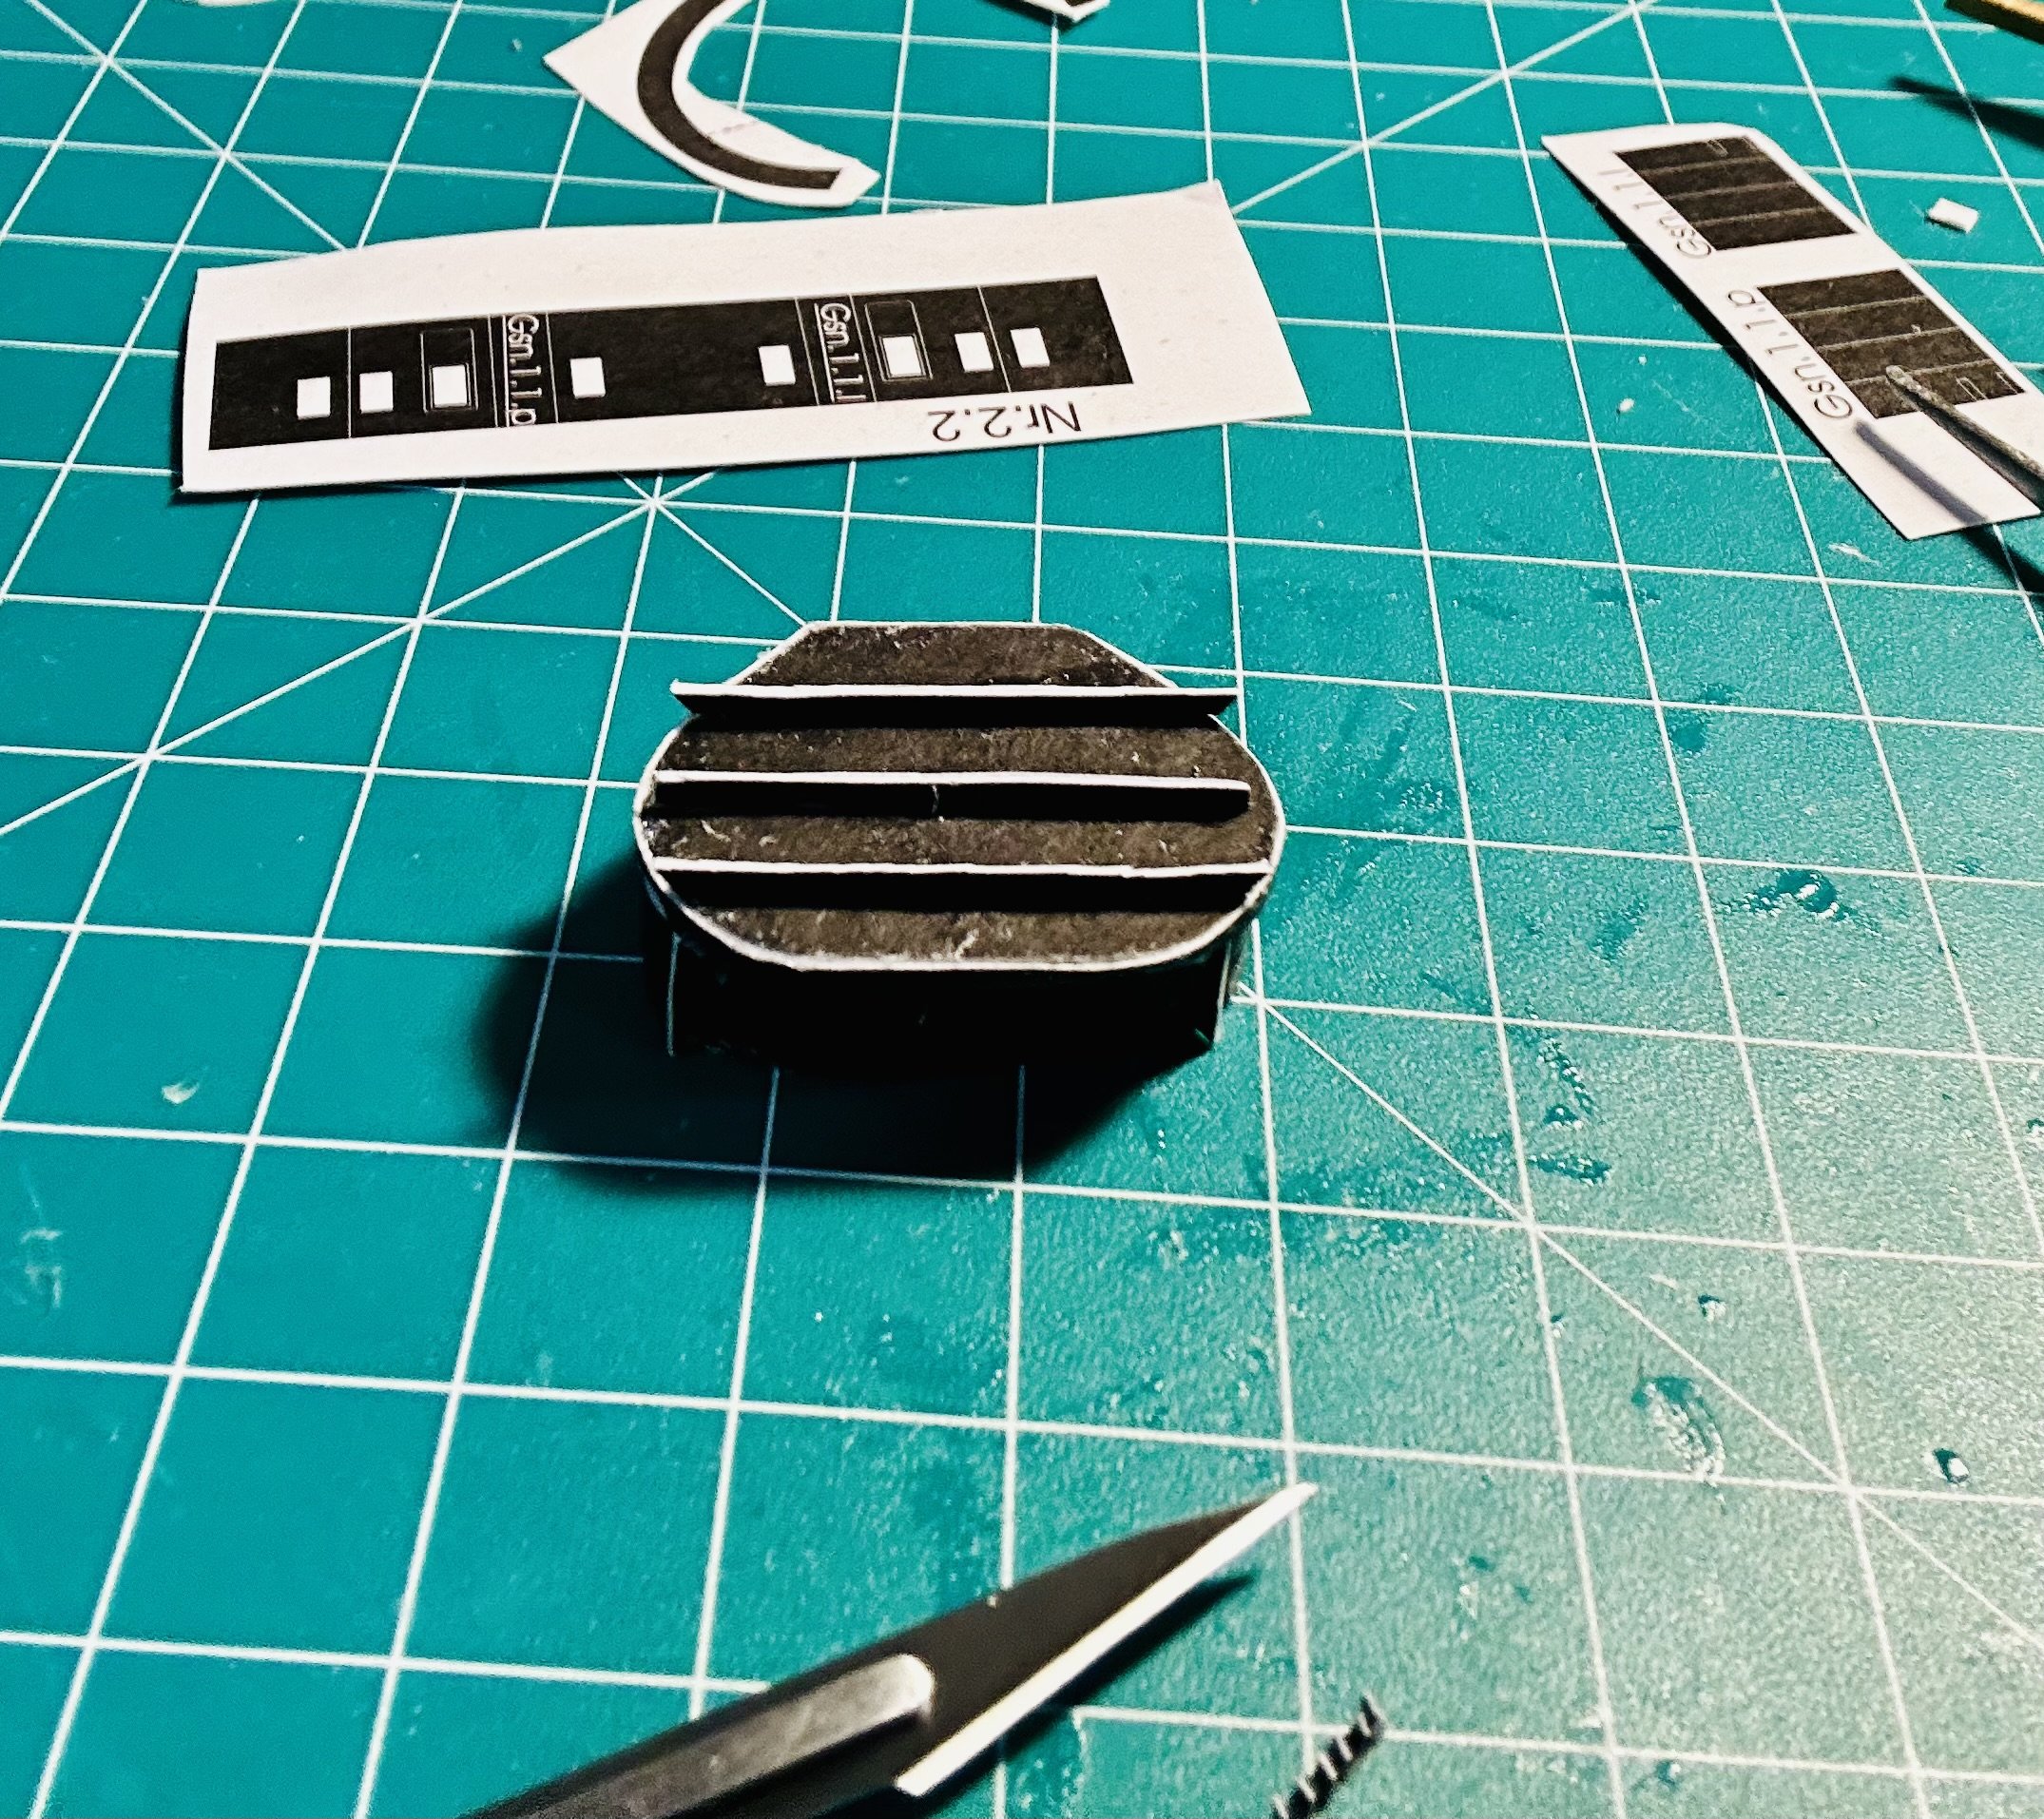
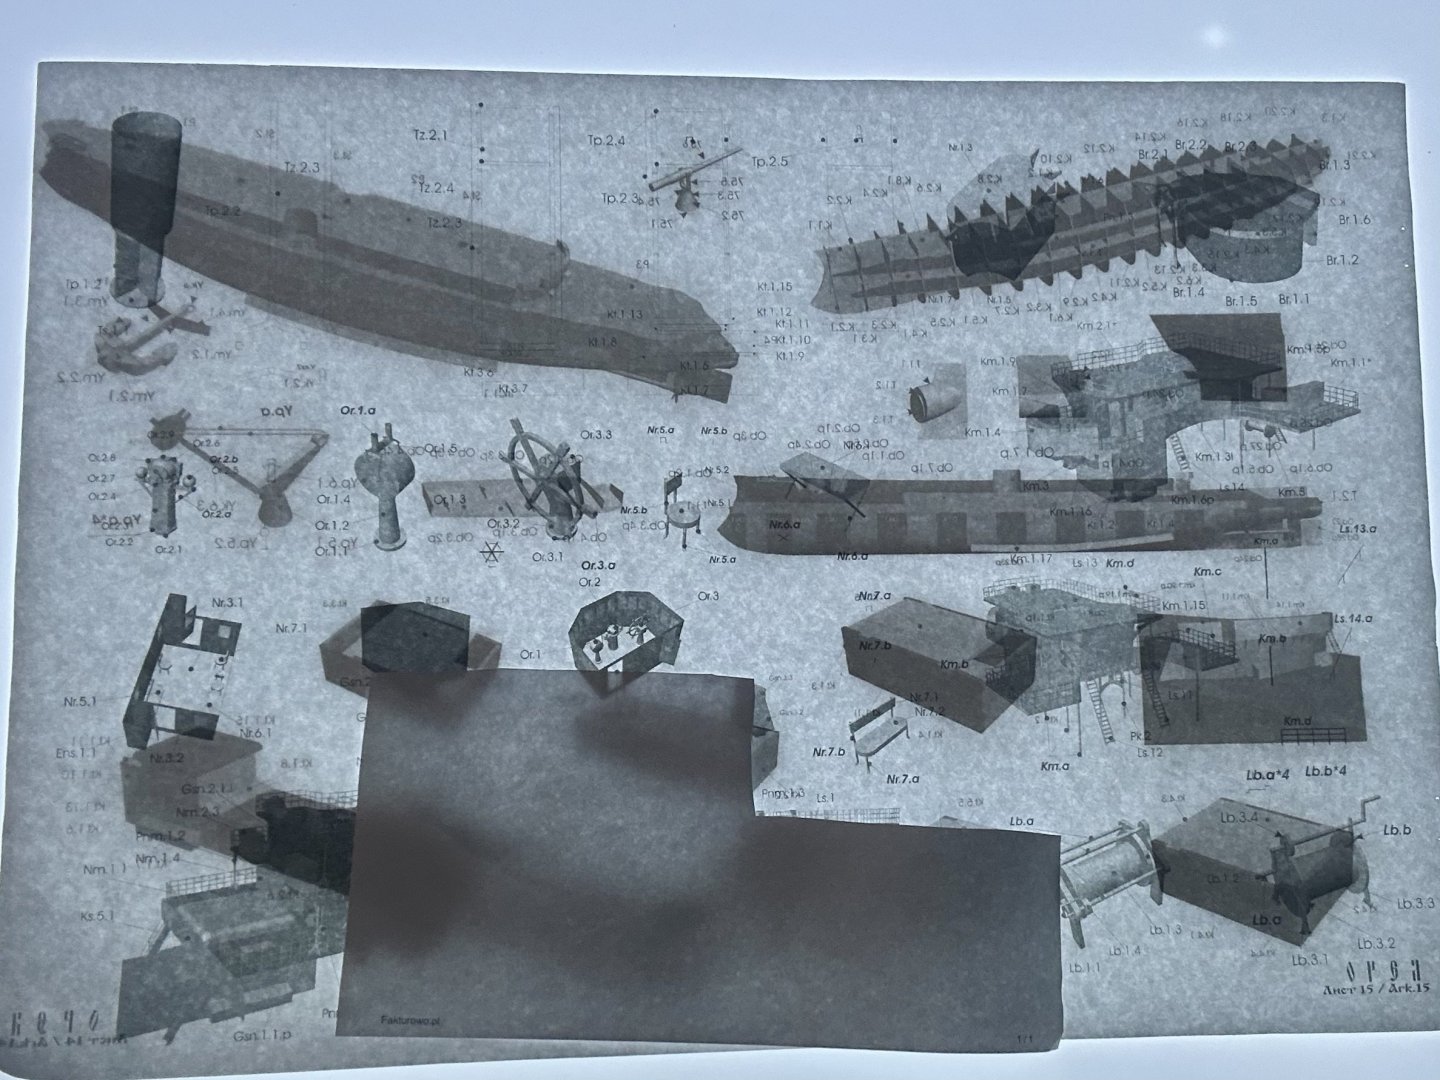
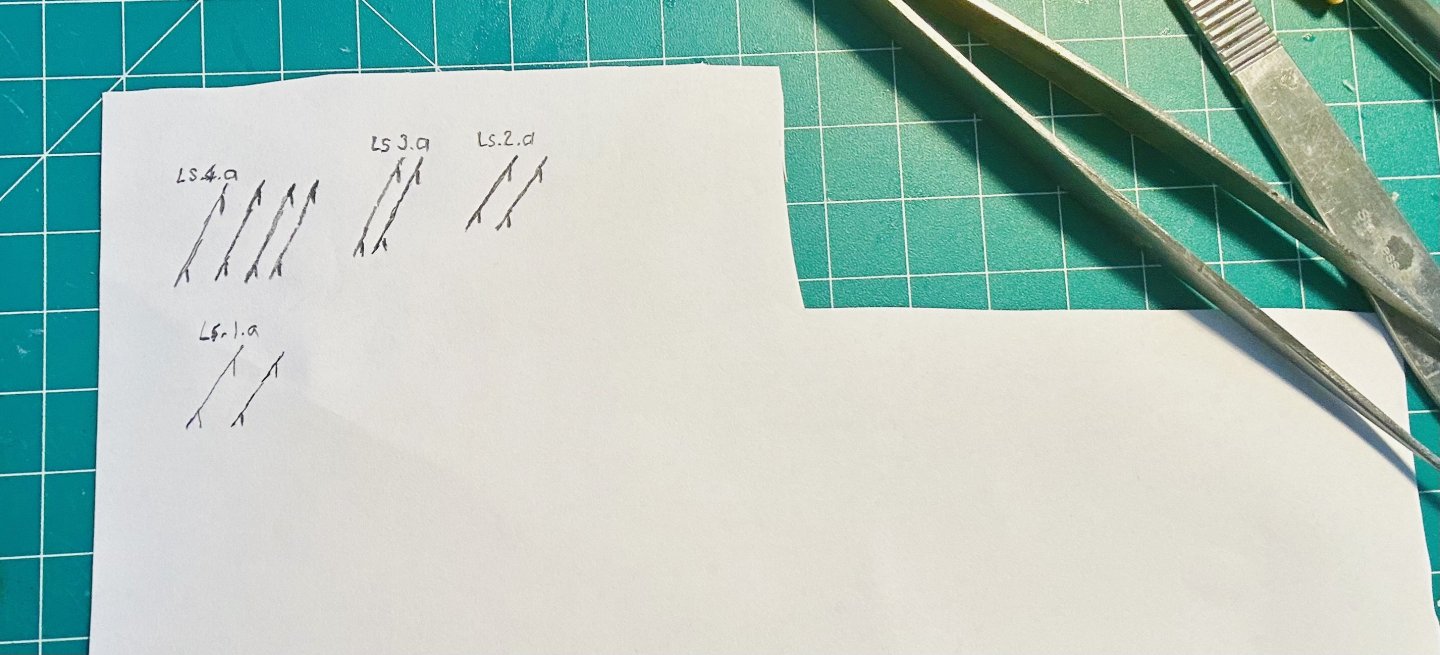
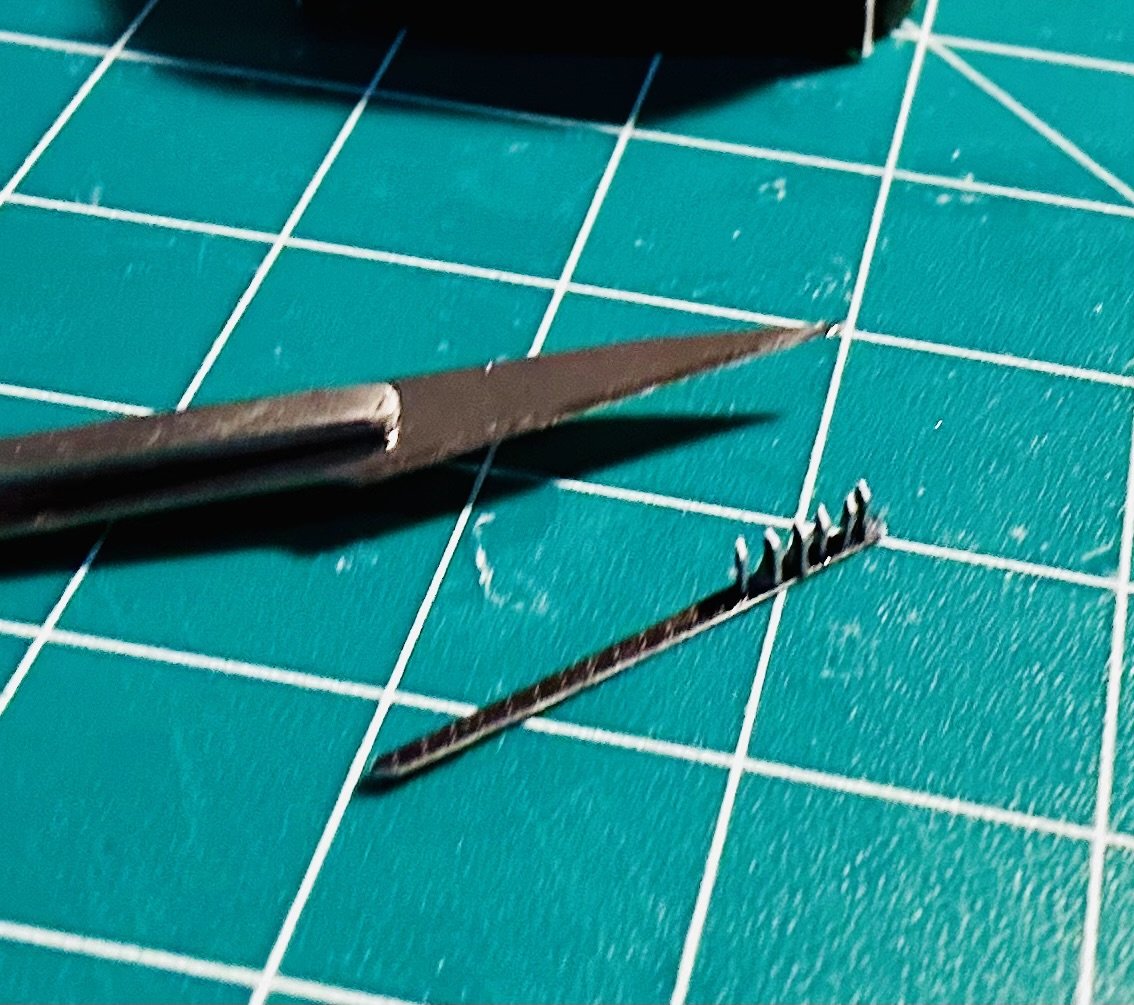
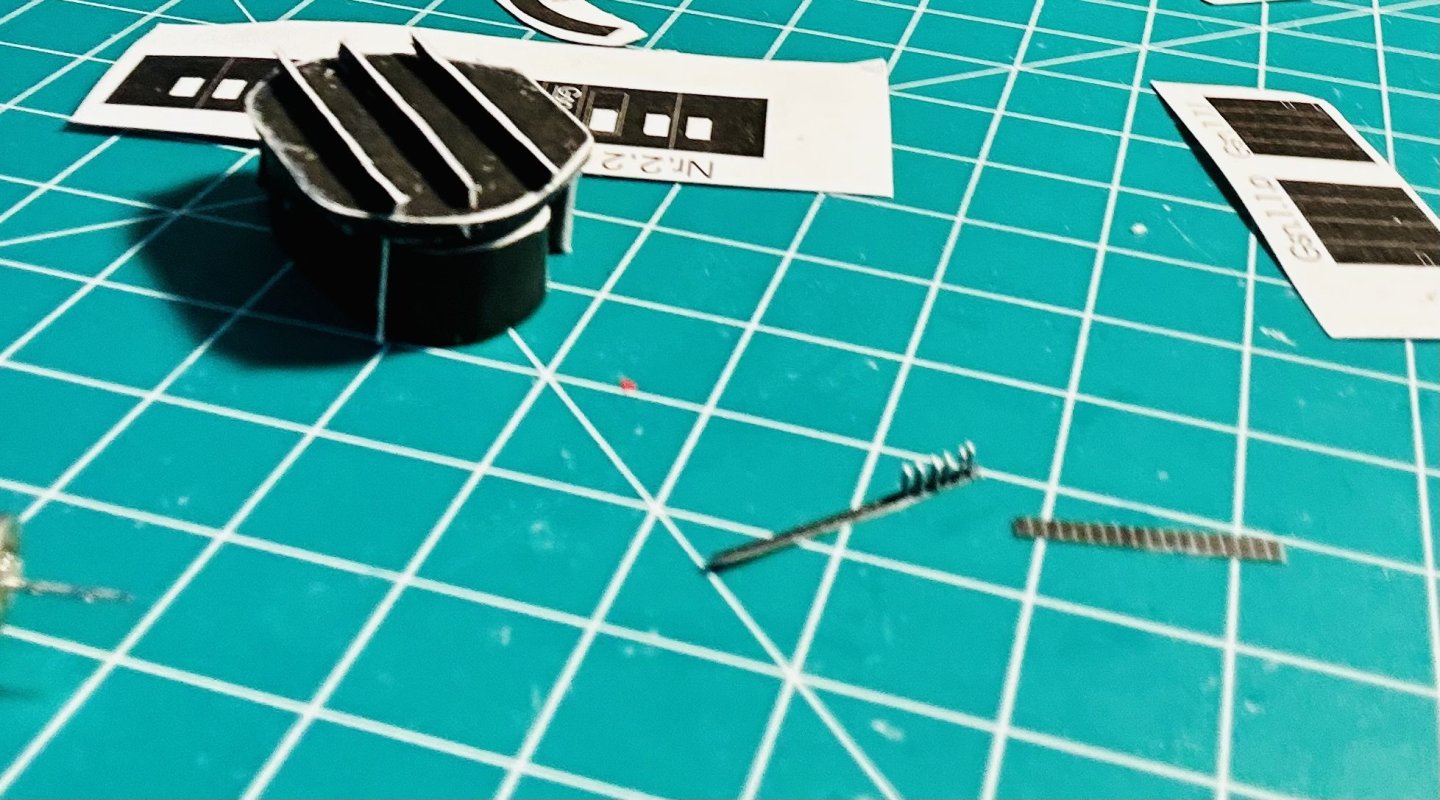
OC, Thank you very much! I finished the ladder and installed it after three attempts to make the handles failed. I also sealed everything that hadn’t been sealed yet. Then I remembered an article from Digital Navy that I read a while back about essentially using paper as photoetch. So, I broke out my light table and did some tracing: And then cut out the pieces that I needed for the lower ladder: It should be noted that I coated both sides of the paper that I cut the ladder from with clear coat prior to cutting, which made it into a type of composite material which won’t fuzz or fray out. I’m not particularly shy about making my own pieces, it’s part of why I like card kits. One of the recent NRJ’s had an article, an editorial, discussing card modelers and whether card modeling is a form of scratch building because a card kit is in essence a set of templates that a model is cut out from, very precisely, and built. For me, it’s not too different than what I did with my sailing Sampan, built from Amati kit plans or my model of the Revenge that is being built from Amati’s Victory Models line of kits. In fact, my experience with the Revenge’s plans led me to buy up many more sets of Amati plans. The only difference between those builds and a card kit is the thickness of material. In the other models, I essentially built up the card to the thickness of a wood part and built like a conventional wood model. However, the basic concept is pretty much identical.

- 288 replies
-
- 11
-
-
- Card
- Pre-Dreadnought
- (and 3 more)
-
Bob, Looking forward to seeing this one!
-
I seal the models as I go with an acrylic clear coat to protect them. As far as stability goes, once the hull is covered, they are quite strong. The scratch built ones are every bit as strong and durable as a wood build. The Orel kits are a little different than the scratch builds. The material is thinner and the pieces are much smaller due to the smaller scale of the models. However, once built, I haven’t had any problems, although the Solferino, which is the only other Orel kit that I built at 1/200 scale, is only a couple of years old and is kept in a case.
- 288 replies
-
- 6
-
-
- Card
- Pre-Dreadnought
- (and 3 more)
-
Welcome!
-
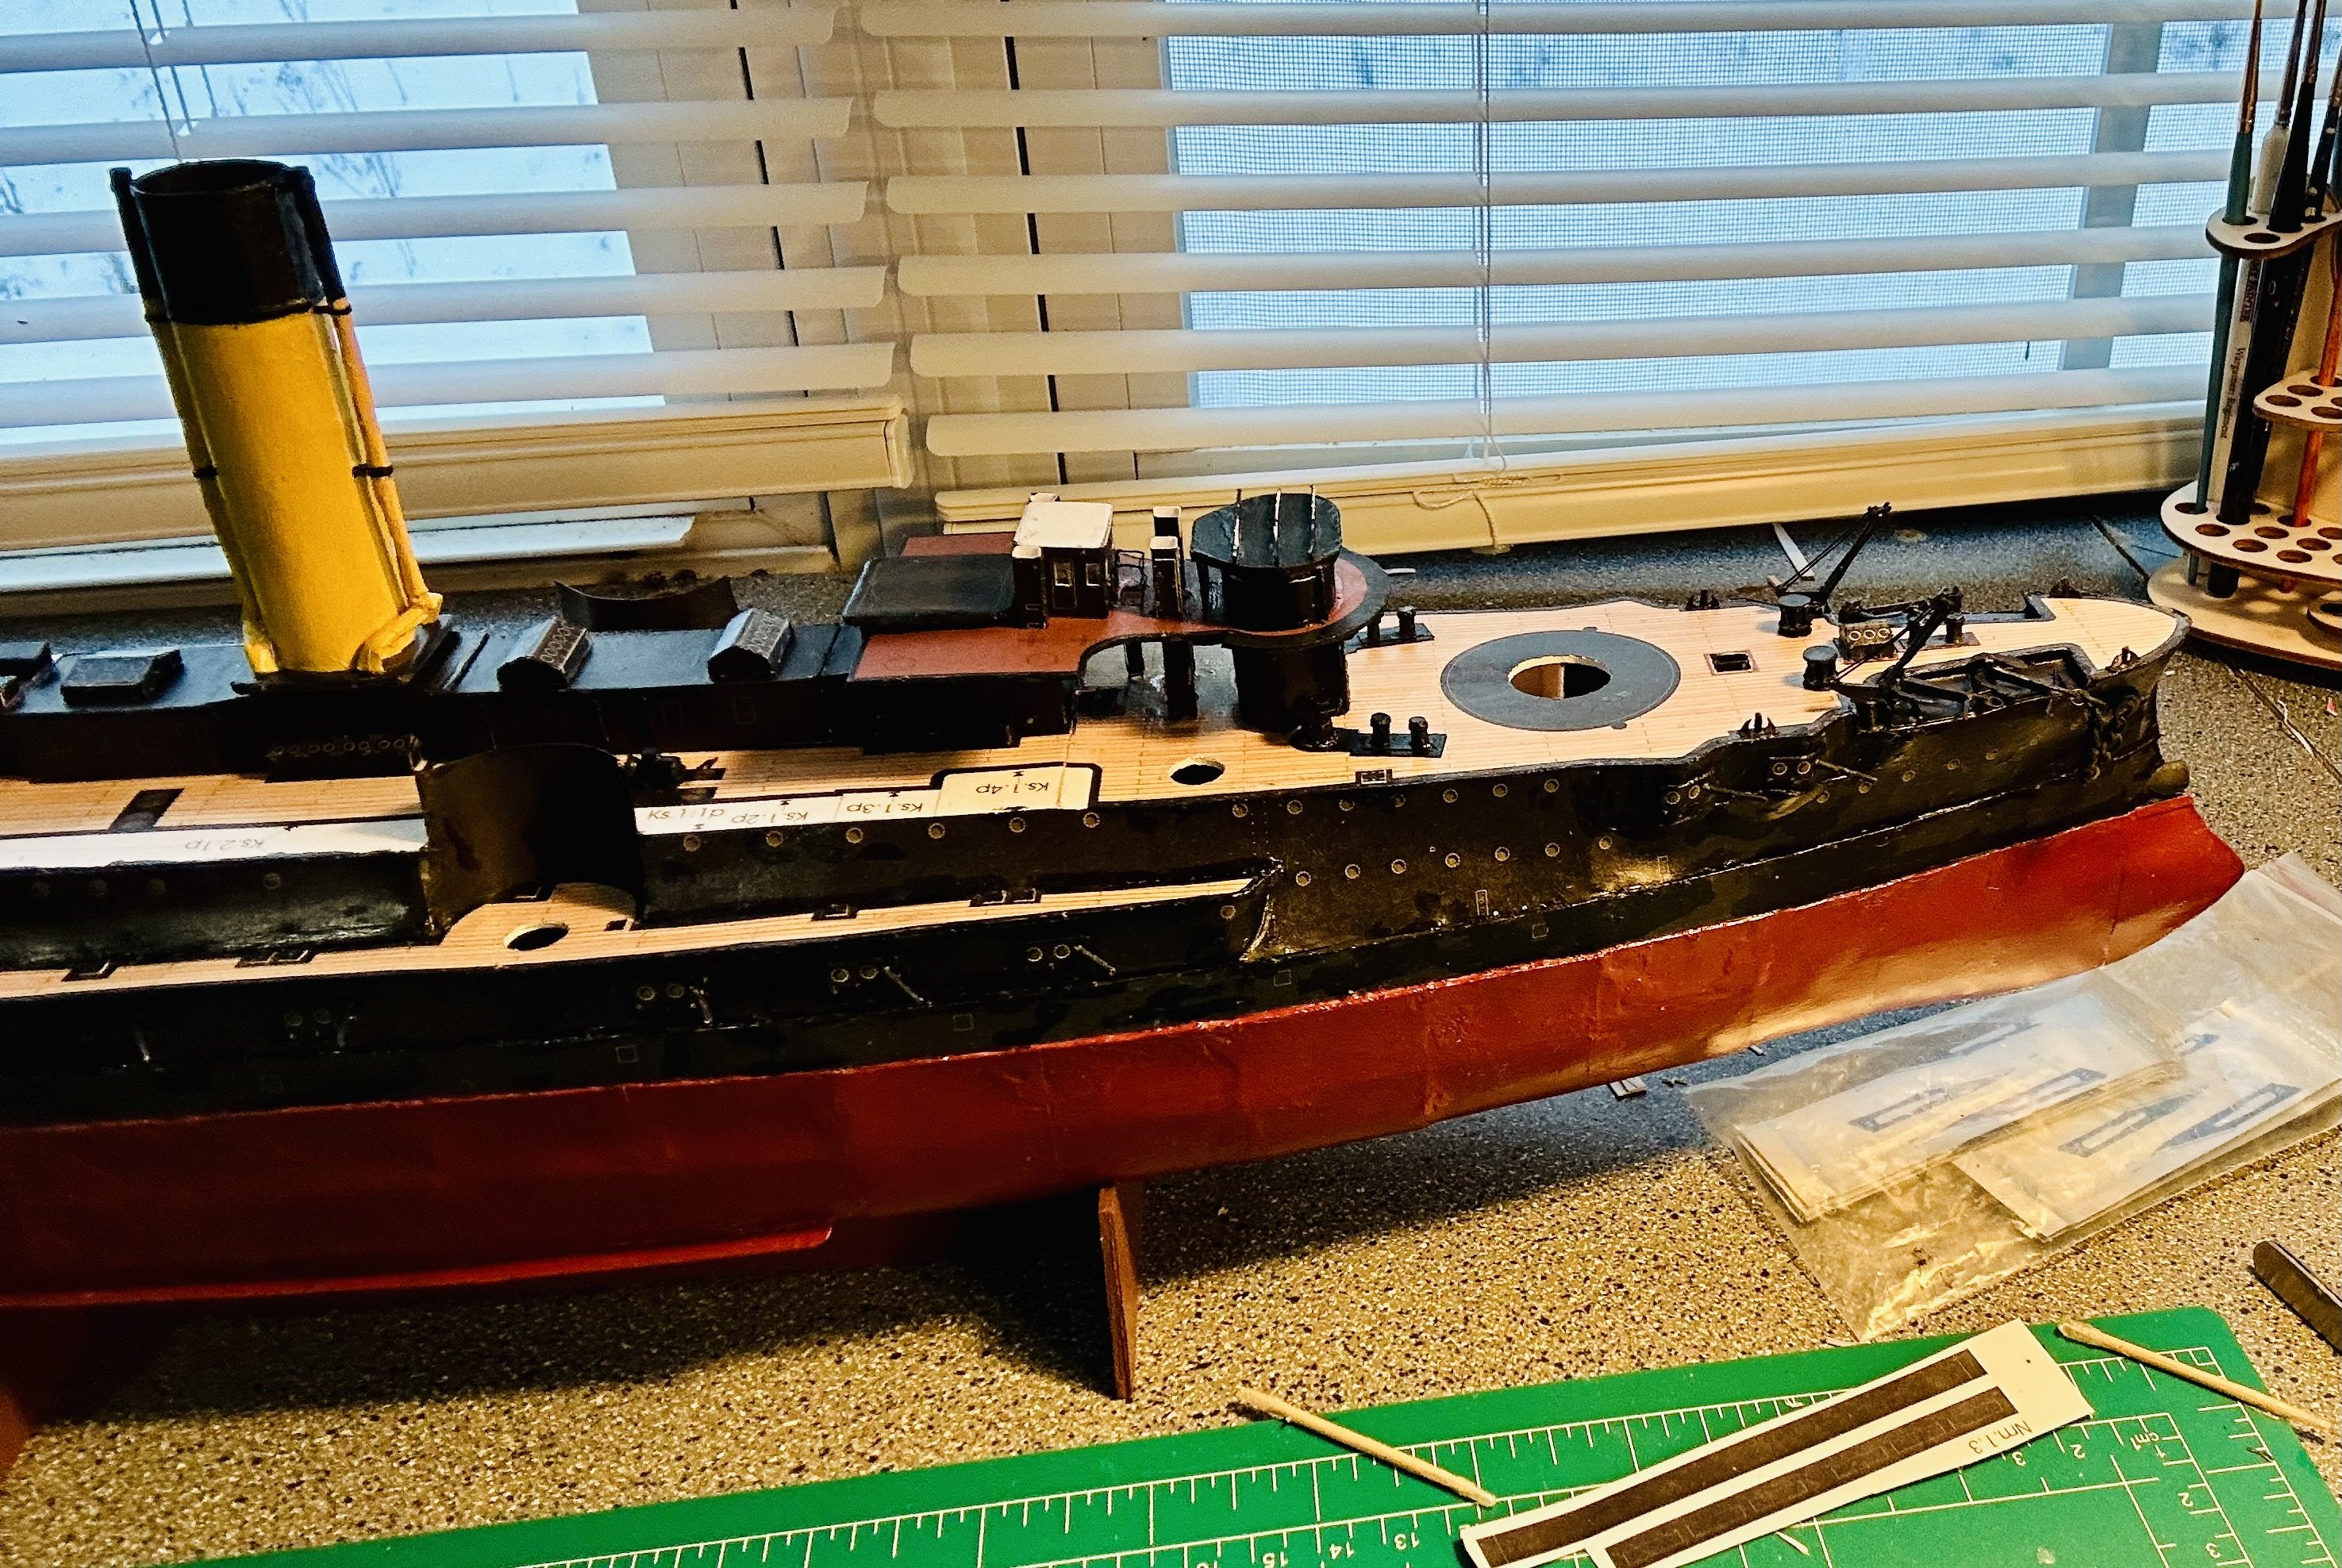
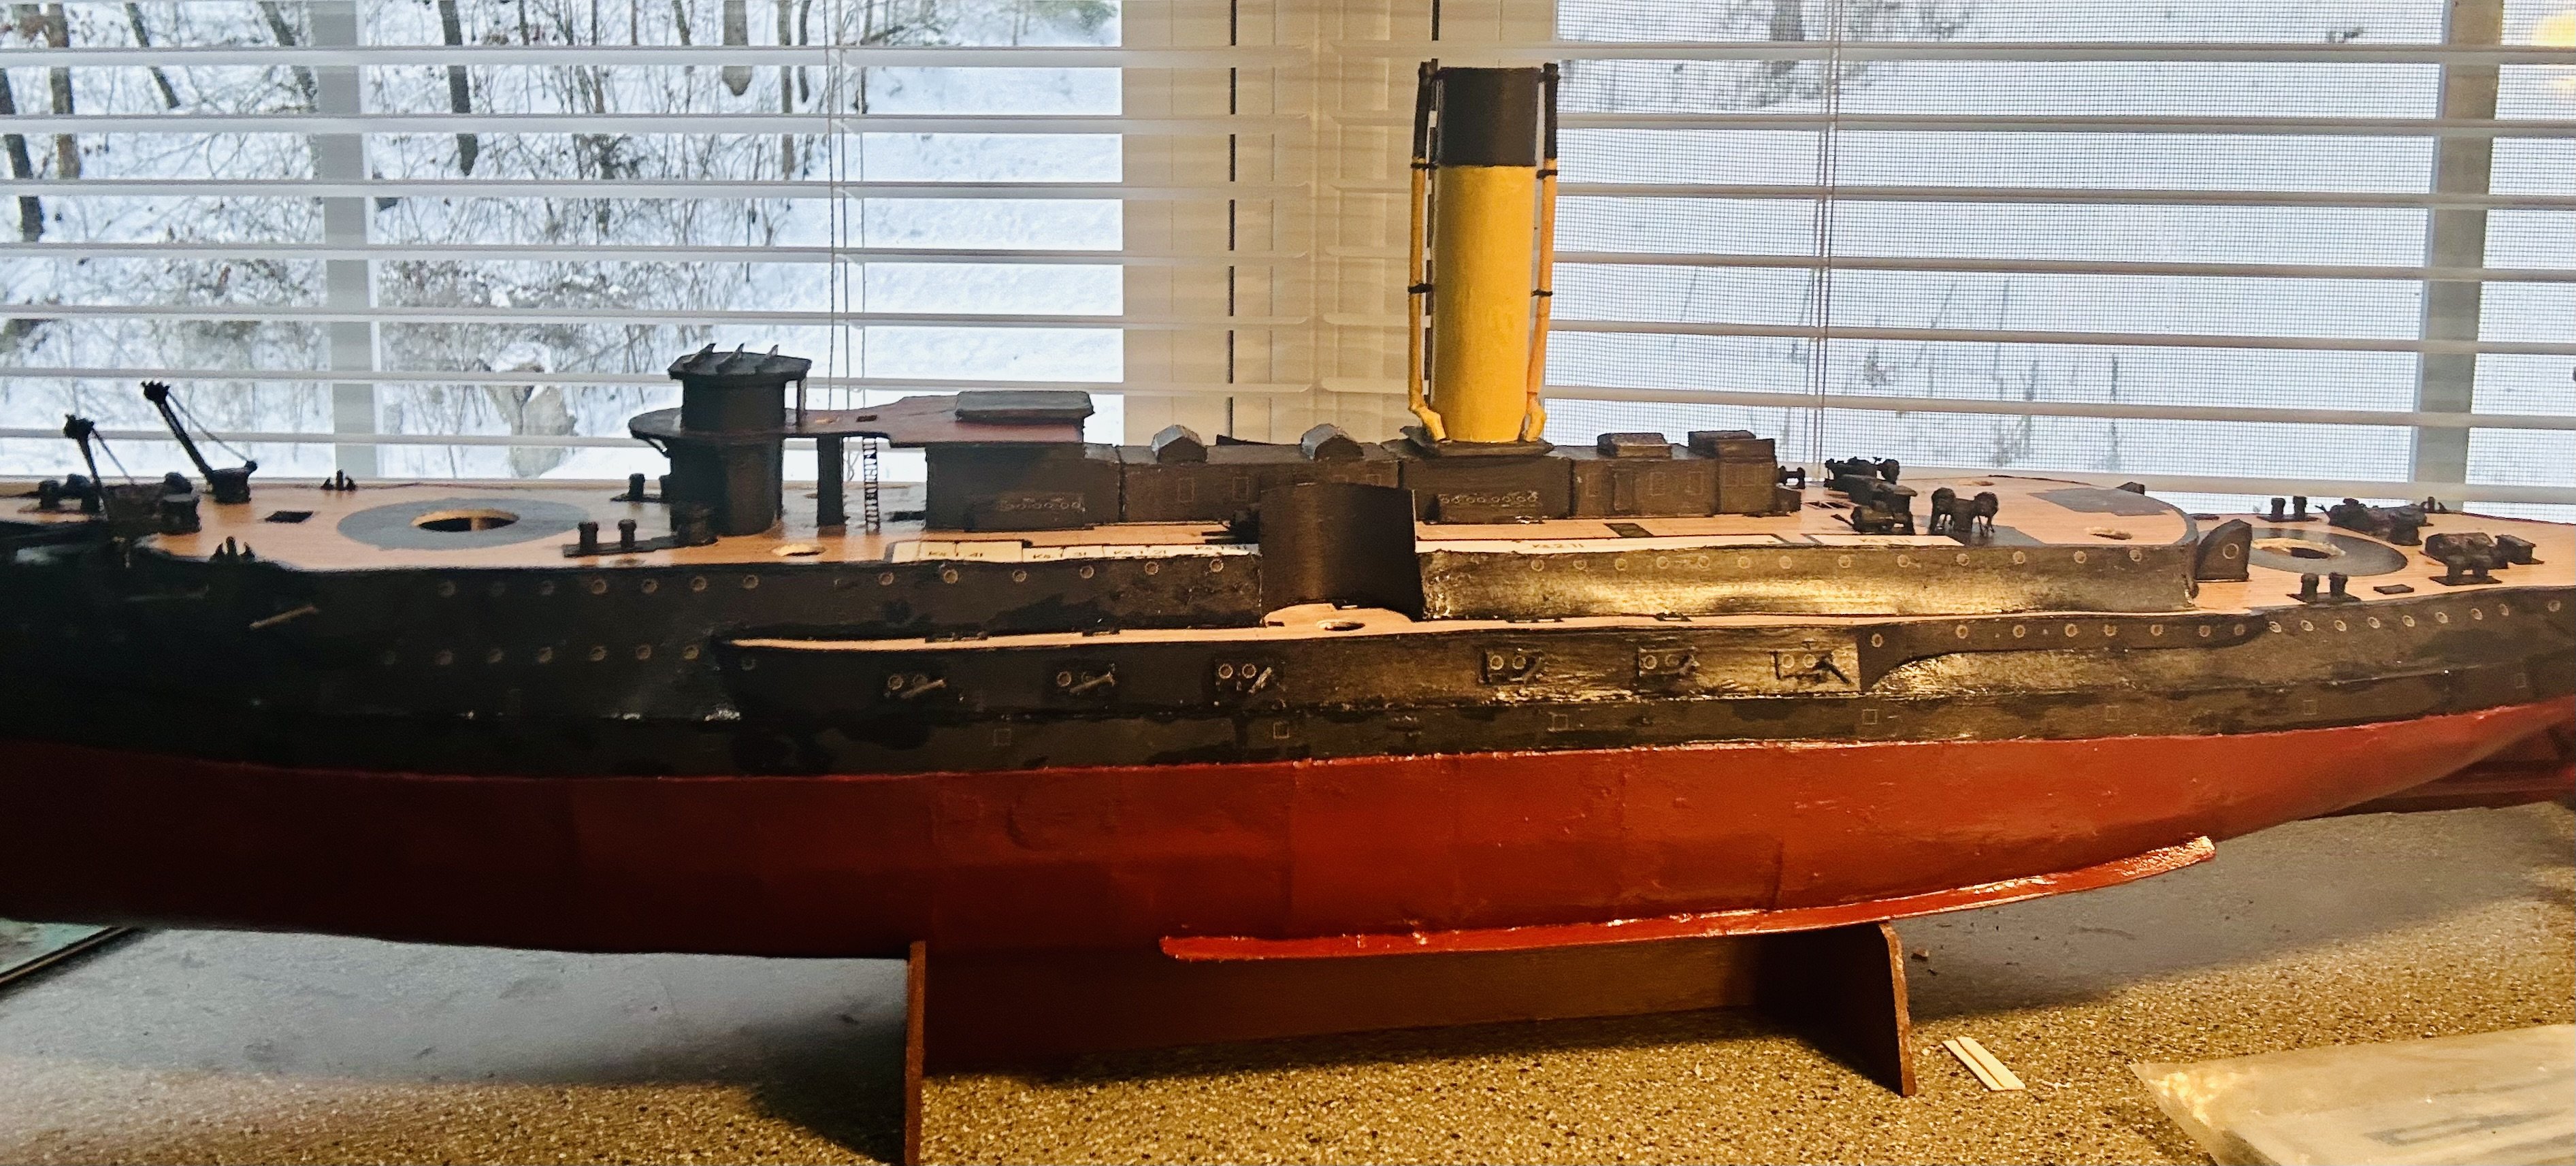
Thank you very much! I have the conning tower built up and ready to paint. Working on my old nemesis, ladders: Slow but steady definitely wins the race here!


- 288 replies
-
- 8
-
-
- Card
- Pre-Dreadnought
- (and 3 more)
-
Advice on French 2nd or 3rd rate ship of the line
GrandpaPhil replied to James Flynn's topic in Wood ship model kits
Don’t forget AAMM! https://boutique.aamm.fr/index.php?route=common/home That is one of my favorite places to buy model plans from! -
The local restaurant is a great idea, especially if it’s one you really like. Another idea is that I’d bet your local Navy recruiter would love to have that model in their office.
-
Welcome!
-
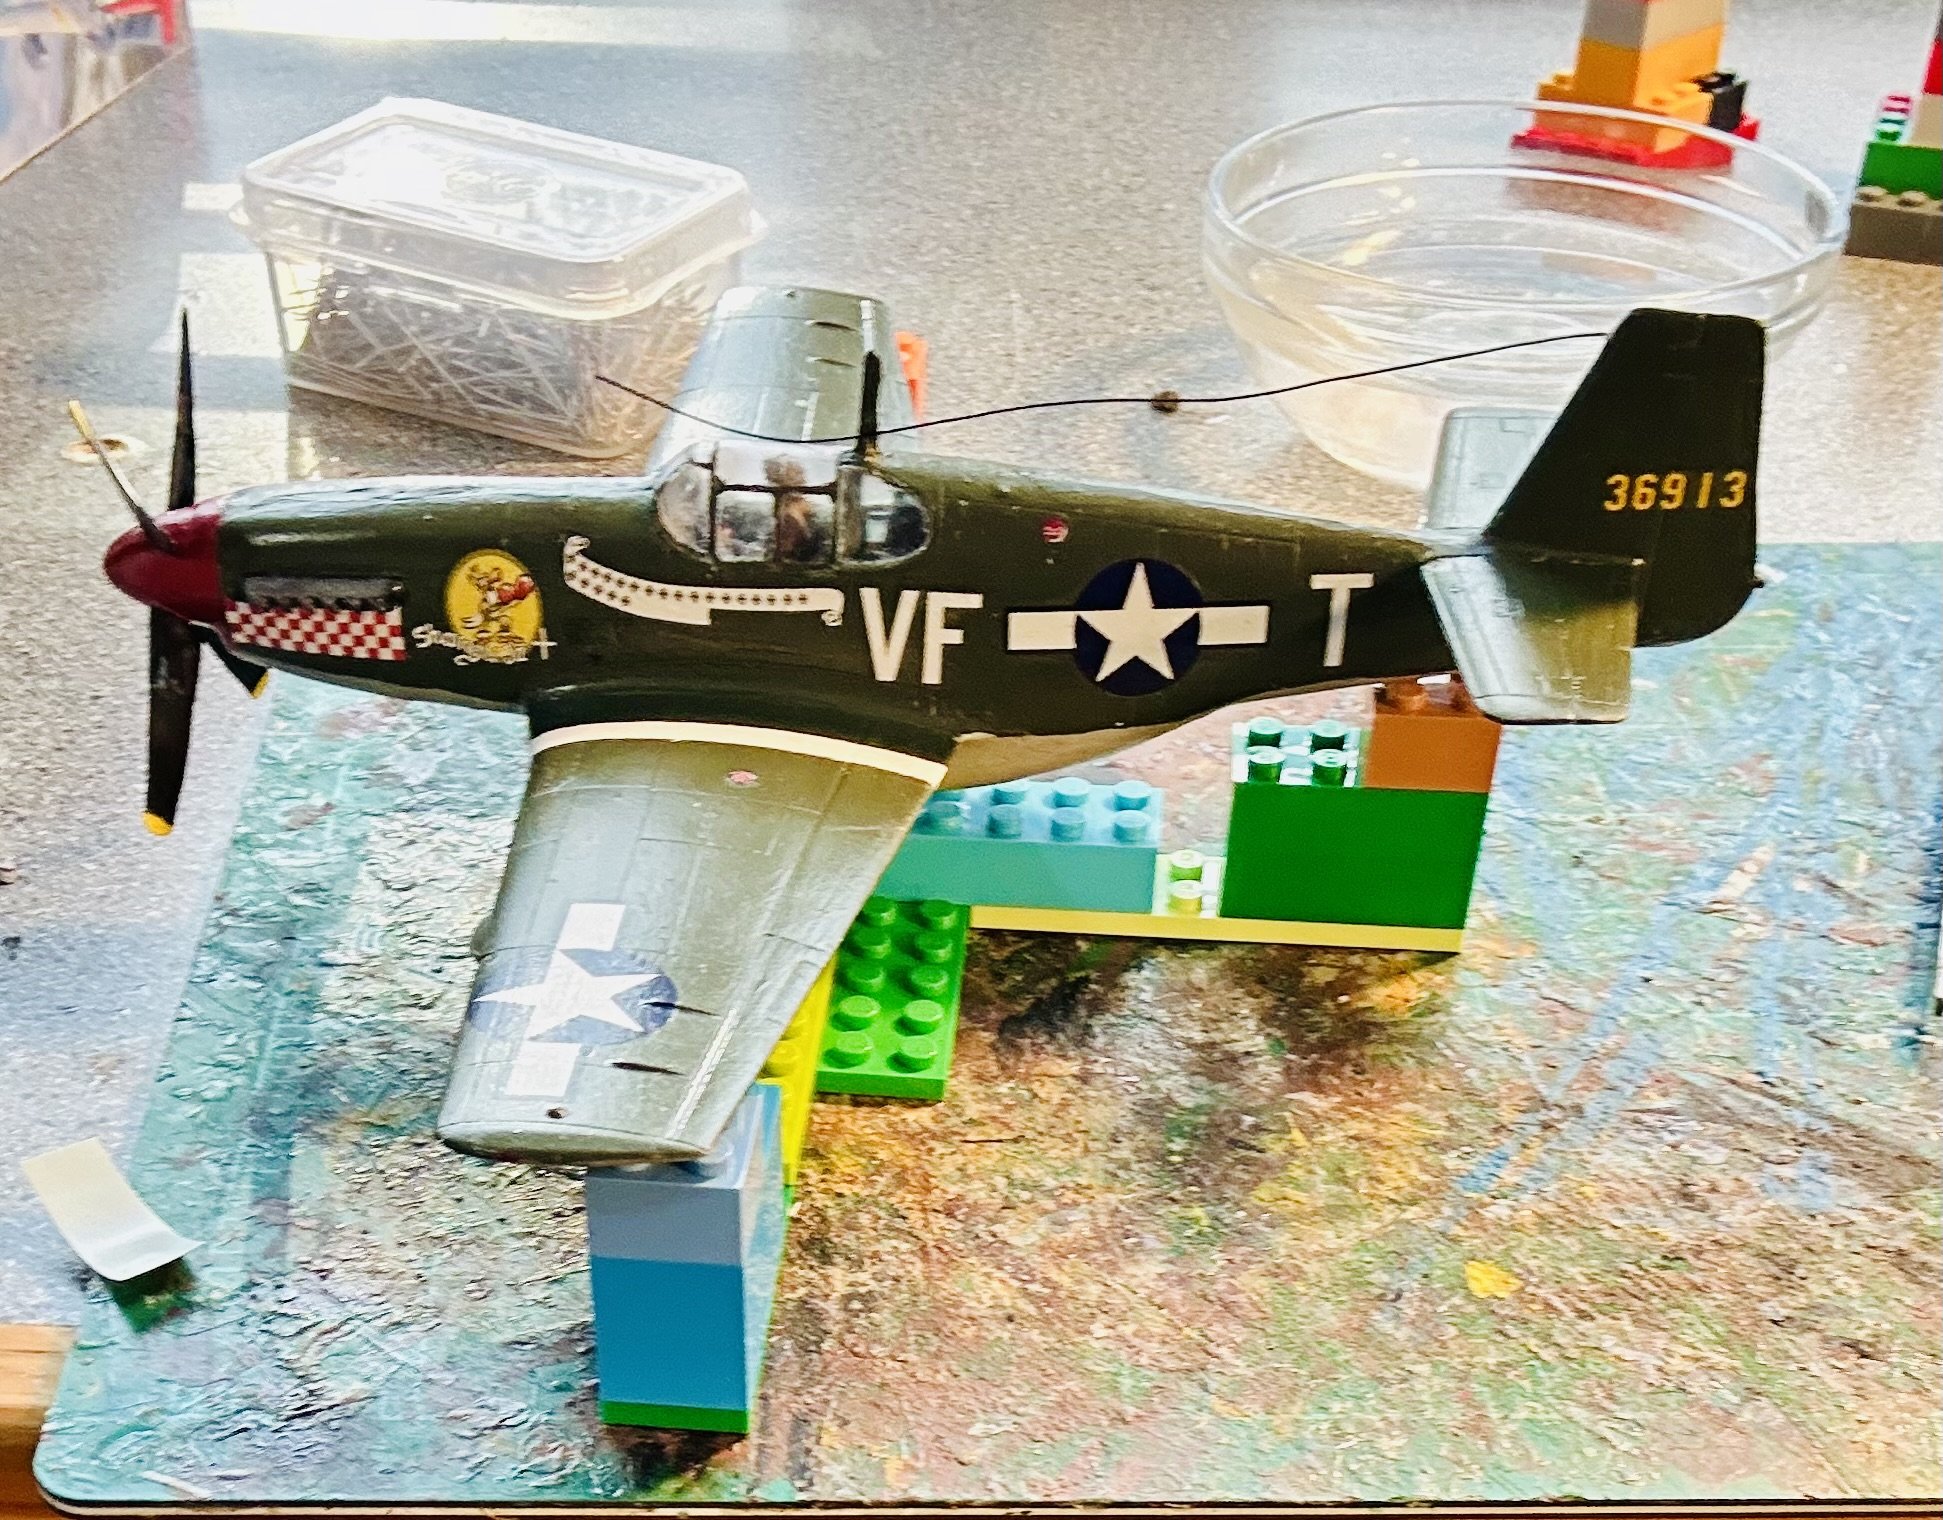
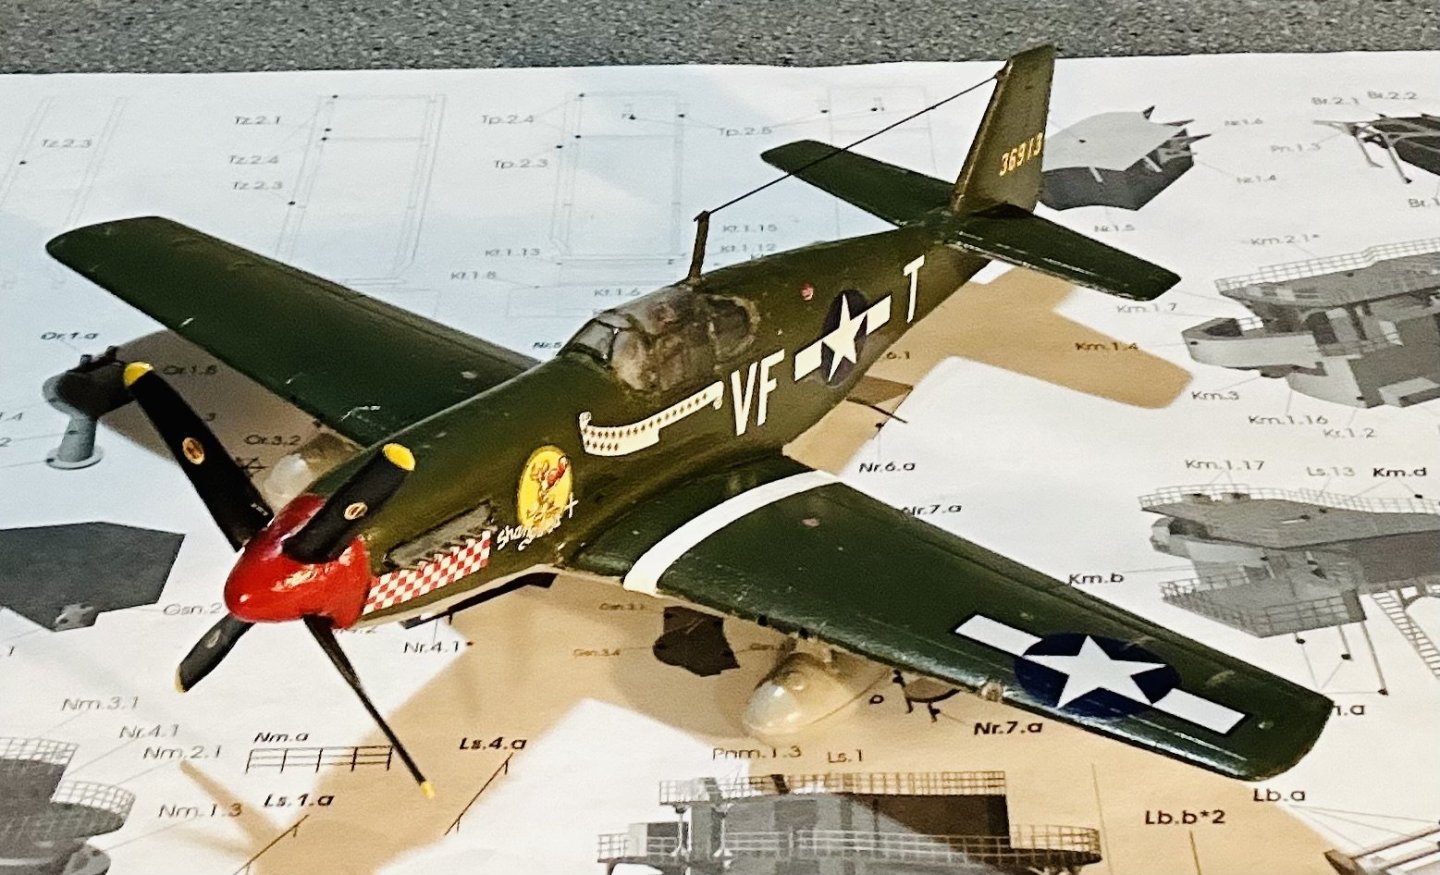
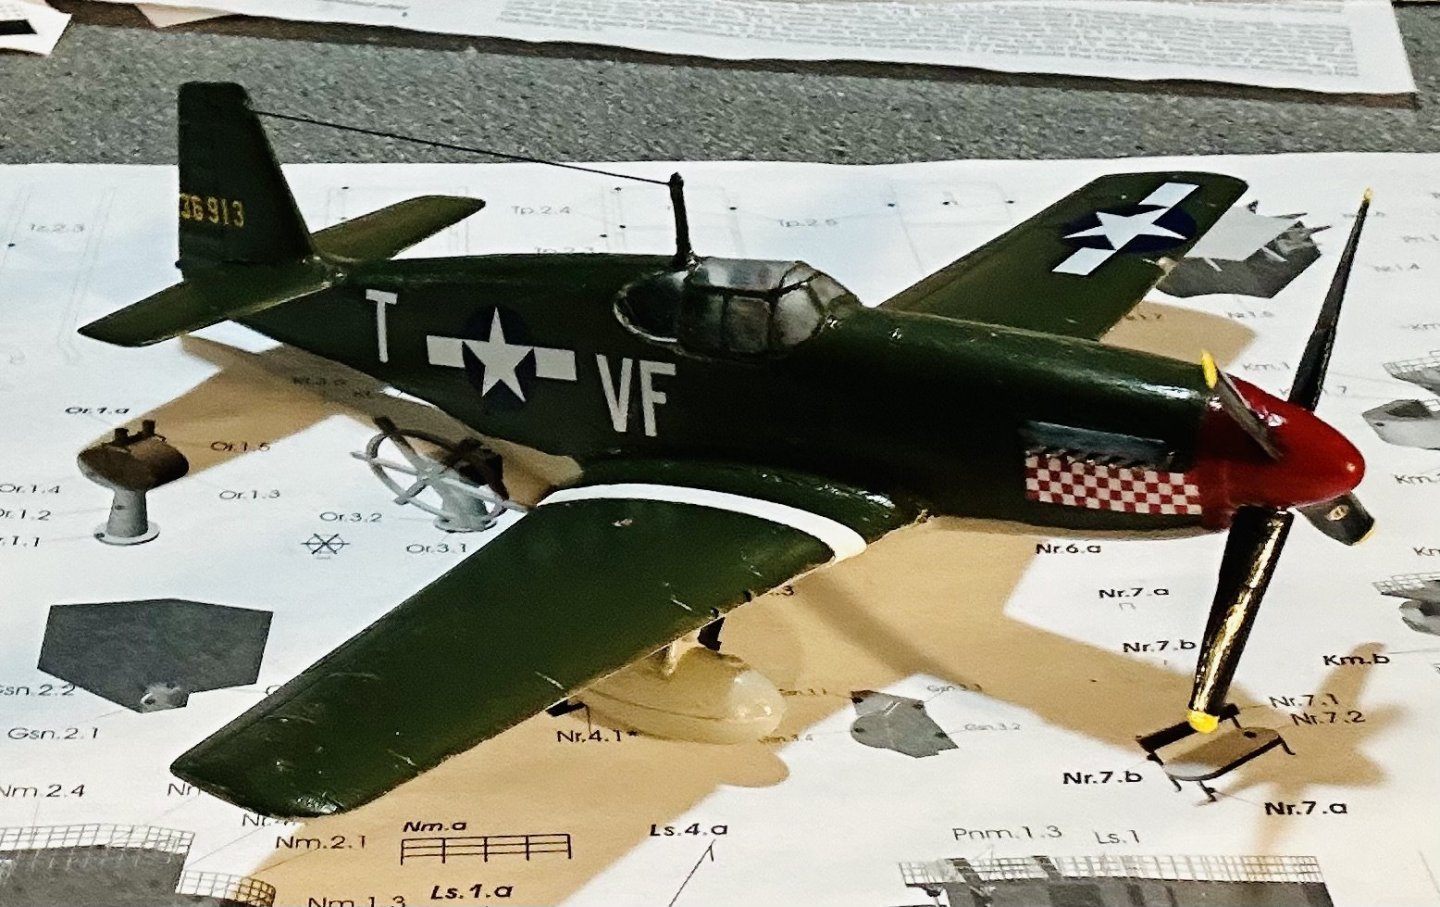
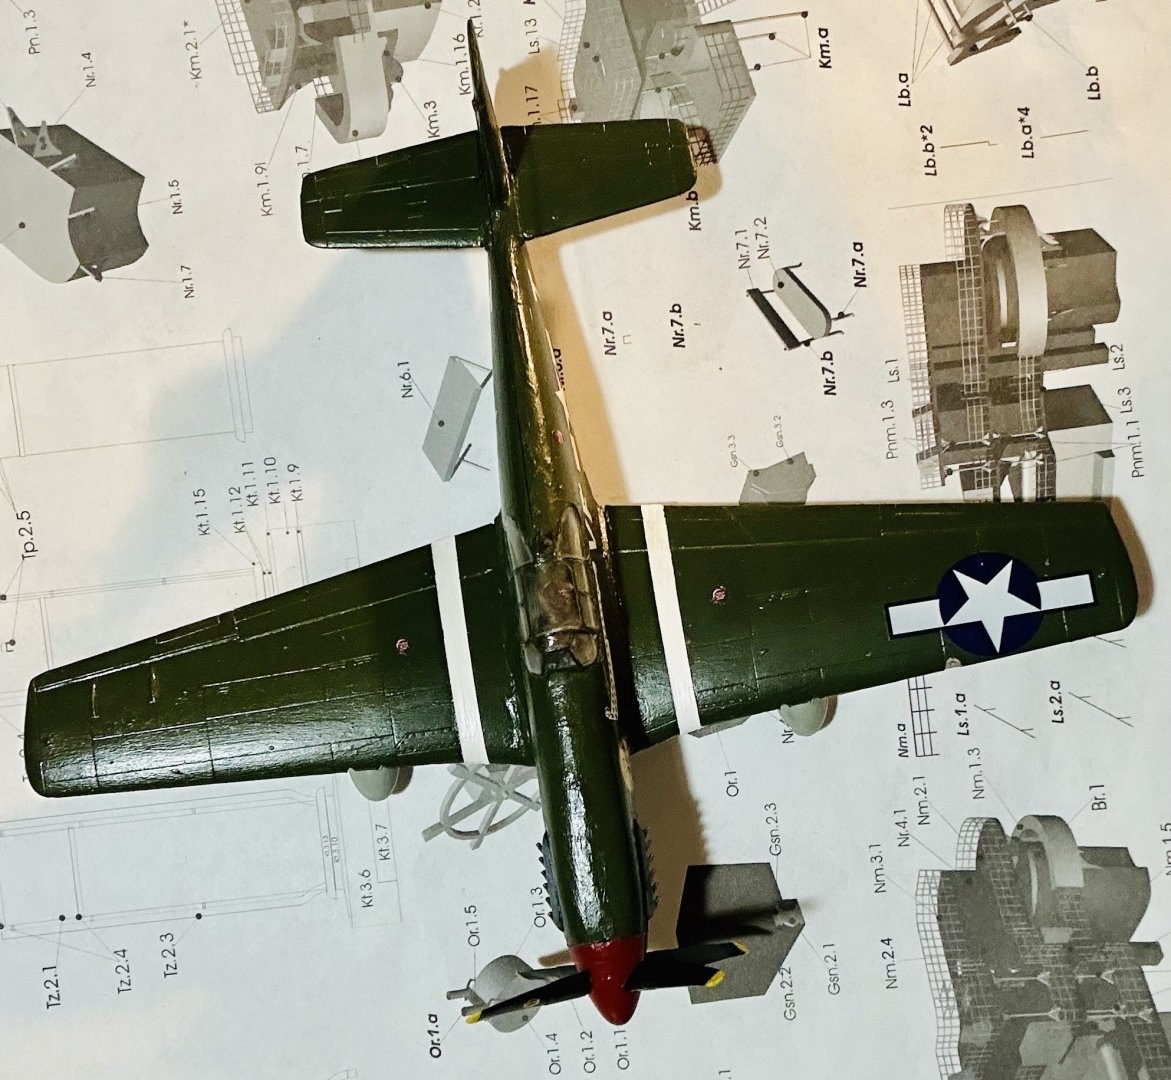
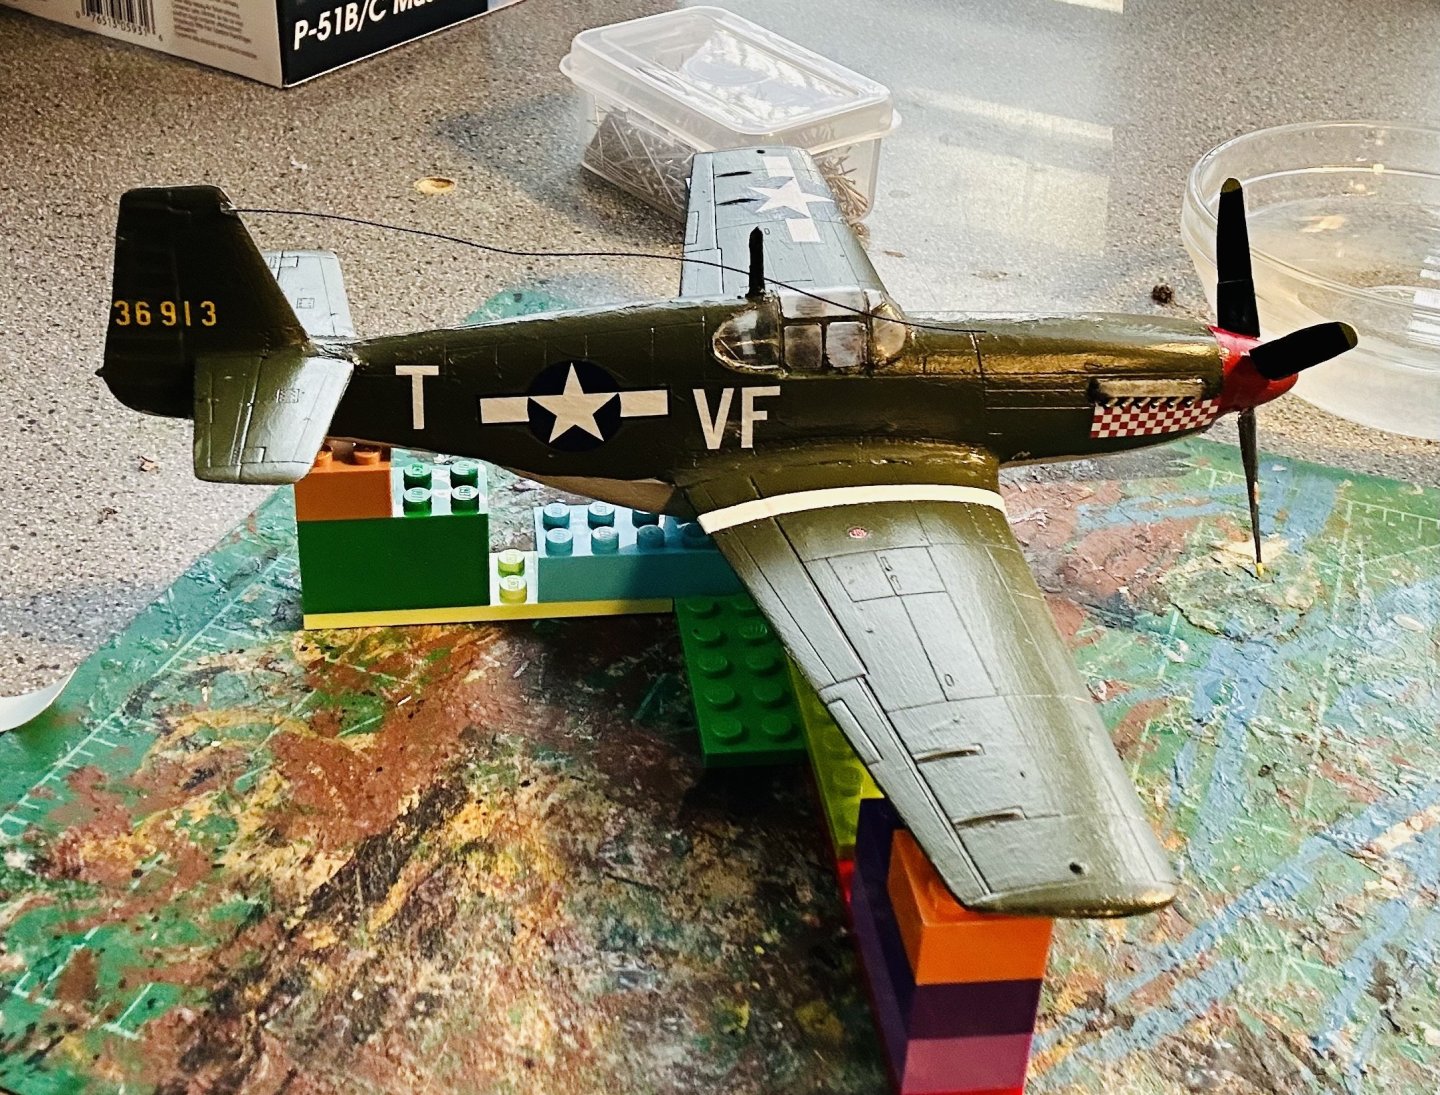
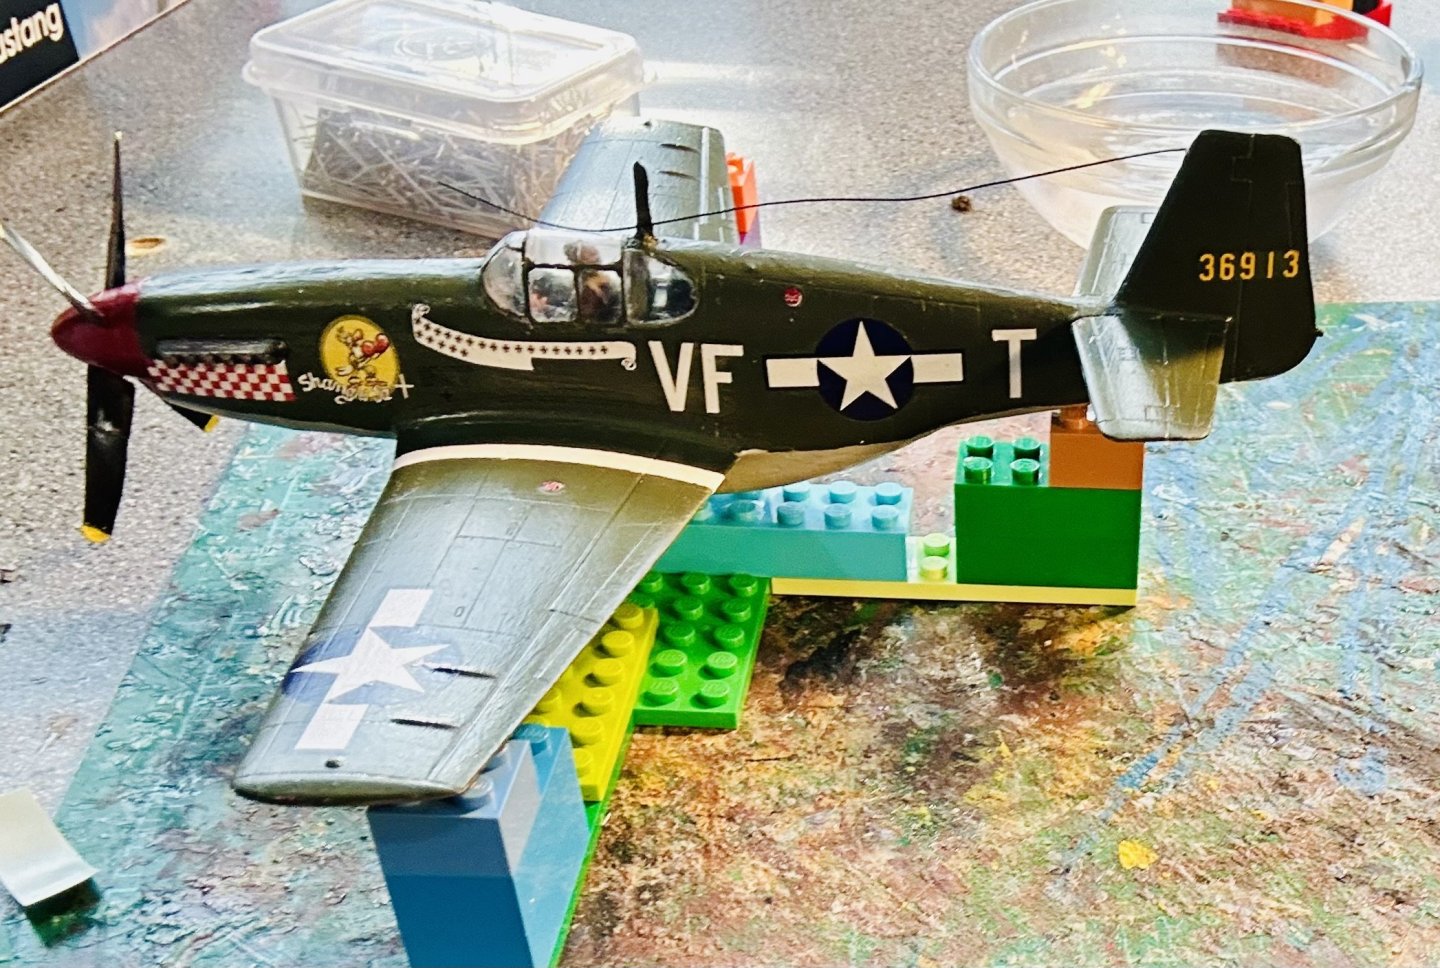
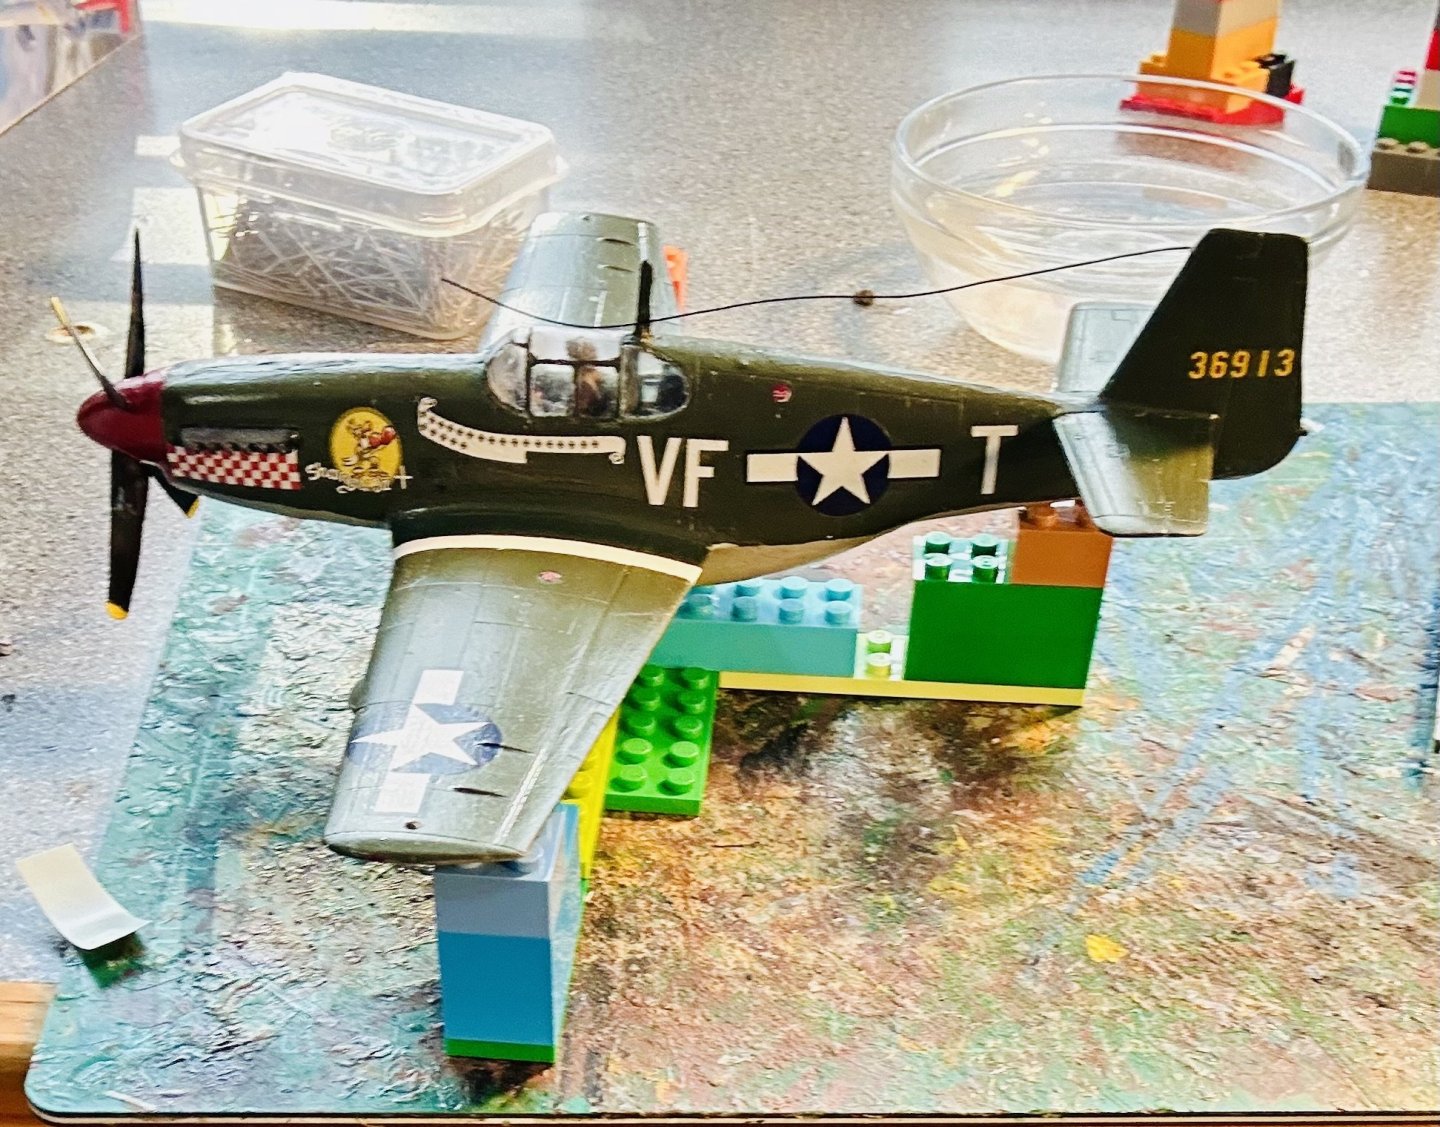
And done: Thank you everyone for watching and for all the likes and comments! Quick note, I’m not too happy about the canopy, but due to the fact that I am most likely going to be building a lot more aircraft for the next couple of years, I ordered some canopy glue.

- 14 replies
-
- 14
-
-
-
Welcome! I have the plan set for the Victory Models kit of the HMS Vanguard, which I believe the Model Shipways kit was a licensed version of. It looks like an awesome project! I plan to build mine eventually, most likely from card.
-
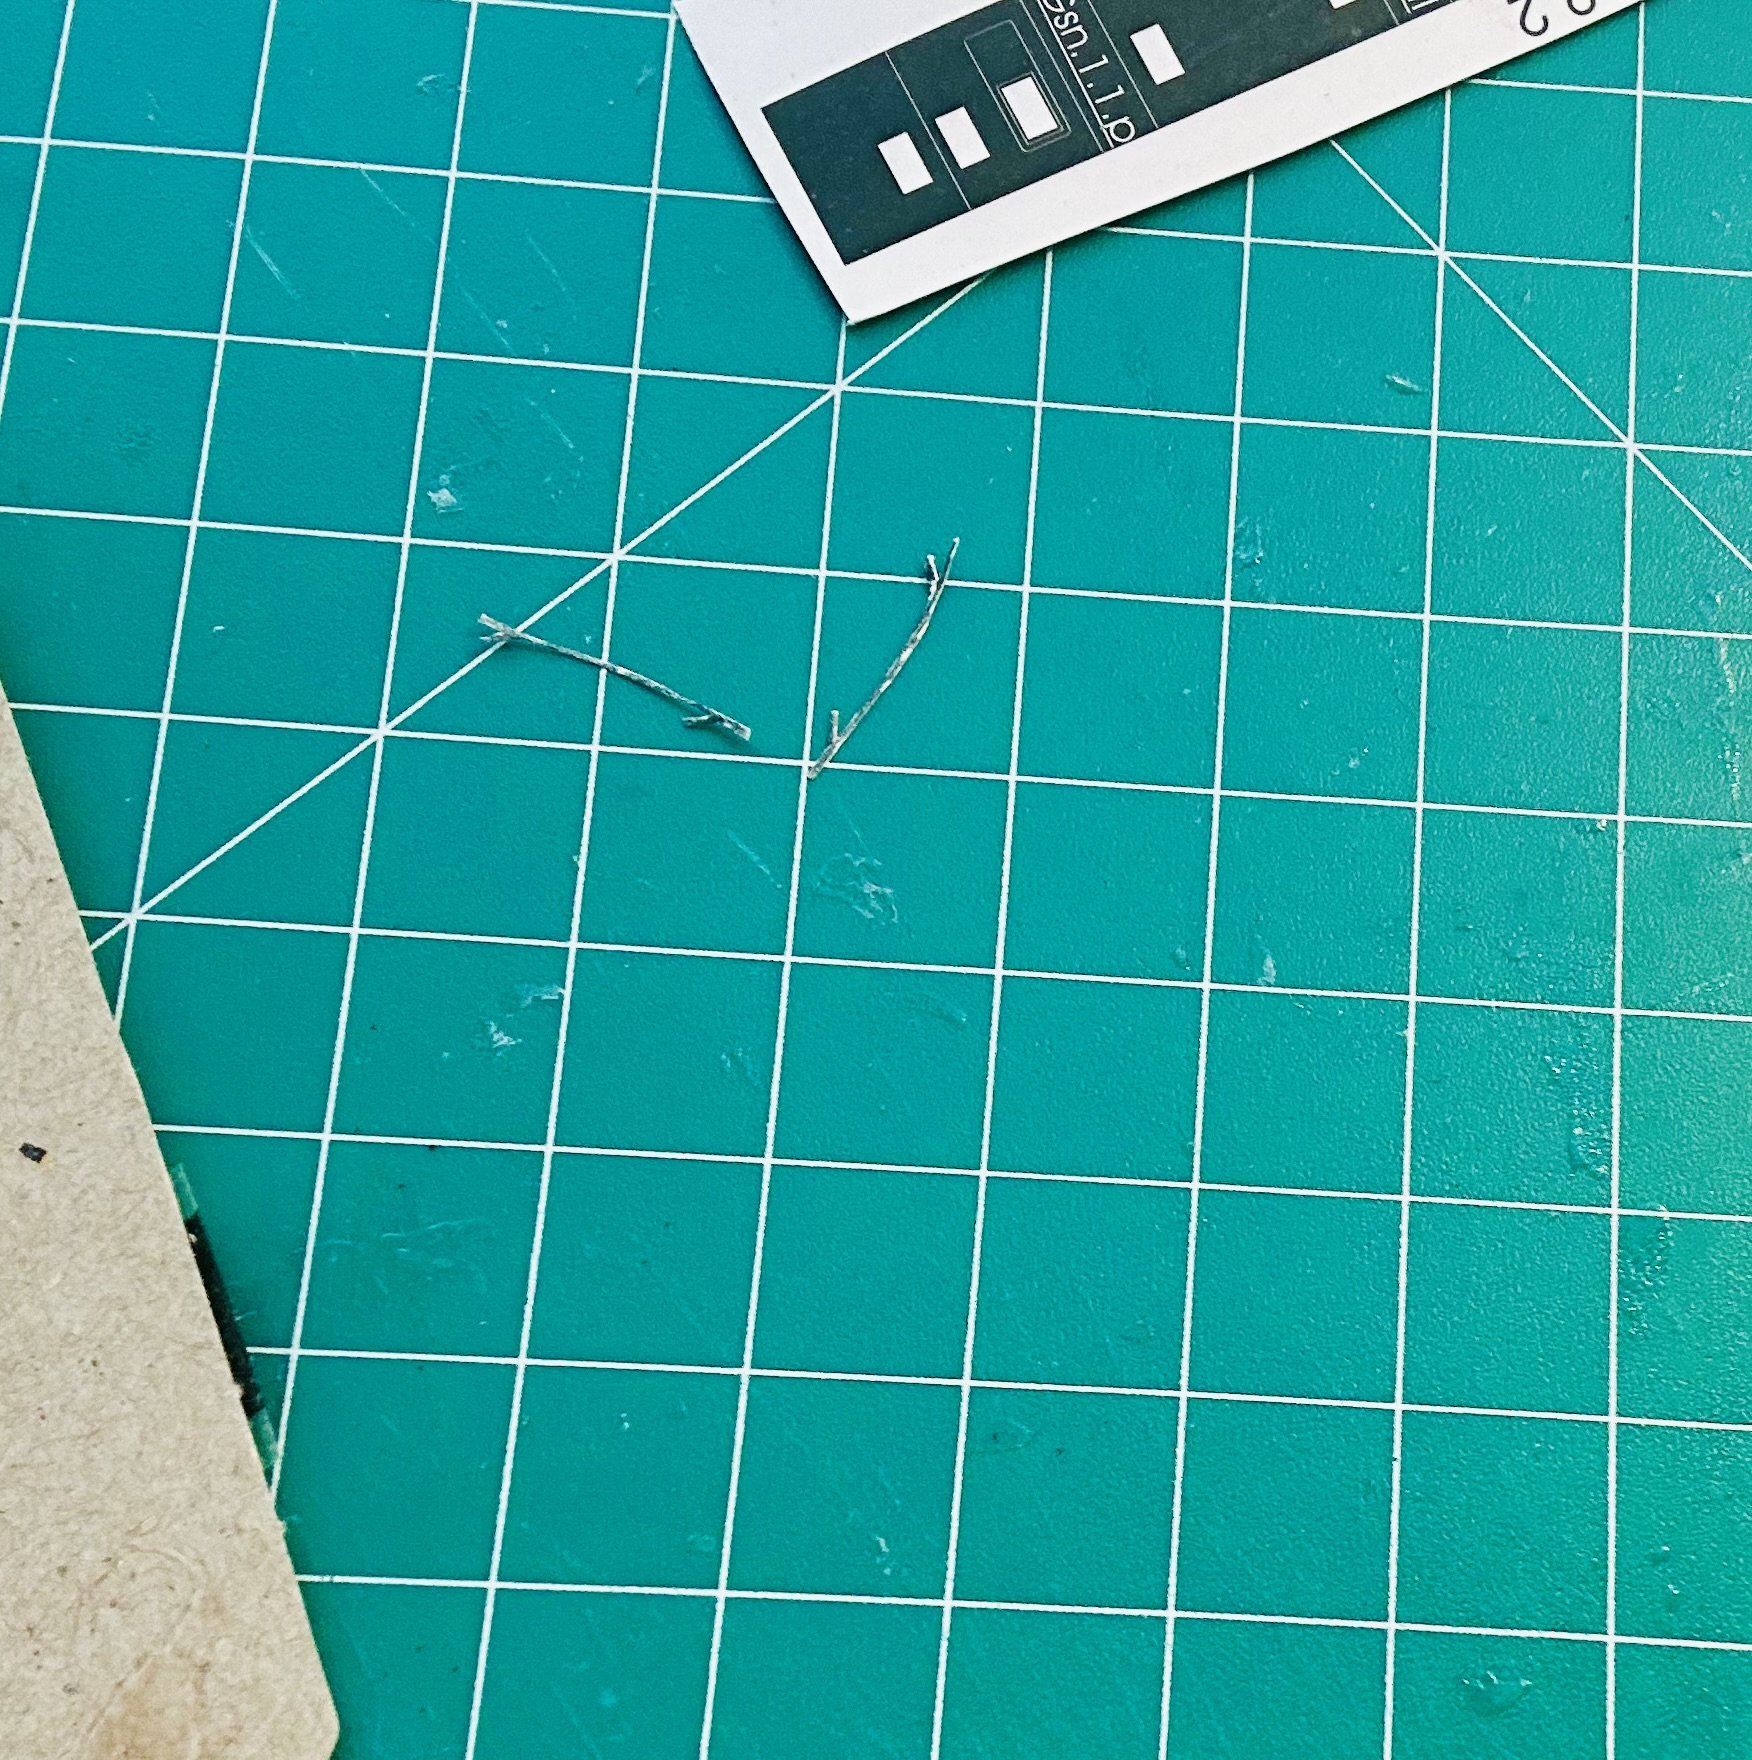
The decals are on and I’m waiting for the Max Hold CA that will hold the HF antenna to dry so I can attach it to the mast. Following my experience with my last round of plastic models, I sealed the model immediately following adding the decals to prevent them from curling up. I used the technique of putting thinned down glue on thread for the long-wire antenna, as is typically done with card models. I would have just used an eyebolt like in times past, but there’s not enough material to drill into on the rudder, so I kind of made my own EZ-line.
- 14 replies
-
- 11
-
-
Welcome!