GrandpaPhil
-
Posts
6,167 -
Joined
-
Last visited
Content Type
Profiles
Forums
Gallery
Events
Everything posted by GrandpaPhil
-
New Member Dale Mierzwik of Northern Colorado
GrandpaPhil replied to DaleMierzwik's topic in New member Introductions
Welcome! -
Congratulations on the finish! Nicely done! Every build is a learning experience and process for me too! That’s half the fun of the hobby!
-
Quality of Model Shipways Skipjack Ship
GrandpaPhil replied to acaron41120's topic in Wood ship model kits
I’ve had a couple Model Shipways kits and I liked them. Their kits are of good quality. -
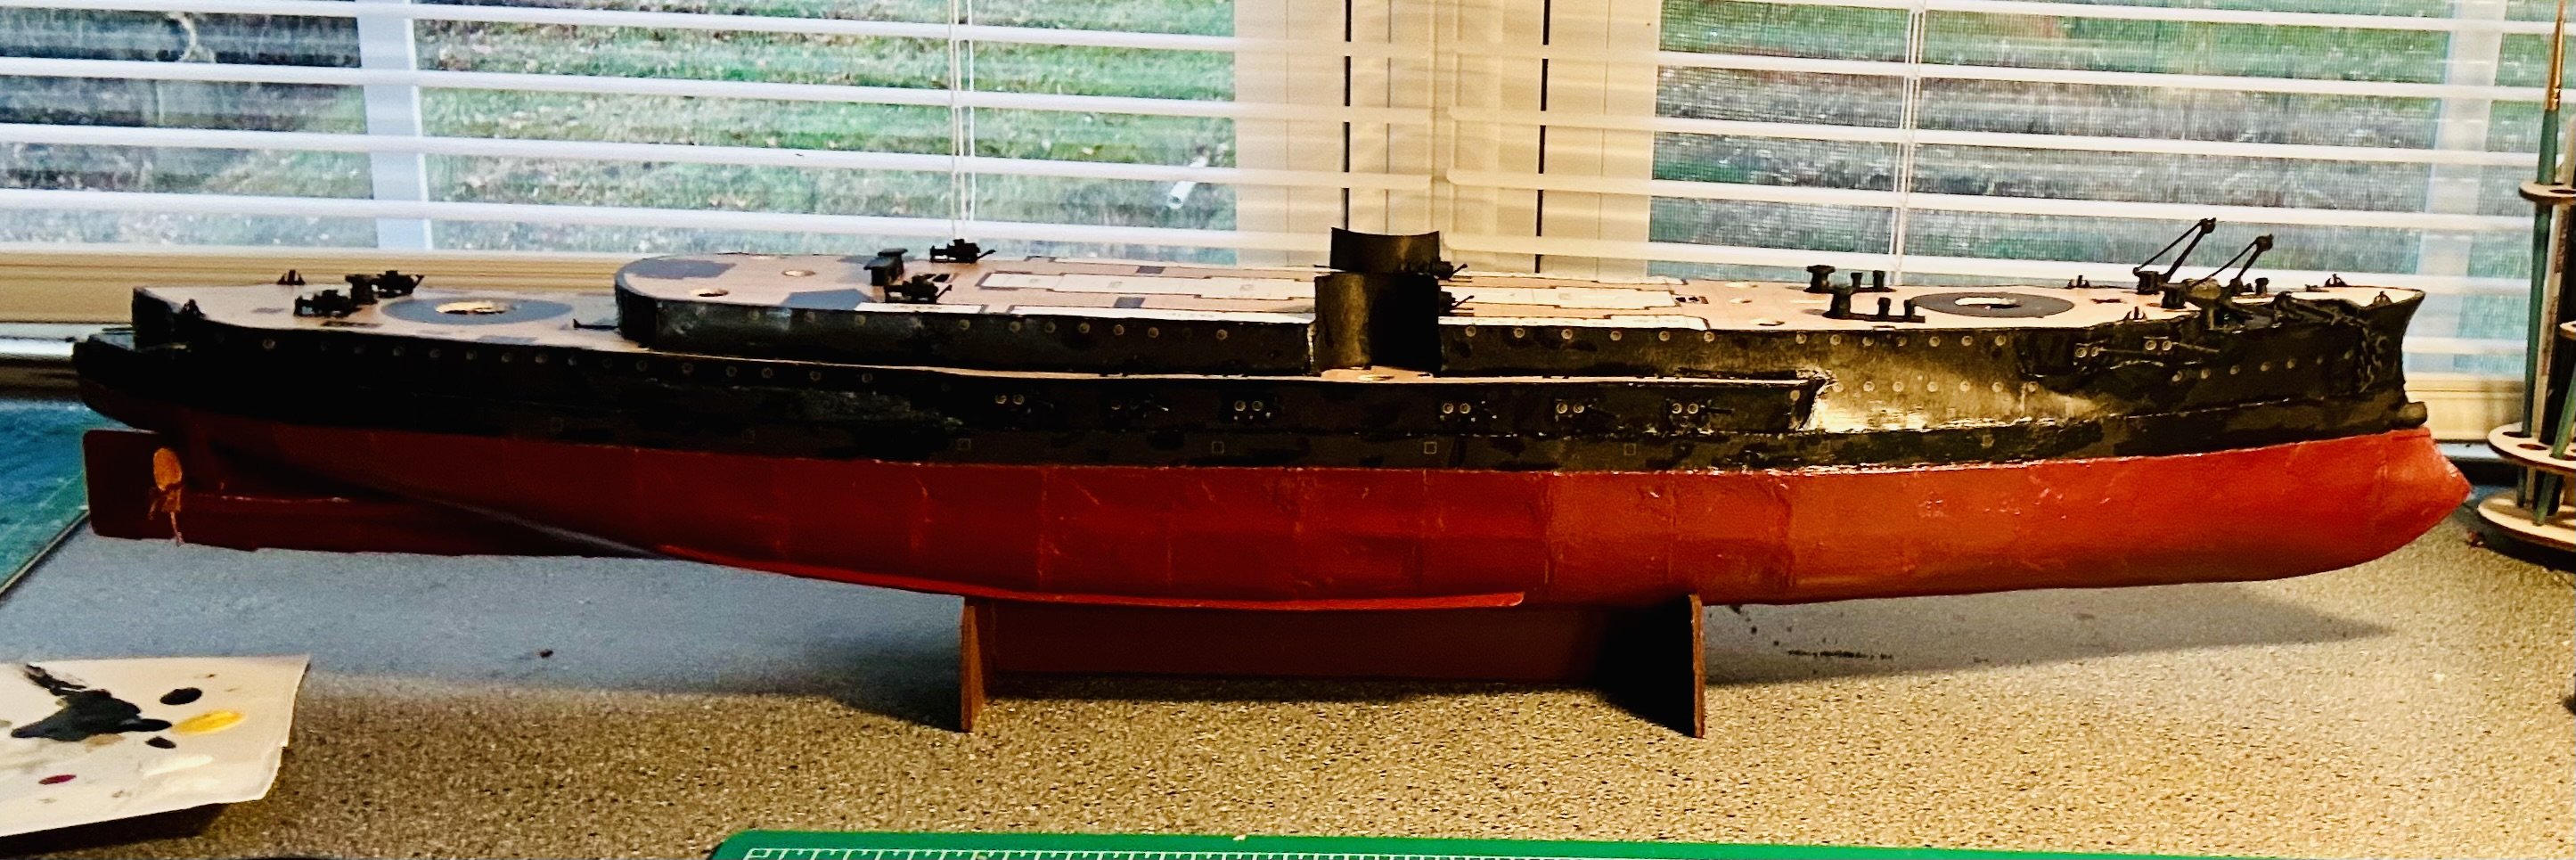
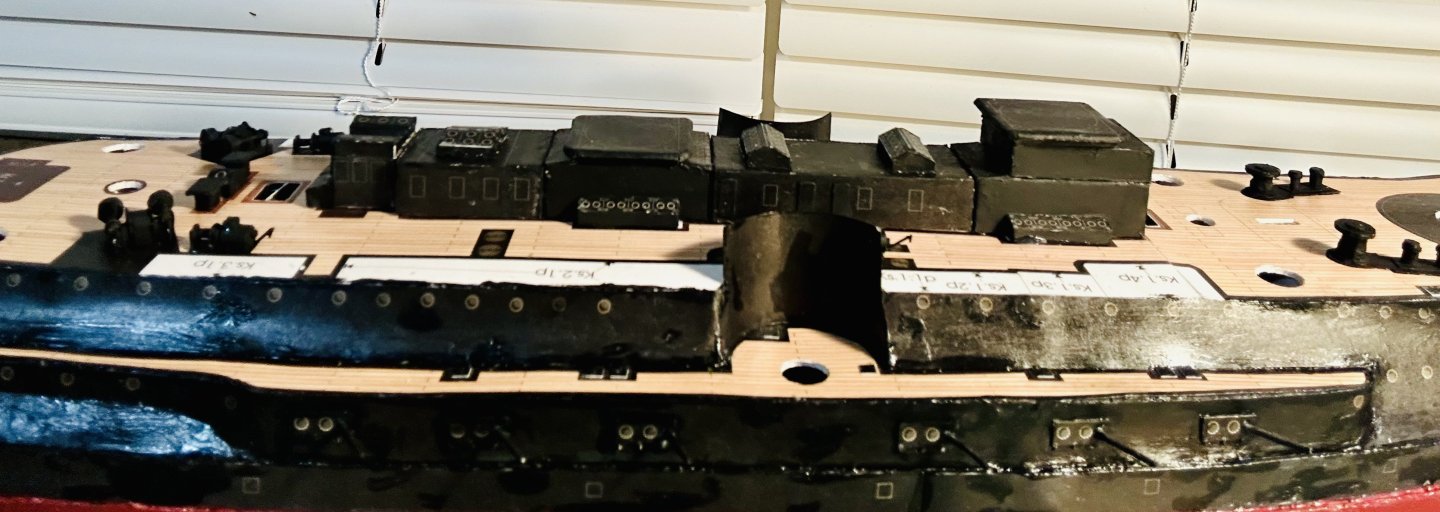
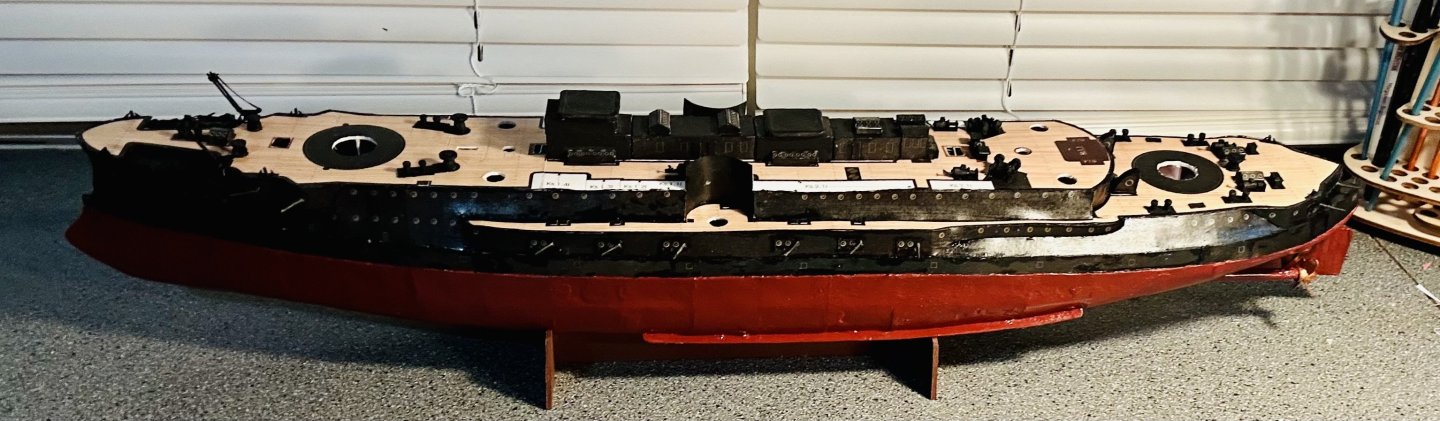
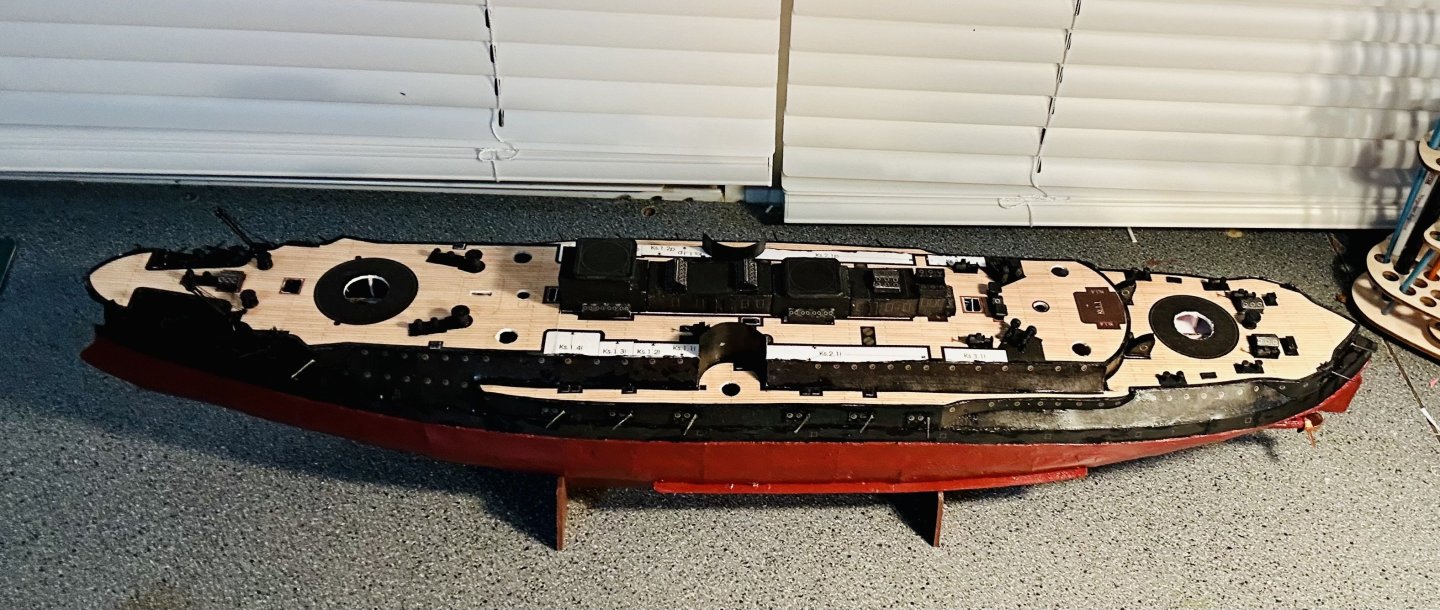
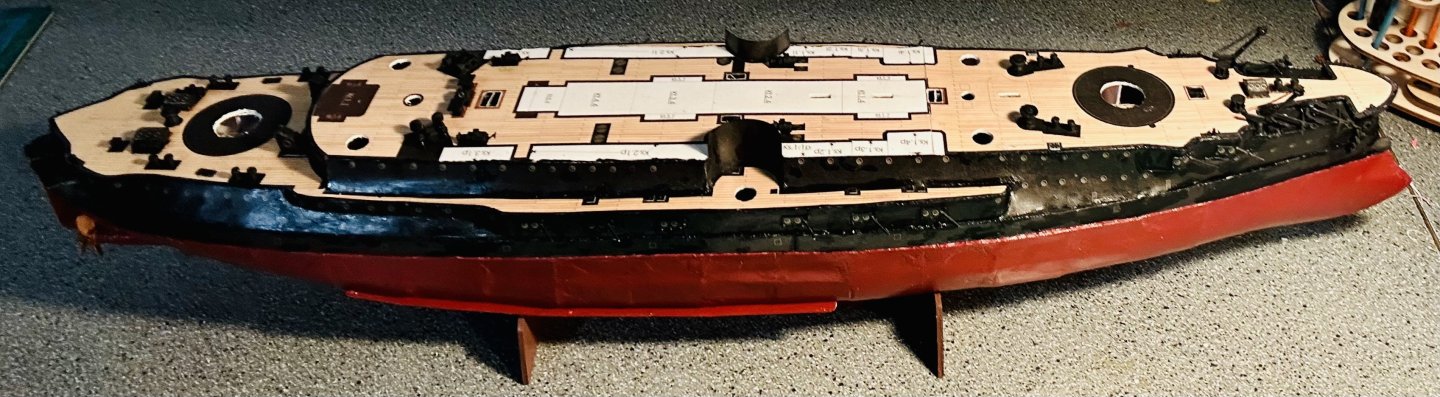
The center superstructure is made and installed: Working the stacks now. The stacks: The Oryol is beginning to look like a battleship!

- 288 replies
-
- 10
-

-

-
- Card
- Pre-Dreadnought
- (and 3 more)
-
Check out Wolfram Zu Monfeld’s “Historic Ship Models”. It is an excellent reference book and includes detailed explanations of the internal construction of a wood ship to include mast installation. As far as rigging diagrams go, most Royal Navy vessels were relatively standardized across a type and time period, so you can take the rigging and masting from another frigate, adjust size, and adapt it to the Triton. I bought the 1/96 Shipyard kit of the frigate HMS Mercury, originally intending to use the masting and rigging diagrams for a possible future Triton or Winchelsea build. It’s still on my possible future to do list, once I get caught up with my current projects.
-
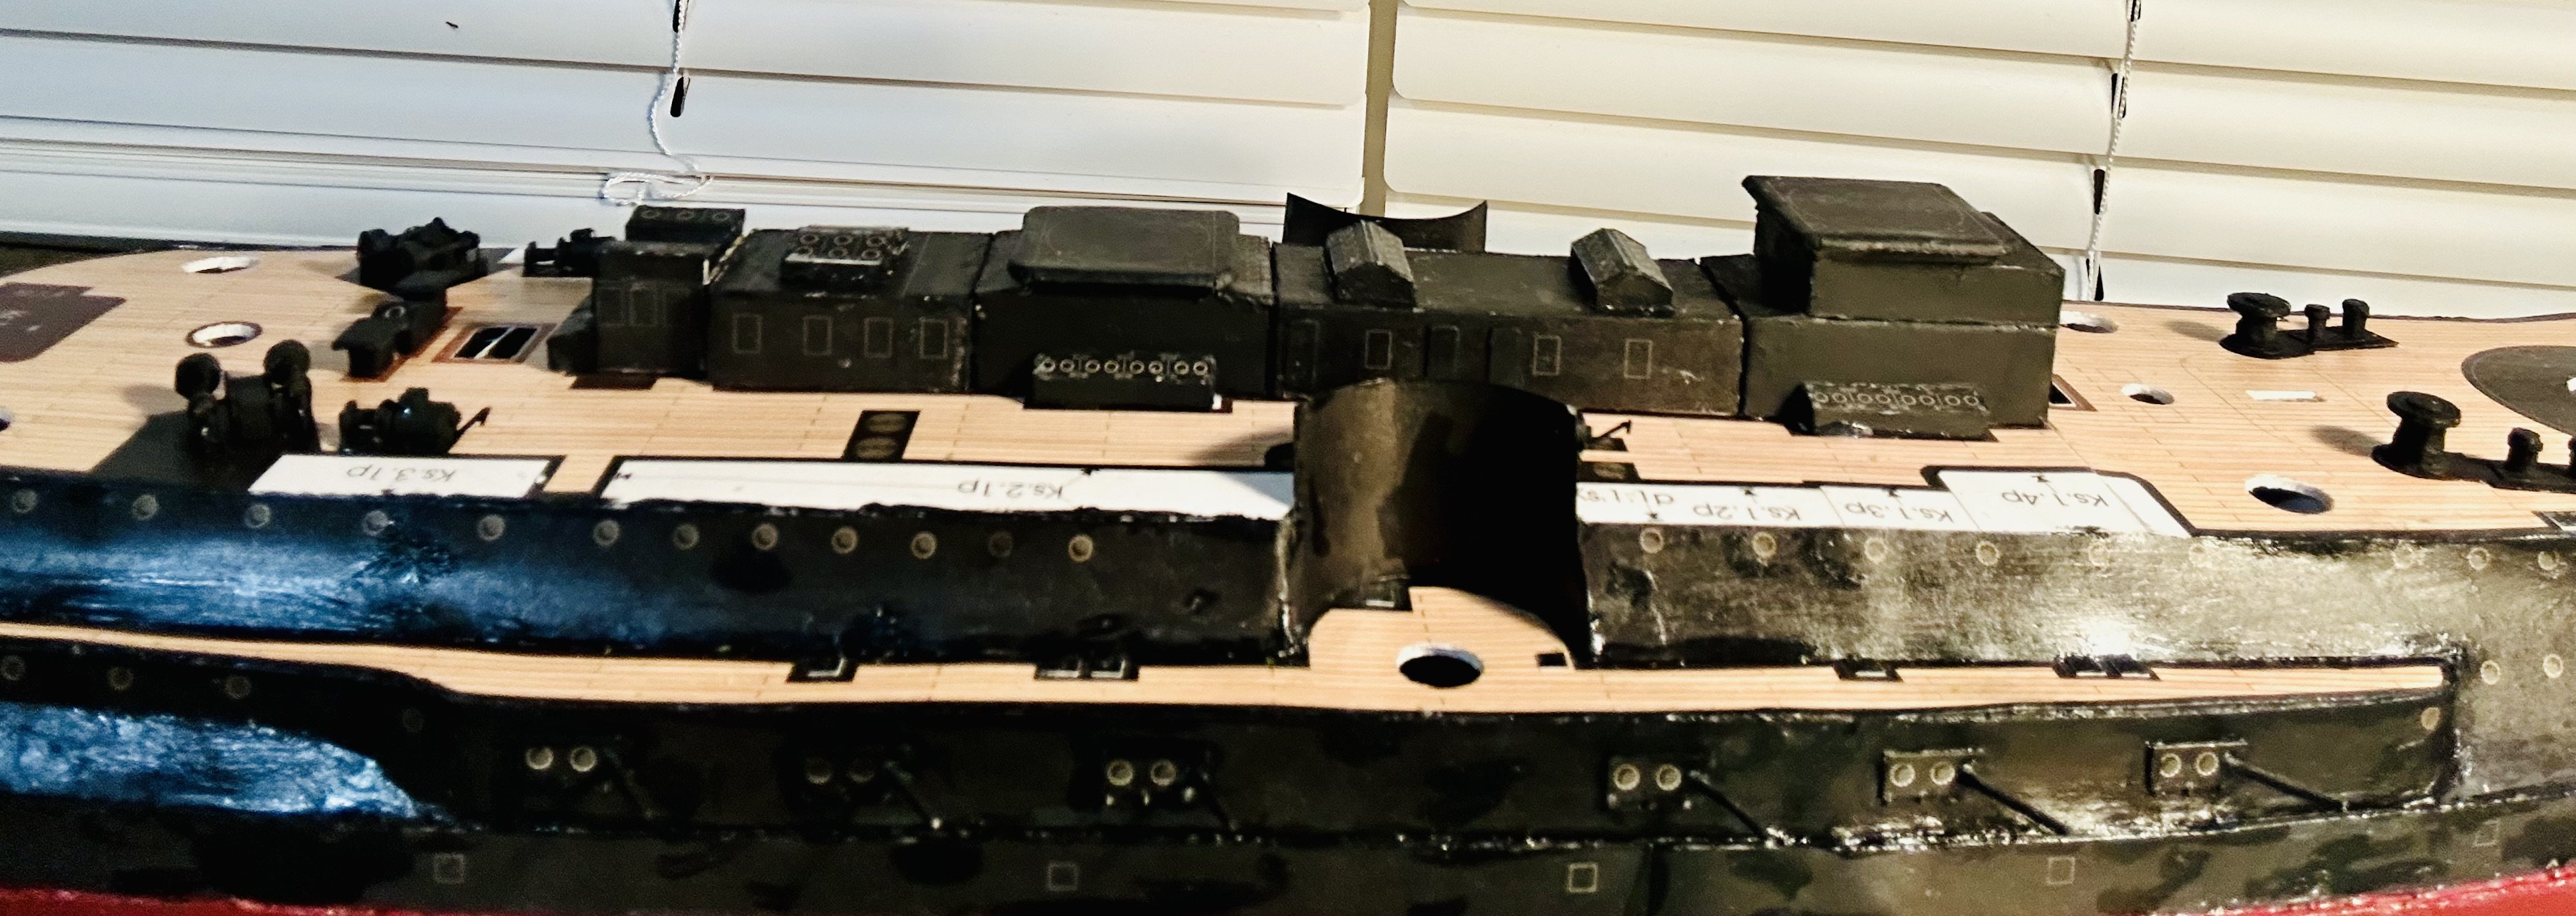
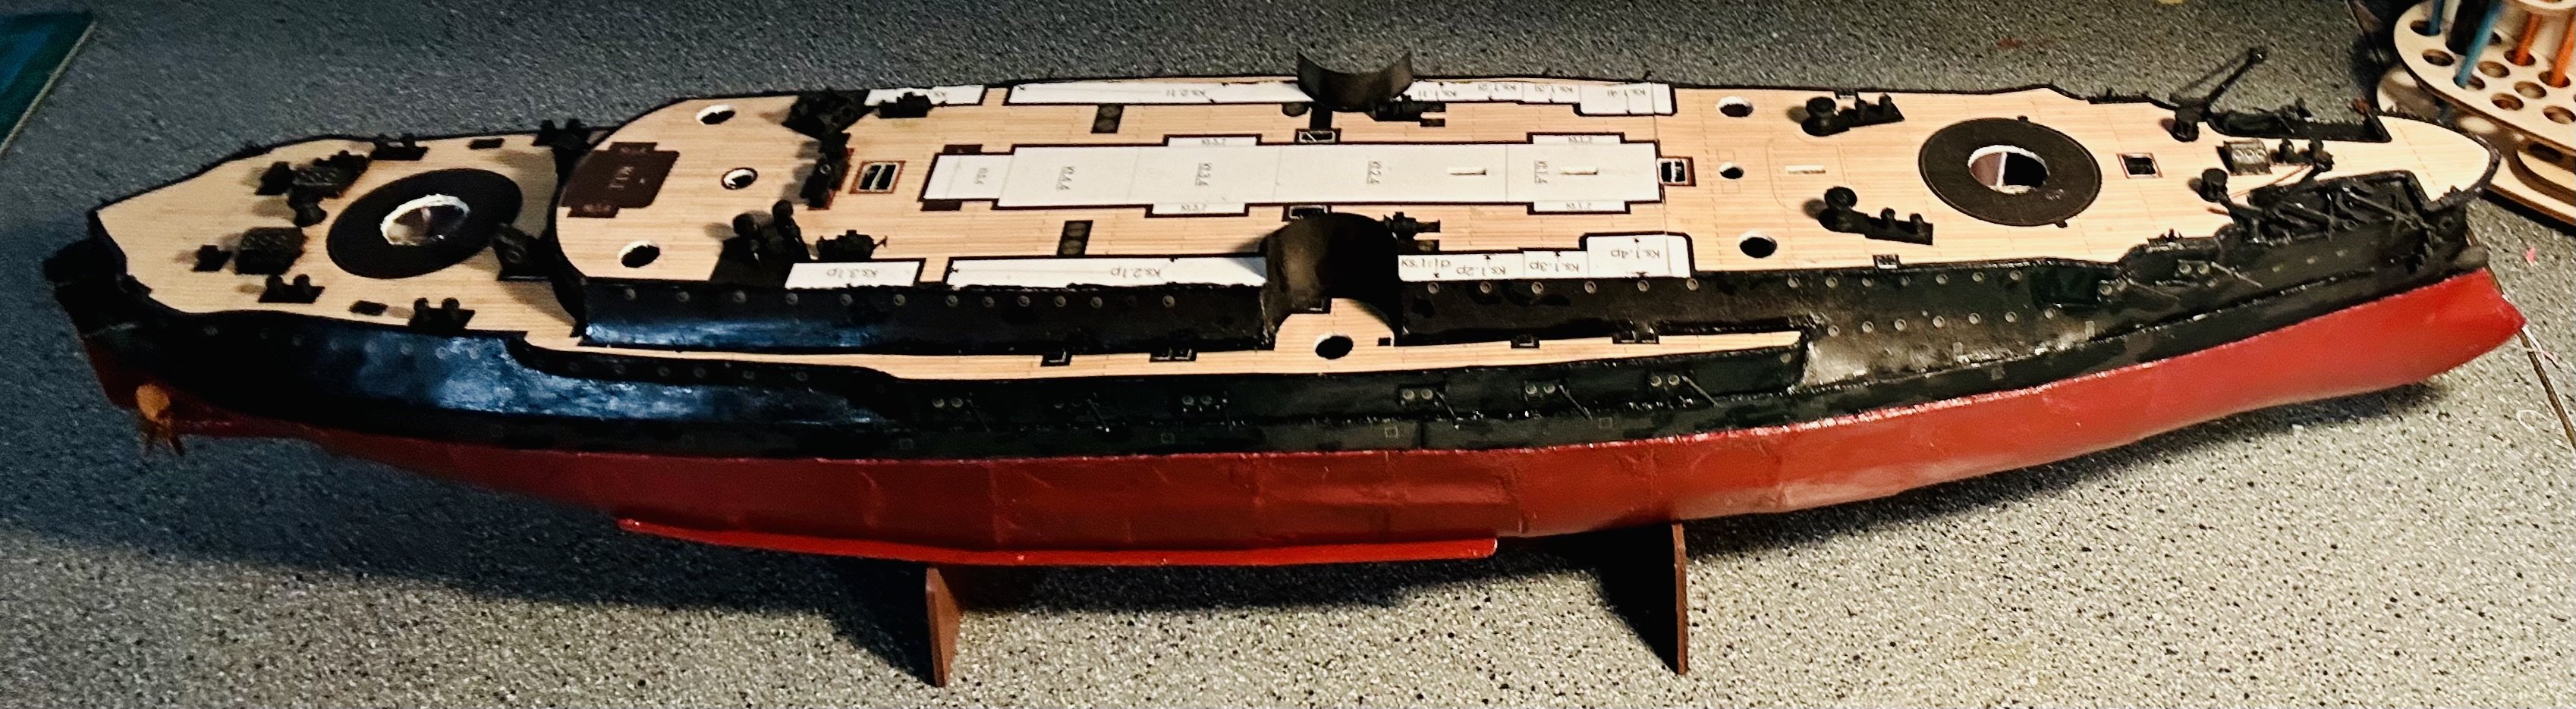
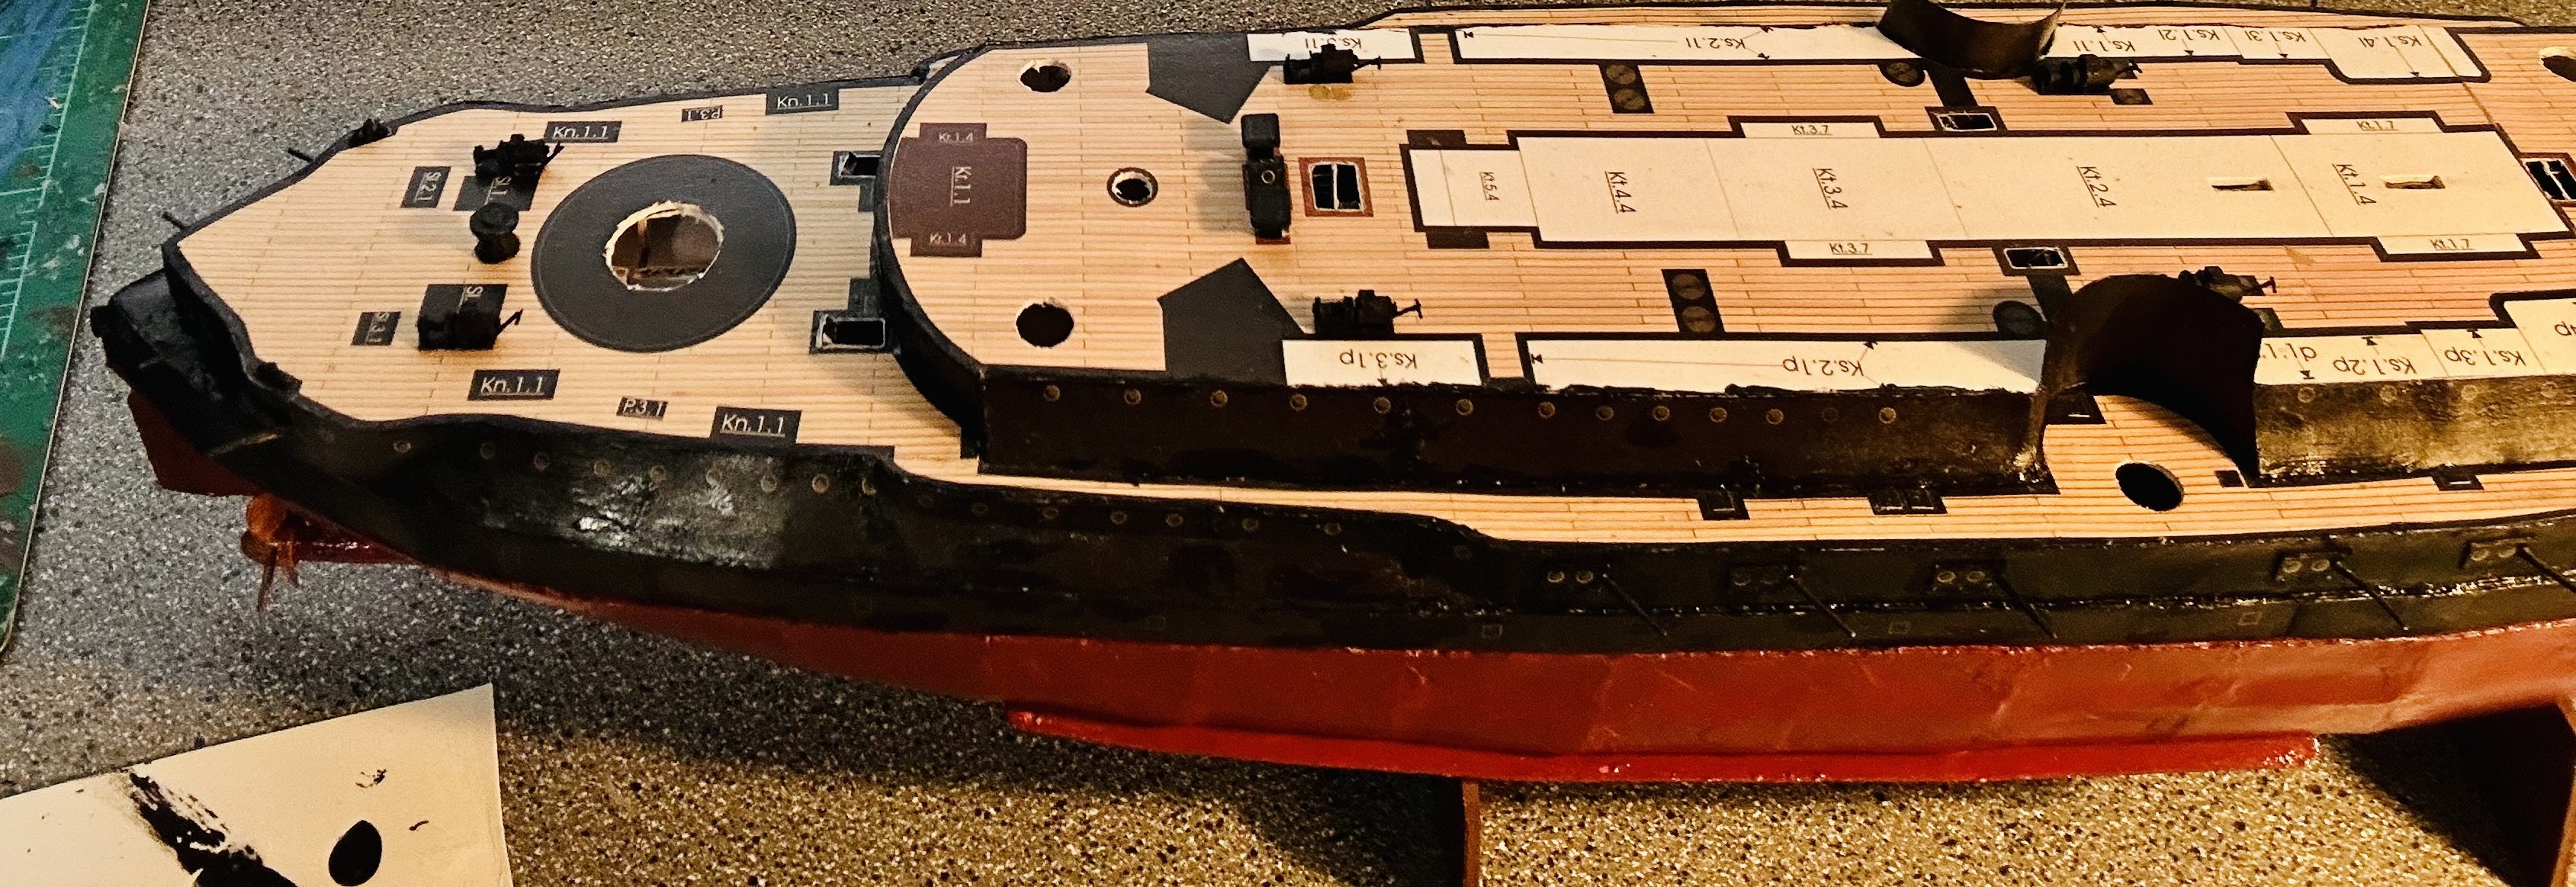
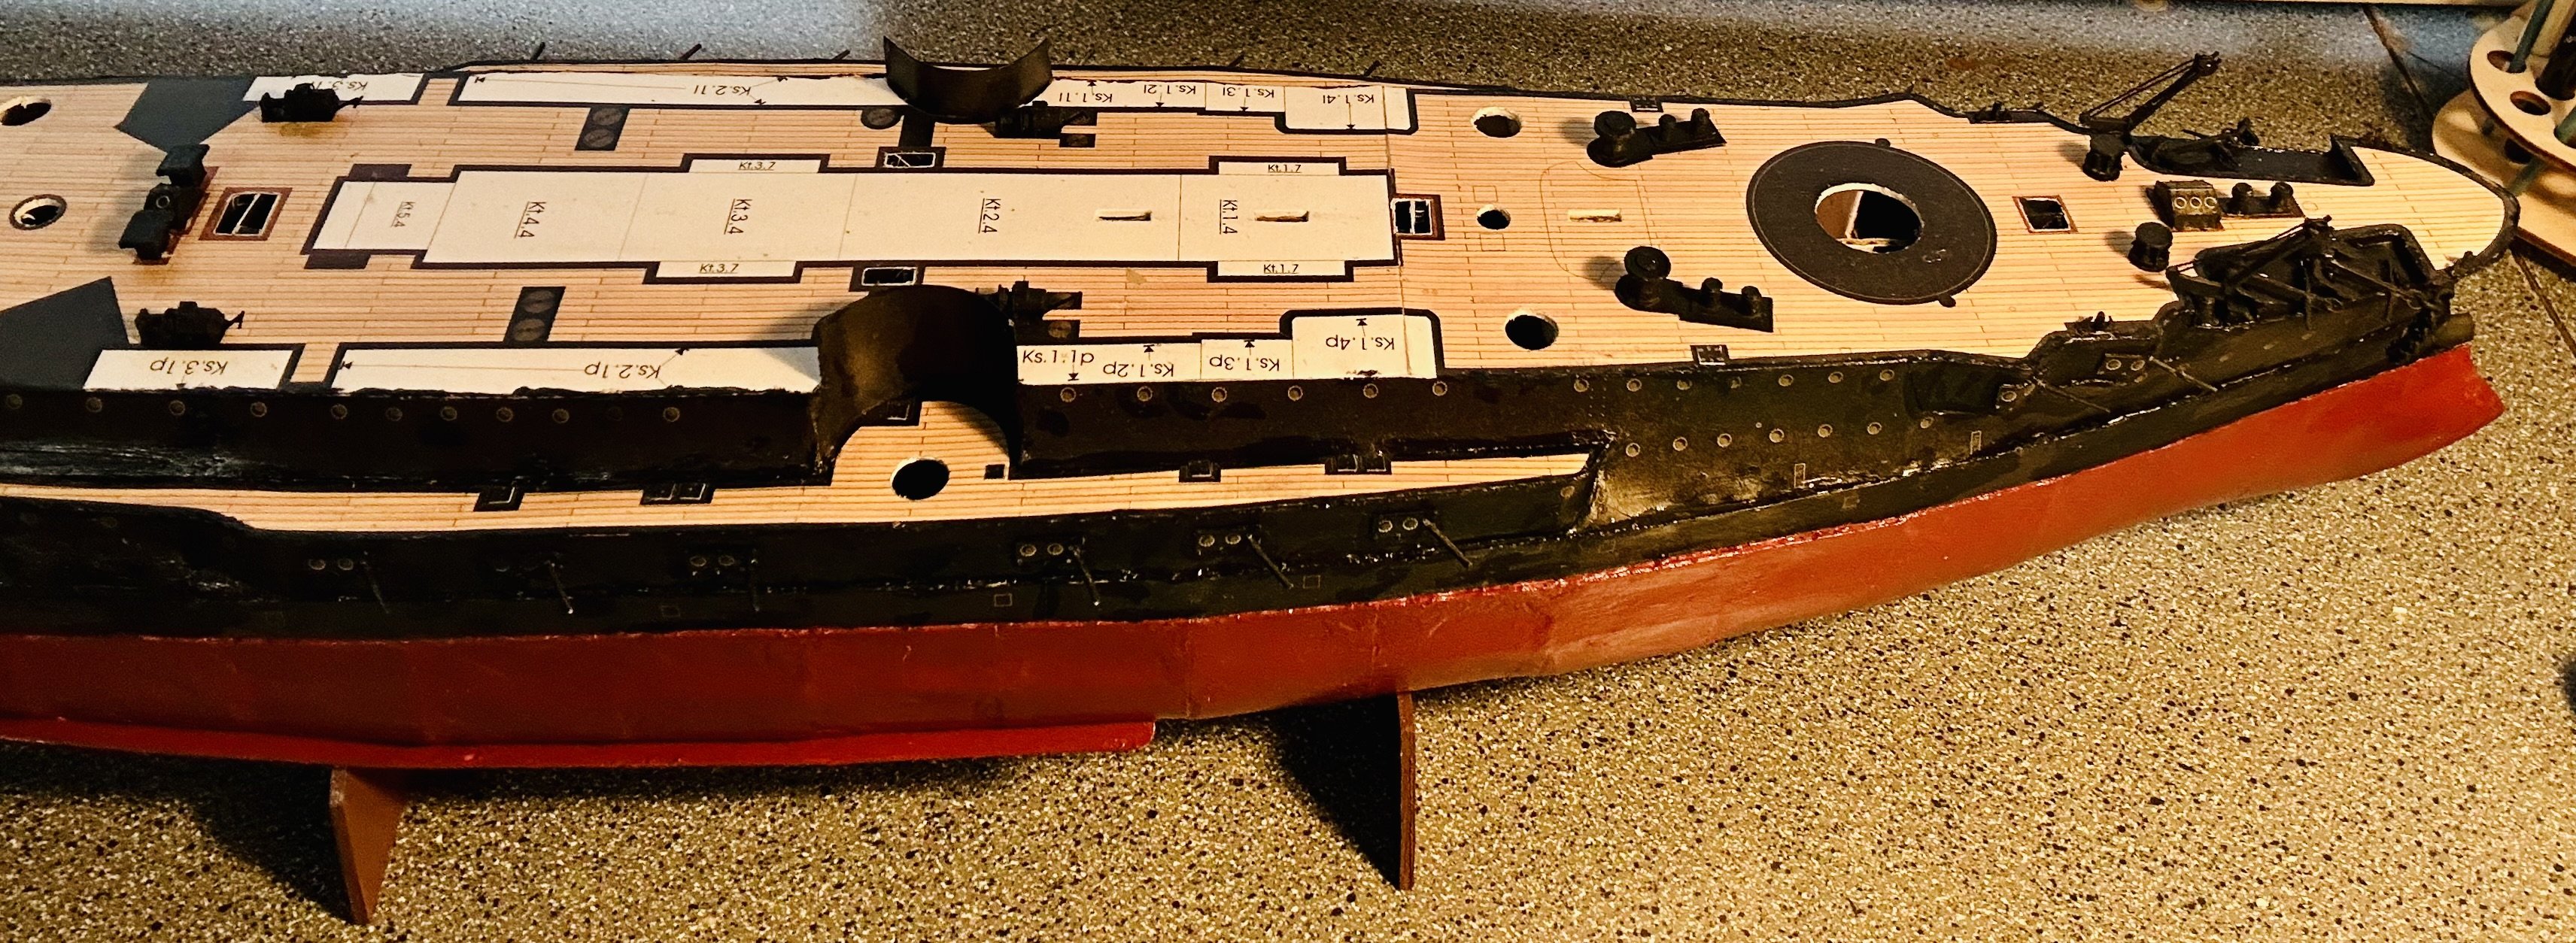
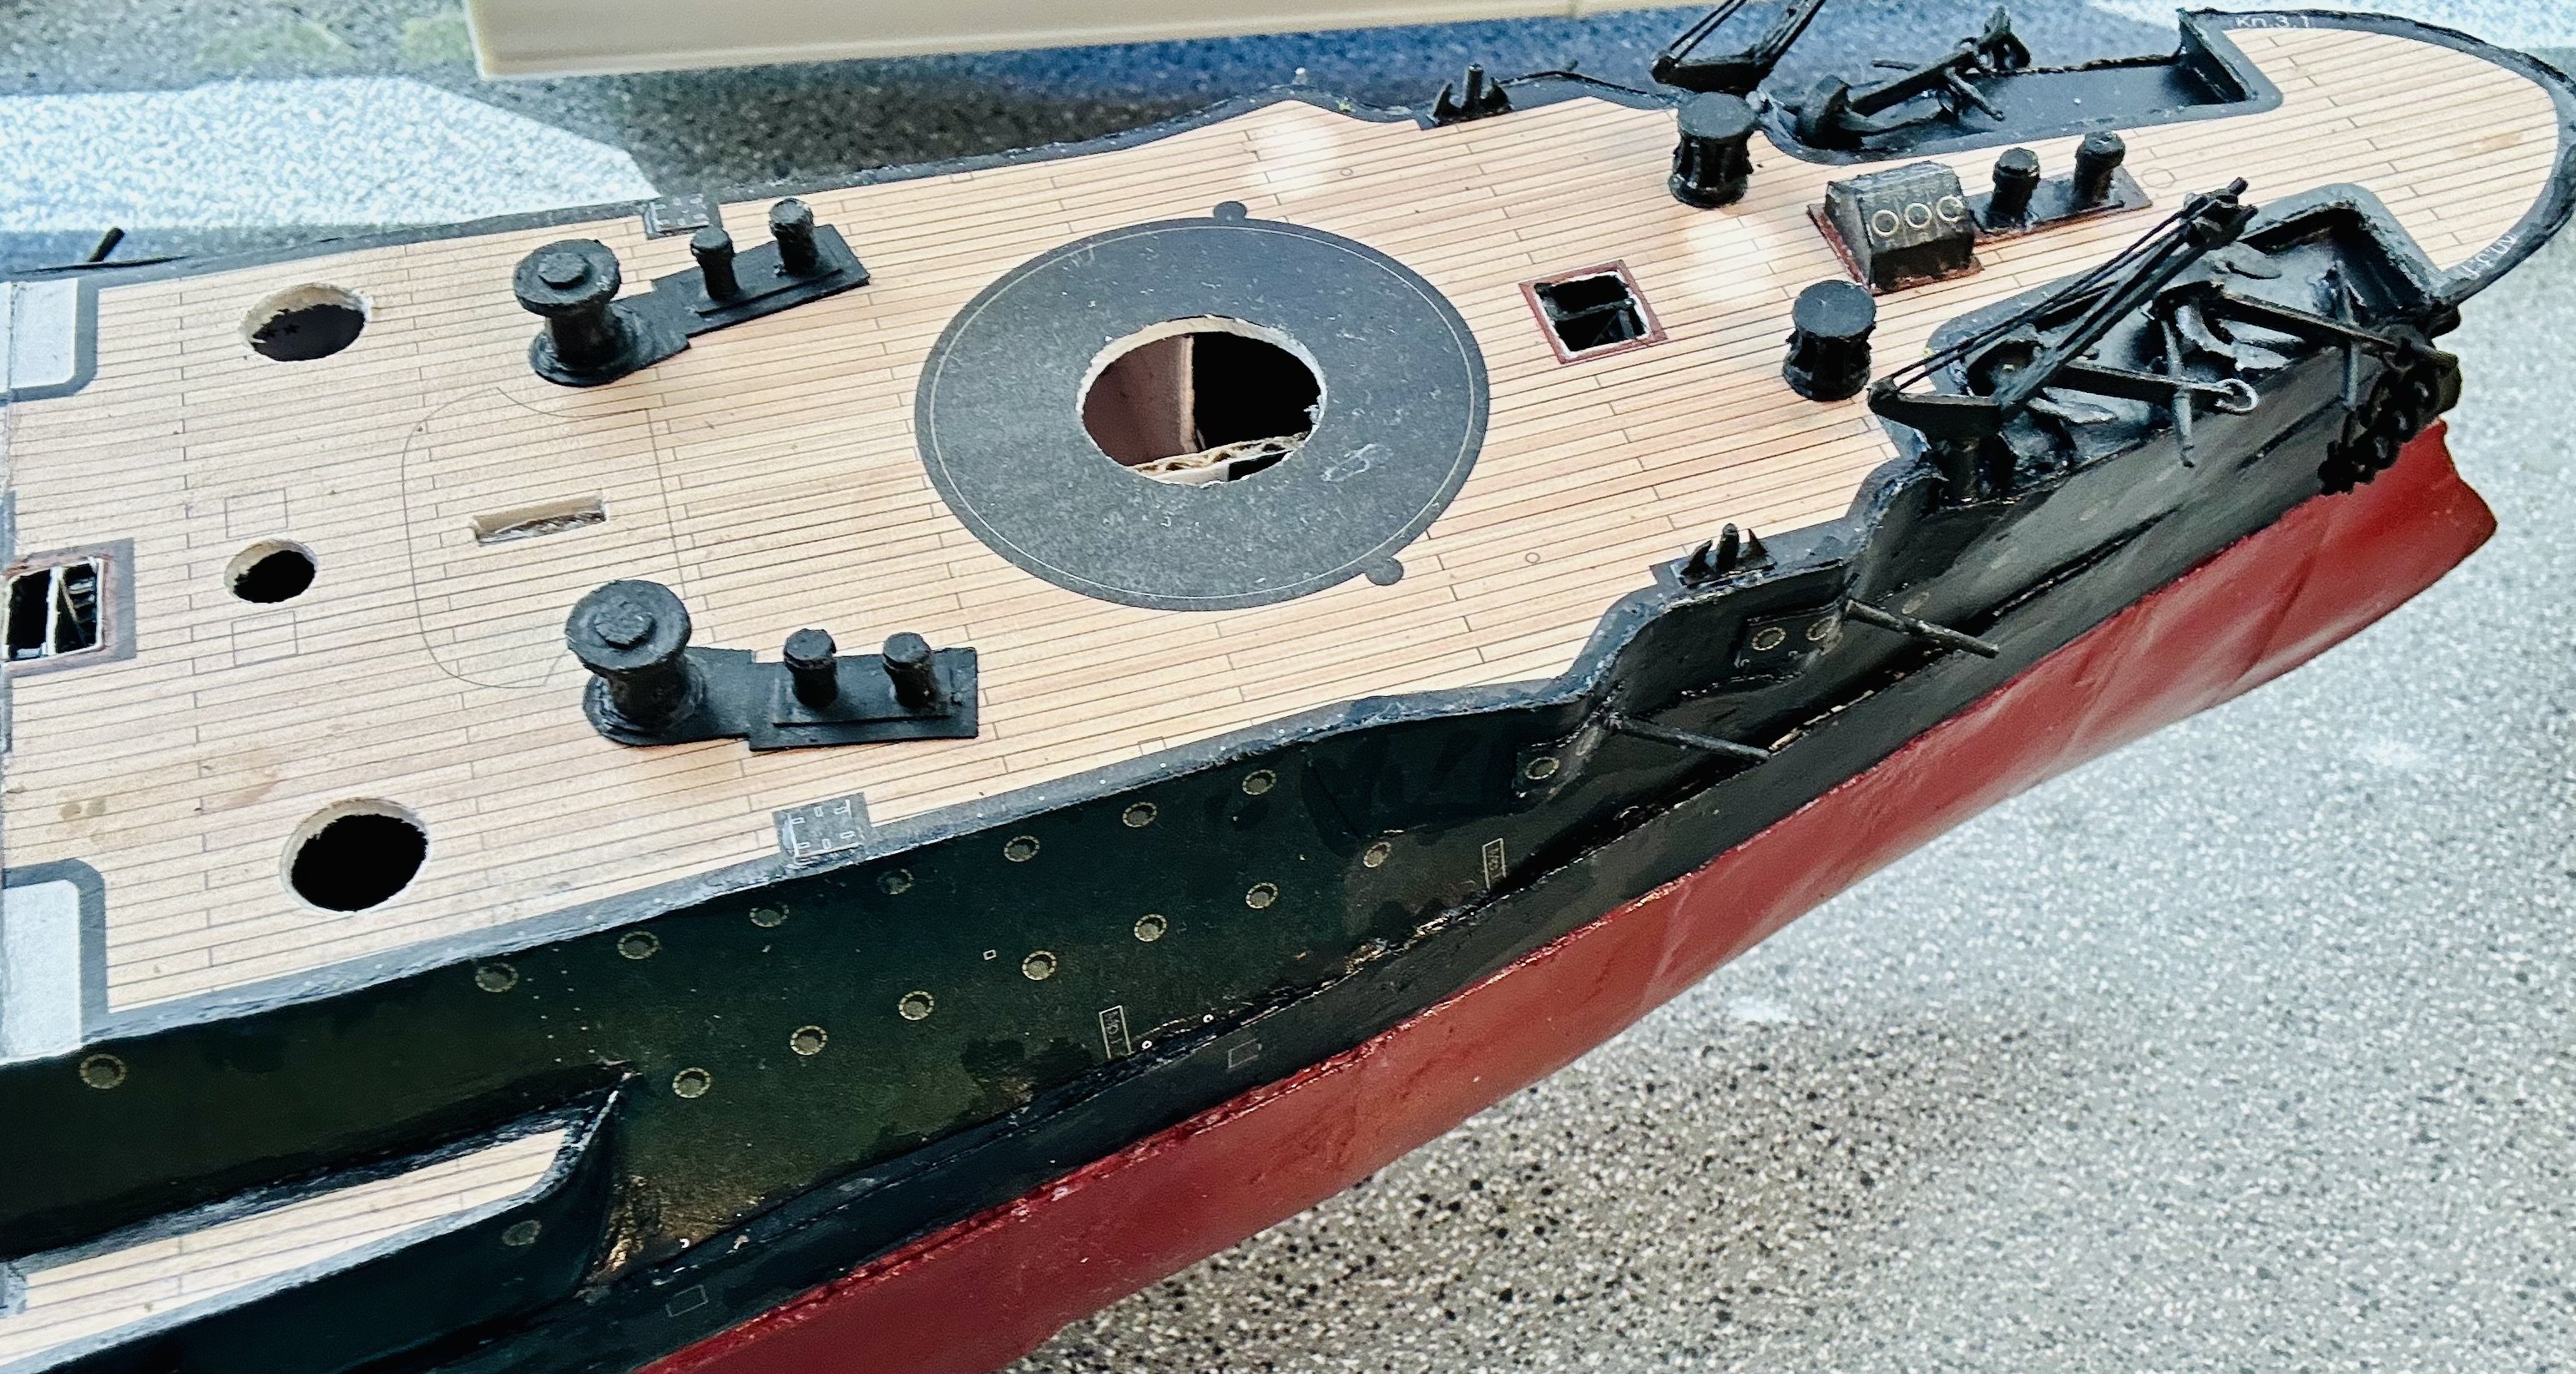
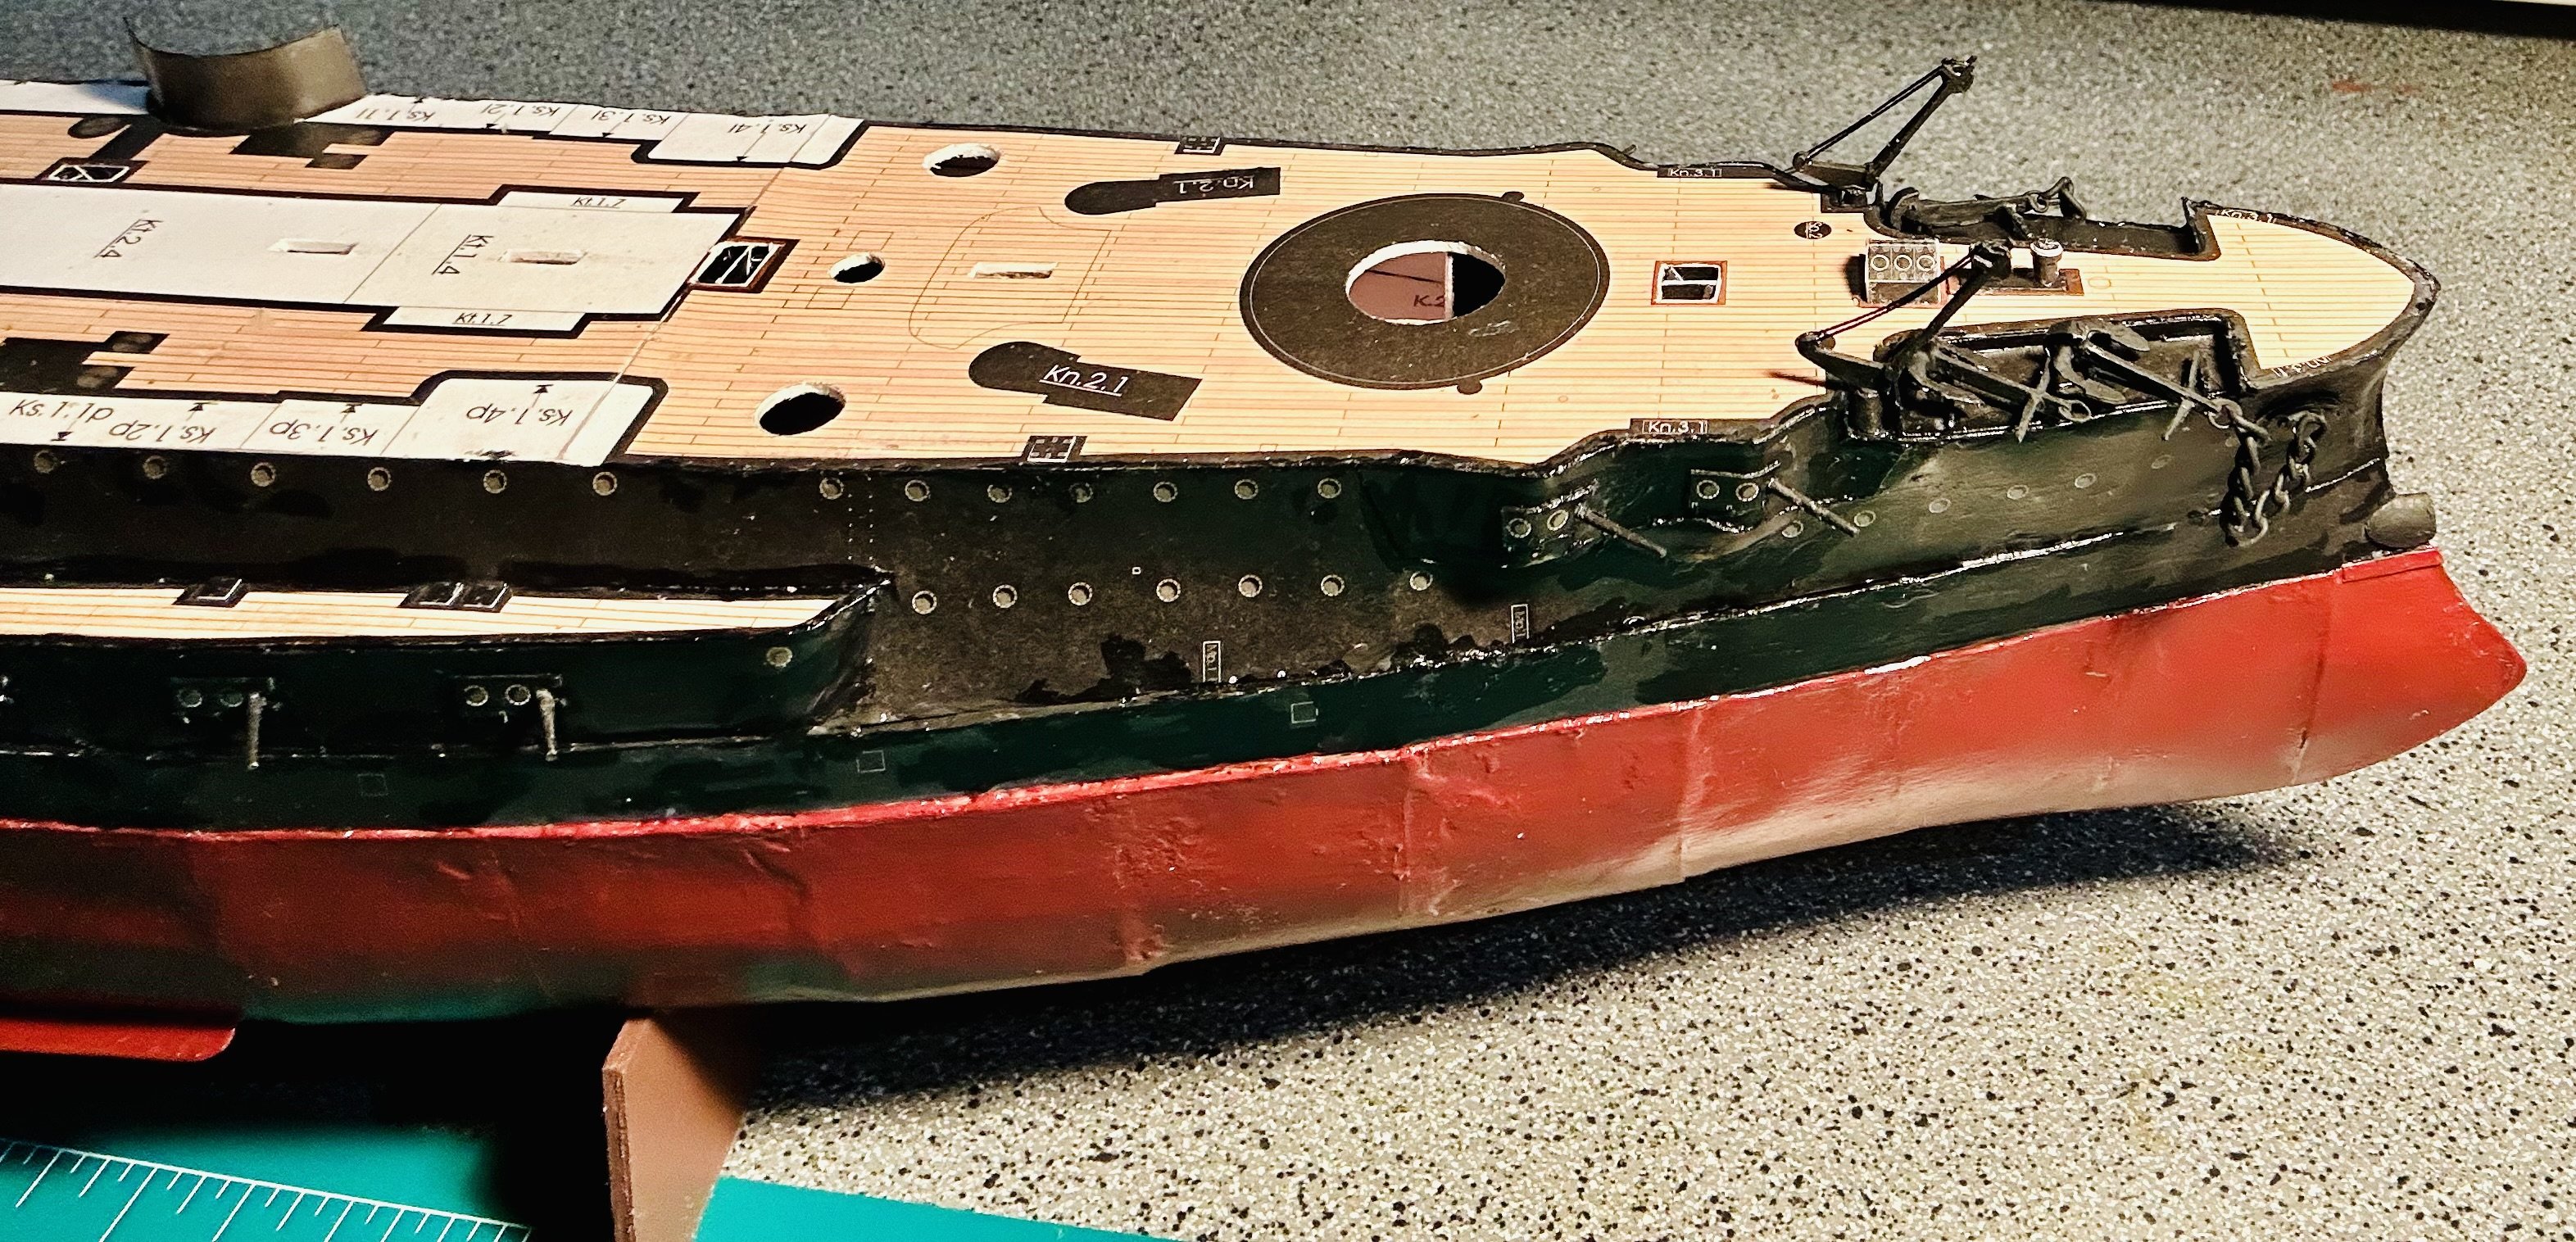
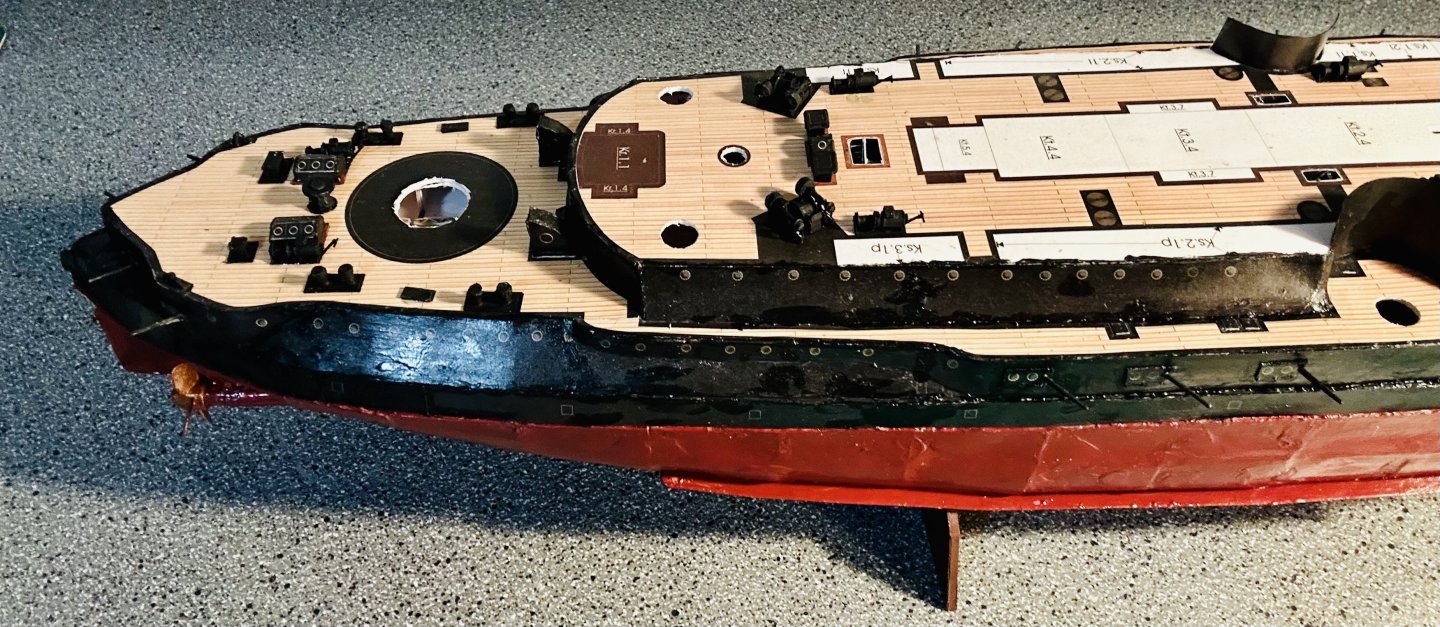
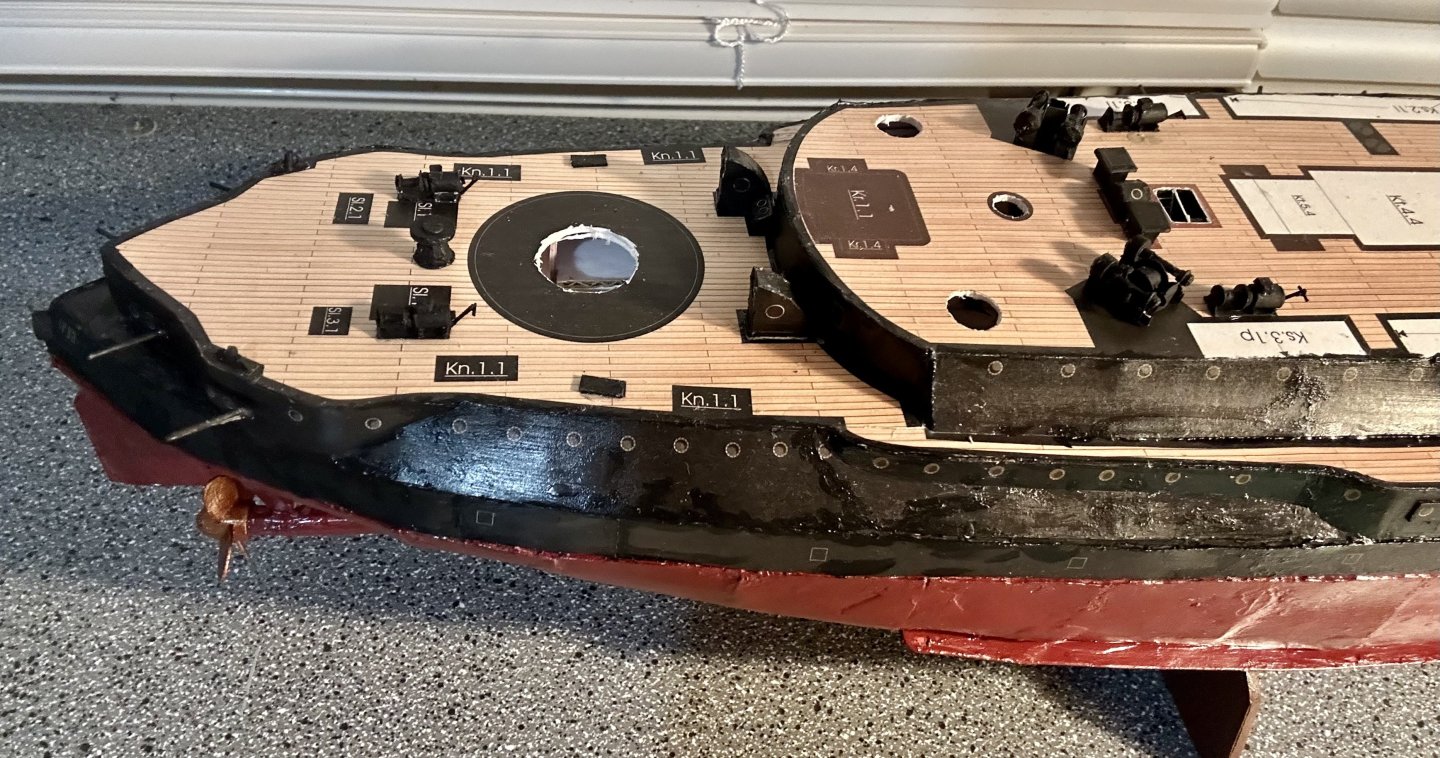
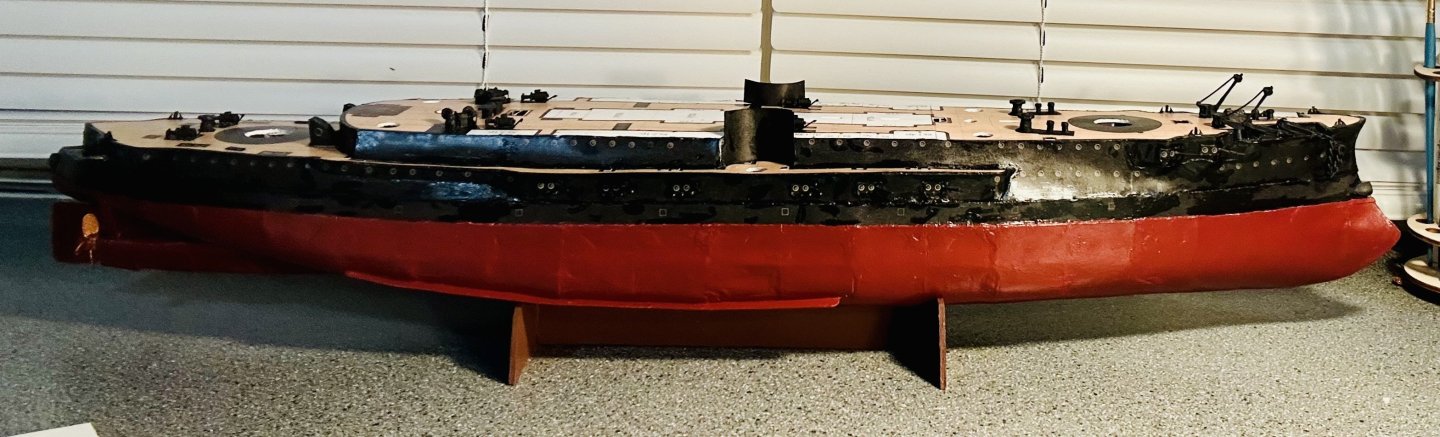
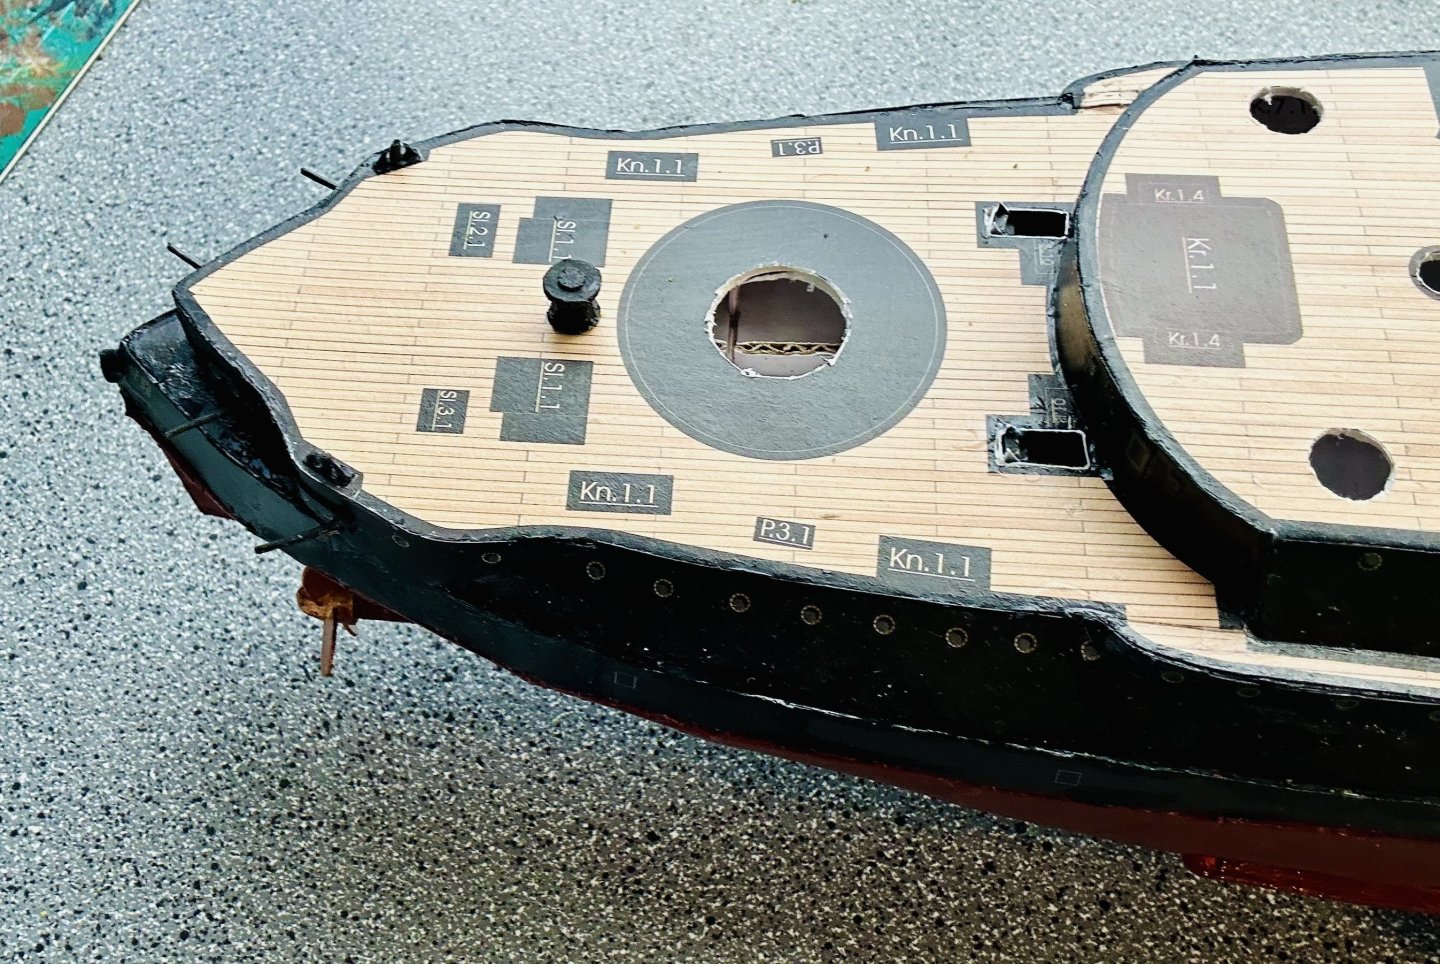
OC, Thank you very much! The Oryol’s main deck is fitted out now with everything but things like railings, which I’m holding off of until everything that needs to sit on the deck is in place to prevent weak spots. Here’s the aft deck: Here’s the entire ship as it stands now: I’m starting on the superstructure and stacks next!

- 288 replies
-
- 9
-
-
- Card
- Pre-Dreadnought
- (and 3 more)
-
Count me in too!
-
Intro to Card Models Intro and Table of Contents
GrandpaPhil replied to ccoyle's topic in Card and Paper Models
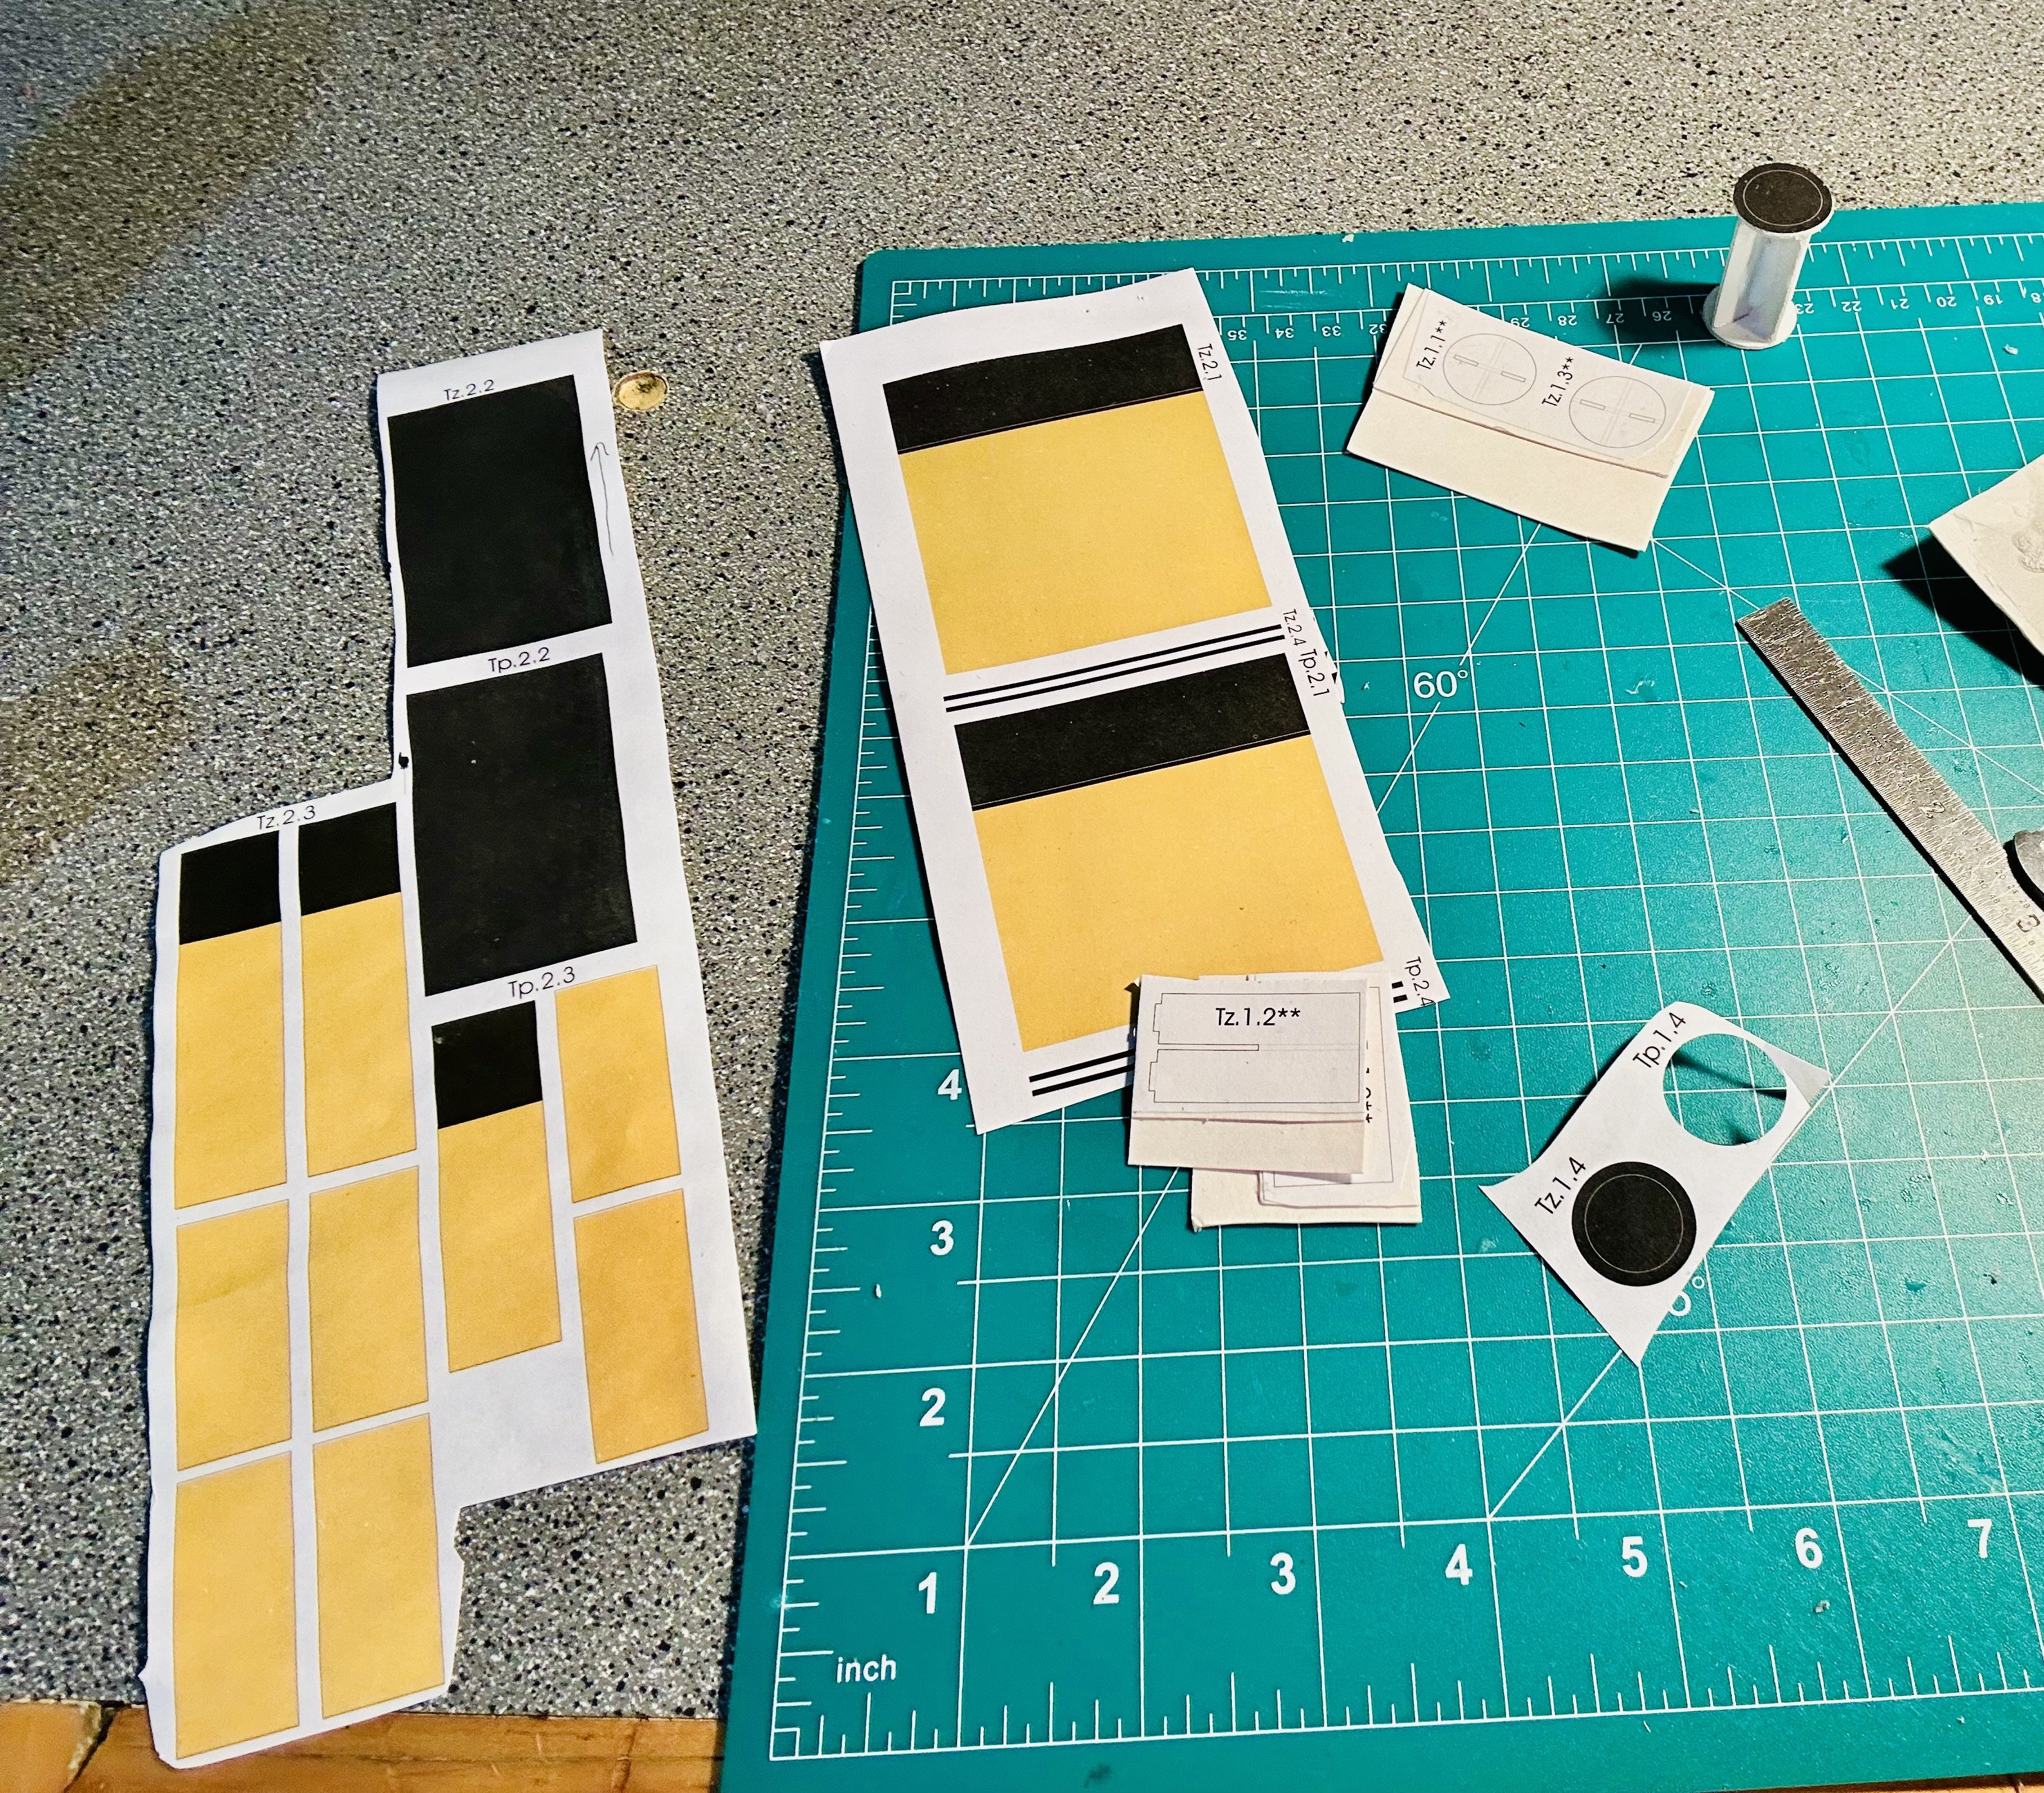
Cereal boxes are about 0.5mm, as is posterboard. I usually layer up to get heavier thickness. You can get heavier card at most craft stores like Dick Blick’s, Micheal’s or Hobby Lobby. I repurpose card a LOT. I usually save cereal and snack cake boxes when I’m getting ready to start a new project. I also buy the eight packs of posterboard from Walmart on a semi-regular basis. Check out Ab Hoving’s scratch building tutorial on this forum too: That tutorial directly resulted in the three scratch builds that I have finished and the models that I have in progress right now. -
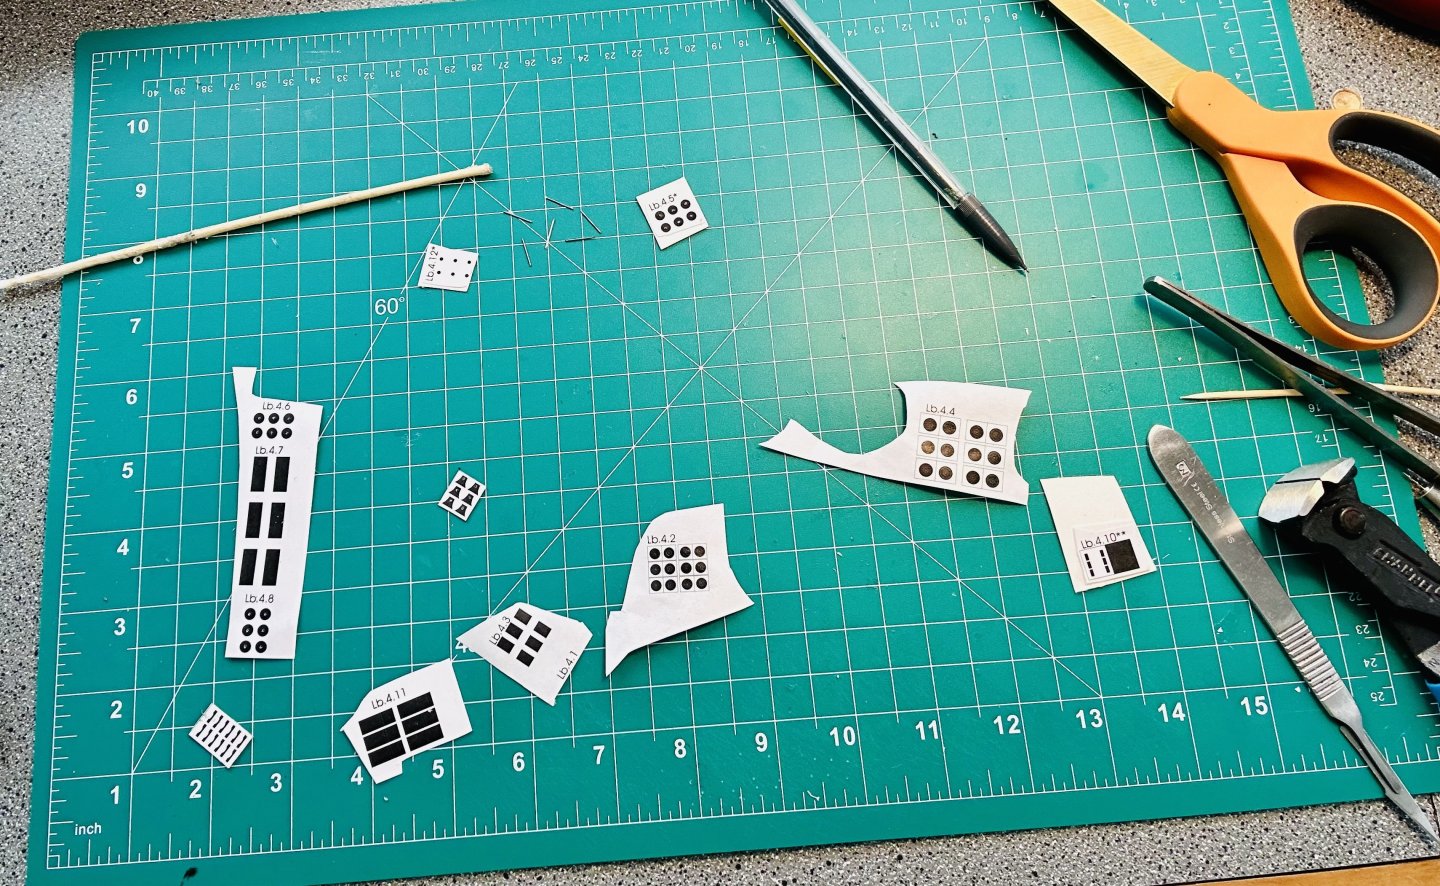
Glen, Thank you very much! They definitely gave me a run for my money! I think I spent about 12 hours making them. Making progress on the main deck fittings! All I have left for main deck fittings for this round, before I move to the superstructure, are four sets of bitts and four deckhouses!
- 288 replies
-
- 13
-
-
- Card
- Pre-Dreadnought
- (and 3 more)
-
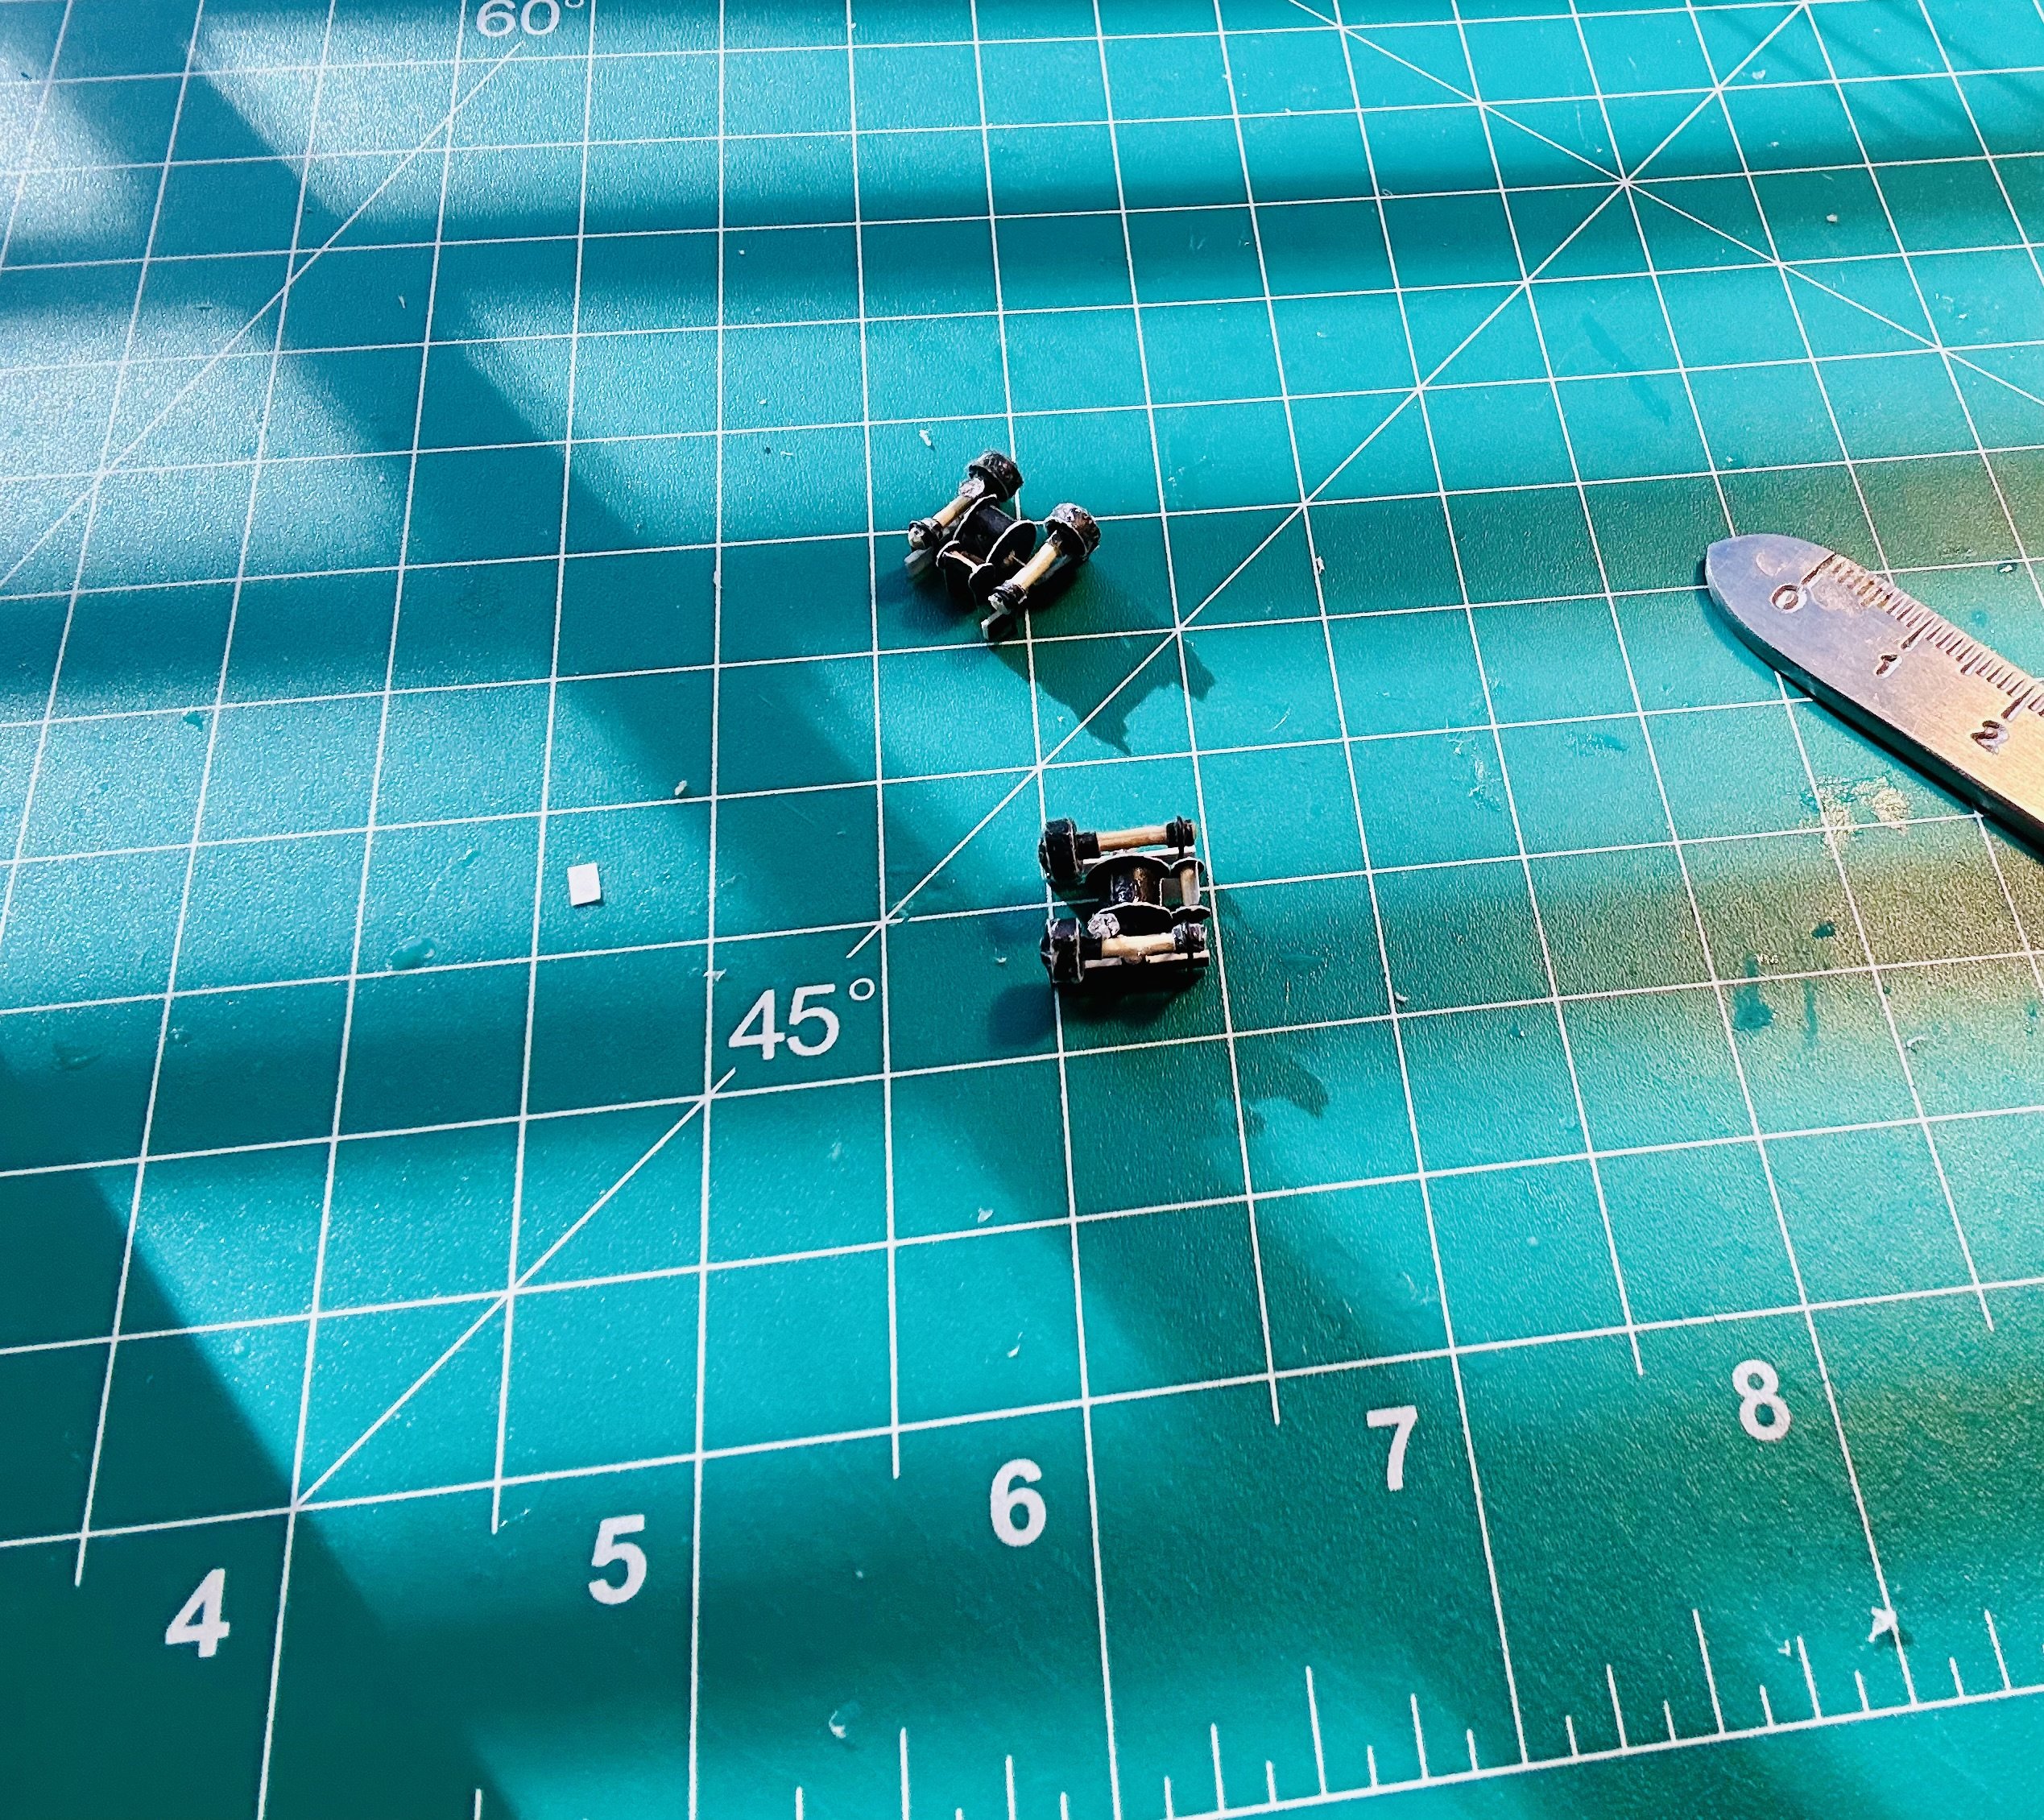
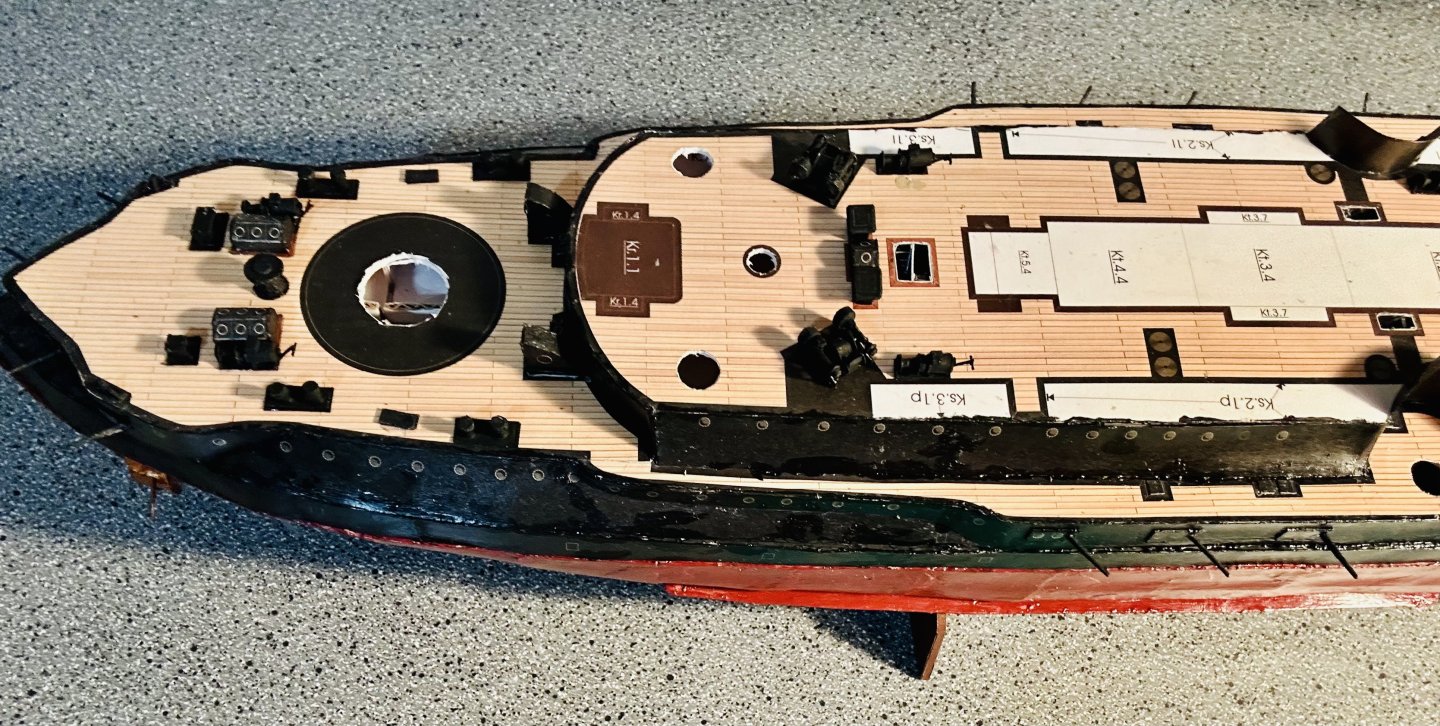
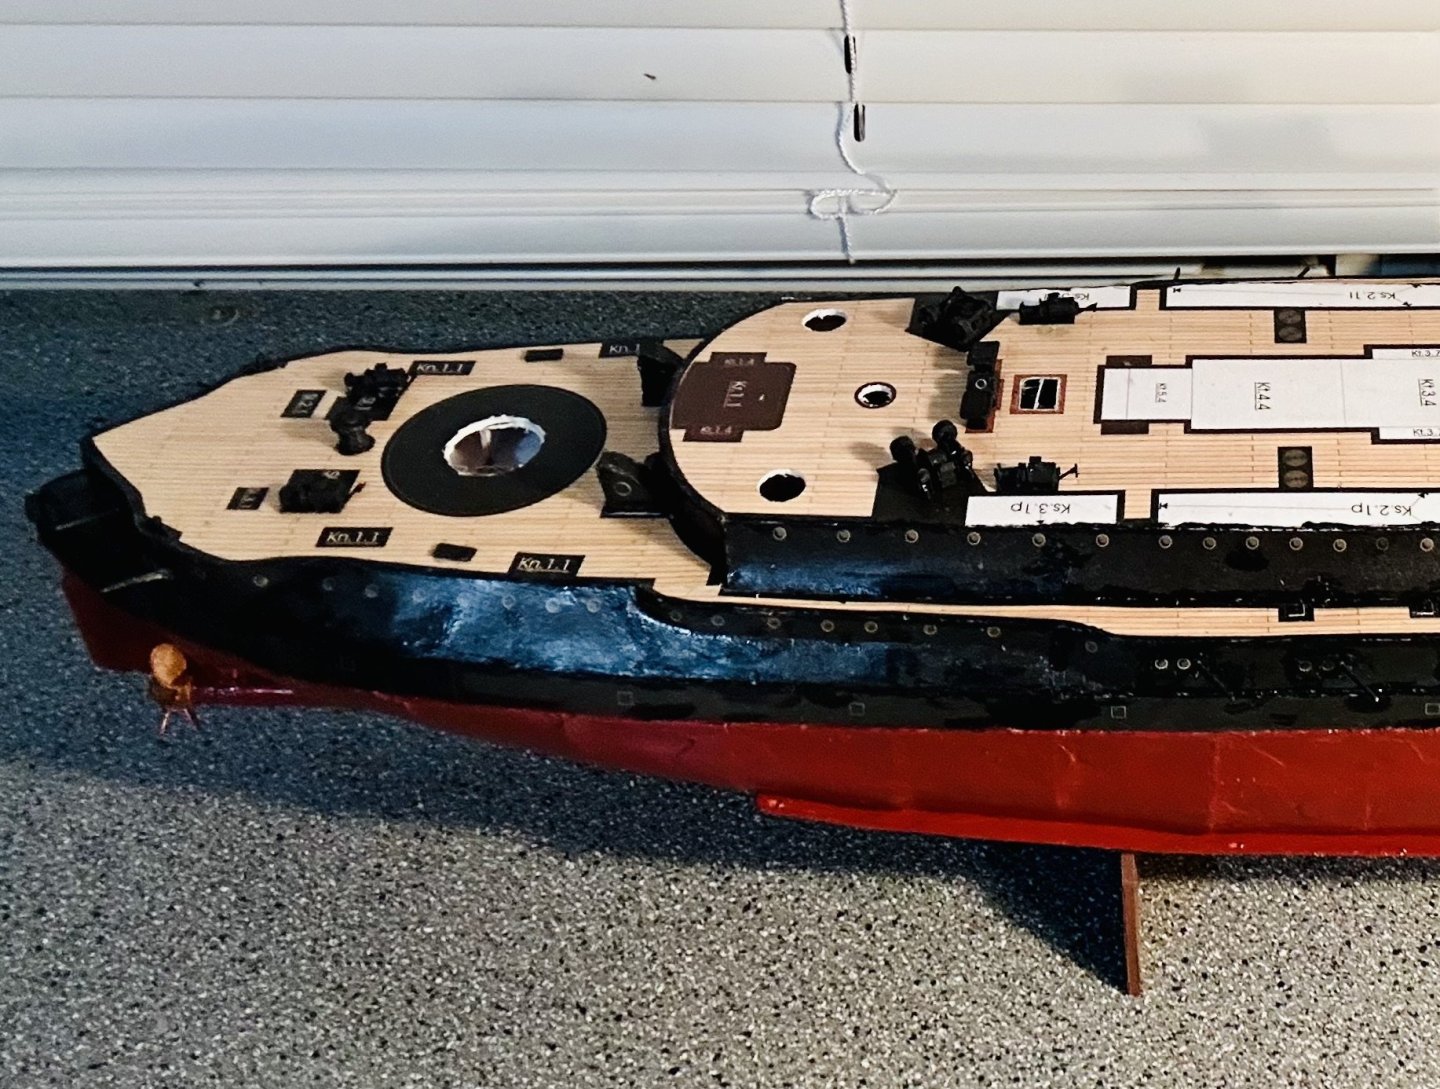
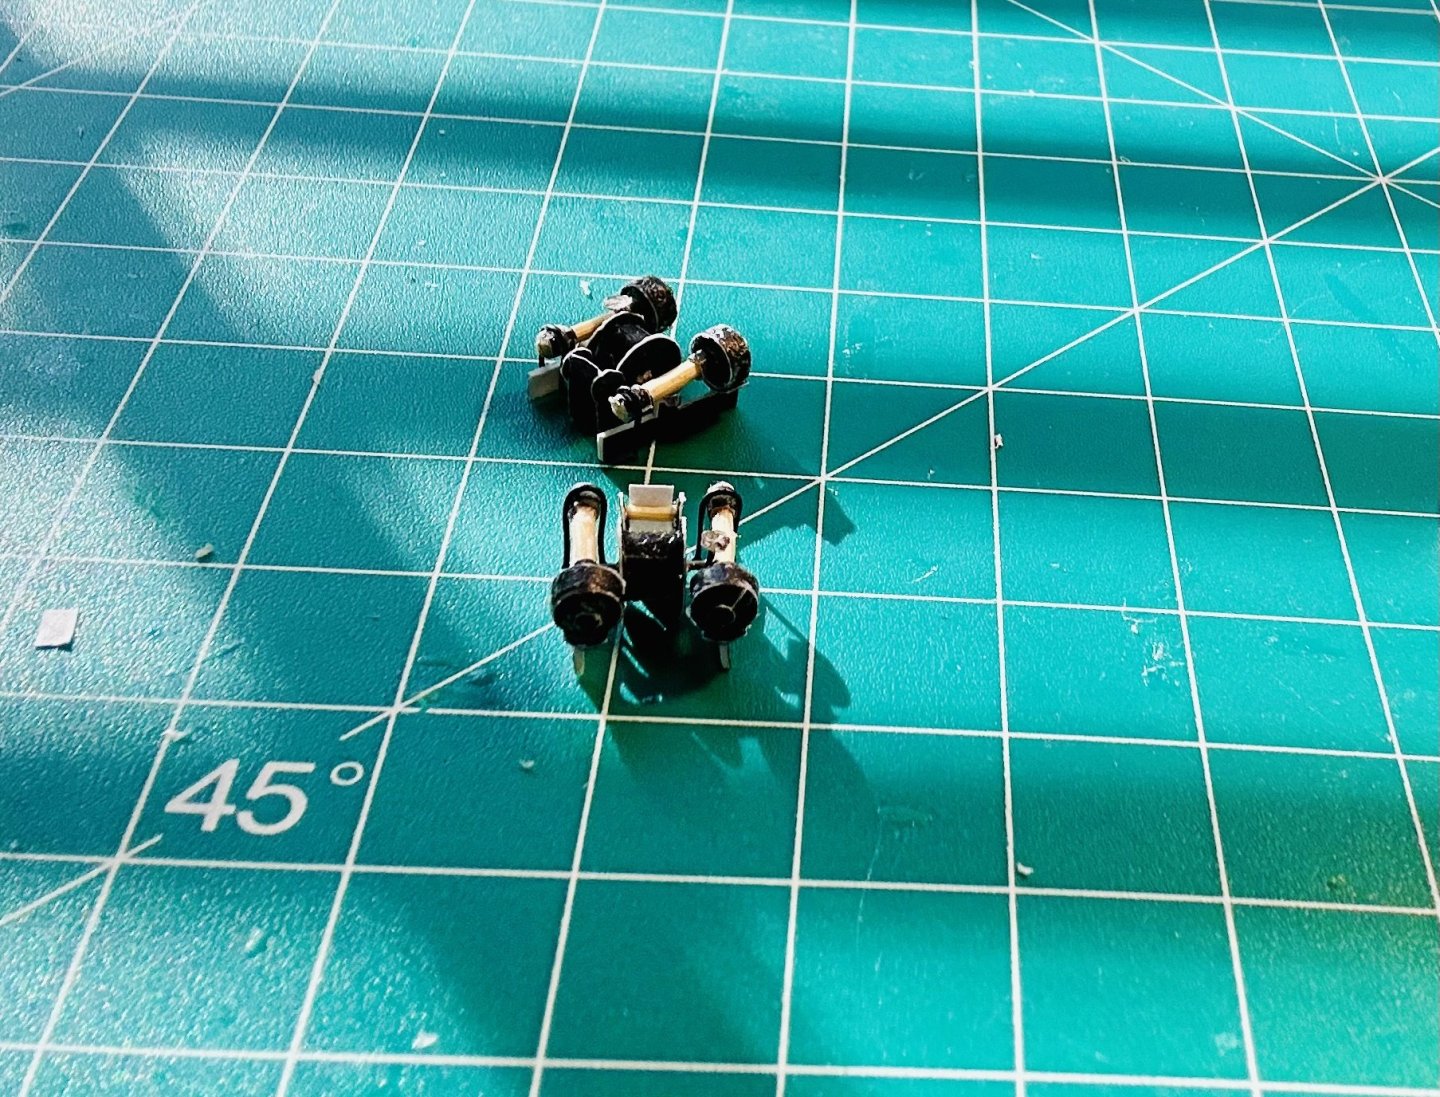
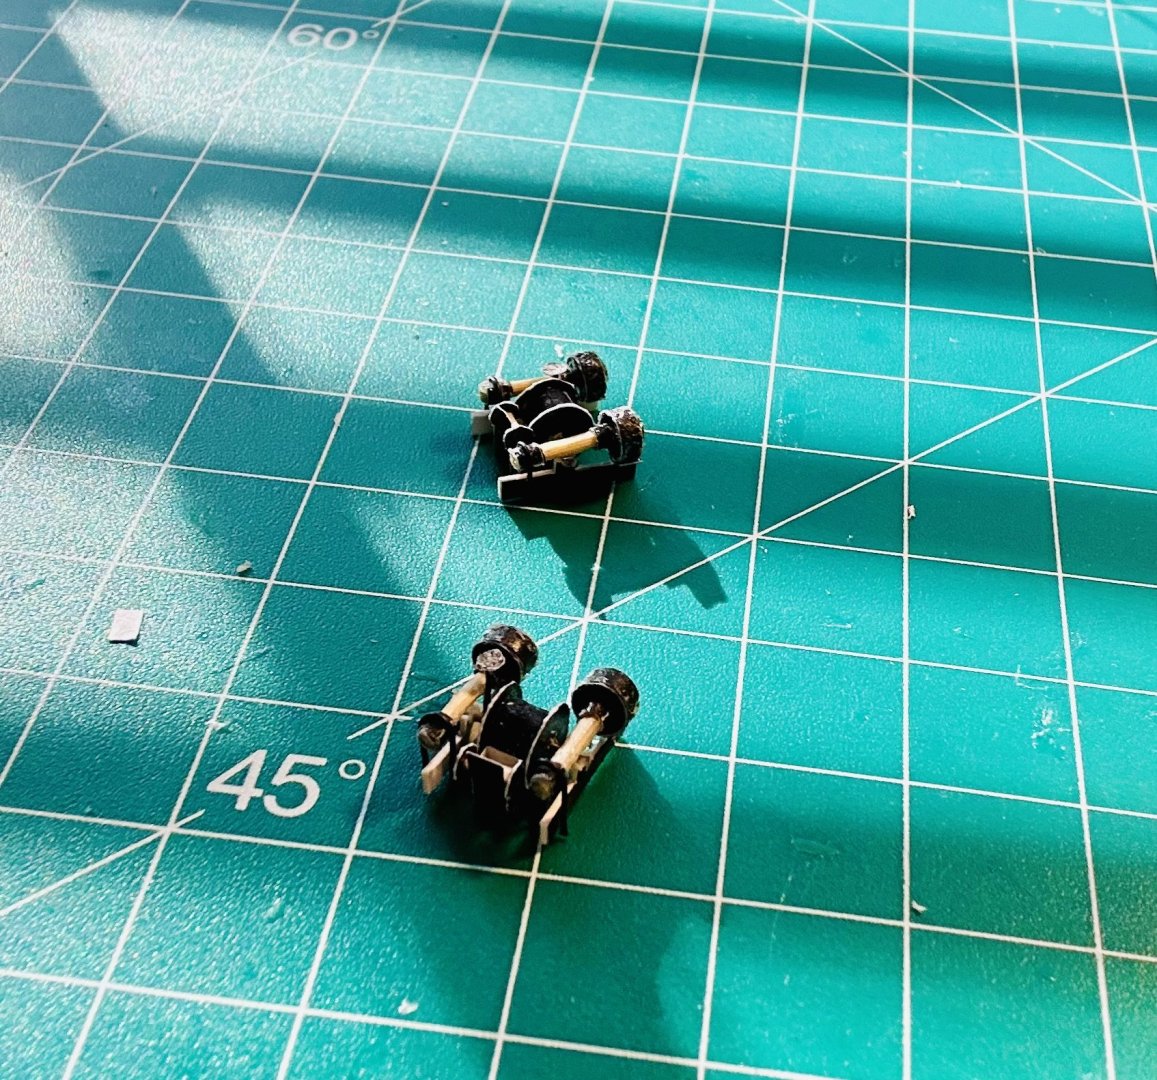
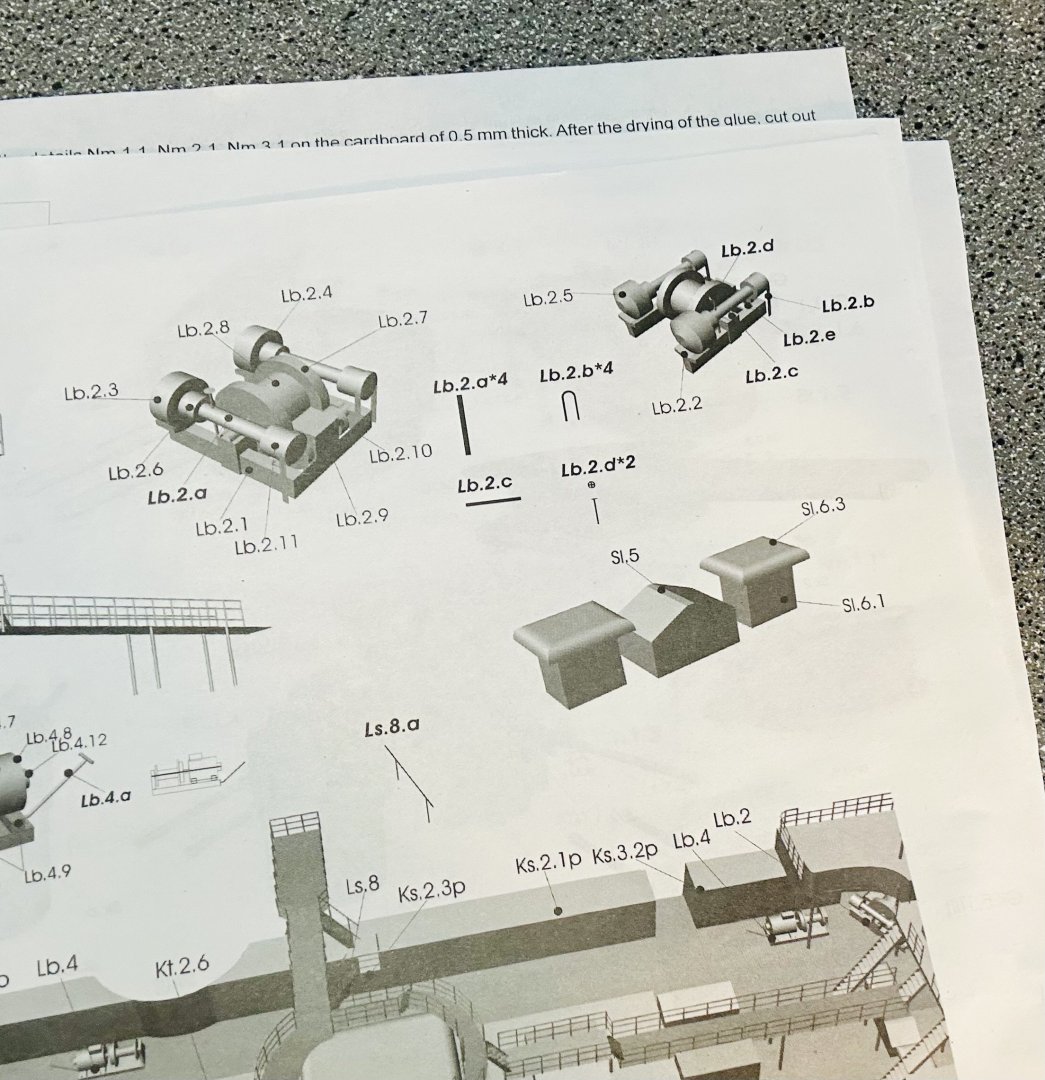
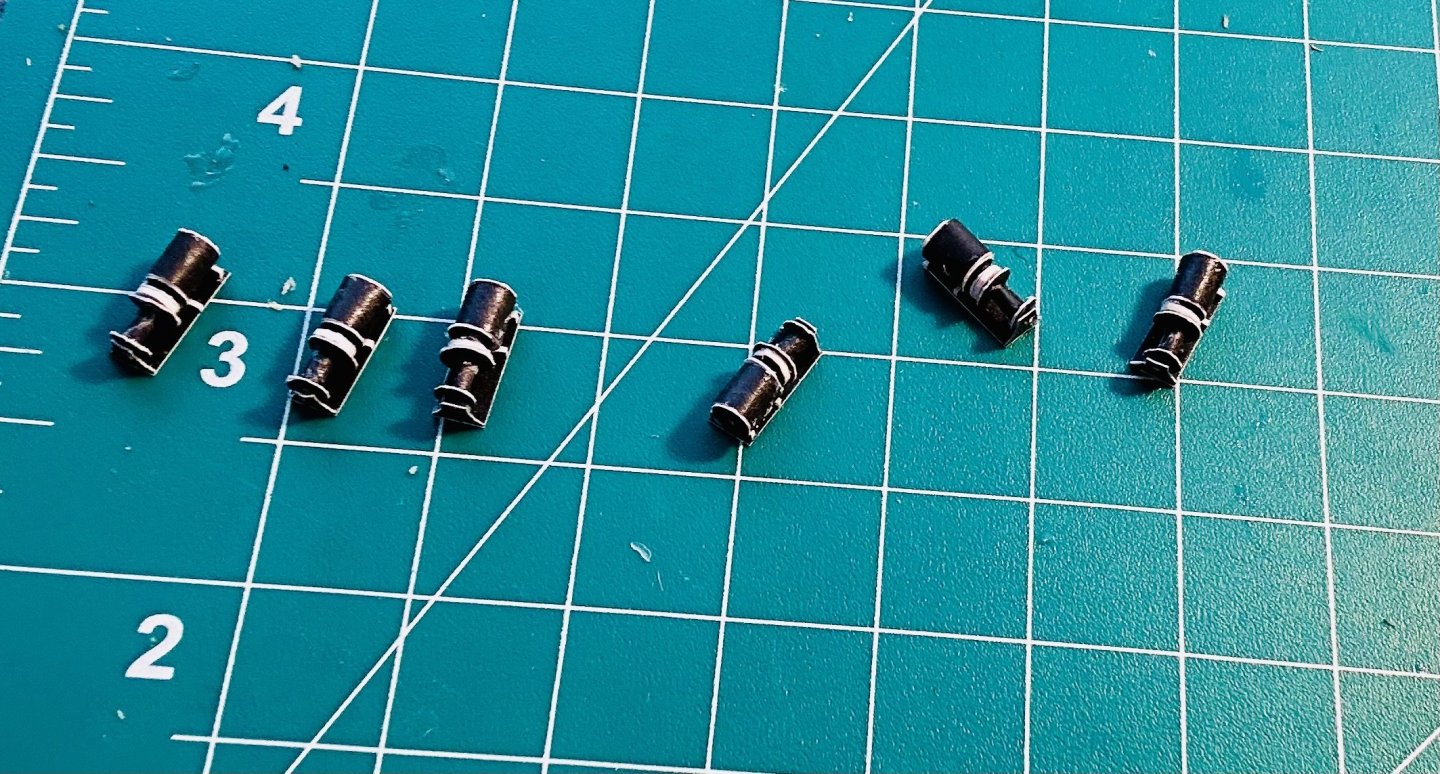
The winches/windlasses are made: They were very labor intensive (although an enjoyable challenge), and I guessed at many of the construction features, but I am happy with how they turned out. Next up, I will paint them and install them. Then we head to the aft deck and make some deck houses and companionways for the aft ladder wells.


- 288 replies
-
- 10
-
-
-
- Card
- Pre-Dreadnought
- (and 3 more)
-
Welcome!
-
Alan, Thank you very much! These kits take every bit of skill that I have! Merry Christmas and Happy New Year to all!
- 288 replies
-
- 7
-
-

-
- Card
- Pre-Dreadnought
- (and 3 more)
-
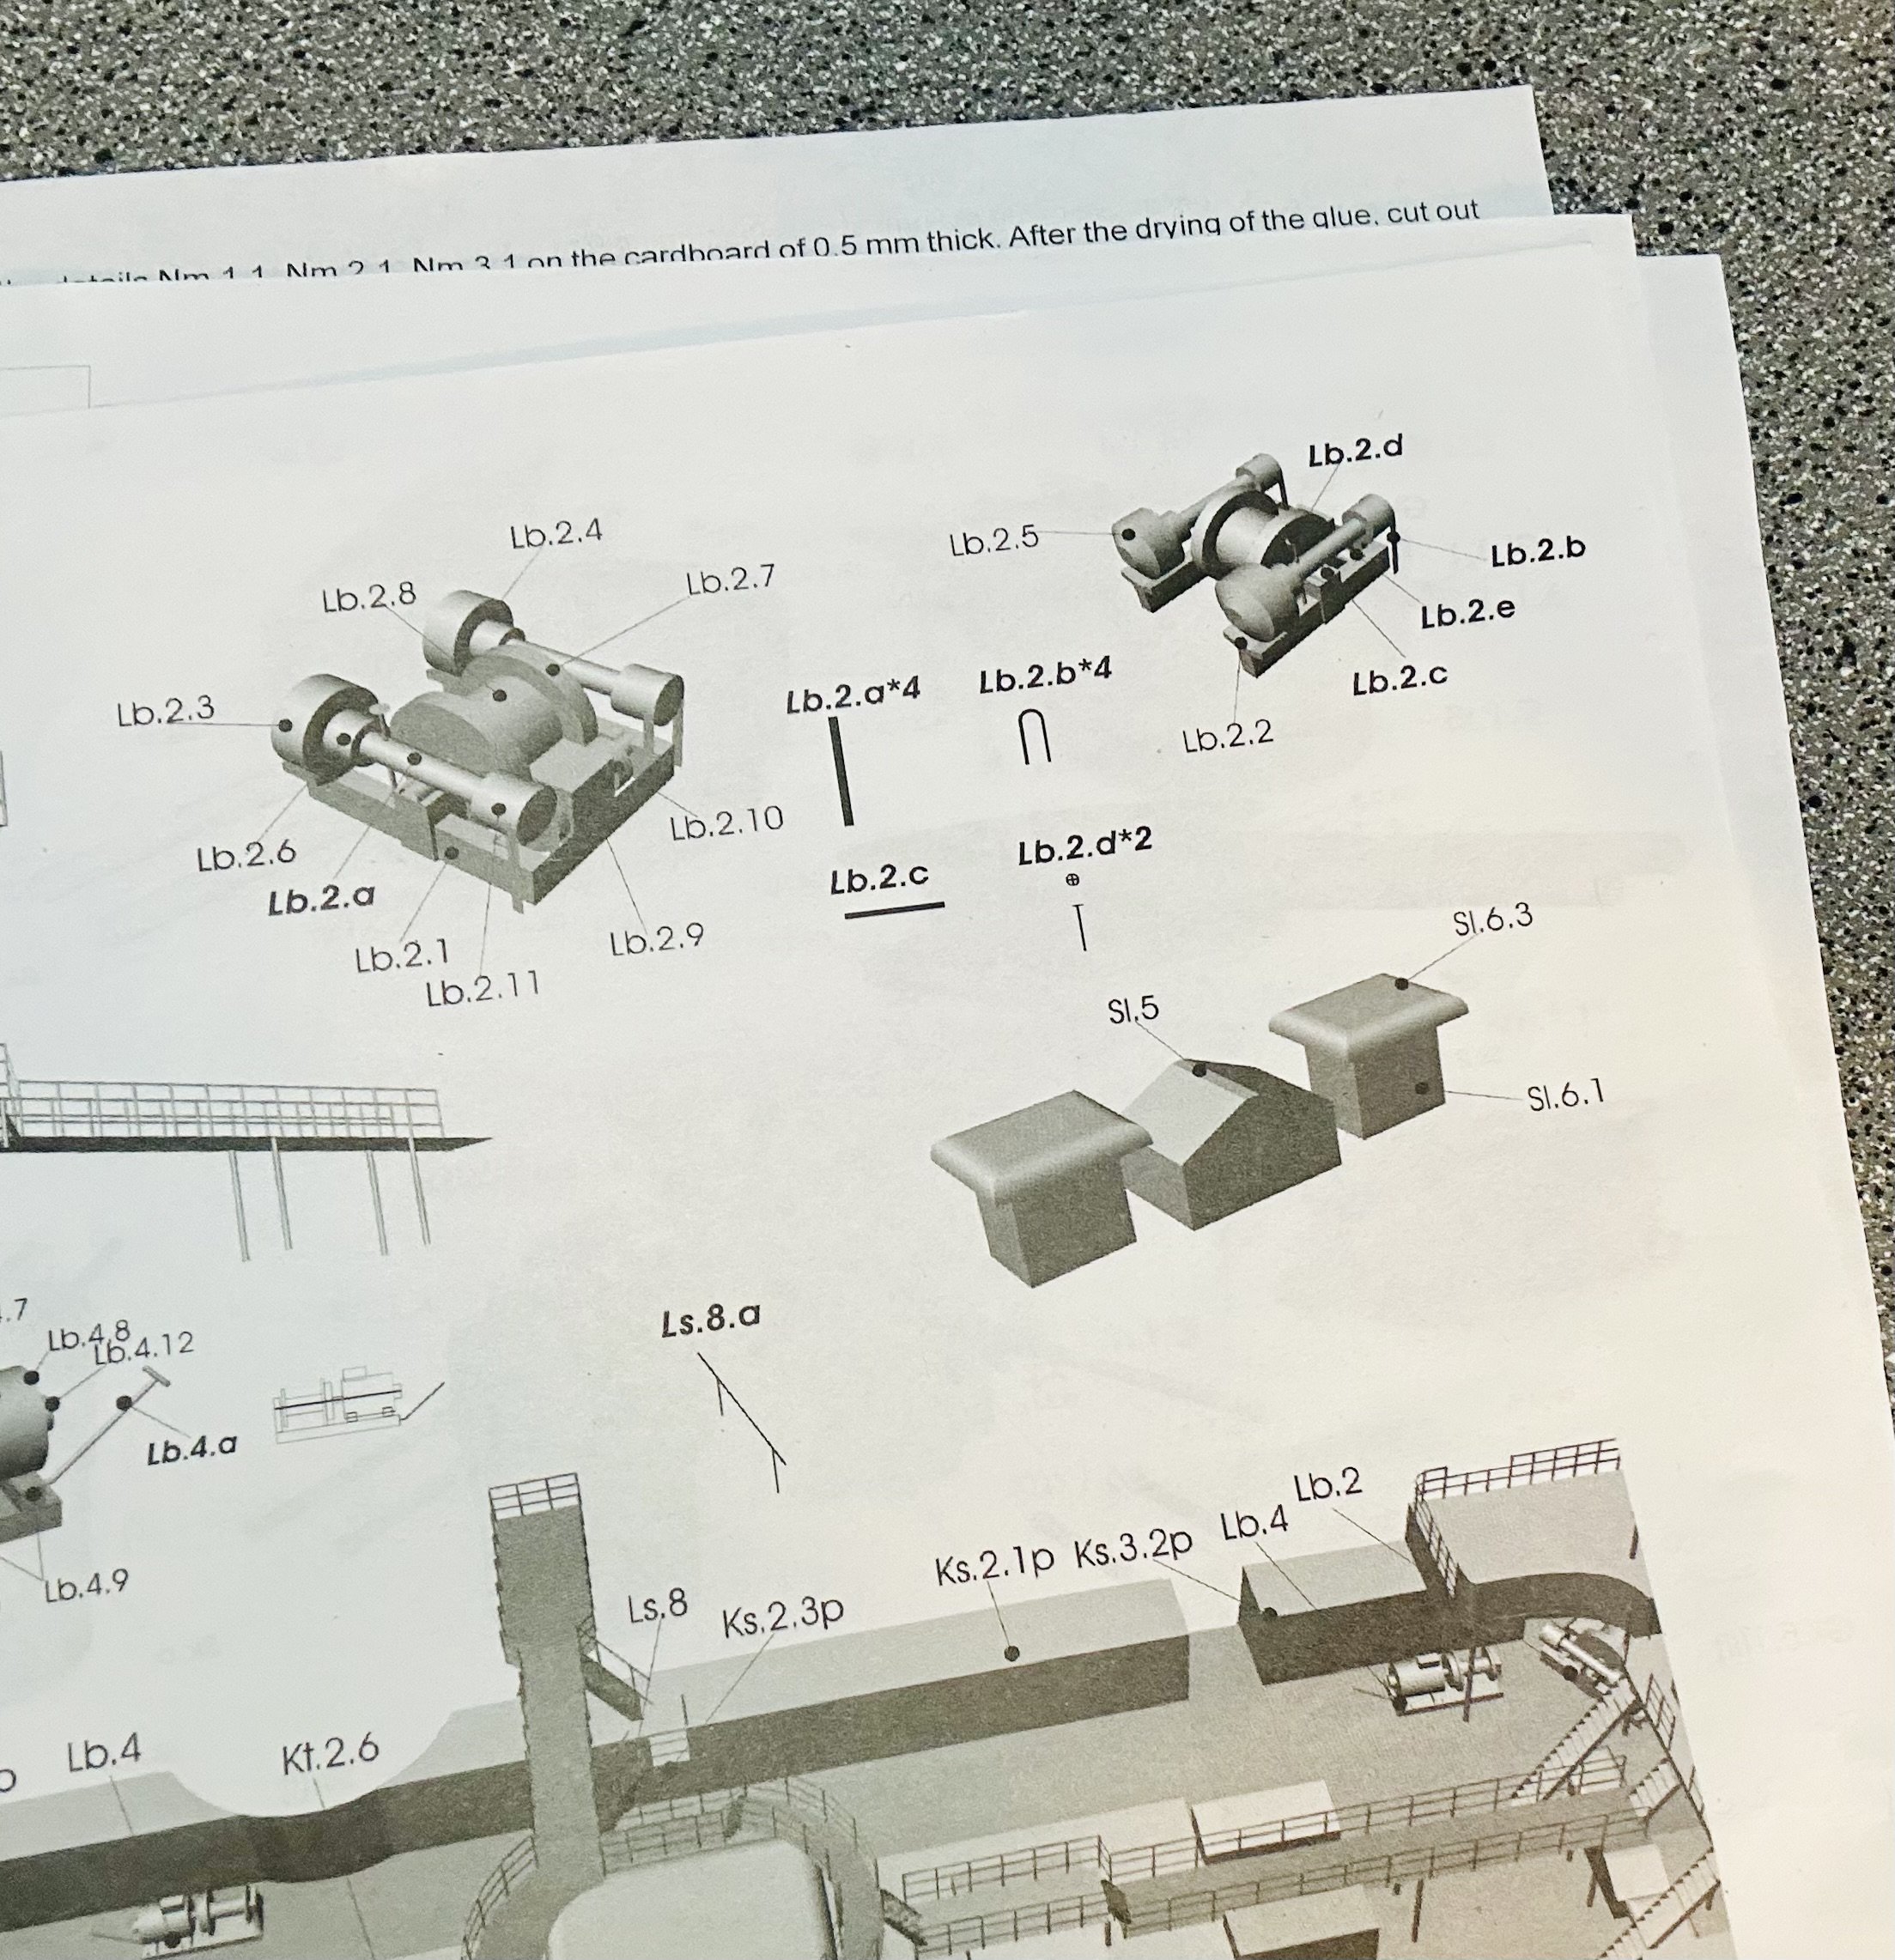
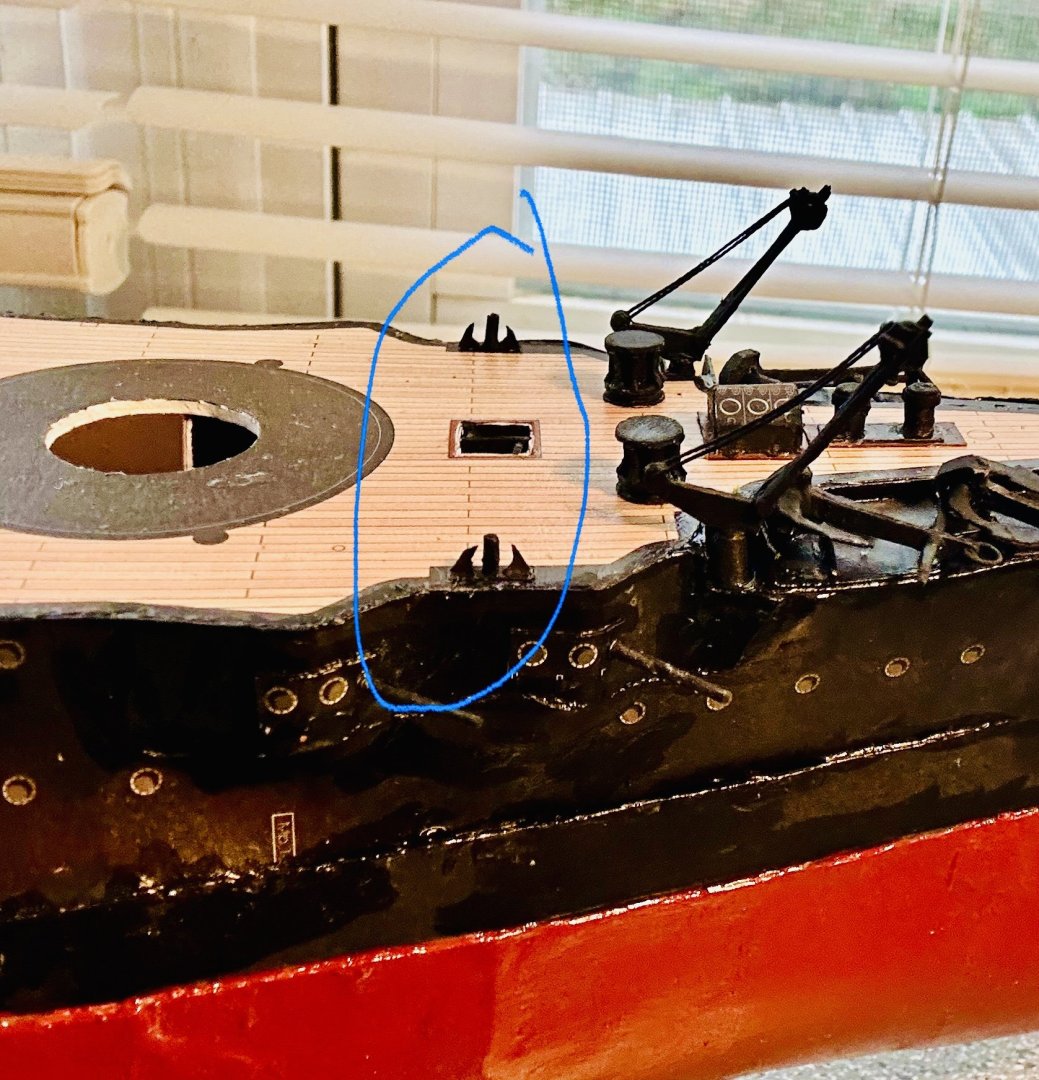
All six winches are finished and installed along with a couple more deck houses and my replacement bitts: This is the state of the ship now: The forward two/thirds of the main deck is fitted out now. I’m currently working on the two double steam winches: Which is supposed to look like: I’m getting ready to make 6 axles total, plus four wire straps. I’ll make the control wheels after I make the rest of the winches.


- 288 replies
-
- 11
-
-
-
- Card
- Pre-Dreadnought
- (and 3 more)
-
I haven’t had a Vanguard kit, but everything I’ve heard about them indicates that they are excellent! I am familiar with Chris Watton’s work though (he owns and operates Vanguard Models), from the Victory Models line of kits that he developed for Amati. His work is top notch. After I bought my first set of Victory Models plans, that he developed, and looked through them, I went and bought the rest of the plans that I was interested in, over the next couple of holidays.
-
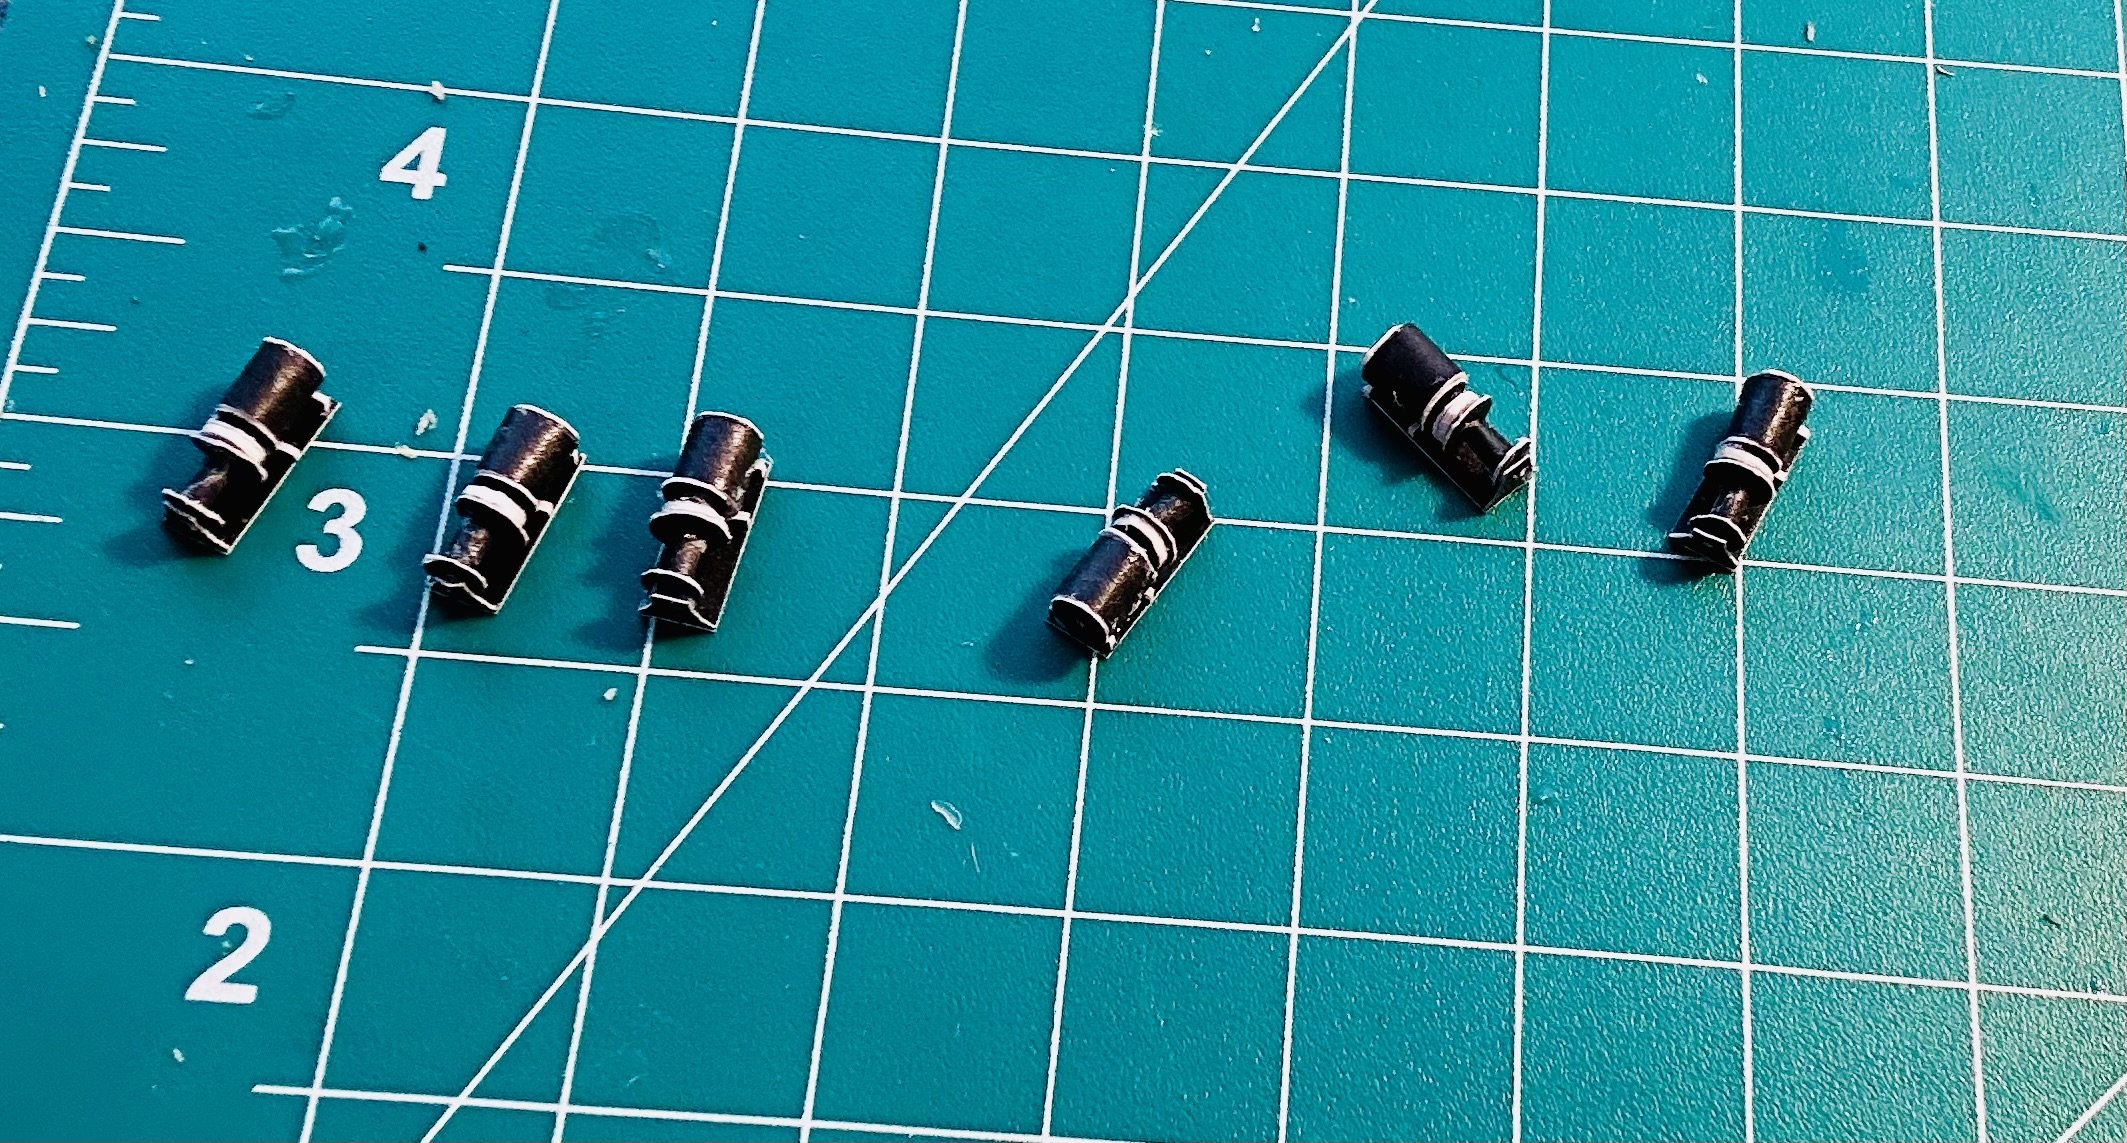
Keith, Merry Christmas and happy New Year to you and your family, too! OC, Thank you very much! They are so small that I have to wear a specific pair of glasses with built in magnification to work on them! 6 tiny winches: I would say that they are steam, but the one drum looks like an electric motor to me and it will have something that looks like a start capacitor to me. Once I finish with these I have two of the double spindle type to make. In other news, I discovered that the kit shorted me two bitts, so I will break out my handy new light table to make 2 more, because they sent me more of the little claw looking things than the bases and vertical section for the bitt.
- 288 replies
-
- 9
-
-
- Card
- Pre-Dreadnought
- (and 3 more)
-
Welcome!
-
For a good kit, I am looking for reasonable accuracy, reasonable quality of materials, good documentation, quality design and excellent fit. Tamiya used to set the standard for plastic models back in the 1990’s and early 2000s back when I used to build a LOT of armor because their stuff had excellent levels of detail, had minimal flash, wasn’t too expensive, and their kits were fall together quality. Carrying that forward to today, with modern production techniques such as modern photo-etch, 3D printing, modern laser-cutting and CNC milling/machining all stemming from improved 3D modeling, CAD, and CAM, sets the bar higher for a best kit. For a best ship model kit, that would involve laser-cut parts from decent materials that are fall together quality, high quality “castings” (mostly 3D printed), excellent documentation geared to the skill level of the expected builder, a reasonable level of accuracy, customer service after purchase, and a reasonable price. Quick note: I’m not a big fan of sending kit documentation on disc because some modern computers don’t have CD/DvD drives on them anymore, plus I don’t really want my computer in my primary work area, especially if I’m building in wood.
-
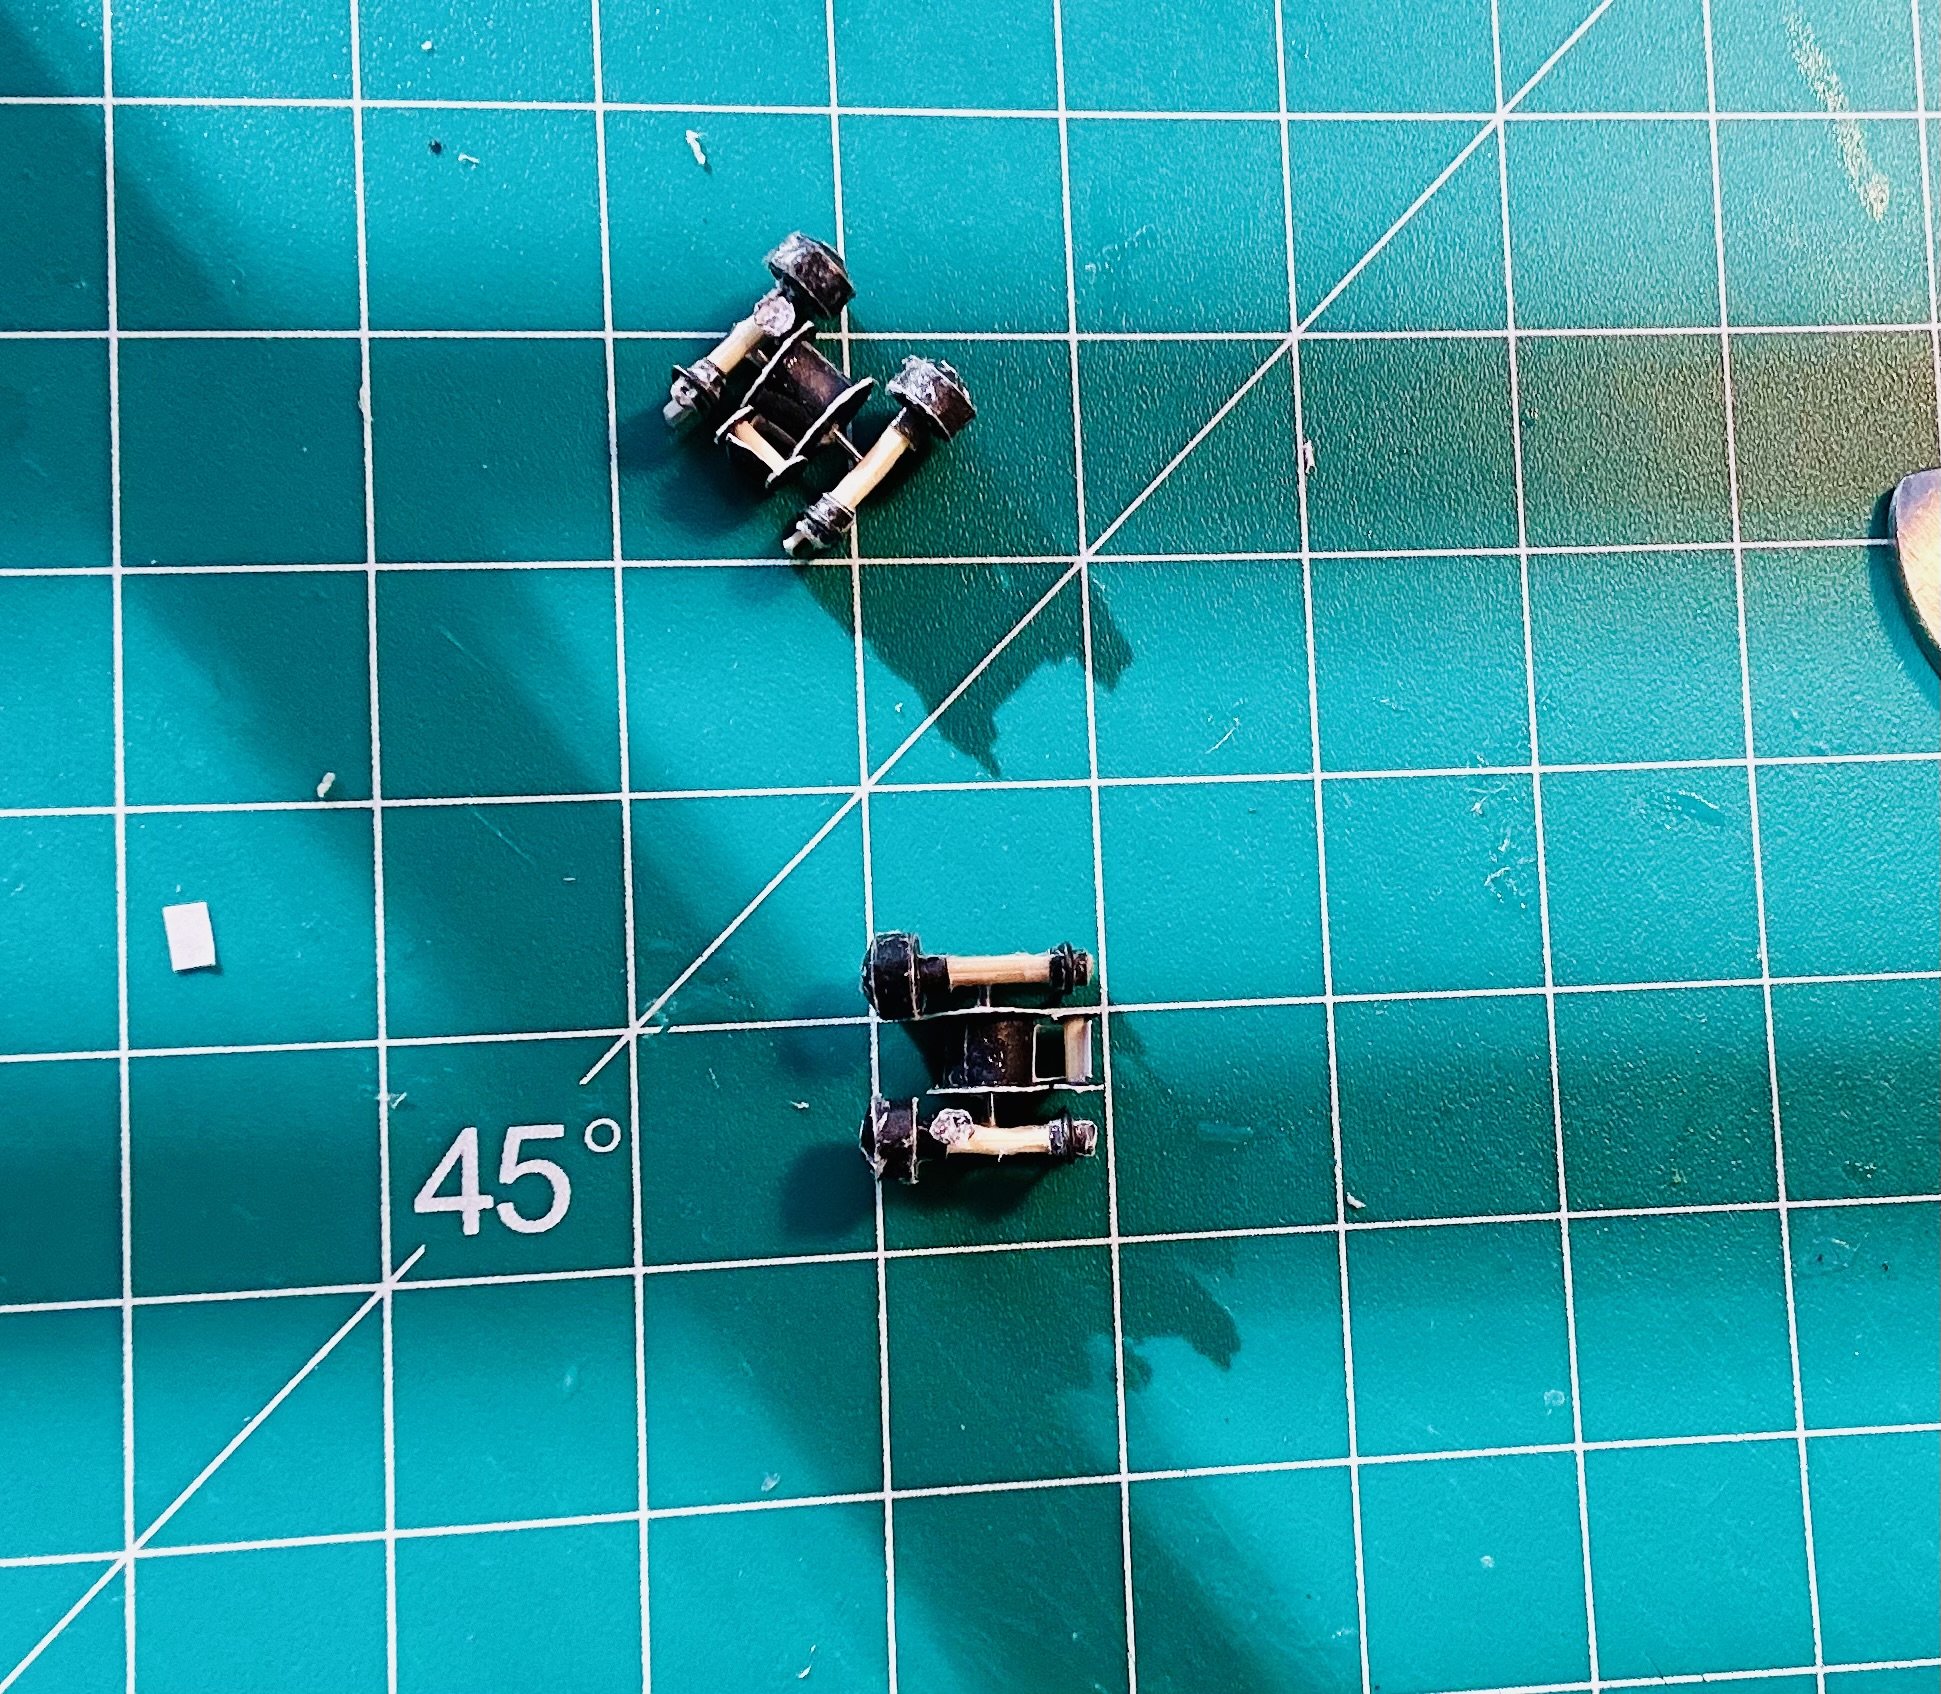
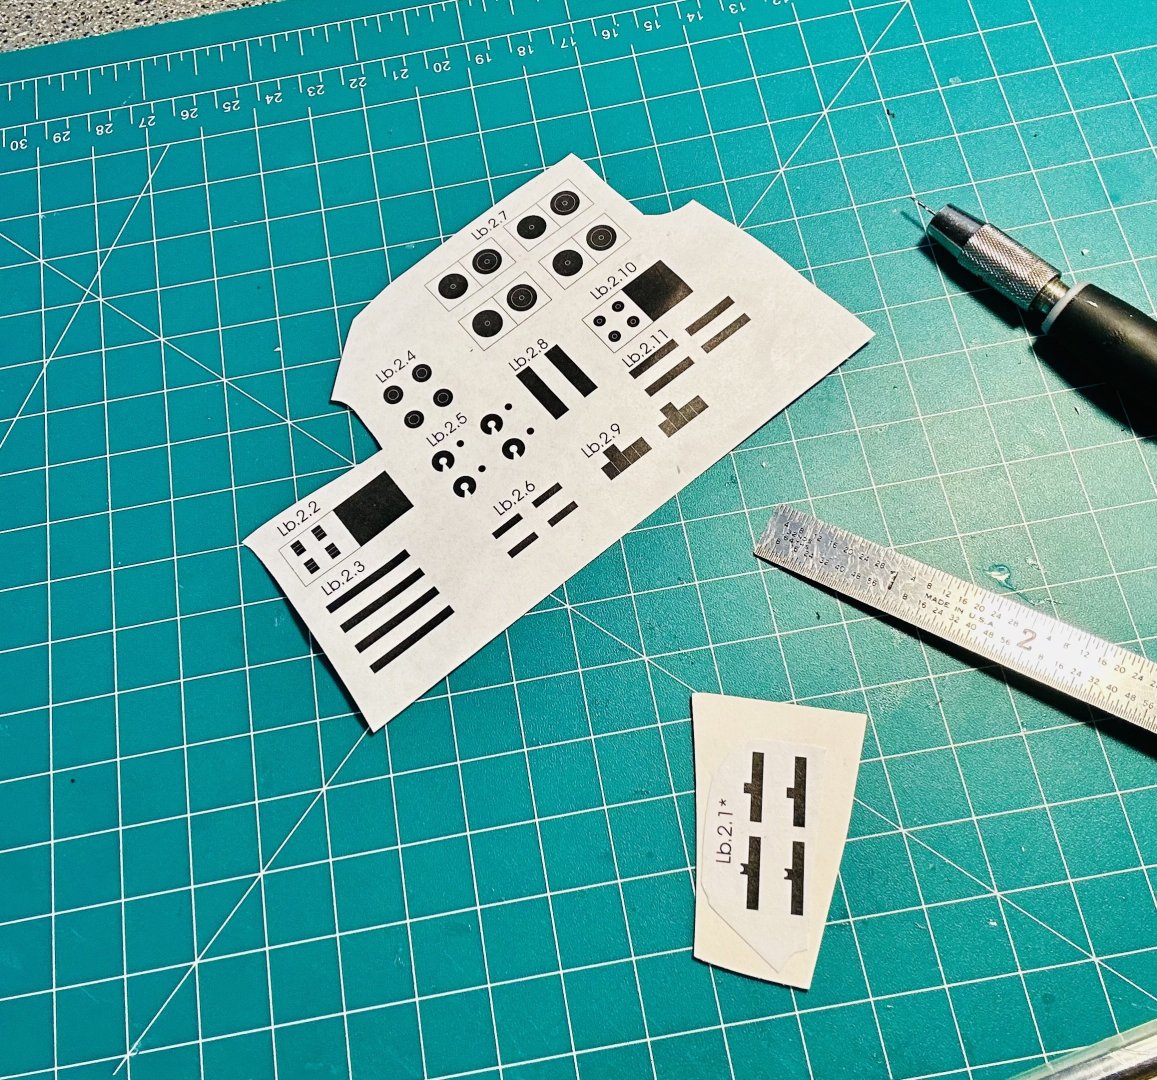
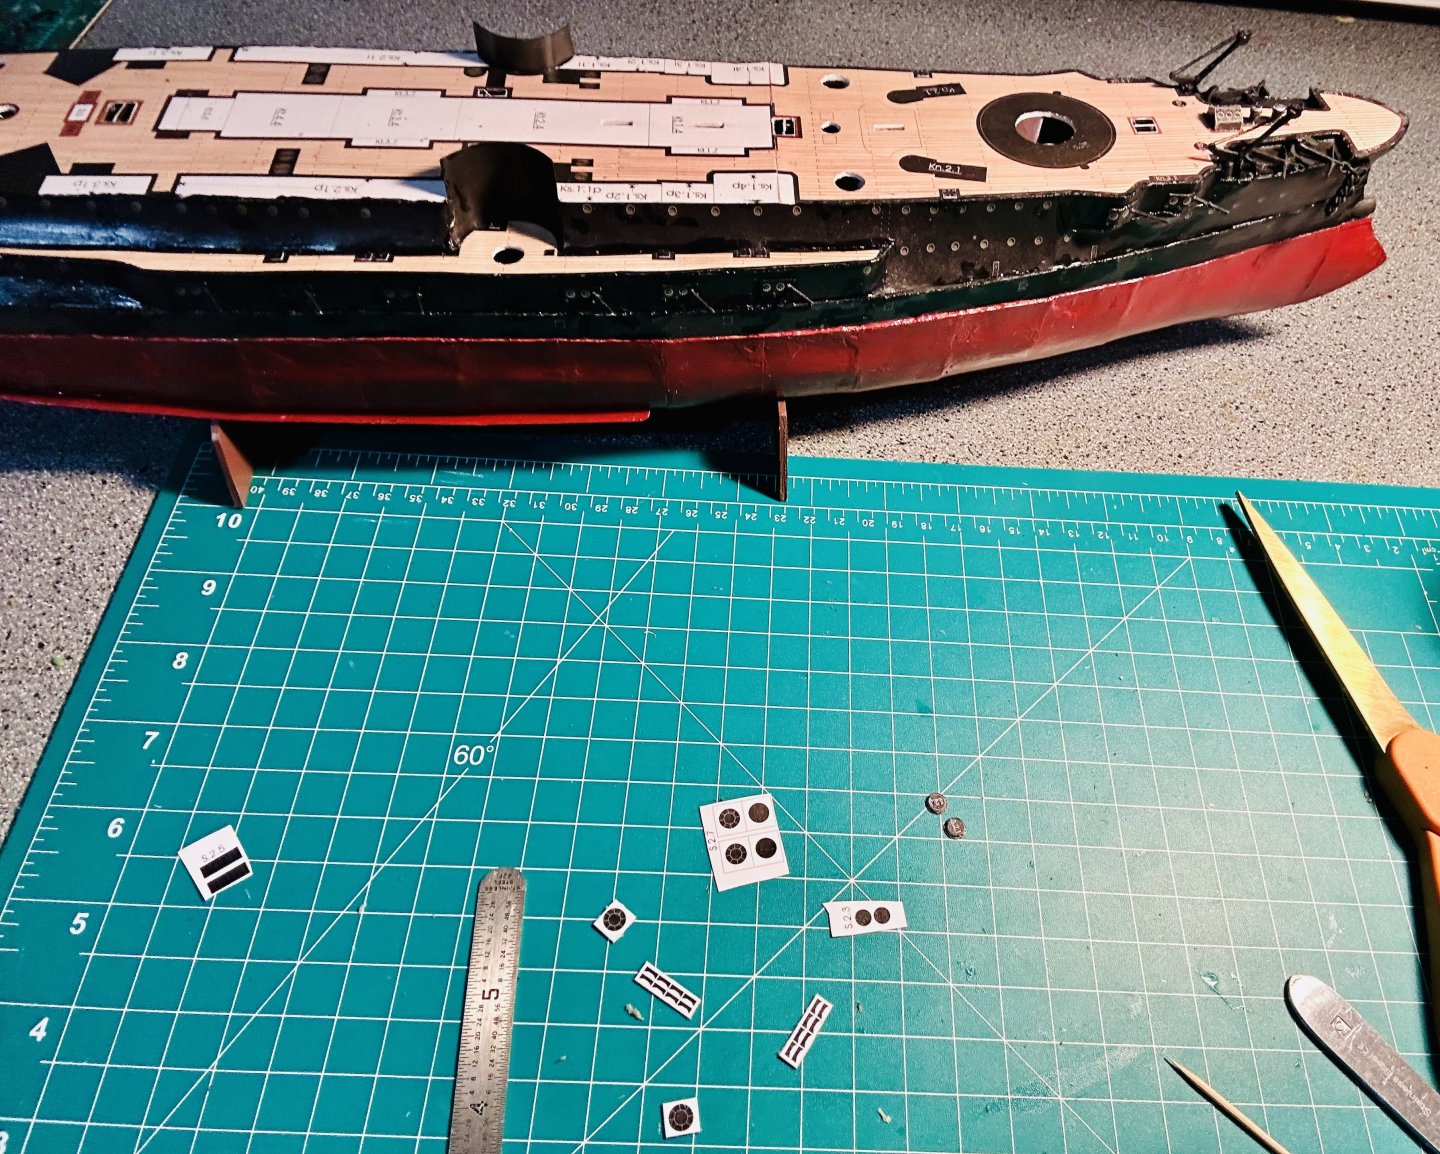
Glen and Alan, Thank you very much! Thank you to all who have hit the like button or just stopped by! Added the capstans and more bitts: If I have to make one of a particular piece, I’ve just been making all of them in an assembly line, and installing them, to save time later. I’m currently making steam winches: There are six of them. You can see the 1/2” grid on my work mat for scale. There are a LOT of tiny pieces on this one. I’m trying to fit out the main deck now while I can still get to it. The center superstructure is the next set of pieces called for in the instructions, so that will be coming after I finish fitting out the main deck.

- 288 replies
-
- 11
-
-
- Card
- Pre-Dreadnought
- (and 3 more)
-
David, Cornwall Model Boats has them for about $34. Shipping usually costs me $10-15 to the Midwest in the USA. https://www.cornwallmodelboats.co.uk/acatalog/Royal-Caroline-Construction-Plans-Set-979.html#SID=137
-
PE parts on models.....
GrandpaPhil replied to Nirvana's topic in Metal Work, Soldering and Metal Fittings
I always paint the PE parts on my plastic models. -
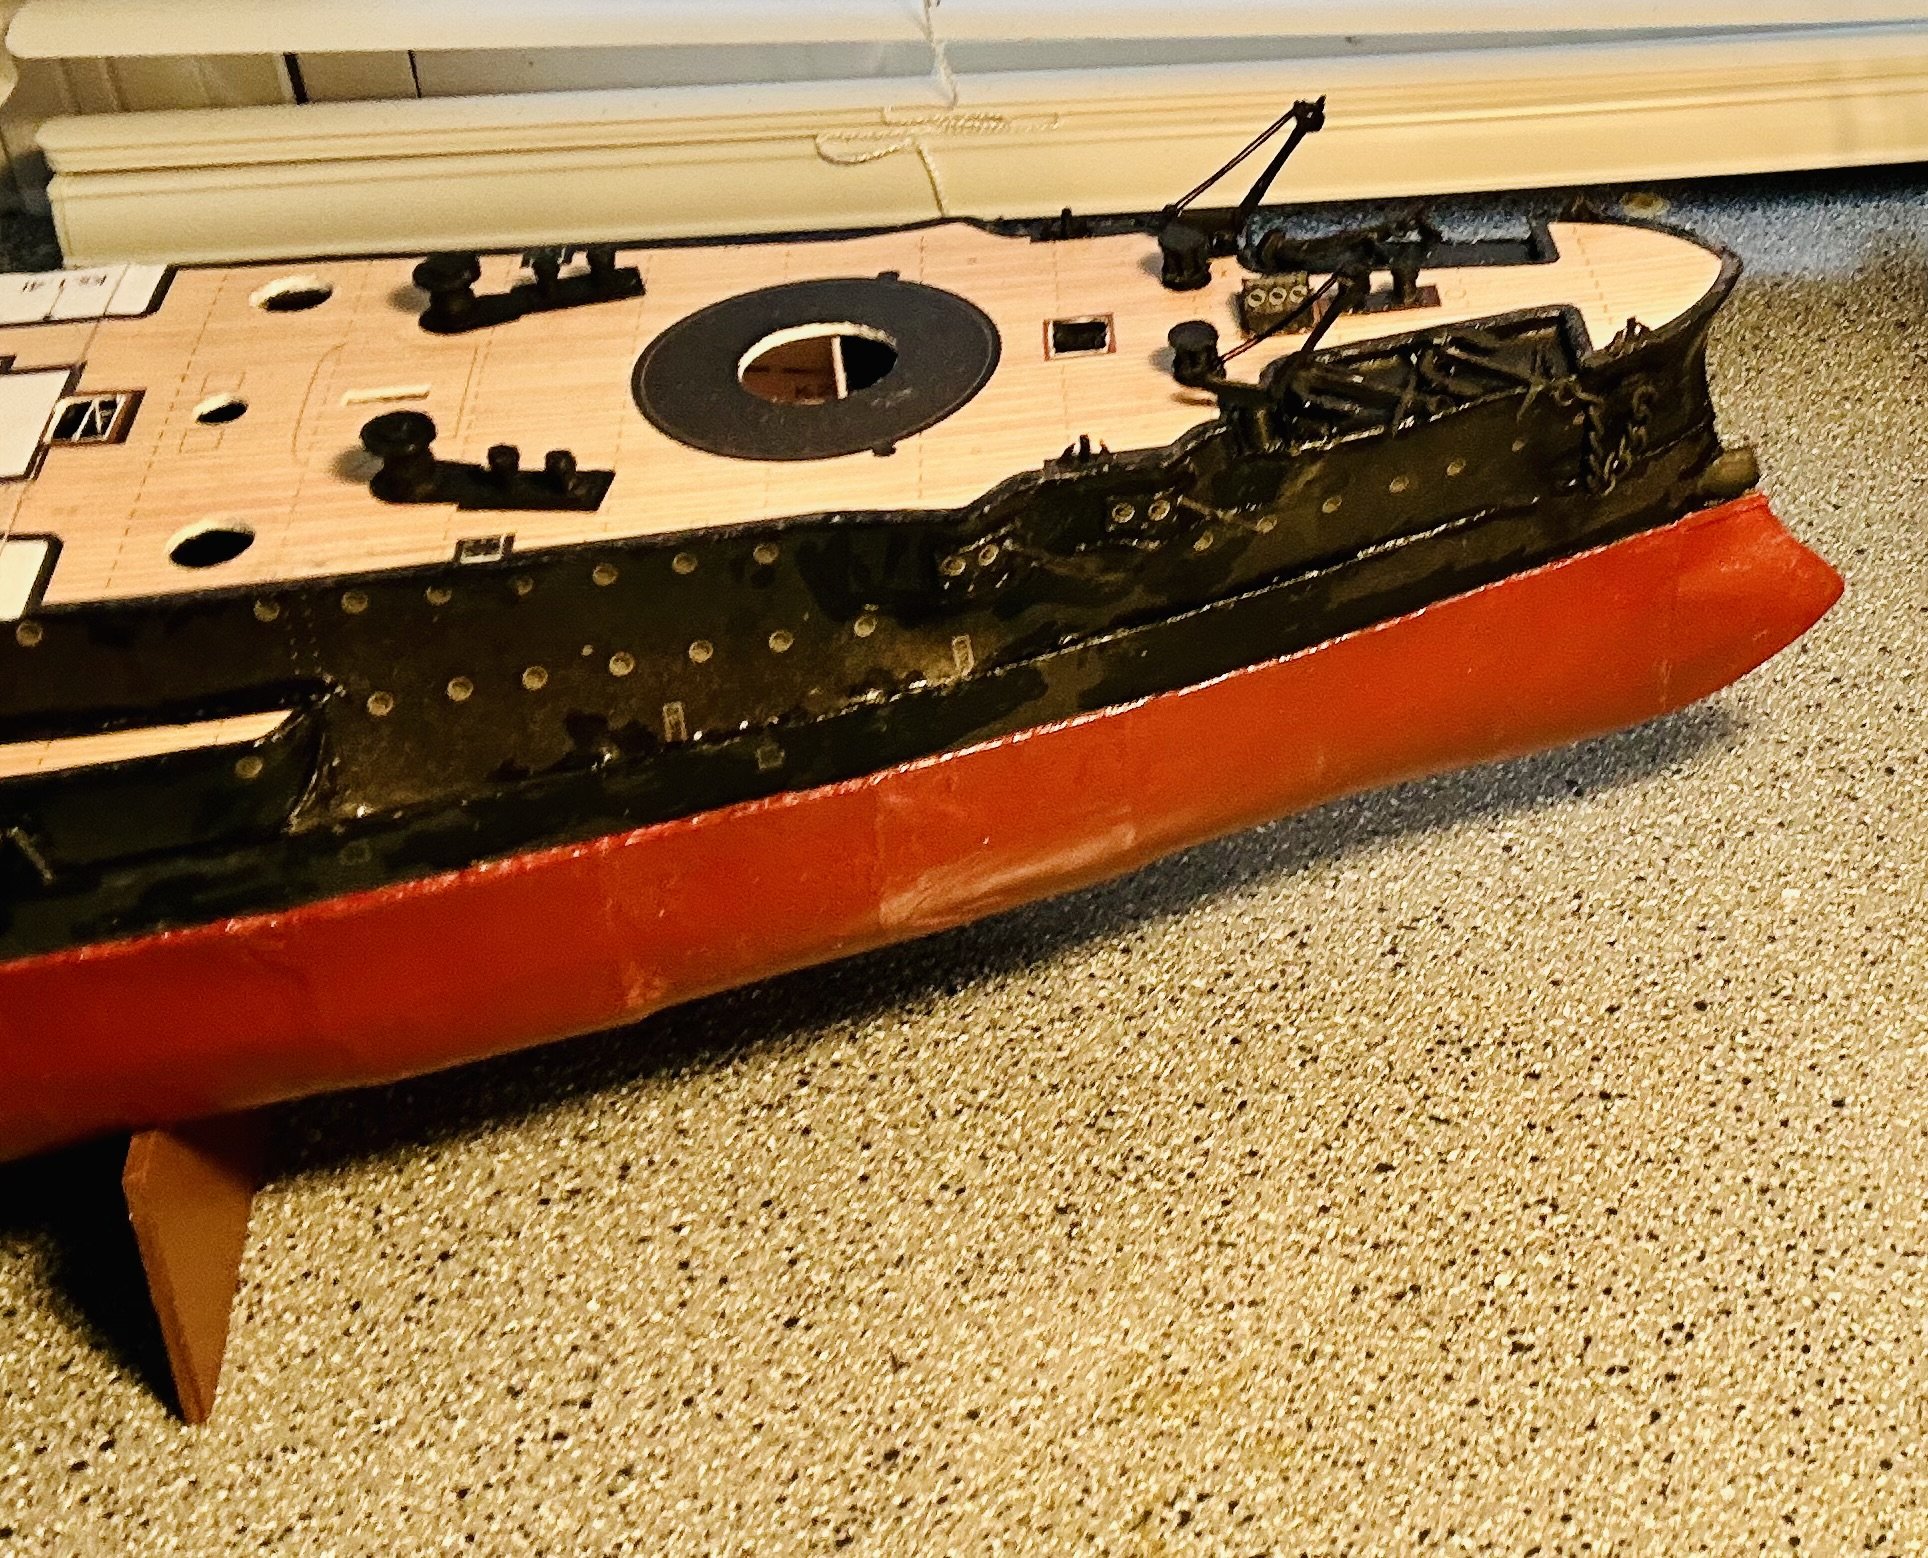
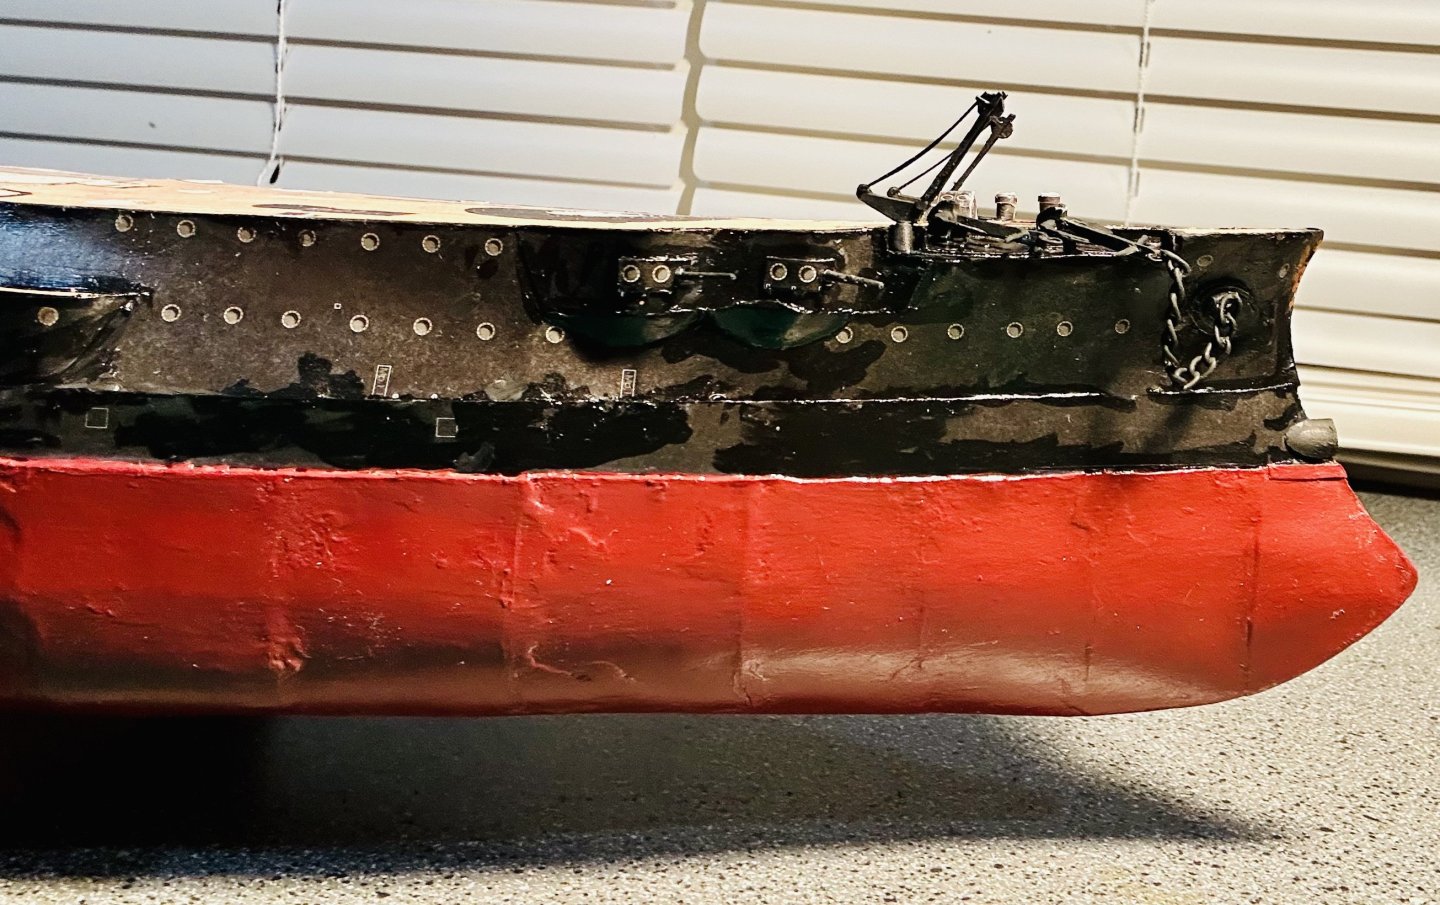
Alan, Thank you very much! Thank you to everyone who hit the ‘like’ button or just stopped by! Making progress and working my way aft: Lots of tiny fittings to make! Soon it will be time to have an edge painting party again, once I finish the forward deck! Currently working on the two anchor handling capstans:

- 288 replies
-
- 11
-
-
-
- Card
- Pre-Dreadnought
- (and 3 more)