hollowneck
-
Posts
1,589 -
Joined
-
Last visited
Content Type
Profiles
Forums
Gallery
Events
Everything posted by hollowneck
-
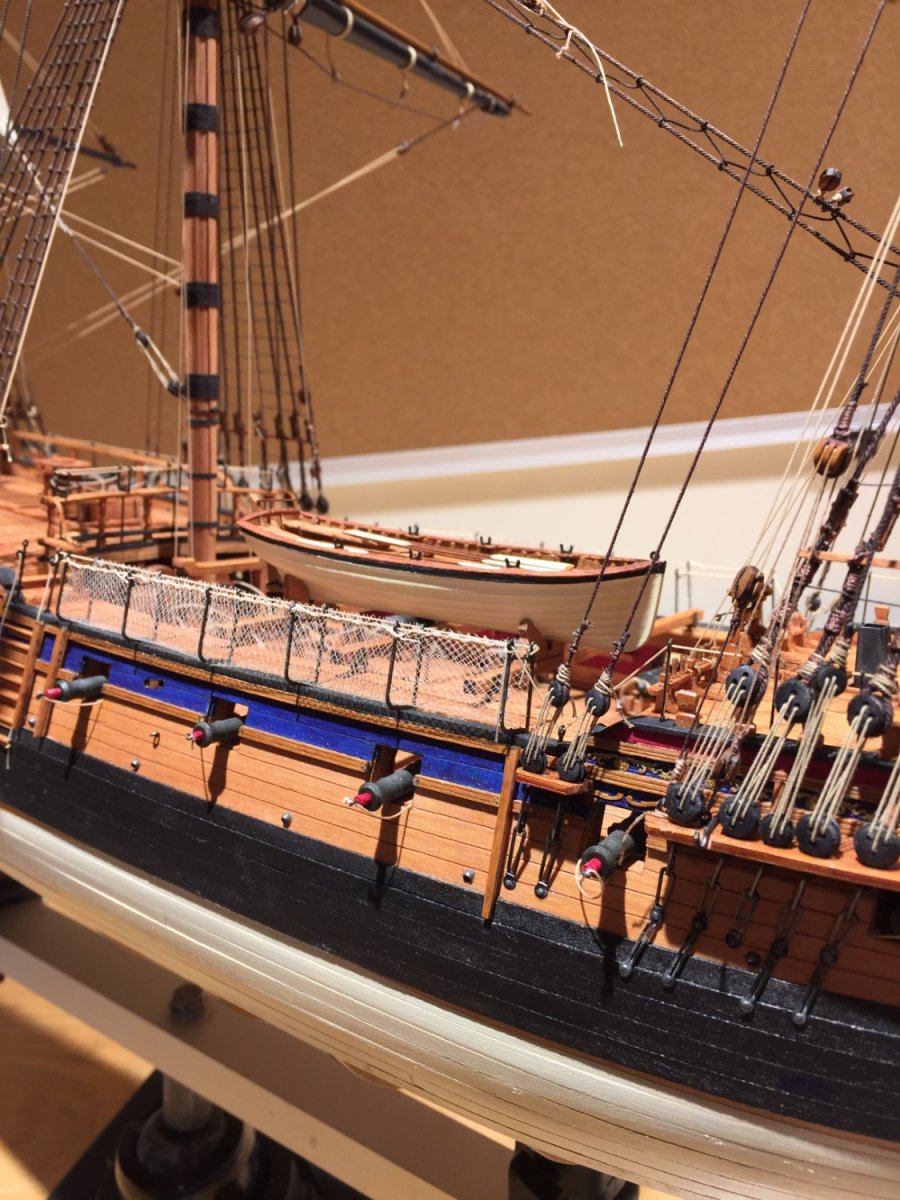
Etsy- a good source for unique items. Thanks for posting this source; I’ve usually gone to chain retailer Joanne’s Fabrics.Here’s a pic of the beige netting on my current build. It appears whiter than it is owing to the strong overhead lighting.

-
With the majority of legacy models I've seen over the years (in-person and in reference materials), the netting for hammock cranes was simulating interlaced hemp rope. I have also seen contemporary models where this added detail is shown with black netting; I believe this is incorrect. Besides his wooden plate and grog mug, one of a 17th & 18th C sailor's most important personal possessions was his hammock; I don't think a sailor would have been very happy to be sleeping in a shell of canvas that has smears - or gobs - of Stockholm tarred rope residue! I use a beige color for this detail on my models as the color more accurately represents hemp rope. The material I use (which is reasonably close to scale-accurate at 1:64), is called "tule." Tule is a synthetic bridal veil material commonly available. However, the beige color is not as easy to get as either black or white. Hope this helps. I'll be interested to see what others say here.
-
Welcome Dave. You’ve found the Good, the Better and The Best for all model ship making serious fun. Questions? Fire away!
-
 Thanks, Brian. Pure cane sugar for Camilla’s bones, no high fructose corn syrup calories.😄 Have you guessed which figure could be my alter-ego?
- 542 replies
-
- 3
-

-
- Sphinx
- Vanguard Models
- (and 3 more)
-
Thank you, Nipper. ‘Inspiration” is a good thing and I am pleased if I can encourage forum members to continue their support of Chris Watton & all he does to make our hobby exciting as well as rewarding. I’m hoping his sales of little blue men is convincing him to offer more “commoner” tars - a growing crew- even if he has to round them up with a press gang!
- 542 replies
-
- 6
-
-
- Sphinx
- Vanguard Models
- (and 3 more)
-
Rig it, Josh. You can do it. Great Winter project leaning into the NE Conference next April, 2023.
- 7 replies
-
- 2
-
-
- Prince De Neufchatel
- Model Shipways
- (and 1 more)
-
I have a “ShopFox” ceiling mounted air cleaning system in the area where I make fine particle sawdust. For bigger wood particles, I use a simple ShopVac hooked up to the outlet tubes (disc sander, table saw, etc.). For “fumes’’ (like lacquer or some acrylics) I do this outside, sometimes in the garage using various sizes of throwaway cardboard boxes (my spray booths). For glue and sometimes paint fumes, I have a small desktop air filtration unit. Hope this info is useful…
- 68 replies
-
- 2
-
-
- Morel
- Master Korabel
- (and 1 more)
-
Psssst…Brian? Did you sand and oil the “keg” on your living room coffee table? If so, you’re a braver man than I!😲 The Watco Danish oil looks great.
- 68 replies
-
- 1
-

-
- Morel
- Master Korabel
- (and 1 more)
-
Thanks, Josh. Nearing the finish line. I'll sign you up after the club's Holiday sing-a-long!😂
- 542 replies
-
- 2
-
-
- Sphinx
- Vanguard Models
- (and 3 more)
-
It’s a SAILCYCLE. I’m guessing that head injuries weren’t a thing in 1934: noggin helmet optional with a suit and tie. I recall riding my bike ‘no hands.’ This skill would be very helpful when tacking this rig by grabbing and tugging on the clothesline to maximize your speed. I also imagine that in a stiff breeze you could also take your feet off the pedals.😬
-
Planking the wale will work out fine, Jeff. Don’t forget to transpose the scupper hole positions to the hull.
-
Your basic hull looks very good; I had some difficulty conforming the single piece wale pattern and decided to plank my model’s wales. I lost the nicely laser-engraved plank scarfing lines of this detail, but after painting I’m glad I made this decision. Other builders here have successfully executed this step so it is possible. The answer: heat, water, lots of creative clamping solutions…
-
Thank you, Jim. These little fellows are fun all around. Painting first, then carefully removing their resin bases, then playing “toy sailors.” One day I might just add a full 100-man on-deck crew to a large model…but this depends on Chris @ Vanguard to keep the 3D printer busy!😂
- 542 replies
-
- 1
-
-
- Sphinx
- Vanguard Models
- (and 3 more)
-
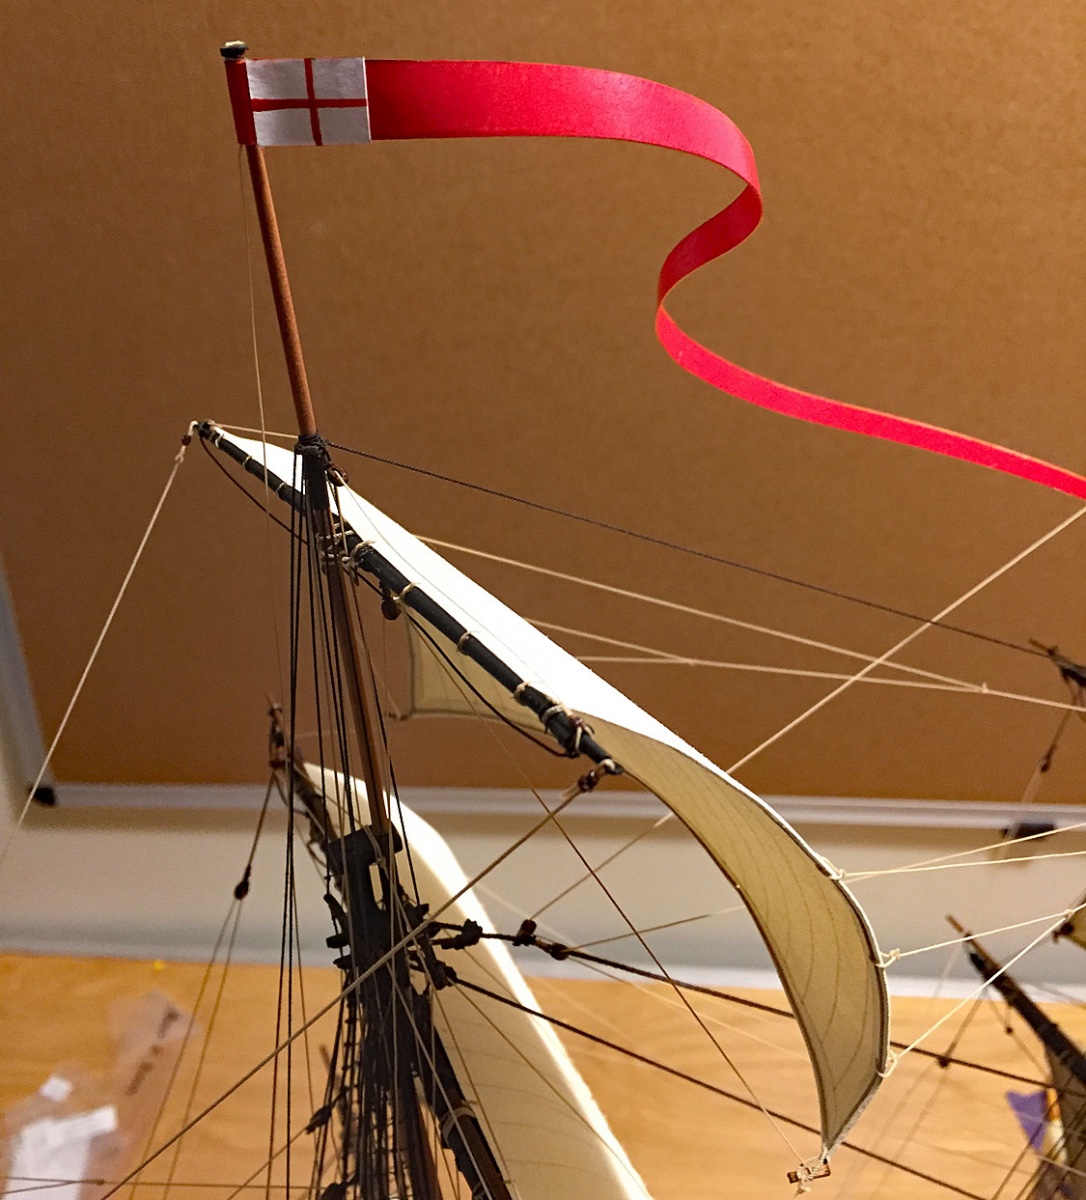
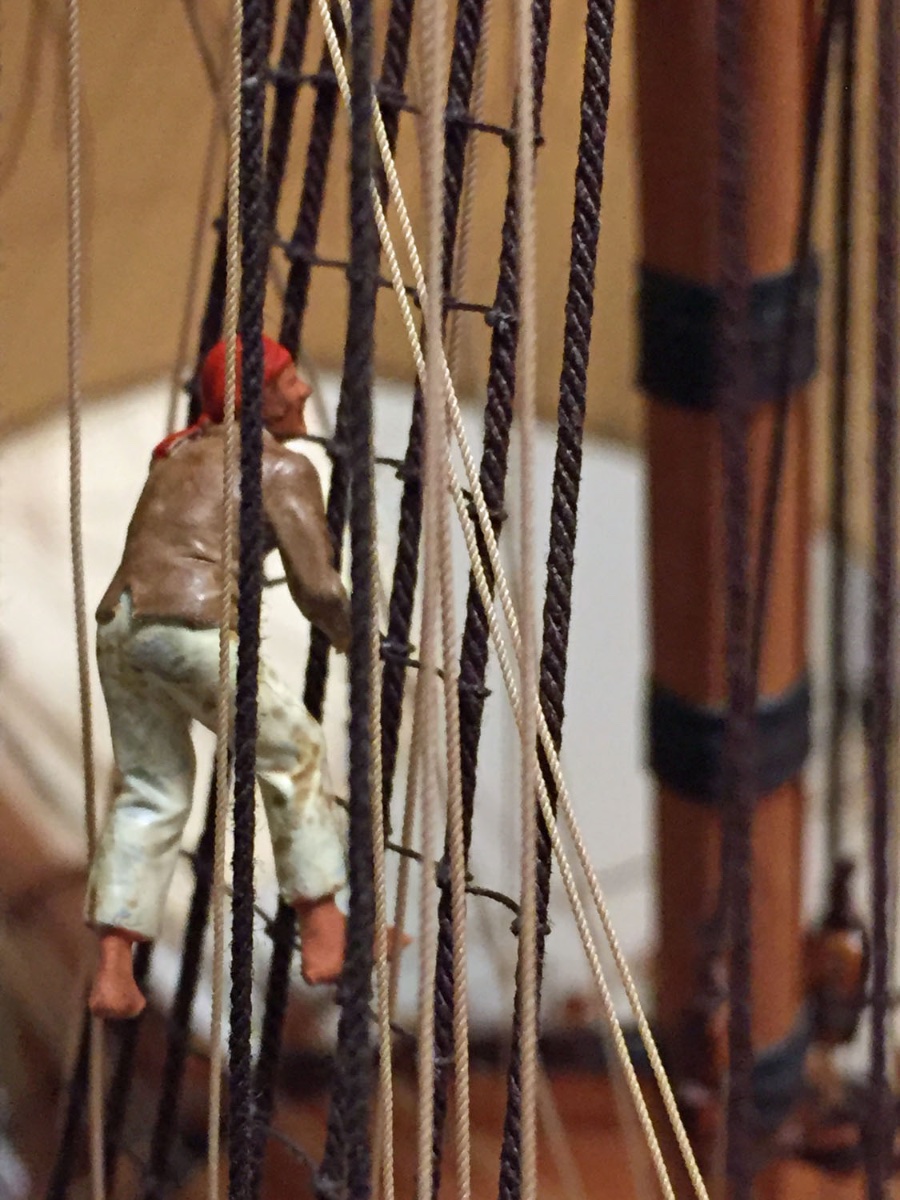
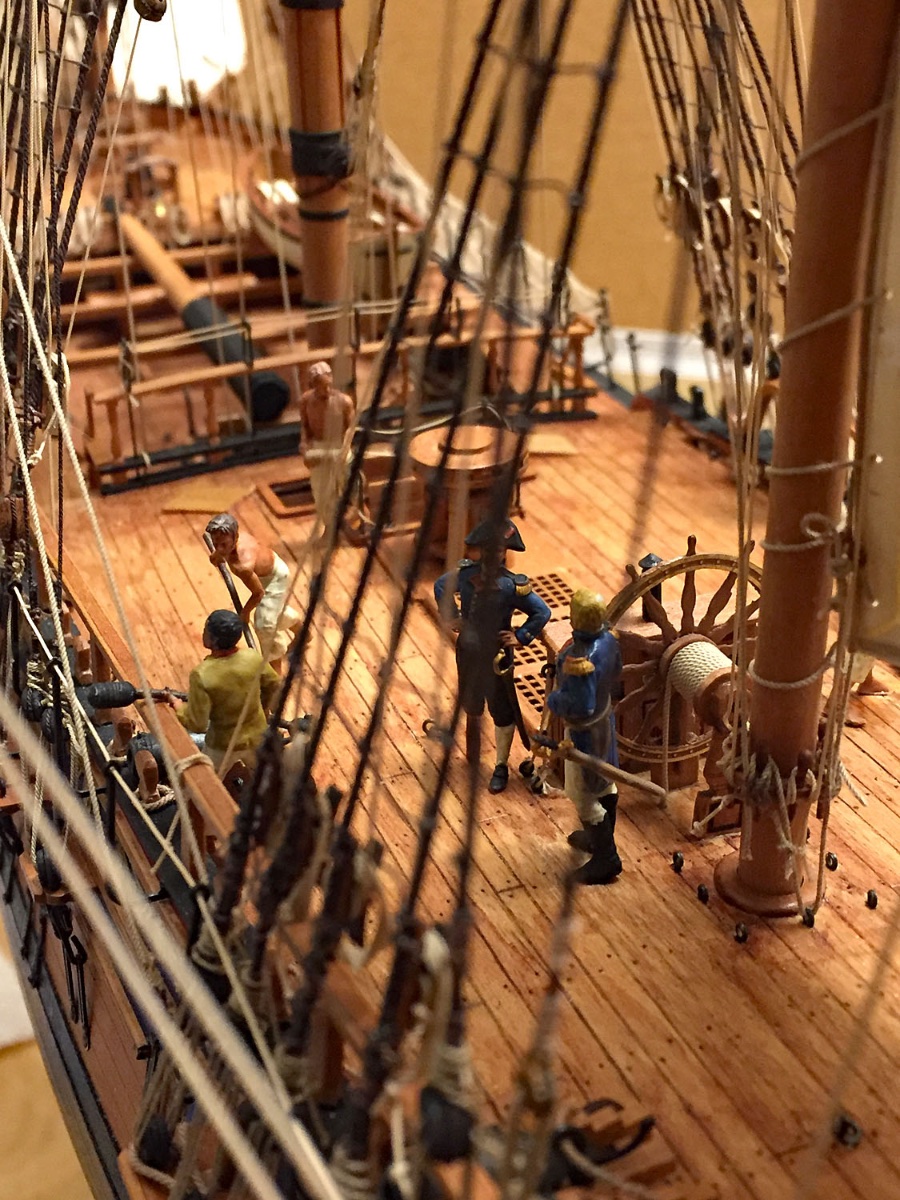
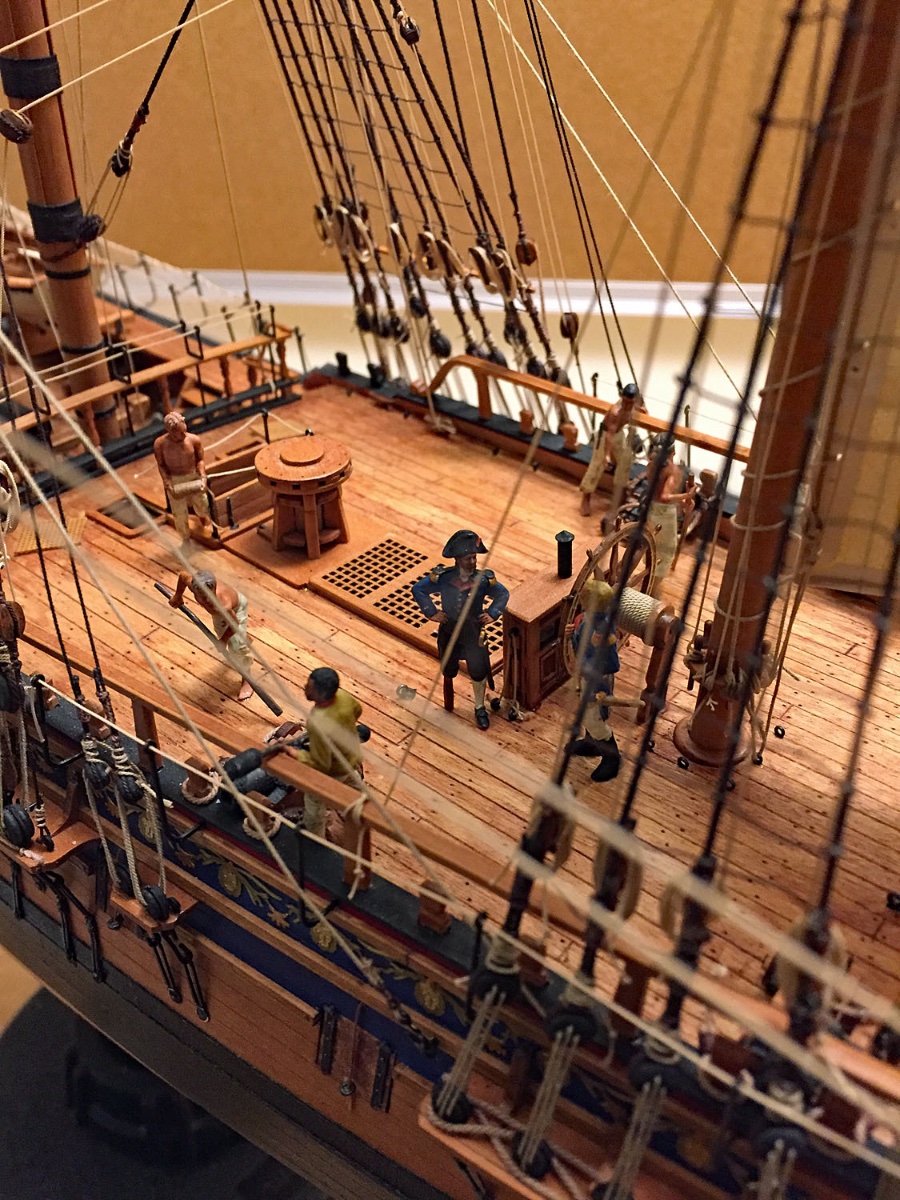
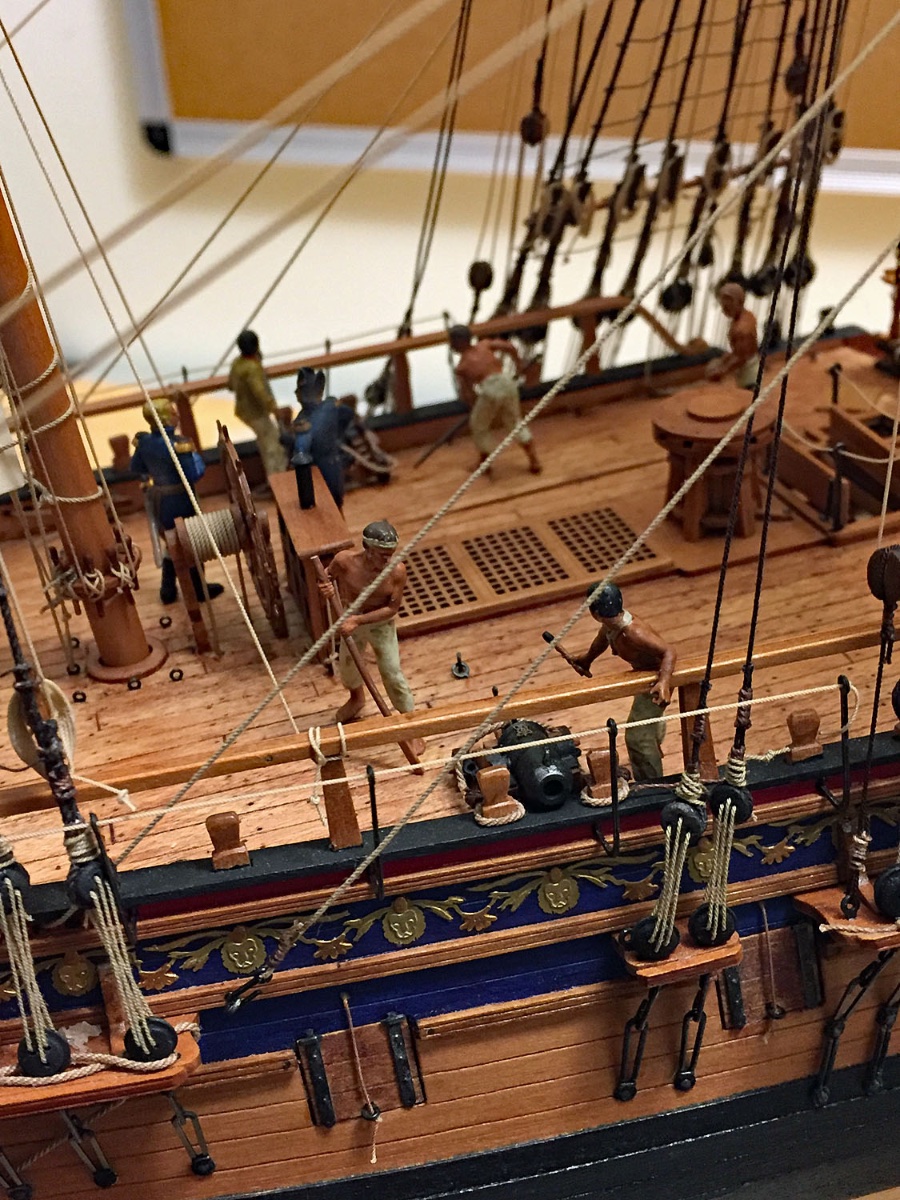
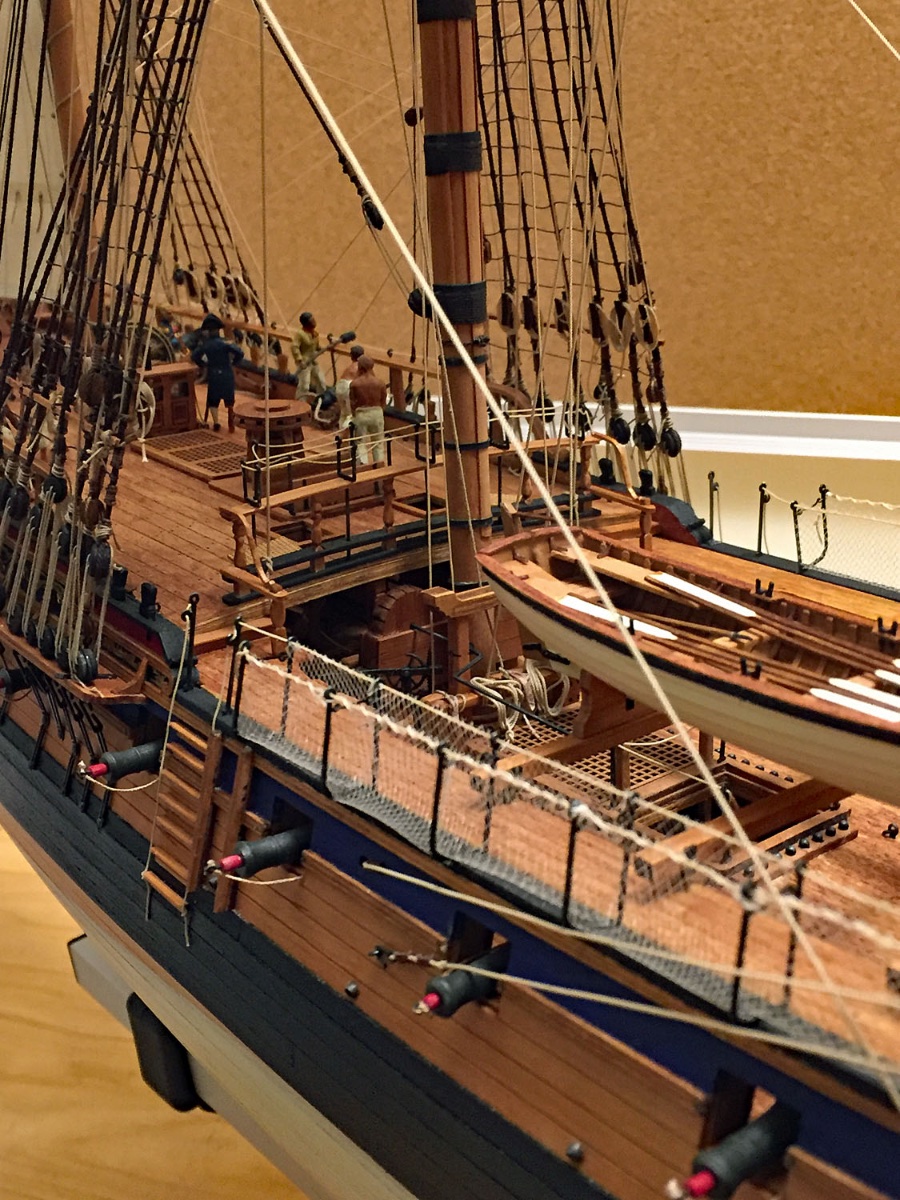
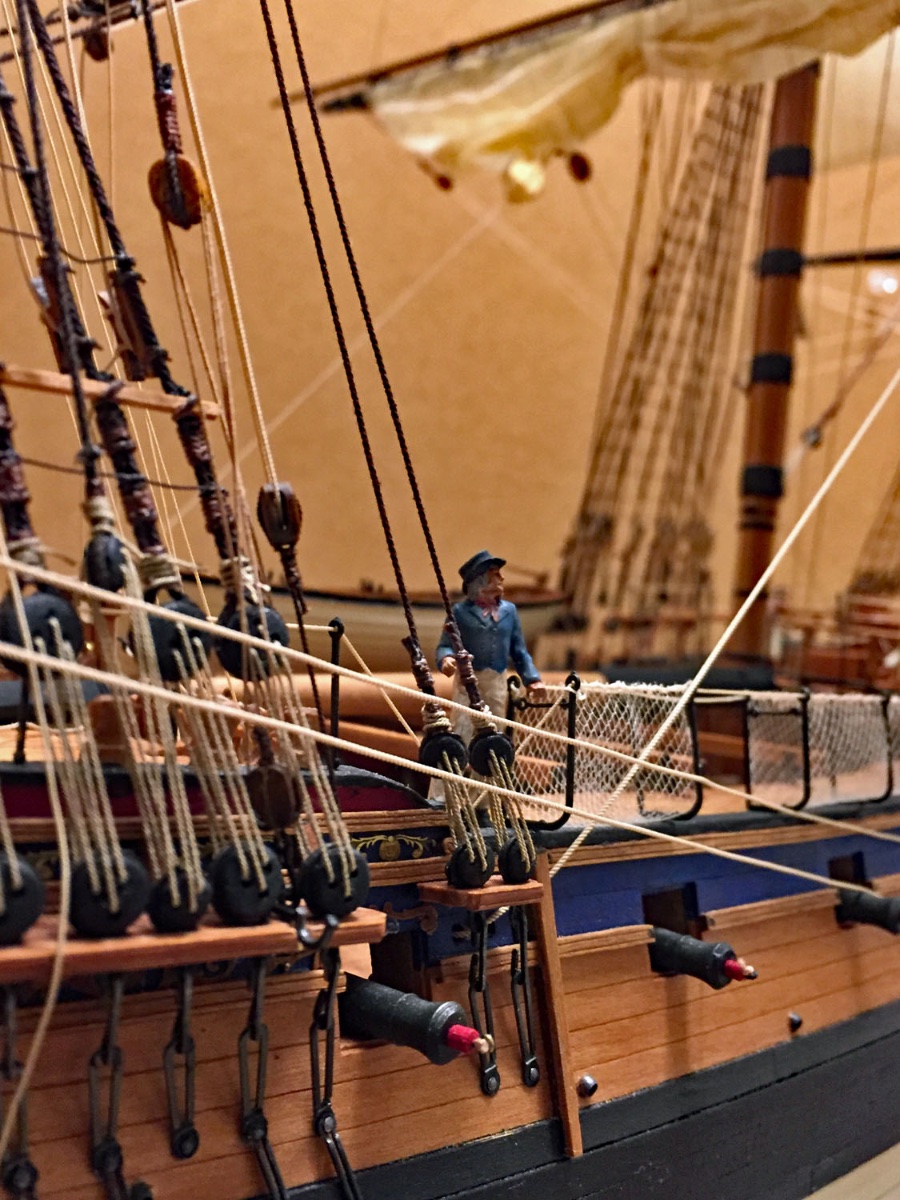
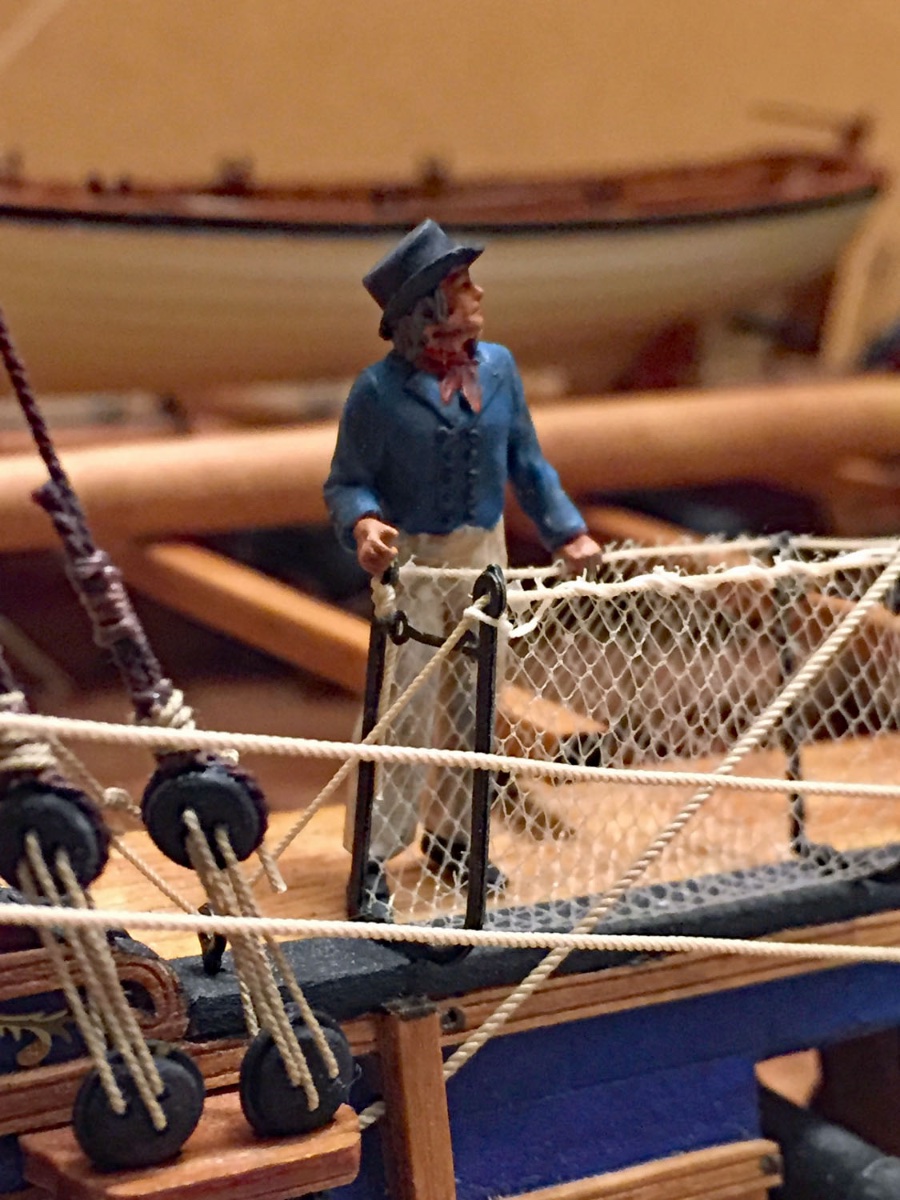
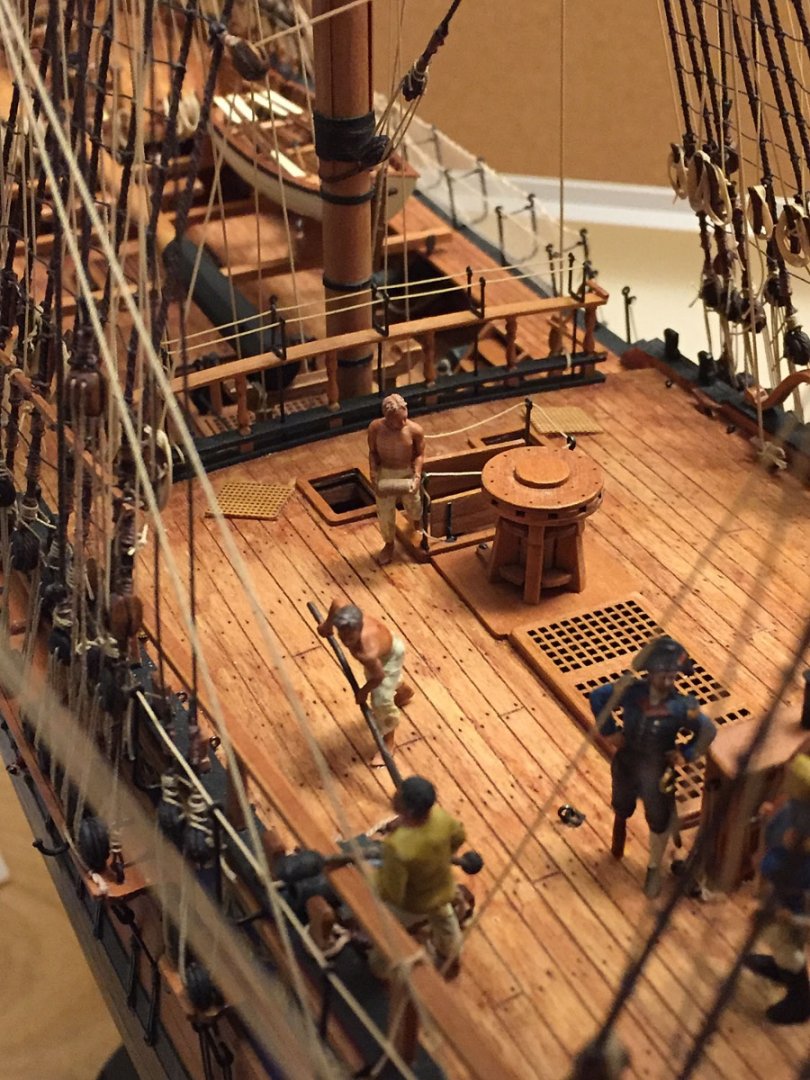
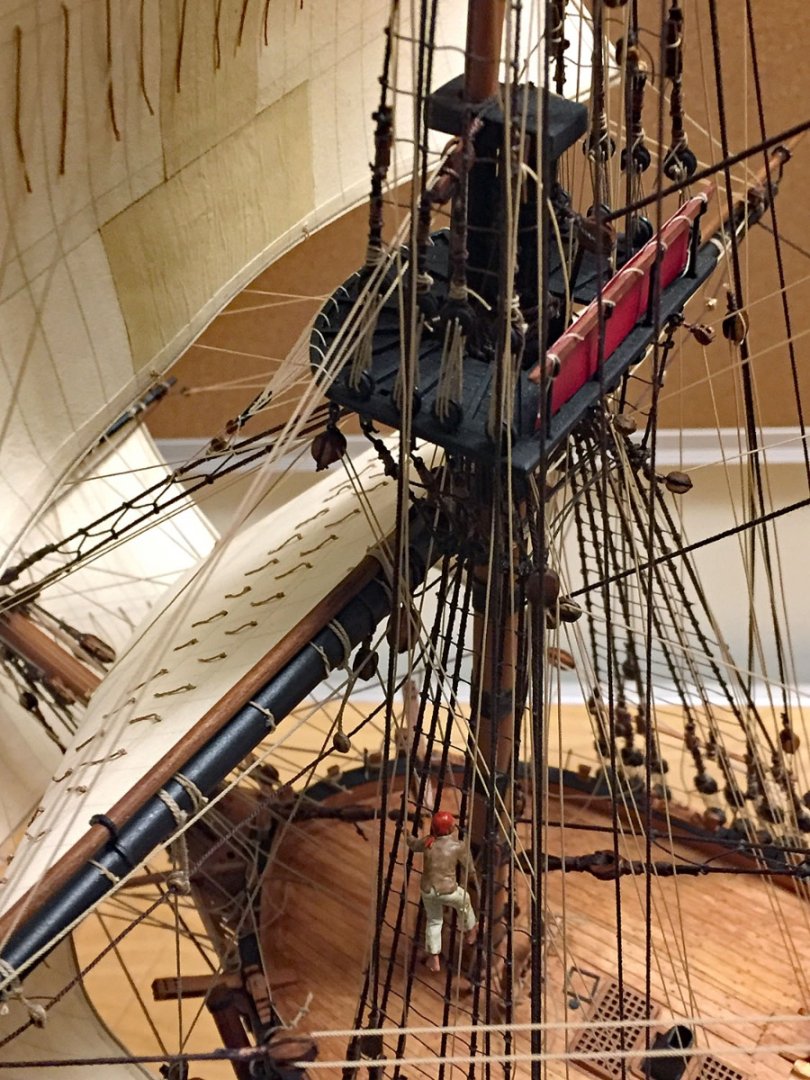
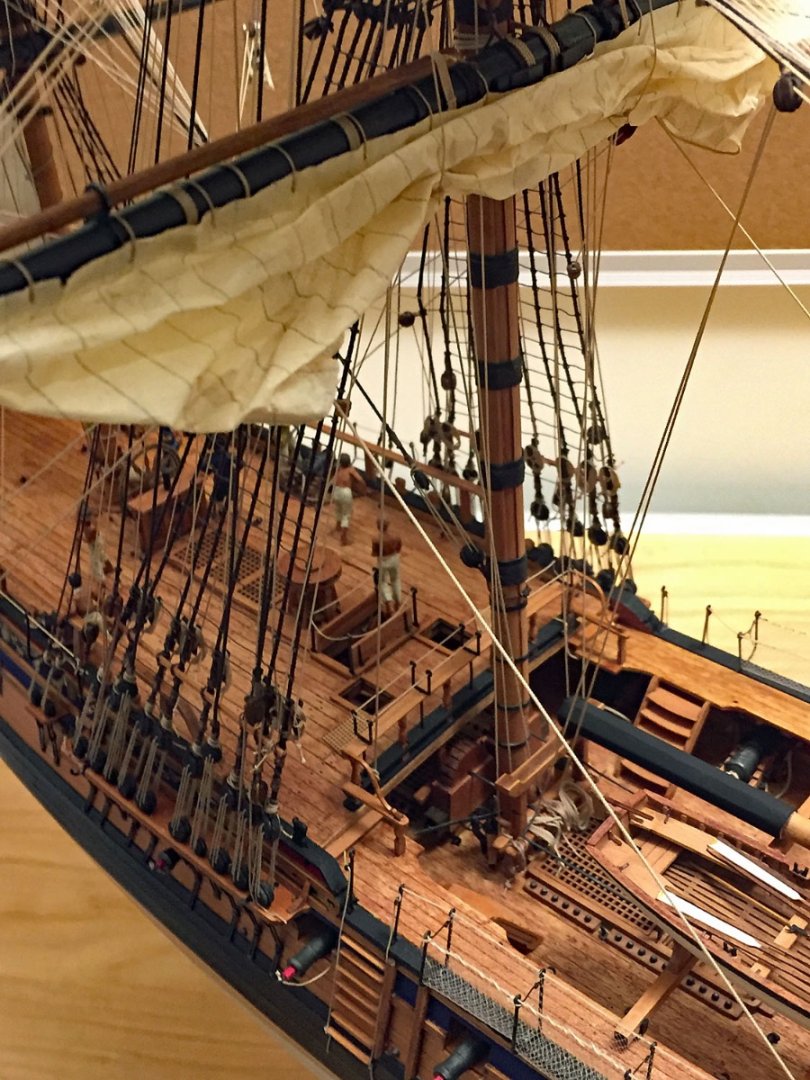
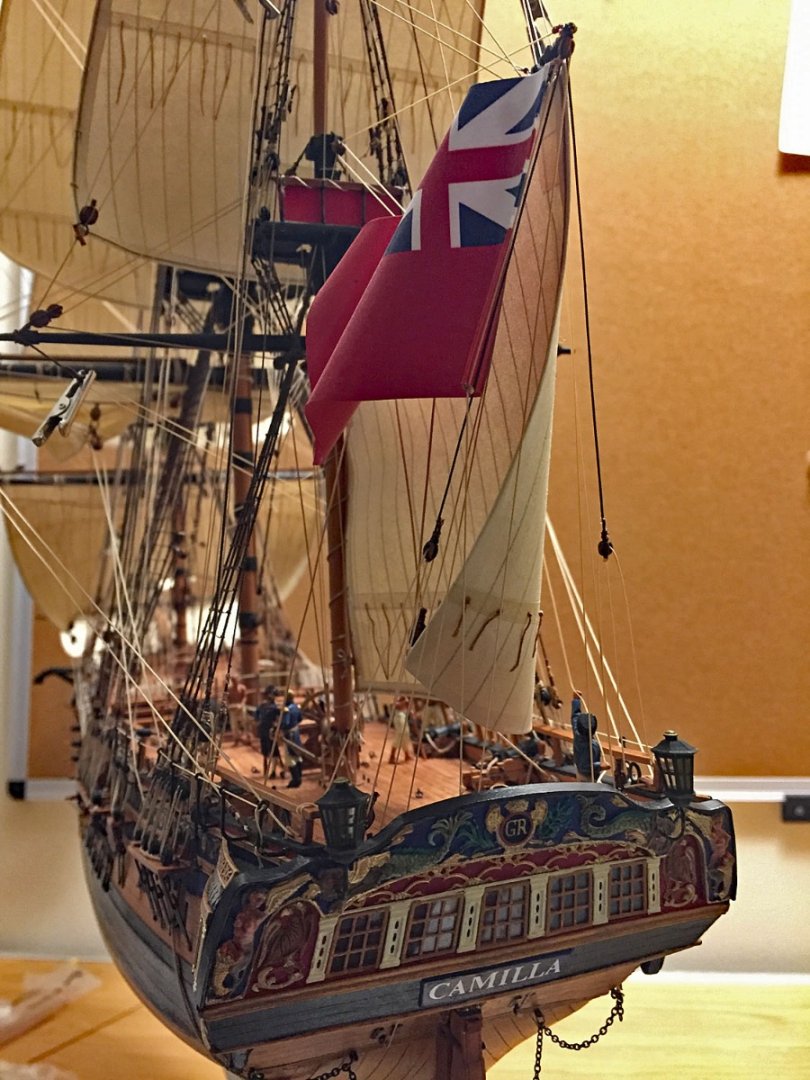
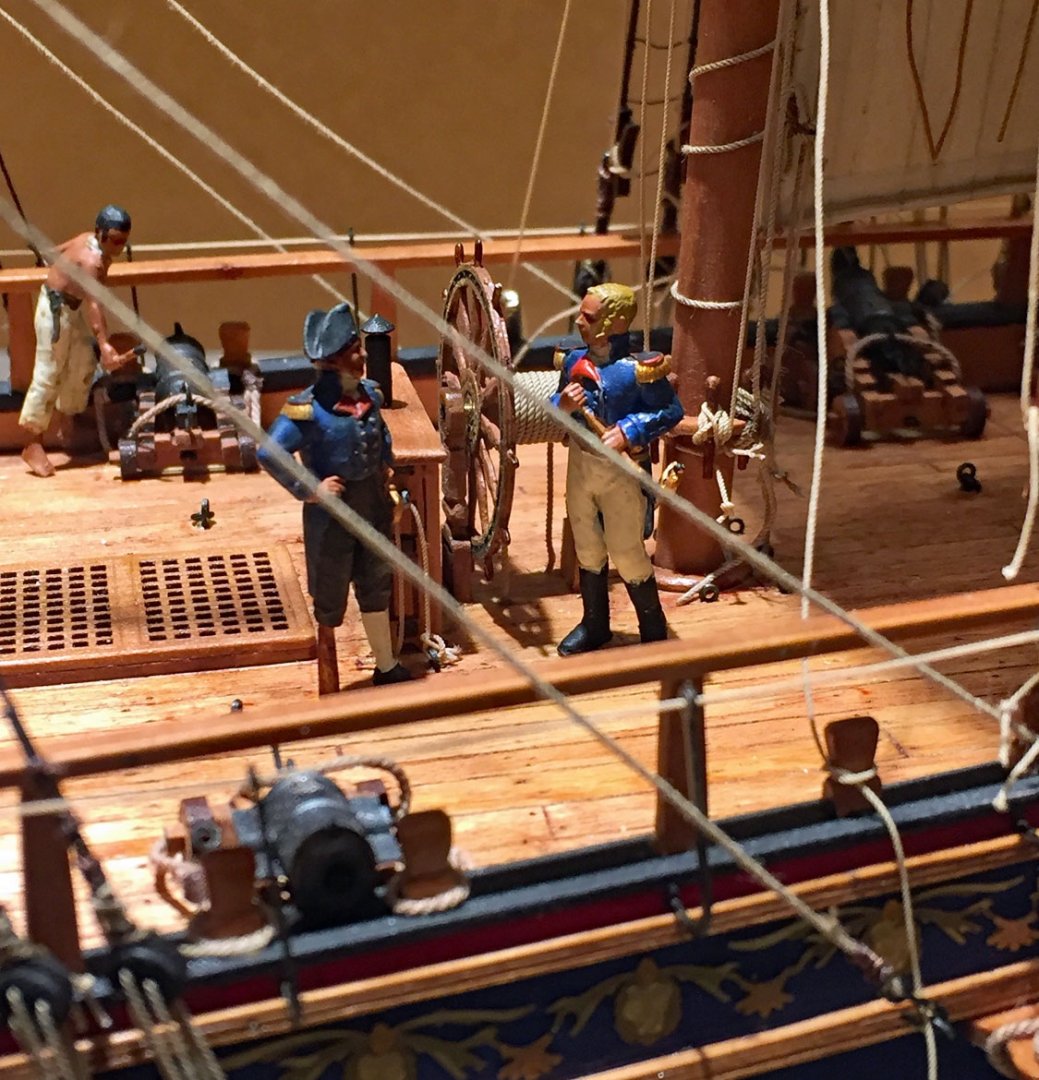
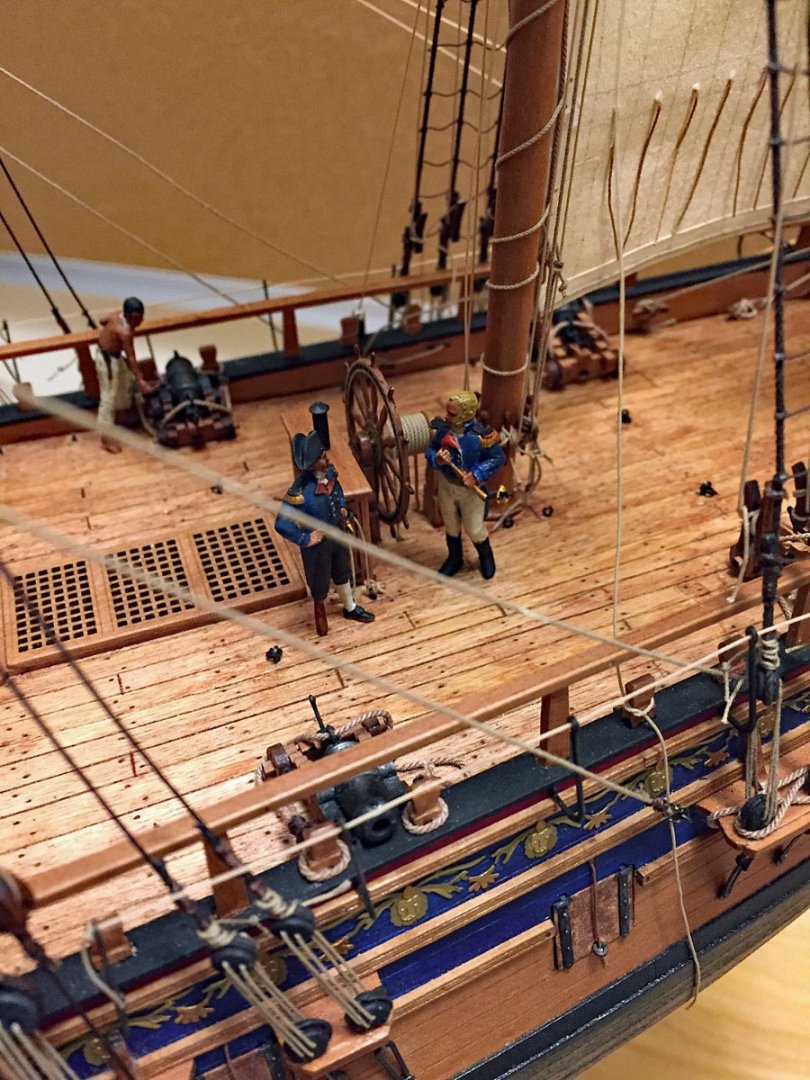
Pennant fixed. Thanks to B.E. for pointing out that the Cross of St. George was missing. Pretty obvious that I added a paper fix with this close-up. Perhaps less noticeable is the tiny section of rope meant to simulate the halyard passing through the mast’s single-sheaved truck. With the painting of Camilla’s diorama coming up this week, I decided to first button-down all the rigging, add the balance of her crew and do minor touchups before the model is placed back into her waterline seascape. Taking care of these details at this stage will be much easier since the diorama is large; access will be a challenge once the model is ‘sealed’ into her water. This shot clearly shows the importance of upgrading to high-quality rope. This close-up is approximately 800% of actual figure size (28mm or a little over 1” high). The textures of realistic-looking rope are quite apparent even with the thinnest diameters(.30-.45mm). Cpt. Pennypincher has asked Wigglesworth to set aside their differences and consider his offer to serve as Pennypincher’s second-in-command. This will resolve the issue satisfactorily for the ship’s crew since both leaders are well-respected. ”I am honored, Pennypincher. Now. Let’s attend to the task at-hand and grab some Froggie prizes, I say!” Never hurts to have gunnery practice, especially with the Navy’s newfangled carronades. A few loose ropes remain with their rope hanks. I started the balancing and tightening of her rigging at the stern and worked my way forward to the stem. After all the running rigging was set, some of the standing rigging needed adjustments to tighten it up. After rigging has been on the model for a few weeks it will relax and last-minute tweaks are necessary to conform it, particularly the backstays. I created a spare main topmast and it can be seen in this photo next to the launch. Like the ship’s boat, the spare mast will be lashed to the skids. The likelihood of battle damage was high when on post duty in the channel where encounters with the enemy were nearly certain. The loss of propulsion owing to a mast-severing cannon ball was a very real threat in close encounter frigate battles. + Midshipman Smythe is one of my favorite blokes from Vanguard. I must have placed him in at least a half-dozen spots before finally deciding on this position. He’s hauling the mizzentops’ls sheet hoping the additional canvas will give her another knot or two… ! My second favorite dude, sailing Master Wilcox.He’s keeping a sharp weather-eye on the hauled Main course. Another 800% close-up. As they told him while on the film set for Master & Commander, “…the camera likes you, Wilcox.” Camilla’s ensign has been sprayed with a dull-coat flat lacquer that imparted a very convincing fabric texture. The copier paper I used for the color print had a sheen that made it almost look plastic, toy-like. I am quite pleased with Vanguard’s figures. The high quality of these 3D-printed figures helps to animate the model. Thanks to Chris W @ Vanguard these period accurate, mini people are a game-changer for us diorama presenters.


- 542 replies
-
- 36
-

-
-
- Sphinx
- Vanguard Models
- (and 3 more)
-
Dan, check your PM.
-
Happy Birthday. Keep rock'n the Model Ship World!
-
I like it. Keep Calm and Carry On.
-
Thanks B.E. I'm on it! Now that it's mounted, rather than paint I'll print two white and red English crosses and glue them to the hoist section of the pennant on both sides. If you look closely at the two officers - and thanks to his man-servant- you'll see that Cpt. Wigglesworth is now wearing recently laundered, clean britches. Thanks. Much appreciated. I don't wish to invoke the anger of either gentleman. Thanks to B.E.'s timely suggestion, I'll cross this bridge later today.
- 542 replies
-
- 3
-
-
- Sphinx
- Vanguard Models
- (and 3 more)
-
Excellent description of your work. The draped flag may be the best I’ve seen on the forum. Thanks for detailing the steps and also for attempting some of the suggested alternatives. I wholly concur with your final choice. It looks great on your model.
-
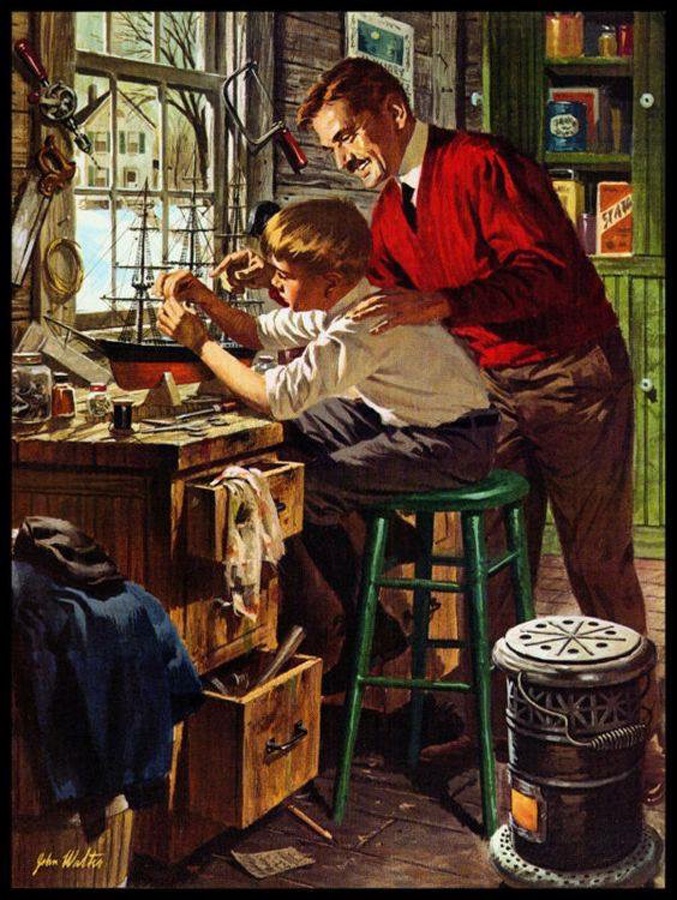
The family that plays together, stays together! Love this Rockwellian illustration. Ahh...fond memories... the uncomplicated 50's, when men were just bigger boys and....girls were...uh....
-
@bruce d...I think I've inadvertently hijacked your thread! But in my defense - it's your fault for starting this one!😂
-
And, in case your sweater isn't warm enough in the garage, you can always fire-up the kerosene heater... It's hard to tell, but do you think the young boy is wearing a tie like Dad?
- 227 replies
-
- 10
-
-

-
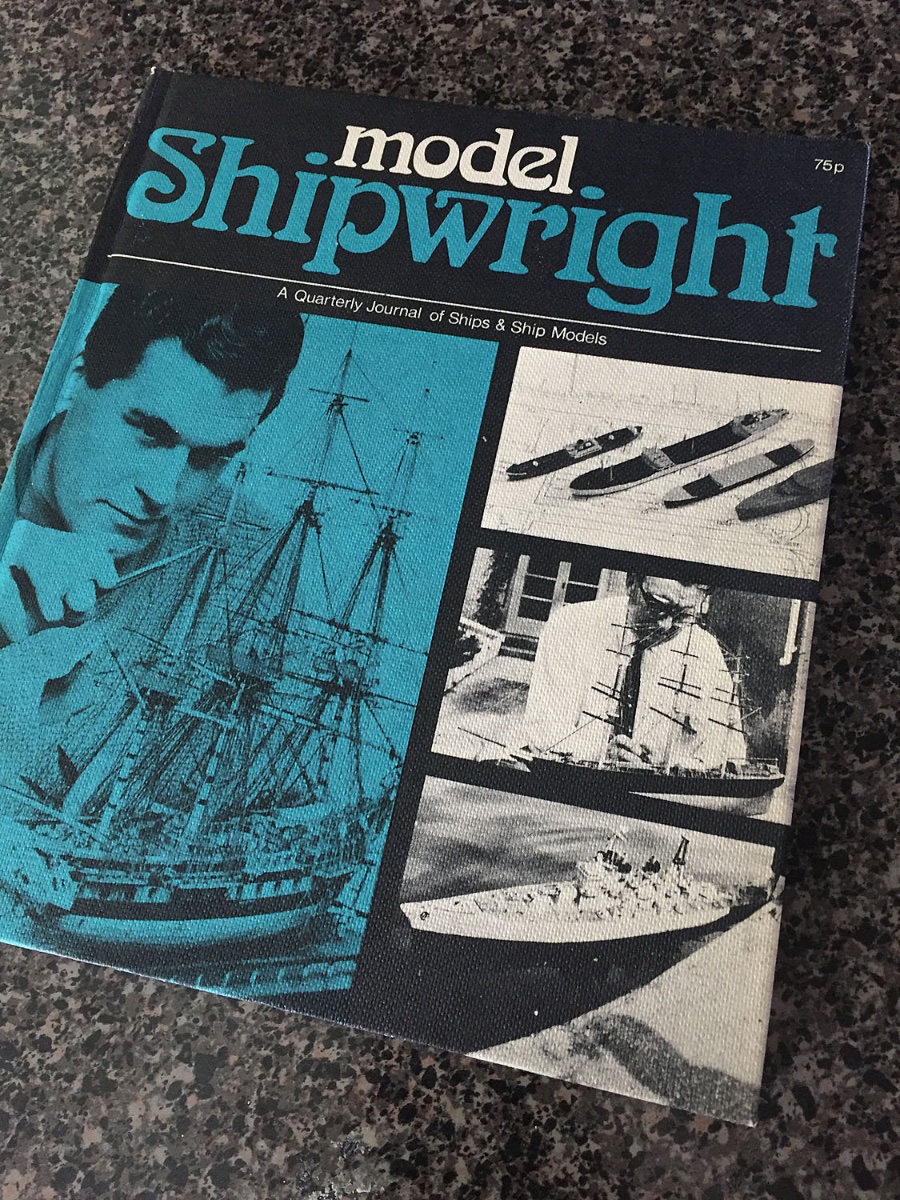
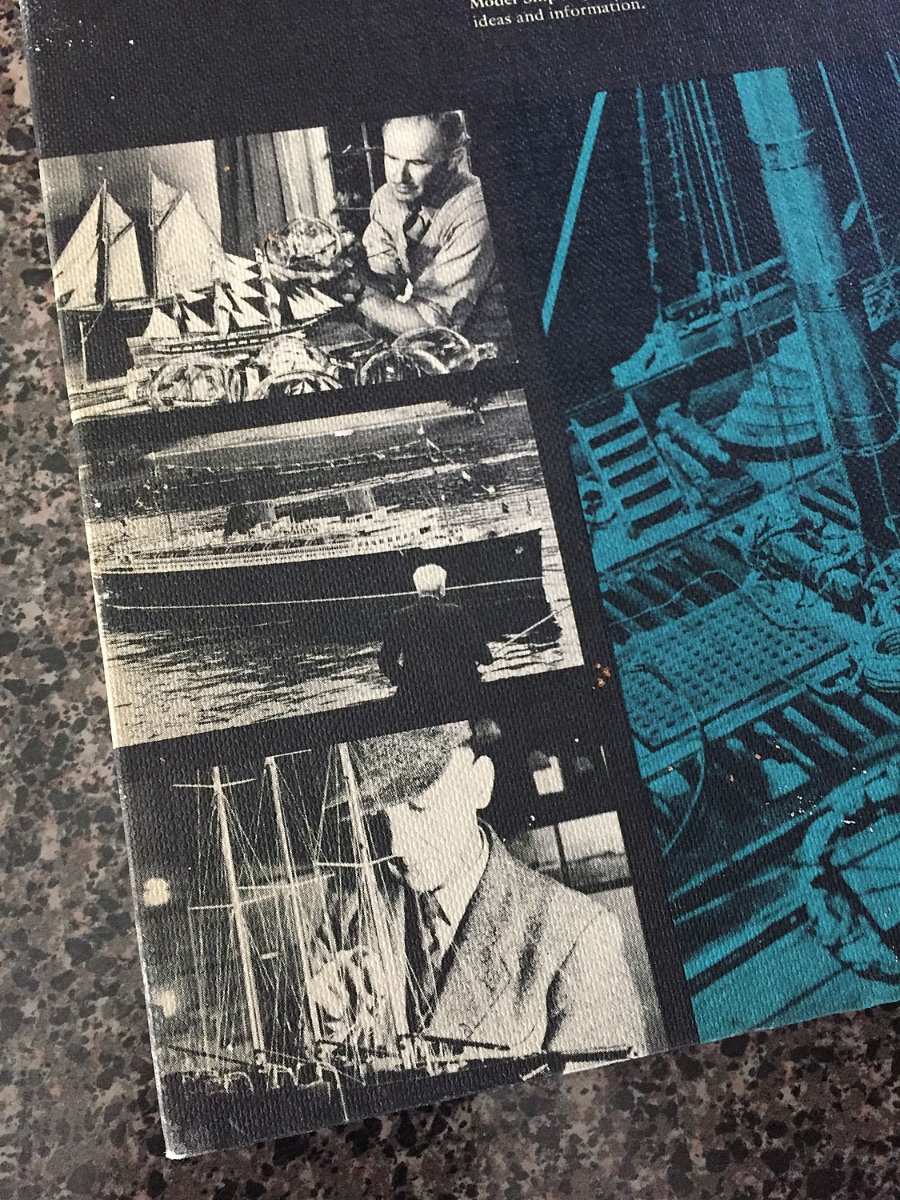
The 1972 First Edition of the U.K.'s Model Shipwright "quarterly" publication (actually a hardcover book). In the Twiggy-era late 60's, early seventies, a tie was optional as the fellow on the left confirms. However, looking on the rear cover of the same issue, some modelers chose not only to wear a suit and tie, but also an attractive chapeau (second photo).


- 227 replies
-
- 10
-
-
-
-
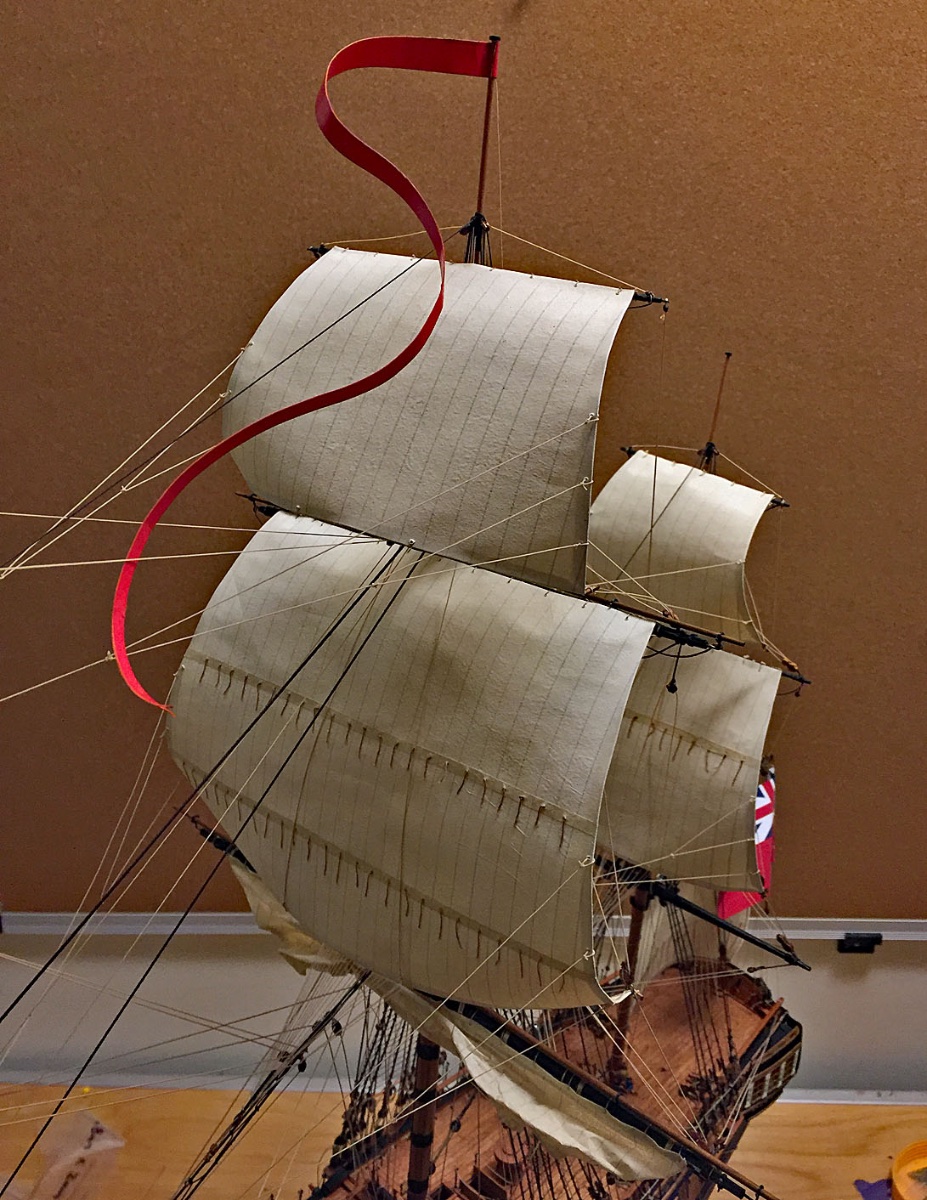
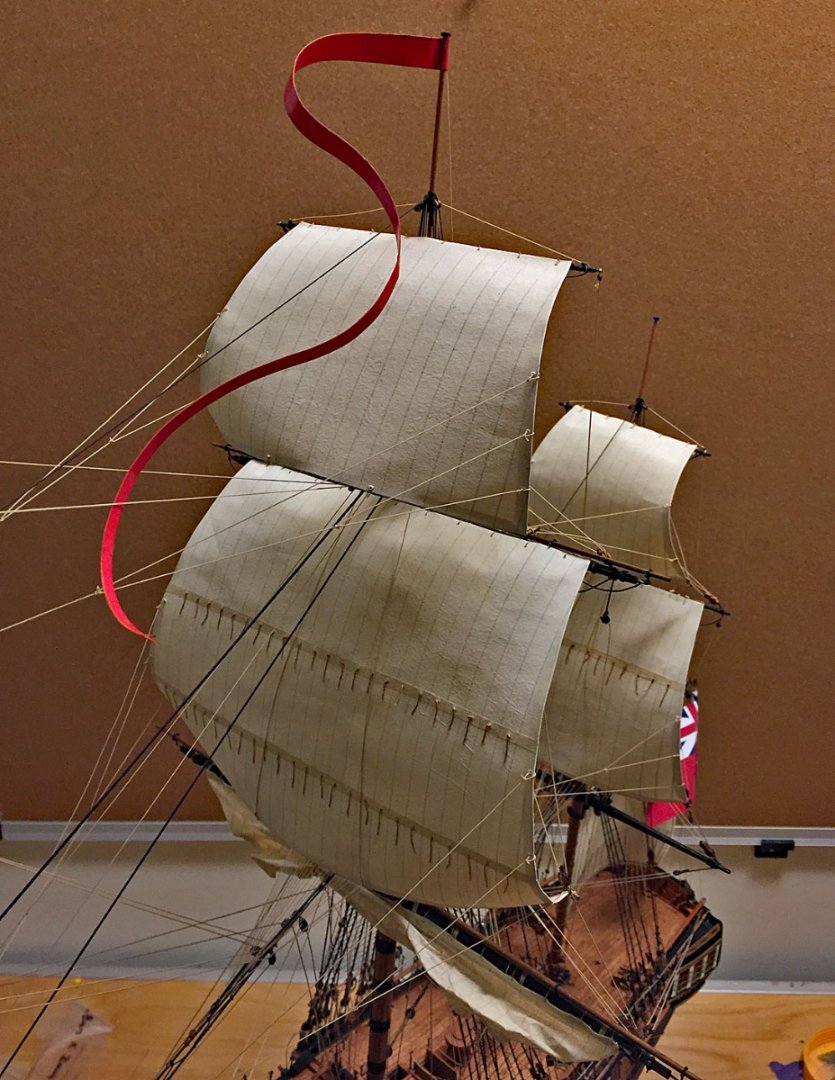
While HMS Camilla is removed from her water setting and while I await some painting supplies, I decided to make her mainmast pennant and have some fun with the various figures that will be her "minimalist" crew. First and foremost, Cpt Pennypincher was in hospital for some emergency surgery (a toothpick for a right wooden lower leg). After a few days of PT, Pennypincher made his way to Camilla's deck without assistance. Captains Pennypincher and Wigglesworth had a natter about who will command Camilla once she's put into service. There's controversy at the Admiralty about a commanding officer in His Majesty's Service having a "disability;" "Do you not feel your impairment will compromise your ability to lead His Majesty's frigate?" C.W. Wigglesworth postulates. "Bollocks!" asserts Pennypincher: "My new leg is as good as new. When my men see I am fully capable of being their Captain, the consequences for their enhanced esprit de corps are immeasurable." Pennypincher further reminds Wigglesworth of an important precedent: "Do you not agree Admiral Lord Nelson's missing right arm does not impair his judgement and ability to lead?" Wigglesworth retorts: "Sir, you insult me by having no hesitation to compare yourself favorably with his excellency Lord Nelson!" ...to be continued as Camilla's crew members weigh-in on the argument...in the interim... HMS Camilla's mainmast pennant catching the following wind. Its halyard was tricky to terminate to the top truck but it's convincing enough to my eye in 1/64 scale. The long pennant is made from two thicknesses of 28lb printed copier paper imaged from a PDF file of the shape. After gluing the two printed layers together and trimming them, I carefully wrapped the long laminated strip around three different paint bottles to get the gentle curves. The result of the two-layered paper is holding well so far. To achieve a convincing shaped form, the previous pennant I made had a 30 ga. annealed florist's wire enclosed between the two layers running the entire length; my new approach to making this flag may - or may not- hold...I'll see if I need to return to a previous technique over the next few weeks.
- 542 replies
-
- 20
-
-
-
- Sphinx
- Vanguard Models
- (and 3 more)