hollowneck
-
Posts
1,591 -
Joined
-
Last visited
Content Type
Profiles
Forums
Gallery
Events
Everything posted by hollowneck
-
 I am not familiar with “beading tool;” can you (or another MSW member) post a photo of the tool? thanks!
- 488 replies
-
- 5
-

-
- Indefatigable
- Vanguard Models
- (and 1 more)
-
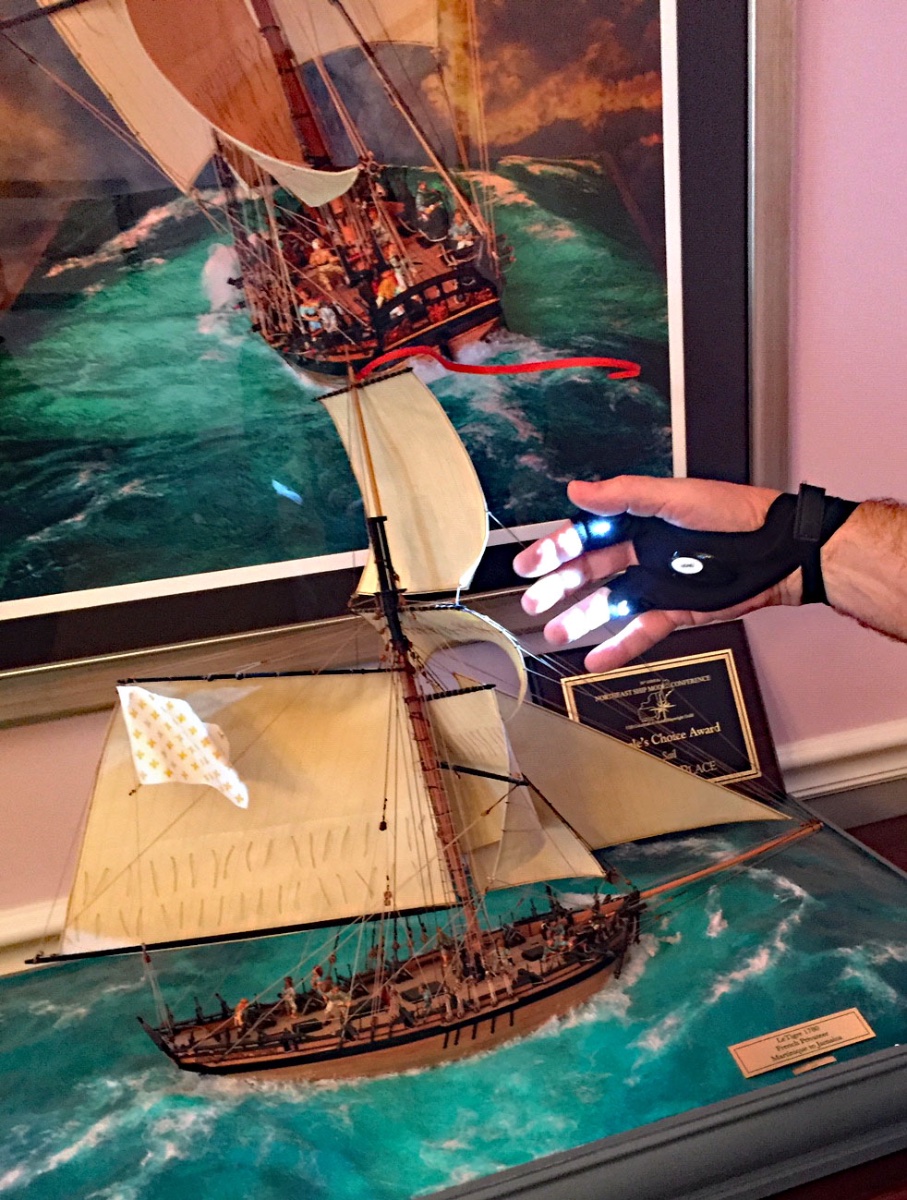
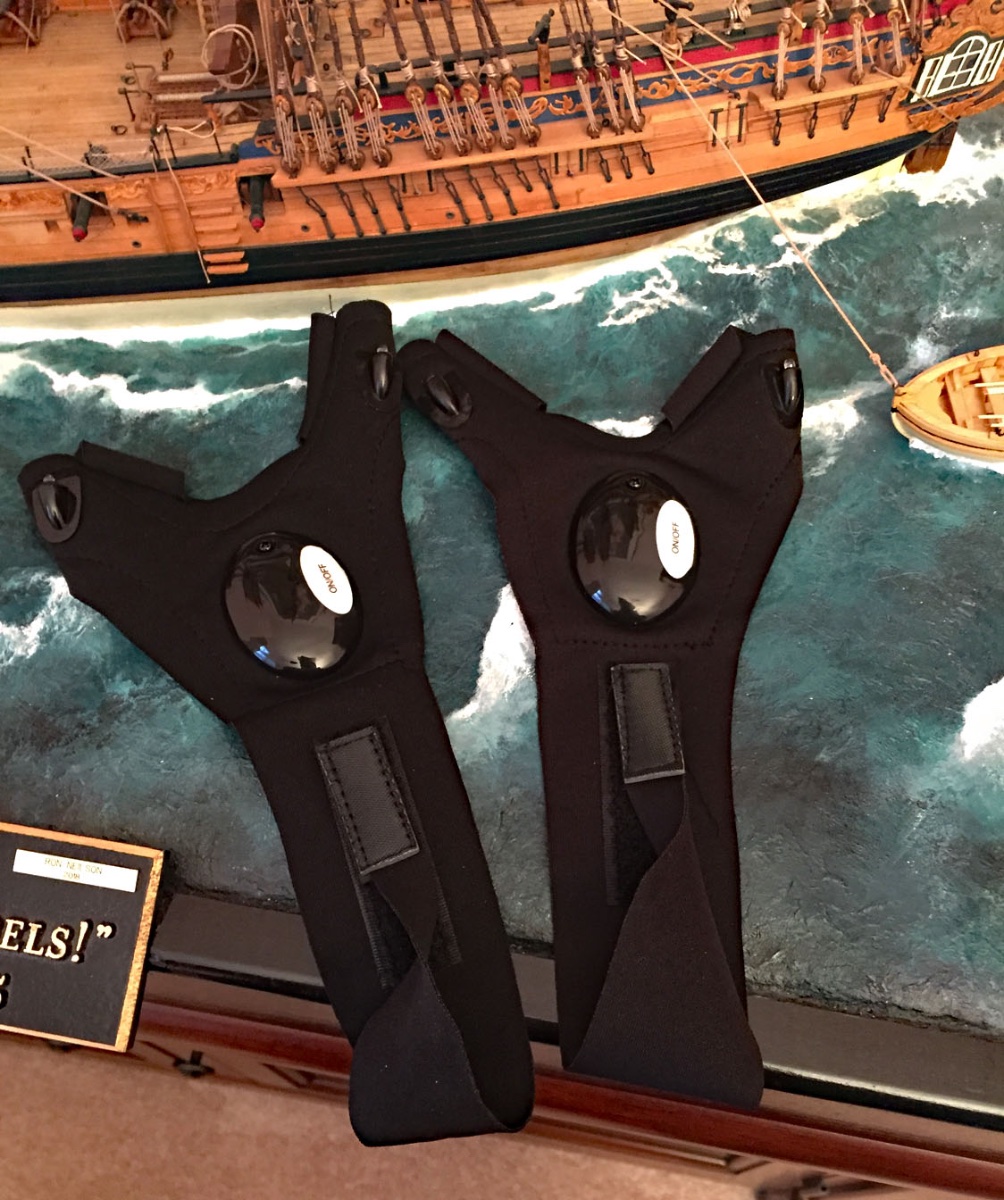
Something for Everyone Topic, or how I learned to love how Santa's mind works. Special "Rigging Gloves" with two bright LED lights positioned at the base of the forefinger and the ring finger (or pinky, to suit). ..and the best part? They come in pairs, left & right, batteries included and installed. These SpaceAge gloves will come in handy for those who no longer want to hold a small flashlight between their teeth whilst rigging (or doing anything else where these awesome gloves might come in handy). Endorsed by thieves with a specialty in lock picking and by poker players who can still have a game when there are rolling blackouts. Essential Wear/WARE for 2023. If there's sufficient interest here, I'll contact Santa and see if his workers are not out on strike...


- 542 replies
-
- 22
-
-

-

-
- Sphinx
- Vanguard Models
- (and 3 more)
-
Thank You, Brian. Taking a boatload of hi-res photos will be the next rewarding step in my journey. Thanks Matthias. Your Unicorn diorama is superb in all aspects: to my eyes you needn't "overwork" it. But do come to my ZOOM Workshop this coming year. I'll post an announcement here when details are finalized. The announcement will appear in this thread as well as in MSW's "NRG News & Information" subtopic. I urge you to consider becoming an NRG member. The NRG's quarterly journal is one of the best, regularly published magazines for our hobby. And, it's digitally delivered - in a 100-page, full color folio. Valuable NRG merchandise is also available to Members with good discounts. You'll also be pleased to know that the NRG has a good number of International Members.
- 542 replies
-
- 5
-
-
- Sphinx
- Vanguard Models
- (and 3 more)
-
I've finished the case staining (Minwax Pecan)and finish sealing (Minwax Wipe-On Poly - Semigloss) and here are a couple photos showing how this turned out. Also, these photos are a test of the new iPhone 14ProMax phone camera. I did nothing special with the camera and the lighting remains "workshop" quality, not studio controlled. The lenses in the phone's camera(s) are superb. The sensor is quite large so image resolution (crispness ) is very evident here. The main benefit of shooting with my DSLR will be the gain in depth-of-field with longer exposures and small apertures. I'm excited that in many situations the new iPhone 14 will get the job done....HOWEVER... it remains to be seen how studio lighting will yield even better photos with this iPhone 14Pro. Those who have followed this log will clearly see the difference between my earlier iPhone 6 pics I've posted up to this post and these new ones I've uploaded here. My trusty iPhone 6 can be said to be "ancient technology" (comparatively-speaking!)...


- 542 replies
-
- 40
-
-
-
-
- Sphinx
- Vanguard Models
- (and 3 more)
-
Many Thanks to @Oldsalt1950, @robert952 and @Knocklouder. As soon as the final timetable and details are available, I'll announce my NRG ZOOM Workshop.
- 542 replies
-
- 4
-
-
- Sphinx
- Vanguard Models
- (and 3 more)
-
She's stunning, Greg. A Boxwood Beauty. Congratulations on completing your inspirational build.
-
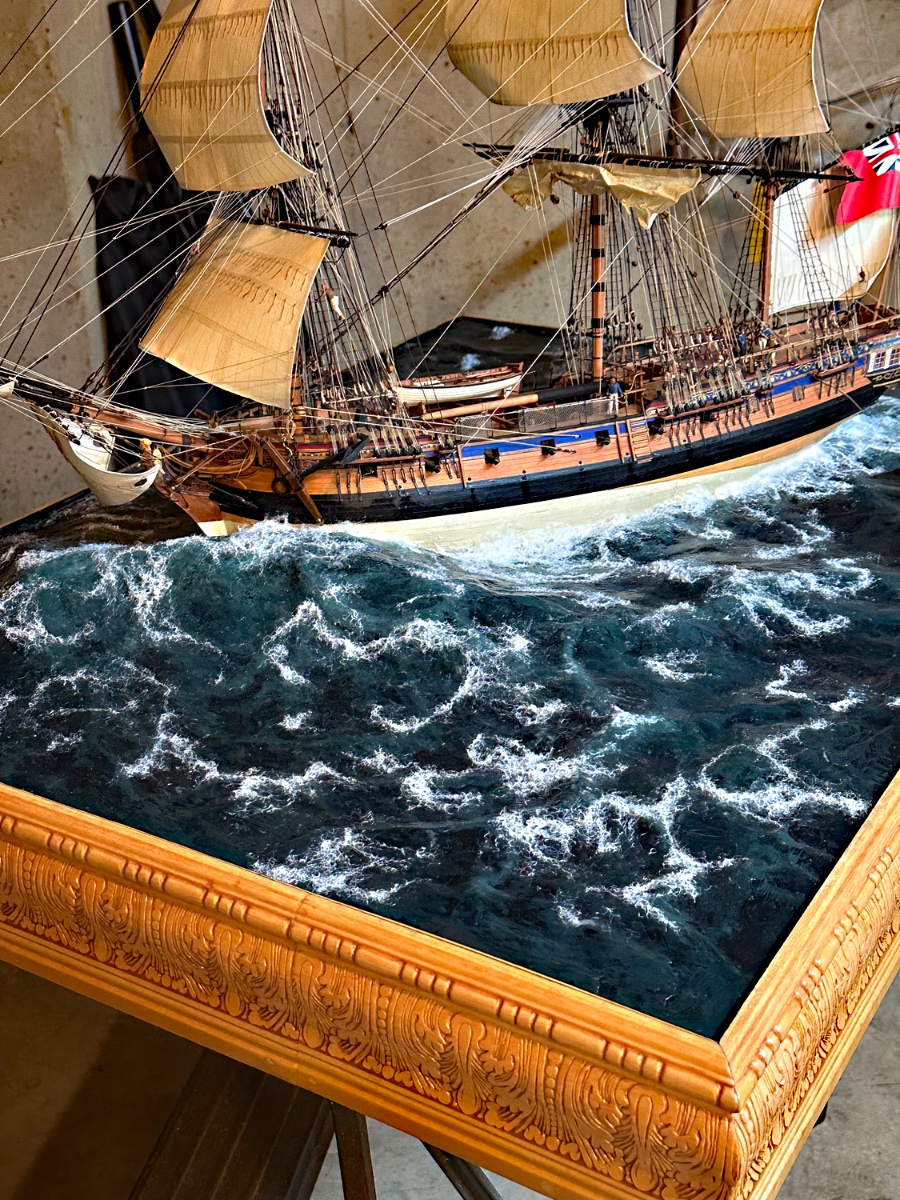
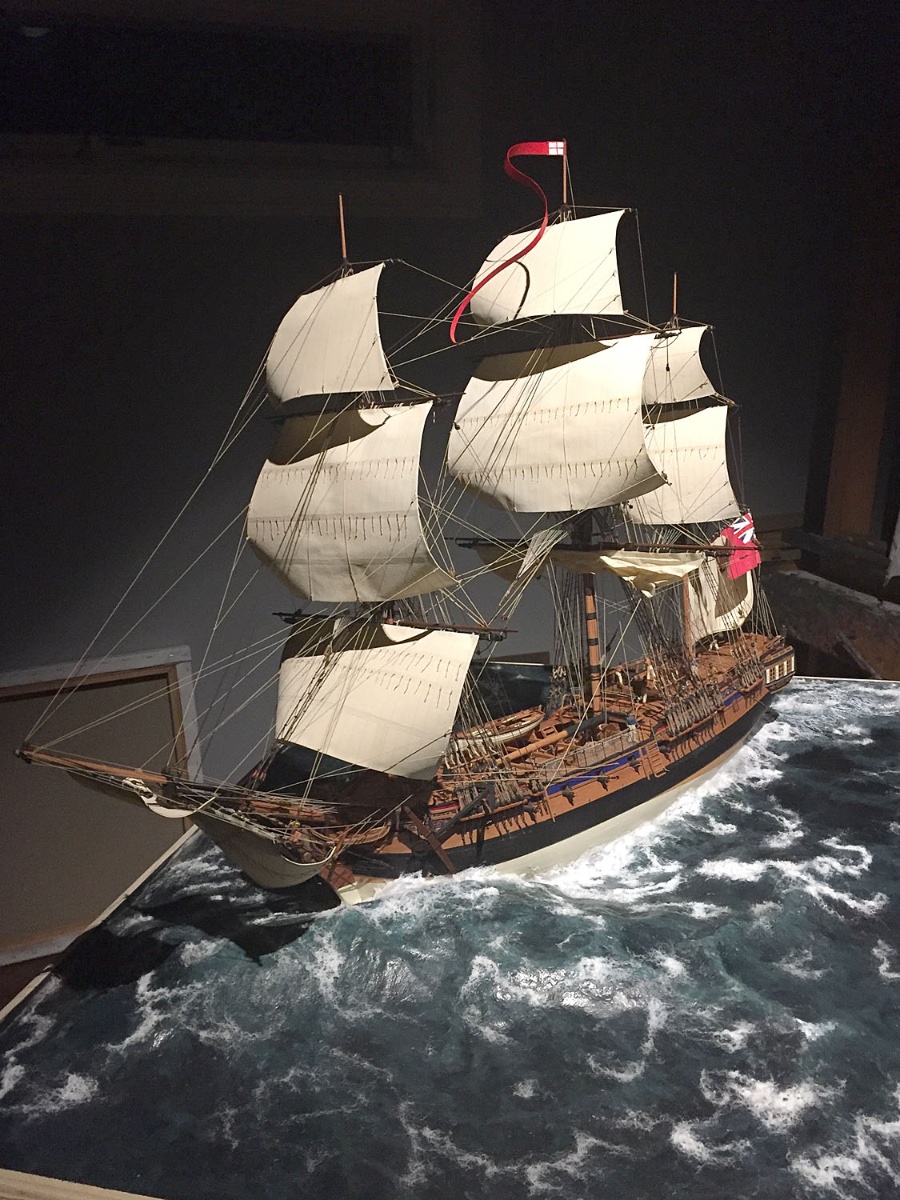
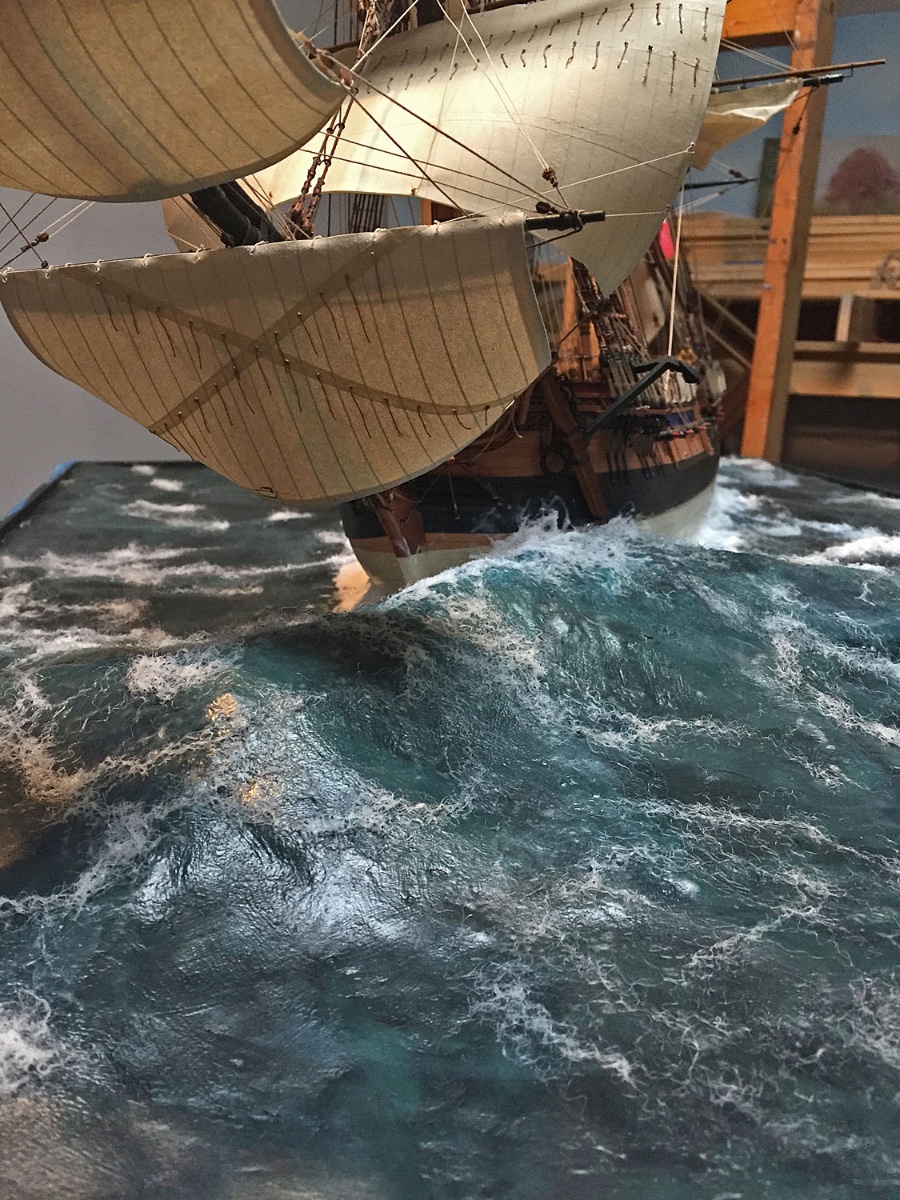
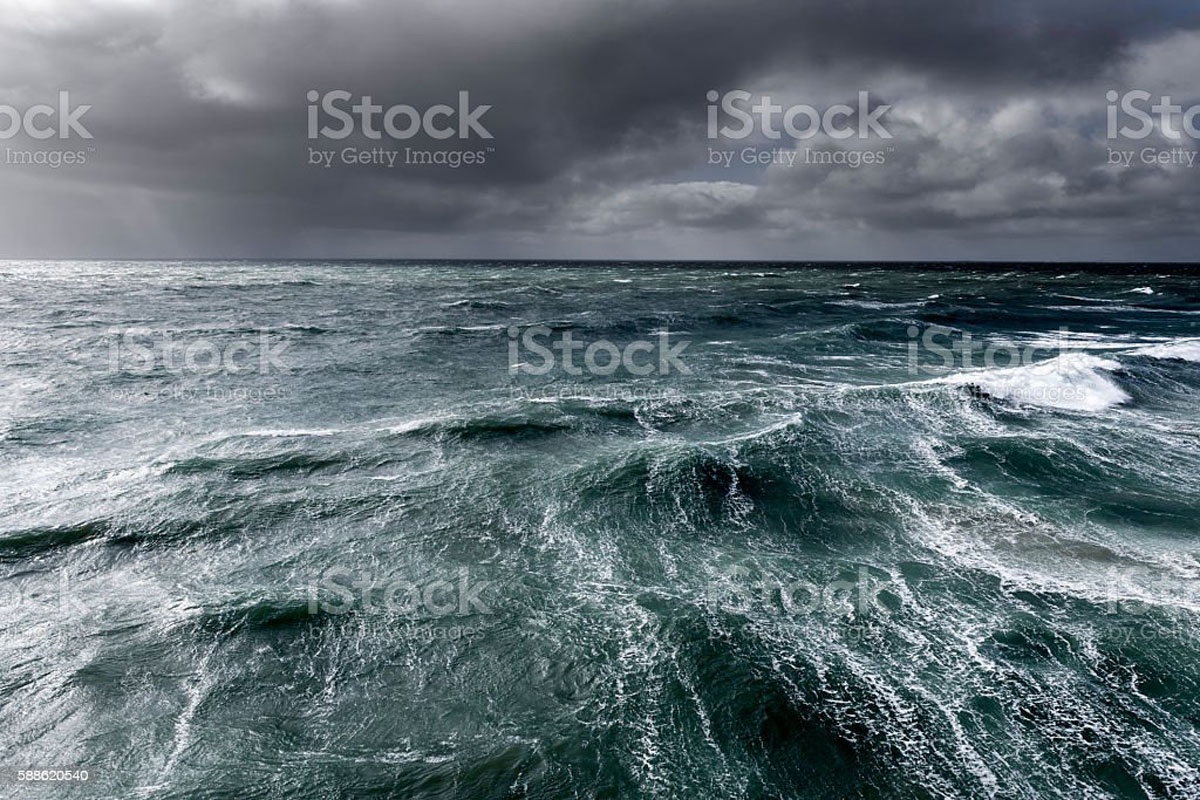
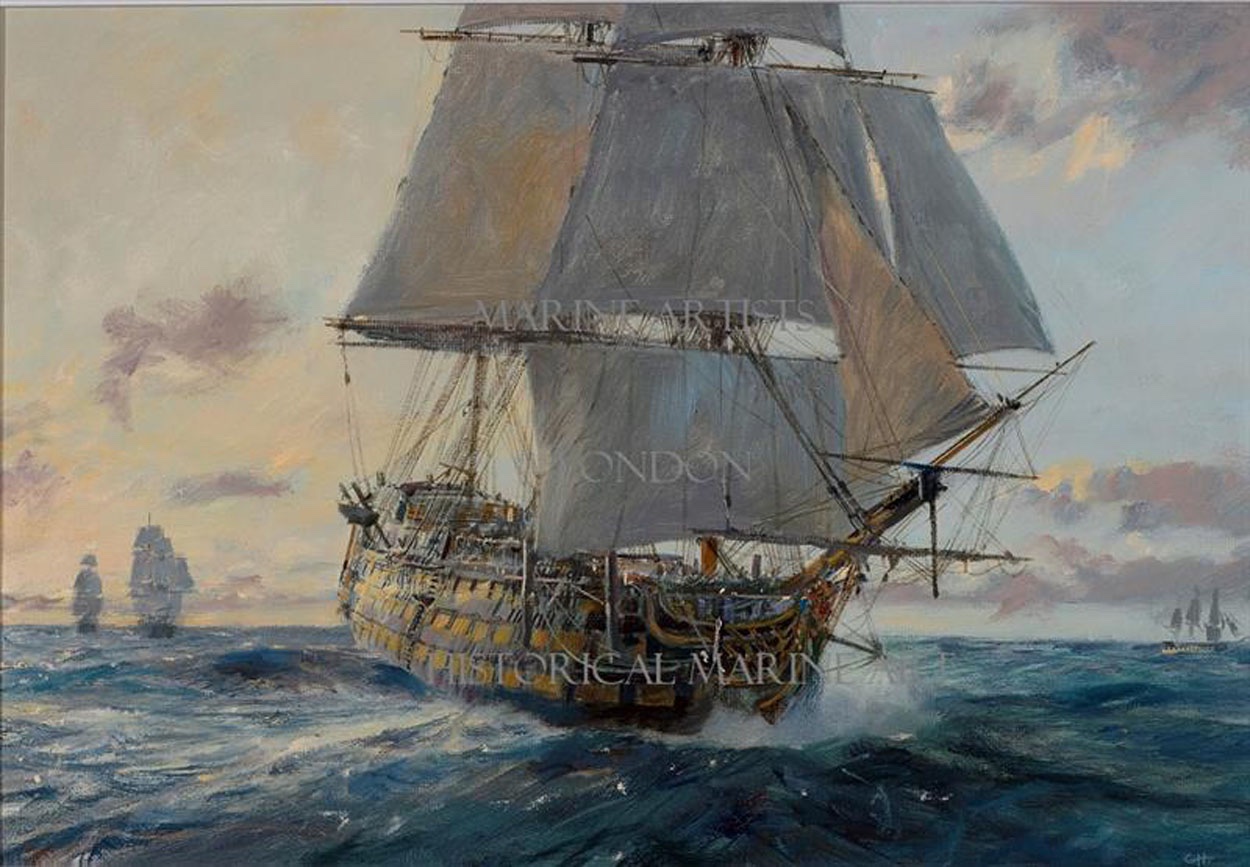
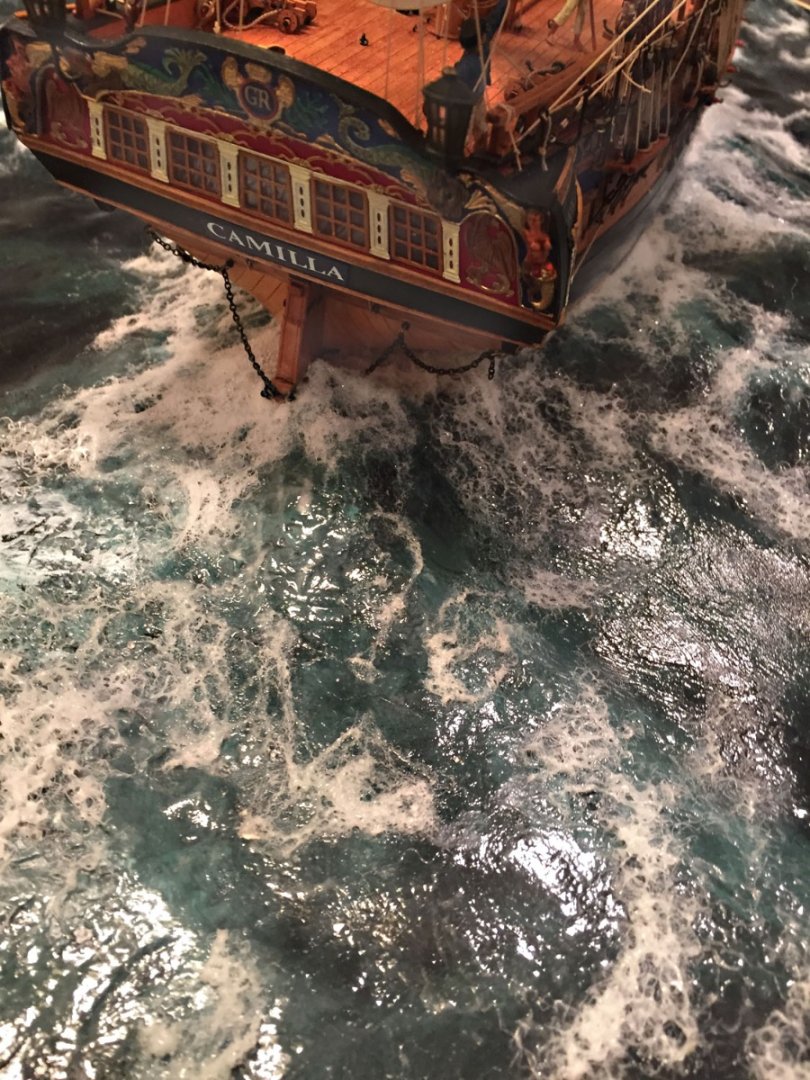
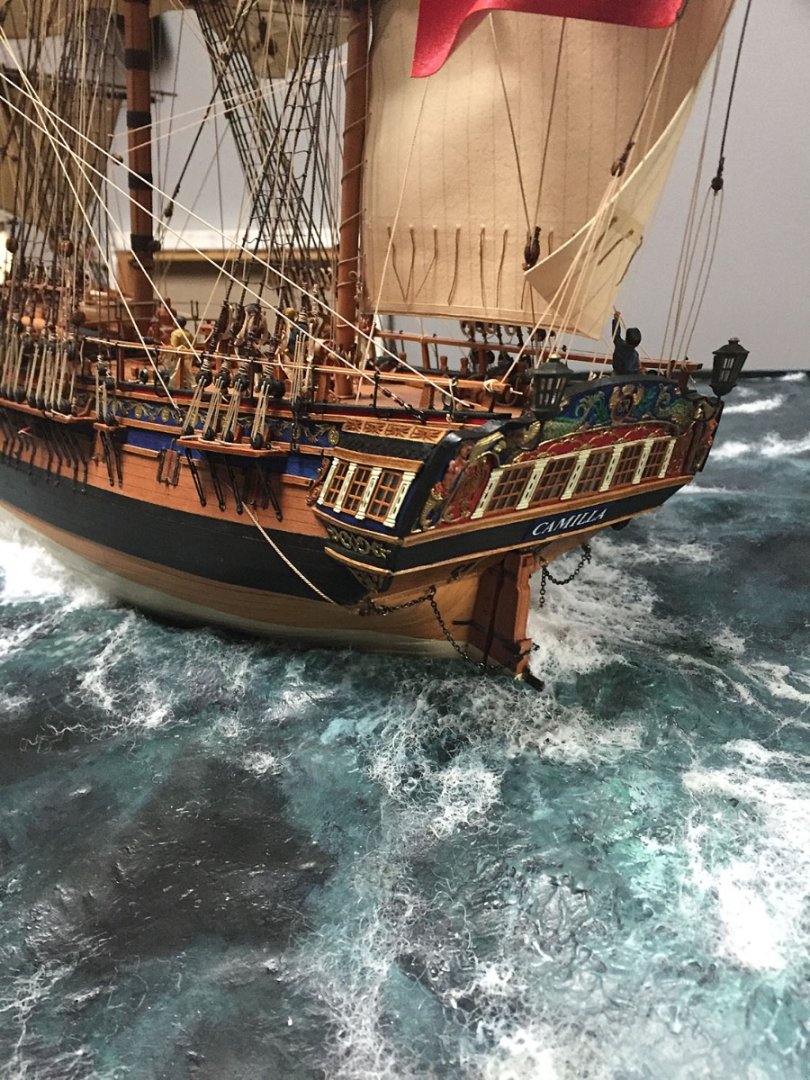
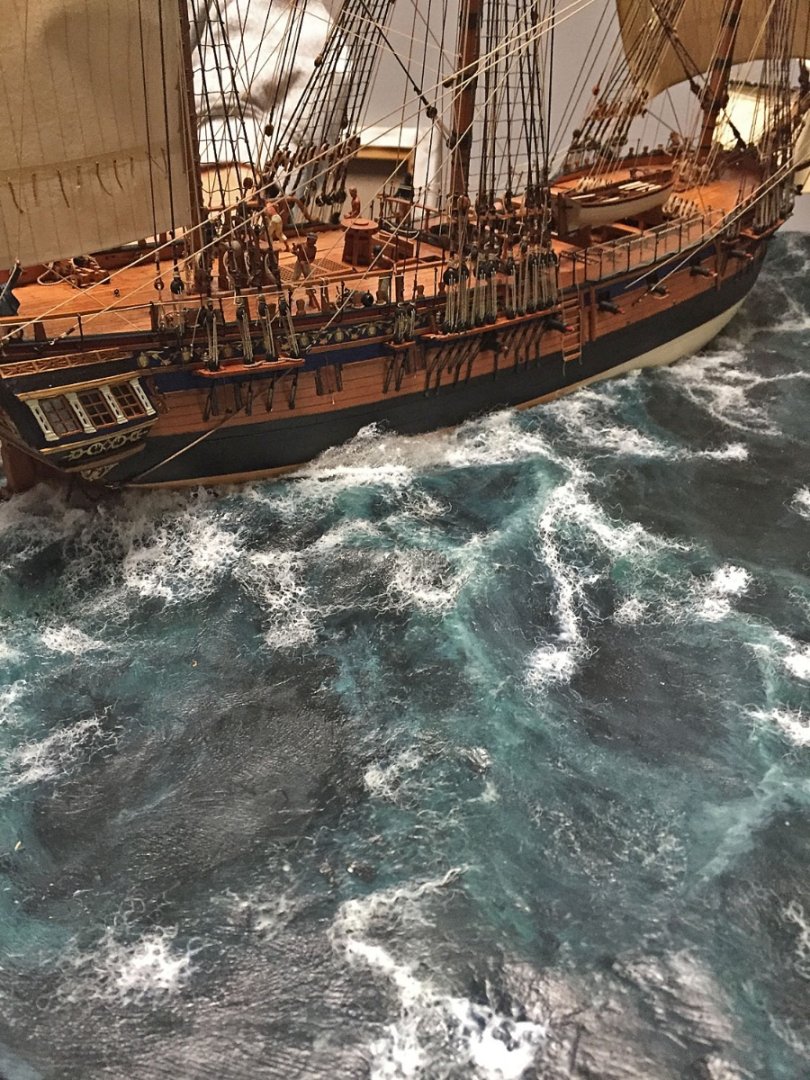
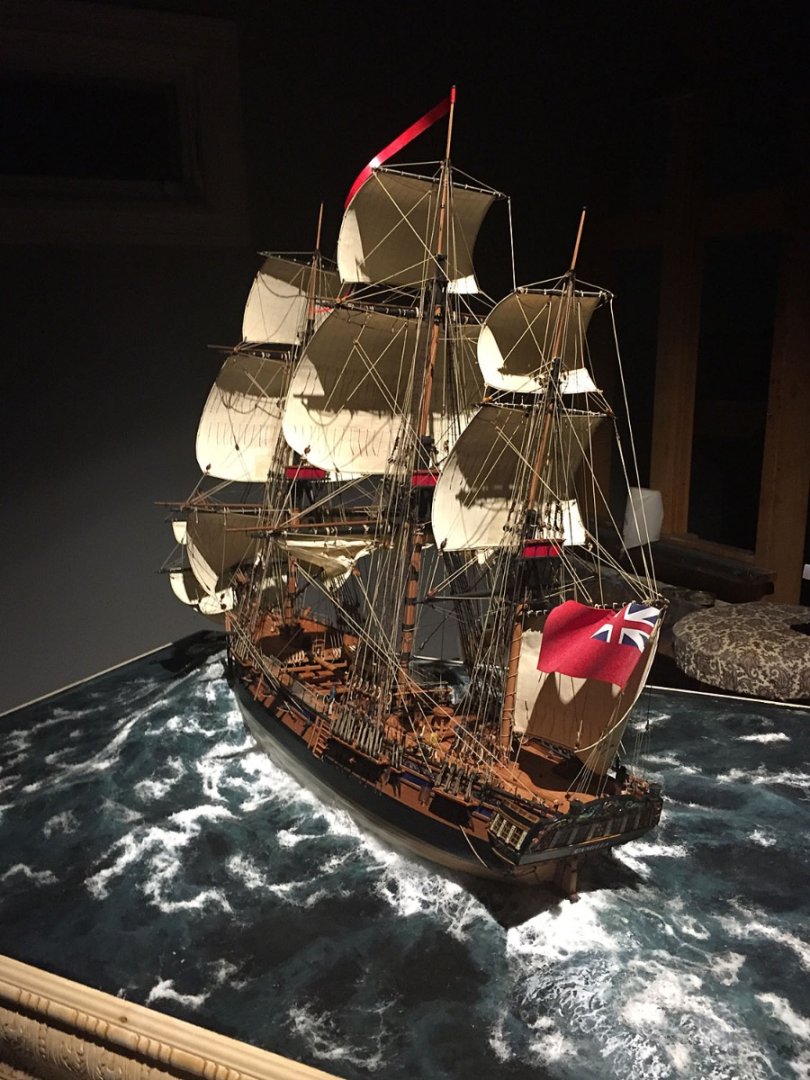
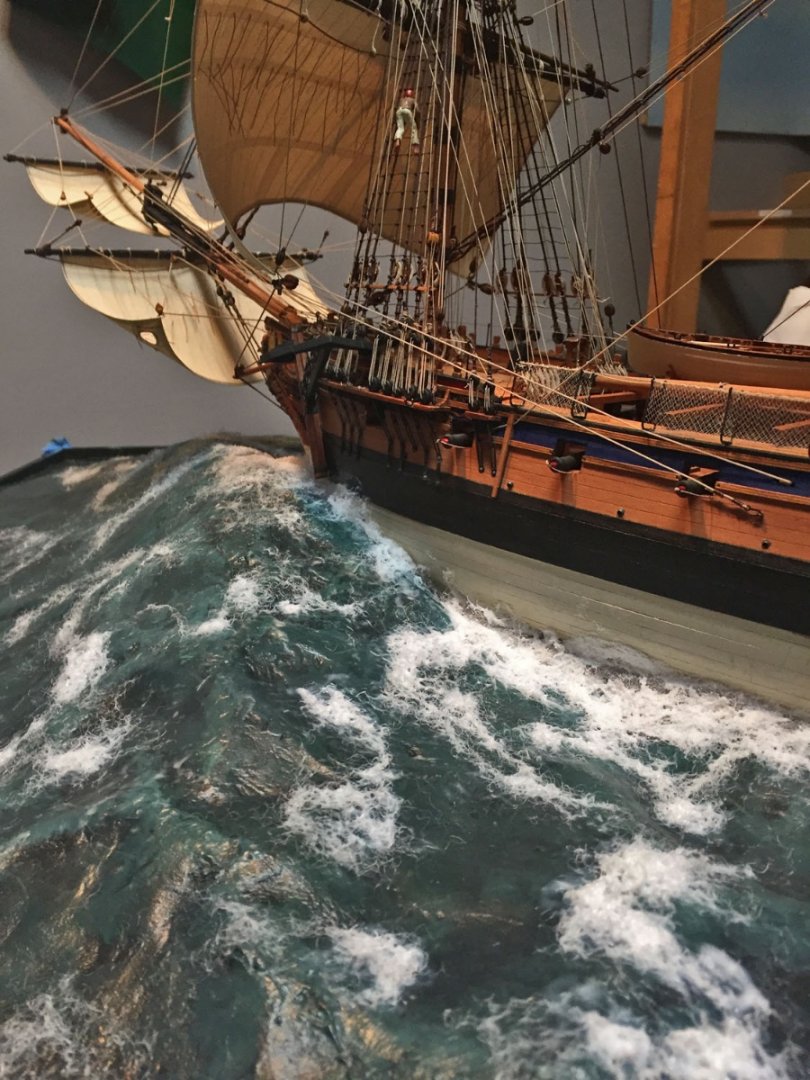
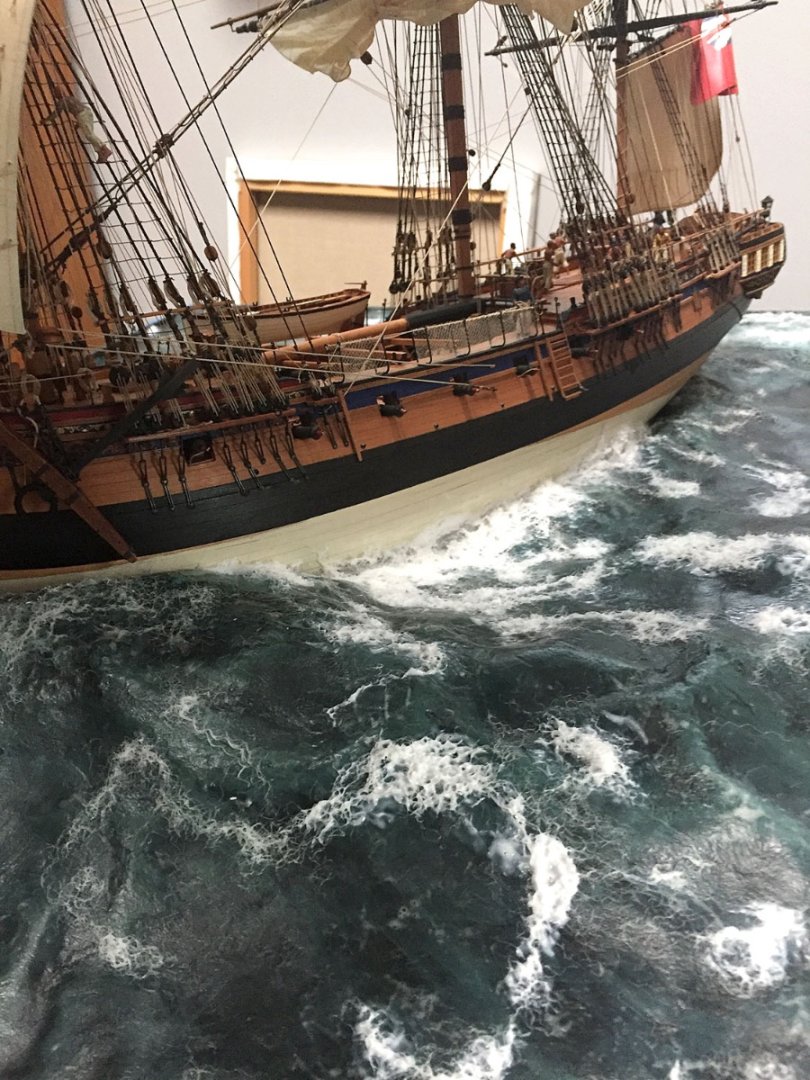
For those who have been following my diorama water creation, here are the two most important references I used to determine the color and state of HMS Camilla's seascape: the first graphic from one of the U.K.'s foremost nautical/maritime painters, Geoff Hunt and the second, an iStock photo searched online. Here, my inspiration was the size of the waves and the stem/cutwater spray at her head…this is a "three-decker"; I imagined what this sea would look like battering a small frigate. And here, the predominant inky green color and the roiled sea surface from confusing winds for inspiration. Note the weather in the sky...a squall in the distance (left). I have gathered a large folder of sea photos and (mostly) 18/19th-C paintings, some contemporary, others legacy; these two graphics were the ones I had in front of me even when I was working on the plaster surface of the aluminum/cotton ShaperSheet forms. My sincere Thank You's to @DARIVS ARCHITECTVS @James G @Nipper @shipman @Thukydides @Paul Le Wol @druxey @chris watton @VTHokiEE @CaptnBirdseye & @Trussben for your generous comments. -------- I am tentatively scheduled to do a narrated NRG Online Workshop on diorama making early next year. I plan to post an outline of the content in advance that will include examining my previous model diorama builds as well as different materials and techniques from others. Per previous online Workshops, this will be free for NRG Members.
- 542 replies
-
- 20
-
-
- Sphinx
- Vanguard Models
- (and 3 more)
-
It's amazing how much detail Chris can design into his 3D prints! ....look'n at you @Blue Ensign ...& @chris watton & @dvm27& @BenD& @mugje

- 488 replies
-
- 26
-
-
-
- Indefatigable
- Vanguard Models
- (and 1 more)
-
Those nicely painted stern figures are the BOMB…but there’s something fishy in that workshop.
-
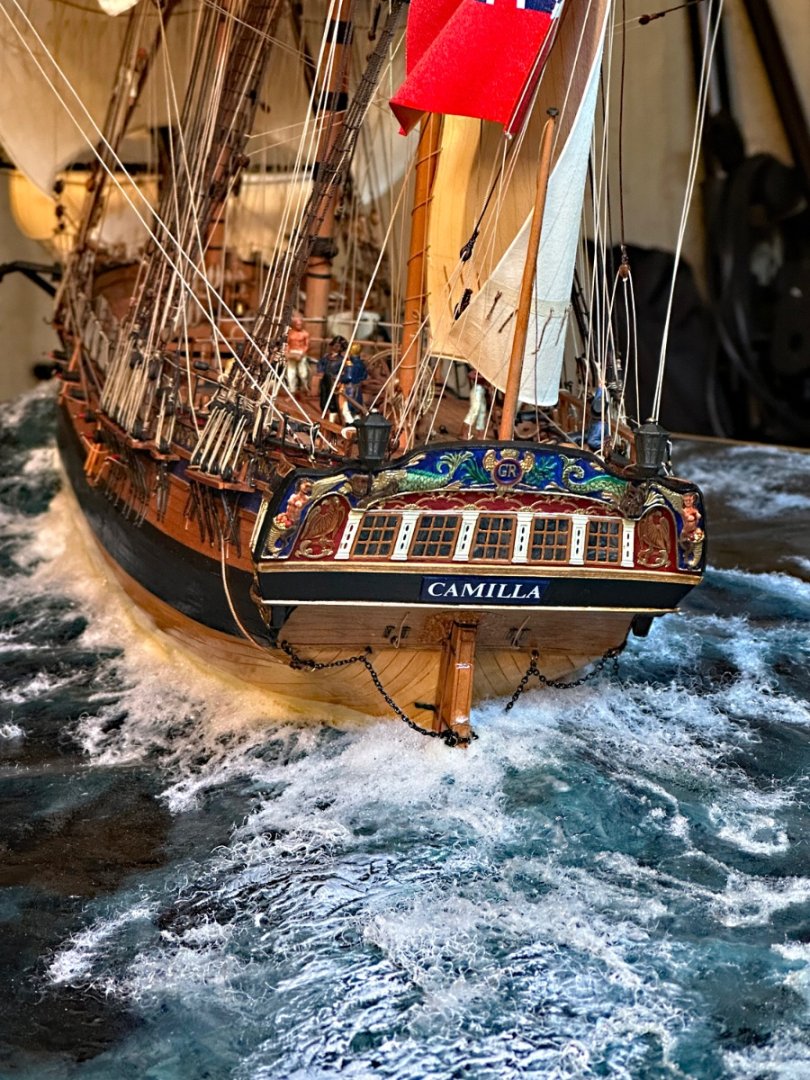
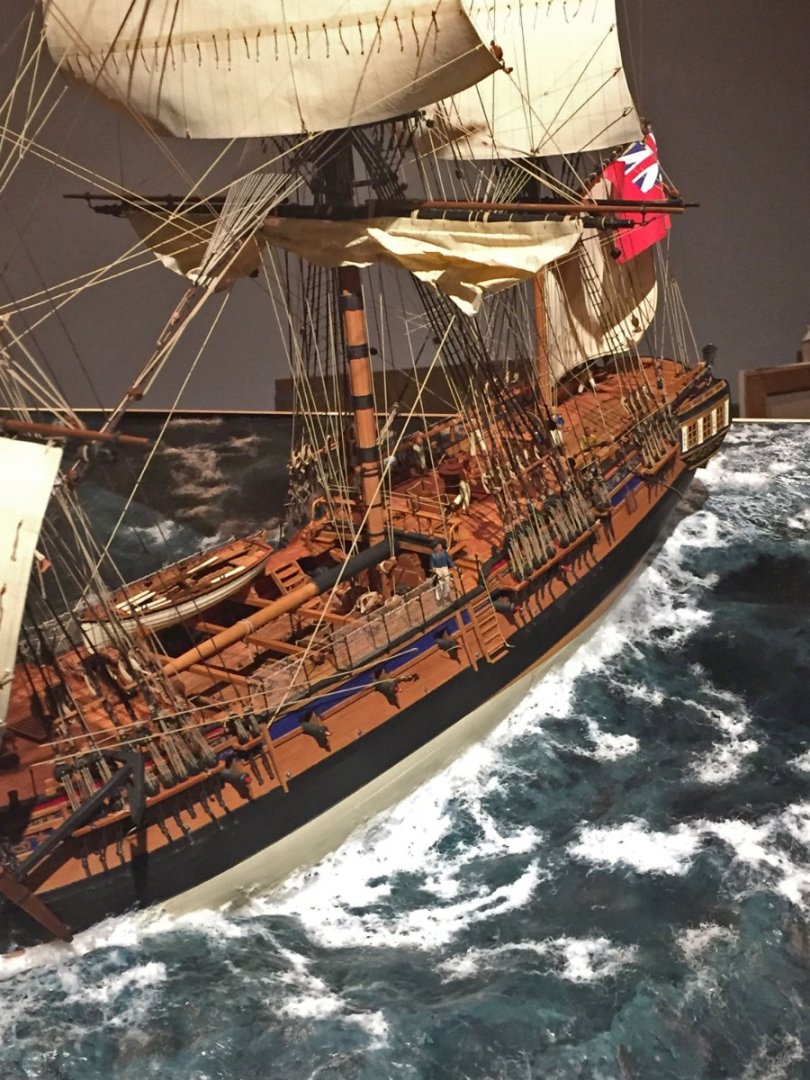
HMS Camilla: The Way Of Water Here is what happens when a final coating of High Gloss Acrylic Varnish is applied across the water surface. I also added gloss varnish below the scuppers to indicate wetness along the hull from water pouring from them. This type of detail will show-up better when I shoot studio photos with a DSLR. I've also applied a liberal amount of the gloss varnish along the model's hull, up and over one wale, as well as splash areas at the stern tuck and even on the lower spritsail. I've chosen a stain color for the embellished casework: pecan (MinWax). I did a rub-on trial with this color stain and I believe two coats will achieve a warm, complementary appearance that accents the model's warm pear wood hues. I'm holding-off on its application for awhile; I'll post photos later.


- 542 replies
-
- 29
-
-
-
- Sphinx
- Vanguard Models
- (and 3 more)
-
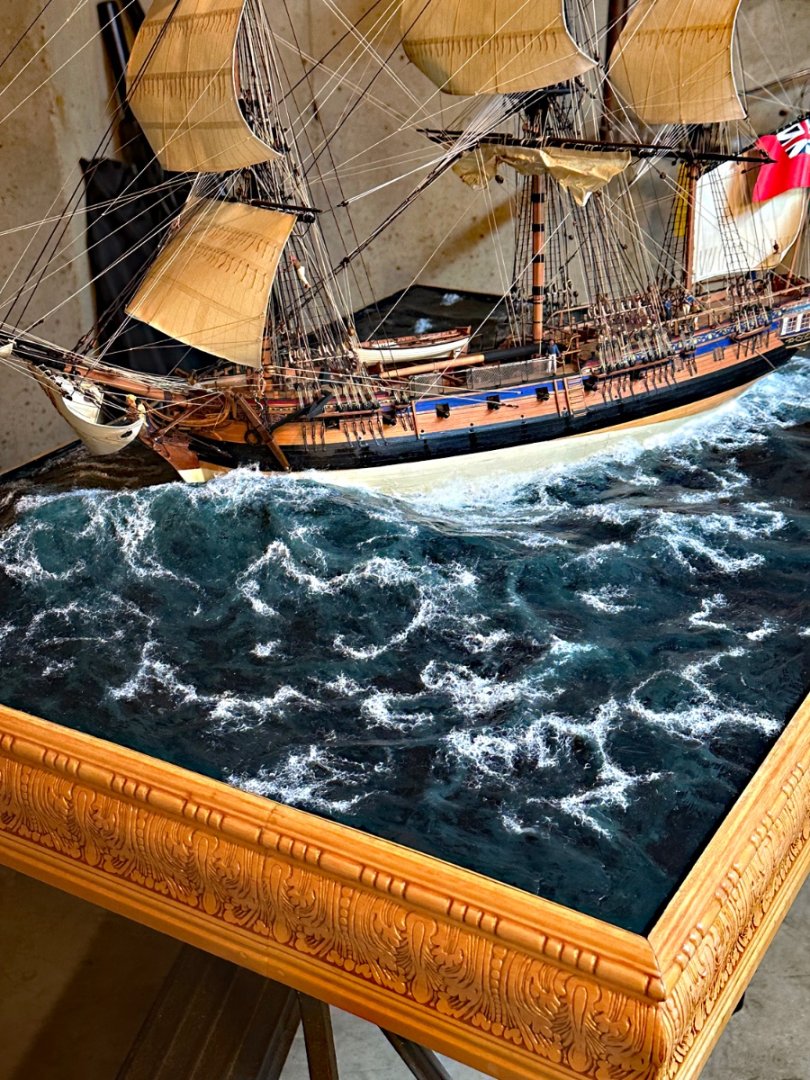
@HardeeHarHar & @TomShipModel A big "Thank You" to you both. Much appreciated. The ship model is finished now that I've added rope lashings to hold the ship's boat securely to Camilla's midships skids and made a few touch-ups, mostly minuscule paint daubs; these additions are not worth a Build Log update. The full diorama also got a final coat of Liquitex High Gloss Varnish (an acrylic) so that the seascape looks very wet now. I'll take a couple photos of how this looks and post them soon. The case will now get some finishing work and then I'll take studio photos to post here in the Gallery. The staining and sealing is dependent somewhat on weather which means it may possibly be a few weeks before this gets accomplished.
- 542 replies
-
- 7
-
-
- Sphinx
- Vanguard Models
- (and 3 more)
-
Unwarranted praise (but I'll take It!) Humbled and a sincere Thank You, Tom. Expect to get wet when looking into the deep end!!🤣
- 542 replies
-
- 5
-
-
- Sphinx
- Vanguard Models
- (and 3 more)
-
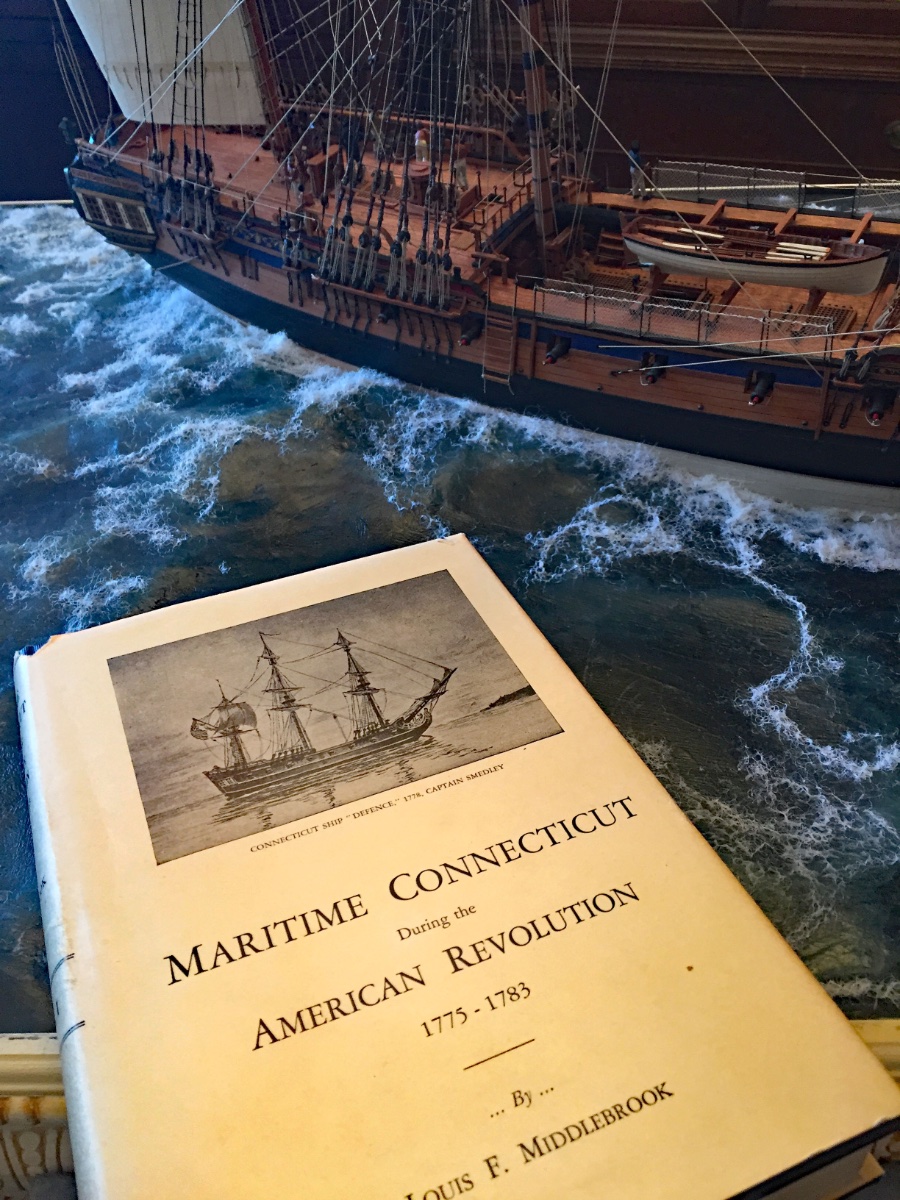
On the first page of this Build Log I posted a terse description of HMS Camilla's history with a portrait painting of the frigate. The most notable fact about this warship is the extraordinary length of her service for England and the detailed history of extensive prize captures under nearly all of her commanding officers: nearly 55 years of service in the British/American War (American Revolution), the French Revolutionary Wars and the Napoleonic Wars. She was sold in 1831, presumed to be broken up shortly thereafter. I recently came across a lengthy history that revealed a little of the fascinating background for HMS Camilla's early service, including being the flagship for the "Commander of His Majesty's Ships & Vessels in North America." (1779). I found this detail and an additional wealth of information about Connecticut's early involvement in the American Revolution in a two-volume set of books published in 1925: Maritime Connecticut During The American Revolution pictured here. I purchased the set several years ago when my home was in Connecticut. While doing some casual research about my early choice to build this Sphinx Class (10 ships) model from Vanguard, I came across additional history, the facts of which I hadn't been aware until the model was nearly completed. For those who may be interested in this ship's history, I've excerpted some interesting historical background below. In addition to completing the finish to my model's casework, I'll make an appropriate nameplate as I've done for nearly all my recent models in dioramas. I'm contemplating the following title: HMS Camilla Leaving Spithead, bearing West, So’west for North America August, 1776 Here is a short, but fascinating summary relating to this possible nameplate choice for the model's identity. Upon commissioning (May, 1776) she made her maiden voyage to North America (Boston) to patrol the troubled Massachusetts colony waters; three years later into the deeper, evolving conflicts in North America, HMS Camilla found herself in shallower waters of Long Island Sound, in a slightly different wartime footing, as follows (information in the first of the dual volume history, from a Connecticut Broadside, a "newspaper" of the era): An Address to the Inhabitants of Connecticut Given on board his Majesty’s ship HMS Camilla in the Sound, July 4, 1779 by Commodore Sir George Collier, Commander of his Majesty’s Ships and Vessels in North America. “The ungenerous and wanton insurrection against the sovereignty of Great Britain, into which this colony has been deluded by the artifices of designing men for private purposes might well justify in you every fear which conscious guilt could form respecting the intentions of the present armament”… Collier continues: …“Why then will you persist in a ruinous and ill judged resistance? We hoped that you would recover from the phrenzy which has distracted this unhappy country; and we believe the day to be now come, when the greater art of this continent begins to blush at their delusion. You who lie so much in our power, afford the most striking monument of our mercy, and therefore ought to set the first example of returning allegiance.”… ----- One day later on July 5th, a sizable force of British troops invaded and pillaged New Haven, CT and continued along the colony’s coastline punishing the rebels. The fleet was manned by a crew of sailors and marines estimated at 2,000 men, and was the largest that had ever entered Long Island Sound. The fleet, afterward employed to transport the British from Newport, Rhode Island to New York, consisted of 110 sailing ships “…passing New Haven by daylight. " "The ships were of light draught, and the largest was the Camilla frigate on which Sir George hoisted his pennant as flagship."

- 542 replies
-
- 16
-
-
- Sphinx
- Vanguard Models
- (and 3 more)
-
Thank You, druxey, much appreciated. Thank You, Tom. Yes, for many years during my professional career I was a graphic designer and photographer.
- 542 replies
-
- 3
-
-
- Sphinx
- Vanguard Models
- (and 3 more)
-
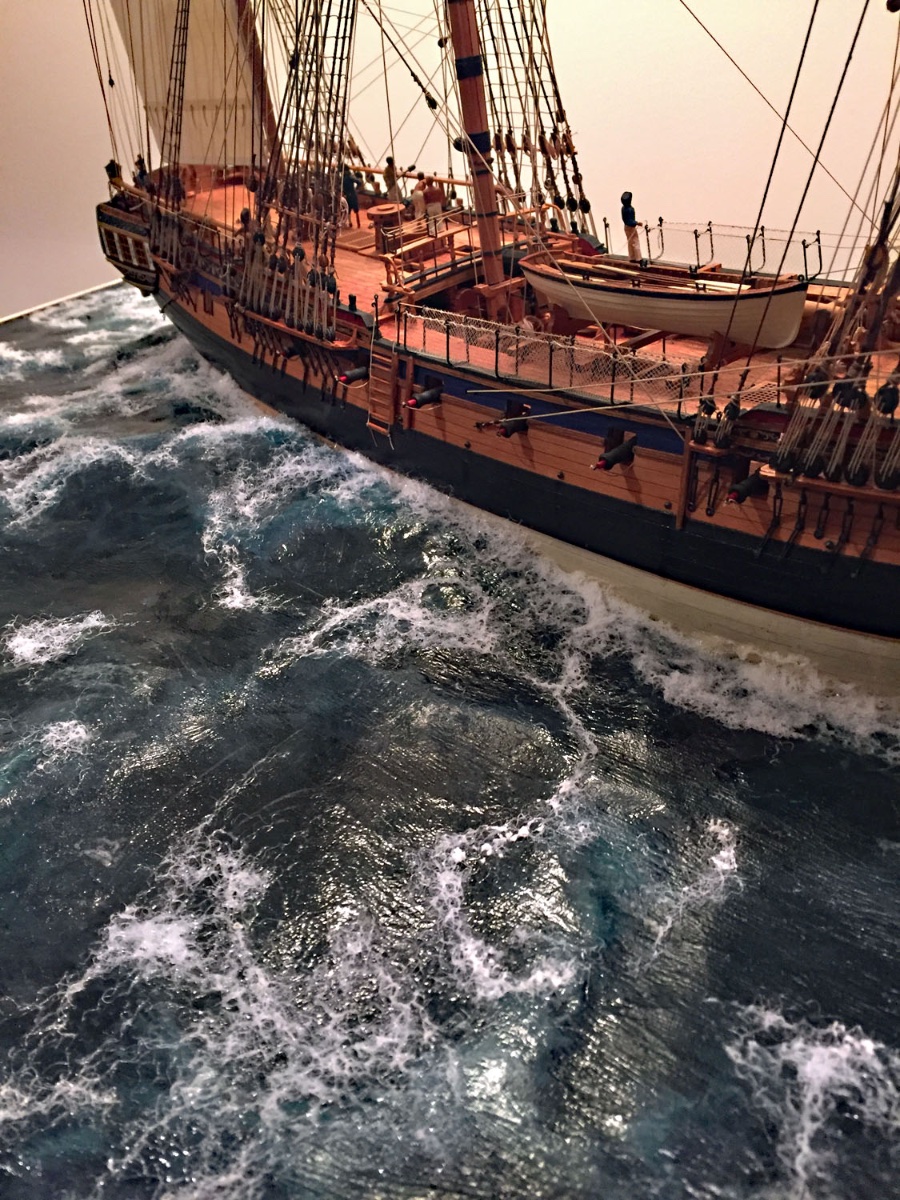
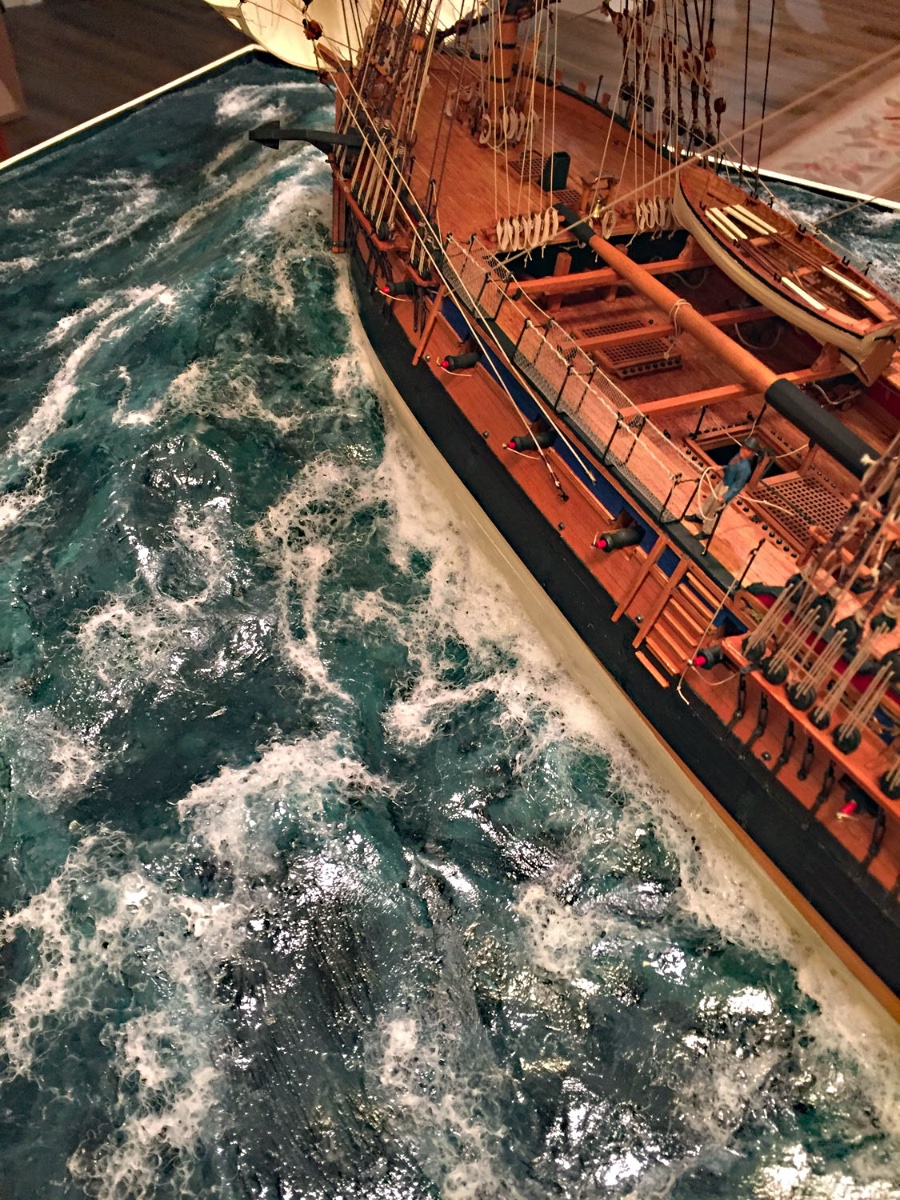
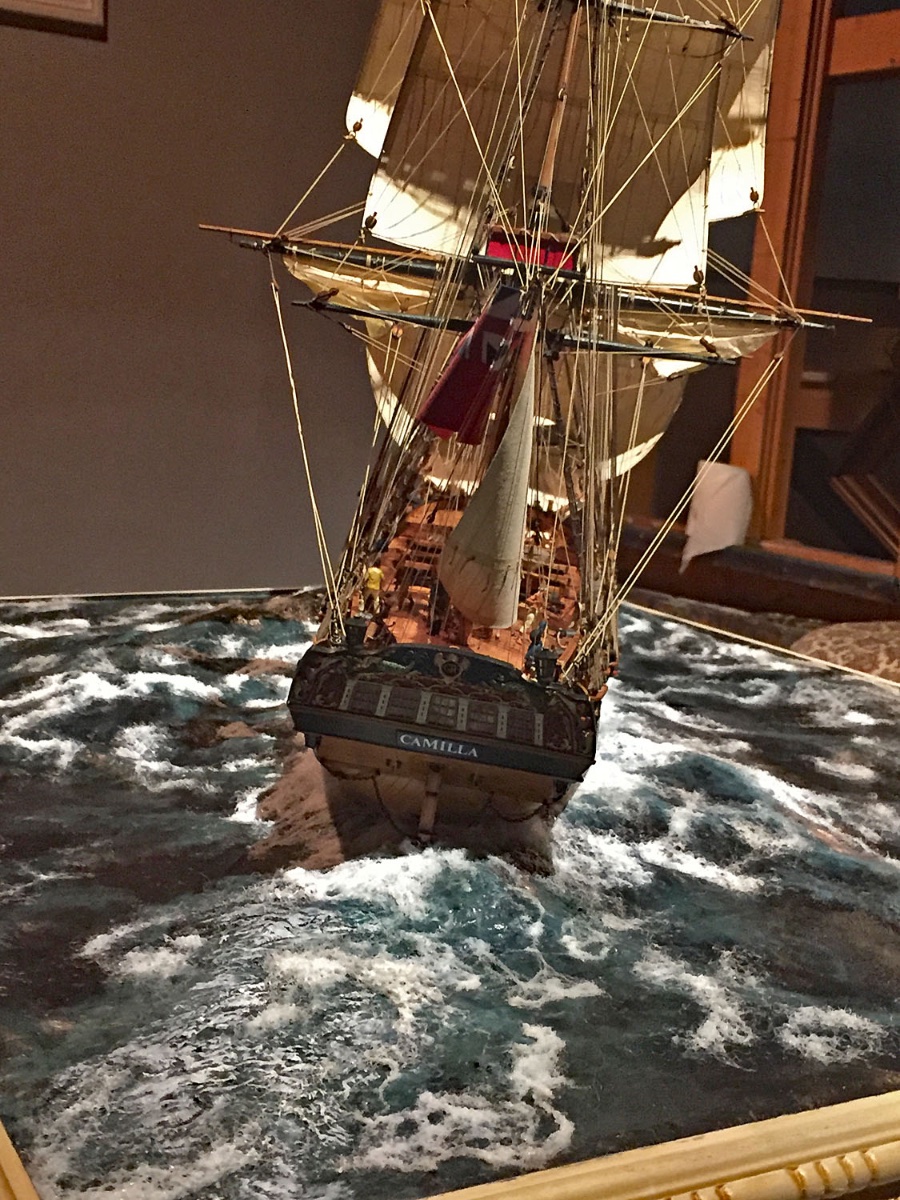
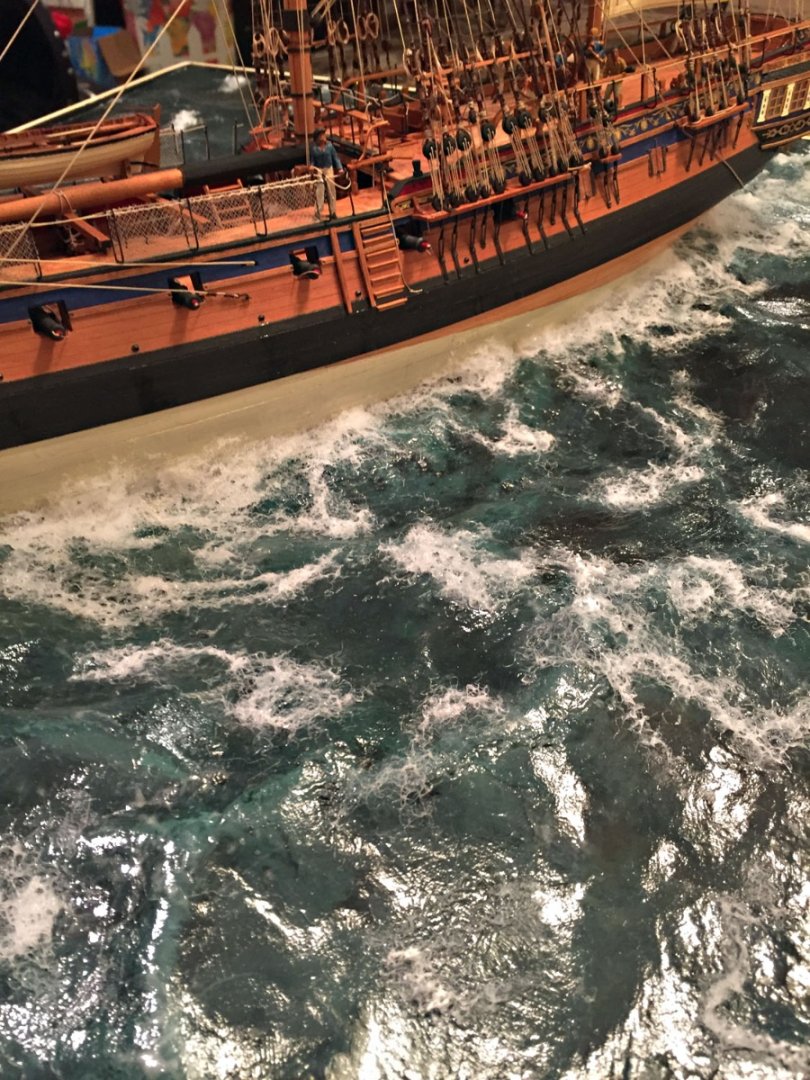
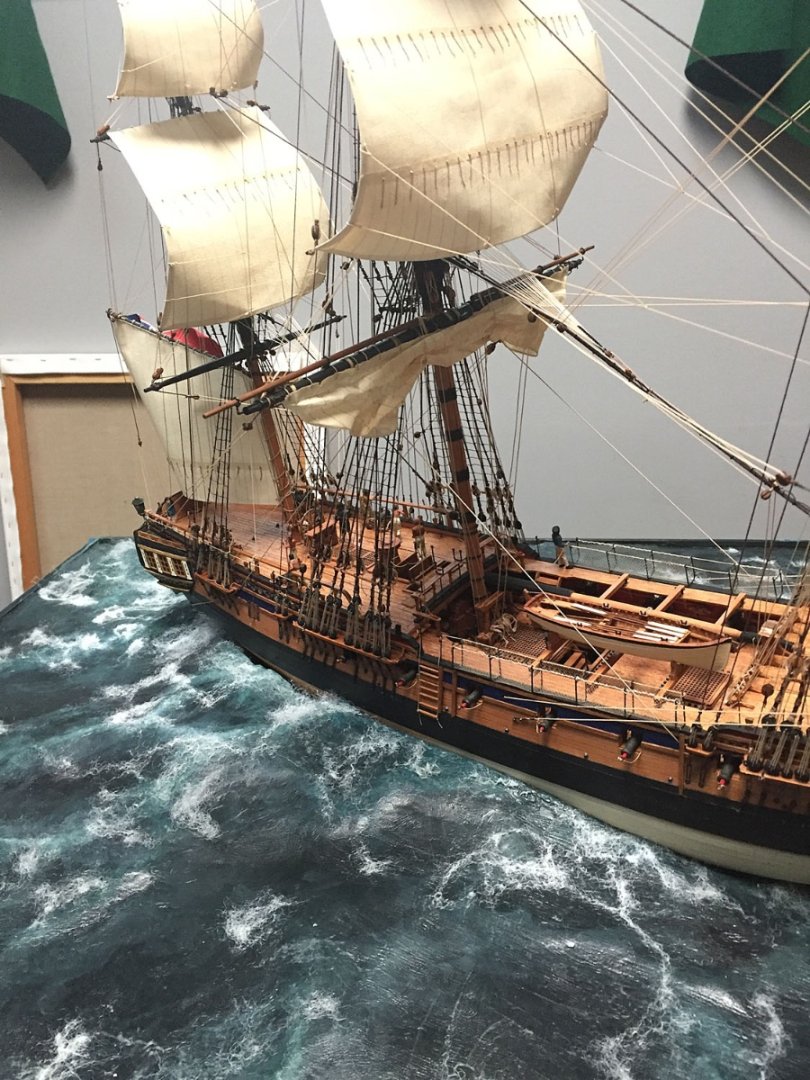
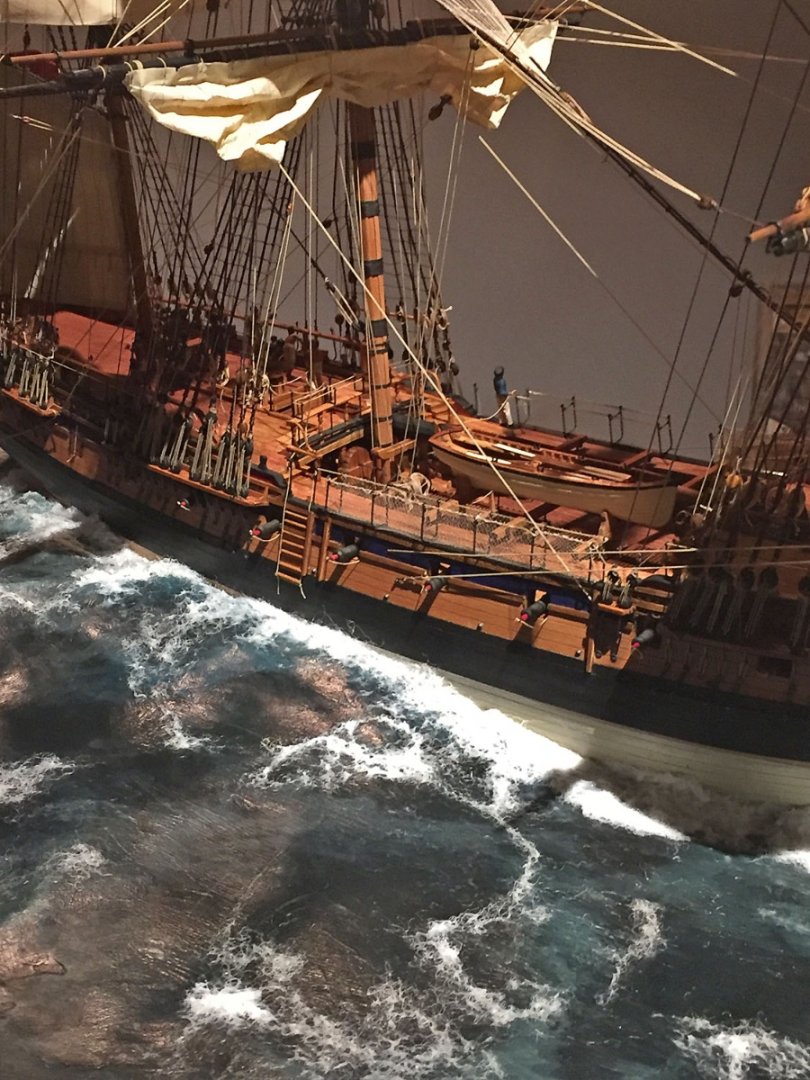
Progress shots of Camilla's starboard and stern waters now complete. First stage for fashioning the stern wake. Completed wake; a good amount of sea foam added to her rudder. This shot shows her prominent list to starboard. Change of lighting; lots o' drama. Water gets very"inky." A higher angle view of her port side (missed this one on the previous post). All the principal water features are complete with only a high gloss acrylic left to apply overall. Time to choose a good, complementary stain for the case.


- 542 replies
-
- 34
-
-
-
- Sphinx
- Vanguard Models
- (and 3 more)
-
@druxey, @mtaylor, @JeffT, @jpalmer1970, @Blue Ensign, @BobG, @AJohnson, @James G, @Bruma, @shipman, @Gahm, @CiscoH, @Glen McGuire, @Nipper, @DelF, @glbarlow, @Landlubber Mike....and @scrubbyj427. Thank You to you all (sometimes spelled "Ya'll)... I am truly humbled by all your comments. I sincerely hope this unique "Group Thank You" suffices. I'll keep getting on with it since there are a few more (nautical) miles to go. I'll also take high-res (properly lighted) DSLR gallery photos when I announce my project's completion. Many of you know this was my first Build Log. To everyone here and those of previous posts who offered their help, advice, hints - and especially encouragement - a very special thanks for your time to look in on my Build.
- 542 replies
-
- 11
-
-
- Sphinx
- Vanguard Models
- (and 3 more)
-
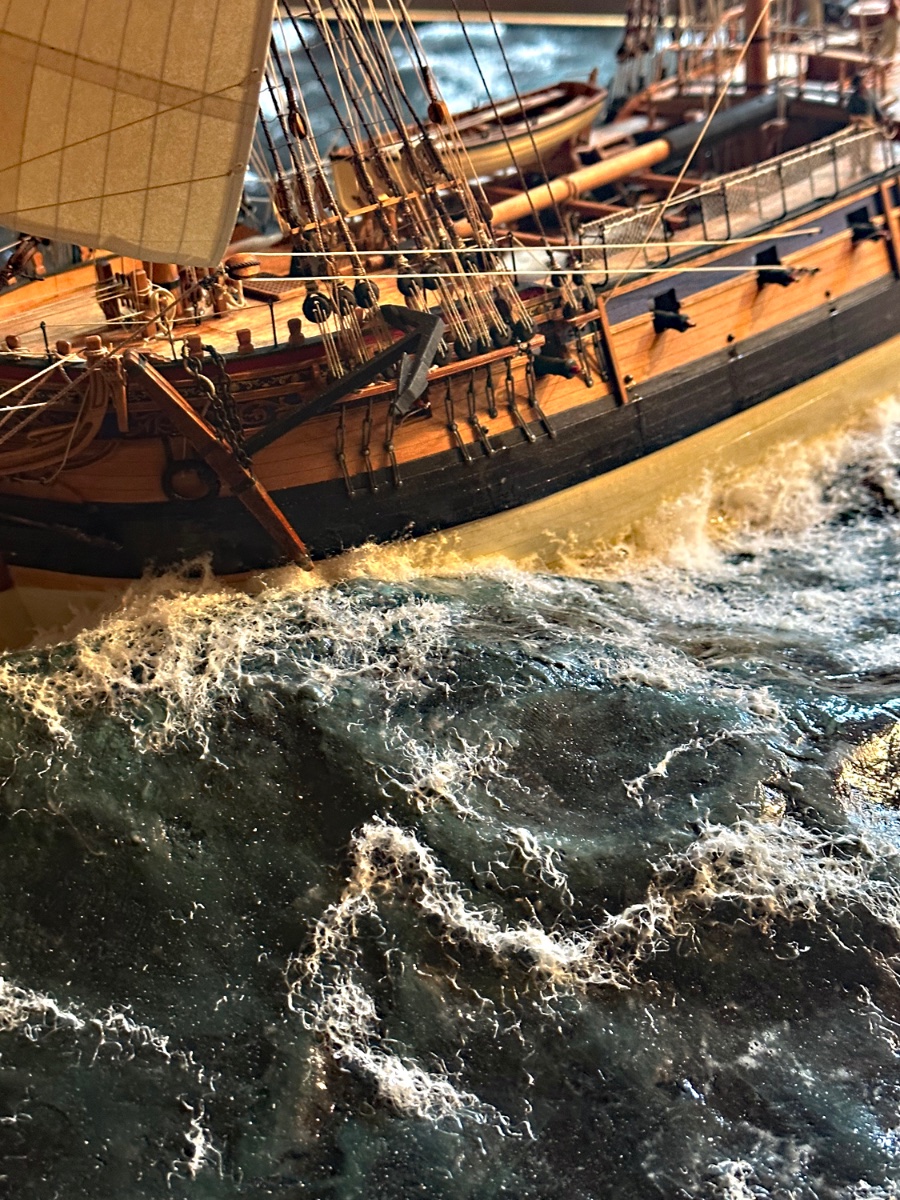
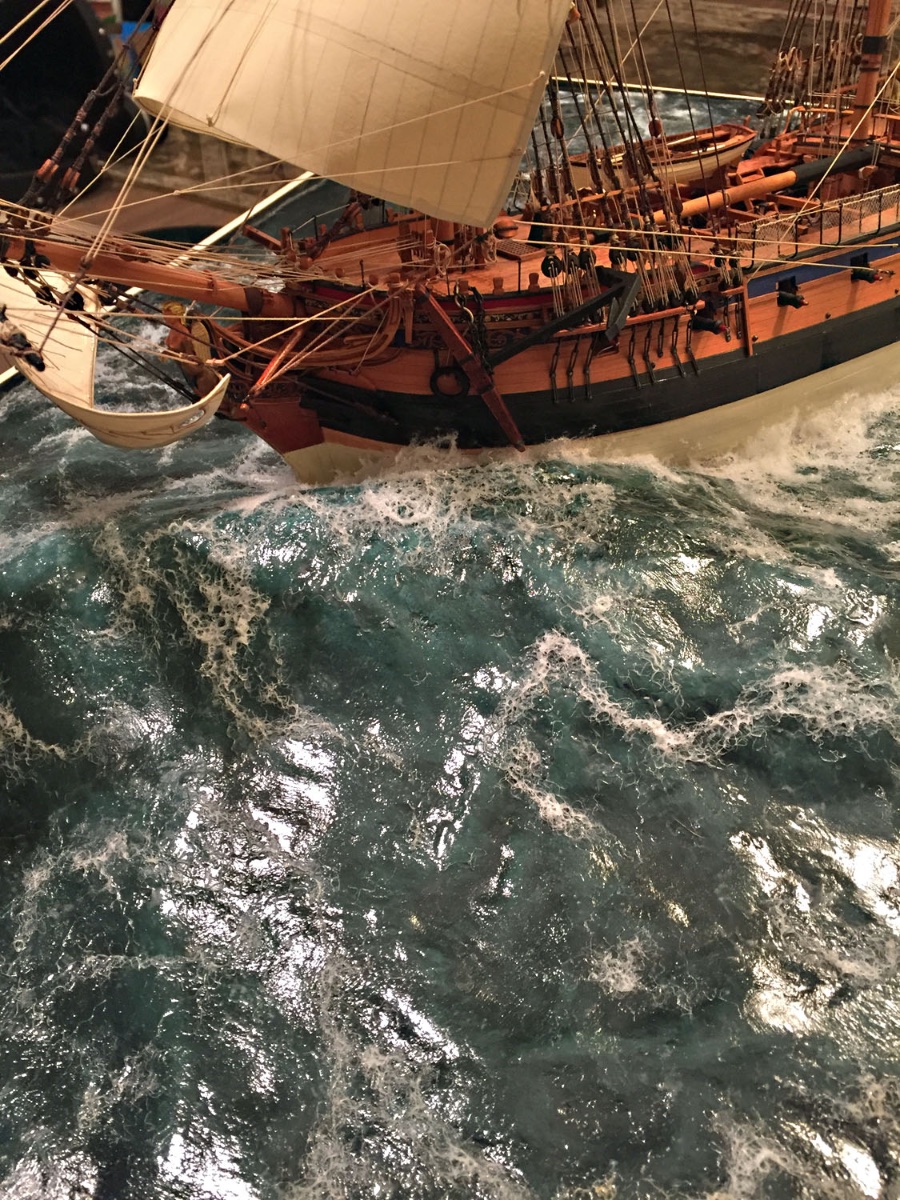
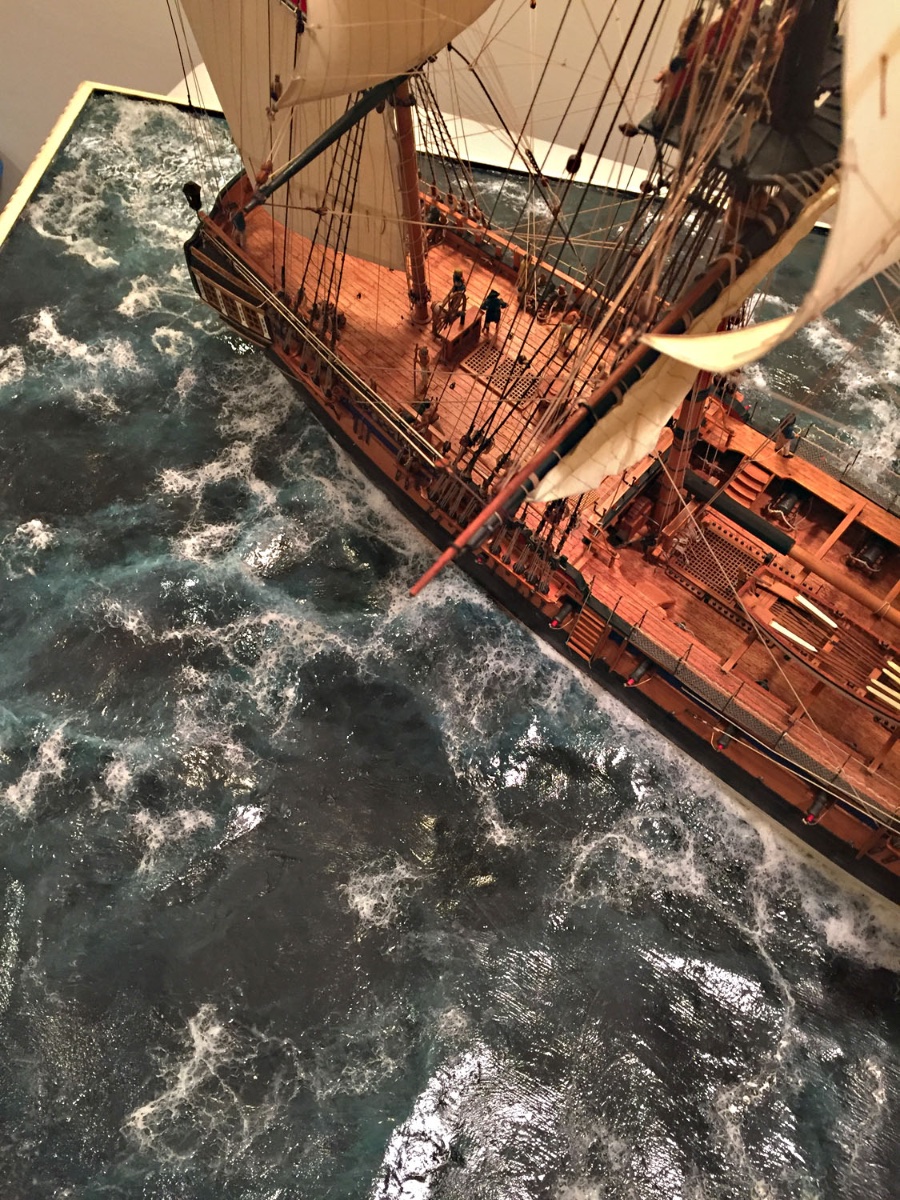
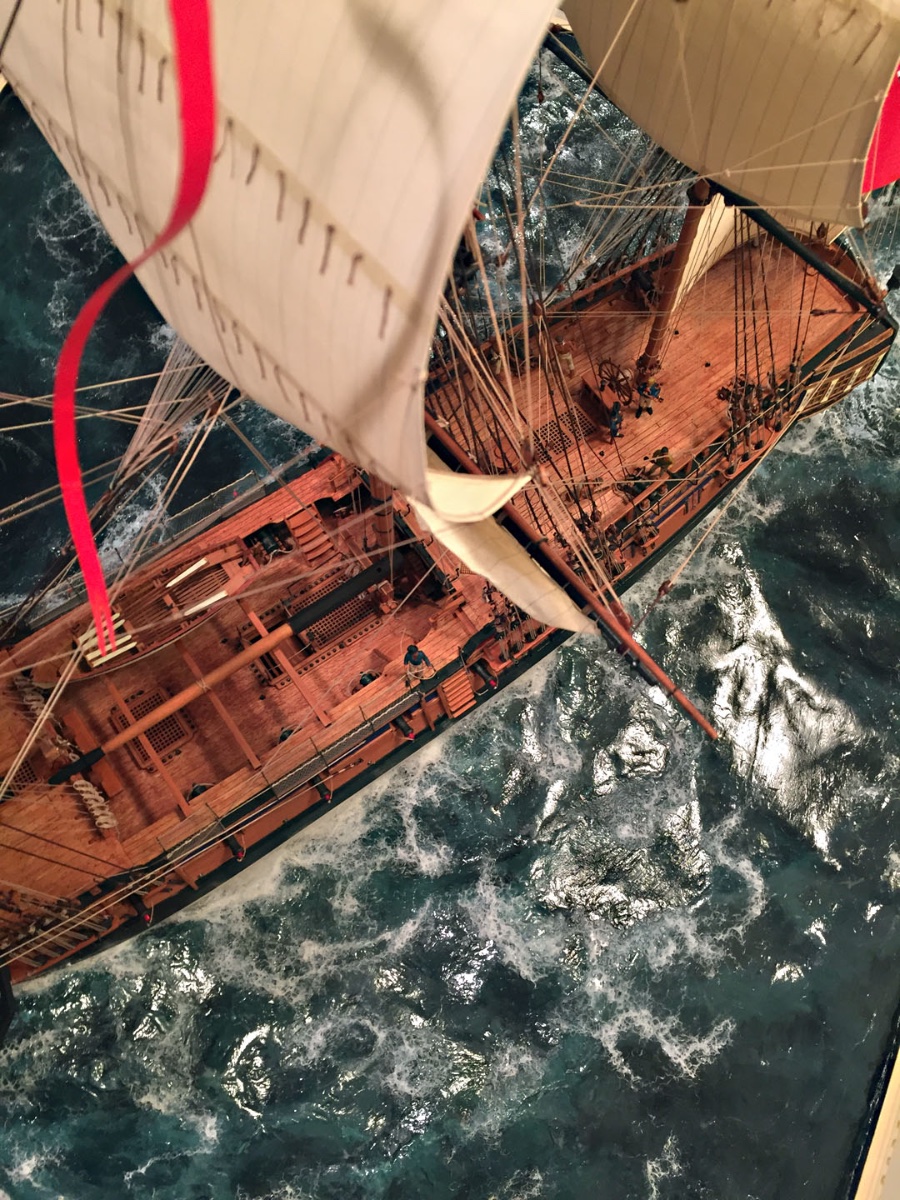
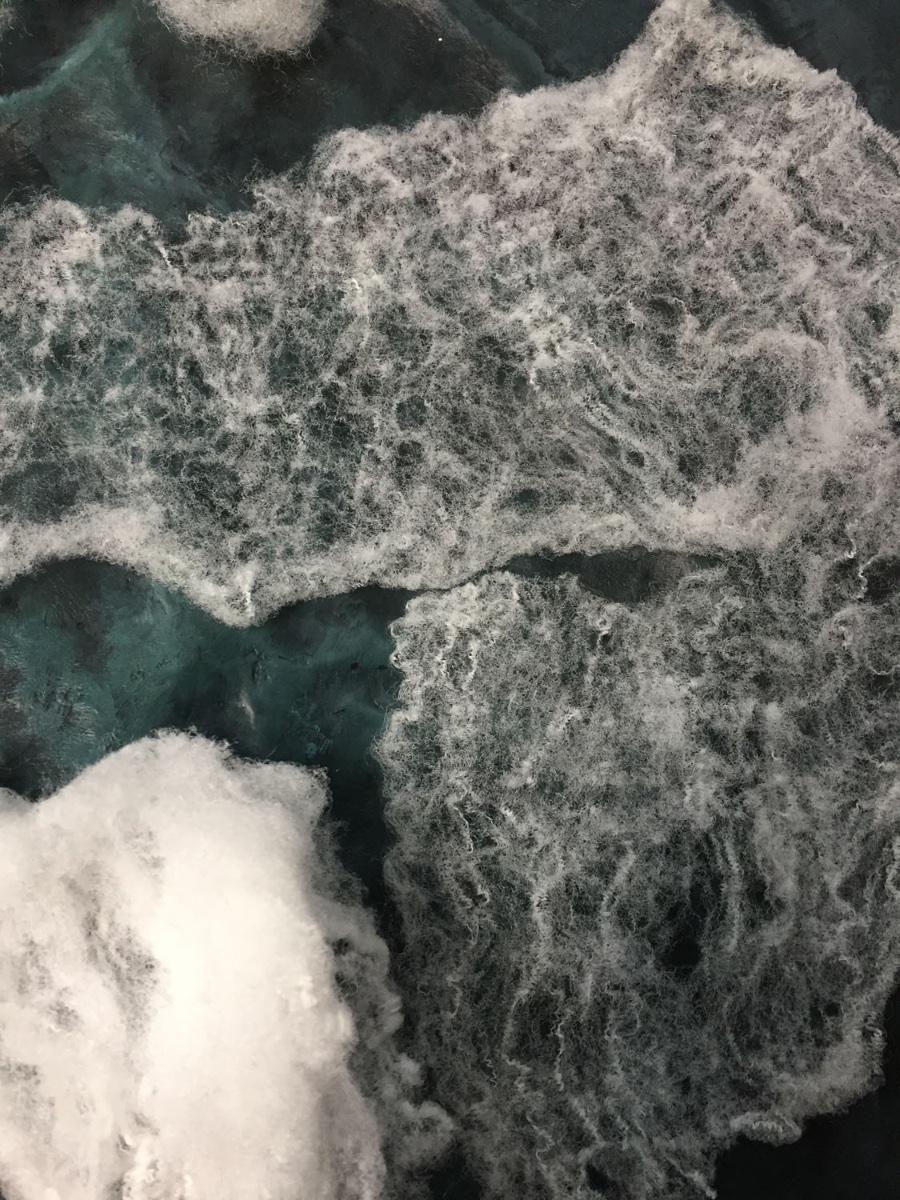
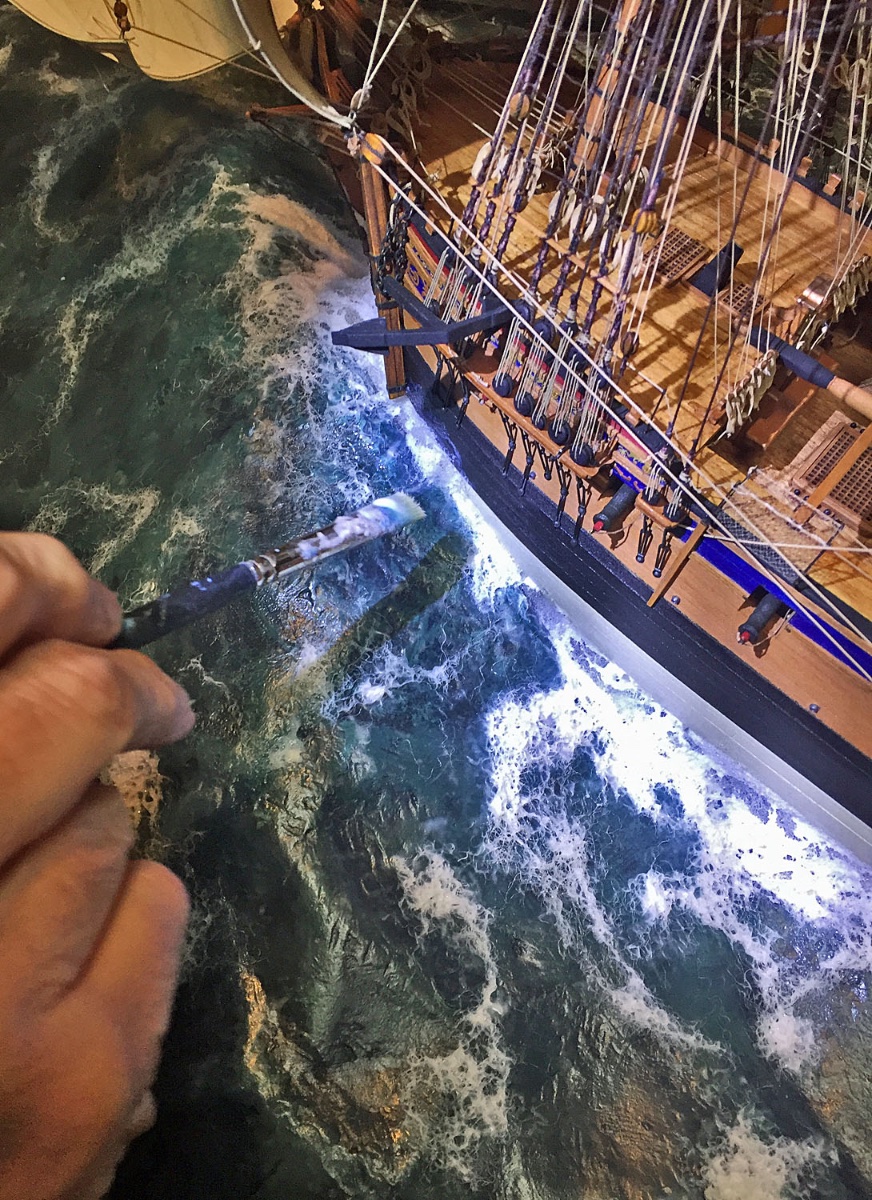
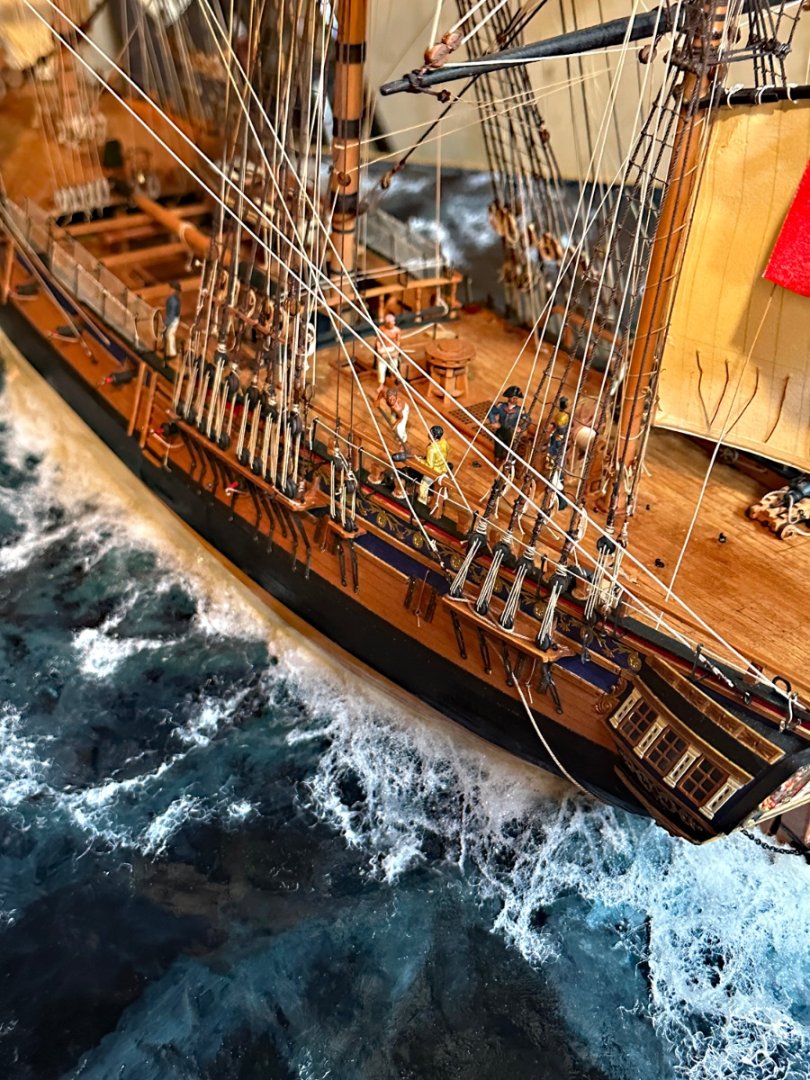
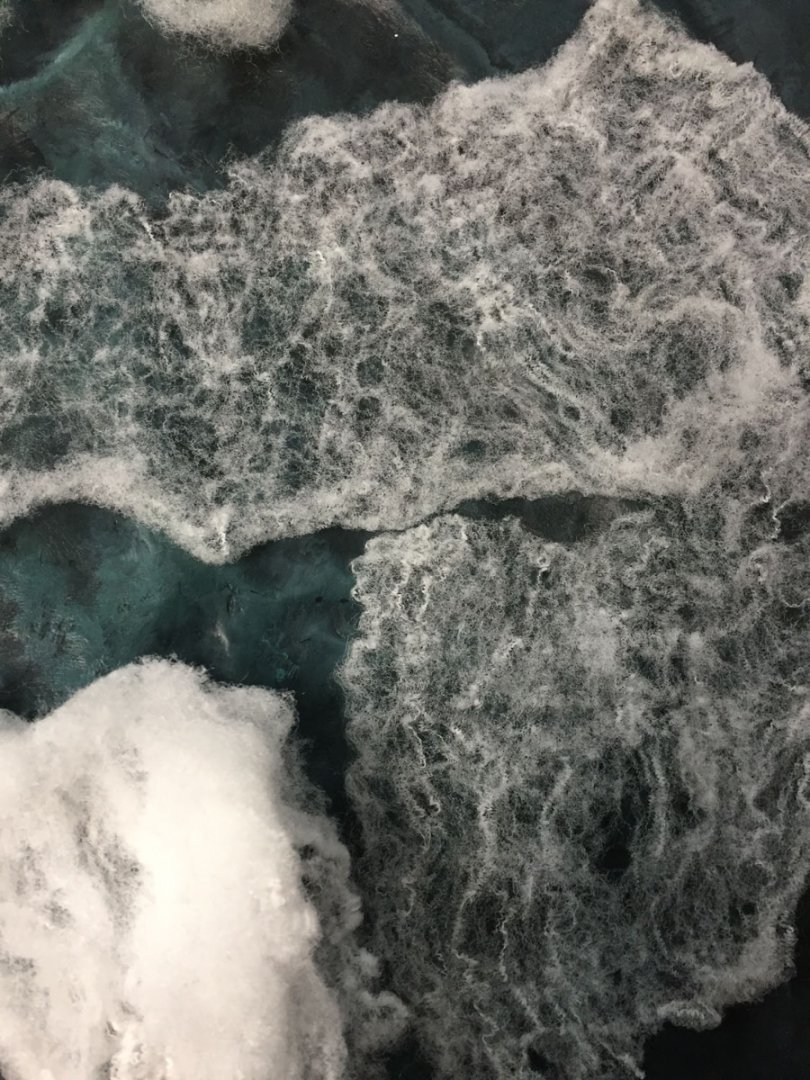
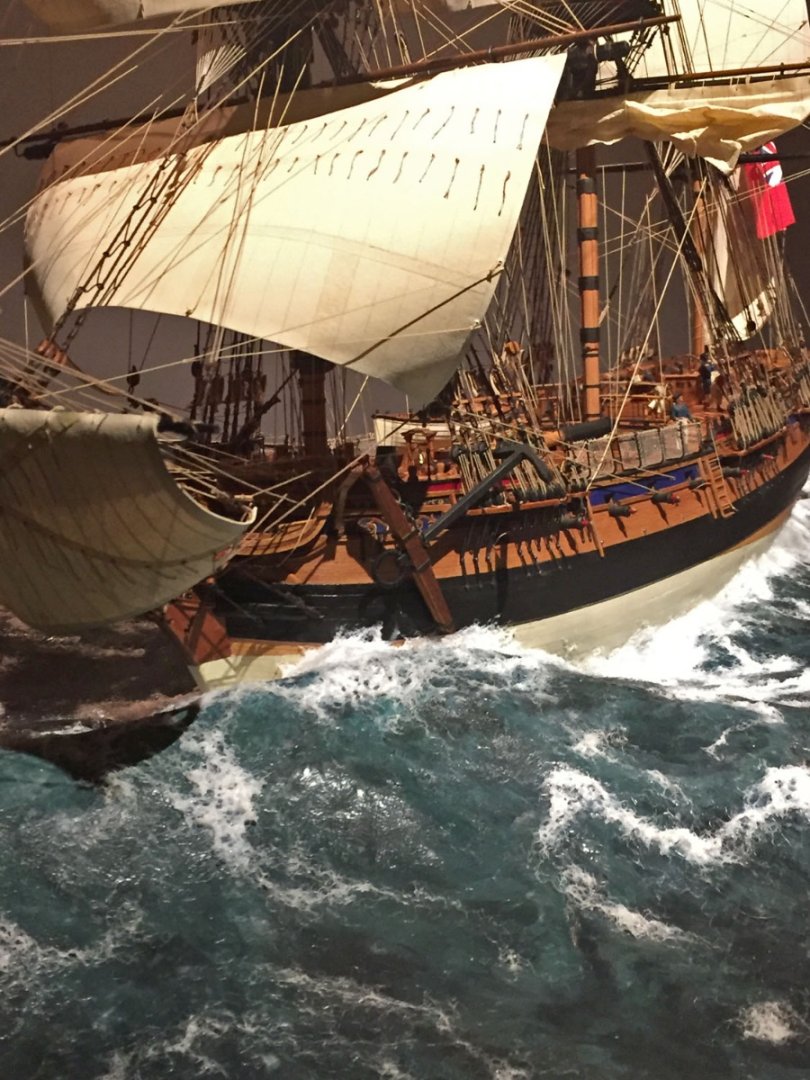
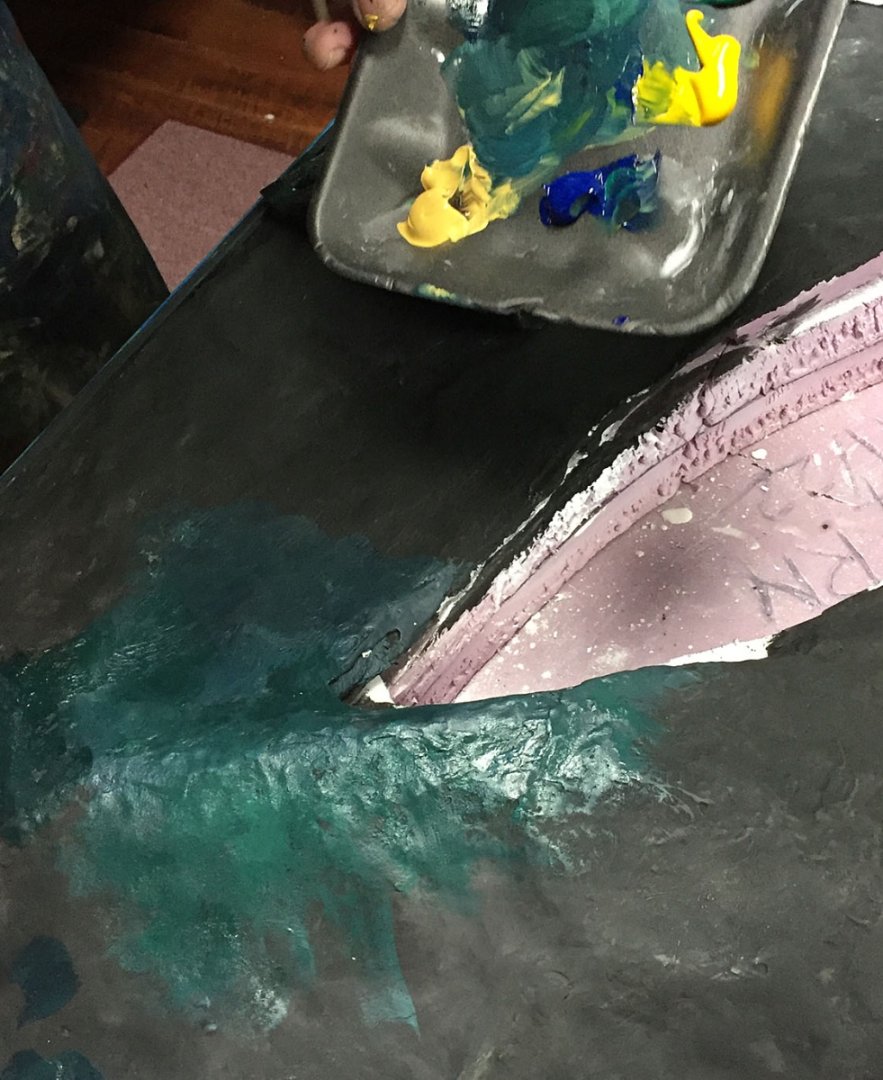
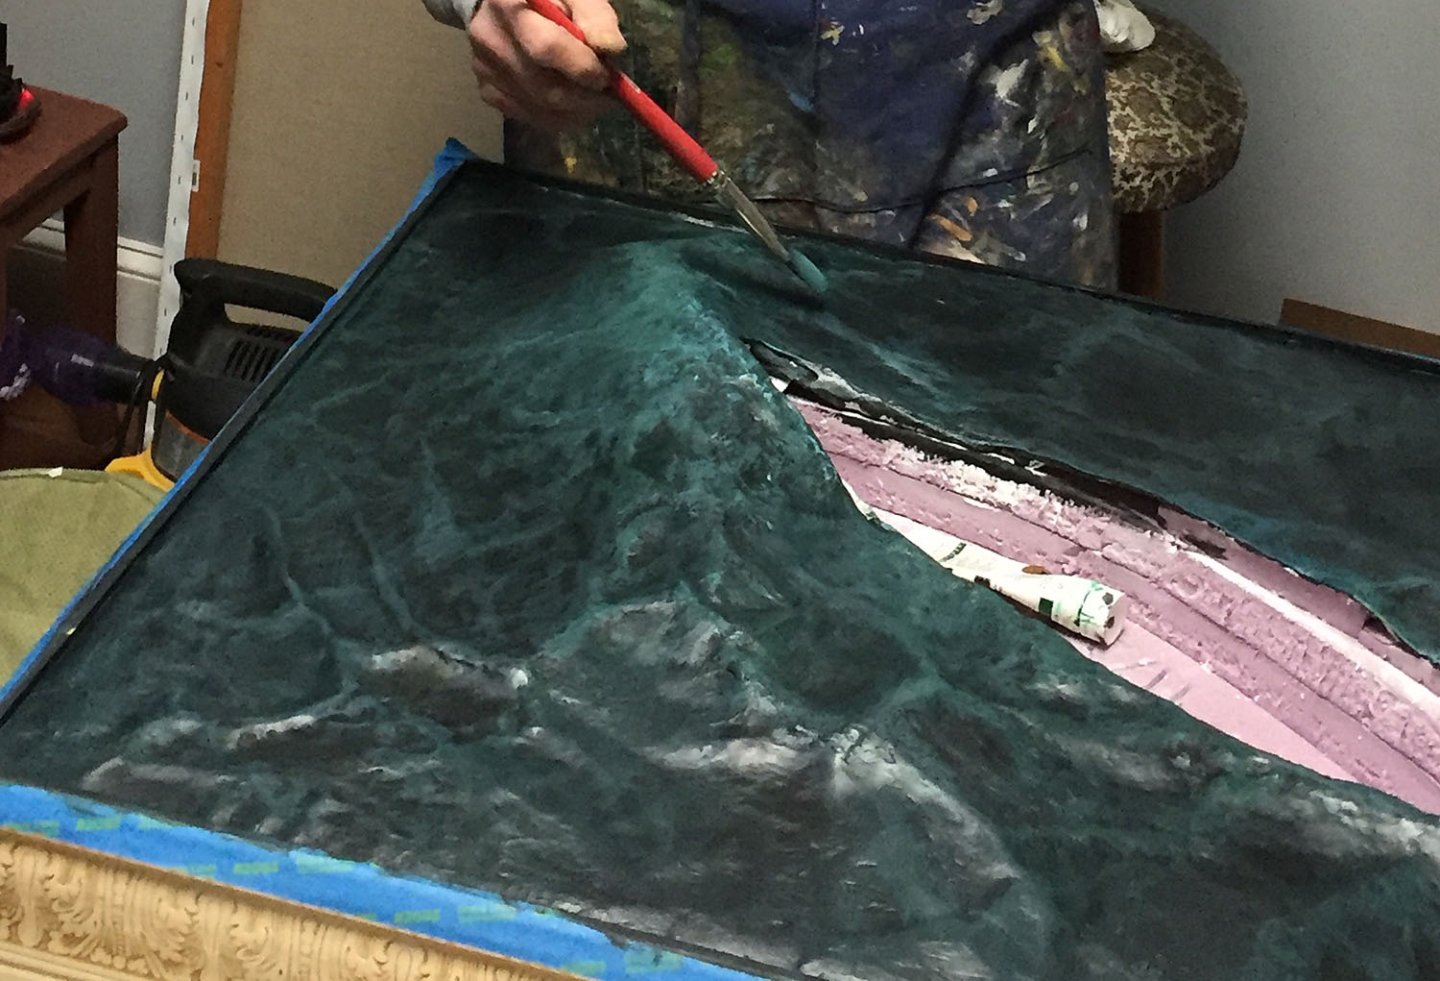
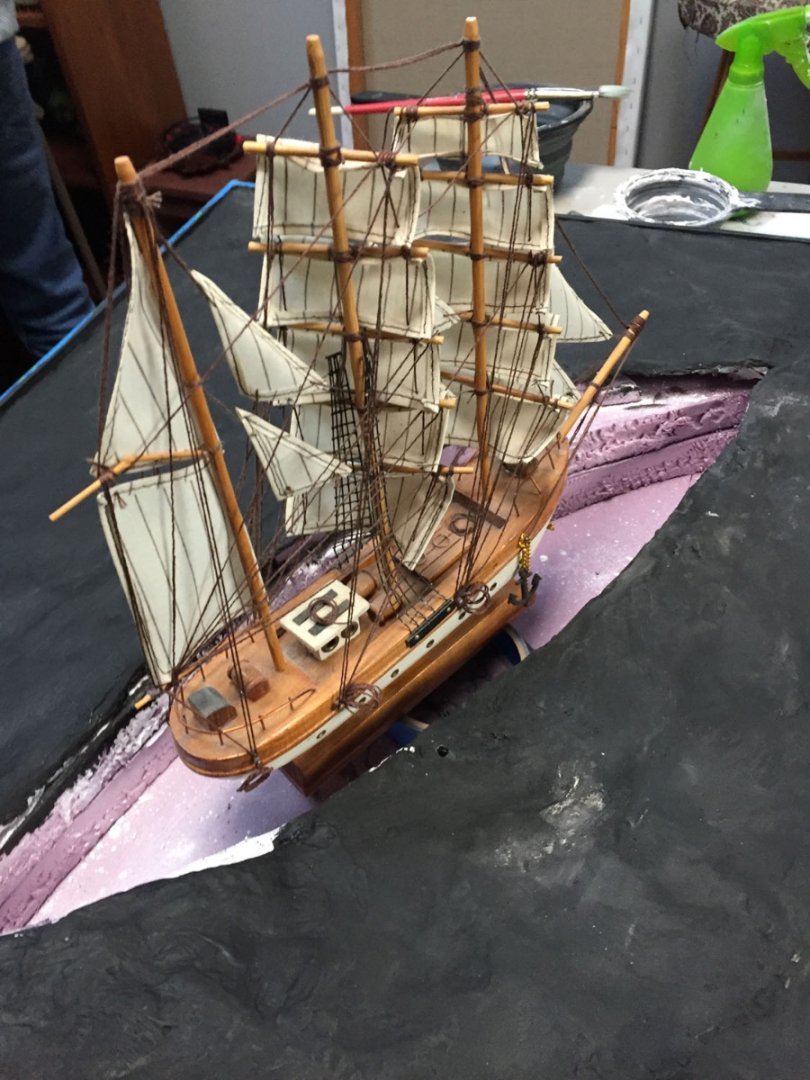
After the base painting has completely dried, the next step is to fashion the wave tops, seafoam on an "active" sea, the wake that appears along the hull that imparts movement to the ship, the all-important stem and stern with random water splashes on the model to give the water realism. The materials to make the foam, the crests of whitecaps, the foaming wake of windblown water along Camilla's hull and at her stem & stern. These acrylic mediums work with pure white synthetic cotton batting to give form and dimensionality to the somewhat mono-chromatic green/grey water surface. Regular paint brushes in different sizes are used, nothing unusual in the way of tools required for any of these painting steps. Shown here, Liquitex Matte Medium, Light Modeling Paste and eventually, the Gloss Varnish applied to the entire completed diorama water surface. This is the polyester "batting", medicinal "cotton" pulled apart with fingers into thin open strands: labor-intensive work like other aspects of this time-consuming process. I purchased a bag of Halloween Spider Web making material at Michael's, a craft store. The bag has enough of the material to do dozens of water dioramas! From past experience with similar materials, I was interested to see how this specific material would work to form the crests and sea foam I envisioned for this seascape. This synthetic "cotton" is worked into the areas between the model's hull and the opening to the immediately adjacent water surface with a paintbrush soaked with medium matte (acting as an adhesive). The matte medium creates translucency and dries clear. When applied it appears "milky." This step involves patience as you tamp down the polyester material with matte medium and a paintbrush primarily. However, other hand tools like tweezers and fingers will also shape the creation of the foam and white water wave crests. The goal is to create something approximating bubbly, splashing foam from agitated water. Anything that doesn't resemble this, do it over. Also (Big Tip)no straight lines, anywhere. There's no symmetry to water: it's chaotic-looking, especially in the ocean with no discernible patterning. Wind and rain further make it move in unpredictable, non-linear ways. We are creatures that favor symmetry. This is an unconscious inertia and has to be recognized as one tries to replicate nature, water specifically. The intense lighting in this photo along the hull and adjacent areas is from a small, portable LED flashlight (which has a cool blue spectrum 5K output). Even with all the overhead lighting I still need intense close-up light in some spots that end up in dark recesses and shadows. The large wave at Camilla's port bow, in-process. The still wet, milky matte medium can be seen in foreground areas. Foam on the sea surface (and under the surface occasionally) is billions of tiny air bubbles; this is the effect I try to replicate with small sections of the polyester cotton-like material glued to the relatively smooth underlying surfaces. The large, dramatic bow wave is completed. In this photo, smaller wave tops on surrounding crests will still need to be created. When I see something on the surface during this process that doesn't look like it belongs there, I remove it! The two small "blobs" at the bottom left were removed and the surface touched-up. Some of the polyester "wave tops" are too spindly looking here; additional dollops of matte medium were used to reshape them so they didn't appear hairy- which is one drawback of using this material. The material - when it isn't sold as "Halloween Spider Webs" is called medicinal cotton balls. It is inexpensive, and easier to shape and glue than its cotton equivalent partially because it isn't an organic substance. I learned this the hard way with previous dioramas. In this photo I've started on Camilla's stern wake. These two main areas (bow and stern) influence the model's movement in the diorama and are the most important and critical areas so I focus on these intensely. Here are several views of the nearly-finished port bow wave area. The model is now firmly seated in the diorama's opening with matte adhesive, medicinal cotton material and some gloss white acrylic modeling paste (see the photo showing the Liquitex acrylic materials above). These last few photos show a more accurate representation of the diorama's water color. A little "splash"on her bow... Sharp eyes will see the sailor climbing upward along the foremast's shroud ratlines... With this area now satisfactory to my eye, I will move on to other areas of the diorama with the same techniques described here. The next series of photos in my log will primarily show the results of these same processes explained in this post; starboard and stern water, other finished views. Once all the wave crests and the various elements of the active wake are finalized there is yet another final step to making the water glisten. Even in overcast weather conditions, in the dreary drizzly weather and in the angry sea that Camilla navigates, water still needs to "look wet." That's the job of the gloss varnish coming up after all this foam and wake work has been completed.


- 542 replies
-
- 41
-
-
-

-
- Sphinx
- Vanguard Models
- (and 3 more)
-
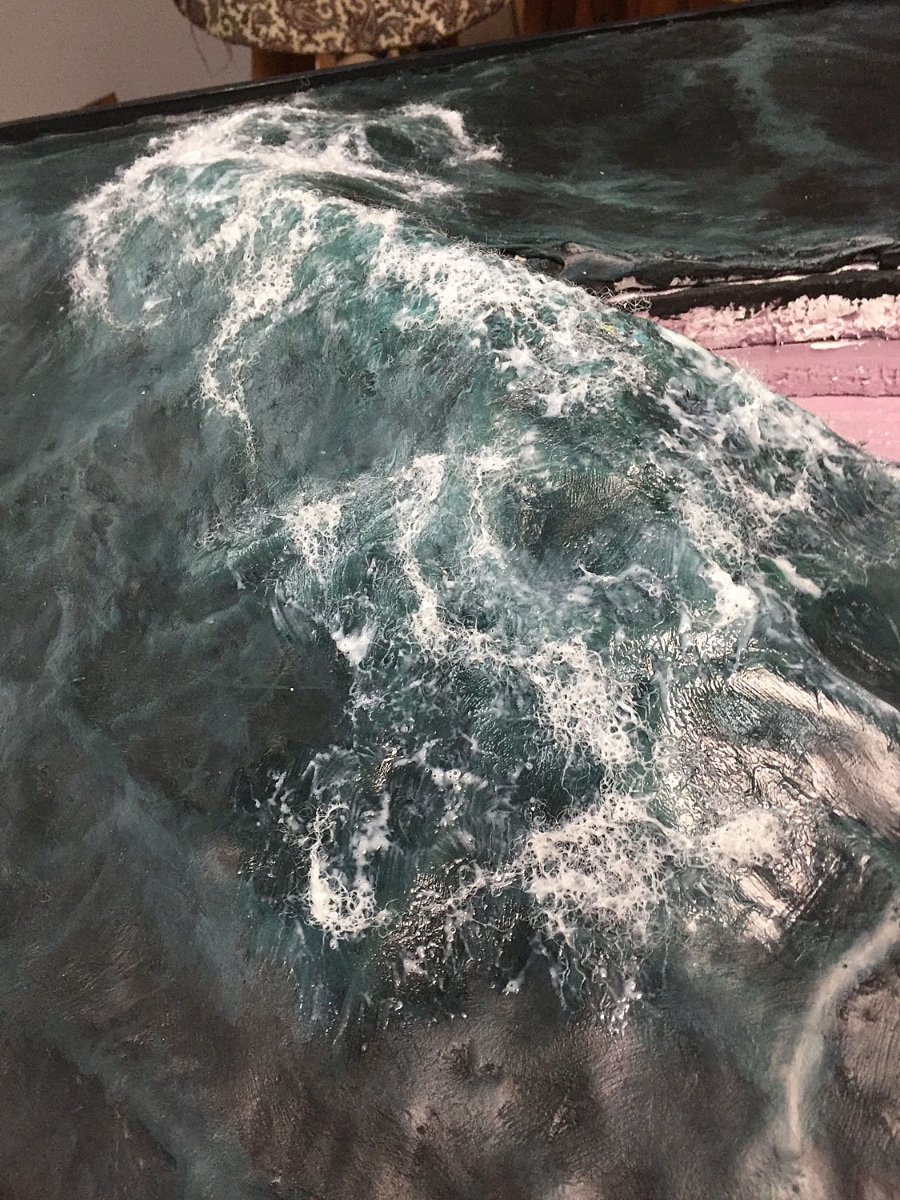
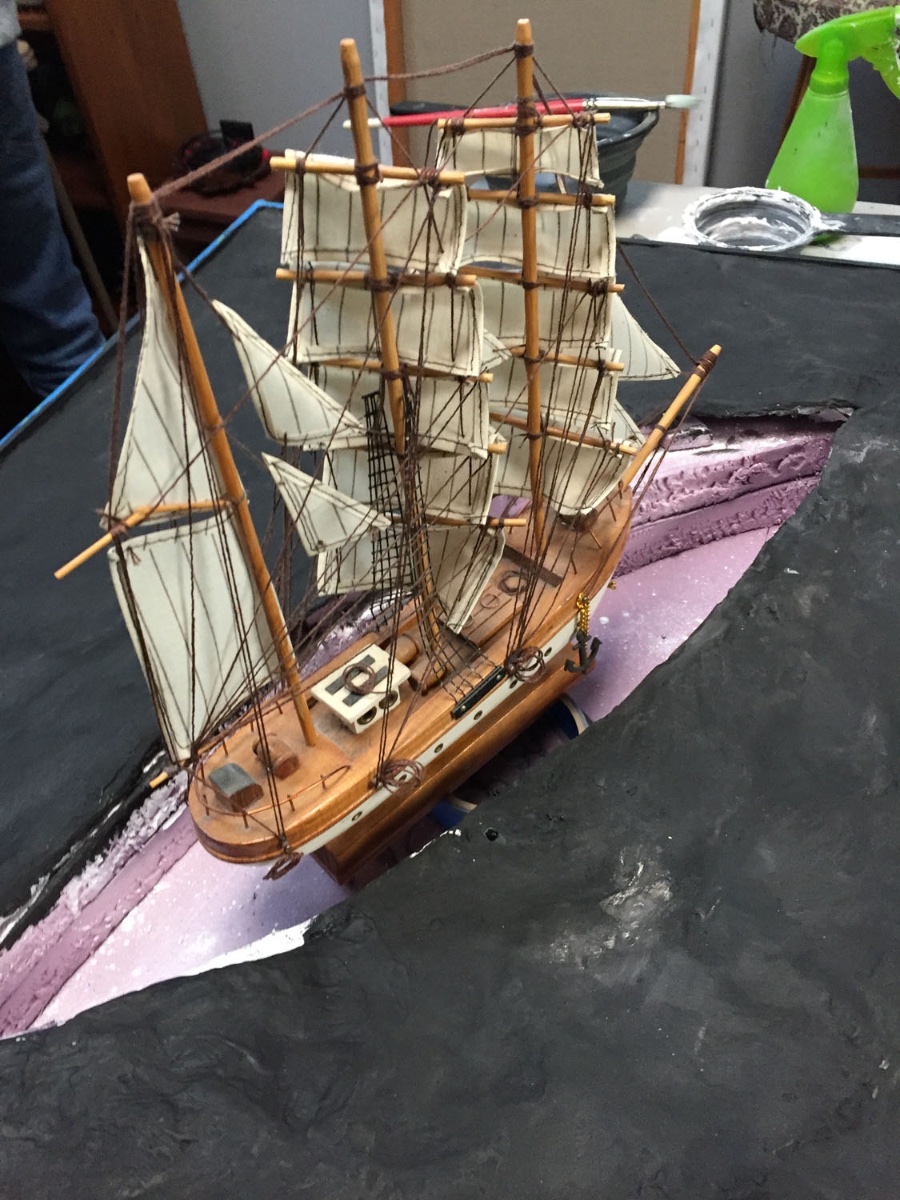
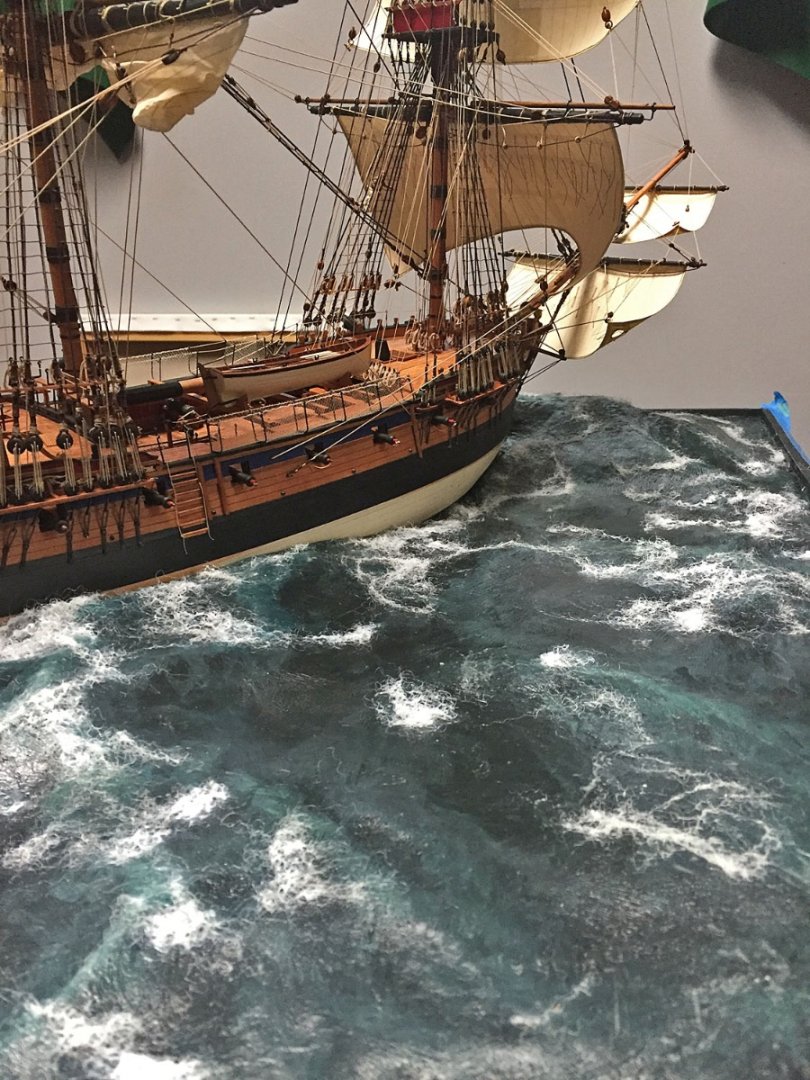
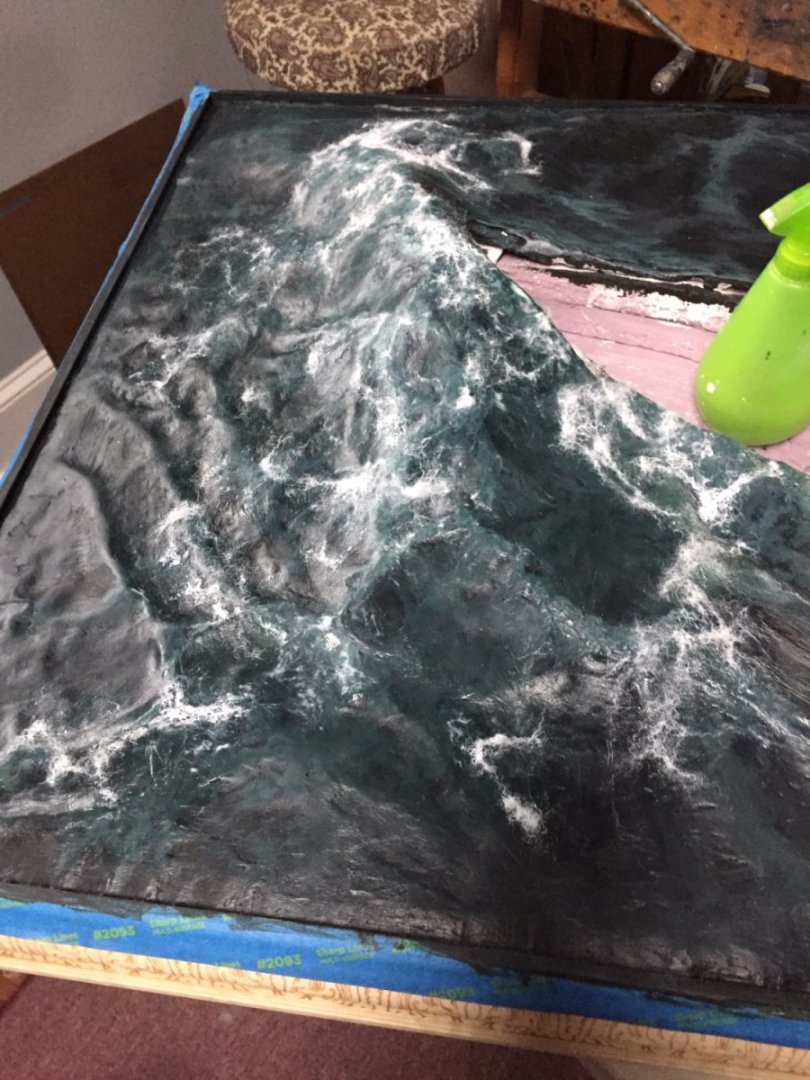
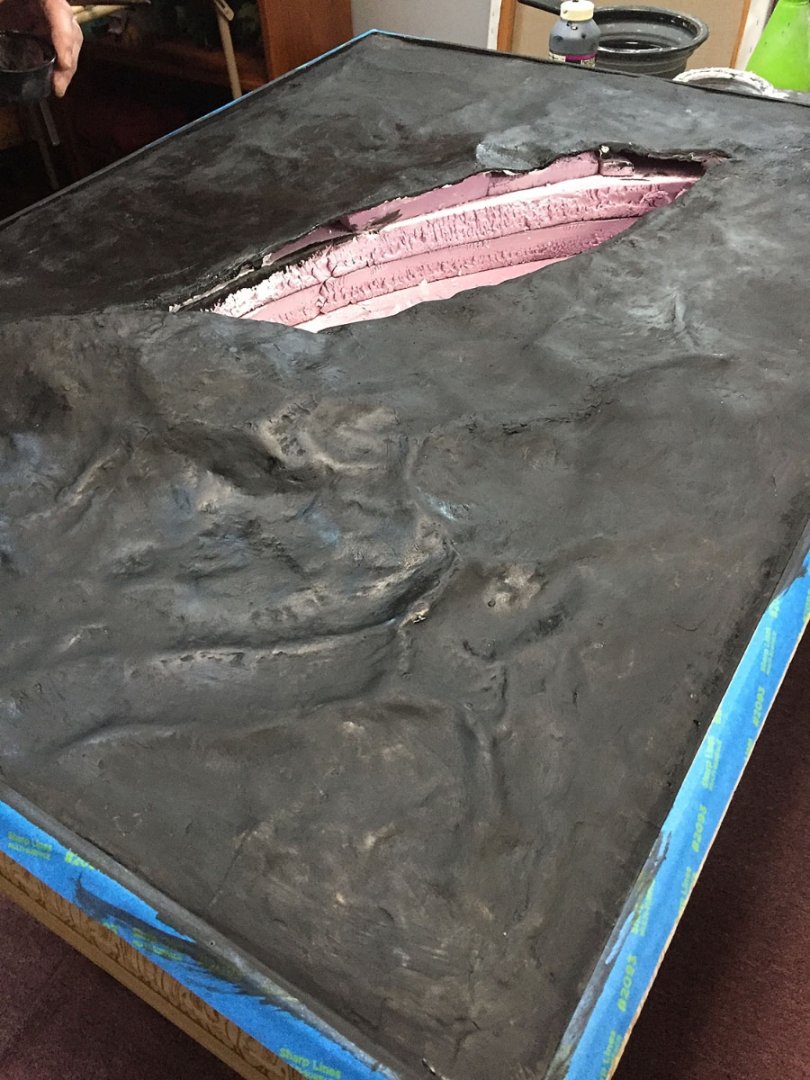
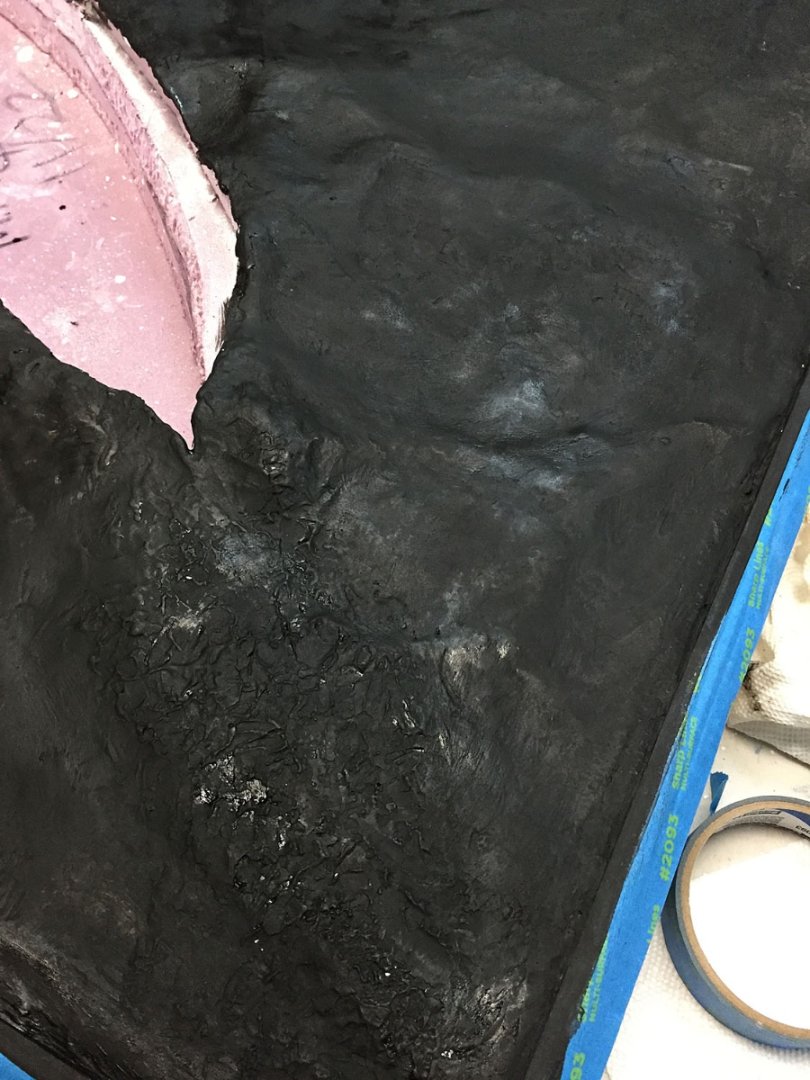
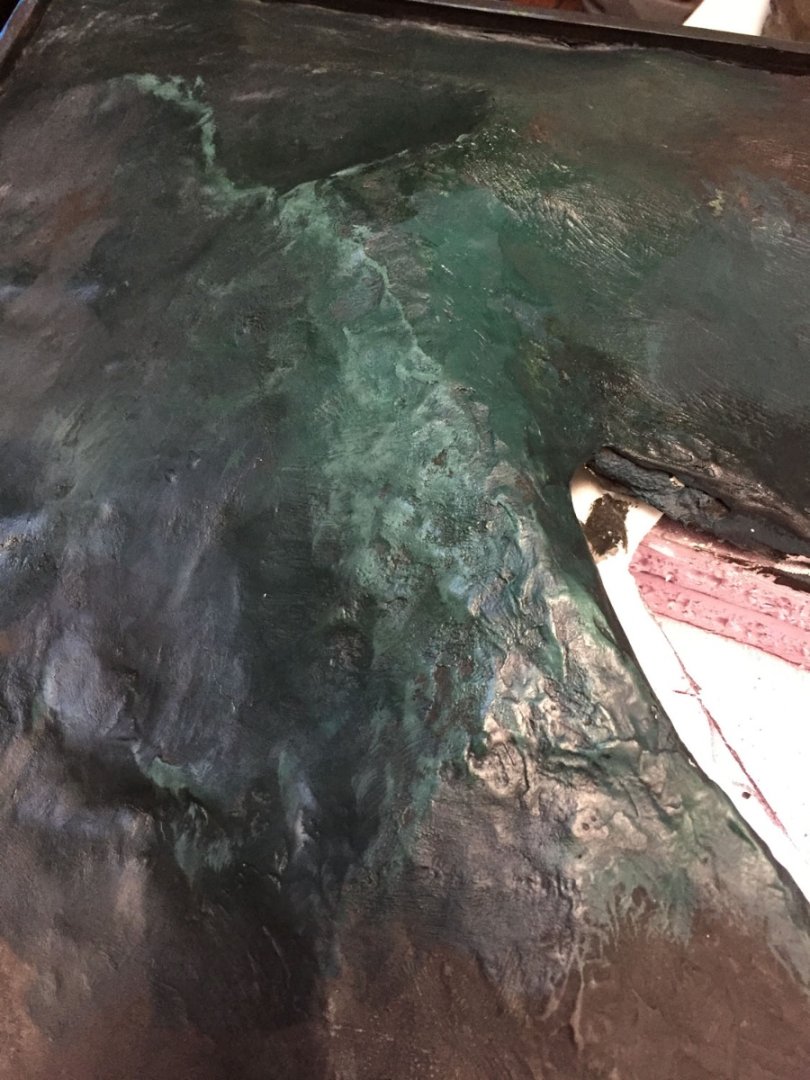
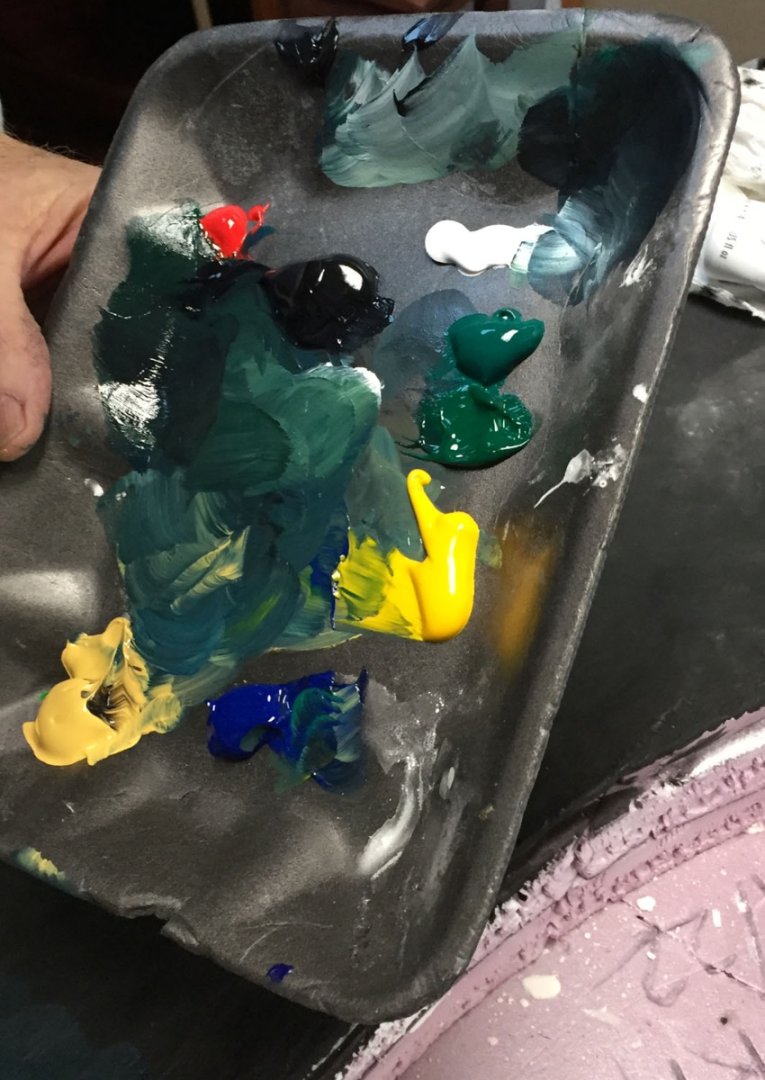
Making HMS Camilla's "Angry Sea" commences: painting turbulent water. This photo looks uninspiring but its intent is to show the black acrylic Gesso that will be painted over the entire surface of the plaster-smoothed surface of the water, edge-to-edge. The texture of the uneven plaster surface can be seen clearly here. This first painting step, underpainting, is a critical one that will figure importantly in the creation of the deep, brooding water of the English Channel. We're looking at the port side of Camilla's water setting. The large gathering bow wave shape looms on the left side. The Black Gesso dries flat. Pretty ugly at this stage. The blue painter's tape protects the case moldings since this step gets messy. At the stern where there will be lots of rudder wake turbulence, the Black gesso is worked into the roughened surface from the previous work with the toilet paper "skinning" and subsequent smoothing with fine grit sandpaper to remove divots that don't resemble "water." The black underpainting is painted as evenly as possible across the entire diorama's surface. This photo shows a test piece (foreground) for the water I created for a previous diorama: HMS Swan. The Swan water was created to portray a blue/green hued ocean with minimal wave action; smooth sailing, just a few white wave crests. The test shows the effect of underpainting in white, not black: a brighter surface. Underpainting is done to convey "depth" as the subsequent acrylic colors will be somewhat translucent because matte medium is also added to the palette color mix. In the background is the dry black gesso and a test of the green/grey hues I want for Camilla's turbulent sea setting. This is the color "palette" for the green/grey hues. Green is made from the combo of yellow and blue. In this instance, two hues of yellow are used. To lighten and darken the mix of green, white and black are added - even a small touch of red - as the black gesso surface gets painted. The acrylic paints will dry to a semi-gloss lustre. Matte medium is in a separate open container as well as a simple dish of water to thin the paint during the color layering. A first layer of a luminescent green hue is painted across the entire surface. This photo is at the ship's port bow, the top of a large, crashing wave. Another view of the large wave that will be hitting the model's port bow. Lighter hues of green/grey are layered atop one another. Like this. To the raised wave "tops" of the entire seascape, lighter shades of green are painted on top of the darker green "base color." To make this variable color palette, white as well as black acrylic paint is mixed into the green paint, along with matte medium acrylic. Oops! Right opening, wrong model. Comic relief to reduce some of the tedium and get cheap laughs... Another view of the green base coloration. Looks weird owing to the overhead lighting. Due to the successive coats of layered paint, the surface needs to dry thoroughly before attempting the next stage. To convince the skeptics this is going to turn out well, here's a preview of where this painting step is eventually headed (in Hollywood terms, a flash-forward) Next up: I add the wave "action": the wave tops, the all-important foam that will show movement, the effect of the wind on the surfaces, the wakes alongside the hull at her stem and stern.


- 542 replies
-
- 21
-
-
-
-
- Sphinx
- Vanguard Models
- (and 3 more)
-
A little ripper from Veretas
hollowneck replied to PeteB's topic in Modeling tools and Workshop Equipment
The guide is a $15 one, probably Chinese. A little fiddly to set up the blade but it works a treat. The blade angle is spot-on. The secret sauce on my sharpening rig is the two-sided grit "diamond stone" that comes with an ingenious holder(heavy and thick-footed, no-slip rubber base); this also comes from China, I think. No slippage. Less costly than it looks. I thought about Veritas ($) but I'm only using this set-up for my Ibex finger planes, no chisels. -
Yep. That's it.
-
A little ripper from Veretas
hollowneck replied to PeteB's topic in Modeling tools and Workshop Equipment
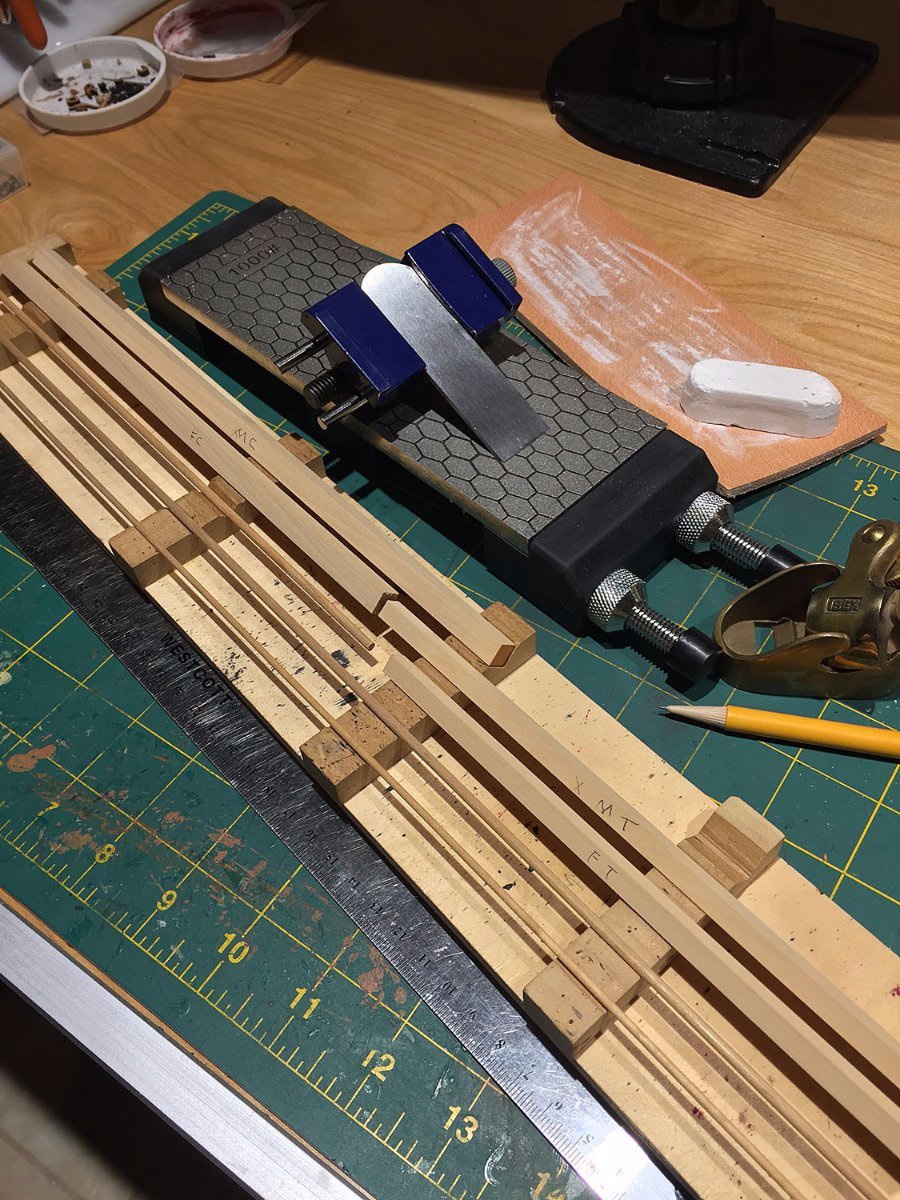
PeteB, Now that you have a high-quality plane, you may want to consider investing in a set-up for keeping your blades ultra-sharp. Here is what I use (photo from my Build Log here re: HMS Sphinx): a sharpening guide (for proper blade angle), stone, and rubbing pumice/leather strop. This is also referred to as a "waterless" sharpening approach which woks just fine for the type of wood planing we do in this hobby.
-
Order Question about Byrnes Model Machines
hollowneck replied to NDK1963's topic in Modeling tools and Workshop Equipment
Nick, try the phone. I recently spoke with Jim Byrnes' wife by phone. -
You're correct, the stern fascia placement is where you need to be careful. I also recall there was confusion about step #220 and the gallery finishing piece, but how this was resolved by others I'm not certain.
-
Unfortunately, my Sphinx (neé HMS Camilla) build started after I had completed my early hull building steps. However, check out the other build logs for Sphinx, especially Blue Ensign's (if you haven't done so already.) This stern area of the build is very demanding, correct millimeter placement and sanding are critical.