Jump to content

hollowneck

NRG Member
  • Posts

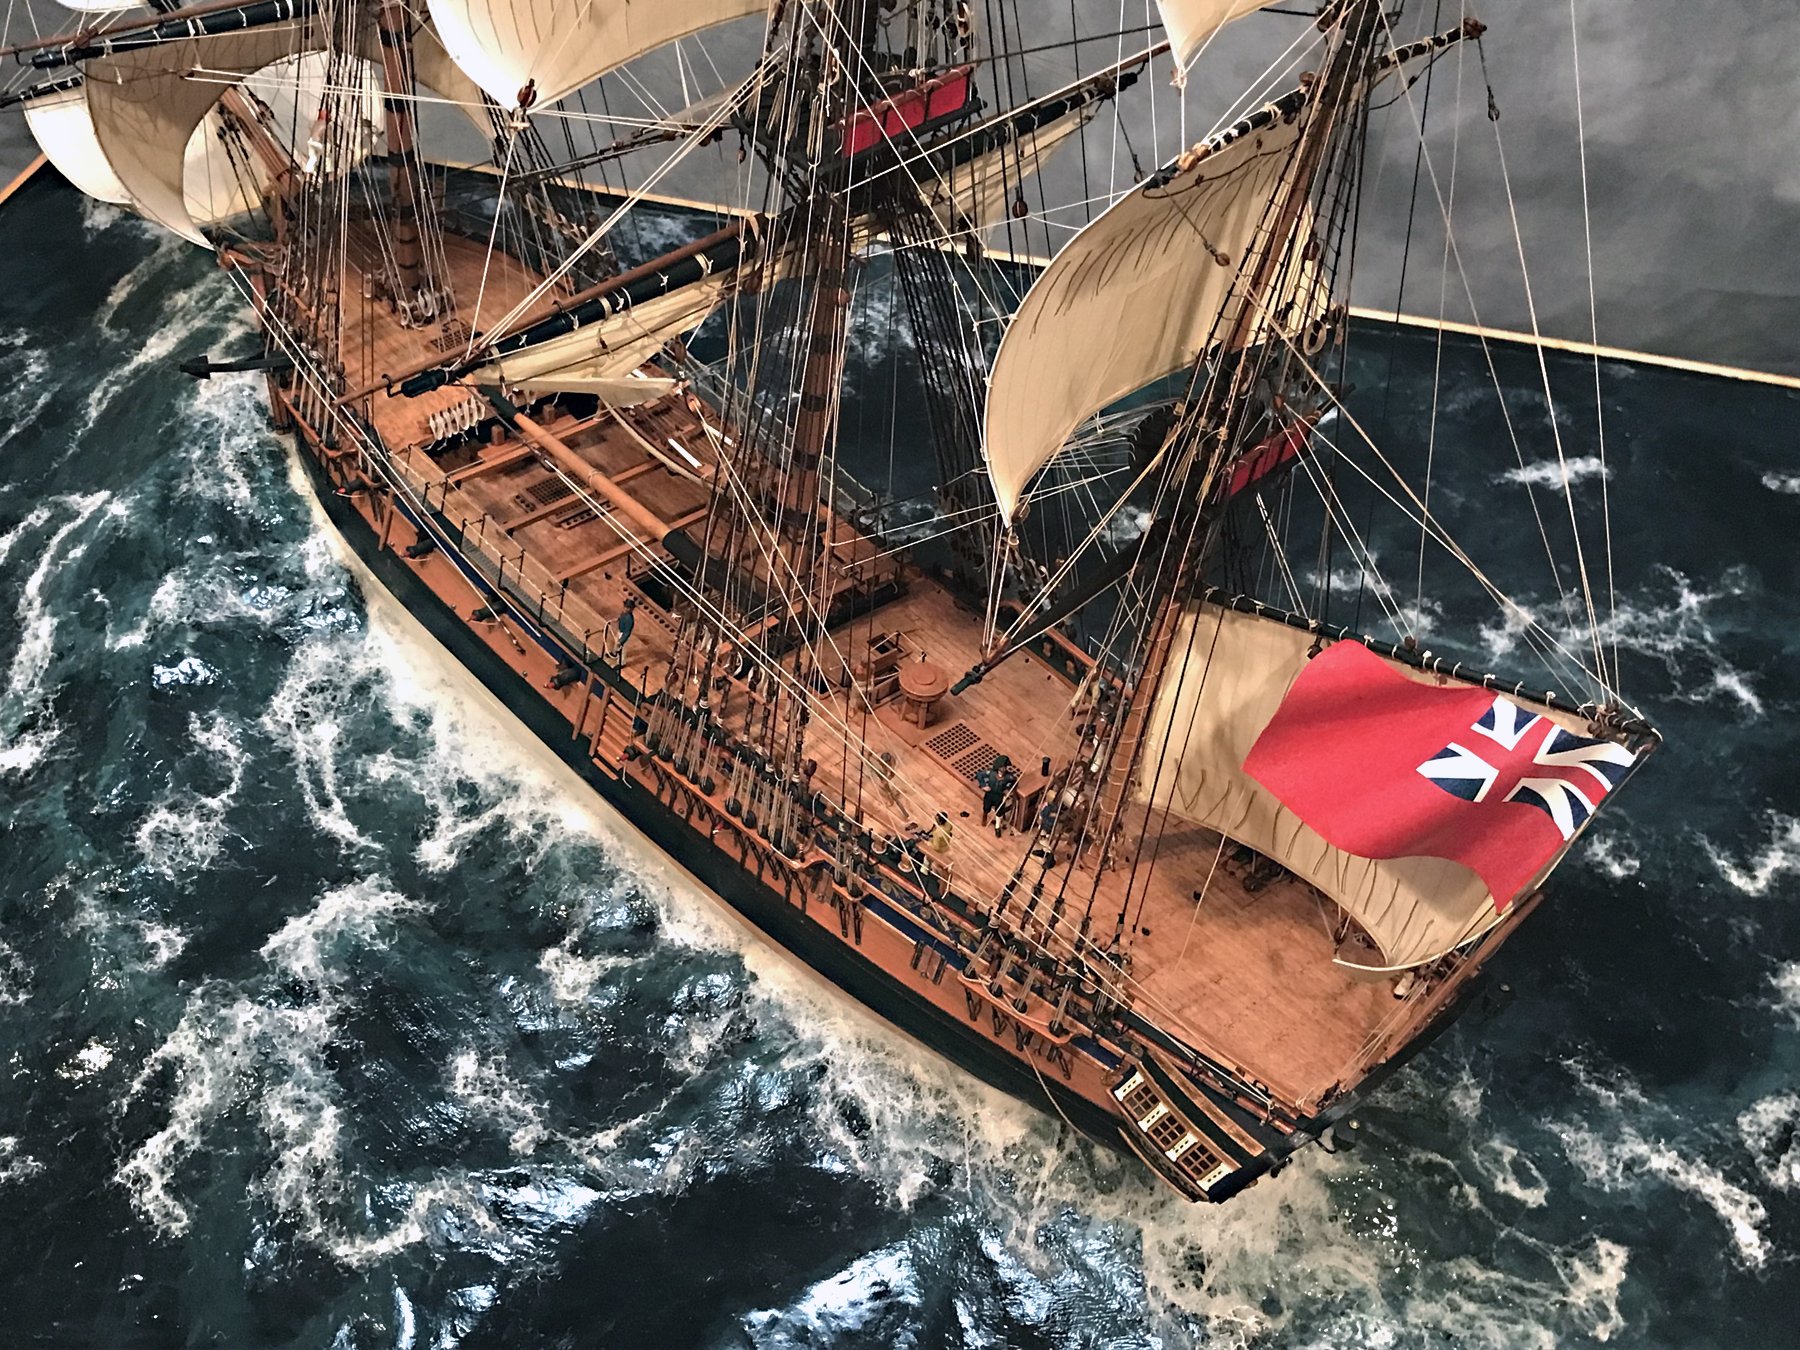
    1,350
  • Joined

  • Last visited

Everything posted by hollowneck

  1. Great to know you're following along on the final stages of my build; your build of this same kit is the "gold standard" - as all of our followers here know! Thanks.
  2. Your comments are much appreciated, Glenn. I do hope someone on the forum will be inspired to present their larger model in a diorama.
  3. Thank You, Tom - much appreciated. Thanks Tom. I can easily imagine one of your excellent models in a diorama. Do It - I know you can, 100% I've got a good source for scale-accurate whales!!
  4. Two more photos of HMS Camilla in her sea environment. What's missing from Camilla's deck? That's correct: the ship's launch. The skids and little boat will be securely mounted post sea creation, since finger access is still required to set the final yard and sail rigging. The launch and her crew board last. Tropical Storm Nicole has moved on from the mid-Atlantic and the sun is re-emerging. It's becoming a nice day...warming up. Time for a dry dock. Warm is good, lower humidity is good too. Time to tackle the next step. A mighty hole where a mighty frigate once sailed. Camilla's keel rests right on the foam board surface. Solid. Once the acrylics I use for making her wake are applied to the hull and onto the plastered cloth, the model will be safely secured into her opening. It's time to give the diorama waves a thin plaster coat. Although I'll leave it o'night and possibly into next week for the next steps, the warm day will help the coating dry evenly. The "cracks" between all the wave pieces get filled first. A kitchen spatula works great for smoothing and spreading the plaster, almost like putting the frosting on mom's cake - if you were lucky enough to have a mom that would let you do more than lick the spoon. The entire surface gets covered in plaster, right up to the edges around the hull opening and up to the blue masking tape along the perimeter of the case. I try to make the coating consistent in thickness but there are spots that will be a little thicker. After smearing-on gobs of plaster, I will use my fingers to smooth out areas that need finessing; I just can't hold my old iPhone with goopy fingers so I didn't take a photo of this technique, but it's important to make all the subtle, undulating surfaces of the ShaperSheet waves reasonably smooth looking. The plaster mix is also from Woodland Scenics. I purchased it at the same time as the ShaperSheet. Almost any good quality hobby brand will work. The consistency of the mixture (just water and the dry powder) is like a thin pancake batter - more watery than not; it gets thicker when spread on the cotton cloth of the ShaperSheet surfaces. The cloth surface holds the plaster well. When the surface has completely dried, it will be solid, hard as a...rock?
  5. When you have an itch, you have to scratch it! What a gorgeous model. Congrats on this stage of your build, Glenn. Also, your photography is so good I could easily conclude you are a professional photographer.😂
  6. The Water Puzzle continues. Rolling along Camilla's port side, another tapered foam wedge supports three raised wave sections. All the ShaperSheet pieces are cut with heavy-duty scissors; an X-acto knife won't cut the stuff. A few wave sections remain. Working around my completed model while it's in the diorama's cutout isn't too difficult but I needed to be careful while handling the larger sections of the ShaperSheet material. All of the wave sections have been cut and formed and are securely glued-in around the case's perimeter as well as all along Camilla's full hull. She can be easily lifted out of the setting and is not yet secured to her sea. A detail of the tricky stern wave sections shown here. Smaller ShaperSheet pieces were cut and had to align precisely so subsequent "wake" making steps would be easier to execute. The locating marks help when executing the final glue process. All the black Sharpie marks will disappear in the next stage. Time for a water making break: neat. No water, no rocks. Best enjoyed with a good friend or partner, but still acceptable as a solo toast to an involved, multistep process that's gotten to about the halfway mark for the water surface of the complete diorama. A view from the port stern. Note the gap along her hull. This was subsequently filled with another wave piece. The completed port bow wave action. and ...the completed bow waves. The blue masking tape has been affixed to the full perimeter of the wood case to protect its edges during the next step of cladding/surfacing the synthesized waves.
  7. Now I get to Make More Waves, several of them... The first wave piece is formed and up against Camilla's stem and bow. I increased the vertical profile of the cut sheet up by manipulating the aluminum foil. The cotton-clad surface is face up, obviously- not the shiny aluminium one (U.K. English spelling!). As surmised, this is a very subjective process, difficult to describe in precise terms. Basically, I try to avoid sharp lines as much as possible when manipulating the material: in my life experience, I've not seen lines and angles with Euclidian geometry represented in the sea! This said, if some straight lines crop-up during this stage, no problemo. There will be remedies a-plenty forthcoming. A large section of "Wave" meets the case corner and underlays the first wave section that touches the model's port bow. T-pins are very handy to secure the aluminum/ cloth pieces. The section in the forefront is also shaped with raised areas, but less dramatic than the bow wave piece. A different, lower viewing angle to the wave shape that touches the bow of the model. This wave creation phase cannot be rushed as it is quite critical to create a convincing "kinetic" seascape. This view shows the layers of the foam board in the case. The foam board couldn't be cut into a precise, close-fitting case pieces because of the scored lines on the raw sheets so a separate sectional piece was cut and added to close this gap. Both the foam board as well as all the ShaperSheet wave sections will be glued together with low-temp glue sticks, also from Woodland Scenics. Regular hot glue will MELT the foam board and that's not good! The aluminum/cloth sheet needs to securely adhere to the foam board, otherwise a white or yellow glue could suffice for this stage. Since the hot glue is handy I use it to glue the foam board into the case and to glue all three layers together too. In making the wave sections there will be raised areas that need support; in this instance, right at Camilla's cutwater. A support made from the same foam board is placed beneath the ShaperSheet and hot-glued into place to give the wave pieces a firm footing before permanently gluing them into place. Camilla's bow, wave sections hot-glued in place and completed. The edges of the overlapping pieces will virtually disappear in a subsequent "cladding/surfacing" step with hobby plaster. Moving along the hull, another small foam block - in this case a tapered one. The support block is placed near the stern to support a wave section. Camilla's dangling rigging ropes have been left loose since the yard bracing and bow line runs may need to be adjusted to reflect her position in the sea setting. On Camilla's starboard, a wave section is cut and finger-formed to align along her hull with sea "bumps", roughed-in as shown. It is very important to make the edges of all the wave pieces irregular to reduce or diminish as much as possible any linear lines in this sectional approach process. This will pay-off immensely in the subsequent steps I'll articulate later. Camilla's starboard main hull wave piece is shaped. The fuzzy surface of the cotton does shed as you handle it but these extraneous bits can be easily removed; all black edge and position marks will be covered with the cladding shaping plaster when all the wave sections are secured with glue and completed. More wave sections are coming in the next post.
  8. Making Water- Phase One Prior to cutting the large foam board that will be the base of the diorama's waves and model support, the bendable curve - shown in the previous post for gathered materials/tools - was placed along the hull of my model at the waterline level. HMS Camilla will heel at an approximate angle of 10-15 degrees, to starboard. This is important as the PORT waterline will thus, be slightly HIGHER and this must be taken into account for creating the waterline cutout template pieces shown here. Utilizing two pieces of foam board from an earlier project (2" ref thickness), the bendable curve lines taken from the model's hull were traced onto two long pieces of foam board and then trimmed with a utility knife to create two hull curvature template pieces: this is required to arrive at a "template" to trace and mark a reasonably accurate "cut line" into the top layer of the 1" foam board that will be the surface that holds the "waves." The two halves of the foam board template are marked so that stem and stern points aren't confused. The next step is to measure, cut and place a 1" thick sheet of foam board ("Pink Panther" insulation) into the case. This 36" wide piece is one of three (3) of 1" thick foam boards that will be stacked and secured into the case: the internal dimension height after stacking the foam board sections is a little over 3" high. The top piece shown here will be on the majority of photos that follow as it is the one to which the "water" shaping components will be affixed. The final step here is to use a black Sharpie to transfer the final cut line to the top layer foam board. After determining the placement of the hull into the case, a keel line is drawn. In this diorama, the keel will be diagonally across the case from opposite corners as shown. Once the keel line is drawn, the template pieces in the previous photo are used to locate the exact position of the model's hull, which is centered along this reference line. The next step is relatively straightforward; using a bread knife (important: it helps if it's a serrated edge because the thick foam board material's consistency makes it difficult to cut through with a utility blade, even a long one. My cutting action must take into account the 10-15 degree heeling angle of the model as I slice through the foam board. This is done by eye and is important so that the previous templating is followed as closely as possible, including replicating the different angles so the model's hull will sit securely in the resultant opening. Here is the first test to see how the model fits into the foam board cutout. Having done this a few times now, my cutting resulted in a near perfect width, length and heeling angle cutout in the 1" foam board's TOP LAYER. Note the angle of the model to the foam board. Zooming in close to the stem while the ship model is temporarily placed into the foam board, it's time to determine how the wave action will look relative to the ship's hull and wind direction. The diorama's wind is a following one, from aft. The wave action will not be strictly parallel to the ship purposefully so that the diorama's built-up waves will create some "visual tension" between the model and the sea. This purposeful "randomness" is a dynamic that is important and will be a recurring theme throughout this final phase of my Build Log. I'll do my best to note when this is a consideration in all the following steps. Moving down alongside the starboard hull, a slight mismatch on the hull is evident, a gap. This isn't critical because it will be covered-up in subsequent water building steps. However, the tighter the better to the previous waterline cutout step. This precision will help make the wave top detail as well as creating the foam wake along the hull much easier. This photo shows the two sides of the "wave material" I will use to shape all the wave action on the full diorama. The material is named "ShaperSheet" and from Woodland Scenics. It's a composited sheet of thin aluminum (a little heavier than regular kitchen foil) with a thin cotton backing adhered to it. It comes in 18" wide by six foot roll lengths. This material will be used to form multiple sections of waves that get placed onto the foam board surface and positioned tightly against the model's hull. The white cotton surface material will hold the plaster that gets applied after the wave sections have been formed and affixed to the foam board around the hull and to the edges of the diorama case. Here, I've made a first wave section: a large "rolling wave" that the ship's bow is meeting. It tapers off as shown -toward the lens- and is held in place with pushpins temporarily. The large piece has been cut from the ShaperSheet and manipulated with my fingers to form a raised section, all by eye - and yep, by "feel." The random front edge shown where it is pinned is purposeful. The black parallel location marks are important as several pieces of the sheet will be required and will need to overlap. My next post will show the development of these wave foil/cloth sections that will comprise the principal wave surface of the diorama's seascape.
  9. Indeed. I’ve waited for years for these little gems to appear! As I’ve indicated earlier, the sculpts are superb and the 3D-resin printing (and high-quality) material allow one to finish paint them in a very realistic way. Note that over a “base” flesh color, I use darkening ‘tone” washes to bring out the minuscule details like facial features, even the space between little fingers! My paints are standard Vallejo brand acrylics. The washes are from a gaming company called Citadel (war gaming miniatures/U.K. But available in the U.S.). BTW: thanks. This ship has svelte lines and lots of subtle, understated decorative elements - as long as one doesn’t paint every one of them in Bright GOLD, these help to emphasize the beauty. This is sort of like jewelry on a beautiful woman, not necessary - but it doesn’t hurt!
  10. Brian, Please look at the last photo of my post #349 in this thread. You’ll see the main tools I use for handling nearly all the rigging tasks. I’ve purchased most of these from Micromark. The scissors are from Germany, “Ginghher” brand, but acquired on Amazon. The original set of dental tools had several pointy things, but the wicked-looking one with the bent sharp point is the most effective for it’s main rigging purpose: hanging rope hanks in difficult to reach spots. The blue handled tool comes from a set of rigging tools designated as such on MicroMark; I’m not certain they’re still available. Spend some time on their site. I wouldn’t bother to go to dental tool suppliers: from my experience that is a deep rabbit hole and completely unnecessary.
  11. Thank you, B.E. You’re correct. I got a little carried away on adding schmutz to the crew’s trousers. This Captain does have higher standards and certainly doesn’t have to mess with gun carriages, gunpowder, ropes- unlike his minions. I’ll give his britches a good wash before the muster is called. Wigglesworth’s man-servant has gone AWOL.
  12. Camilla's Crew. My People. "Ready when you are, Capt'!" The 3D printed bases successfully removed with minimal orthopaedic foot damage. A limited palette of mostly subdued colors. Most can stand upright without the assistance of glue, but all will get CA'd to the deck in good time. Vanguard (Chris Watton) has indeed gone "above and beyond " with these superbly-sculpted, 3/D printed resin figures. The quality of the material is excellent and after a simple primer coat they take tiny paint strokes nicely. The hands and face detail is very convincing once a light accenting wash is used. A reminder: you're looking at 1/64-scale figures that are nominally 28mm tall across the range. These identical figures are available from Vanguard in smaller as well as larger scales. The legacy and standby Amati not-very-accurate-28mm (& 33mm)-scaled figures should now be retired to old fishing trawlers... However, we now also have Vanguard's scale-accurate and excellent fishermen figures at-hand. Cpt. C.W.Wigglesworth is ready to take command of His Majesty's Frigate, HMS Camilla. He's perched within the Vanguard official shipping container and its special cushioning. That sword is on it's own sprue and gets affixed behind his coat after painting. At Vanguard, this figure is known by "Lord Cochrane”..to avoid confusion at the website should others desire his presence on their model. "Could some bloke help me out with all this bloody rope?!" 80 rope coils completed. Three of Camilla's six-packed & sun-tanned cannon crew... Their linen trousers need a good wash, eh? - "After the day's gunnery practice," says Wigglesworth. ...and three more cannoneer brethren. " ...an extra pint all-round for you blighters!" says a pleased Wigglesworth after a particularly good gunnery session.
  13. Ha-ha. I'm sorry to give fellow MSWer's nightmares - the wholly unintended consequences of my Build Log! Sorry, peeps. I no longer have house pets, but in an earlier life I had 5 cats (2 house, 3 barn), and two dogs*. The cats had a pet door, the dogs - cozy doghouses. But this was before my wife and I were empty nesters after raising a combined 7 children. Most of our children now have pets - for their children, who do get VERY CLOSE TO Gampy's ships on occasion! I'd NEVER seriously consider having pets with all my "open air" models. Well, maybe an iguana in a terrarium, or a fish tank, but no birds either! I'll now have nightmares dreaming about a pet parrot perched on a model's bowsprit! * not counting 4 horses and usually 15-20 head of heifers, but they never set hooves inside our farmhouse...😂
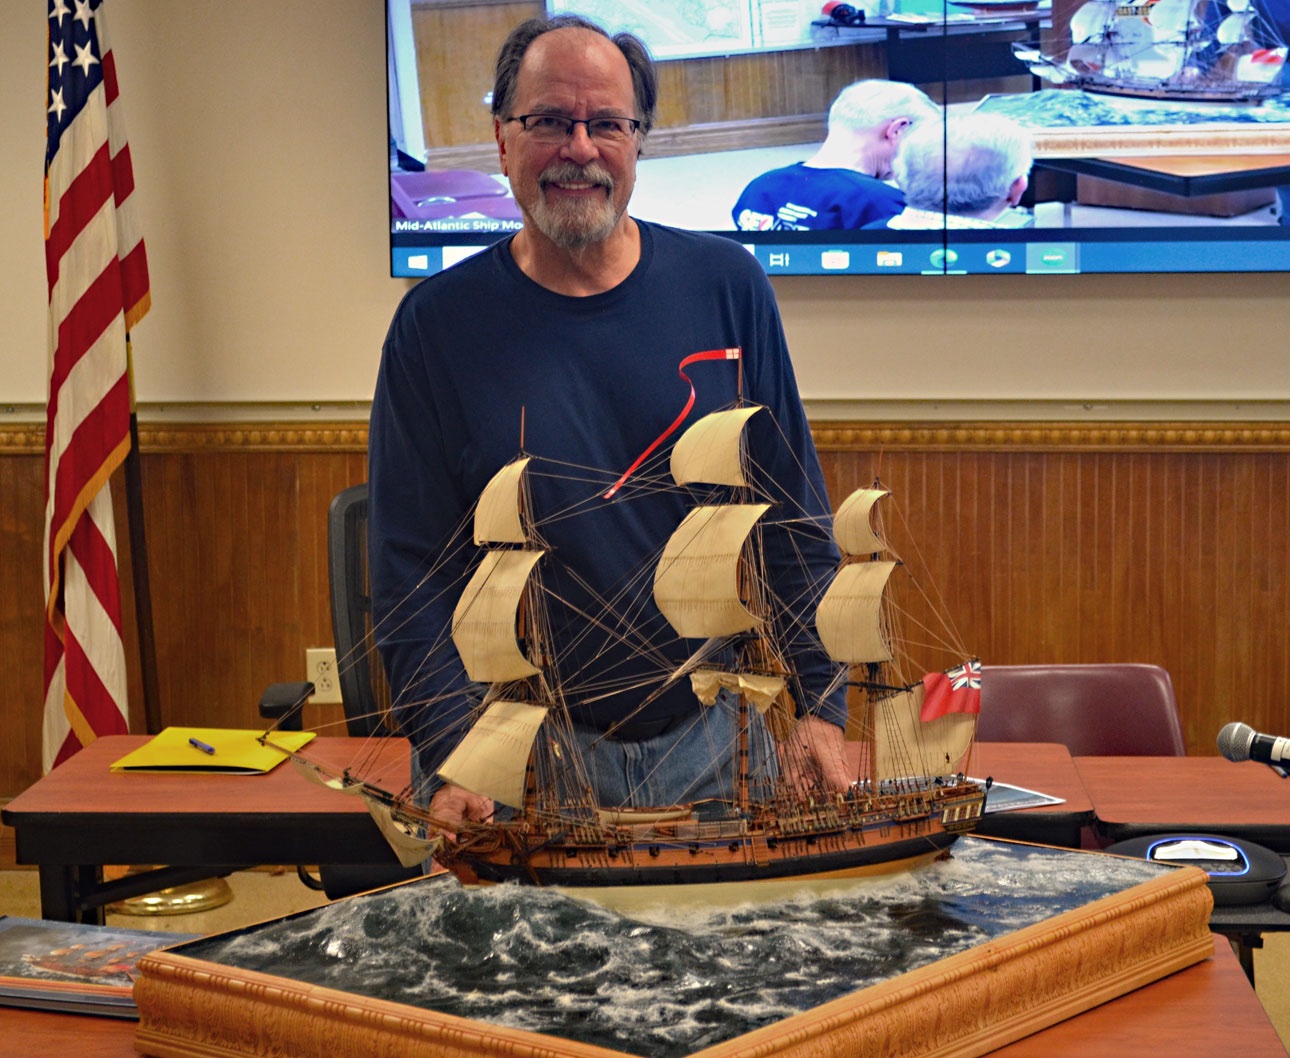
  14. The gathering storm... Pretty self-explanatory. Most (but not all) materials gathered. A couple prelim tools. Of course there will be sundry hand tools like various paintbrushes and cutting implements like a hotwire foam cutter, breadknife (for cutting the insulation foam), etc. The insulation foam board is from HomeDepot and comes in 4 X 8 sheets like plywood. It had pre-scored cut lines so you can break it into sections so you can fit it in your vehicle if you don't drive a Ford F-250. I'll use multiple levels of this inexpensive material to build up the wave profiles. I also haven't shown various glue(s). The bendable curve was held against Camilla's hull (port and starboard and a tentative waterline profile for both was transferred to spare pieces of 2" thick insulation); these will be used to trace the outline of the cutout in the base foam board for Camilla's hull. This cutout will need to be careful "finessed" with additional hand tools to create as tight a fit as possible to the model's hull to secure it in the foam board's cutout. Various acrylic materials molded along her full waterline will act as adhesion components to create her hull's wake - and, naturally "disguise" the small openings ("cracks") that will appear around her hull after placement. Thinking about the case color in a natural wood finish. I'm leaning toward the right end of this cutoff piece of the case's millwork: oak stain with a chestnut stain (over-wipe) to fill the patterning. On the opposite end(left), the stain is chestnut only; at this point in time I feel it may be too dark. The ultimate decision will be made after the diorama is completed. To finish (and protect the wood) I'll use a Wipe-On Poly, and likely a semi-gloss. The bottom of the case will have felt bumpers.
  15. Derek, one word (well, two actually): lovely display. Your Speedy looks impressive, with good lighting and the gilded mirror is a nice touch. I don't know about you but I do a "walkabout" every few weeks (no set schedule) with a can of compressed air and a small handful of long medical swabs - to reach some areas where the air blasts aren't enough to keep the dust bunnies from accumulating - especially on the rigging as #druxey has correctly noted. Frankly, this takes a couple hours to hit all my models but I get to be up close (again) with each one, noting where I could have done things better.🤔 And a by-product, the models stay mostly clean and still they tempt guests to closely inspect them. I purchase several cans of compressed air at a go: saves $. And I don't have to feel stingy when giving them air baths!🤣
  16. Hey, Mike - big thanks, again. The quick answer is that the model's keel will rest on the plywood bottom and in this instance (depending on the depth of the wave action in her diorama), I may add a small "shim" of insulation foam board under the keel to raise Camilla up slightly. On previous dioramas I've rested the bare keel on the base. No adhesives required. The surrounding foam and resultant water texturing materials hold her hull firmly in the open cutout of the foam board. I'm posting a quick couple photos of preliminary diorama materials next as I'm jumping into this soon...
  17. Thank you kindly, Derek. The larger "fighting sail" models many of us are fond of are space hogs when they're masted and rigged. My original plan for HMS Camilla was to also show her with stunsails! That is, until I measured what this would yield across her breadth. My extremely empathetic and supportive wife wasn't thrilled. I wanted to do it simply for the challenge of never having added these sails previously. I dreamed of replicating the look so many era painters have depicted of these beautiful ships under full sail. As it stands I'm very fortunate to have a large home that already has an even dozen of my models scattered about. My wife calls our home "The Neilson Ship Museum." There is room for Camilla (I'm thinking about purchasing what's termed here as a "hi-top bar table" to set her completed diorama on) since it is large and nearly square-based. There is even space for Vanguard's new Indy, somewhere...🤔 Lucky me, I can rig my models until the whales come home, so-to-speak. Go ahead, tell your wife a Yank made you do it. I'll take all the blame and bashing from afar. Just don't show her this photo of what greets our guests when they open our front hallway door! Cheers - Your Speedy model is a beauty, superbly rigged. Go Large as they say here: build Sphinx with a full rig. You know you want to do it.
  18. Thank you kindly, Tom. I get very EXCITED having arrived at this next (and last) step. I certainly have ideas about what I want to create, but so much of this final phase is freeform, open-ended - seeing how the "Flow" goes. I've learned when "creating water," to remain open to the possibility of many happy surprises. This said, I do my homework by collecting a thick folder of water photos, and in this case (pun), the English Channel, which I've seen many times, firsthand. My challenge this time around may be to create "wispy" whitecaps on a troubled sea. We'll Sea.
  19. You're correct, I WILL notice. I LOVE Dilbert. I'm certain he also builds model ships. Thanks for the levity. Us model makers tend to take ourselves way too seriously at times (methinks). Cheers Druxey!
  20. Thanks Glenn, your comments are always appreciated. As is evident, I like all the elements you personally find uninteresting. I have built a number of models presented in the conventional manner on pedestals on baseboards. However, the ones that get the most excited reactions - and often, deep discussions - are my diorama models of the last few years. They also turn me on the most too!
  21. Big Stuff this past week or so. Sawing, hammering, gluing, sanding, detailing...you get the picture. In my basement shop where I can make sawdust ( I have two air systems: a plain ShopVac for vacuuming, and a ceiling mounted 'ShopFox' for all the tiny airborne particles. HMS Camilla's diorama case completed. Tricky business to get the 4" high mitered corners precisely joined. Specialized 45/90 degree mitre clamps required. The model is positioned approximately in the case with an approximate list to starboard. The outside case measures 38" W X 28" deep. Height = 4" to case sides. The water may possibly be slightly higher depending how I create the wave action of stormy weather. Camilla will present herself considerably lower in the case once removed from the build clamper and resting her keel close to the plywood interior base - like all my other dioramas. The yellow tube in the corner is Stainable Wood Filler (MinWax); I used it on the case and also on the model. The name says it all. It dries out rapidly and getting it out of its tube is a pain, but it does take stain well because it's a (somewhat) malleable paste with actual ground up wood; the solvent carrier evaporates rapidy so you need to work it as soon as it pokes out of its nozzle. Fingers work best I've found. Another view. I am a model maker, and at best, an amateur cabinet maker. You know the saying: "Measure Twice, Cut Once?" I measured Thrice and still got it wrong! I had to salvage enough from cutoff pieces of the casing millwork to recover from this boob on the LAST side (of course). The yellow glue joints to a three-piece completed side rail are somewhat evident here. This will be less of an issue once I detail sand and then give the case it's final staining (I'll wait until all the water is complete and the model is in place before deciding the final colors for the millwork). The slight mis-match on the lovely Acanthus pattern of the case bothers my eye a little, but I'll be able to live with my imperfection(s). 3 sides out of 4 isn't too bad, right?🤫 Now, my next posts will be diving into the deep end: Camilla's water awaits!
×
×
  • Create New...