HOLIDAY DONATION DRIVE - SUPPORT MSW - DO YOUR PART TO KEEP THIS GREAT FORUM GOING! (Only 27 donations so far out of 49,000 members - C'mon guys!)
×

Darius359au
-
Posts
128 -
Joined
-
Last visited
Content Type
Profiles
Forums
Gallery
Events
Everything posted by Darius359au
-
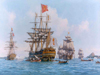
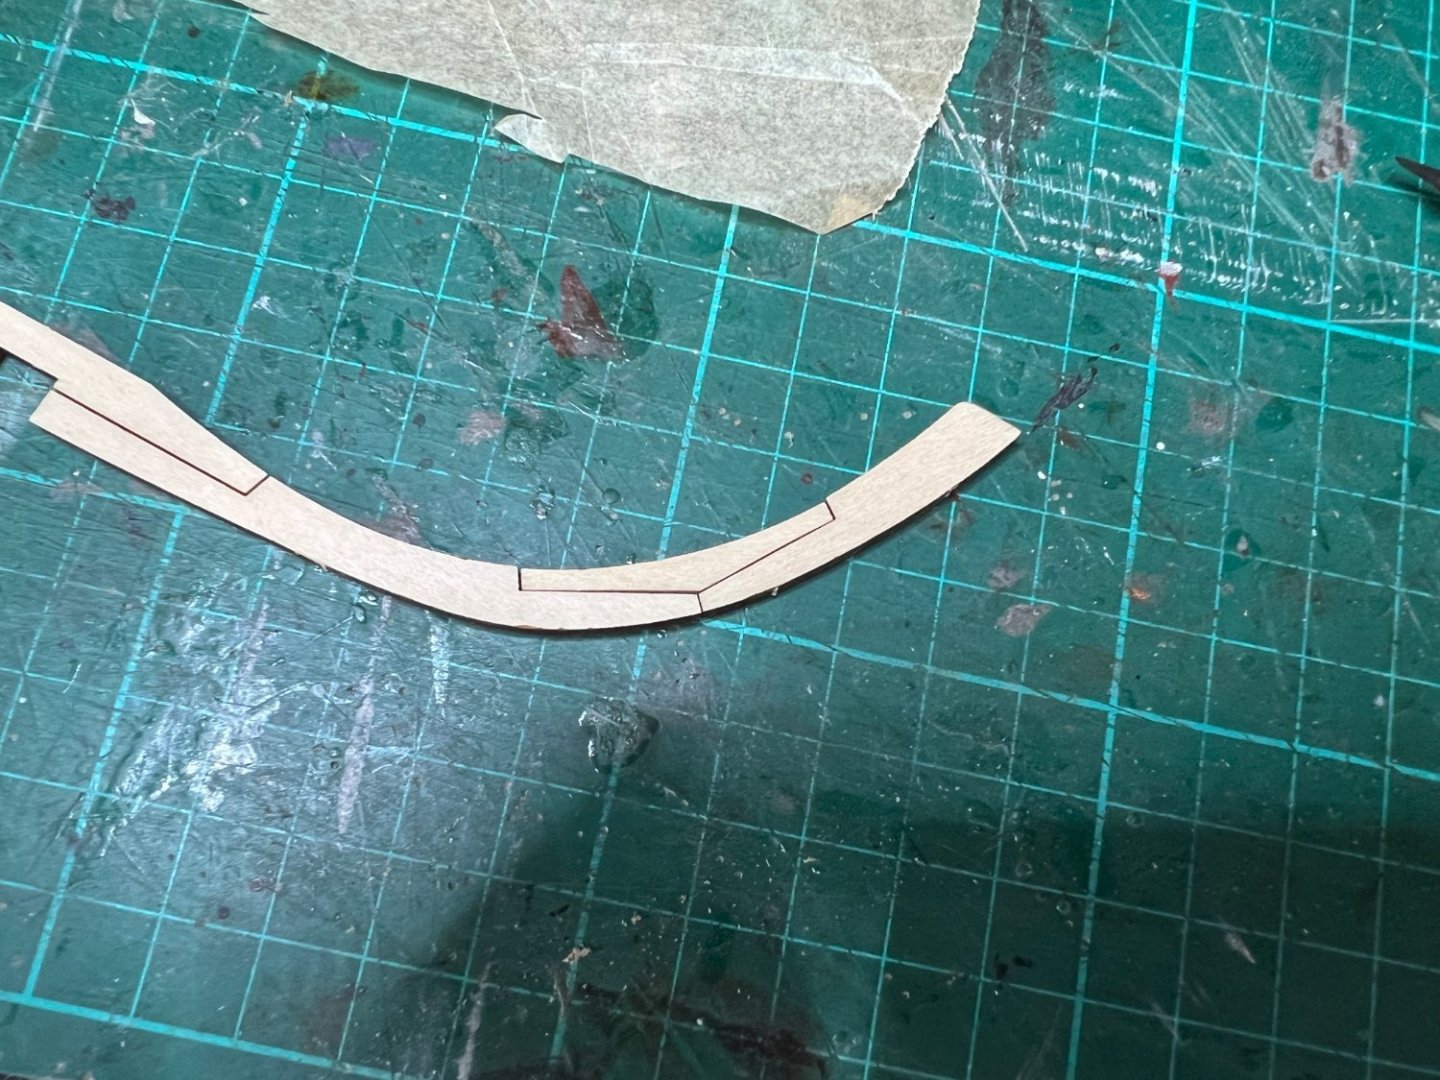
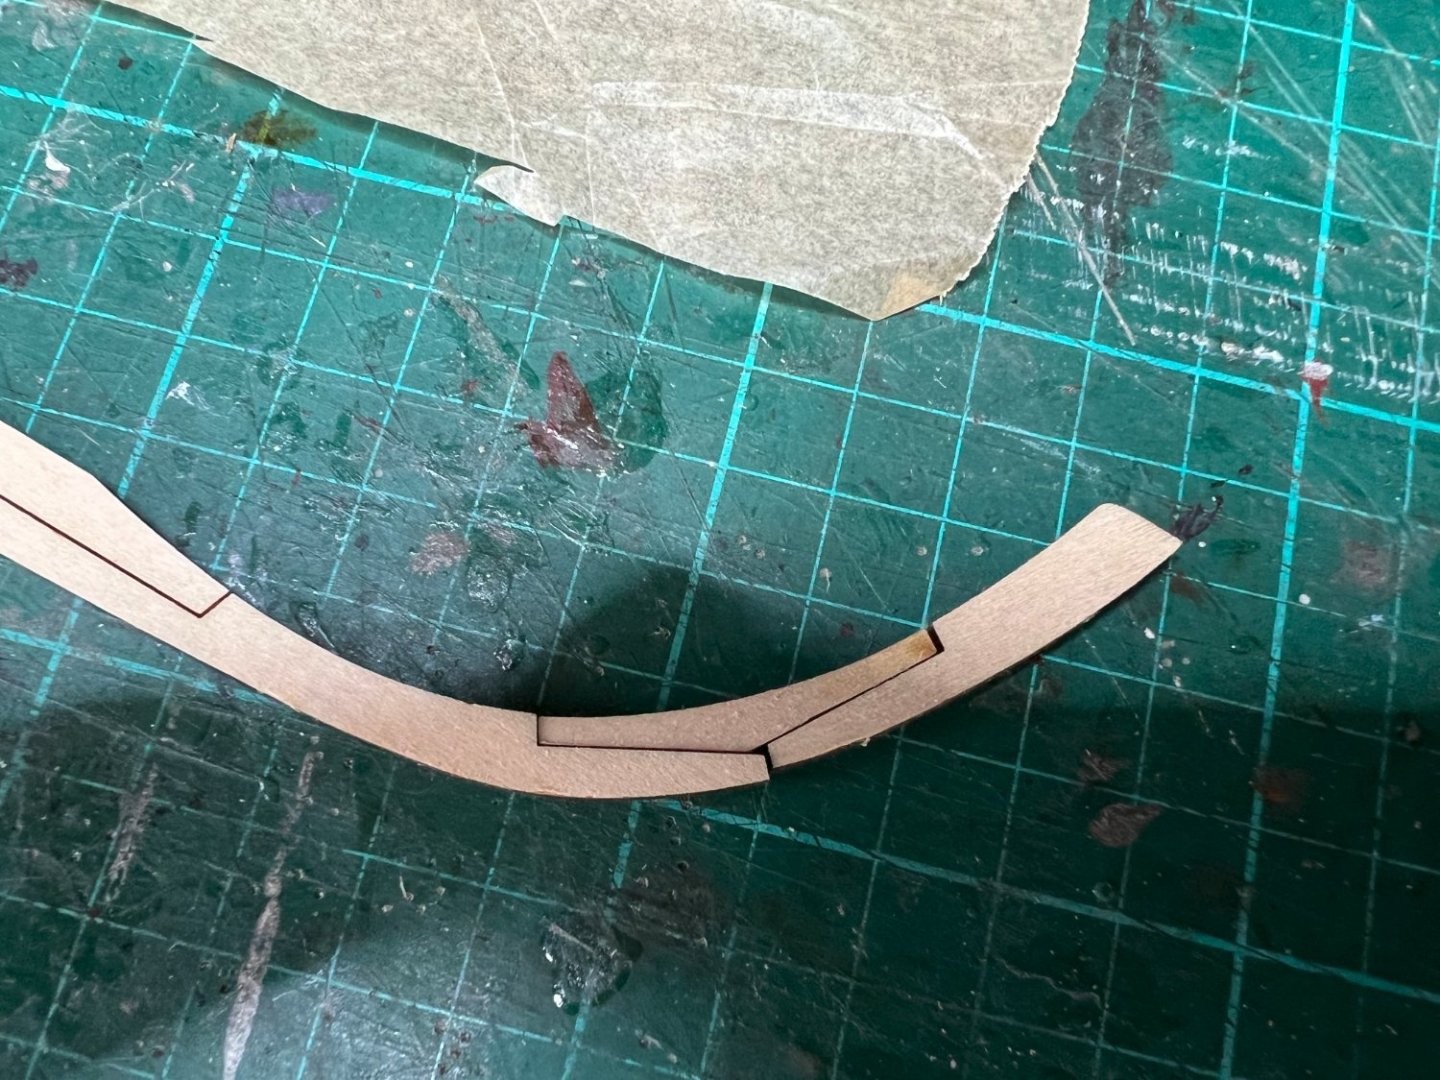
Just for fun here's a caparison between the corel 1:98 vs the Artesiana Latina 1:72 HMS Victory Cross Sections!
- 32 replies
-
- 5
-

-

-
- Victory
- Artesania Latina
- (and 1 more)
-
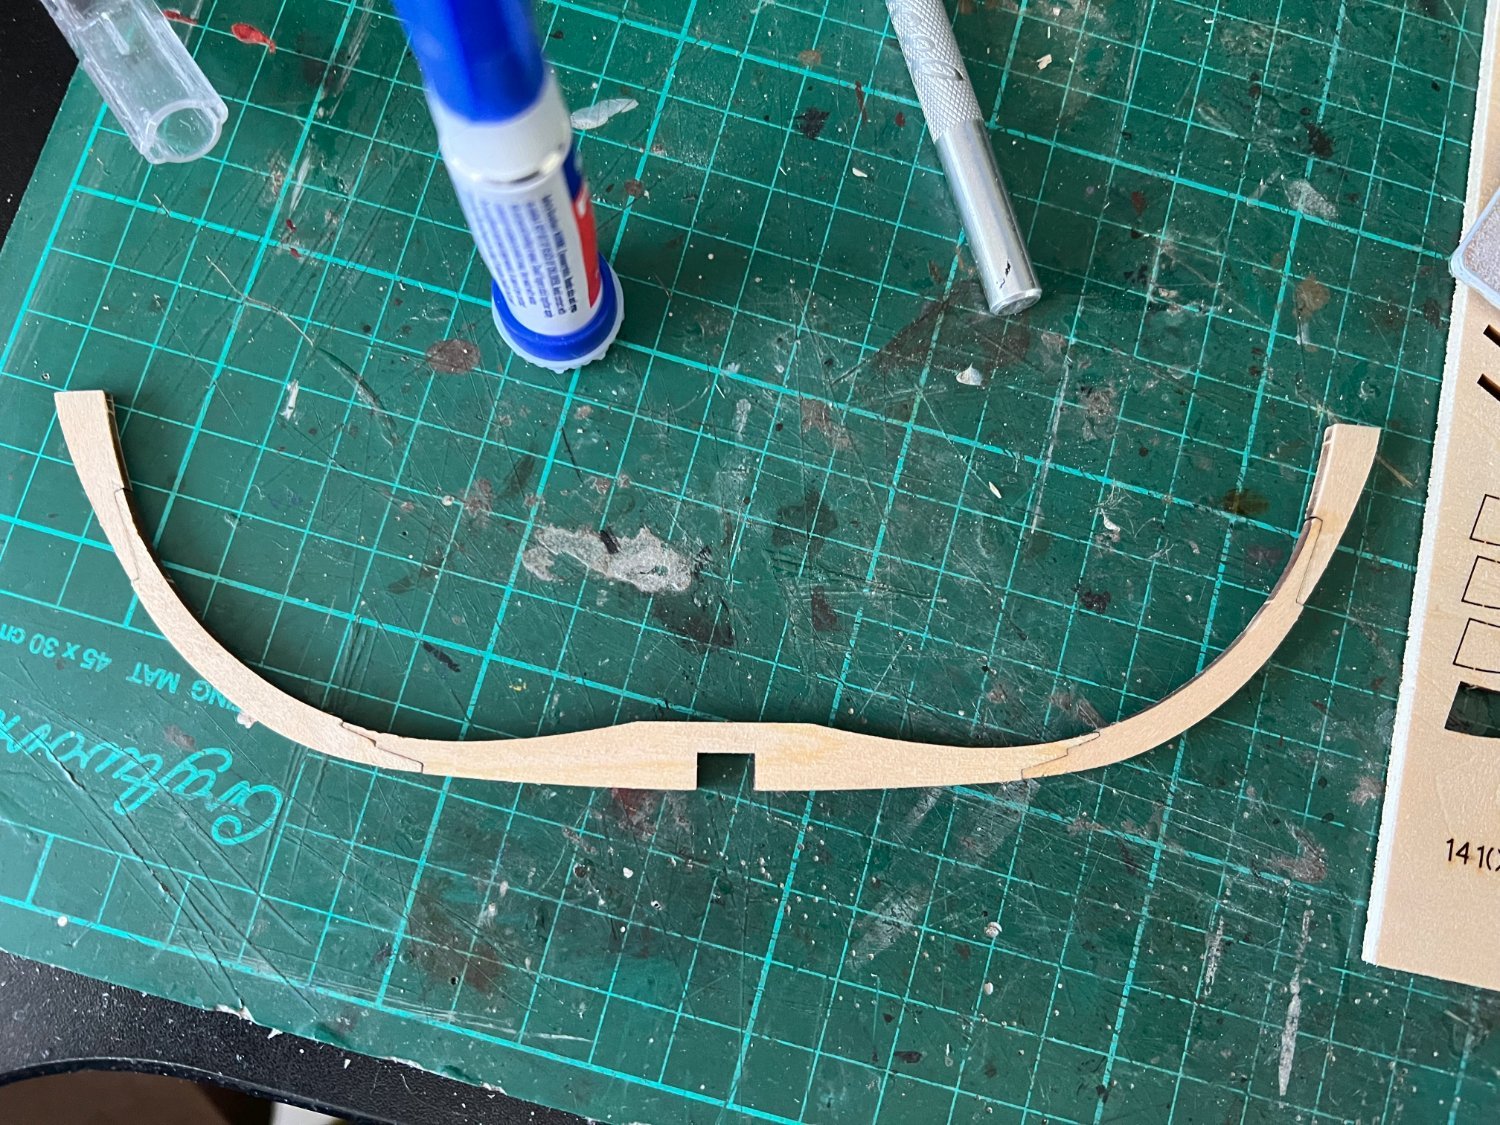
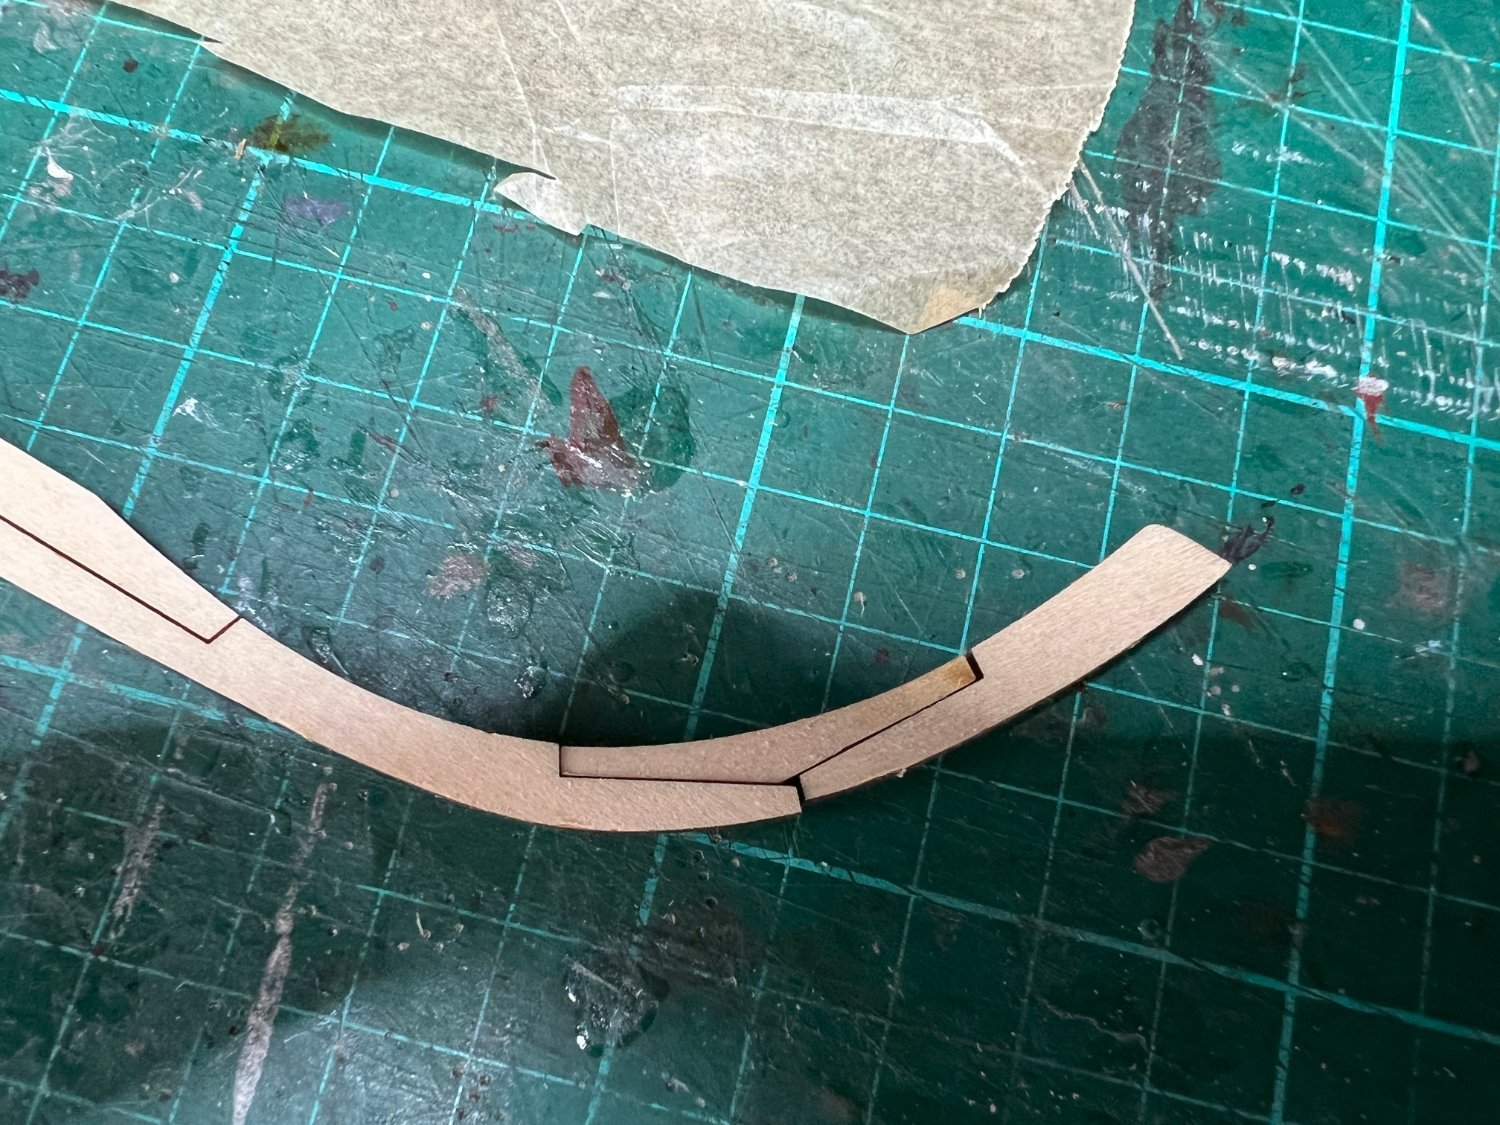
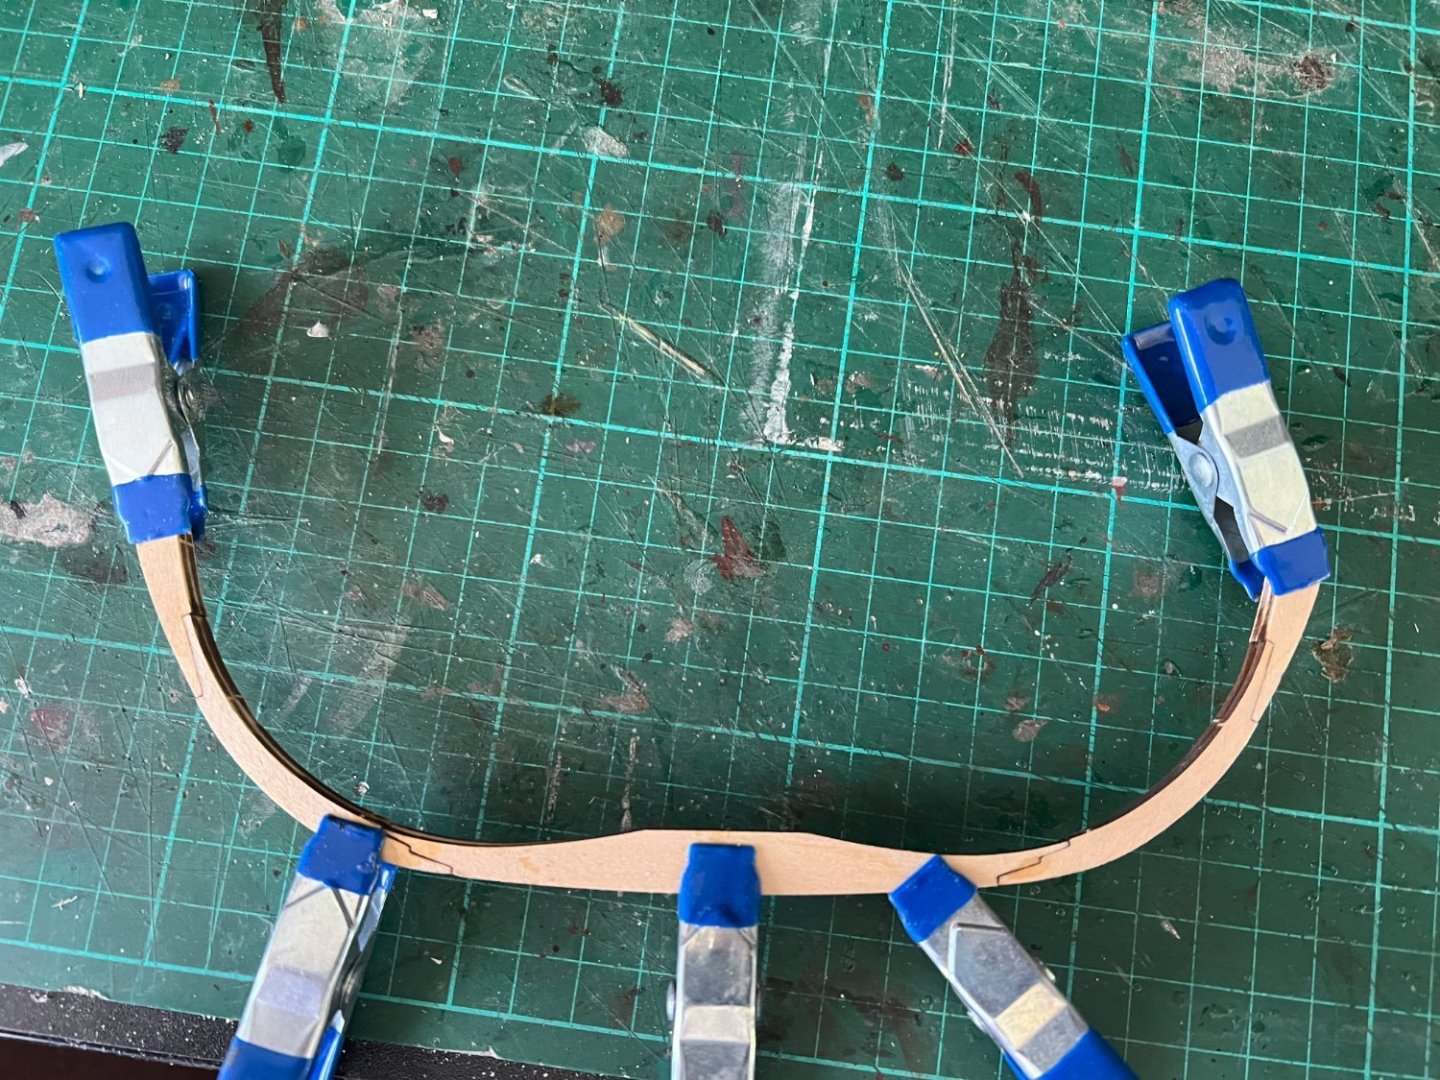
Working on the Riders ,pretty straight forward except you need to be careful with the parts for piece 13 - part 13B has one leg longer than the other and that's the one you glue to 13A ,(images showing the right and wrong way below) 12 is just 3 pieces but be careful notching the top to fit in place as they may break ,after a small repair and clamping the top in a vice to cut the notches it went much better😕😄 Test fitting went ok ,no real problems so their ready to go once i make the other pair and do some sanding. Richard


- 32 replies
-
- 4
-
-
- Victory
- Artesania Latina
- (and 1 more)
-
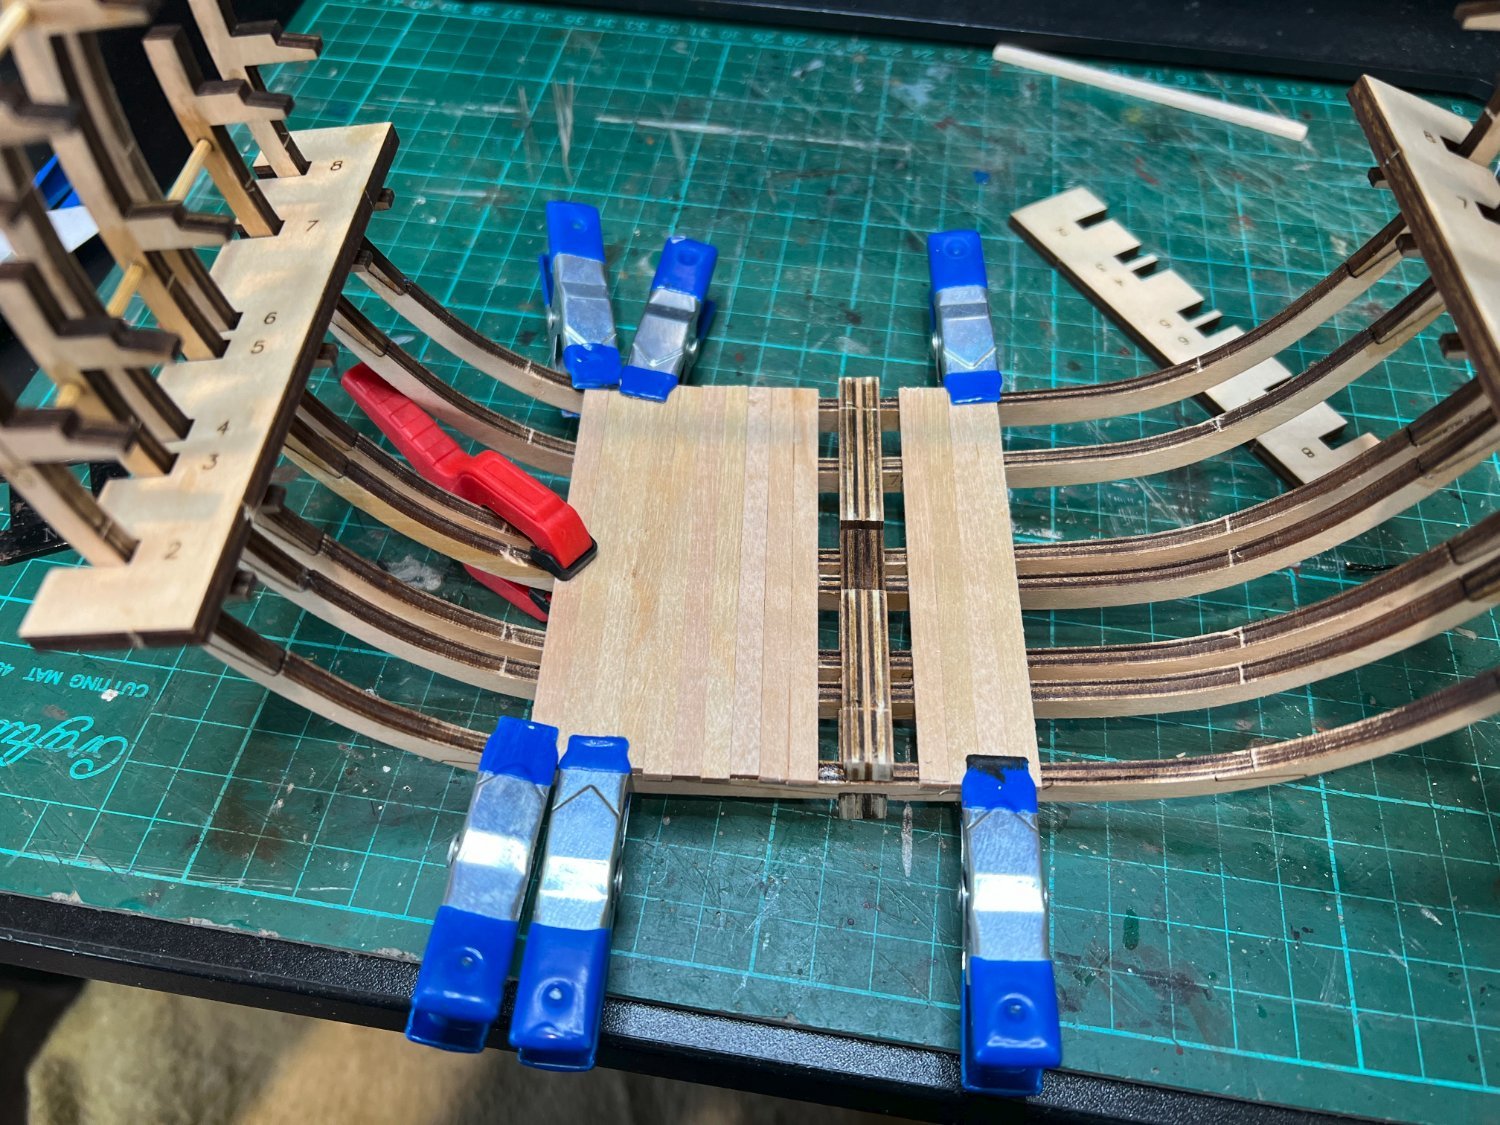
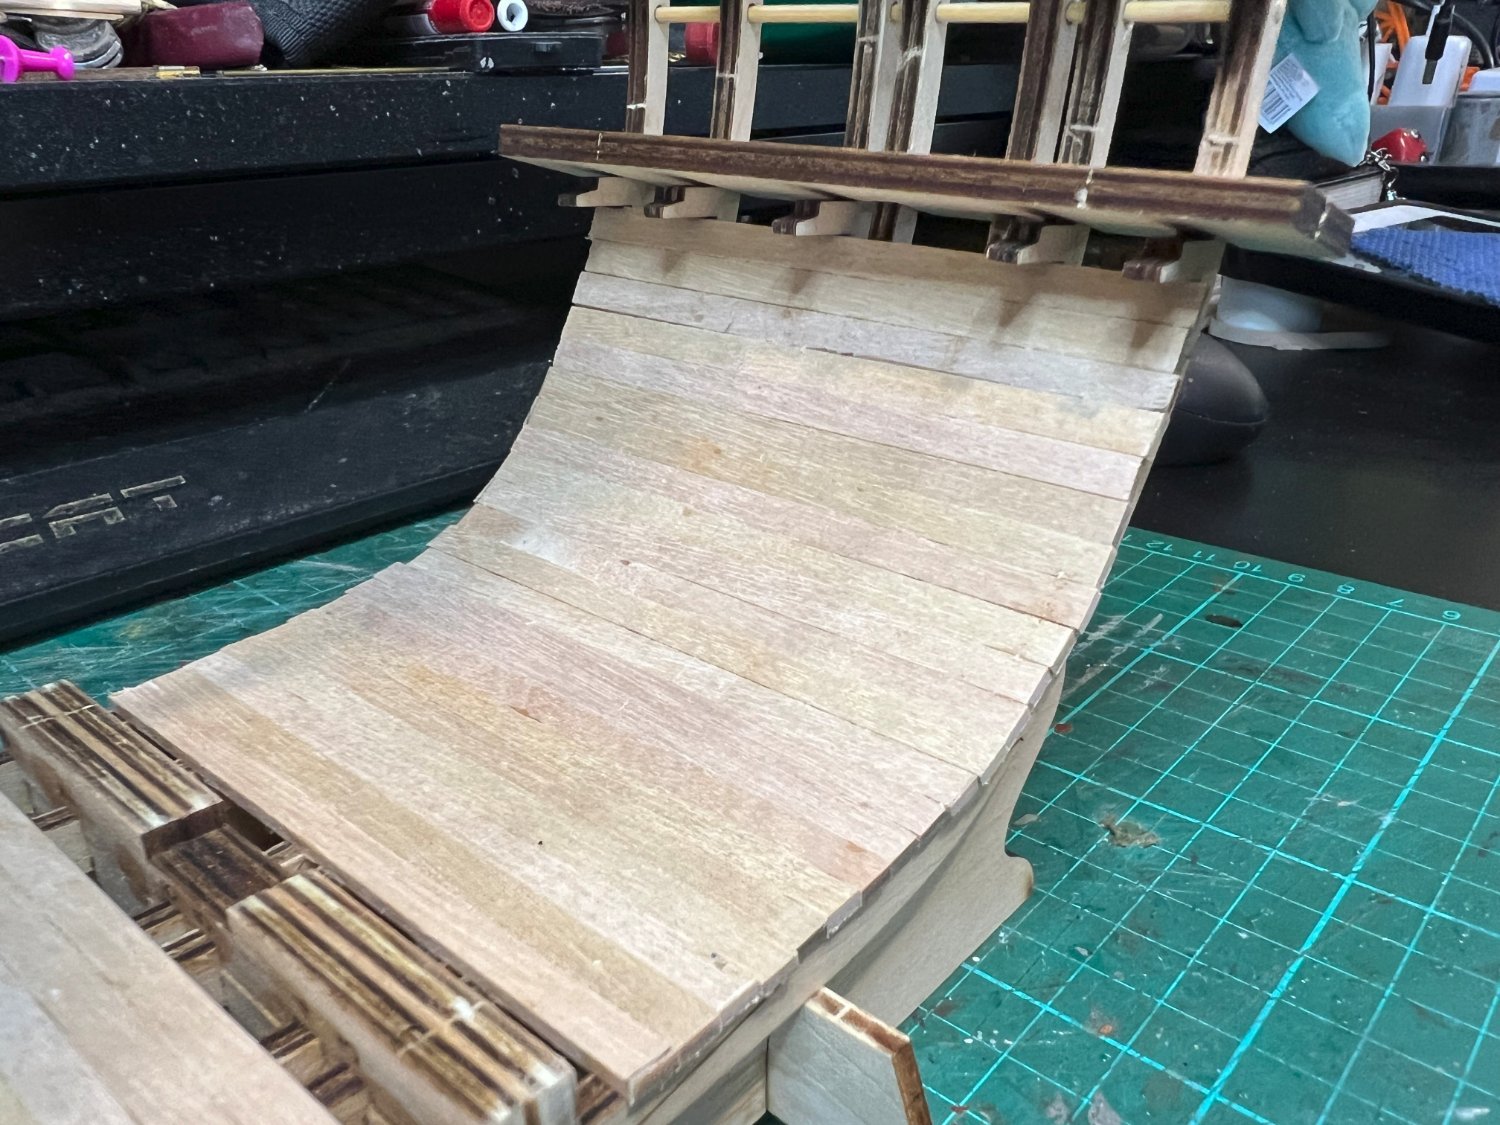
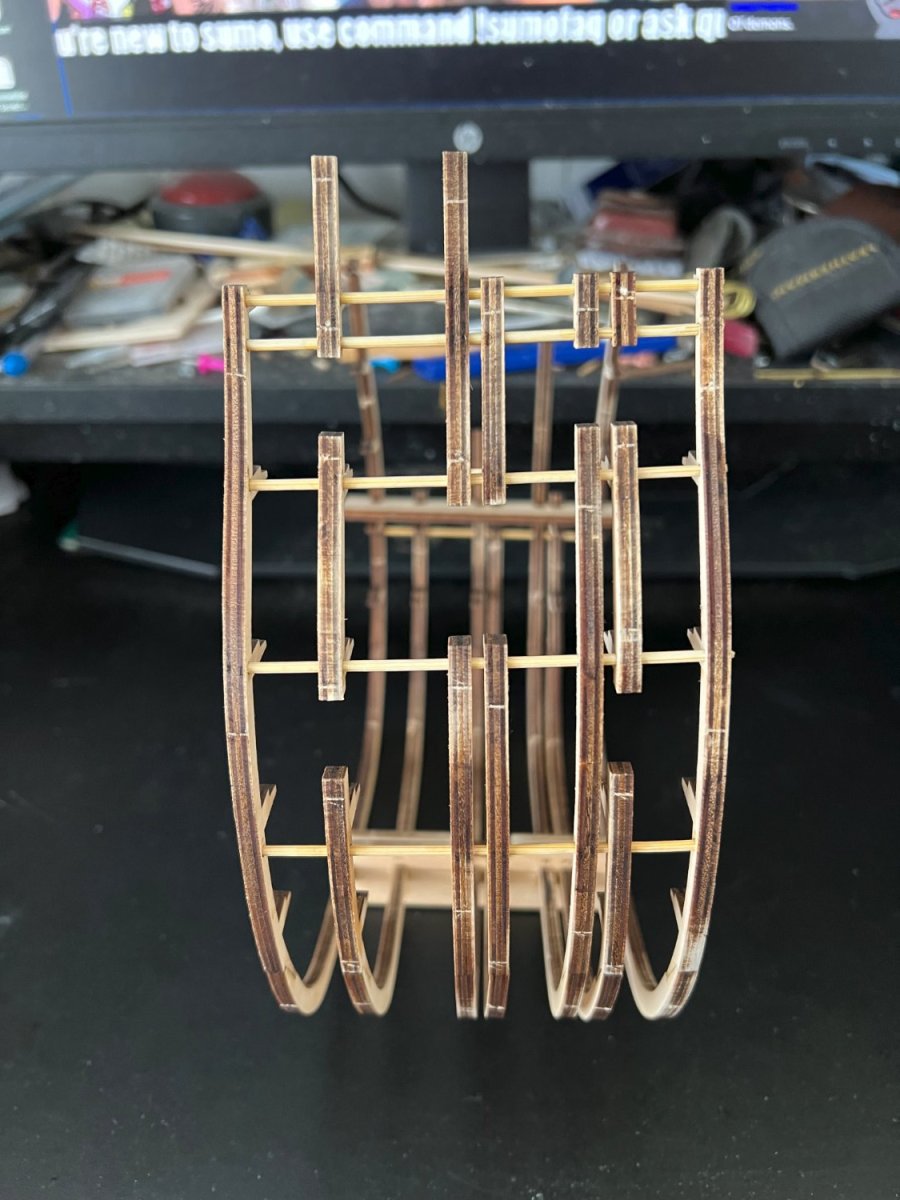
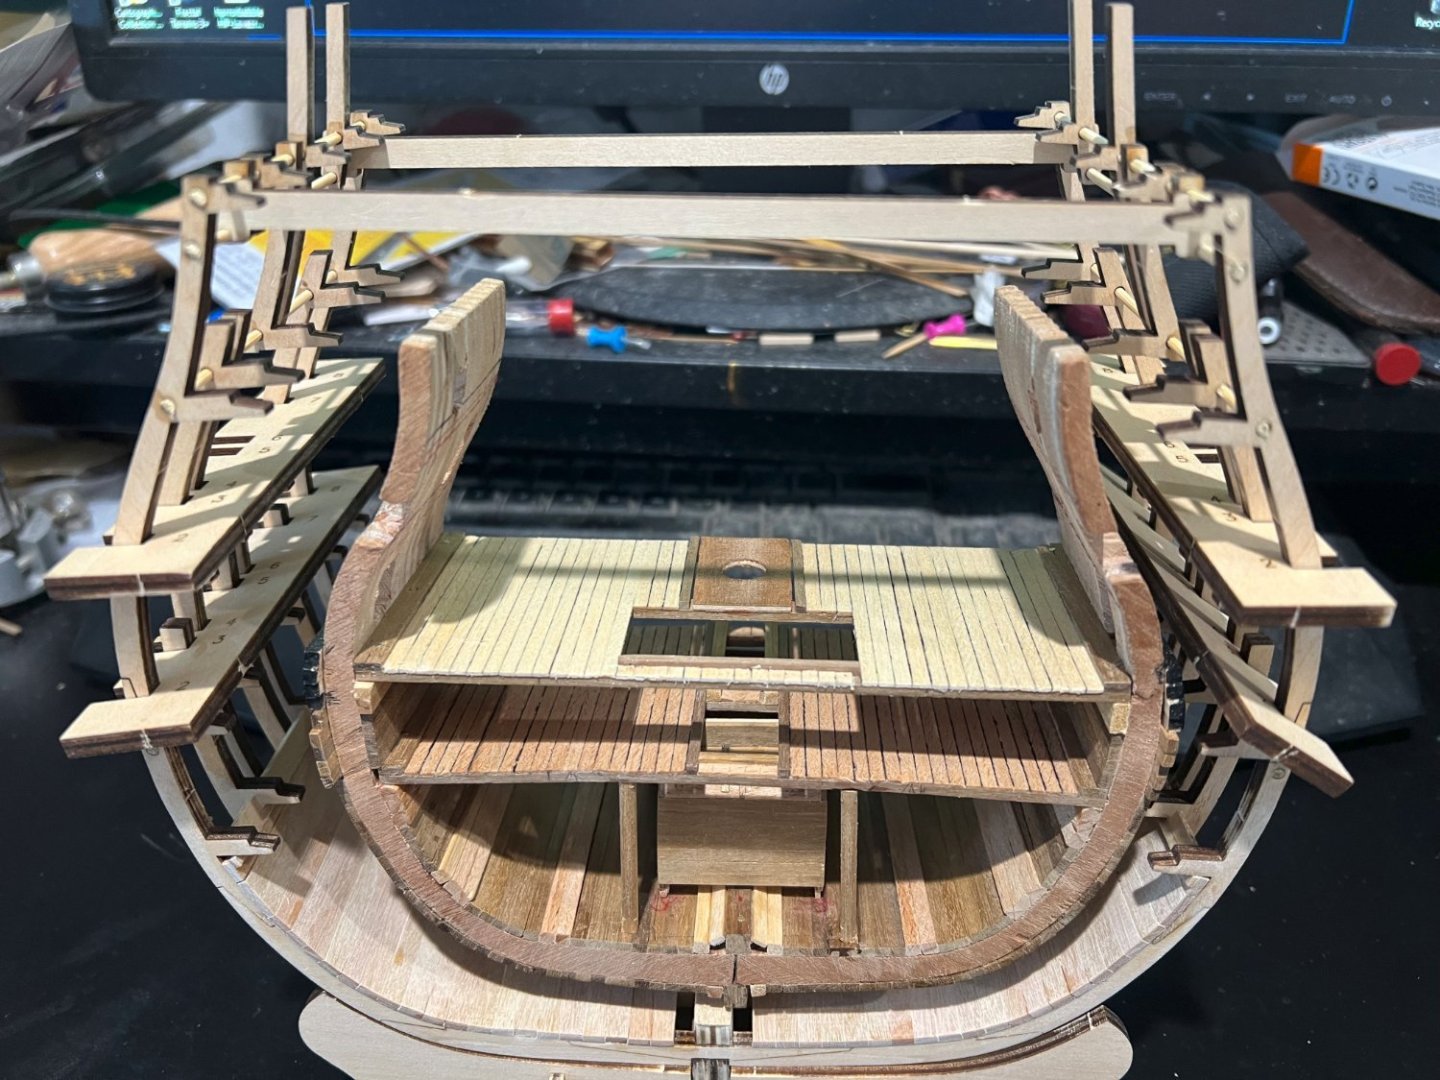
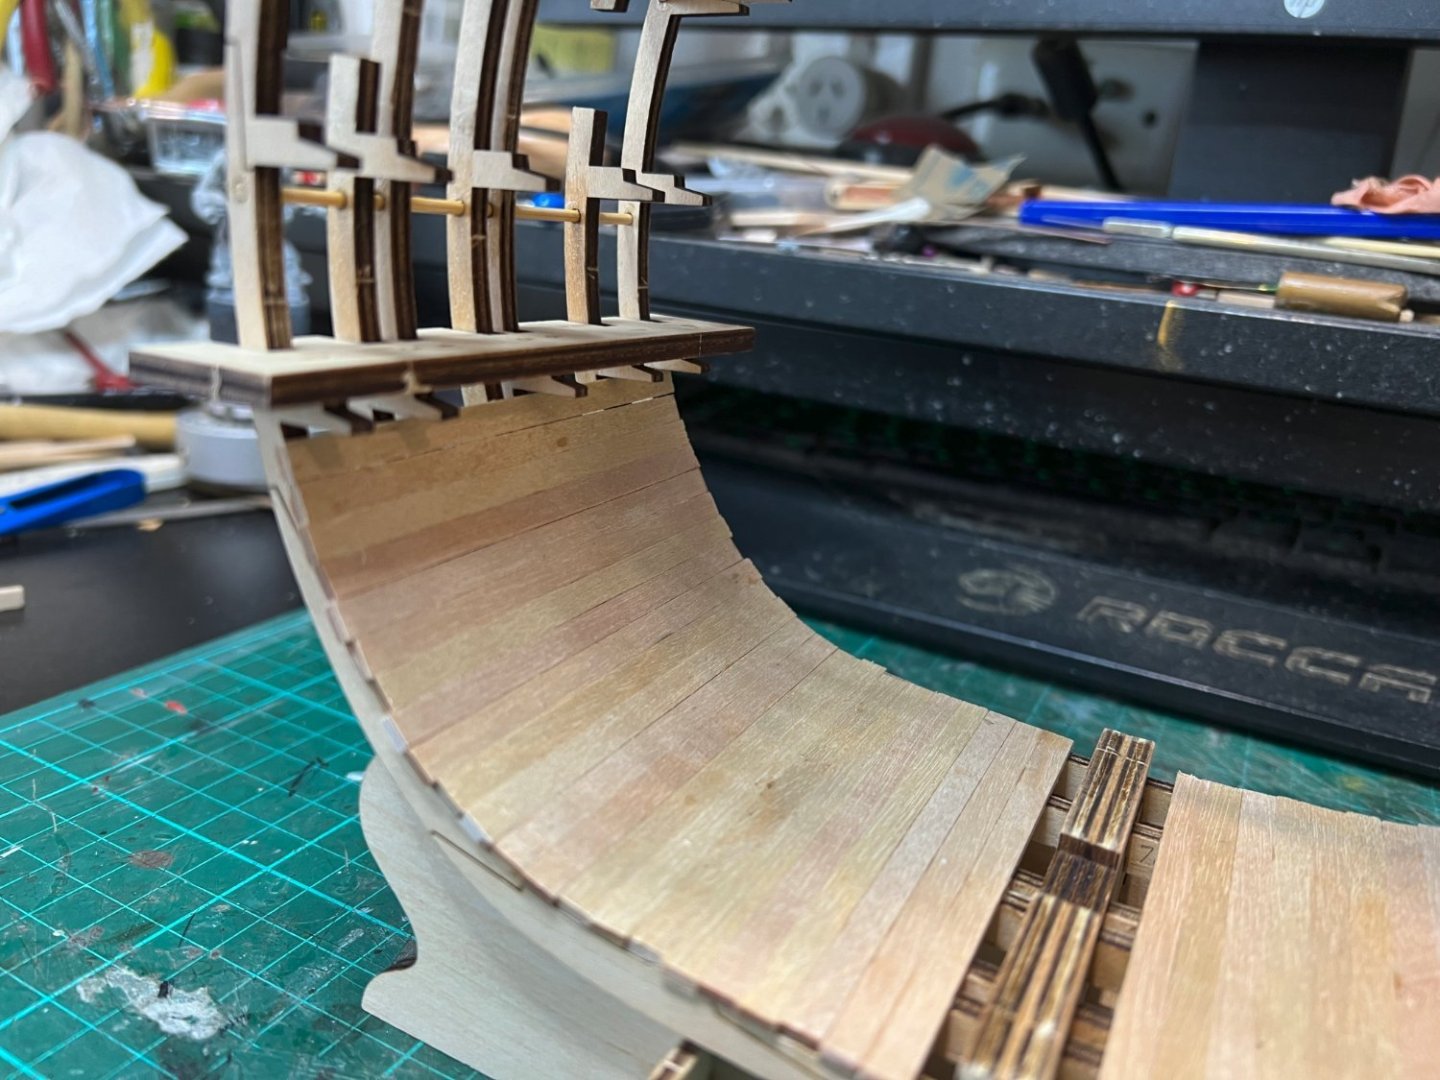
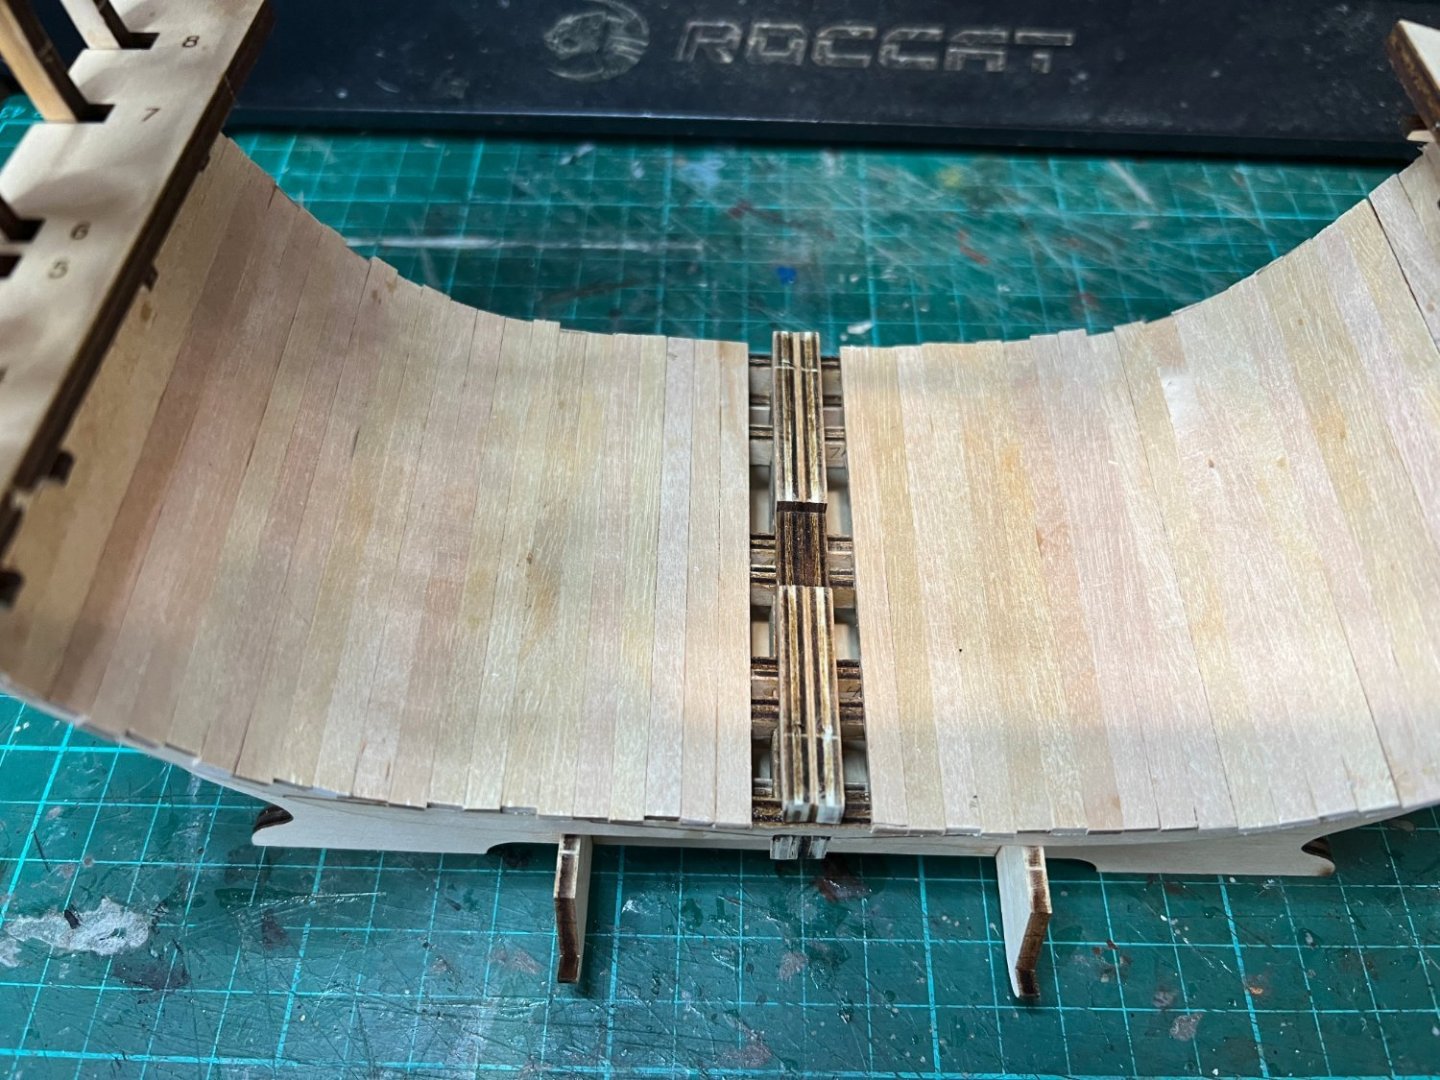
I've planked the hold ,1st thing is to glue 2 2x5mm planks together to make a spacer between the keelson and the 1st plank to make the limber channels ,later on you make the boards! So far no real issues other than I glued a couple of frames to the keel slightly askew ,(only around 1mm off square at one end),I glued the keelson to compensate for the keel and the inner planking's fine! ,should only need a minor tweak once i start the outer hull planking!

- 32 replies
-
- 4
-
-
- Victory
- Artesania Latina
- (and 1 more)
-
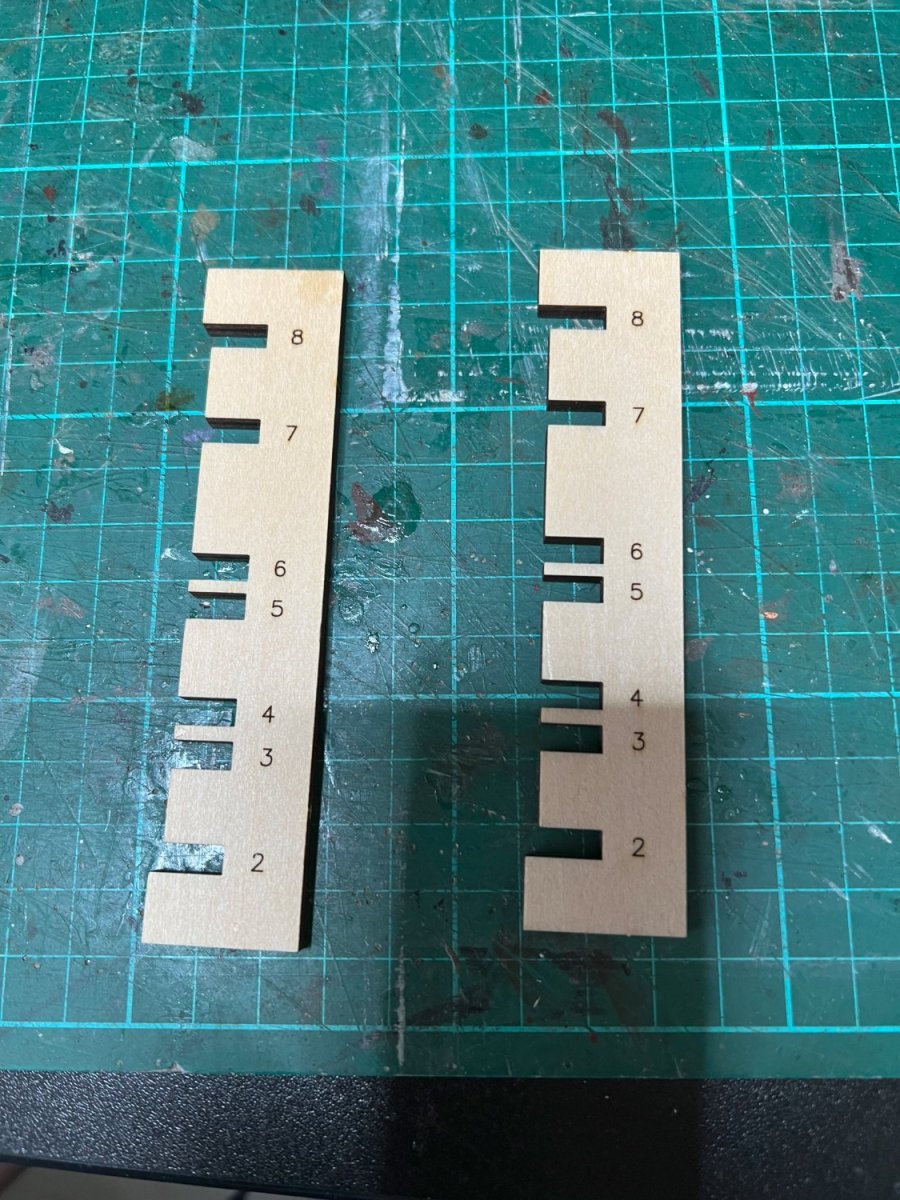
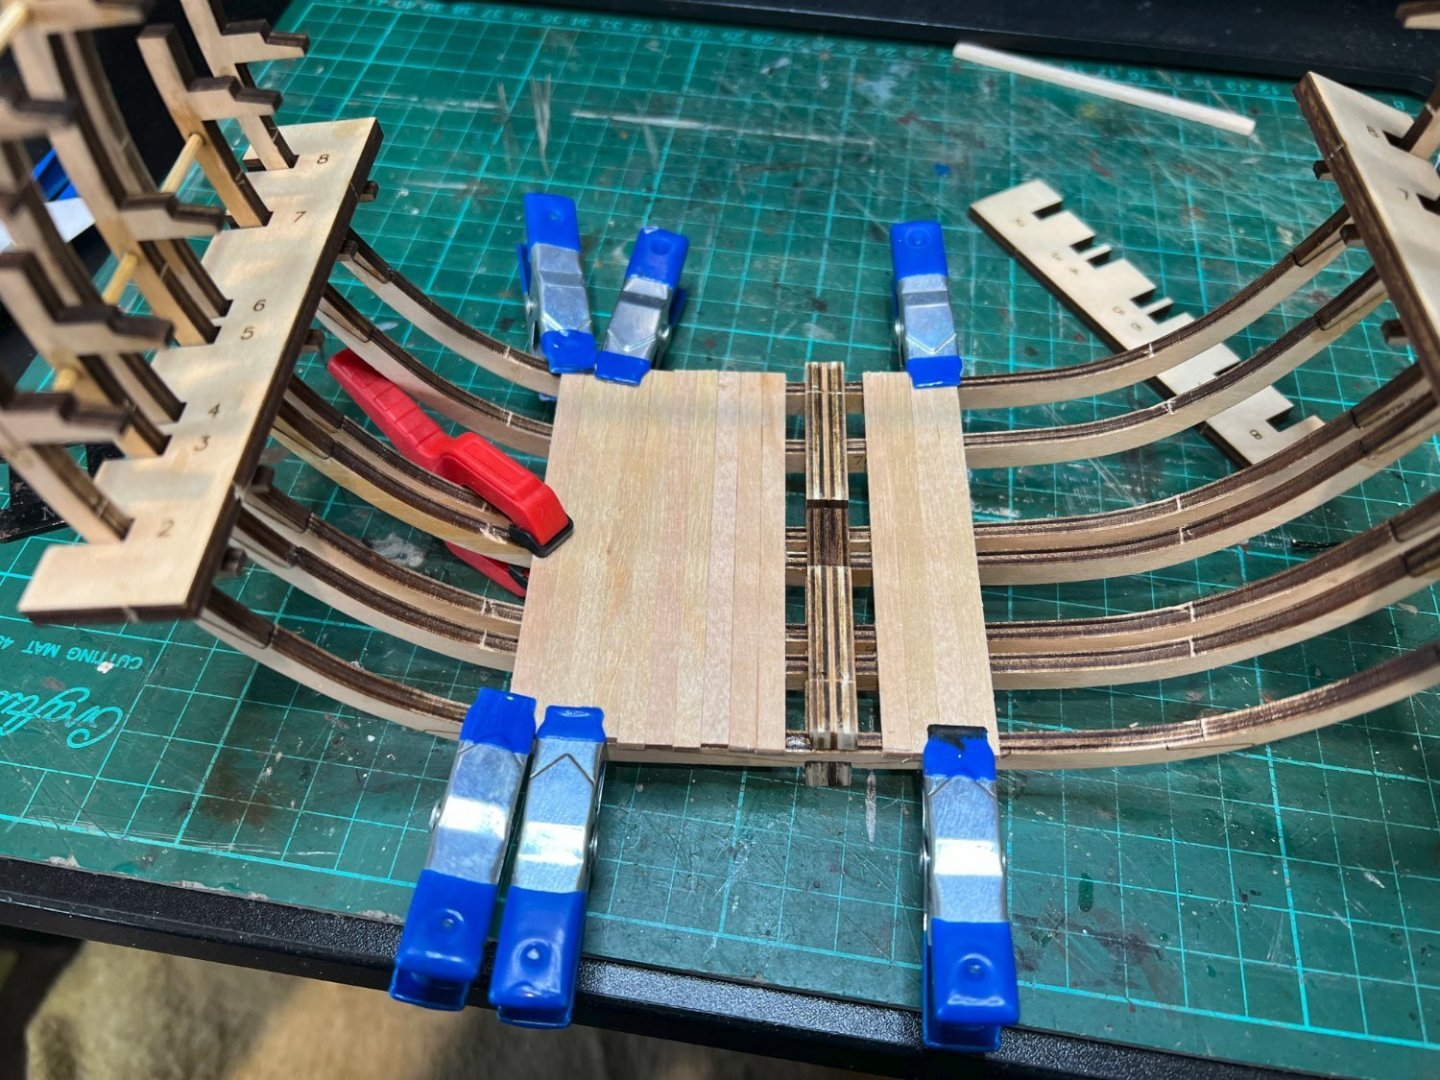
Frame spacing tools ,you get 2 pairs one each for port and starboard , they get moved up as you go and allow for the correct spacing for the floating frame parts as well as the main frame parts ,run the dowels through the holes and then glue!

- 32 replies
-
- 3
-
-
- Victory
- Artesania Latina
- (and 1 more)
-
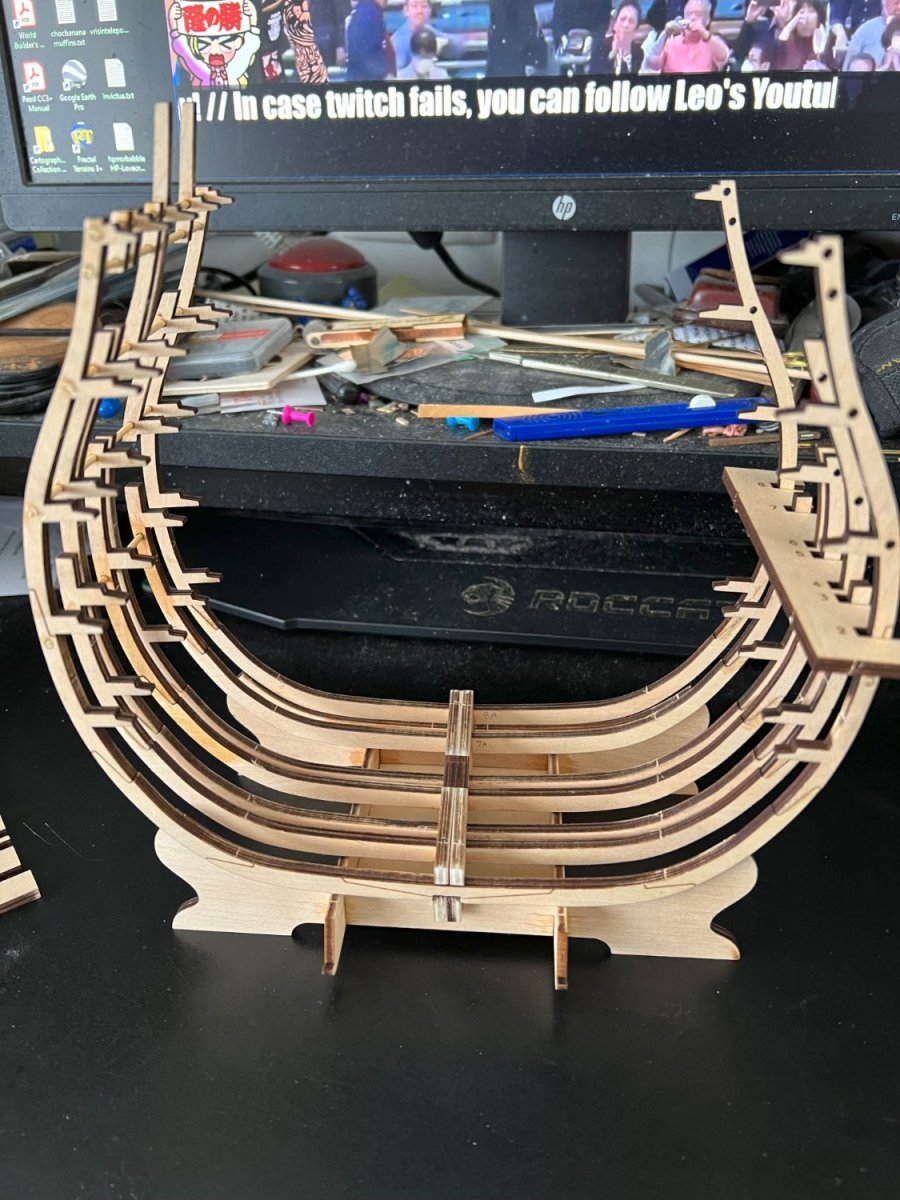
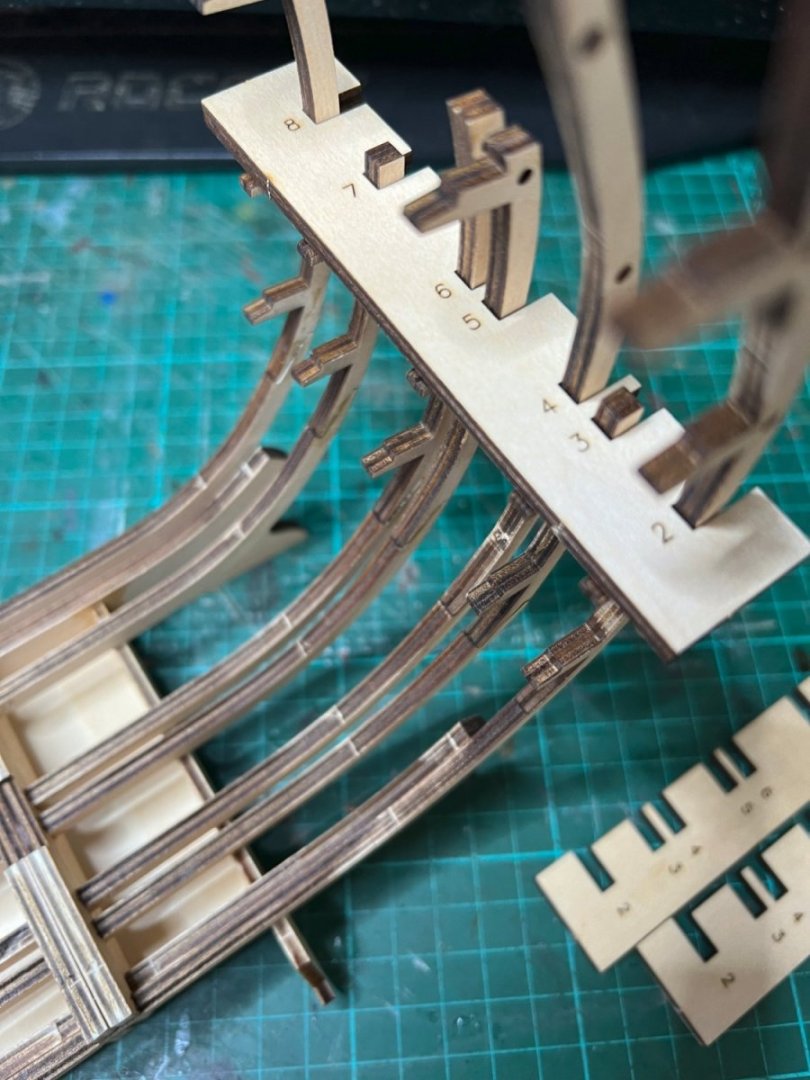
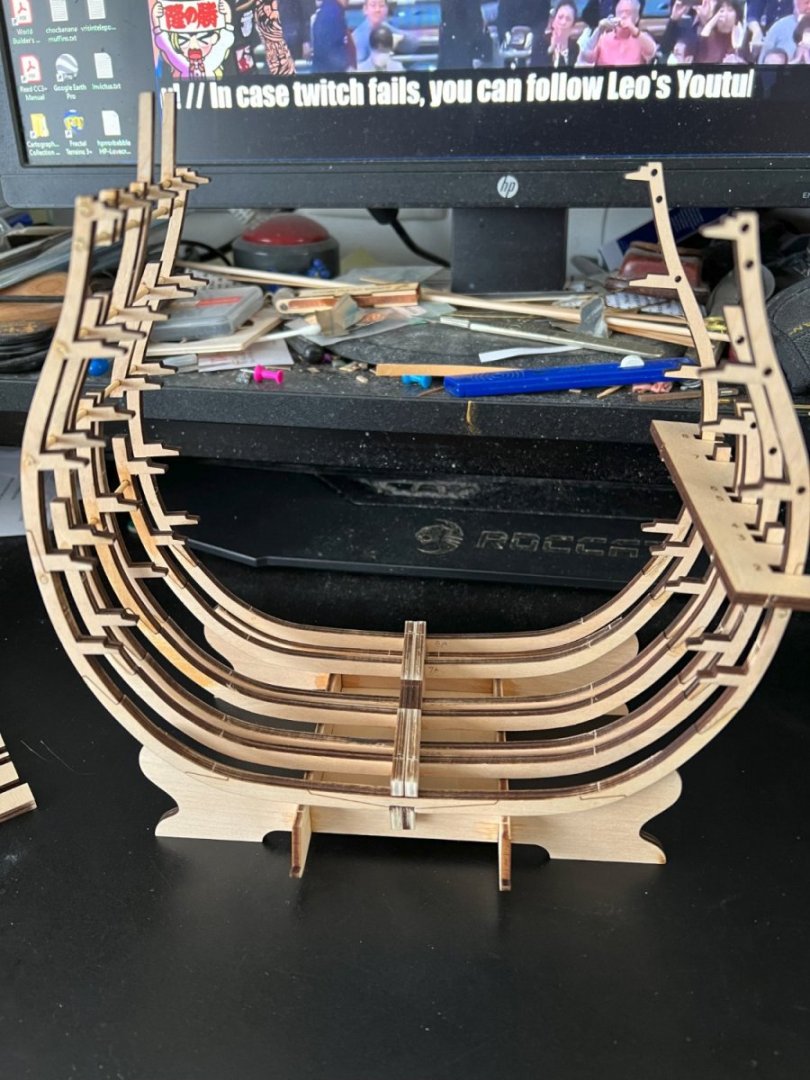
I said when I got the kit that I would start the kit after I got close to the rigging stage on my Pegasus But I made a mistake and thought I'd see how the frames go together ,one thing lead to another so I've almost finished the framing😏😄 Parts are clearly marked and the youtube instructions are ok But some stages are in the wrong order after their editing ,it's also a prototype from the look of it but it is all there ,just needs some going back and forth in the video! The Laser cutting is very fine and precise so little clean up other than cleaning the char and the small nubbins left after their cut from the sheet! When i started I thought it seemed pretty flimsy but once you've fully built the side it's solid! pictures are front on and Starboard frames finished! ,the gun port and entry port framing is separate and are attached to the dowels. link to the whats in the box post

- 32 replies
-
- 3
-
-
- Victory
- Artesania Latina
- (and 1 more)
-
Long lasting paint
Darius359au replied to GrandpaPhil's topic in Painting, finishing and weathering products and techniques
I dont know about 50 years but I've got plastic models over 30 that haven't had any paint issues ,I use hobby acrylics like tamiya ,AK ,Mig etc! Acrylics also have a pretty benign chemistry as well with usually doesn't react with paints under or over them. Richard -
Favourite recruiting poster for the 95TH Rifles ,(And also a Sharpe Fan😎) “In this distinguished Service, you will carry a Rifle no heavier than a Fowling-Piece. You will knock down your Enemy at Five Hundred Yards, instead of missing him at Fifty. On Service, your Post is always the Post of Honour, and your Quarters the best in the Army; for you have the first of everything; and at Home you are sure of Respect—because a BRITISH RIFLEMAN always makes himself Respectable. GOD SAVE the KING! and his Rifle Regiment!”
-
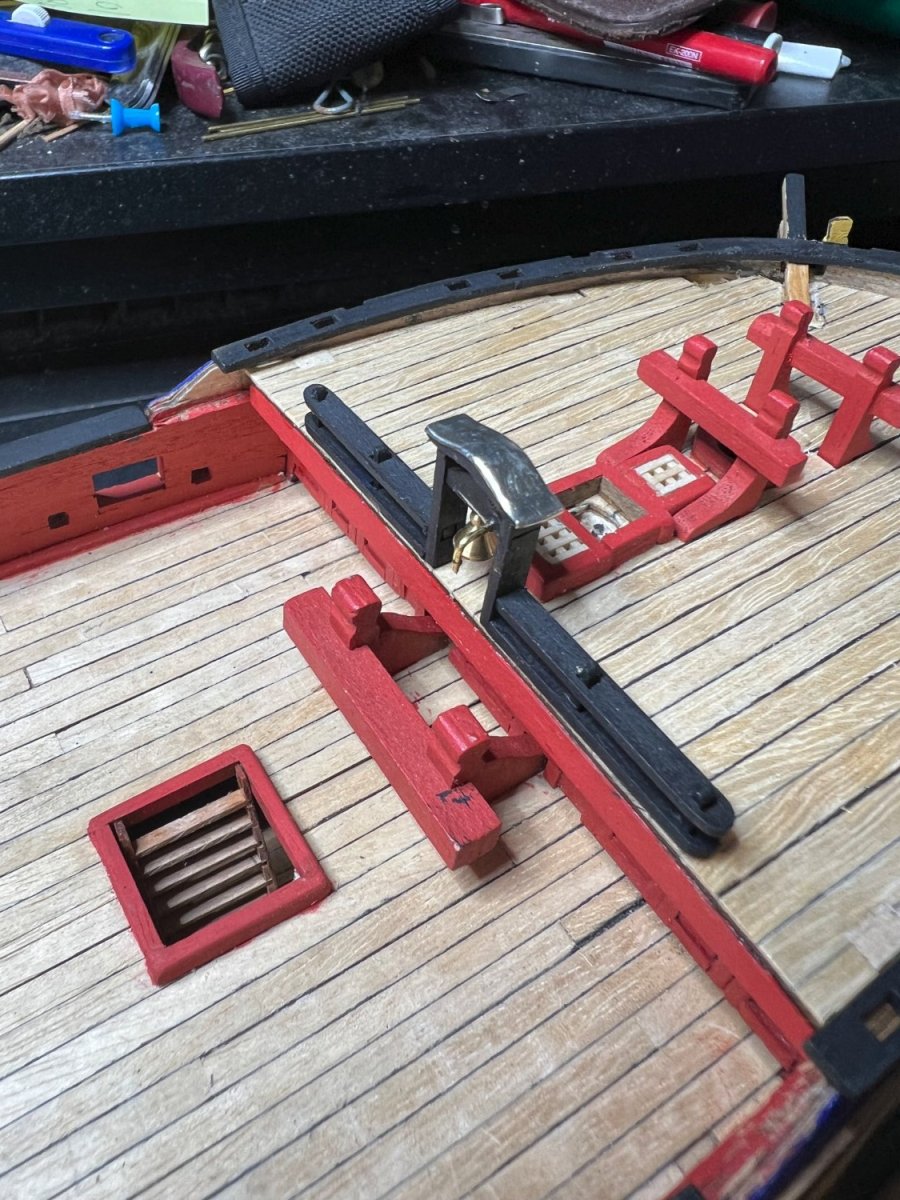
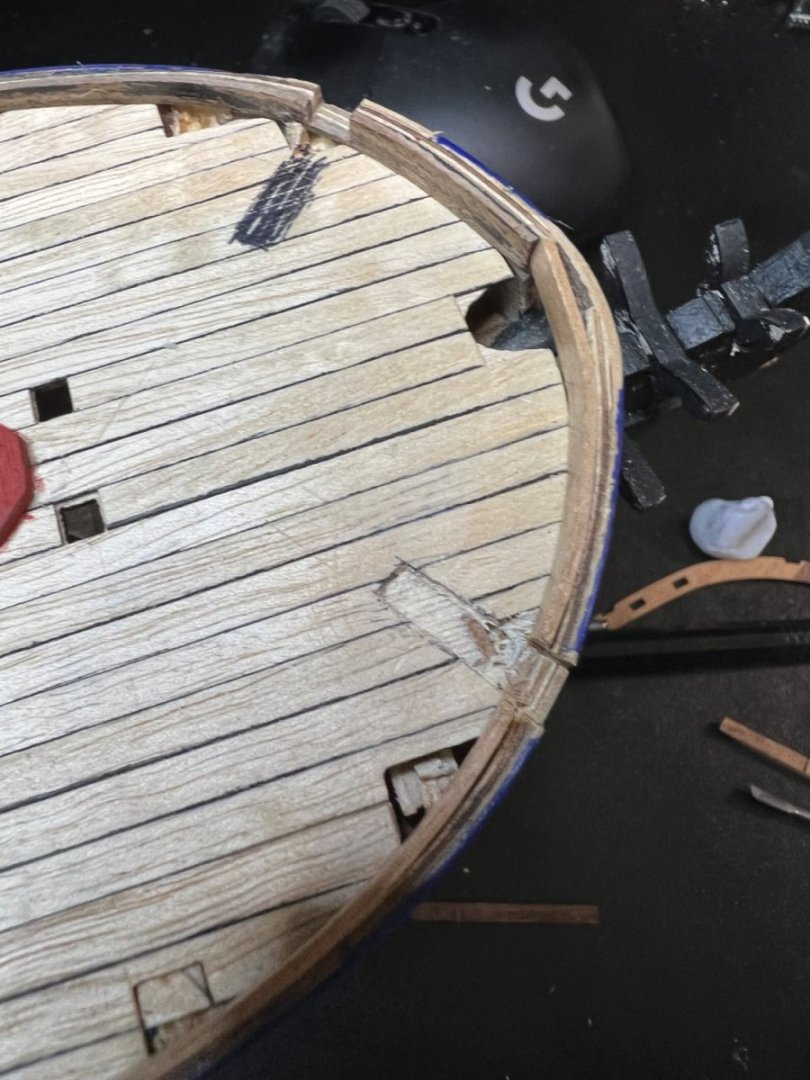
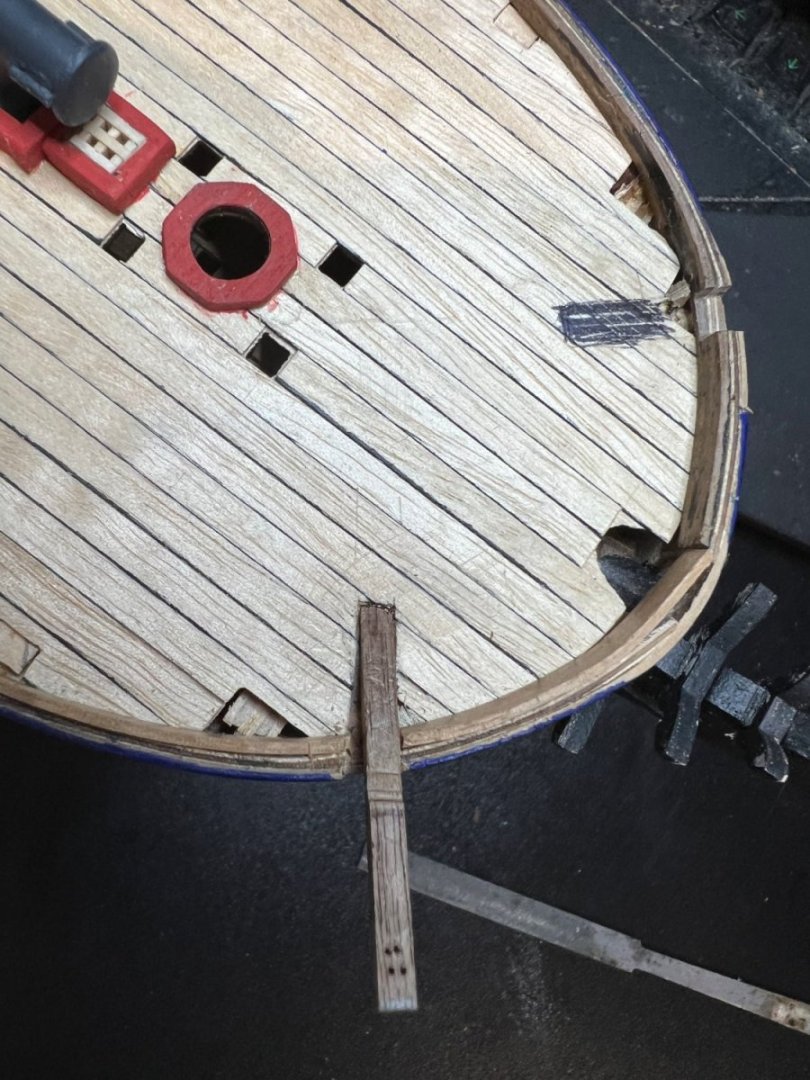
plugging along ,heads are done and just needs decorations ,bellfry and rails for the spare spars in place and the bellfry is leaded. Next job is finally fix the quarterdeck in place and build the gangboards to the fo'c'sle -guns need to go in first and holes for the inbuilt "sheaves" for the rigging cleats. Image - "leaded" belfry ,just needs painting Richard

- 49 replies
-
- 2
-
-
- Pegasus
- Victory Models
- (and 1 more)
-
One matt varnish I've use a fair bit for mini's is from The Army Painter ,you can get 17ml dropper bottles or spray can's and can use it like a primer as well as a final coat! Richard
-
Thanks for you replies Greg and Allan ,Ironically I've got book 2 of the fully framed model yet for some reason I didnt think about looking in it... I've got enough to go on with and it's not critical to have in place now so I can add it later. Richard
-
@allanyed the kit quarterdeck has a skylight between the grating and the mizzen mast! ,I think it's on the NMM Pegasus quarterdeck plan, there's the large section with "grating" written in it then there's the next section towards the stern with no writing in it and it's in the right place for the kit's skylight.
-
Due to a save from a near disaster I am now in need of measurements for the quarterdeck skylight on my victory models pegasus - after somehow clipping the shelf i store pegasus on and nearly dropping her ,the skylight has been launched into the void! I'm wondering if anyone whose built pegasus and added details still have any measurement for the modded skylights they made? ,or can direct me somewhere that would have any. Richard
-
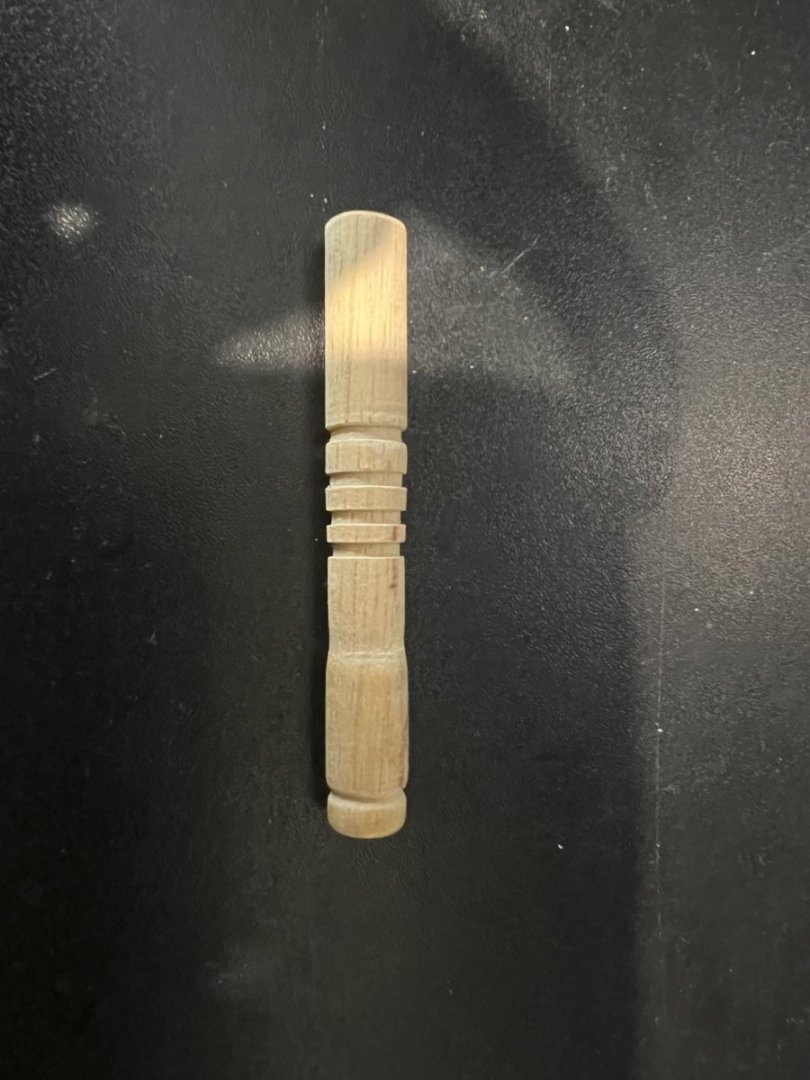
Sorry I missed the column part ,in the instruction video's ,for the large turned deck support one's you add square pieces to the top and bottom of them so they end up looking pretty close to the real ones!
-
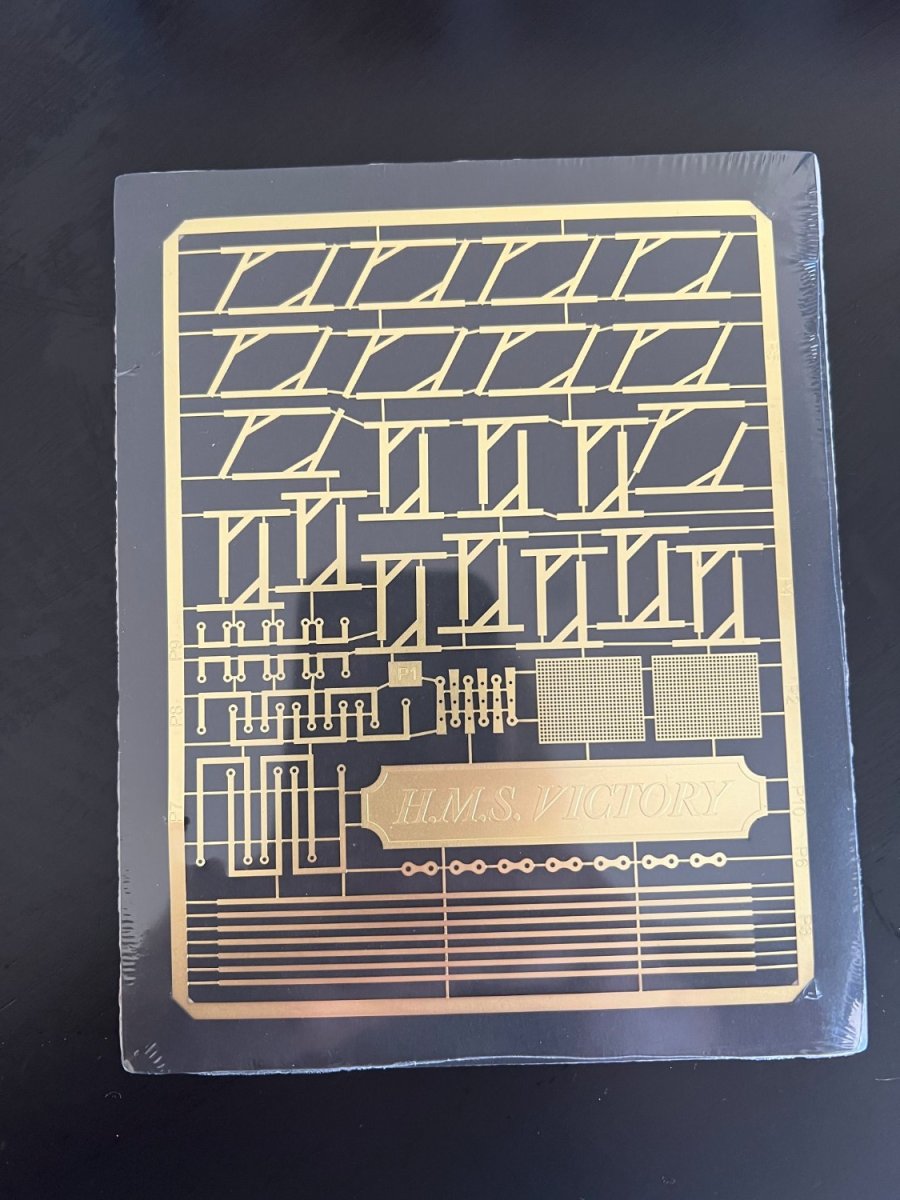
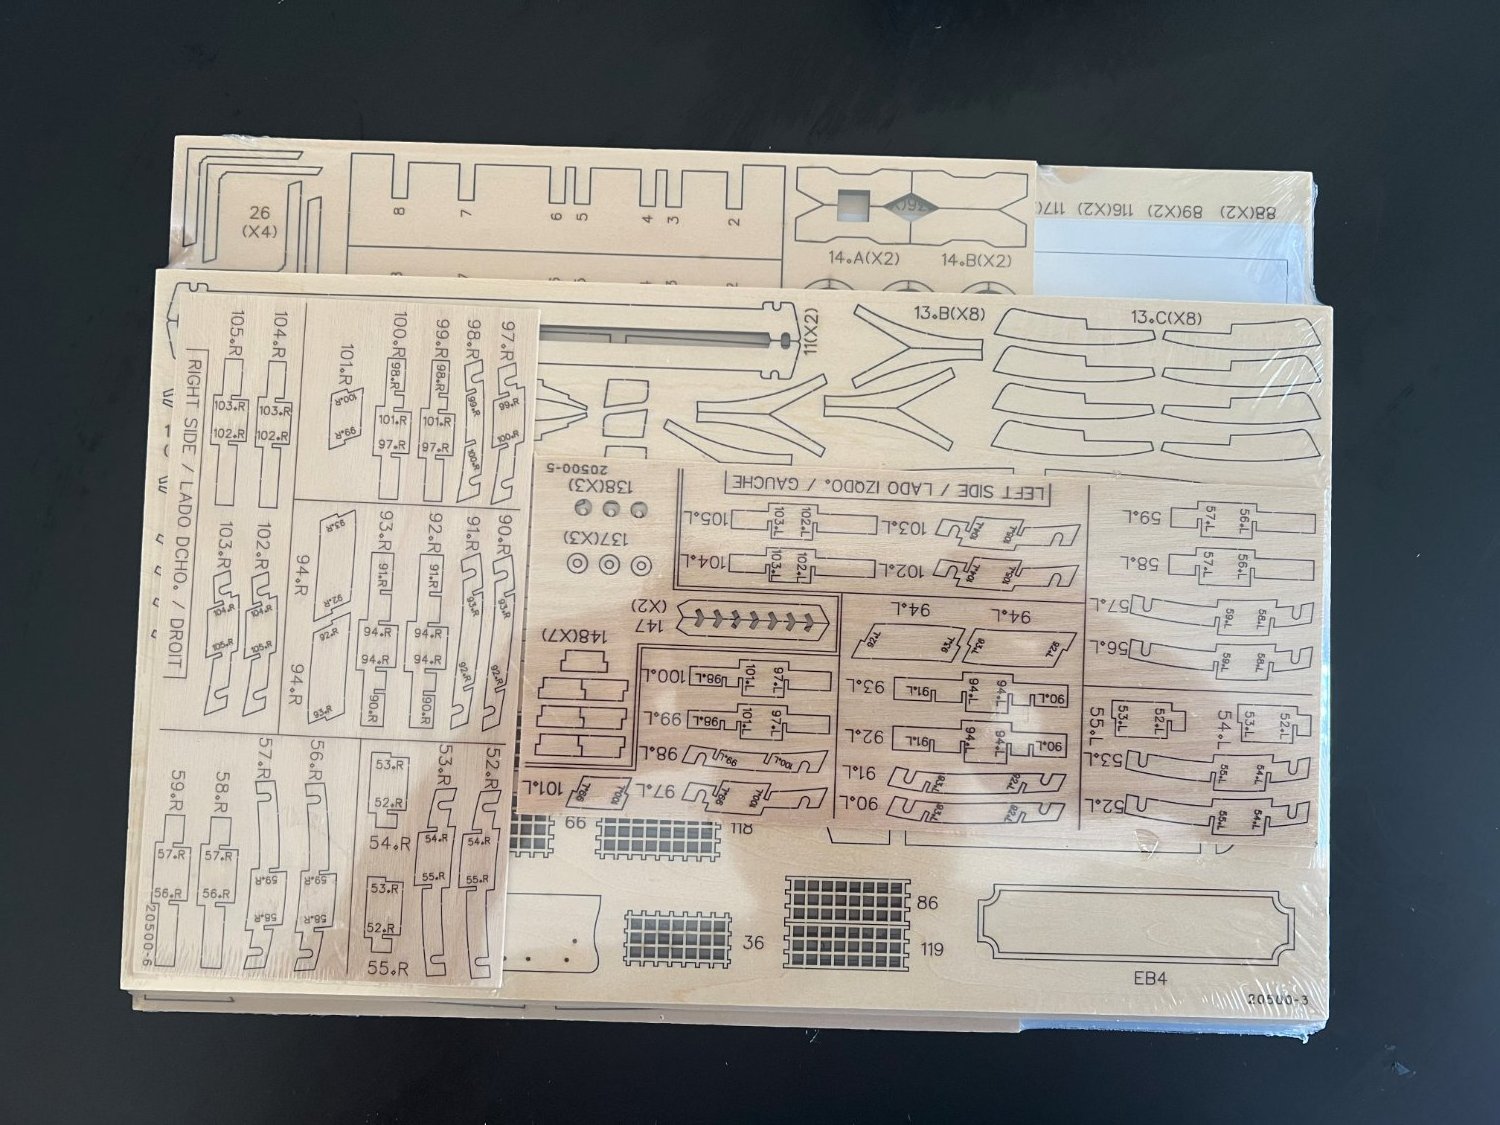
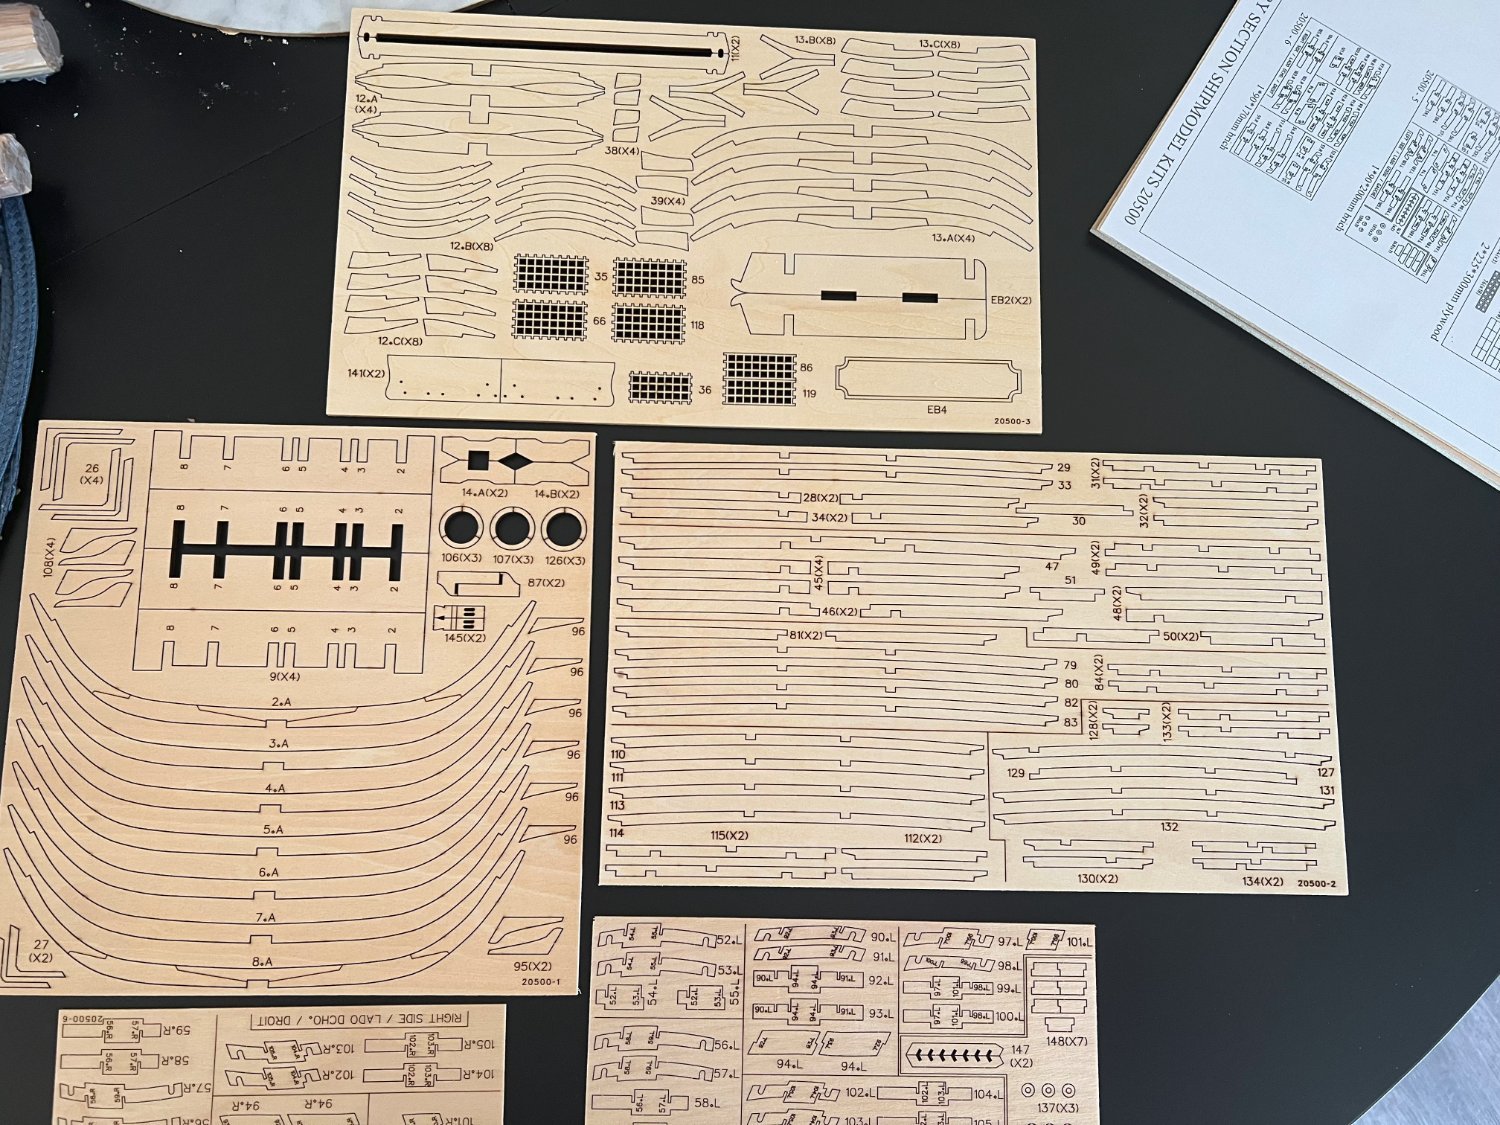
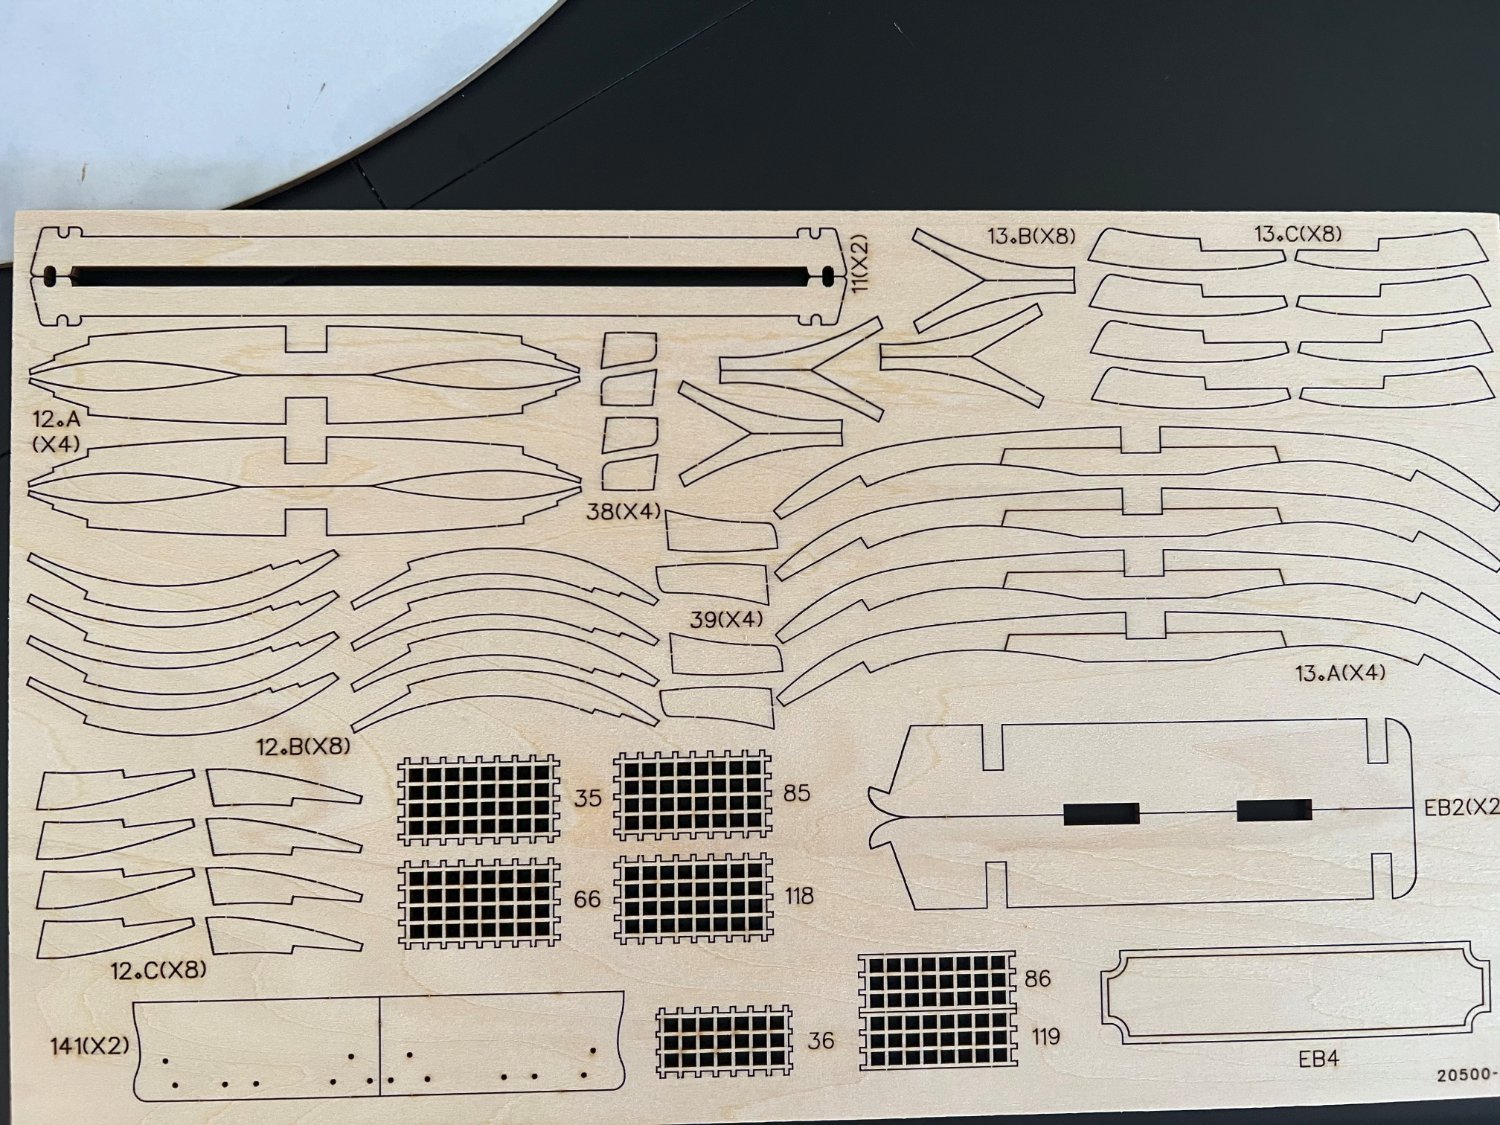
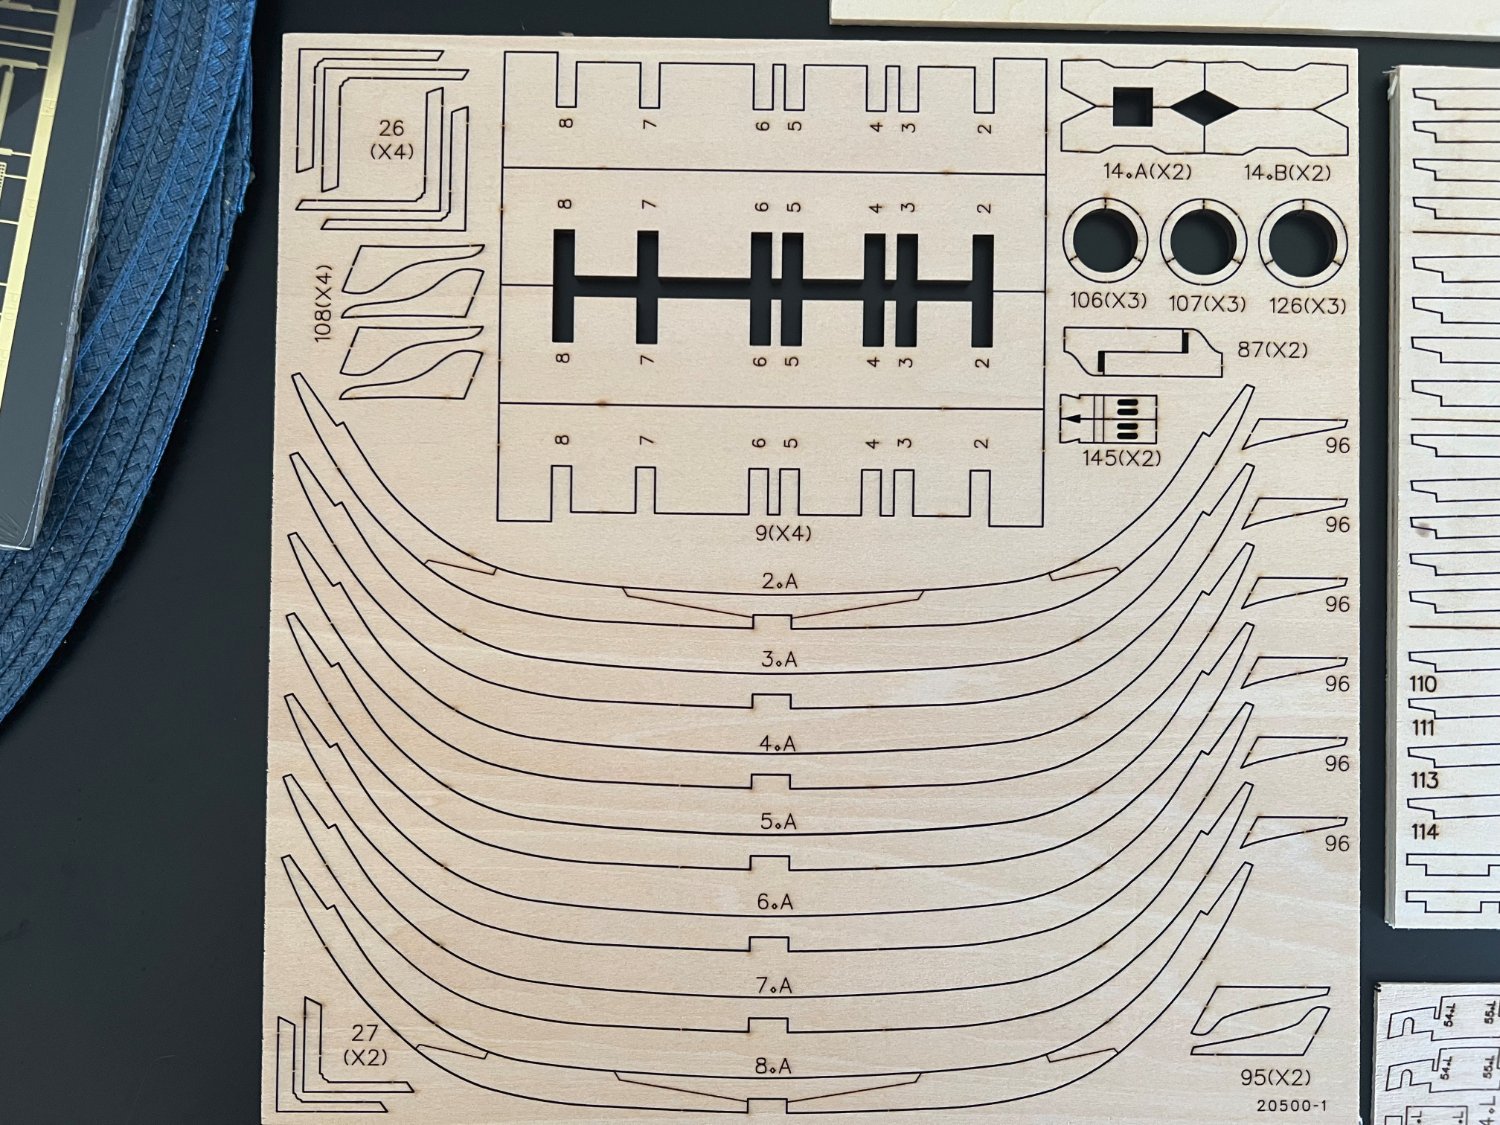
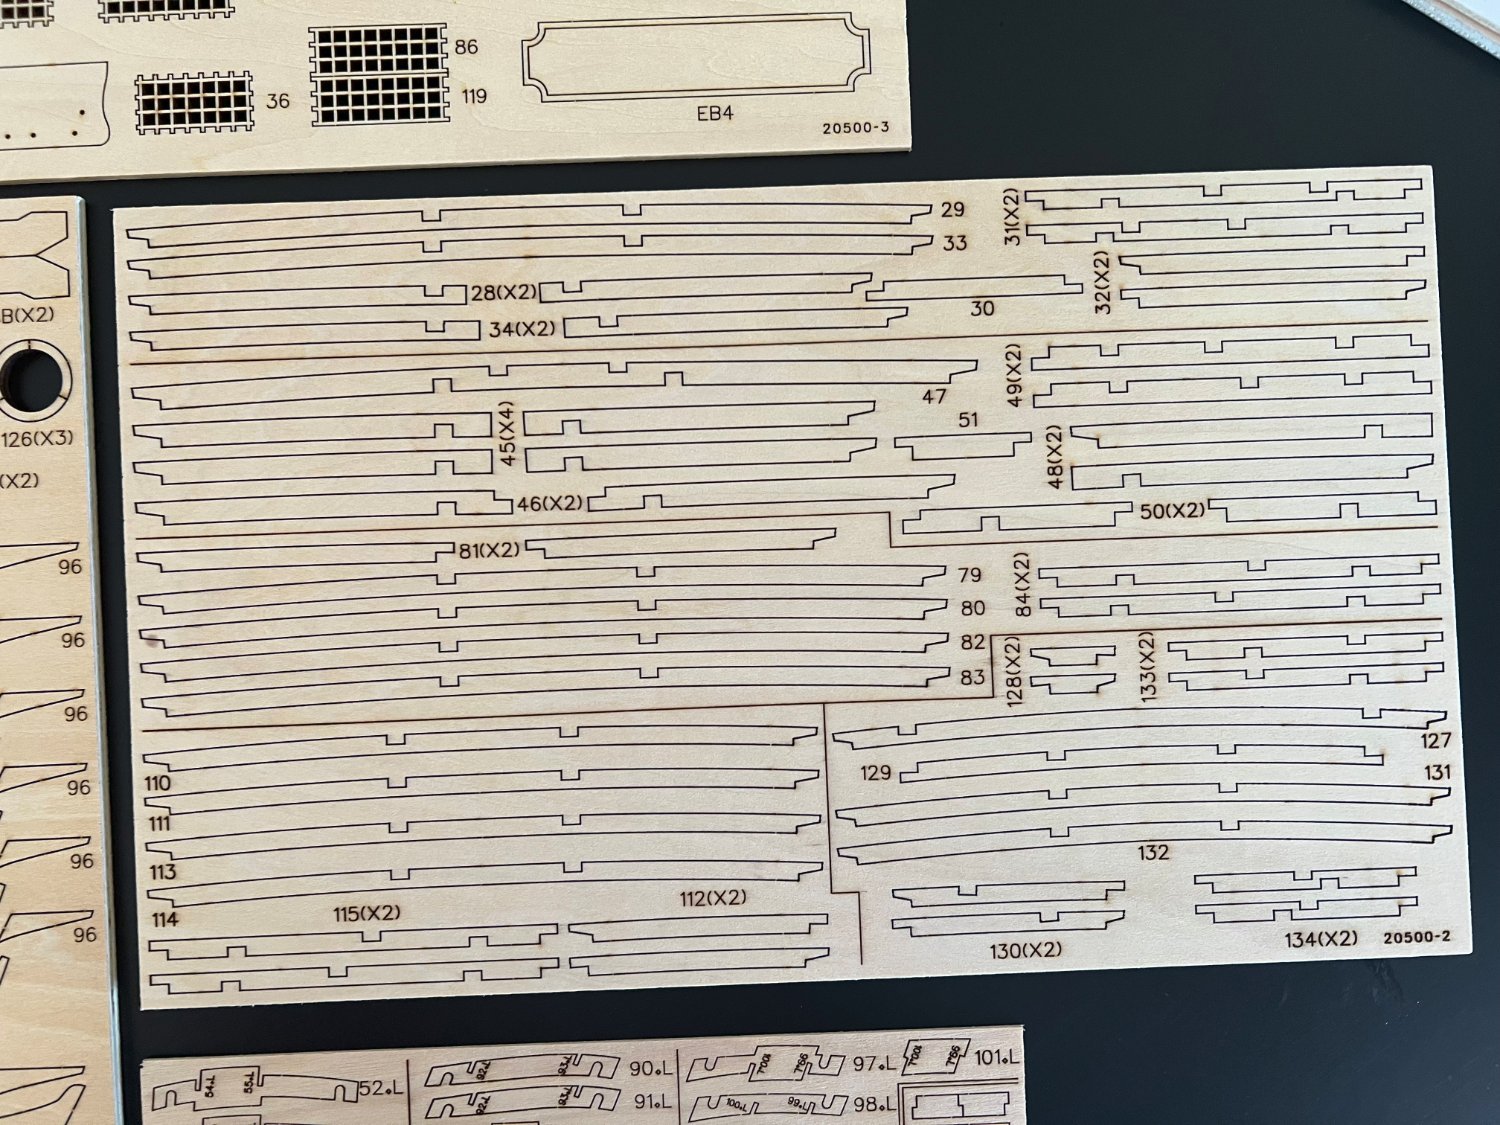
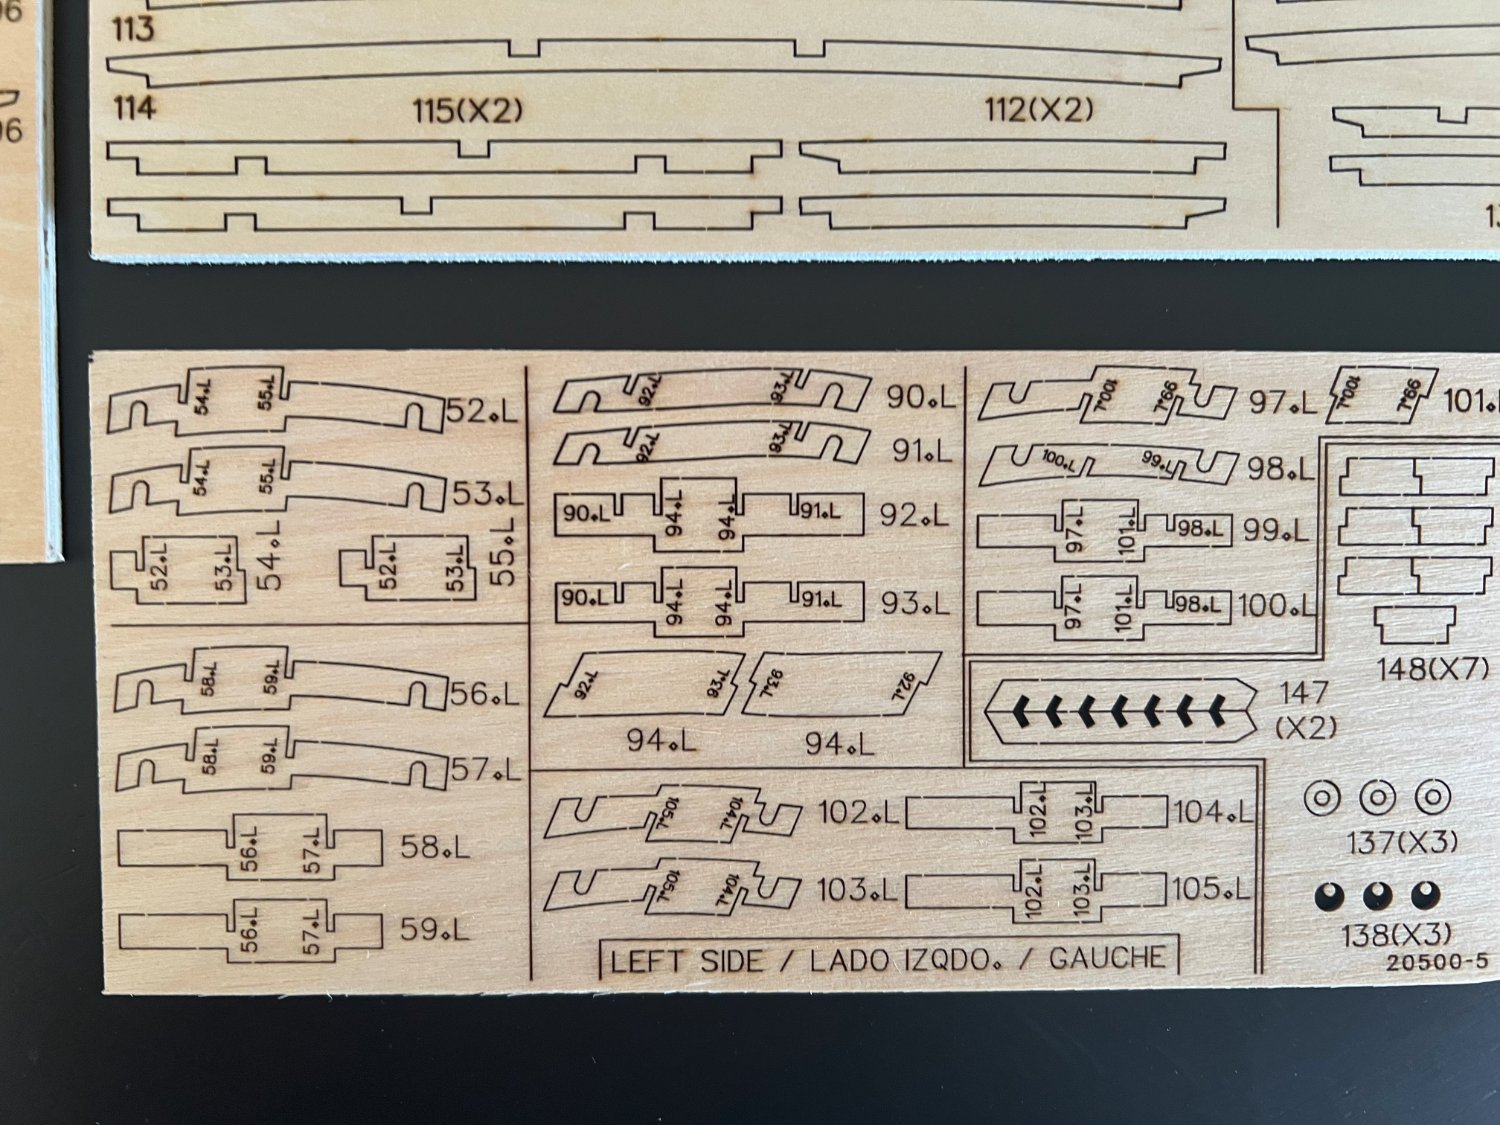
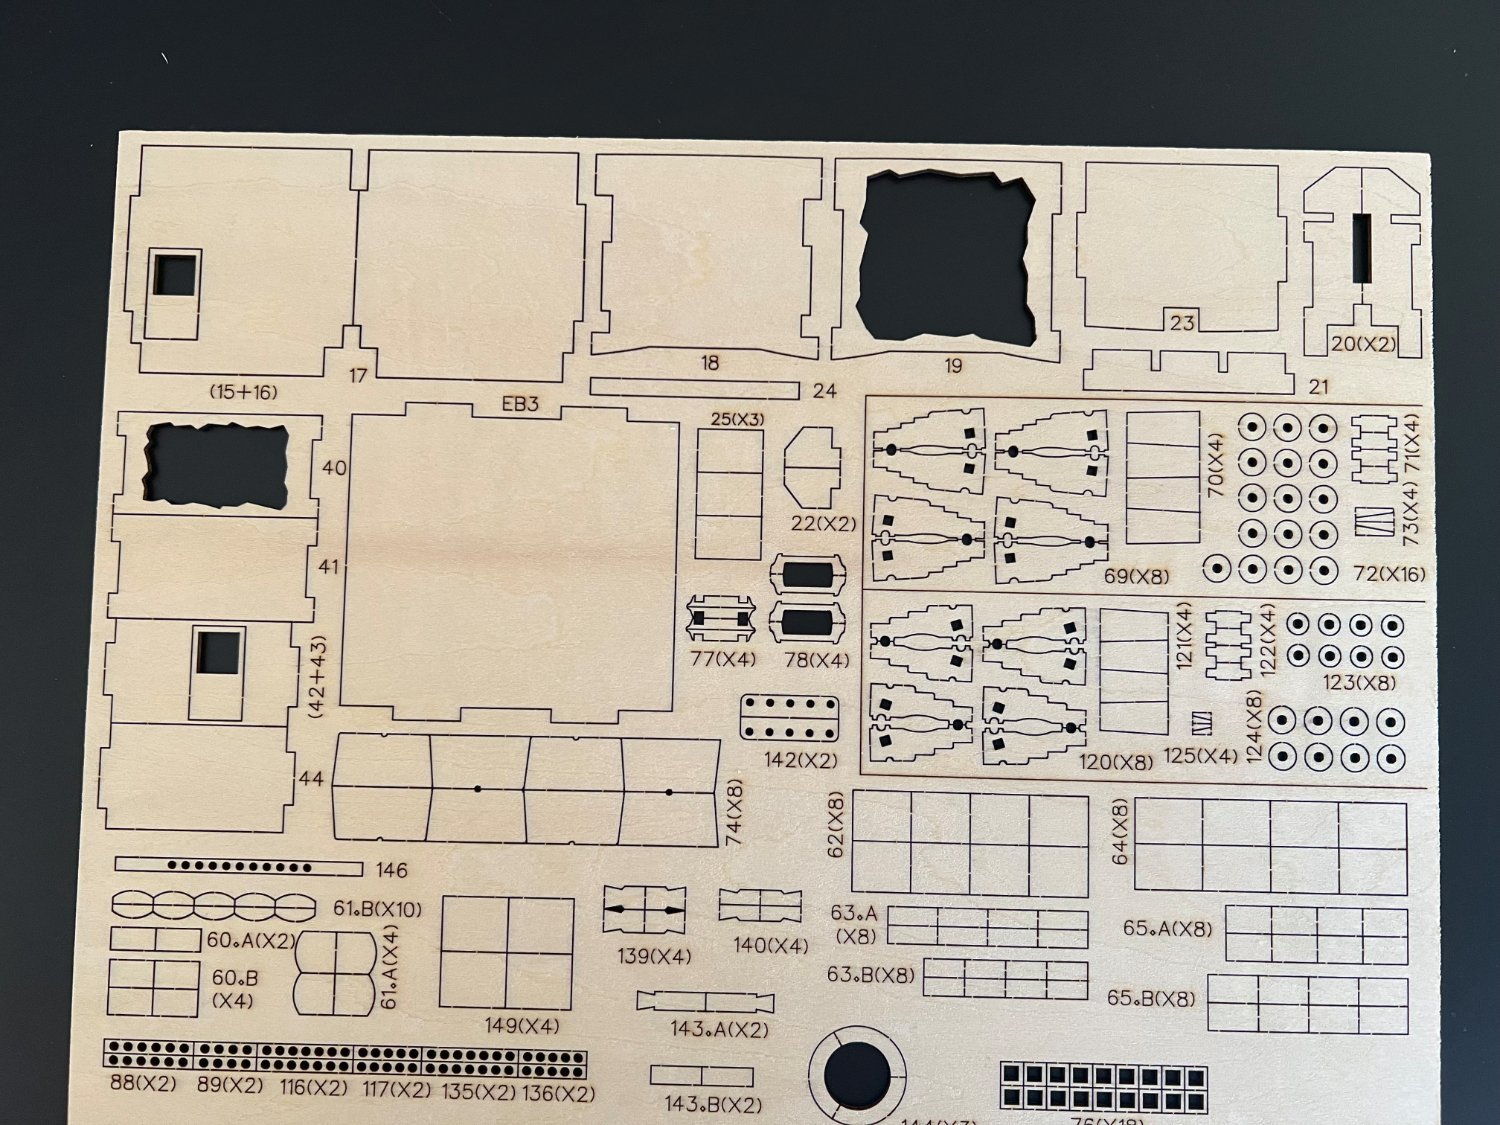
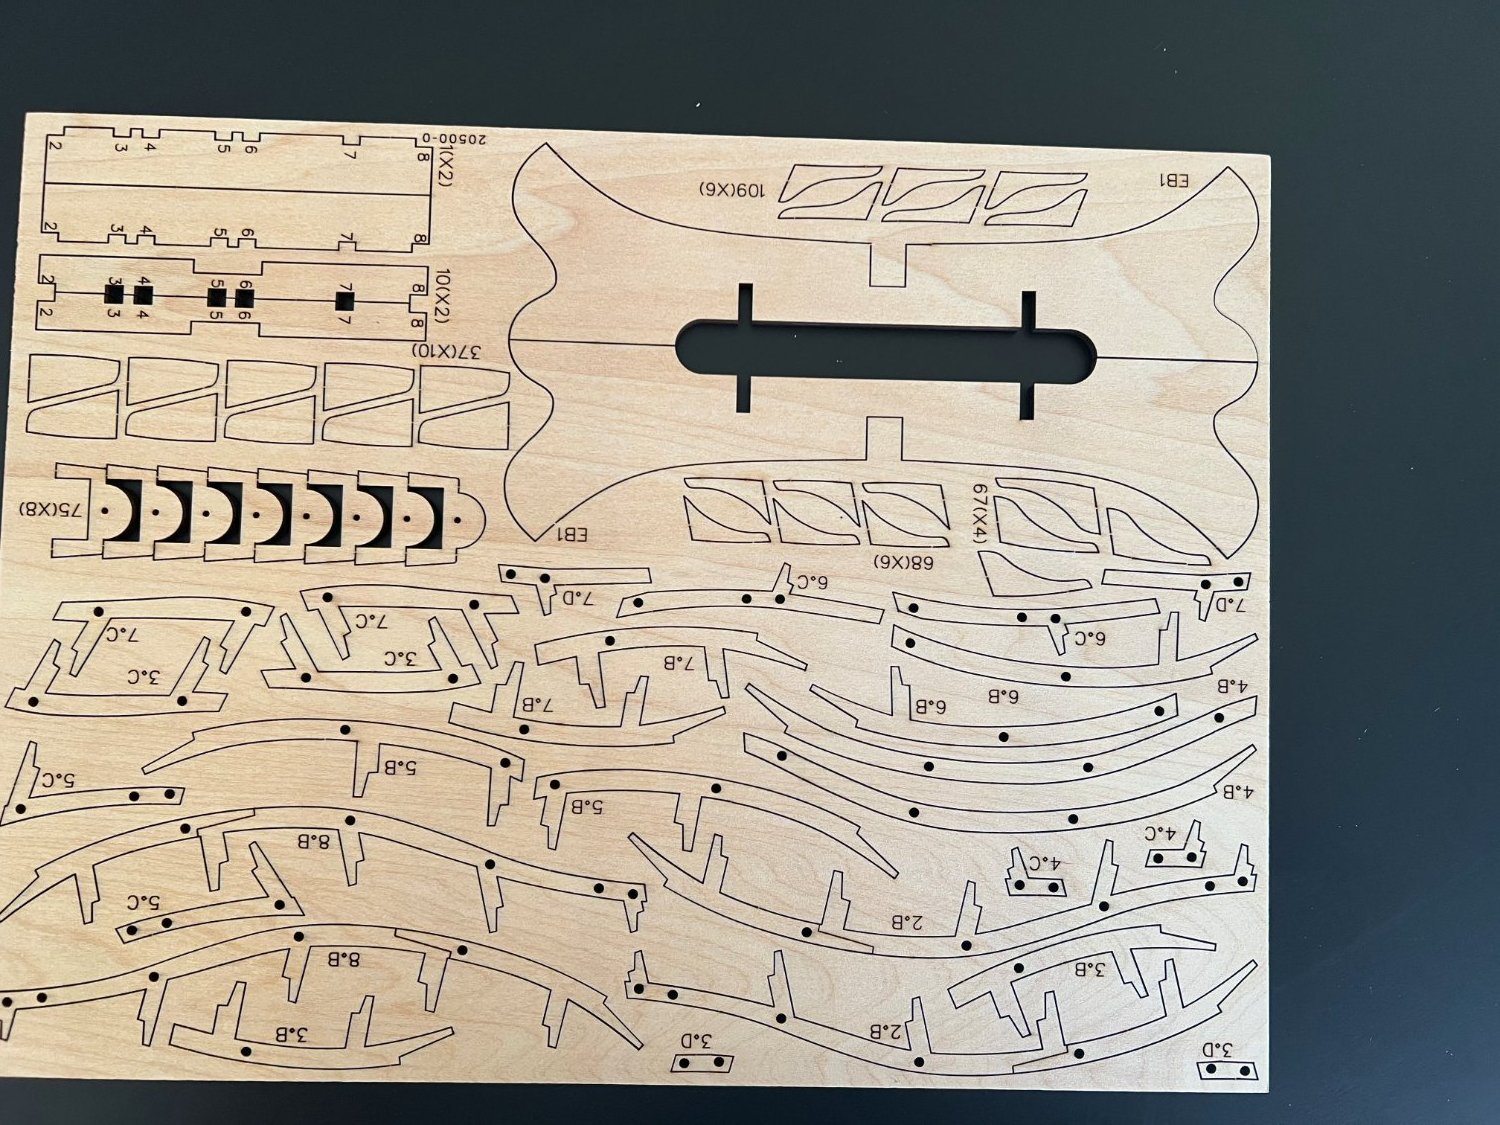
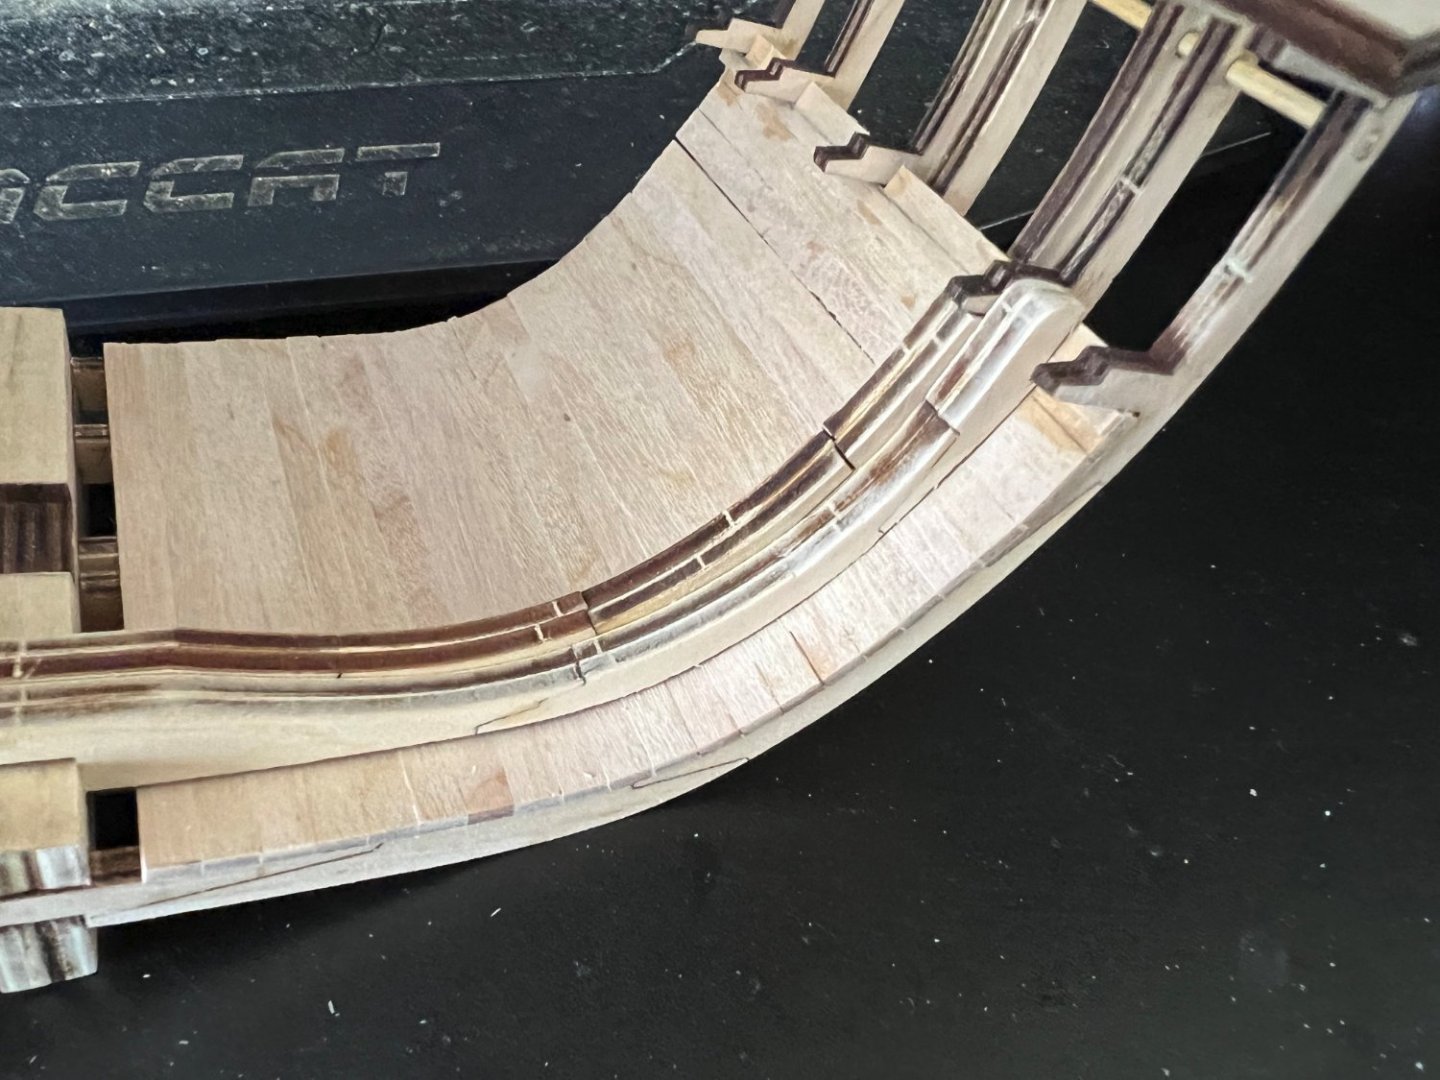
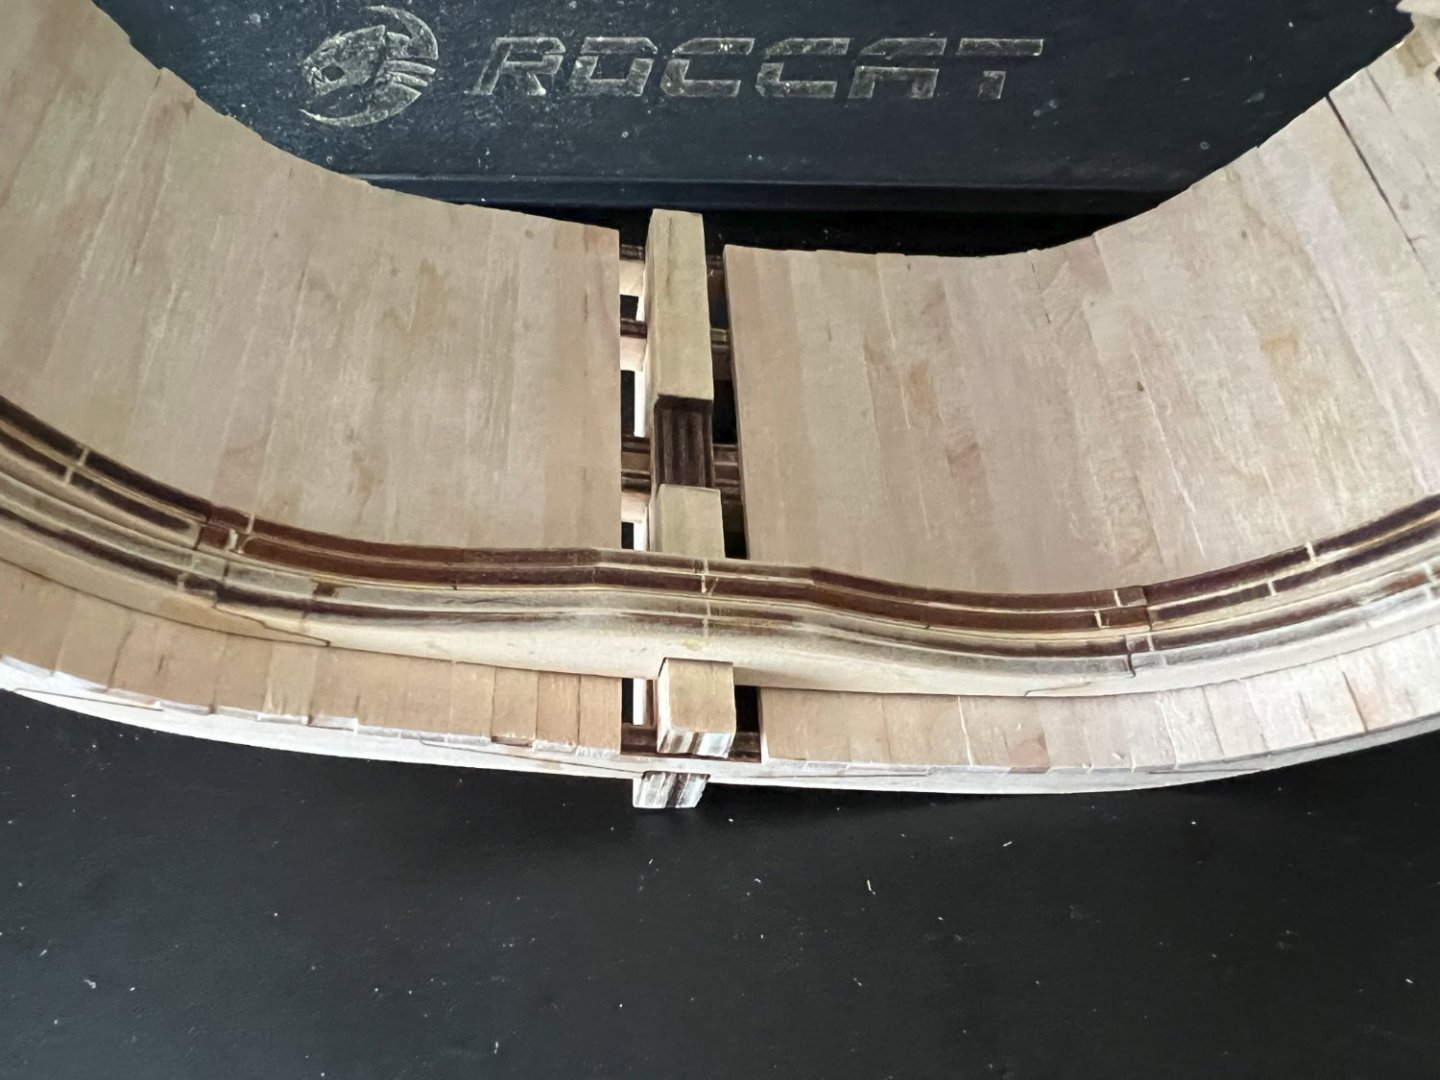
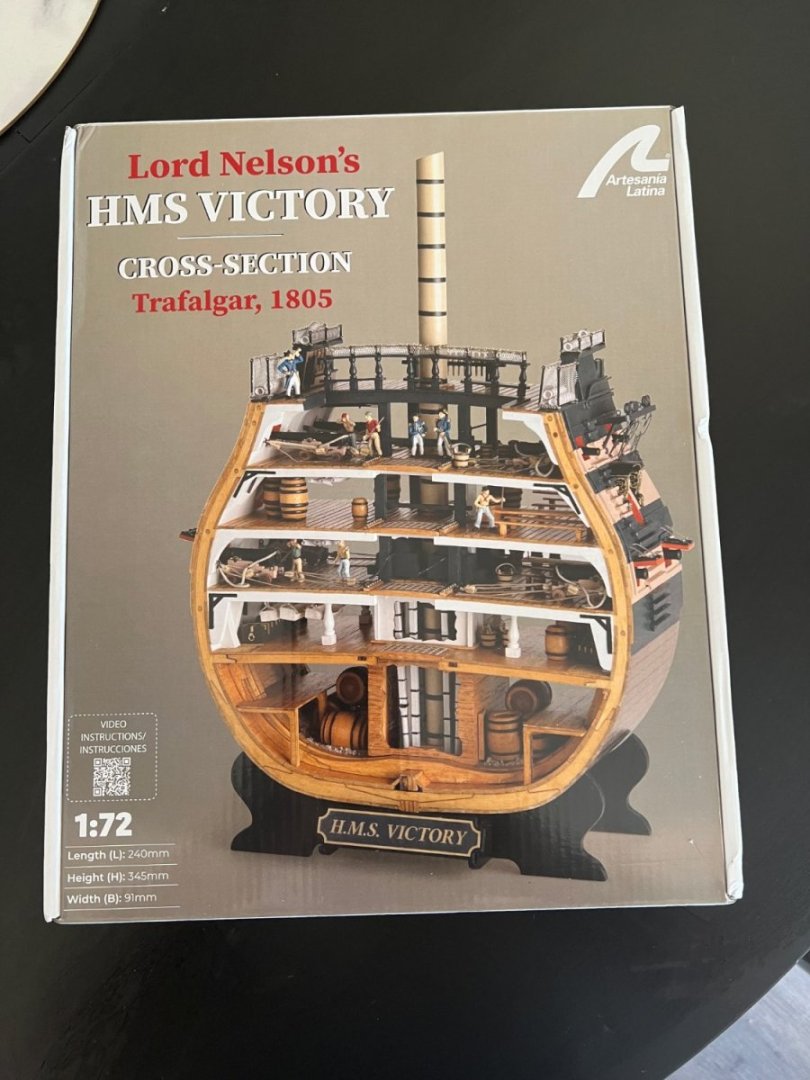
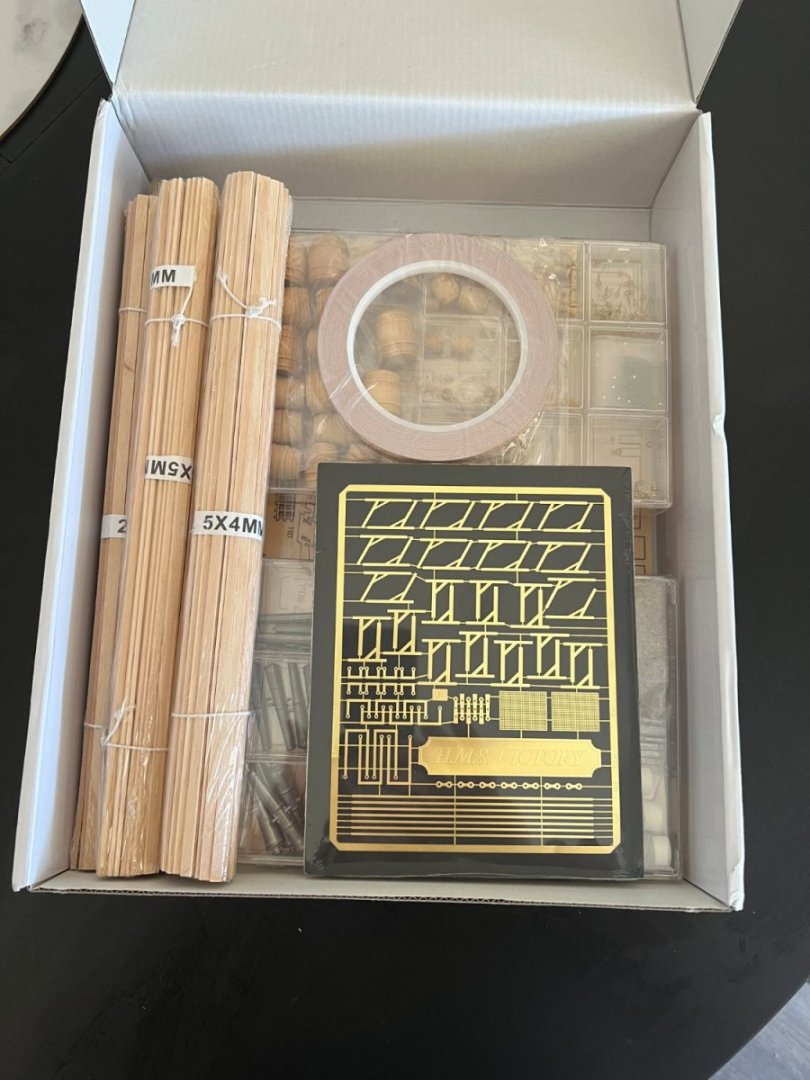
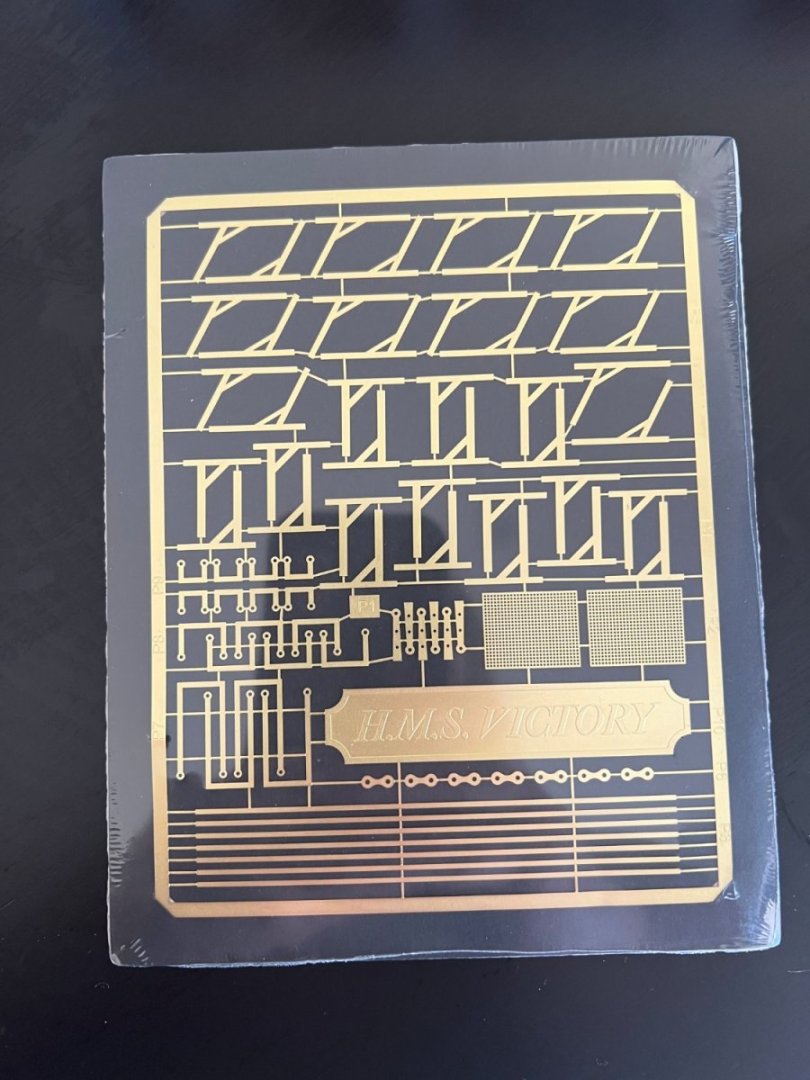
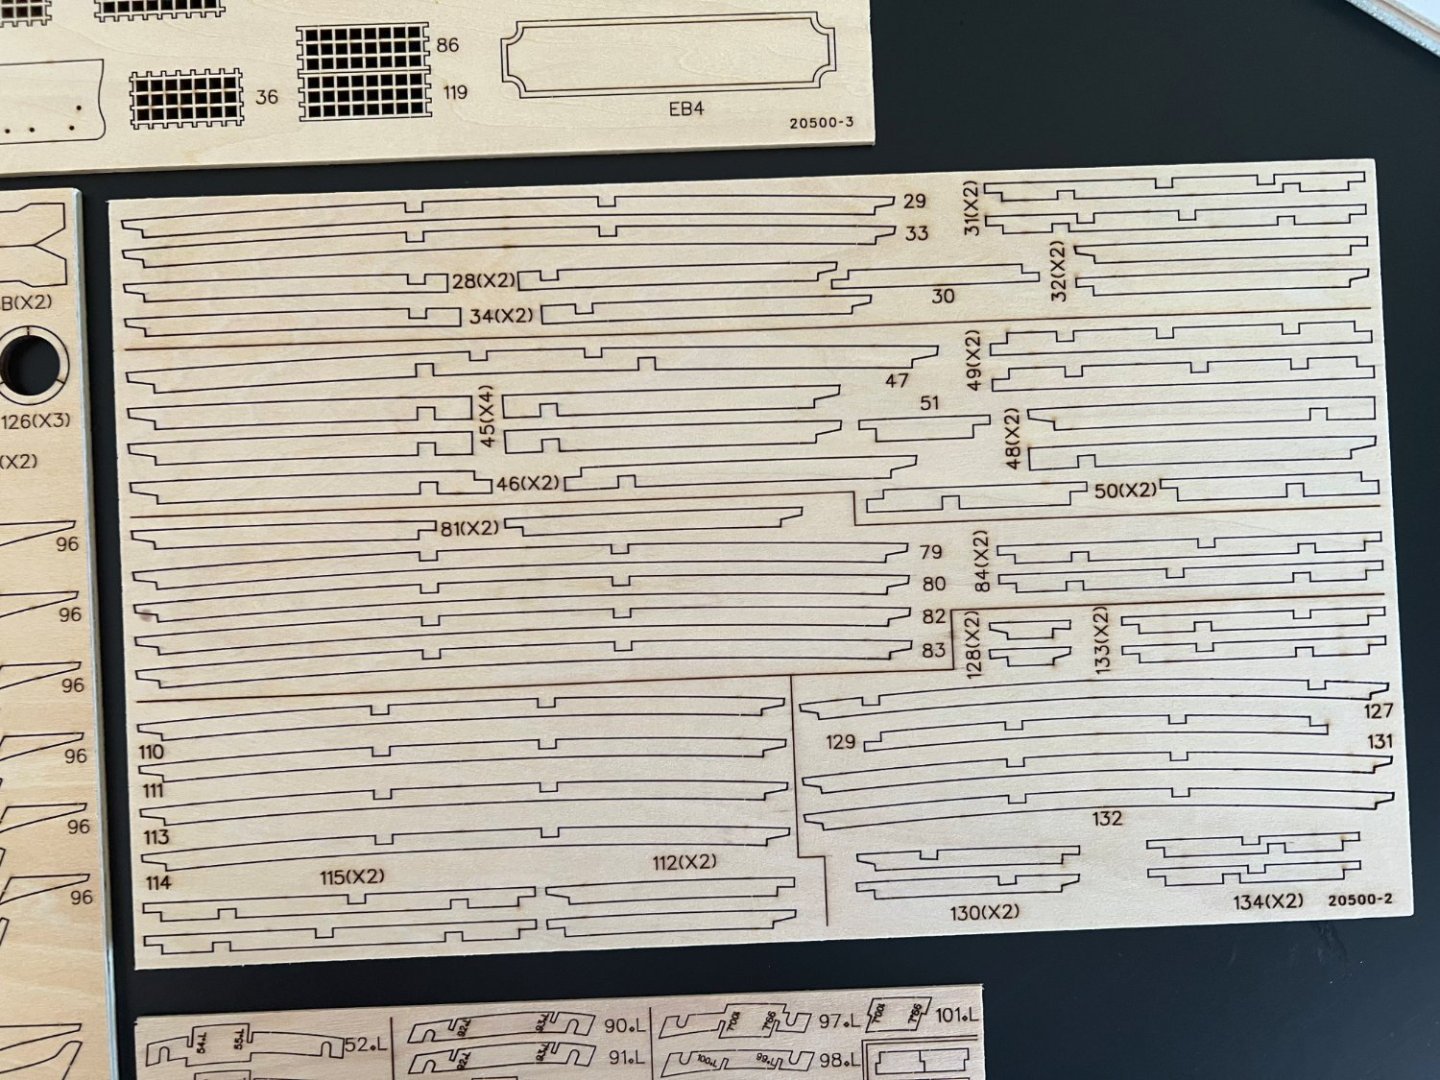
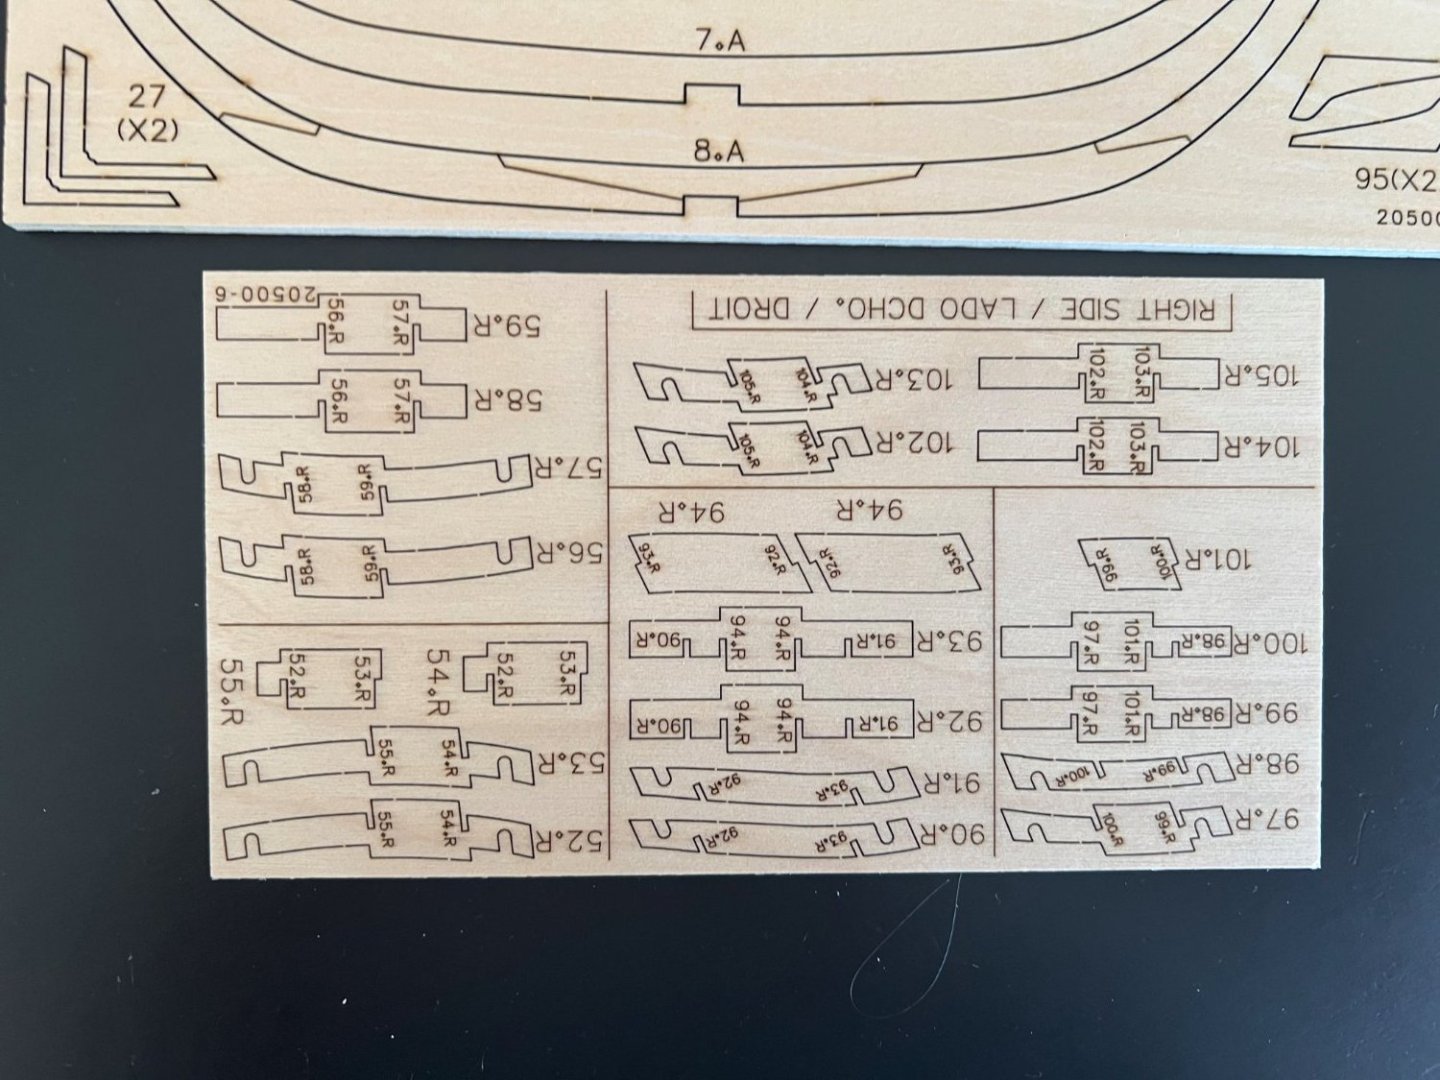
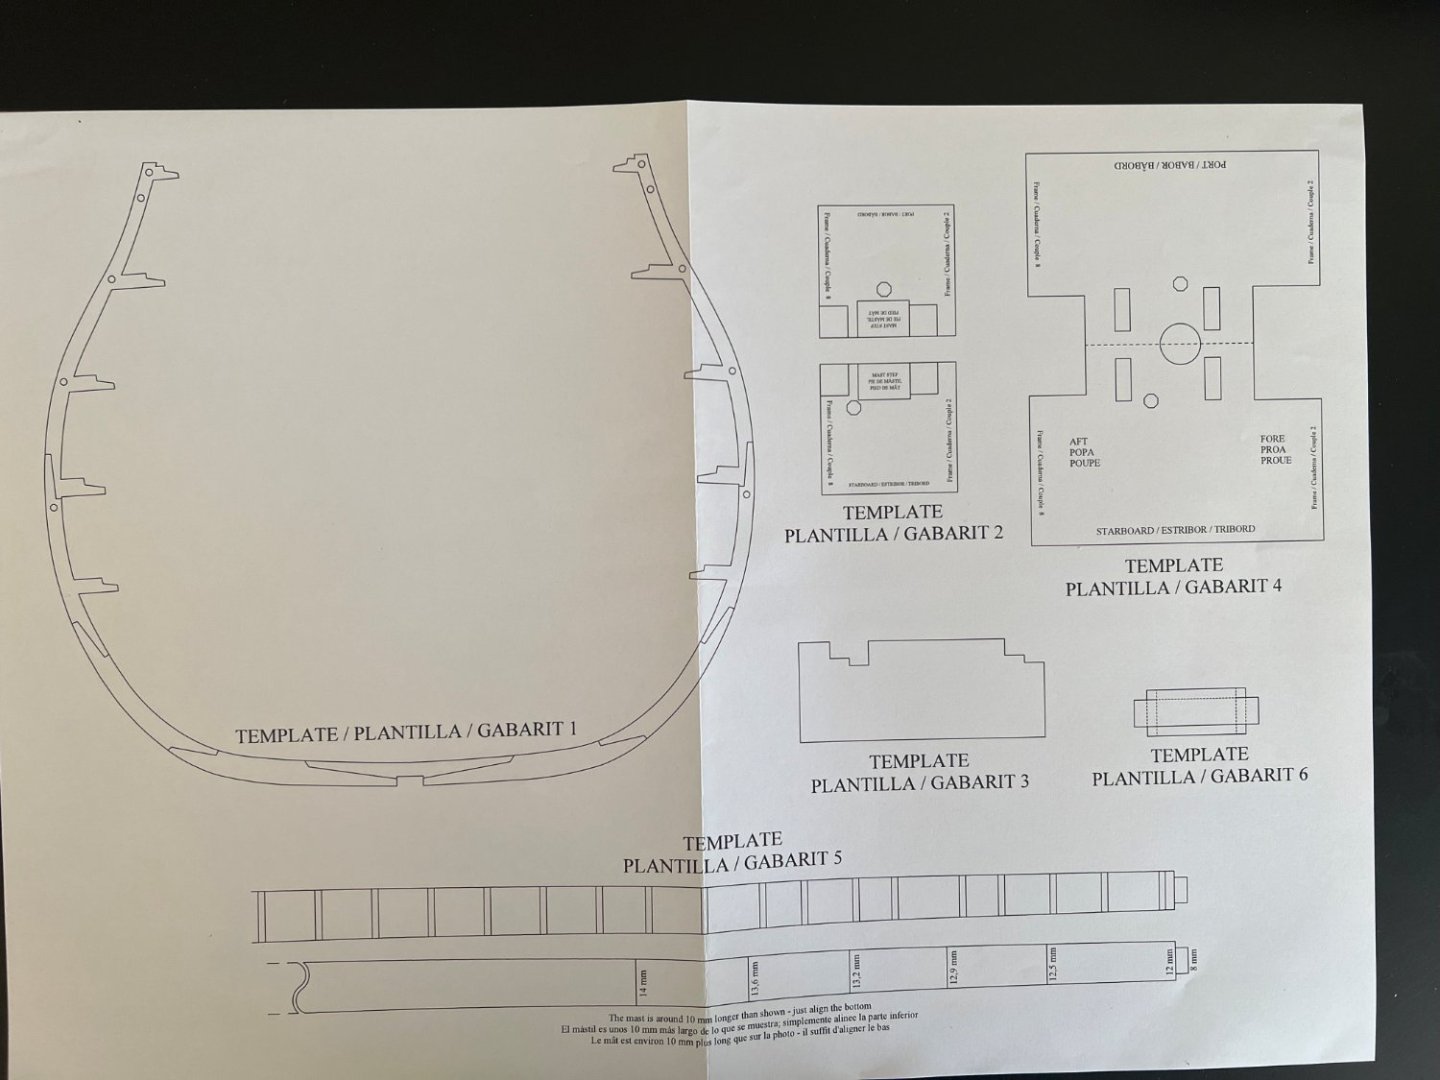
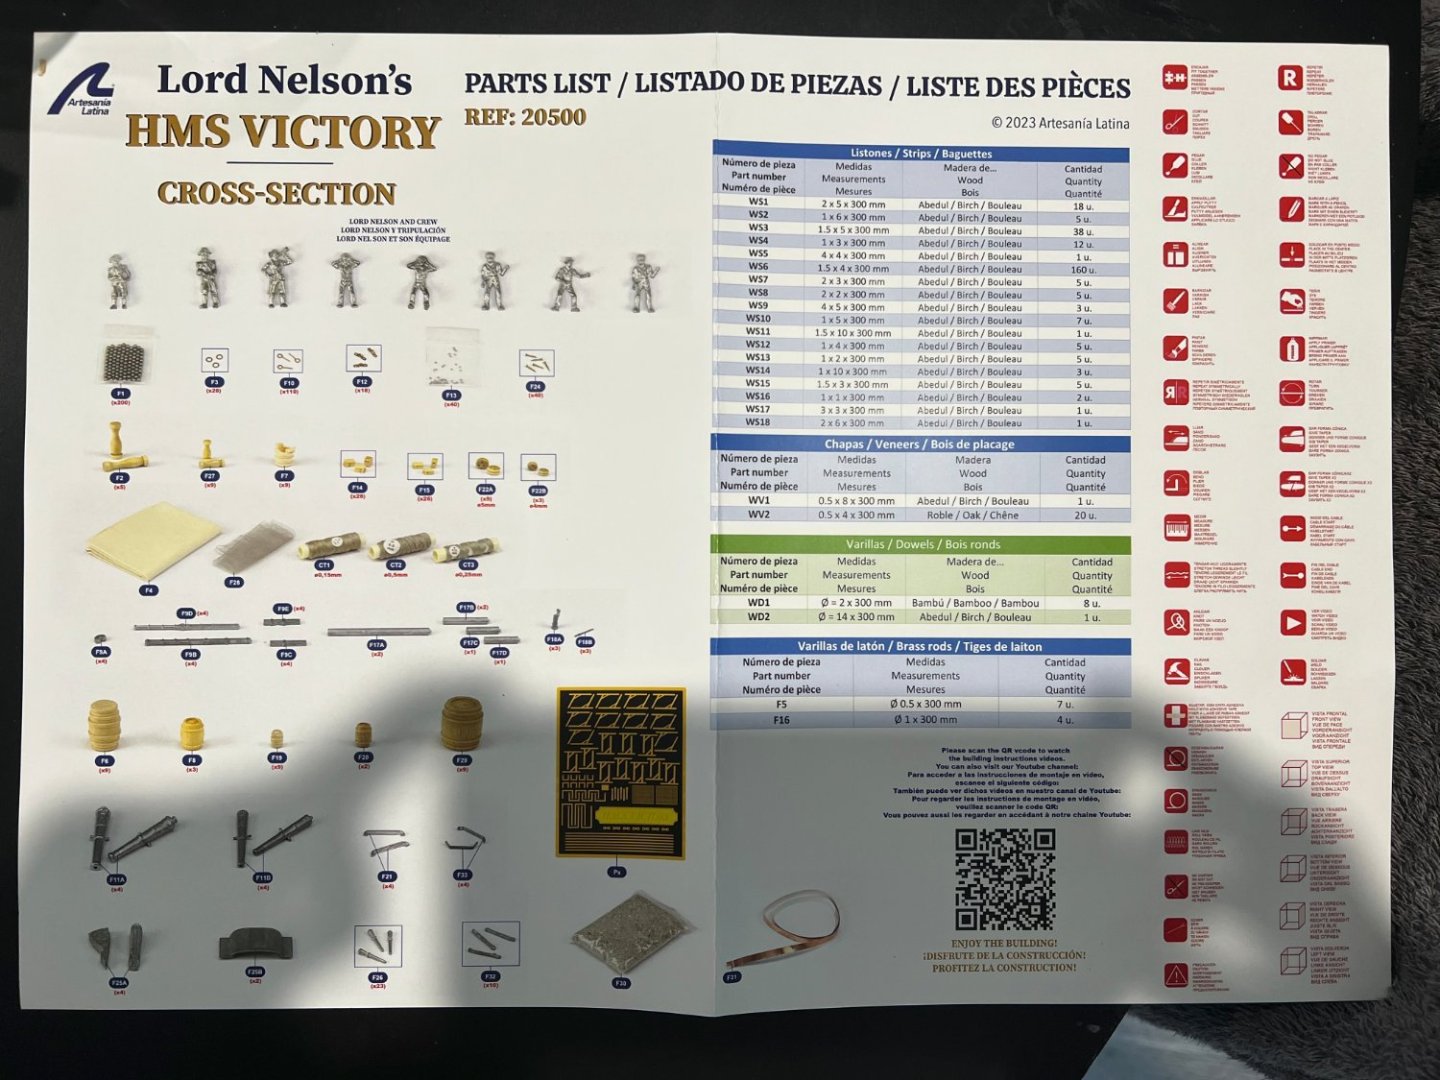
The new AL Victory cross section has finally been released here in Australia and found I one for a decent price so grabbed it while it was in stock! Received it today and I have to say I'm pretty impressed with the quality and and amount of materials in the box ,reminded me of when I got my victory models Pegasus with whats in there! All the wood is bundled and clearly labeled with sizes , same as the thread for ropes and all the laser cut parts are clearly numbered and labeled! I'm not going to start straight away as I want to get Pegasus up to the rigging stage or at least made the masts and yards ,I thought I would post this so people can see whats in the box if their thinking about getting the kit! now for the photo bump😎🤣 Edit - I forgot ,there's also a colour parts sheet as well Edit 2 -One thing I will say is this kit is Cheaper than the Corel cross section , larger scale and miles in front on quality and detail! Richard


- 3 replies
-
- 12
-
-
Just looked at the model on Occre's site ,not sure if it's just a prototype issue and someone wasn't paying attention but there's guns directly behind deadeye's and their lanyards.
-
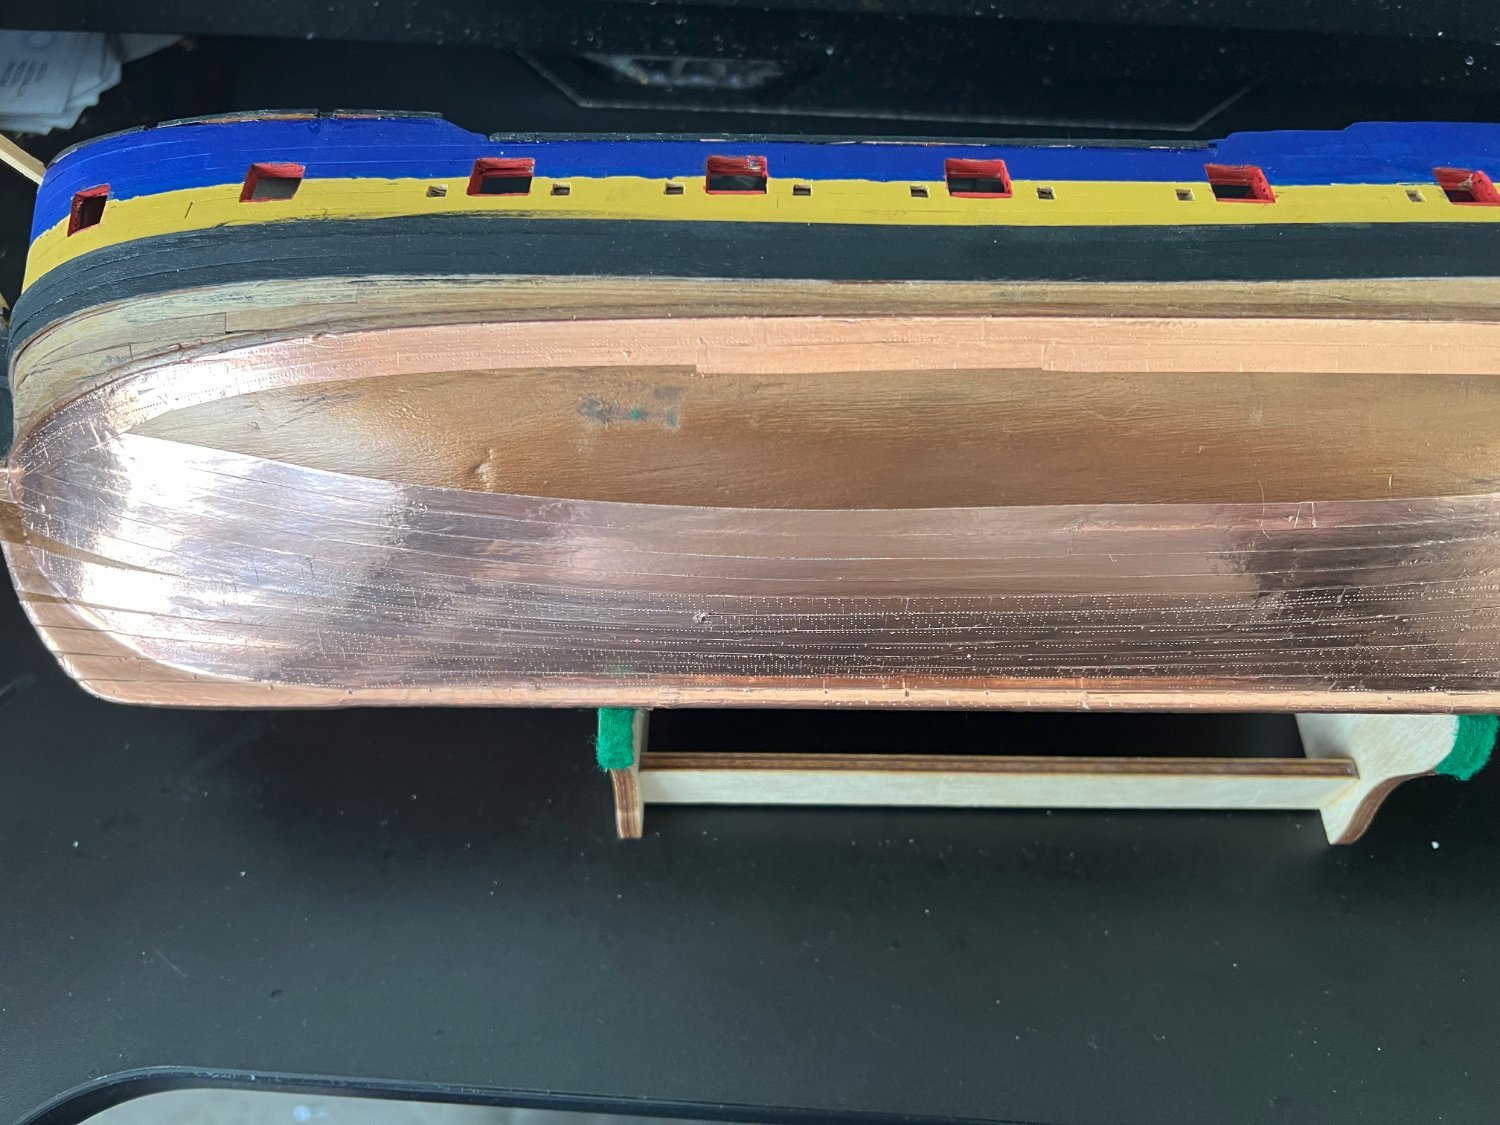
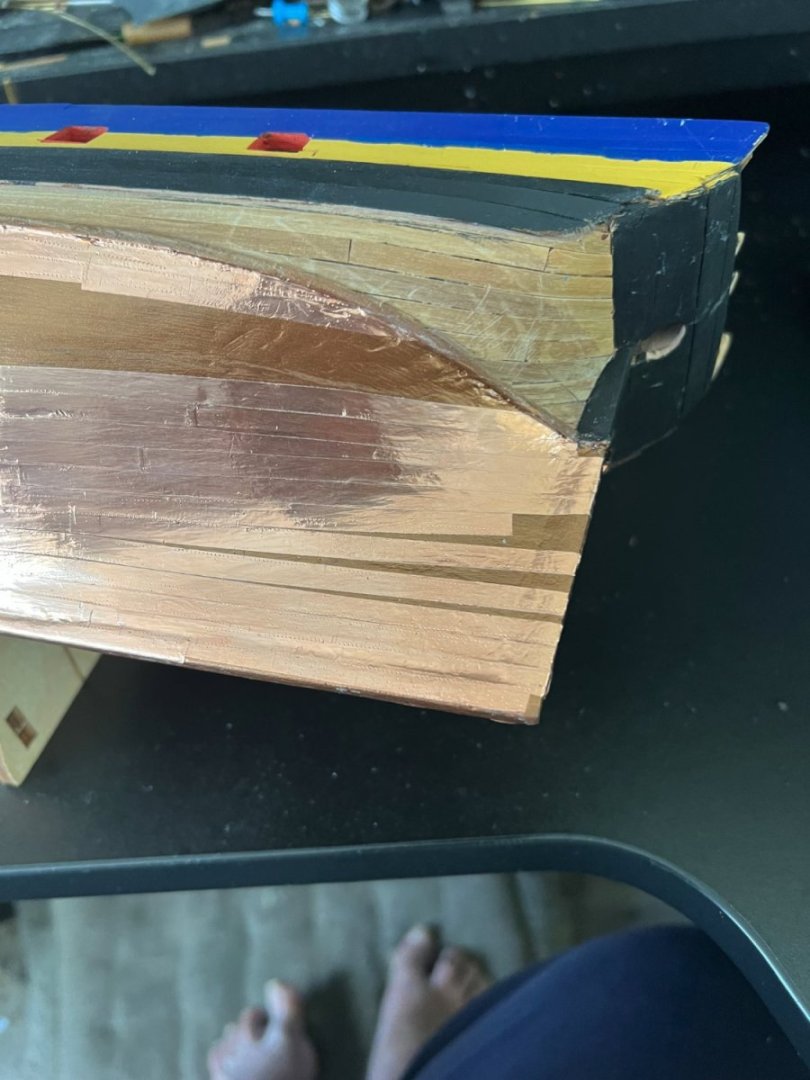
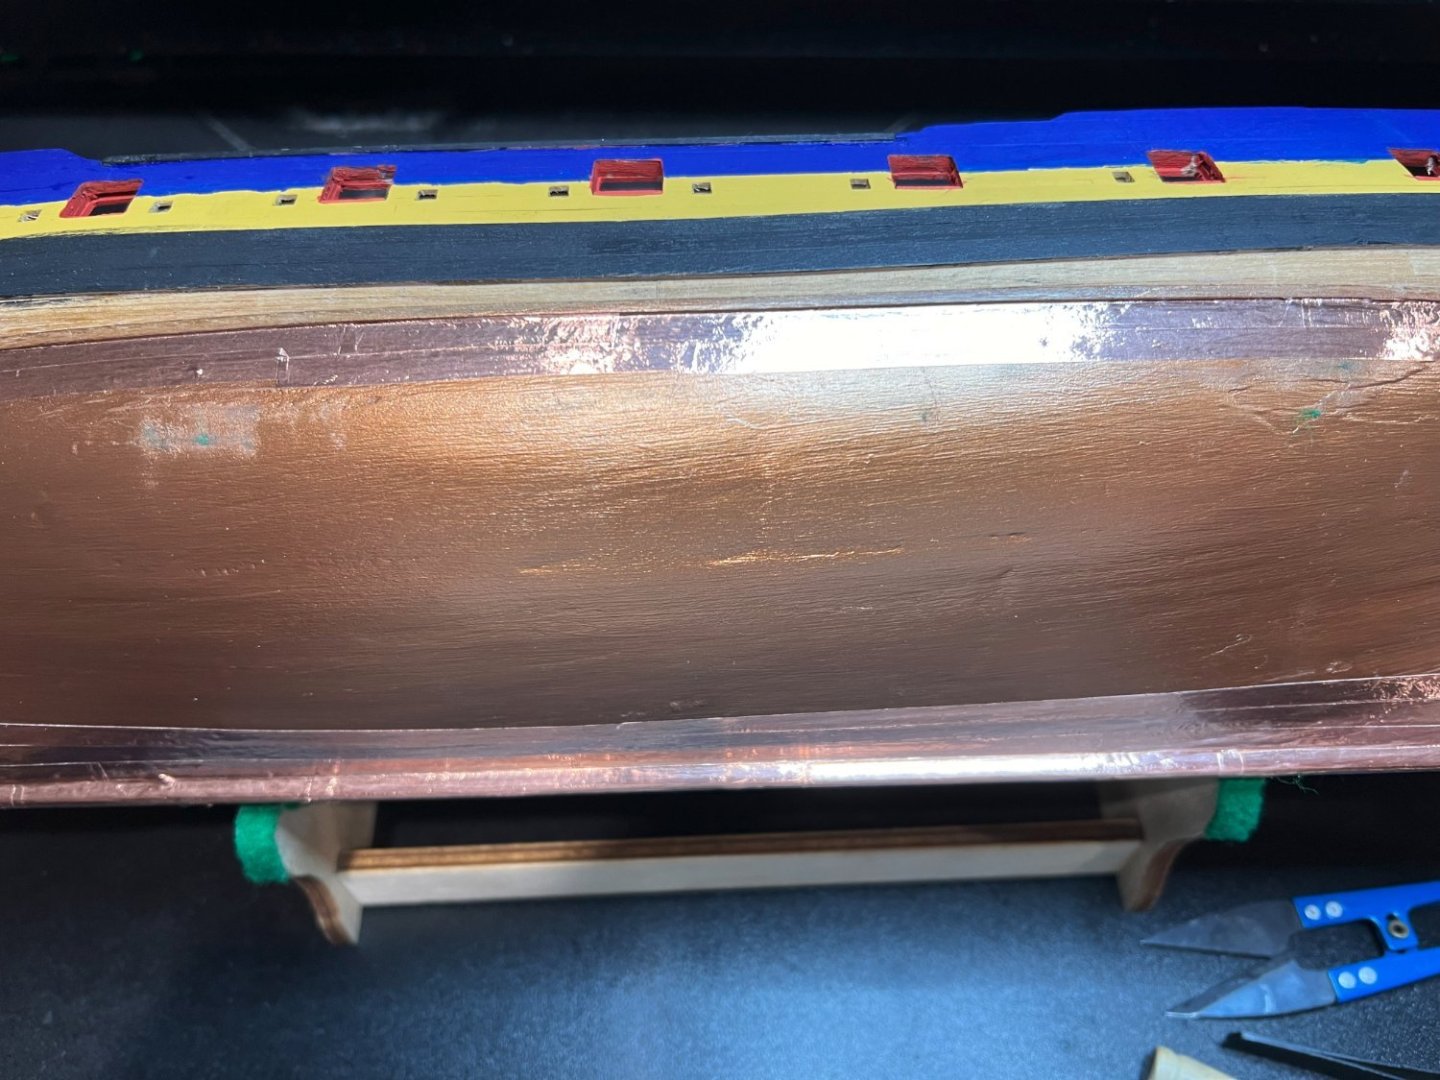
Well the coppering has been finished ,not exactly prototypical close up But from normal viewing distances it looks the part so im happy. Was about to get back to the decorations and somehow I dont have any 2x1 and 1x1 mm wood left for the job ,a few small pieces but not enough for the rest of the model so wood order time😒 Richard
- 49 replies
-
- 2
-
-
- Pegasus
- Victory Models
- (and 1 more)
-
There's less chance of things going wrong using the thinner from the paints maker but if your using water based acrylics then Vallejo airbrush thinner is a very good all rounder that plays nice with most paints,(tamiya acrylics are an acrylic lacquer so you need to use their thinner same as mission models paints!) One really useful item to use while brush painting with acrylics is a Wet Palette ,it doesn't thin you paints but it keeps them "moist" so they dont dry out while you using them! there are plenty of guides in the internet on how to make your own if you dont want to buy one. Richard
-
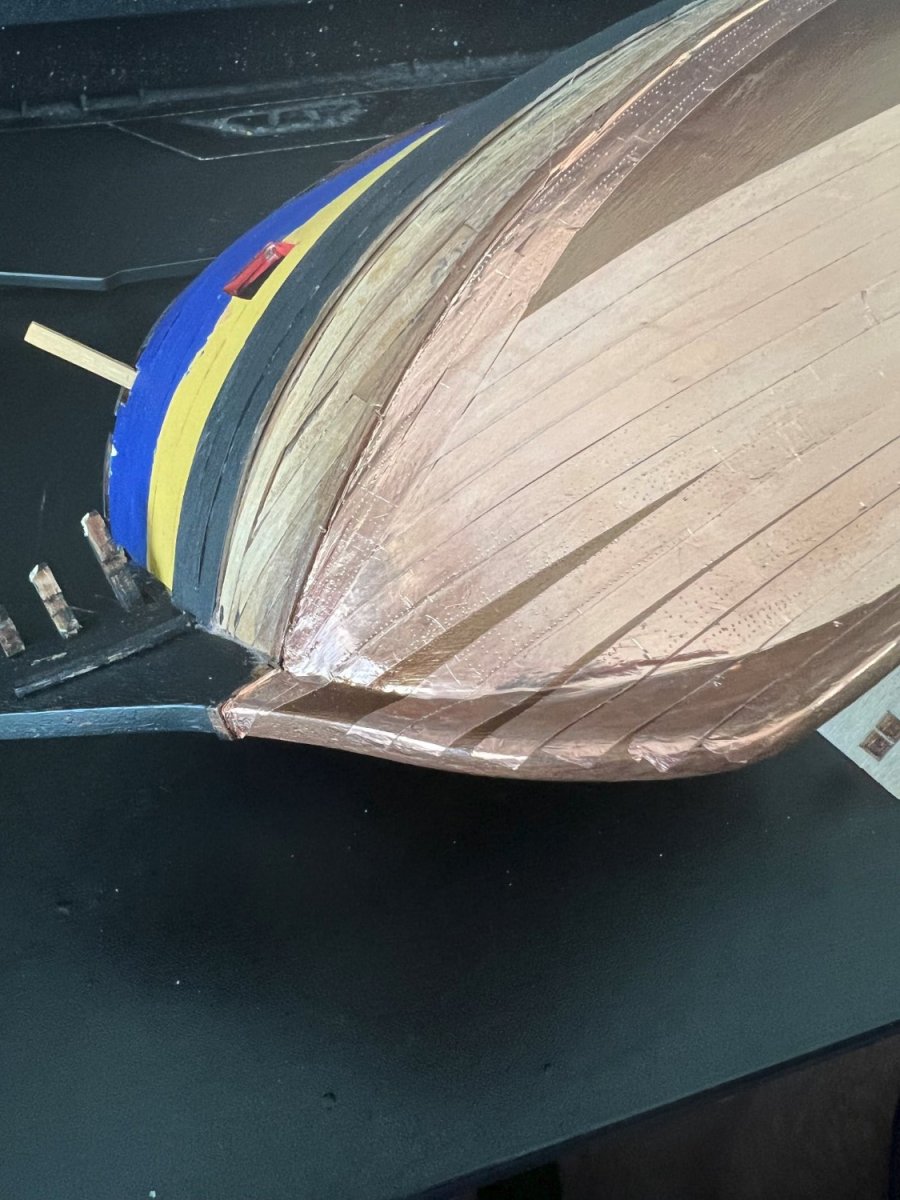
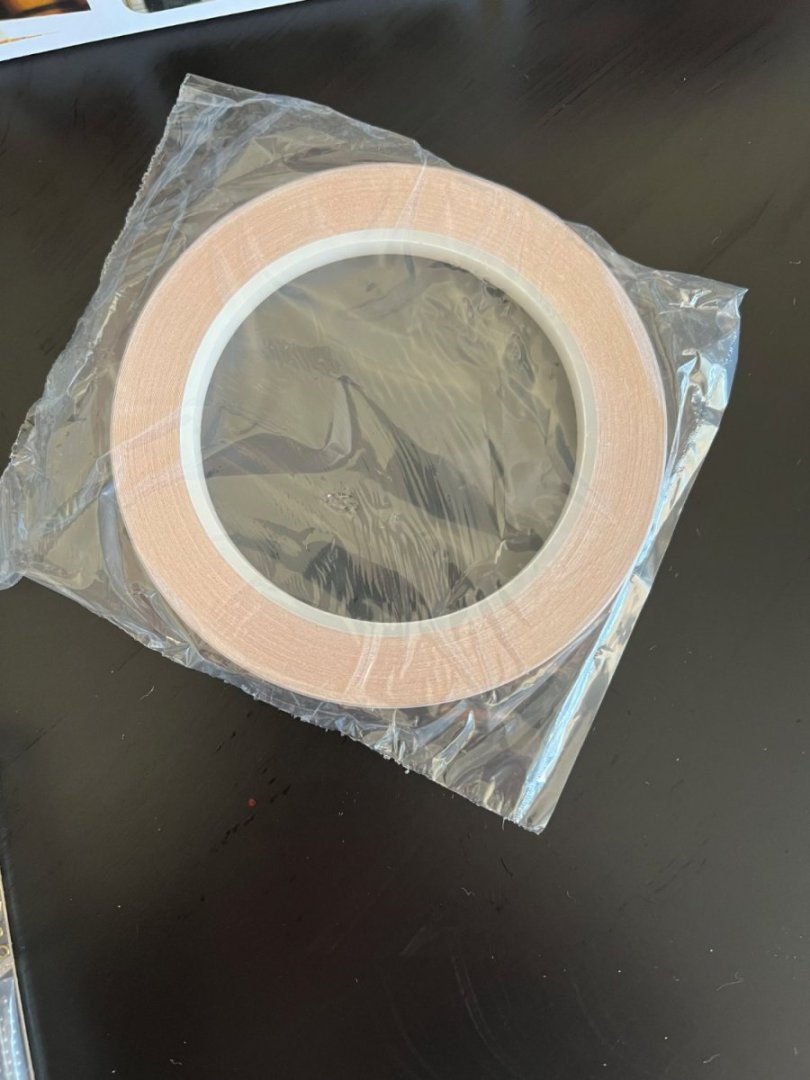
portside coppering continues ,taking a bit more time than i thought between working it out and my spine going ouch,(shot spine ,multiple fused vertebra and an idiot hunching over models and losing time then trying to stand up and getting yelled at by said spine😒) One thing I've learned is the tape looks better in long runs instead of short lengths and it's easier to control how it all goes down lines up! I've experimented with the AL plate roller and it works better than expected ,not perfect but it gives the illusion of plating from a normal viewing distance! ,and did on the port side because if it all went wrong that sides not seen when on display😎🤣


- 49 replies
-
- 3
-
-
- Pegasus
- Victory Models
- (and 1 more)
-
Mr Hobby MisterS Cement is my go to now for all styrene models - I've used tamiya thin for years but tried the Mr Hobby cement after seeing a few streamers I watch using it and i find it works better than the tamiya product - it's thinner but uses a smaller brush and you dont need as much for the same result ,I find it 'grabs" quicker and a small amount goes a long way with capillary action! For wood and foams I use a white glue - believe it or not "Elmers School Glue" is pretty good and cheap. For photoetch and joining different materials I use Deluxe Materials "Rocket Hot",(thin) and "Rocket Max",(thick gel)
-
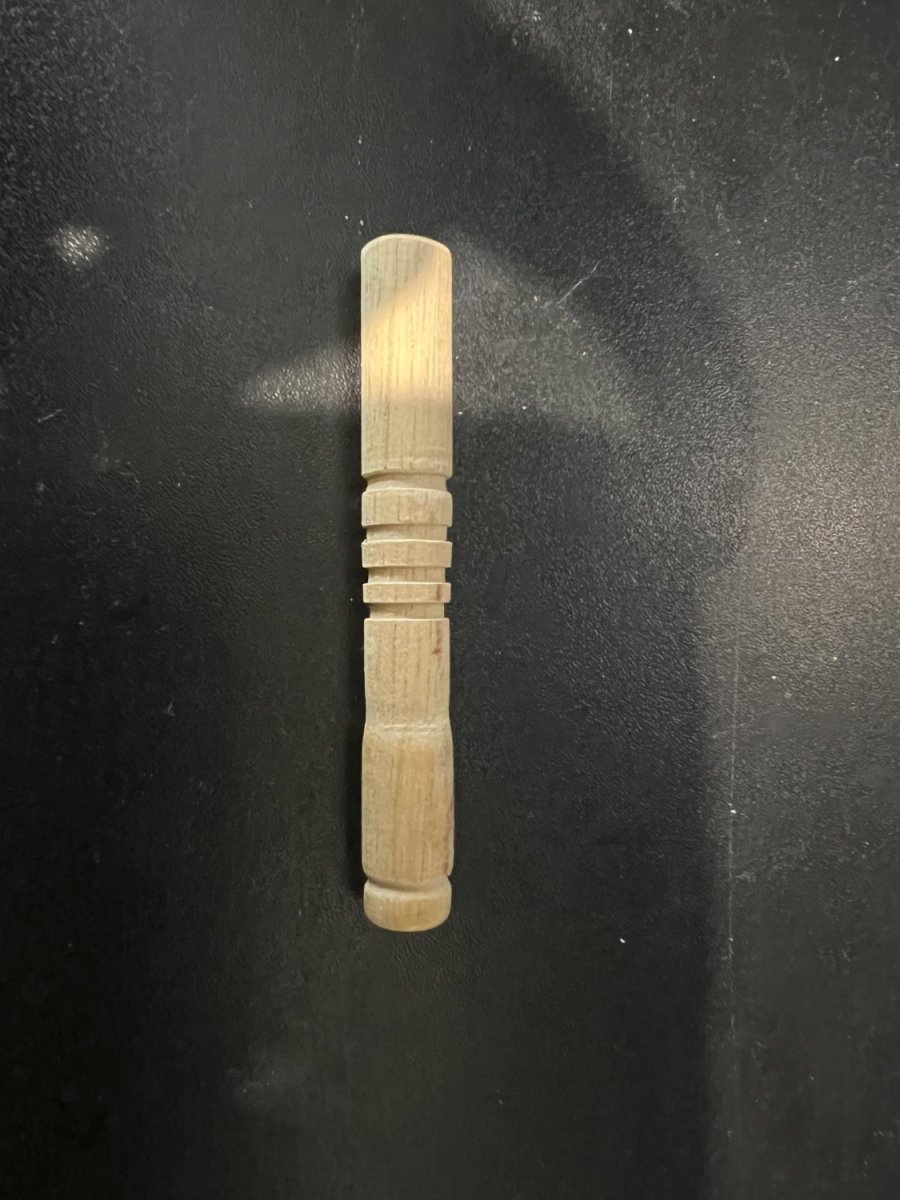
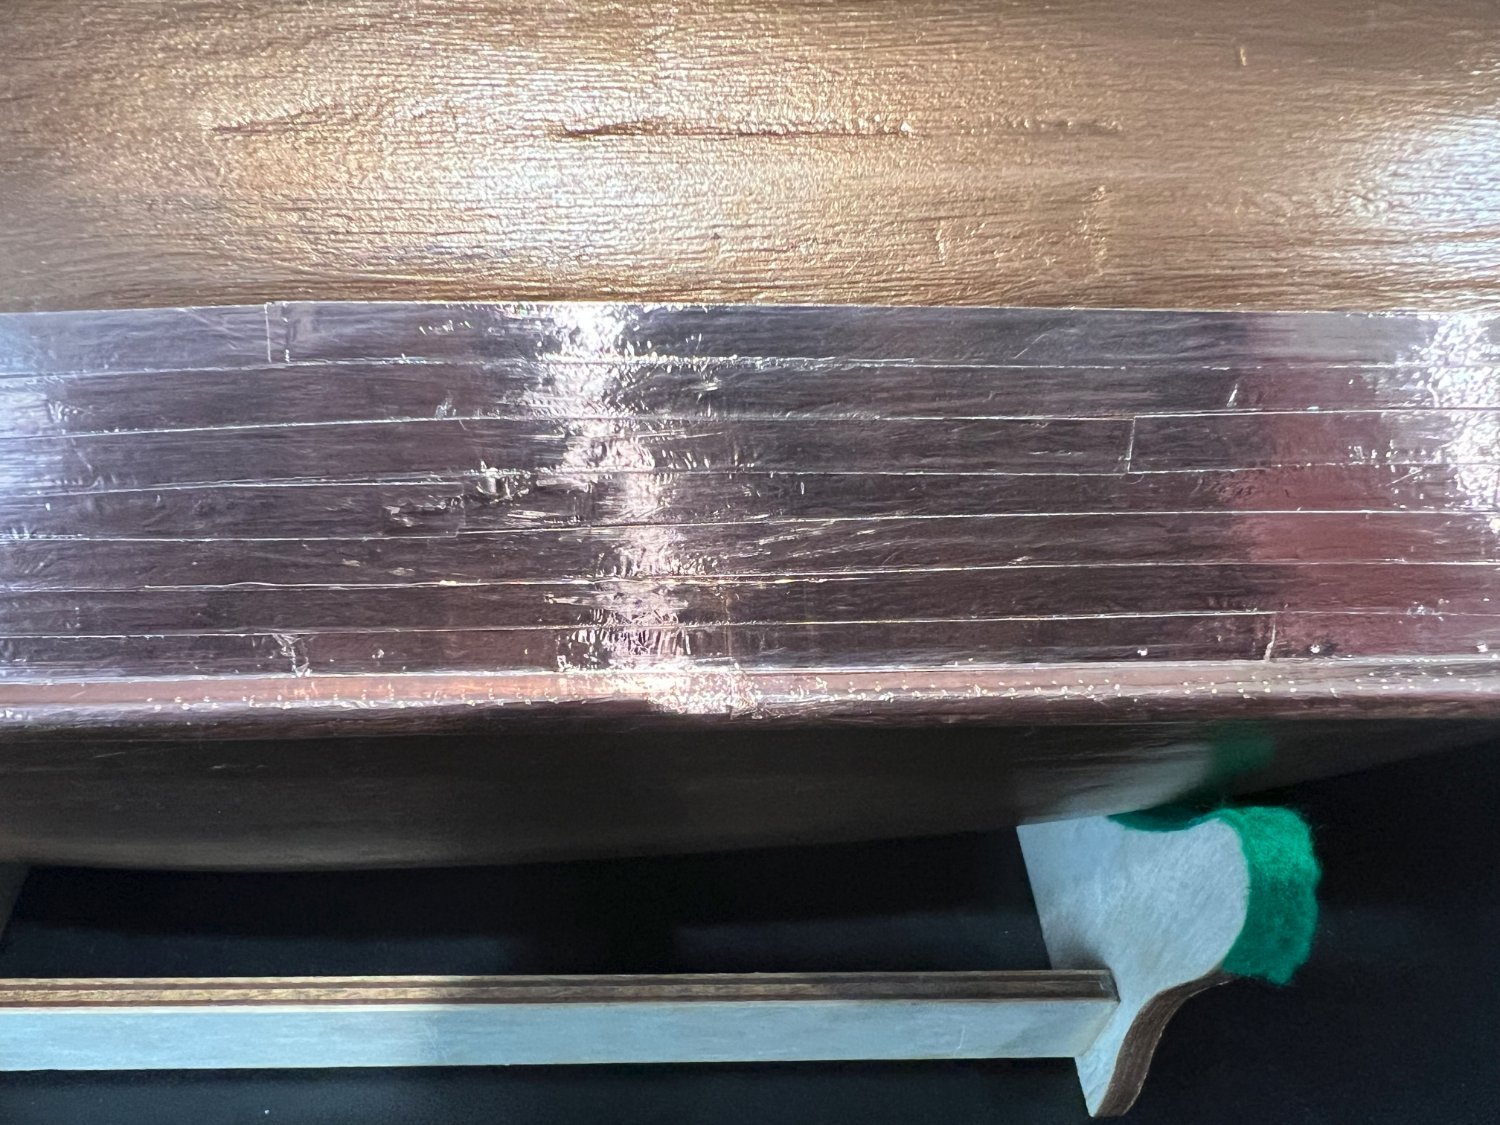
Ever made a tool thats perfect for a job but was a complete accident and you were doing something else? ,I've just done that with the "tool" im using to smooth down the copper tape im using on Pegasus! Long story short ,I did some tests on a piece of 10mm dowel and was happy with the results of just using files and sanding pads - be interesting to see what I can do when i get chisels! Started putting the copper tape on the hull and I needed something to smooth it down ,I looked at the end of the dowel I'd turned and it was like a eureka moment ,the end was rounded and smooth so I rubbed the tape down and it worked alot better than I thought😎

- 49 replies
-
- 2
-
-
- Pegasus
- Victory Models
- (and 1 more)
-
I've been getting the decorations in place and heads done which has lead to a Best Layed Plans situation - I left the rails unpainted above and below the photoetch ,then i got to the last part and looking it as a whole I dont like it😒 ,I'm going to paint them black once the heads done and the last pieces of rail are in place ,(ignore the scrapped paint ,I'd painted the blue to far down so cleaning it up for the ochre). Another thing I've done is experiment with copper tape on the hull....yeah now I've done a few rows on the port side and figured it out im going to have to the whole thing because it does look much better than the paint..... Richard
- 49 replies
-
- 3
-
-
- Pegasus
- Victory Models
- (and 1 more)
-
Pulled the trigger on something I've wanted for a long time ,and ordered a Proxxon DB250 Lathe - getting to the stage on Pegasus to start thinking about masts and yards and I had the money and opportunity 😎 ,still got to get chisel's and a chuck but I can start experimenting with sanding once it arrives!

- 49 replies
-
- 2
-
-
-
- Pegasus
- Victory Models
- (and 1 more)
-
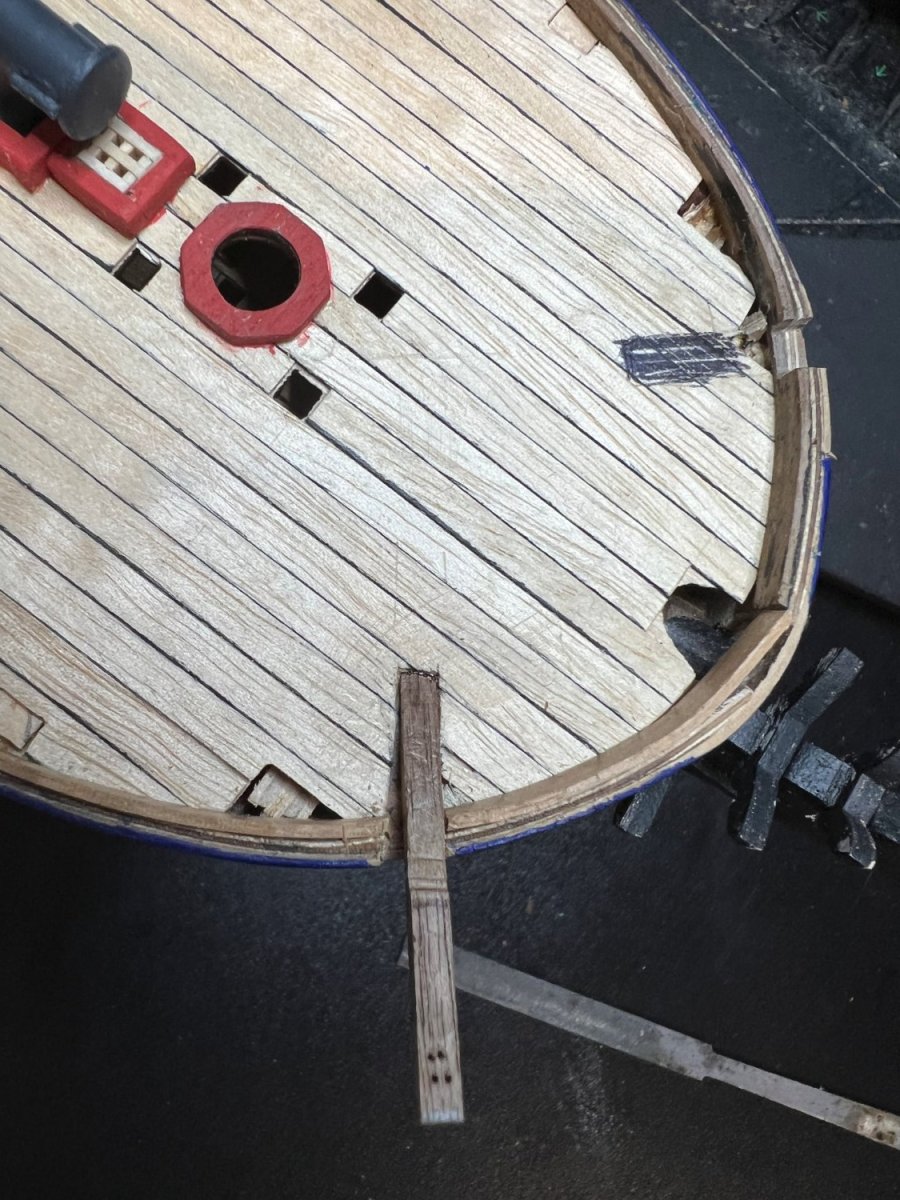
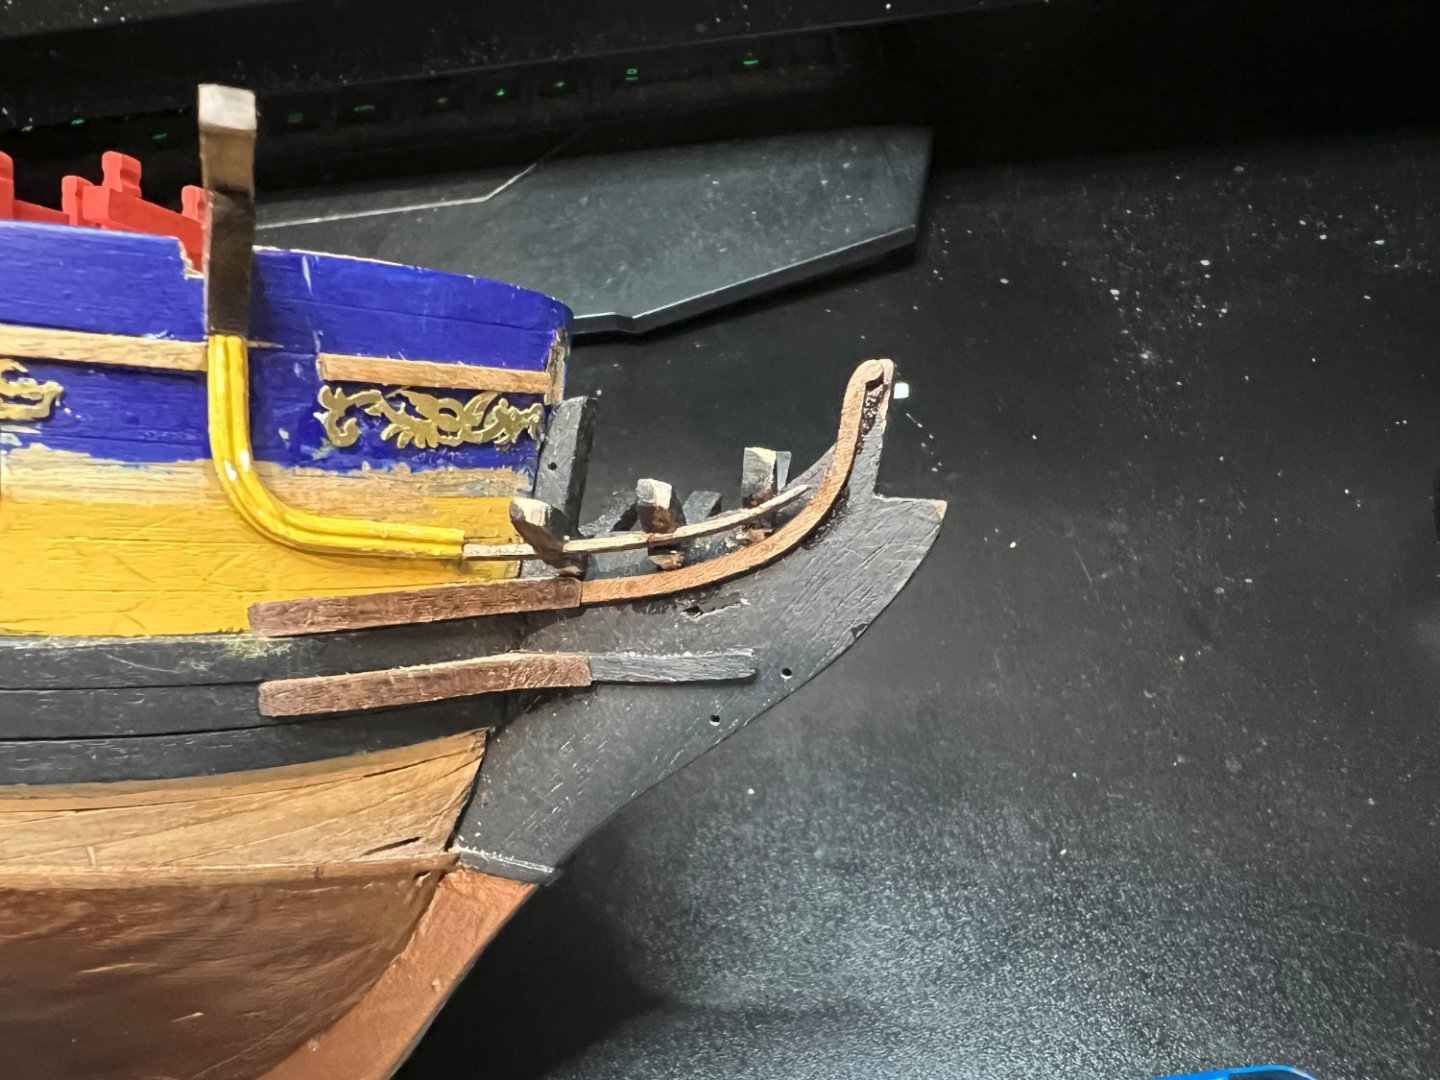
Catheads ,cut a slot into the deck planking for the cathead to fit in ,I had to notch the cathead where it goes under the railing or it wouldnt fit ,took a little too much off but it's covered by the rail so not visible! Richard
- 49 replies
-
- 3
-
-
- Pegasus
- Victory Models
- (and 1 more)
-
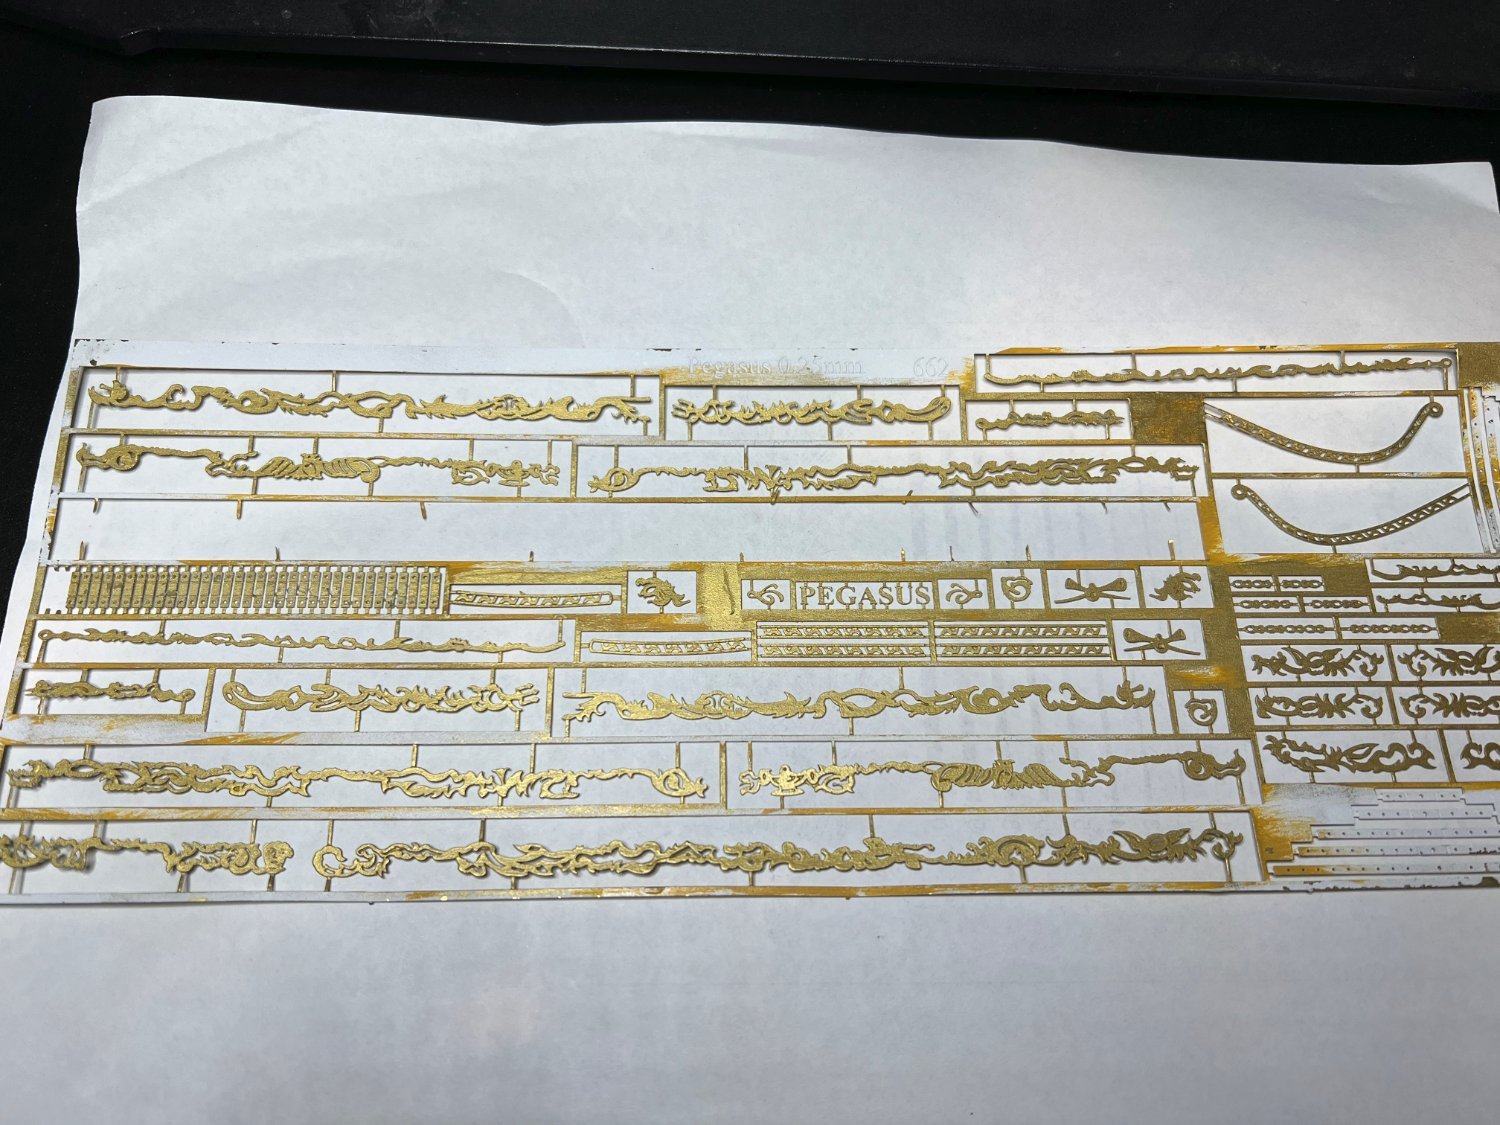
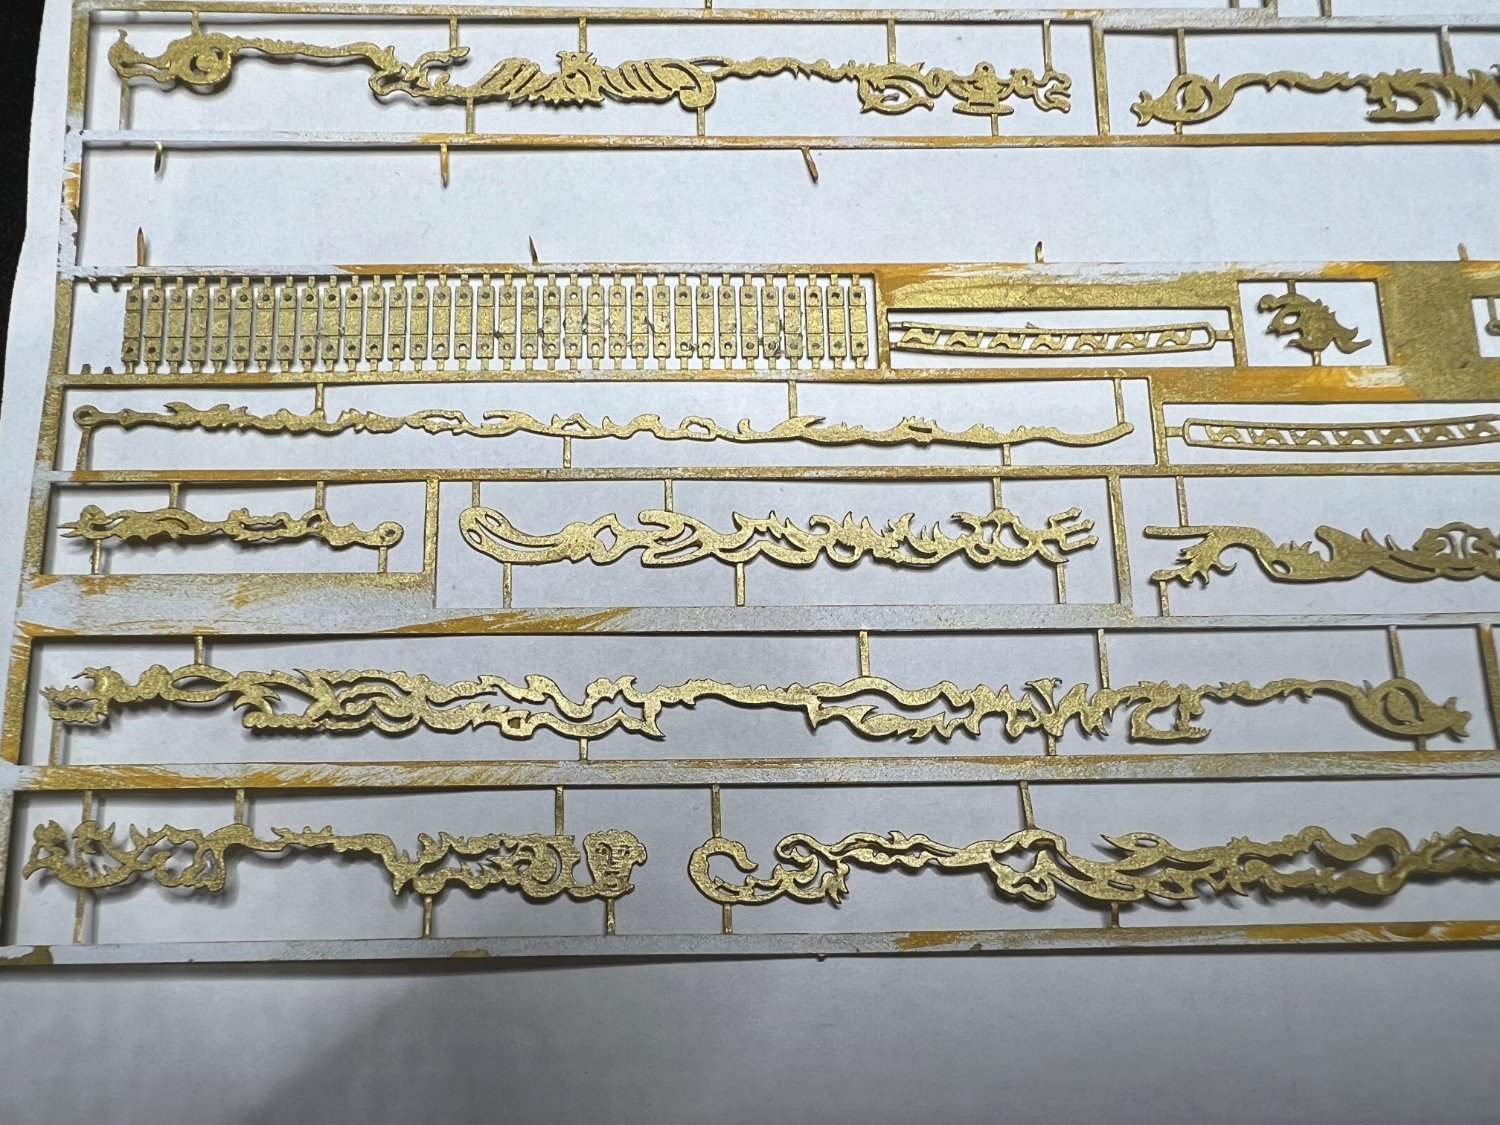
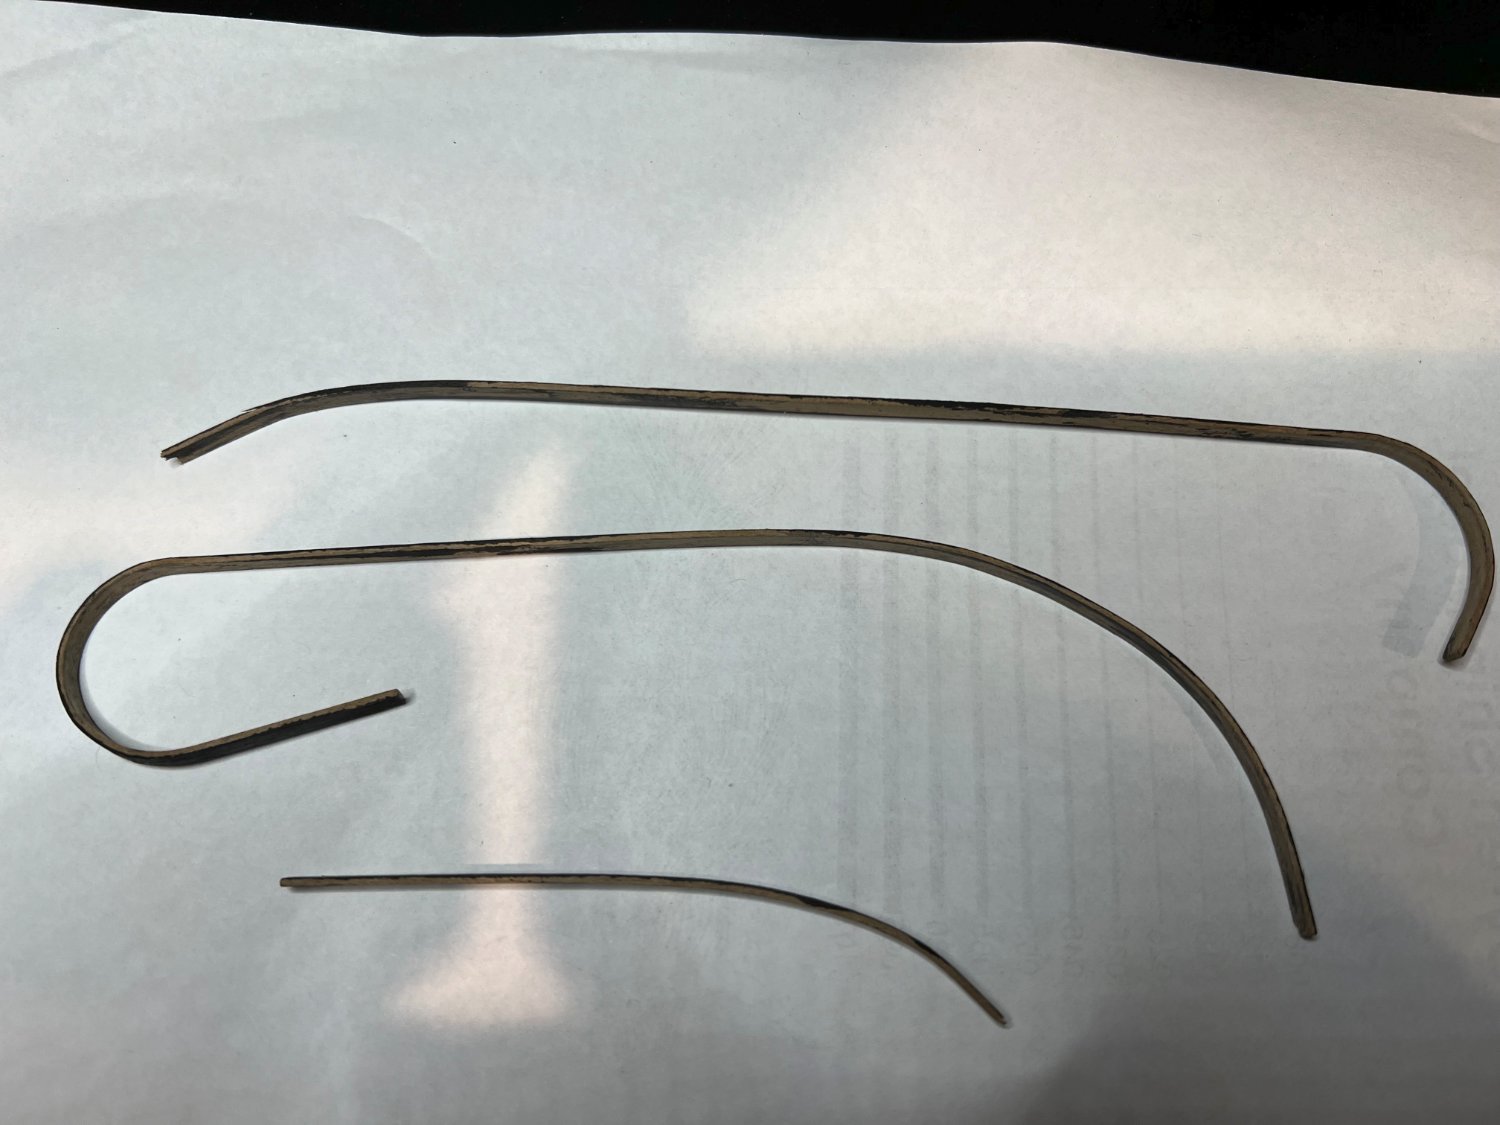
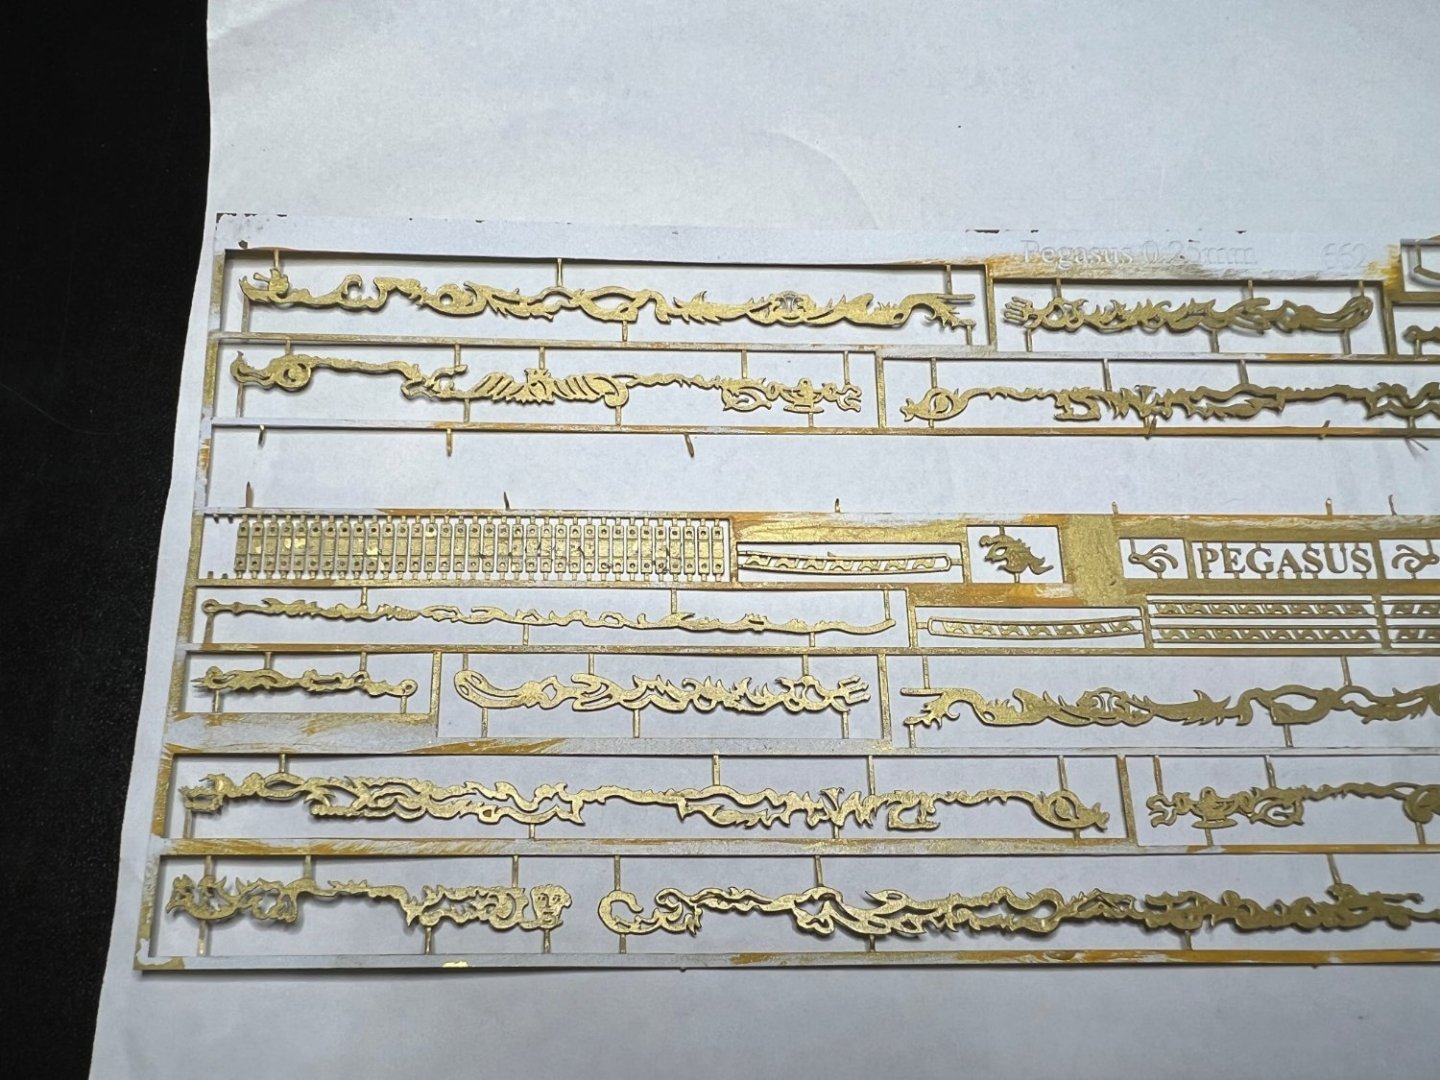
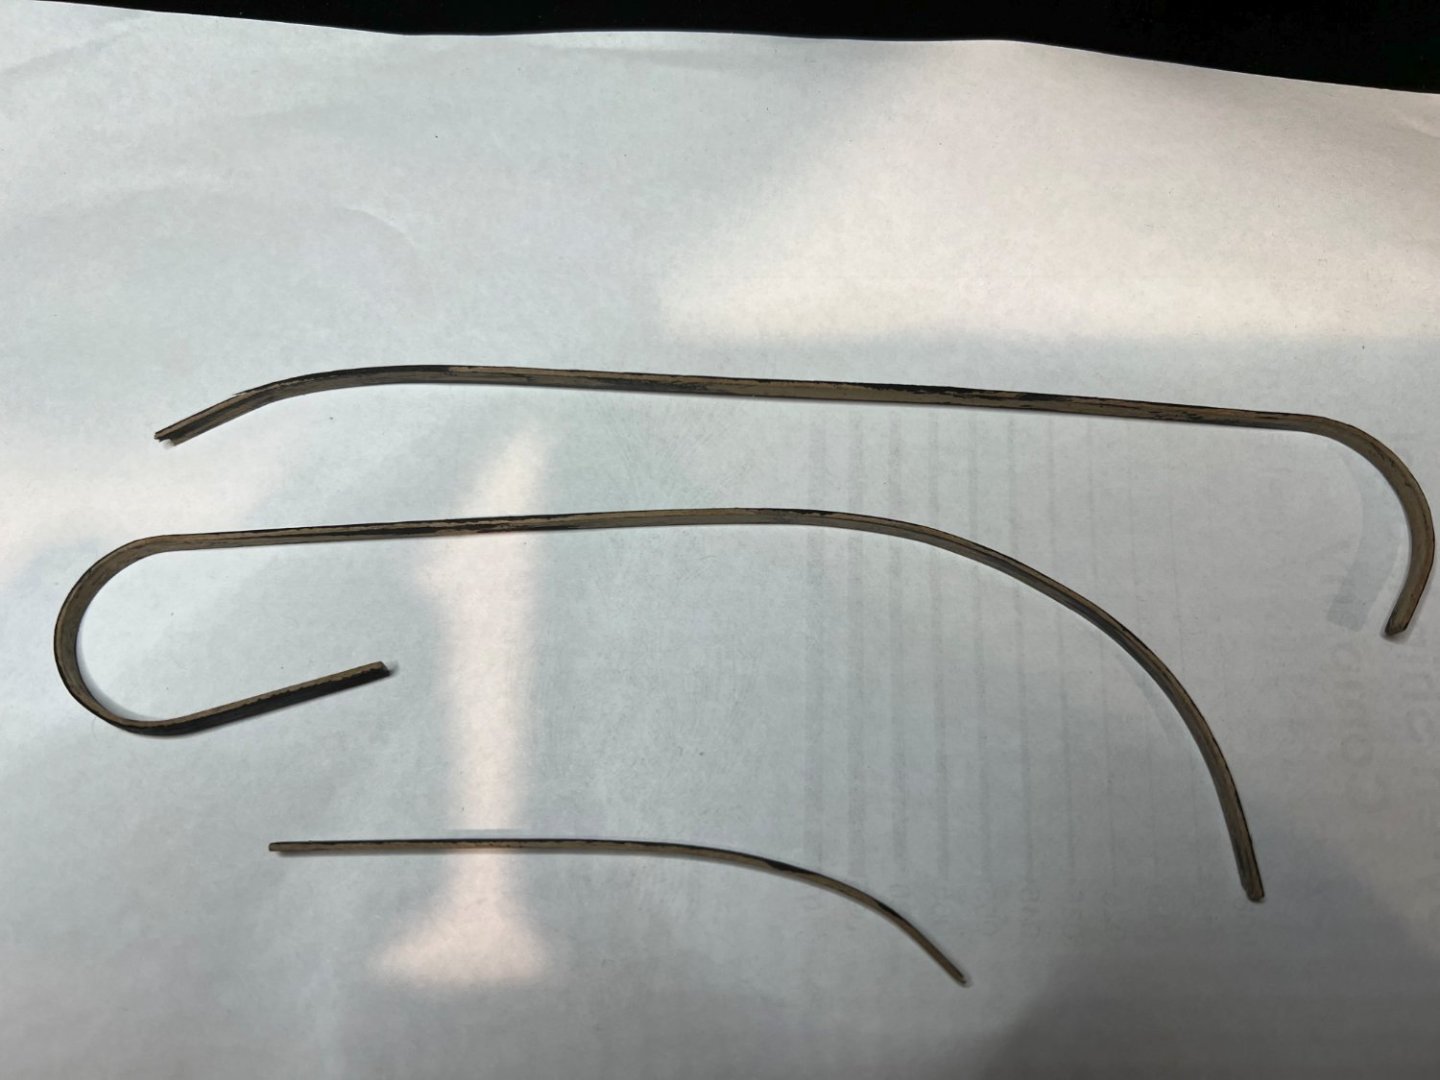
All the decorations have been painted in the true metal and I've given them 3 coats of Mission Models flat varnish to protect it - because the true metals a wax based product it can rub off a bit on fingers and get on other parts you handle! ,The Mission Models varnish stops that and it can resist scratching with a fingernail so I dont need to worry so much about damaging it😎 The flat varnish has also knocked back shininess of the gold colour and gives it a nice sheen. Oh and added a pic of my results with my new plank bender ,the really tight bend has a 25mm inside diameter which is crazy! Richard


- 49 replies
-
- 3
-
-
- Pegasus
- Victory Models
- (and 1 more)