Dr PS - Paul Schulze
-
Posts
304 -
Joined
-
Last visited
Content Type
Profiles
Forums
Gallery
Events
Everything posted by Dr PS - Paul Schulze
-
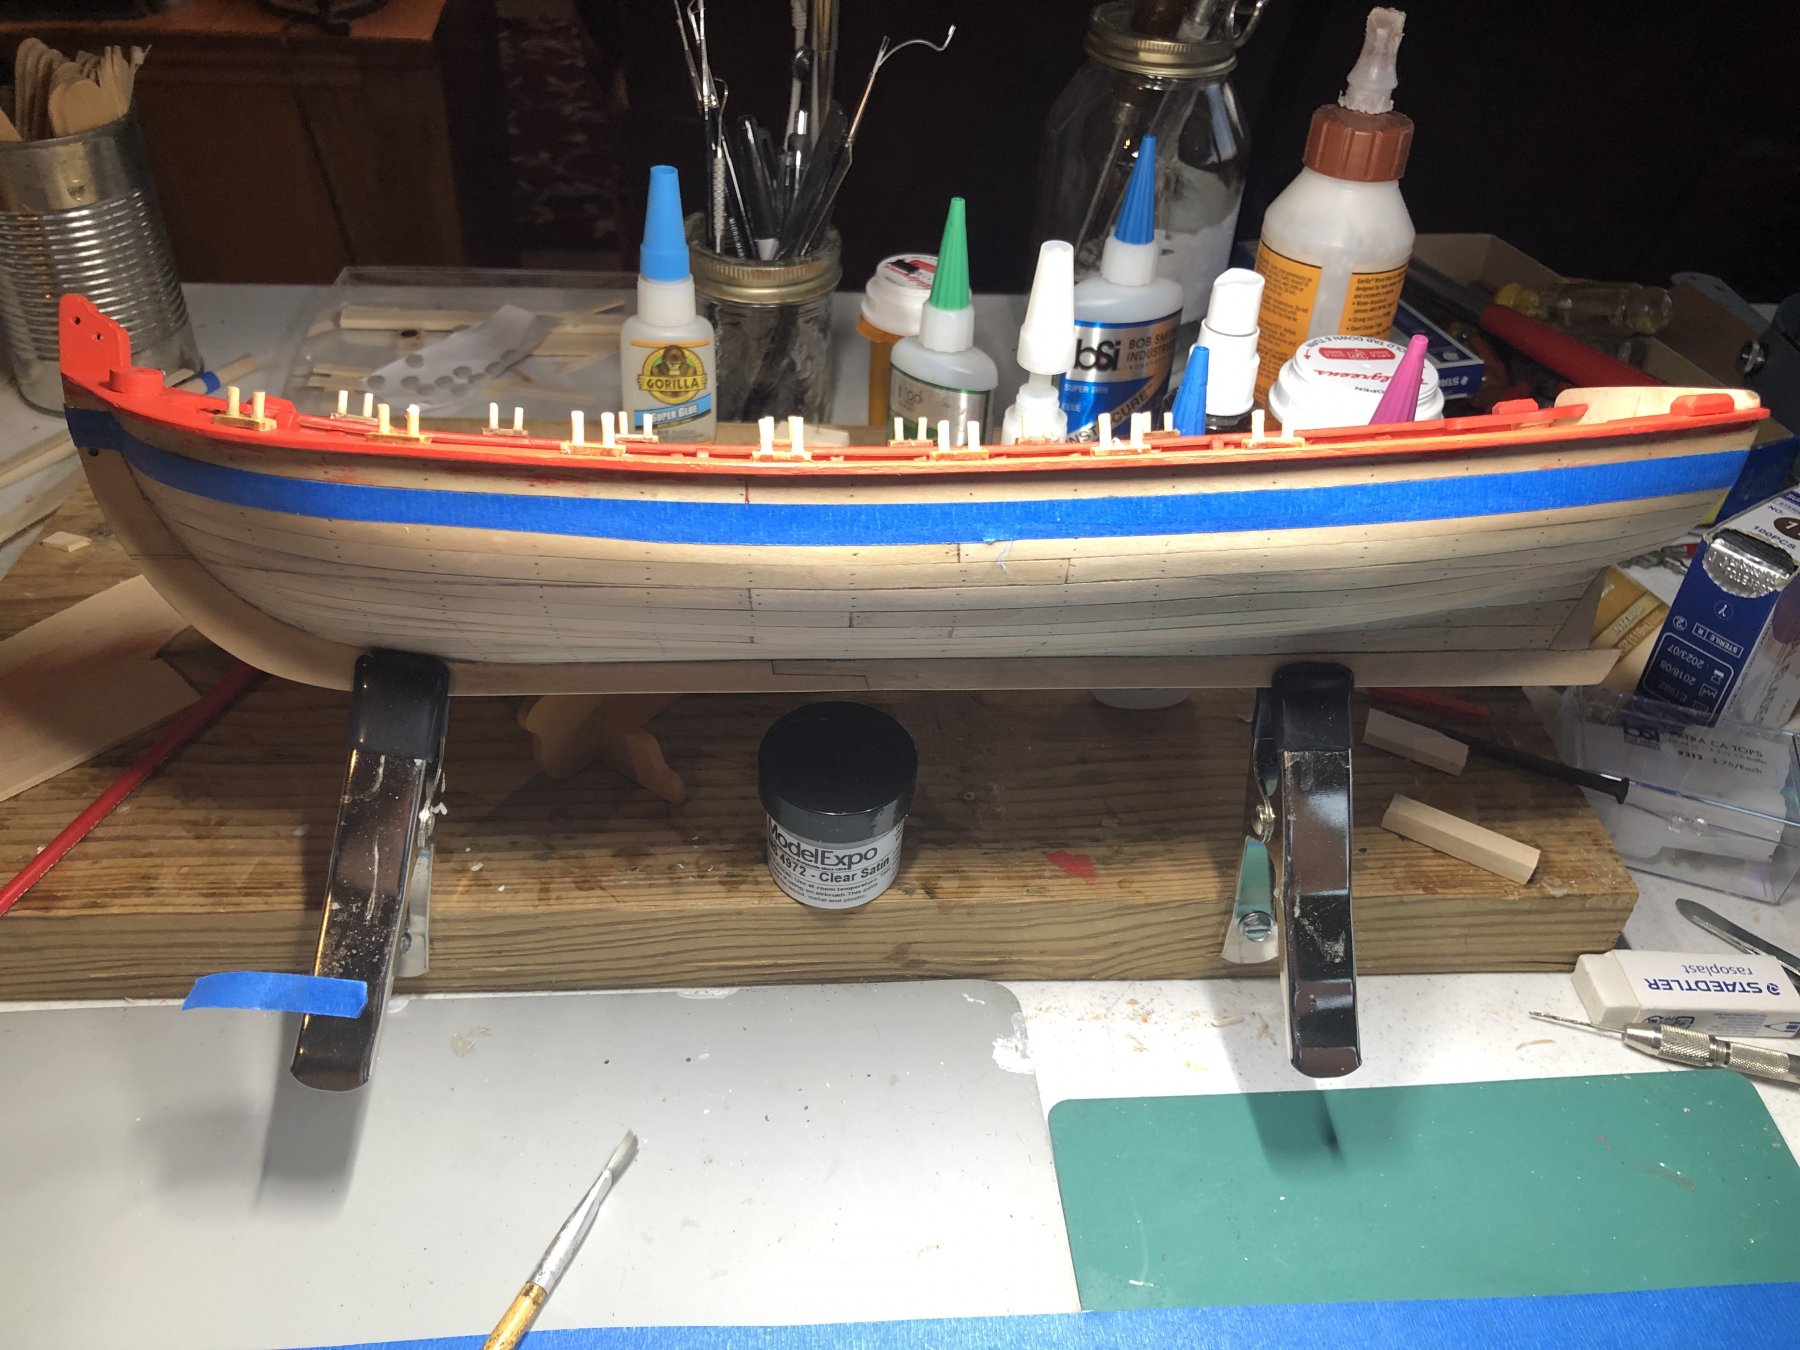
 Arthur, I not sure if I’m ahead yet as I don’t have the rub rails on yet. I hope to get them on today. I have been doing yard work instead since the rains have stopped and the yard has dried up some. I did get the tiller done on my next try after I posted about it in #92, but that’s about it. Why on earth would boat builders paint a rub rail white as it would be banged up all the time?
 -
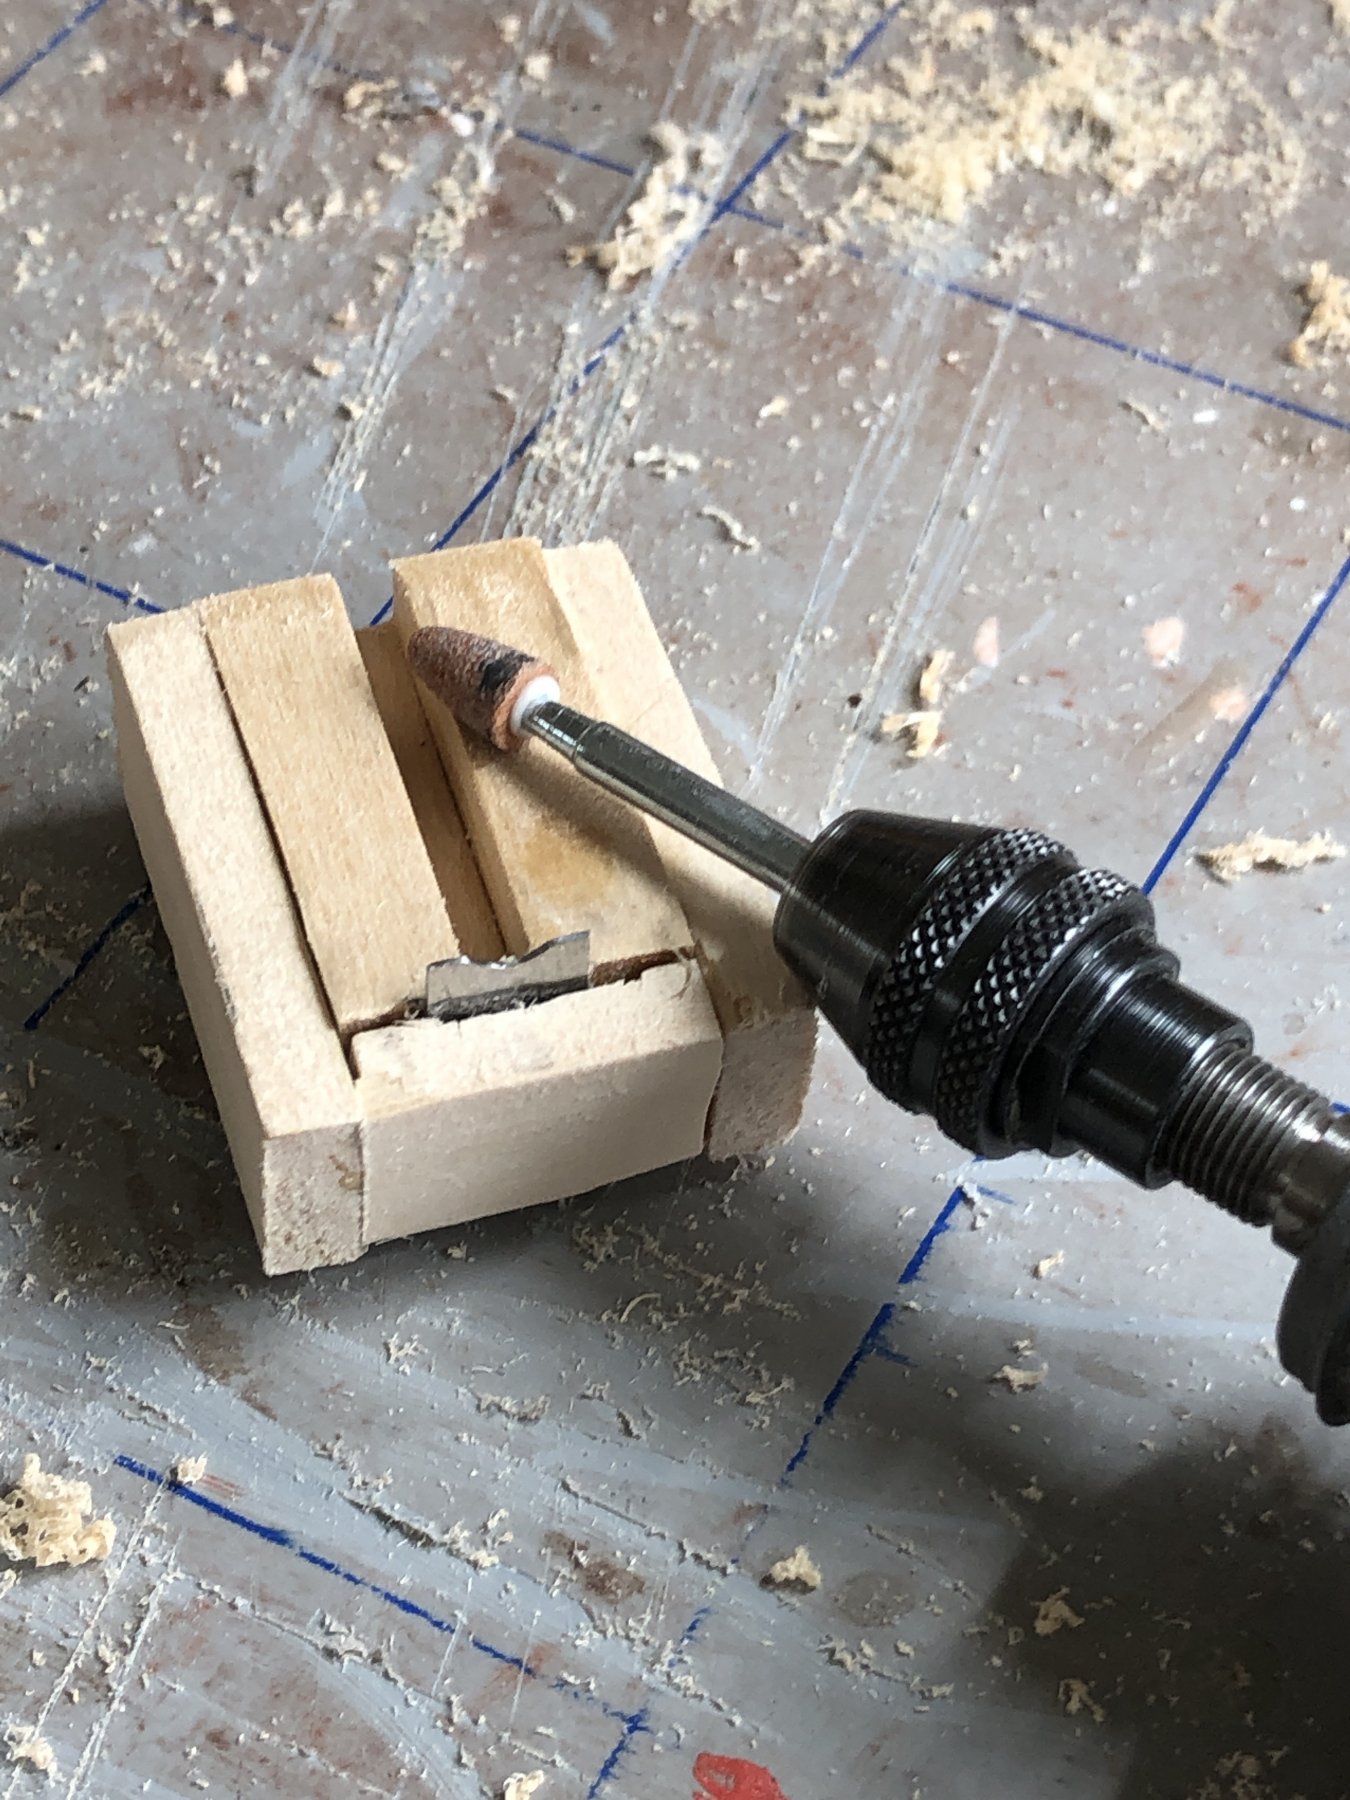
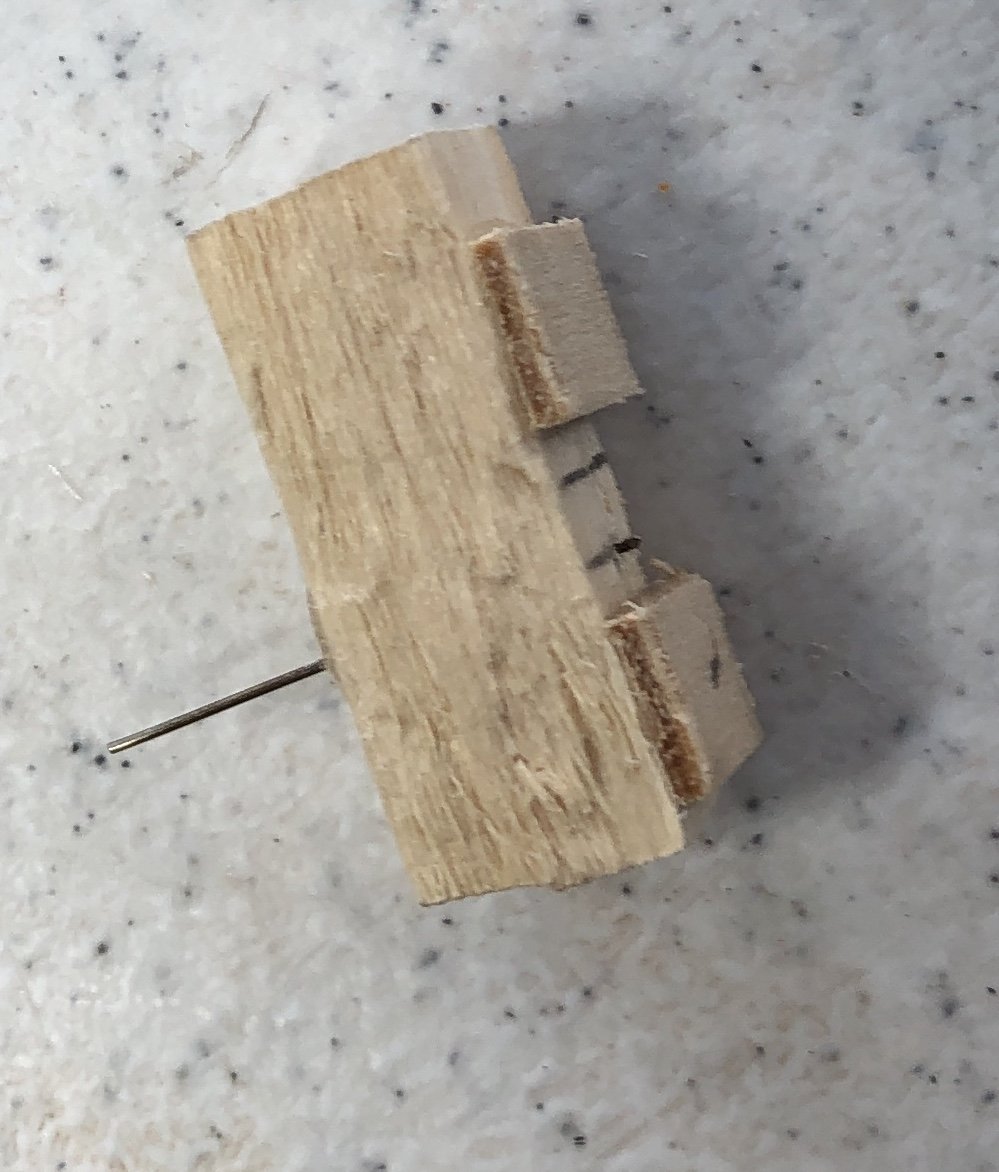
Just some encouragement for those still working on the tiller. It can be done. I have only carved a test piece although it came out 2.5” in length by accident. Not curved though. If you are lucky enough to get a 3/64” “pin” put a bit of super thin CA on it as the CA will harden it. I will save this one just in case as I think it can be bent using very hot water. Now I get to try for the real thing. 😳 BTW, I use Bob Smith CA and their accelerator. This stuff is great.
- 168 replies
-
- 5
-

-
- 18th Century Armed Longboat
- Model Shipways
- (and 1 more)
-
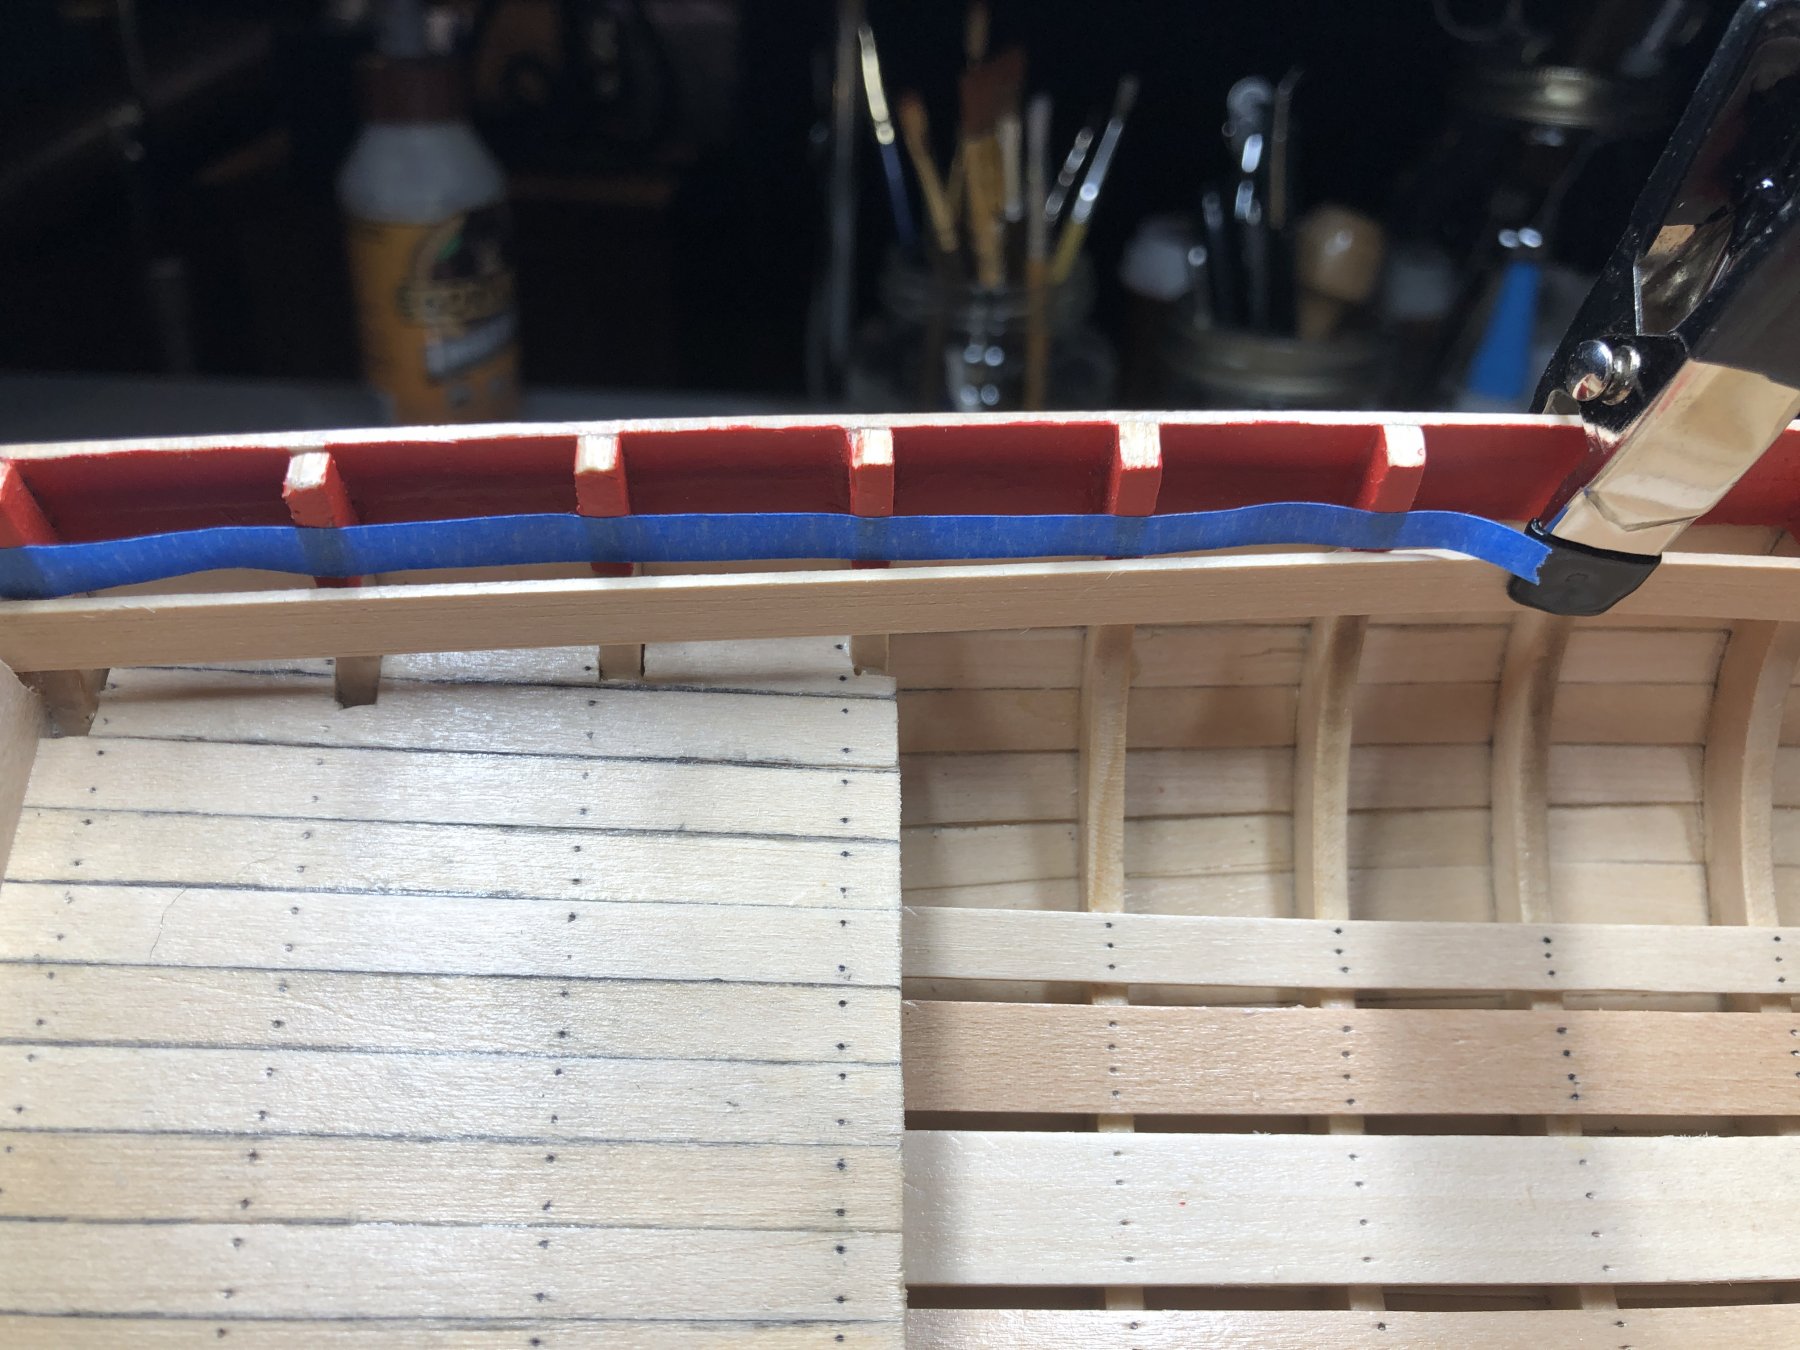
Well I did a bunch of research/searching on the subject of bleeding paint under masking tape. Whew! It’s amazing how many ideas there are out there - from brands of tape to how it’s applied or pulled off. I finally thought I would try the combination of a couple which seemed reasonable and made real sense. First, when applying the tape, do not stretch it and rub it smooth five or six times with a clean cloth to make sure the tape edge is sealed well. It goes without saying that the surface should be clean as well. Second, paint the edge of tape with the masked color, in this case clear satin, stain or whatever was used. This step seals the tape from further leakage and any bleeding at this step will have no affect as the leaked on surface is the same color as the bleed. Then paint away! Well, it worked great.

- 168 replies
-
- 6
-
-
- 18th Century Armed Longboat
- Model Shipways
- (and 1 more)
-
Well, I’m ready to paint the hull. I made one attempt using blue masking tape but the red paint started leaking underneath it as it seemed to get buckled when it got wet from the paint. The clear satin seems to slick for the masking tape to work. I wonder if electrical tape would work? That is one listed for masking in the front of the manual. Another one listed was low tack automotive tape whatever that is - maybe something for painting.
- 168 replies
-
- 5
-
-
- 18th Century Armed Longboat
- Model Shipways
- (and 1 more)
-
Yes it is very small, and being soft metal, I have no idea how it would scrape anything very well much less be easy to hold. I just hope I don’t break one of my strips when I get around to putting them on. I wish I had a stock of boxwood. Where do ship artisans get it? I sort of remember something like The Lumber Mill or something like that. BTW, I tried to delete that last two photos in my last post and they just keep reappearing. Any suggestions?
-
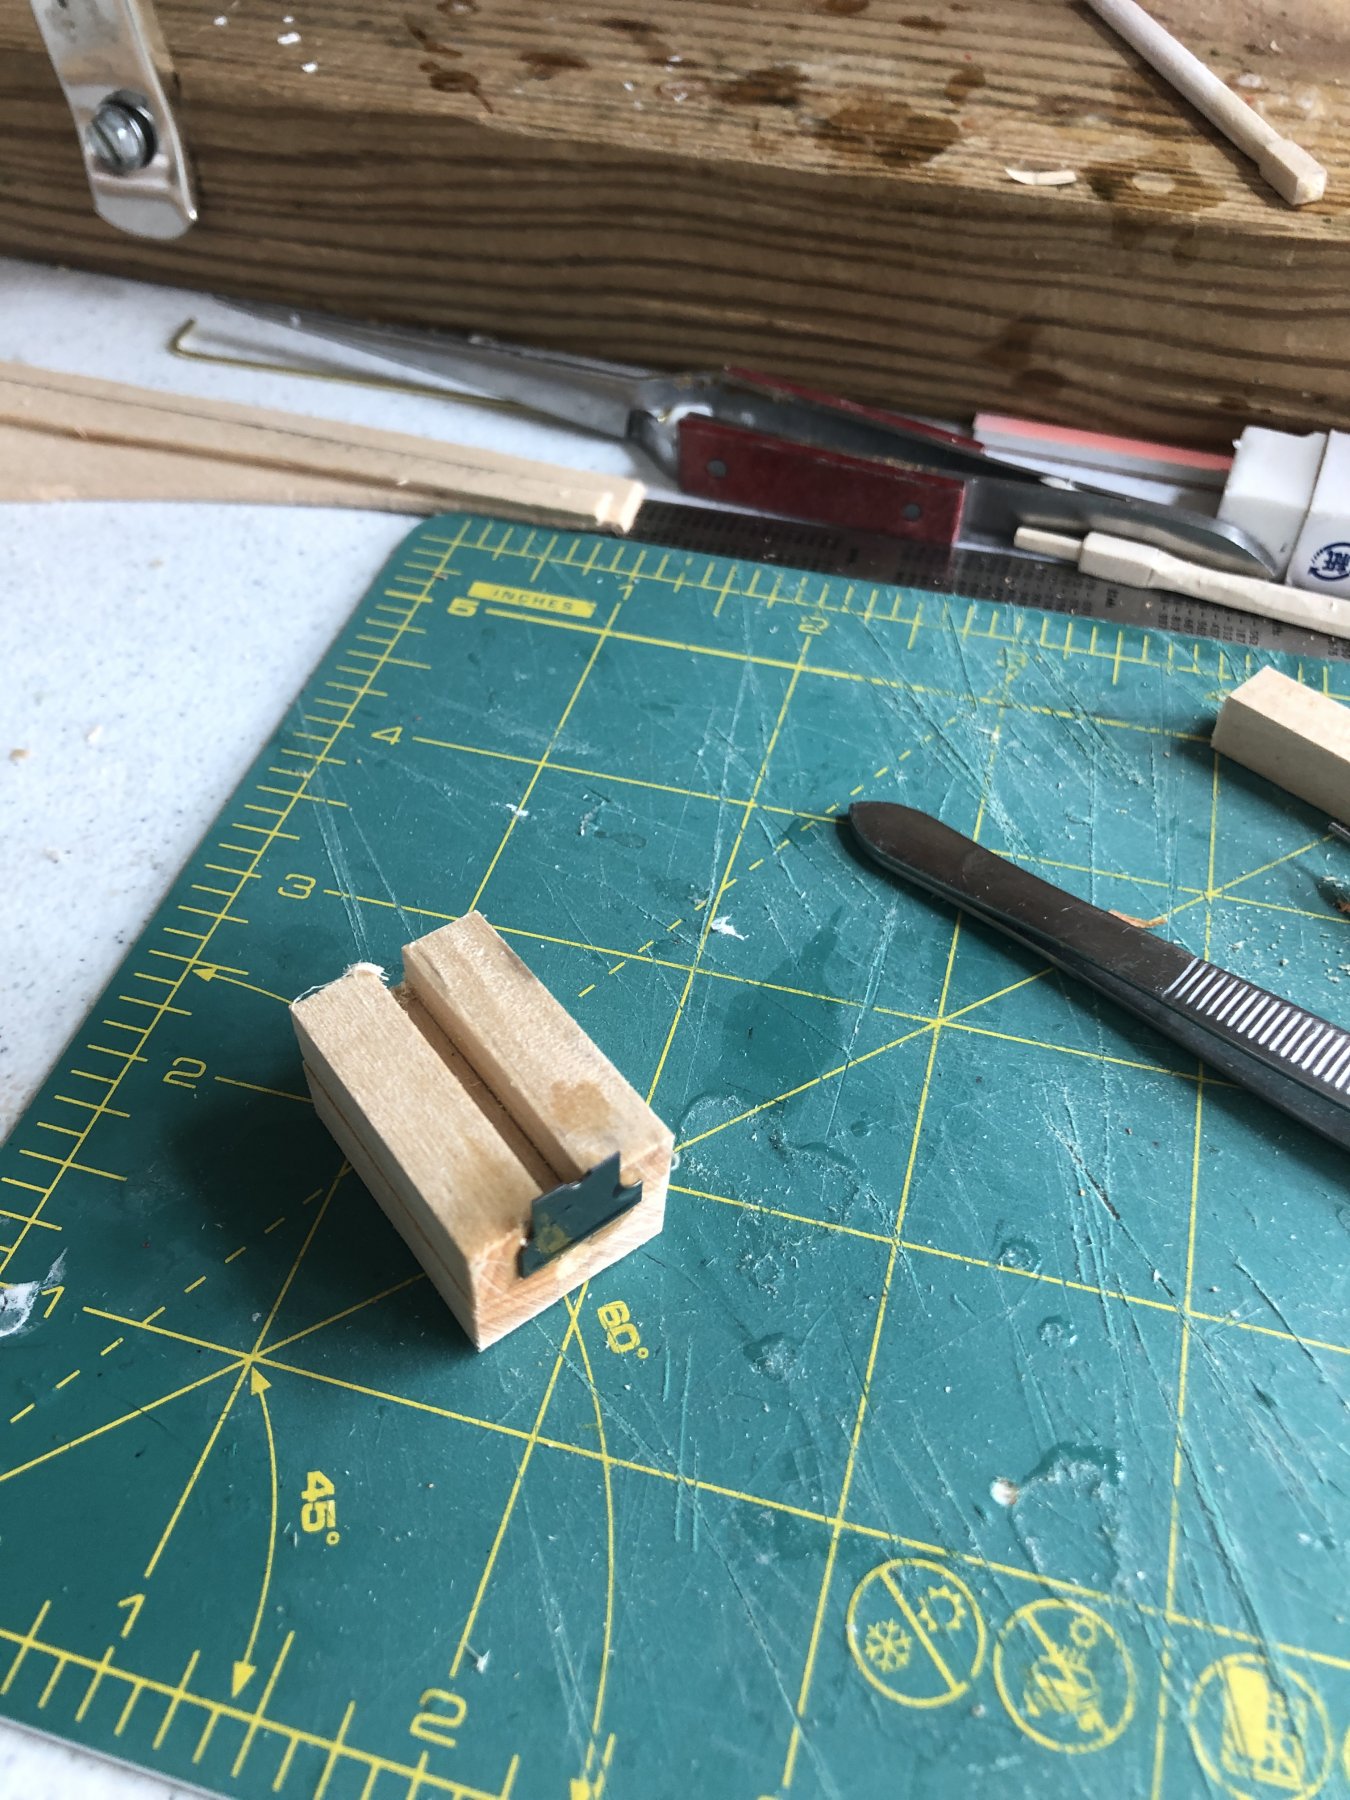
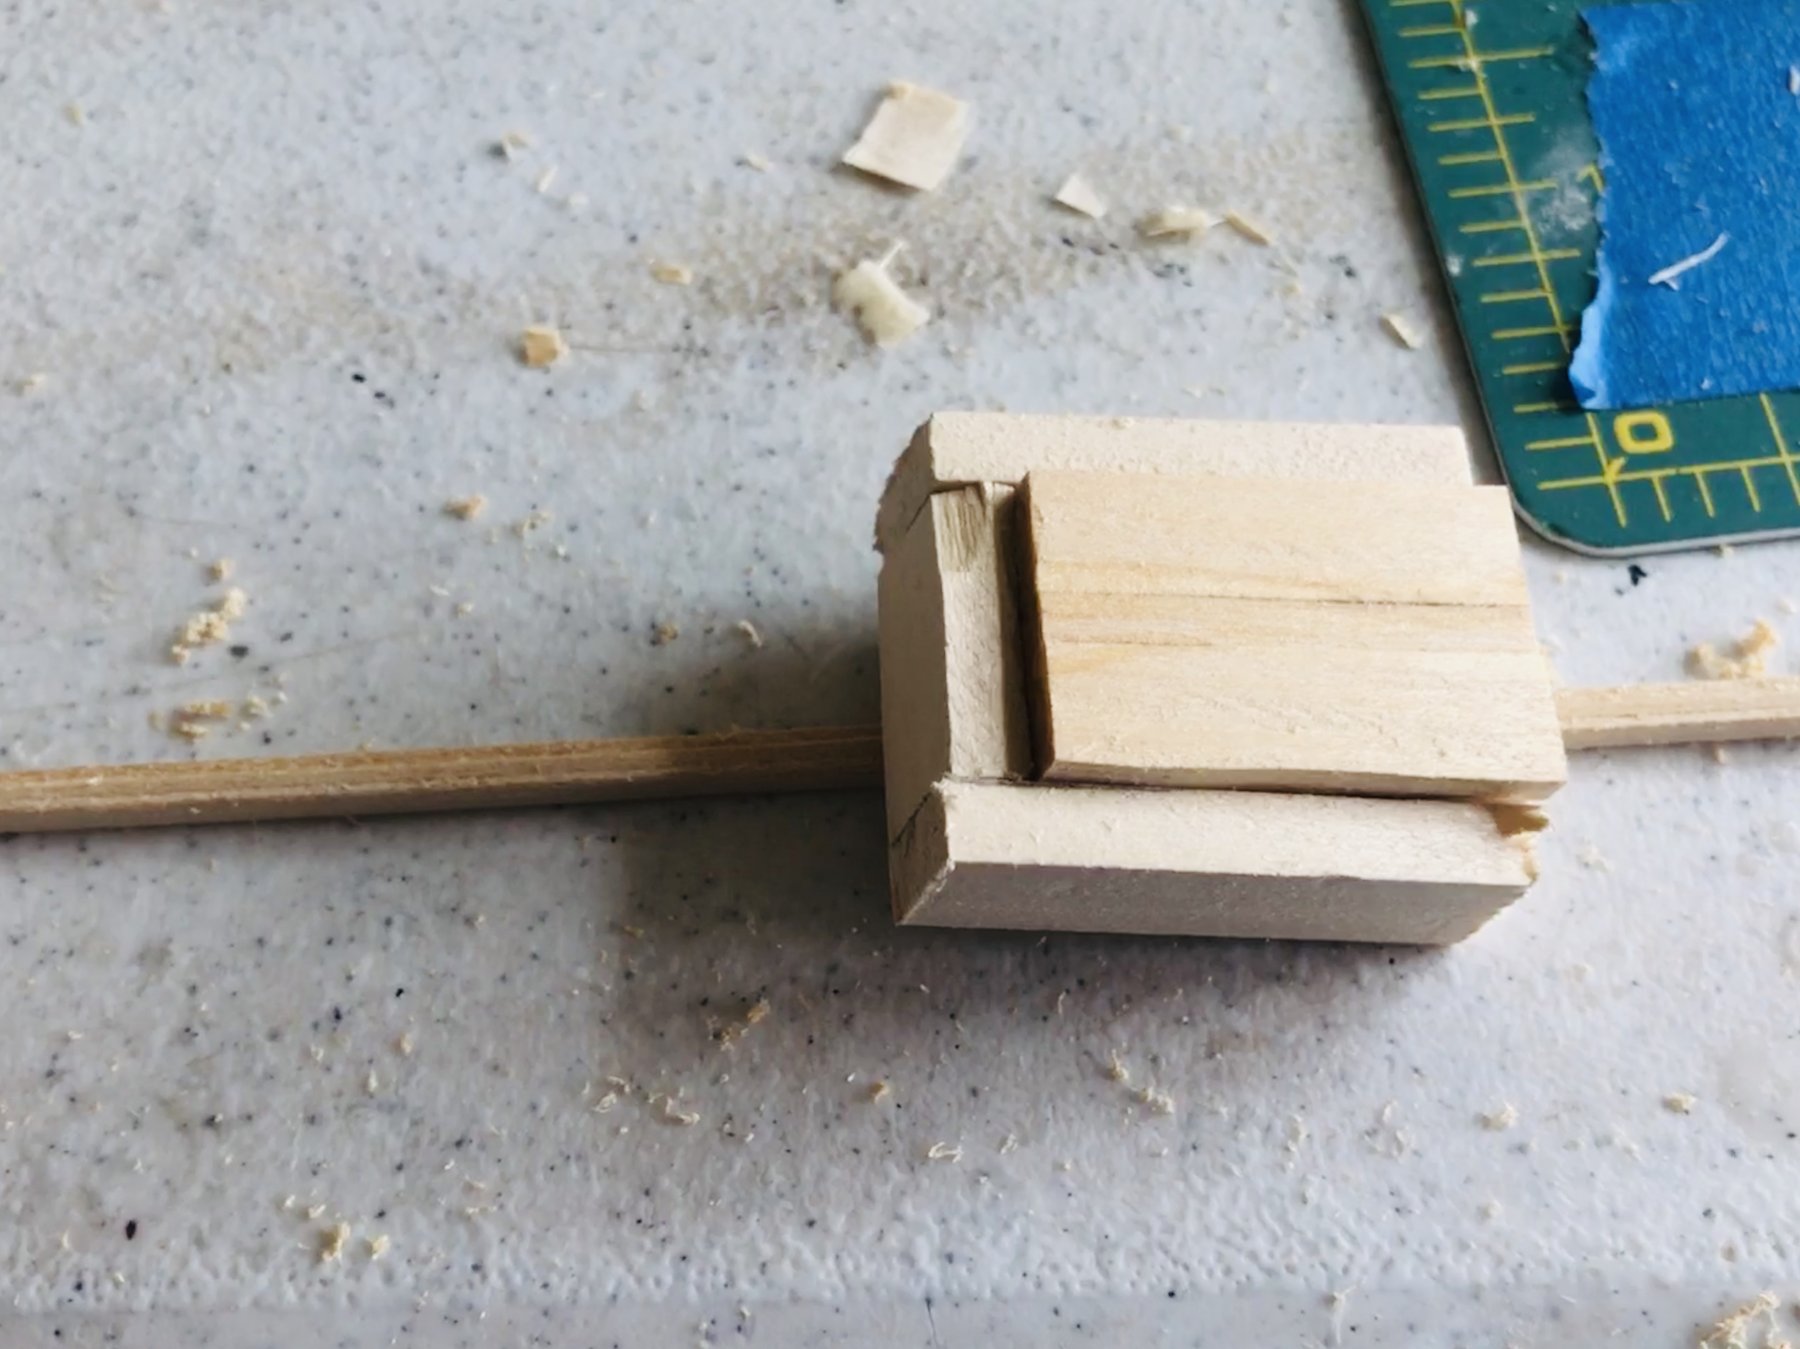
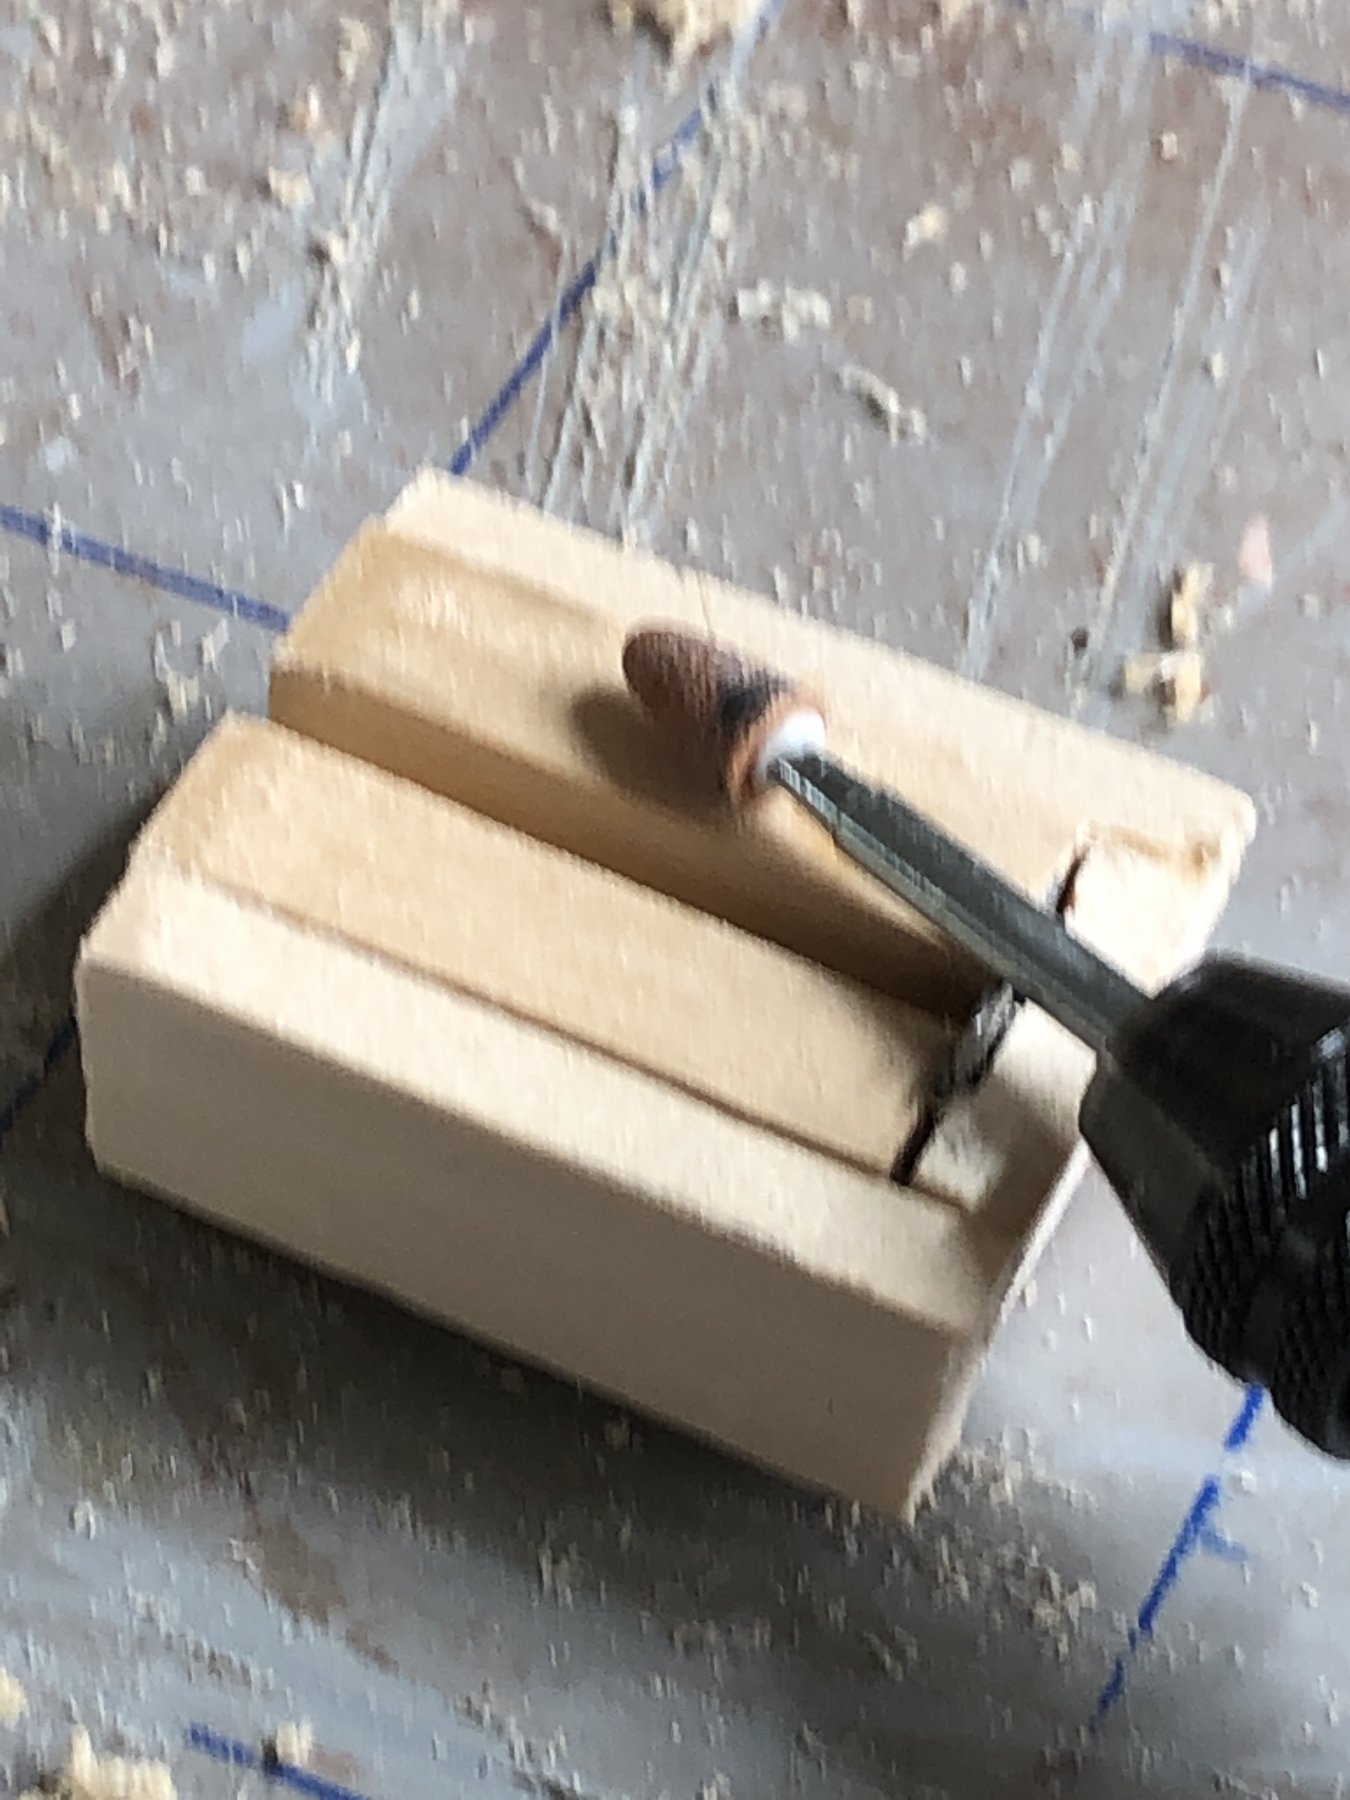
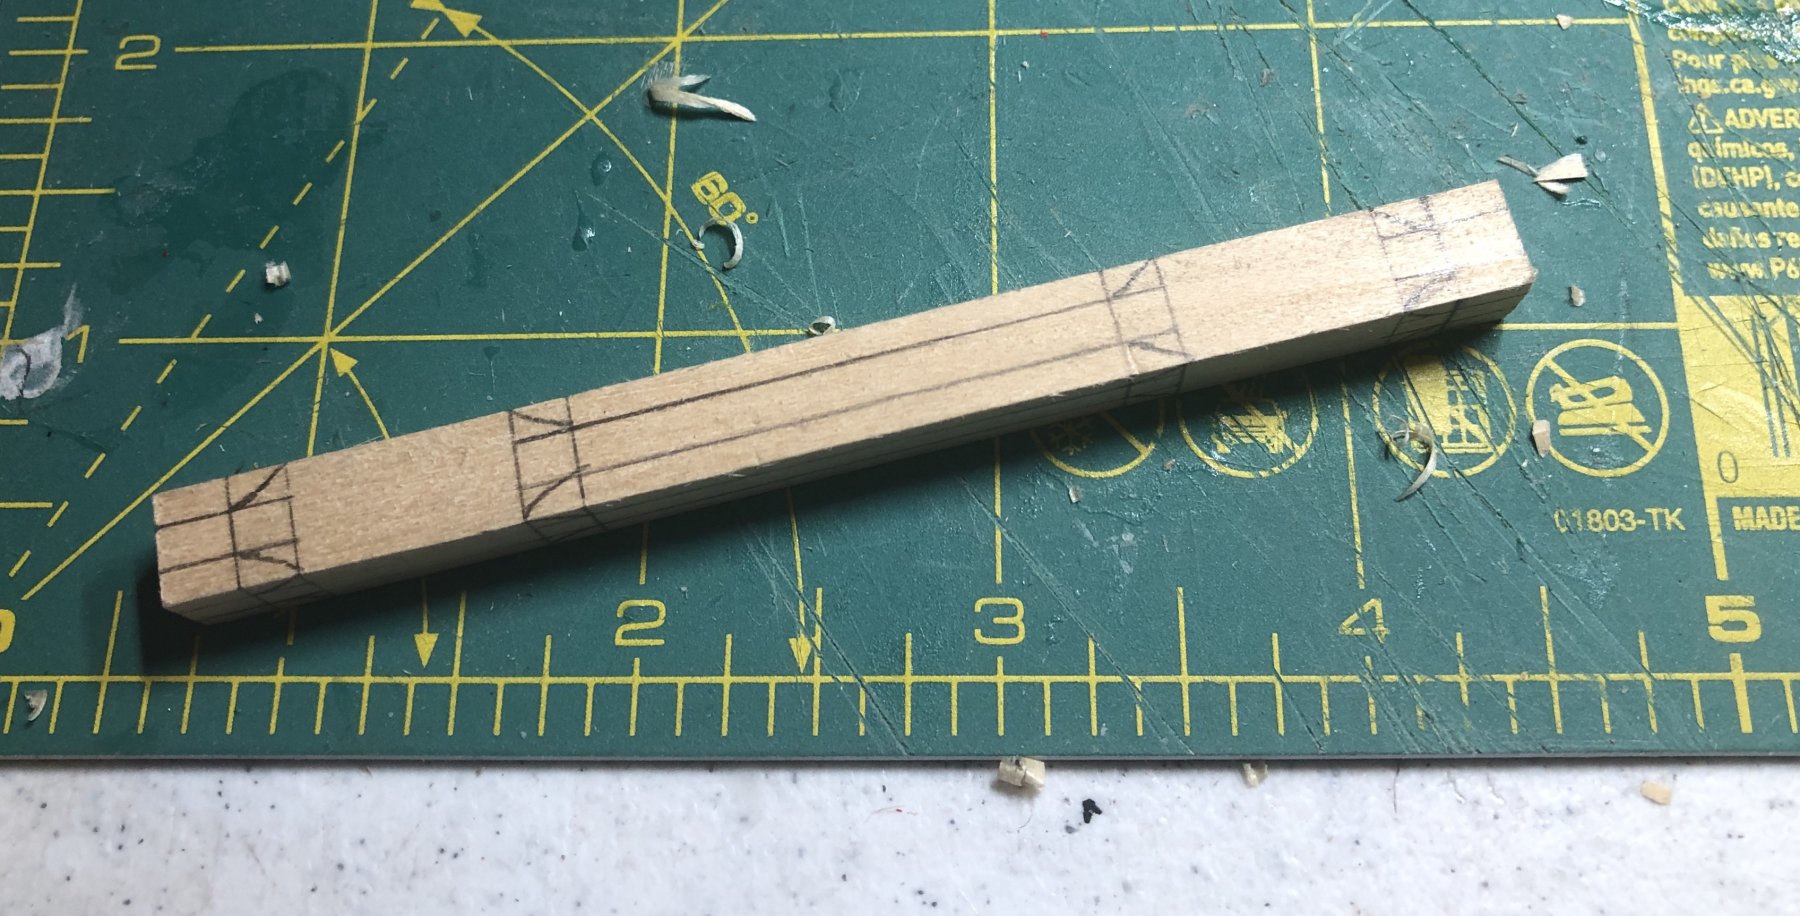
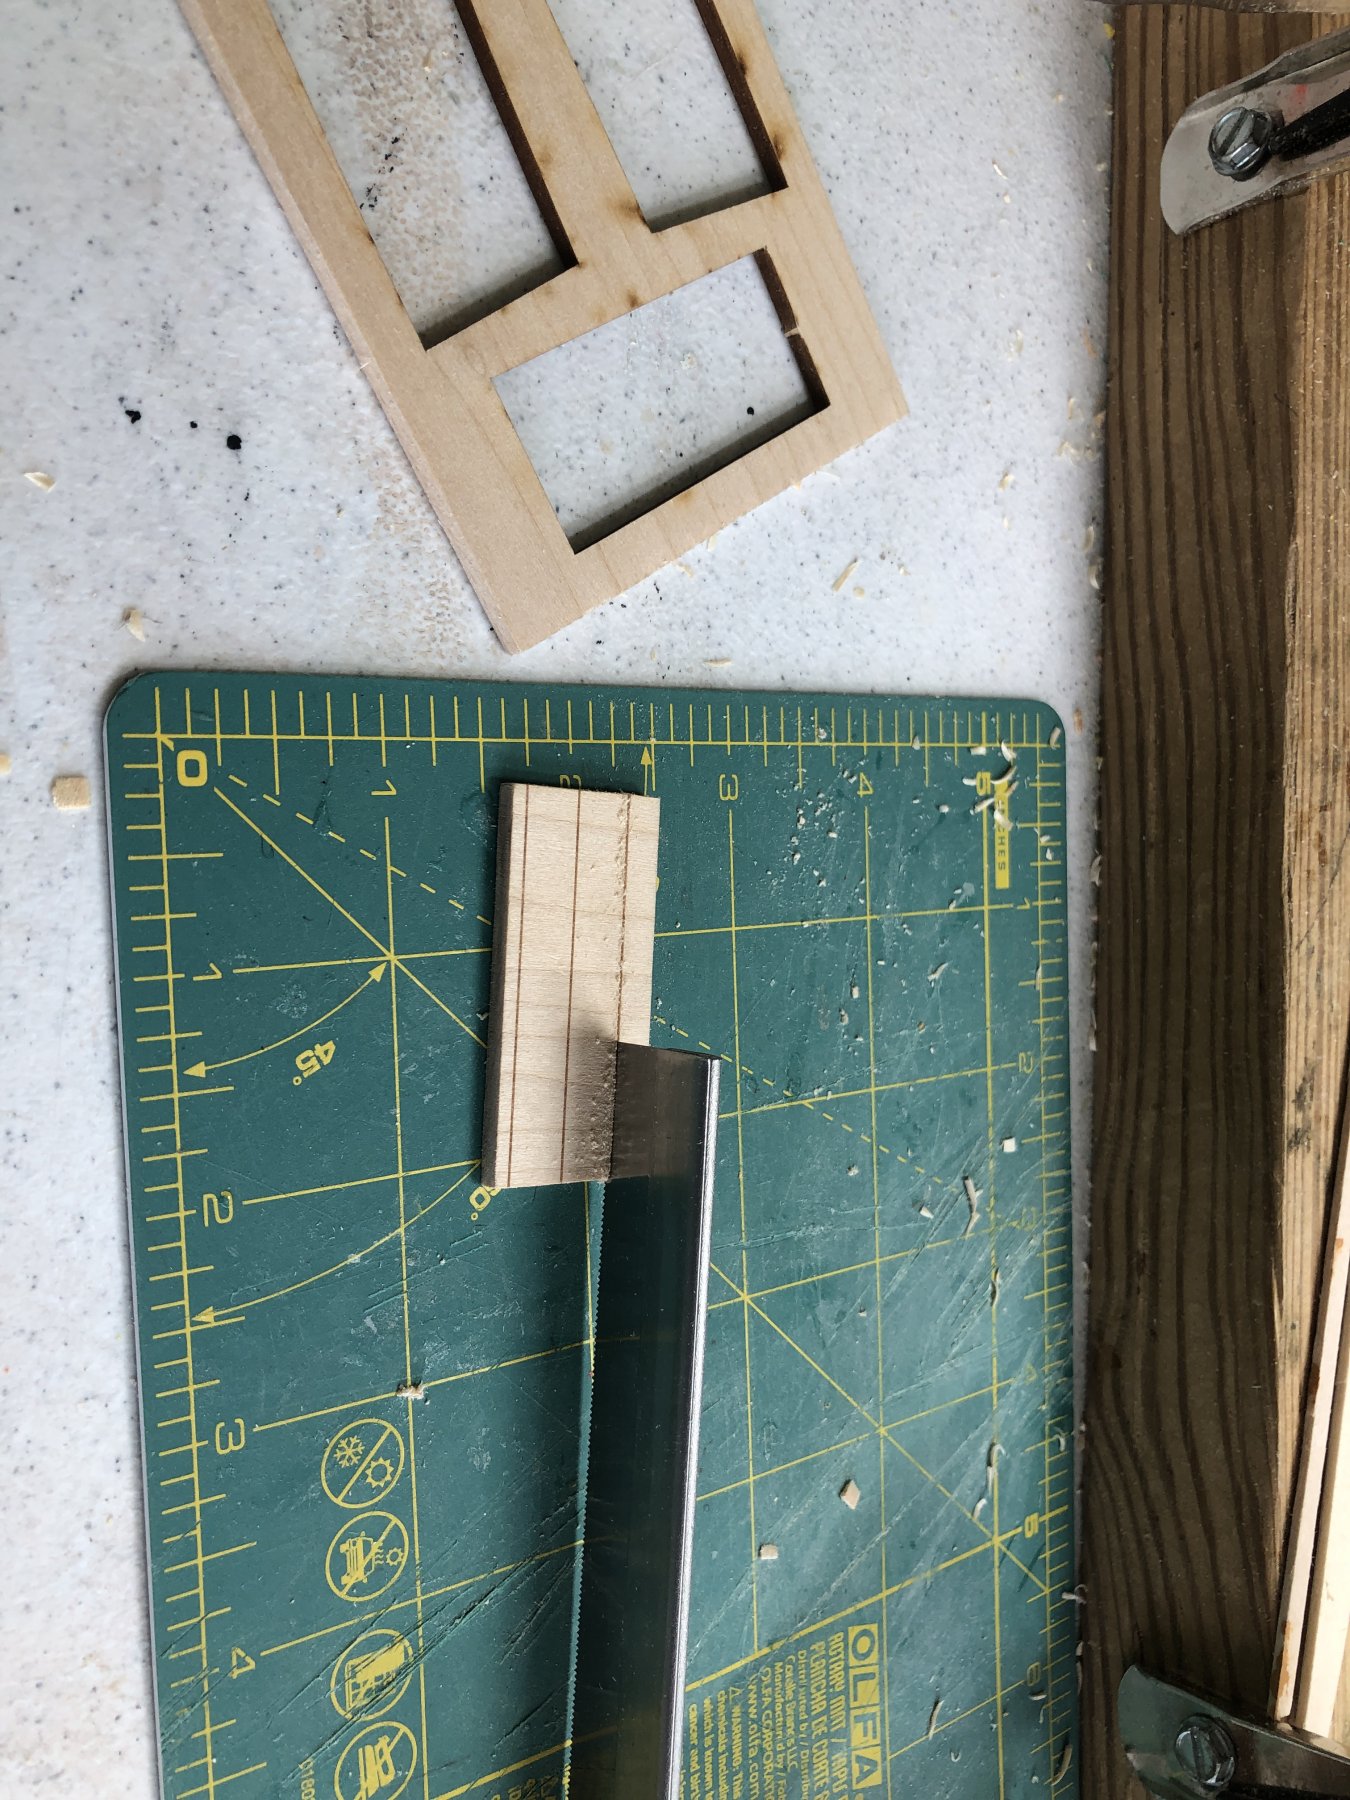
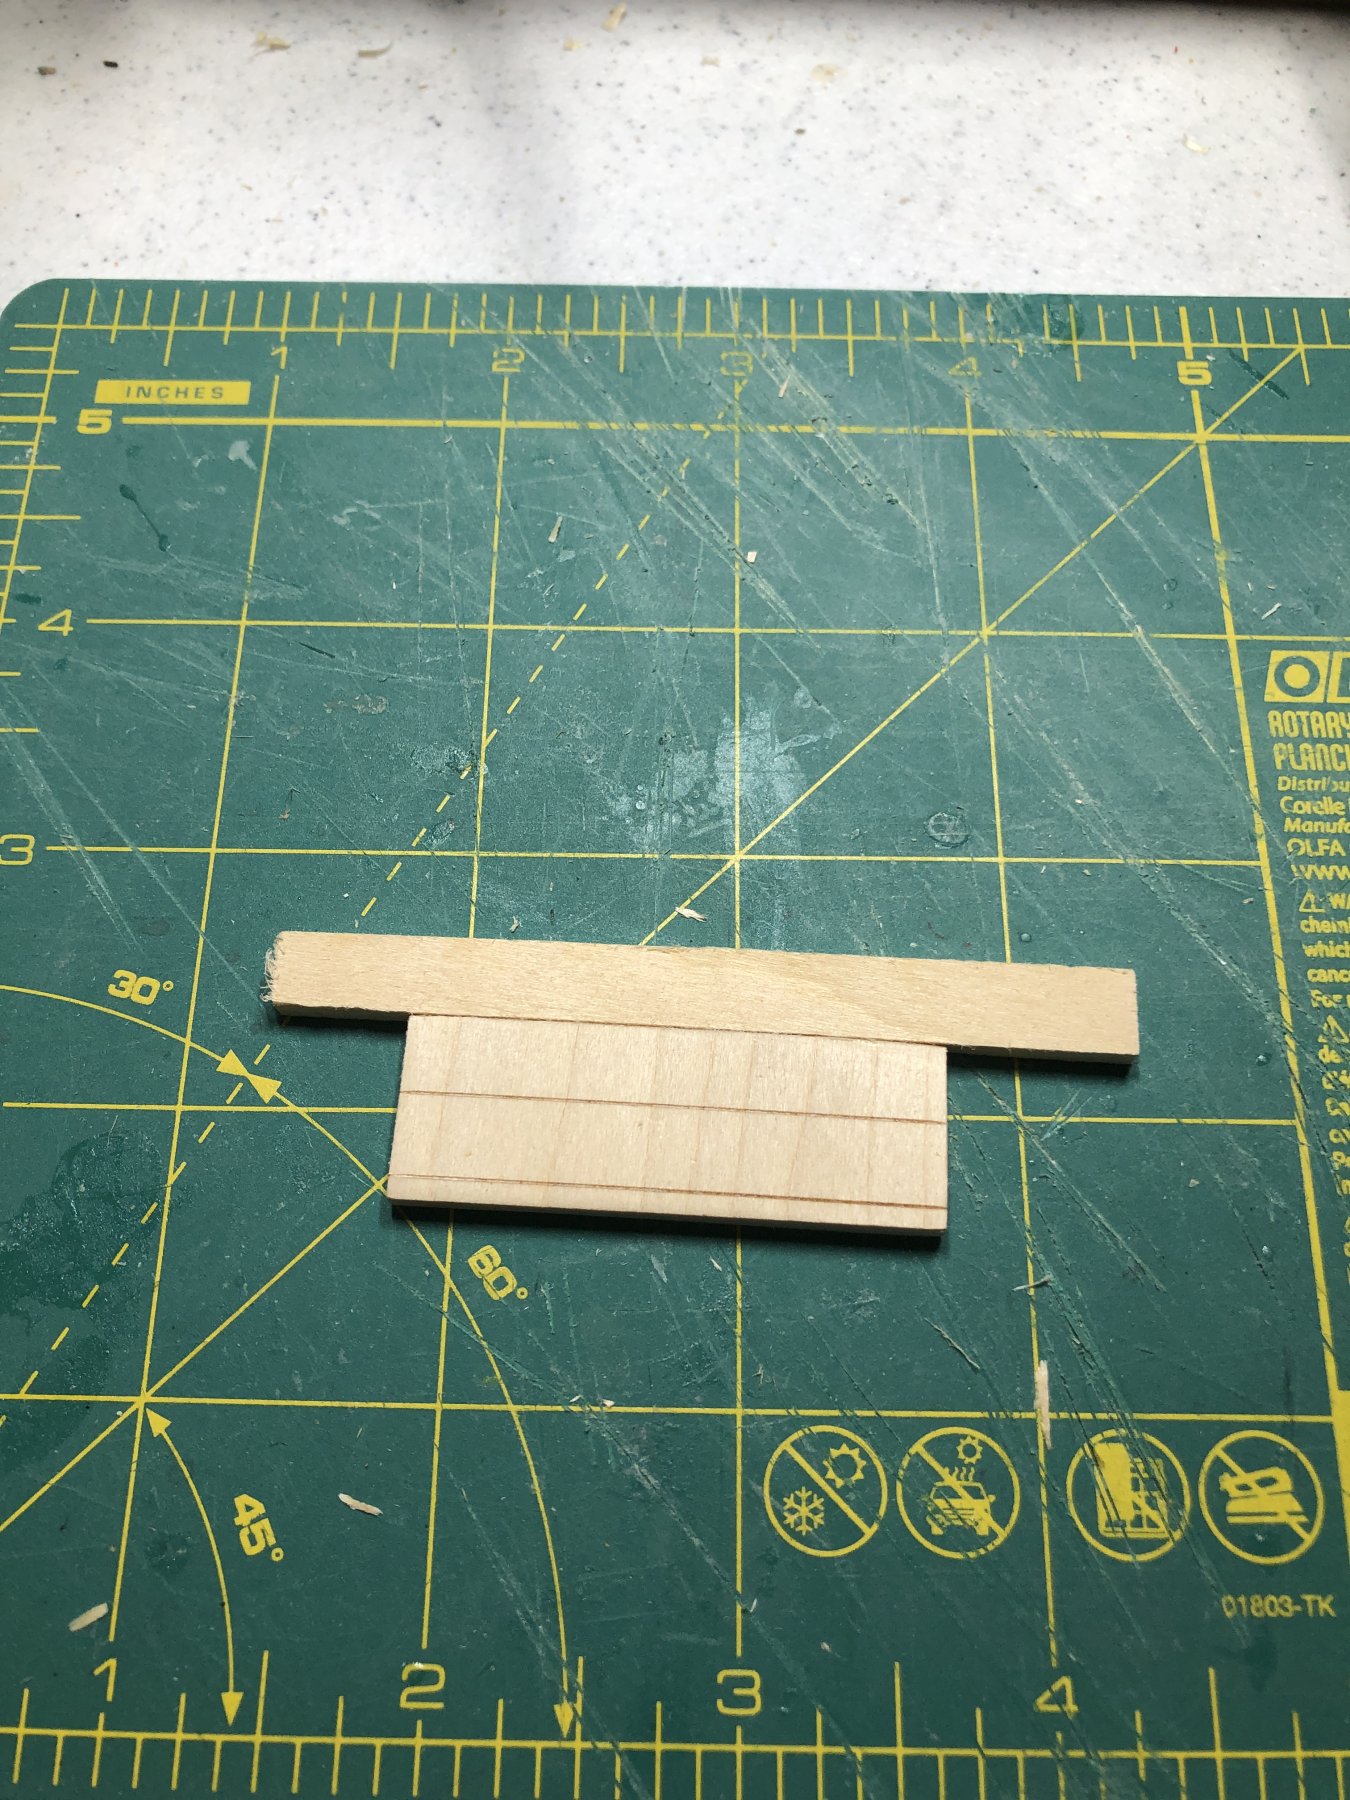
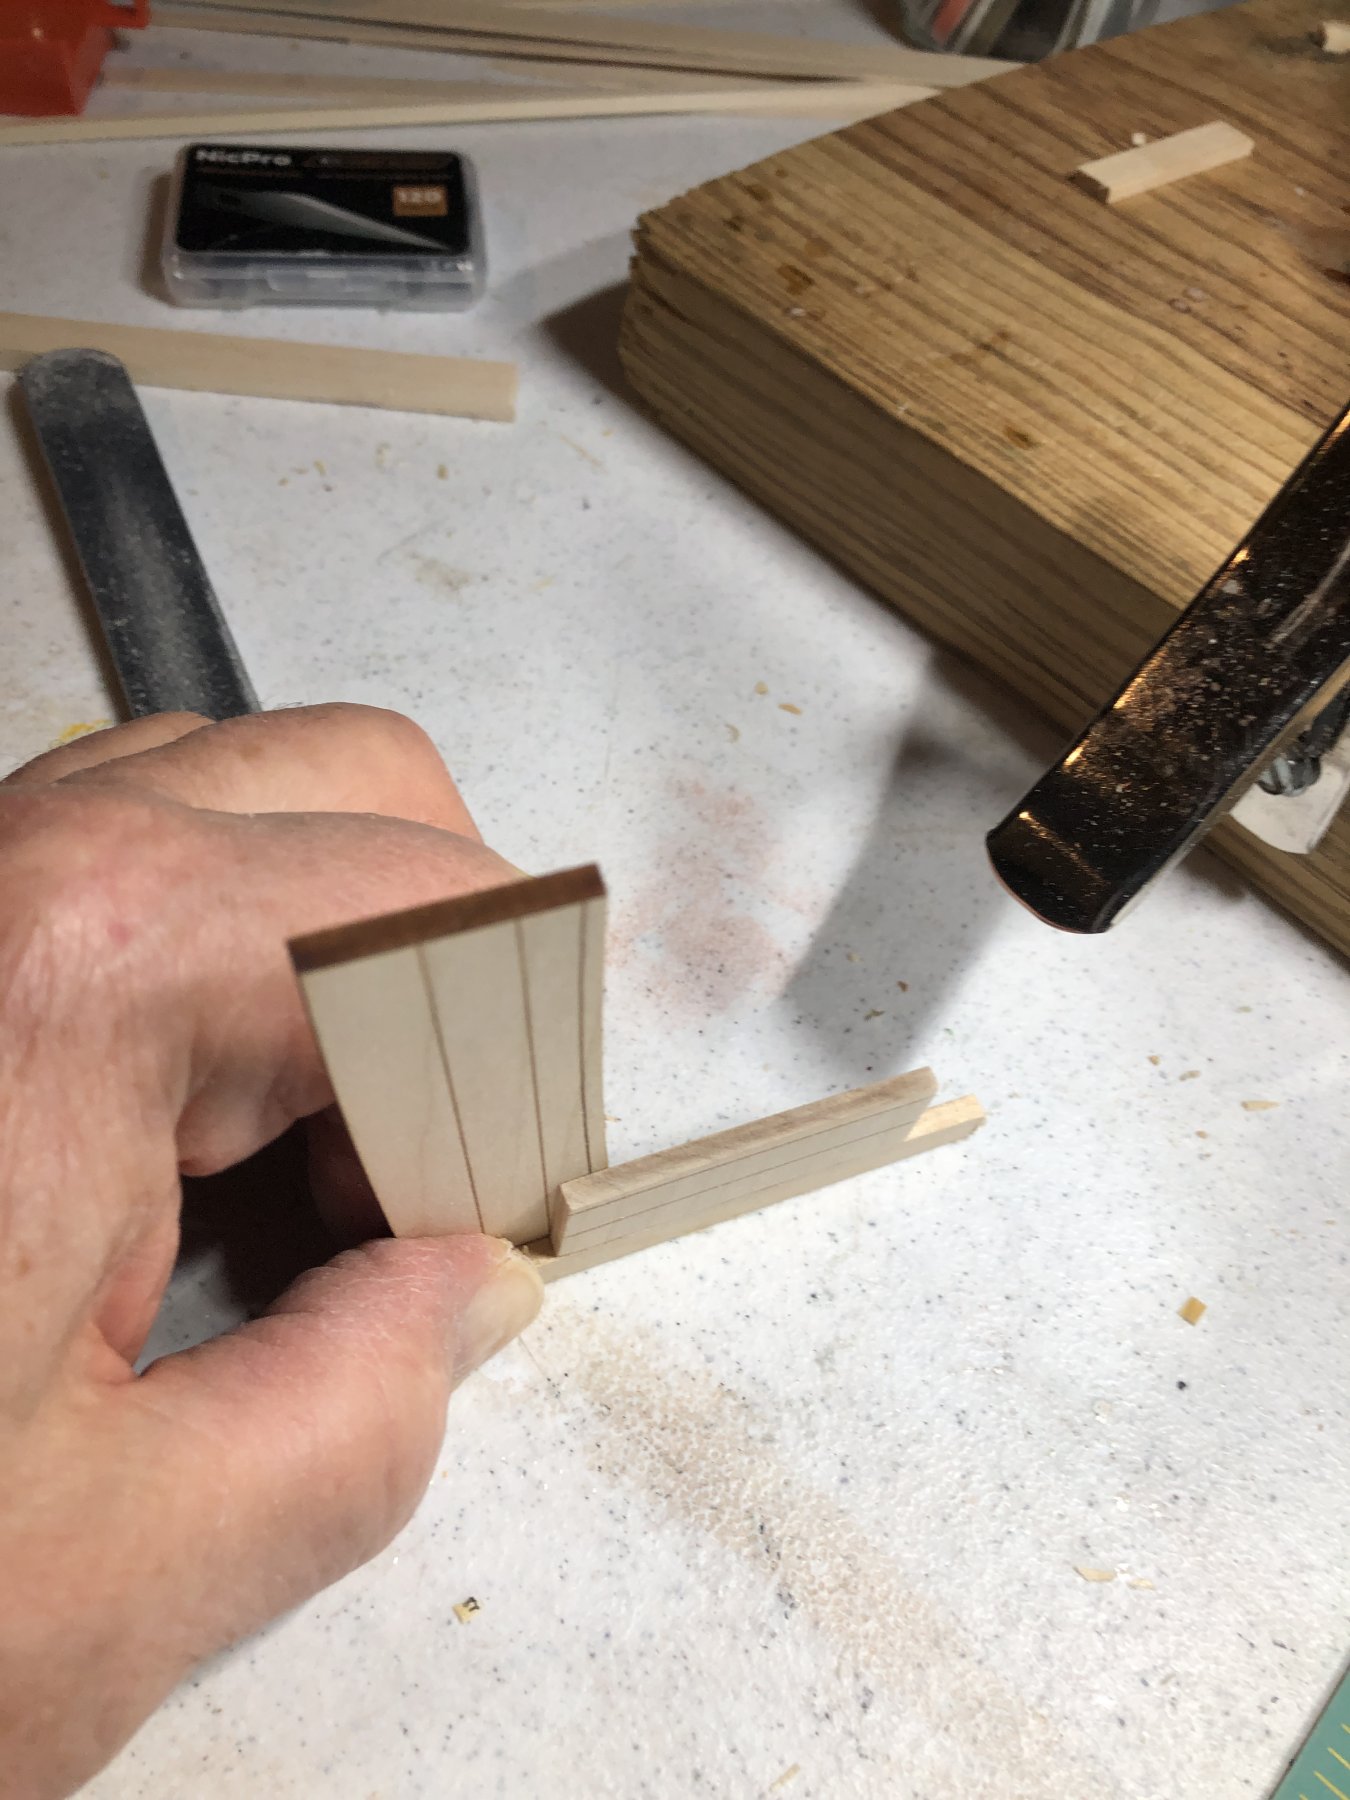
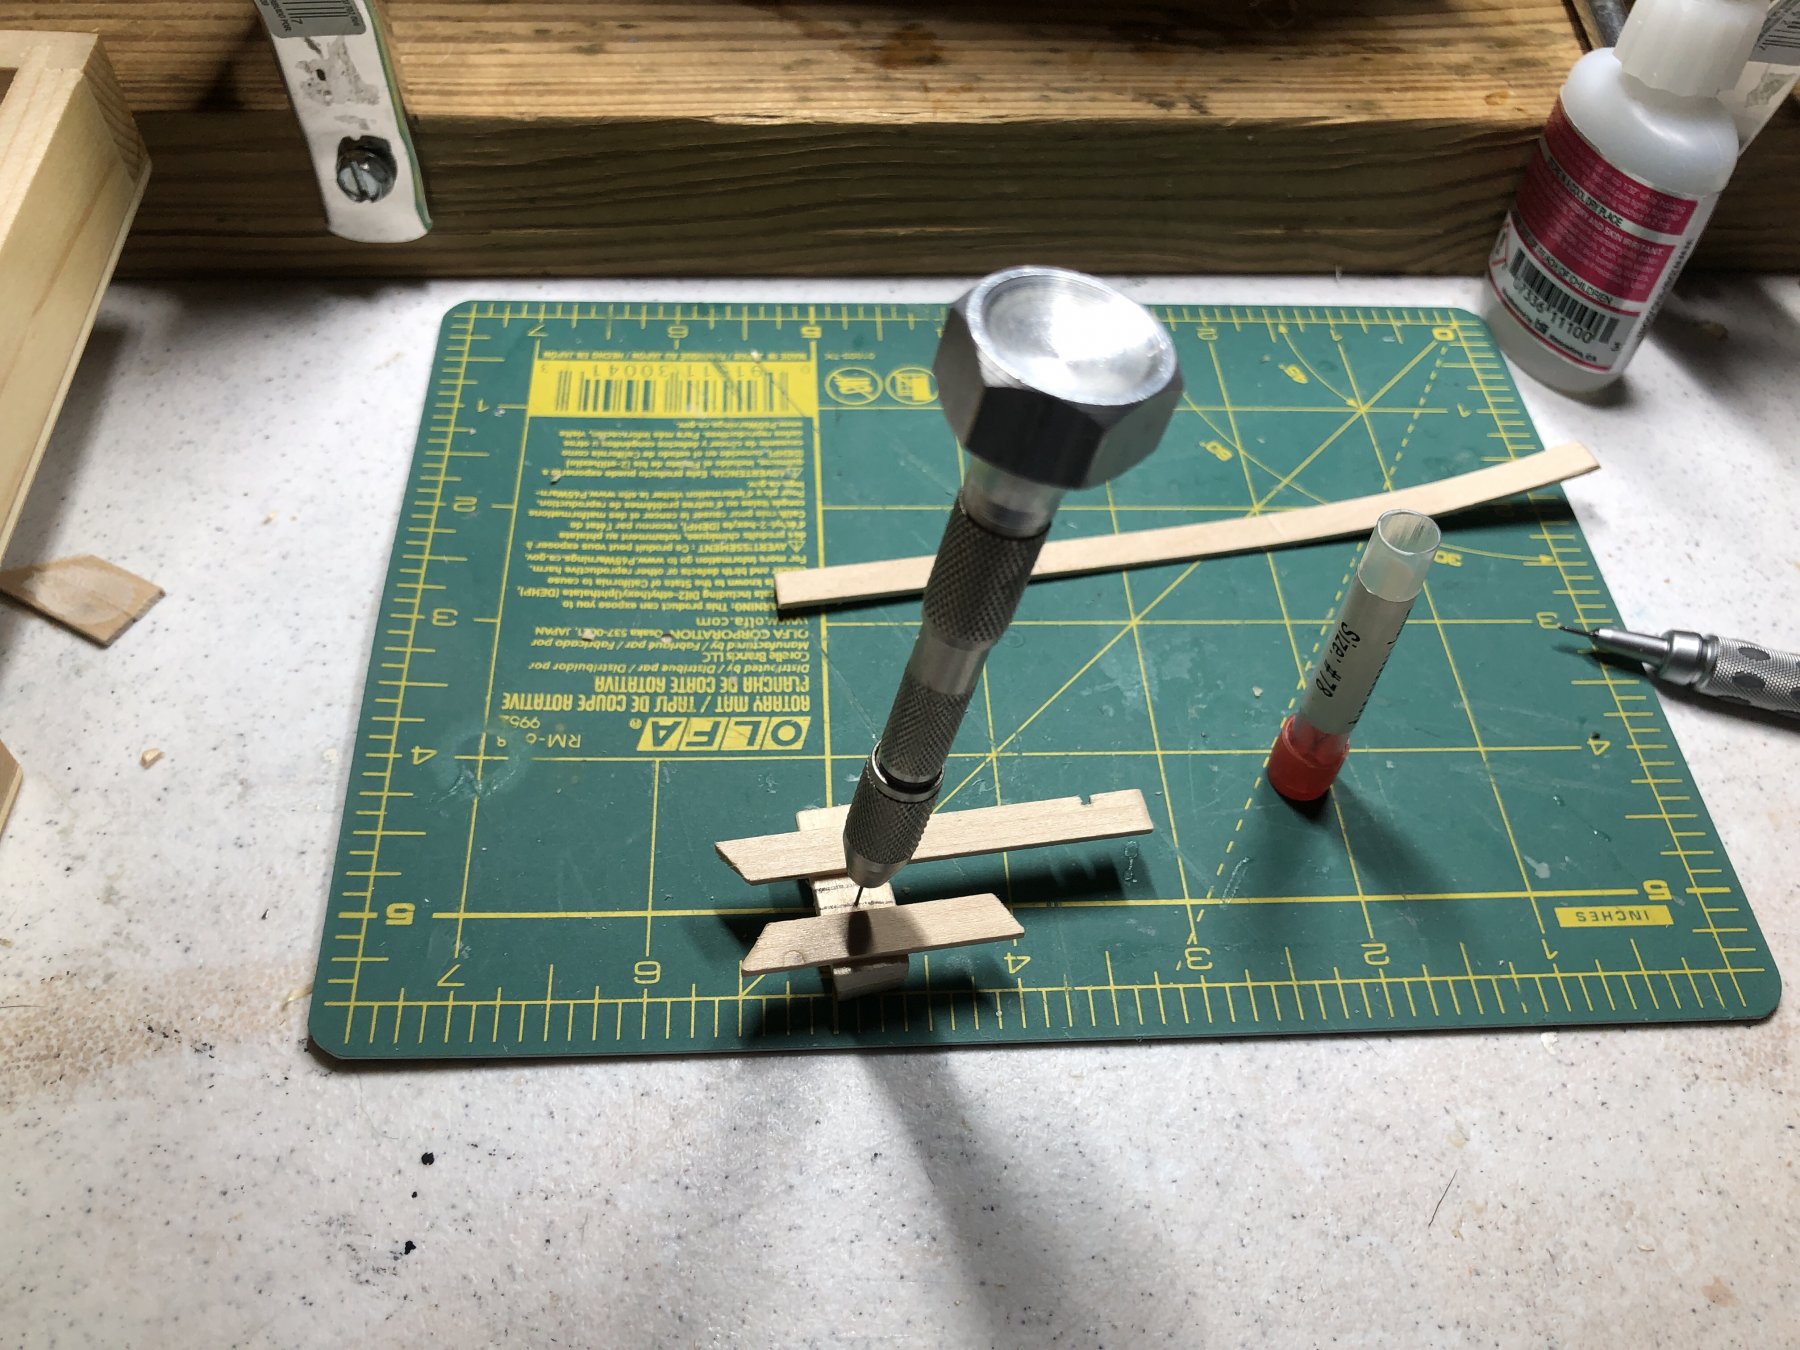
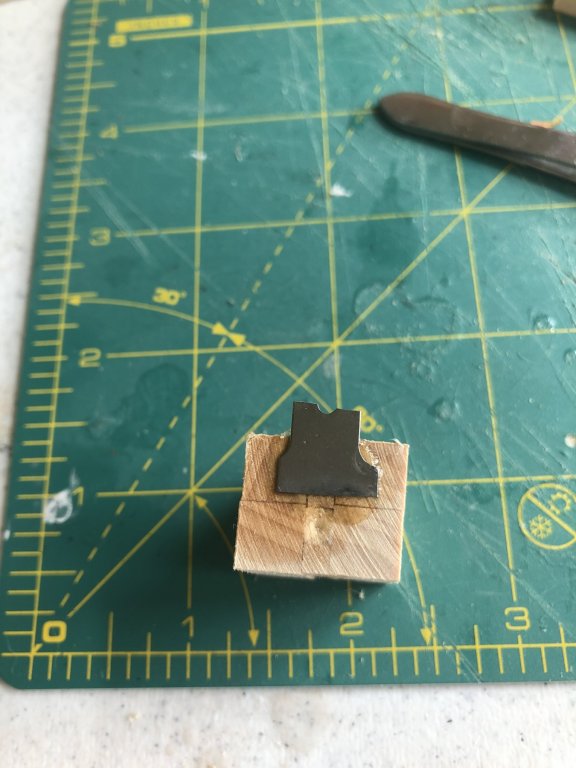
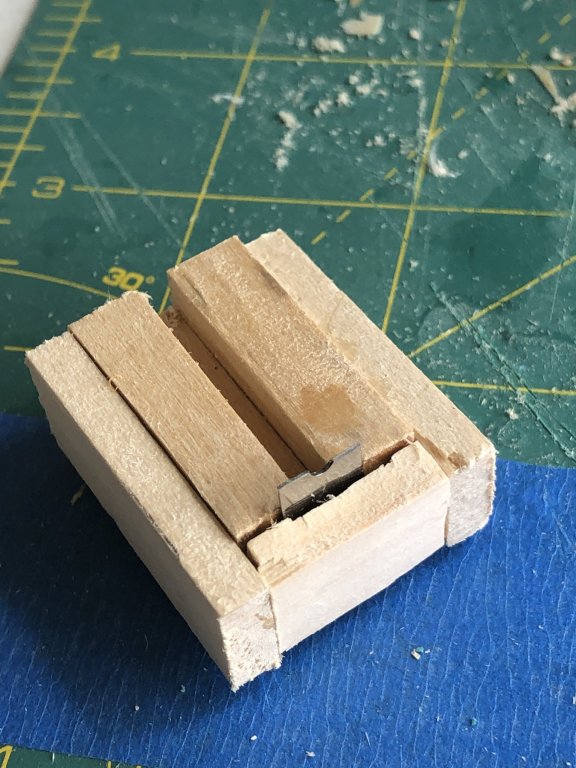
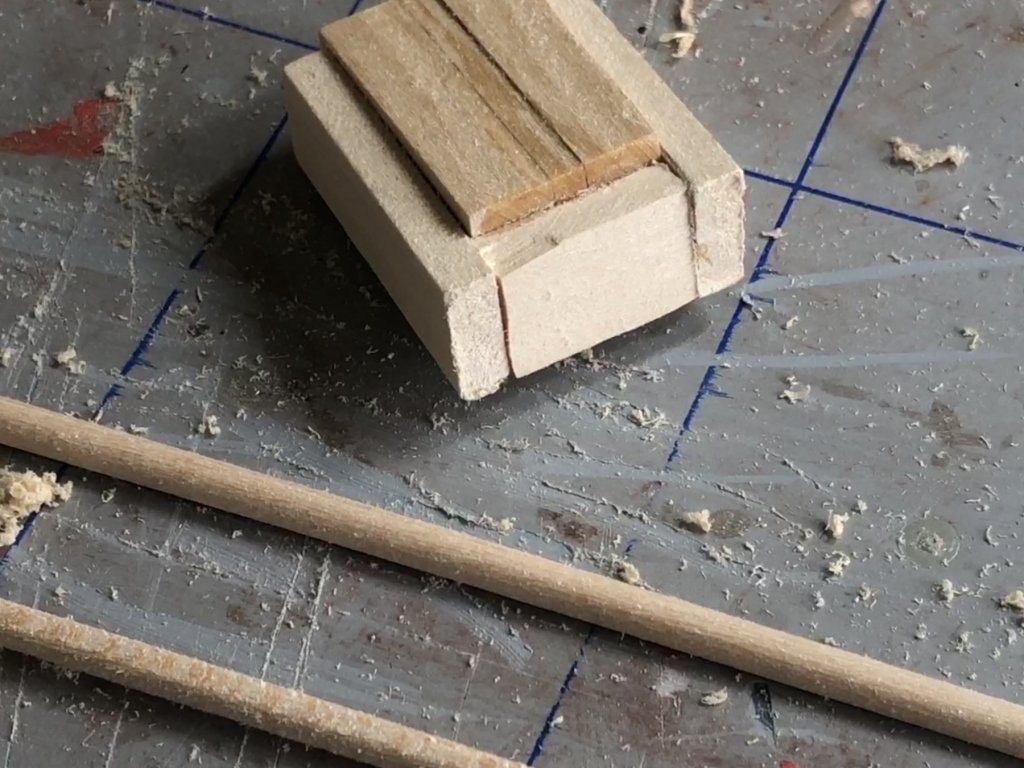
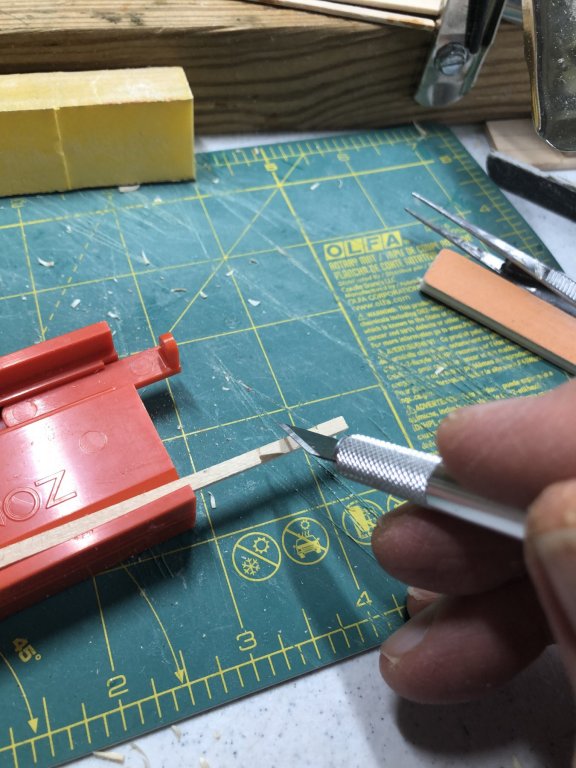
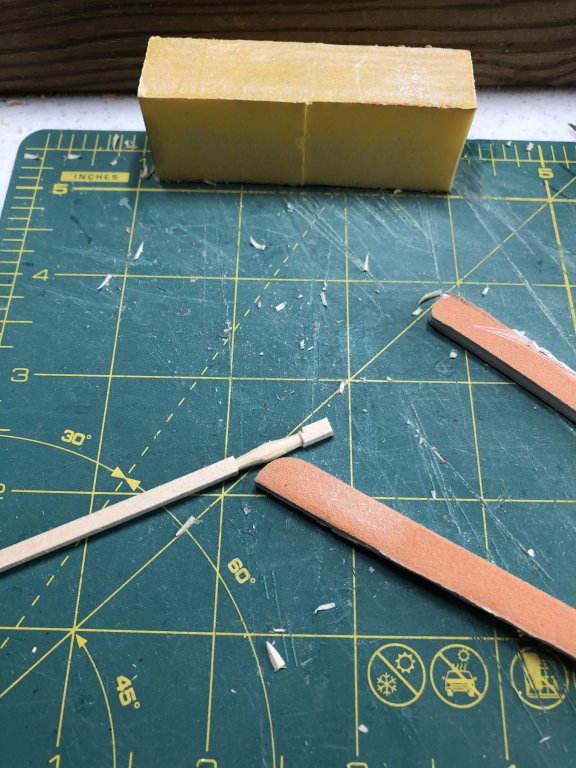
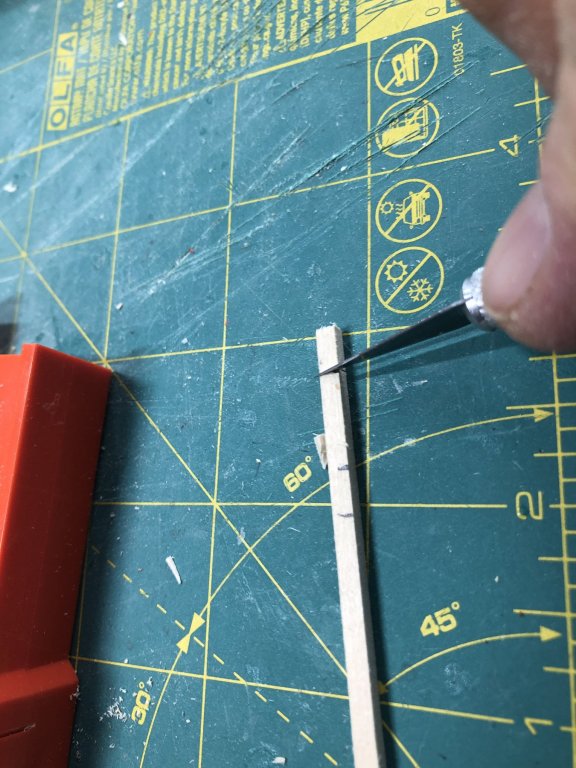
Jumping ahead a bit, I decided to form the rub rails with 1:8” x 1/8” x 24” basswood from Hobby Lobby. And since I love to design and use jigs, I made one for shaping the rub rails. If you look at an Xacto blade, you will notice that it has an extended oval. Xacto blades can be easily snapped be holding the blade with pliers and glove or rag and extremely bent. Try to get the break so that the resulting “legs” are the same length. Then mount the blade/cutter onto blocks which are separated by 1/8” using CA glue. Add additional blocks as braces as well as making it easier to hold. If necessary, use file or Dremel to obtain the final shape. Test on smaller picture eces and do additional final shaping. I made several attempts at the legs and opening with a Dremel (tool shown below) before I got what I wanted. The groove in the block will guarantee proper alignment as you scrape Wood grain will usually be an issue. Use lite pressure when scraping. Some sanding will probably be necessary. I widened the gap of the cutter so that the scrapes did not leave a lip on either side of the strips. I then scraped until I got a rounded edge the width (1/8”) of the strip. Another tip, with a pencil mark somewhere to indicate which side you are scraping.


- 168 replies
-
- 5
-
-
- 18th Century Armed Longboat
- Model Shipways
- (and 1 more)
-
I did check out Medway and I think you are right. Thanks Paul
-
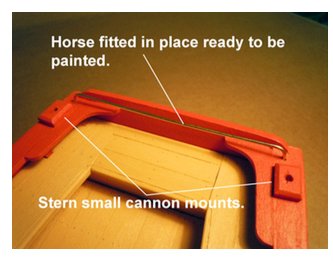
Arthur, your schooling plans sound great. All the best. I am referring to the horse made of the 3/64" round bar. In the picture from the manual which I am showing below, it looks to me like they squared it off.
-
Arthur, I hope your schooling goes well. What is your chosen field of study? A question on the build, is the horse really square? At 5/64”, there will be nothing left of the rod. I am tempted to just leave it round. Do you know what the prototype was? I have been scouring the builds but have not found anything yet. I am adding and edit to this post as I went back in your log and found the entry by xken and his horse I think appears to be round and not square. I will proceed as I was inclined to do and go with round unless I find out differently.
-
Arthur, I wonder if the prototype builder had the same problems with the rudder and tiller? I am not looking forward to possibly running into the same issues. BTW, your square “holes” look really good. I got mine fairly square but had trouble getting them uniform. Leaving the state soon? Maybe you’ll decide to retire here someday. Anyway, the internet reaches everywhere.
-
It’s possible they only used the windlass while in port. I need to do some research on this.
-
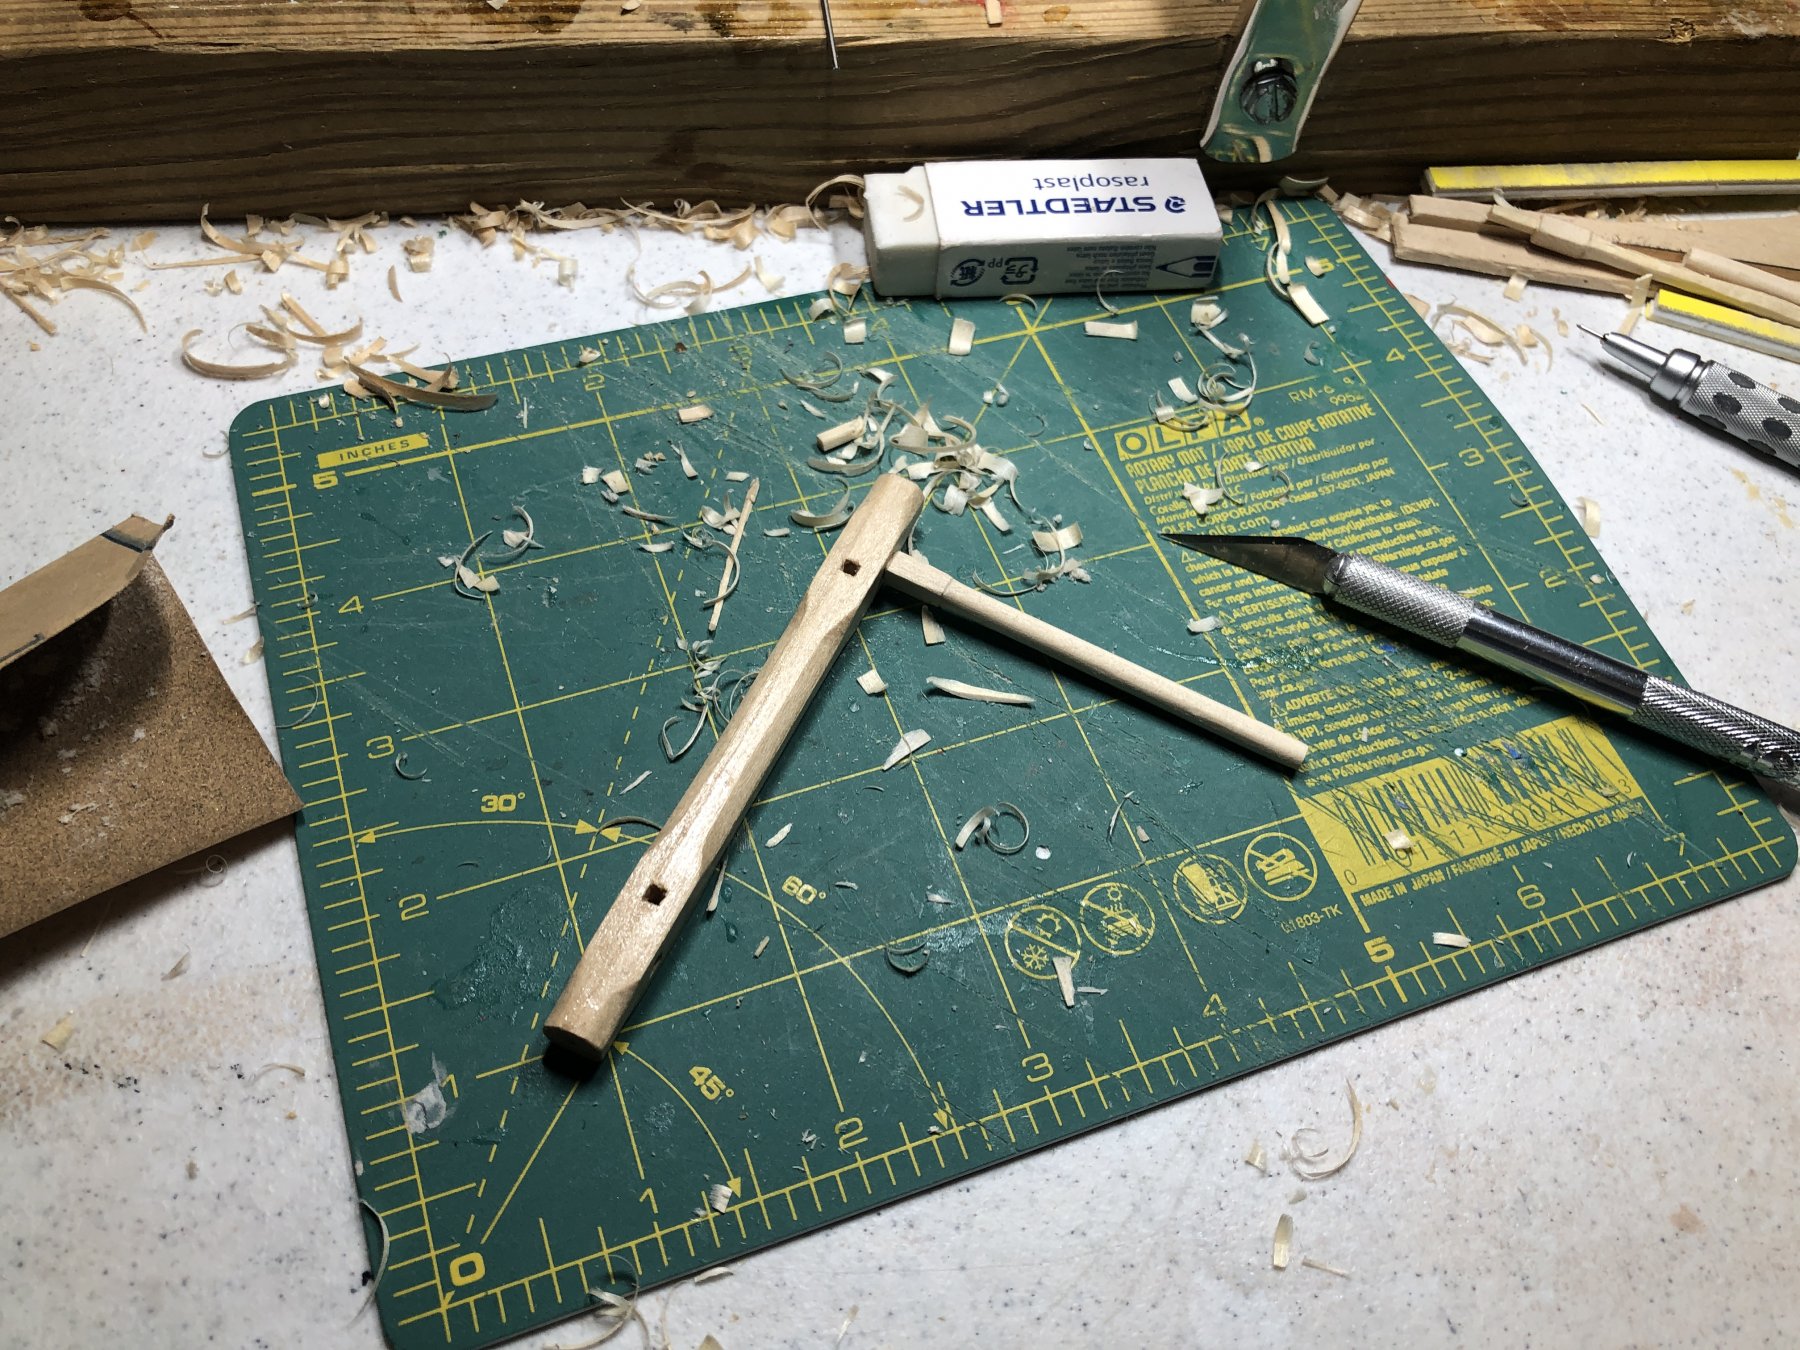
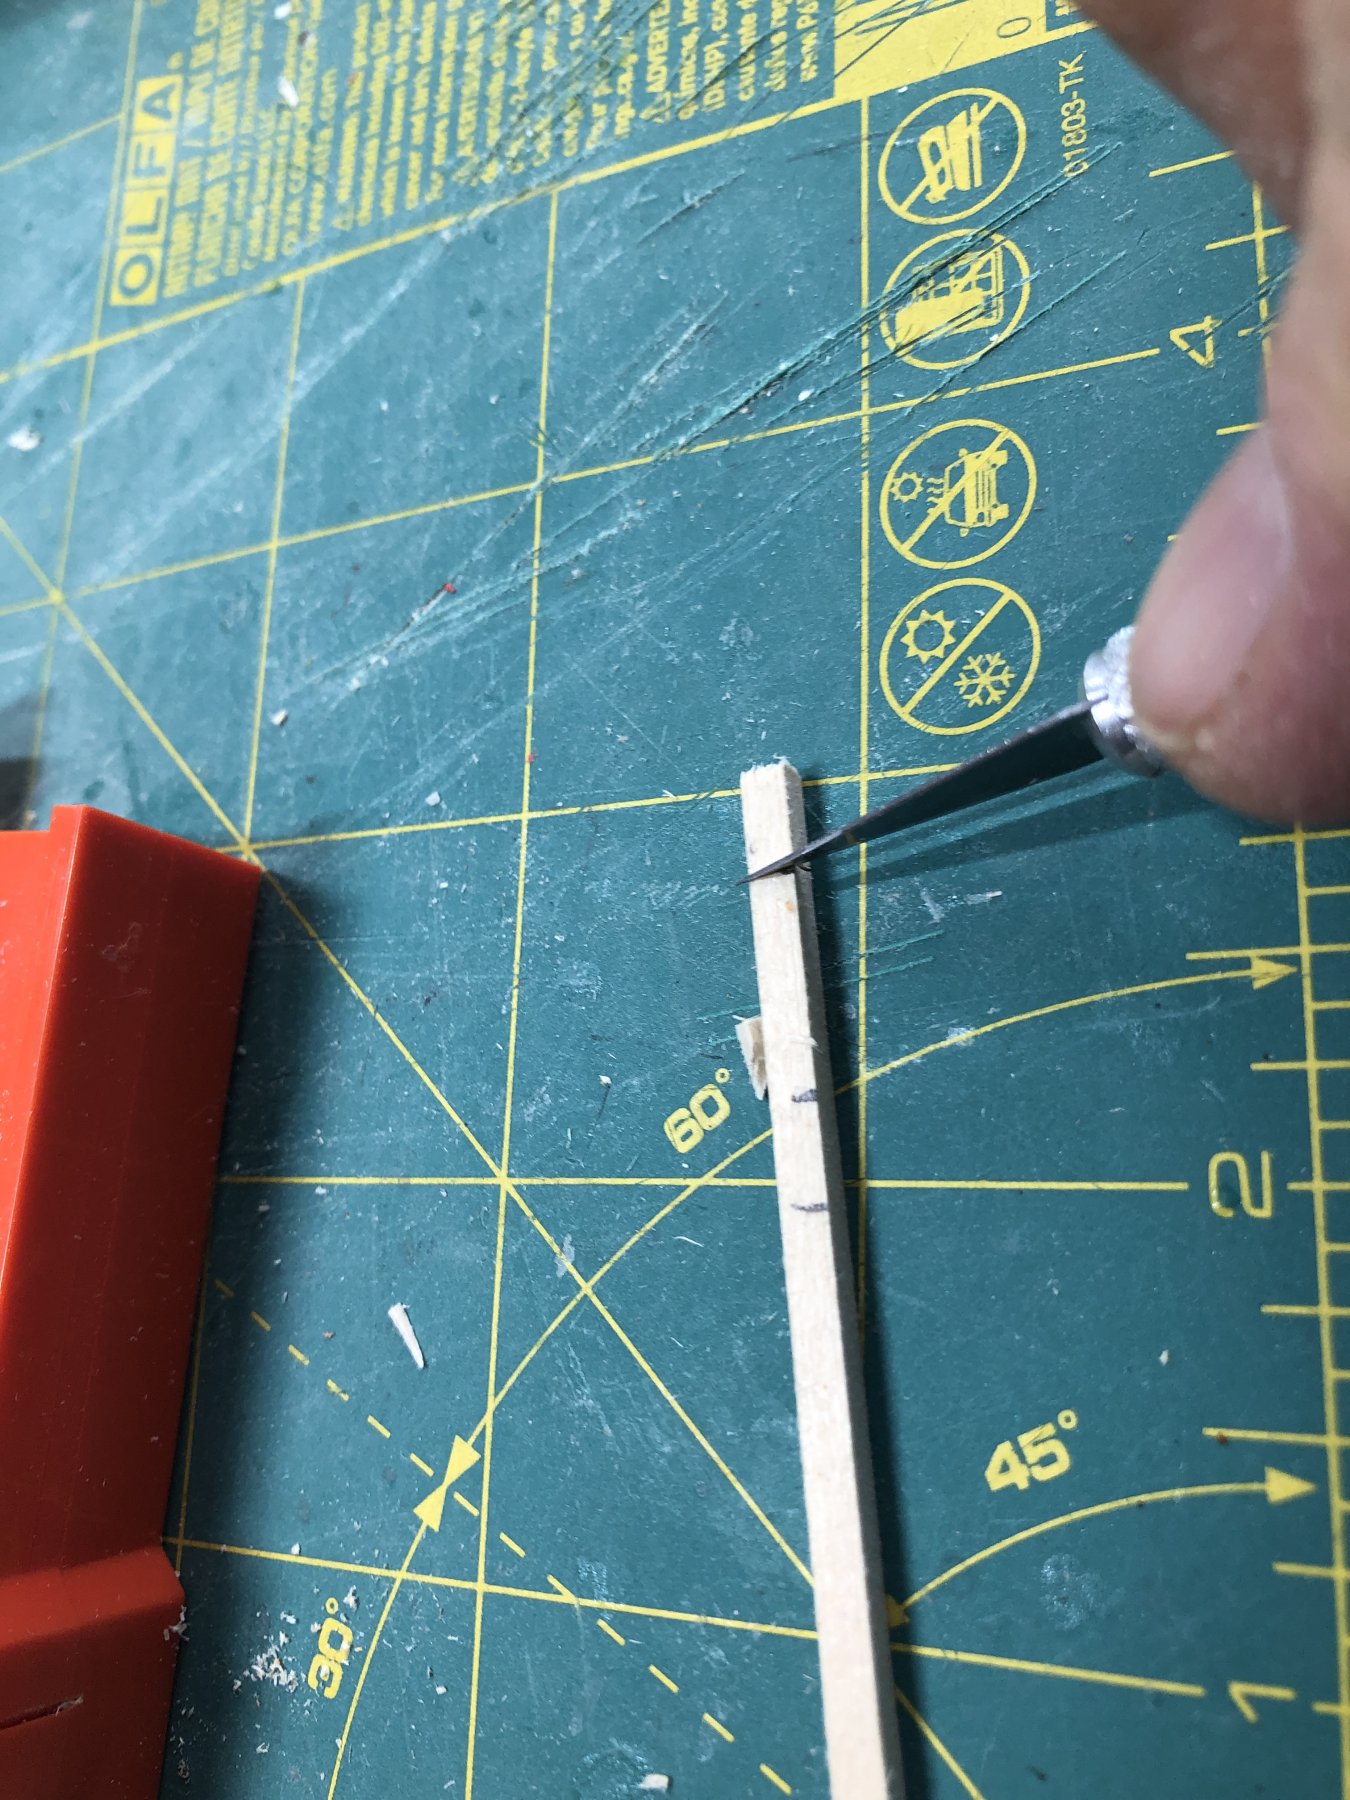
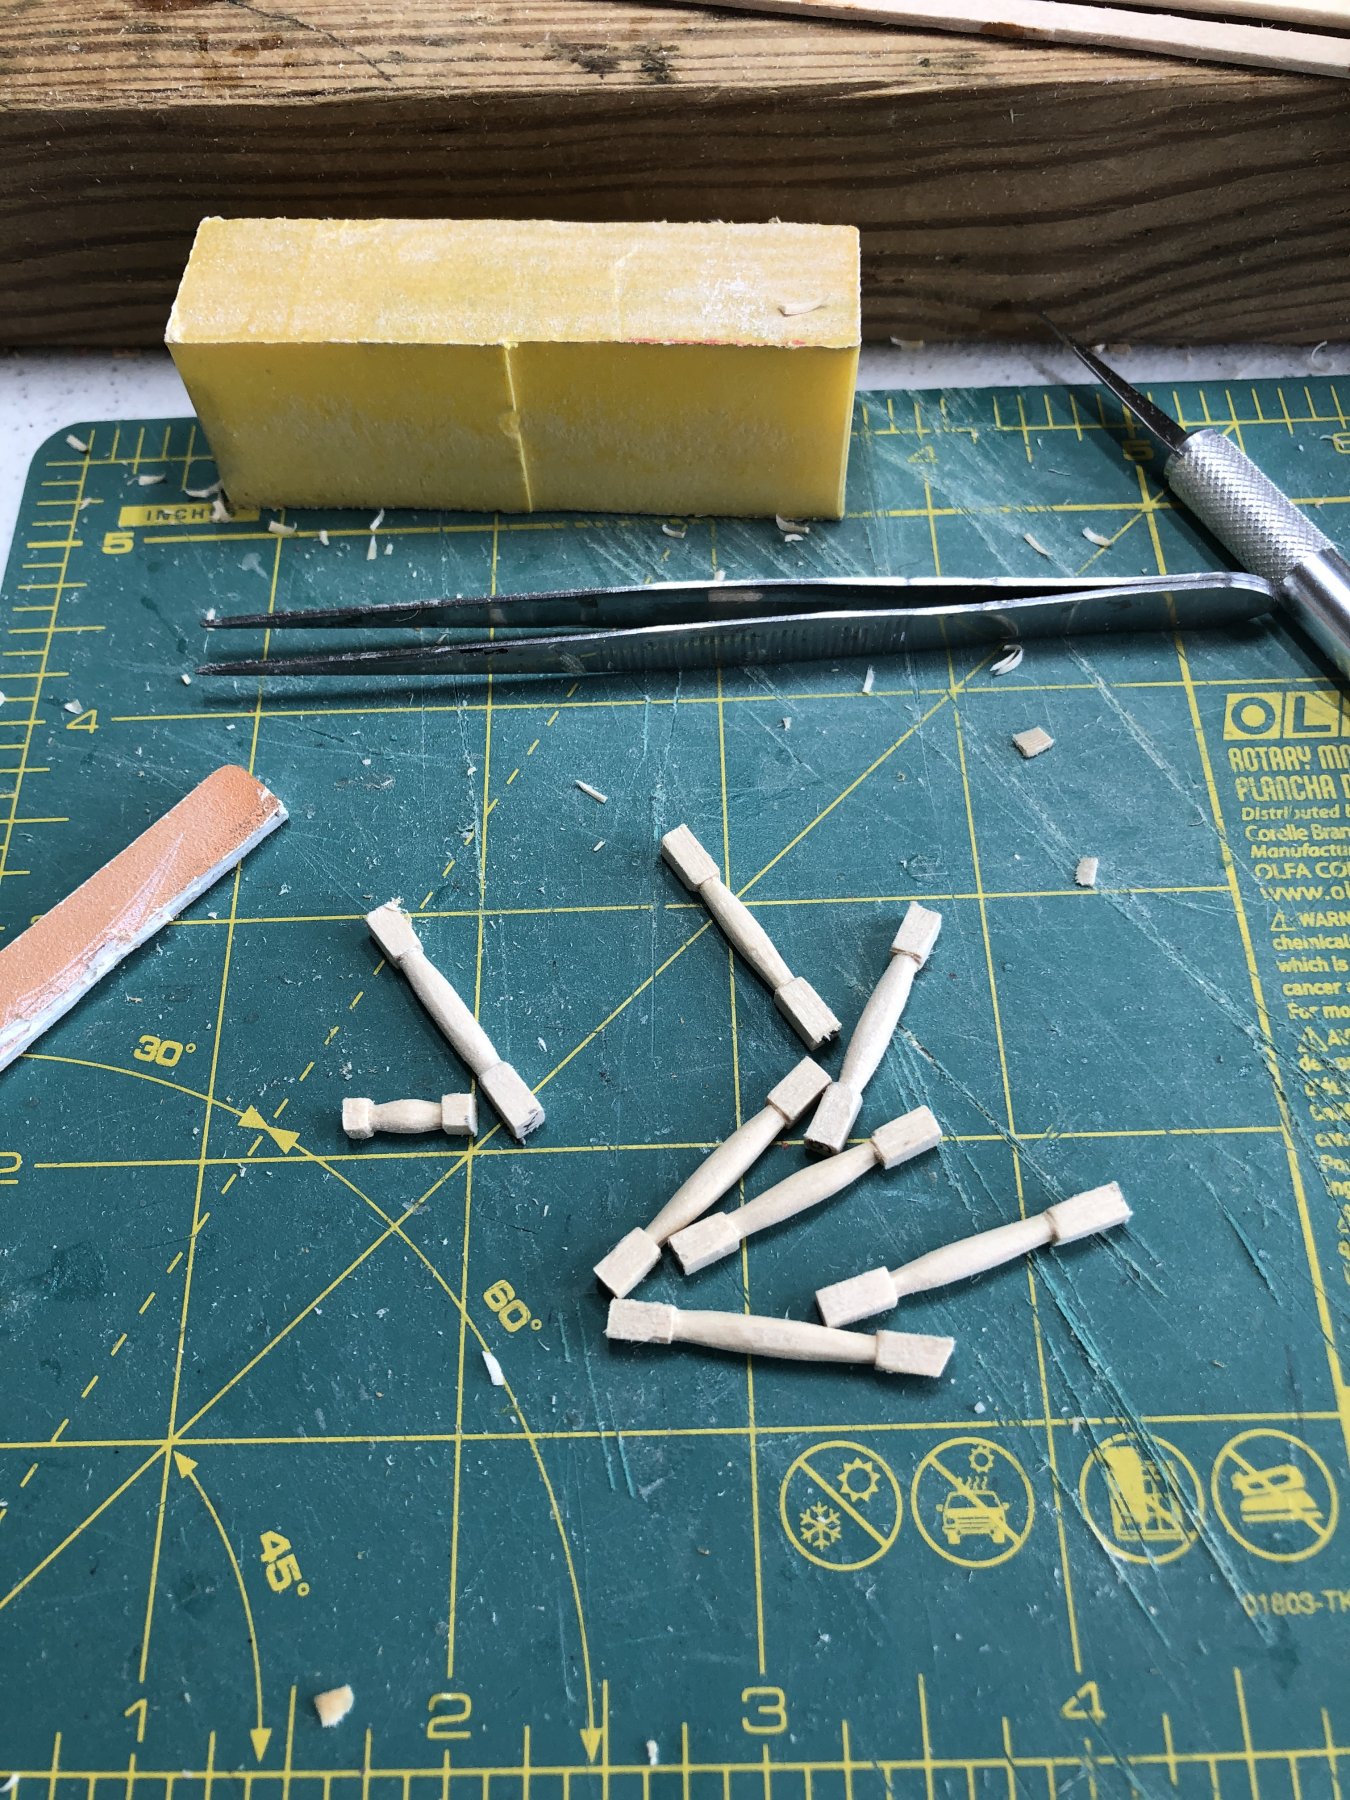
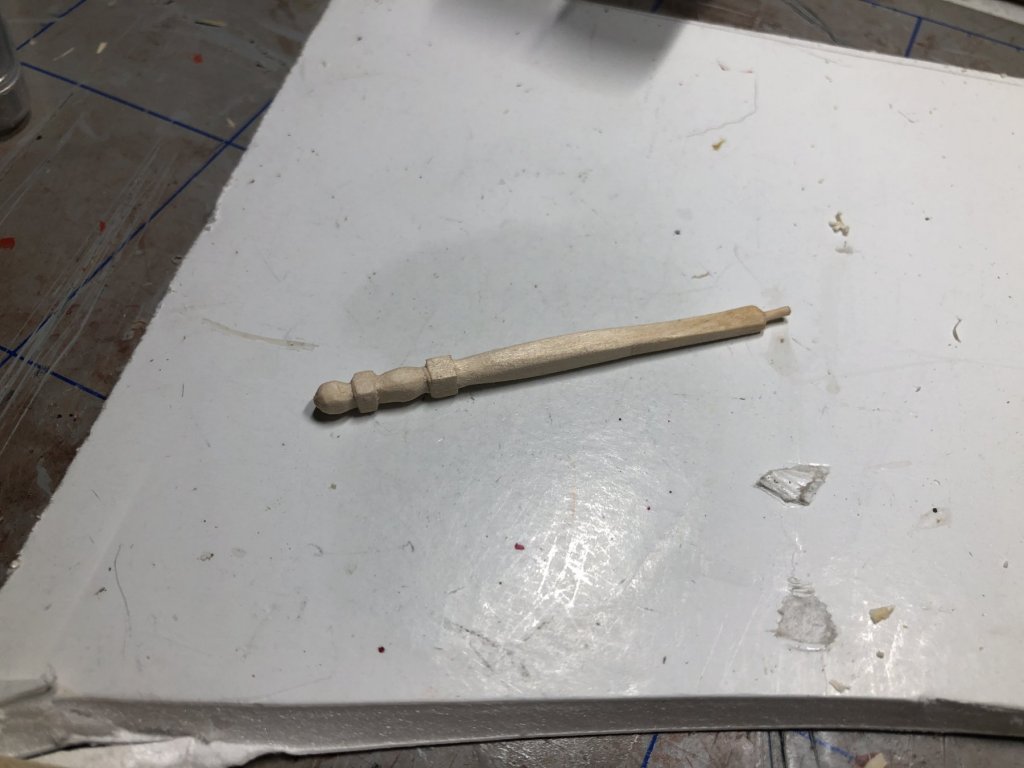
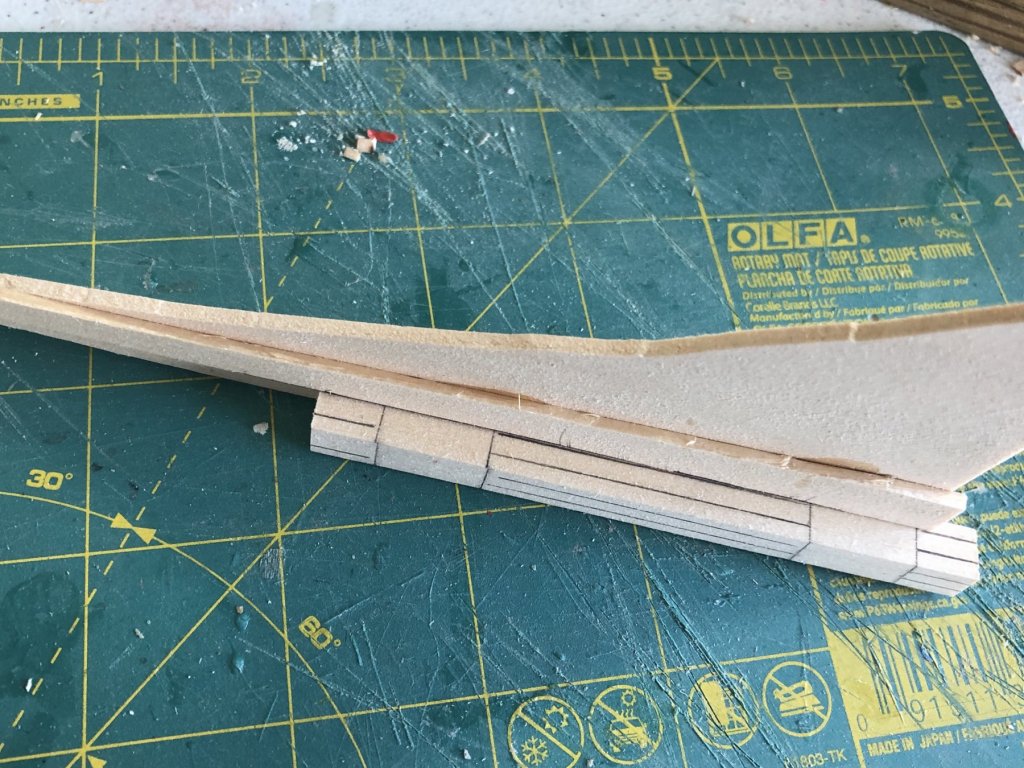
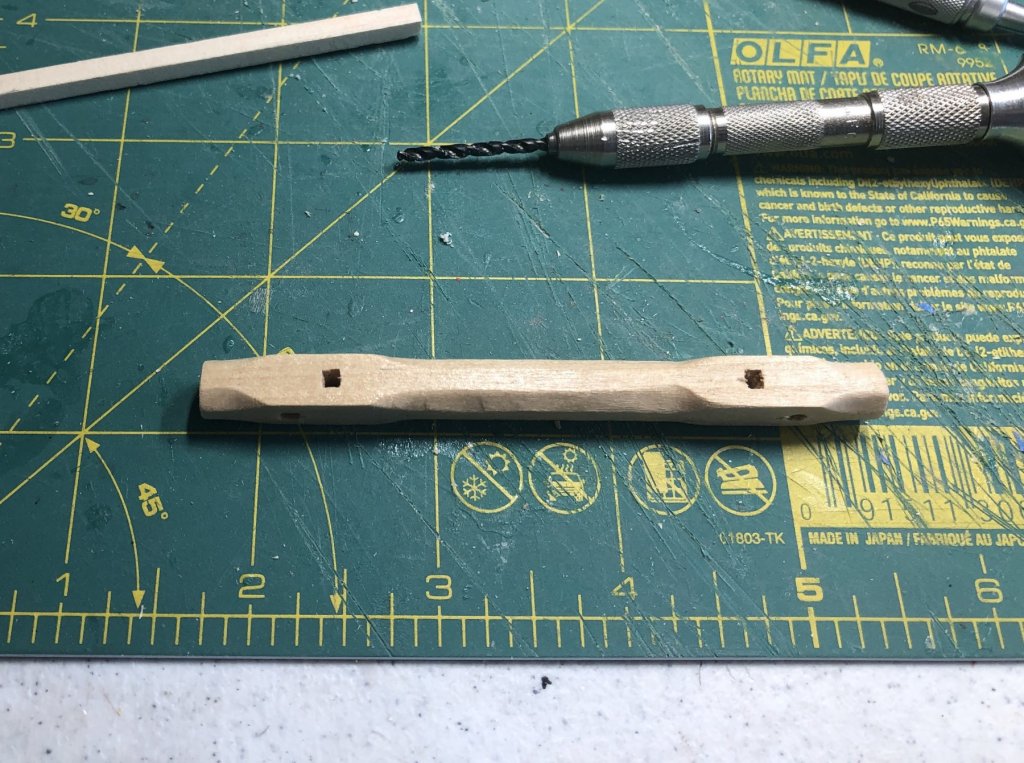
Well, I started windlass with eager enthusiasm. First I made another jig (I like jigs) to ensure the lines drawn along the 5/16” square “rods” were straight and uniform. It is shown below. Next I proceeded to draw all the cut lines. Here’s where my enthusiasm waned. The first try was too short as I measured wrong. The second try was a flop. The third and fourth tries were OK but not to my satisfaction. I stopped on the fifth. The handles were fairly easy to carve. The finished windlass with handles is shown in the boat below. I wonder where the sailors sitting in front of the windlass put their legs? 😳


- 168 replies
-
- 7
-
-
- 18th Century Armed Longboat
- Model Shipways
- (and 1 more)
-
I think the word “hexagon” on page 27 of the instructions should be “octagon.”
-
So far - - - see log entry above. 😎

- 168 replies
-
- 5
-
-
- 18th Century Armed Longboat
- Model Shipways
- (and 1 more)
-
Looking good! Yes sanding and sanding and sanding but don’t eat too deeply into your planks. 😎
-
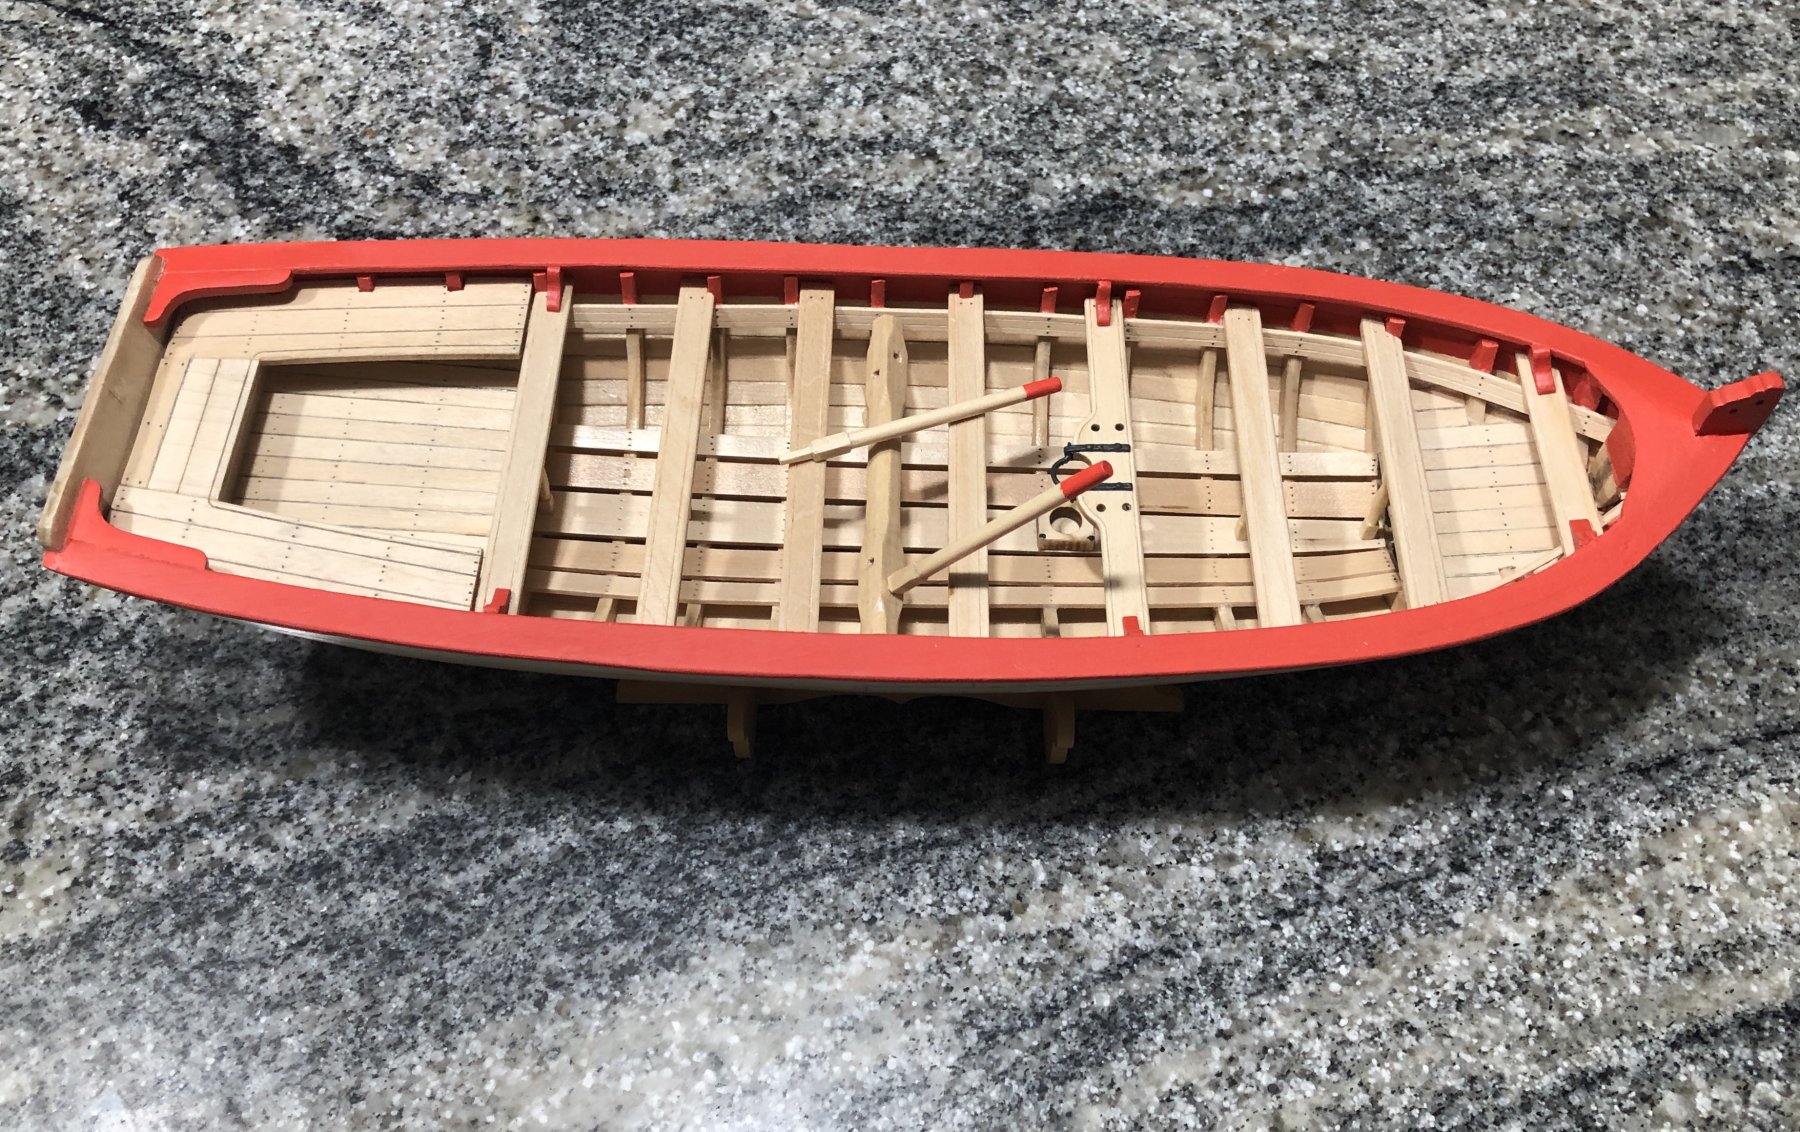
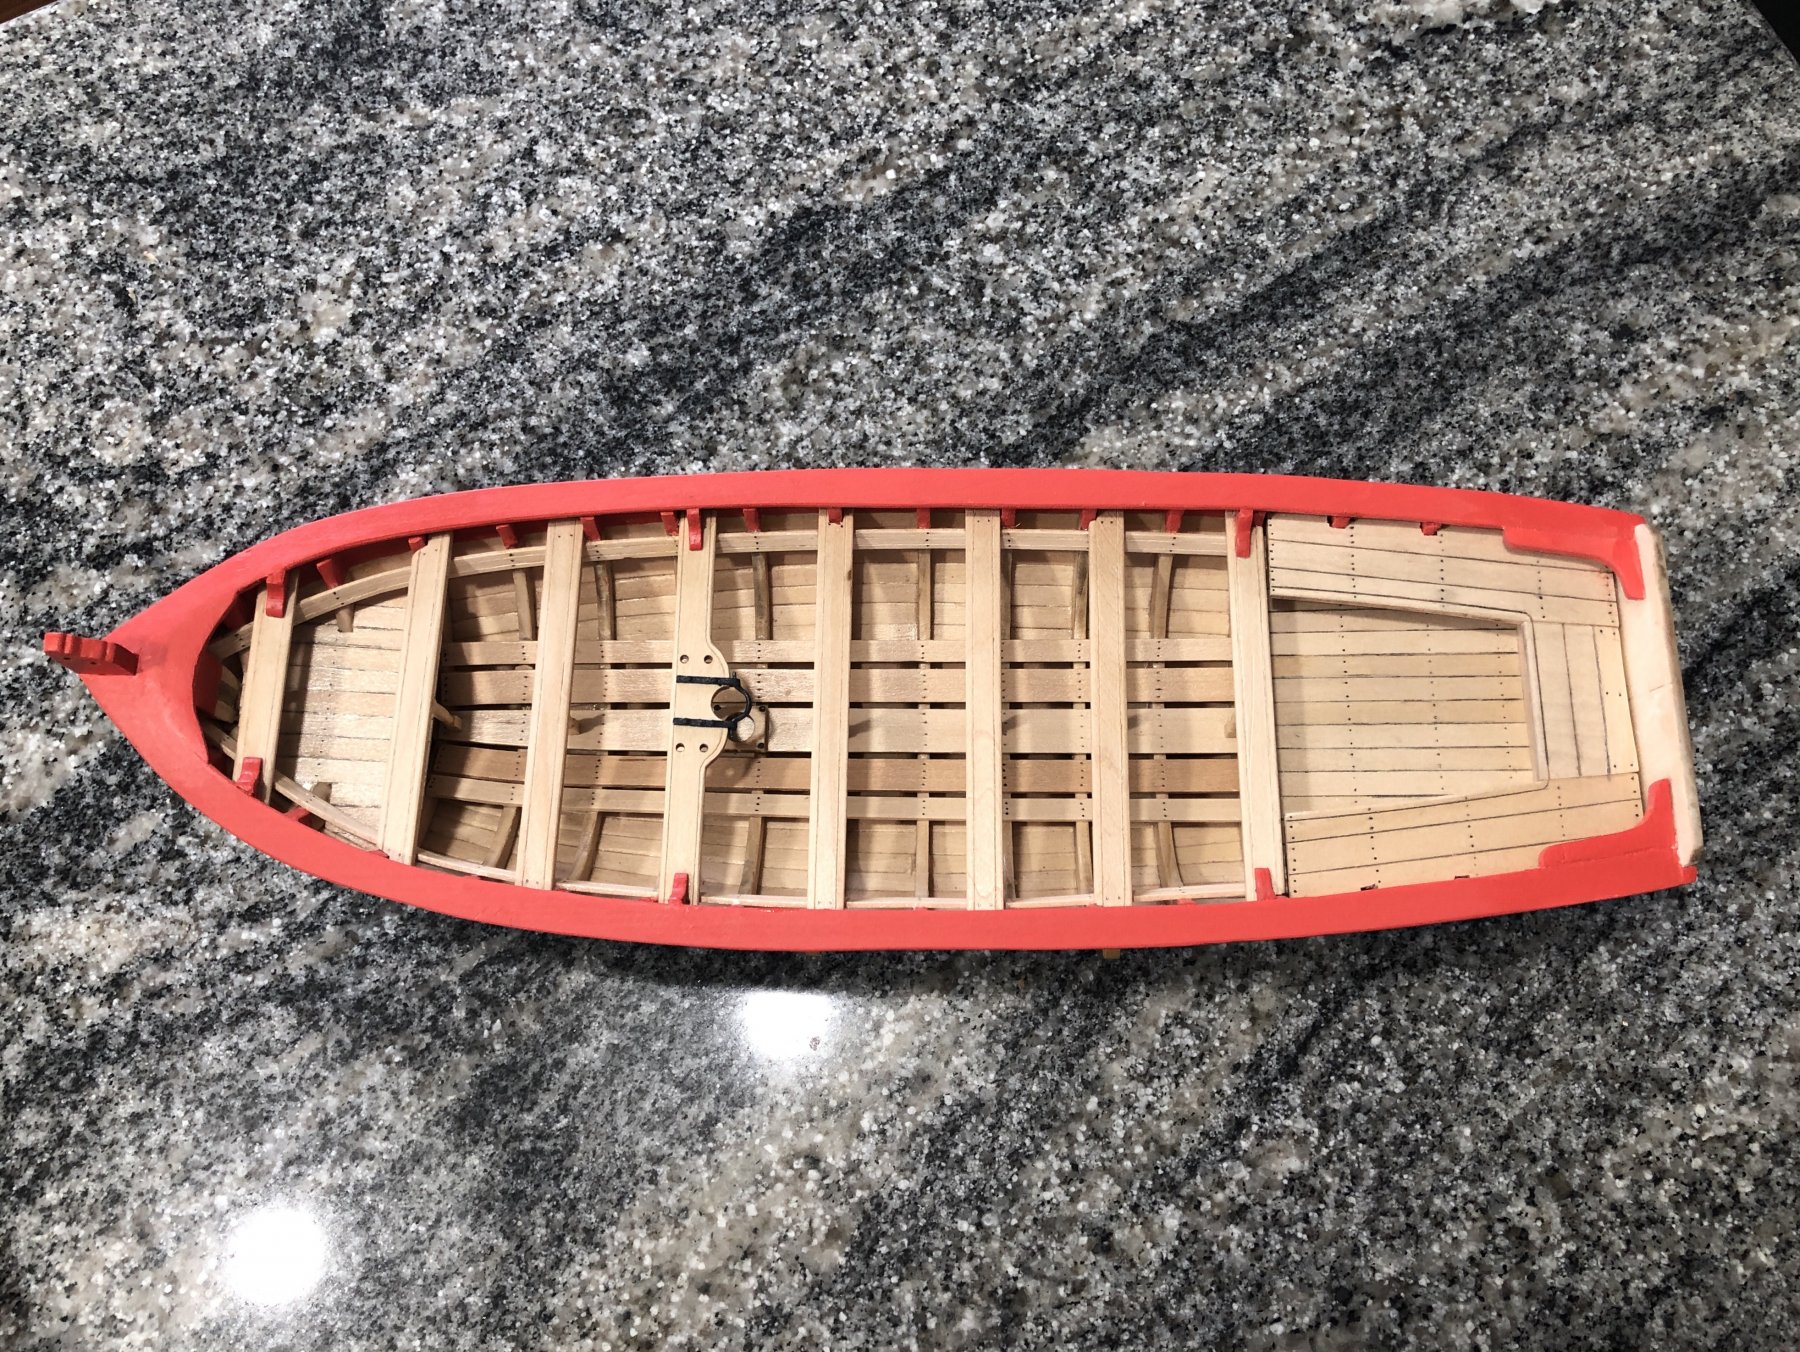
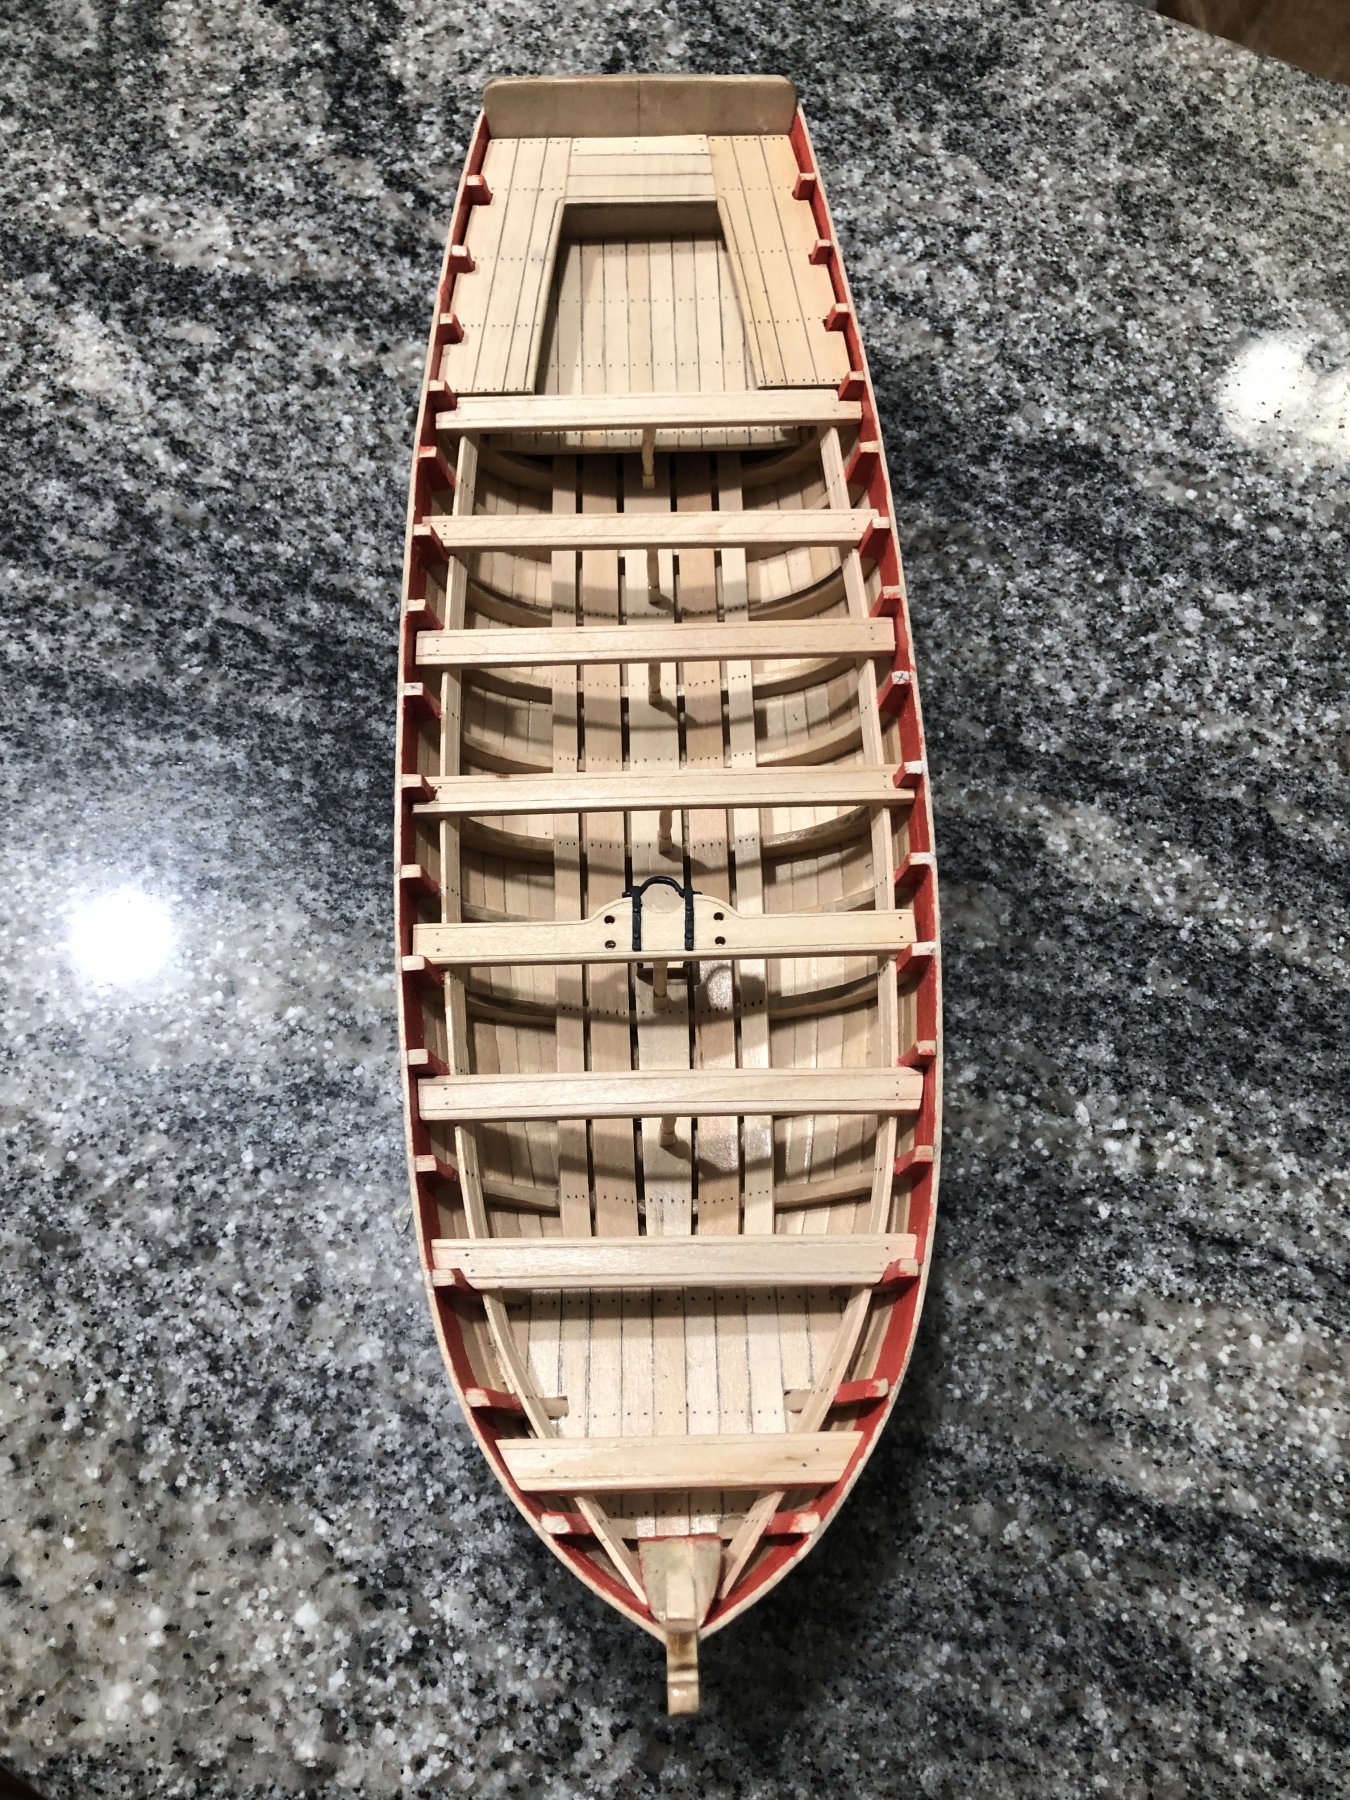
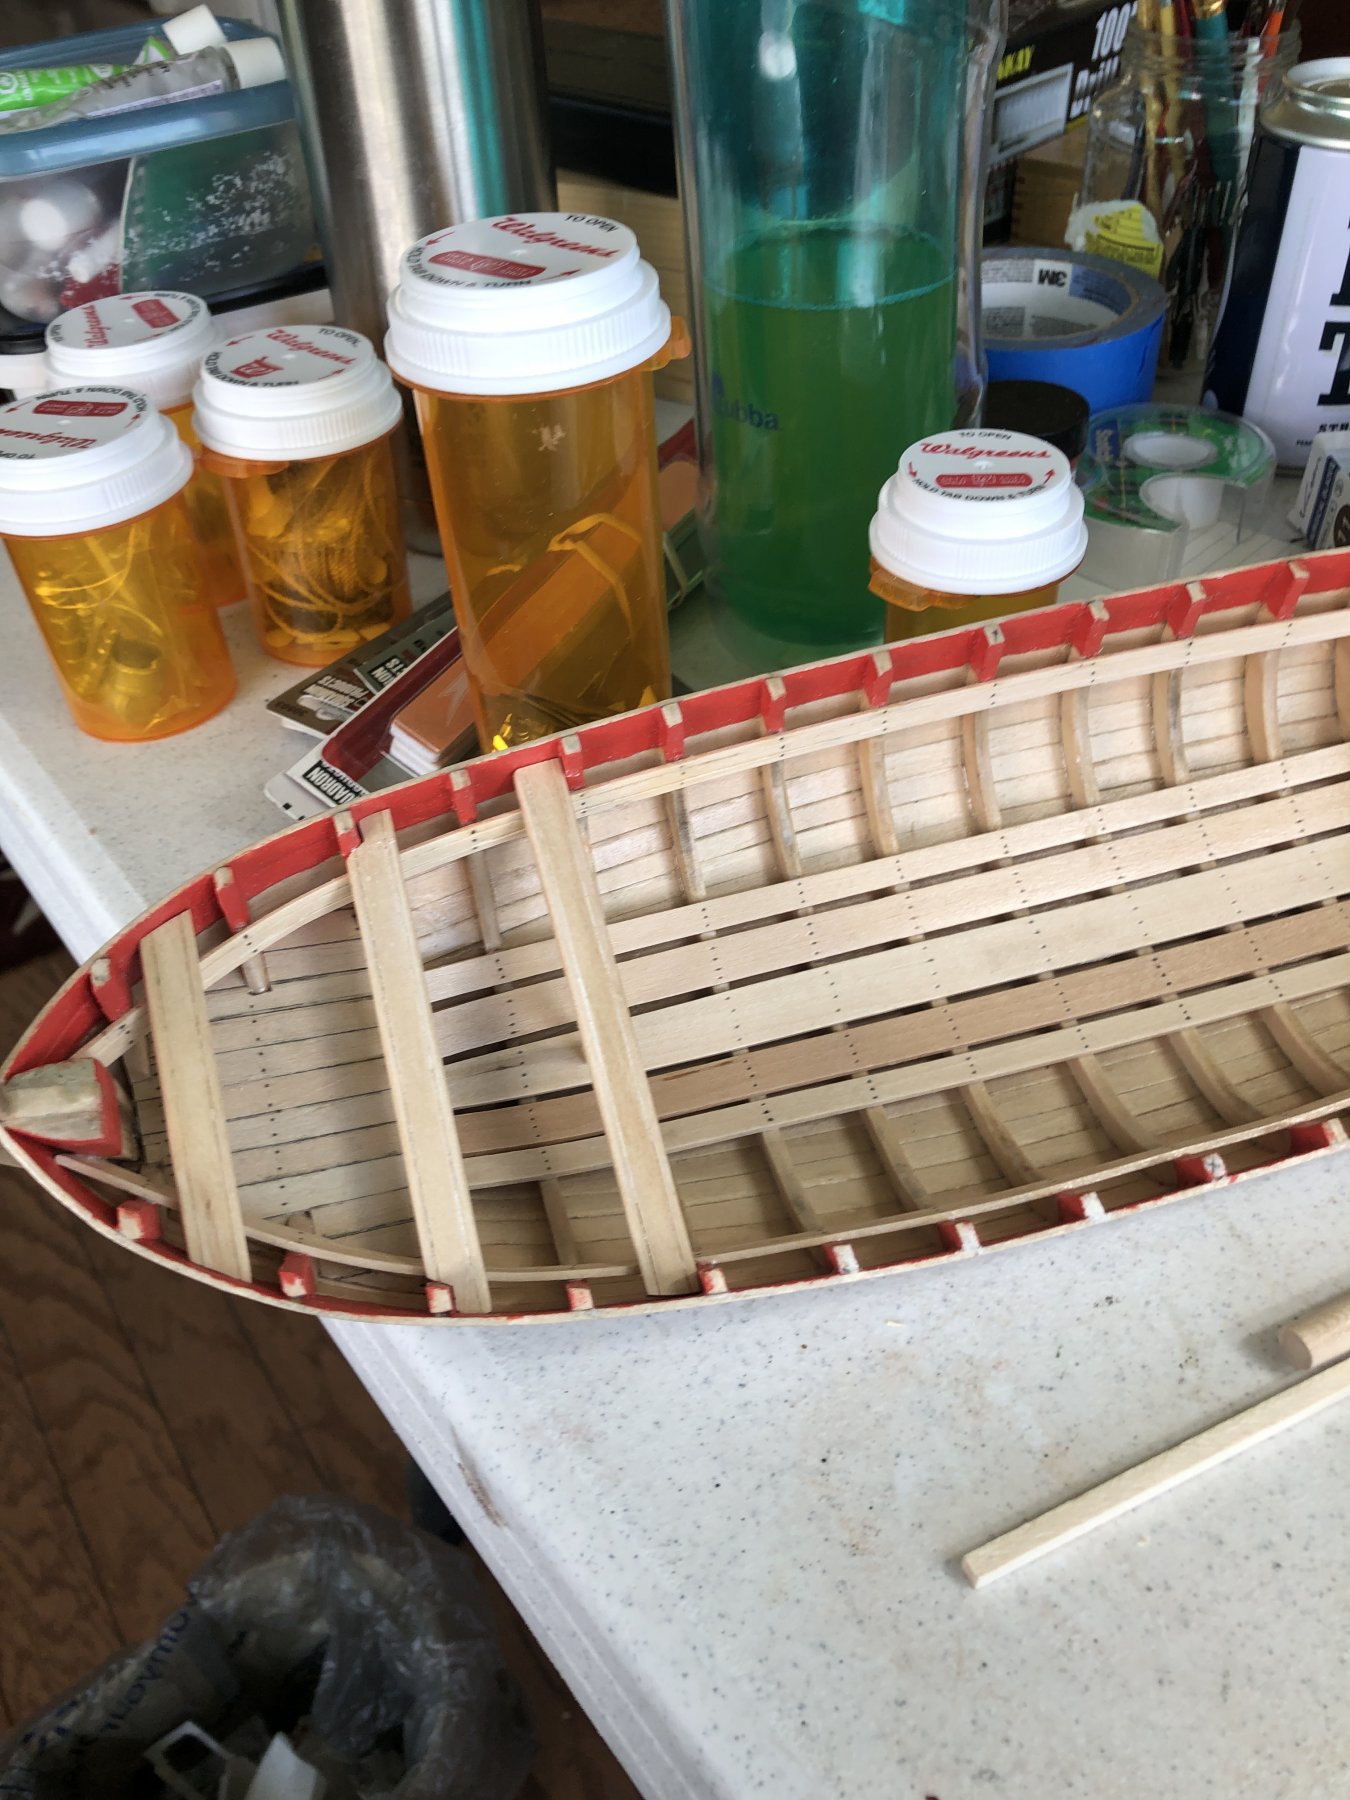
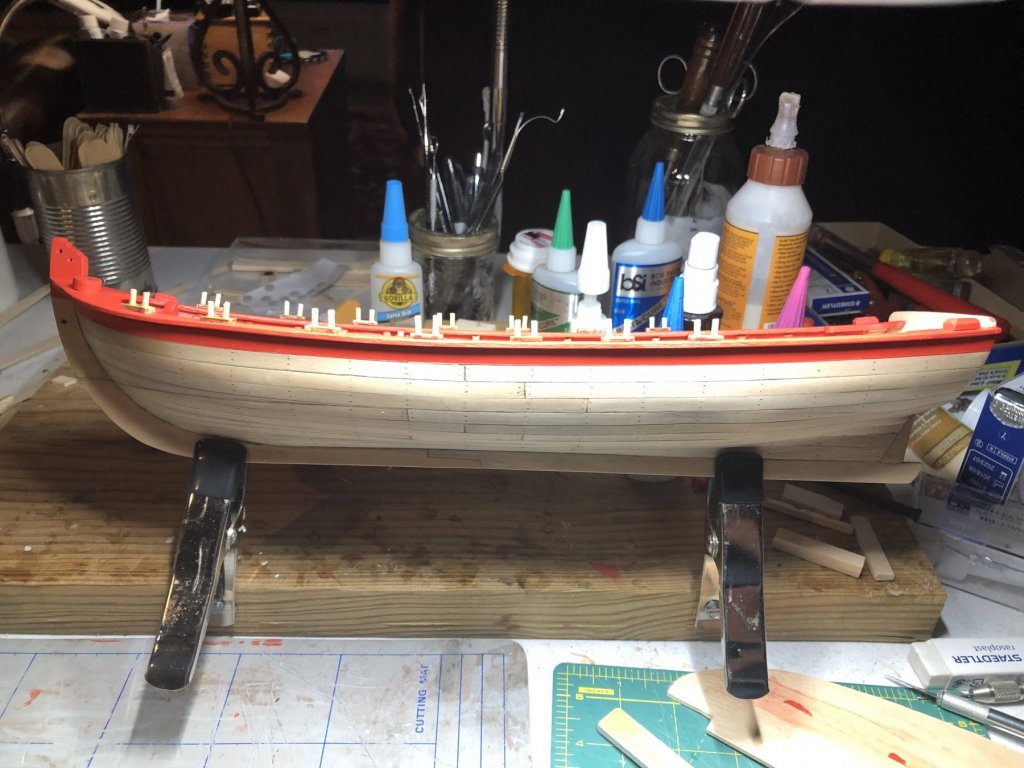
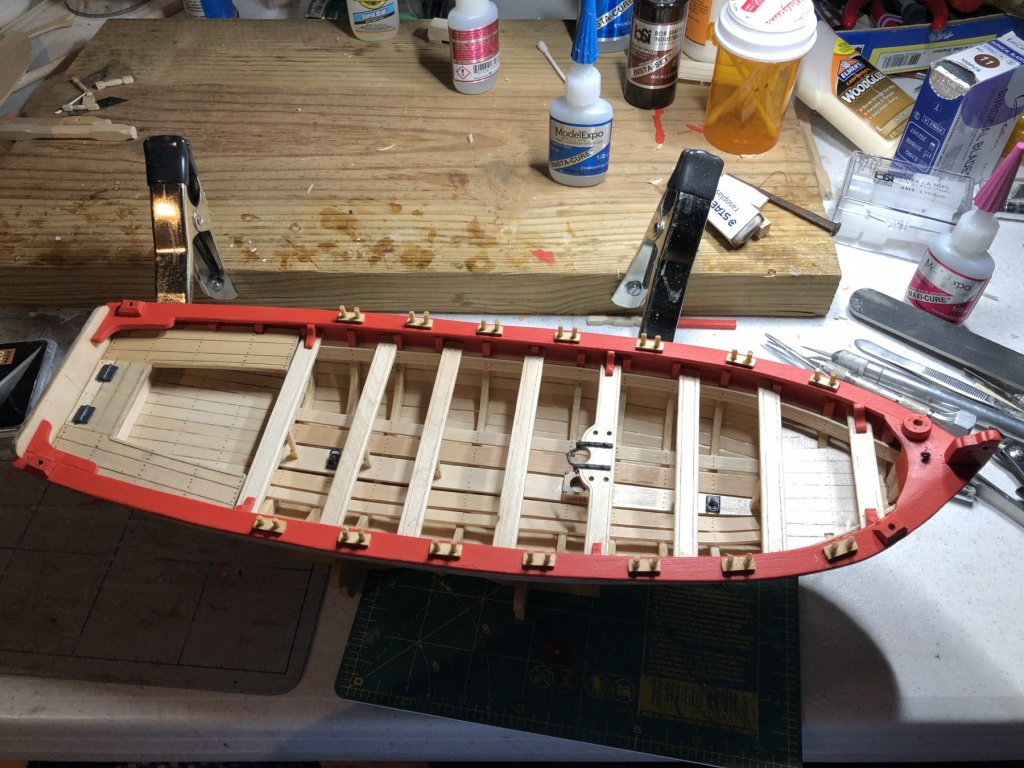
Arthur, maybe I’ll catch up with you, however I’m hoping not as your build log is very helpful. That said, I’m nearly finished with the Thwart Kees, Transom Kees and Breast Hook. This has been one of the most time consuming steps outside of planking. It looked so easy when I started. For the Transom Kees I had to glue tabs under the Cap Rails next to the Transom. The tabs were helpful when positioning the Kees. Some time ago I did a crazy thing and bought another complete kit which on sale. I have needed too many replacement parts to request them from Model Expo. I found that some wood sheets in both kits have differing thicknesses. It would seem control needs to be improved on this. To get things right, I should have requested all wood sheets but I didn’t. Sigh 😔 Maybe others can benefit from my saga and check thicknesses out before leaping. 😳
-
If I may interject, go to an article posted in this forum: http://modelshipworldforum.com/resources/Framing_and_Planking/Lining Off your hull for planking.pdf
- 95 replies
-
- 1
-
-
- Model Shipways
- 18th Century Armed Longboat
- (and 1 more)
-
Again reading ahead would be good - very good. When I read your log, I get ahead of myself and assume things which would be resolved easily by reading the appropriate section in the manual. Duh 🙄
-
Hey, your boat is really looking great. Is the scraper you mentioned just a half round piece of metal or something else? I have not seen the 1/48th scale boat scraper.
-
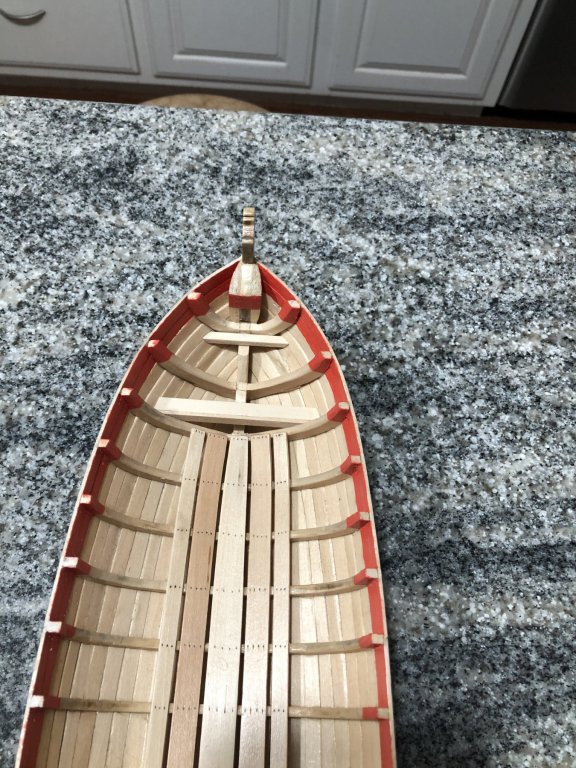
I have completed the cap rails with some complications. Getting the shape using card stock as per instructions went OK. I cut the cap rails as one continuous piece per side thus departing from the instructions. Shaping was not too difficult. except fitting at bow was moderately difficult. After gluing, I found that I needed to have the outside of the cap rails extend over the transom sides.I will fix this later by inserting an extension.
- 168 replies
-
- 5
-
-
- 18th Century Armed Longboat
- Model Shipways
- (and 1 more)
-
I’m sure this inquiry has been covered somewhere in a log or discussion entry. However a simple search for basswood yields over 3000 entries. The question is this, what is the difference between the basswood in, say, Model Shipway’s lasercut sheets and basswood sheets like you find at Hobby Lobby? The wood in the kit seems more amenable to carving and less likely to split than Hobby Lobby’s.
-
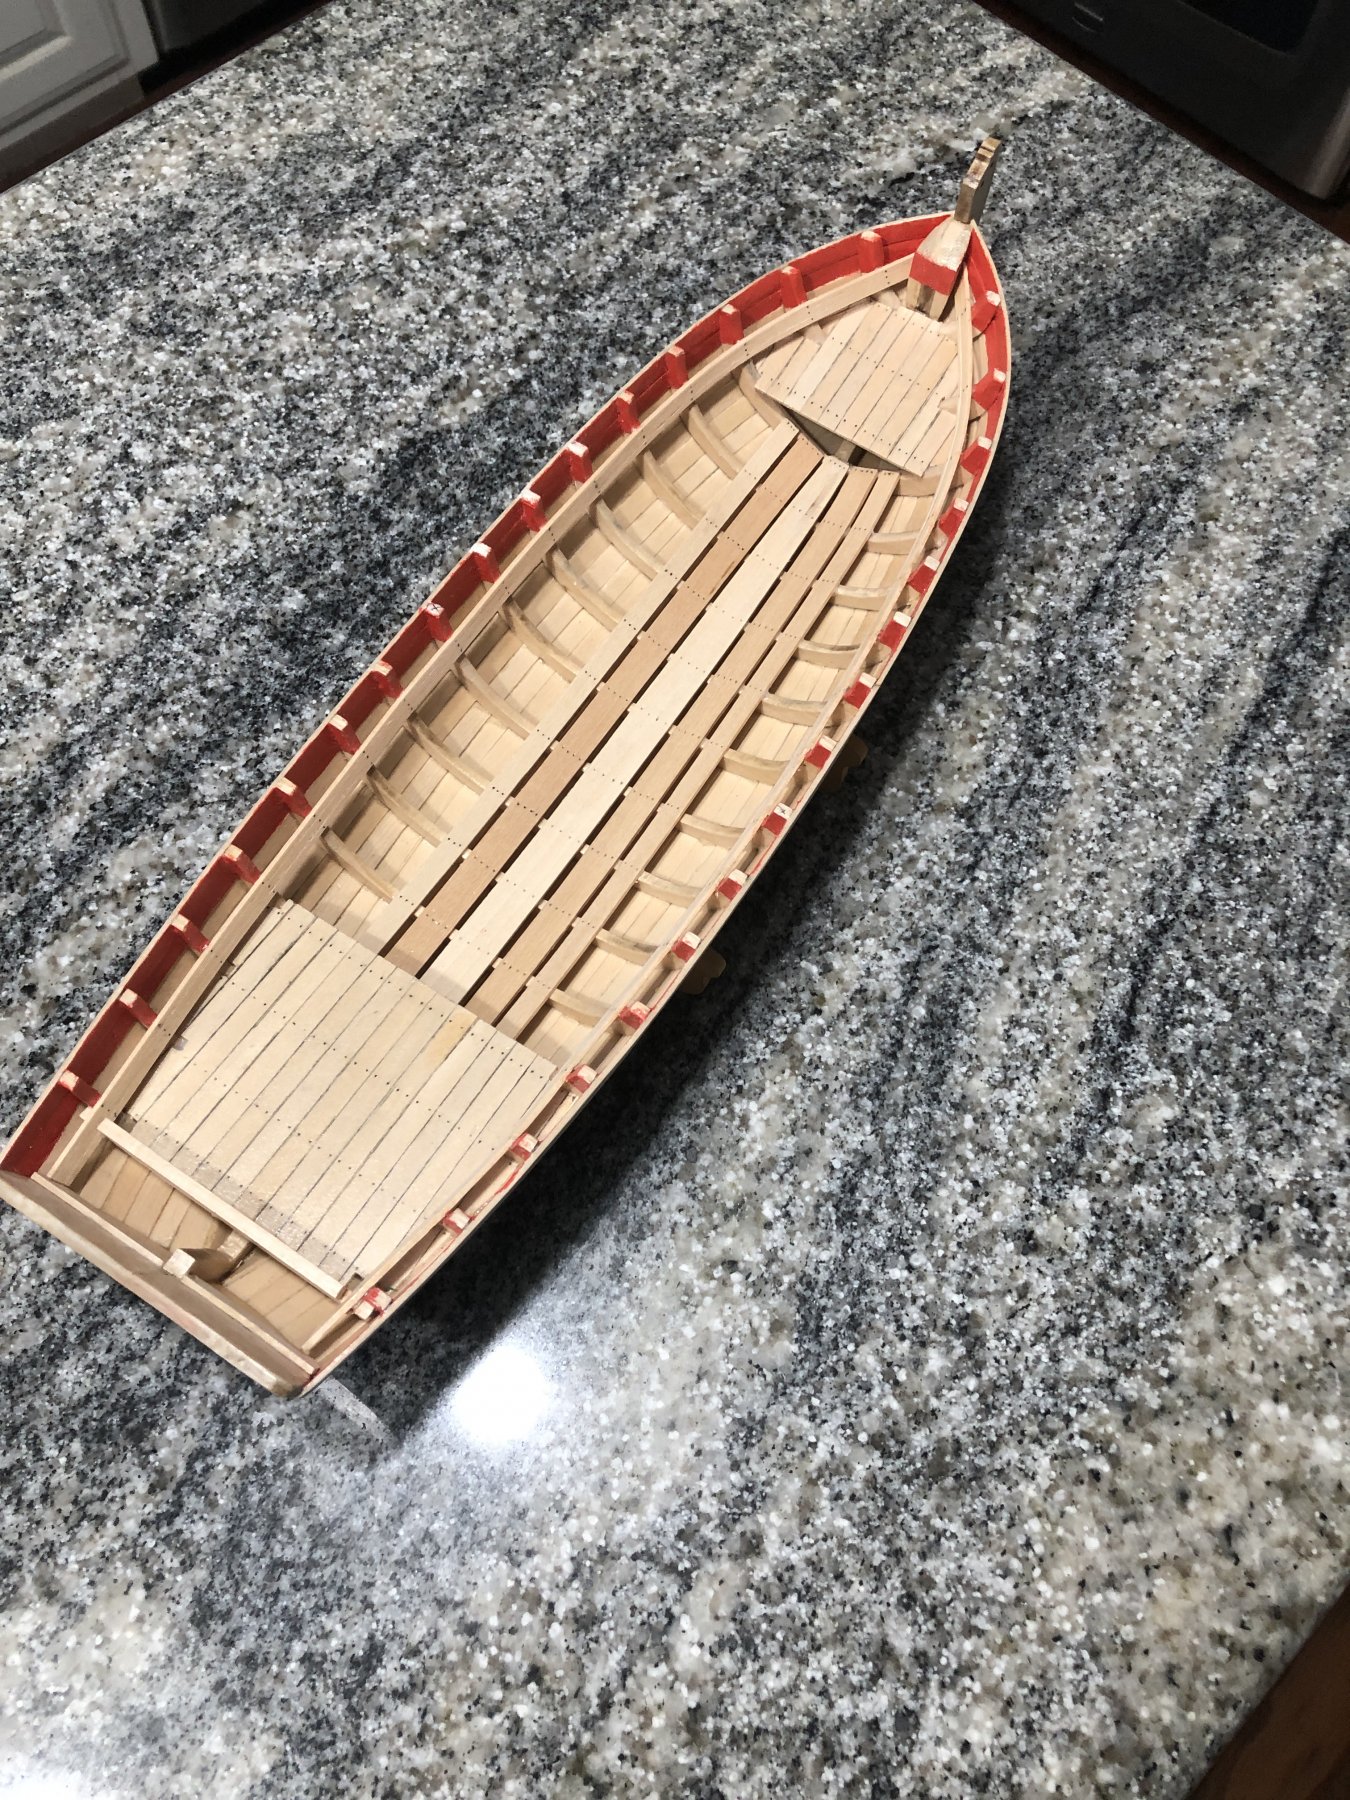
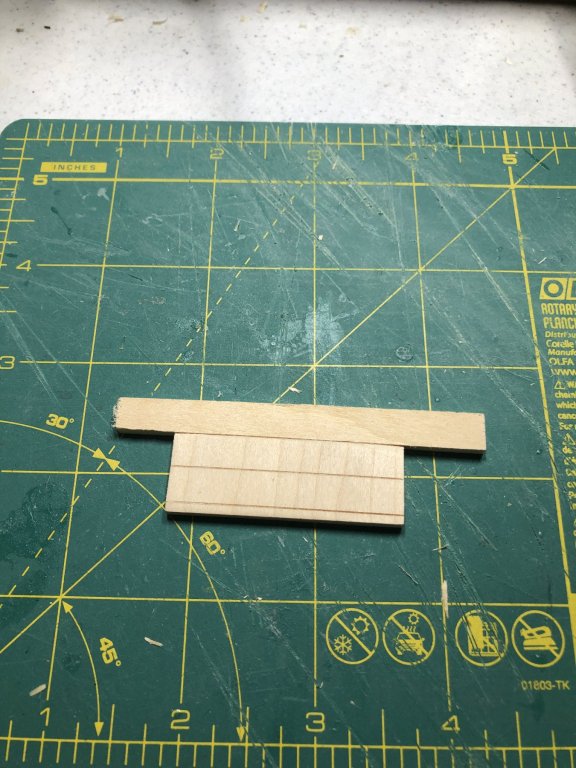
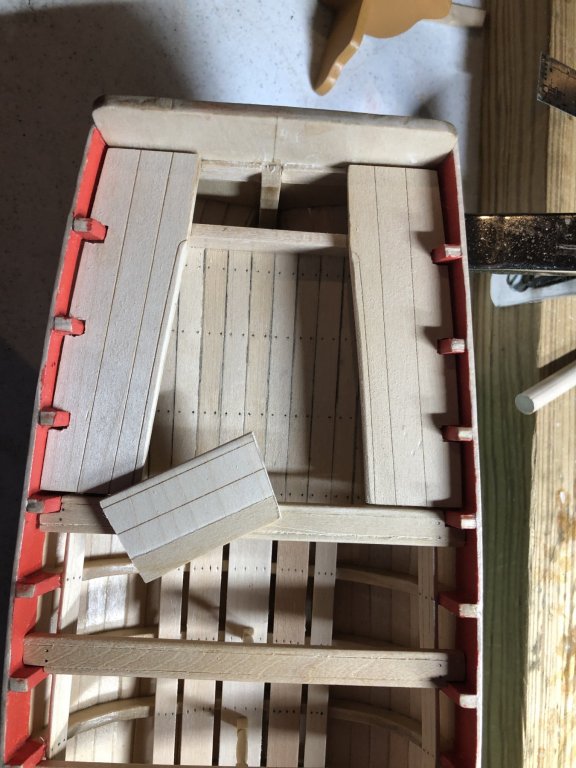
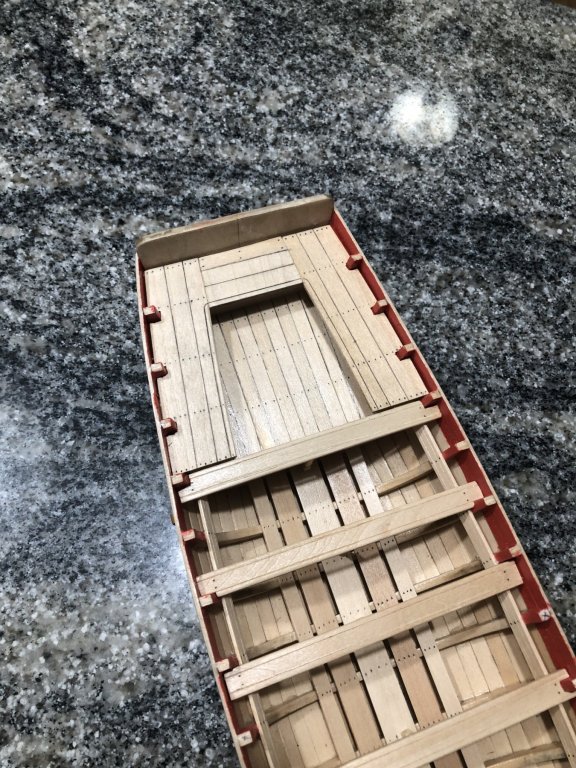
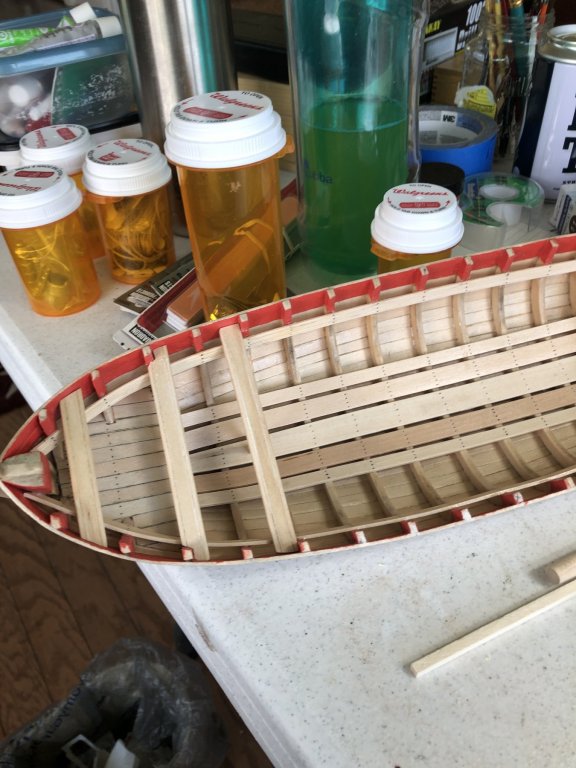
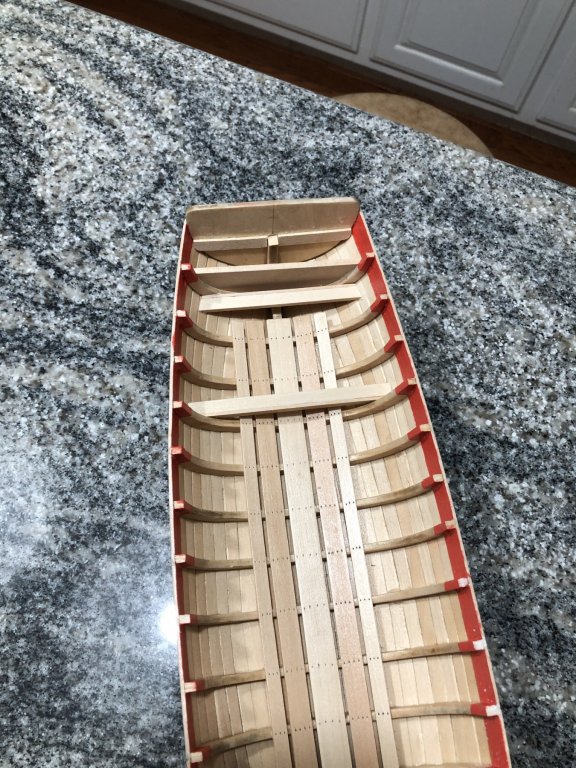
Continuing my last log entry, I would like to describe my work on the cockpit seats. As Arthur Wayne describes in his log, the locker lid was not long enough to extend from front to back. Similarly I found mine to be too short as well. My solution was to cut the last “board” off and replace it with a wider one. The photos below will illustrate my solution. Cut off l”board” Adding wider stripe using cockpit seat Using cockpit seat to mark curve on locker lid for cutting. The laser lines line up when cutting the last “board” off. Also, the new strip offers a natural “gap” for the locker hinge. As a final note to this entry, I found that the instruction booklet says to glue the mast bracket to the mast Thwart but is not shown in following booklet photos. I don’t know if this creates any problems as the mast bracket can be glued now or at several succeeding step. Arthur Wayne suggested the fore and aft floorboard planks needed to be wider. I agree although I am not sure as to how much wider.


- 168 replies
-
- 7
-
-
- 18th Century Armed Longboat
- Model Shipways
- (and 1 more)
-
Finished Thwarts and the support posts which were kind of fun to make Again, I found the key to success was using sharp #11 blades Marking off 1/4” drops and cutting 1/32” deep cuts all the way around. Made slices on corners from 1/3 mark to the 1/32” cuts first and then trimmed the rest. Sanded with medium sanding sticks in order to get final results. Finished product before staining. Installing stained Thwarts and posts. I will show final results with completed cockpit seats in next log entry.

- 168 replies
-
- 5
-
-
- 18th Century Armed Longboat
- Model Shipways
- (and 1 more)
-
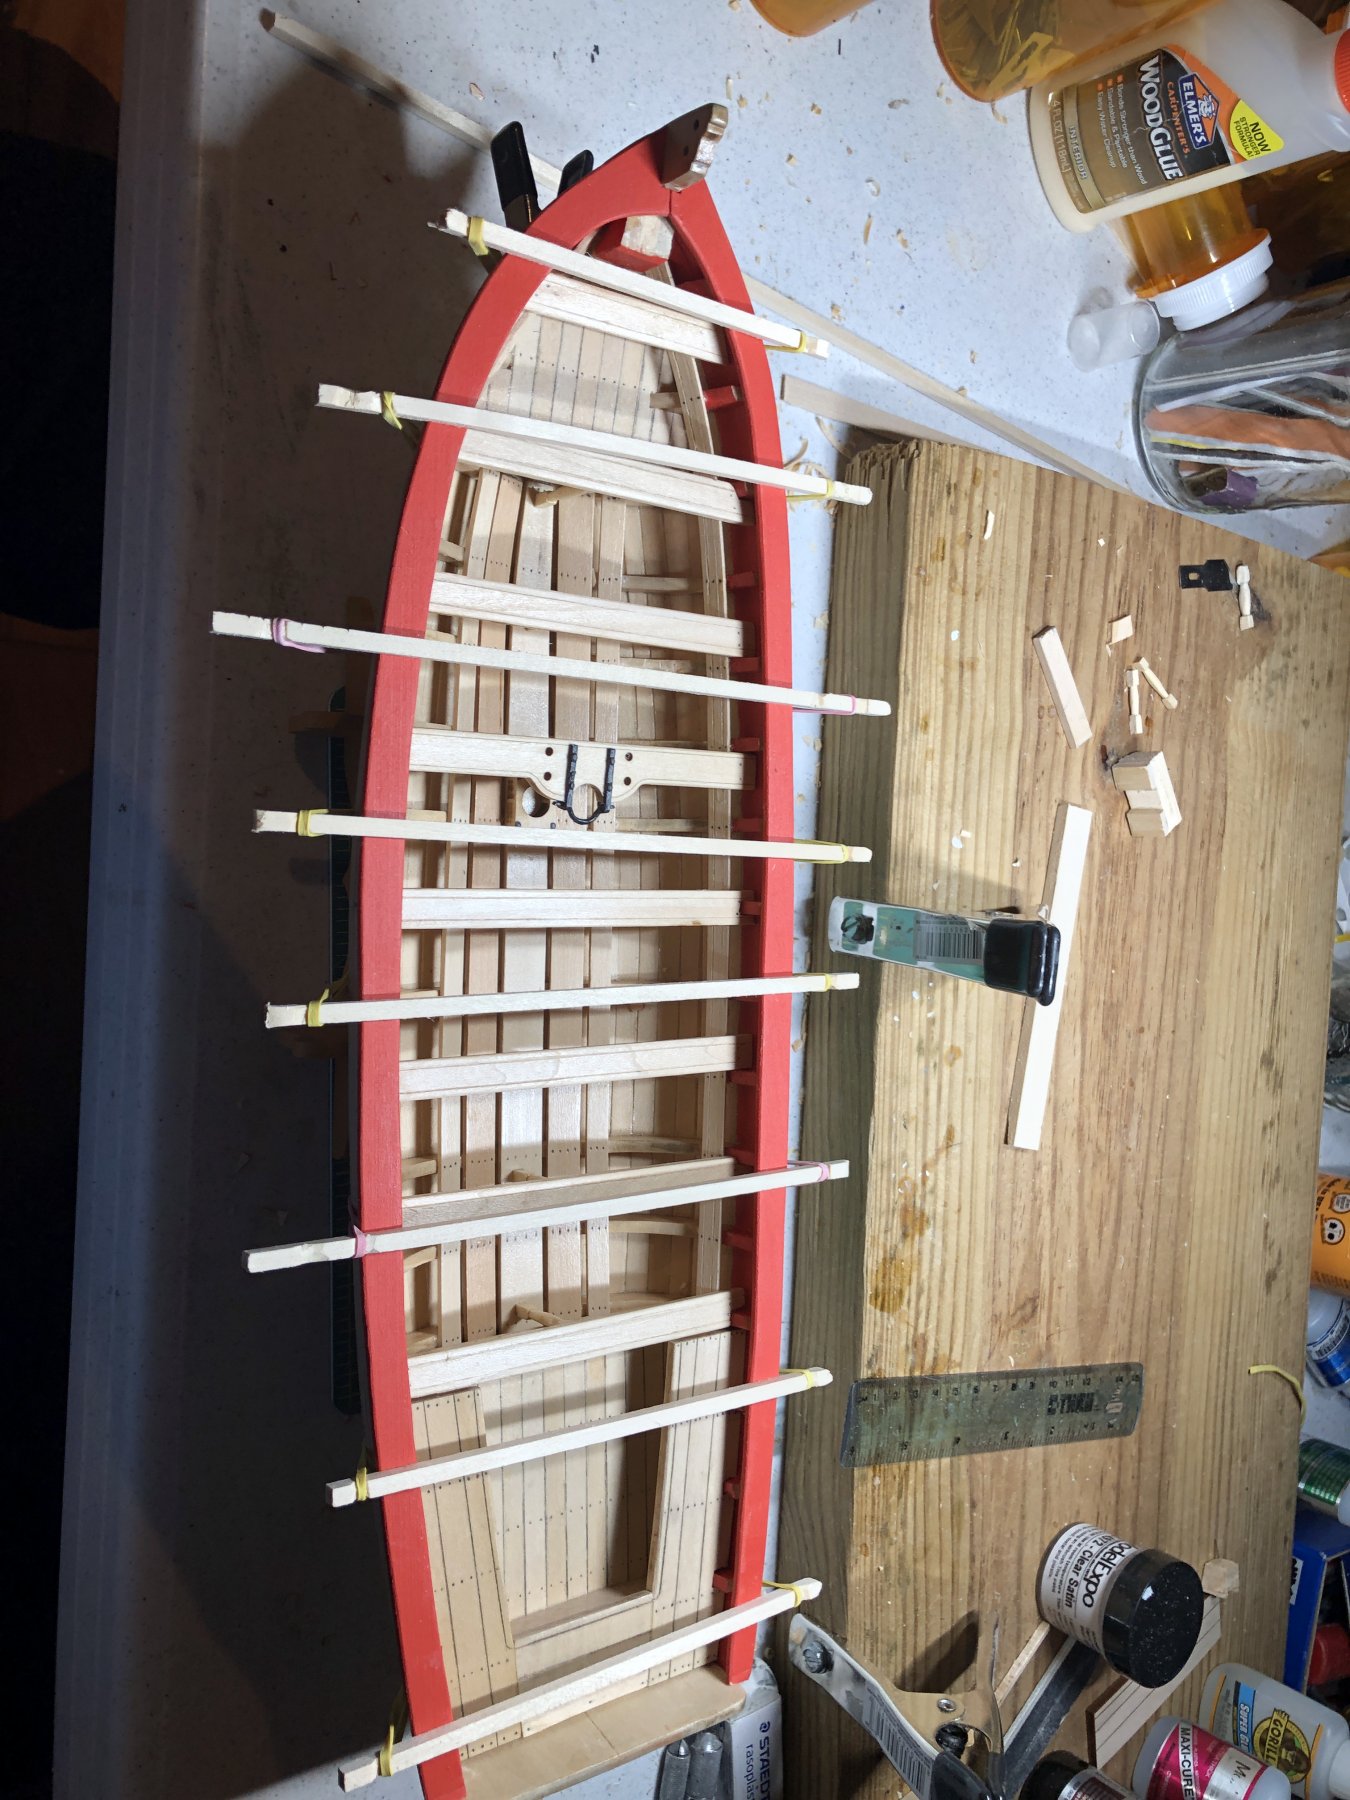
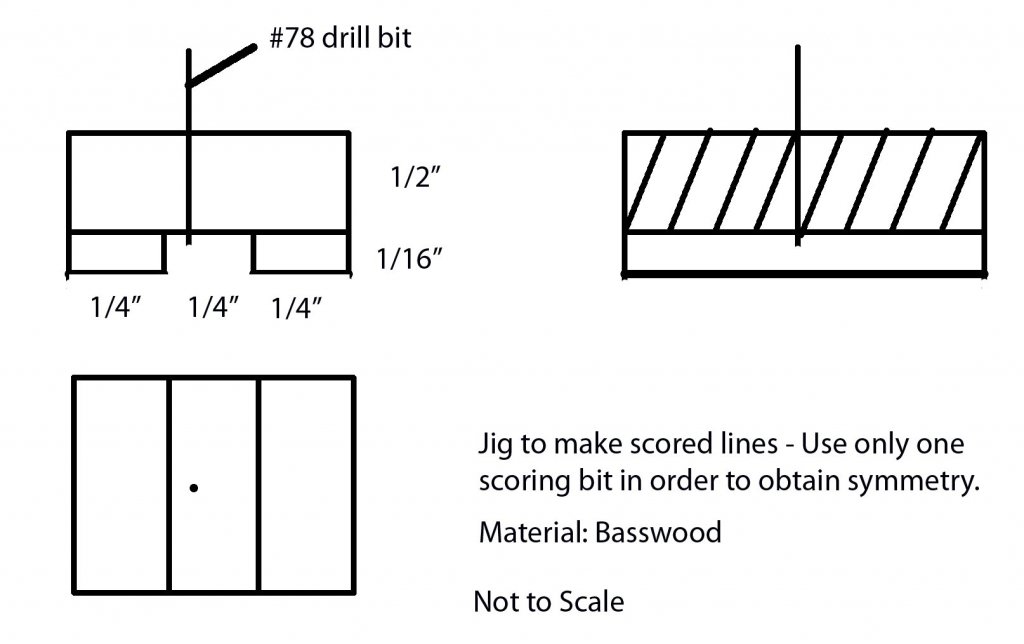
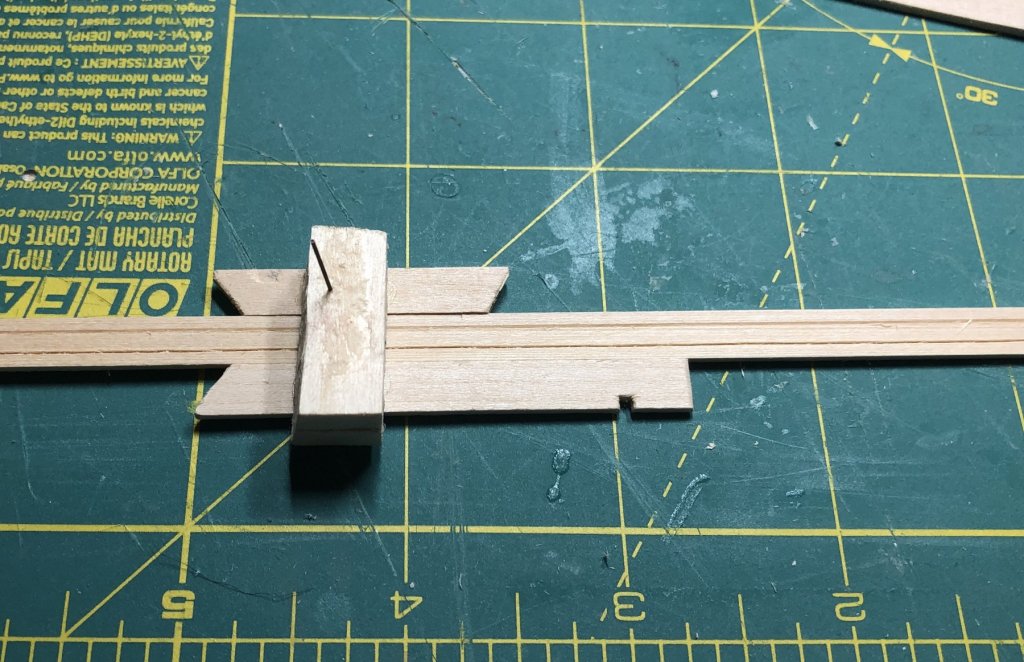
Next I tackled the Thwart Risers. First I made a scoring jig to score the risers. The jig took about 20 minutes to make and score all the 1/4" strips I would need. Below is a drawing of the scoring jig. I plan to make a similar jig for the Thwarts. I set masking tape at the appropriate height and glued the first Thwart Riser in without a hitch. The second one caused me no little grief but I finally got it positioned correctly after three tries. When removing CA glue with Un-Cure, it is important to grab the right bottle and not some ultra thin CA glue - Sigh! Just as a passing note, water tends to obliviate the score lines, so if you can get it done without soaking, do so.Drilling hole for bit placement from bottom.Scribing linesModified jig for making passes to risers on boatUsing wood strip to help align masking tape Finished with Thwart Risers


- 168 replies
-
- 7
-
-
- 18th Century Armed Longboat
- Model Shipways
- (and 1 more)
-
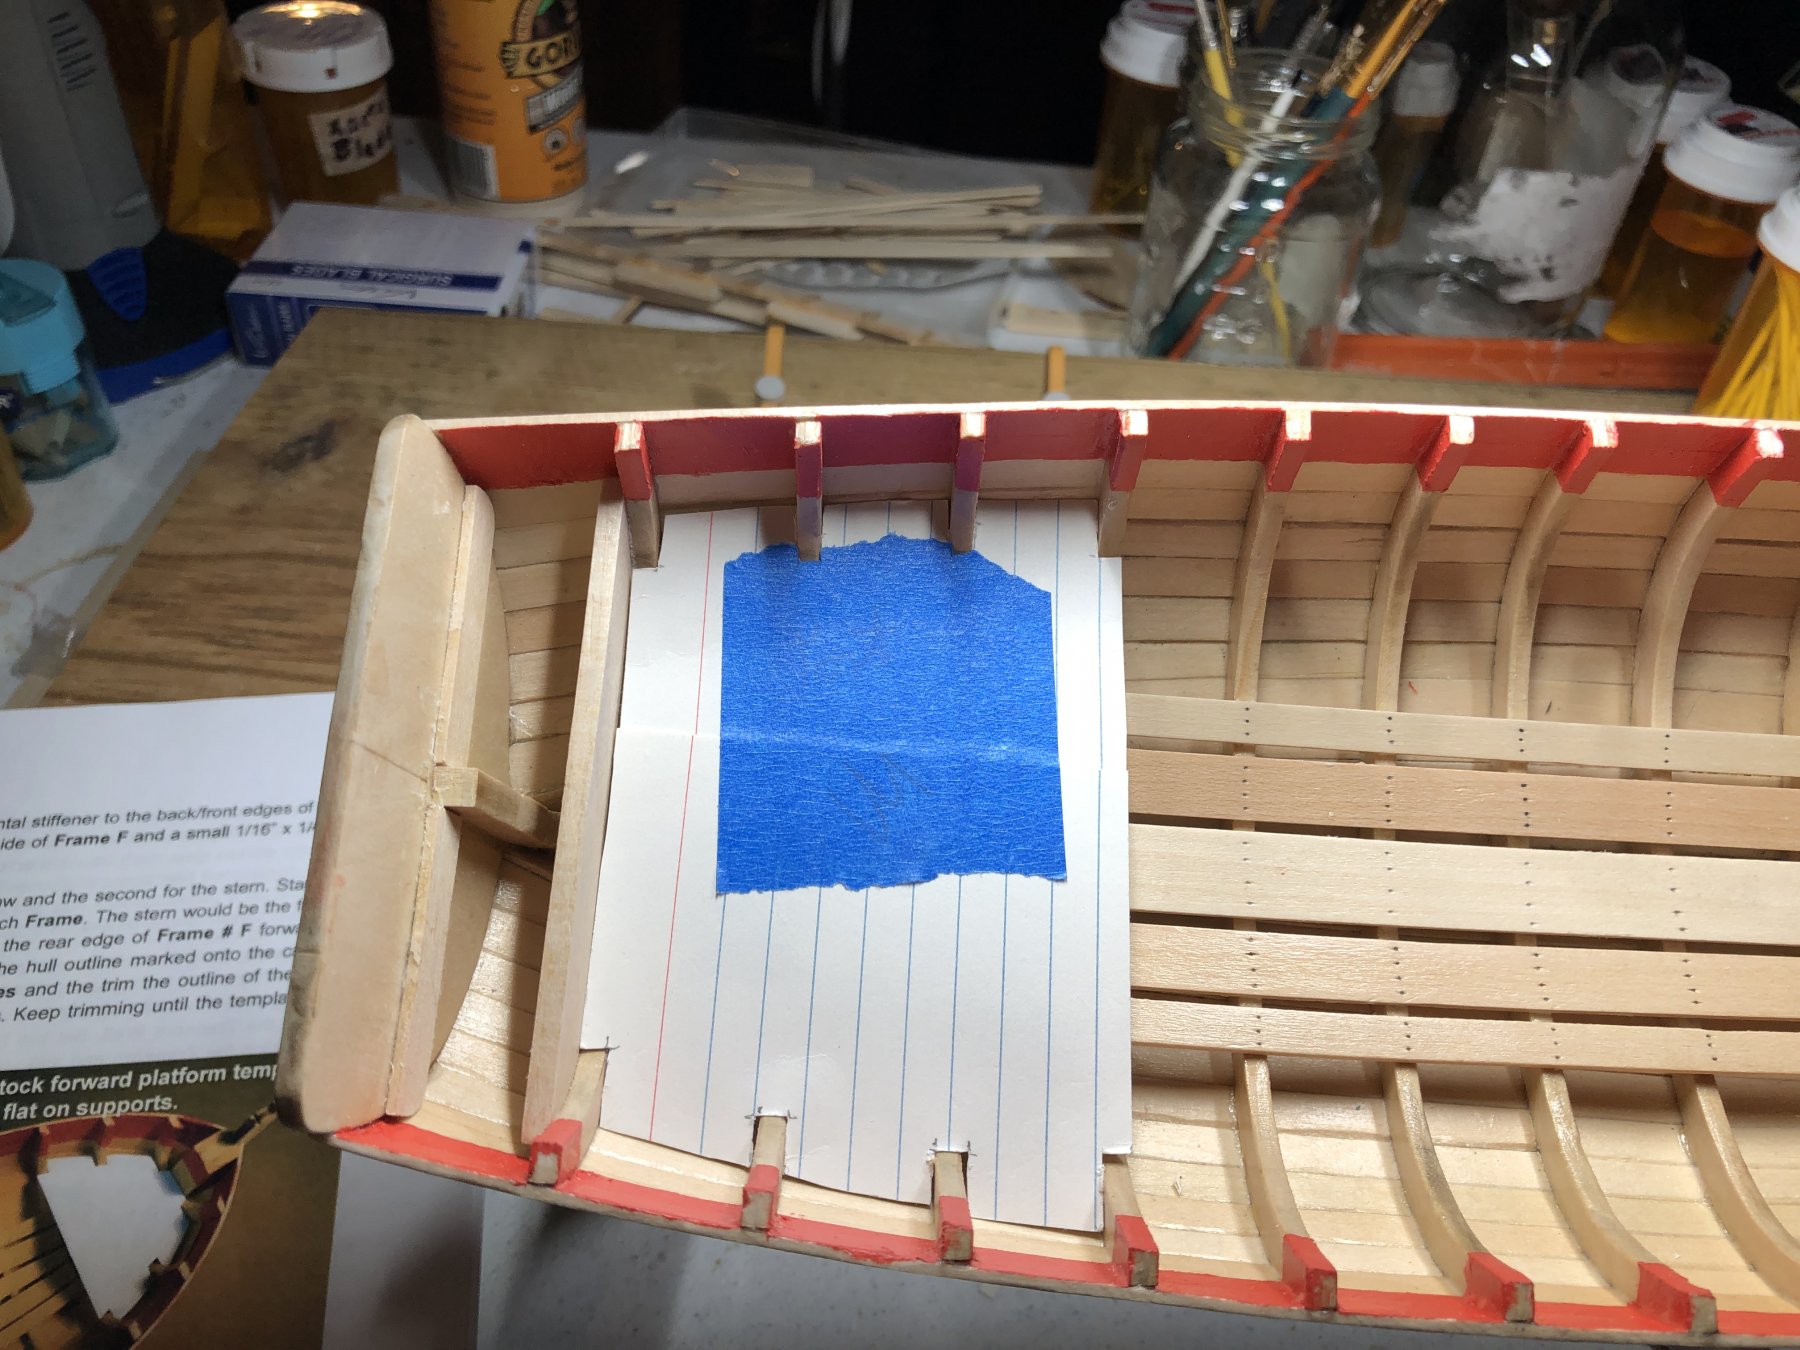
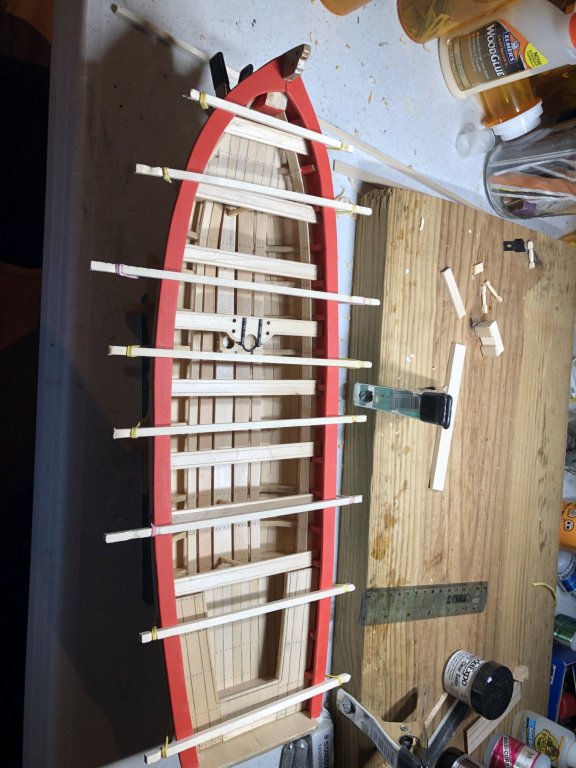
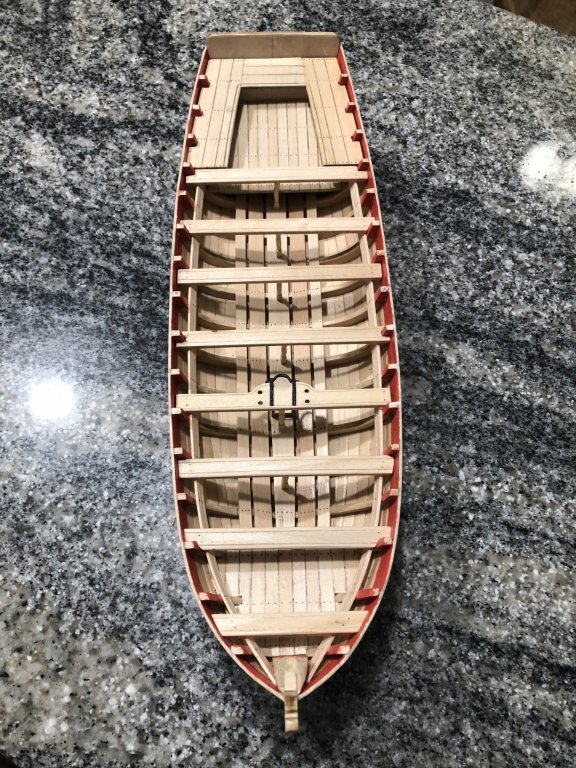
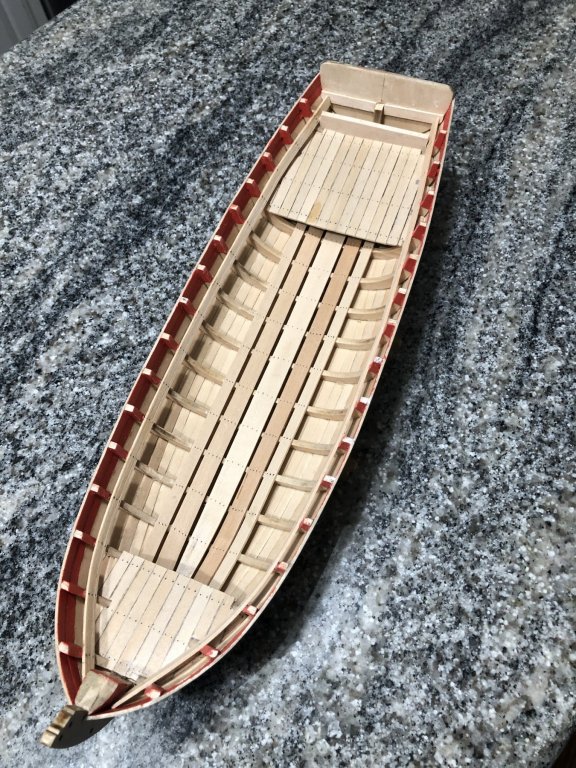
have completed the platforms. The shape of the hull was drawn on two cards for each platform. The frame locations were noted and marked then cut out on each card. For each platform, the cards were slid togther and taped into position so they would accurately convey the shape of each plateform. The glued together 1/4" x 1/16" basswood strips were then cut to match the templates. I then carefully separated the wood near the center and adjusted the wood to fit into place on the boat. Then the two halves were glued into place after I was satisfied that everything was fitting well


- 168 replies
-
- 6
-
-
- 18th Century Armed Longboat
- Model Shipways
- (and 1 more)