HOLIDAY DONATION DRIVE - SUPPORT MSW - DO YOUR PART TO KEEP THIS GREAT FORUM GOING! (Only 24 donations so far out of 49,000 members - C'mon guys!)
×


Dr PS - Paul Schulze
-
Posts
304 -
Joined
-
Last visited
Content Type
Profiles
Forums
Gallery
Events
Everything posted by Dr PS - Paul Schulze
-
 Tiger, I don’t know if you read my solution (post entry #74) to the center seat problem, but I simply cut the aft board off of it and replaced it with a wider one.
 -
Very nice Arthur. You have pointed out and completed some nice improvements which I should have probably caught but did not. Your boat is a remarkable build and one of which you should be very proud. BTW, I love the backdrop for your boat 🚣♀️
-
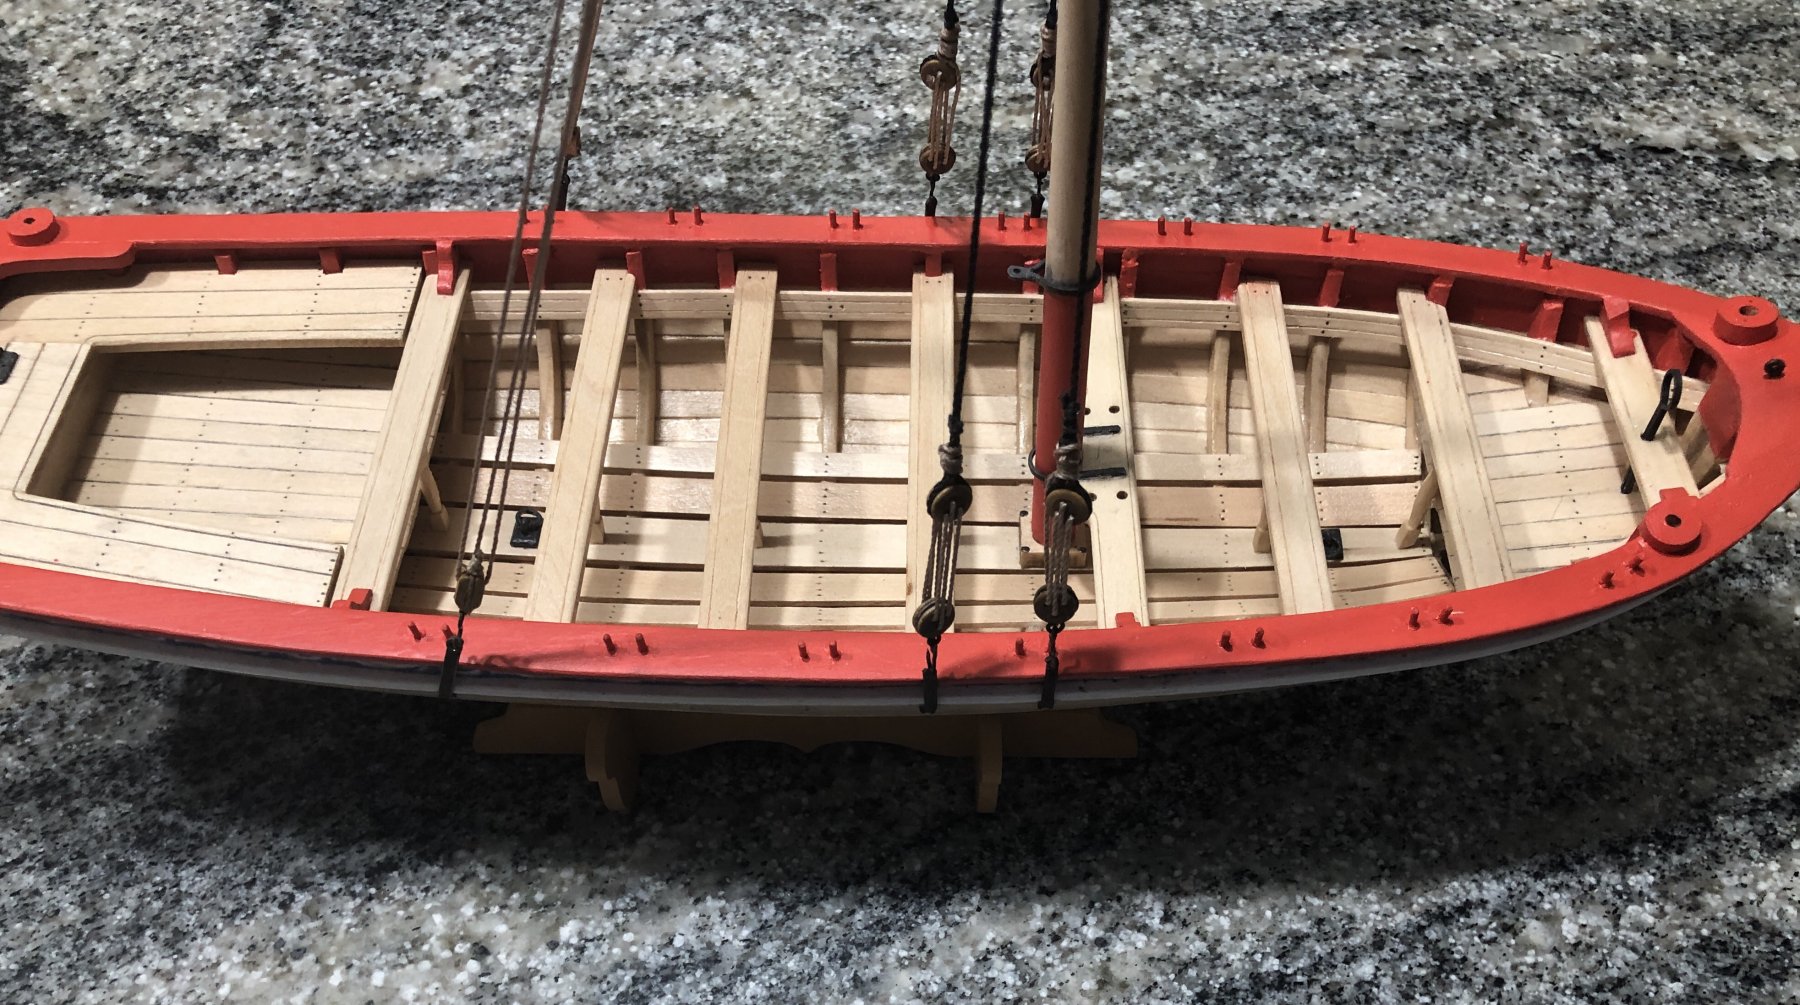
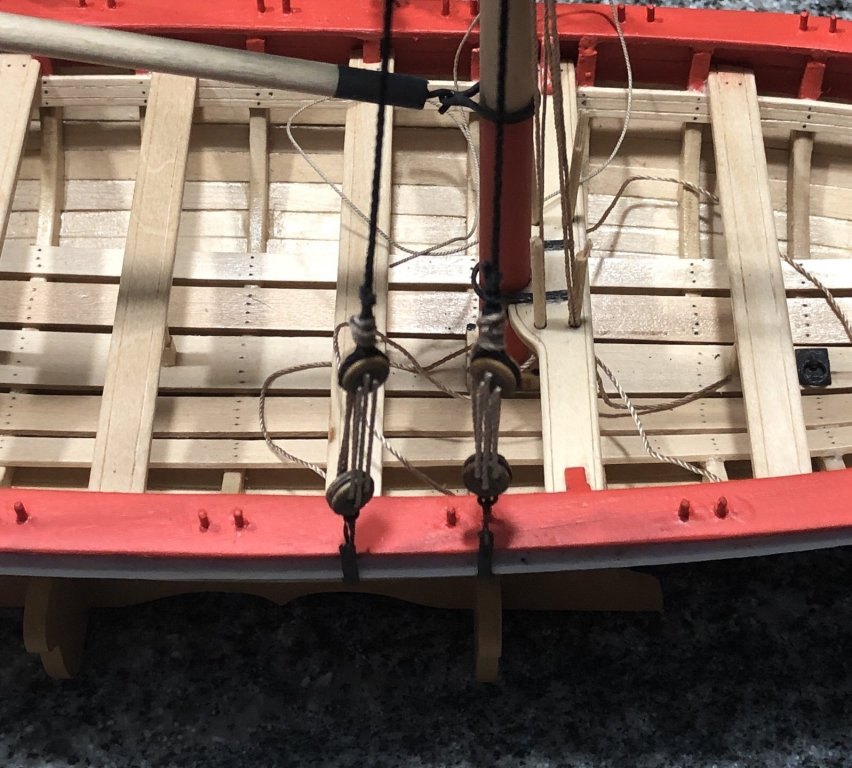
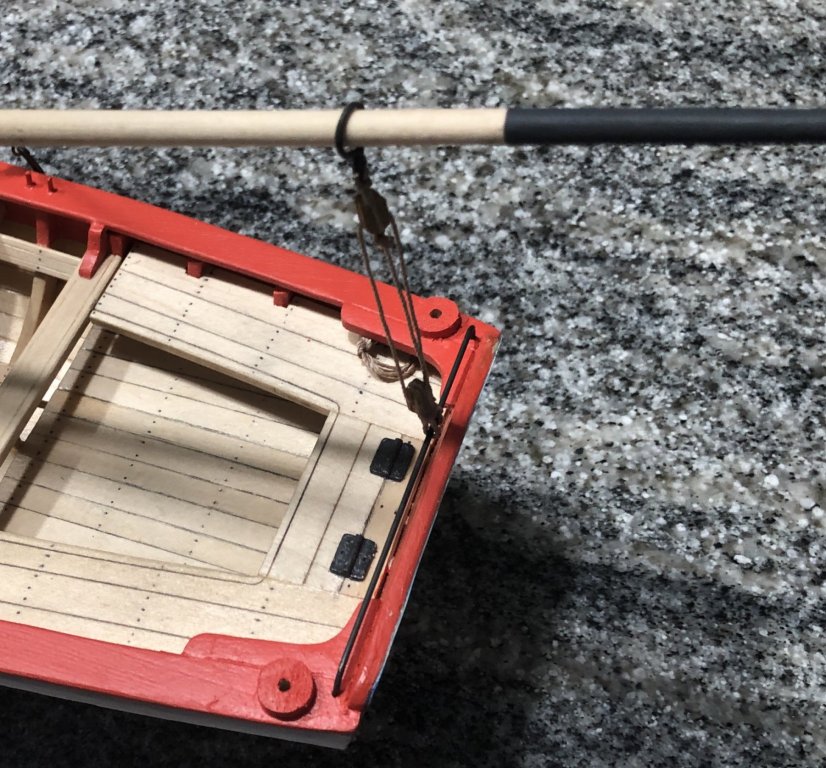
Just a few shots of the rigging which is almost finished. No real problems were encountered although I decided to use a thinner tan line than the kit supplied rope for the running rigging. The line I used was 0.7mm. Also, instead of using the kit supplied horse traveler, I opted for a rope loop attached to a block.

- 168 replies
-
- 6
-

-
- 18th Century Armed Longboat
- Model Shipways
- (and 1 more)
-
I think your pirogue is indeed very cool. I find that as a possibility for me to try sometime. Considering your cockpit seat problem, a possible work around might be to cut the fore part of the starboard side so that it is parallel to the thwart and also even with the port side. Then make the thwart notches deeper so that it can be moved aft and butt up against the starboard and port cockpit seats. I agree with Arthur, keep up the log as everyone's build becomes helpful to someone else.
-
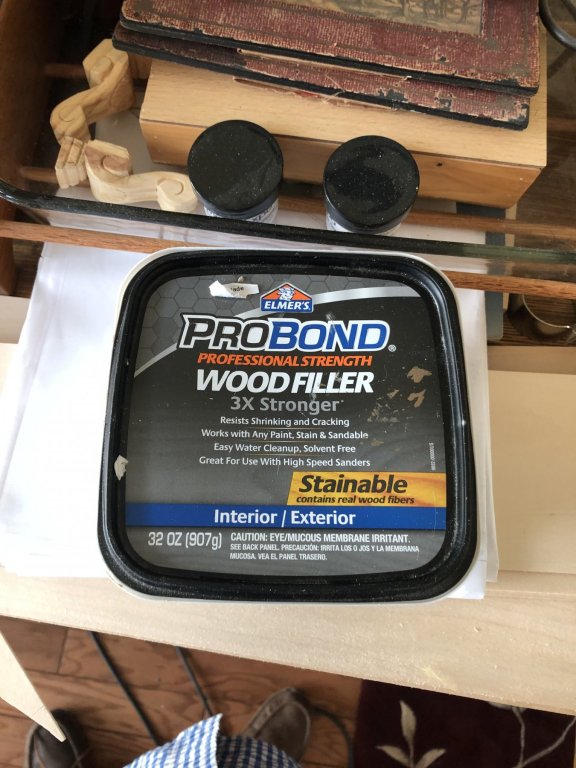
Arthur, just a possible solution, use Elmer’s Pro Bond Wood Filer, redrilll the hole and cover the patch with the coiled rope. I think you will find the wood filler does a pretty good job matching the unpainted wood.
- 168 replies
-
- 2
-
-
- 18th Century Armed Longboat
- Model Shipways
- (and 1 more)
-
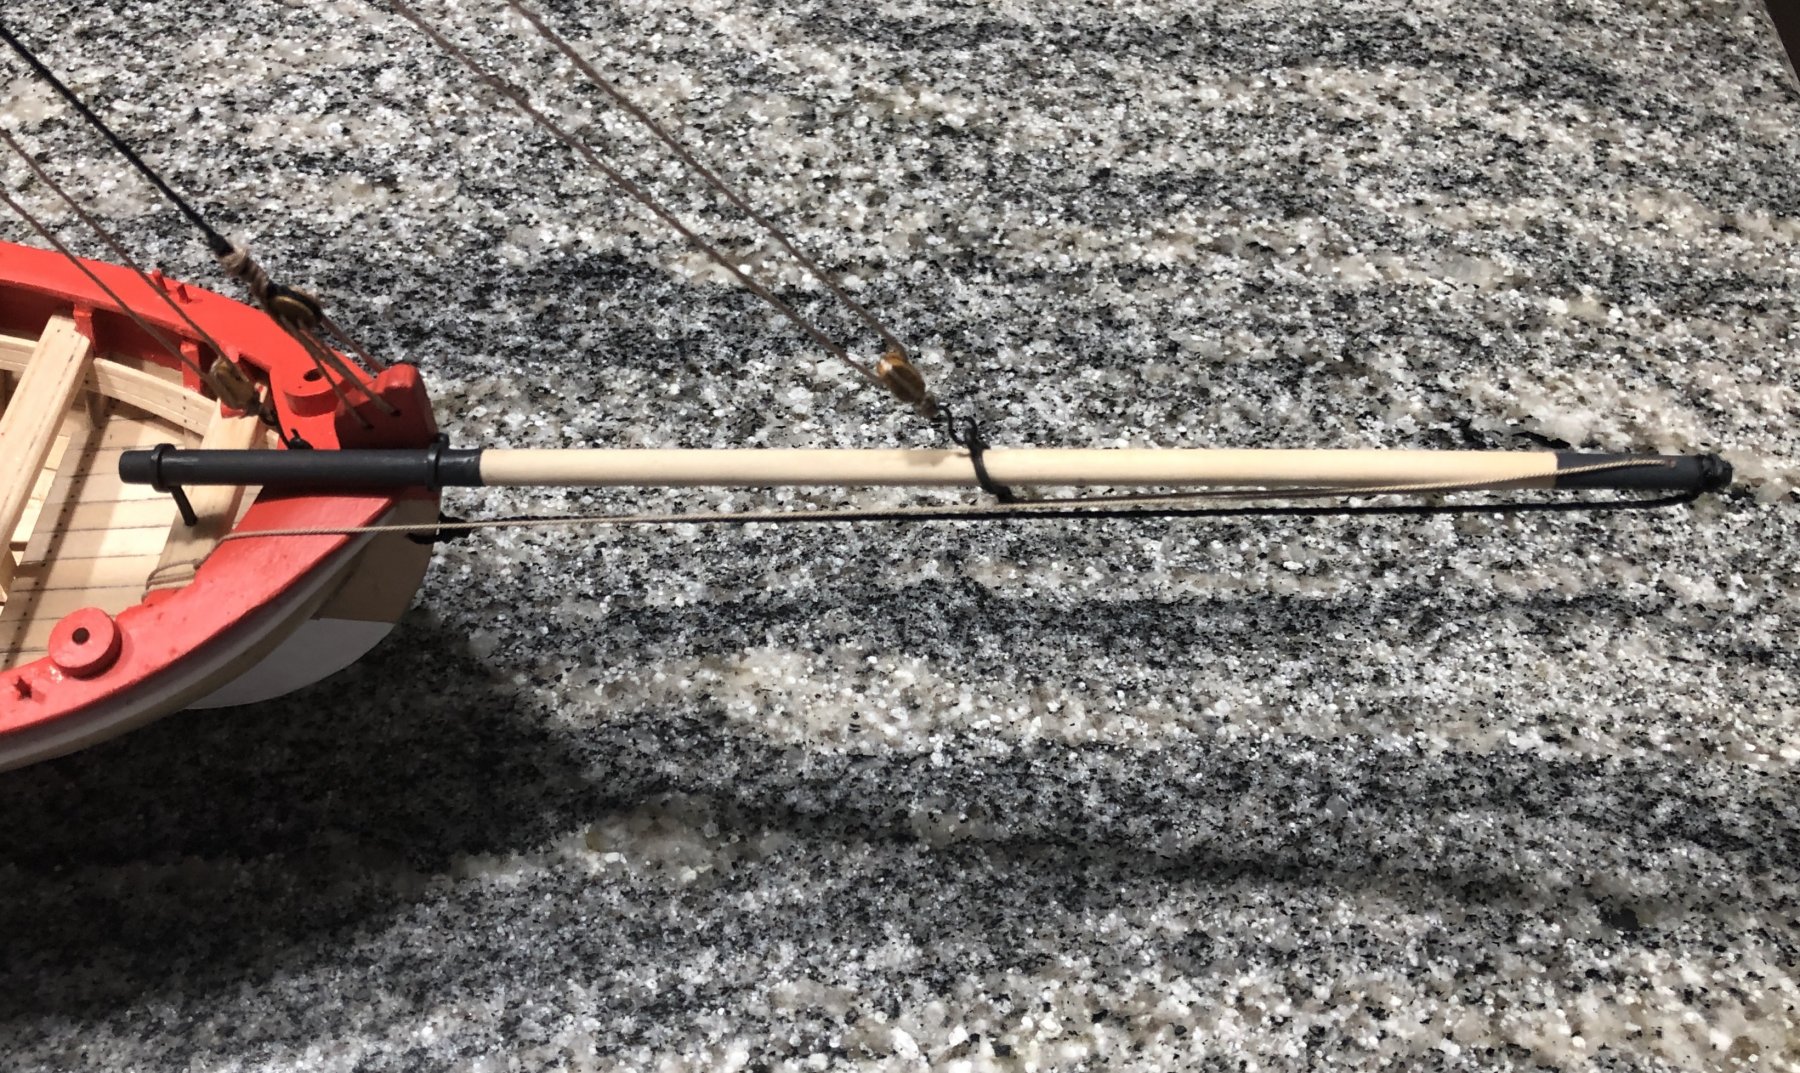
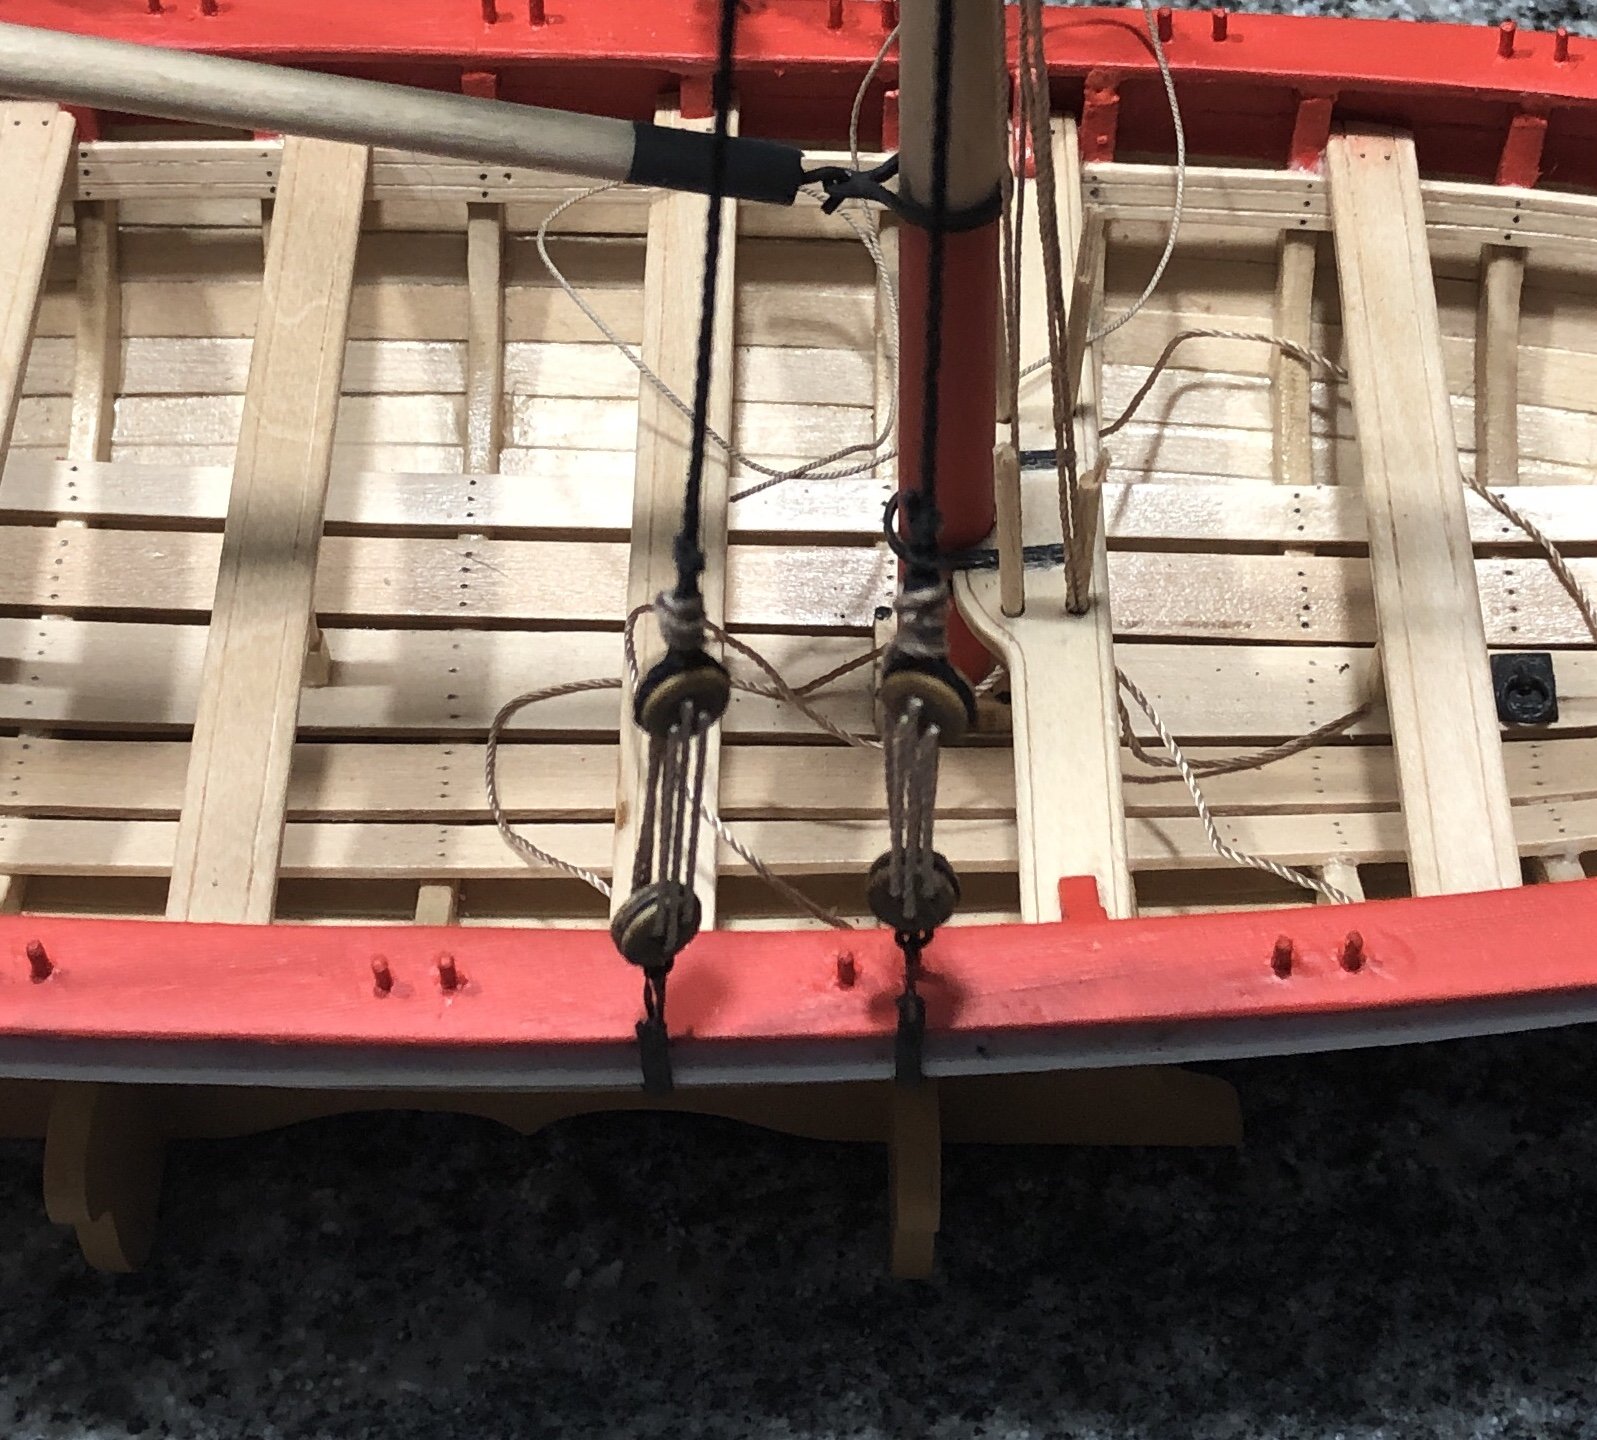
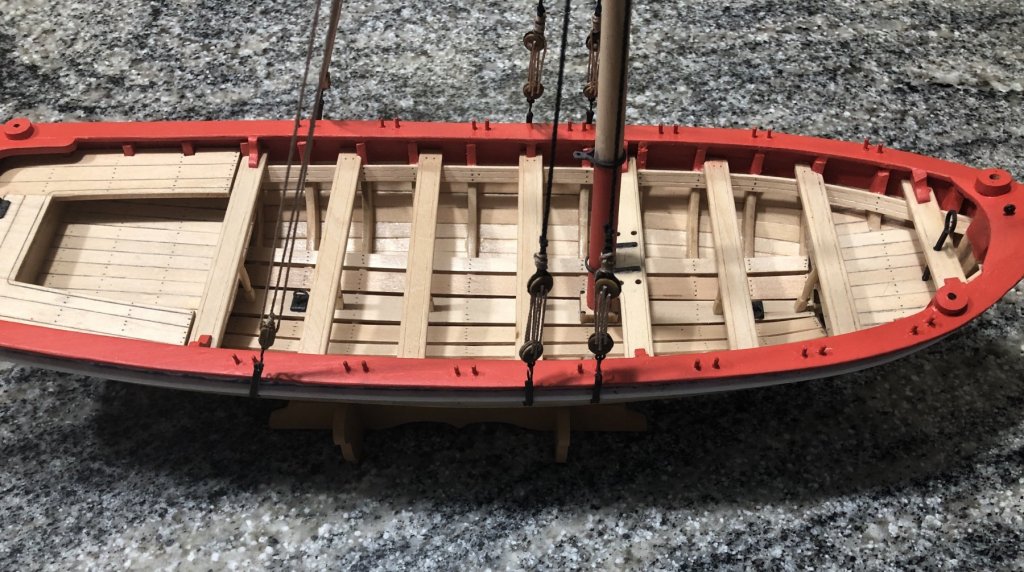
Rigging underway- chainplates, deadeyes and shrouds. I used the Kit supplied black rope to string the deadeyes but went with a smaller non-kit tan shroud rope. I installed the modified chainplates along with the home constructed hooks and stropped deadeyes. The deadeyes were strung off the boat, as shown below, and then moved into place. Next, the backstays were strung. All this went without much difficulty. Finally, I installed the bowsprit brace and post. I decided to install the bowsprit post in the center of the forward thwart as was done for the Medway version. I was concerned about making a rectangular hole in the deck as it was to be located under the thwart. As it turned out it was a piece of cake. I drilled a 1/16” hole through the thwart down into the deck. Next the hole in the thwart was shaped and the post inserted. I pushed a bit on the post to mark its shape and to my surprise it popped through the deck. Viola! Easy peasy!


- 168 replies
-
- 6
-
-
- 18th Century Armed Longboat
- Model Shipways
- (and 1 more)
-
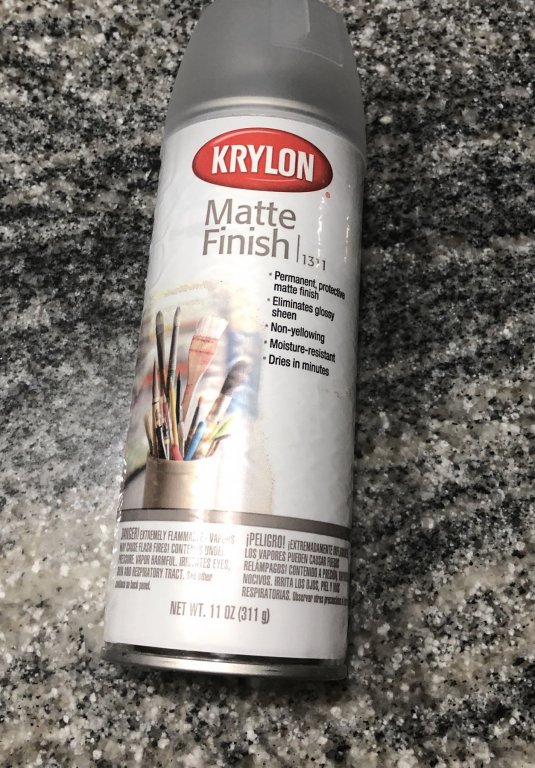
Arthur, La Chaloupe Armée / 42ft Armed Longboat of 1834 by tkay11 – scale 1:36 - plans by M. Delacroix has thwart posts. Apparently this was a documented boat. Anyway, I don’t think they’re probably necessary. The matte spray is shown below. It seems to work well.
- 95 replies
-
- 1
-
-
- Model Shipways
- 18th Century Armed Longboat
- (and 1 more)
-
Nice mod you have going. I will be following you progress as I am watching how it works out.
-
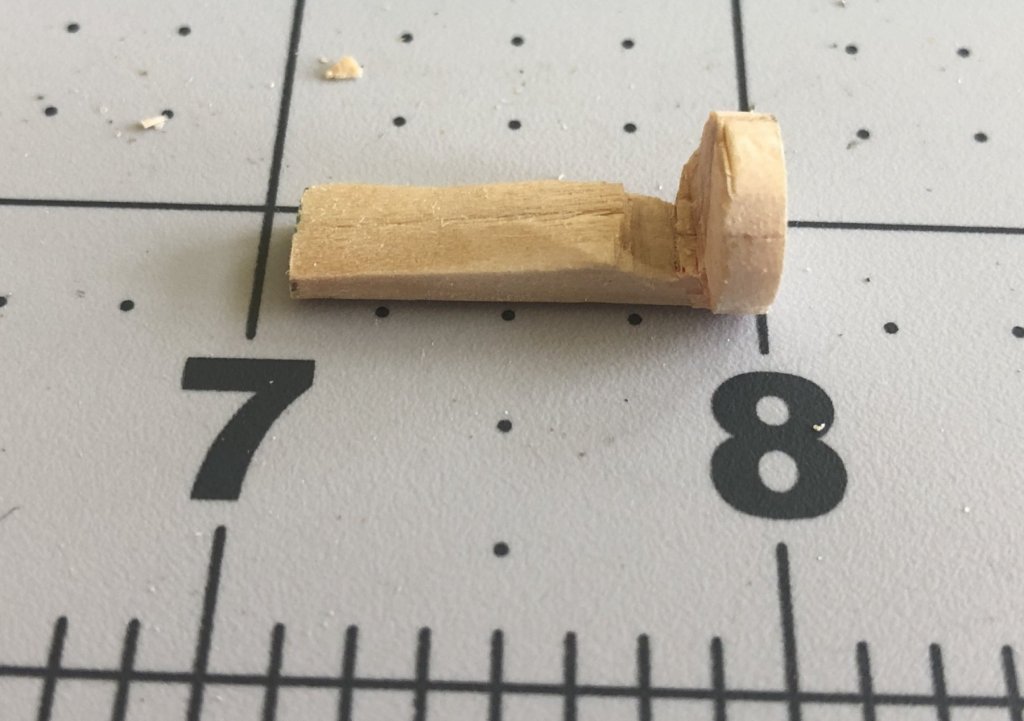
Arthur, it looks like you are really putting in the hours and making some cool modifications. I like your thimbles very much. I have not decided what to do in this regard yet. I may give it a try but I will see - not there yet. About the belaying pins, they should be rather easy to carve from square basswood rod. When I made the thwart seat posts, to my suprise, I found it rather easy to care and shape round posts. You may have skipped that step. BTW, I was reading the supply list in the manual the other day and found a can of Matte Finish Spray listed. I did a search of the instruction manual and found no reference to its use. I thought about it and decided it would actually be good to spray painted surface, like the mast, etc., with it as they tend to scratch easily, e.g., when slipping on the collars and such. I tried it out today and it does prevent scratching and it also takes out the sheen of the paint and gives it, in my opinion, a better look.
-
Do it Arthur. It took about 2.5 hours at most. If you don’t you’ll wished you had later. Now is the time. Carve the front one before you take anything off and then you can decide from there.
-
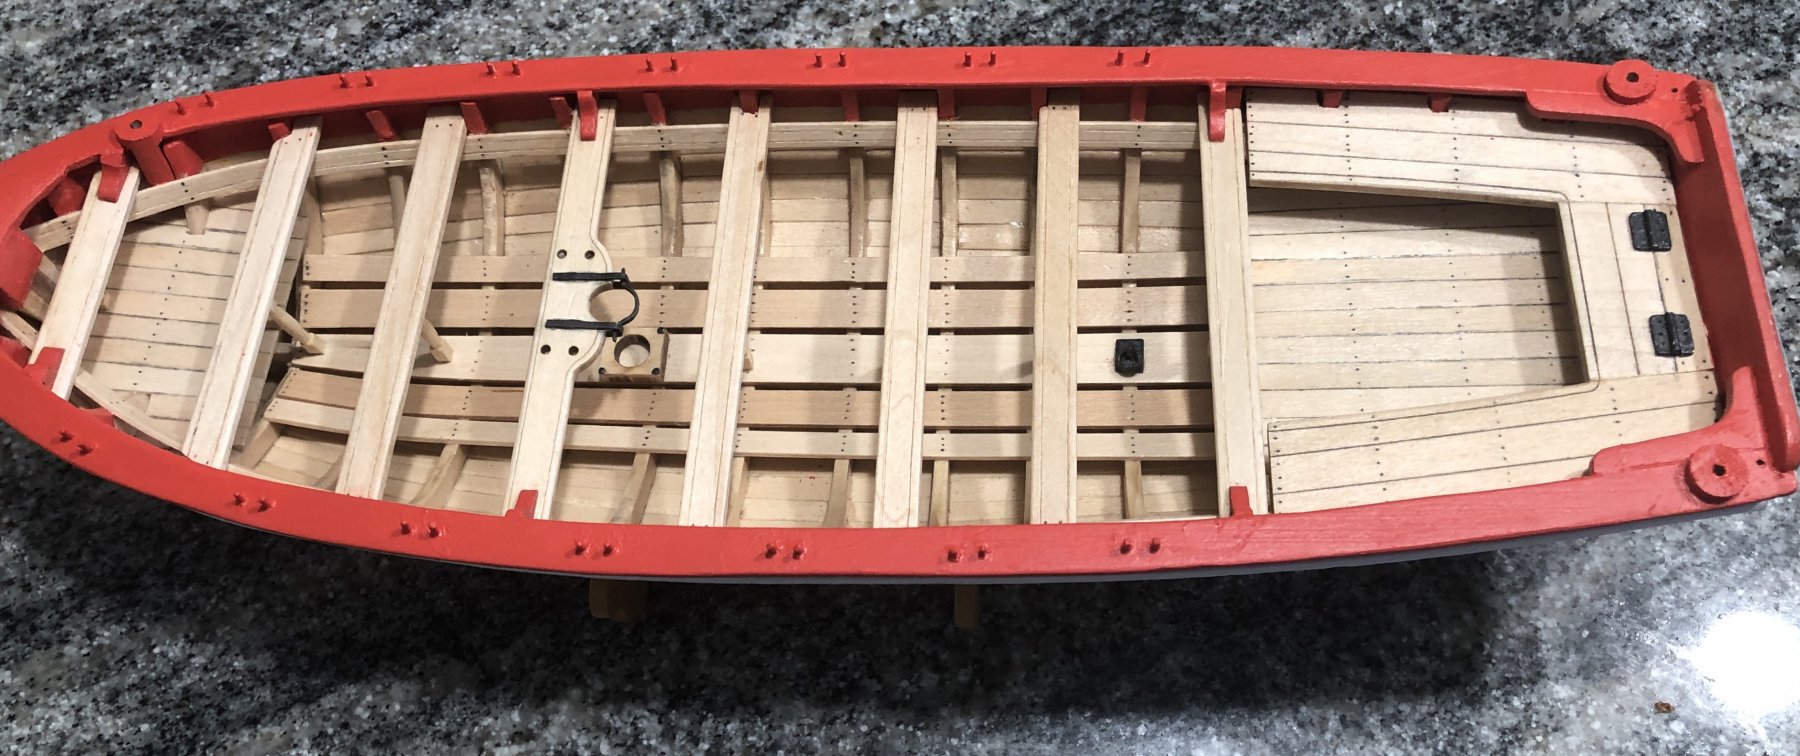
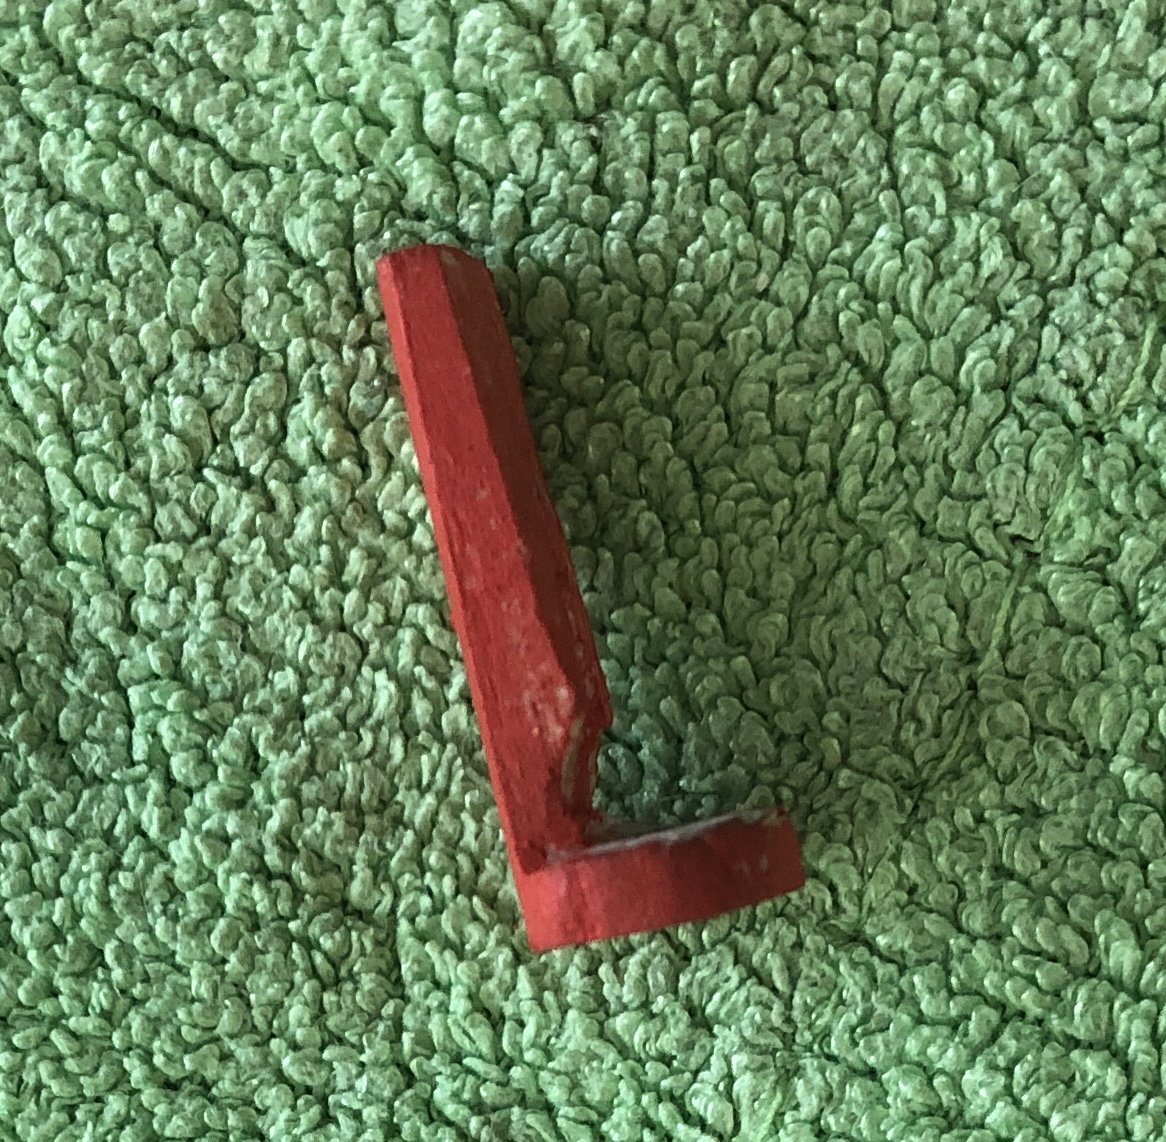
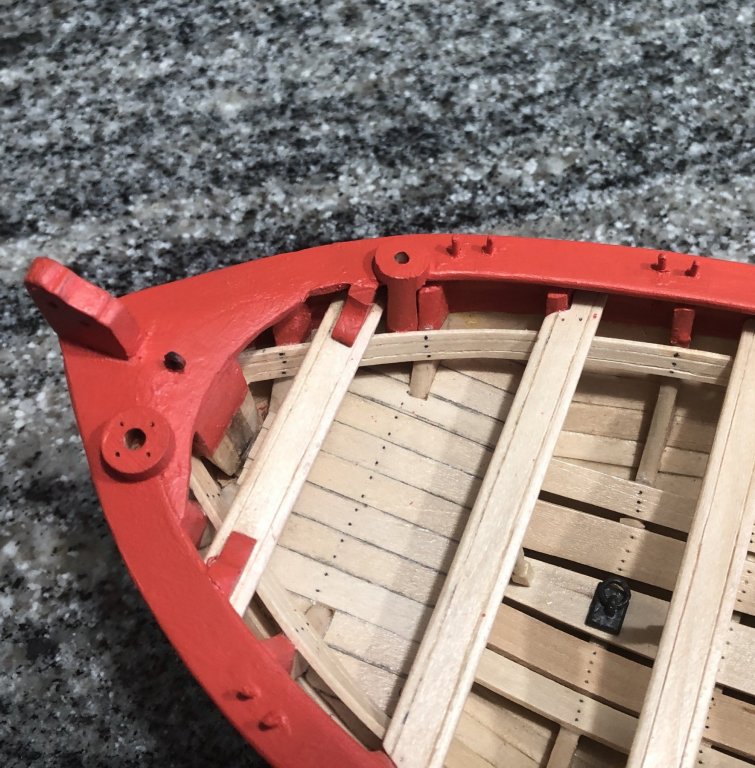
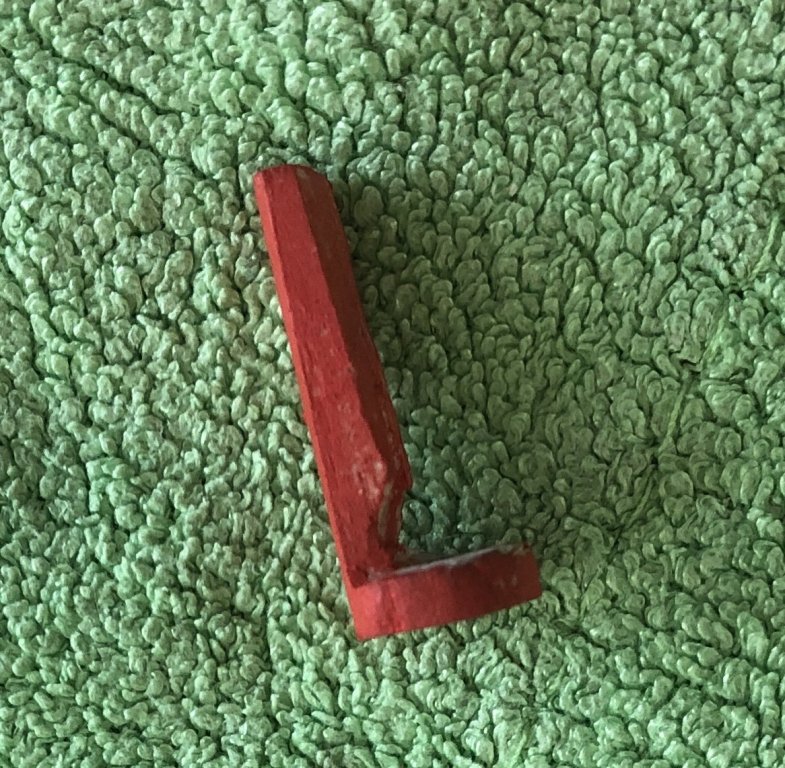
Before proceeding to the rigging, I decided to redo the canon mounts. I cut them from 3/8” dowel. The stem starboard gun mount was carved to fit between the bow Thwart and G bulkhead/frame, then come up inside and over the cap rail.

- 168 replies
-
- 5
-
-
- 18th Century Armed Longboat
- Model Shipways
- (and 1 more)
-
In the reading I have done, many of the Longboats or launched in the early 1800’s were converted or built as armed. I would not be surprised if some of the boats did not have bowsprit backstays. When sails were up as for rescue boats, there would be strong upward forces needing a counter force. As as far as the x2 enlargement, I think you are correct. Obviously, some mods were needed for their concept of arming the boat.
-
Thanks all for the comments. I don’t think Arthur and I are in a mad dash to finish rather we want to do the best we can. Actually I find it interesting and fun to make modifications to the kit plans. Both of us have been in a discovery mode and we hope it will give others ideas and help as they work on their builds.
- 168 replies
-
- 2
-
-
- 18th Century Armed Longboat
- Model Shipways
- (and 1 more)
-
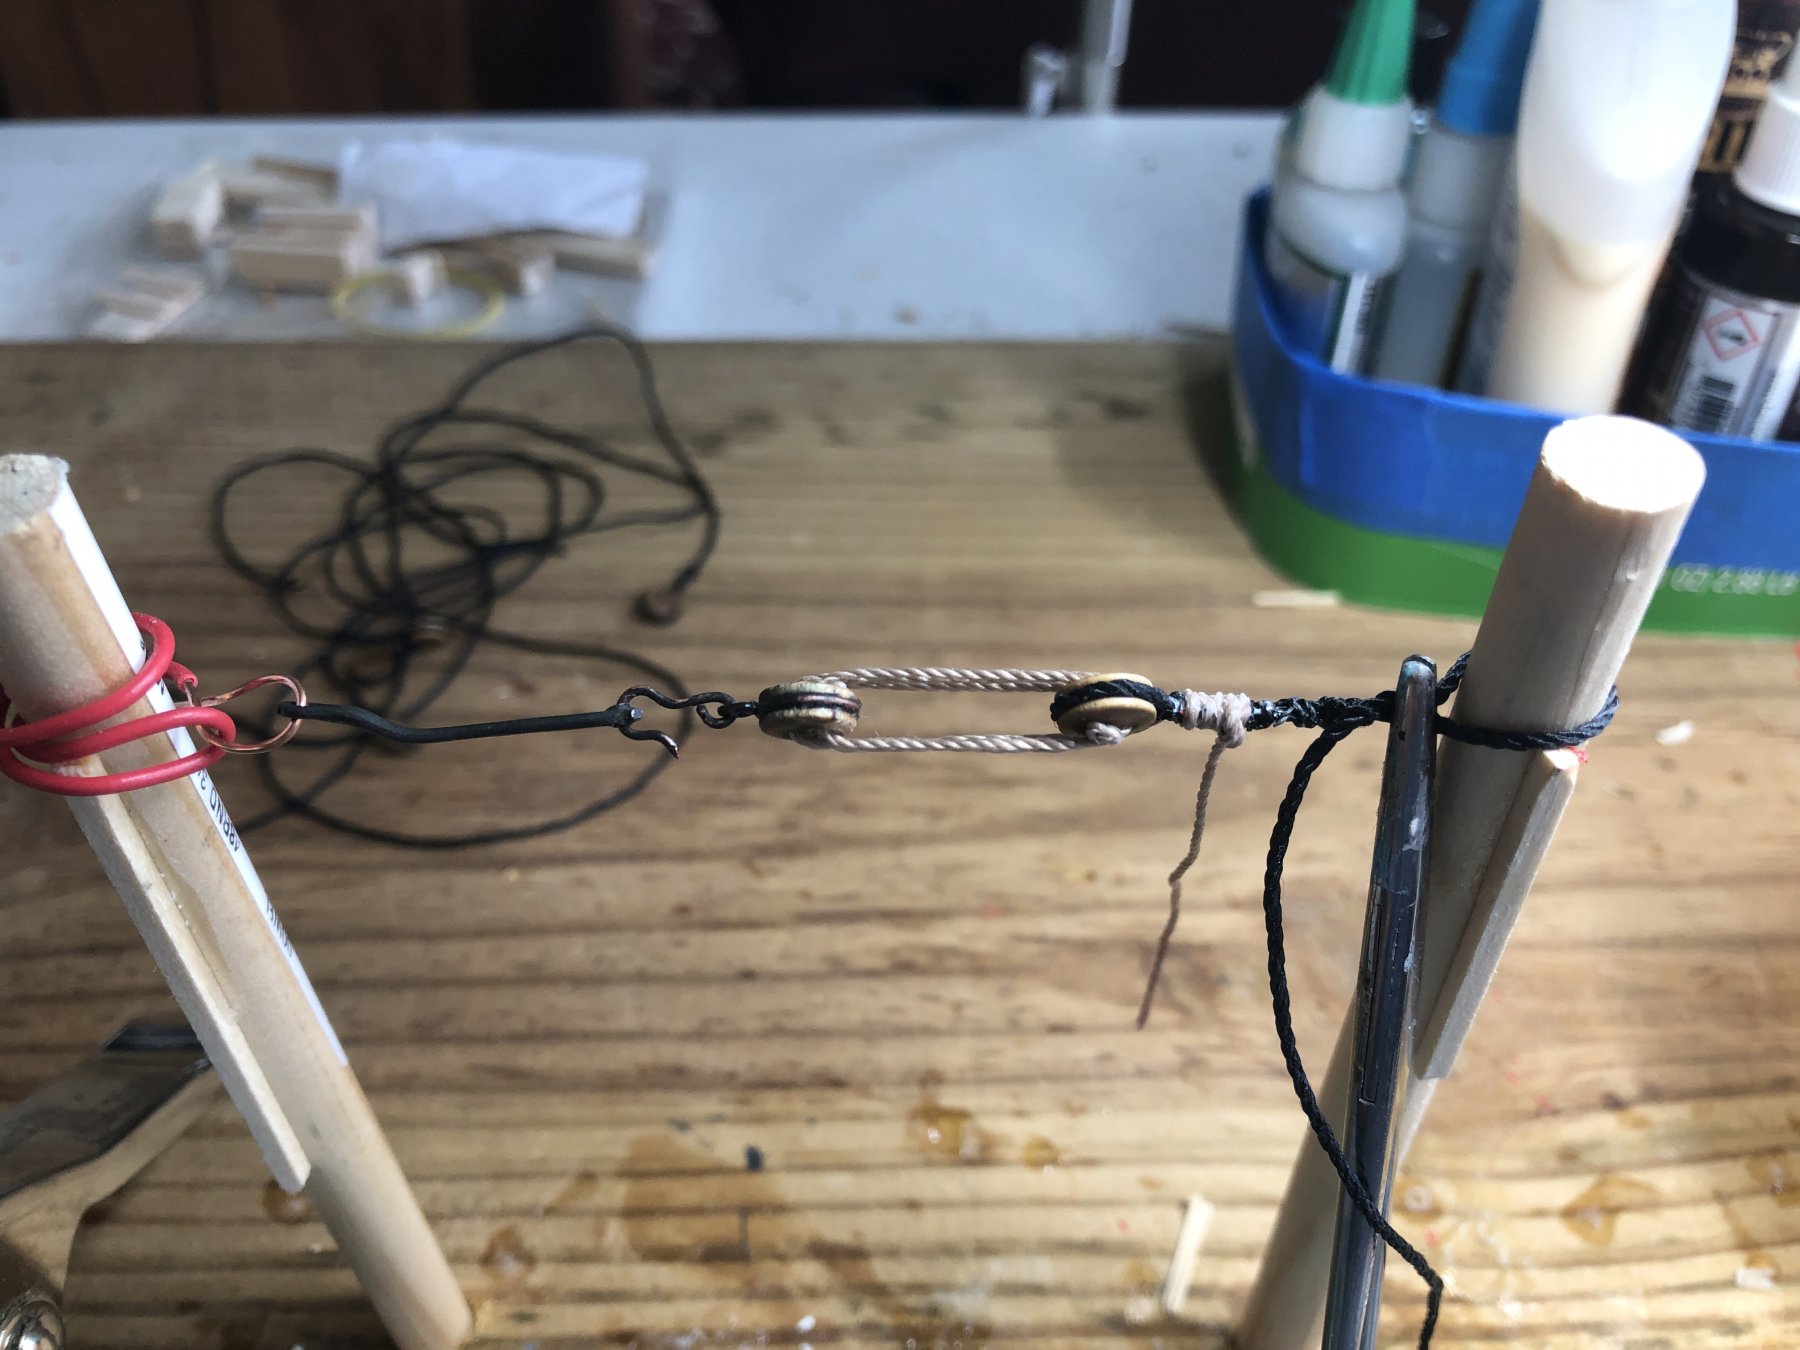
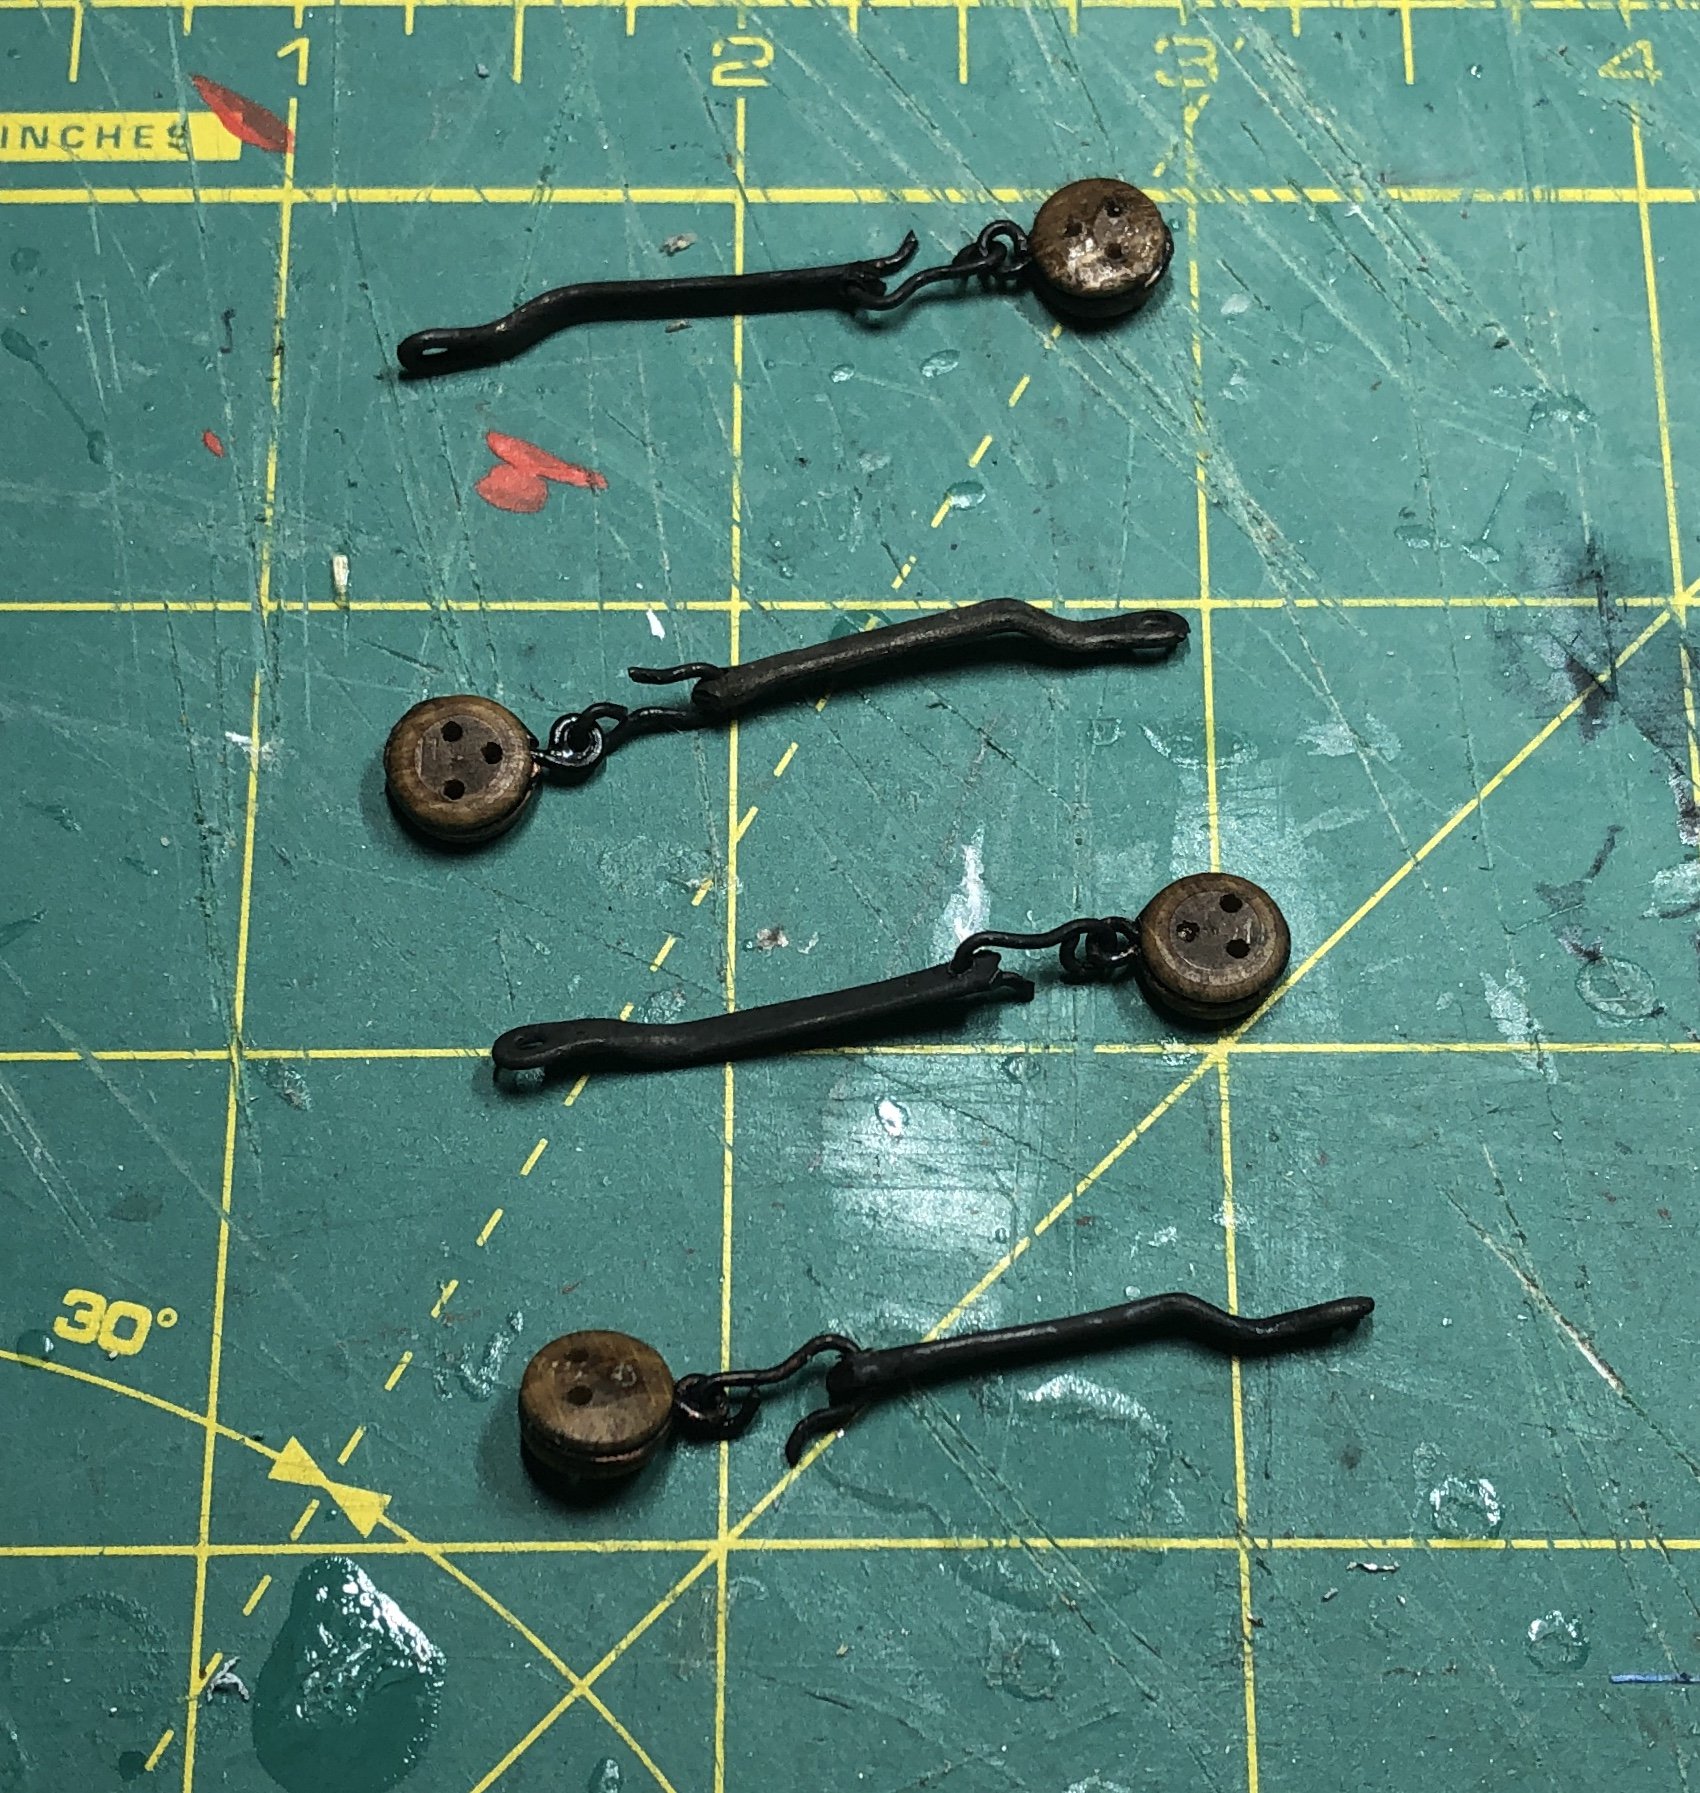
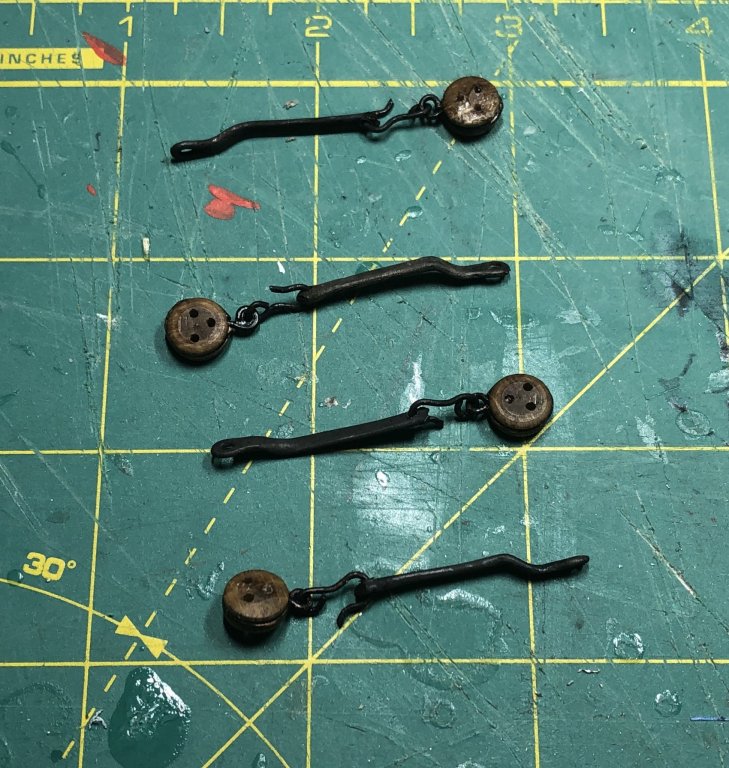
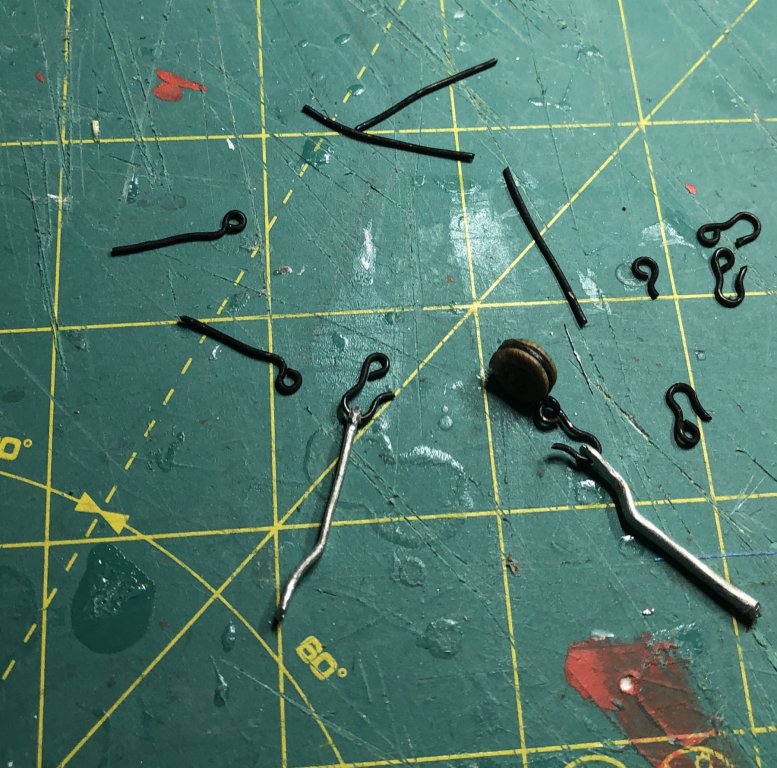
I have adopted Arthur’s approach to chainplates and deadeye strops as we are both on an approach of modifying our boats using Chuck’s design. I tried forming strops from small brass rods but found it difficult to create the small curves. I experimented with various wire and decided copper would work well. I settled on 20 gauge thermostat wire. I used small round nosed jewelry pliers to form the bends and curves. In order to create a black color, I used Brass Black Metal Finish on the copper parts. Holes were drilled in the deadeyes to receive the eyebolts. The bands and hooks were glued with thin CA. I would refer readers to Arthur’s fine detailed description, but basically there are four parts: modified kit chainplates, strop rings or bands, strop eyebolts and strop-chainplate hooks. In the first photograph below, the parts are shown with the strop bands appearing as unbent straight wires. Finished assemblies -
- 168 replies
-
- 4
-
-
- 18th Century Armed Longboat
- Model Shipways
- (and 1 more)
-
I remember the mention about the cap rail width problem, but it would require either removing and replacing or shaving off some from the outside. The inside is somewhat fixed because of the frames so only the outside can be reduced. I am not sure I want to tackle this as if I mess up, I would probably scrap the build and start over with Chuck’s or something else. At this point I think I will probably have fun and finish it. There was also mention that the boat boat was too narrow for a gunboat.
-
Arthur, great look for the strops and hooks. Right now I am not doing too well getting something looking even a fraction as good as yours. The hole idea may be the key. I have been trying to make a one piece strop-hook combination. Trying to bend a hook on it is a real problem. Thanks for sharing your post on this.
-
Arthur, I have not looked at the bowsprit Traveler at all other to make sure it fit and slid. Can the rigging be made to reflect reality? With regards to your rigging, what size are you considering? Chuck on his rigging plan uses 0.45 mm and 0.63 mm. I have some of both and some other sizes leftover from my Cutty Sark build. Also, are you using wire or brass for your strops? I tried using 1/32” brass rod but it is way too hard to shape and also I think it looks too large. I think 20 gauge wire might be the ticket.
-
I think Chuck is happy when boats are improved in any way. I have slowed way down as I ponder what I am going to do next.
-
Working on rigging but undecided as what to do with the chainplates and strops. I am looking at various options which also includes those offered in the kit.
-
Arthur, I looked at the Medway Longboat and l like the color scheme and am tempted to go with it as well. I will think about it.
-
Arthur, it looks very good. I had the same problem when drilling the holes in the cap rails. I like the tape idea. I too will have to give the cap rails an extra coat of paint or two. I probably should have squared in the tholes but It never occurred to me to do it. Oh well 😔 a perfectionist I’m not. That is why my treenails are pencil marks not in very straight lines.
-
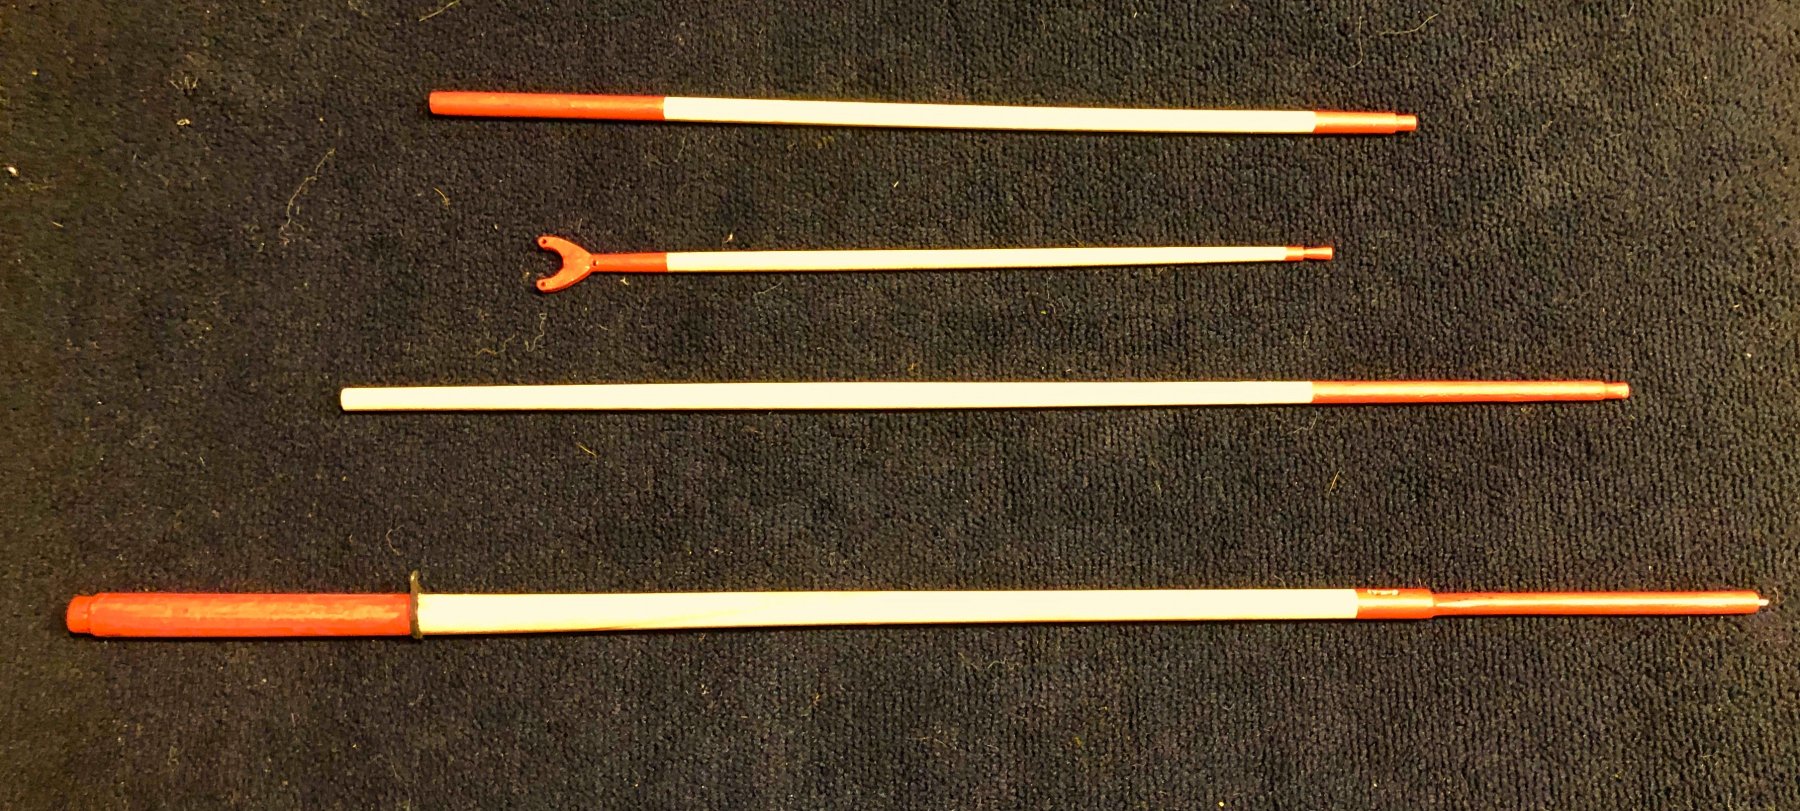
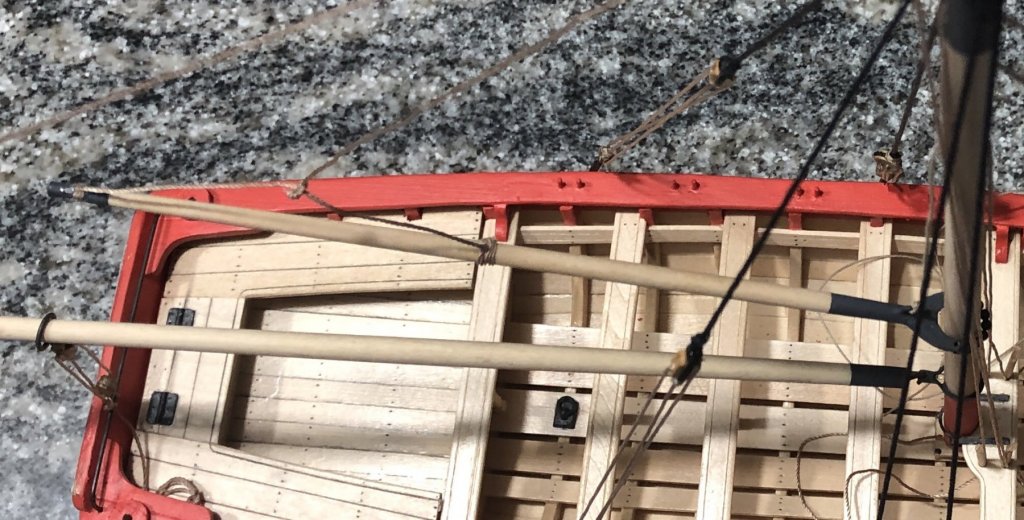
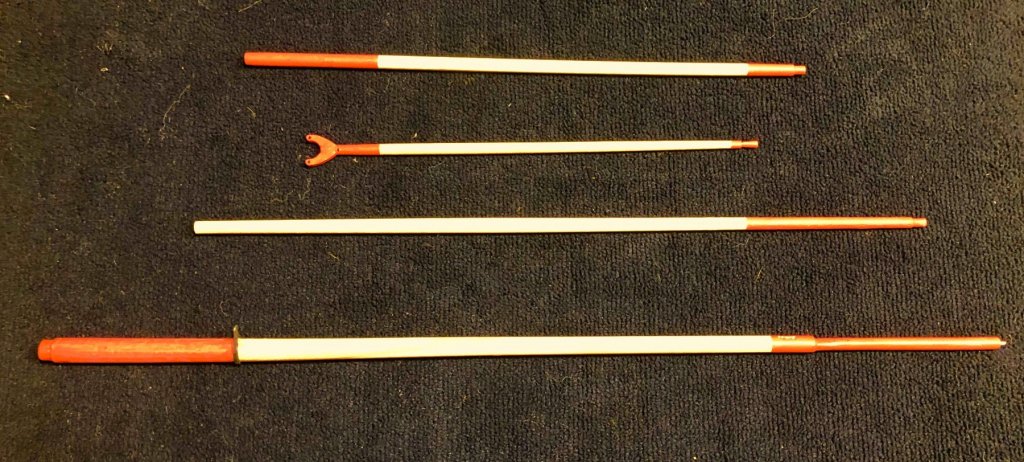
Finished shaping and painting the Mast, Boom, Gaff and Bowsprit. All of these were shaped using the technique described above. Also, all small parts were blackened using Jax Pewter Black. The Horse was blackened using Birchwood Casey Brass Black.
- 168 replies
-
- 5
-
-
- 18th Century Armed Longboat
- Model Shipways
- (and 1 more)
-
Hello Aaron, I just noticed you have not posted in a good while. I hope you continue to make progress on your boat. As a suggestion, I would contact Model-Expo again and request a new sheet which contains the keel and false keel. Paul
-
Welcome Curtis to the group building the 18th Century Armed Longboat. I hope your build goes well and if you have any questions, there are several of us in the process of building this boat. There have been a number of surprises found by the group members which you might want to read about in member logs. Paul
-
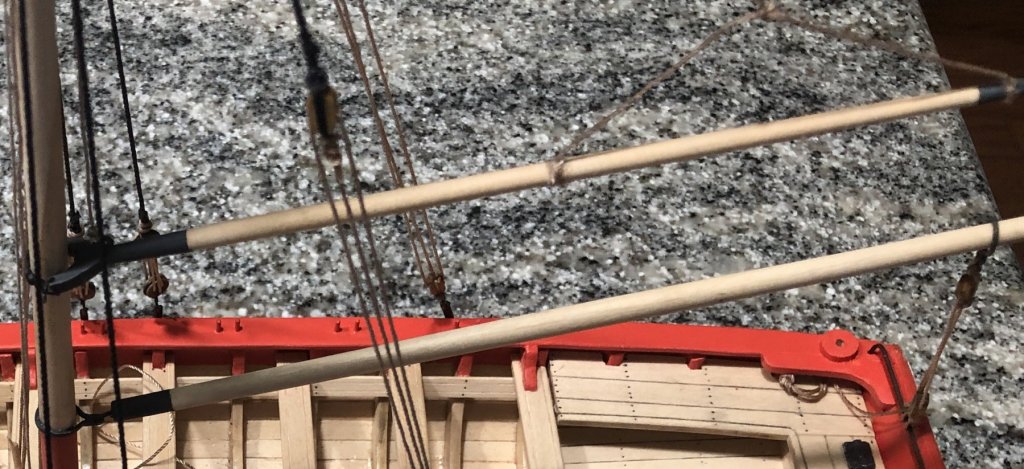
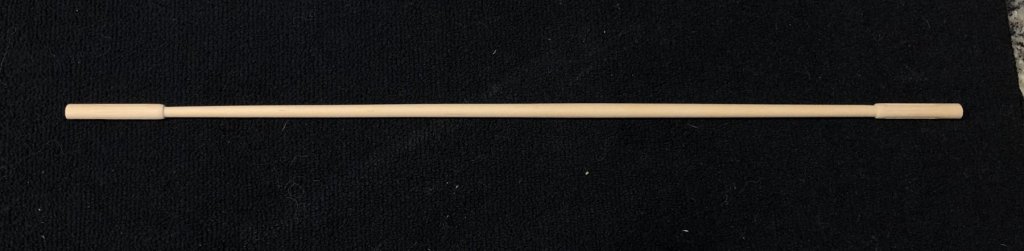
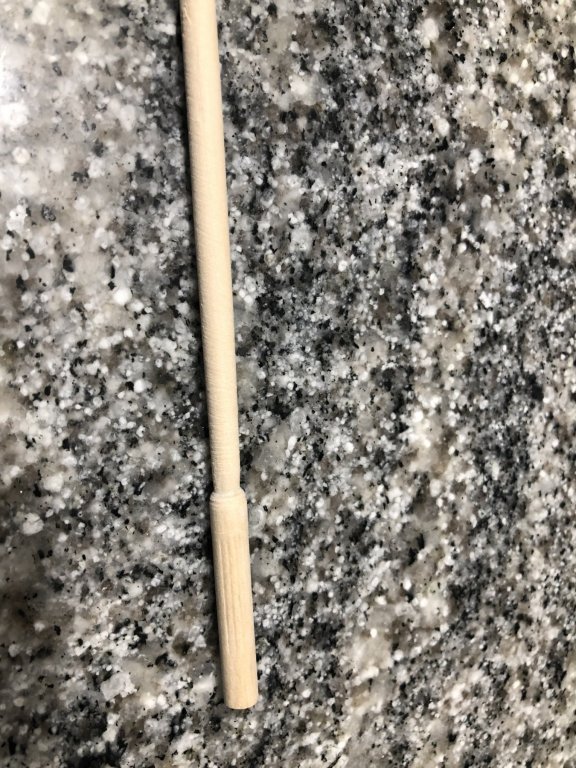
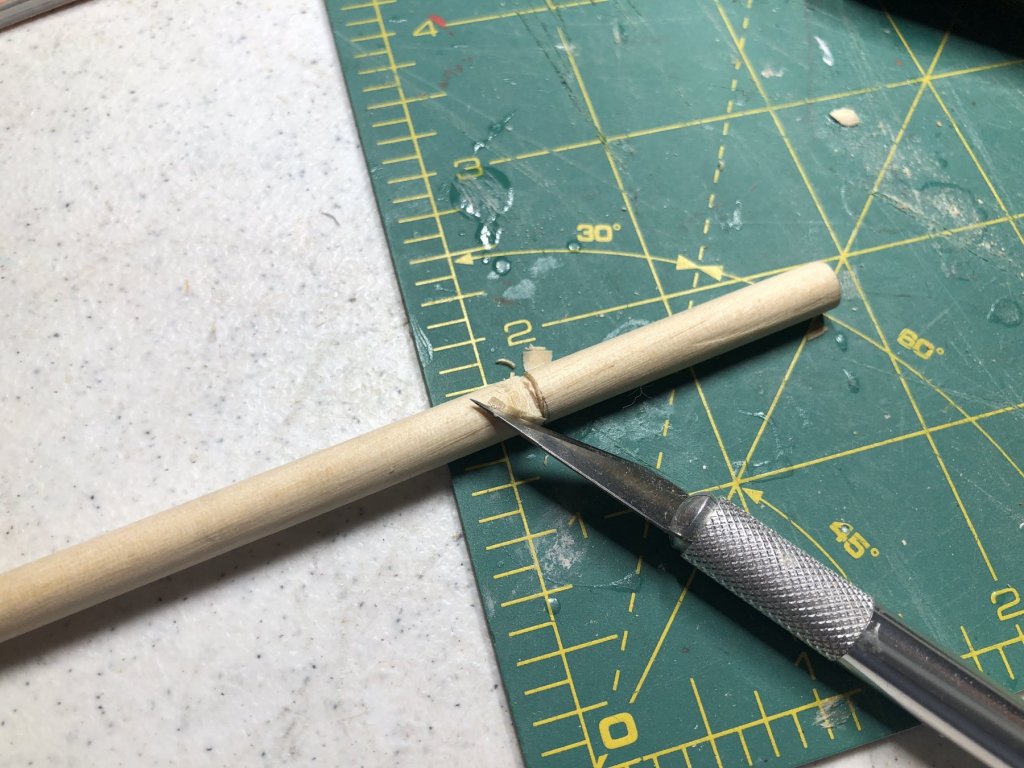
The Boom was made from 1/4" round birch dowel. A piece of dowel 15" long was cut and marks made at 1.5 inches from each end and 5.5 inches from one end. The end nearest the 5.5 inch end was turned down to 3/16" at the 1.5 inch mark and the the other end at the 1.5 inch mark was turned down to 1/8 inch. The former will be the hook end. The 1.5 inch pieces on both ends were used to clamp the dowel in an electric drill and were cut off after finishing. Both tapers were started by cutting around the dowel at the 1.5 inch marks and then making slicing cuts towards the cuts moving around the dowel as well as away from the 1.5 inch marks. In this way a rough taper was cut. The dowel was then put in the electric drill and brought to final shape with 50 grit sandpaper. The dowel was clamped in the drill with the chuck nearest the end being worked on so that chances of the dowel breaking were reduced. Finally, 250 grit sandpaper was used to finish the piece. Initial slicing cuts to form end of taper were made from the downward cut at the 1.5" mark backward towards the 5.5" mark - - Rough cut taper and coarse grit sanding done on one end - - Finished Boom before cutting off chuck holding ends - - The finished Boom (not shown) is 12 inches long and has a shoulder notch cut at the 1/8" end for the Topping Lift Rope. As a note in passing, I made the mast from basswood and the boom from birch and I think that the birch is a whole lot easier to work with.
- 168 replies
-
- 4
-
-
- 18th Century Armed Longboat
- Model Shipways
- (and 1 more)