Dr PS - Paul Schulze
-
Posts
304 -
Joined
-
Last visited
Content Type
Profiles
Forums
Gallery
Events
Everything posted by Dr PS - Paul Schulze
-
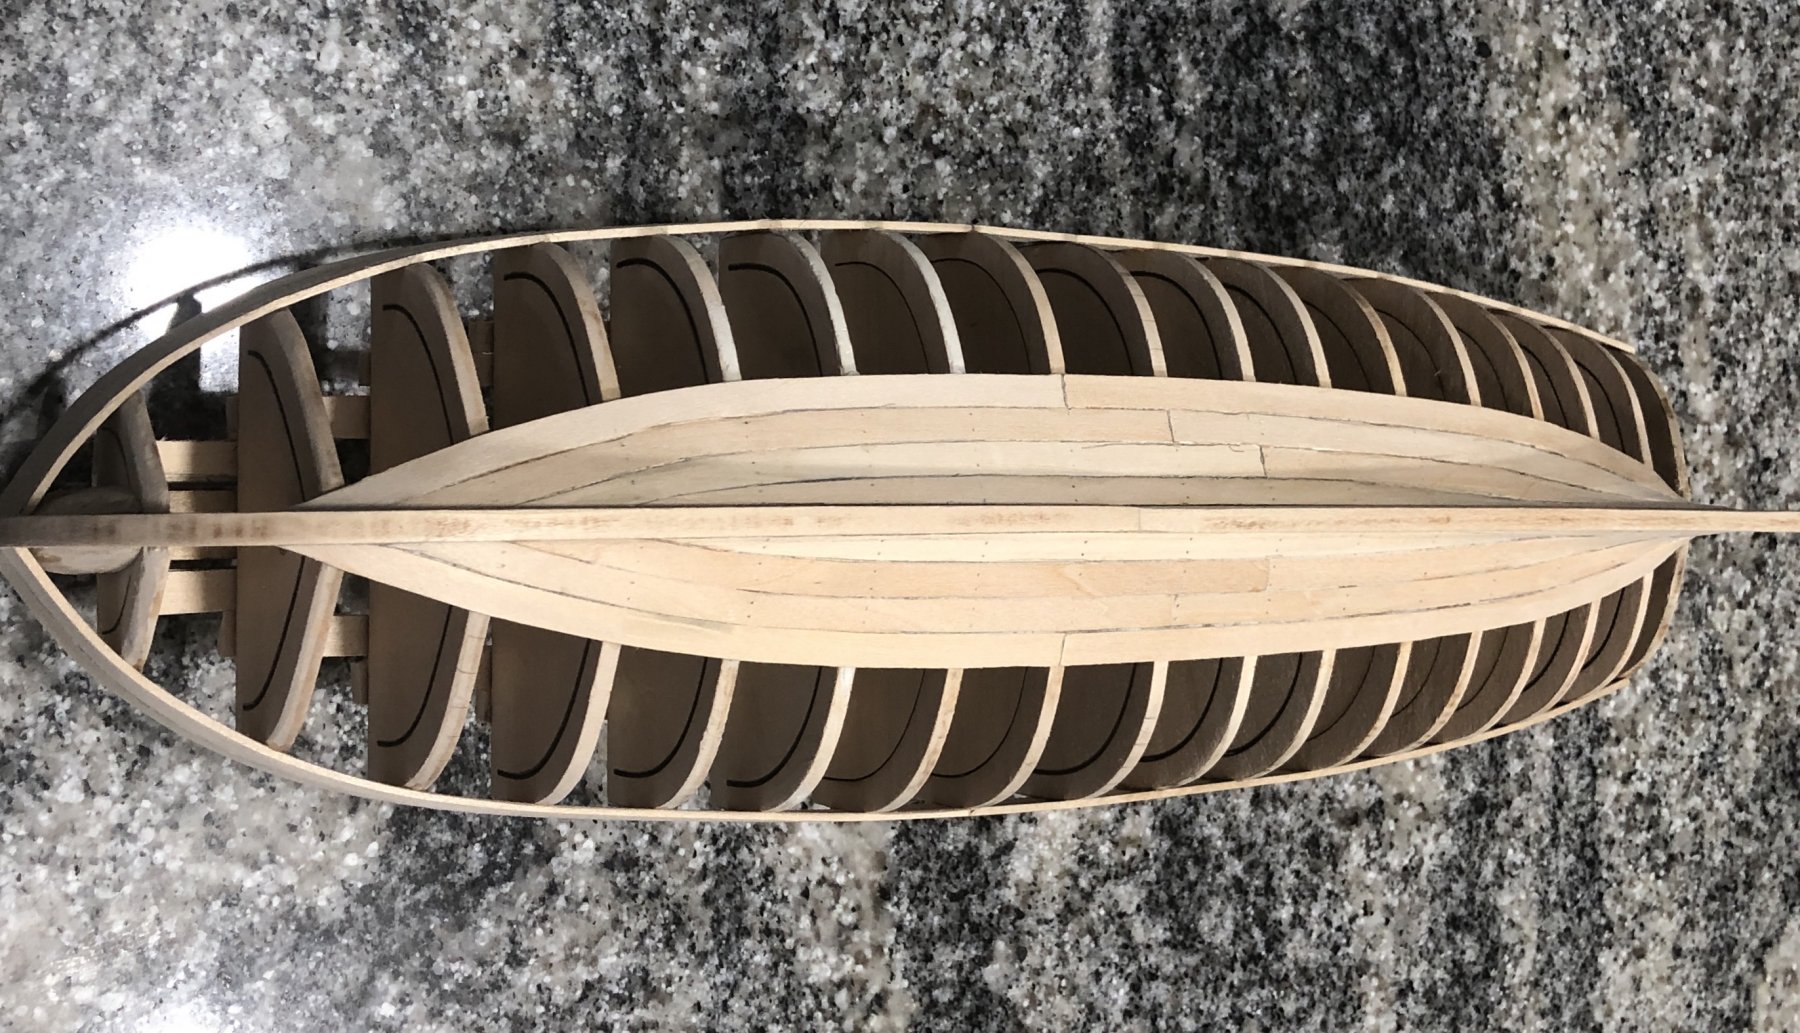
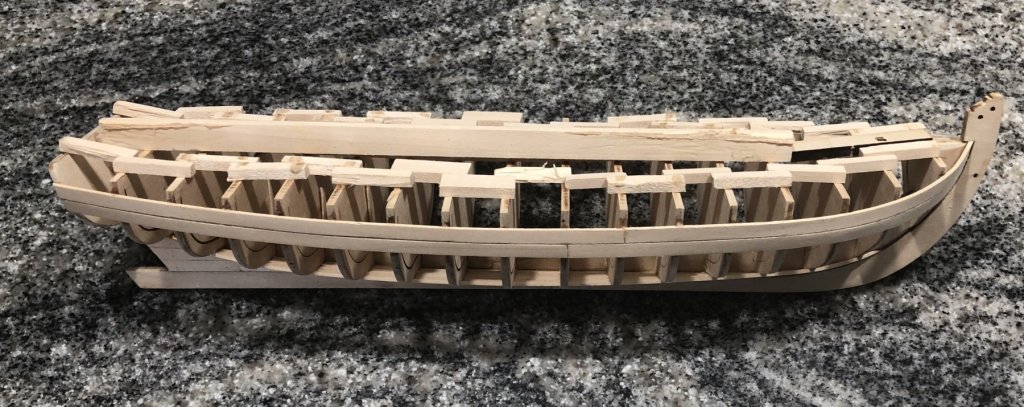
 I cut the above bulkhead apart and aligned the frames at the sheer end as well as the hull curve. The result is about 1mm difference at the keel end.Not much but it is amazing how the eye can pick up this slight difference on the assembled hull. I conclude that it should not stop any boat building. I press on!
- 168 replies
-
- 4
-

-
- 18th Century Armed Longboat
- Model Shipways
- (and 1 more)
-
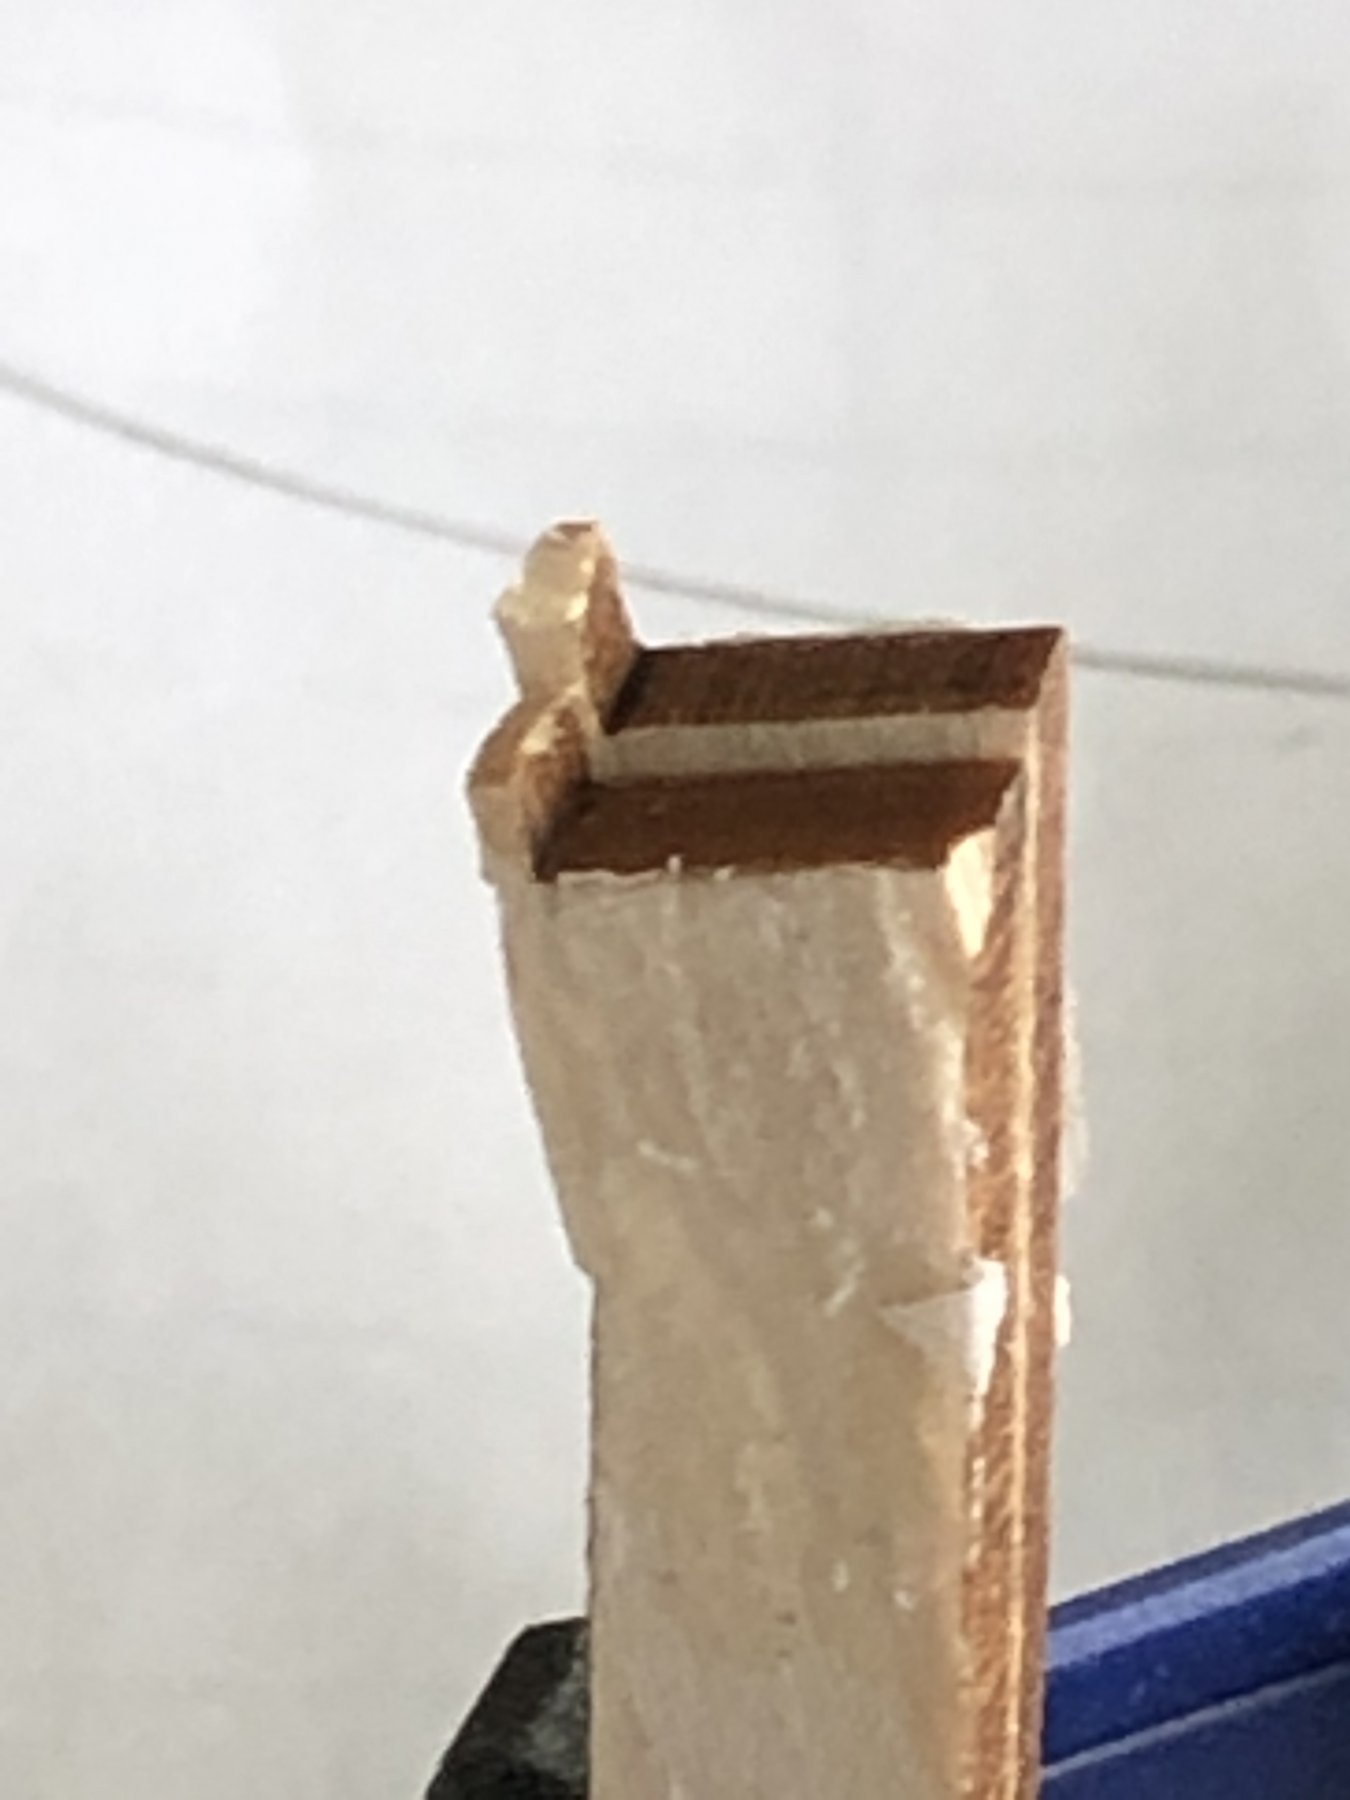
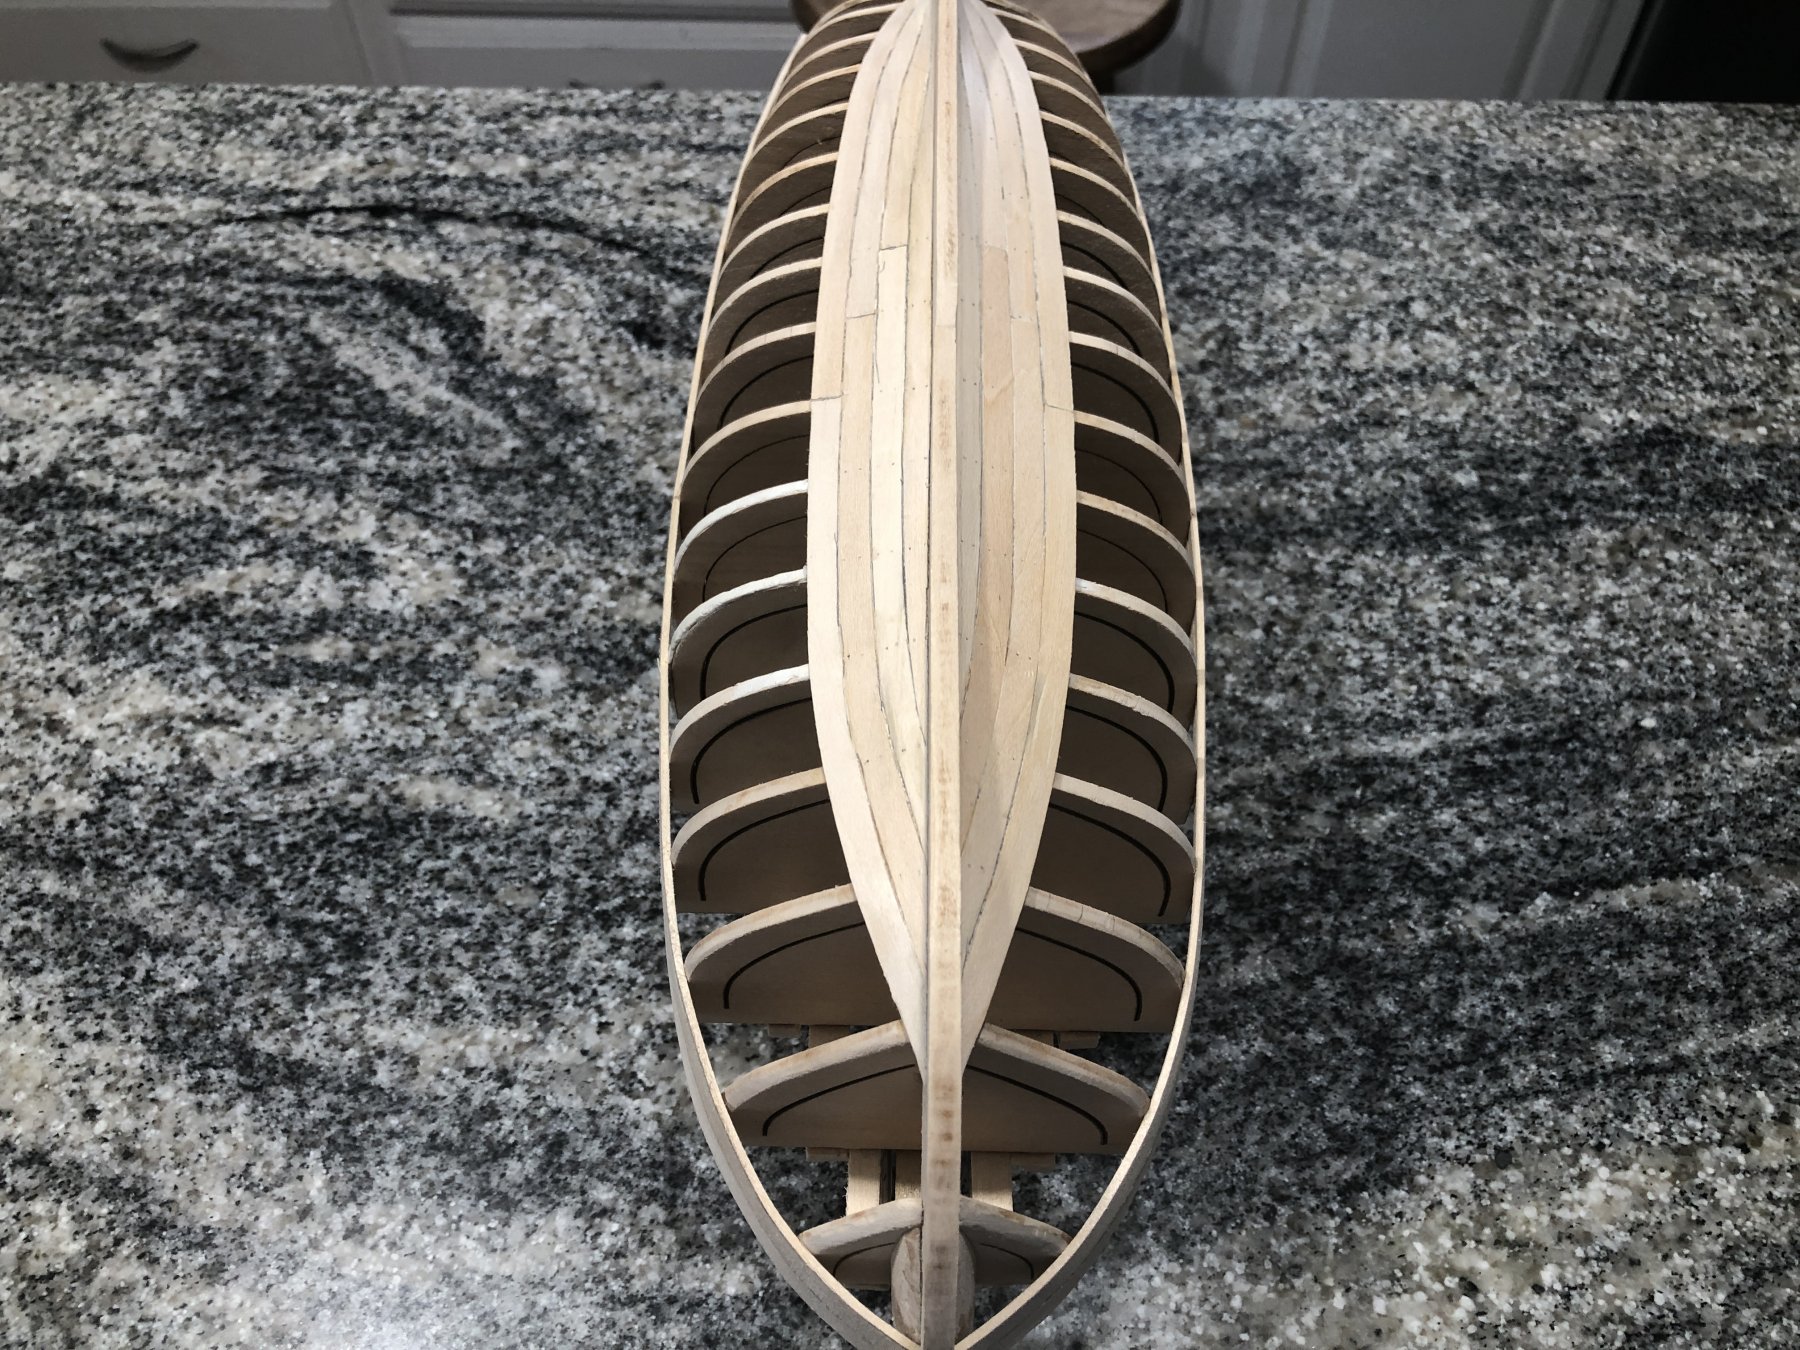
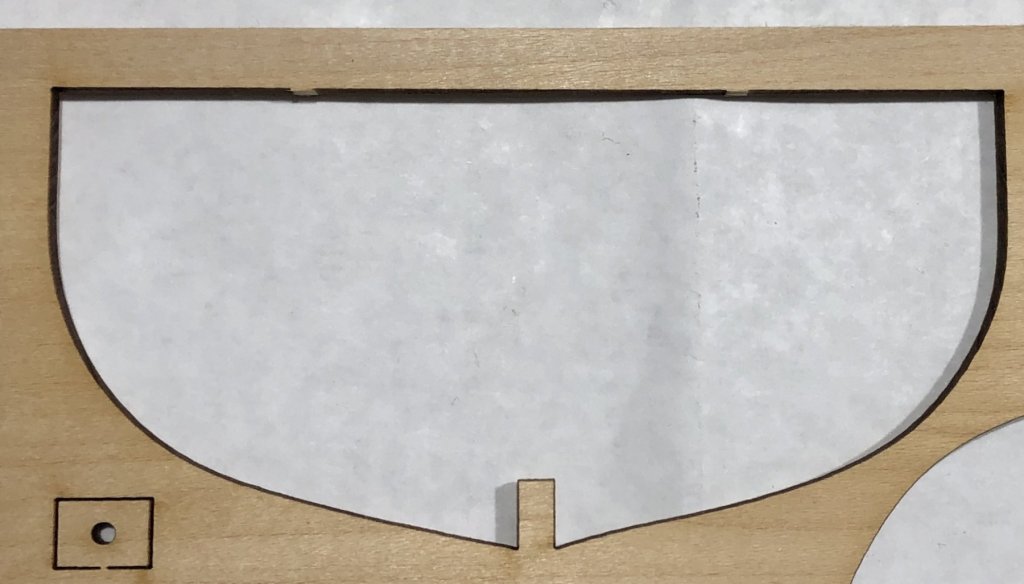
Thanks all for the suggestion. I came up with a better solution which most builders probably cannot do. I had an extra sheet with #1 bulkhead on it which I cut out and flipped over. You can see from the picture below that the starboard side is steeper than the port side. It is not much but it is noticeable. I think when completely built it may not be too bad. Reshaping the bulkheads could have been done but it would have resulted in one side of the frame being thinner than the other. This should be corrected in laser cutting control if others are experiencing this. I find it hard to believe that I have two sheets with the same skews. I will continue on with this build.
- 168 replies
-
- 3
-
-
- 18th Century Armed Longboat
- Model Shipways
- (and 1 more)
-
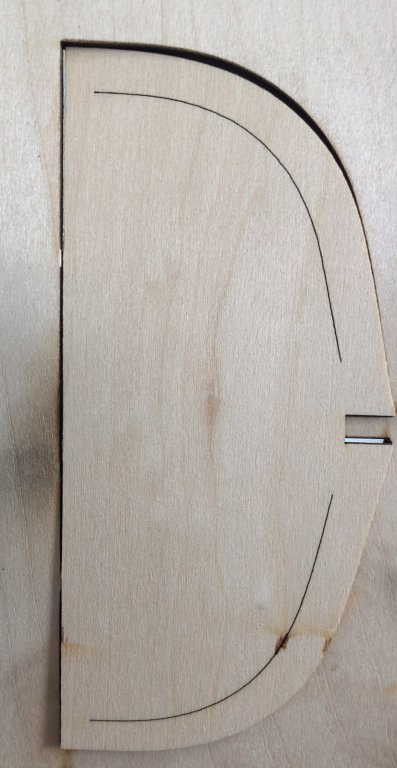
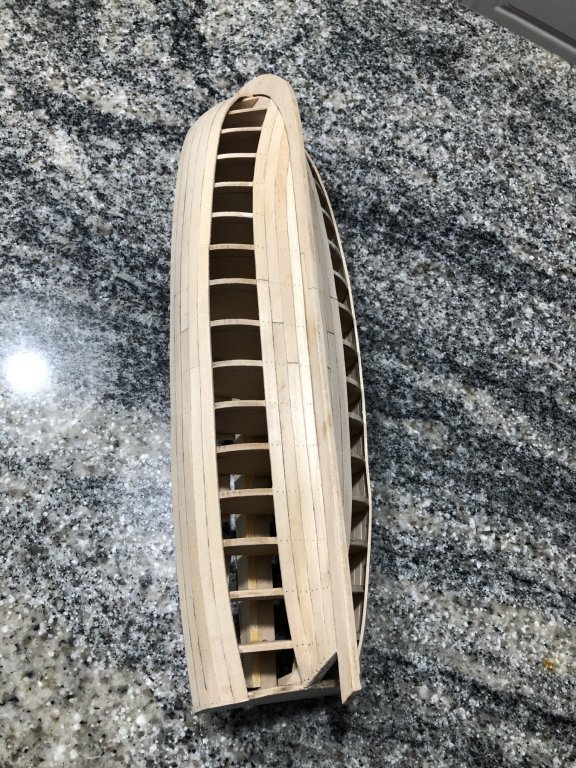
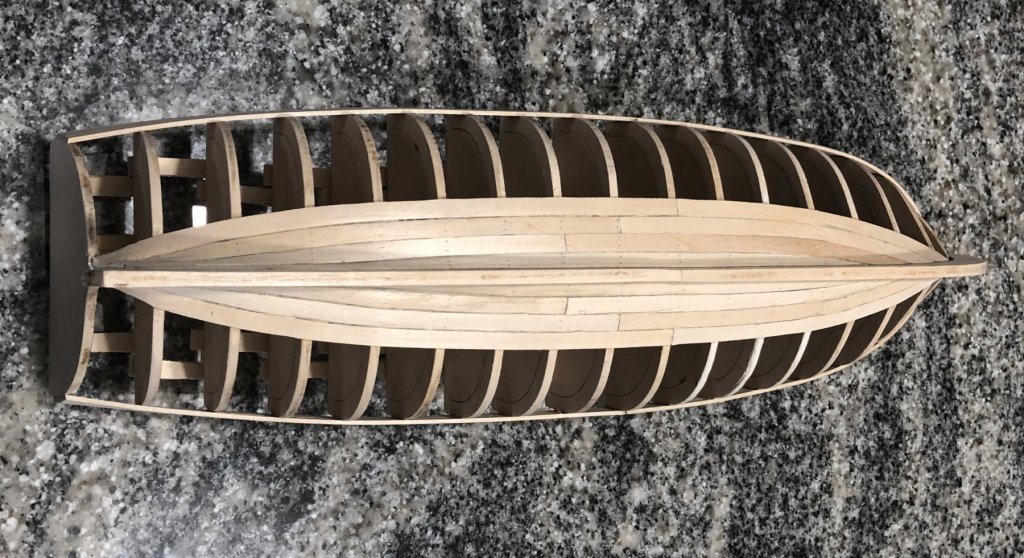
I did not notice something until now, but the curve of my bulkheads do not seem symmetrical resulting in the starboard side of the boat being steeper from keel to the shear than on the port side. It is slight but I see it on the boat. The photograph below shows just one of the laser cutout scraps. I saved all the scrap sheets and everyone seems to show this non-symmetrical behavior. Sigh! 😔 Can anyone else see this or is it my imagination?
-
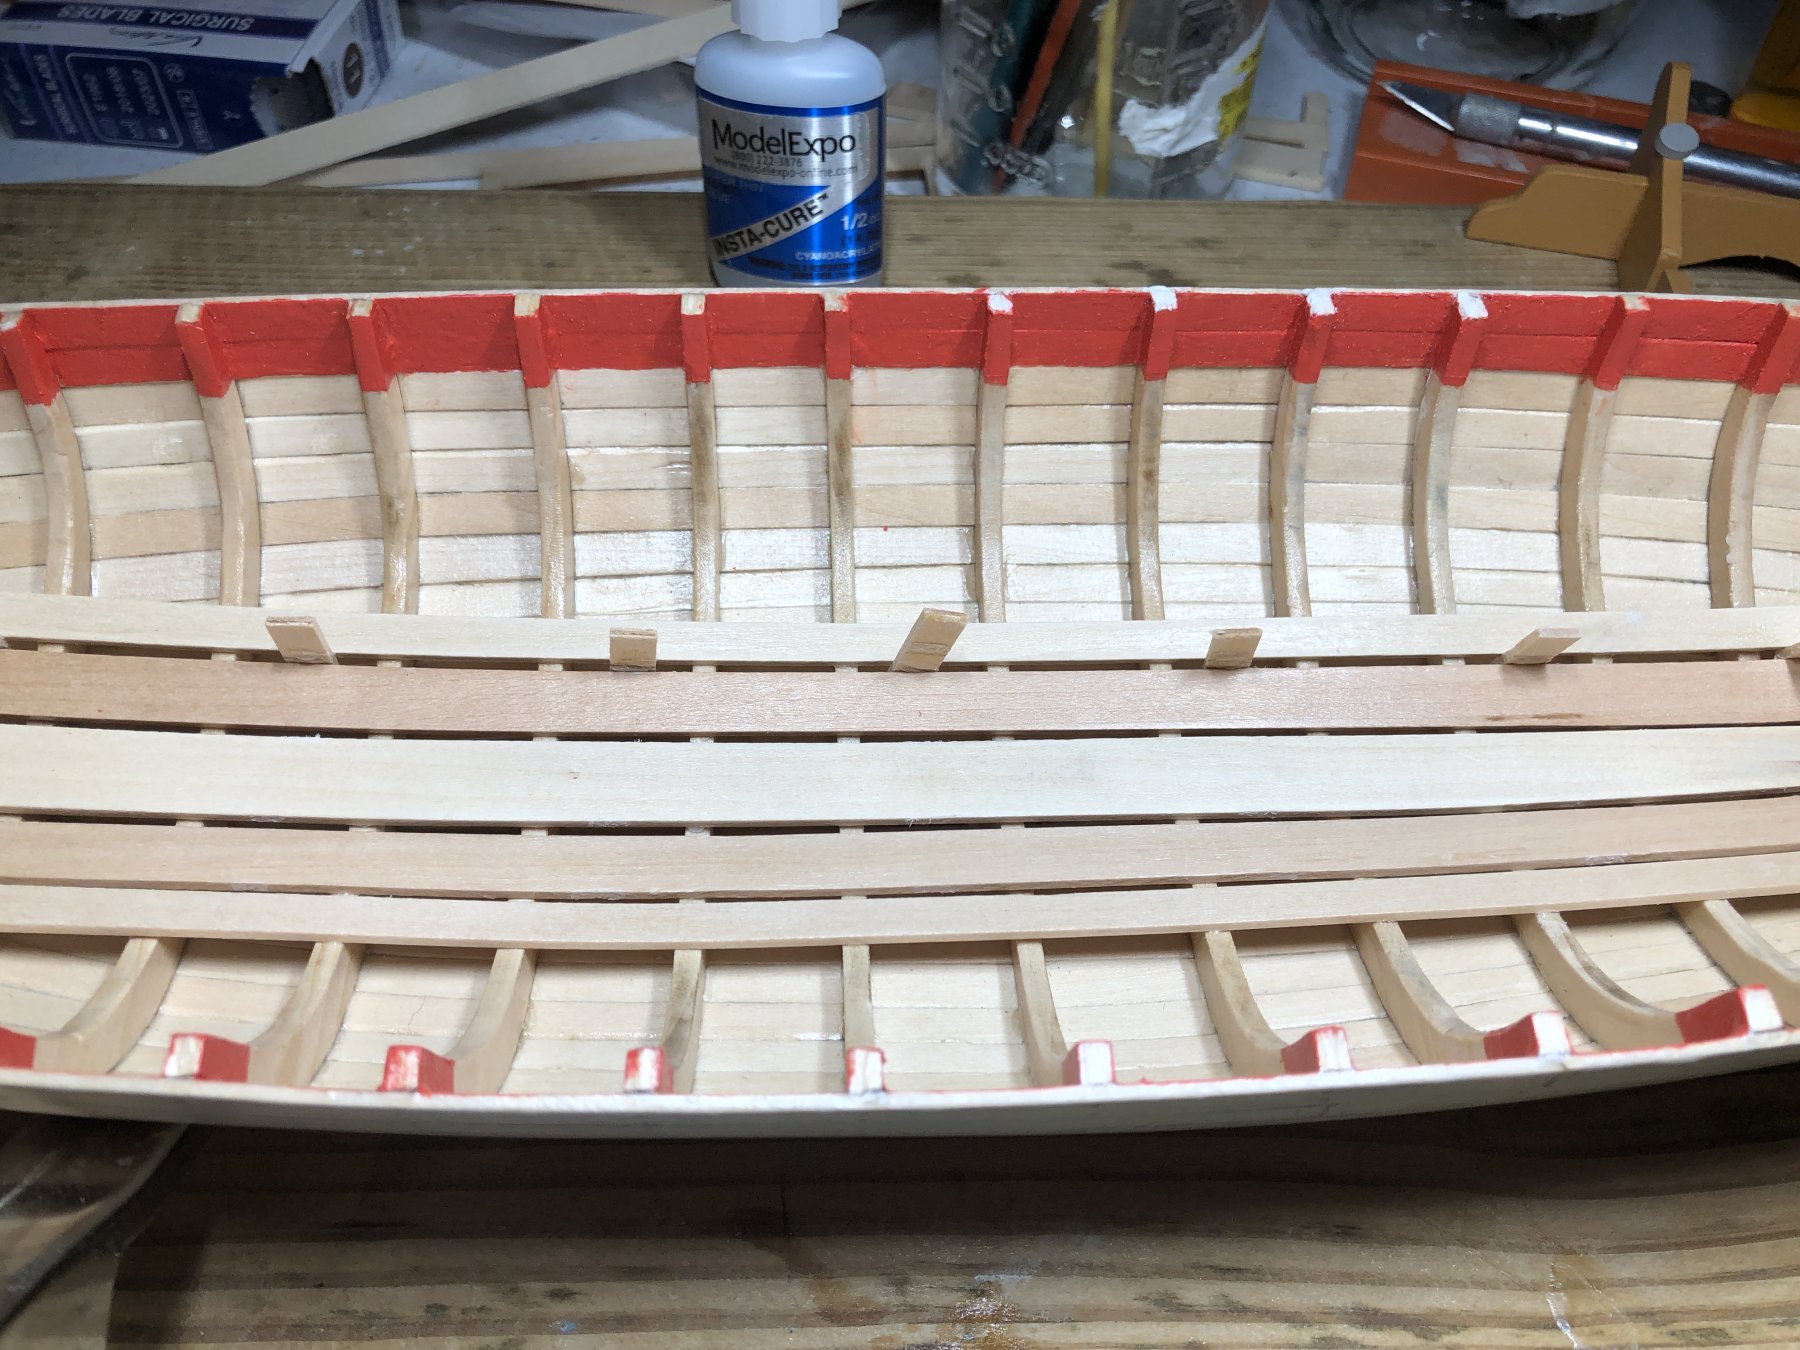
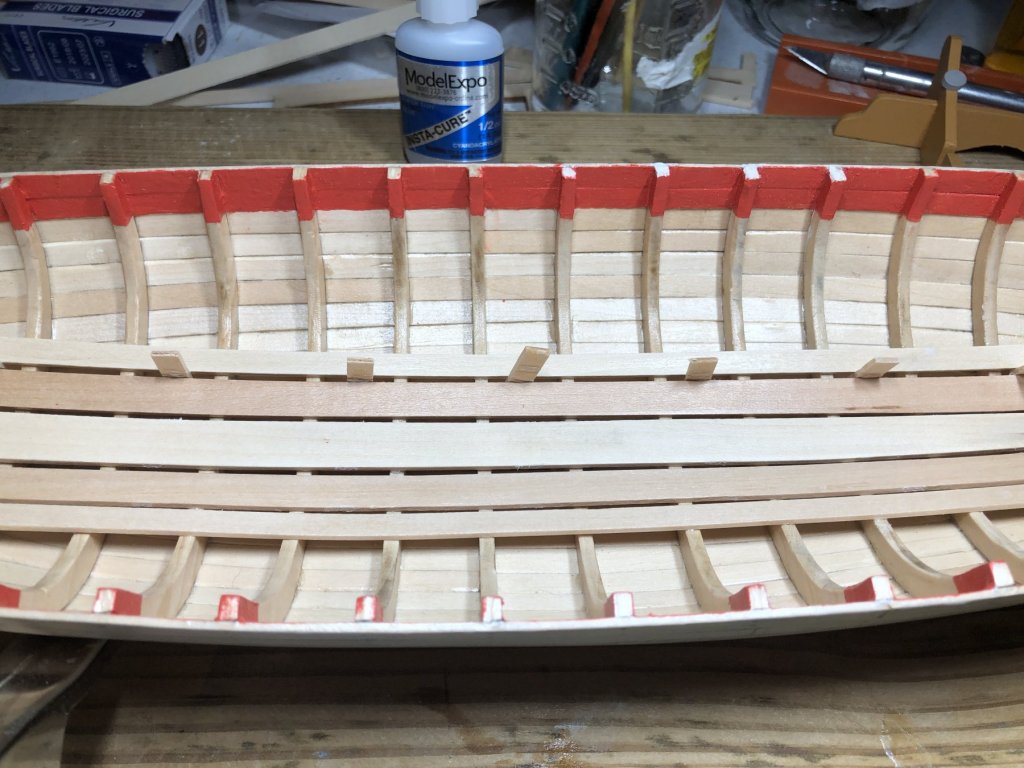
Used bit of CA to glue temporary 1/16” spacers in place on edge of previously glued floorboard. Easy back-and-forth motion breaks spacers loose after next floorboard is glued into place.
- 168 replies
-
- 3
-
-
- 18th Century Armed Longboat
- Model Shipways
- (and 1 more)
-
Arthur, Nicpro 120 PCS Utility Excel Blades #11, and, Stainless Steel Sterilized Scalpel Blades (100 PC.) Both can be found at Amazon. For the scalpel blades, I actually bought Viamed #11 Scalpel Blades (100 PC.) but for the life of me I cannot remember where. Any of the blades listed should be essentially the same. They come individually wrapped in easy open wrappers and fit #1 X-acto handles.
- 168 replies
-
- 1
-
-
- 18th Century Armed Longboat
- Model Shipways
- (and 1 more)
-
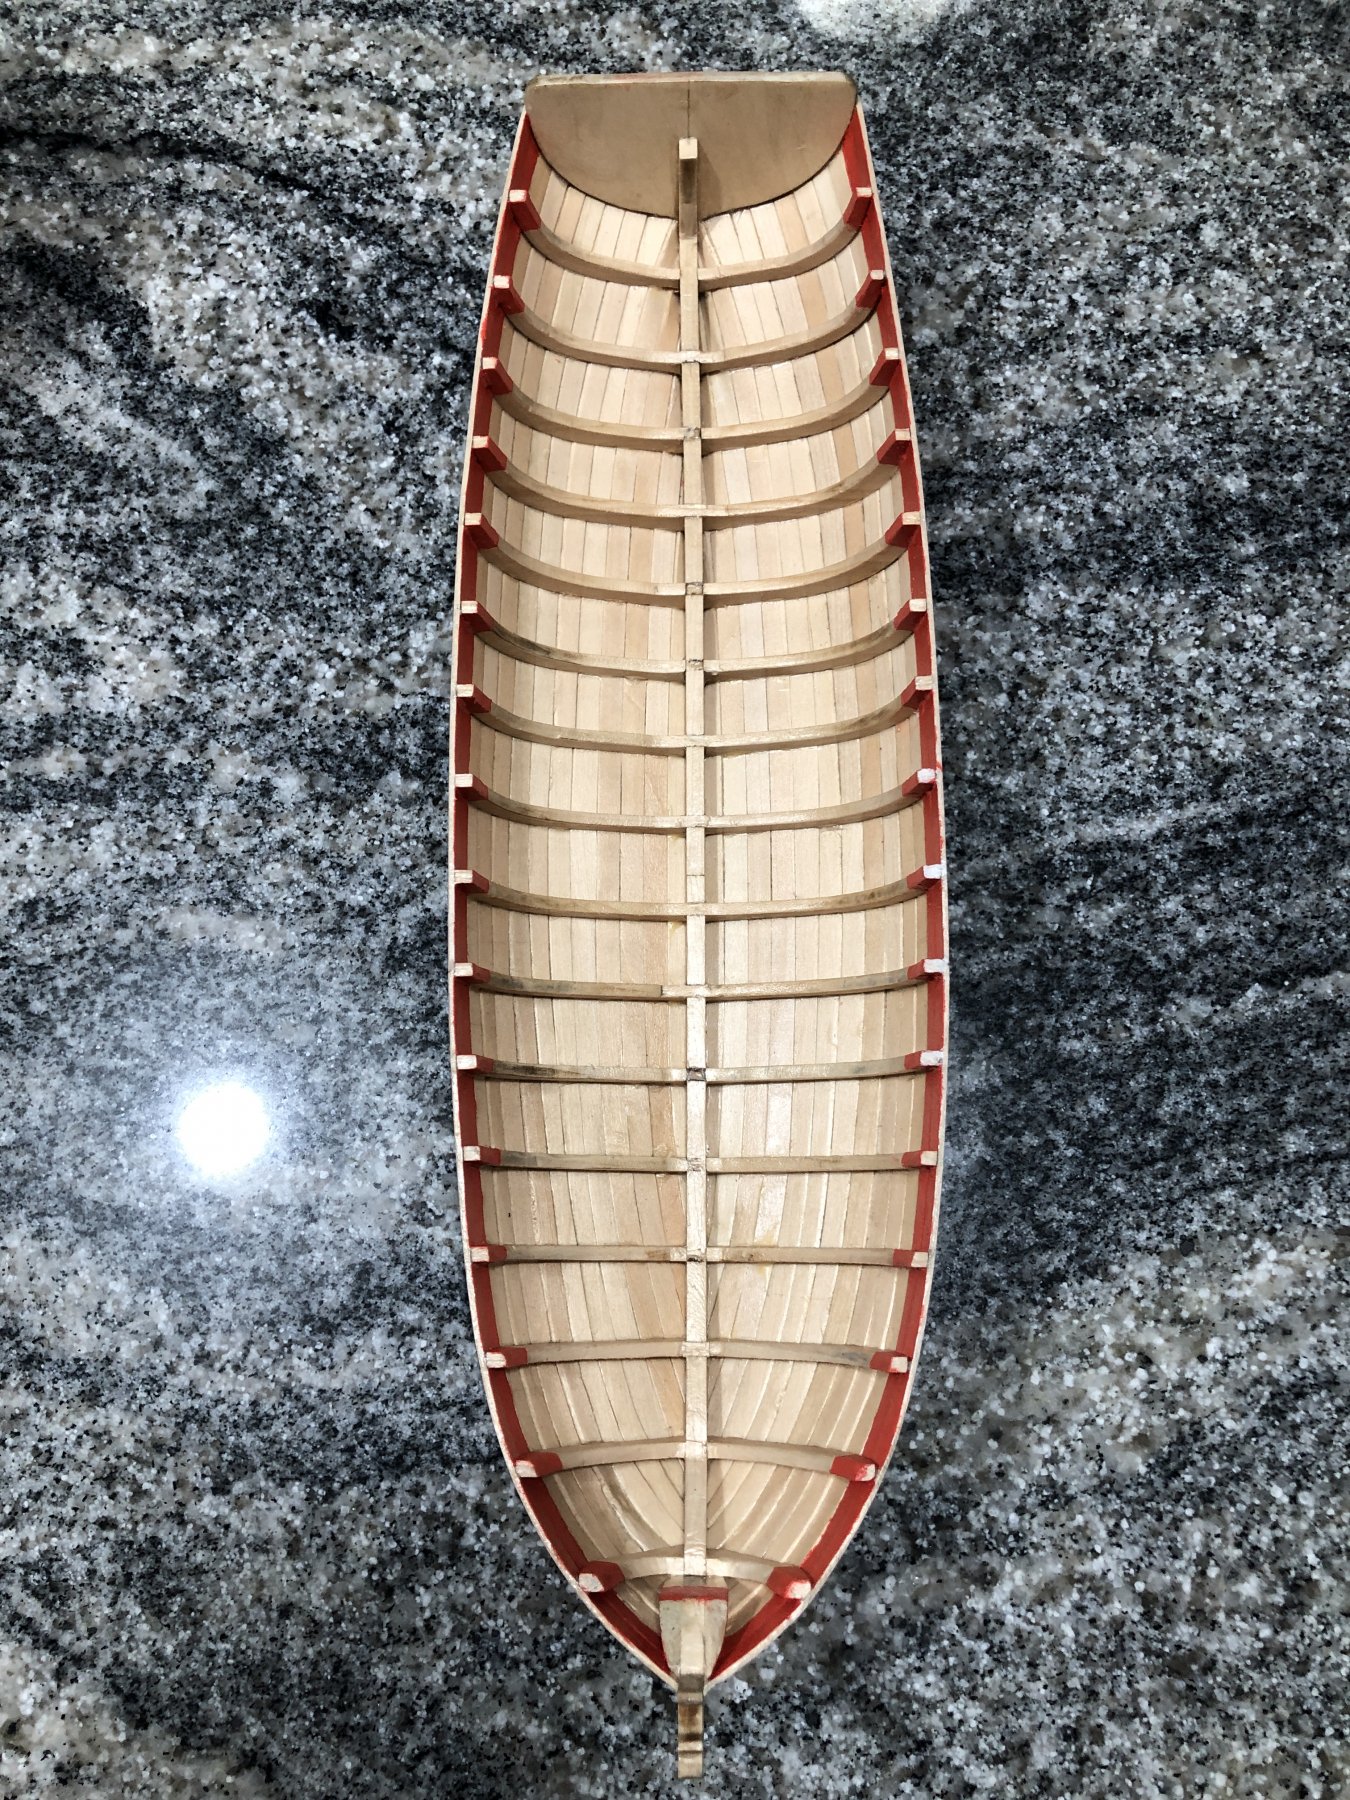
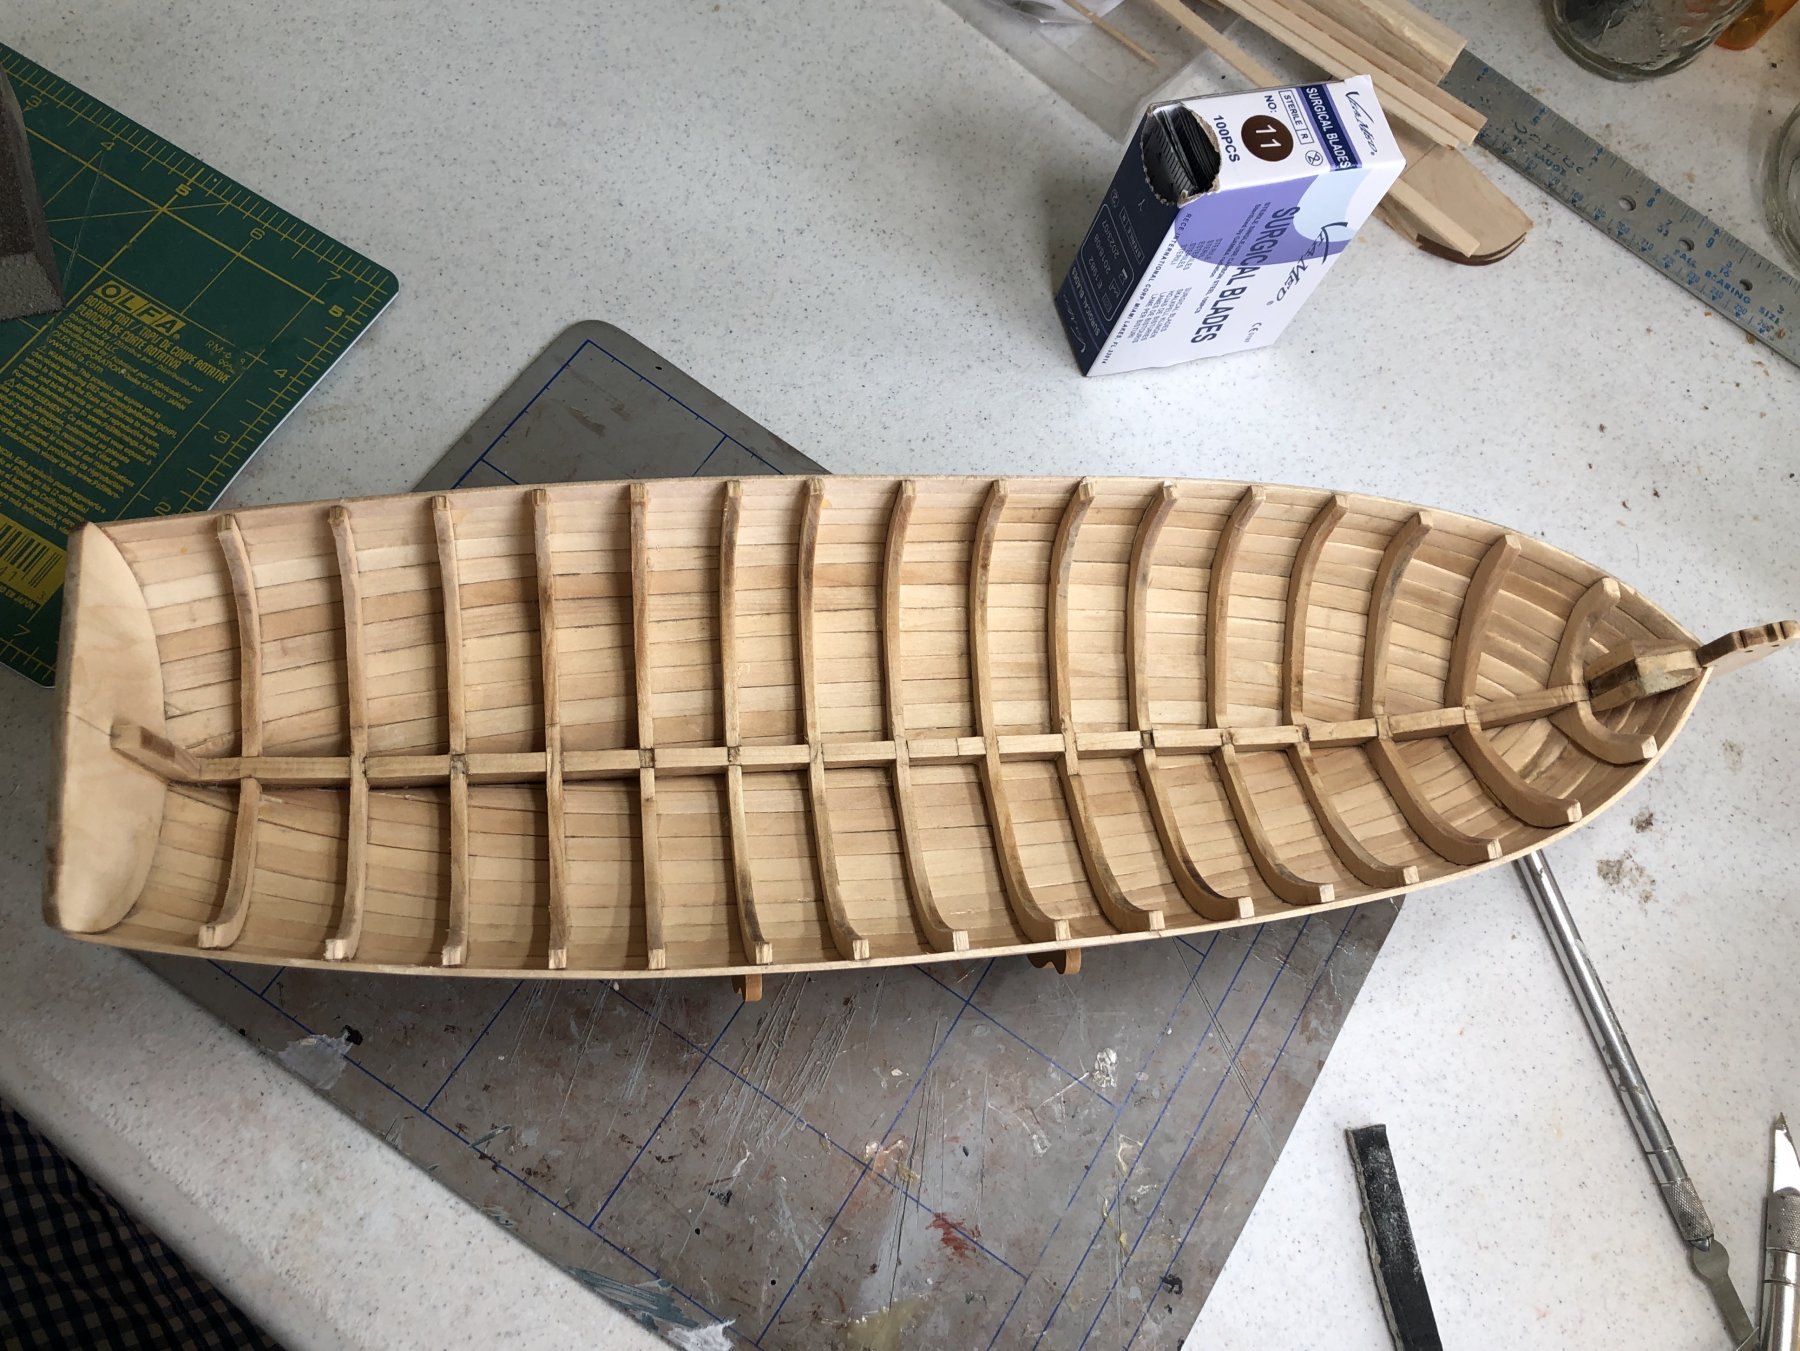
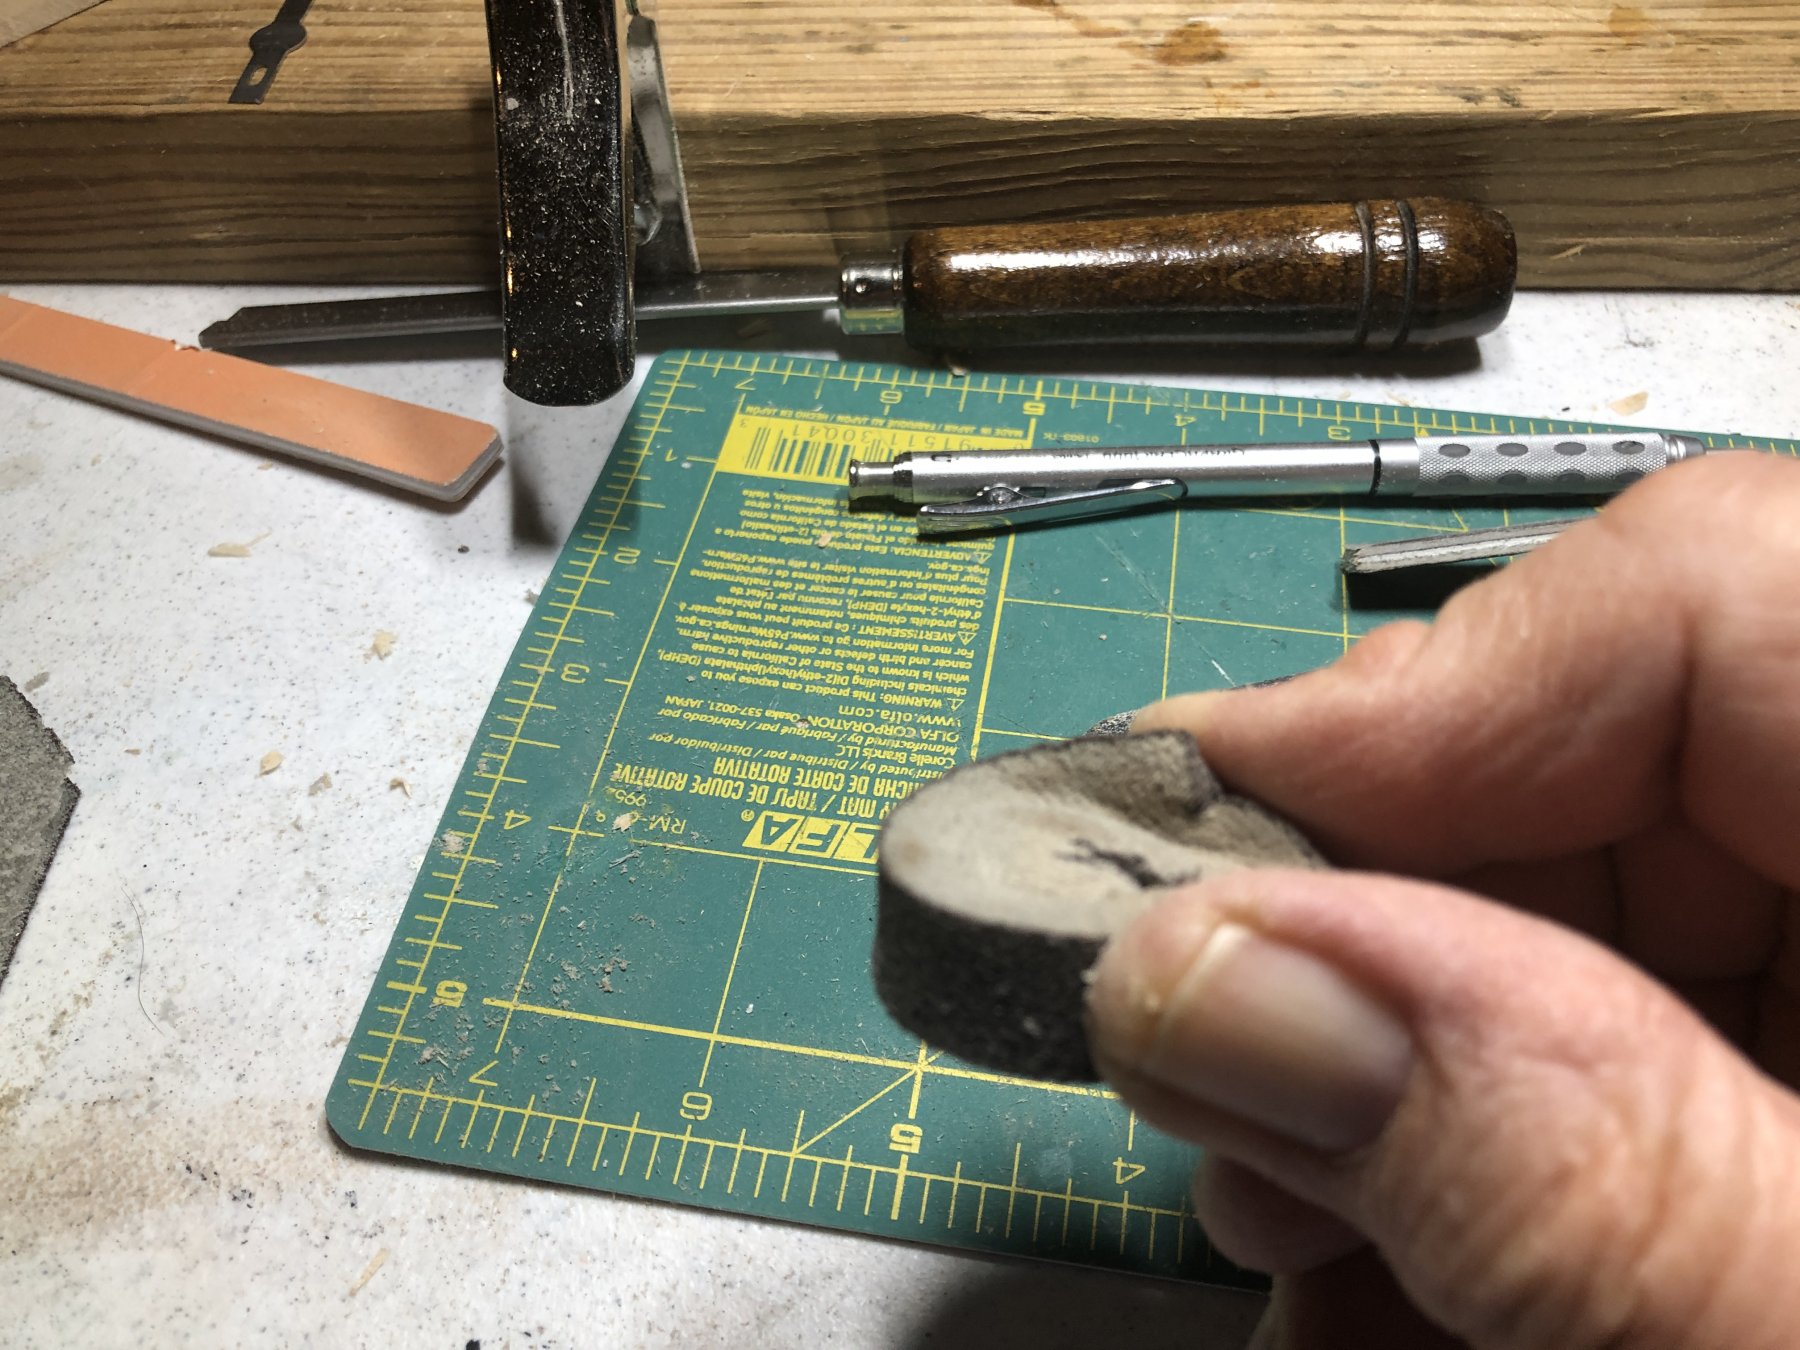
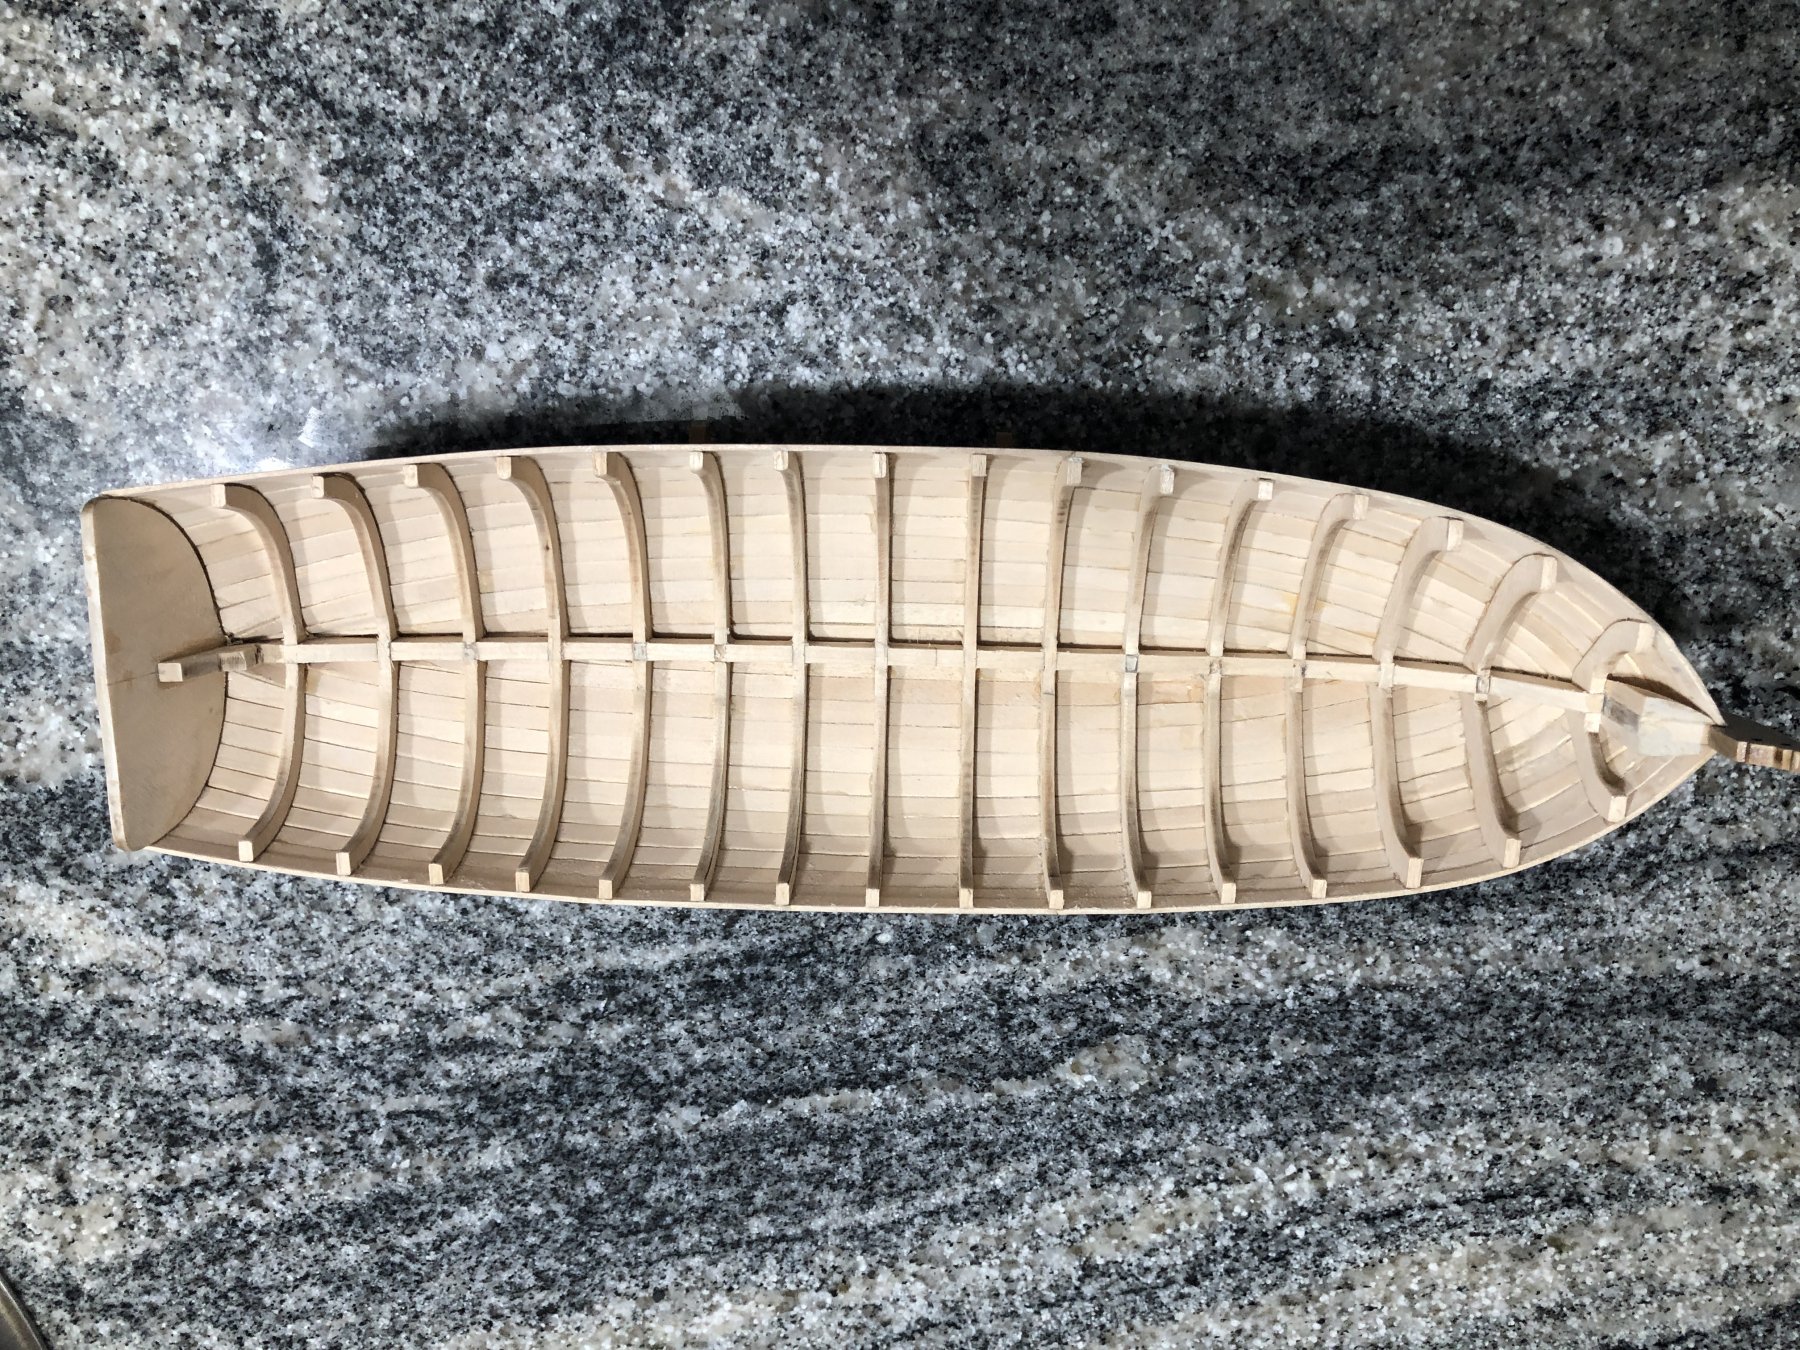
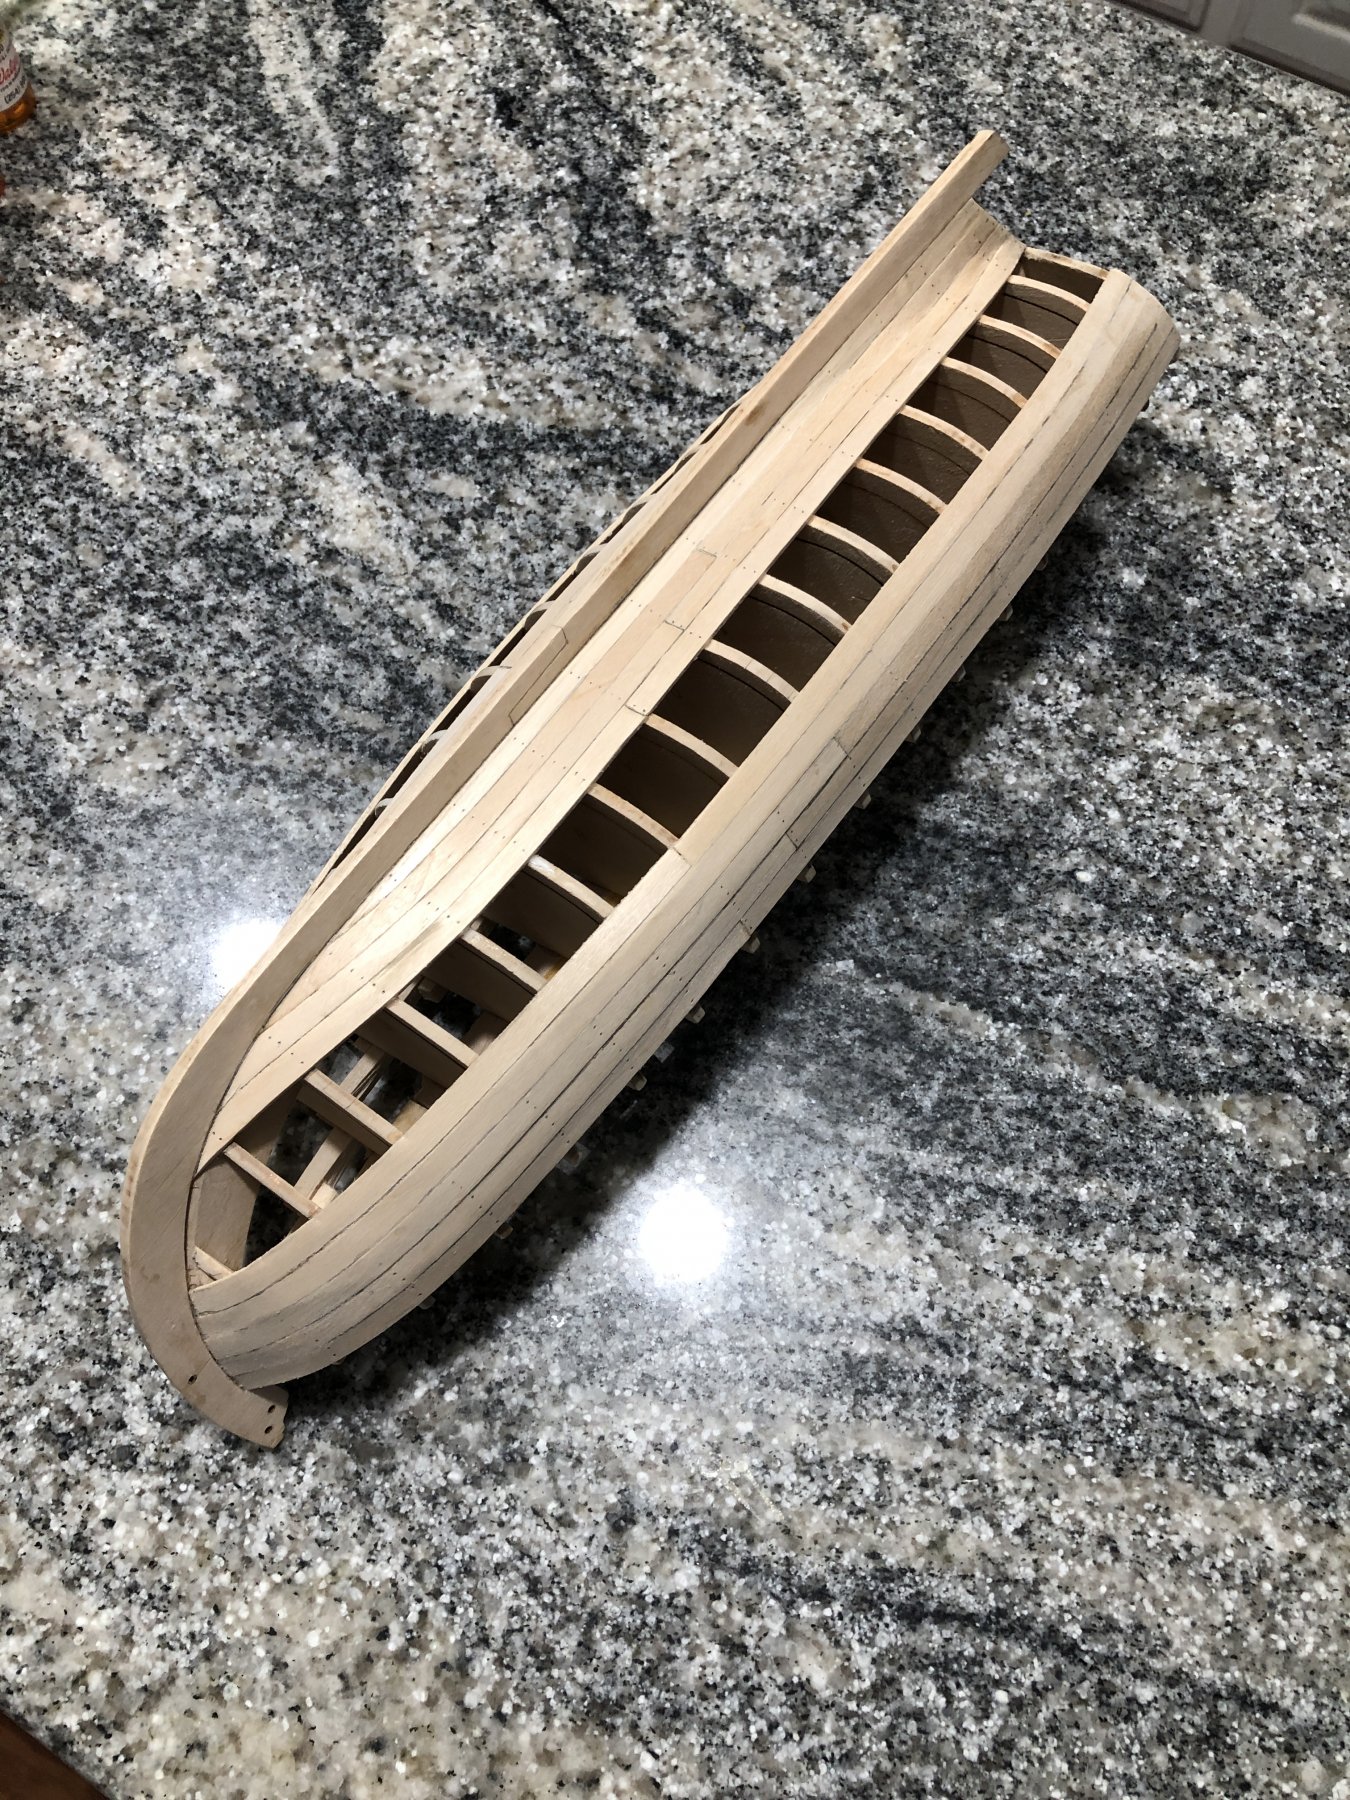
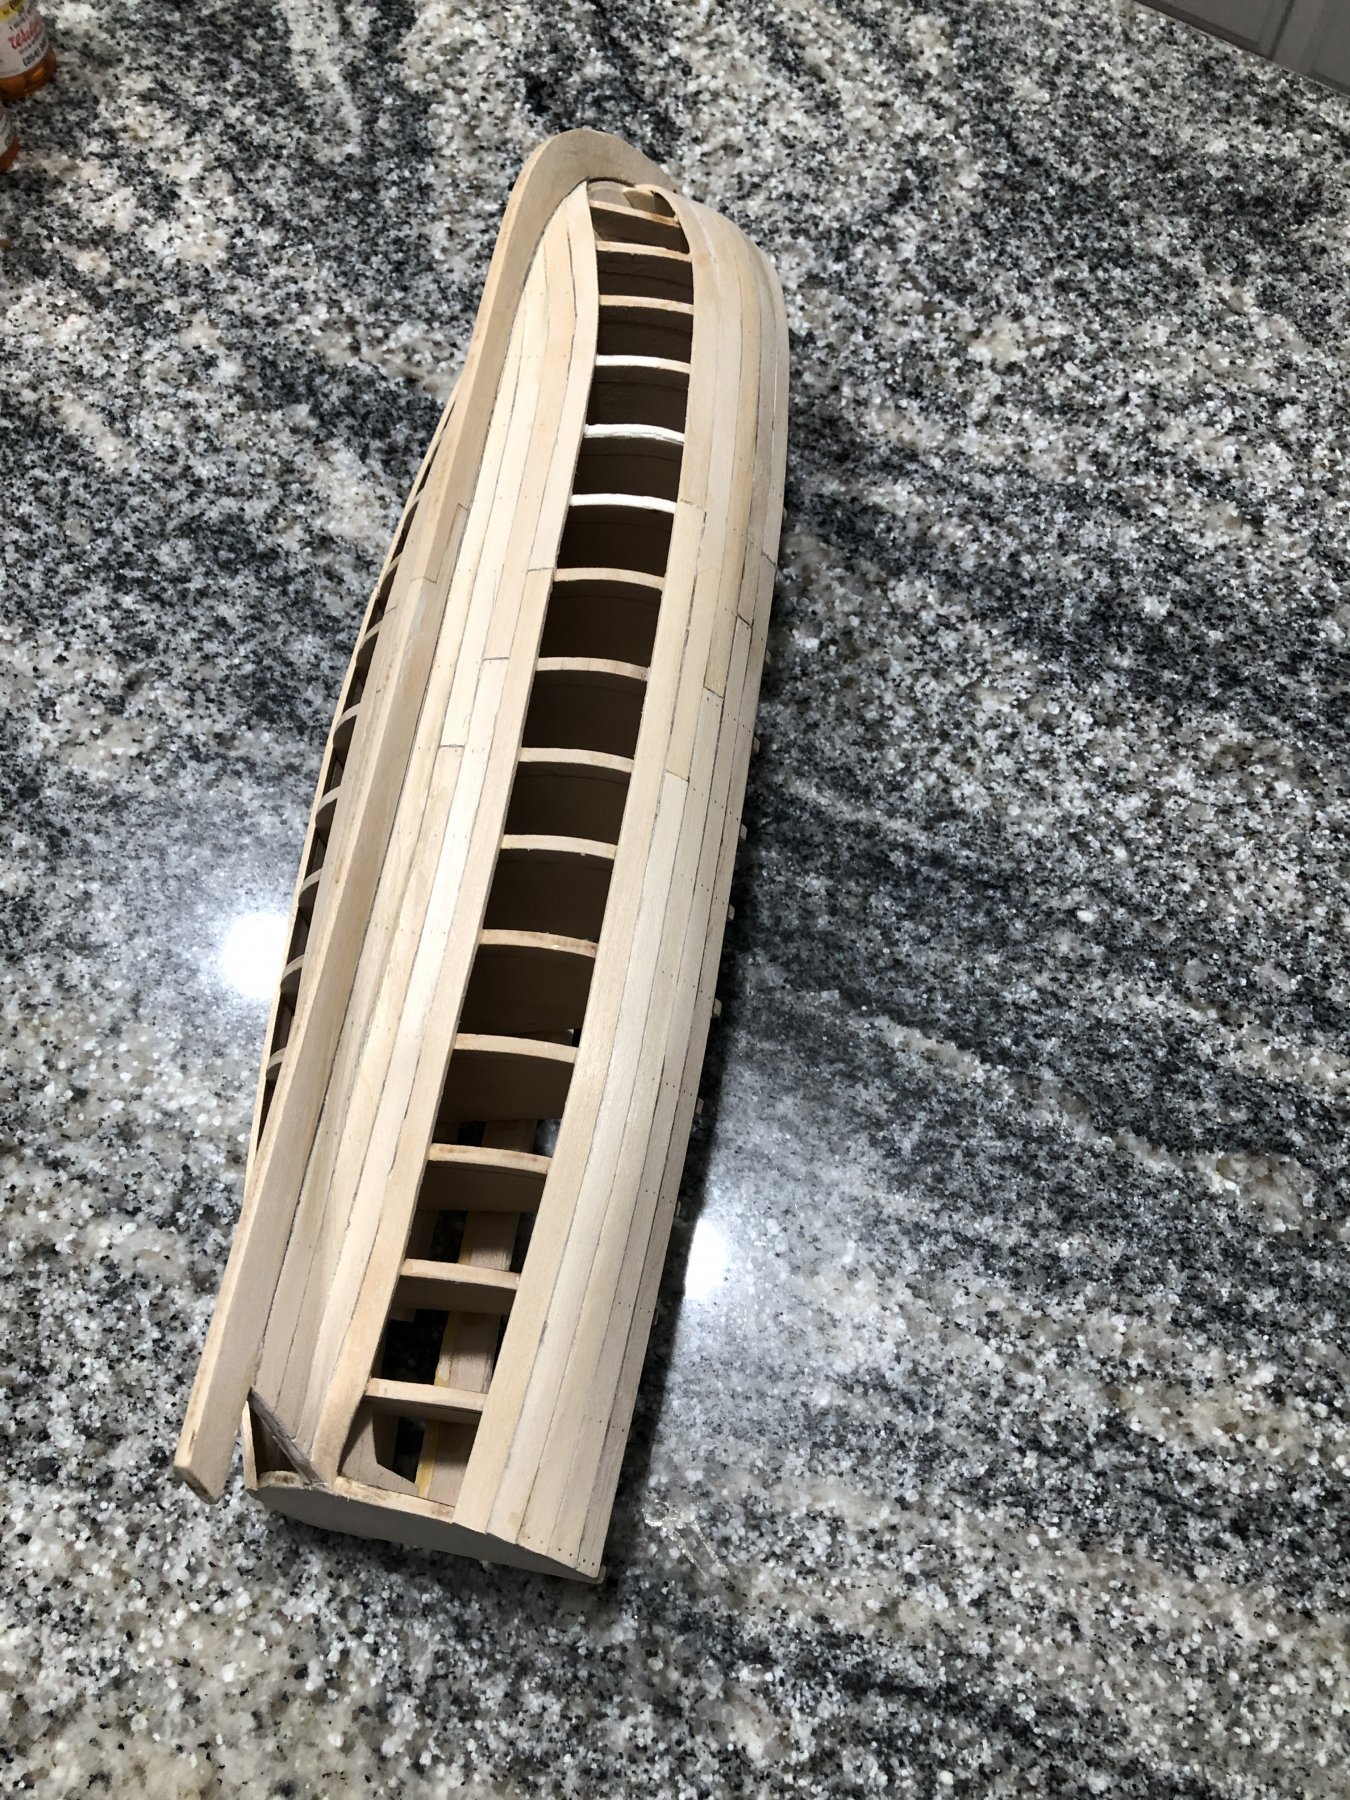
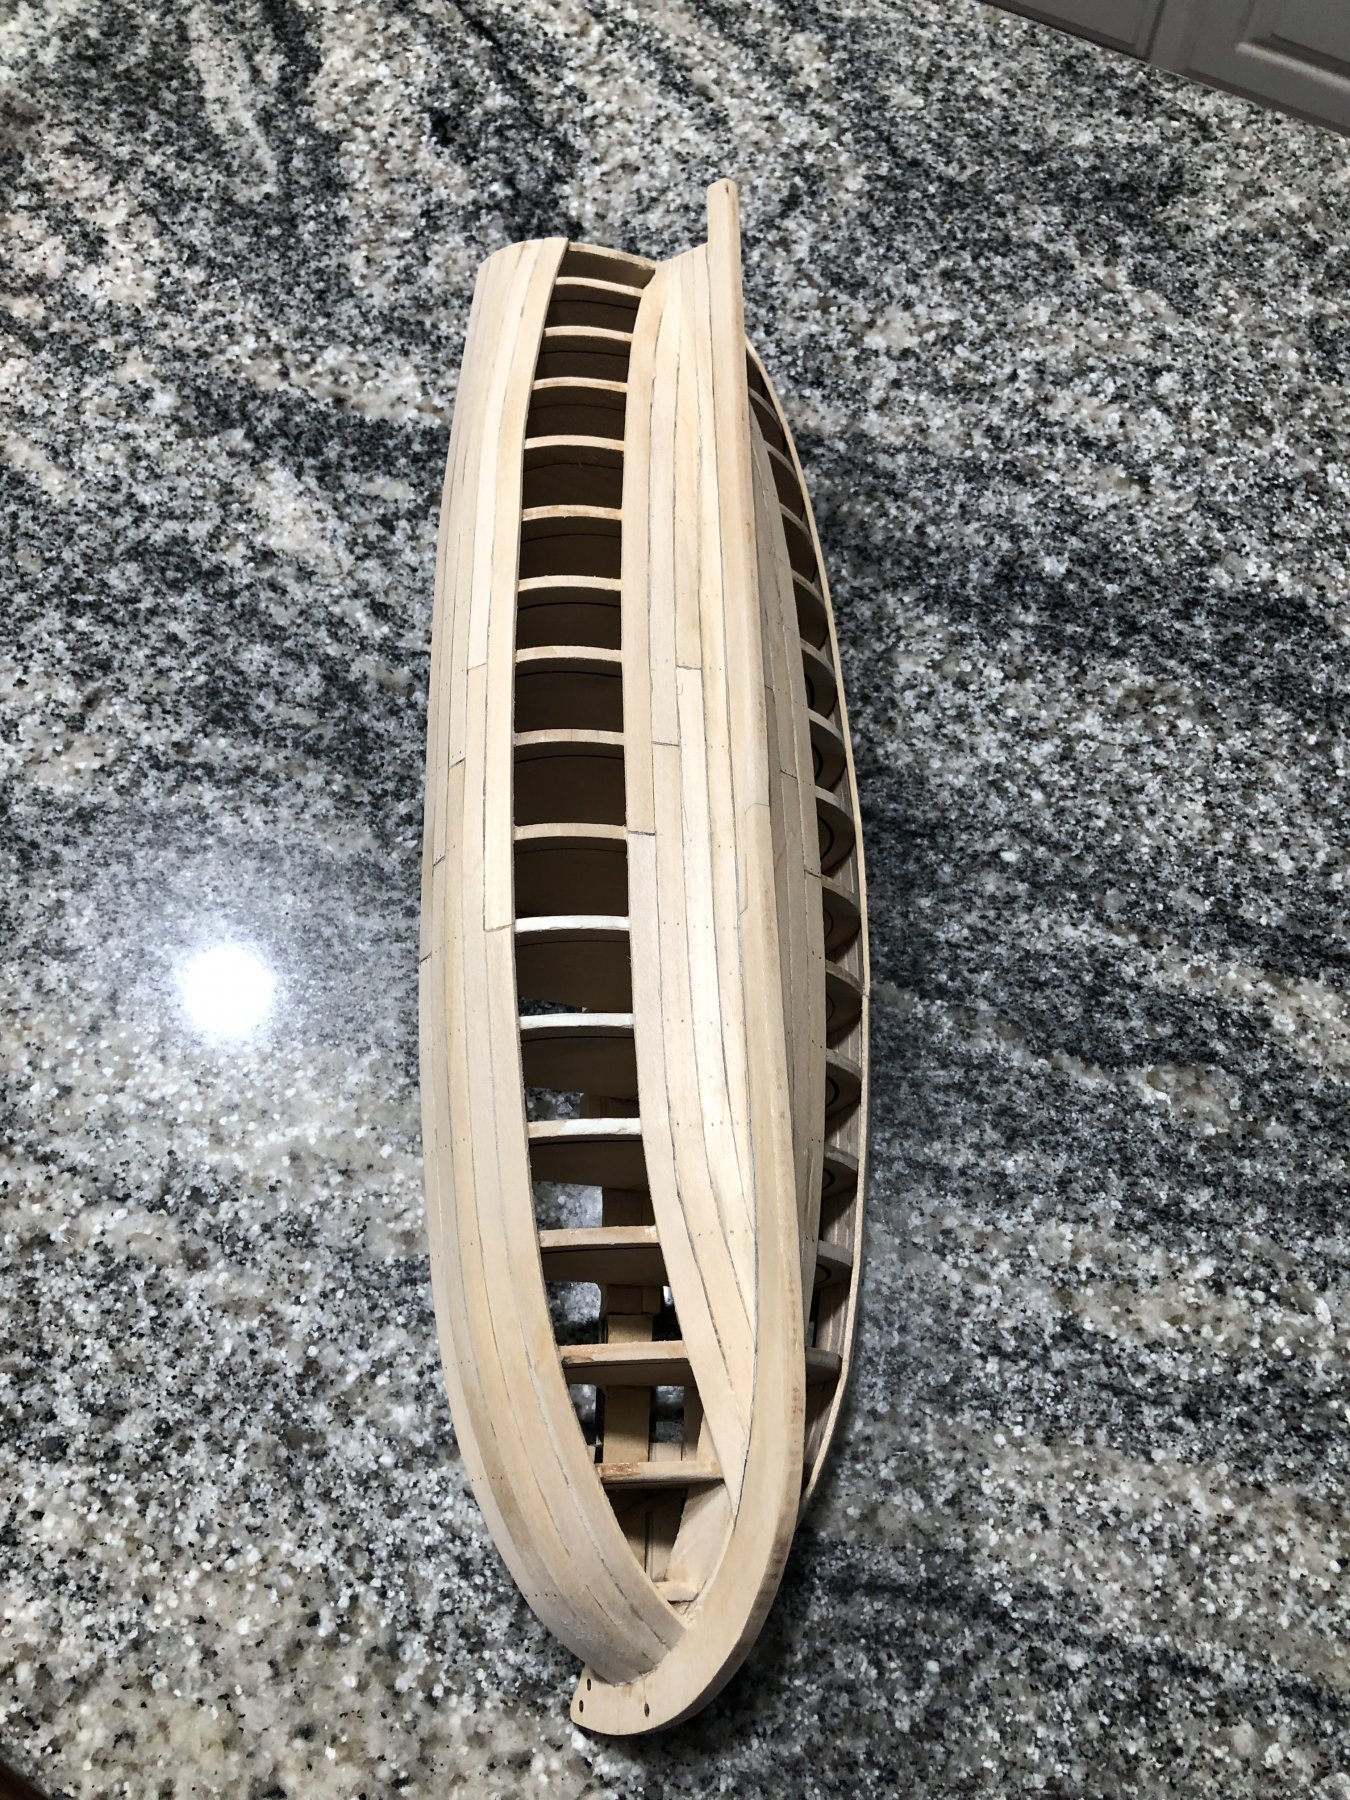
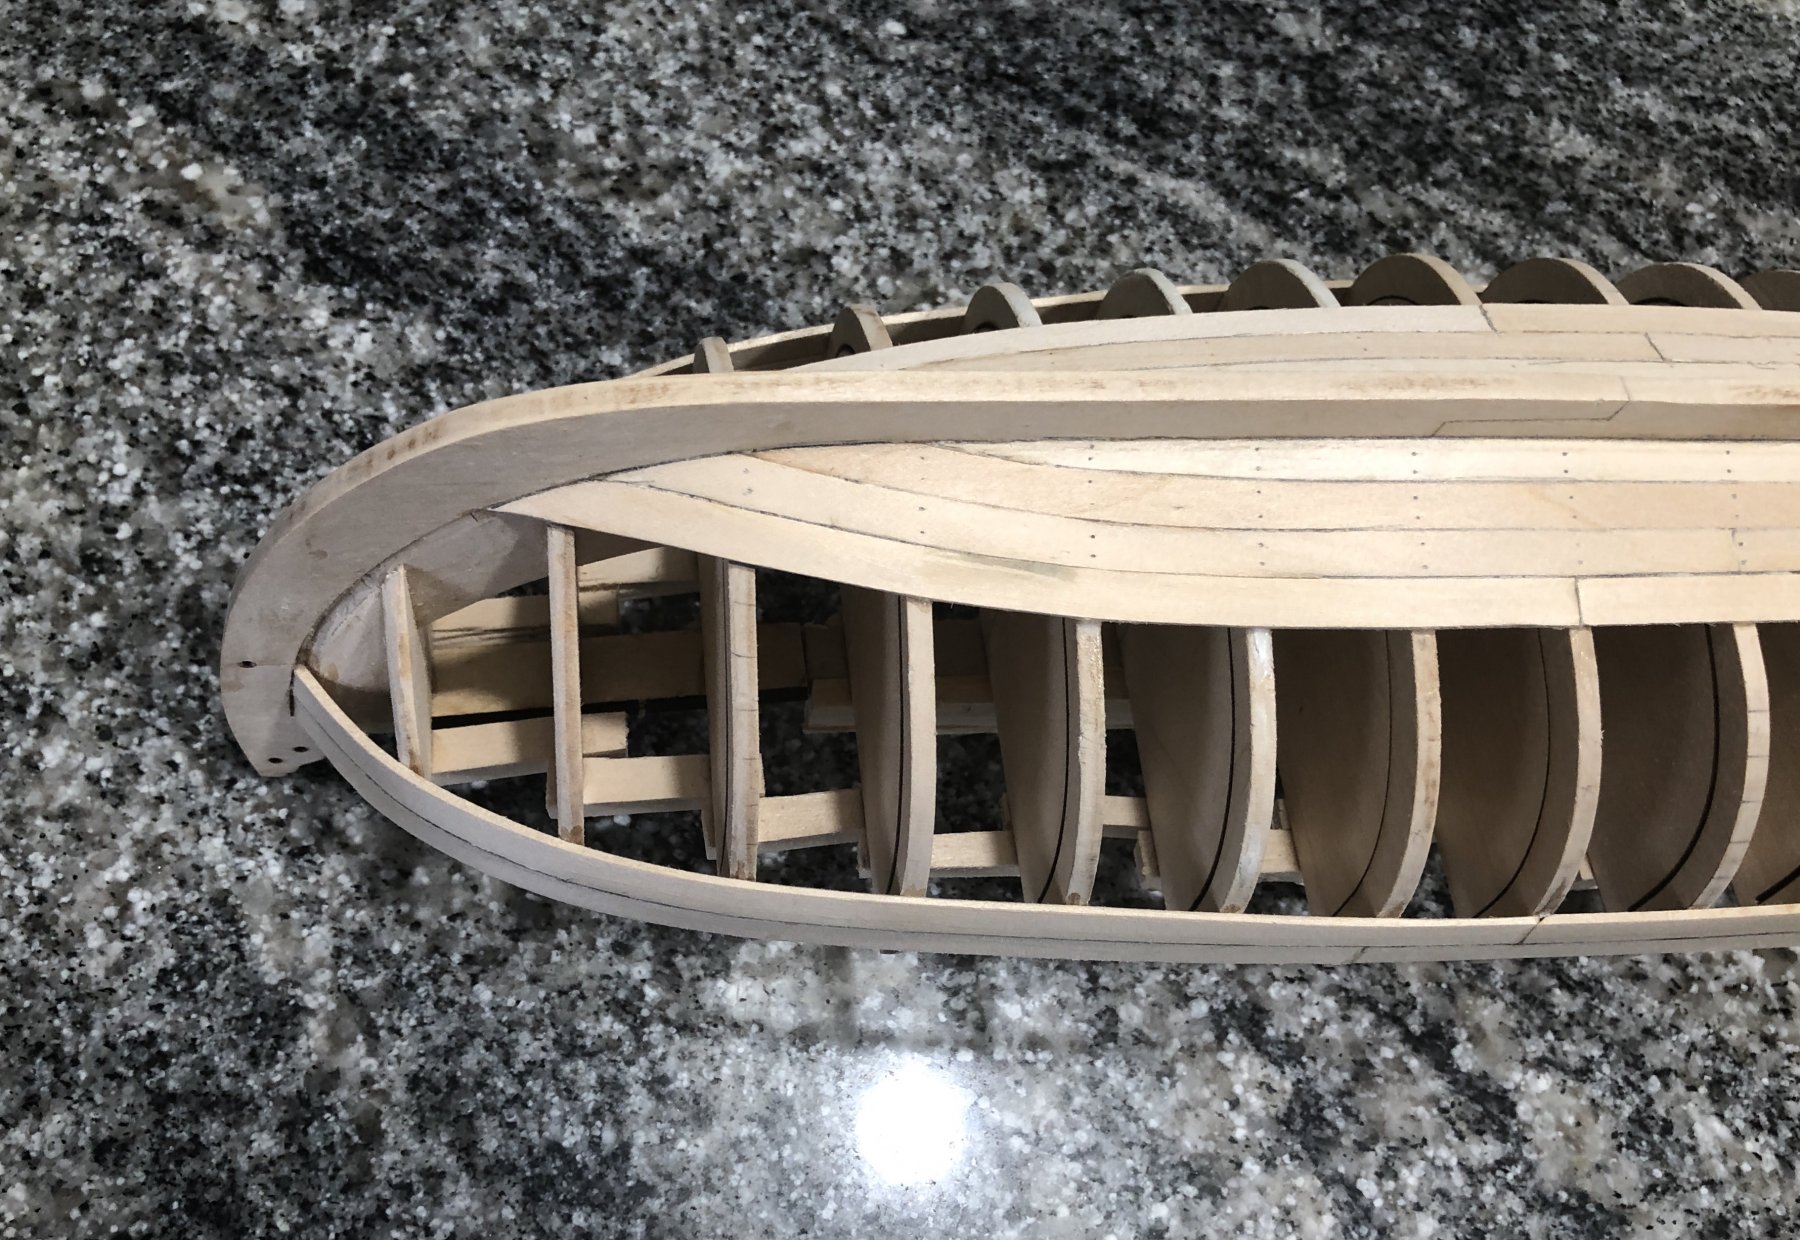
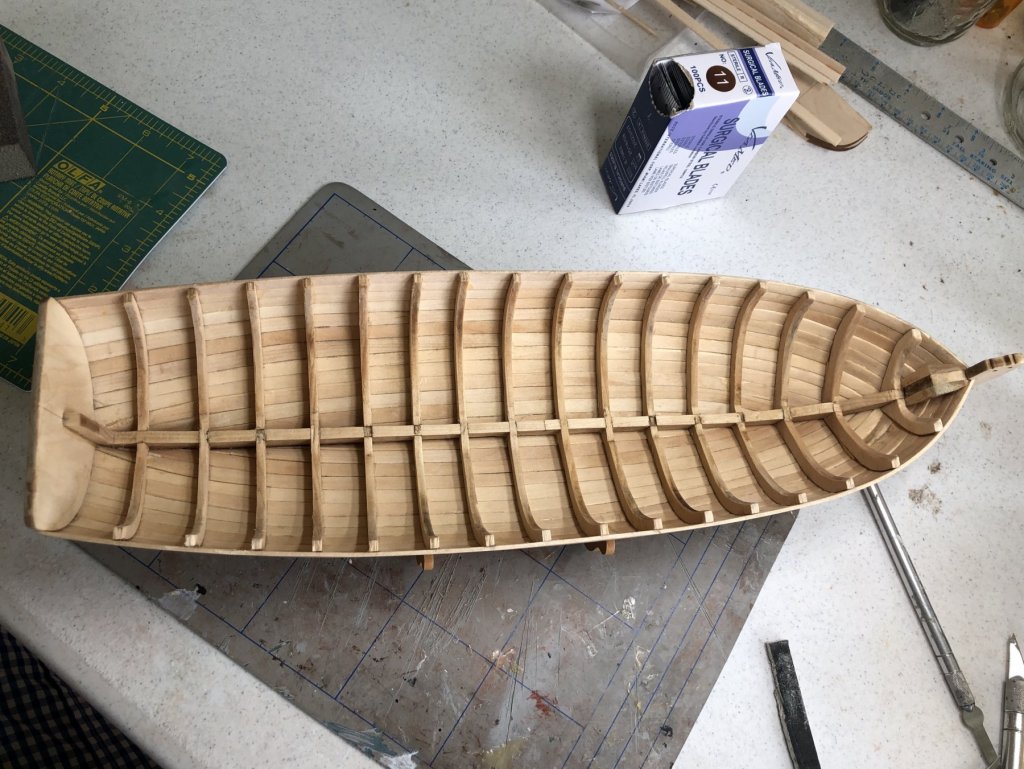
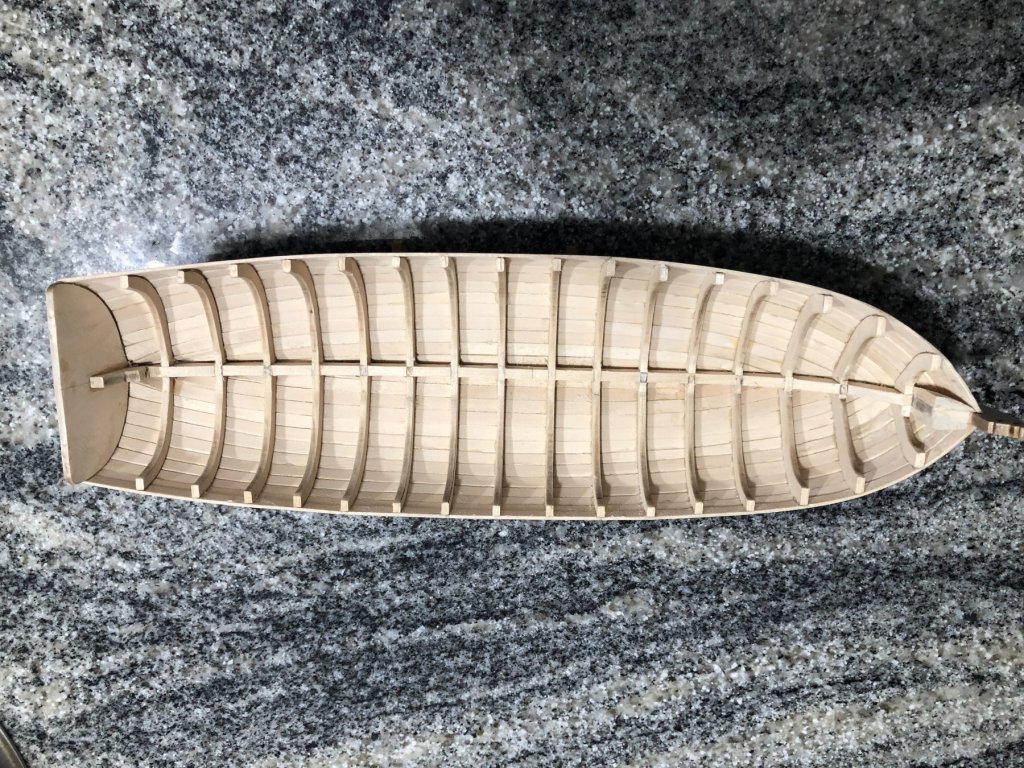
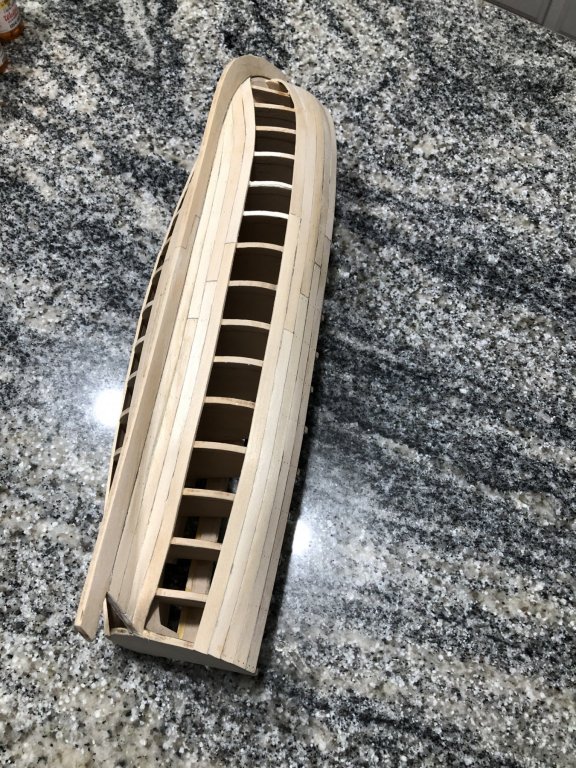
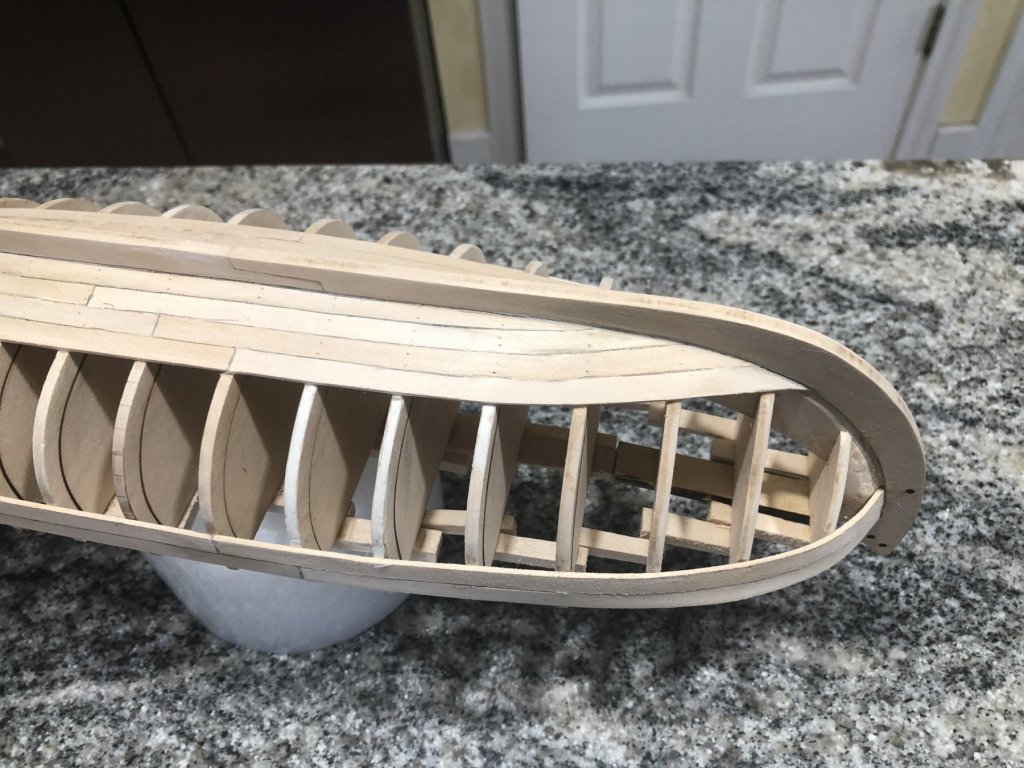
Fairing completed. Yay 😀 I decided to carve away instead of sanding. After reading Arthur Wayne’s great blog, hours and hours of sanding did not seem like fun. Carving became easier after the first couple of frames. I believe the key to successful carving is to use only sharp #11 blades. I used up to 5 or 6 #11 surgical and hobby blades per frame as they are relatively inexpensive. Surgical blades can be deformed for cutting in difficult areas. Hobby blades are rather stiff and more difficult to deform.
- 168 replies
-
- 2
-
-
- 18th Century Armed Longboat
- Model Shipways
- (and 1 more)
-
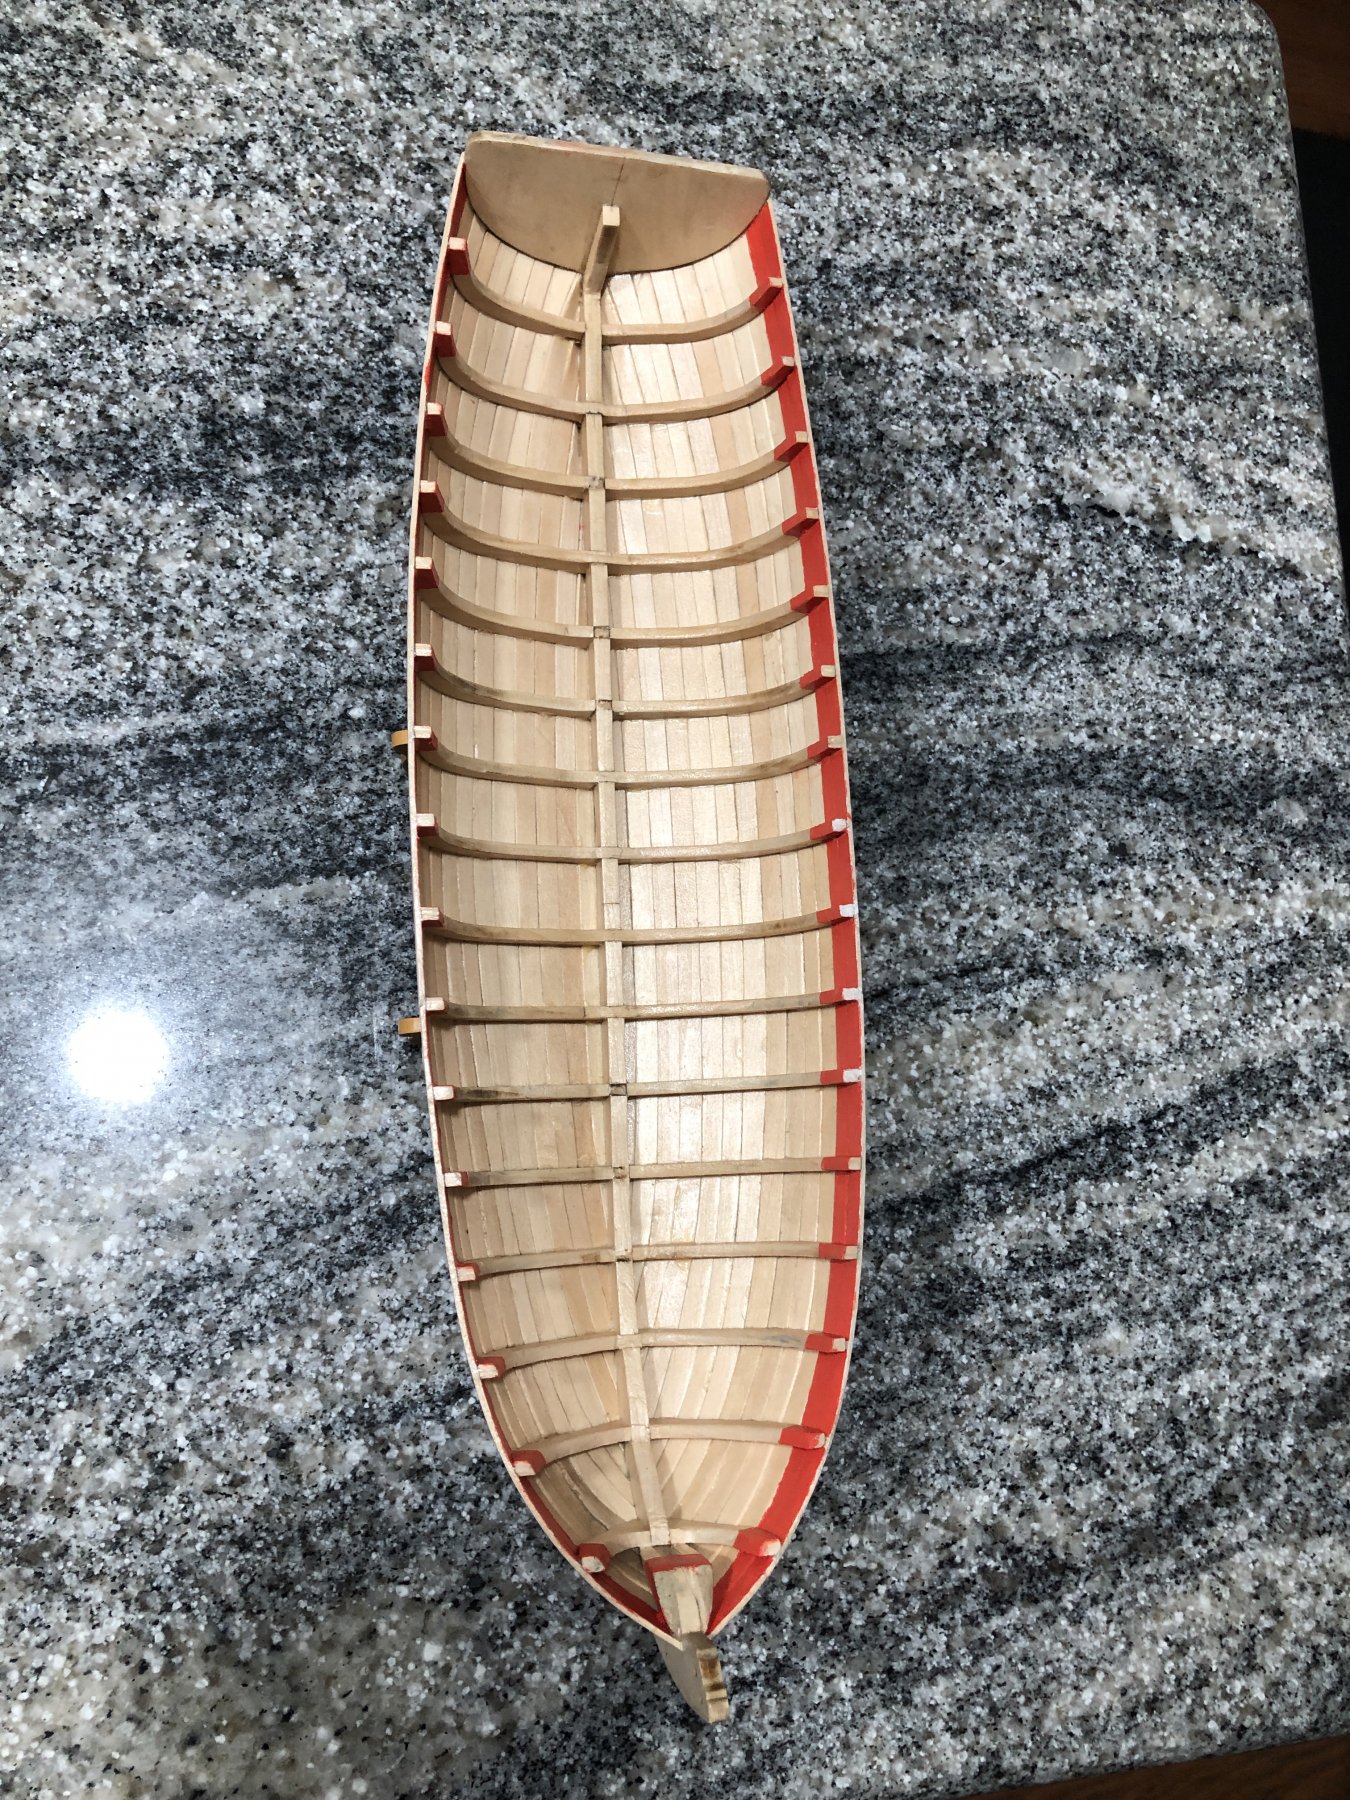
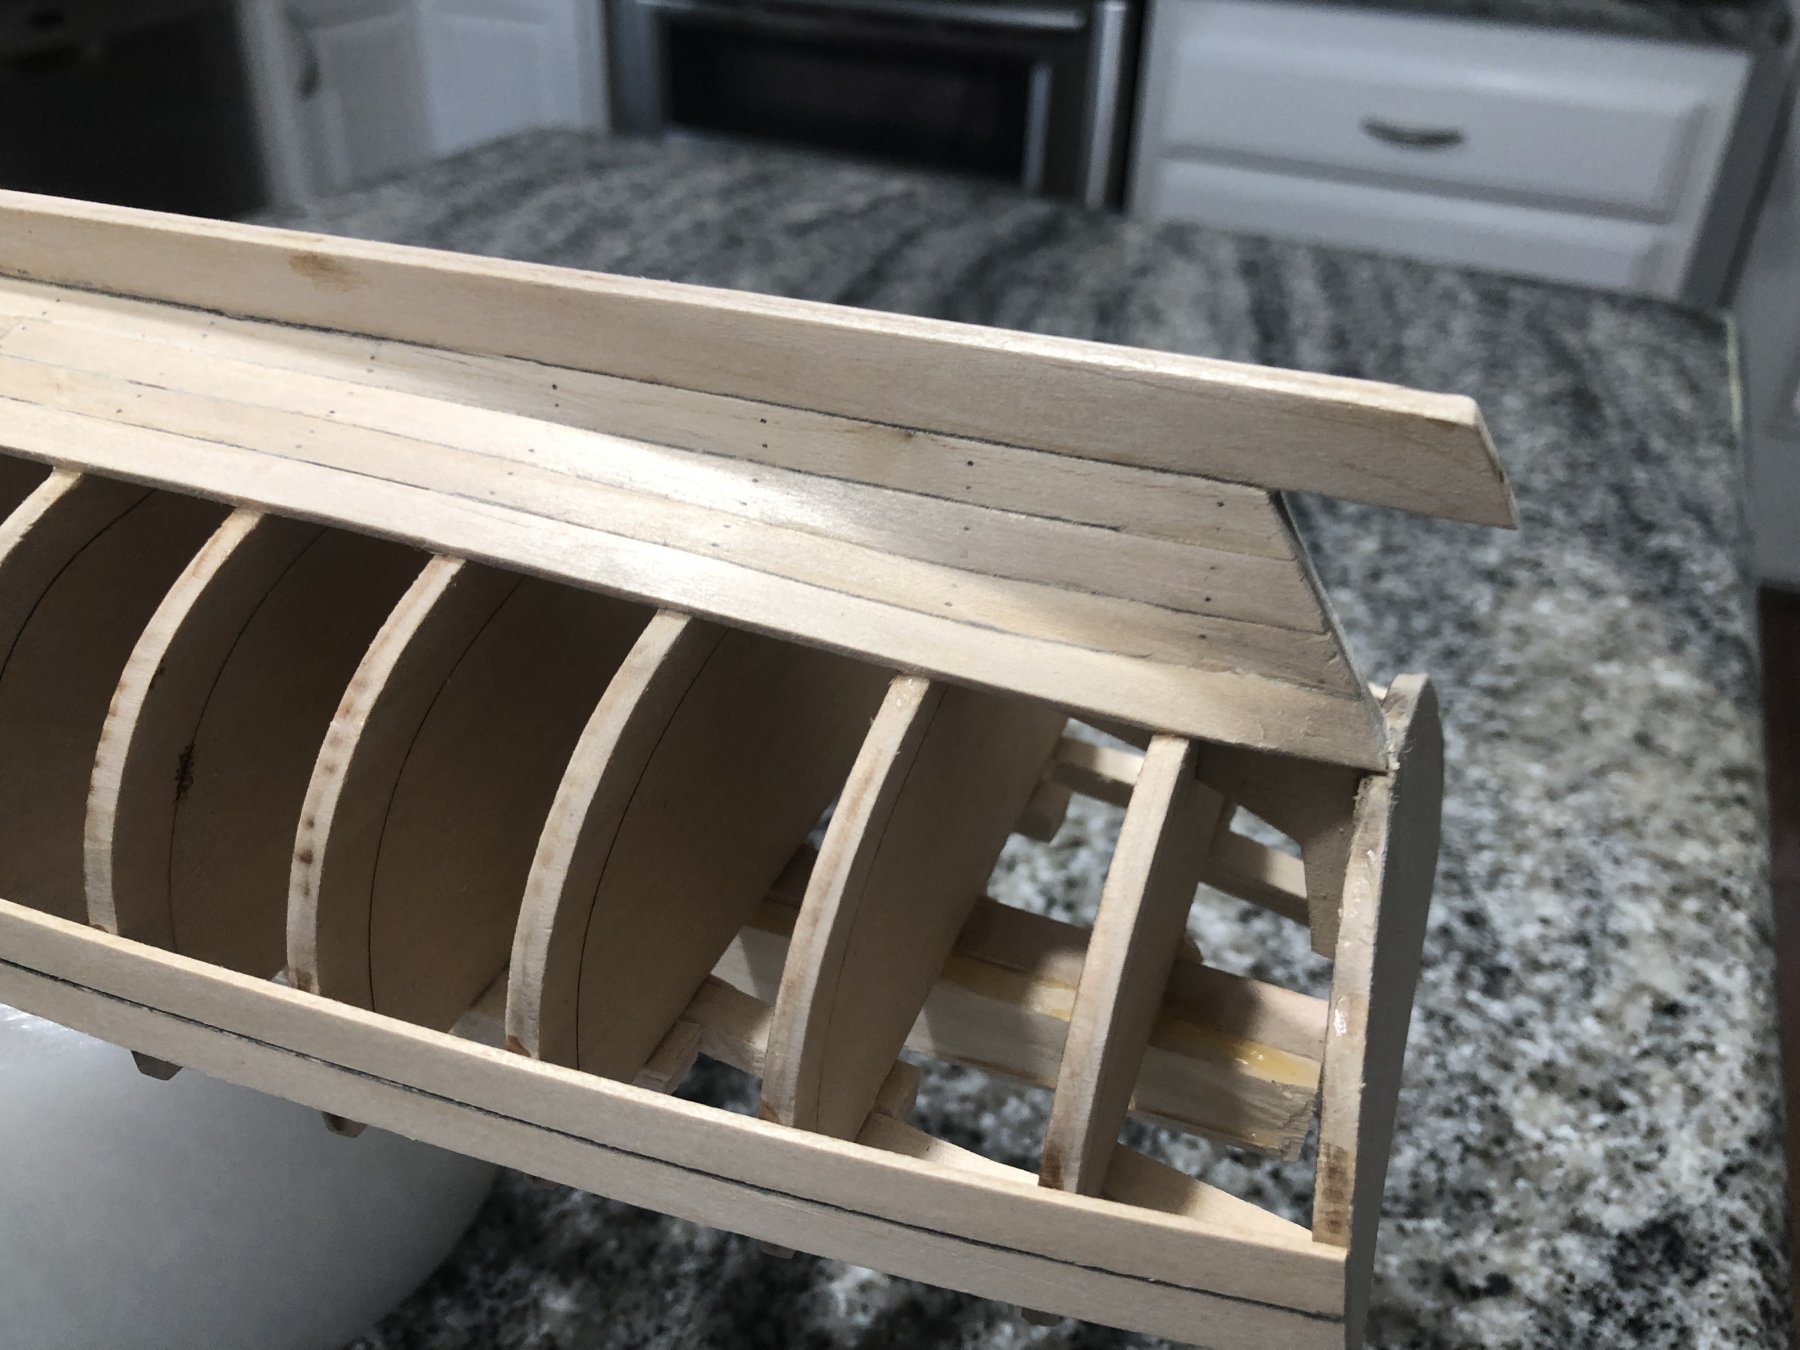
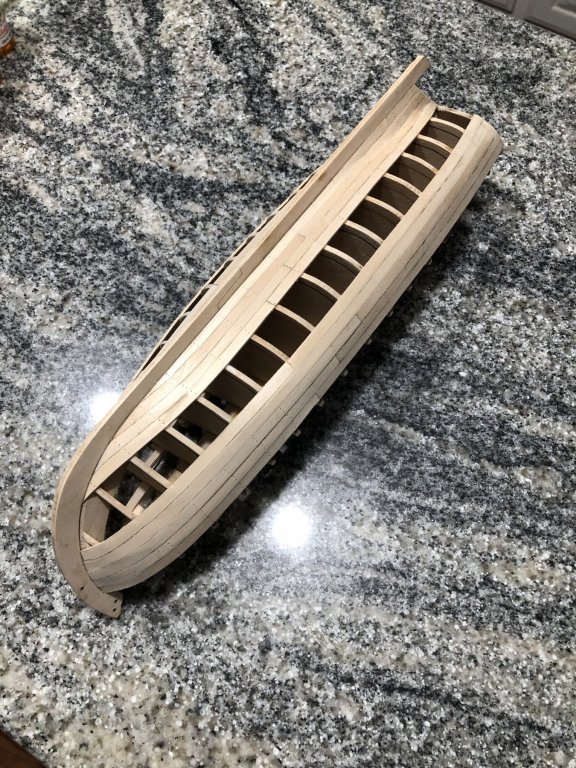
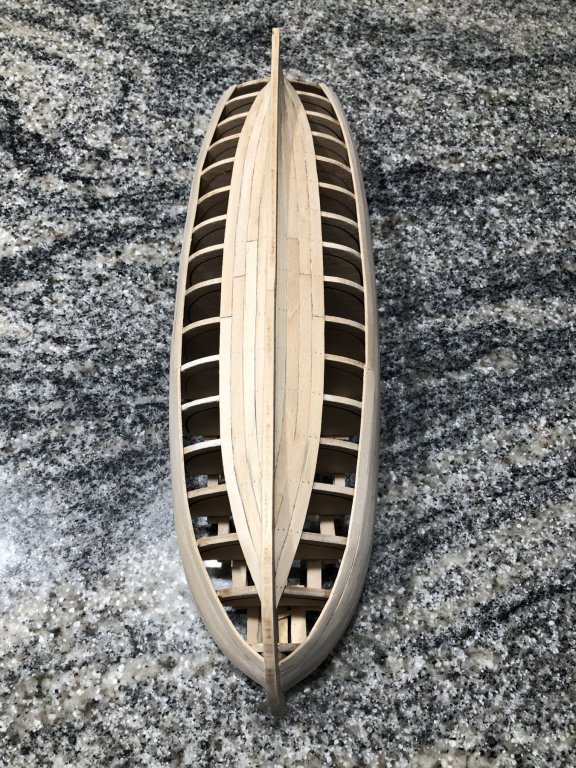
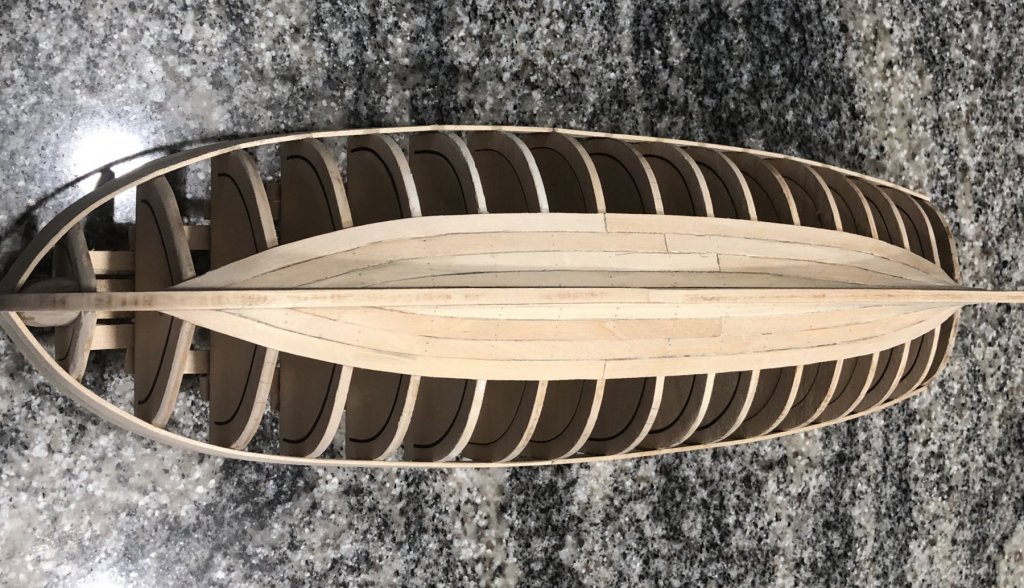
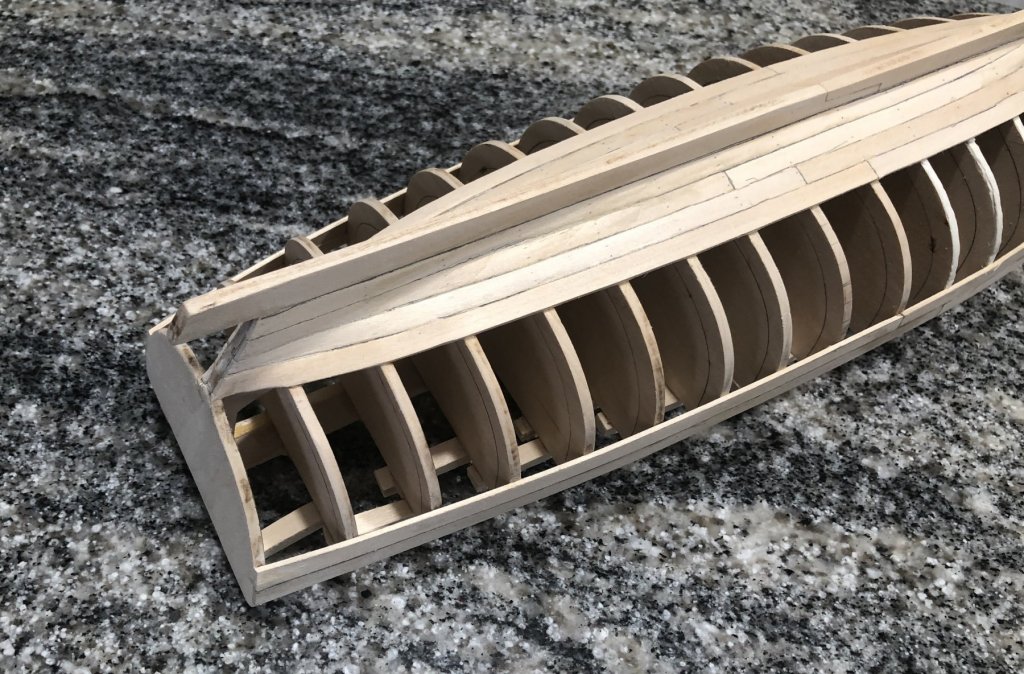
Sanding the interior was done with Squadron sanding sticks and 3M sanding blocks cut into strips and rolled into a curve. The boat shown below is ready to have the frames faired.


- 168 replies
-
- 8
-
-
- 18th Century Armed Longboat
- Model Shipways
- (and 1 more)
-
Hello Dan, Thank you for compiling these logs into a easy to use index. I have a comment about the small craft log and specifically about the 18th Century Long Boat versus the 18th Century Armed Long Boat. Arthur Wayne, Sea Hoss, Dwight and myself (Dr PS) are listed as 18th Century Long Boats and Tiger65 as an 18th Century Armed Long Boat . In order to help readers find the logs on the 18th Century Armed Long Boat, it would be helpful to list them all as 18th Century Armed Long Boats . The two models are similar in many ways but there are some very specific issues associated with the 18th Century Armed Long Boat. Also, I would think that listing only one as an 18th Century Armed Long Boat would lead others to believe that there are no others doing this particular boat.l Thanks, Paul Schulze
-
Very nice boat build I am most impressed by how fast you built this boat. Did you ever eat or sleep? I am doing this build as well and will consult your log as I proceed. BTW, I do N-Gauge model trains.
-
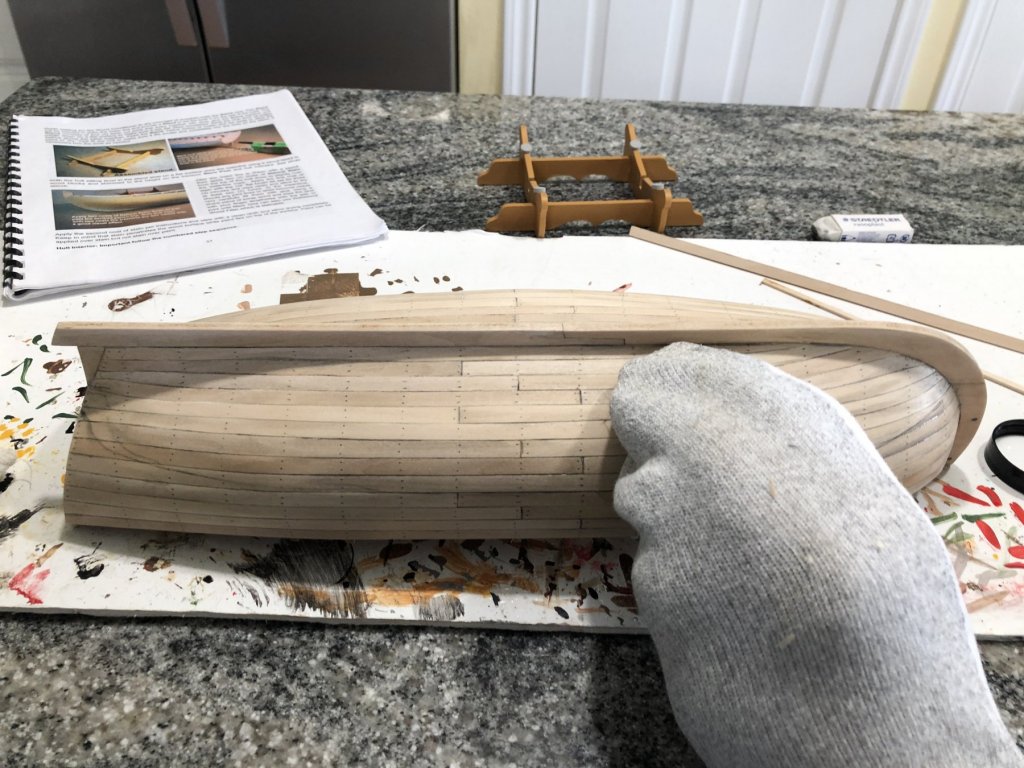
Old athletic socks make good wipes.
- 168 replies
-
- 4
-
-
- 18th Century Armed Longboat
- Model Shipways
- (and 1 more)
-
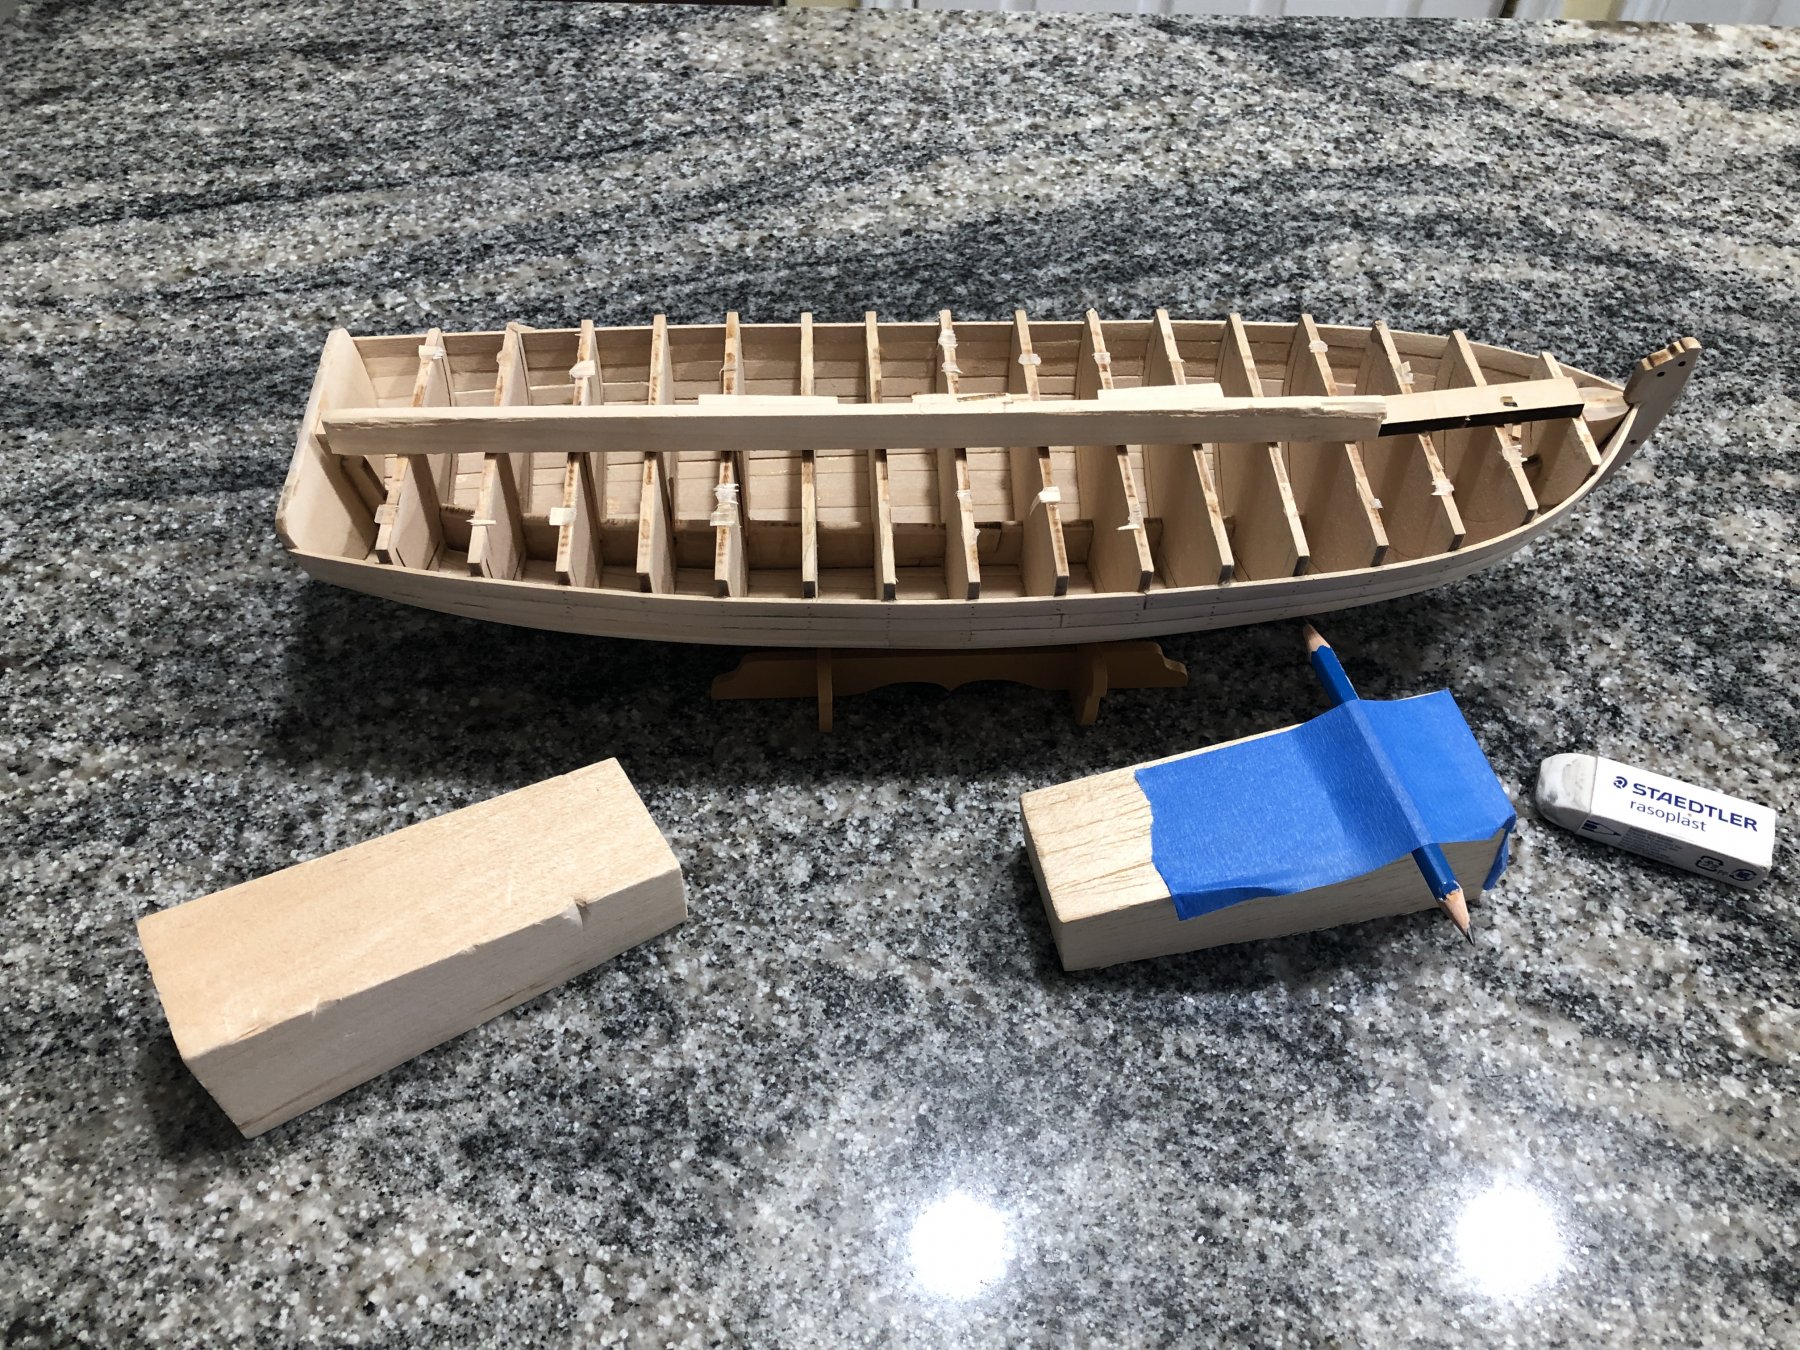
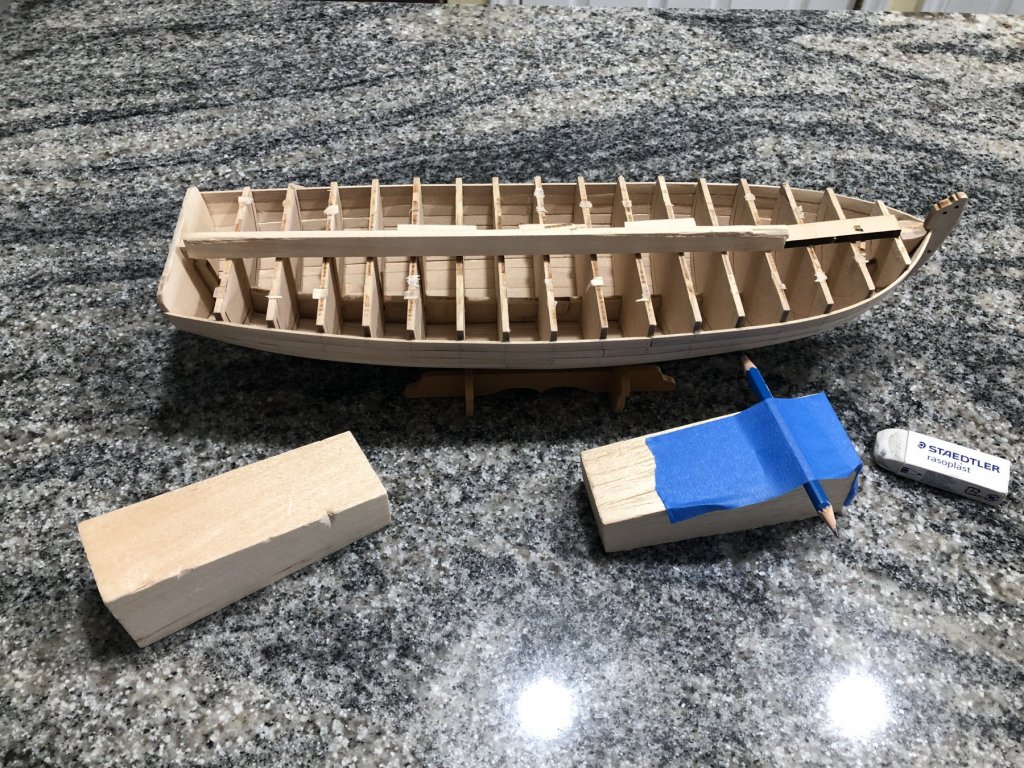
Angled balsa blocks make for easy hull marking. Simply slide pencil to desired height and tape down for waterline marking.
- 168 replies
-
- 2
-
-
- 18th Century Armed Longboat
- Model Shipways
- (and 1 more)
-
I seriously doubt I will catch you in two weeks. I am splitting my time between this project and work on my N-Gauge model railroad. BTW, now we have a growing group of builders of this boat called the ALB group. I guess we are really a subgroup - Ha. Thanks all for the encouragement. You know, looking back a quick couple of weeks ago or so, I would tell my younger self to do a better job at fairing. That is one area I really need to learn more about before I ever start another plank-on-bulkhead project. This time through it was just guess work. Good fairing would have made for a much smoother finished project. As they say, hindsight is better than foresight. Sigh 😔
-
She looks really good!
-
Hello Sea Hoss, Welcome to the 18th Century Armed Long Boat group 😎 You are moving right along and it looks good. I’ll be following your log with interest. I am curious as to how starting your garboard at bulkhead G will work out as there are 12 strakes above the garboard and they have to fit into the rabbet at the bow. I don’t know if you will have to use drop planks or not.
-
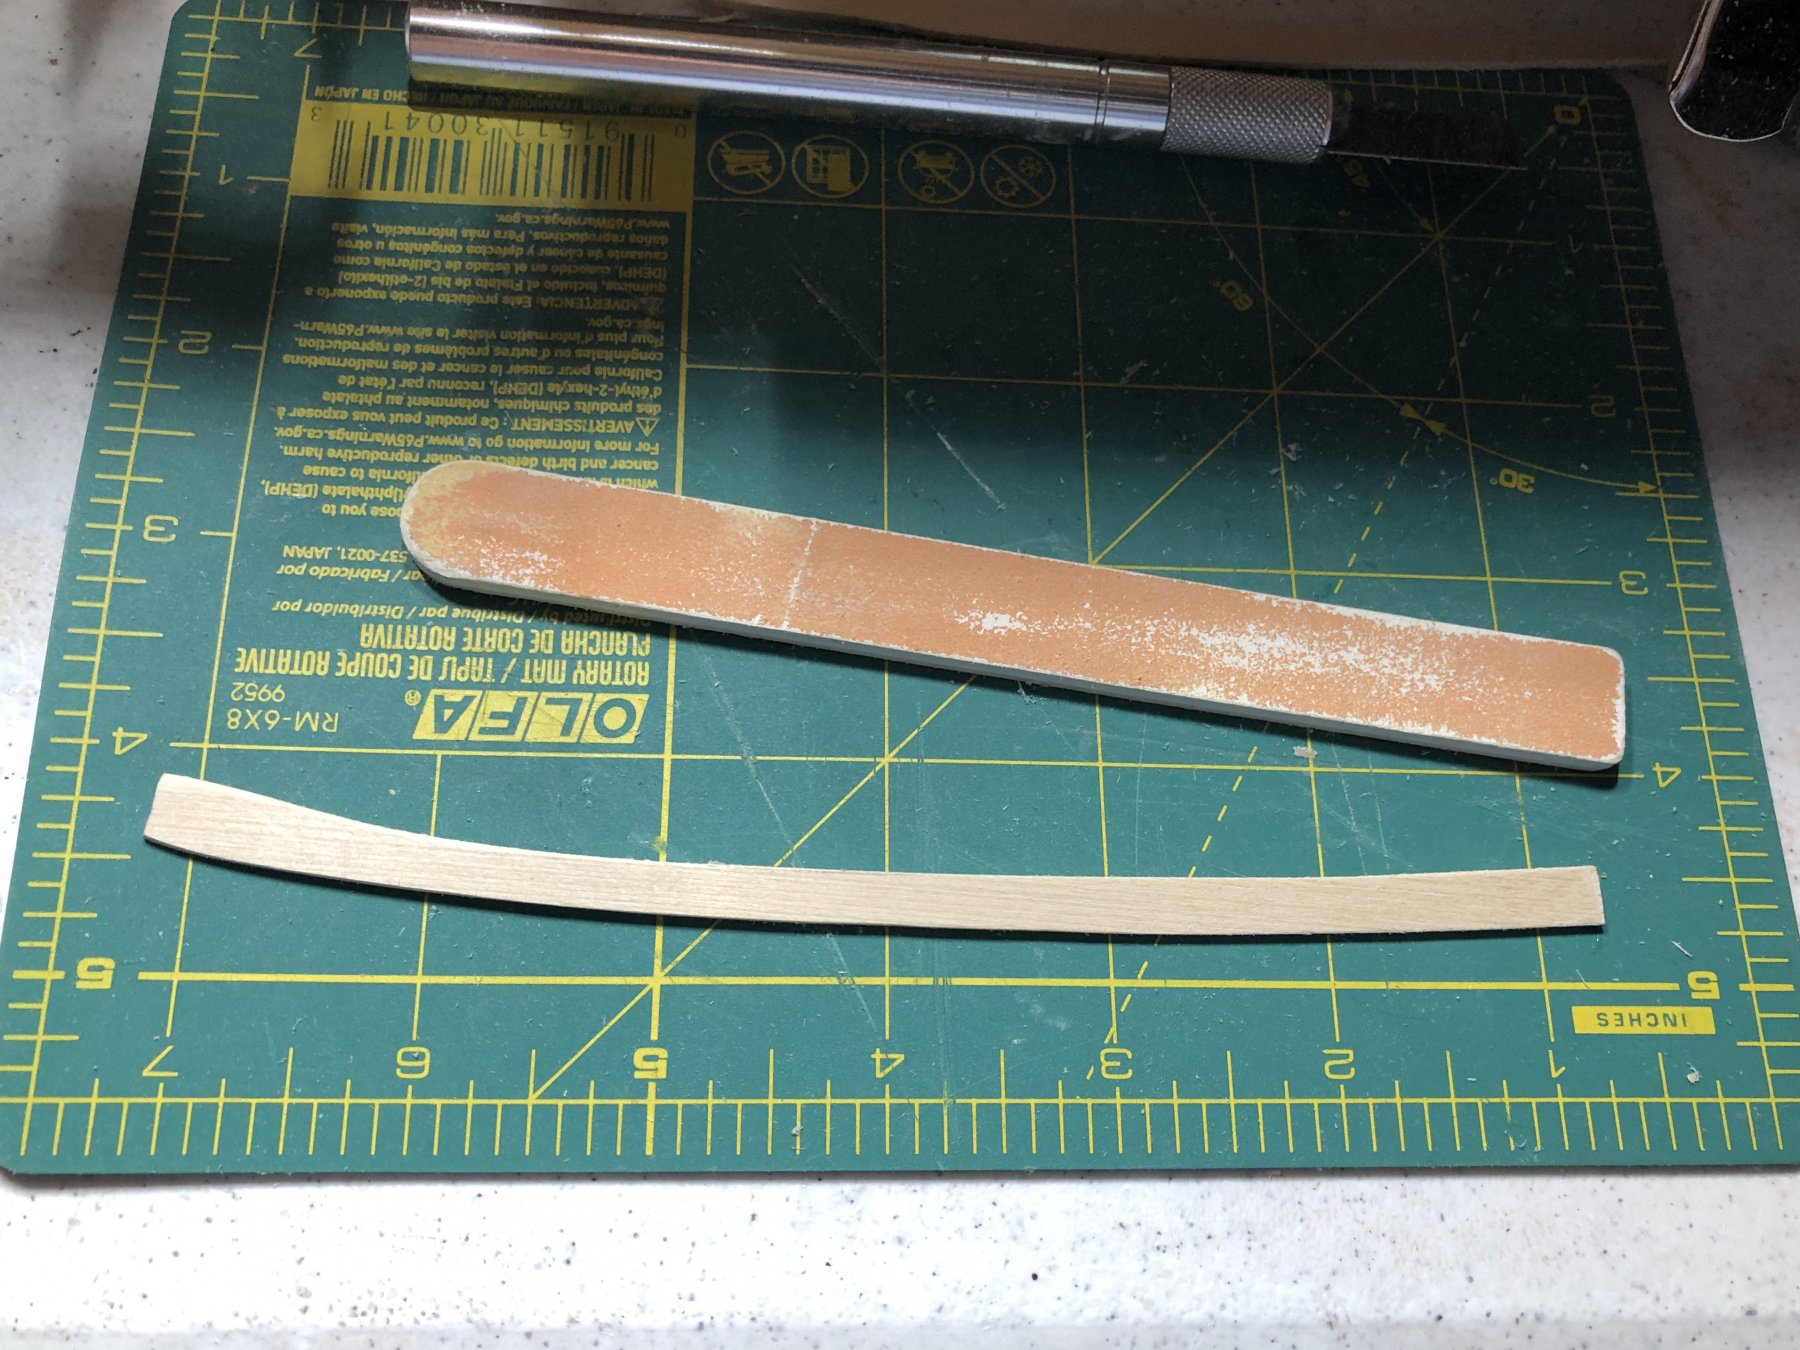
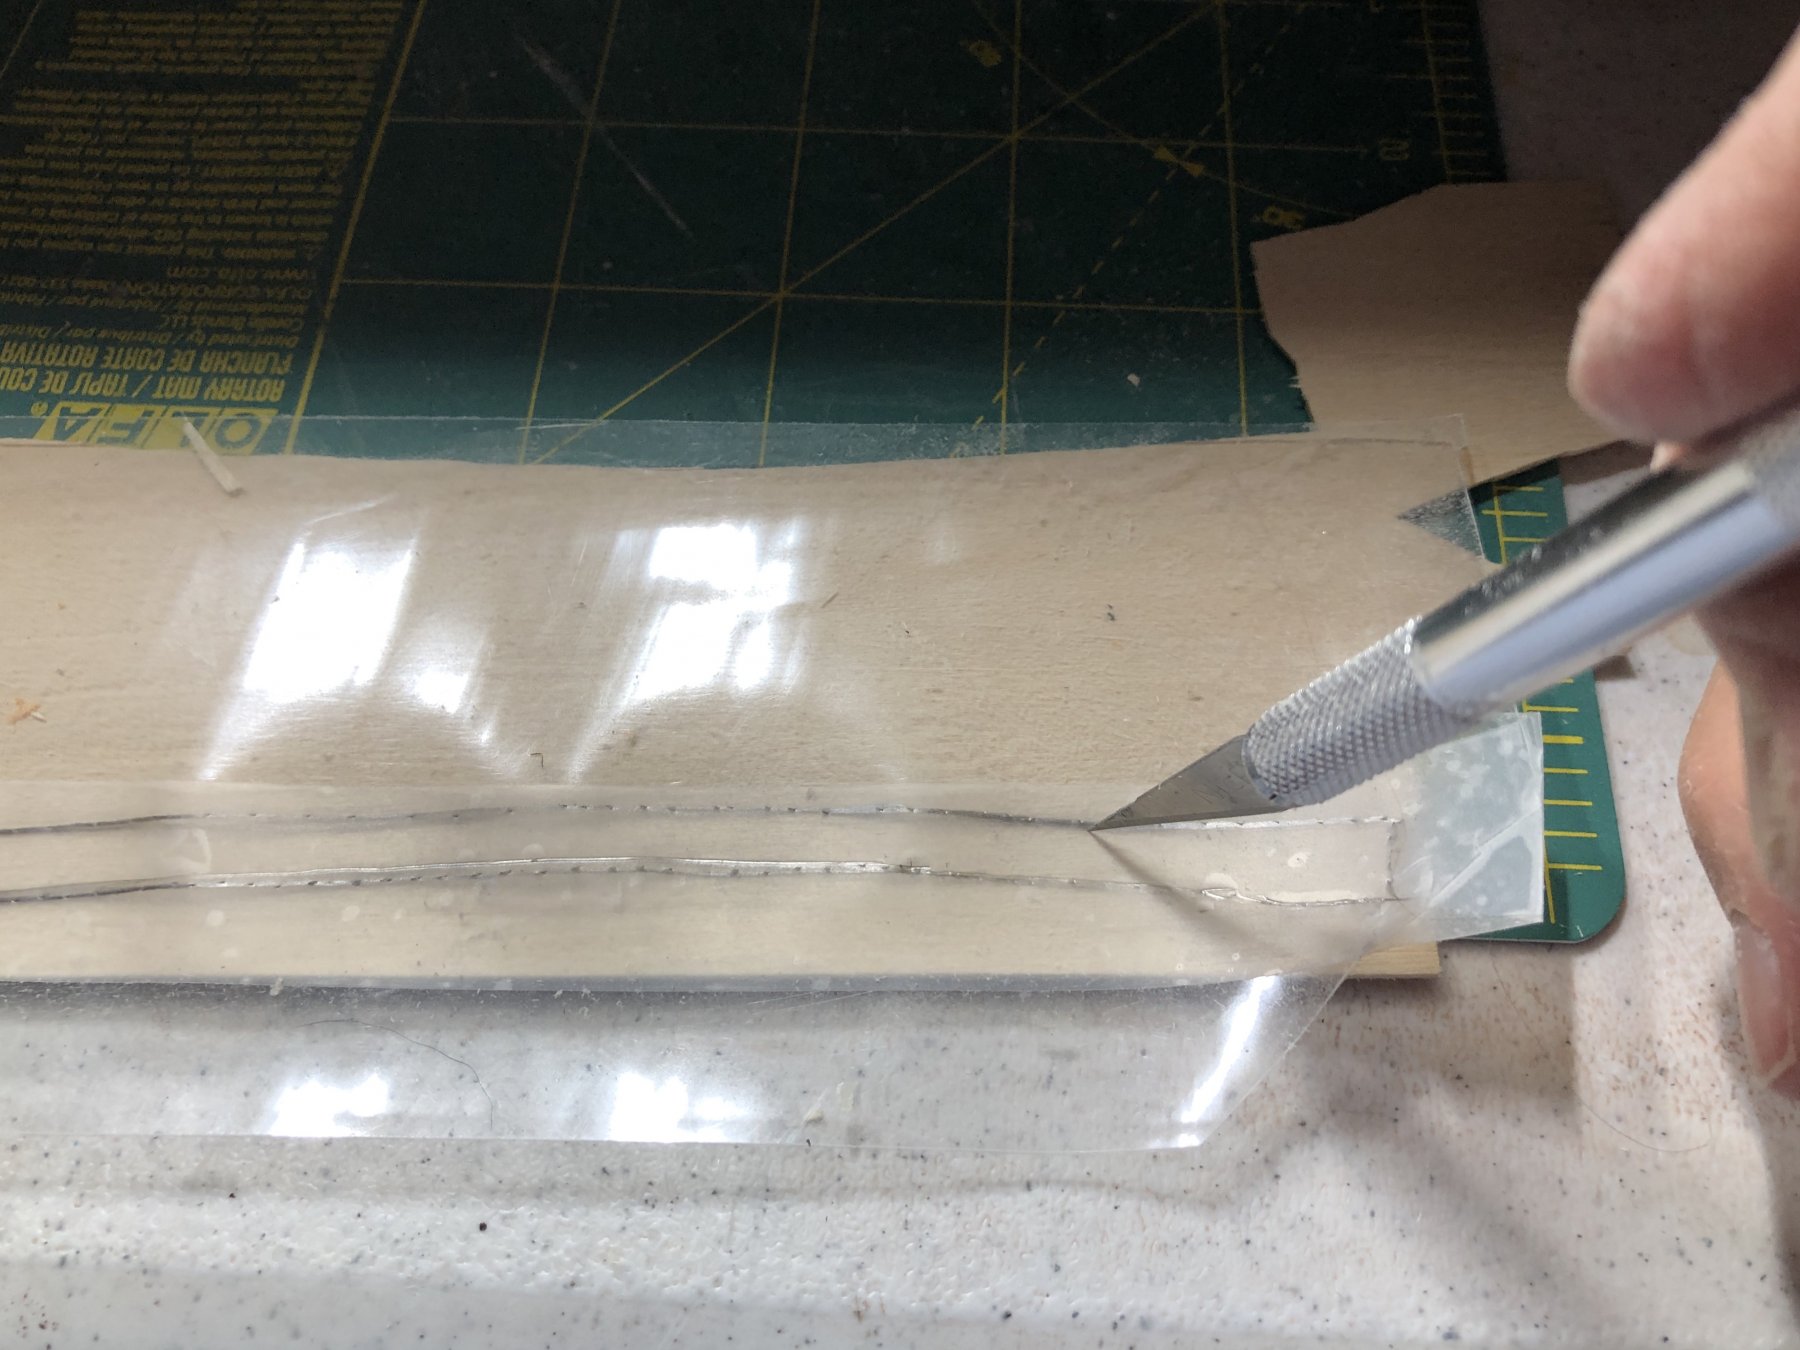
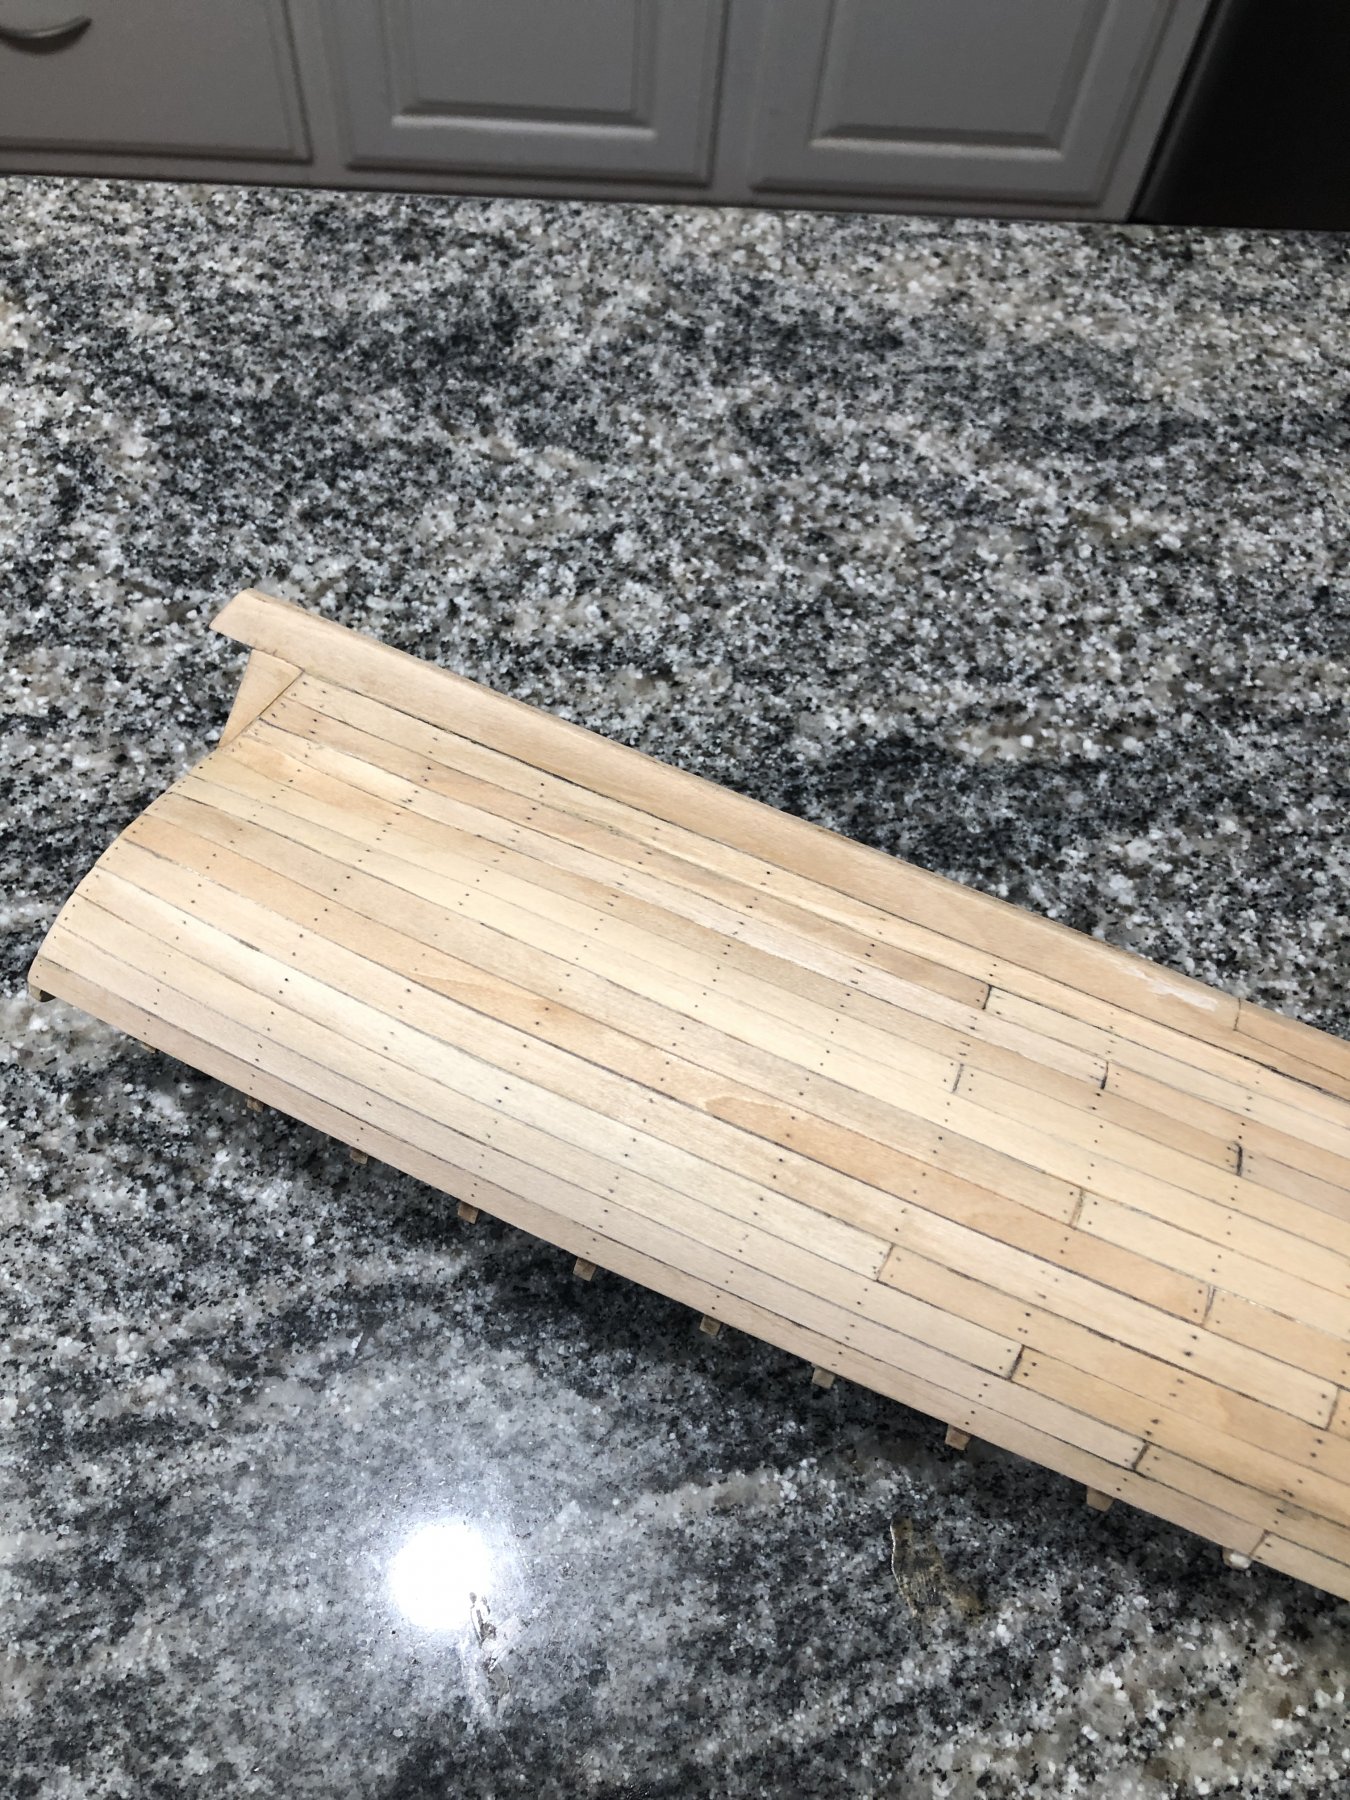
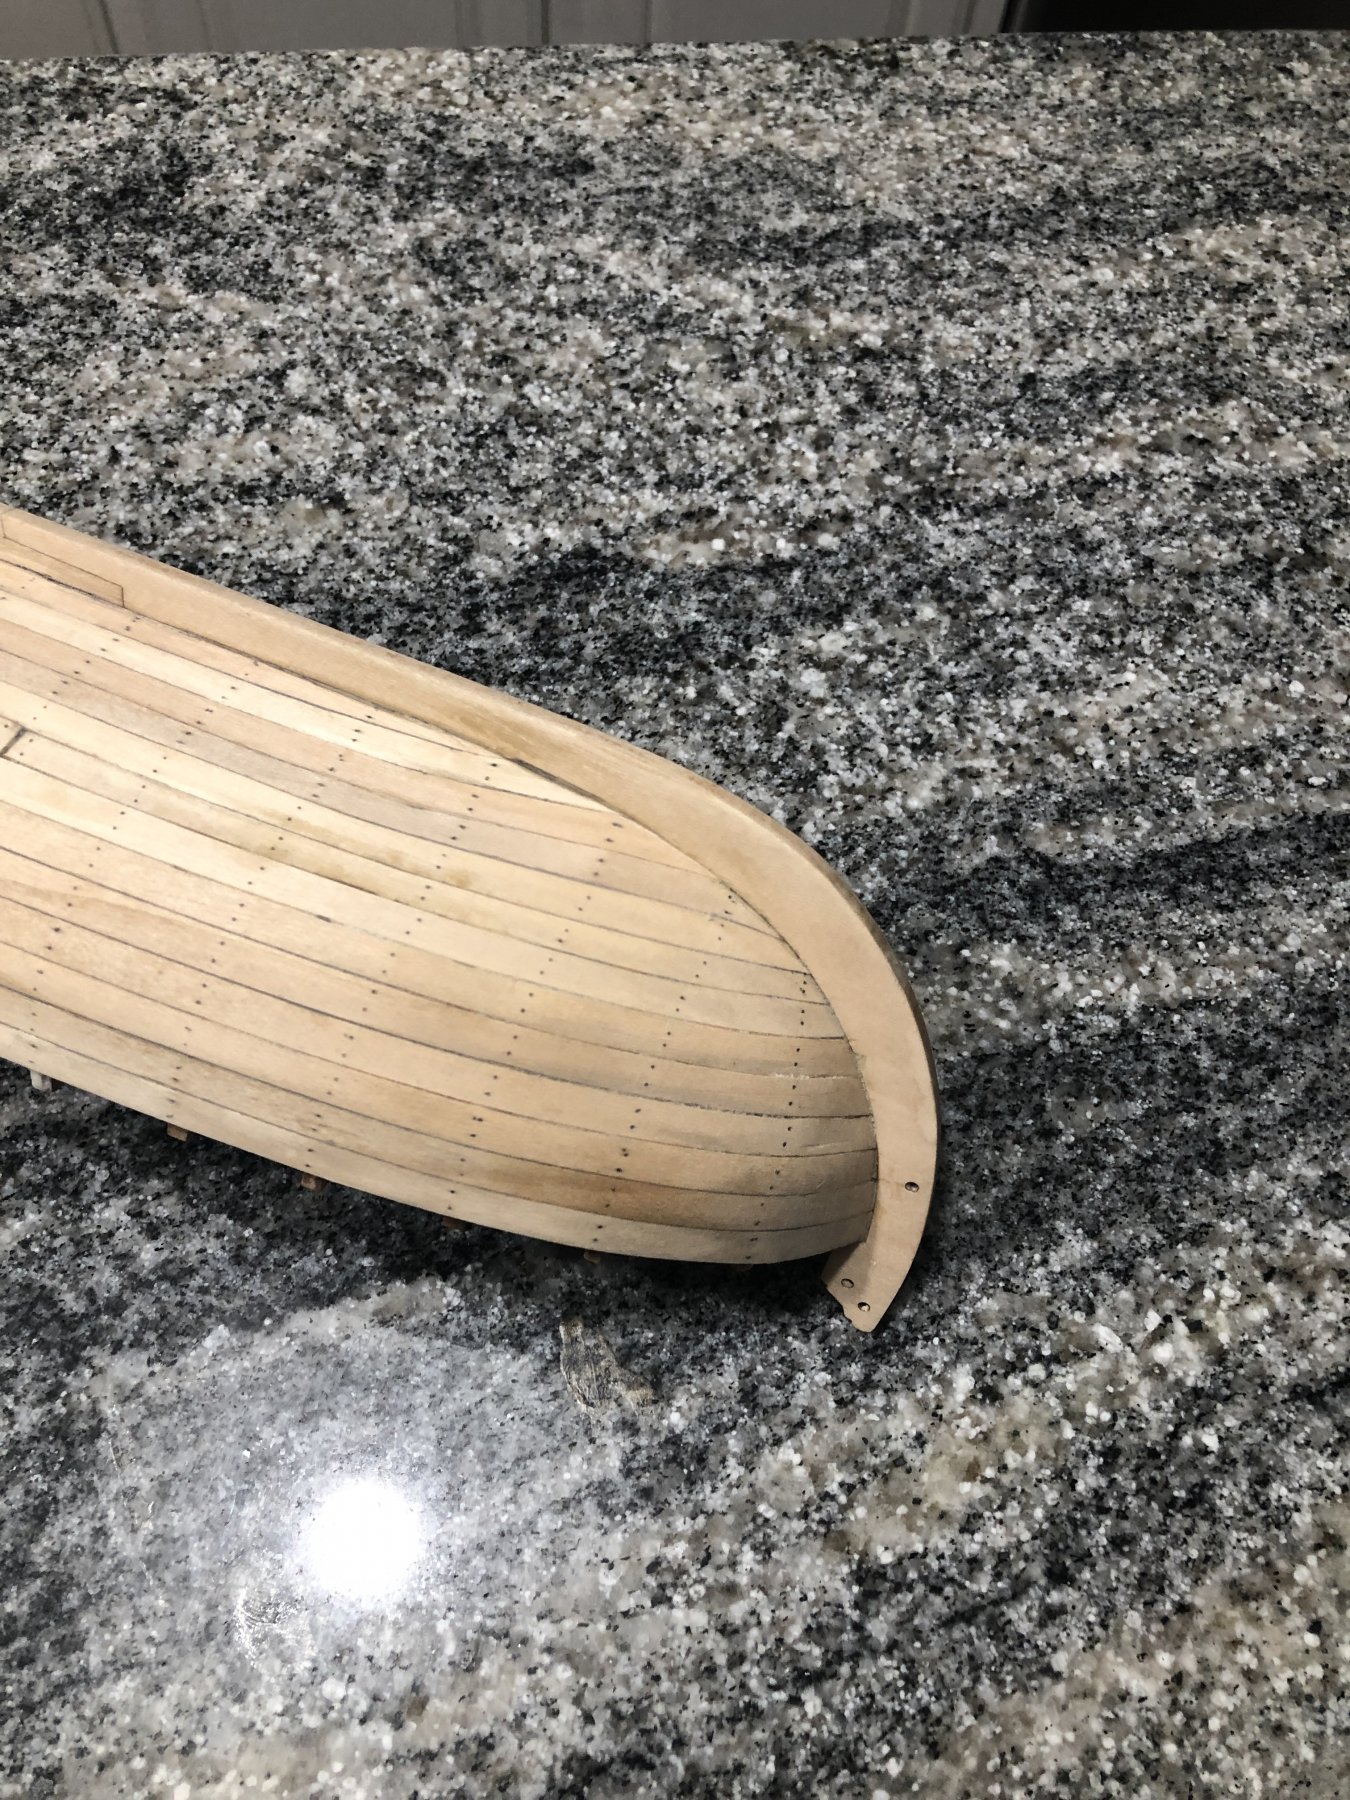
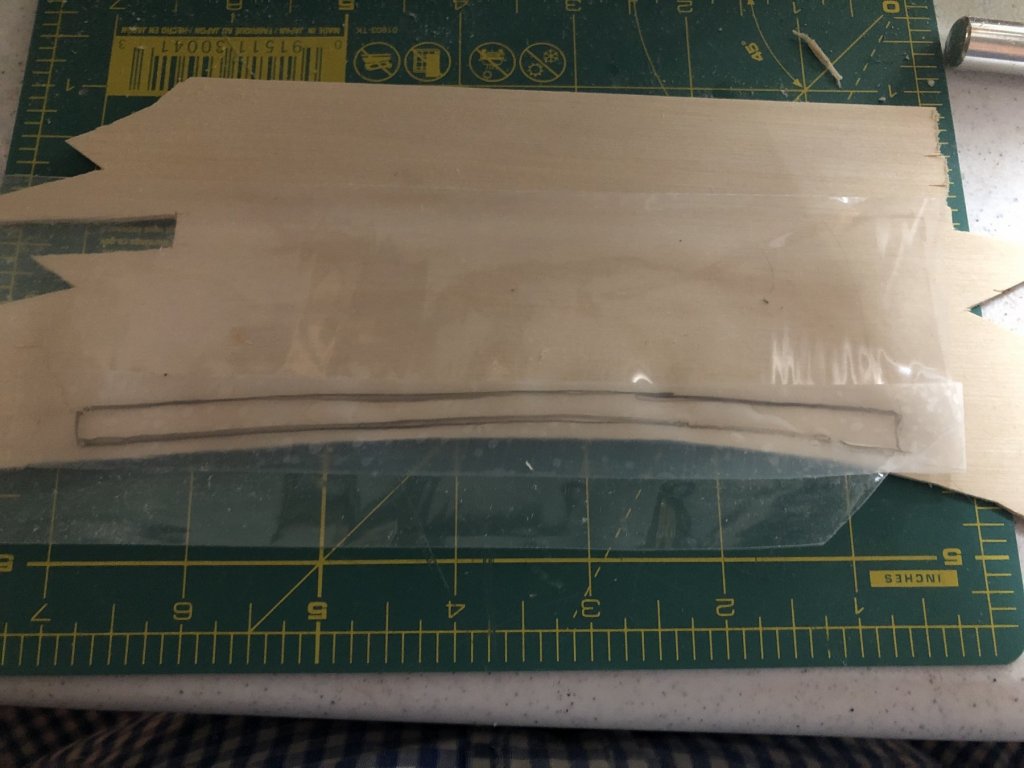
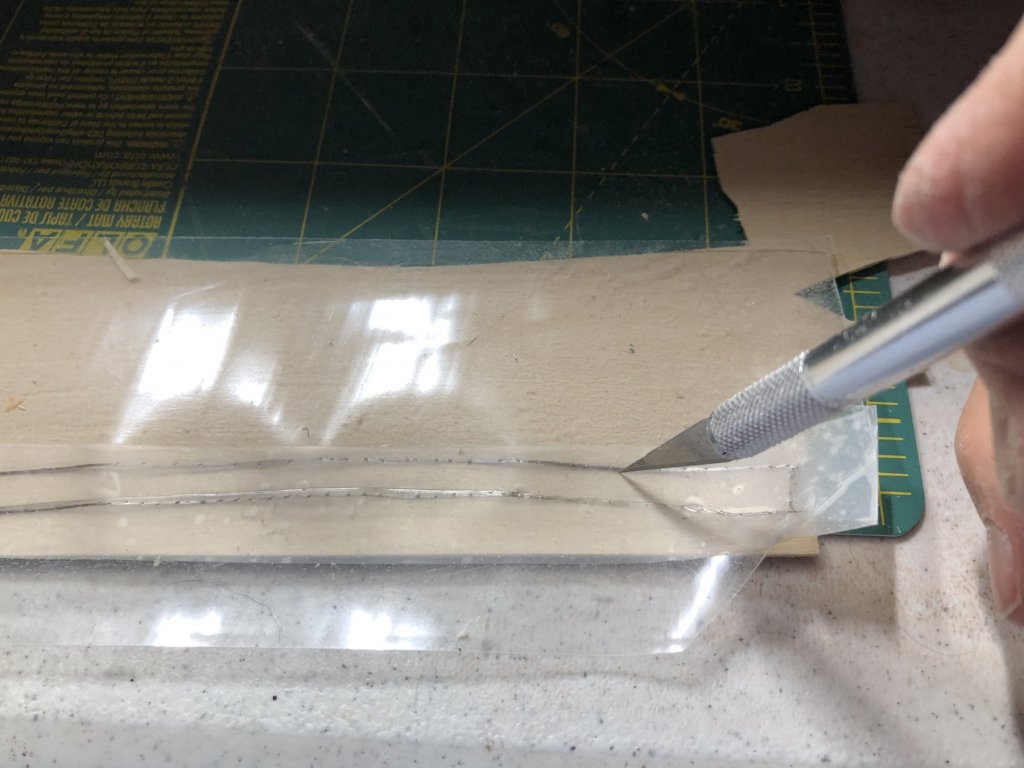
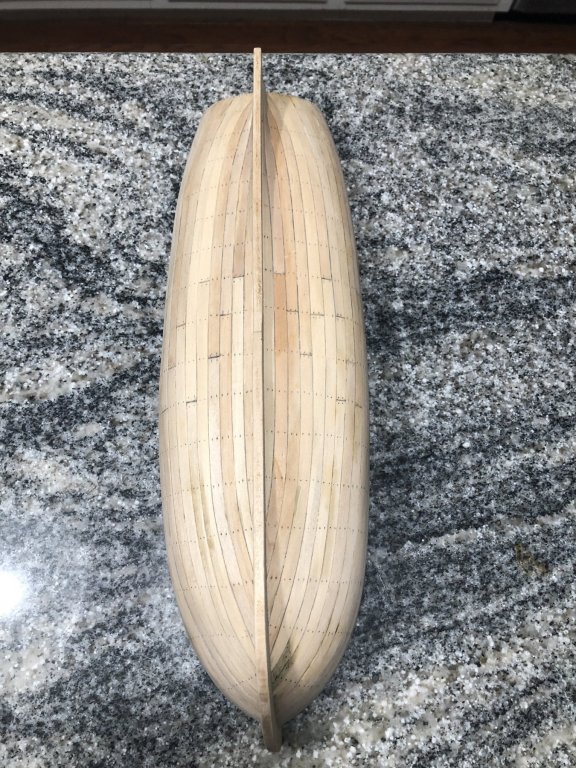
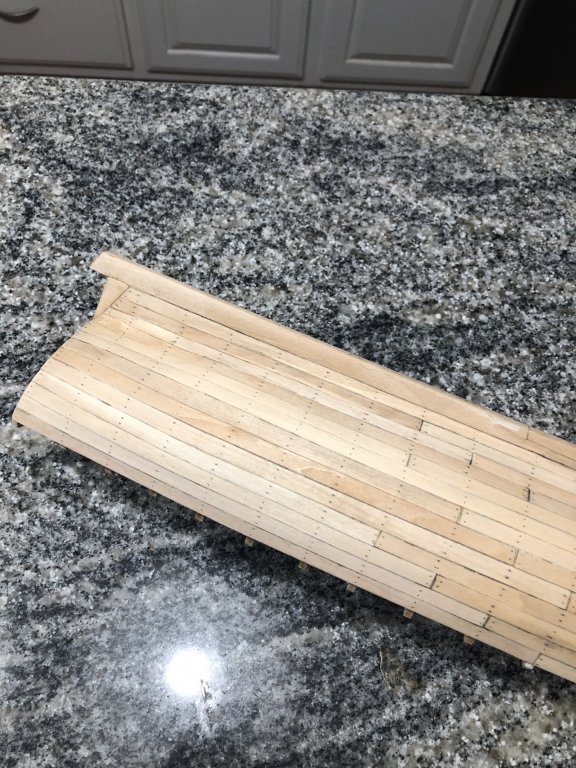
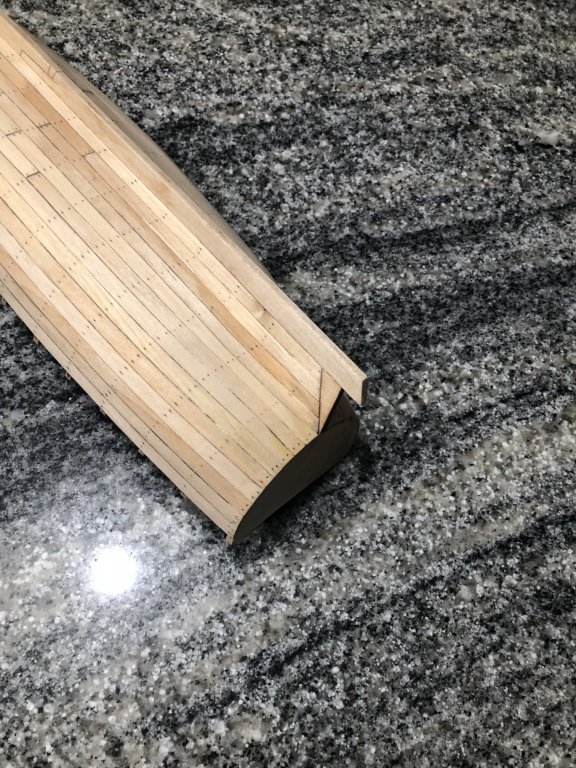
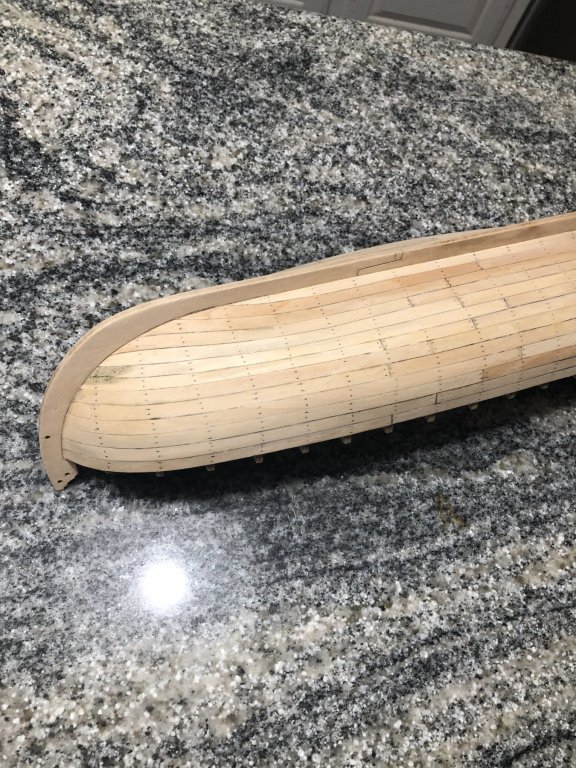
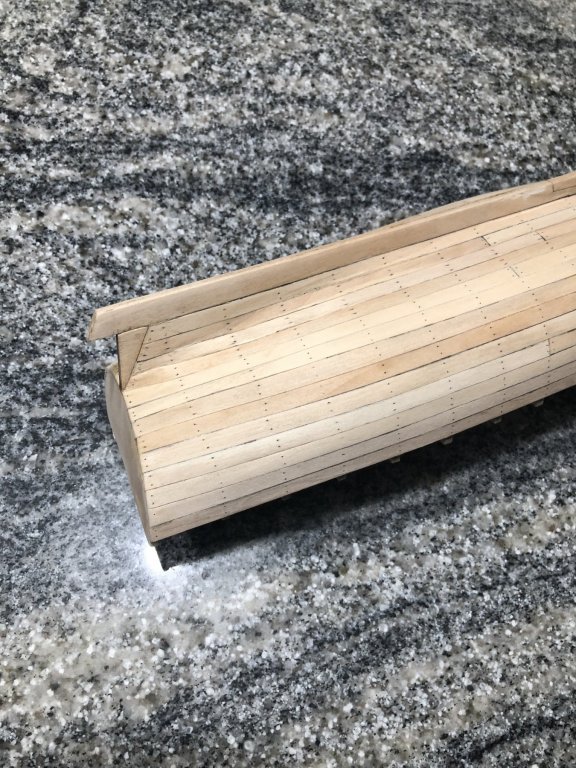
Well I think I have the hull nearly finished and I am almost ready to go to the next step. Before I post my results, consider a few steps I used in forming some of the strakes. I have included this for readers who may be unfamiliar with this technique. Above: Wide Patco tape overlayed with Scotch tape marked with #4 pencil. This step is typical Above: Tape on basswood sheet. Above: Blade used to mark wood prior to cutting. Tape removed in case a second cut is needed. Above: Plank ready for trimming to fit. Used sanding sticks for final shaping. Results so far: Above: Some “tar” lines more pronounced than others.* Also, butt joints are slightly different than plans. *The dark lines are not gaps rather they are pencil lines added after strakes were in place as much of the original pencil lines came off during sanding. I have decided not to try and make every line uniformly the same as I cannot imagine real boats as having everything done in perfection. The hull is not completely smooth from some strakes to others, but I feel rather good about the outcome. Sanding might improve the smoothness but I don’t want to risk sanding too far. Above: Dark area is wood filler which I think will be completely below the water line paint.


- 168 replies
-
- 6
-
-
- 18th Century Armed Longboat
- Model Shipways
- (and 1 more)
-
I have laid down strake #10 and now need to spile #11, #12 and #13. Here is where I think I should depart from the instructions. At bulkhead 0, the gap is 3/4”. The gap at bulkhead F is narrower and at stern, more. My plan is as follows: Use calipers to measure the width of the gap at each bulkhead and divide each into three equal parts, recording the numbers and putting tick marks on the bulkhead. Then, lay down wide tape (I am going to use 3” wide Patco 5560 wide Scotch Magic Tape on top since you cannot write on the Patco tape. Petco tape will hold its shape quite well and is removable.) I will then run a pencil along the edge of the strakes above the gap (away from keel) as well as marking the positions of each bulkhead. Next, at each bulkhead mark, mark down (towards keel) on the tape the recorded distance for one strake. Then use a French curve to draw a smooth cut line. Next, lay the tape onto a 1/16” thick sheet of basswood and cut out the strake leaving a small extra width for shaping. Repeat for each strake, stem and stern. I would appreciate comments, pro and con on this approach.
- 168 replies
-
- 1
-
-
- 18th Century Armed Longboat
- Model Shipways
- (and 1 more)
-
Nine planks on both sides down. No real serious surprises here but the reader should note the above comments since the last pictures. Well, ready to do the last four strakes. The final three might have to be spiled from a 1/16” thick basswood sheet or 1/16” X 1/2” stock. So far I have not had to do any spiling, therefore this will be new territory for me.

- 168 replies
-
- 4
-
-
- 18th Century Armed Longboat
- Model Shipways
- (and 1 more)
-
Hello Arthur, Yes it makes sense. I have experienced this as well. I think I have now completed plank #8 successfully on one side.
-
Arthur, was it necessary for you to sand the hull planks to achieve a smooth join between strakes or did they join up with no step?
-
I am having more trouble with plank #8 then I was expecting. The problem is at the stem. I assume the planks need to be flat against the bulkheads G and H. To do this, it is necessary to twist the planks. When positioned against plank #7, the joint between #7 and #8 is not “smooth.” I suppose chamfering the joint would help but I’m not sure that it will do the trick. Am I on the right track?
-
Well, I finally got the sheer plank and two more strakes added. No real issues but I redid the stern section of plank #6 several times because of the severe twists involved. I am only somewhat satisfied with the overall build so far but I believe it will work out alright. If I started over, I’m not sure it would end up being completely satisfactory anyway as perfection takes lots of practice and this is my first plank-bulkhead boat/ship. I have backed up several times to correct issues. BTW, I forgot to put “tar” lines in before gluing and I am trying to put them in after-the-fact with a 0.5 mm mechanical pencil. Oh well, on from here I go. Any suggestions would be great.👨🏻🎓


- 168 replies
-
- 10
-
-
- 18th Century Armed Longboat
- Model Shipways
- (and 1 more)
-
Arthur, somewhere I got the impression that 3/8”x1/16” planks were also to used to form strakes #11, #12 and #13. Would there be enough to do the platforms, floorboards and strakes? Is this what you were referring to on the Medway Longboat?
- 95 replies
-
- 1
-
-
- Model Shipways
- 18th Century Armed Longboat
- (and 1 more)
-
Be sure to check the thickness of the laser cut sheets. I found one containing the bulkheads thicker than the rest.
- 95 replies
-
- 1
-
-
- Model Shipways
- 18th Century Armed Longboat
- (and 1 more)
-
Very nice work and useful information Arthur. I will let everyone know about the kit supplied materials when I get there. Still working at a sub-snail pace. Paul
- 95 replies
-
- 1
-
-
- Model Shipways
- 18th Century Armed Longboat
- (and 1 more)