


lraymo
-
Posts
297 -
Joined
-
Last visited
Content Type
Profiles
Forums
Gallery
Events
Everything posted by lraymo
-
From this impressive build, its hard to believe that you're impatient! It looks amazing, and the bonsai driftwood is very cool!
- 106 replies
-
- 3
-

-

-
- Kentoshi-Sen
- bottle
- (and 1 more)
-
Once again, I go away for a few days and come back to see more AWESOME work you've done on Lula. It's looking really great (and i'm so happy there's a cat onboad!) Good luck on the handrails! Your attention to detail is fantastic!
- 732 replies
-
- 6
-
-
-
- Lula
- sternwheeler
- (and 1 more)
-
Wow, just amazing! I can't believe how much patience you must have, to do something like this... and it turns out looking fantastic!
- 106 replies
-
- 2
-
-
- Kentoshi-Sen
- bottle
- (and 1 more)
-
I love all the detail you've put into this ship! It looks great! And I'm glad you are back in your daily rhythm, but from someone who dropped out for more than a year, I know how hard it is to return. Glad you did!
- 732 replies
-
- 5
-
-
-
- Lula
- sternwheeler
- (and 1 more)
-
@Glen McGuire - @Keith Black thank you both for your encouragement and kind words! There's so many mistakes and errors in this build so far, and it's messy at best, but your encouragement makes me think it will look fine (from a distance!) when its finally done! I am ok with its current state, giving myself alot of "grace"! But I am absolutely terrified of working with the remaining blocks and deadeyes, simply because they are SO SMALL! (even tho you both have worked with much smaller items!) So I'm going to muddle thru, and I appreciate your words and your support! (It also helps that the other model is out of stock, so I can't get it anyway!) I am going to work on it a little at a time, since golf is in full swing, and I've got some other commitments, but I have to tell myself it isn't a "race" to the finish line, but a "stroll" through an activity that I enjoy, that I can work on a bit at a time! Not only that, it occurs to me that each new difficult task is helping me learn and improve my limited skill set! So I thank you both again for your wonderful encouraging support!
-
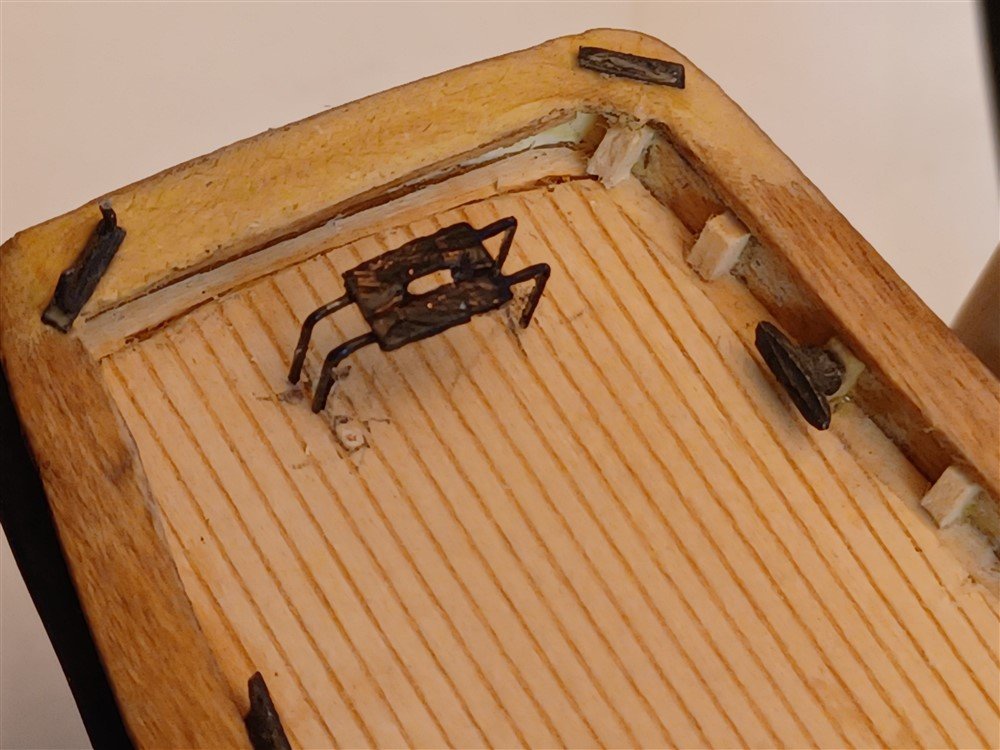
I worked a bit more on the Traveler, trying to make it look a little better and straightening the legs (staples!), and painting it black. It needs another coat, but this is ok for now. This has not been glued in, I just wanted to see it in position. Disregard the pencil marks, and all the other blemishes! I'm seriously considering going back to the 3rd ship in the Shipwright series (I had only done numbers 1 and 2). The 3rd ship is at a 1:24 scale, which might help me become more experienced, before trying to finish up the Phantom.
-
Keith, this sounds like very good news! And glad you are back with Lula! I am sending healing thoughts for your appointment on the 19th!
- 732 replies
-
- 2
-
-
-
- Lula
- sternwheeler
- (and 1 more)
-
Glen, thanks for the kind words. I am awed by the talent in MSW, and love watching what everyone is building. Obviously, i am a rank beginner, and at the moment, having a very hard time with the small scale of this ship... but I'll forge ahead for now. Meanwhile, I jumped over to your Kentoshi build. Wow! Incredible!
-
Glen, this is a fantastic ship! It looks so amazing! Thanks to your very kind comment on my build, I had to come over to see what you were building. I am awestuck, and will follow to see it installed in its bottle!
- 106 replies
-
- 4
-
-
-
- Kentoshi-Sen
- bottle
- (and 1 more)
-
I vote for Glen's story as well. My Dad used to make our family car trips really long because he didn't like to ask for directions and also didn't like to turn around! So we might've ended up on a ferry trying to return to where we were supposed to be! As for women in pants, I cringe now at the memory of having to wear skirts and dresses into the office. Ugh, so happy that I no longer have to put up with that!
- 732 replies
-
- 5
-
-
- Lula
- sternwheeler
- (and 1 more)
-
Thinking of you today, Keith, and sending healing thoughts! Hope all goes well!
- 732 replies
-
- 5
-
-
-
- Lula
- sternwheeler
- (and 1 more)
-
Thanks Keith! I consider myself one of the gang, and seeing all the friends you've got here, you have a wealth of support getting through these next challenges!
- 732 replies
-
- 4
-
-
-
- Lula
- sternwheeler
- (and 1 more)
-
Wow, I go off to play golf for awhile and come back to changes! I will be sending healing thoughts for you on the 30th and afterwards for whatever the next steps are. Meanwhile, will be thinking of you. Lula looks fantastic! I like the rigging on her... looks great!
- 732 replies
-
- 4
-
-
-
- Lula
- sternwheeler
- (and 1 more)
-
Wowzer! And I thought my stuff was tiny... but yours are teensy! Way to go!
- 732 replies
-
- 4
-
-
-
- Lula
- sternwheeler
- (and 1 more)
-
Wow, you've done so much since I was here last! She's looking amazing. Love all the intricacies, and your historical detail that goes along with your build!
- 732 replies
-
- 3
-
-
-
- Lula
- sternwheeler
- (and 1 more)
-
Wow, this is looking great! Enjoy reading your history and descriptions of terrain. Looking forward to following your continued amazing progress!
-
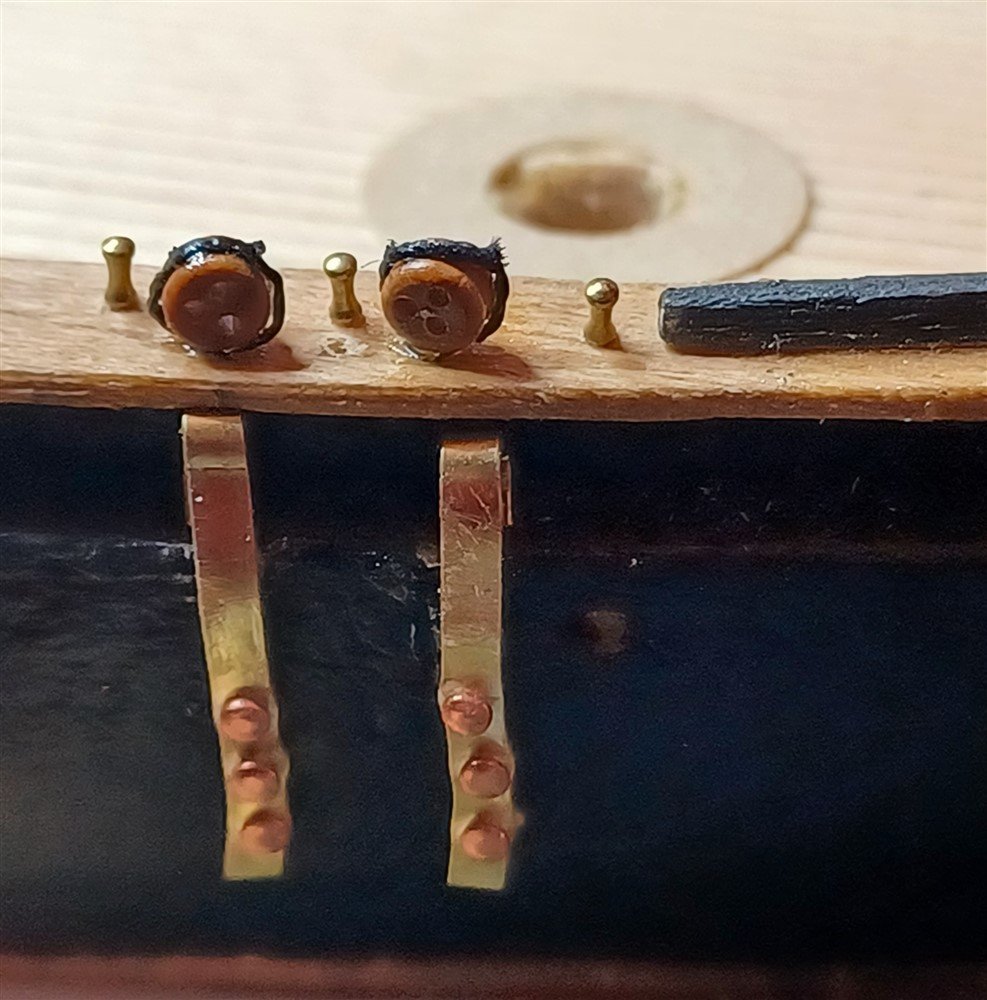
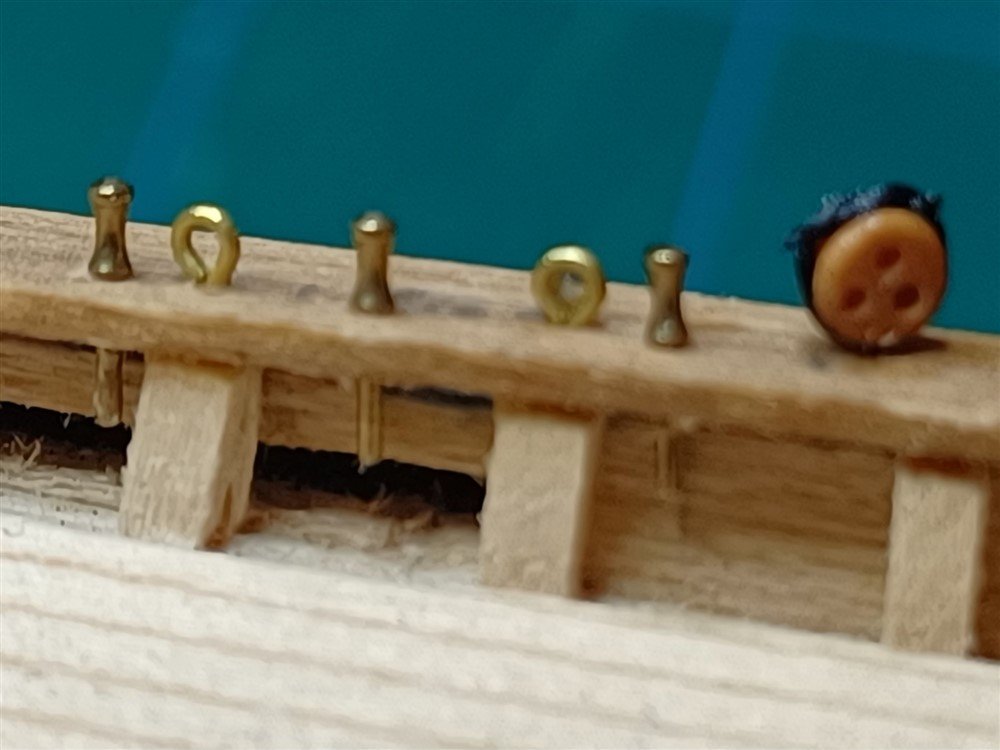
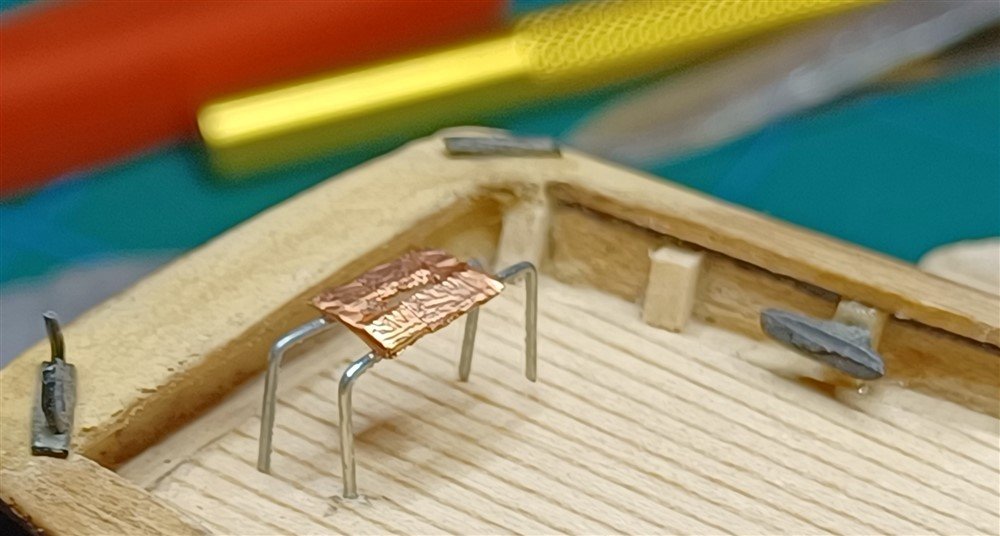
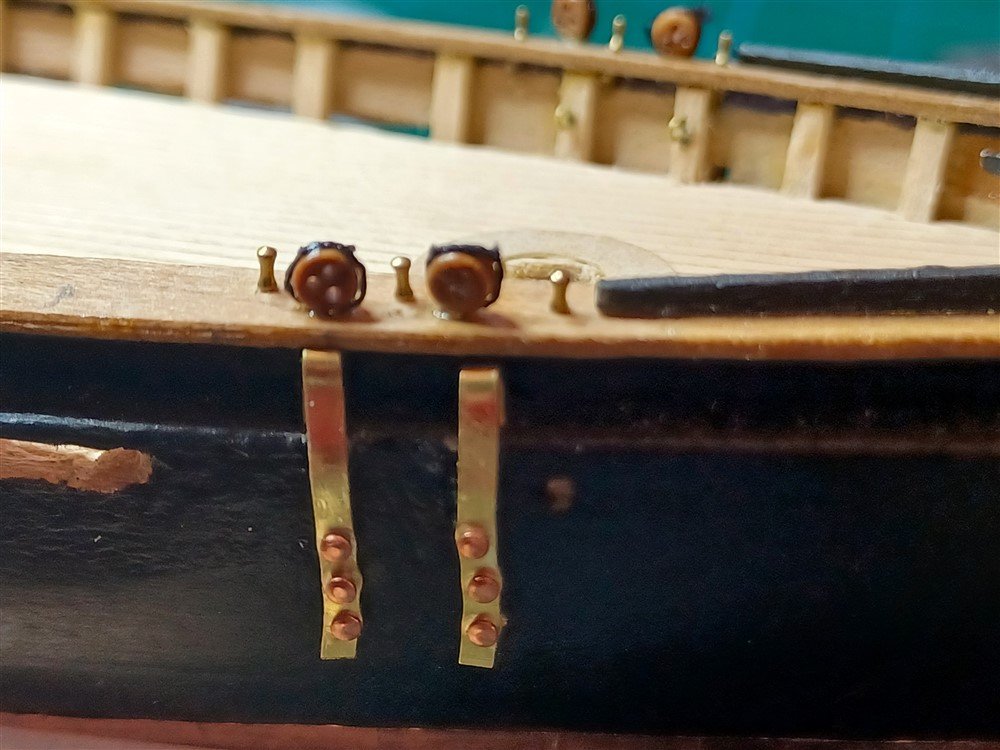
Fun with superglue and itty bitty pieces! So I installed belaying pins and eyebolts on the cap rail. I dragged each of the belaying pins thru some superglue (conveniently poured into a plastic bottlecap for ease of access). But since it appears I can still move some of the pins, it apparently didn't do the trick. However, it looks like these pins are for "show" and don't have anything else attached to them, so as long as I don't hold the ship upside down, I'll be ok! (I wish my phone could take clearer pics!) Also created the Traveler. I went completely off script trying to create this little gem. Couldn't get the legs right using the .22 gauge wire they suggest, but I stole a couple of staples from my stapler and they work rather nicely! The actual Traveler is a completely made-up version of what they asked for, but at this point, it'll have to do! It's not secured yet since I still need to install an eyebolt under it. While working on this build, I also took some time to read "All Hands on Deck" by Will Sofrin. It's the true story of sailing a refurbished 1800"s "tall ship" from New Jersey to California (thru the Panama Canal) for it to be used in filming the movie "Master and Commander" with Russell Crowe. I learned many new words associated with sailing (who knew that "dismasting" is how to describe a broken mast?) It's a fascinating story of how a small crew sailed a 3-masted tall ship through treacherous waters, and survived some harrowing experiences (dismasting, for example!) to successfully deliver the ship to the movie makers. A fun read!
-
I'm quickly learning to adopt this sentiment, otherwise I'll never finish this build! Thanks for this bit of wisdom!
-
Well, after a really busy week, where I was hosting a brunch (and had to put away my modeling because my workshop is also my kitchen table!), I decided to forge ahead with this build, and move on to the next step. Things will slow down a bit, since the golf leagues have started, but I'm going to give it a try again!
-
Eric, I actually thought of doing something similar! I'm thinking of cannabilizing the Longboat kit, and using some of its parts to experiment with using the mast and rigging from the Longboat , replacing one of the masts on the Bounty. I was planning on not using the sails on the Bounty anyway... I just like seeing the rigging lines! It might look a little goofy, and certainly not historically accurate, but it might be fun!
-
Jacques - thanks for the good advice! Keith, thanks for being so kind! And so encouraging. I still like building, but I think its time to go after a simpler model just because I'm getting so frustrated with the little tiny pieces, and it's not very much fun. I'm thinking of trying the larger scale model that Eric mentions. Although i'd like to do some simple rigging, and I see the Glad Tidings Pinky Schooner has more rigging to it (along with the dreaded chainplates!). But I don't know if it would be any easier (and its a bit more expensive!) Eric, I really appreciate your thoughts! You, too, have been really encouraging! I looked up the Bounty Launch... seems it might be the better choice since its a larger scale. It's on backorder, though, so I'll continue to muddle along until its available. One of the reasons I chose the Longboat was that I wanted to learn more about rigging. The Bounty doesn't have much rigging going on, but i like the fact that its a larger model.
-
well, as a matter of fact, it DID say it was generated by Google AI! Oops! I wasn't sure what it was trying to say, but thought maybe I just didn't understand. Seems like it was AI that didn't understand! (I won't fall for that again!)