-
Posts
424 -
Joined
-
Last visited
Content Type
Profiles
Forums
Gallery
Events
Posts posted by abelson
-
-
-
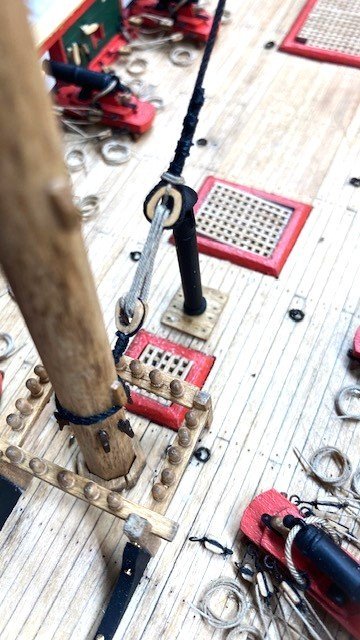
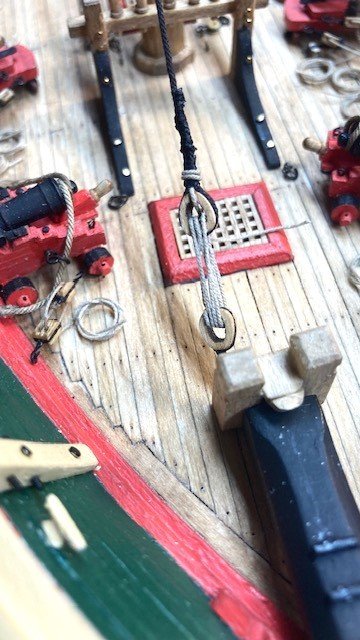
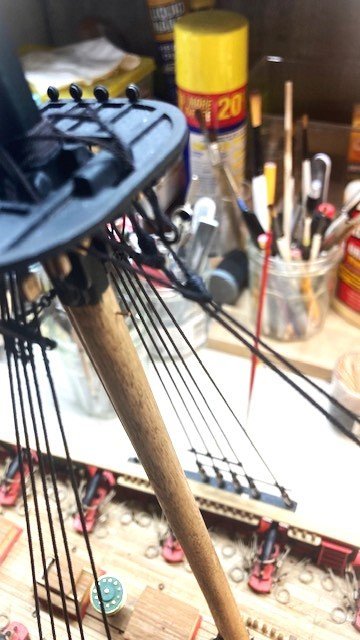
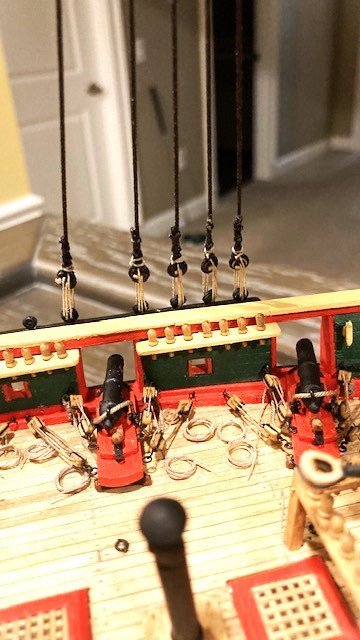
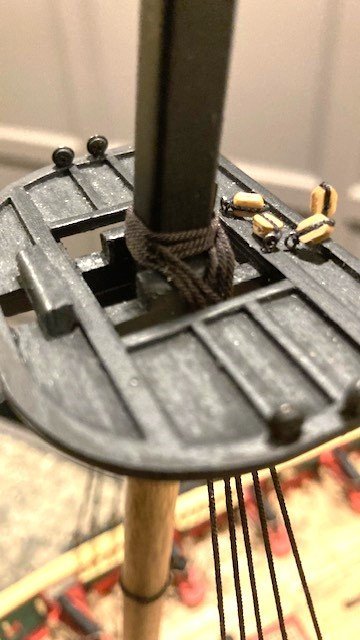
Completed the Main and Fore Mast Stays. I used .045" Syren line for the Main Stays and .035" Syren line for the Preventer Stays. The Main Mast Stay has a 5mm Syren closed heart and lanyard attached to a 5mm Syren closed heart with a collar (previously installed) that is seized around to the fore mast. The end of the Main Mast Preventer Stay has a 5mm closed heart, a lanyard, and a 5mm closed hard with an iron strop that is attached to an eye bolt on the Bowsprit Bitts. The Fore Stay and the Fore Preventer Stay each have 5mm closed heart and lanyard that are attached to the laser cut open hearts on the Bowsprit.
I began the stay rigging by making the mouse. I used a 5/32” diameter dowel and pre-drilled the end with a .55mm bit first and then gradually increased the bit size to accommodate the .045” and .035” rope. Note: The plans call for .047” rope which is not furnished with the kit. The end of the dowel was roughly shaped with a sanding stick and sandpaper. The length of the mouse is somewhat arbitrary. It appears to be very small on Plan Sheet 5. I made it 3/32”. Before cutting off the dowel, I scored the end with a knife, removed some of the dowel, and then filed around the score to get the basic shape of the mouse. I then cut off the dowel and finished shaping the mouse. The process is pretty easy. I applied CA to the end of the main stay line to make it easier to pass it through the mouse.
.jpg.08bd0b59003c794c320187b200bd6858.jpg)
.jpg.346003dc4c89cd9f83655b1dd98b5218.jpg)
.jpg.62e7fb24fbb2d1a13e871126904886e5.jpg)
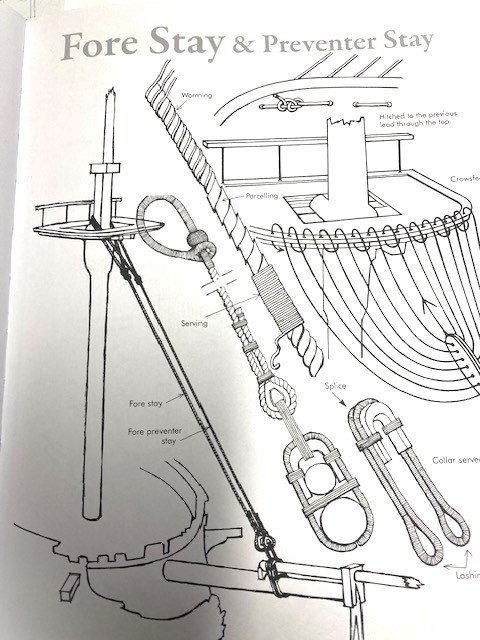
Next, I seized an eye onto one end of each stay using sewing thread. I measured the lengths of the stays from Sheet 5, allowing extra length for the wrap around the mast head and seizing the 5mm closed heart to the loose end. I set up the Main and Fore Stays around the mast head temporarily to get the distance between the mouse from the eye (about 3 1/4”). The position of the mouse is somewhat arbitrary, but I used Sheet 5 as a guide. Once I set the position of the mouse I applied a little CA to secure the mouse to the rope. The orientation of the mouse and eye is not clearly shown on the plans. It's typically oriented as shown in the attached photo taken from Petersson’s Rigging Period Ship Models. Some build logs follow this, some don’t. Note: the distance between mouse and eye on the preventer stays is greater than the stays as shown on Sheet 5. I painted each mouse black and served it with black thread.
.jpg.b32da0c630250986c7ec683c70bbcaeb.jpg)
.jpg.840df2a46401f085dbf19094be236cce.jpg)
.jpg.49b89e12fe2ae93d63733a06f553bbde.jpg)
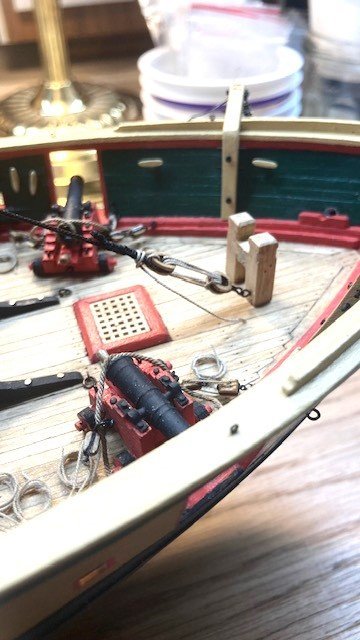
I seized a Syren 5mm closed heart to the loose end of the Main Stay and Preventer stay with .008” black rope. Note: The plans call for the lanyard to be .016” rope. The kit is not furnished with this size rope. I used .018” Syren rope instead. I reeved the lanyard between the Main Stay closed heart and the closed heart rigged on the fore mast. I tied the lanyard to the heart on the fore mast with half hitch and reeved the line 4 times around the hearts, tied it off at the Main Stay, secured it with CA and trimmed it. I did the same for the Preventer Stay but didn’t secure the tie off end in case I need to tighten the lanyard later on. The Fore Stays will be rigged later when the Bow Sprit is rigged.
.jpg.3ddc9aee10ad8e64f3314fe83f11aef2.jpg)
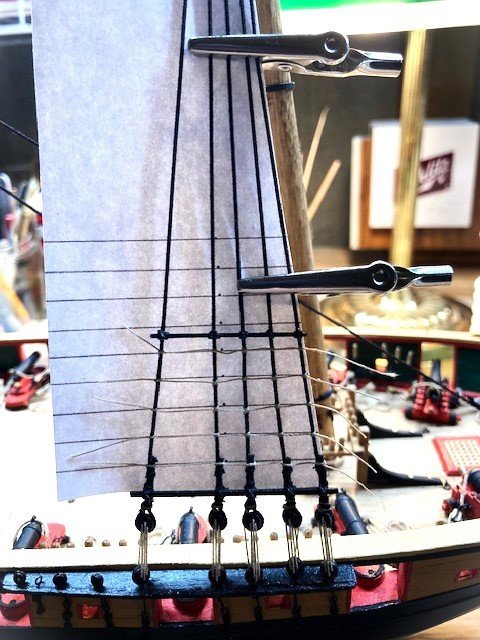
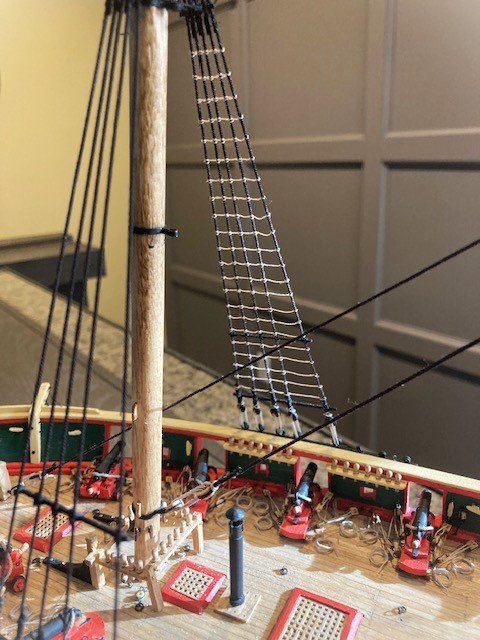
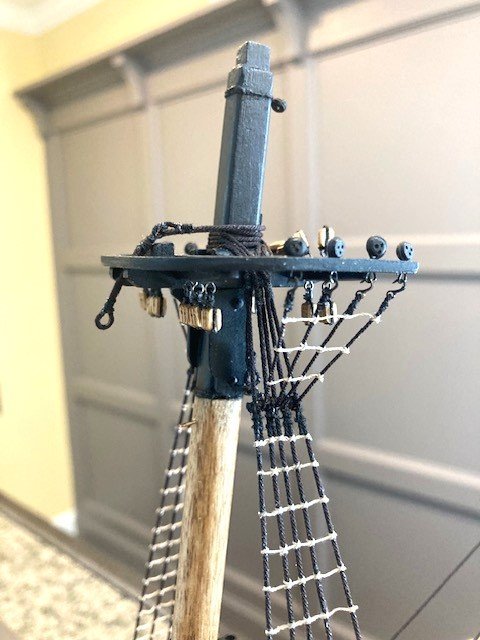
Completed the rat lines on the fore mast shrouds and the fore top mast shrouds. I used Syren .008” tan rope to simulate the rat lines on the replicate ship -some build logs chose to use black rope. The plans call for the rat line spacing to be 7/32”. For simplicity, I created a grid sheet with 1/4” spacing. I attached the grid to the shrouds with allegator clips. Working from left to right, I tied the rat line to the first shroud using a half hitch knot and applied a little CA to secure the knot. For the remaining shrouds I used a clove hitch, and applied CA to secure them. The loose ends were trimmed with a nail clipper. The Fore and main Top Mast Shroud detail on Sheet 5 shows 4 rat lines. To keep the fore mast and top mast shroud rat line spacing uniform, as other build logs have done, there are only 3 rat lines on the top mast shrouds. I had difficulty with the top mast shroud rat lines (some do overs). I’m not completely satisfied with them. I don’t think they’ll be that noticeable in the final analysis. The main mast shroud rat lines will be completed in similar fashion.
.jpg.f890e52f63bc0353ee32b9f59c0cb48e.jpg)
.jpg.5ae34e1548131e386fe54b9ba533b173.jpg)
.jpg.67658df51d09cf177acc0e97b1cf0001.jpg)
-
Nice work on your Niagara. I haven't seen plastic used in other build logs. The use of plastic seems counterintuitive to wood ship building. I hope plastics don't creep into wood ship models.
-
12 hours ago, Sergey Karelia said:
The fairleads are for the buntlines and leechlines. I plan to simply tie off the buntlines and leechlines to the fairleads as some other build logs have done.
-
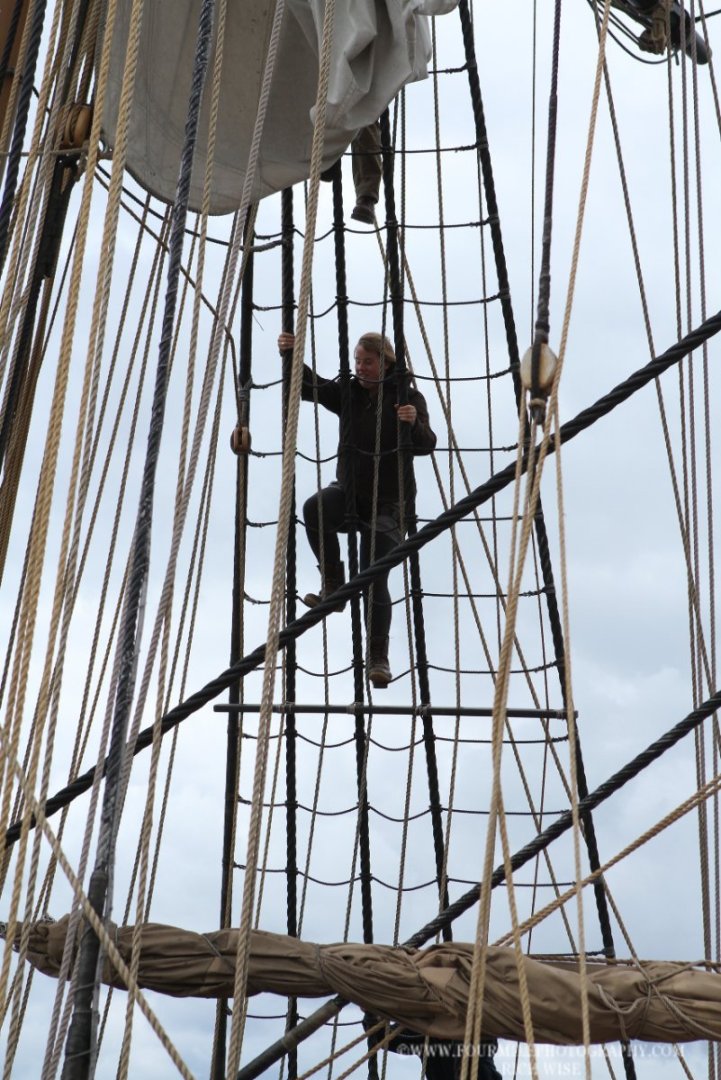
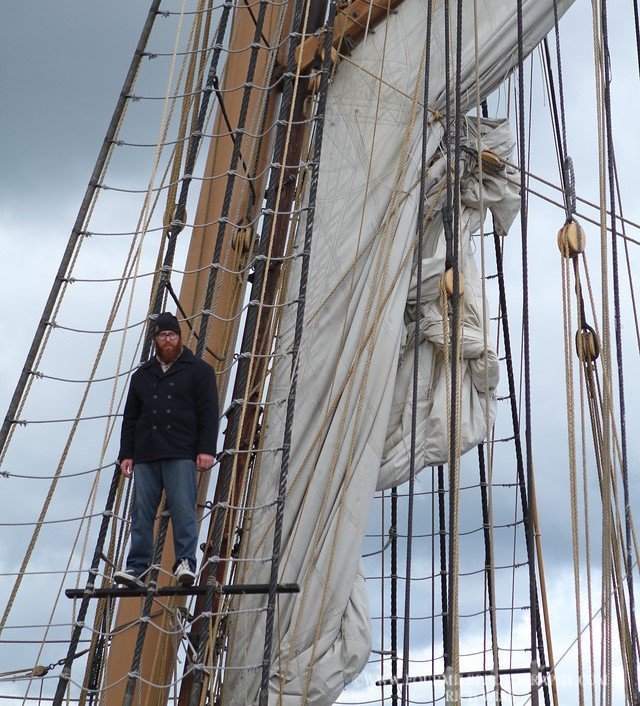
Completed the Main Mast shrouds a la the Fore Mast shrouds. Added the sheer poles (3/64”x1/32”) and the Fairlead Bars 1/32”x3/64”) to the shrouds. Painted them black to match the replica ship. I glued them first and then lashed them to the shrouds using .012” line. I drilled three holes in the Fairlead Bar as detailed on Sheet 5. Before drilling the holes, I added a little CA to prevent the wood from splitting. I made a tick mark for each hole on both sides of the bar and them drilled the holes from each side. The holes are for the “lines going to the pin rail.” The only line that I can find on the Sheet 5 is the Top Mast Tack. Note: After looking at photos of the replica ship, I discovered that the Fairlead Bars are lashed to the shrouds on the inboard side and not the outboard side as I did – I wish I would have read 6ohiocav build log before fashioning the Fairlead Bars. Also, as can be seen on the attached photo of the replica ship, there are eight (8) lines that pass through the Fairlead Bar. Further, there is a Fairlead Bar on the Main Mast shrouds as well (not shown on Sheet 5). This is a shorter bar that has five (5) lines passing through it (see photo).
Decided to leave the starboard side fair lead bar in place for risk of damaging the shrouds while trying to remove it. Lashed the port side fairlead bar to the inboard side of the shrouds. Pre-drilled holes in the bar via the same method as the starboard side. Fashioned the Main Mast Fairlead Bars. Pre-drilled 5 holes in the Fairlead Bar and spray painted them black. Glued the bars to the shrouds and lashed them with .012” line. Note: the bars are shorter than and lashed on the shrouds lower than the Fore Mast Fairlead Bars per the replica ship. Touched up the shine from the CA with brushed on black paint.
Added the staves to the shrouds. The plan calls for 1/32 inch diameter wood staves. The kit is not furnished with this size wood strip. I used a 1/32“x 3/64“ wood strip. The staves are mounted on the inboard side of the shrouds, which makes them difficult to install. I applied CA to the shrouds to secure the staves. I then lashed the first stave to the shrouds with .008 inch line. I decide not to lash the remaining staves. My thought was that the staves will be secured when the upper mast shrouds are wrapped around the staves. Note: I extended the staves across all of the lower shrouds. Sheet 5 shows the staves extending only across the four aft-most shrouds.
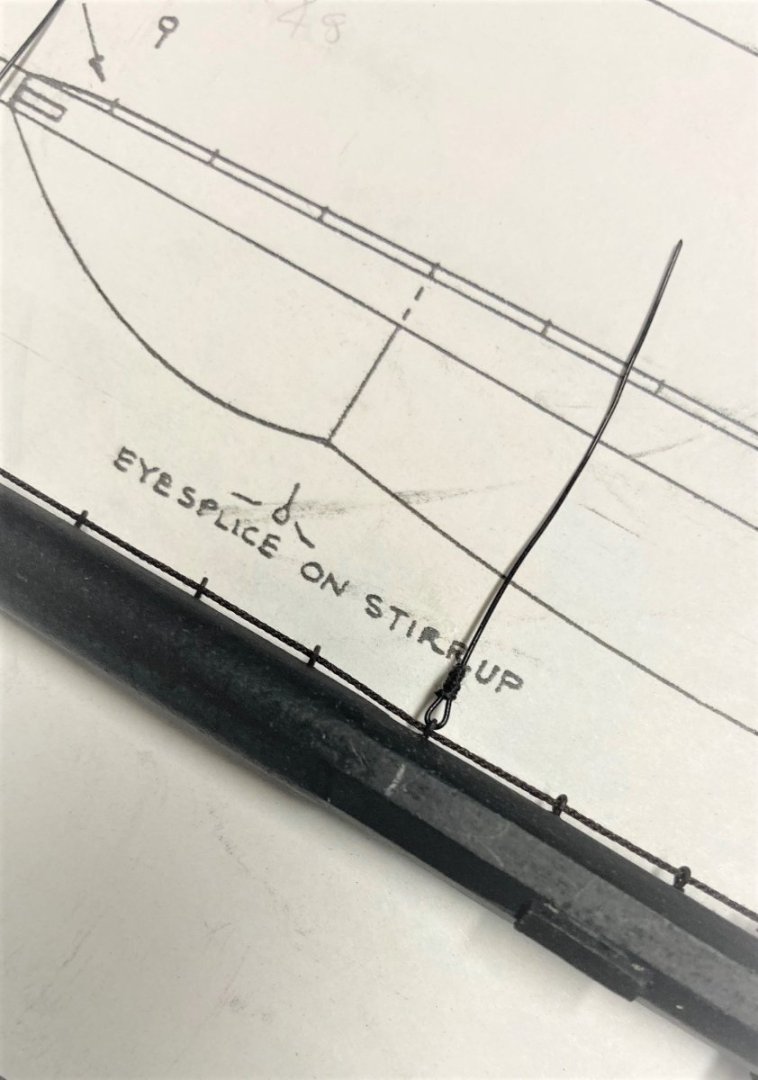
Next, the catharpins on the lower shrouds. It’s easier to add them before adding the futtock shrouds. Note: There is no discussion in the Instruction Manual on when best to add the catharpins. The detail on Sheet 5 calls for the catharpins to be made with .023” rope. I used a .018 rope – I think thinner is better than thicker in this case. I made 2 thimbles for each catharpin from 28 gauge wire and lashed a short piece of .018” rope to each thimble. The completed piece measures about ¾” from thimble to thimble. Next, I cut a length of .018” rope long enough to pass through one thimble and the shrouds. I eye spliced and seized one end of the rope to the stave, passed the other end through the thimble and then through the shrouds and attached an alligator clip to the end. I cut a similar length of rope and passed it through the opposite end thimble and through the shrouds, and clipped both ends together with an alligator clip. The loose end of the eye spliced rope was eye spliced and seized to the stave. I adjusted the length by tensioning the loose ends of the rope on the opposite of the catharpin. The opposite side catharpin was set in a similar fashion. The sides of the catharpin aren’t exactly equal, but they’re close enough for my liking.
.jpg.94bfafb31391fcf23241a9748a057767.jpg)
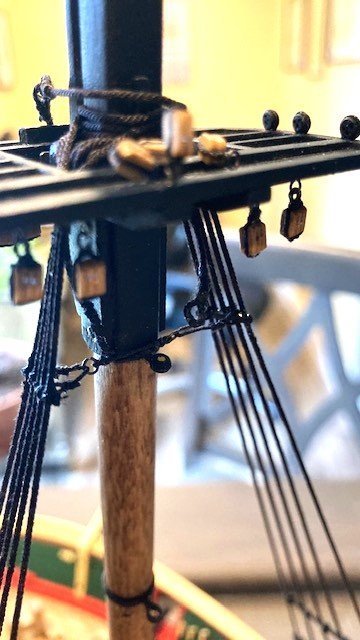
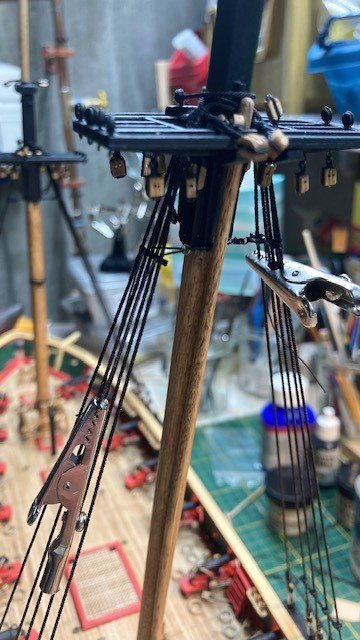
.jpg.95f0745639d1620b1e89526517e5e2fa.jpg)
Added the 16 futtock shrouds. The shroud hooks were 5mm purchased from Crafty Sailor (easier than making them), blackened with Brass Black. The plans call for .023” rope (not furnished with the kit) for the futtocks shrouds. I used Syren .023” rope. I found that a length of 2.5" is sufficient The lines were seized to the hooks, hooked onto the deadeye eyebolts, wrapped around the stave, and seized to the lower shrouds with polyester sewing thread as per Figure 8-3 in the Instruction Manual. The shrouds were fairly easy to install. I’m thinking of fashioning the Main Mast Stays next.
.jpg.a430dfd280a5f7a0fcaf676bc5abff67.jpg)
.jpg.4ece2affa698124cb91ccbb0dbaf8e39.jpg)
.jpg.0020f07320f2795ed73f5ca0b1aad842.jpg)
.jpg.dcd468fbb341fc07918469de43c013c0.jpg)
.jpg.e0c3fd962daeba10d5ed52cacfbbadb8.jpg)
- RossR, robert952, Ryland Craze and 3 others
-
 6
6
-
On 1/30/2024 at 1:33 PM, Ethel said:
abelson,
I am working on the Niagara after about 5 years, being incompleted, and in a box, -but I'm still plugging away. I am studying your posted listings and want to thank you for such a great study of detail & documentation of your progress. I am not an experienced model builder or knowledgeable of nautical terms, but love the challenge & turn to your pics for direction & understanding!! Keep up the excellent work!!!
Thank you immensely. I am just starting to do the planking & trying to paint as I go along. Alot of my previous stock of paint dried up, so I want to get the new bottles used.
Perseverance and patience are virtues in model ship building. Thanks for the compliment. I'm pleased that my build log is helpful.
-
On 12/21/2023 at 2:49 PM, milosmail said:
Nice work on the shrouds!
I, too am not adding hammock netting. It never ends up looking 'authentic' and the deck is pretty cluttered anyway.
I have replaced all the cordage for the ship with Siren, after finding the ME stuff pretty tedious to work with. I have 8, 12, 18, 35, aand 45 as needed in tan and dark brown. Very happy with it. There is another build log that lists about how much to purchase, but I'm just estimating so far. I suspect it will cost about $100 for all the replaced line. I also bought cleats from Syren for the ship, as they are more to scale.
Each builder will have to make their own decisions on many of the constructs of the ship (and how much extra they want to spend). Do they want a ship that is an accurate representation of the reproduction, or something more historically accurate (but not necessarily litteraly accurate)?
My objective is to simulate the current ship yet not historically authenticate it. Thanks for the compliment.
-
Decided to forgo the hammock stanchions. I thought the effort wasn’t worth the effect. I like the clean look without them. So, on to rigging the Main and Fore Mast lower shrouds. But, first, I discovered that I had forgotten to attach the boarding ladders which I had previously fashioned. The ladders interfere with the carronade tackles. It must have been problematic on the actual ship.
.jpg.538347943d4e35ce4aa53cc00c1fe68c.jpg)
.jpg.049065de4024872b12930787939d2e27.jpg)
And I decided to finish the laser cut quarter davits. I painted them yellow (MS4829 Hull Yellow Occre) and black (Model Color acrylic by Vallejo). The davits have sheaves at the top. I created the faux sheaves in the davits using a saw. Drilled a .55mm hole for the bitter end knot. Added a 7/32” cleat to each davit per the detail on sheet 4. I purchased the cleats from Crafty Sailor. To secure the cleats to the davits I inserted a brass pin in each cleat. Note: be careful when making the davits because they are not uniform in shape from end to end. Lay them on the detail on sheet 4 to be sure you have the correct orientation. I made the davit brackets from 1/64"x1/32" brass strip - they will be blackened later. The davits will be left off ship and out of harm sway for now.
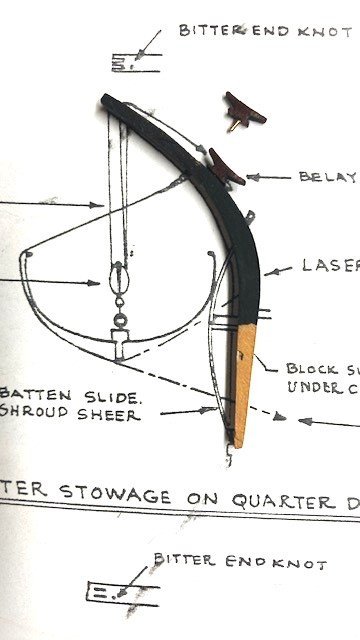
.jpg.81516dd8ac7d51f30811e15ddcf9c3fc.jpg)
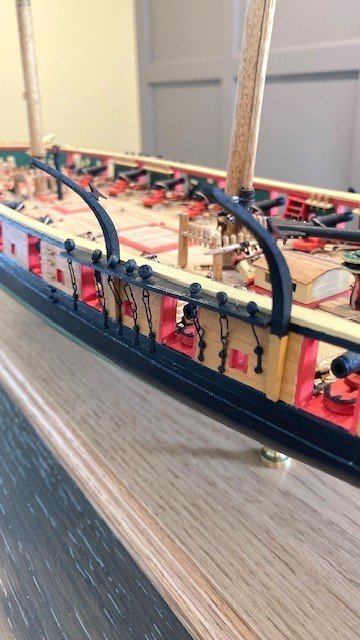
.jpg.e8cacb0760a69726e523f5b1bdd25e1f.jpg)
While fabricating the davits, I realized that I did not drill a hole in the stern davits for the bitter end knot. This was carefully done with a .55mm drill.
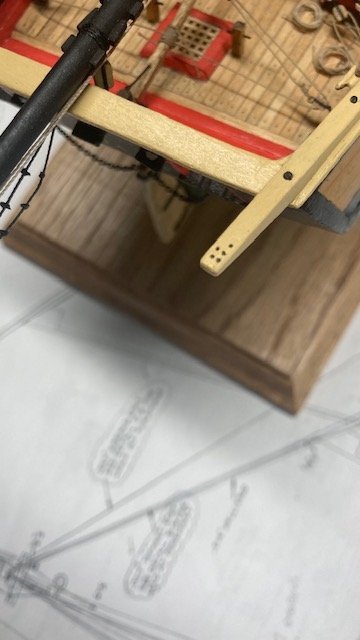
Before making the shrouds, I reviewed the plans and the instruction manual, particularly the details on Sheet 5. I began with the Fore Mast lower shrouds. The burton pendants with single shroud P&S are first, followed by the first pair of shrouds P&S and, lastly, the second pair of shrouds P&S. The fore stay, preventer stay, and course yard sling in that order. As the instruction manual states “remember, stays go over the shrouds.” The plan calls for the shrouds to be .035” line (not furnished with the kit). I used .035” brown rope purchased from Syren. I spray painted the deadeyes flat black (Testors 1249T enamel) to simulate the actual ship.
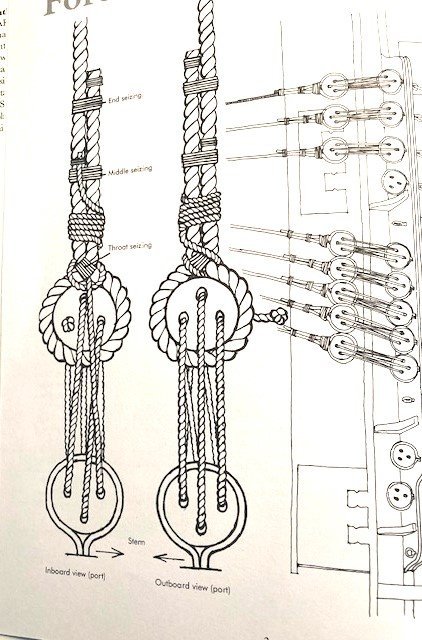
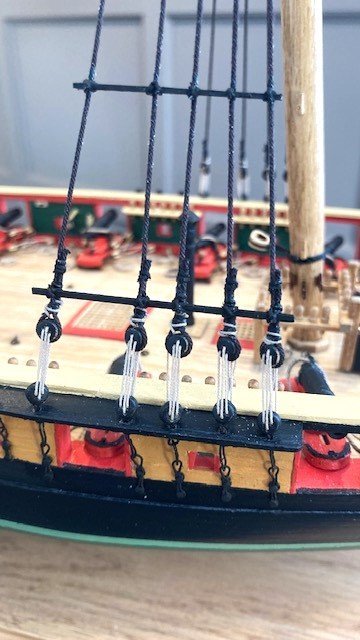
I made the burton pendent shrouds first following the detail on Sheet 5. I measured the length of the shrouds from the plan and allowed enough wrap around the 1/8” deadeyes. The 1st and 2nd pair the shrouds are slightly longer from fore and aft. I found a rope length of 19" to be adequate. I added a little CA to the ends of the rope to prevent them from fraying. To space the deadeyes, I fashioned a jig from 28-gauge wire as pictured in Figure 8-2 in the Instruction Manual. With the jig in-place, I wrapped the first shroud around the deadeye, tensioned it, attached an allegator clamp, and seized it with .012” black rope at the throat, middle, and end of the rope. The length of the end of rope is a matter of preference. I made it 1/2" above the top of the deadeye. I used Syren 012” rope for the lanyards. I found that I had to adjust the height of the jig for the second pair of shrouds in order for the deadeyes to line up. There isn’t much detail on the plans to illustrate rigging the deadeyes, so I copied a nice detail from Petersson’s Rigging Period Ship Models and added it to the build log (see photo). I didn’t quite follow the detail in every respect, though - I improvised.
.jpg.76a50725e731b51d4d7626dc391991de.jpg)
.jpg.28d36edf6c54d938a44dbb1c2b5d4bd5.jpg)
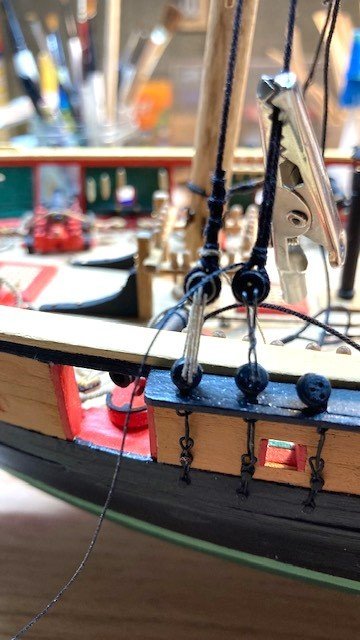
Completed the Fore Mast lower shrouds. Next up, the Main Mast shrouds. This will be the last post for 2023. Wishing everyone happy holidays and a healthy 2024. Stay tuned.
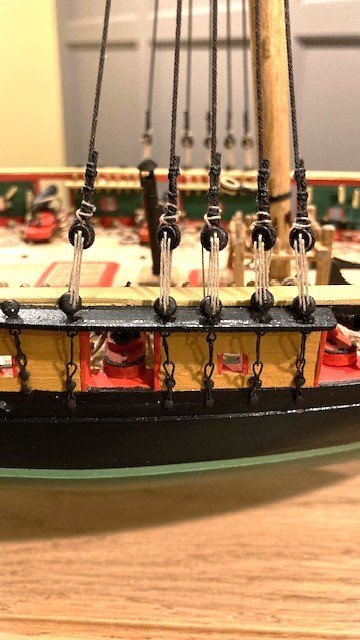
.jpg.685f05d4a9b8e183d6252b561e4ddc02.jpg)
-
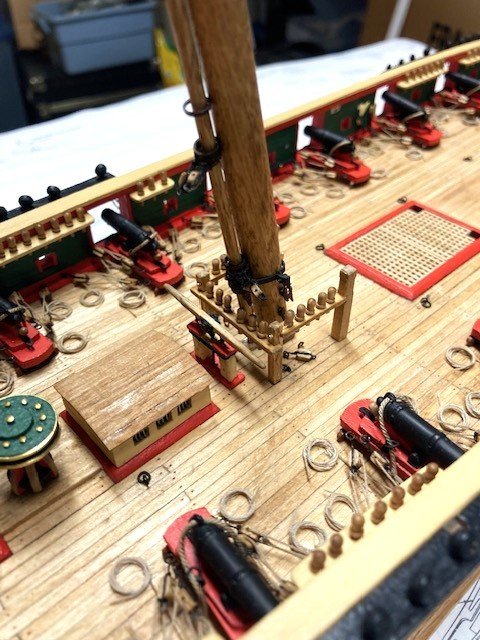
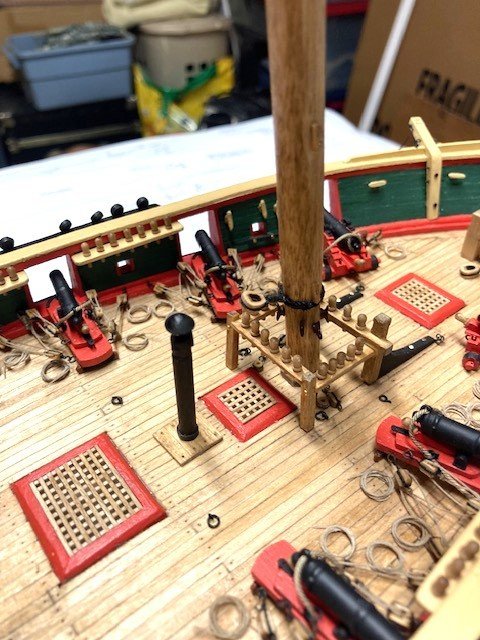
Completed placing the structures and setting the Main and Fore Masts.
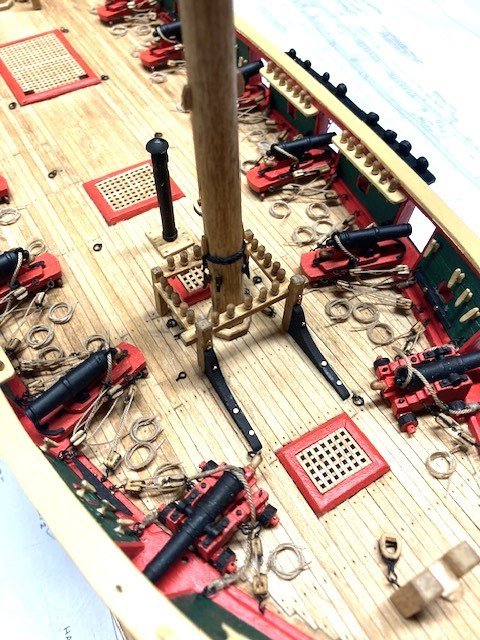
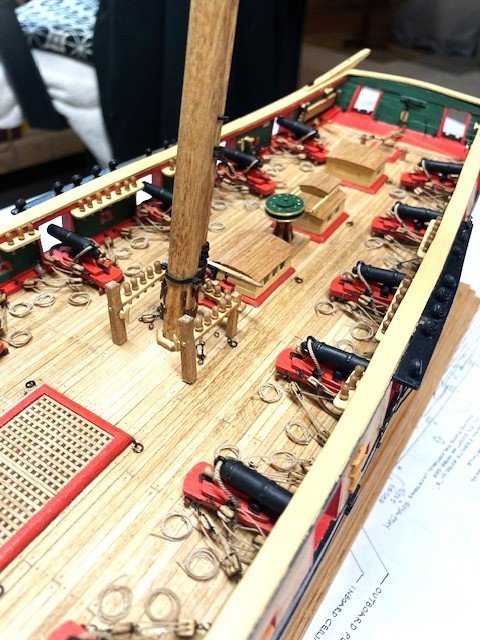
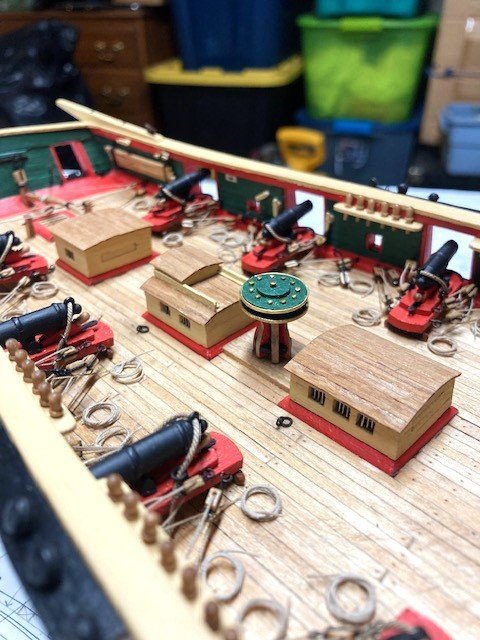
.jpg.bbd96bfff23a334d5402e305c0588344.jpg)
.jpg.b6ae4aa95ebf6ef502a6e20960d28aa1.jpg)
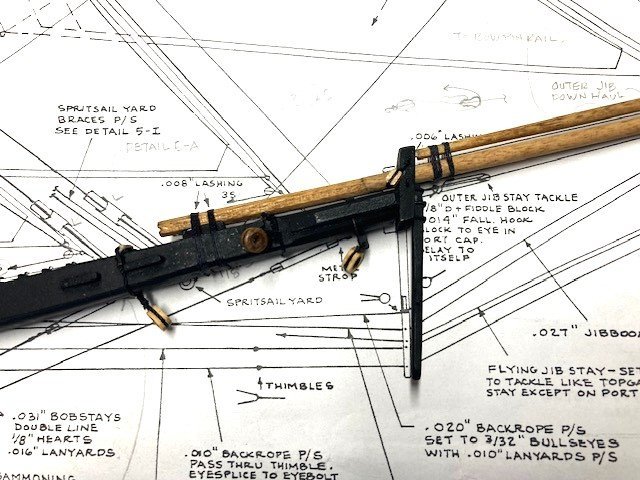
Decided to work on the Bowsprit next. Added the following blocks to the Bowsprit cap: 1/8” double with hook on front port side for Jib Stay tackle, 3/32” single with hook and thimble on lower eyebolt P&S for Sprit Sail yard lifts, and 1/8” single on upper eyebolt port side for Jib Boom out haul tackle. Note: Unable to find on the plans where the outhaul tackle is belayed. Looking at other build logs, I found that the outhaul apparently passes through the chock rail and is belayed to the Bow Pin Rail.
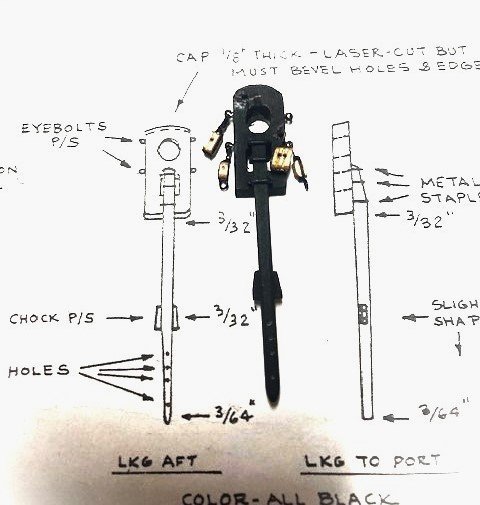
Added a Syren 1/8” closed heart (not furnished with kit) to the metal strop on the Bowsprit for the Bob Stay. Will use .012 tan rope for the lanyard and Syren .025 black rope for the Bob Stay.
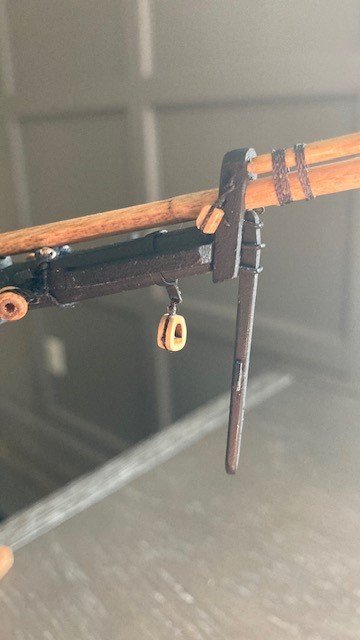
Made the Bowsprit Collar (.021 black) with 1/8” bullseyes and mounted it on the Bowsprit for the Bowsprit Shrouds. Will use .012 tan rope for the lanyards and Syren .025 black rope for the shrouds. Bullseyes were purchased from Model Expo – not furnished with kit. Fashioned the Inner Bobstay Collar (.021 black) with 1/8" closed heart as detailed on Sheet 5.
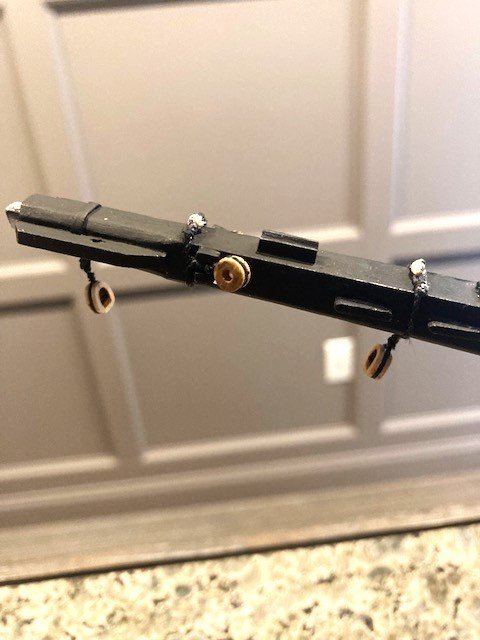
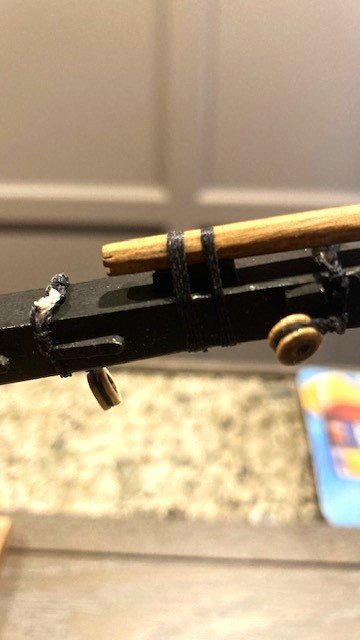
Lashed the Jib Boom to the Bow Sprit and the Flying Jib Boom to the Jib Boom. I used the kit furnished .008” rope.
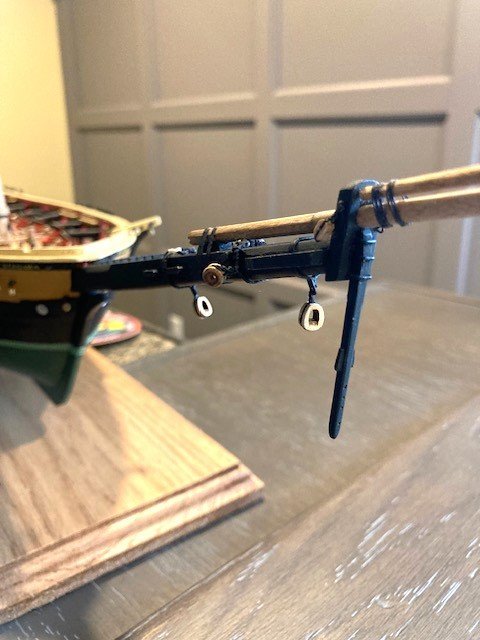
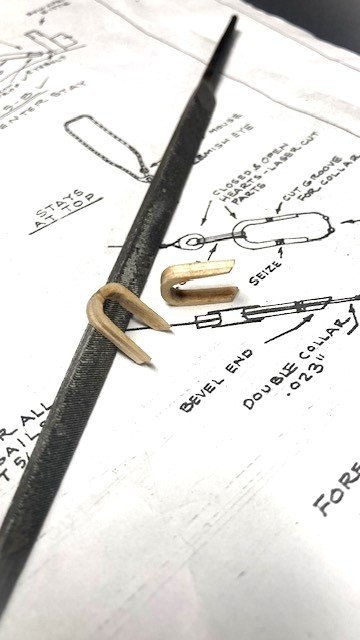
Next, I turned my attention to the two laser cut Hearts for the Bowsprit Forestay and Fore Preventer as shown in Detail 5A. The Hearts are rather thin and fragile. I snapped one while sanding of the char. So, use caution when sanding and creating the groove in them. The hearts are black on the replica ship but, like many other build logs, I decided to stain them (Golden Oak).
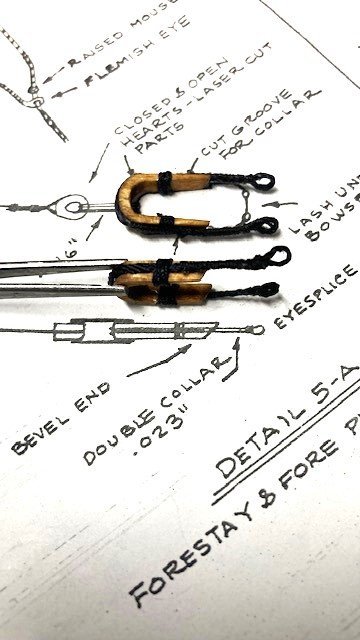
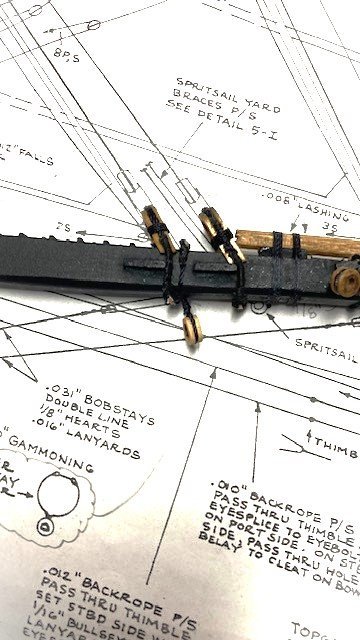
Added the double collars for the Forestay & Fore Preventer Stay as per Detail 5-A. The detail calls for .023” rope for the collars, which is not furnished with the kit. I used the kit supplied .021” rope. I made the collars 2” long from eye spice to eye splice. The collars were lashed under the Bowsprit with .008” tan rope. Note: The Instruction Manual, page 28 calls for using .031” line for “Lines of plan” .022” to .031” - .031” line is not furnished with the kit.
.jpg.869e260d99fb29b792a40a624a04a86c.jpg)
.jpg.12c3d62a1afe7f3eb6a5a09a30a4246f.jpg)
Moved on to the Spritsail Yard sling. The detail on Sheet 5 calls for .016” rope which is not furnished with the kit, so I used .021” rope. One end of the sling has to be attached to the Spritsail Yard and the opposite end has to be wrapped around the Bow Sprit and then around the Spritsail. I’m going to remove the Bowsprit while I work on the Hammock stanchions and rails next, for fair of snagging it.
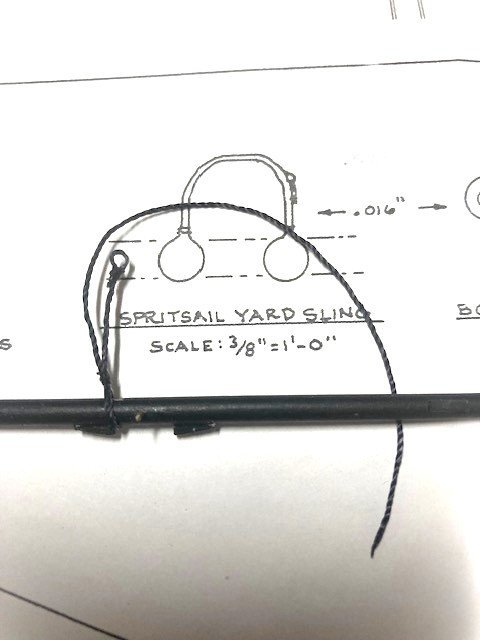
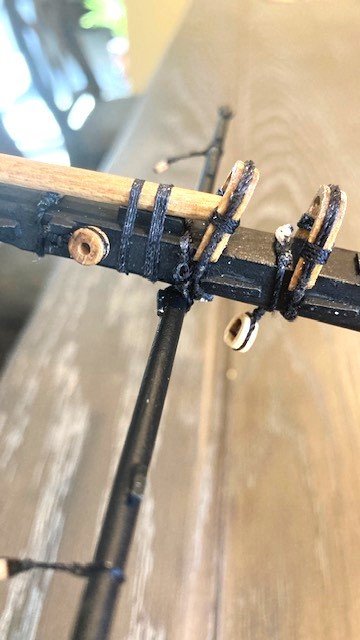
.jpg.0e8266c658ff9845f7efe2b358c9bb97.jpg)
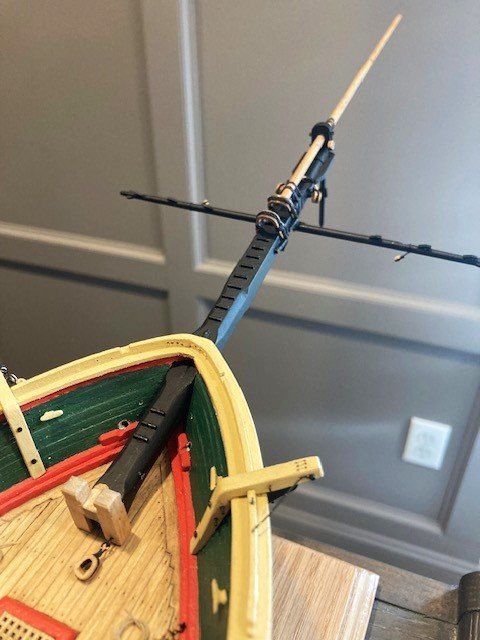
-
-
On 10/15/2023 at 9:07 AM, Tom E said:
Morning,
Hope everyone is well. Beautiful cool fall morning. It's just begging for a good old-fashioned hearty breakfast.
The breakfast that sends you back to bed for a nap. Coffee and tea. Egg, potato and green pepper omelet's, bacon, sausage.
You can't do these types of breakfast too often.
I would get a stern finger shaking from my primary care doctor as my cholesterol shoots off the scale!
Anywho,
With the main and Its preventer stay in place, I will work upwards but still just rigging items that are on the centerline of the ship.
The topmast stay and Its spring stay are next.
Only working on the center line rigging as it seems logical.
The lower shrouds can still be moved out of the way. Easier to work with an open field of view than around in place rigging.
While working on one set of stays on inherently starts to tinker with the next set.
I've noticed a firmness forming in other ropes already in place. But a pleasant firmness.
Everything so far, including the bowsprit rigging, has a pleasant tension to it. Not too hard, not too lax.
It is a balancing act when tensioning off ropes.
Constantly checking other ropes to see how they react while I apply pressure to whatever rope I'm working on.
Feel like I'm missing something. Or is the usual for me, I'm over thinking it.
Below is her all dressed up for company coming over.
Show her off a bit!!
The spanker boom makes a rare appearance.
Below is a little show and tell.
The wrinkled old hand is mine. But, with a genuine Stanley Cup winning ring from 1970 with the Boston Bruins hockey team.
A friend of mine, her grandfather, ran the old Boston Garden from the 1950's thru the 80's. Back then, he would have been considered the GM.
They knew all the old Bruins and Celtic players. Pictures of them with Bill Russell, Bobby Orr, Larry Bird, Reggie Lemelin.
The ring is no bigger than my high school ring. The rings these days look silly, gawdy.
Thats as close as I get to 15 minutes of fame, and I'm cool with that!!!!!
Go Bruins!!!!
Tom E
A nice keepsake. Bruins are off to a good start. Your ship is really taking shape. Nice work.
-
-
-
Completed the sprit sail yard. Added the 3/32” single blocks for the lifts and the 1/8” single blocks for the braces.
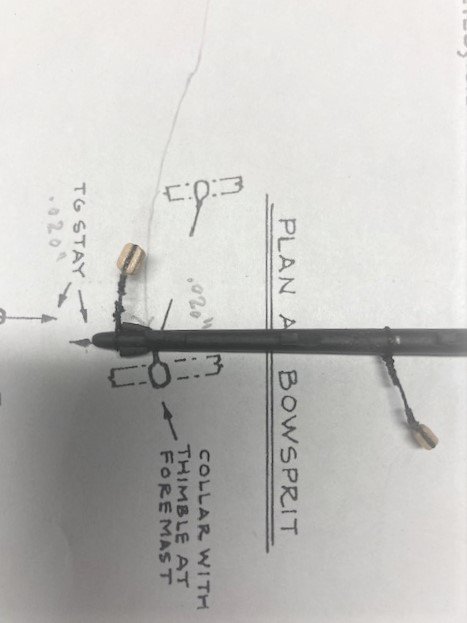
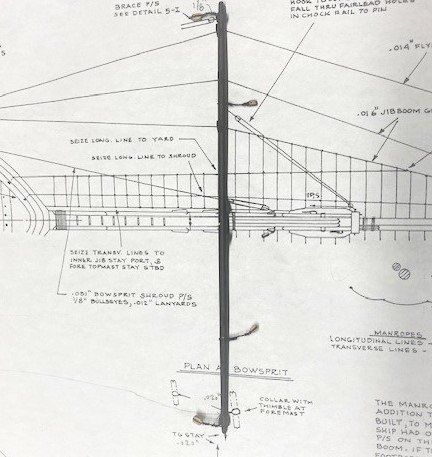
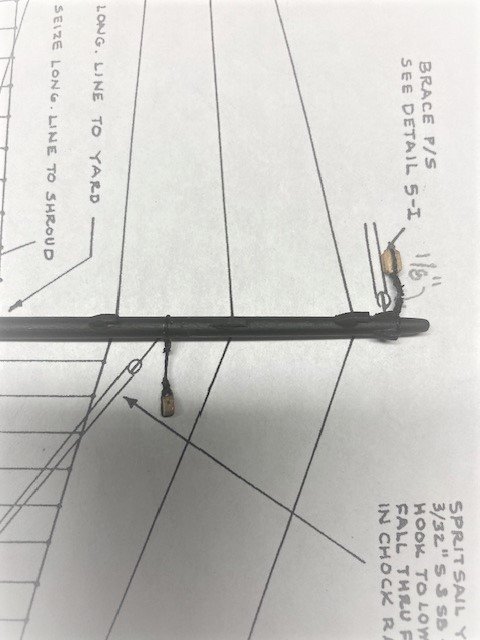
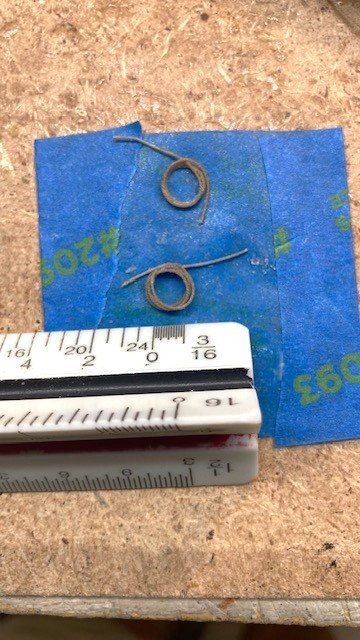
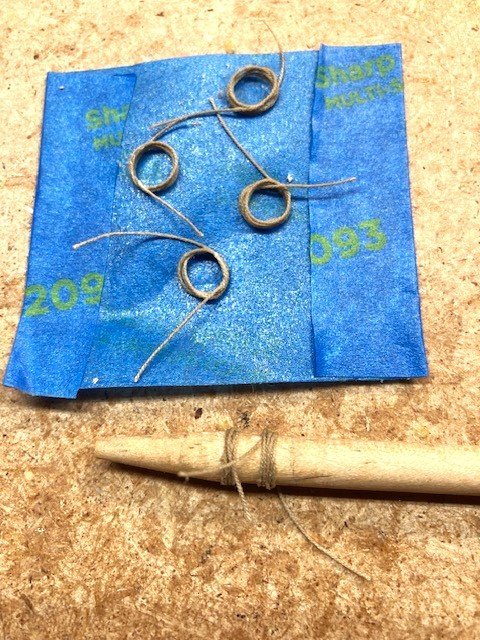
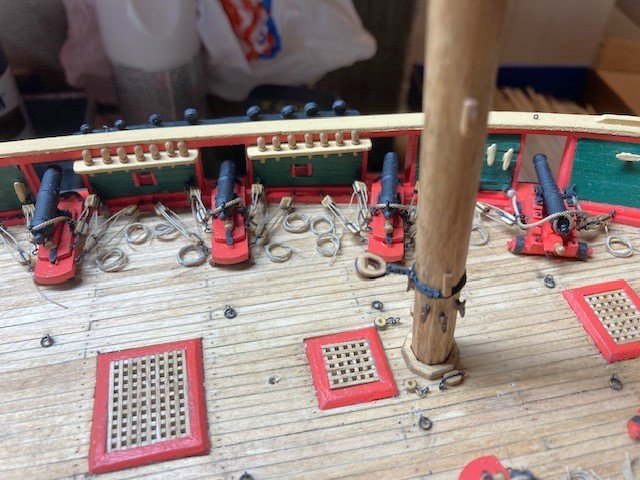
Moved on to the monotonous task of making the 76 rope coils for the carronades. I revisited my Syren build log to refresh my memory of how I previously made the rope coils. Many build logs neatly coil the rope. I figure the sailors on a war ship probably didn’t neatly coil the rope and, if they did, the rope probably didn’t stay coiled for long. So, I decided to un-neatly coil the rope. I wrapped .012” tan Syren rope around a 3/16” dowel (see photo) 4 times, applied a little CA to the loose ends, and then brushed on a 50/50 solution of white glue and water. When dry, I gently slid the rope off the dowel and unto some masking tape, flattened it out somewhat, and applied a little more 50/50 solution of glue and water. For me, this technique is easier than neatly coiling the rope. Added some coils to the deck for effect – looks good (see photo). More to come.
.jpg.2bf50be96c75fdca47c9bc96849b5254.jpg)
.jpg.ac616913c67edf9829a7558fc3b4f836.jpg)
-
On 9/7/2023 at 12:40 PM, cardensb said:
I just scrolled through your log, I have the MS kit sitting in my pile of kits bought when they had a great sale about 10 years ago. I think this will be my next build based on your log. Echoing many others, love the amount of photos that are quality and clear. Also love the drawing on the plans for clarity.
I really appreciate you identifying all the small eyelets and chock points needing mounted to the hull before starting to rig and find it difficult to get a pin vise in later.
Any major lessons learned to pass along that did not get documented but as you reflect back to the early steps of the build? Comment: As my build log has evolved, I have tried to point out lessons learned or things to be aware of. So far, I there hasn't been anything major that I can recall.
Some specific questions:
1. Frames and filler blocks: Any regrets for not using filler blocks entirely between all of the framing? (I had a keel take a bend during a break in planking years ago) Comment: No regrets not having used filler blocks between all framing members. I think it's matter of preference.
2. Additional purchases: Have you compiled a list of "must buy" additional parts or do I need to scroll back through? I would rather shop all at once if possible. I see you id'ed shortages of many smaller items that add up in shipping charges. Comment: I've purchased parts as I have needed them. I do try to wait until I have a number of items before ordering so as to keep the shipping costs to a minimum. It seems there's always something additional that you need.
3a. Gun tackle: Do you like how the brass hooks turned out in the armament tackle assemblies for the time it was worth or should I stick with bending wire? Comment: I like the Crafty Sailor hooks - a good purchase that saved time.
3b. Or should I skip the hooks completely and just attach the lines to the rings with a little glue like many of MS kit's have us do? (I like the hooks ideally but once done, not sure if it looks to busy or out of scale?) Or should I skip the gun tackle completely to reduce "deck clutter" Comment: The hooks definitely do not look out scale. It's a matter of preference.
4. Copper plating: your photos of the real ship appears to have copper plating below the waterline, any recommendations to do it or not do it? I have done it on some and not others so it's not the repetition that makes me think otherwise. Comment: I have read in some build logs where it is thought that the original ship had copper plating. I don't think the replica ship does. Again, this would be a matter of preference.
5. What's next for you? You are into the rigging now, have you thought what is your next build? I like the Niagara for the different cannonades than I have done before but I really enjoy building frames so my follow-on will like be a one where each frame is cut from about four pieces of cherry locally harvested. I recently purchases the Washington Galley plans. I find myself thinking ahead as I finish up a Hannah build based on plans and a wood only kit from The Lumberyard that has been a work in progress for about 7 years. I wonder if I need to try a completely different style of ship to expand my skills like a viking longboat or an Egyptian ship from a two-thousand years ago. Comment: I'm nearing the rigging stage, but first I need to add rope coils for the carronades. I've been putting this off as long as possible. As for my next build, I have the USS Constitution awaiting. I purchase it from MS when it was on sale.
-
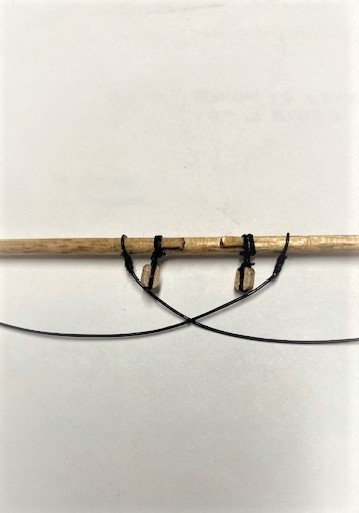
Moving on to the Top Gallant Yards, Sheet 6 calls for 3/32” double blocks for the Top Gallant Sheets and Clew Lines. The kit is not furnished with that size block, so I used the next size up 1/8” double. It also calls for 5/64” single blocks for the Top Gallant Braces, which also are not furnished with the kit. I used 3/32” blocks instead. Furthermore, 1/16” single clump blocks are called out for the Royal Sheets, also not furnished. I will use 3/32” blocks instead. Note: The clump block is seized into the Top Gallant Lift, so when you add this block to the Top Gallant Yard you’ll have to use a long enough rope to belay the lifts to the pin rail on deck. These will be added later.
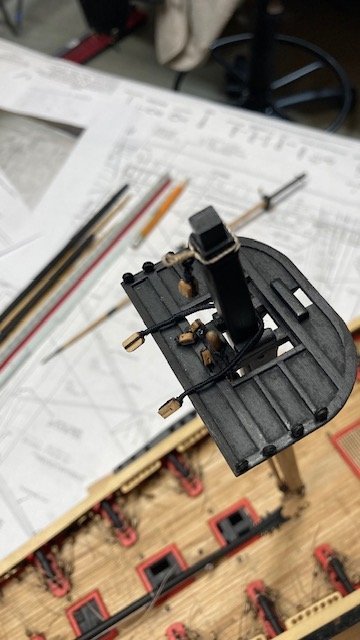
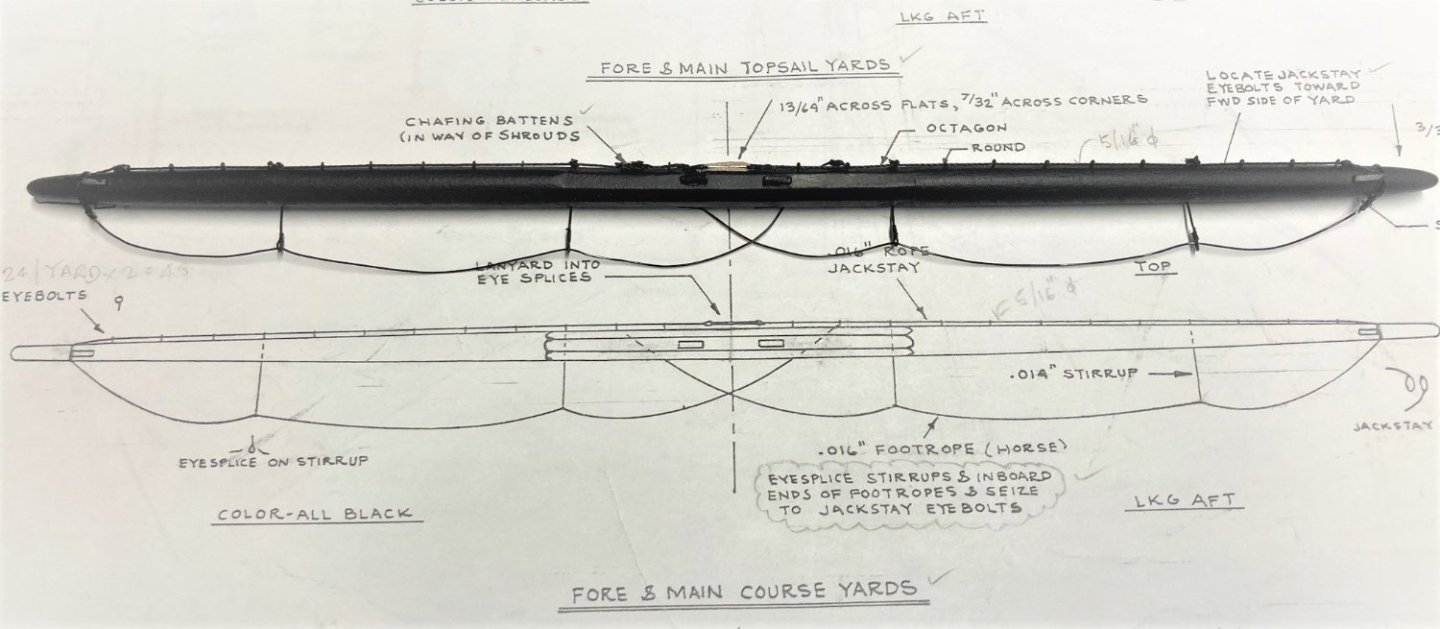
Added the jackstay eyebolts, rope (.012”), eye splices, and lanyard (.012” tan rope). I made the eye splices first, reeved the rope through the eyes, and seized the rope to the mast. I completed the Top Gallant Yards by adding the blocks for the Royal Sheets, Top Gallant Sheets and Clew Lines, and Braces, and the stirrups and foot ropes (20 gauge annealed wire). The topgallant yards have a thimble fairlead seized to the jackstay as detailed on plan Sheet 6 Main Mast, Looking Aft (see photo).
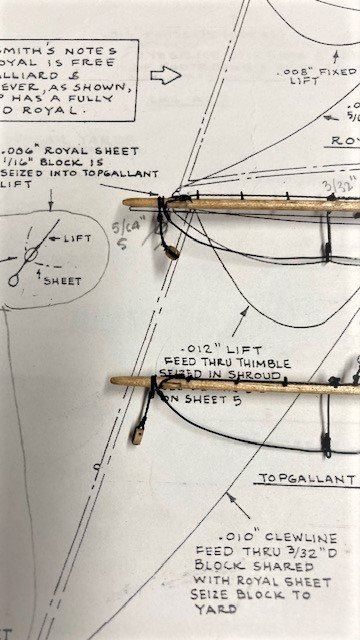
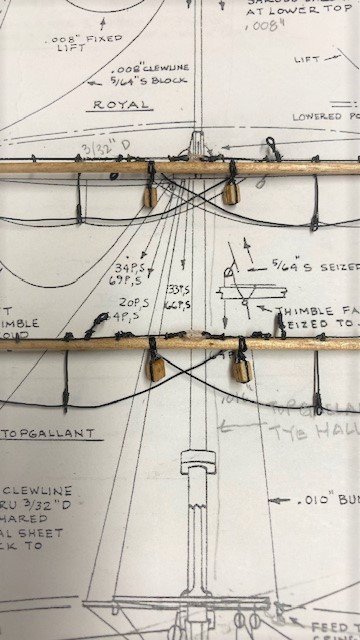
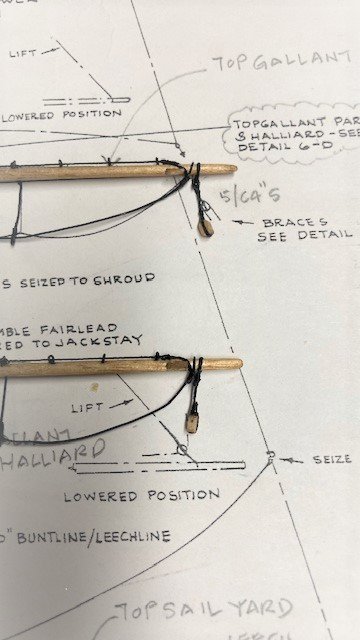
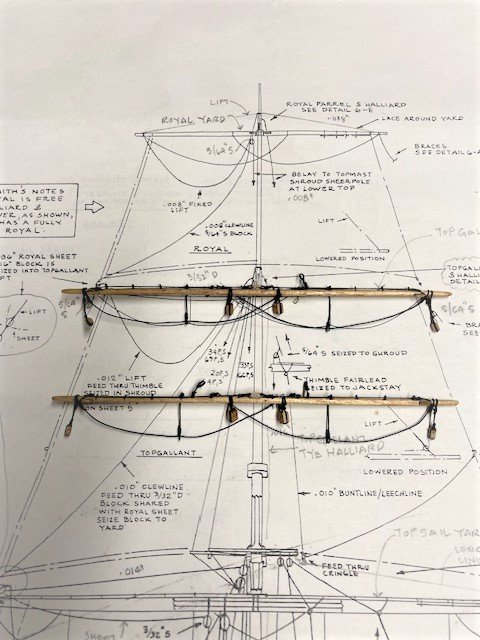
The Royal Yards are next. I added 3/32” single blocks for the clew lines (plans call for 5/64” blocks, which are not furnished), and foot ropes (20 gauge annealed wire),
.jpg.fcaafa393e7a390aa1edc953693ad89d.jpg)
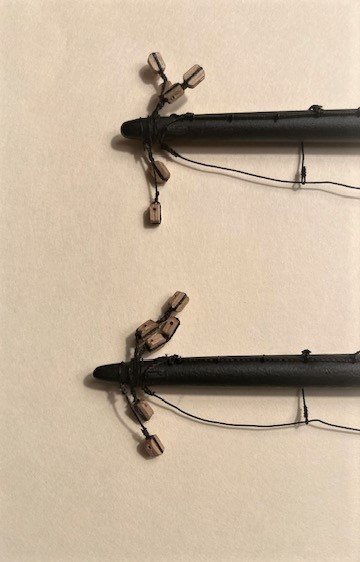
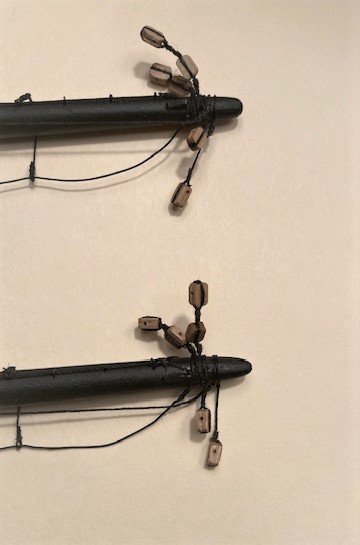
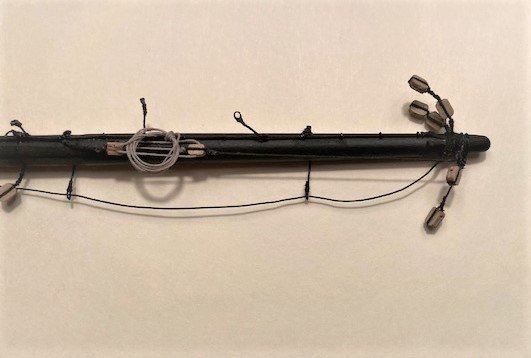
Except for the Course Yard braces and the yard tackle for lifting cargo, The yards are complete. I debated whether to add the yard tackle, as many build logs eliminated this. I decided to add them - I presumed there is one on each course yard. I made them basically as shown on sheet 6. I Seized a pendent to the Jack stay to hook the tackle to. It’s not clear to me how this tackle works. The location of the rope suggests that the cargo was hauled up from the course yard. I coiled a length of Syren .012 tan rope and belayed it to the Jack stay rather than hang on slings. I realized later that if the tackle was lowered to lift cargo from a boat, the rope would have be about 140 feet long. Be that as it may, I definitely didn’t coil enough line. I completed the course yards by adding the braces. At this stage, all of the yards are now complete. Next up, add the blocks for sprit sail yard. Stay tuned,
.jpg.2a6ca739405ce1c5c65fe00db9a5e36c.jpg)
-
Made significant progress on the Fore and Main Course Yards and the Top Sail Yards. Added the jackstay eyebolts, rope (.018” line for the Course Yards and .012" for the Top Sail Yards), eye splices, and lanyard (.012” tan rope). I made the eye splices first, reeved the rope through the eyes, and seized the rope to the mast. The hard part is getting the space between the eye splices to get the proper lanyard length.
.jpg.cd2951d5626b6c44440dfac417d4eebd.jpg)
.jpg.ccfcccf62a8efda7275c3dc2643c8b08.jpg)
Fashioned the Course Yard Slings. I used Syren .035” rope. It’s difficult to get the right lengths. After a couple of failed attempts I think I got it right. I made the yard slings about 1 1/4” long and the mast slings about 1 7/8” long.
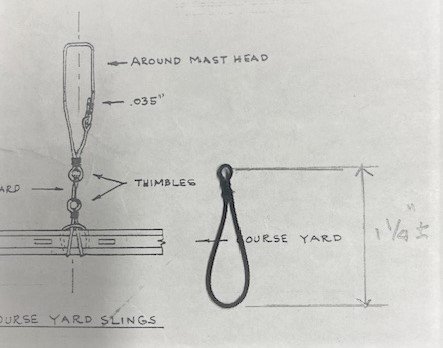
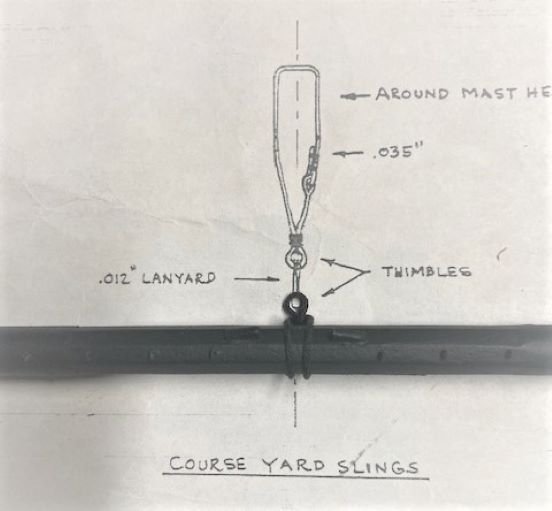
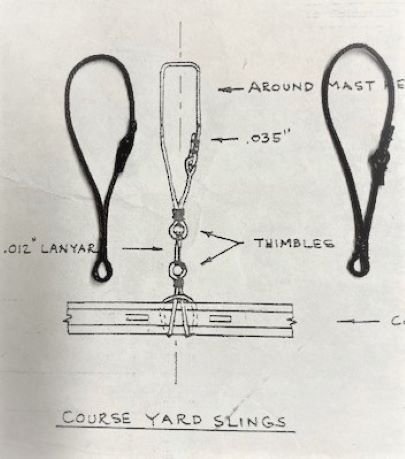
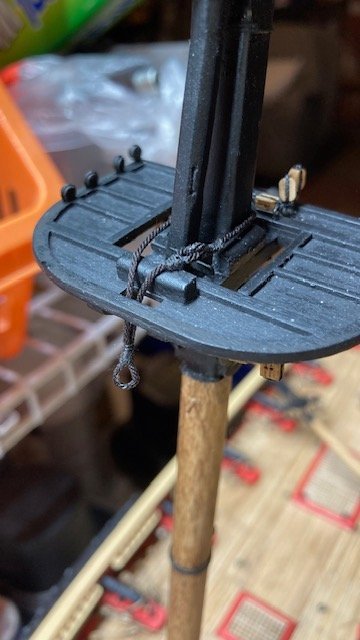
Next, the stirrups and foot ropes. A la my Syren and Fair American builds, I used 20 gauge annealed wire for the stirrups and the foot ropes. They were eye spliced to the jackstay eyebolts and seized with black sewing thread.
To the Fore and Main Course Yards, I added the 5/32” clump blocks for the Topsail Clew line and the Course Yard Lifts and Sheets, the 5/32” single blocks for the Reef Tackle, the 1/8” single blocks for the Clew Garnet, and the 5/32” single blocks for Top Sail Sheets. The 5/32” single blocks and pendants for the braces will be added later. One dilemma I had was where to place the 1/8” single blocks for the Clew Garnet lines and the 5/32” single block for the Fore Topsail Sheets, because the plan sheet shows them in the same location as the chafing battens on the aft side of the yards, meaning that the blocks would be wrapped around the chafing block. So, I decided to move them so that the don’t interfere with chafing blocks.
Added the fairleads with short pendent for the bunt lines and leech lines.
.jpg.95d11f361e3a7eace4125af067ef823a.jpg)
.jpg.c7b2d1cdf22b80ef6982c08c8af90cce.jpg)
Finished the Fore and Main Top Sail Yards. Added the 3/32” single blocks for the Topgallant Sheets, 5/32” single blocks for the Top Sail Clew lines and the 1/8” single blocks for the Braces, the thimble fair leads, the stirrups, foot ropes, and Flemish Horses. Note: The Flemish Horses are shown on the plan but are not called out. Clarification: The 3/32" single blocks for the Topgallant Sheets are supposed to be seized into the Top Sail Lift as detailed at the Royal Yard on Sheet 6. I missed this detail and made a lash in the block for seizing the Top Sail Lift as can be seen in the left and right photos below- my bad. Next on the To-Do-List, the Top Gallant Yards and the Royal Yards.
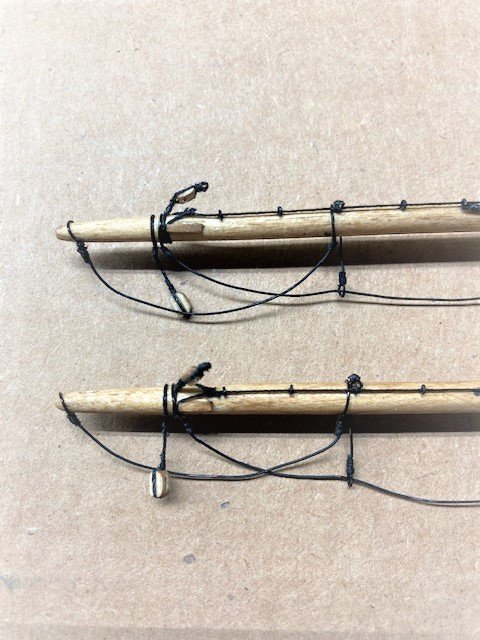
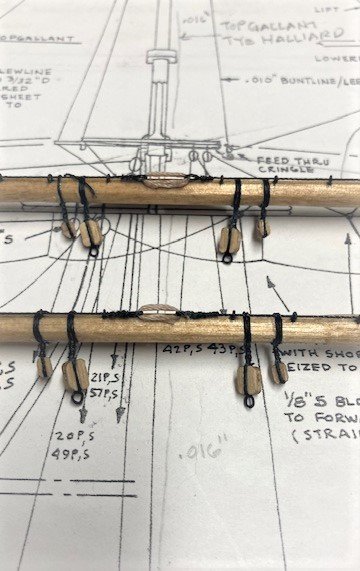
.jpg.b5633ec83edfbb48a84dbb4811fadbf1.jpg)
.jpg.50a3ffd61d3a6069374fe184fb7b7043.jpg)
- RossR, Gahm, Snug Harbor Johnny and 3 others
-
 6
6
-
On 7/21/2023 at 6:27 PM, milosmail said:
Realy nice work!
I'm about ready to start with rigging, but I have spent the past month to interrupt workflow by building ships boats. Have you built yours yet? I am not sure how to build a caprail for them. Any ideas would be appreciated.
The rest has been pretty straight forward; used styrene strip for most of the detail, and birch for seats and the two sheets at bow and stern. Debating how to make elbows....or just leave off.
Thanks. I've only created the hulls, so I can't help you out there. Did that early on in the build. I'm thinking that will be one of the last things I'll do.
-
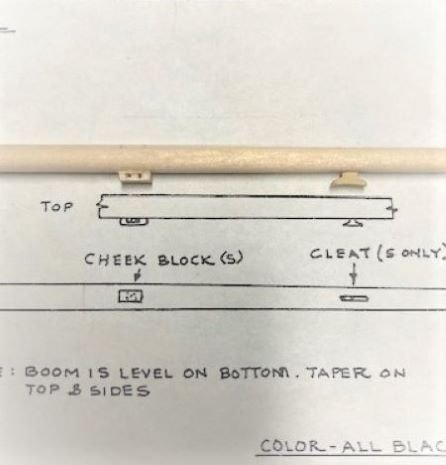
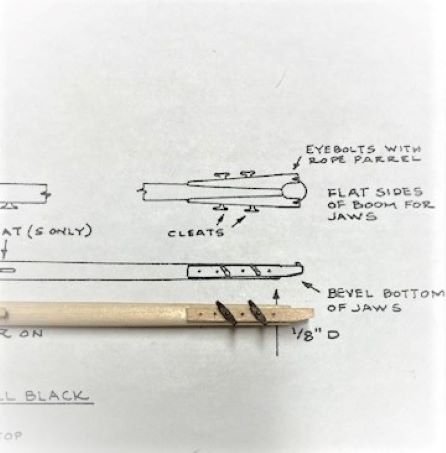
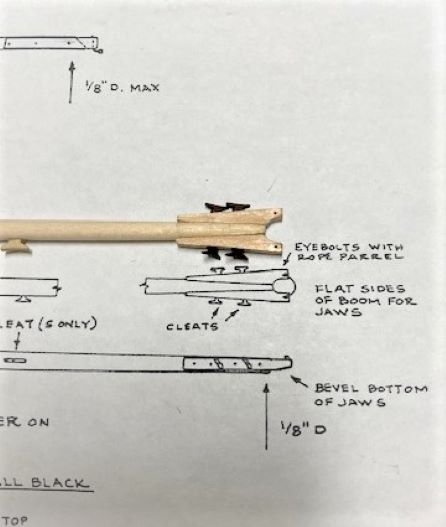
Fashioned the Spanker Boom from 3/16” dowel. I used my poor man lathe to taper the boom. Leaving about a ½” of dowel for insertion in the drill chuck, I cut and filed the aft end of the boom down to the approximate thickness (9/64”) before tapering the boom. Made the faux sheave and added the chocks (P&S), cheek block (S only), boom cleat (S only), jaws, and jaw cleats (5.5mm from Crafty Sailor). I made the jaws from 3/32”x 3/16” stock. I cut out a photocopy of the jaws and glued it lightly to the wood strip and used it as a guide for cutting and shaping the strip. Primed and painted the boom black. I left the Crafty sailor cleats in their natural color for contrast. I added brass pins to the jaws to simulate bolts.
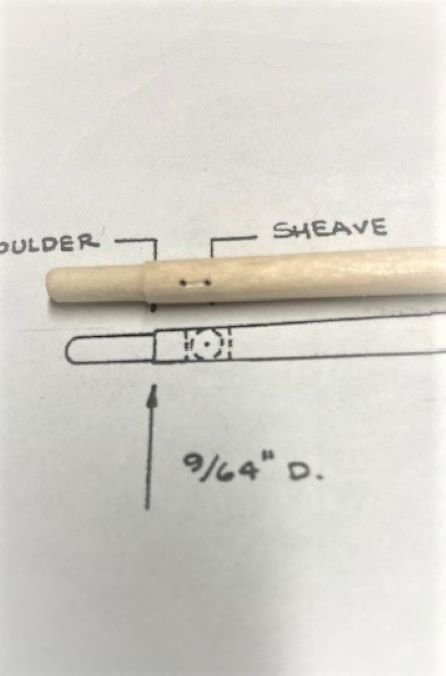
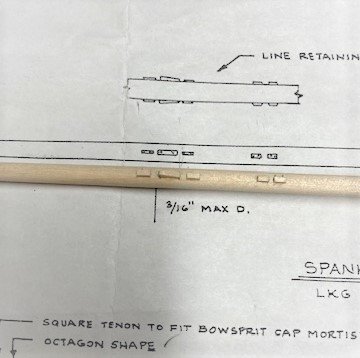
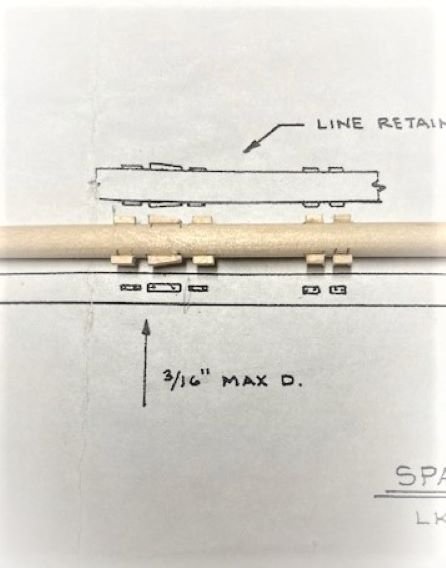
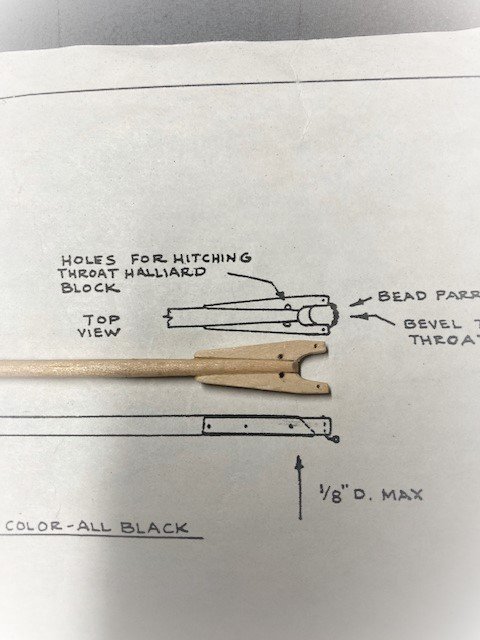
The Spanker Gaff was fashioned from 1/8” dowel. The gaff is only tapered on the aft end. Added the halliard stop chocks (P&S) and the jaws. The gaff jaws are a little thicker than the boom jaws, so I used a 1/8” x 1/8” wood strip. I cut and shaped the strip a la the Spanker Boom jaws. I drilled the holes for hitching the 5/32” double block for the throat halliard (Detail 5-J) after gluing the jaws to the gaff. The plan calls for the gaff to be painted black. On the replica ship the gaff is natural. I decided to make the gaff natural, so I stained it with Minwax Golden Oak. Also, the replica ship does not have the “shoulder” shown on Spanker Gaff detail, so I eliminated this and added chocks for the spanker tack. A la the Spanker Boom, I added brass pins to the jaws.
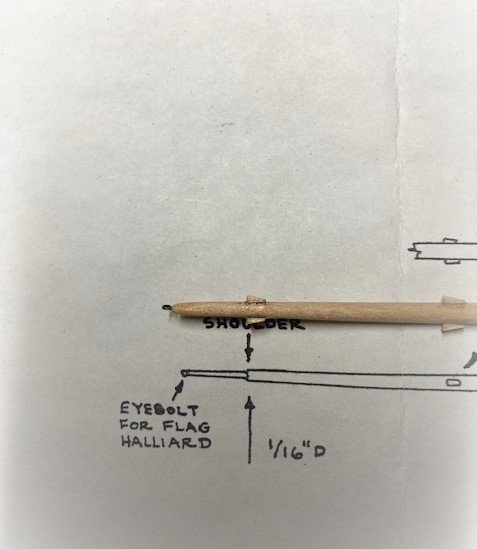
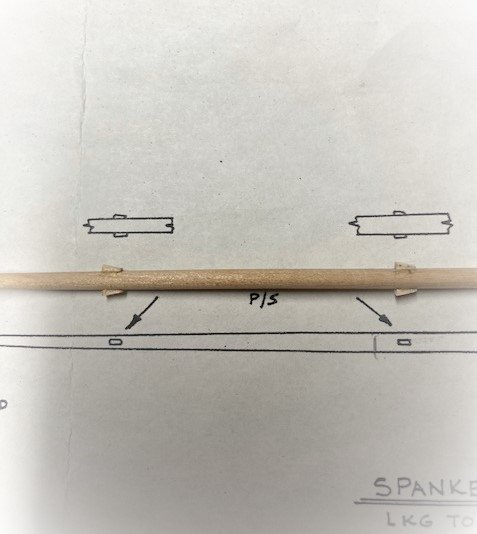
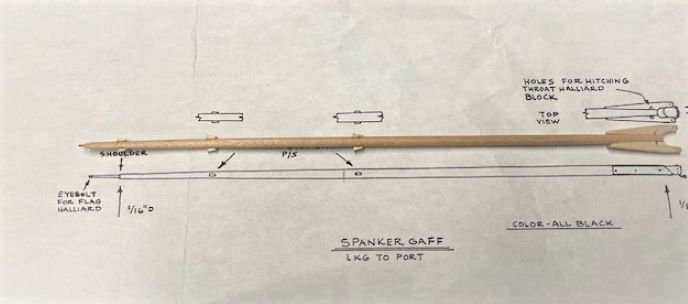
Continuing with the Spanker Gaff, I added the three 3/32” single (P&S) and one 3/32” double (P&S) blocks for the Brails, as shown on the plans. I also seized the two 5/32” single blocks for the Peak Halliard, and the 5/32” double block for the Throat Halliard and added lacing. Note: The kit is not furnished with 3/32” double blocks, so I trimmed down a 5/32” double block. Also, the plan calls for a 1/16” single block, which is not furnished with the kit, for the flag halliard. I used a 3/32” block. The Brails run down to the deck and are belayed on the aft fife rail. I haven't seen these on any other build log.
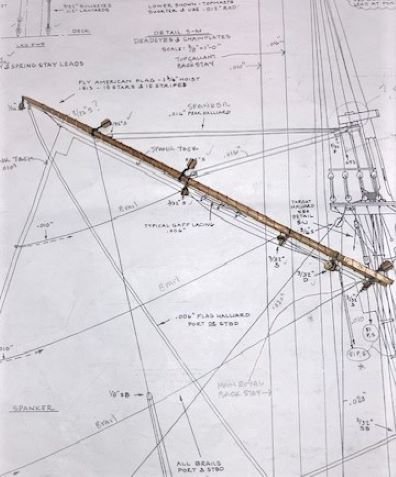
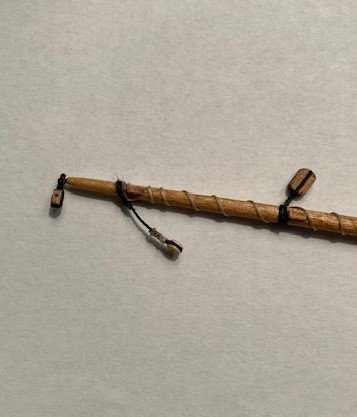
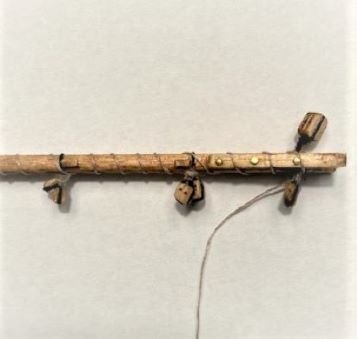
Another item that I’ve only seen on one build log is the clew outhaul shoe block. As noted on Sheet 5, this block is made up of a 5/32” single block and a 1/8” double block seized together. Note: The replica ship does not have this block. The outhaul tackle is seized to the Spanker Boom fore of the cheek block and is reeved through the double block and the cheek block, back through the double block and is then belayed to the boom cleat.
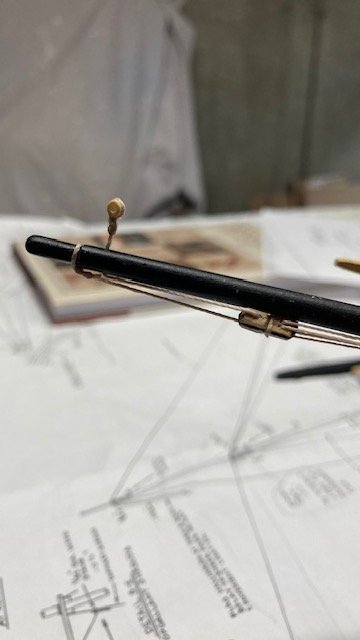
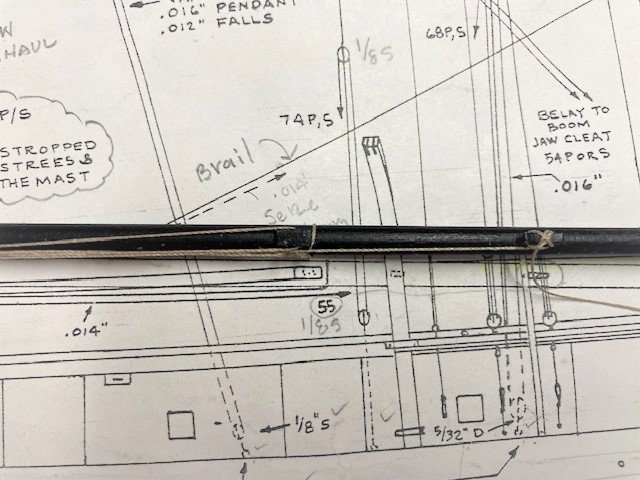
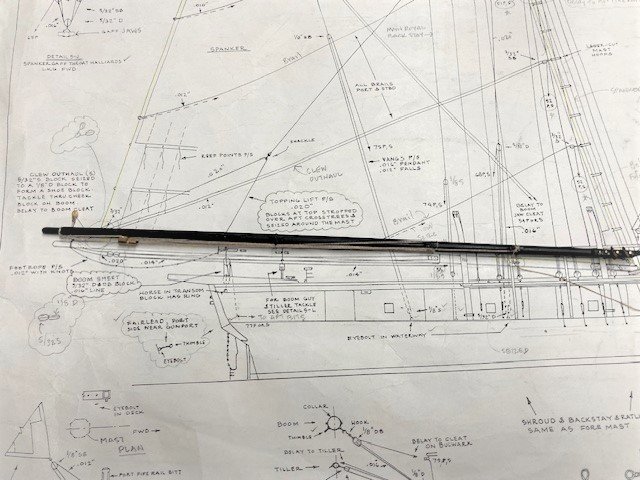
I’ve studied the plan and can’t wrap my head around how the clew outhaul works with the shoe block in the position that it is shown on Sheet 5. The way I think it works, when you pull on the tackle, the sail is furled and the leech and foot lines move in two directions with the aid of the brails. The clew line travels with the leech and foot lines and ends up below the throat of the gaff as can be seen in the attached photo or midway at the Spanker Mast (sail luff) as pictured on Sheet 5.
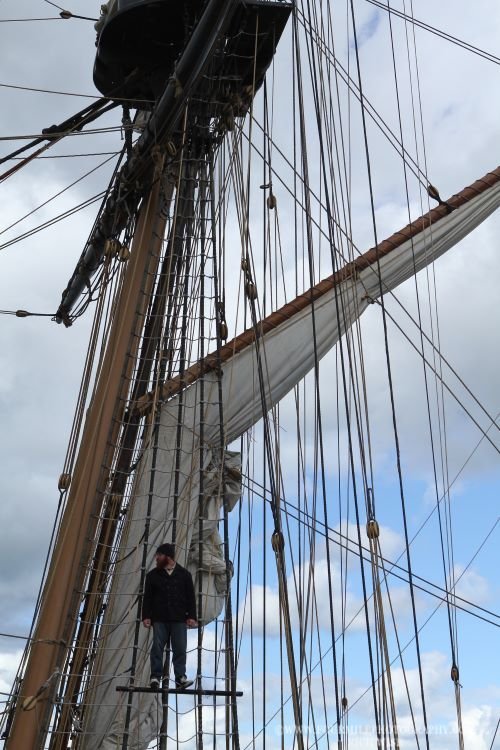
Getting back to the clew outhaul shoe block, I think the position shown on the plan would be the position of the blocks with the sail furled because when the sail is unfurled the outhaul shoe block would have to travel fore. I might be wrong here, but if anyone can better explain the workings of the Spanker Sail I’m all ears. At this point, I’m unsure how or if I will present the brail, leech, foot, and clew lines on the ship. In the meantime, I've fashioned the clew line as per the plans. Note: Landlubber Mike's technique for furled sails on Model Shipways has a good description of spanker sail component and how to make sails.
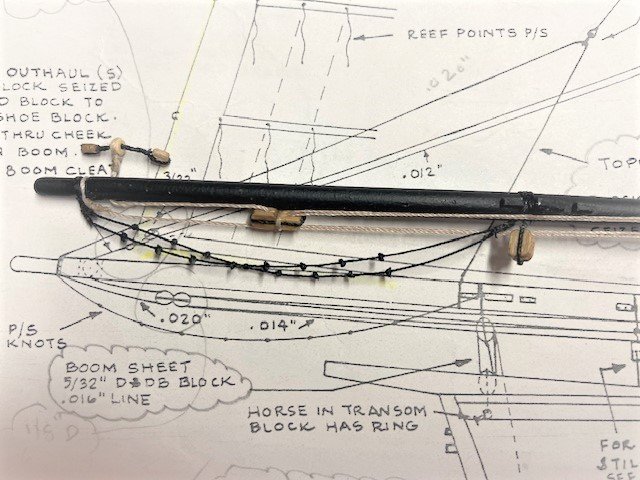
For the Spanker Boom foot ropes, I stretched a length of .012” line between two brads set in a board over laid with paper. I made tick marks about 1/4” about on the paper to mark the location of the knots. I tied a knot at each location, applied a little CA to each knot, and trimmed the loose ends. Next, I seized each foot rope to the Spanker Boom. The difficult part is trying to get the ropes to lineup. I also added the two 3/32” single blocks (P&S) that pass through the cringle at the end of clew line. Each has a block and tackle midway on the Spanker Mast. I added the 3/32” single blocks at the Spanker Mast for the Brails. The blocks were seized to the mast hoops as they appear to be on Sheet 5. The out hauls (P&S) are belayed to the aft fife rail as shown on the Belaying Plan on Sheet 6.
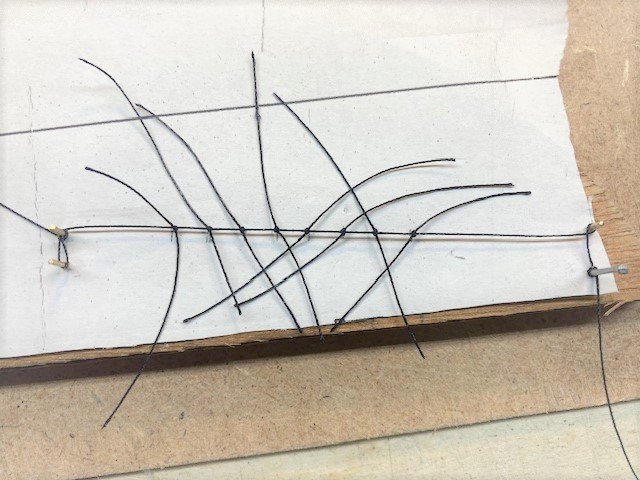
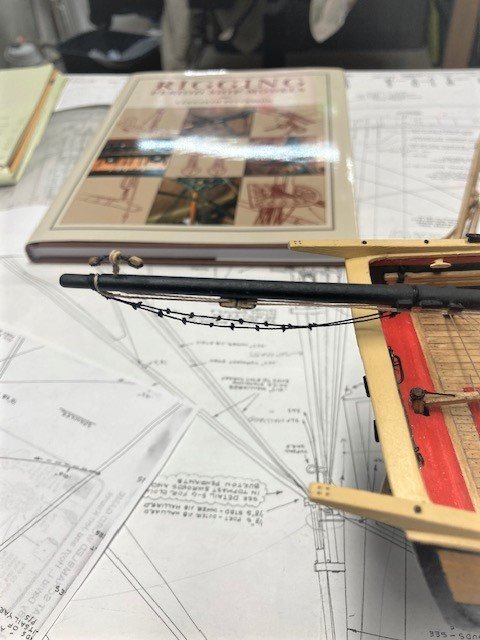
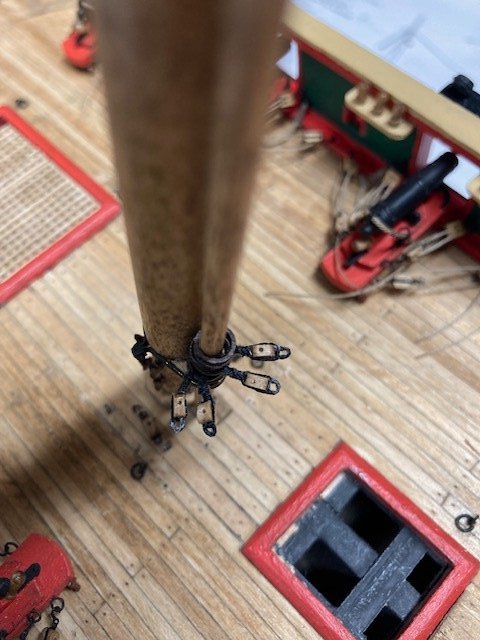
Lastly, I added the fair lead for the boom sheet and the 3/32” double block with ring attached to Horse in transom. Seize the 3/32” double block to the Spanker Boom. Now, it's time to move on to completing the yards.
.jpg.d3ac886c54e17de36b507edd46207ec7.jpg)
Moving on to some of the miscellaneous items, I added 1/8” single blocks to the main topmast cross tree for the topgallant braces (as per the replica ship) and the lift lines, and the sling (.018” tan) to the Main Mast for the gaff lift line.
.jpg.9672c537a6dcbb1cd610a2e92417085e.jpg)
.jpg.6173229095cdfde7cf941350e3ea1383.jpg)
-
On 3/27/2018 at 10:16 AM, 6ohiocav said:
BRACES
Moving along to completion. The last major rigging task is the braces, and boy was this more difficult than it needed to be. Sixteen blocks needed to be seized, most to the shrouds, some to the tops on both masts, and SHOULD HAVE BEEN DONE BEFORE I DID ANY RIGGING.
**** WARNING**** TO ALL NIAGARA BUILDERS – SEIZE THE BRACES BLOCKS EARLY.
All of the blocks on the upper shrouds could have been attached while my masts were still on the bench. It would have been so easy!
Instead, I had to strop a set of 1/8 and 5/32 blocks with long lines, seize the lines to the block, snake the line through a mess of rigging to wrap around the shroud or bar on the tops, pull it through away from the model, tie a seizing, then pull the tail and with tweezers snake the block back through the rigging lines up against the shroud, then reach through to tighten the seizing lines, apply a spot of glue to freeze the knot, and if that is not hard enough (or stressful), then insert an x-acto knife and cut the ends off as close to the knot as possible, without cutting something else.
This took me the entire weekend. I kept smacking yards, back stays, and shrouds with my hands, my tweezers, my pliers, my knife, my kitchen sink…. You get the picture. Thankfully, everything except a couple of ratlines held up. The 4 blocks seized under the lower top on the foremast were by far the hardest. There were at least 8 rigging lines and back stays to work around.
As soon as I get everything done on deck, and insert the hammock stanchions, I will rig the braces, (last thing) since that will completely encapsulate the space between the masts.
Here are some photos. The knots are not up to par, but only in close up pictures. From afar, you can hardly see the blocks.
Good pickup on the blocks for the topgallant braces - Detail 6-A incorrectly shows them on the straight crosstree.
-
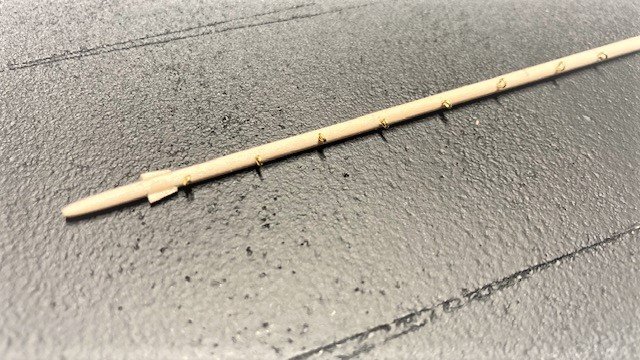
Made some significant progress on the build but, first, getting back to the Top Rope sheave, I found an explanation in Laxet’s build log by BillLib, as follows: “The top rope was used to hoist and lower the topmasts. It was hooked under the underside of the cap, reeved through the sheave at the foot of the topmast, up through a block, which was hooked to the cap, and down to the deck. On a model the top rope can be omitted, as it was only used when sending up or striking the topmast and was only rigged at those times. The only traces to be seen are two or four ringbolts on the underside of the cap.” BillLib cites Historic Ship Models, Wolfram Zu Mondfeld. Thus, I will omit the top rope in my Niagara build, but the faux sheave does make it authentic – no lost effort there.
And, digressing here, after studying the plans, there seems to be a discrepancy between the plans and the replica ship. Detail 6-A notes that the blocks for the topgallant braces are seized to the straight section of the Main Crosstree. However, on the replica ship the blocks are seized to the curved section of the crosstree (see photo). Also, in the photo there’s another block adjacent to the bunt line and leech line blocks and only one block in the shroud. The lone block in the shroud I believe is for the reef tackle. I believe the additional block in line with the leech line and bunt line blocks is for the topgallant lift line.
.jpg.2f58def9939199c81eb2871e48125f94.jpg)
Began fashioning the Fore & Main Course Yards. To shape them, I used a poor man’s lathe (see photo), i.e., two drills with one end of the dowel secured in the drill chuck and the other end free to turn in the drill chuck.
.jpg.f5689ddf83b9cb6d876f58943106548f.jpg)
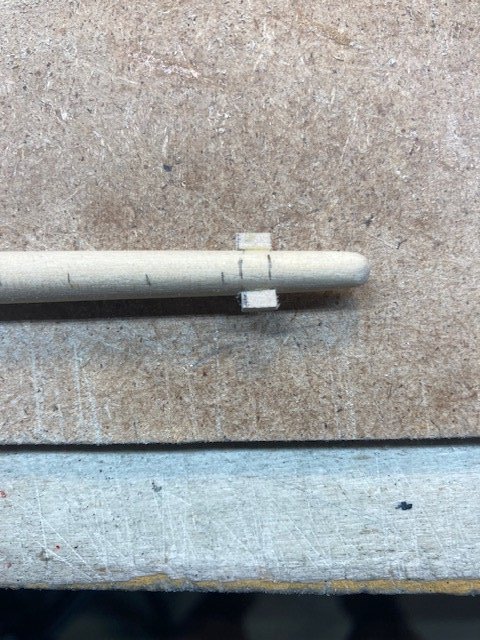
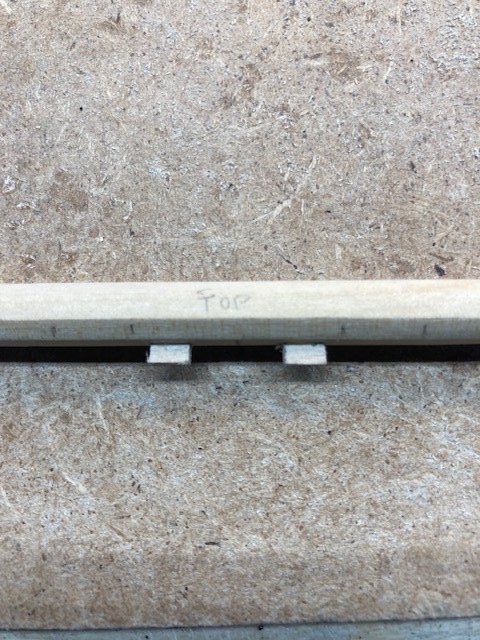
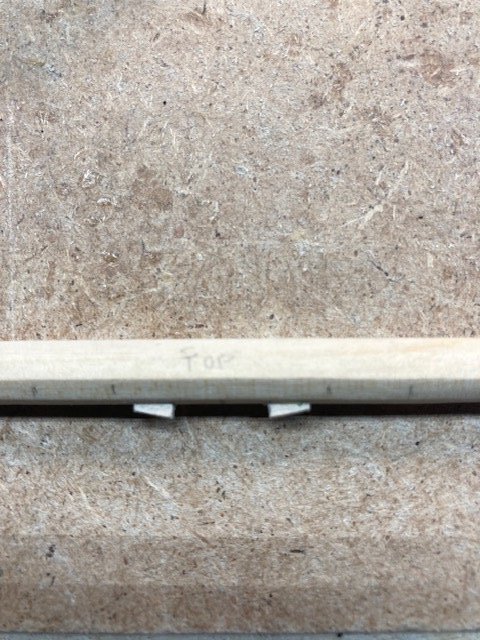
I left a ½” on each end of the dowel for insertion in the drill chuck. I started by marking the ends of the yard with a pencil. Then, I cut around the pencil mark with an x-acto knife and remove a portion of the dowel as a starting point for shaping the dowel. I used a combination of files and sanding blocks. It’s time consuming, but it works for me. The parts list calls for ¼” dowel. I like to use a little larger diameter dowel so that when the octagonal section is shaped it’s truer to scale. I used a 5/16” dowel. When shaping the dowel, I don’t use a micrometer to check the thickness, I just eyeball it and compare it to the plan. The photos make the yards appear thicker then they are, albeit, I admit that the taper is a little thicker and the plan. After shaping the course yard, I created the octagonal section. The small chocks, chafing battens, and Jackstay eyebolts were next. The stop chocks we’re cut from 3/64”x3/32” strip, glued on the yard, and shaped in-place. The chafing battens were cut from the same stock.
.jpg.8f8bf814caf1d3a0352720192edff2d4.jpg)
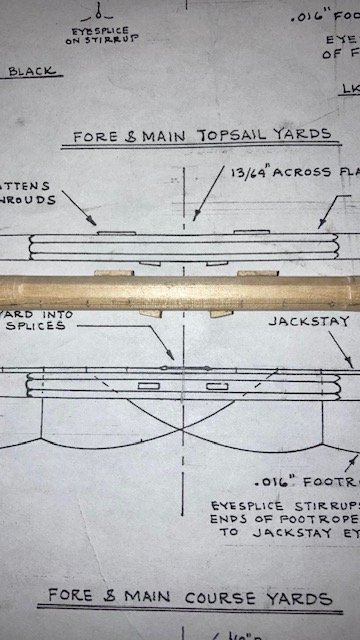
.jpg.cf5bcdcfd23f9a8bf4ba74baacec4003.jpg)
I marked the locations of the jackstays with a pencil and straight edge and then drilled the holes for the eyebolts (6mm). Note: The eyebolts are located “toward the fwd side of the yard.” I cut the eyebolts down to size, test fit them, and blackened them. I primed and painted the course yards black.
.jpg.33d5efef8e68ad0147fe35e3dc5f5bbc.jpg)
.jpg.b459611839fec7e0e06f04ae91124847.jpg)
Moved on to the Fore & Main Topsail Yards next. These were fashioned basically the same as the course yards, except that I added the battens. I couldn’t find any photos of the replica ship that show the battens, but I decided to add them anyway. I figure the yards will be easier to mount with the battens – time will tell. The battens are pinned to the yards.
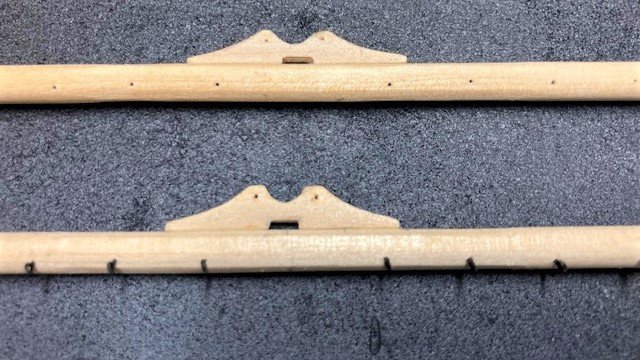
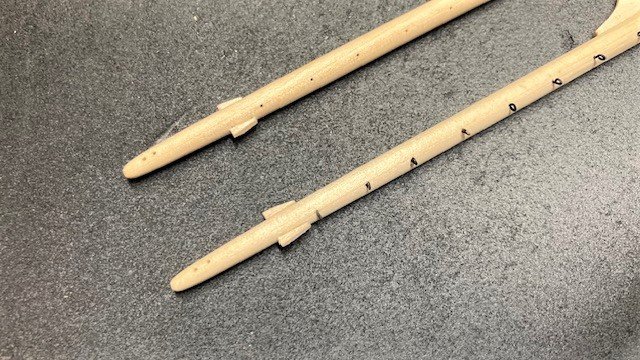
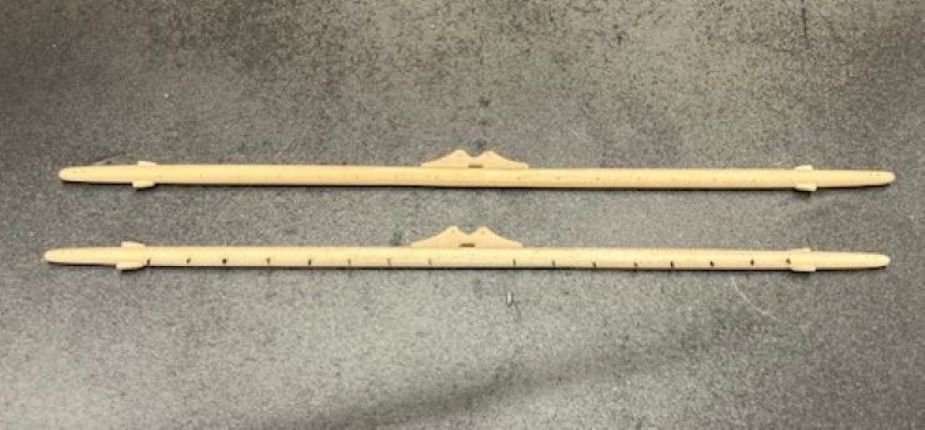
Lastly, the Fore & Main Topgallant Yards and the Fore & Main Royal Yards. These were fairly easy to shape. I added the battens to the Topgallant Yards a la the Topsail Yards.
.jpg.8e94a4b3791d8a2d90ef04fddf144381.jpg)
.jpg.a18d1ee8898194cd33de48b01b68a31f.jpg)
All of the yards were pinned temporarily to the masts (see photos).
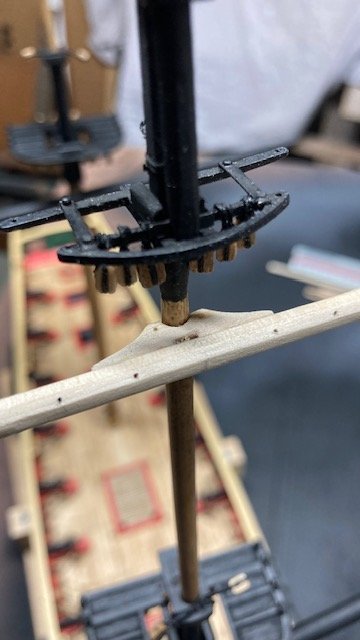
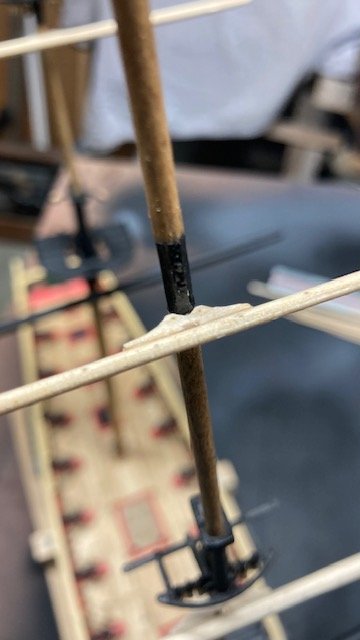
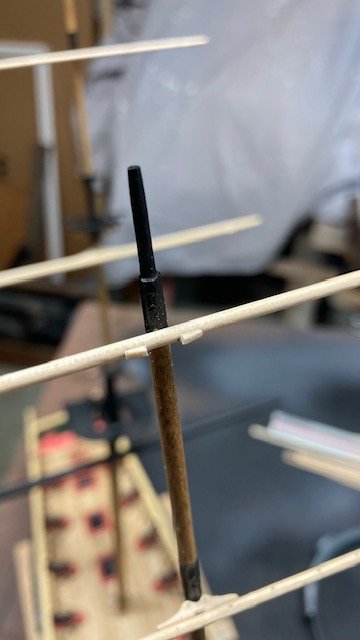
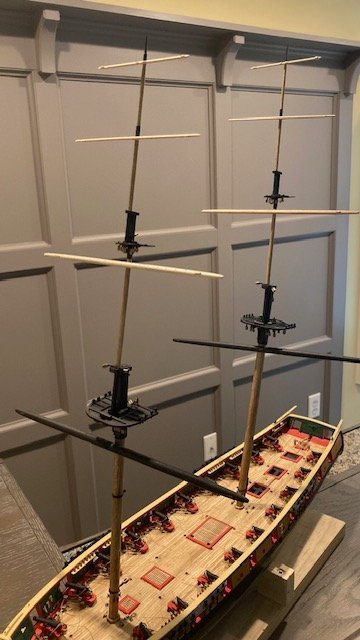
The plans call for all yards to be painted black. On the replica ship, except for the course yards, all the yards have a natural (bright) finish. I’ve already painted the course yards black. I’m undecided whether to make the rest of the yards black or bright finish.
Fashioned the spritsail yard as per the plans. The chocks and the cleats aren’t quite to scale but when rigged won’t be noticeable. The spritsail yard was primed, painted black, and temporarily pinned to the bowsprit.
.jpg.1a8f9c1df47f516b7a43c17172ab9342.jpg)
.jpg.58636da324b7fd3e20fc958330351f8f.jpg)
.jpg.23b97c1a1ebf55ee3af96548978afe06.jpg)
.jpg.975eec1913487d7a78cdd8930df56021.jpg)
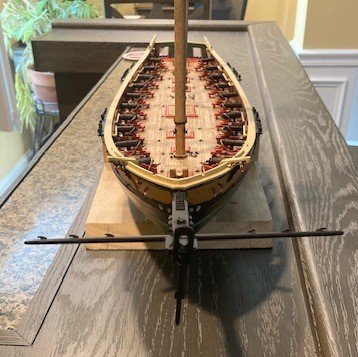
There's still some work remaining to complete the yards, i.e., Jackstay eyebolts, eye splices and a lanyards, stirrups, footropes, rigging blocks, et al, but I think I'll fashion the Spanker Boom and Spanker Gaff first. Stay tuned for updates.
- GrandpaPhil, Gahm, robert952 and 1 other
-
 4
4
-
17 hours ago, Snug Harbor Johnny said:
Yours is a fine build, with much to share with fellow builders !
Thanks.
-
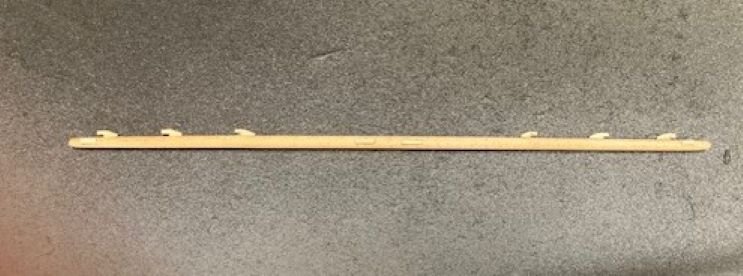
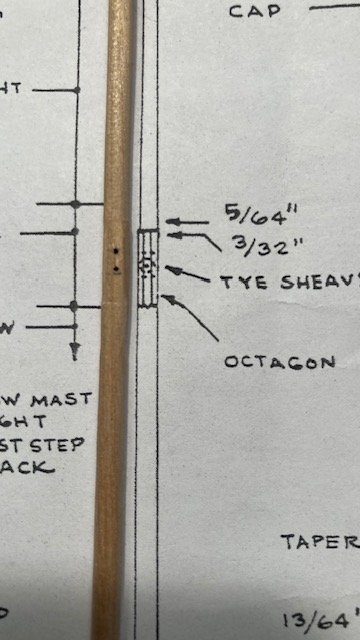
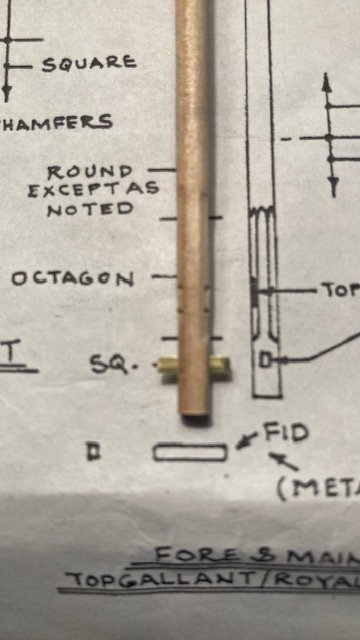
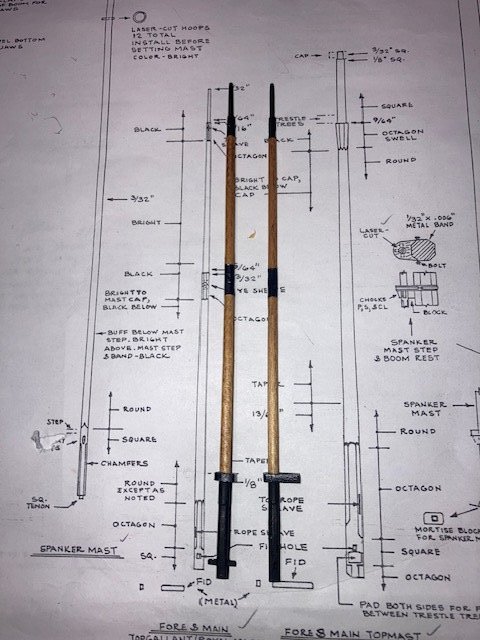
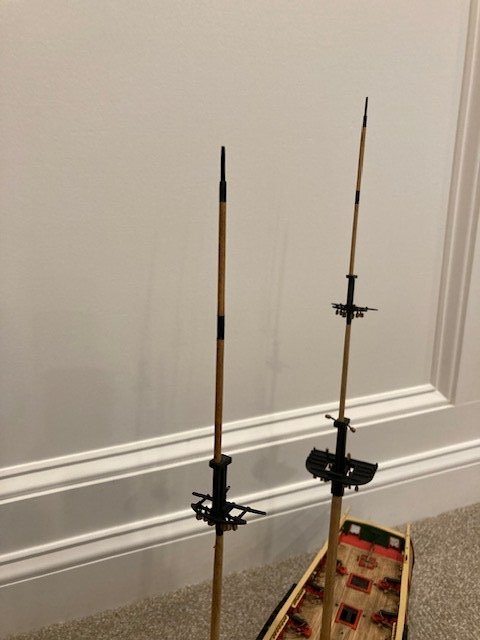
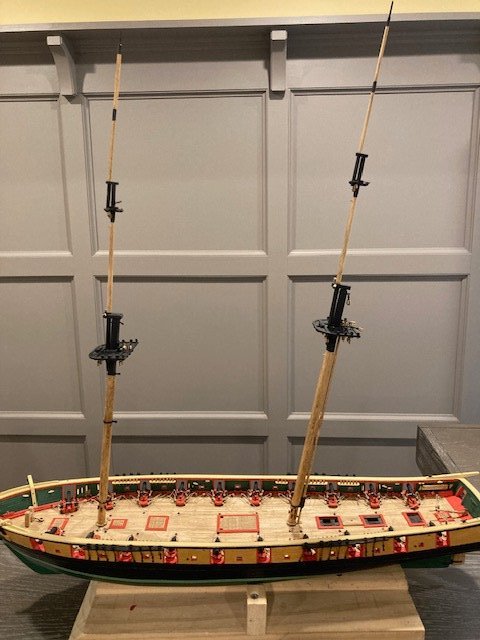
Fashioned the Main and Fore Topgallant Royal Masts. A lot of sanding/filing required to shape these as per the plans. I left the tip of the mast a little thicker for fear of breaking it off if too thin. I used the top mast cap as a guide in shaping the mast. Made the faux sheaves for the .010” Topgallant Royal Tye Halliard and the .016” Topgallant Tye Halliard. Note: The kit is not furnished with .010” line. I plan to use .012” for the Royal Tye. I also made the faux sheave for “Top Rope.” I have not found the Top Rope that passes through this sheave anywhere on the plans. If anyone knows what this is, please feel free to let me know. For the fid, I used a 1/64” x 1/16” brass strip. The masts were finished as per the plans. For the “bright” finish I used Minwax Golden Oak. I applied a coat of Minwax Polyurethane. Next up, the Fore & Main Course Yards.
.jpg.7e56004364d6d0b8b5e2cea8242ccae6.jpg)
.jpg.5790450cea8ec83b23054c729711b5ab.jpg)
-


.jpg.ebb24394dc234287f6198551fb212248.jpg)
.jpg.ce23cbeebb116e3c31ca9a6858aabc71.jpg)
.jpg.c1aac5fcd6ccf4ceba6d9bbce852e418.jpg)
.jpg.07a23ae41f493d0ef89d1d8defe6abc4.jpg)

.jpg.3e2726ea3b4e1319e561b6a0ab6ce509.jpg)
.jpg.1cc0a5b654c655e0863eea6b866b2376.jpg)
.jpg.2fd99bb7c2f80762e6503db5c4704179.jpg)
.jpg.9caf3083d599160e244936bf739d08fb.jpg)
.jpg.ce94424338cfb17610e4d690b54acbf6.jpg) x
x
.thumb.jpg.bf08006e934d1757607596d1d4876349.jpg)
.thumb.jpg.efff2660d48e100039091445314f5b9e.jpg)
US Brig Niagara by Abelson - Model Shipways - 3/16" scale
in - Kit build logs for subjects built from 1801 - 1850
Posted
Completed the main mast and main top mast rat lines. Began work on the top mast shrouds. The first pair of shrouds have 1/8" single blocks. Note: the blocks are not in the same orientation. As can be seen on Detail 5-G, the reefing block is facing fore to aft, and the lift block is facing port to starboard. I used Syren .025” rope (the plan calls for .023” line which is not furnished with the kit) for the shrouds. The Burton pendants were made with Syren .018” rope (the detail calls for .016” line which is not furnished with the kit). It isn’t clear from the plans and the instruction manual just how the shrouds are placed. I presumed they are placed first pair/second pair portside, first pair/second pair starboard side.
Completed the top mast shrouds with rat lines same as the main and fore mast. Added the sheer poles and staves. Before proceeding, this is a good time to review the plans and instruction manual and to update the To Do List. I decided to add the Top Mast Back Stays followed by the Top Mast Stay and the Spring Stay. The back stays are set up with 3/32” deadeyes and lanyards (.008”). The Top Mast and Spring Stays are rigged with a lanyard (.012”) and 3/32” bullseyes to eyebolts adjacent to the fore mast and inside of the fife rail as shown in Detail 5-H. Note: The eyebolts are not shown on the Belaying Plan. According to Detail 5-H, the lanyards are different lengths (not sure why).
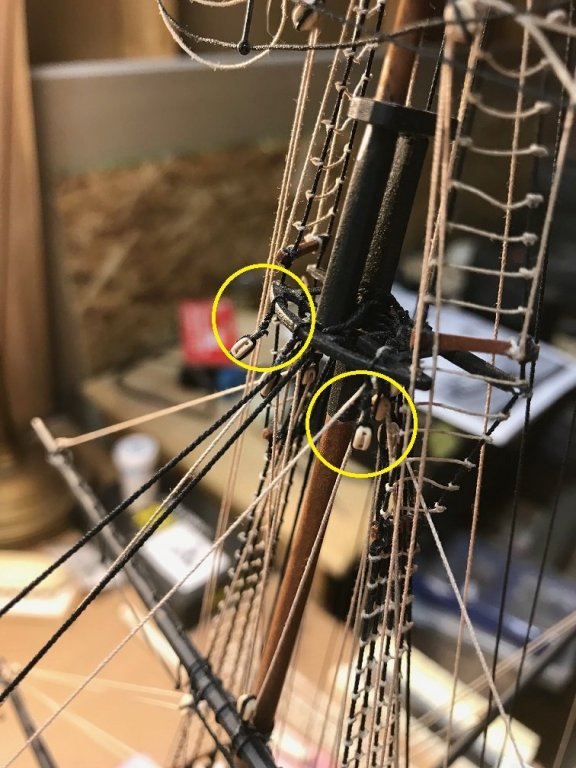
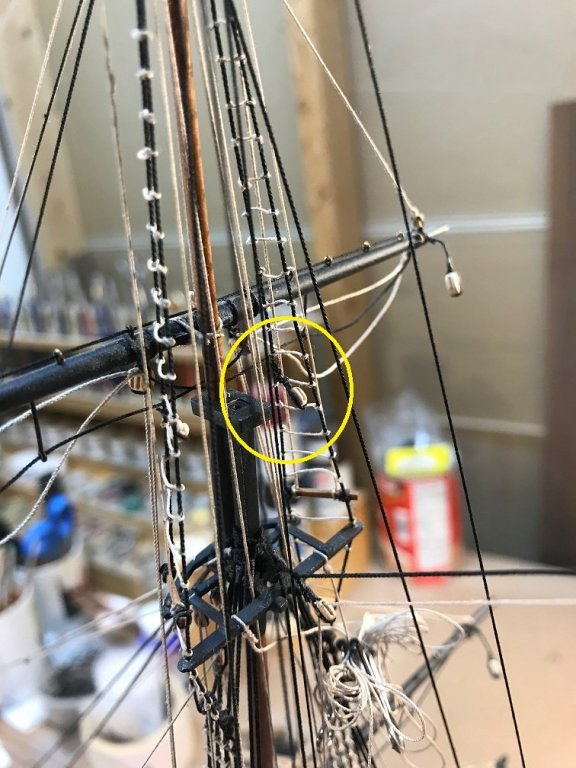
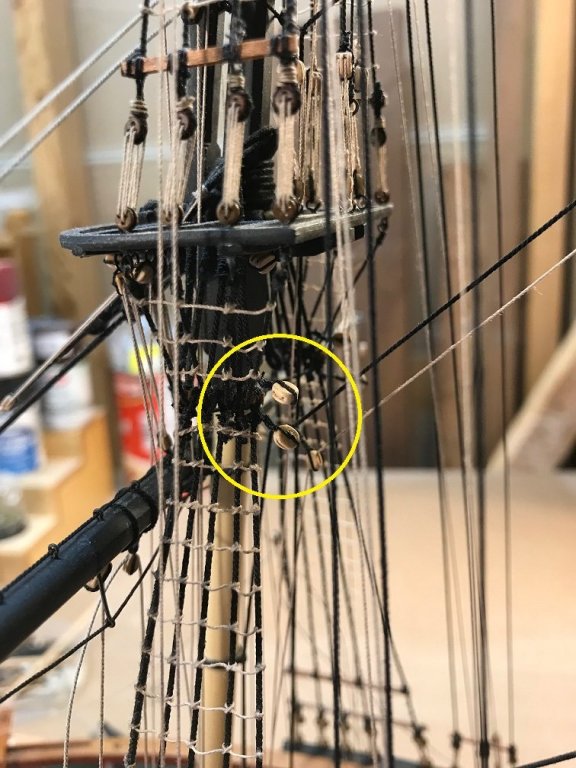
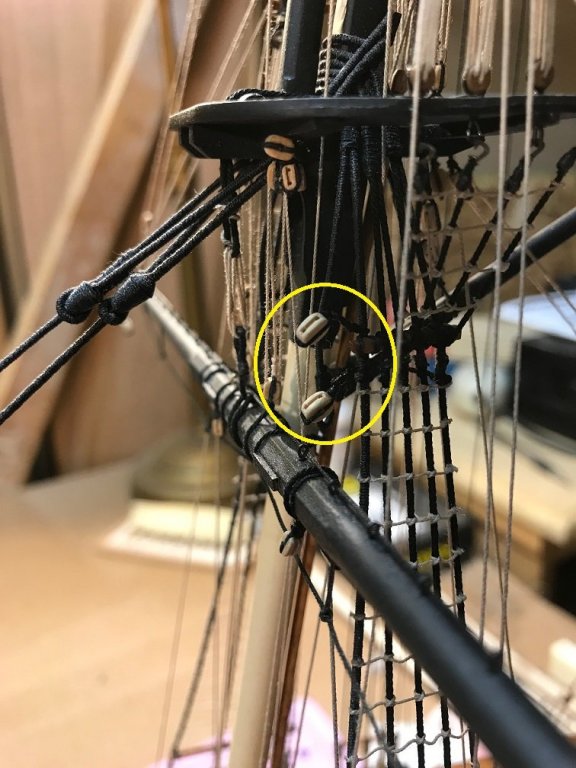
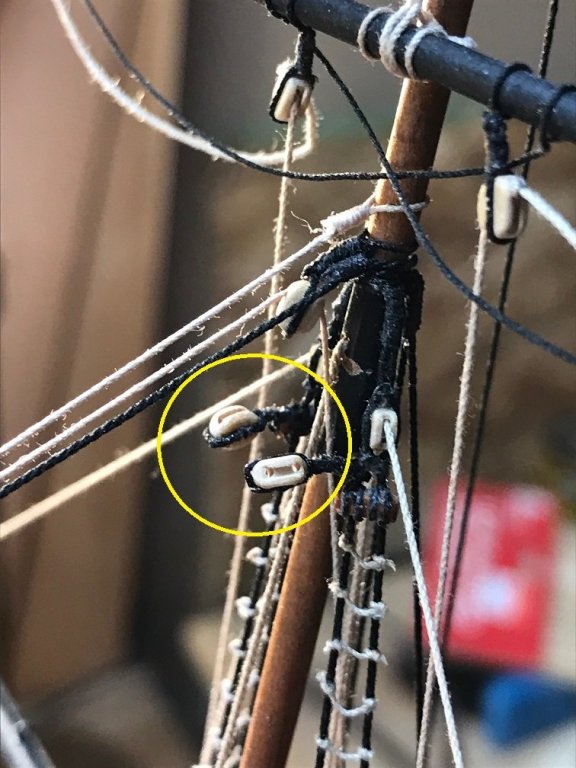
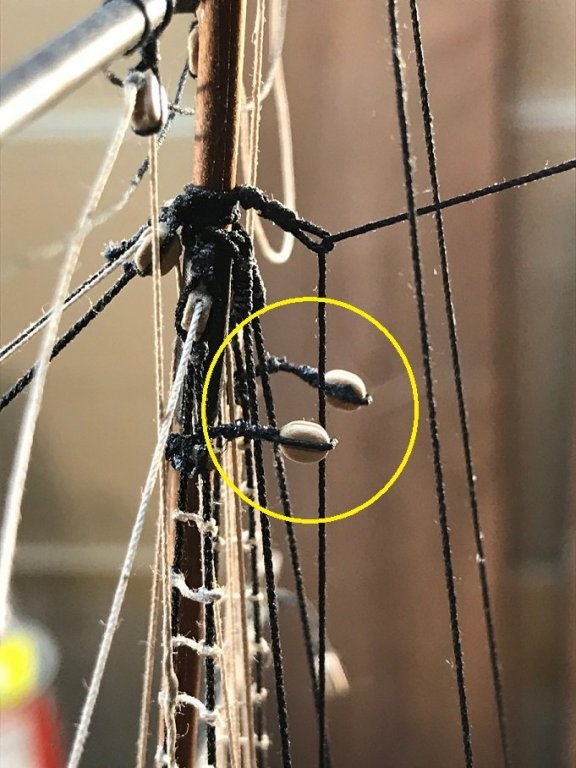
While studying the plans, Sheet 5 specifically, I discovered that there is an 1/8” single block that is seized to the fore stay collar on the port side (see photo). This block is for the Fore Stay Sail halliard. A note on Sheet 5 says the forestay sail is a storm sale and not generally rigged at the forestay. The Fore Stay Sail is most often rigged at the main stay. So, an 1/8” block needs to be added to the main stay as well. If you plan to add this block, make sure you do it before you rig the Fore Stay and Main Stay. Also, note that there is an 1/8” single block seized to the main stay over the main hatch and on the fore stay over the forecastle hatch. These blocks are for a stay tackle. Further, there is an 1/8” clump block with falls and pendants for the Inner Jib and for the Outer Jib. I’m not certain how or whether to rig these. There is also a similar, more complex, arrangement of blocks, clumps, falls, and pendants for the Top Mast Stay Sail.
Added grommets and 3/32” single blocks to the bowsprit and the jibs for the Outer Jib Downhaul (2P), Fore Staysail Downhaul (2S), Flying Jib Downhaul and Fore Top Gallant Stay Fall (3P), and Inner Jib Downhaul and Flying Jib Stay Fall (3S). It’s best to add these blocks while the bowsprit and jibs are off ship. The downhauls pass through the fairlead holes in the chock rail and are tied off on the forward pin rail as noted on the Belaying Plan on Sheet 6.
Planning ahead, I made the sister hooks for the bowsprit shrouds, the 1/8” single blocks with hook for the Spritsail Yard lifts and the 1/8” double block with hook for the Outer Jib Stay tackle. Note: Sheet 5 shows this 1/8” double block being hooked to the lower eyebolt on the cap, but the Bowsprit Plan notes the 1/8” block for the Spritsail Yard Lift is hooked to the same eyebolt.
Fashioned the mouse on Top Mast Stays, Spring Stay, and Inner Jib Stay from 3/32” dowel. Predrilled the dowel before shaping the mouse. Made an eye at one end of each stay. The size of stay throat is arbitrary. Secured the mouse to the stay with a dab of CA. I decided to paint each mouse black rather serve them with sewing thread.
Added a 1/8” single block to the Top Mast Stay throat for the stay Halliard, a 3/32” single block with thimble for the Downhaul, and the fairlead to the Top Mast Stay for the halliard tack. .Also, added 2 thimbles for the Halliard Tack. The thimbles were made with 5/64” split rings and .008” rope. Rigged the stay halliard (the plan calls for .014” line which is not furnished with the kit. I used .012" Syren rope) with 1/8" single block with hook, the halliard tack (.010" rope), and the downhaul (.010" rope). The tack and the downhaul are a continuous rope that passes through a split ring attached to the hook on the 1/8" block. The tack end of the rope passes through the 3/32" block thimble and the fairlead and is belayed on the fife rail (22 on the Belaying Plan). The downhaul end of the rope passes through the two thimbles on the top mast stay and the 3/32" block and is belayed on the fife rail (22).
Set up the Main Topmast Stay and Spring Stay with bullseyes and lanyards as per Detail 5-H. The lanyards are belayed to themselves Moving on, I was planning to add the fore top mast back stays next, but I'm now contemplating adding the Fore Course Yard so that the lifts can be rigged while the back stays are not in the way. Need to study the plans some more. Stay tuned.