


mfrazier
-
Posts
253 -
Joined
-
Last visited
Content Type
Profiles
Forums
Gallery
Events
Posts posted by mfrazier
-
-
2 hours ago, Old Collingwood said:
Loving those gratings Mark - really really nice they look perfectly to scale also (lots of kit ones are way over scale - not the ones you built)👍
OC.
Thank you OC. I know what you mean. I was very happy that they appeared to be very close in scale. I am amazed at the builds you guys make. I hope I am up to the challenge of this project and can it justice.
Mark Frazier
-
2 hours ago, Daliab said:
Mfrazer... Your version of the Victory is looking really good. I'm building the 738 kit. The only difference is the copper hull. Will continue to follow your build.
You can view my build at HMS Victory by Daliab. Keep up the good work.
Thank you Daliab. I have checked out your build even before I got my kit when I was researching builds for ideas and inspiration. I know the ship was coppered, but I just for some reason don't care for the copper. I prefer the wood. I just hope I can do this build in the quality league and standard many of you guys have set with your builds.
Mark Frazier
-
I am getting the deck furniture built while waiting for planks glued on to dry.

Maybe by the time I get done planking, everything else will be built.
Mark Frazier
- Edwardkenway, GrandpaPhil, gieb8688 and 2 others
-
 5
5
-
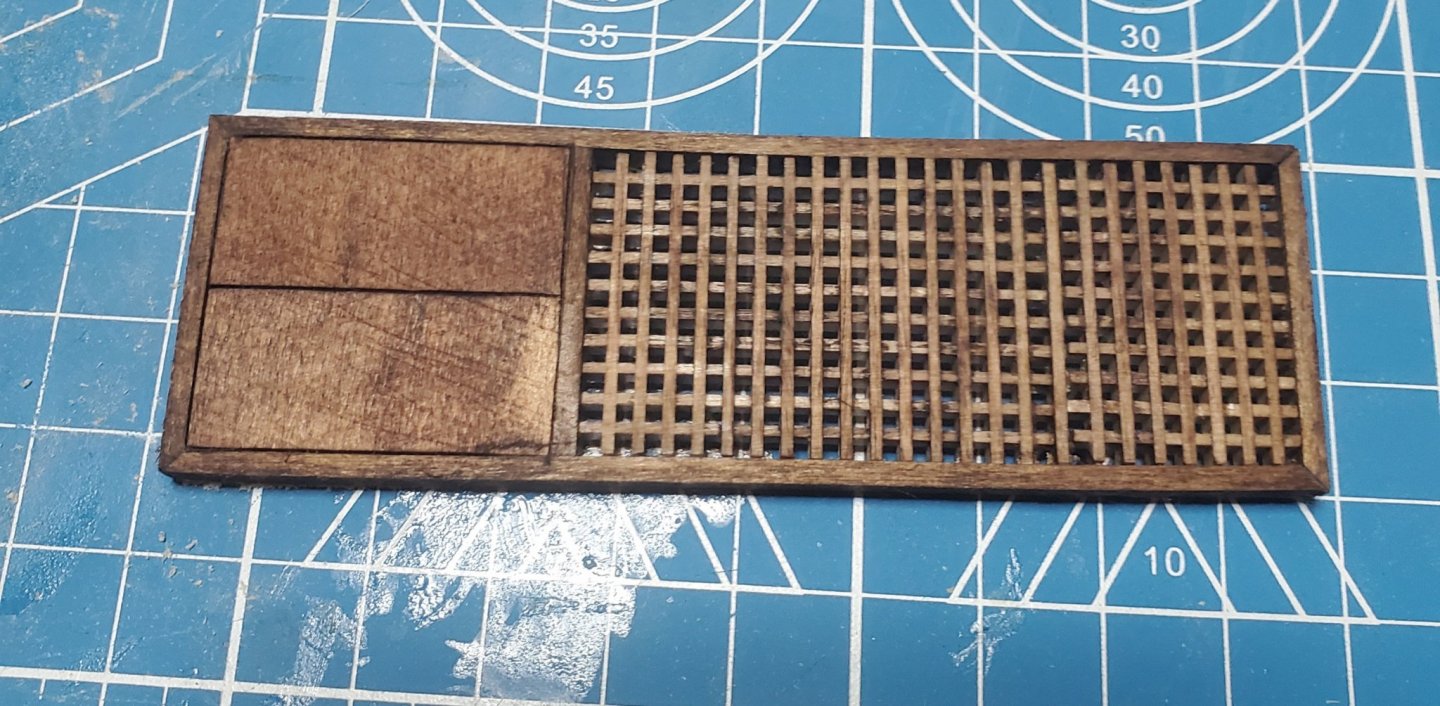
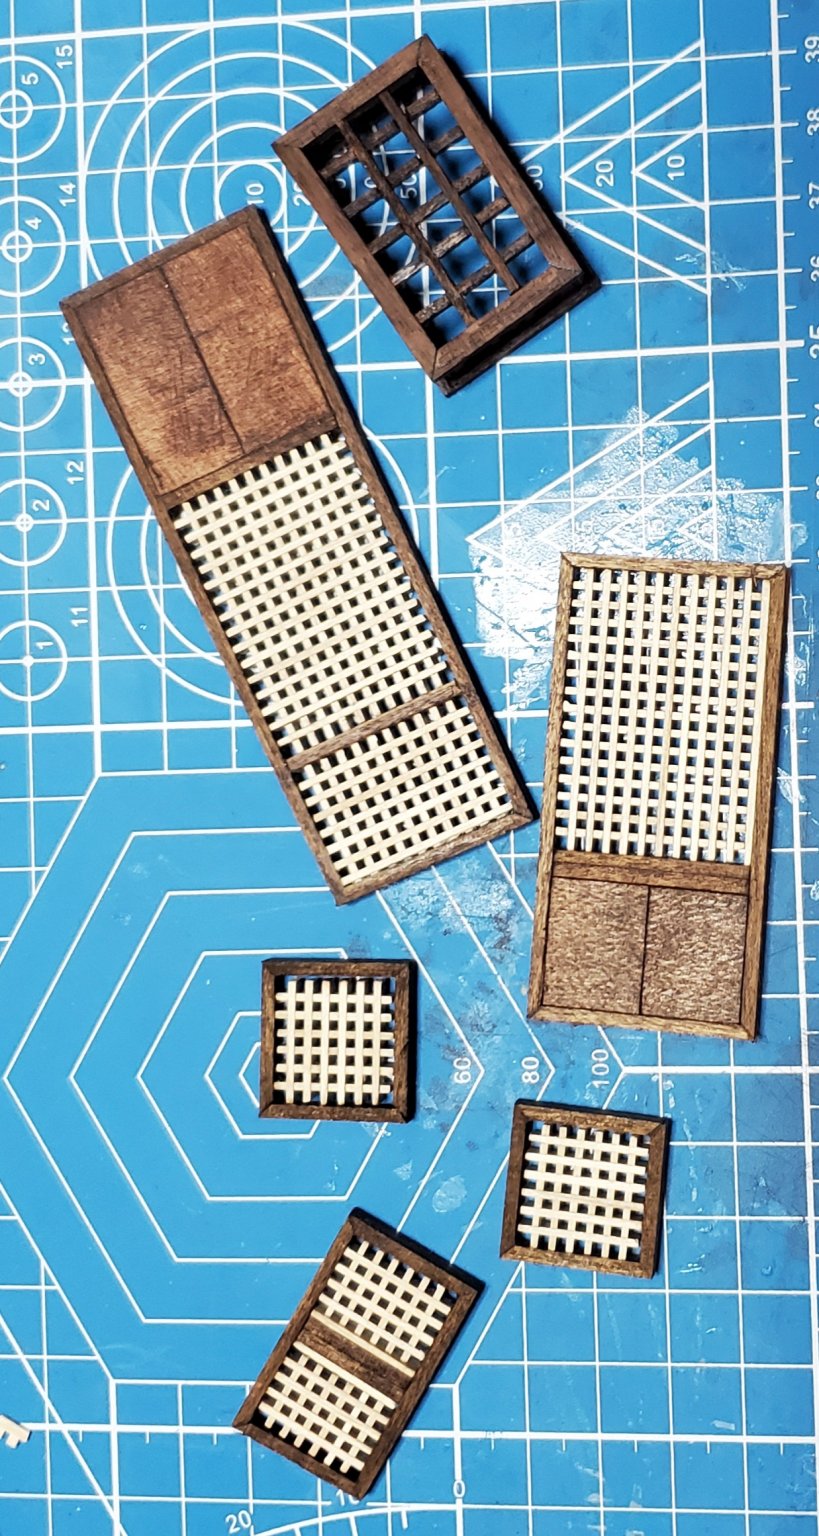
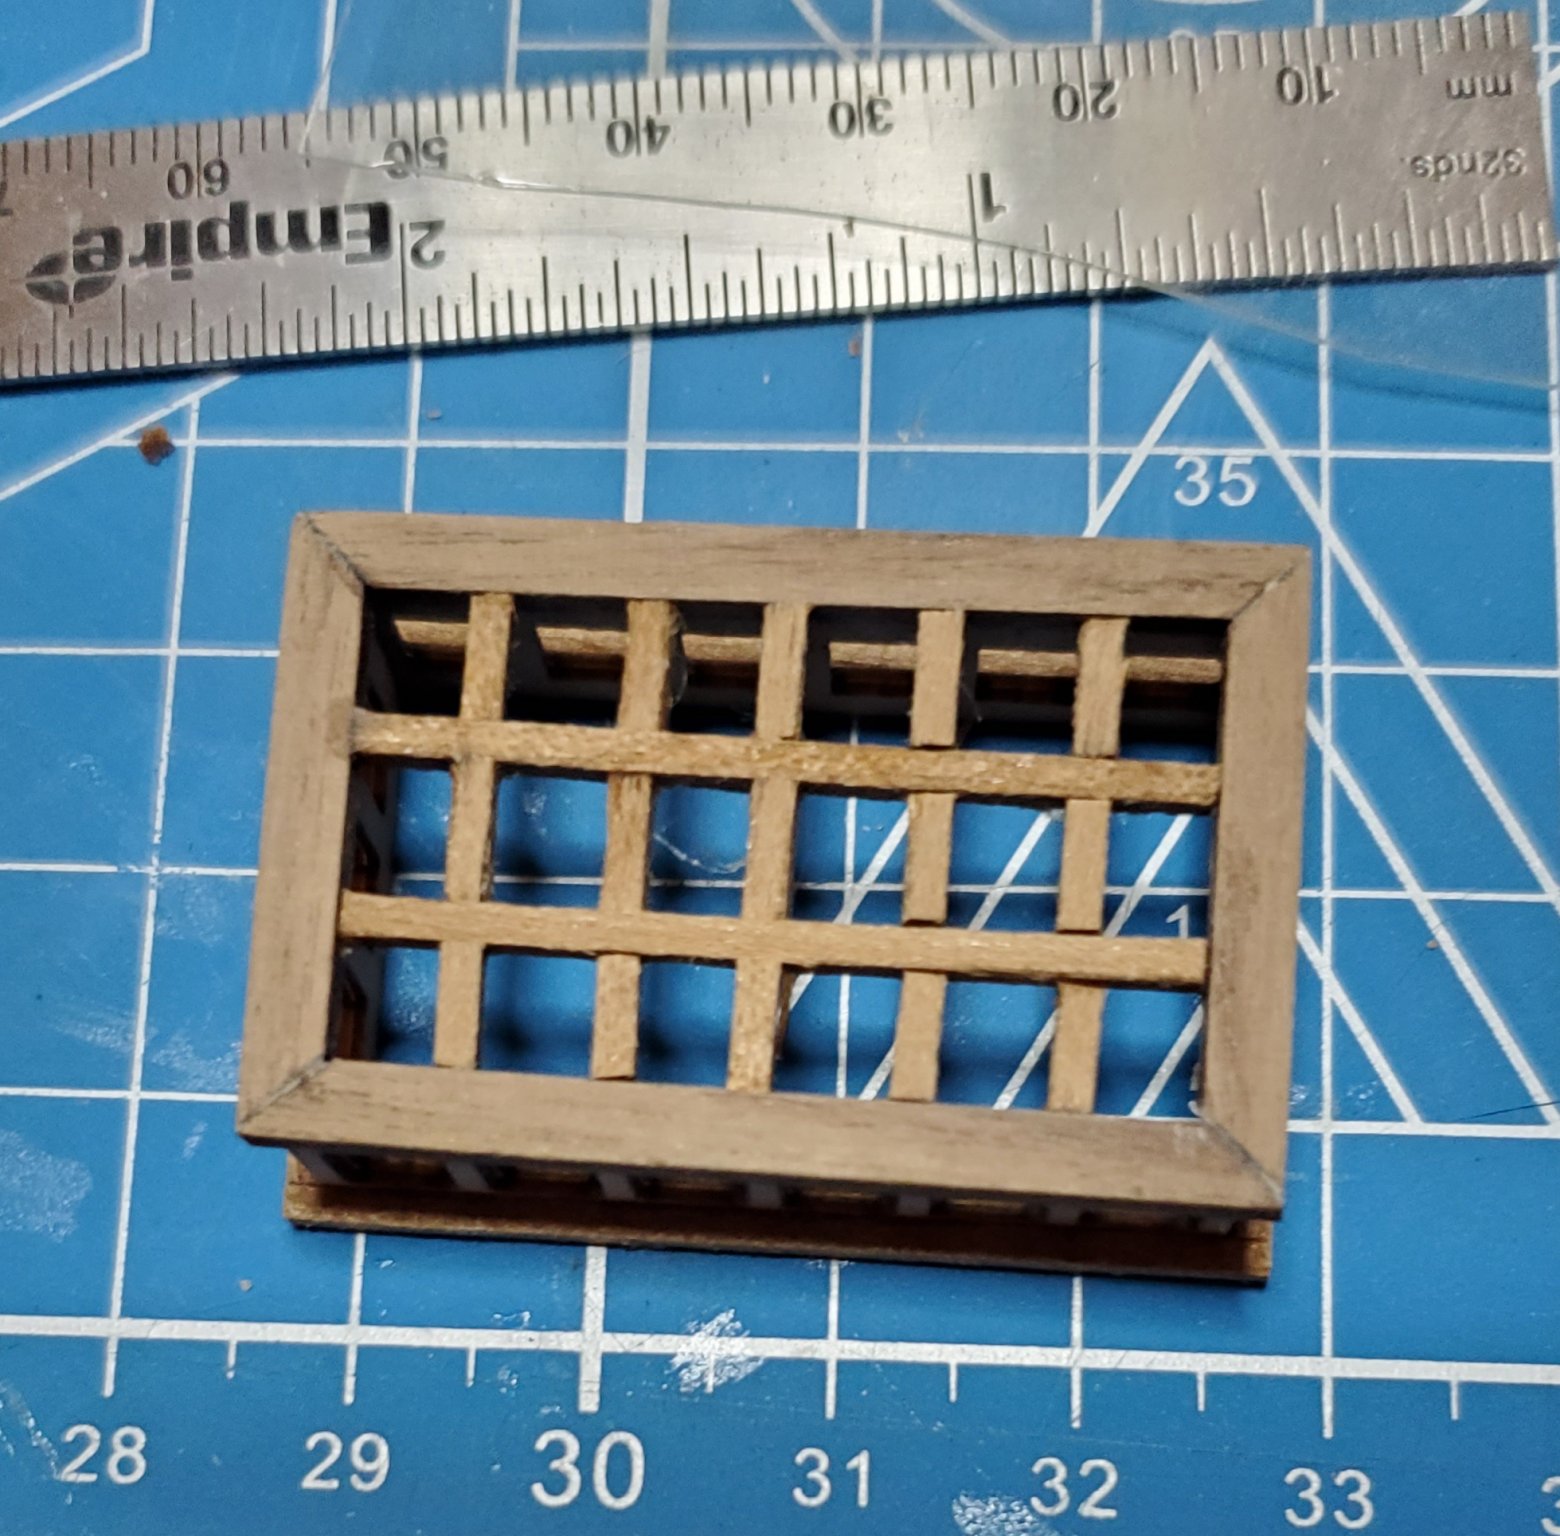
I made one of the gratings for the upper deck. I still have to put the poly on it and hinges and handles on the doors.
Mark Frazier
-
2 hours ago, Rob S said:
Hi Mark. I'm stared building the Mamoli Victory (1/98) last May and am now in the planking stage using the kit provided 5mm x 1mm walnut laths. I bought the kit sometime in the early nineties and tried to keep it in the right humidity type conditions. The walnut is rough and seems brittle, but so far, so good. I've been soaking my walnut for 10-15 in warm water and find it fairly pliable. I'm also using a heated, electric plank bender by Model Shipways (MS7205) for the more serious bending that helps a lot. You seem to be a seasoned modeler, so I apologize if I'm telling you something you already know/have tried.
I have tried various methods. It just takes patience and soaking the wood and it is going, just slow as I can only do a few planks at a time. I am edge gluing the planks also.
Mark Frazier
-
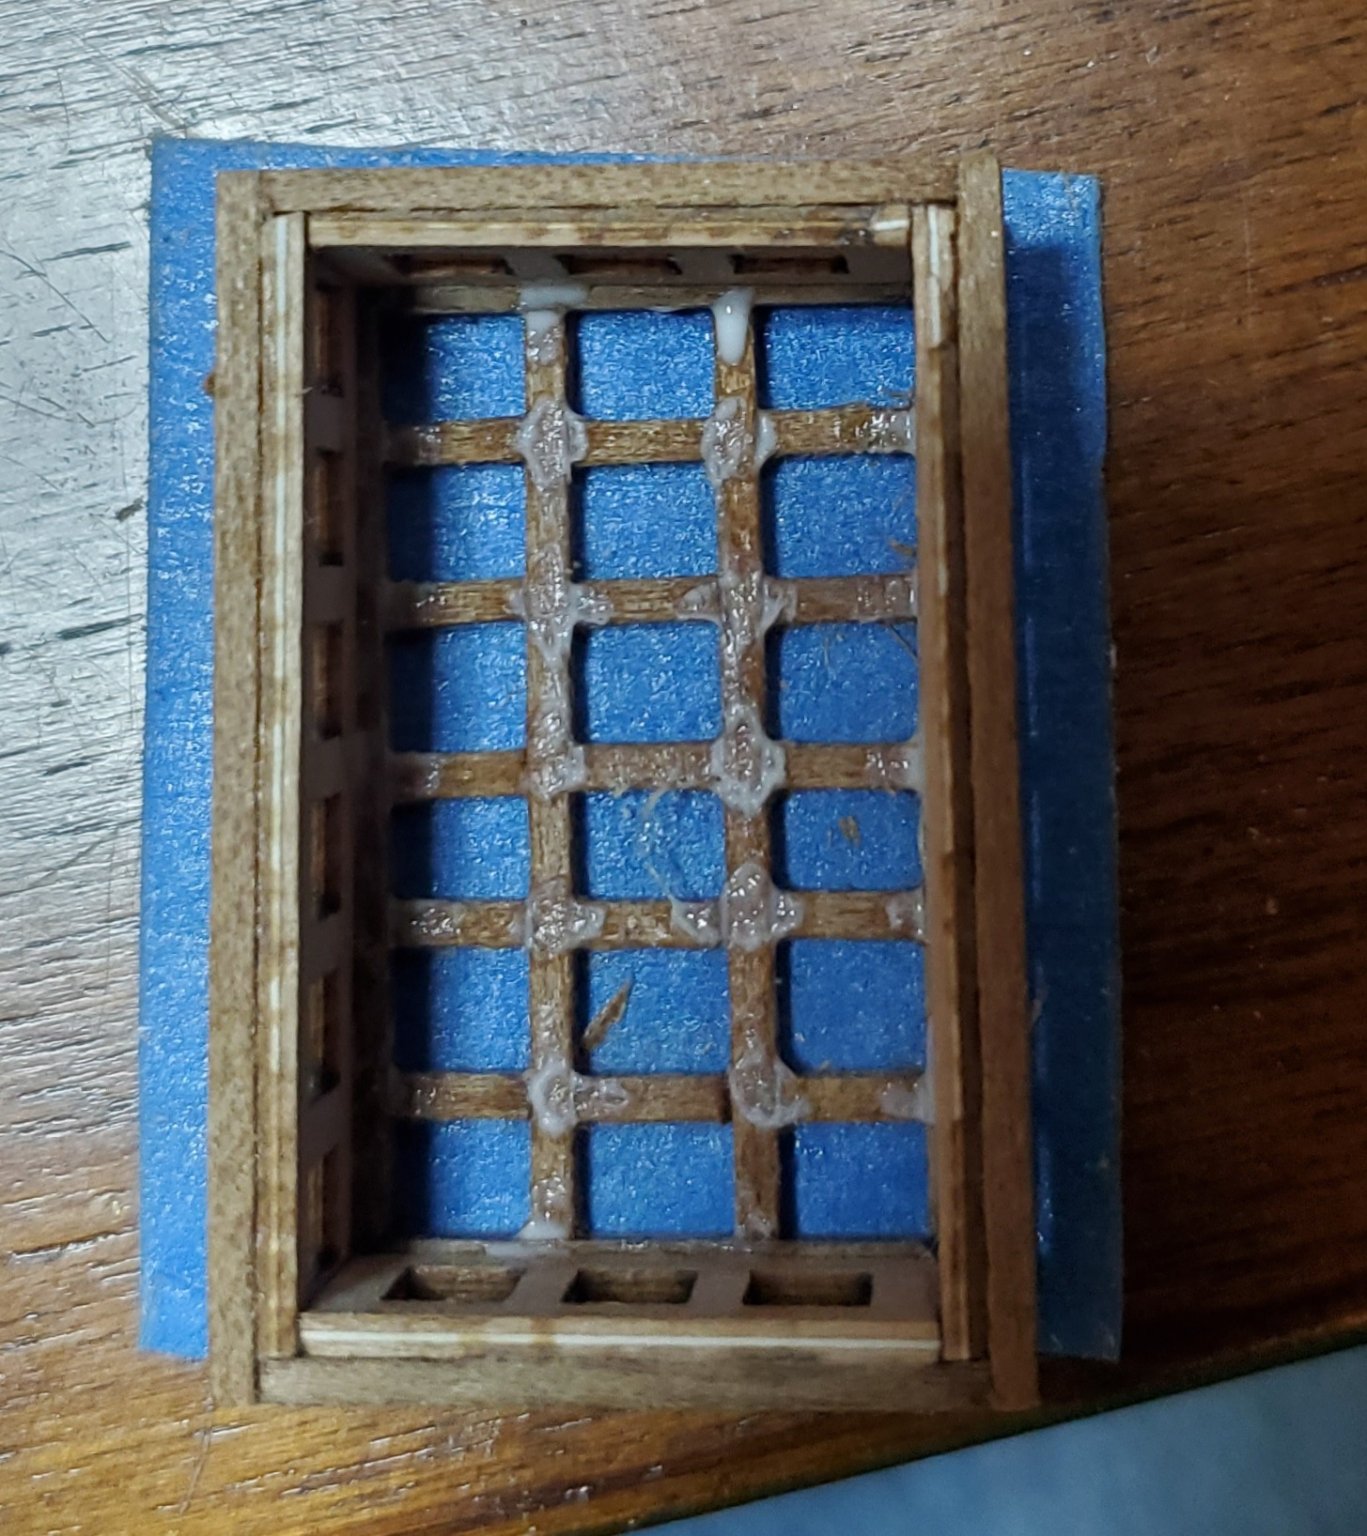
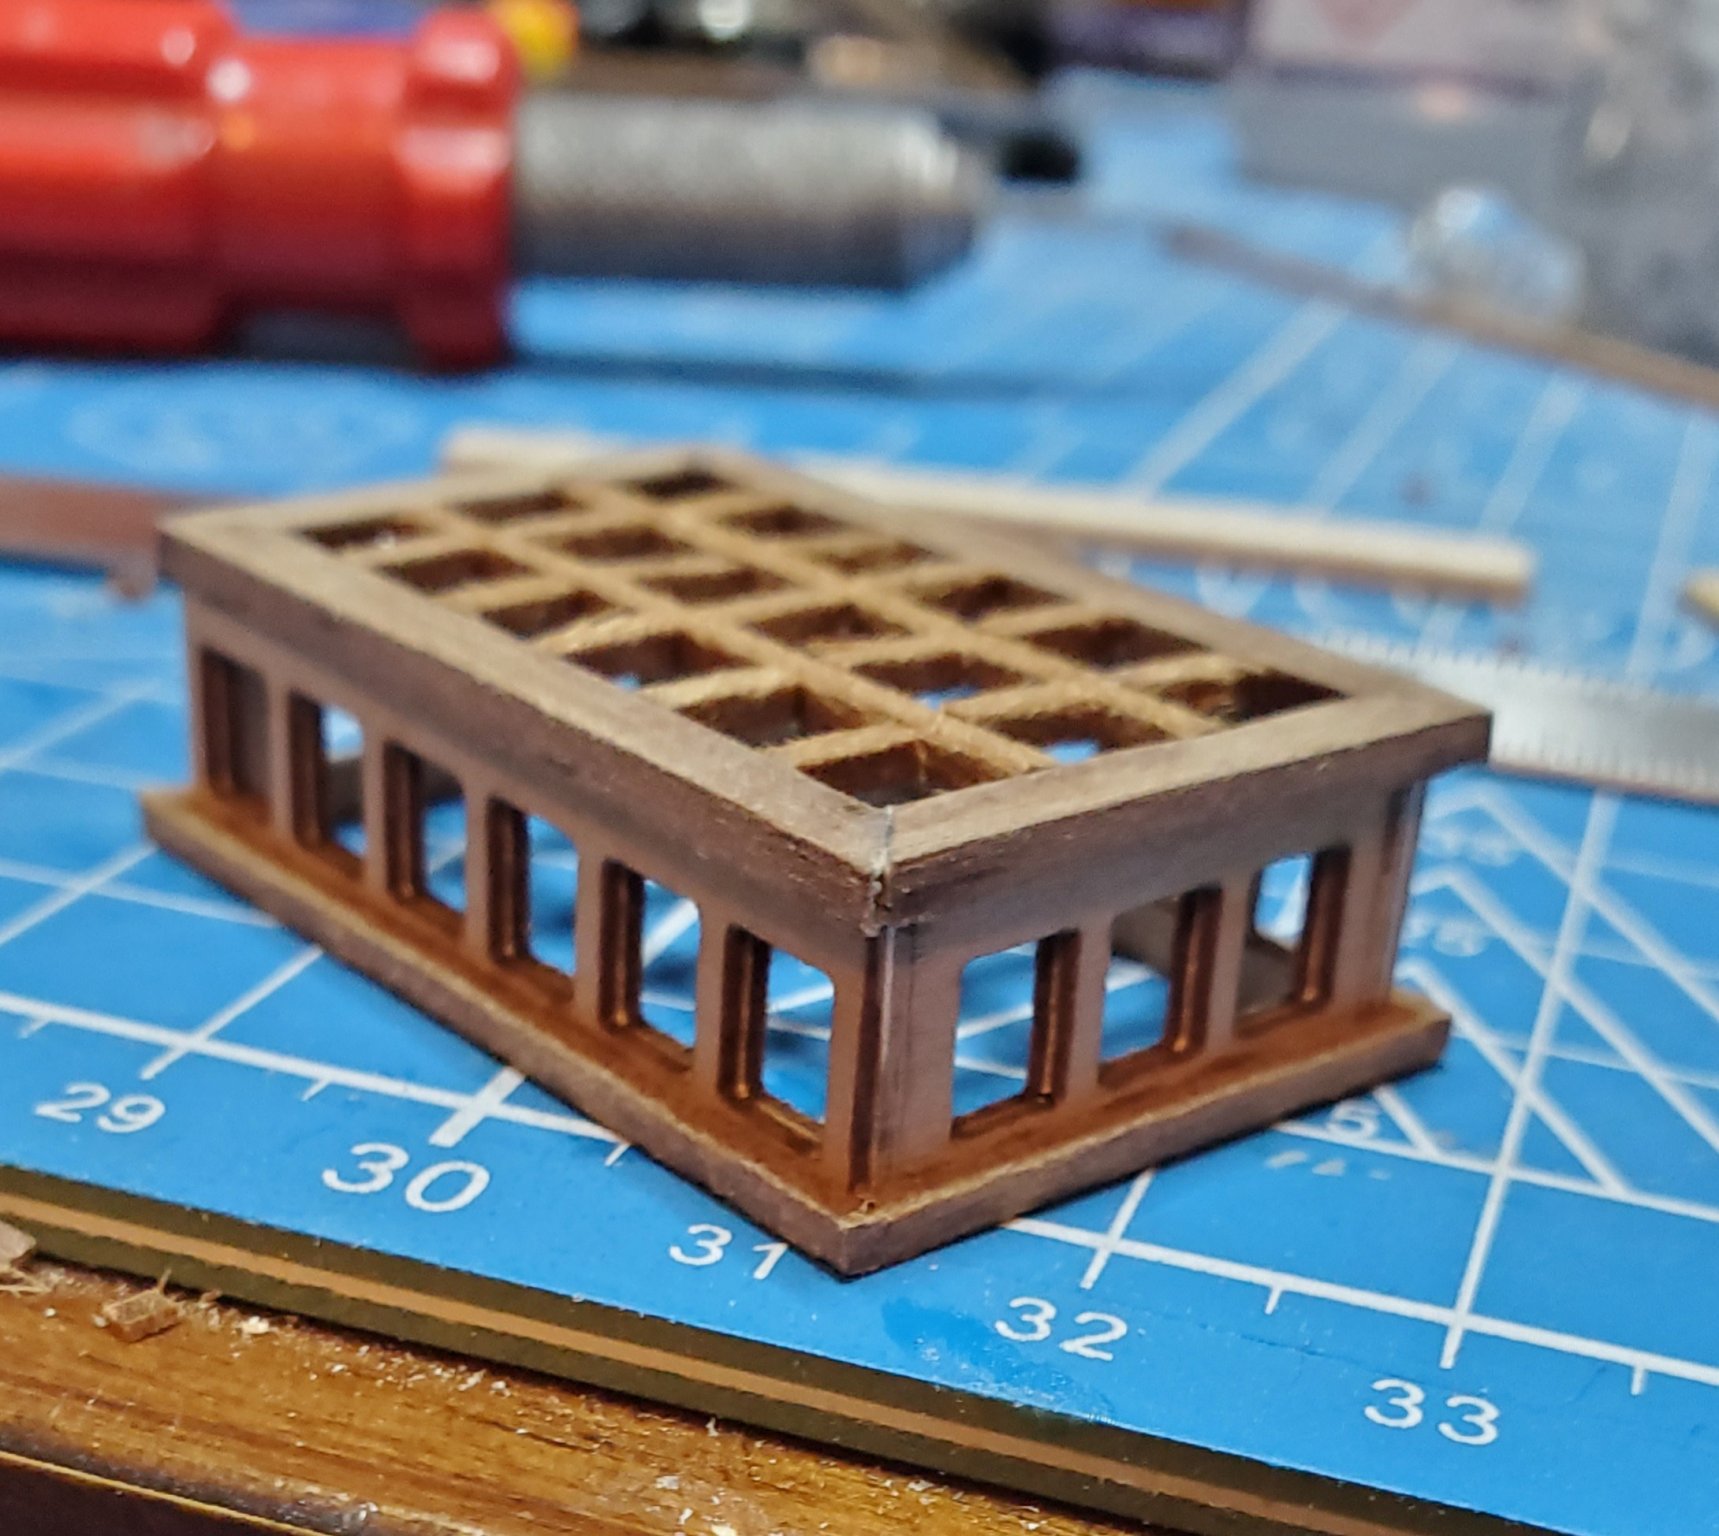
While I wait for the glue to dry on the 4 planks I put on the hull, I figured why not make something else. So, I decided to make the poop deck skylight. Of course the kit version is no good, but I figured I could use some of the parts and build from there. The kit say to put grating on the top. This is both wrong and ugly. I used the kit sides and ends, put a 1.5 mm frame around the bottom, put a 1.5 mm X 3 mm frame around the top. I mitered the corners for good looks. Then I turned it upside down on a piece of painters tape.

This will hold all the little 5 mm long window stiles that were installed and glued together on the bottom side.
This is the finished skylight. I am very pleased with it.
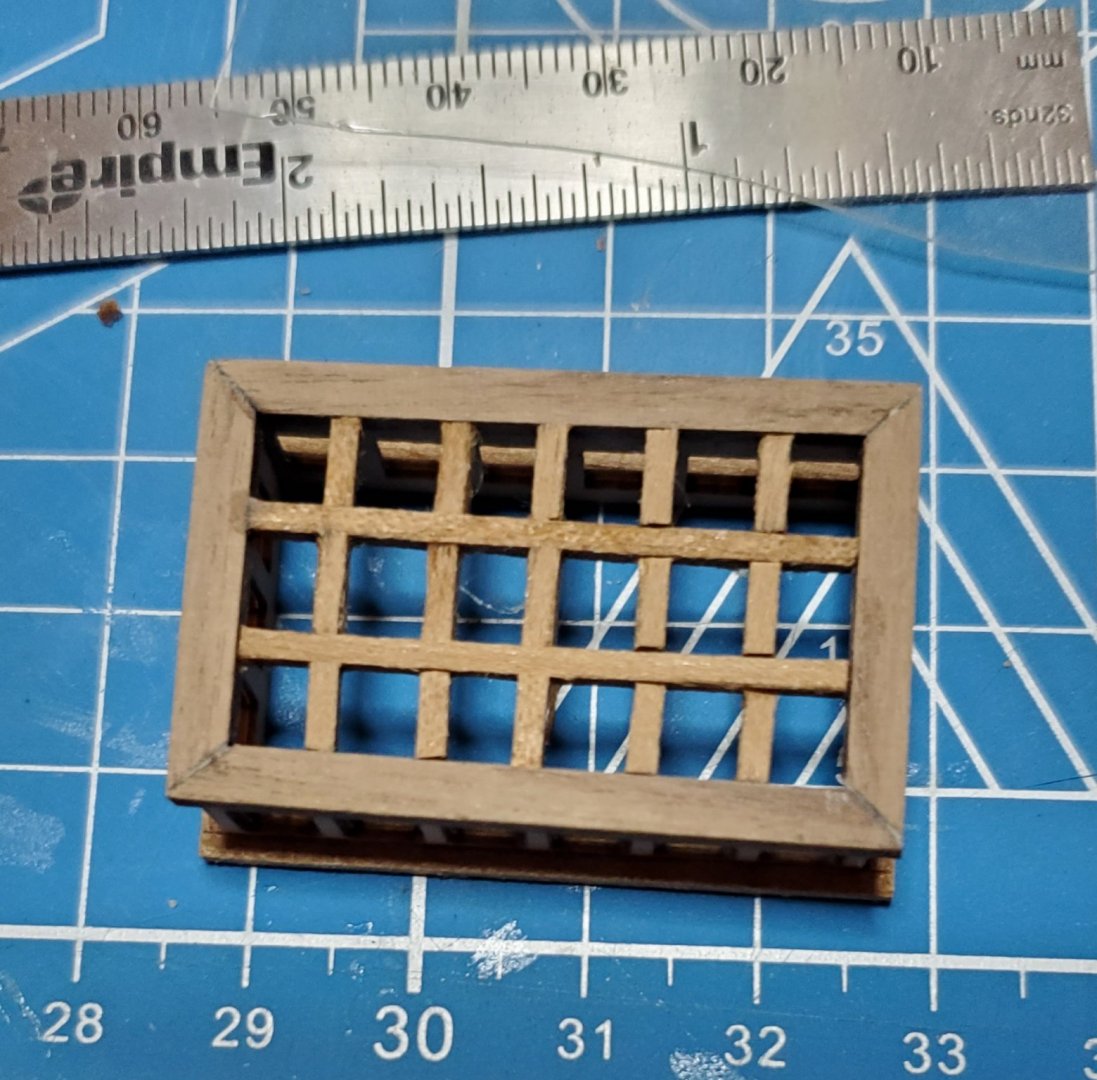
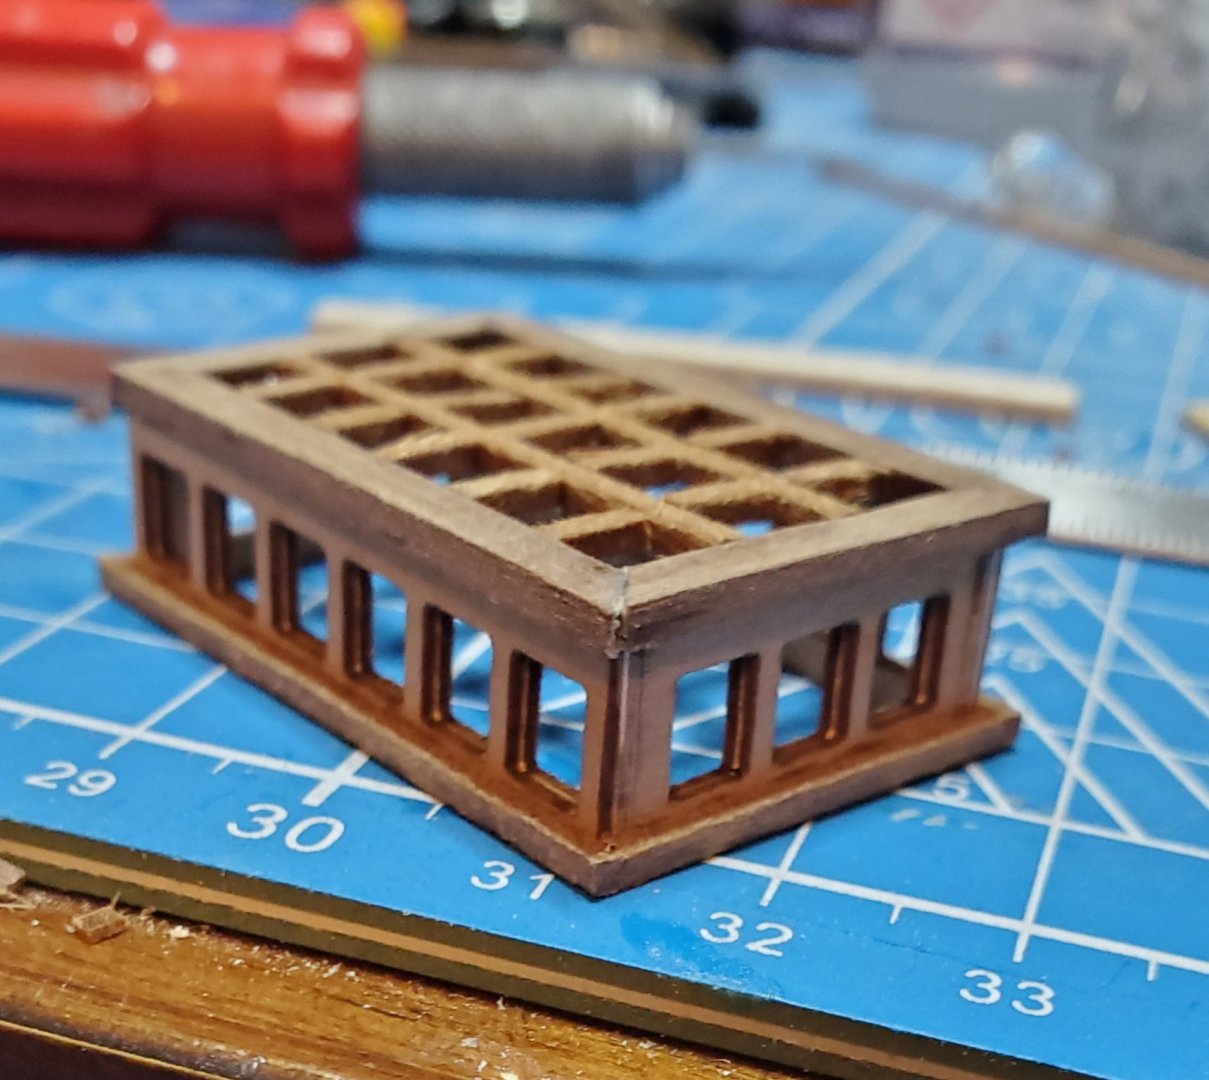
I have acetate sheet to cut windows from and will glue it inside the top and sides. I am thinking about no finish on this as it kind of looks a little weathered which I think is a good thing. I will sand it just a little more after the glue has cured. ( I would hate to get in a hurry and knock it apart).
-
6 minutes ago, Y.T. said:
May be to have whole bunch of all planks provided with kit soaked in water? I hope this may restore some wood splitting properties.
I was debating just soaking the whole bunch for a few hours and then let them dry, but don't know if that is a good idea or not. what do you more experienced fellows think?
Mark Frazier
-
1 hour ago, clearway said:
looking good- brings back memories of the fun i have had (and still having) with my billings victory! to be honest the cabins on the quarter deck arn't really that noticeable when the rest of the hull is finished and your effect looks better than the original- would also say yep scrap the figurehead and get the caldercraft one- i bought the sergal castings set for some of the stern decoration and agree the sergal figurehead looks way over scale.
Keith
I have already ordered the caldercraft figure head. I also had to order cannon balls. The kit has cannon ball racks, but no cannon balls.
- Old Collingwood and clearway
-
2
-
I wish I had gotten the billings kit.
- Y.T. and Old Collingwood
-
2
-
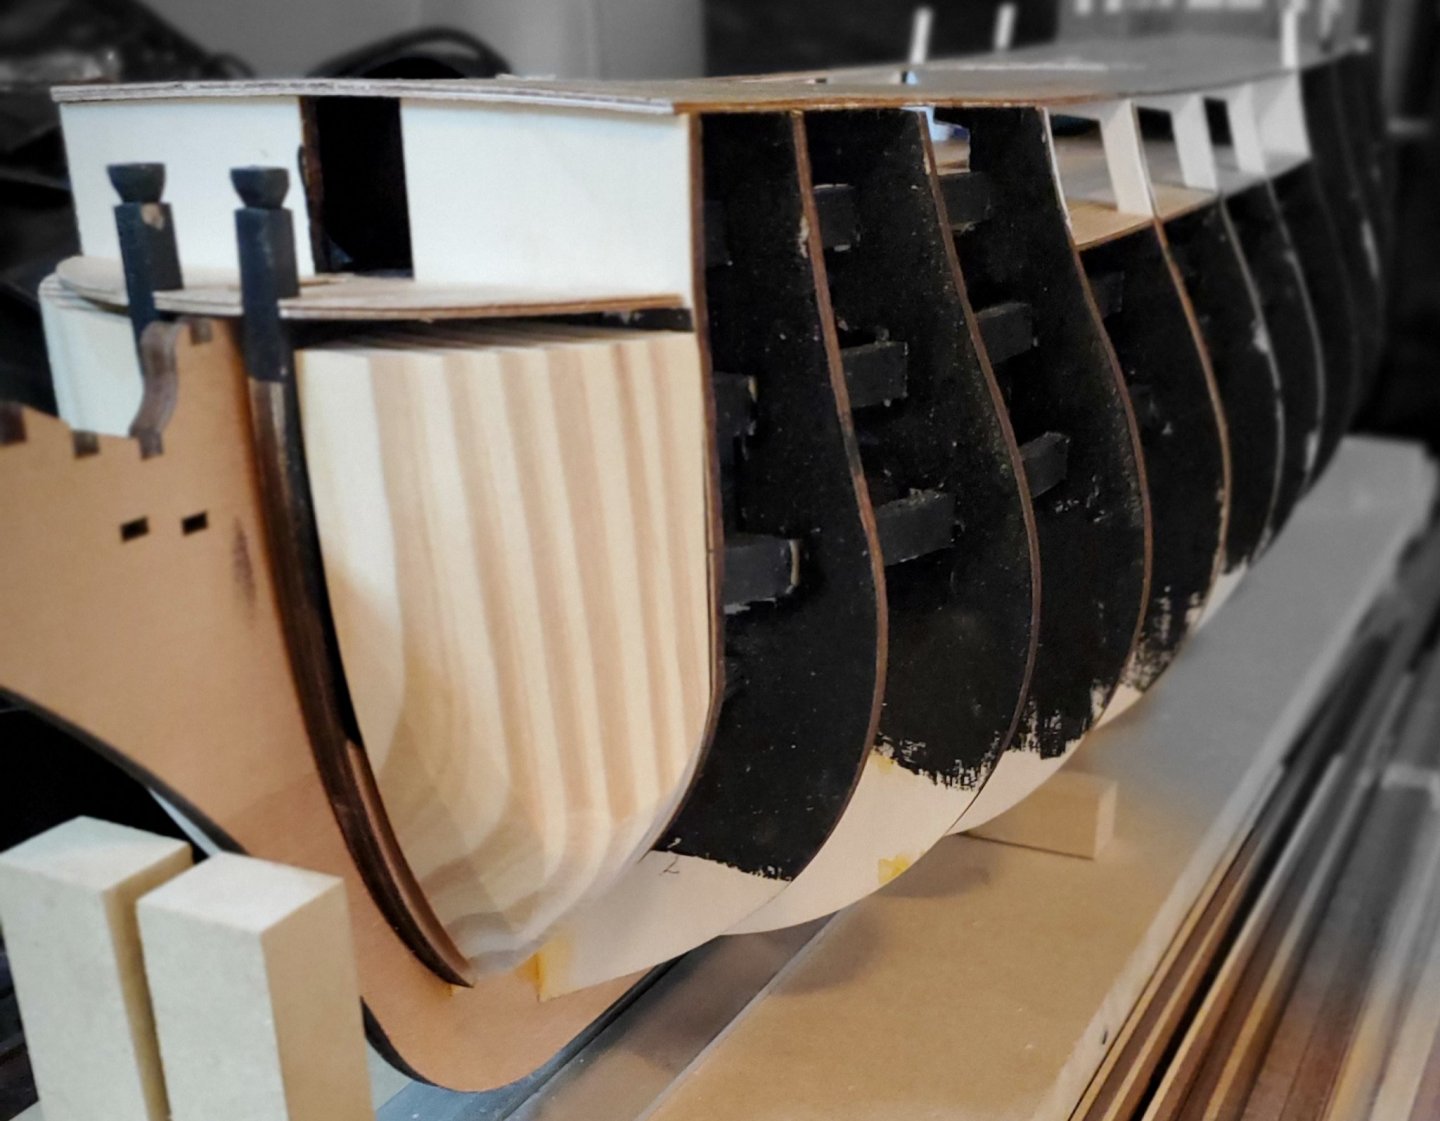
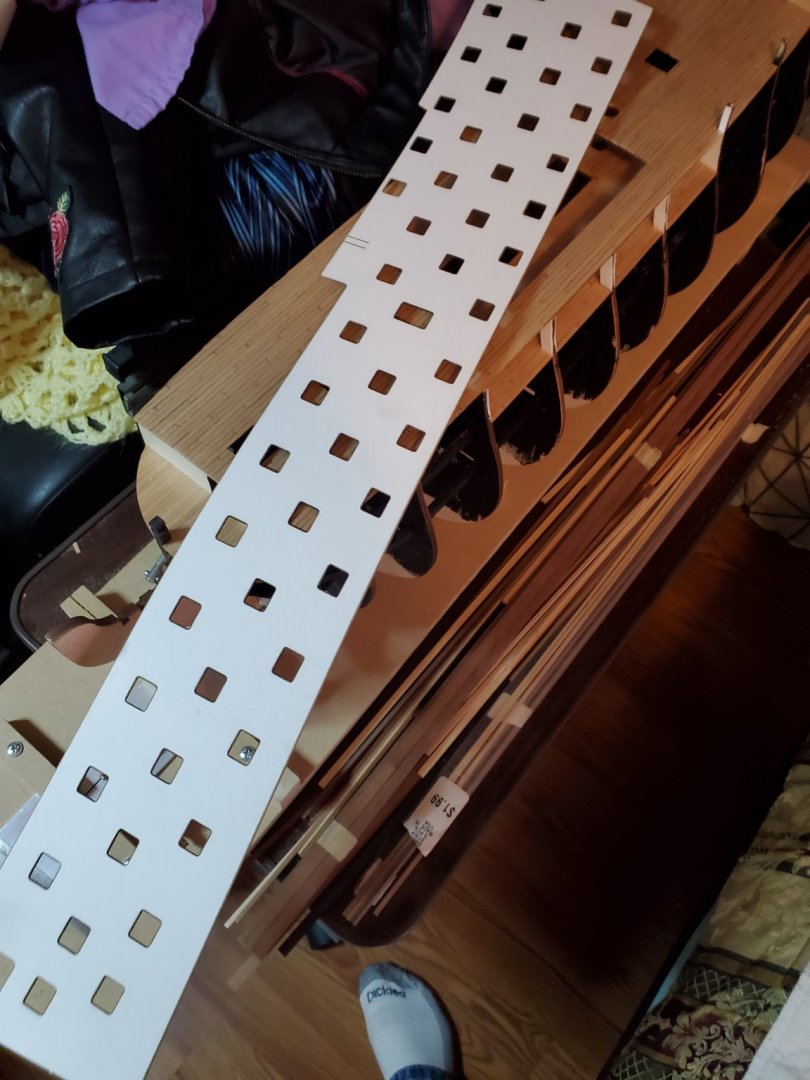
I have started planking.
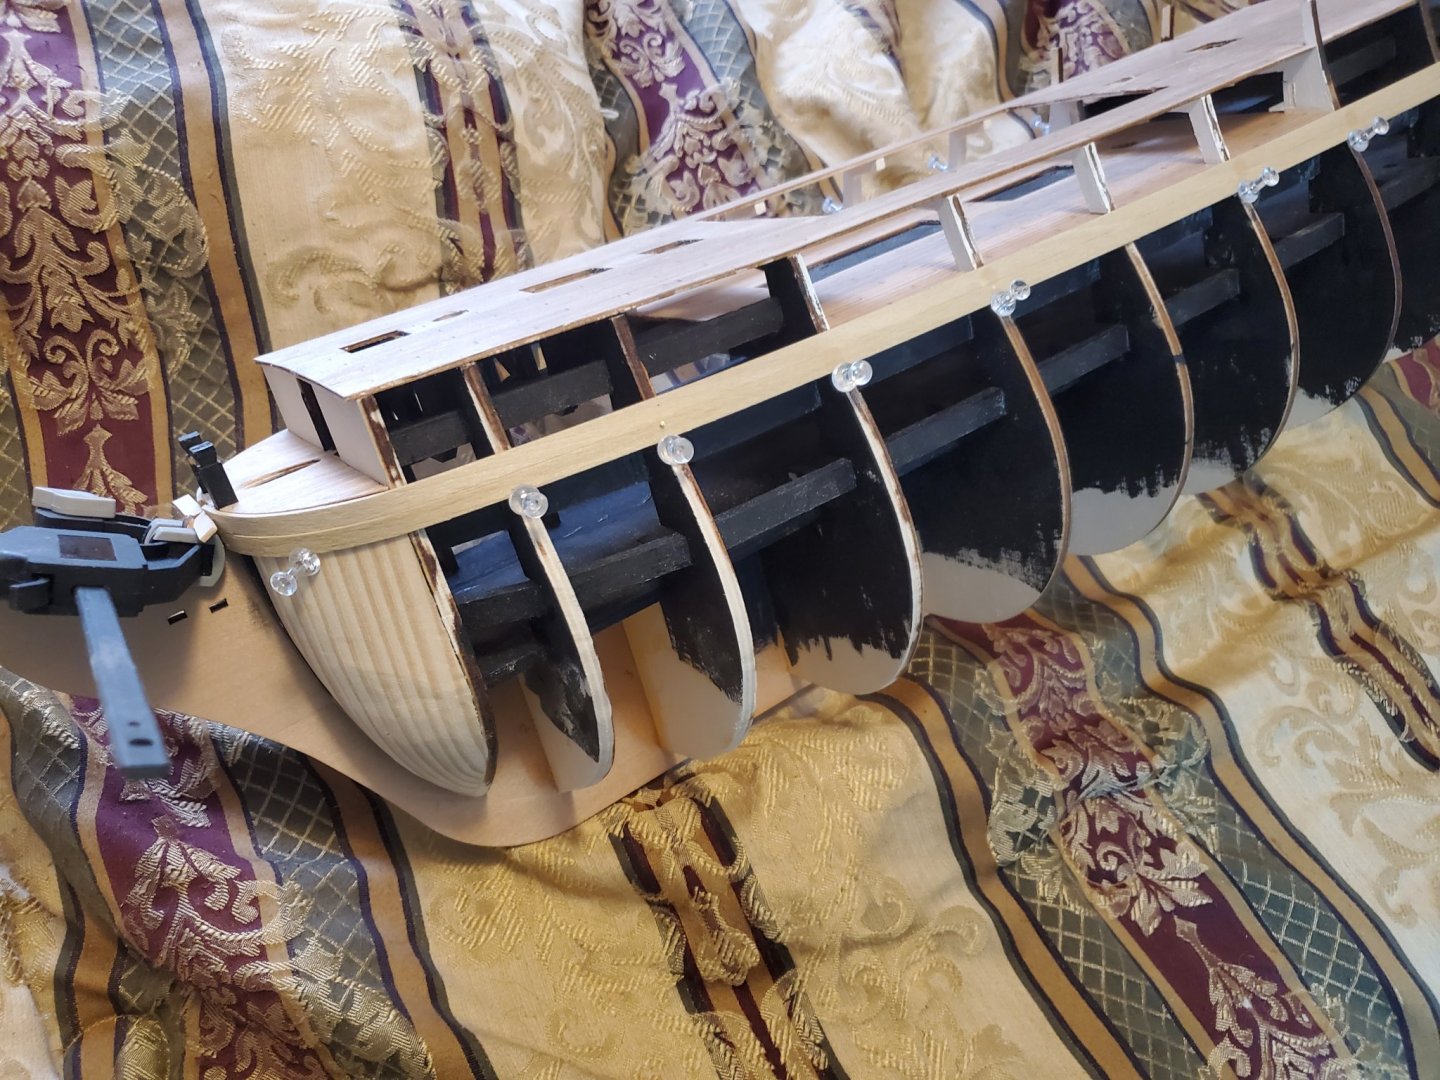
This is going to be a long process. The wood is so dry and brittle, I have to wet every plank and let it dry. To bend the ends at the bow, I have to soak the end of the plank. This dry limewood snaps so easily because it is so dry. I don't know if it is because it was sitting a long time or it is just more poor quality on Mantua's part. I laid the first plank on each side mostly to the instructions. They said to follow the gun port line, but that was forcing the plank to curve upward some at the rear, so I let it relax some to lay almost naturally. If I force the first plank, I would have to force every plank into position and that doesn't seem right. This is going to be hard enough, working with brittle wood. I don't want to make it anymore difficult. The walnut for the second planking is very dry and brittle also and the edges are not very smooth. I now this is just crappy wood. I would like to replace it, but don't know yet. That would be a big expense.
Mark Frazier
- ccoyle, gieb8688, GrandpaPhil and 1 other
-
4
-
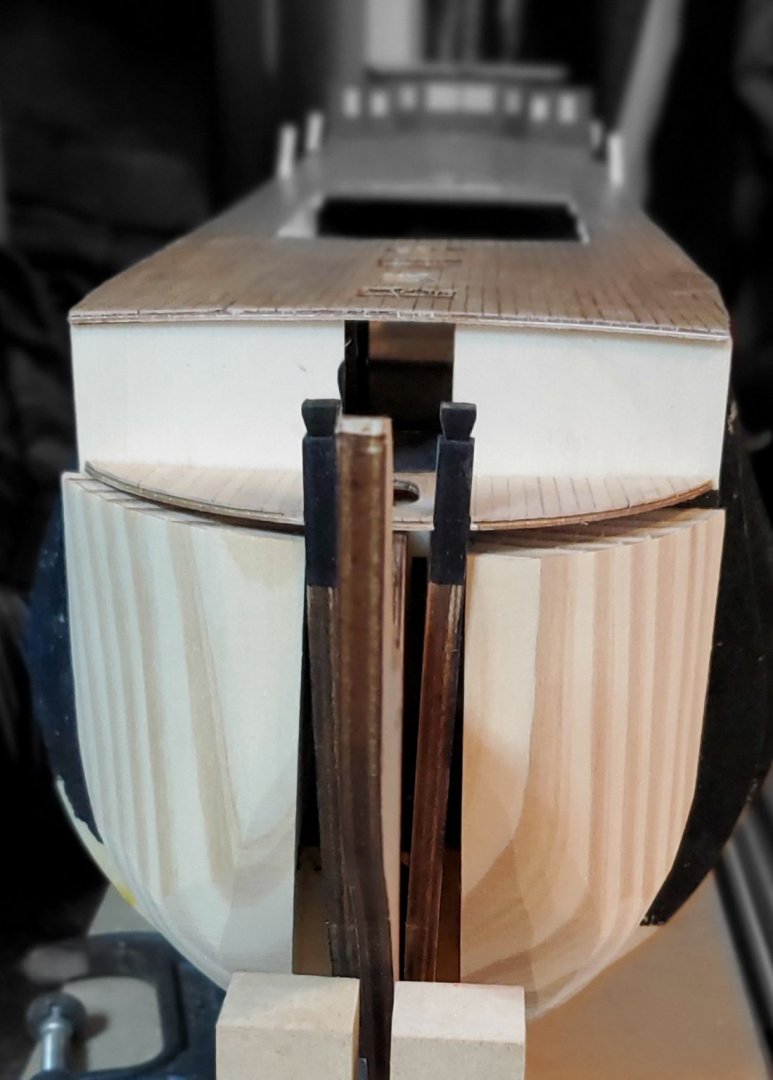
I am putting filler blocks in the front mainly to hold the planking in form. I don't intend to fasten to them. They are rough shaped and I will finish them in place.
Mark Frazier
-
As I look ahead for more things to watch for, I noticed the ships wheels. They are way too thick and look bulky. These are twice the thickness they should be. I can order the correct scale ones but thought maybe these can be saved. You can see in the next photo, I thinned one down.
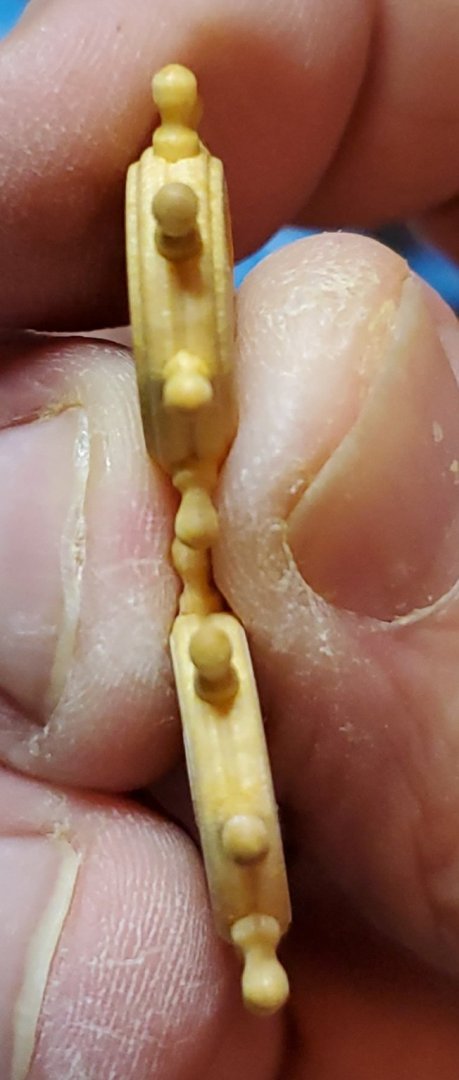
This is an improvement. I probably could go a little thinner.
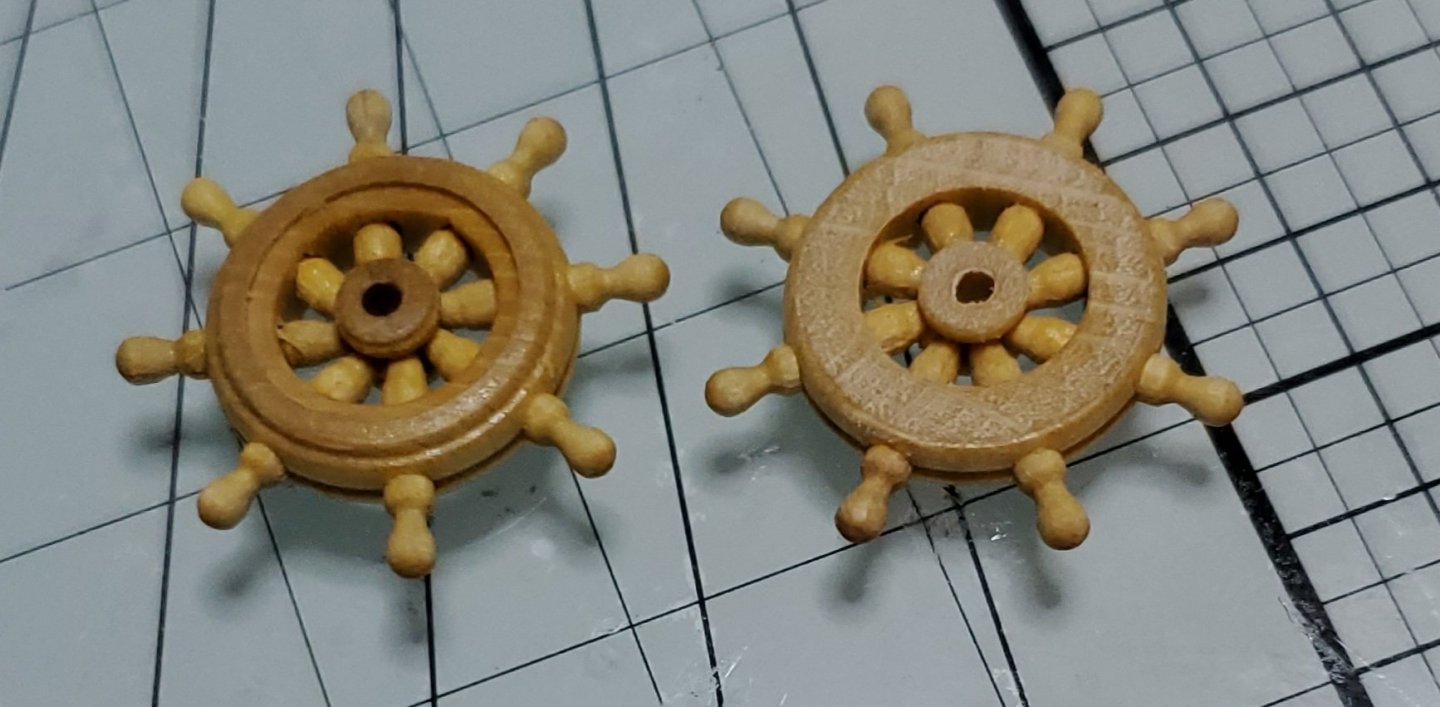
If I thin them a little more, I think they will be okay. This wood doesn't take stain hardly at all. I will probably have to paint them wood brown. We shall see how they look when I get them done.
Mark Frazier
- gieb8688, GrandpaPhil, Edwardkenway and 2 others
-
5
-
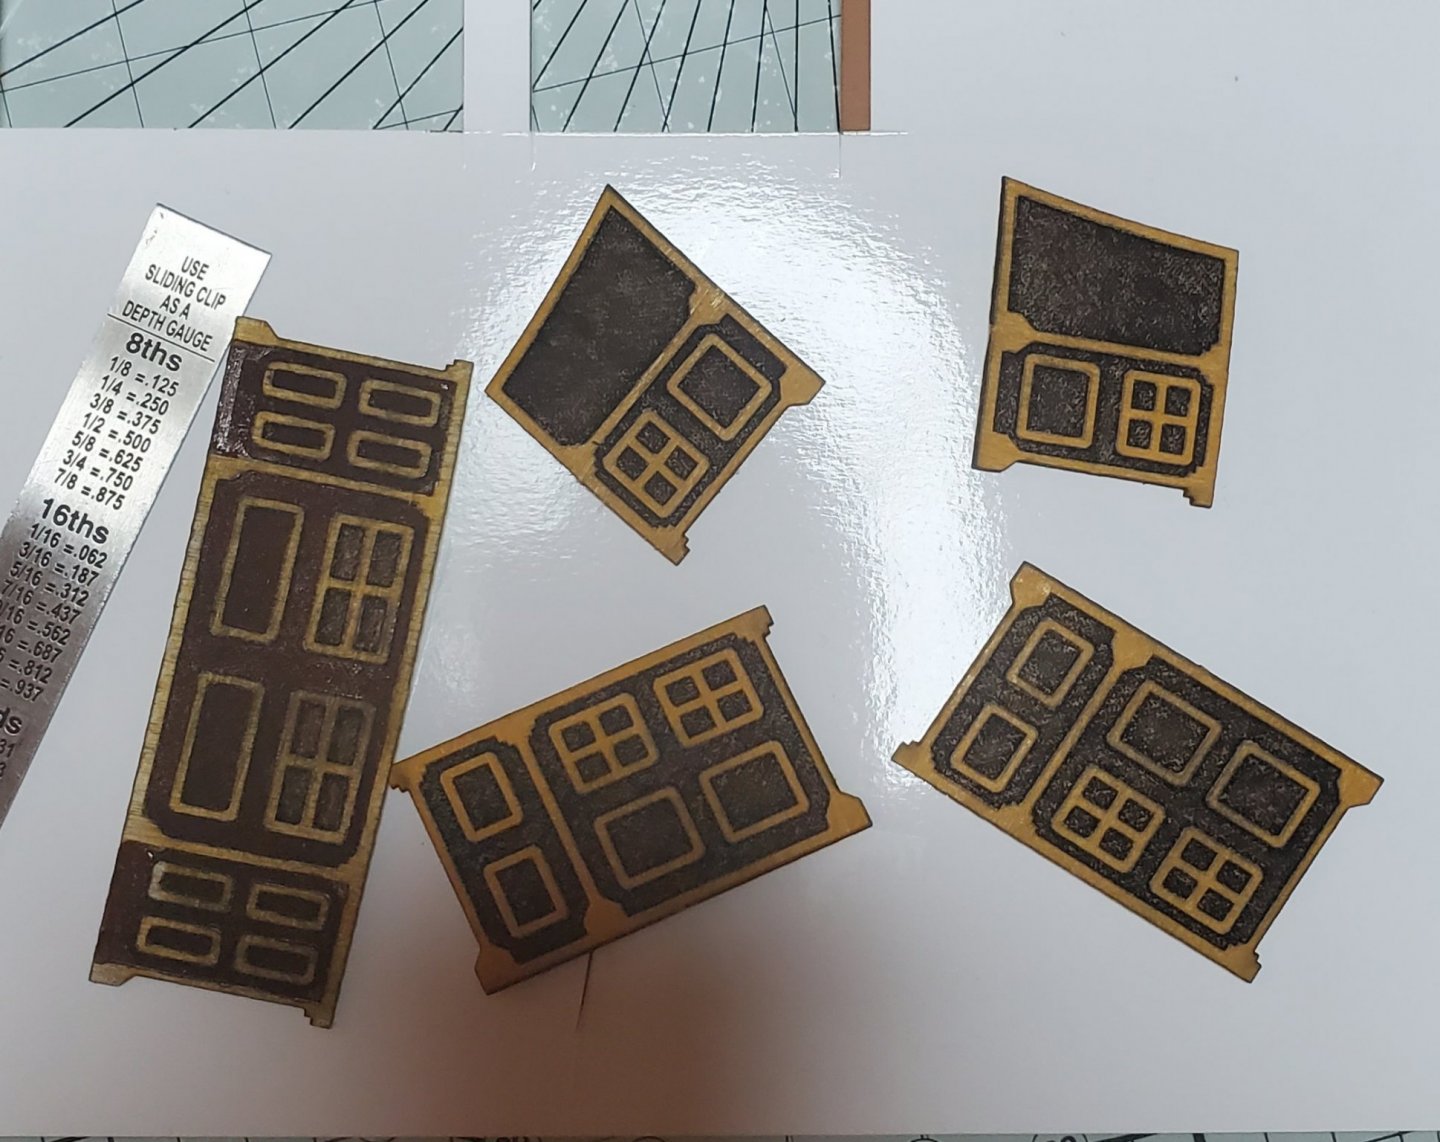
The cabins are finished and I am reasonably happy with them. ( I still have to trim the outside edges when glue dries. ) I printed them then glued tiny pieces of wood to the pattern. ( My problem is that I am a machinist and used to working with dimensions to .001 inches. That kind of tolerance just doesn't work with wood. )
I think these look great considering they will be very difficult to see the details once everything is in front of them. Now I am ready to start the first layer of planking.
Mark Frazier
(Once the brass black arrives, I can make door handles. )
-
1 hour ago, Old Collingwood said:
Looking good I think we all have to do this as the kit parts are just so bad.
OC.
Especially the Mantua. All the wood in this kit is poor. It is very dry. If it wasn't so expensive and wasteful, I would replace all the wood. I regret settling for this kit and I had to pay more for it. But it gives me a nice challenge. I am just glad I could come up with something better for these cabins. I am happy with this attempt.
Mark Frazier
-
3 minutes ago, Edwardkenway said:
Lovely cabin bulkheads, Victory is coming along nicely 😁👍
One panel down and 4 more to go.😁
-
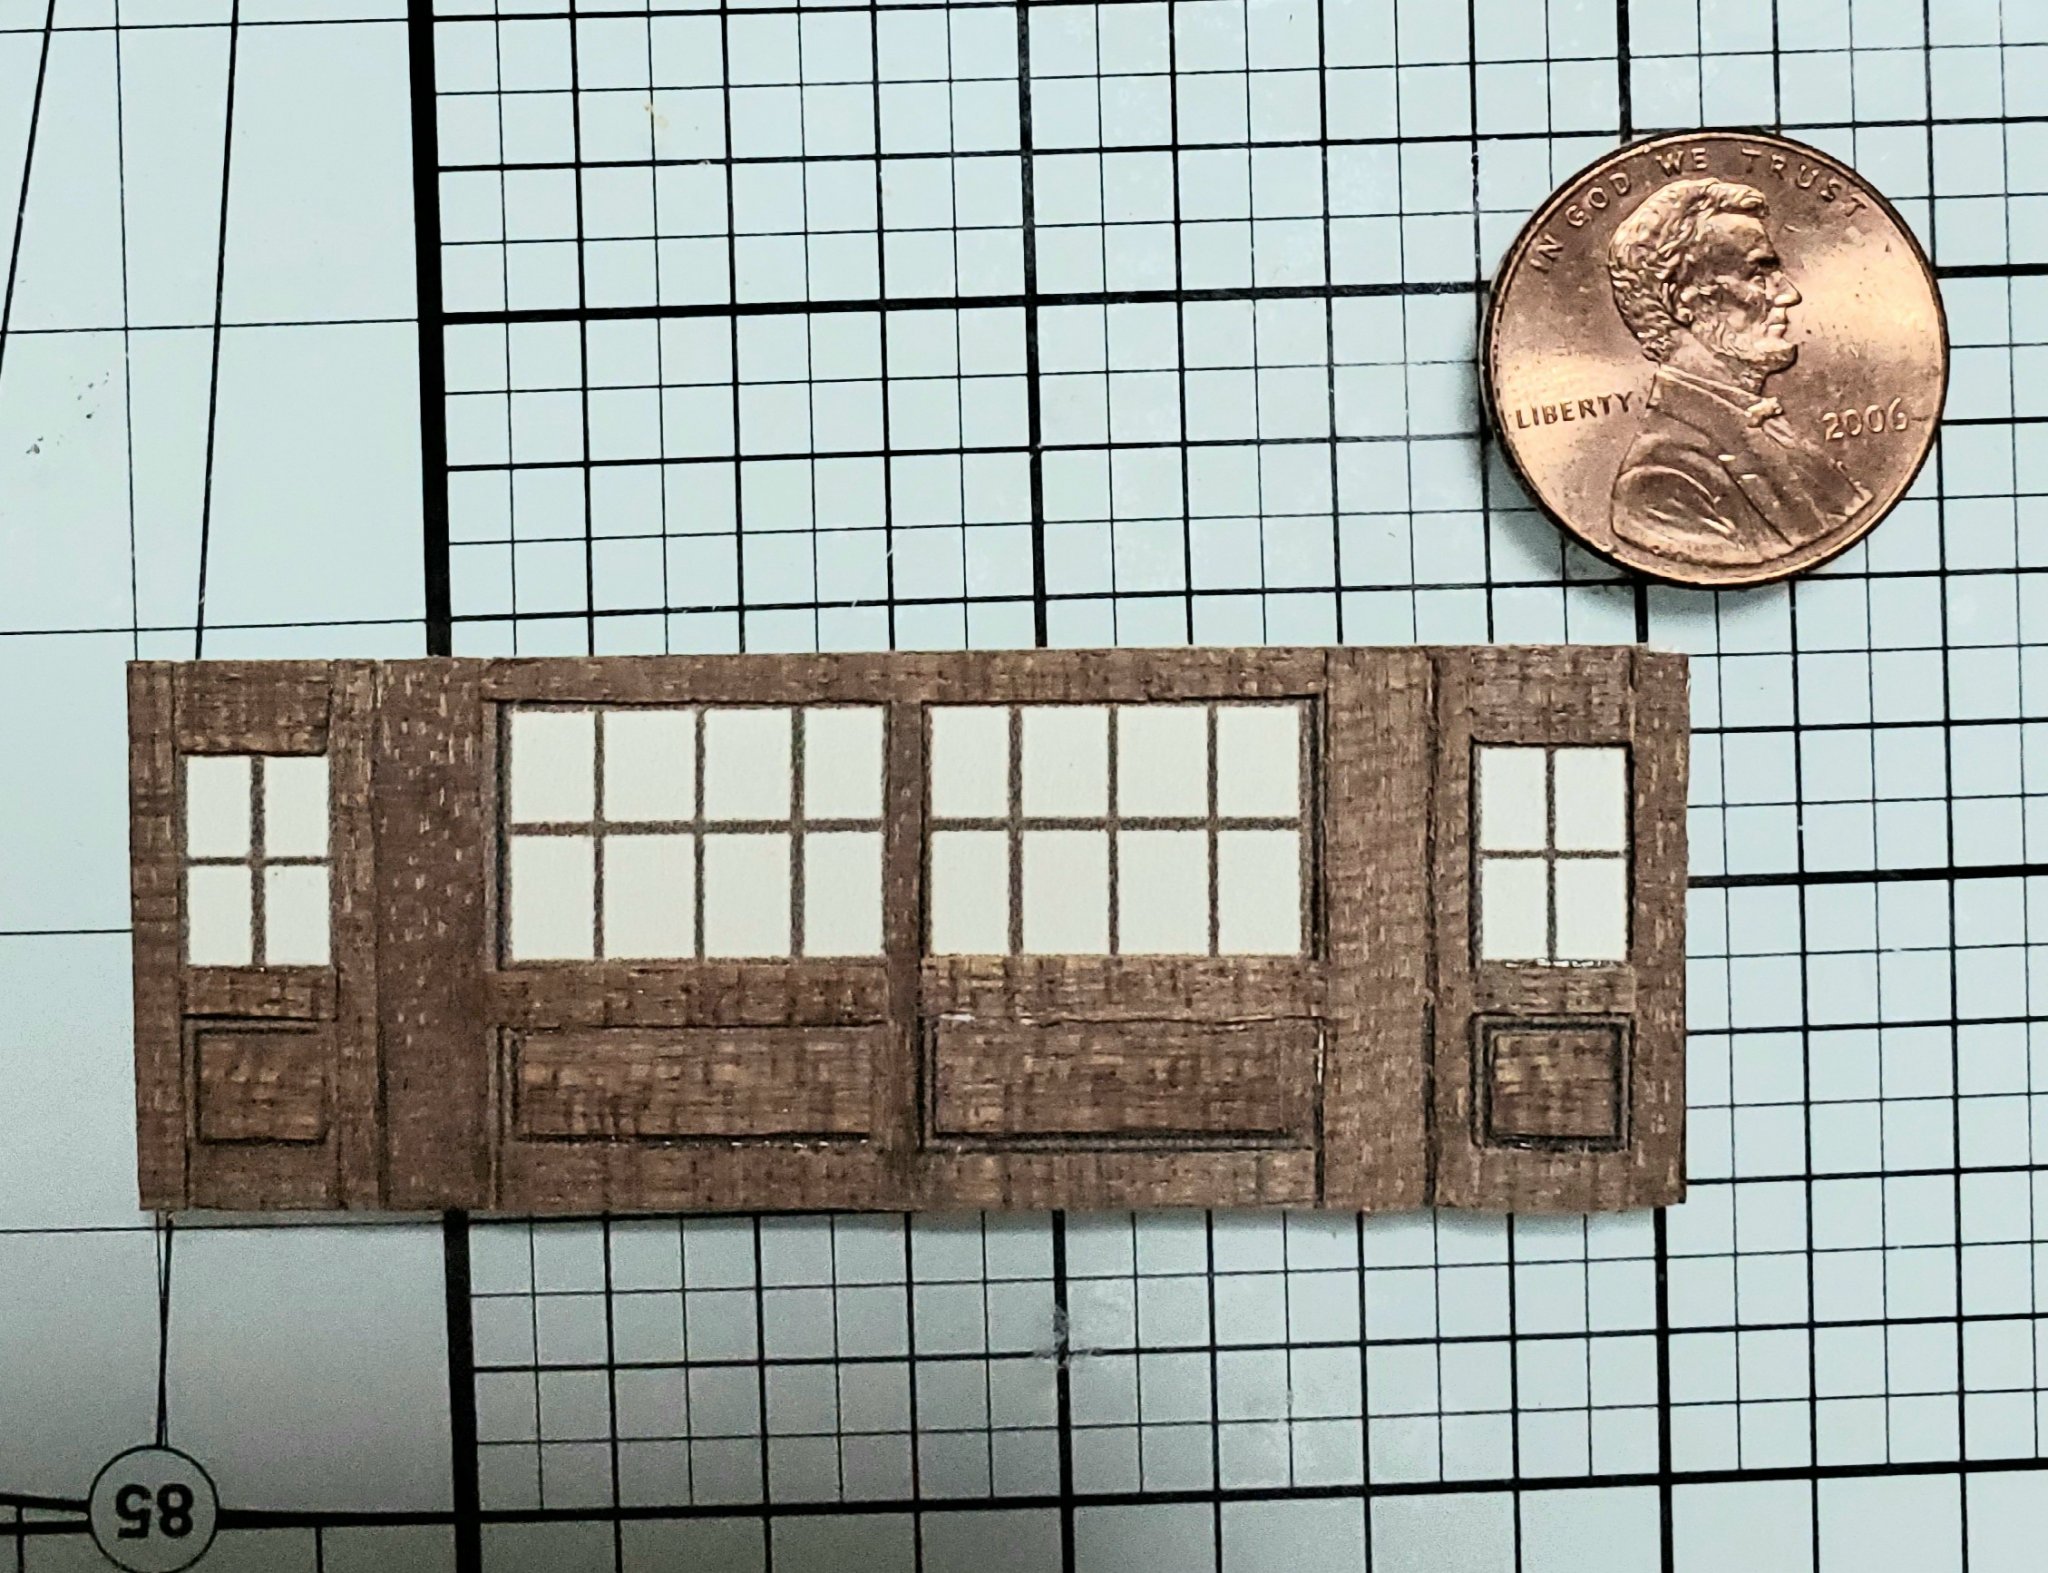
This is the final version of the cabins (I think). It is maxing my skill level I think. I printed the cabins from my PC on card stock. I also put a really light gray tint on the windows so they are not so bright white. After printing, I cut them out and cut little pieces of wood from .5mm thick left over mahogany planking from my last ship and glued each piece on the printed cabin pattern. There are 22 little pieces of wood on this one piece. After a very light sanding it is ready to install. I will not put a finish on these. This method is going to give me ,I feel, the best amount of detail and depth to the cabin walls. I like these but .... I do think they could be better.


Mark Frazier
-
Thanks OC. I think a combination of the printed and some scratch building would be ideal. I'm still working with this idea.
Mark Frazier
-
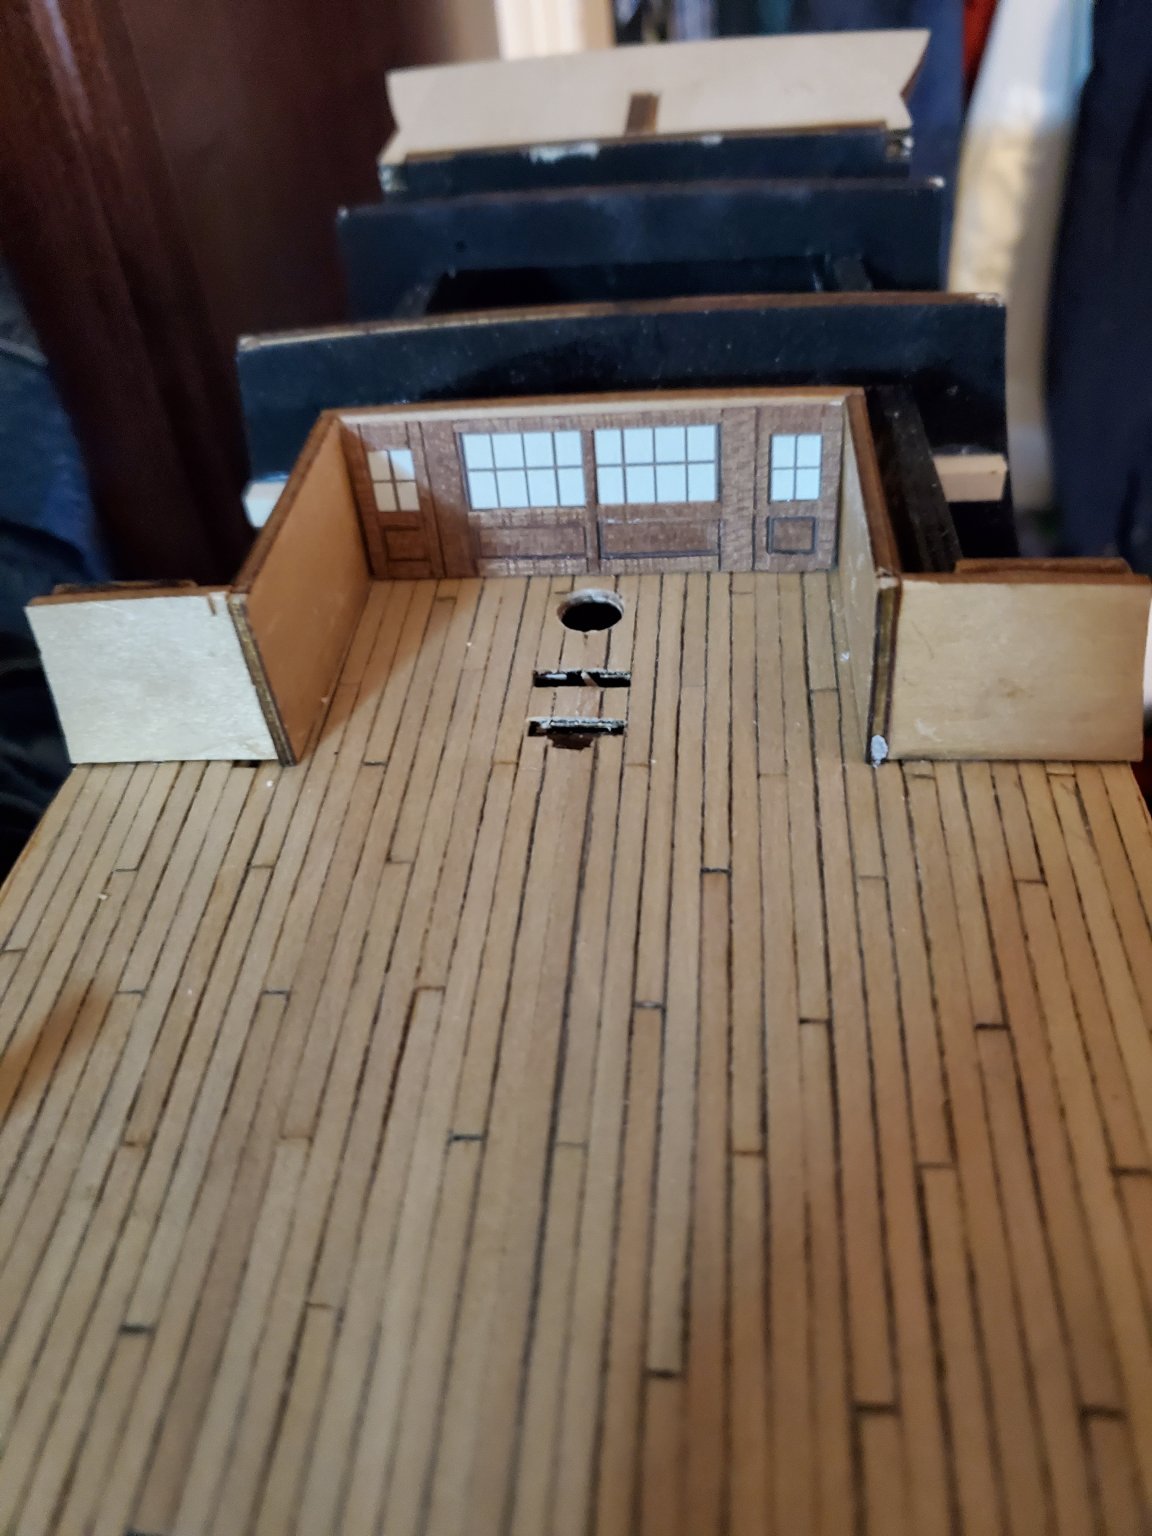
These are the cabin panels supplied with the kit and they are sorry pieces of junk.
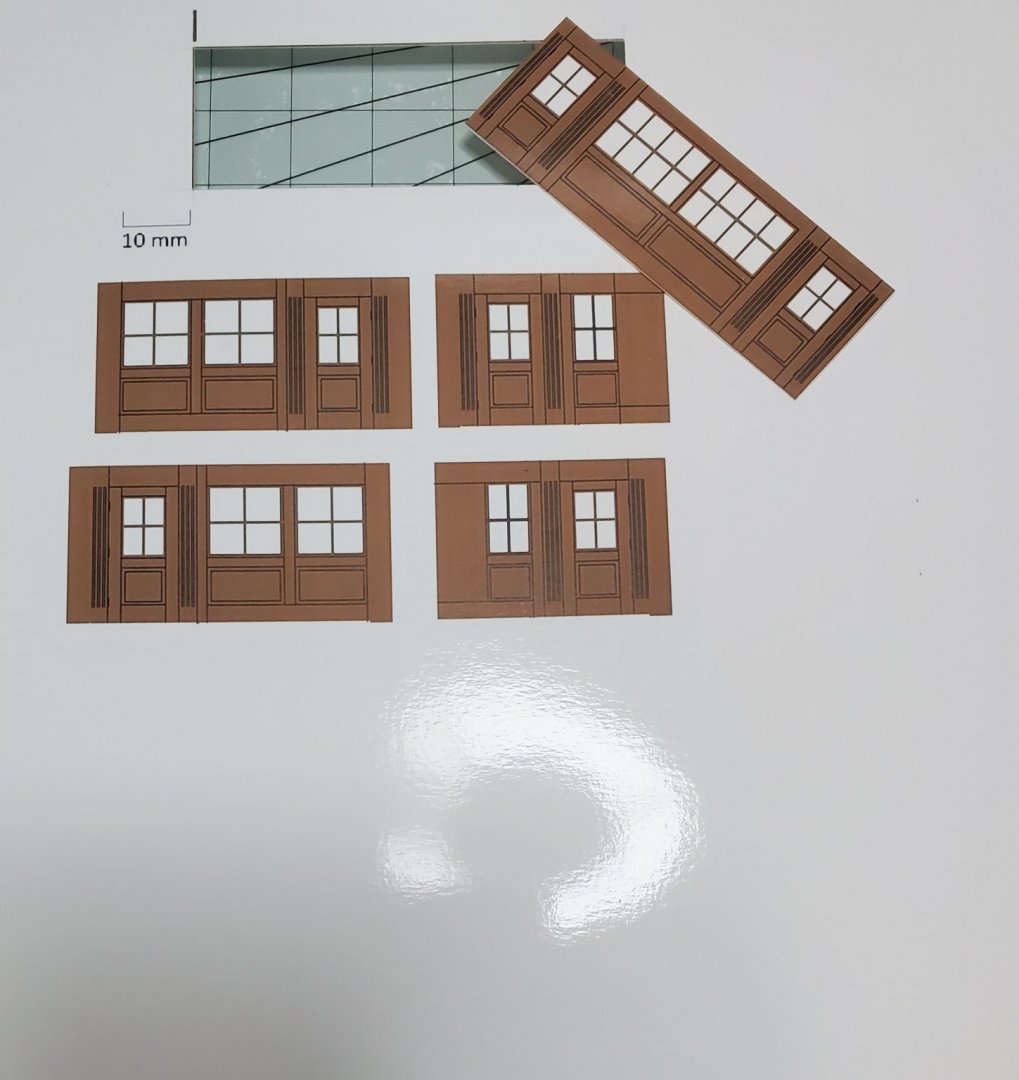
I was going to scratch build some with the windows cut out and acetate windows. I have the materials..... a lot of work but very doable.......but ...... upon looking more closely, you will barely ever see them once the poop deck is on, the ships wheel, binacle, fire buckets, and poop deck stairs are installed and then a cannon under the stairs in front of the cabin. The space behind the cabins is an empty space so the windows should probably be white background. So I thought I would try something different. I don't know how this idea will be accepted.
I designed panels on my computer, took about 3 hours, printed them out to scale on heavy photo paper and cut to size. The nice thing about this is I have great details right down to the door hinges. I will put blackened brass door knob (rings) on the doors using eyes and rings.
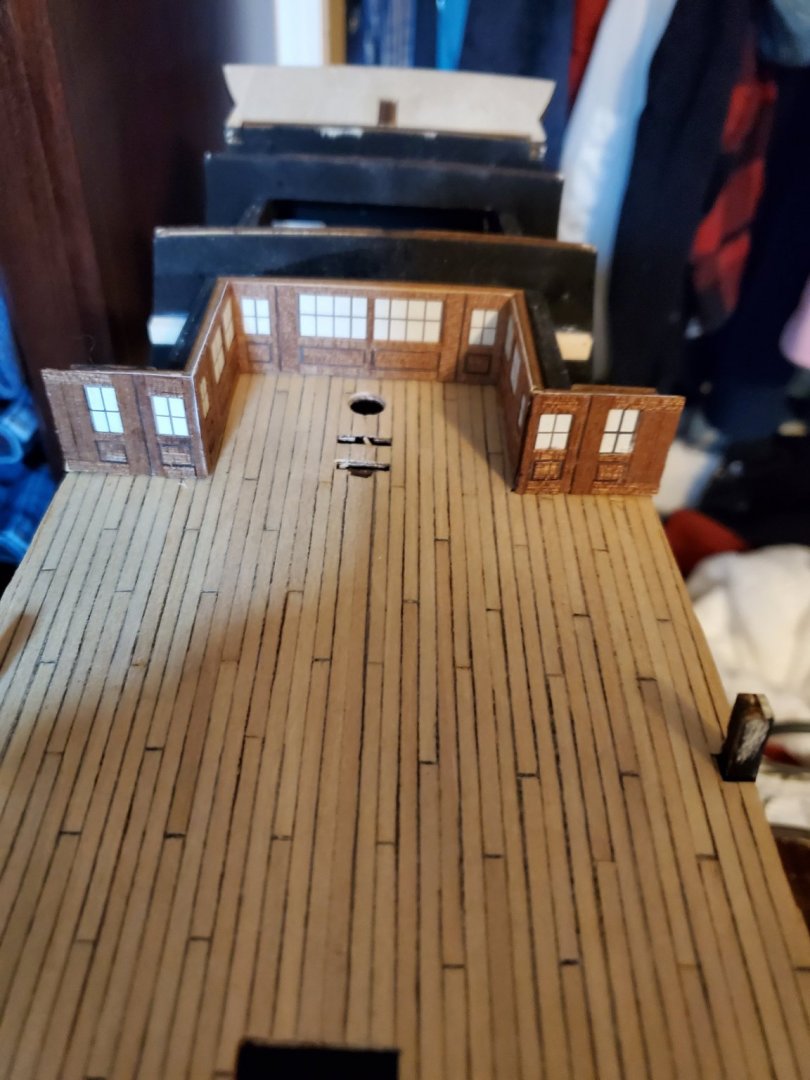
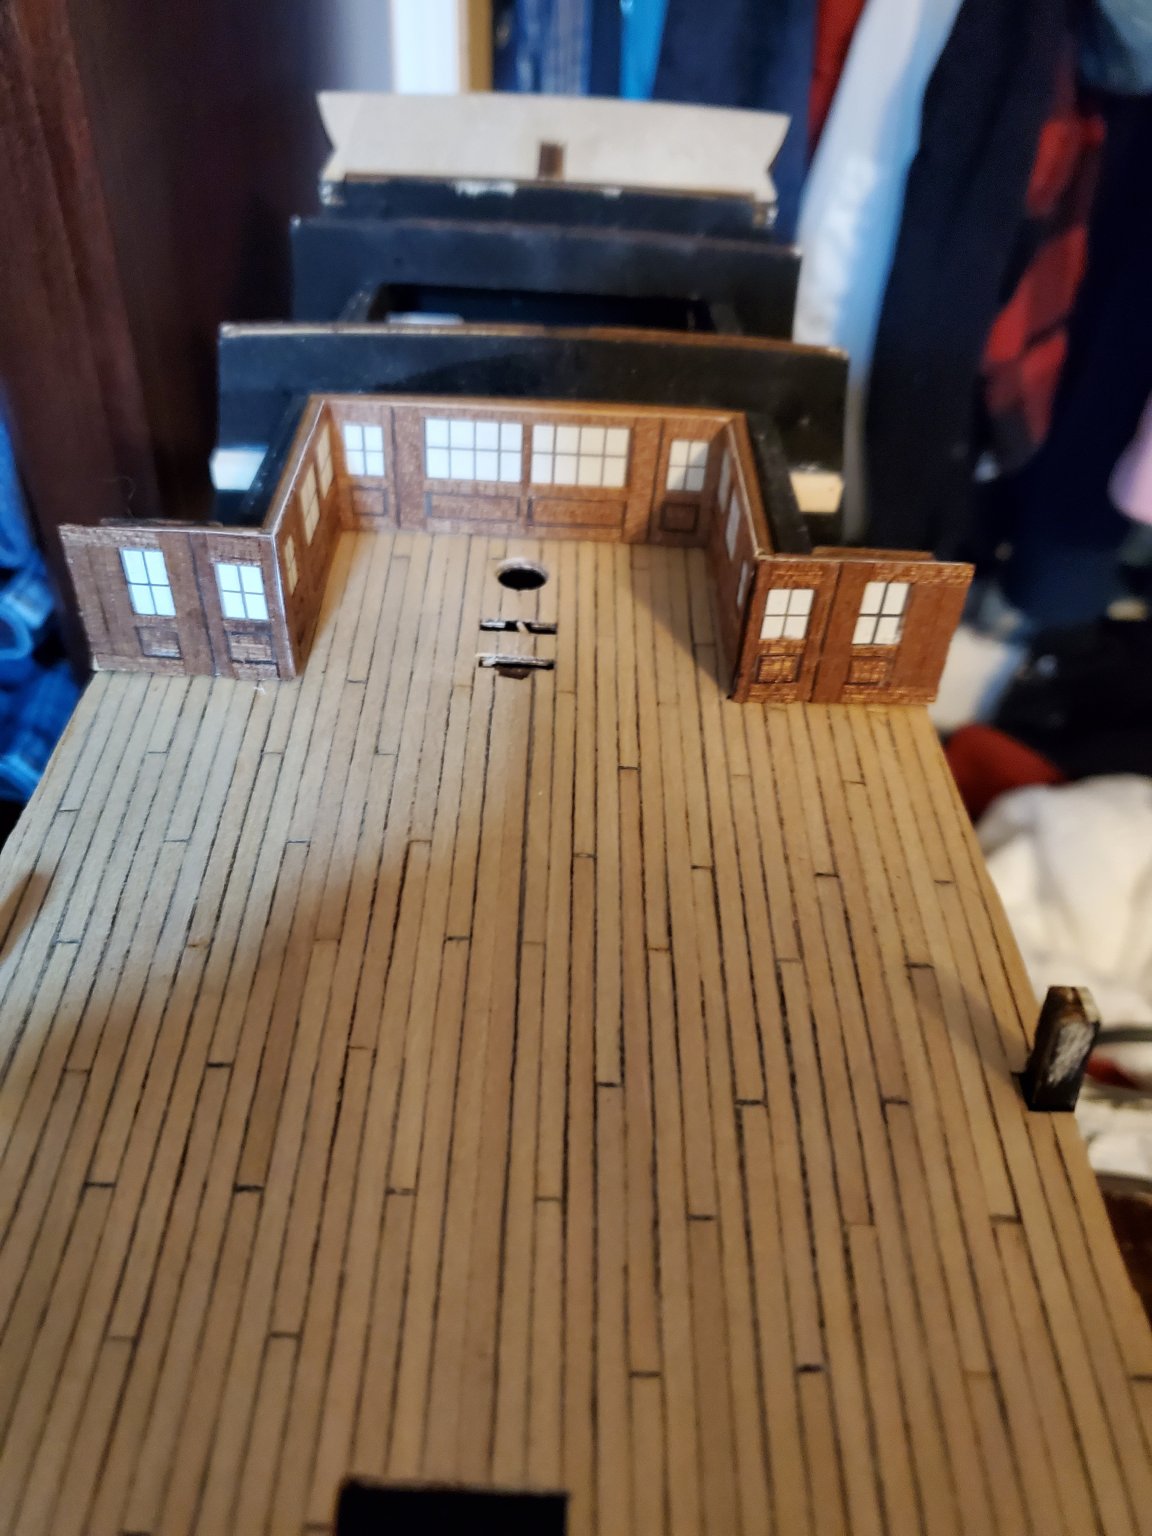
installed temporarily

Poop deck sitting in place. They actually look better than the photos. I have to cut the sides down after the glue dries. I like these and think I will keep them. The only change I considered was to take some photos of the cabin windows from the internet showing what is seen through them, shrink them down and put them in the window panels before printing, but at the small size I'm not sure it's worth the work. Maybe the windows should be blacked out. This is my first effort at trying this. Sometimes it takes a couple tries to get it right.
- Edwardkenway, GrandpaPhil and gieb8688
-
3
-
5 hours ago, Old Collingwood said:
I did mine after I had second planked - just small pieces of 1mm strip
Thanks OC .,
It looks like you taperd the front of your beakhead also. This helps me a lot. I have a much better idea of what to do. I think I should break the paint line at the water line. Thanks again.
Mark Frazier
-
45 minutes ago, Old Collingwood said:
I planked ontop of my keel ans all the way up the beakhed and even the rudder post
So, after I plank the hull, ( first and second planking) I then plank the beakhead, down and all along the keel sides and up the rudder post sides. Since I am not going to copper the hull and leave it stained wood ( at least that is the plan), but the beakhead will be painted black ( I think), I have to decide where to break the paint line. This is why I am looking at all this early. Because one thing affects ten other things and I don't want to have a problem later because of a decision earlier.
-
24 minutes ago, EricWilliamMarshall said:
I find for myself this is the case
I think now that the second coat of poly is on, it will be fine.
Mark Frazier
-
9 hours ago, Old Collingwood said:
Dont foreget you still have to plank the beakhead - that will alter the thickness.
OC.
I wonder how far down the planking goes. From photos, I see the planking runs in two directions (perpendicular), but I can't find a photo showing how far down it goes. ( maybe that is way other builds don't do it).
-
28 minutes ago, Y.T. said:
Mamoli plans are cryptic, very difficult to understand, often out of scale, have mistakes and discrepancies.
Mamoli must be relatives of Mantua.
The lack of information requires us to constantly plan and look ahead.
-
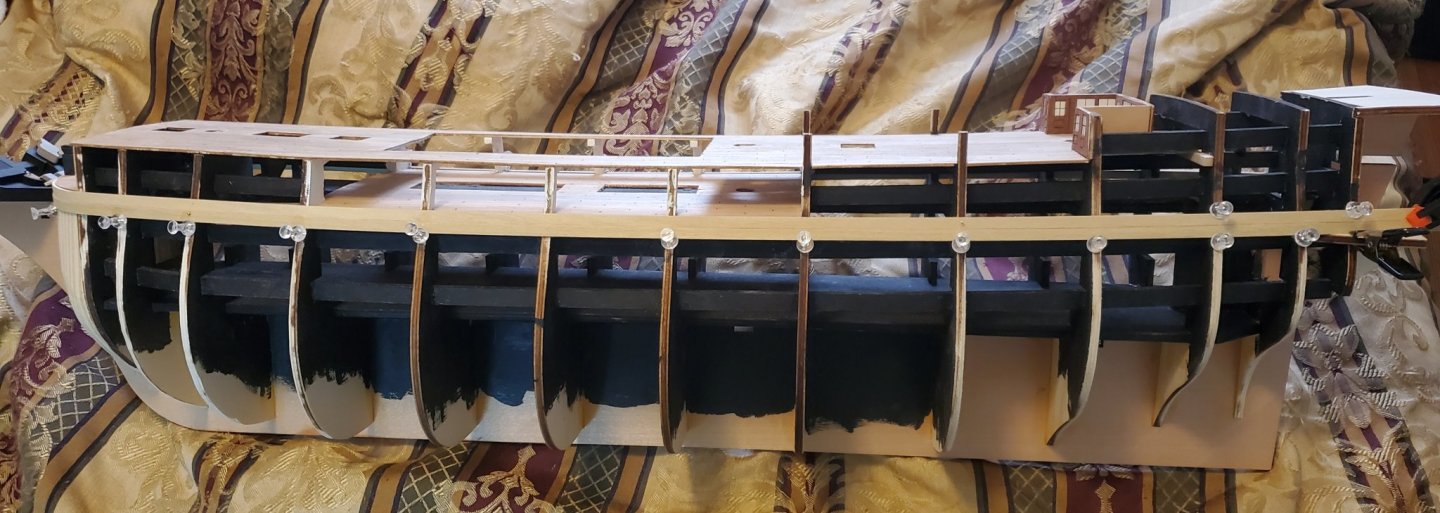
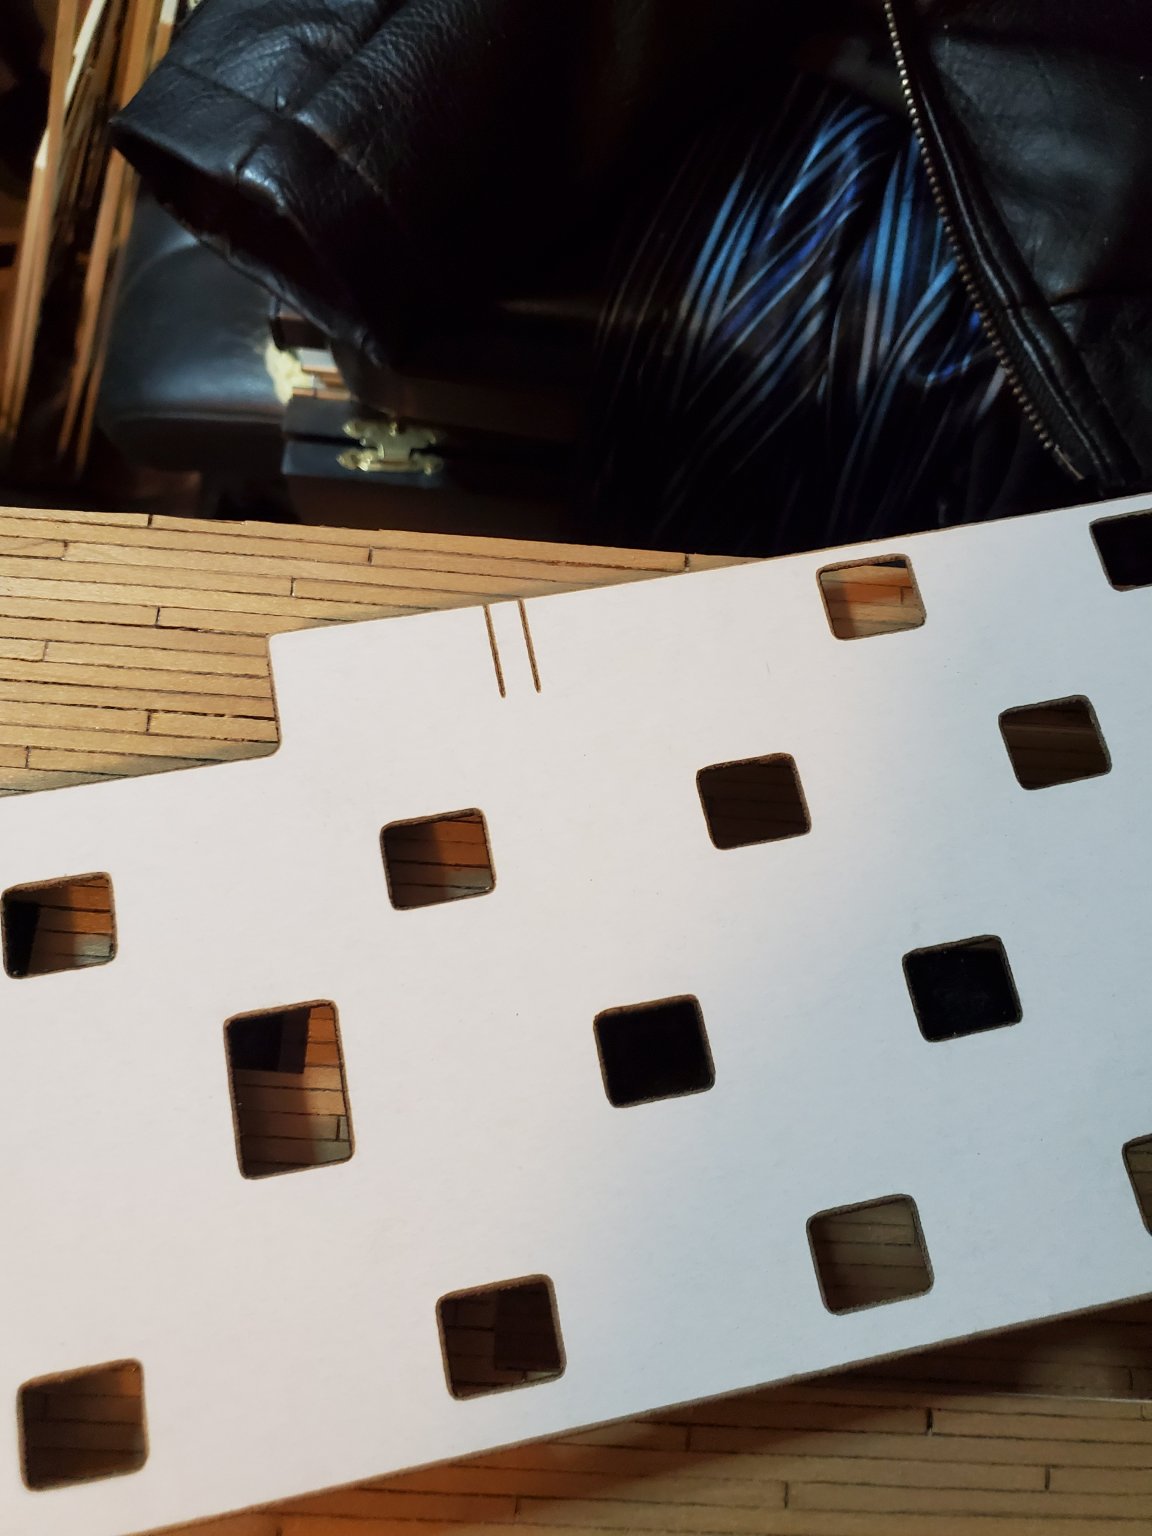
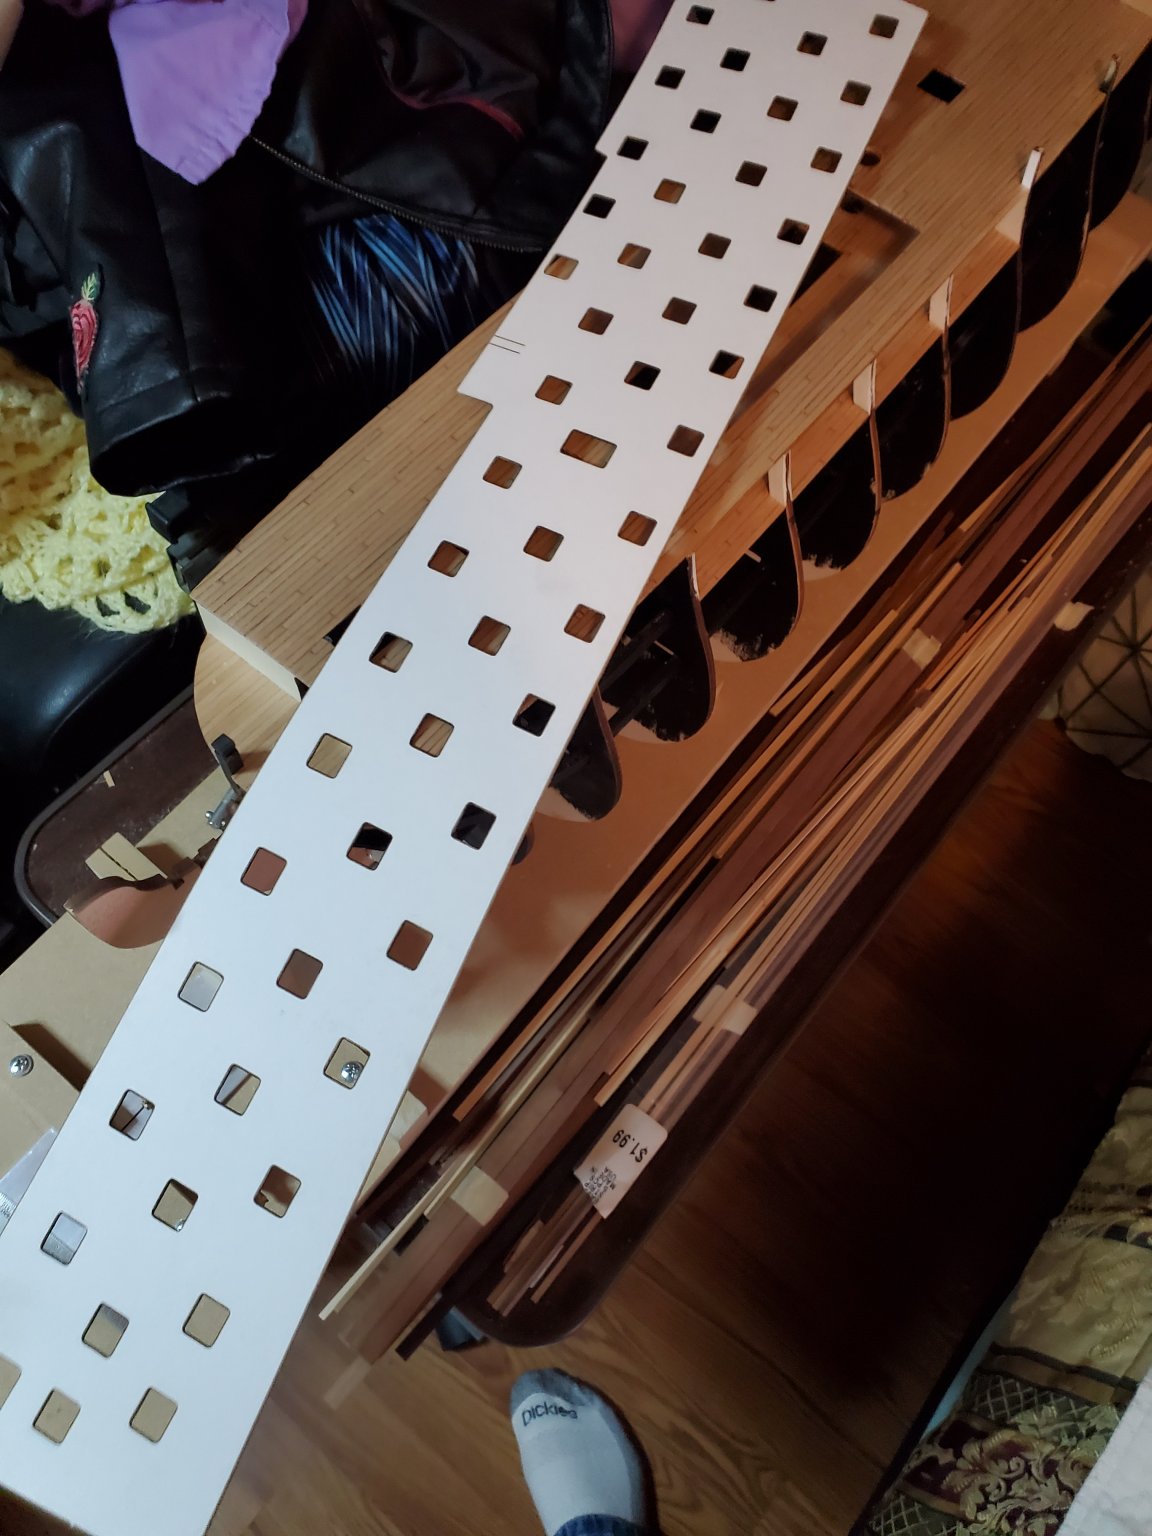
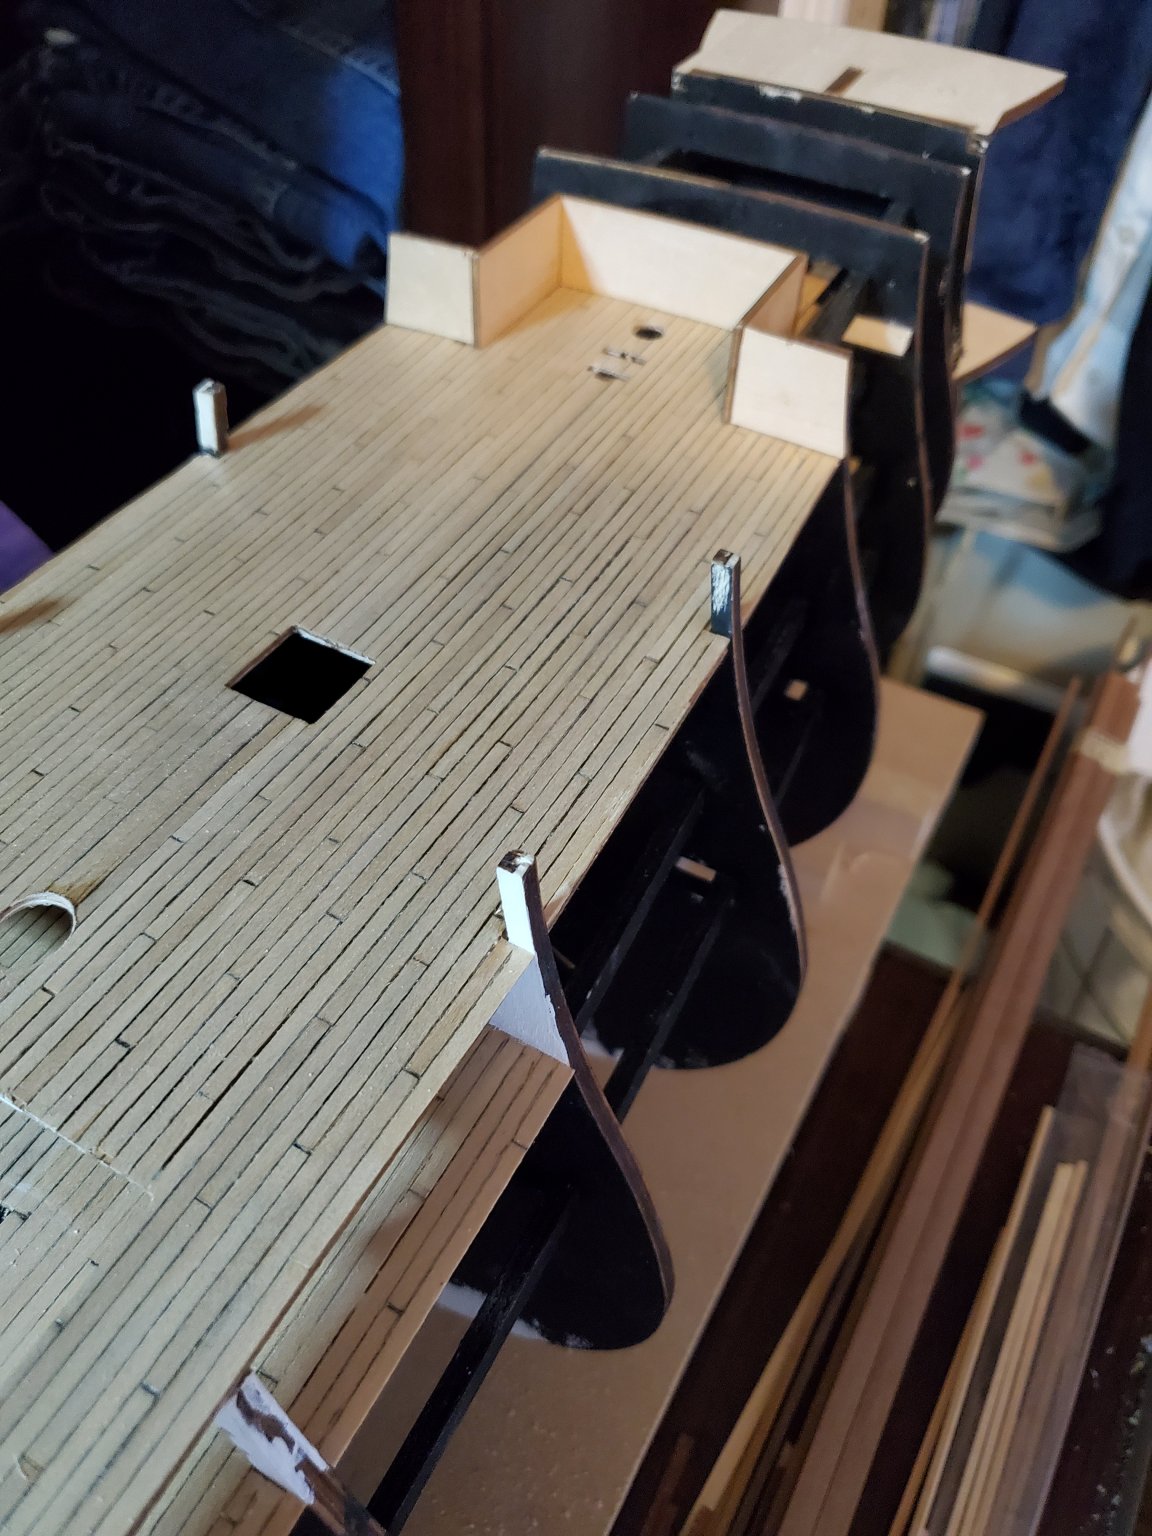
Now that the figure head is mostly sorted out, I need to get back to the hull and getting it ready to plank. I was checking some more things ( with this kit, you have to try to think way ahead) and found another small issue. The cardboard pattern for laying out the gun ports has two lines on it that line up with one of the bulkheads.

When it is place where it goes, there are 3 or 4 gun ports that have a bulkhead showing in one side. So, I have decided, I will plank the top of the hull and then lay out the ports so I can keep and eye on where the bulkheads are. So far the only solution to this is to shift the position of those few ports about 1/4 inch to avoid this. I will lay them out and then see how it looks before cutting them out. So much to keep track of.
On another note.

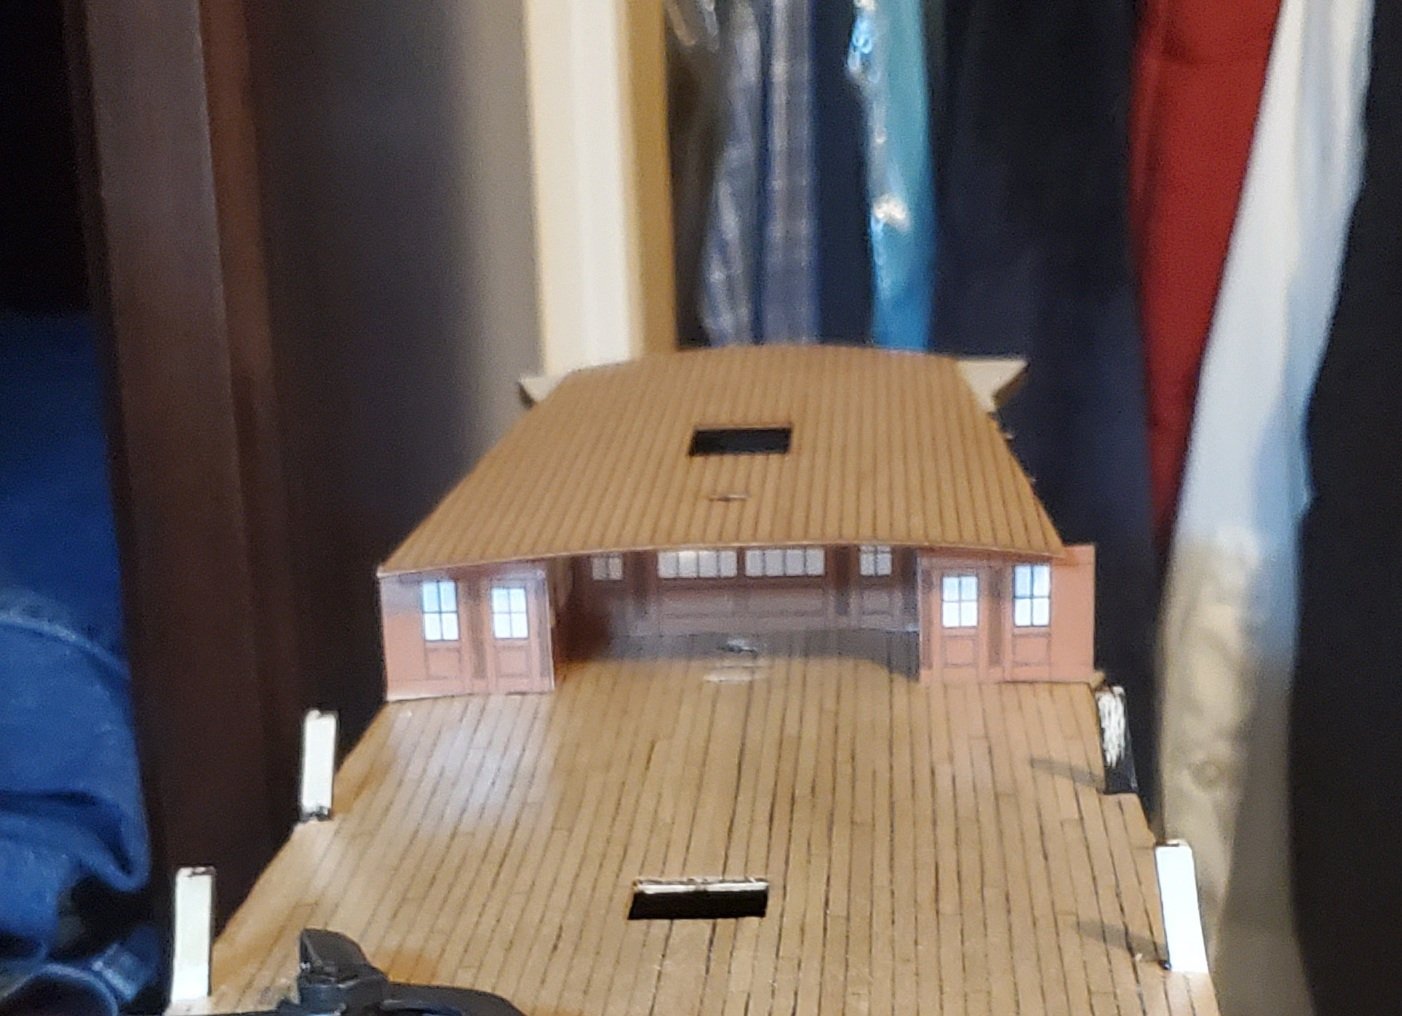
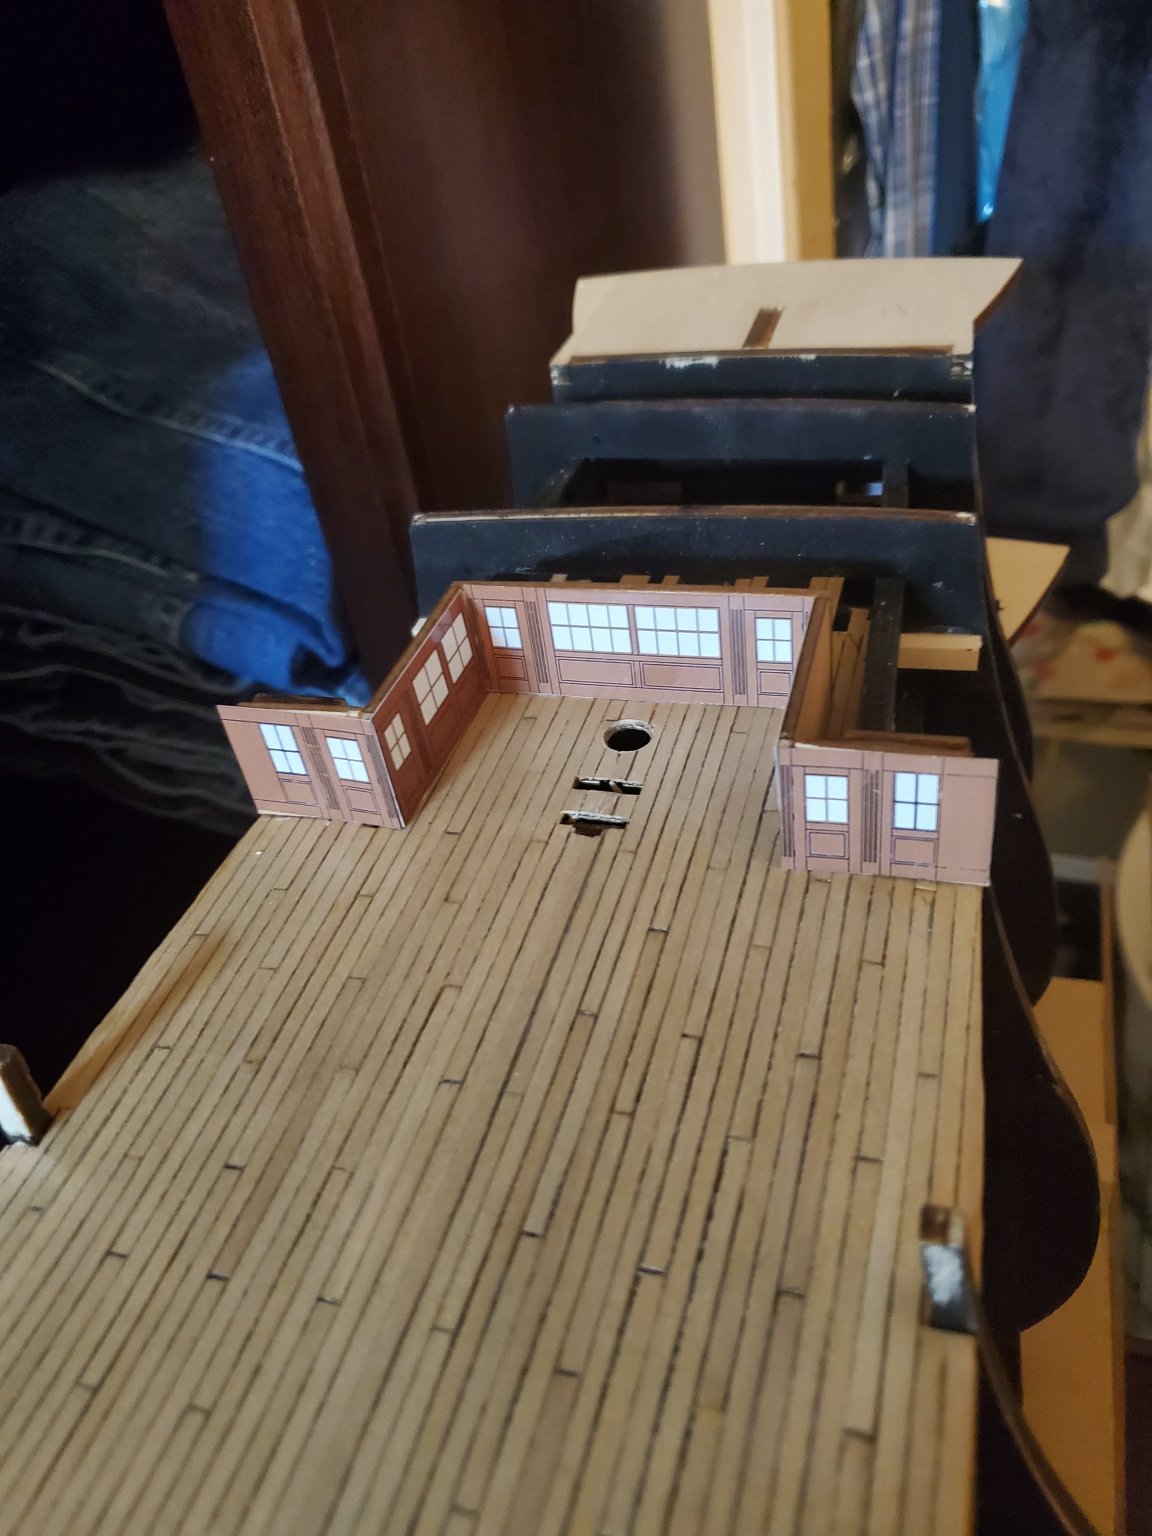
I installed the framework for the stern cabins. I was going to cut out the windows and put clear acetate on them, but decided not to. Once the ships wheel, mast, poop deck, and stairs from poop deck , cannons under the stairs, and fire buckets are installed, you can barely see these cabin walls. I am going to enhance the kit ones with the pillars, some trim and door handles. I will leave the windows either blacked out or a white background as the space behind is empty framework anyway. There are a few more things to plan ahead on but I am ready to start planking the hull.
Mark Frazier


HMS Victory by Daliab - FINISHED - Mantua/Panart
in - Kit build logs for subjects built from 1751 - 1800
Posted
I have a question. When you laid out your gunpoint openings using the cardboard pattern supplied with the kit, did you have any openings with a bulkhead showing in the opening? I laid my pattern on the side to check it before planking and a couple ports would have a bulkhead showing in the side of the port. I'm thinking I may have to shift a couple ports about a 1/4 inch.
Mark Frazier