SHIPSCAT
-
Posts
387 -
Joined
Content Type
Profiles
Forums
Gallery
Events
Everything posted by SHIPSCAT
-
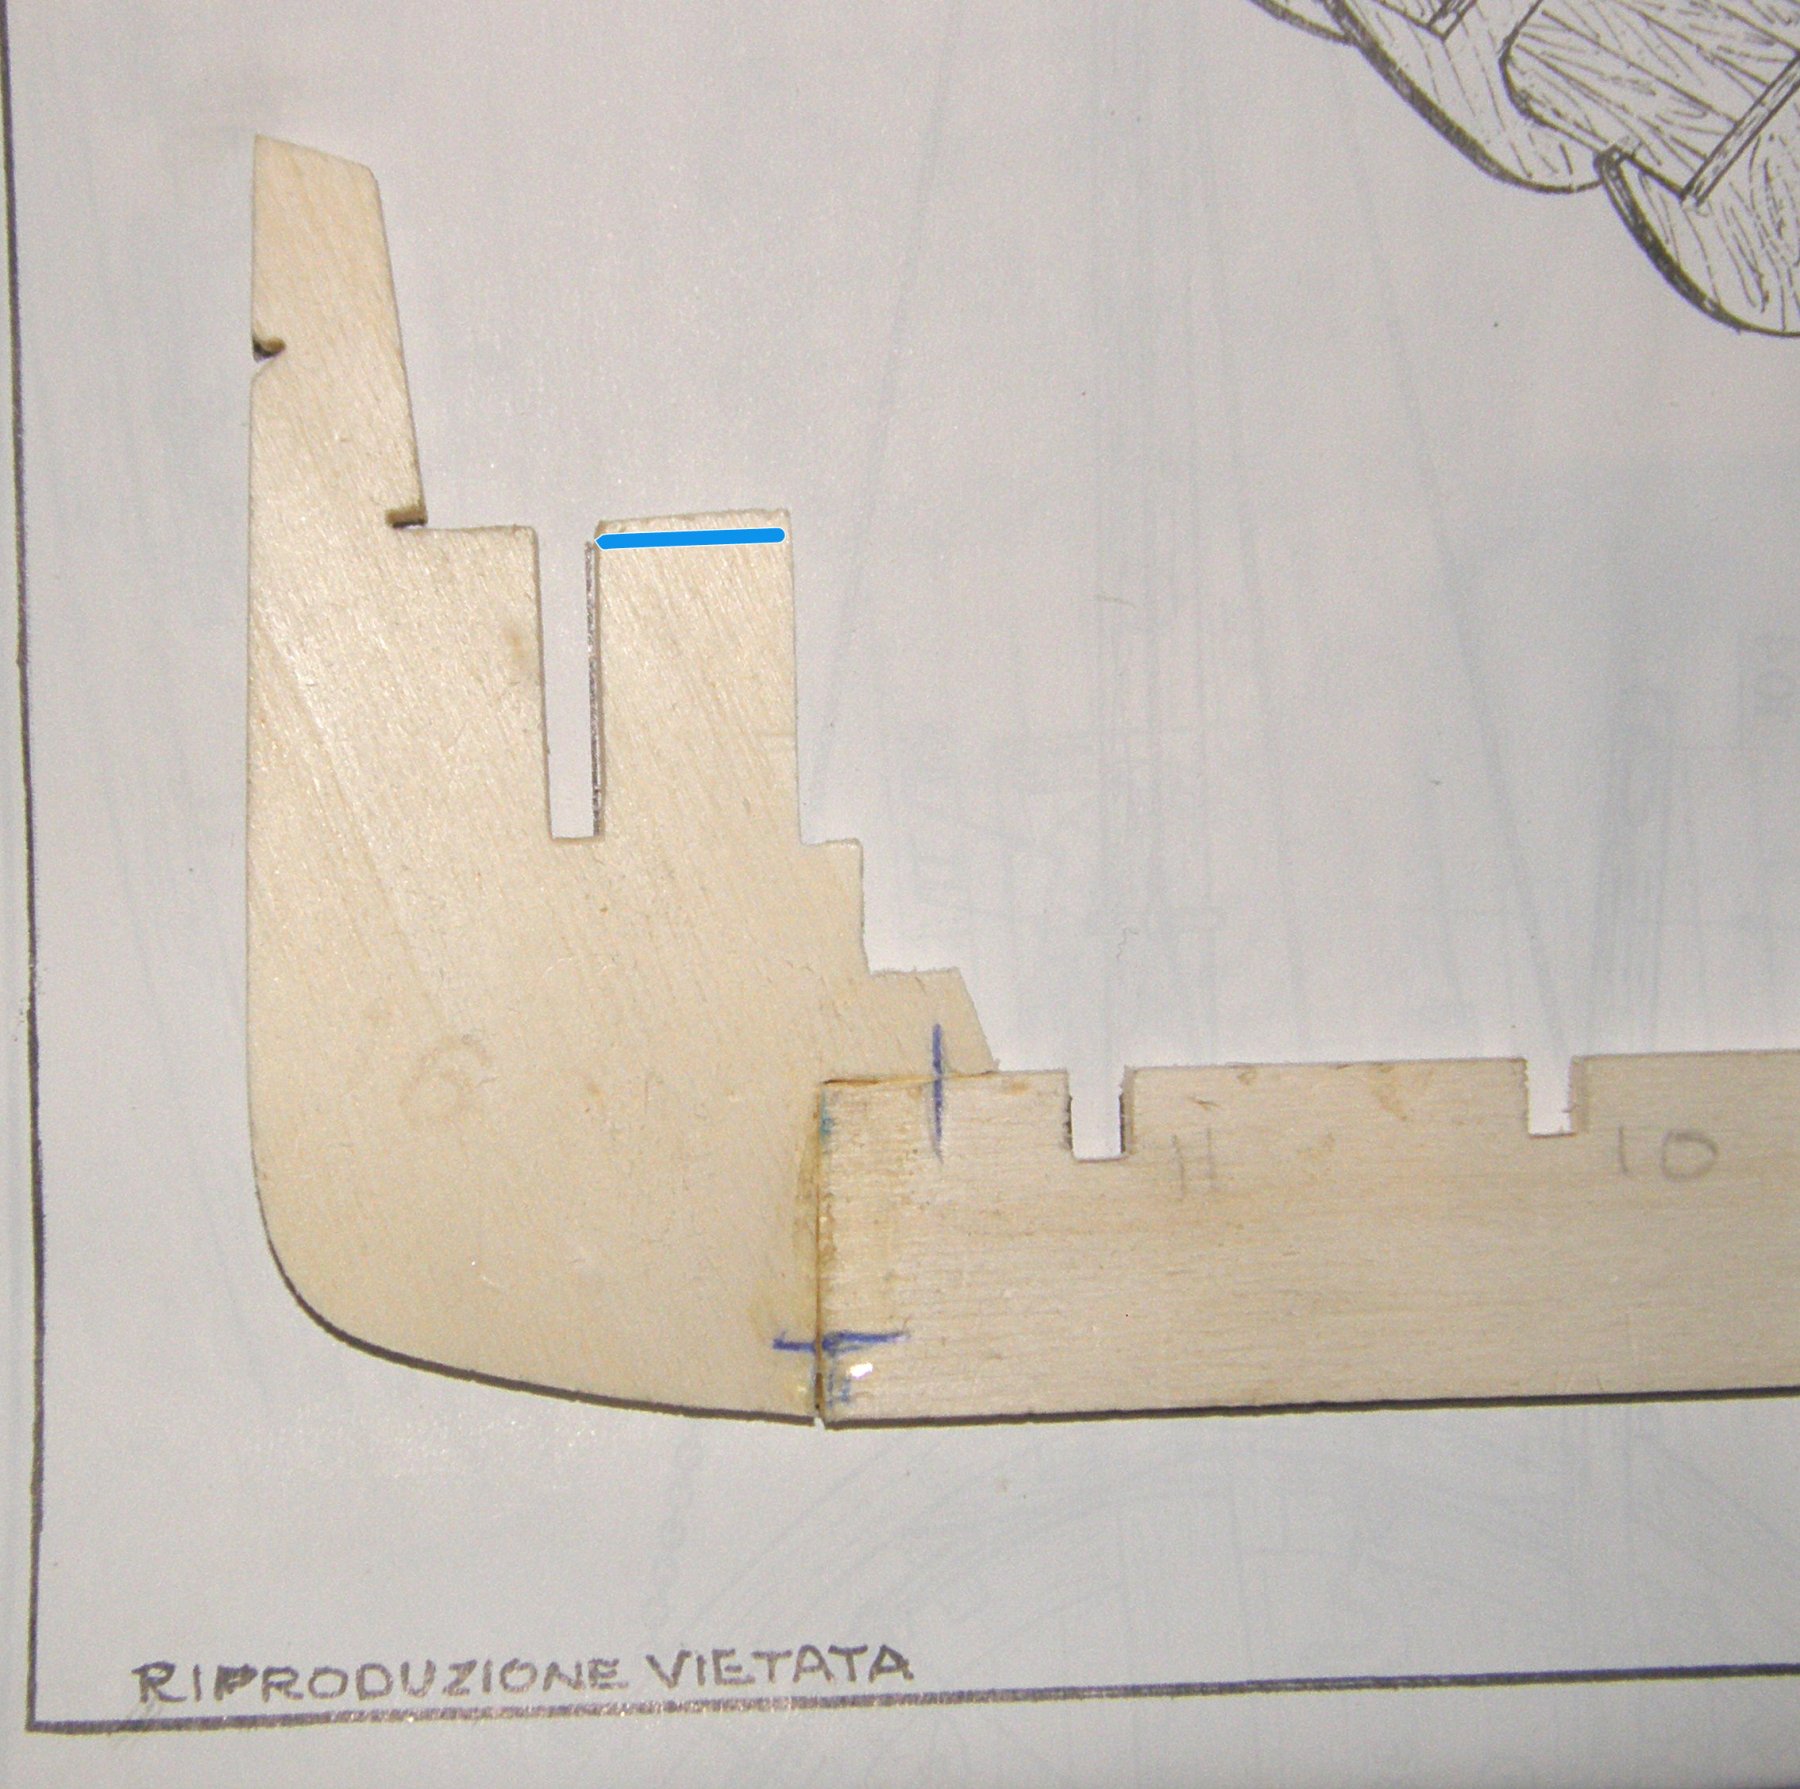
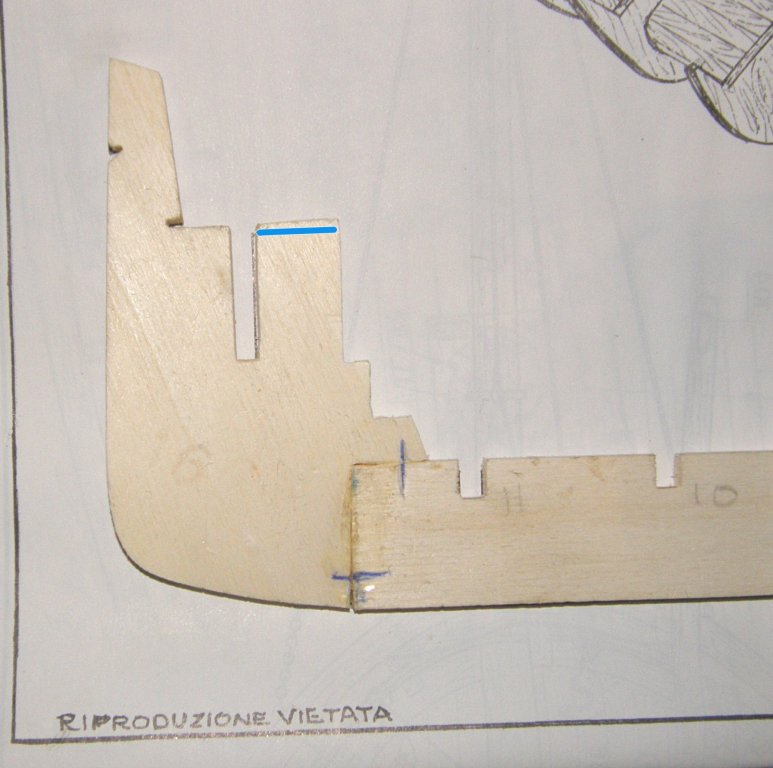
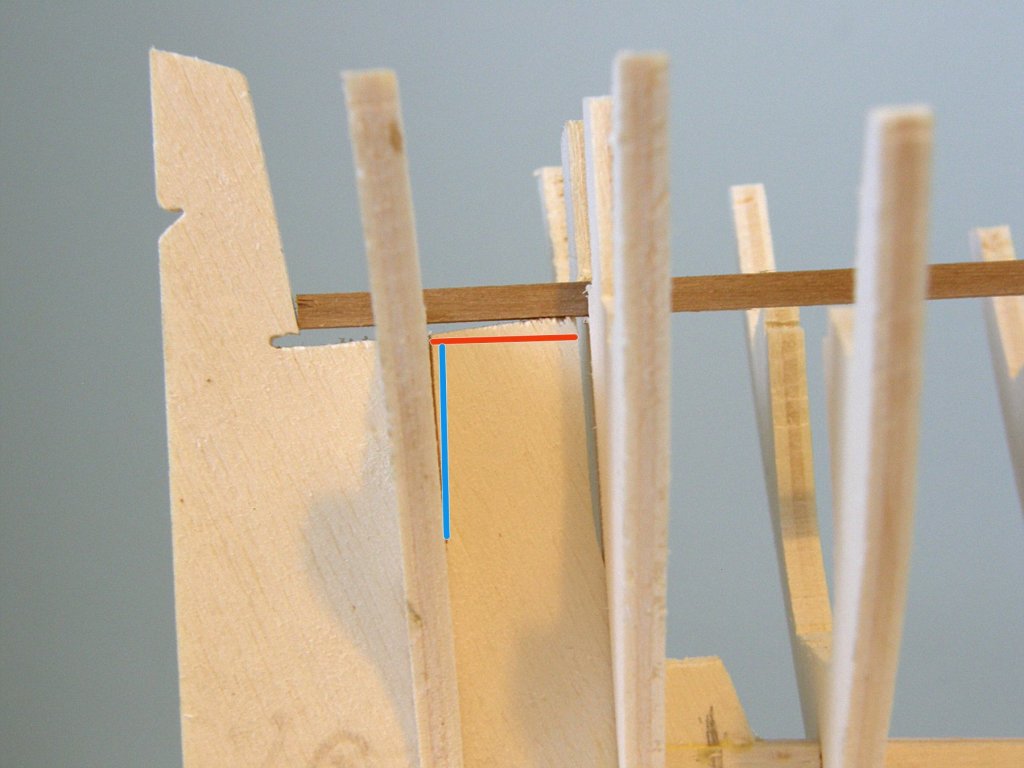
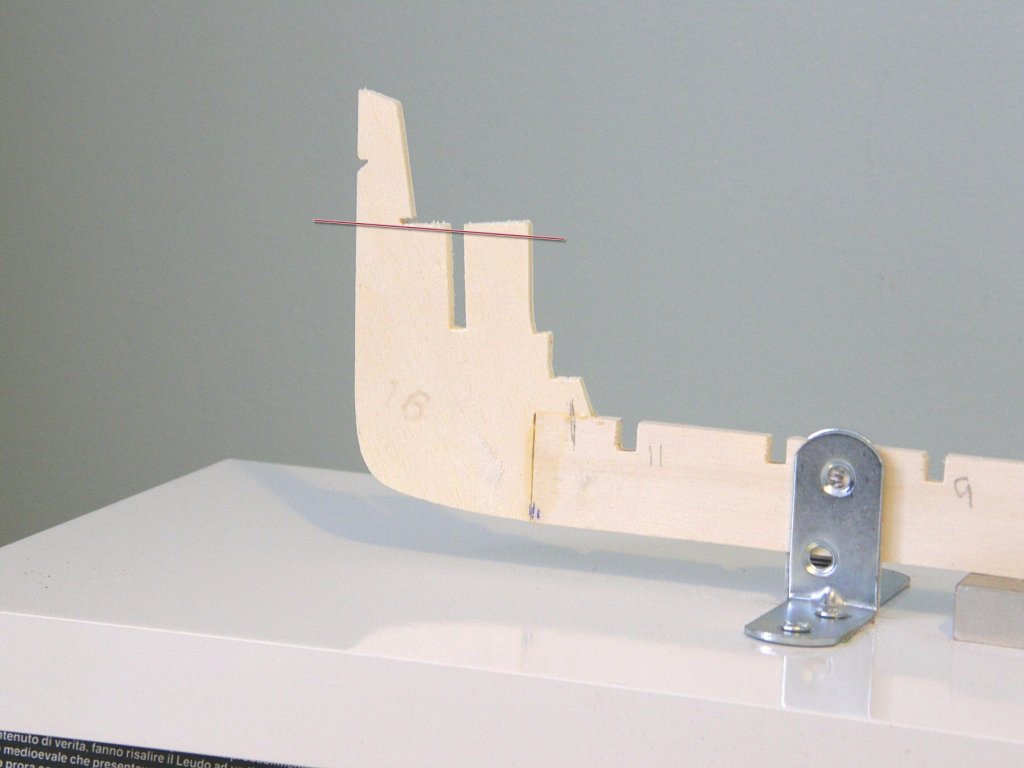
 Hello all. After taking the parts apart I found after putting them on the plans that I did not have to make a V shaped piece of wood. In fact I had to file some off part 16. It looks like I have to file down to the blue line as this looks a bit too high. It amazed me that taking only a little bit off part 16 can move the top over by about 5mm. Jo.
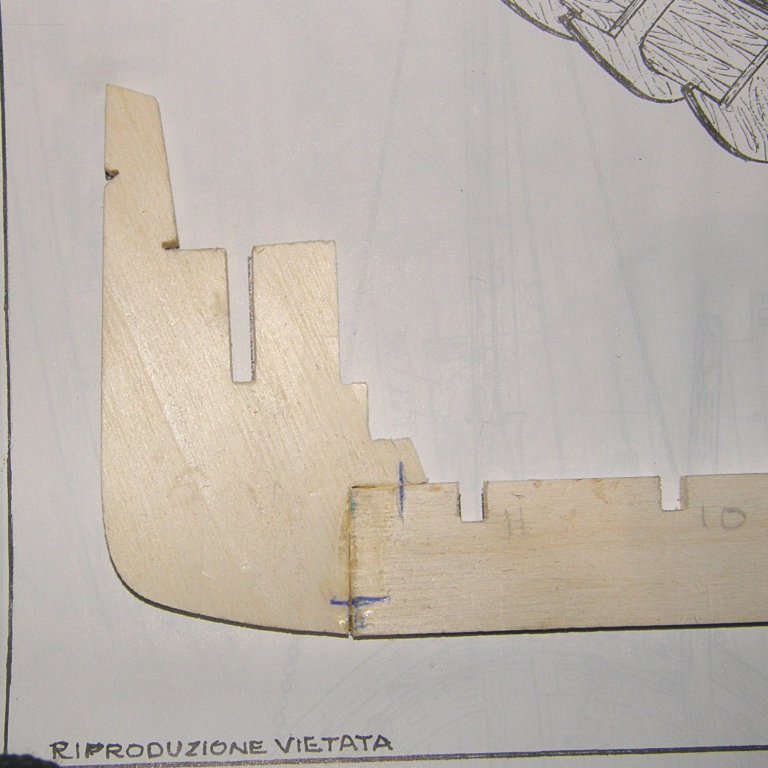
-
Hello Sam Dark side "a"☠️ the only thing I scratch is my head over this kit 🤣. Jo.
-
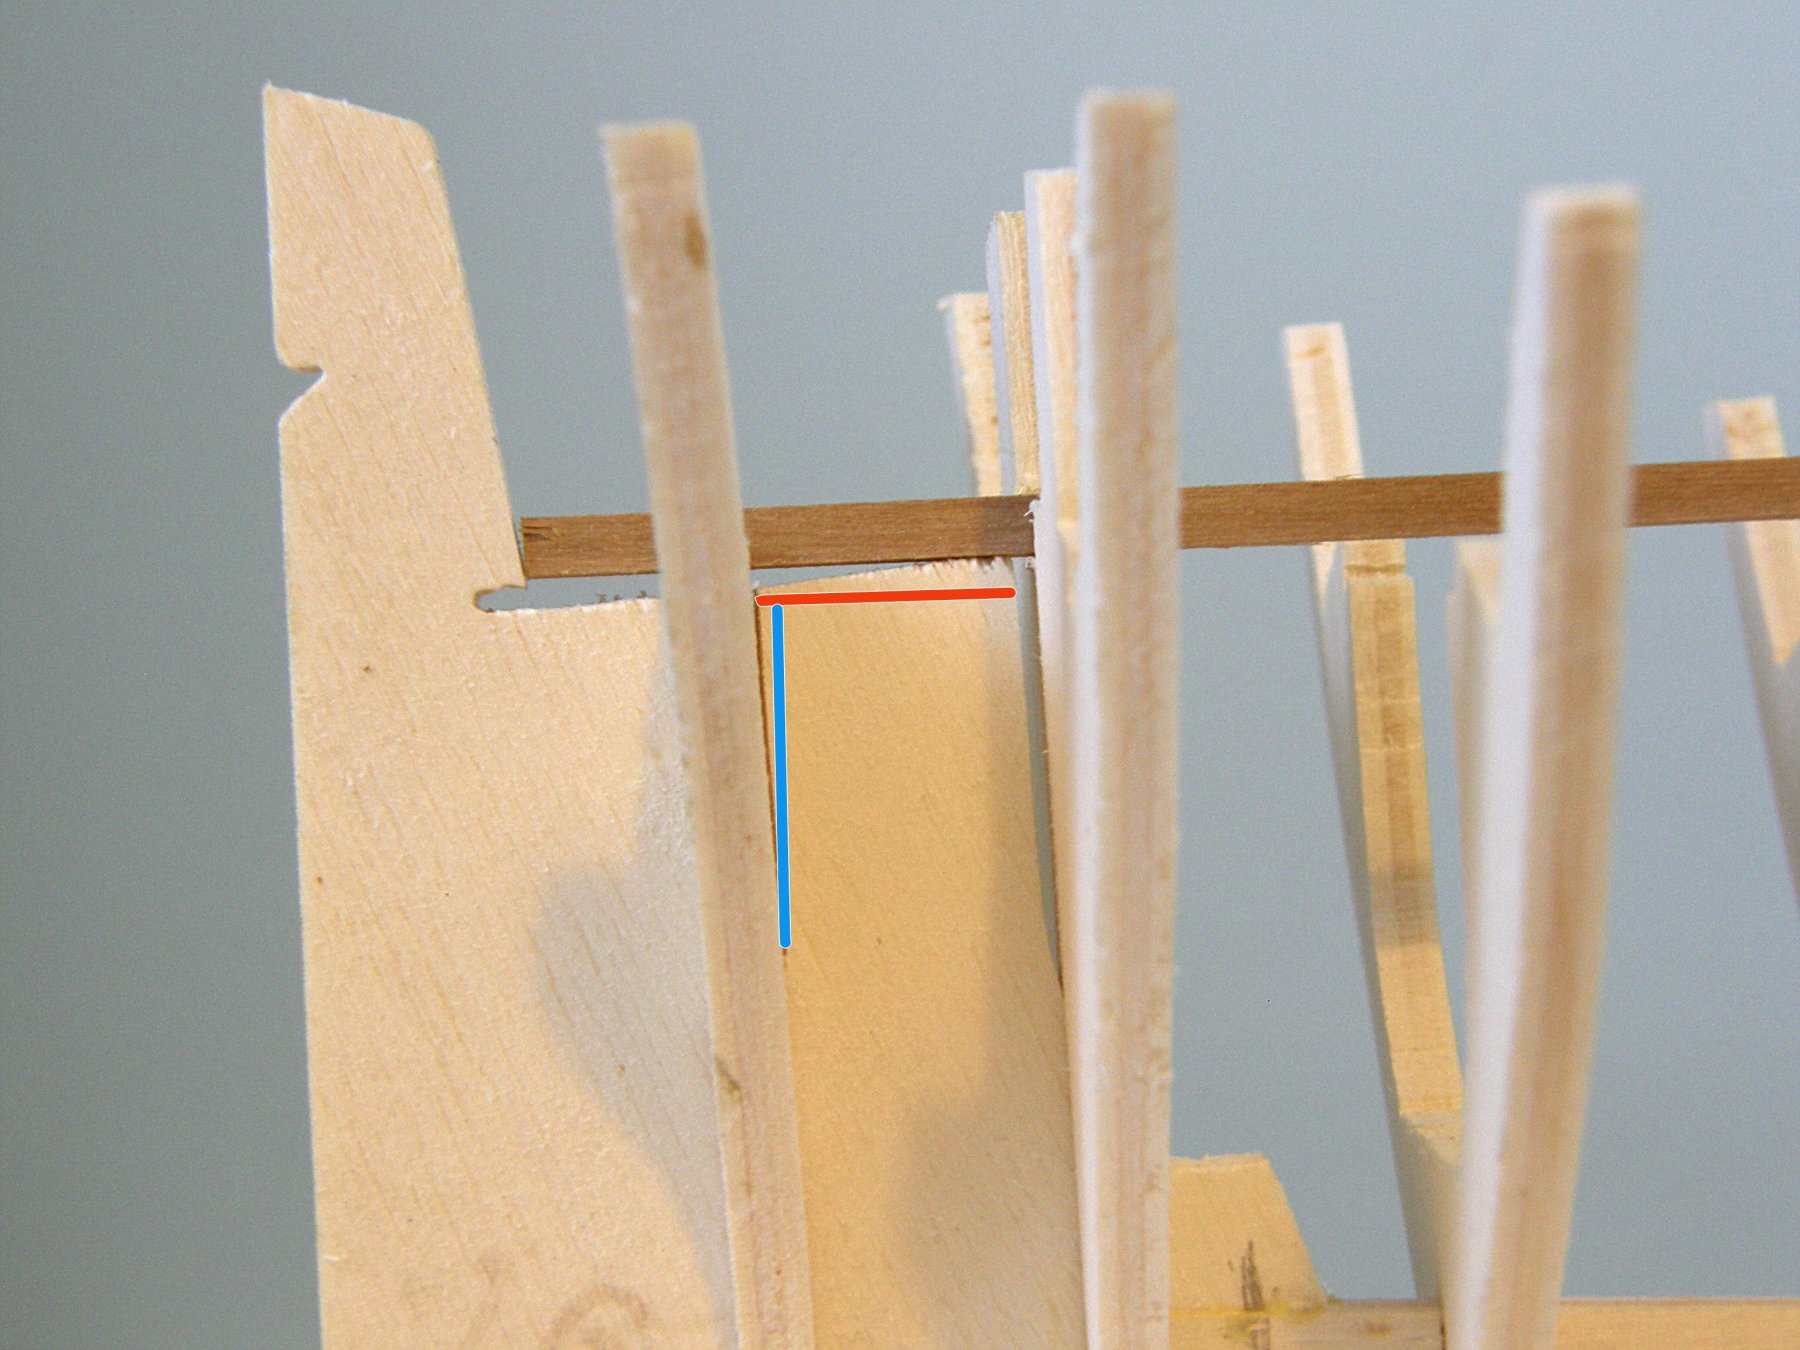
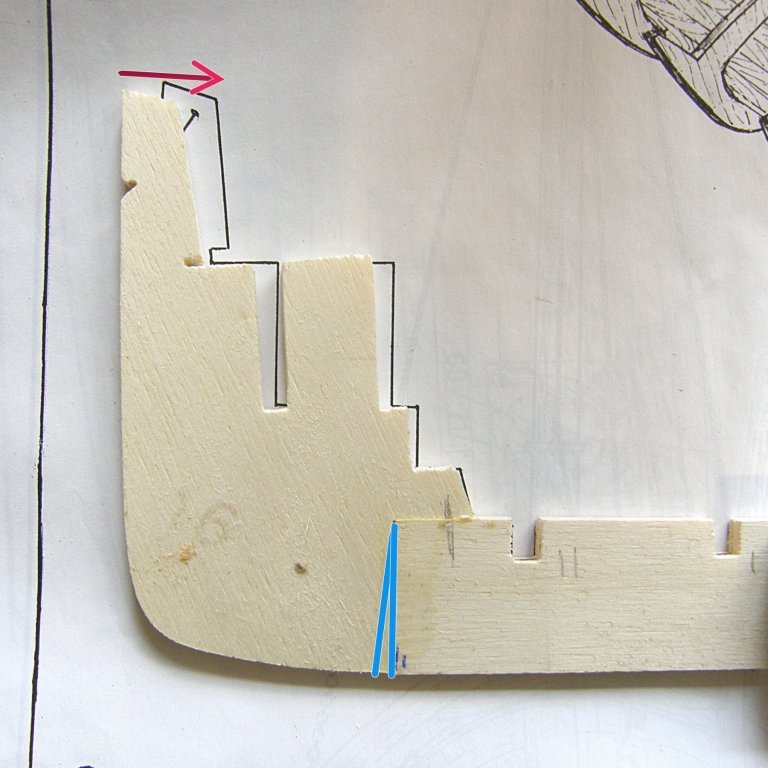
Hi again Gals and Guys Ok I took the advice and took it all apart. This is how far it is out according to the plans. Now I don't know if what I am going to do is right or not. This is what I have been thinking about, try and unglue the parts, then put a piece of wood by the blue lines in a V shape this I hope will push the top over, see red arrow. Any other suggestions before I completely destroy the wood. Jo.
-
Hello Sam Got it from Bunnings yesterday when I got my mini files. Jo.
-
Hello Carl Ha-ha Spirits well for your info I only drink coffee, tea or water. Jo.
-
Hello Ondras Thank you for the link for the IL Leudo. Jo.
-
Hi Mark Thank you I will go to Bunnings and try to get some. Jo.
-
Hi Mark. Yes I can take the frames out and lay it on the plans. But I will have to take the part 16 off and that is glued on with Titebond. Jo.
-
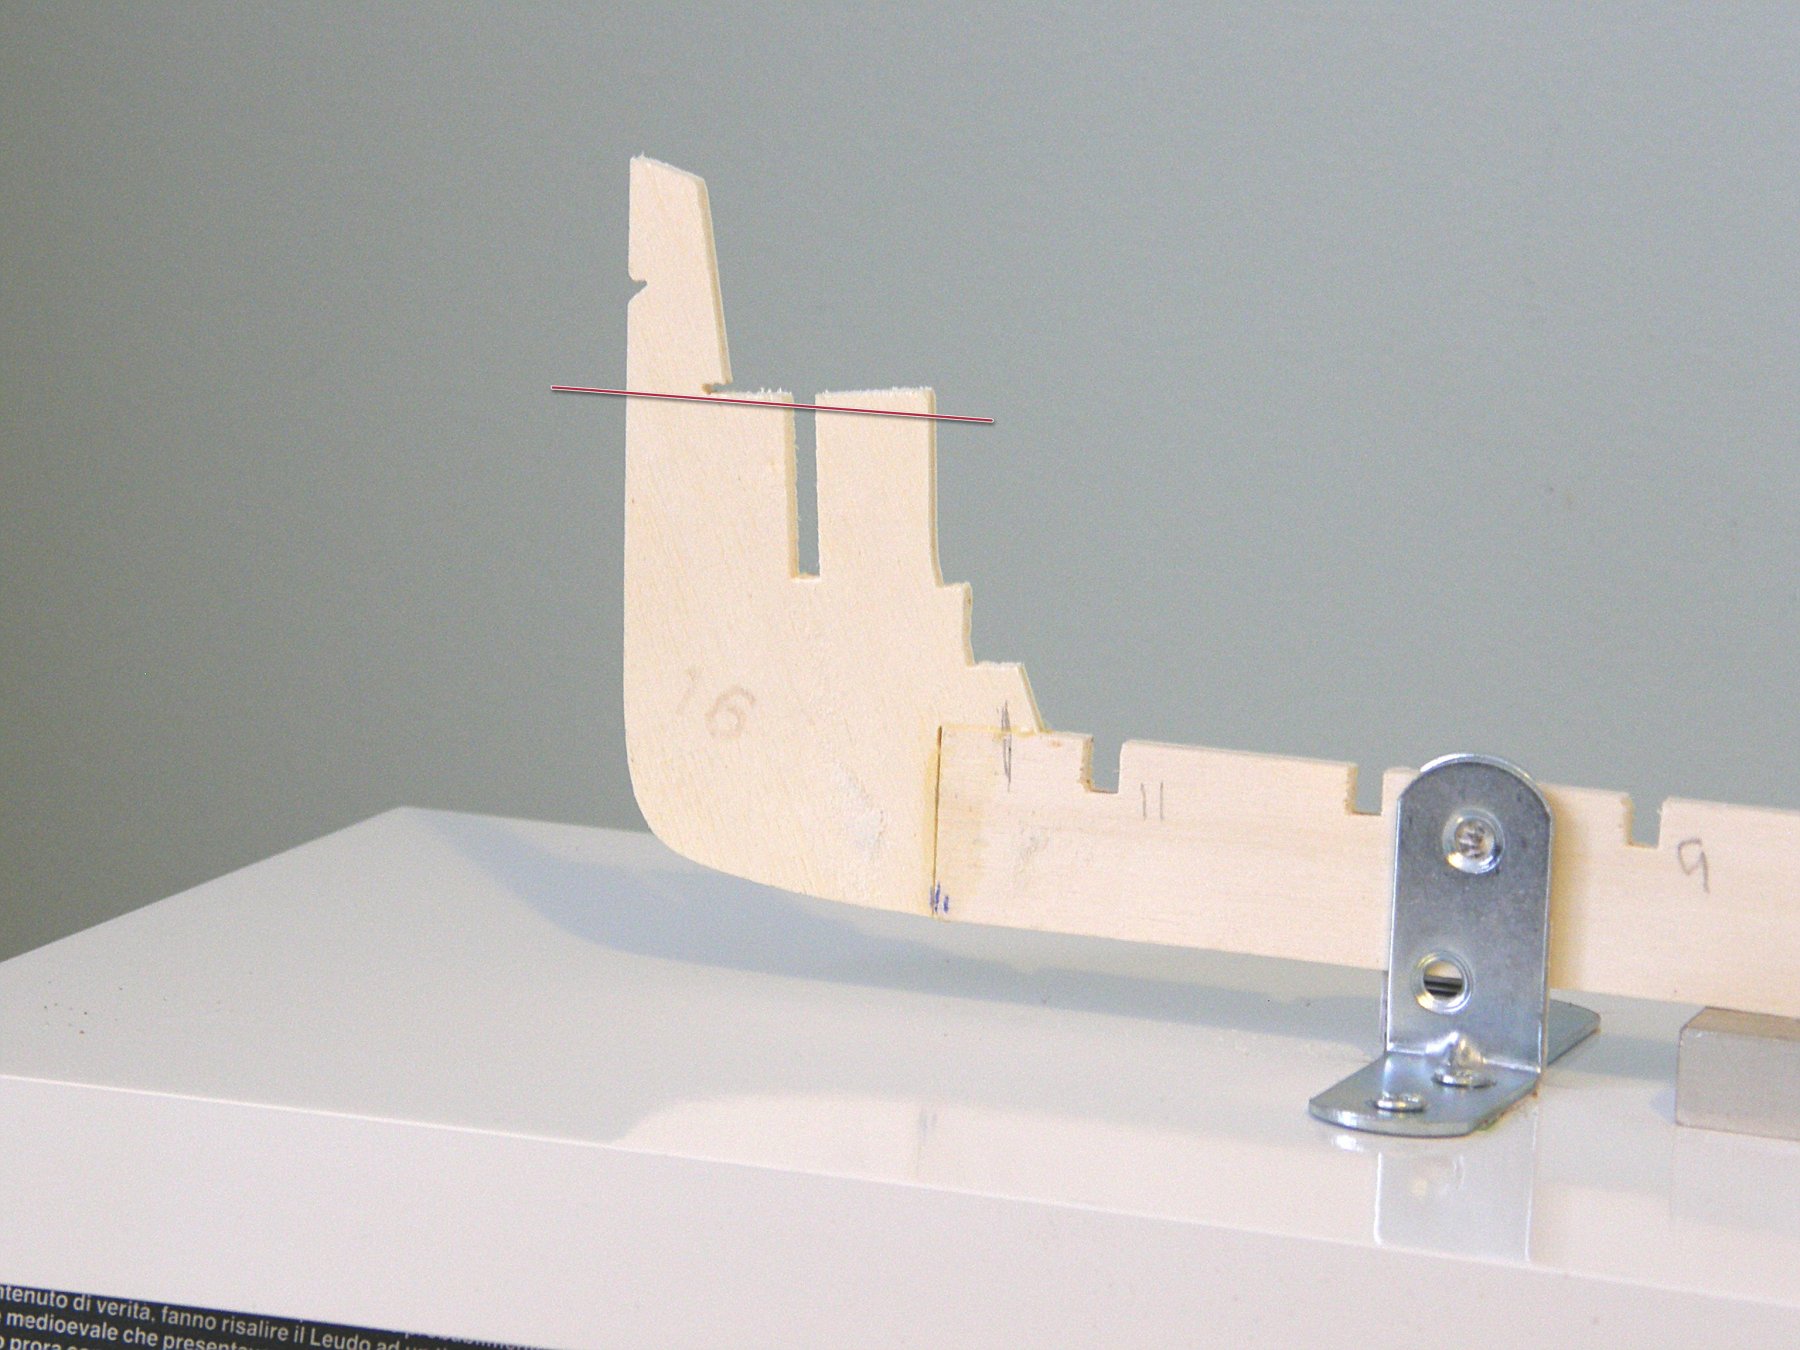
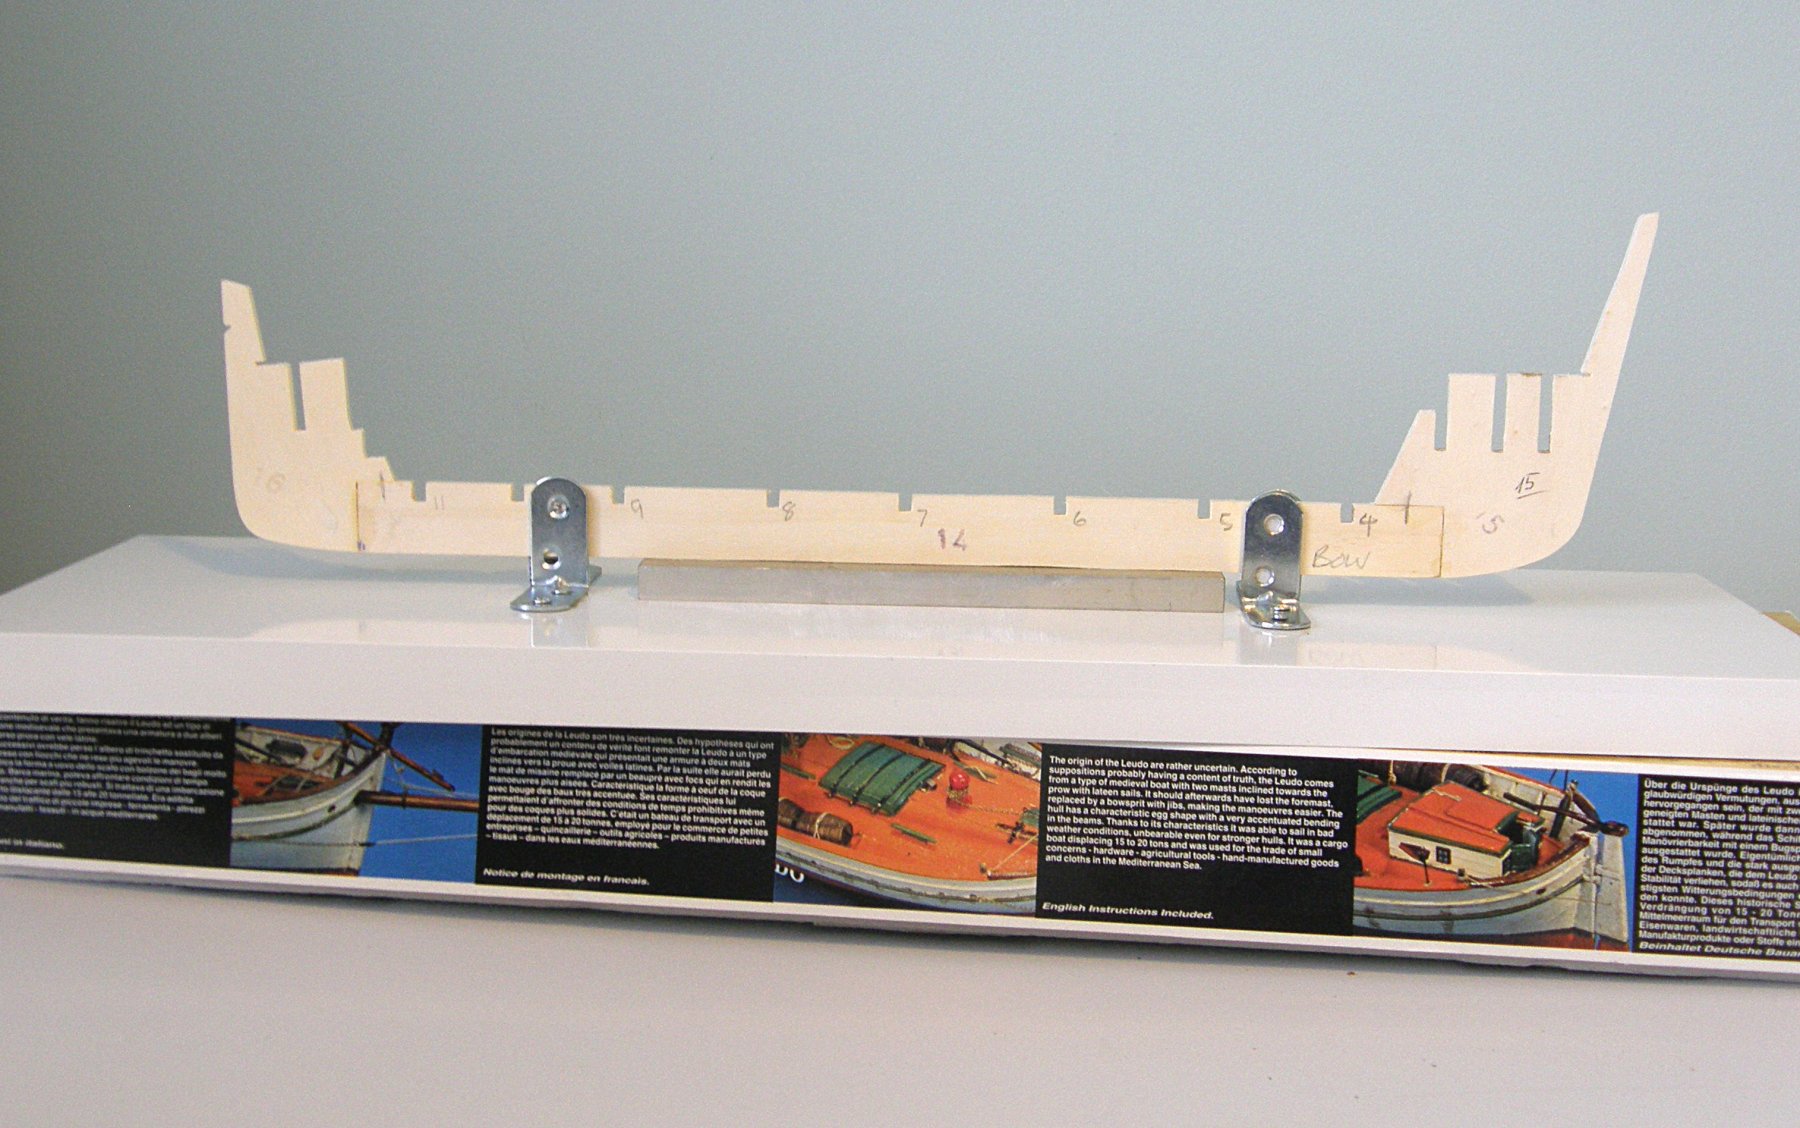
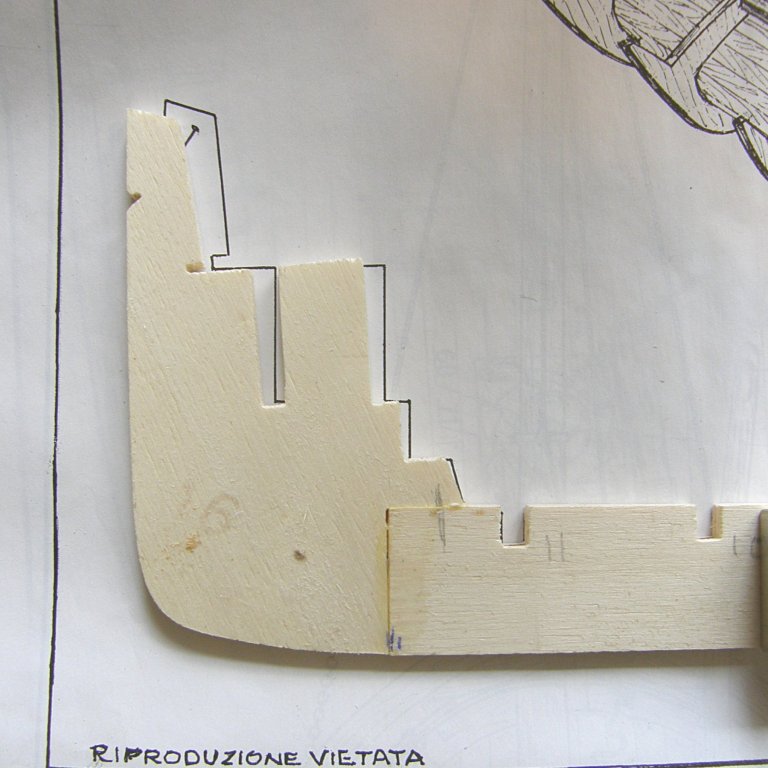
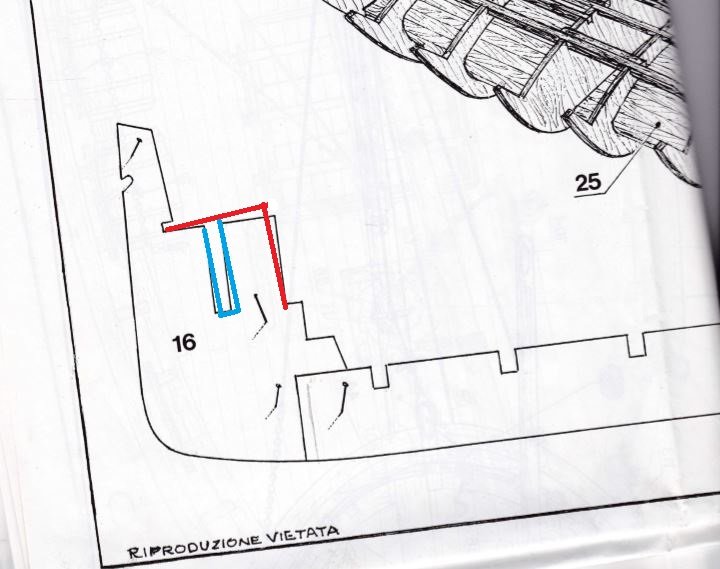
Hello Part 16. You can see how far it is out of line, the centre wooden strip is in place as per the instructions. The red line is how it should be. I am not sure if the frame should be on a slant or not as the plans don't indicate it if it should be or not. I think the best thing to do is file the top down to the red line and file the slot to the blue line like some of you have said. Jo.
-
Hello Mark Plans as you asked for. Jo.
-
Hello both I will have a look next time I go to bunnings. Jo.
-
Hello Sam I have never seen square headed screws before. Jo .
-
Hello Mark No not yet but will try and scan the plan and post it tomorrow. Thank you for your concern. Jo.
-
Hi Dave Thanks for the tip. Jo.
-
Hello johnothanswift Thank you for the link. Jo.
-
Hello Cog and Sam My drill bits are Metric. Jo.
-
Hello Dave I did drill a hole but it must have been a small drill bit, but thank you for your advice. Jo.
-
Hello John I promise you it will never be painted with polka dots or will it 🤣. May be a nice shade of PINK 😉. Jo.
-
Hello Doris Thank you for looking in on my log and for the encouragement. Also the link. I am very excited about my build, yes I will make mistakes but it will be fun trying to fix them. I have visited your log and wow you are a master builder. I will never achieve the skill you have. Yes I agree we need more woman on the forum. Jo.
-
Hi OC Your ship is looking great your wife will be happy when it is finished I know I would be. Jo.
-
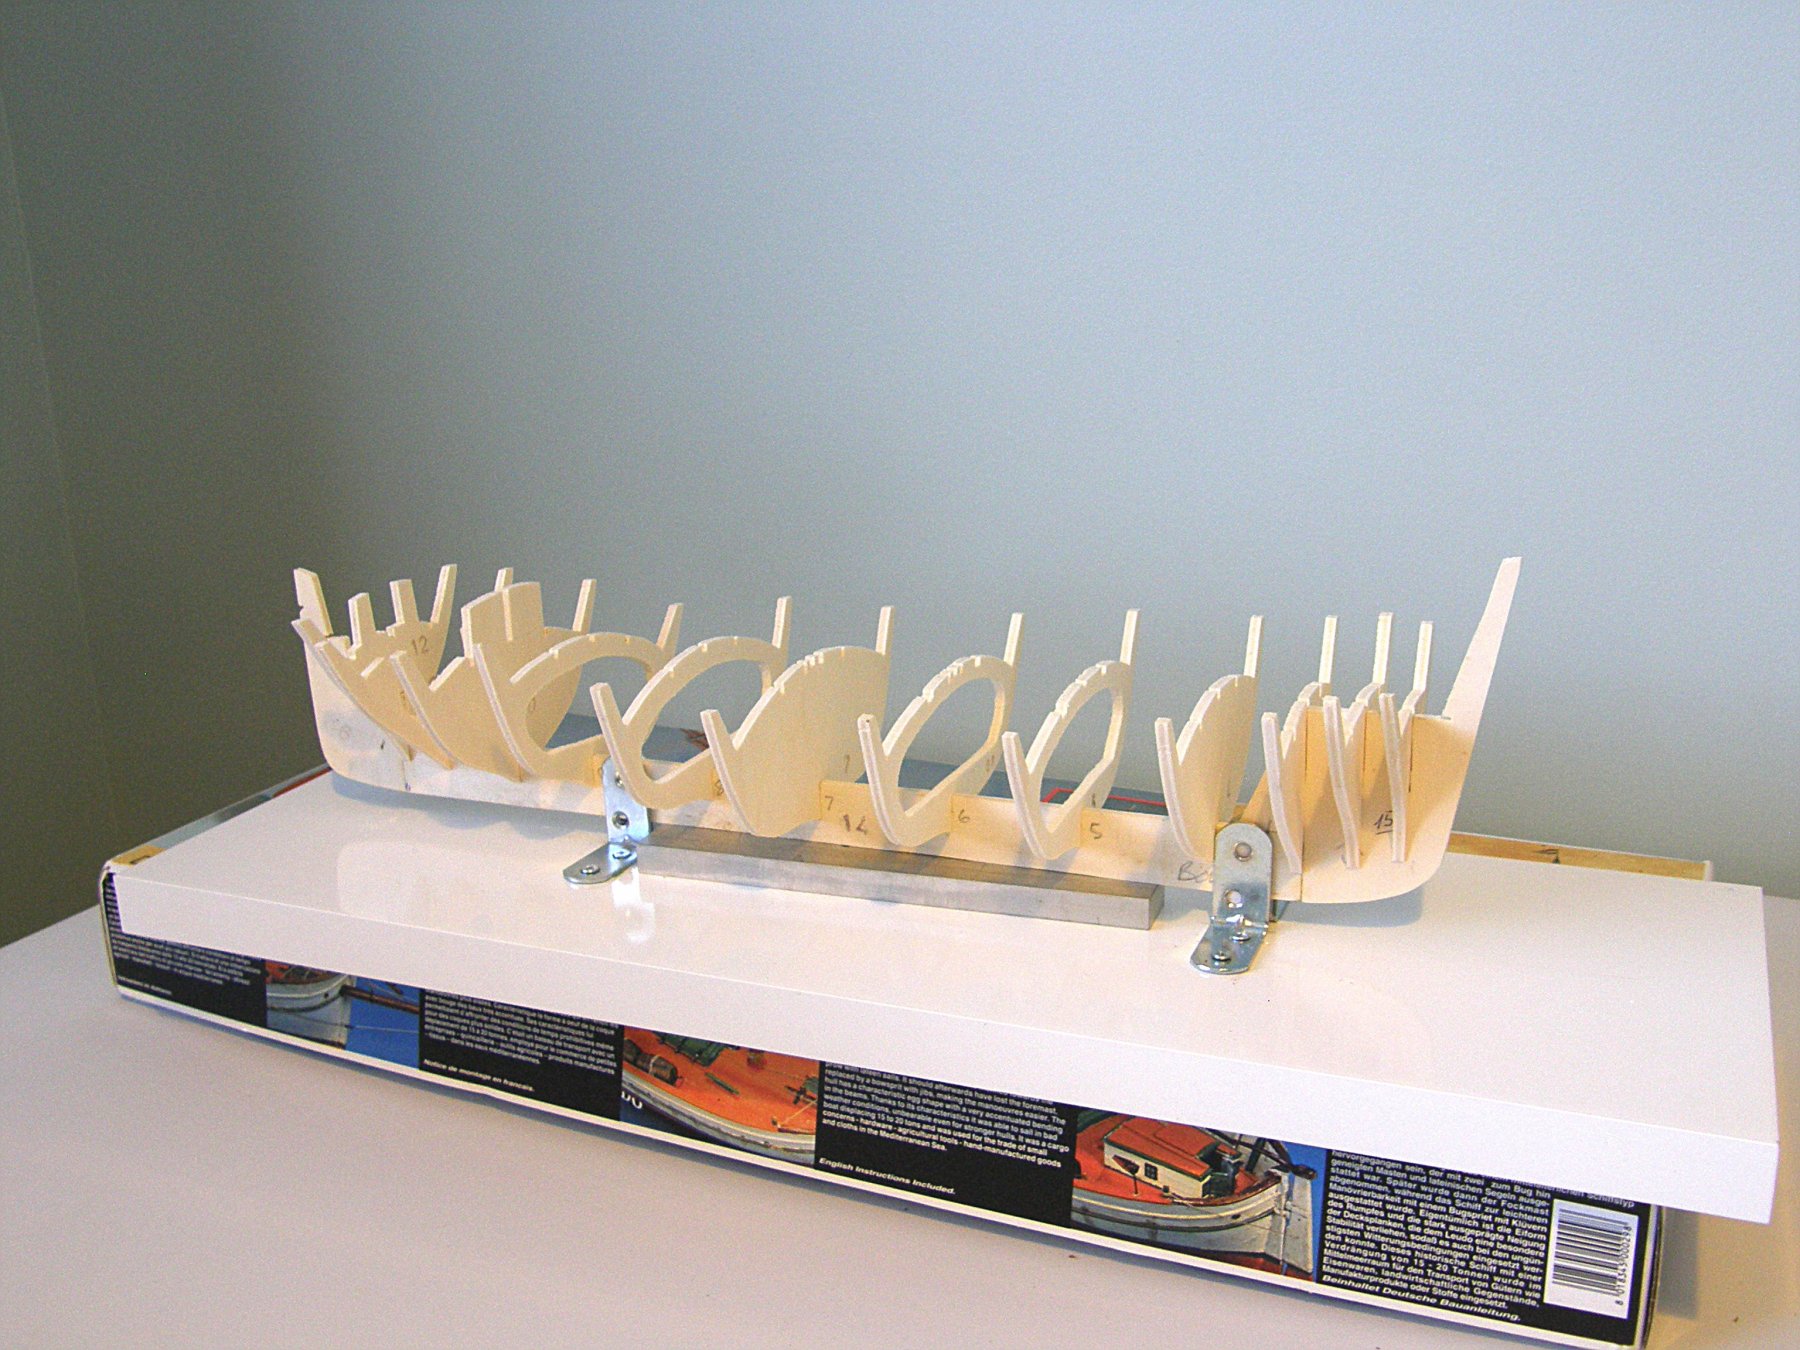
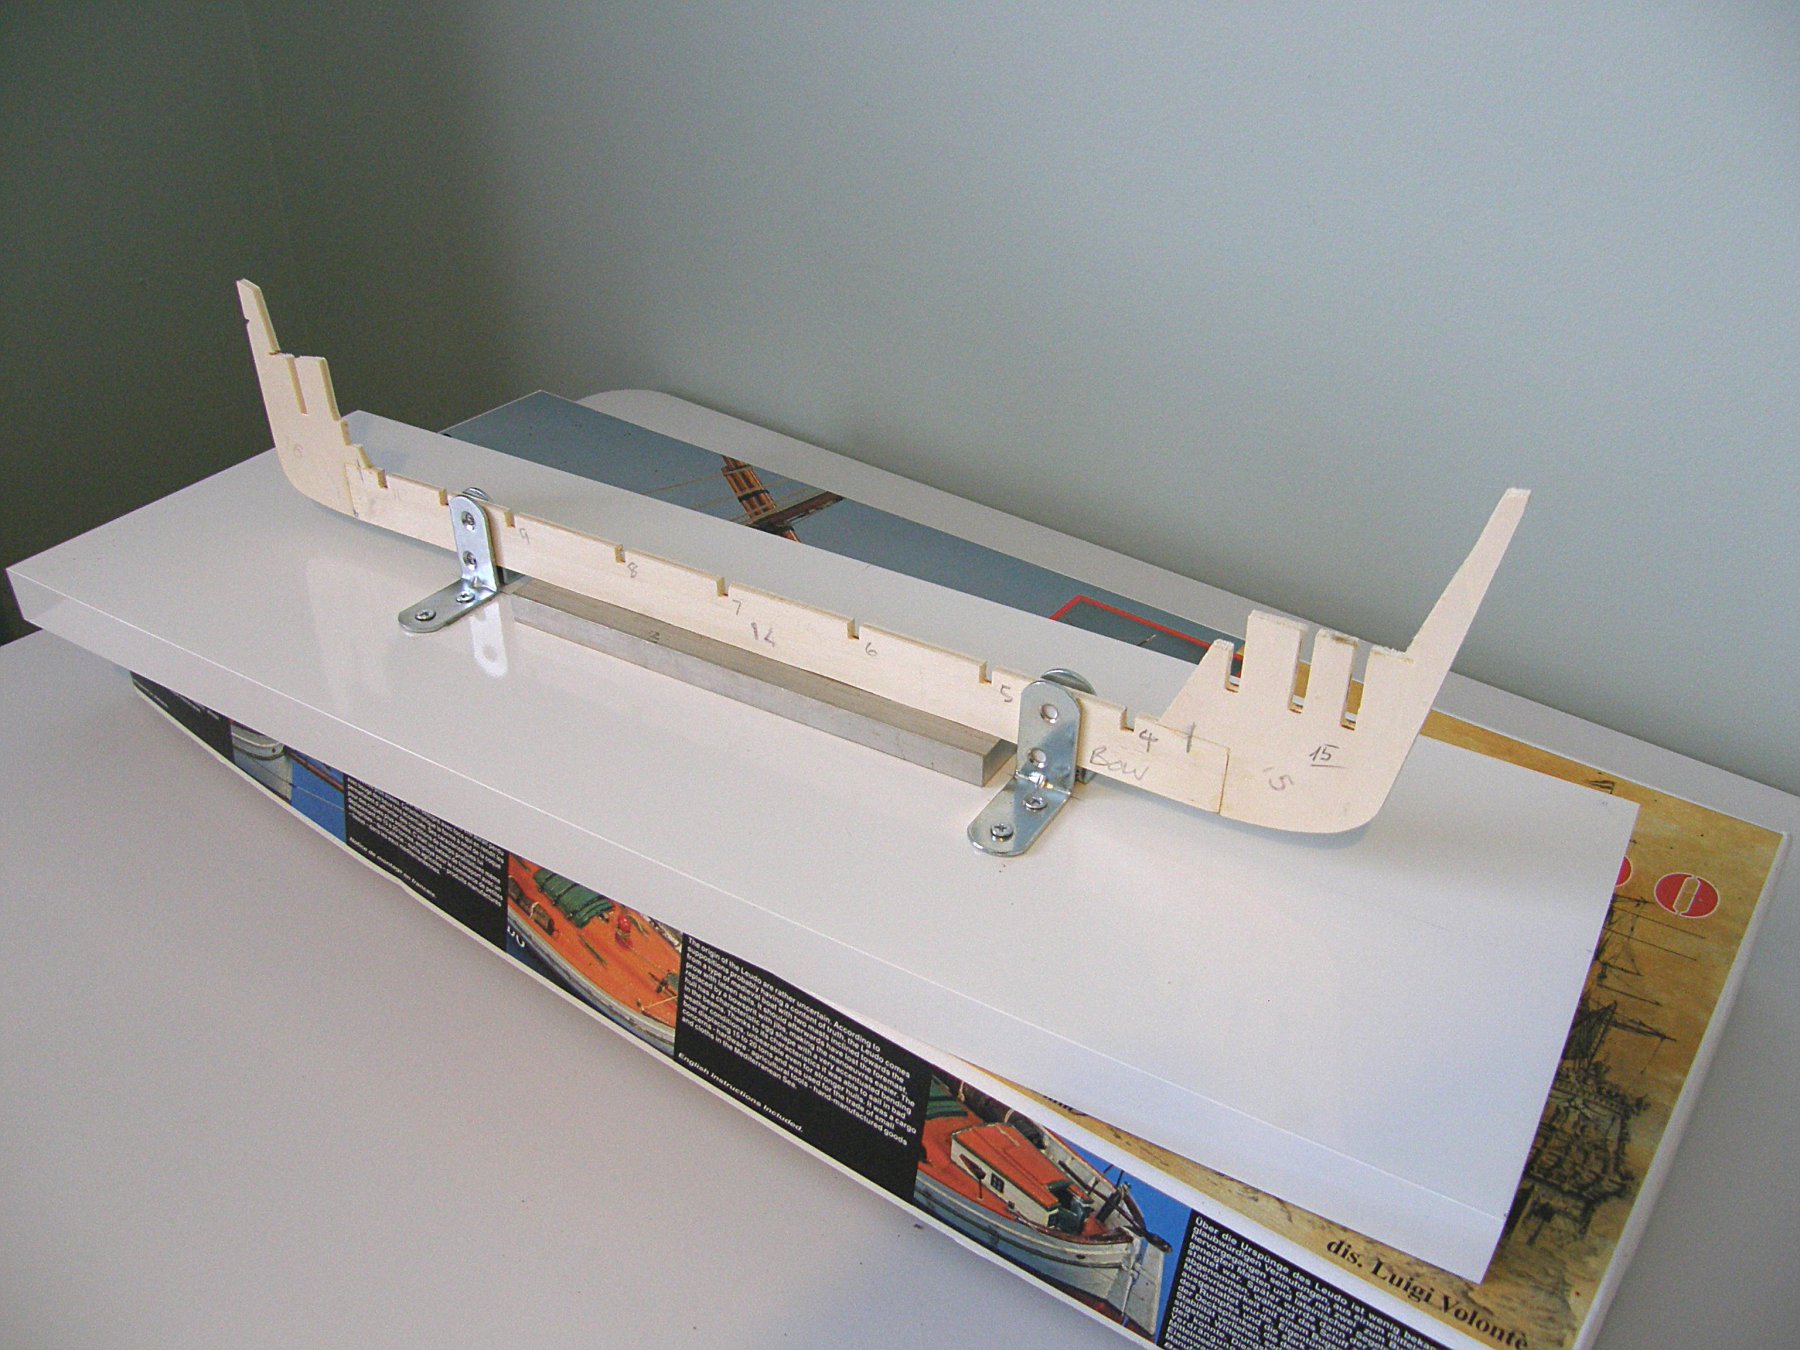
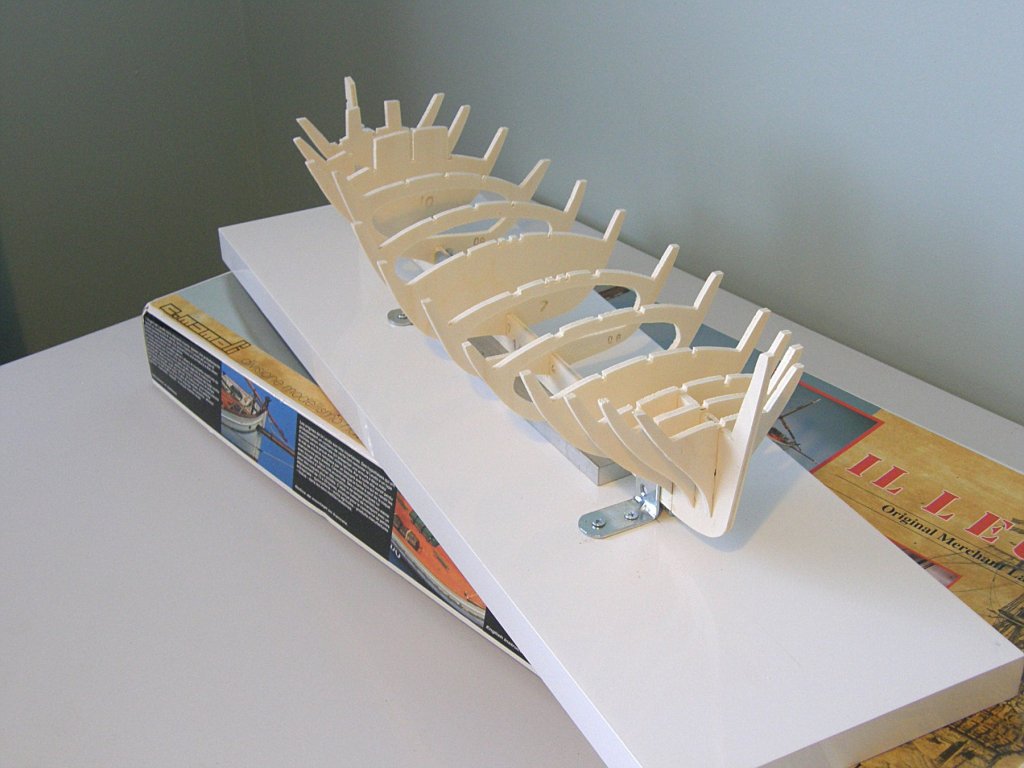
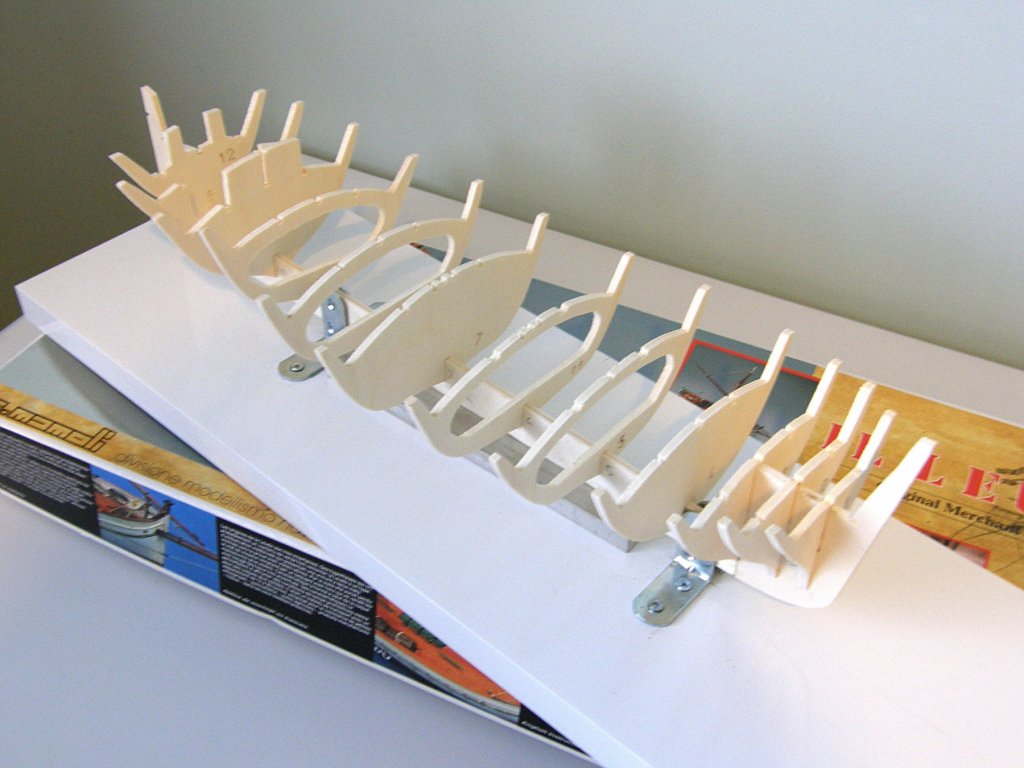
Hello my friends. I have dry fitted (I think that is what you call it) the frames all but the last one, that one I will leave till I have put the wooden strips on. Sorry that frame 10 is a bit leaning over ☹️ not a lot for it to hang onto. Jo.

-
Hi again Problem according to the plan part 16 just down from the top (see photo and the line) it should be level. My next step says to assemble the frames so they fit without gluing then put 3 strips of wood across the top of the frames to see if they are high or low. Do I do this first and see if frame 16 lines up or not, or should I file frame 16 down first. Hope you understand what I am saying.
-
Hello Sam I clamped the keel on the table top, I put some thin plastic on the bottom and top so the glue did not stick to the table top and clamp. Jo.
-
Hello shipmates. Just a small up date for you all. The two end parts have been glued on. Jo.


-
Hello cog Thank you for the link. Jo.