Edwardkenway
-
Posts
3,047 -
Joined
-
Last visited
Content Type
Profiles
Forums
Gallery
Events
Everything posted by Edwardkenway
-
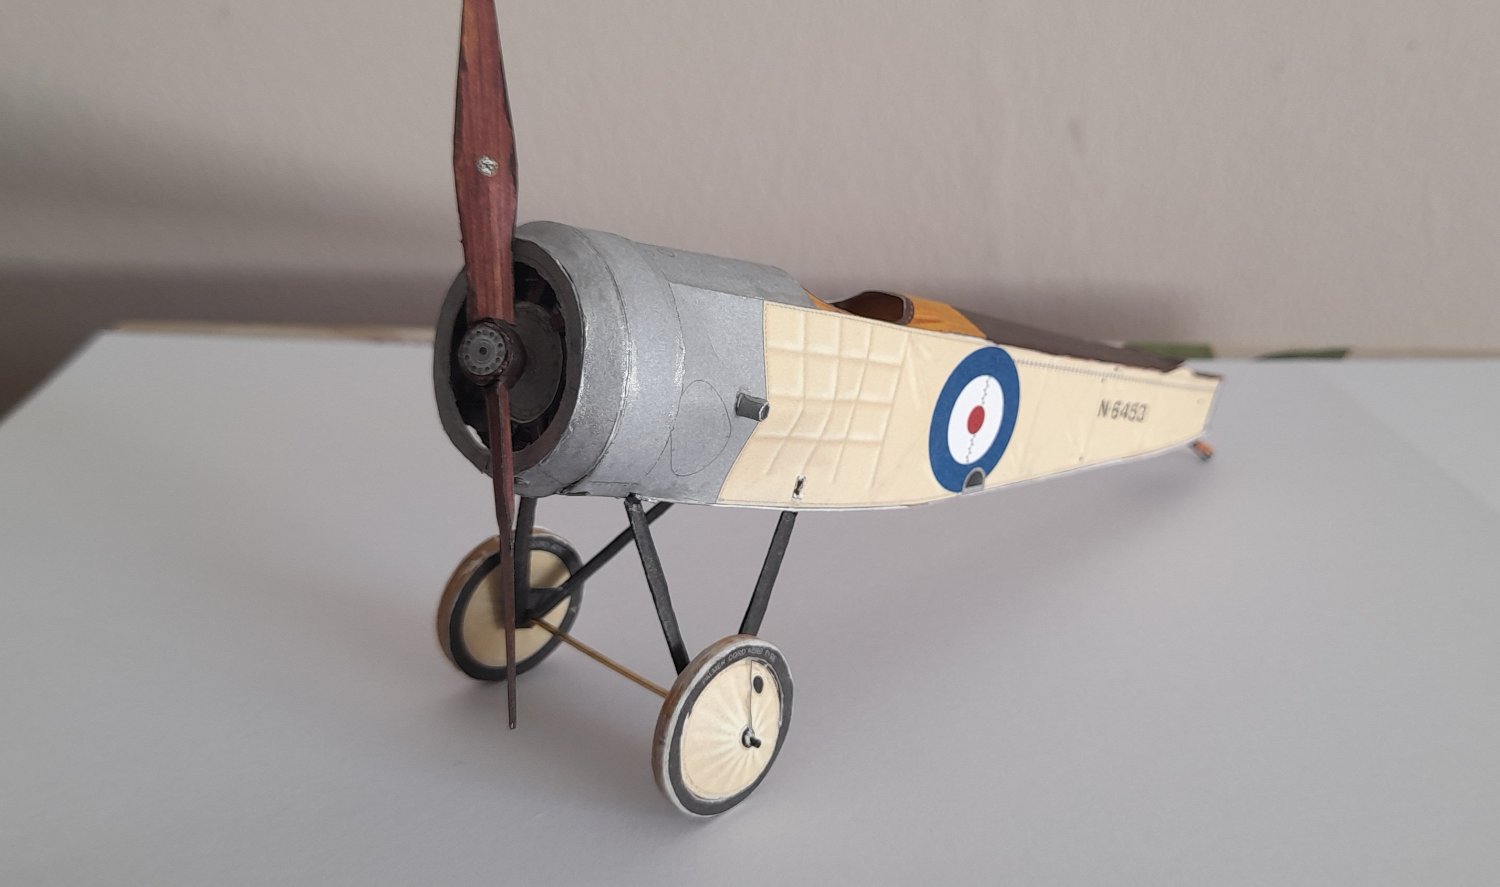
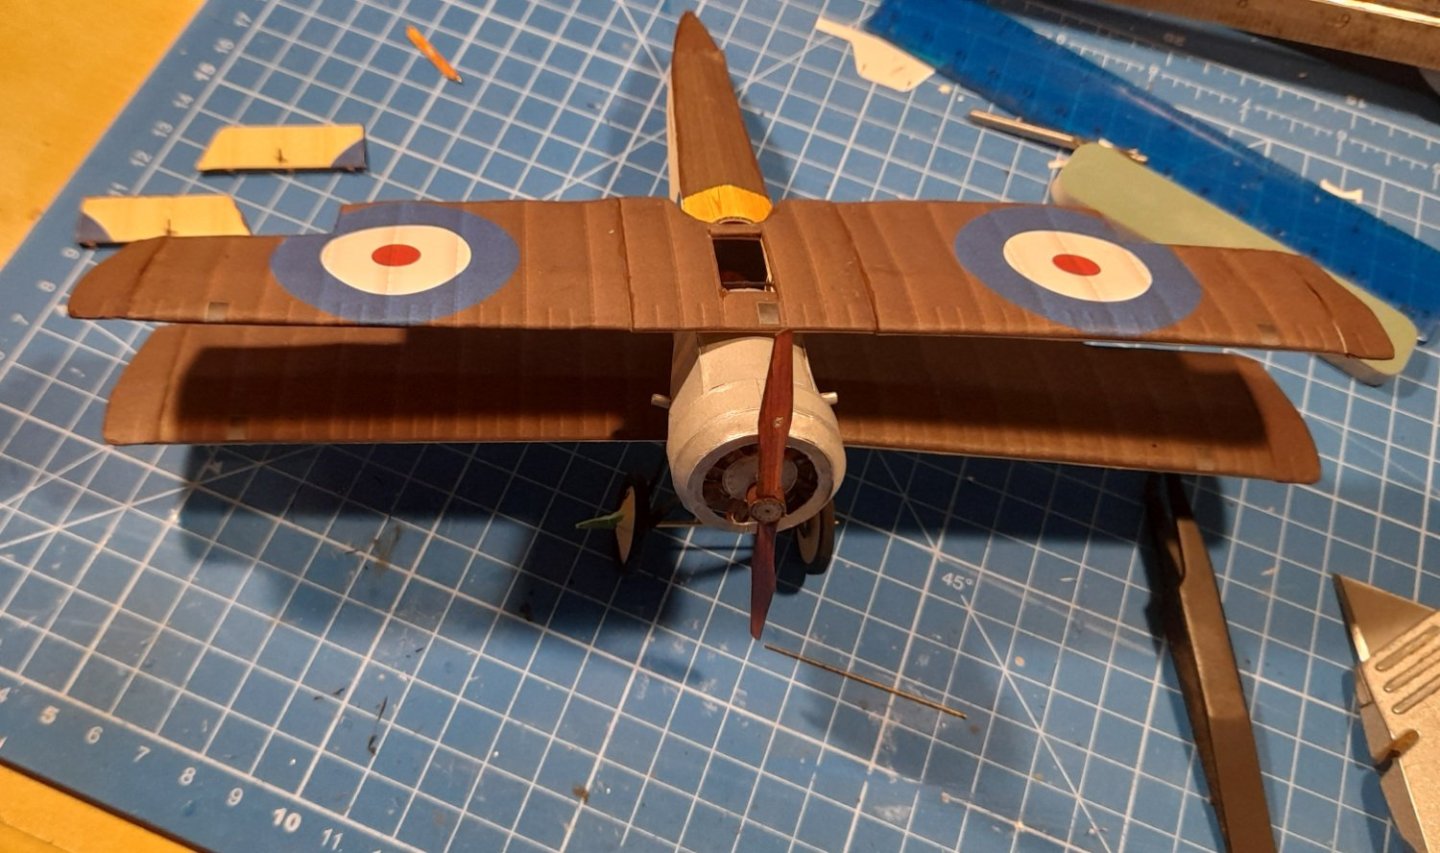
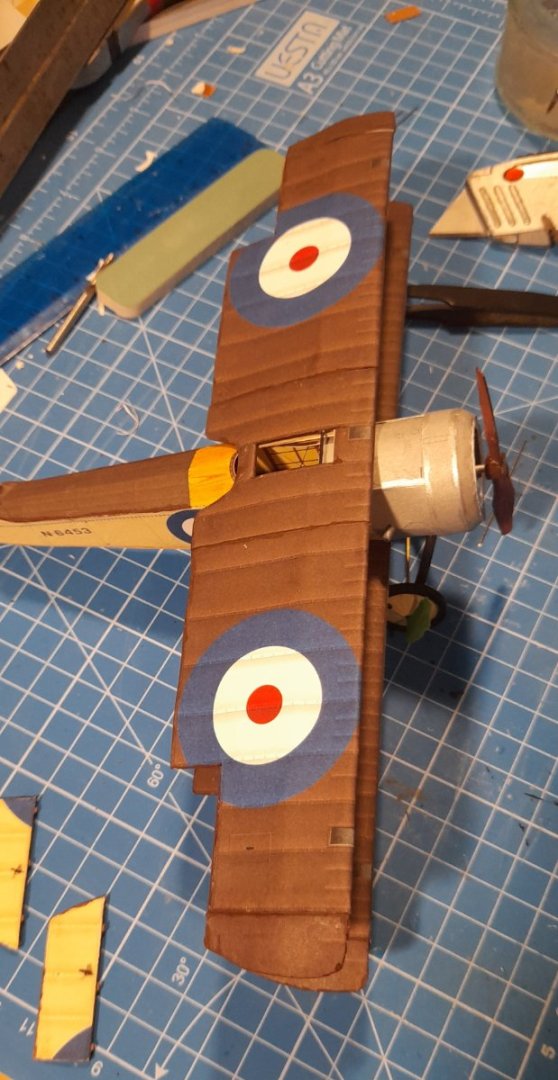
 Good evening, not a lot has changed, but I have got all the wings skinned. I think I've got all the edges coloured The wings are not glued yet I just wanted to see what it looked like and make the obligatory engine noises as it is flown round my head😊😁 Thanks for any input, likes, etc... Cheers BTW, whilst browsing the Internet, especially Wak models, I couldn't help but notice and subsequently download the free WW1 monoplane modelWAK-E-001-MoraneG.pdf
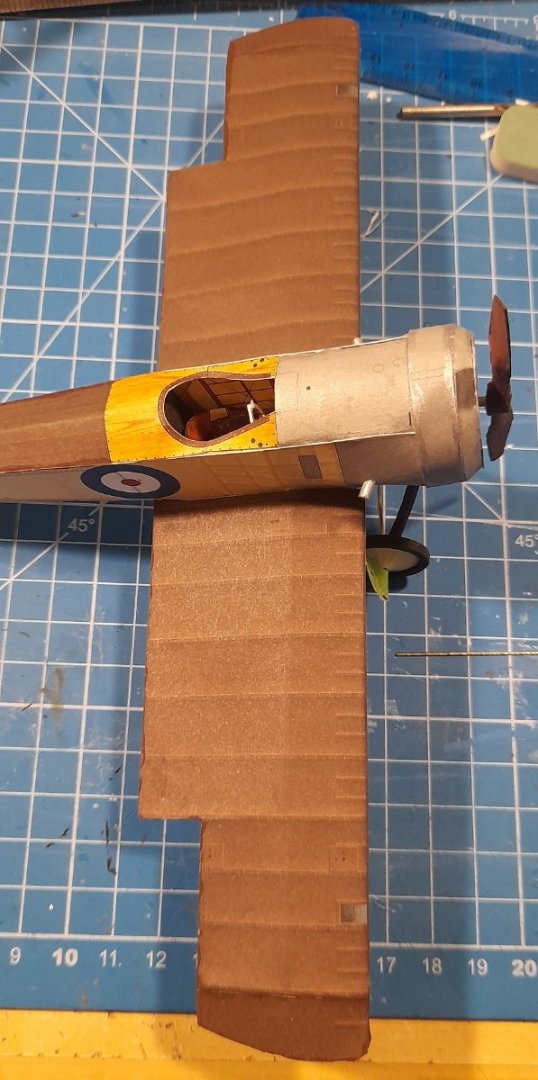

- 93 replies
-
- 15
-

-

-
That's the joy of the forum, learning and sharing tips,tricks and information. 😀👍
-
If you're on a pc or tablet, you should be able to download a translation app and basically do the same thing😉🤭
-
Yes, take a photo or scan the document and then import it into the translator. Just checked, mine is Google Translate.
-
I used a translation app on my phone and saved the results as a pdf. Although with this kit, the construction drawings have helped me, much like the drawings in a plastic kit. For me, it is getting the curves to flow rather than angular. Oh! and rolling small parts😑😄 With this kit costing me less than £10 with laser cut parts and shipping, it wouldn't be a big loss if I cock up and bin it😊 I don't think I'm quite ready to tackle a ship of the line type kit though. I'm still just dipping my toes in😏
- 93 replies
-
- 10
-
-
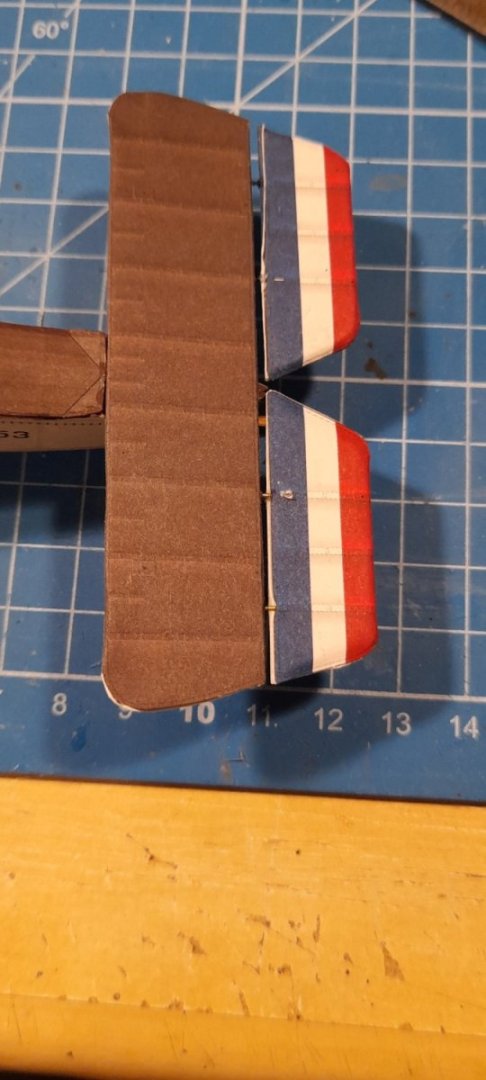
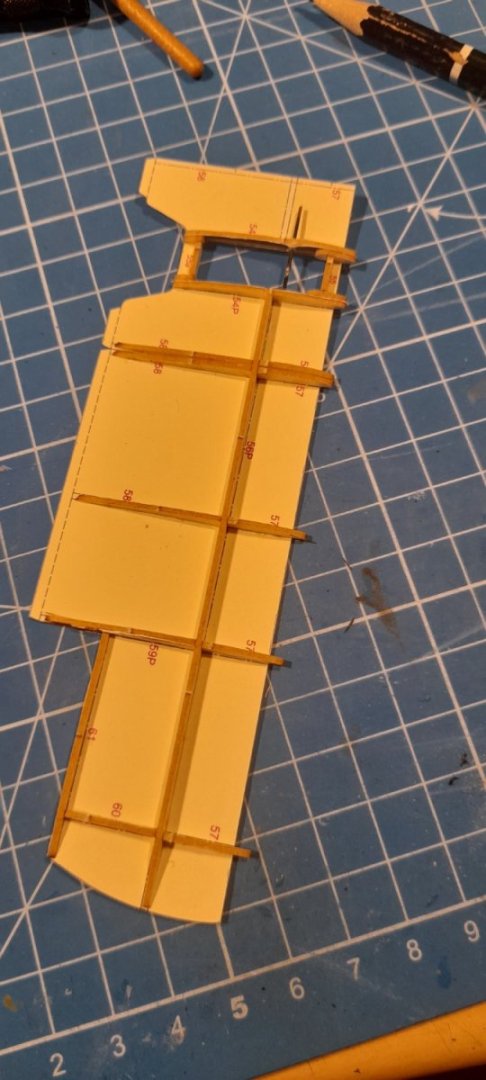
Tonight's progress, I put the outer skins on the tailplane (horizontal thingies 😁) but oh my, those edges really do need tidying up! One side is definitely better than the other, as the second went on better. I appreciate all the likes and comments 😊 Many thanks to all who have had a looksie. Cheers
- 93 replies
-
- 14
-
-
Well, who'd have thought it!🤭 Thank you kindly, Ken, 😉 Thank you Alan, I don't even need a draught, I can drop and lose parts in card, wood and plastic!😂 Resistance IS futile🤭
-
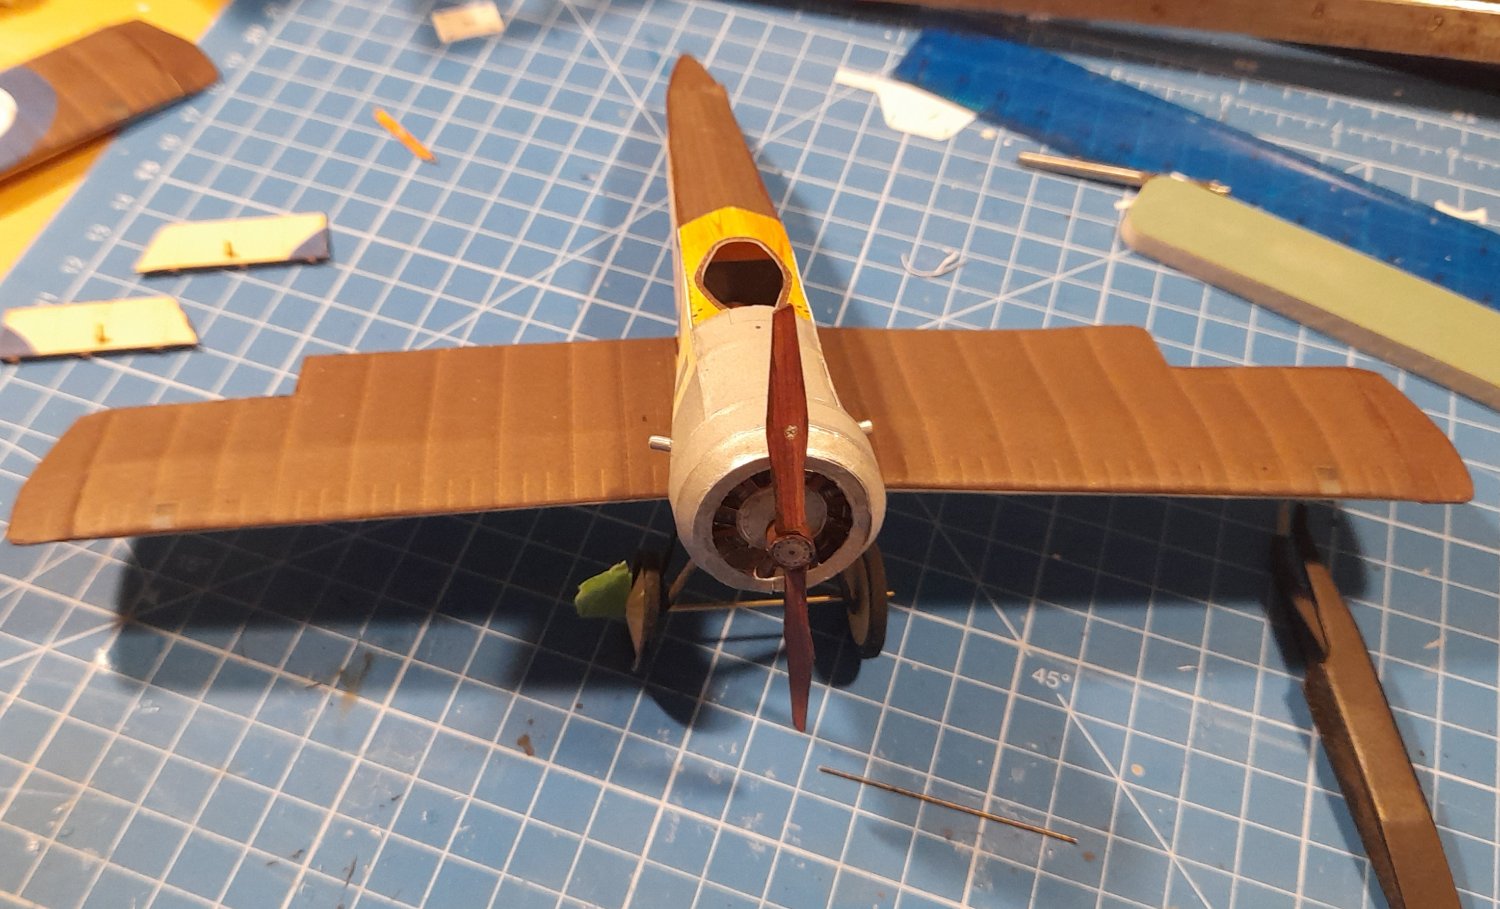
Last night's bit of work, the prop, got me pulling my remaining hair out! i got there in the end. The landing gear is dry fitted to check and the wheels need some work to get them looking better Next up the tail and horizontal thingies at the back. Ps still got a lot of edges to colour in. Thanks for looking in, the likes, all and any comments. Cheers
- 93 replies
-
- 15
-
-
-
RH, welcome to MSW
-
Looking good Alan, there is plentiful detail on these 1/72 tanks of yours. Very nice work.
-
Agreed!! You'll not lose this audience 😉
-
Ah, I couldn't say wether an actual hobby store stocks these sort of models, as in my local area model hobby shops are rarer than rocking horse manure.
-
I went through Draf Models, direct from Poland, reasonable delivery costs to the UK. The others Chris mentioned ship to the USA according to their websites.
-
Thank you Chris. Yes it does, I must say I'm tempted to buy another just to do the RFC version. I shall contemplate it!
-
Gill, welcome to MSW
-
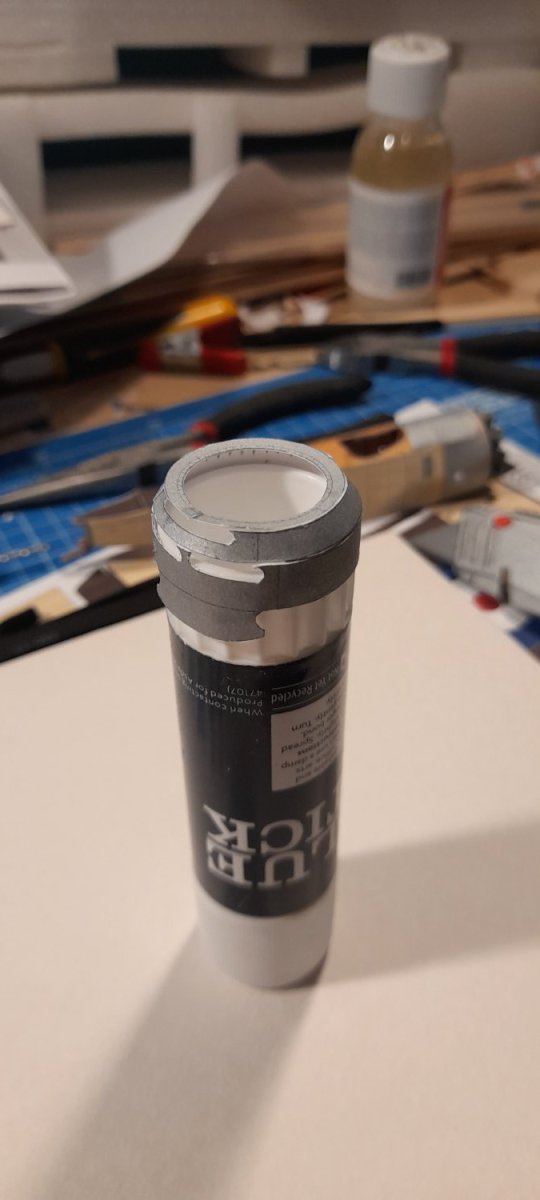
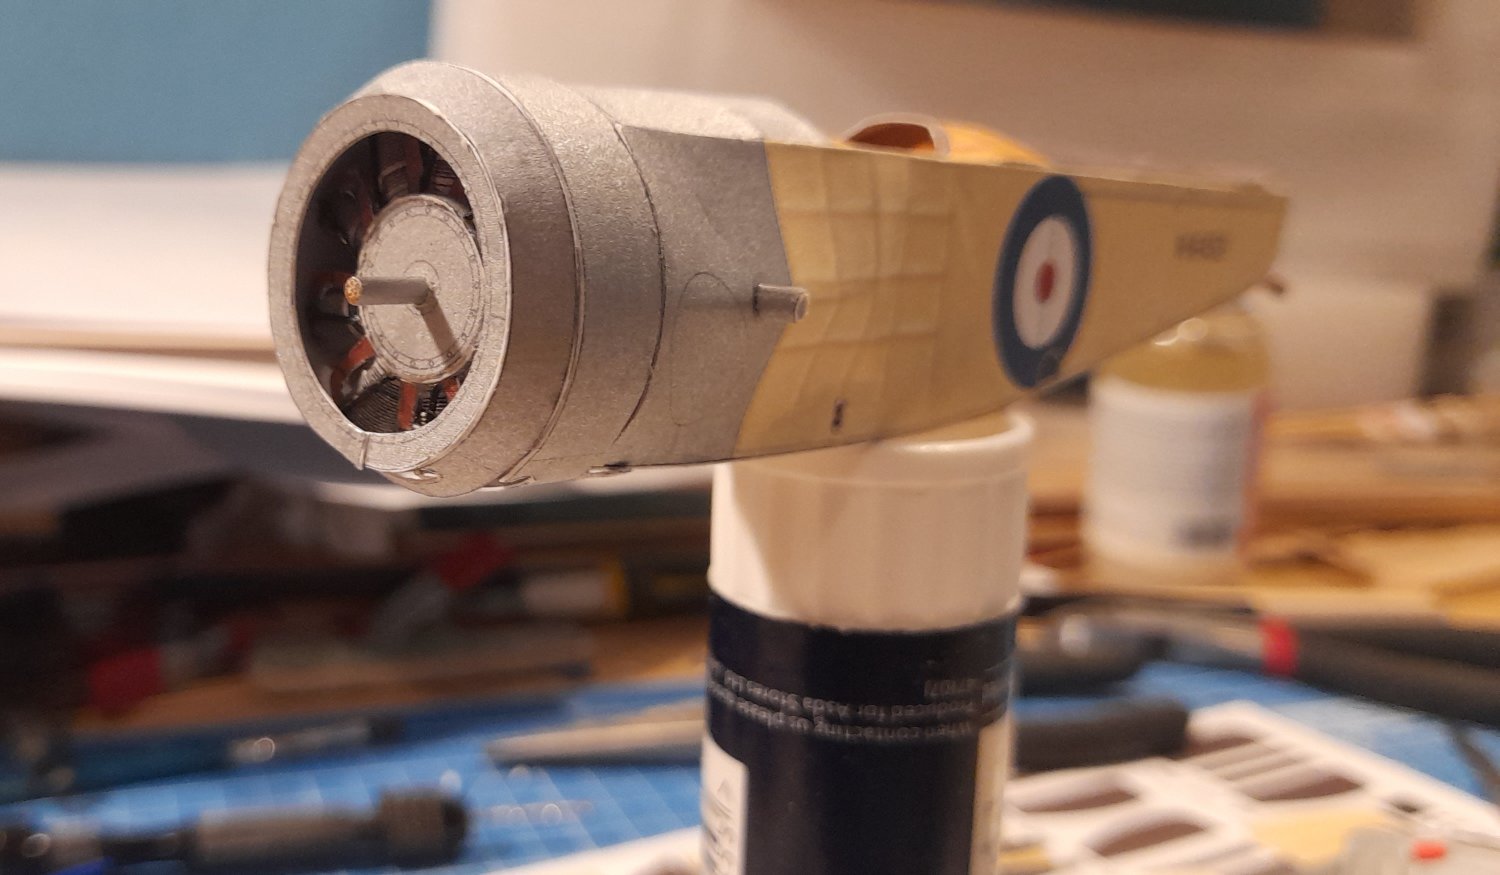
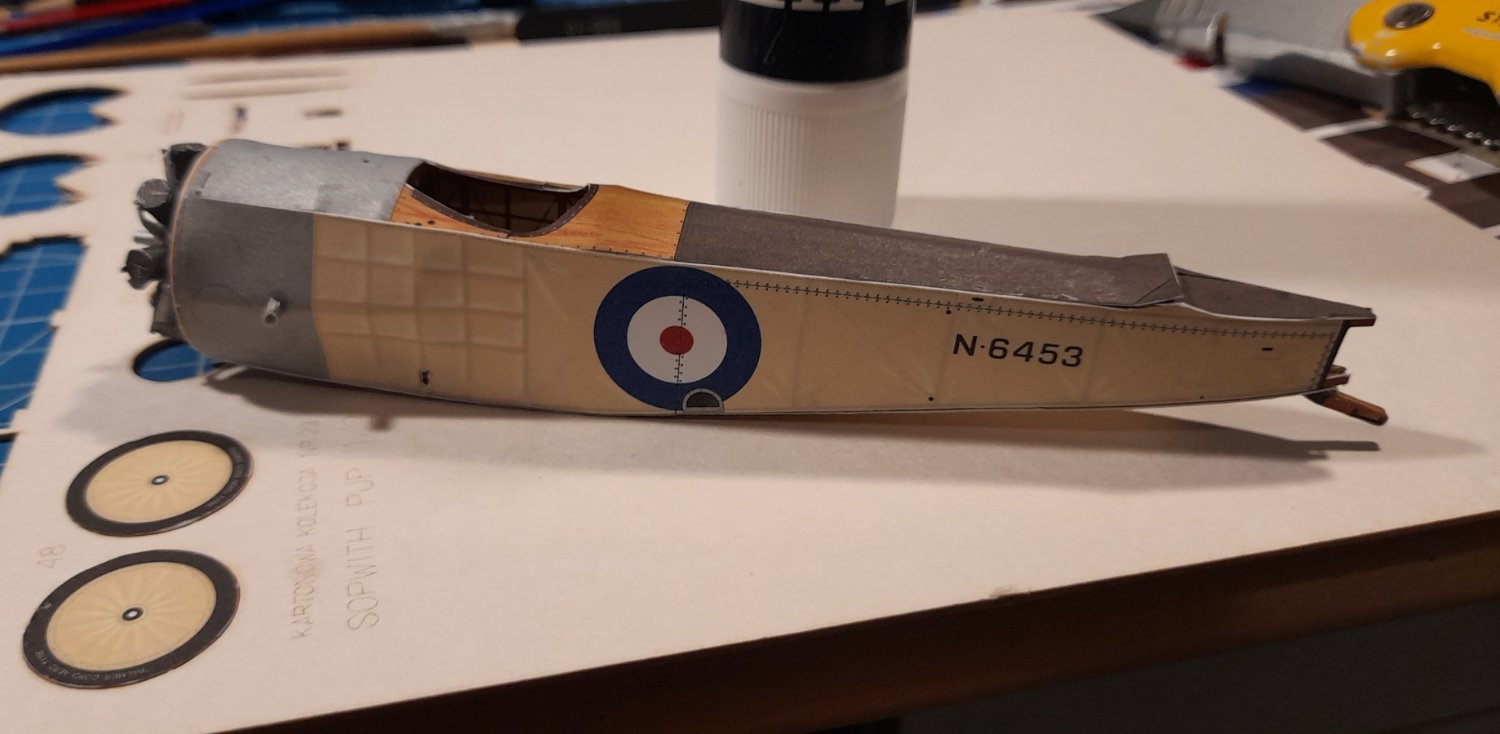
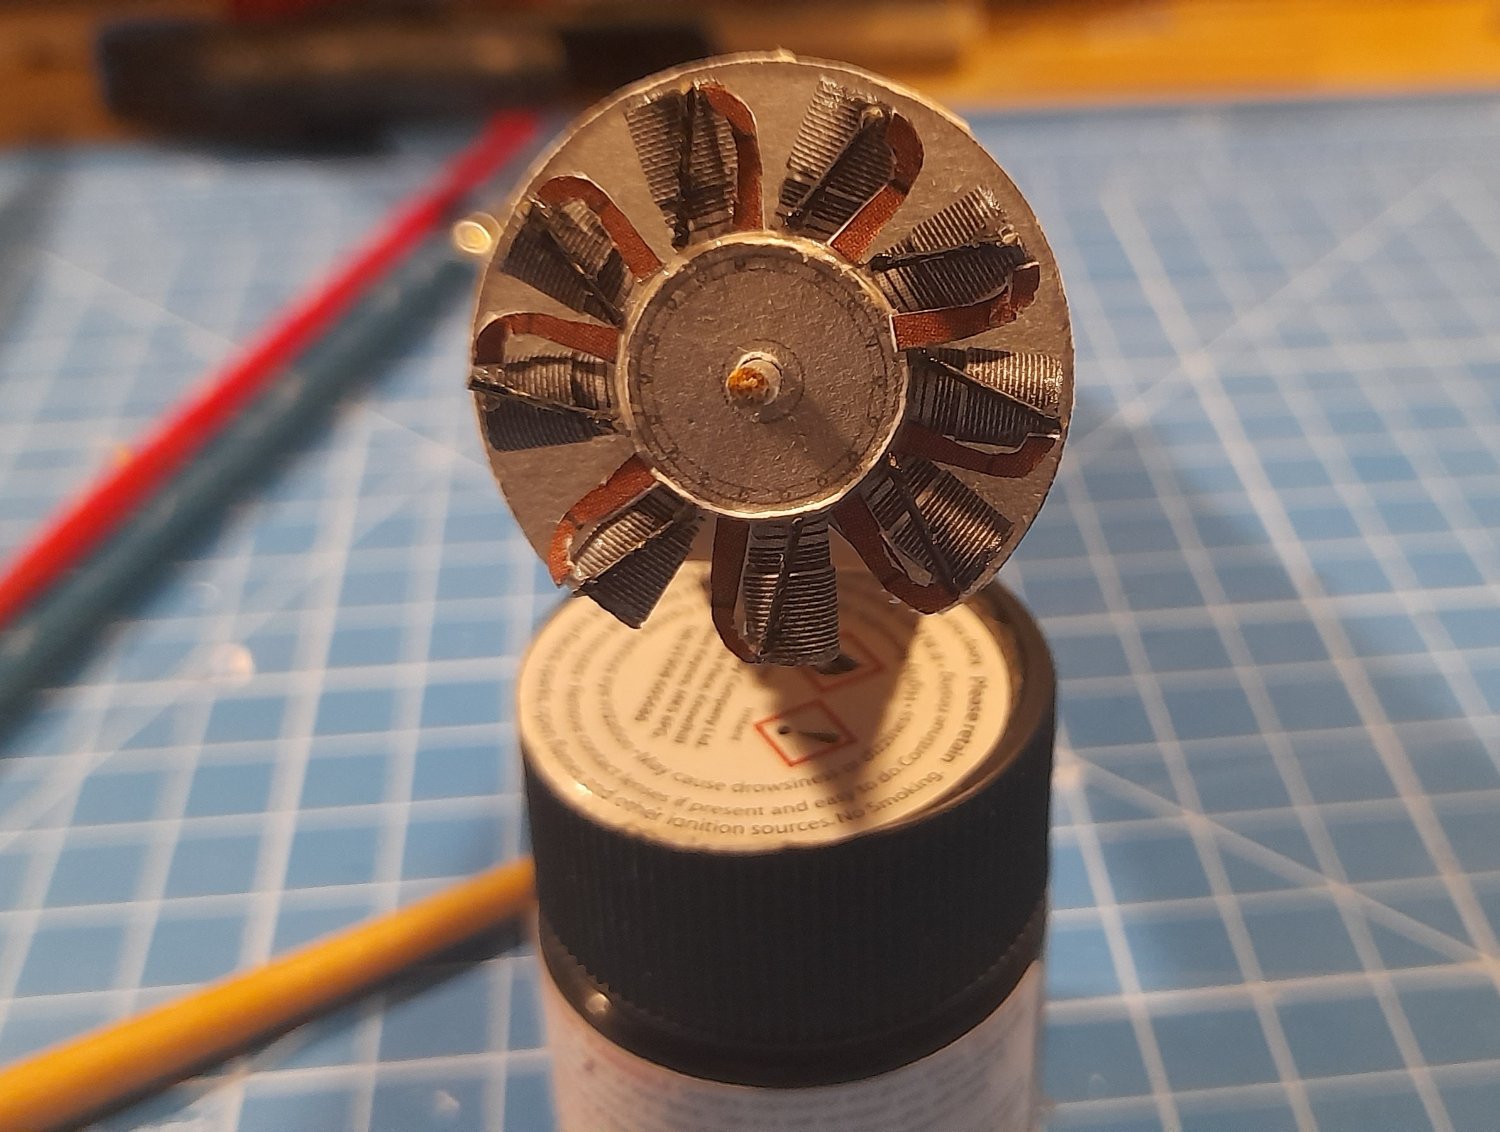
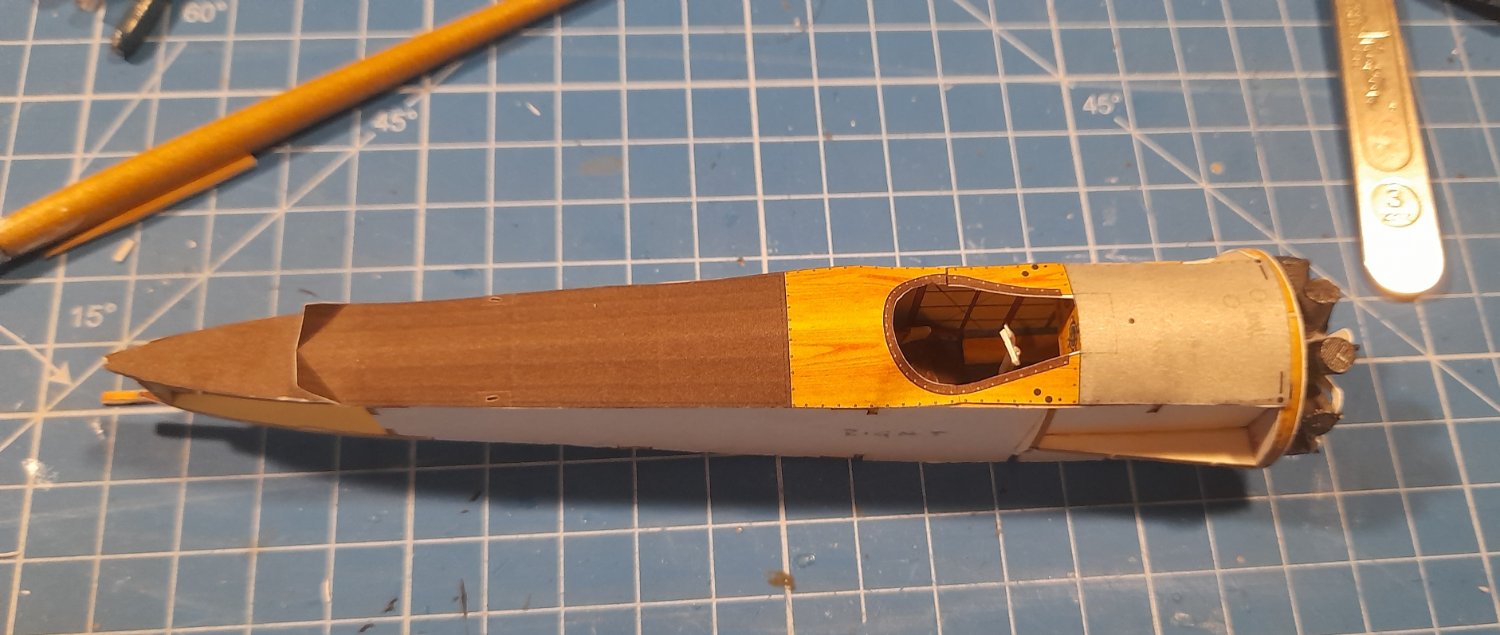
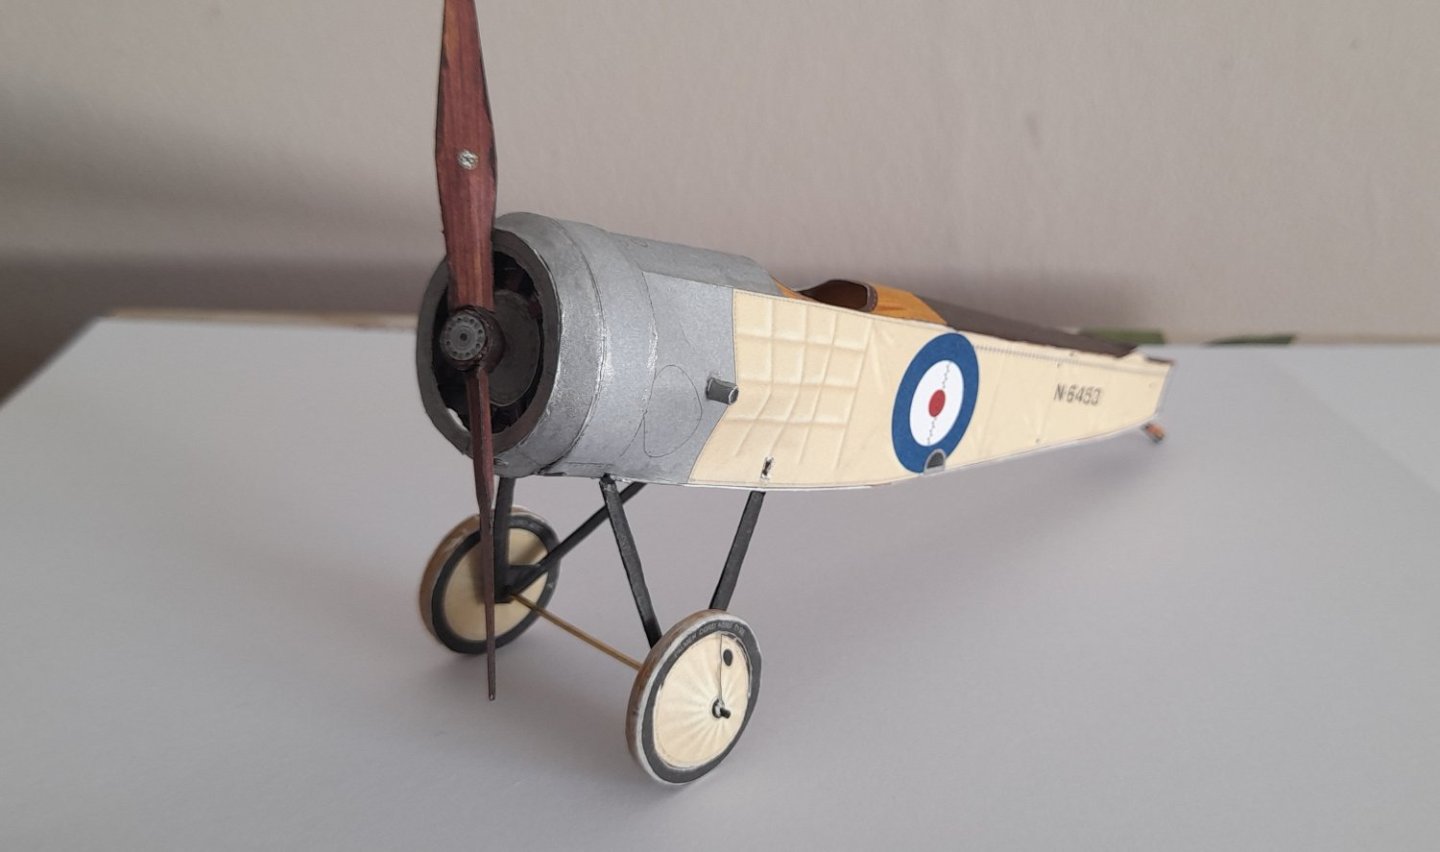
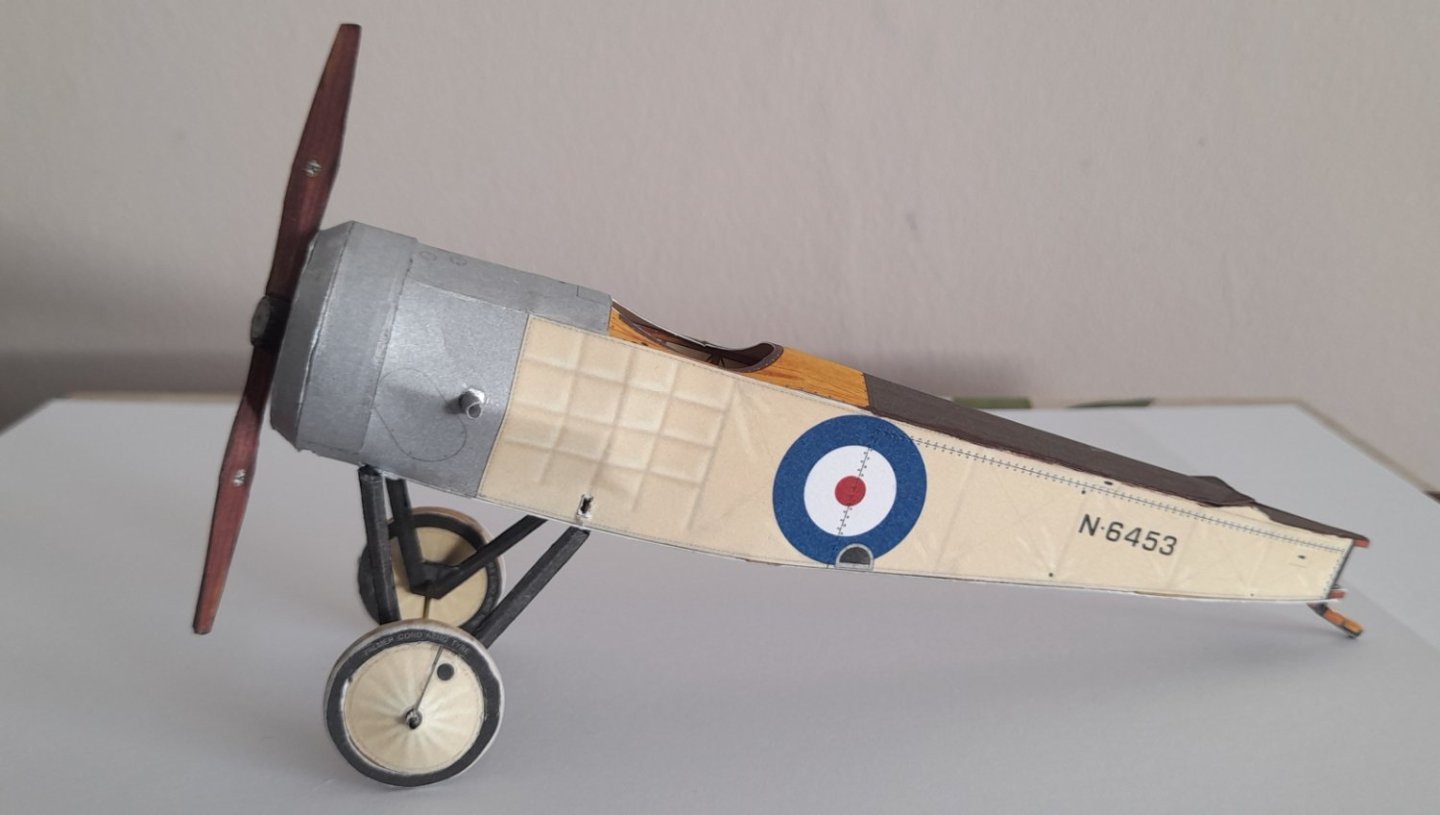
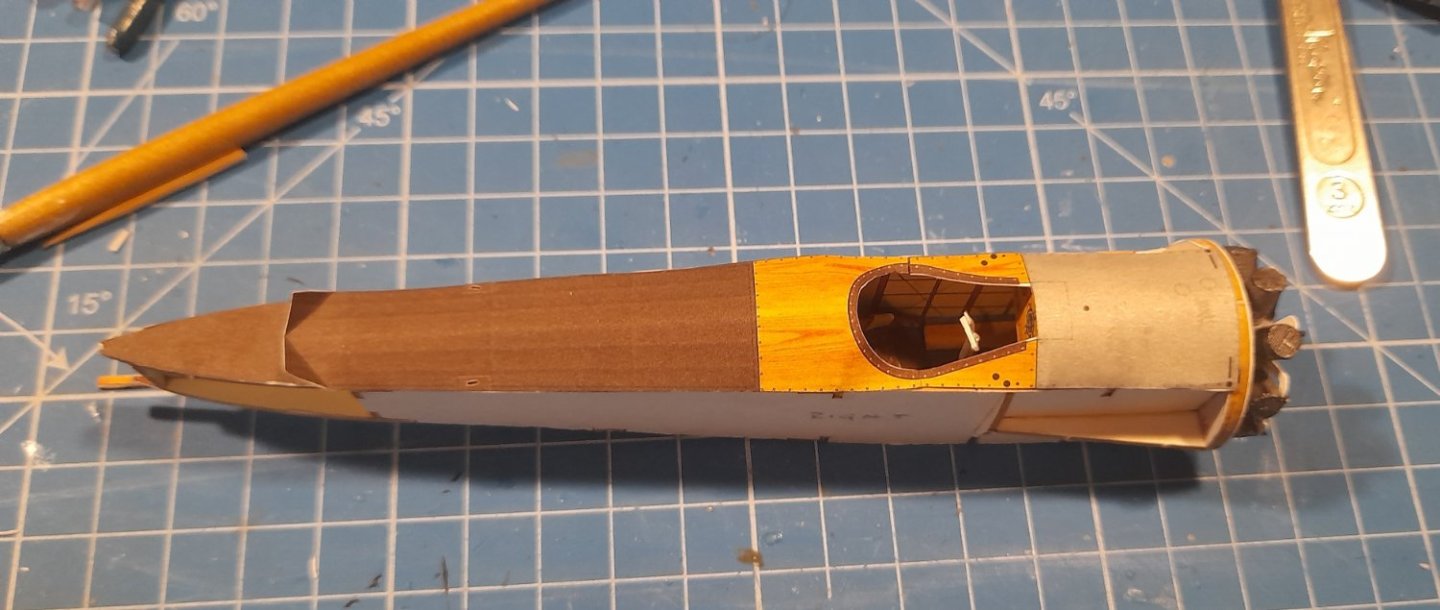
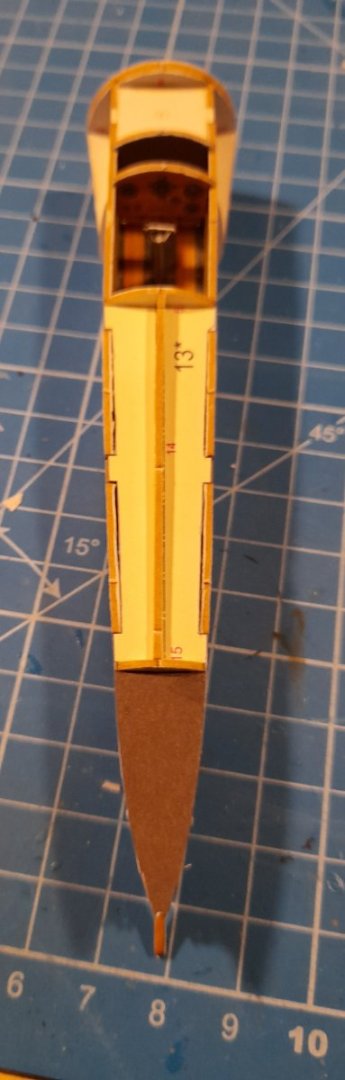
Ahem😏, that's where I've struggled! The curve on the front of the fuselage, hasn't quite got the form it should have, but I'll know next time. So, tonight the rest of the fuselage skins have been attached I decided to do the Navy version rather than the Royal Flying Corps Next was the step I really wasn't looking forward to, the engine cowl. As luck would have it, my glue stick was the ideal size to use as a former and stand. And it fits perfectly with a test fit,a bit of touch up on the raw edges to tidy it up and there is the dodgy curve on the fuselage, not quite as rounded as I would have like around the exhaust area😬 But despite these little niggles, I'm really enjoying this build. Once again, thank you for hitting the thumbs up, comments and just calling by. Cheers


- 93 replies
-
- 15
-
-
-
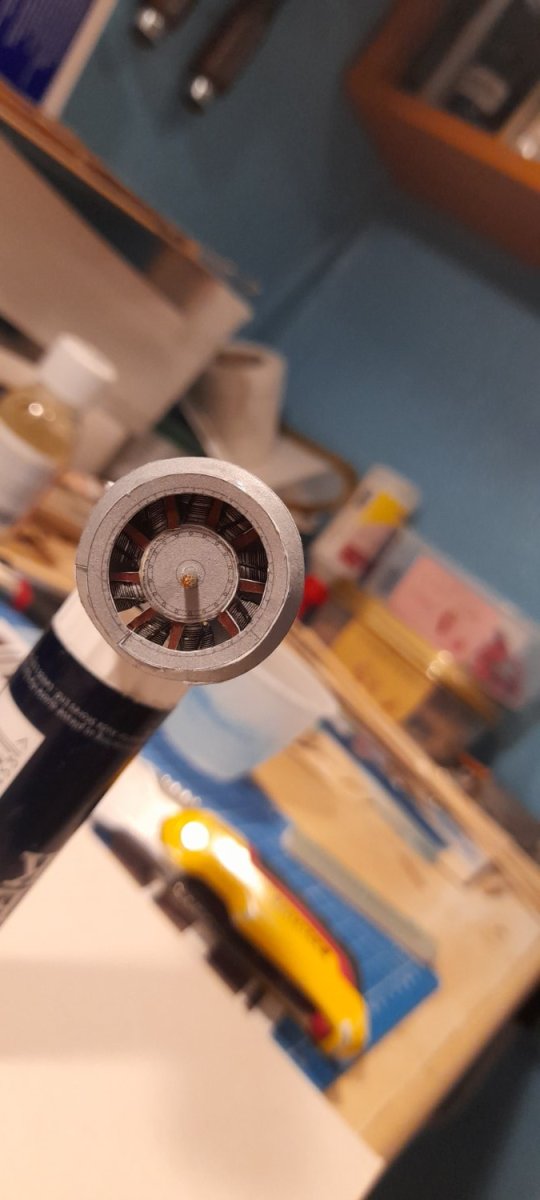
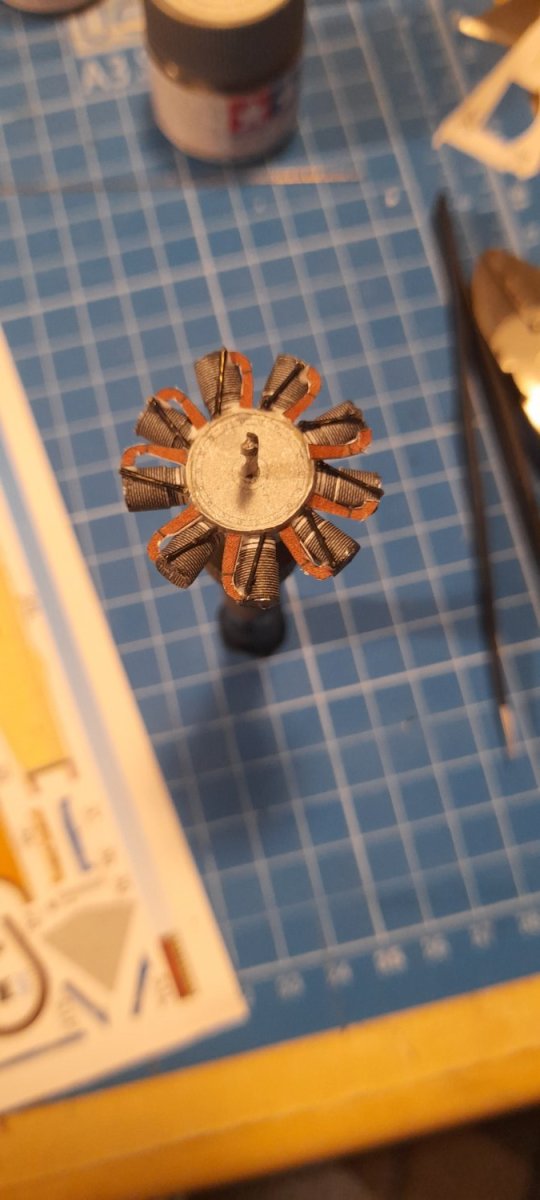
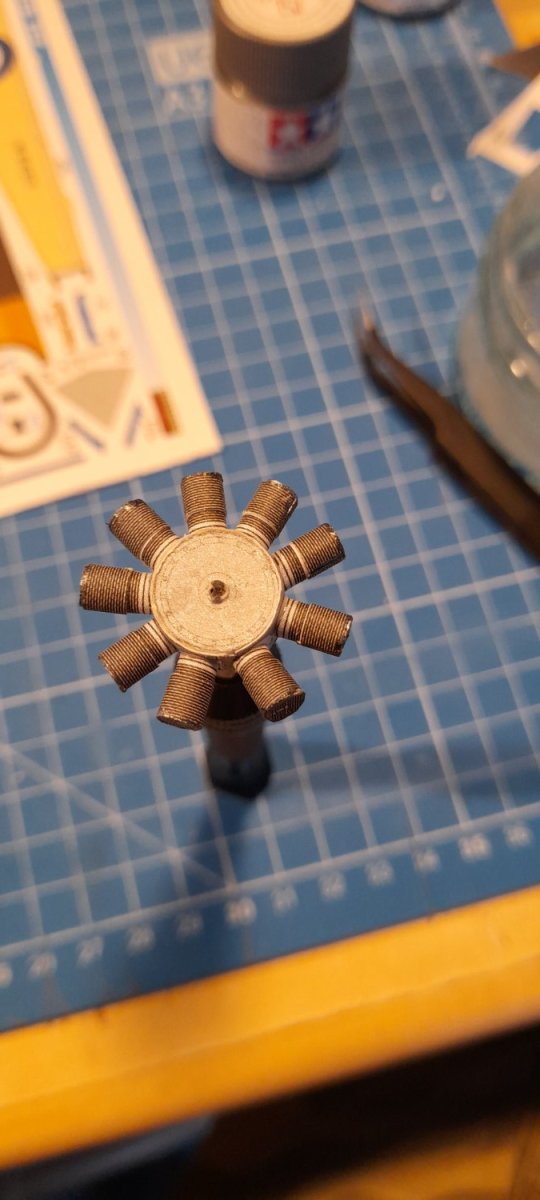
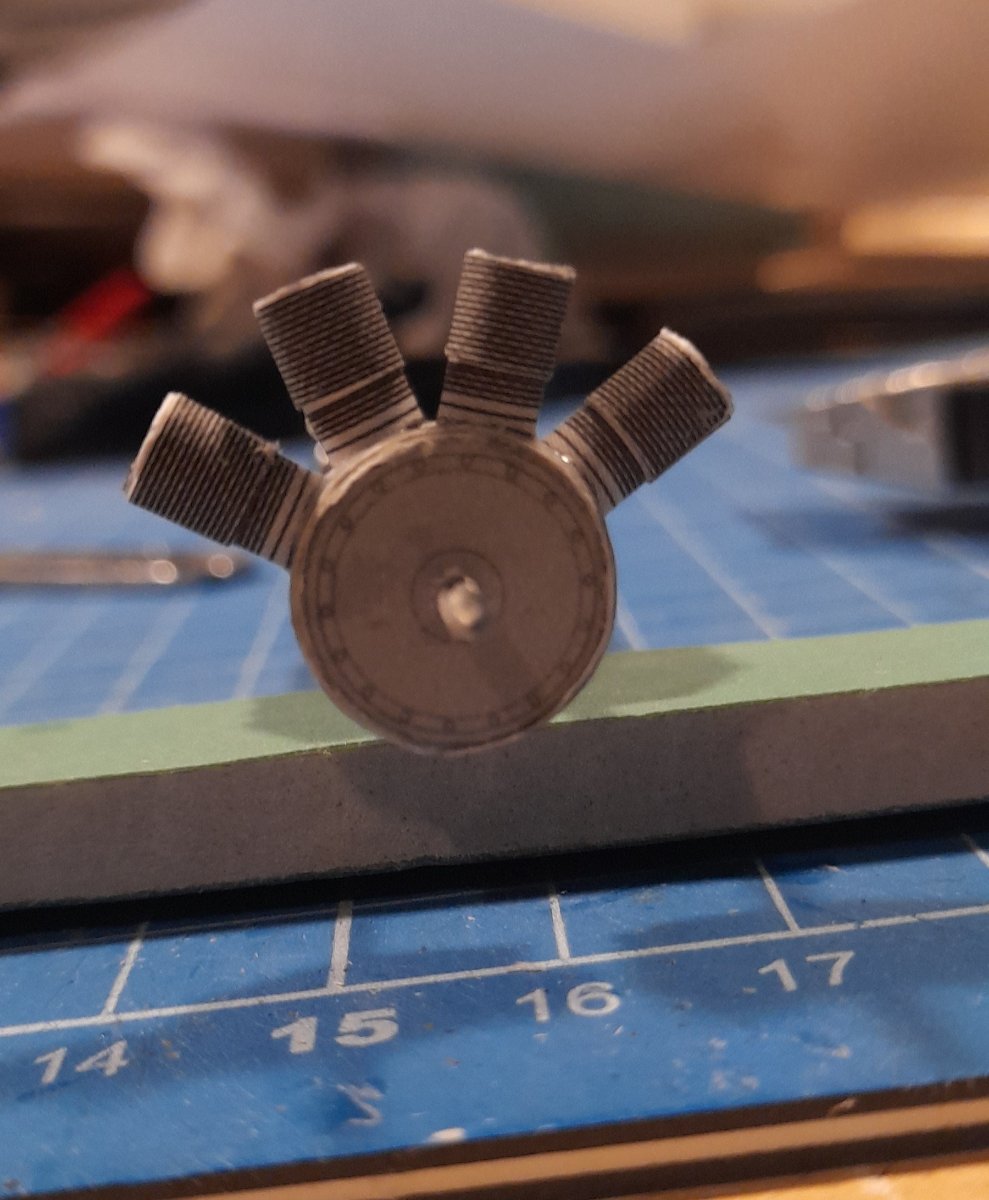
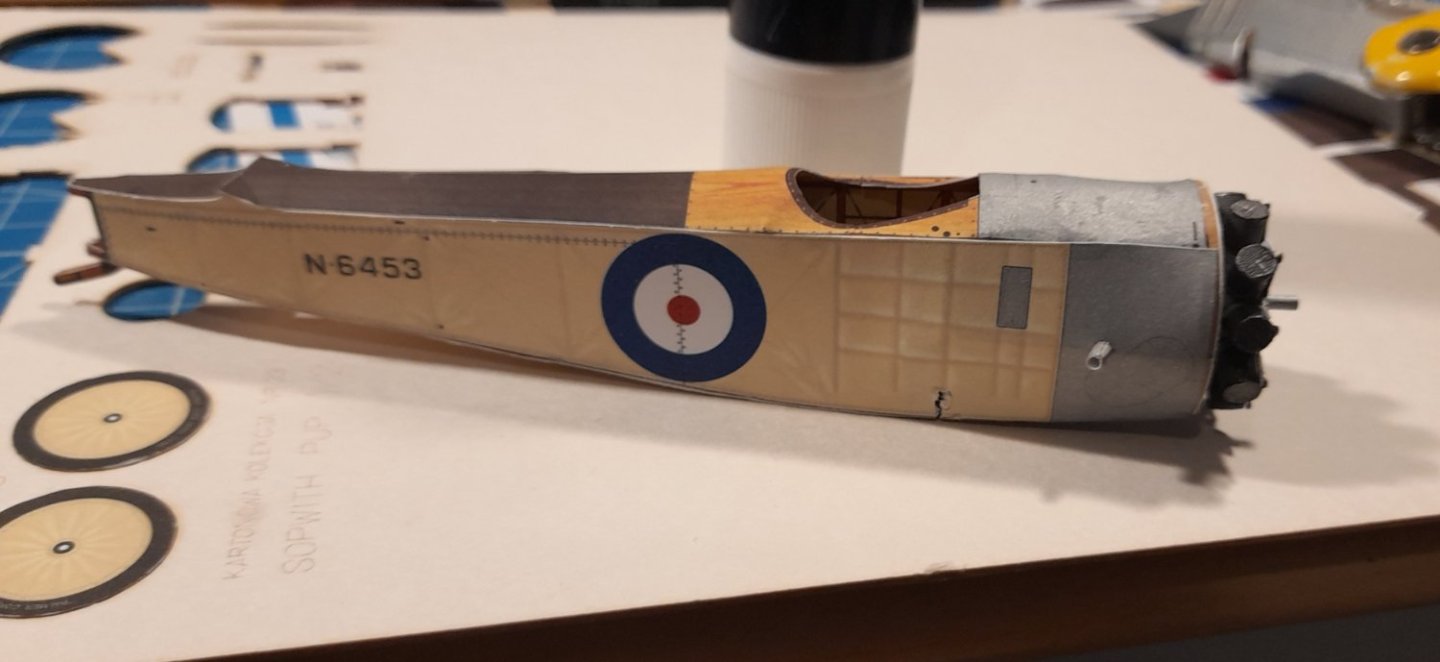
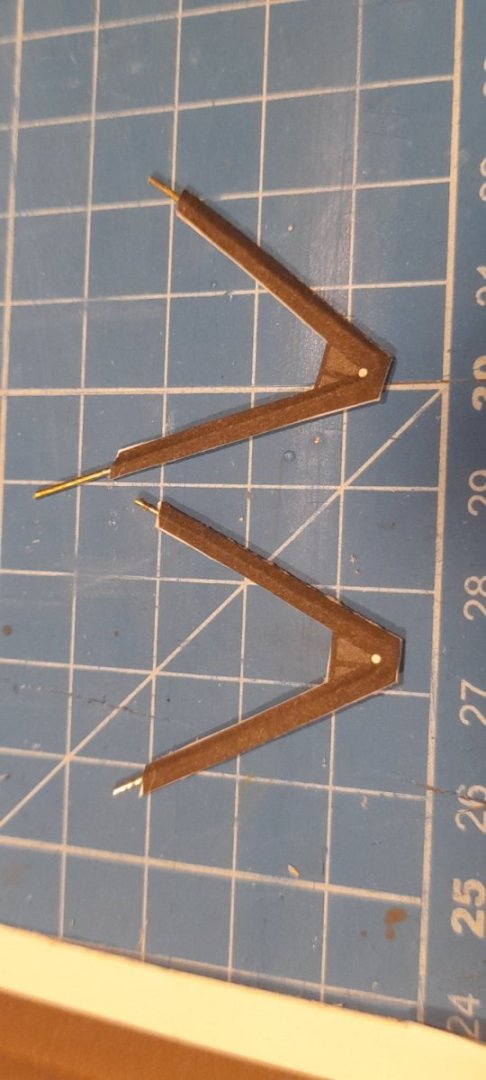
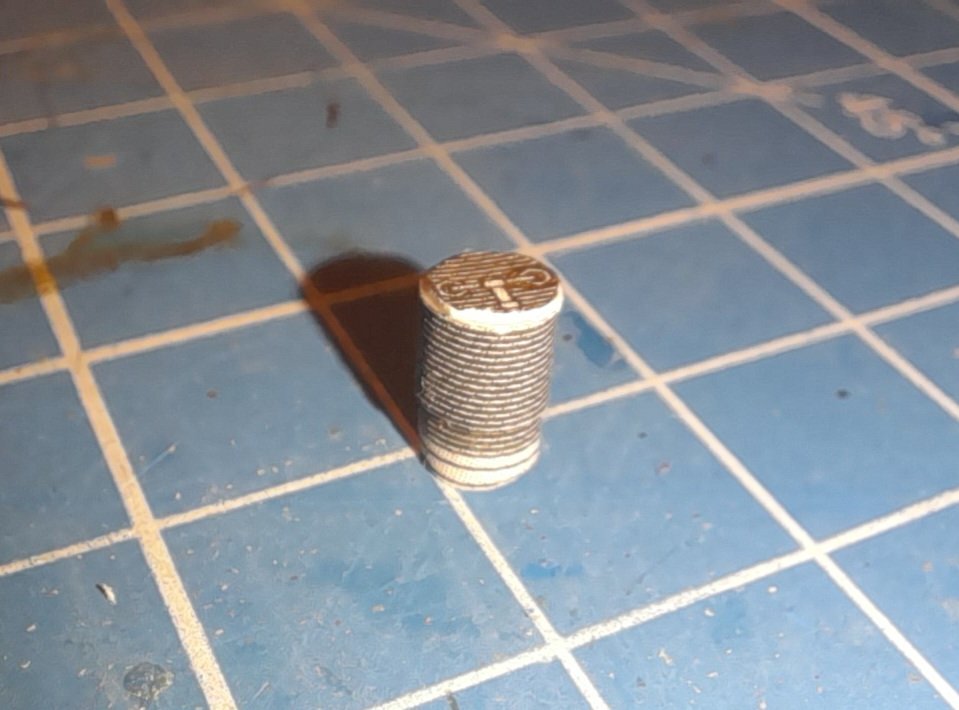
Another little update, the rest of the cylinders are done I've added the details. These things were a little bit fiddly, and by the end my eyes were crossed 🤪😵💫 the landing gear struts are reinforced with a wire spine and the fuselage gets its first outer skin I'm finding 90 or so minutes is just about enough to work on the Pup, before my eyes get tired. Many thanks for all likes and comments. Cheers


- 93 replies
-
- 16
-
-
-
Polaris by JDillon - OcCre
Edwardkenway replied to JDillon's topic in - Kit build logs for subjects built from 1801 - 1850
Good start, Joe. BTW Syren do ship to the UK Not an easy thing to do, joggling, I dared not do it on my first model, so big up to you for giving it a go! -
Mwhaha! Resistance is Futile! It appears we are succumbing one by one. I'd say give it a go, it's really fun and as has been said, by Chris Coyle, there is no painting (Apart from edges)
-
F-86F-30 Sabre by Egilman - Kinetic - 1/32nd scale
Edwardkenway replied to Egilman's topic in Non-ship/categorised builds
Amen to that! What you can, when you can, is fine with us especially when it is always excellent work😉 -
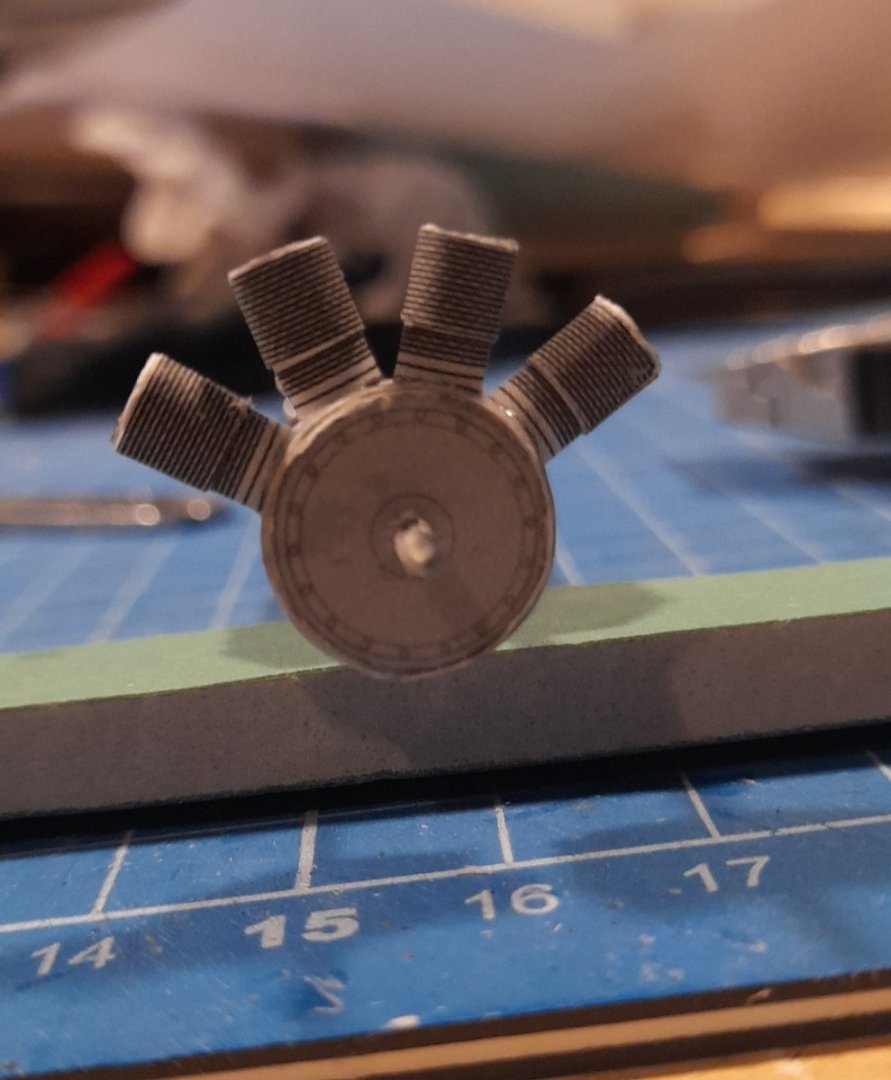
Well, I've started on the engine, One down 8 to go, still got to touch up the edges. 2 hours and im halfway with the cylinders, the rest done next time along with the exhaust manifolds and other bits. Thanks for looking in and the likes. Cheers
- 93 replies
-
- 17
-
-
-
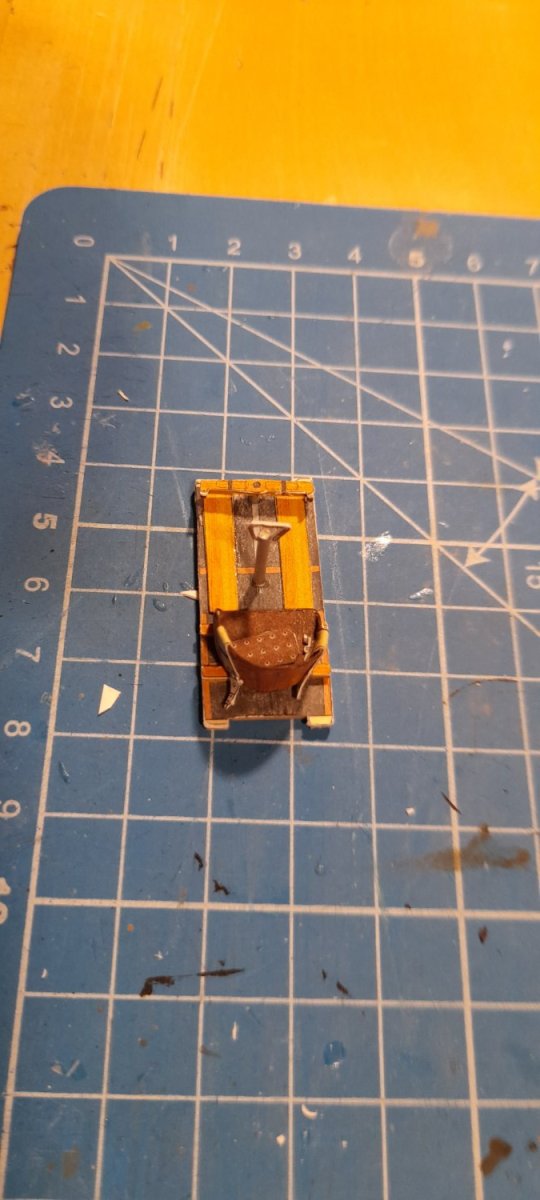
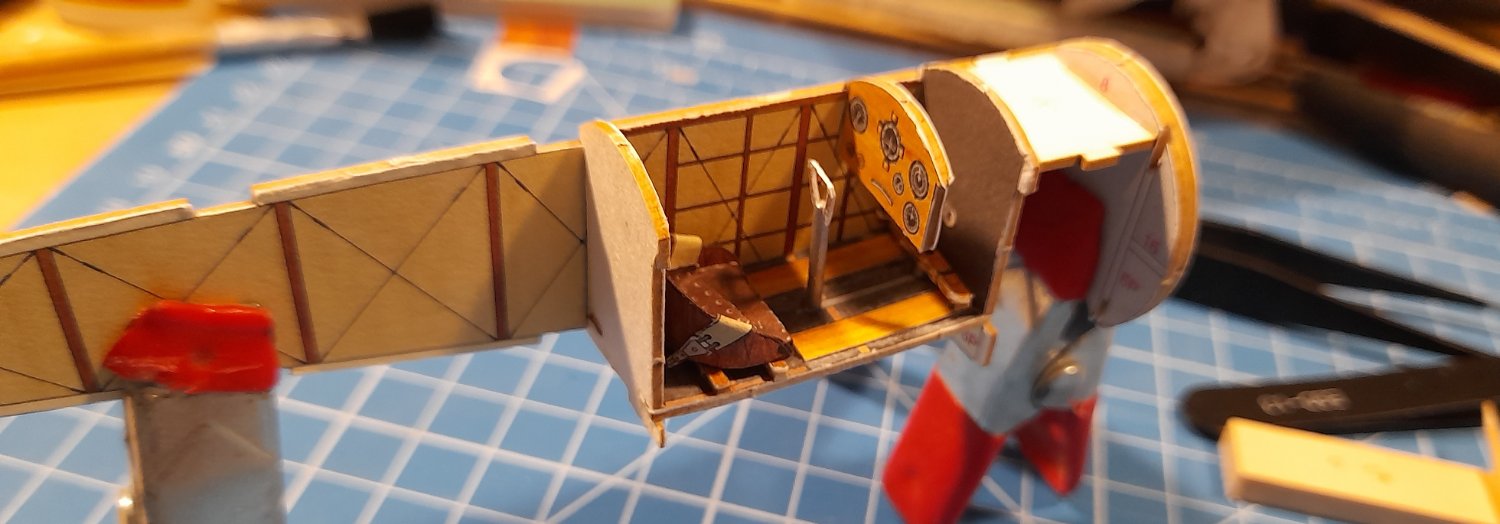
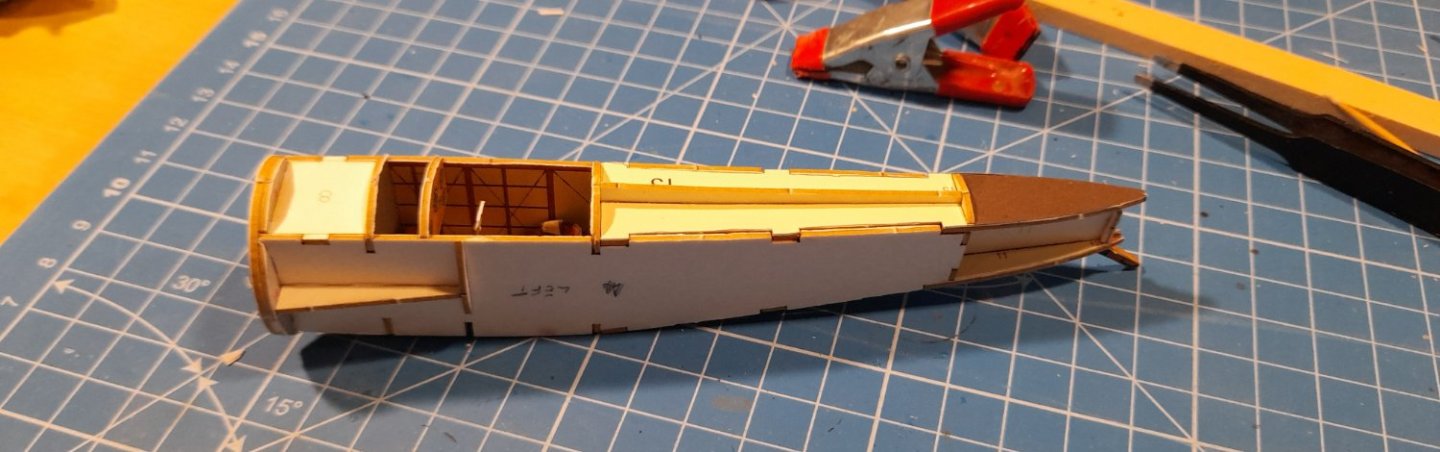
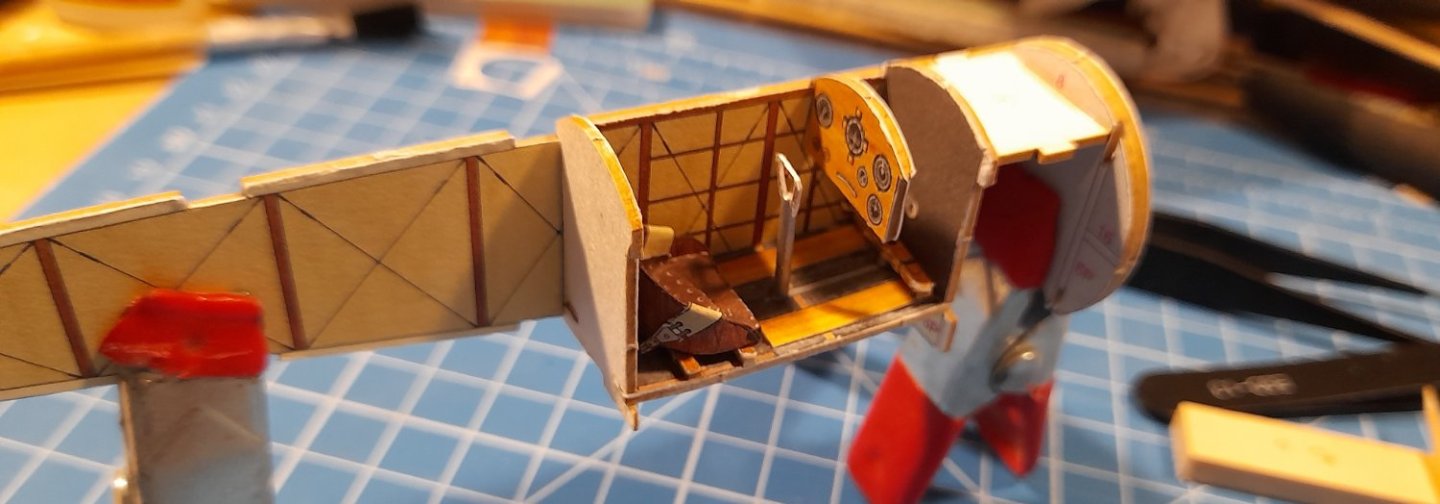
Some more progress, the pilots seat, joystick and pedals fitted. after quite a few dry fits and tweaks, and utilising the earlier advice from Mr Coyle😉, the cockpit was glued to the port side fuselage inner skin. The starboard side was glued in position and the top and bottom pieces test fitted I feel I've done the easy bit, and now it's going to test me because, it's on to the engine 😬. Thanks for all the comments, likes and interest, all very much appreciated and most definitely welcome. Cheers Sorry about the photo quality 😔

- 93 replies
-
- 20
-
-
Demostenes, welcome to MSW.
-
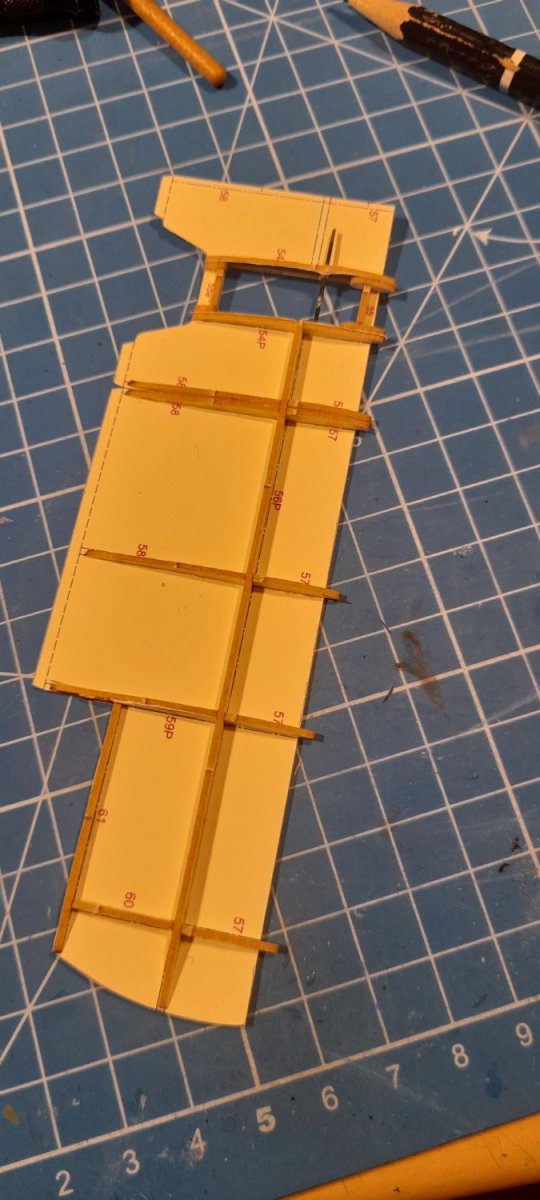
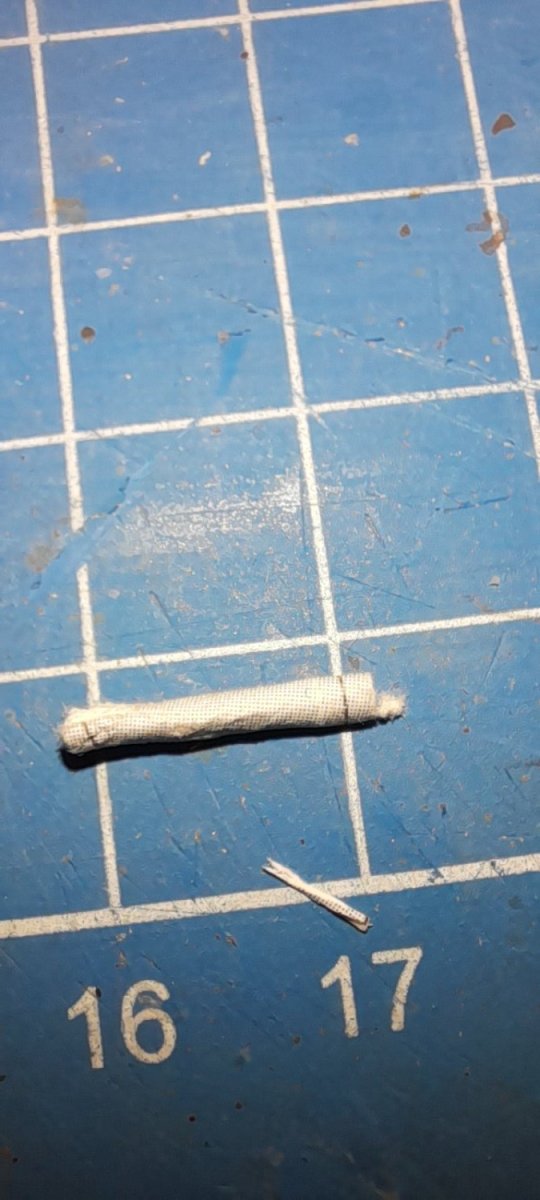
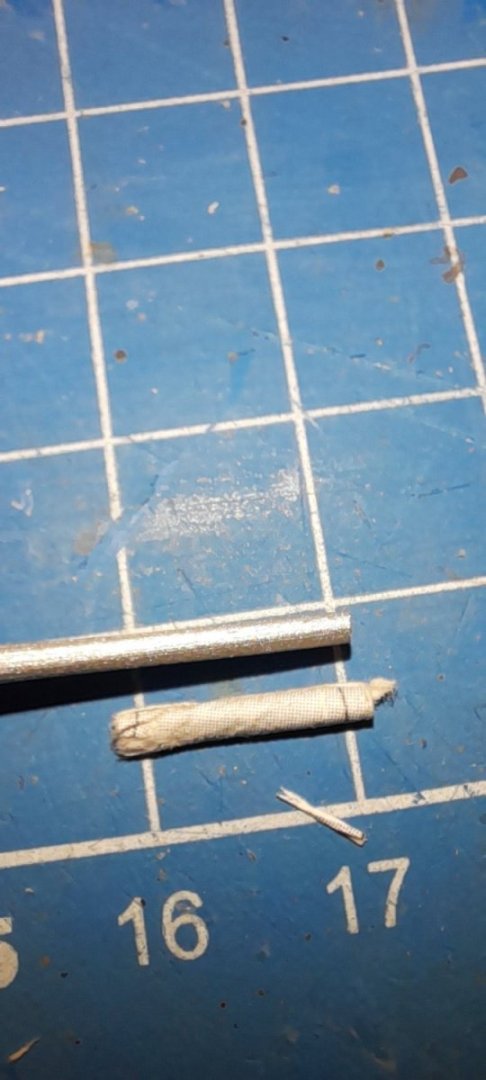
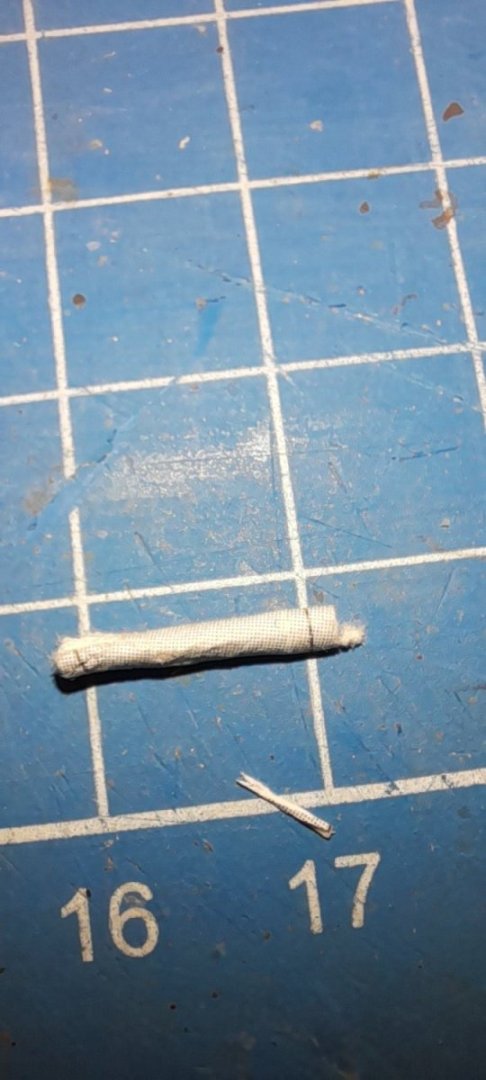
Thanks to all for the interest👍 Thank you for the advice about the cockpit Chris. Wing framing continues, as does lamination of the parts that require it. Began making up the control stick for the cockpit, and boy did it fail big time! that scruffy, silver, little so called roll of paper is supposed to be the joystick 😂 a toothpick, sanded to size and painted flat aluminium has been pressed into service. I think a lot more practice on the rolling tightly is needed. Thanks for looking in. Cheers
- 93 replies
-
- 14
-
-
-
I'm in!