Edwardkenway
-
Posts
3,047 -
Joined
-
Last visited
Content Type
Profiles
Forums
Gallery
Events
Everything posted by Edwardkenway
-
 It's good things are a little more settled now, but as the others have said, get that follow up with your GP, and look after her OC😉 Take care and stay safe.
 -
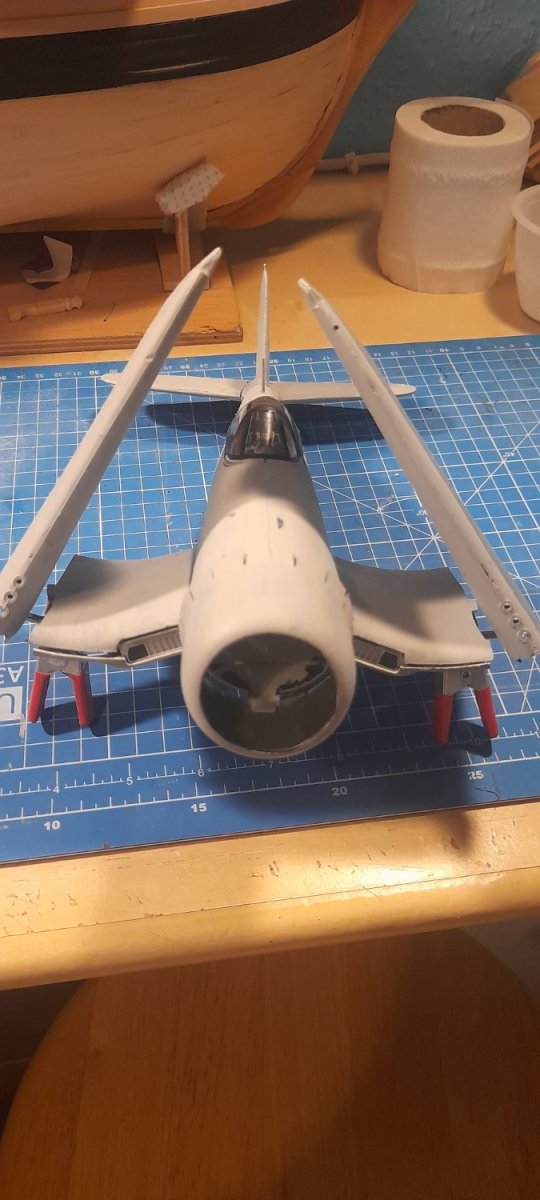
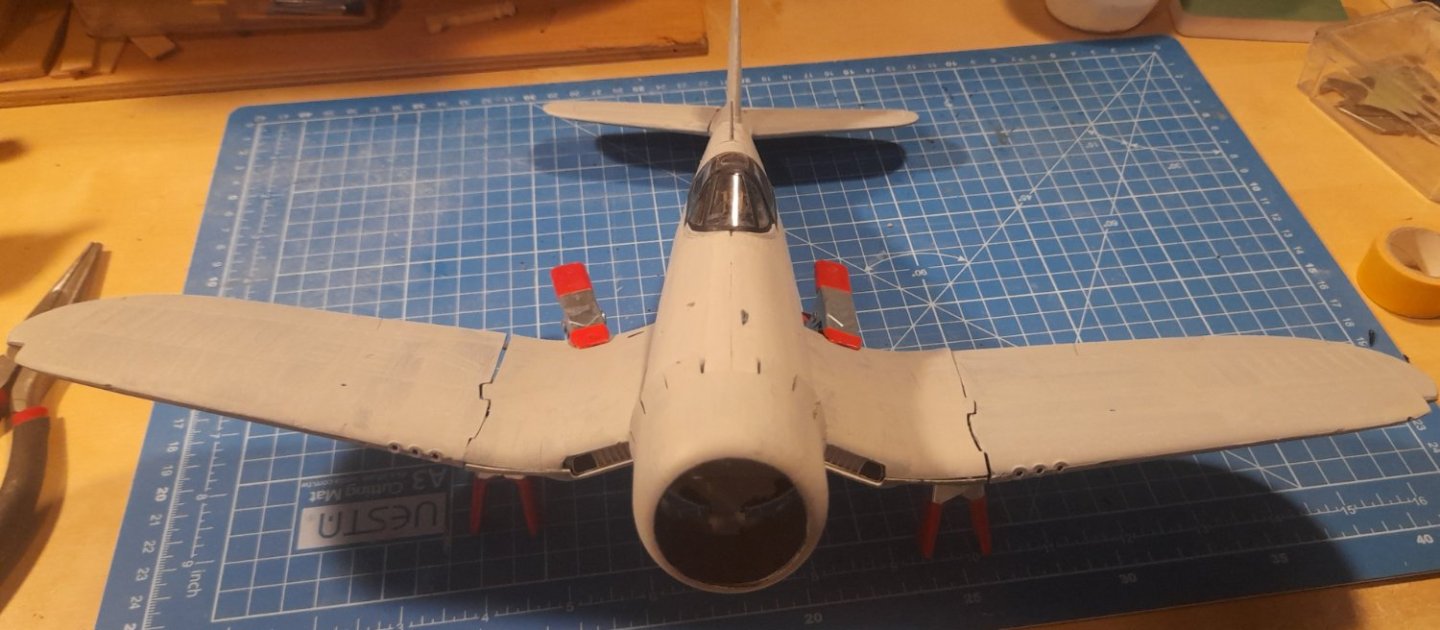
Well, it's been a while since I worked on this one. I'm hoping to get a bit of colour on her and get the wings fixed on I'm thinking something similar to this one But any suggestions are welcome. thanks for your patience. Cheers
.jpg.d740ef8c4cffcd68a52fc0ecec693f8b.jpg)
- 136 replies
-
- 13
-

-
An absolutely stunning rendition of a fine frigate, with amazing detail. My hat is doffed! Thank you Chuck.
- 1,784 replies
-
- 6
-
-
- winchelsea
- Syren Ship Model Company
- (and 1 more)
-
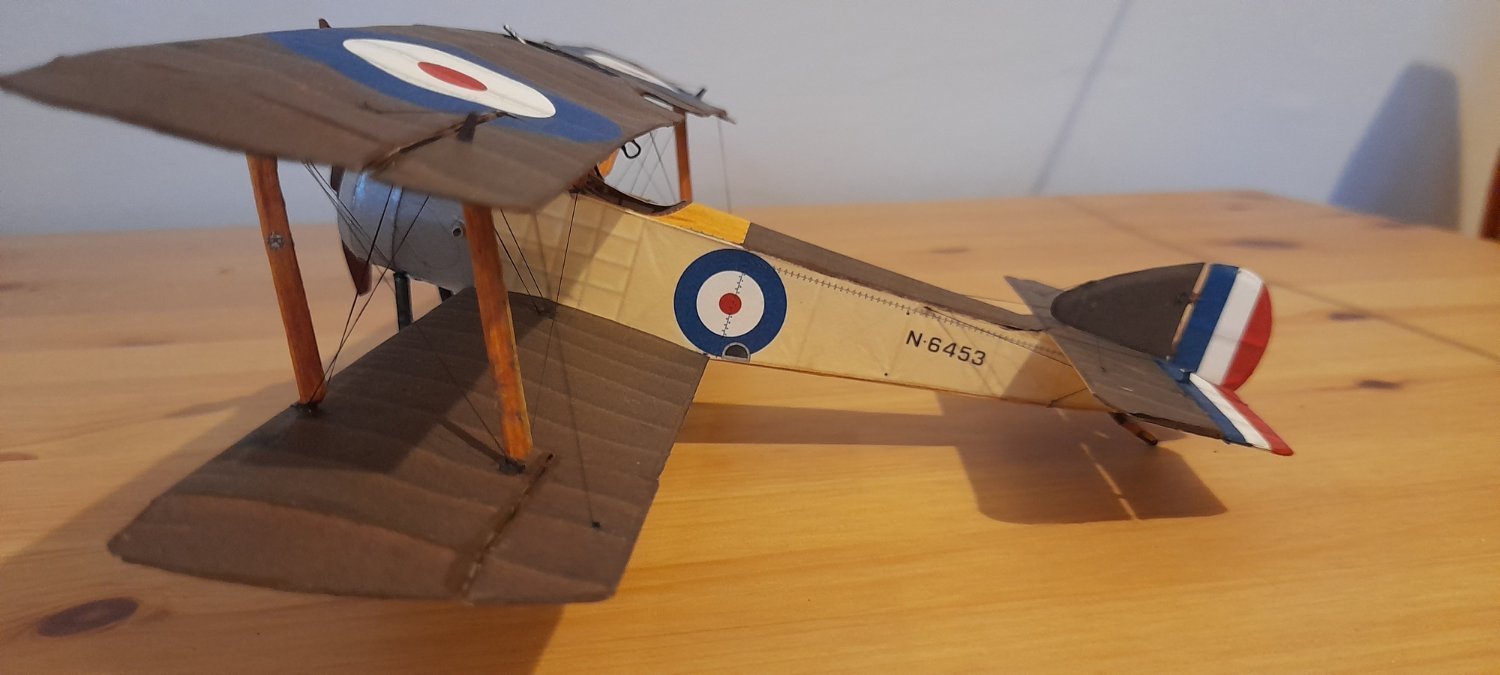
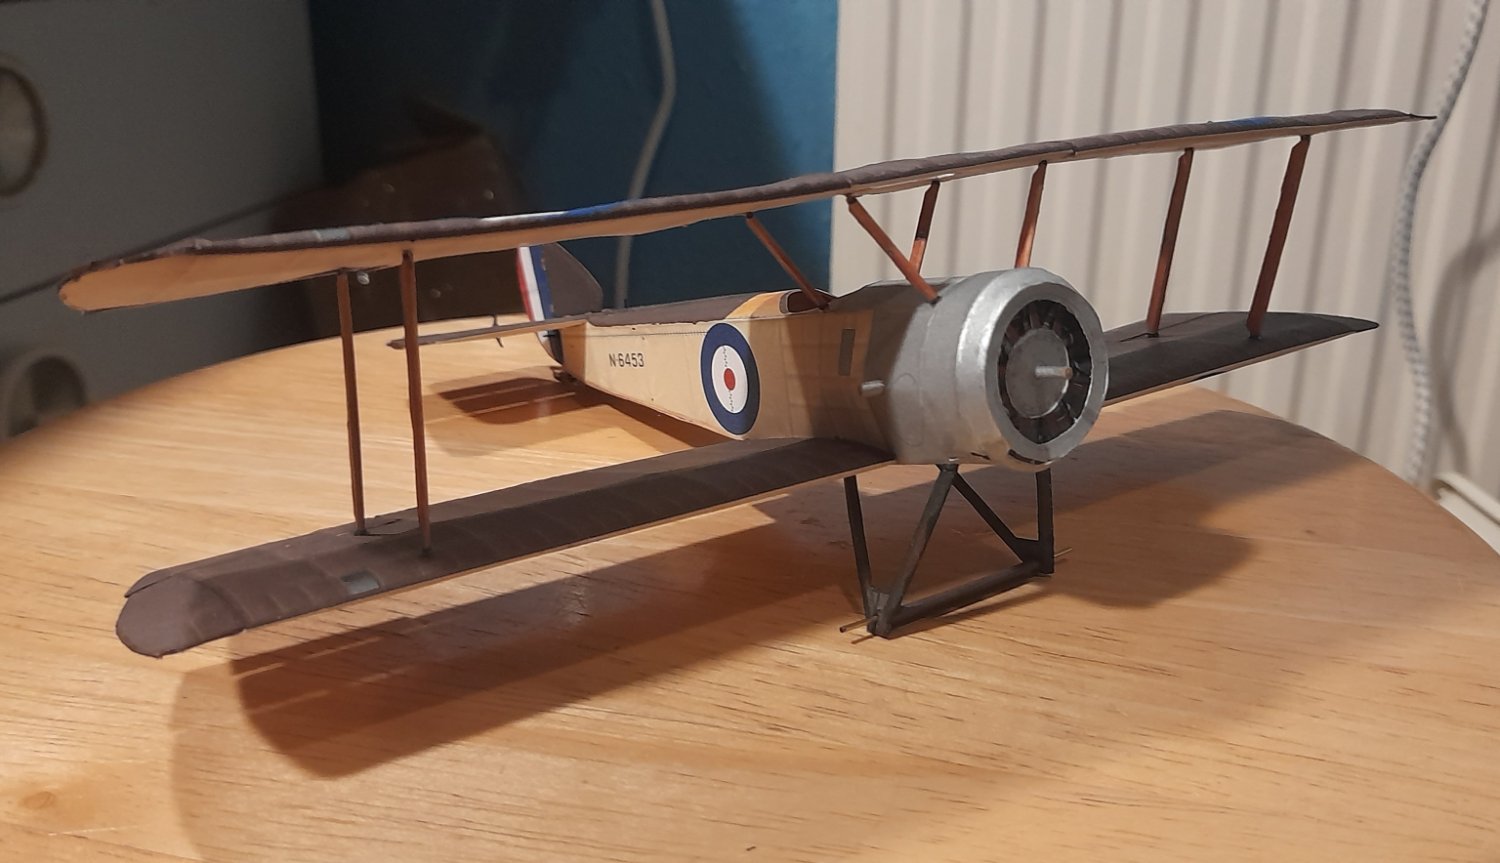
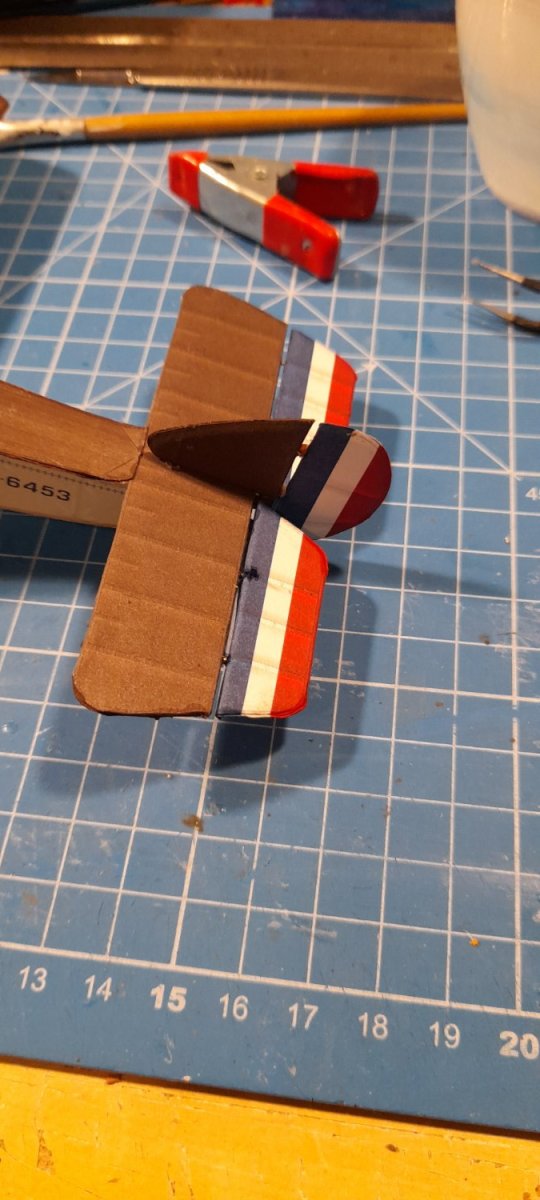
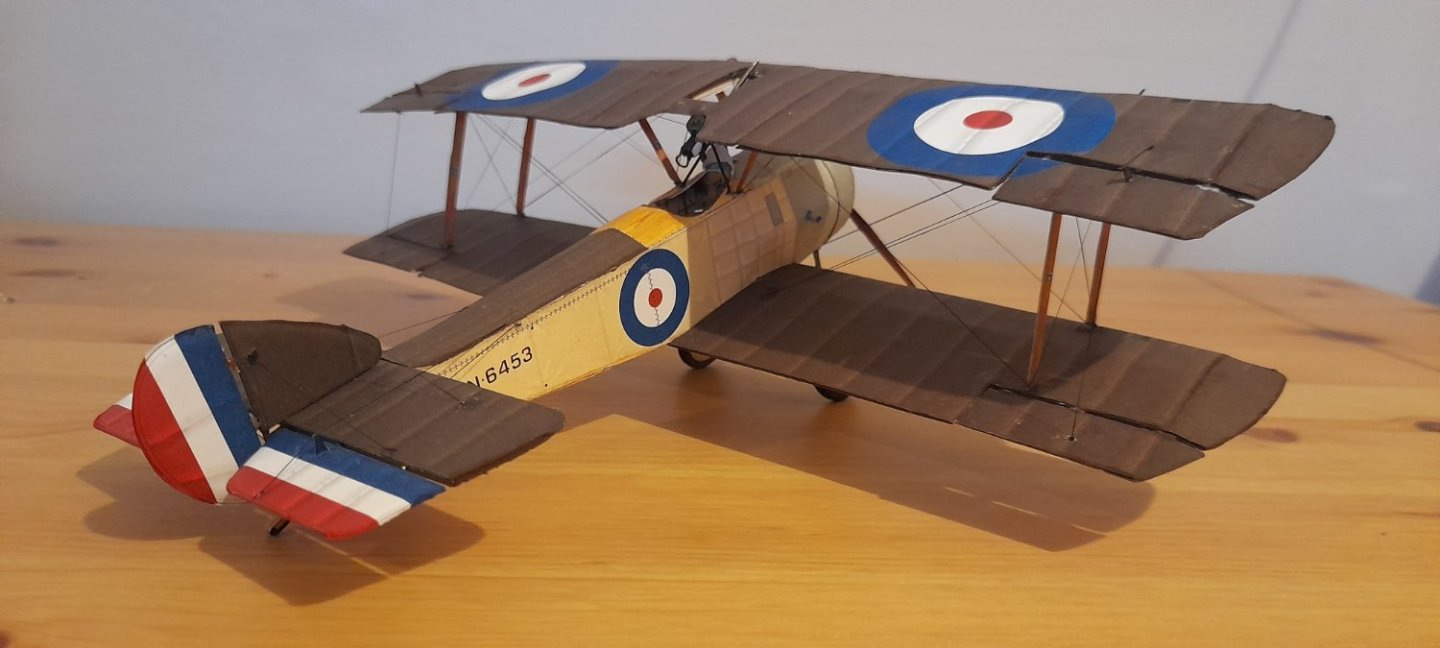
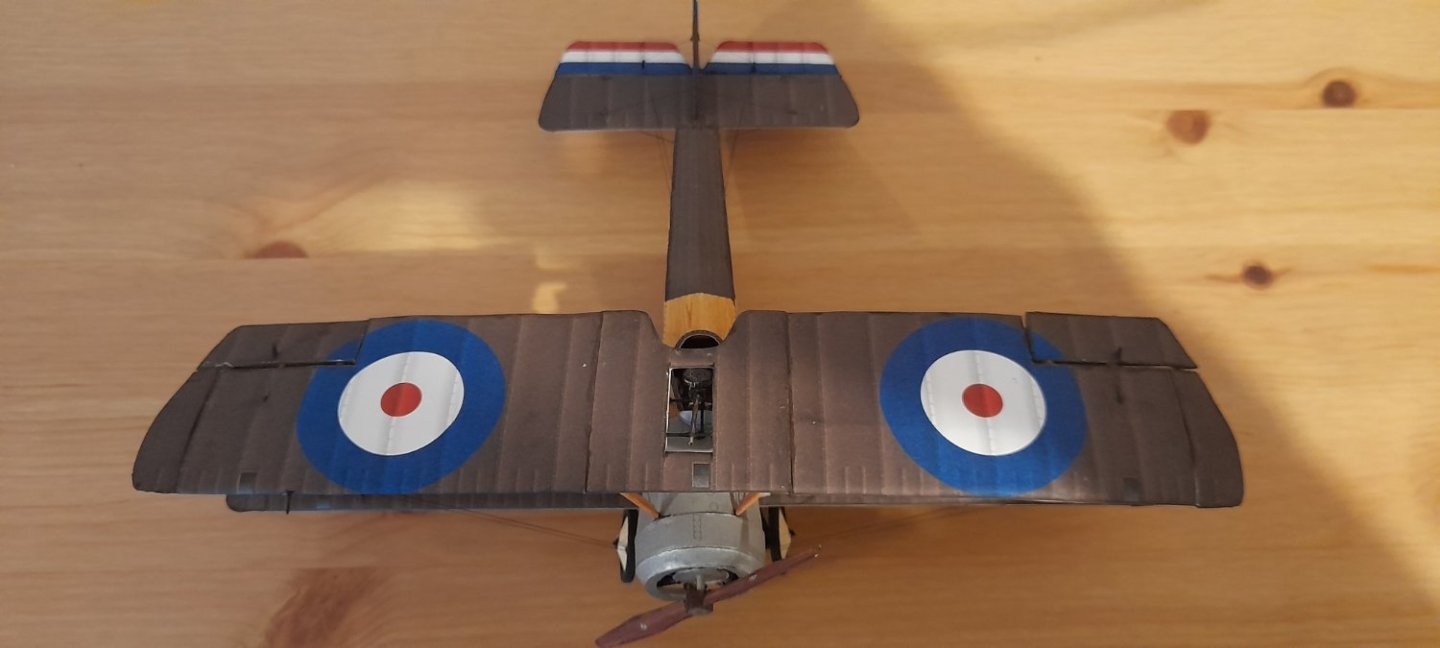
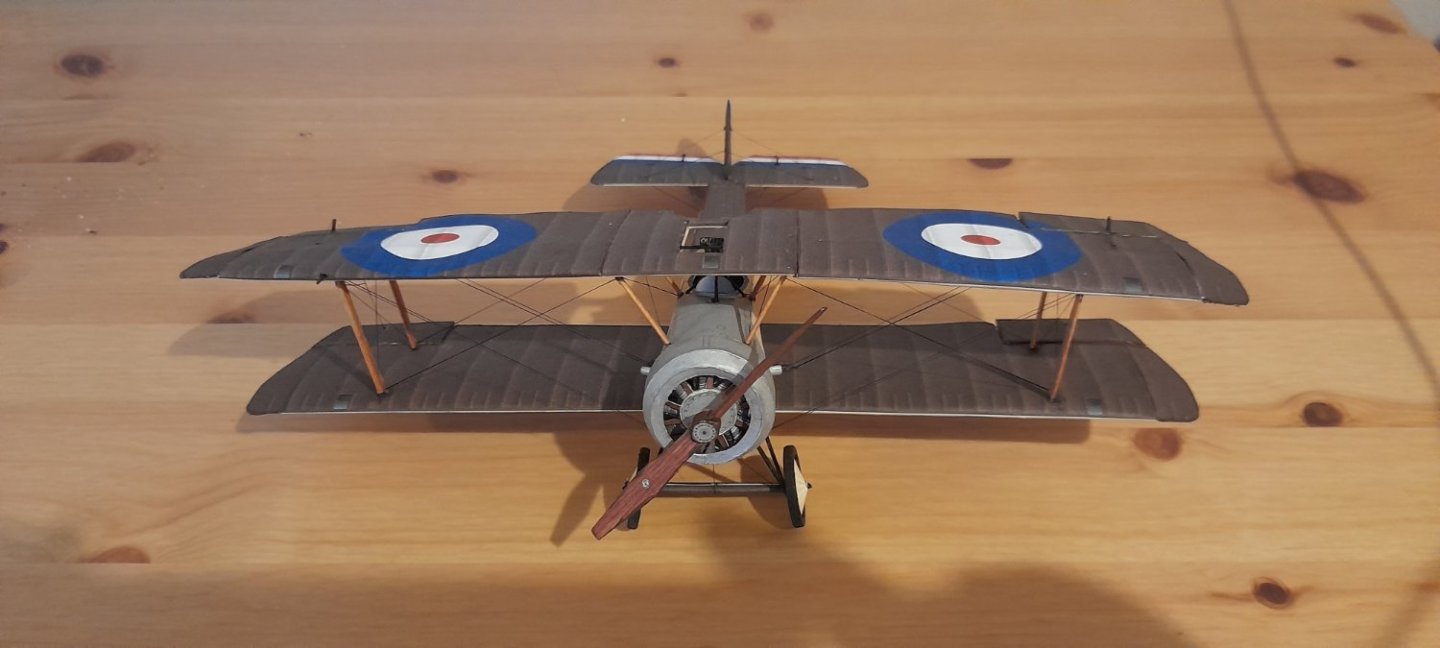
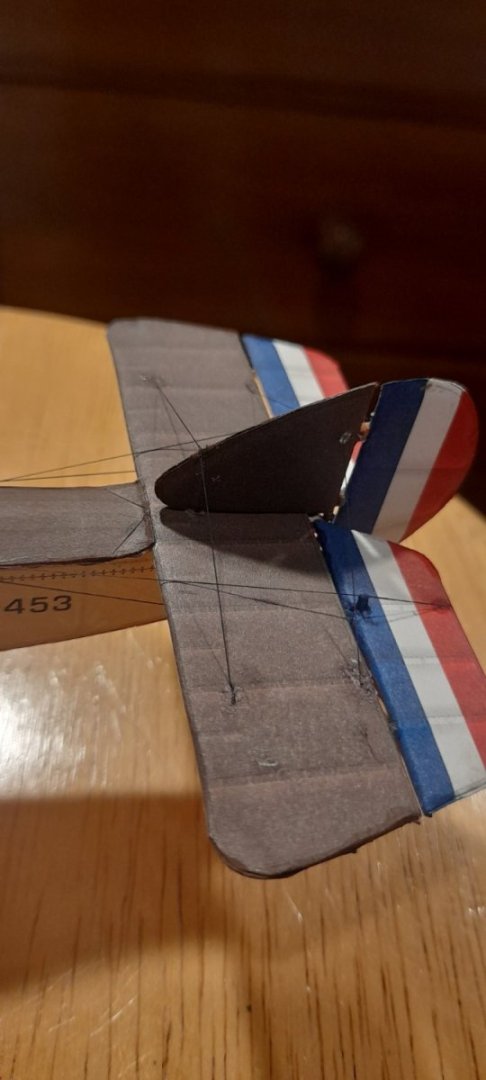
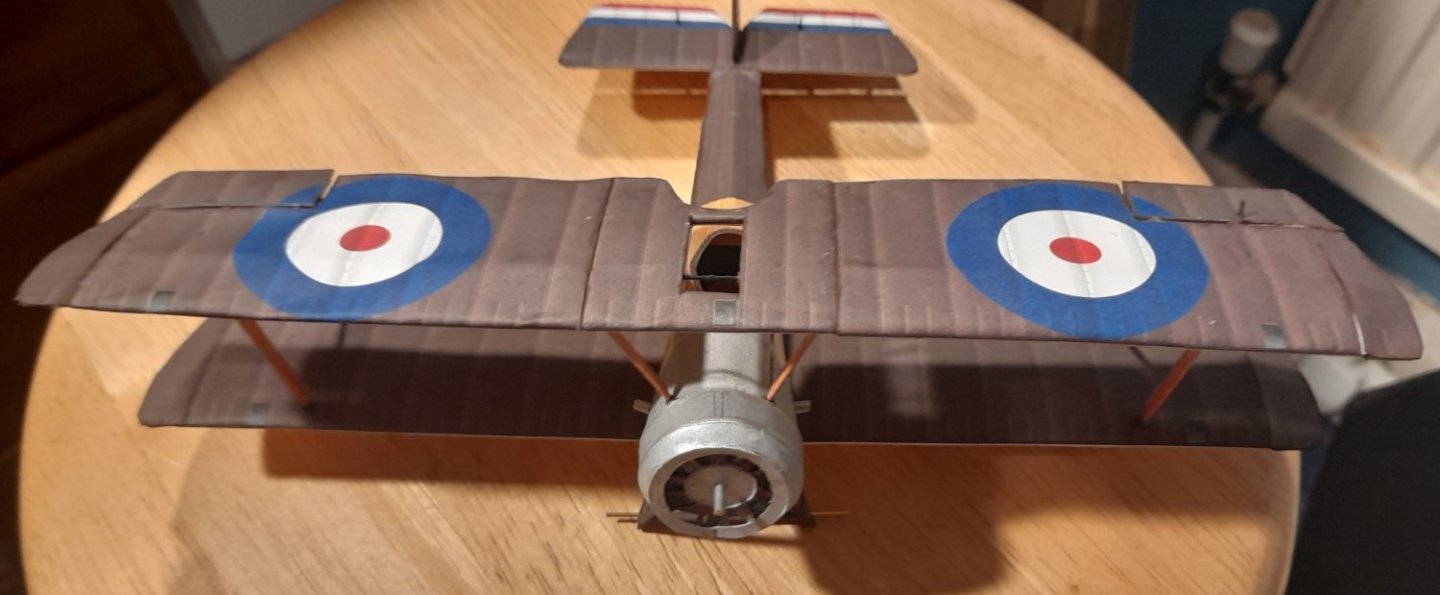
So, I managed to complete the rigging, fit the gun and then realised that the windshield needed fitting 🙄. So very carefully in order not to snap any cables or knock the gun off, glued the very last piece on. That's it, my first serious card model finished 😊 There are plenty of lessons learned, mainly to take a bit more care with glue, especially the CA used to attach the rigging. Taking more time to match the colours for the edges, is also something I'll need to do next time. All in all, it's been a fun little build, I've enjoyed building this plane. It was fairly straightforward, and would be a very suitable subject for novice card modellers. Now for some more photos. Thanks to everyone who has followed along and for the likes, your input is greatly appreciated. @ccoylegets a special mention because, it's all his fault😁 Till next time Cheers


- 93 replies
-
- 19
-
-

-
New(ish) Ship Builder for a new(ish) challenge
Edwardkenway replied to Dowlking's topic in New member Introductions
Brian, welcome to MSW -
Stunning looking ship Glenn, it's been a joy to follow, albeit silently.
- 476 replies
-
- 2
-

-
-
- sphinx
- vanguard models
- (and 1 more)
-
Lovely clean planking Frank, beautiful work all round.
-
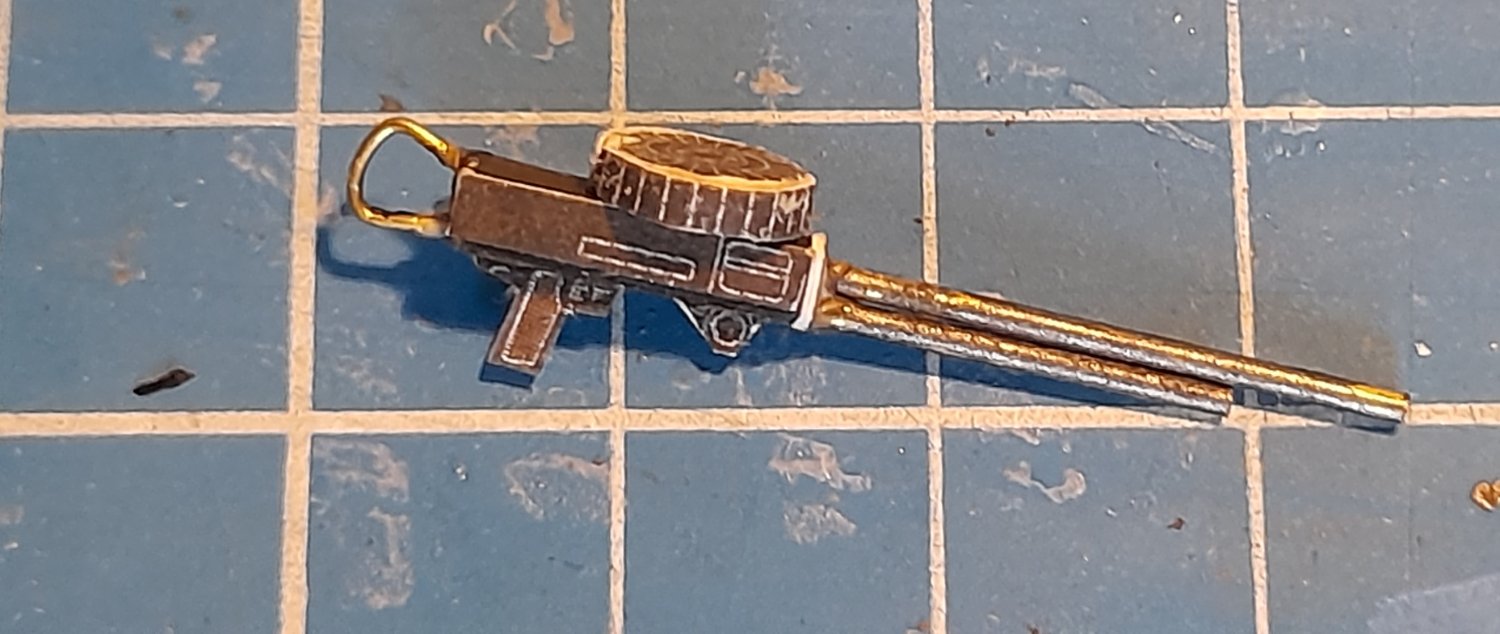
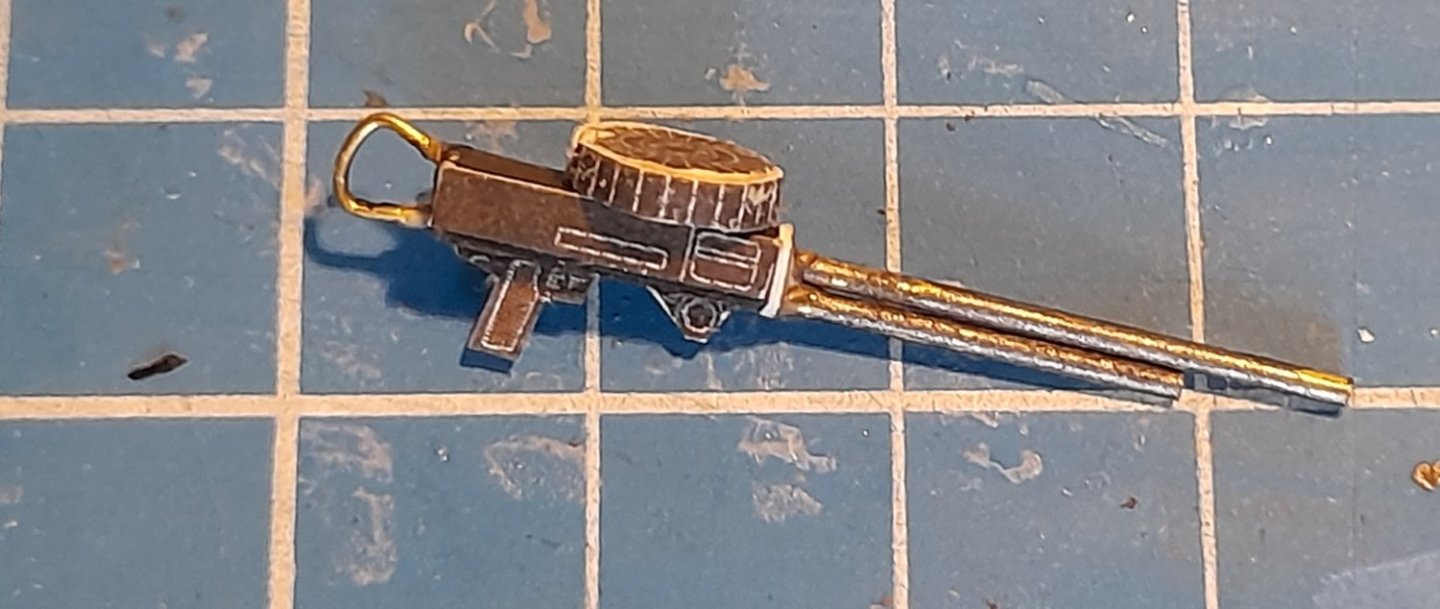
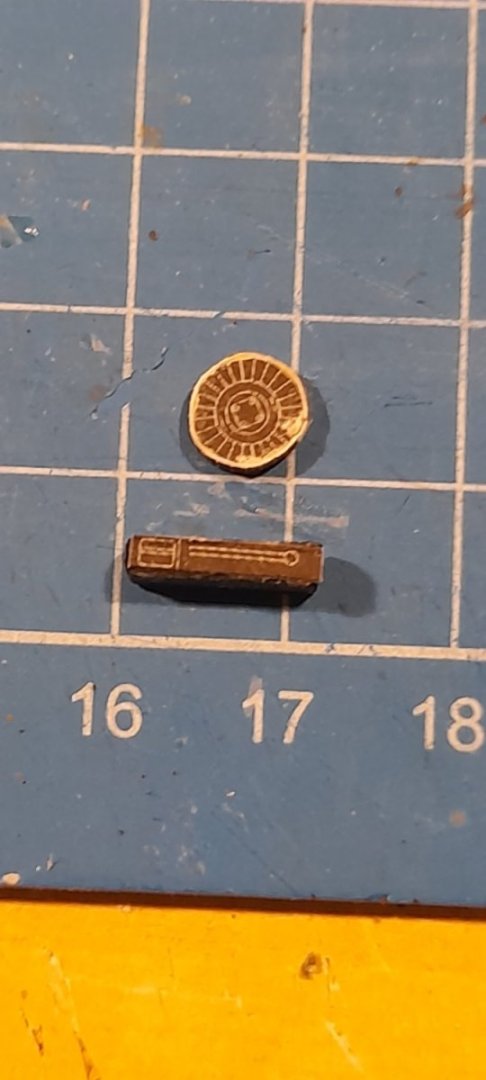
Rain has stopped play, early day from work, so I used some unexpected free time to put together the Lewis MG The tweezer ping happened as I was trying to attach the handle, so improvising and overcoming, a small piece of brass wire became the handle. It goes without saying, the barrel is brass too, I've still not managed to roll the small tubes satisfactorily 😬. I'll keep practicing though 😉. Just have darken the edges. Thanks for looking in and the likes. Cheers
- 93 replies
-
- 12
-
-
Nicely done, Dan👍
-
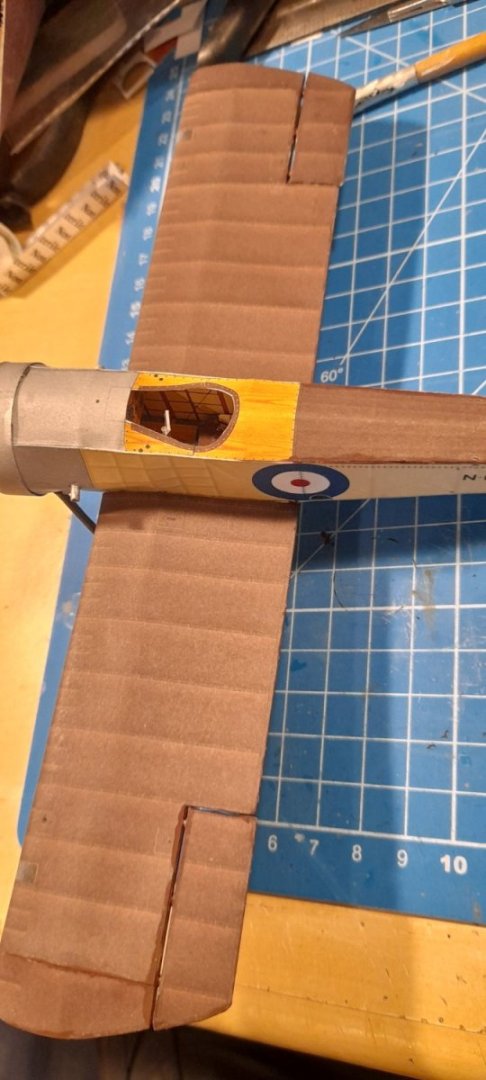
Bit more done with the tailplane rigging another long look at the rigging diagram and I think that's it for the rear of the plane. So before I move onto the wings I've got a couple more bits to do, starting with the weapon. the version I've done has the Lewis gun. To be honest I have toyed with the idea of buying the aftermarket weapons, but that would feel too much like cheating😇🤭 As always thanks for visiting, commenting and all the likes. Cheers
- 93 replies
-
- 13
-
-
MRAP ATV by CDW - FINISHED - Rye Field - 1:35 Scale
Edwardkenway replied to CDW's topic in Non-ship/categorised builds
Very realistic looking model, great job! -
Looks like it'll make a nice plane, Craig. I'm in!
-
Shaun, welcome to MSW
-
Just a thought, have you checked the soles of your shoes and the knees of your trousers!!🤦♂️🤷♂️🤭
-
😲😲.....
-
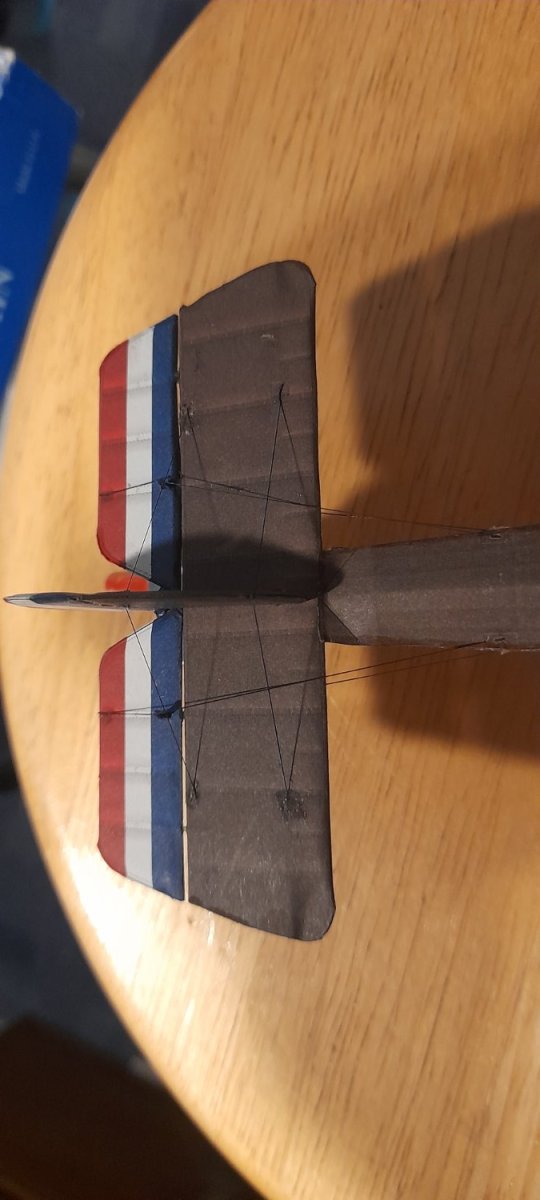
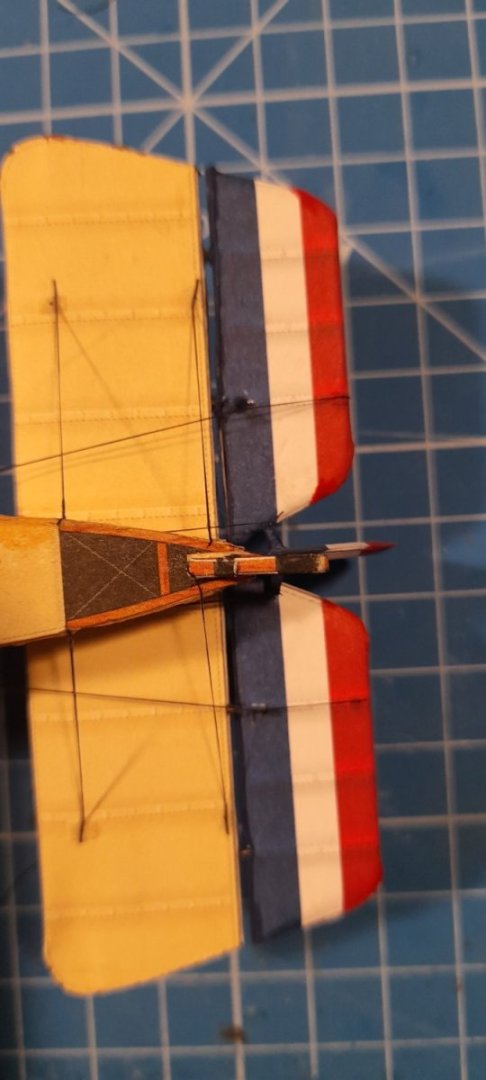
Thankyou gentlemen, I think I've worked out the run of all the lines, after a long perusal of the diagram and lots of looking at various pictures of other models and full size Pups. so I've started with the rigging at the back. This may take a while😊 I'm using fine black EZline. This is the first rigging I've done since Sherbourne and I'm a bit rusty. Thanks for all the comments, likes and having a peep. Cheers

- 93 replies
-
- 17
-
-
Oh I'm in! Real nice looking kit, don't strain that left eye😉. Nothing wrong with brush painting.
-
F-86F-30 Sabre by Egilman - Kinetic - 1/32nd scale
Edwardkenway replied to Egilman's topic in Non-ship/categorised builds
Was it like this one Ken? Picture from Flickr
-
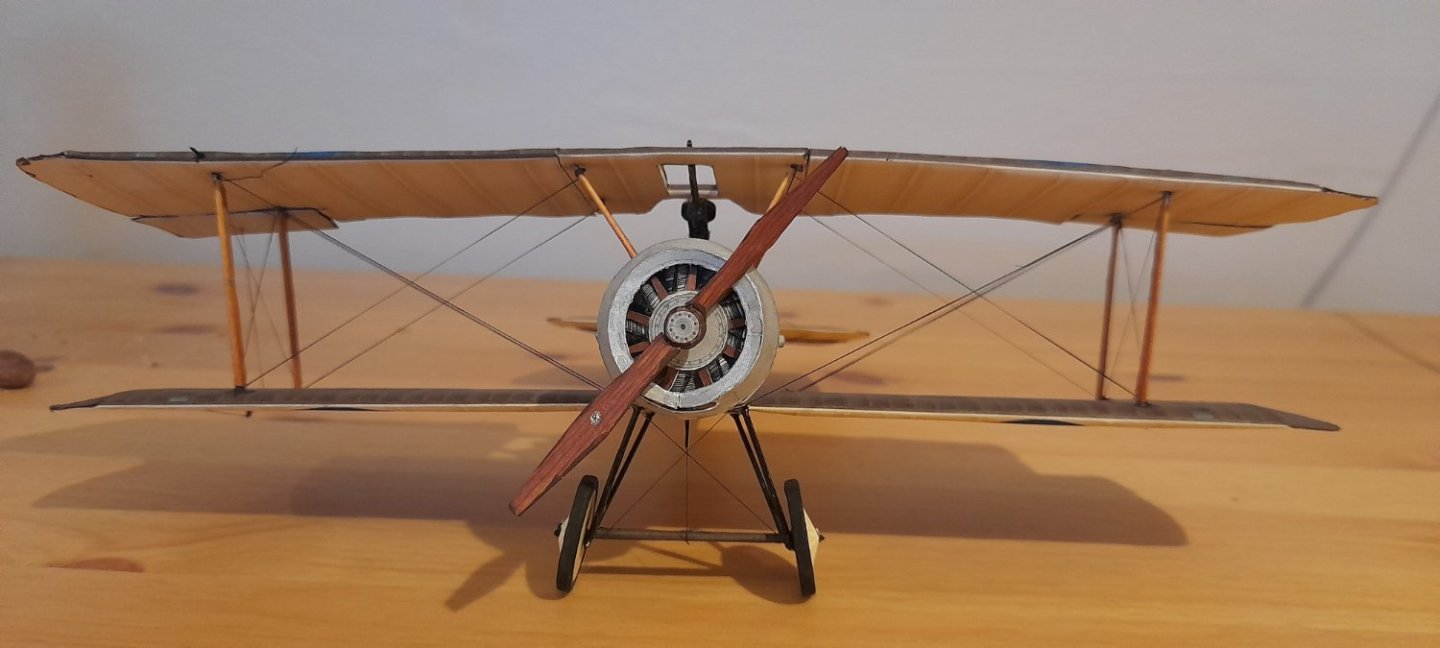
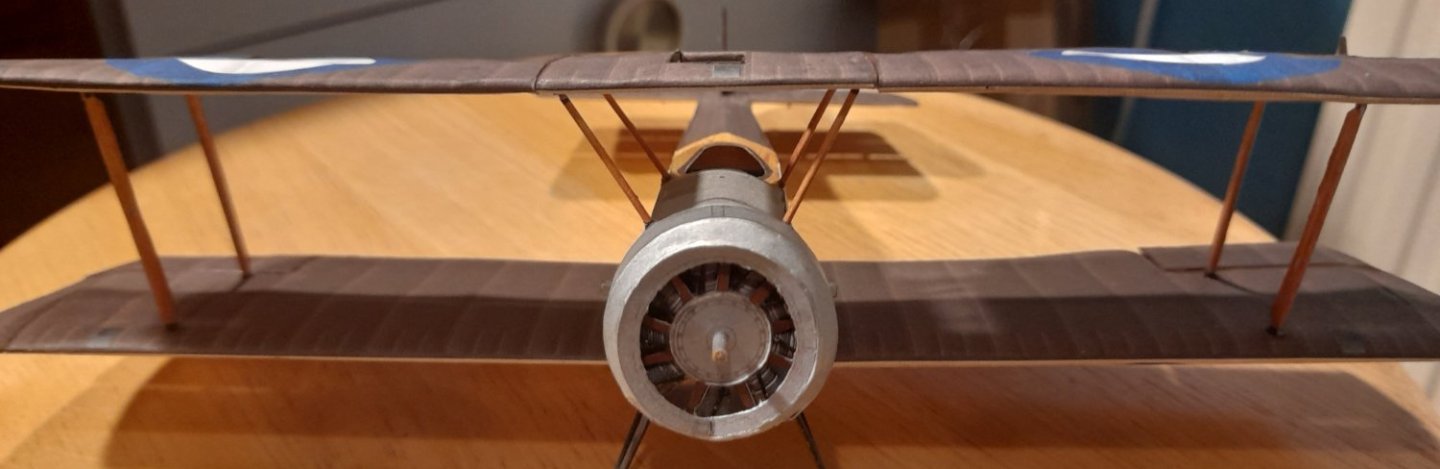
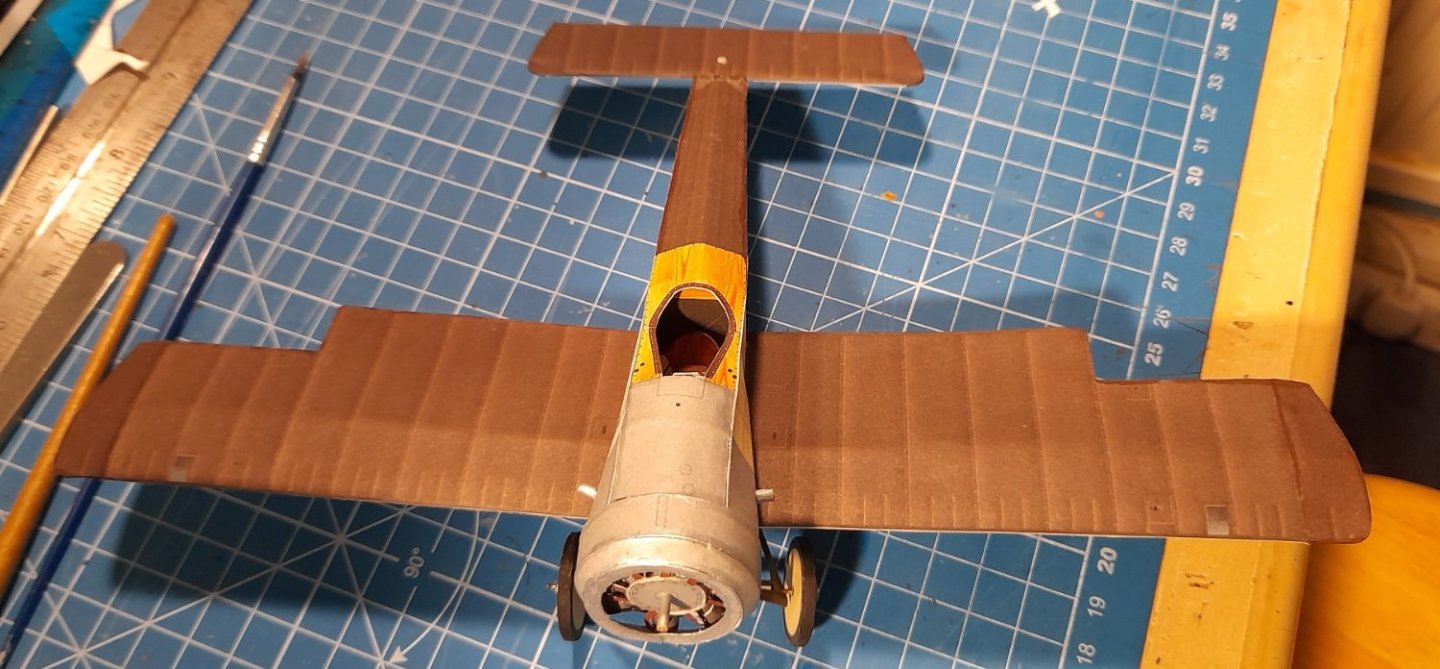
Hello again, another hour on the pup, and the top wings are attached. The struts were a little bit fiddly then trying to line the struts up with the tiny pinholes in the top wing was even worse. Next time I'm going to attempt do all the rigging on it. The diagram to do this is slightly vague, as there are no steps to follow, just lots dashed lines showing the runoff the rigging. Thank you to those who've commented, hit the thumbs up and just visited. Cheers

- 93 replies
-
- 16
-
-
It's like you've never been away! Still turning out stunning figure painting, lovely work, OC
-
Zac, welcome to MSW. The best advice I could give is definitely start that build log, as you can get an amazing amount of help, advice and encouragement from any who look in. Best of luck with Endurance, hope to see your build log soon. Have fun. PS, the shop notes, modelling tips and research section is also a good place to look and ask questions in.
-
and welcome to MSW
-
I thought much the same as Derek and BE! If the bar goes any higher, I'll be able to walk under it. Excellent work as always. I'll enjoy following the subsequent chapters.
- 840 replies
-
- 5
-
-
- winchelsea
- Syren Ship Model Company
- (and 1 more)
-
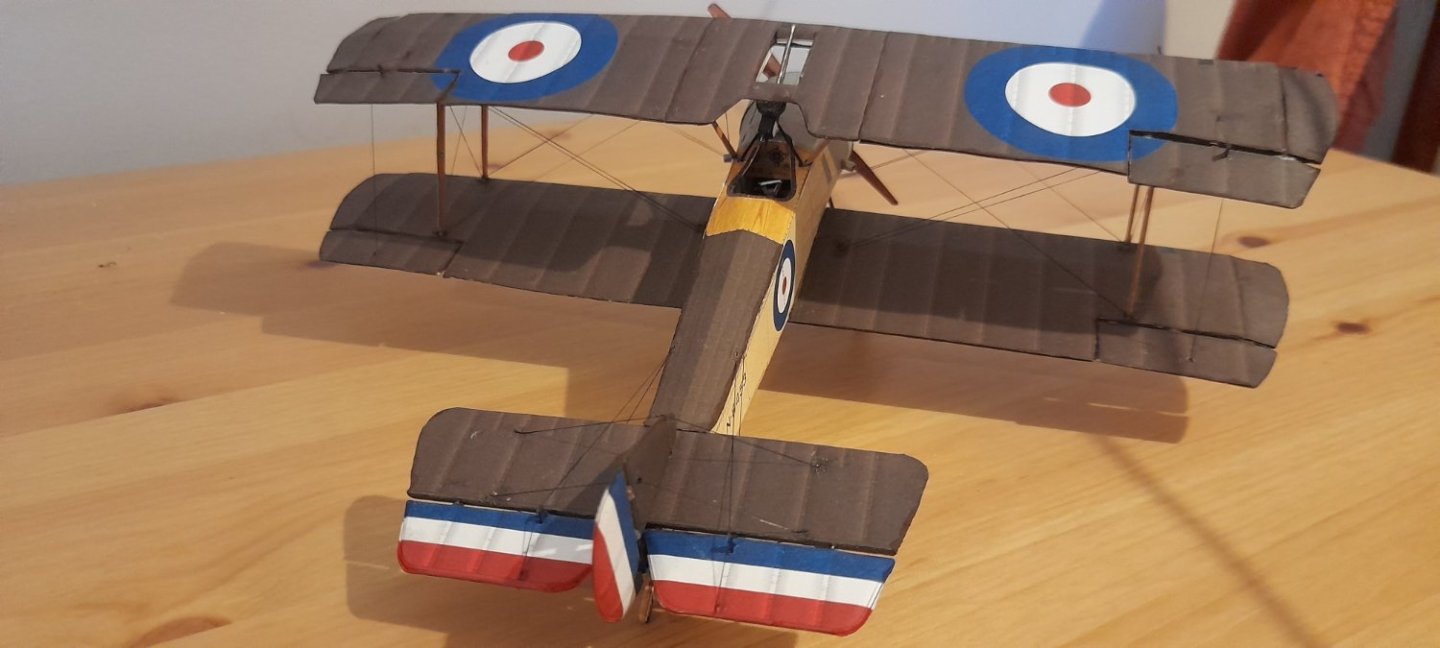
I've struggled to find time for the pup this week, but managed 90 minutes or so tonight. The lower wings and horizontal stabilizer have been fixed. Also the tail fin, rudder and rear flaps. Finally for tonight the lower wing flaps. Thanks for all your encouraging comments, the likes and popping by. Cheers

- 93 replies
-
- 14
-
-
Nice work, Richard. It's nice to see that model put together, and looking good! For a free download, it does make a nice model. I will definitely give my one a try.