Edwardkenway
-
Posts
3,047 -
Joined
-
Last visited
Content Type
Profiles
Forums
Gallery
Events
Everything posted by Edwardkenway
-
 Plodding on with the bulwarks I realised when I reached the bow that I still hadn't fitted the bollards, so the two I'd decided were the best of many I'd made were duly glued into place I'm not too bothered about the glue stains on the lower two planks as there is the second layer to fit. Still have to do it all again on the opposite side. Thank you all for your comments, visiting and the thumbs up. Cheers
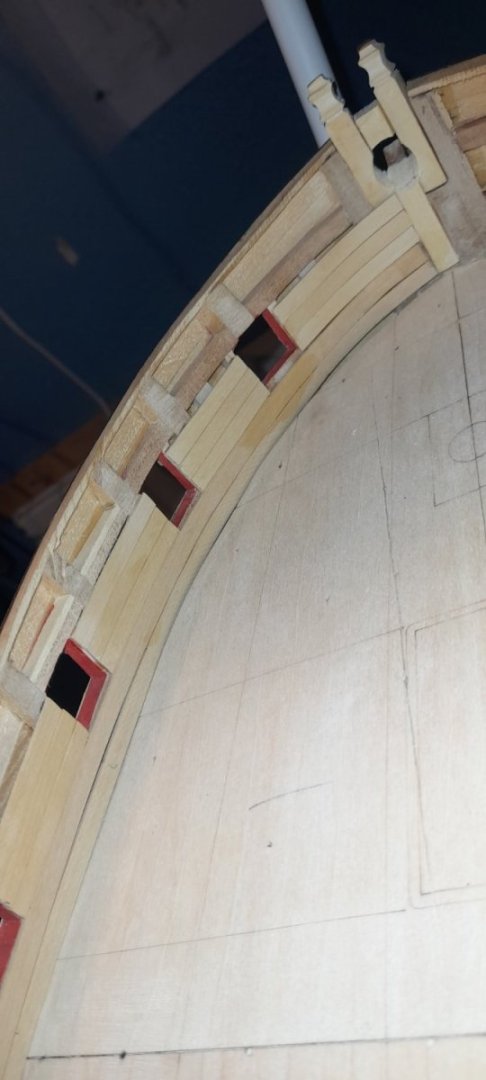

-
Paul and welcome to MSW. Good to see you're not undercover and taking on the Winchelsea group build!
-
Tom and welcome to MSW
-
Mark and welcome to MSW
-
Superbly done Patrick, watching this build come to fruition was very enjoyable and educating, thanks.
- 756 replies
-
- 2
-

-

-
- galleon
- golden hind
- (and 2 more)
-
Looking good, you're scratched harpoon turned out nice.
-
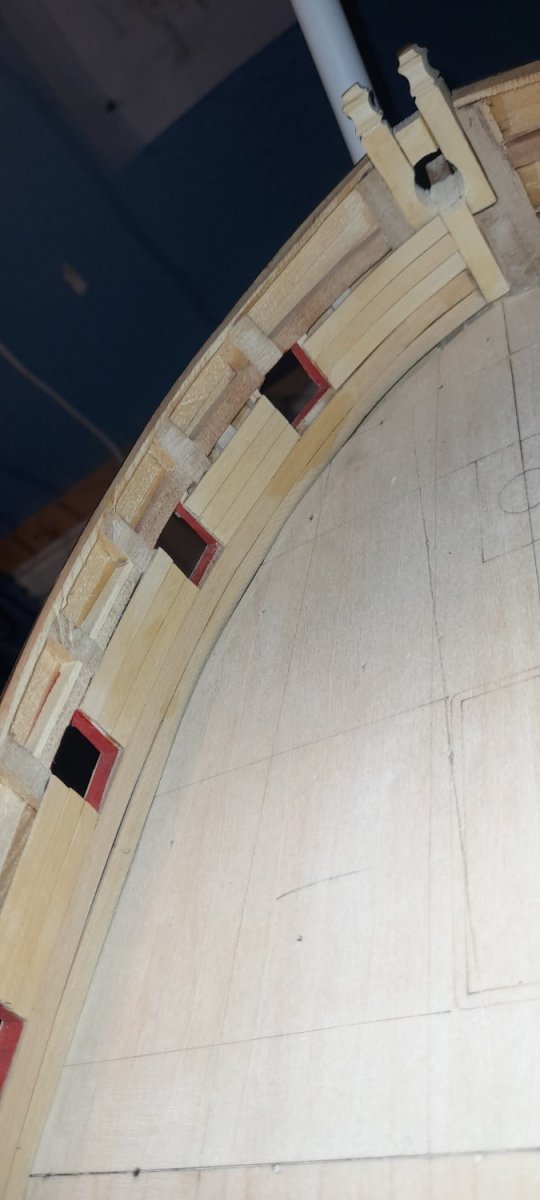
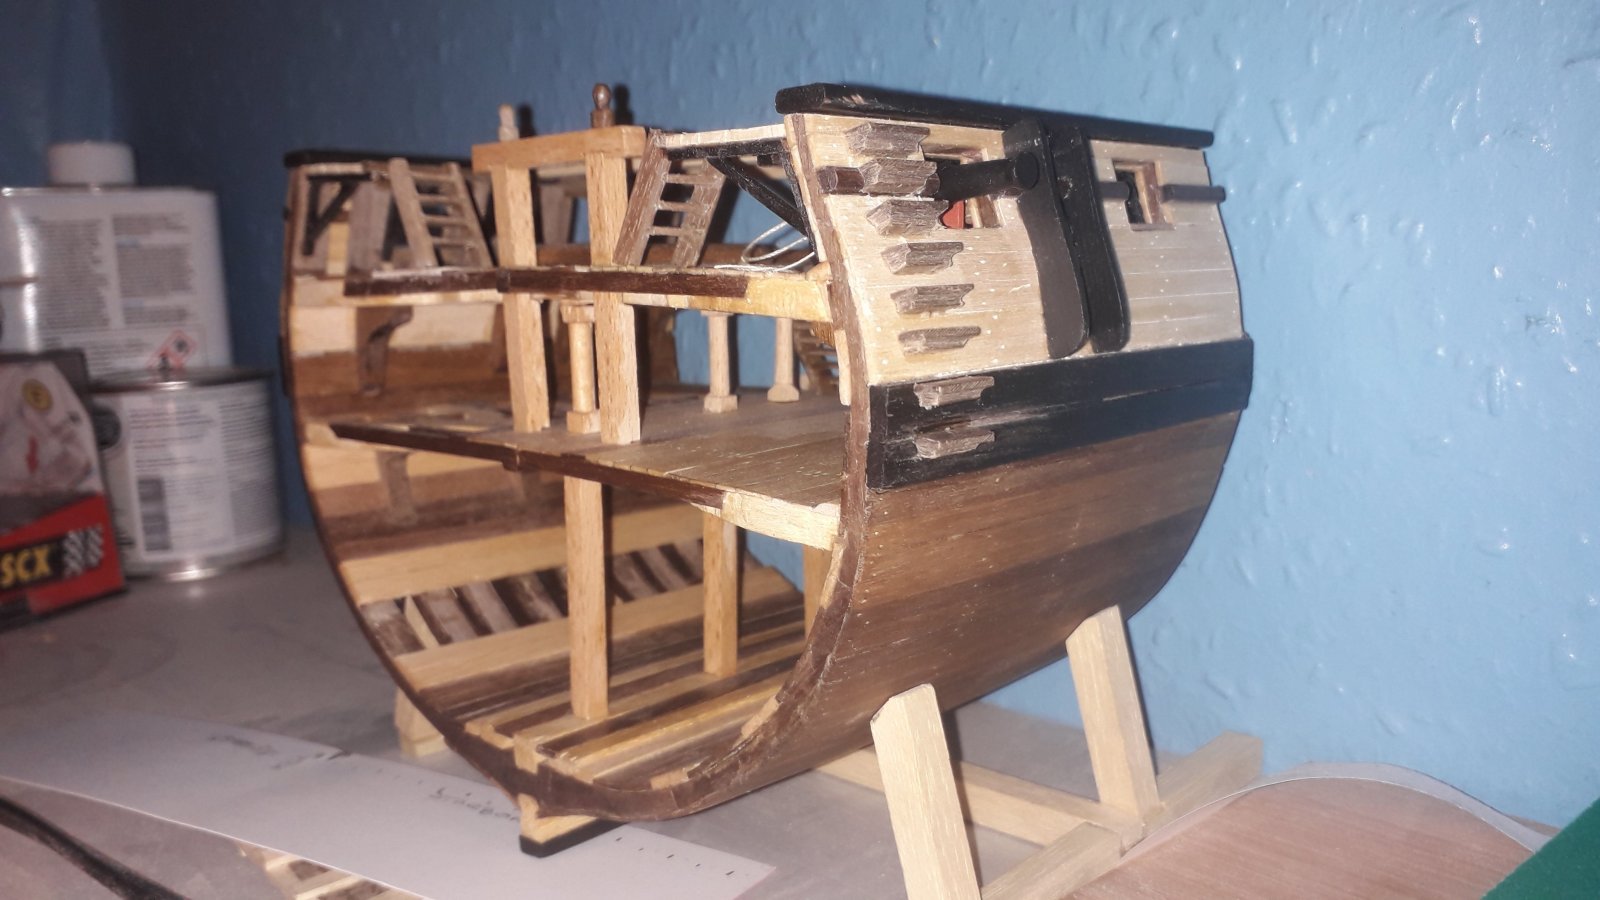
The bulwark internal planking has got me pulling what's left of my hair out! because of the tumblehome it's like trying to plank virtually upside down. But I'm slowly progressing, although I shall be glad when it's done. I shall put some photos up when it is a bit tidier. Thanks once again for your comments, likes and looking in. Cheers
-
welcome to MSW. Good looking first model! Great work!
-
Welcome to the group Jim, this build is a great learning curve, just take things nice and slow. I also built my very first wooden boat in 2019, with a couple others under my belt since then. You're in good company here with some good logs to check. Good luck and happy building.
-
Sorry to hear of the crash, but glad you're getting fixed quickly! Will they use metal pins and plates or wood and fabric 🤔😊😇
-
I'm in, hammock slung and settling in for the long haul. Nice start, will you sand it lightly when built, as that will hide minor imperfections in the stones.
-
Thanks Glenn, with the coamings all I've done is remove the char. I'm going to start planking the bulwarks next, once I've got some more strips cut. I appreciate all the likes, comments and visits. Cheers
-
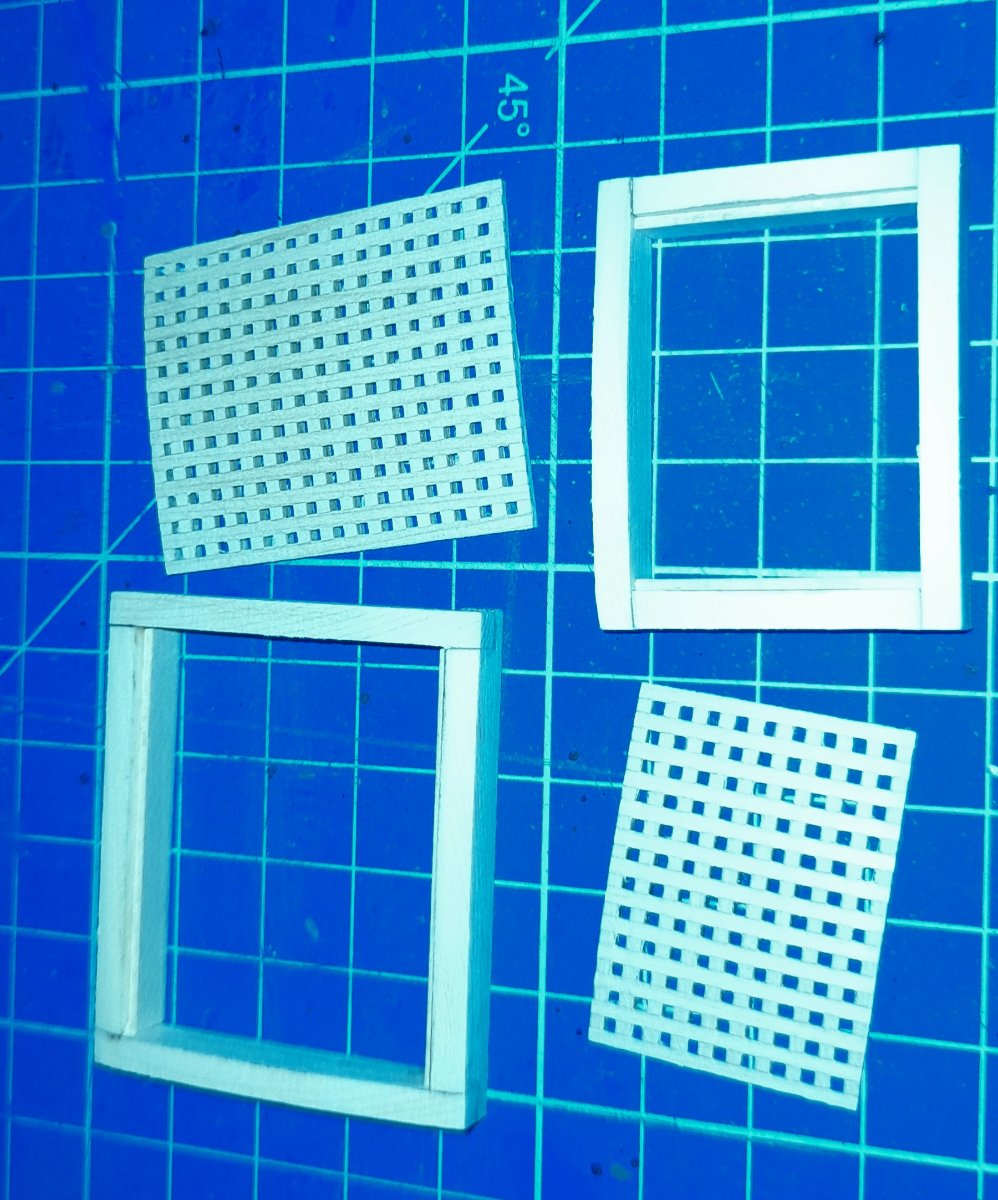
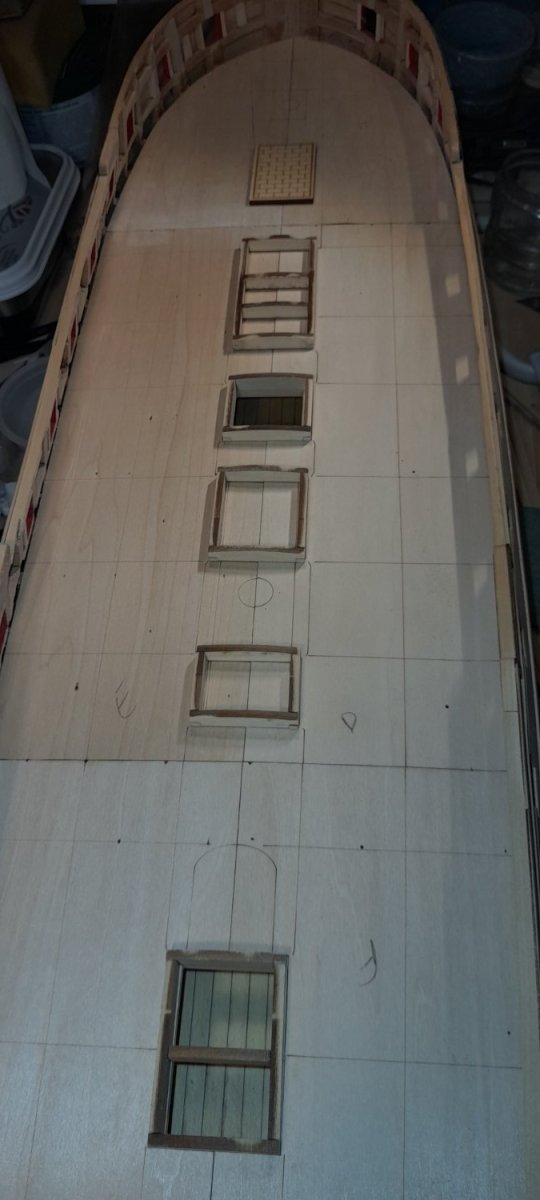
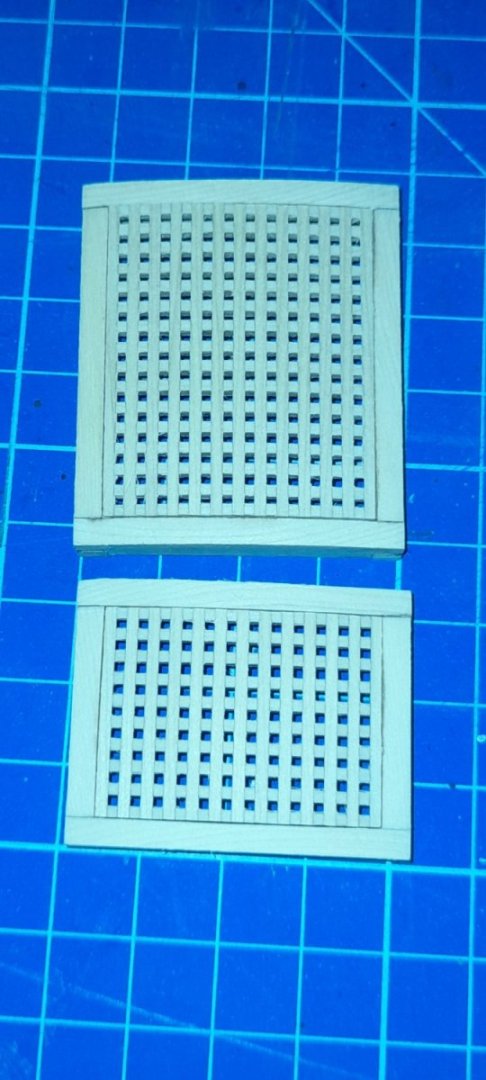
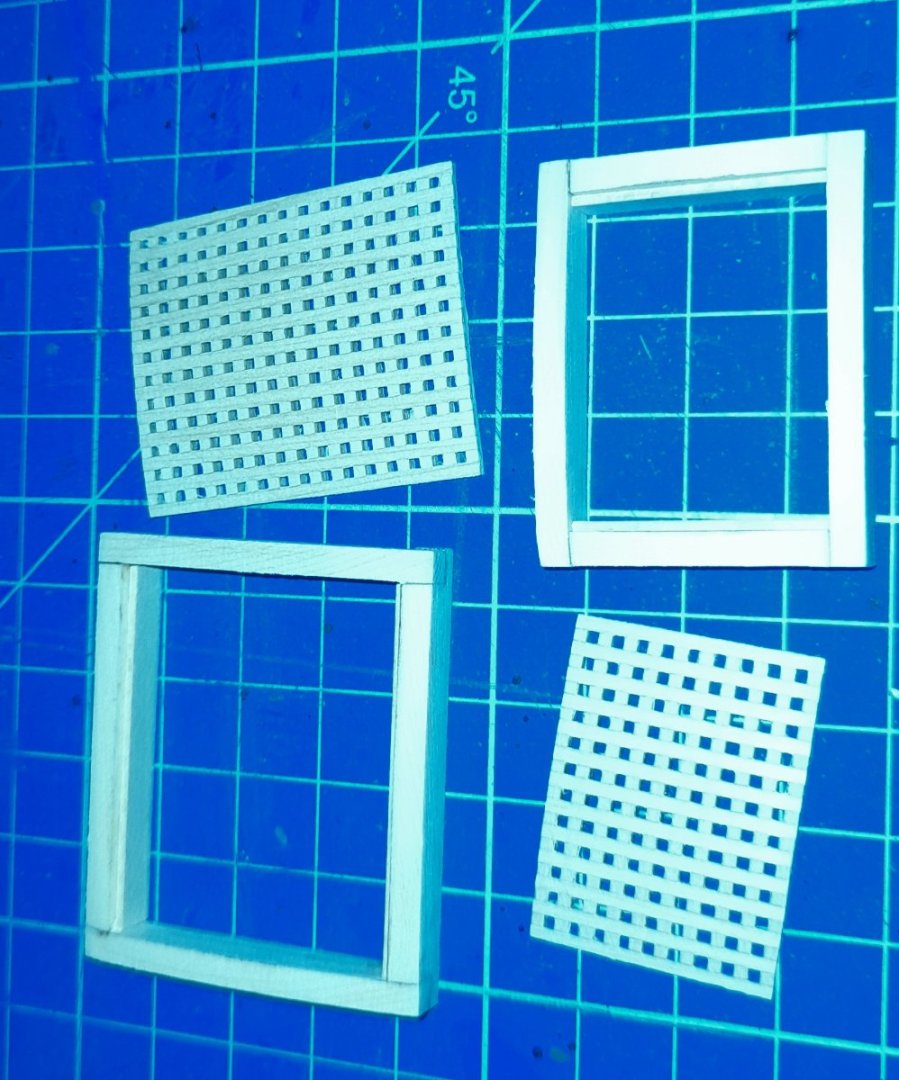
I decided to have a crack at making a couple of the gratings up these two are the result. I've sanded them as thin as I dare. As most of you are doing or done, I'm going to paint the coamings black. Thanks for all the likes, comments and calling by. Cheers
-
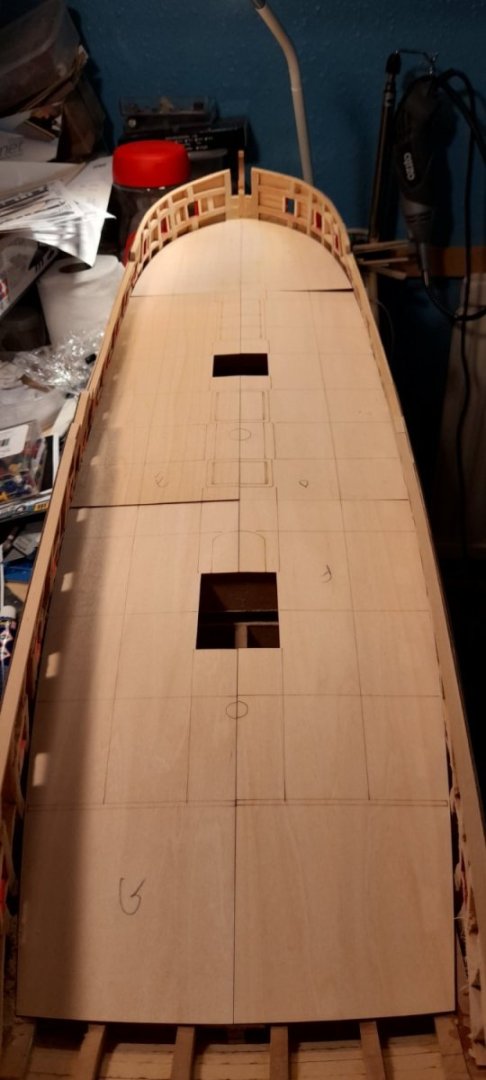
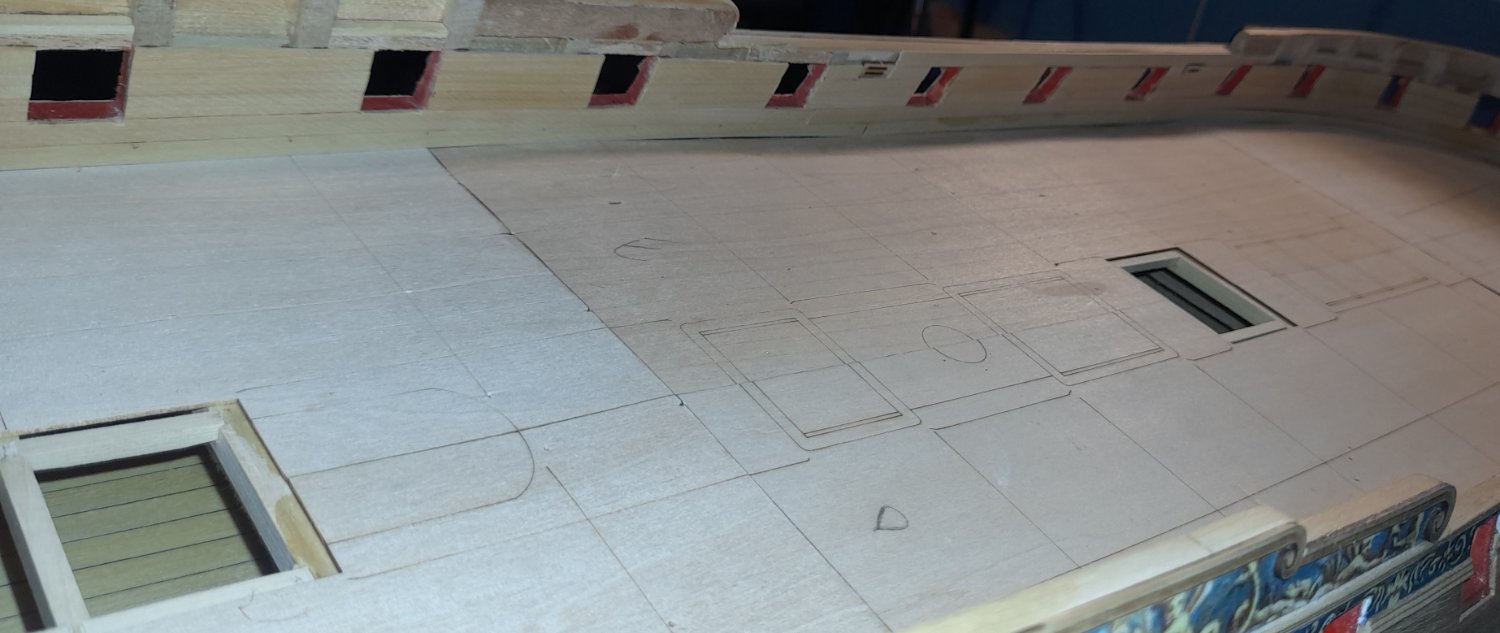
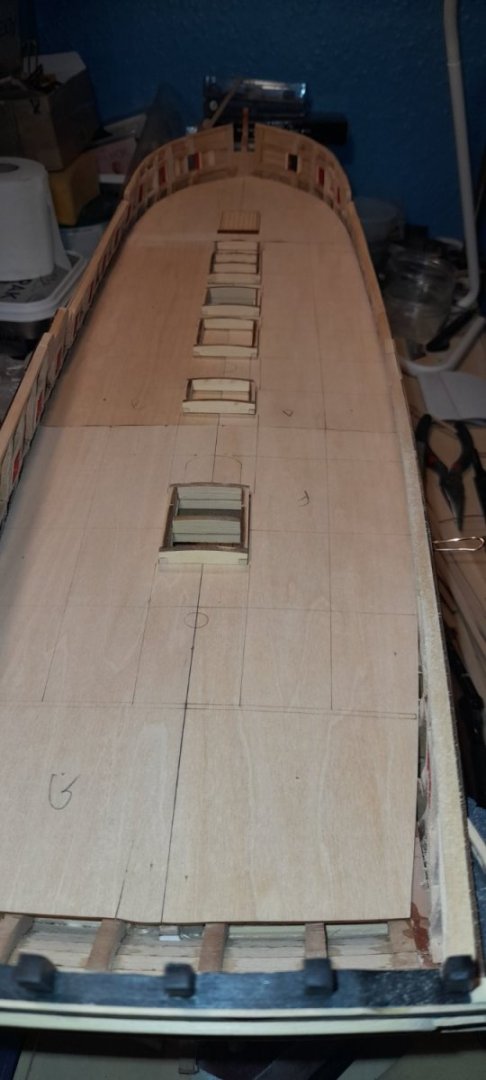
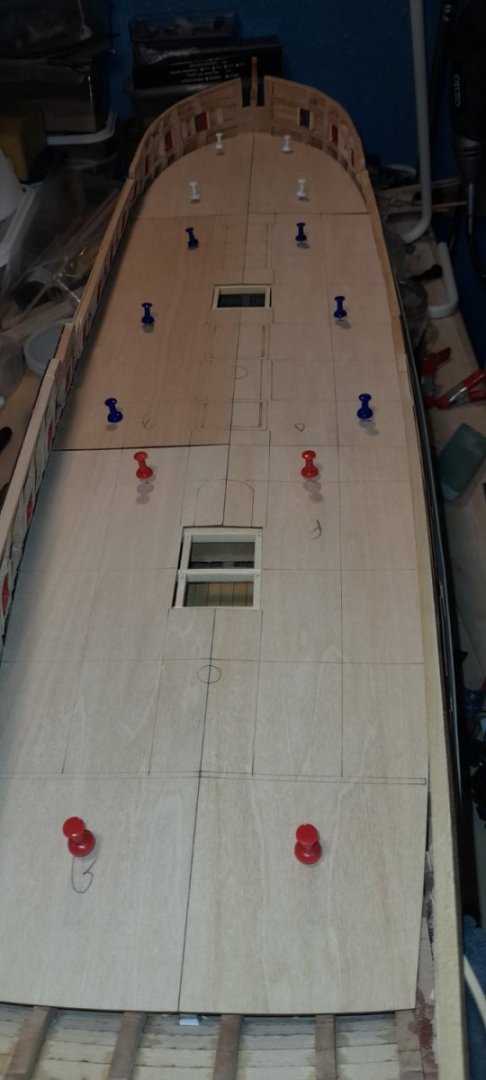
The hatch framing has been tweaked and glued, so the false deck pieces were fitted and glued. It was then I realised there was hump on the join between the bow sections and the midship ones😬😑 Very very carefully I detached the four pieces and set about the bulkheads with a sanding block. I'm putting this down to my initial cutting of the offending bulkhead. Anyway the false deck is once again glued and happily flat. I've made all the coamings and also put together a couple of the gratings. Those are another item I'm glad I decided to get from Chuck. The fittings all seem to line up on the centre line nicely. I'll need to cut some planking strips in various widths to do the bulwarks. Thanks for all your comments and likes, or just popping in. All interest is always and greatly appreciated. Cheers

-
I really do like the care and attention you are putting into Winnie! Stunning work, as I've come to expect from you Glenn 😉 I'm in agreement with Scrubby, about upping my game in the tools department 😊
- 840 replies
-
- 5
-
-
- winchelsea
- Syren Ship Model Company
- (and 1 more)
-
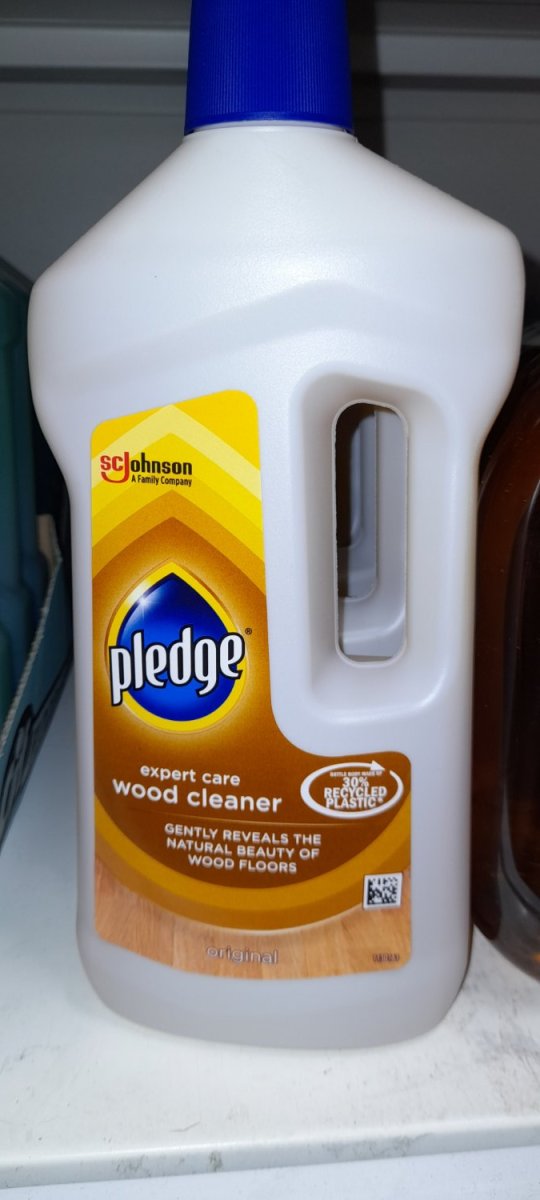
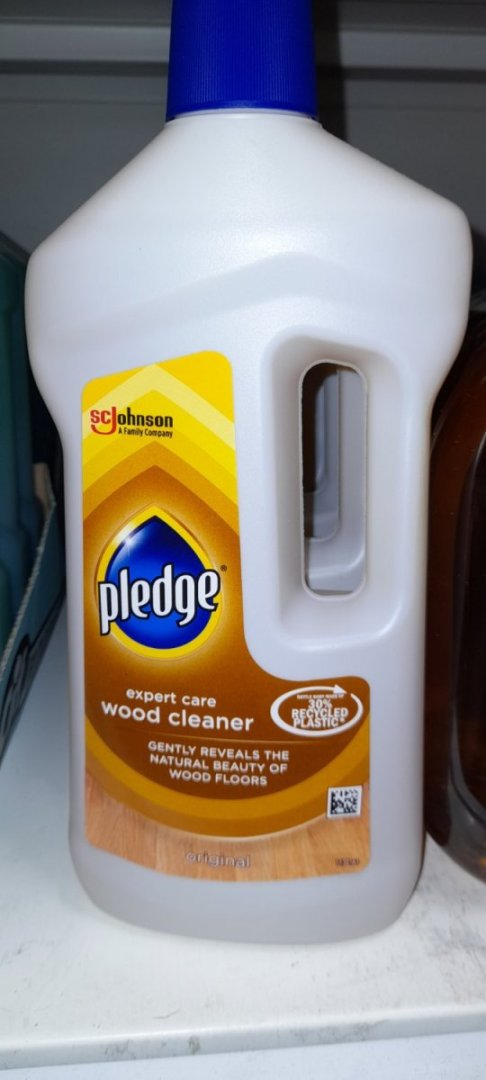
With the Winchelsea parts arrived, this is taking a back seat for a while. It gives me chance to purchase the Mig RAF colours and try and find some Pledge over here. I wondered if this would be suitable or does it need to be a polish type stuff? Thanks for any help and recommendations. Cheers
-
Superb finish Alan, as the others said the figures complement the scene perfectly. I love the 1914/18 style photographs.
-
Late to the party, but I'm in, I just love these builds you do!
-
Doing a bit of catching up, you're doing wonders with the dio, the figures look great to me. I did a whole box of the Airfix 1:72 Waterloo highlanders 30 odd years ago, I recall I just did a flesh colour on the face,no extra detail, but then they were placed in square when based up, so difficult to see much detail anyway. Can't wait to see the troops on the base!!
-
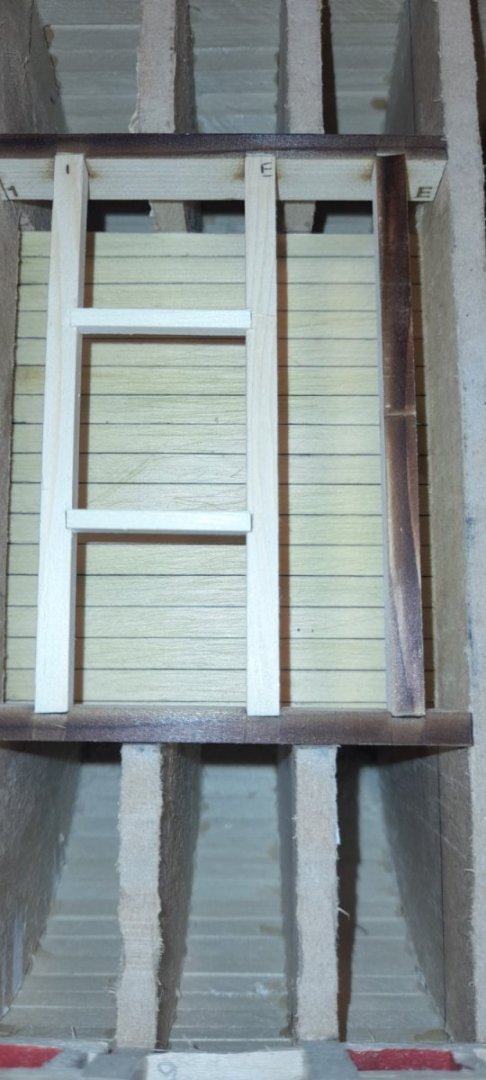
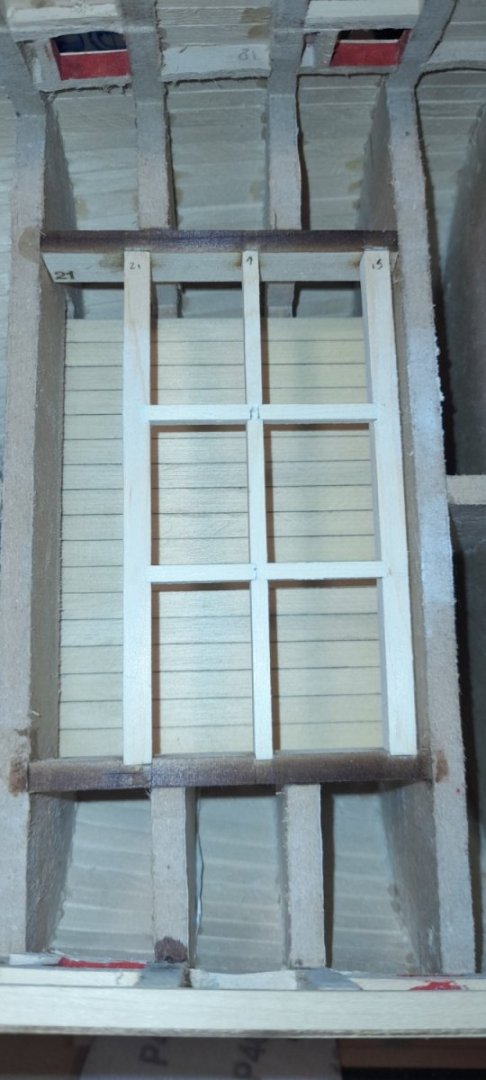
The glazing looks good, very 1700s, handmade type glass.
- 389 replies
-
- 2
-
-
- winchelsea
- Syren Ship Model Company
- (and 1 more)
-
Operation char removal has also began! with the hatch beams. Carlings cut. Everything is just dry fitted and the false deck pinned in position. the centreline seems to be fine, some tweaking of the aft hatch, I think 🤔 Once again thanks for all your interest, likes and comments. Cheers
-
Thank you gentlemen. Chapter 4 has started, the two sub platforms have been planked, and the framing dry fitted. Once I've sanded the sub decks and give a couple of coats of WOP I shall begin fitting the pieces for the gratings*. Thanks for the likes, comments and looking in. Cheers Edit: *Doh! Imean open hatches
-
If you do take the plunge and make your own moulding scraper, you can have whatever profile you want. It is your model after all. I personally made basically the same profile for all the mouldings, just in different sizes depending on which piece I was making. I used some scrap pieces of boxwood to practice on, before doing the actual strips for Winnie. I'm sure the size difference you mentioned would not be adversely detrimental to the build, as long as the strips are positioned correctly. Your Winnie is looking good btw.
- 389 replies
-
- 2
-
-
- winchelsea
- Syren Ship Model Company
- (and 1 more)
-
It seems I'm not as brave as I thought🤭😂. I chickened out and bought chapters 4&5 😁 I couldn't help myself, I had to see if the false deck fitted, apart from a bit of chiselling the corners of the bow bulkheads, it looks like it is fine. There may be a bit of fine tuning. Thanks for looking in, the likes and encouraging comments. Cheers