Edwardkenway
-
Posts
3,047 -
Joined
-
Last visited
Content Type
Profiles
Forums
Gallery
Events
Everything posted by Edwardkenway
-
 Oh my, it is very small! Until I looked at the photo of you holding it, I was thinking it was about 10- 12 inches long. It must be less than half that. Admirable work, it looks very good.
 -
Thanks Jack and Matt, I'm feeling the same about them, definitely enjoying them more than I thought I would! I removed the moldings in the previous post as I didn't like them, made some more and started on the columns The top and bottom pieces were a bit of a test for my eyes! Thanks for the likes, comments and looking in. Cheers Edit: can the carvings be retro fitted after everything else is done??
-
I'm sure you'll enjoy your holiday, have fun with the family!
- 1,784 replies
-
- 5
-

-
- winchelsea
- Syren Ship Model Company
- (and 1 more)
-
M3 Lee Tank by CDW - Miniart - 1:35 Scale - FINISHED
Edwardkenway replied to CDW's topic in Non-ship/categorised builds
Totally agree with the above comments, it'd be a real shame to hide your hard work. Was this an early tank? I ask because it has a very primitive look about it. Looks good though! -
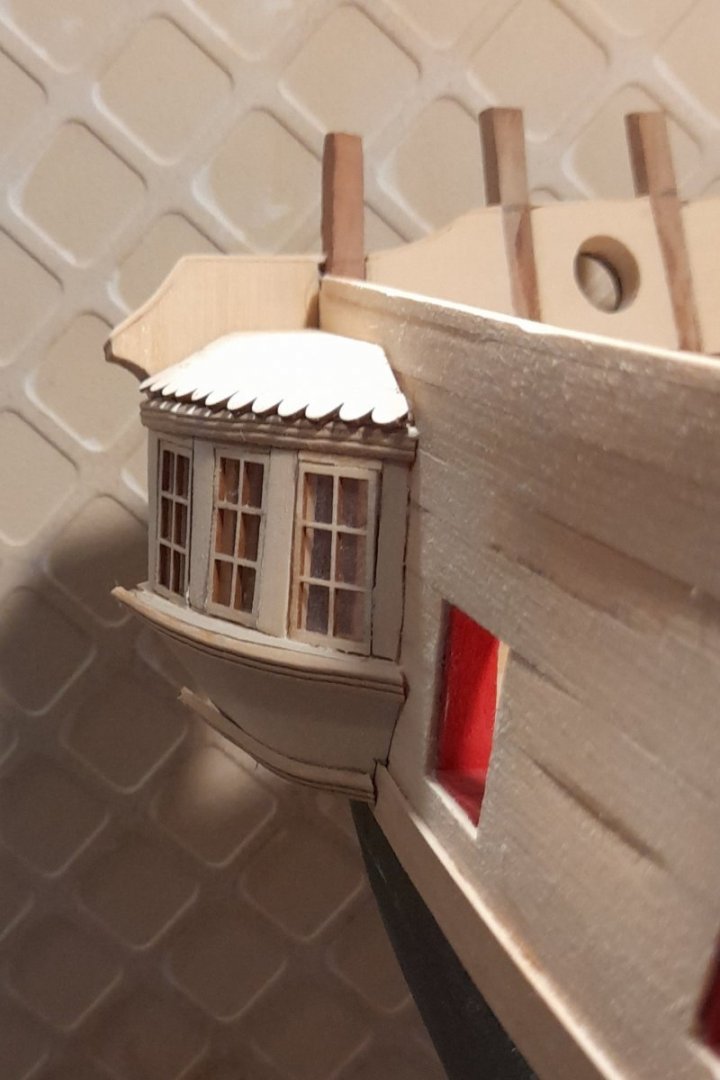
Thank you nzreg and Scrubby, and thanks for the likes. I spent a couple of hours on the roofs, shaping and tiling them. I painted them in tamiya rubber black as it not jet black, and drybrushed with dark grey. on to scraping the fancy moldings. Thanks for looking in. Cheers
-
and welcome to MSW
-
Wow! Great work at that scale Gabe!! It'll be well worth the effort with the end result.
-
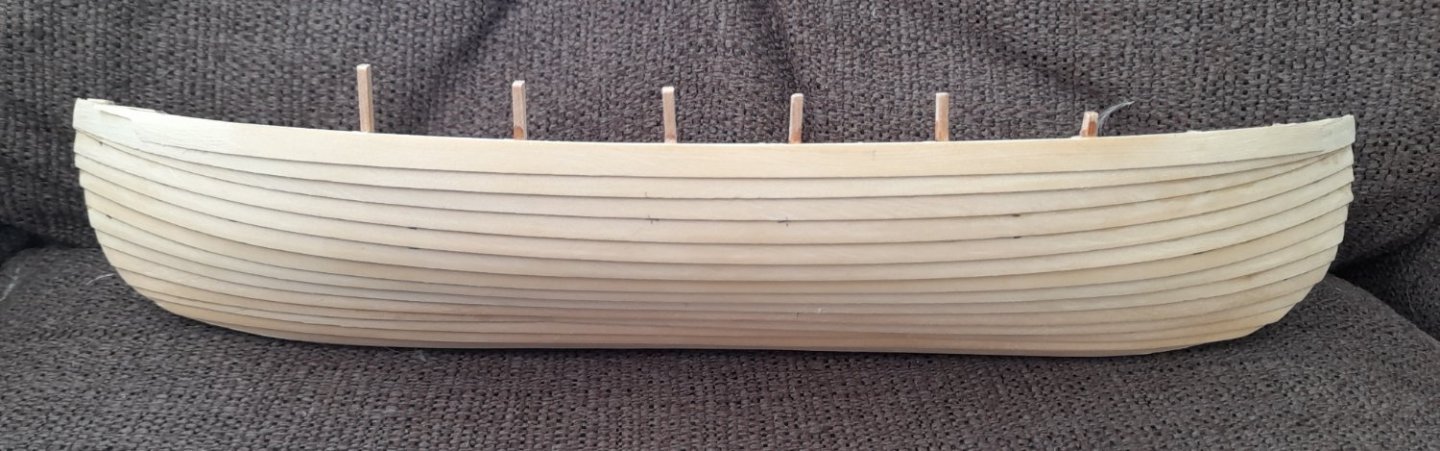
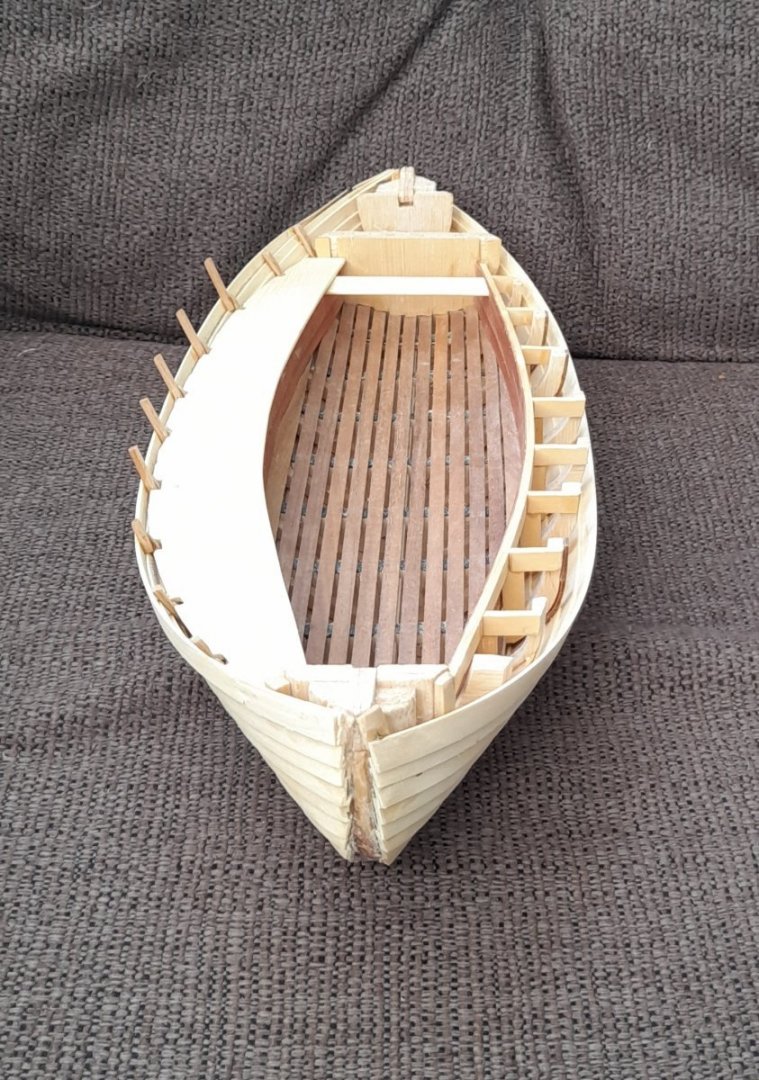
This boat was built by the man who built a lot of the fishing boats in Sheringham, and was commissioned to build this lifeboat by the Upcher Family. He based it on the very successful fishing boats used, as it was a private lifeboat, not crewed by RNLI, who had their own craft a little way south, but by the fishermen themselves, so they would have known how to handle this type of boat. Thanks for your interest, any input, comments and lifeboat info is happily welcomed. Cheers
- 30 replies
-
- 6
-
-
- small
- clinker built
- (and 2 more)
-
welcome to MSW
-
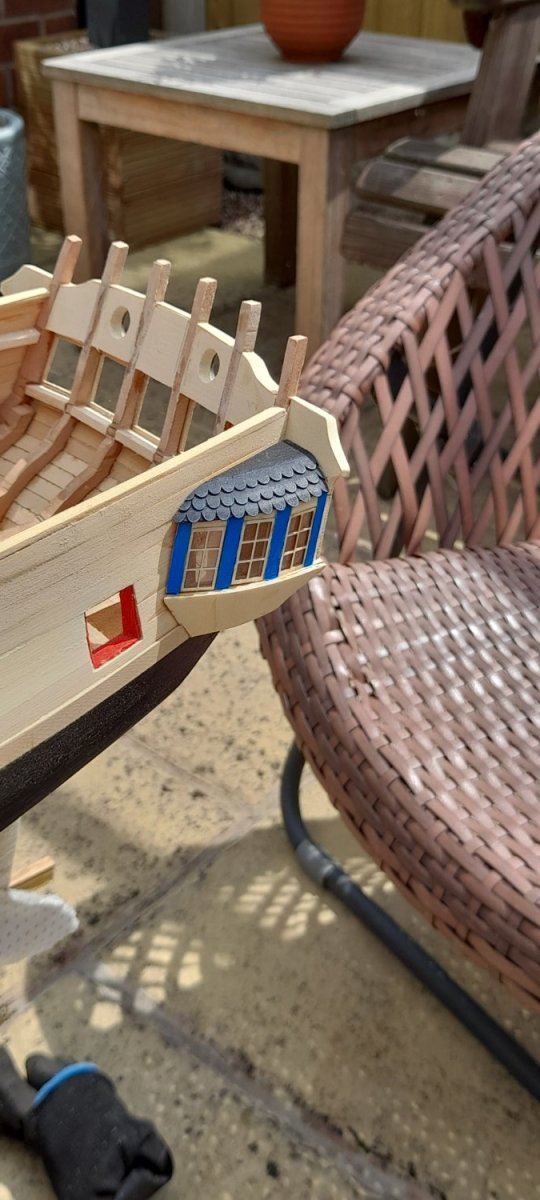
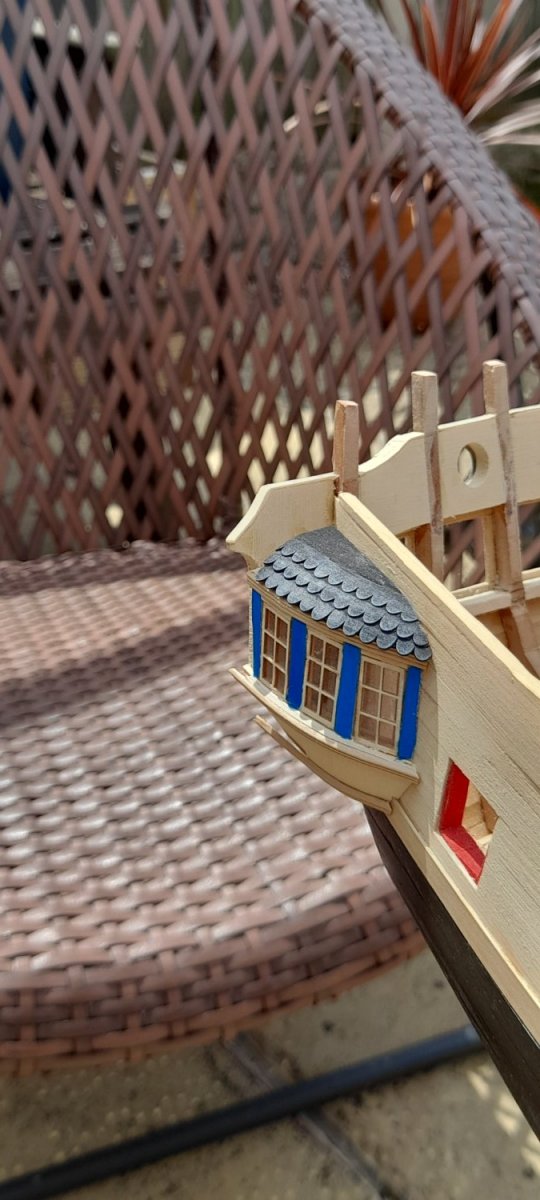
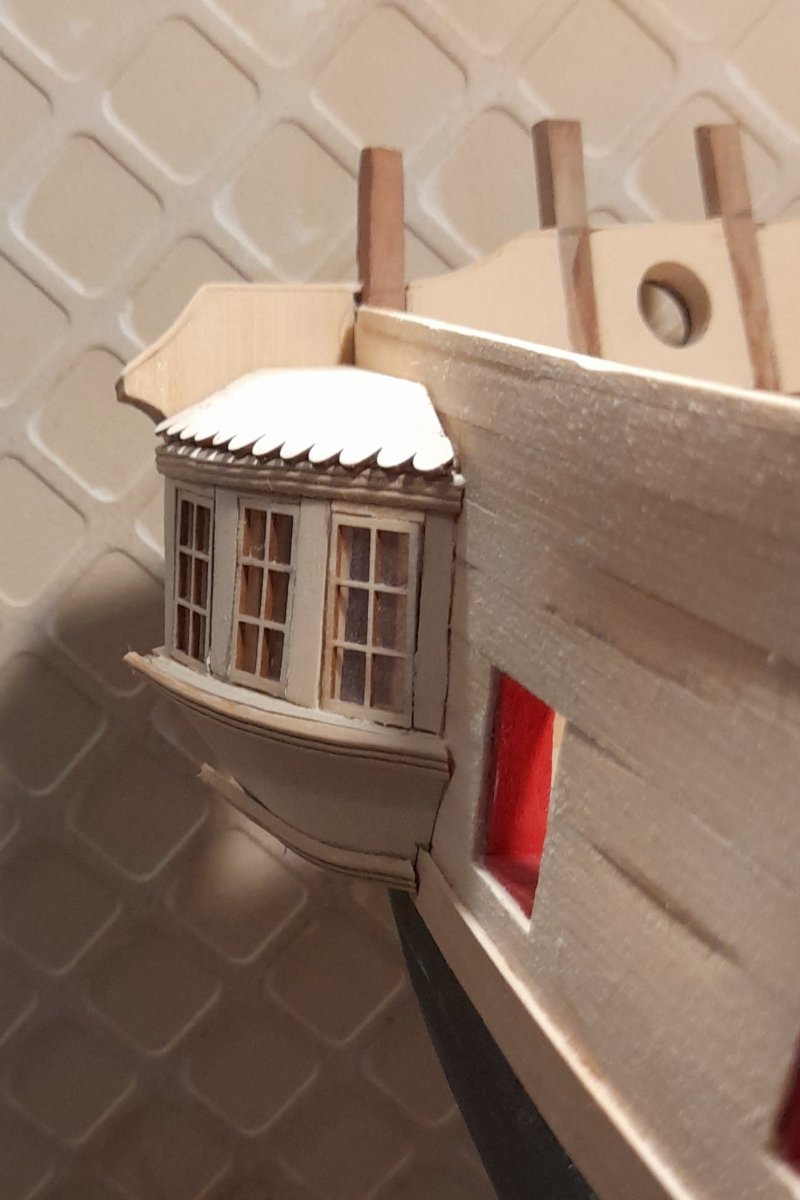
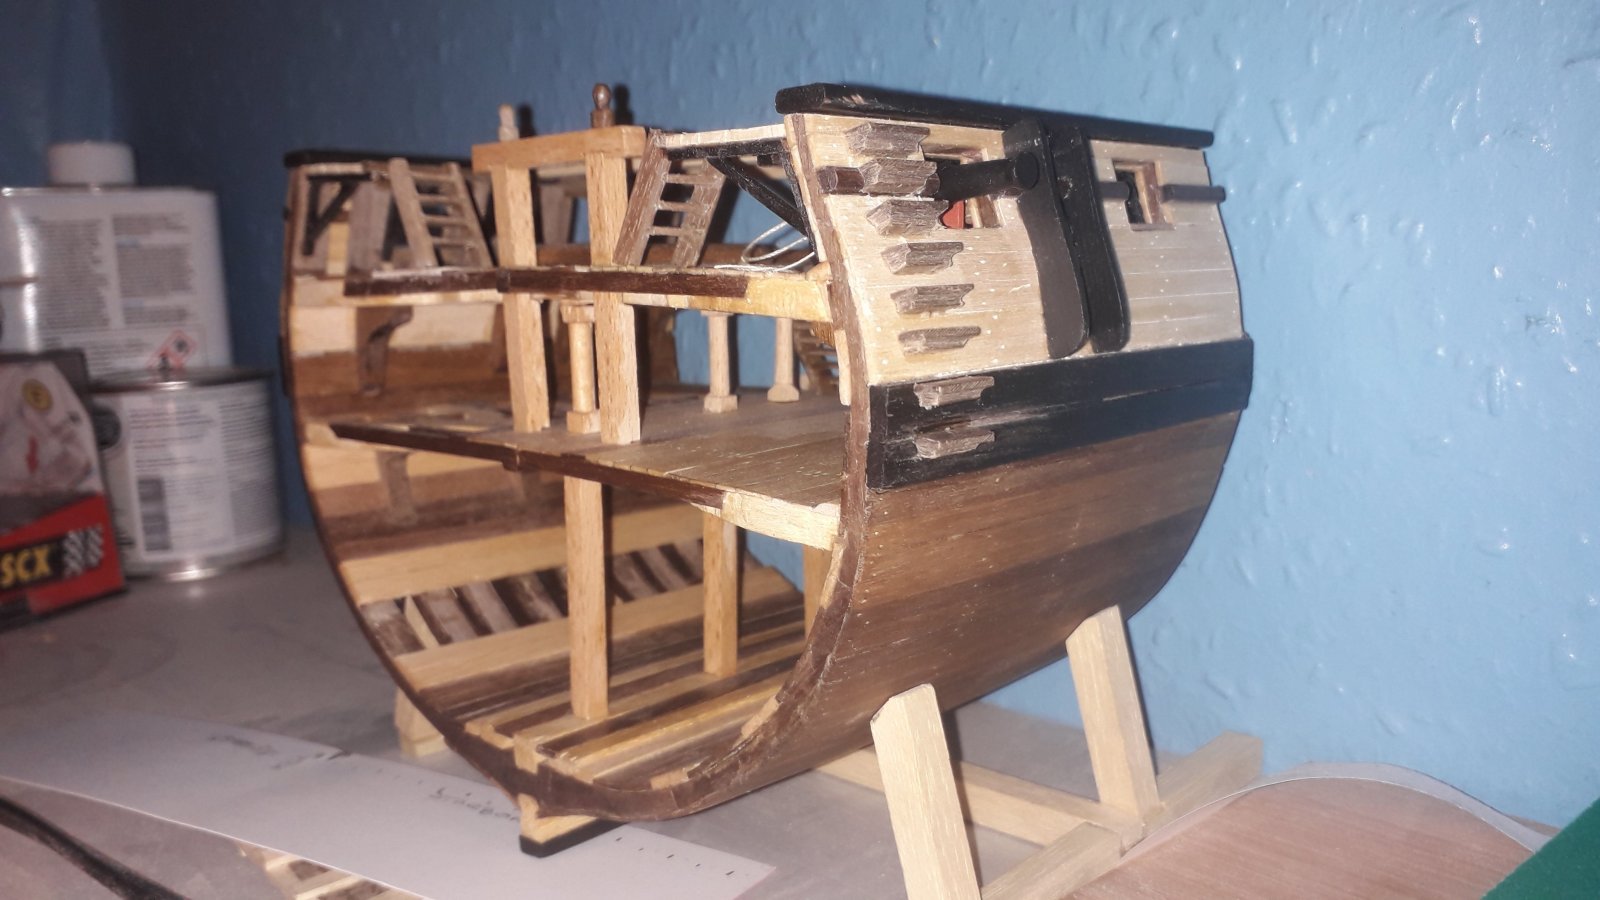
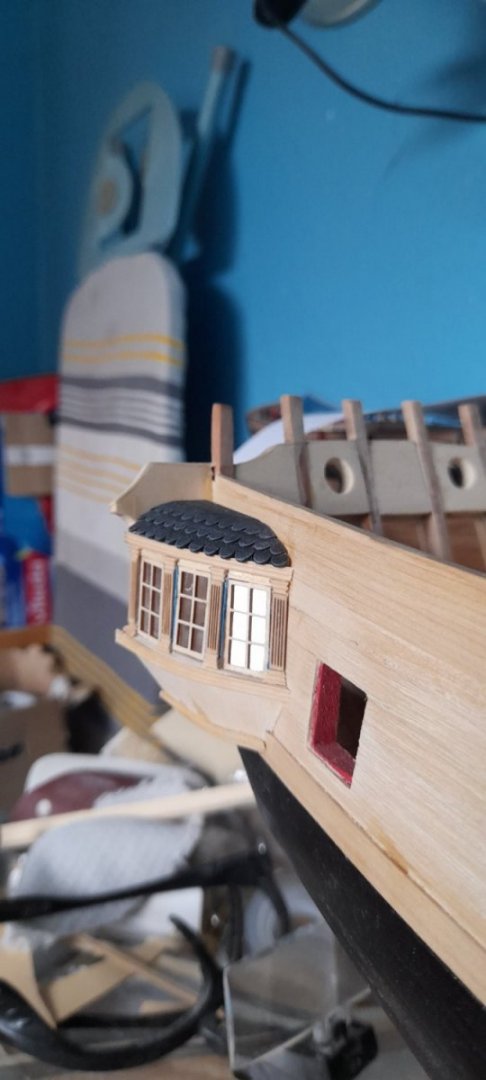
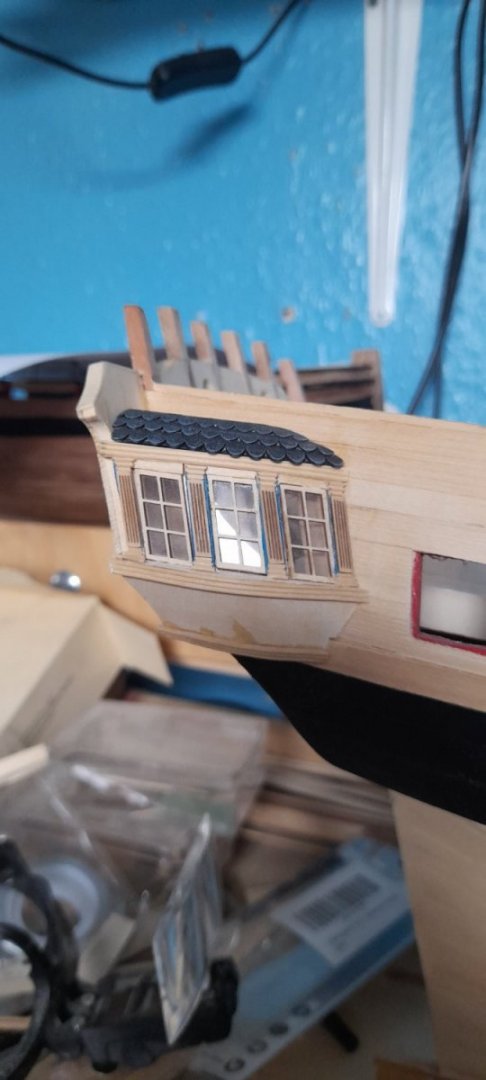
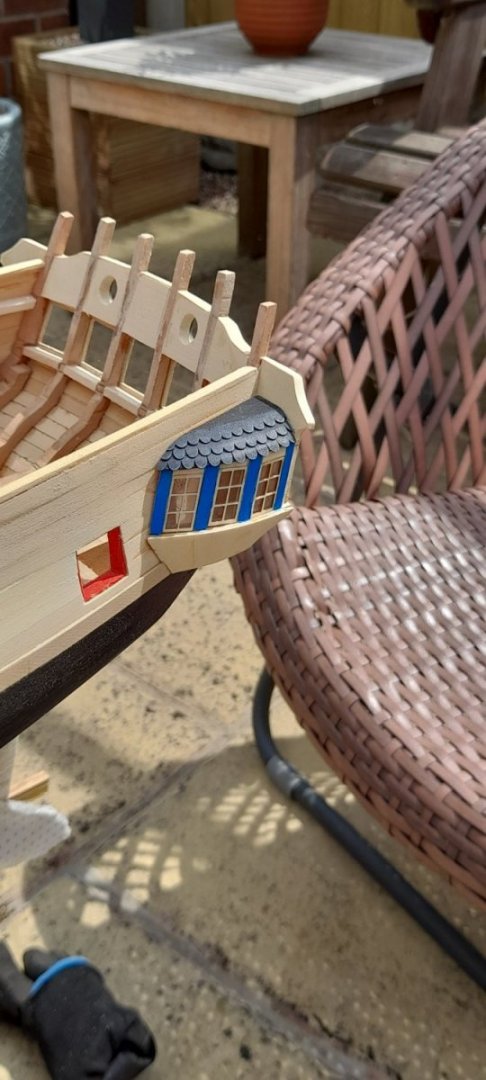
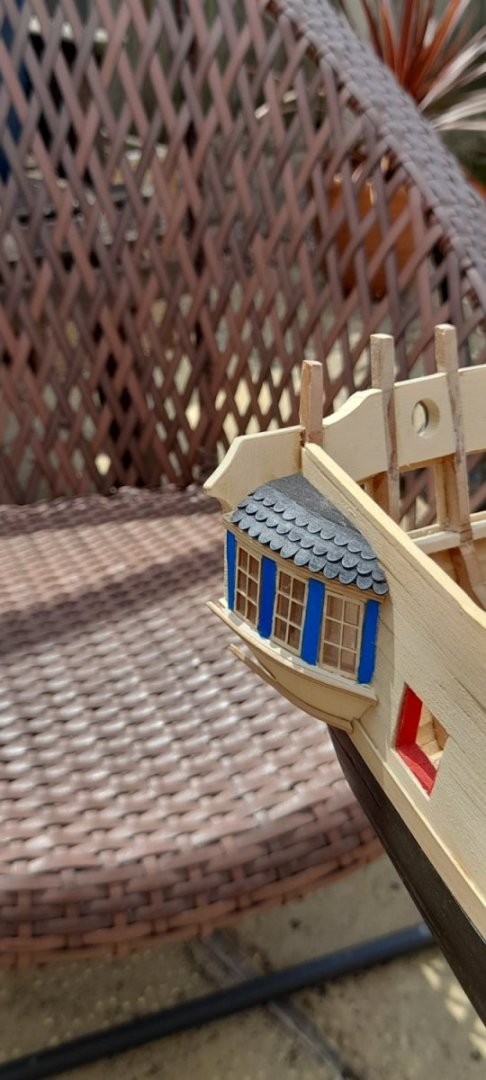
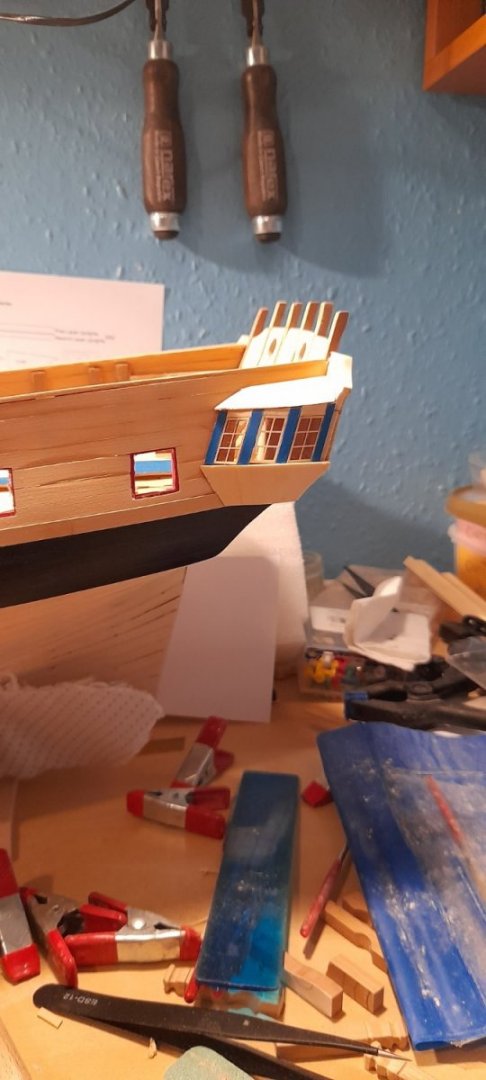
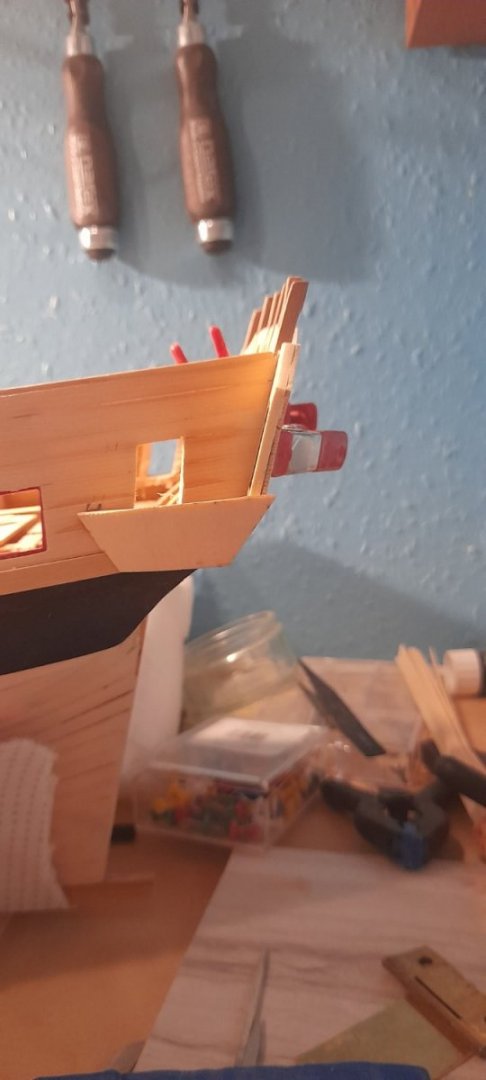
So, the QGs are progressing, with some very cautious ungluing and re-gluing, the windows are so fragile 😳 I'm totally in awe of everyone who's already done this part, and made it look effortless. the roof is not glued on, just placed on to see. the opposite side is better, and with a touch of colour. I have several areas of planking, mainly between the gunports that have been, or need removing, mostly like the two in the above photo. But I'm moving forward on the build😊 thanks for the likes and looking in. Cheers
-
Very nice rendition of a familiar subject, the display area is perfect, and bravo for hanging in with the model, I admit the card ones beat me😉
-
welcome to MSW Rob!
-
It's coming to life! Looking excellent so far OC. Your pile of casualties is great, some very intricate brushwork.
-
and welcome to MSW, Brad.
-
Lurked for a few weeks. Here's my intro
Edwardkenway replied to Mark m's topic in New member Introductions
Mark, welcome to MSW -
You could leave that detail off the troops that are very difficult to get at, only you and we few here would know🤫
-
Mitsubishi A6M2b by CDW - Tamiya - 1:72 scale - Finished
Edwardkenway replied to CDW's topic in Non-ship/categorised builds
Nicely done Craig -
Jim! Welcome to MSW
-
M3 Lee Tank by CDW - Miniart - 1:35 Scale - FINISHED
Edwardkenway replied to CDW's topic in Non-ship/categorised builds
Come on up Lou, I've been waiting to start on the brittle 😉😋 -
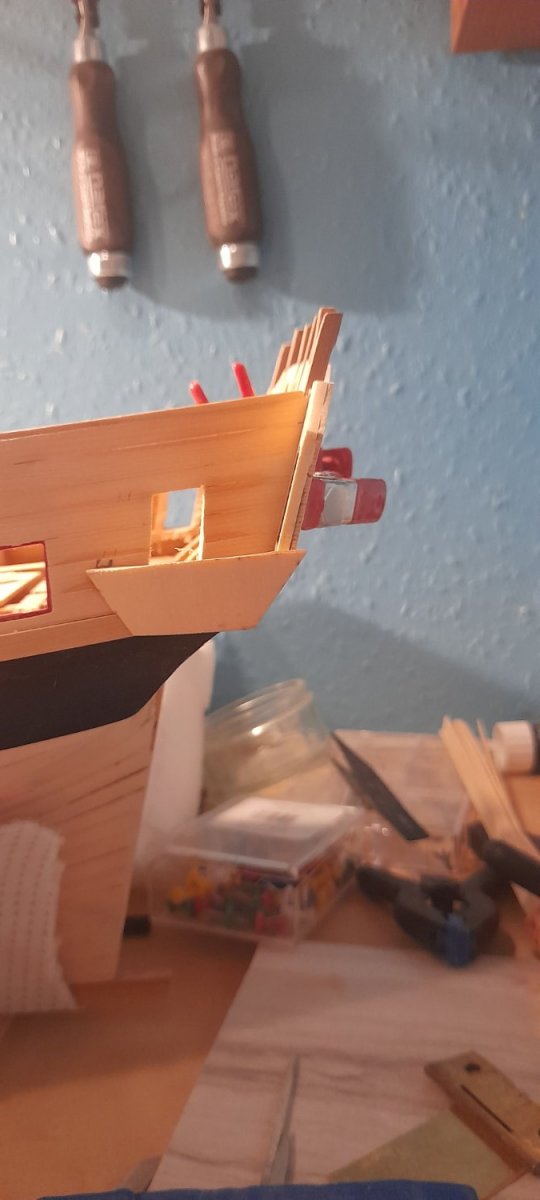
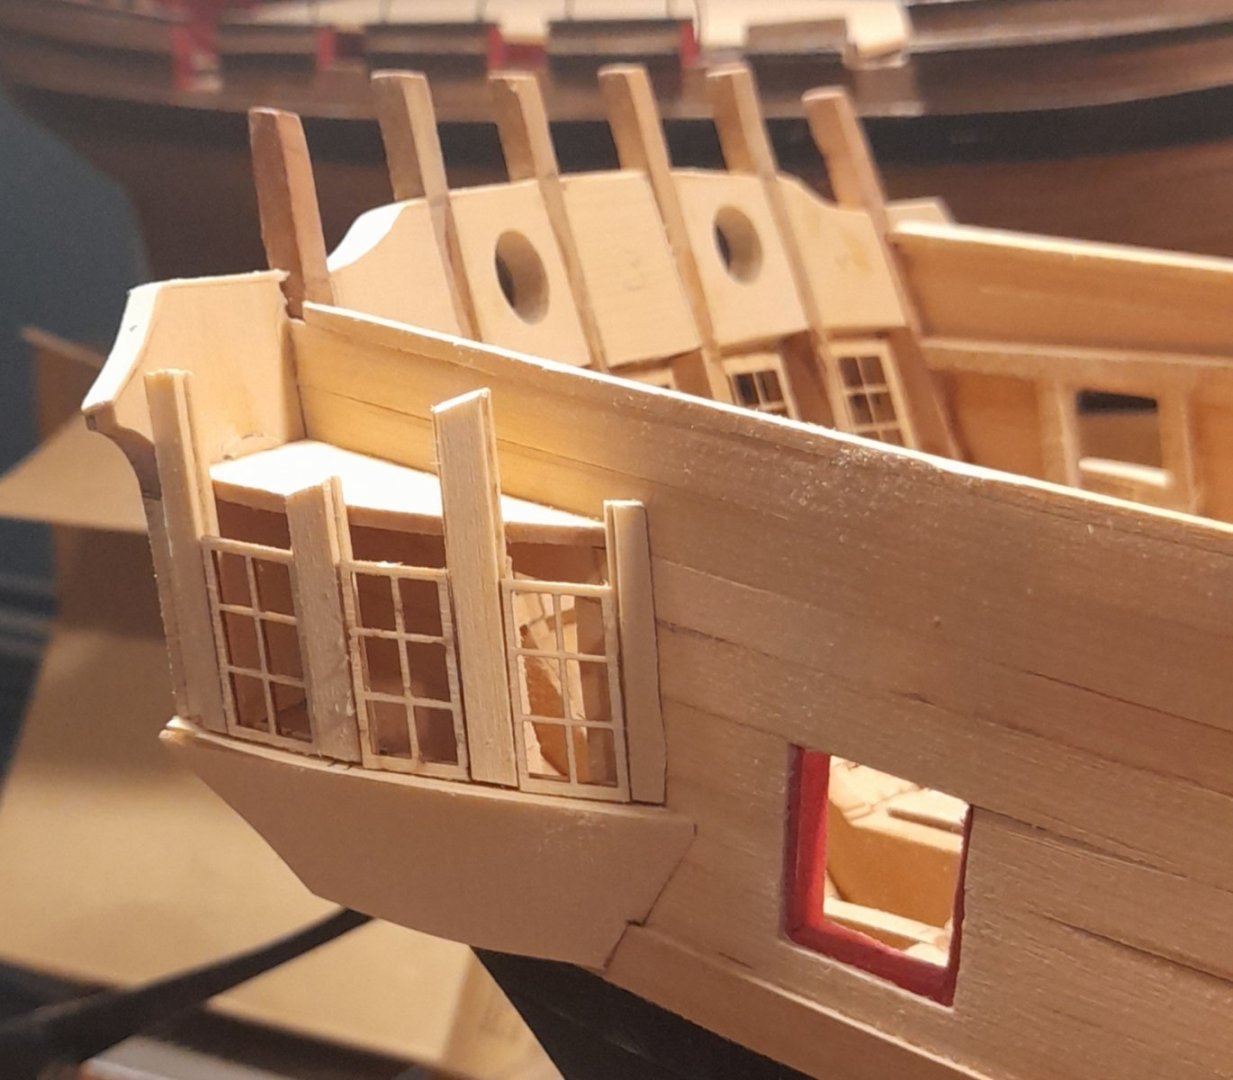
Quarter galleries are started, I'm so glad I purchased the laser cut parts for this chapter😊 note to self is do more dry fits before gluing 🙄 some sanding to do, but I'm pleased with myself upto now😉 Honestly though most credit must go to Chuck's very detailed instructions! Thanks for looking in, the likes and comments. Cheers

-
welcome to MSW
-
F-86F-30 Sabre by Egilman - Kinetic - 1/32nd scale
Edwardkenway replied to Egilman's topic in Non-ship/categorised builds
Yep, lots of rest, so take it easy, we're all patient fellas😉 -
F-86F-30 Sabre by Egilman - Kinetic - 1/32nd scale
Edwardkenway replied to Egilman's topic in Non-ship/categorised builds
Bravo! Looks great to my amateurs eye EG. Excellent work, all the drafting work realised.😉 -
Your planking is coming along absolutely gorgeously. You'll soon be starting chapter 3 and then I can follow your example.
- 840 replies
-
- 3
-
-
- winchelsea
- Syren Ship Model Company
- (and 1 more)
-
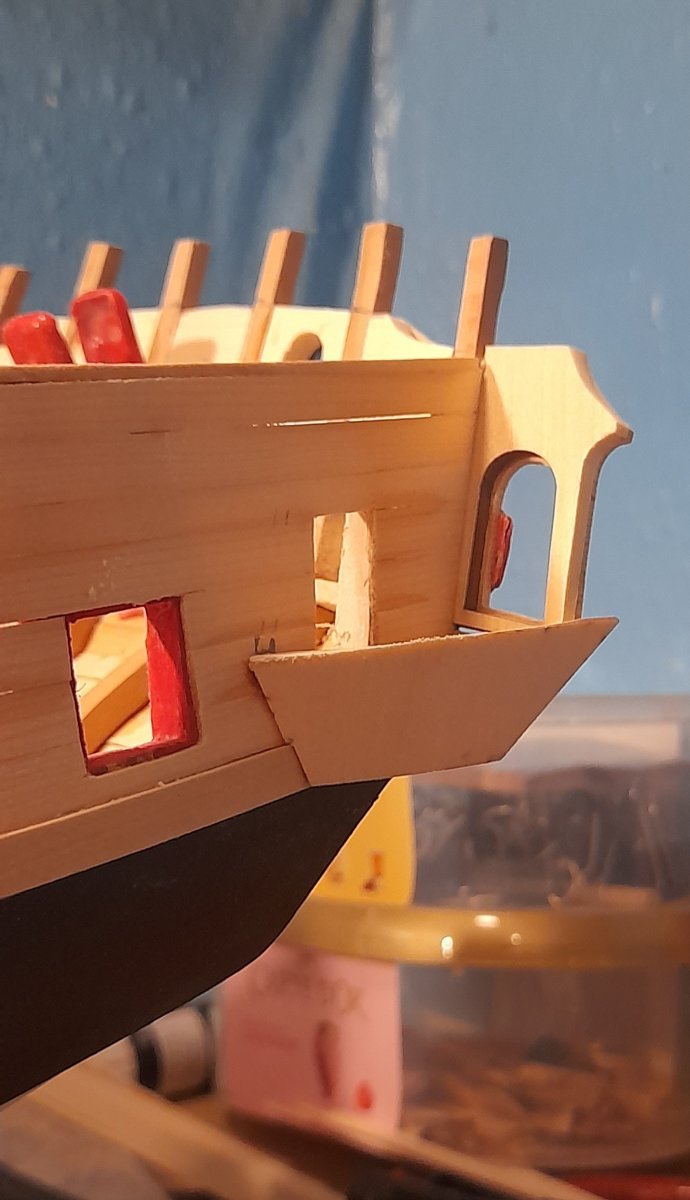
Hi, planking the HRU is still ongoing. The port side is almost done, starboard 3/4 done. I've fitted one bulwark bench so I can make up the side to the cap rail. There is an flotation aid to fix to the hull, roughly at the area where the wales would be on a ship. It may be a while before the next update as I'm back working on Winchelsea as well. Many thanks for the likes, all encouragement is greatly appreciated. Cheers

- 30 replies
-
- 14
-
-

-
- small
- clinker built
- (and 2 more)