Rob S
-
Posts
339 -
Joined
-
Last visited
1 Follower
-
 FrankieYoung reacted to a post in a topic:
HMS Victory by Rob S - Mamoli - 1/90th scale - first build - Terminated
FrankieYoung reacted to a post in a topic:
HMS Victory by Rob S - Mamoli - 1/90th scale - first build - Terminated
-
etubino reacted to a post in a topic:
HMS Victory by Rob S - Mamoli - 1/90th scale - first build - Terminated
-
Rob S reacted to a post in a topic:
HMS Victory by Pfälzer - Corel - 1:98
-
Rob S reacted to a post in a topic:
Santisima Trinidad by Cleat - OcCre - 1/90 - cross-section
-
Rob S reacted to a post in a topic:
HMS Victory by Rob S - Mamoli - 1/90th scale - first build - Terminated
-
Henke reacted to a post in a topic:
HMS Victory by Rob S - Mamoli - 1/90th scale - first build - Terminated
-
Gregory reacted to a post in a topic:
HMS Victory by Rob S - Mamoli - 1/90th scale - first build - Terminated
-
 I've reached the point in this build where I will call it 'Finished' although in the traditional sense it is far from it. I never intended to complete all the masts and rigging work and to end at a 'hull down' state, but as you can see, I've not reached that state either - by a long shot. As I stated in my very first post in July '19 when this journey began, I had been carrying the kit around for many years before actually opening the box and beginning what seems like yesterday. As I familiarized myself with the abundant site information and read the wise suggestions from many of you, a key thread I noted was not to undertake a project of this magnitude as your very first wooden ship. I of course, did not listen and jumped in with both feet. As time went on and as evidenced by the kit progress and subsequent results, I did not possess the skill set to properly assemble the kit. Lack of skill coupled with a Mamoli kit that was not known for it's quality had the makings for a bumpy ride. That bumpy ride was mitigated by many of the suggestions you kindly brought my way and for which I'm extremely grateful. That said, we've reached the end of this journey due primarily to the type (e.g., small railings) of work required vs. the poor state (e.g., size, brittleness, etc.) of the wood bits I have for the work and my lack of skill for such work. So it's farewell for now and I wish you all fair seas in your modeling endeavors!
 -
Bill Morrison reacted to a post in a topic:
HMS Victory by Rob S - Mamoli - 1/90th scale - first build - Terminated
-
Bill Morrison reacted to a post in a topic:
HMS Victory by Rob S - Mamoli - 1/90th scale - first build - Terminated
-
Bill Morrison reacted to a post in a topic:
HMS Victory by Rob S - Mamoli - 1/90th scale - first build - Terminated
-
Bill Morrison reacted to a post in a topic:
HMS Victory by Rob S - Mamoli - 1/90th scale - first build - Terminated
-
Bill Morrison reacted to a post in a topic:
HMS Victory by Rob S - Mamoli - 1/90th scale - first build - Terminated
-
Bill Morrison reacted to a post in a topic:
HMS Victory by Rob S - Mamoli - 1/90th scale - first build - Terminated
-
Rob S reacted to a post in a topic:
HMS Victory by Rob S - Mamoli - 1/90th scale - first build - Terminated
-
Thanks Gregory and sorry Rob B for such a long time in responding. As stated, no parts list. I've found it extremely beneficial to be patient and review the instructions carefully step by step to identify the type and measurement of the material called for. Using the wrong material, as I have in some cases, comes back to bite you later. The differences can be slight (a mm here or there...). I'm doing a lot of searching to find the called for material, and if I can't find it will have to figure out an alternate way to identify suitable replacement wood or another way forward entirely.
-
Rob S reacted to a post in a topic:
HMS Victory by Rob S - Mamoli - 1/90th scale - first build - Terminated
-
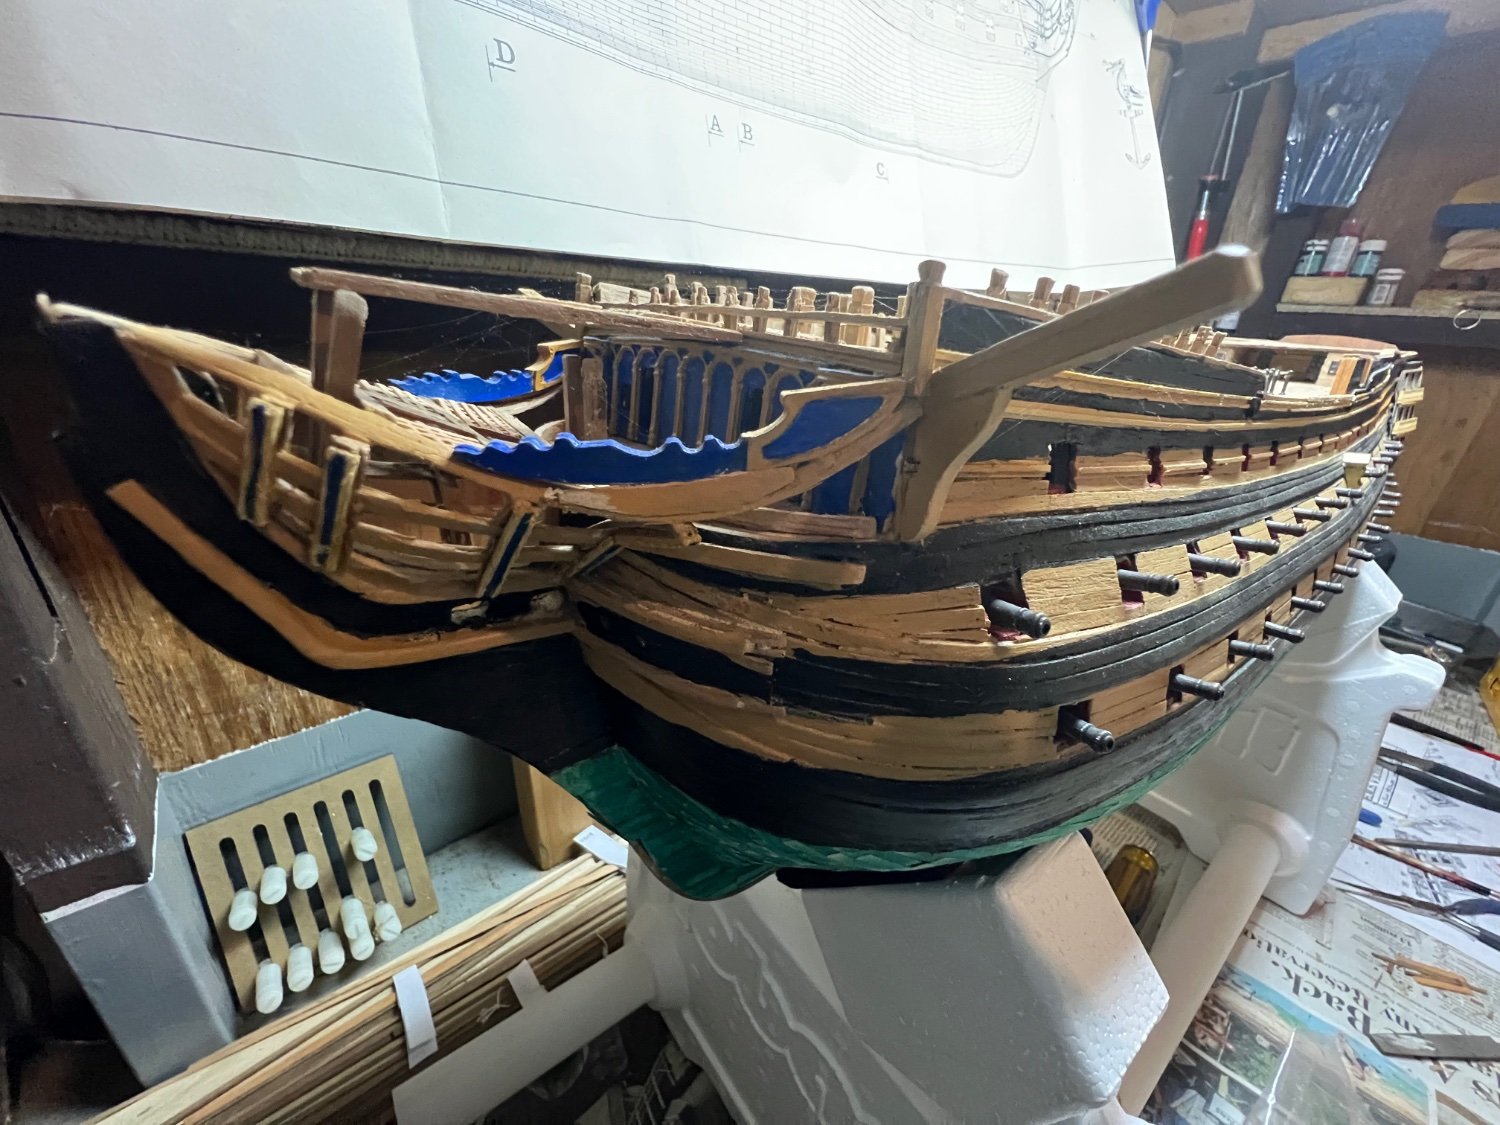
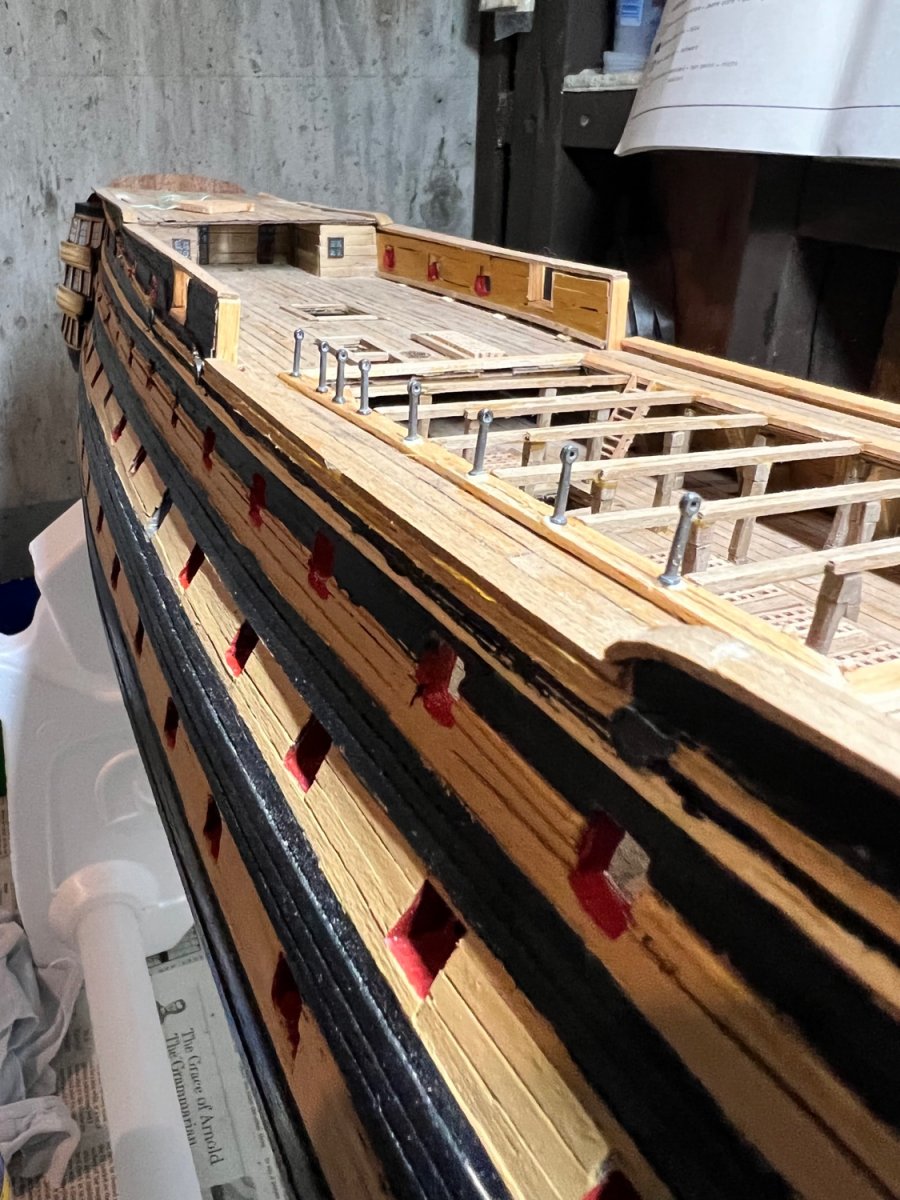
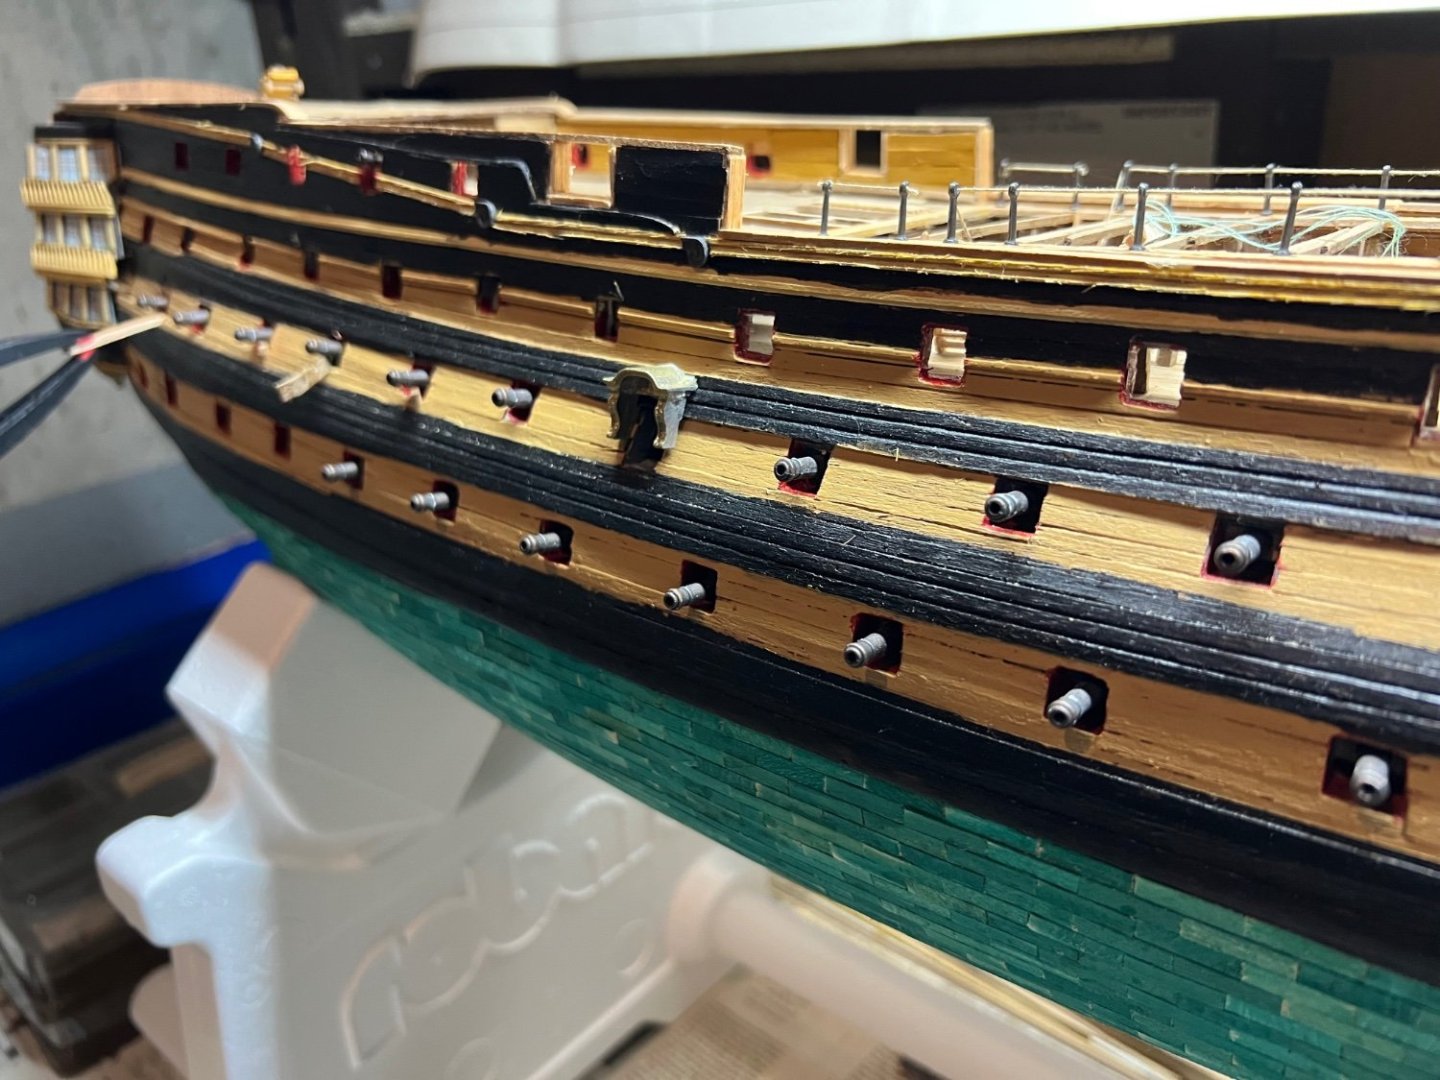
I decided to start adding the lower deck cannons before continuing with the deck finishing efforts.
-
Rob S reacted to a post in a topic:
HMS Agamemnon by Henke - Caldercraft - 1:64
-
Rob S reacted to a post in a topic:
HMS Agamemnon by Henke - Caldercraft - 1:64
-
Rob S reacted to a post in a topic:
HMS Agamemnon by Henke - Caldercraft - 1:64
-
Rob S reacted to a post in a topic:
HMS Agamemnon by Henke - Caldercraft - 1:64
-
Rob S reacted to a post in a topic:
HMS Victory 1805 by kiwiron - Caldercraft - 1:72
-
Henrik - Glad to hear you are well on your way to a sound and healthy recovery. Your Aggie is a beautiful ship and I’m sure you will be back at it when the time is right. Take care my friend:)
-
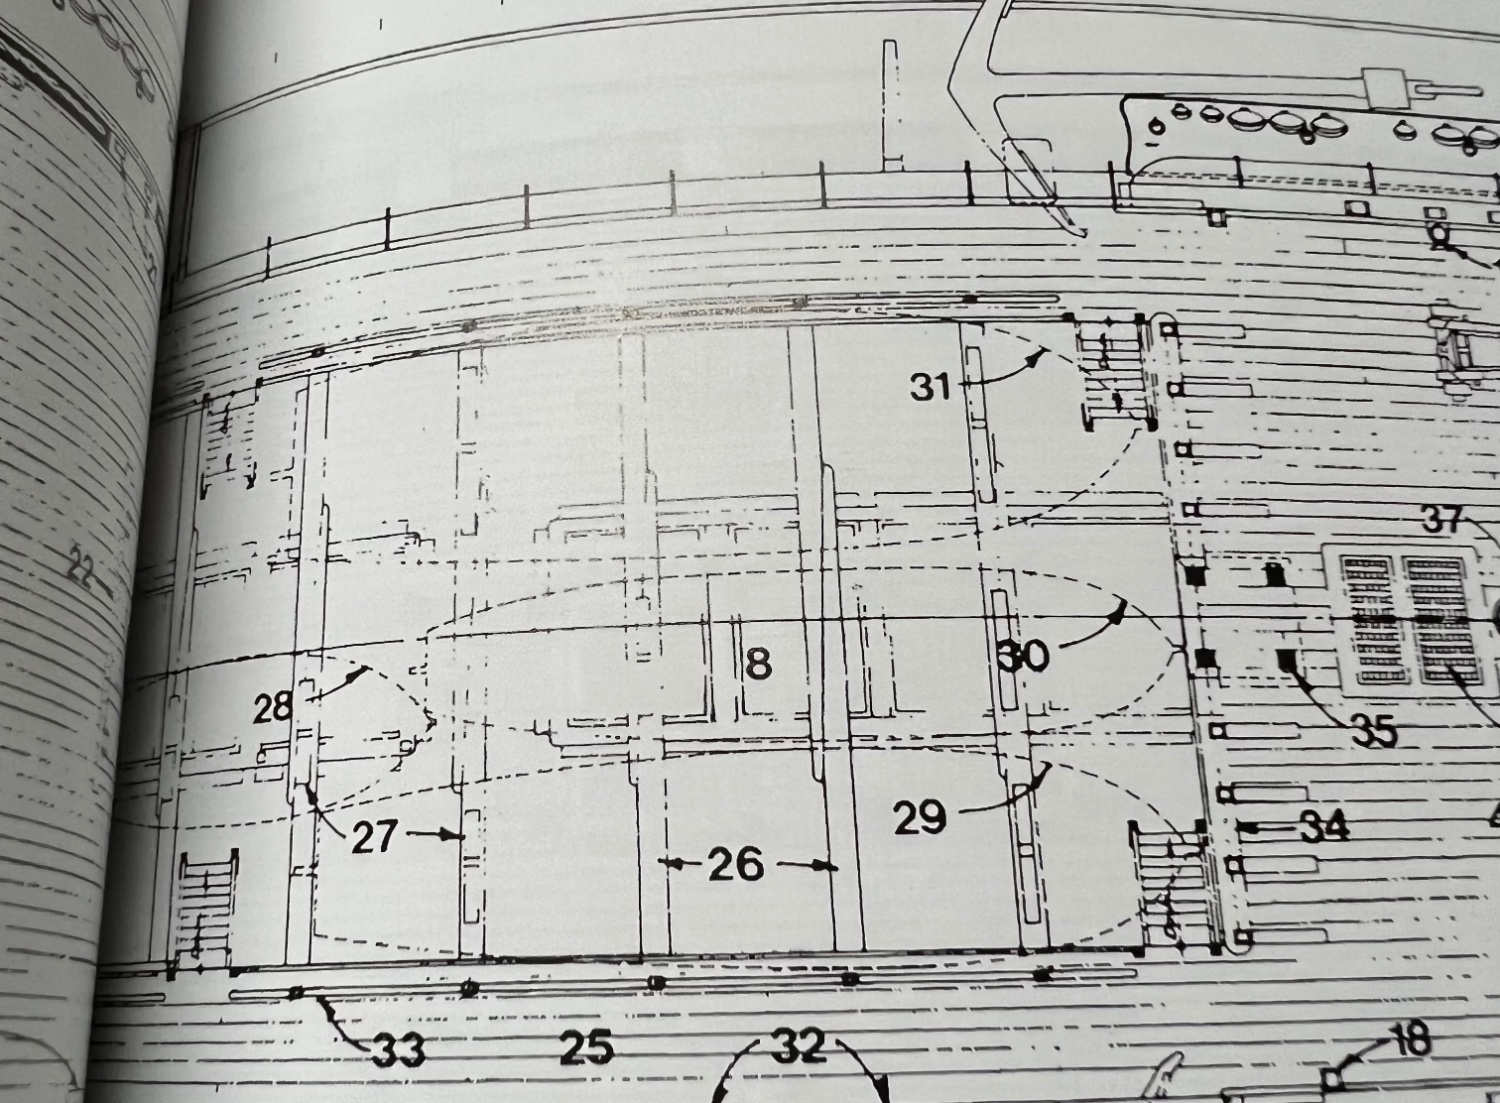
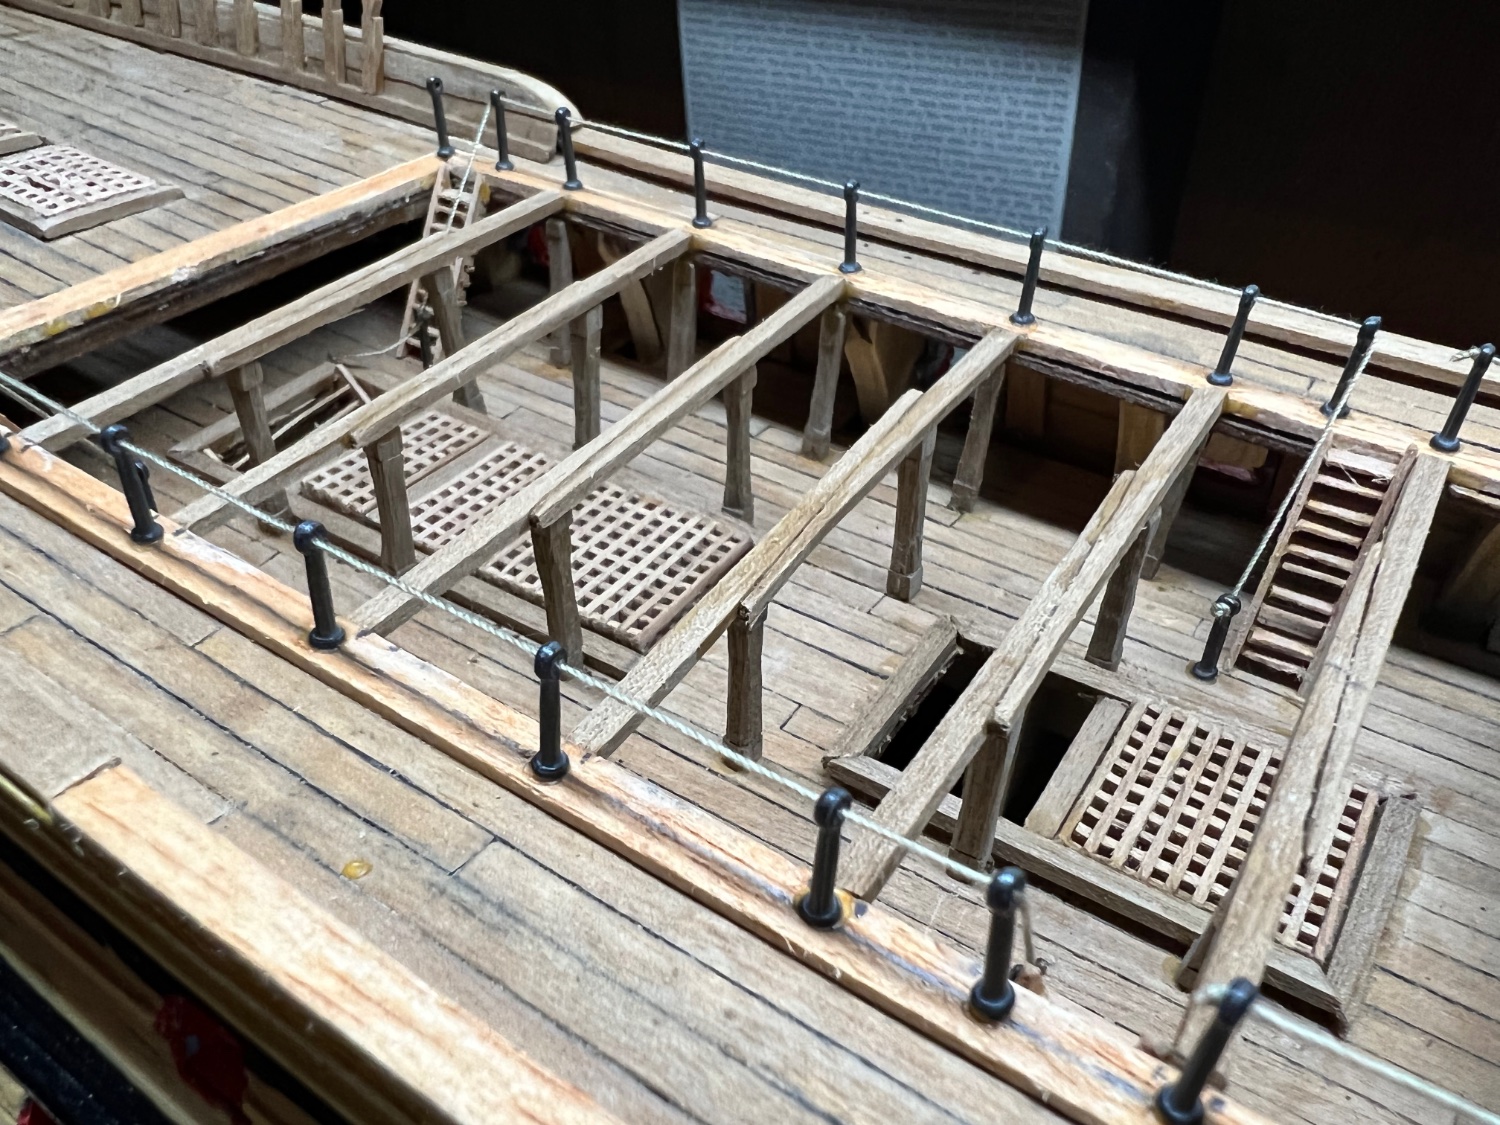
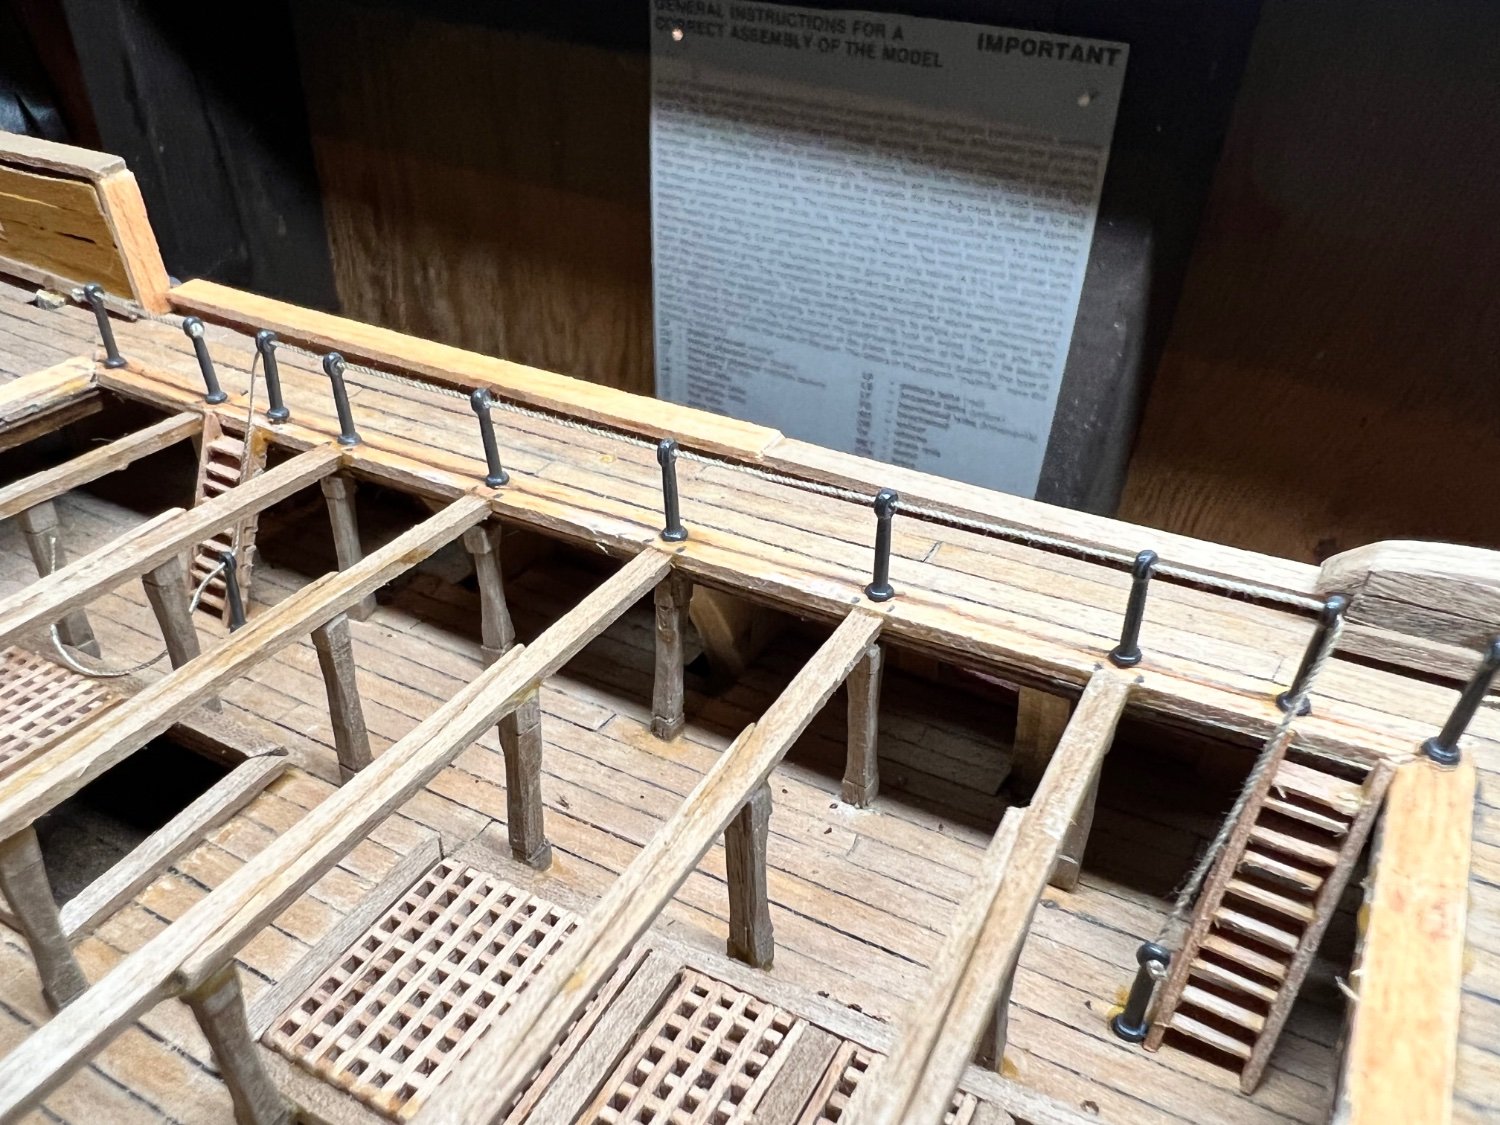
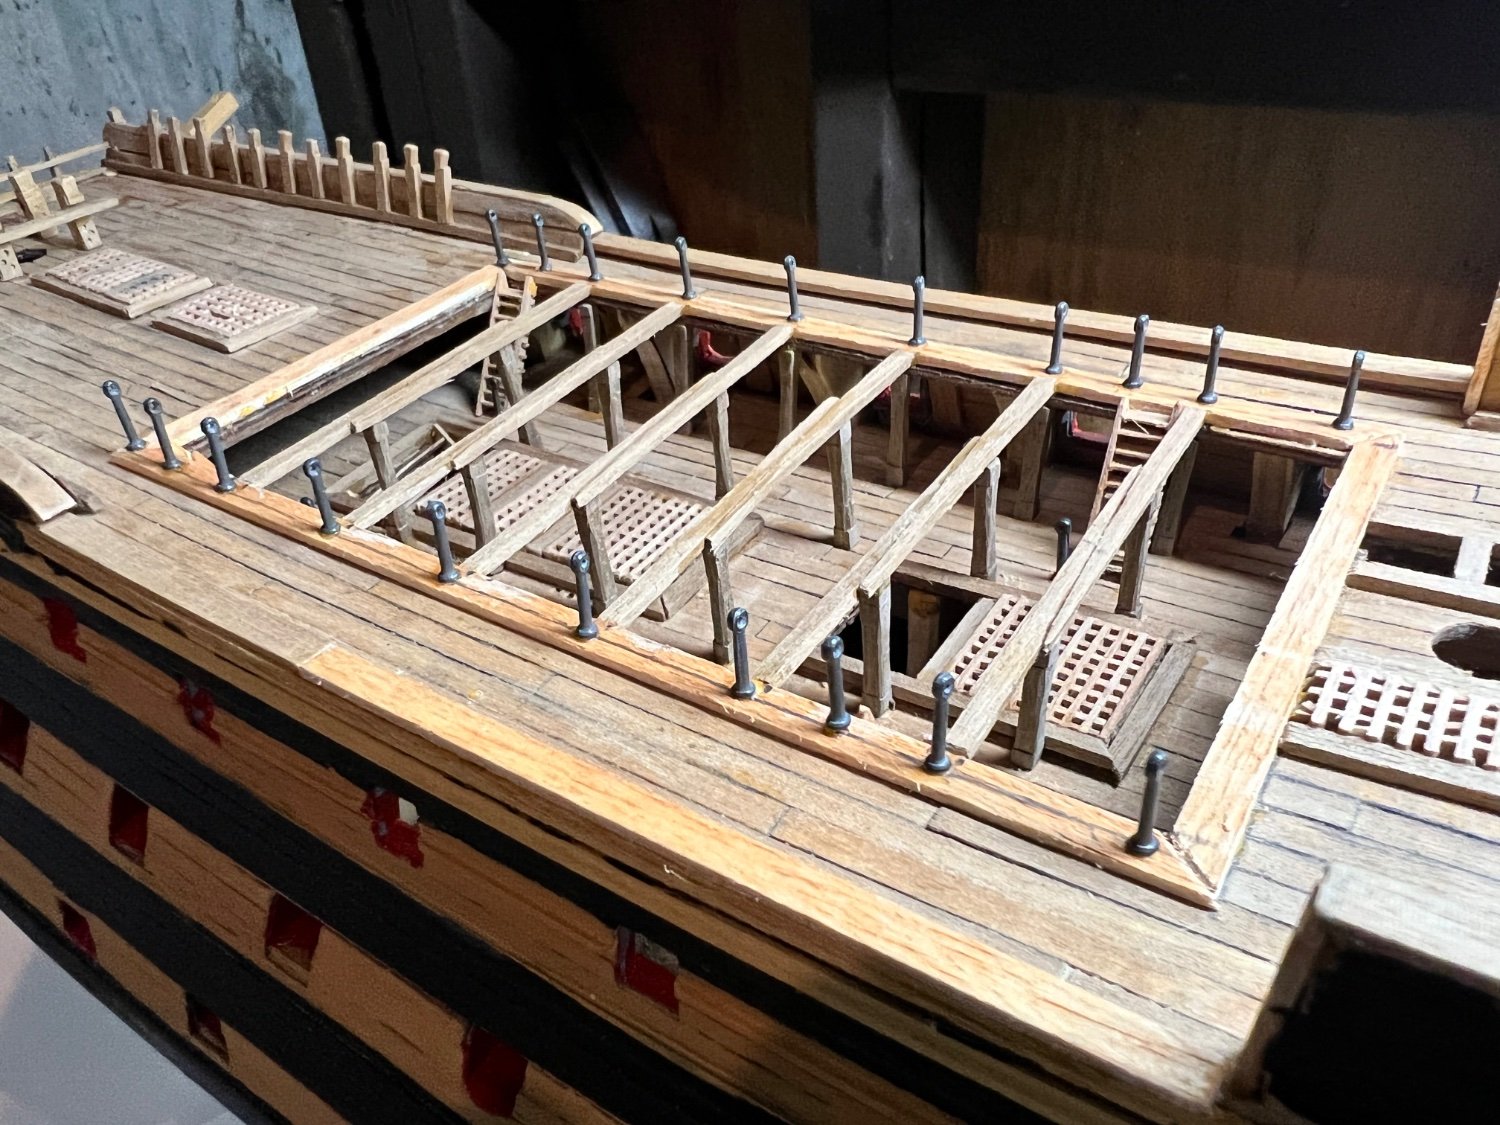
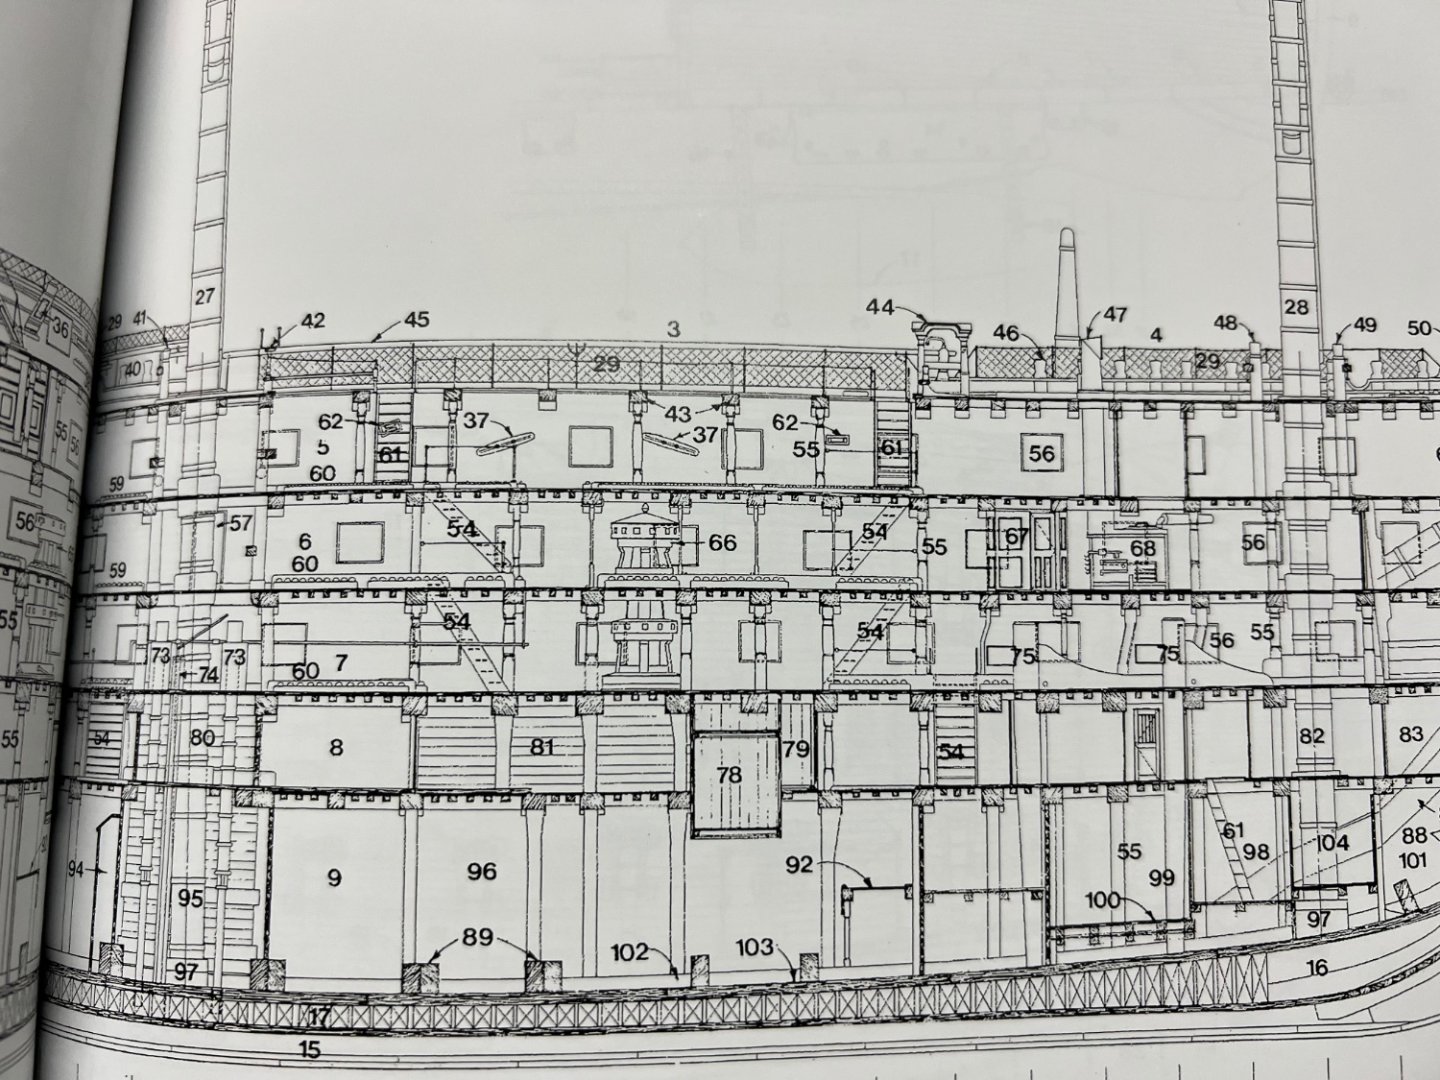
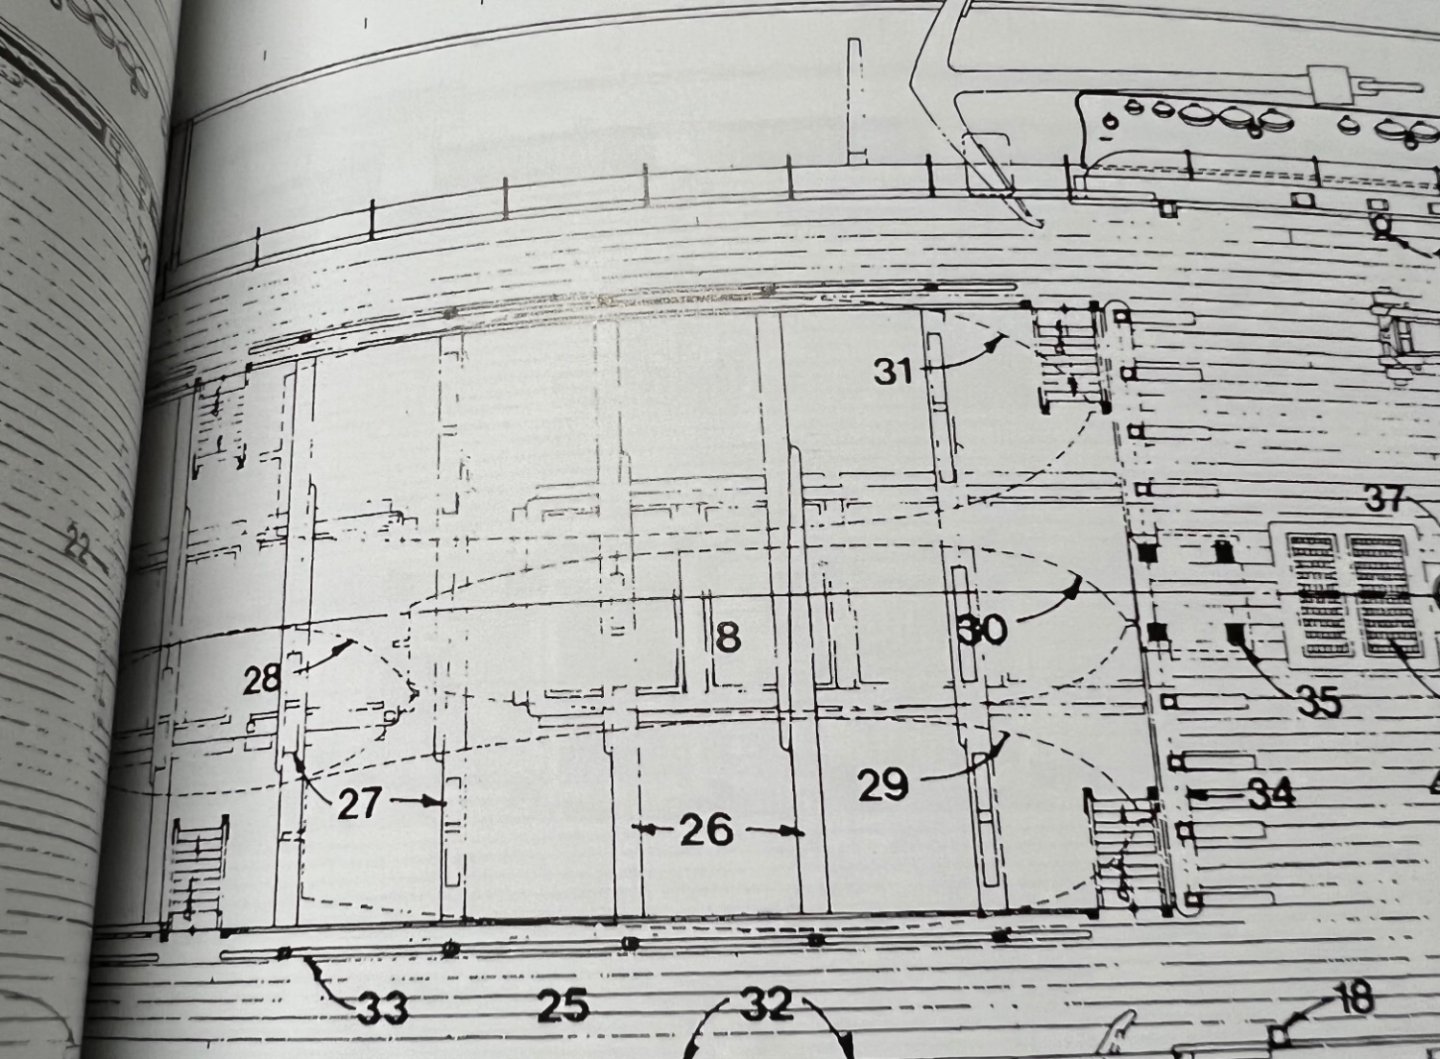
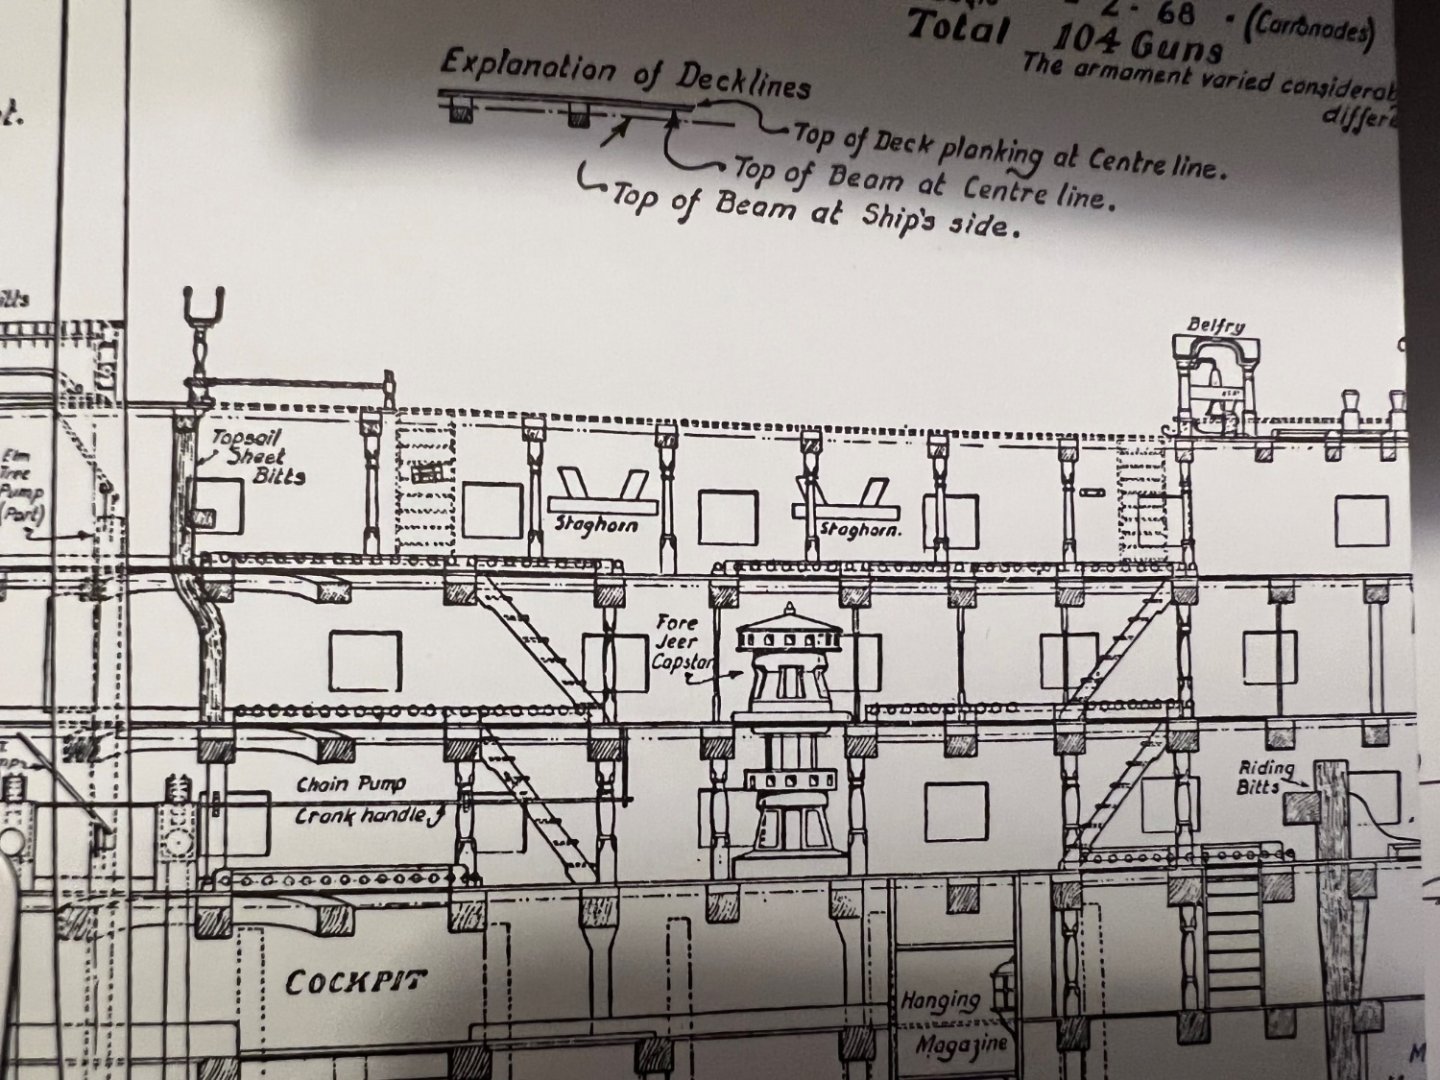
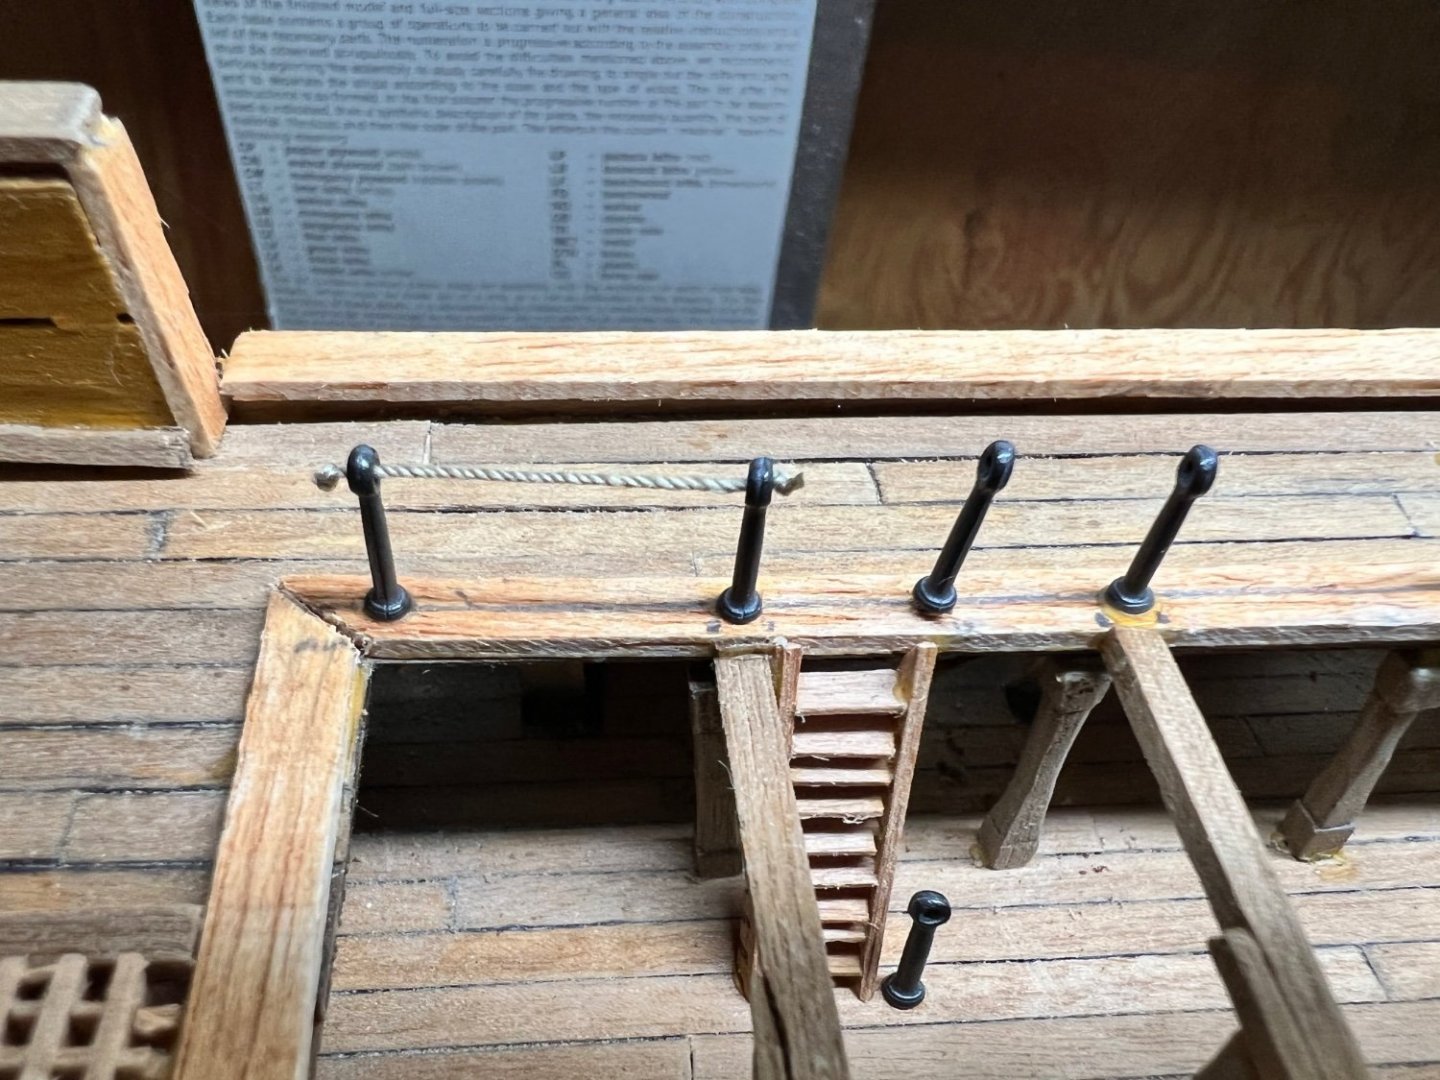
The skid beam pillars are also shown in McKay’s ‘The 100-Gun Ship Victory’, page 38. Rails are depicted on page 40, but the rail material is not specified.
-
Thanks Allan. The skid beam pillars are shown in Longridge’s book ‘The Anatomy of Nelson’s Ships’, Plan #1. See attached. I’ll look at the railings. In either case, they both were included with the kit and shown in the instructions.
-
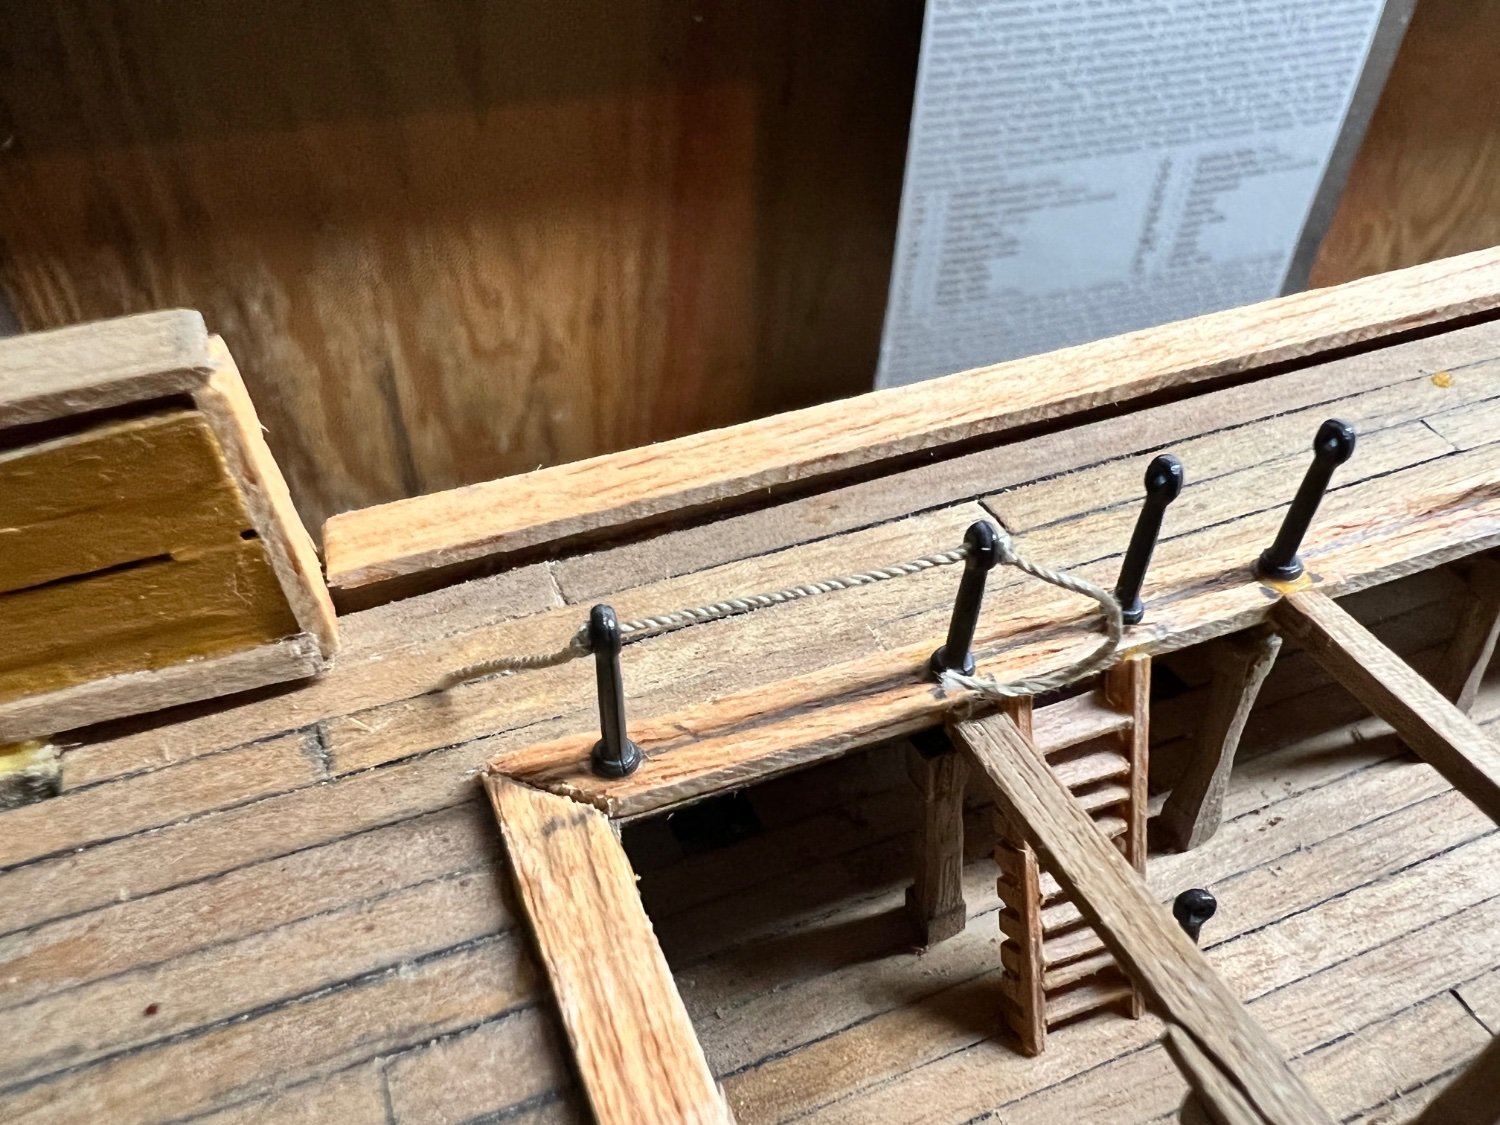
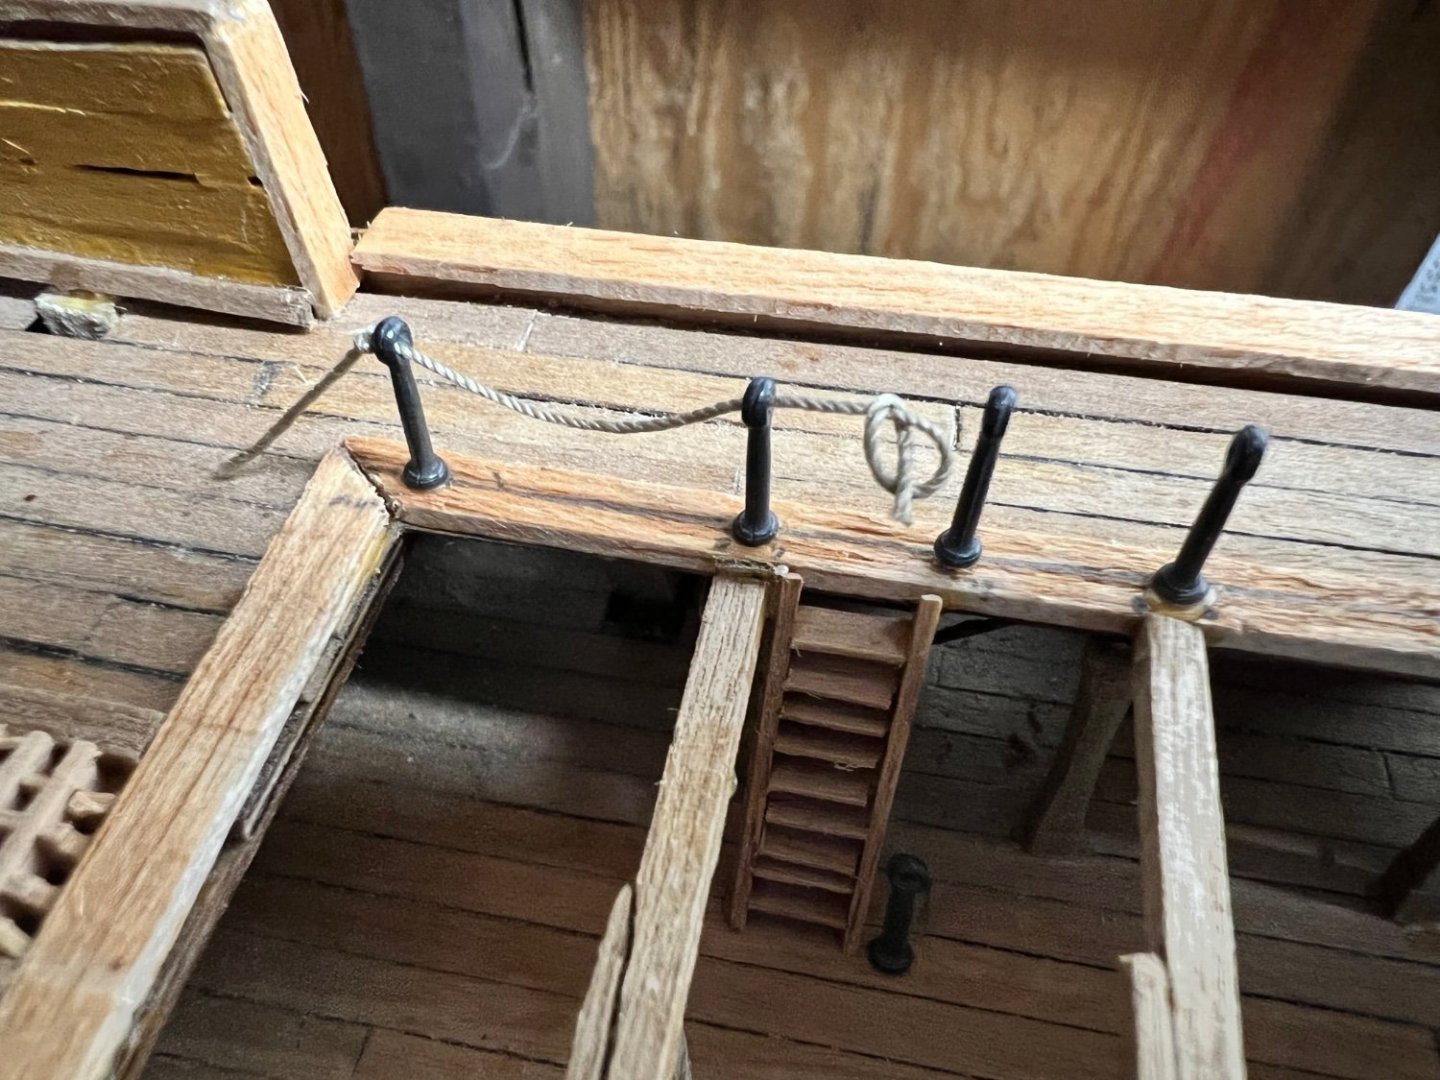
Installing the ropes between the quarterdeck railing. Challenge is keeping the rope taut as I work the knots. Here was the process for the first rope. I’ll look in the rigging section for tips on doing this correctly. Other than that, perhaps YouTube may have some tutorials I can watch.

-
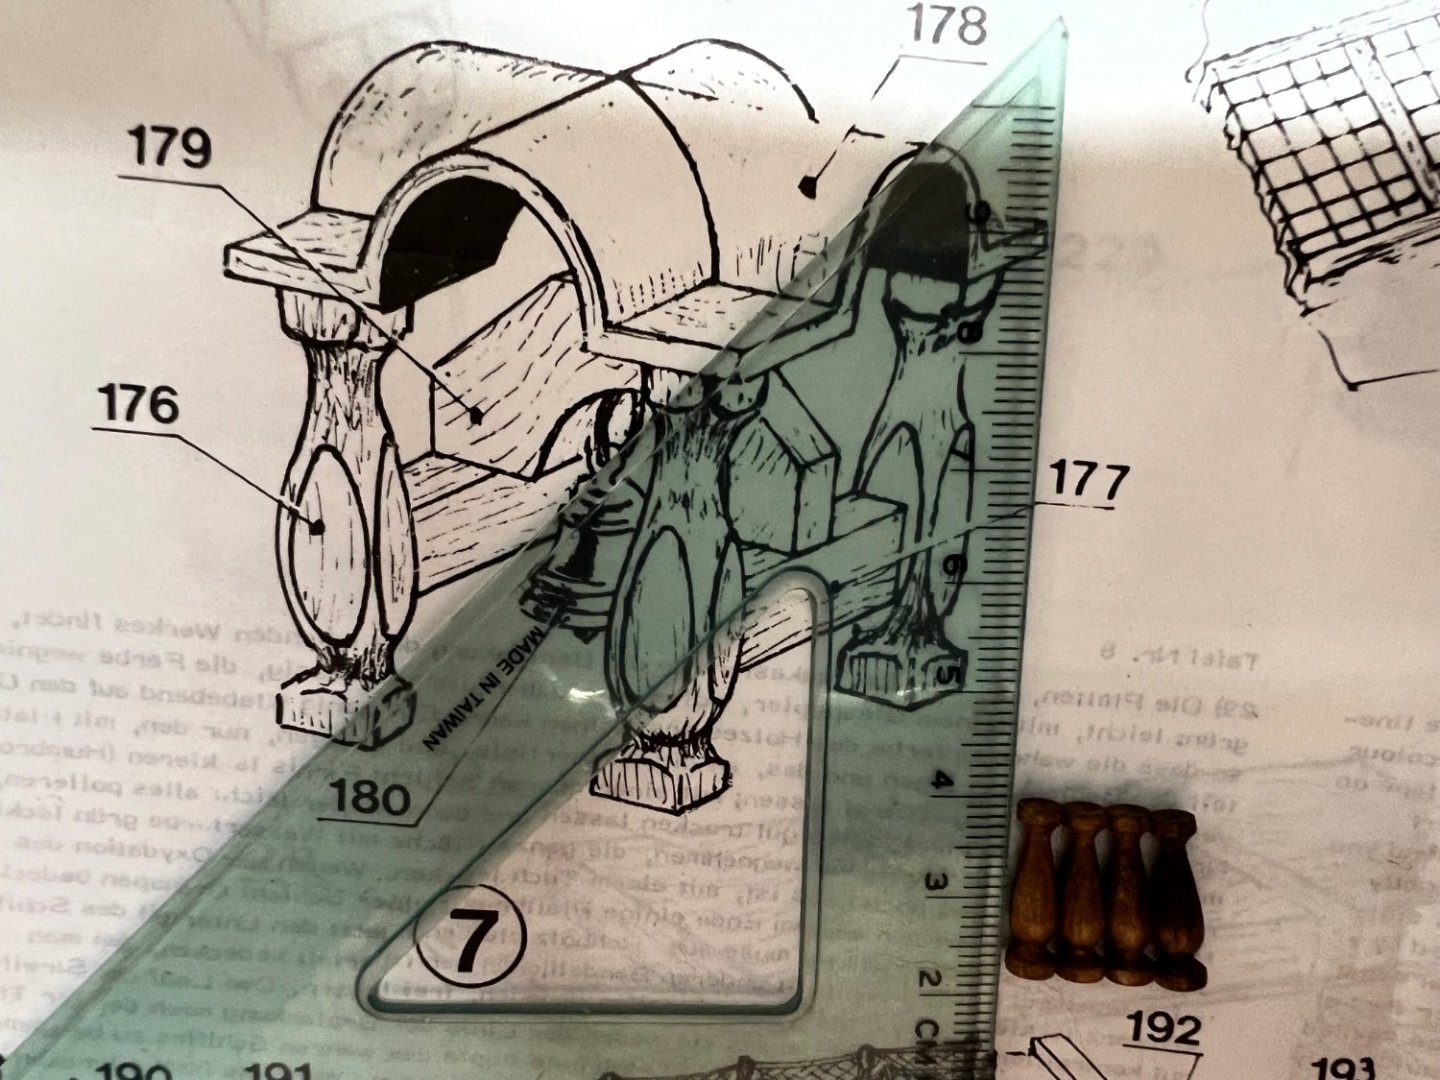
Thank’s for your kind offer Gregory. The balusters match up pretty well per the drawings with the mods shown. I just wanted to ensure I wouldn’t need them later. These 4 should do:)
-
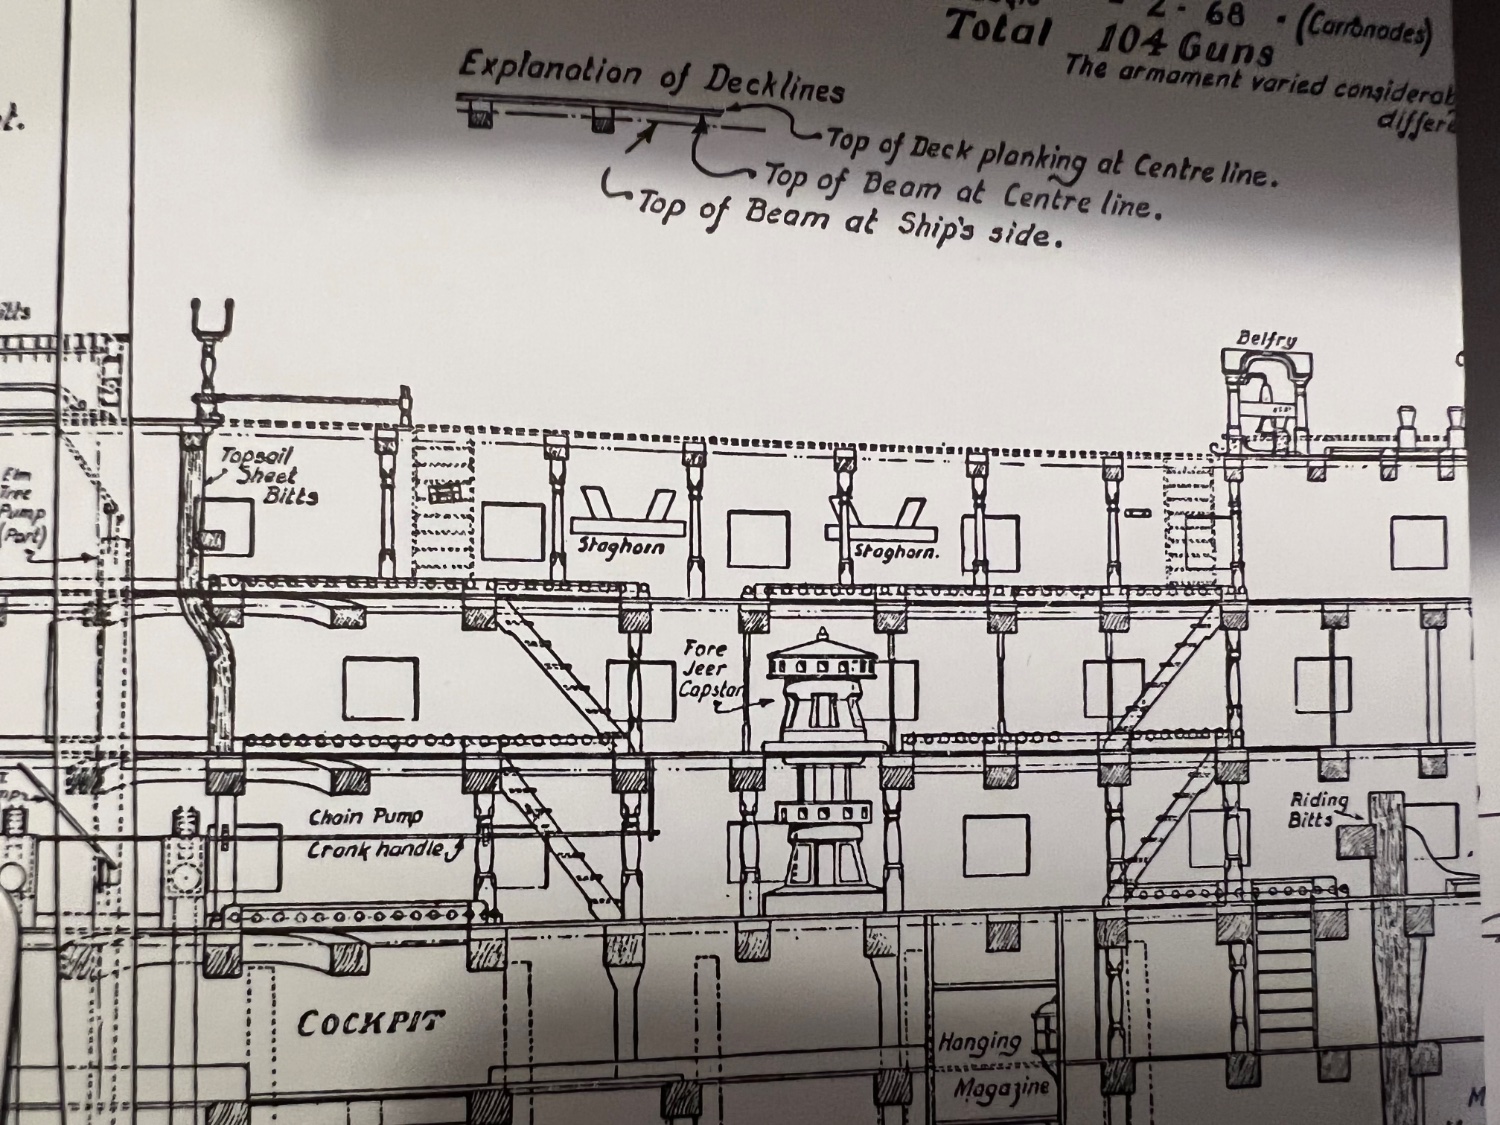
Looking for some help here folks. I’m starting the belfry buildup and not certain if I should be using the shown columns. It’s not clear in the Mamoli directions shown. I don’t want to use these in the belfry only to find out the pieces are required somewhere else in the build. It appears they would need to be modified as shown. Appreciate any thoughts on the matter. Thanks in advance!
-
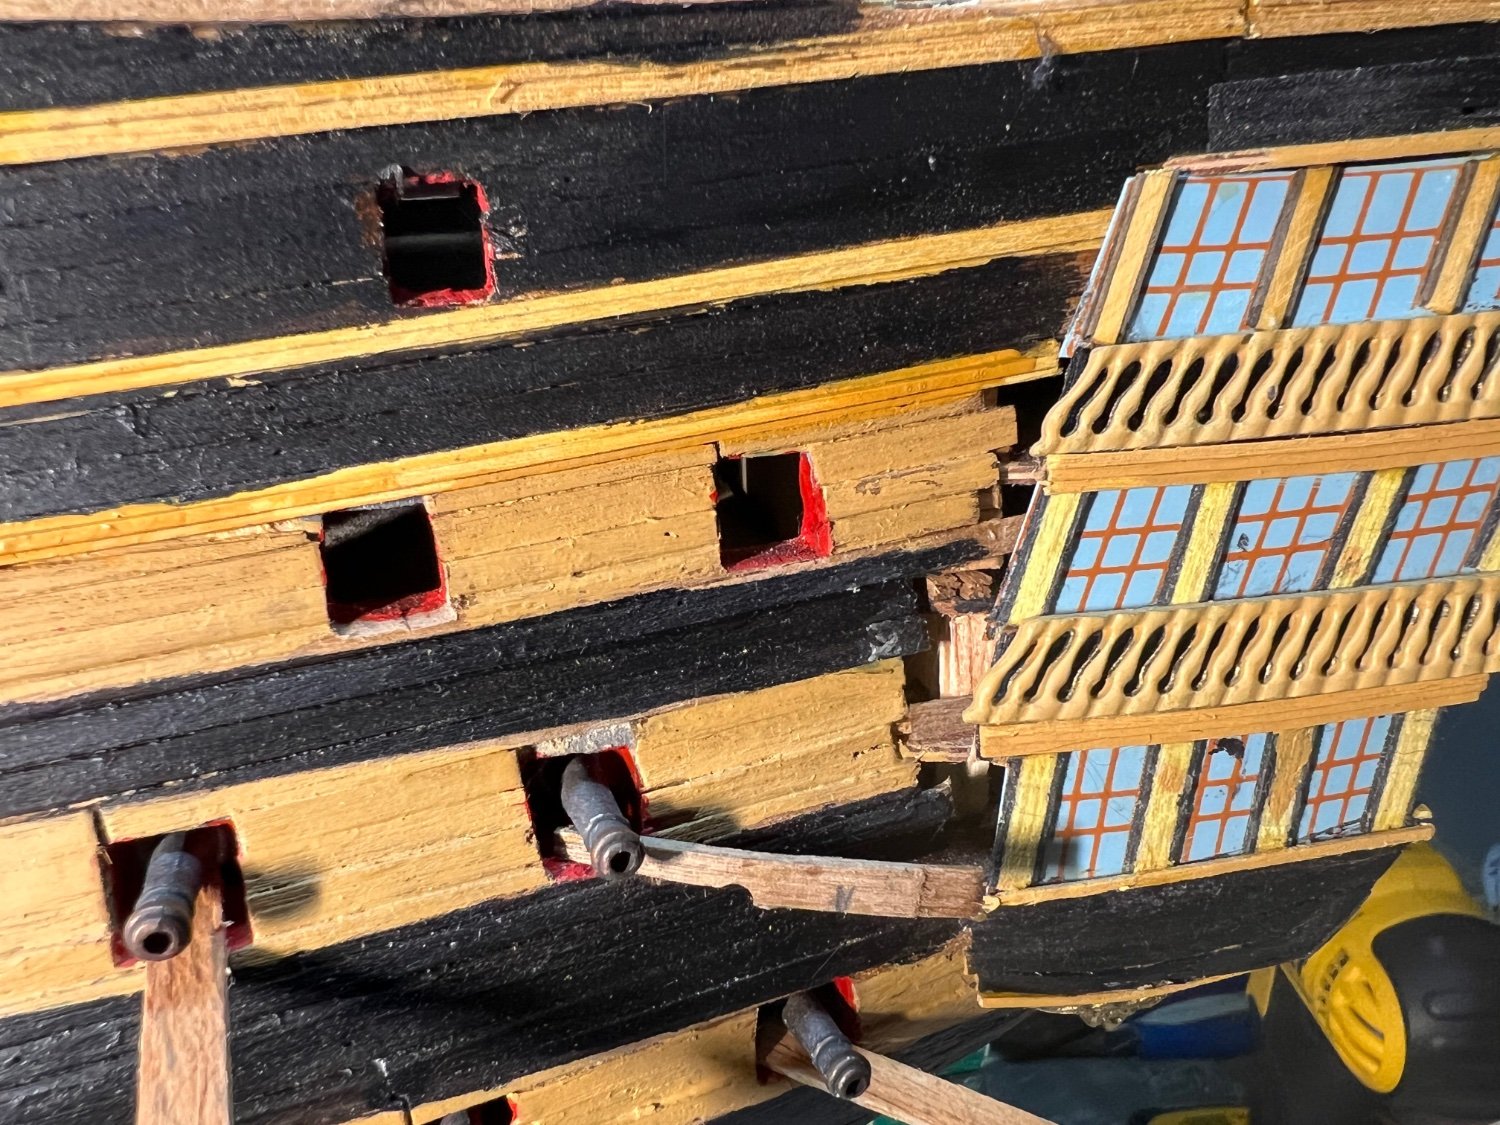
More finishing work. A small hand held/powered drill was very helpful in making the holes.