sire_eris
-
Posts
32 -
Joined
-
Last visited
Content Type
Profiles
Forums
Gallery
Events
Posts posted by sire_eris
-
-
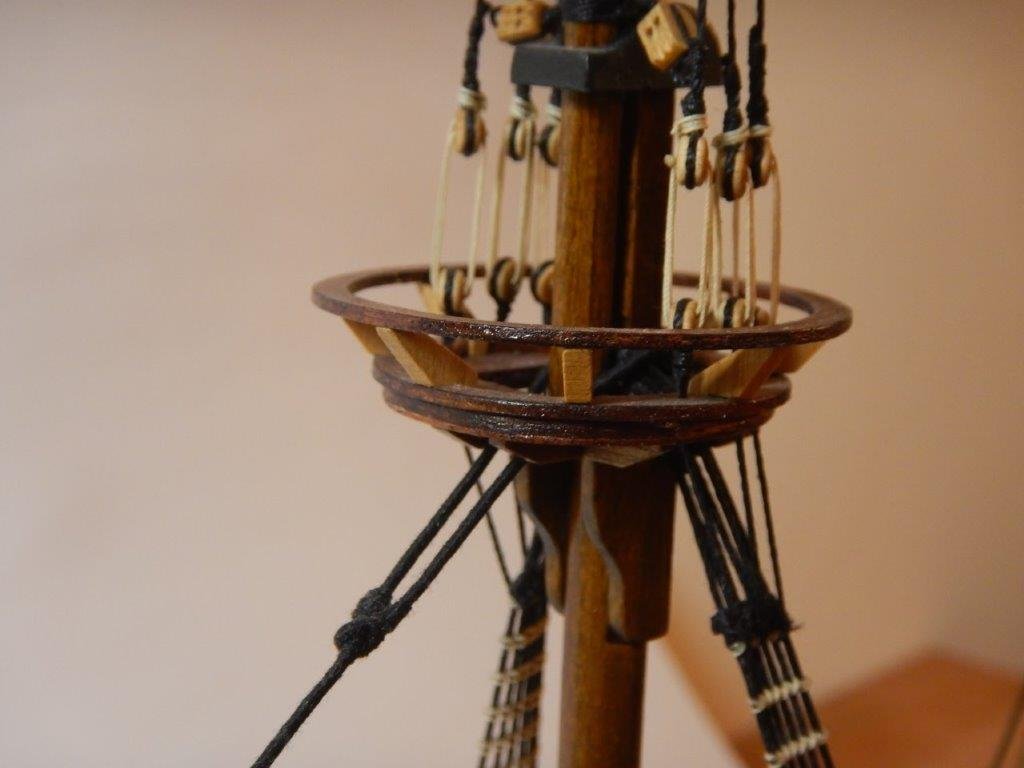
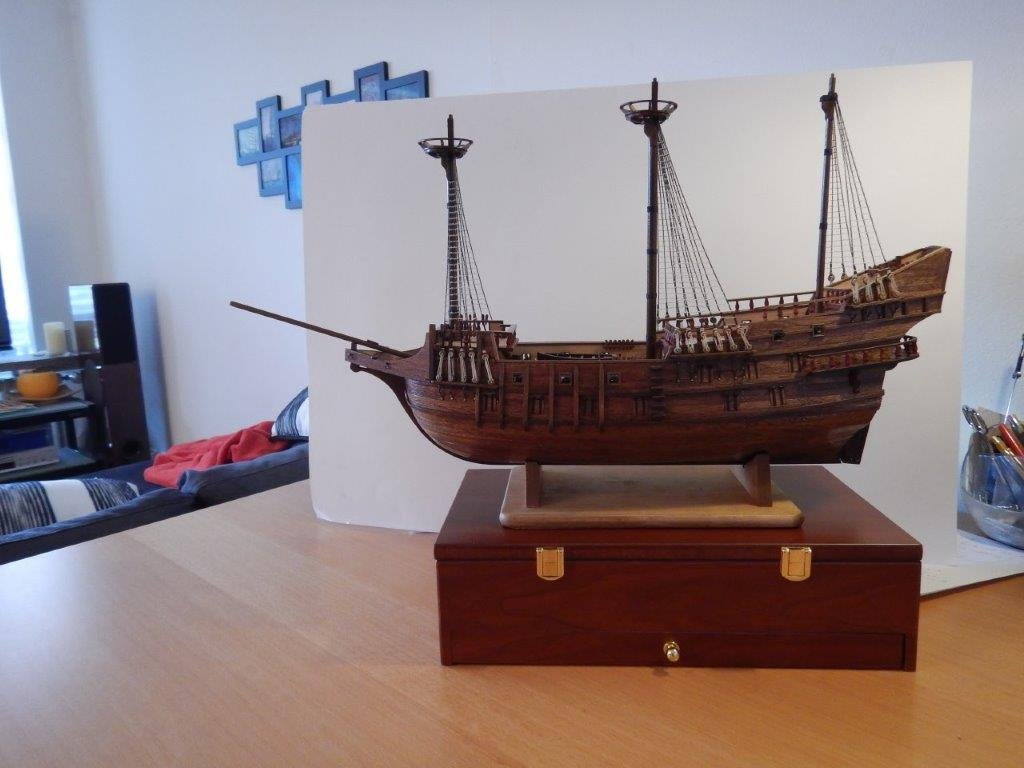
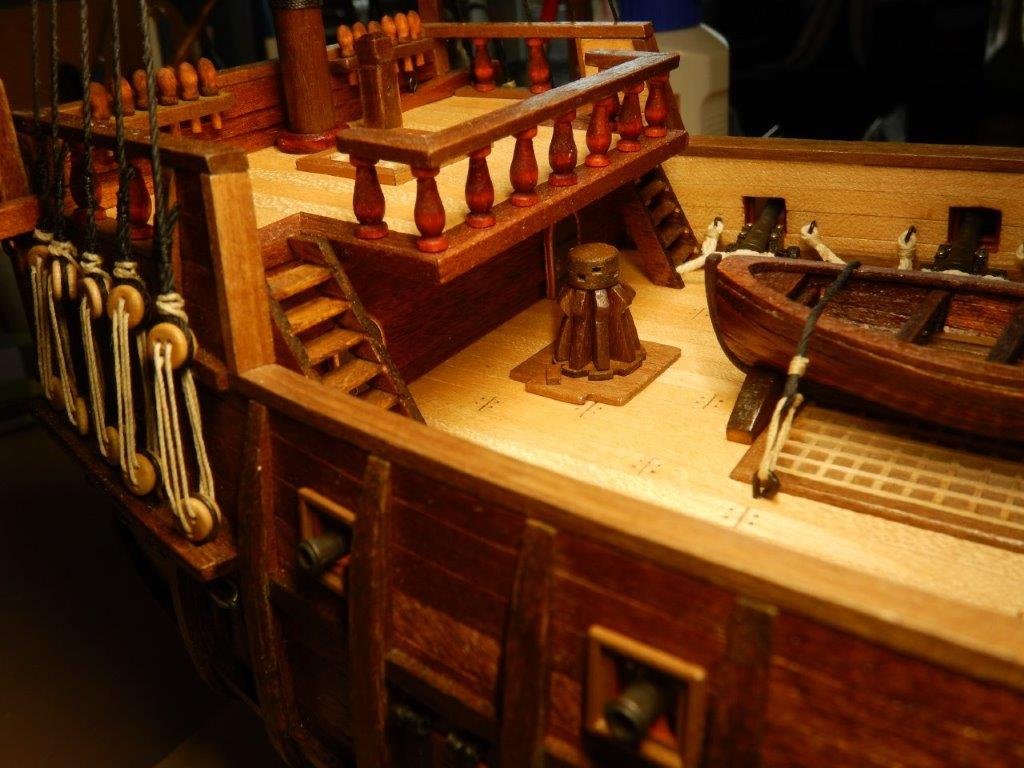
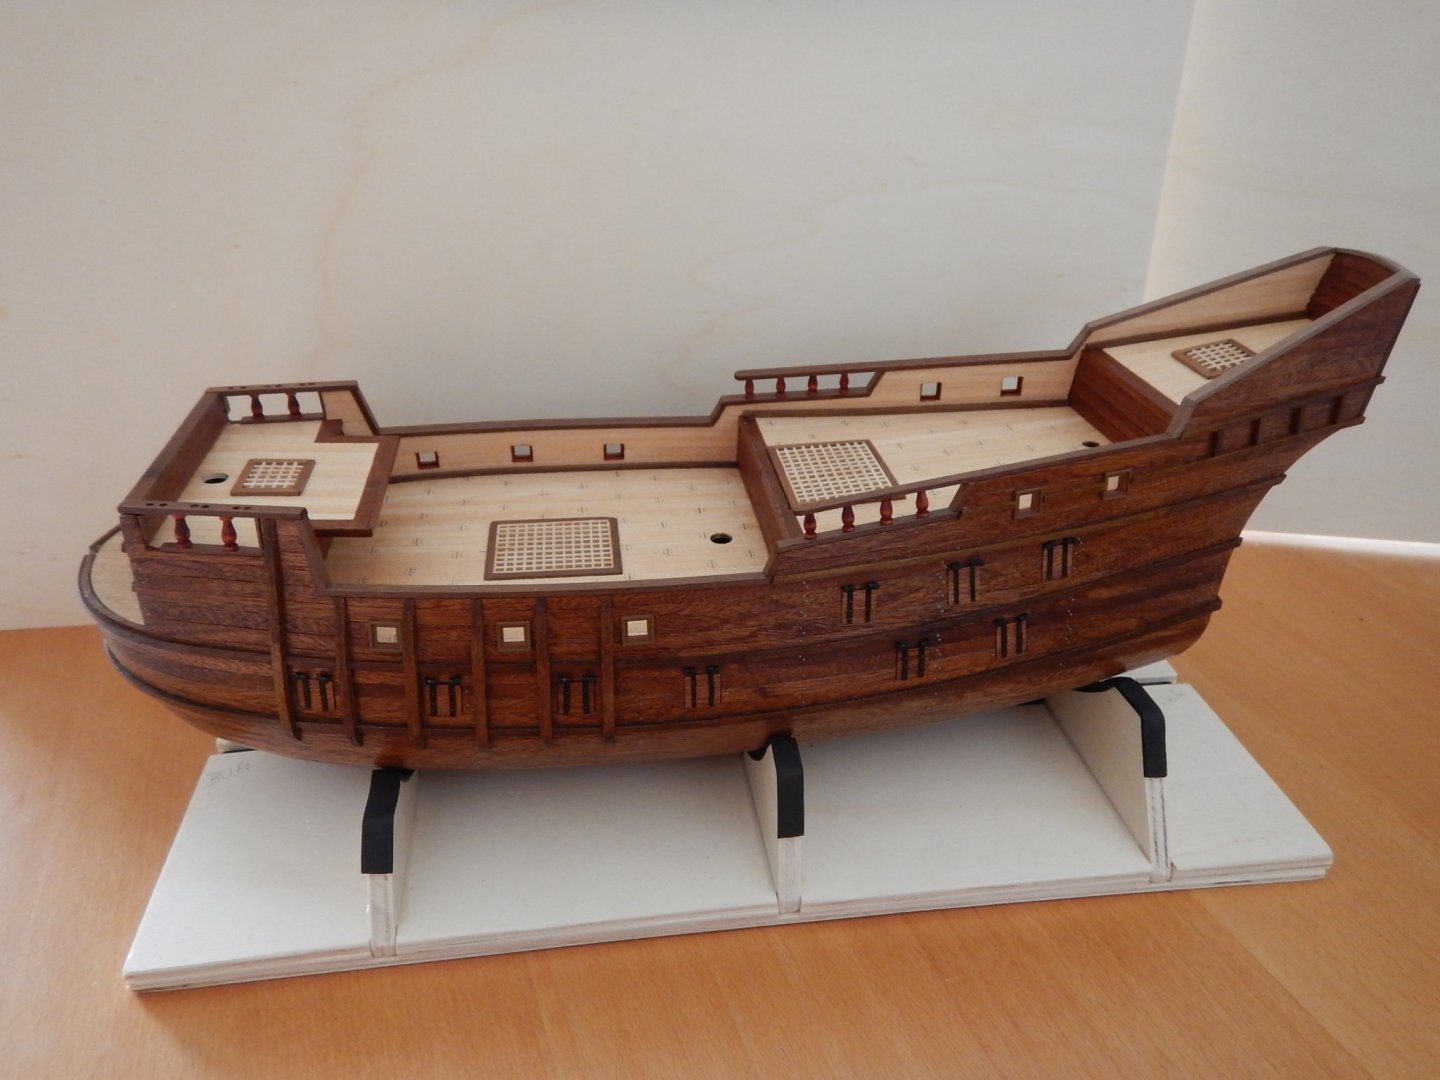
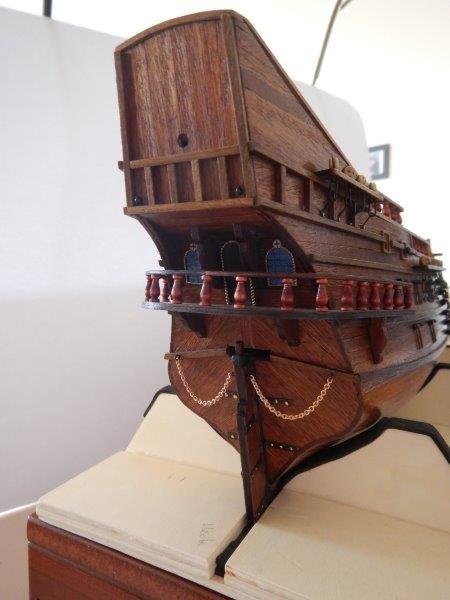
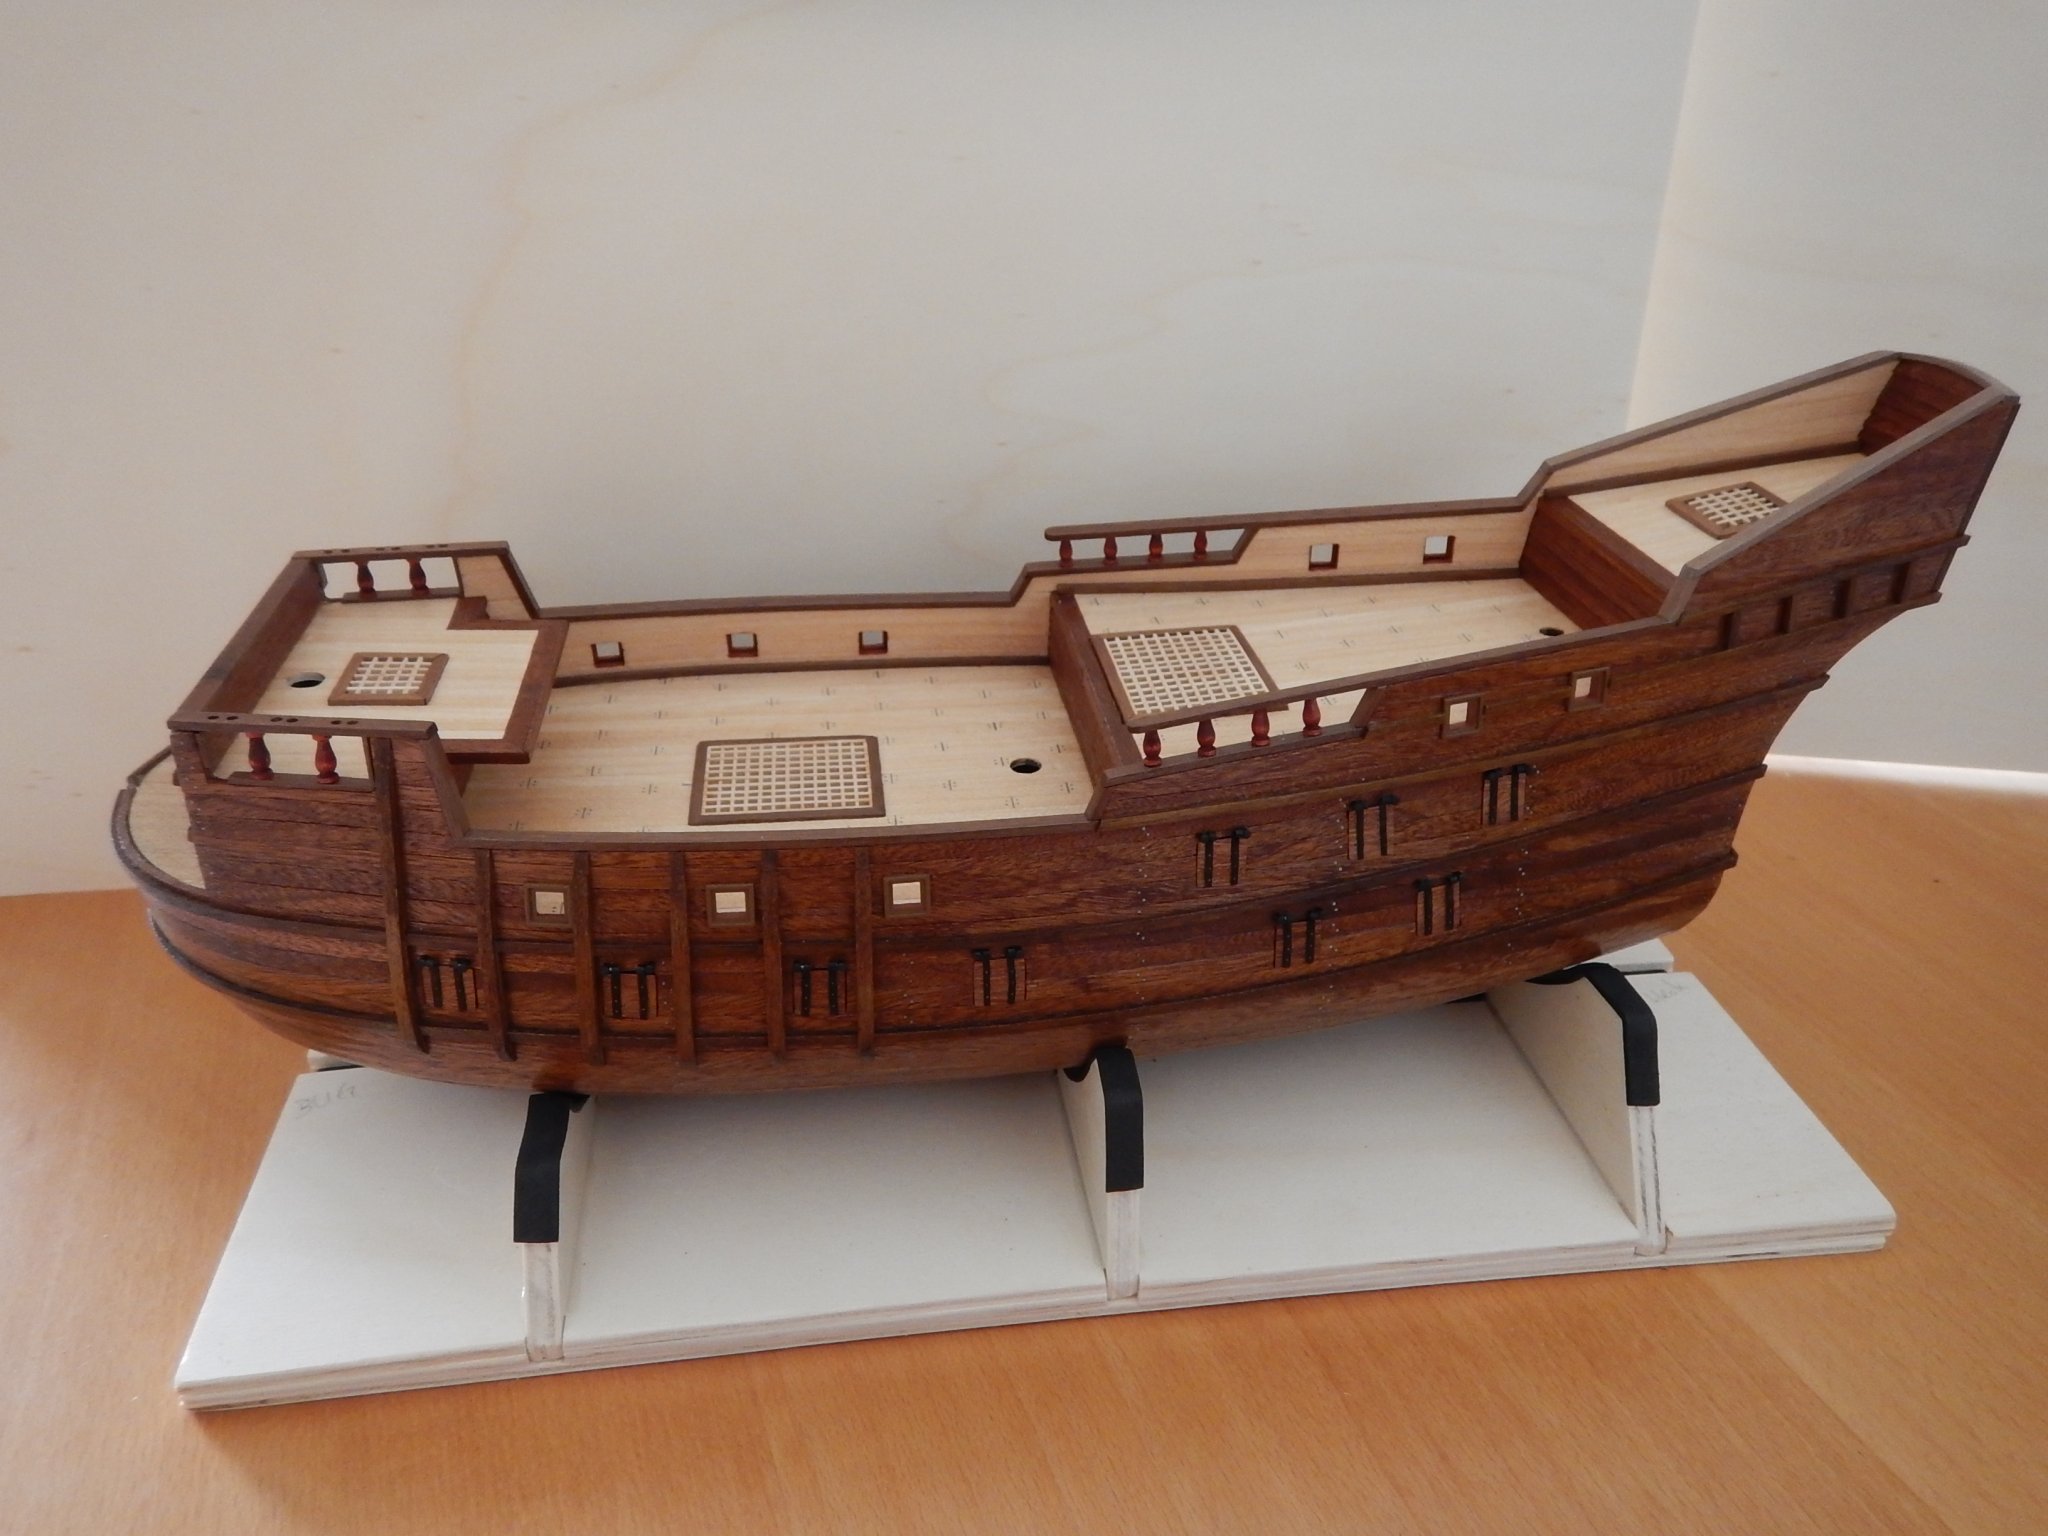
Status of model as of End 2022. Masts are completely set up with all the standing rigging.

-
Status as of April 2021:
-
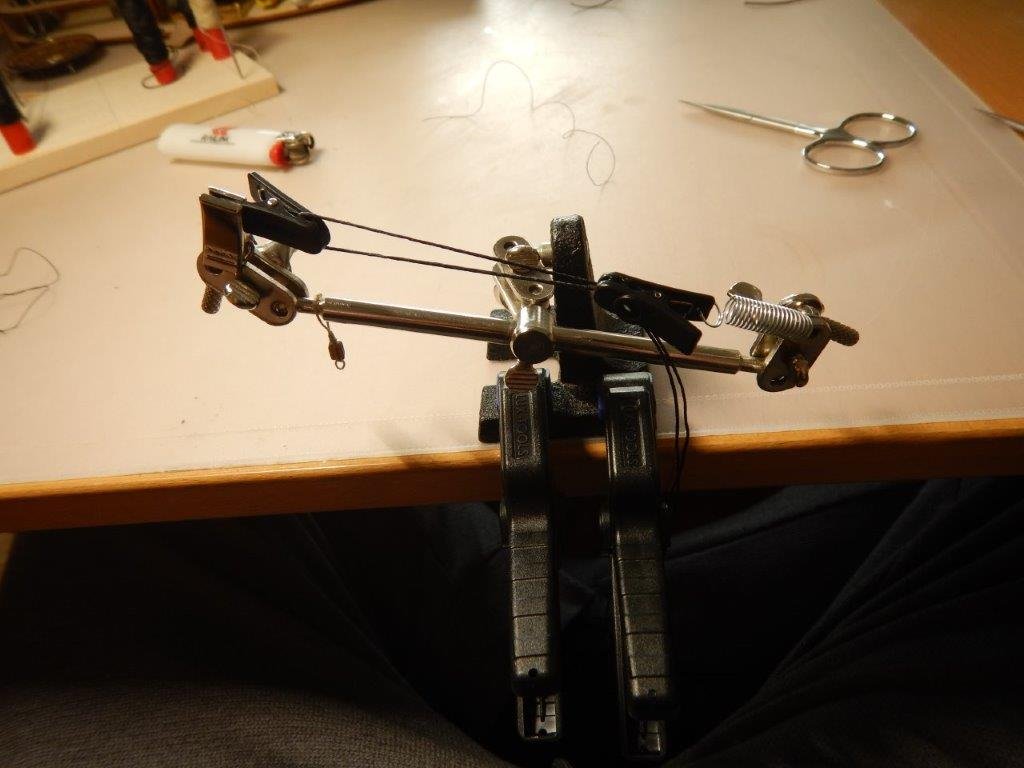
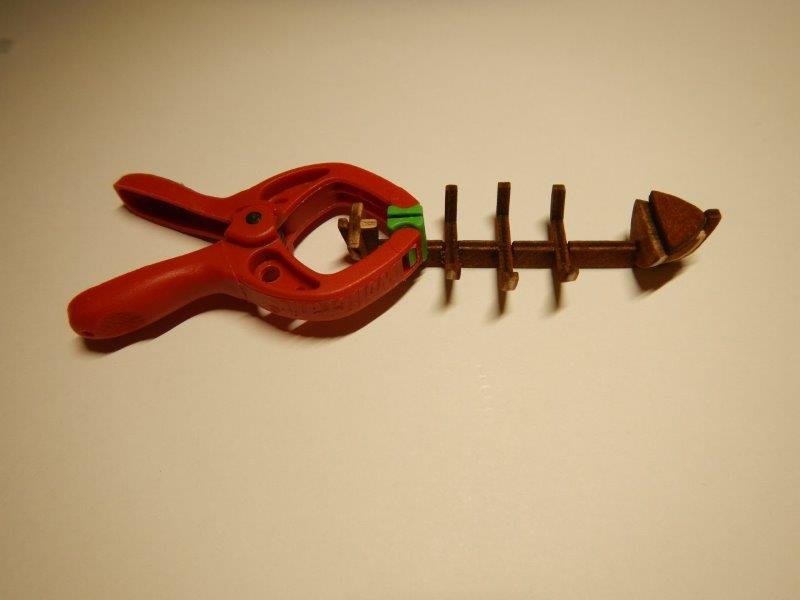
My very useful third hand, modified for manufacturing seazings:
-
As I haven't worked on the ship for quite a while, respectively only did some stuff during some short periods, it took some time for the next post here... Recently I picked up work and now am trying to finish the build. The rigging is something complete new for me and a lot new stuff and techniques to learn. So I have quite some respect regarding all that work - also stuff can be broken easily now when working on the model 🙄
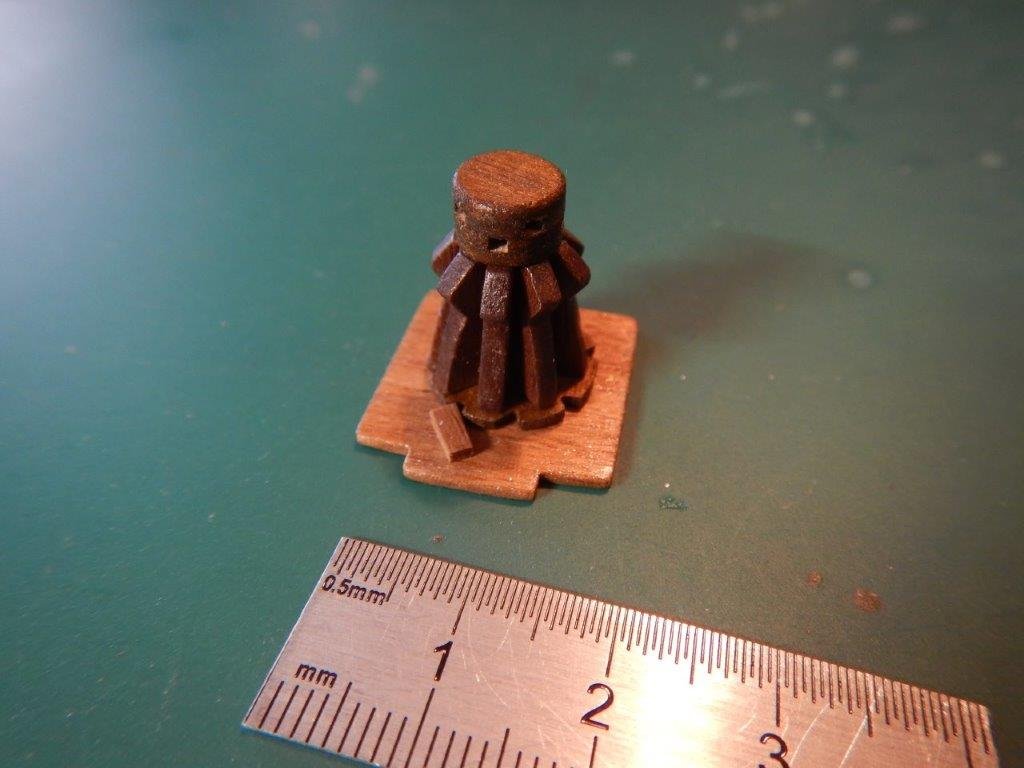
As there was some space on the deck and I thought this detail is missing in the kit, I built a scratch capstan:
-
18 hours ago, DARIVS ARCHITECTVS said:
Your wood top looks SO MUCH better than the cast one! Gute Arbeit!
The tops in my Artesania Latina SF II are laser cut wood. It must be a different version of the kit.
Thanks! Looks like Artesania did change some parts quite frequently. My instruction says the deck gratings are included in die cast but wood was included to build them, the bow grating should be included as die cast part as well but there was nothing at all in the box... I previously built the SF2 cross section and there was also a top of laser cut wood included. My ship is the old version of the SFII (single planked), so probably the older kits contain (or should contain) more die cast parts than newer ones? Anyway, AL is out of business which is a bit sad, I liked the kits and a lot of the parts are also very well made and of good quality. The included 5mm planks were good mahagony and the sails are pretty nice I think. They look handmade and are of good detail.
-
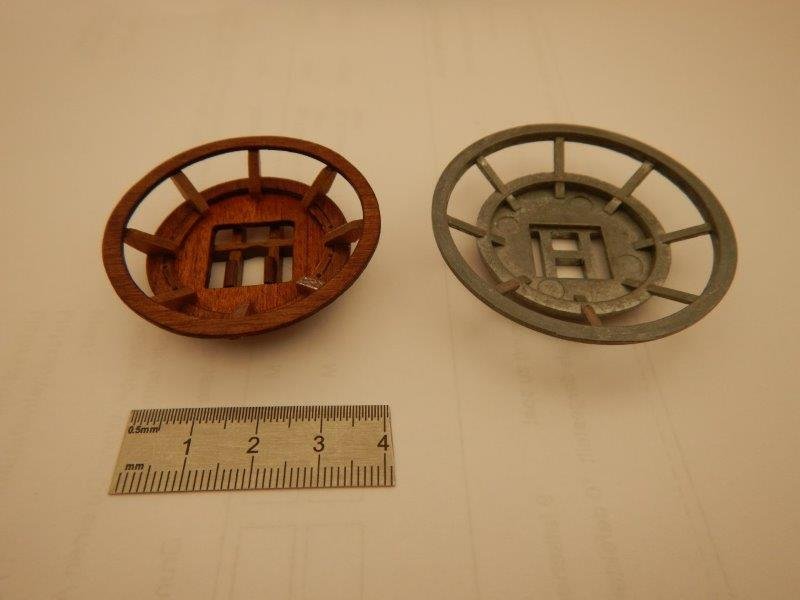
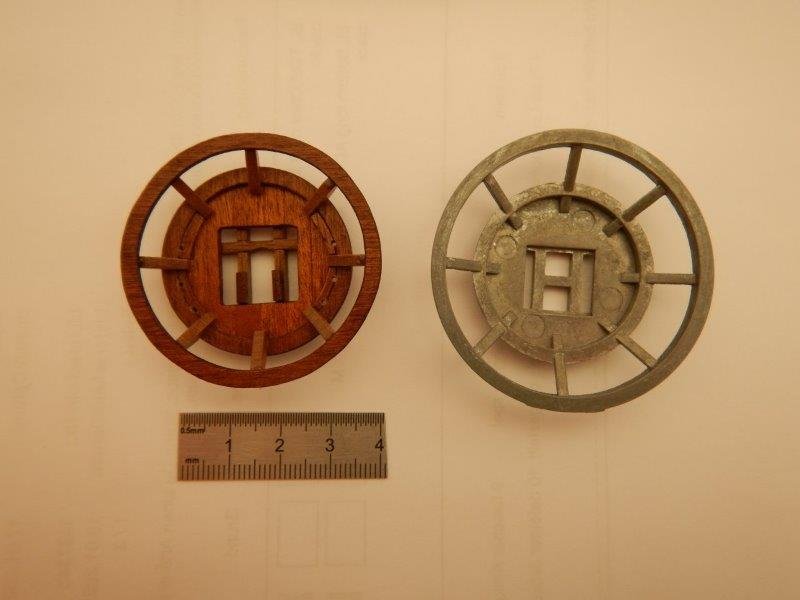
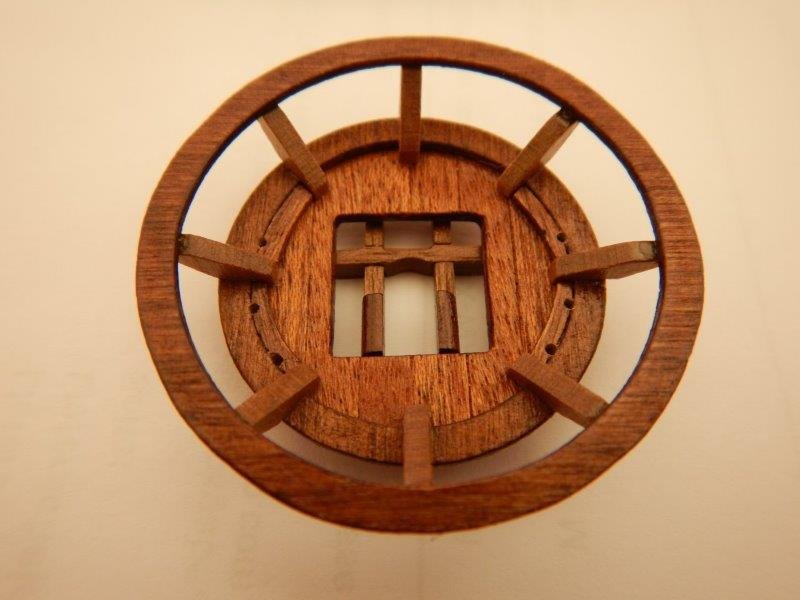
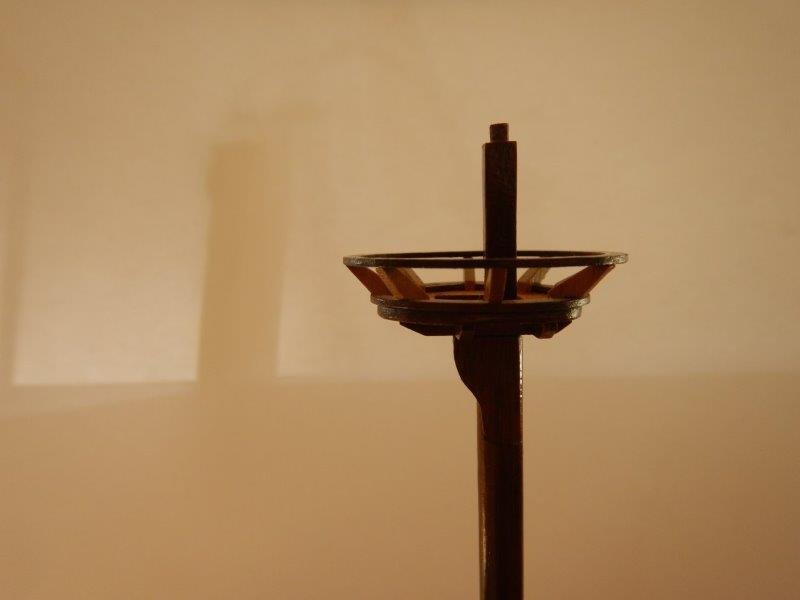
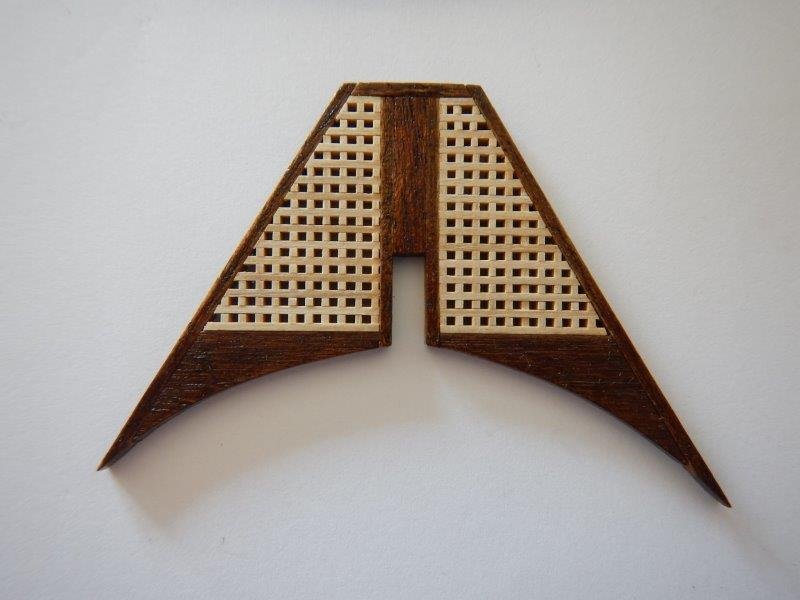
Next part in the kit that was really ugly was the top plattforms (how do you call them in English correctly? In German the "Mars") of fore and main mast. So I made some own completely from scratch, trying to rebuild them as close as possible to the ugly die cast part. Was quite a process cutting and fitting all the small delicate parts together. I'm quite happy with the result
 Last pictures show the testwise mounted platform not attached yet.
Another comment to artesania latina's die cast parts: they are ****! The top plattforms die cast parts not even showing the holes you need for attaching the upper shrouds. If you would forget to drill them as the instructions do not say anything about it, you would be fucked up having to deal with it if already mounted on the mast... As well as drilling holes in such die cast parts of a complexity of that top plattform is not the wood modeler's main ability nor will it end up very precise...

- GrandpaPhil, kirill4 and kostas_gr
-
 3
3
-
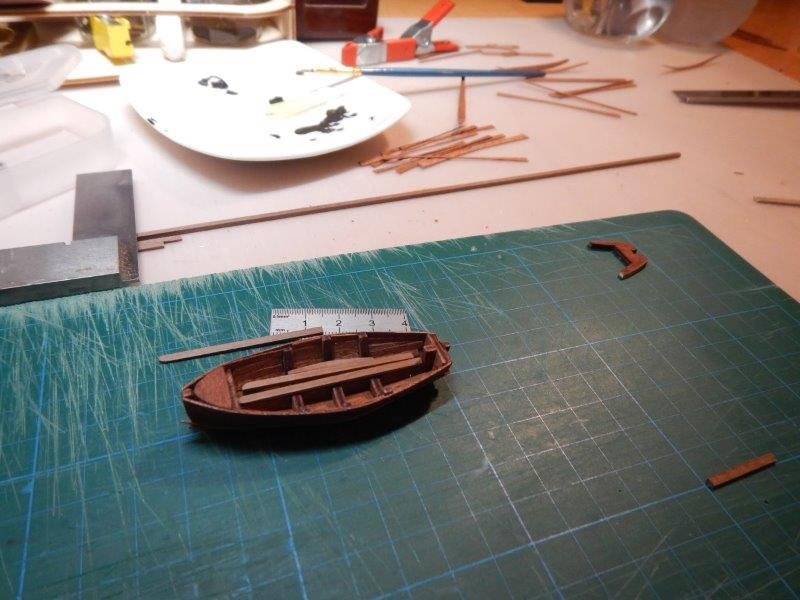
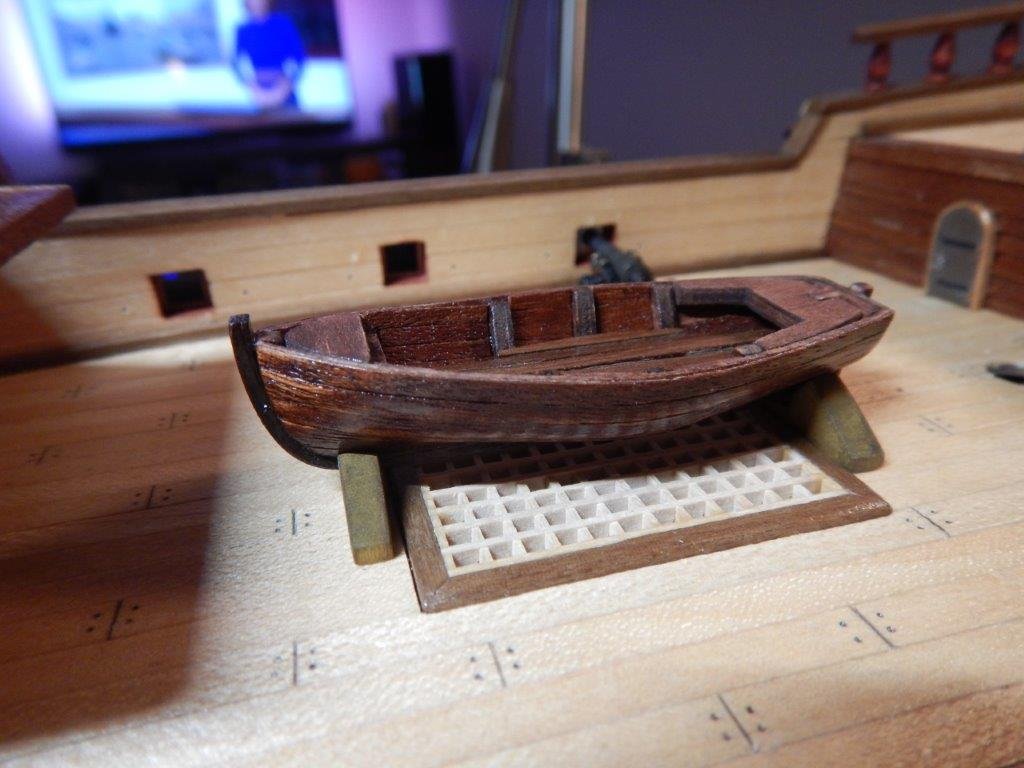
The included die cast jollyboat in the kit was not really nice and also way too big for the deck I think. So i made an own one from a separate kit with upgrading it:
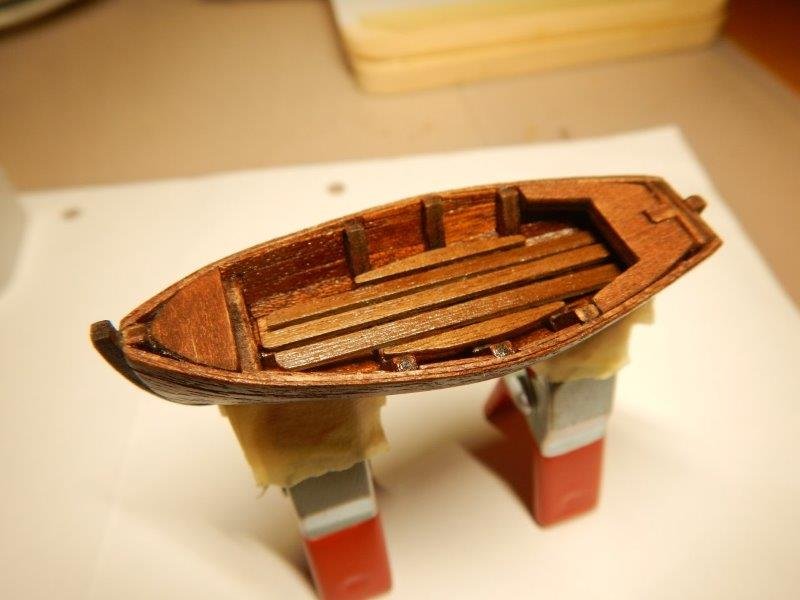
-
On 1/6/2021 at 5:15 PM, Barr1 said:
Nice work on your San Francisco. I got this kit about 10 years ago and started it, but have not touched it for about 8 years. I have the planking done, which was a little frustrating at times, but I learned a lot from making mistakes. I am now working on the bow grating. I have a metal one with my kit, but it is not going to be used. I have been looking for a way to make the bow grate and your pictures are helping a lot. Thanks for posting them. A question I have is on your deck. How did you get the lines between the deck board and the dots for where nails are? I have not done that and I like the look. Another quesiton is the bow sprit stanchion. How high should it be? My instructions leave a lot to be desired. Thanks.
Hi Barr1. Sorry just saw your message, so answer a bit late... Cool, nice to hear that pictures can be useful 🙂 I guess that casted bow grating in the kit looks quite ugly?
The lines on the deck (joint of the planks) are made by slightly engraving the planks with a saw and blackening the groove with a pencil. The "nail holes" are made by hammering a not too pointy pencil into the planks. Both done before gluing the plank stripes onto the deck.
Which part do you exactly mean with "bow sprit stanchion". And from what view? My mother language is German. So it is quite difficult and tricky for me to get all the names of the ship's parts in English. Crazy anyway how many technical terms there are in the world of old ships... X-)
-
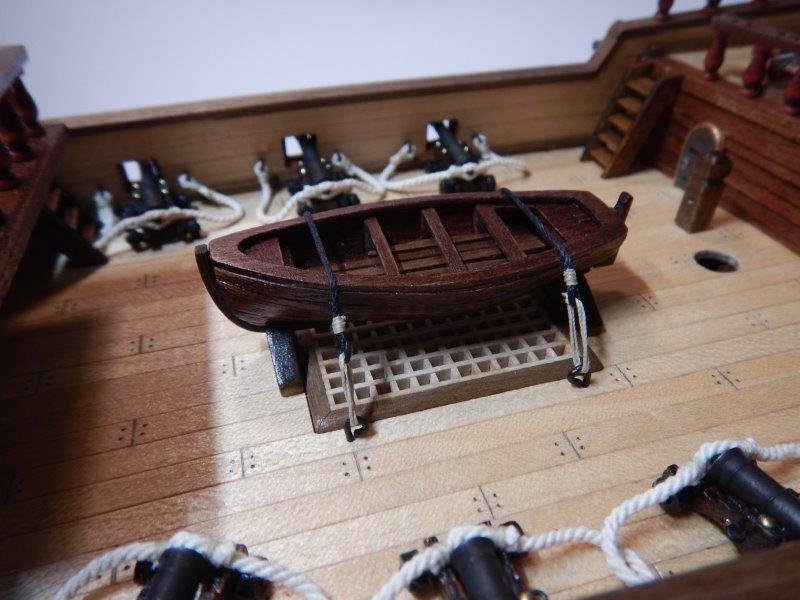
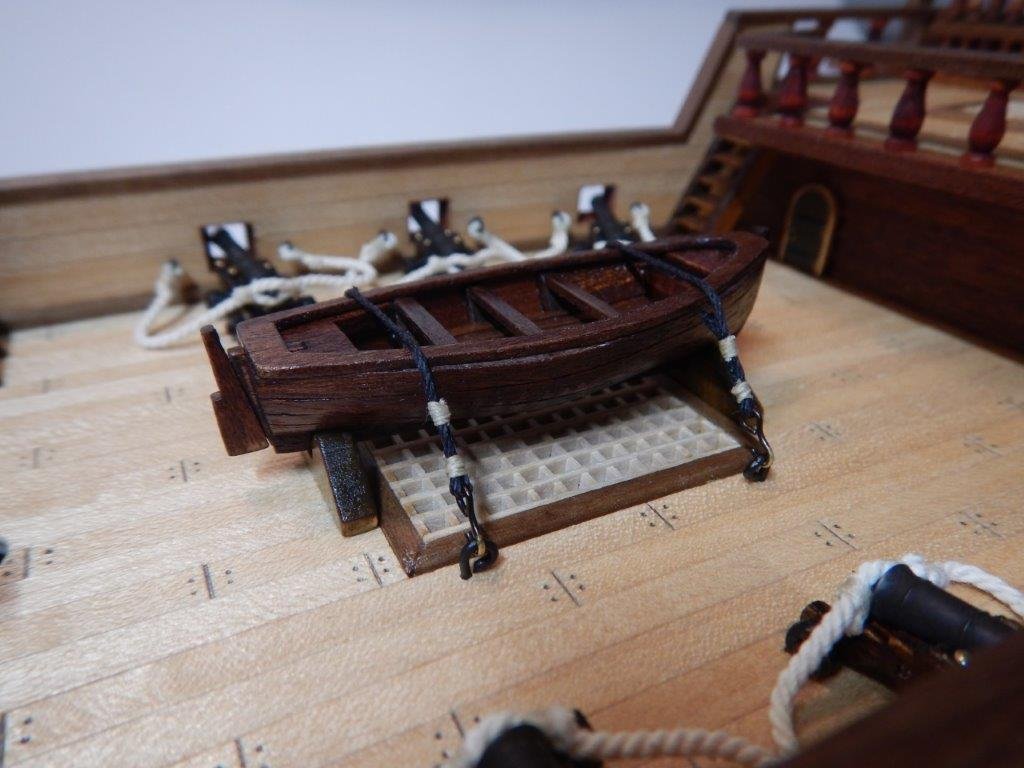
Sorry guys took a long time to finally display the result. Thank you very much for the hints. Tried to do it with the truckers hitch but it was too small to succeed. So I just did some improvisation with square knots and seizings:

- thibaultron, leclaire, amateur and 4 others
-
7
-
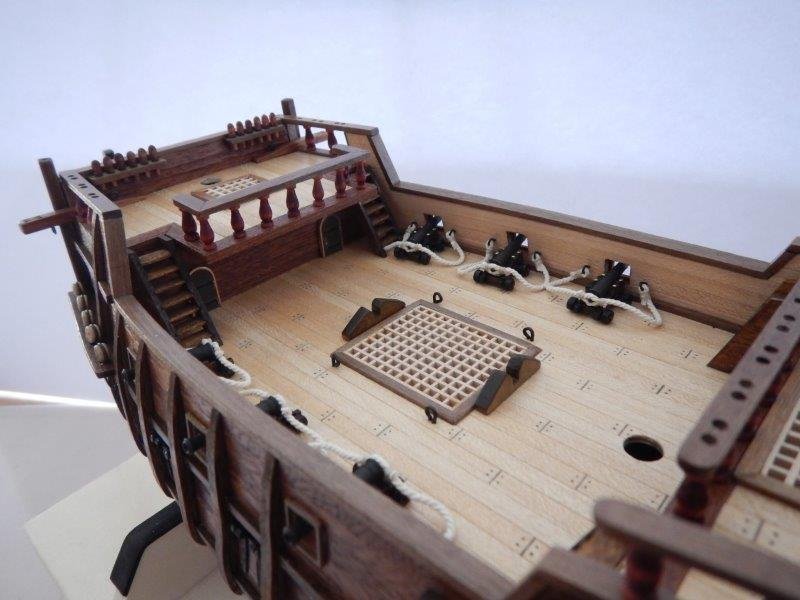
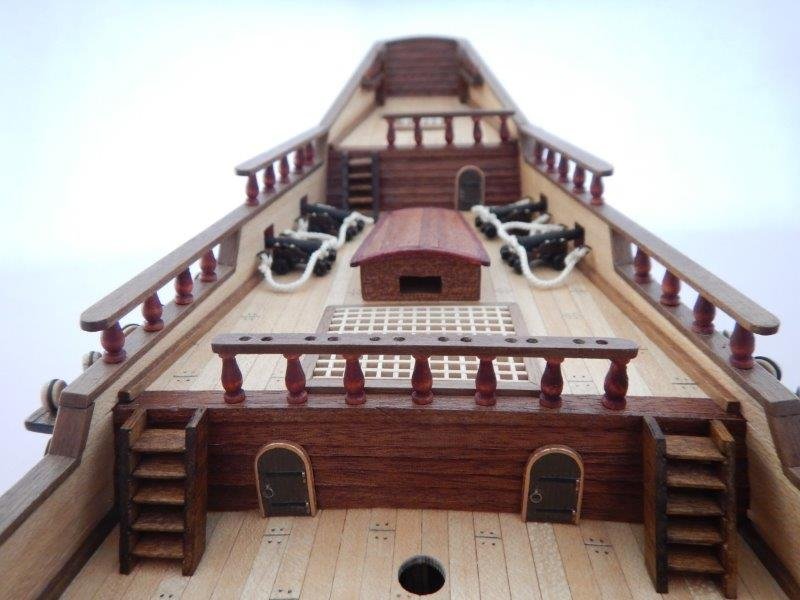
Cannon with many other deck parts are now mounted. Still need to finish the jollyboat and lash it to the installed stand. So far everything worked well 🙂 Next chapter with mast and rigging is coming up - I guess that will be the biggest challenge not messing anything up...
-
-
Hi mtaylor
Thanks for the hint. So far thats clear. But I was looking for a somewhat more elaborate lashing. Probably something with two blocks at each line for tightenig the lines. I don't know what kind of "system" in the line was used to strap the boat historically correct (only ropes fixed to an eyebolt mounted in the deck floor is not historically correct I think!?).
- thibaultron and mtaylor
-
2
-
Dear fellows
How is the correct method to lash a dinghy / jollyboat on deck? I built some wooden blocks as stand, now I need to fix the boat somehow with lashings to the deck, please see picture below (dinghy is not yet completely finished...).
Its' on a spanish galleon, 16th century. Model San Francisco II of Artesania Latina which I upgraded with some custom made parts, such as the dinghy.
The dinghy is only 70 mm long, so the lasing shouldn't be too complicatedy as it has to be very small size...
Would be great if you could give me some advise how I can realise the most realistic looking lashing.
Thank you and kind regards from Basel Switzerland
André
If you like to see the full build log, please visit
- mtaylor, Duanelaker, thibaultron and 1 other
-
4
-
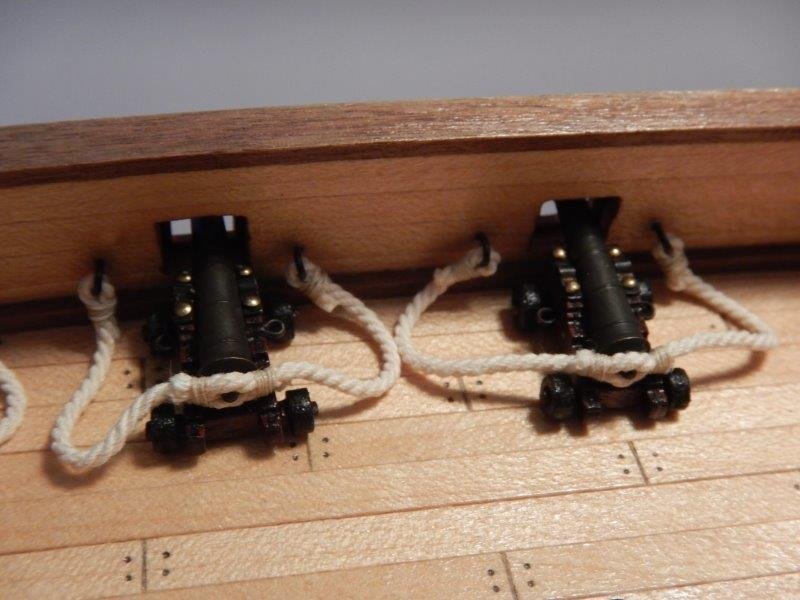
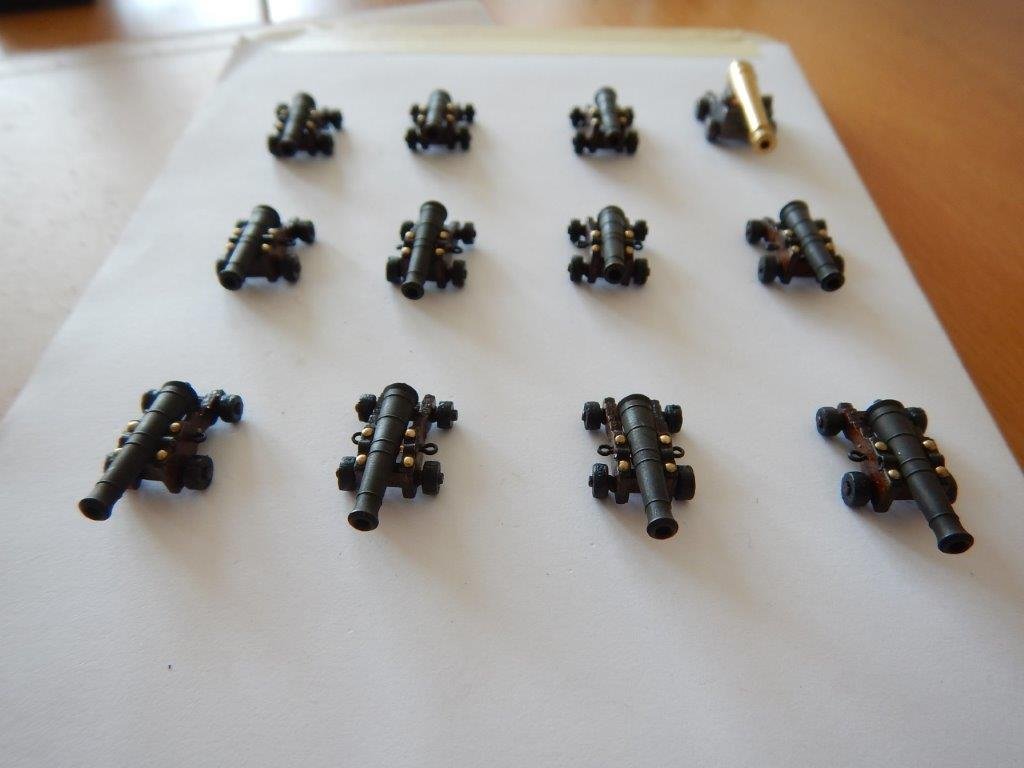
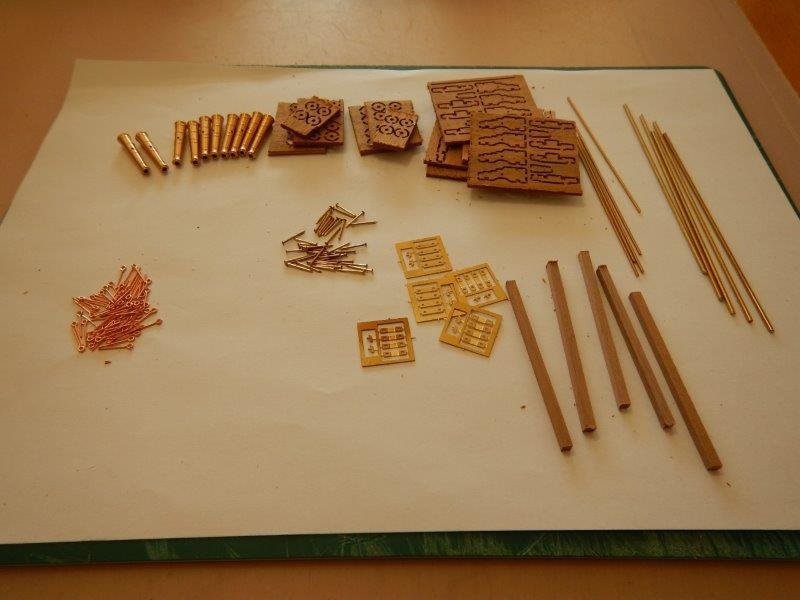
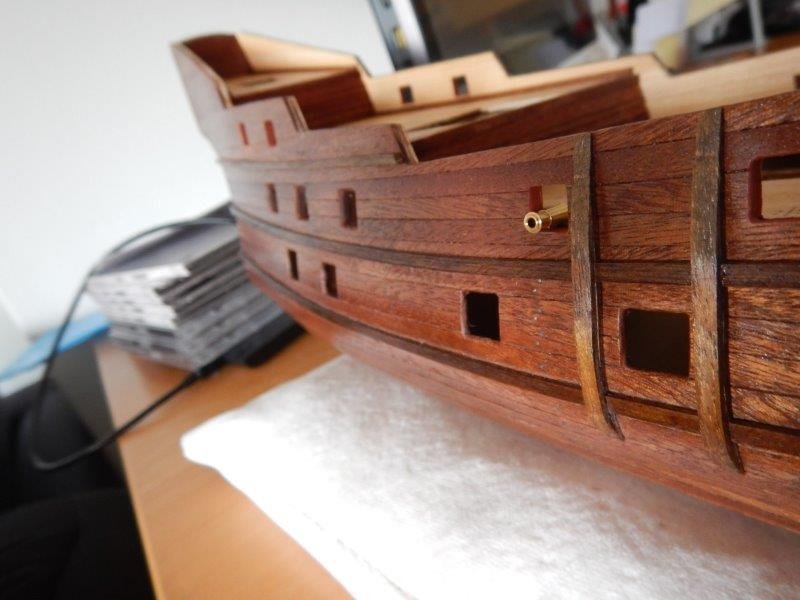
Worked alot on the 10x cannons (+ 1 reserve). That took me 19.6 hours until they were all varnished. Still need to do the ropework for mounting them.
I think the effort was worth the time if you compare the result to the simple iron cast carriages provided in the kit (shown on last of the three pictures):
-
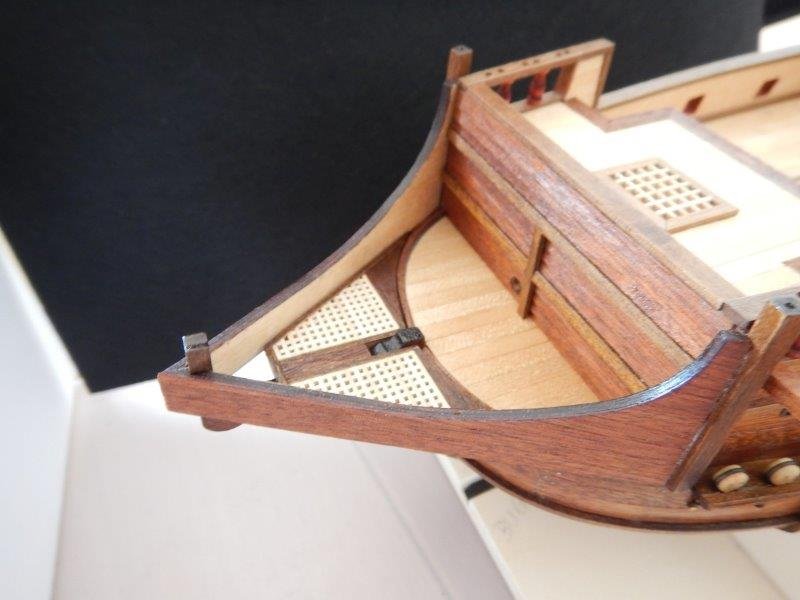
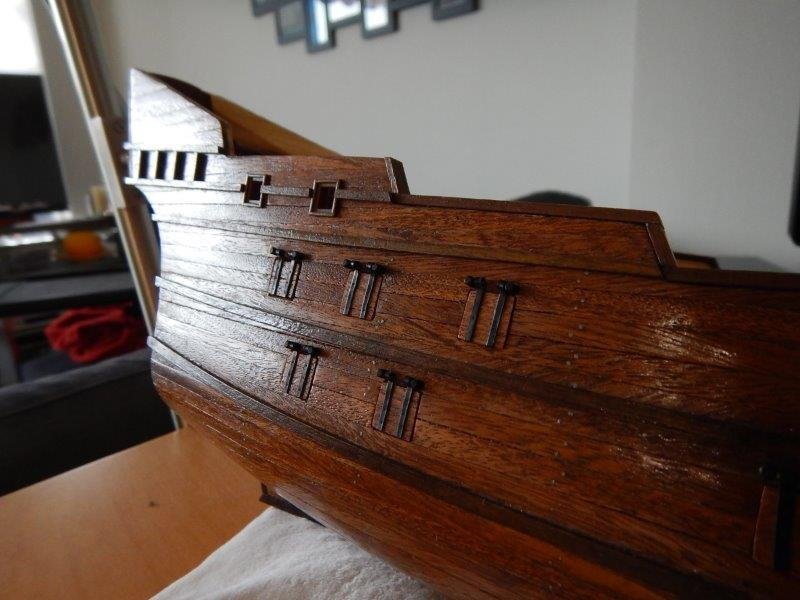
Also the grating for the bow had to be scratch built. The AL instructions says "these parts are supplied in cast metal" but there was noting in the box - and if it would, it would have looked ugly anyway...
Getting all the angles and the bending for the bow right was quite some effort. Then, when almost done with the part I almost destroyed it when trying to do some minor sanding with the sanding machine. Not a good idea... Luckily only a small damage at the bottom side occured which is gladly hidden on the photos and the mounted part on the ship ;-)

-
Hi fellows. A small update since a long time - didn't work that much on the ship during summer 2020.
Had to make the channels from scratch, the one at the foremast was quite tricky as it hat to fit around some other parts:

-
On 5/10/2020 at 5:54 PM, Spellapeaka said:
Looking great! I currently have this kit in waiting until I finish the AL Harvey I'm working on. Same situation with the planks. Single hull, thick planks, really tough to bend. It took me a long time. It was fustrating and irritating to say the least. The only caveat was the fact that the planks are so thick, you can sand them down a serious amount and the end result actually looks quite good. I am going to try some more professional methods of planking when I get around to the SF2. Like splining as mentioned up above. For now, I am happy with the result. I will be watching your build with great interest! I might have to steal a few ideas from you too! 🙂
Thanks mate 🙂 Good that you have this nice and already old kit in stock - probably it gets rarity value as AL went out of business 😉 Well I guess taking some inspiration from other builders is very kind "stealing"... There are some good logs here for SF2, I also took some inspiration like from DesertWolf who also did own gunport lids and a crazy effort for planking, which ended but veeeeery nice. Be prepared for a big fight with the planks, almost all of them needed extensive treatement before mounting. Luckily there was enough wood for that in the box, so producing quite some broken ones didnt end up in big problems. And as you write there is good possibility to sand them down somewhat to shipshape. Let me tell when you start with your SF2 please!
-
Built a solid construction stand for the ship, so all the details being in production can be mounted later more easily:
-
A good side of the coronavirus (April/March 2020) is that it gives you a lot of time working at home on your model ship... 🙂
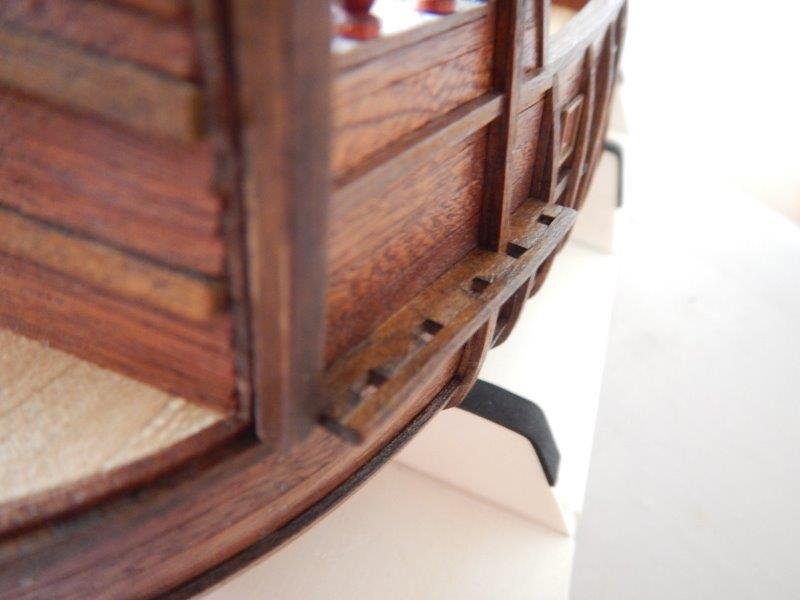
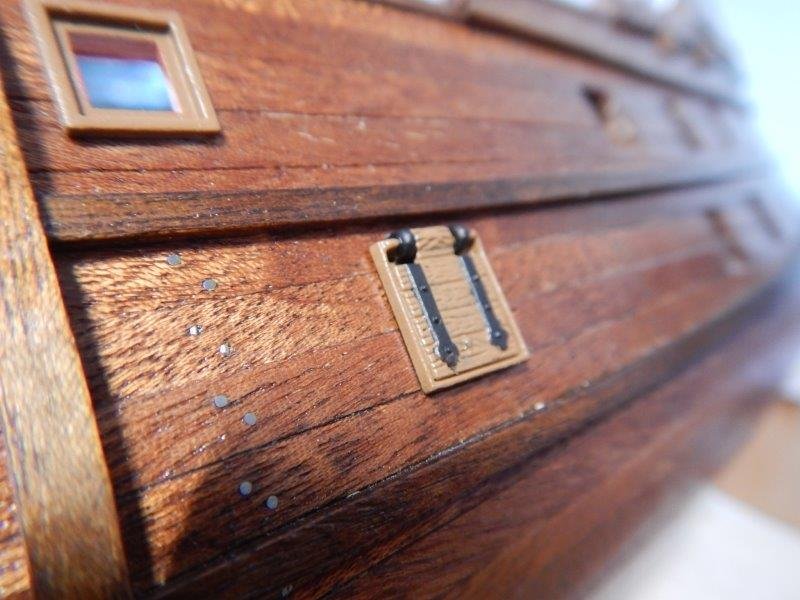
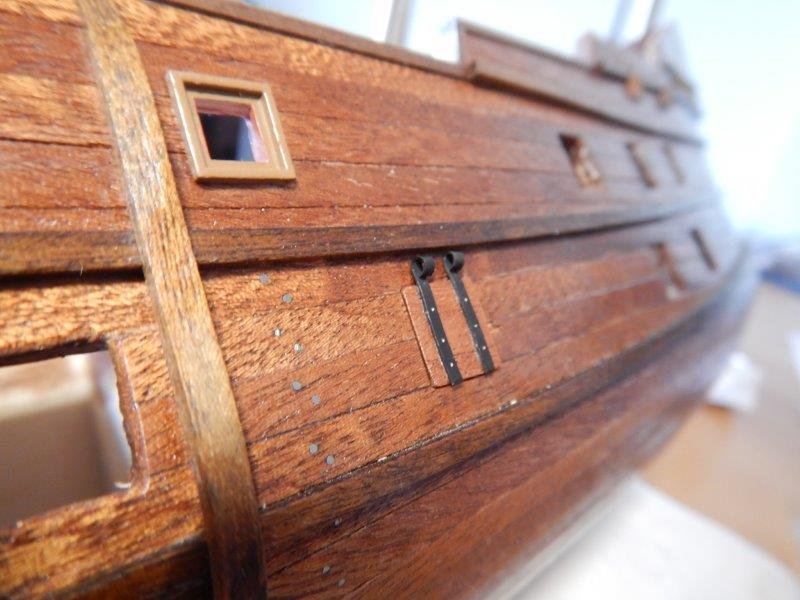
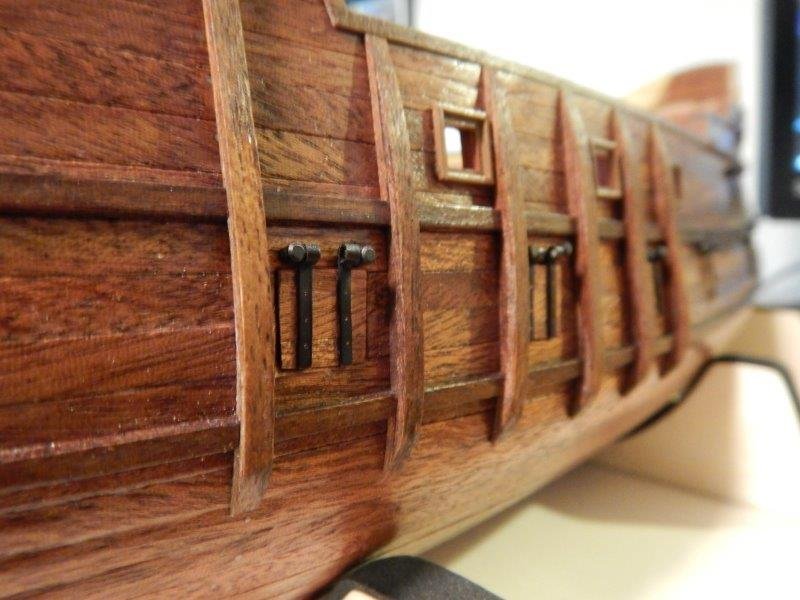
Although I painted all the gunport lids given in the kit, they didn't look nice on the ship. Nothing shipshape with these metal cast pieces:
 Si
Si
So I made some lids from scratch with 3mm copper for the hinges and spare planks. Quite happy with the result 🙂
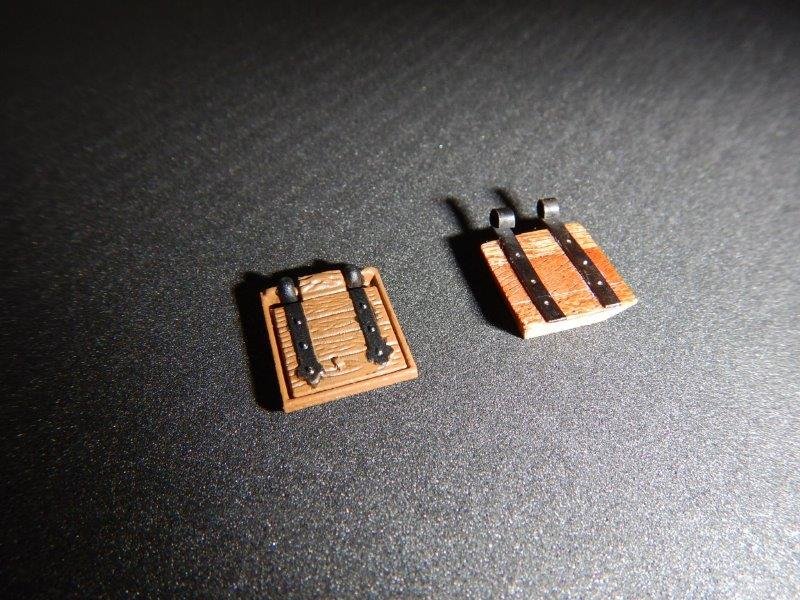
Looking way better on the ship:
After probably a 6 weeks process of buildung all the parts needed and mounting them:
- GrandpaPhil and Duanelaker
-
2
-
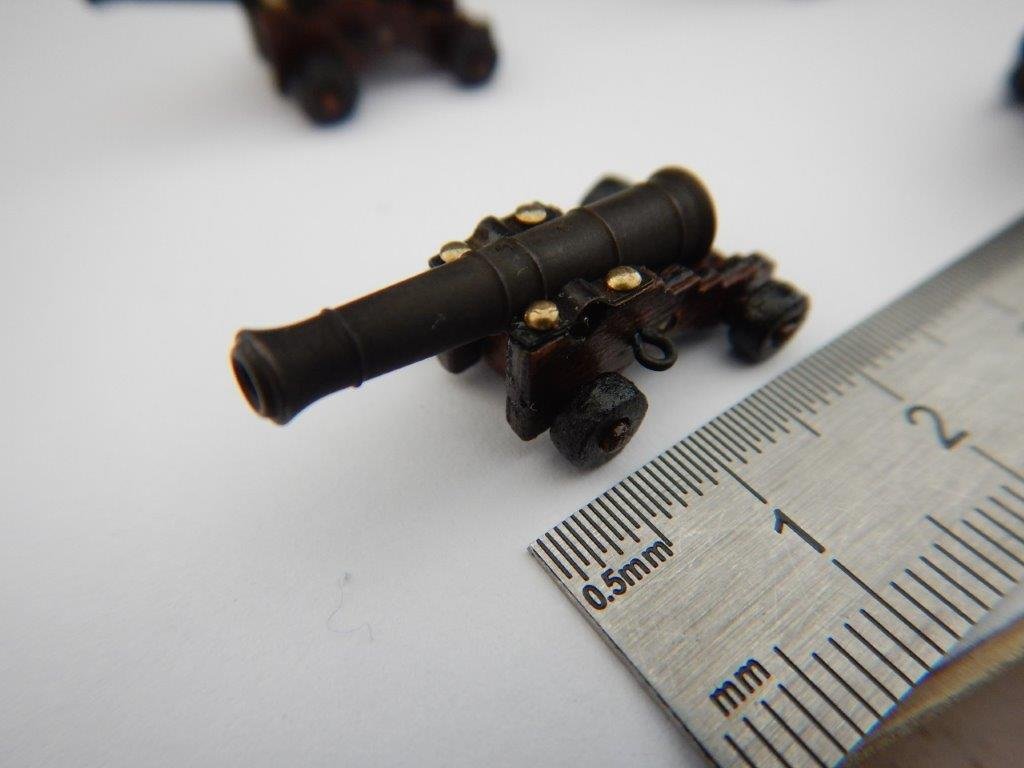
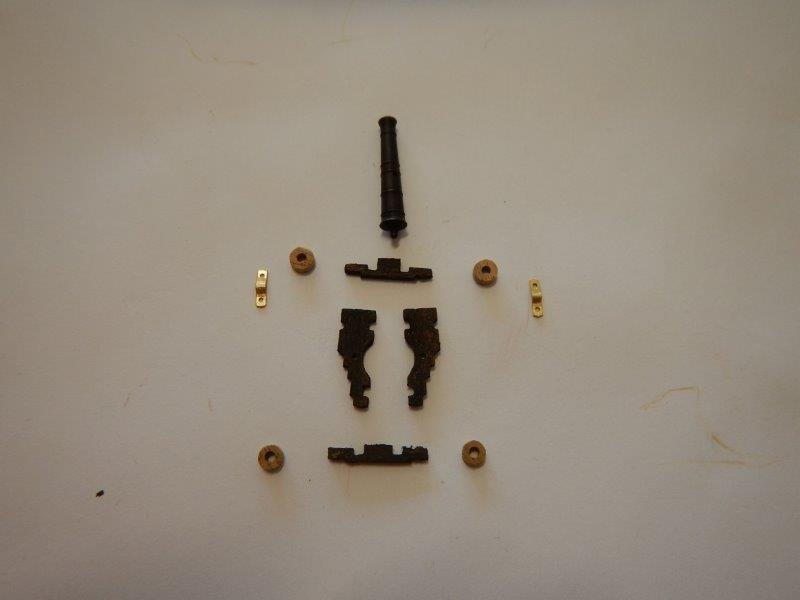
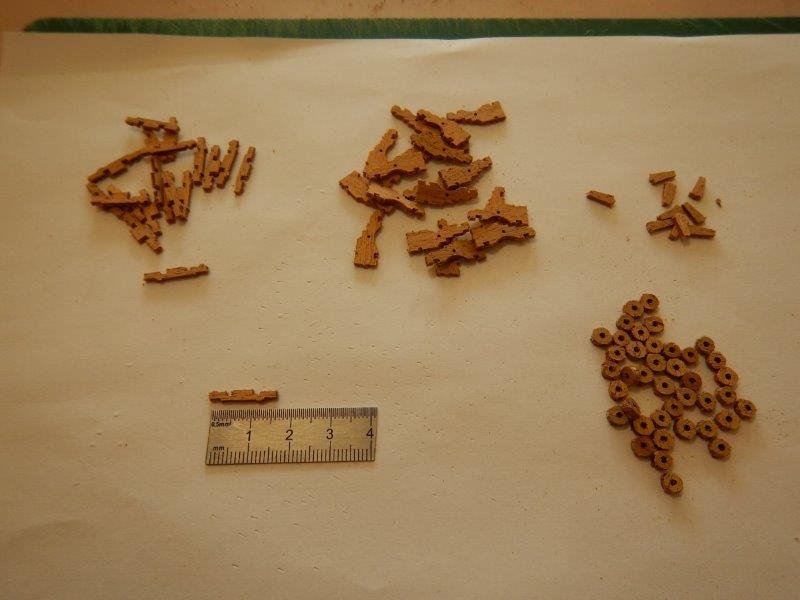
The canons in the kit of Artesania Latina are very basic and made of metal. Thy look quite poor.
So I decided to do some own and started the fabrication. Not really made from scratch but out of a kit. 26mm canon lenght. The sanding is an awful lot of work with all those really tiny pieces...
- GrandpaPhil and Duanelaker
-
2
-
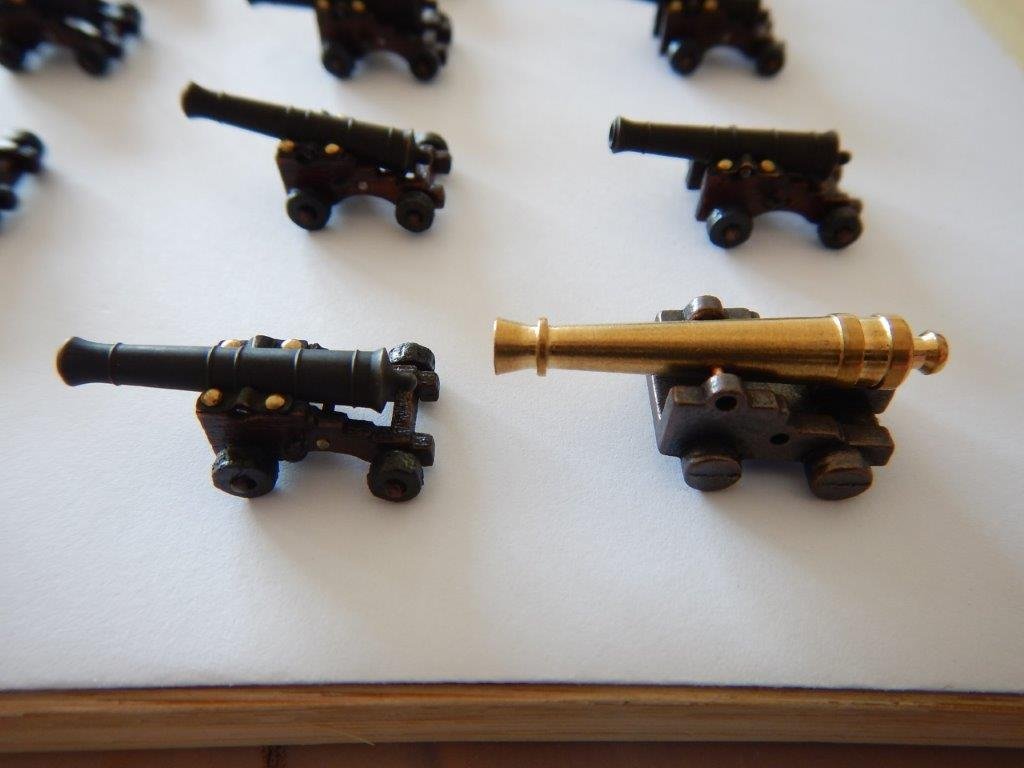
Greeting from the prototype cannon lensig out of the gunport for test purpose:
- Duanelaker and GrandpaPhil
-
2
-
After sanding and varnishing. Quite happy with the result 🙂

- JayCub, BLACK VIKING, GrandpaPhil and 5 others
-
8
-
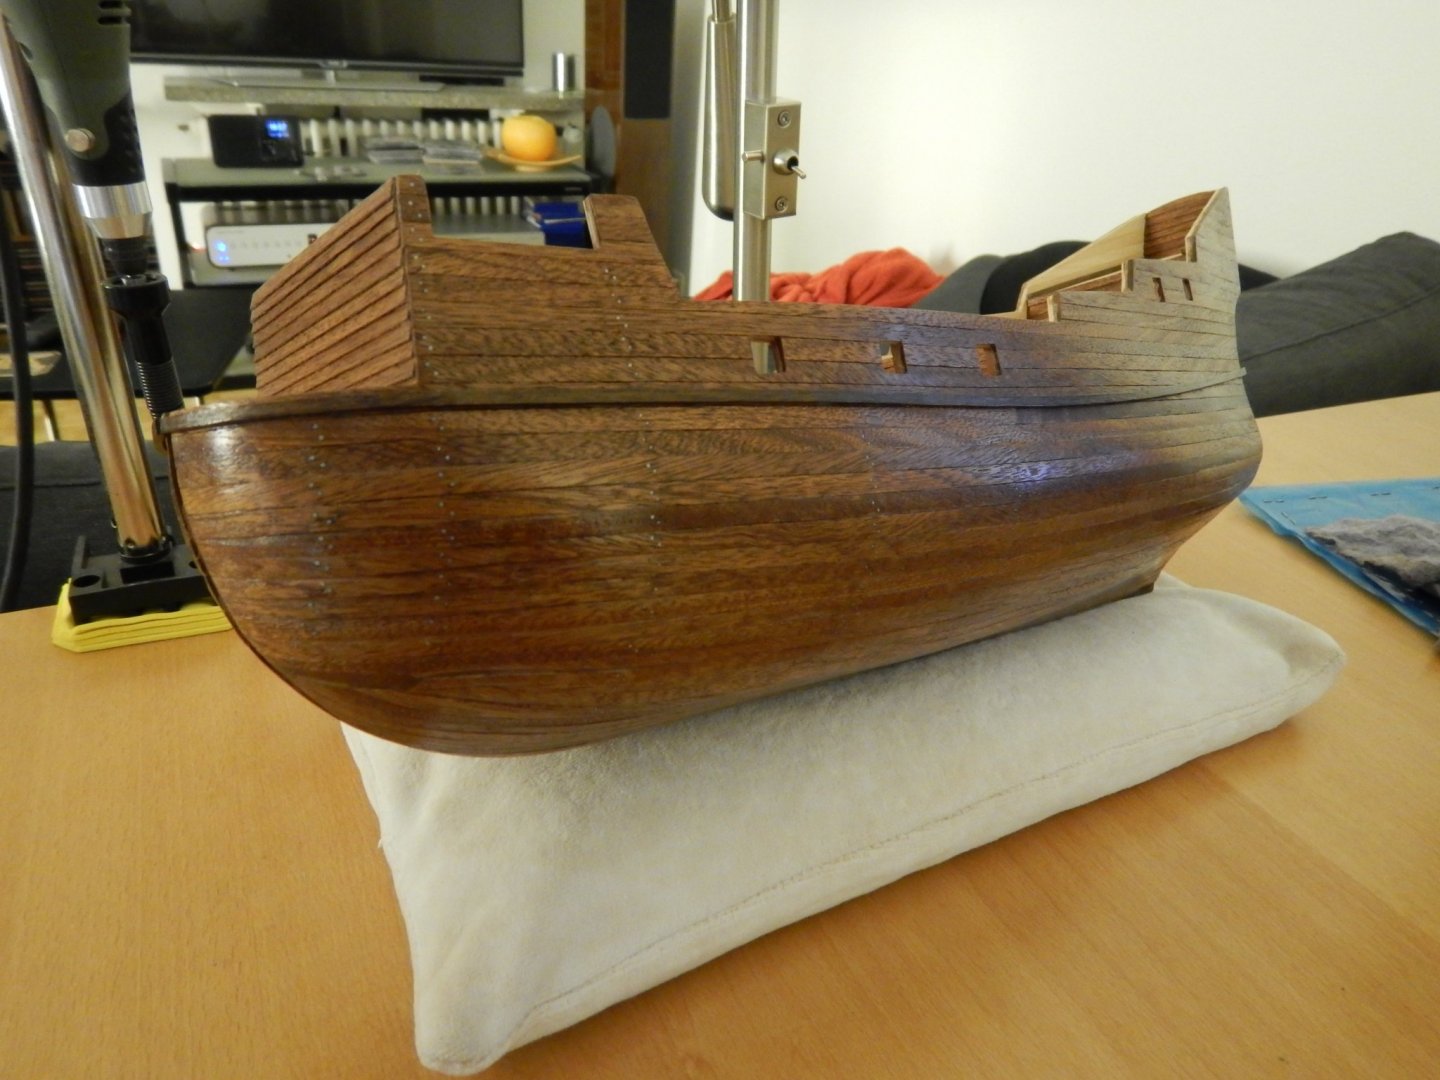
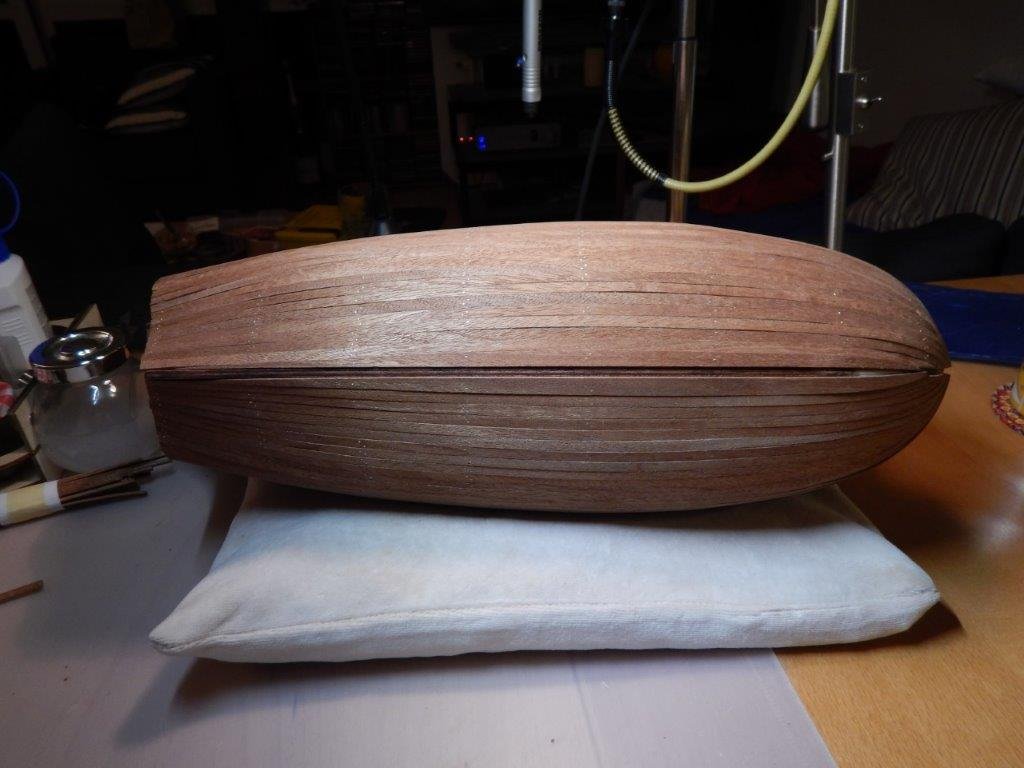
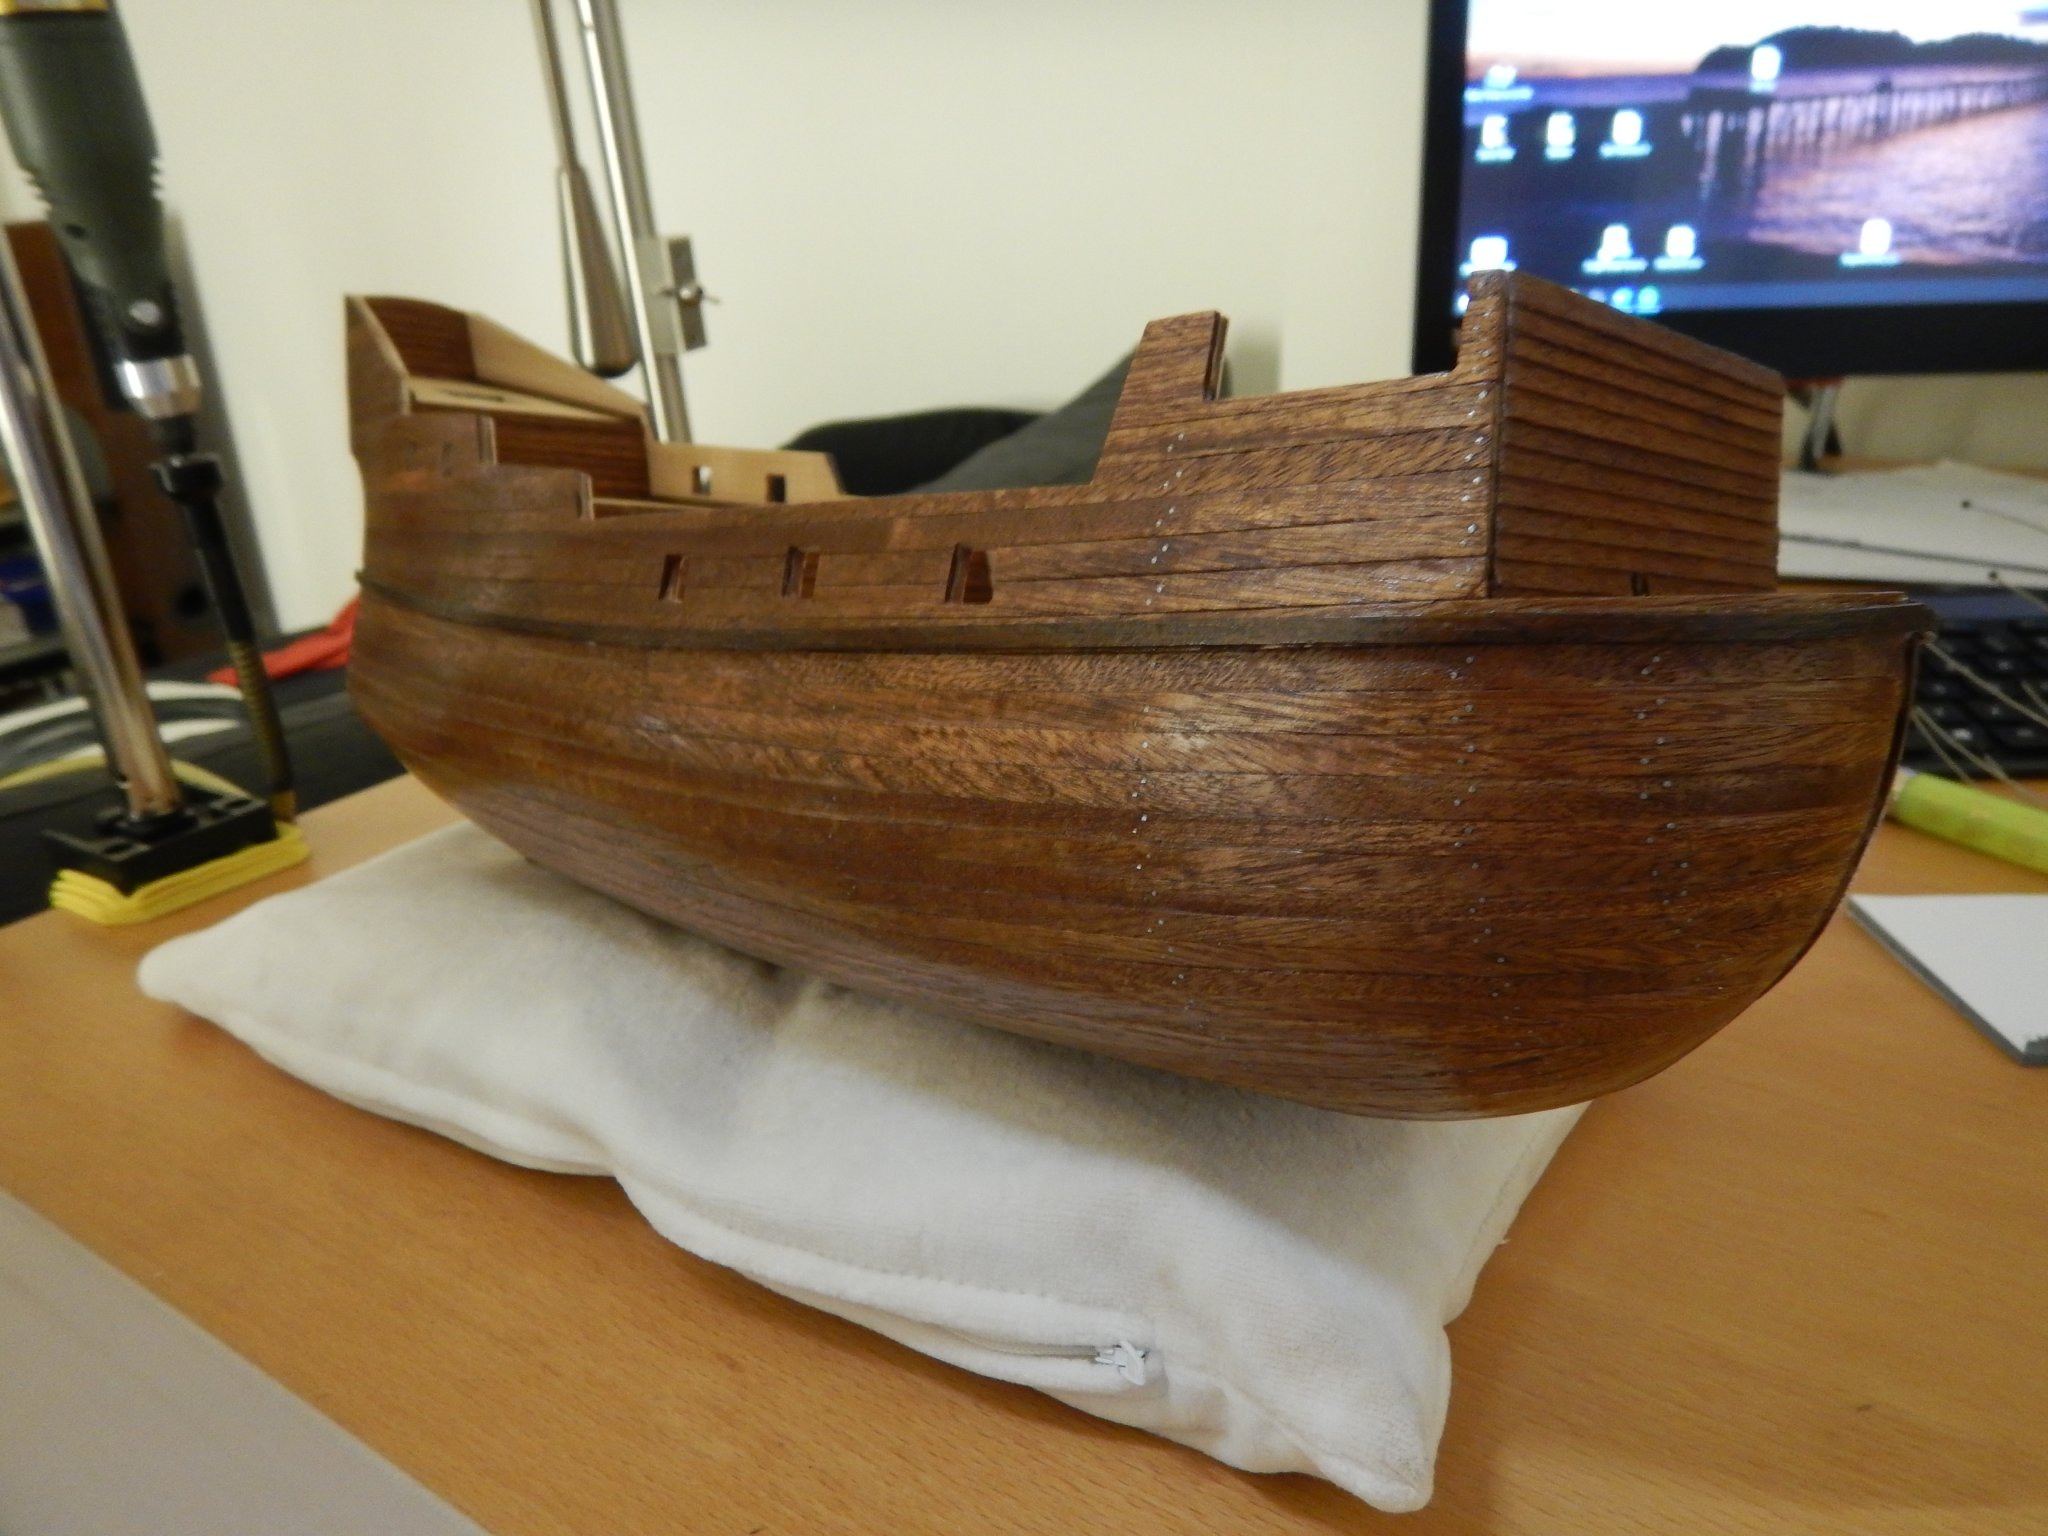
I had to give up the idea and plan that all planks will touch the steven at the bow. This was just not possible to taper and bend the planks that massively. Also I had to insert one drop plank at the bow.
With the result I'm quite happy, its my first full ship and with single plank layer only. Final sanding is still outstanding.
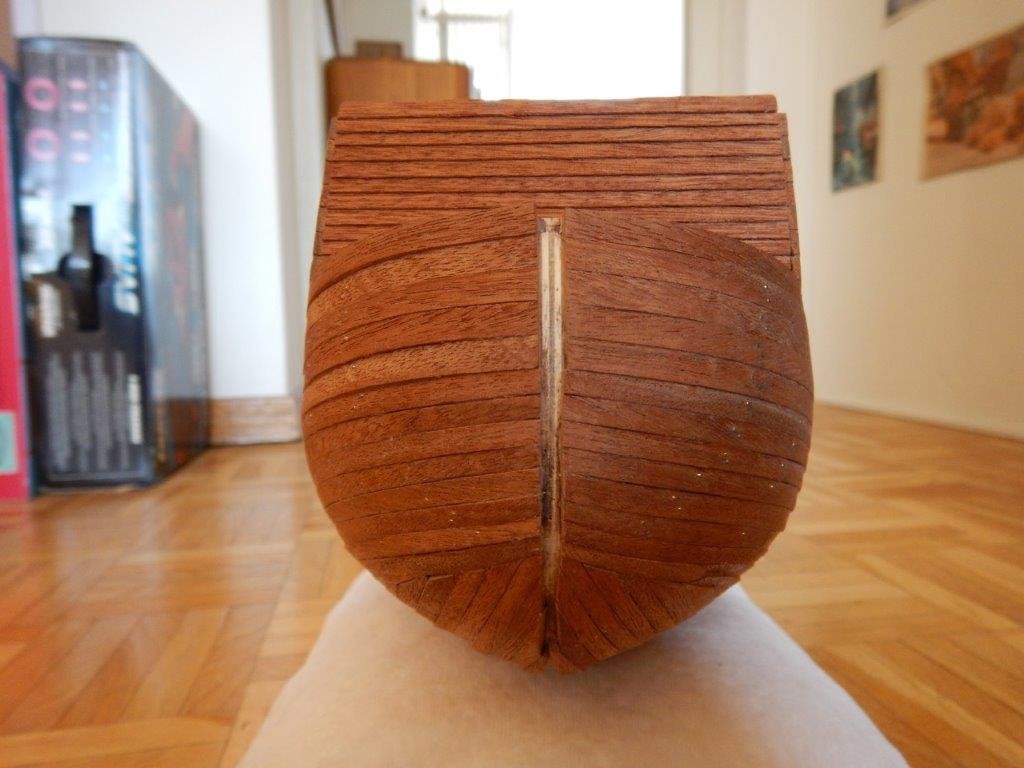

-
The hull beforde inserting the garboard plank:
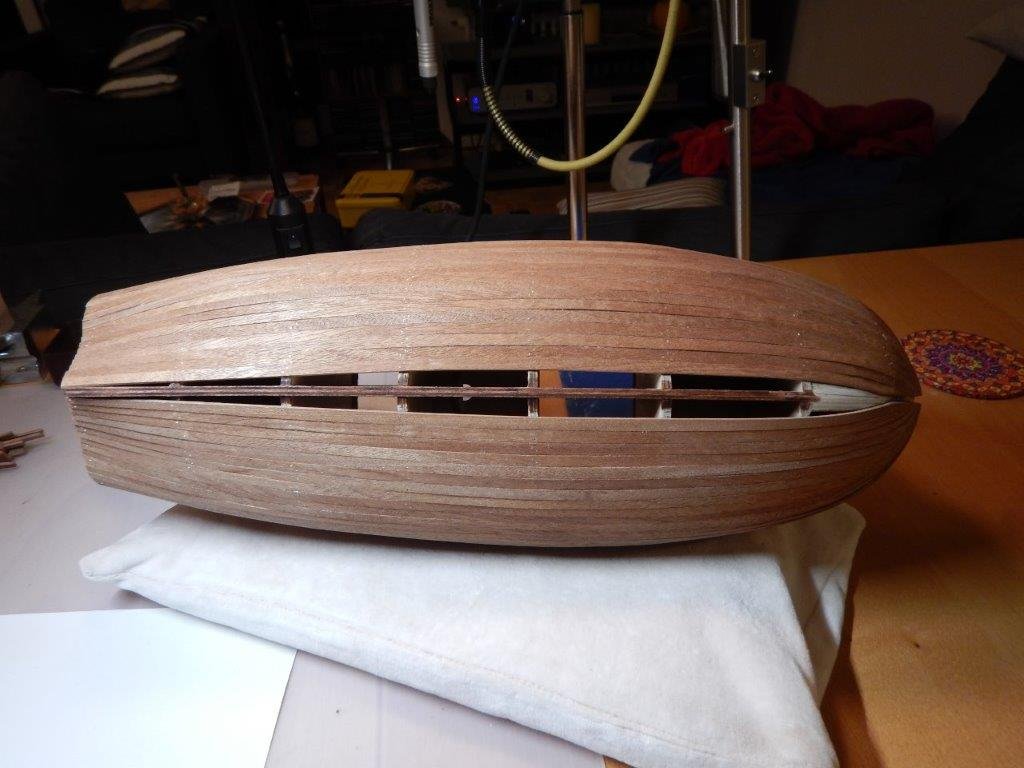
Garboard plank inserted:
- Duanelaker and GrandpaPhil
-
2

San Francisco II by sire_eris - Artesania Latina - scale 1:90
in - Kit build logs for subjects built from 1501 - 1750
Posted
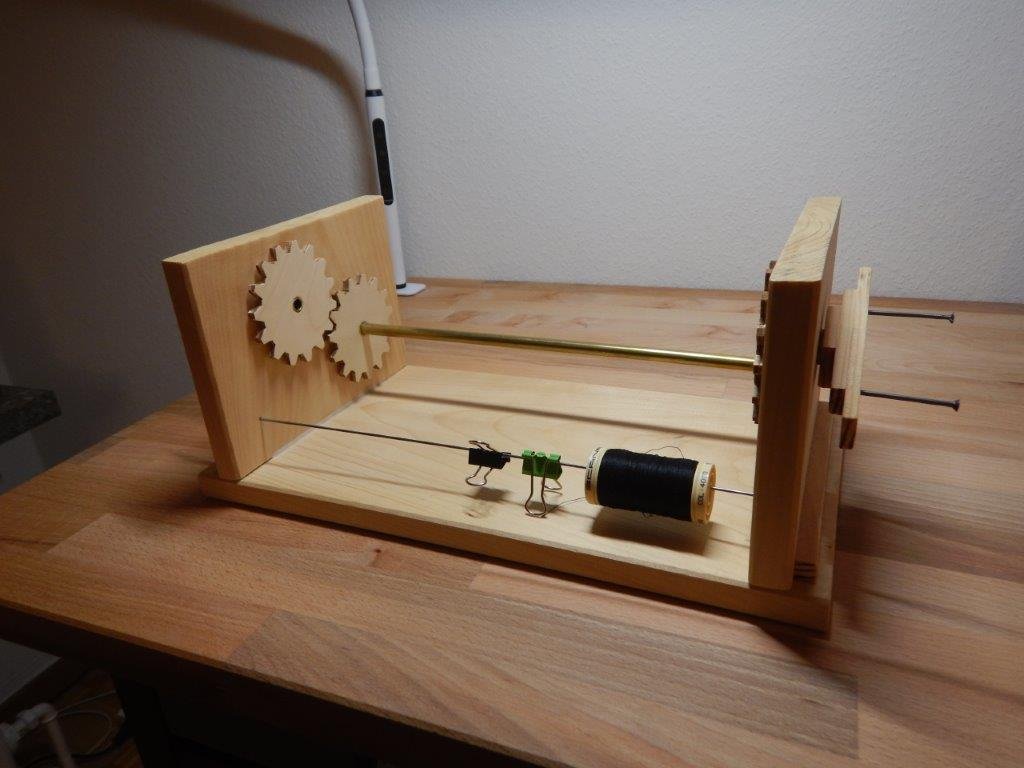
So far all worked well. Even served the part of the stays which go around the masts with thin rope, including a "mouse". Took me quite a while to figure out how to do that and had to build a serving machine for that, which I rebuilt by looking at the serving machine offered by Syren model (thanks guy for putting the assembly instruction online!).