LyleK1
-
Posts
541 -
Joined
-
Last visited
Content Type
Profiles
Forums
Gallery
Events
Everything posted by LyleK1
-
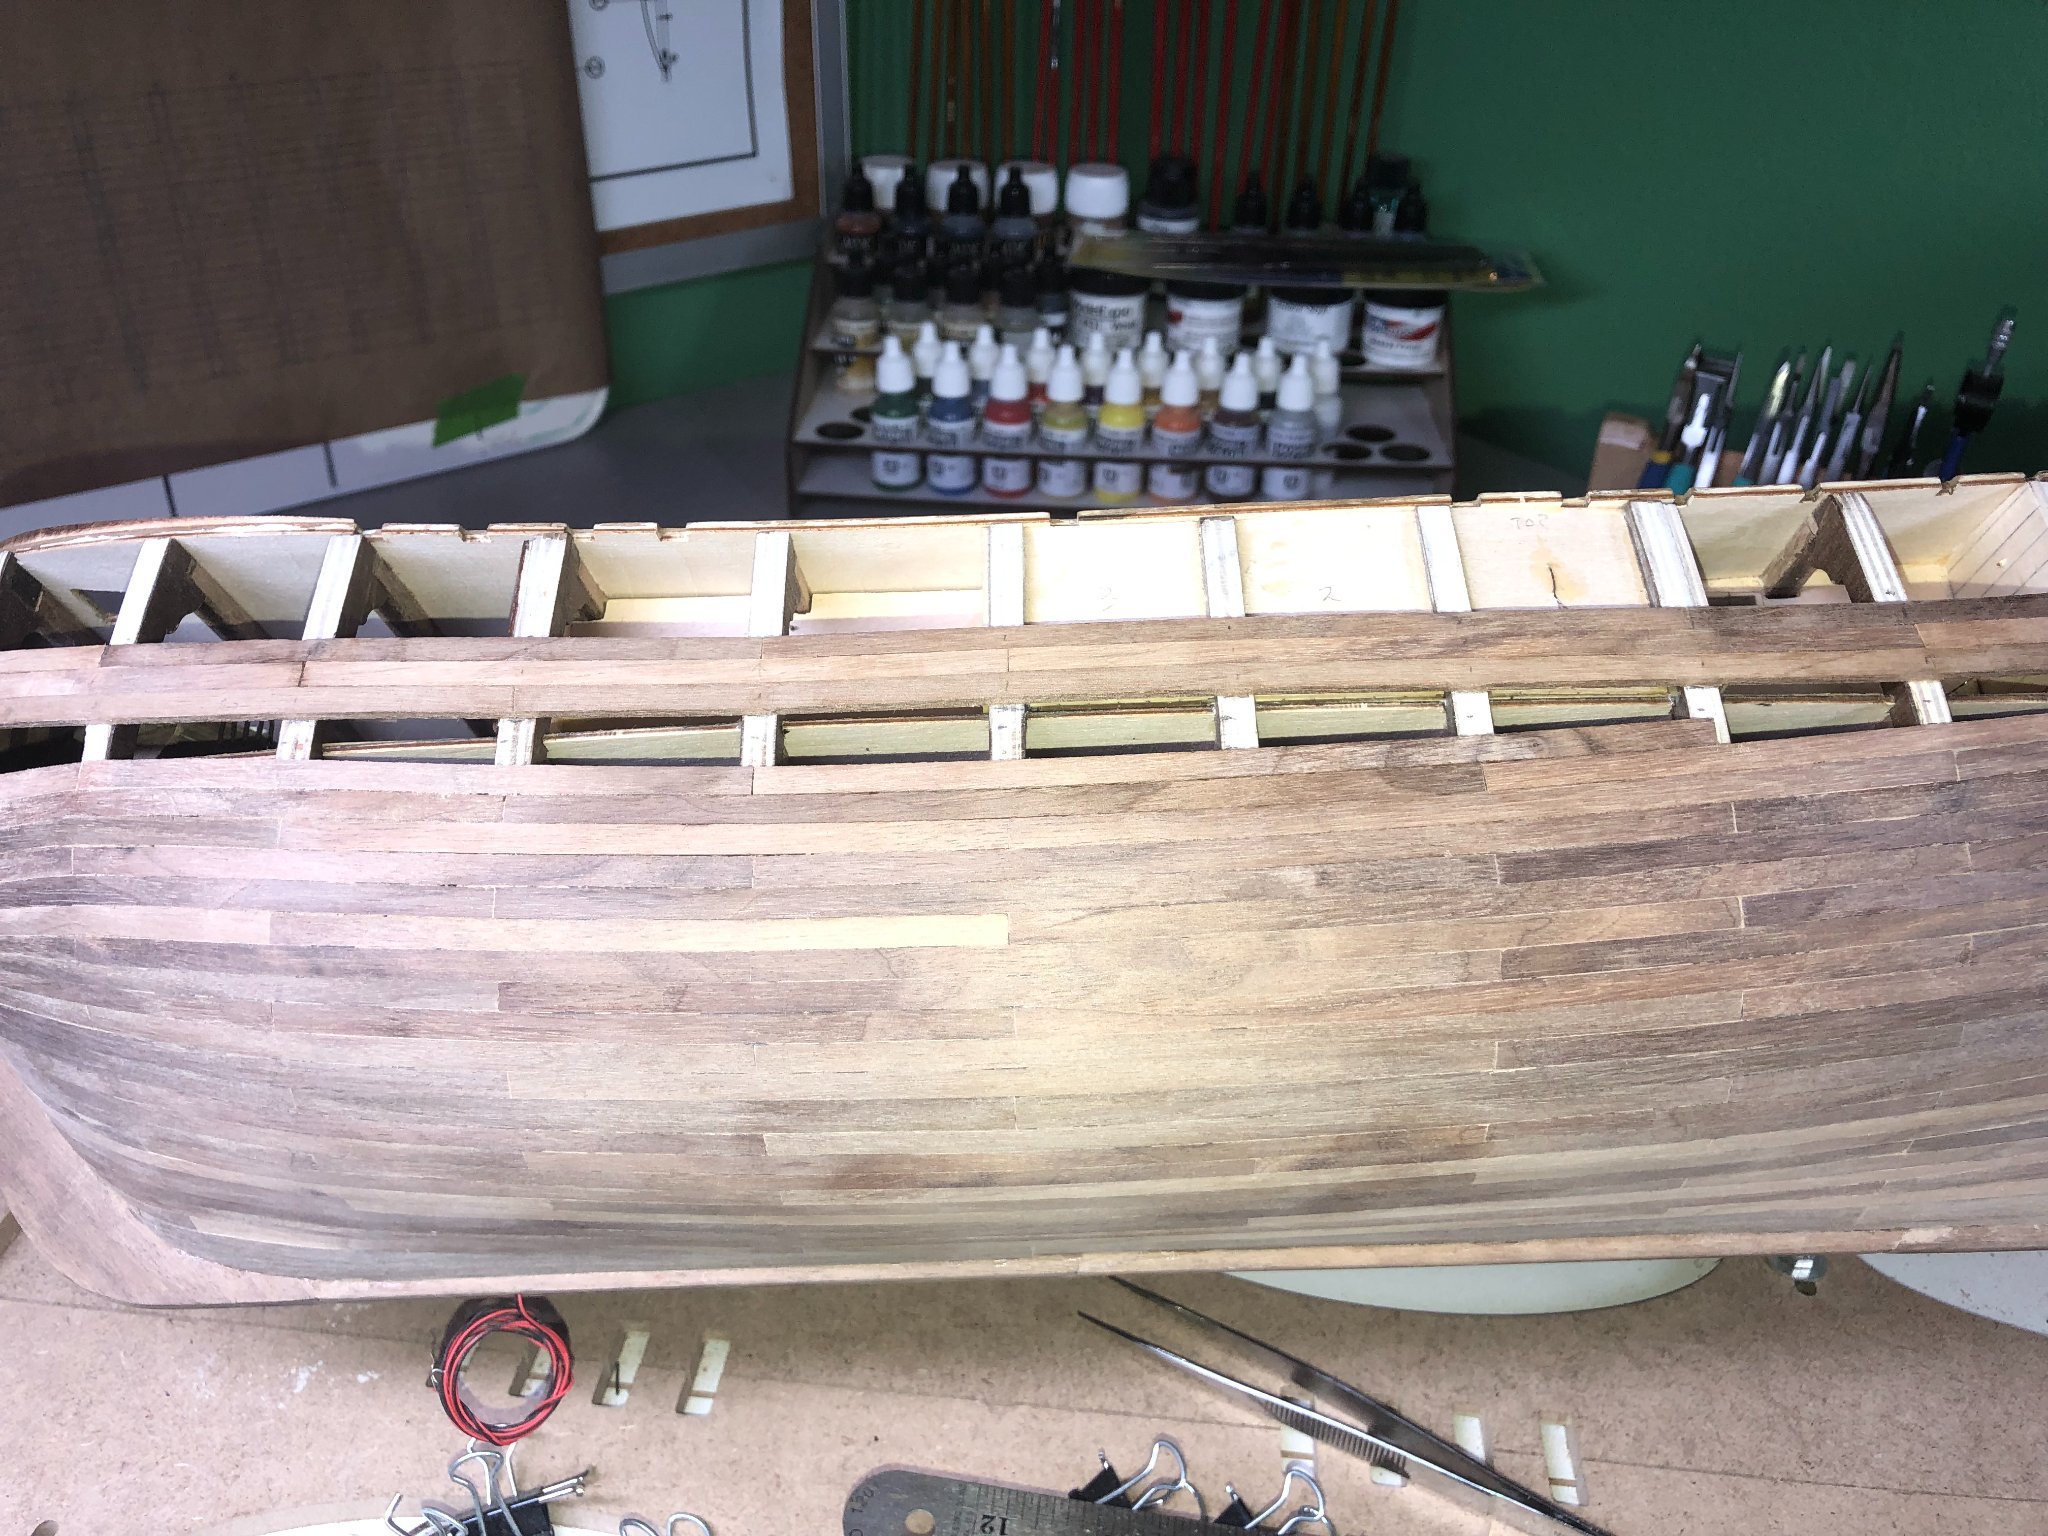
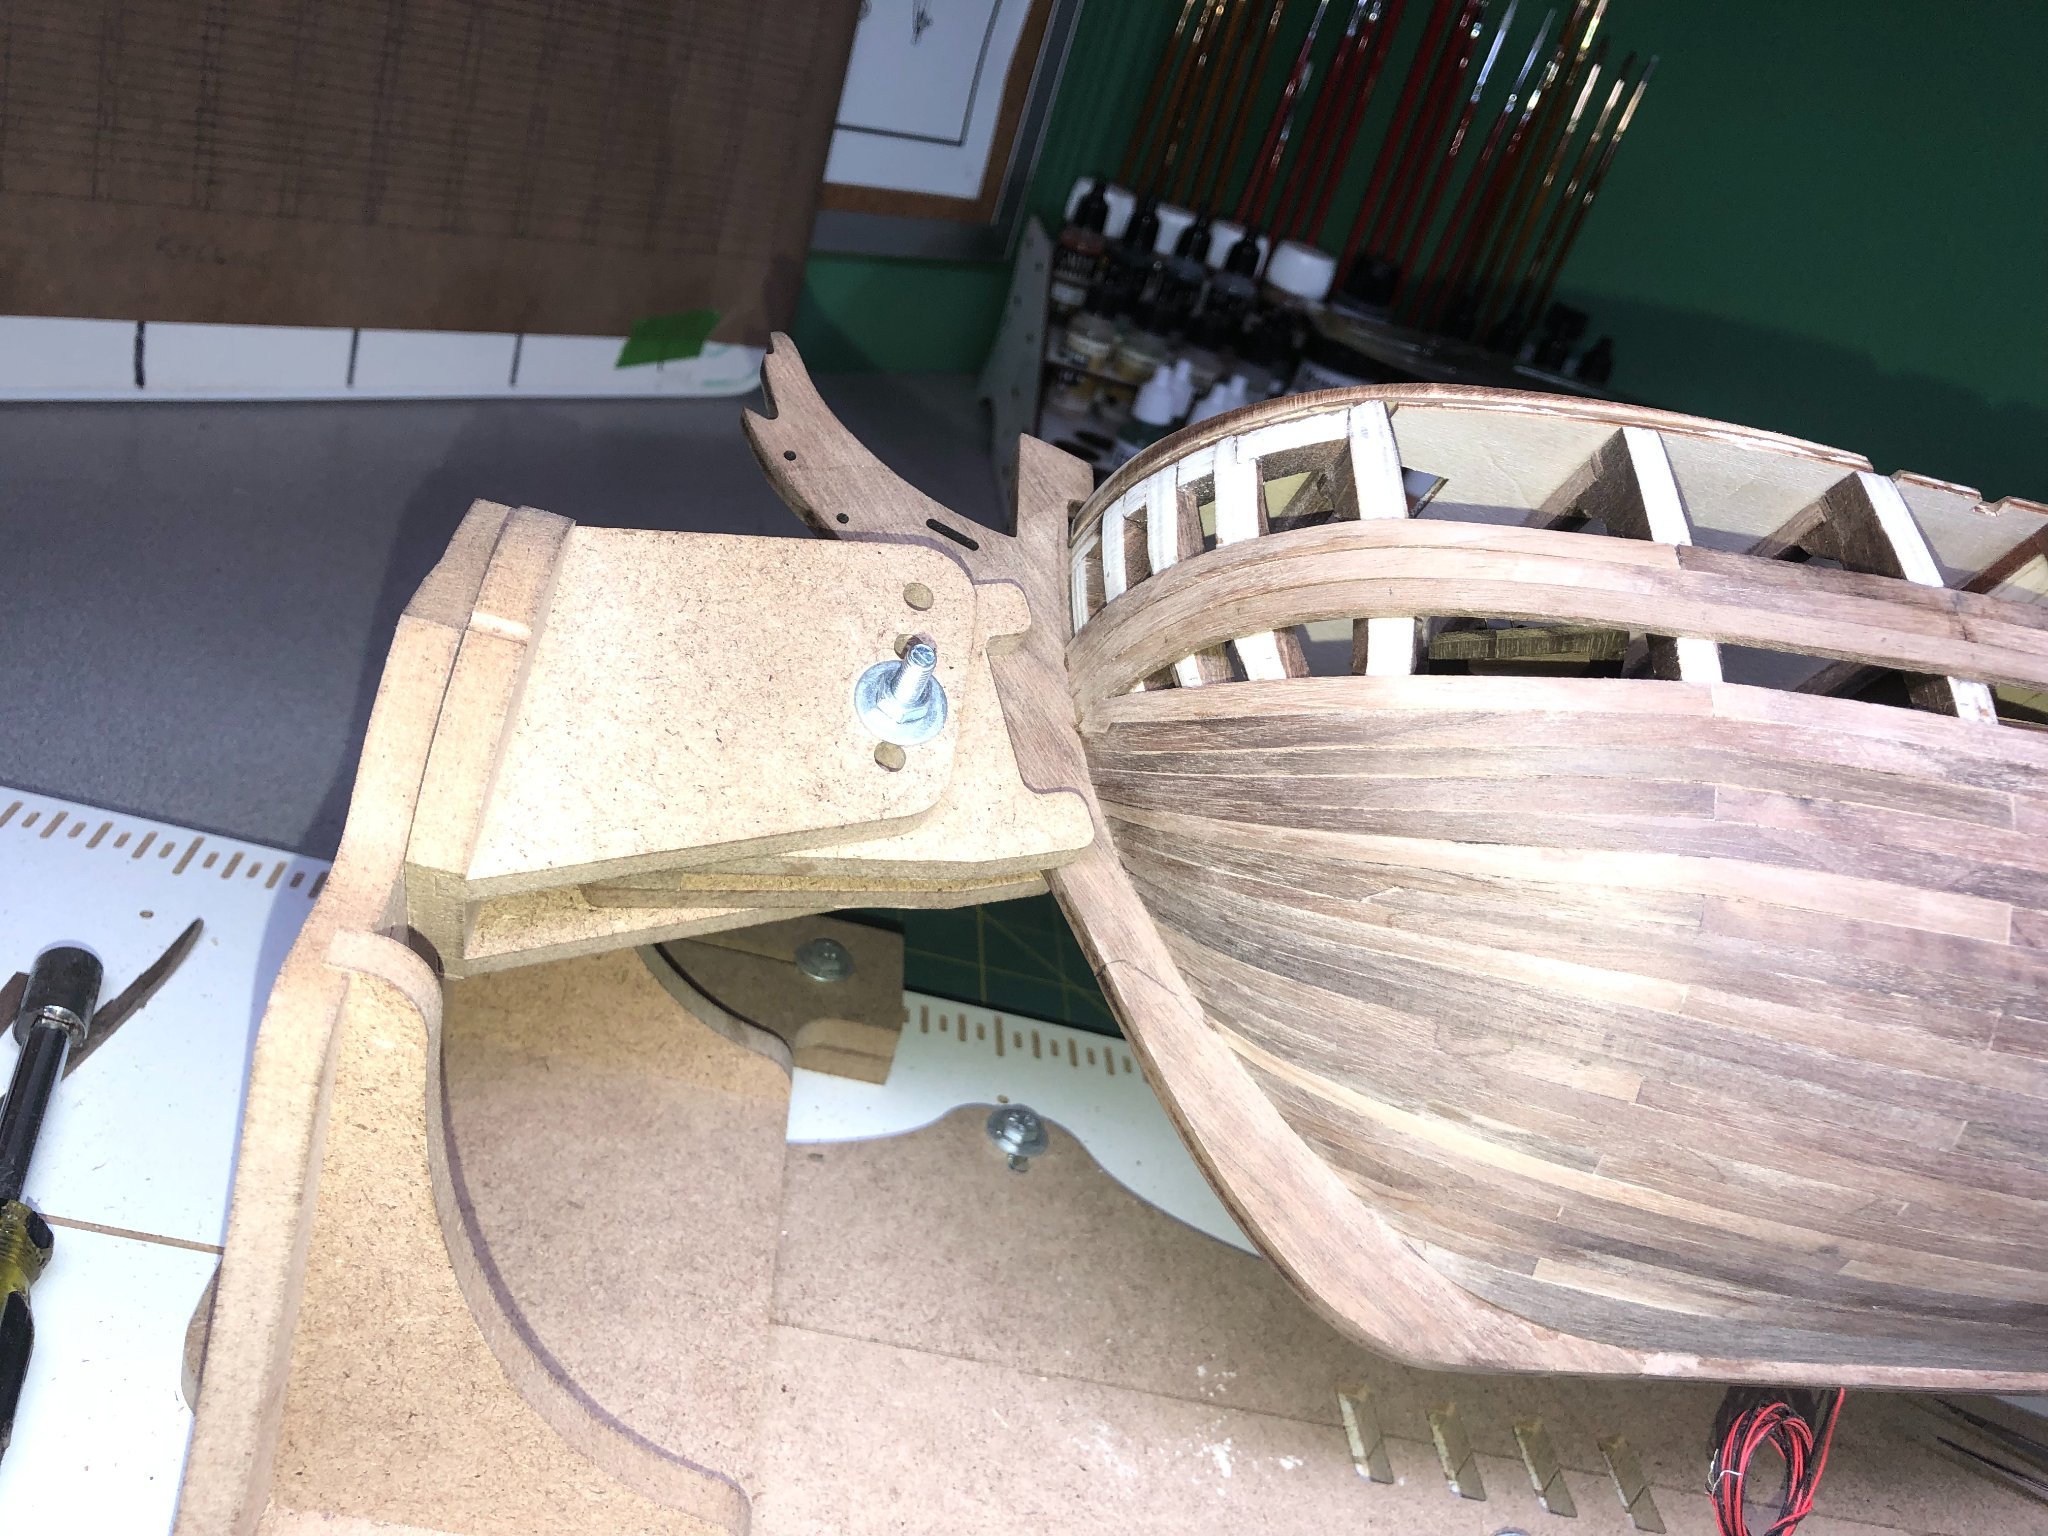
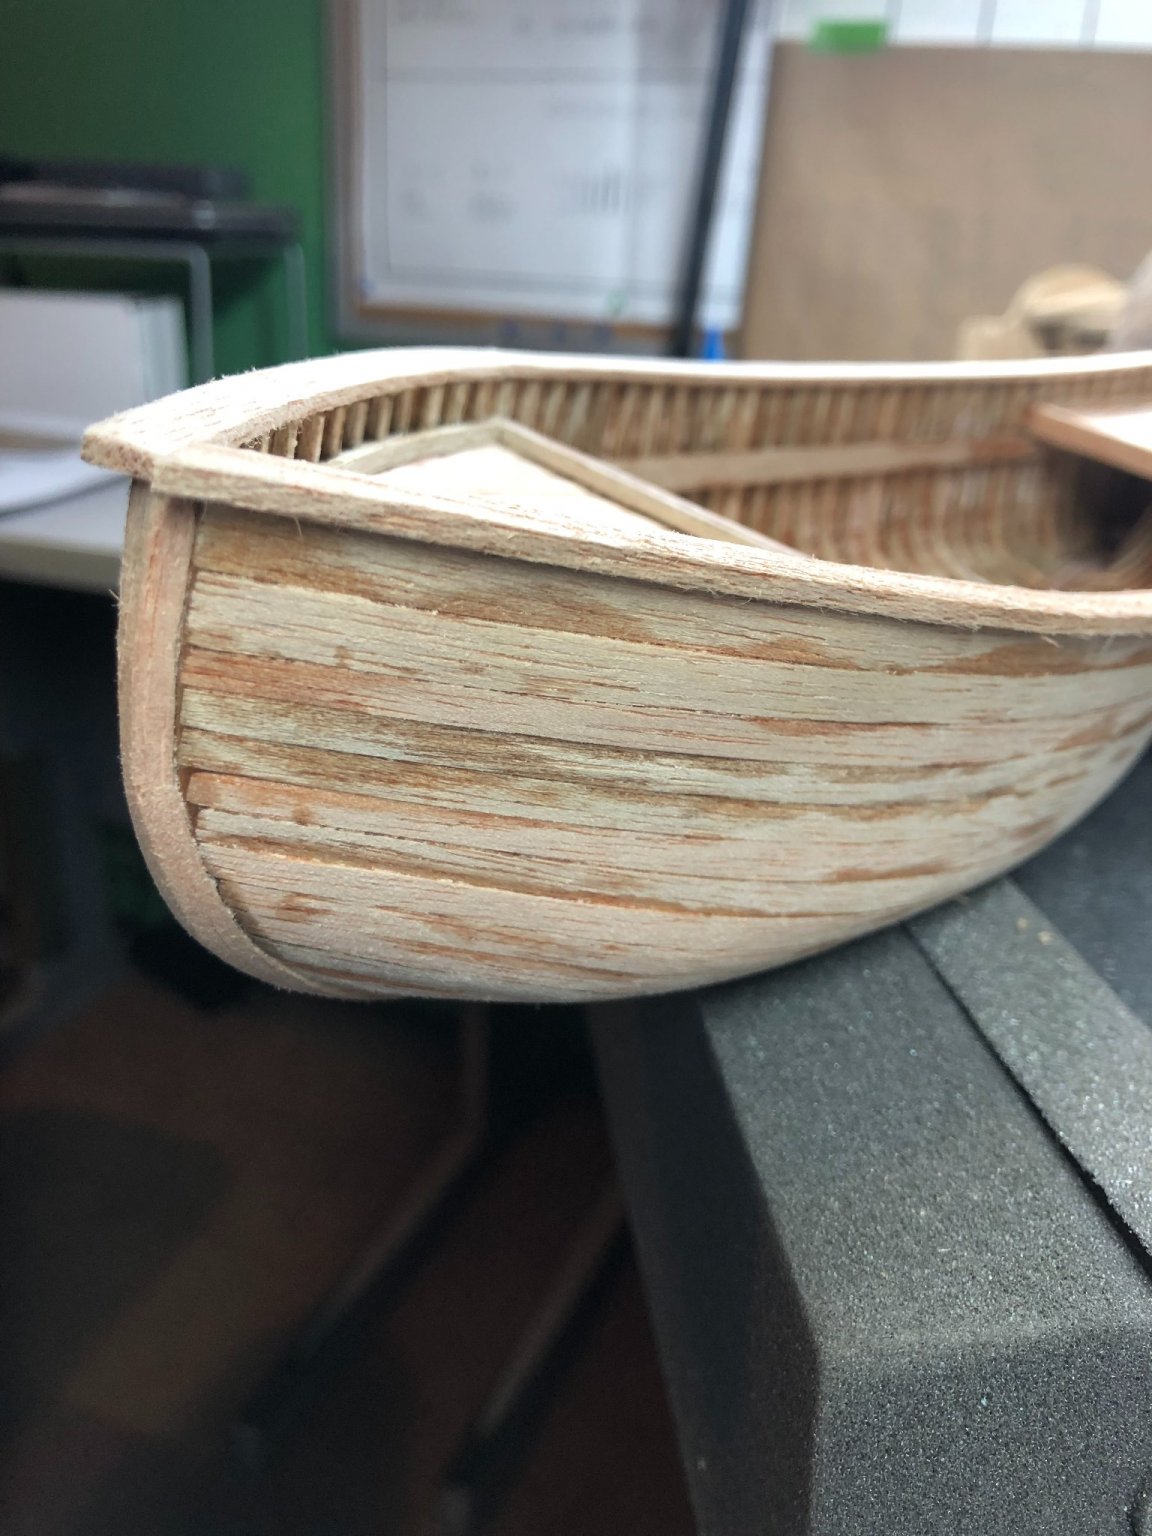
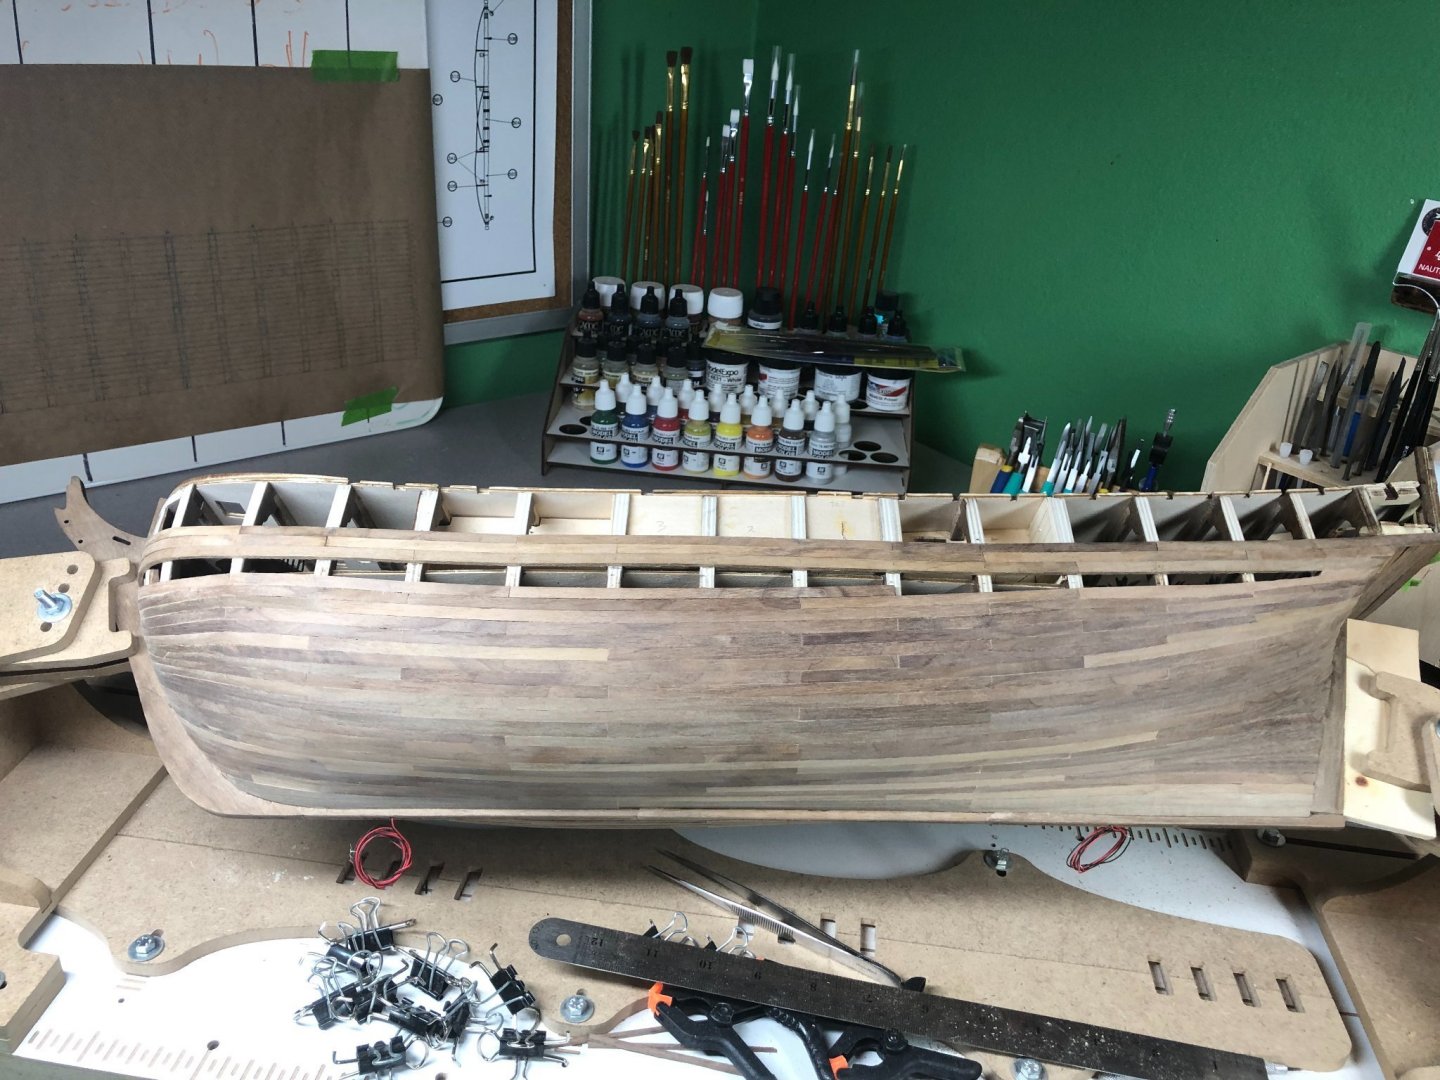
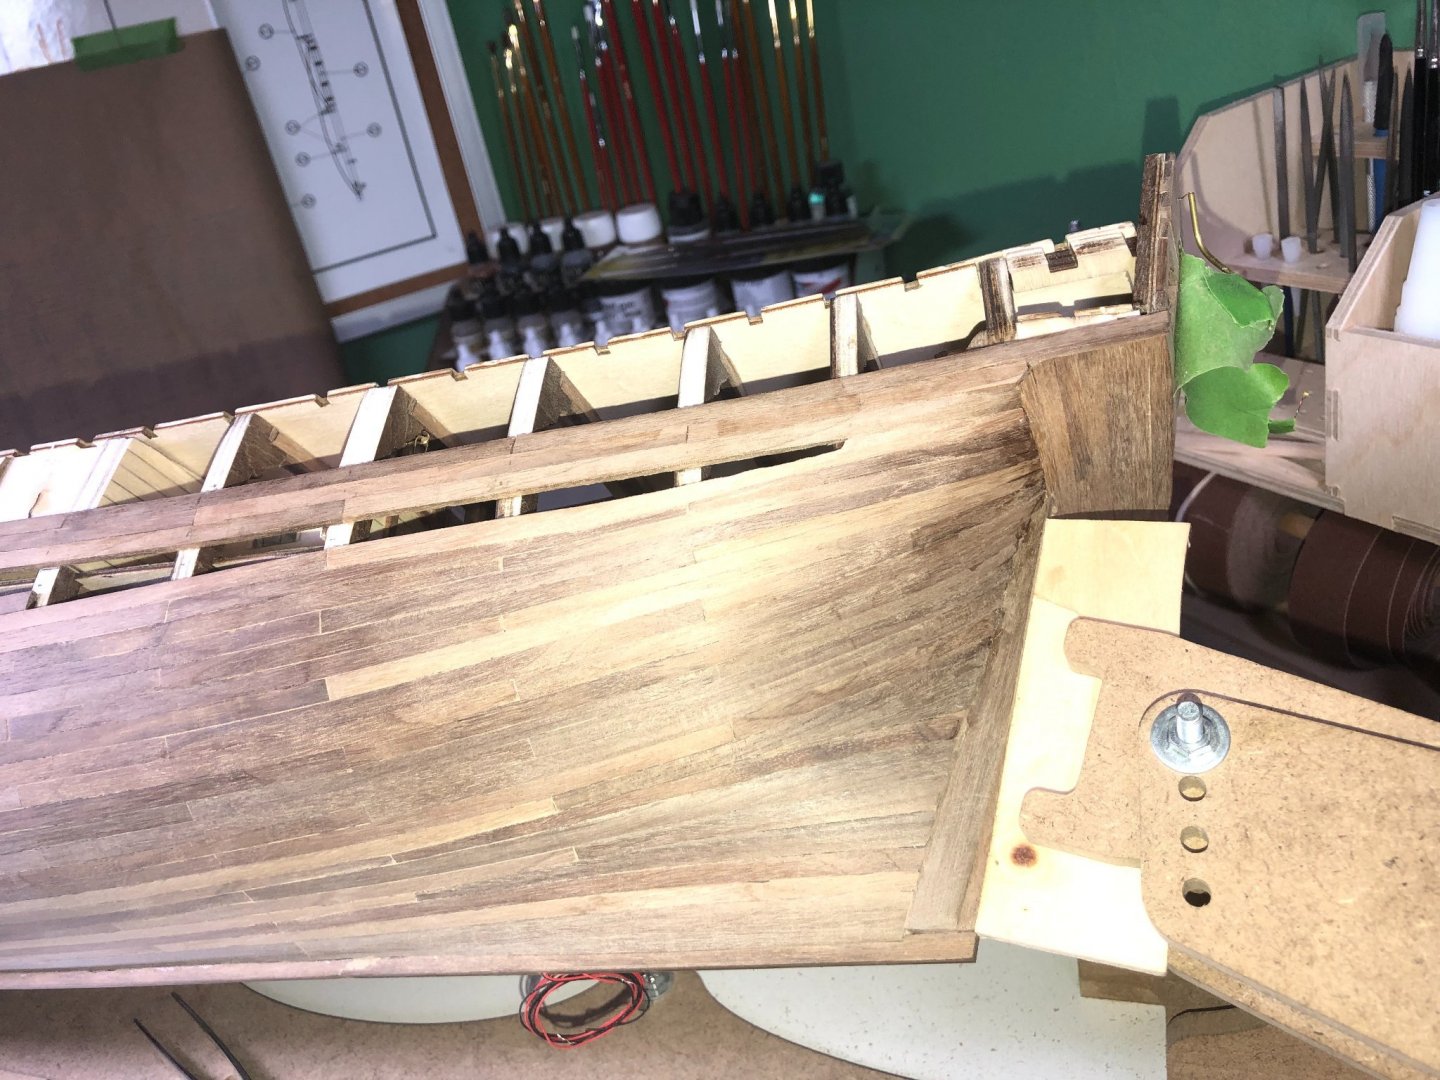
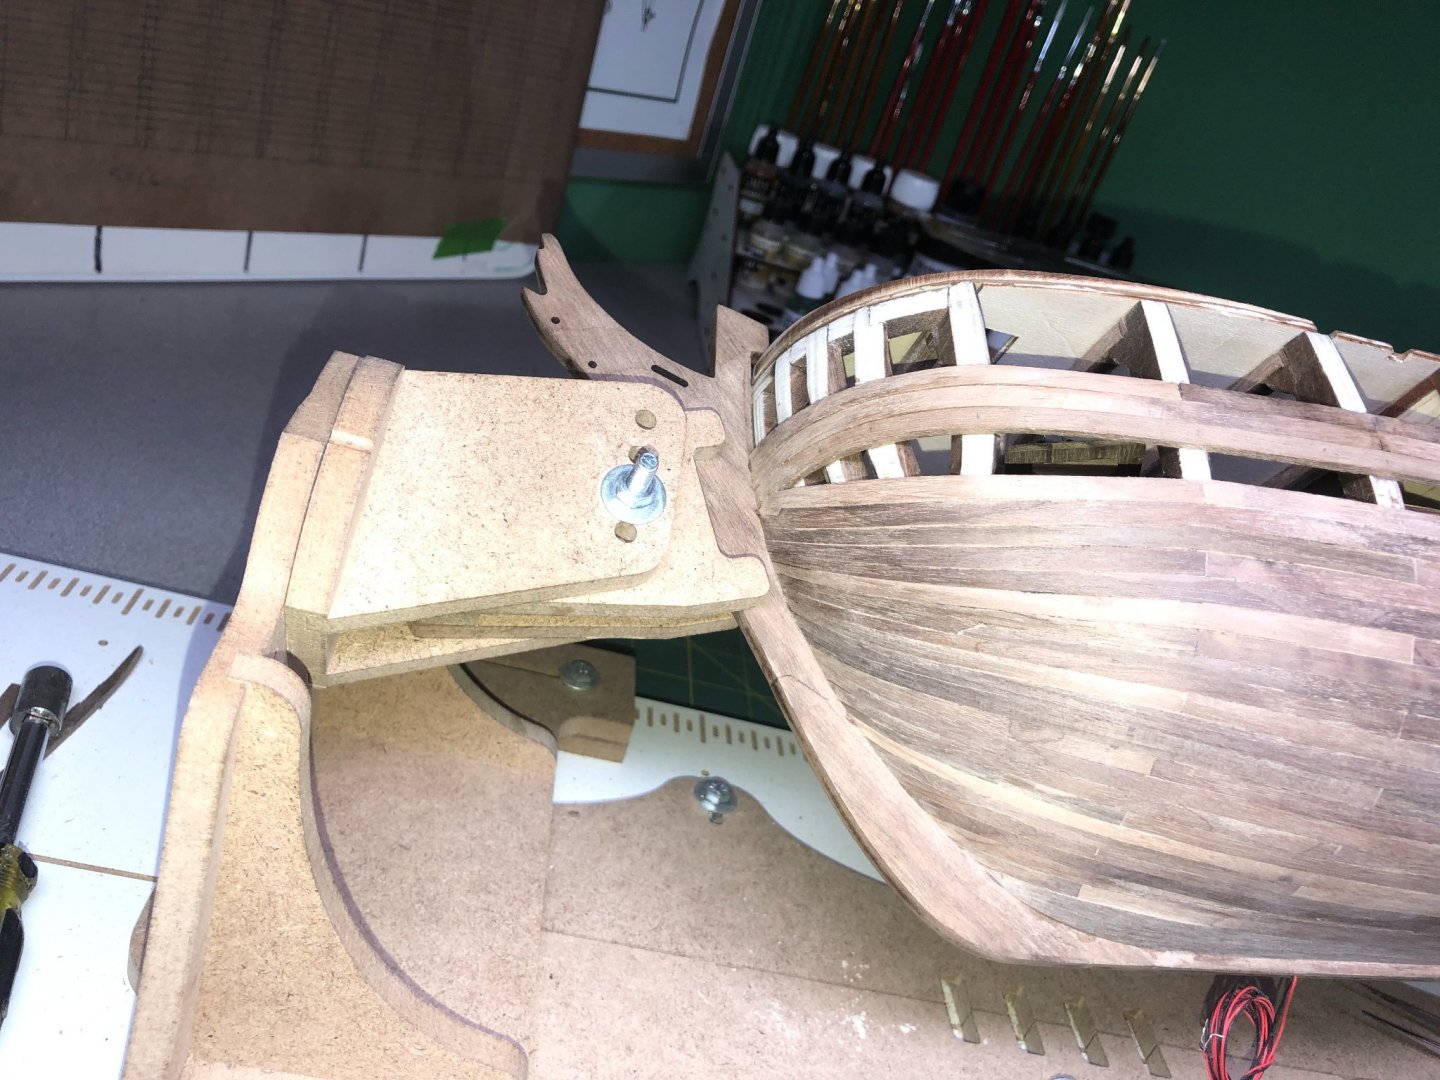
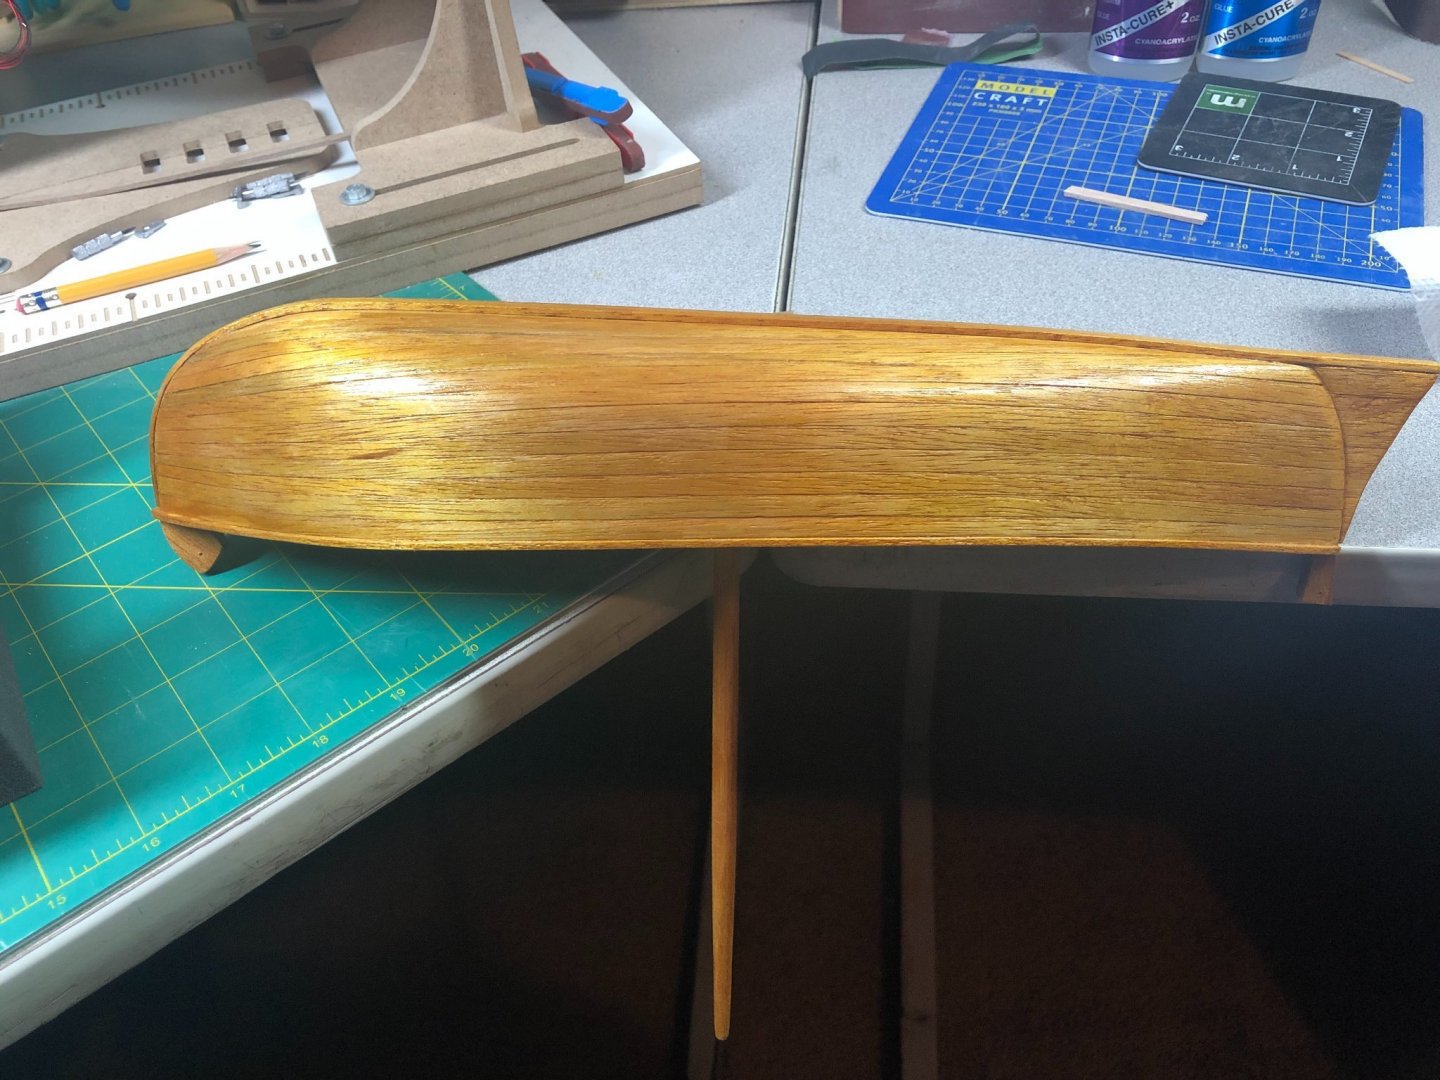
 The little hiatus almost made me forget about the trials and tribulations of working with walnut... Almost! I'm nearing the end of the planking. A couple more rows and I'll be up to the wales: The bow is a little more curved than I wanted but turned out good: The stern was tough, it took those particular planks longer due to the bend and twist in many of them. I had to soak the pieces multiple times and used my hands to shape the planks: Once I complete the last couple rows to the wales, there are 5-6 rows above the wales and the planking will be done! I've done some sanding but have a lot more to do. Especially around the stern and bow areas. Such a struggle to get this very hard wood to conform! Gotta start experimenting on how to age this wood too.
-
So true! And you're using them very well!
-
Chuck, Looking good! I like the AYC too. With the taper at both ends, you have a much more pronounced "arch" at the center of the boat. So, I'm wondering, will the center of the planks meet the keel sooner than either end? And if so, how will you reconcile it? The light can be so unforgiving but as you stated, it will look great once sanded! Hate to say it, because I wasn't a fan of CA glue before this build, but you're gonna need to use it with all the twisting and bending! I have a new found respect for the glue if used in the right situations. It can make life easier. You just need to be aware that it does stain the wood... easily covered with the right products though! Let the fun begin! You are at the toughest part of the build... at least it was for me! Good luck!
-
It took 7 weeks to complete but it's ready and in time for my dad's birthday in a couple weeks! Couple pictures: A really fun build too! I put my first hour into the Bounty today after 7 weeks away! I've got vacation and a remodel going on but plan to get time in to her... so, stand-by, more coming soon.
-
Thanks Chuck, Steven, Moab and Tom. Appreciate your stopping in from time to time and your comments. Looking forward to dad's birthday! Stop by my Bounty log!
- 83 replies
-
- 2
-

-
- Sea of Galilee boat
- SE Miller
- (and 1 more)
-
Thanks Chuck! Looking forward to your updates and progress!
- 83 replies
-
- 1
-
-
- Sea of Galilee boat
- SE Miller
- (and 1 more)
-
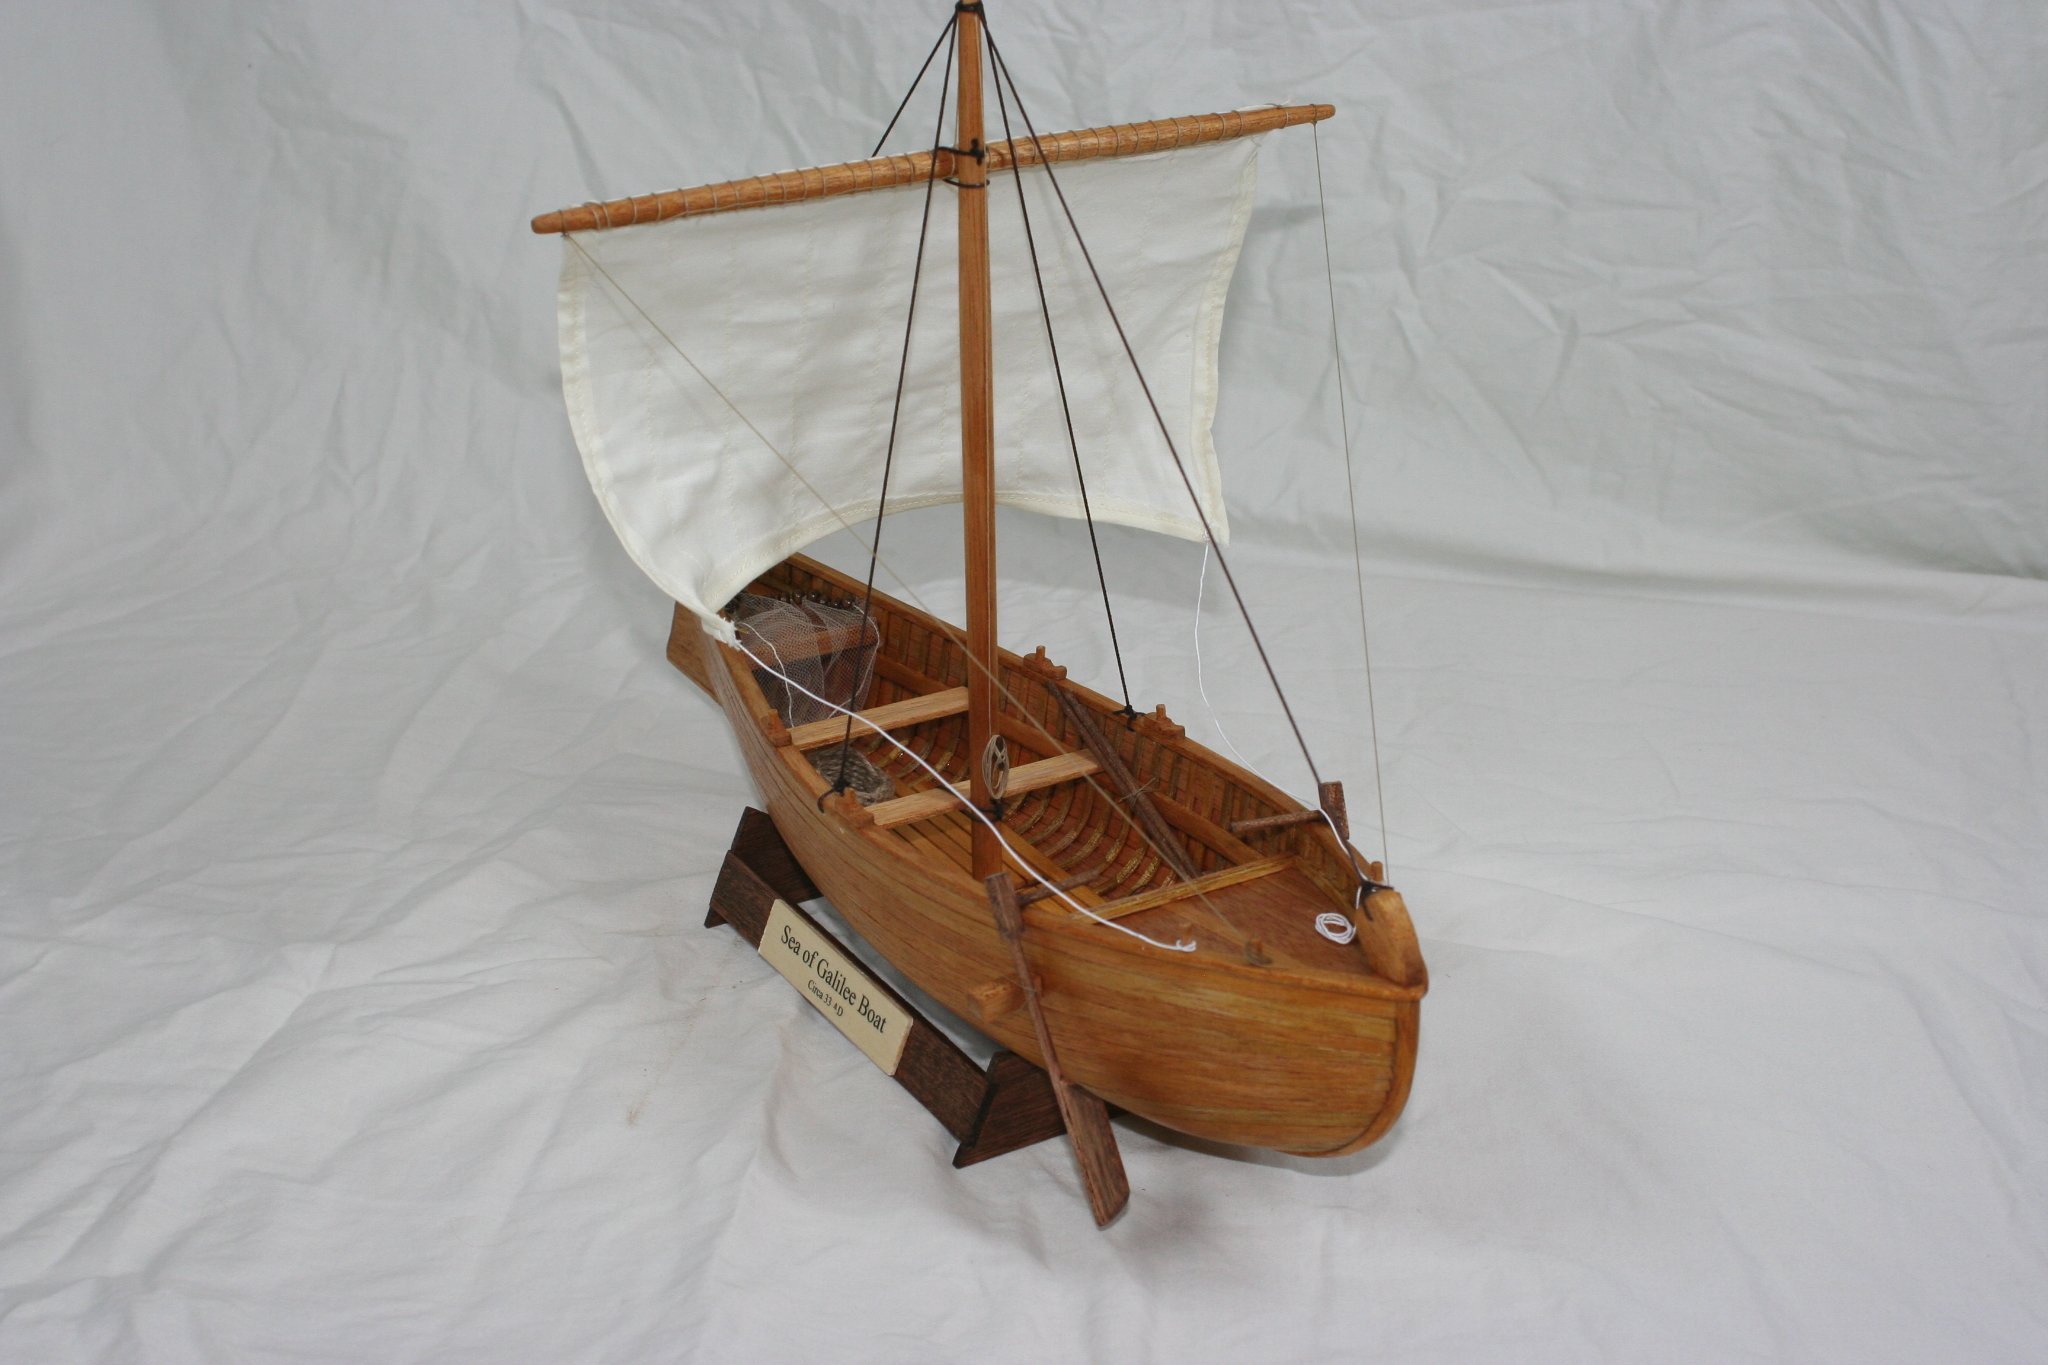
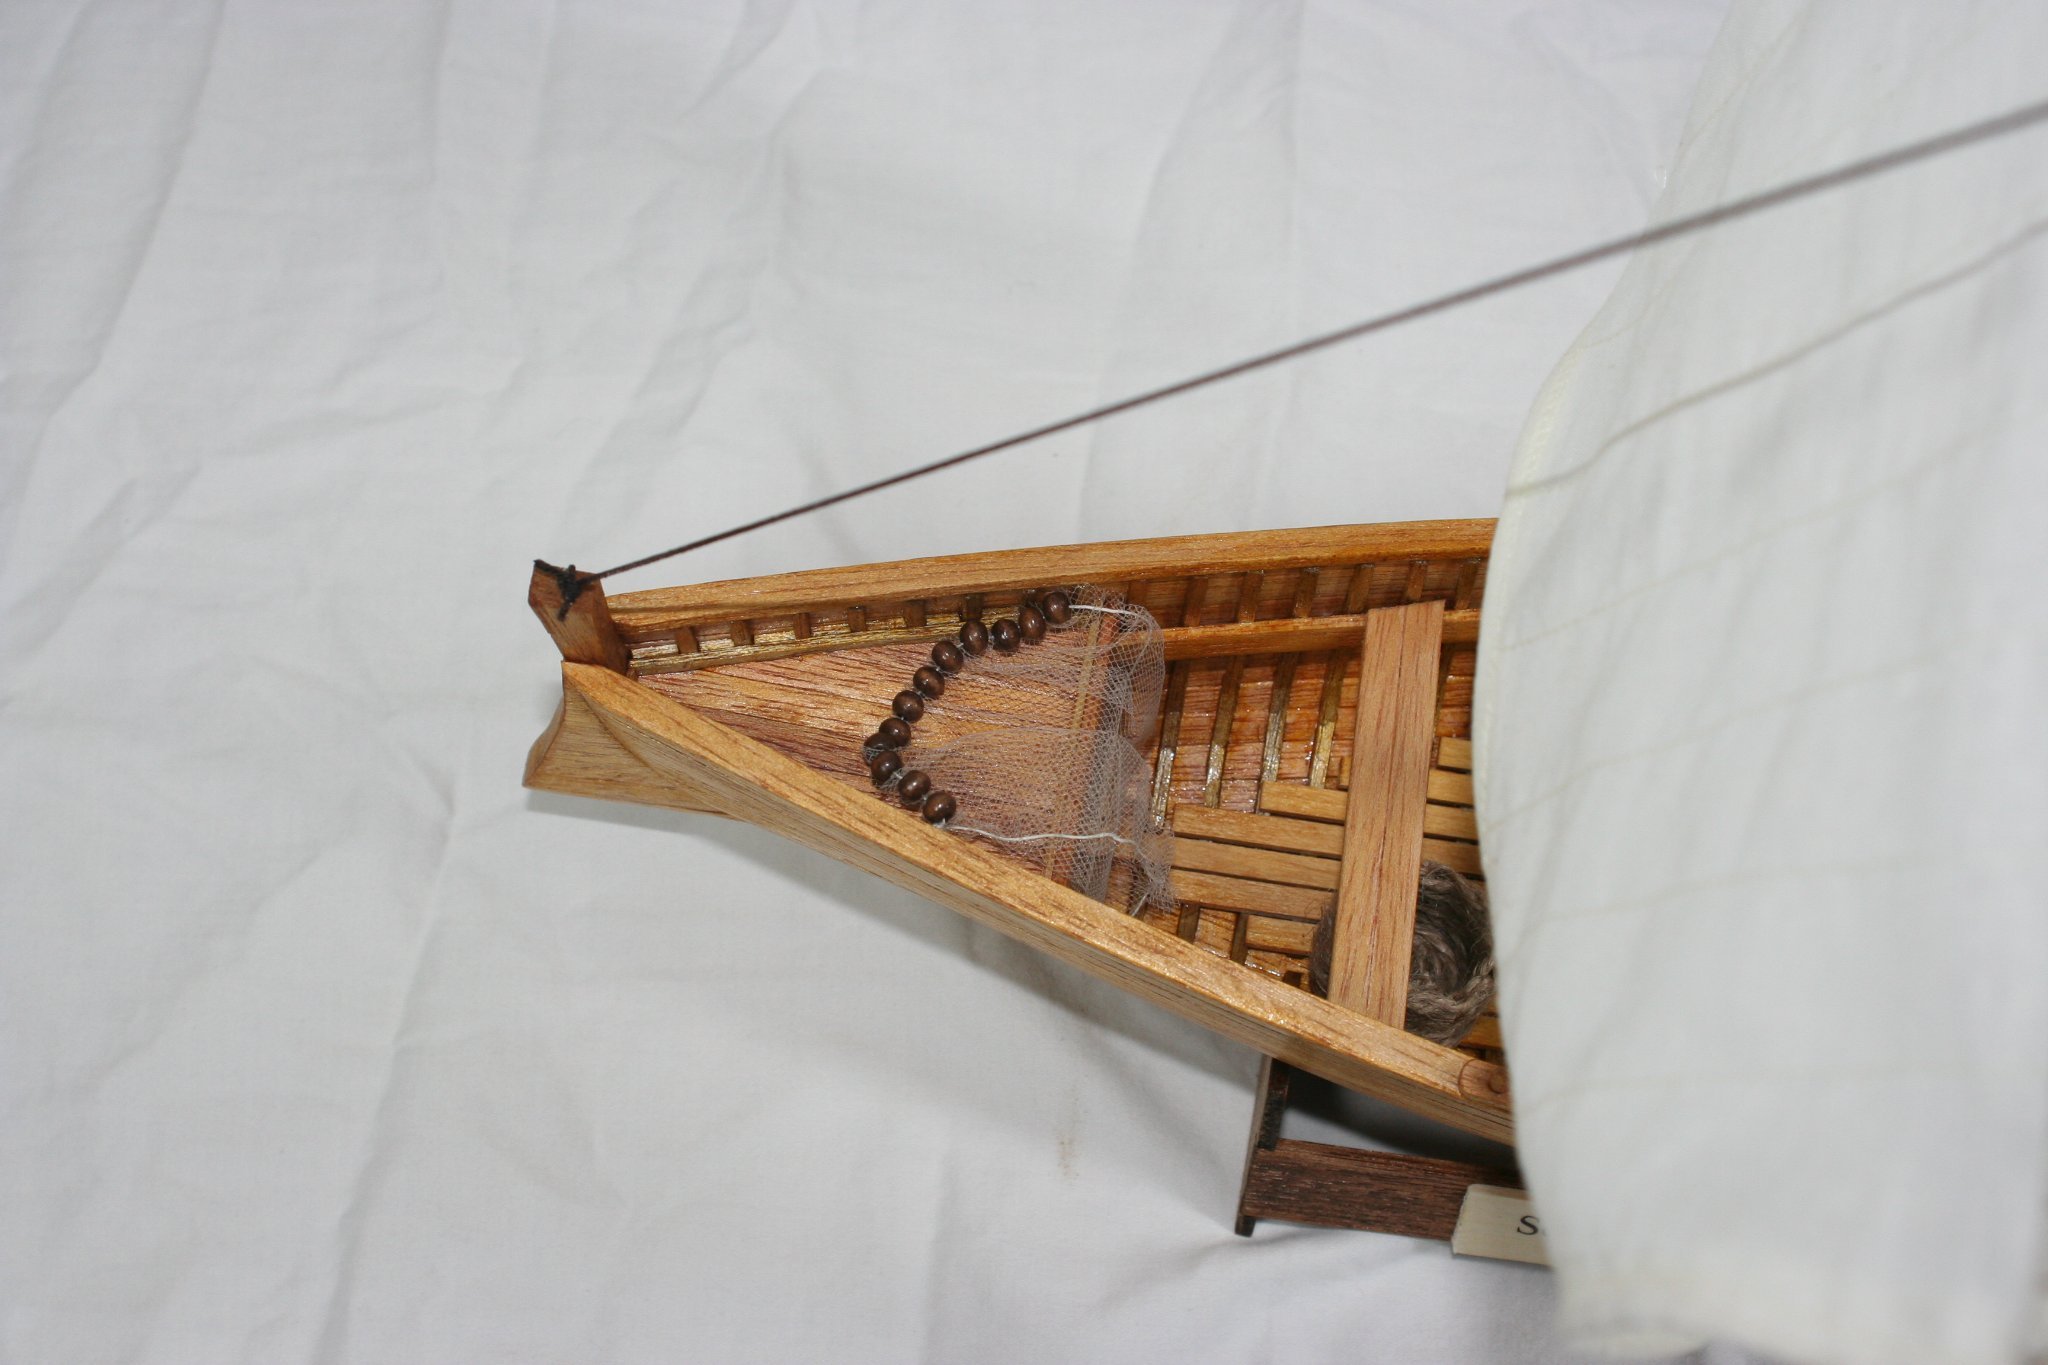
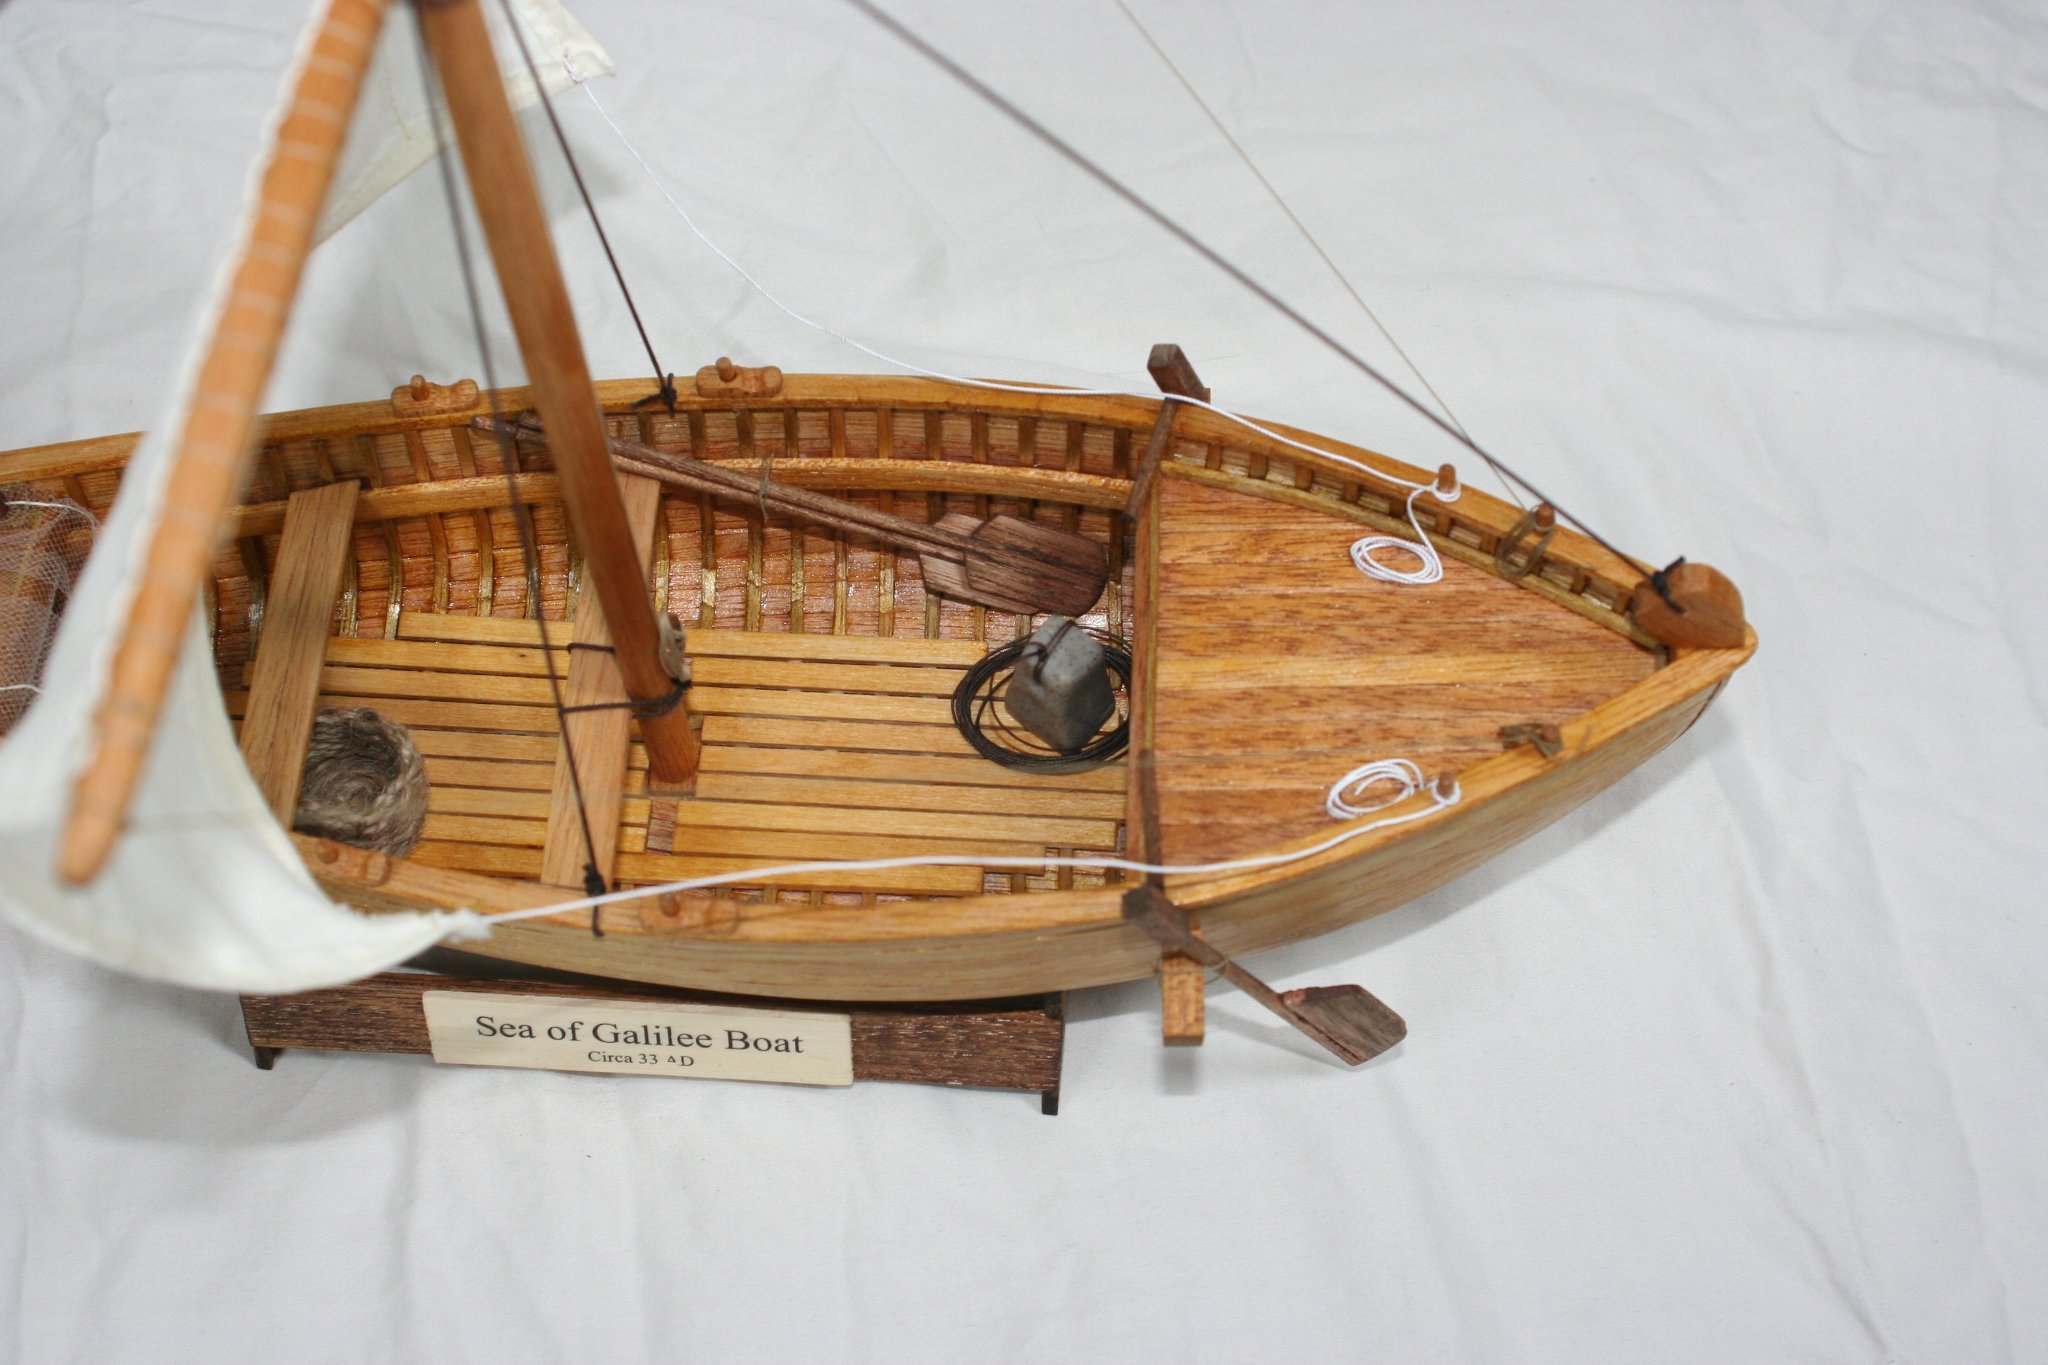
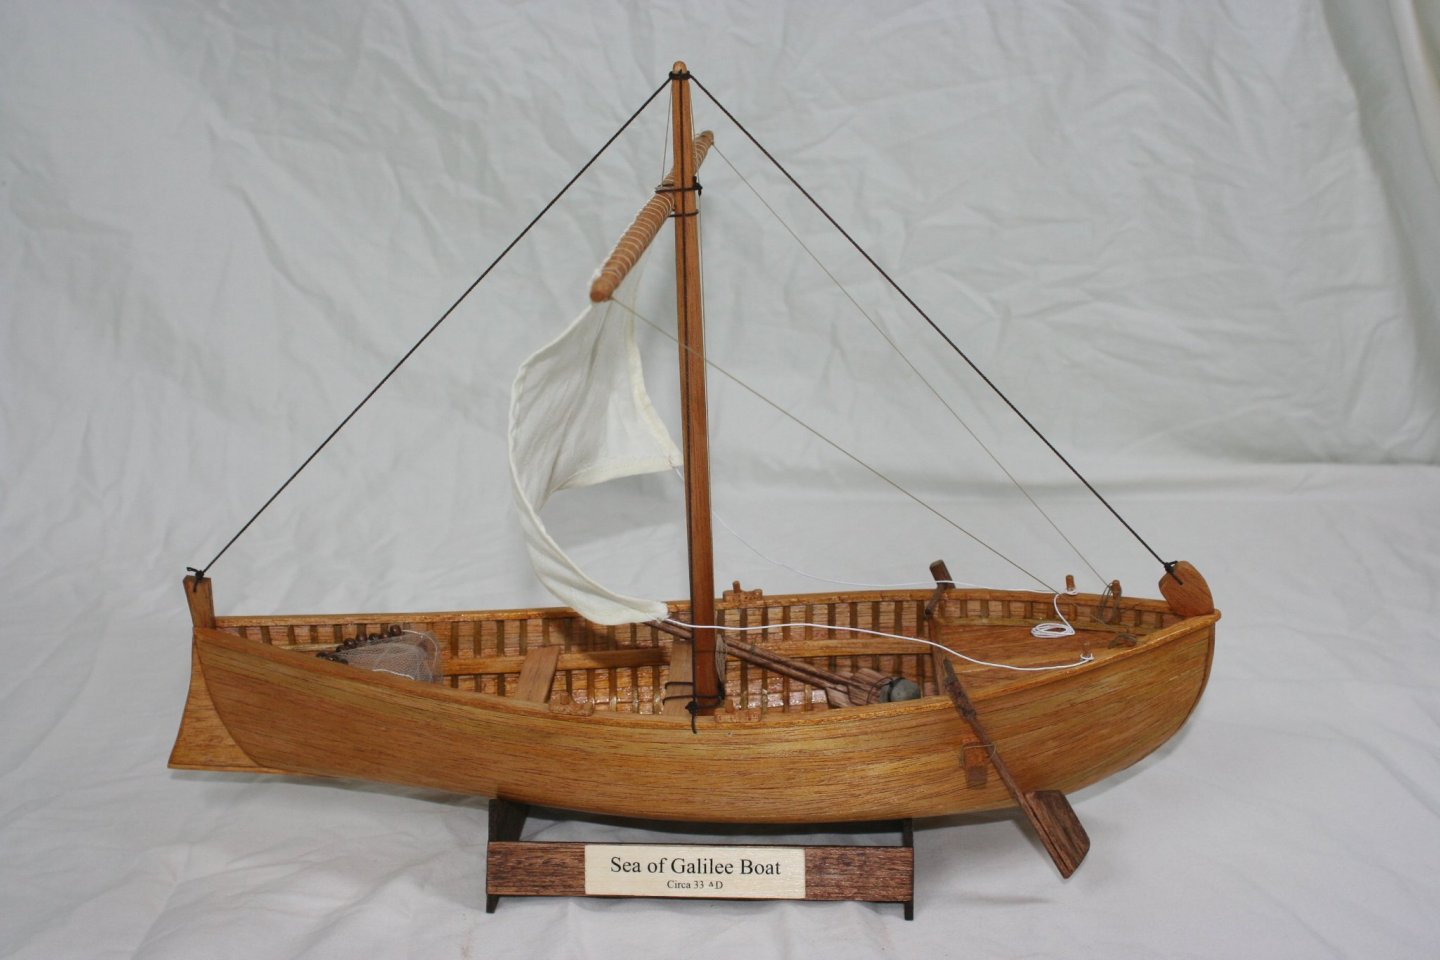
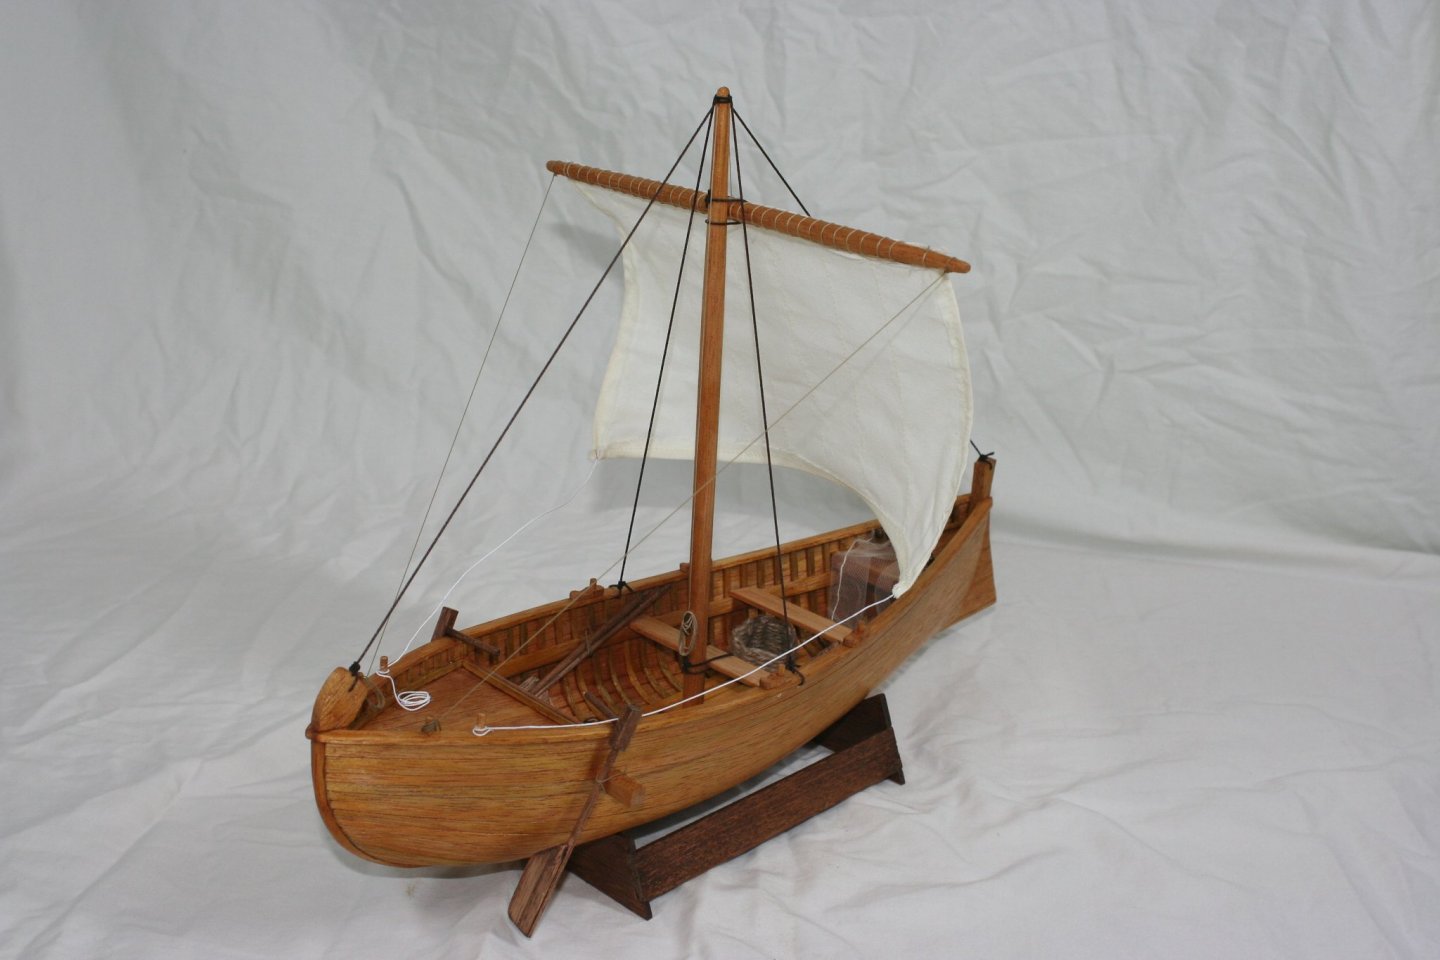
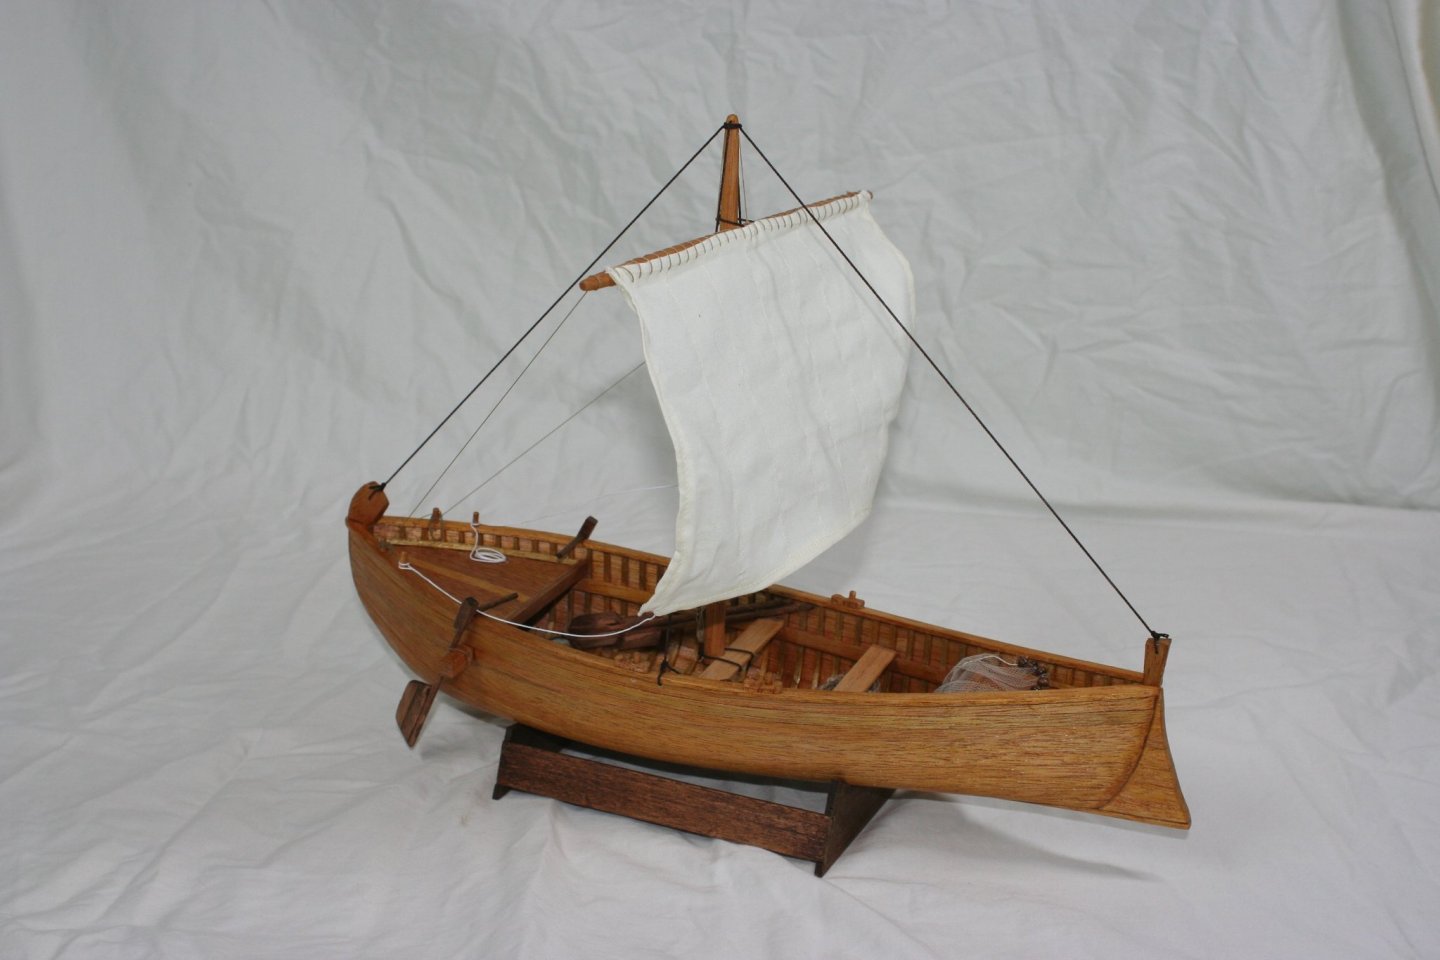
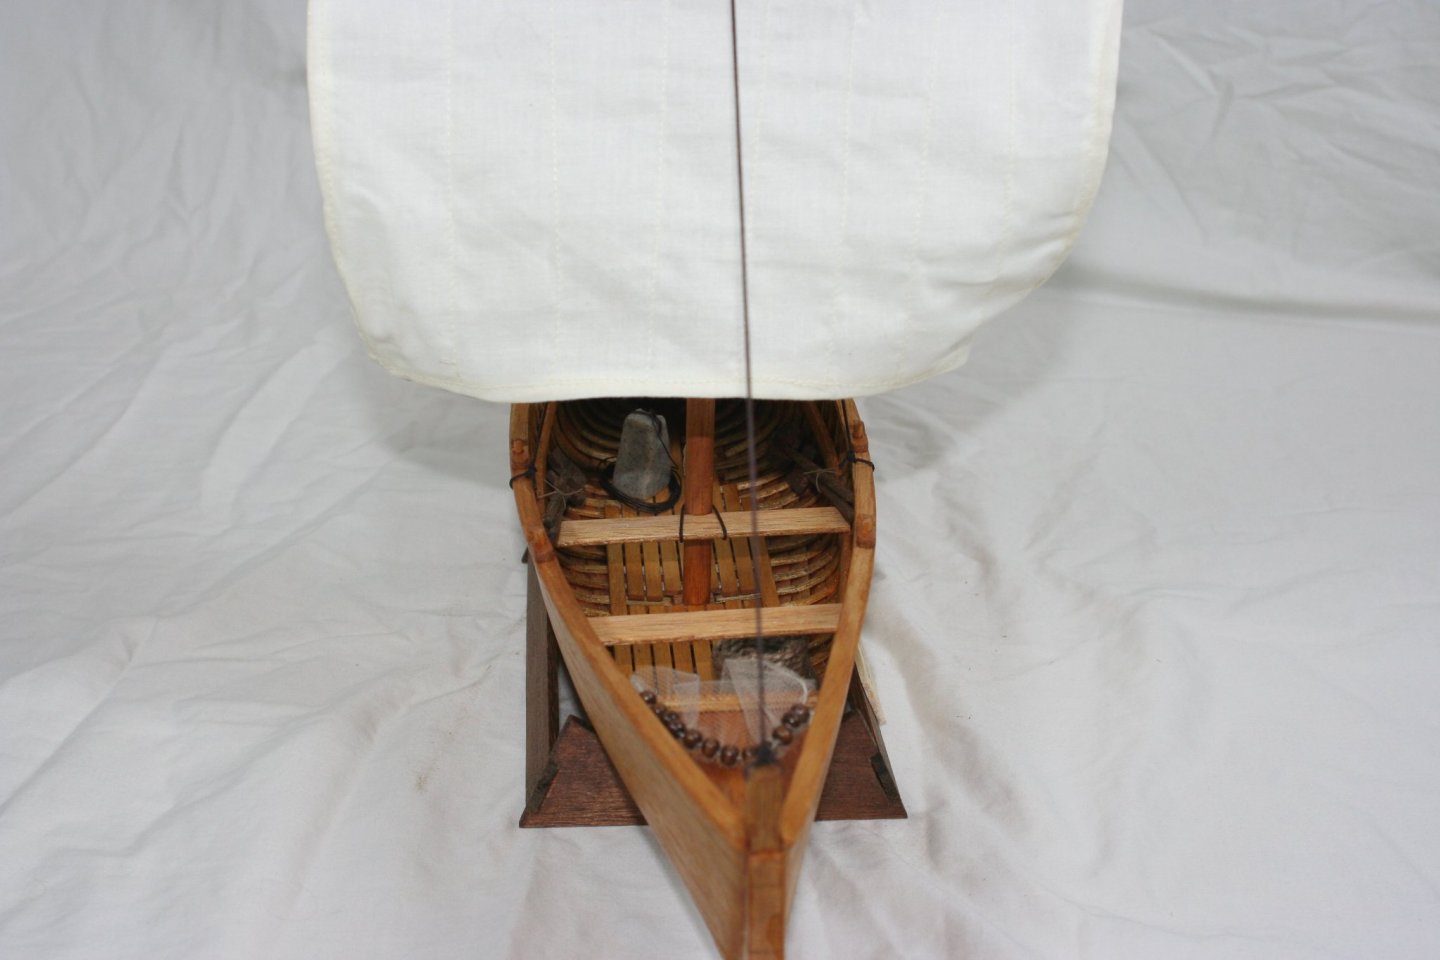
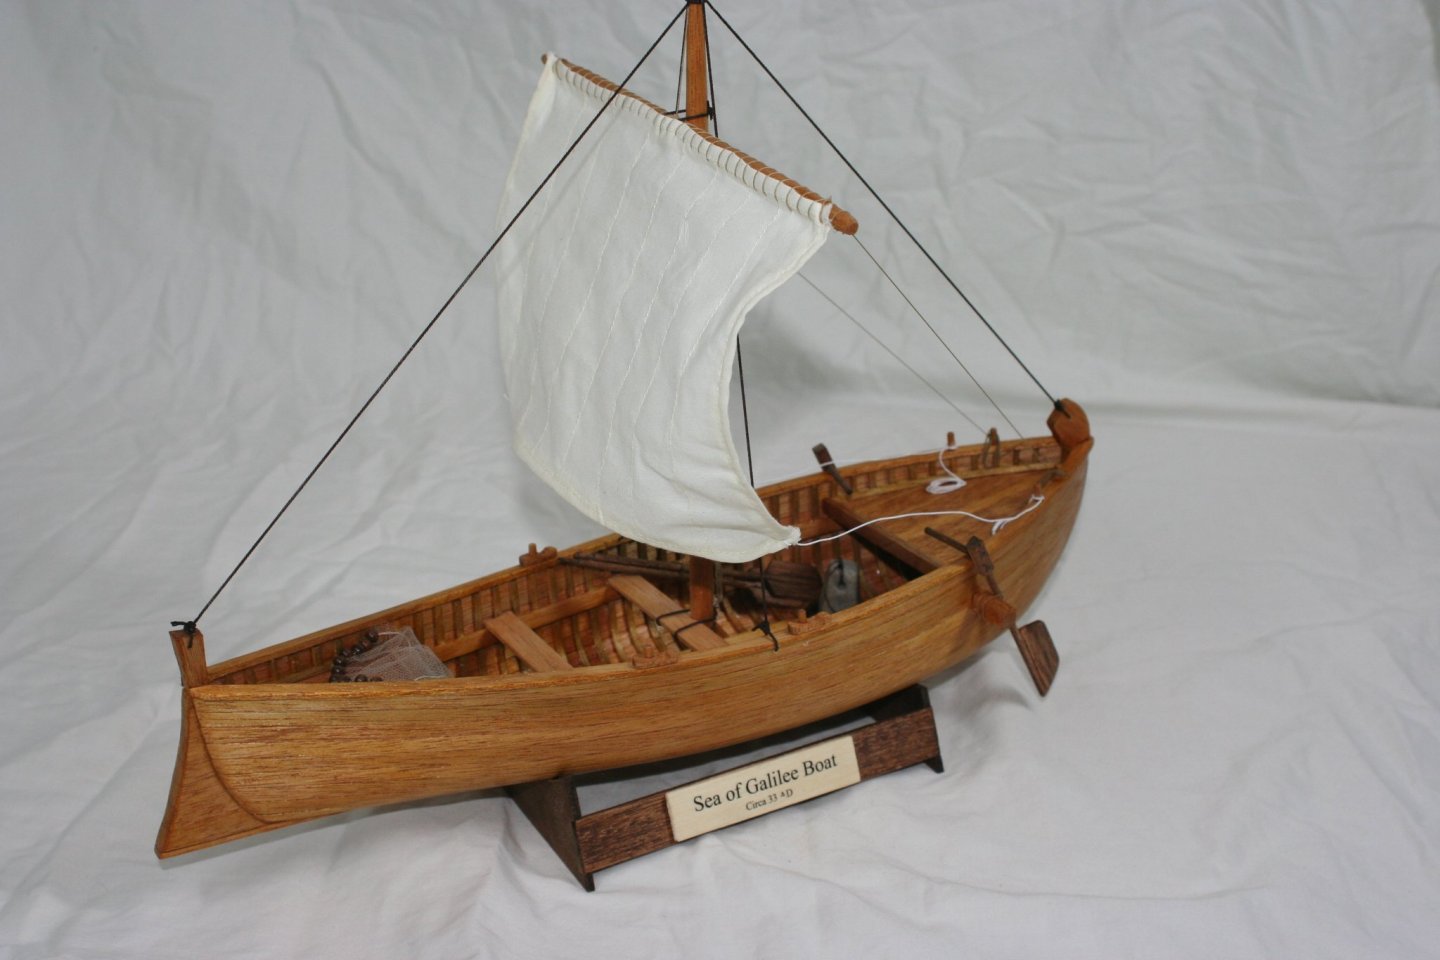
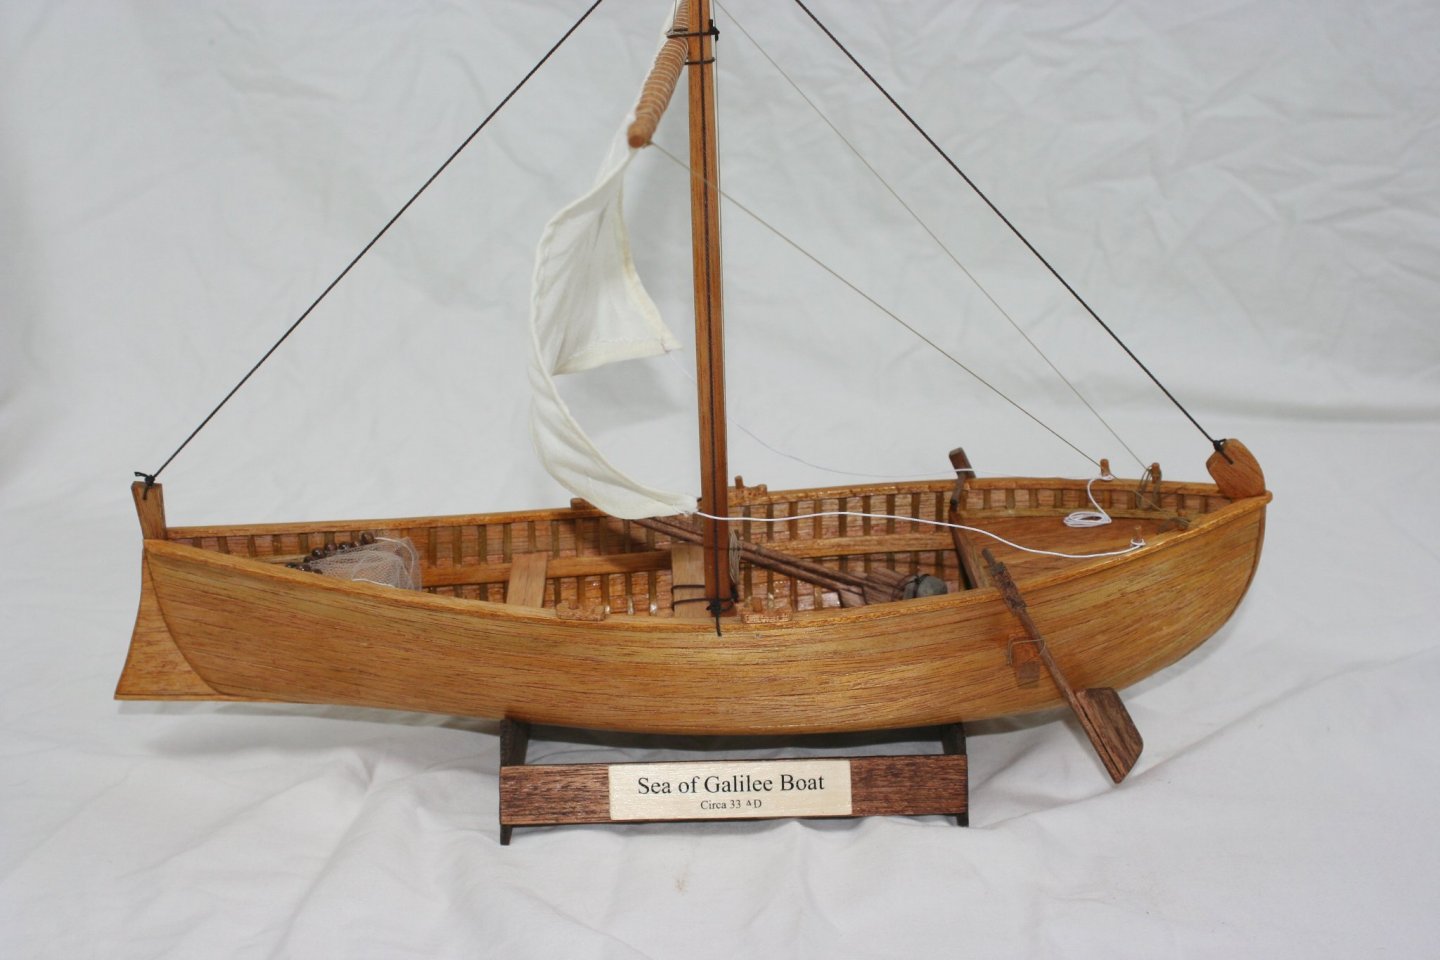
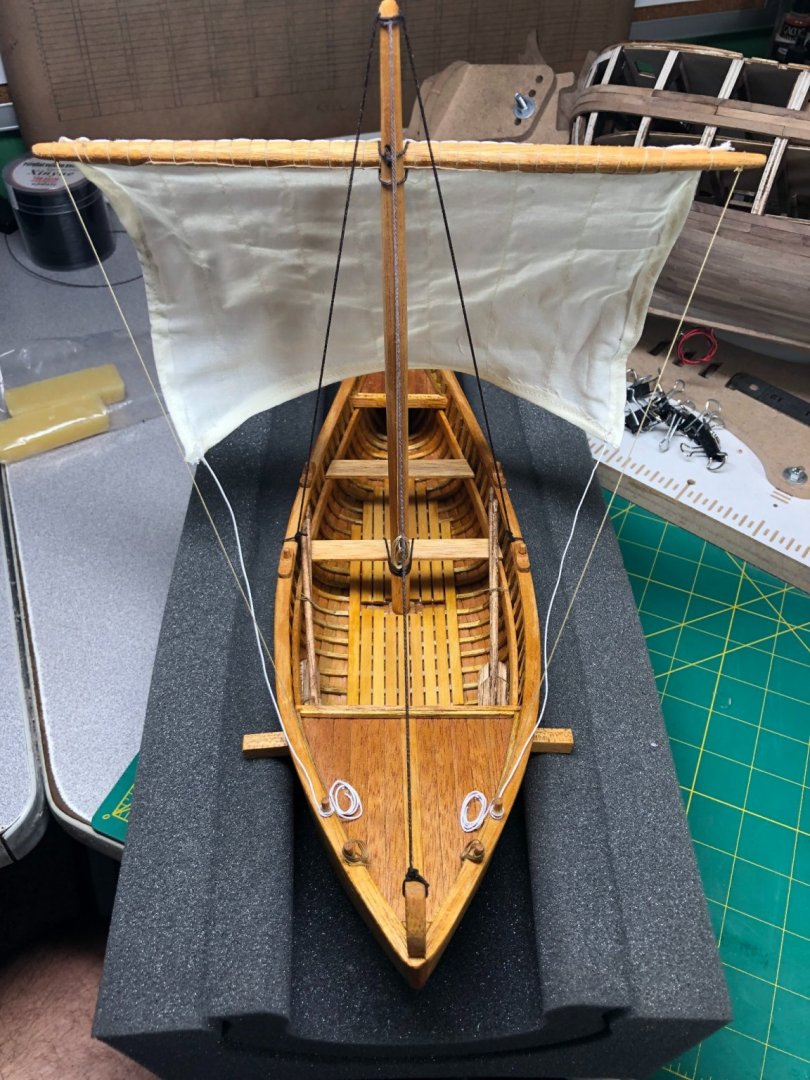
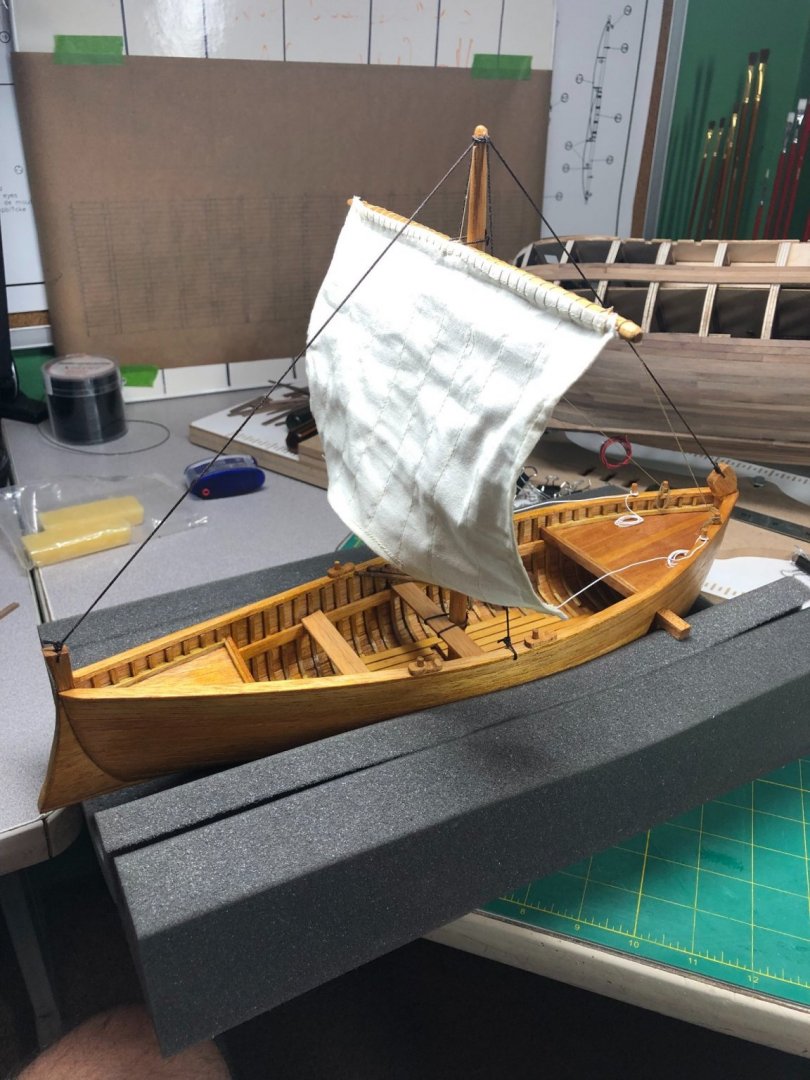
I made it! With a couple weeks to spare! Below are pictures of the final product. This has been a fun build and I've really enjoyed it. Once I give it to my dad, I'll post a few more pictures! Until then... Thanks to all for your encouragement, ideas and for tagging along! I'll be taking a few weeks off and then... back to HMS Bounty!


- 83 replies
-
- 10
-

-
-
- Sea of Galilee boat
- SE Miller
- (and 1 more)
-
I don't think so. My dad has limited space and this guy should be pretty easy to keep clean!
- 83 replies
-
- 1
-
-
- Sea of Galilee boat
- SE Miller
- (and 1 more)
-
Excellent idea! Will give it a try!
-
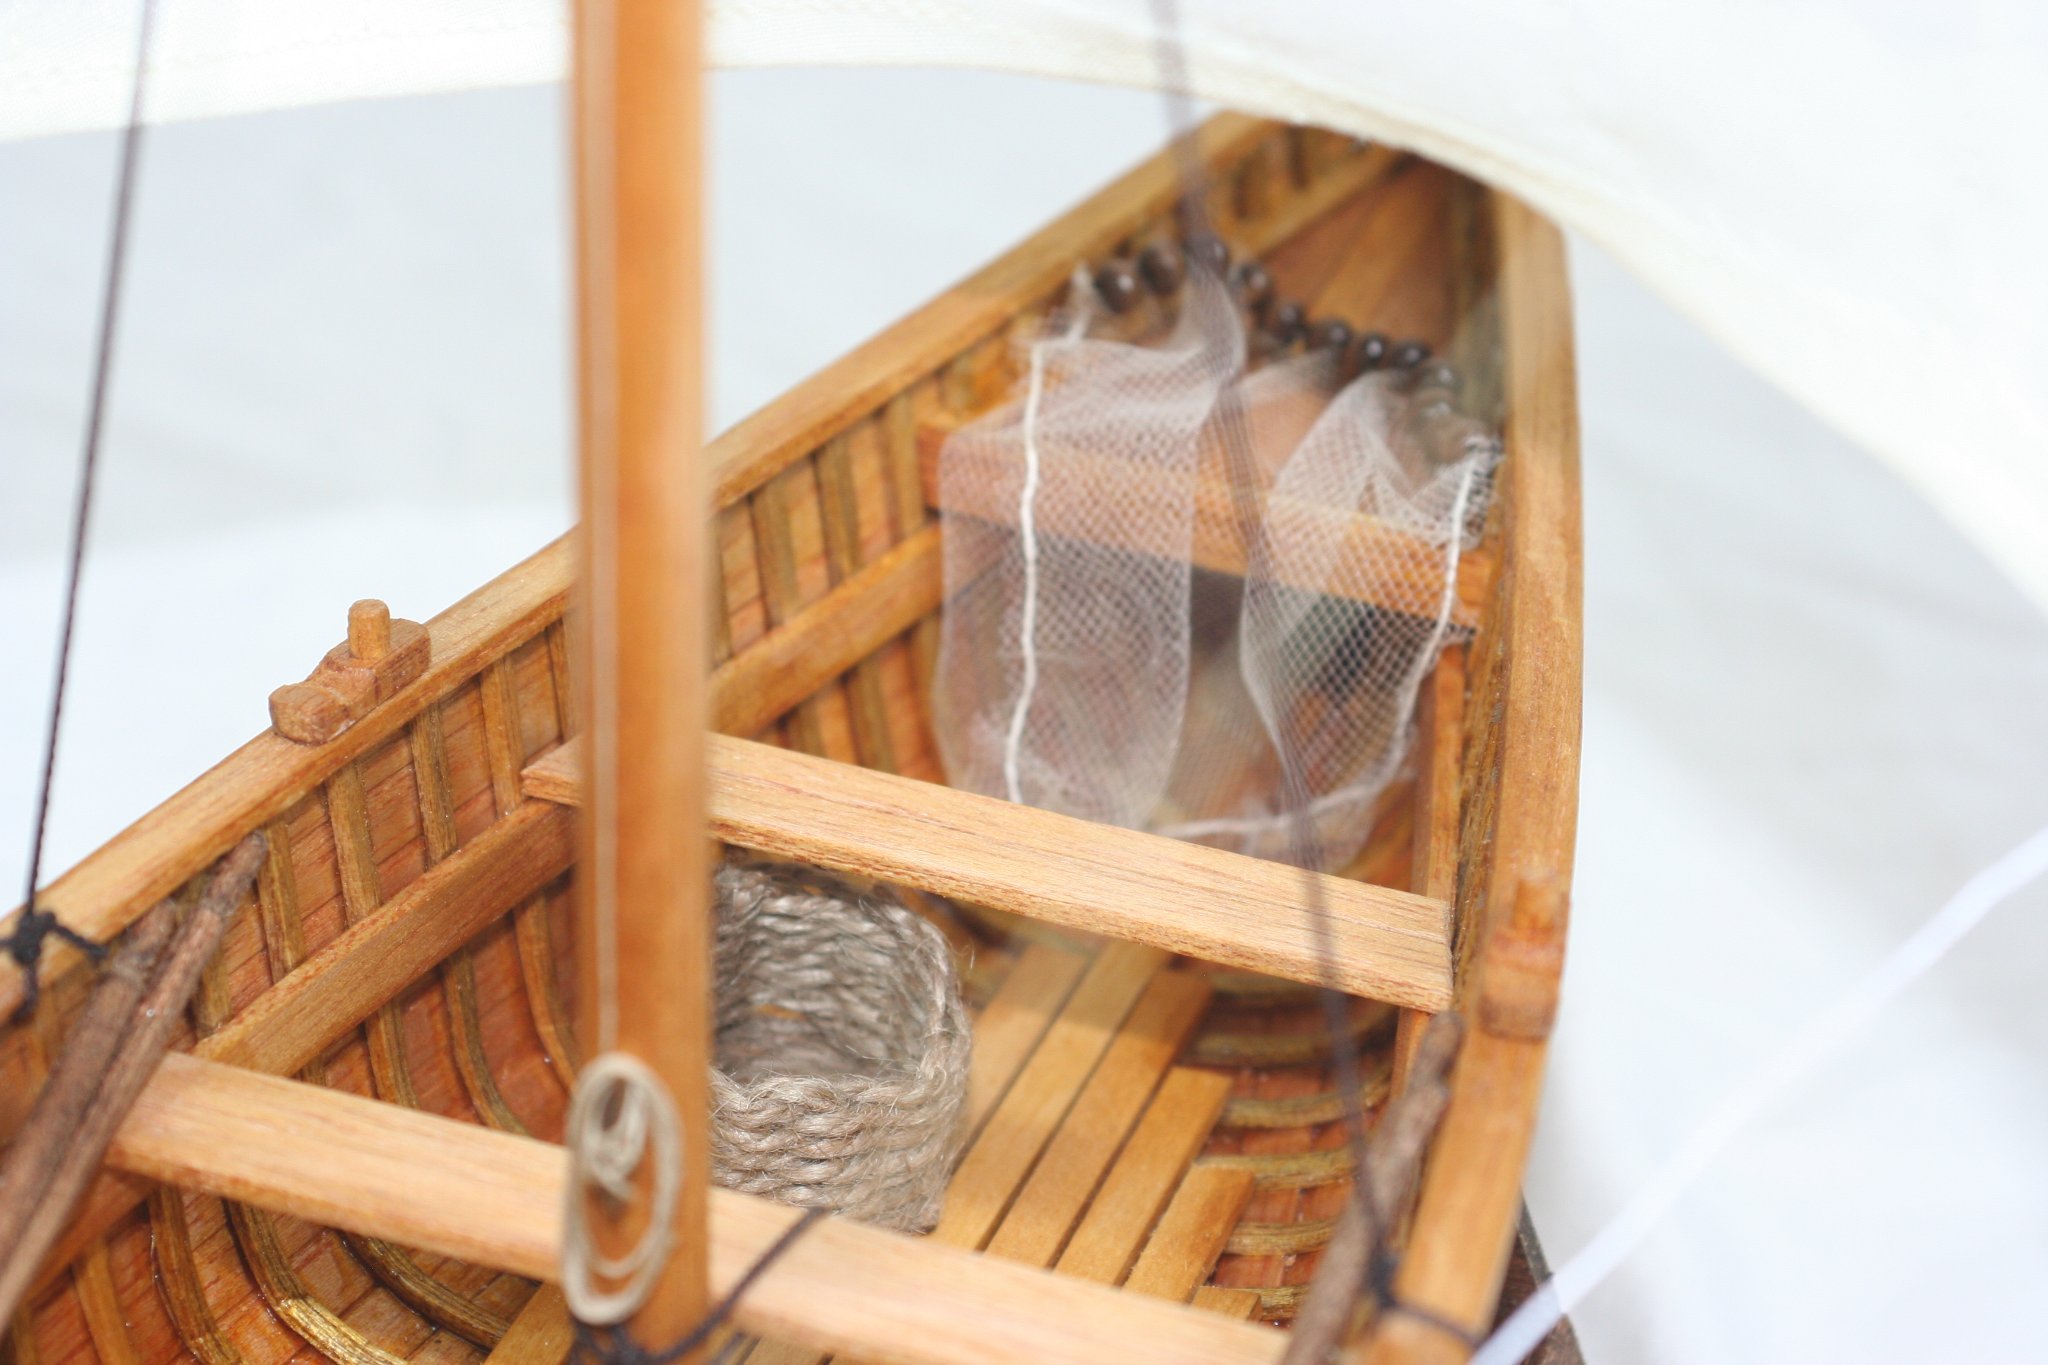
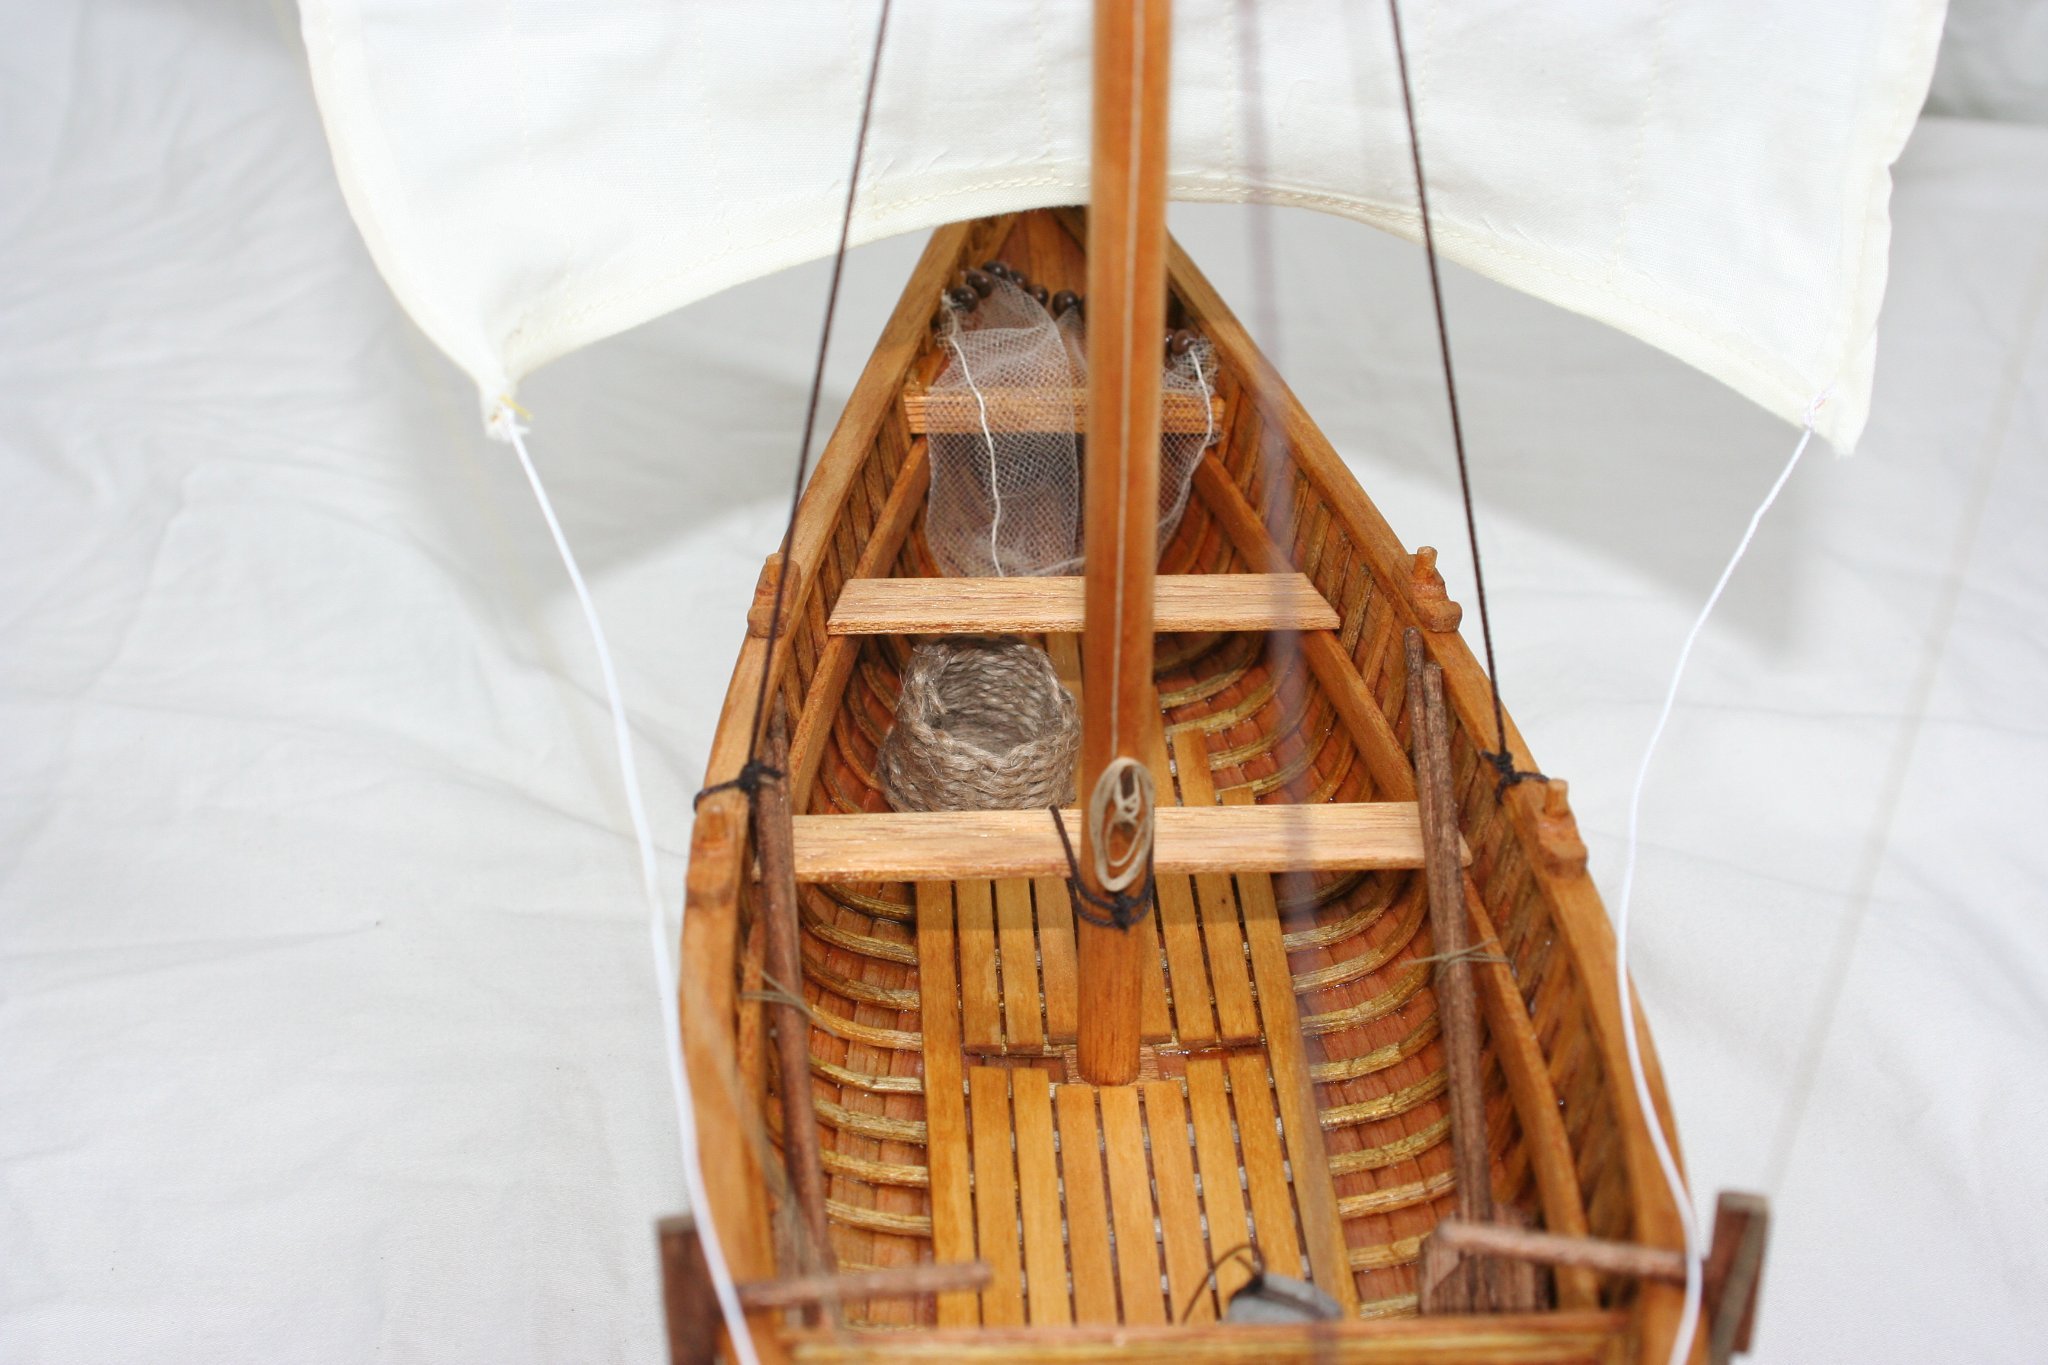
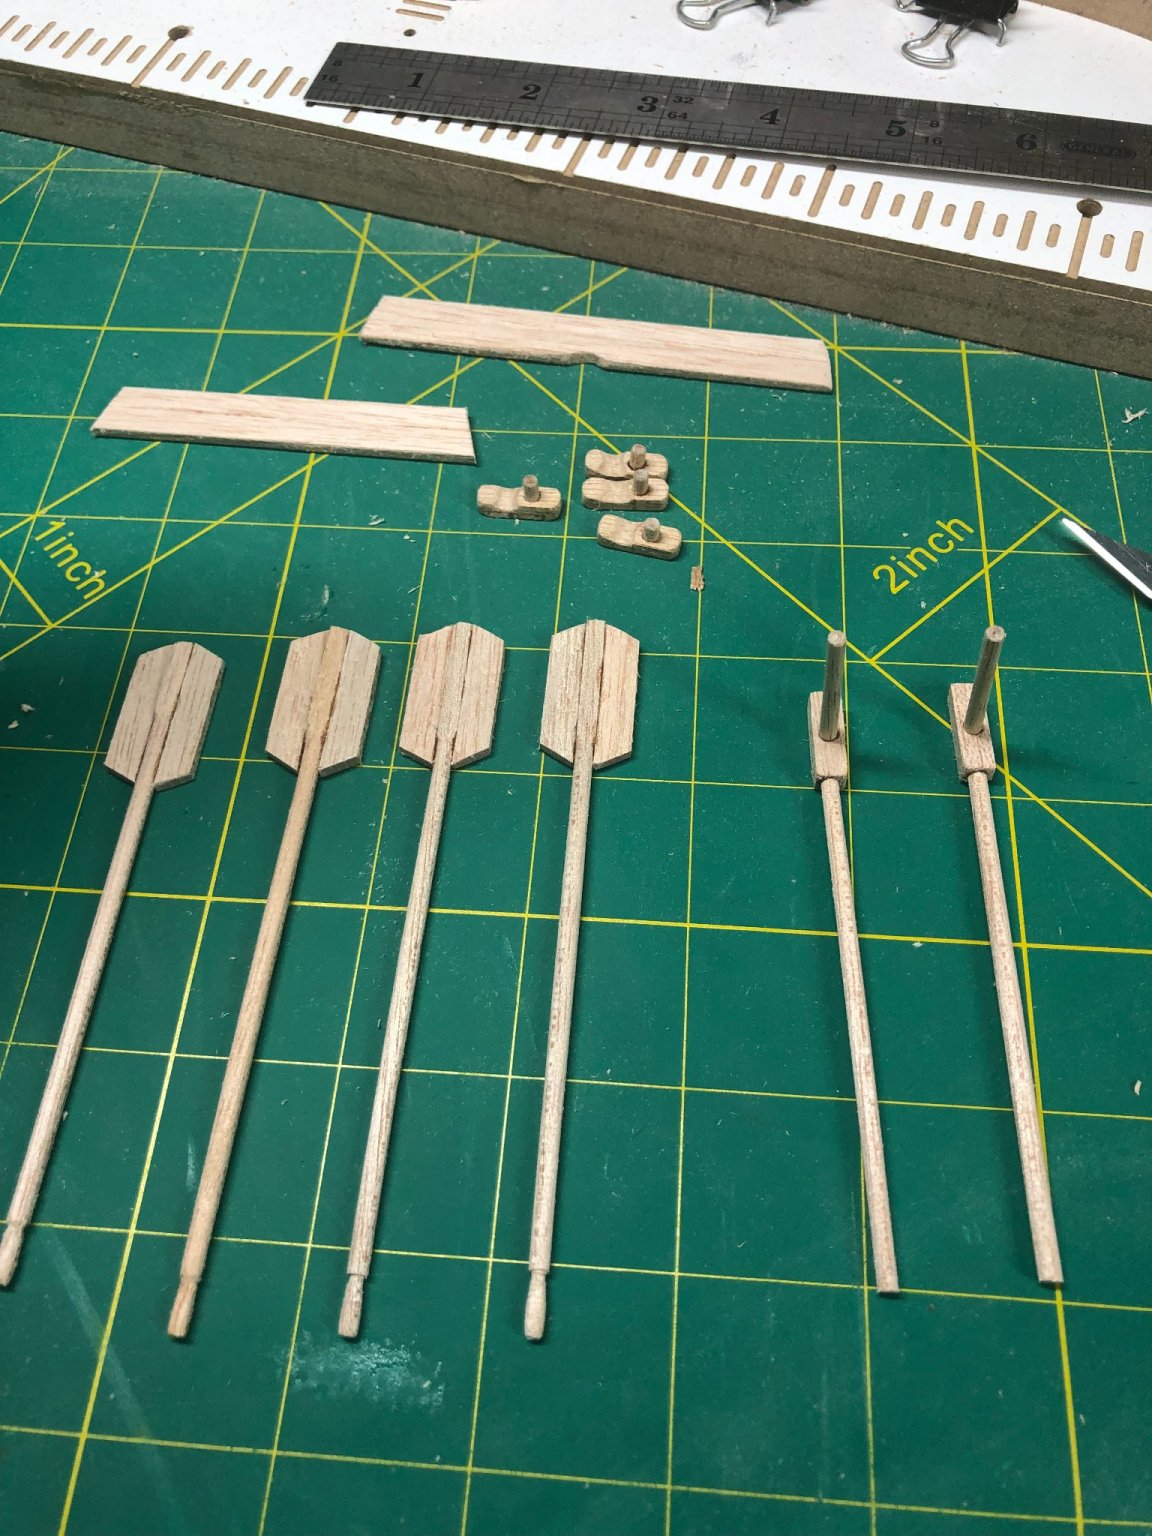
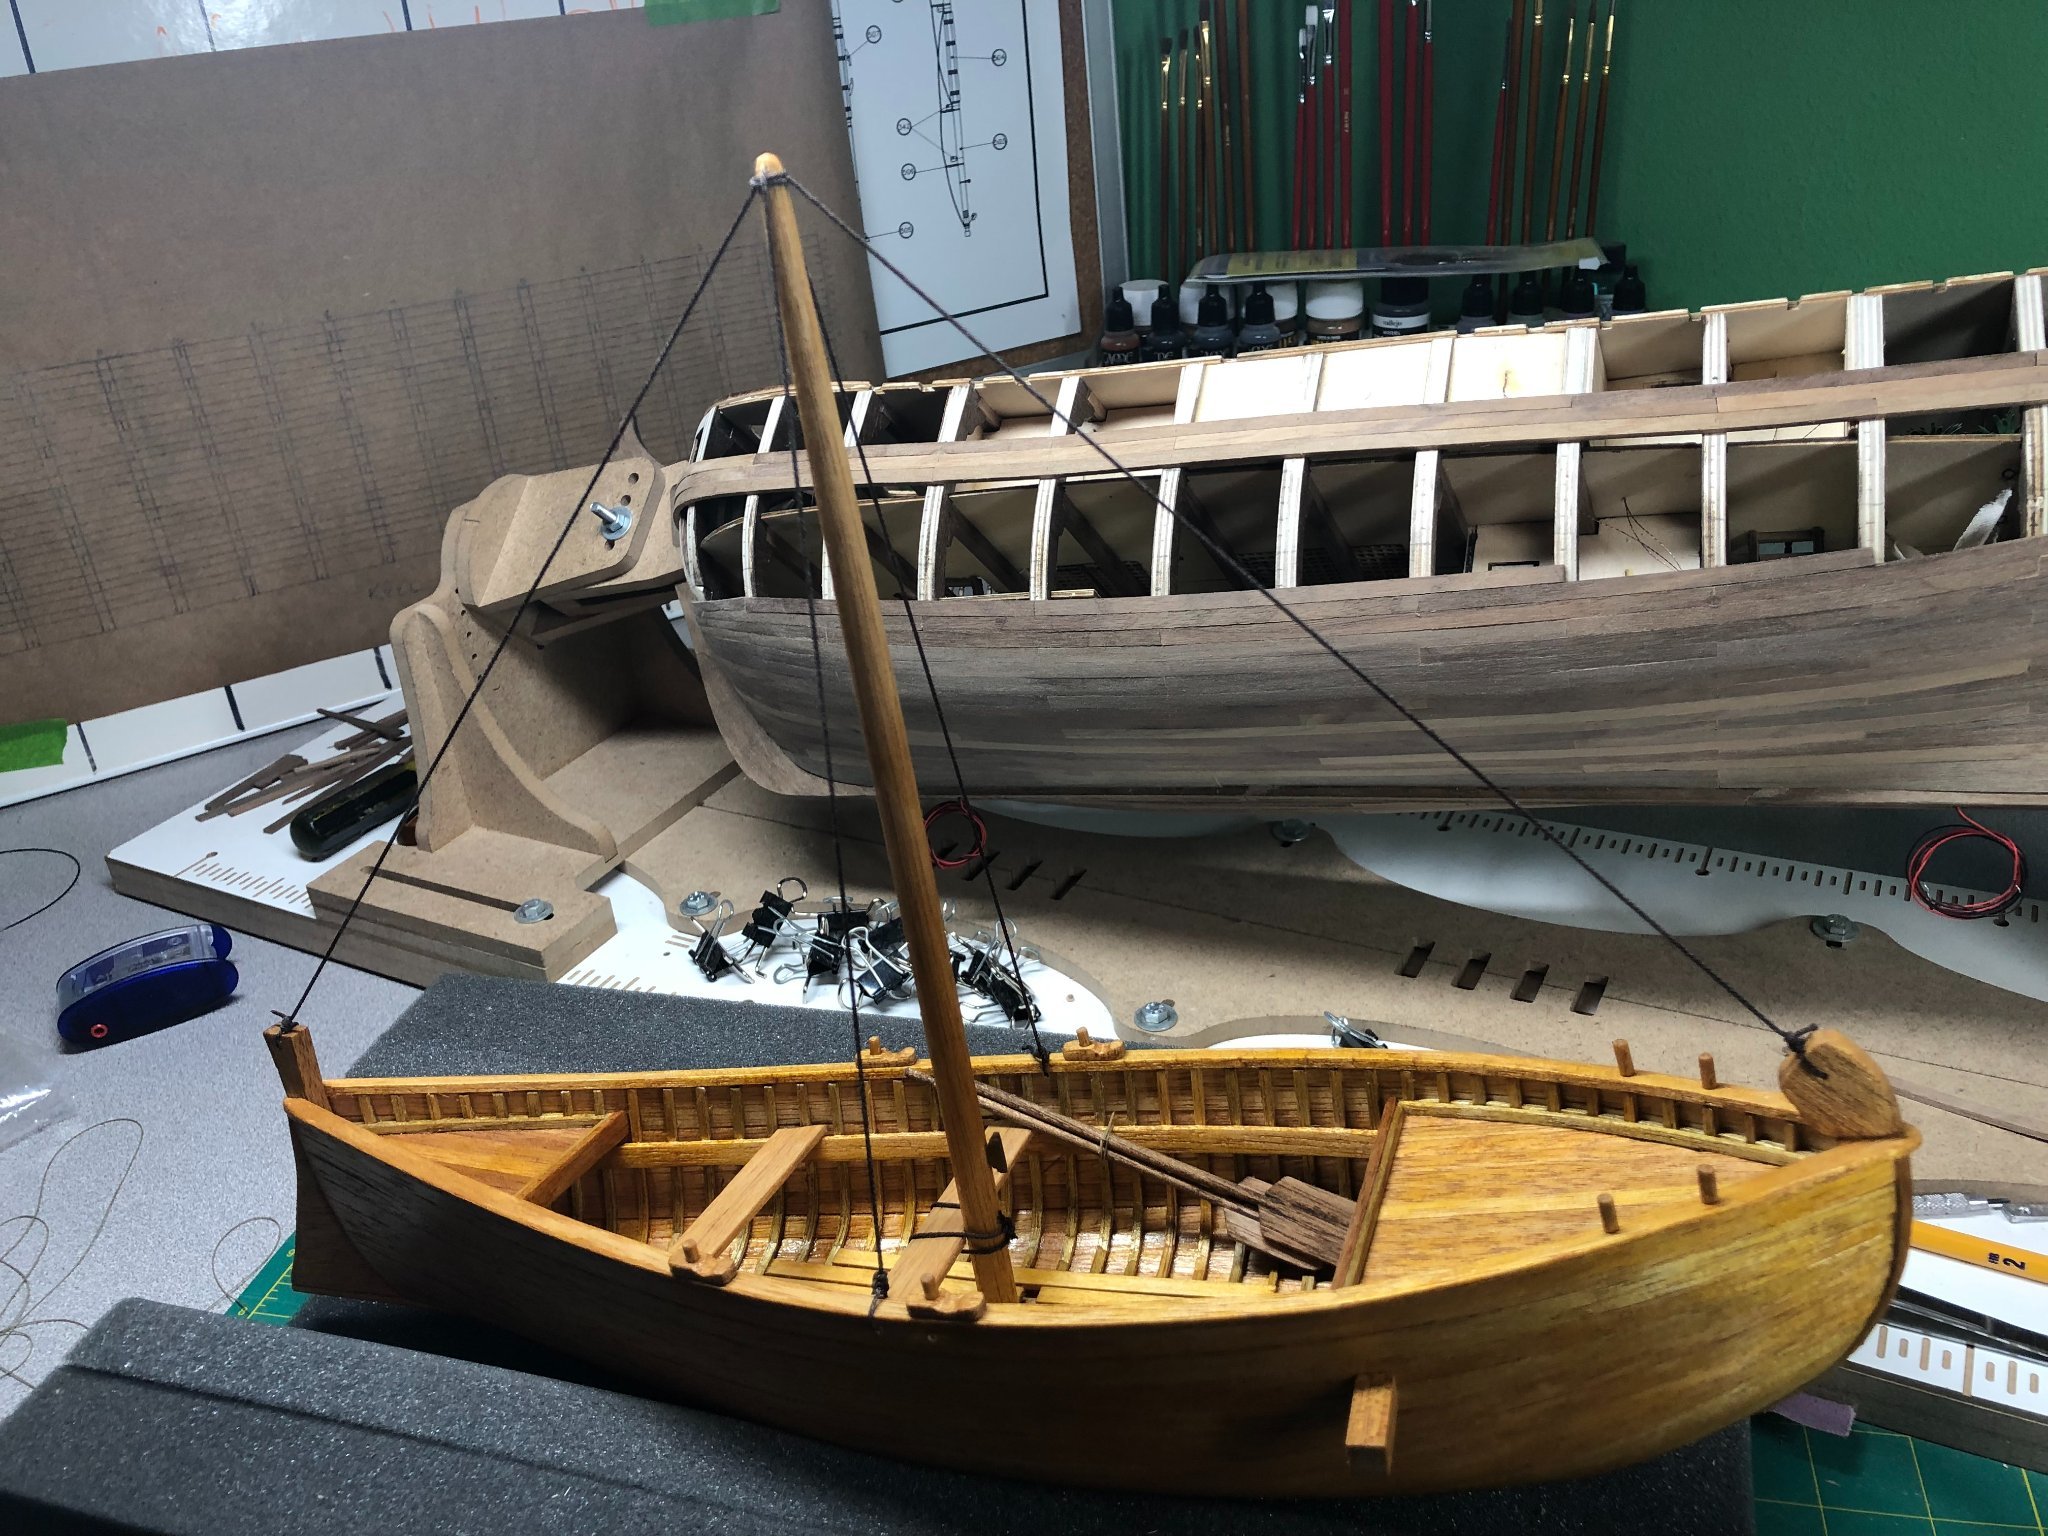
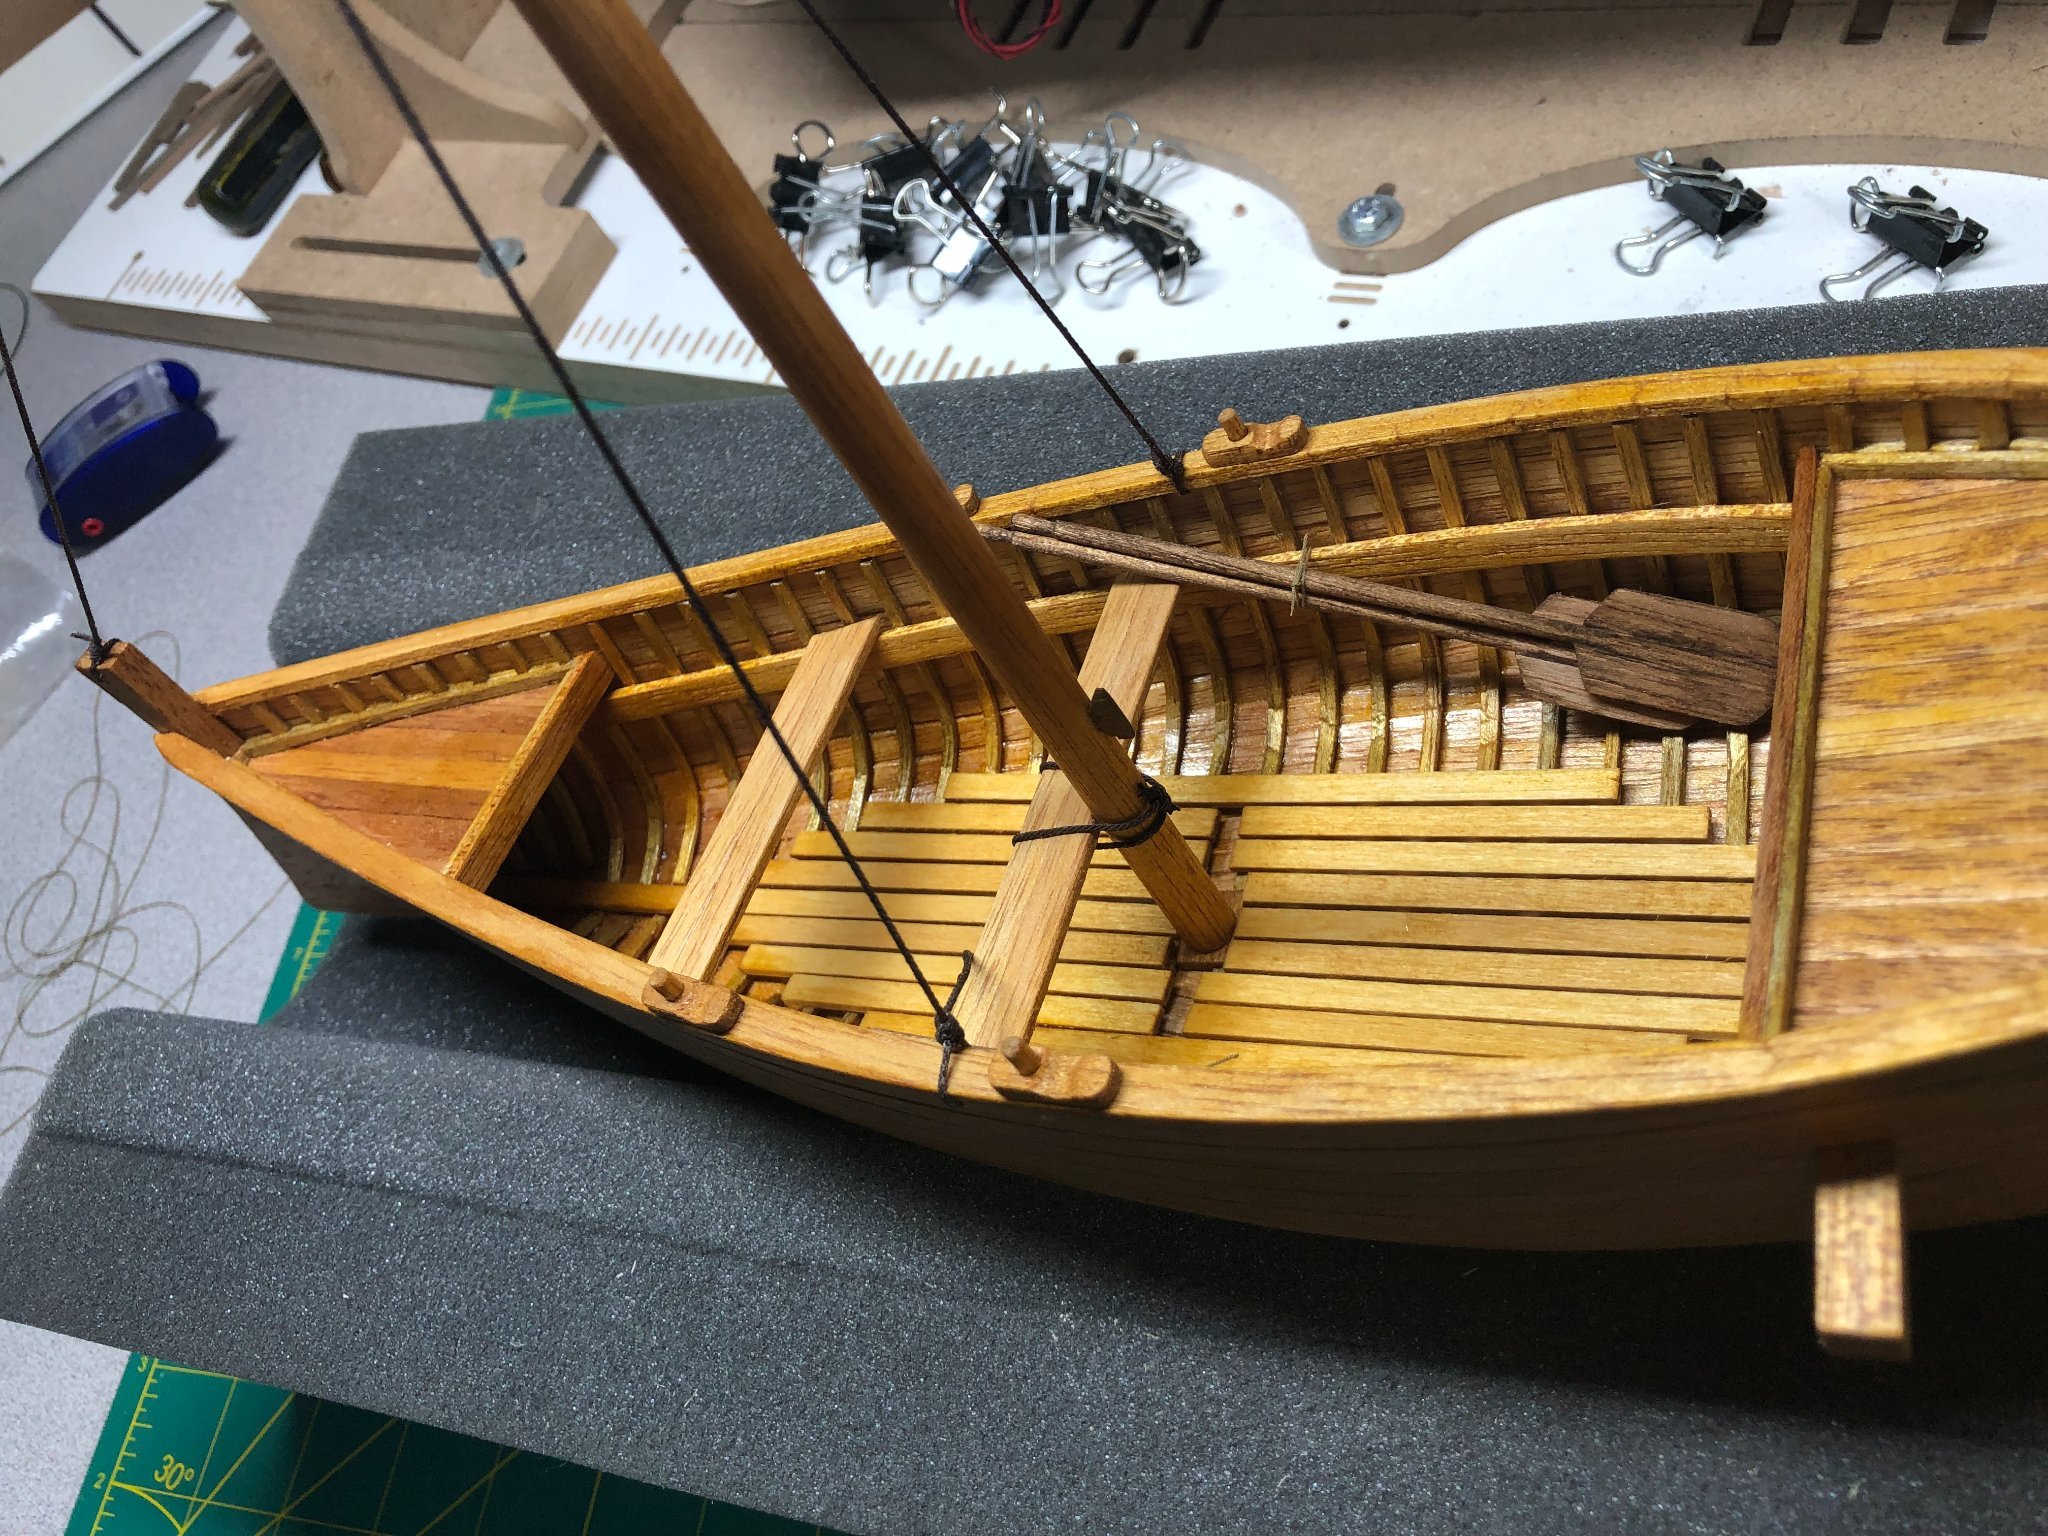
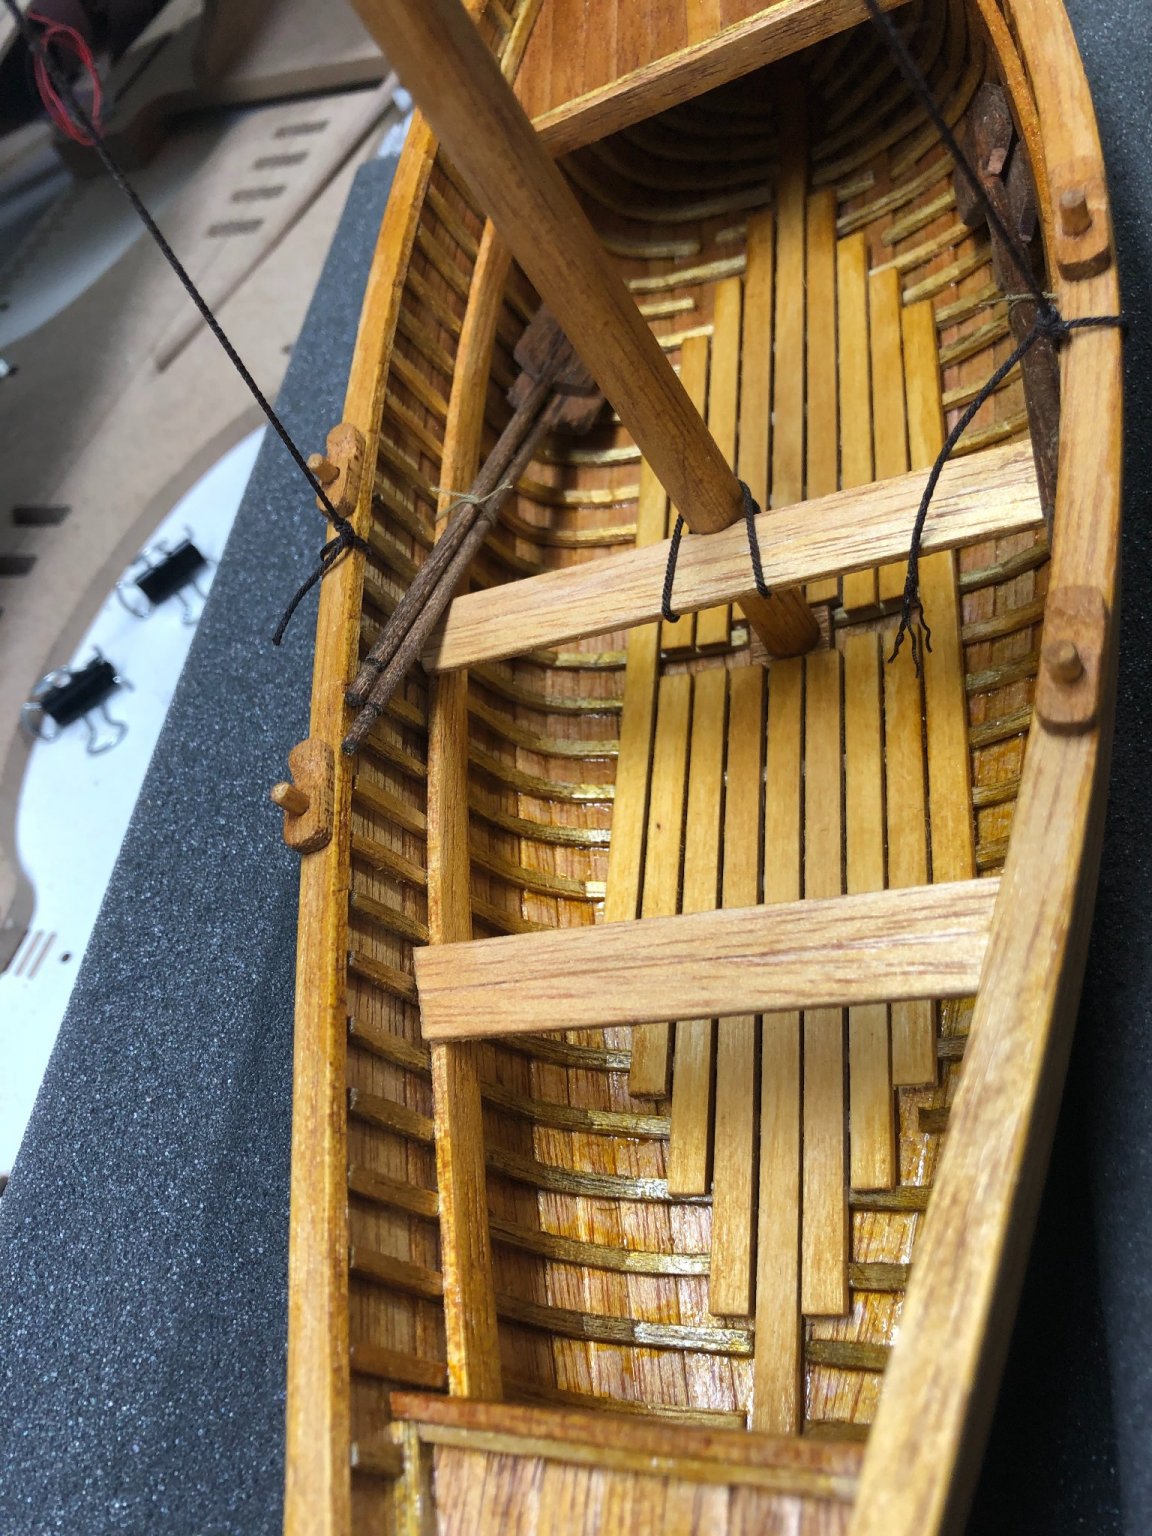
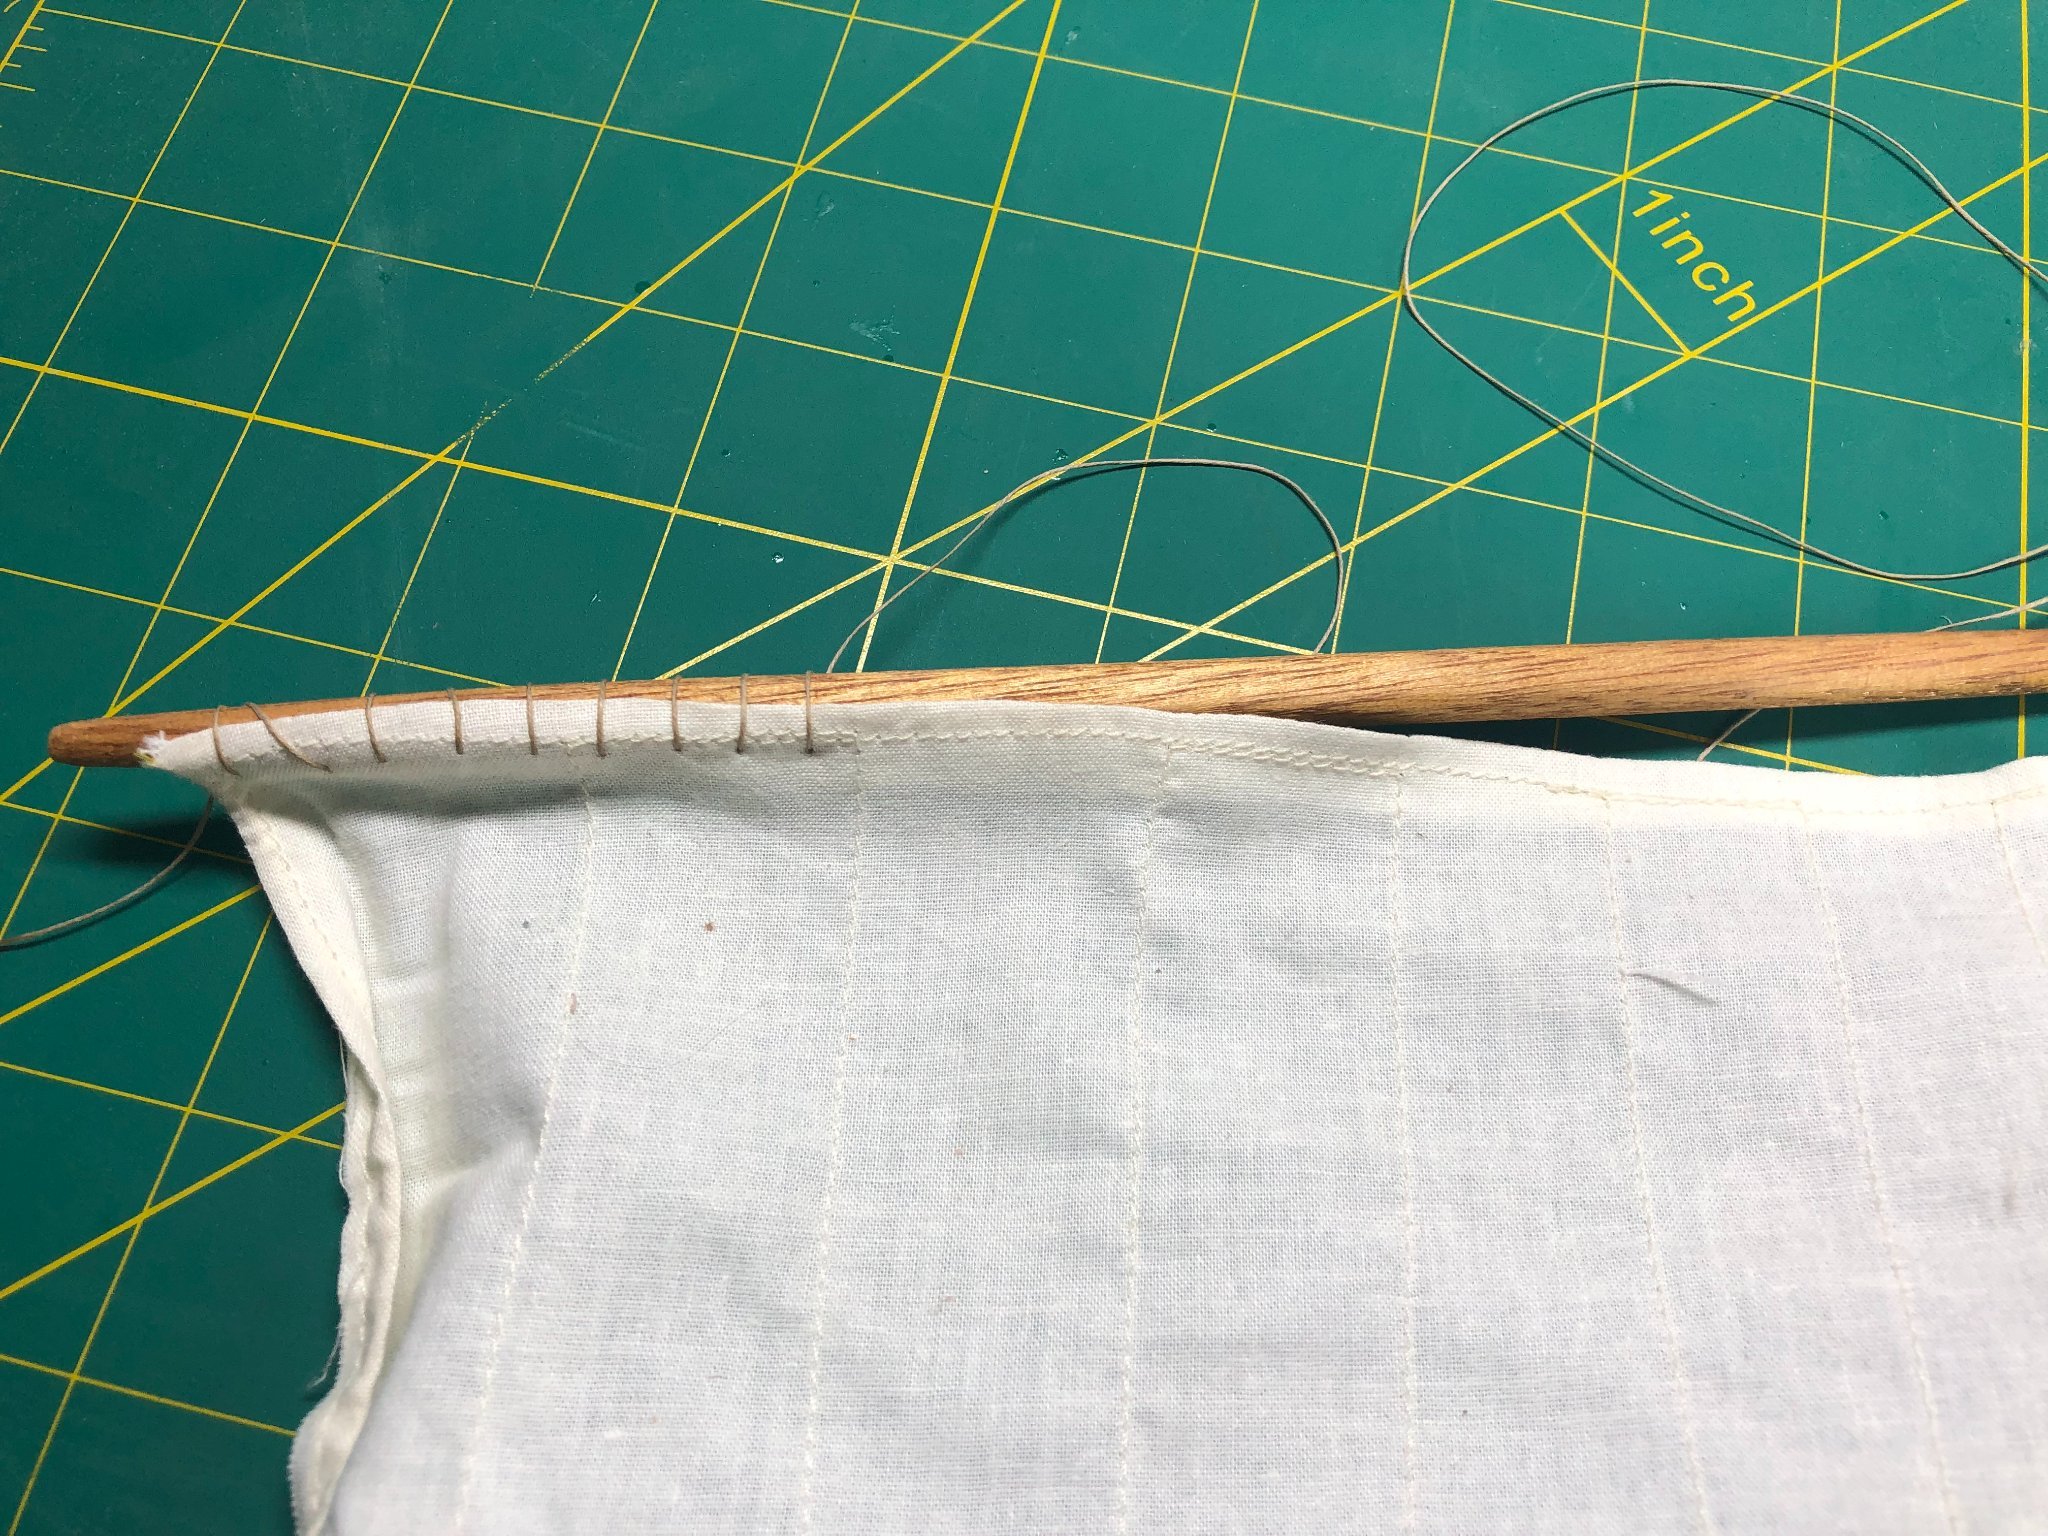
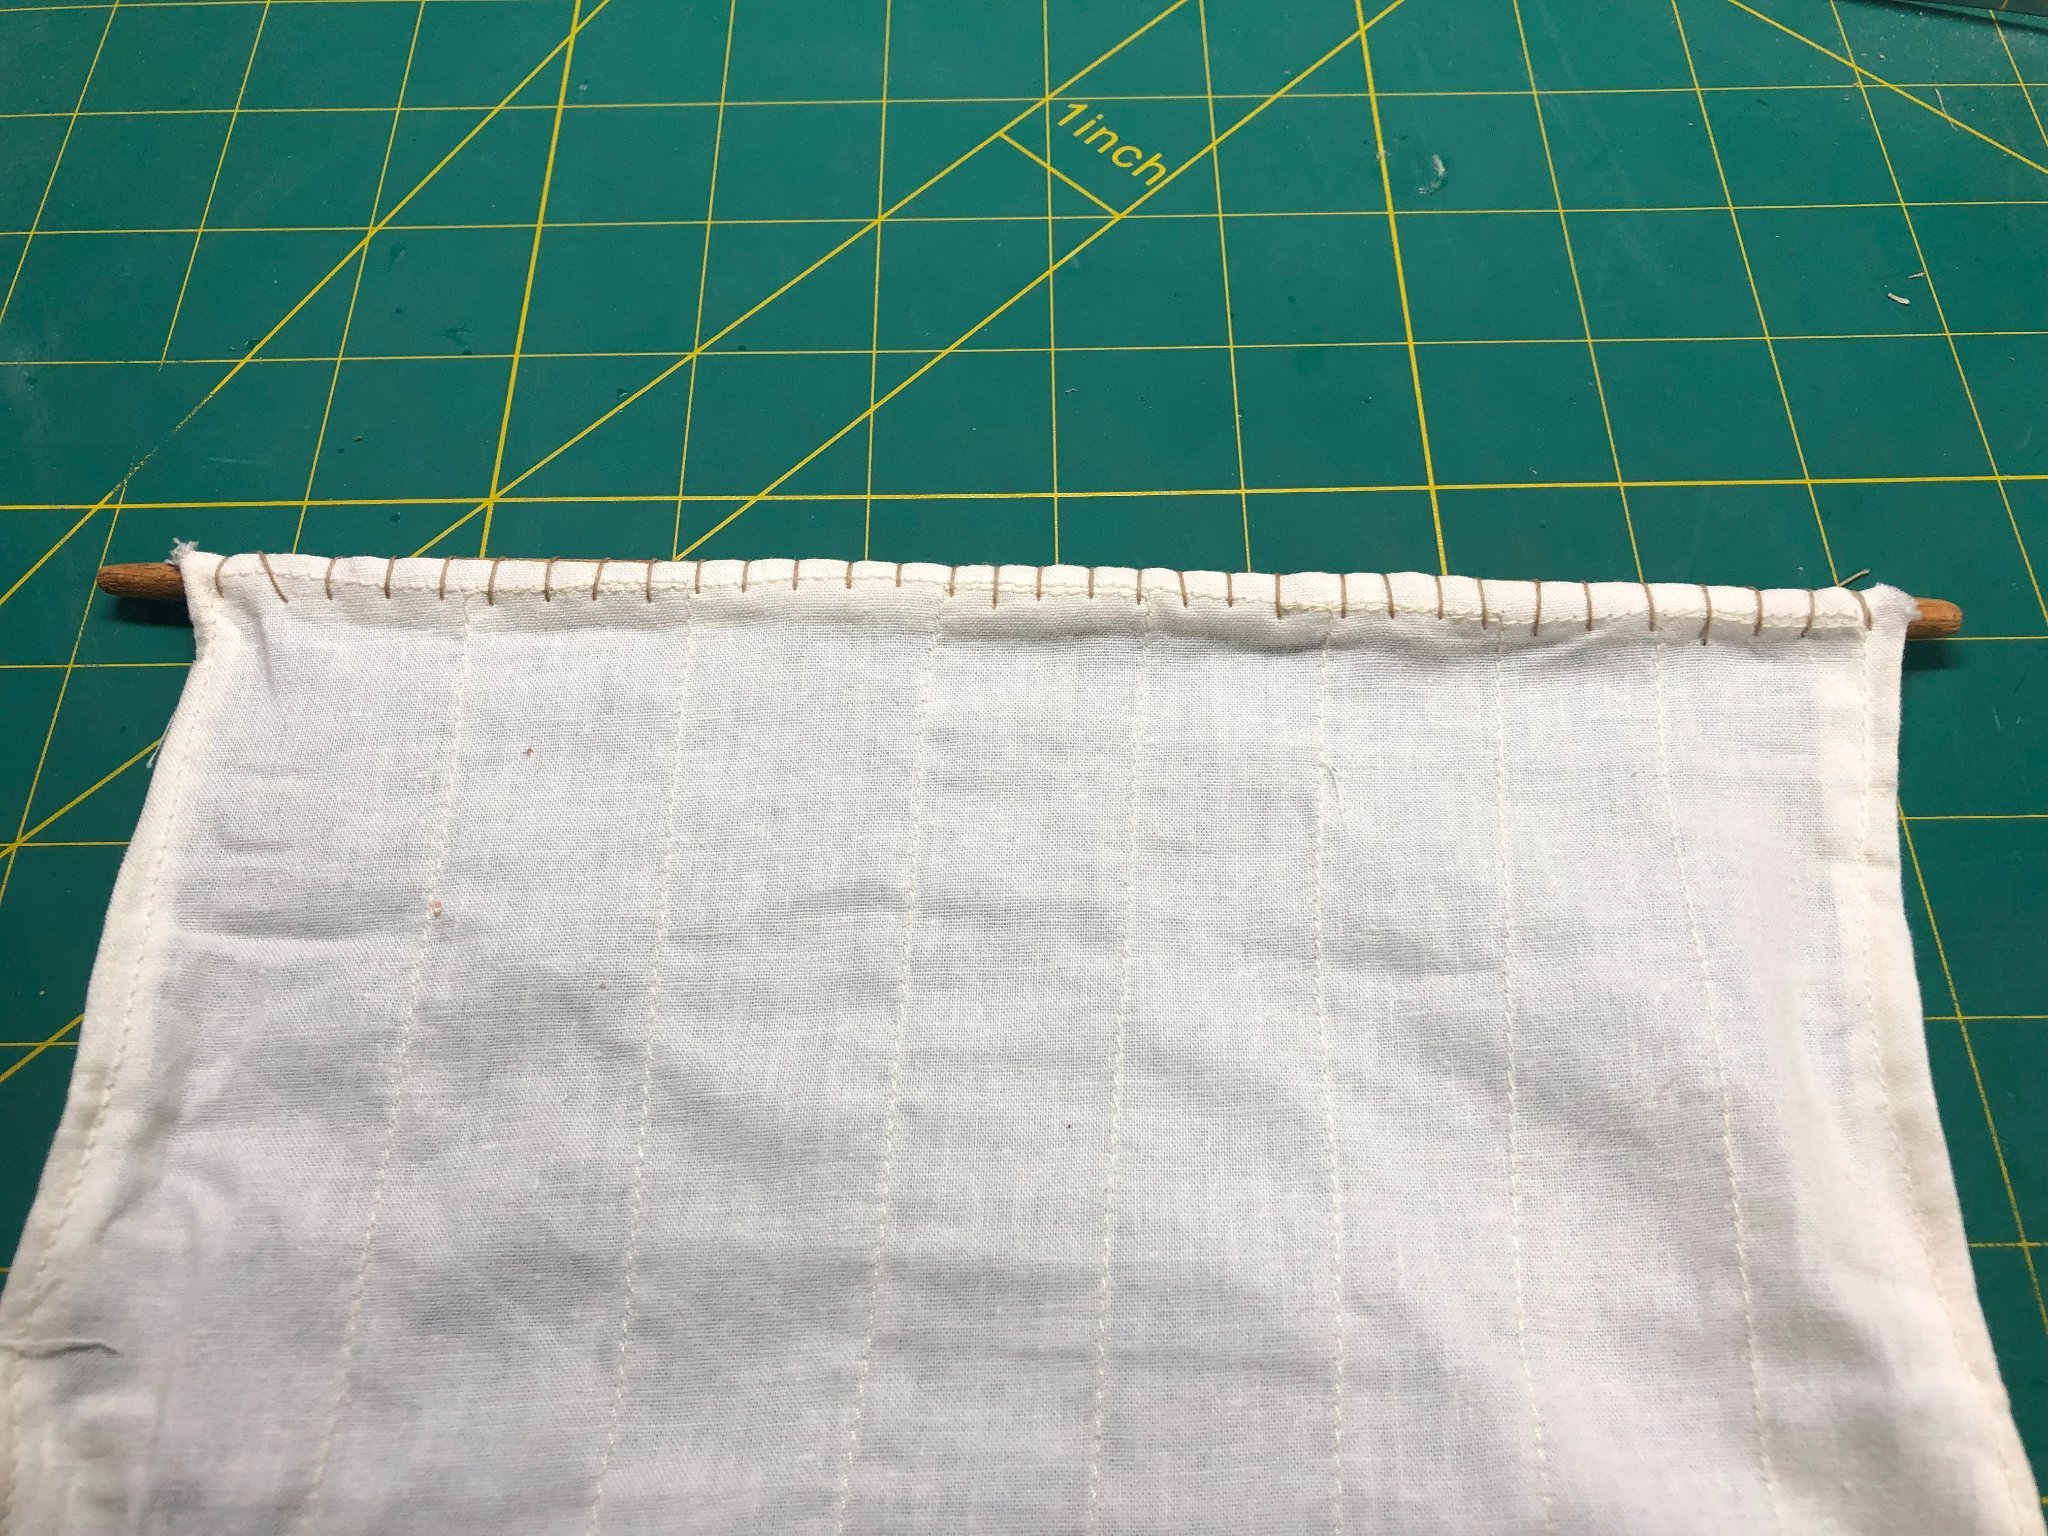
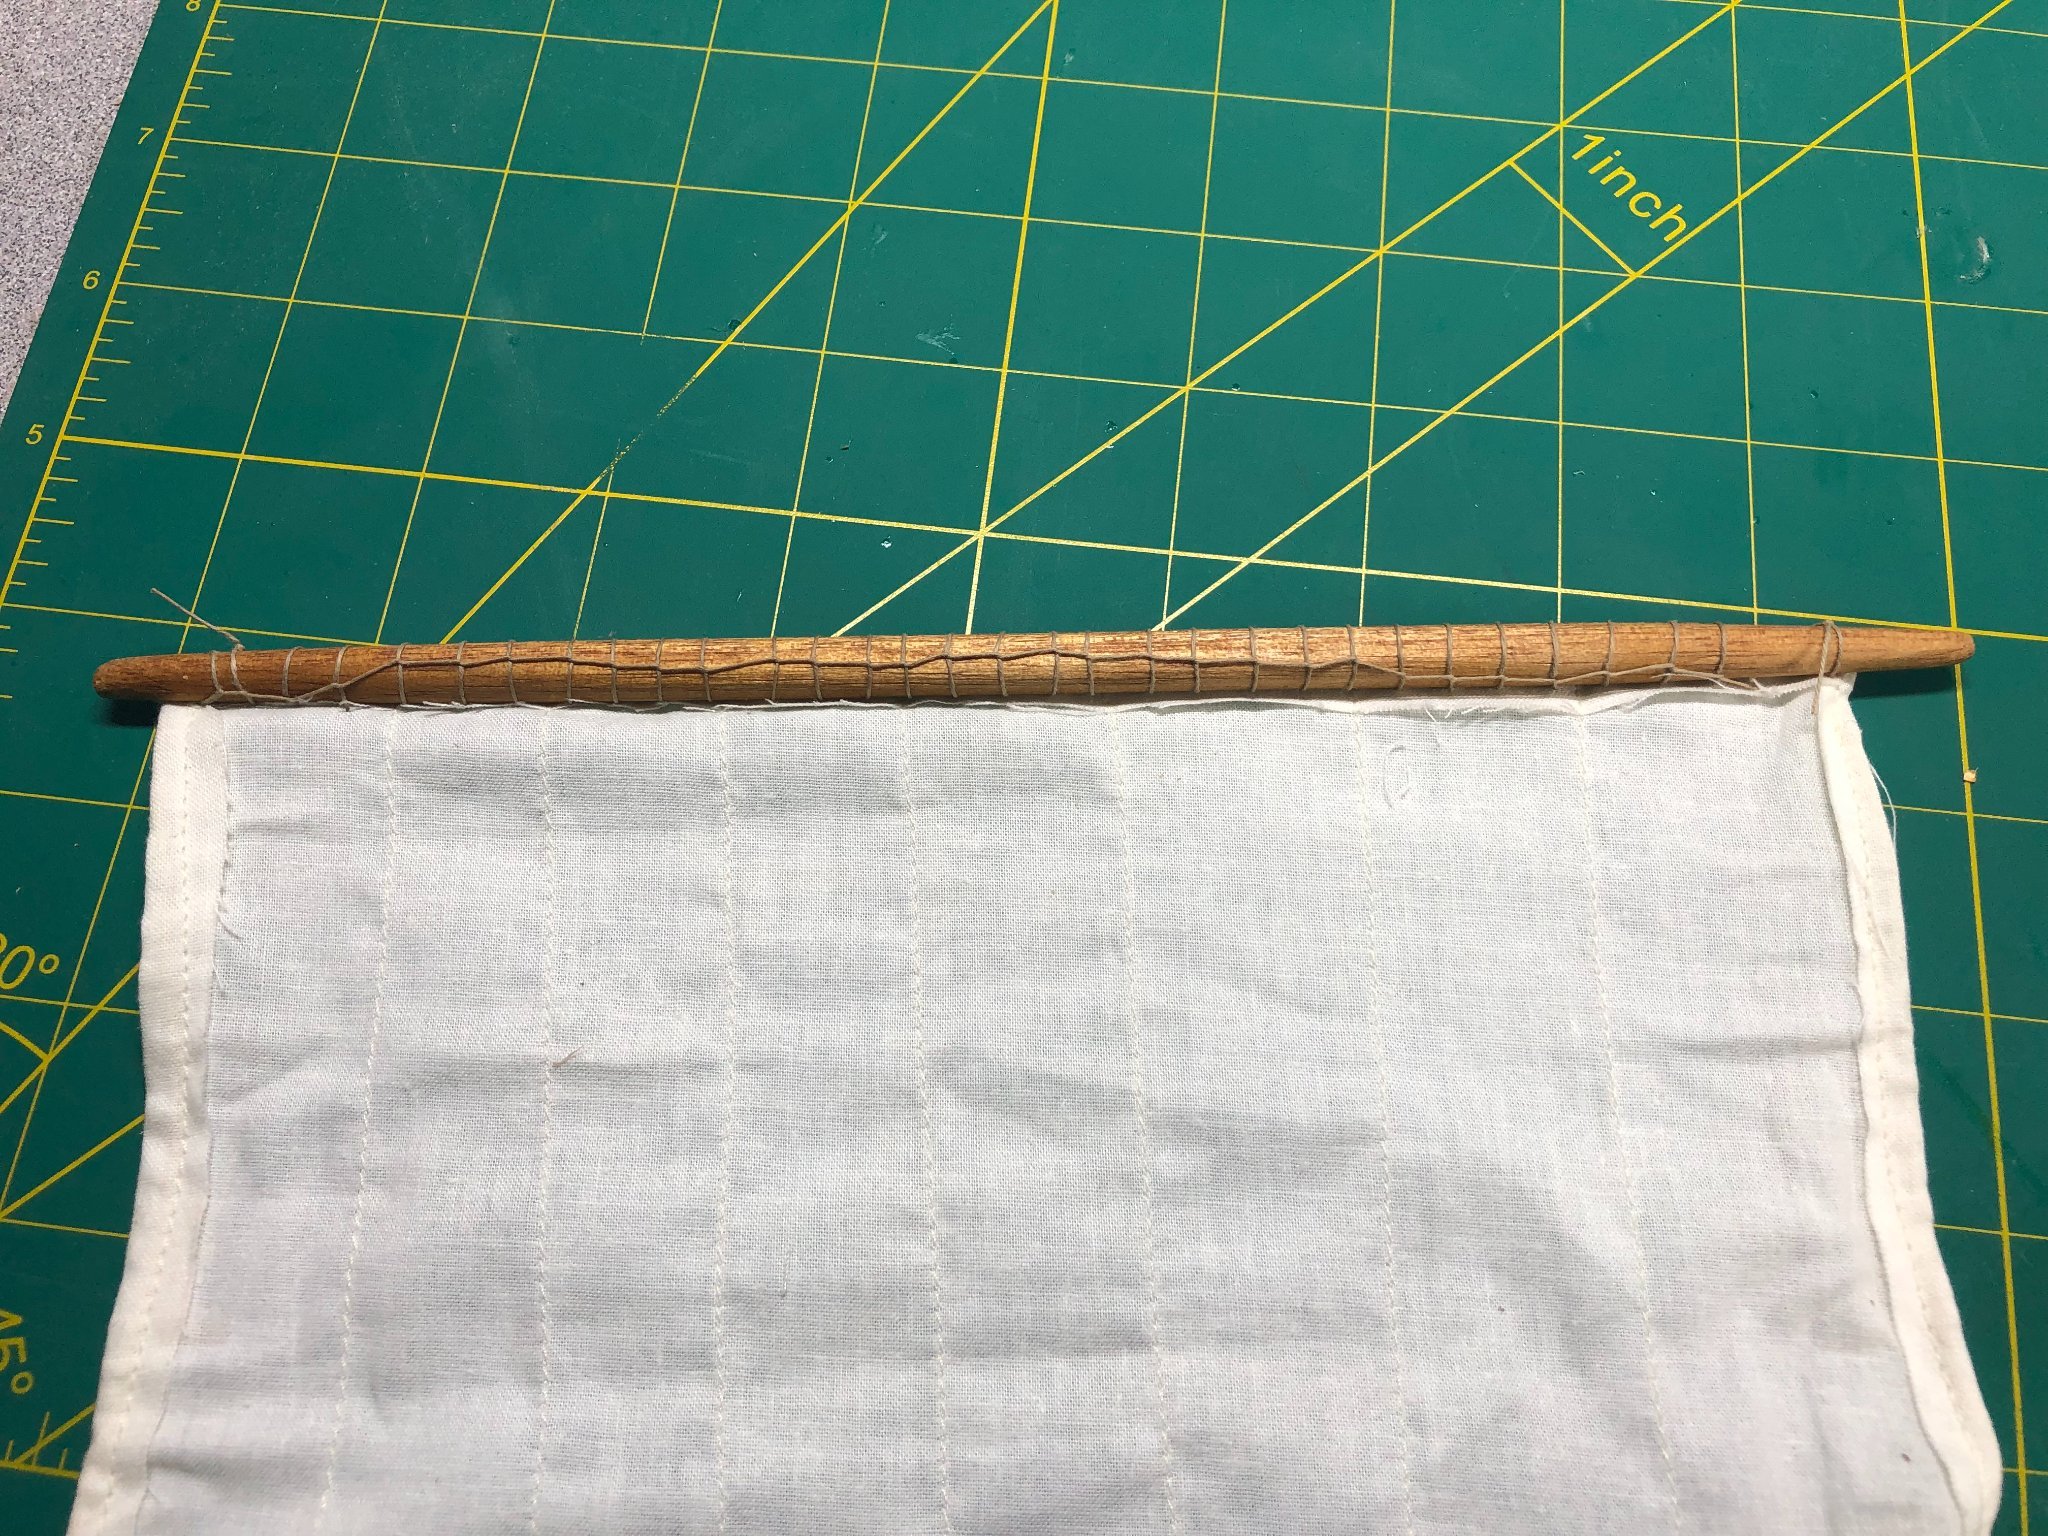
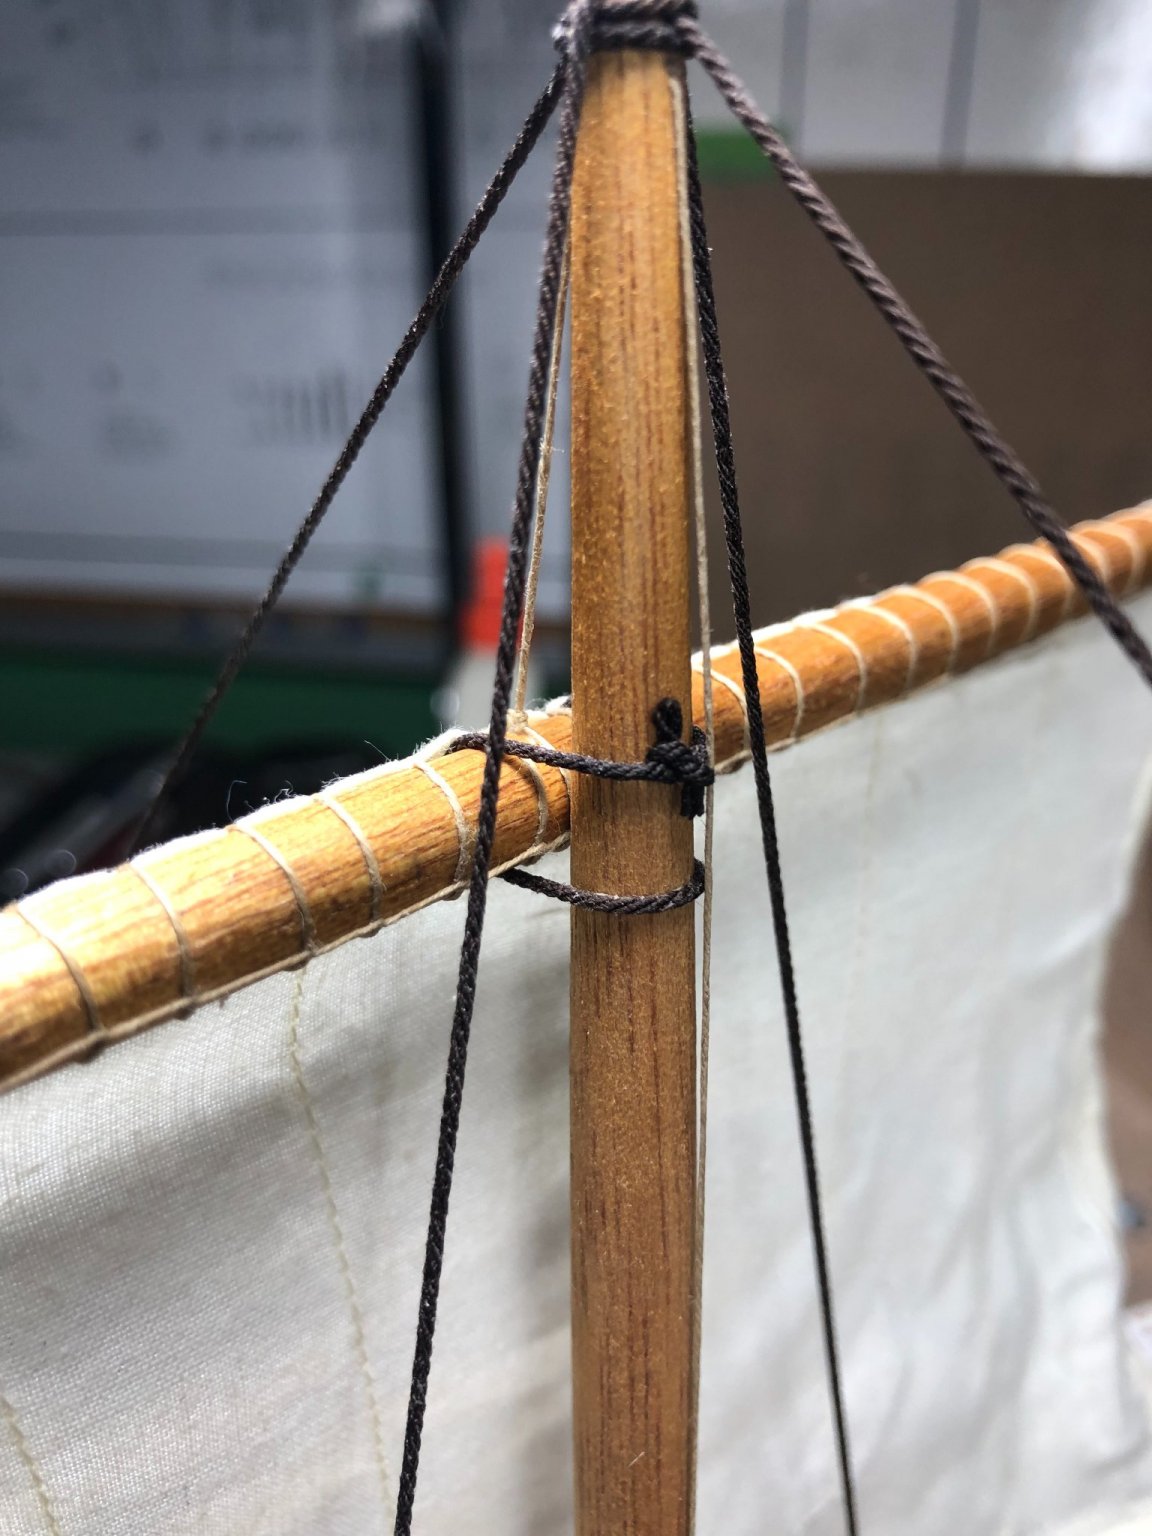
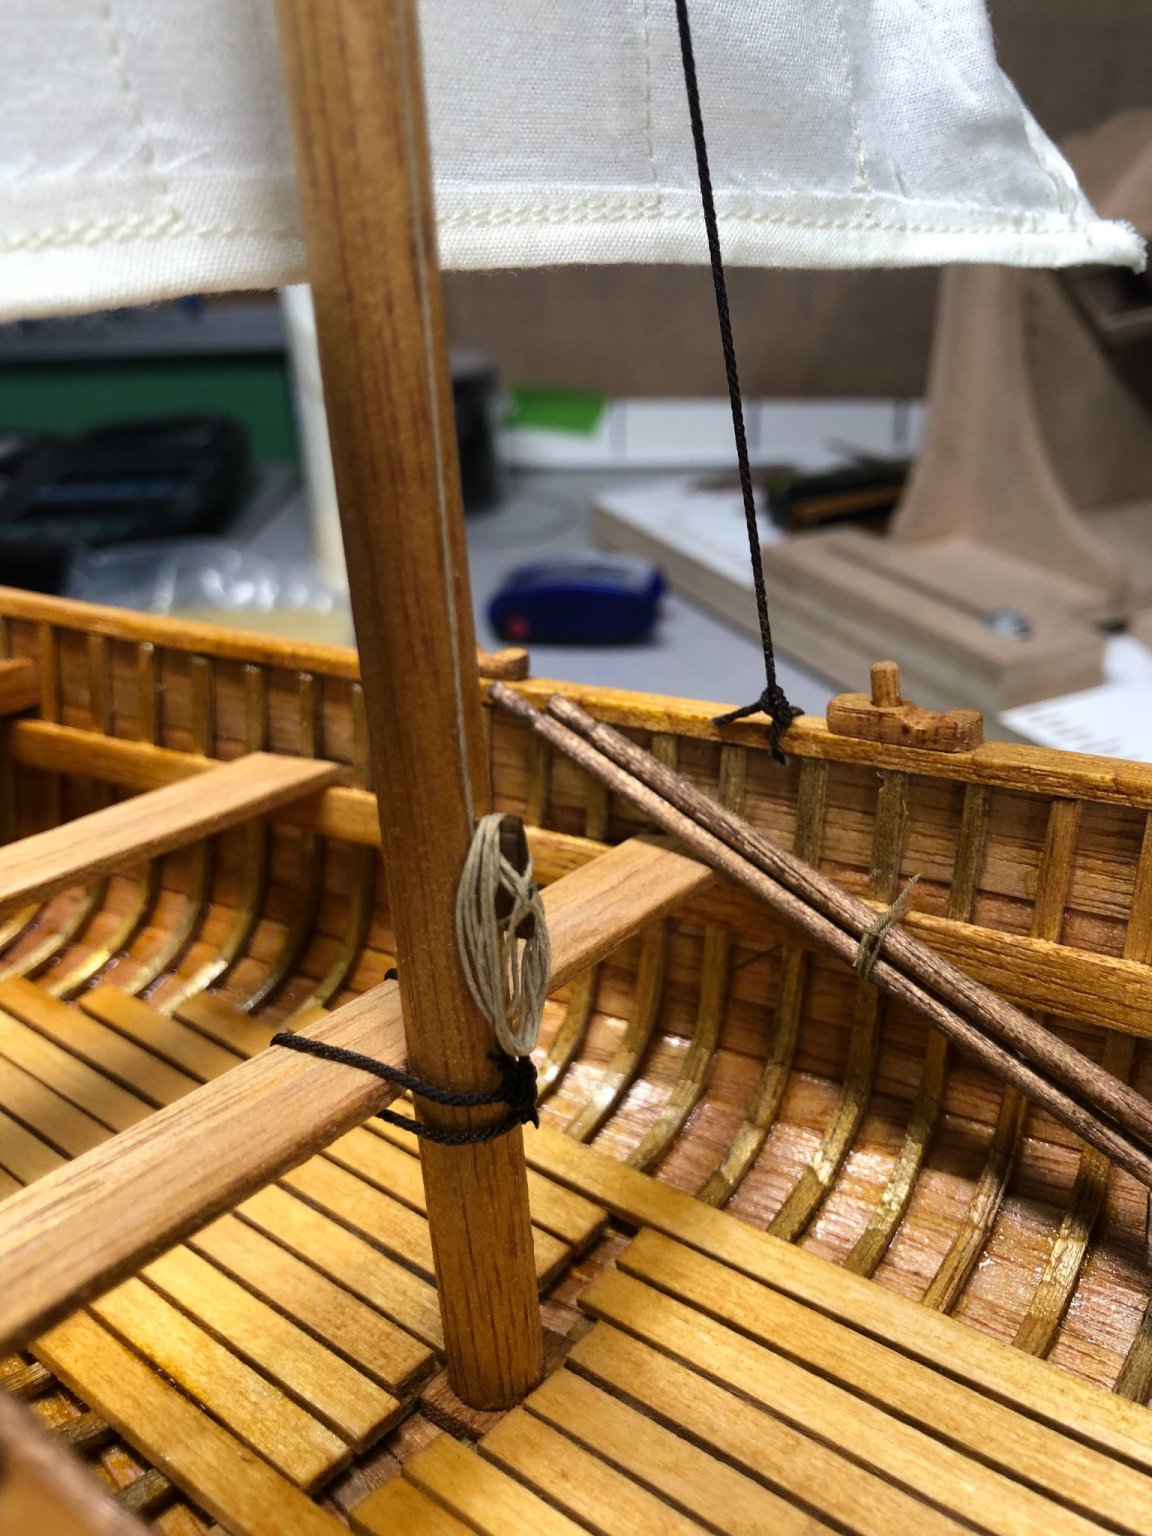
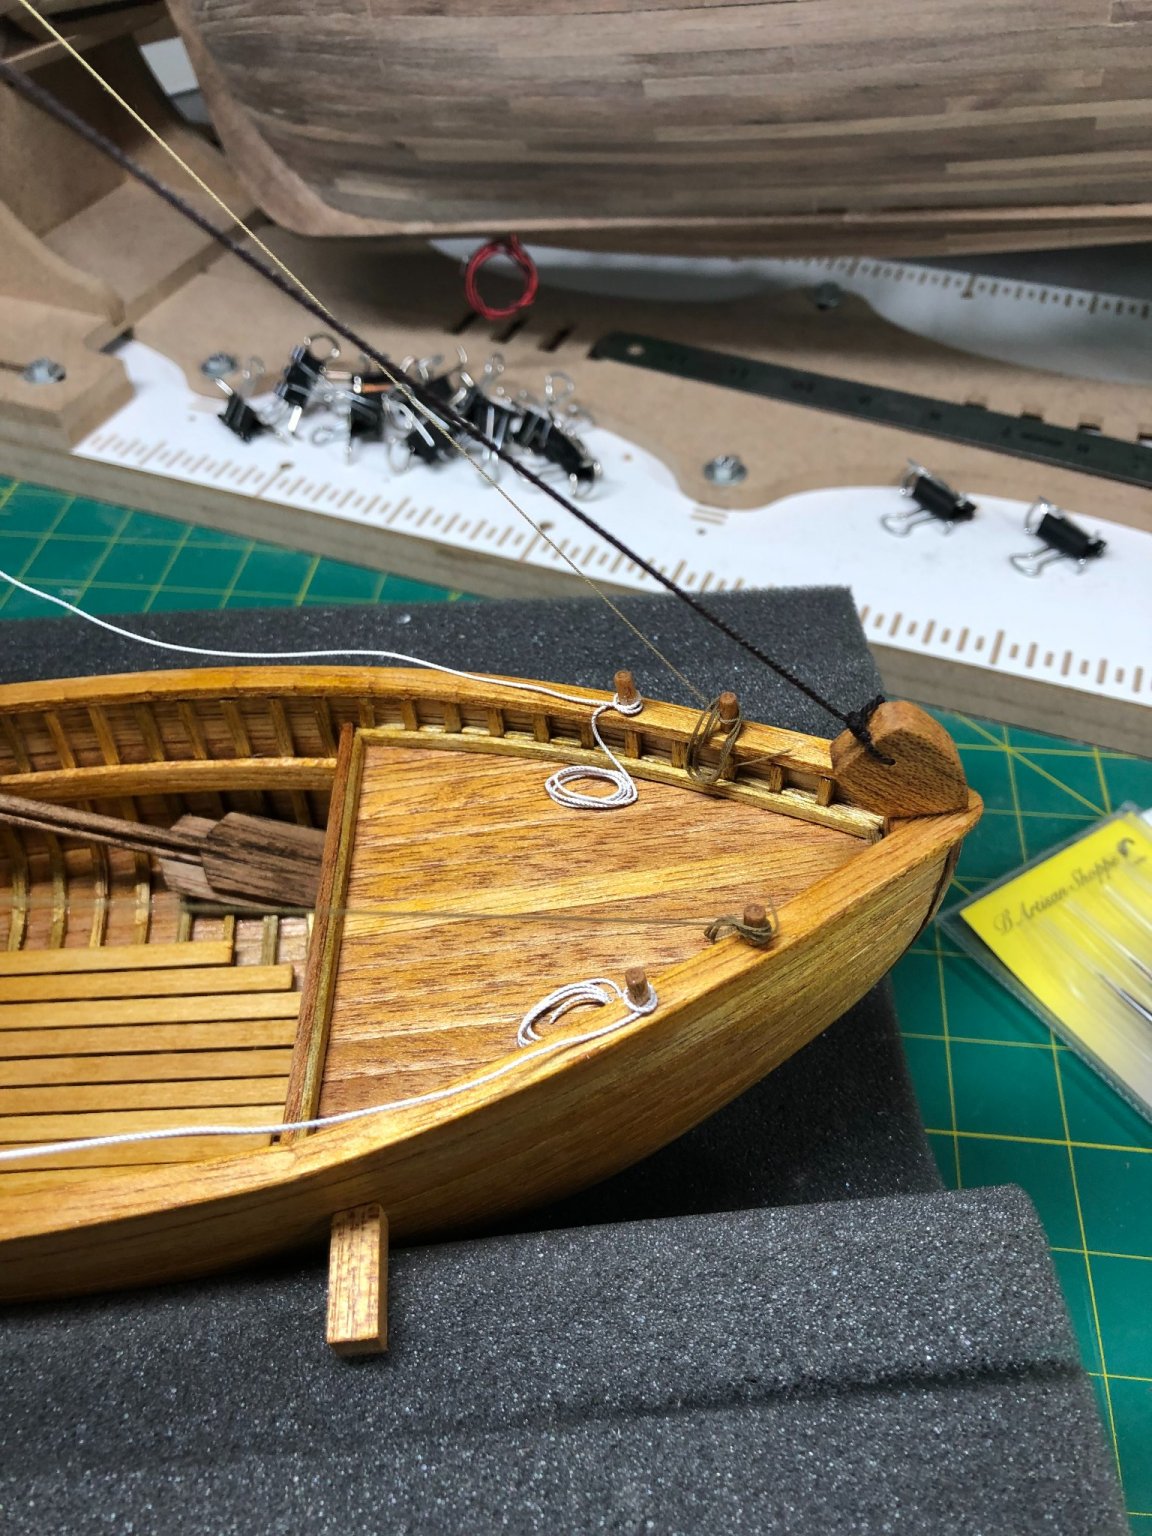
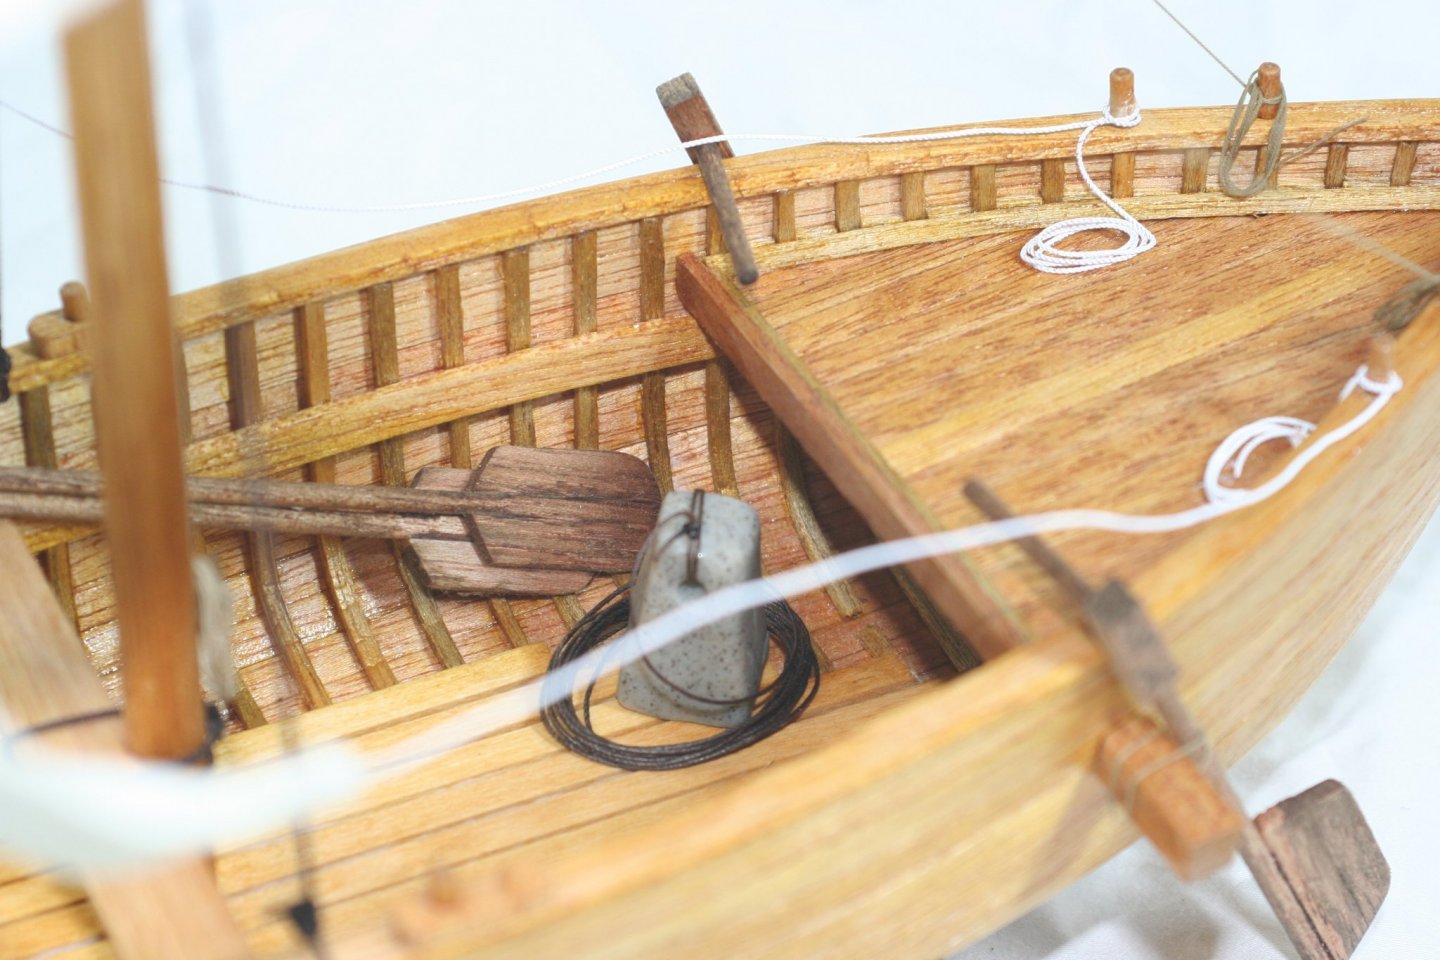
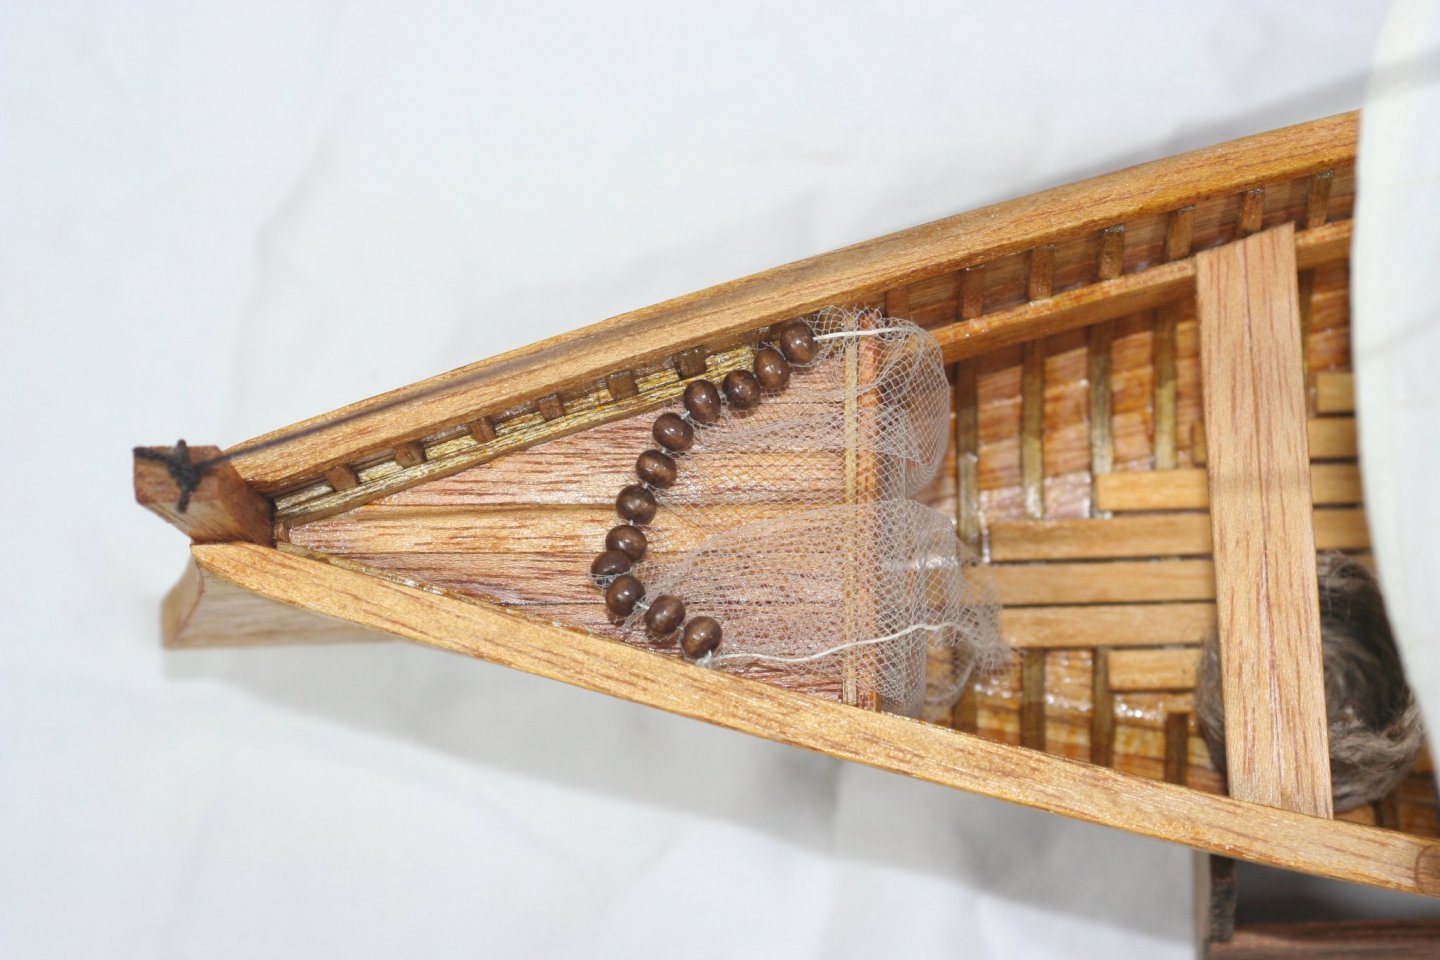
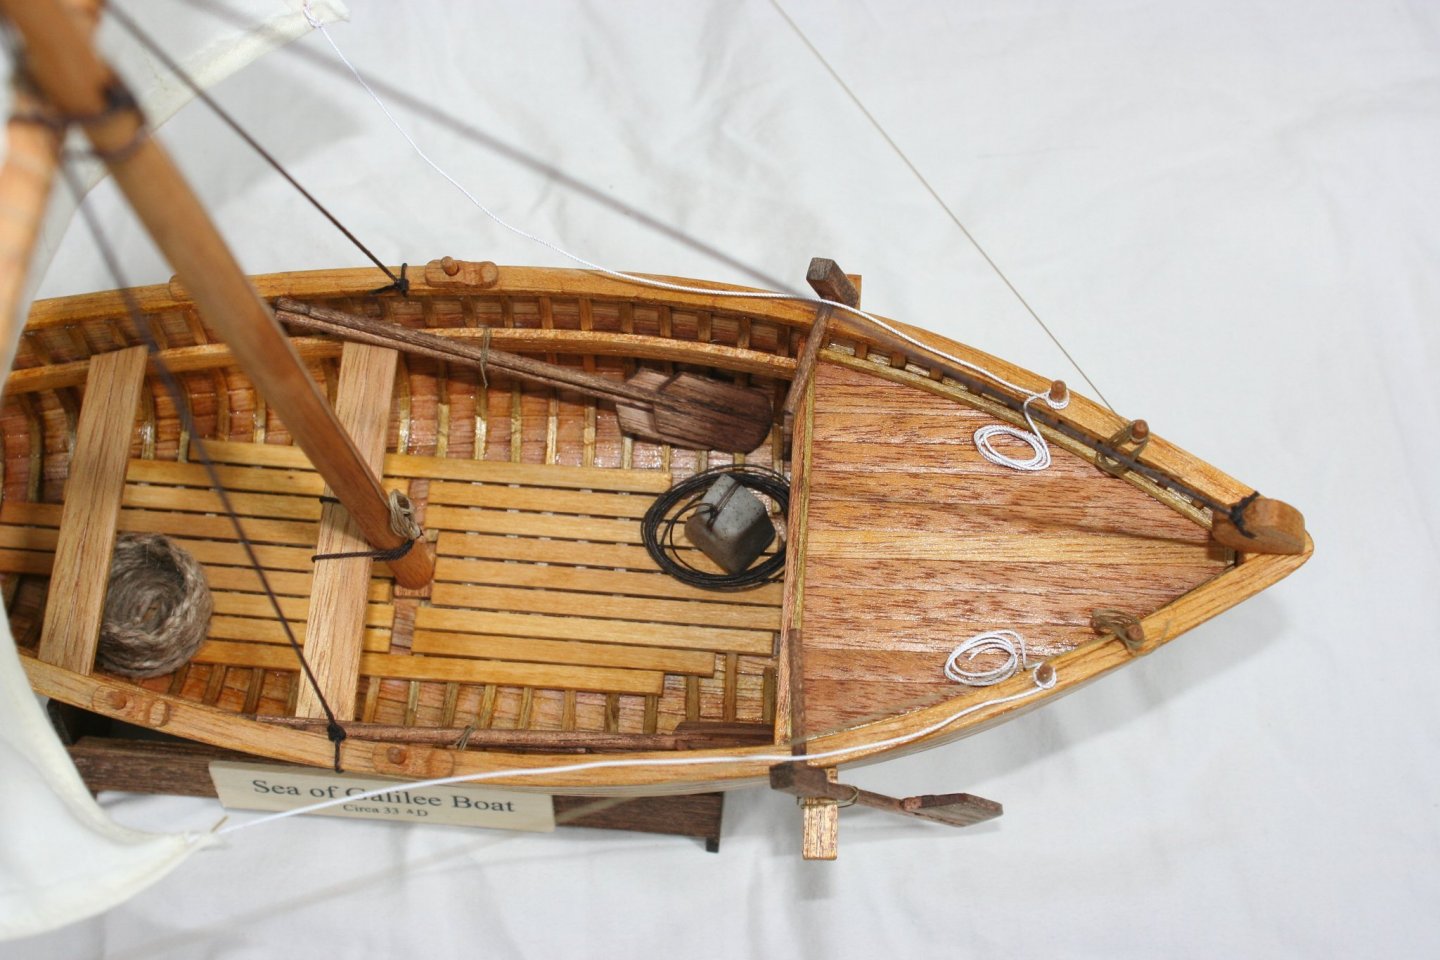
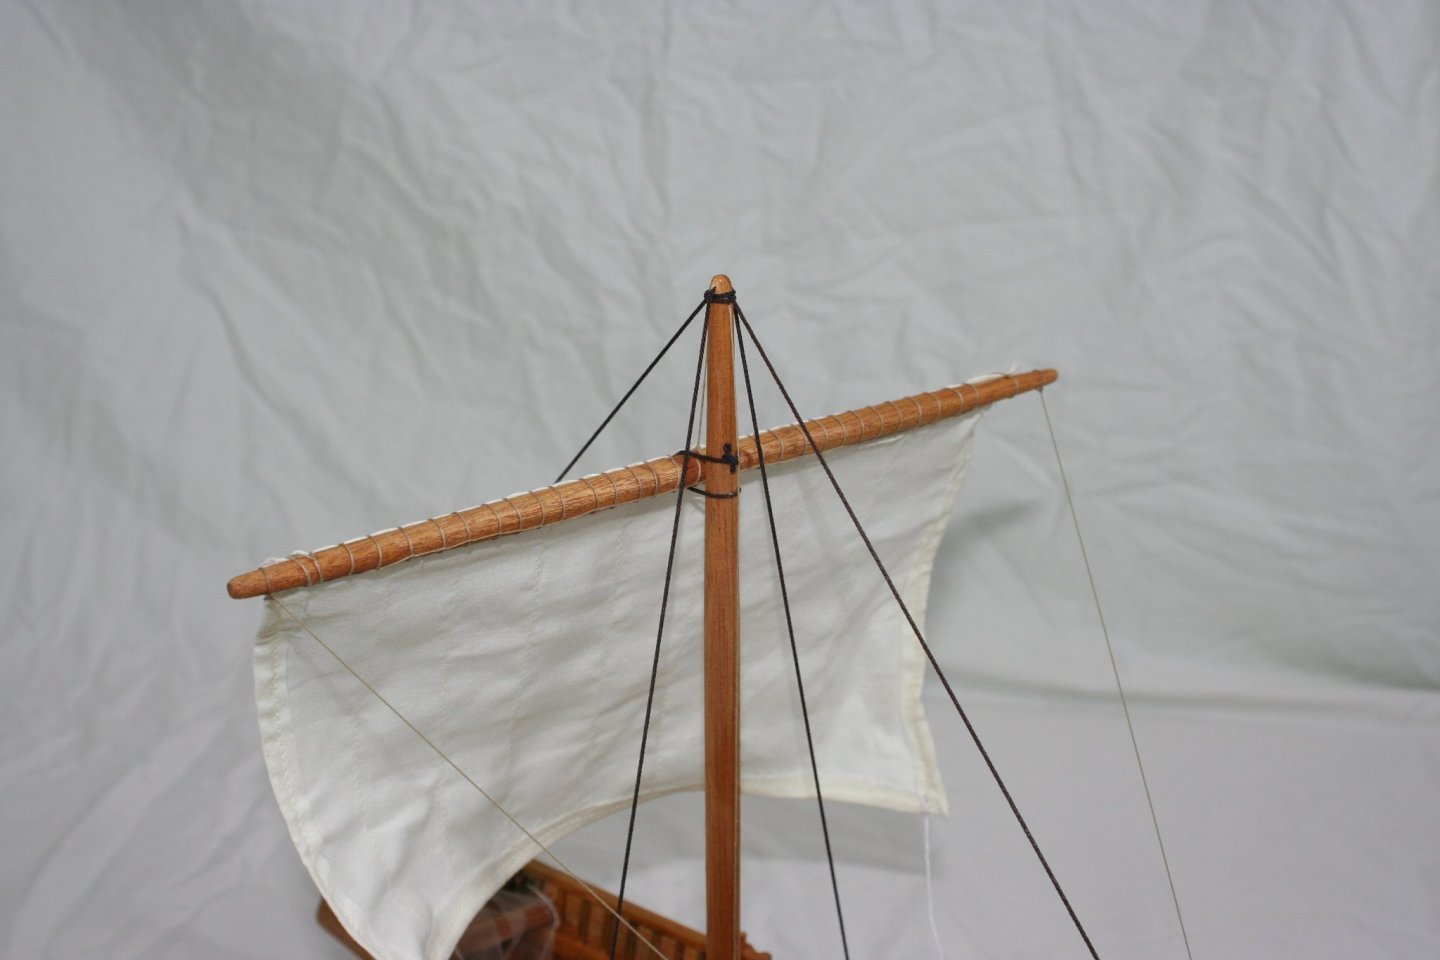
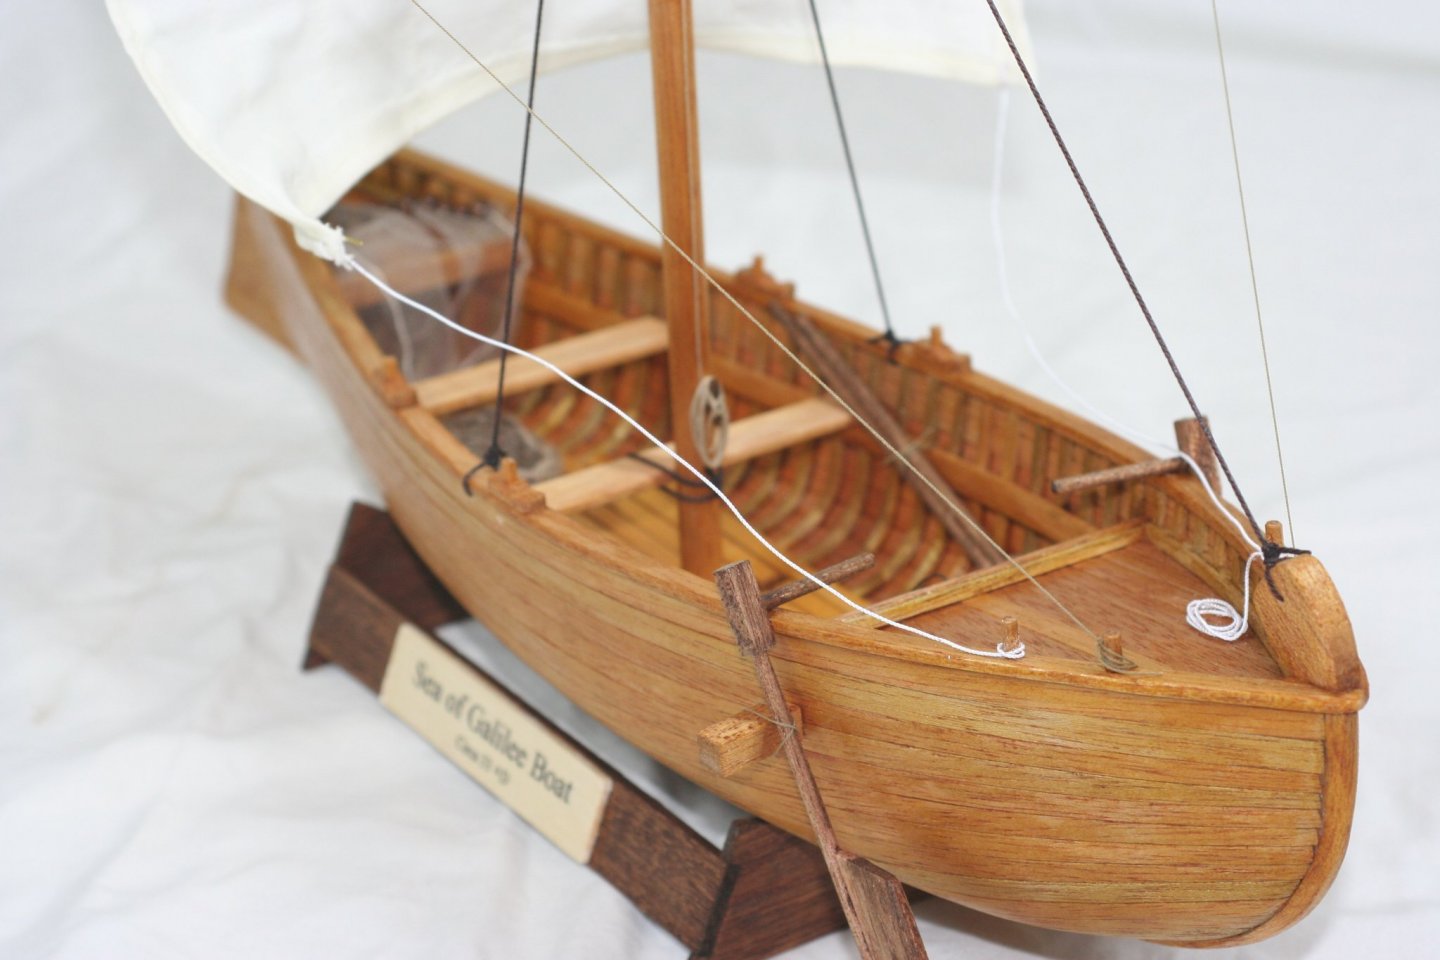
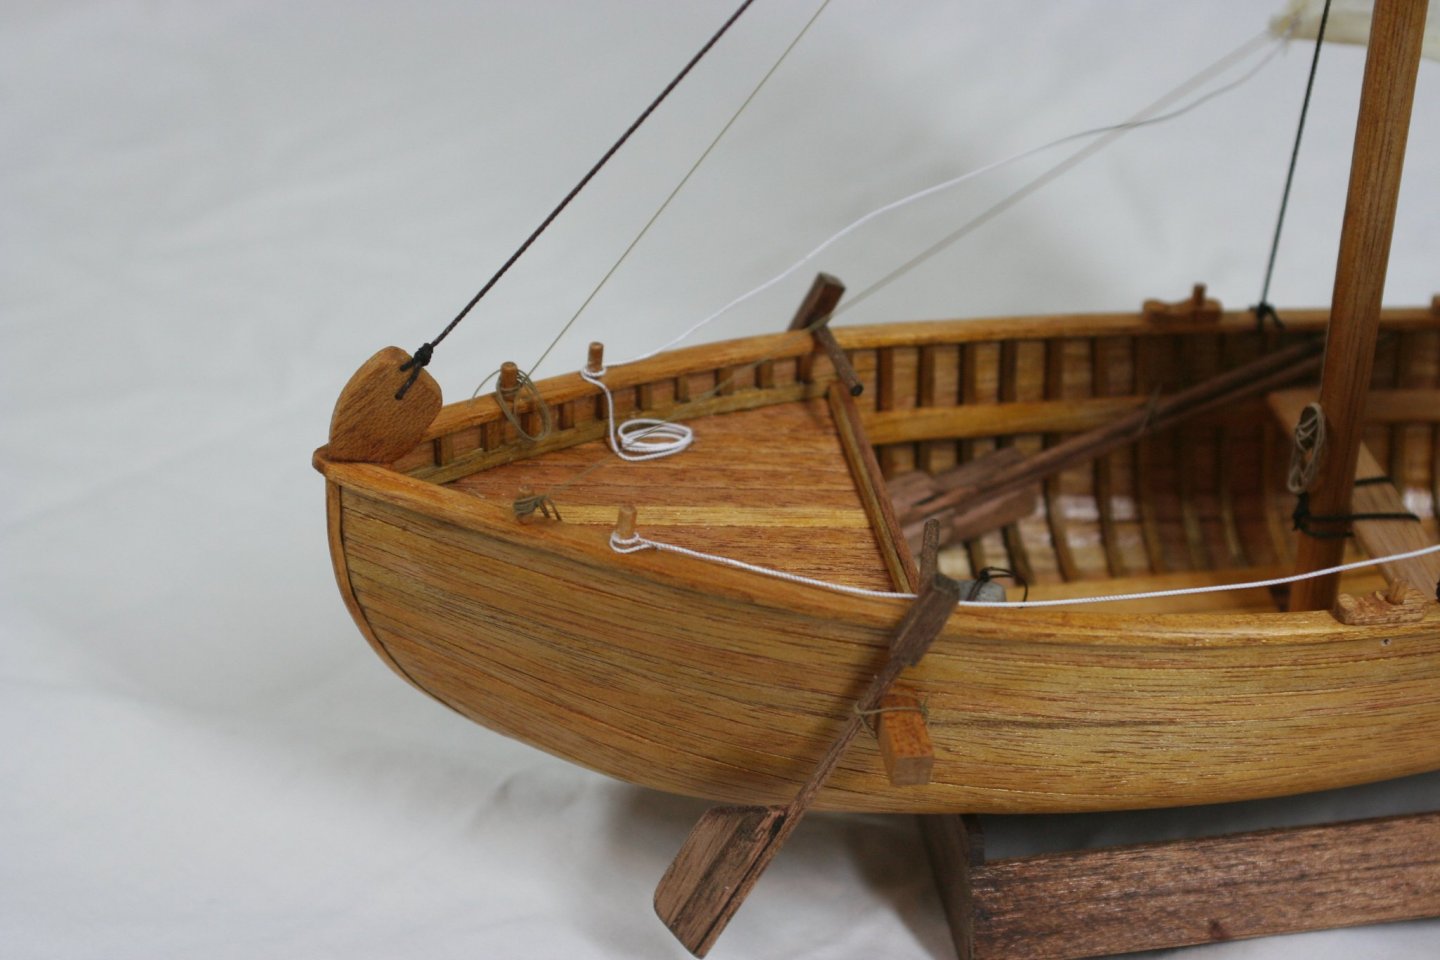
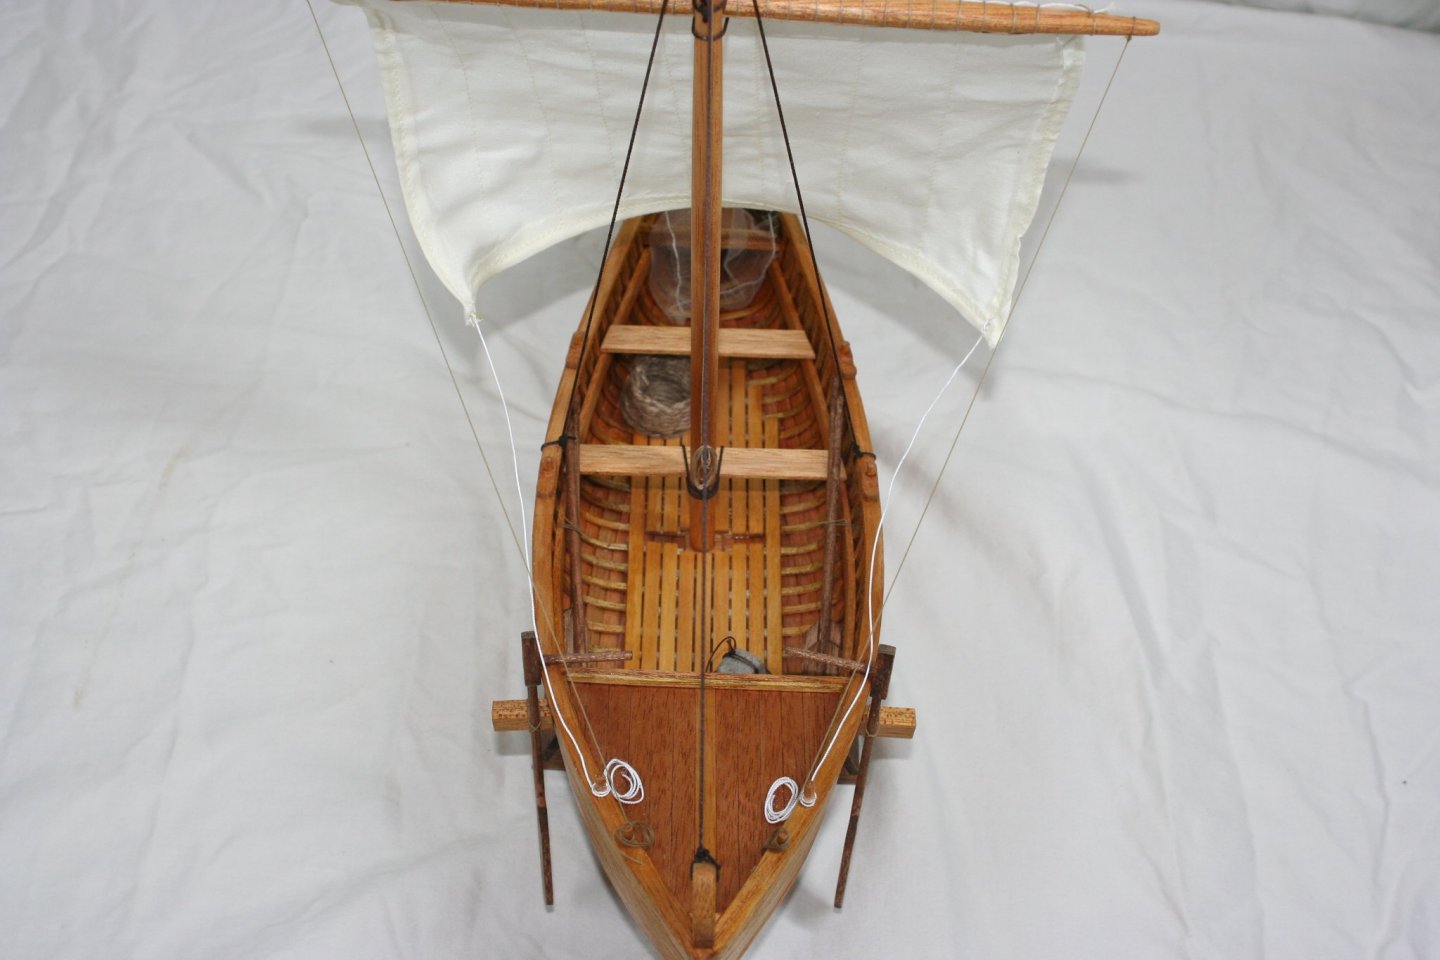
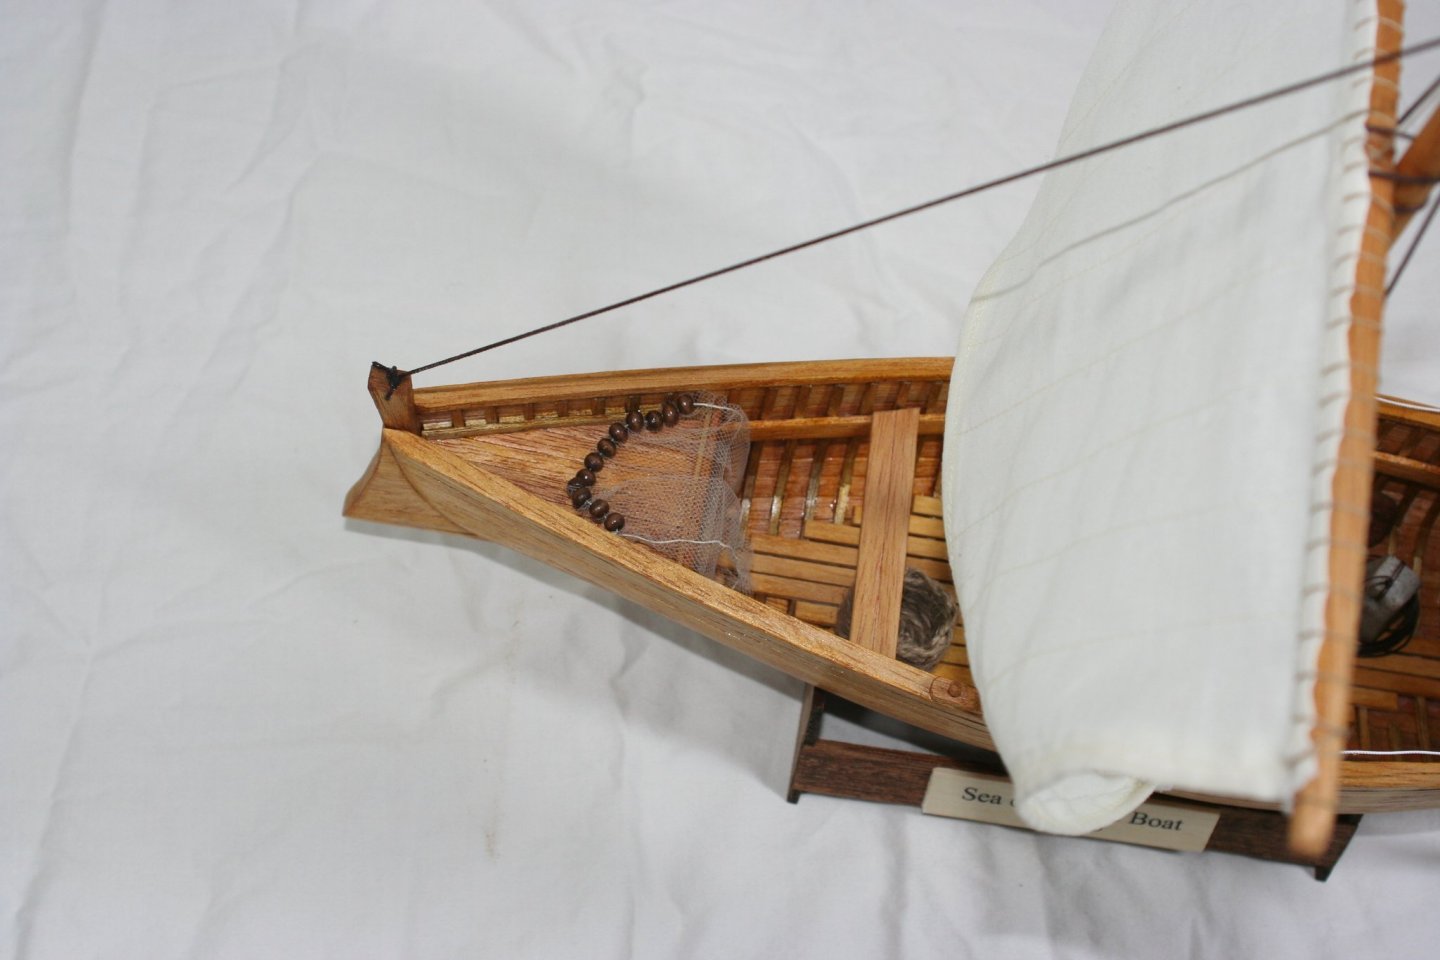
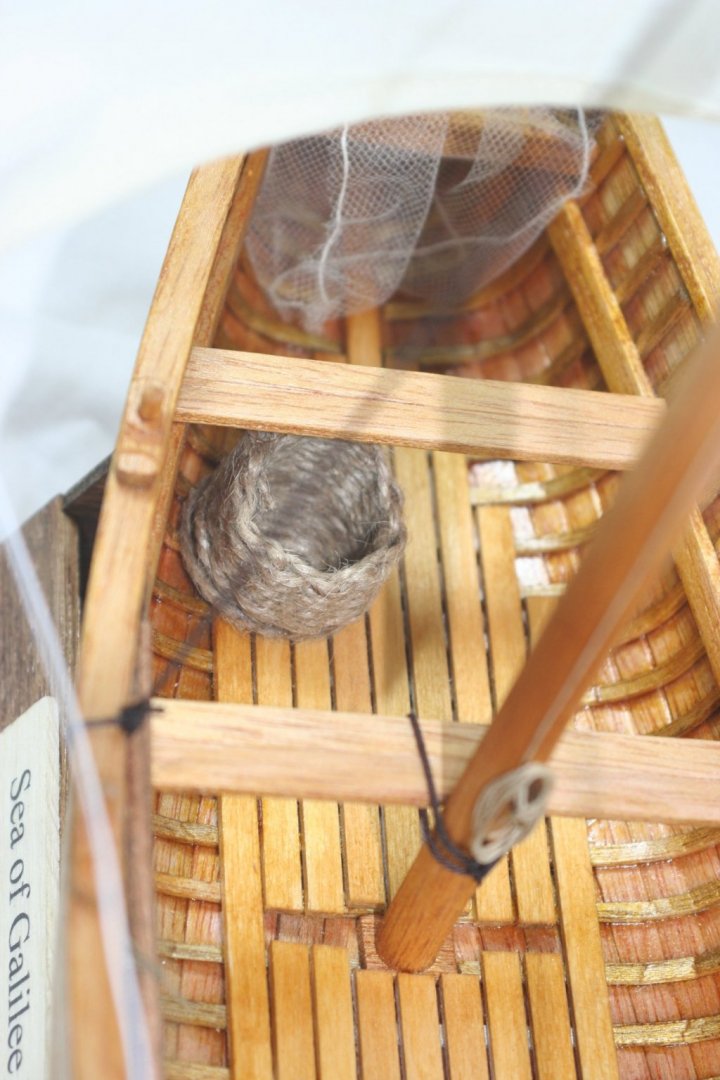
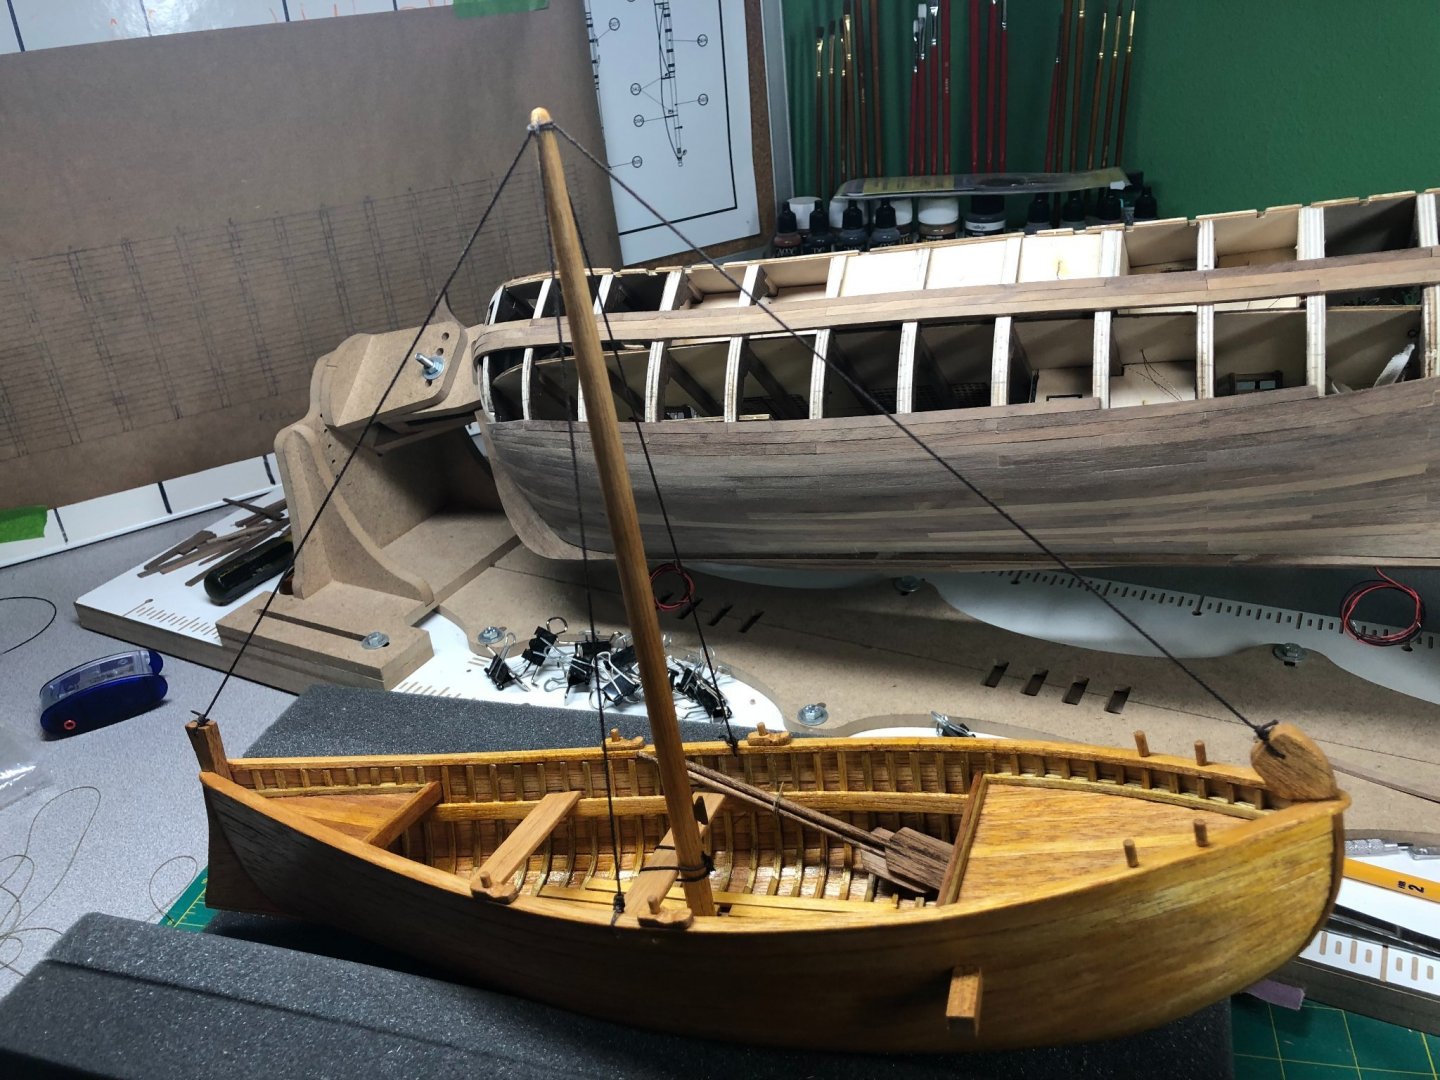
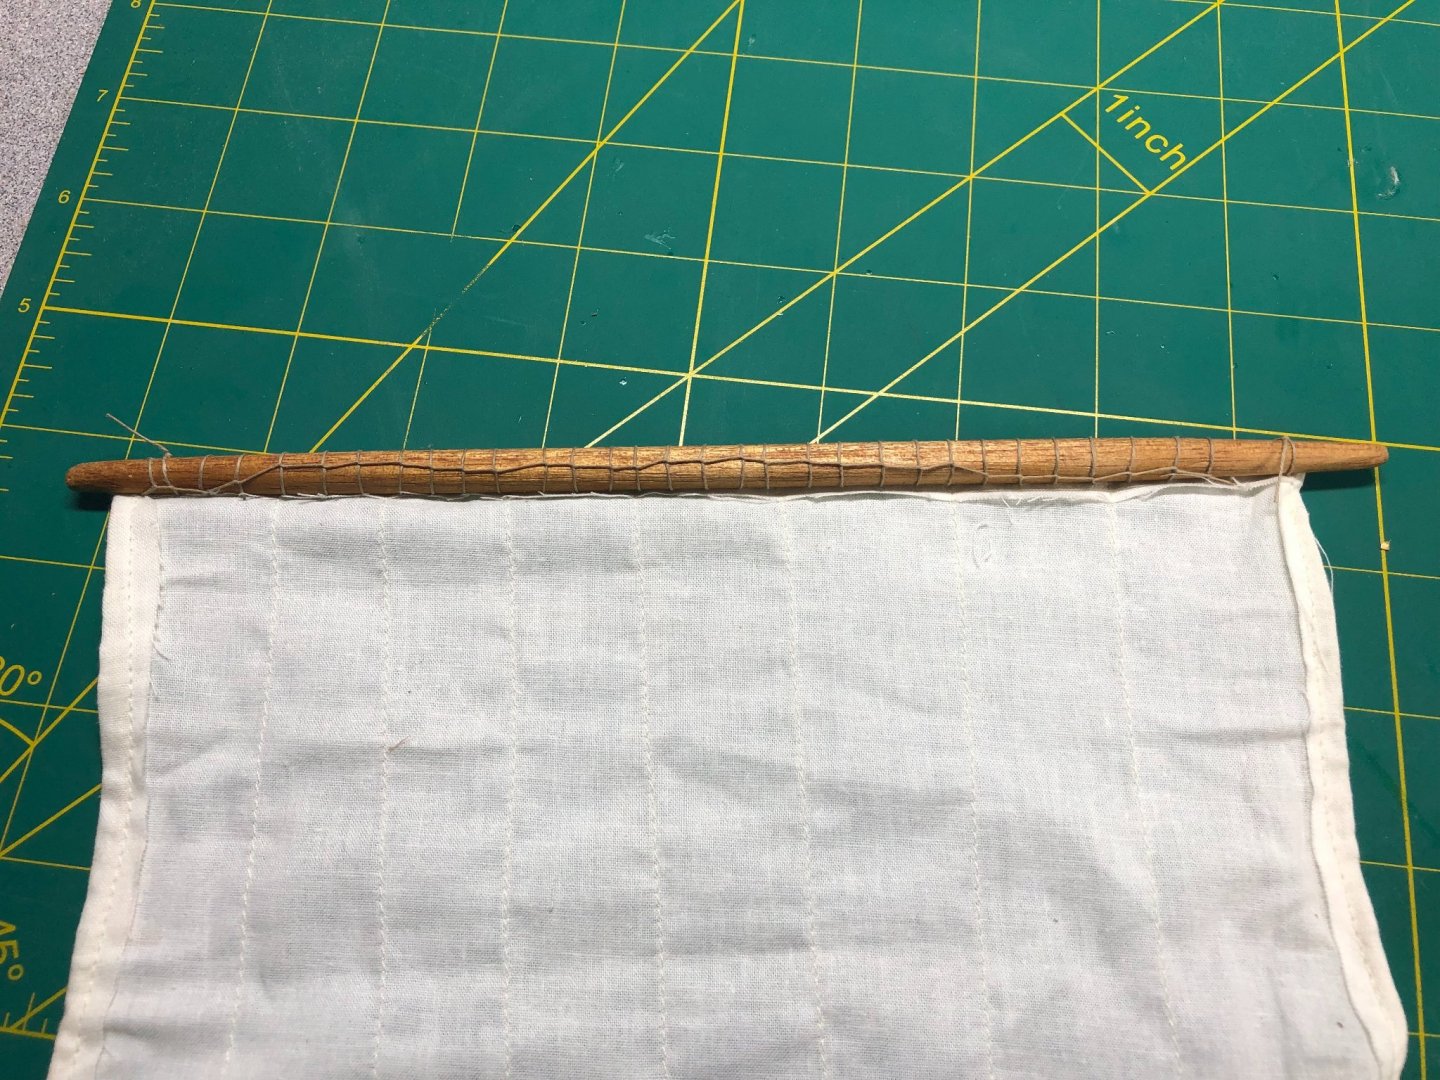
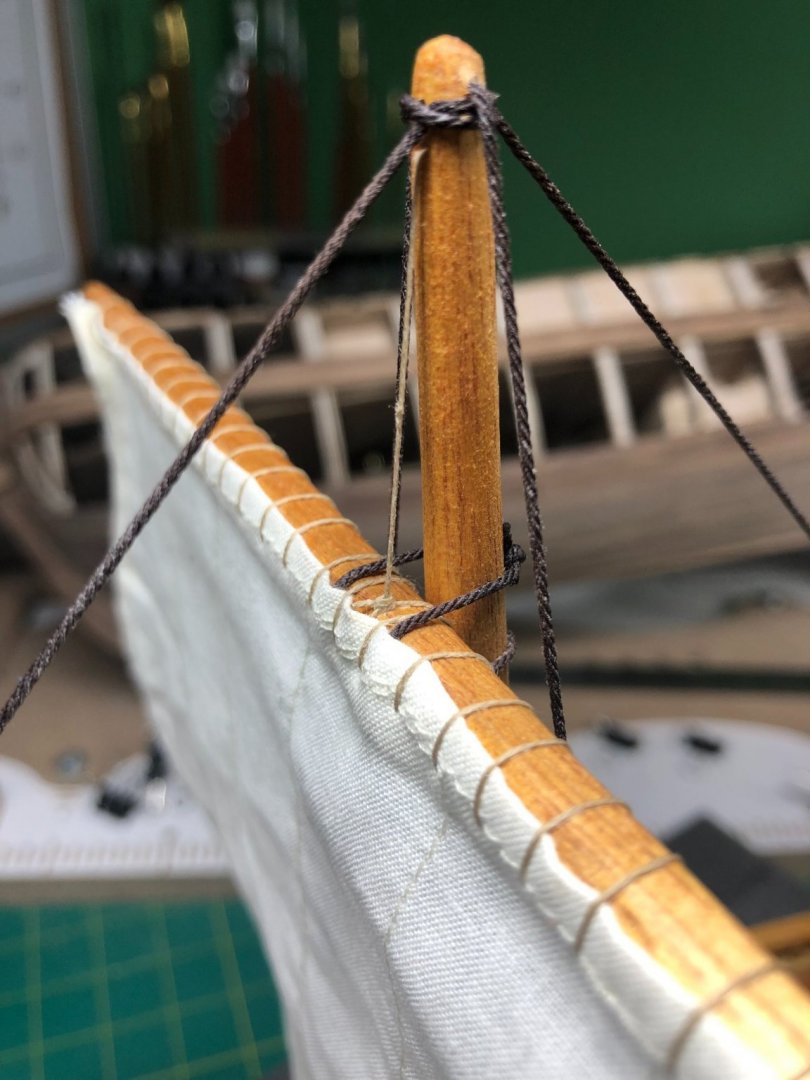
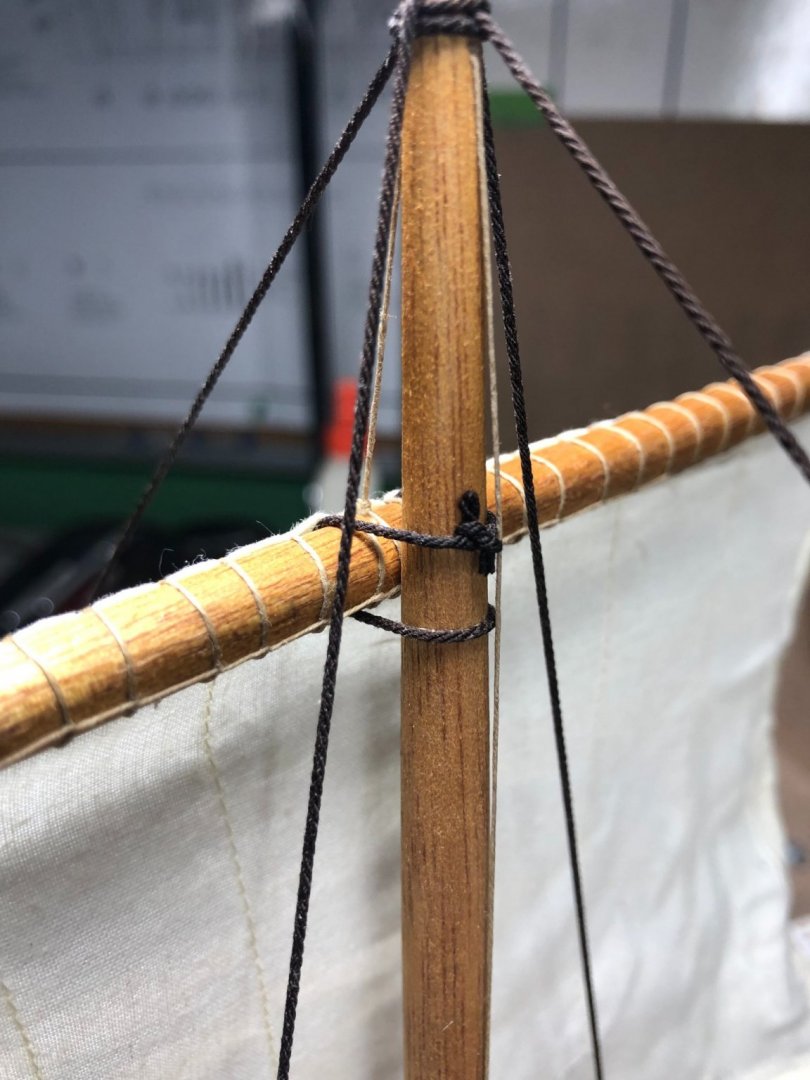
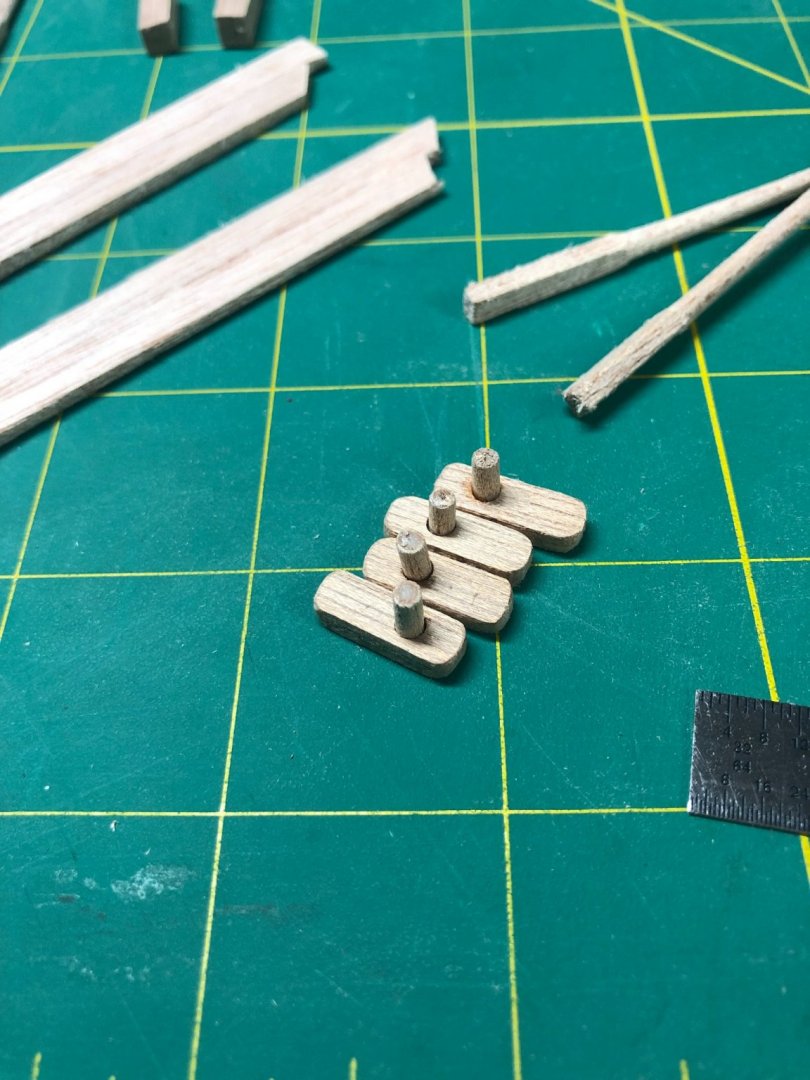
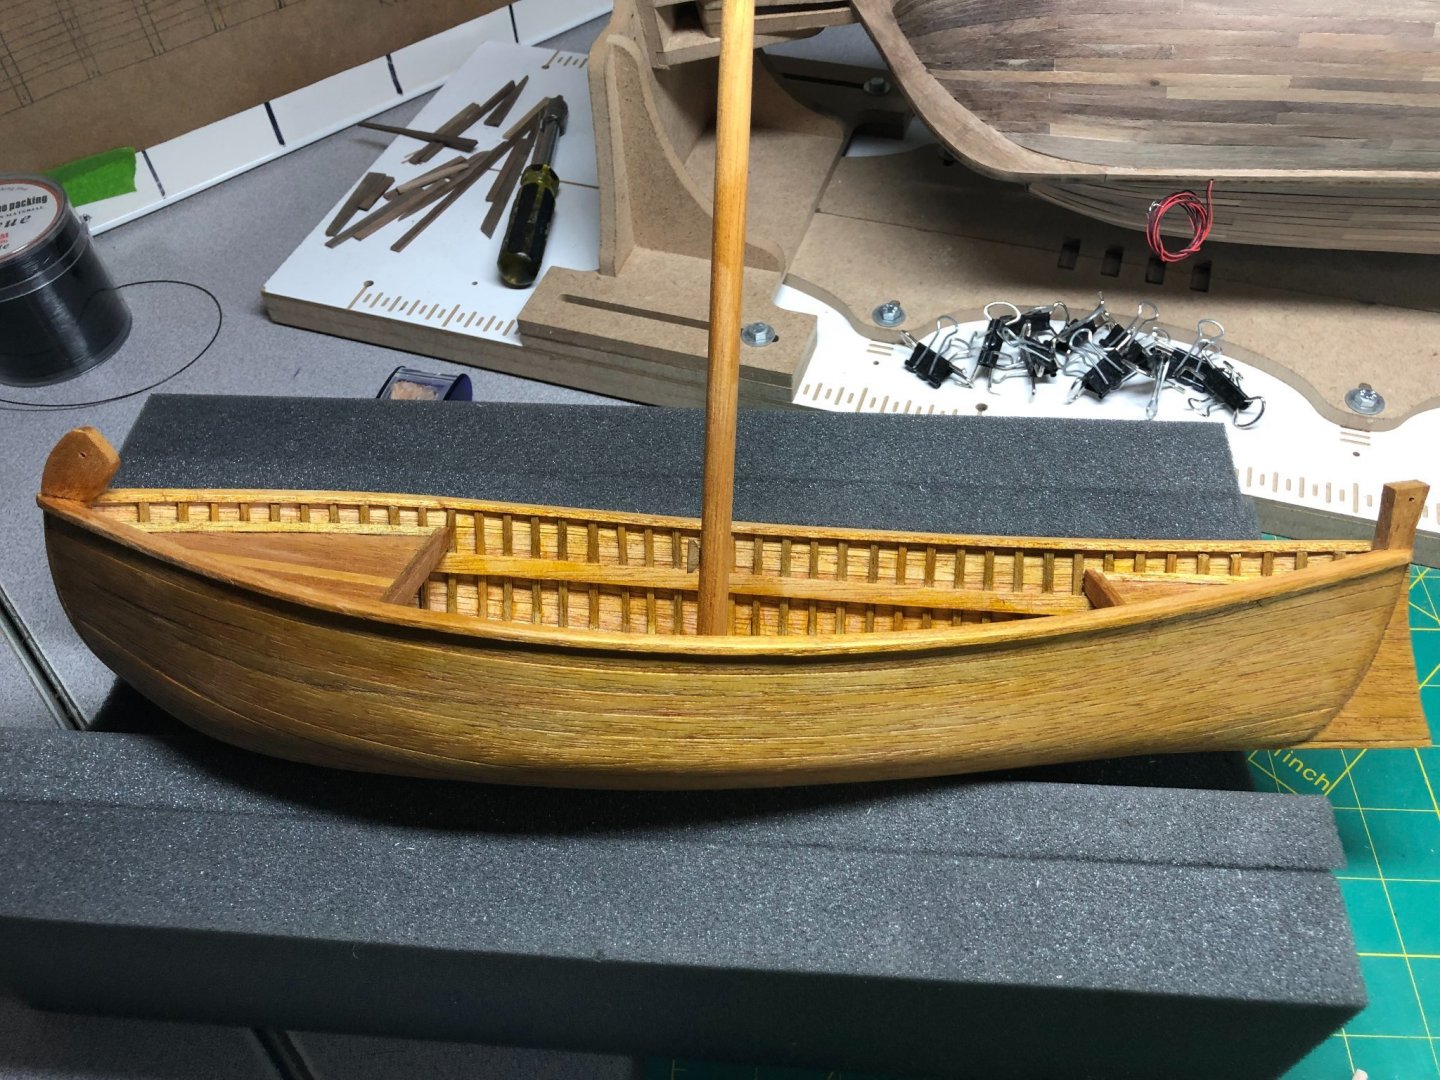
Oar locks, Oars, seats and rudders are assembled: ... and installed along with the rigging pins and rudder davits: The rigging is so much simpler than the usual work! No complaints! Standing rigging including the seat to mast and the oars. I decided to stain the oars and rudders in a contrasting color: Bending the sail to the yard was a simple stitch: My one regret is that I should have ironed the sail before bending it to the yard and hanging it on the mast... oh well! I have a few ideas to remove some of the wrinkles. I'll get to that last. Also, need to straighten out the stitching a little bit! I began working on the remaining rigging. Again, very simple. As you may have noticed in the above (and below) pictures, I chose not to use the the supplied rigging lines and used the lines that I made with my rope making machine. The yard was bound to the mast and the line to raise and lower the yard were completed: The sheet lines are actually made from a copper wire painted white... an interesting idea to keep the sail away from the mast and look more natural: The stand: The fishing net, anchor and line and basket are all that remain to complete this model. I do intend to work on the sail... shaping and removing the wrinkles are the main goals. Gotta check the little things too. Sometimes, I get lost in the big job and forget to look closely for anything that may need a little attention. If you notice anything, please feel free to point it out! The next post will be the final of this build log with pictures of the final build! It will be a few days, as I would like to set up a good photo area and finishing the little bit I have left. Also, once I present it to my dad, I'll post a few pictures of that too!


- 83 replies
-
- 8
-
-

-
- Sea of Galilee boat
- SE Miller
- (and 1 more)
-
Interesting that the book I read did not mention floor boards. There must have been an updated version of the book several years after the original was written. I know the work to save the boat took several years.
- 83 replies
-
- 1
-
-
- Sea of Galilee boat
- SE Miller
- (and 1 more)
-
Off to a great start! I wonder how the tape will work? Never crossed my mind to try it! The AYC looks awesome!
-
Have you tried raising dents with a little water? Usually, a minor dent will pop out with a fingertip of water rubbed into it. Of course, if fibers are broken or crushed that trick doesn't work. I had several dents working with this wood but most came right out.
-
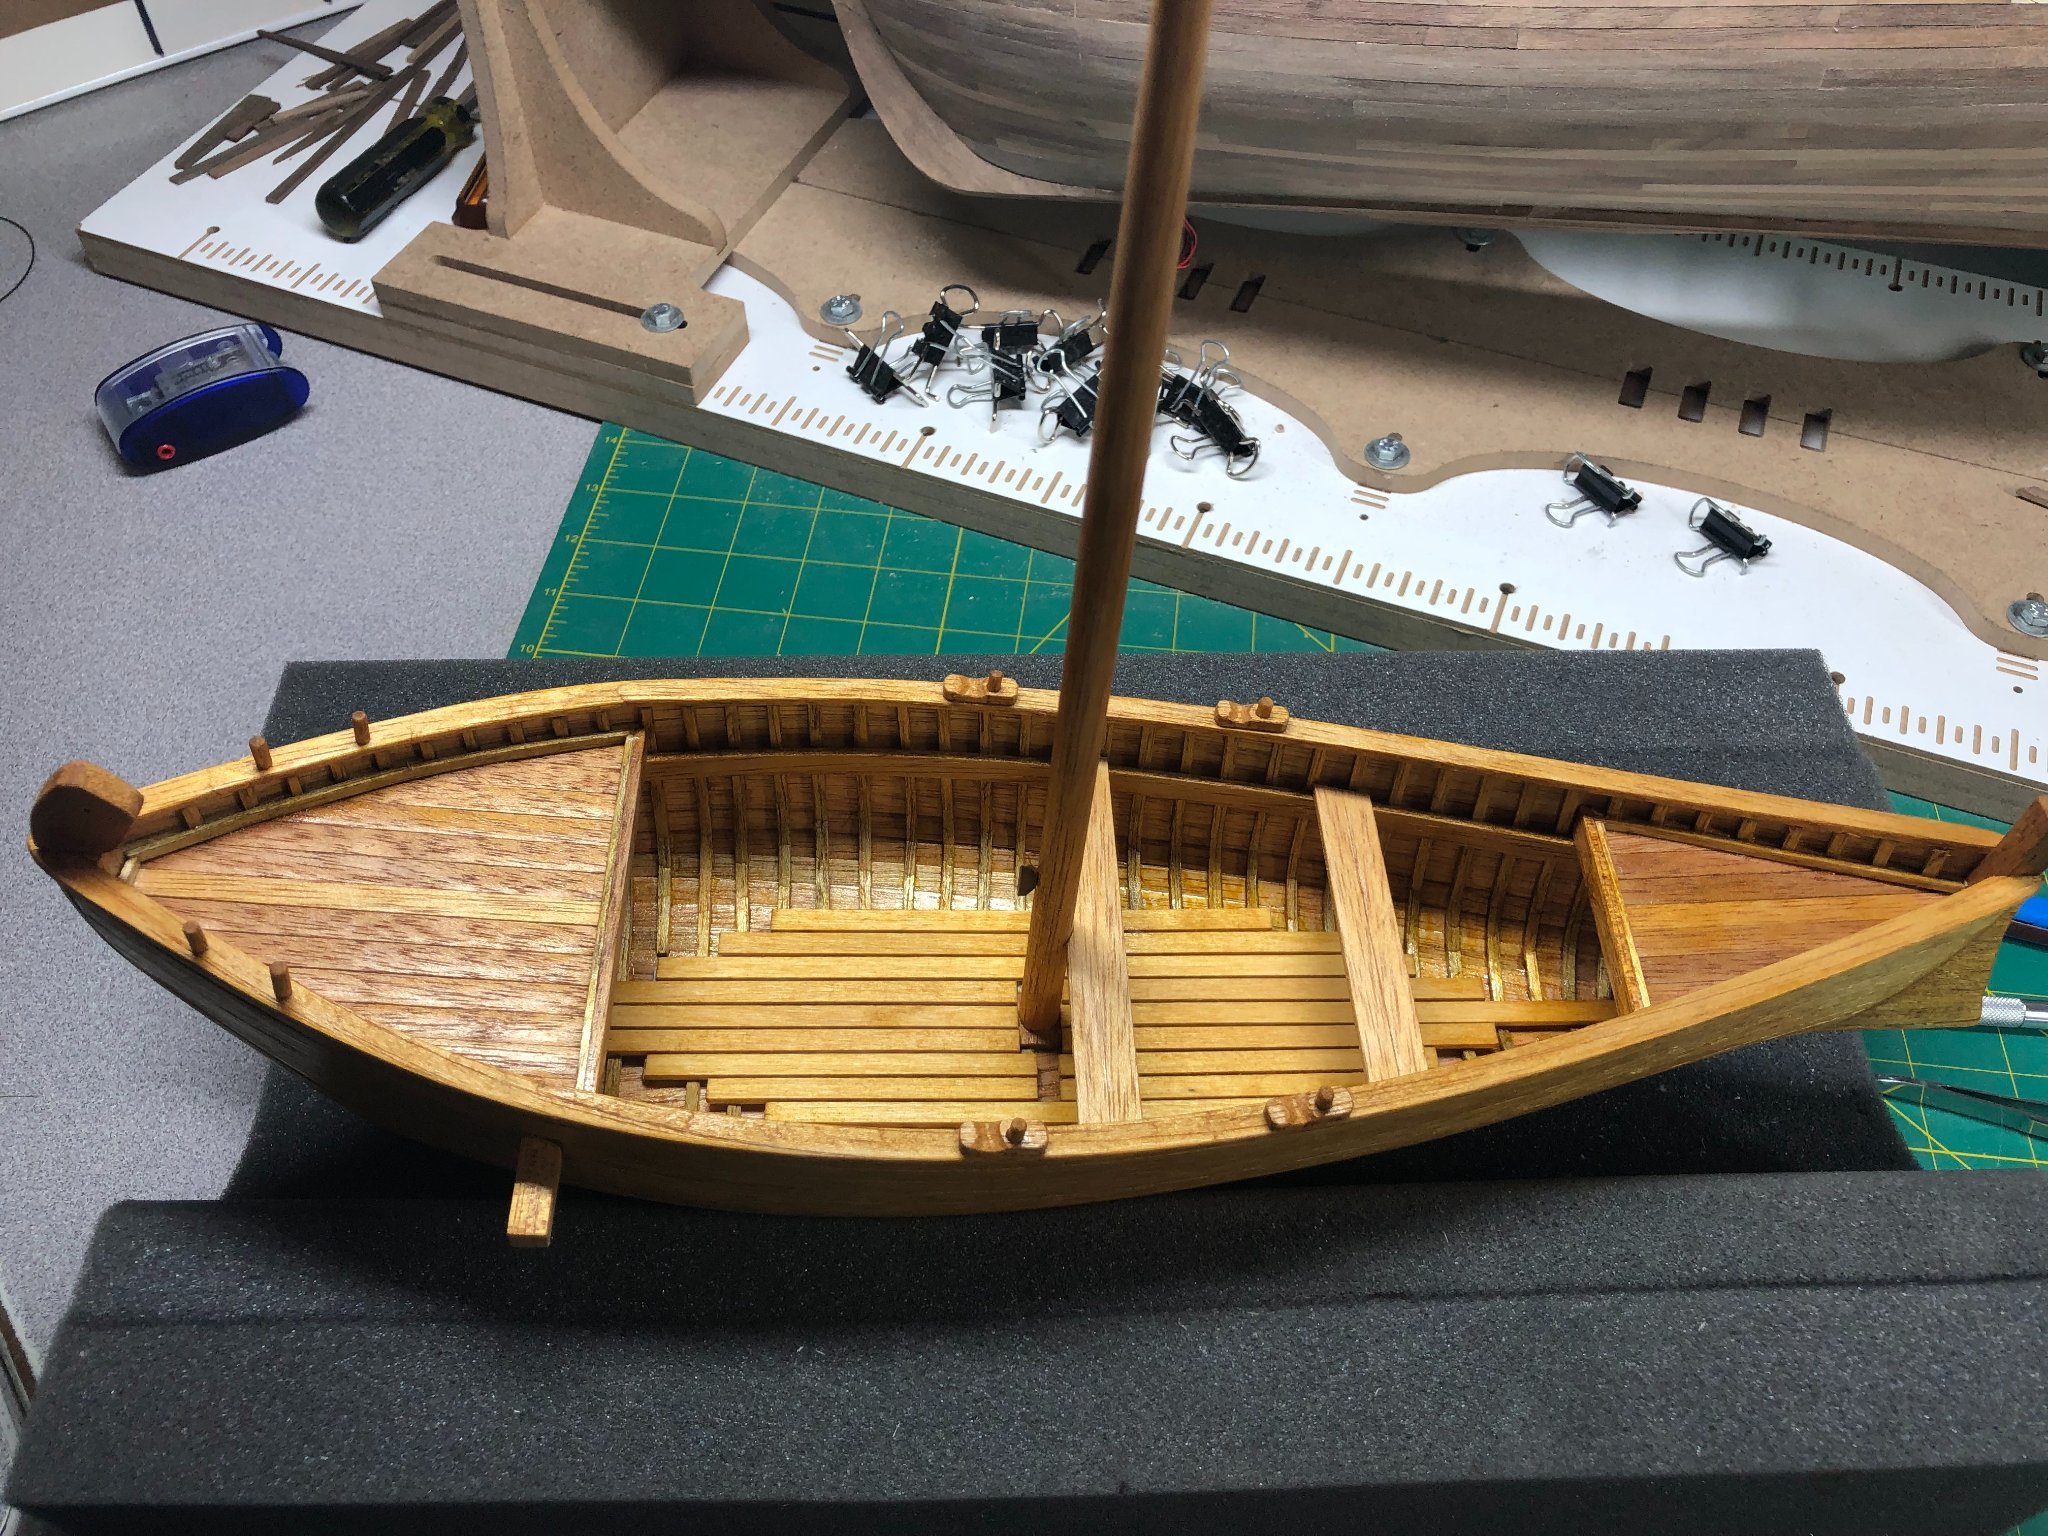
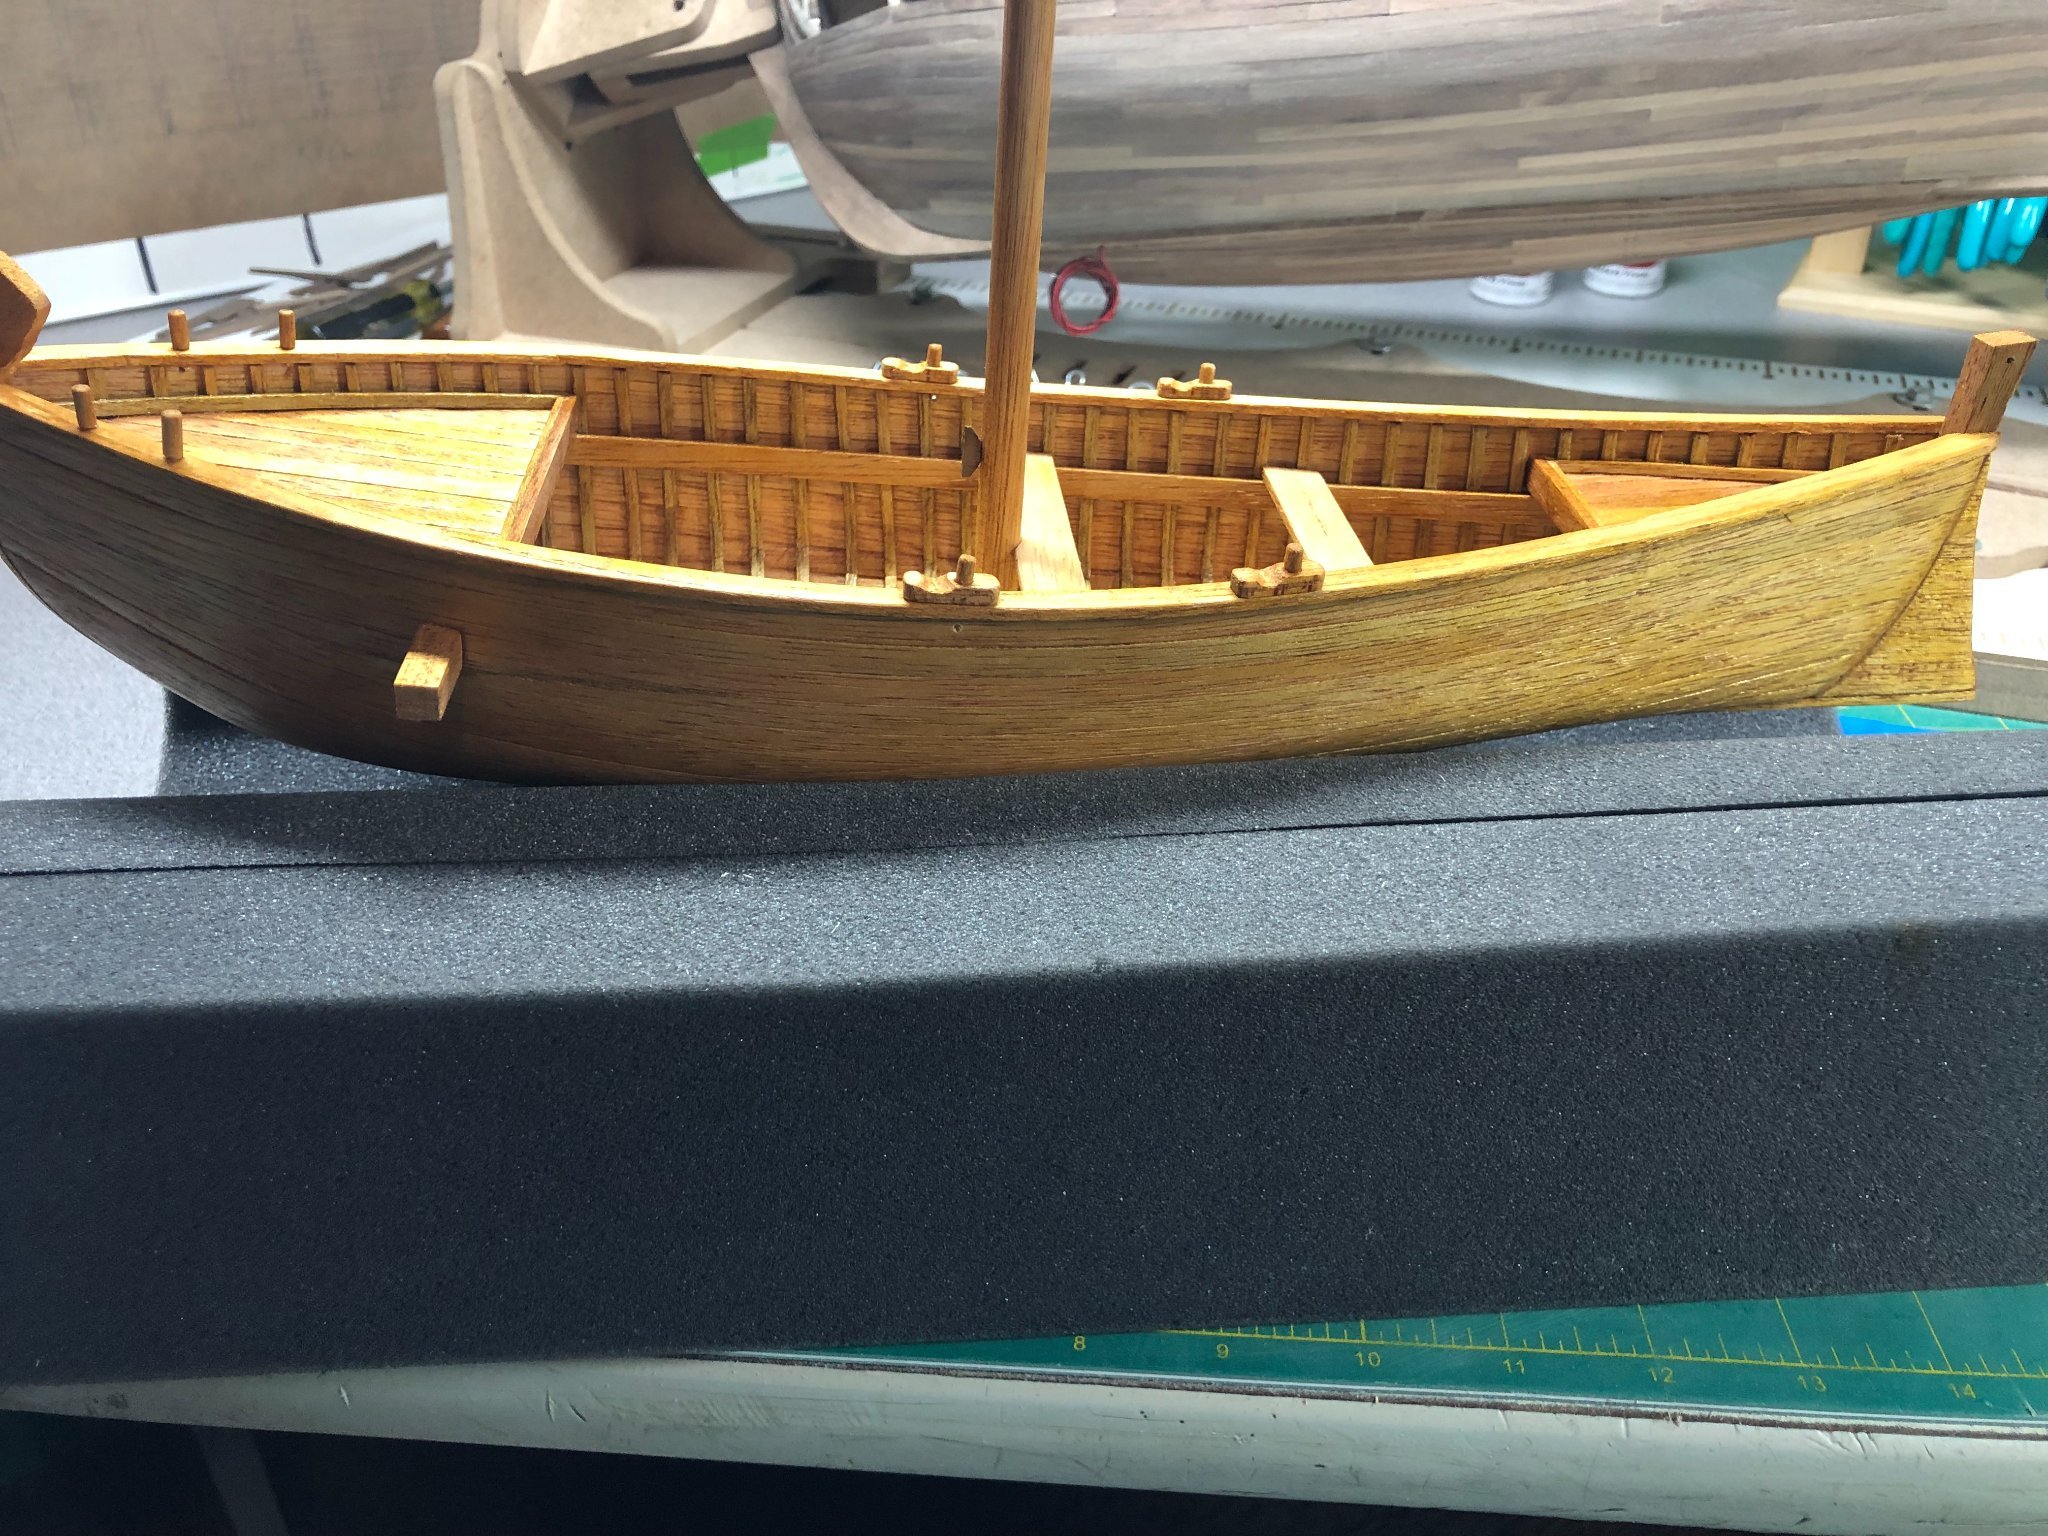
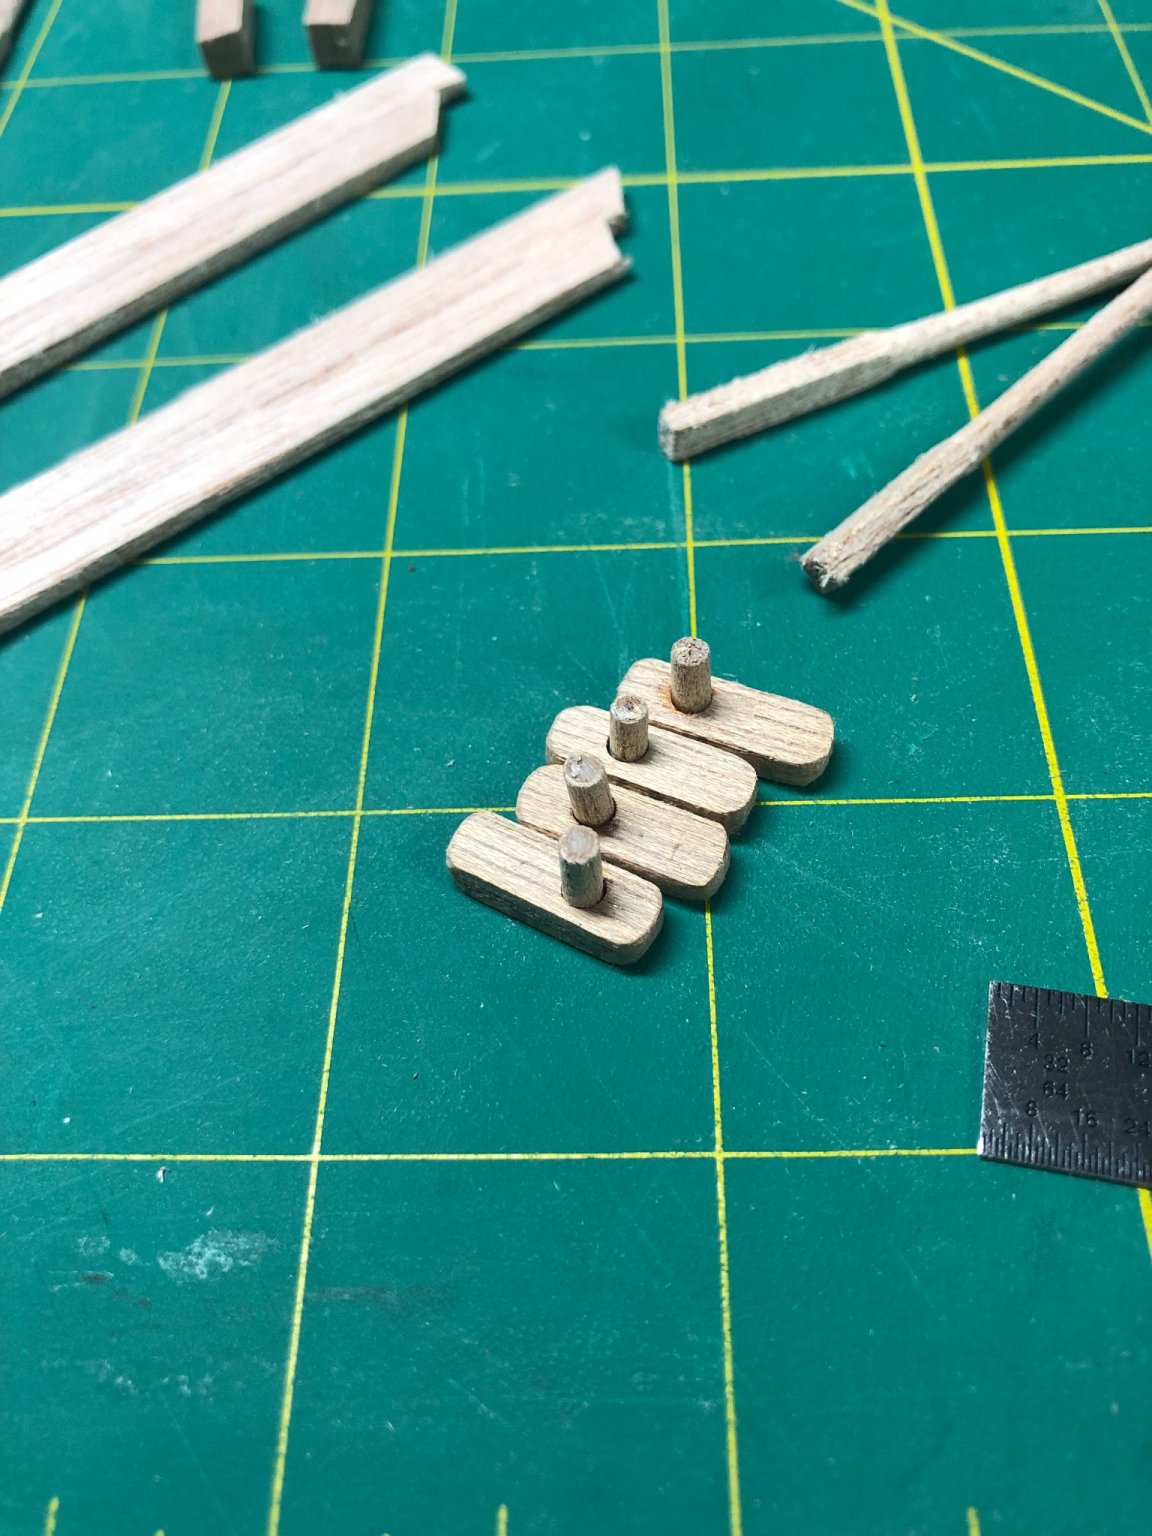
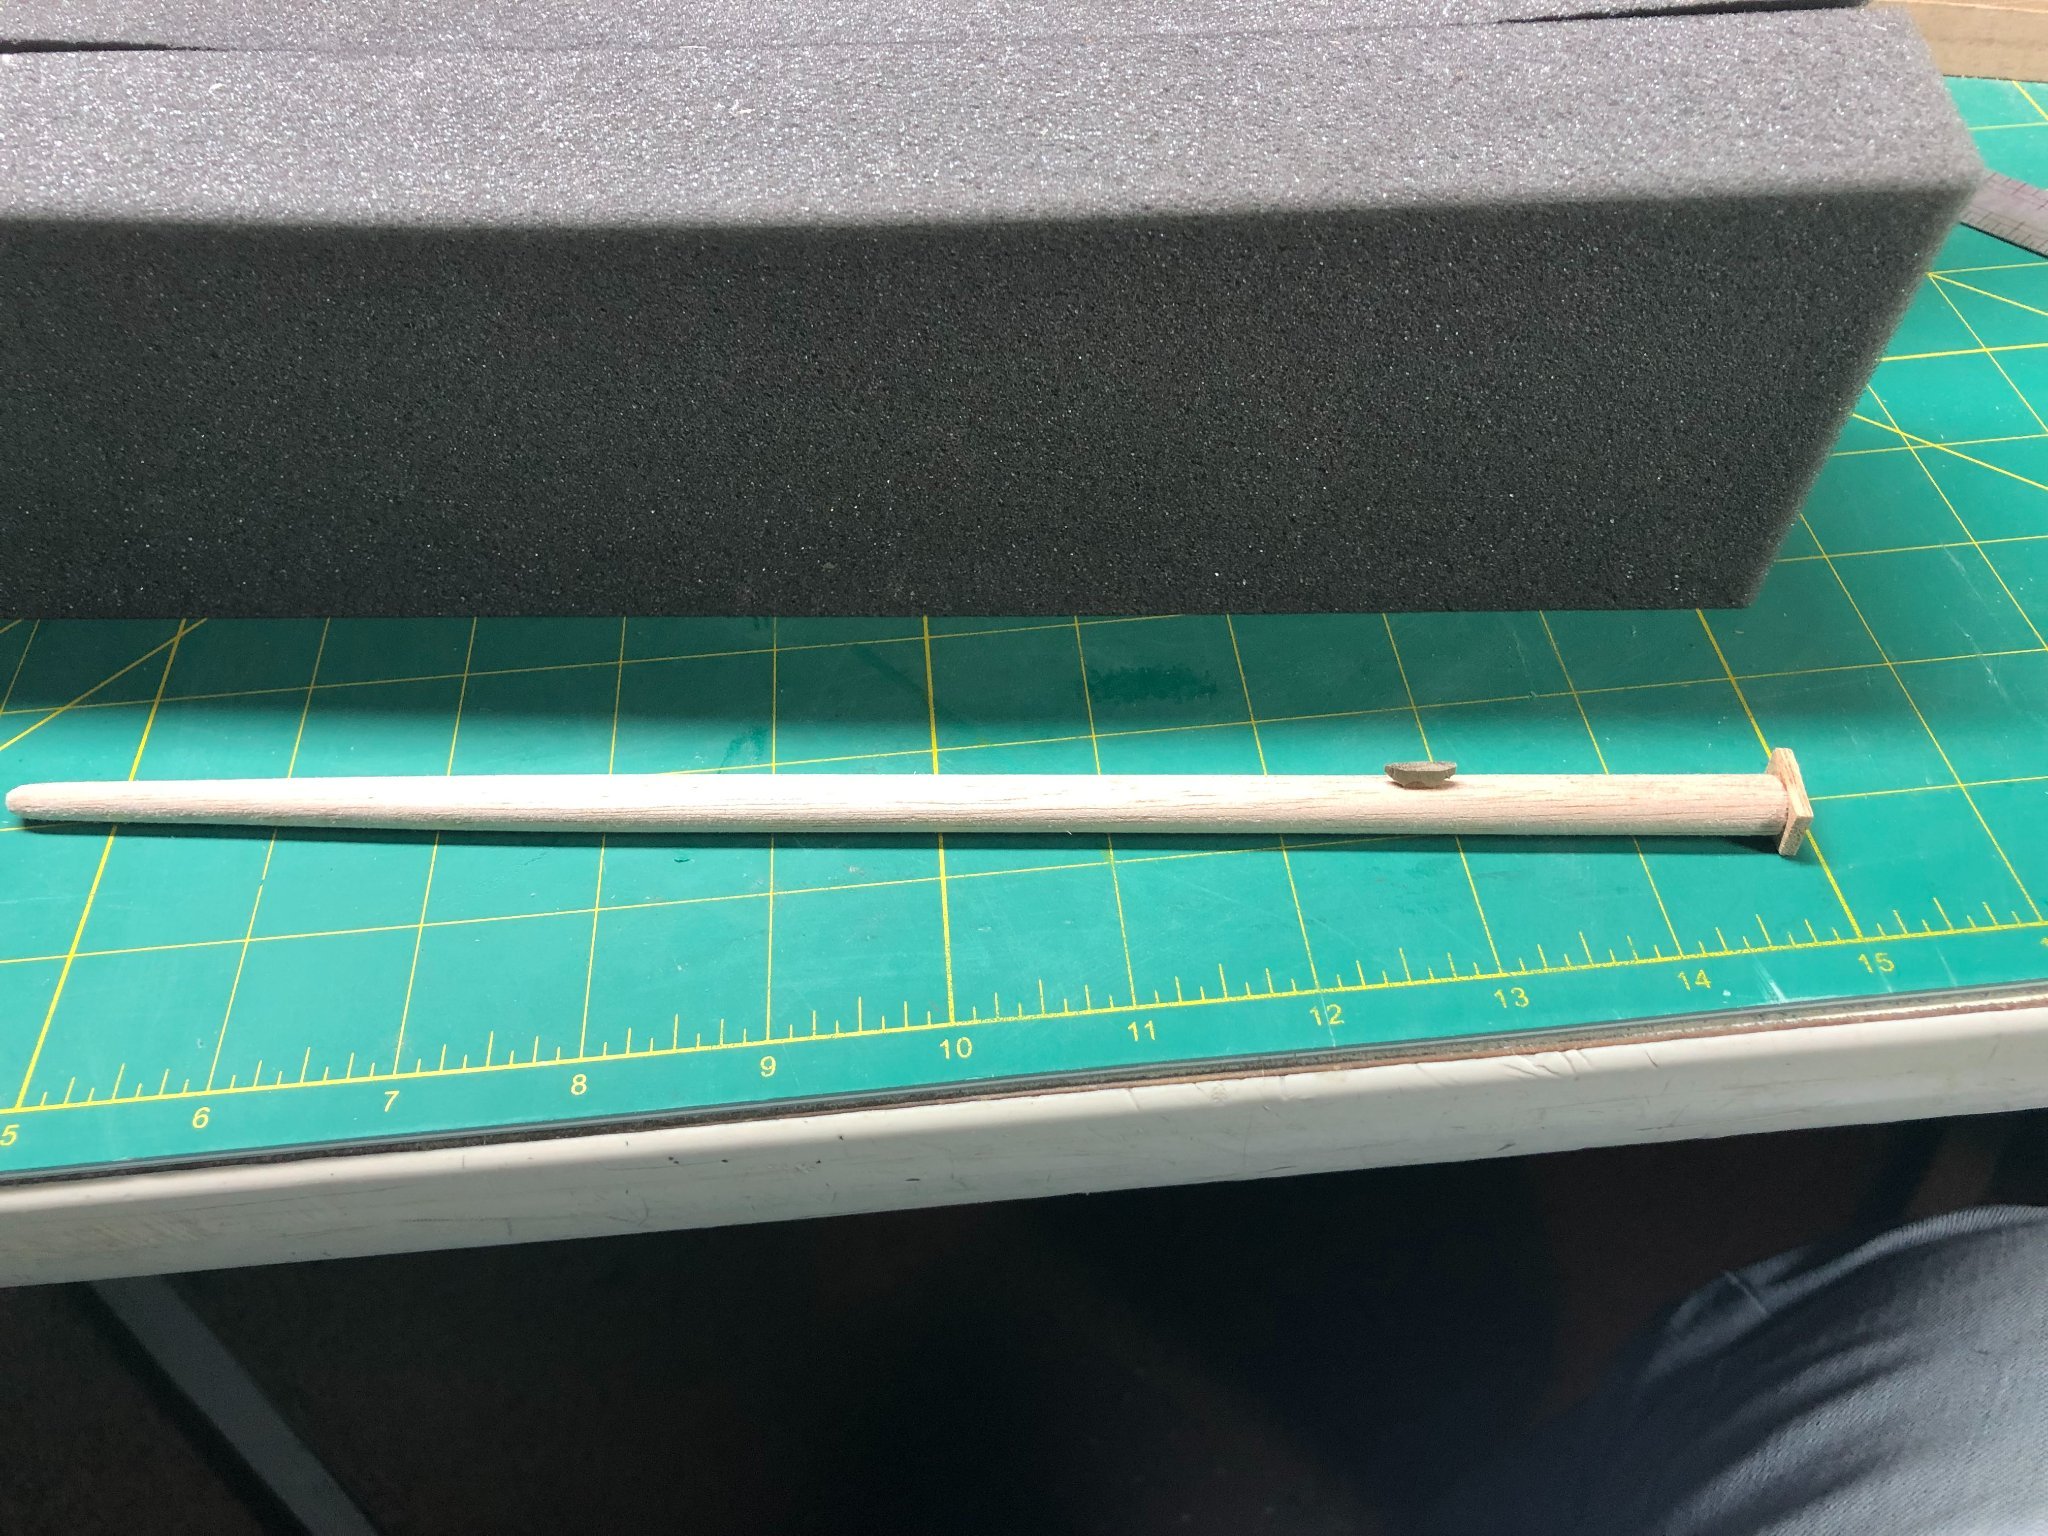
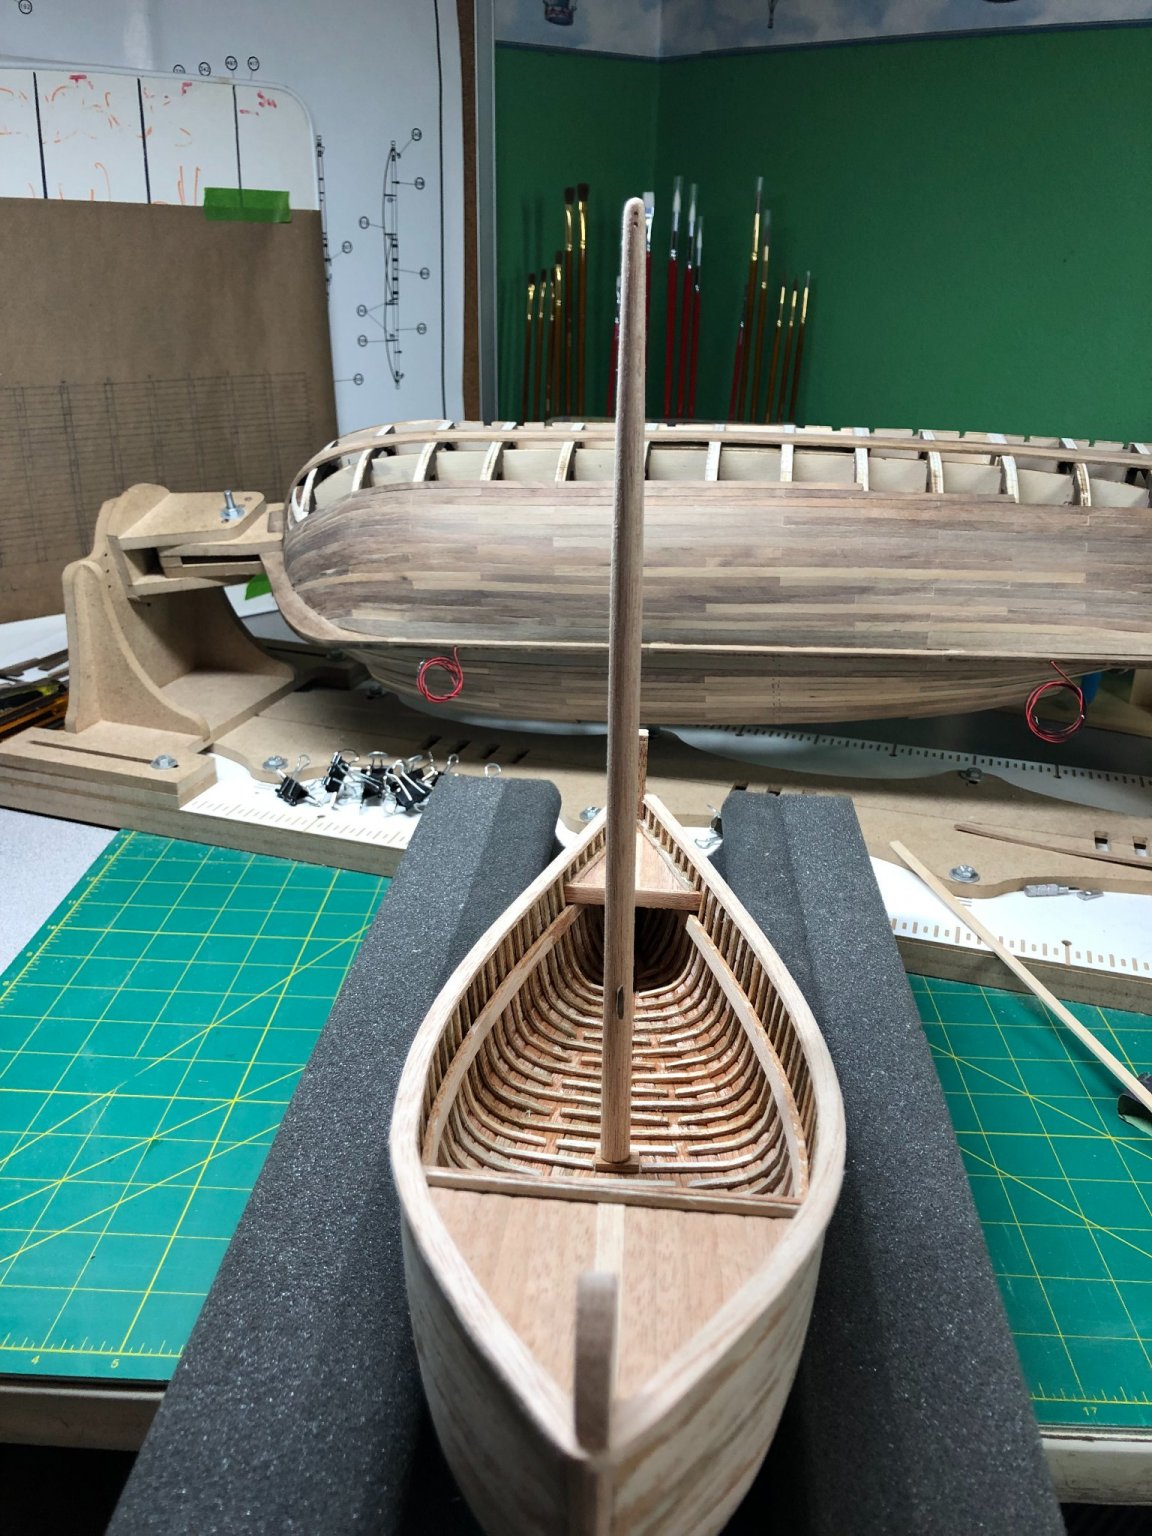
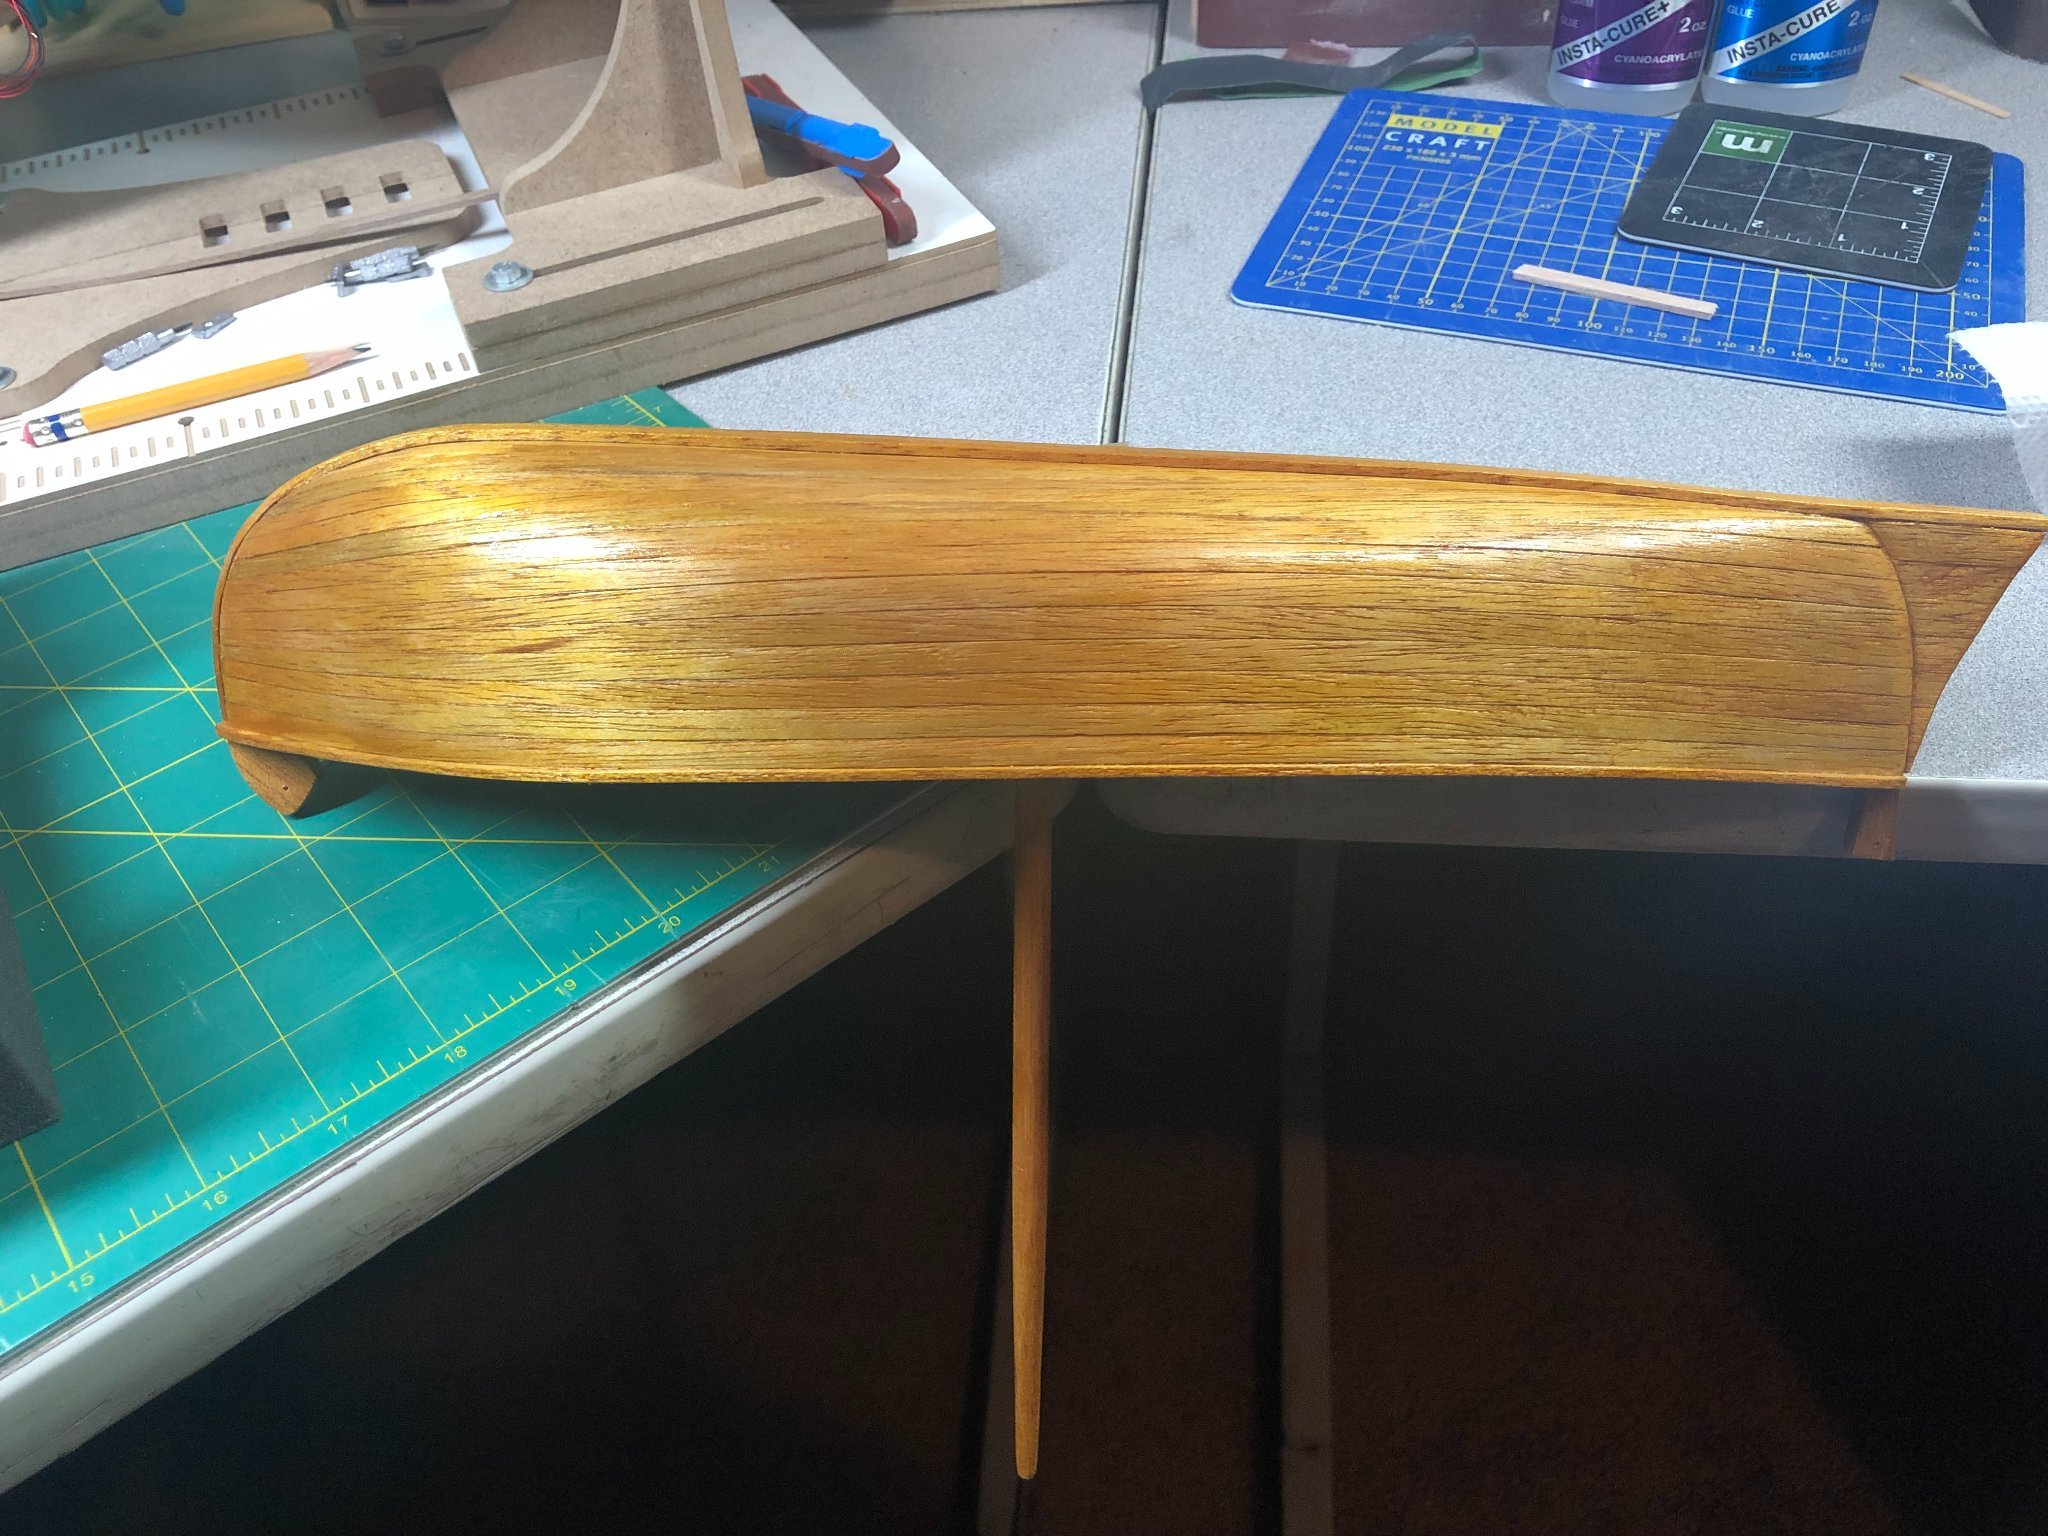
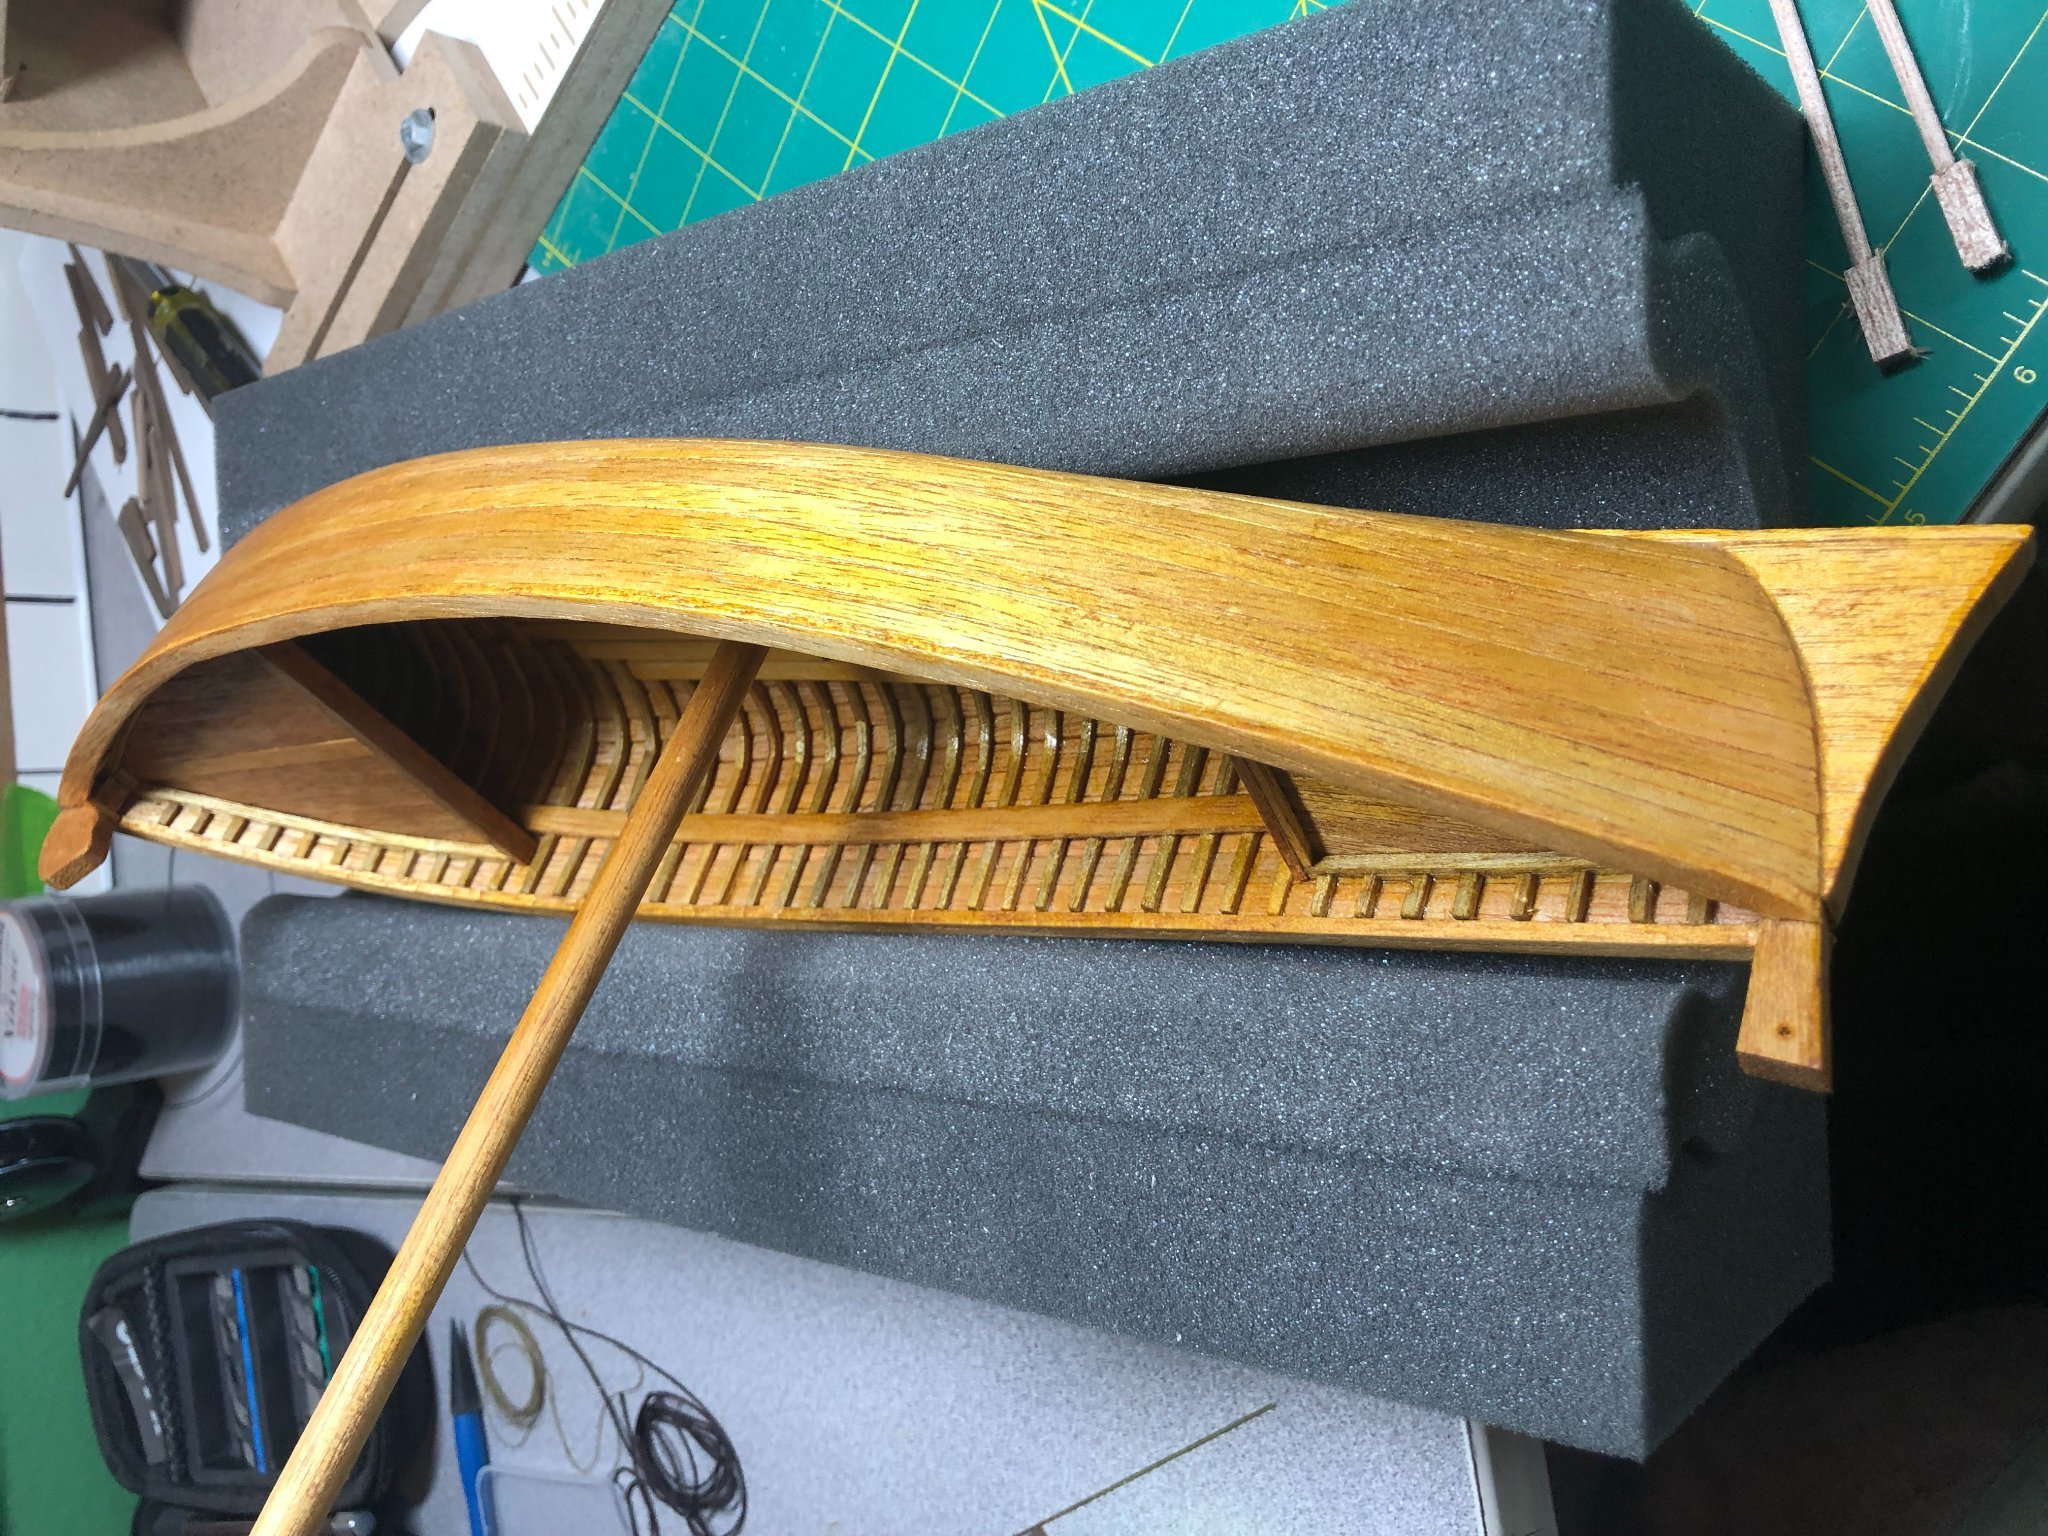
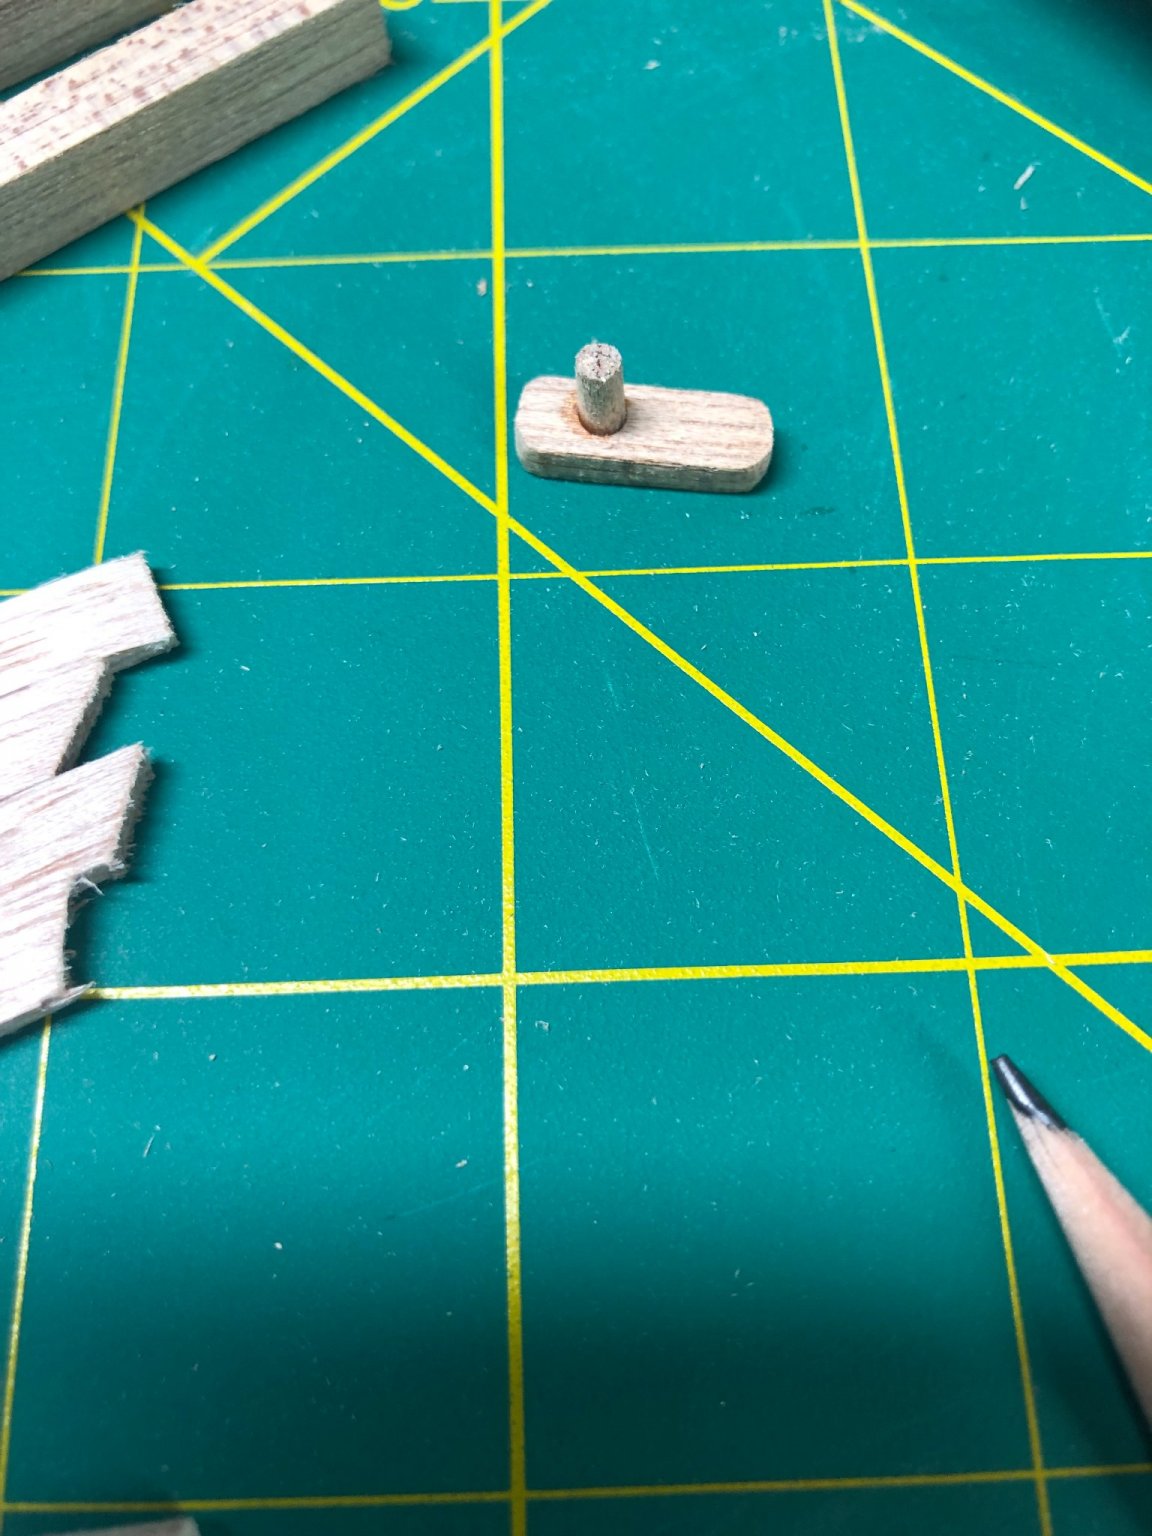
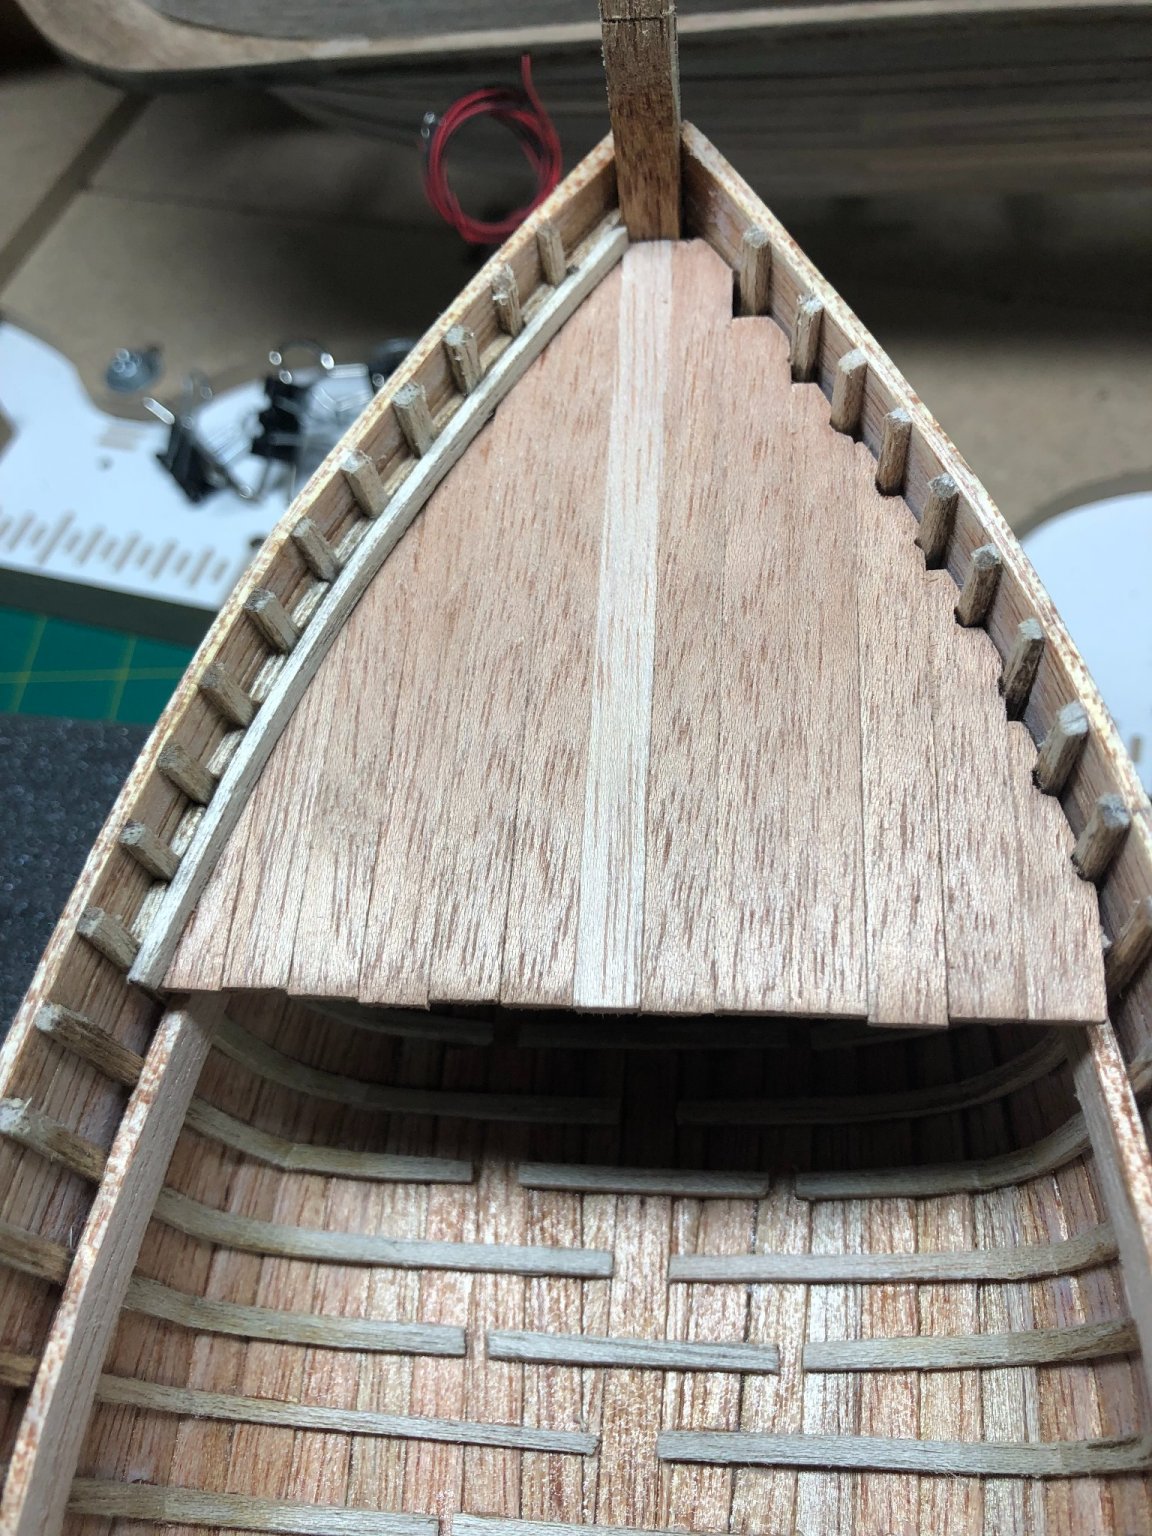
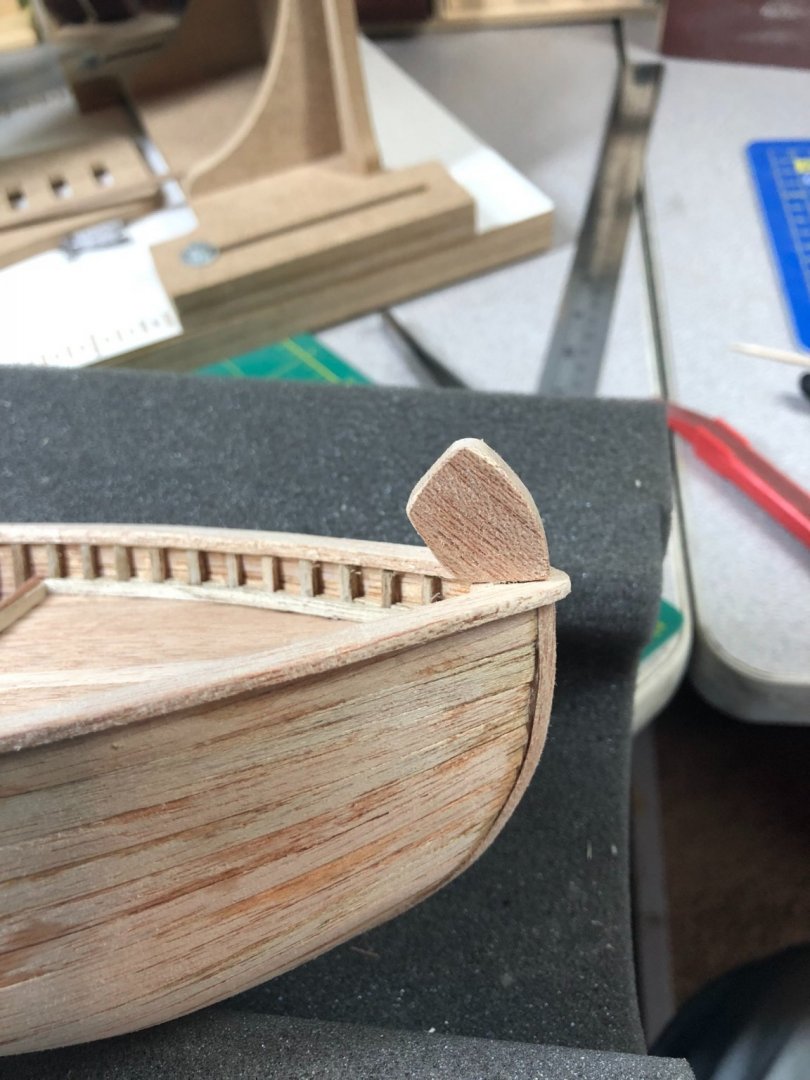
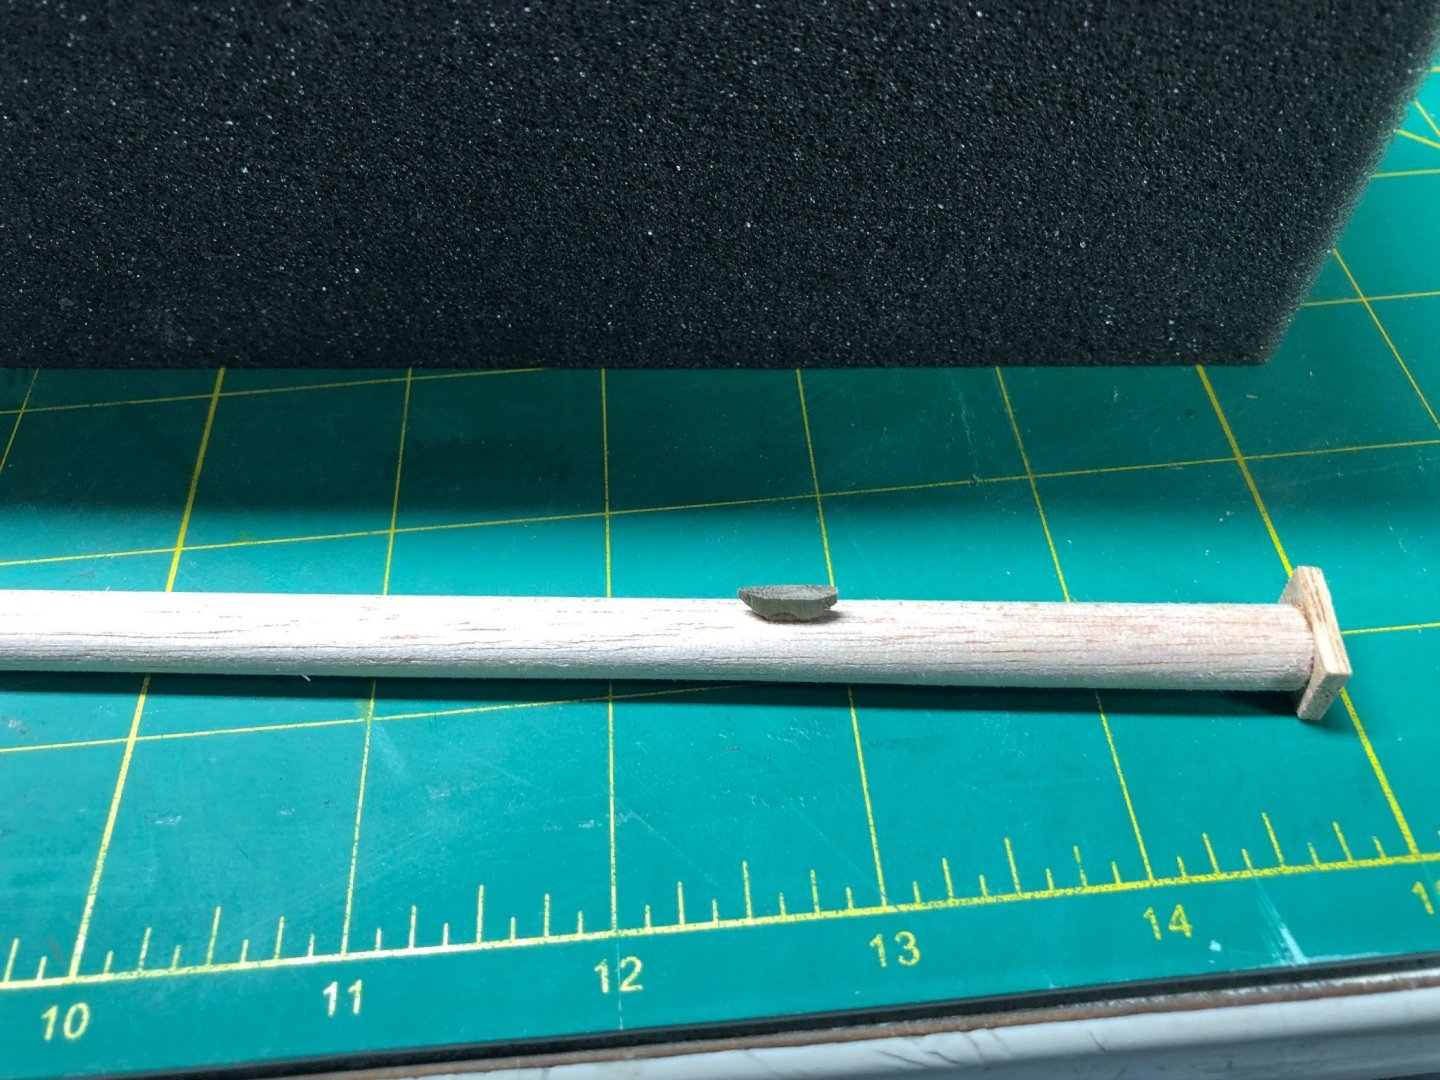
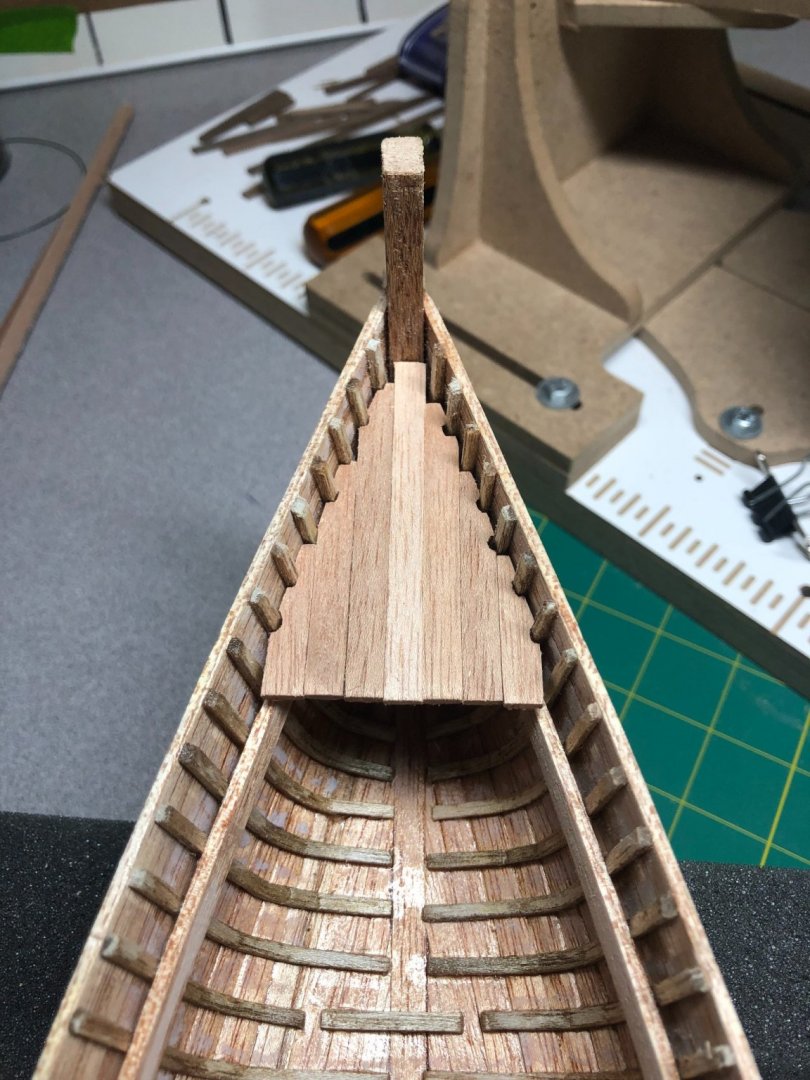
Getting down to the nitty-gritty! Stern cap installed: Mast work is pretty simple on this build. The mast was preformed and required nothing except sanding and a couple of holes drilled near the top to handle the rigging later on. I added a halyard cleat to the aft side of the mast. I made it out of walnut because every time I tried making it with the stock wood, it would split! After the fourth one... I switched wood! I also added the mast step and used a piece of brass rod to ensure a solid joint: And then glued it into place. On my build, I measured forward 7.5 inches from the stern and cut away some of the partial ribs to make room for the mast step and mast. Double-checked the alignment on both axis: Any minor adjustments can be done with the rigging. But actually it's pretty well aligned. Mast done! Looking at another build log awhile back, I saw some deck boards that I think would have been appropriate for the time period and the boat. I decided to use a similar pattern but maybe a bit more primitive than his work. If I can find it again, I'll give credit. Used some Basswood just for a bit of change for the deck: Time for a coating of the finish. I followed the advise of the kit designer and used Amber Shellac. I've never worked with it but found it to be really easy to use: I like the look and after some rubbing with steel wool, I like it even more! Now that the main structure is done, it's time to get busy on the bits and pieces: Pictured above are the oars, rudders, seats, oar locks and davit pieces. I started by sanding all the pieces and then went on to assembly the 4 oar locks: Some shaping with a round file and these will be ready for a little touch-up sanding and shellac and then be ready to install. Work continues tomorrow and through the weekend!


- 83 replies
-
- 8
-
-
-
-
- Sea of Galilee boat
- SE Miller
- (and 1 more)
-
Hi Chuck, Appreciate the references and am looking forward to watching your build log. I corresponded with Scott via email a few times and although he didn't come right out and acknowledge it, I believe the wood to be Spanish Cedar. Overall, I've found it fairly easy to work. But I am super curious to see the AYC. I have never worked with it and am hoping to get some insight for my next build (after the Bounty... still in the wings and waiting!) Good luck and have fun! It's a really fun build!
-
Thanks Moab! Appreciate you stopping in.
-
Thanks Steven. Appreciate you checking in!
-
Thanks Chuck! I’m pleased with look of the model. I’m sure yours will be beautiful! I just finished the cap rail… done for the night:
- 83 replies
-
- 3
-
-
- Sea of Galilee boat
- SE Miller
- (and 1 more)
-
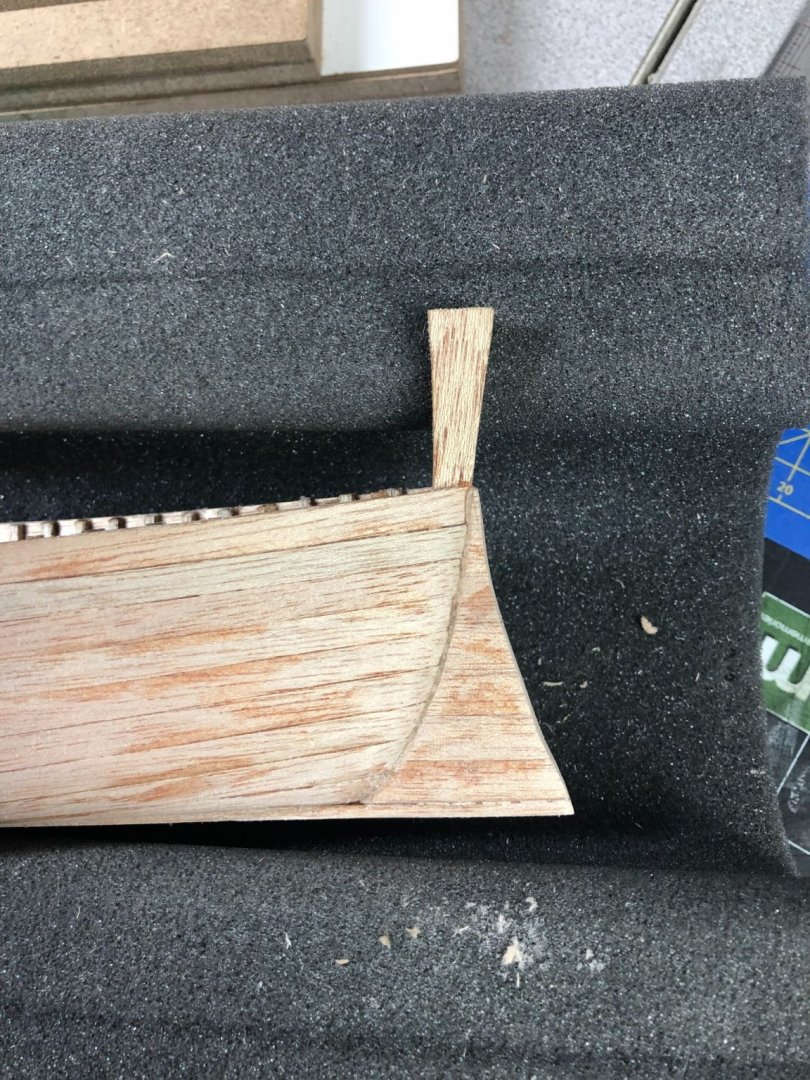
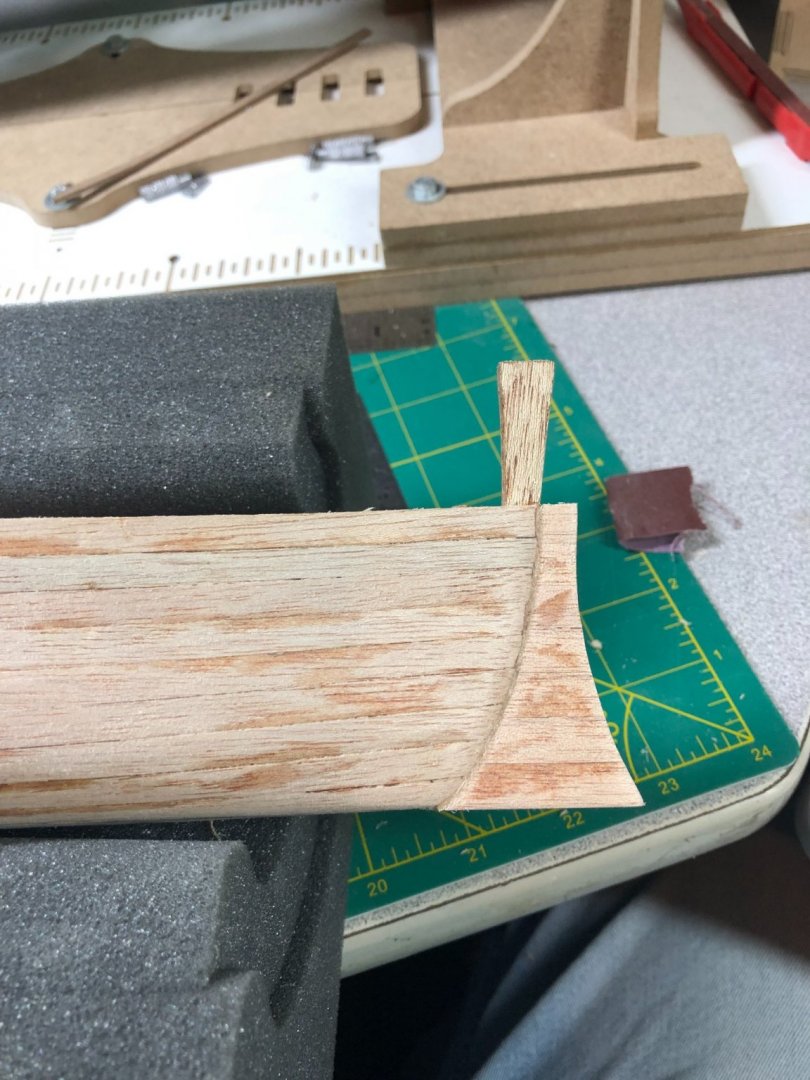
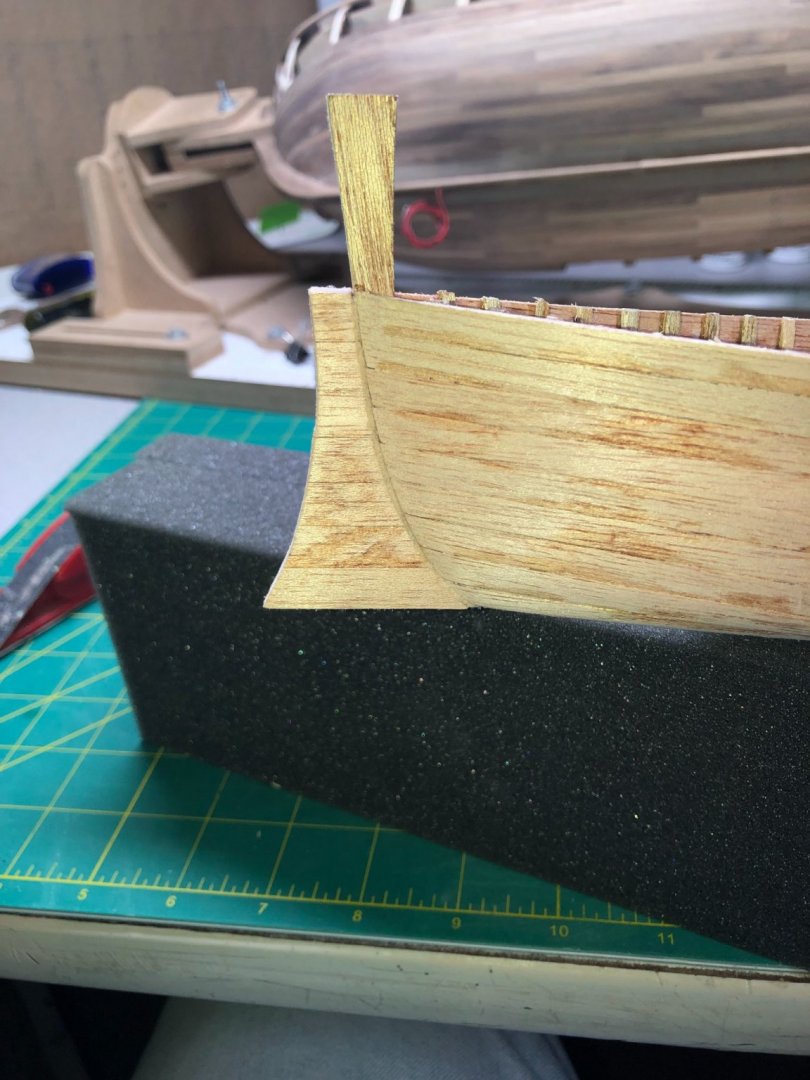
Fore deck work was next on the agenda... built similar to the aft deck: And then trimmed up just like the aft deck: Decks are done! I really didn't like the look of the cutwater... a little reshaping and it looks much better: The false keel piece had to be soaked and bent several times until I got the shape right without breaking it! Once glued into place. I beveled it at the bow to match up with the planks: And the false keel is glued and sanded: Cap rails present another challenge. One of the two that came in the kit was split and unusable and the other was way over bent. So, I soaked a spare plank and the remaining cap rail. The rail that started out as a straight plank was soaked for about an hour in hot water, wrapped in paper towels and micowaved for about 30 seconds. It was fairly easy to bend from there: The other rail had to be straighten... again I soaked for about an hour and then slowly straightened out to the proper shape. I tack glued the stern part in place and now am letting it dry before gluing it down: Once in place, a little sanding and trimming and the cap rails will be done! I think I'll be using Amber Shellac for the finish... some light sanding on the hull and possibly some steel wool to finish off the sanding and then I'll finish it, inside and out. I do plan to add some floor decking and the mast step... need to determine if I should do those item first or finish it first... Comments?? And then on to some decking and the mast!


- 83 replies
-
- 3
-
-
- Sea of Galilee boat
- SE Miller
- (and 1 more)
-
Yeah… I wasn’t liking the look of it either and I have altered it: Looks better now! More progress today… I’ll post another log later or tomorrow.

- 83 replies
-
- 2
-
-
- Sea of Galilee boat
- SE Miller
- (and 1 more)
-
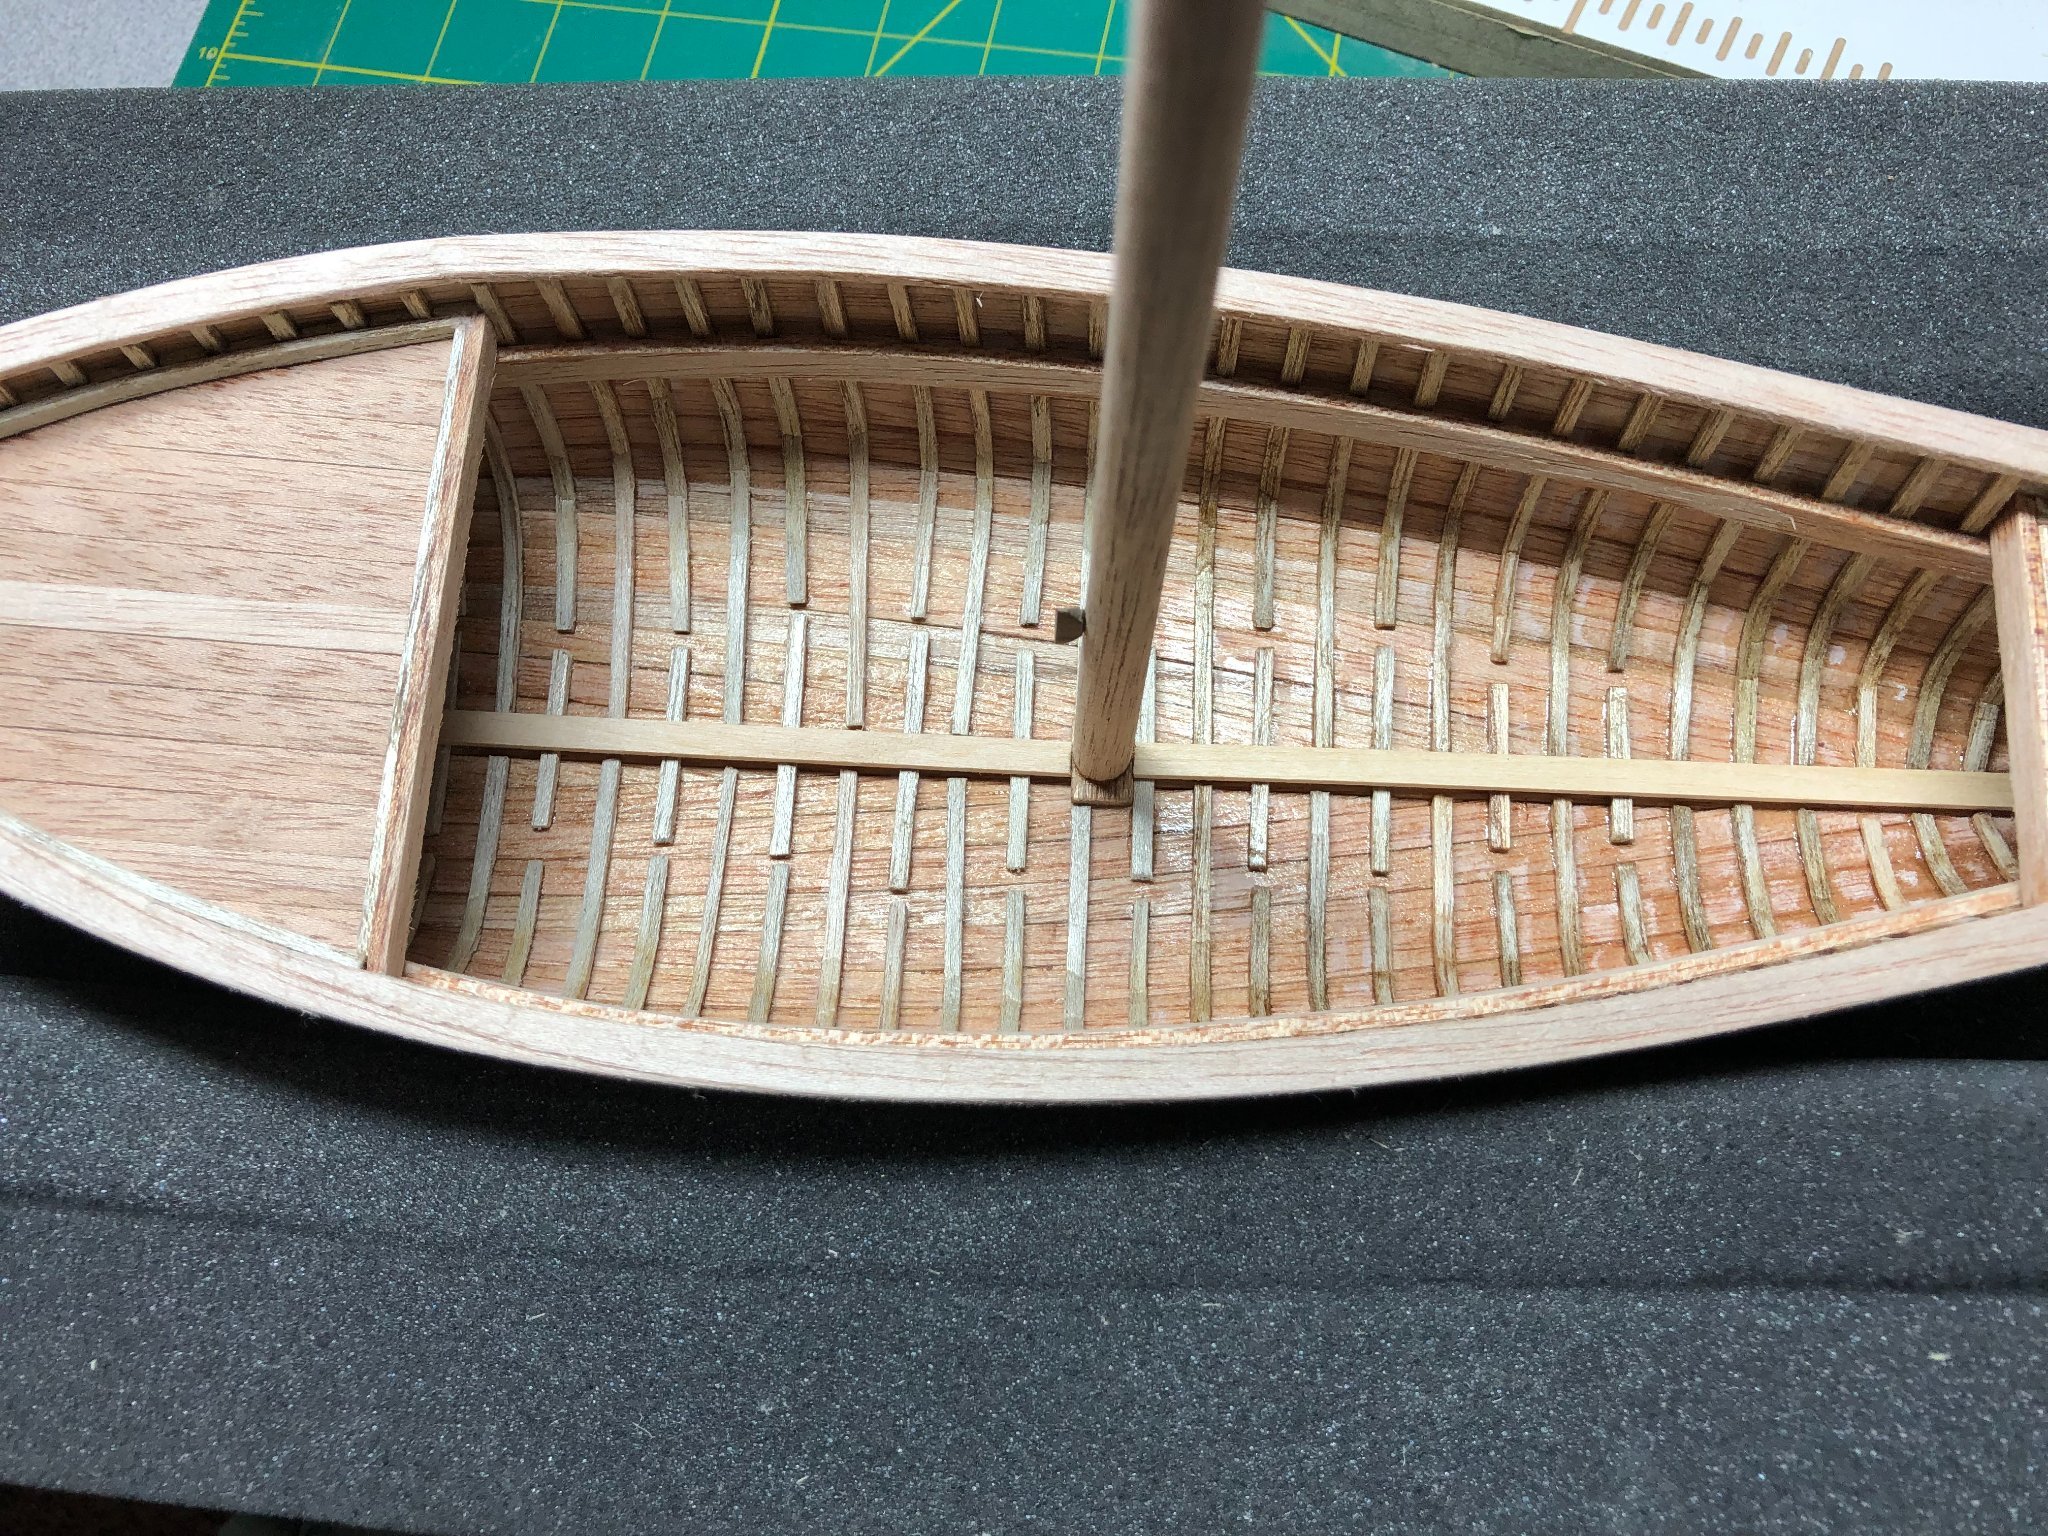
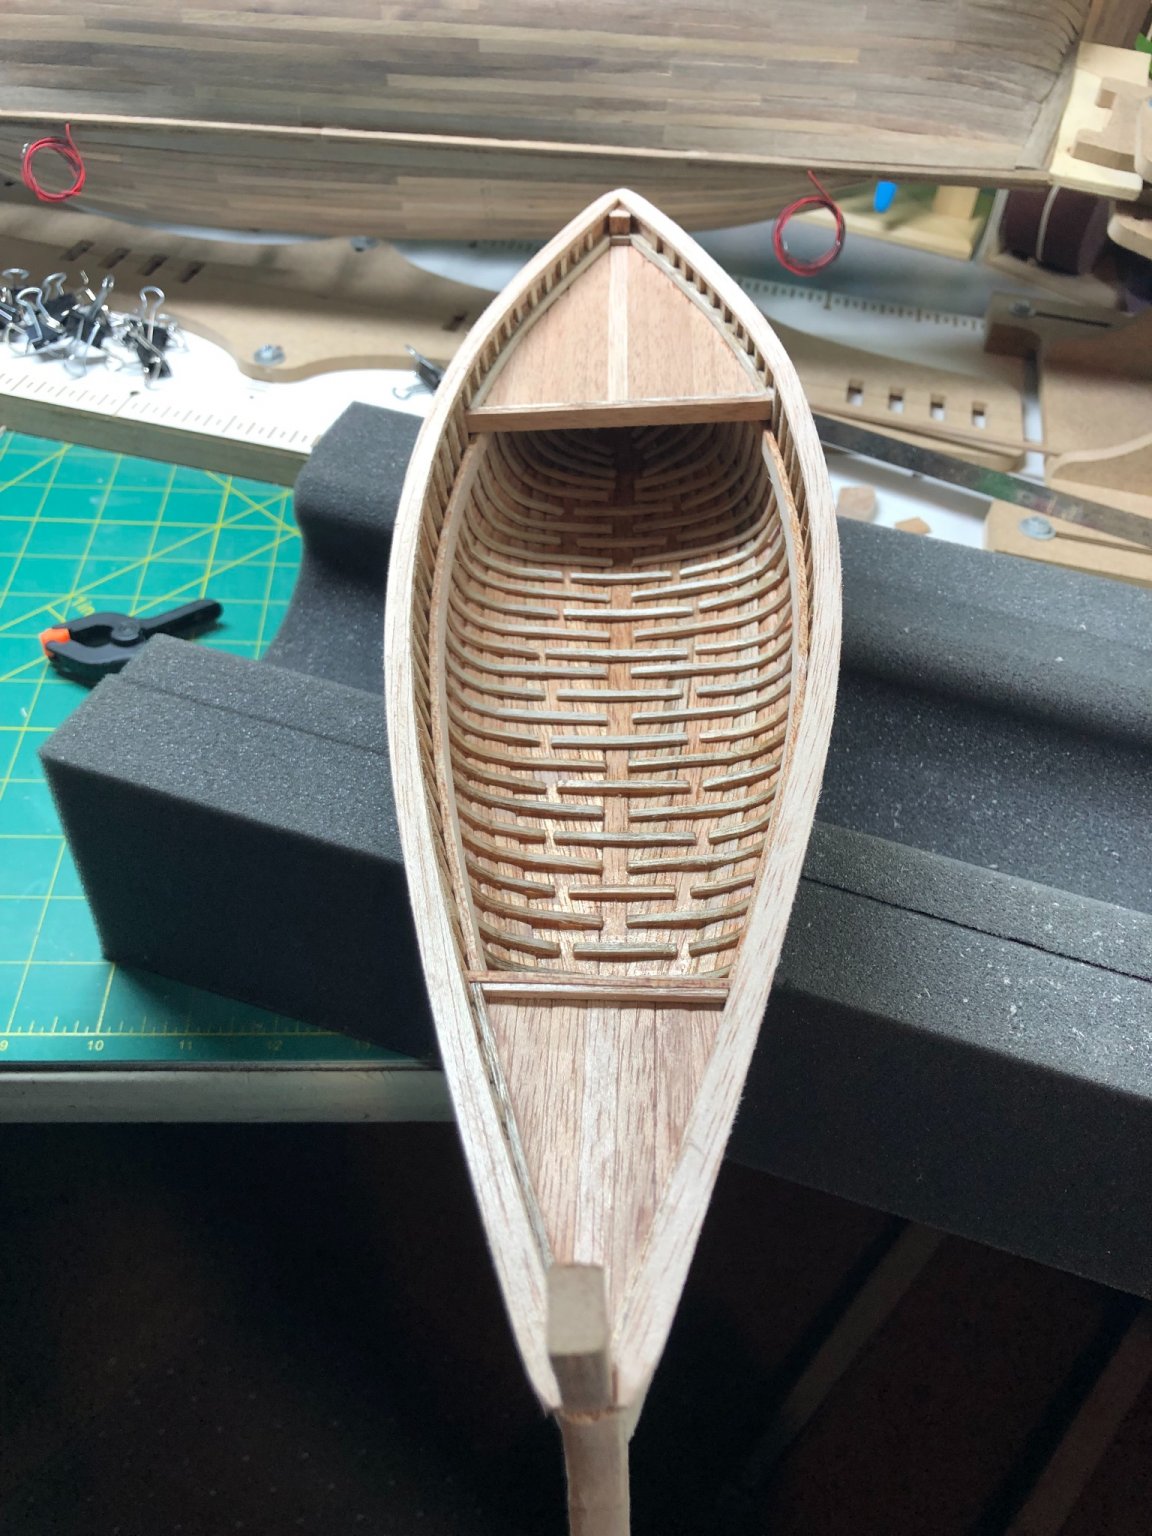
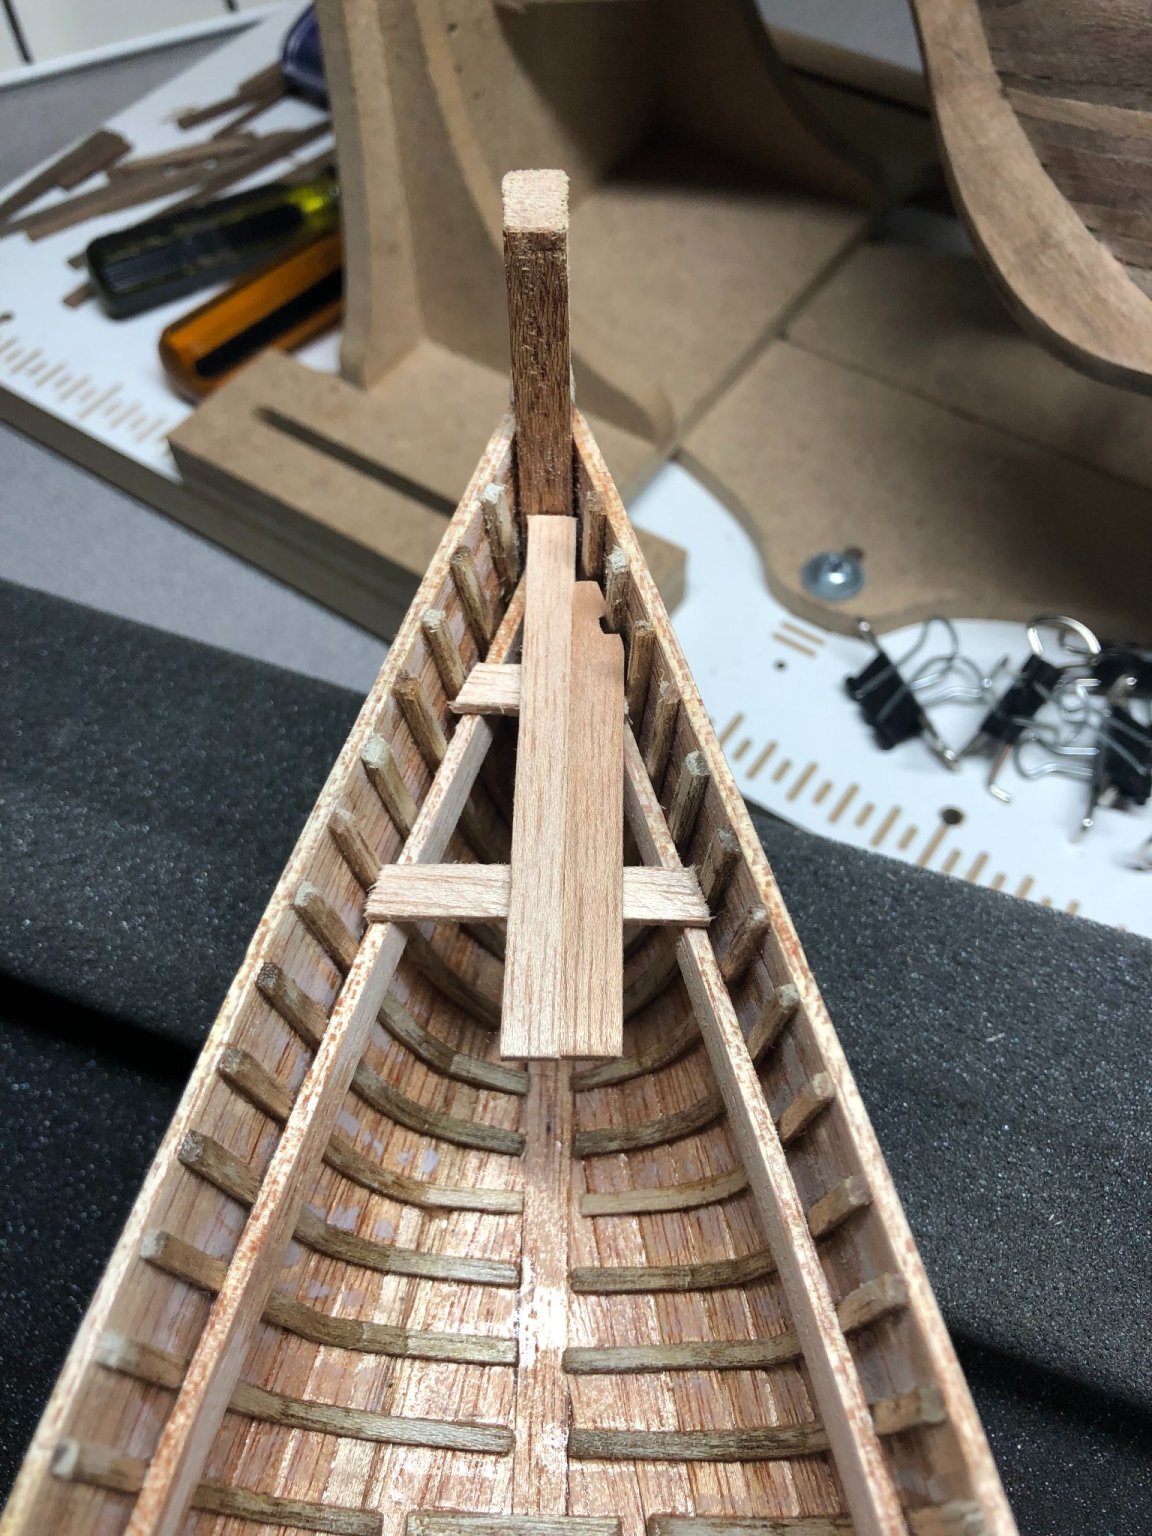
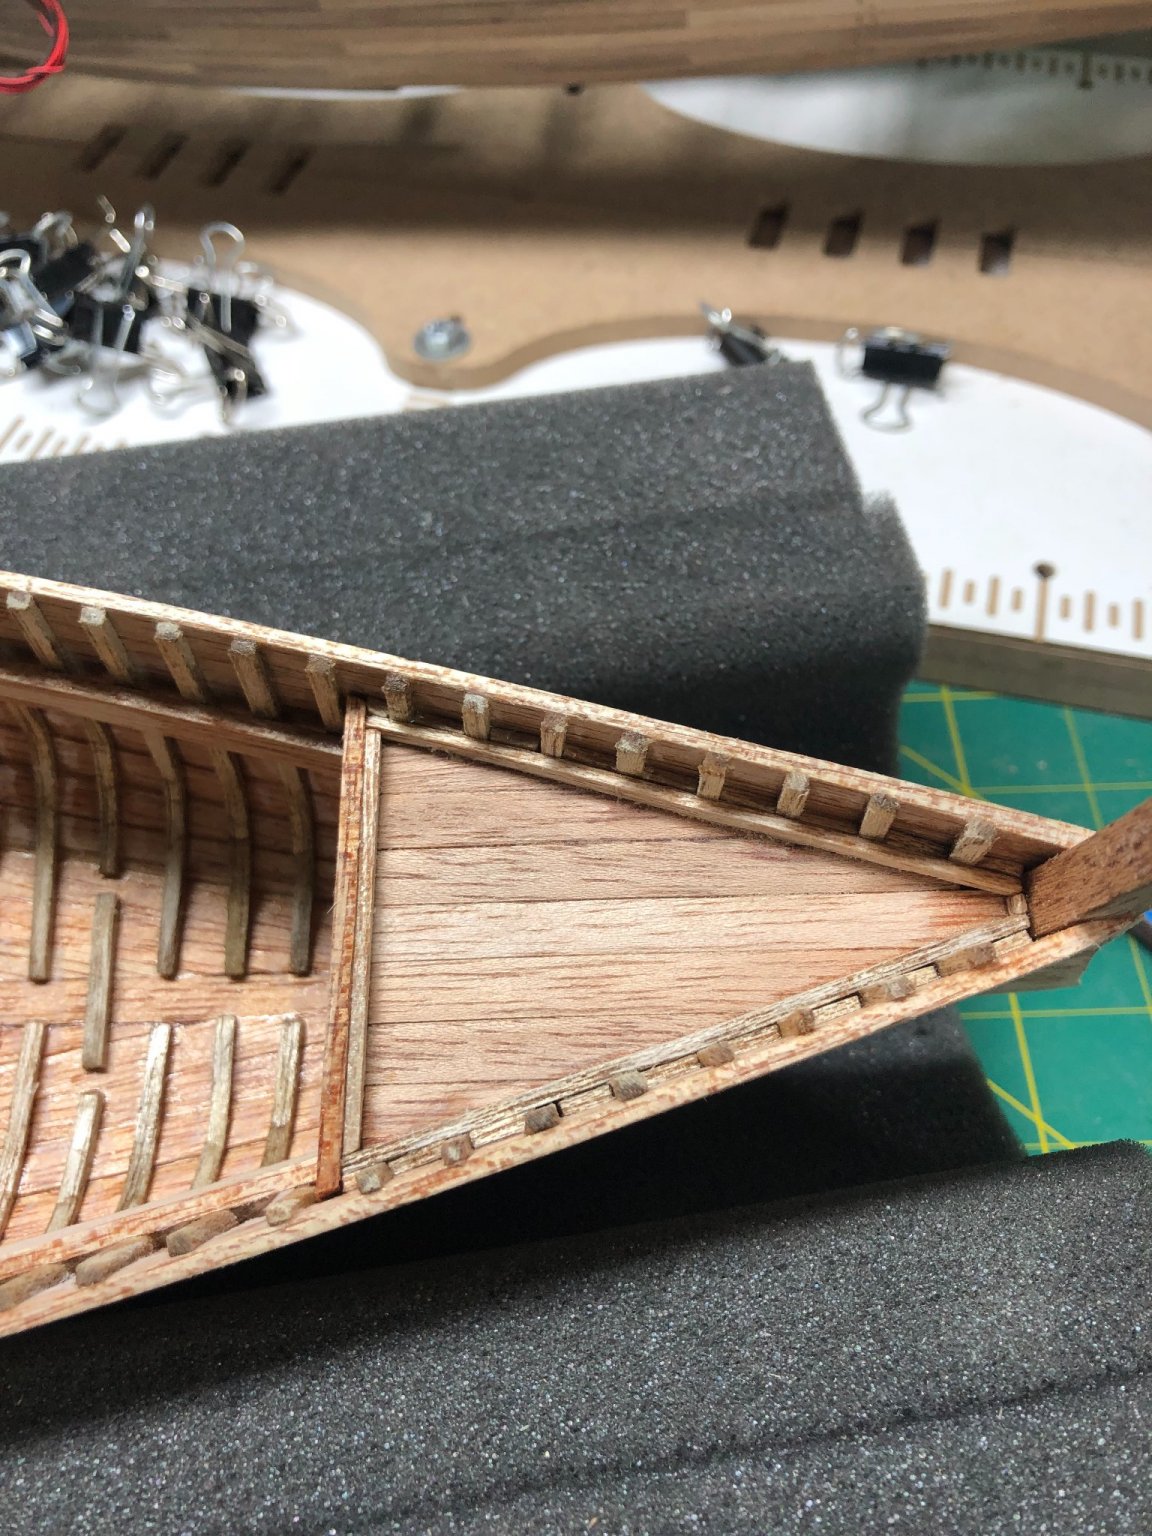
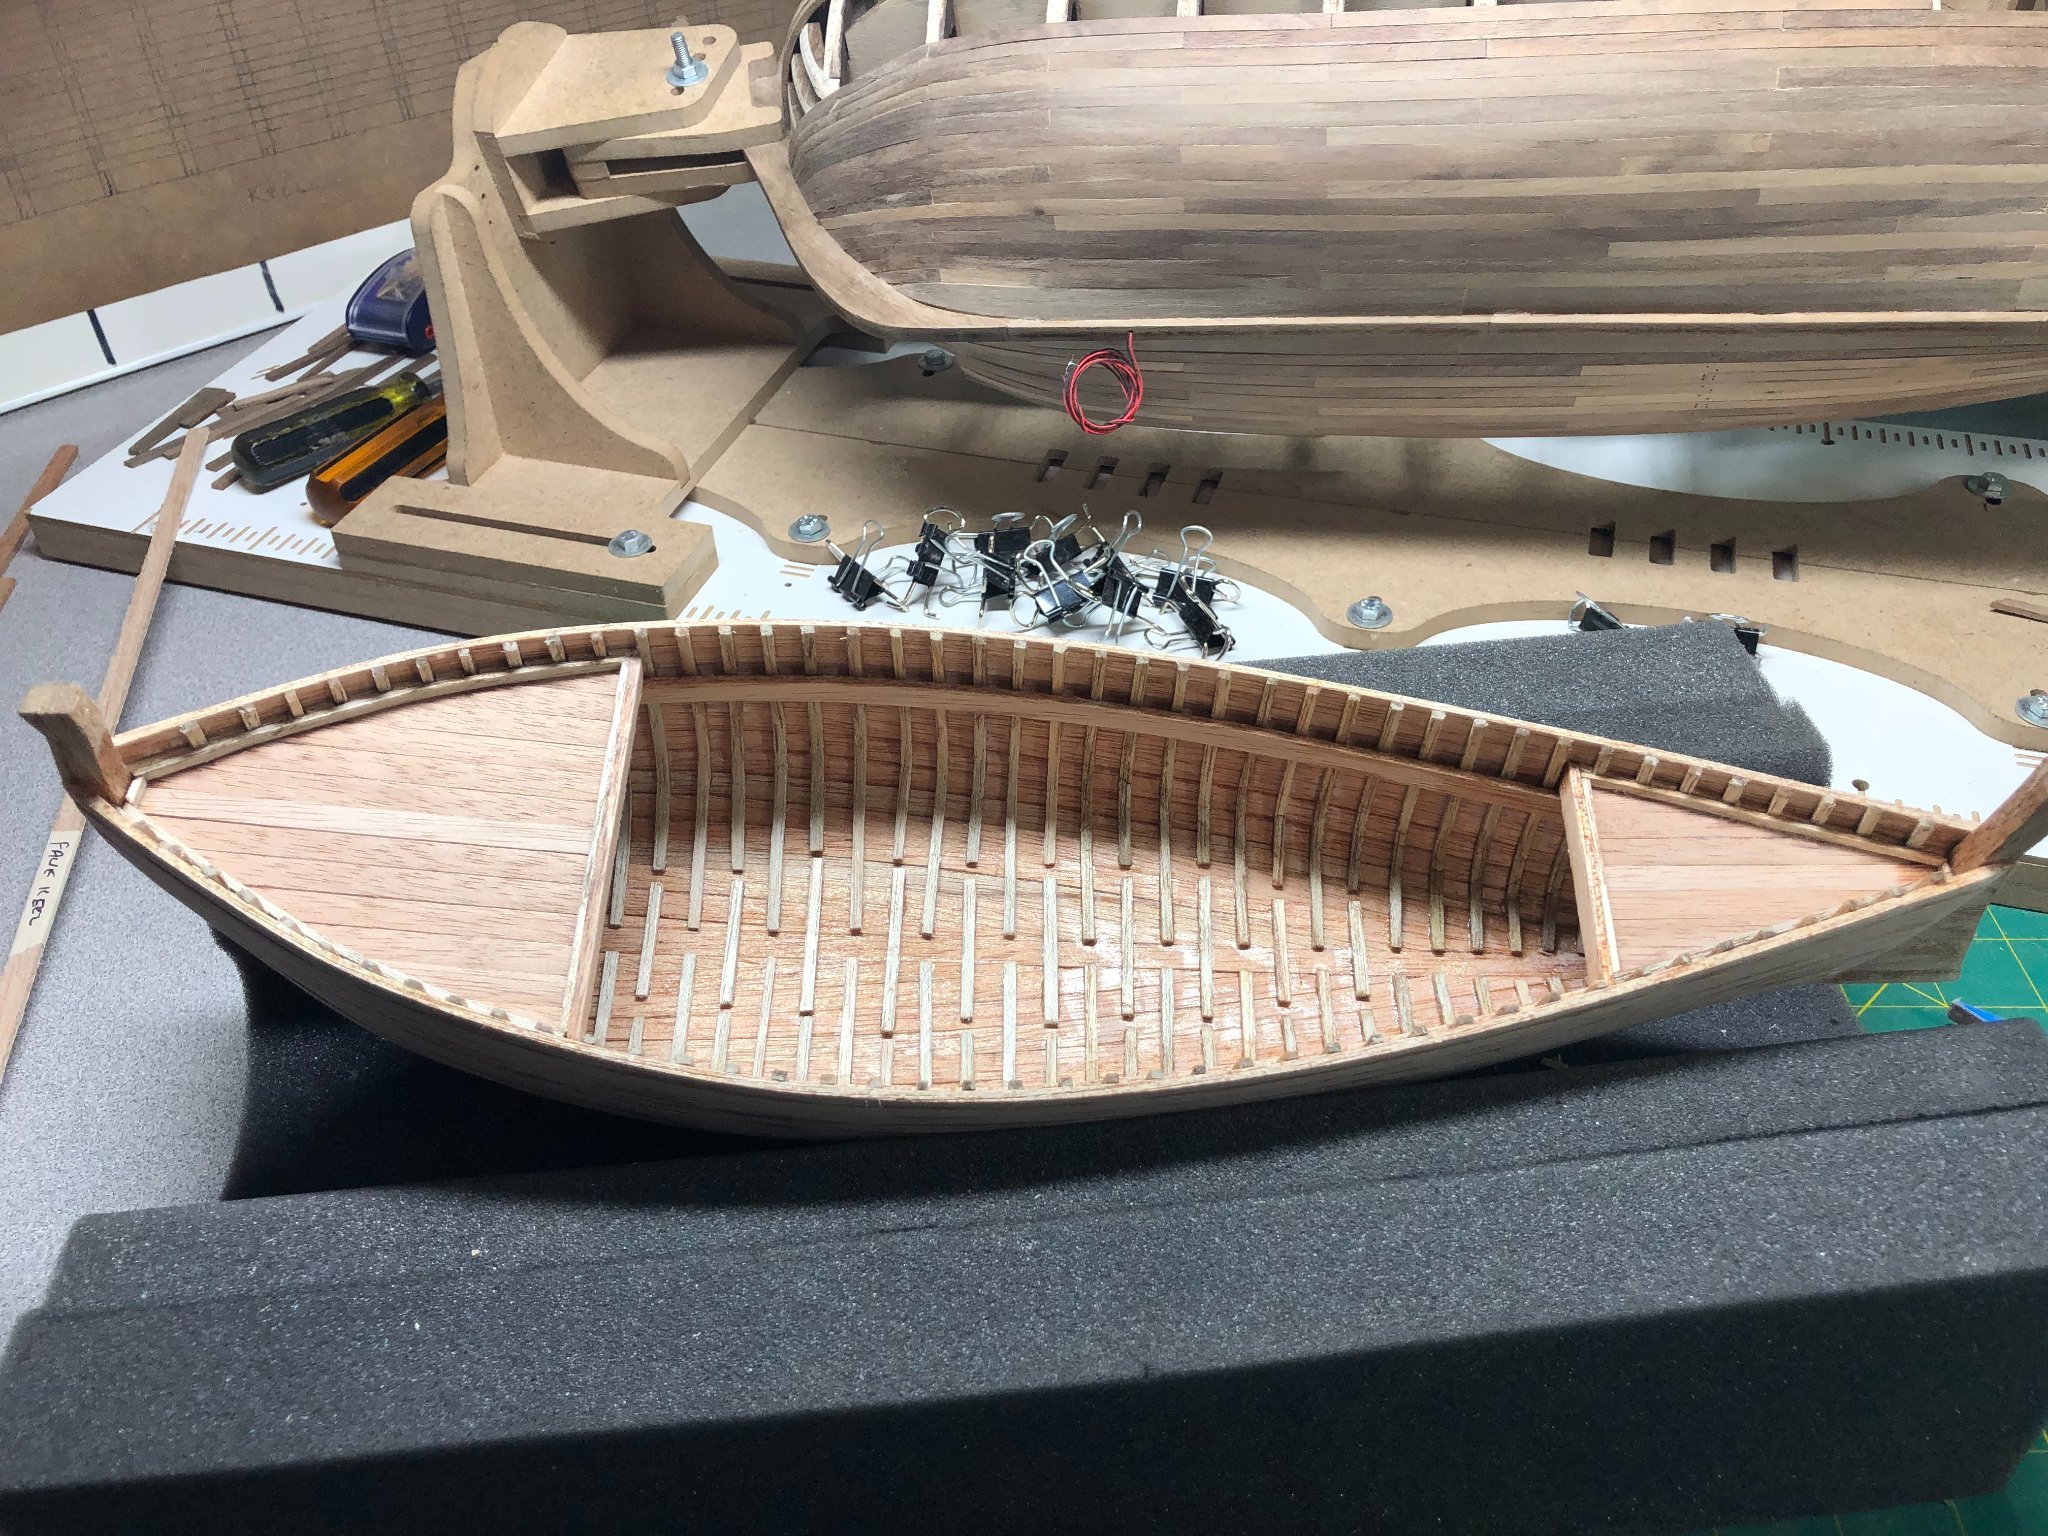
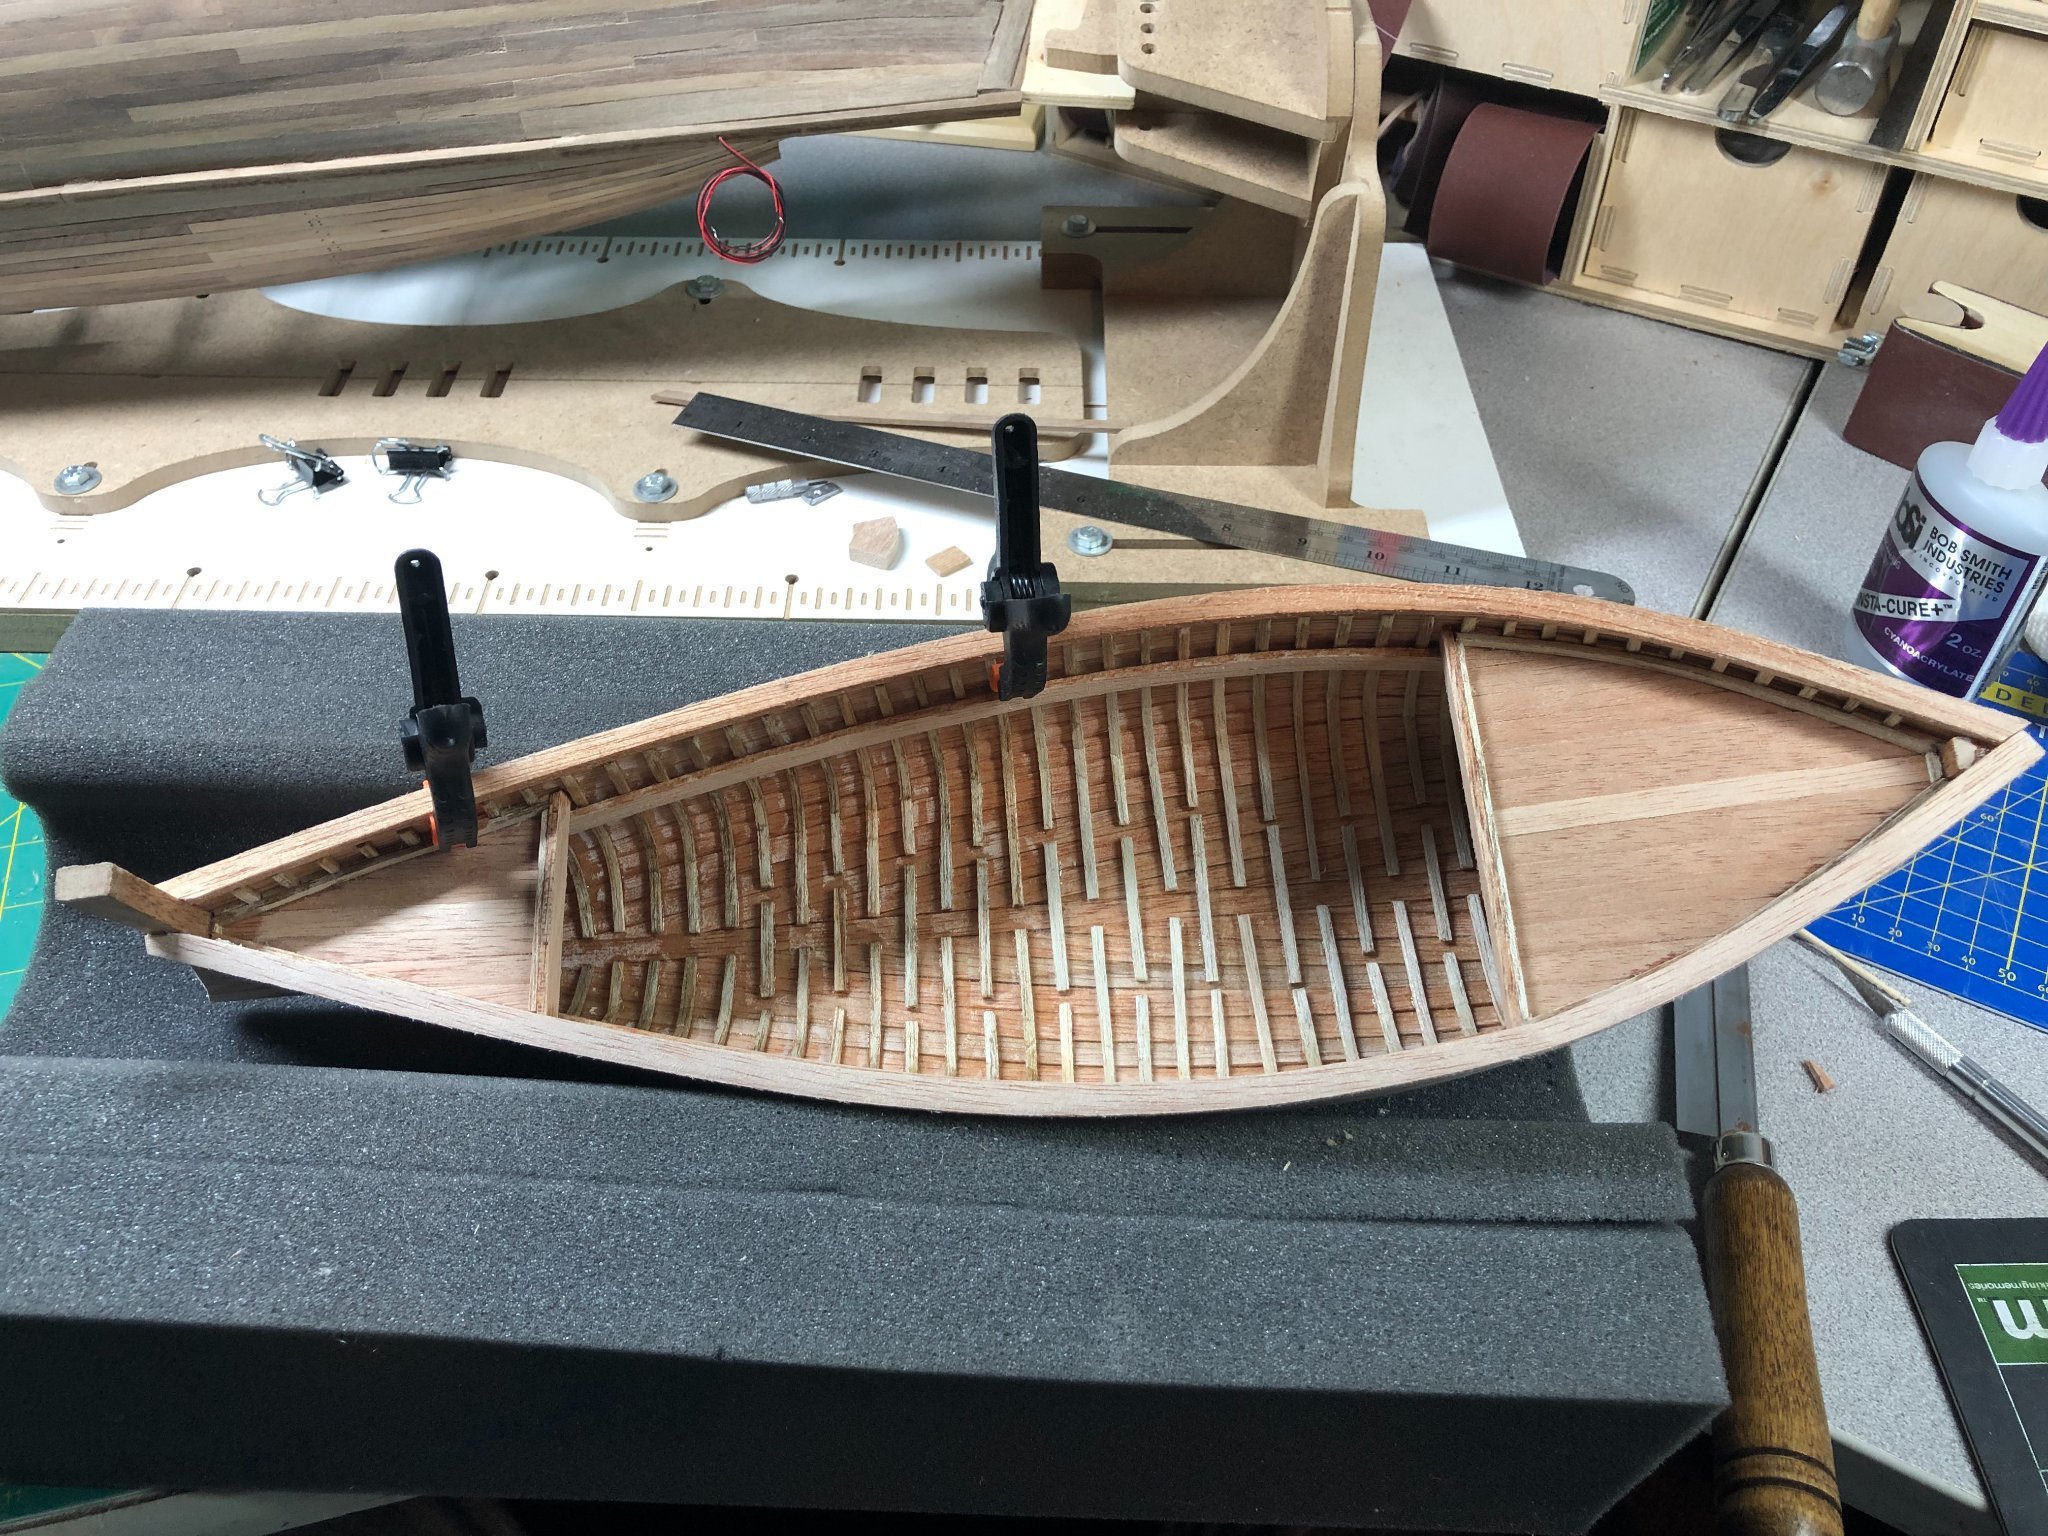
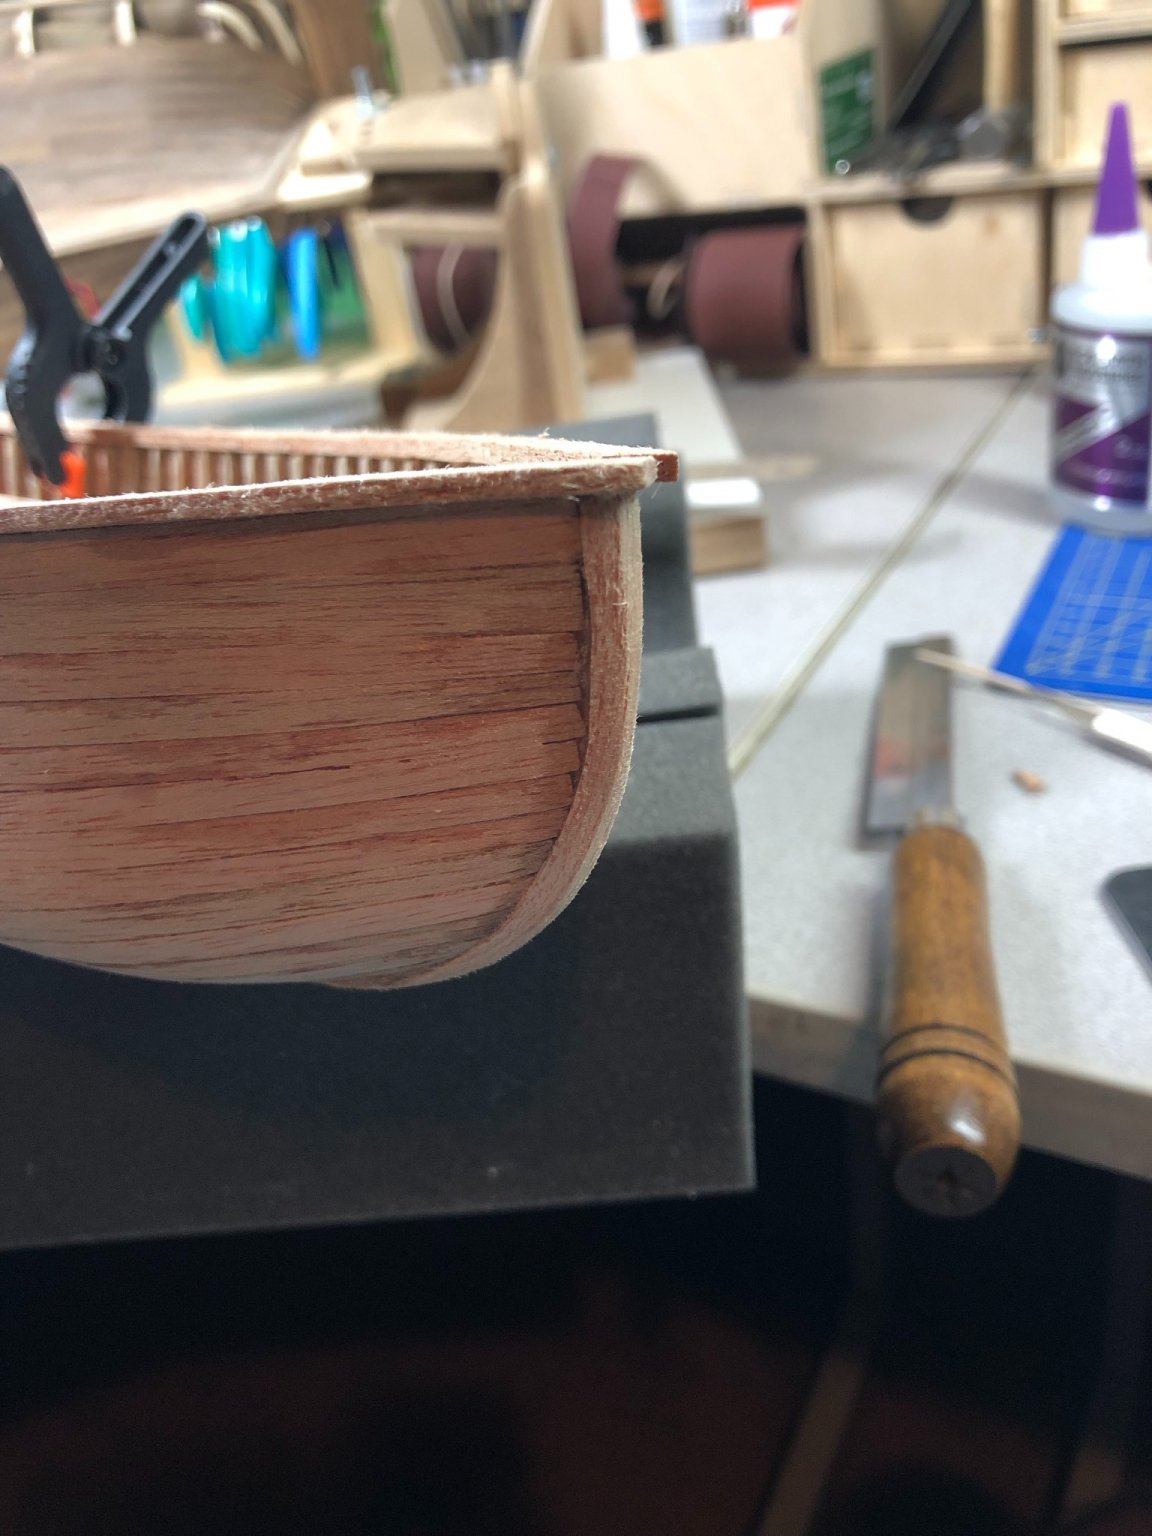
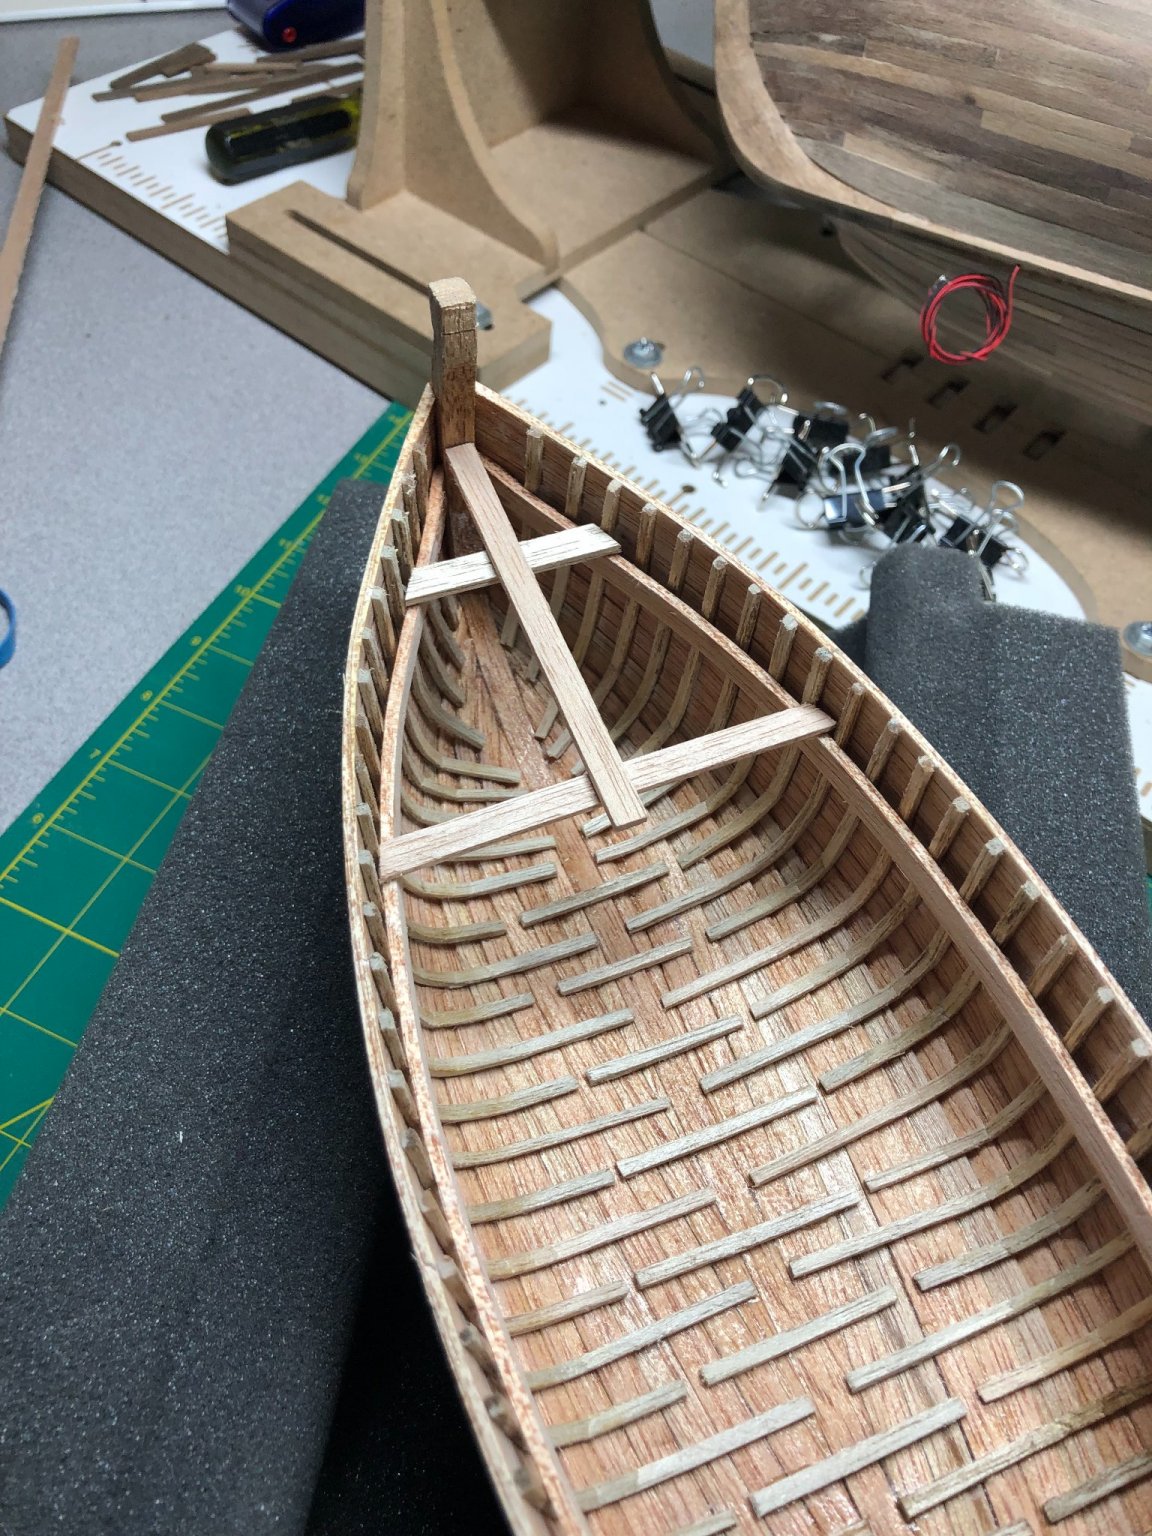
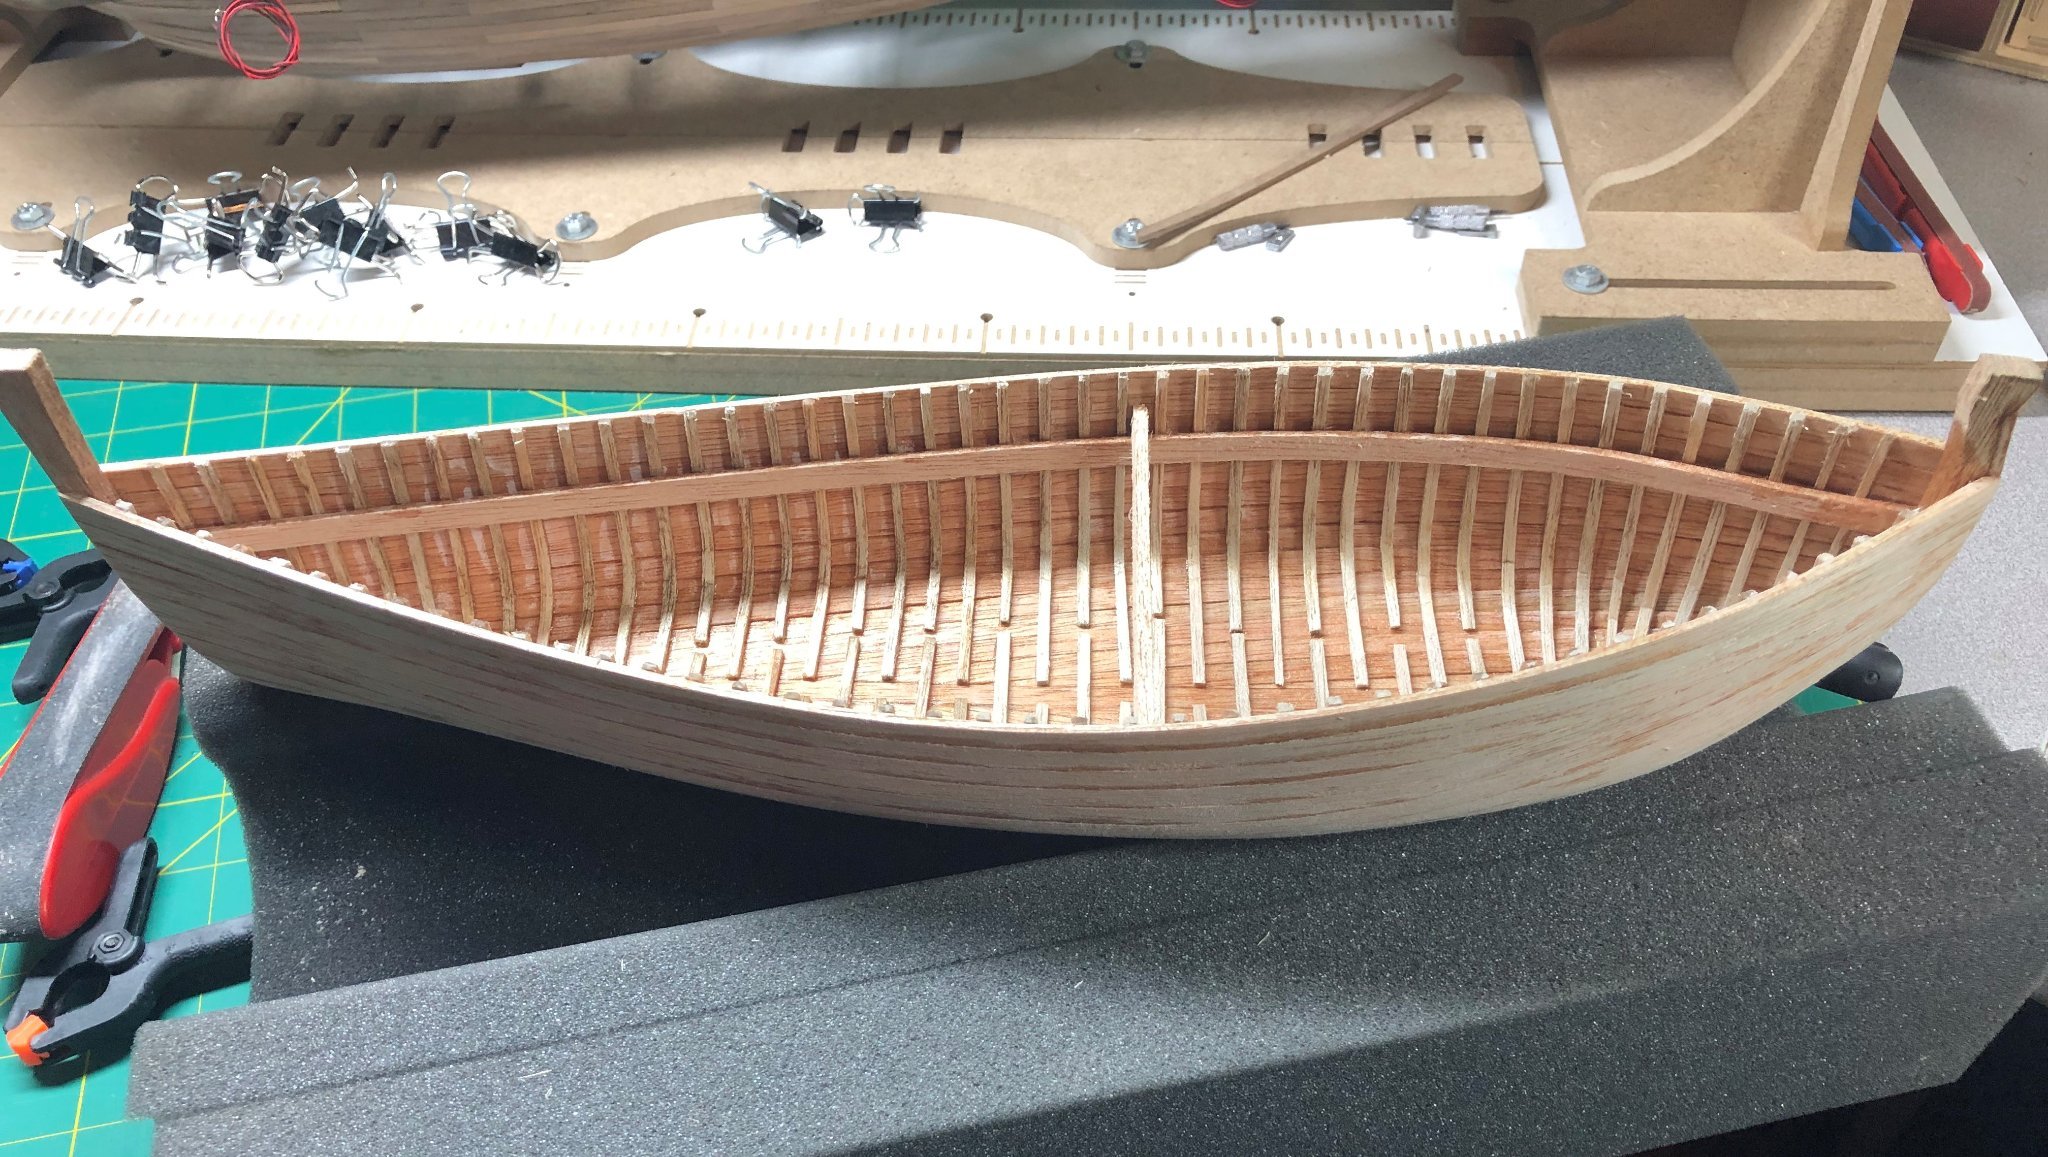
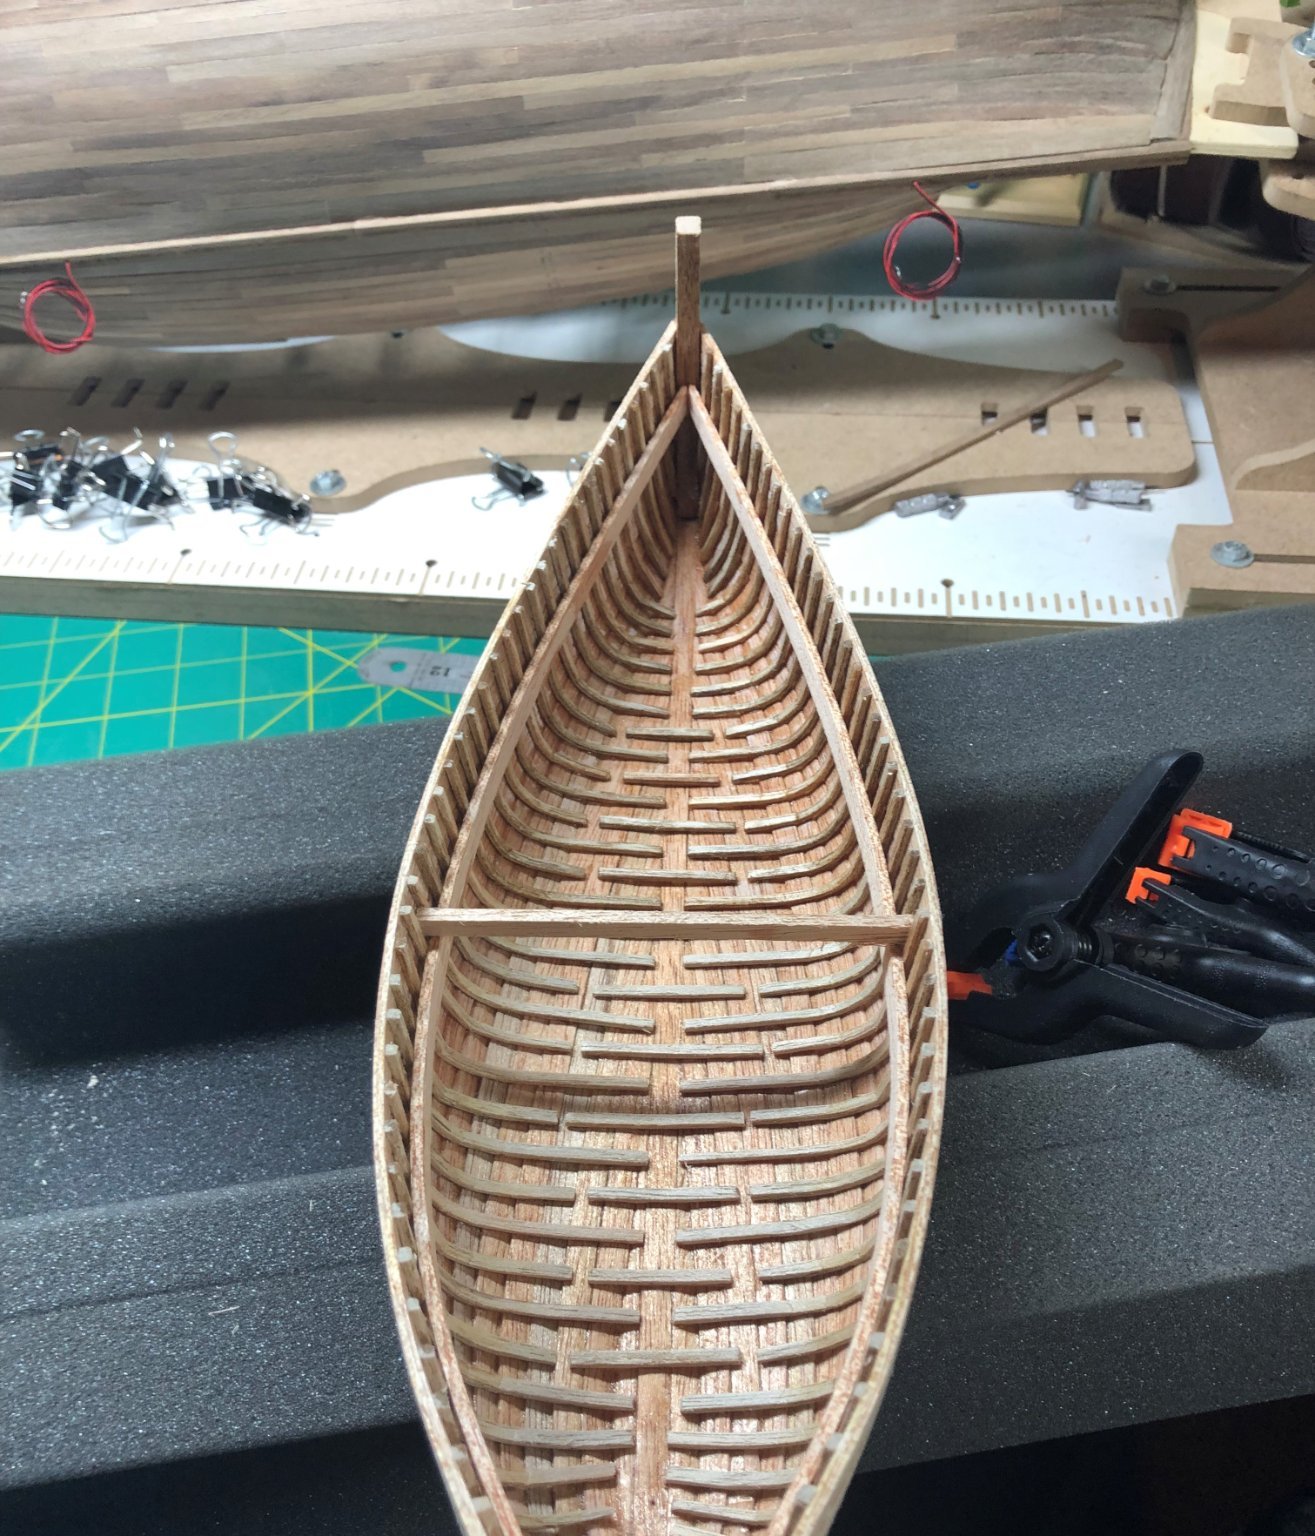
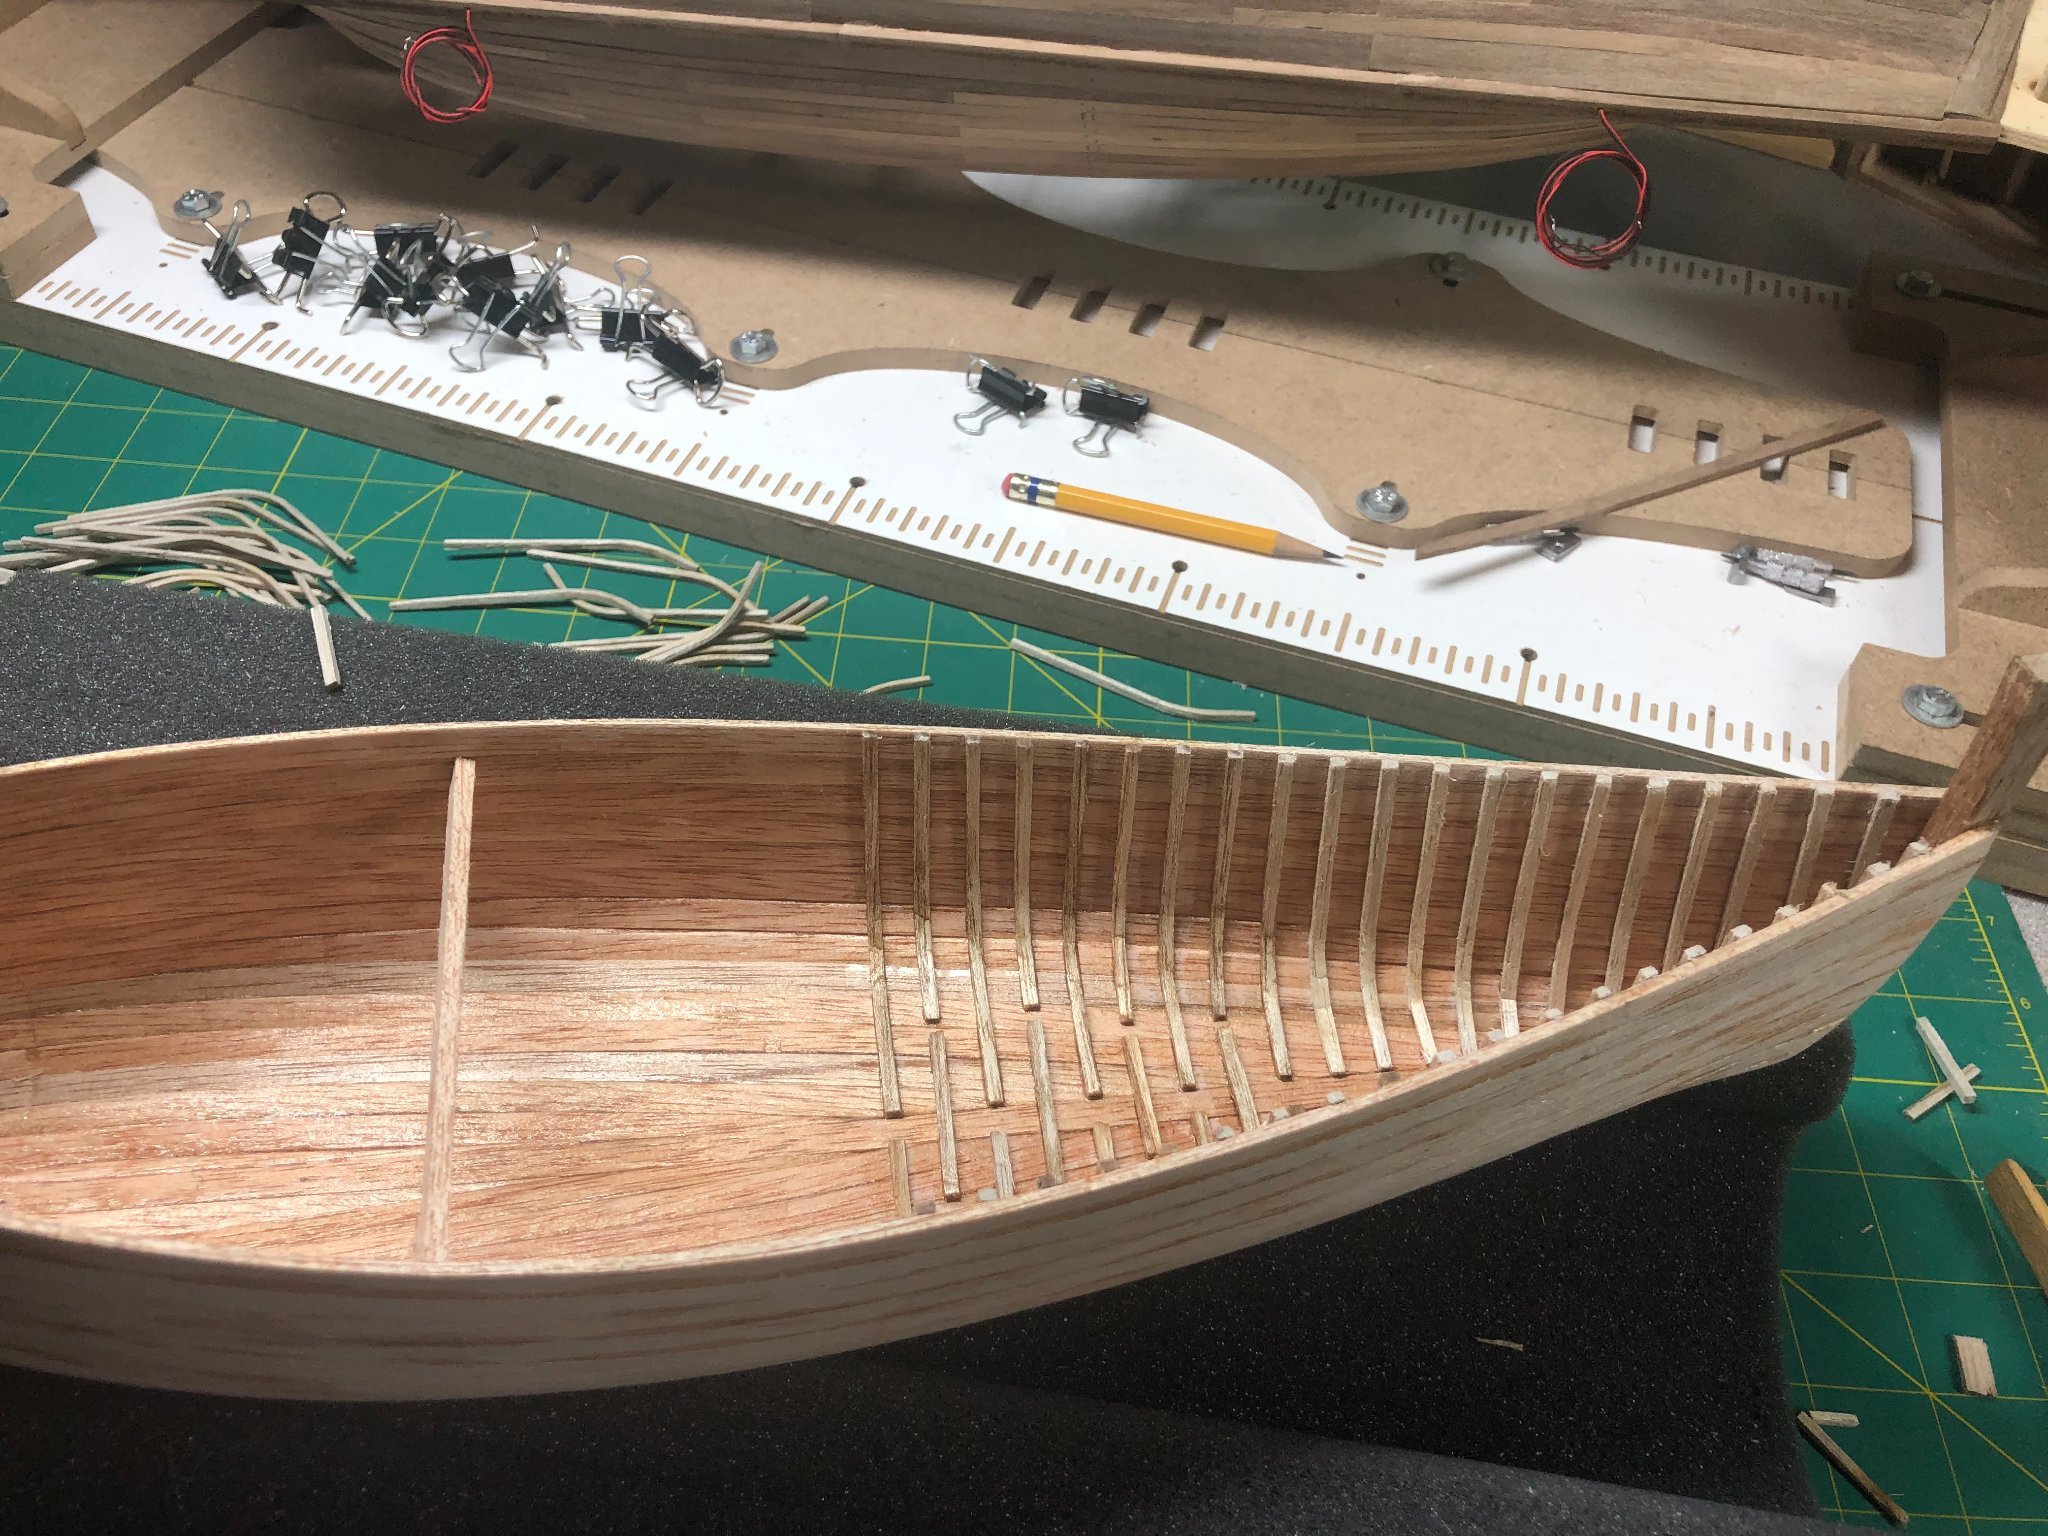
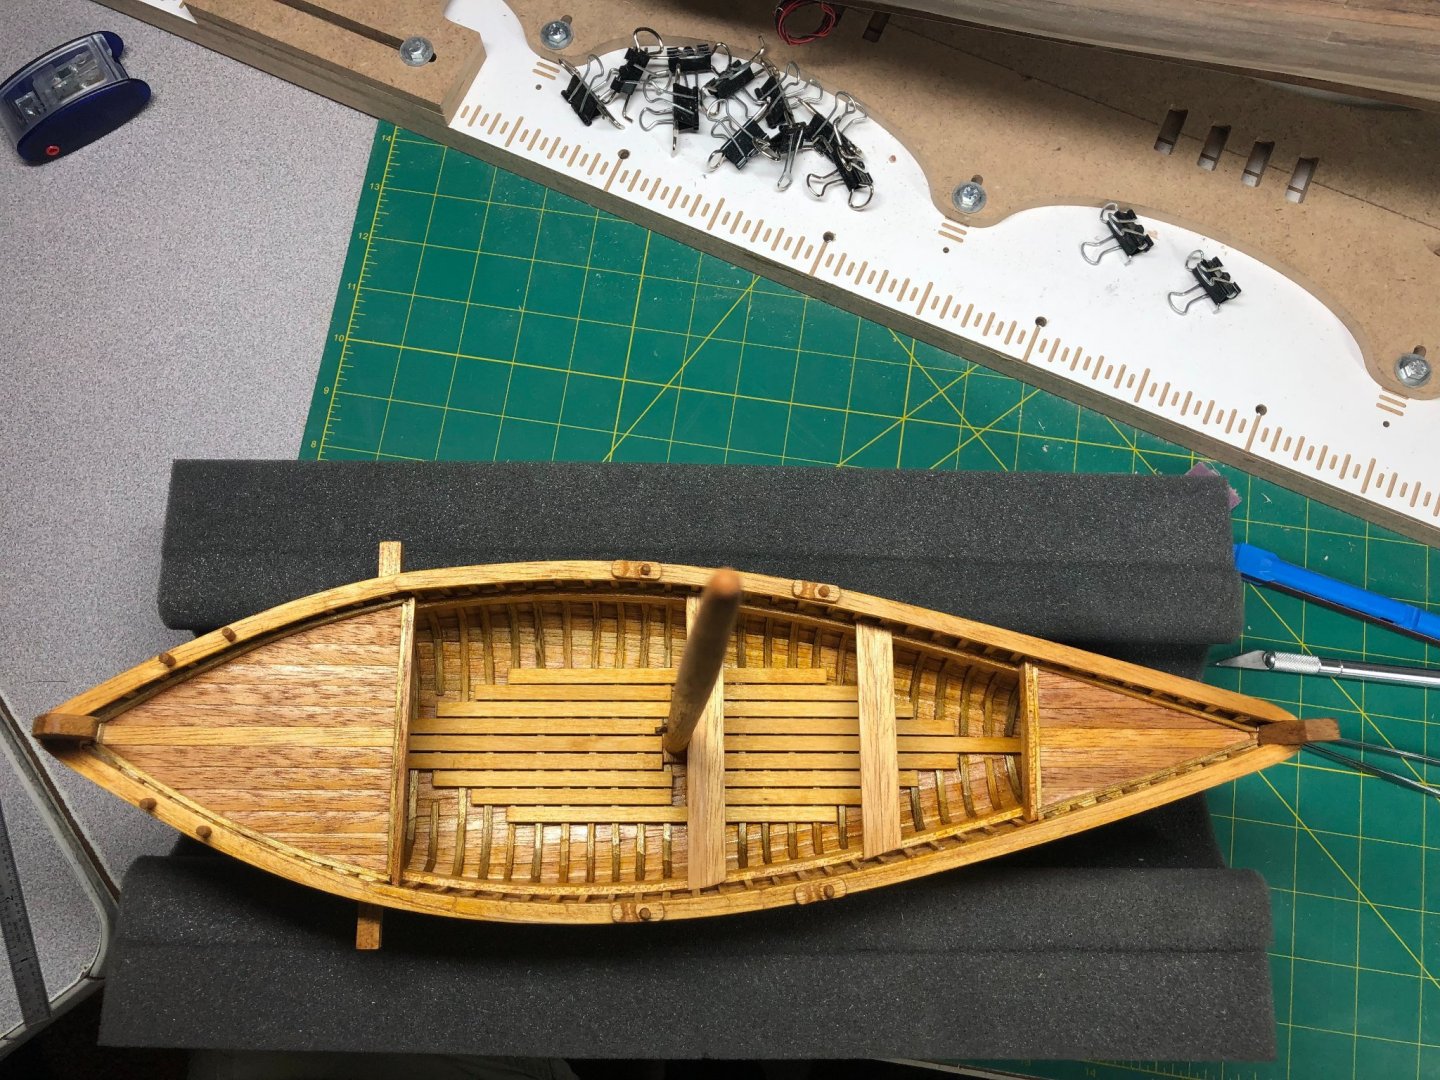
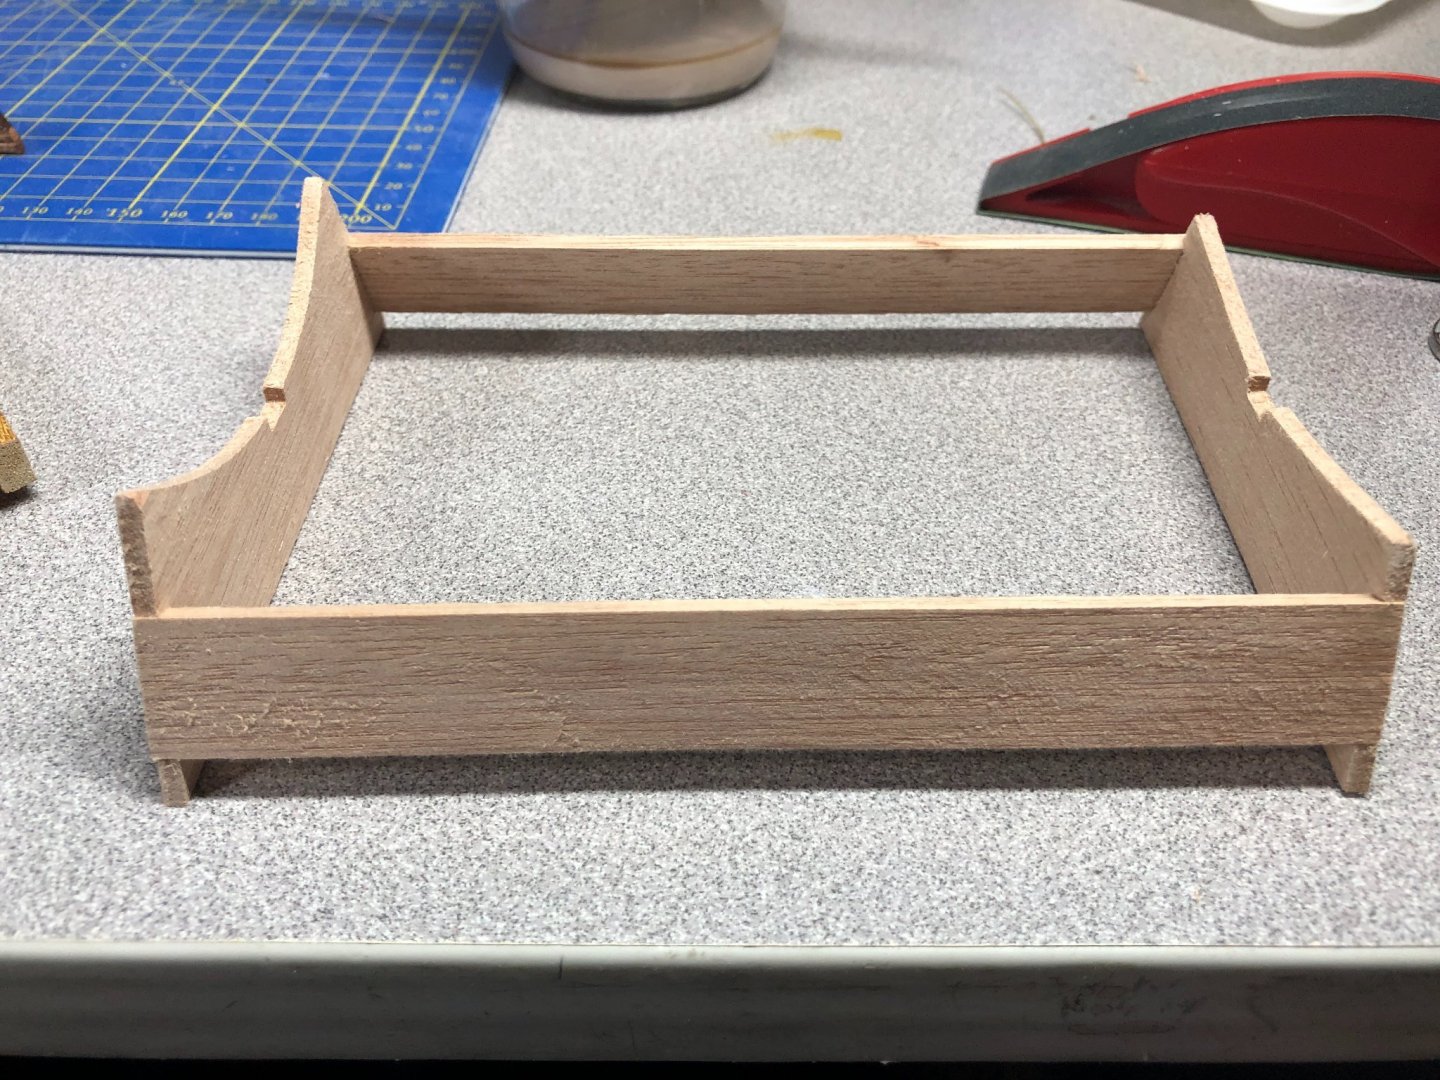
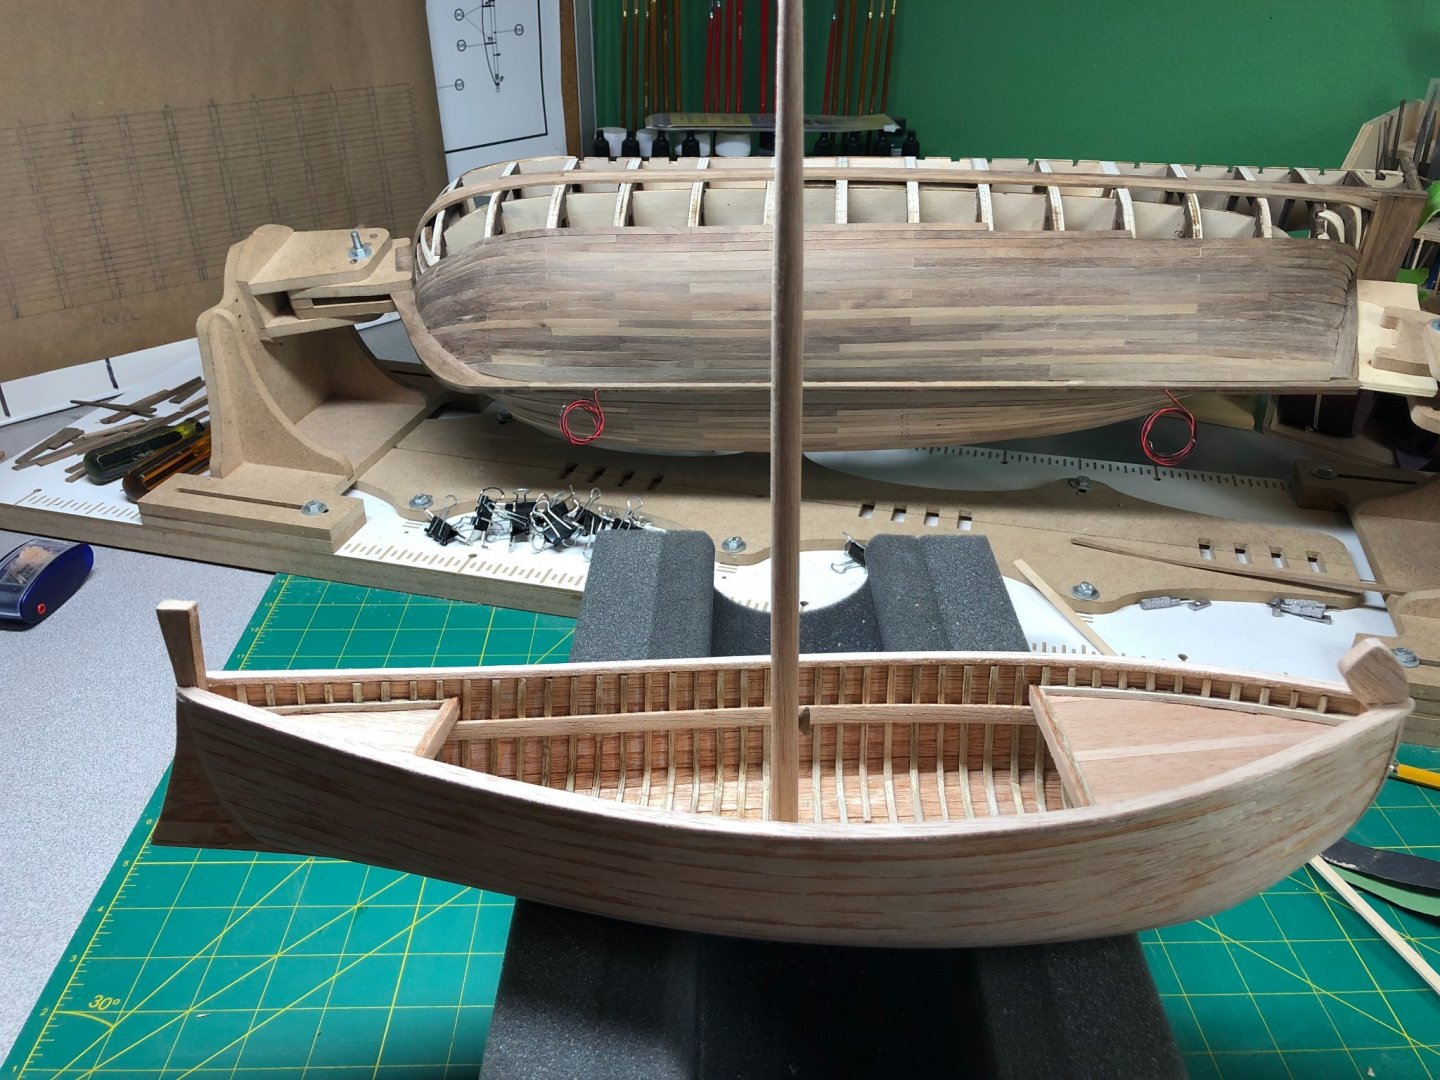
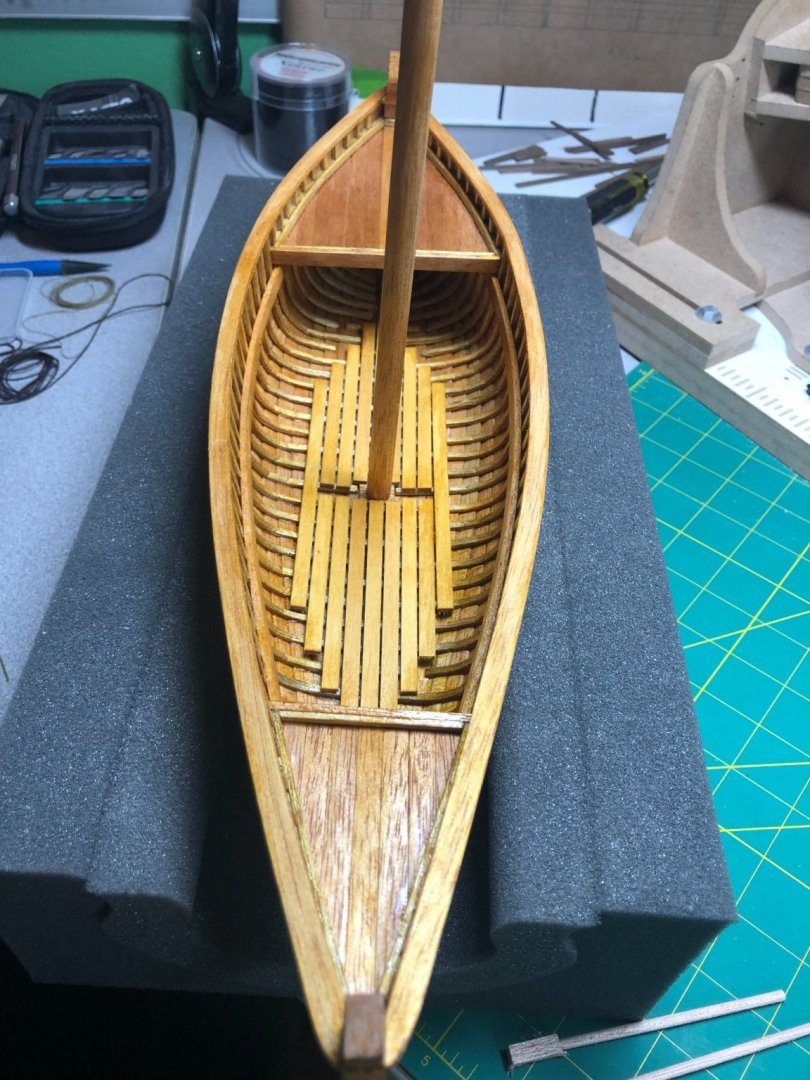
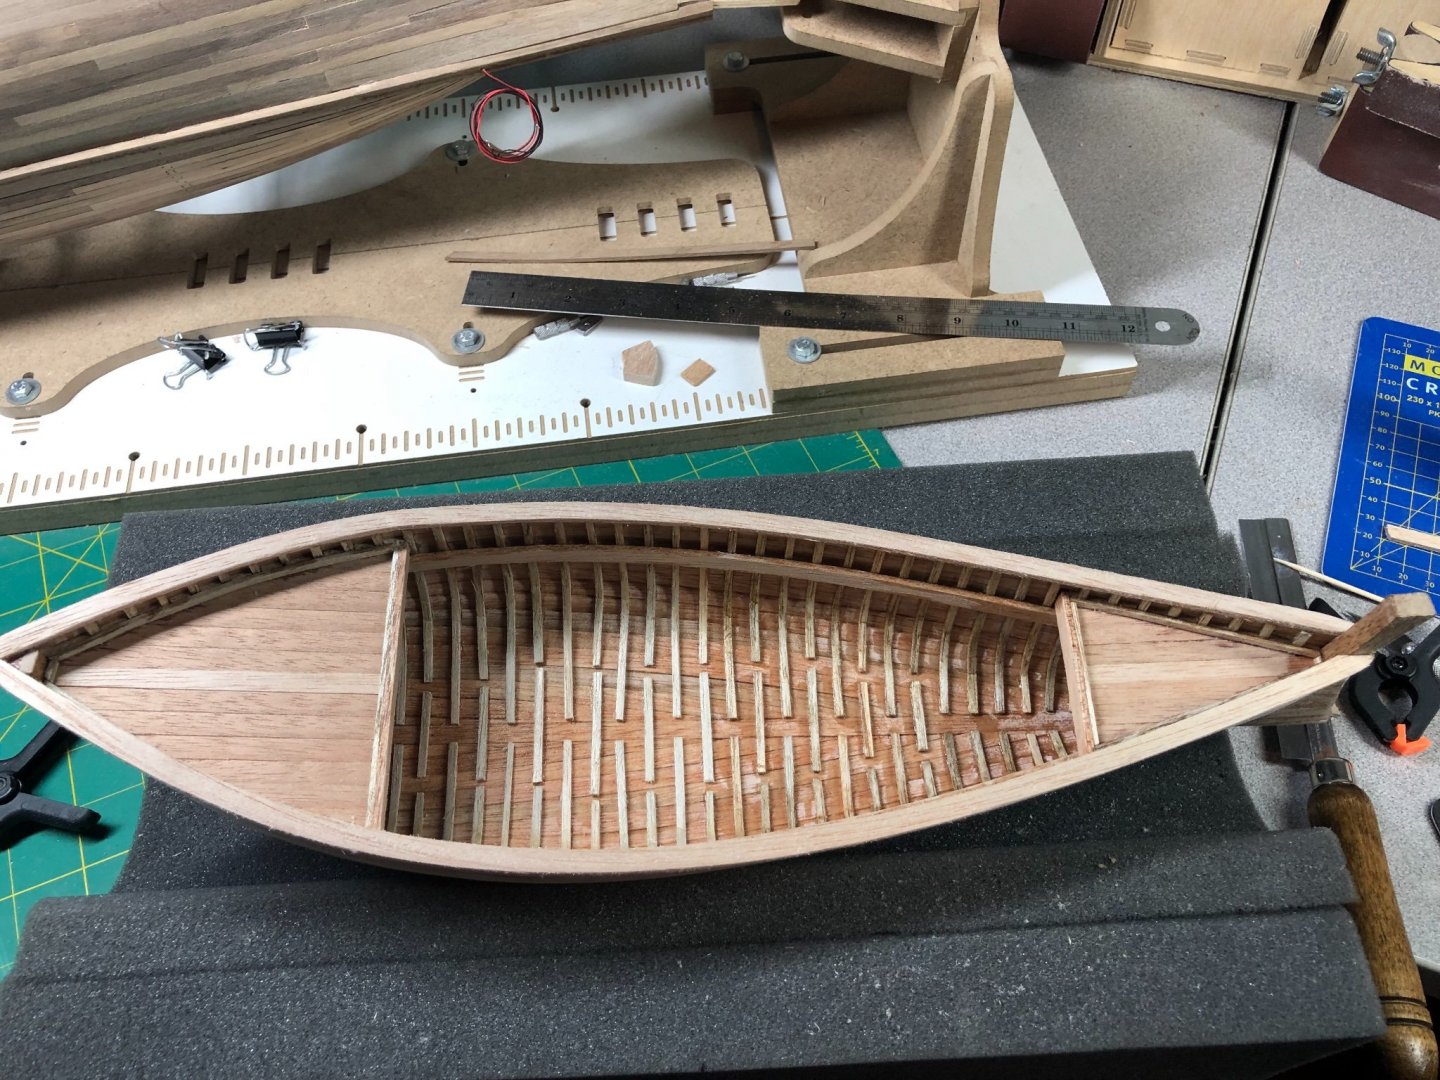
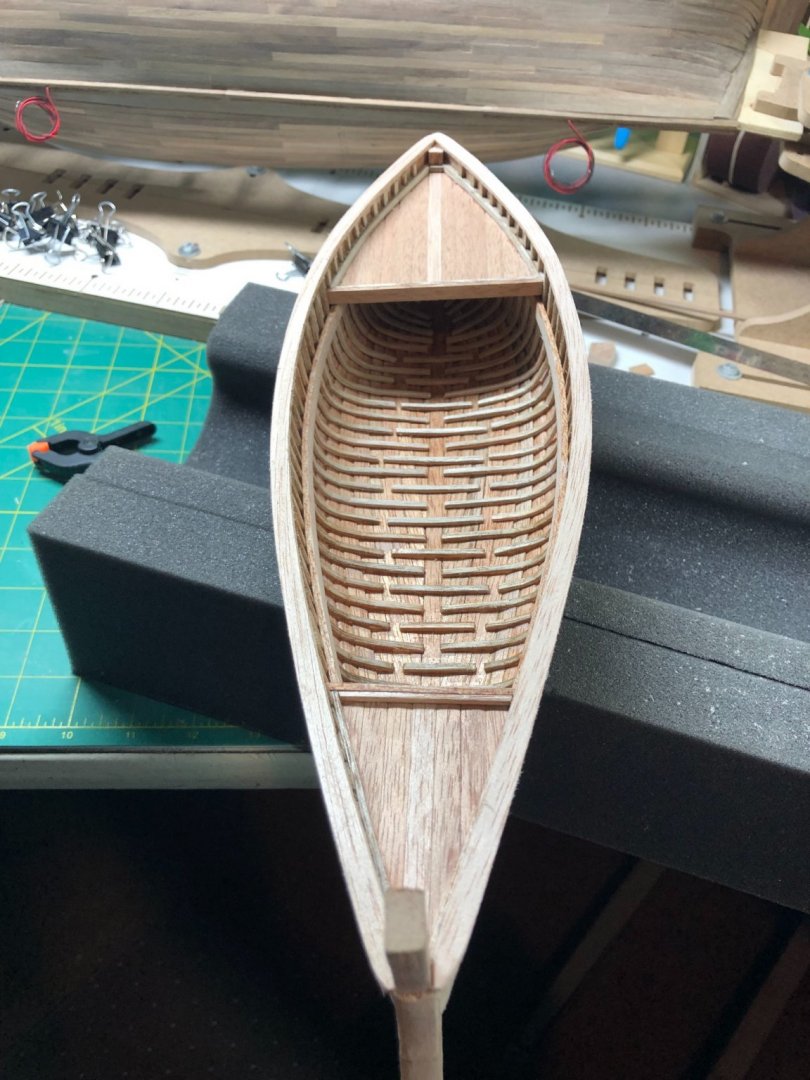
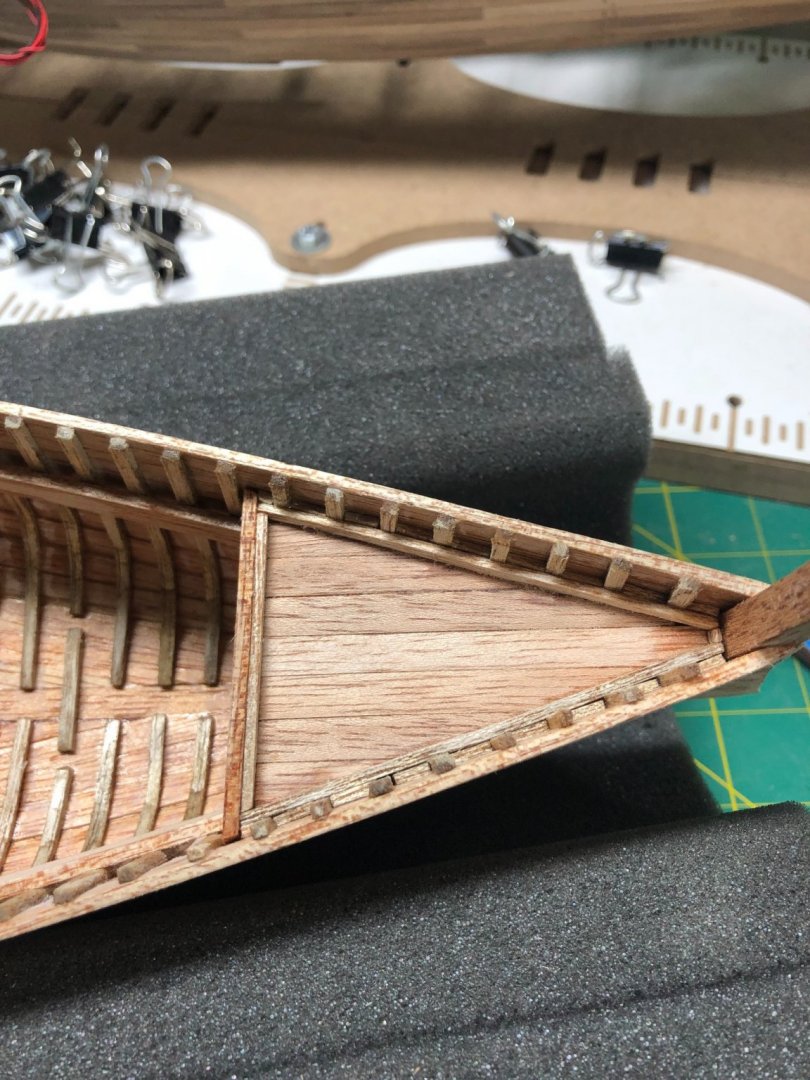
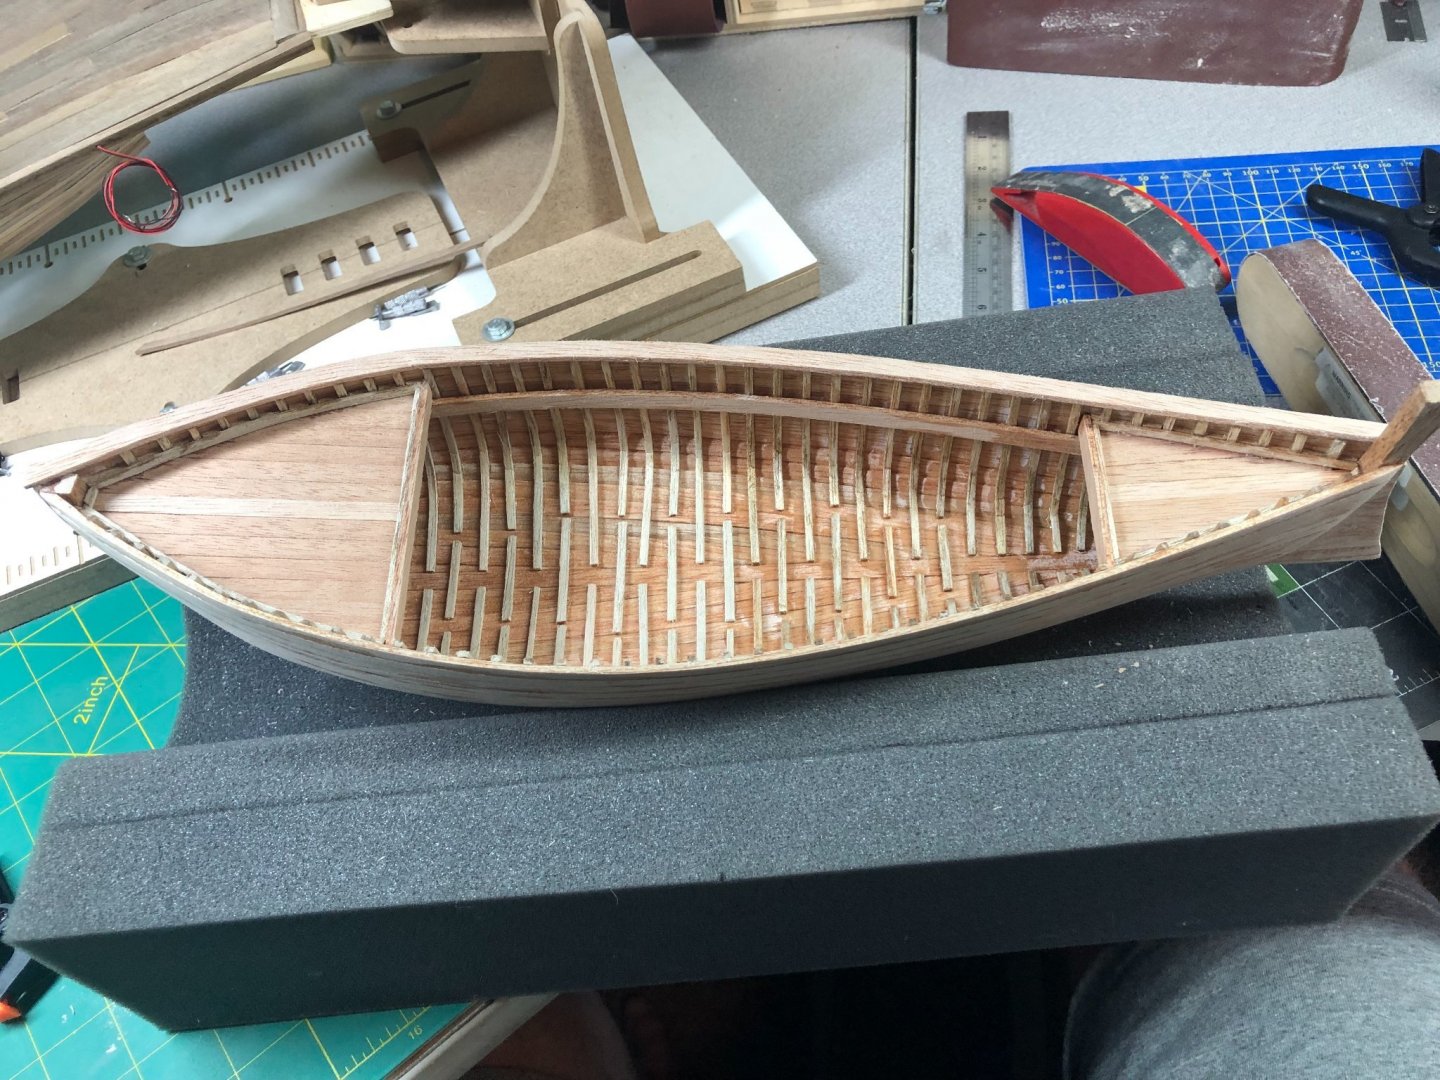
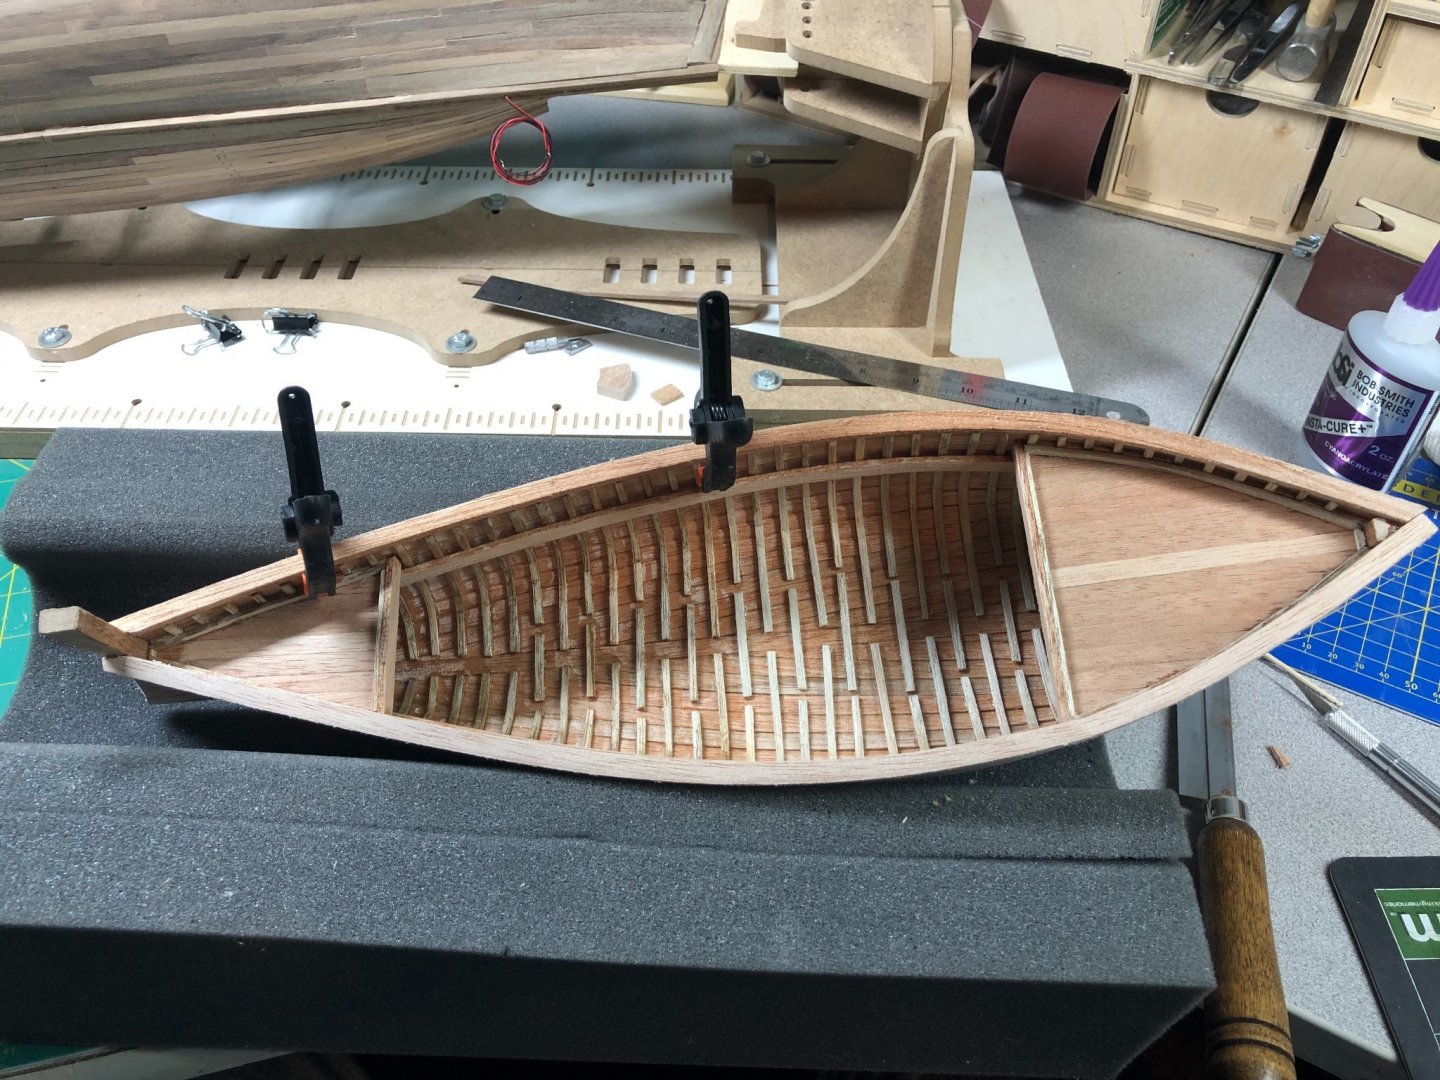
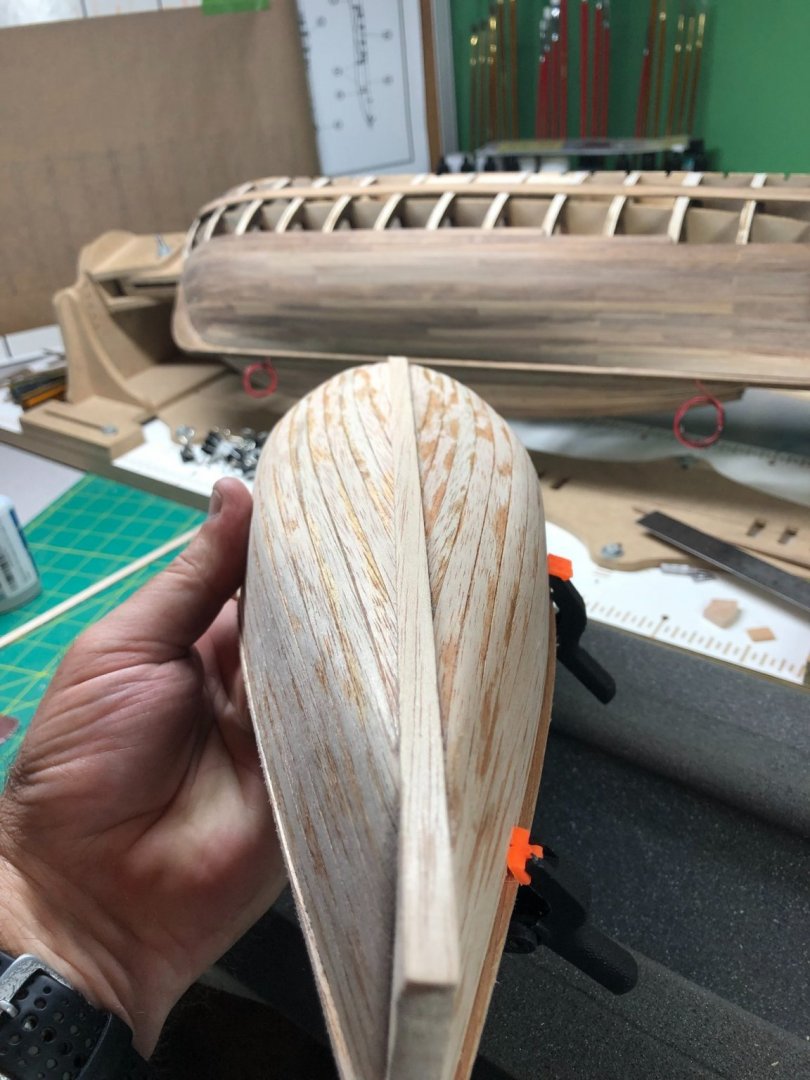
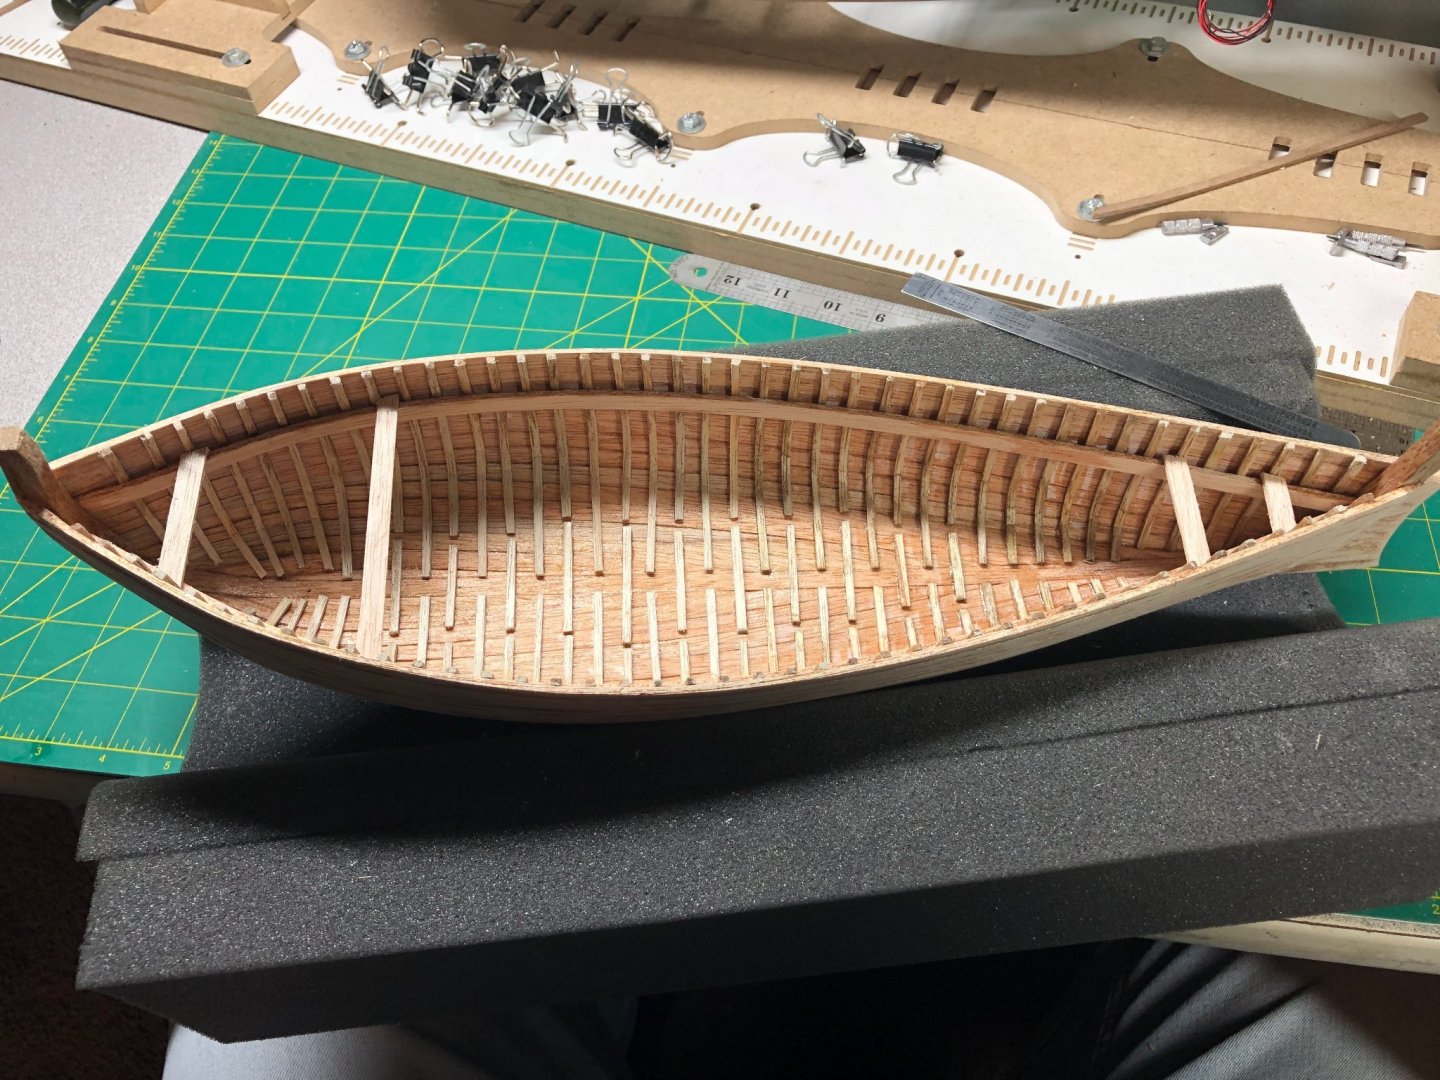
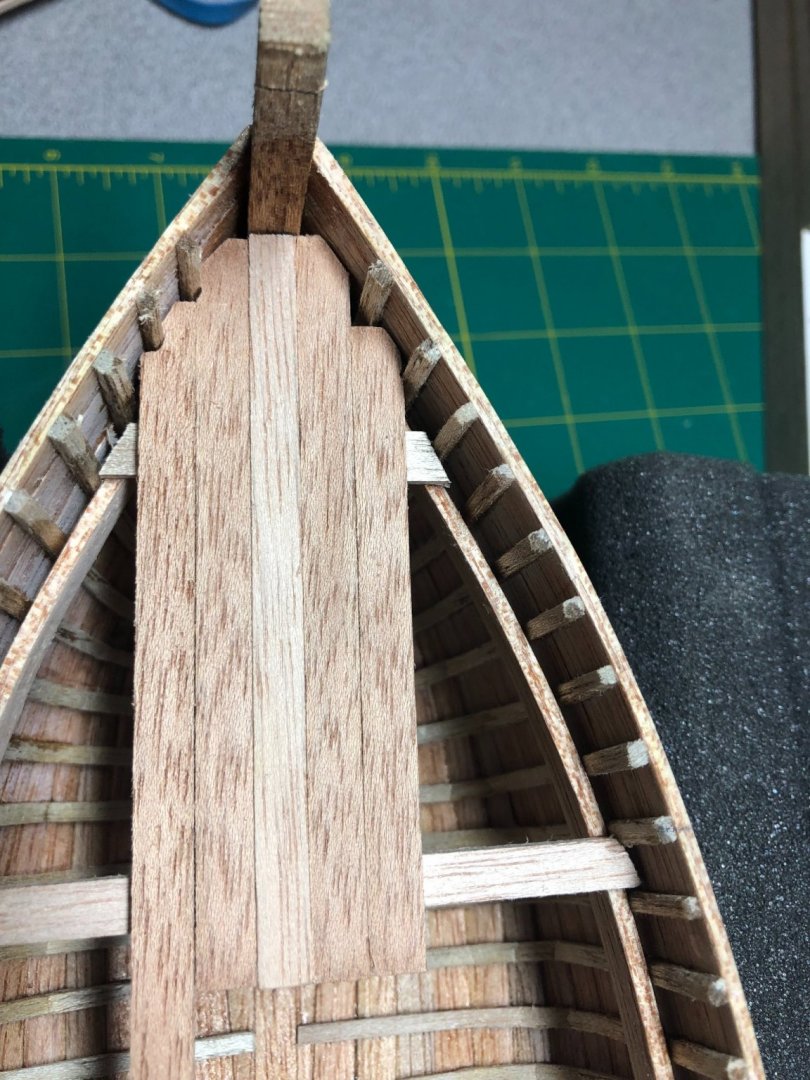
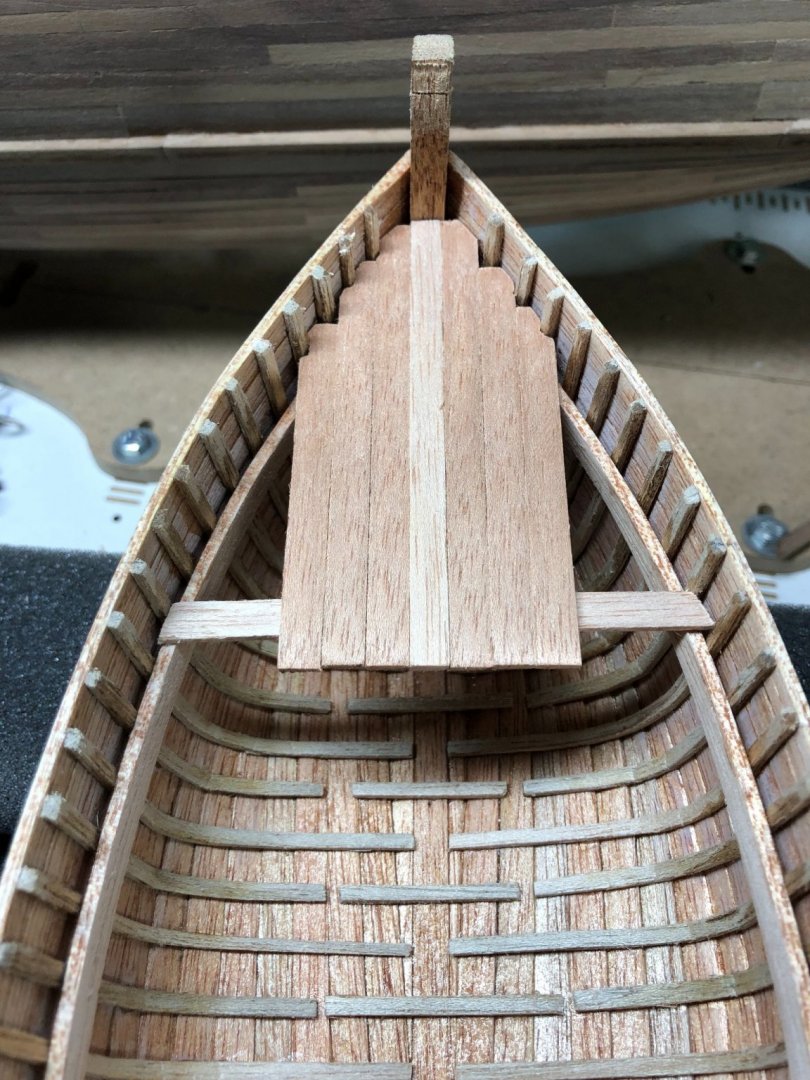
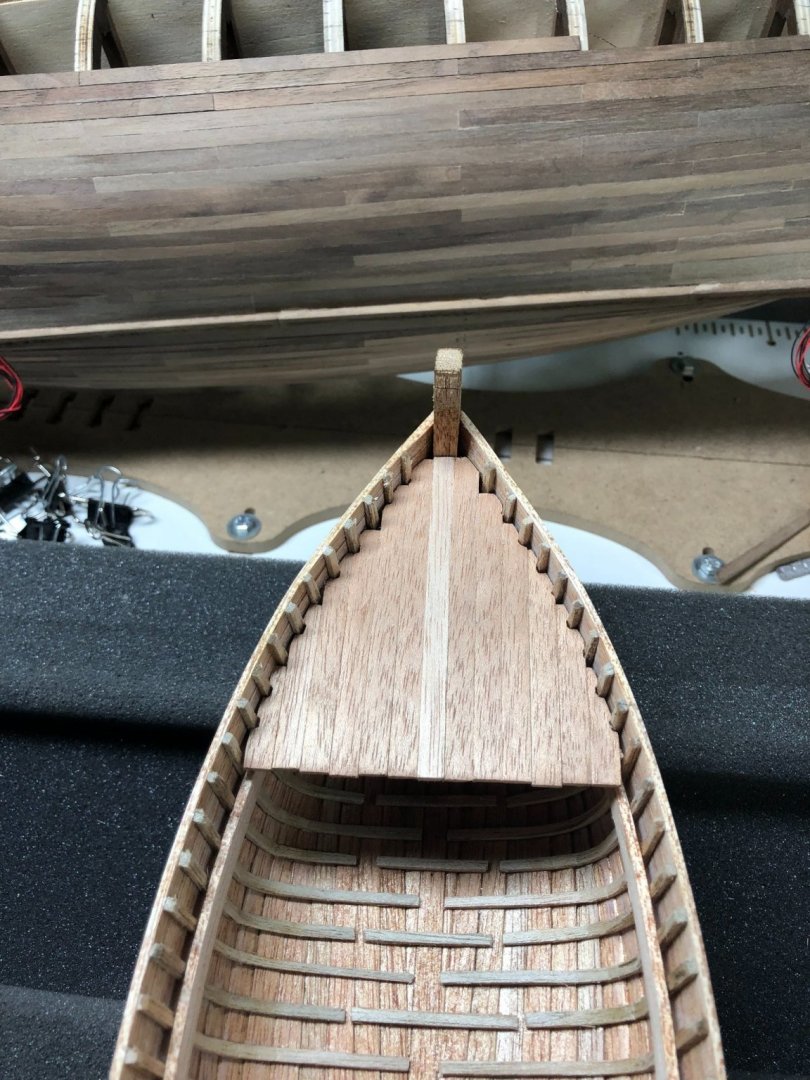
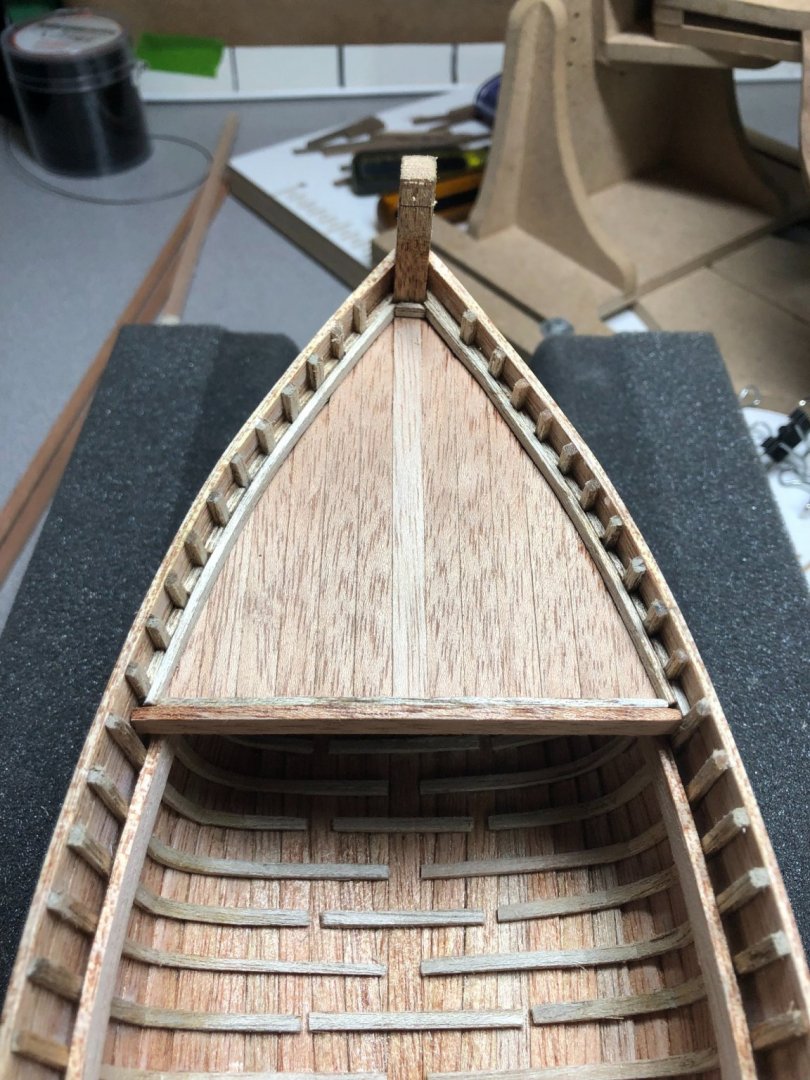
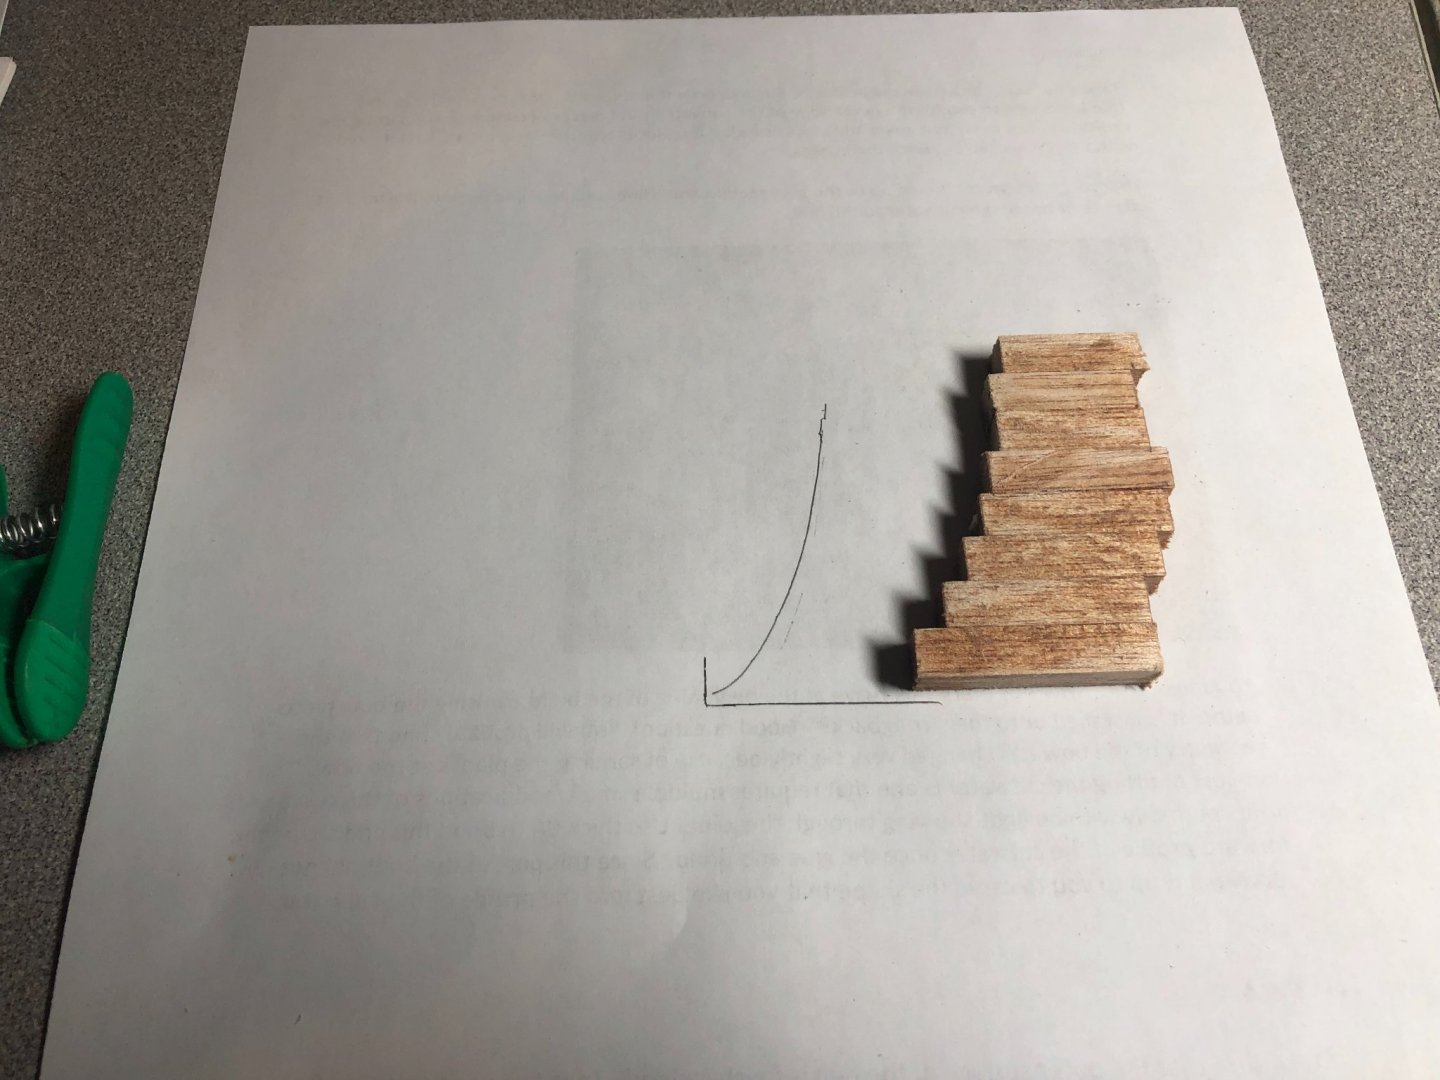
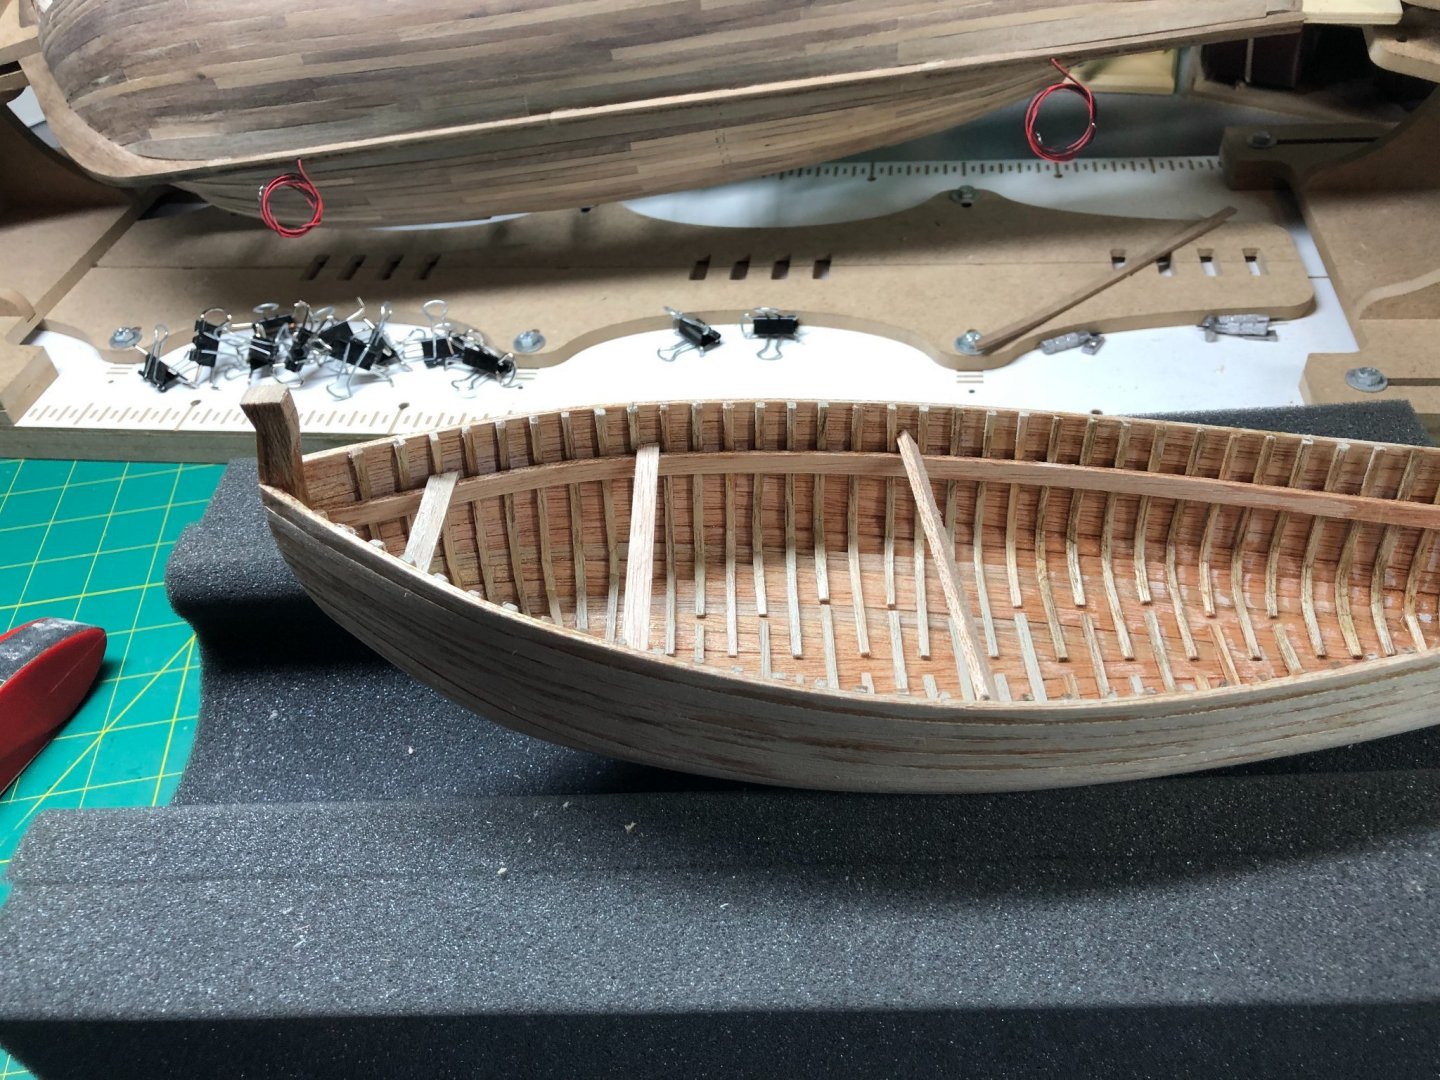
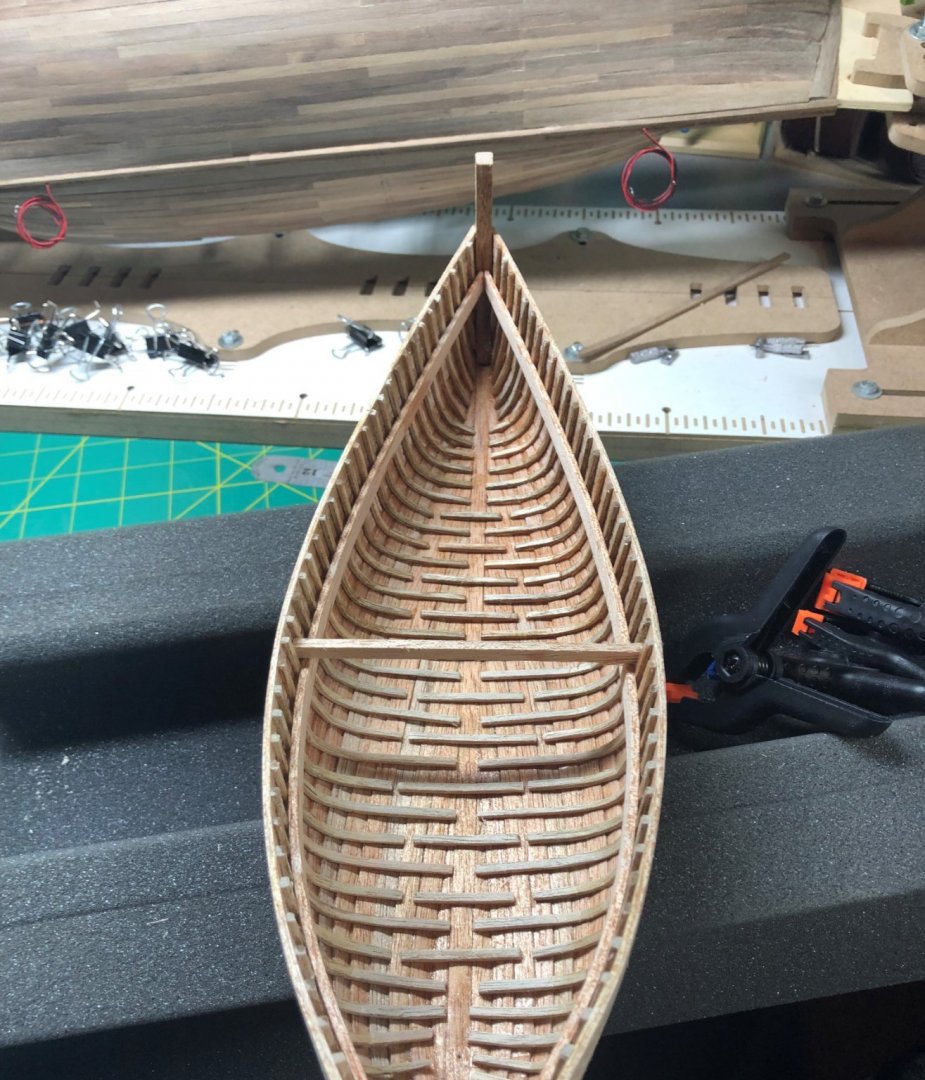
Lots accomplished over the last few days... I finished the ribs. I found it to be very difficult to bend some of the ribs in the sharper corners near the bow and stern. Since they will be covered by the decks, I gave them less worry below the deck line. Overall, a tedious task working with 1/8 x1/8 wood: The inner wales were next. I let the pieces soak in hot water for about an hour before bending them by hand... no heat. The bend was not sharp and actually shaped easily. I used clamps and made sure the wales were in the right position along the entire length of the hull. Once the inner wales were in place and still wet, I clamped them down ensuring that they touched each rib at the top and bottom. Once dried, I used the the thin CA glue and glued them in place while still clamped, resulting: The cutwater was a bit of a conundrum for me. There are no real instructions that were helpful on this part of the build. Fortunately, I found a couple of pictures and build logs that gave me a good view and idea of what I needed to make. It started with several 1/4 x 1/4 wood pieces glued together: I laid the bow down and used my pencil to trace the curvature of the bow. The pieces were glued together to match the curve. I used my scroll saw and cut the shape out and then cut the leading edge. Finally, I sanded and glued it onto the bow: Still need to sand the cutwater at the keel flat to properly receive the false keel but I am really pleased with the outcome! Next, deck beams were installed at the bow and stern: And the decking begins... simple but a little work to cut around the ribs: Finally: Some sanding on the end to even up the deck ends... I decided that I wanted a more finished look. So, I cut pieces to put between the ribs and then placed a piece of trim around the hull. Also added an end cap to the deck: A better look to me... what do they call it........ artistic freedoms! Hopefully, not too far off base! The fore deck, cap rails and the false keel are next!


- 83 replies
-
- 7
-
-
- Sea of Galilee boat
- SE Miller
- (and 1 more)
-
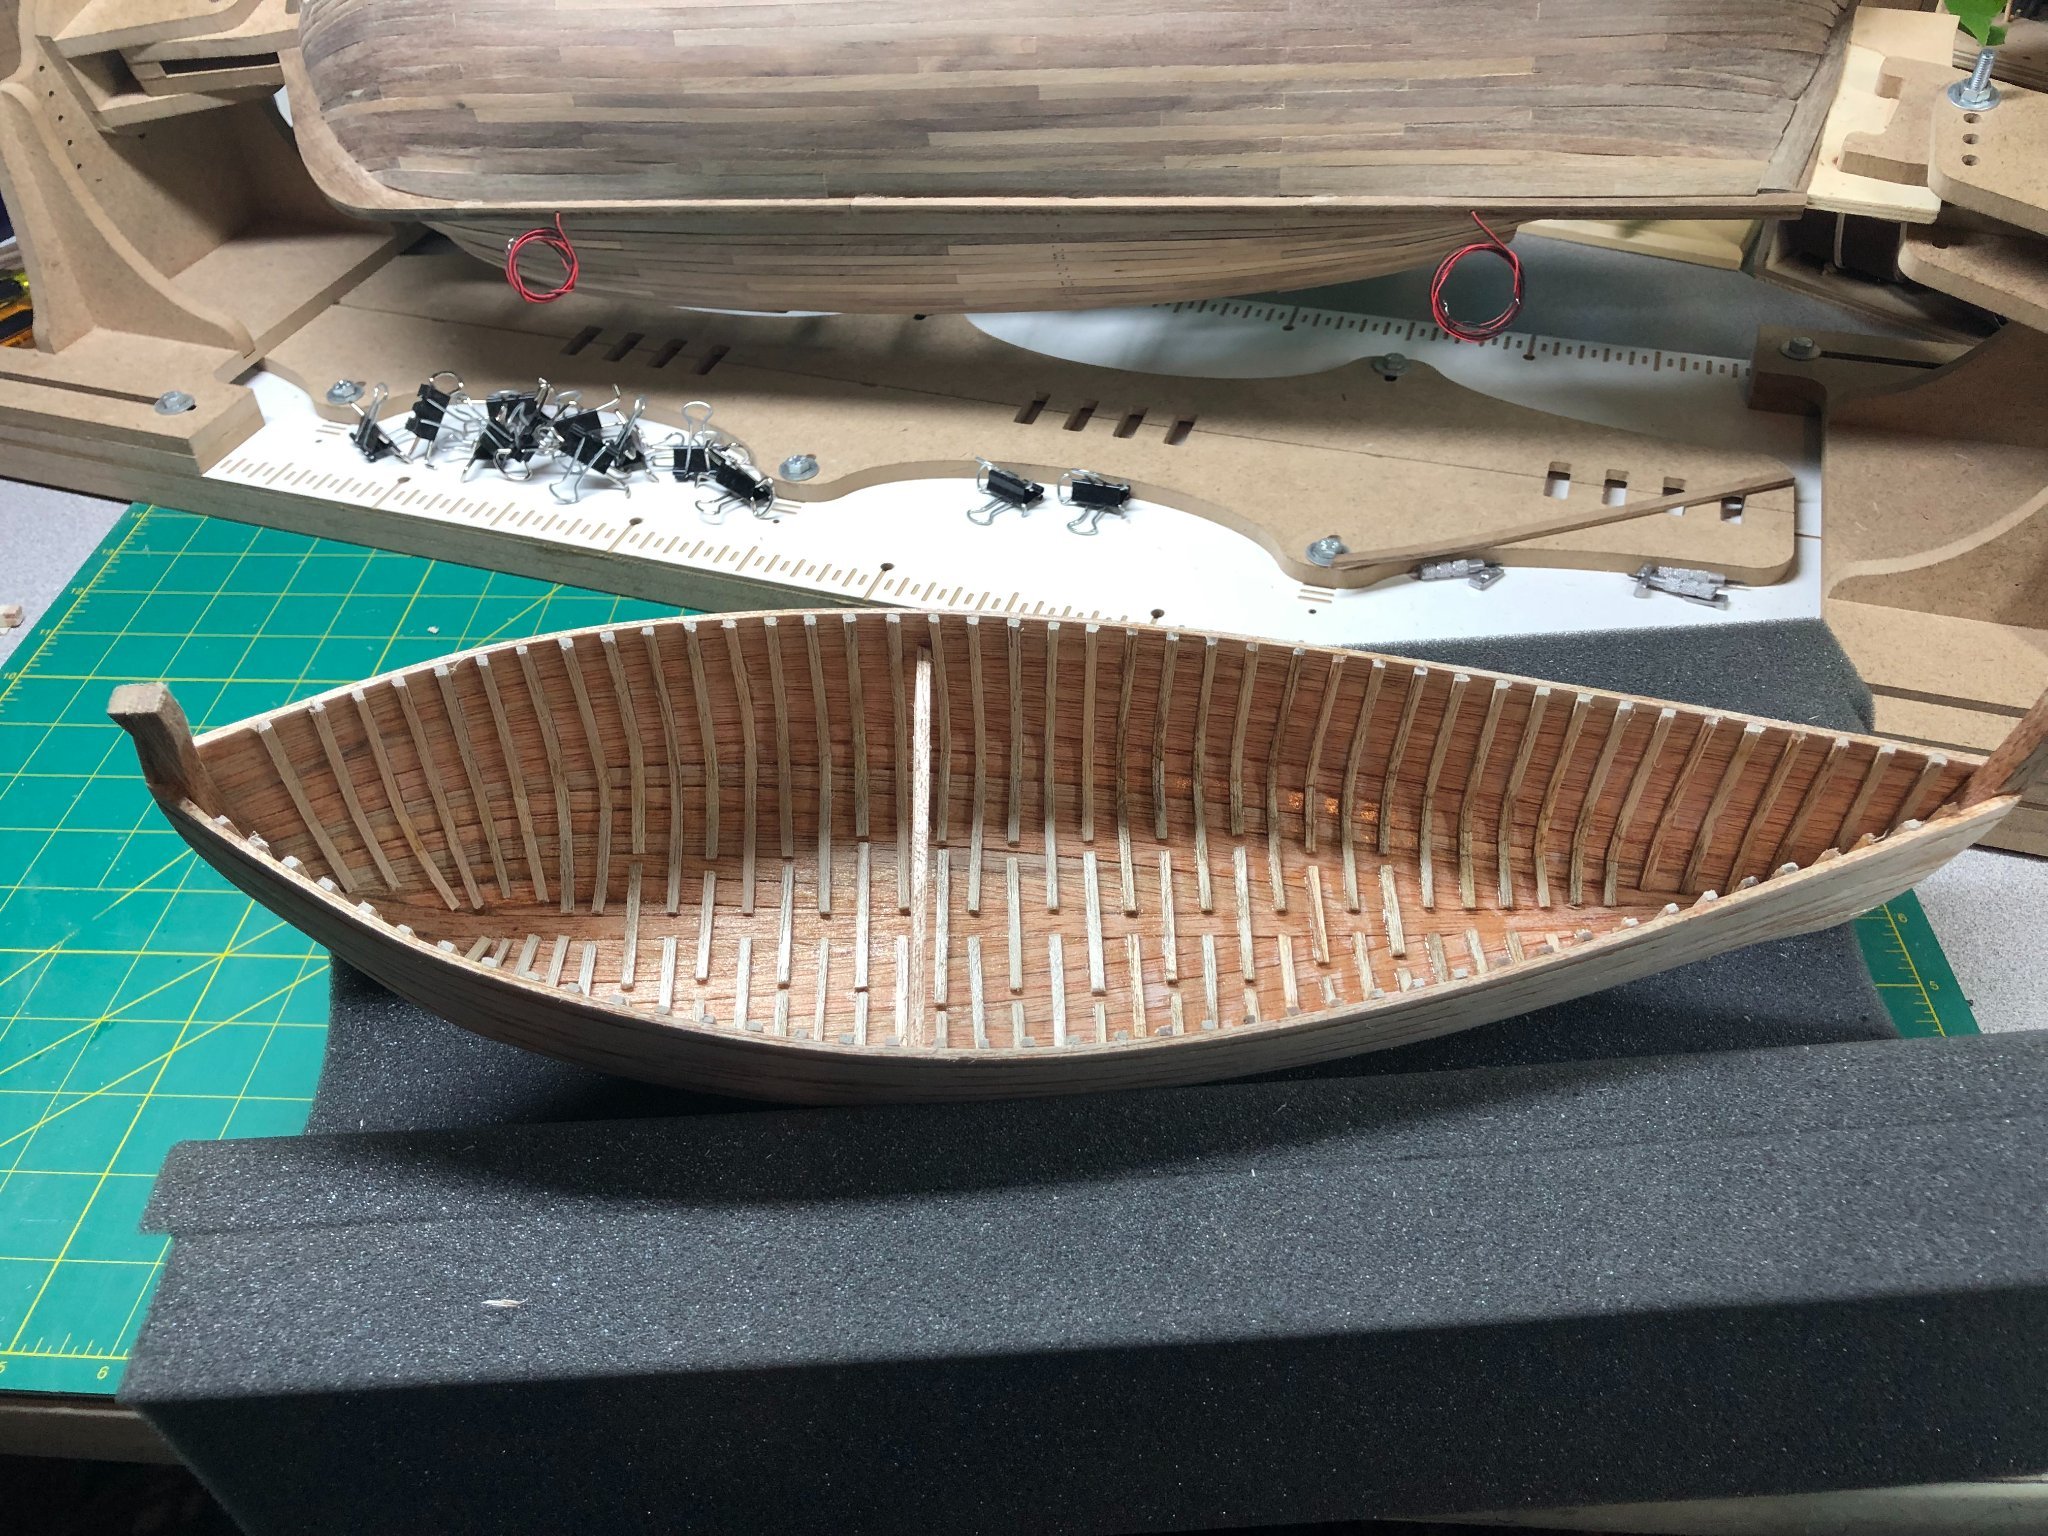
Half the ribs done: A month and five days until dad's birthday! Gotta get busy! Summer makes it harder to work... boating, gardening, etc! Still think I can make it without having to rush.

- 83 replies
-
- 5
-
-
- Sea of Galilee boat
- SE Miller
- (and 1 more)
-
I use Bob Smith Industries... works well and we'll see about the longevity. Frankly, I'm not a huge fan of CA but can see the reasoning for using it on this build.
- 83 replies
-
- 2
-
-
- Sea of Galilee boat
- SE Miller
- (and 1 more)
-
"I have seen models where floor timber/futtock arrangement goes the full length of the boat and some where that arrangement is used only for about the center 1/3 while floor timber-only is used for forward and aft 1/3s. Who knows for sure." Exactly! The pattern is debatable but I think the pattern chosen is appropriate for the time period and type of build. As shown in Chuck's post, the pattern is not even the same throughout which I find unlikely but more of a product of the age and condition of the boat when it was excavated.
- 83 replies
-
- 1
-
-
- Sea of Galilee boat
- SE Miller
- (and 1 more)
-
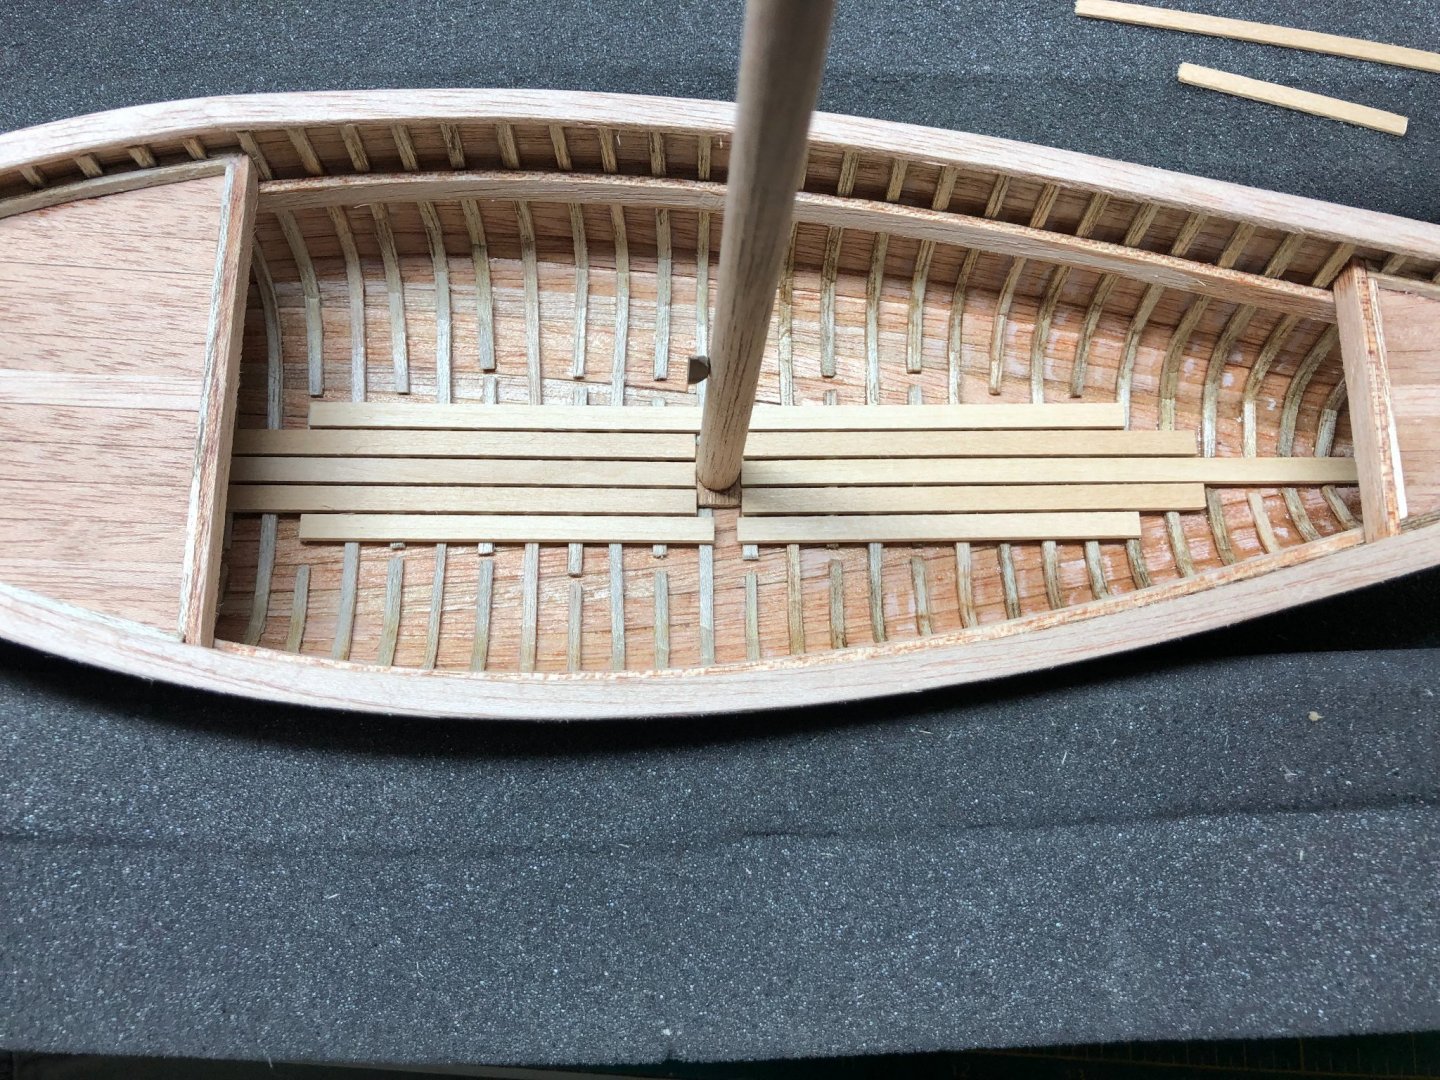
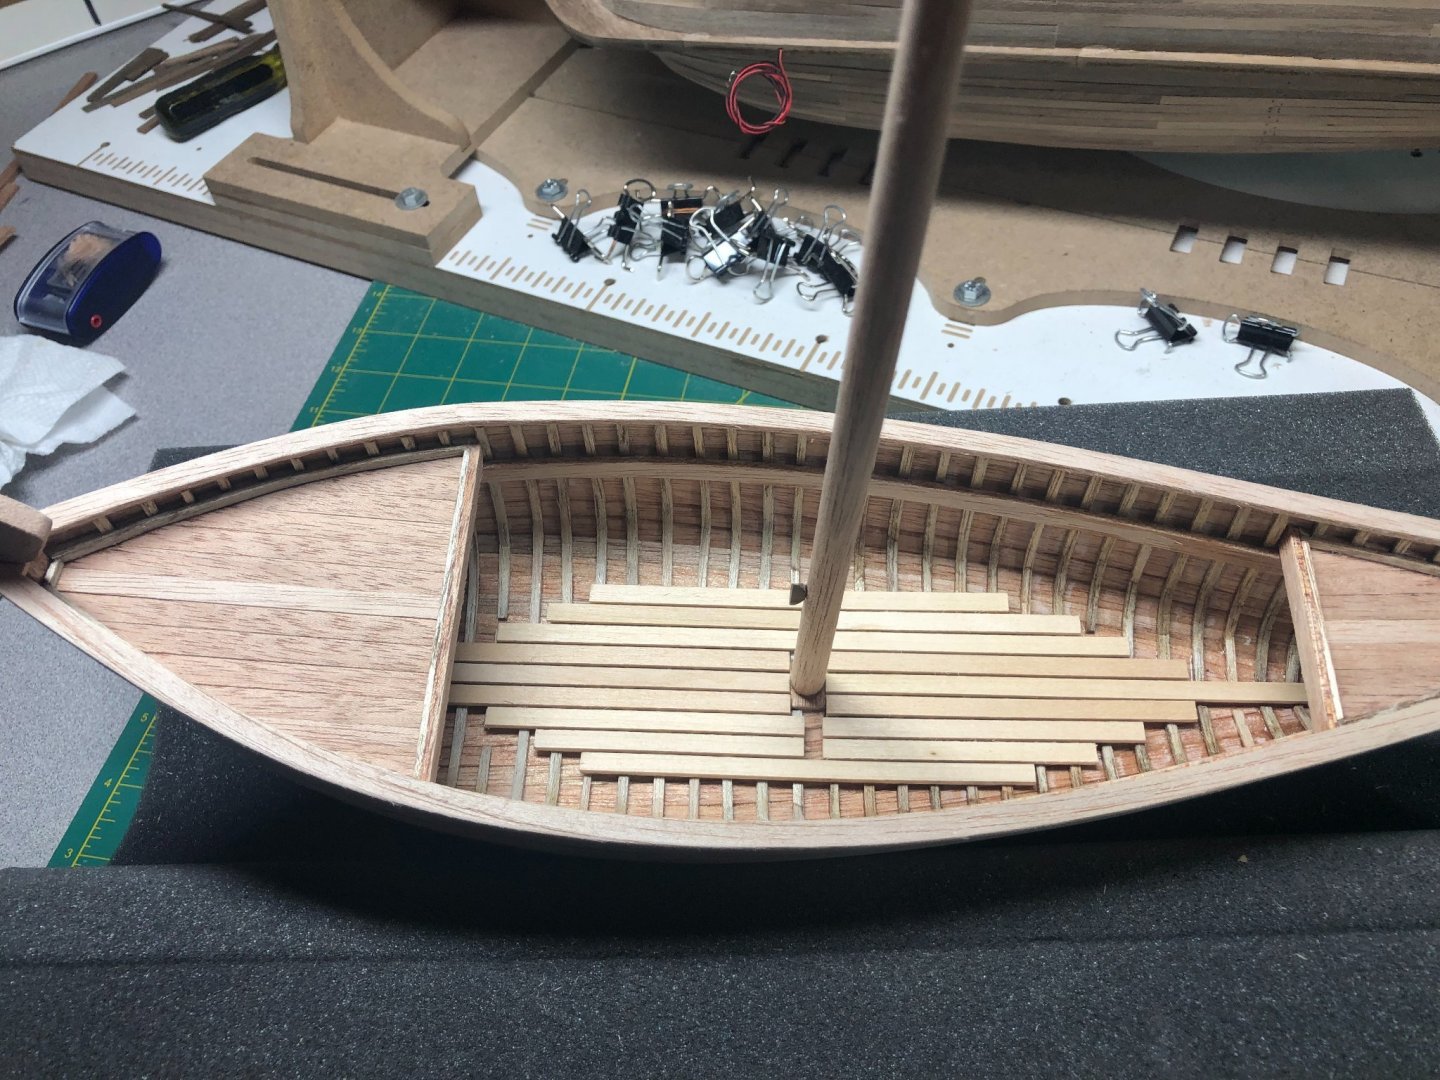
I presume you are referring to the ribs? The pattern shown is followed throughout the hull. Based on the original, that appears to be the correct pattern. I am considering adding floor boards with some small spacing which will cover the bottom of the hull... haven't decided yet.