LyleK1
-
Posts
541 -
Joined
-
Last visited
Content Type
Profiles
Forums
Gallery
Events
Everything posted by LyleK1
-
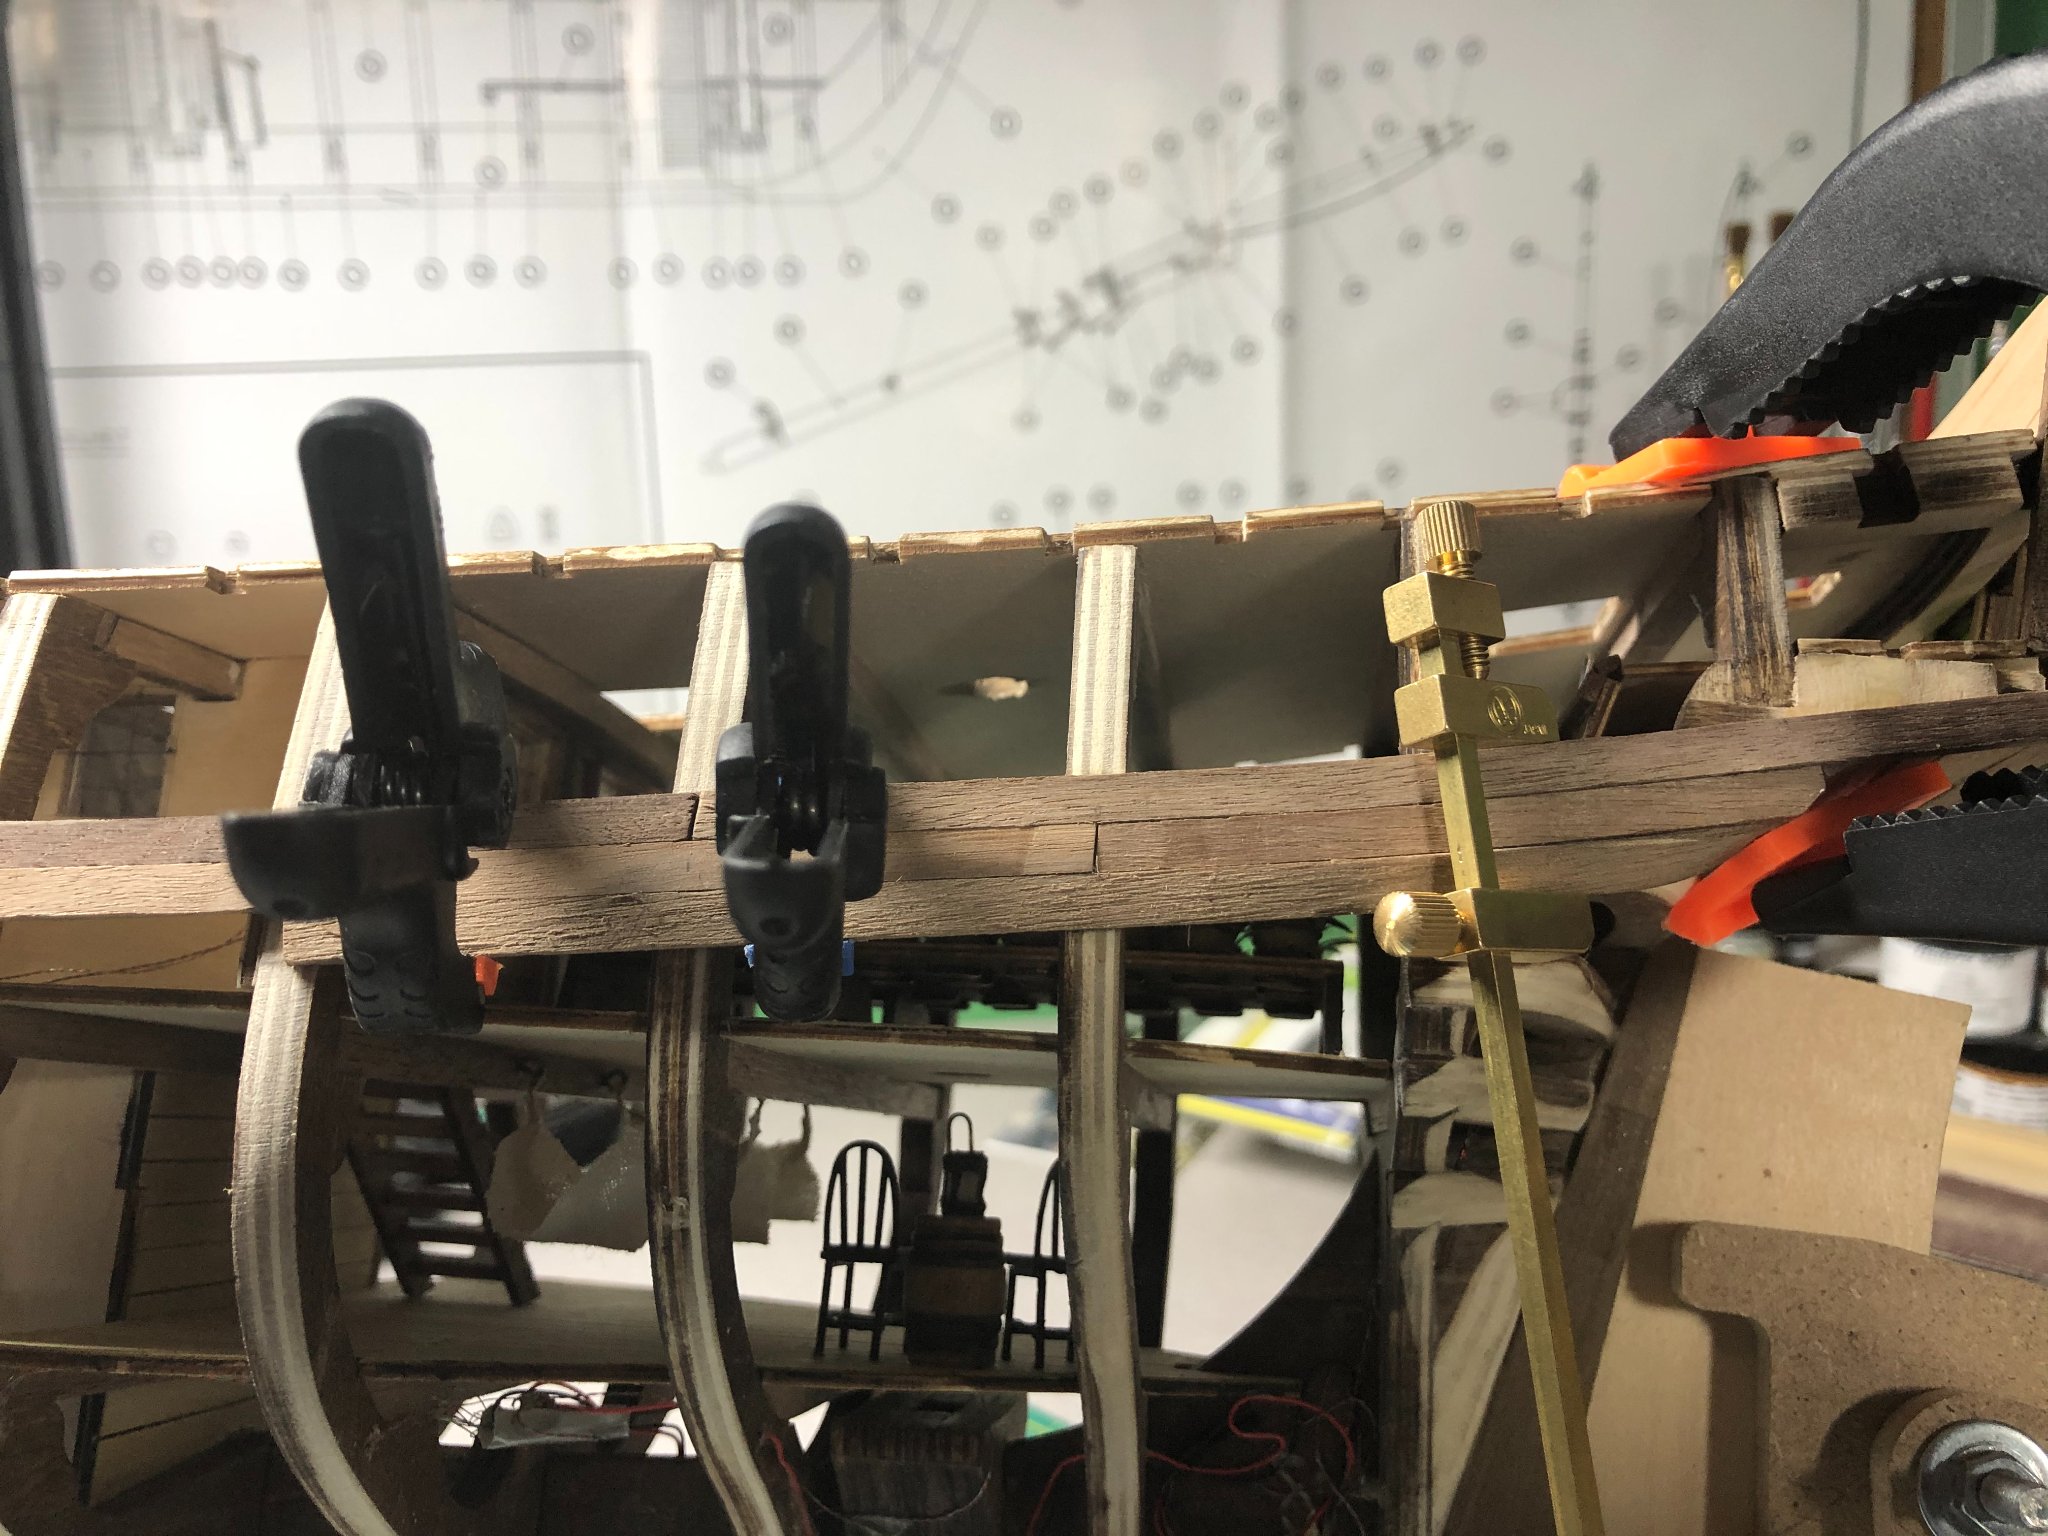
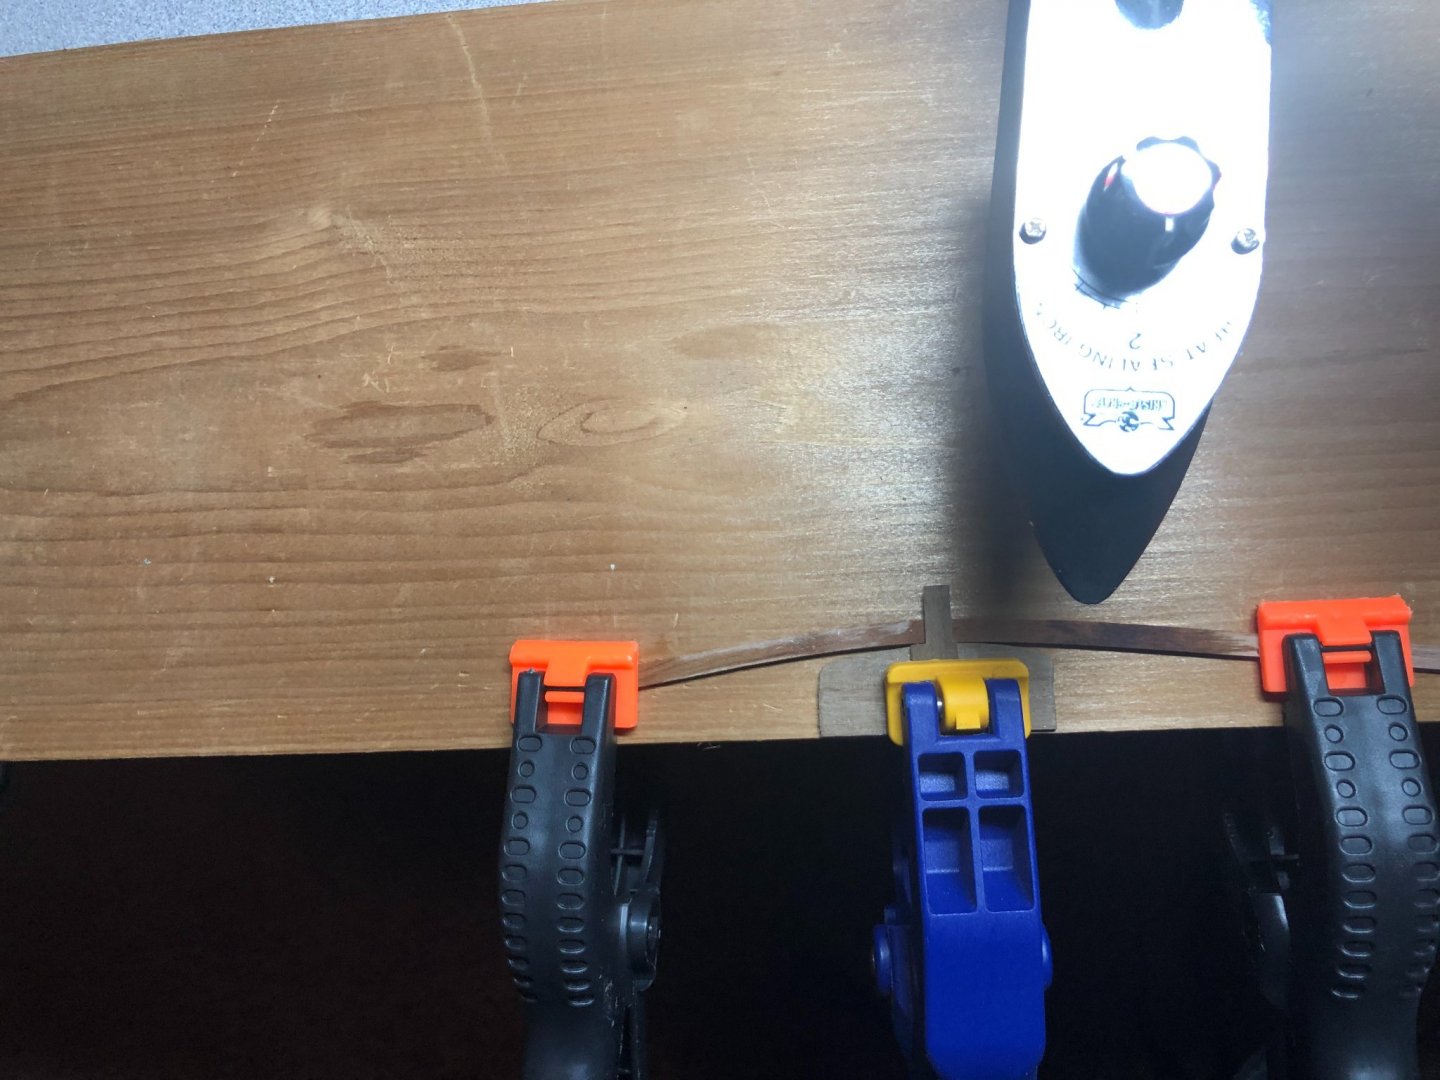
 Not a lot of progress this week as life got in the way! However, I did get a few planks laid for the wales. Before I show pictures of my miniscule progress(!), here is a bit on the process of bending a plank. First, here is my bending station: I have 8"X1" board that I'm using as a base. The center clamp is holding down the bending form and a piece of stock to keep the planks from raising up when being bent. The two outer clamps hold the shape while I use my sealing iron to "steam" the water that I either wiped onto the plank or that I soaked the plank in. This set up works good for the bow and stern planks that need lots of "curve". I don't bend them in the most often seen method. Rather I bend them across their width. When placed on the frames, this method proves to work for the two axis that planks at the bow and stern need to be bent in order to sit flat on the frame over the course of the full plank width. It is a much longer process but the fit is better in my opinion. I can attest that it works better with softer woods than walnut! Walnut has proven to be very difficult to bend. And even when bent, they tend to want to return to their straight original shape! Also, walnut is much more brittle and I've already broken several pieces by not going slow enough on the bending! This model will definitely test my patience! Fortunately, these first few pieces gives me time to work through a process with a little forgiveness since the wale is double planked: Once the wale is done on the port side, I'll do the small sections on the starboard side before lining of the planking belts and working from the keel up, begin planking... More when progress is made!
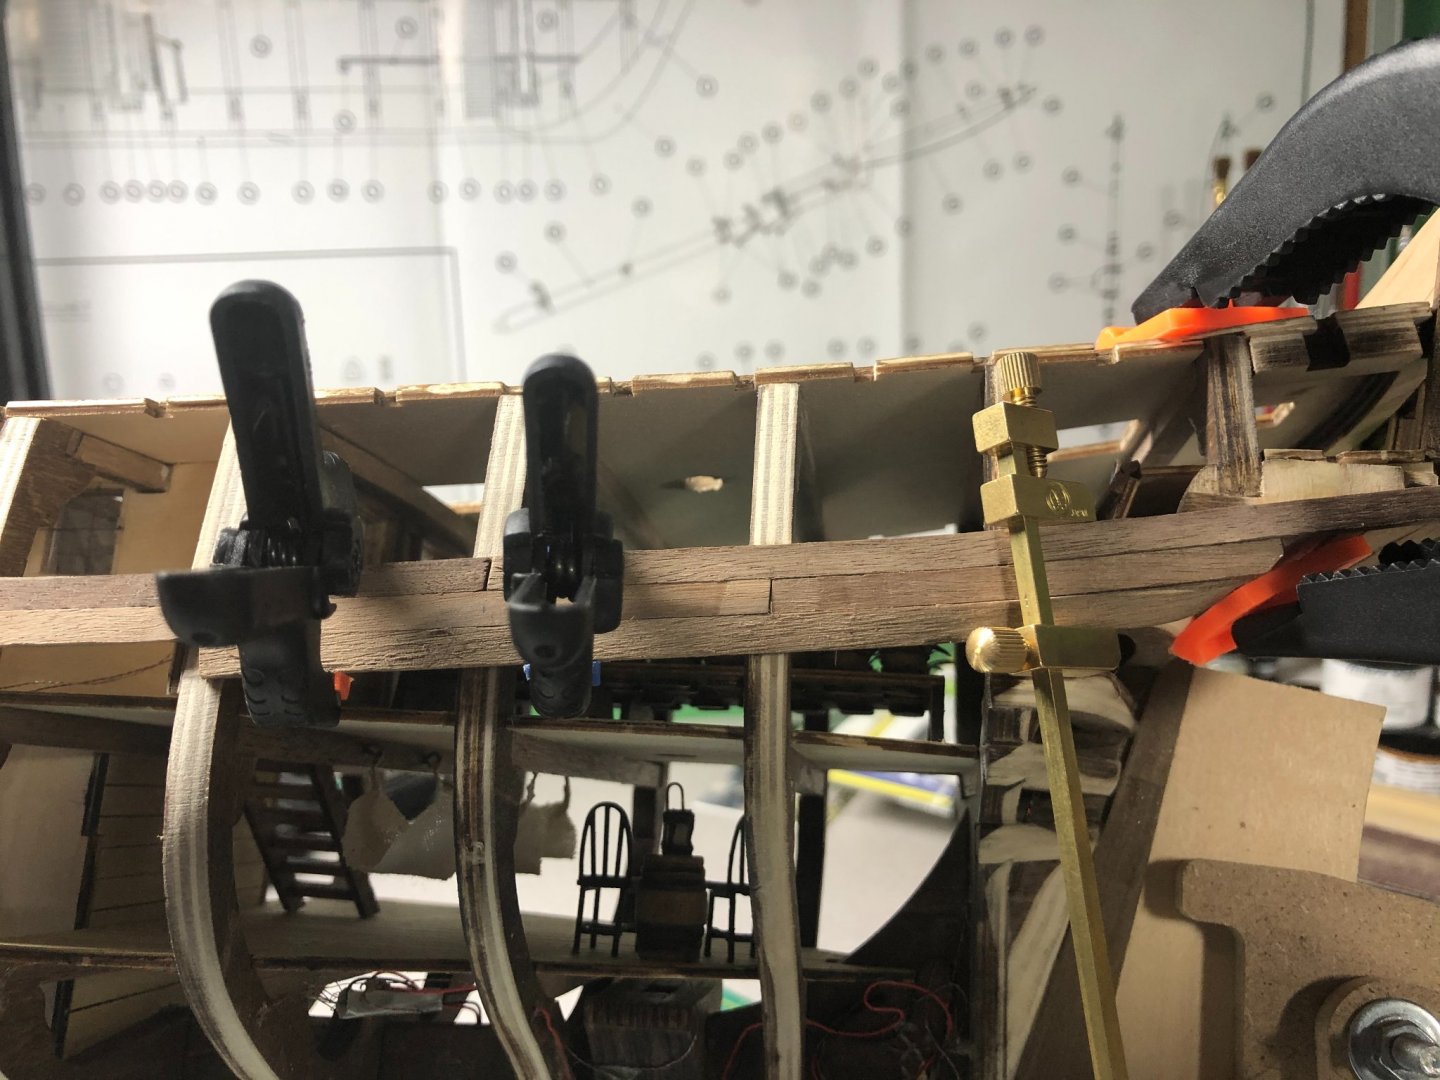


-
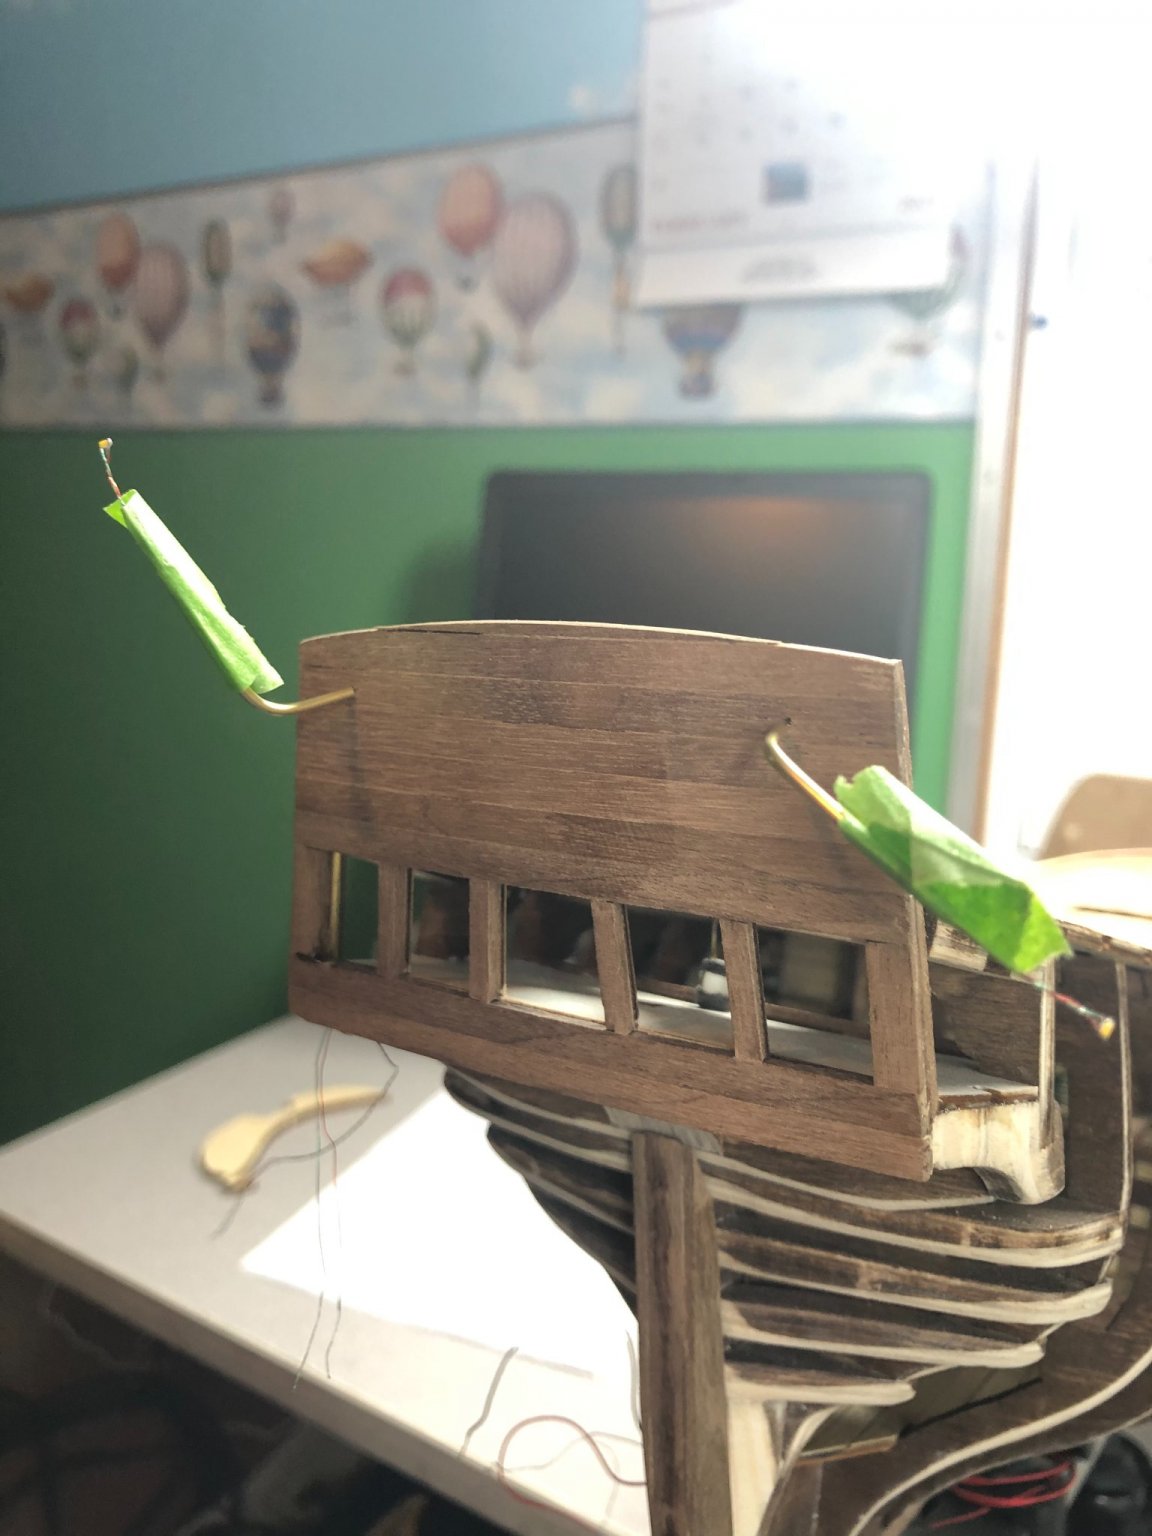
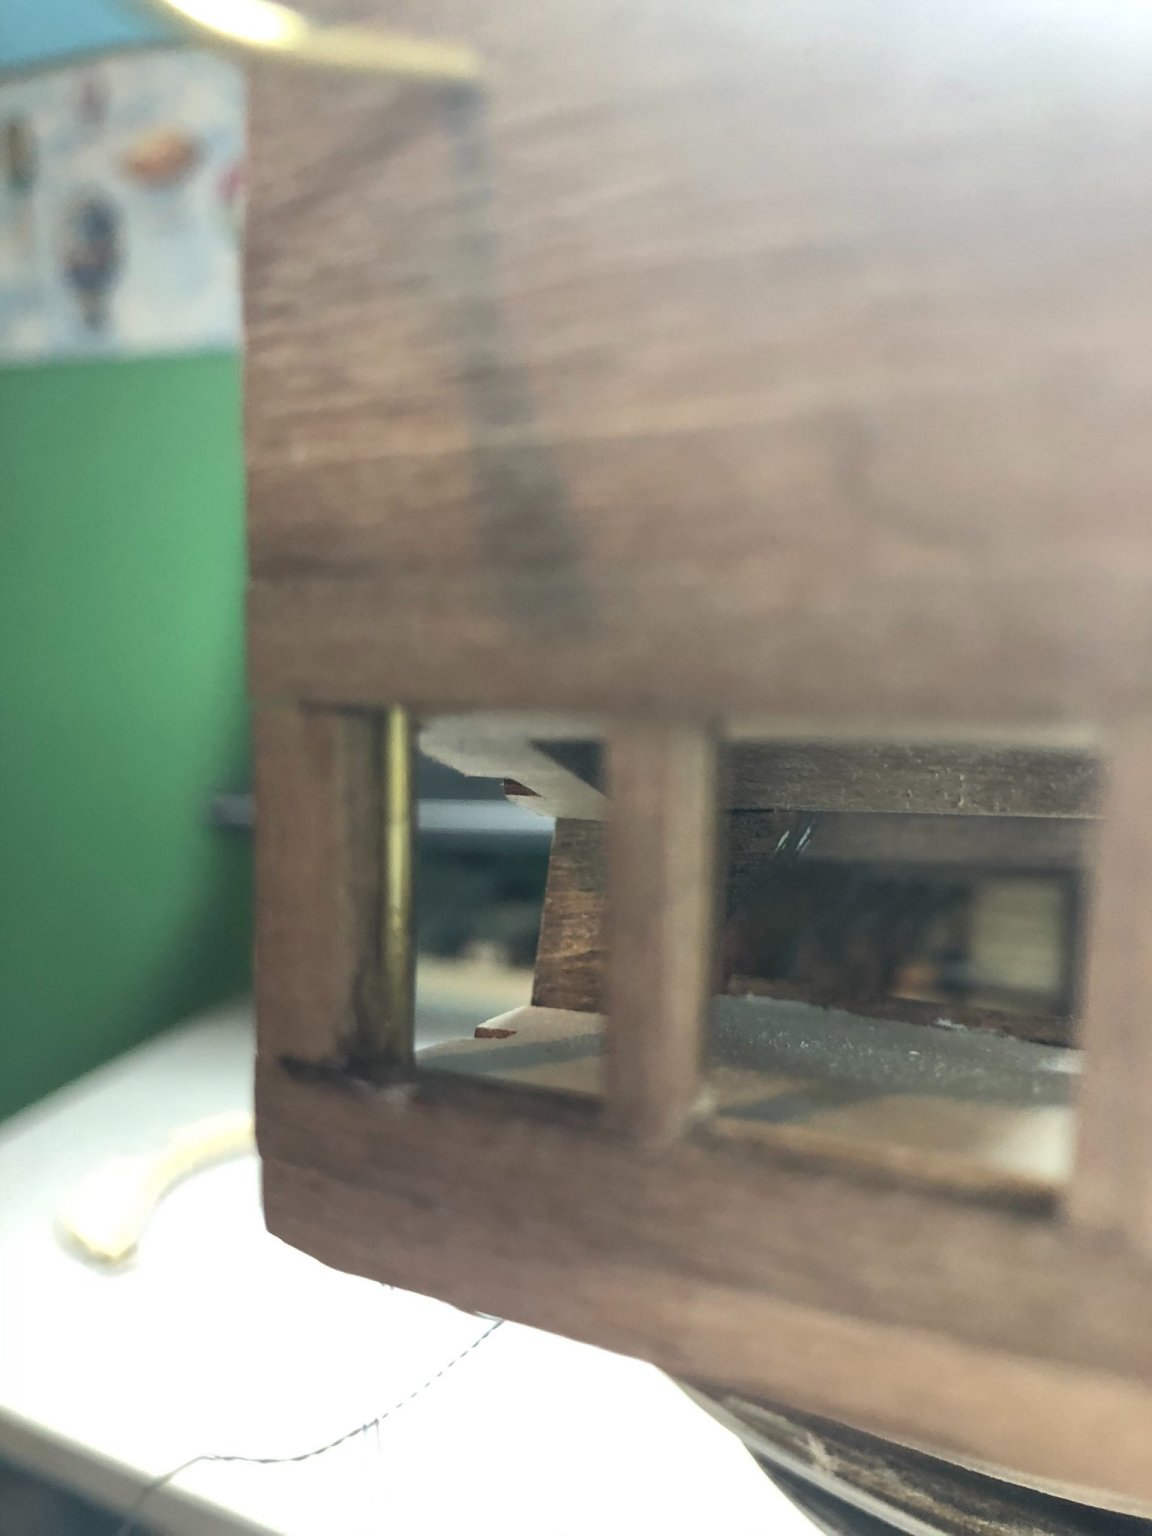
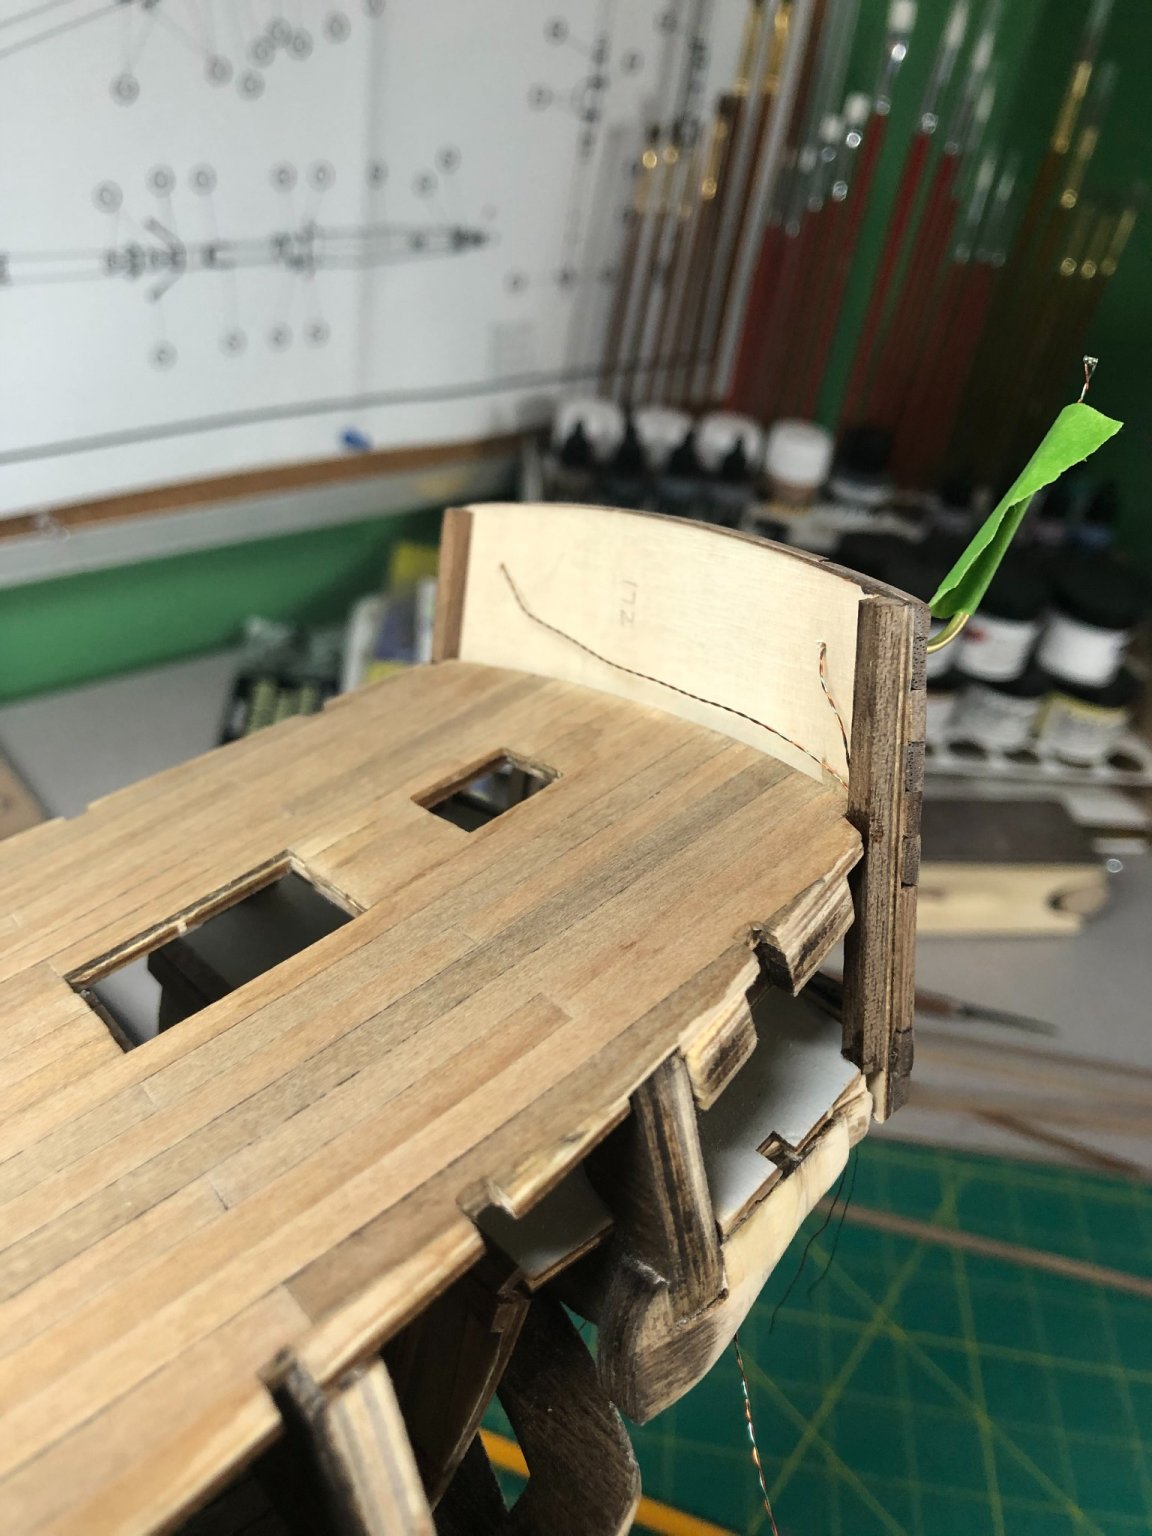
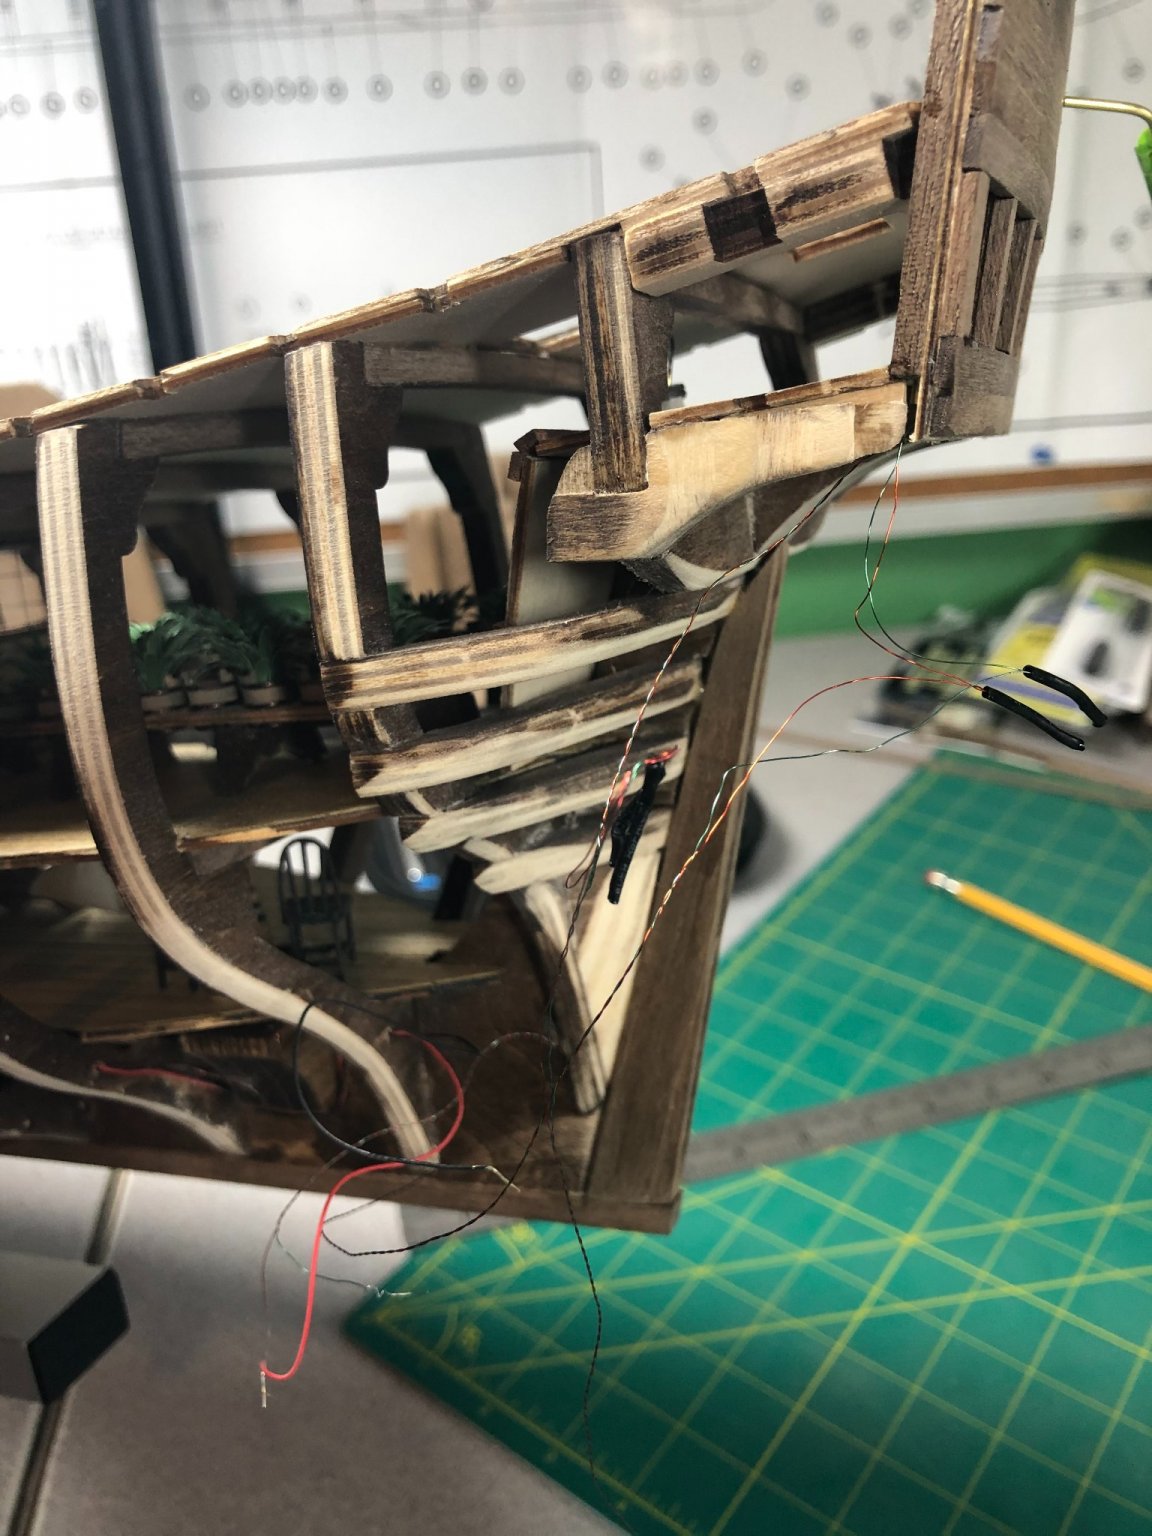
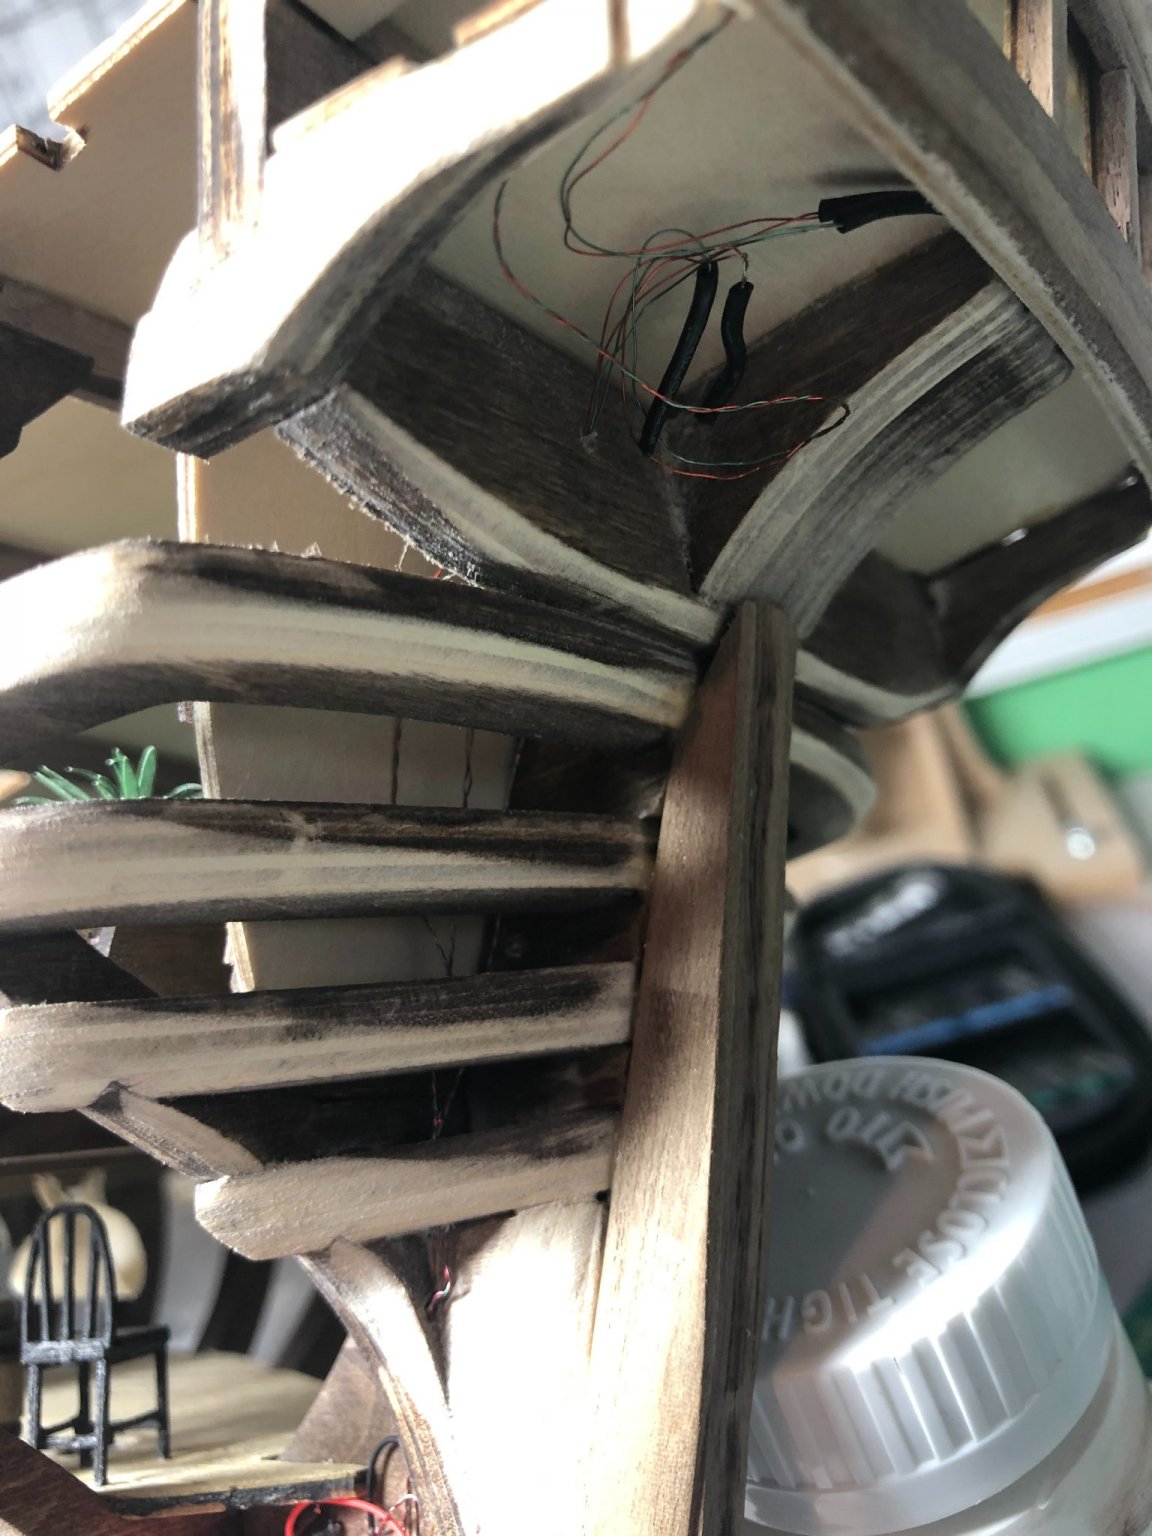
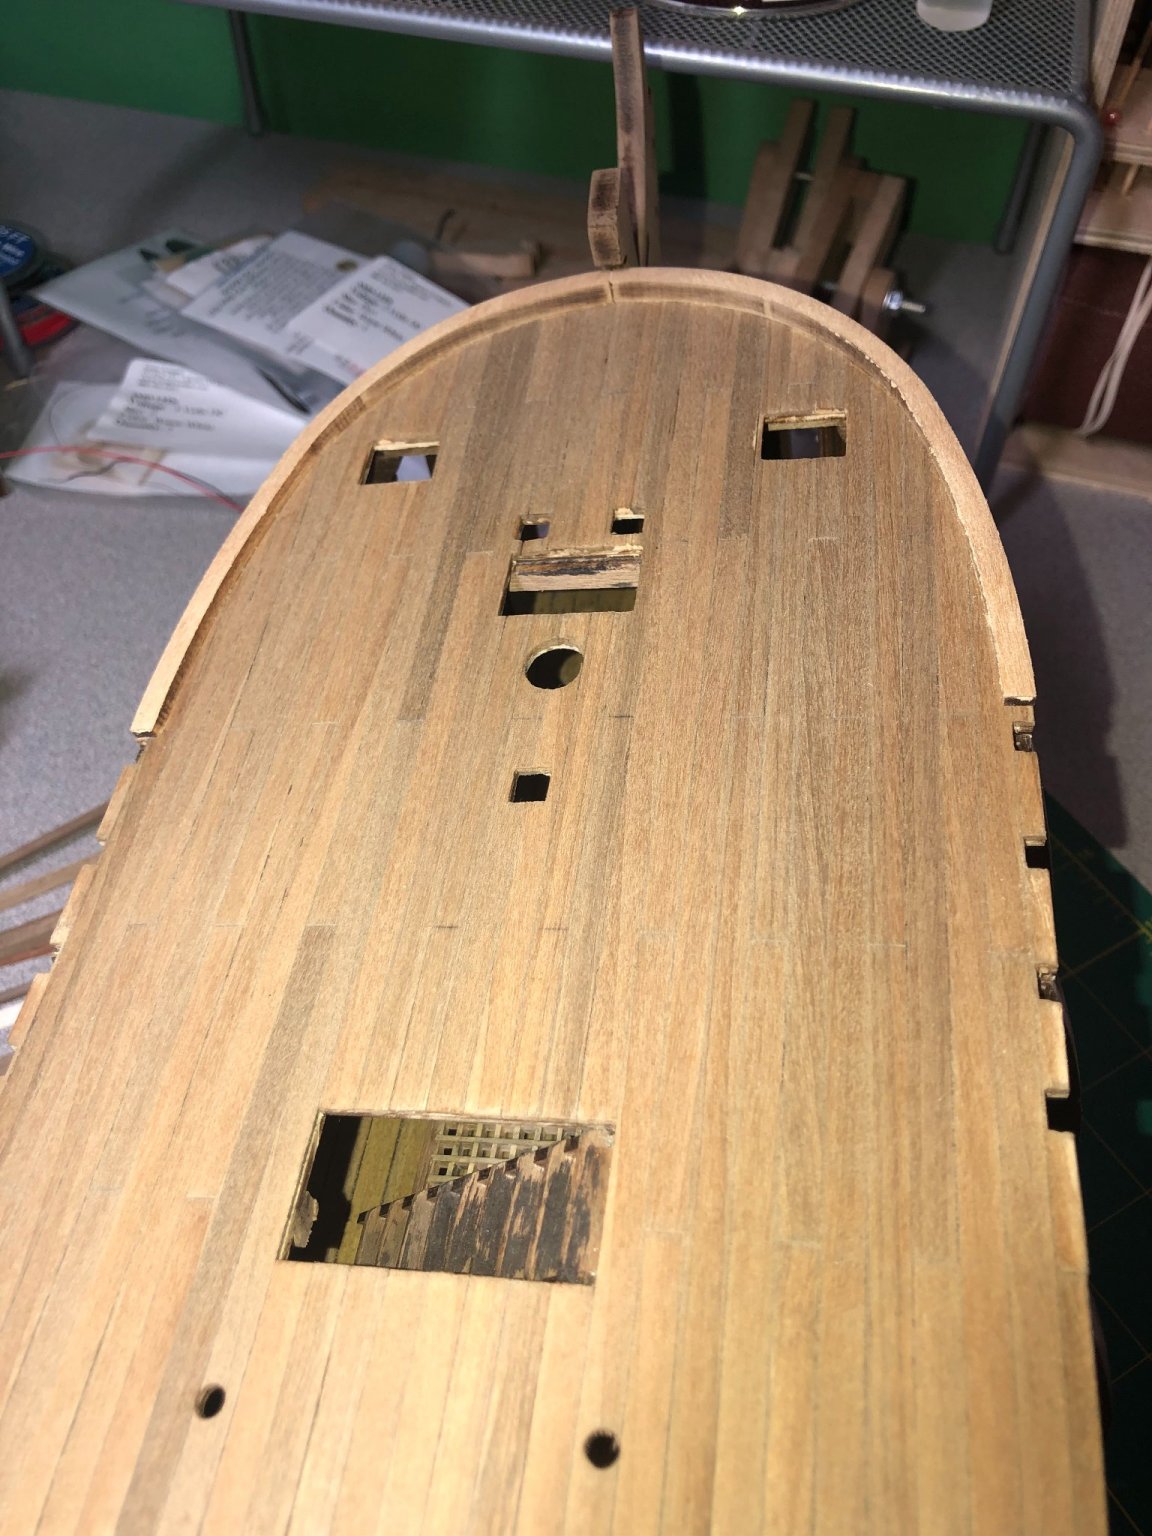
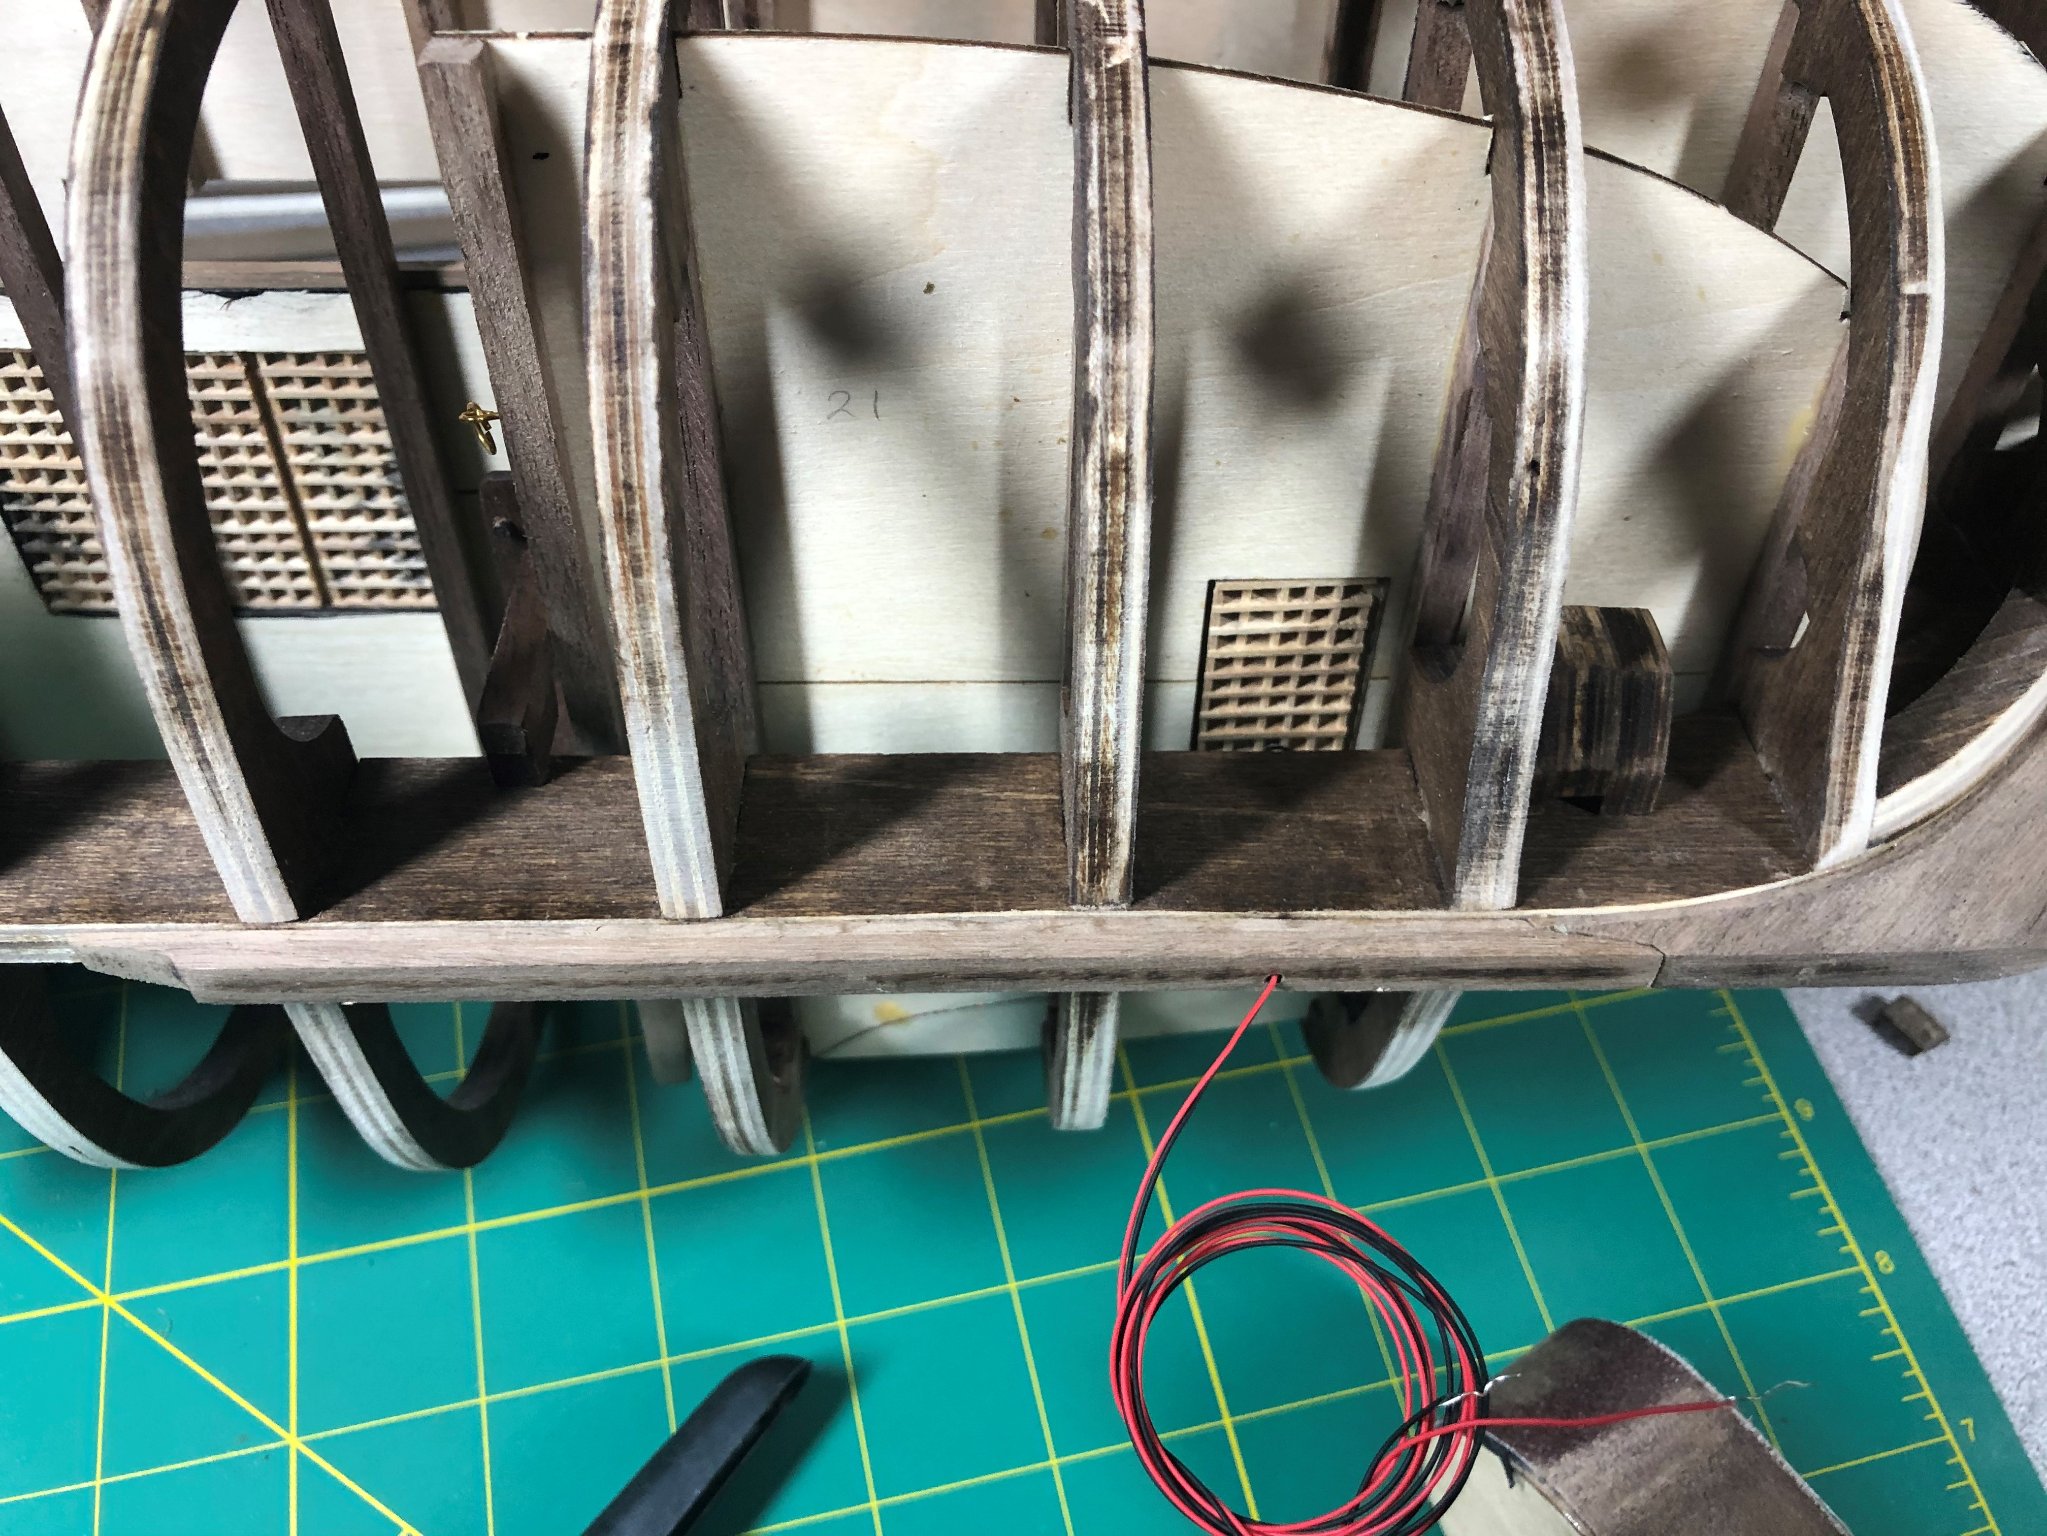
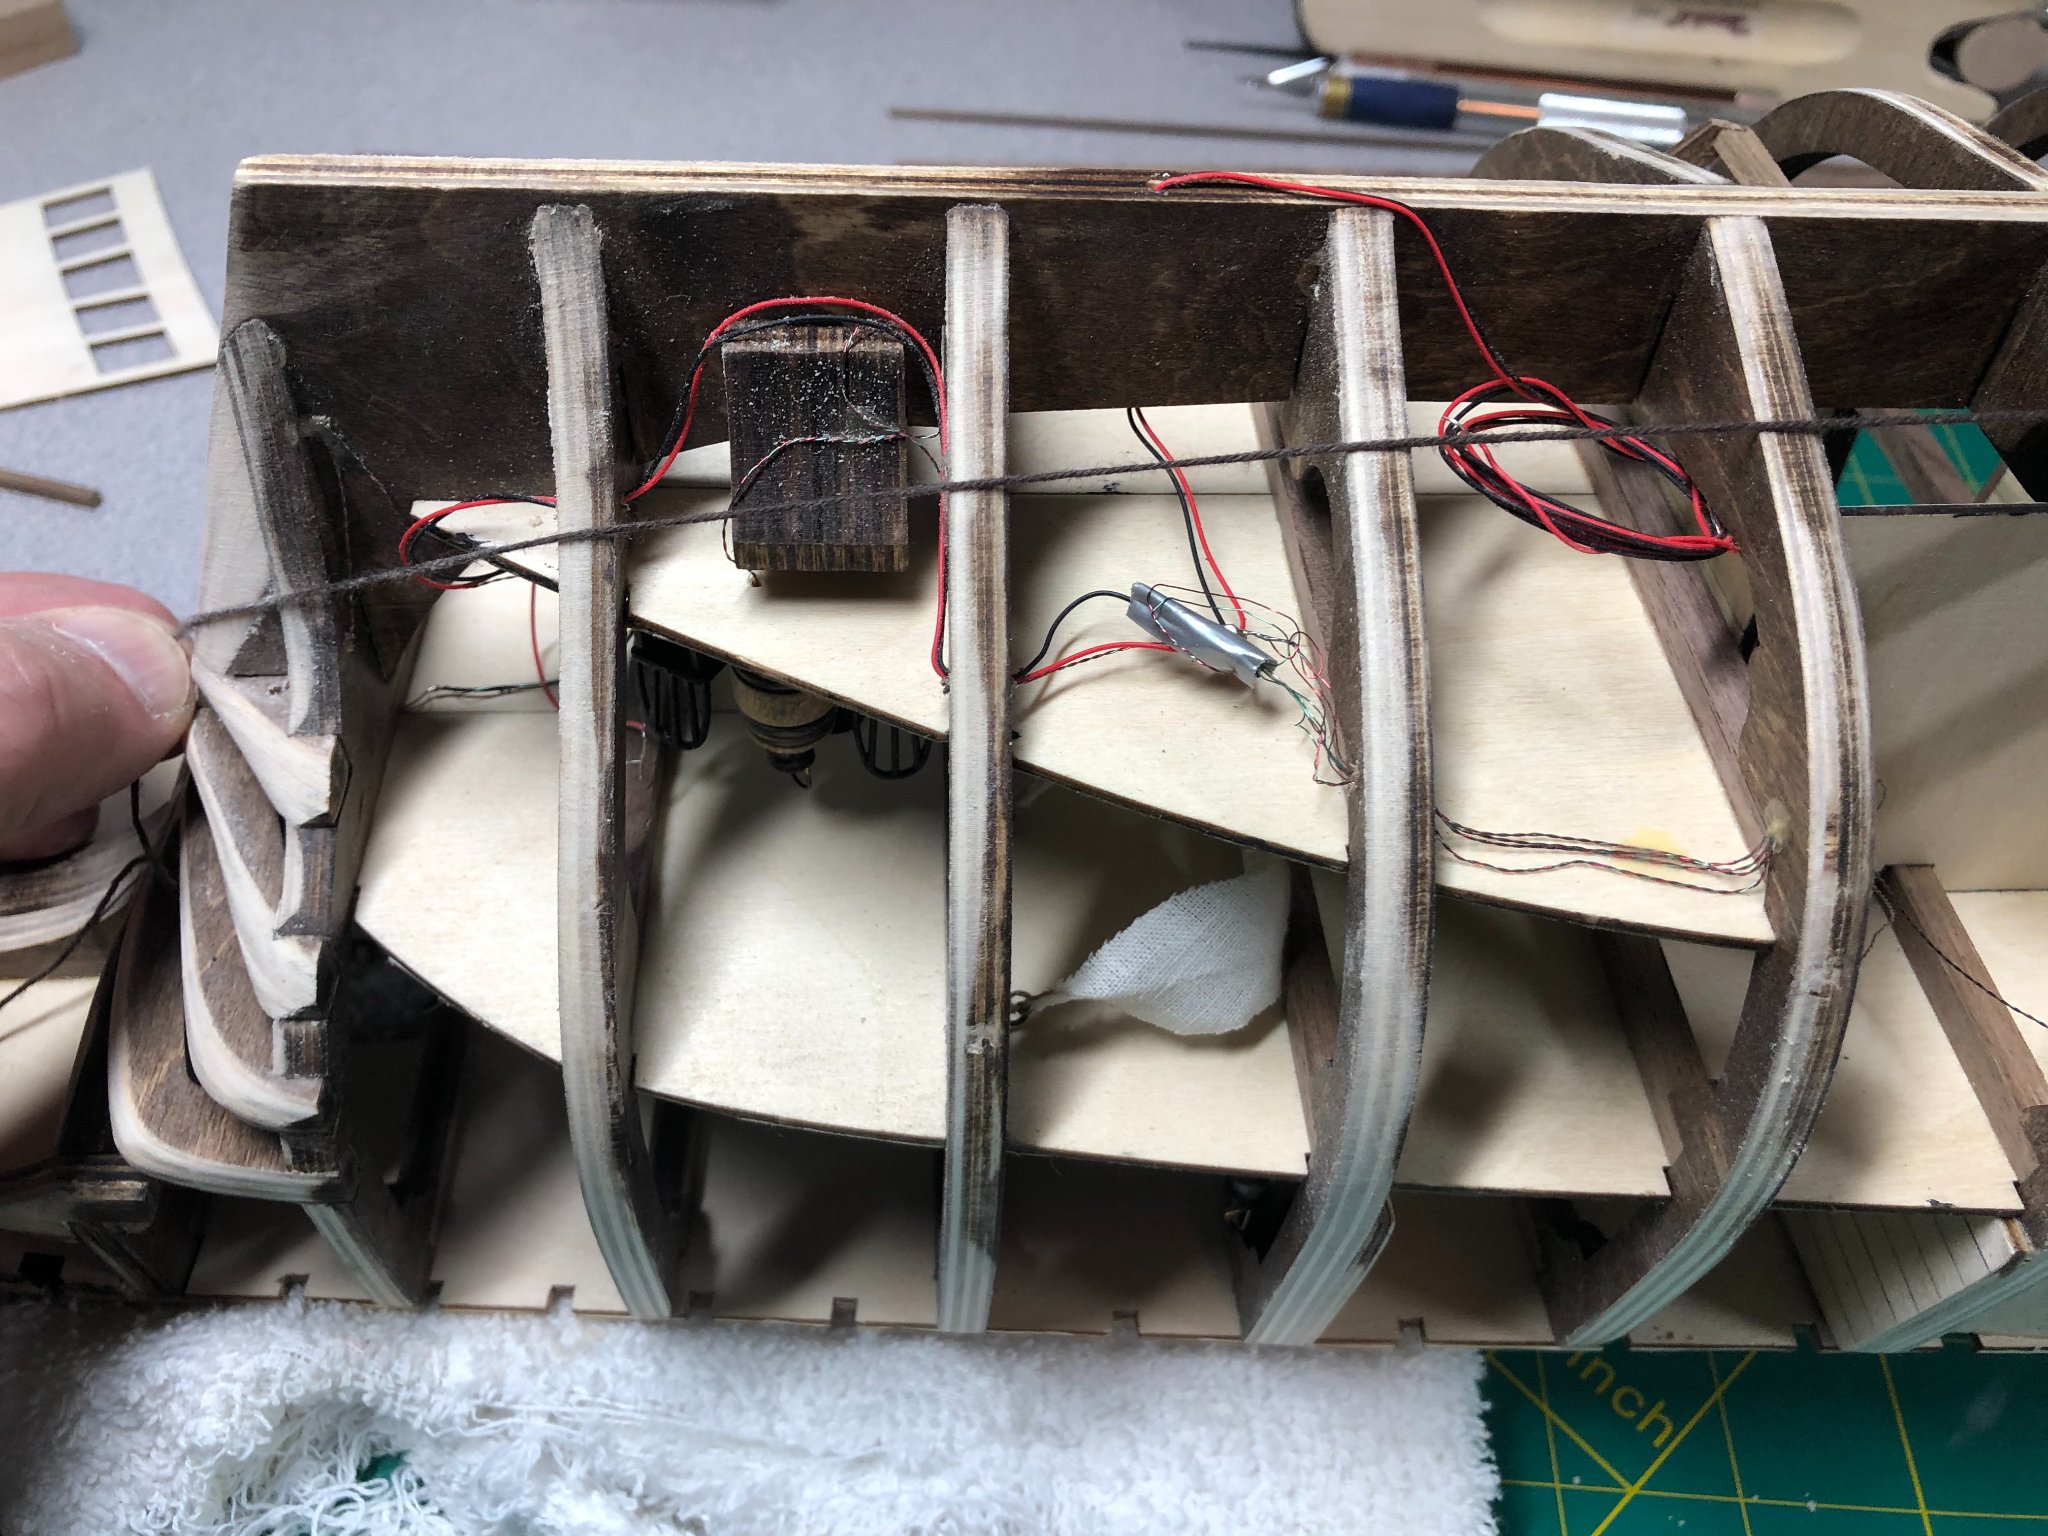
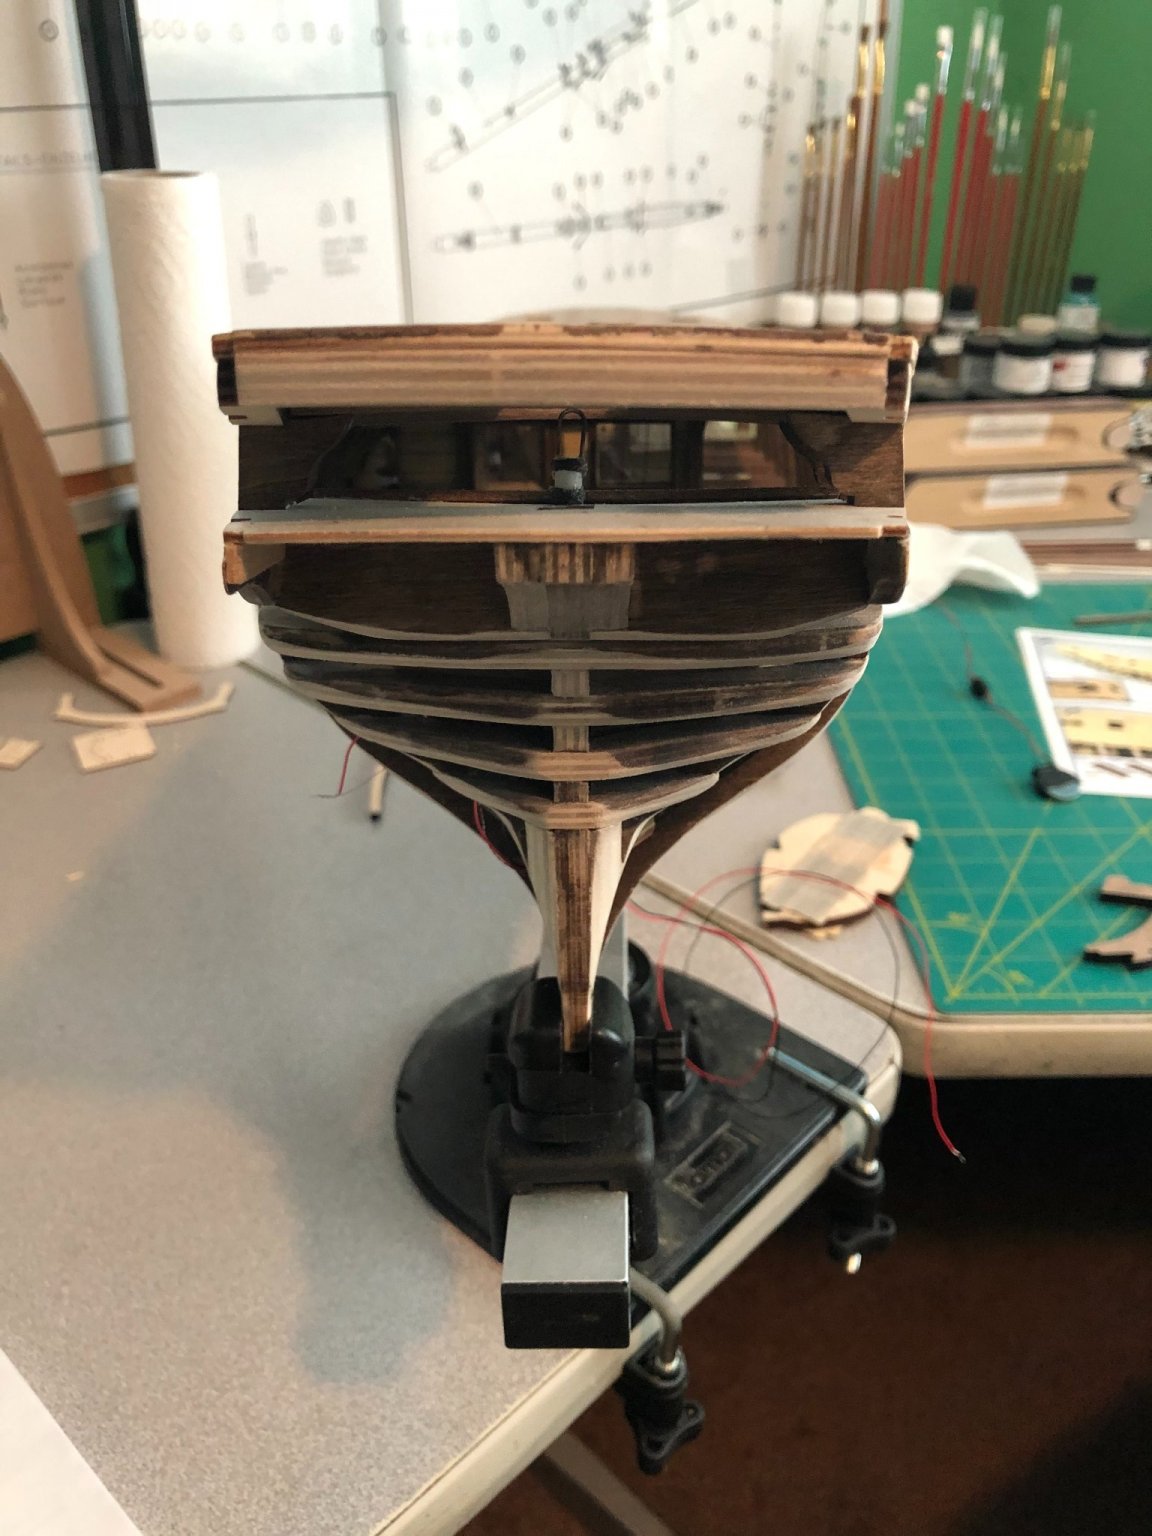
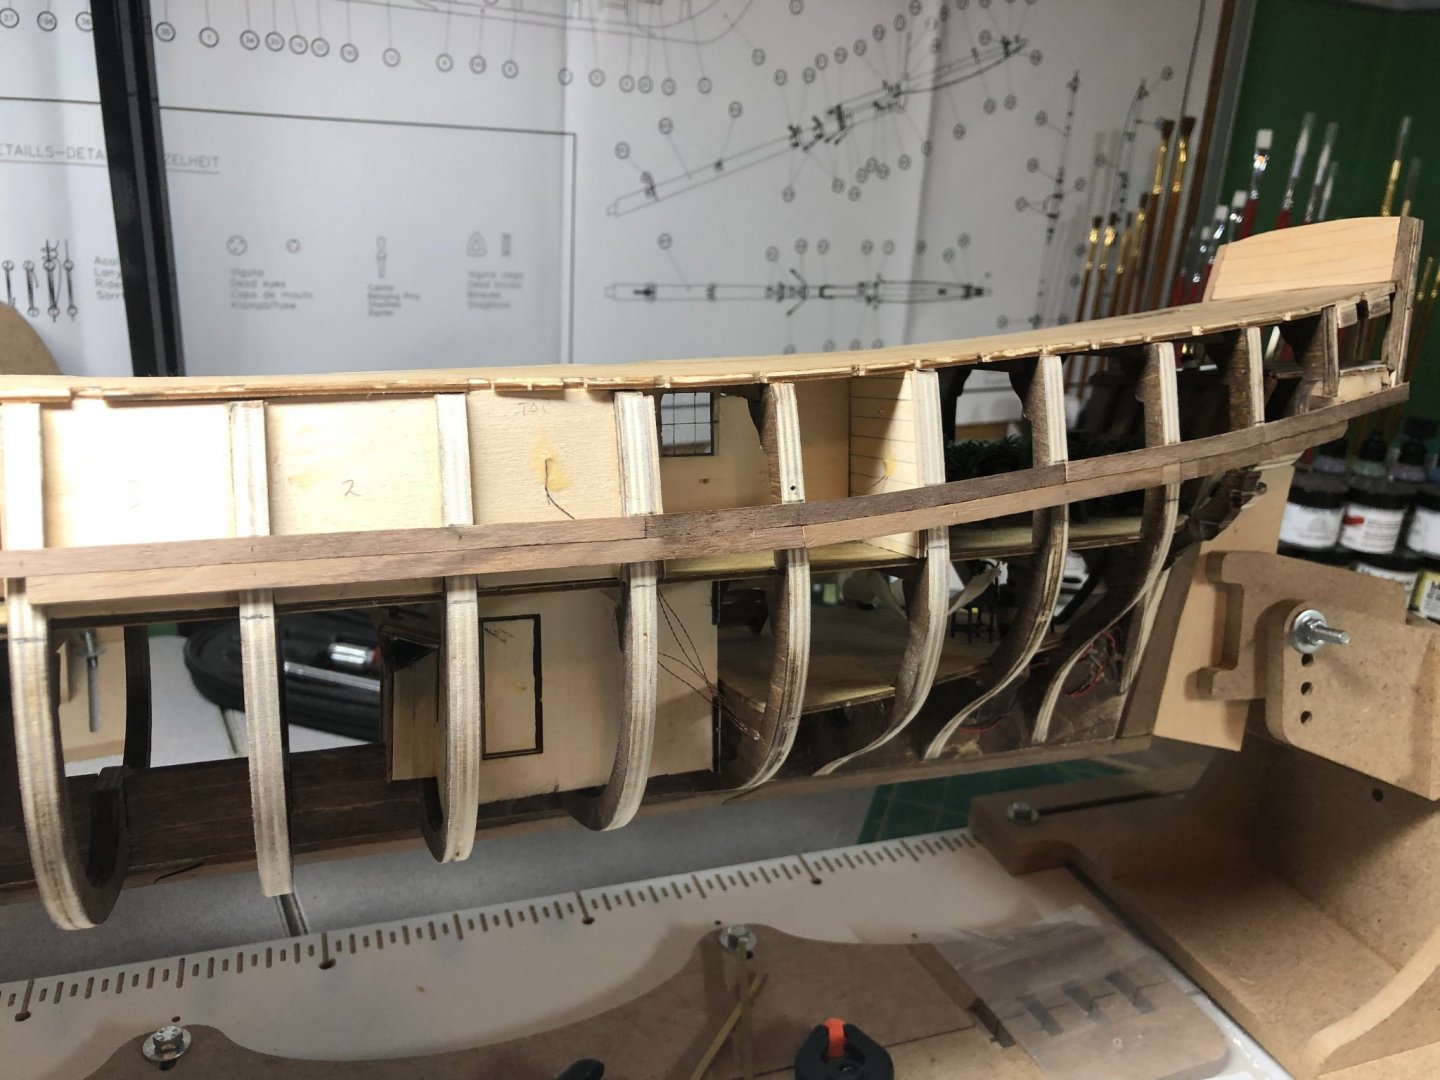
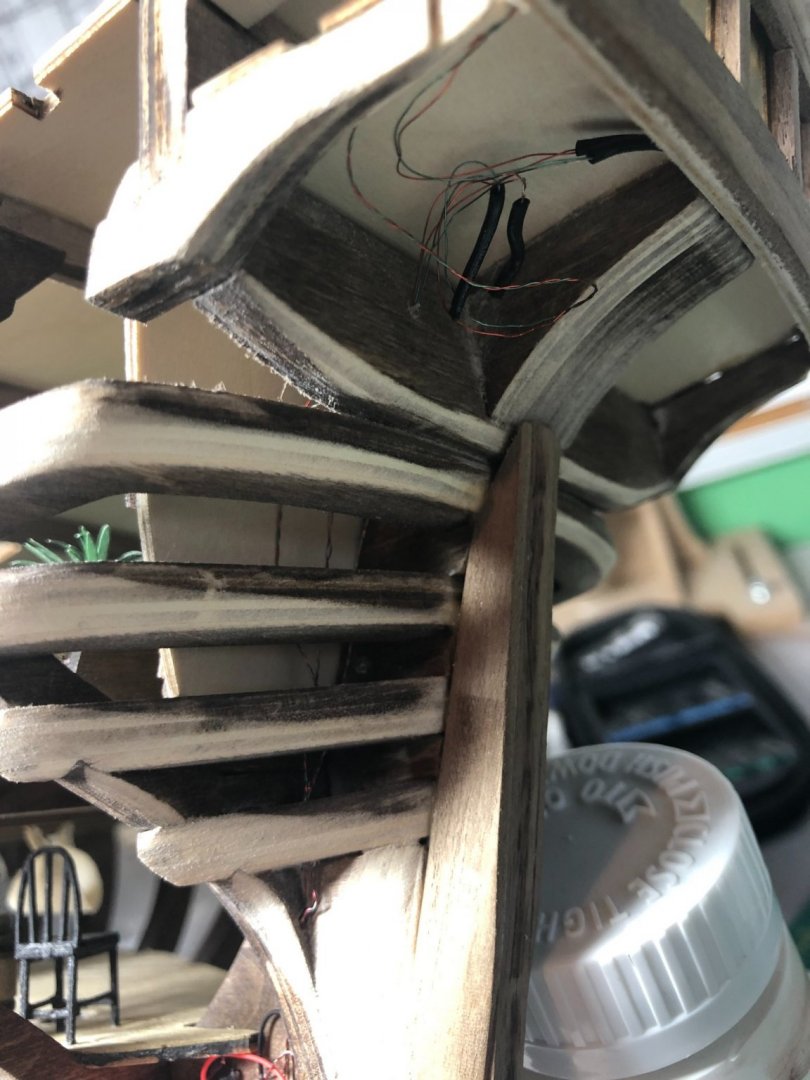
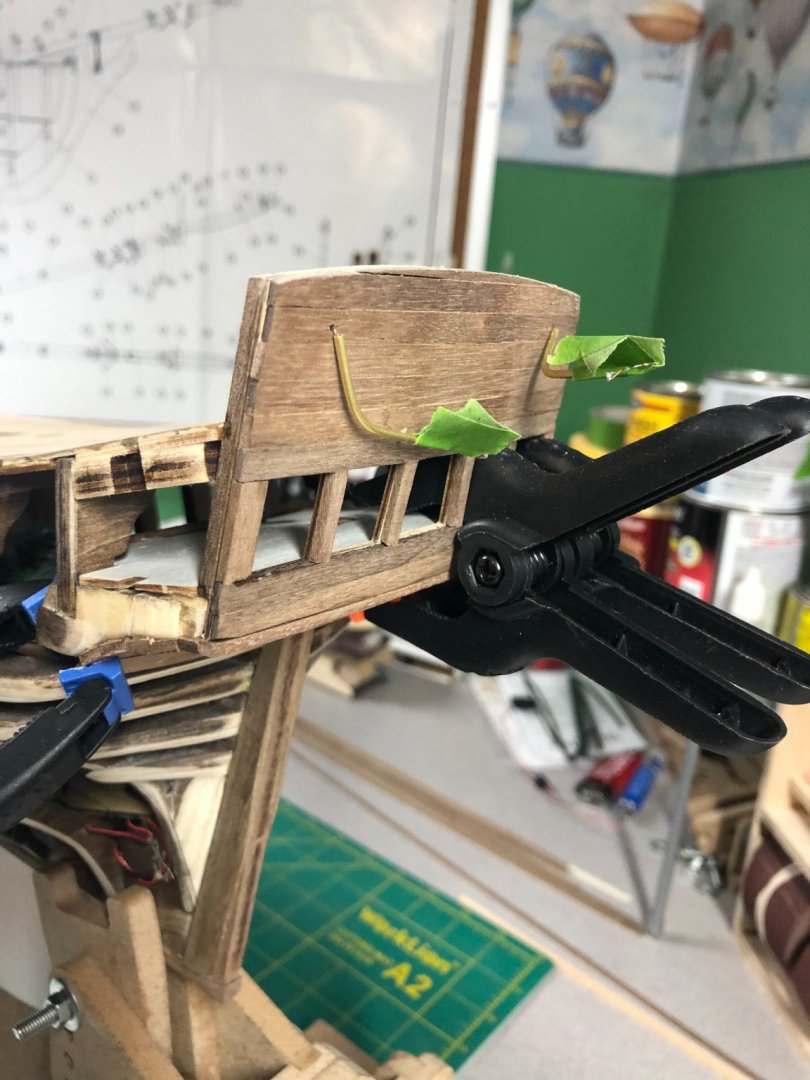
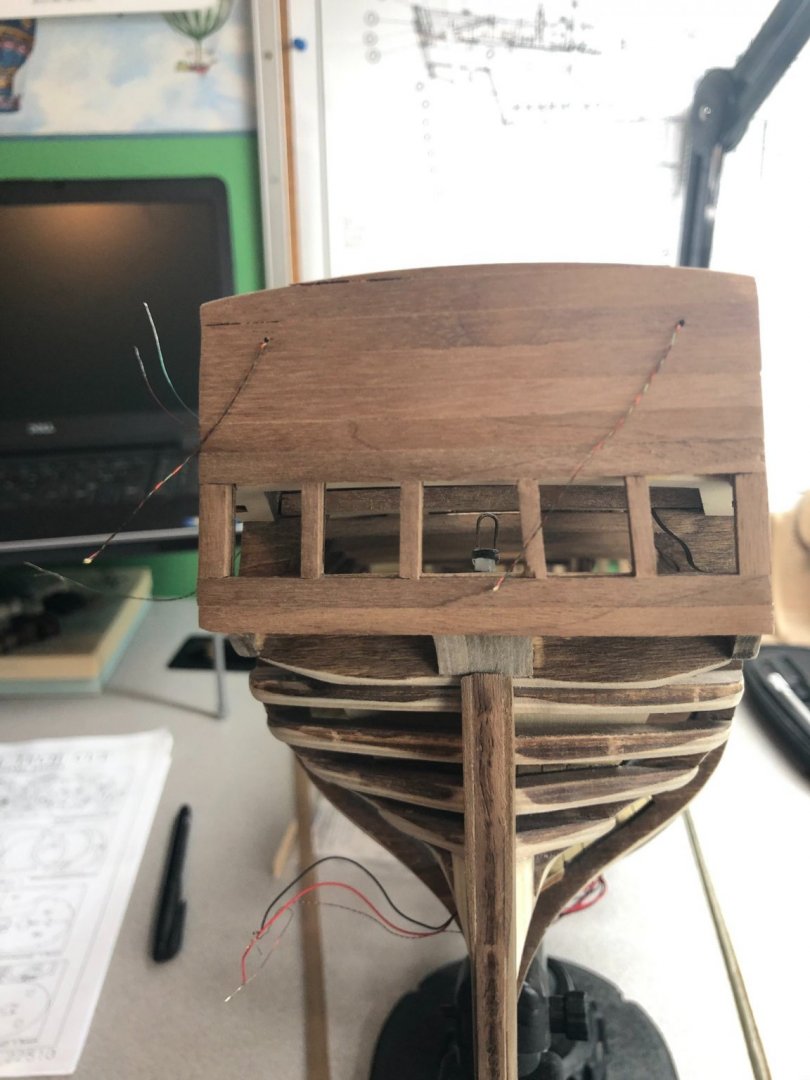
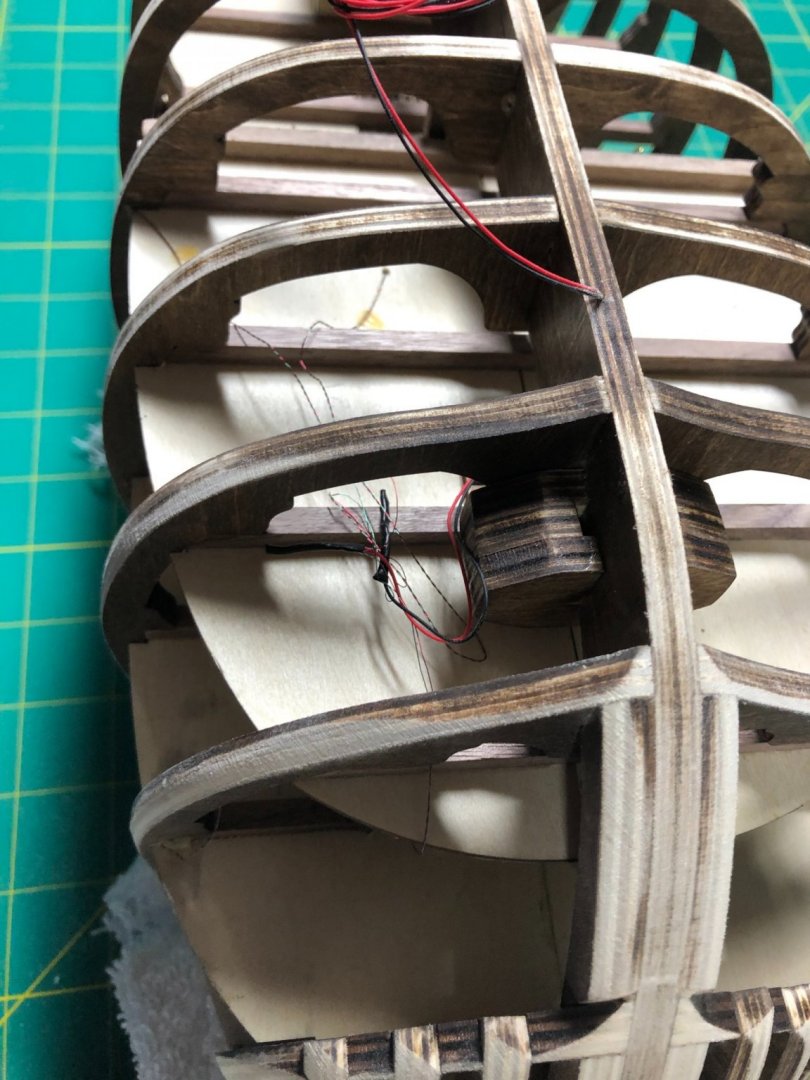
So, the stern lanterns don't get installed until much later in the build but I had to figure out how to get the LED to the lanterns. By looking at the plans and some pictures, I determined where the lanterns would be on the stern plate. I marked and drilled holes for the wiring: And ran the wires to port side stern stanchion. I used a very small brass tube as conduit to run the wires through the deck and into the frames: I'll just paint the brass when the time comes. I also had to cut and fashion the tubes the lanterns will be mounted. Since the LED won't fit in the tube, I have threaded and tape to keep from moving around too much: The wiring is now complete for the model except the switch and battery which will be in the mount base. I finished planking the stern plate: The keel is installed and the first thing I like to do is lay-out the position of the wales: And so it begins! I plank the wales first. I use the wales as a reference for the planking and since the wales is a double layer, I don't need to worry about butt patterns and length of planks: More to come!


-
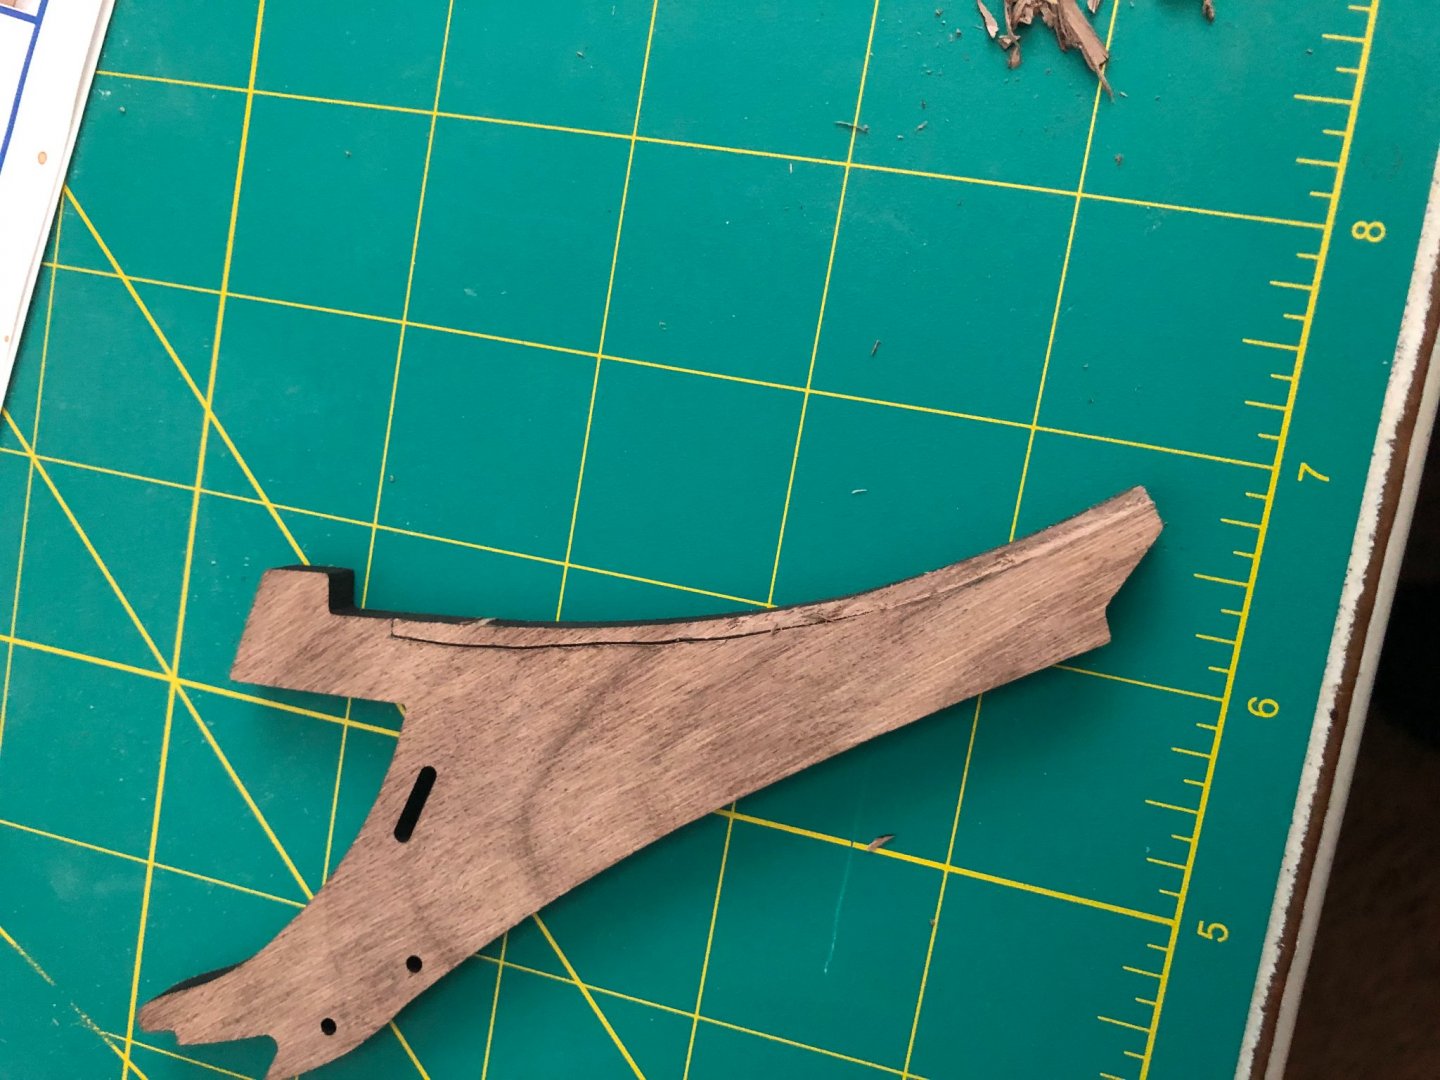
Sitting at my computer watching snow accumulate... 8 inches and counting! I'll get lots of work done today... Can't do much of anything else! So far this week I've continued cutting the rabbet into the keel pieces. The walnut is a difficult to work with but am making good progress and a portion of the keel is now in place. Additionally, I got the stern post built up to properly accept the planks: This last picture is of one of the keel pieces as I prep it for the rabbet cut. I installed the stern plate and began planking the outer section: Still need to do some blending and sanding. Also installed the lower bow rails: Hope to have the keel installed today and start planking! Also, will be getting the light and wires in place for the stern lanterns before planking the inner surface of the stern plate. Another quick update tomorrow or Monday.


-
Thought I would mention for anyone interested in the HMS Bounty’s history. I just finished reading “Mutiny on the Bounty” by Peter FitzSimmons. Written in 2018, it is a historically accurate account of the time right before she left England (actually, including Bligh’s previous service) to nearly 30 years after that fateful trip. It’s based on journals, notes and letters from all involved. A lot of interesting info that you won’t find in any other retelling of the story... very factual. I found it to be an excellent book and enjoyed it thoroughly!
-
i do remember seeing that in a previous post. Good luck! Another love of mine... planes, but specifically WWII era planes! The pictures of your Bounty are stunning! Absolutely beautiful piece of art! Hope to accomplish something close to what you've done! Your build log continues to provide inspiration and guidance! Appreciate the opportunity to get some help from time to time! Overall, I like the kit but the instructions are not the best and out of order. Fortunately, build logs have helped and I'm really enjoying the challenge and the detail.
- 171 replies
-
- 1
-

-
- artesania latina
- bounty
- (and 1 more)
-
Congratulations! Looking forward to the pictures! A little early as I usually like to take a short break but what's up next?
-
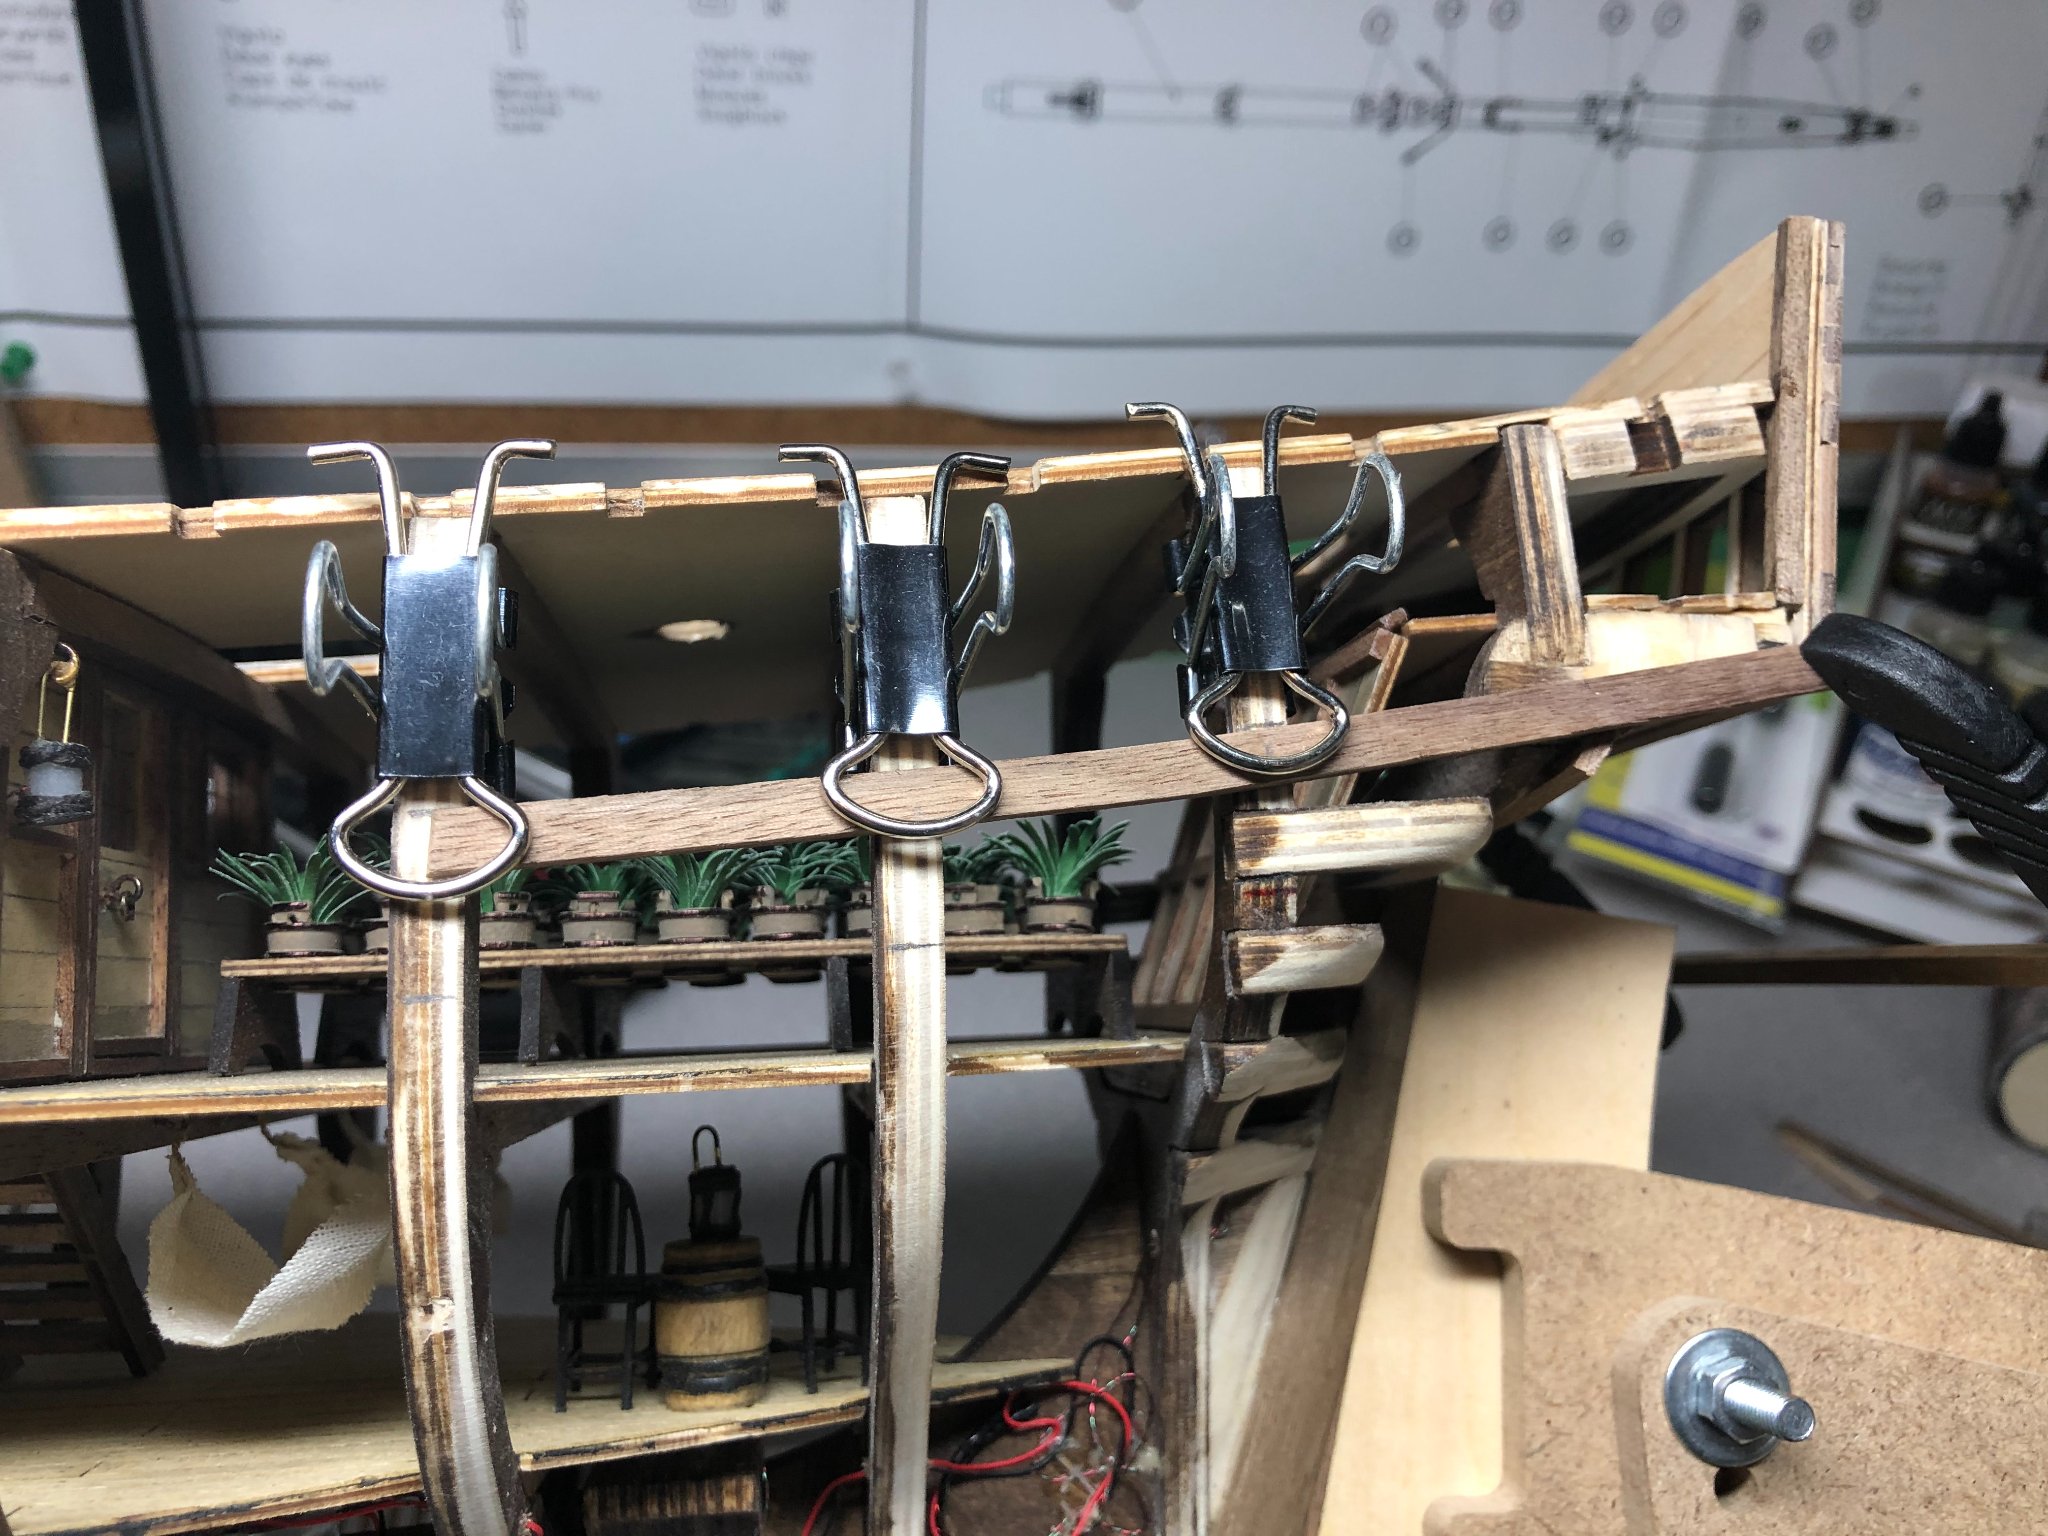
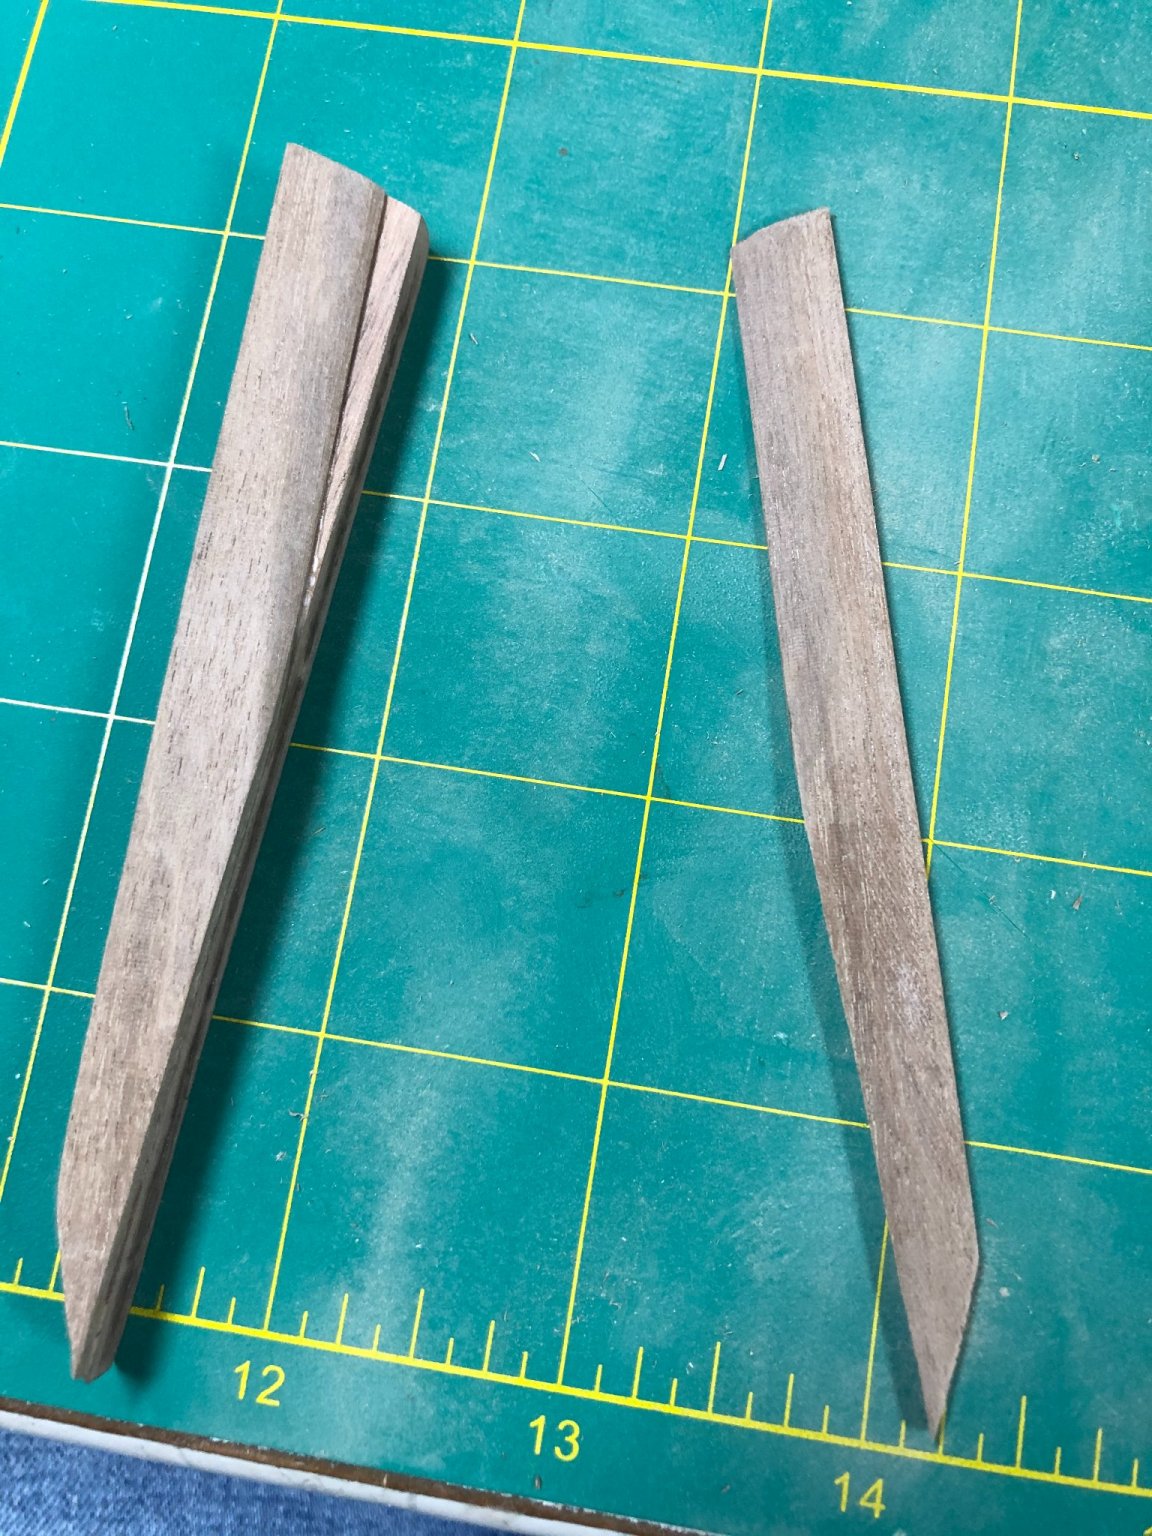
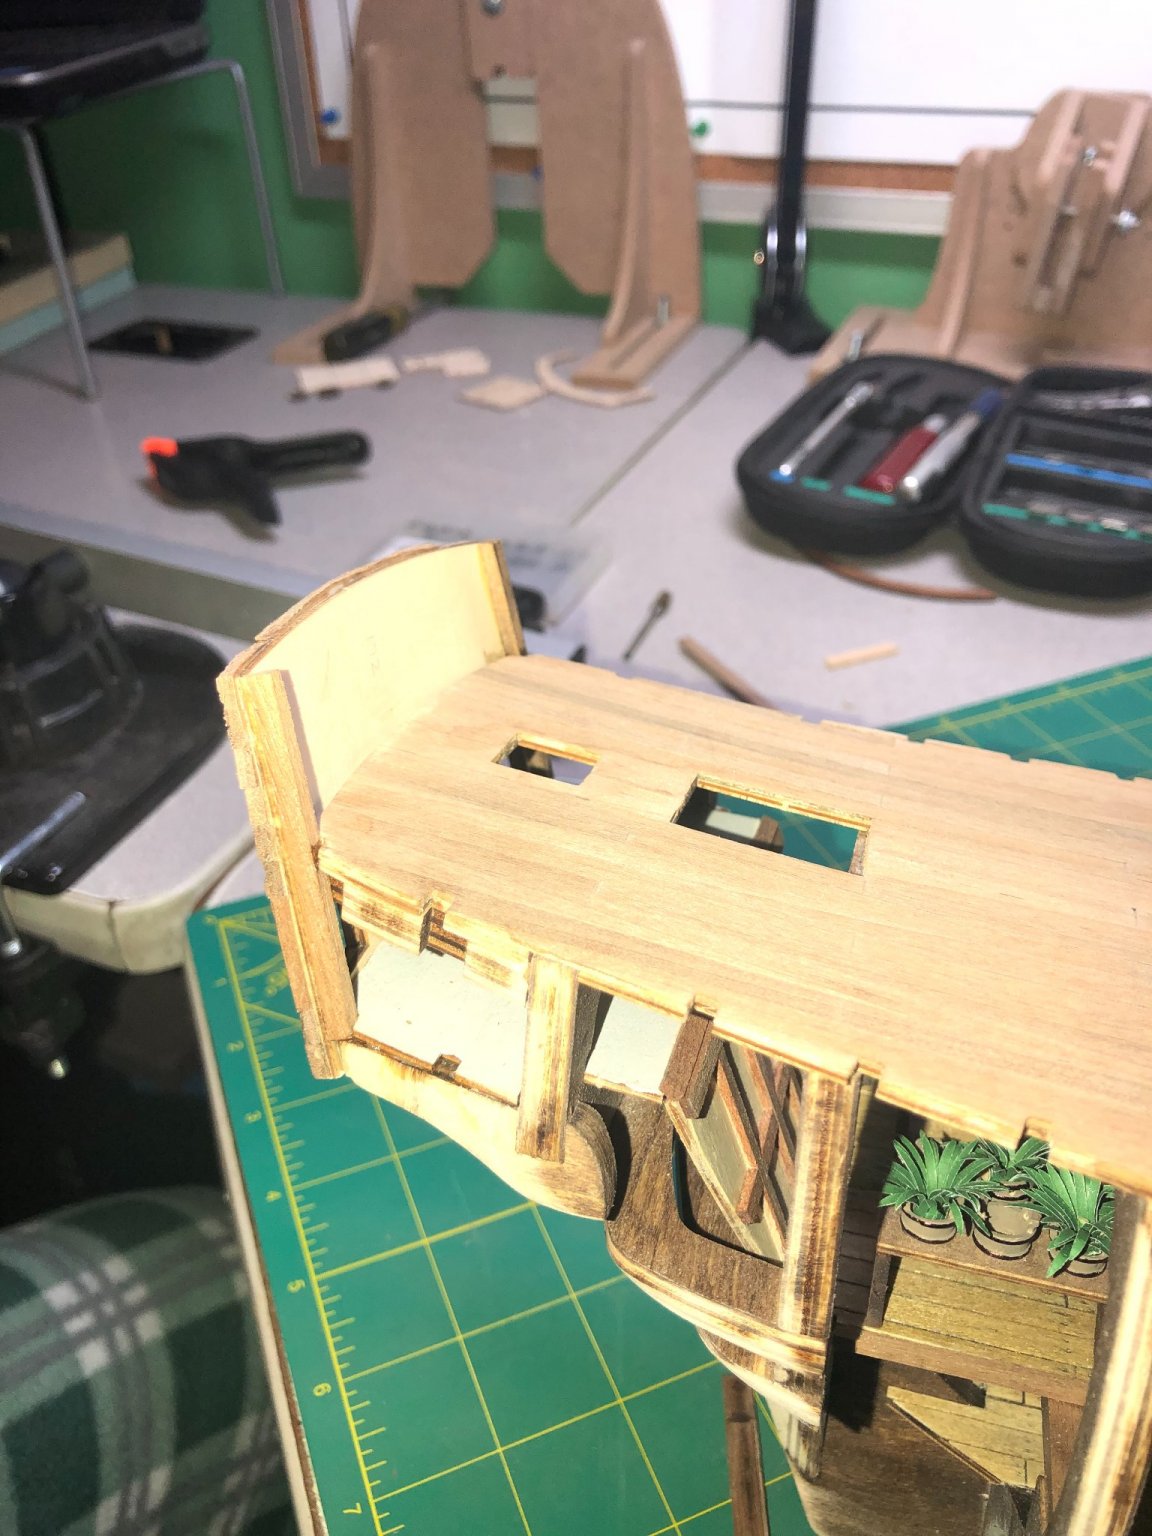
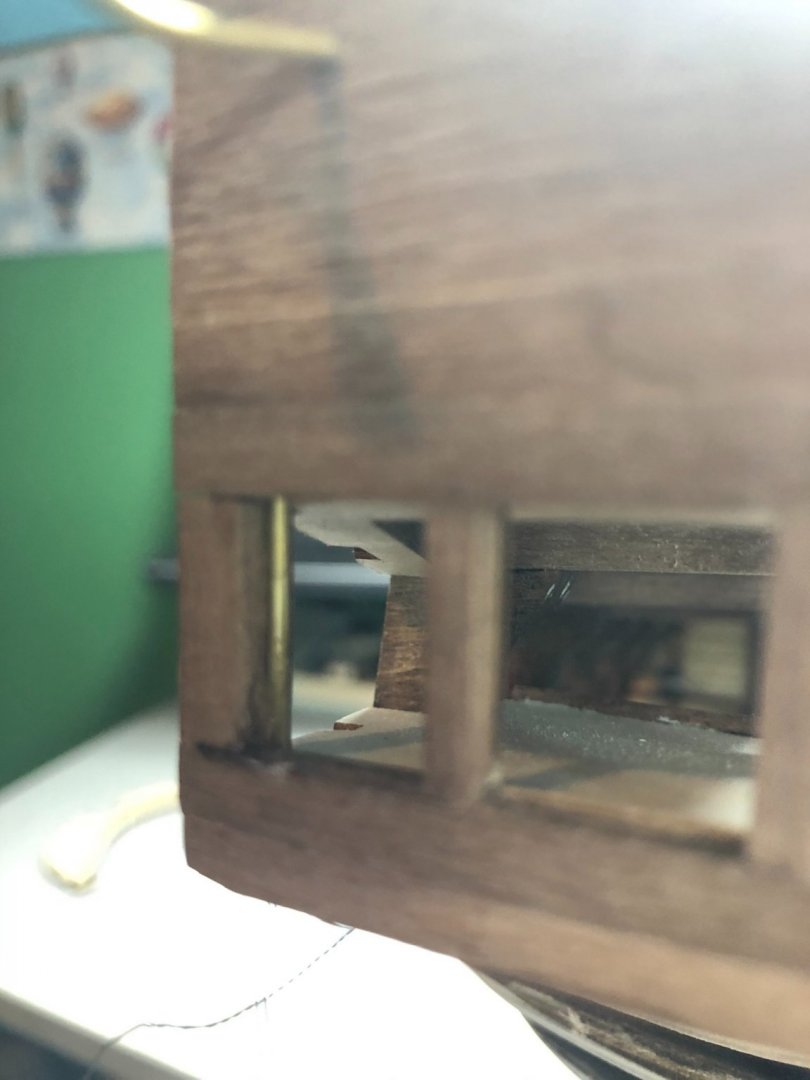
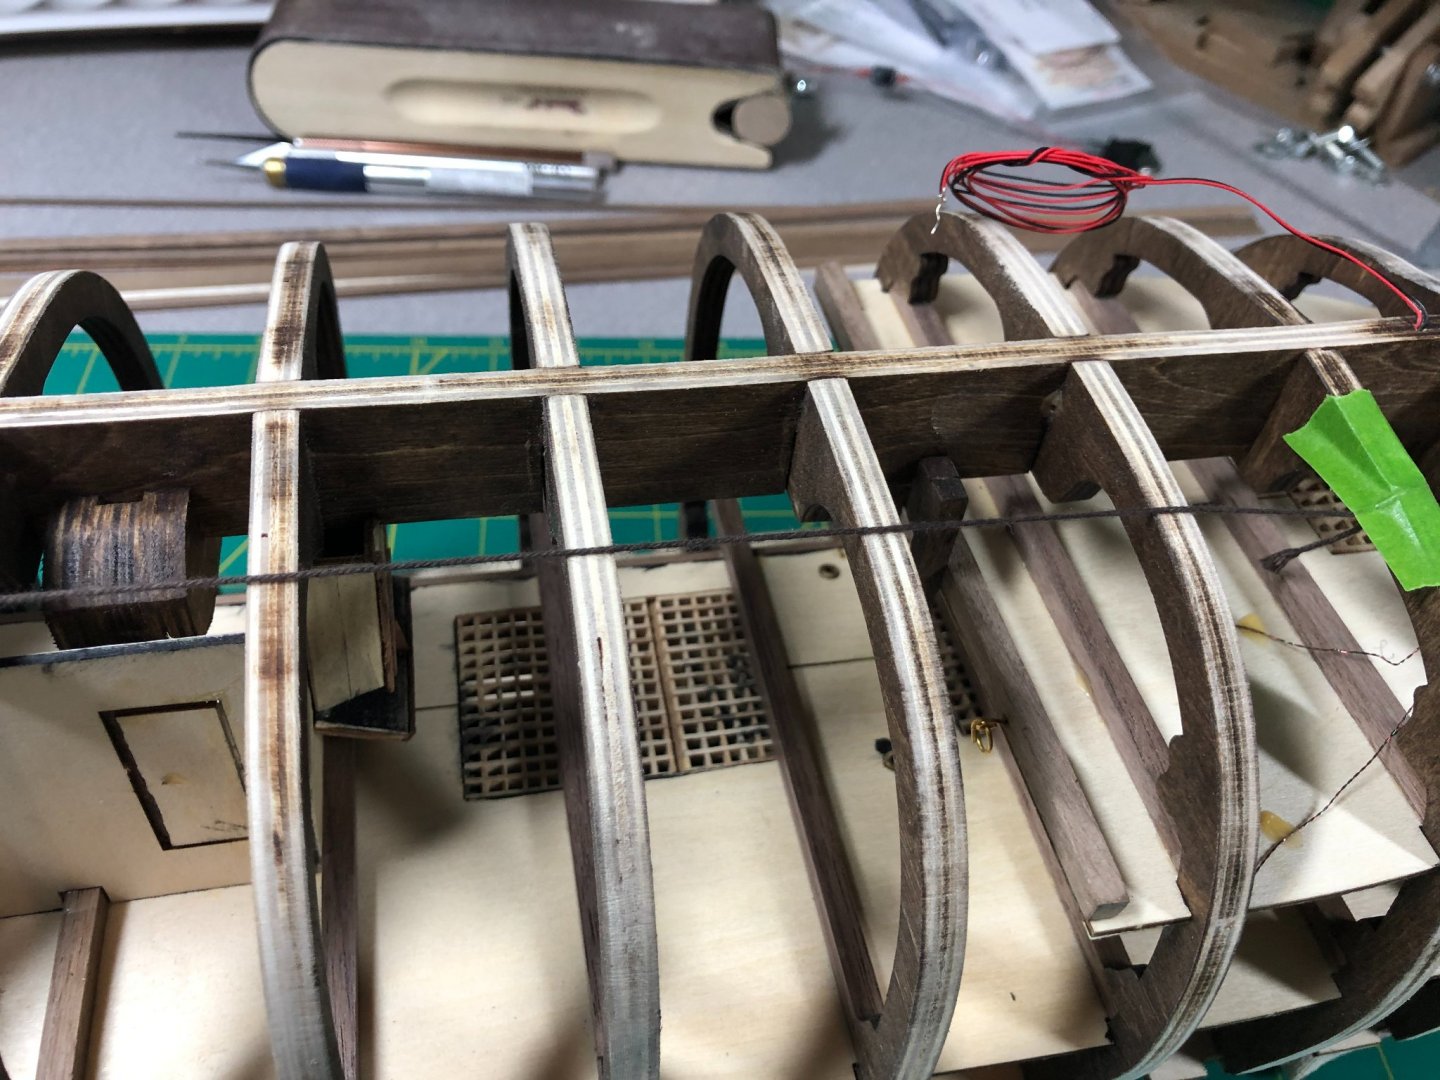
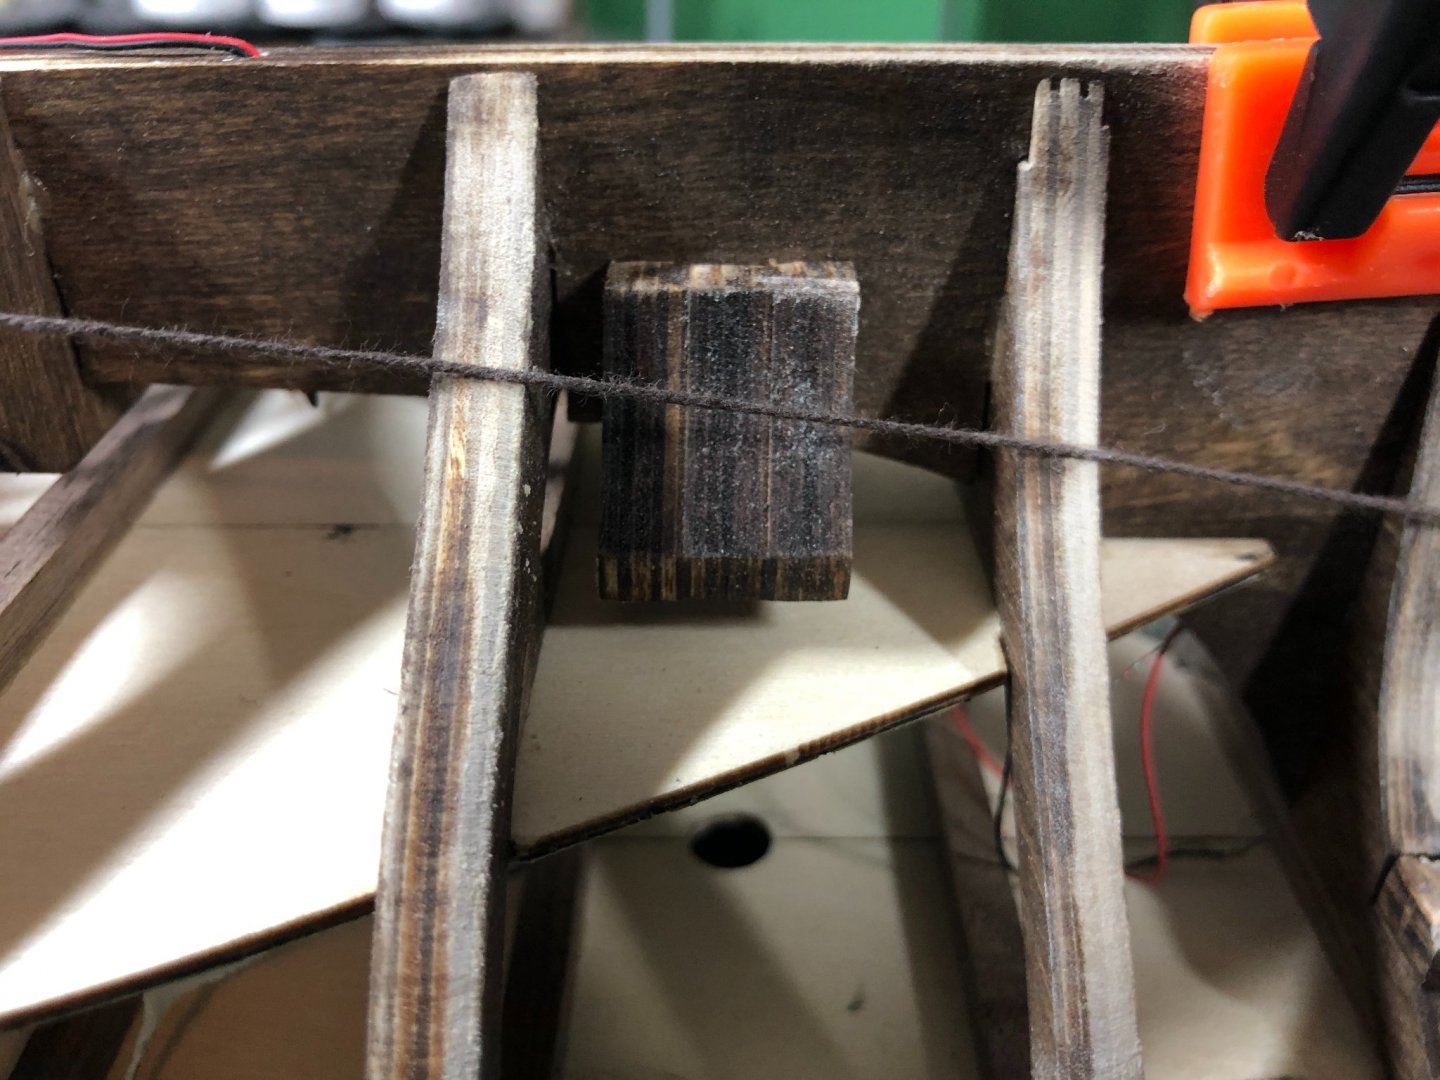
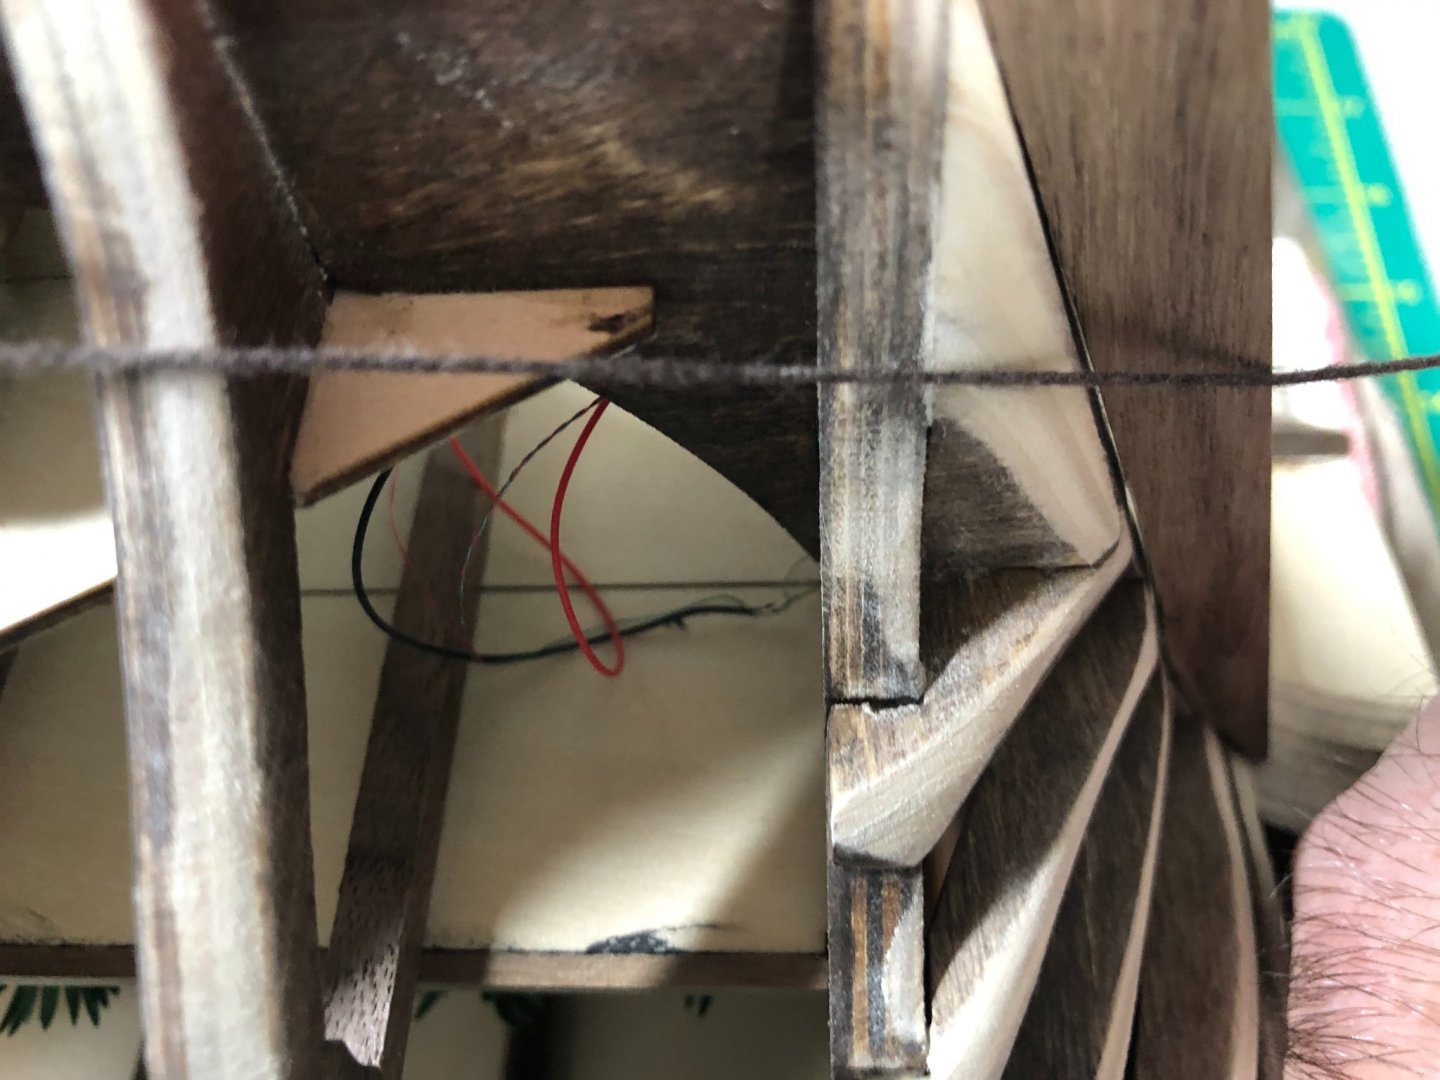
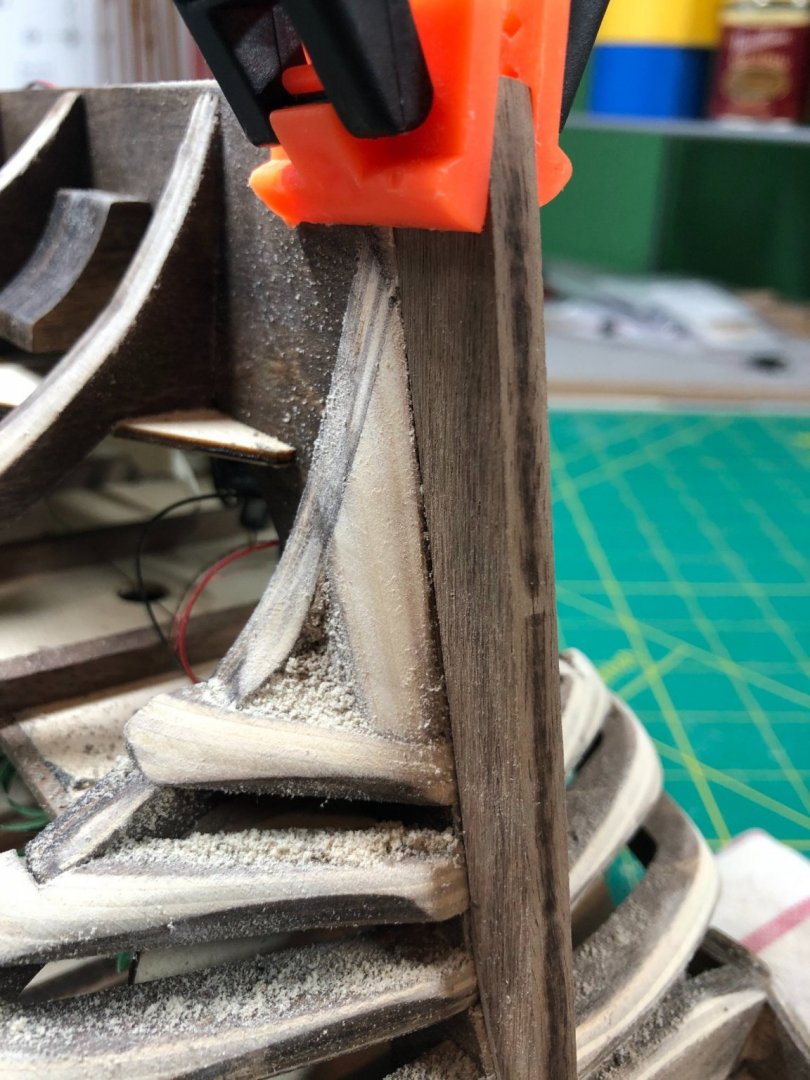
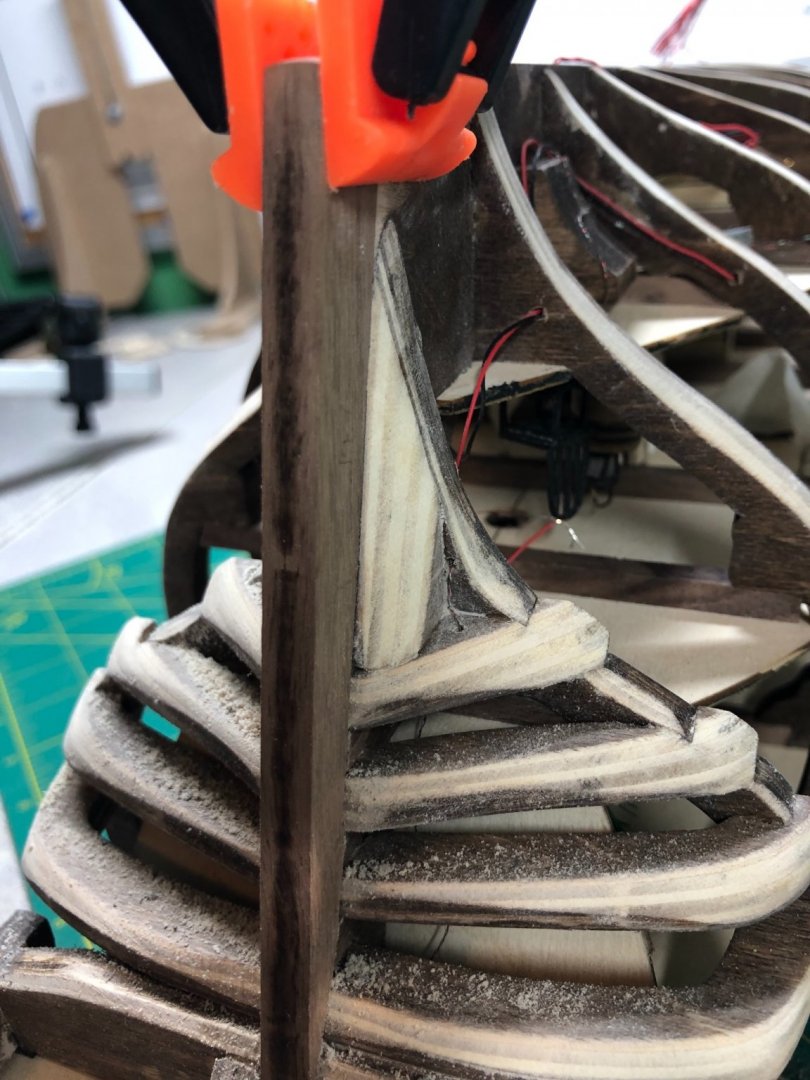
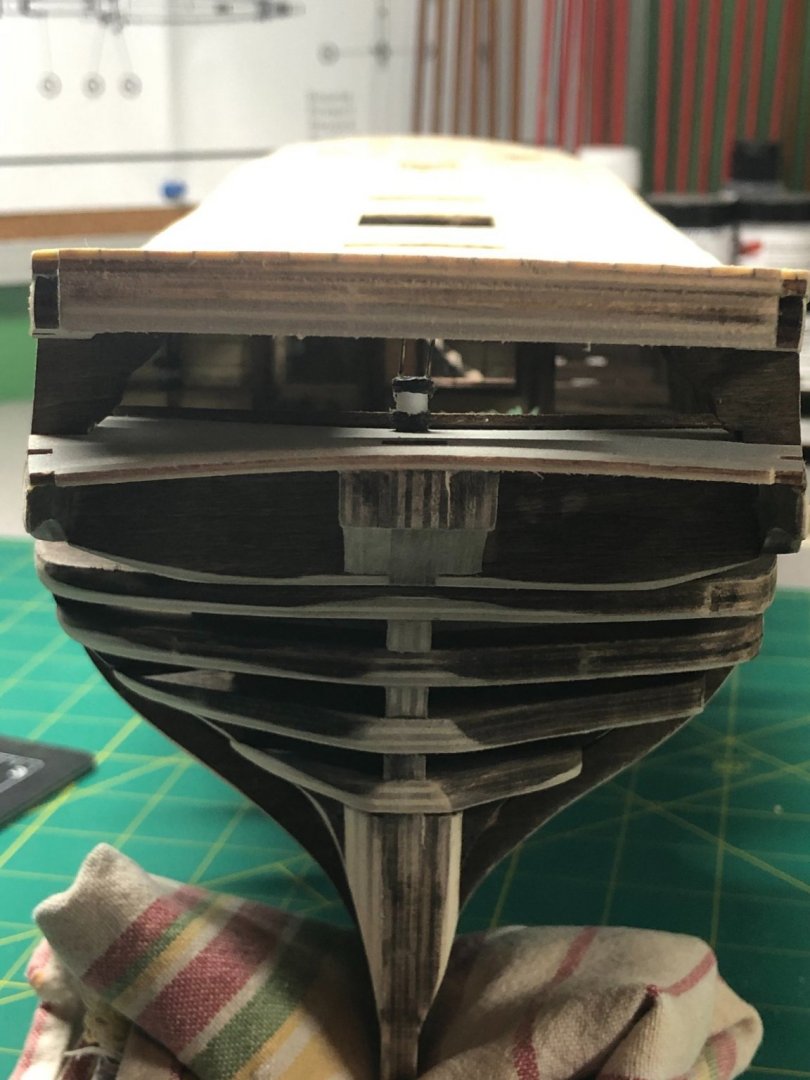
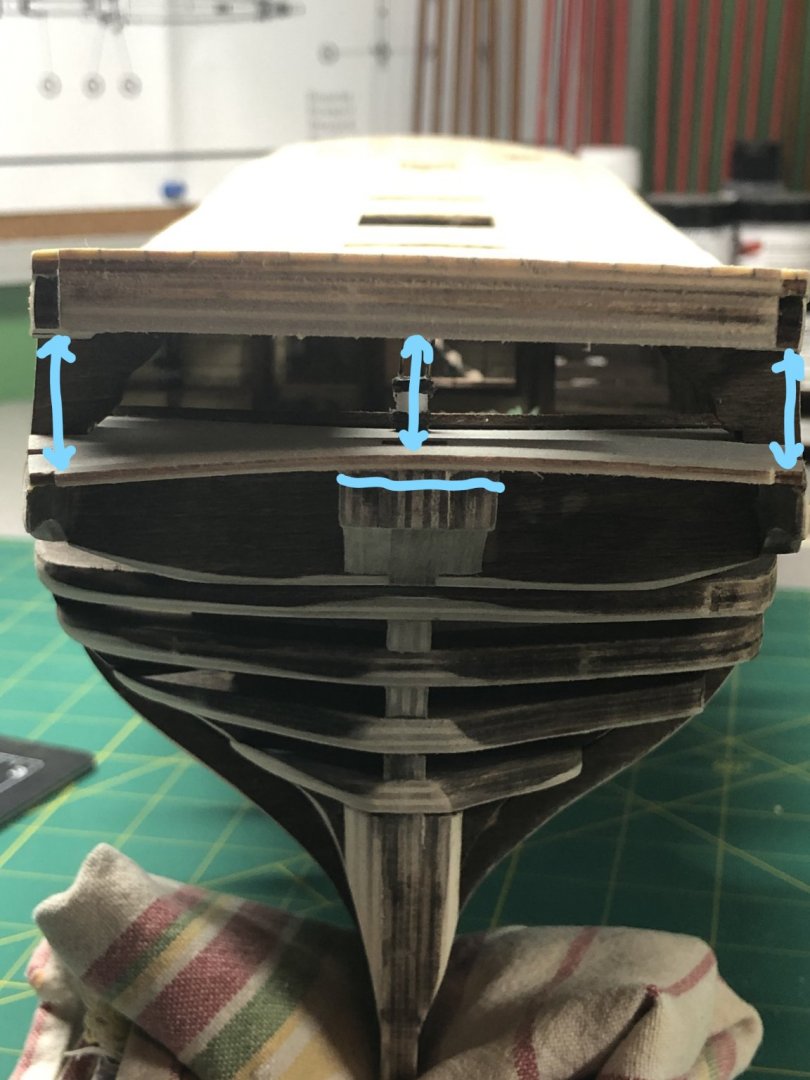
So, where to start with this update...! A lot accomplished but not necessarily visible work. Let me show you the main deck first: I am not 100% happy with the outcome! Although, I am not going to change it either. I am at a complete loss as to why the color turned out different from my tests. I followed the exact same method and got a light brown color instead of the gray-brown I was looking to attain. However, it does look good. After much internal debate and research, I have chosen to forgo the treenails. In actuality, I discovered that on ships with wood decks, the treenails are plugged and very hard to see. I looked at several pictures and found that 1:1 scale, they are visible but just barely. Now take into account that at 1:48 scale, the average treenail is only .5mm across! I just could not see the point of putting them on the deck... even though I did do it on the lower decks! Please render your opinions below, I'd love to know how others feel about the deck and treenails. Moving on, on my last update I showed a problem with the stern area that had to be fixed: I had to do some shaving on the middle support and on the port side and had to reinforce the side brace. Everything is re-glued and sanded smooth, ready for the stern plate and stanchions. Also been working on the fairing and as promised, some pictures of the method I use to check for good surfaces to glue planks to: The string is pulled tight and lays approximately in line with the planks. Obviously, high and low spots are easy to spot and address too. During this process, I discovered another issue that needs some attention. The model design is just not right in my mind at the stern post. The planks should butt into the post. The kit looks to be designed to just have planks end at the post... I don't like it! There are a couple options: 1. Reduce the size of the frames and false keel to allow the planks to butt in to the stern post. Probably the best option, if you don't have wiring running through the area... I do! 2. (and the option I've chosen) Increase the stern post thickness by adding walnut strips to both sides. I'm still working out the details of this change but it will increase the thickness by 4mm (2mm on each side) to accommodate the planks. I'll be working on this next, feathering added strips toward the rudder. In the meantime, I'm getting ready to add the stern plate and stanchions: And, working on the rabbet on the bow keel section: This requires that a 2mm wide notch is cut on both sides to allow the planks to fit right into the keel. This has to be done the entire length of the boat... not easy work with Walnut! Have a great week!


-
Thanks Tim I don't have the option of going as thin as you have, the wiring for the lighting would have to be re-routed... not gonna happen! Your method is otherwise the perfect choice. I'm moving forward with a heavier stern post and I'll make it work just fine! Thanks for the pictures!
-
Thanks... was considering building up the stern post on both sides as an an alternative too. A 5x2mm walnut strip on both sides feathered toward the stern may work.
- 171 replies
-
- 1
-
-
- artesania latina
- bounty
- (and 1 more)
-
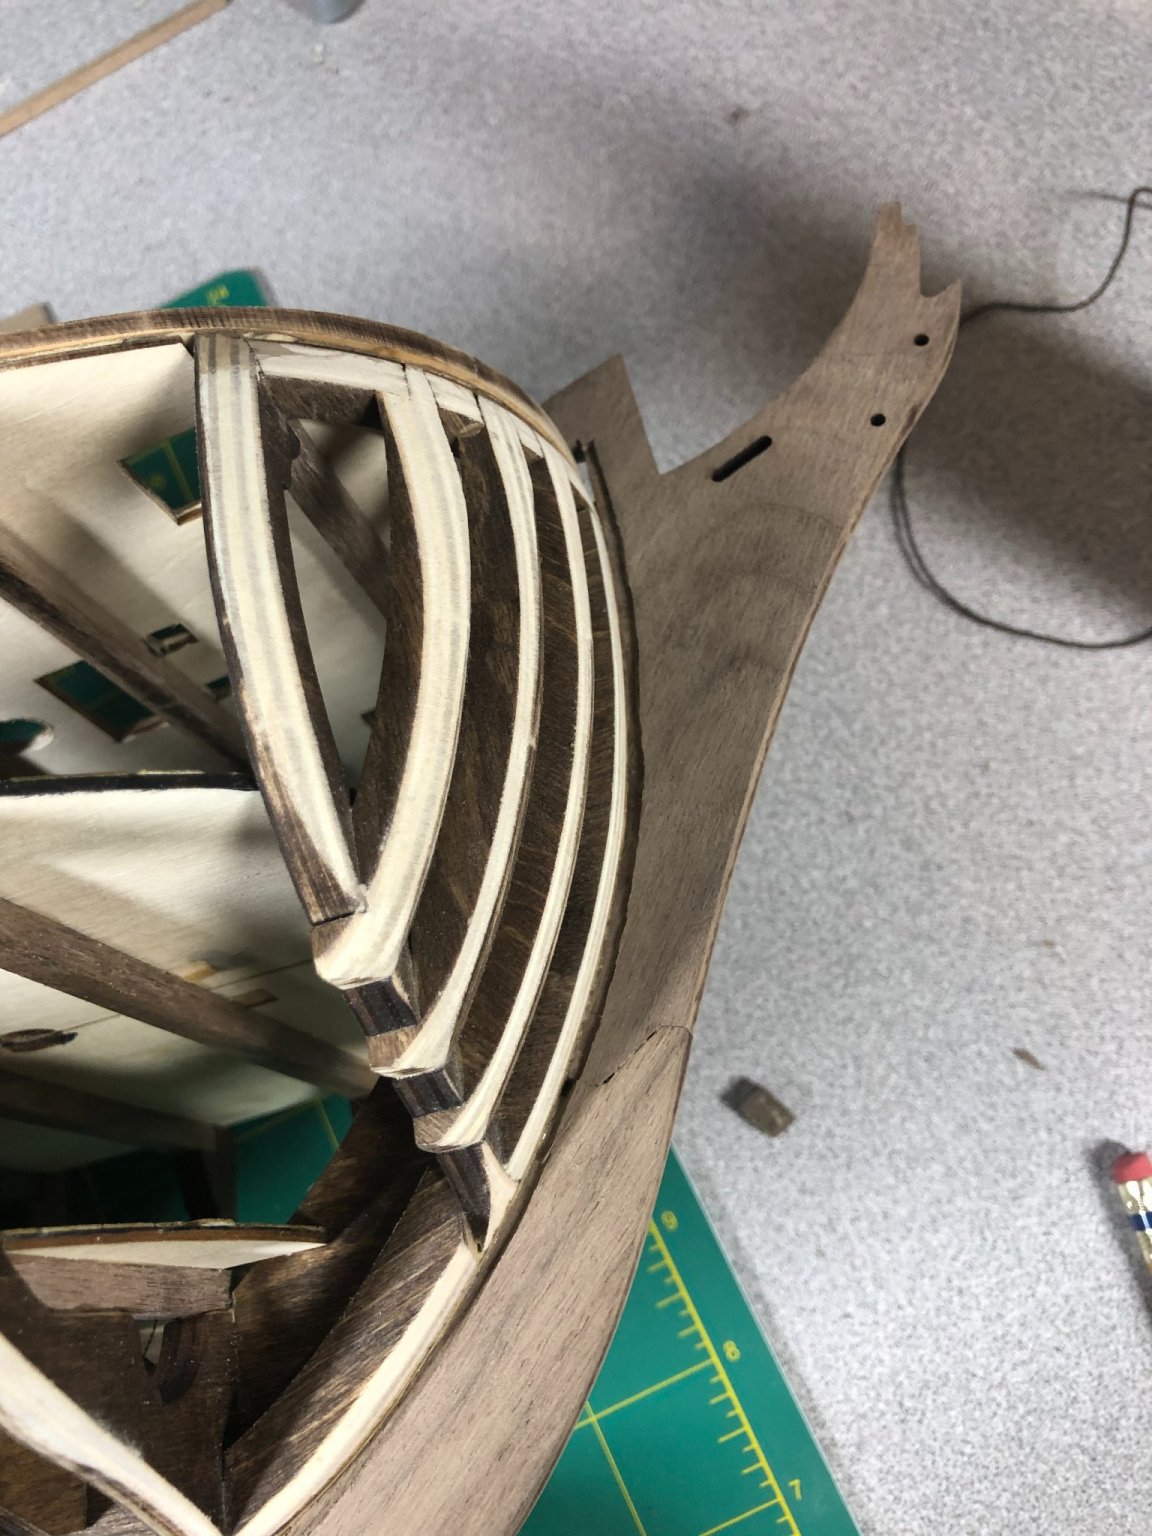
Hey Tim, A question for you... l’m in the process of fairing the hull, in particular the stern. At the stern post I expected the plank ends to butt right into it. However there is so much material from the stern keel stiffeners that you almost need to sand or file them completely out! How did you handle this particular area? Appreciate any advise!

-
No worries! I totally understand! Besides, it is a good idea... for future builds!
-
Stunning work, Tim! I look forward to seeing the finished product. Your log continues to be source of information to me. Thanks for keeping it going to the end.
- 171 replies
-
- 3
-
-
- artesania latina
- bounty
- (and 1 more)
-
That would be tough to do since it’s already planked! But I like the idea!
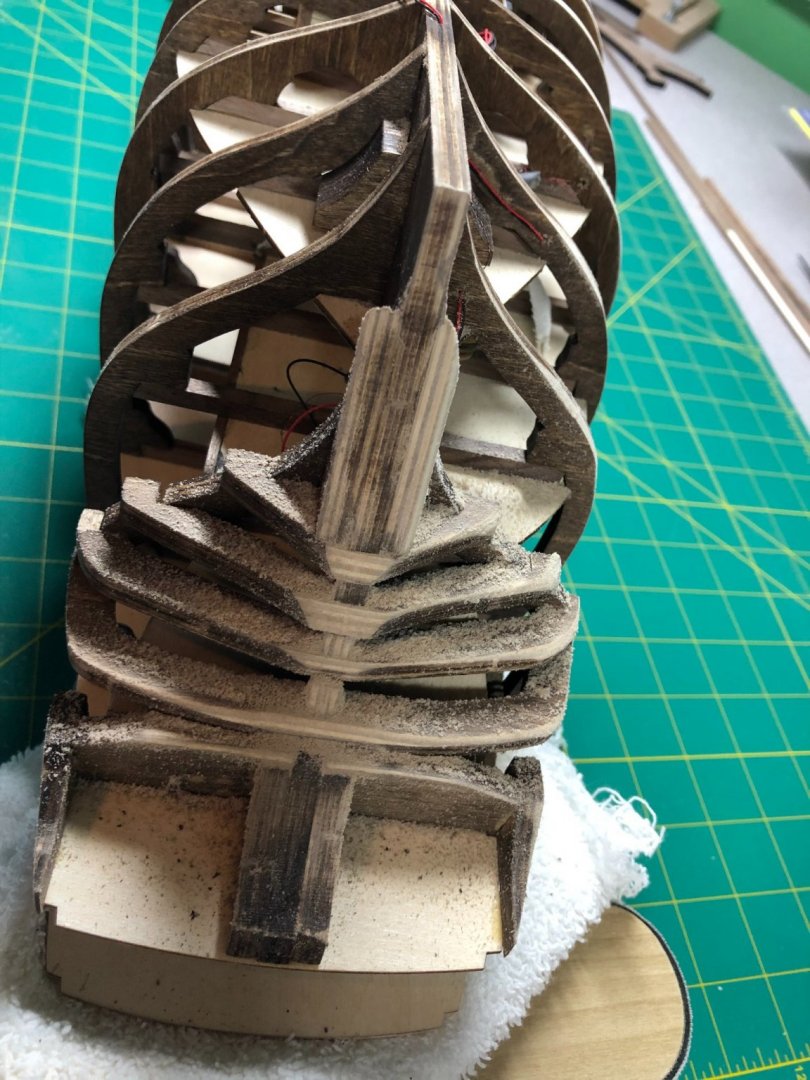
-
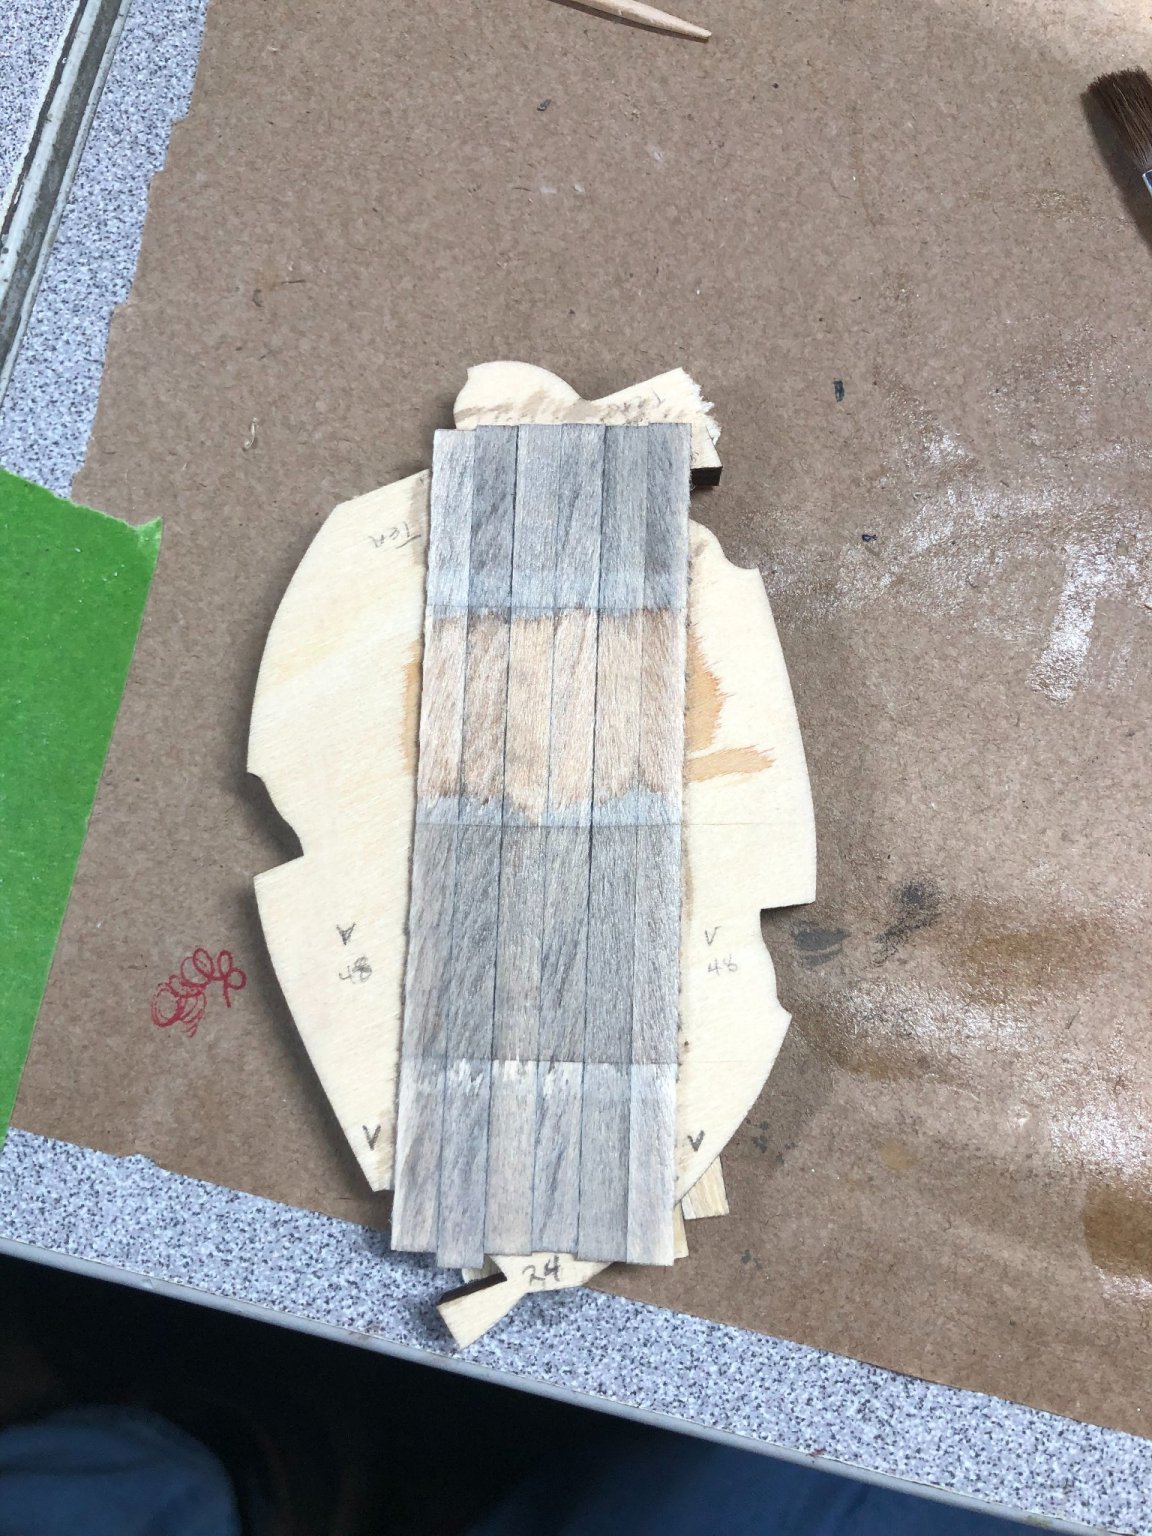
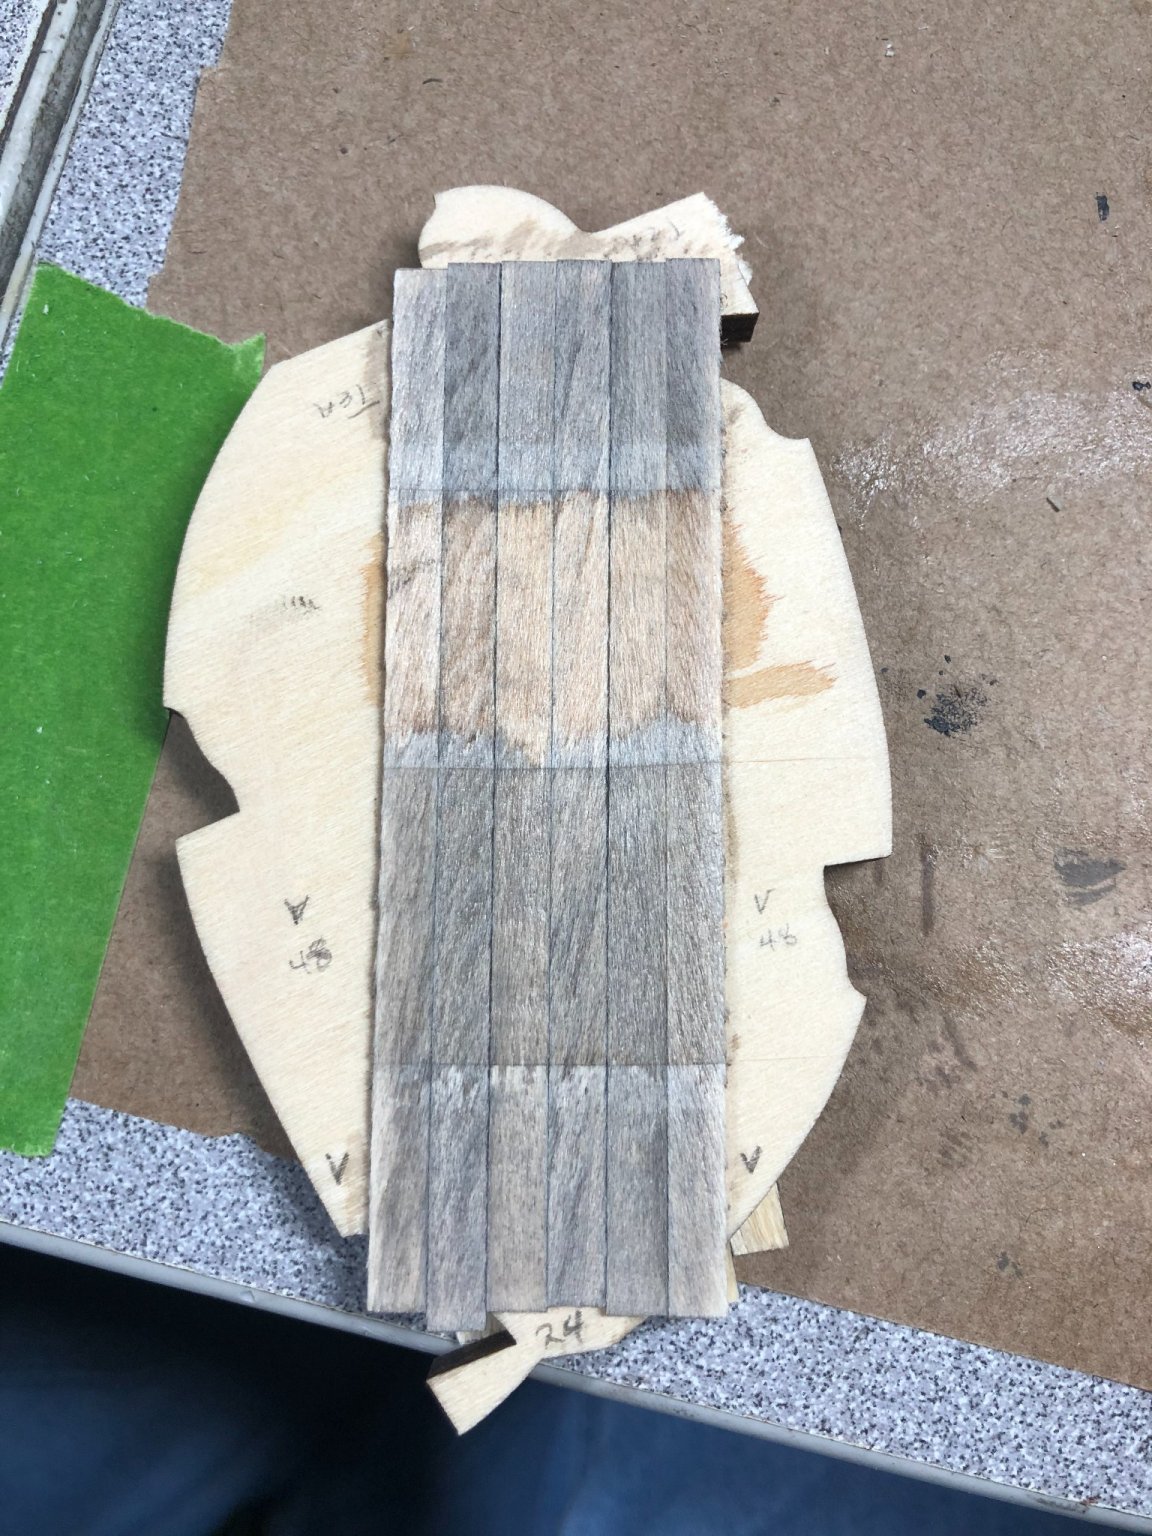
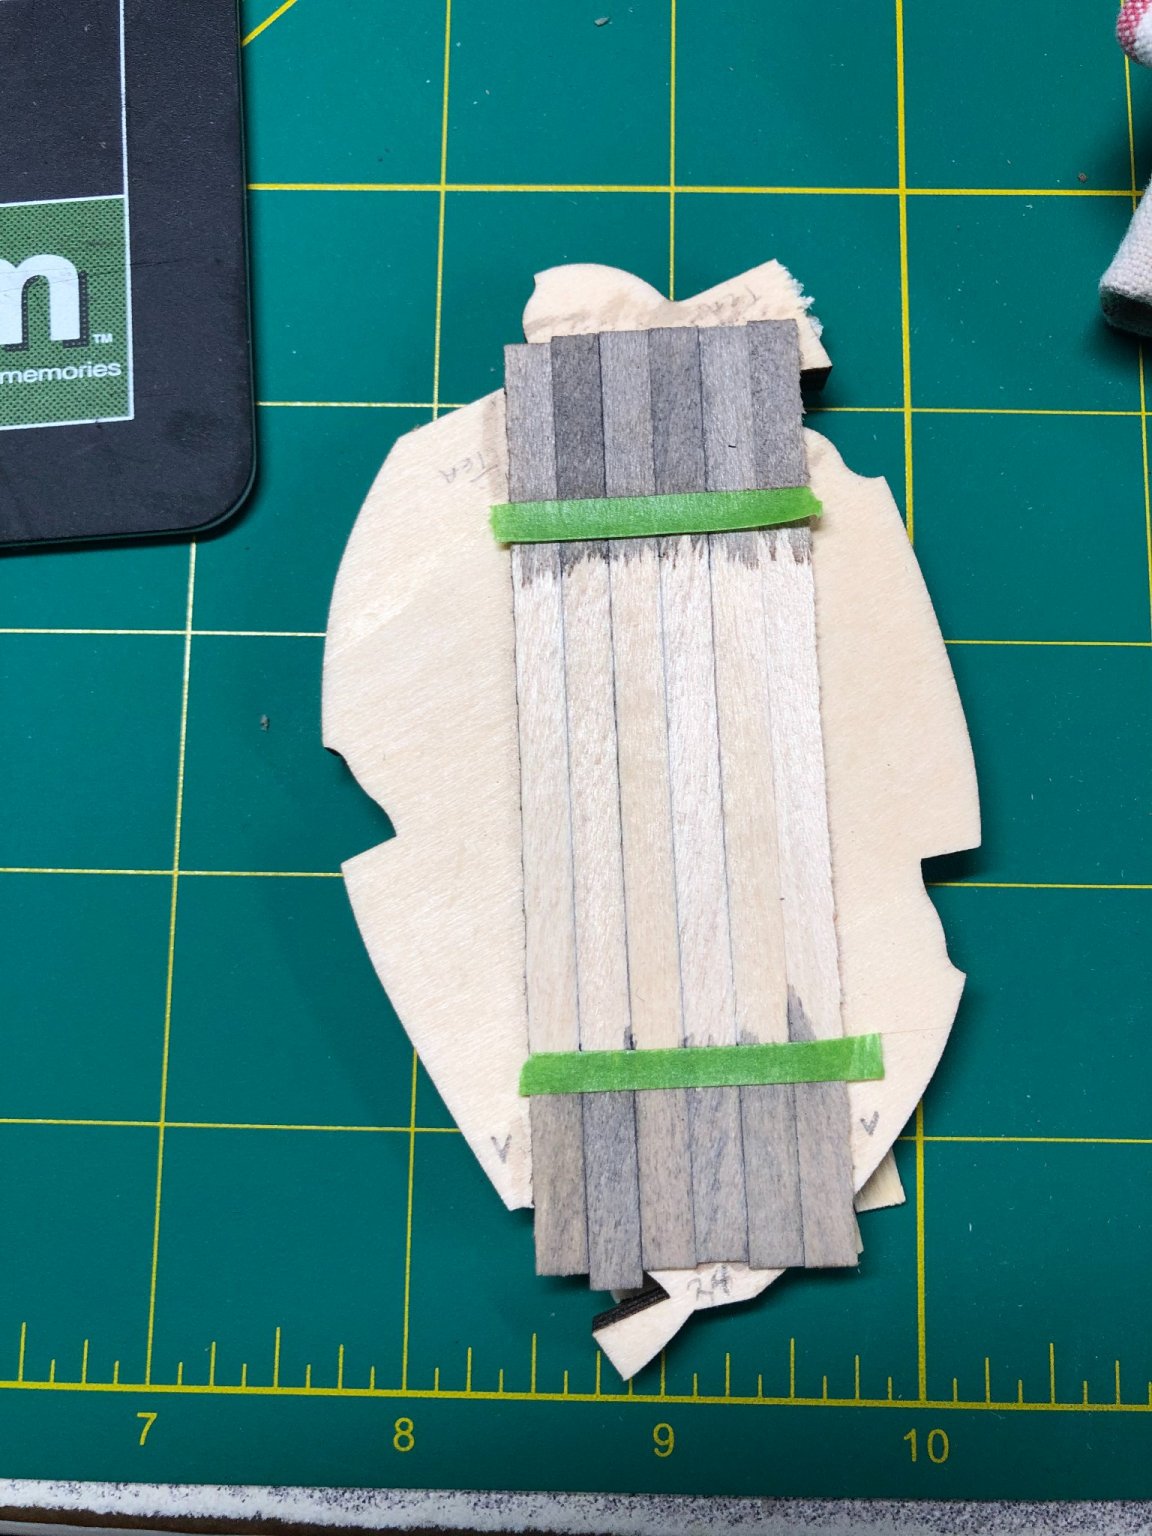
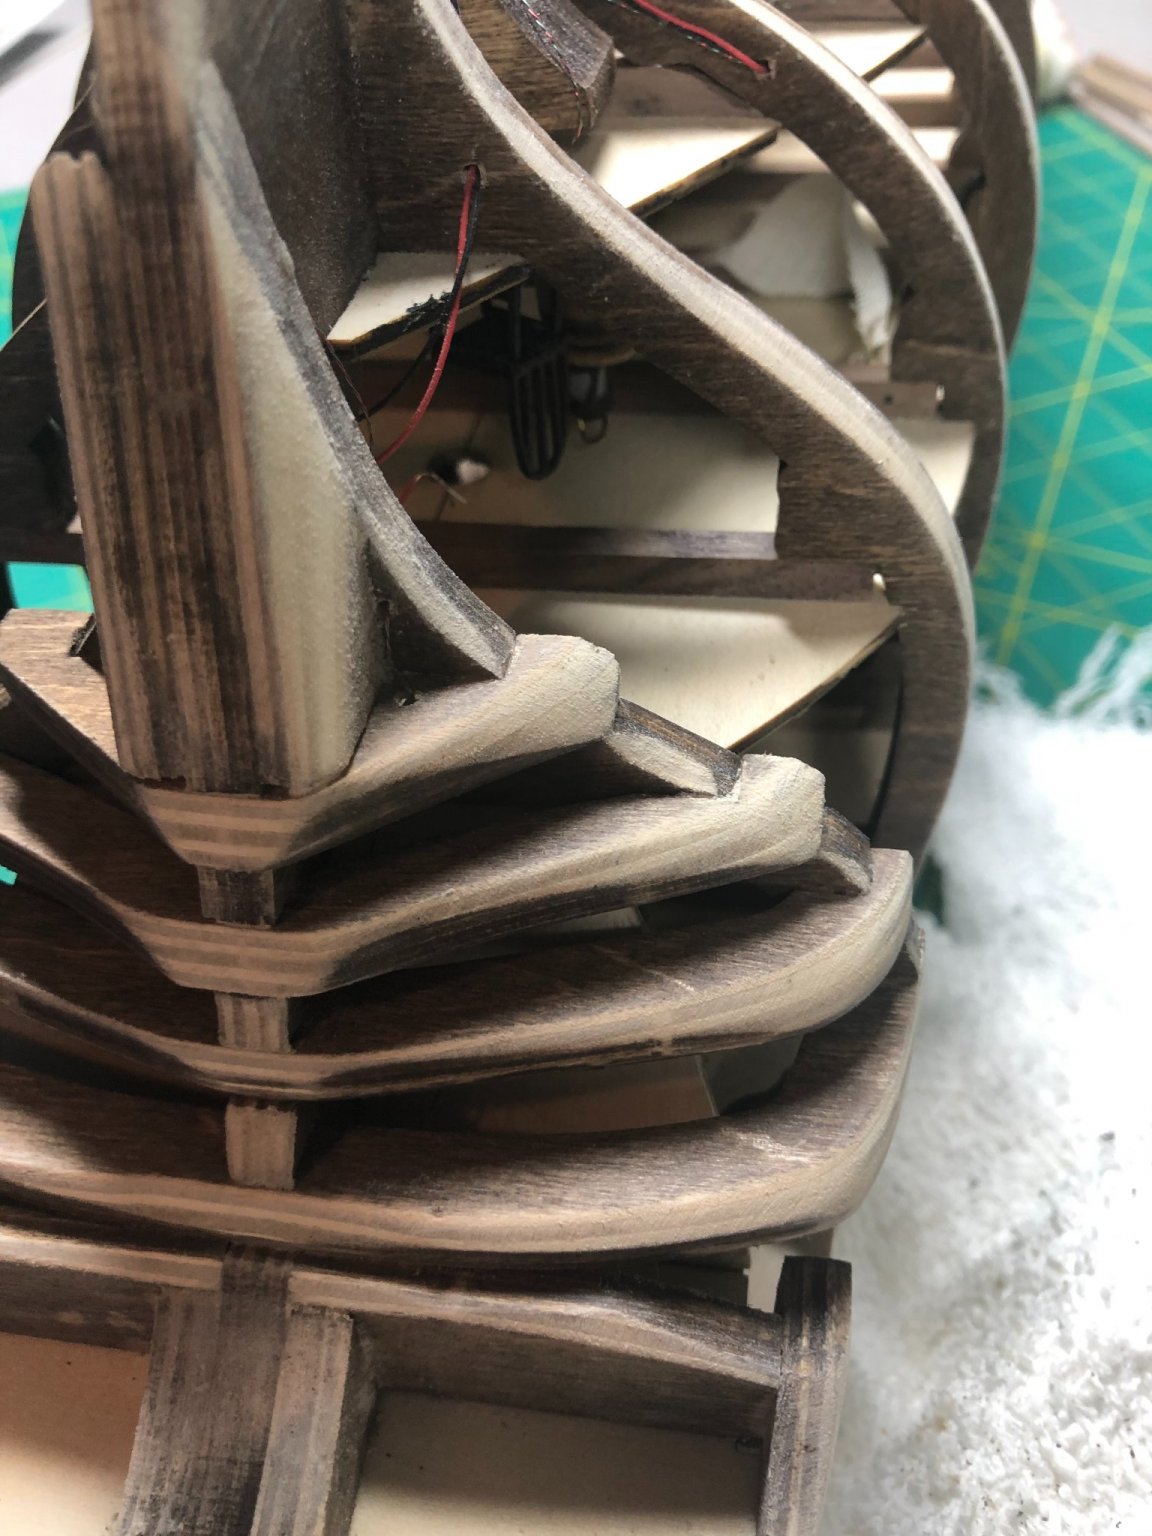
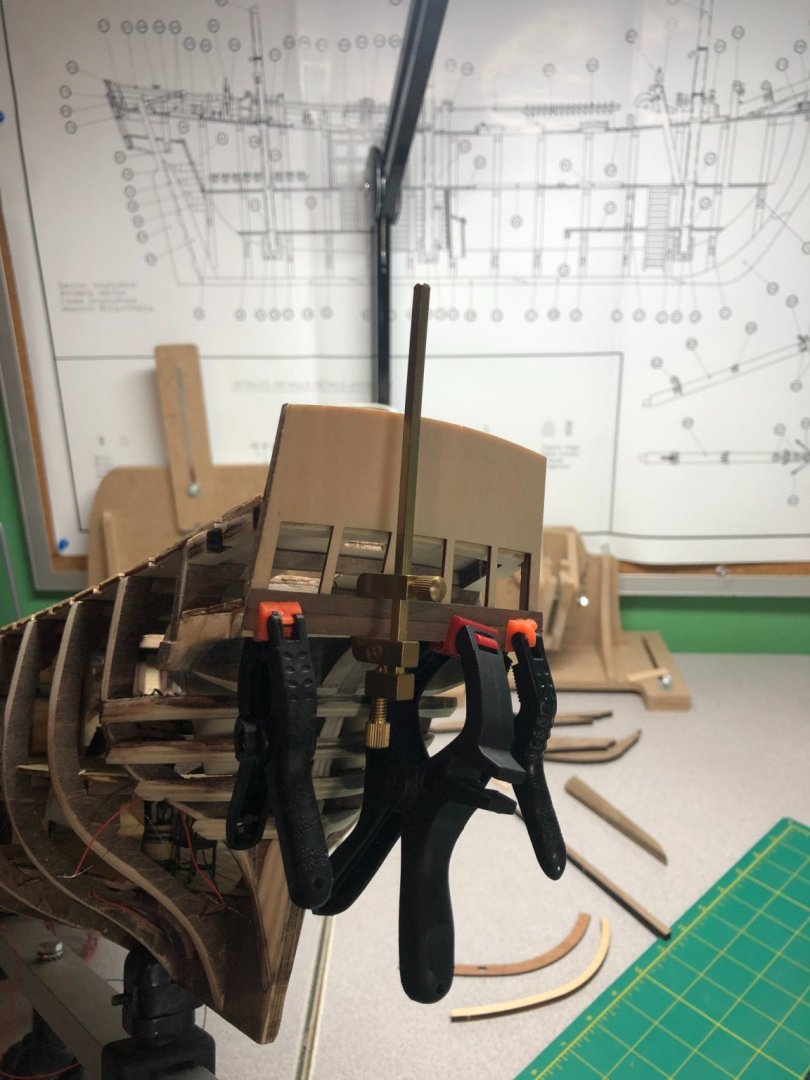
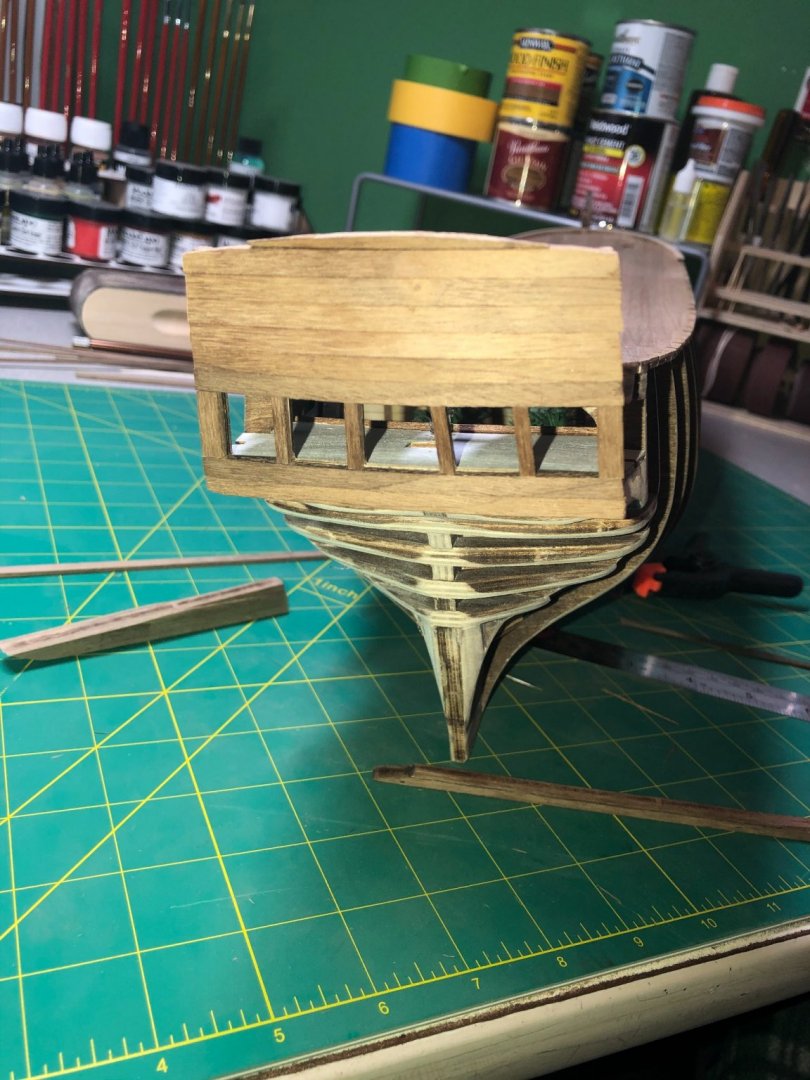
So, here is the final test panel: From bottom to top, Steel wool and vinegar soaking for 24 hours; steel wool and vinegar soaking for 48 hours; steel wool, vinegar (48 hrs) and a small amount of Hydrogen Peroxide; steel wool, vinegar and tea. This picture was taken before sanding. After sanding: To me, not much difference between the 24 hour and 48 hour solution. The tea and HP solutions are not what I'm looking for on a deck exposed to the elements. Pictures and experience show decks to be gray. The next test will be on the opposite side with my treenail tests to see how they react to the 24 hour solution: While doing all this experimenting I've been doing some fairing and ladder assembly. I also decided to start looking at installing the stern stanchions and plate... except I found a glaring problem: When I installed the platform the lantern is sitting, I assumed (incorrectly) that it was supposed to be curved like the deck. I didn't realize how badly it looked until I tried installing the stern plate! So, I was able to get it loose and shave the center support down. It's regluing now! Pictures of it completed (I hope) in the next post.


-
Quick update... Testing different solutions for the main deck. The first solution is about 1/4 cup of white vinegar with a small ball of #000 steel wool left to soak for 24 hours. Then it was brushed on the wood and left to dry: This next shot is of the same solution but with tea water put on the wood and allowed to dry first: This solution is on the top of the picture while the first test is on the bottom: I'm still waiting for the Hydrogen Peroxide for the final tests. Then I will sand the test and conclude which one I'll use for the next tests on the other side that have the different treenails. More soon!

-
I'm not familiar with a 3d printer but the smaller pieces should be doable with it. I wouldn't want to infringe on any copyrights... let me know if I can help.
-
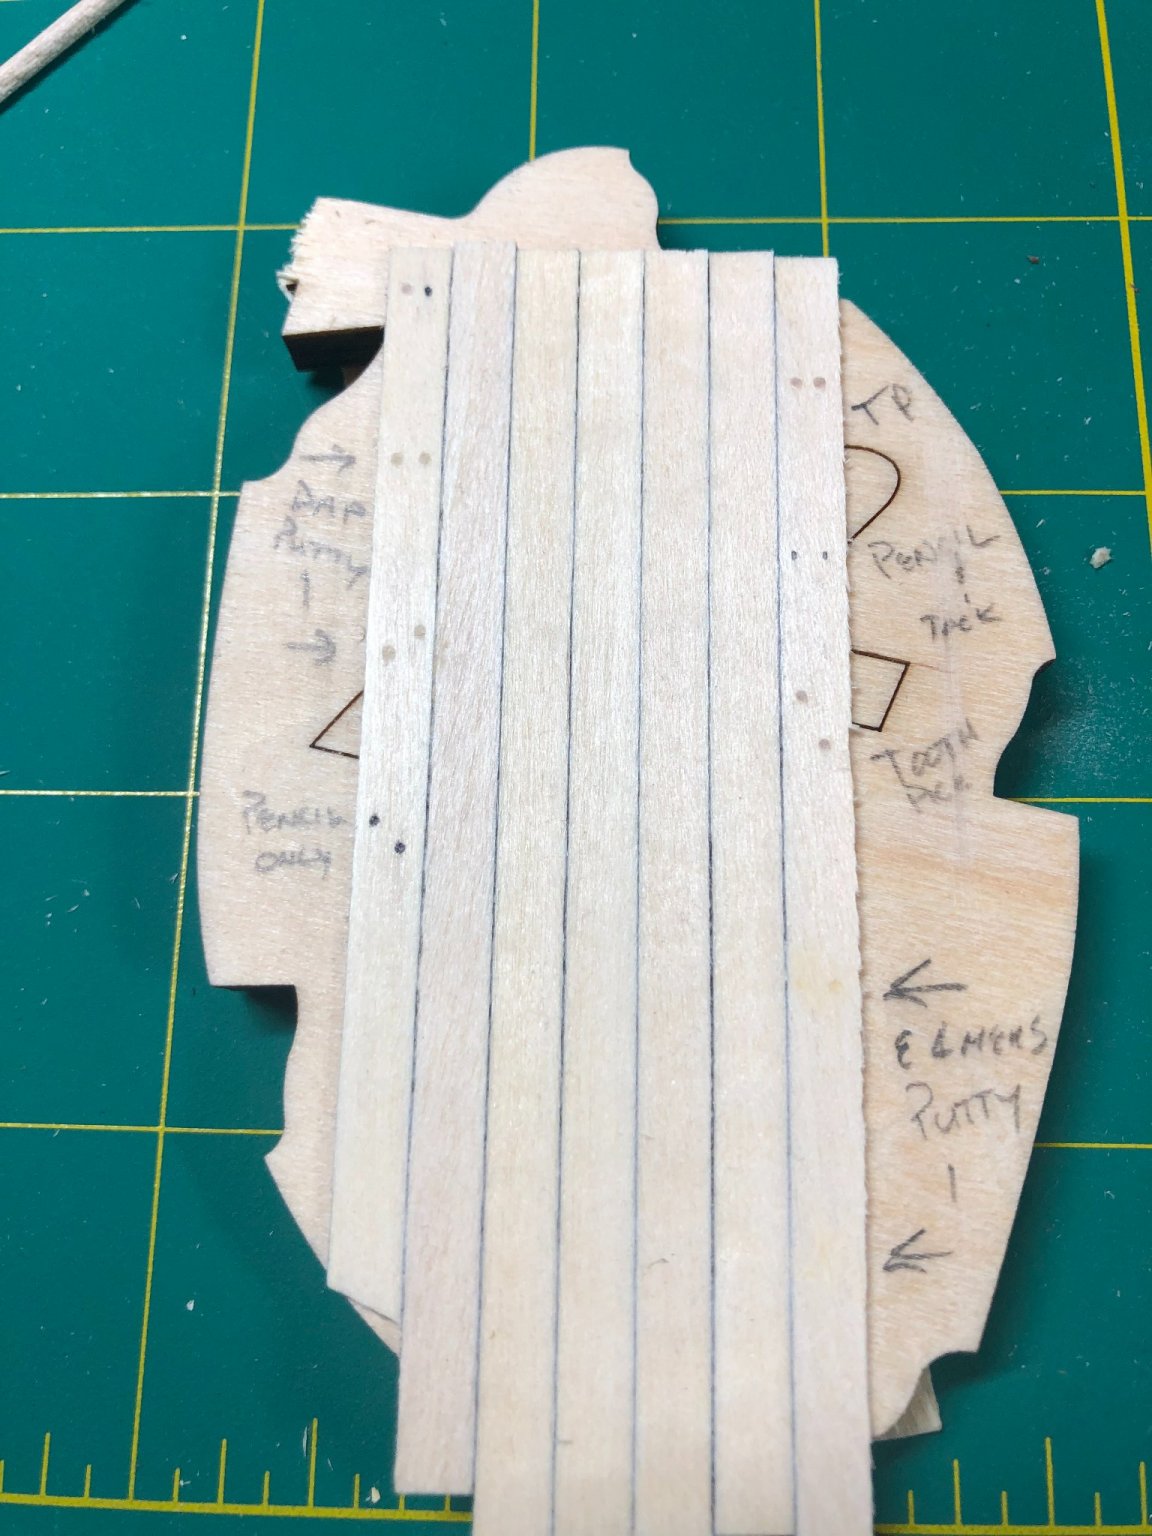
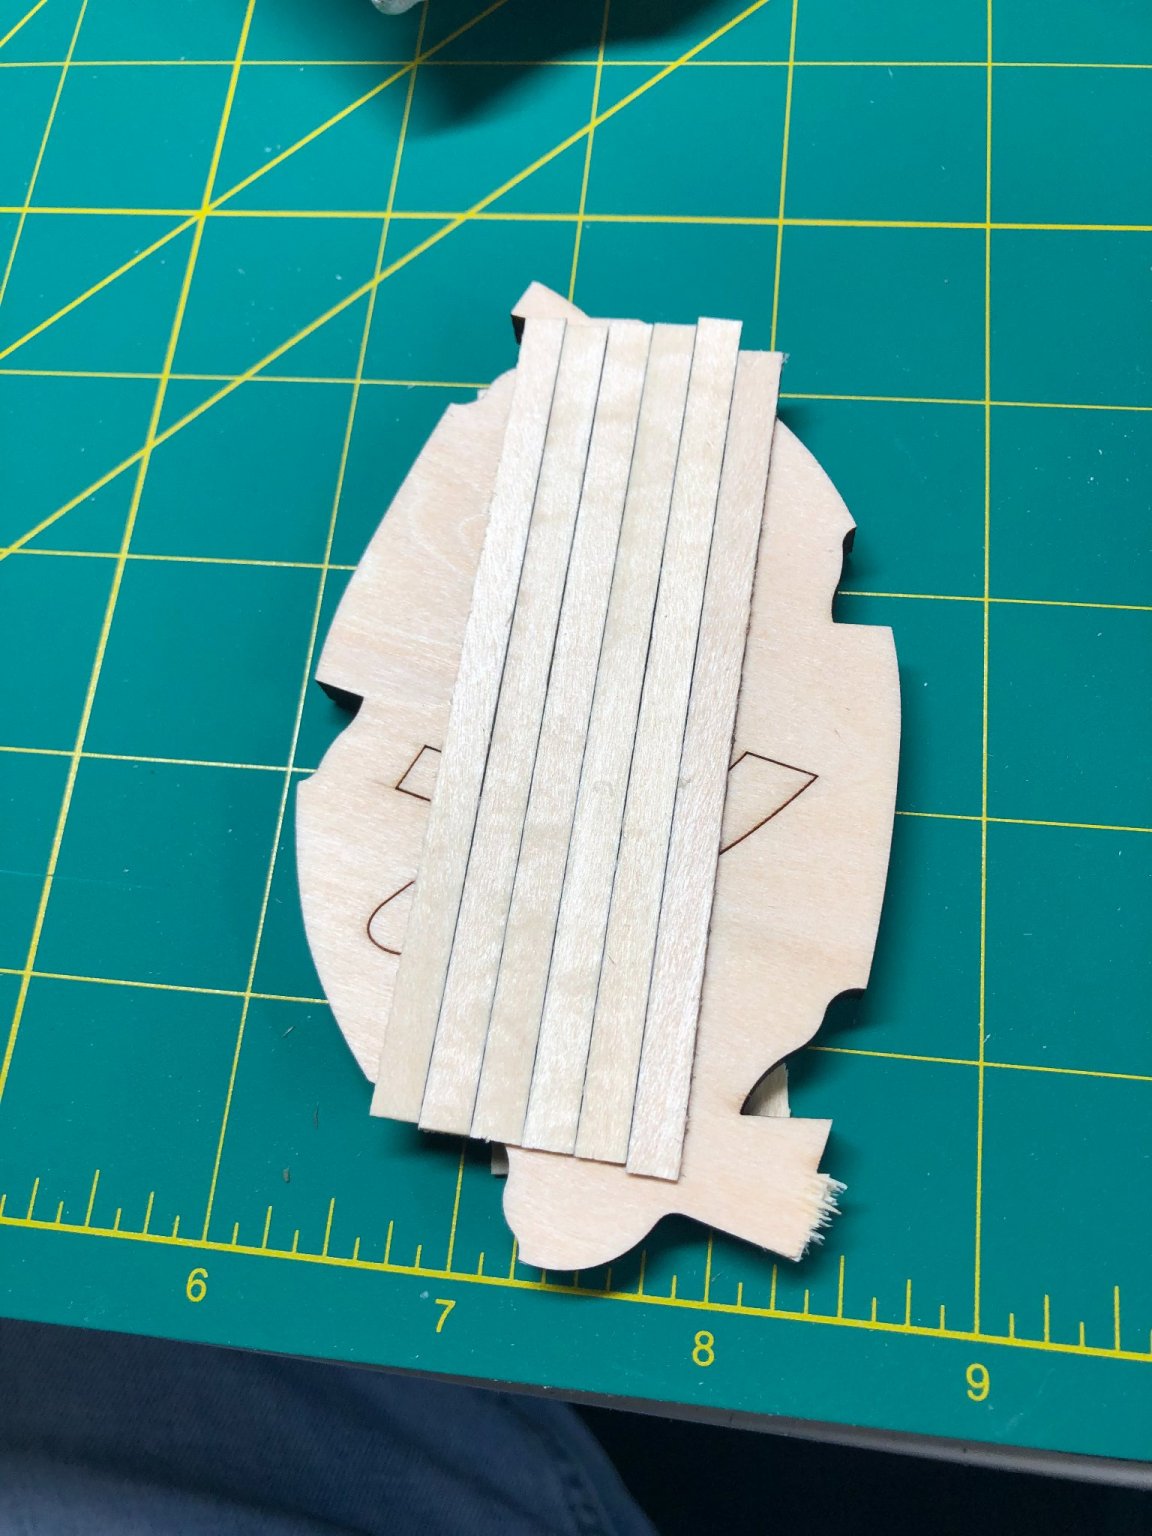
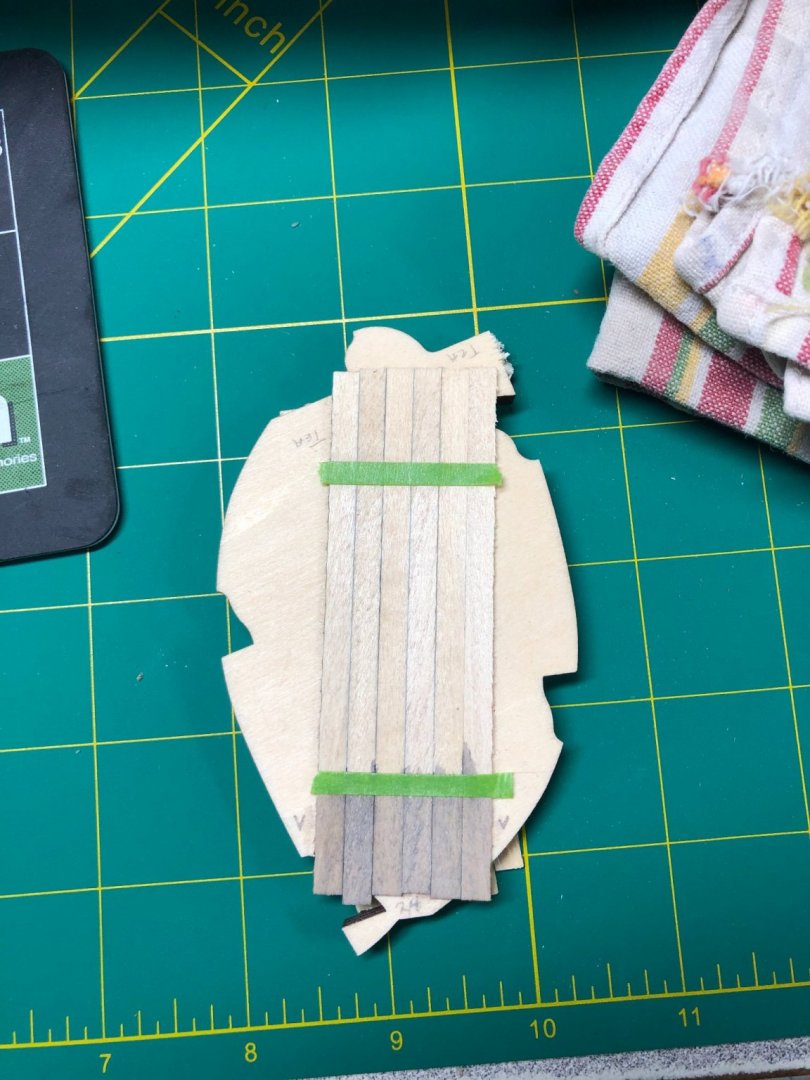
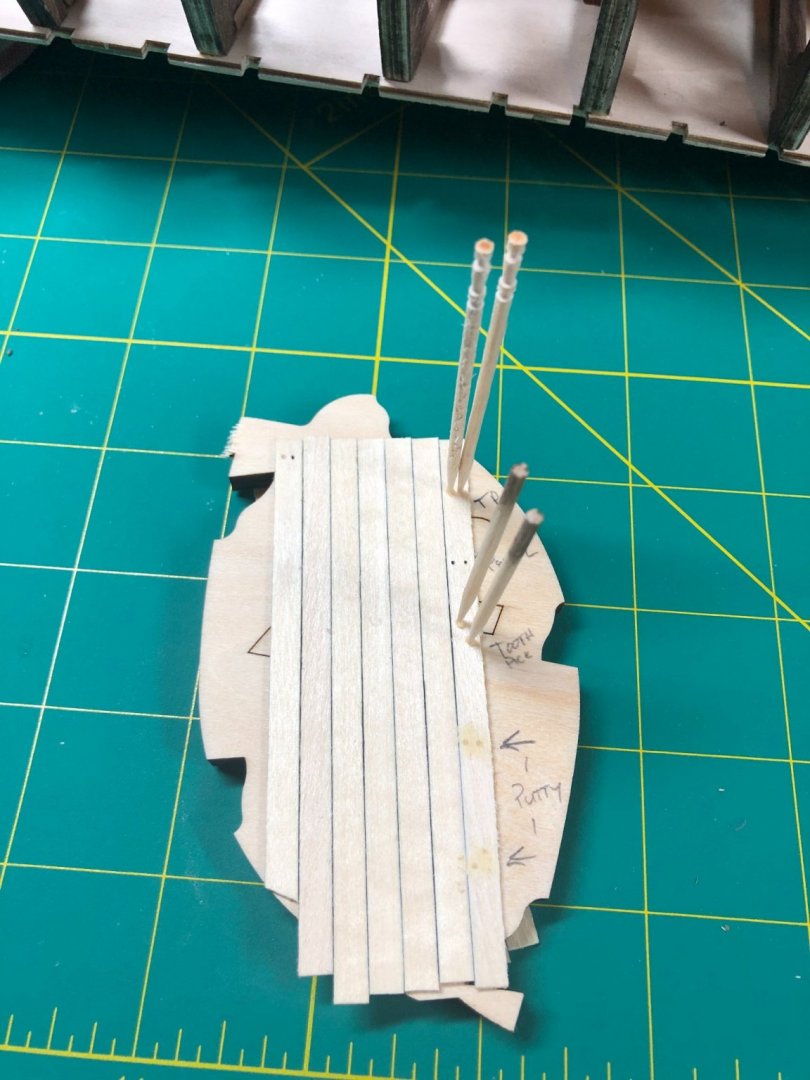
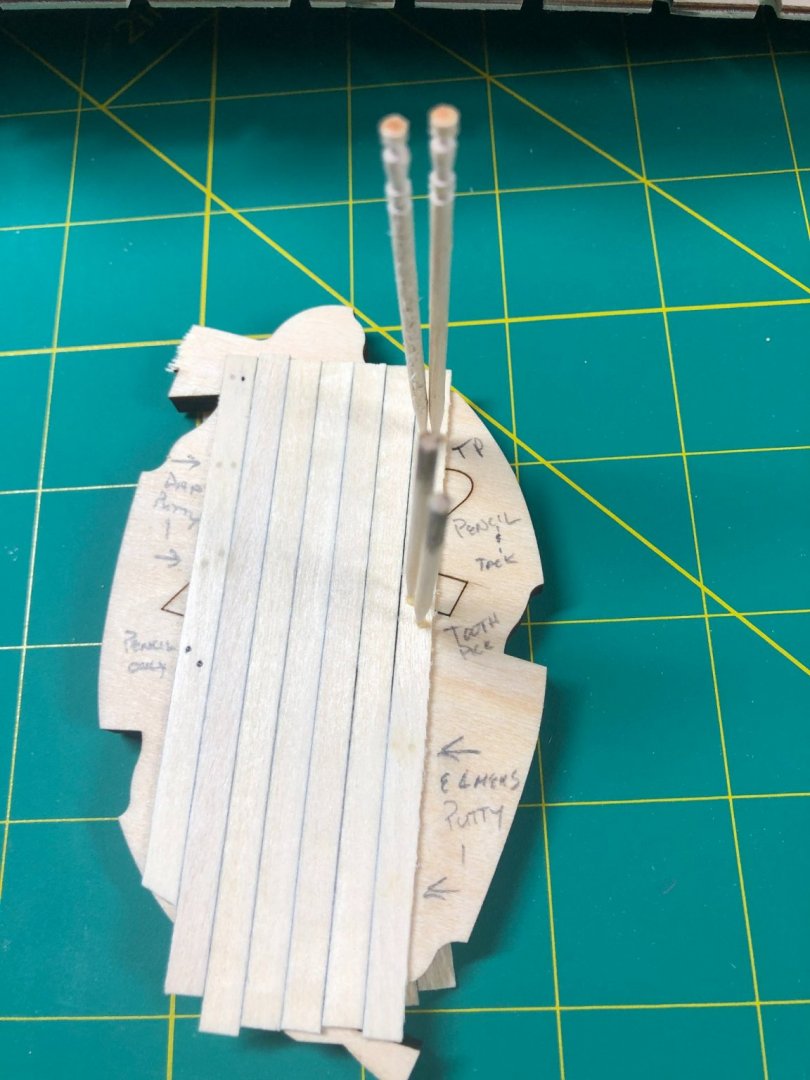
Not much accomplished this week with only a few hours working on her... Waiting for some product to continue my weather/aging experiments before doing main deck. I have taken a few sample strips and glued them down using the same process as the deck. I did this on both sides to give me two areas to experiment on: I lightly sanded it and then drilled some holes that will be used for treenails. I'm experimenting with a few different methods. Toothpicks, two different types of wood putty and using a punch and pencil: As you can see in the pictures above, I've marked what I used for reference. I sanded the test strips semi-smooth and now must wait for my supplies: I have everything except some Hydrogen Peroxide which seems to be harder to get these days but it should be here next week. Can't go any further on the deck until I see how these will be effected by the aging process. In the meantime, I'll build a couple ladders and do some more fairing on the frames. Next update soon!


-
Although the entire unit might be a bit difficult to build without proper equipment, the base would be easy enough. Have you thought about building one yourself? I'm sure those of us that have one could supply pictures and measurements.
-
Looks good! I assume you are using the sails that came in the kit? Did you do anything to them prior to mounting? I’ll take a look at Landblubber Mike’s post too.
- 171 replies
-
- 1
-
-
- artesania latina
- bounty
- (and 1 more)
-
I was considering furled sails as well... I'll be watching with interest.
- 171 replies
-
- 1
-
-
- artesania latina
- bounty
- (and 1 more)
-
Thanks Tom! Gonna be a challenge working with walnut!
-
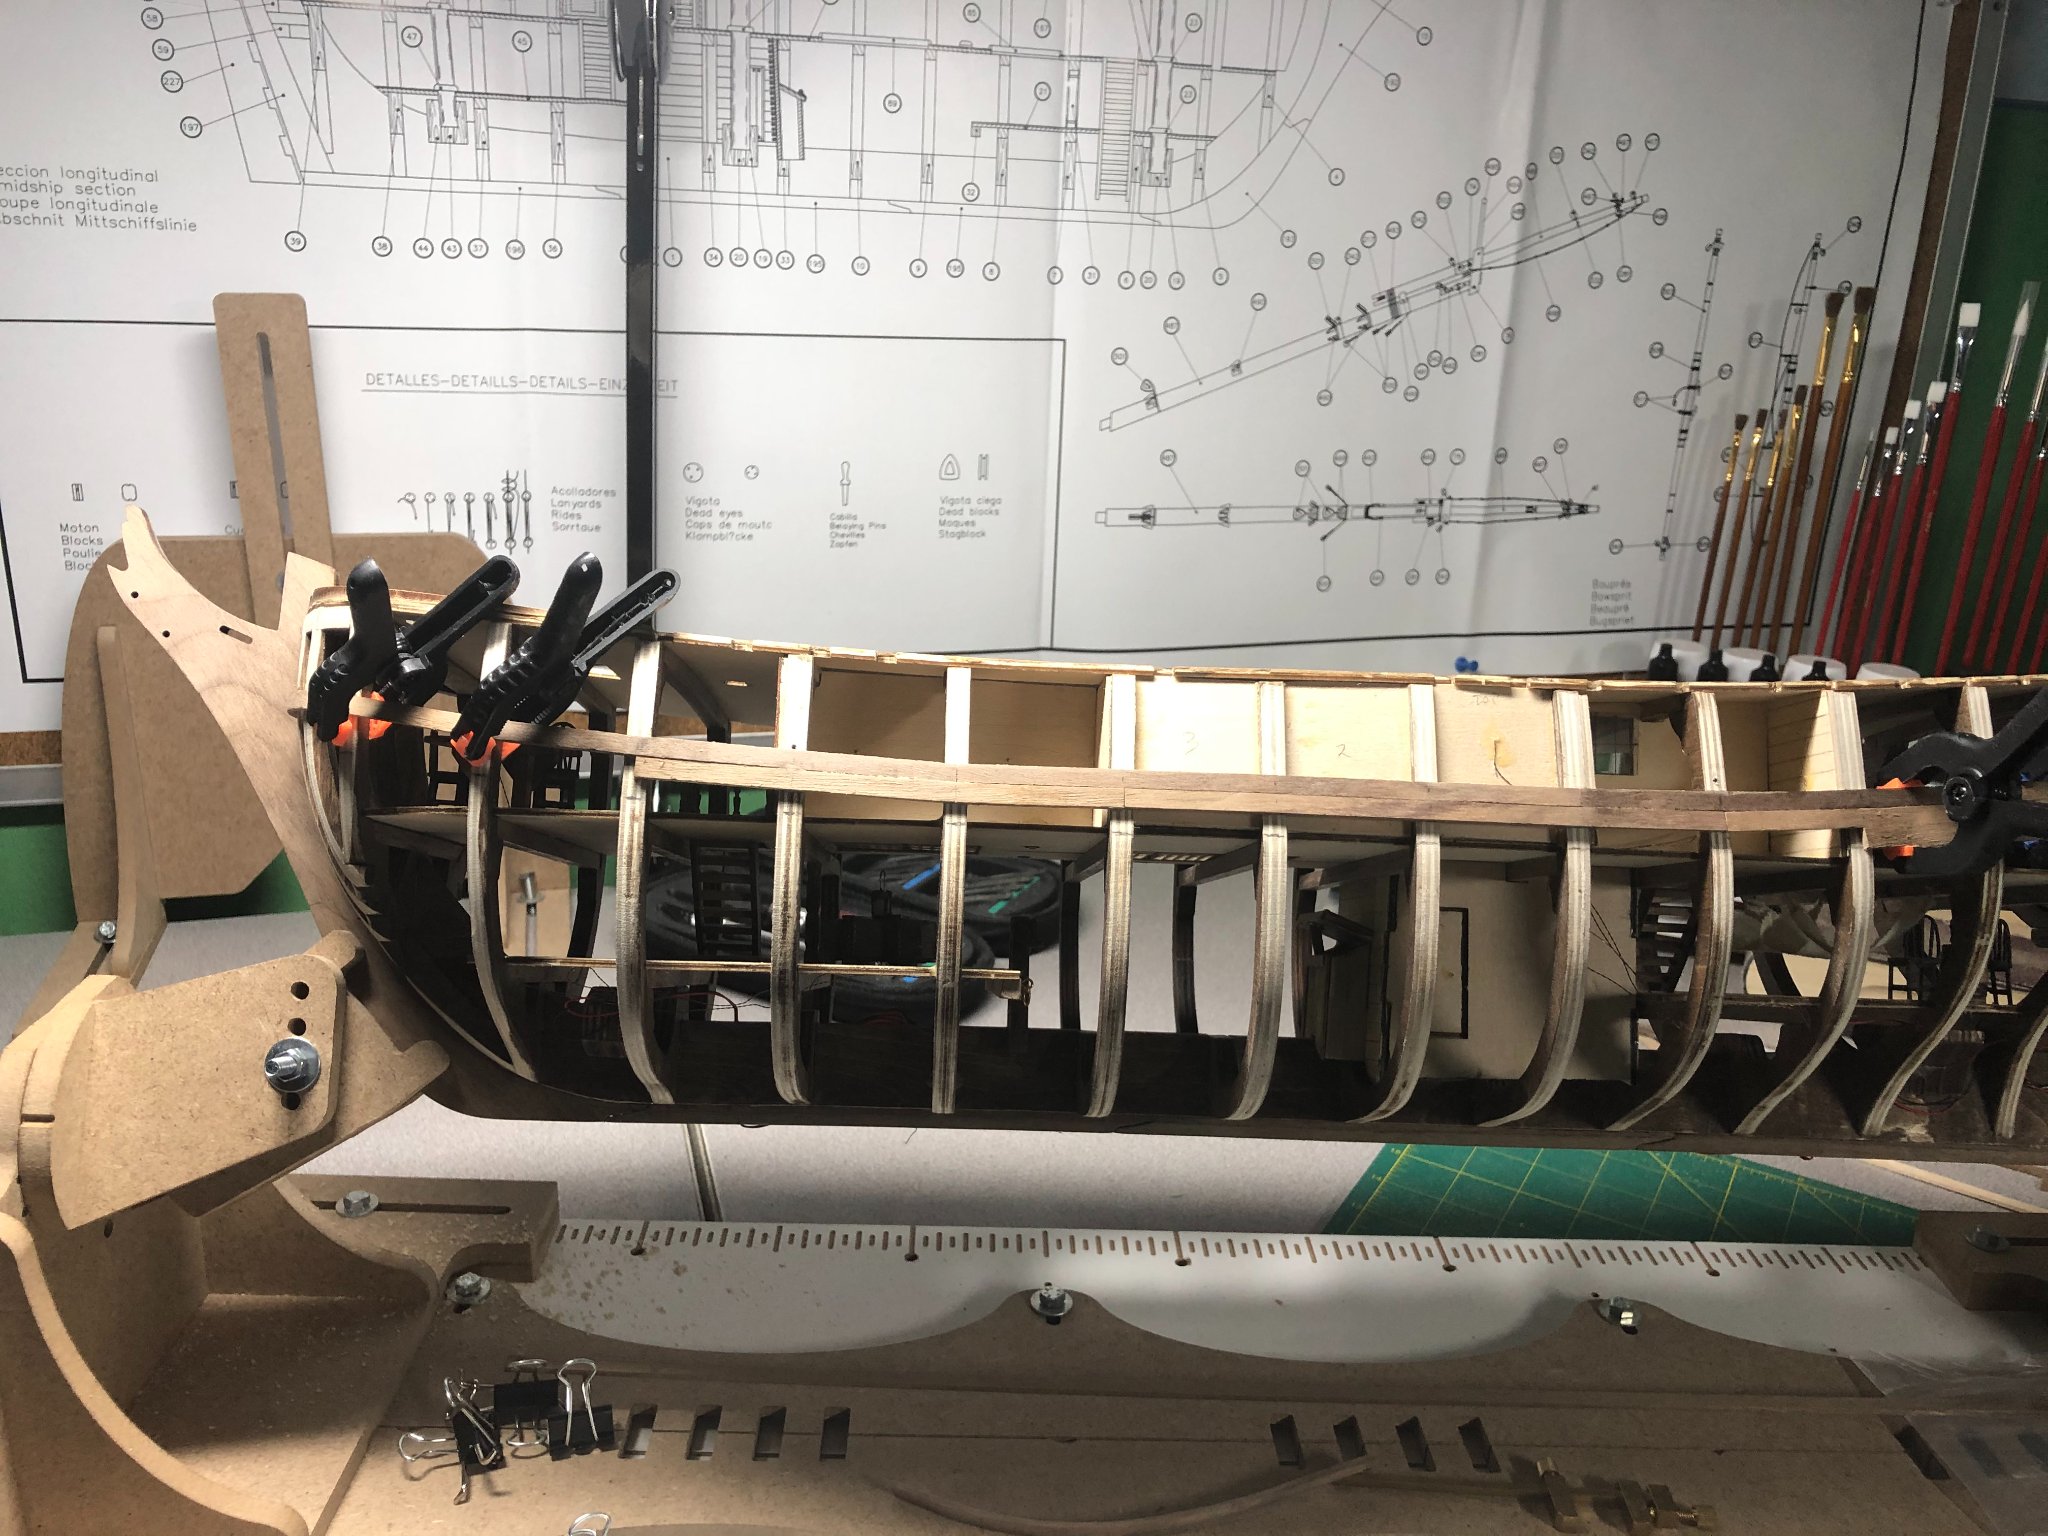
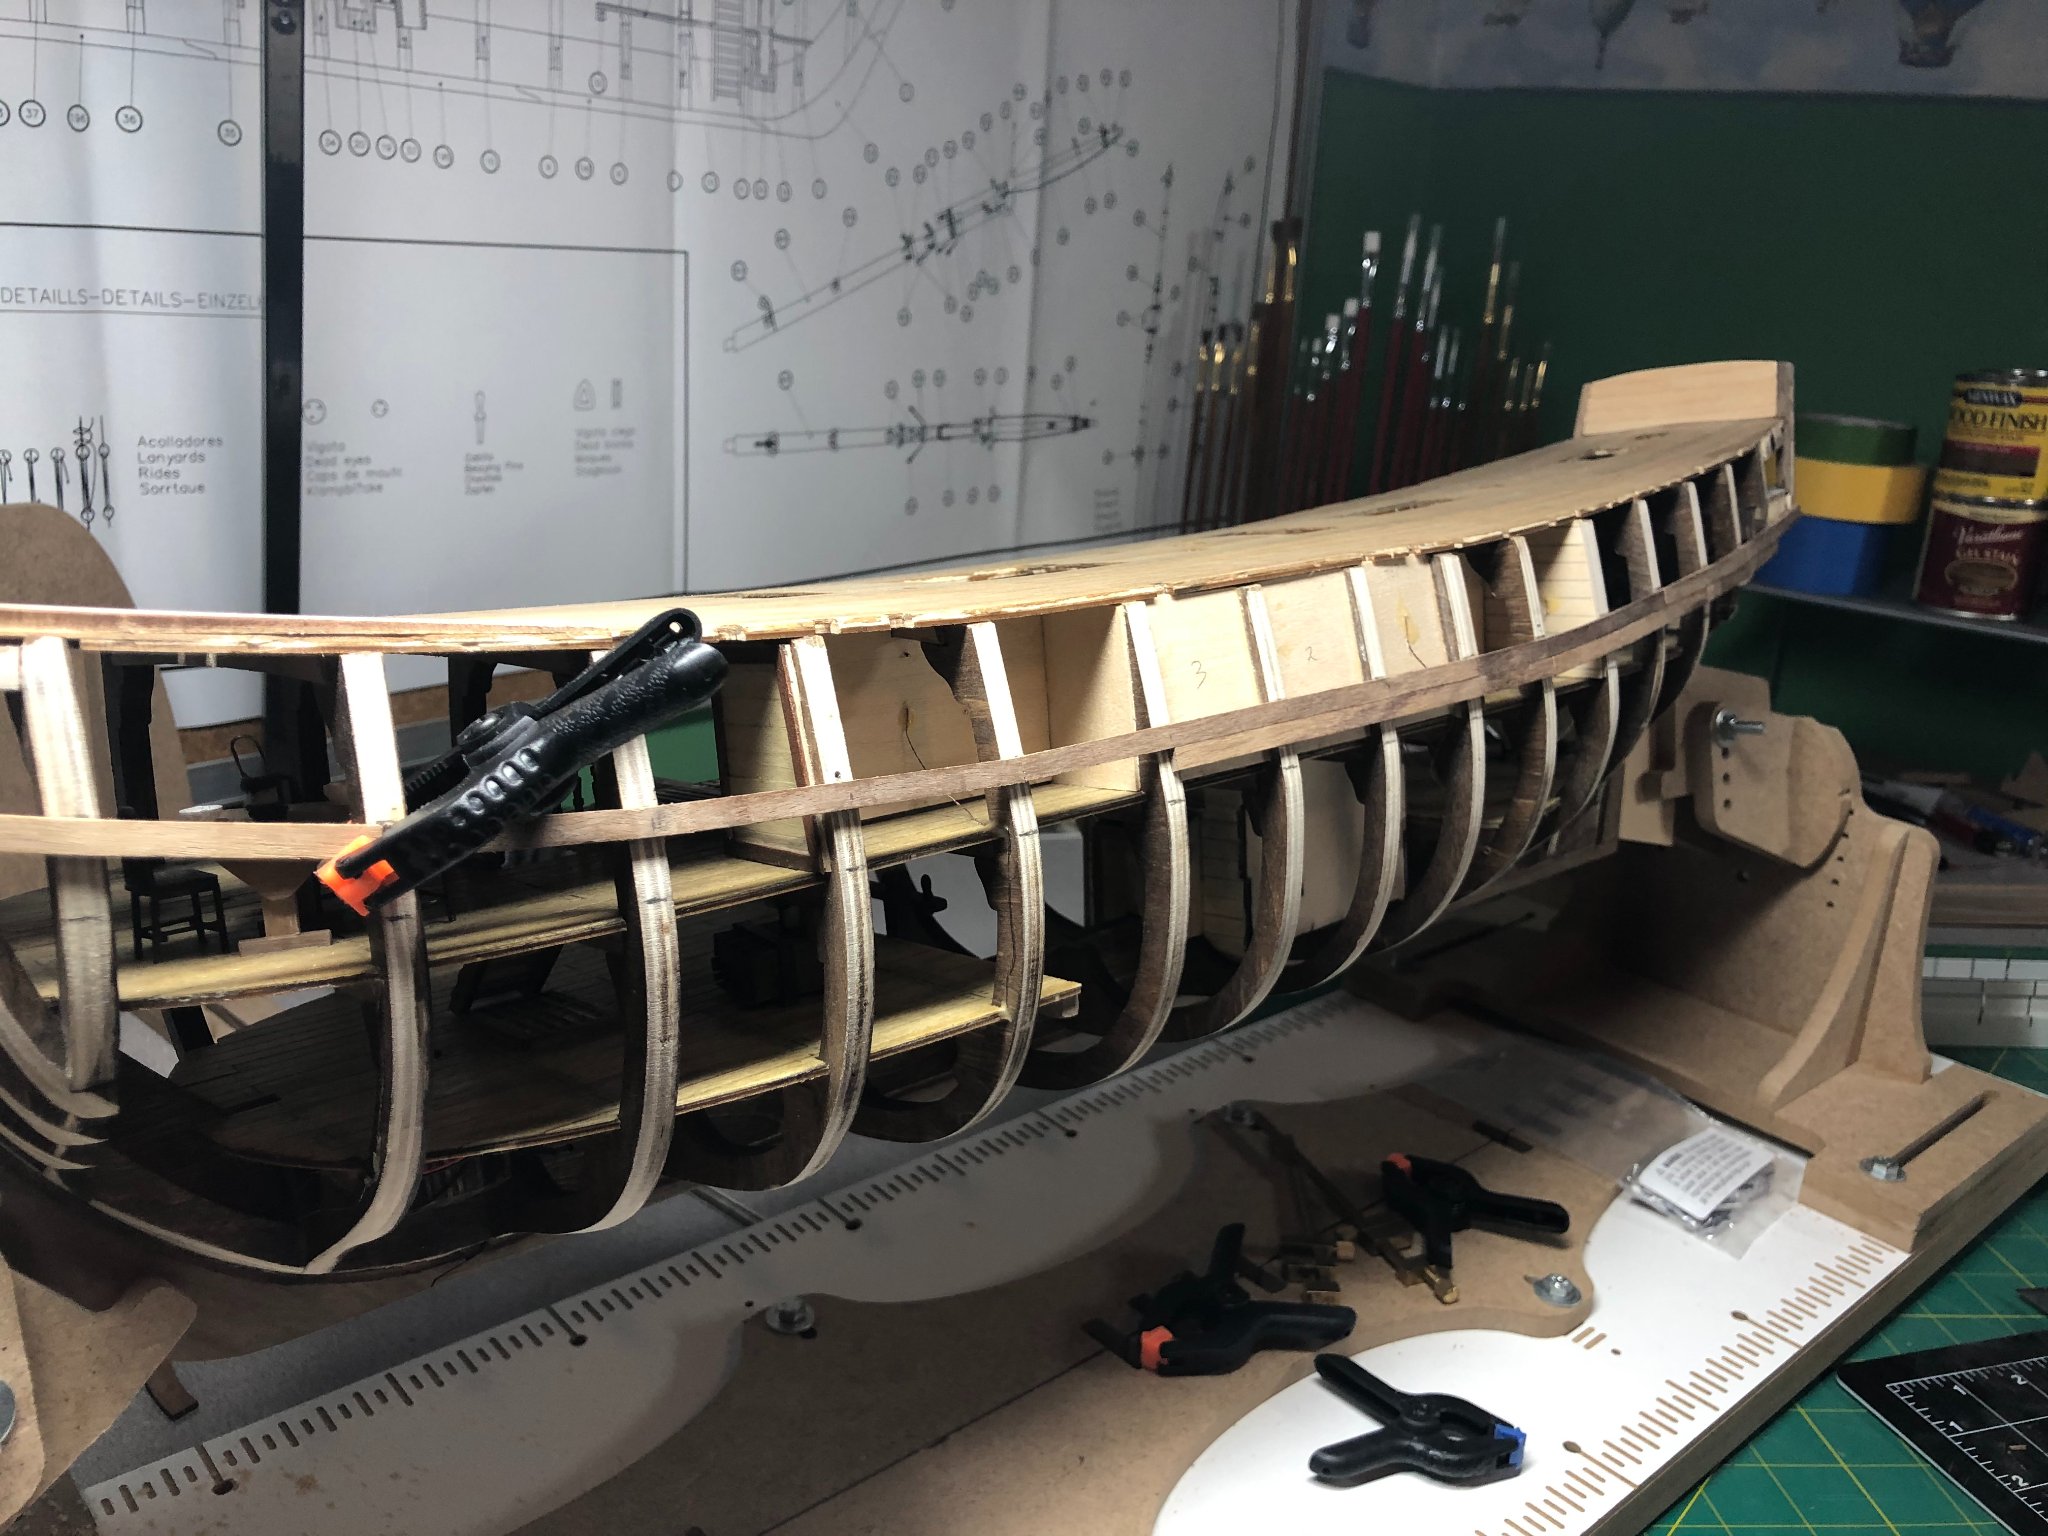
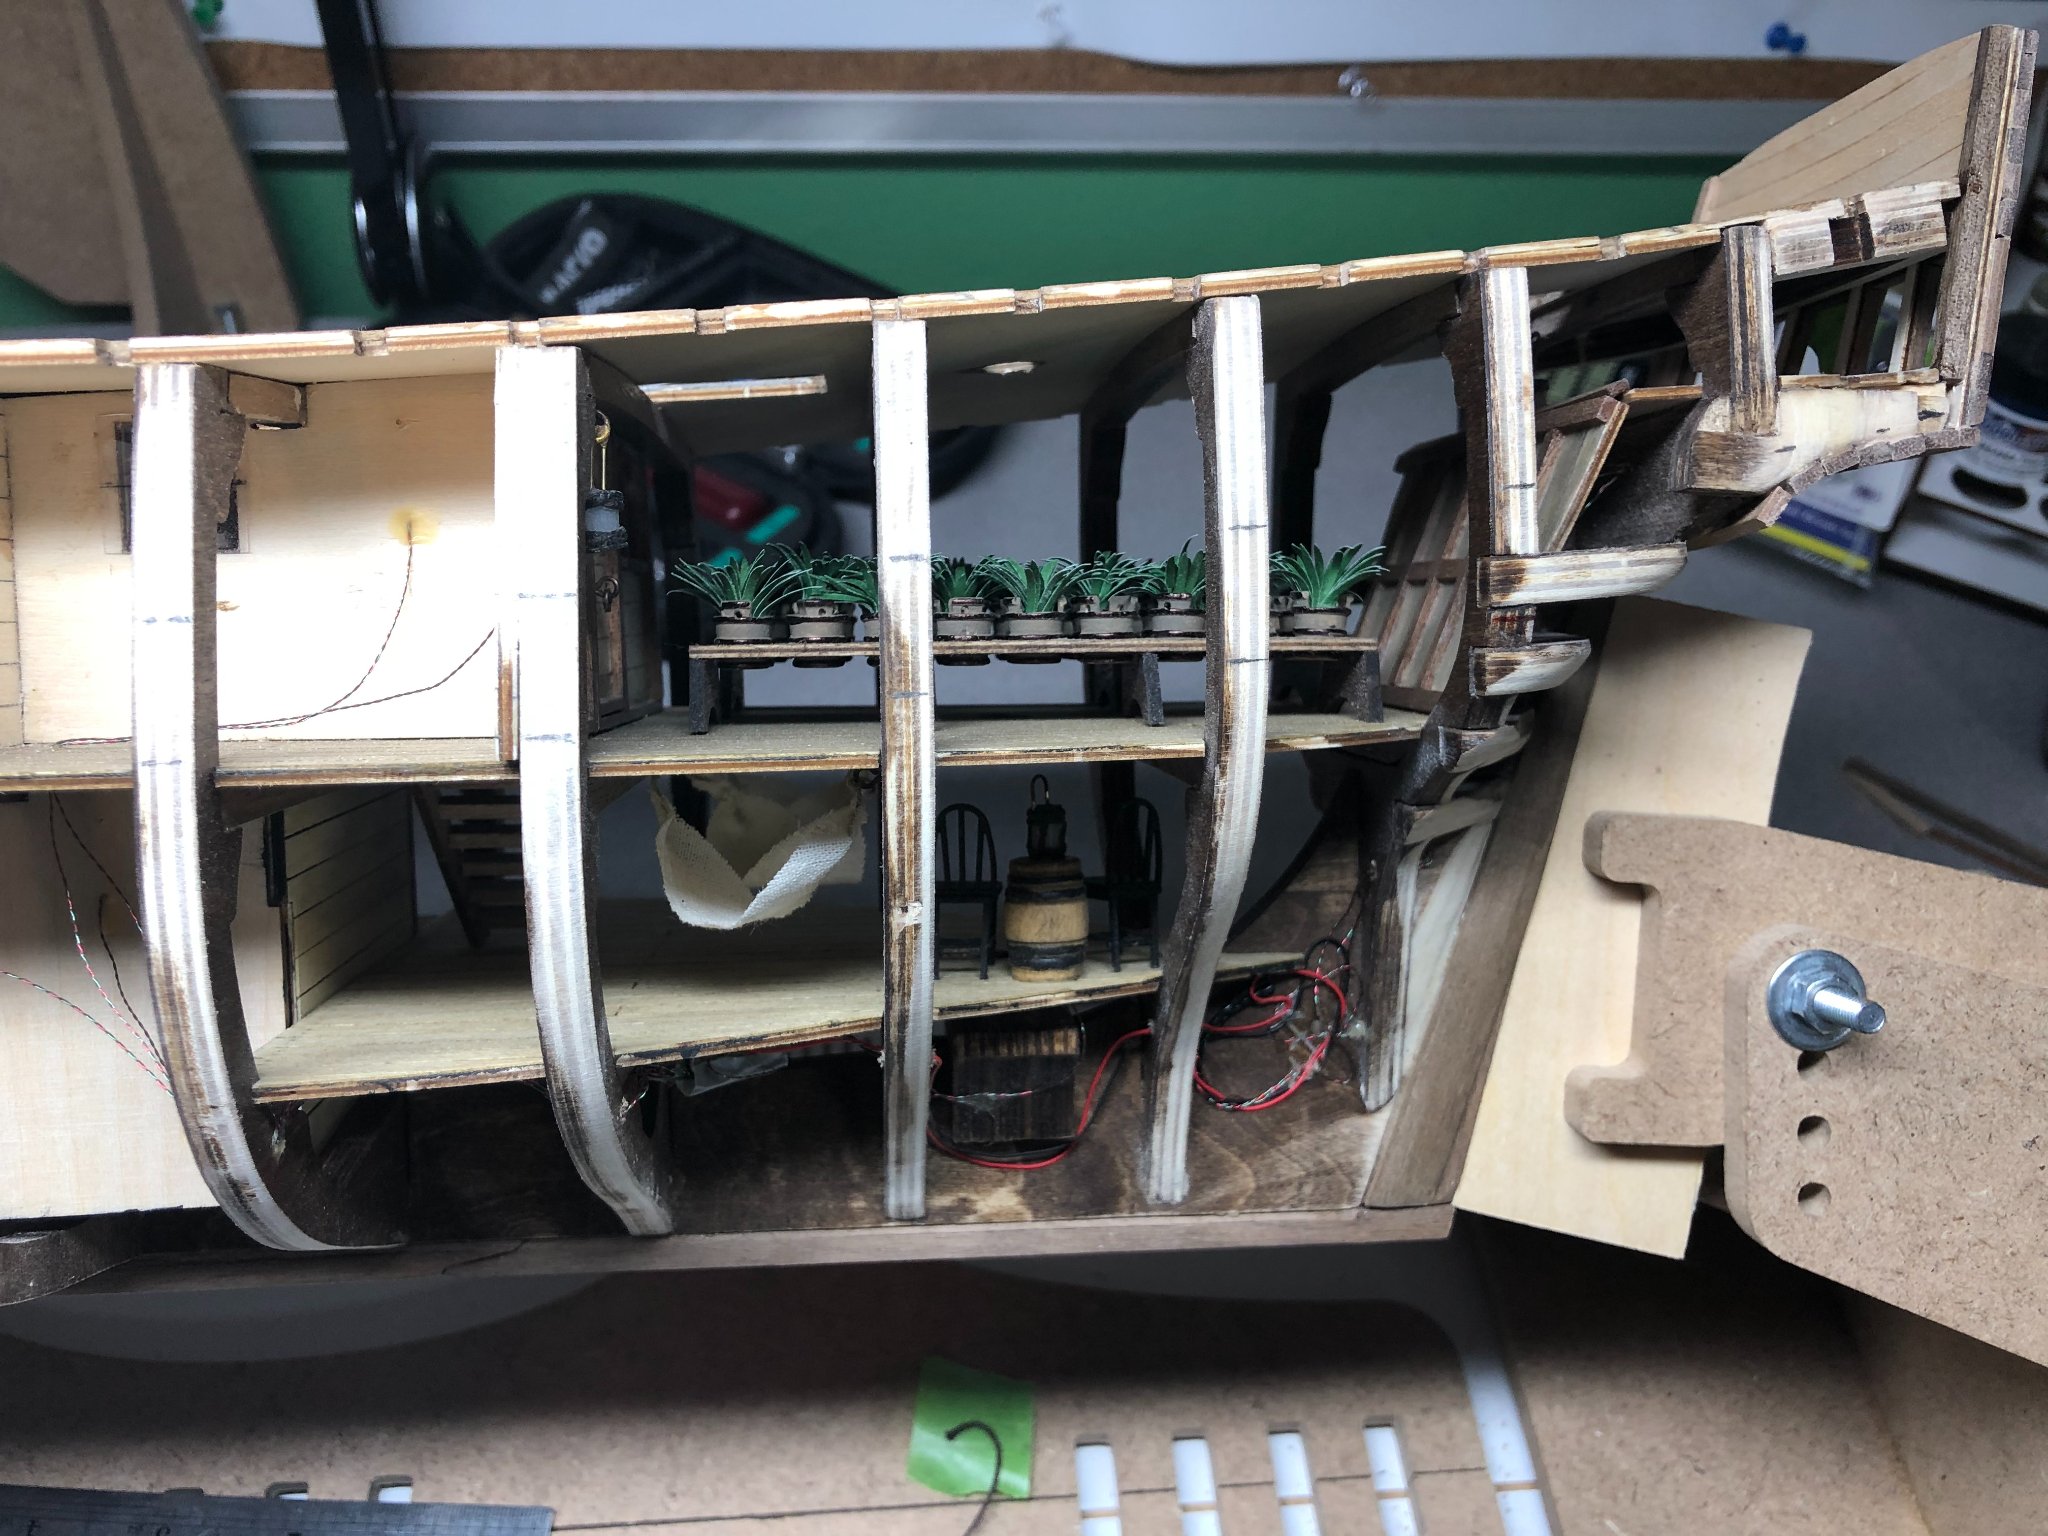
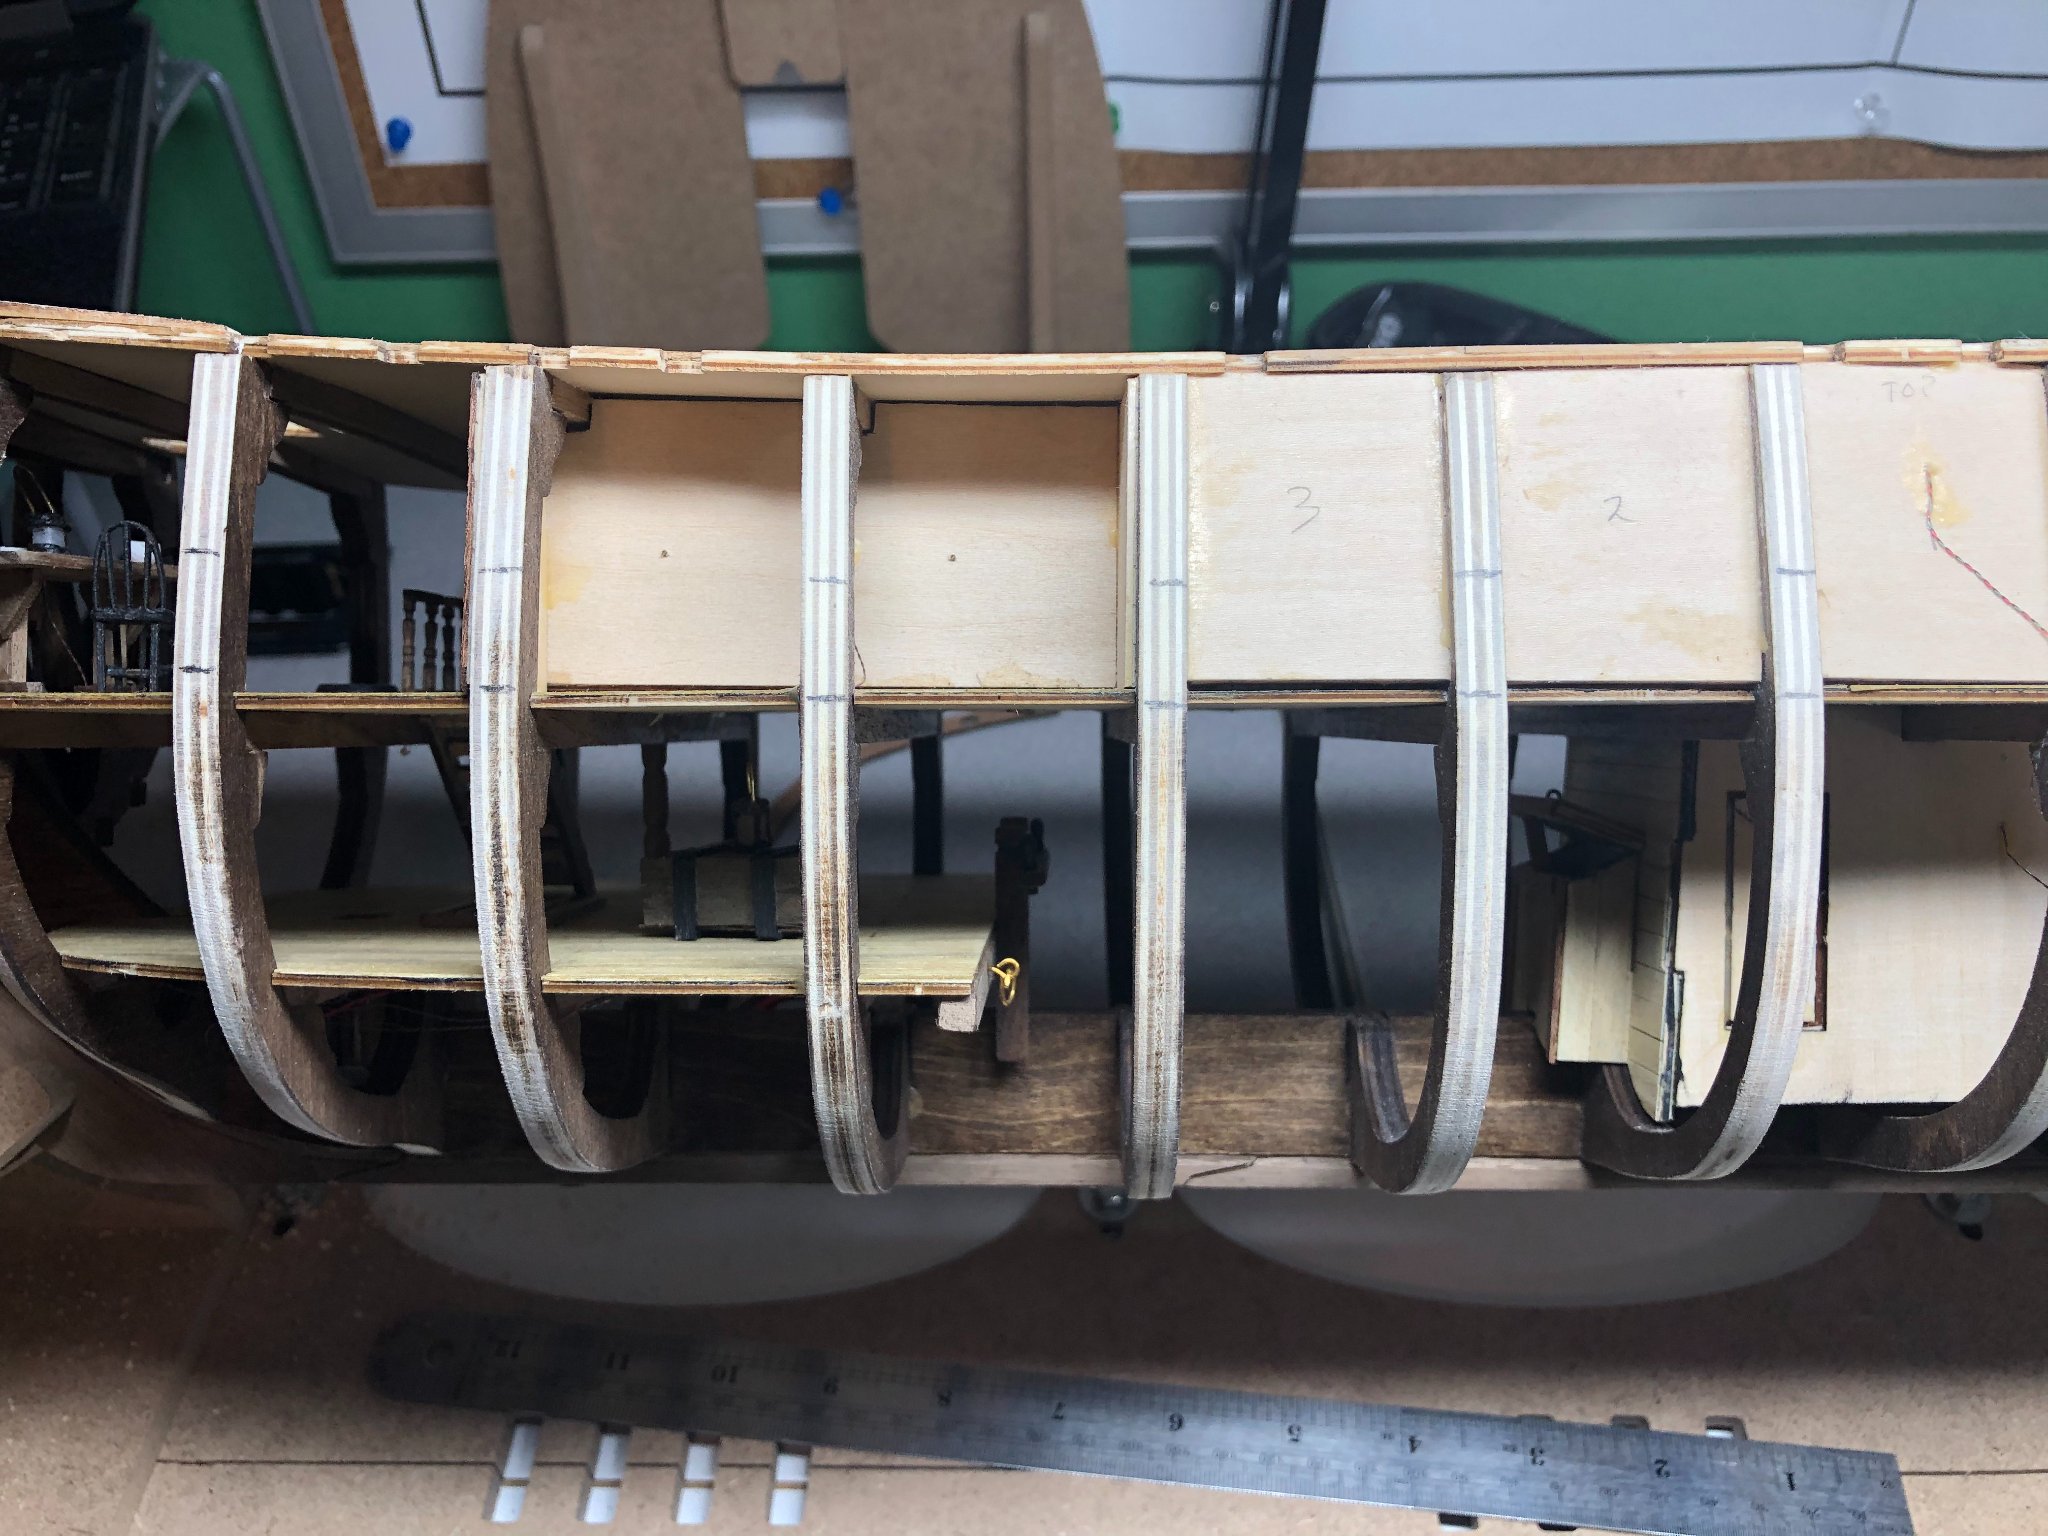
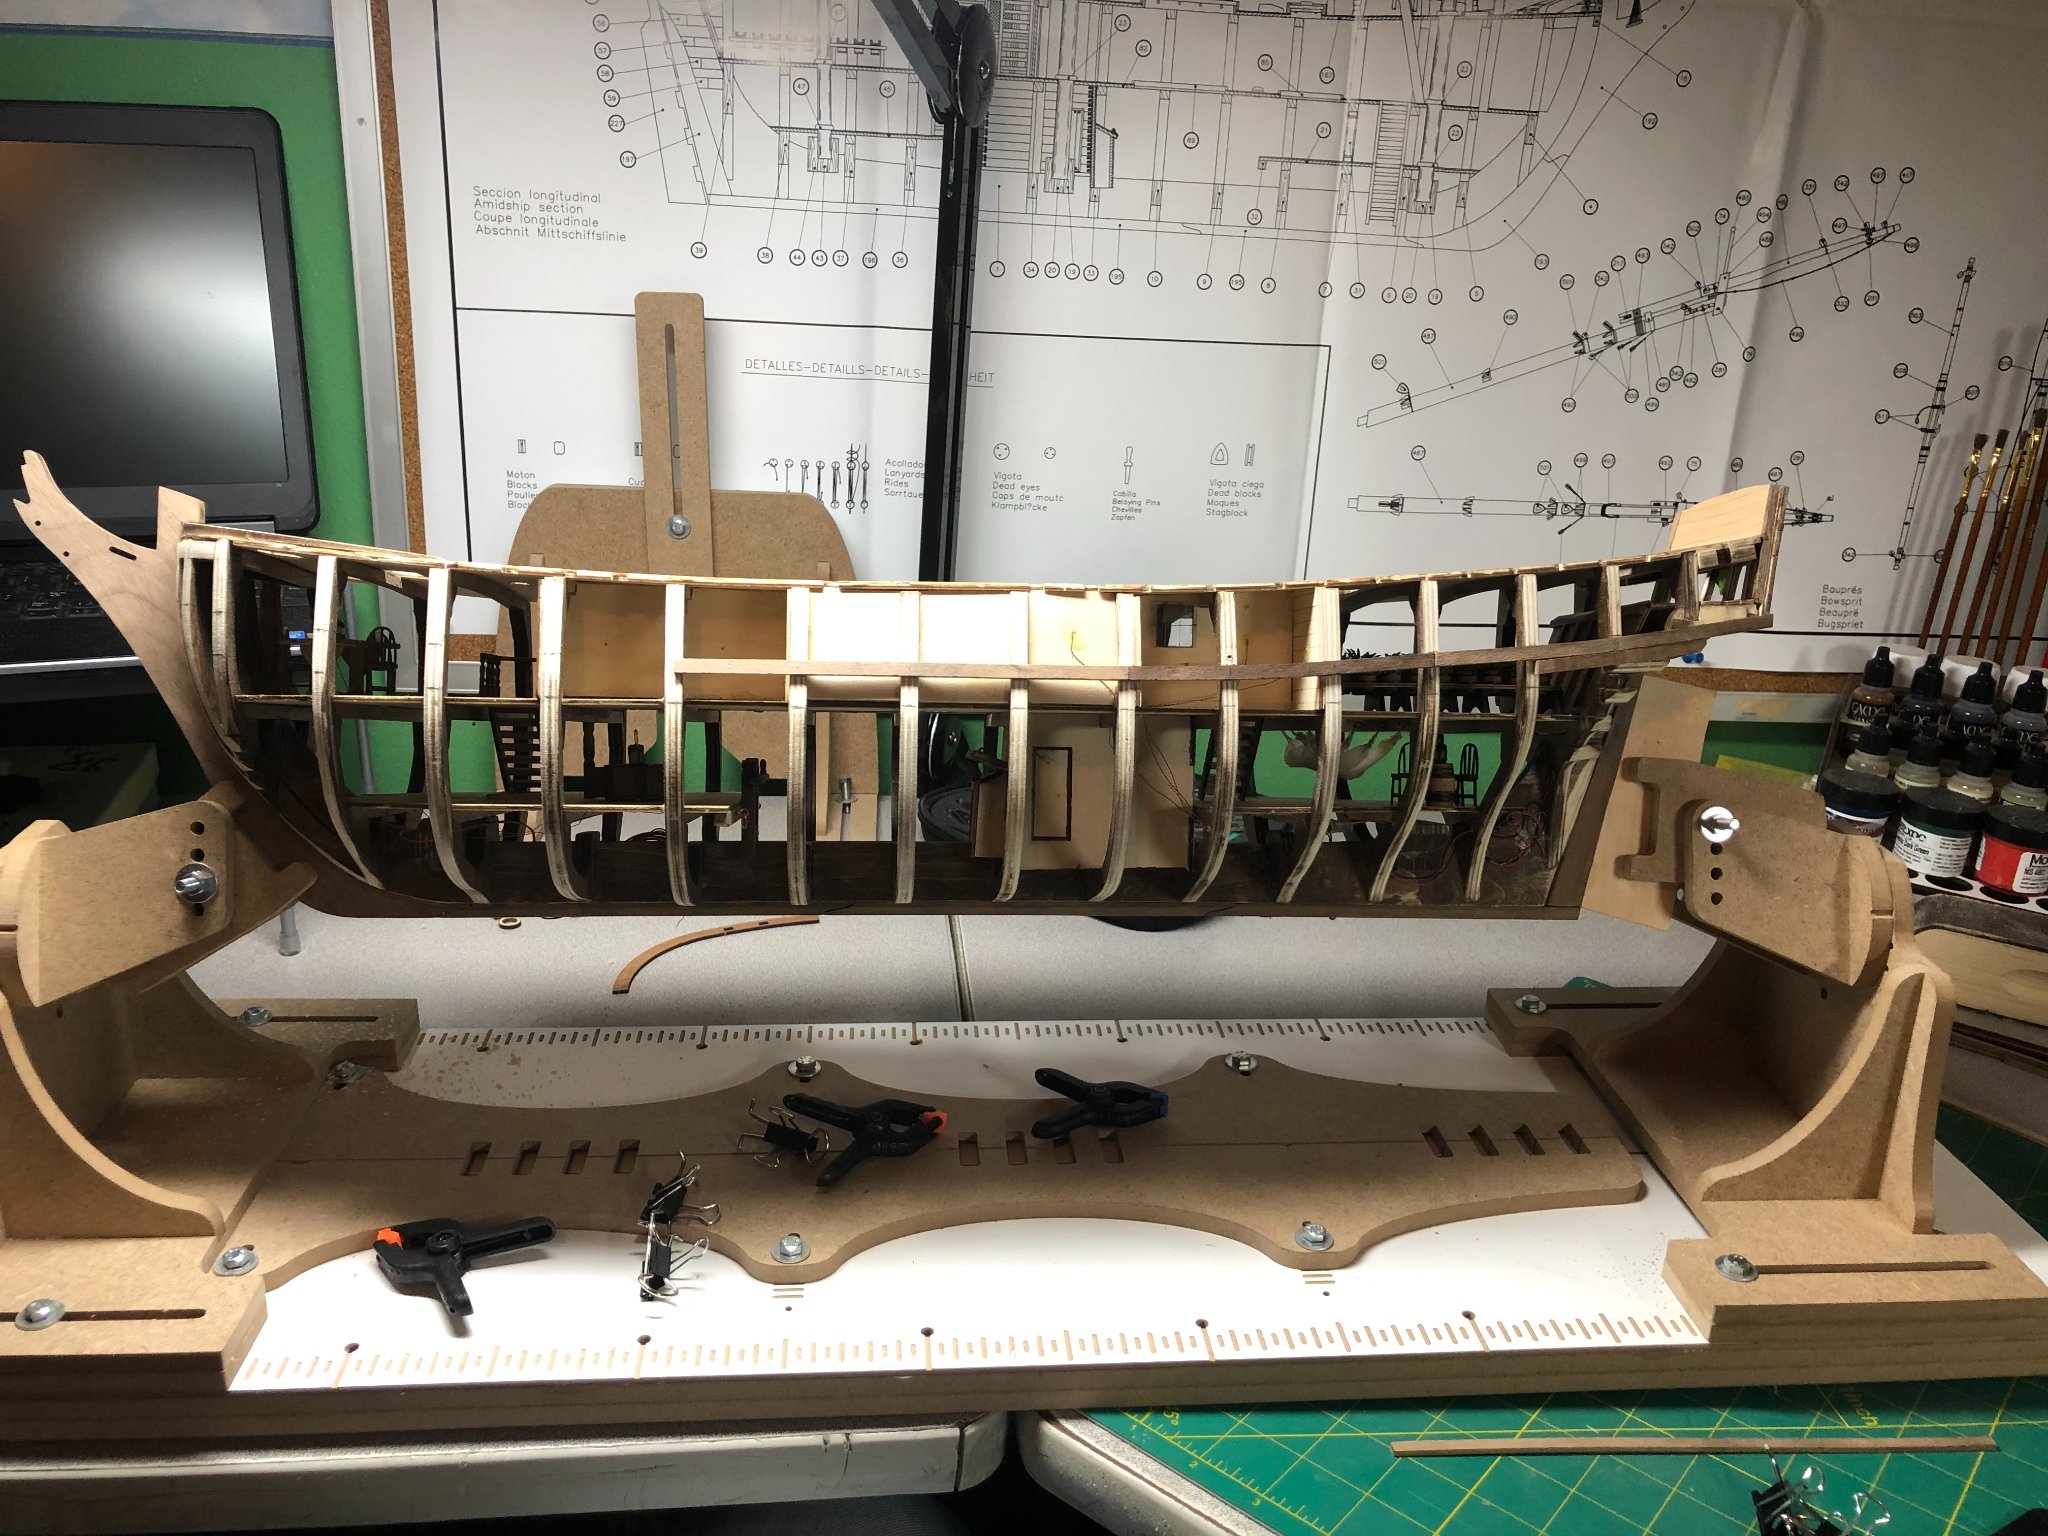
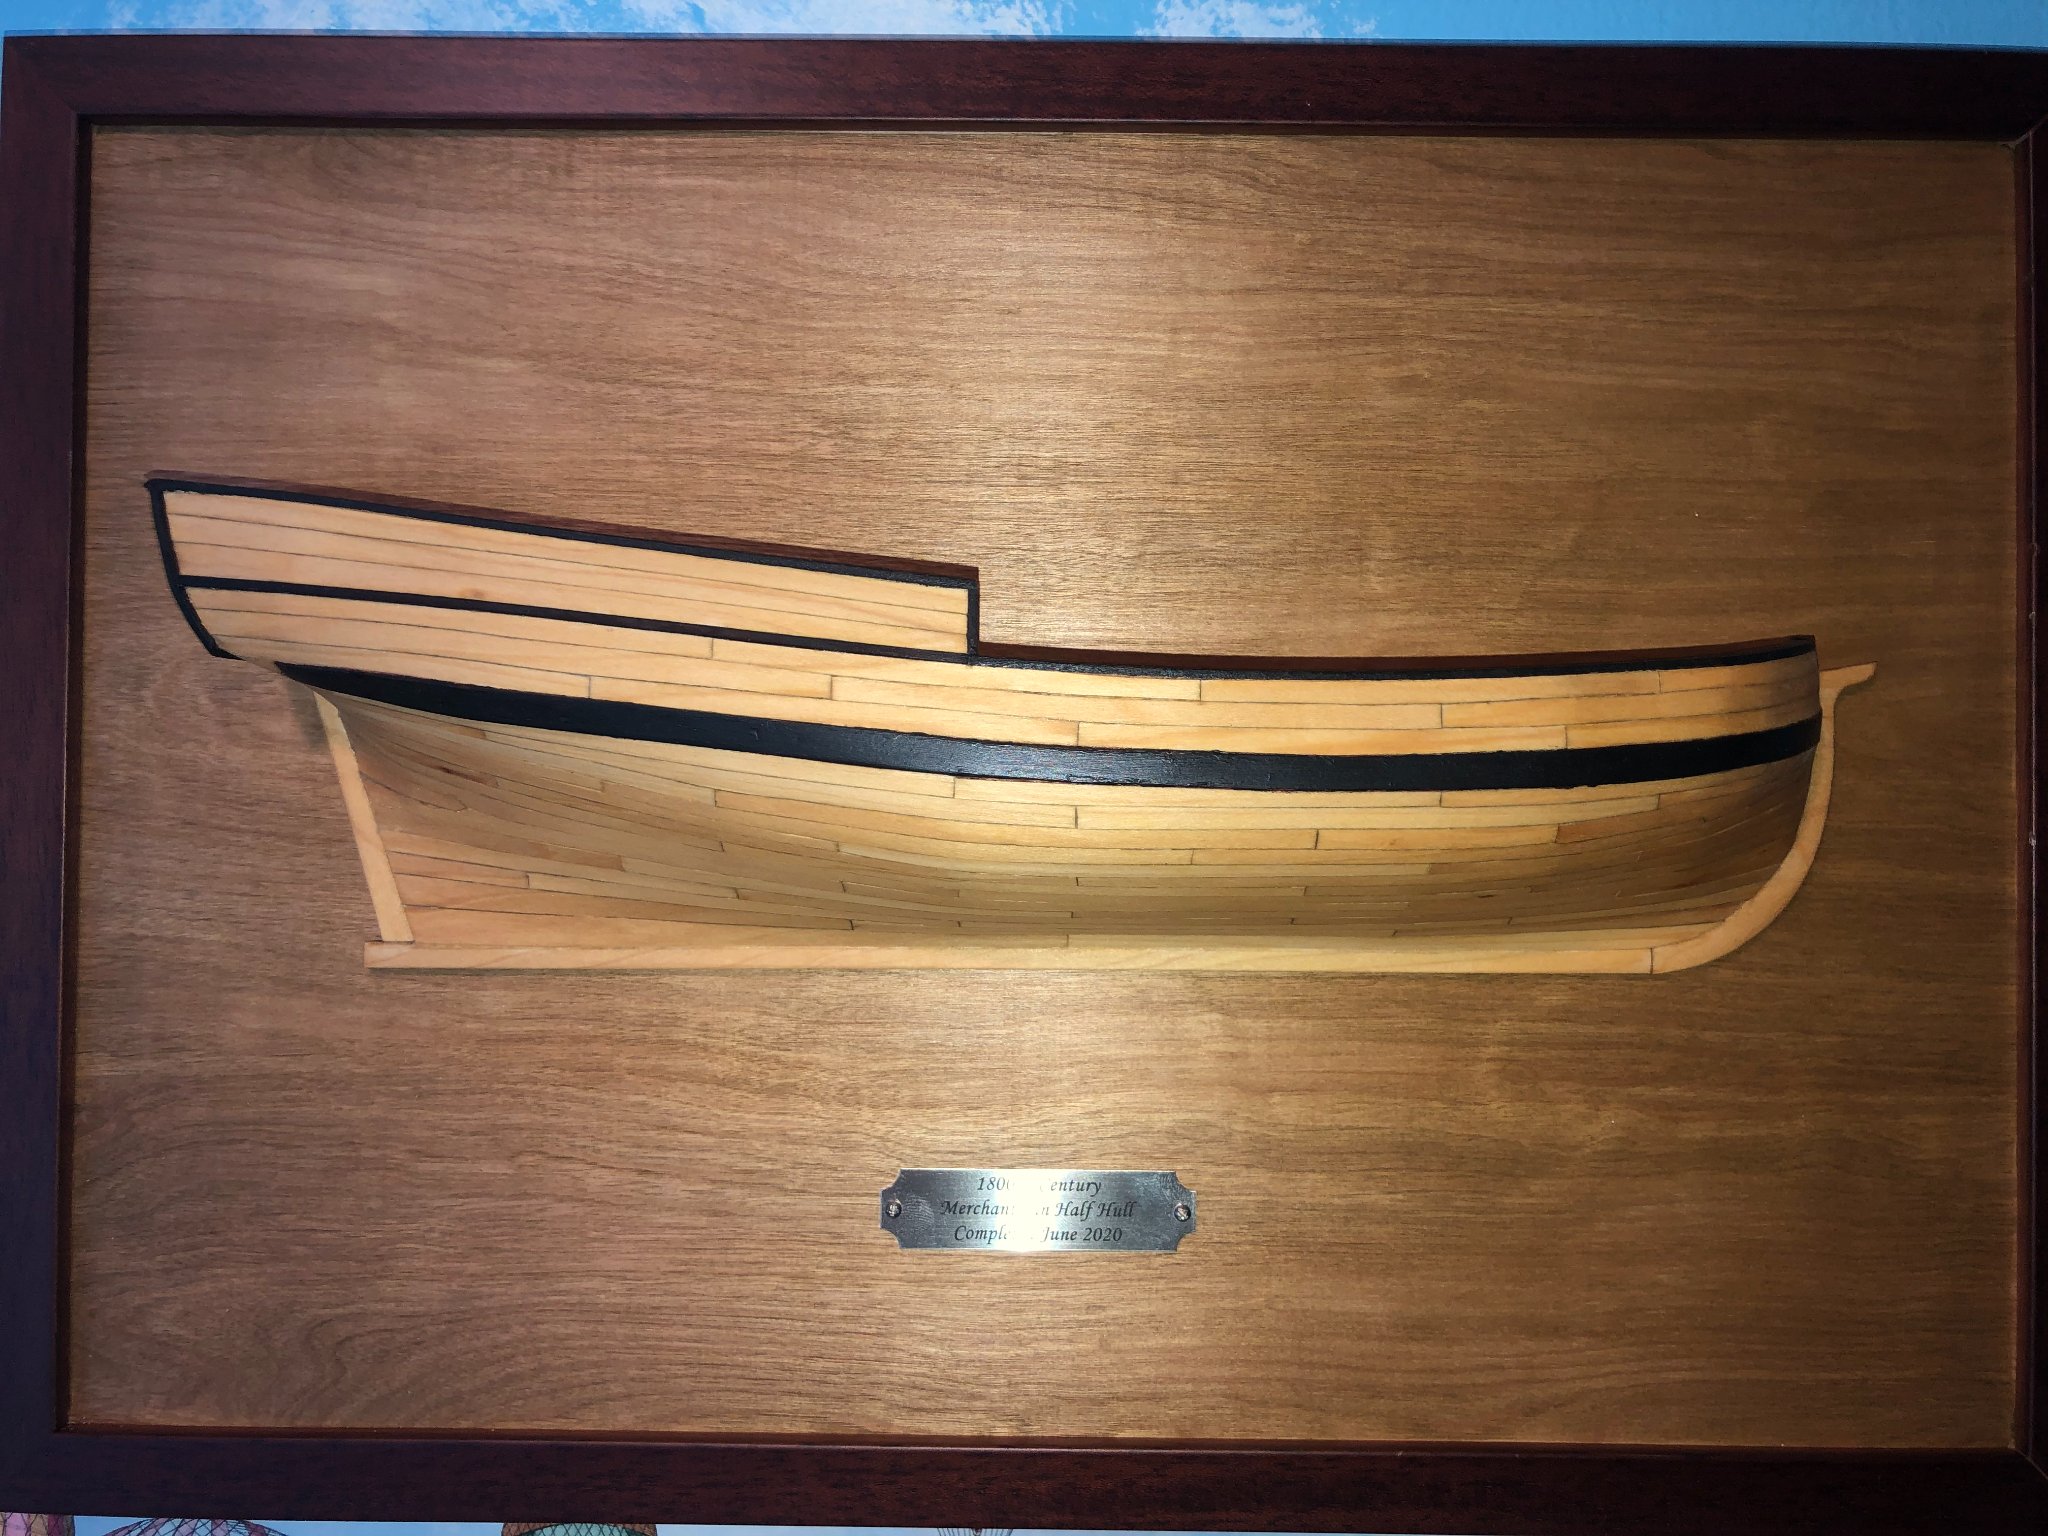
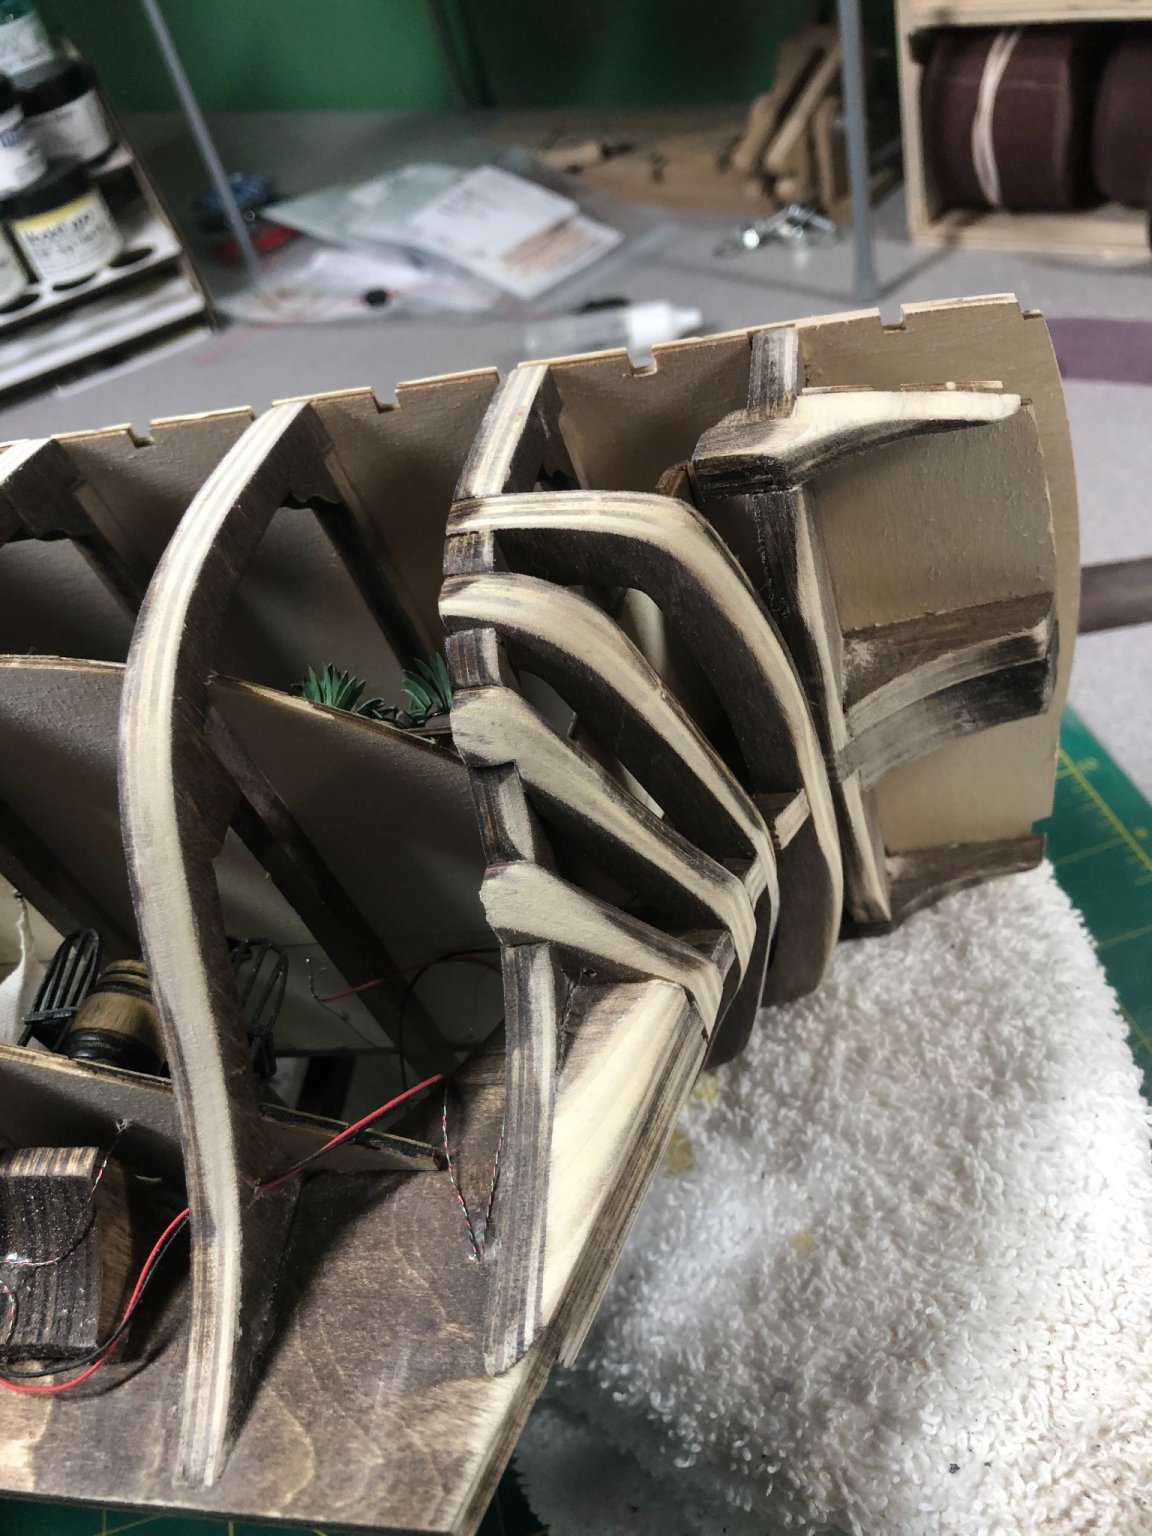
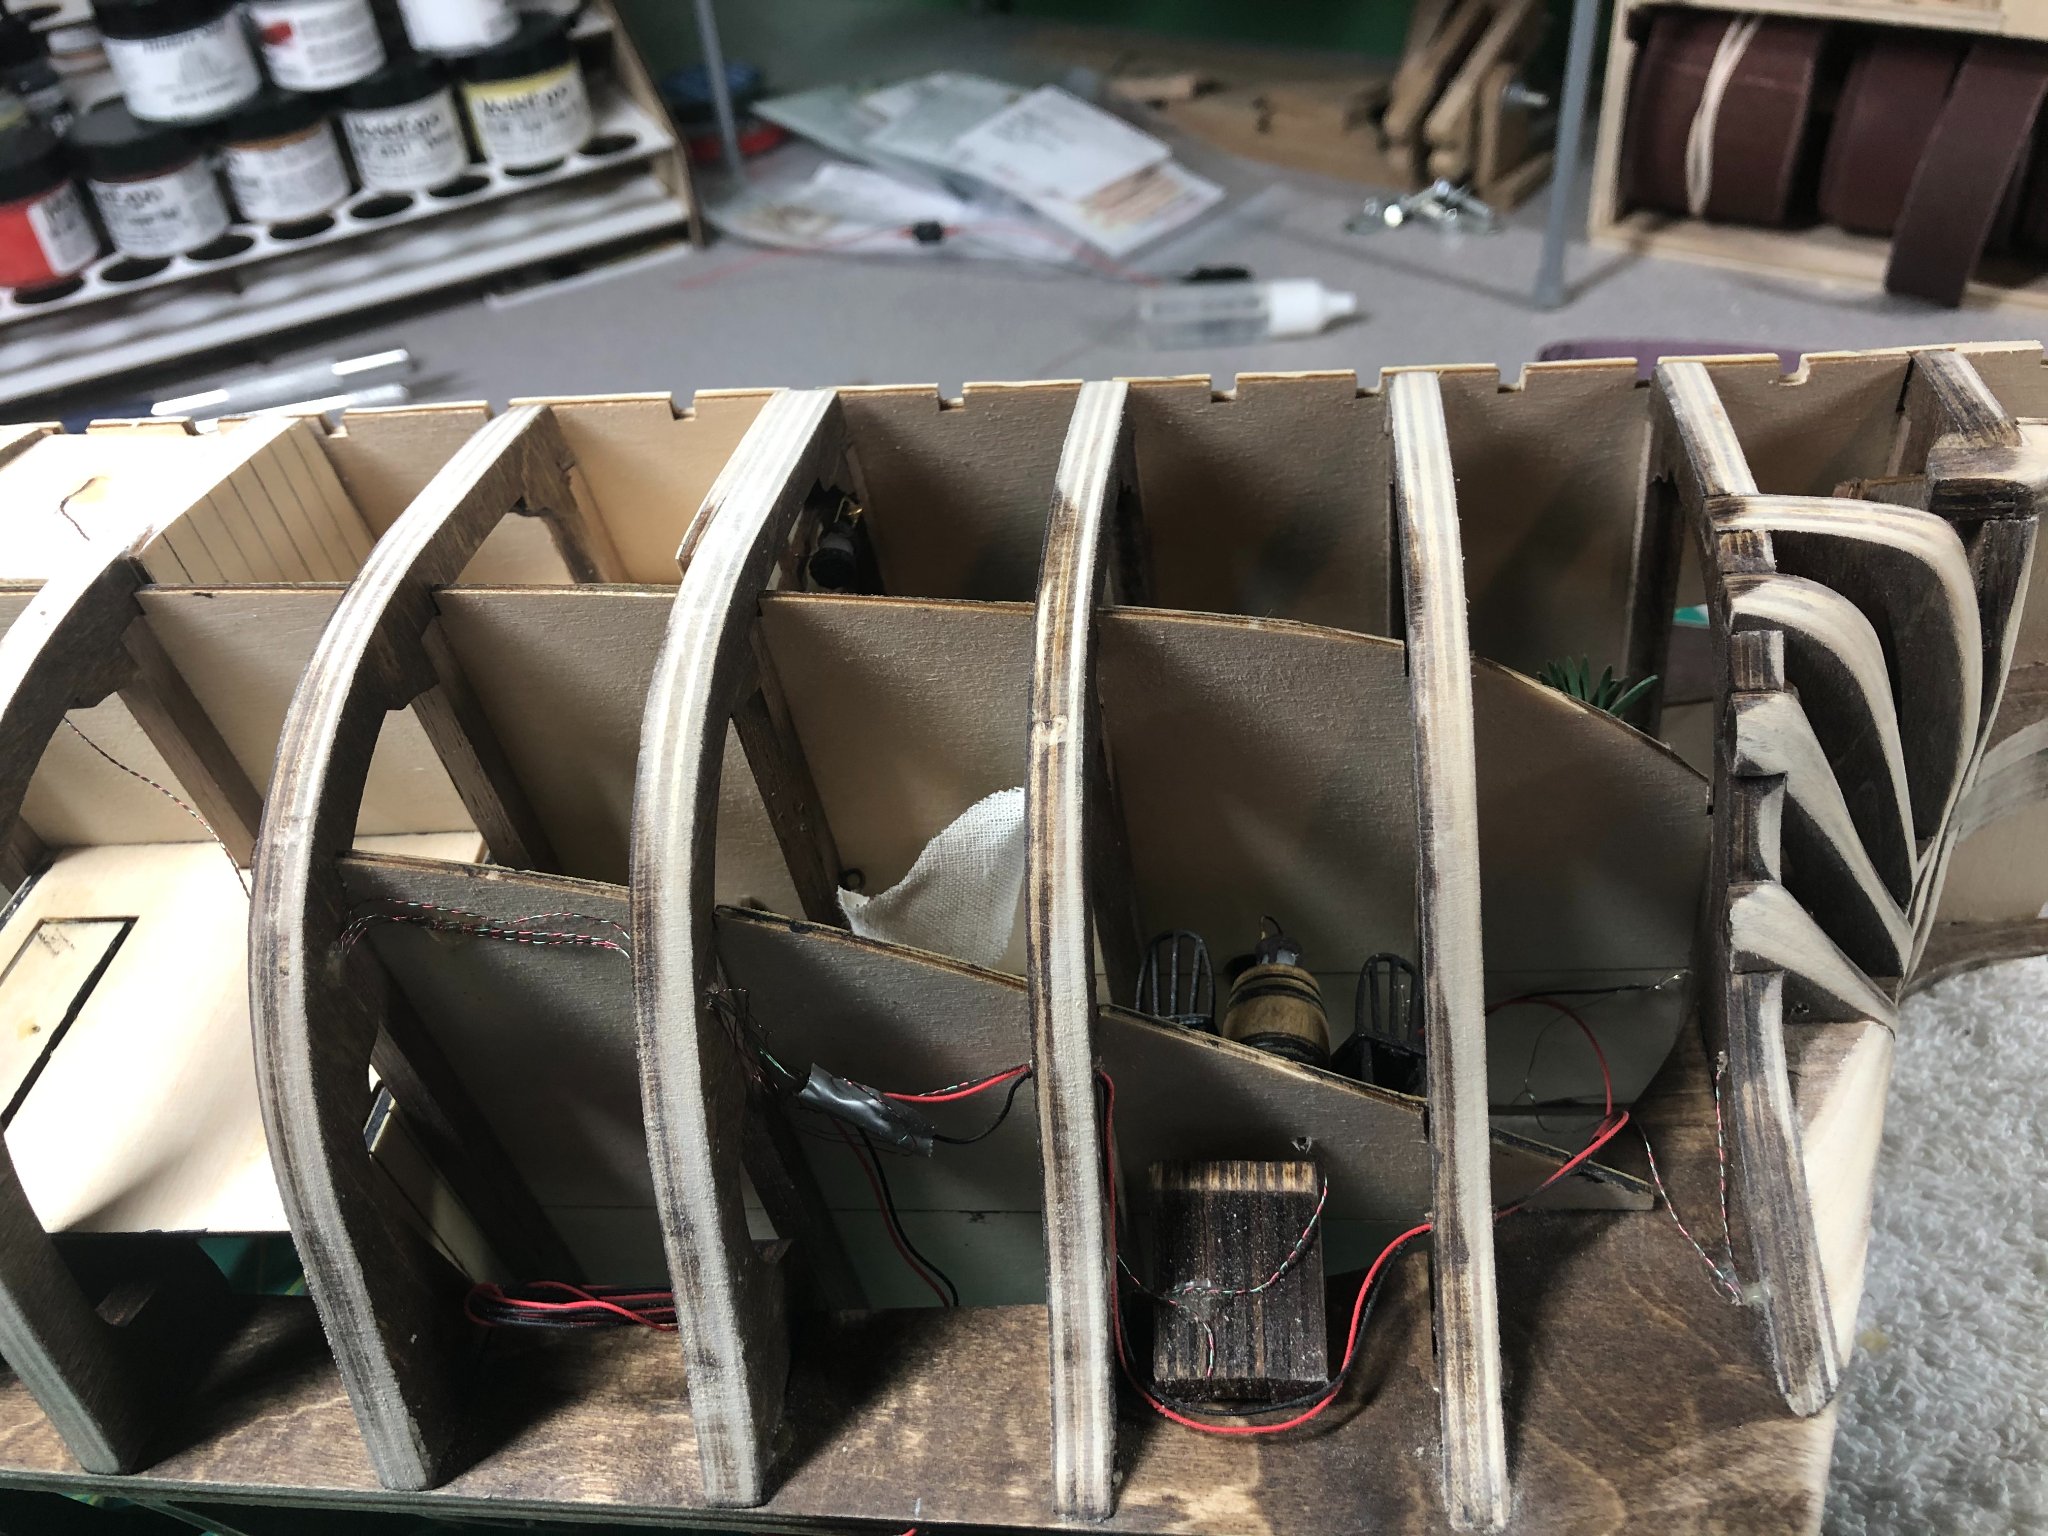
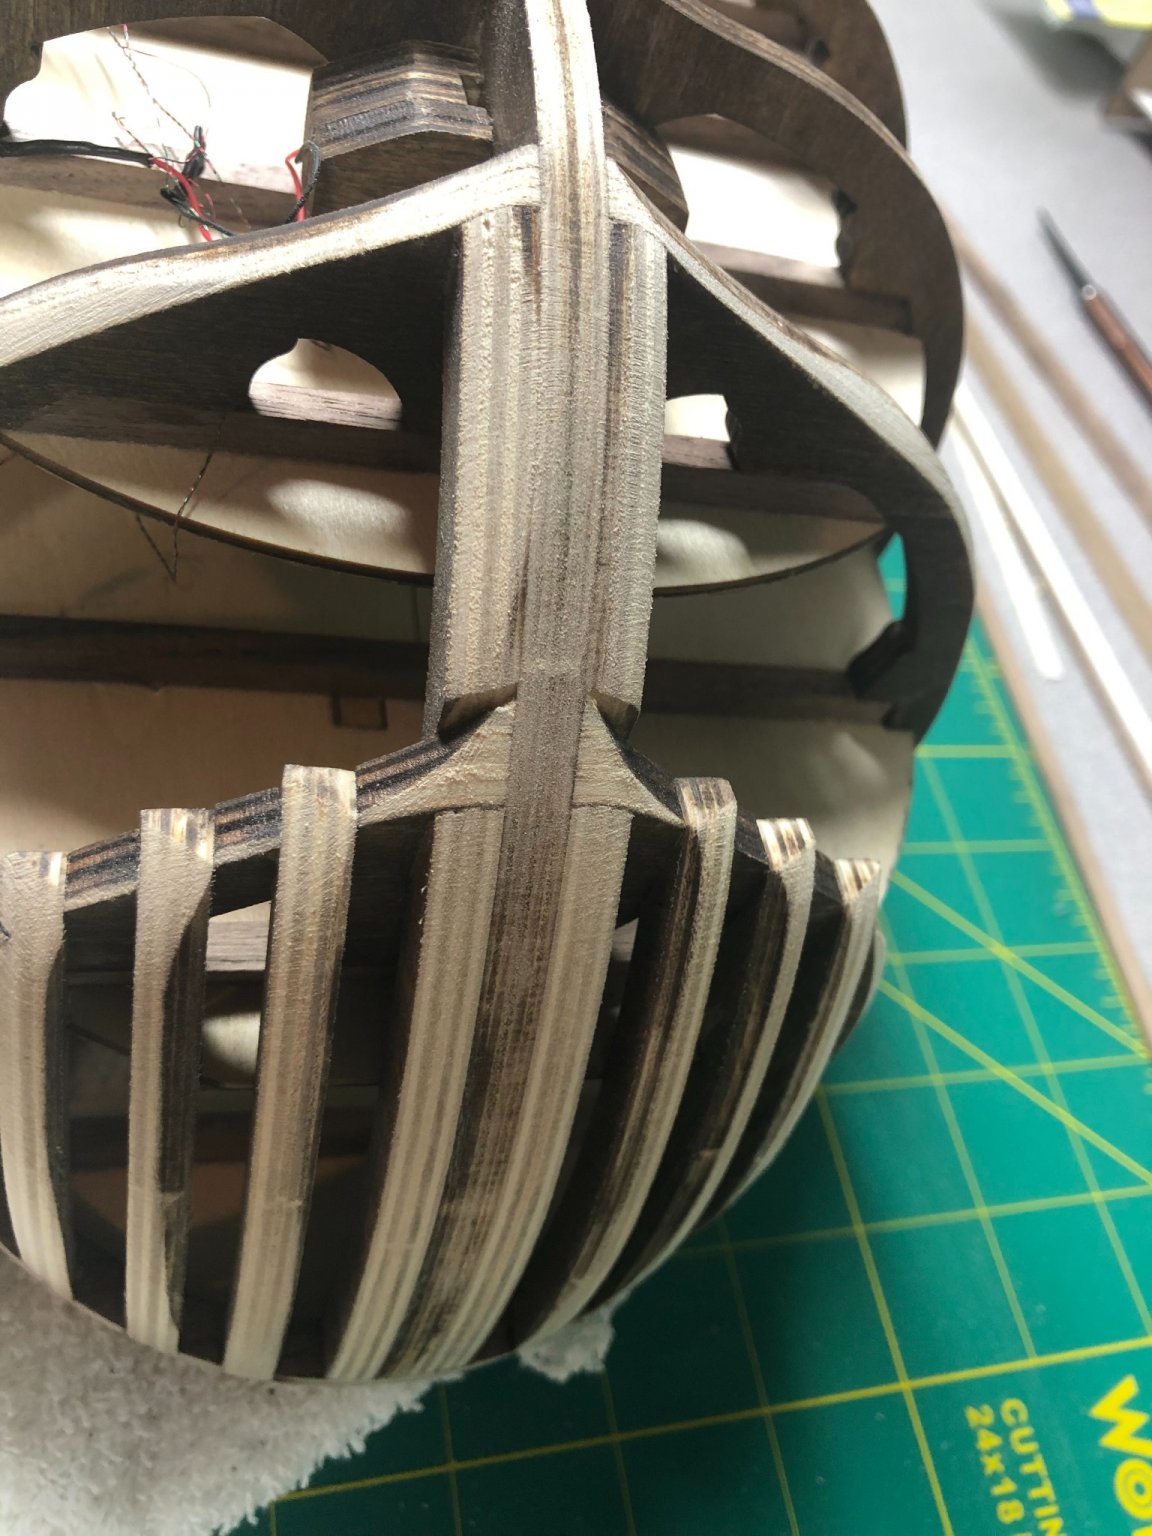
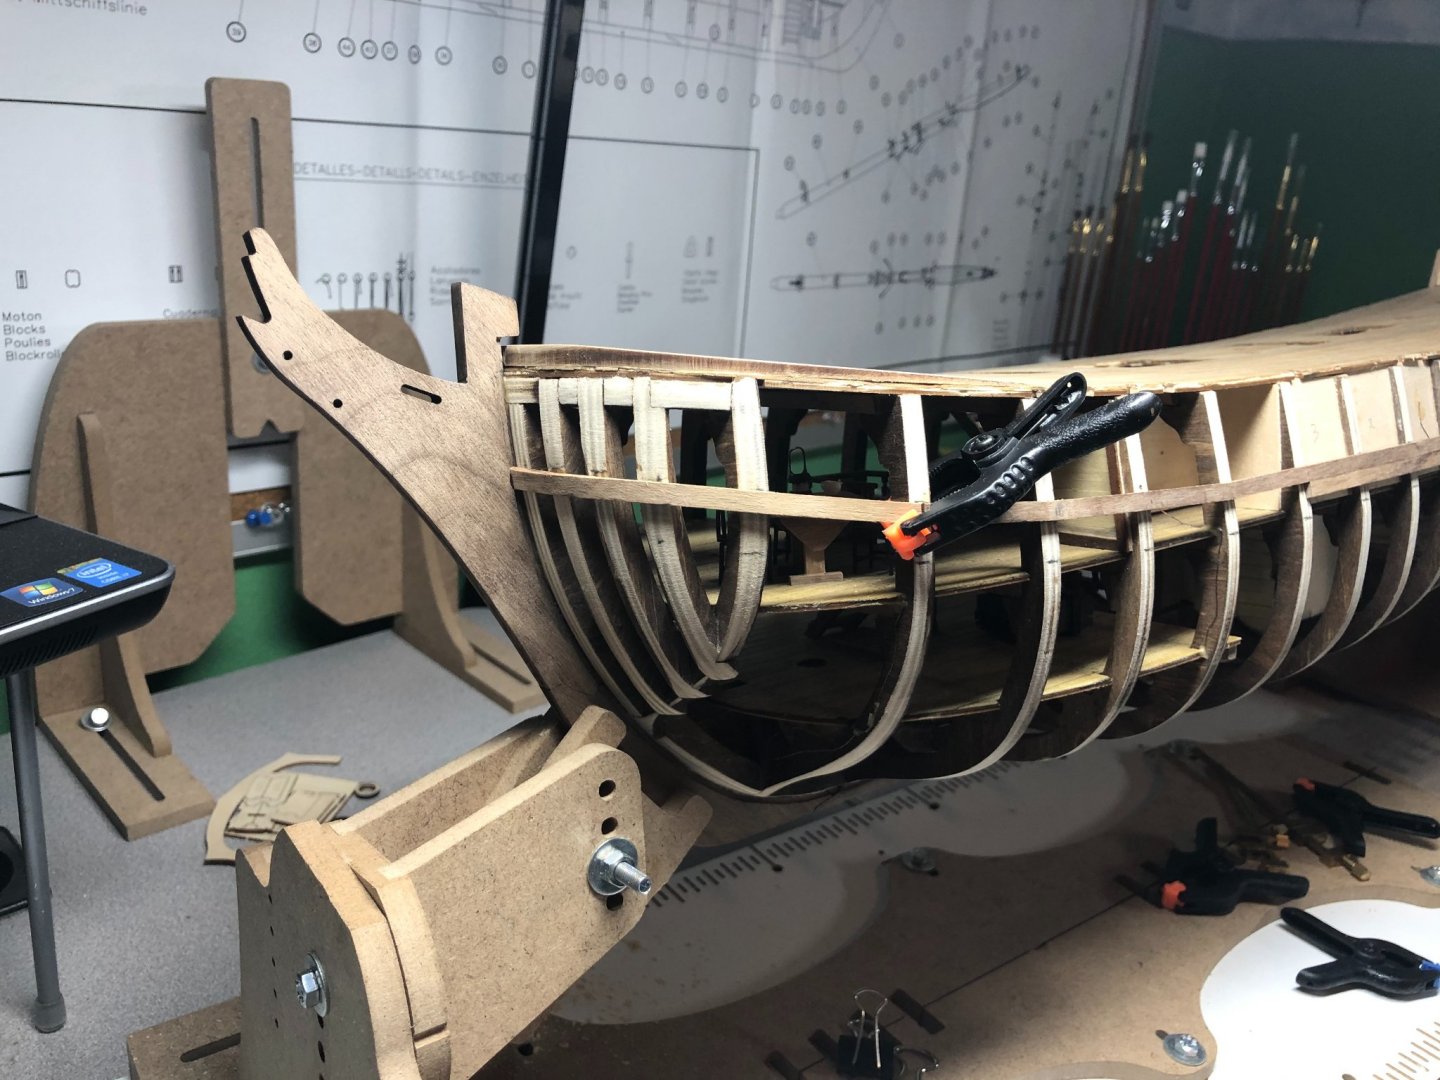
So, before I finish the main deck, I'm going to do the fairing of the frames for hull planking. I think there will be less chance of damaging the deck now. Additionally, I'll be installing the keel, keel stem and stern post. These will be notched for the rabbet line and, eventually, I'll begin planking from the keel to the main deck. I'm using this method due to the historical accuracy and the techniques I learned doing NRG's Half Hull Project: As the above picture shows, I'll be using similar methods but with the kits supplied wood. I have purchased some additional walnut for the garboard and for fashioning any drop or stealer planks. The length of the planks will be kept to 20-25 feet (approximately 5" by scale). But first comes the fairing... And I will admit, of all the work done any model, this is the part I like the least! However, it is extremely important to get it right. The shape of the hull and the ability to glue the planks successfully depends on the quality of the fairing. I noticed that in all the build logs, for the Bounty, on this site, there is very little referenced to this step and even fewer pictures. Hopefully, I can remedy some of that. Fairing is critical throughout the hull but especially at the bow and stern. The goal is to get as much gluing surface as possible on each frame while maintaining the proper hull shape: This particular model is a bit more challenging because of the open starboard side. I don't plan to fair any of the frames that are not planked... a pain to figure that out! Of course, I've made the challenge even more difficult with the wiring and the need to protect it! I use a string and run it along the frames looking for high spots and low spots and as much surface for glue as possible. I'll show that process in my next update. I still have a ways to go... I'll update again when this portion is done...


-
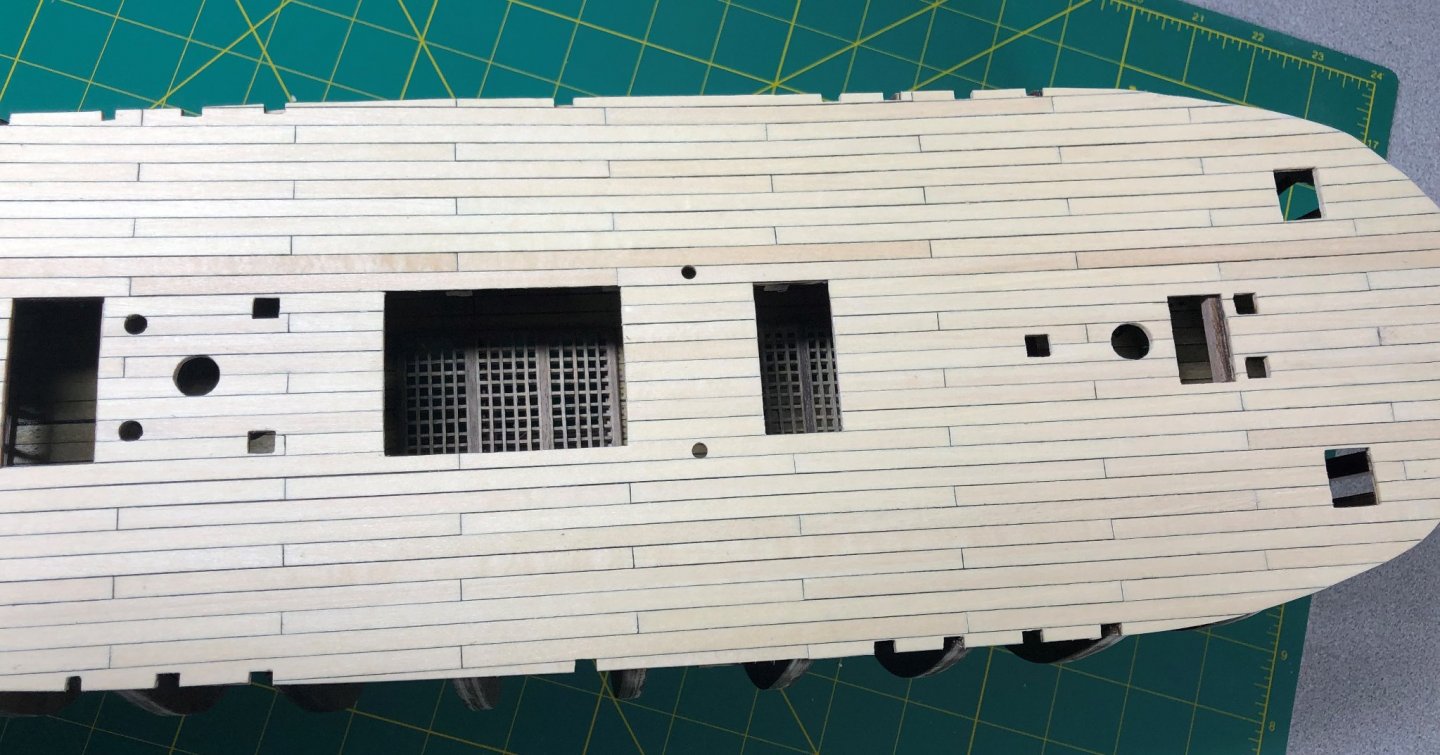
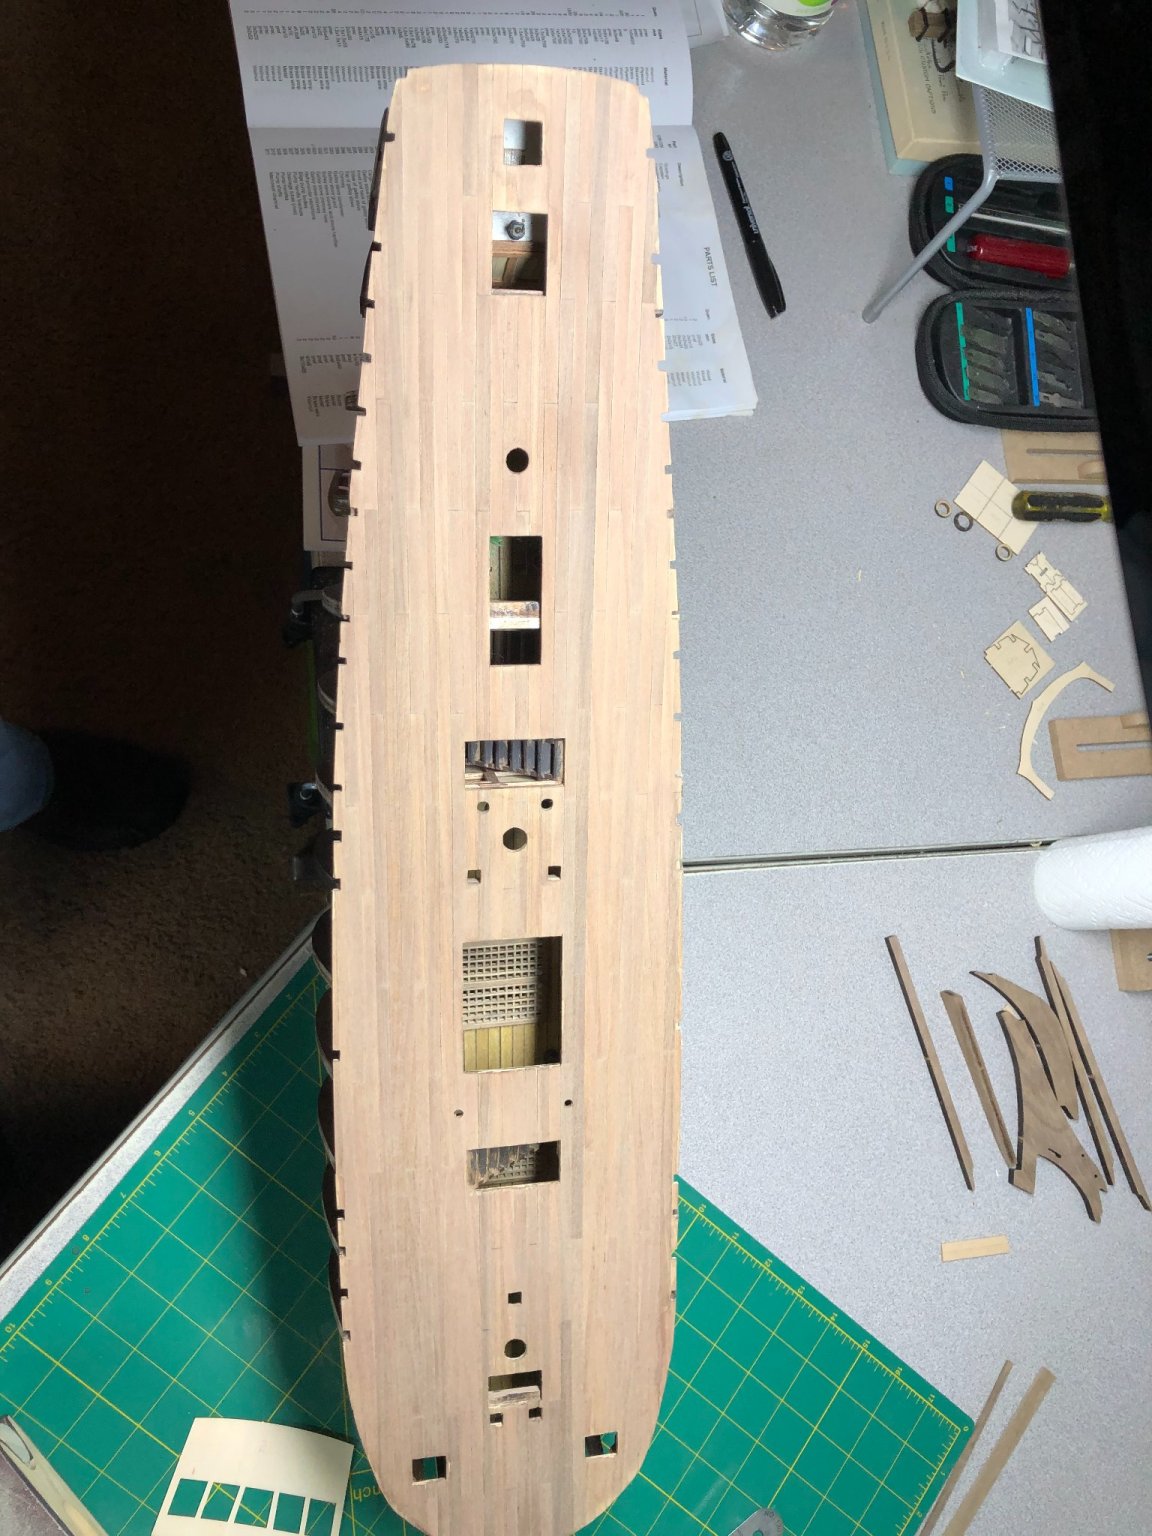
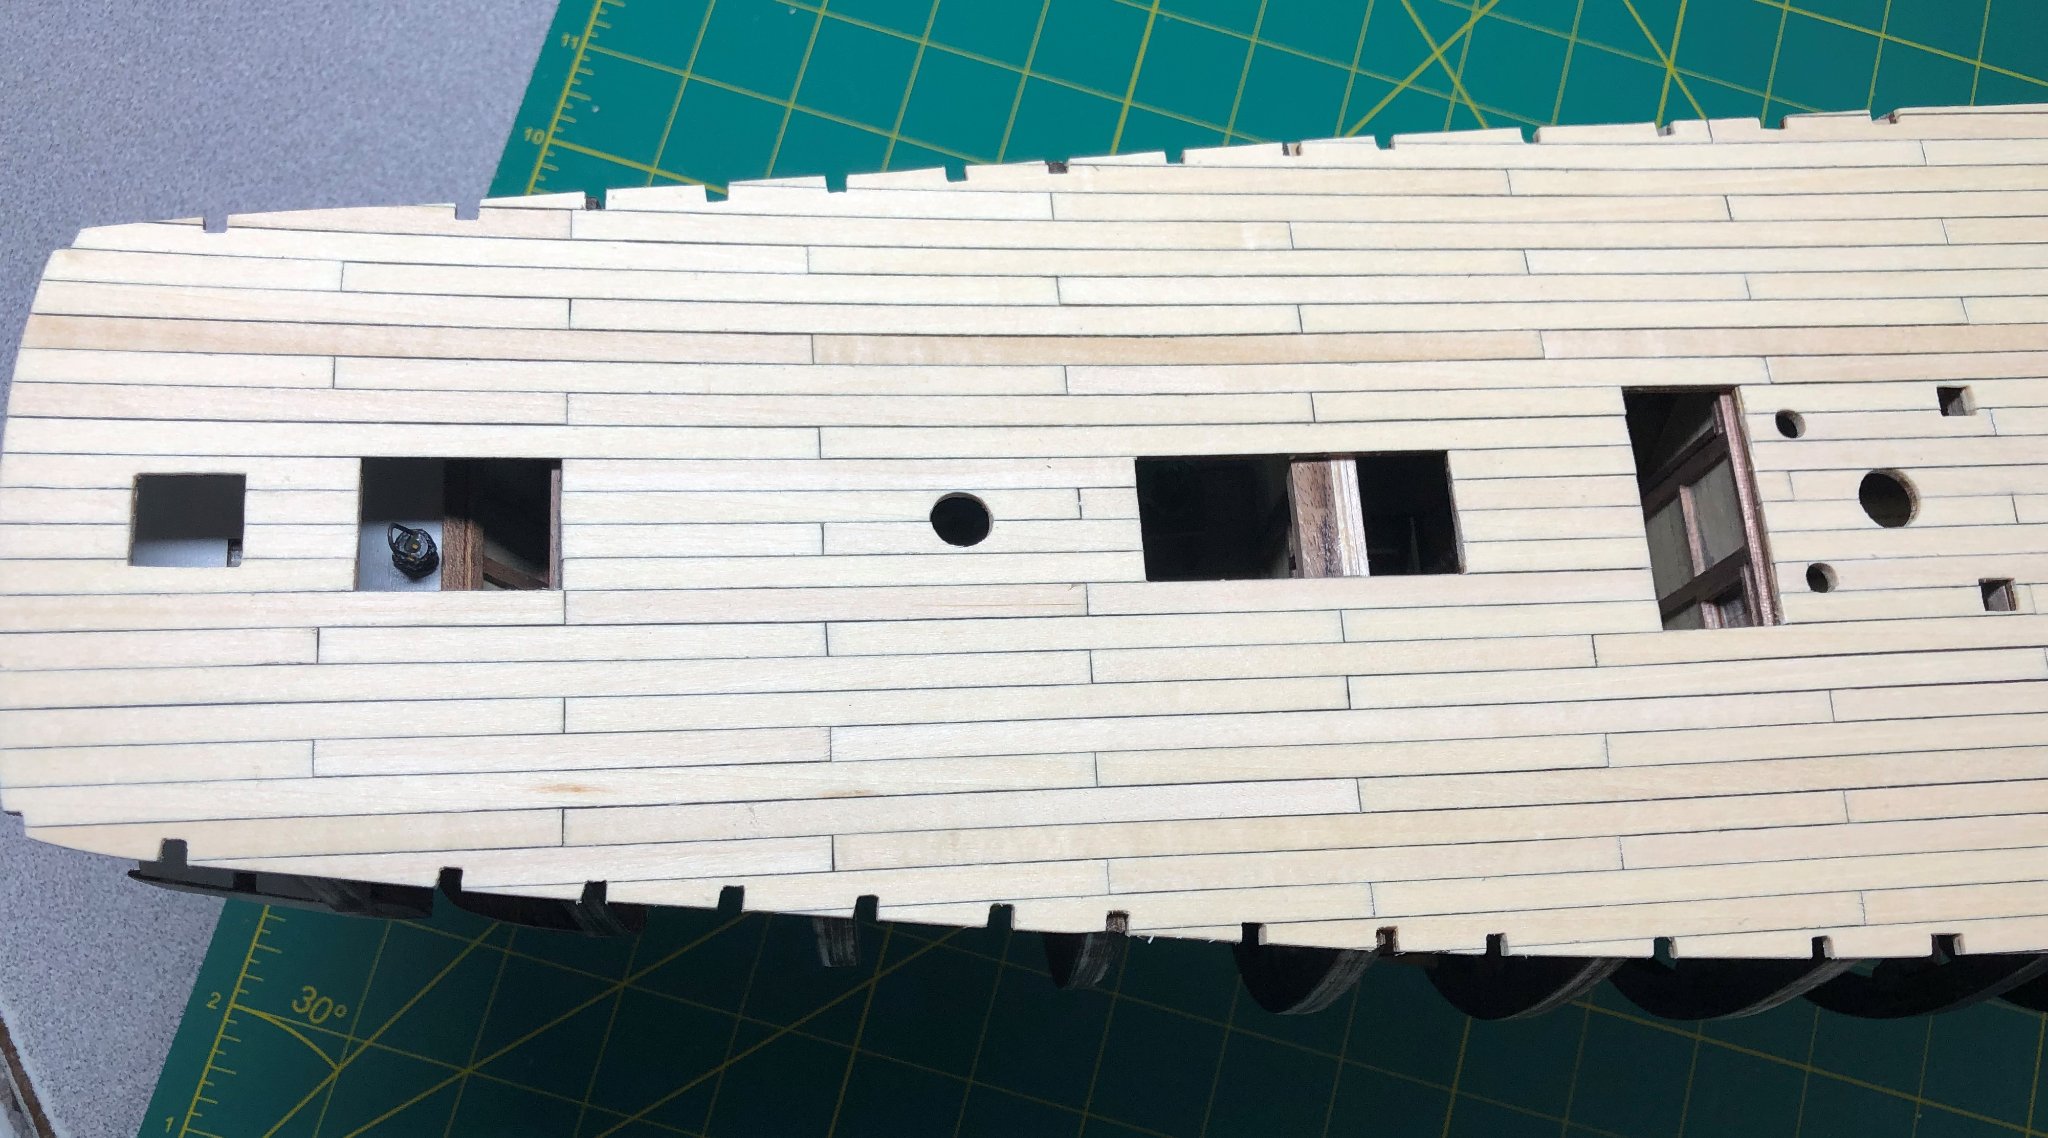
Another week has gone by and I have finished the main deck planking! Since I failed to mention it in my previous update, I thought I would briefly go over the procedure I used for each plank. I measured and cut each plank individually and used a No. 2 pencil to darken the 4 edges. I doubled checked the fit and then used Elmer's wood glue to adhere them to the false deck. The glue was applied and then smoothed out with my finger to ensure that the entire surface was coated with a thin coat... too much glue and you get glue stains, too little glue and you don't get good adhesion. The results: The numerous cut-outs were accomplished using an Exacto knife and Exacto sawblade, finished with a flat and round file. All the through deck items were checked, again, to ensure good fits. Sanding is next and then the very tedious installation of the treenails... I'm still trying to decide which method I will use. On the lower two decks, I used a punch and a pencil to mark them. I'm leaning on doing the same on the main deck too. However, the aging portion will be different since this deck is exposed to weather and sunshine... I found an individual on one of the FB groups I follow that had a very realist looking deck. I'm going to experiment with his method for aging. This will also help me decide on the treenail option too. I'm going off the sequence of the plans for the next few steps because I plan to do the planking of the hull completely different...