HOLIDAY DONATION DRIVE - SUPPORT MSW - DO YOUR PART TO KEEP THIS GREAT FORUM GOING! (Only 13 donations so far - C'mon guys!)
×


LyleK1
-
Posts
538 -
Joined
-
Last visited
Content Type
Profiles
Forums
Gallery
Events
Everything posted by LyleK1
-
 Agree on the Bligh comments... a brilliant navigator though! I'll check out the other book, always enjoy knowing as much as possible about the current project. The Antarctica expeditions are of interest too. I built the HMS Terror a while back... similar backgrounds, but very different! I'd love to see a picture of the iron ballast! I'm using black stone to simulate the ballast on my rendition.
 -
Thanks Joe... Short of information that can be authenticated (as you probably know), I've made some assumptions for the time period and origination of the Bounty. And I agree, she could've been blue, but I doubt it. Have you read Mutiny on the Bounty by Peter FitzSimmons? An excellent book and a source for some information too. Appreciate you stopping in!
-
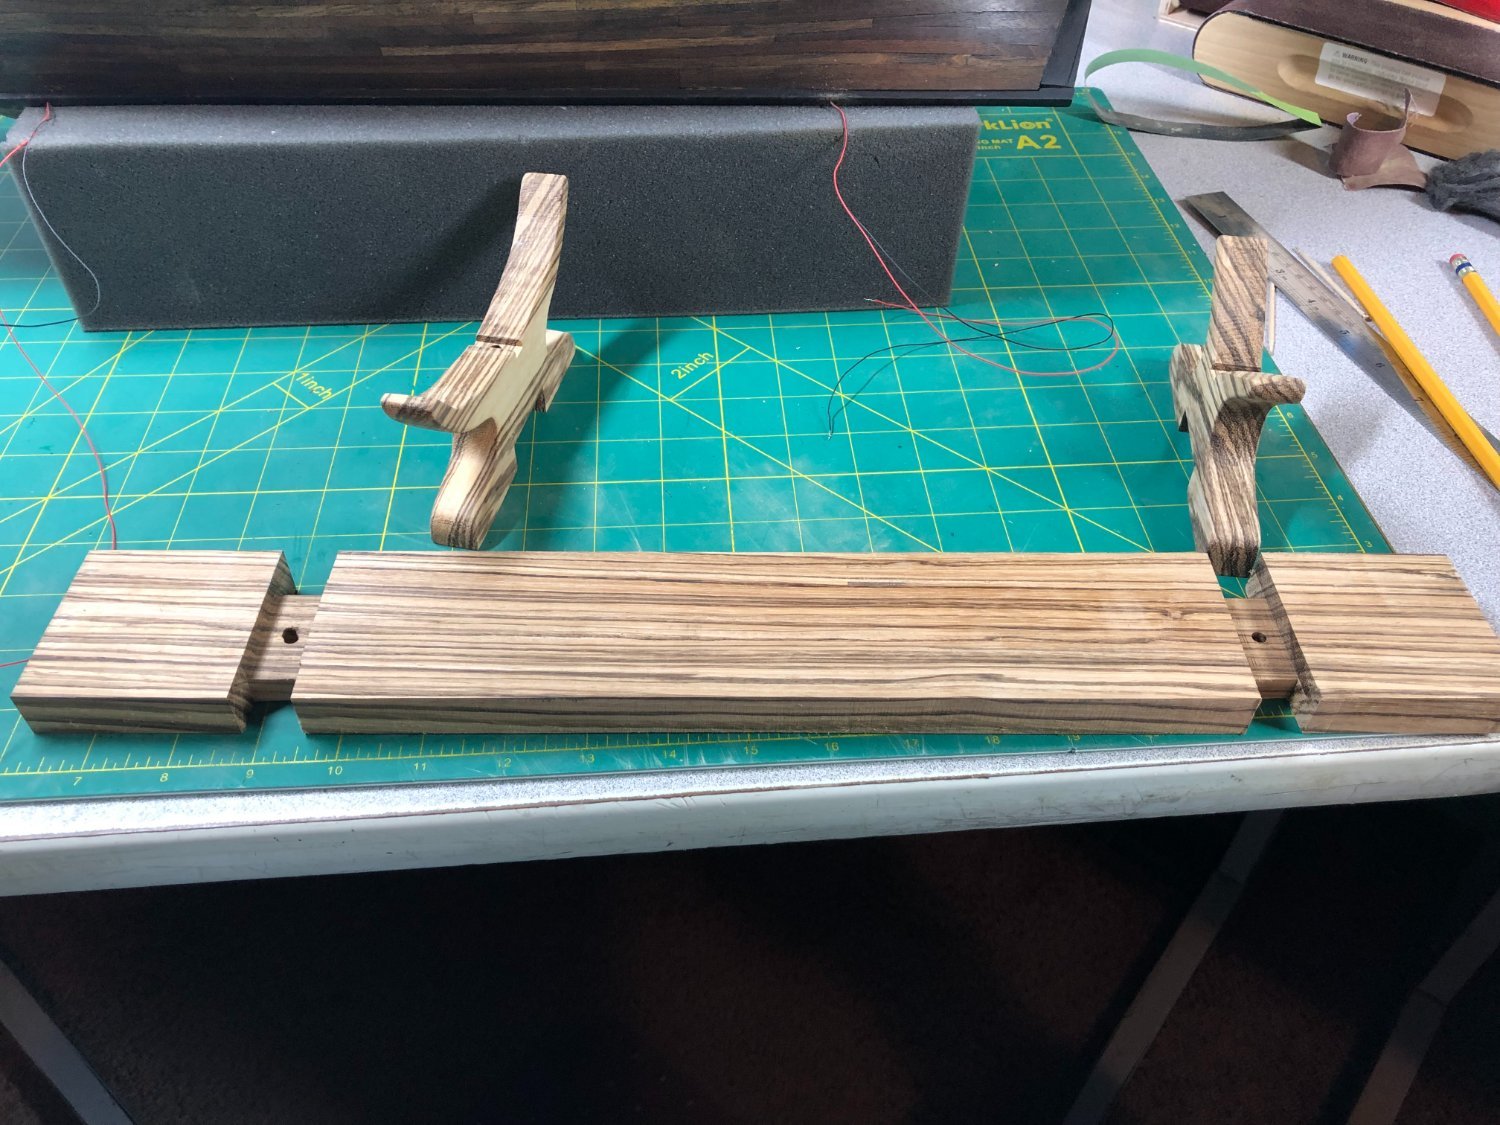
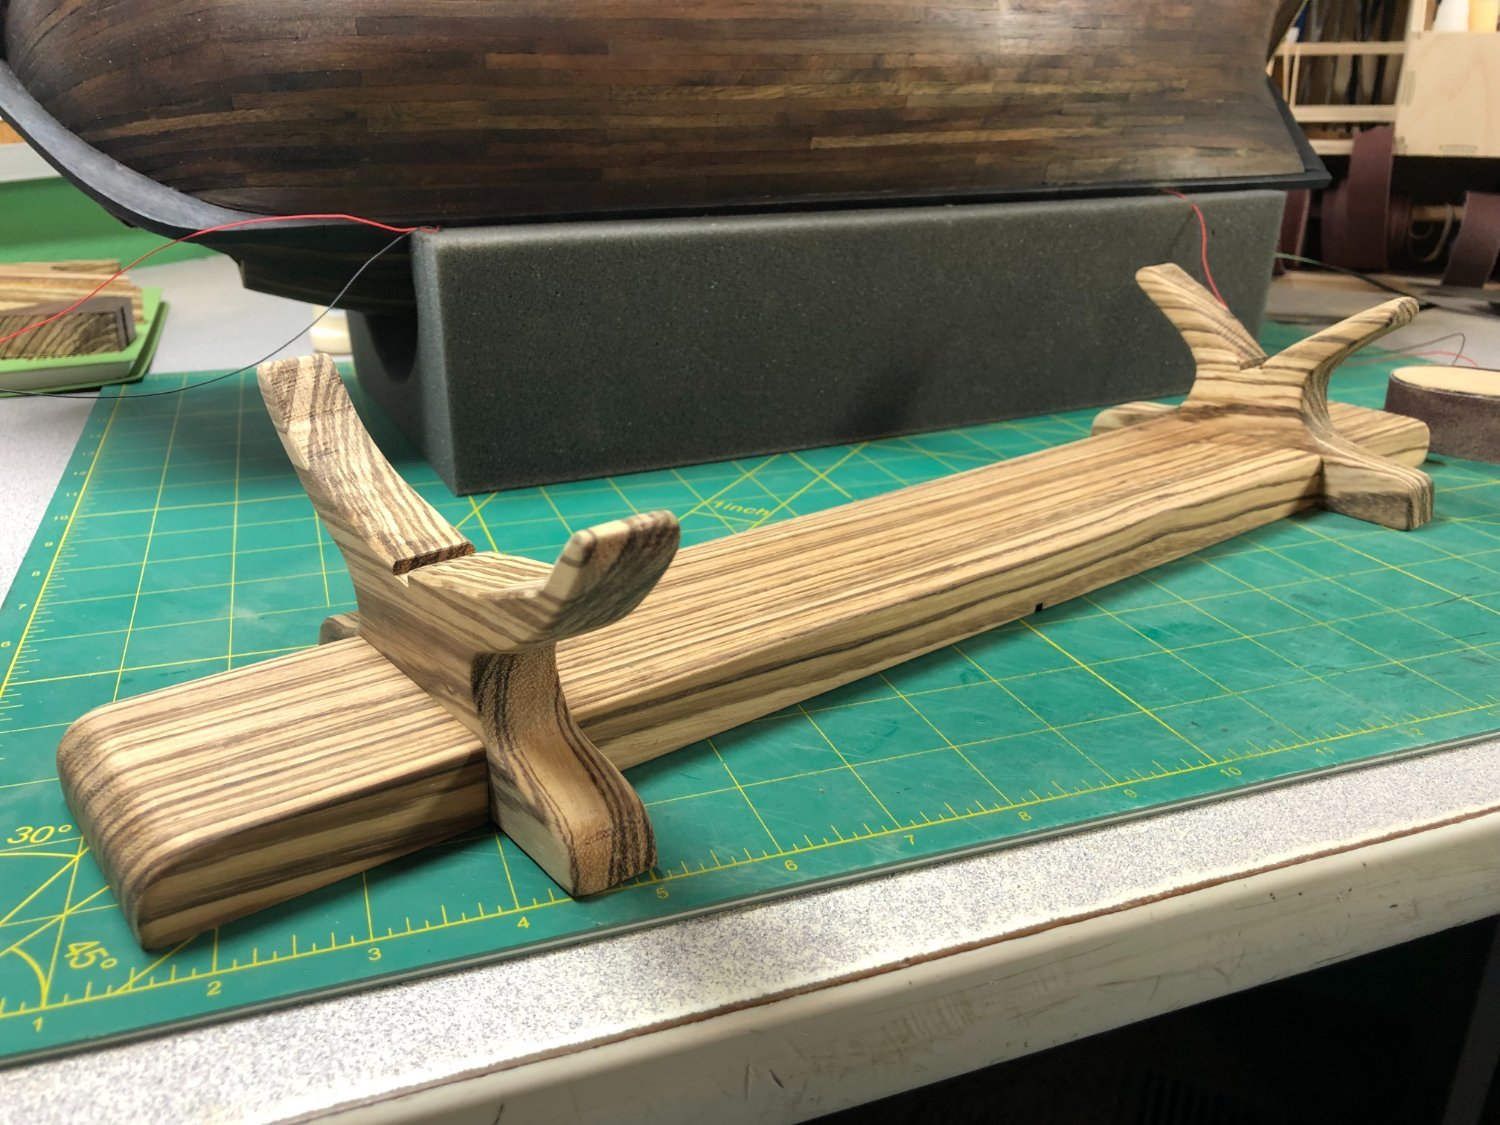
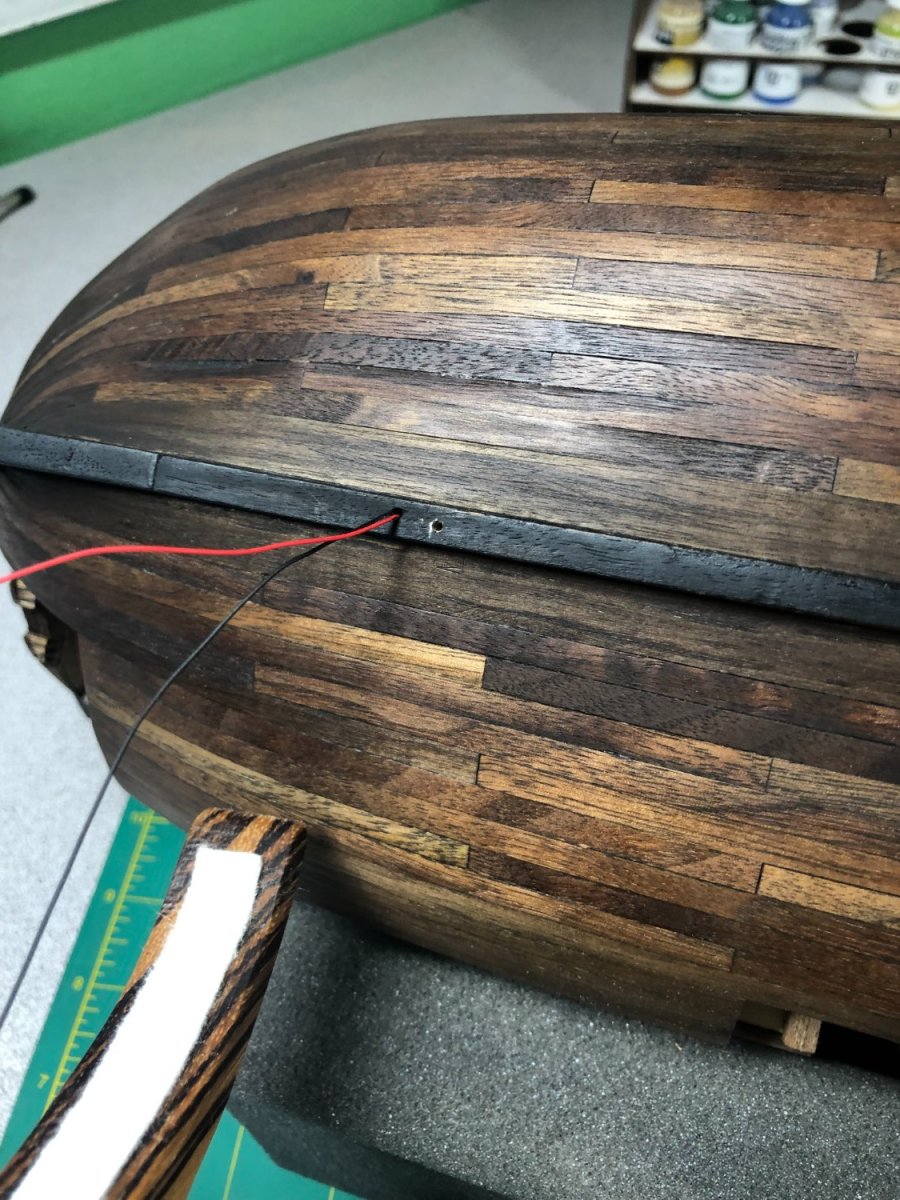
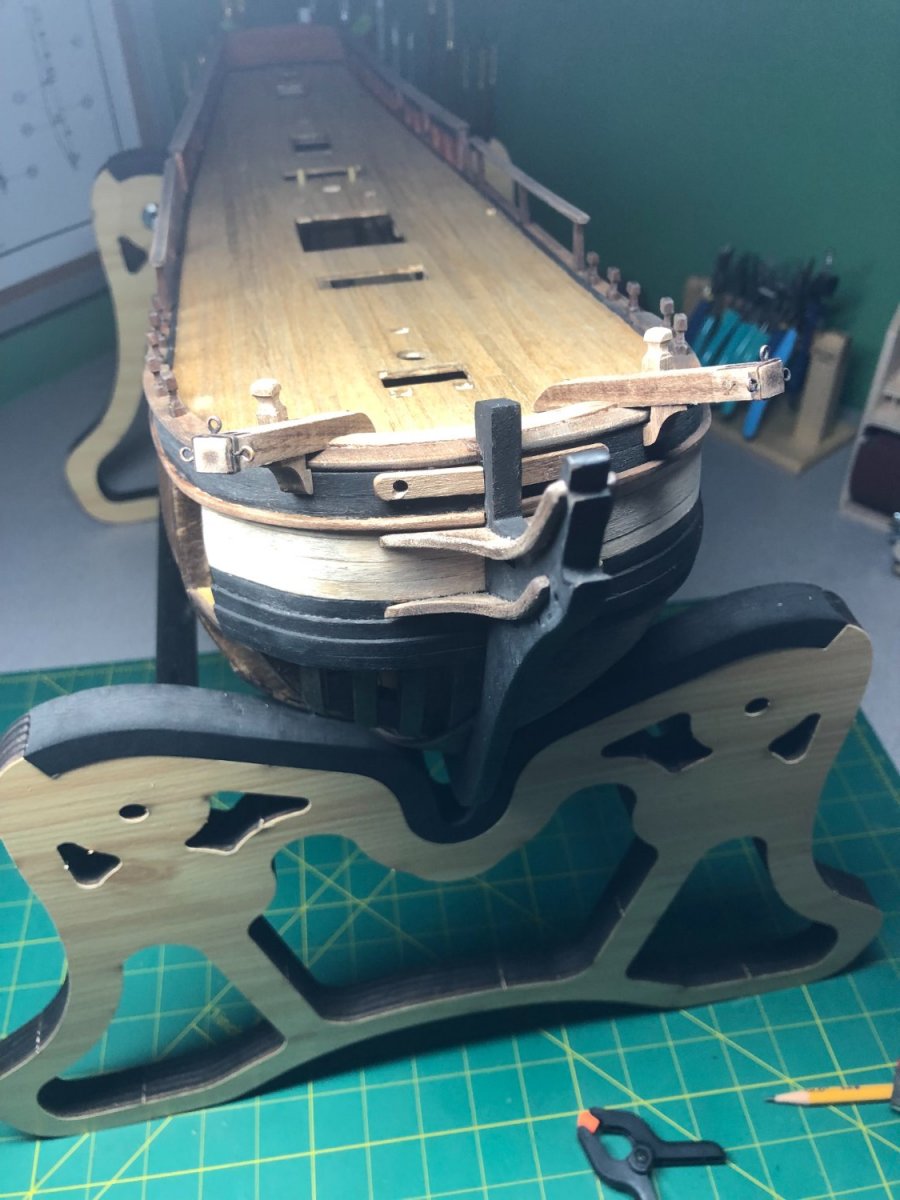
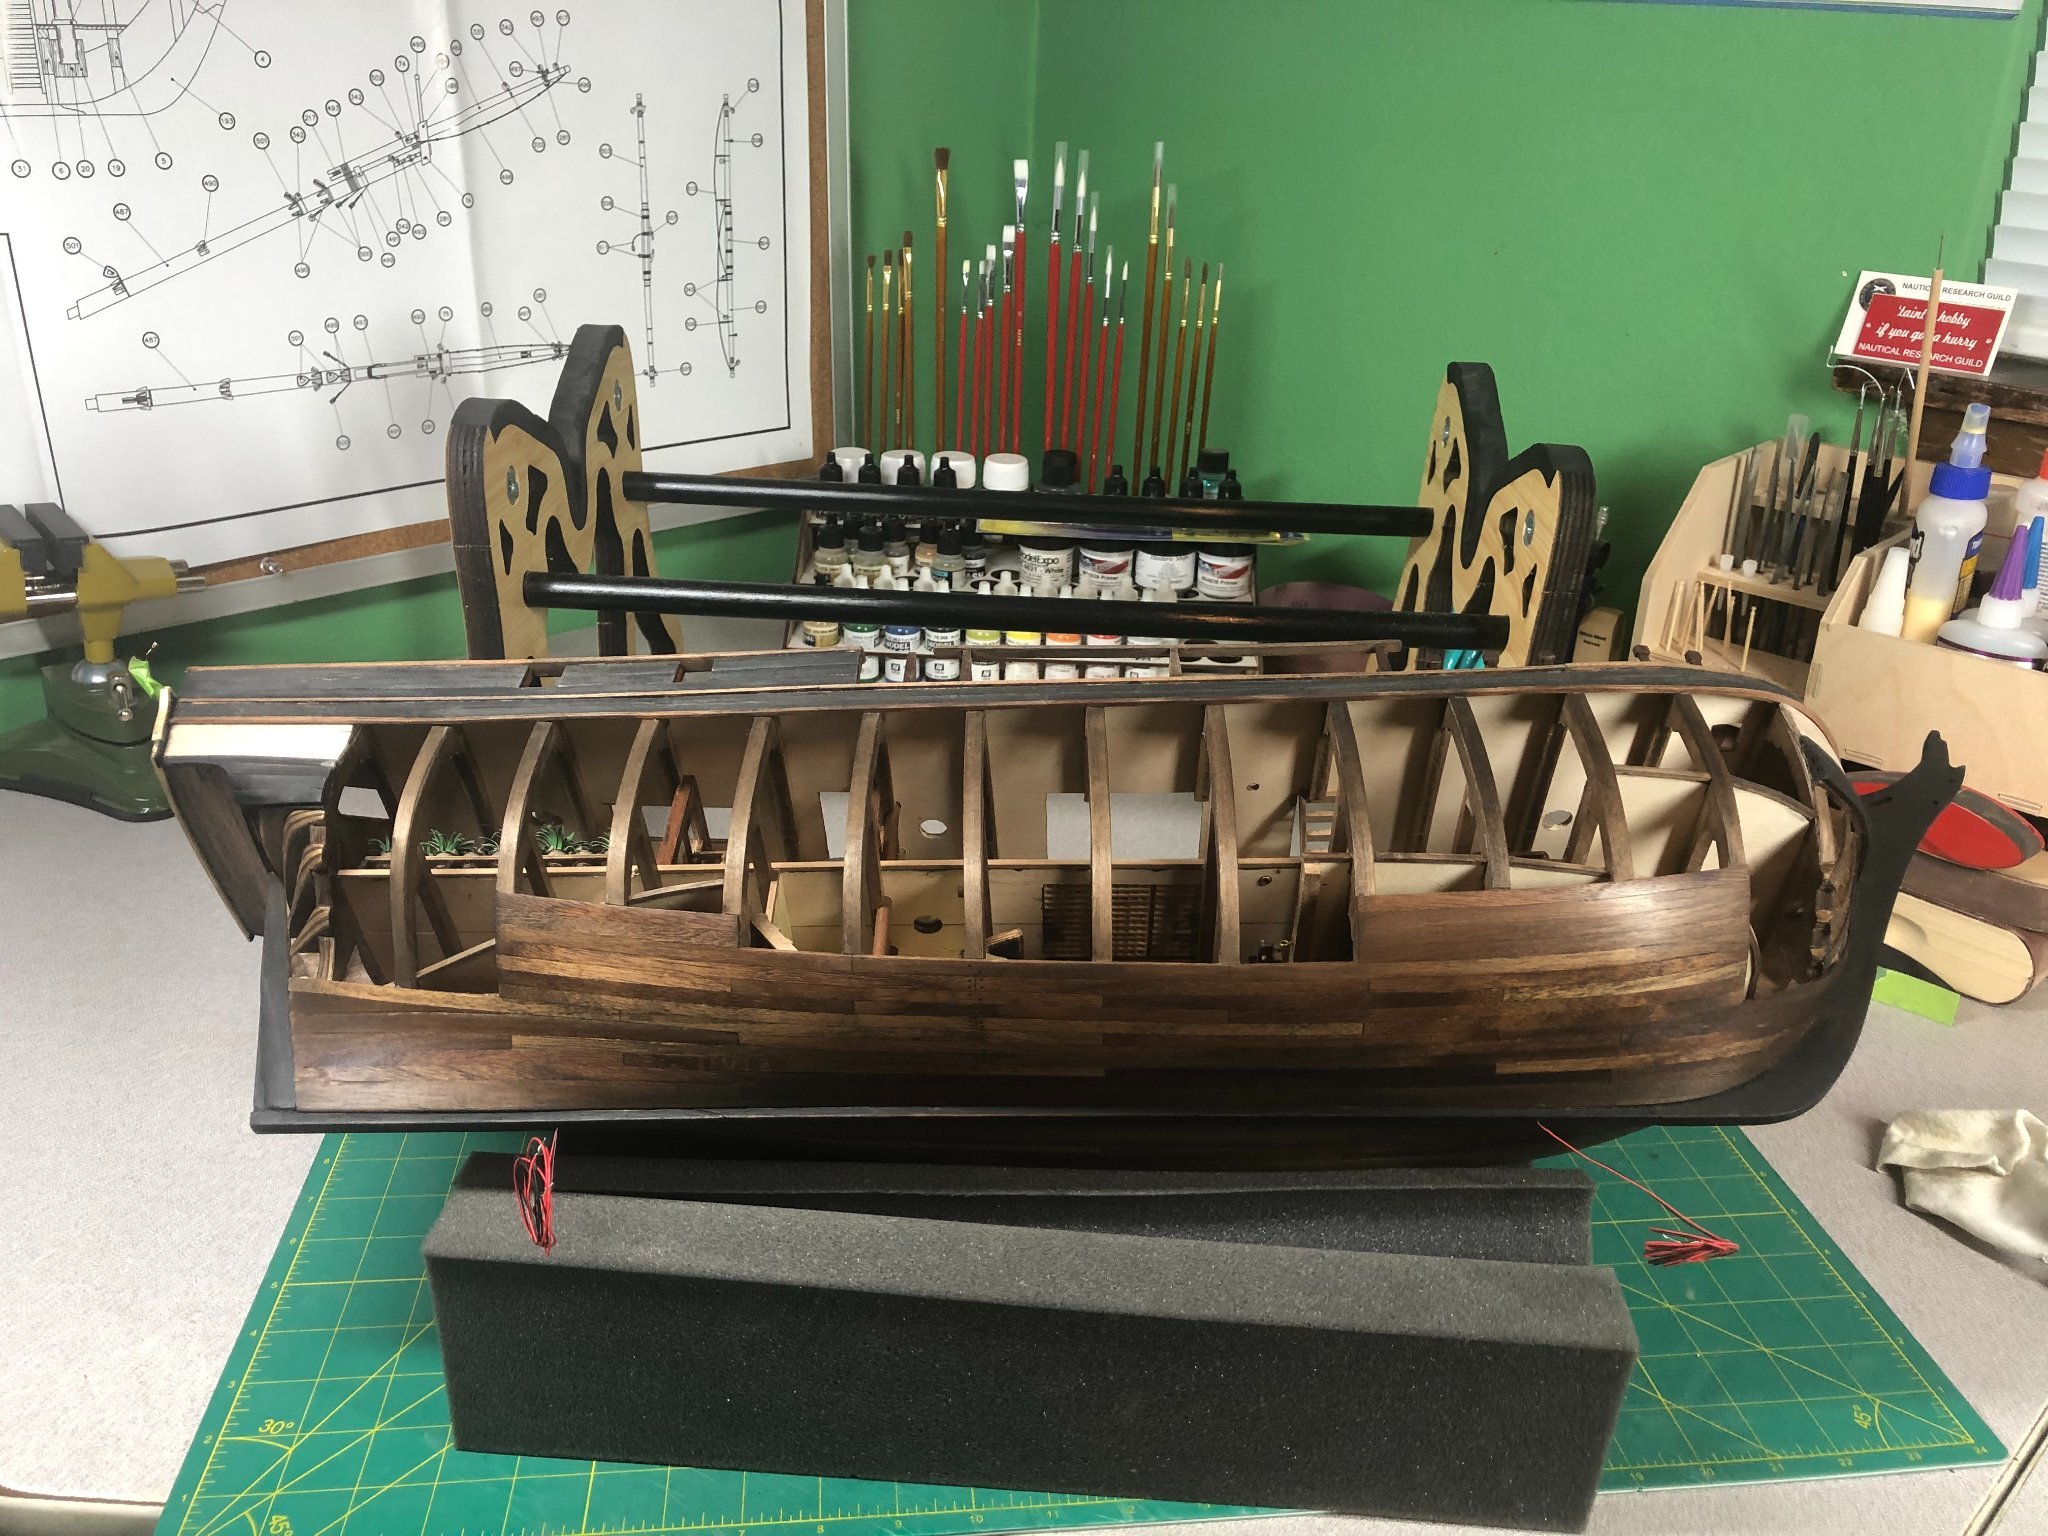
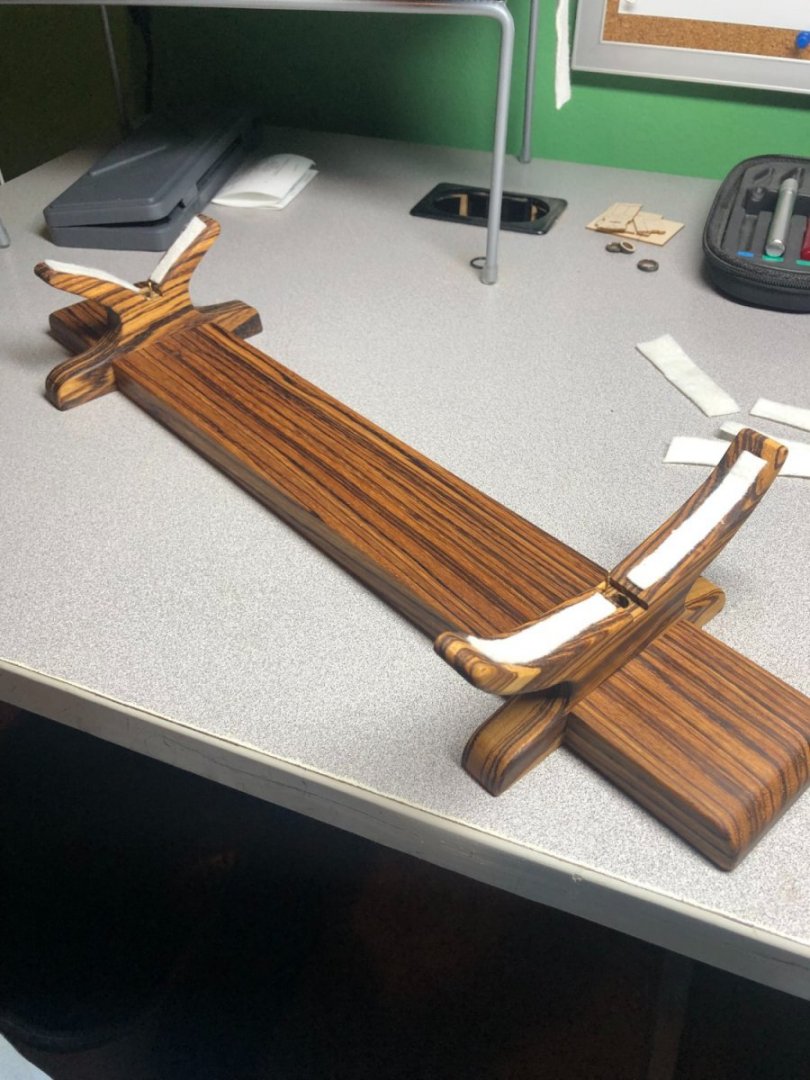
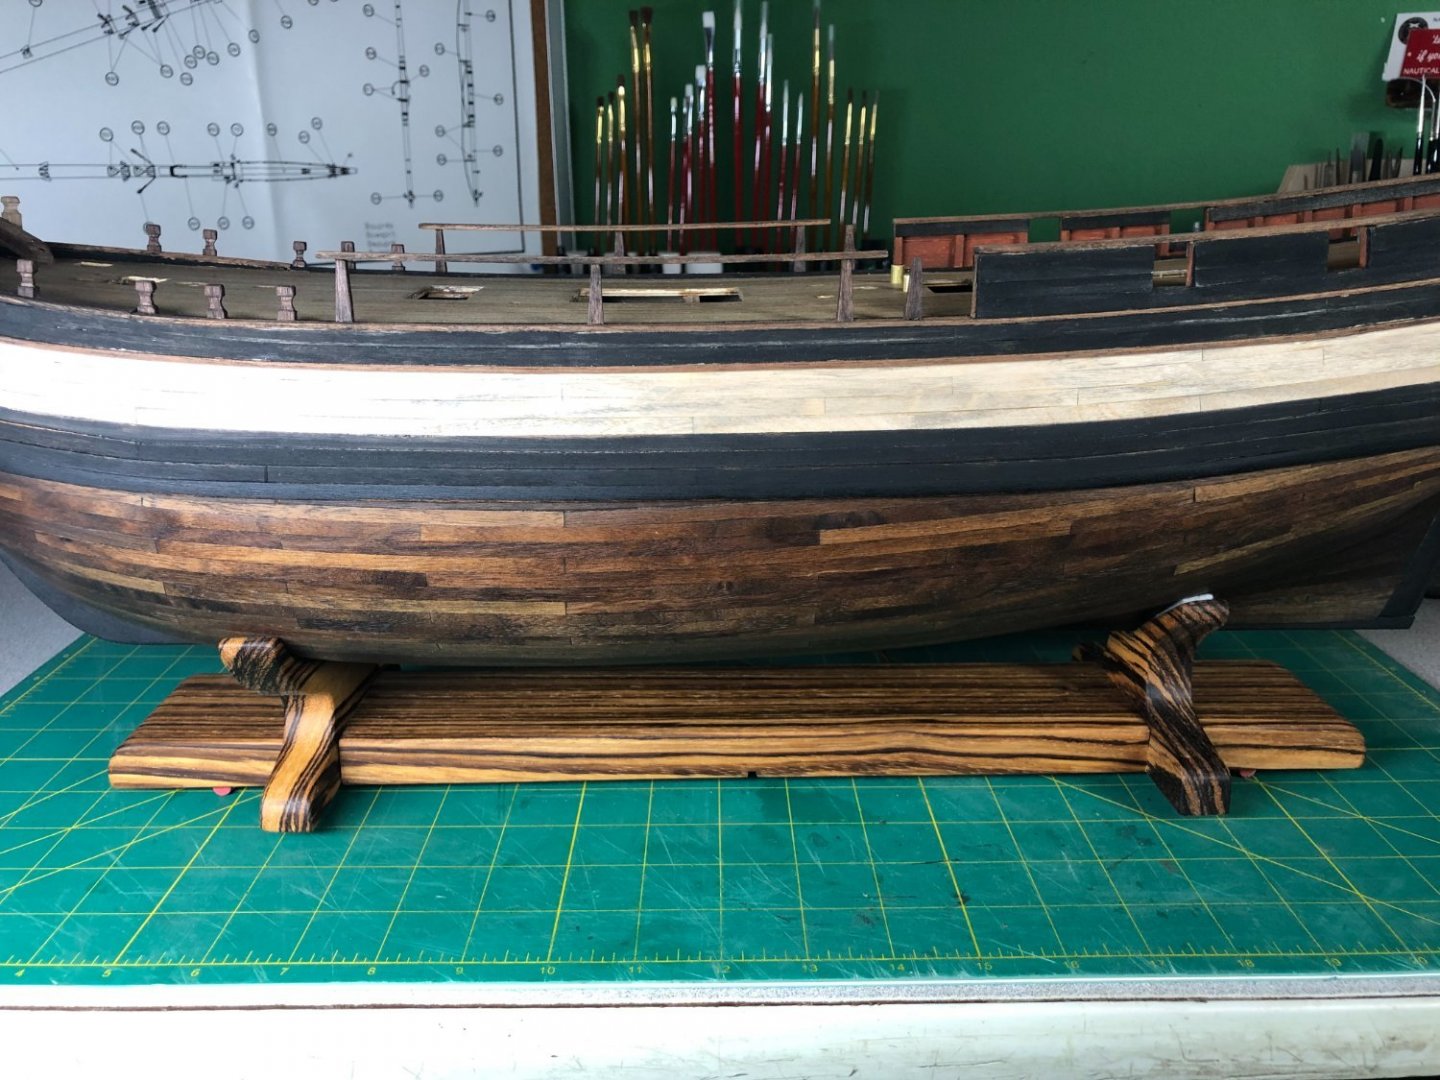
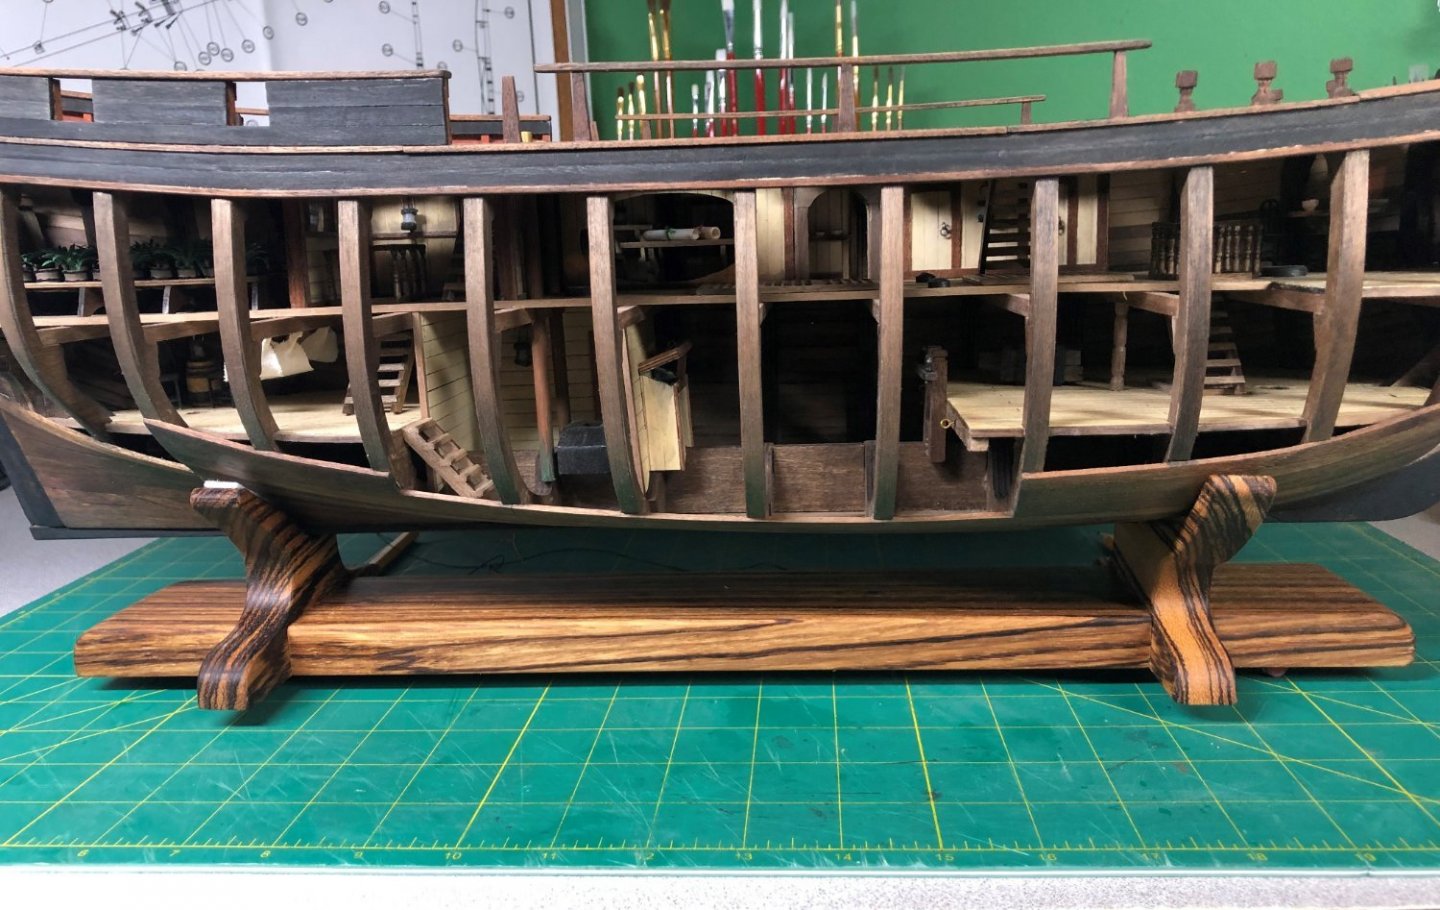
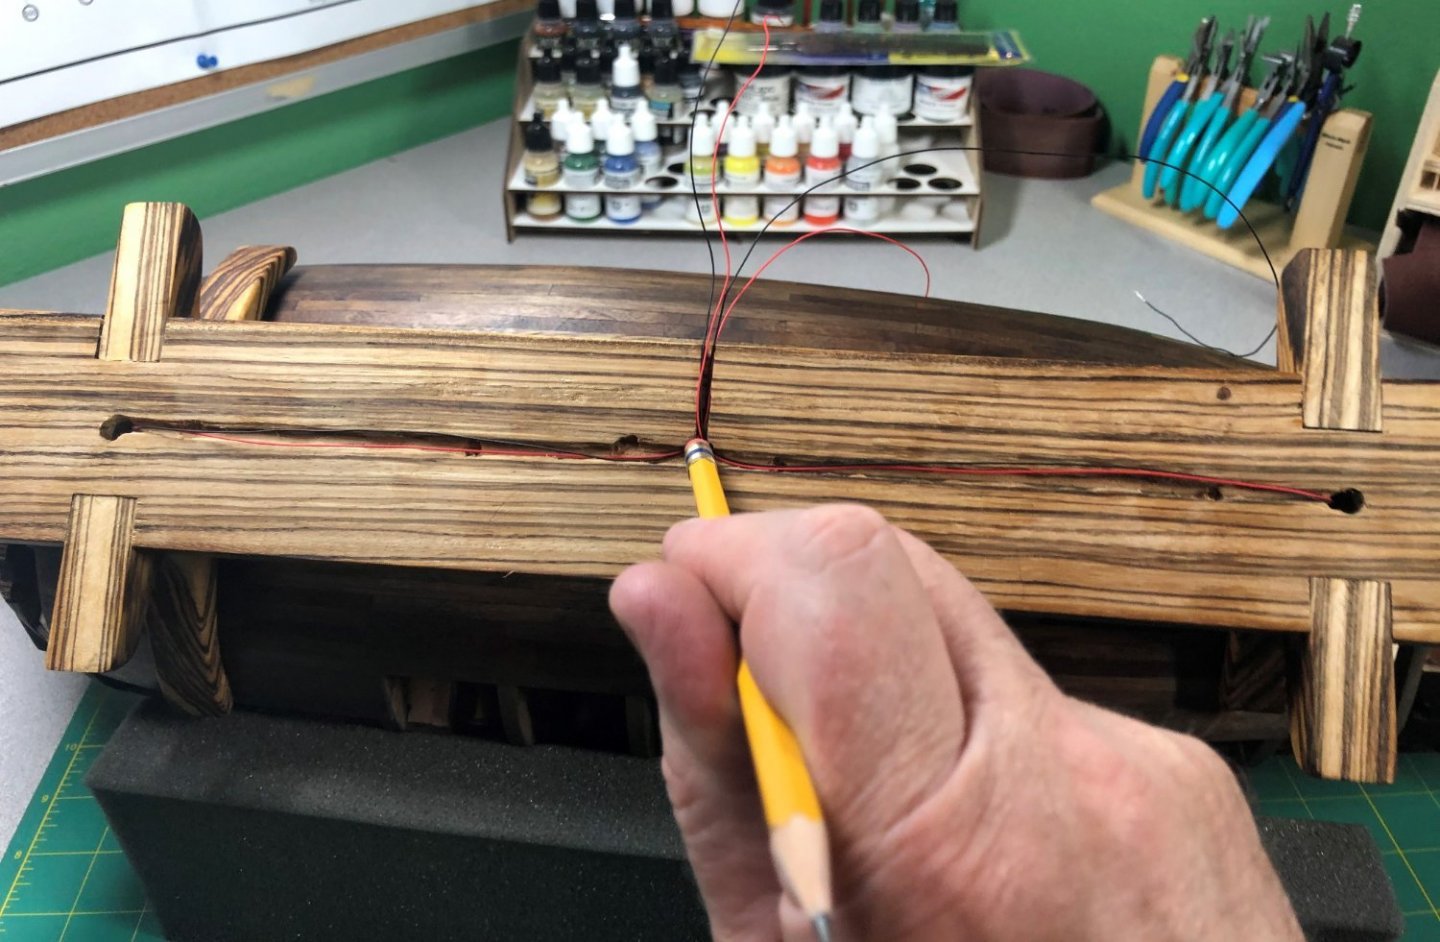
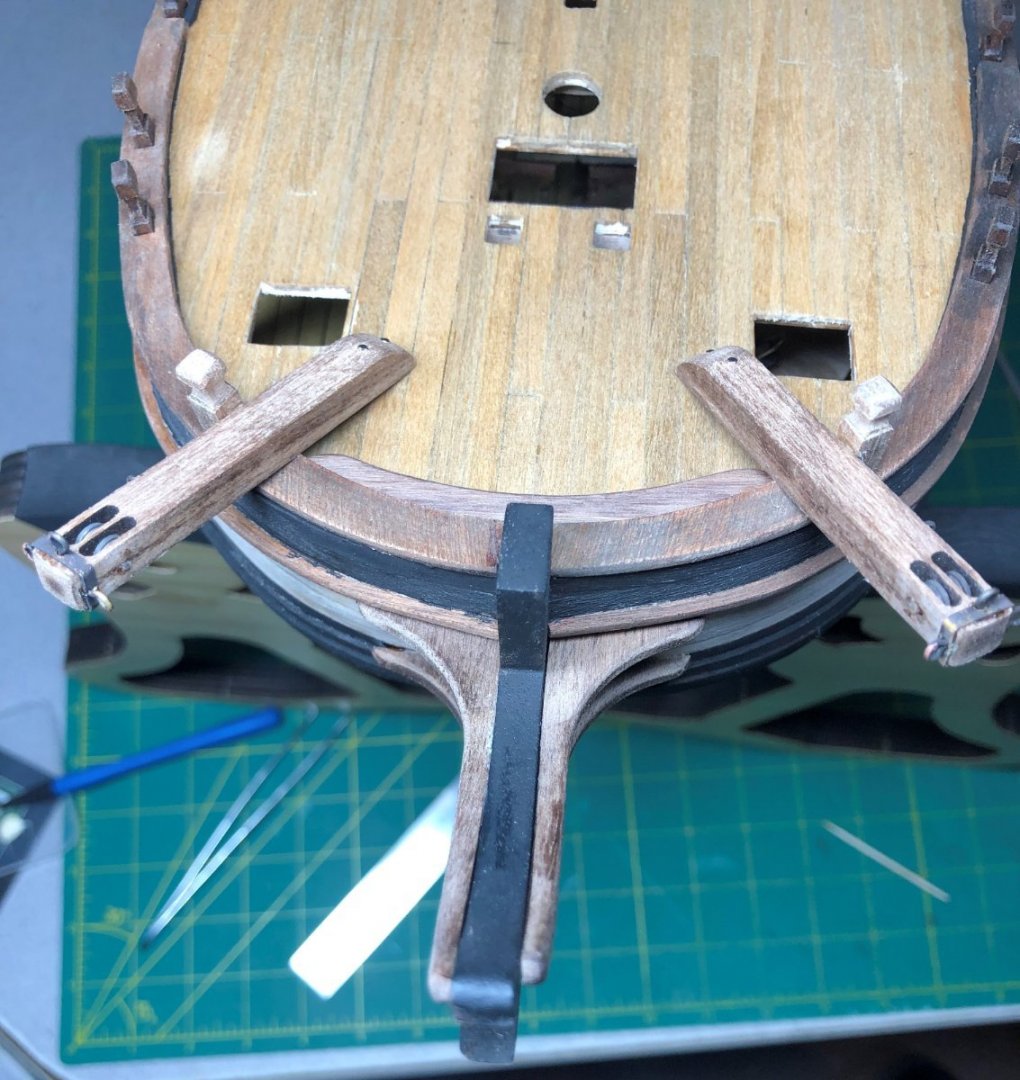
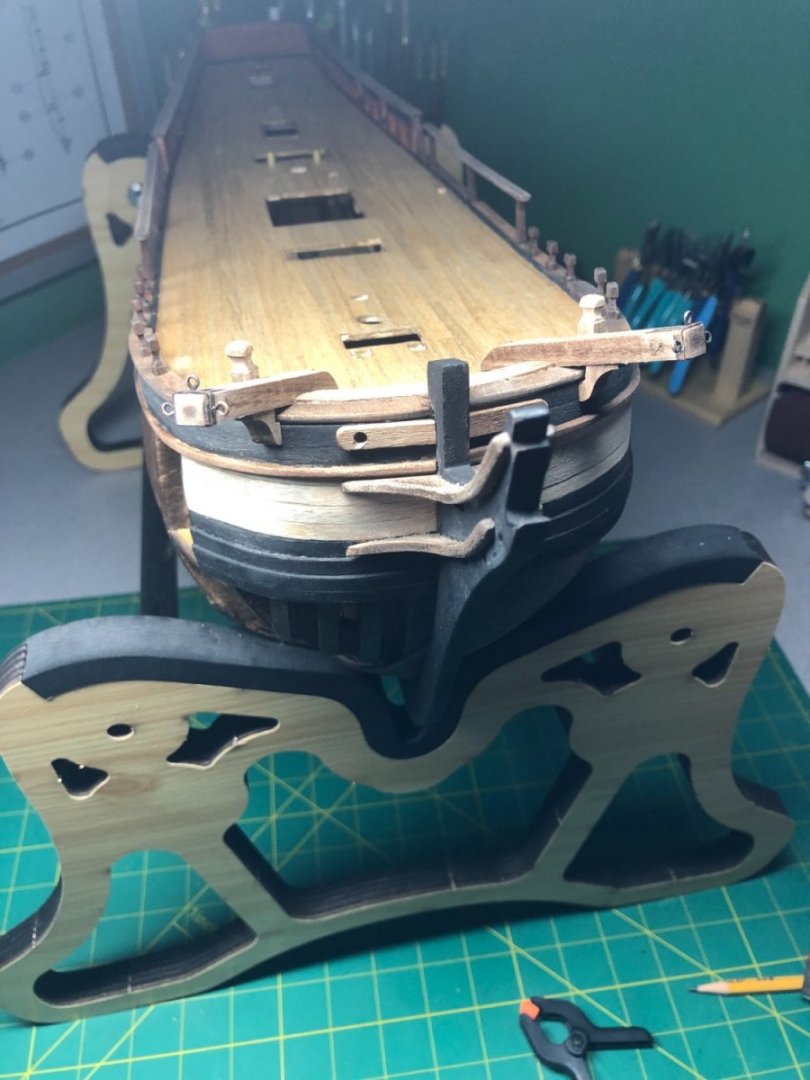
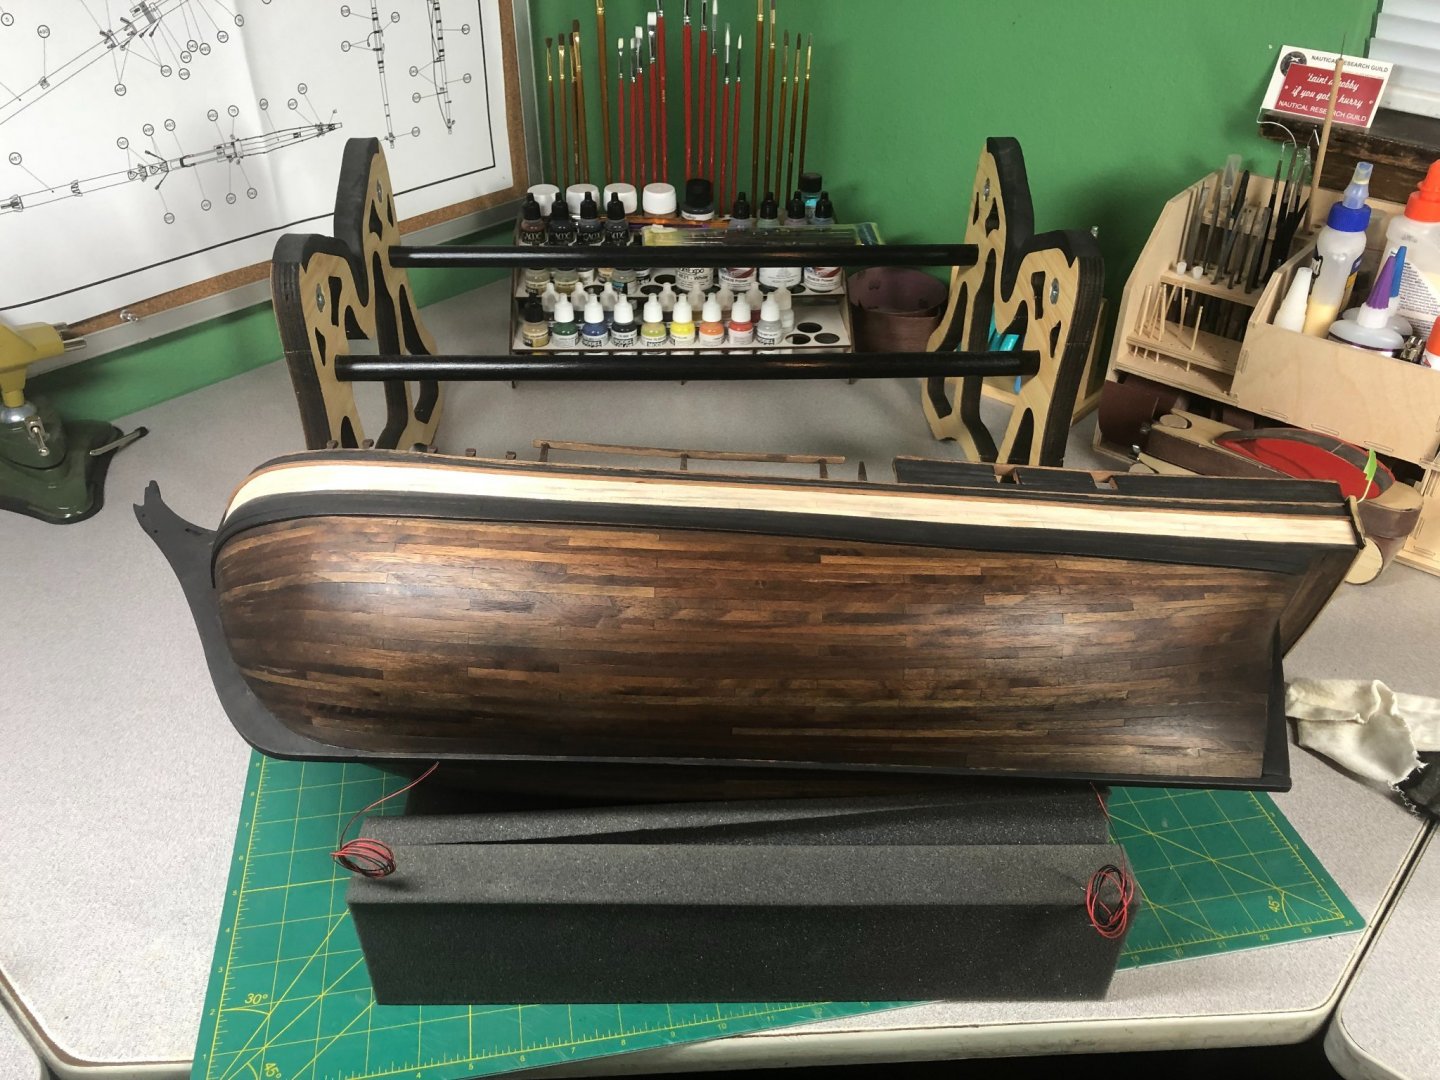
Finished the mount! Changed my mind on the wood... Used Zebra wood instead of Walnut: 3 coats of linseed oil and felt pads added: I installed a brass rod on each support that slips into the keel to keep the Bounty from moving. It also saves the wiring from undue wear and tear: The wires will run through a channel on the bottom of the main strut. I've ordered 2 quick disconnects that I will connect to the Bounty wiring and fit into the mounts for easier removal from the mount when needed: Finished: Back to the stern and rudder areas!


-
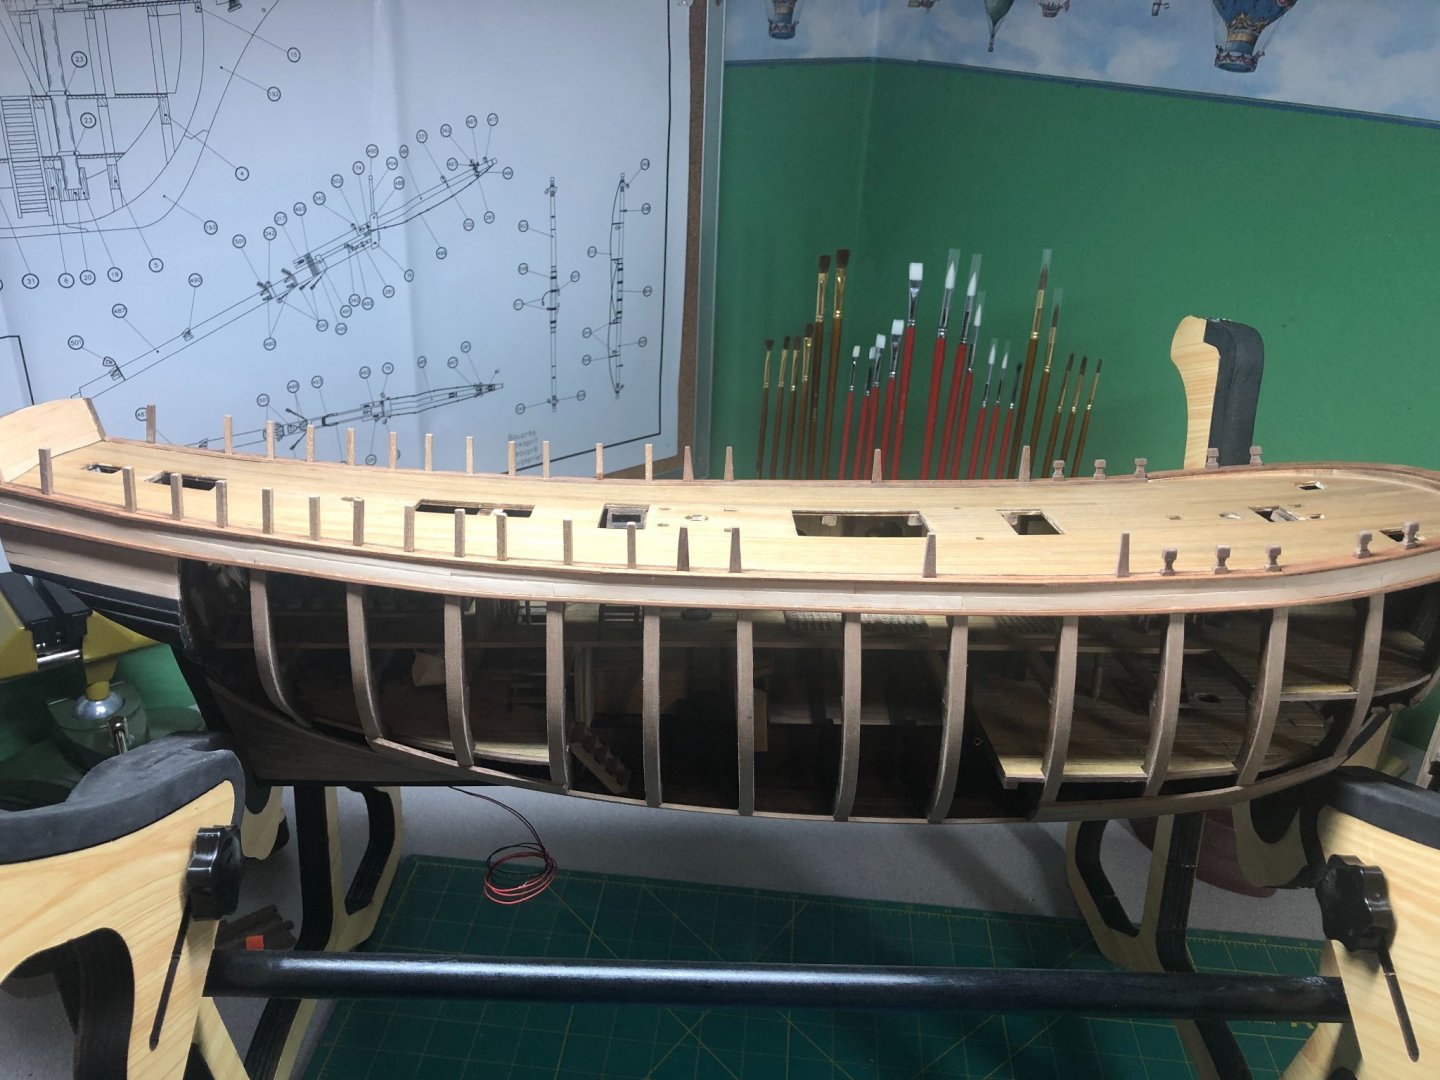
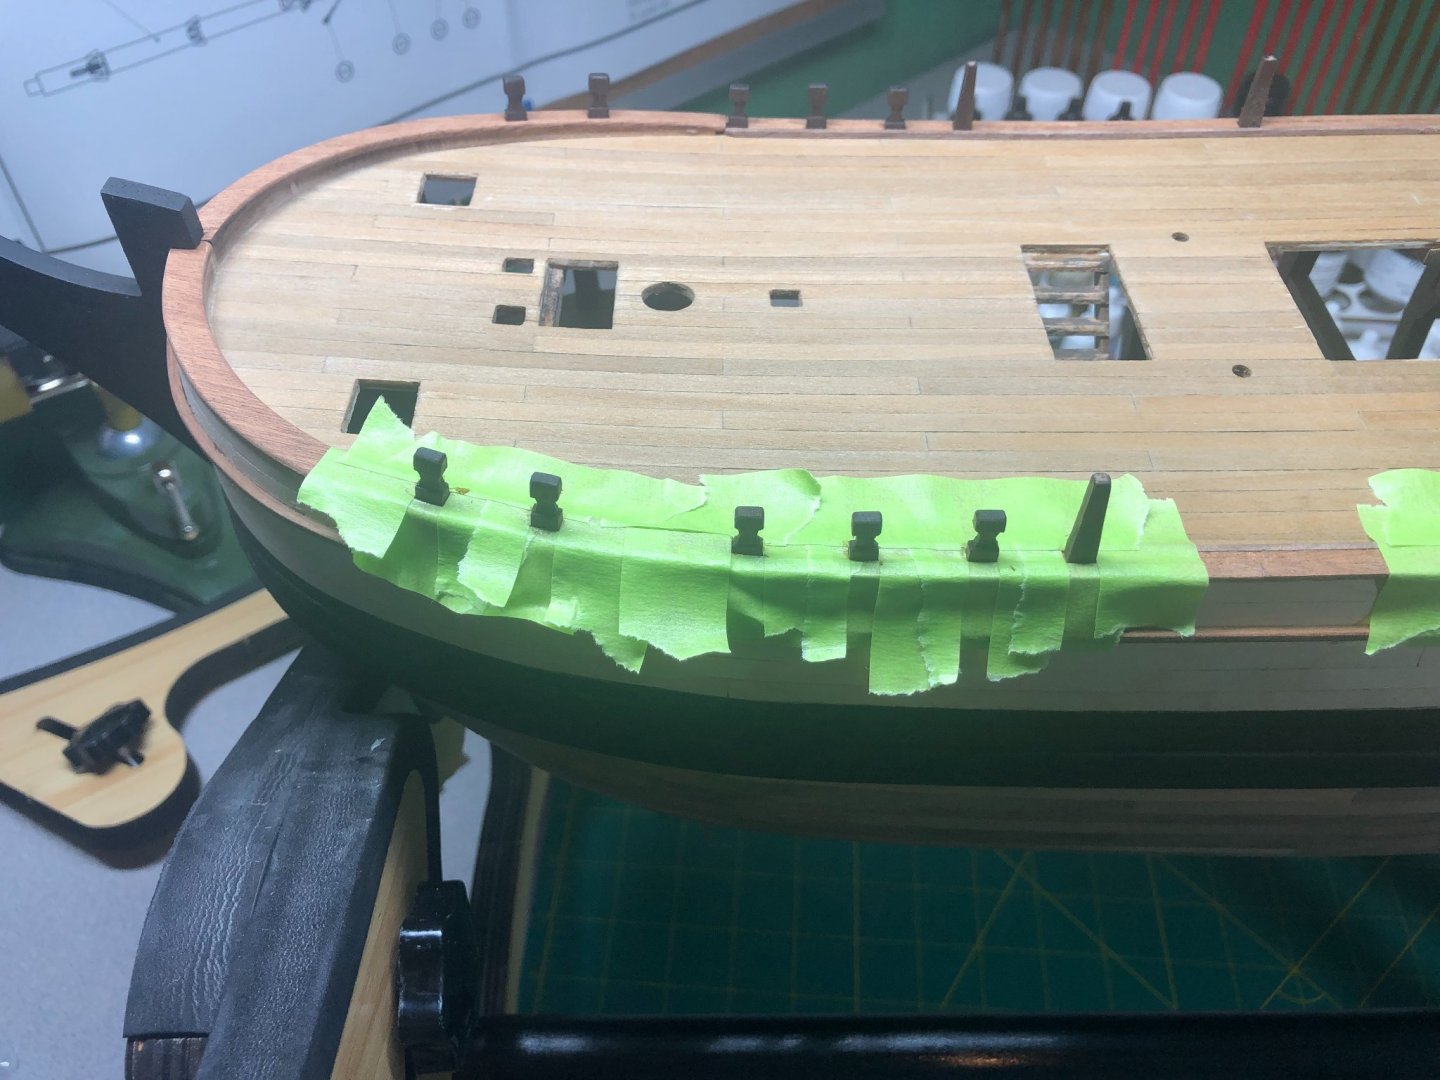
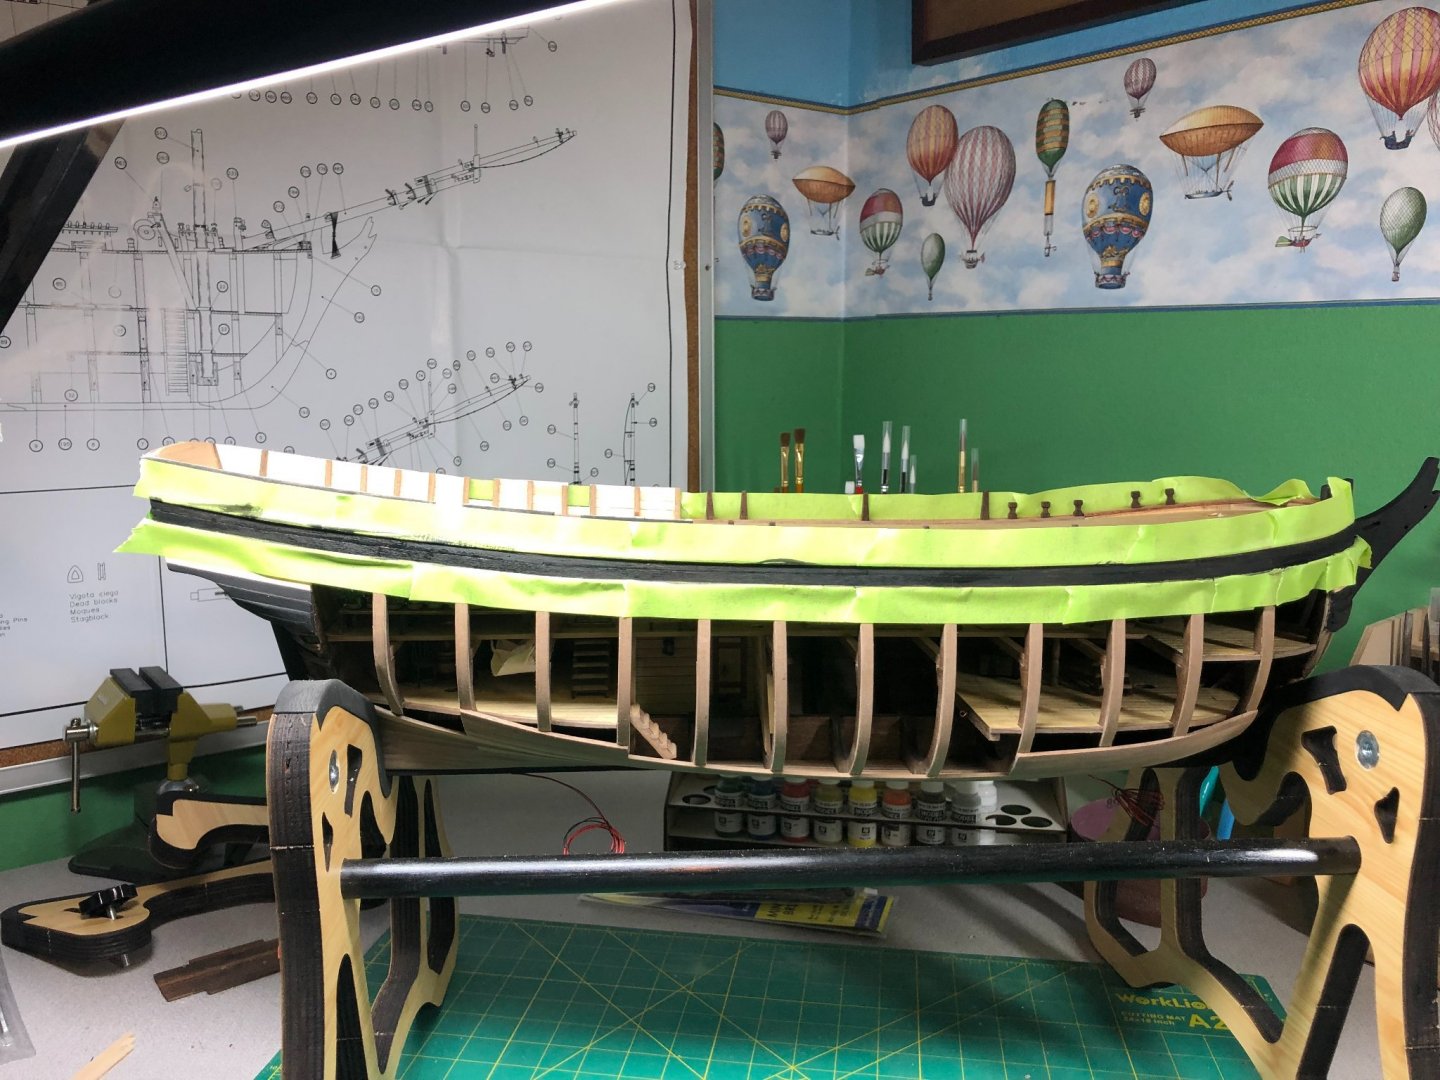
Done with the head rails... tedious work! Little tiny pieces of 1.5mm square stock. I used walnut for the main rails and basswood for the smaller rails. Most pictures or paintings show the head rails to be white... a compromise! And at the end, my measurements were a bit off but overall looks good and once everything is place, it will be unnoticeable. I did end up changing the lay-out a bit to ensure less problems when rigging the bowsprit later on: At this point, I need to make a mount for the ship. It is getting difficult to work with my current holder and I want to get the wiring tucked away. I have been looking for the right mount for her and I ran across this earlier today: I really like it and I think it will be perfect for the Bounty. I will make two cradles and not use the pedestals. I'm going to make it from walnut. I found a good piece at a local store and will pick it up tomorrow. I don't plan to add it to my build log since there is a video of it already unless some of you think it's worth me adding it... let me know what you think! Thanks for looking in on the log.


-
A batten is a good method too. If you do soak a piece of wood, never install it until it's completed dried. What Glenn mentioned is accurate! I've installed a few that were not completely dry and ended up removing it because it shrunk! DO that half hull project, you'll learn a lot!
- 362 replies
-
- 1
-

-
- Amati
- Lady Nelson
- (and 2 more)
-
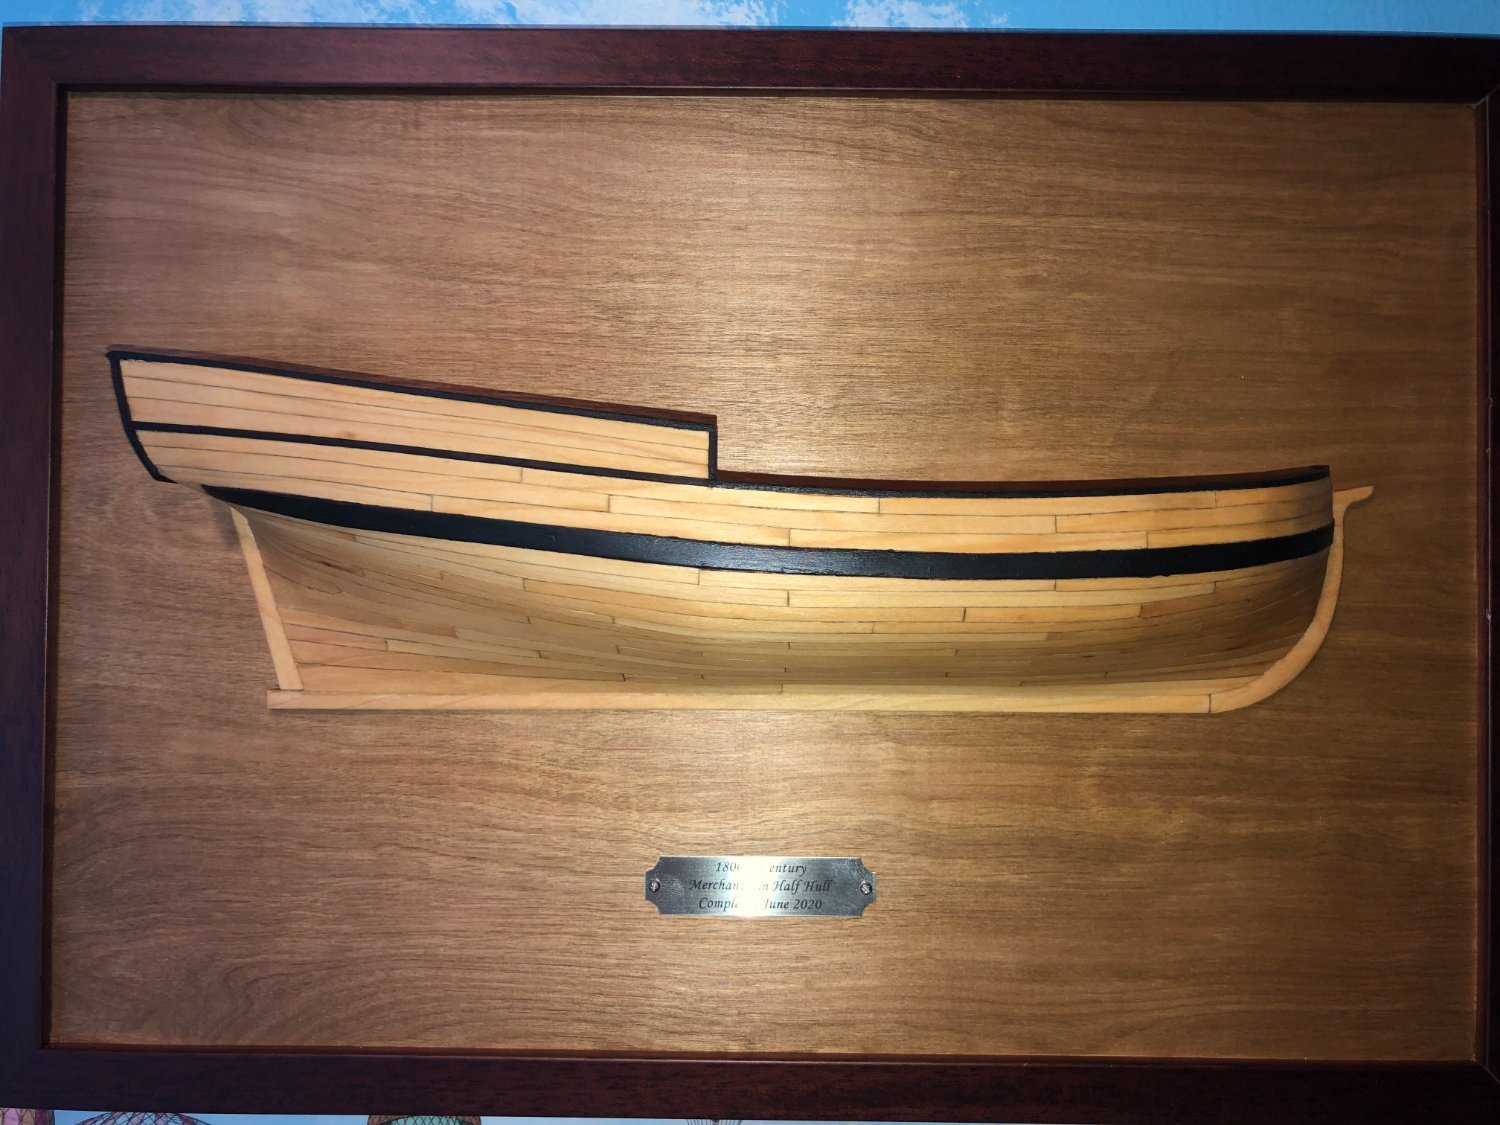
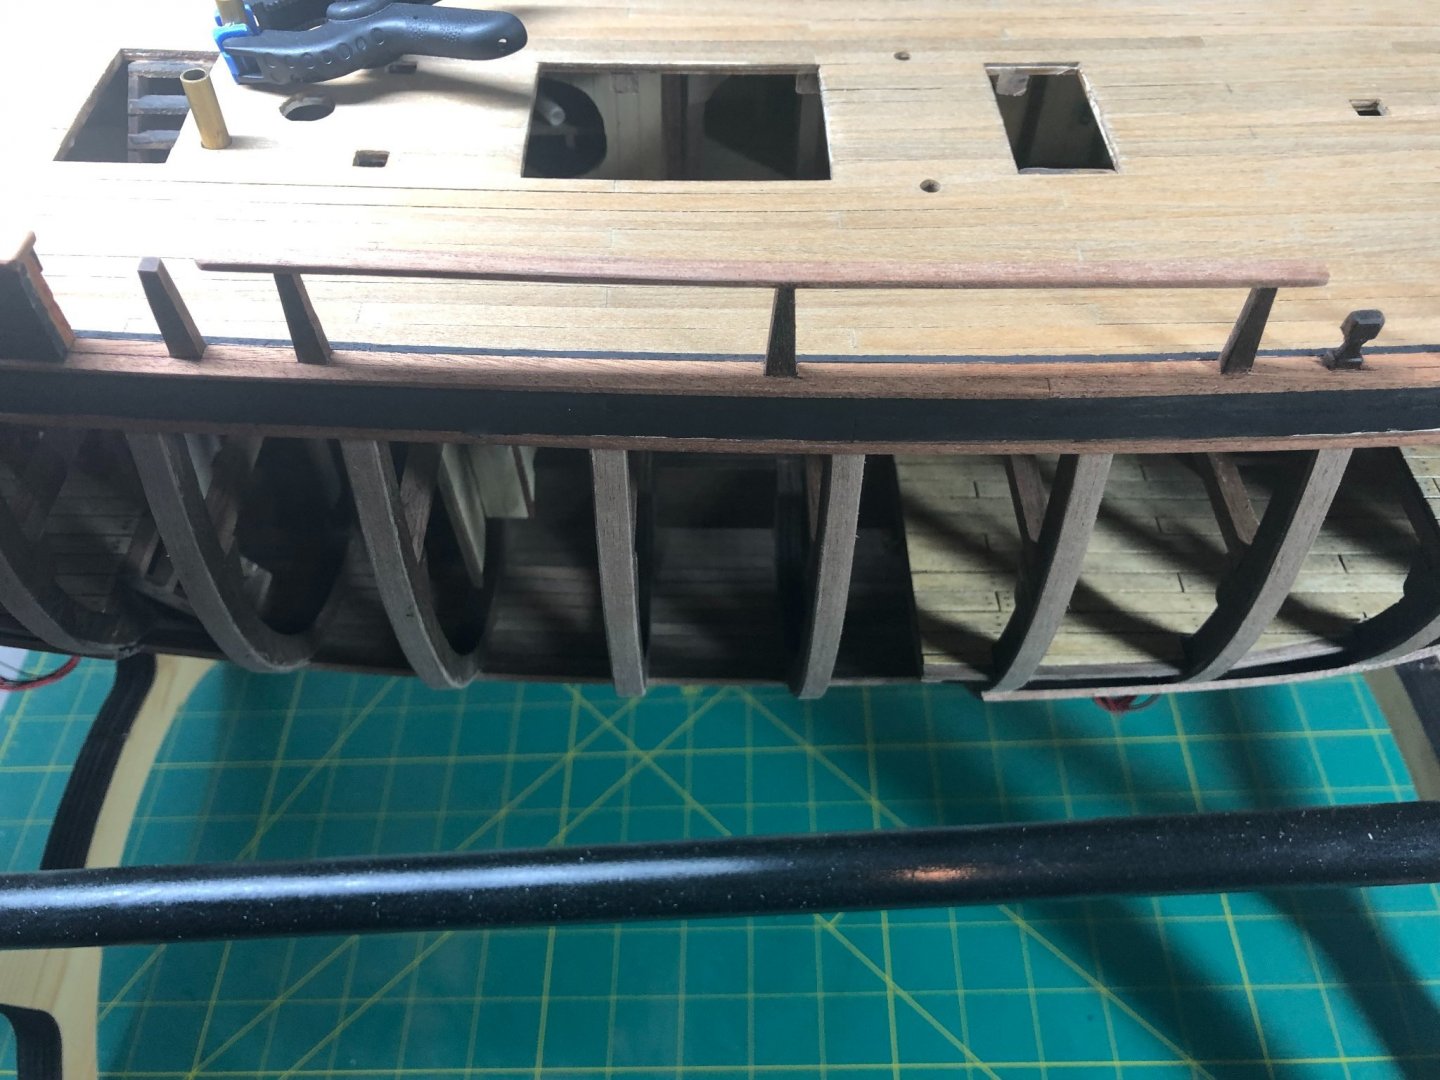
Hi Dave, Hard to tell from the pictures but it appears your fairing of the bulkheads may need a little more work. When I'm fairing, I use a string and run it from bow to stern. The string should lay flat on every bulkhead or frame. If it doesn't, more sanding is required. Also, if it doesn't touch a frame, you may need to reduce the amount on the frames on either side or or add a small strip to the offending frame and re-sand it. You mention the "twist" at the bow and stern. As you've already found, there are a million different methods to deal with it. Chuck P.'s method is a really good one to use but whatever method you choose, stick with it! I soak my pieces prior to heating and bending/twisting, I find it easier for me. One more suggestion... I know you're "going for it" on the Lady Nelson. However, NRG sell a great teaching tool (and a fine model) for planking. It's called the "Half-hull project". I highly recommend it! It made my life so much easier when planking! It's inexpensive and can be assembled in a few weeks, depending on how much you work per day! I've attached a picture of mine! It also, gives you a small taste of scratch building. Some of the principles are hard to apply to kit materials since they are pre-cut but I think it will help you develop your own method. Good luck!

- 362 replies
-
- 4
-
-
- Amati
- Lady Nelson
- (and 2 more)
-
Thanks Dave. The workshop is definitely getting more time now!
-
Congrats to you as well! Nice to hear from a fellow Washingtonian too. I lived in Stanwood a lifetime ago. Beautiful area. Good luck and enjoy that first build. I'm betting there will be many more to come! Thanks for checking in, it's always nice to hear from everyone.
-
Thanks Tim! Appreciate you stopping by. Happy New Year to you as well!
-
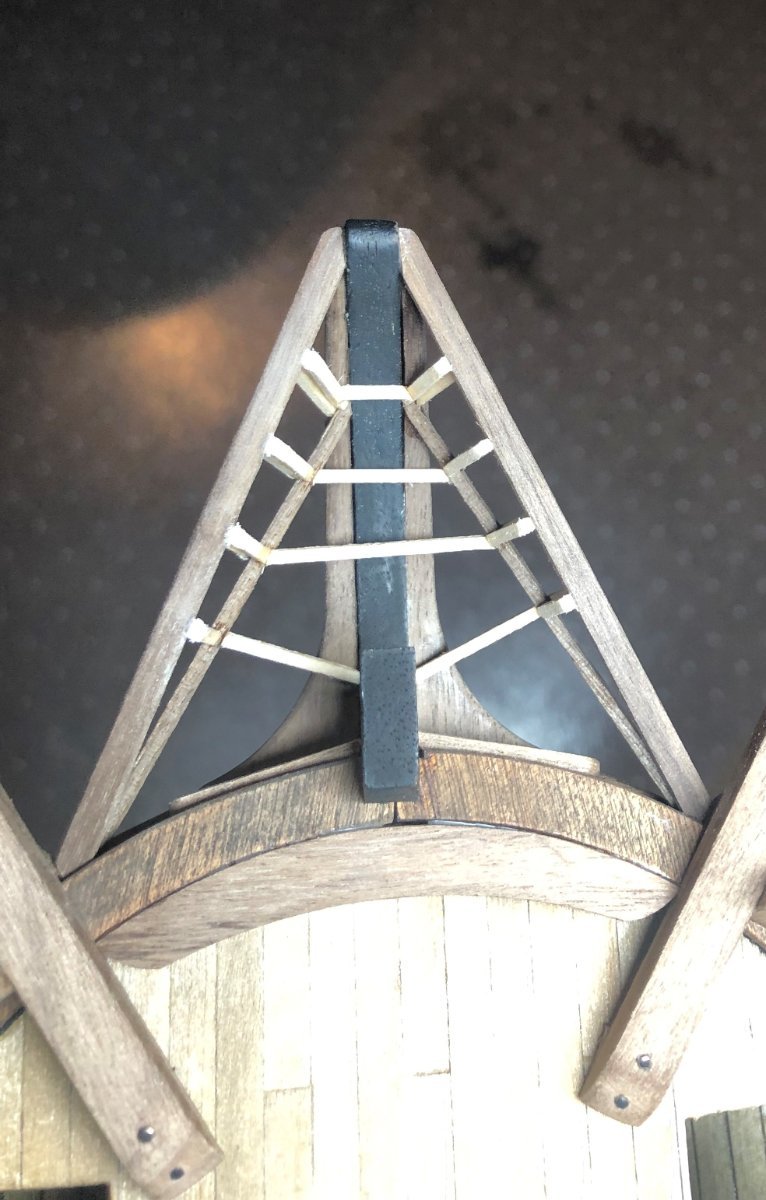
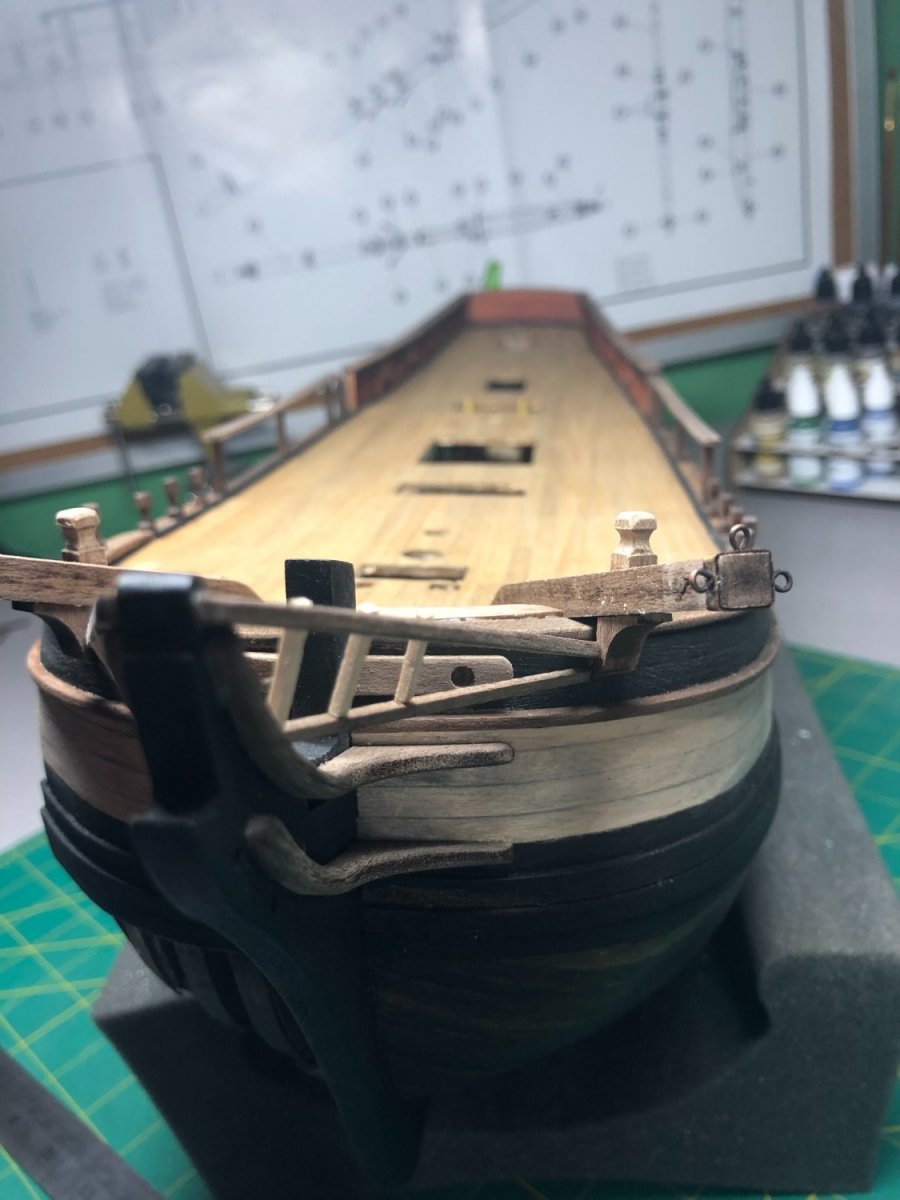
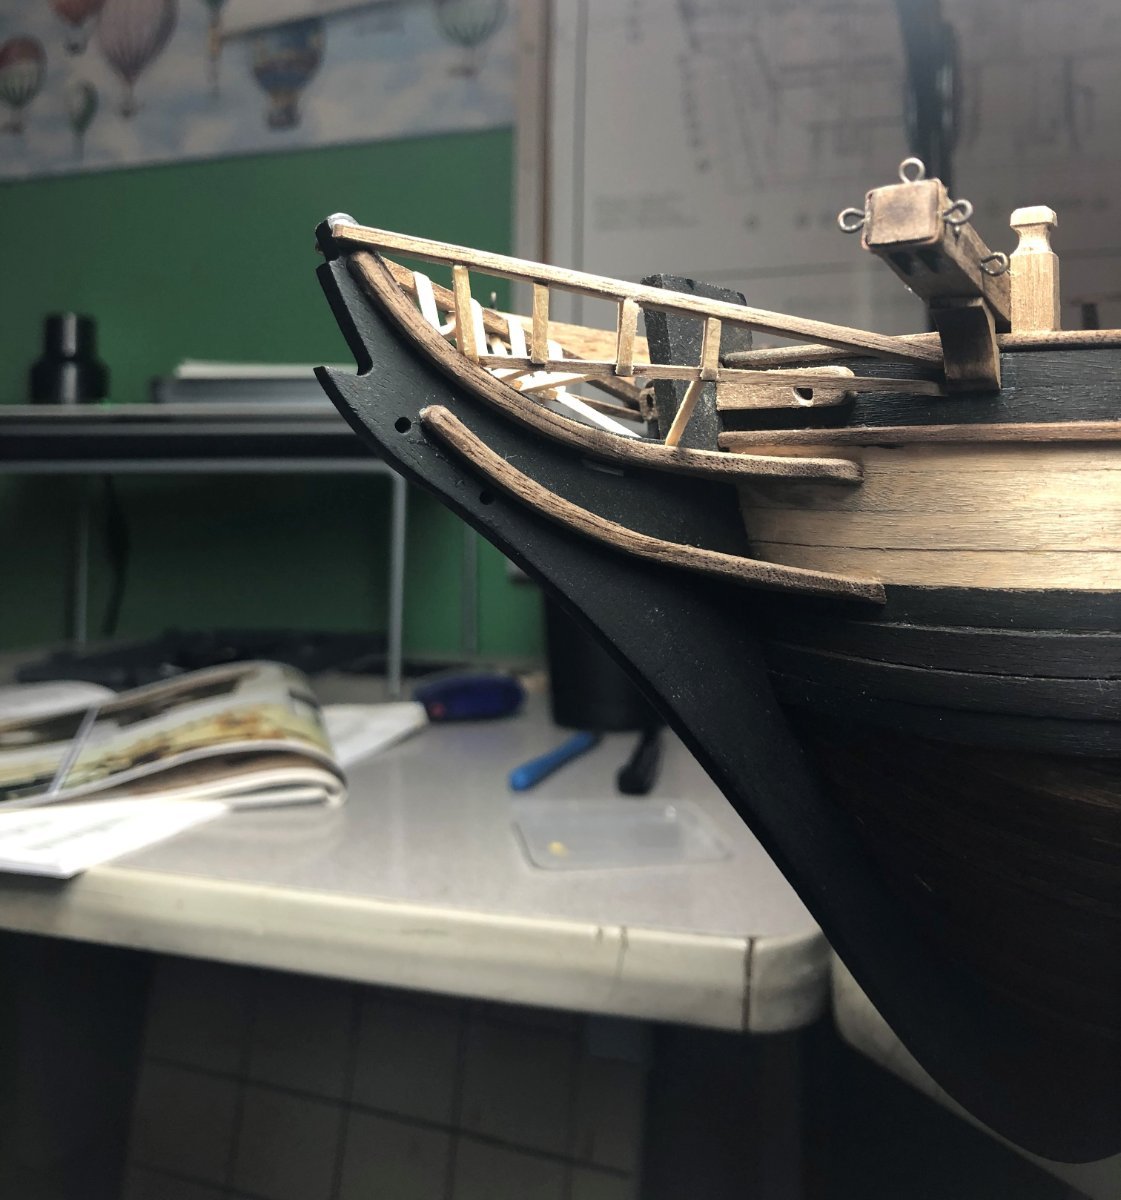
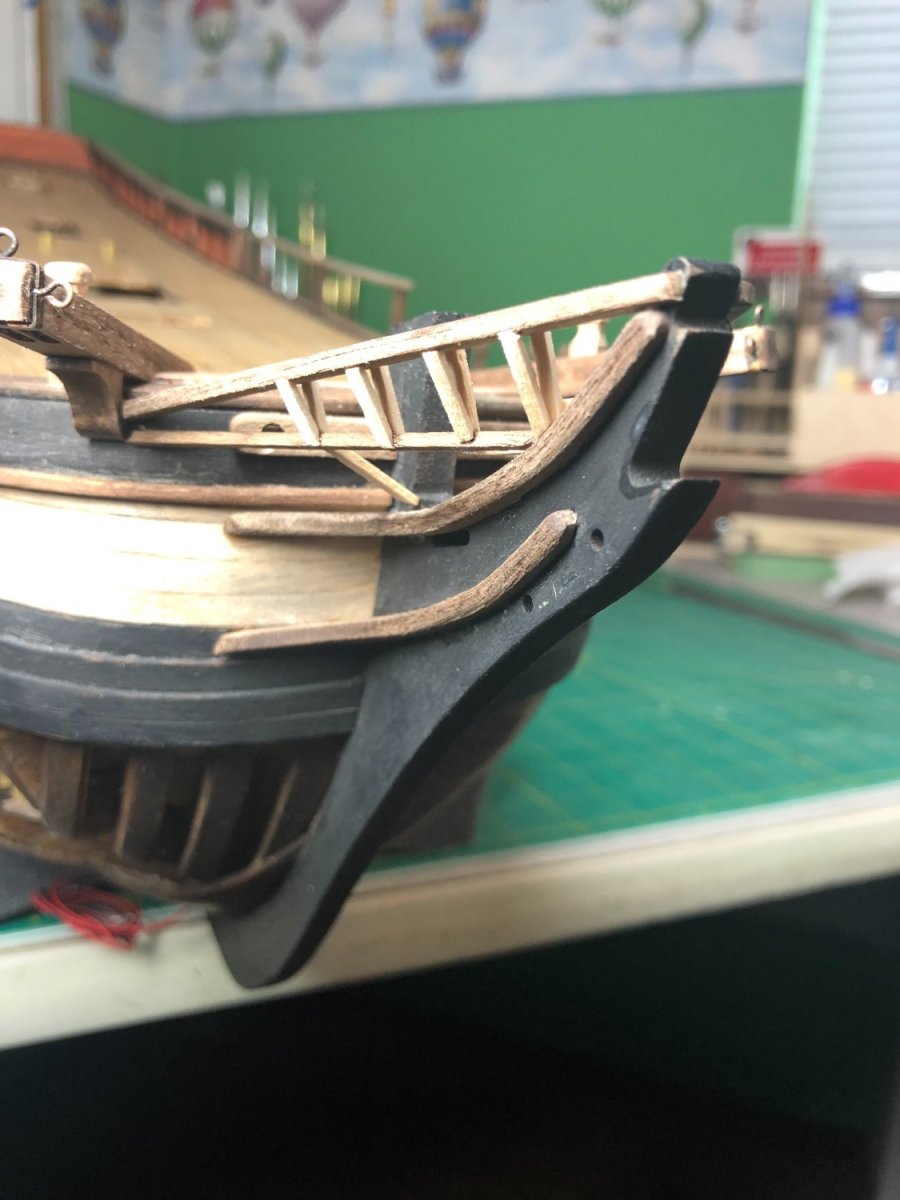
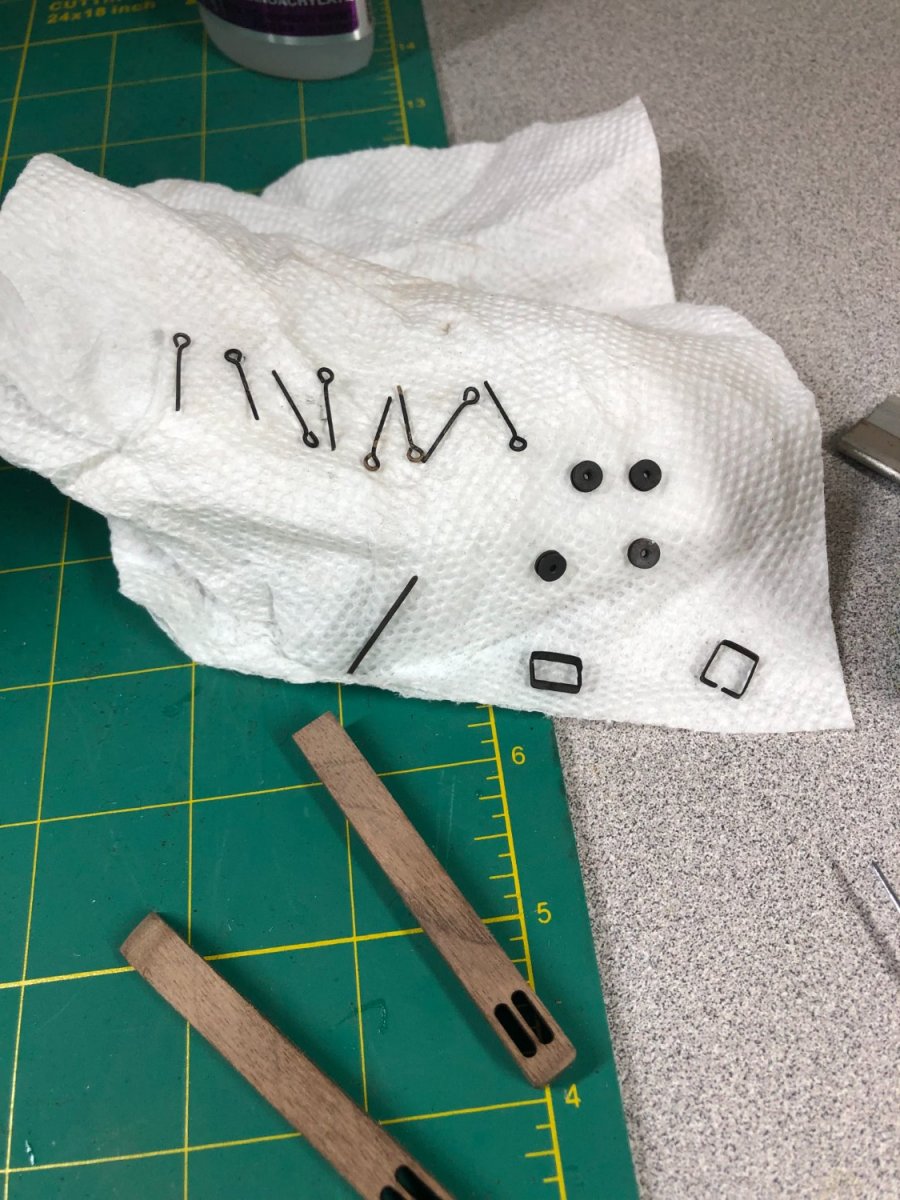
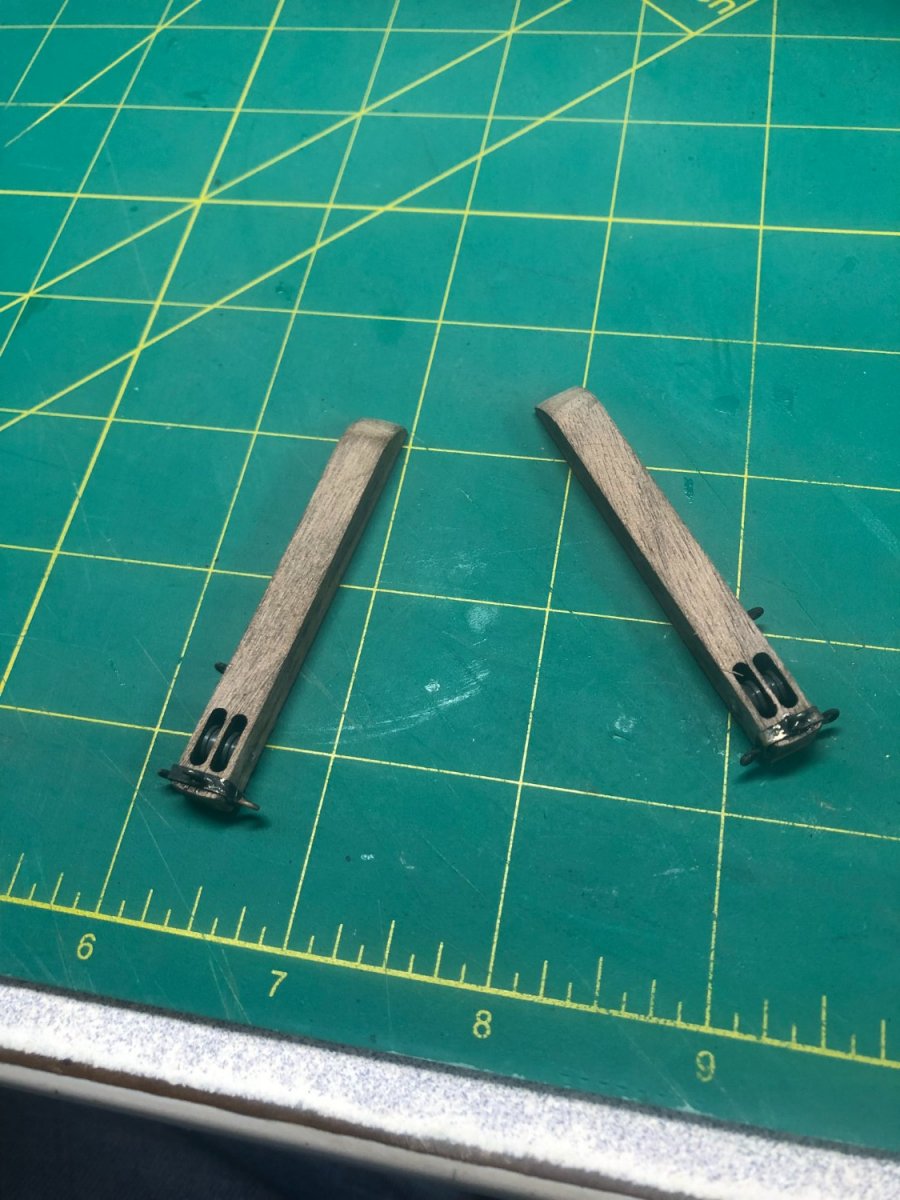
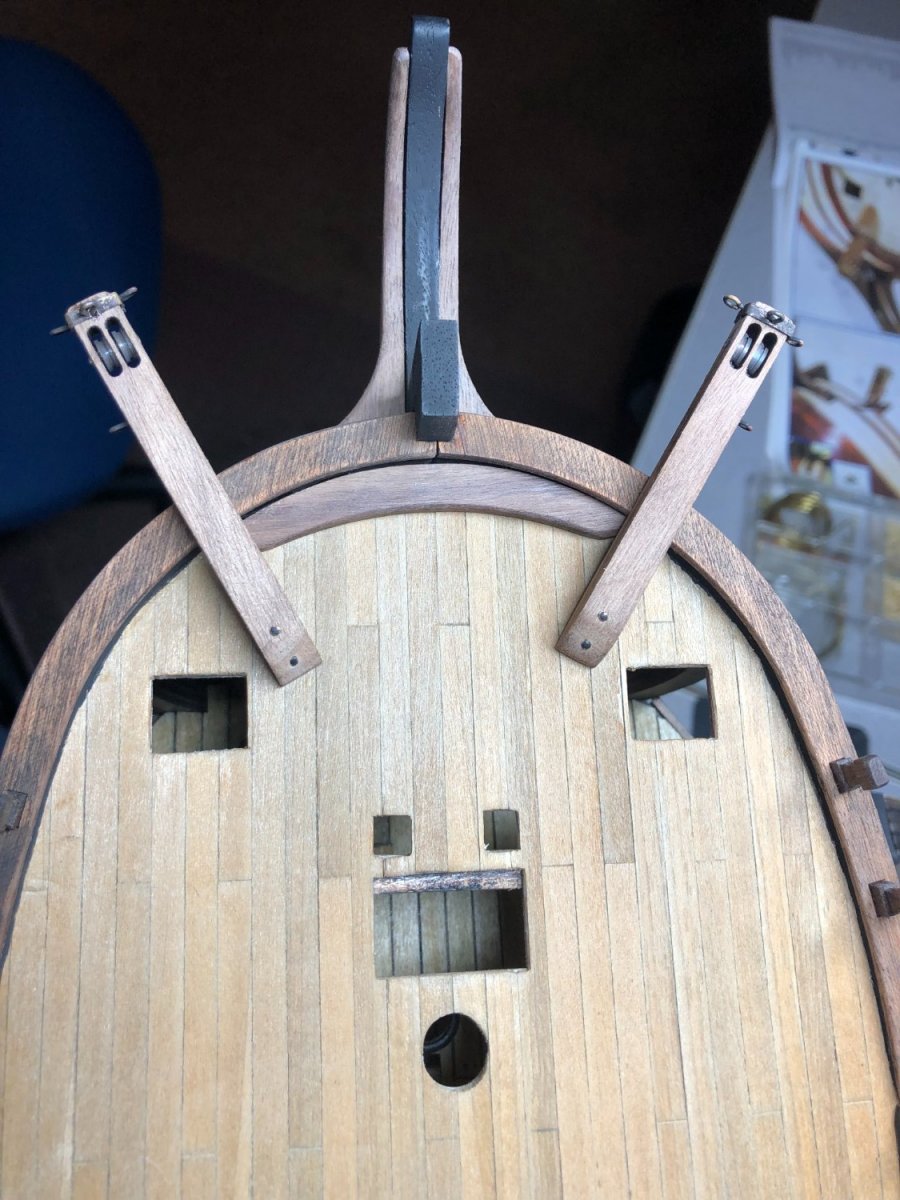
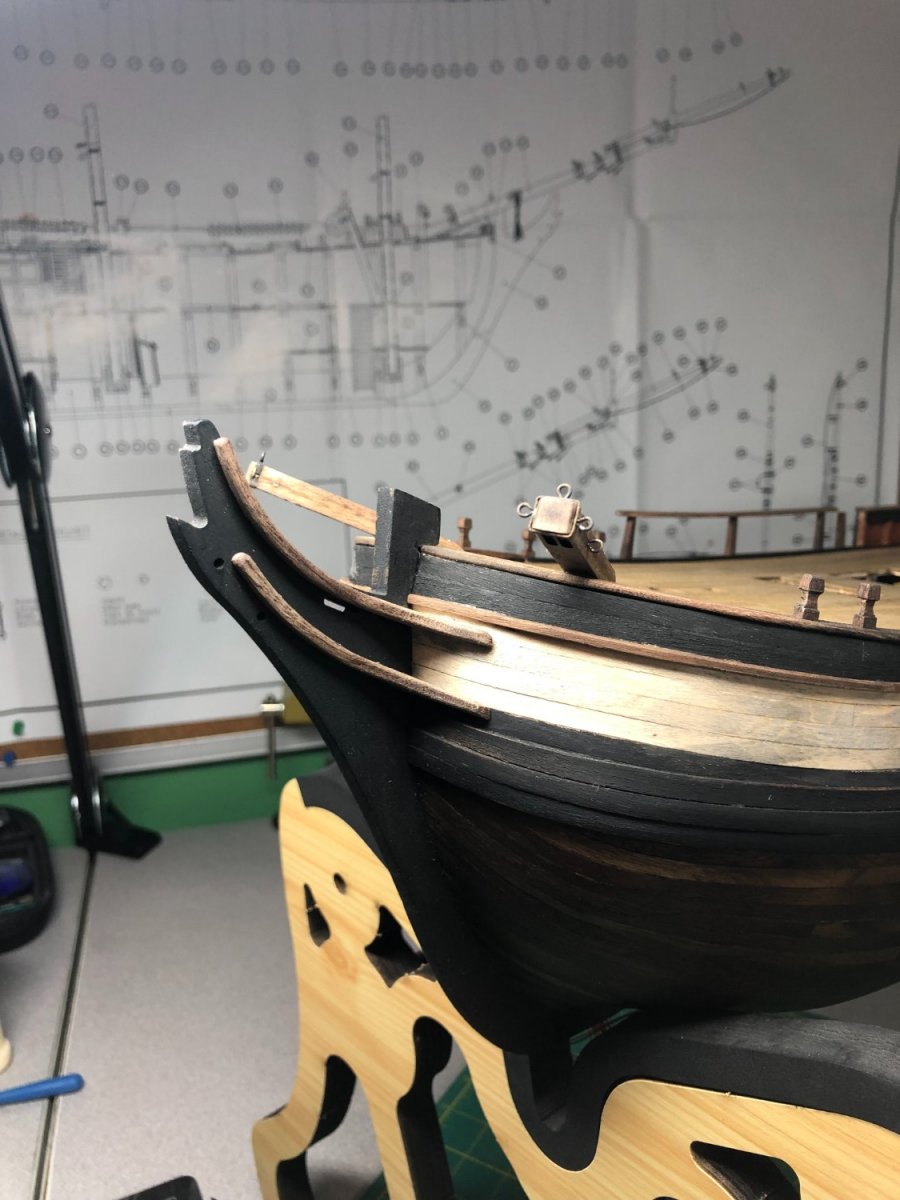
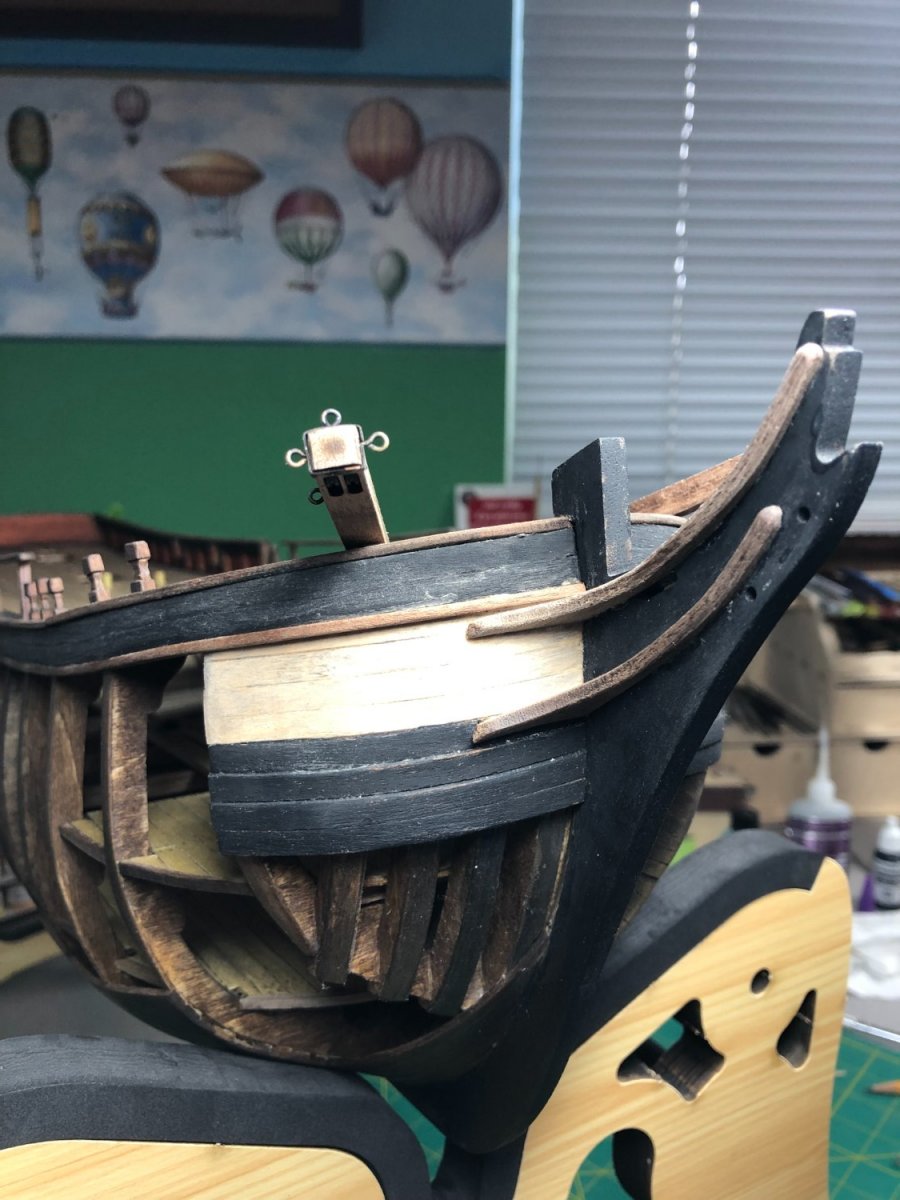
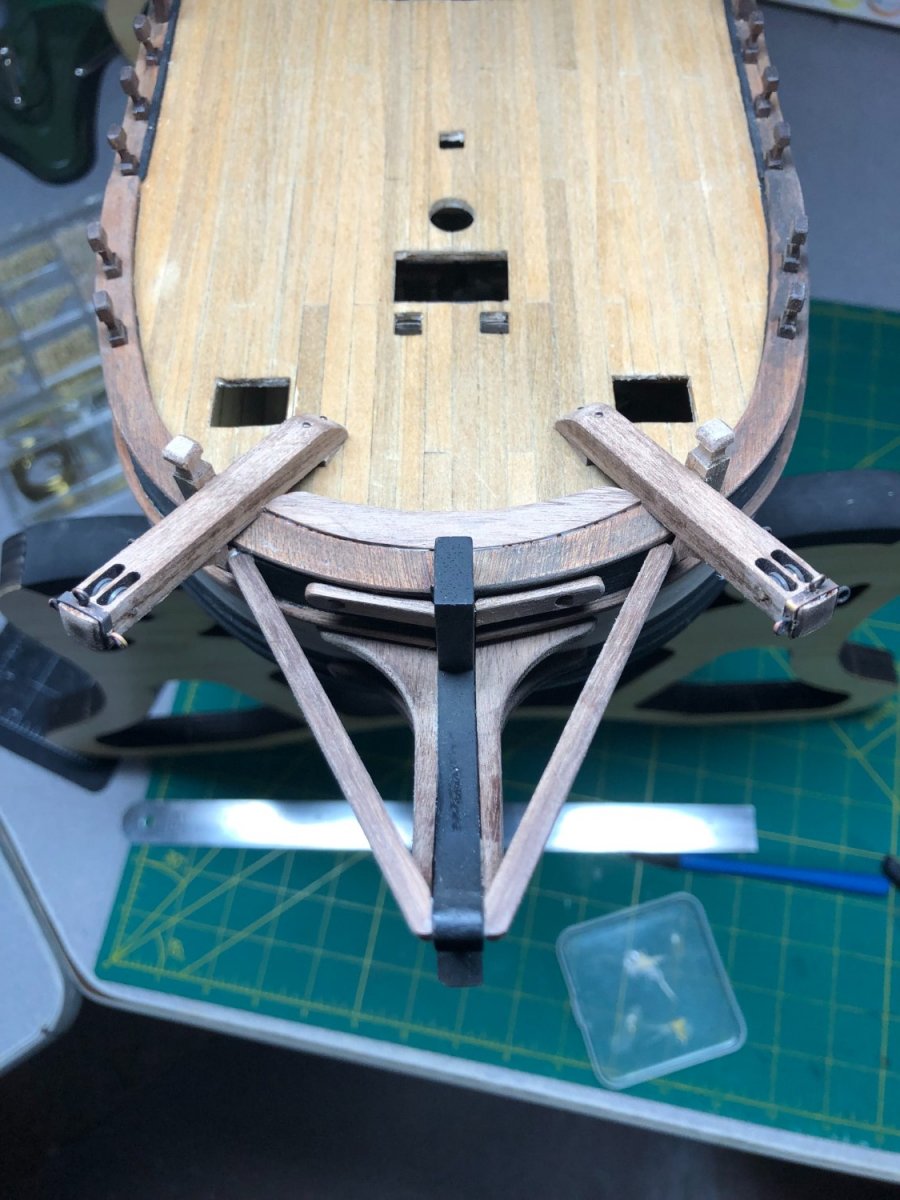
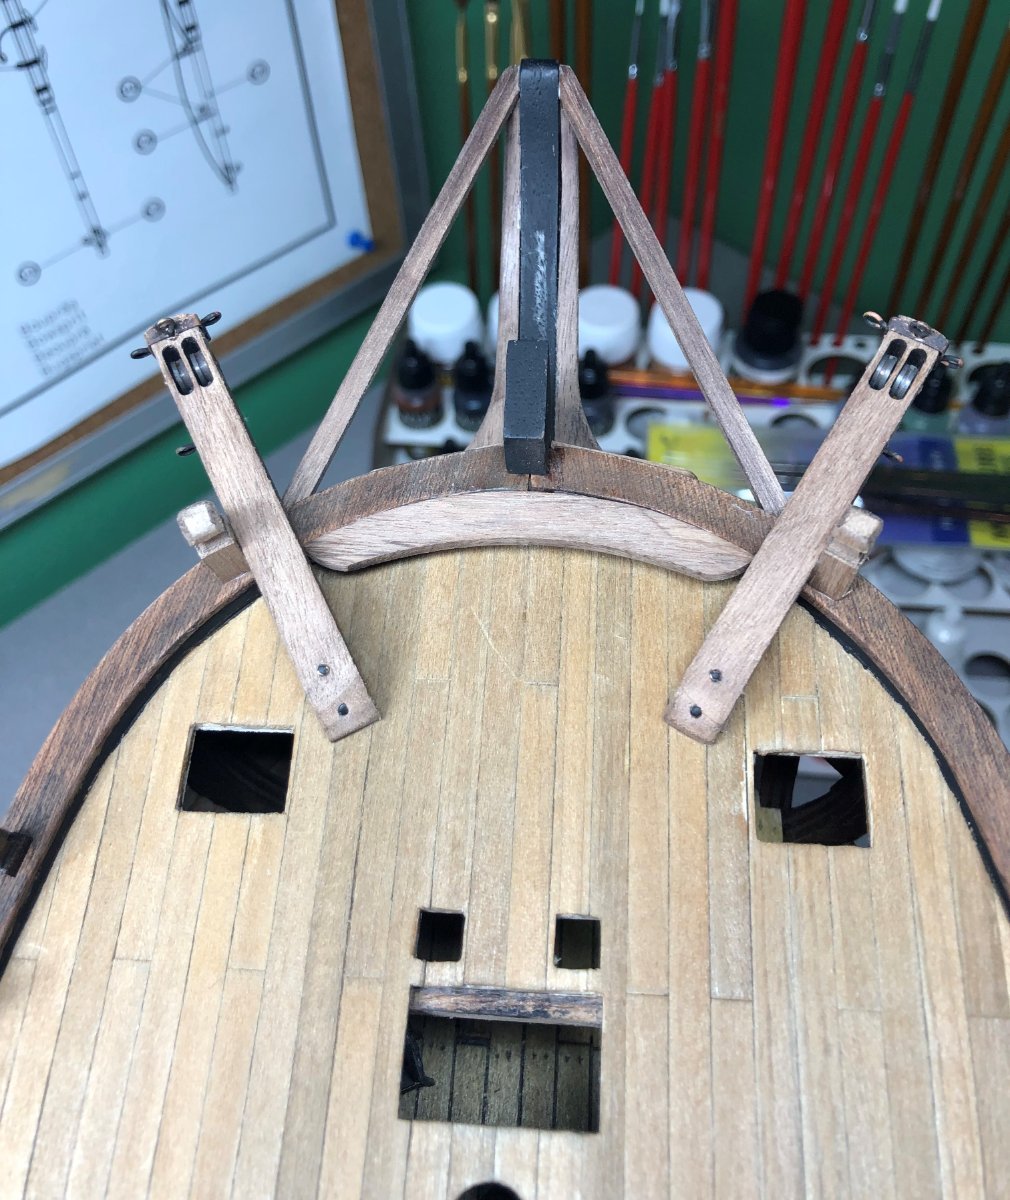
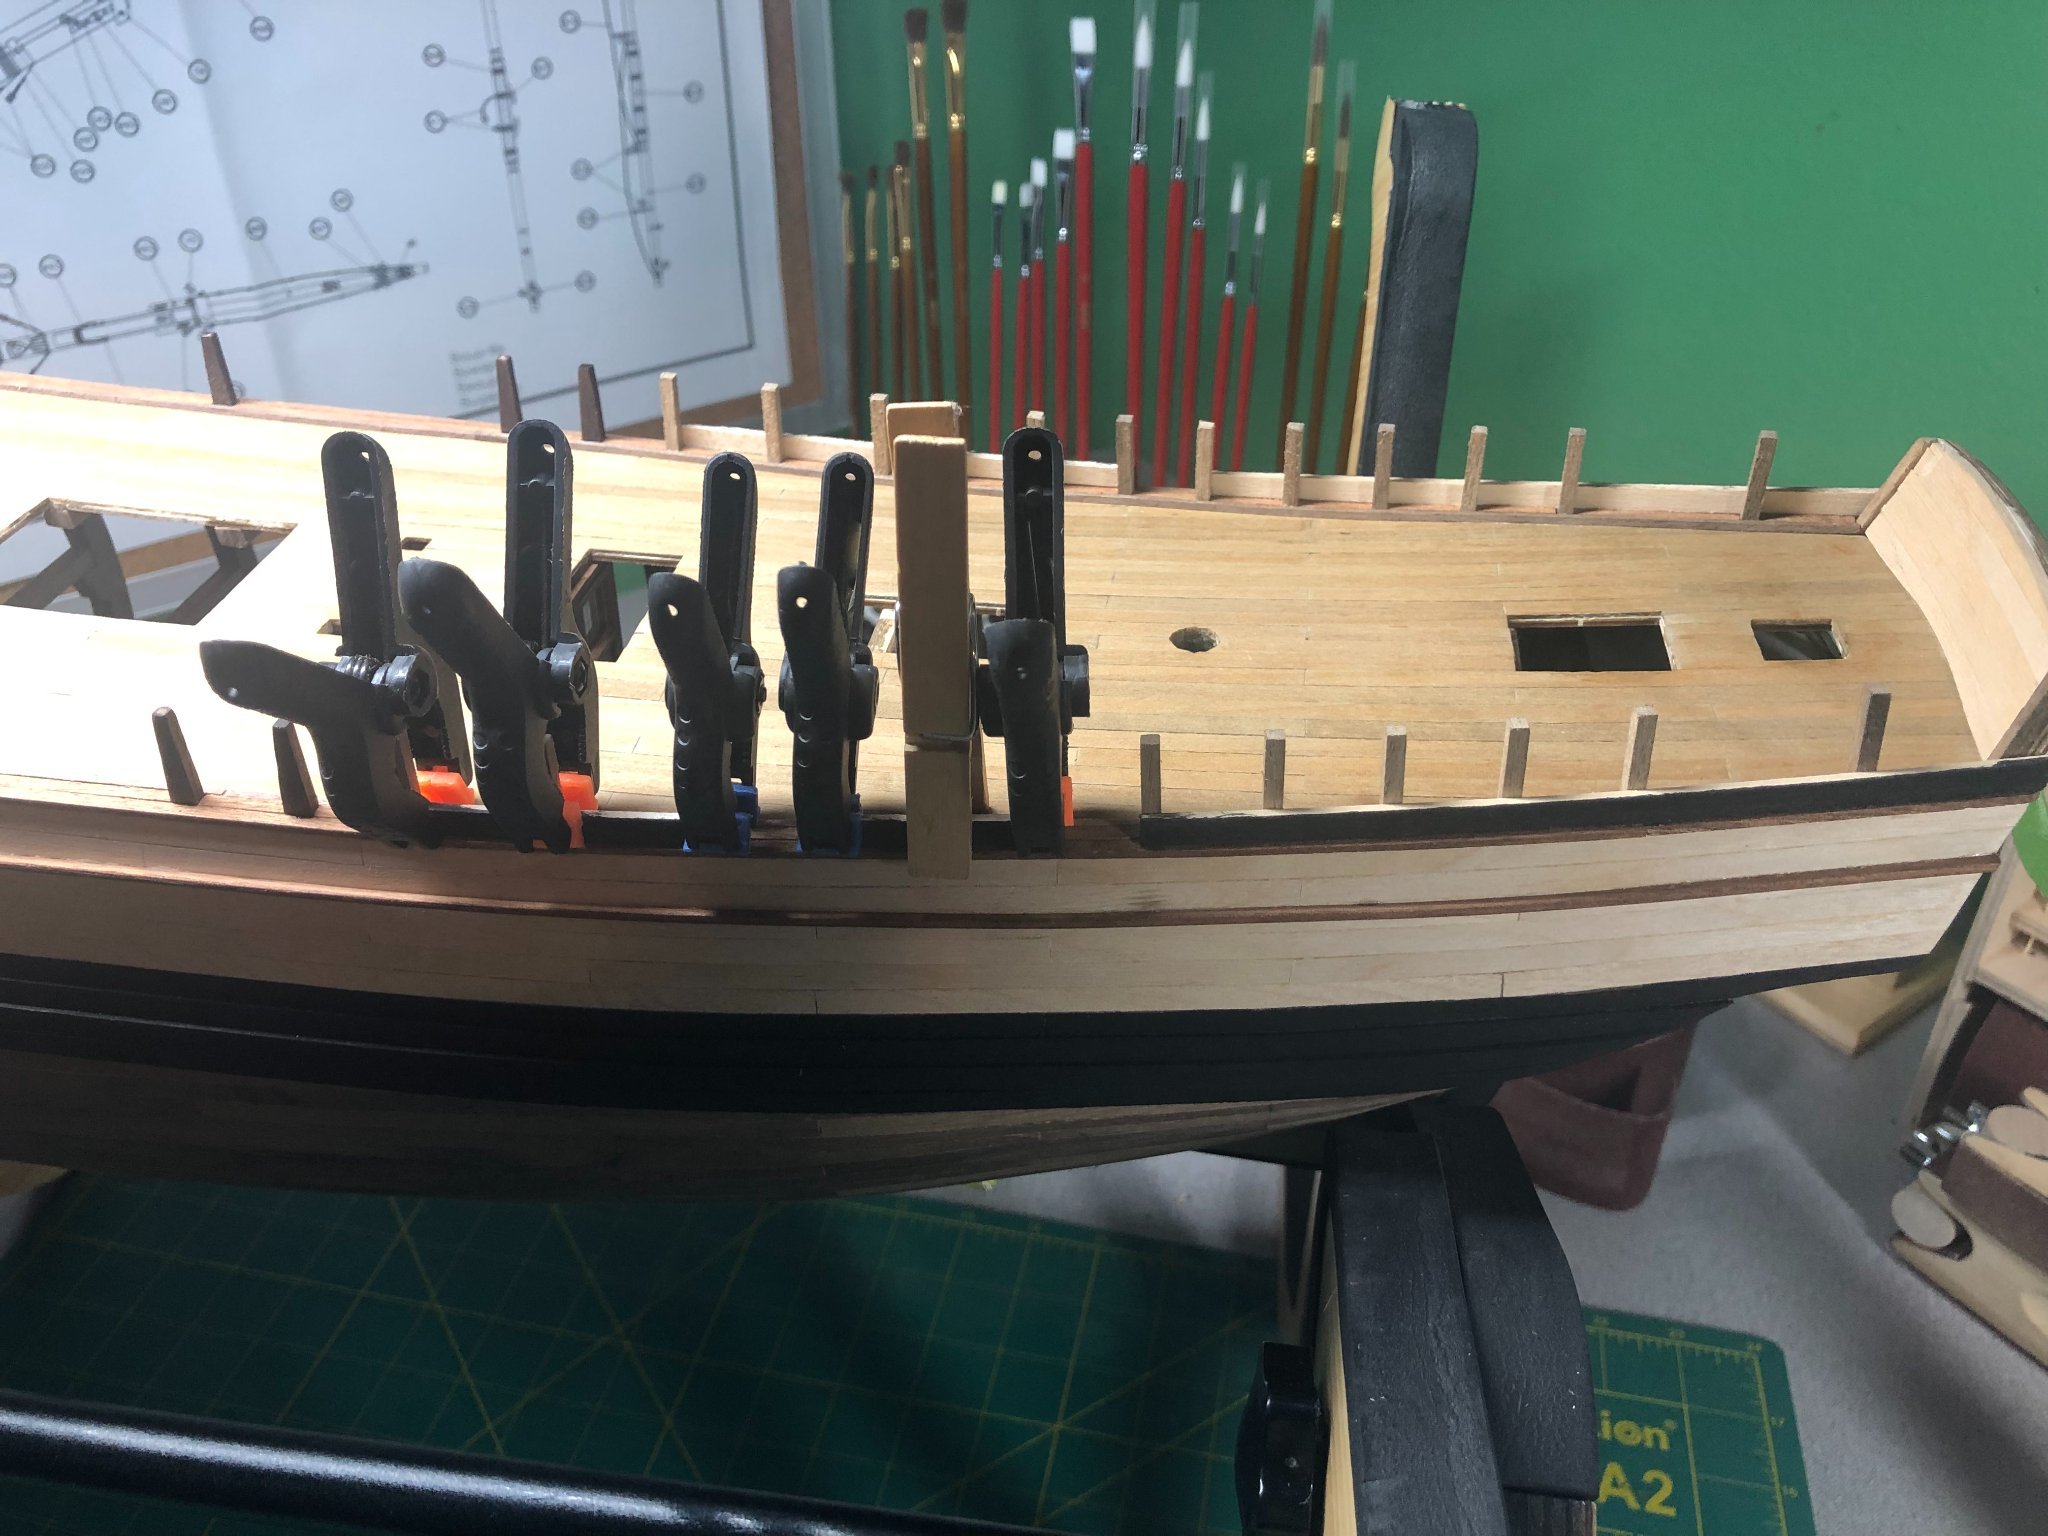
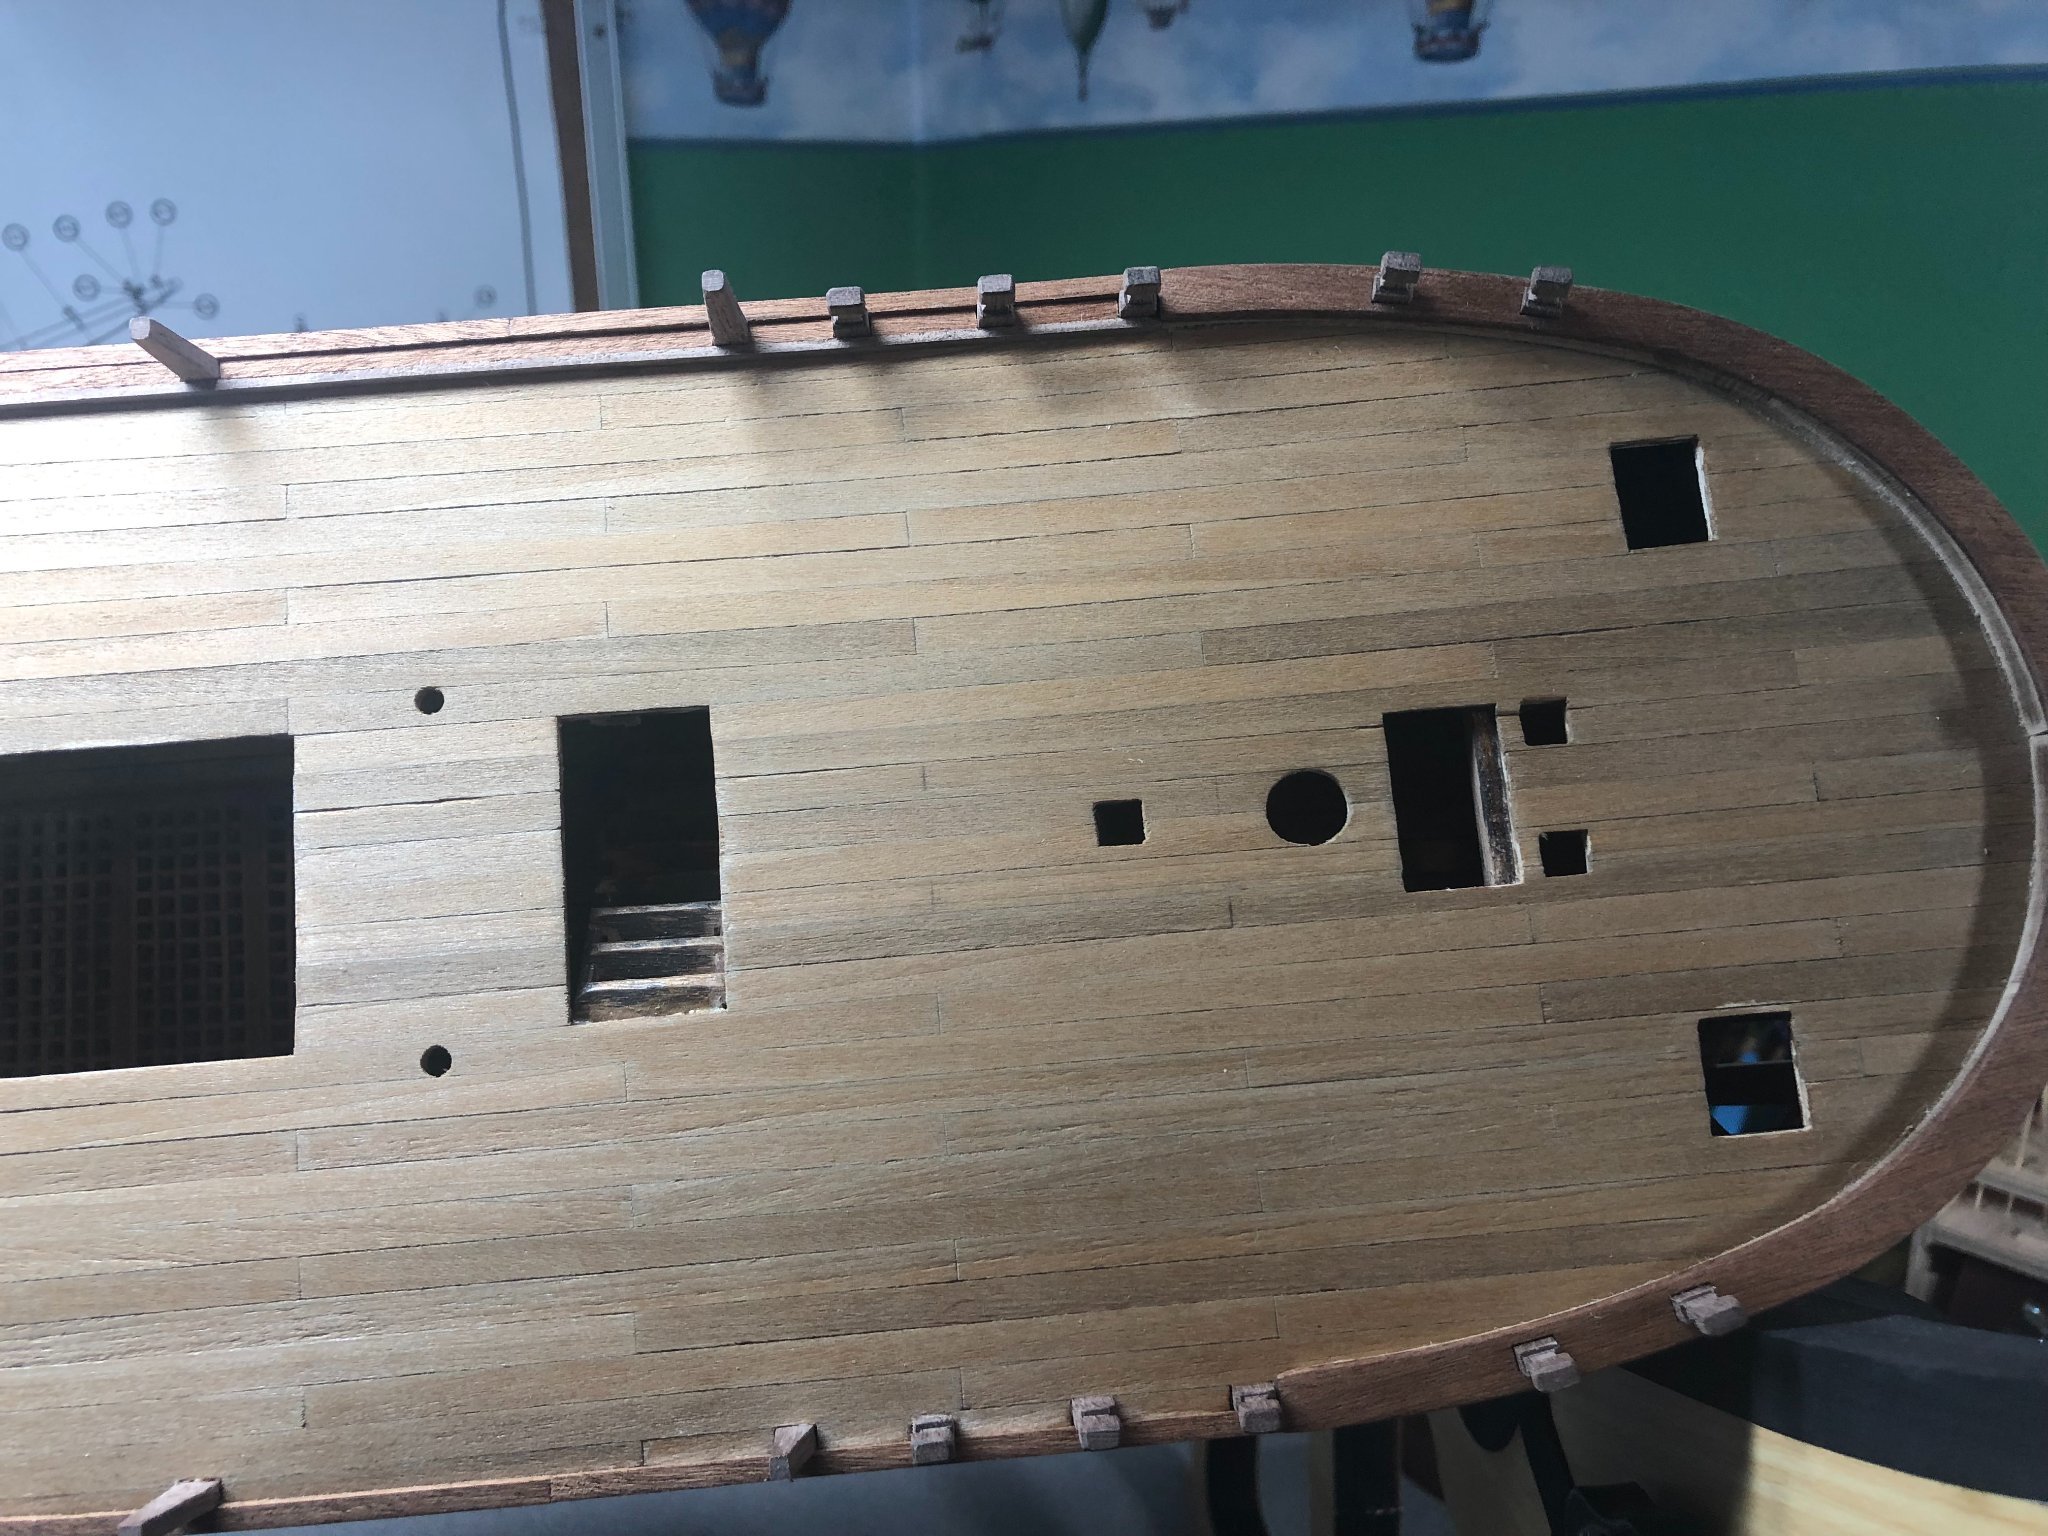
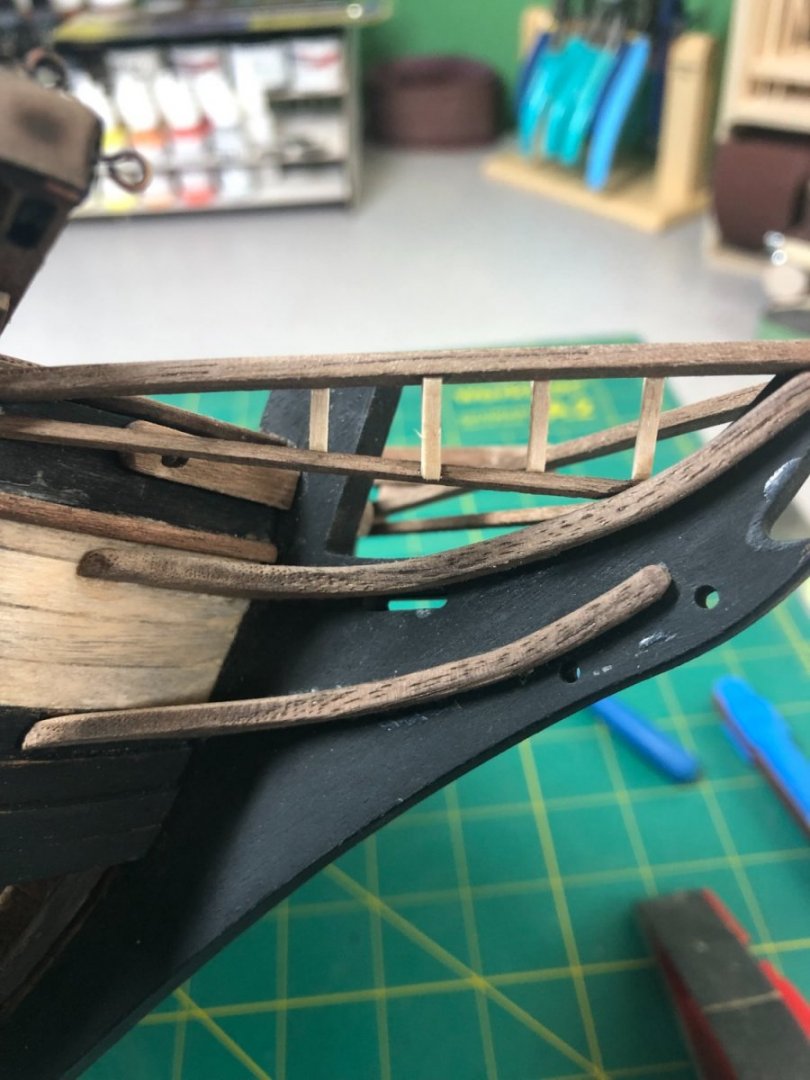
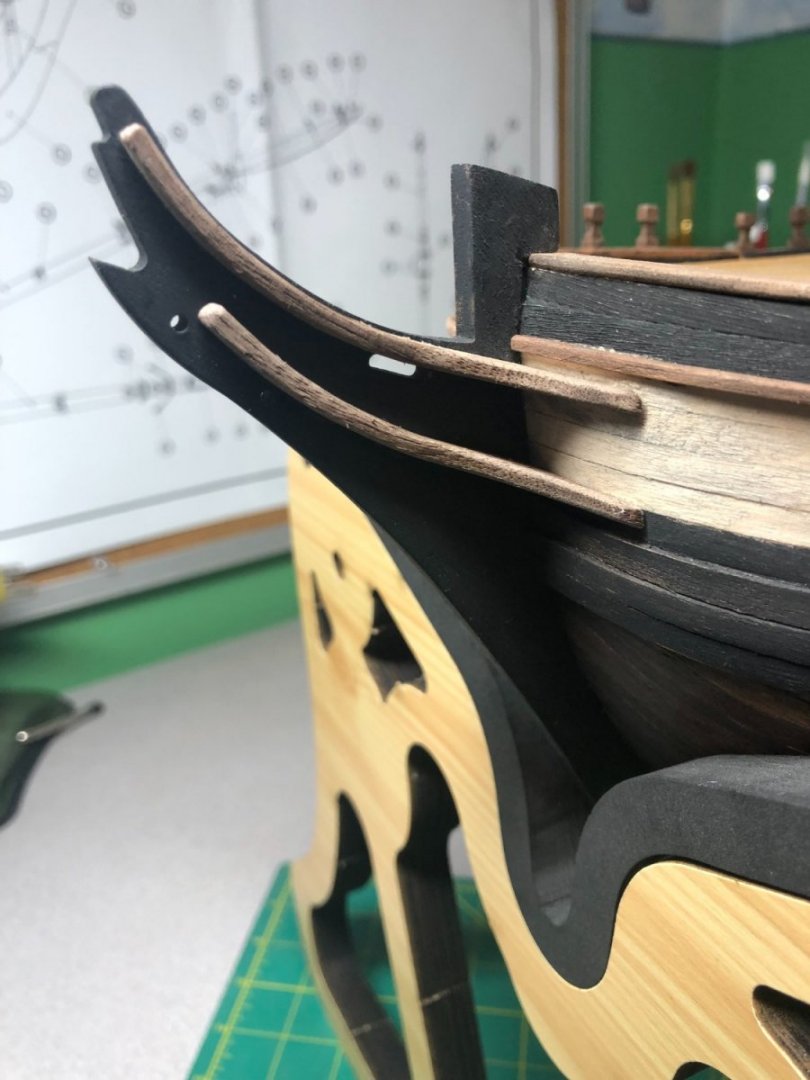
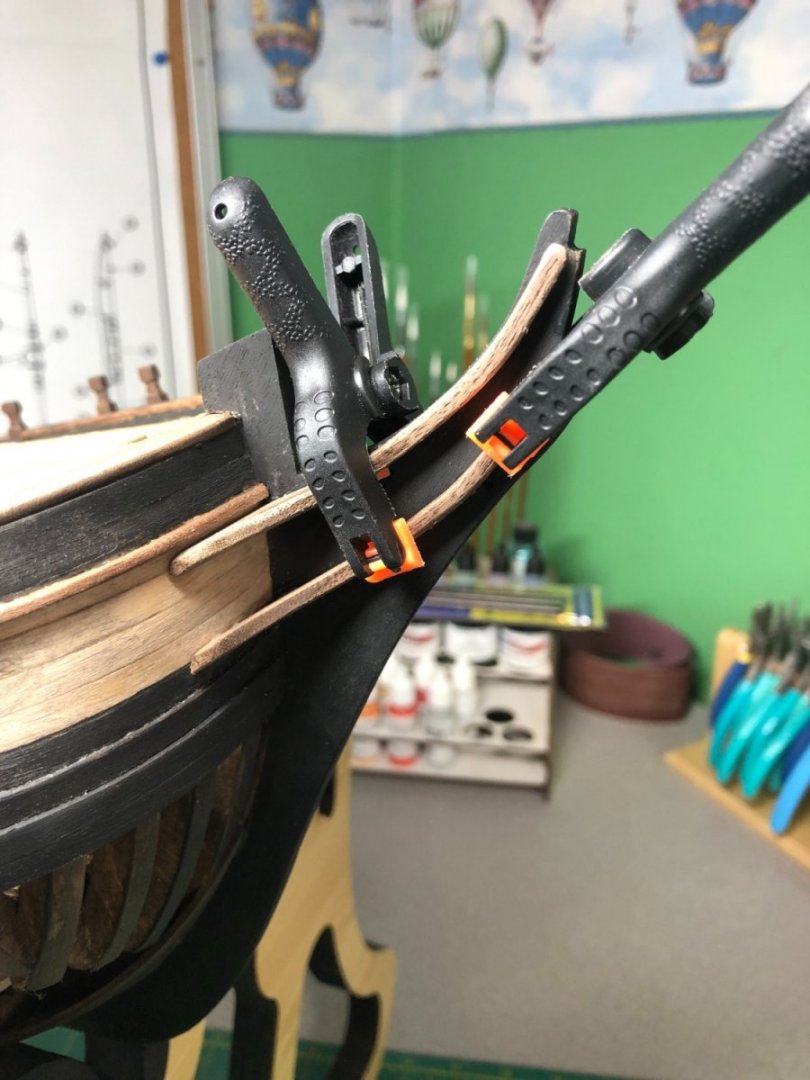
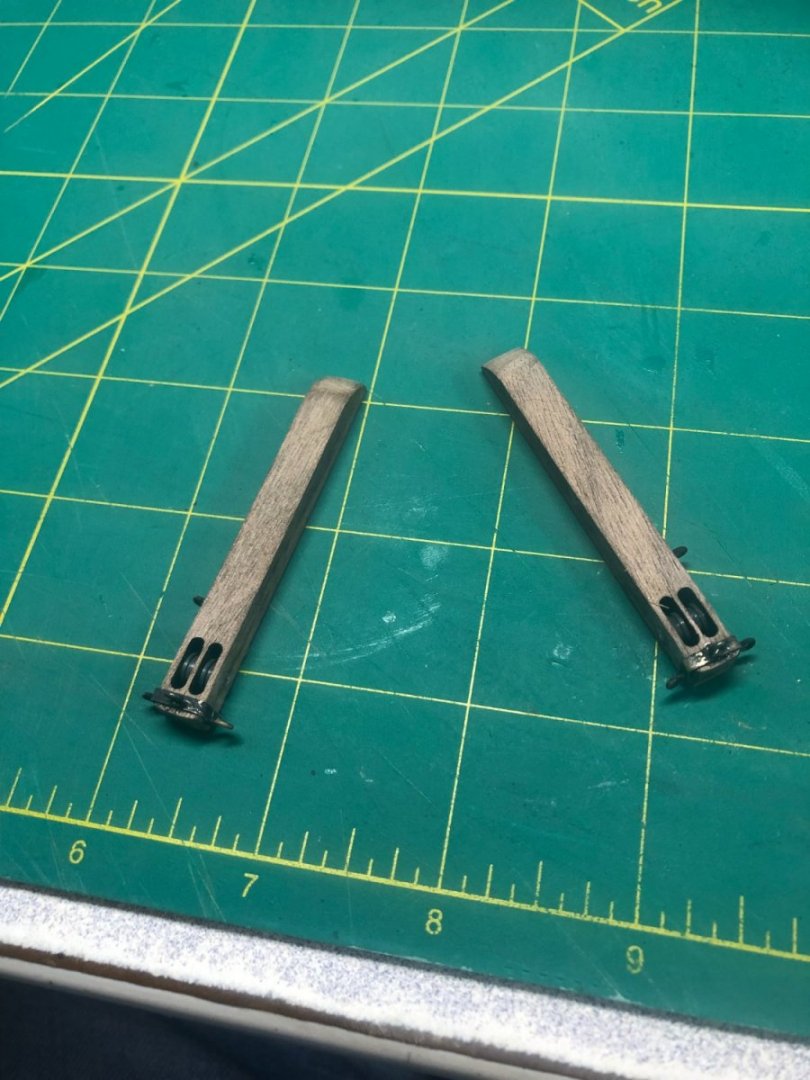
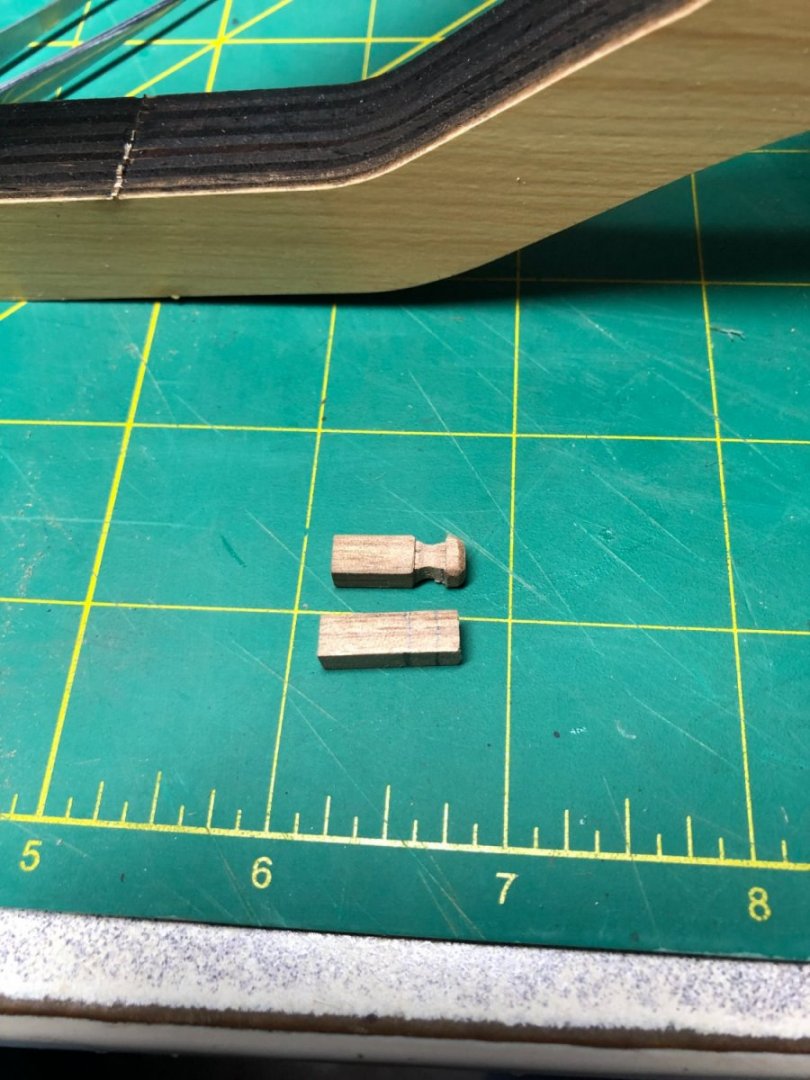
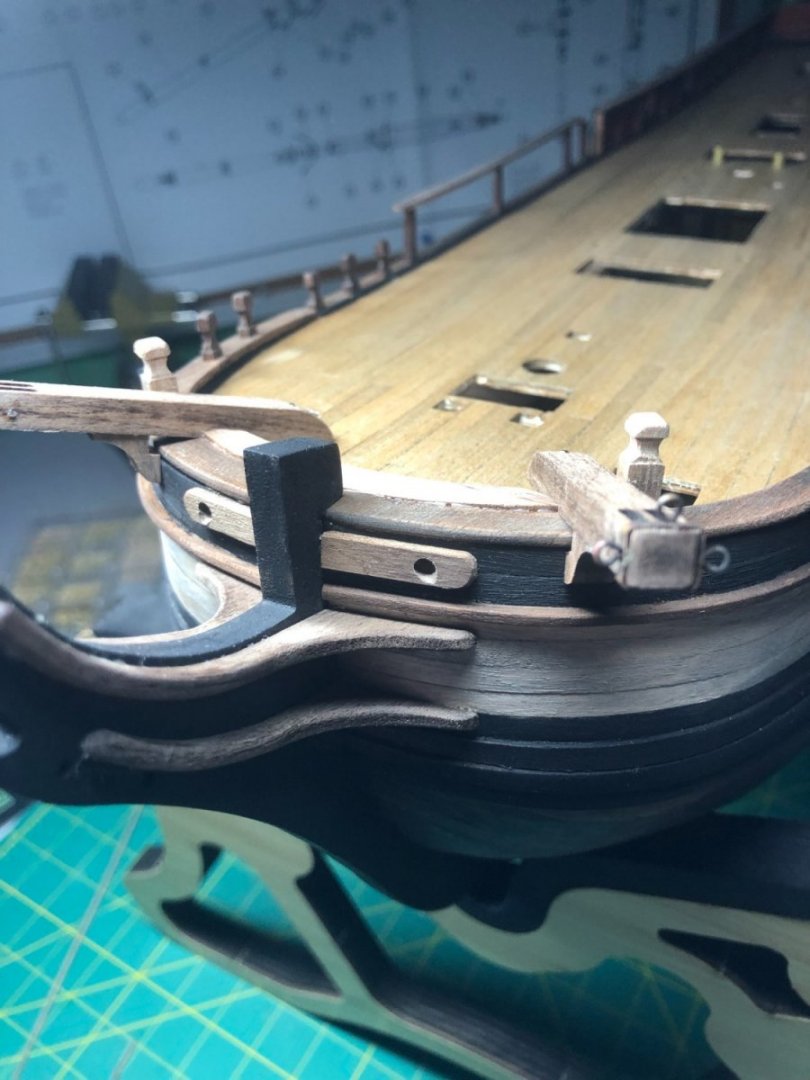
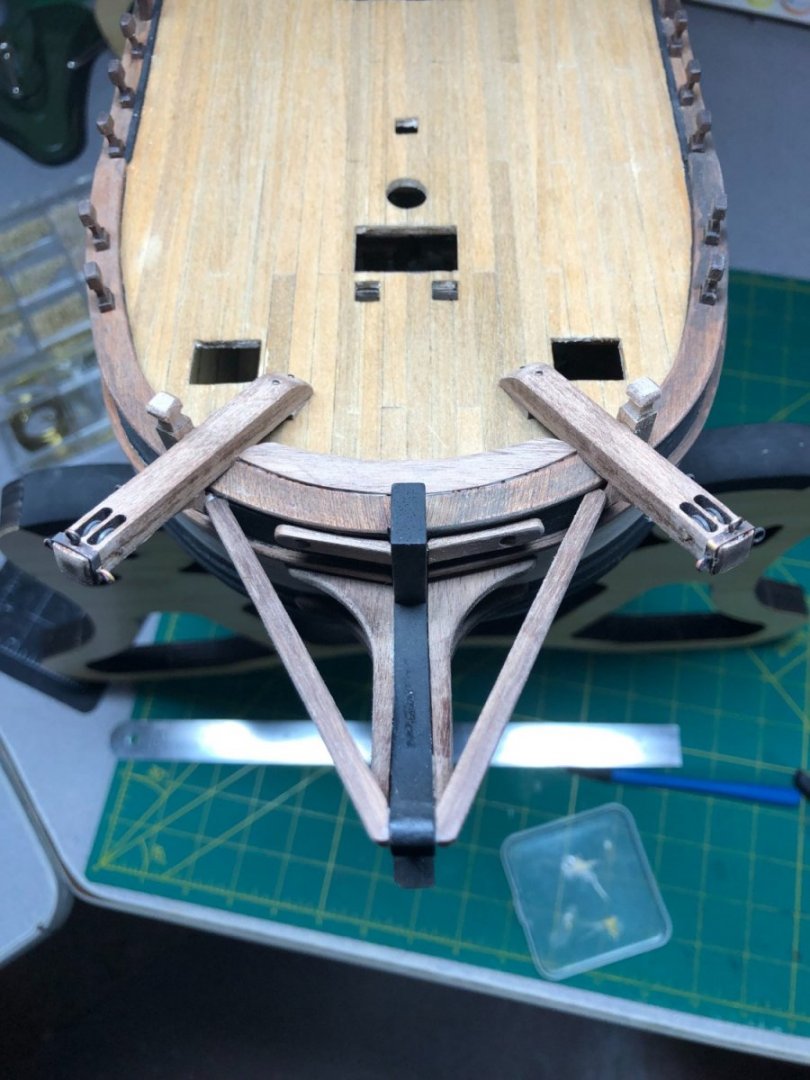
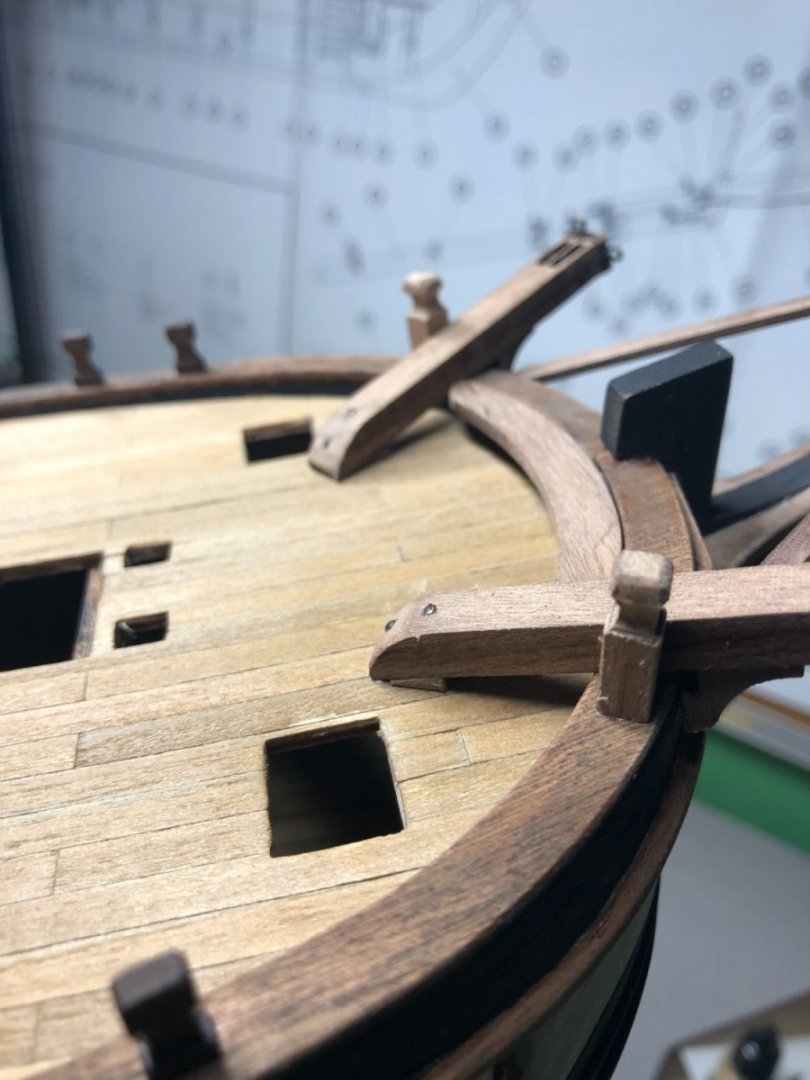
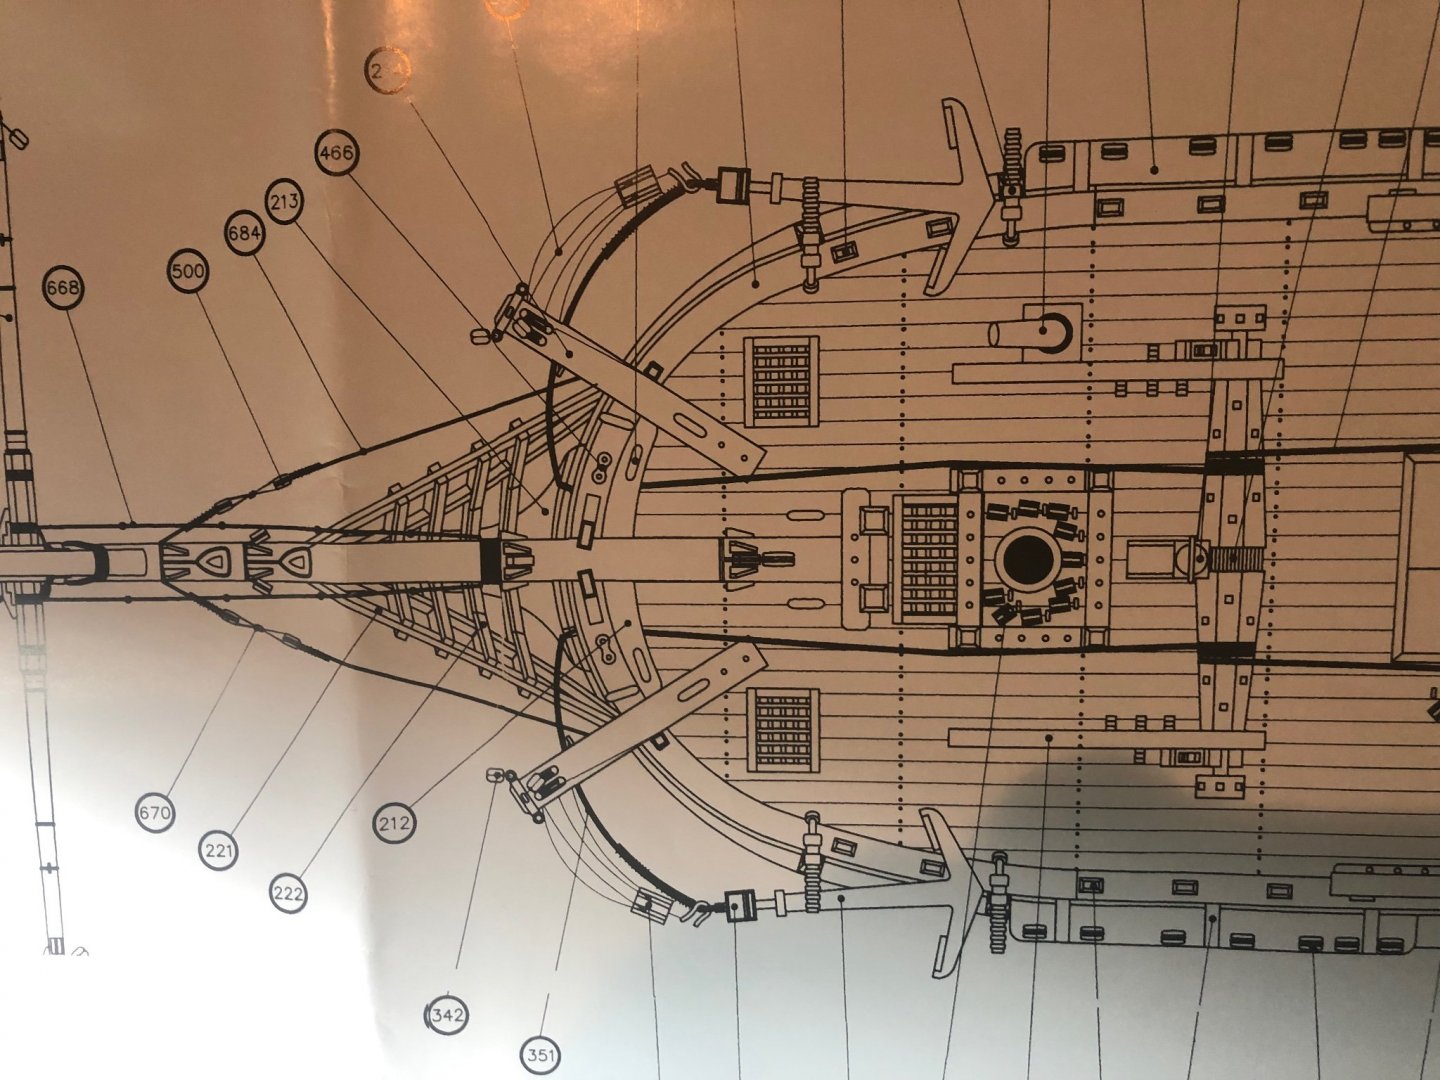
Today was my first day of retirement! So, a lot of pictures and info on the bow work currently underway! There are quite a few small pieces that make up the bow section. Some decoration and some parts of the structure or a working surface. I started with 2 strips on each side of the stem: Obviously, these needed to be shaped, the first set was easy enough but matching them for the other side was difficult! I soaked the pieces in water for about 30-45 minutes and used heat bend them: Clamped and glued into place: The anchor davits were next. These are precut pieces and needed little more than some shaping. Again, in keeping with my weathering theme, I blackened all the hardware associated with the davits. The product I use is in the picture, it does a really good job, the longer it's left to react, the more aged it looks: The assembly was pretty straight forward. However, there was one discrepancy that I found with the plans and the pictures involving the eye hooks. On the plans it shows it on one side of the davit while the picture shows it on the opposite side. The side eye bolts should be on the outside. Here is the assembled davits: And installed: Anchor line tie-off's were shaped using my mini mill and a round file: And installed: The anchor line holes were drilled out and the protection plates installed along with the davit supports: The head rails in the plans looked to be the wrong size (1.5mm X 1.5mm)... it just looked wrong! I used my table saw and cut down 5mm X 2mm strip to 3 X 2, shaped and installed: Lastly, the angle of the anchor davits to the deck just didn't look good. I added a shim to give it a little more finished look: Hoping to finish the bow work tomorrow and move to the stern and the rudder next. Happy New Year and thanks for visiting!


-
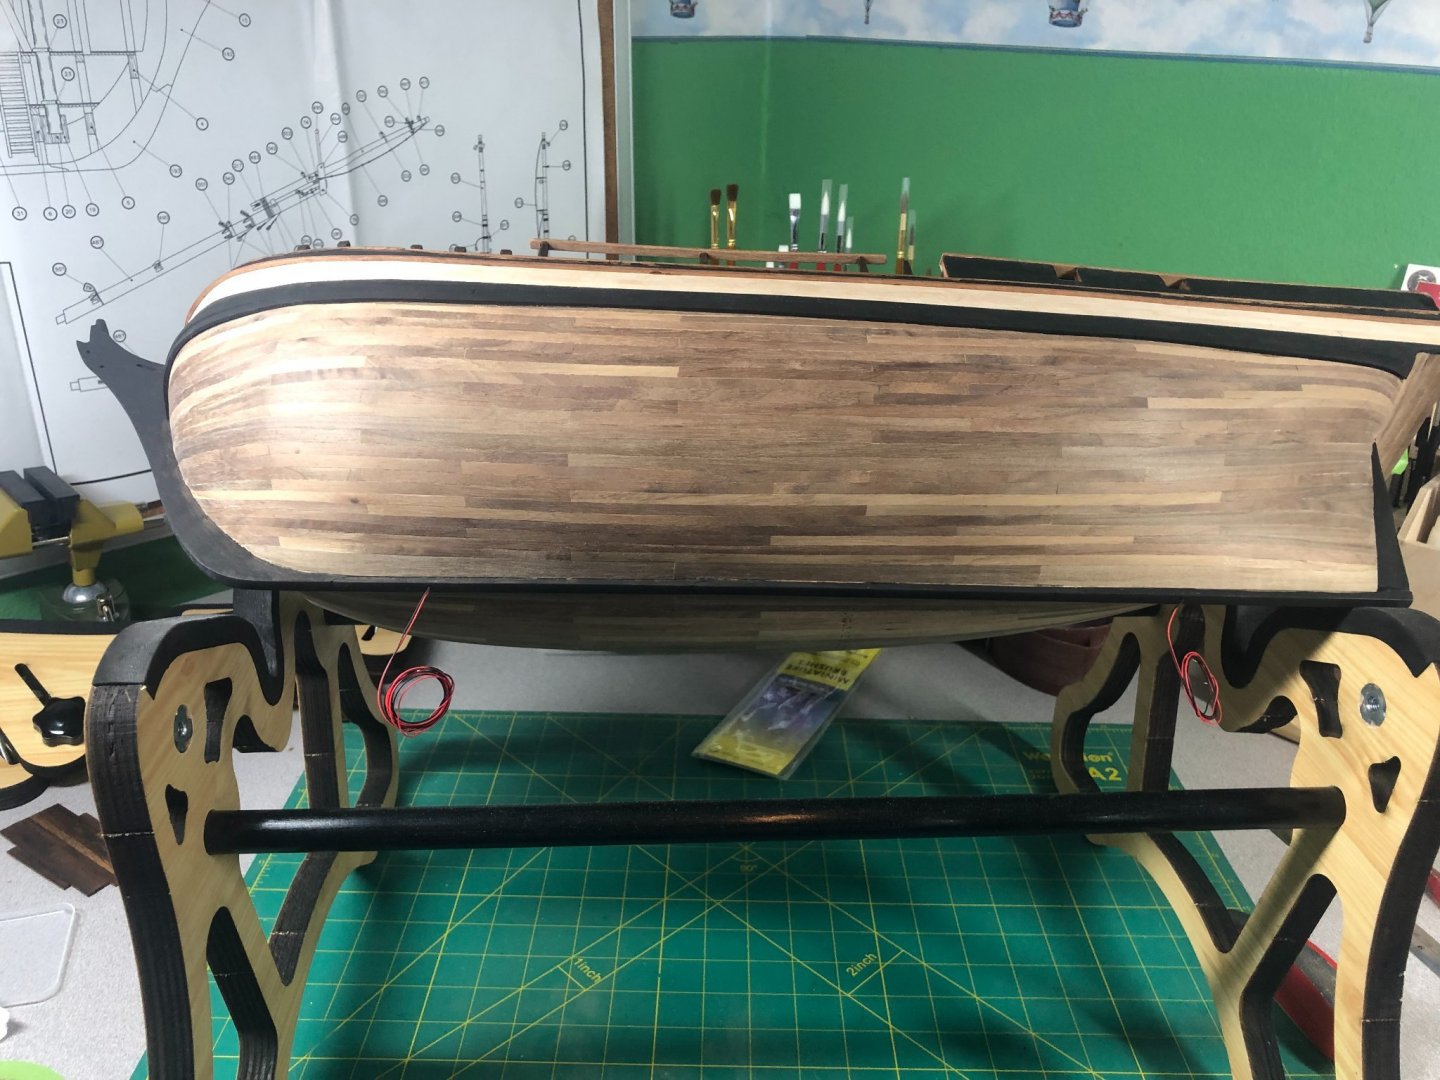
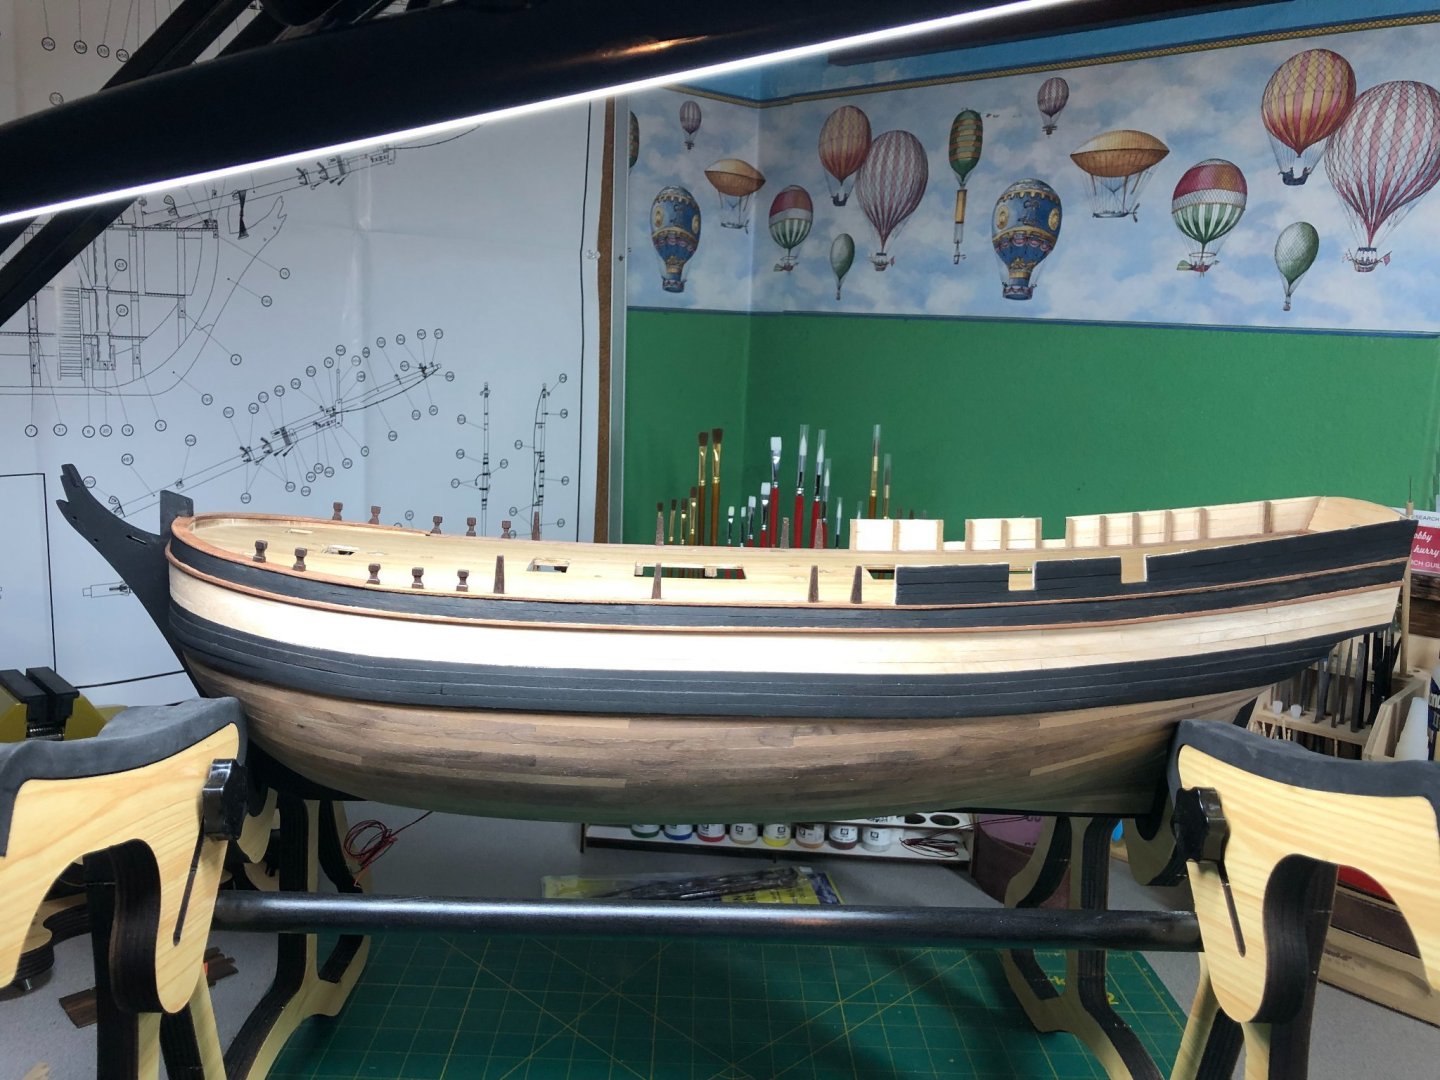
As promised, pictures of the completed finish on the hull: I've applied linseed oil up to the wales. Nothing above the wales because there are still a lot of pieces to be glued into place! There are two coats applied and sanded with steel wool. I also finished the stern... for now, and oiled it too: Working on the bow now.

-
Happy birthday, Tim! Job well done! A beautifully detailed vessel. So, out of curiosity, how many builds have you completed? How are you displaying them? Merry Christmas to you and your family!
-
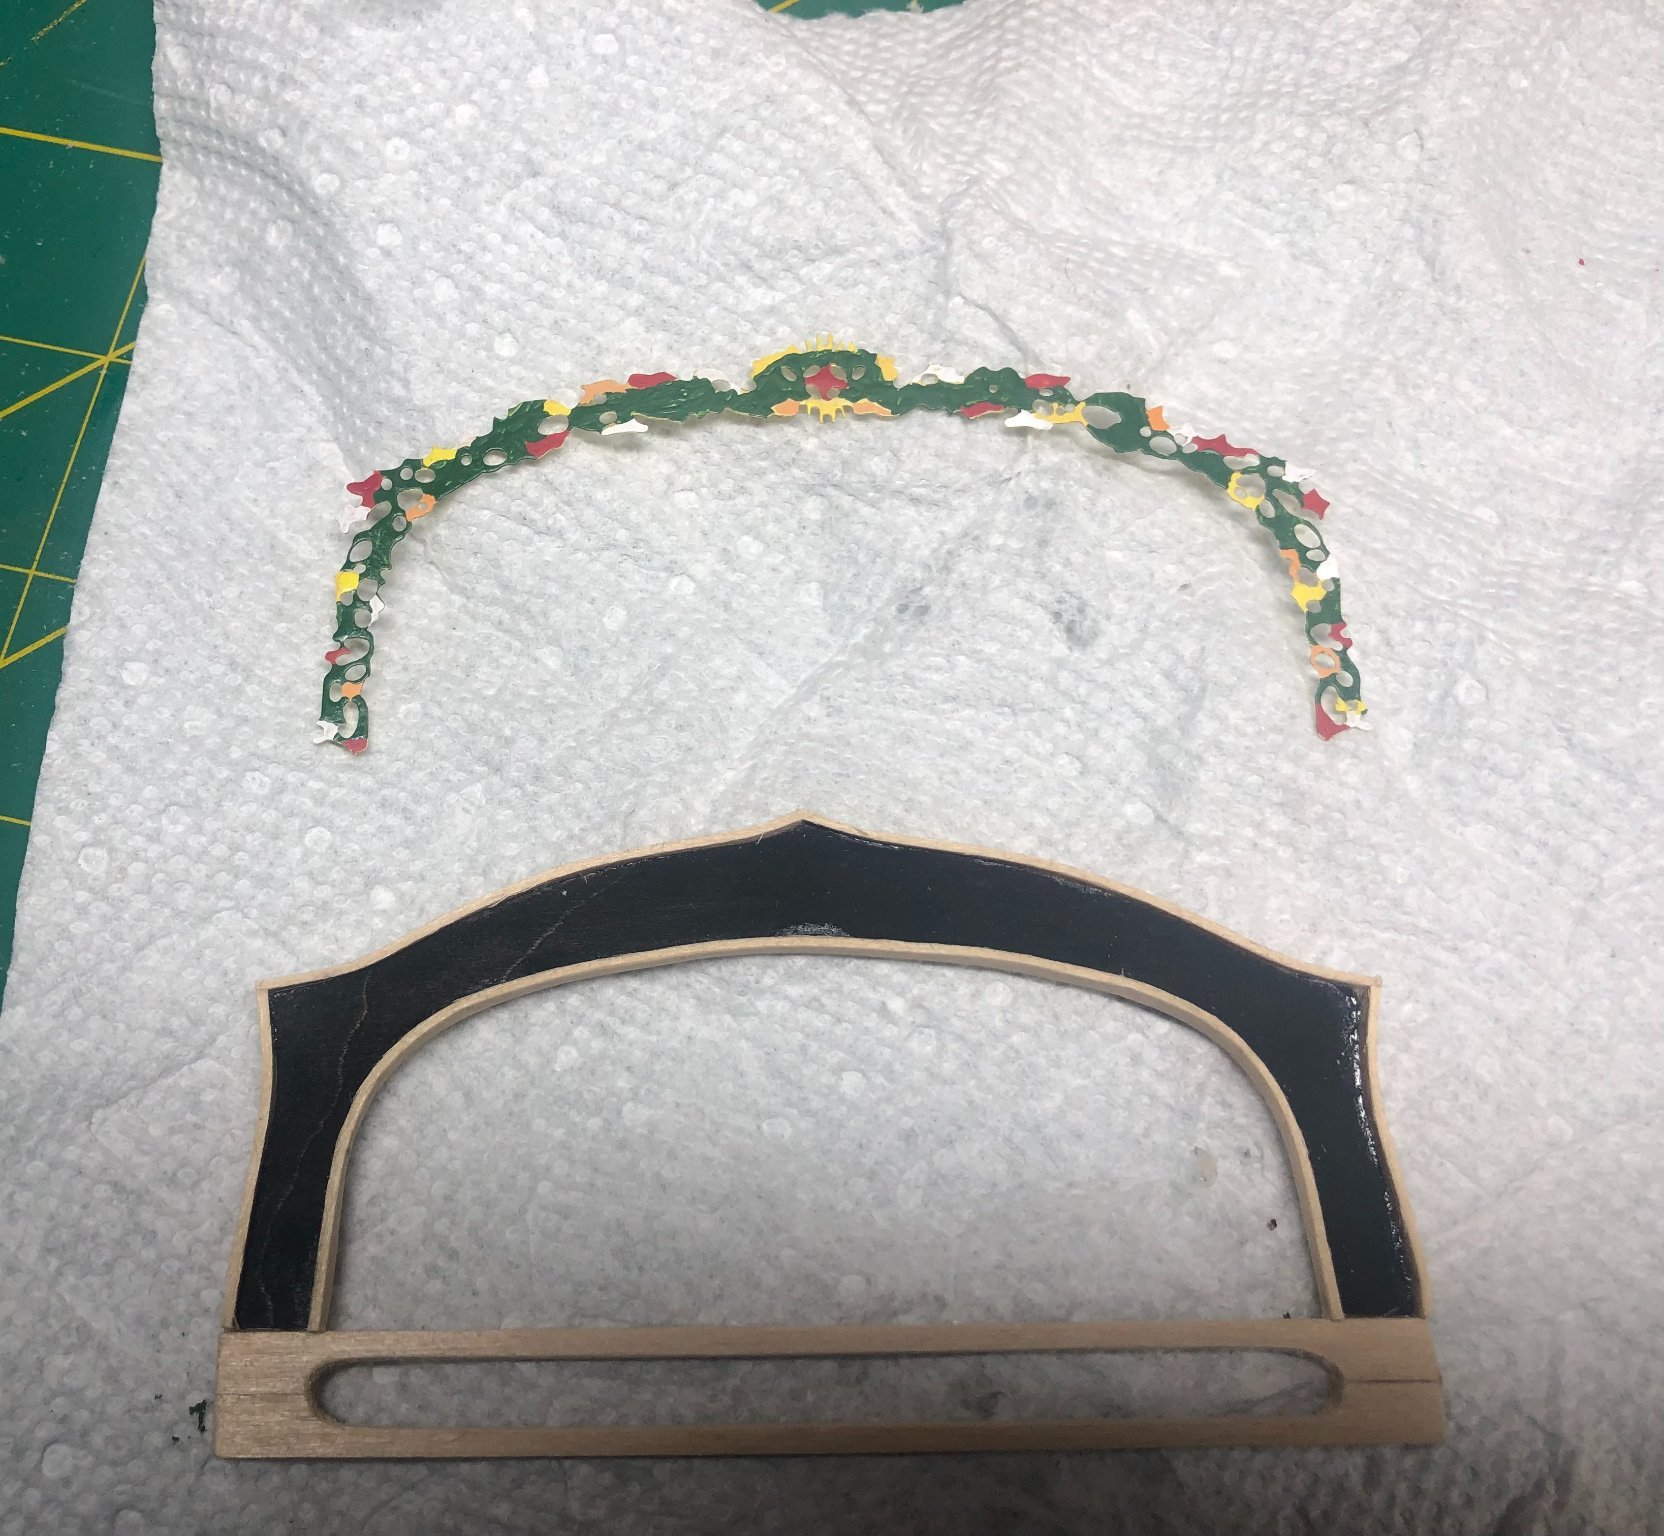
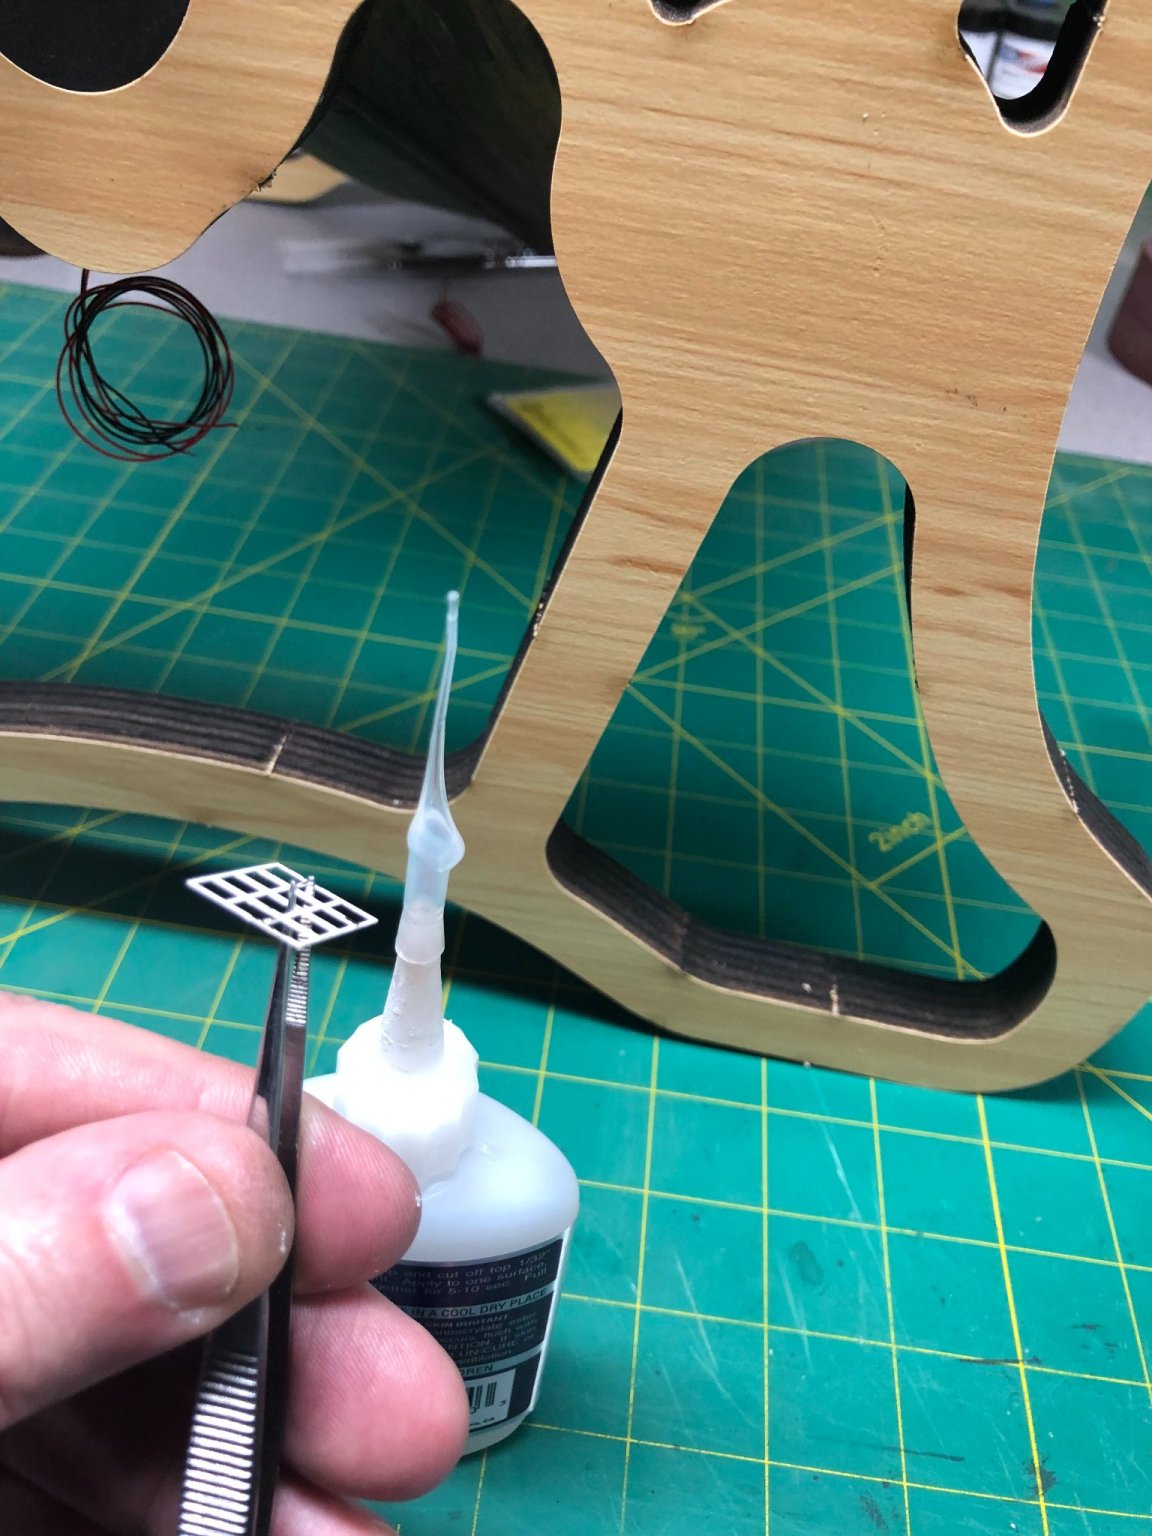
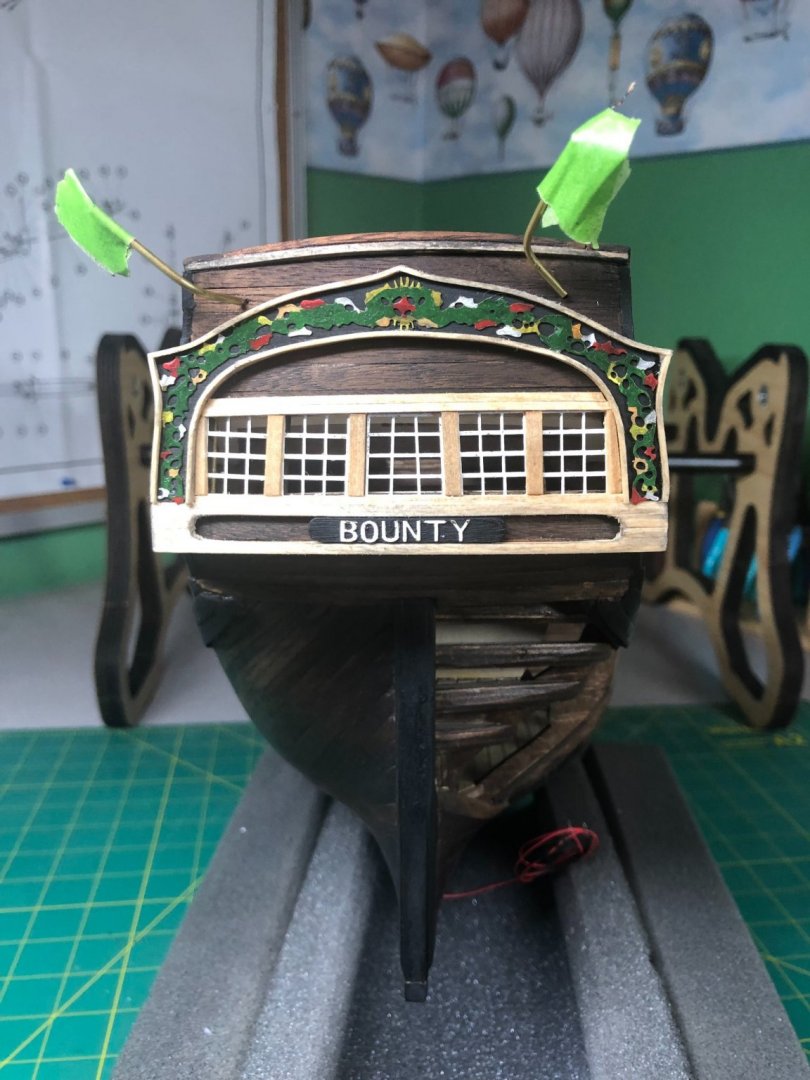
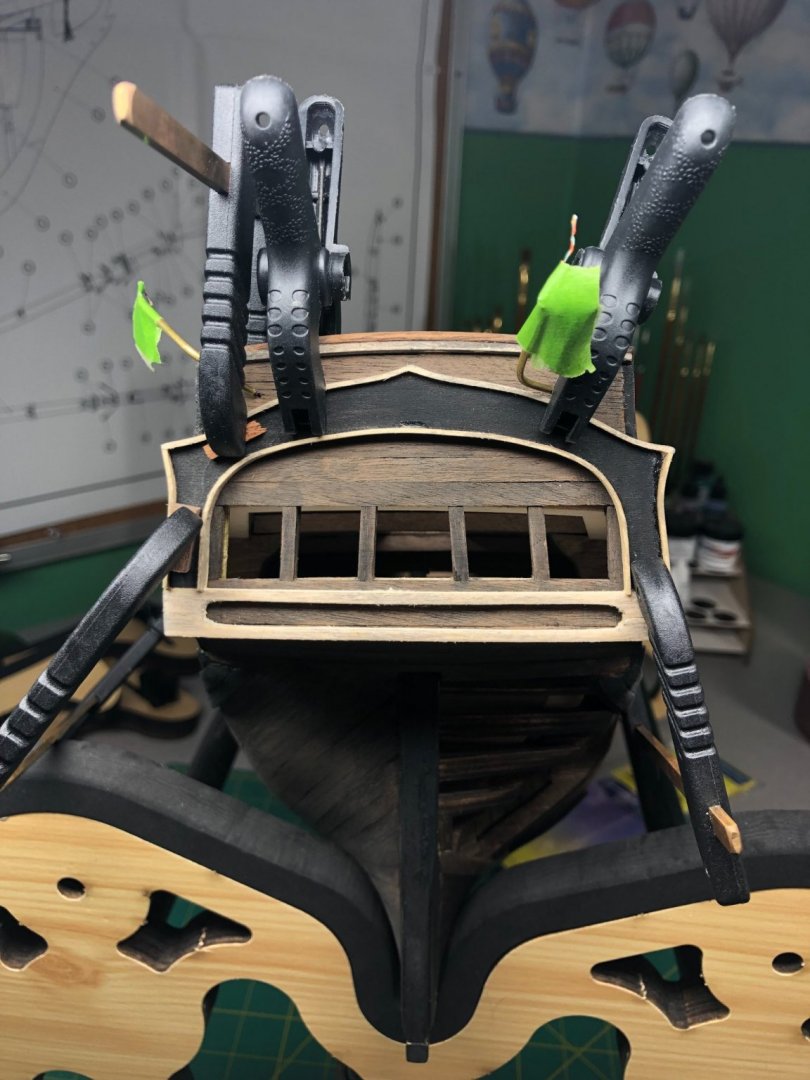
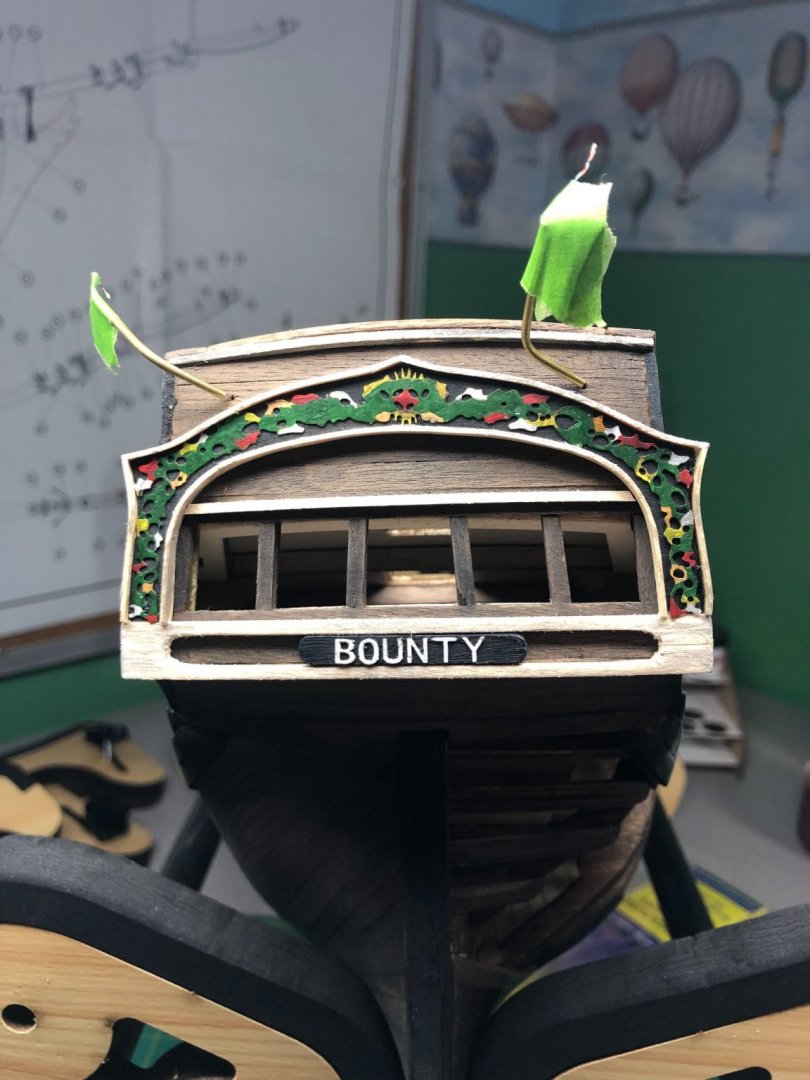
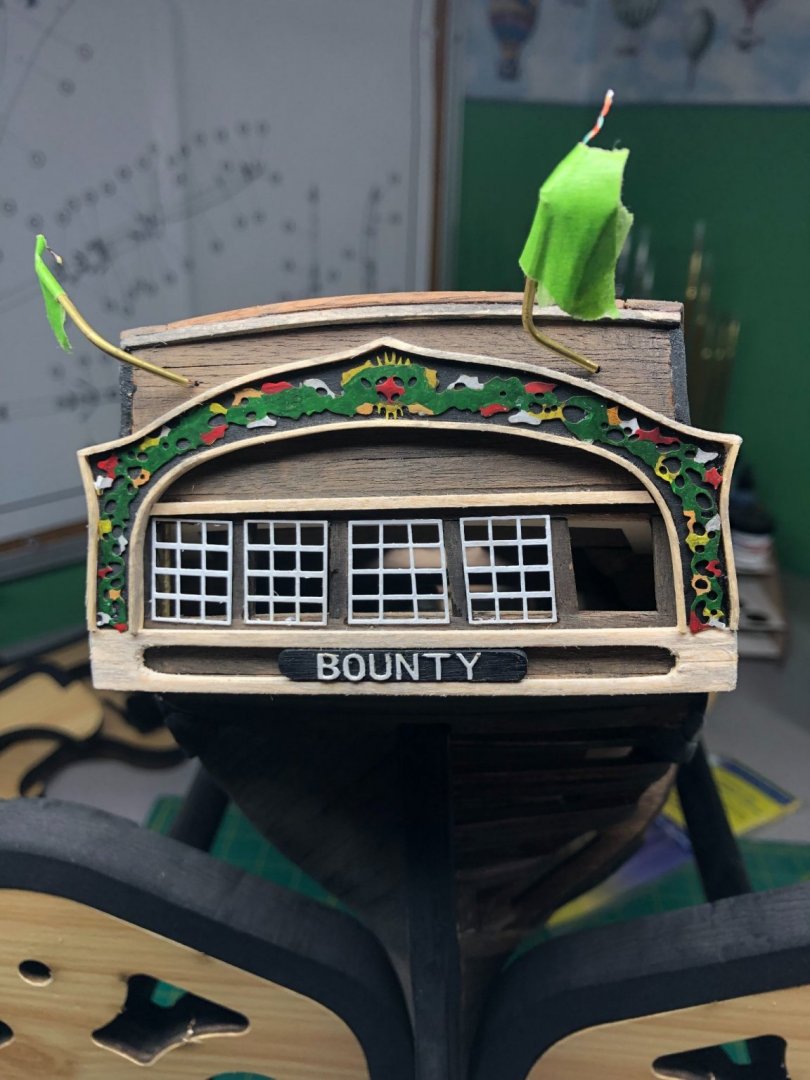
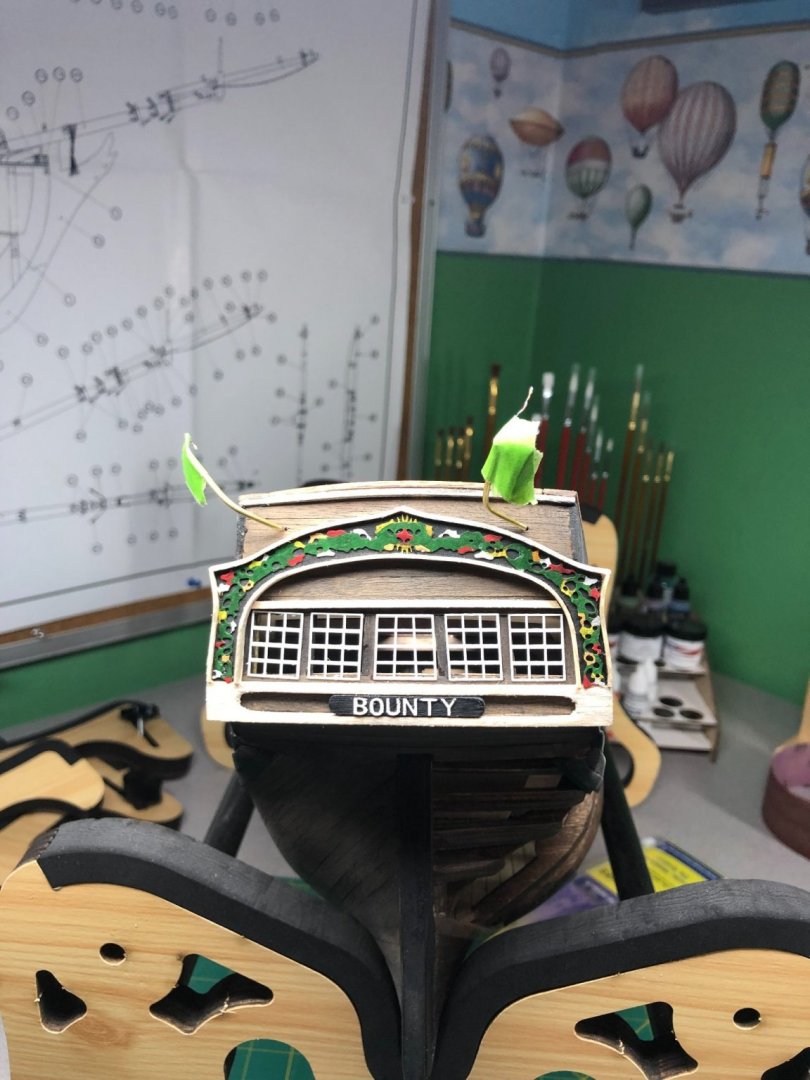
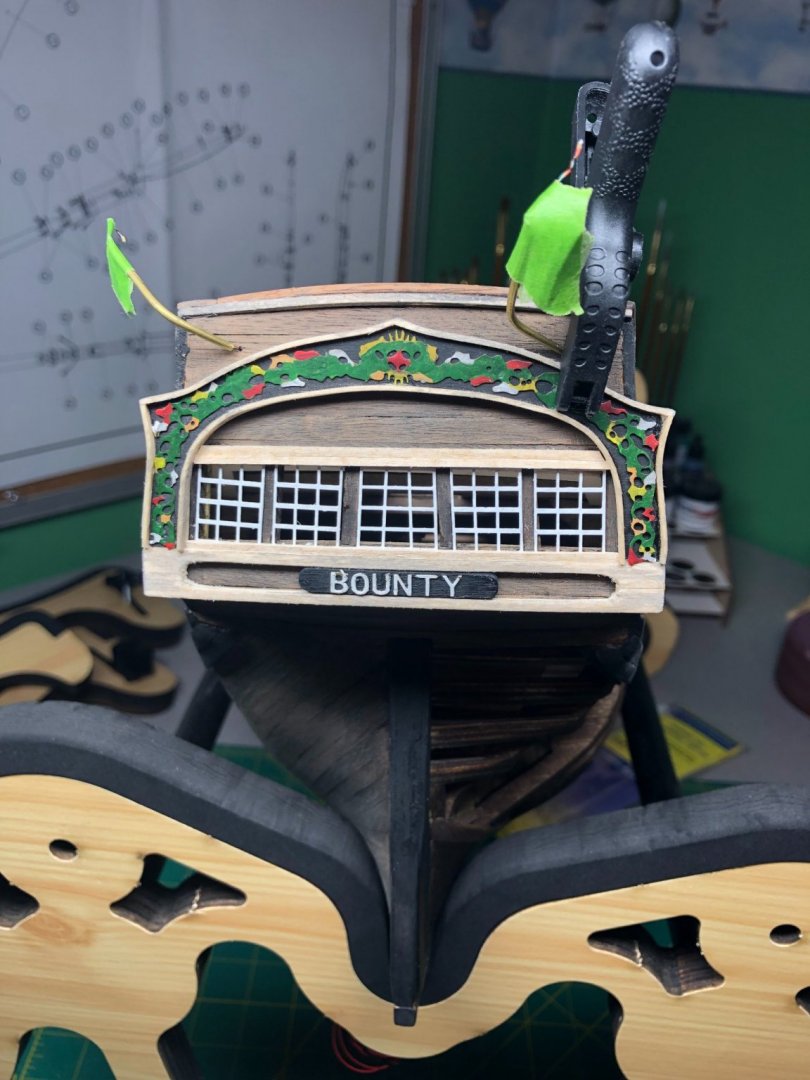
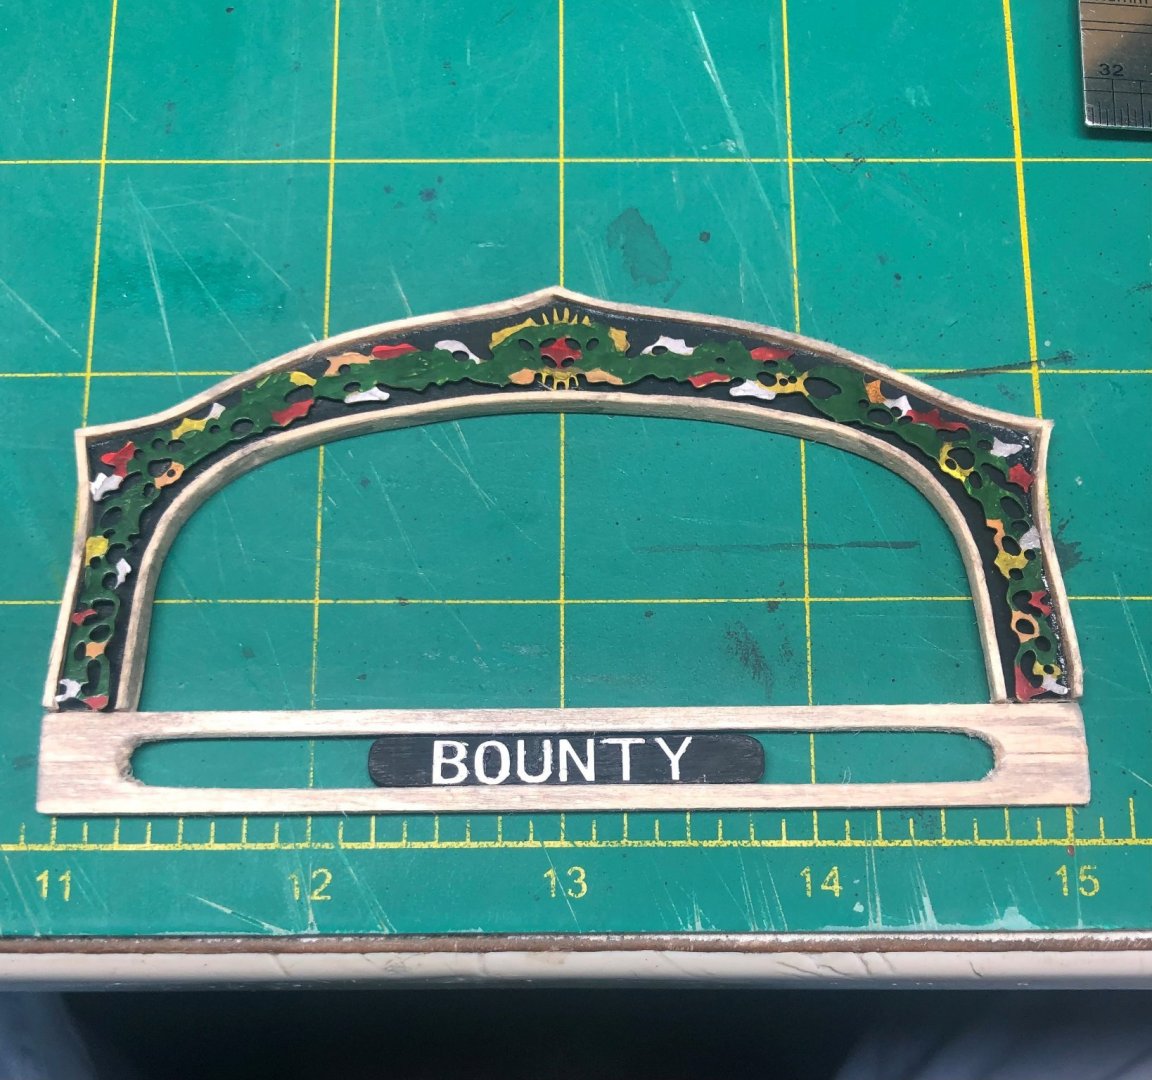
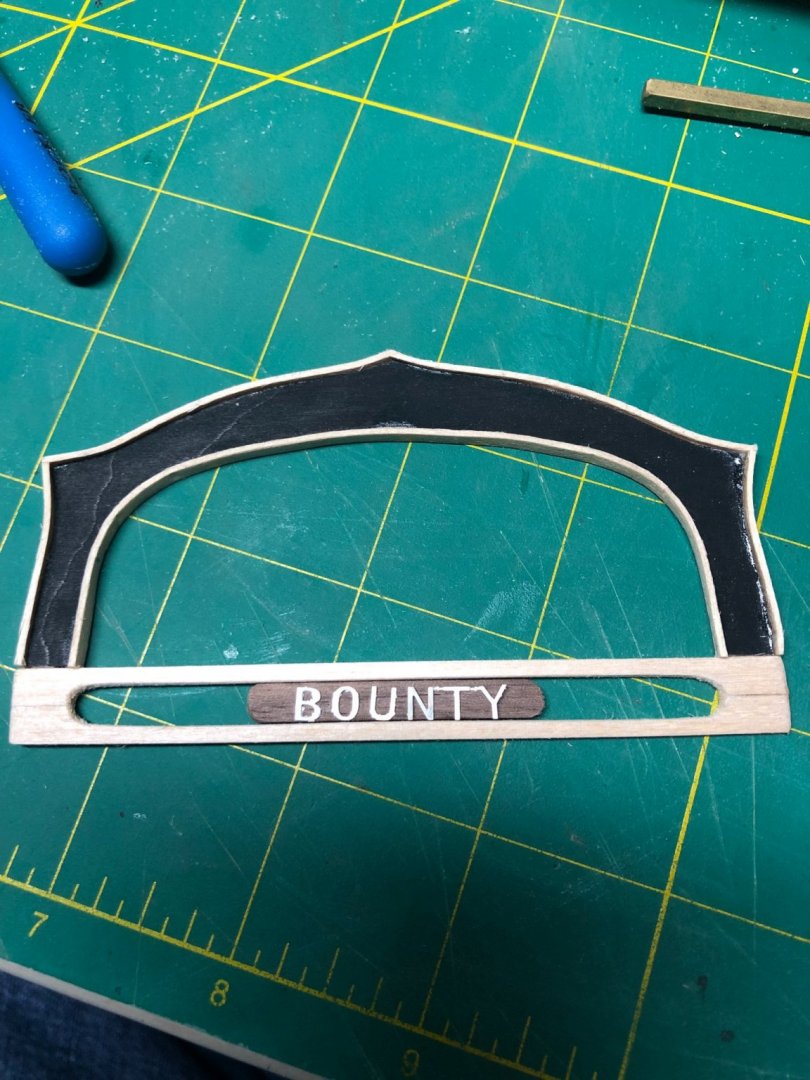
I still haven't taken that hull picture... guess I'll wait until I finish the port side too! Stern decoration work... I went looking for some direction on what was on the original Bounty. Best place to look? An Anatomy of a Ship: The transport Bounty... An excellent reference for many things on and in the Bounty but... not the stern decoration! The author clearly states that he took some liberties because there are no known accounts of the stern work. So, artistic freedoms were the theme for me as well: Assembled but before aging: And after aging: And gluing in to place... this was tough to get perfectly lined up AND get the clamps on to match the stern curvature: Nameplate and decoration in place: Again, using various sources (pictures of paintings, this time), I decided to paint the window frames white and installed them using a very thin tip to apply CA glue: I am installing some lighter window frames to again, match the color scheme in the painting. Still have the vertical pieces to do: I'll finish this up over the next day or two and move on to the bow for some preliminary work! Probably will get some linseed oil on the port side and stern too.


-
If only we could "butcher" our builds as well as you! Another beautiful job, Tim!
- 79 replies
-
- 1
-
-
- Fifie
- Victory Models
- (and 1 more)
-
I had no idea that it made a difference on the gratings! Thanks for the info! As to the lettering... I don't have a steady enough hand to do those letters with a brush! The letters shown were actually from the kit and made of brass, I painted them white... I suspect I won't find anything better or easier to apply. Appreciate the information, Allan. Merry Christmas to you!
-
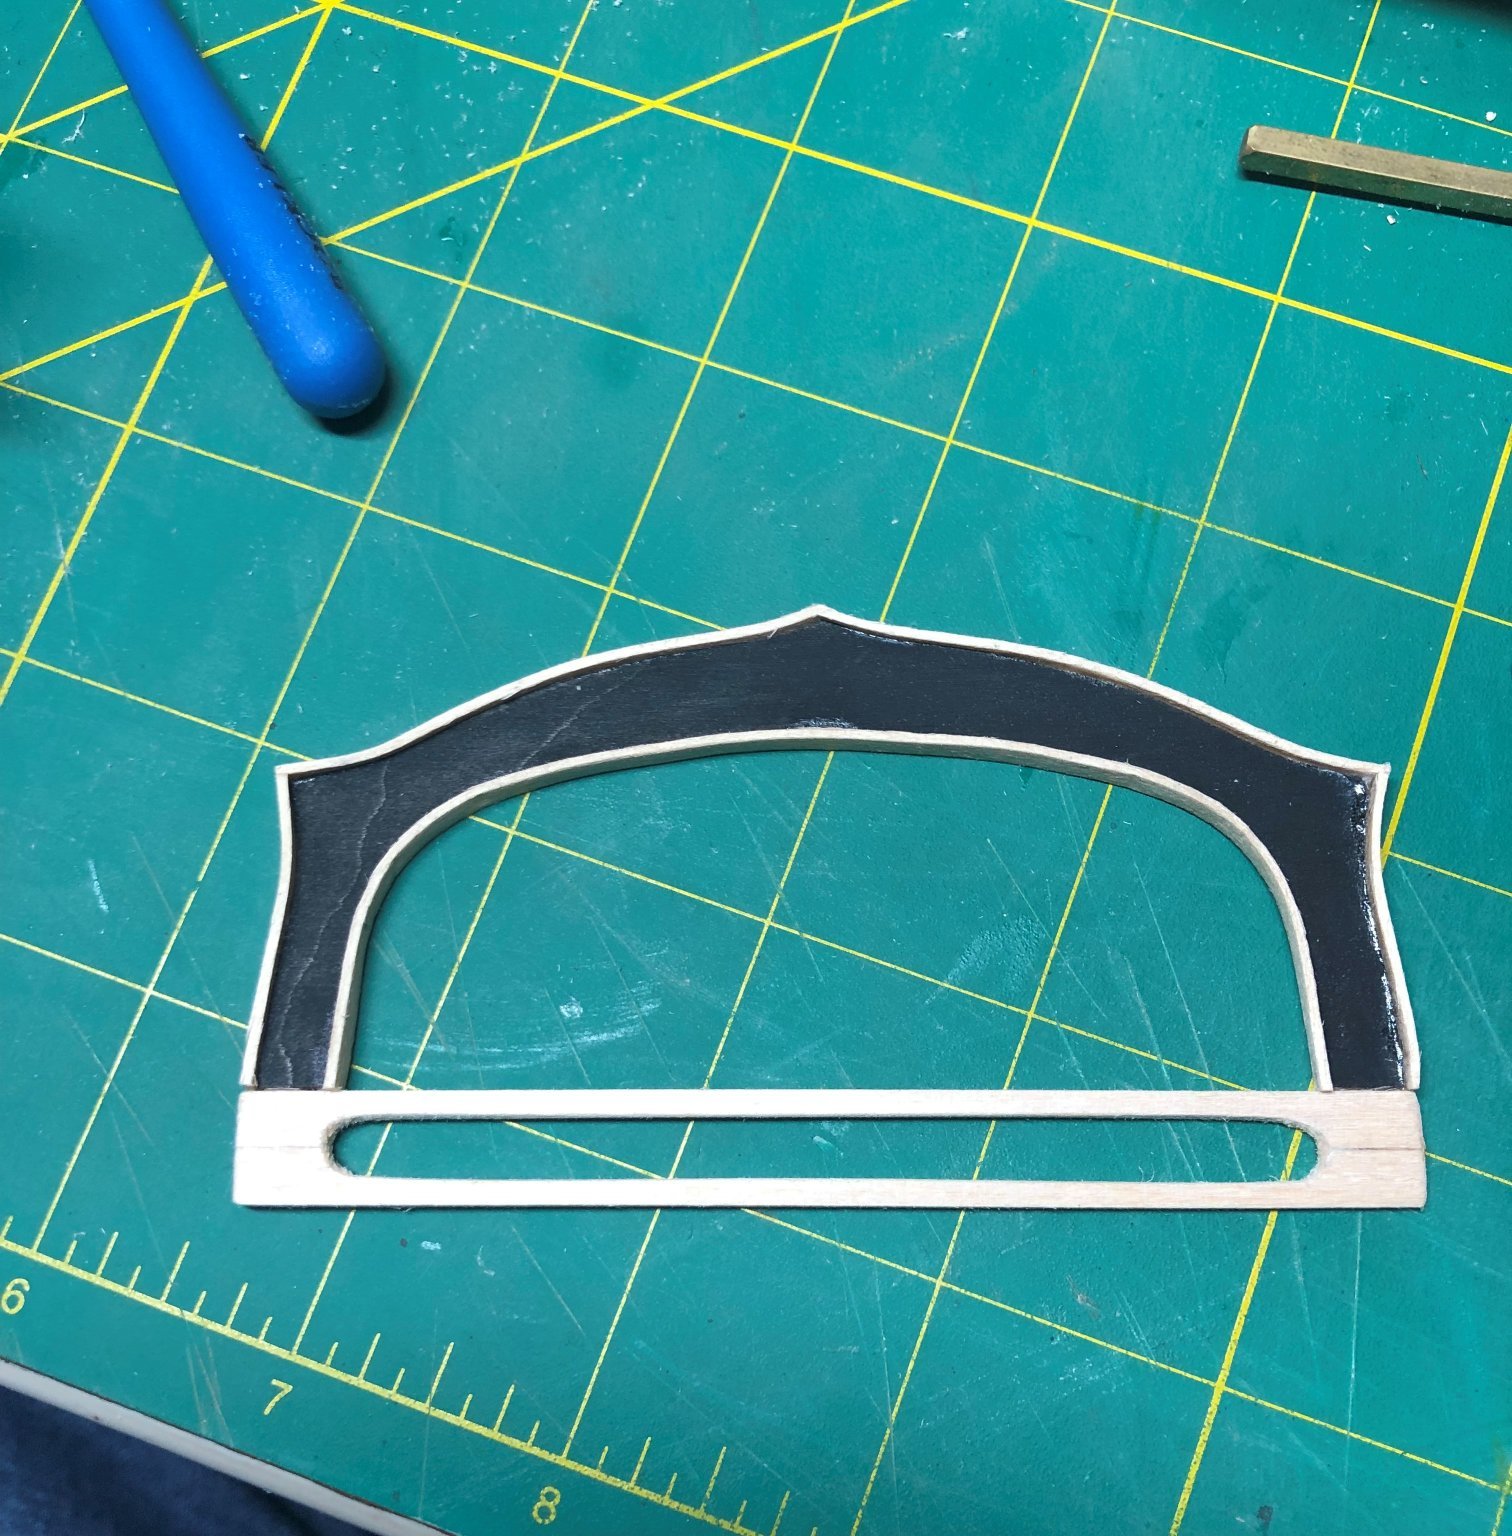
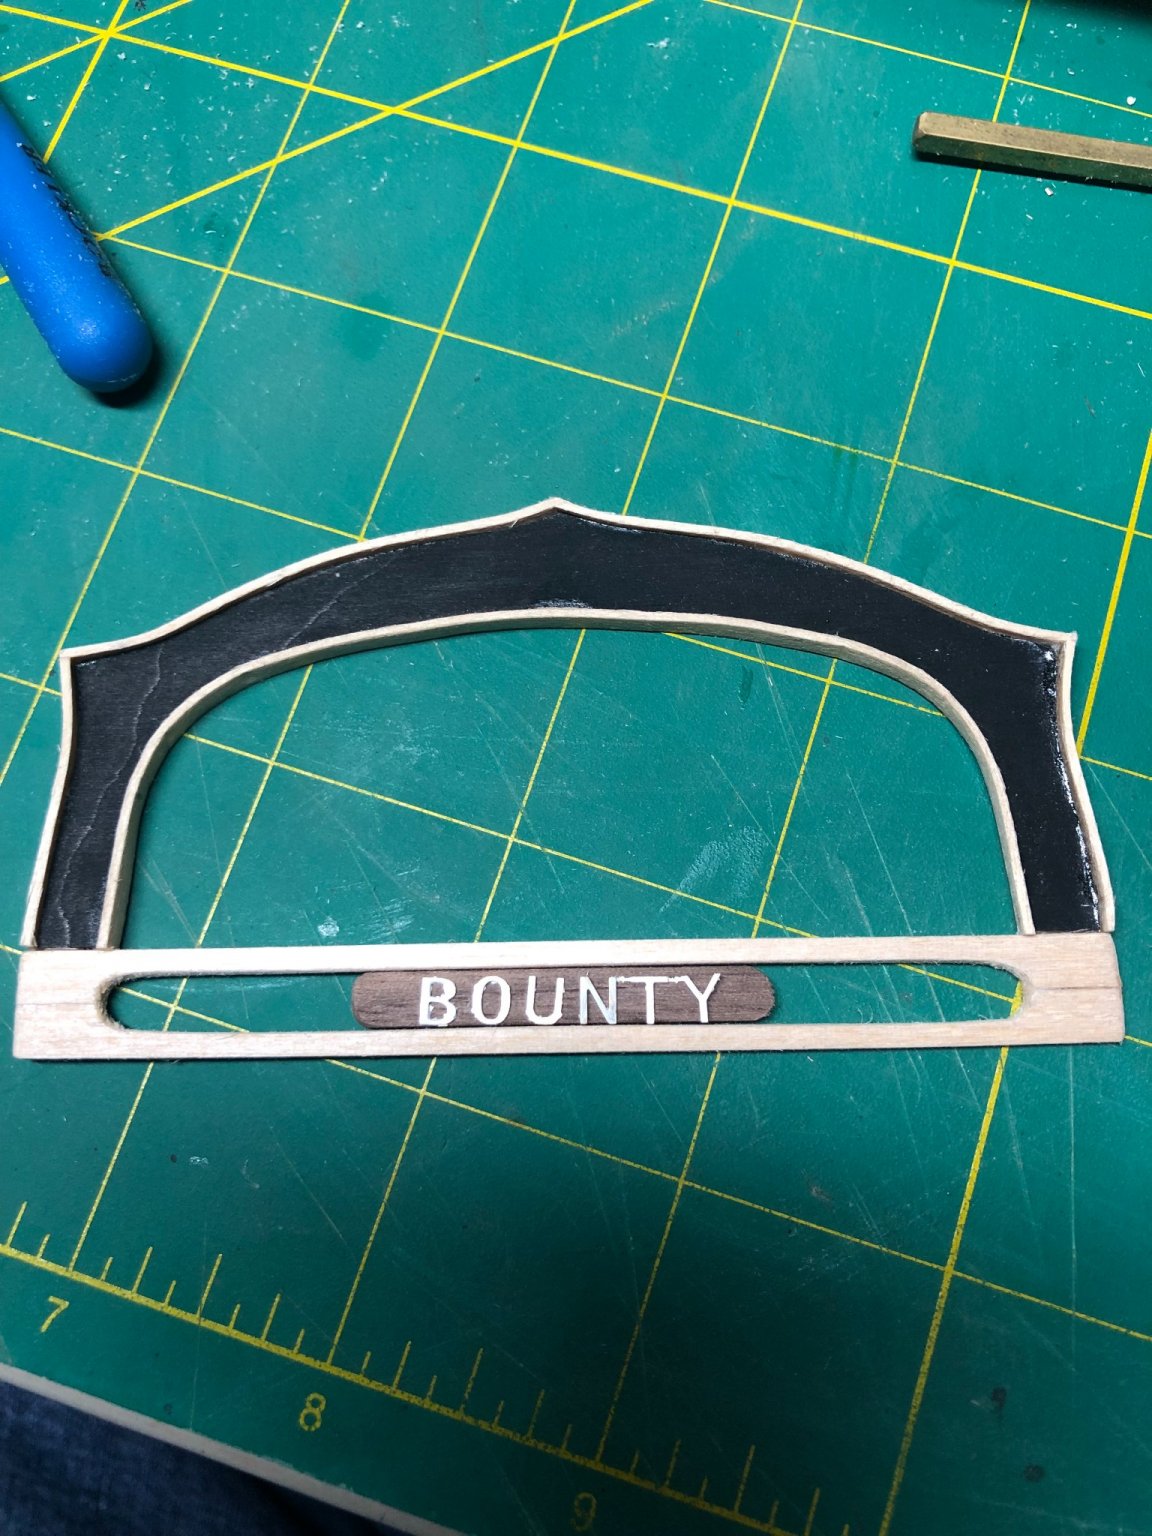
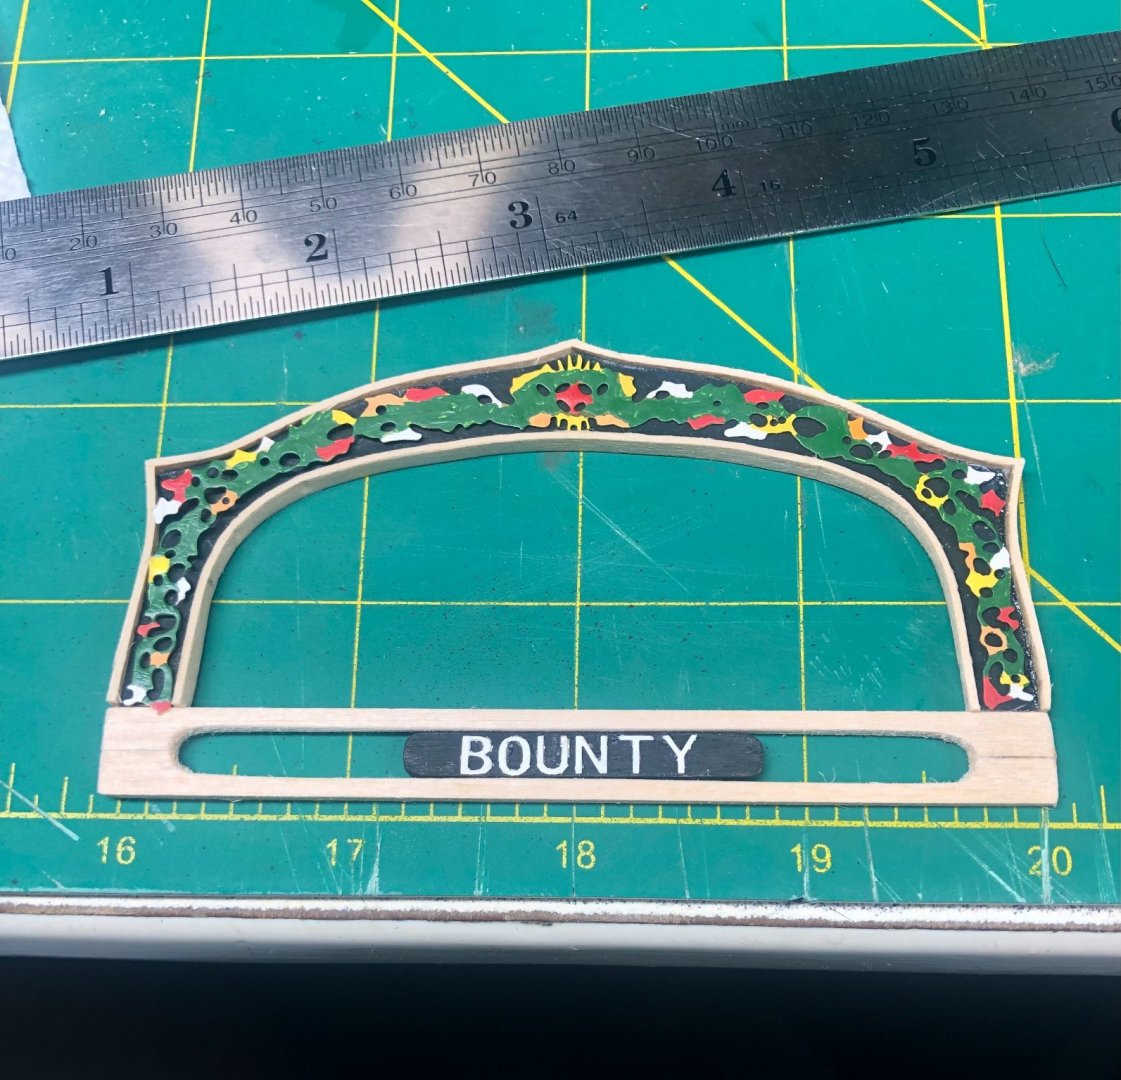
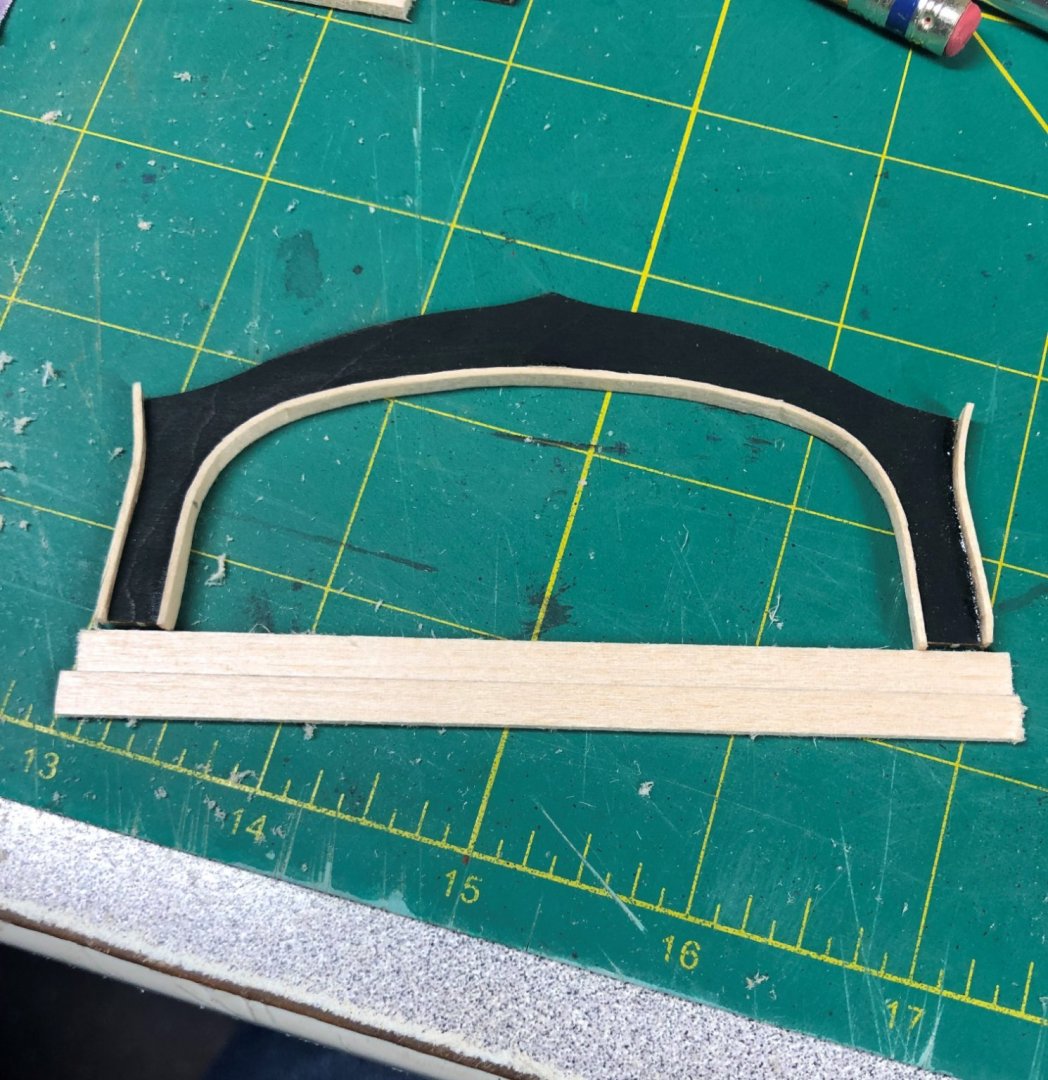
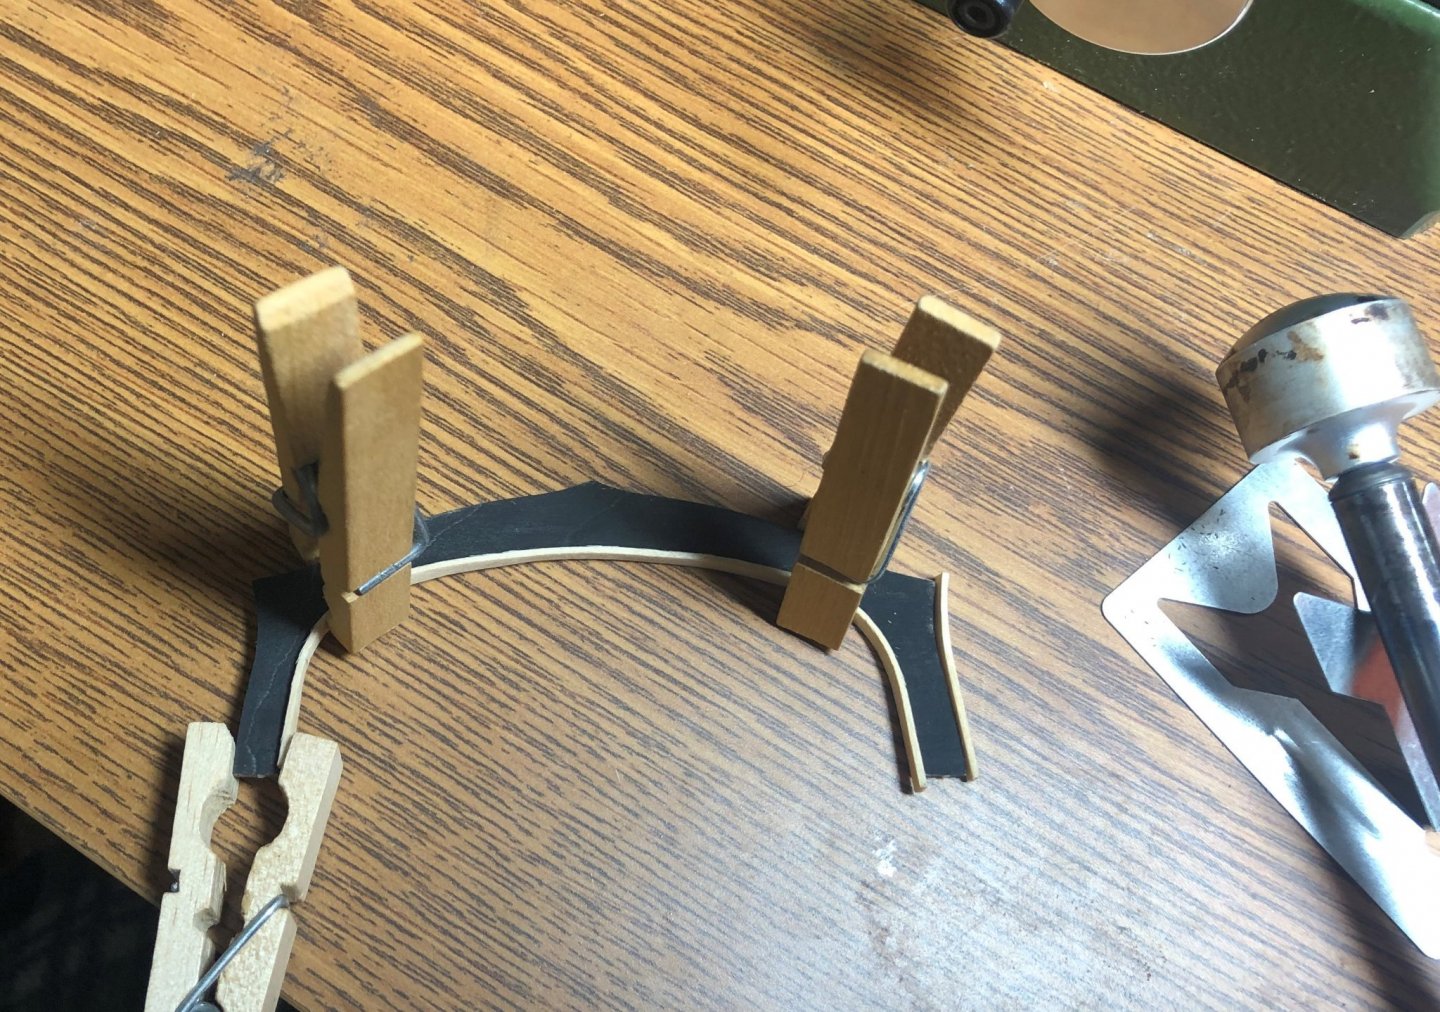
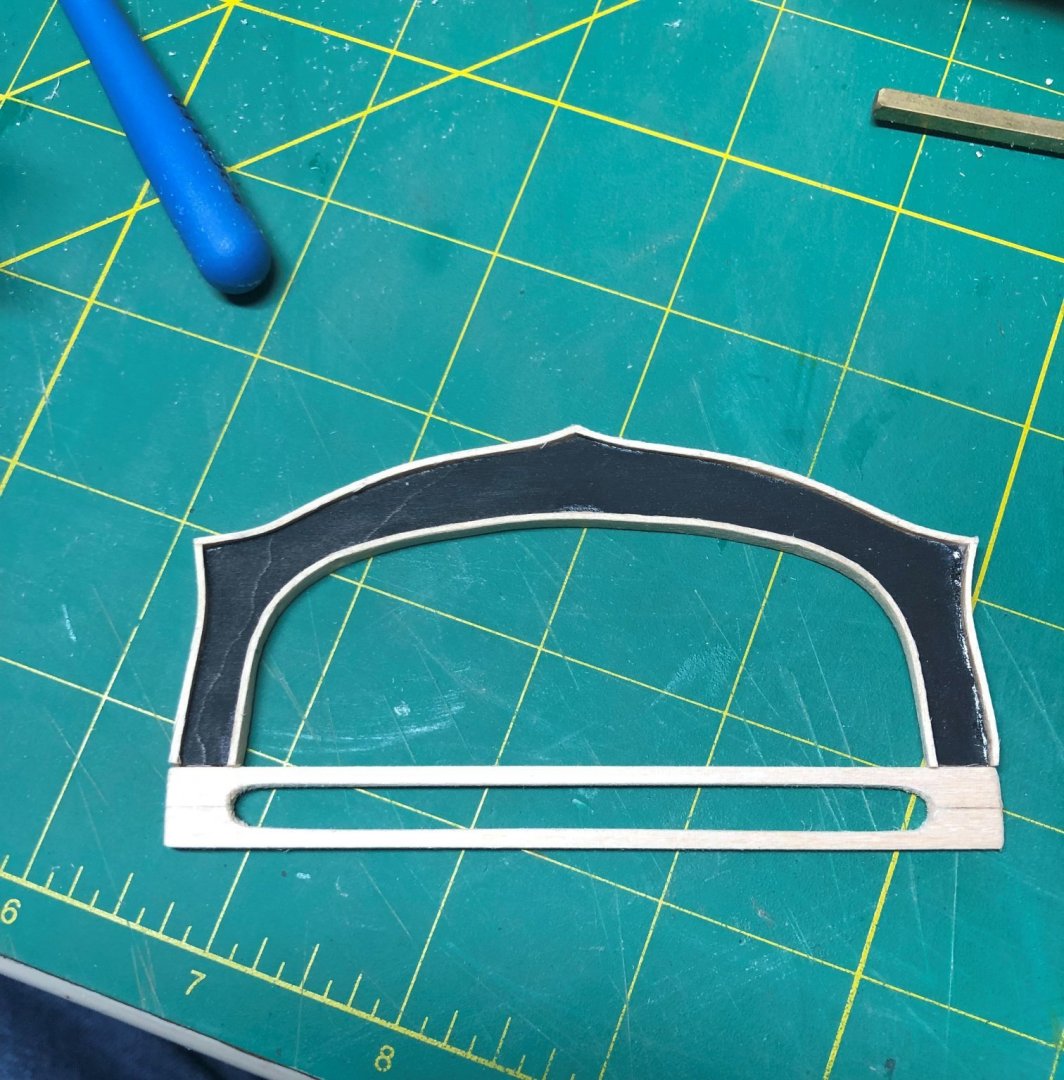
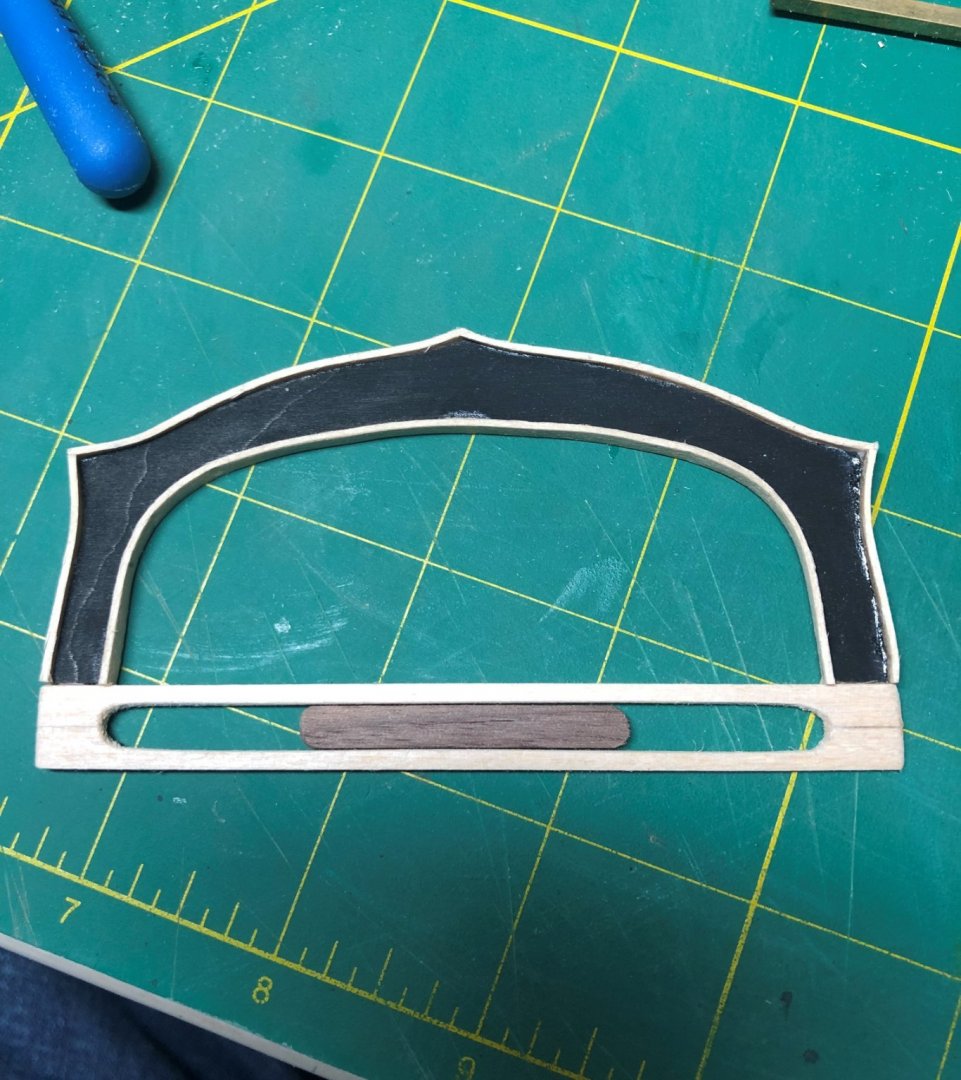
Forgot to take a few pictures of the starboard hull... will get them in next time. But I buffed the first coat out with 000 steel wool to cut the shine down and then added a second coat of linseed oil, waited for it to dry and buffed it again with the steel wool. So, onto the stern decorations and vessel name. Getting these little pieces bent and glued together was a bigger task than I expected: Decided to change from the model directions and take 2 - 5mm X 2mm basswood, gluing them together and using my mill, cut out the area for the vessel nameplate: Glued them to the decorative ring (above) The nameplate will be painted black before placement but you get the idea: And after painting, the name will be attached... not sure how yet. The letters are really small... putting them on will require some movement to ensure they are straight and spaced evenly, unlike below: Letters need a little cleaning up too. The decorative ring needs to be painted before installation. Coming soon!
-
Really good info... And I wasn't even looking for this... yet!
-
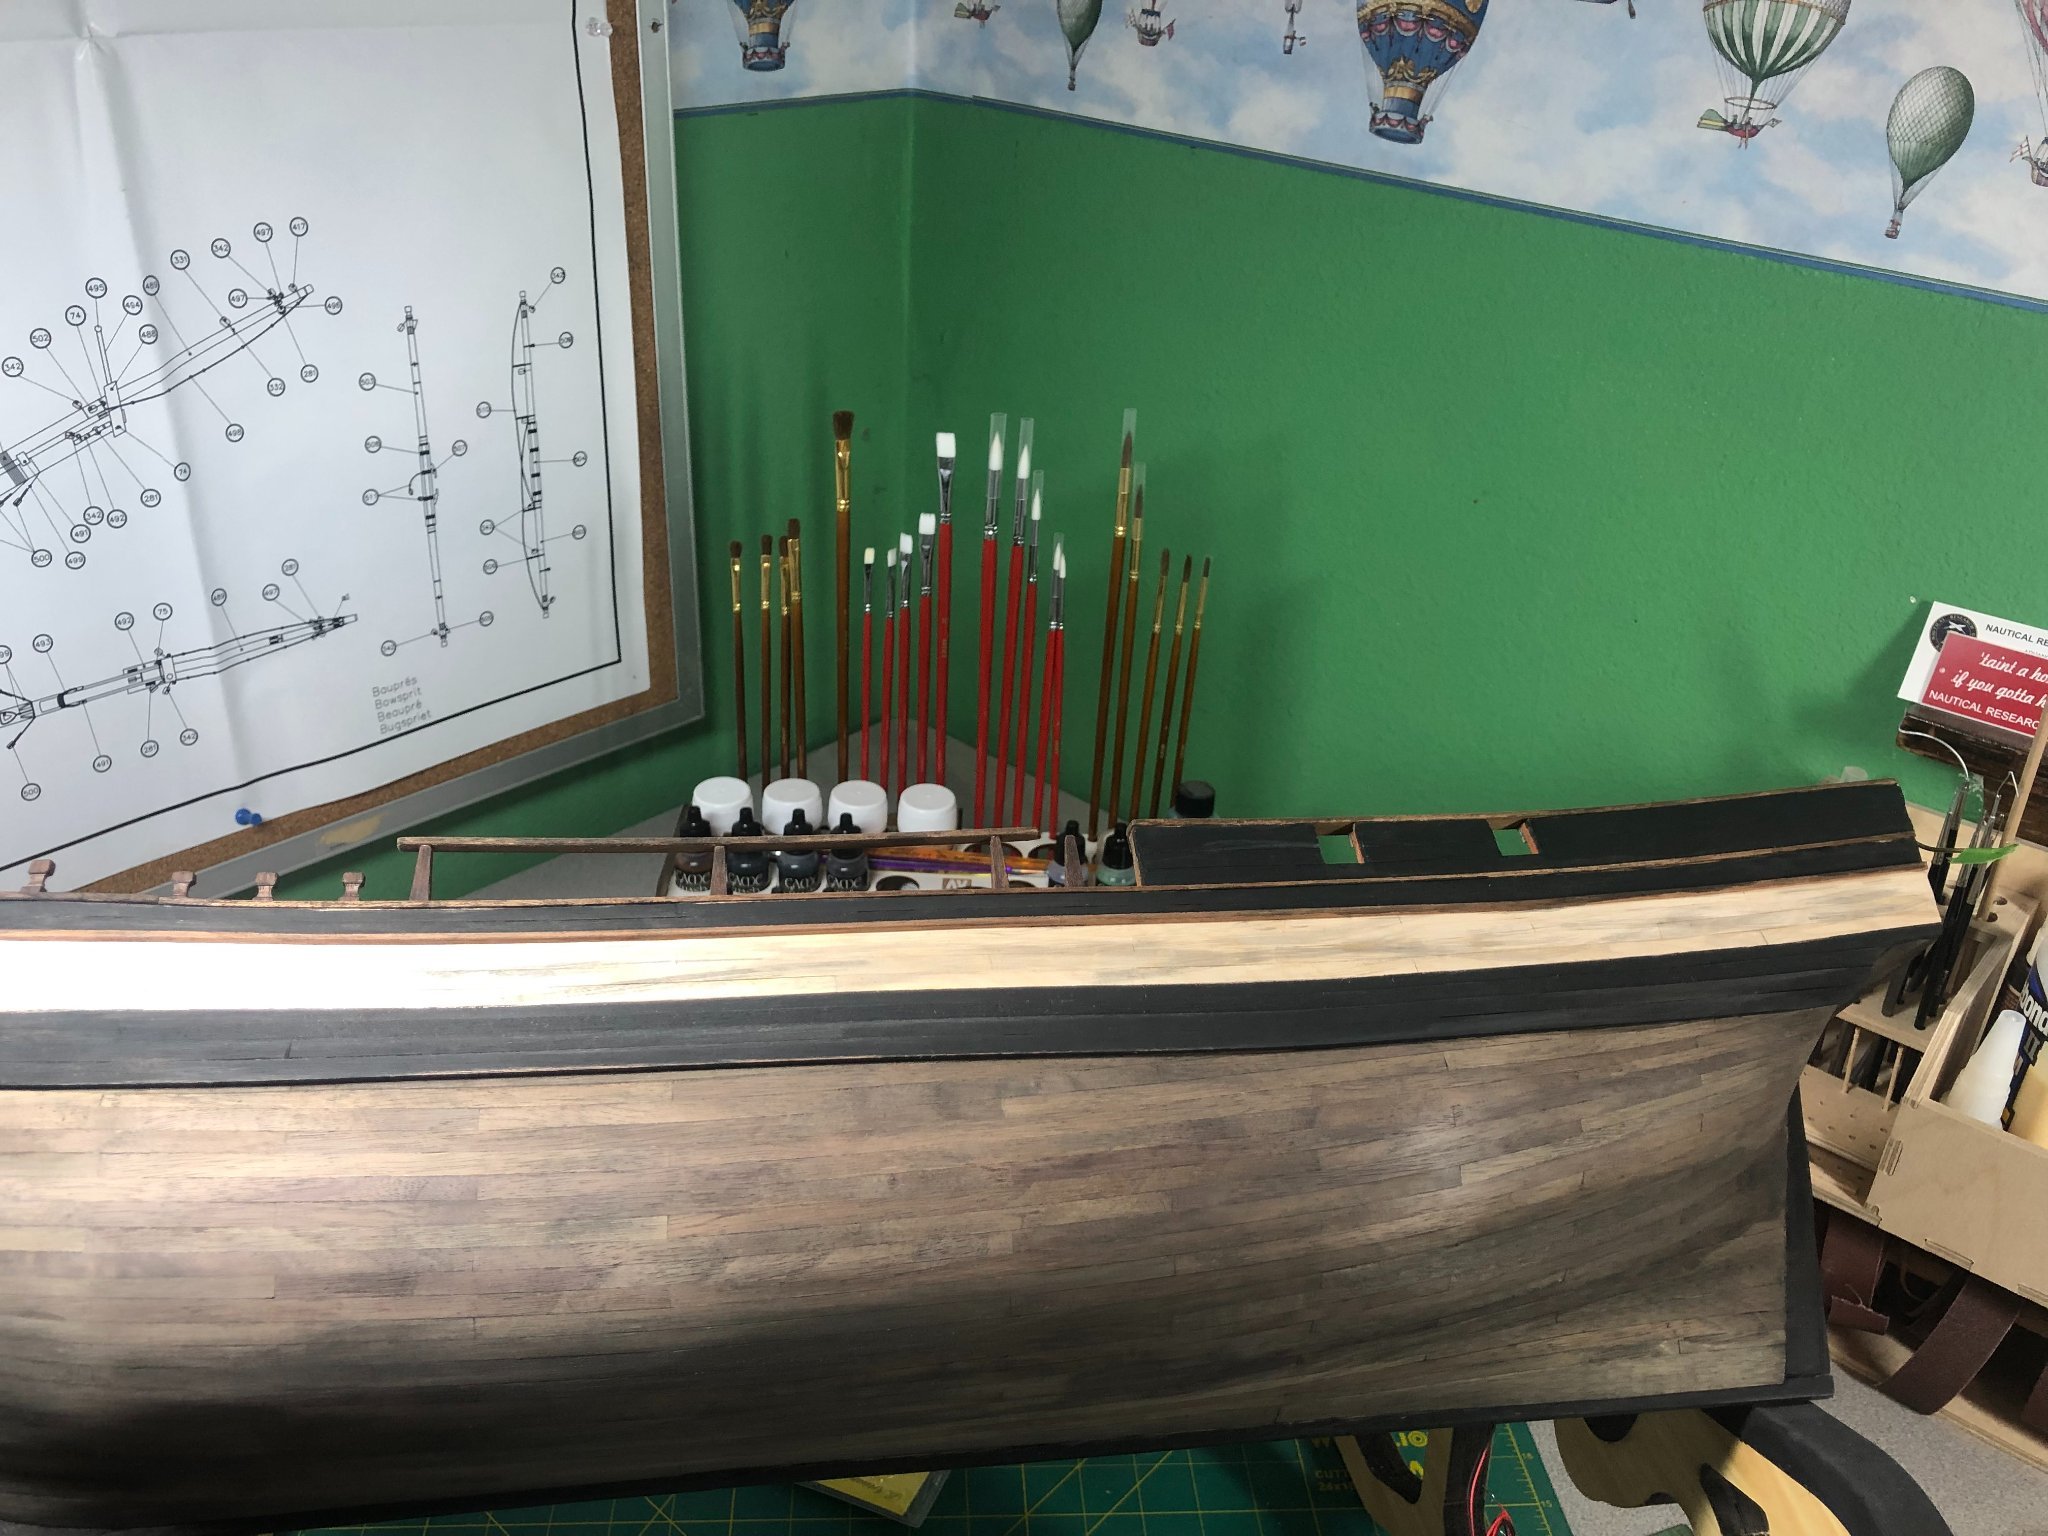
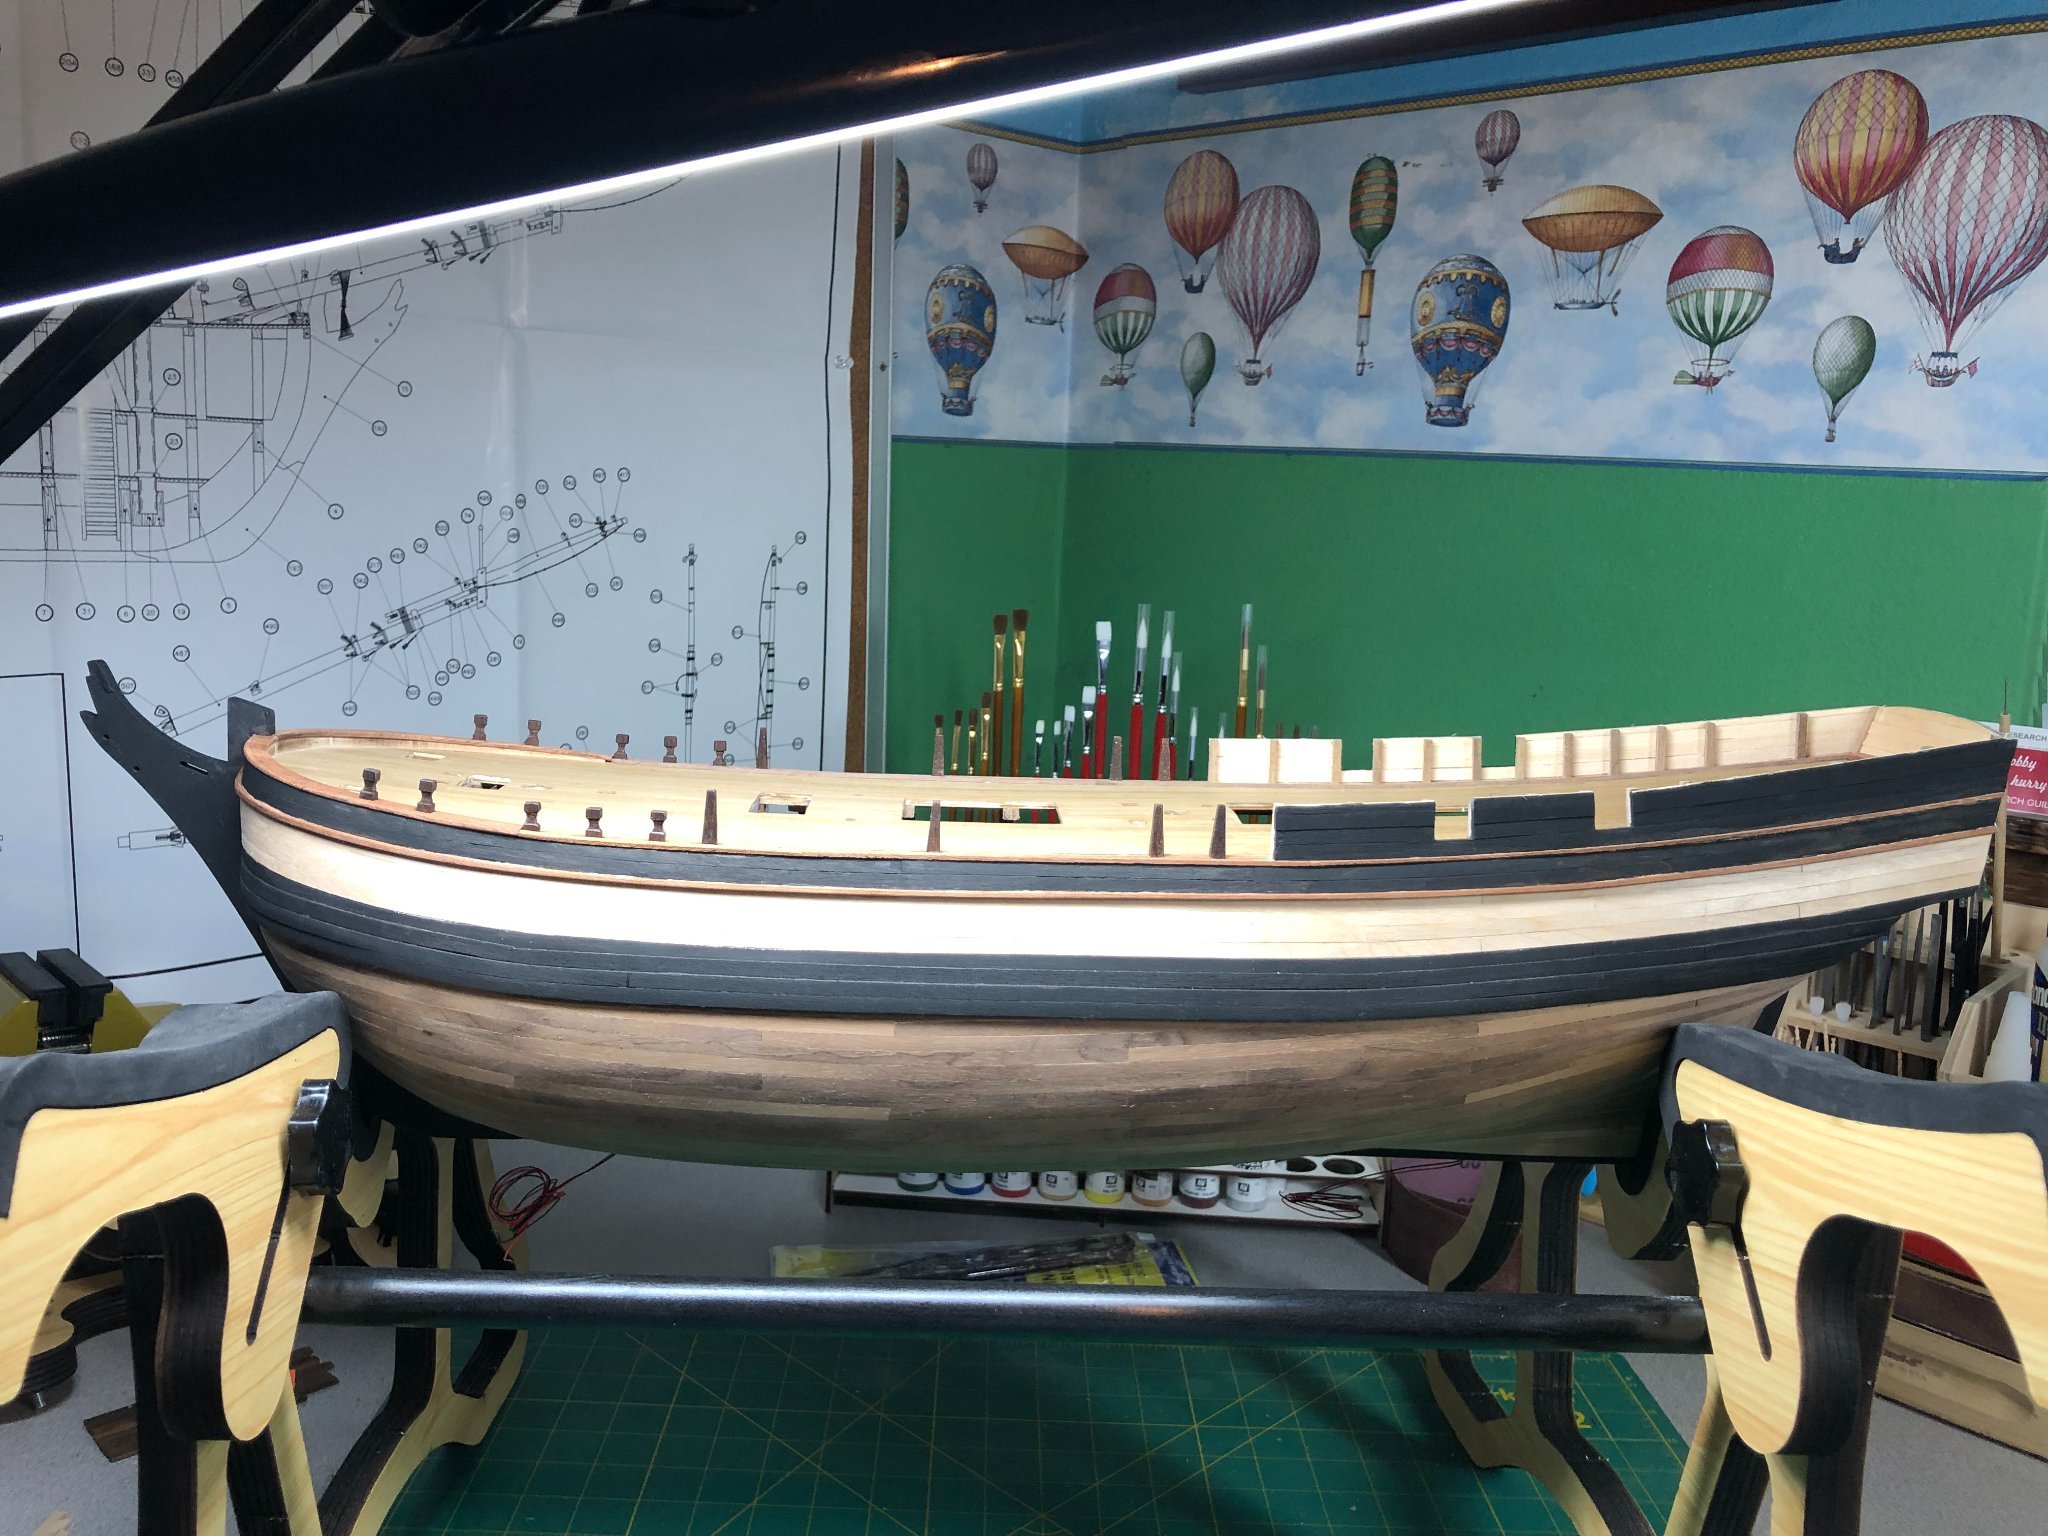
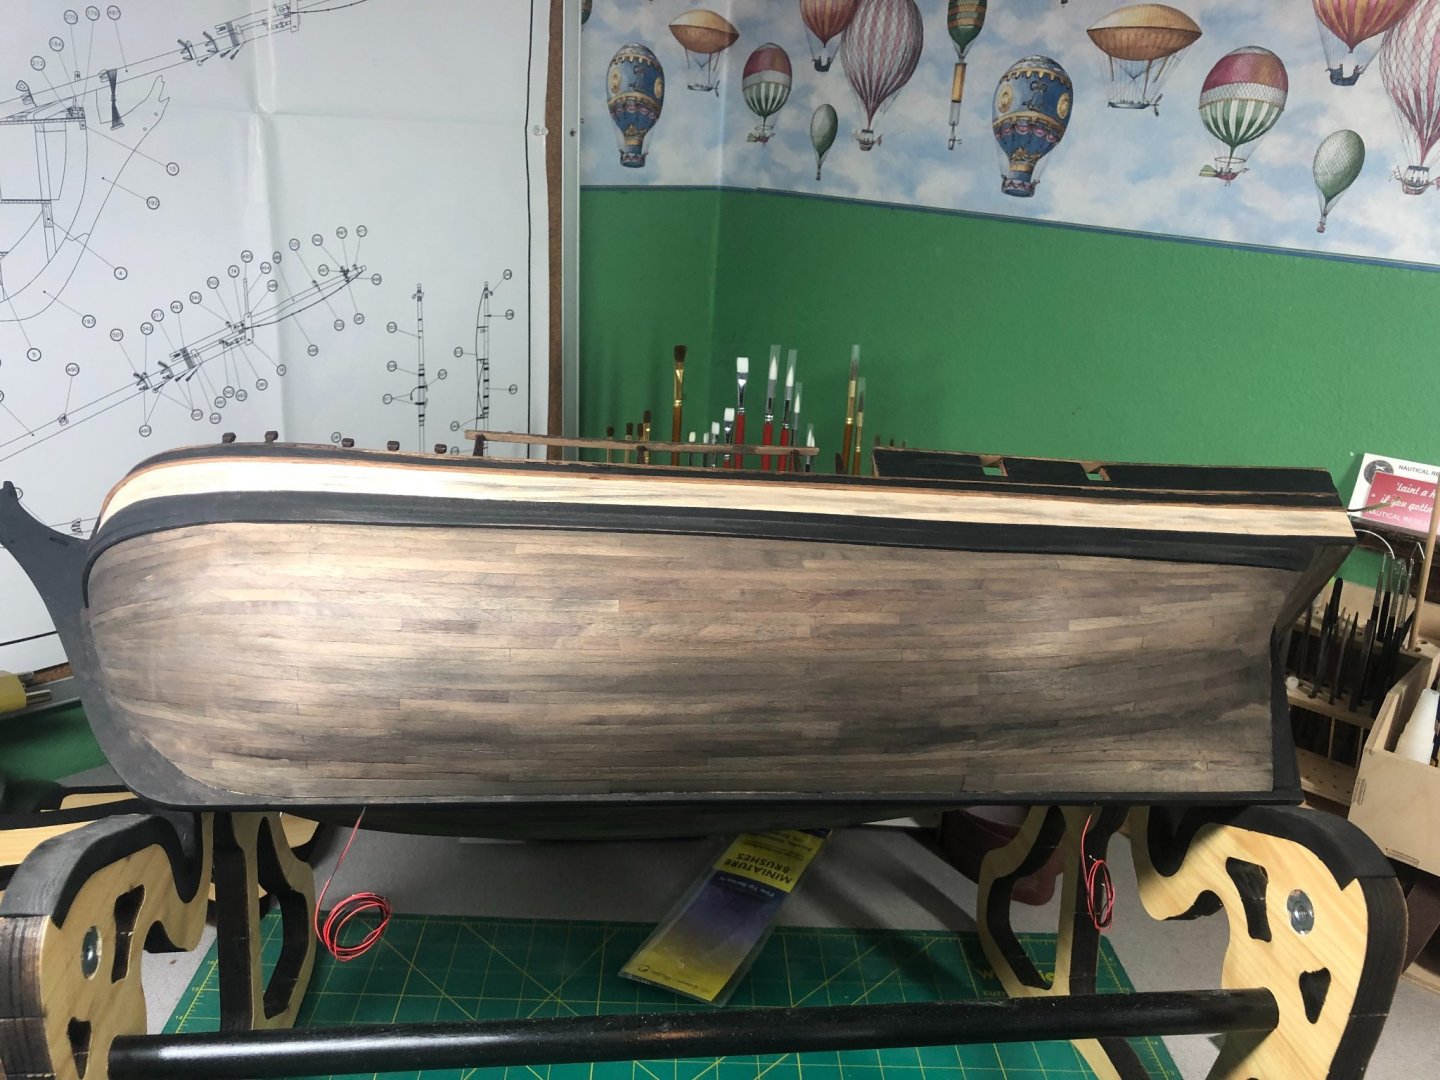
Decided to do some hull aging. As per my earlier formula, I used black wash, sanding, vinegar and boiled linseed oil. Before the wash: After the wash: After wash and vinegar: After one coat of linseed oil: More coats to come... Gotta be a bit careful where I apply the oil because that are still some pieces to be glued and glue doesn't work so good on linseed oil! Also, may need to use some steel wool to cut the shine... will wait until it is 100% dry to decide.


-
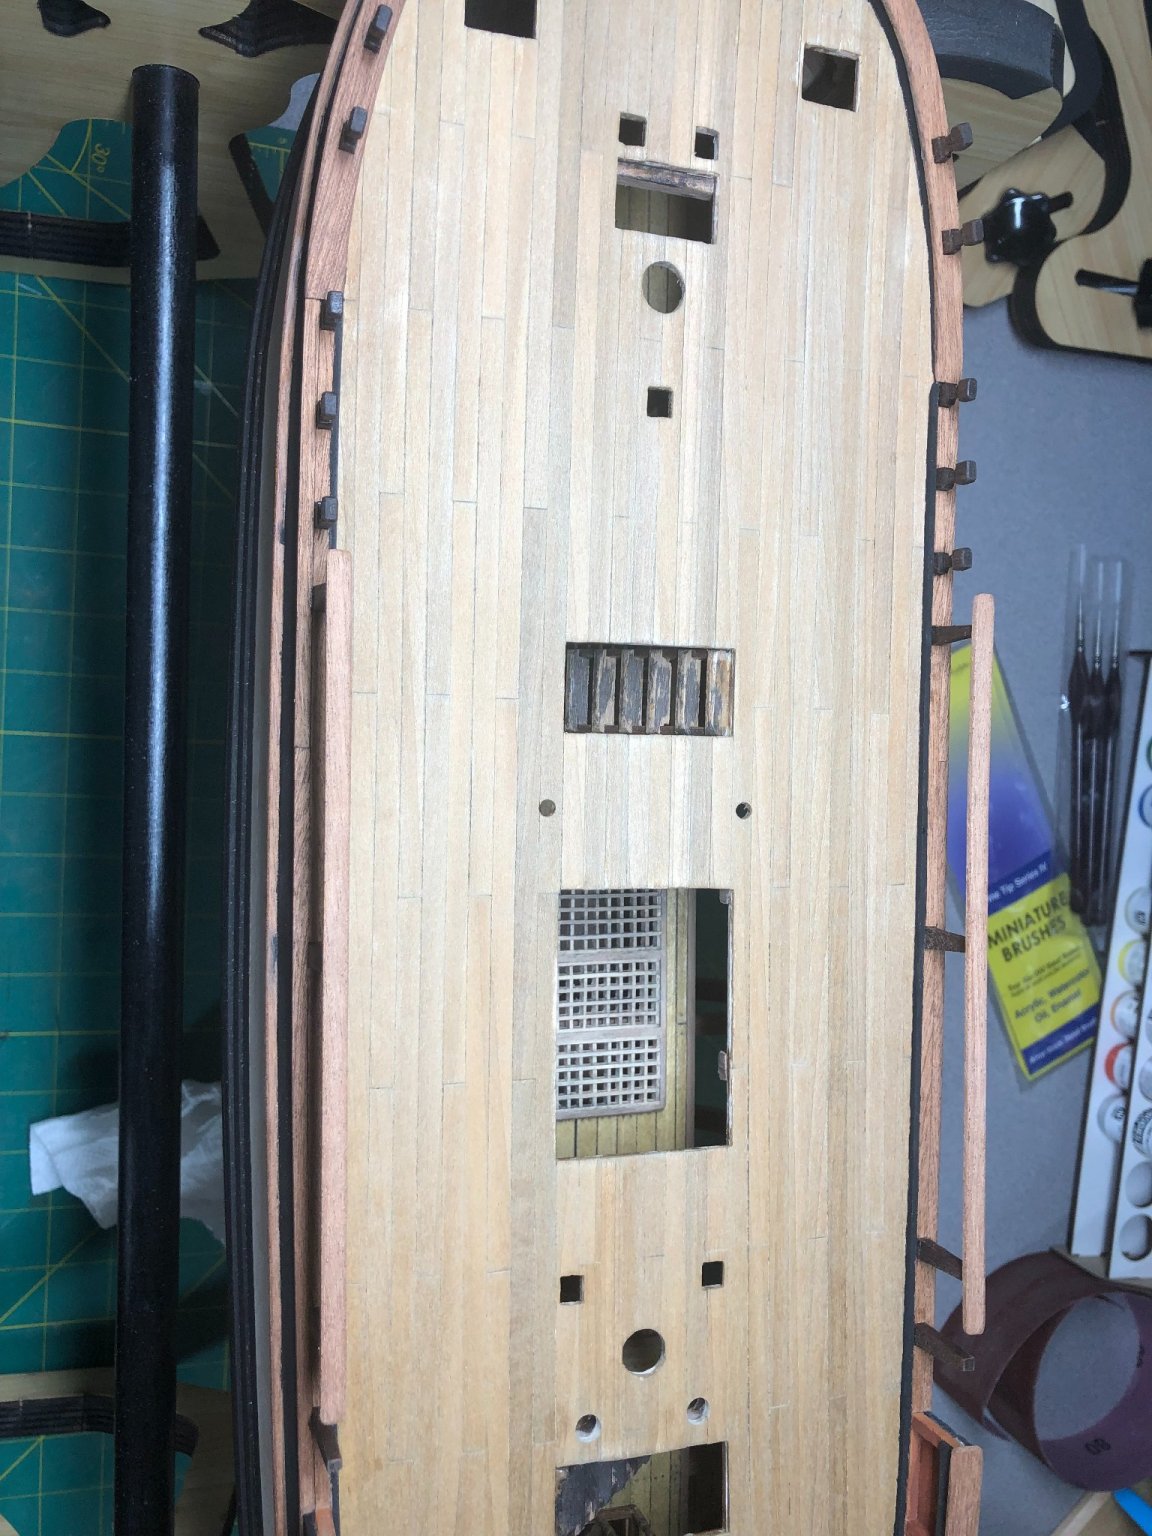
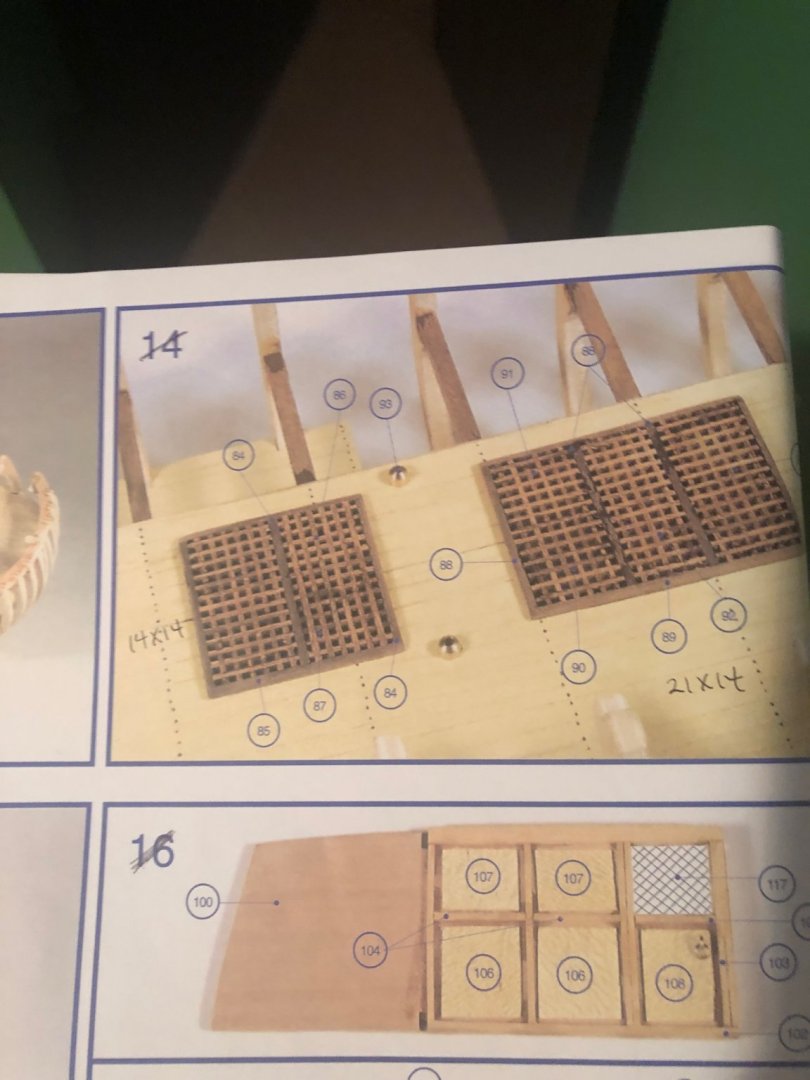
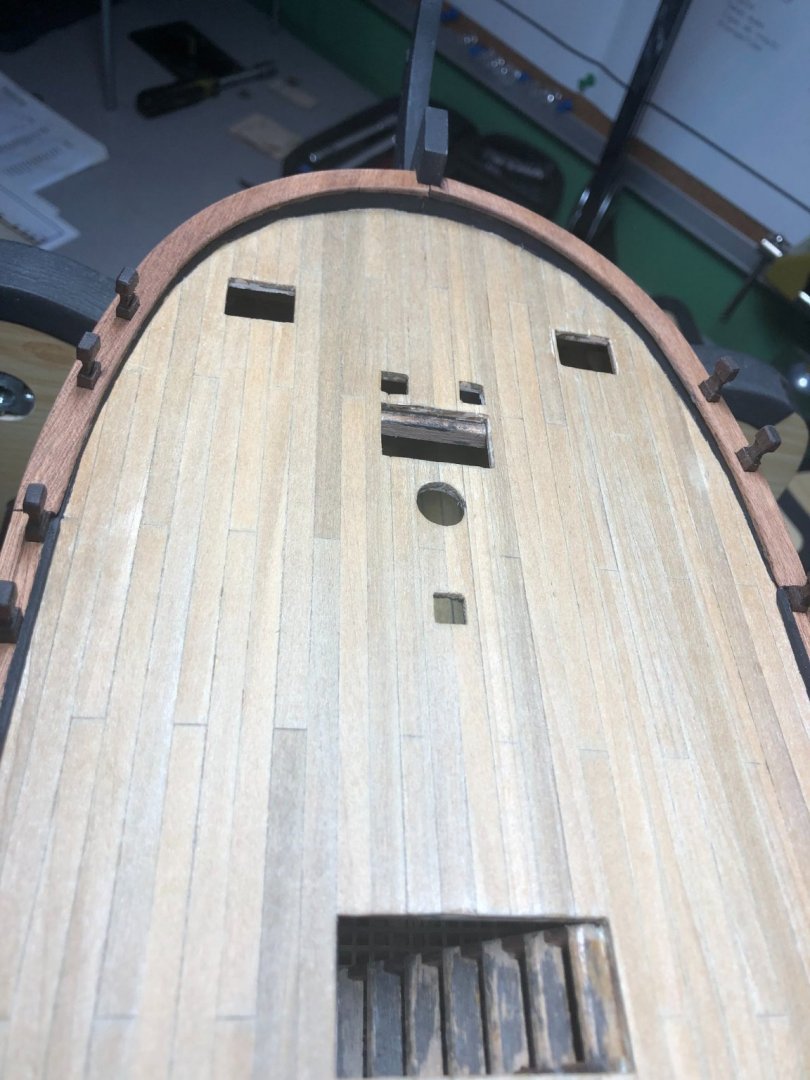
Hi Allan, I appreciate the comments and you stopping to check out the log! Can you elaborate on the grates? I’m not sure I understand what I did wrong and want to be sure I get it right! These are from the kit: Please explain!! I do have the plans you attached too. I’ll pull them up later today. I took a quick look from your link but didn’t see a lot of details for the grates… but I am using my phone as I’m away from the house right now. Its probably too late fix the lower deck grates but I do want to know exactly what I did wrong and learn from it! Thanks!
-
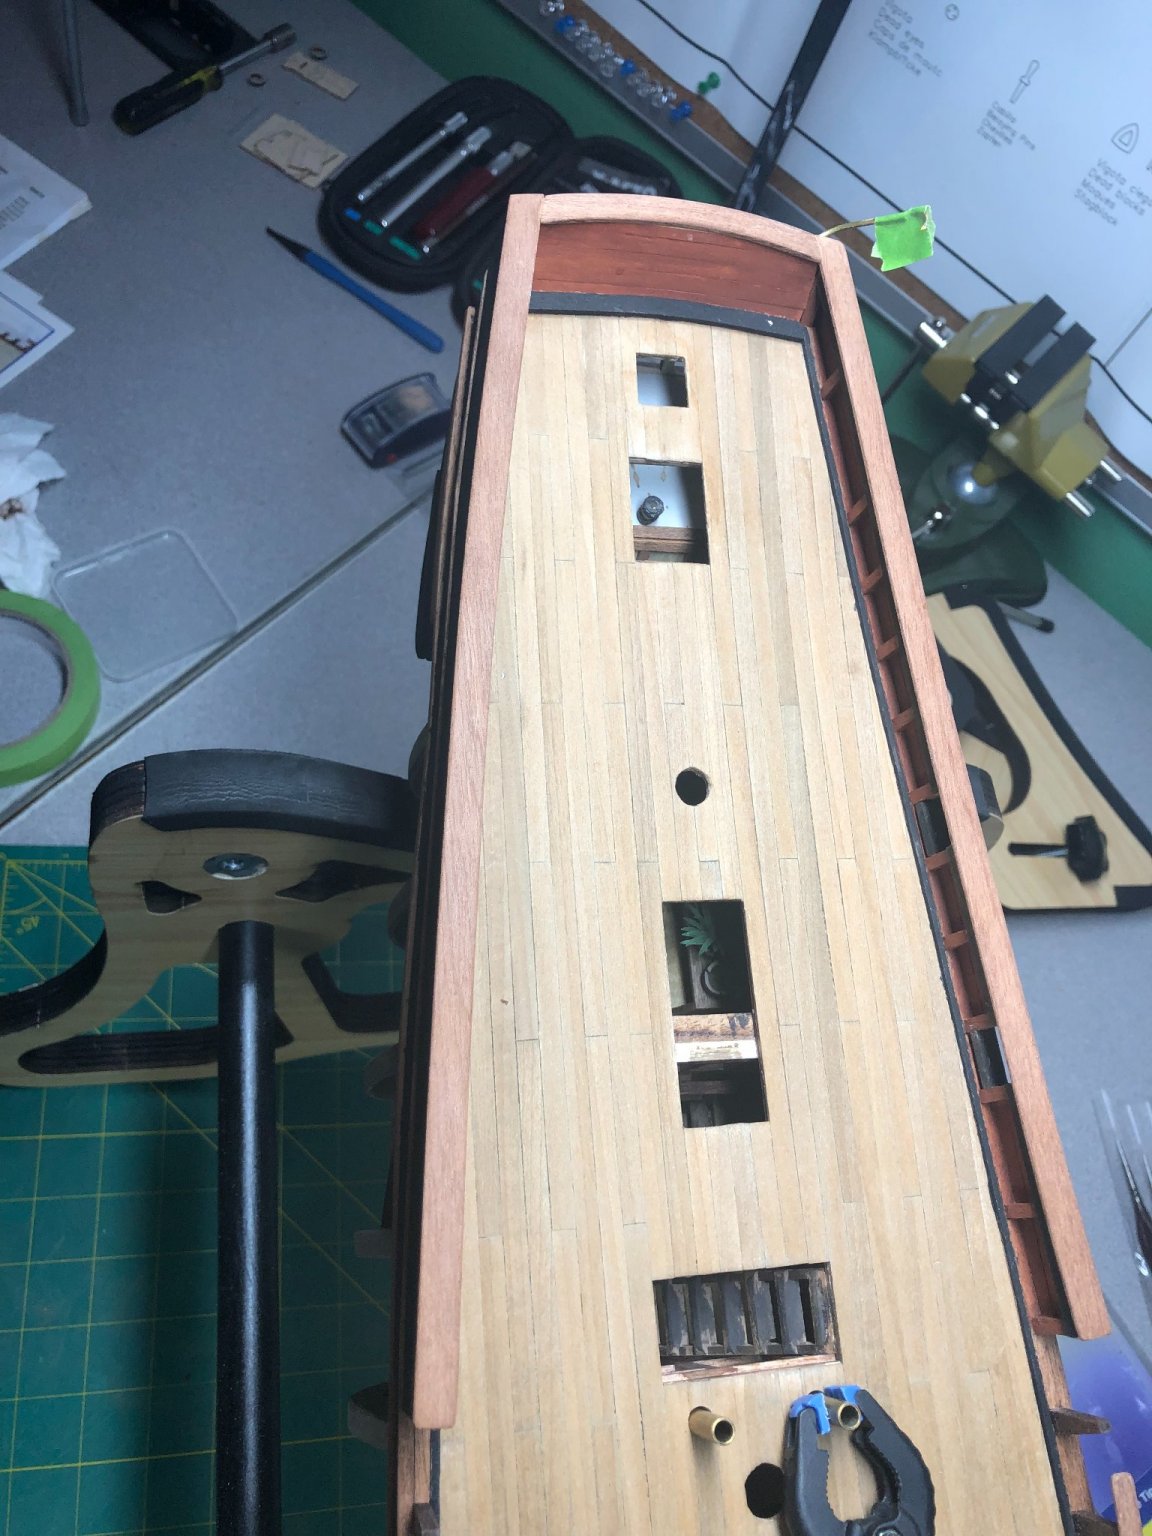
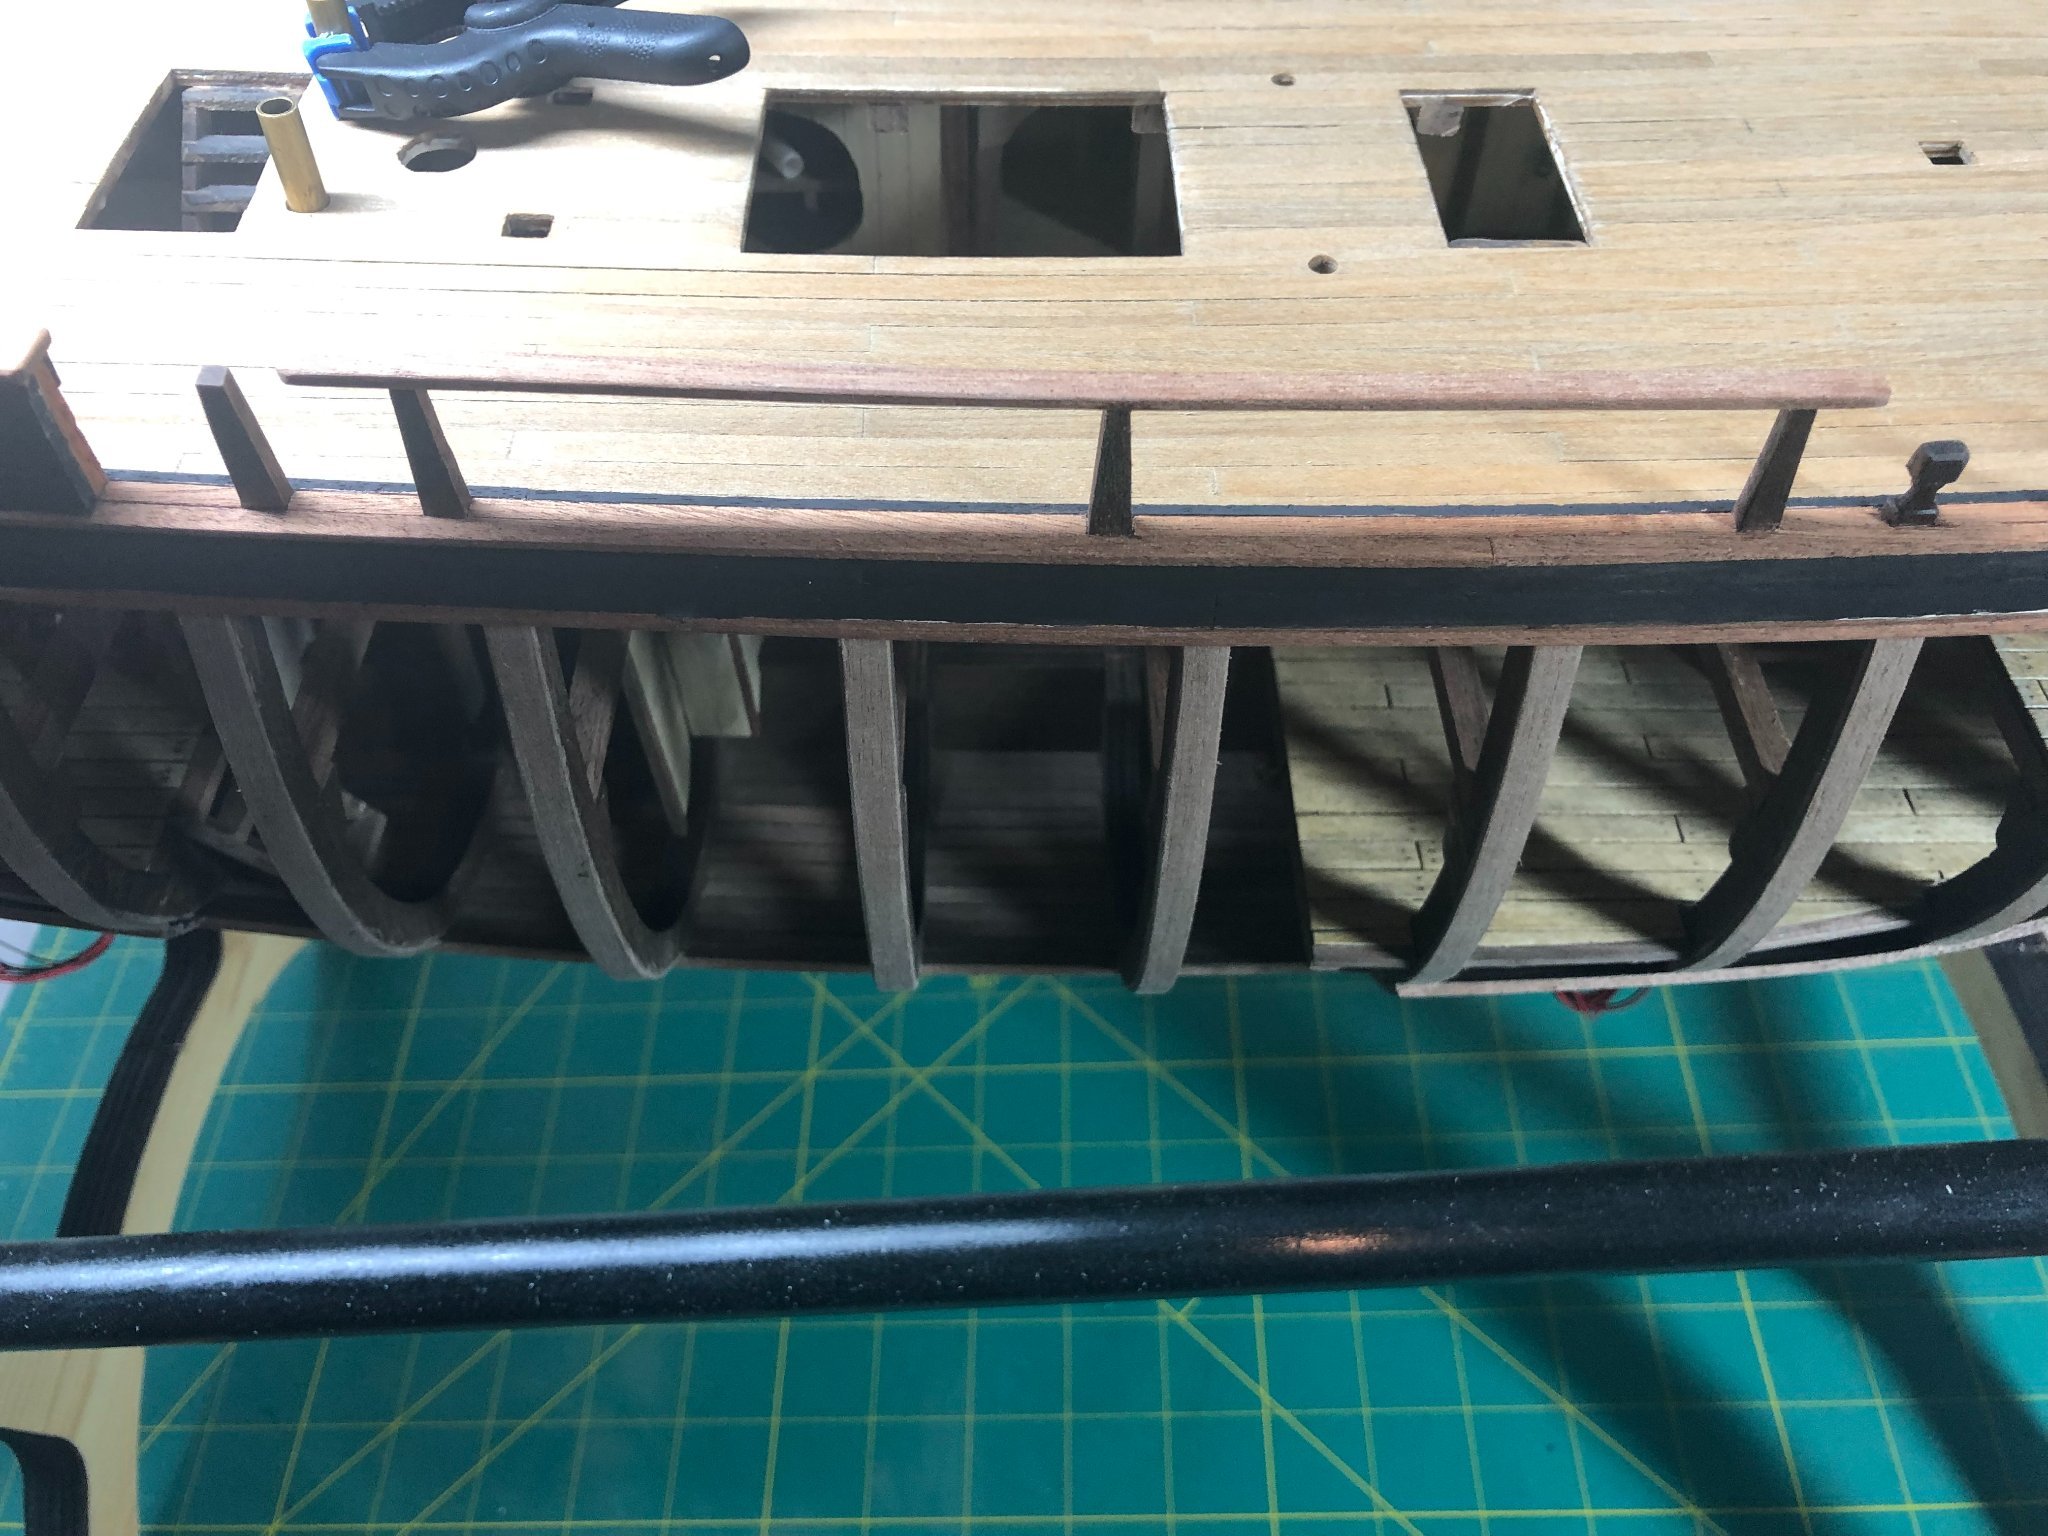
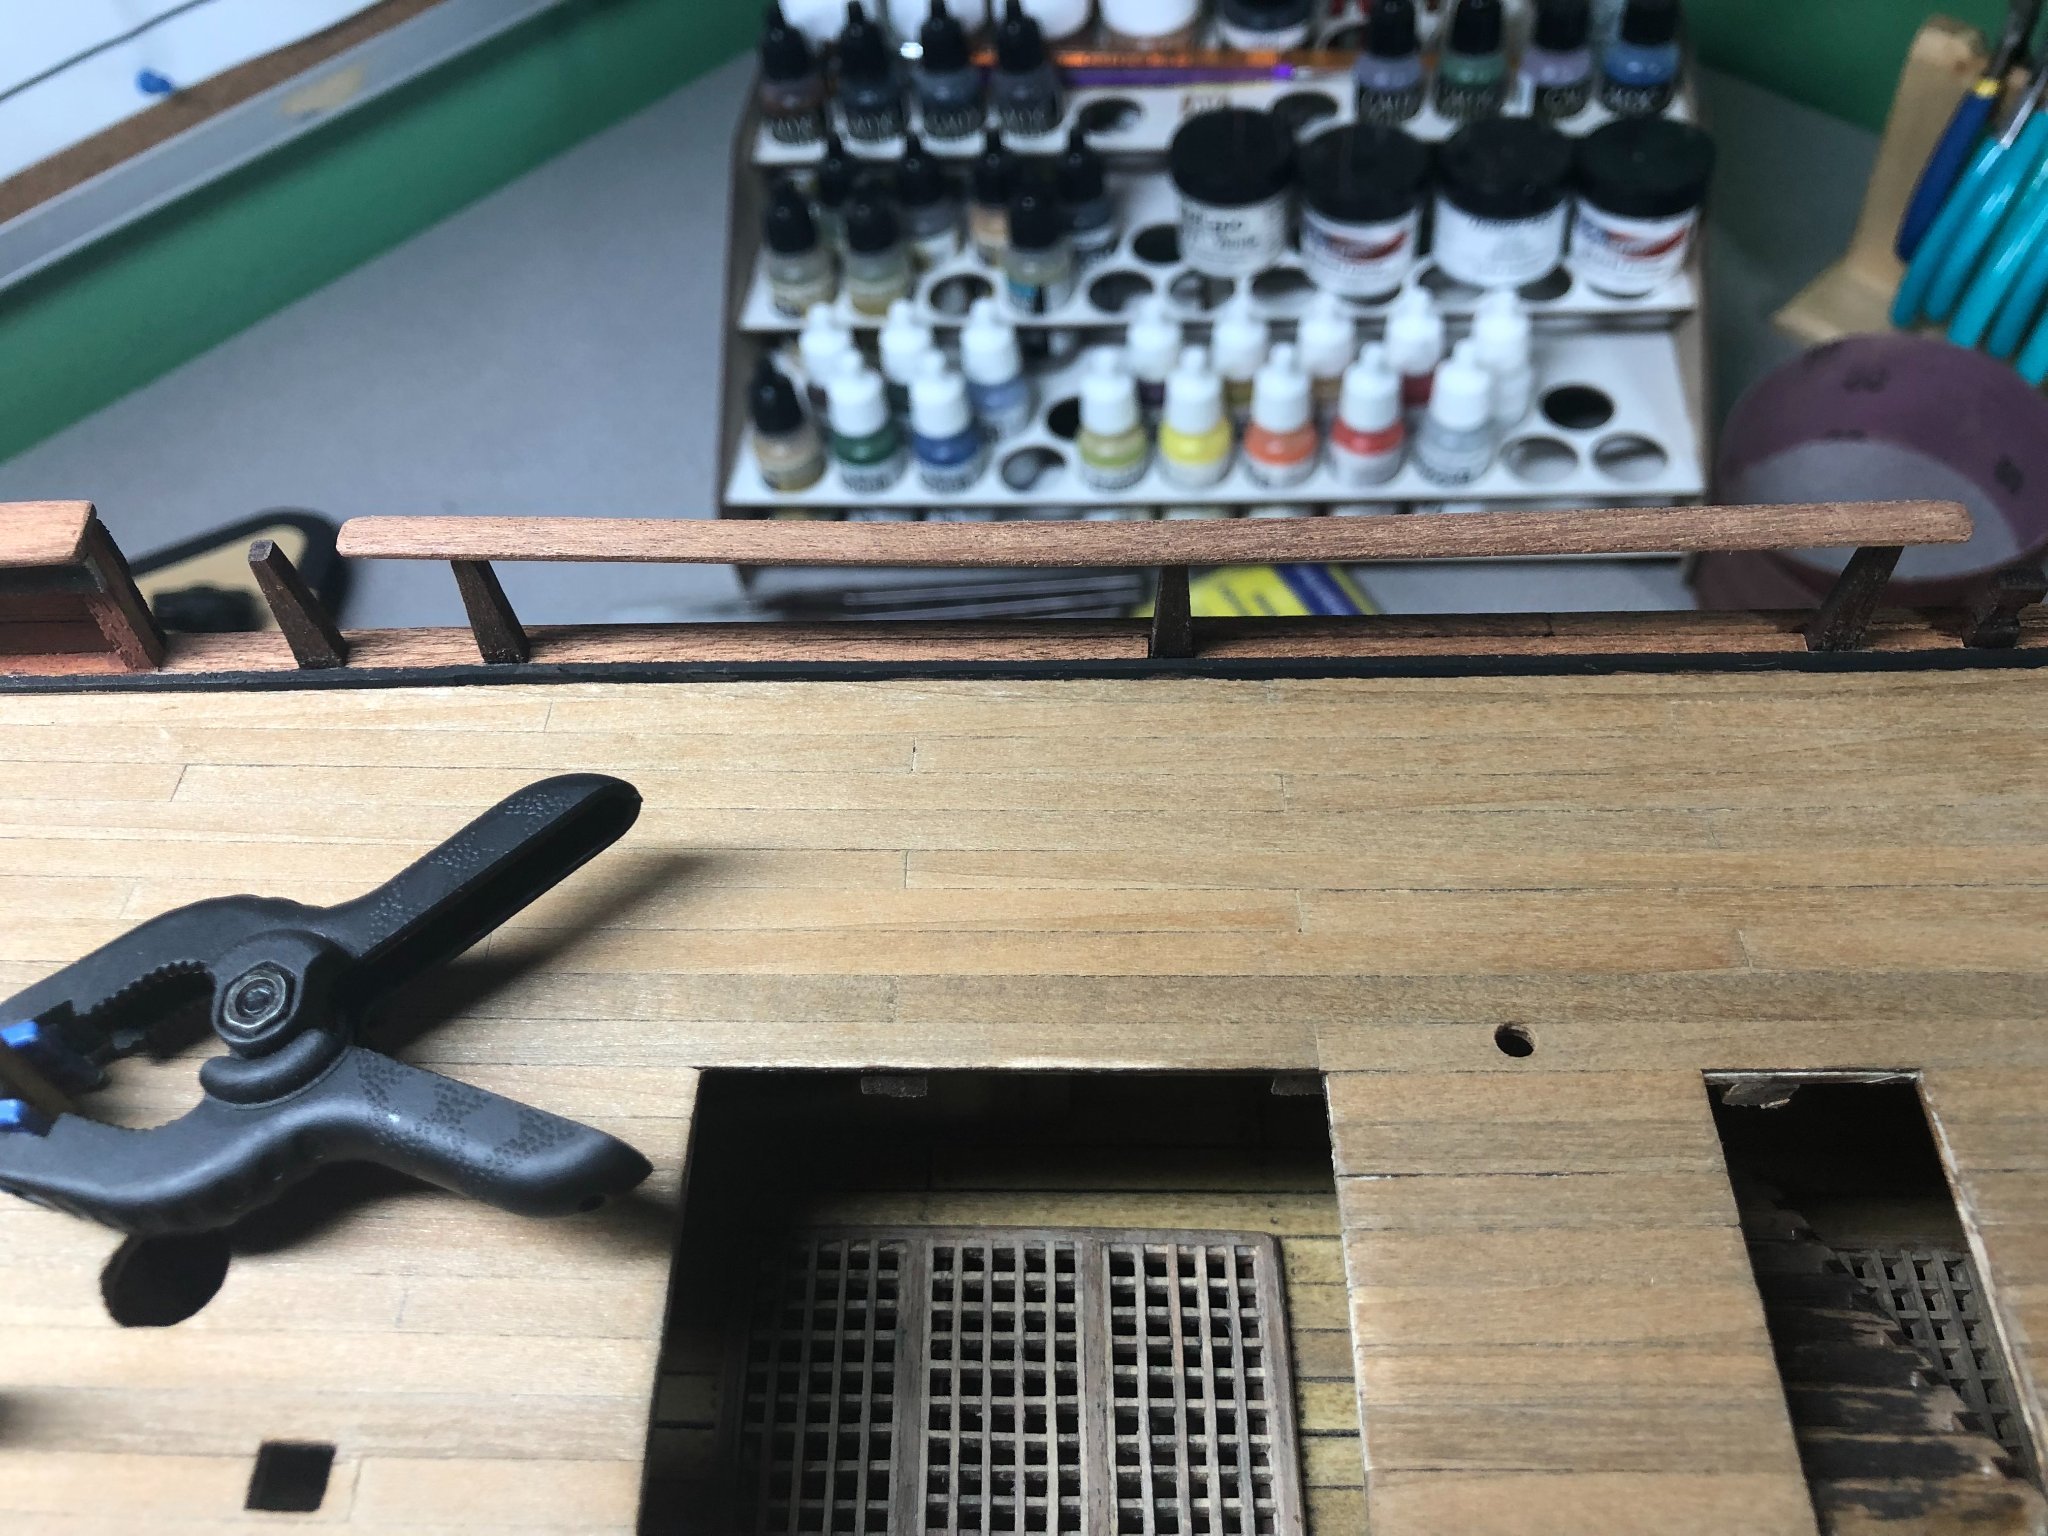
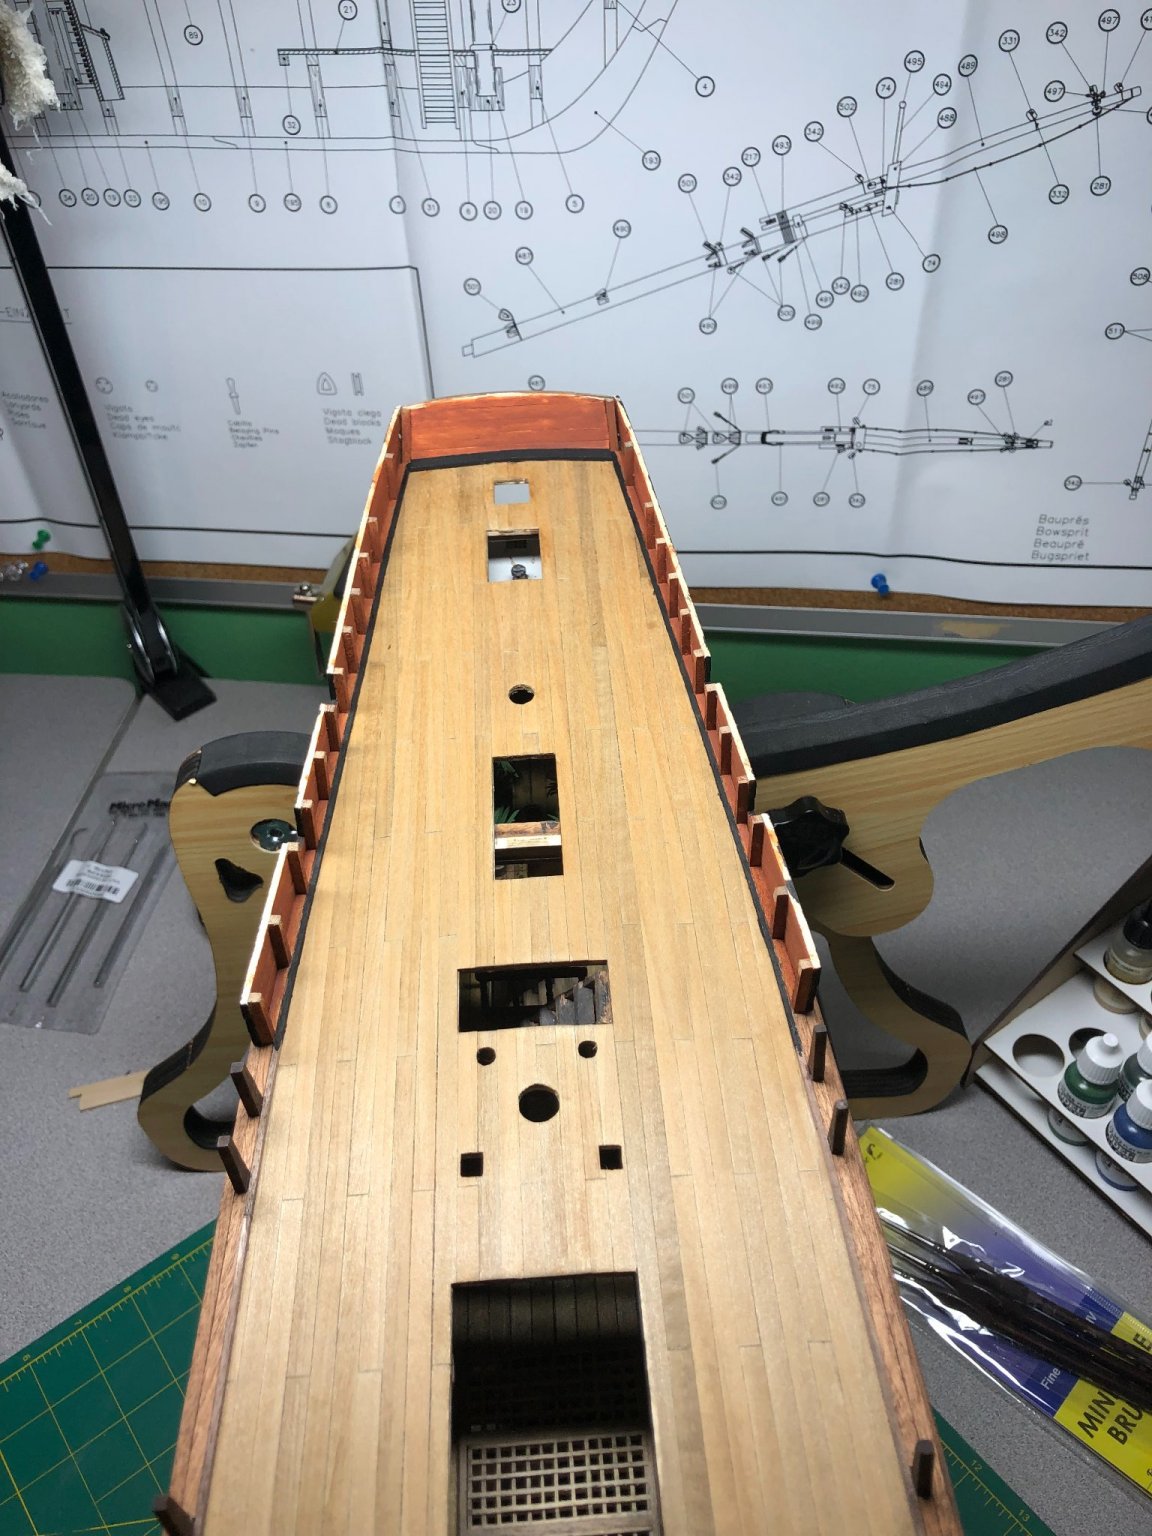
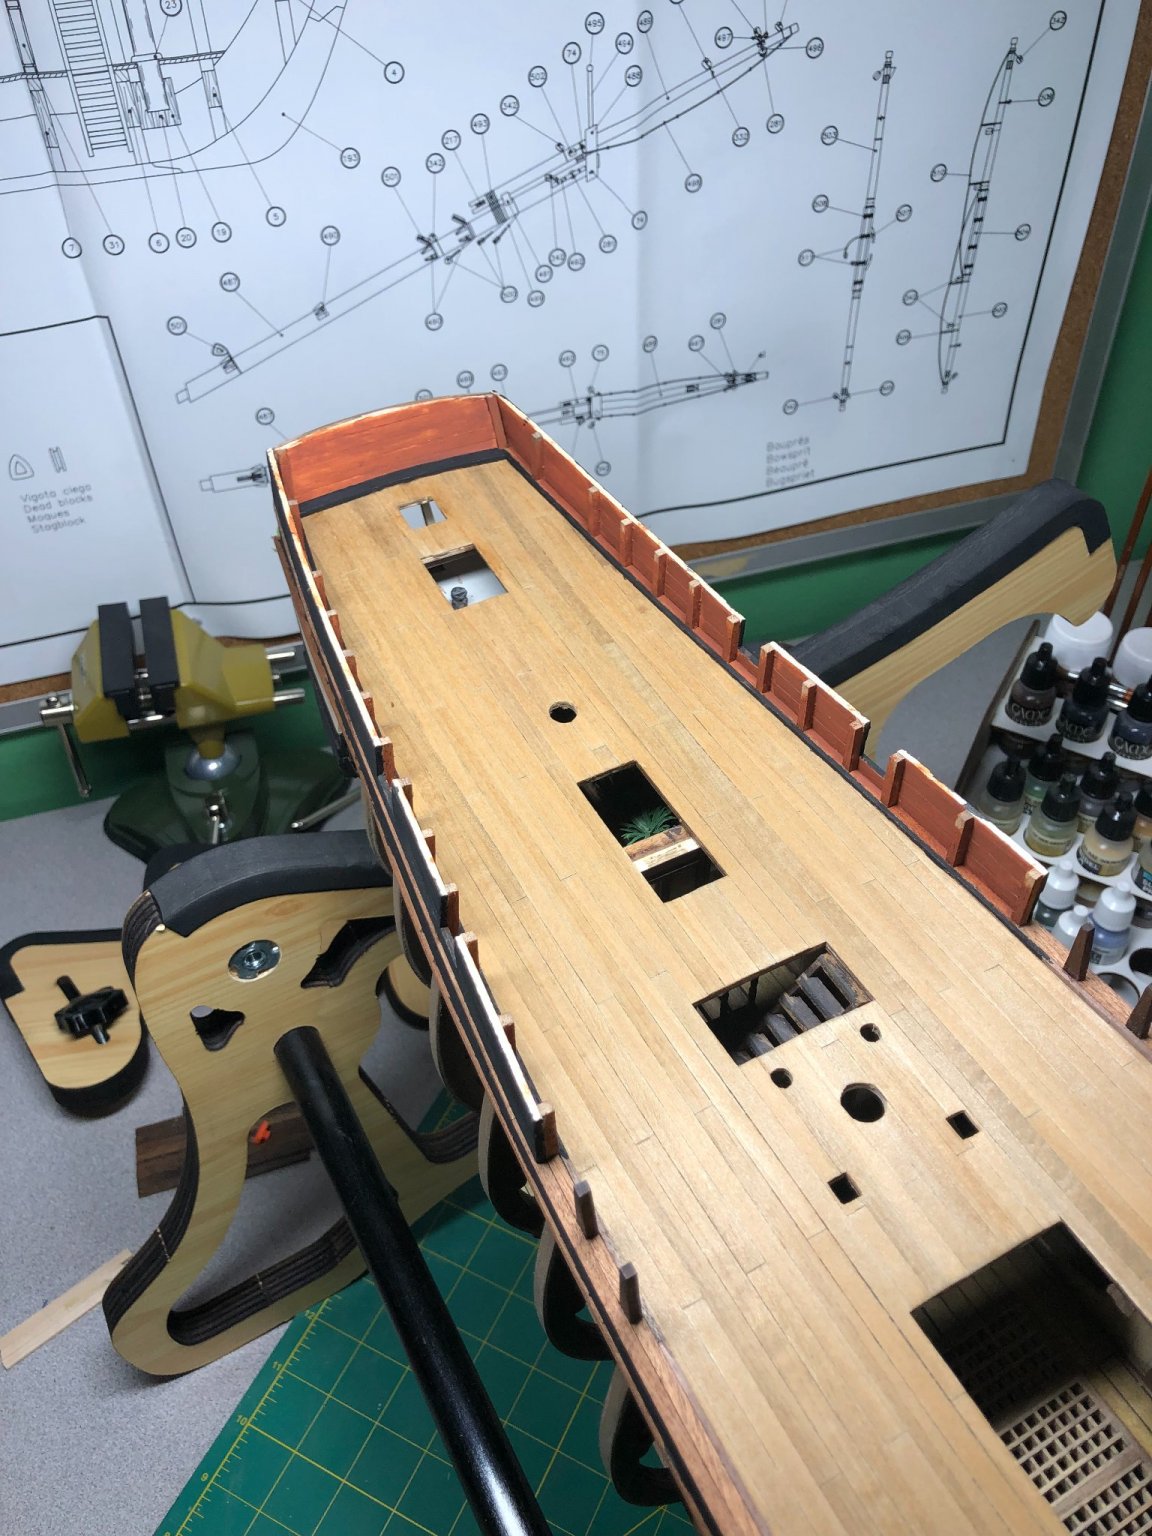
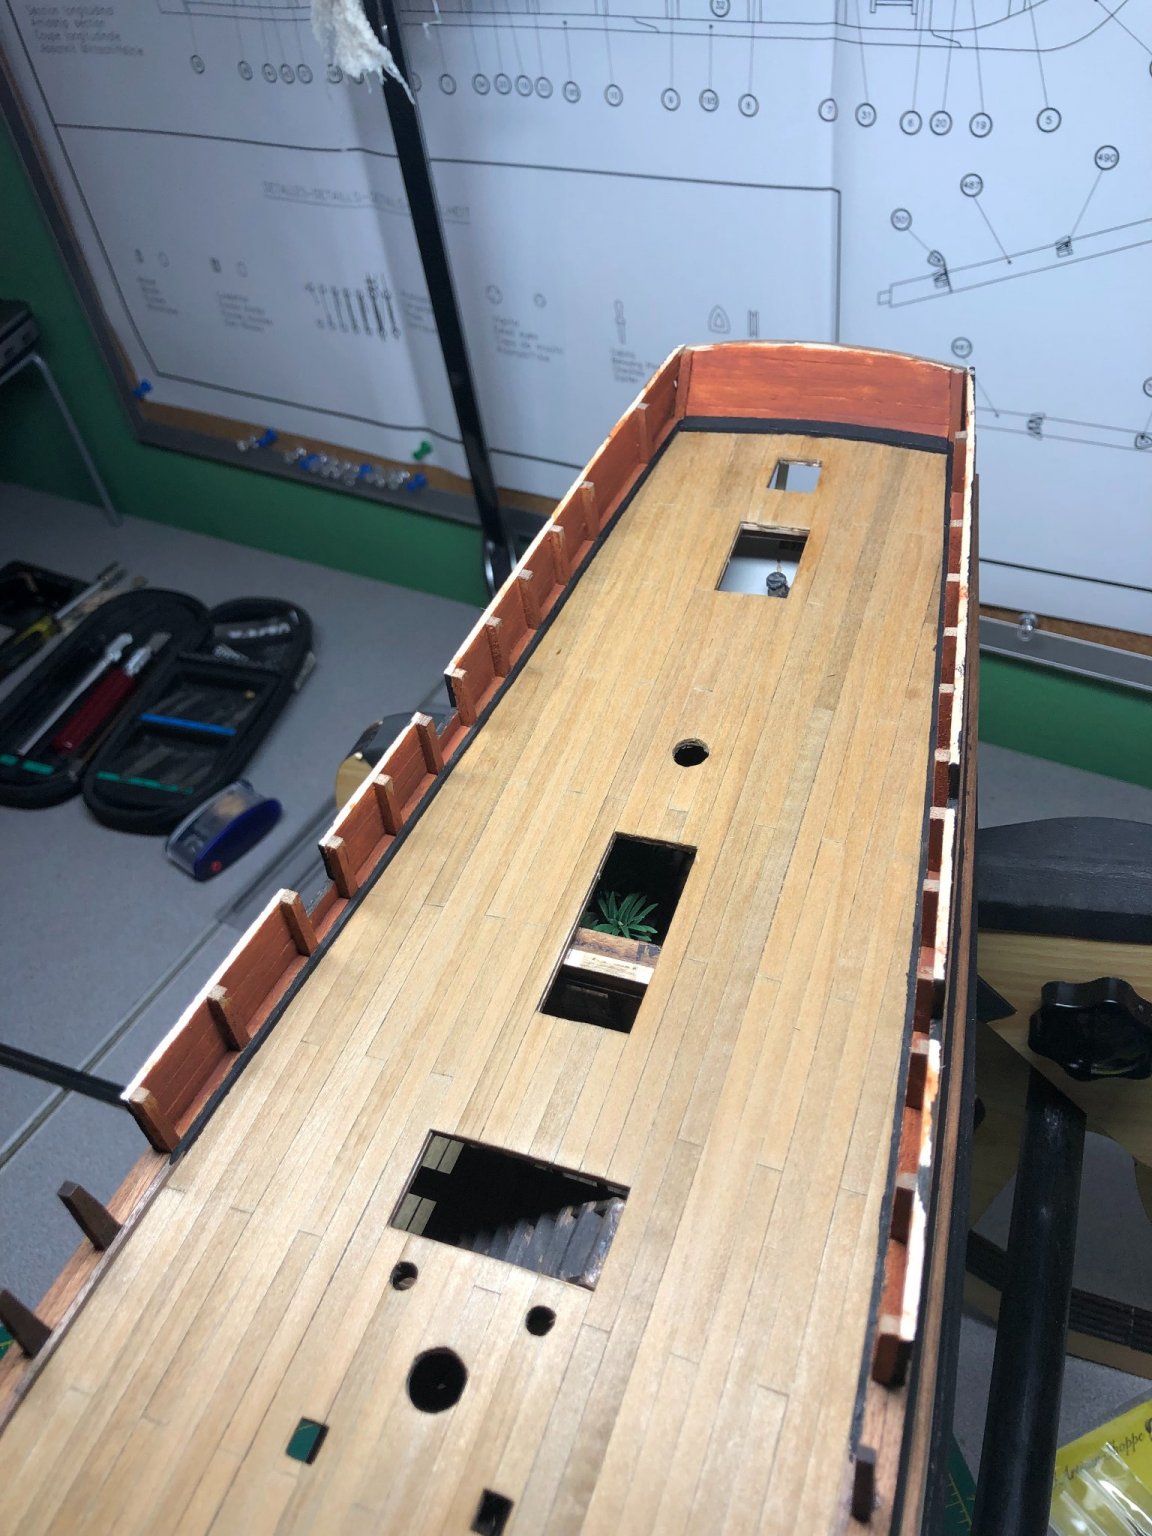
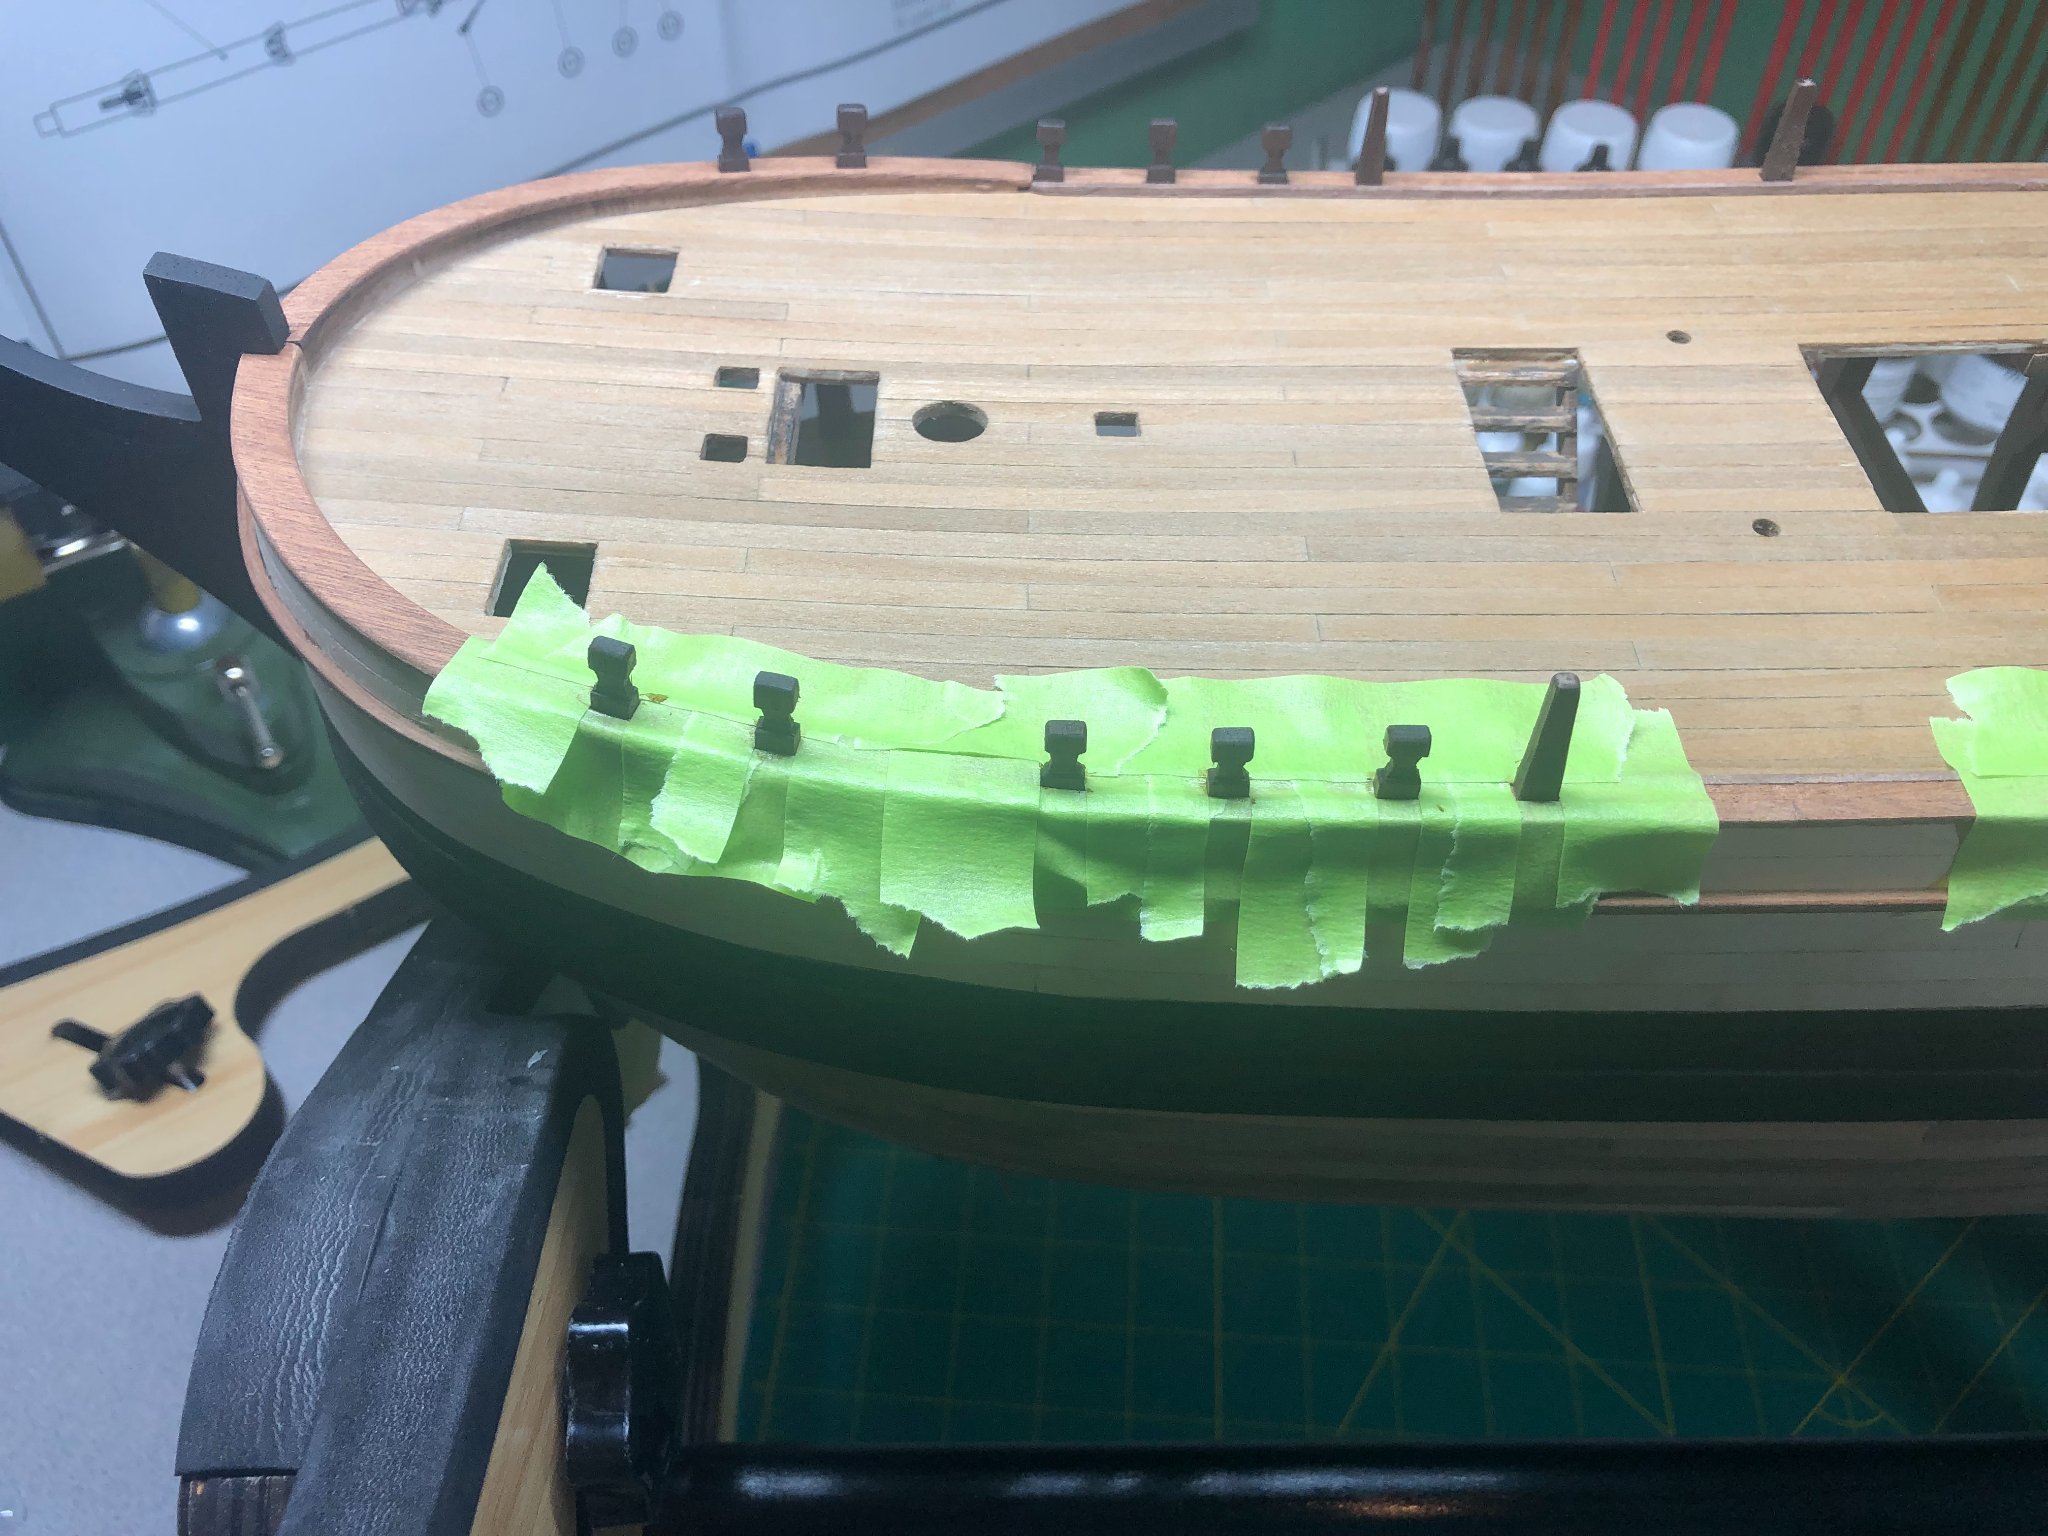
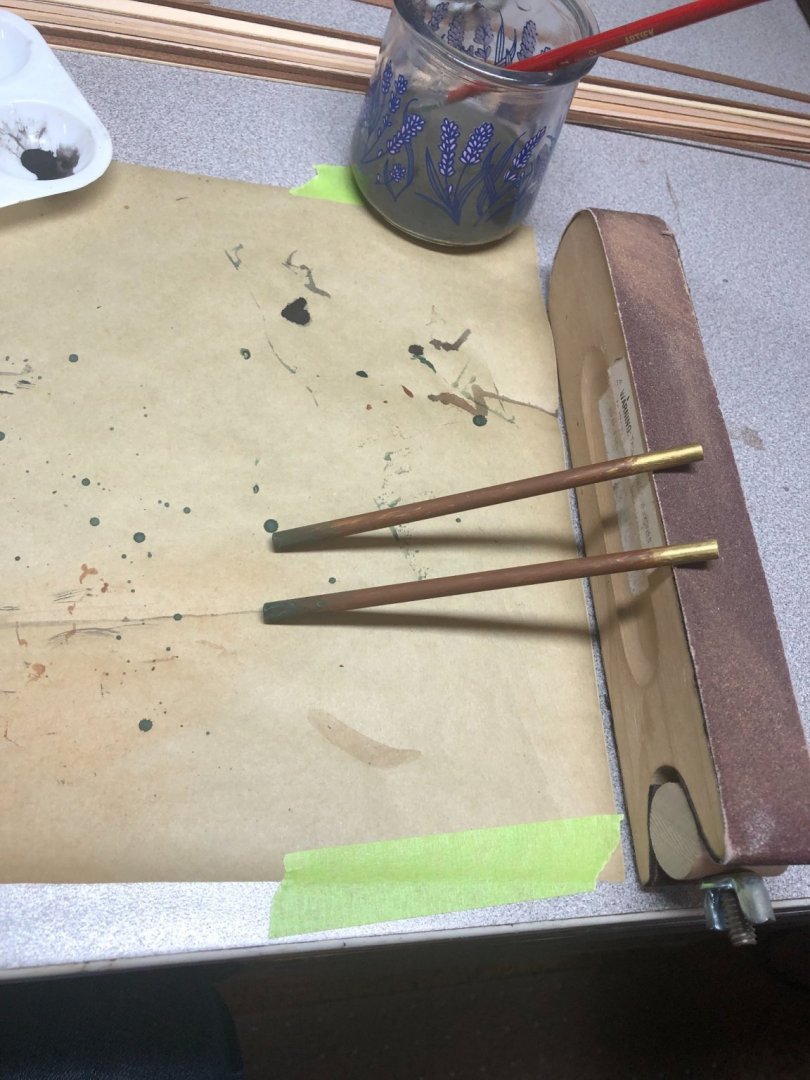
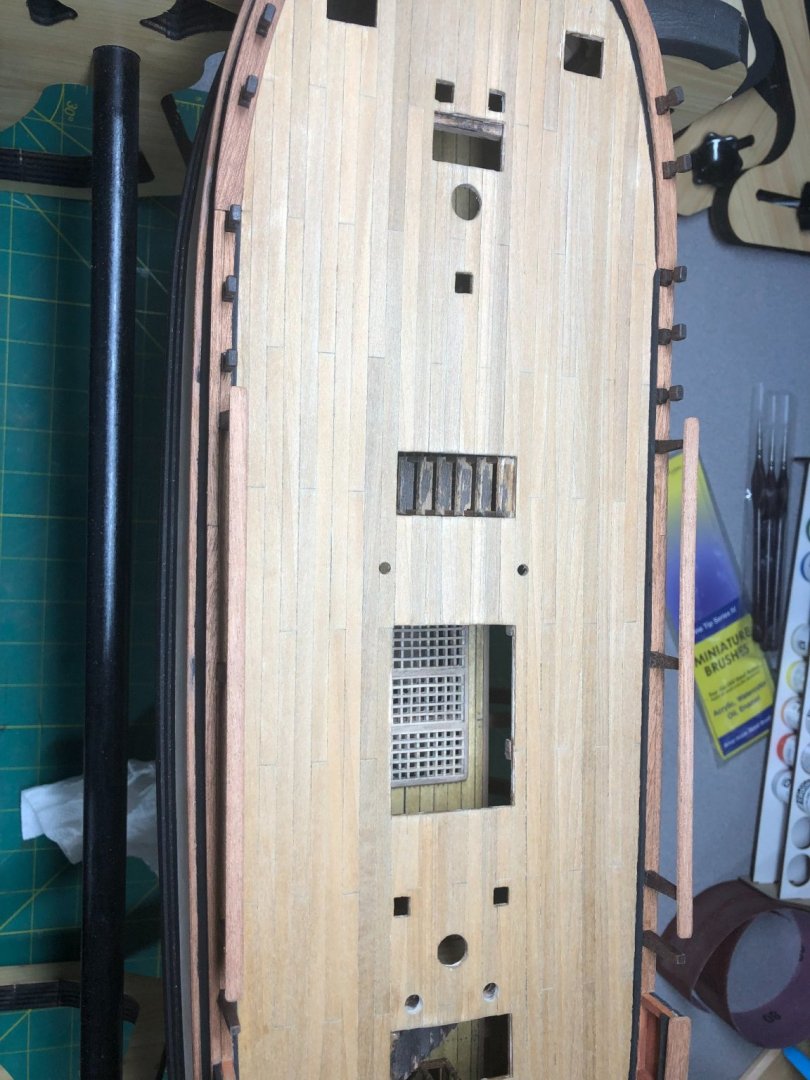
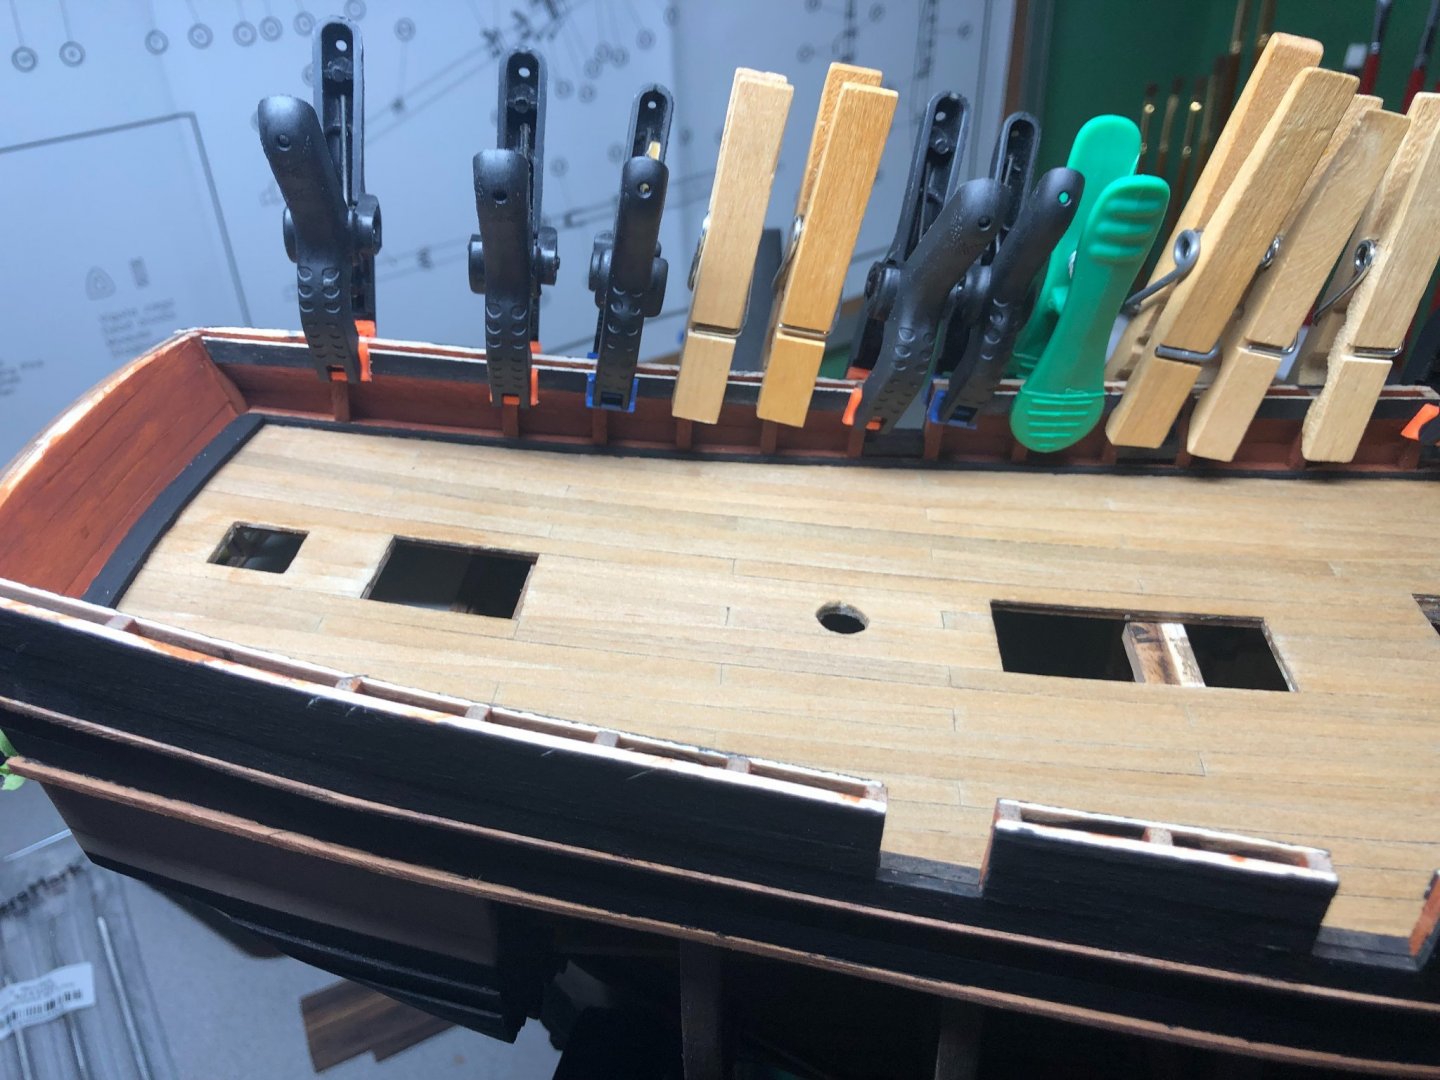
Cap rails done: and hand rails: Finished up some trim painting around the waterways and all the way to the bow: The bilge pumps were made from Elm tree trunks... the kit sent brass tubes! I think dowels would have been a better idea. I looked for some around my work shop but I don't have any the right size! Brass tubes will be used! After doing some research, I decided to paint the brass a medium brown, hoping to simulate an Elm tree! At the base of the tube, I used several different colors to try to make the tube look as though some algae or other "green stuff" would grow when wetted a lot: The holes that the tubes slide through are a bit tight and were scrapping the paint off! I widened them enough to prevent paint removal. These are not quite at the right height yet, but close: On to the some of the stern decorations!


-
Great idea!
-
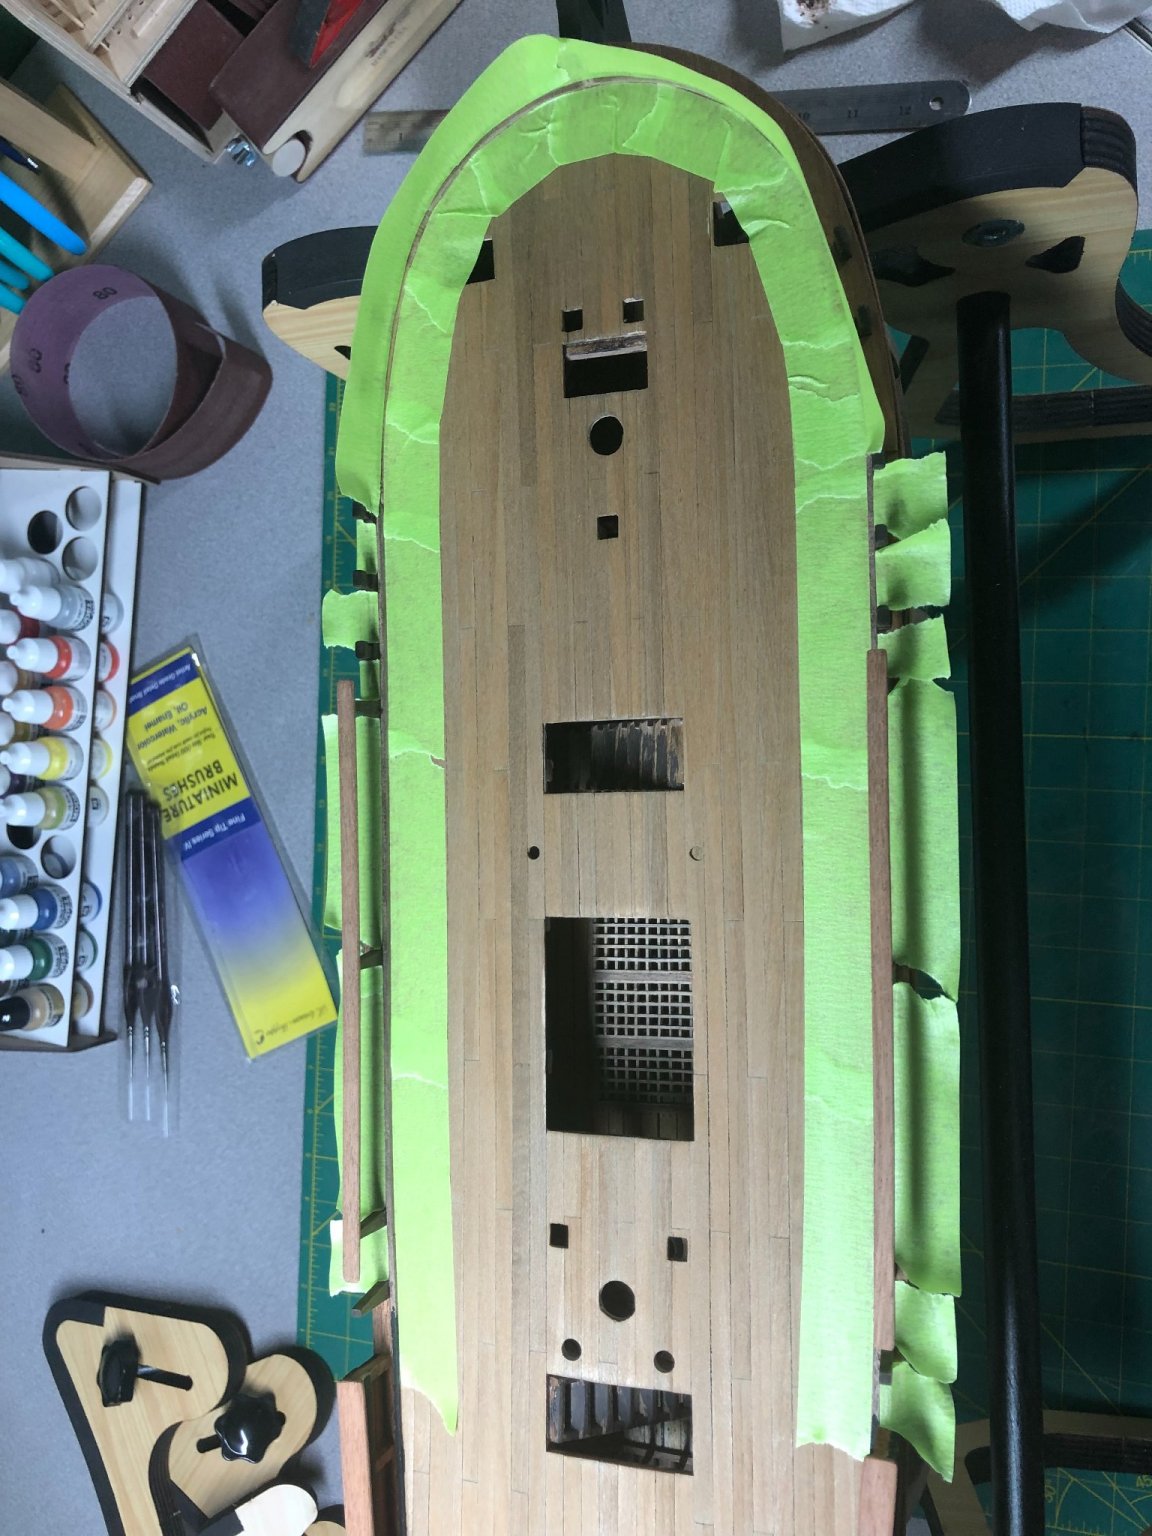
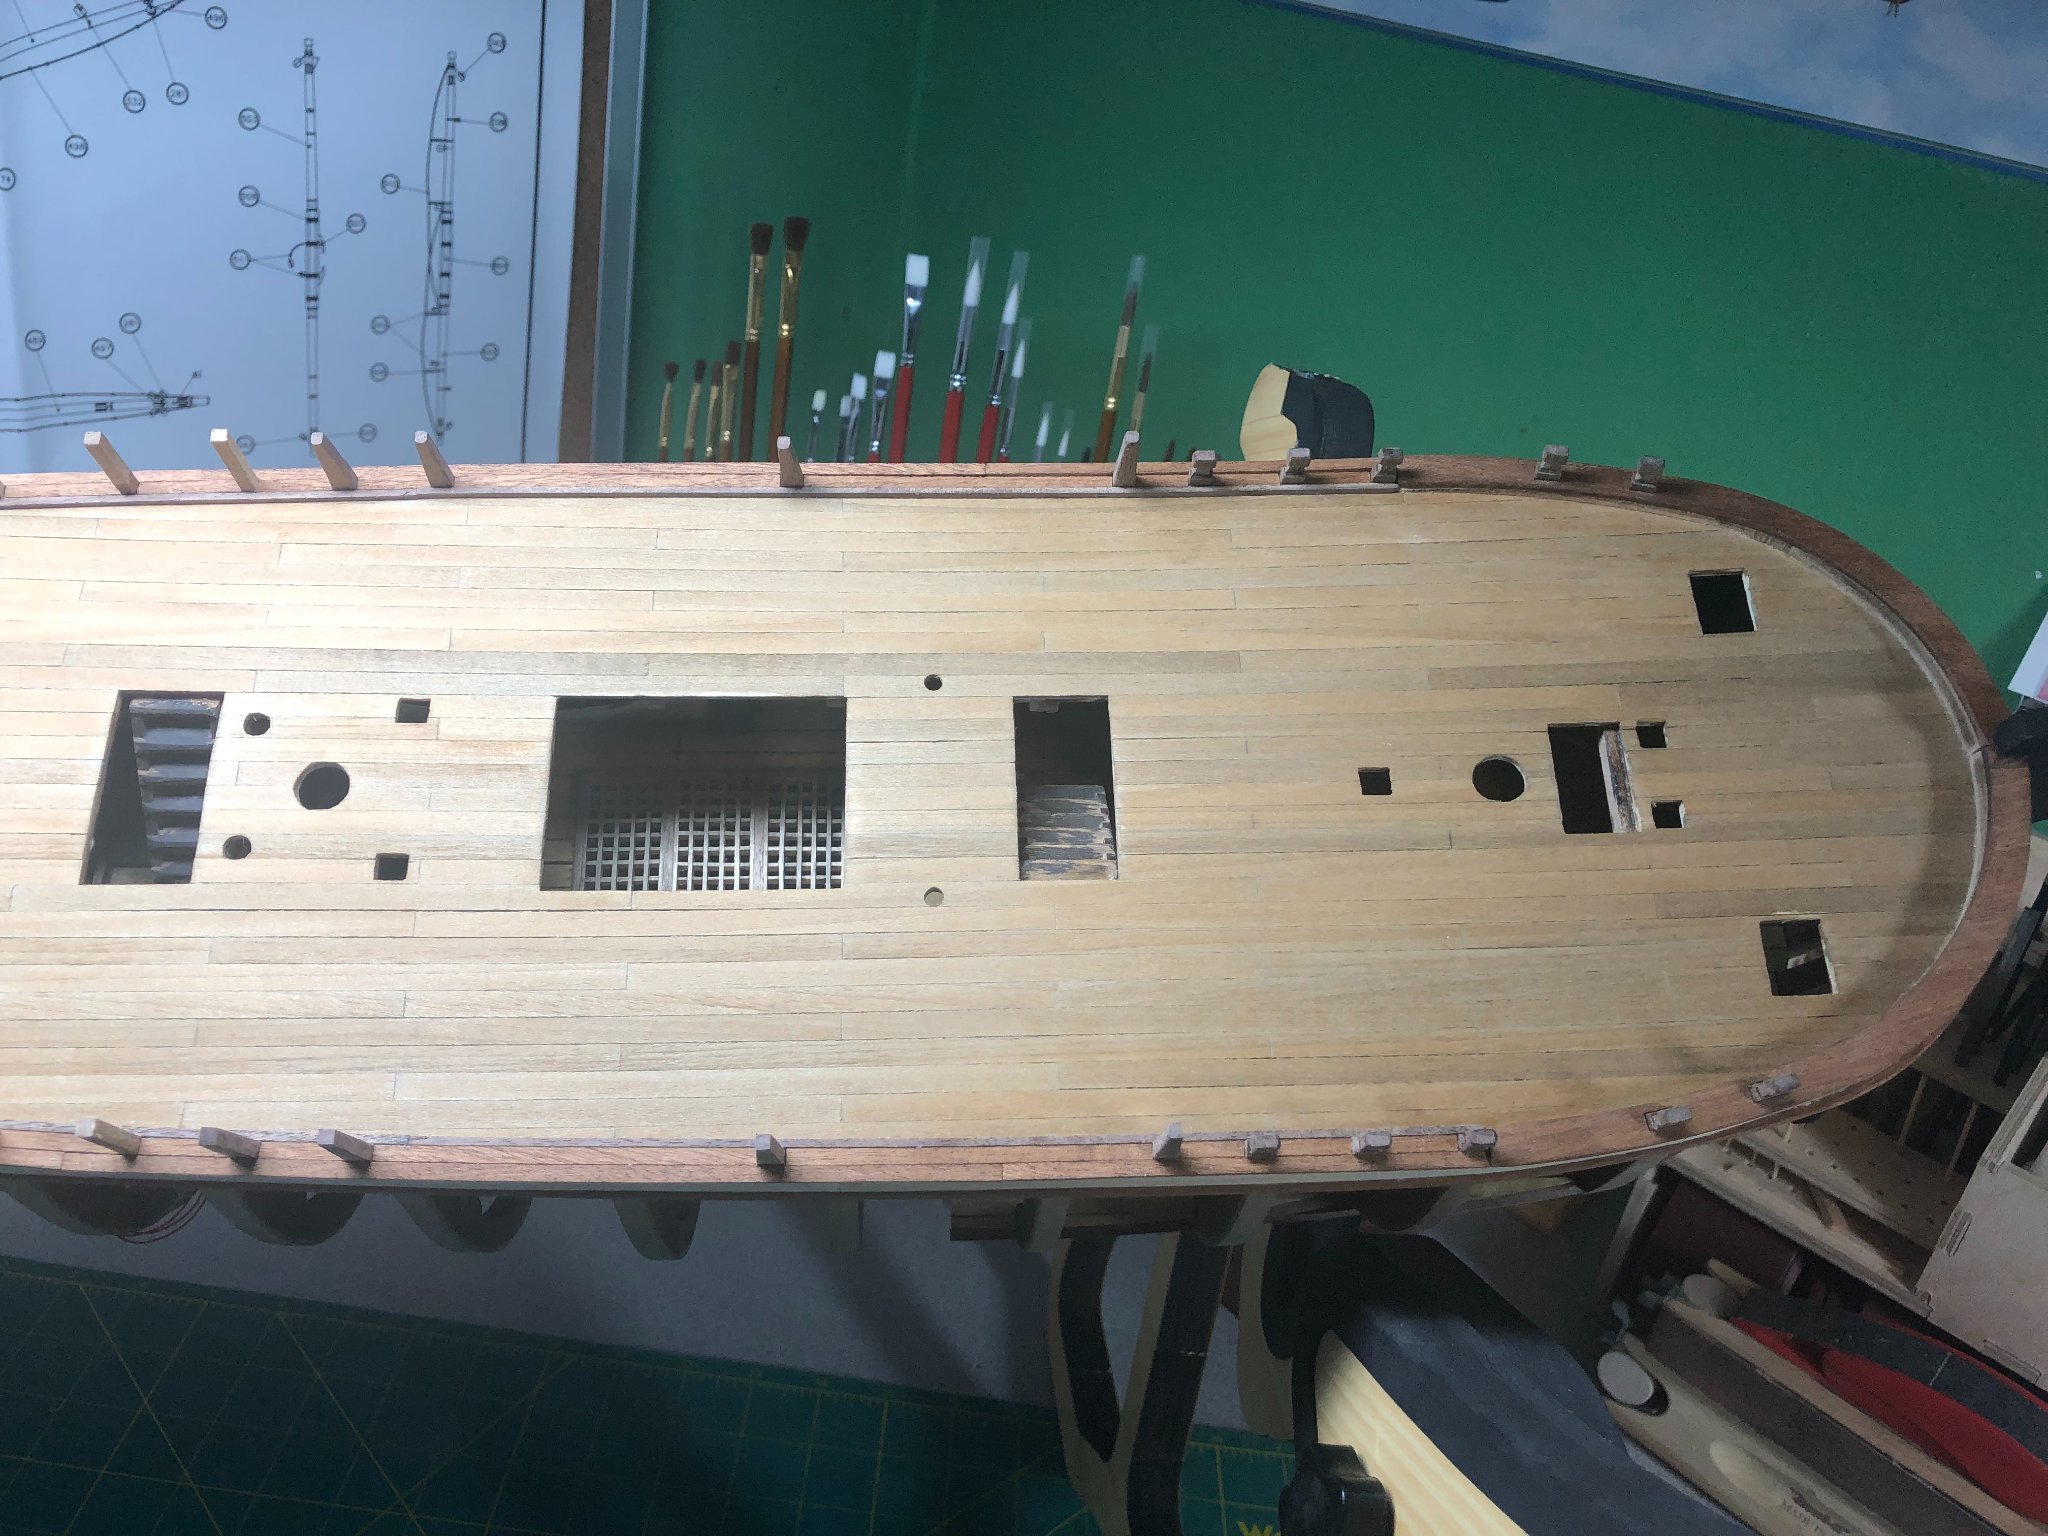
A little painting... ok, a lot of painting! In keeping with my original plan, I have thinned the paint to give it a more weathered look. Some distressing and a final coat on the hull is forthcoming: Same scenario on the inners sides of the gunwale rails: Inner stiffner rails and cannon hole supports added: Cap rails are next! Thanks for taking a look!


-
Looking good, Andrew! I am amazed at the differences in the design of the Bounty by two different kit manufacturers. I'm watching with interest.
-
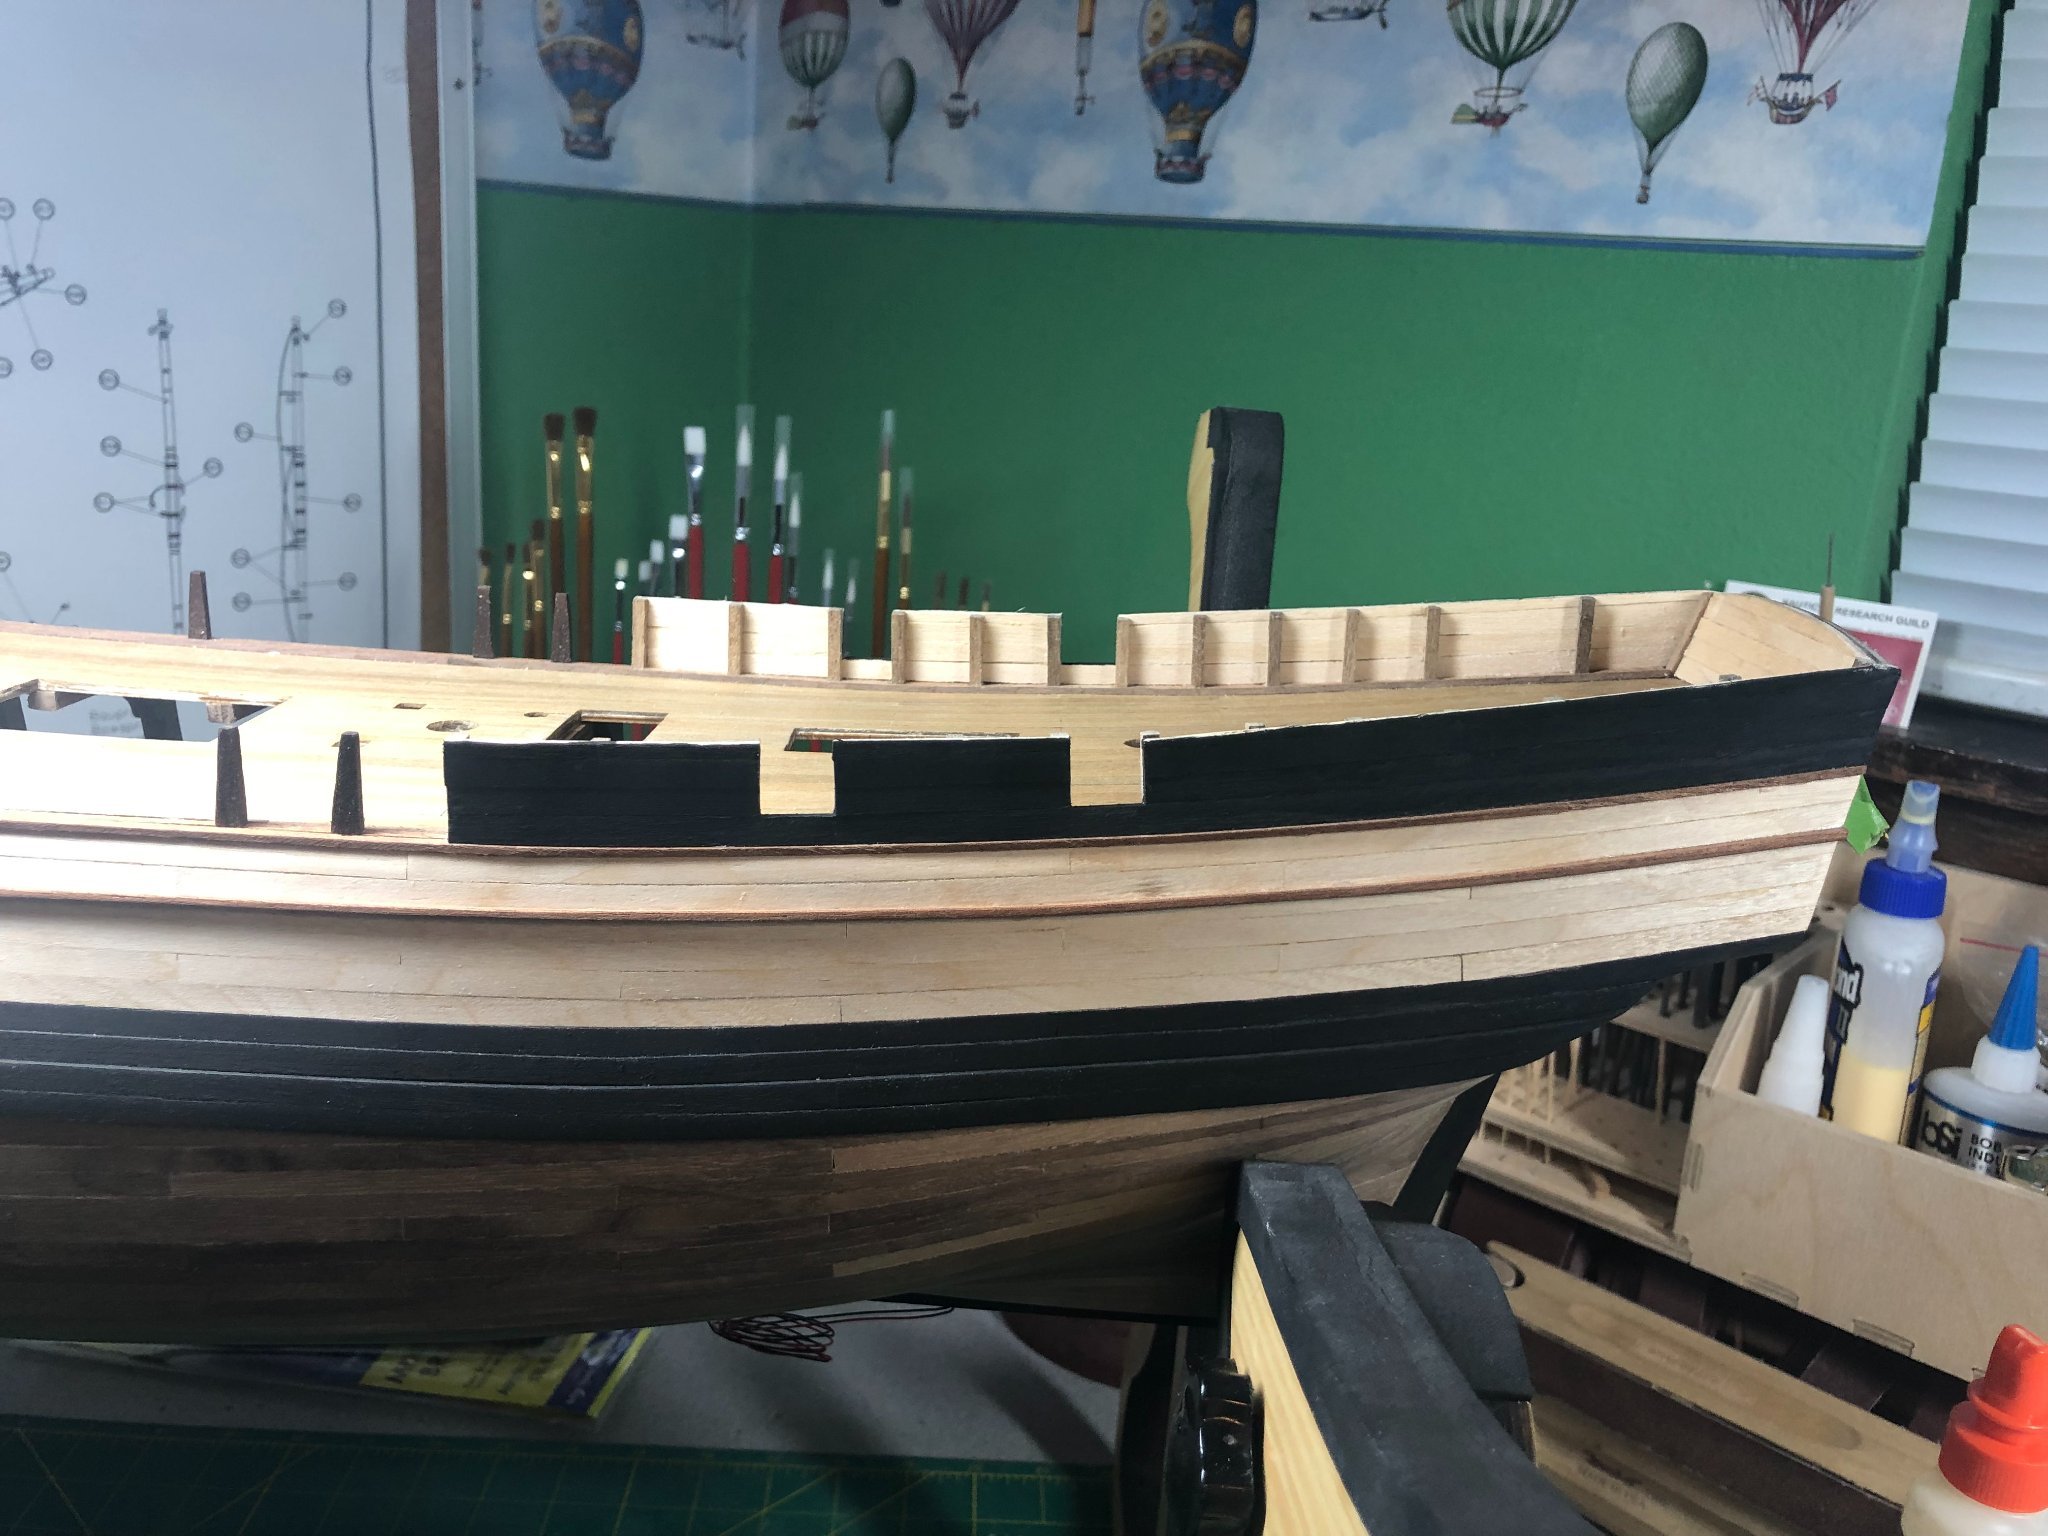
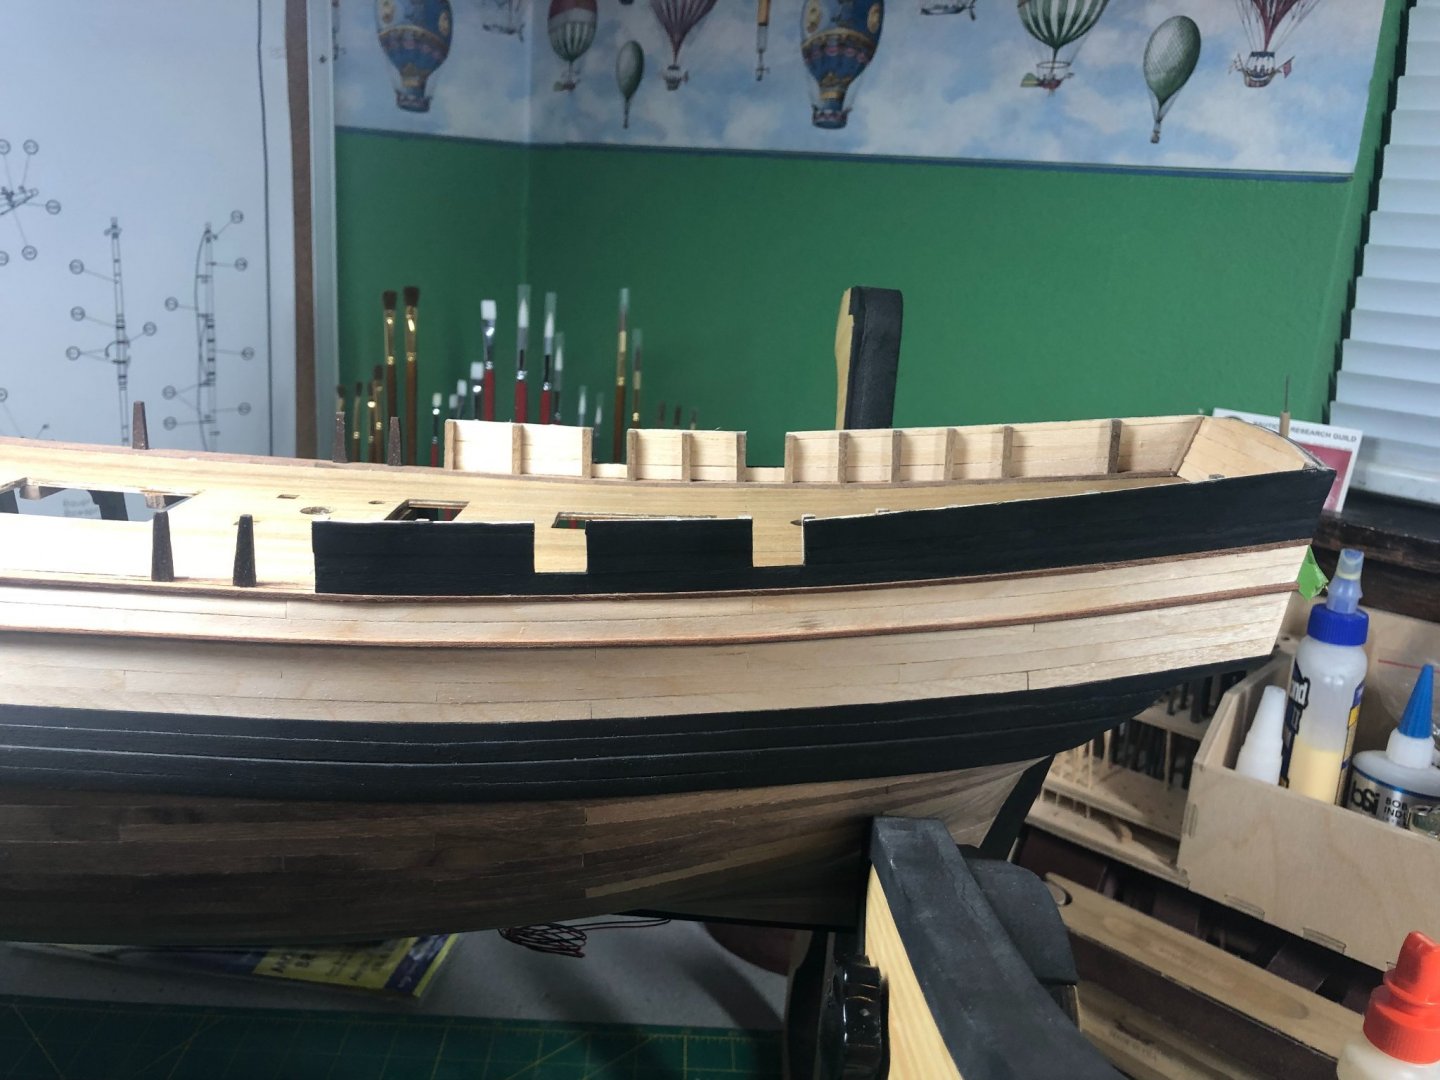
Made a mistake! The lowest plank on the aft rails was supposed to be one piece... no cannon openings! If you look back at my previous log entry, you'll see what I mean! I was able to remove the pieces with no damage and just some light sanding to remove old glue residue. So, all of that set me back a little but reminded to always look at the pictures and plans before starting on a piece! Aft rails going in: Aft rails sanded, painted and done on the outside: Inner rail paint and rail caps are next.

-
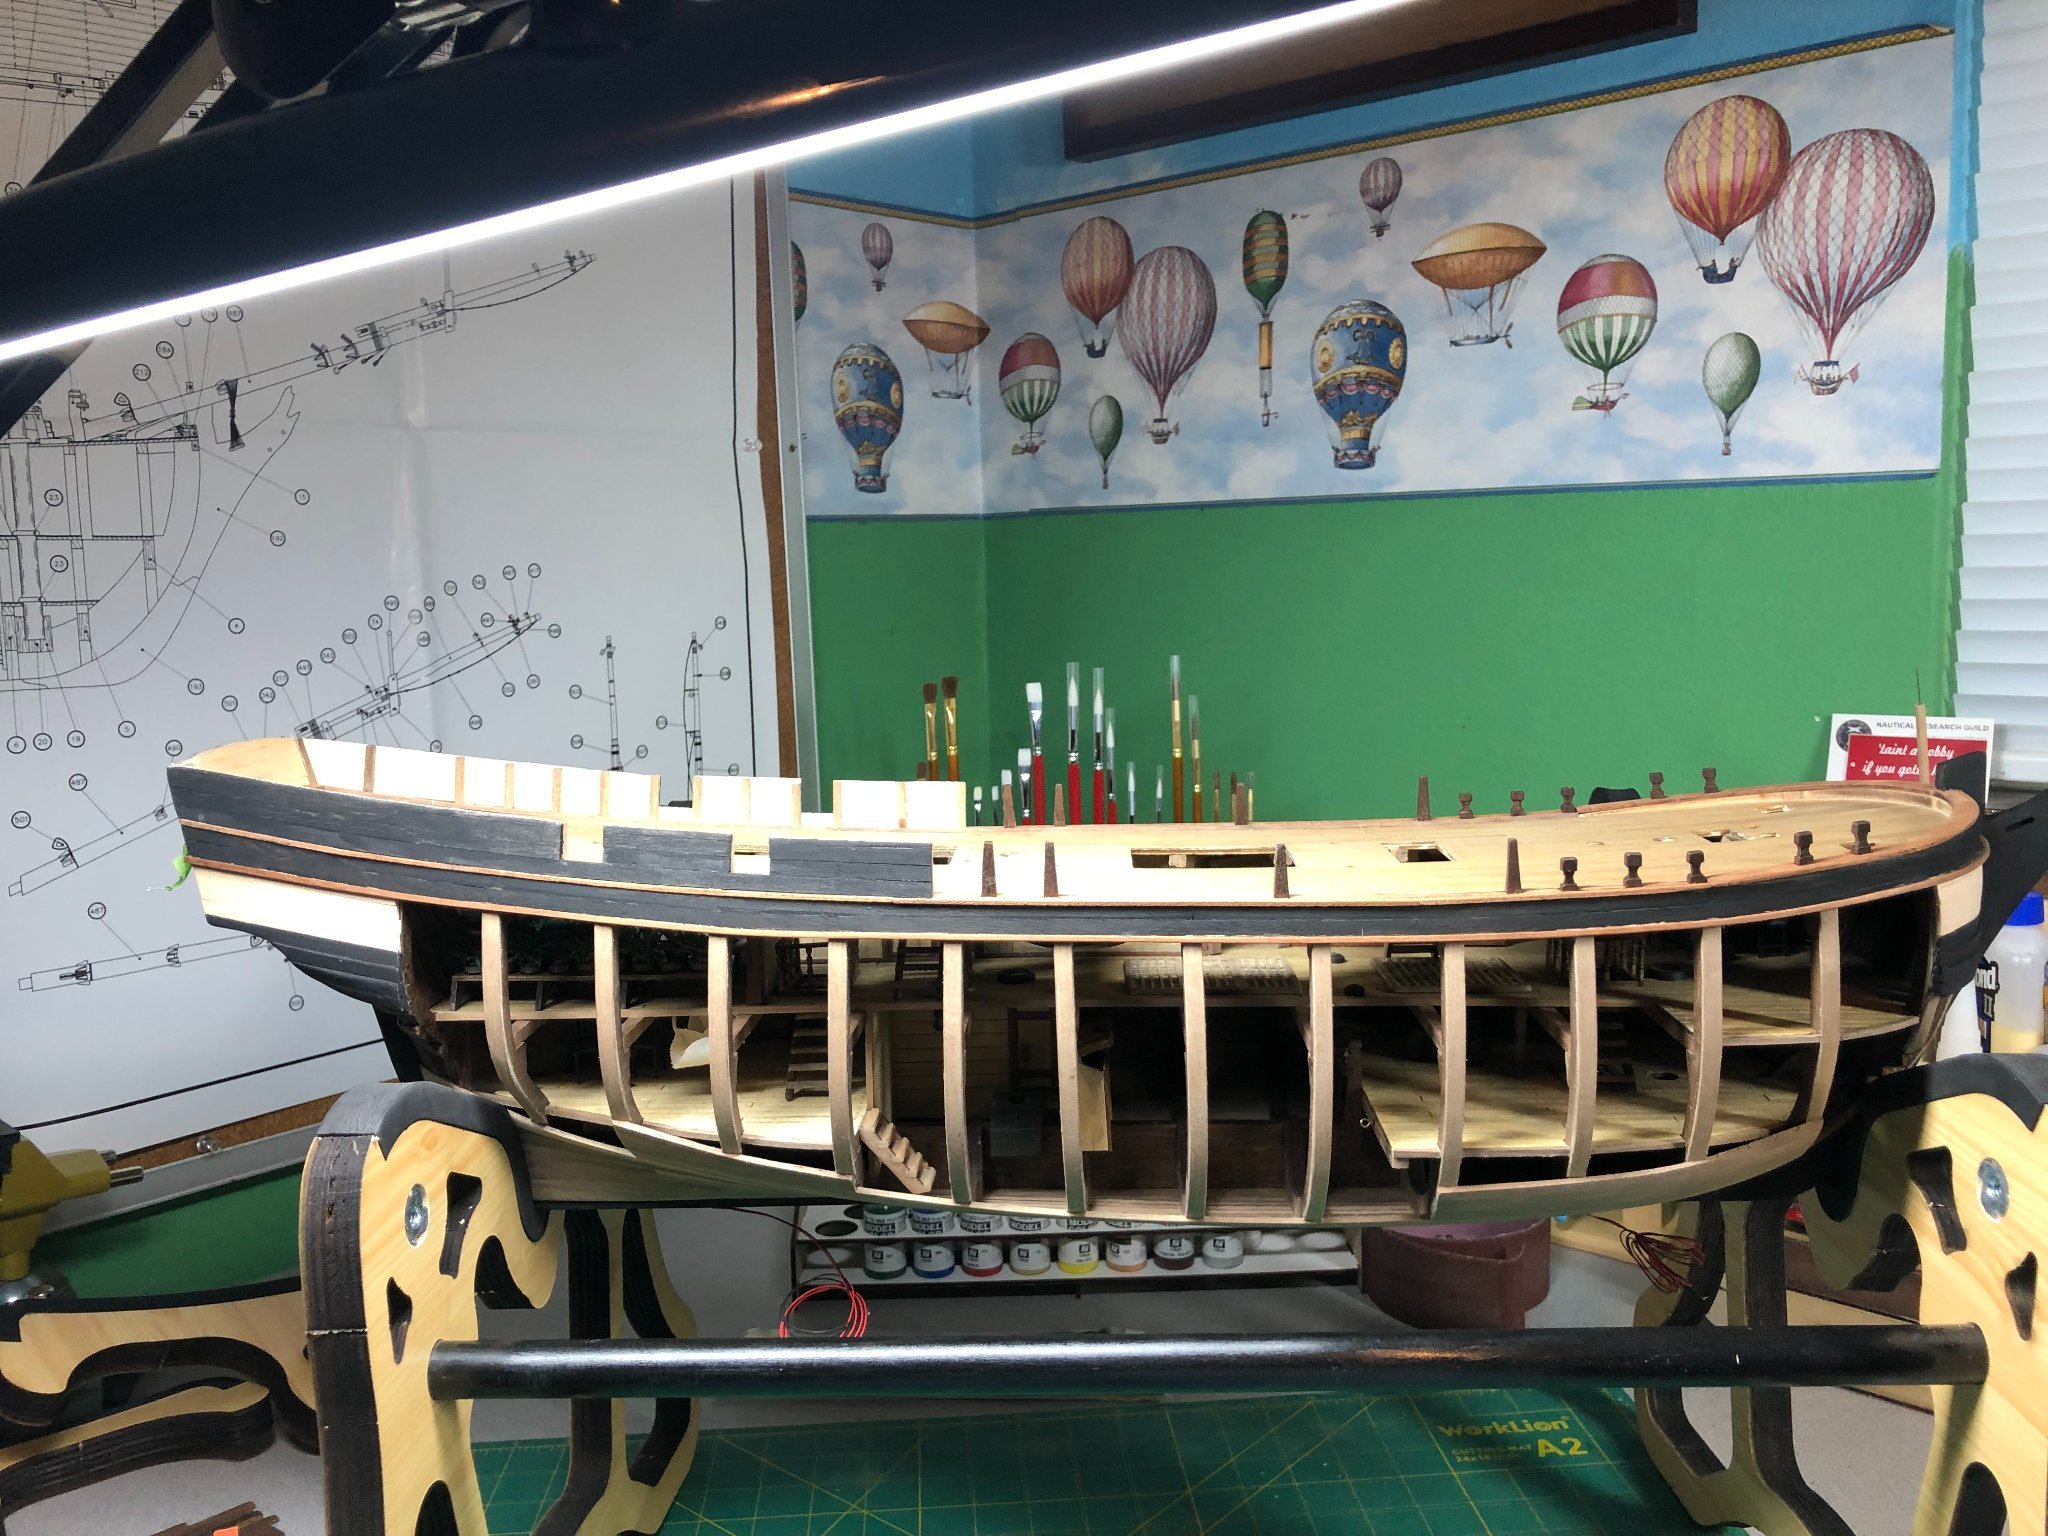
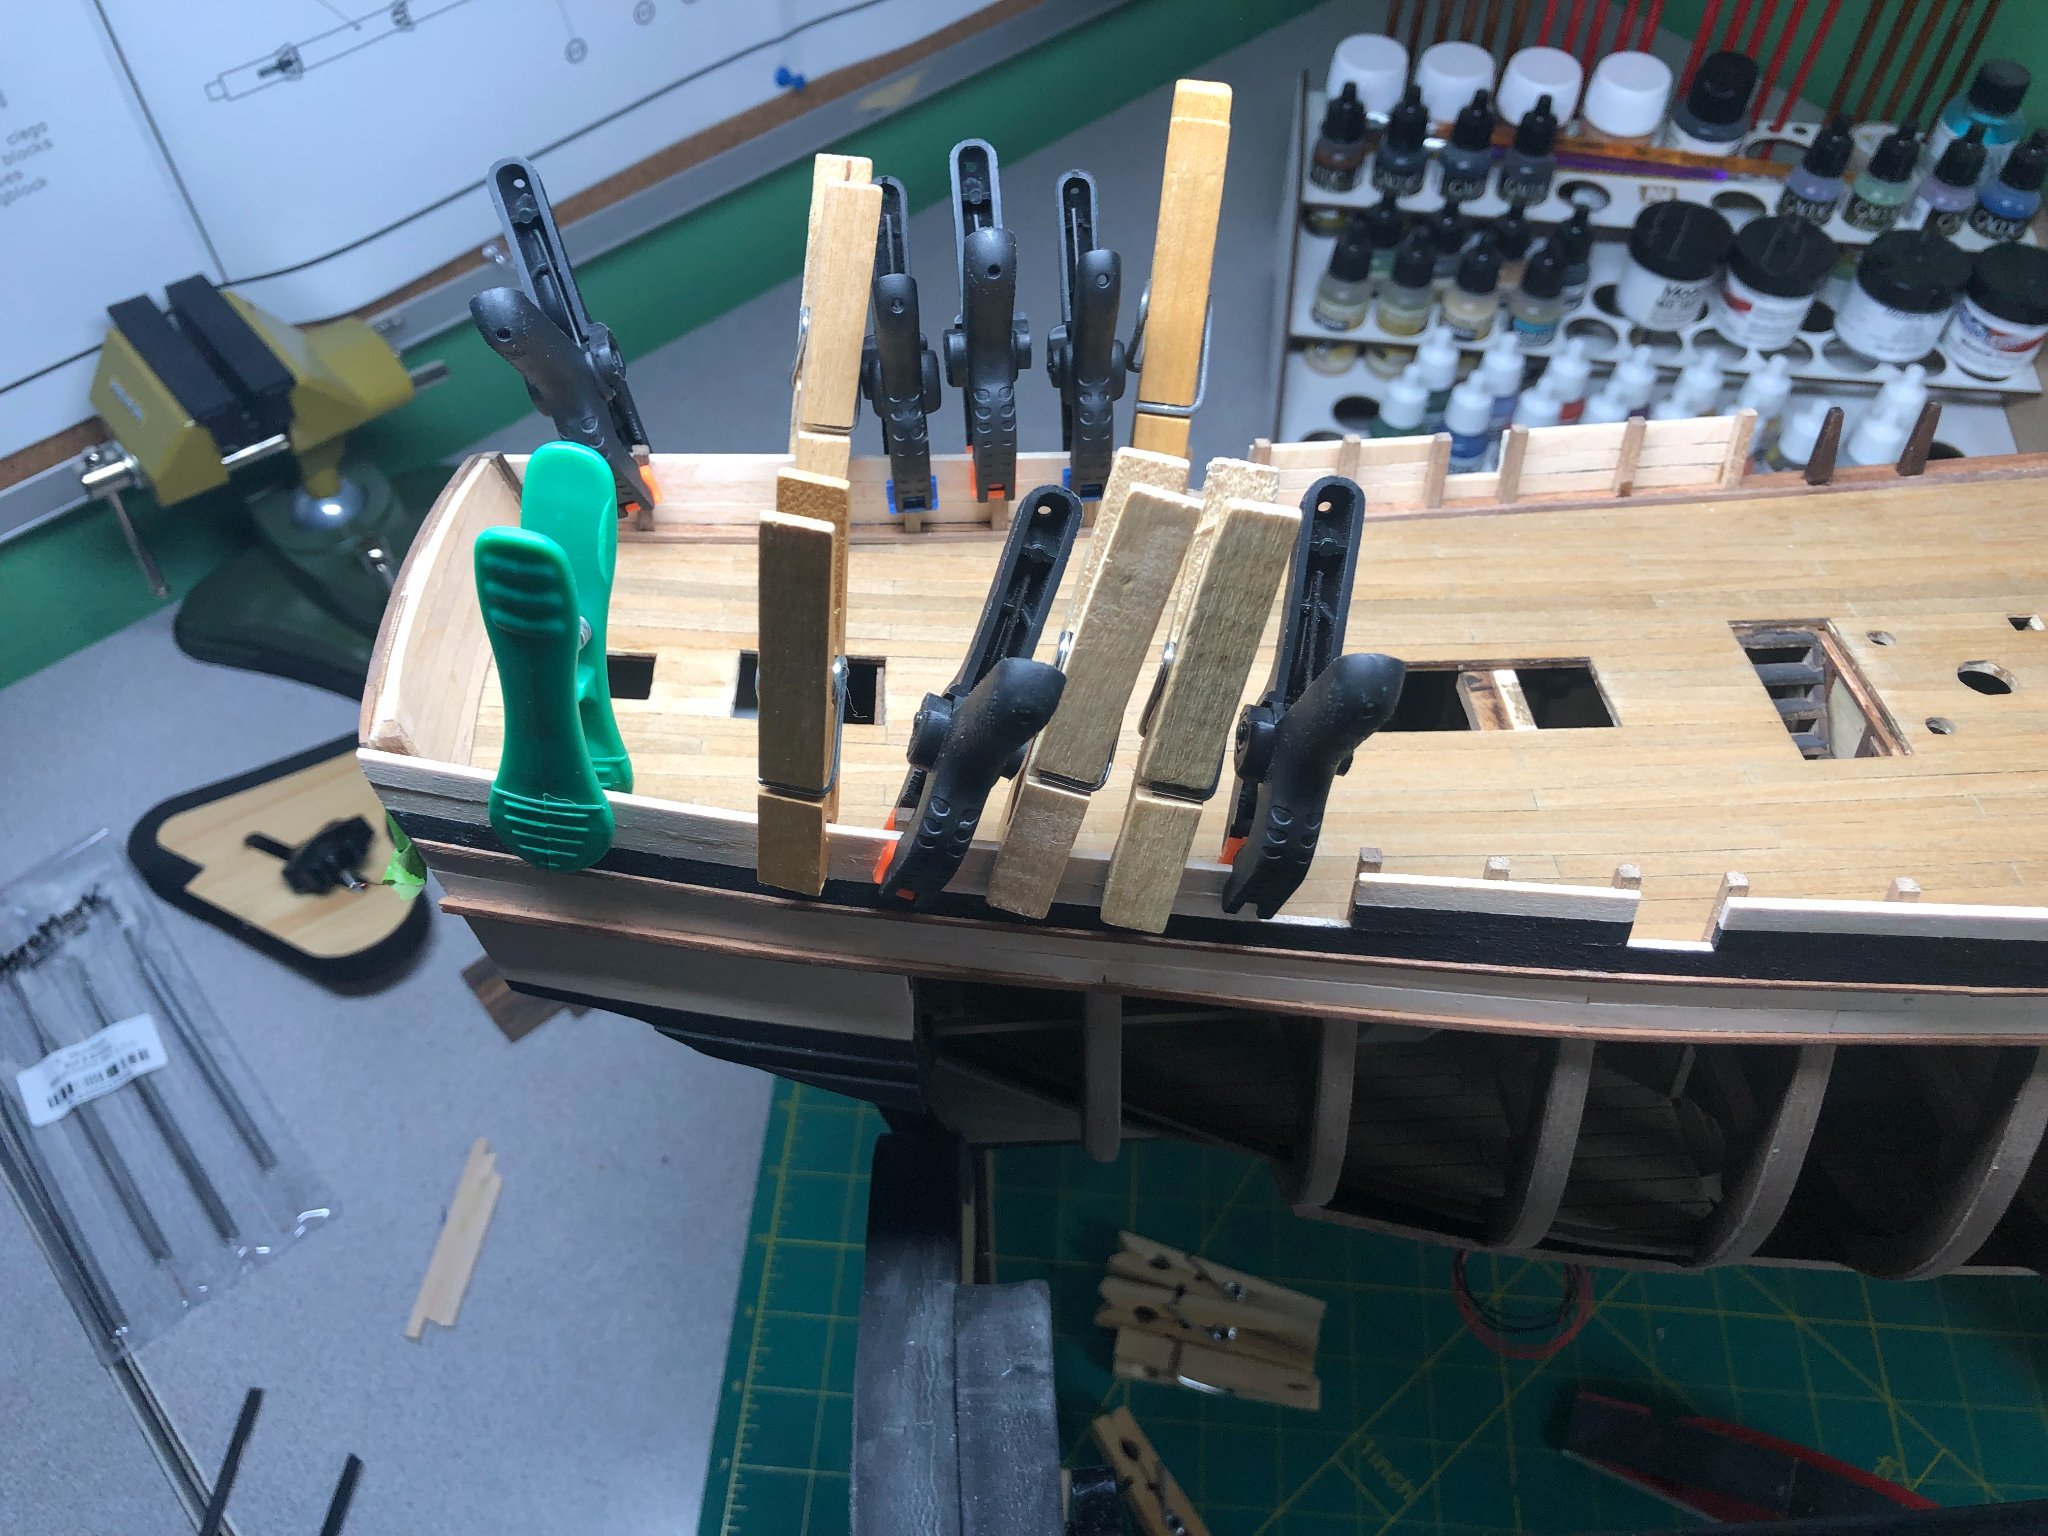
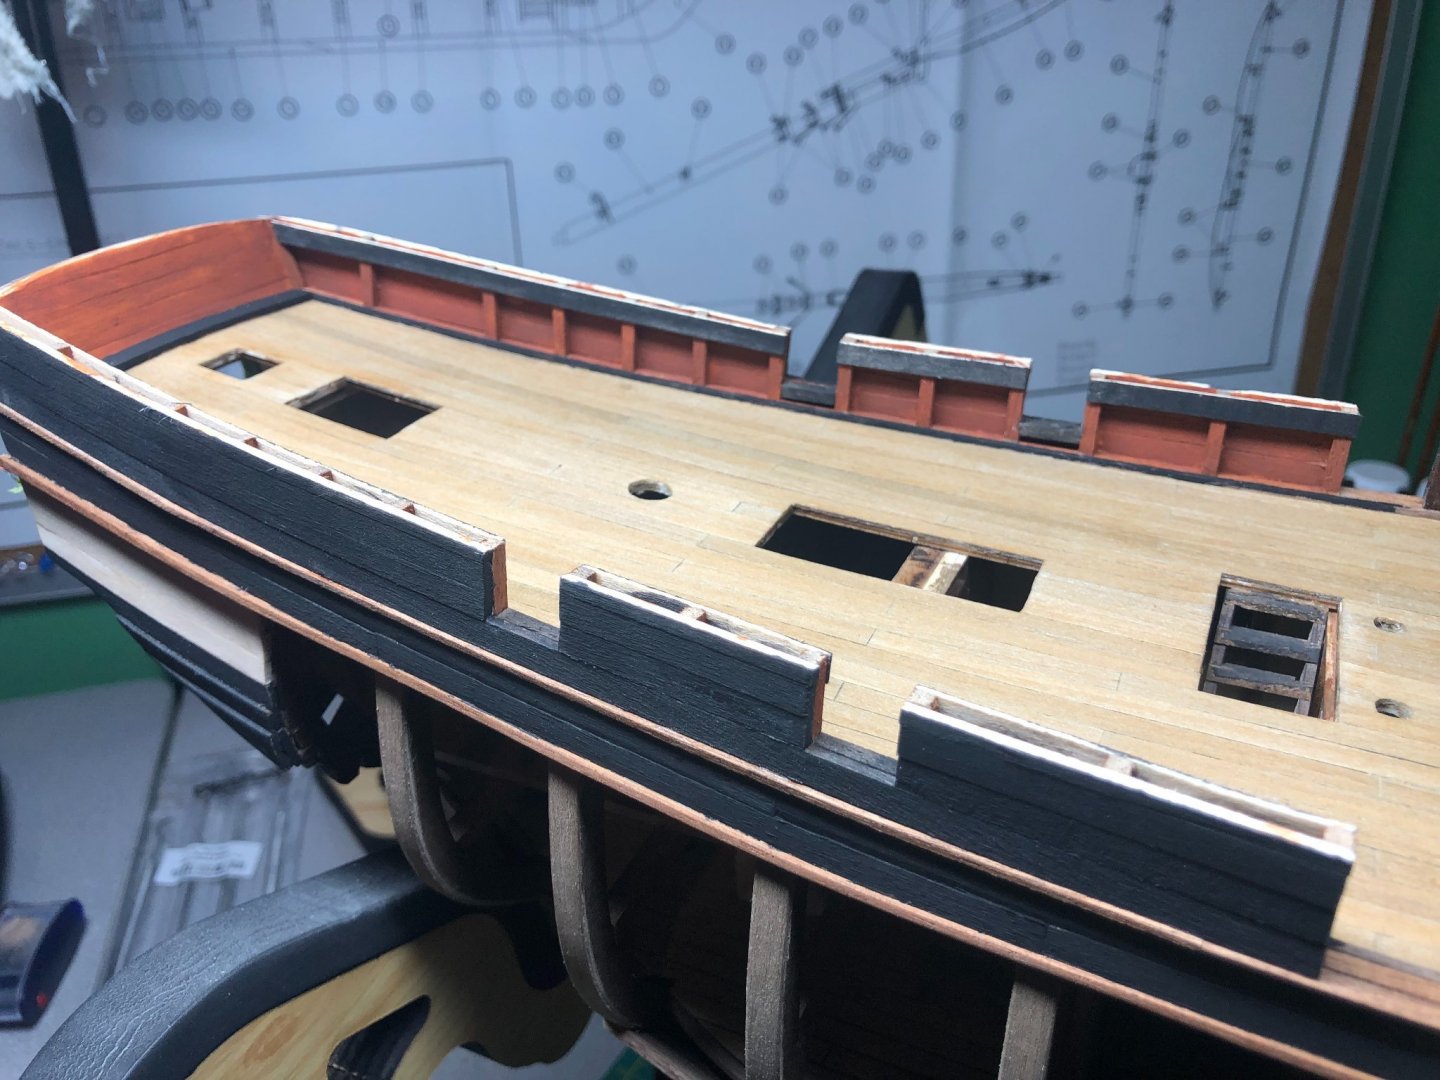
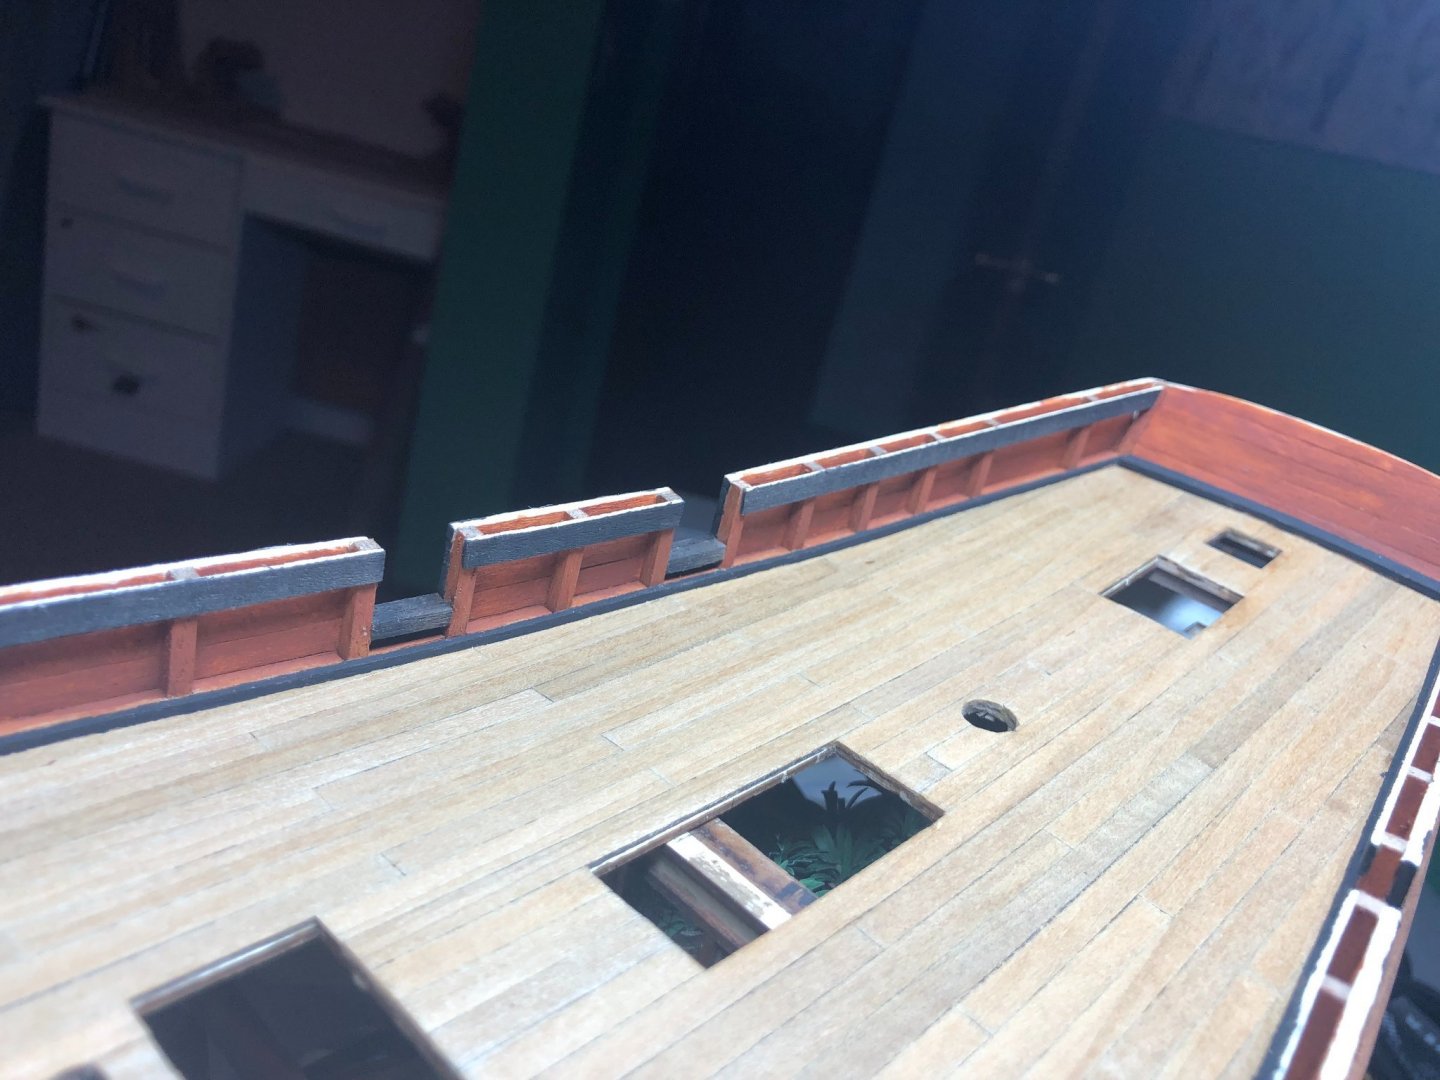
The samson posts were bugging me... didn't like the machined look. So, I did a little filing and am much happier with the results: All made by mini lathe and files, all glued into place: The starboard side was completed in the same fashion and spacers were placed between each post and finally, a small rail to cap the work: The midship timbers and the samson posts were given a coat of Danish oil to deepen the color: The first layer of aft rails... painted first to avoid trying to mask off certain areas. I decided to cut the planks to the proper lengths for the cannon holes rather than cut the holes afterwards: I'll finish the aft rails tomorrow and then begin painting the insides of them before install the cap rails. Also, the piece that is a precut rail that sits on the deck against the transom is not even a close fit. It shouldn't be too difficult to make another one. The transom cap rail (precut too) may fit, it'll be close. More soon!