LyleK1
-
Posts
541 -
Joined
-
Last visited
Content Type
Profiles
Forums
Gallery
Events
Everything posted by LyleK1
-
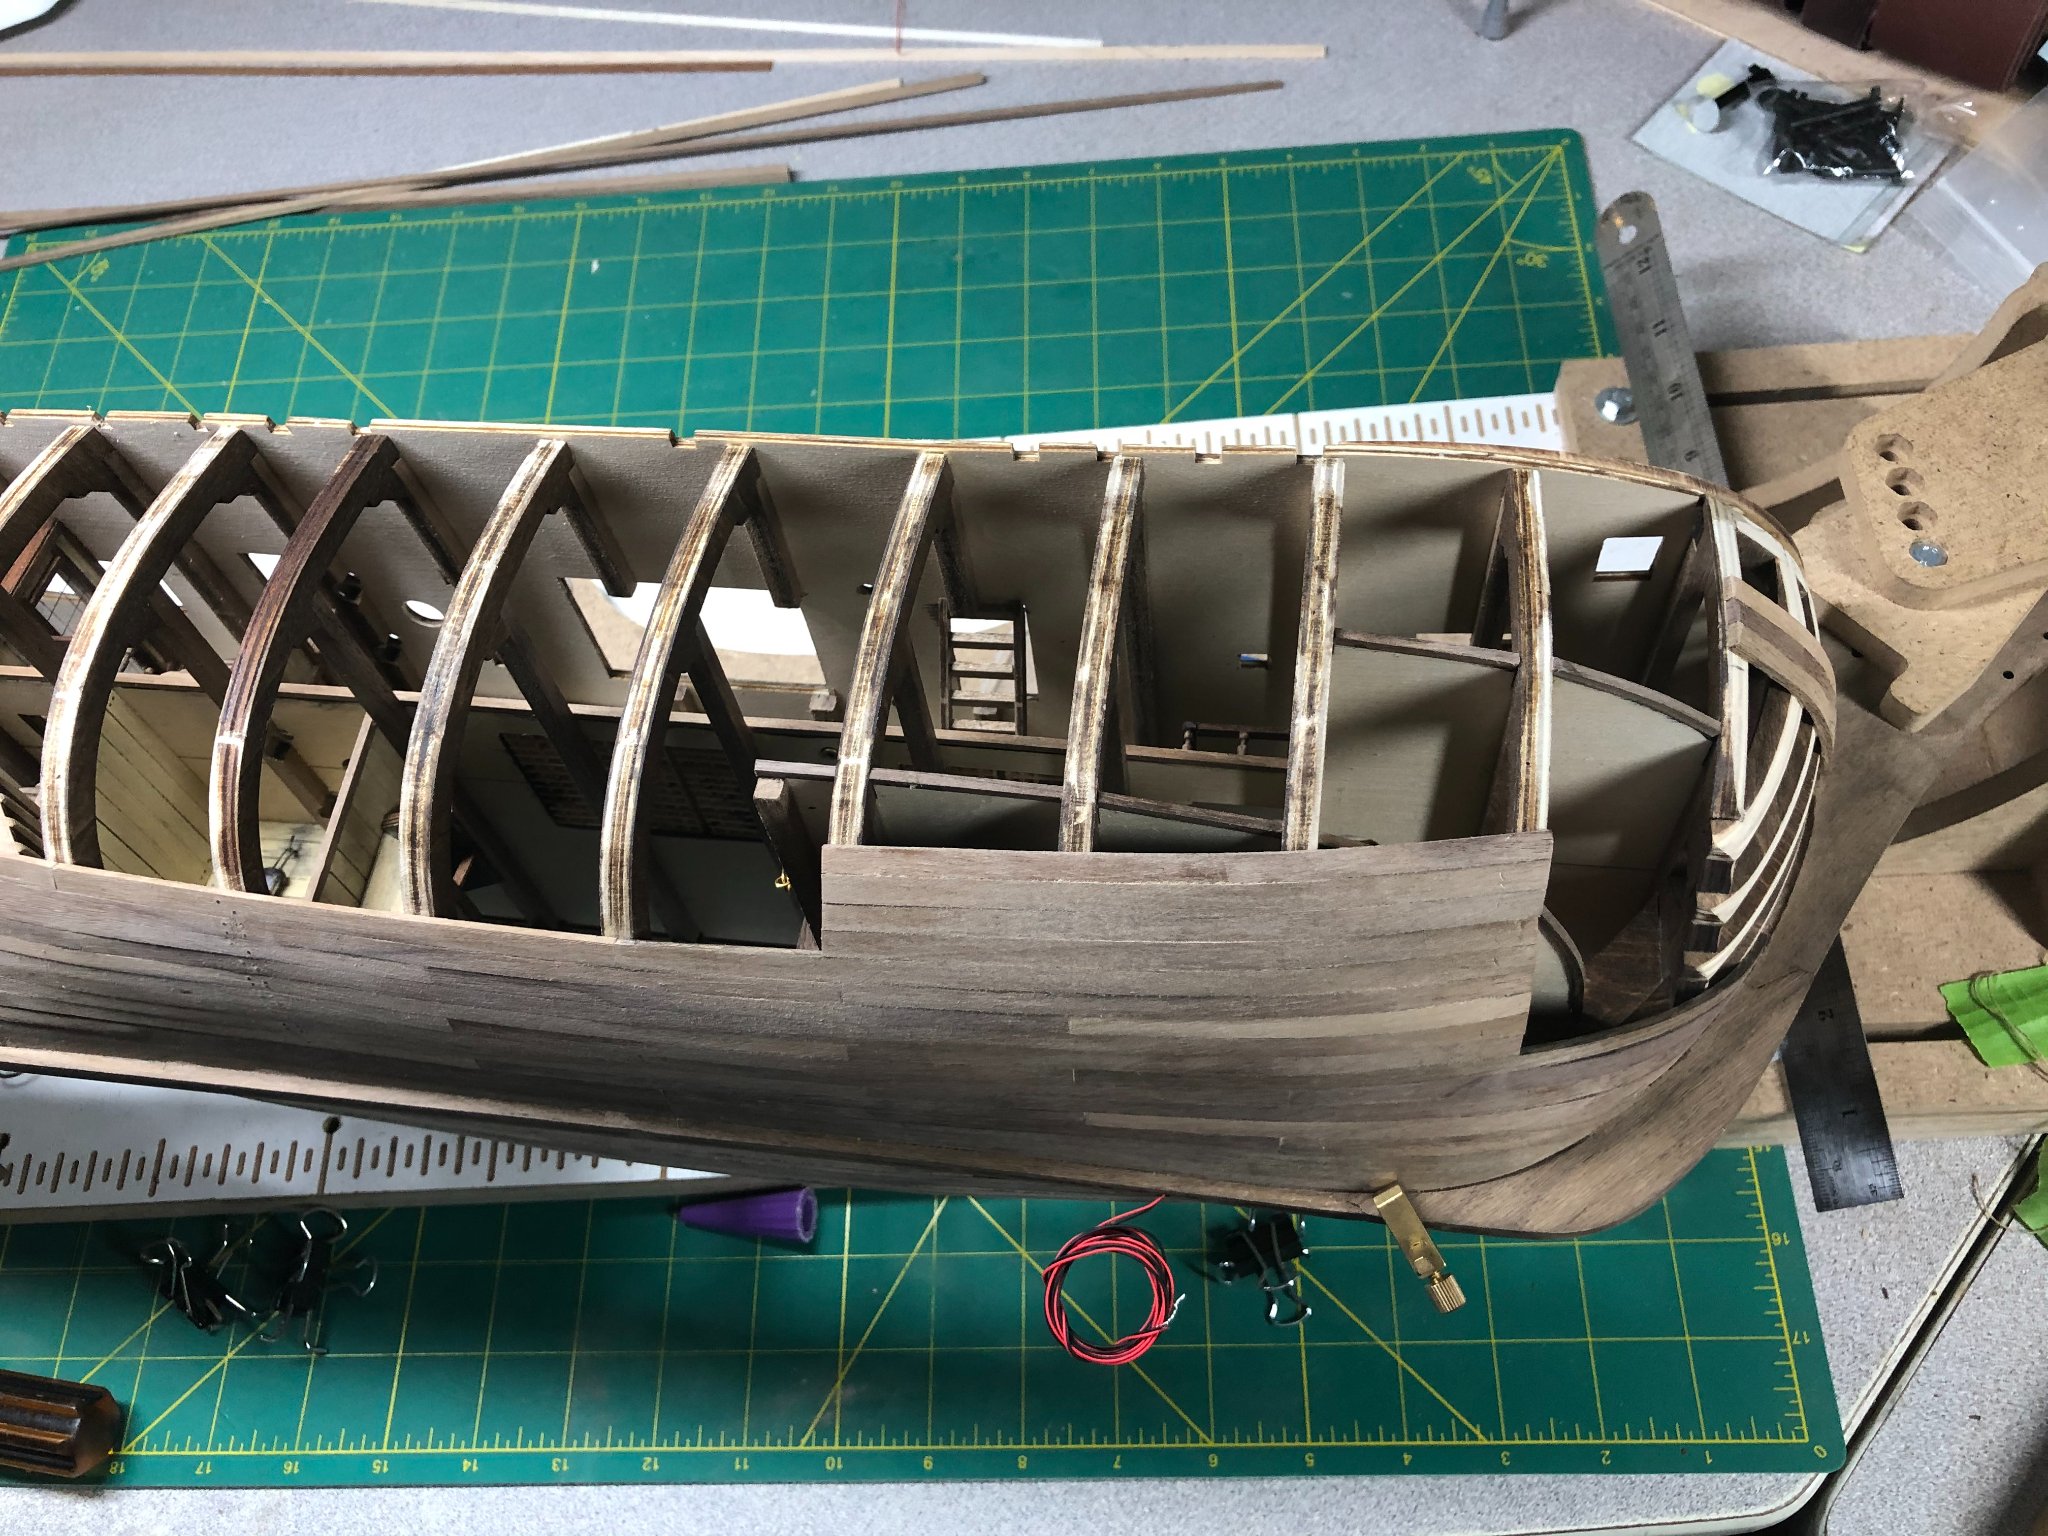
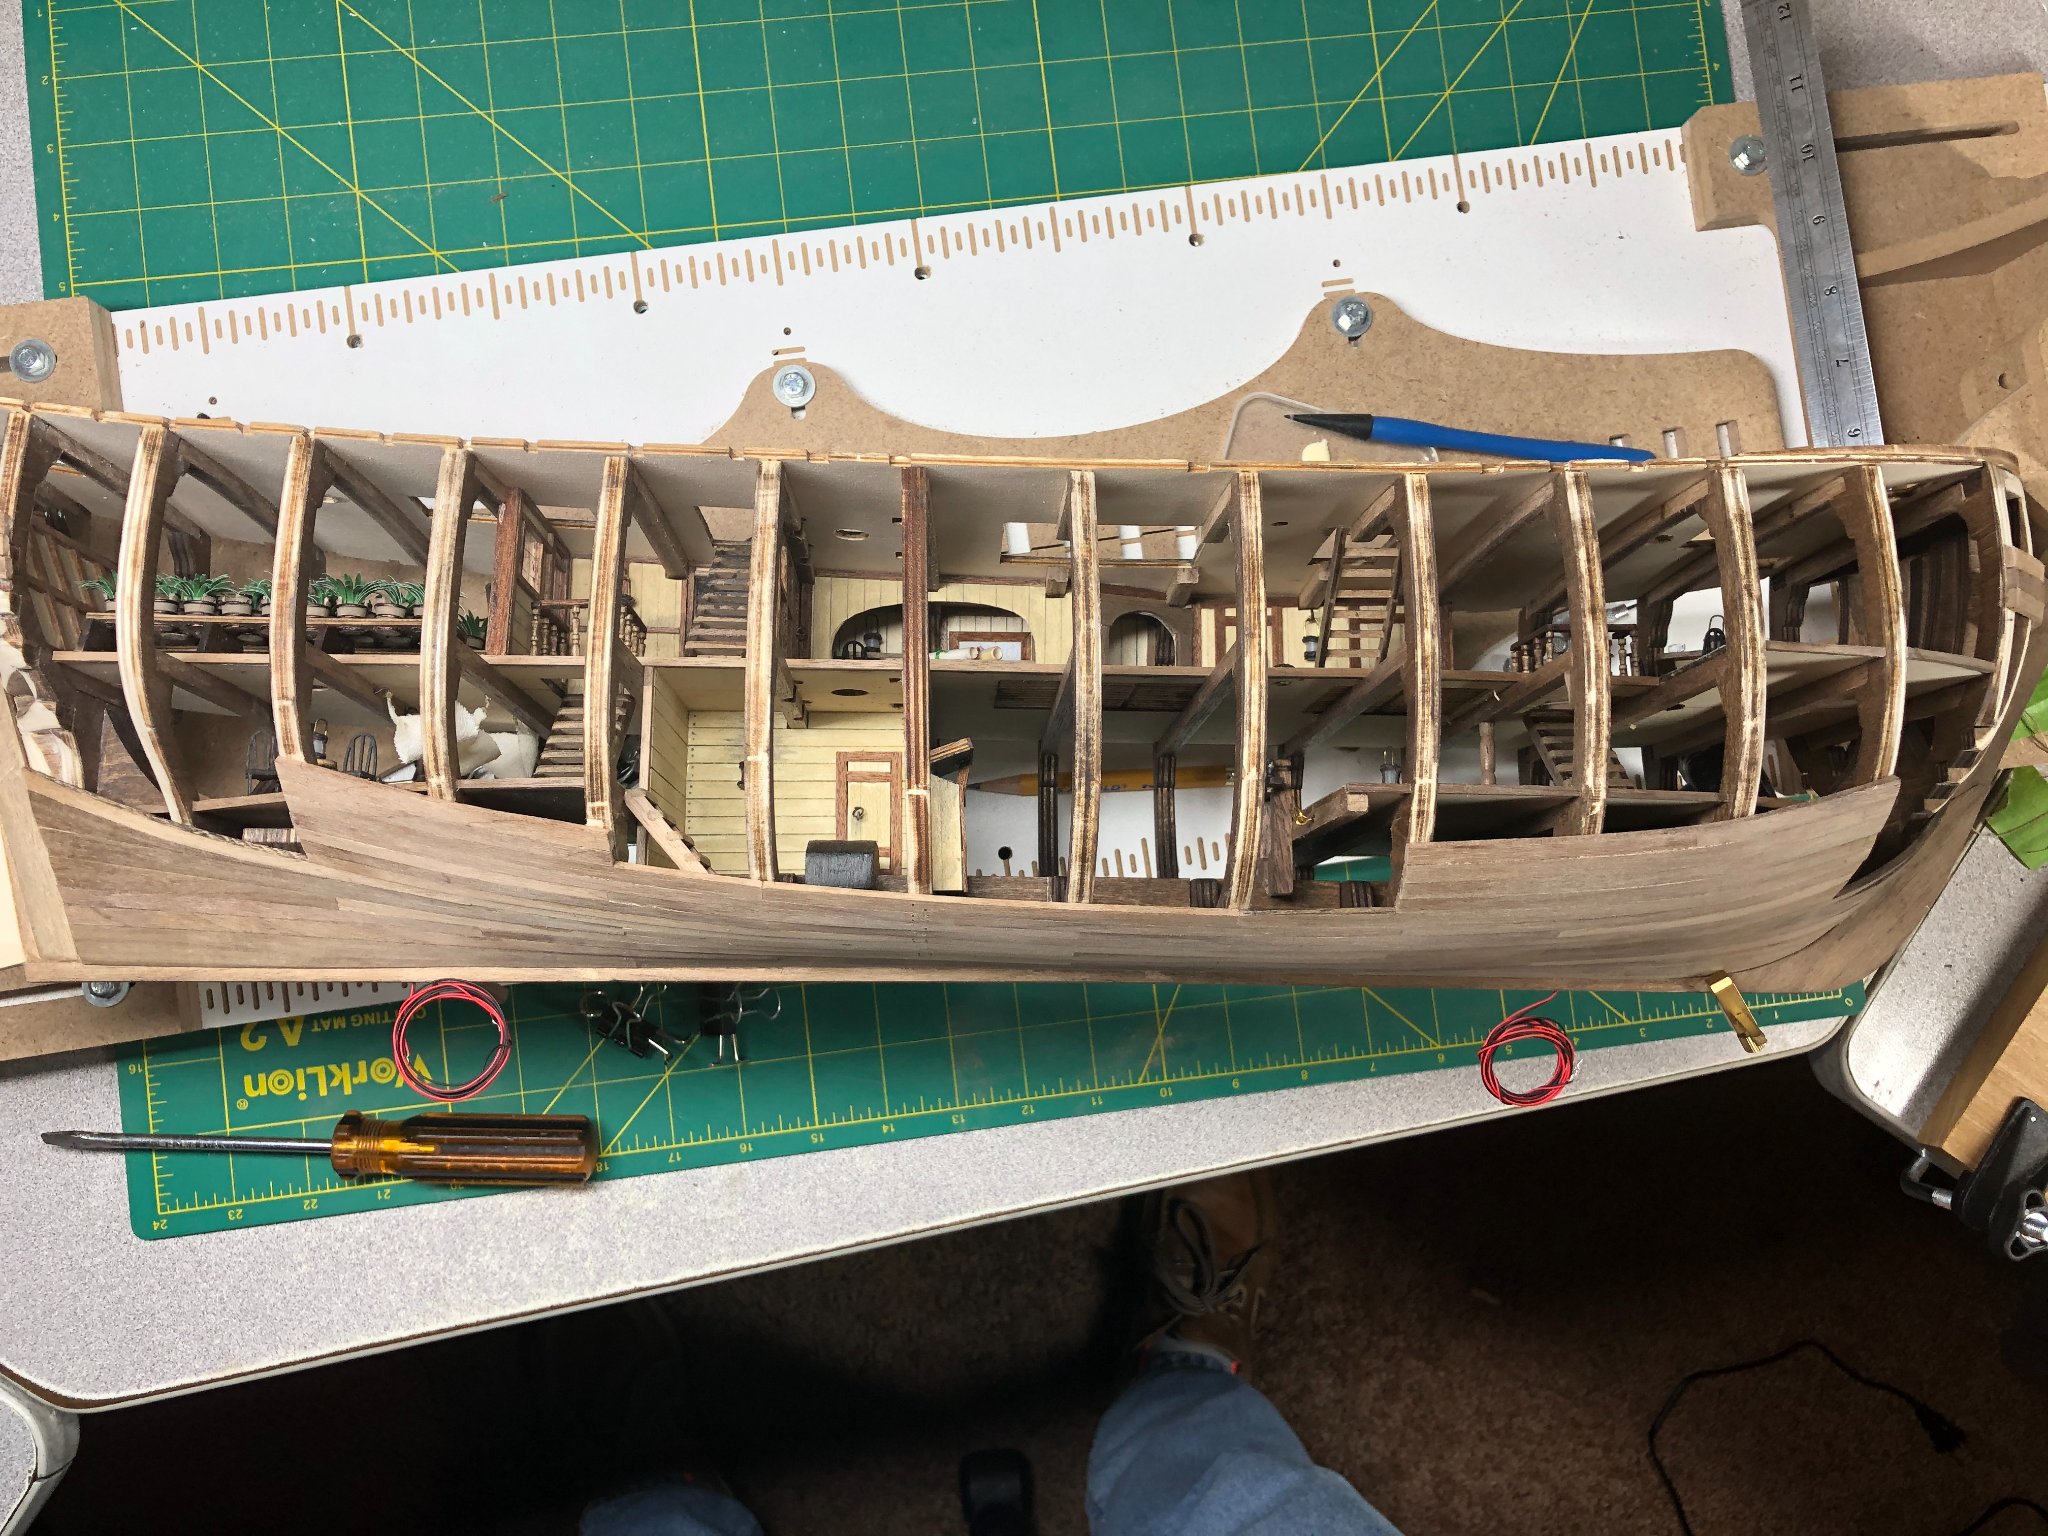
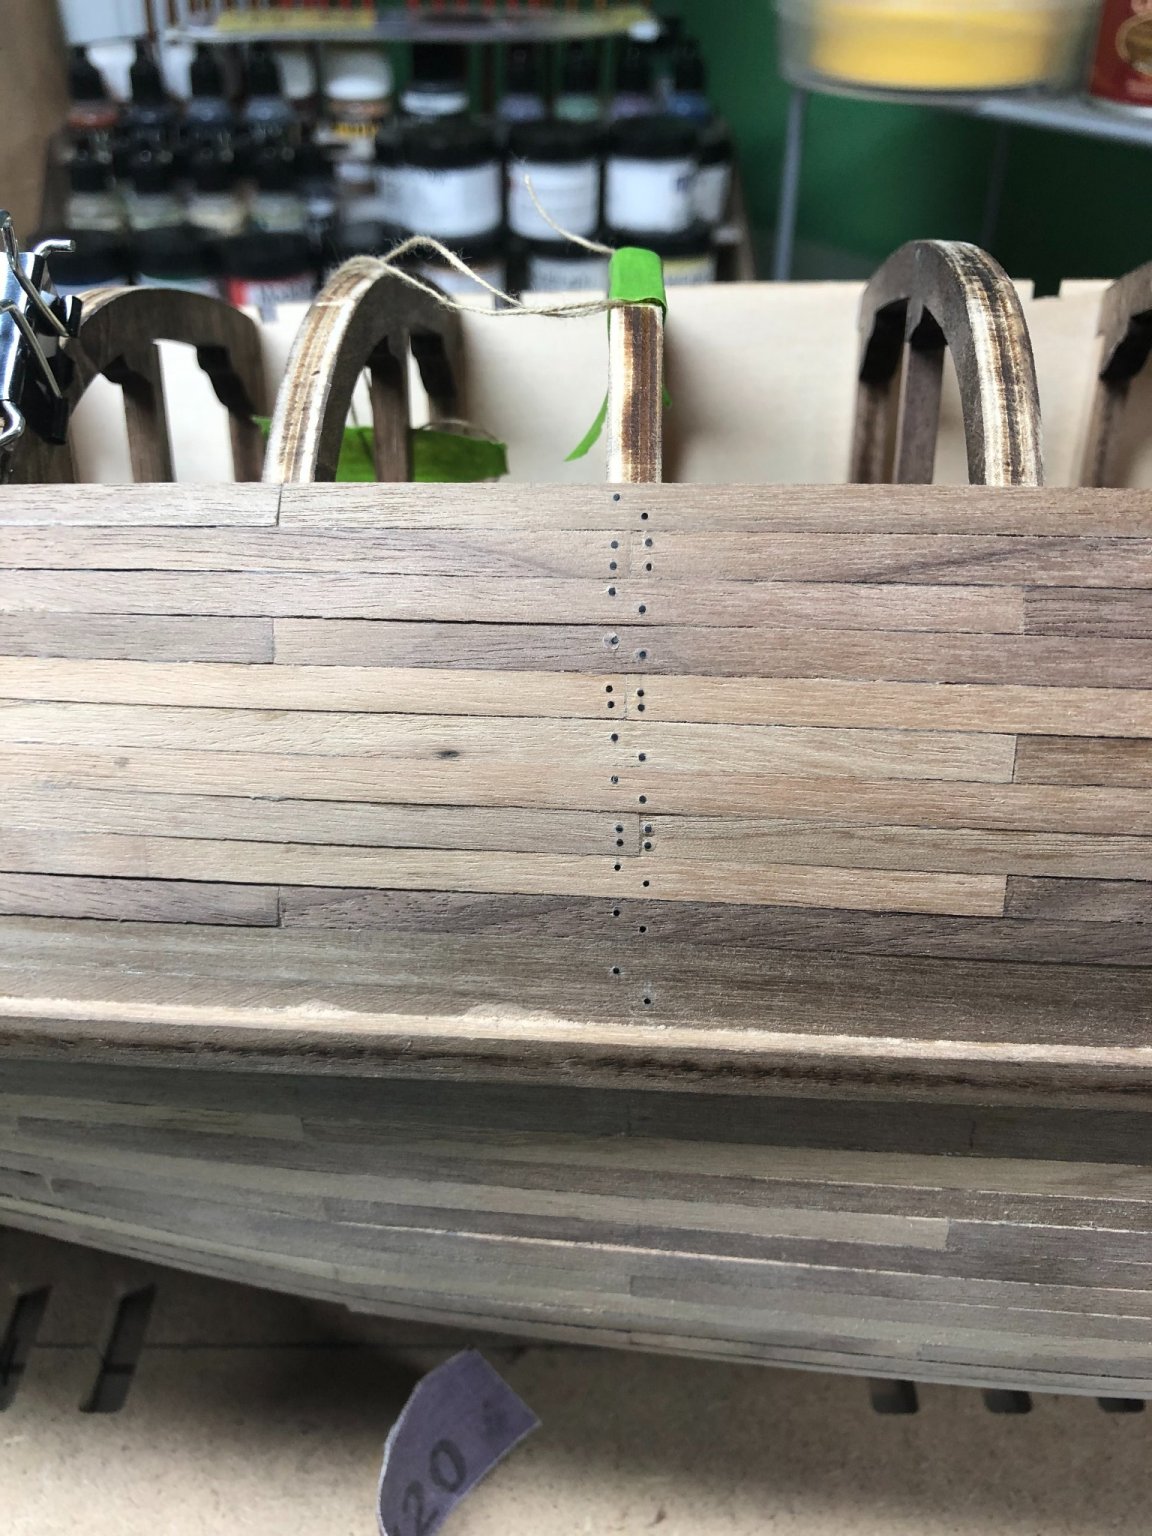
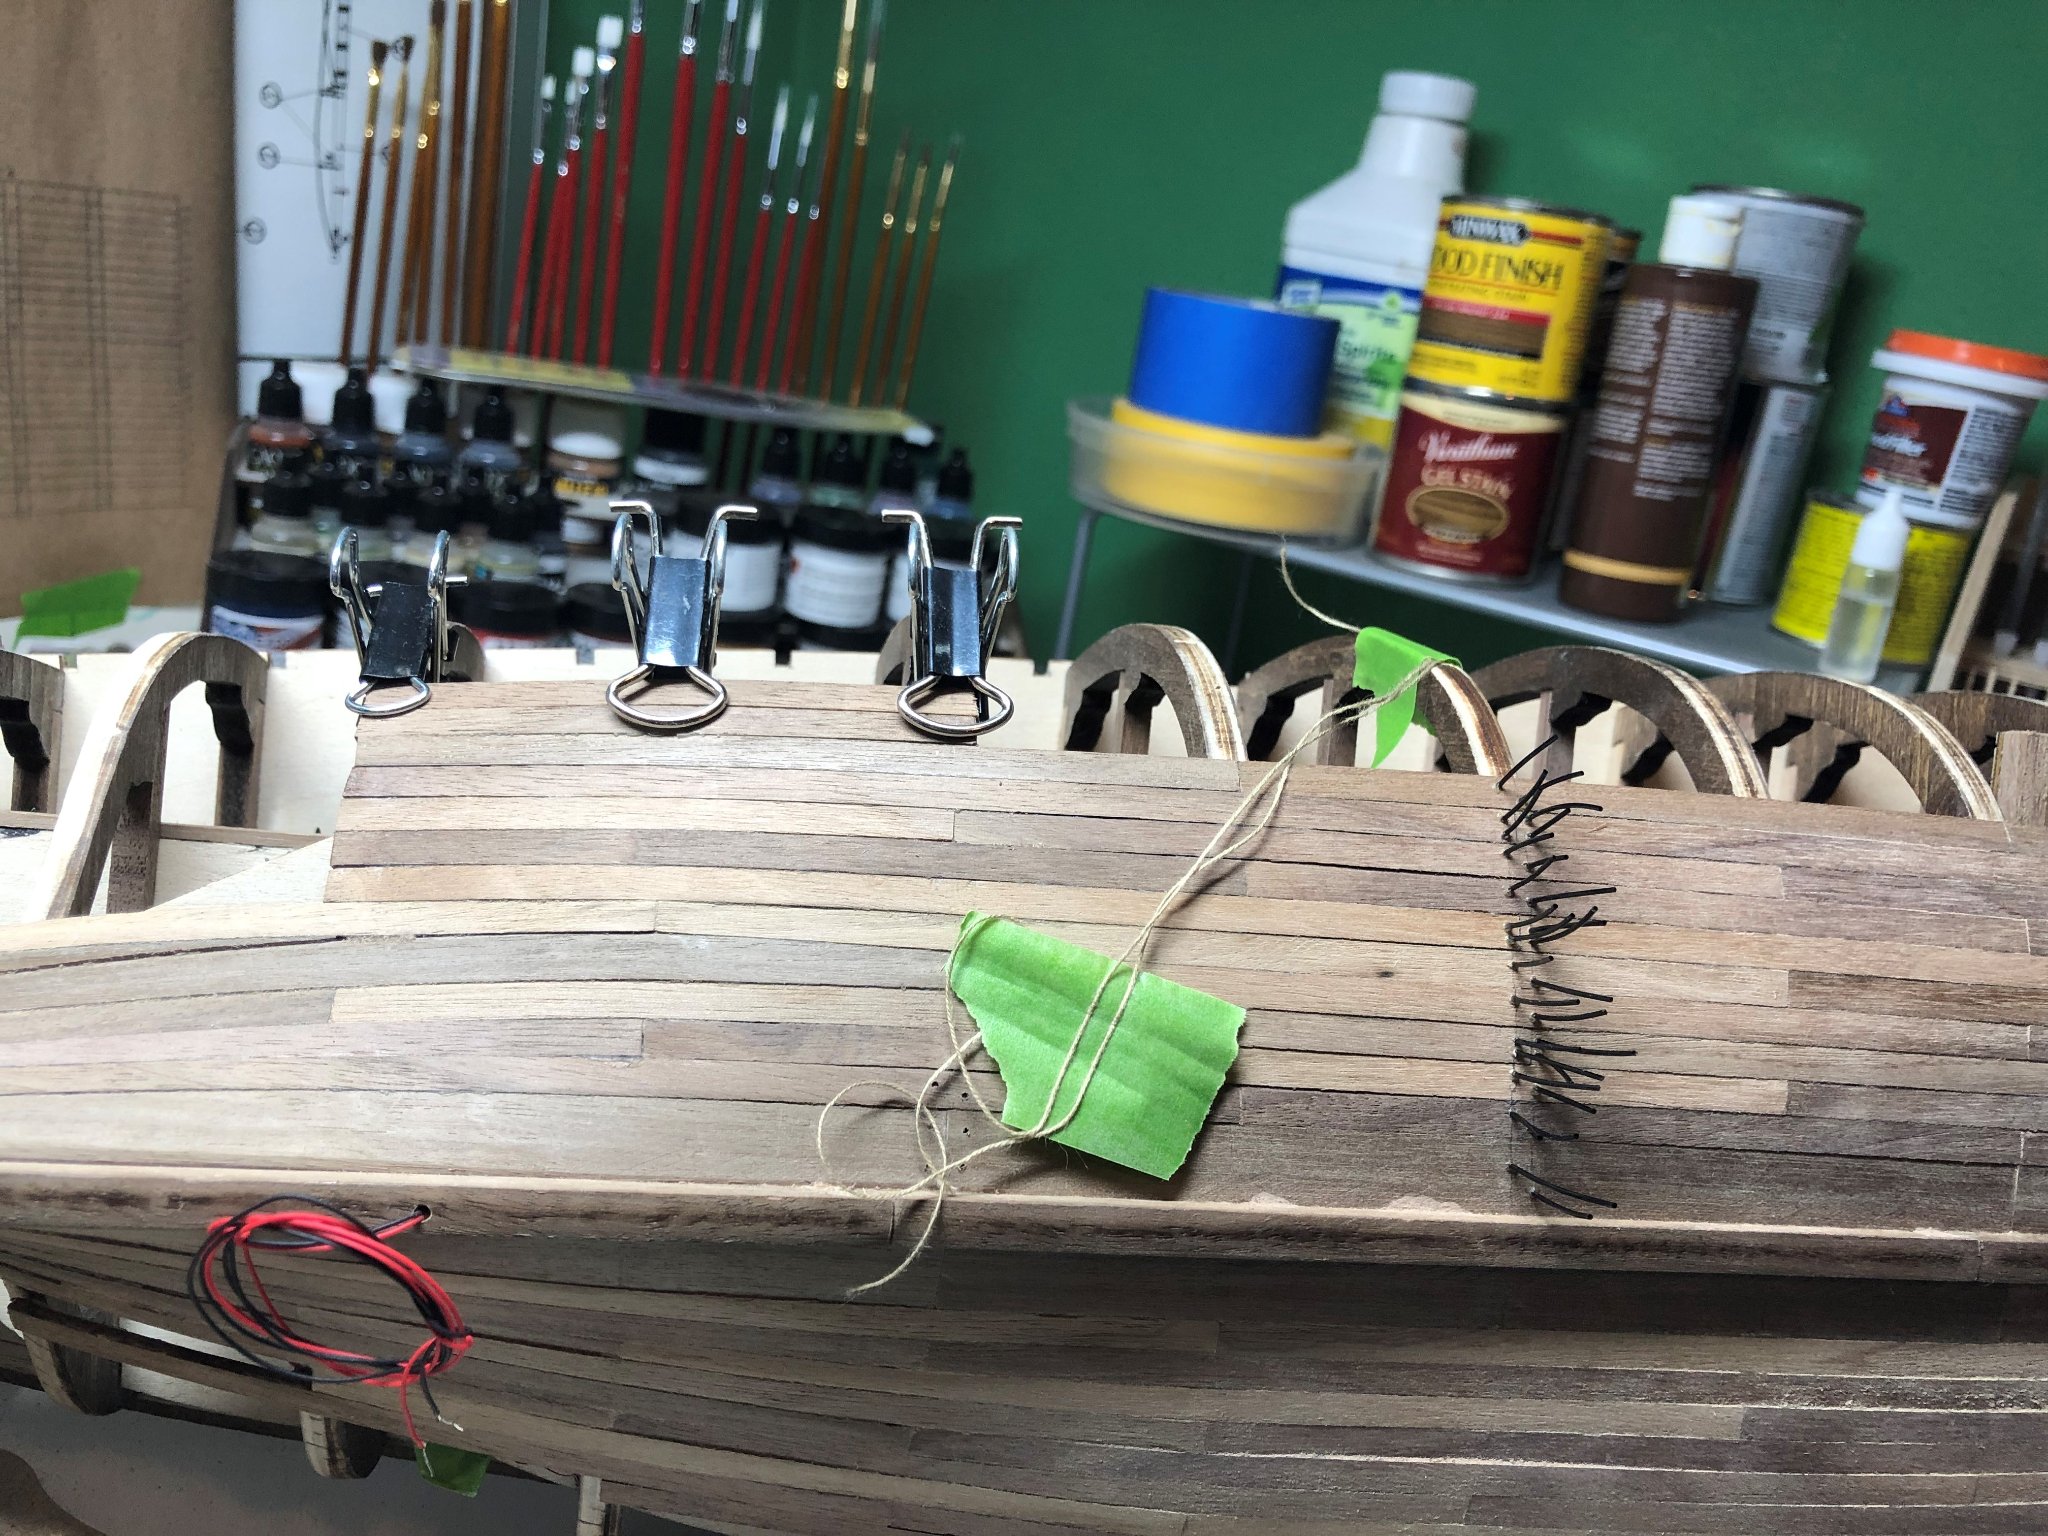
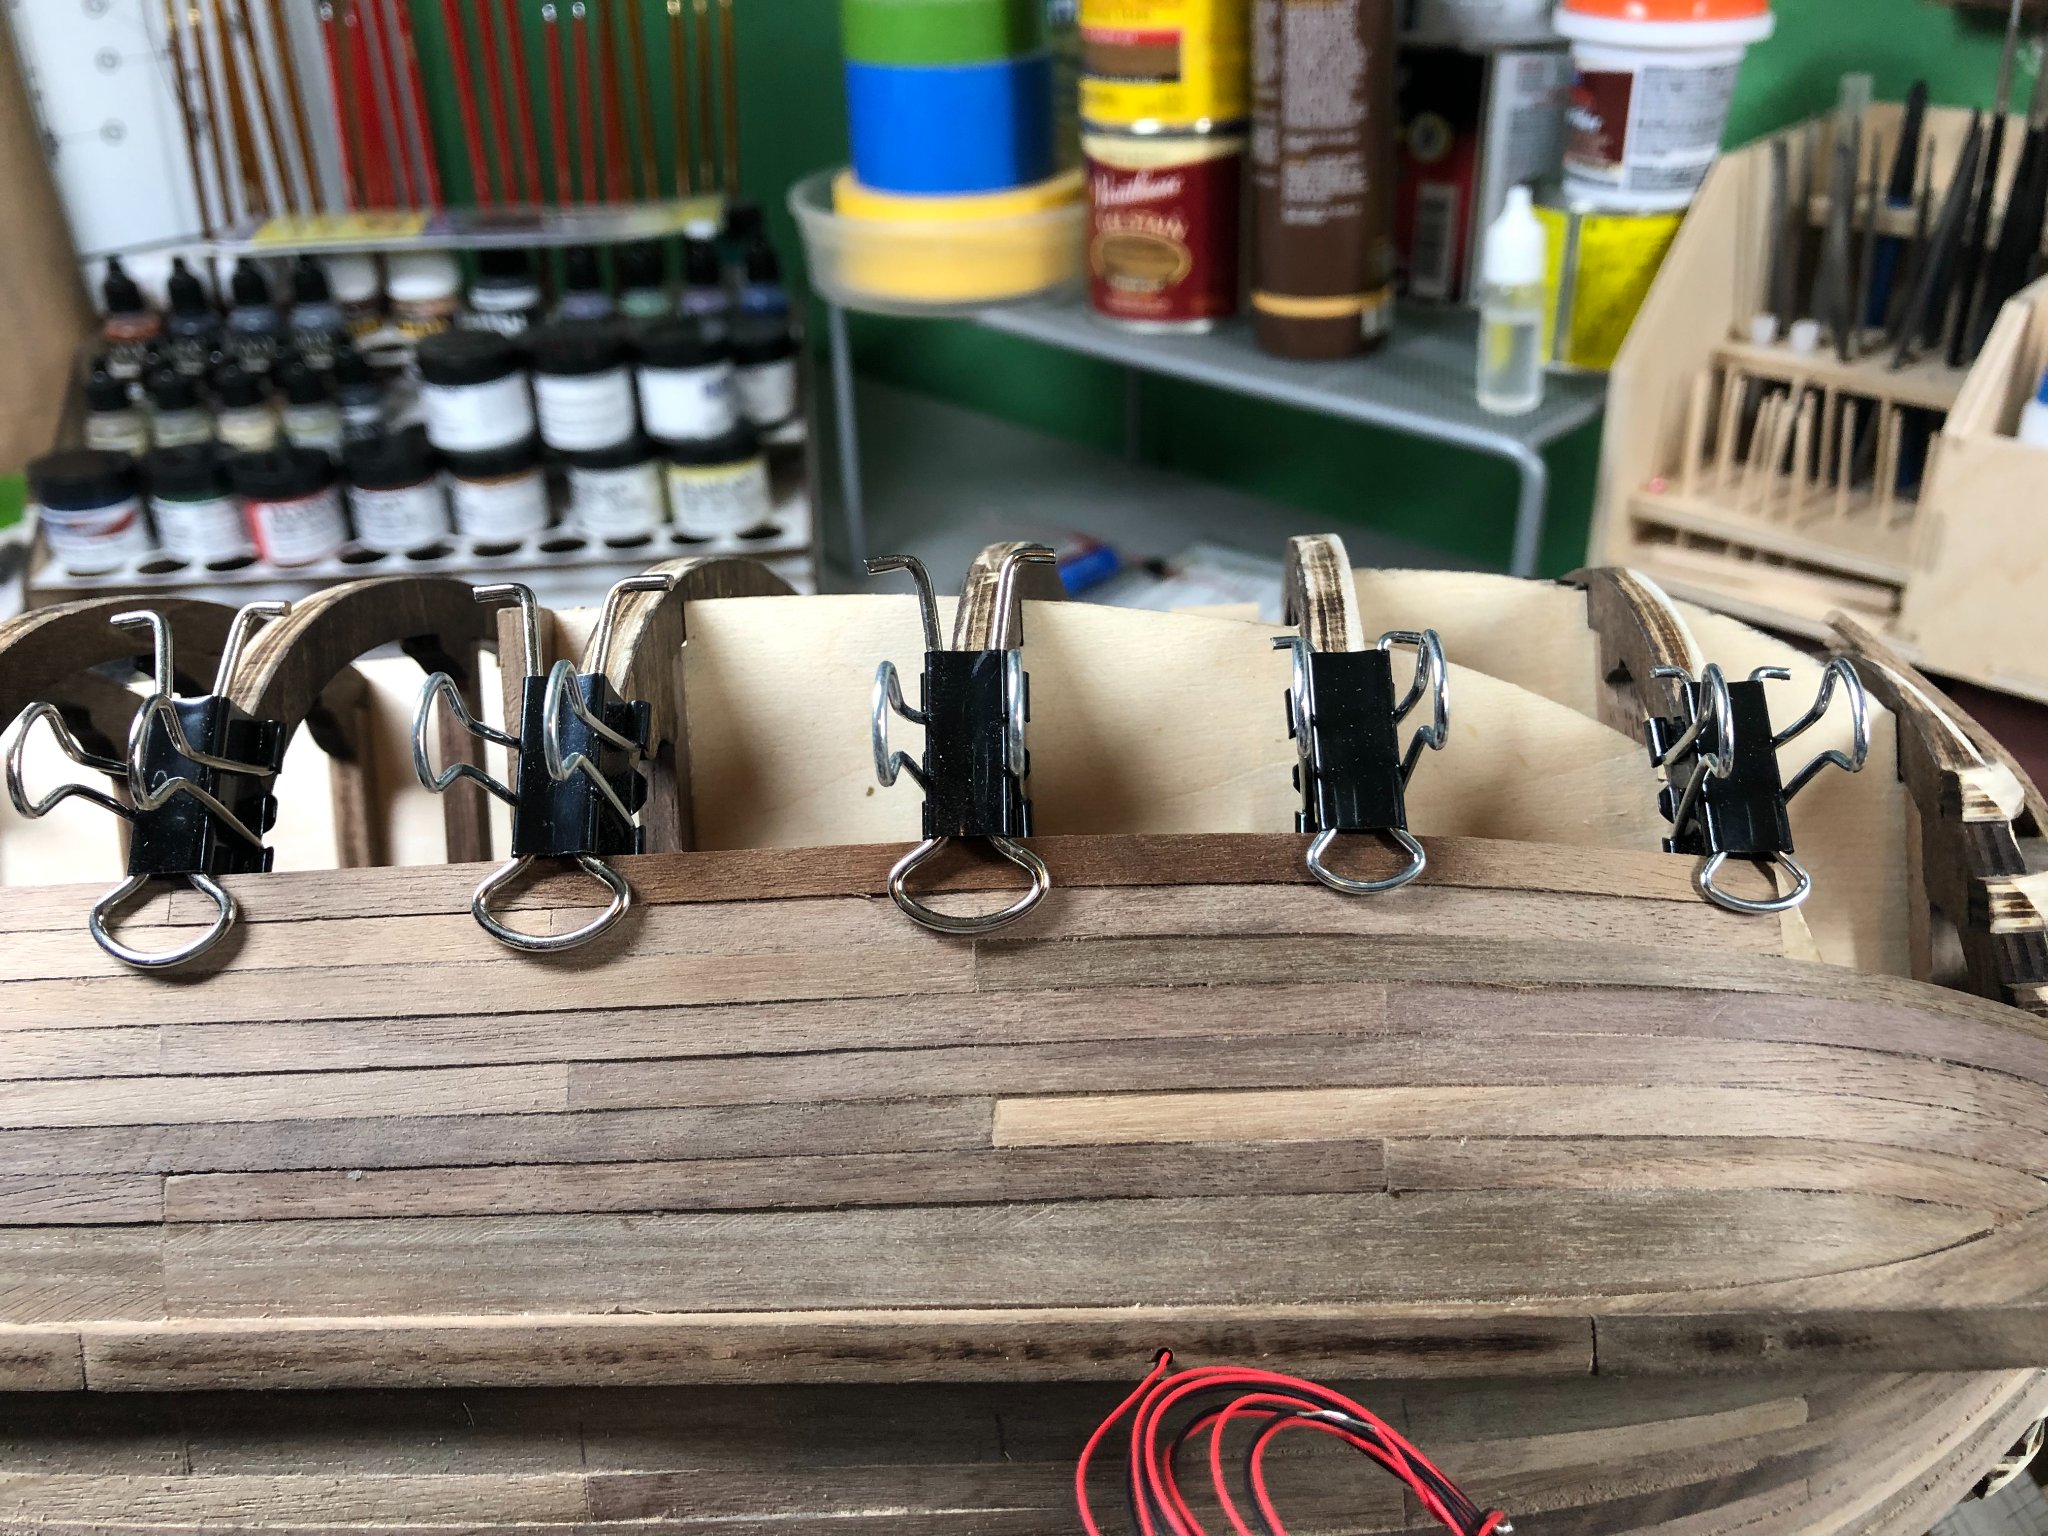
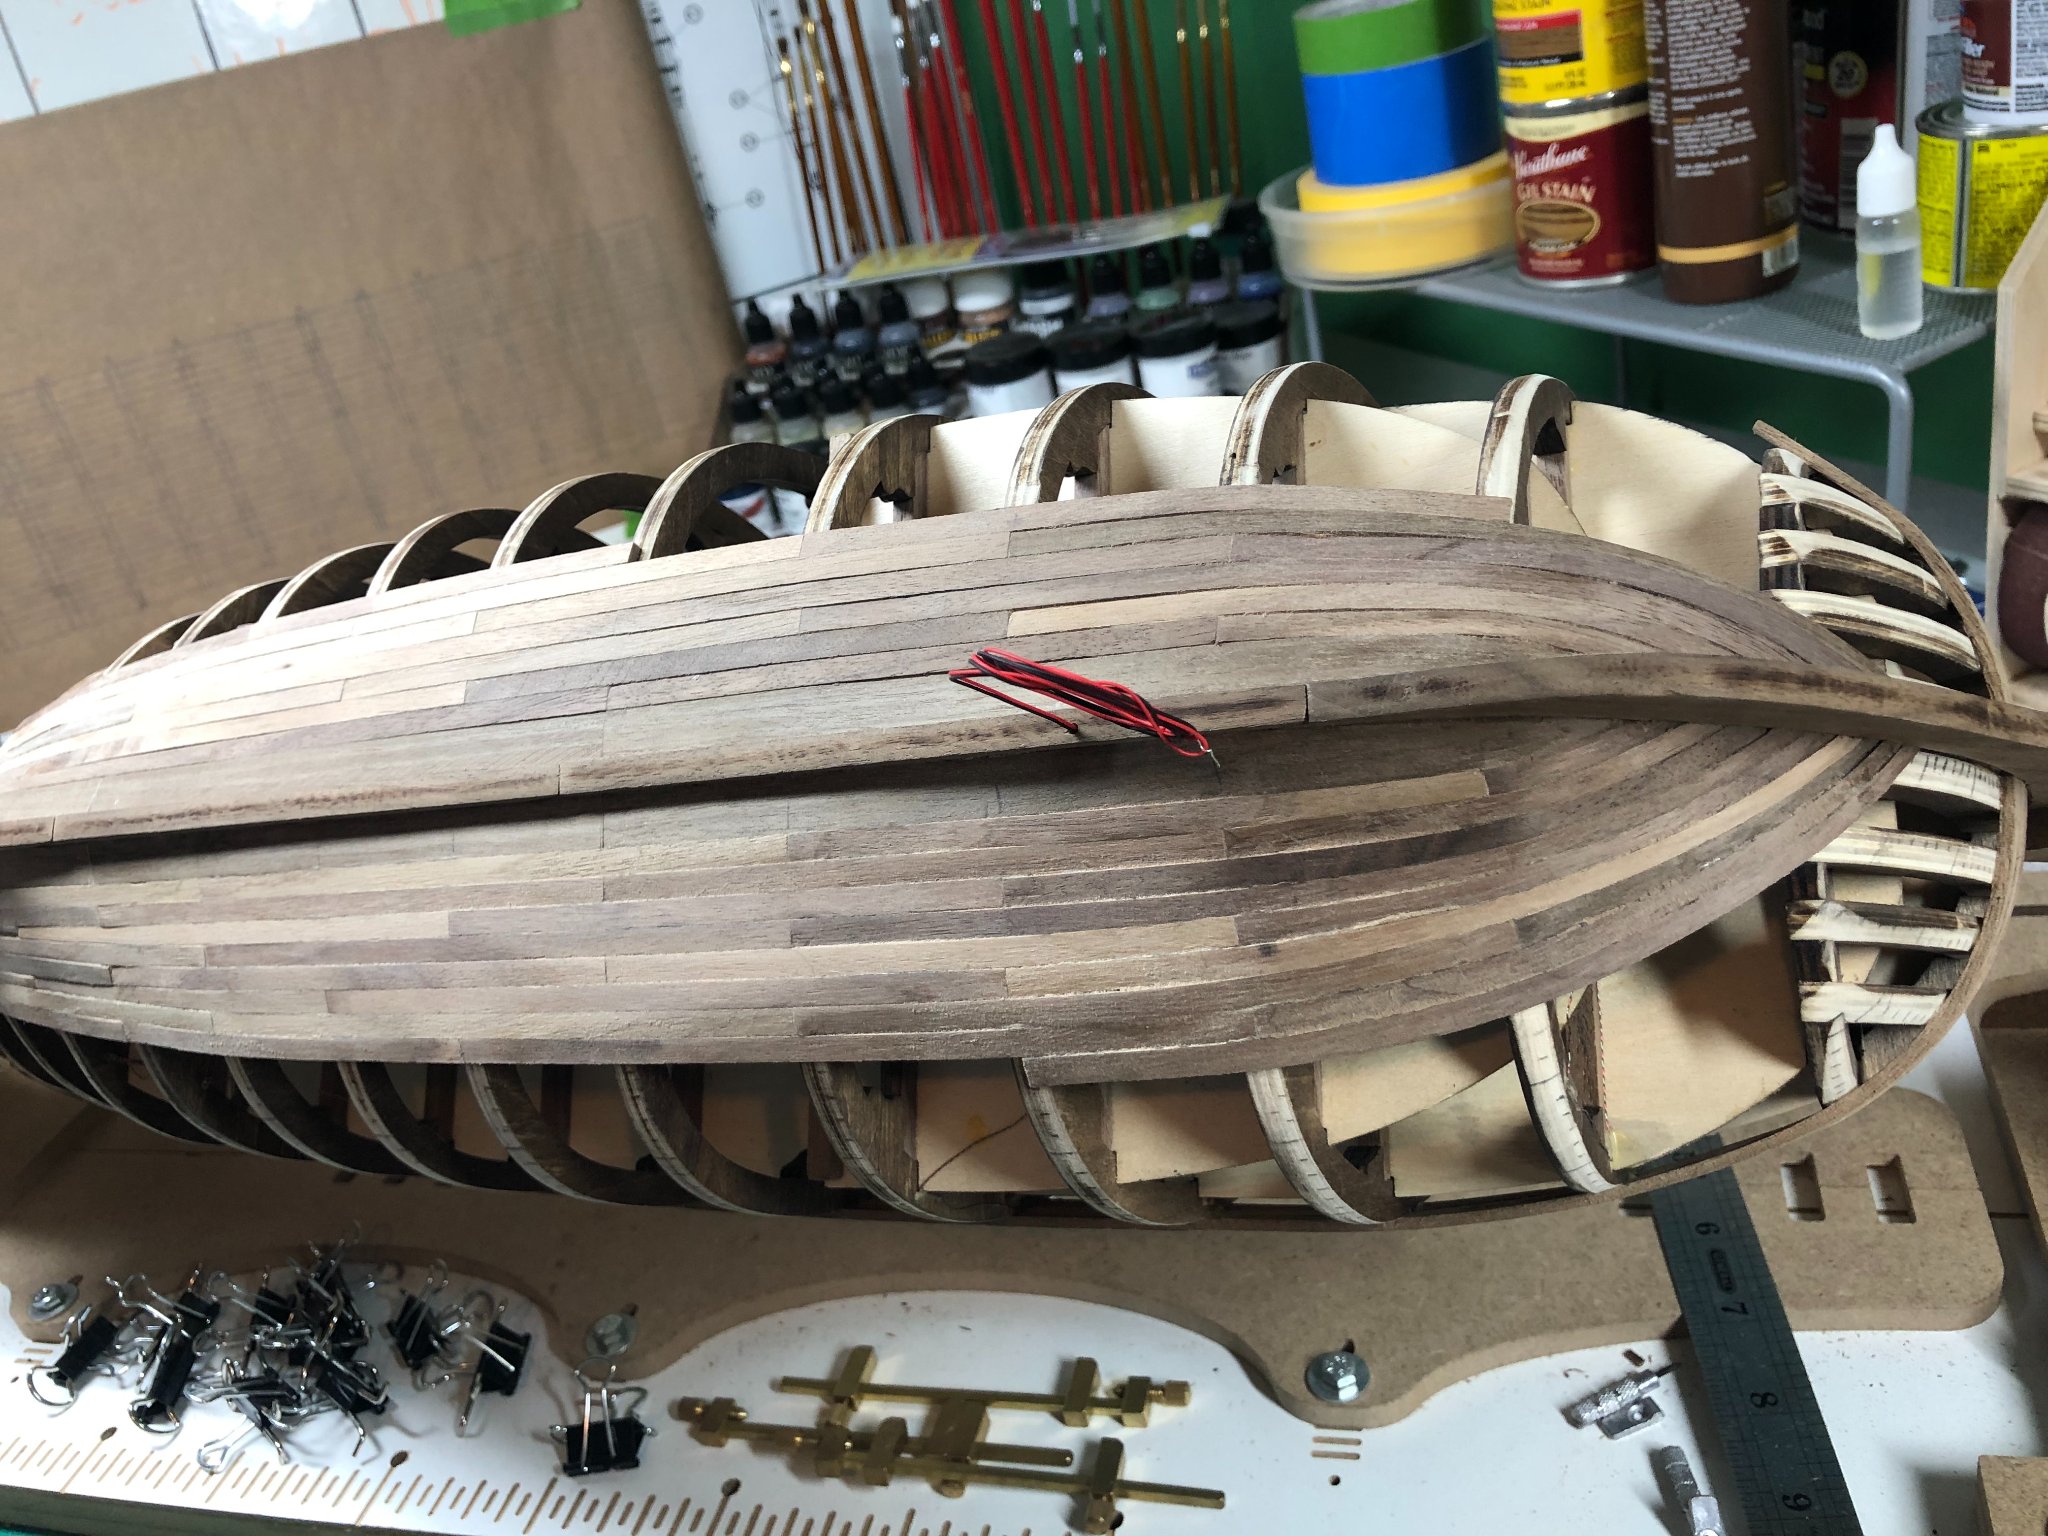
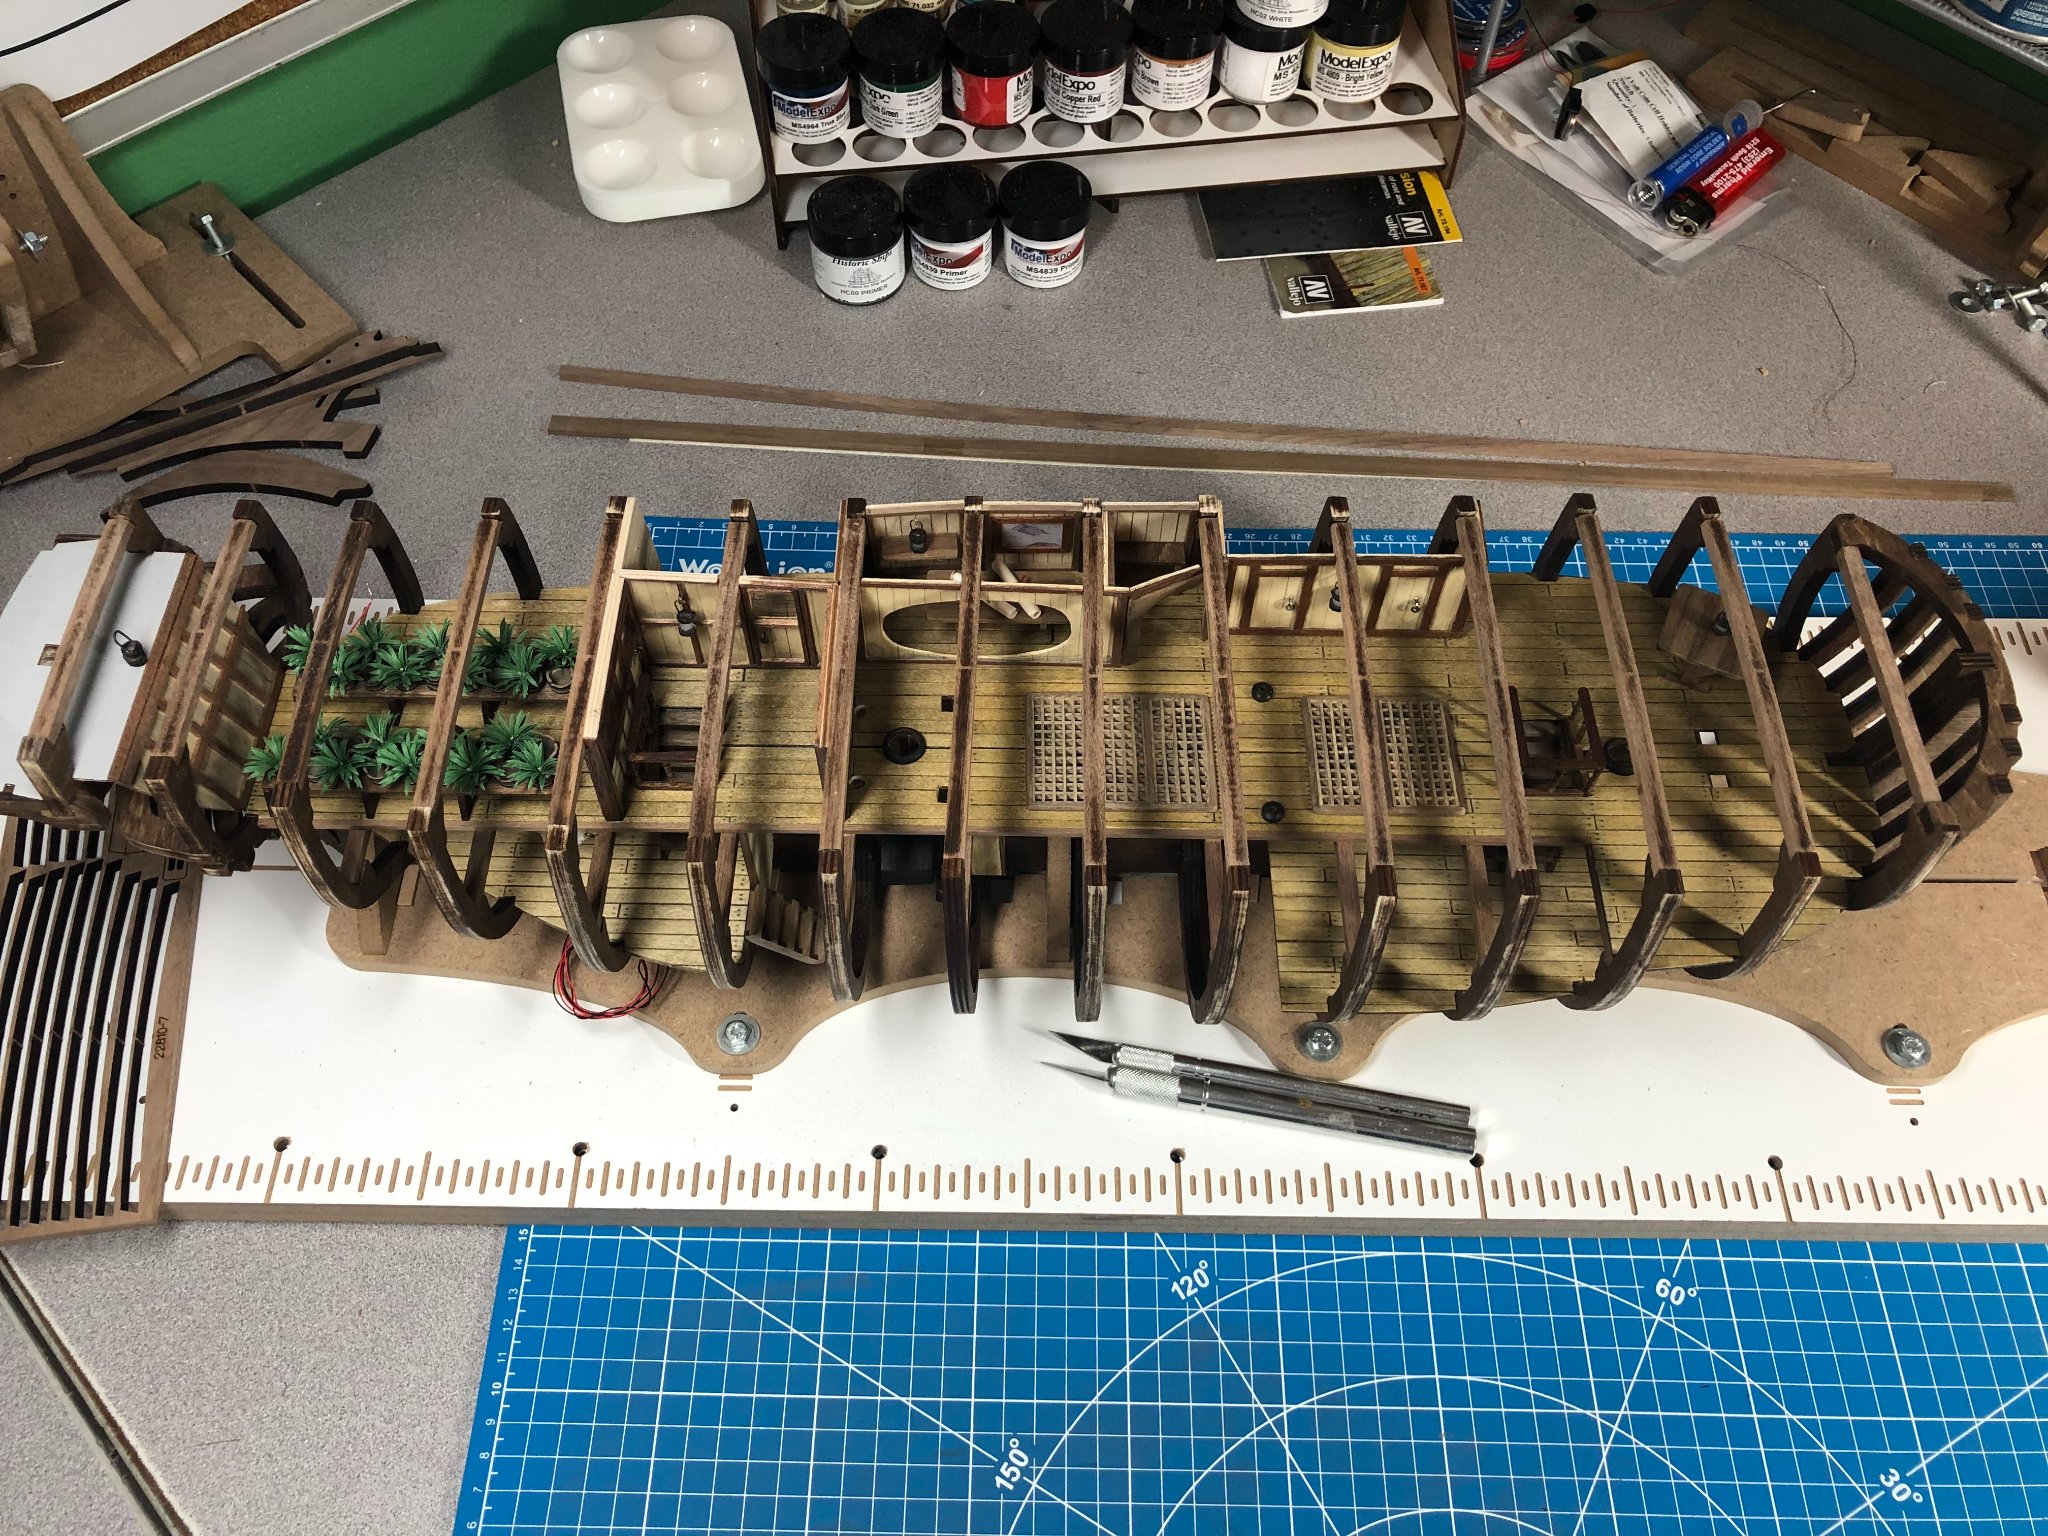
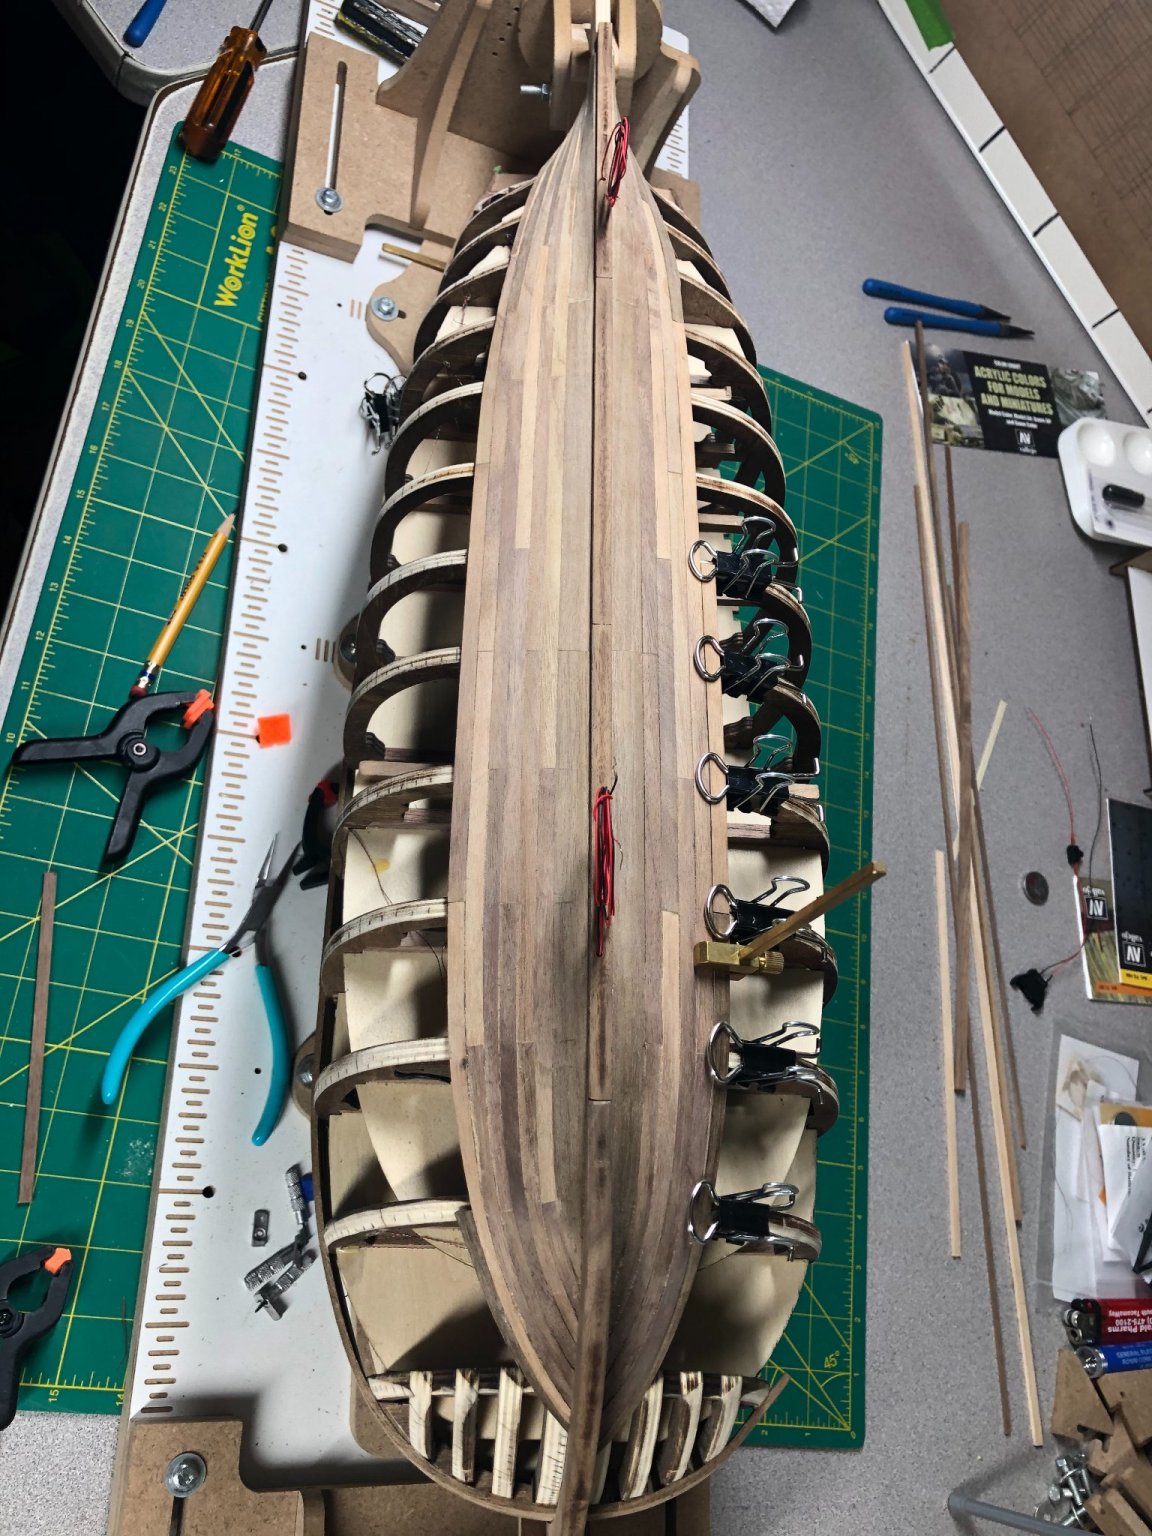
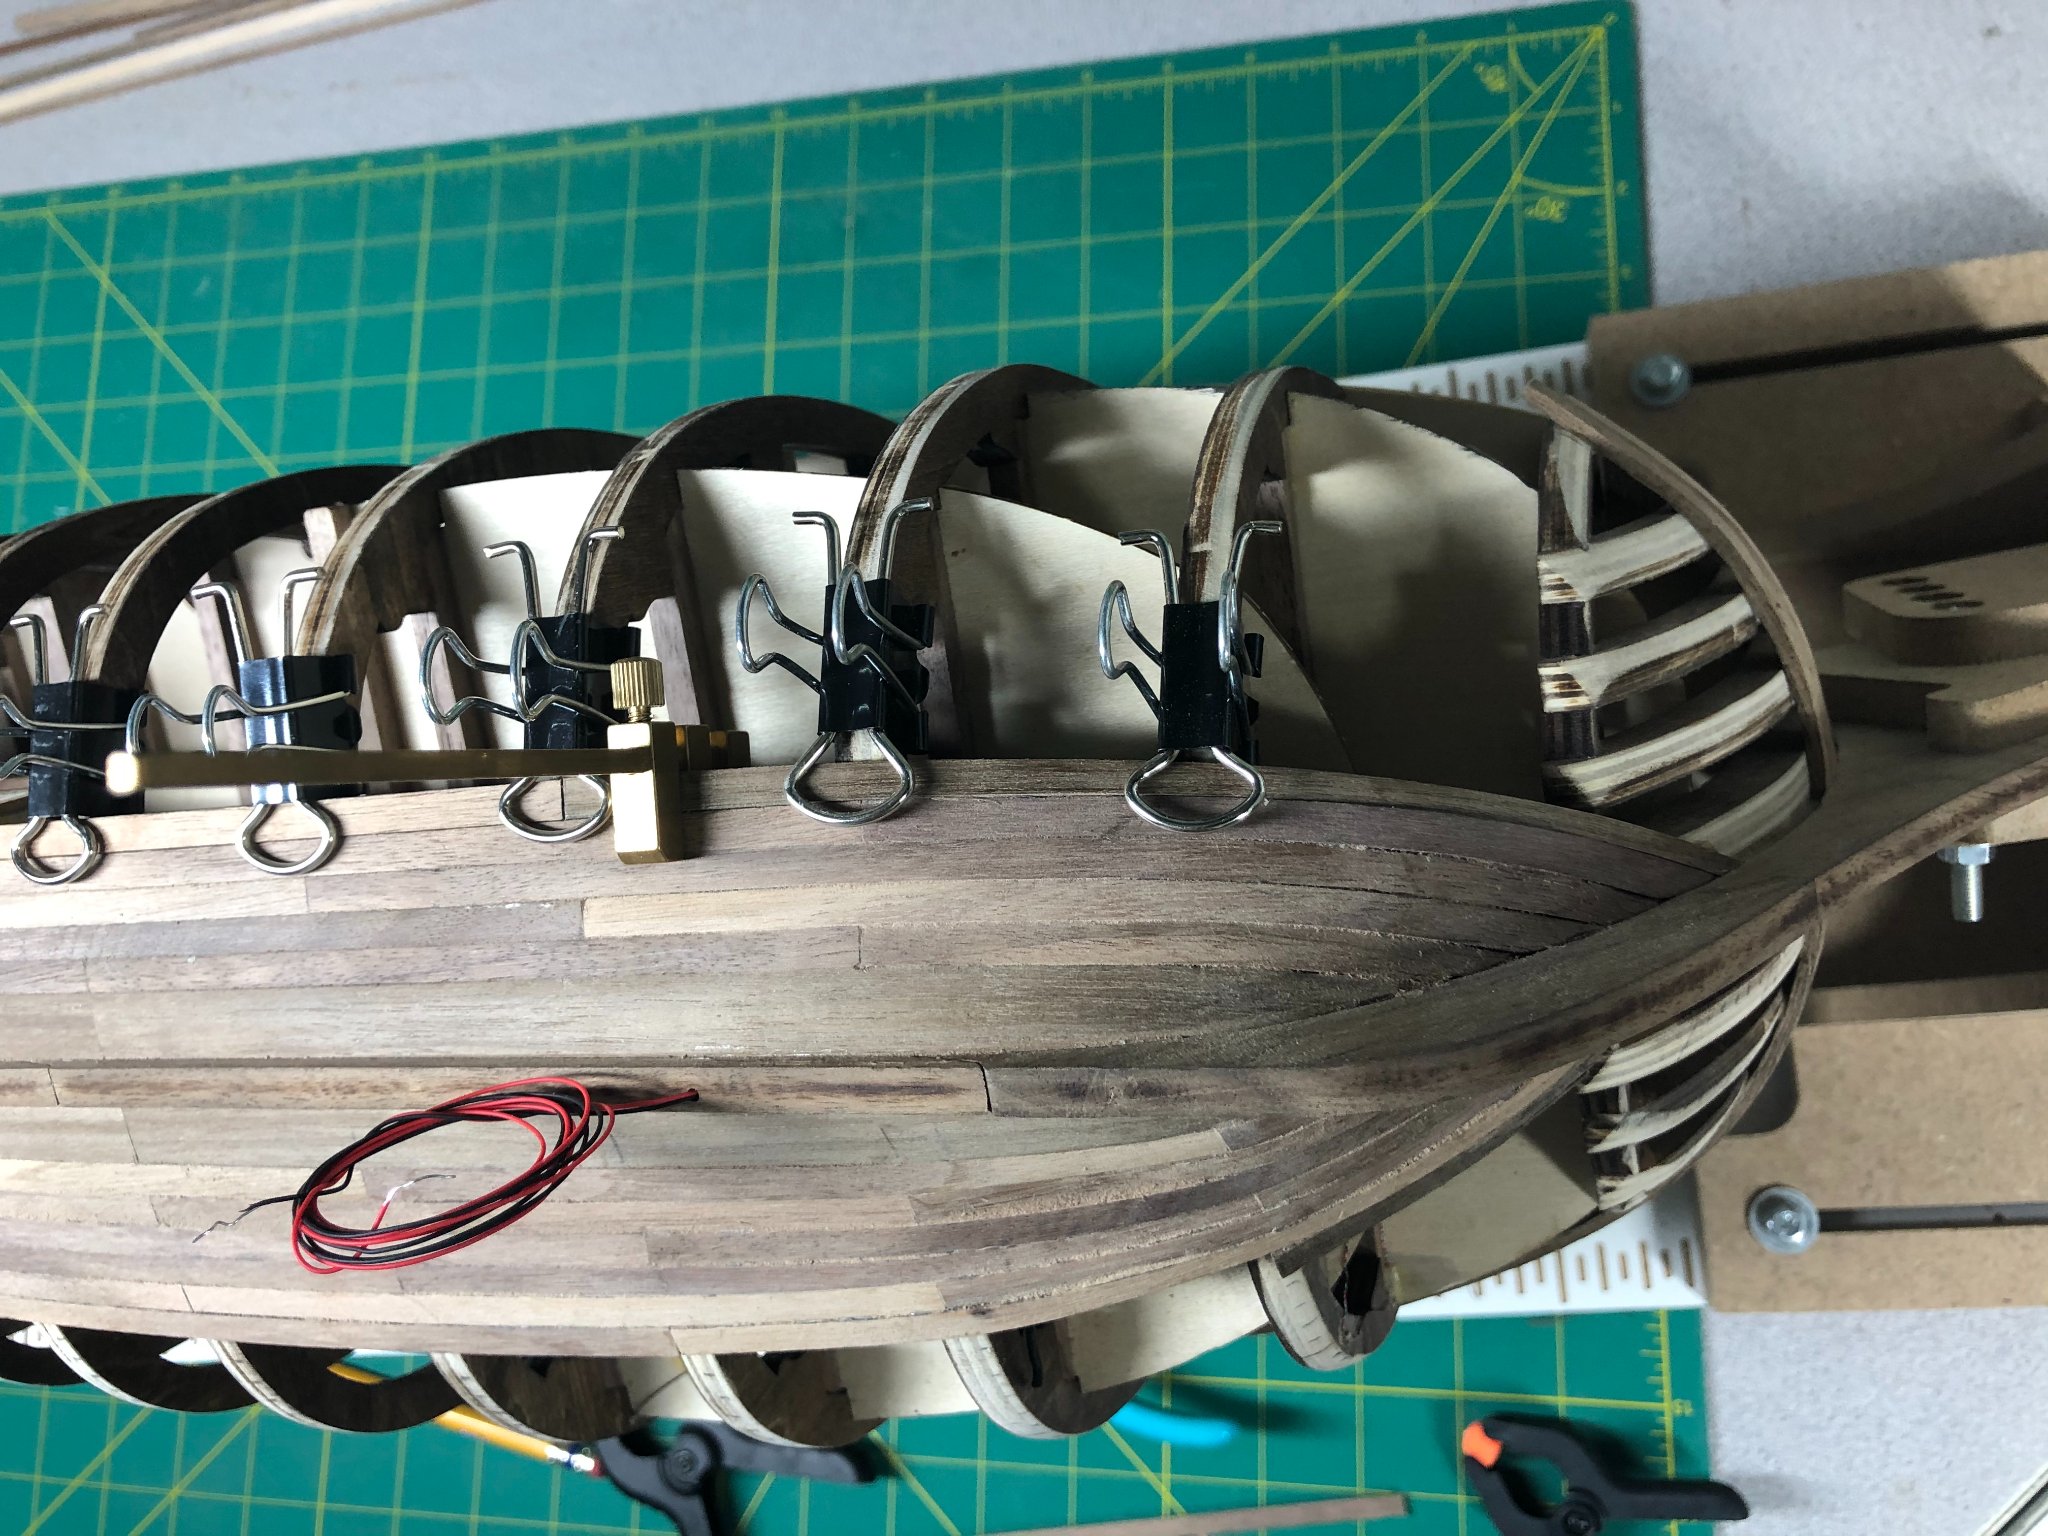
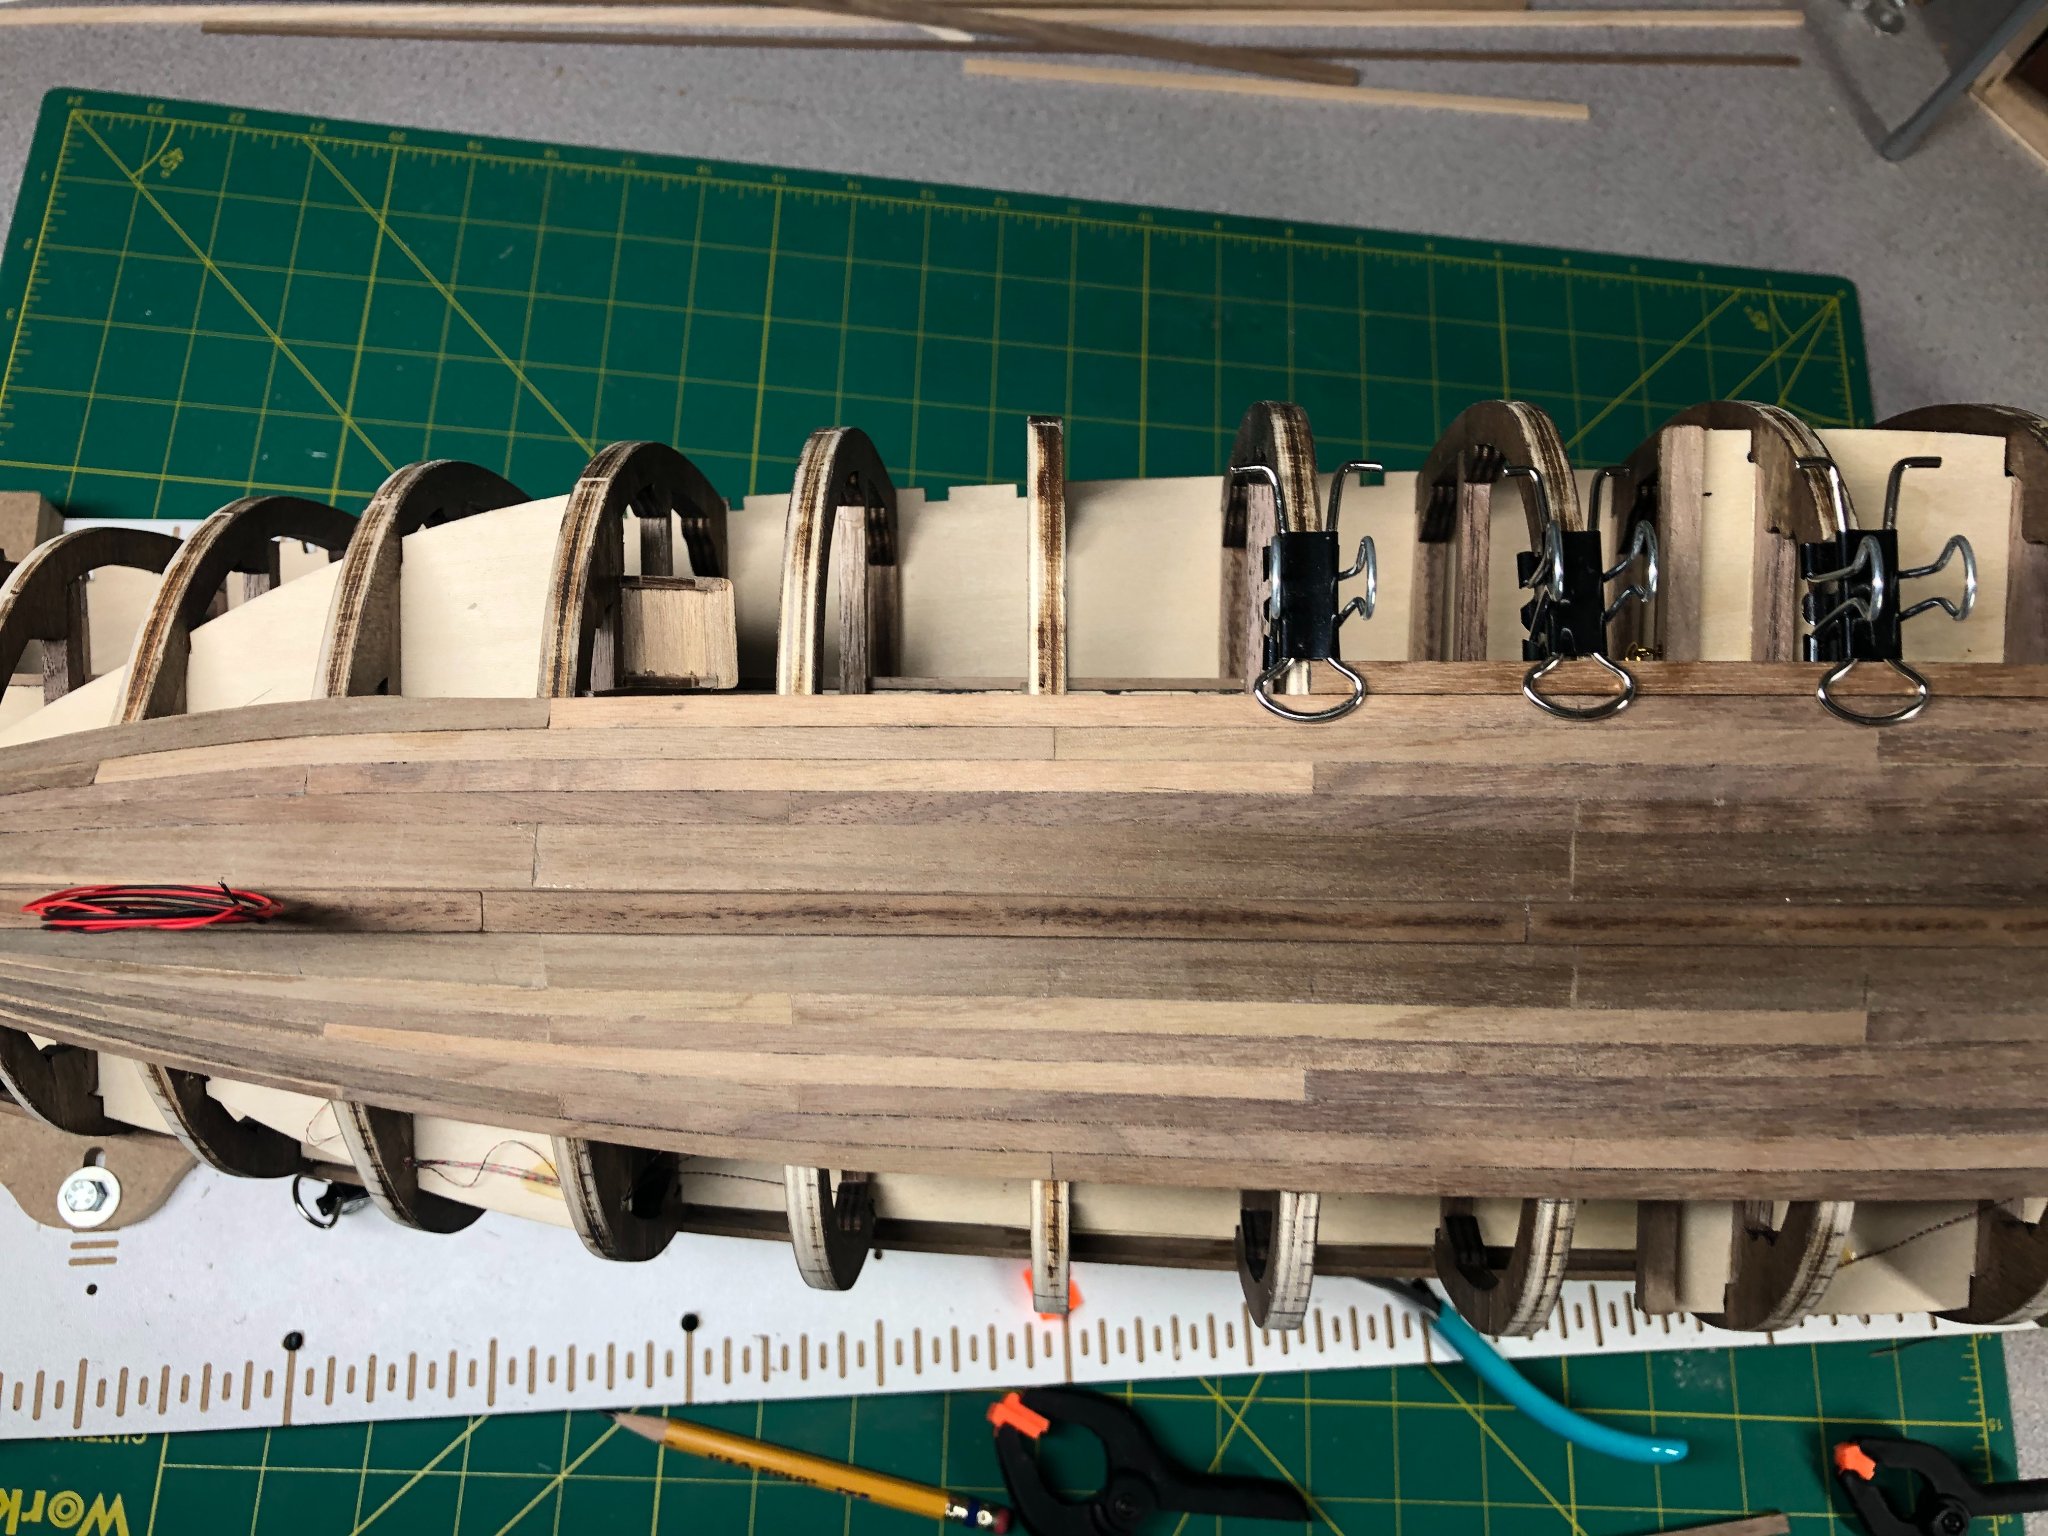
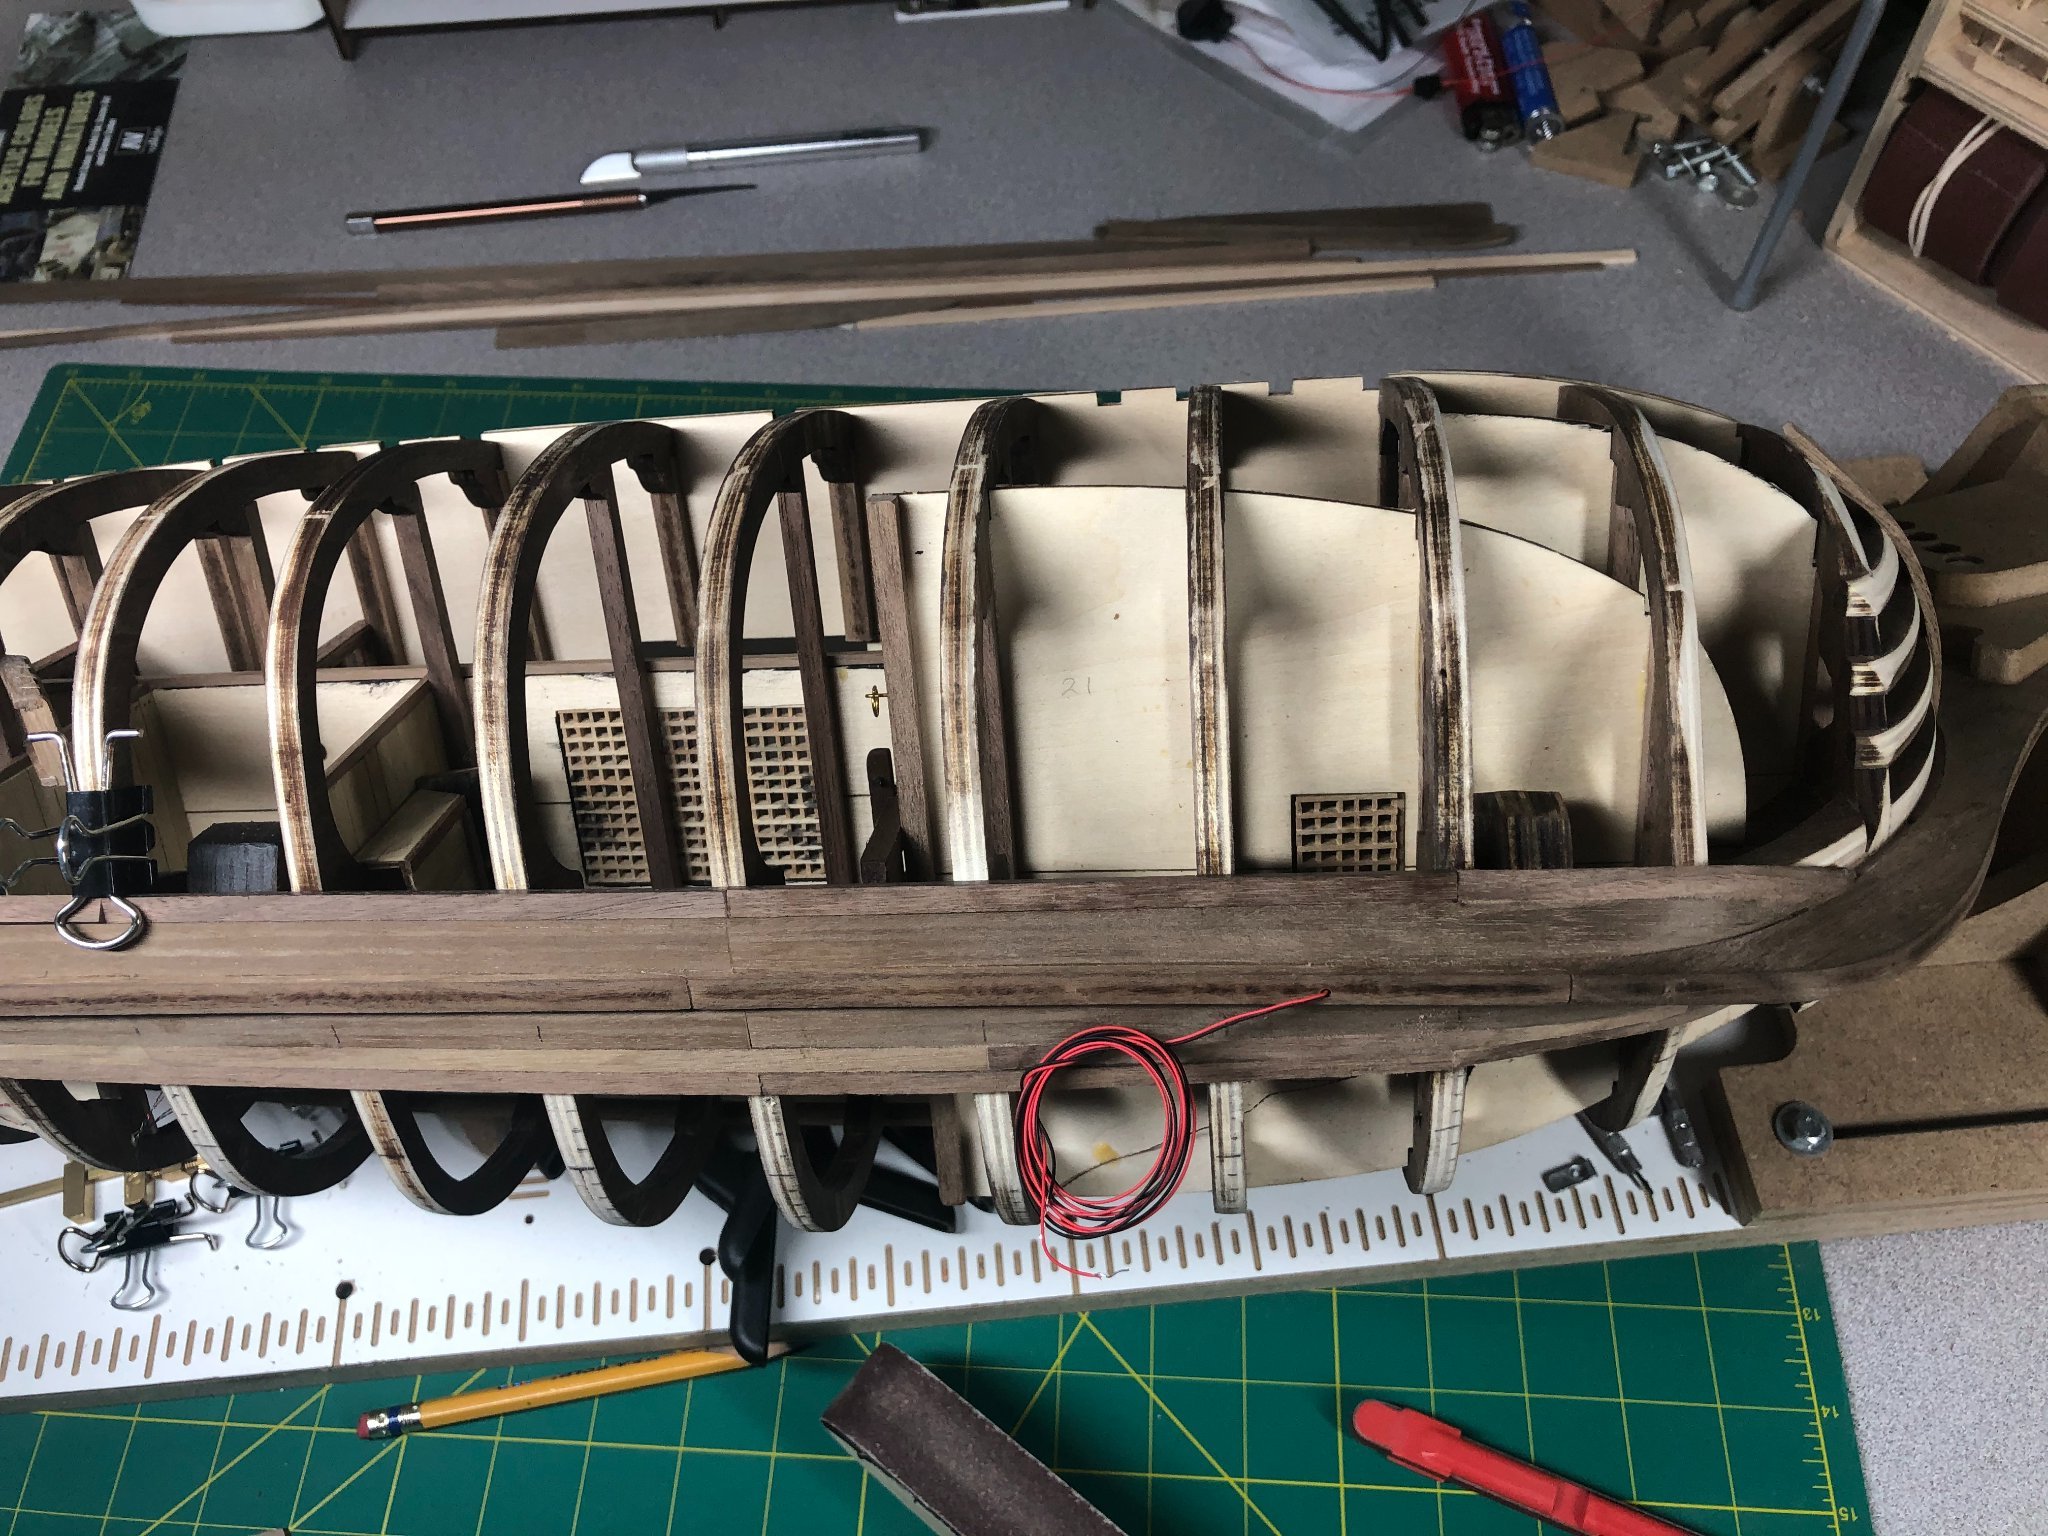
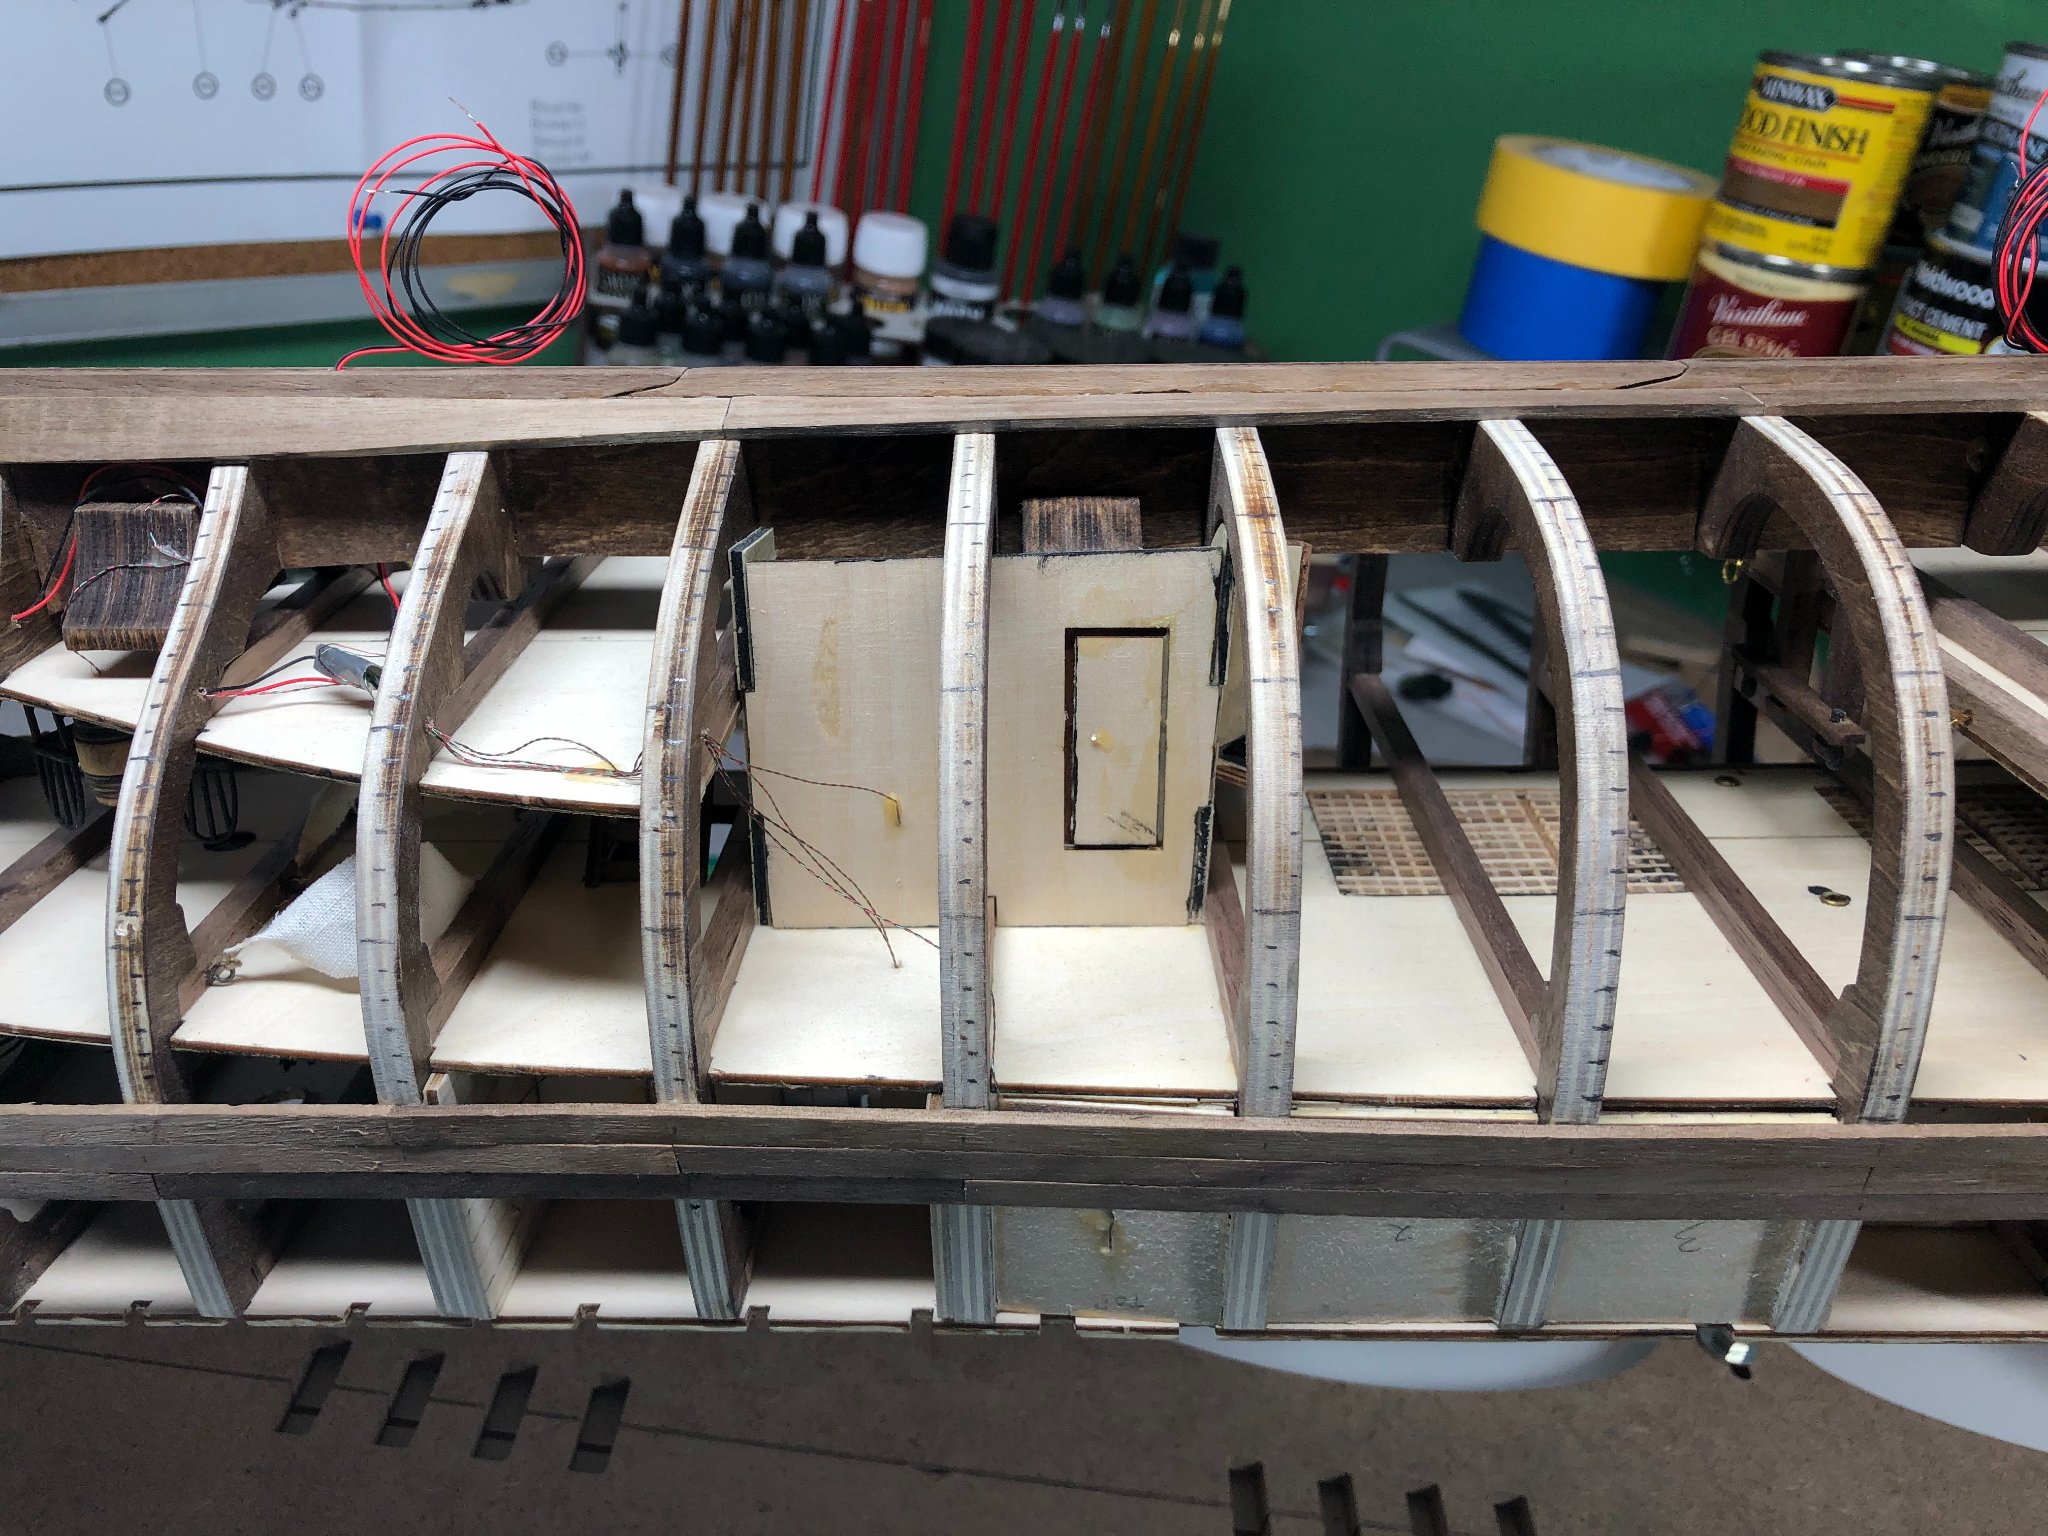
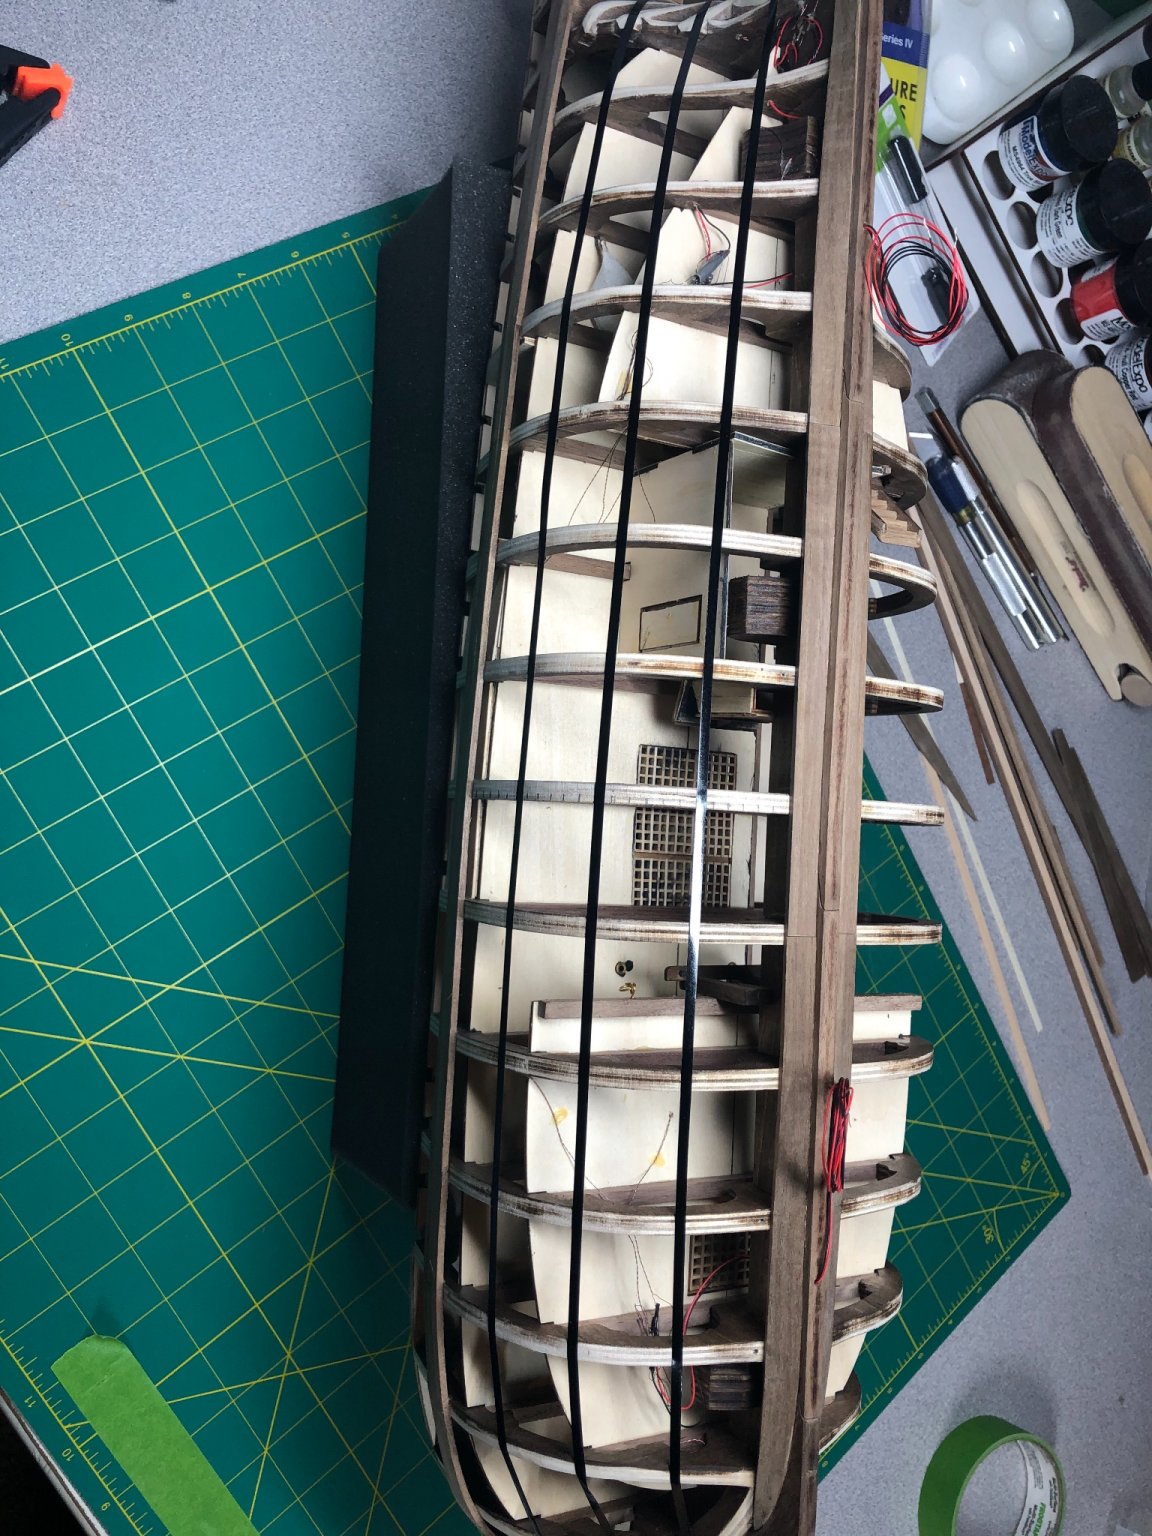
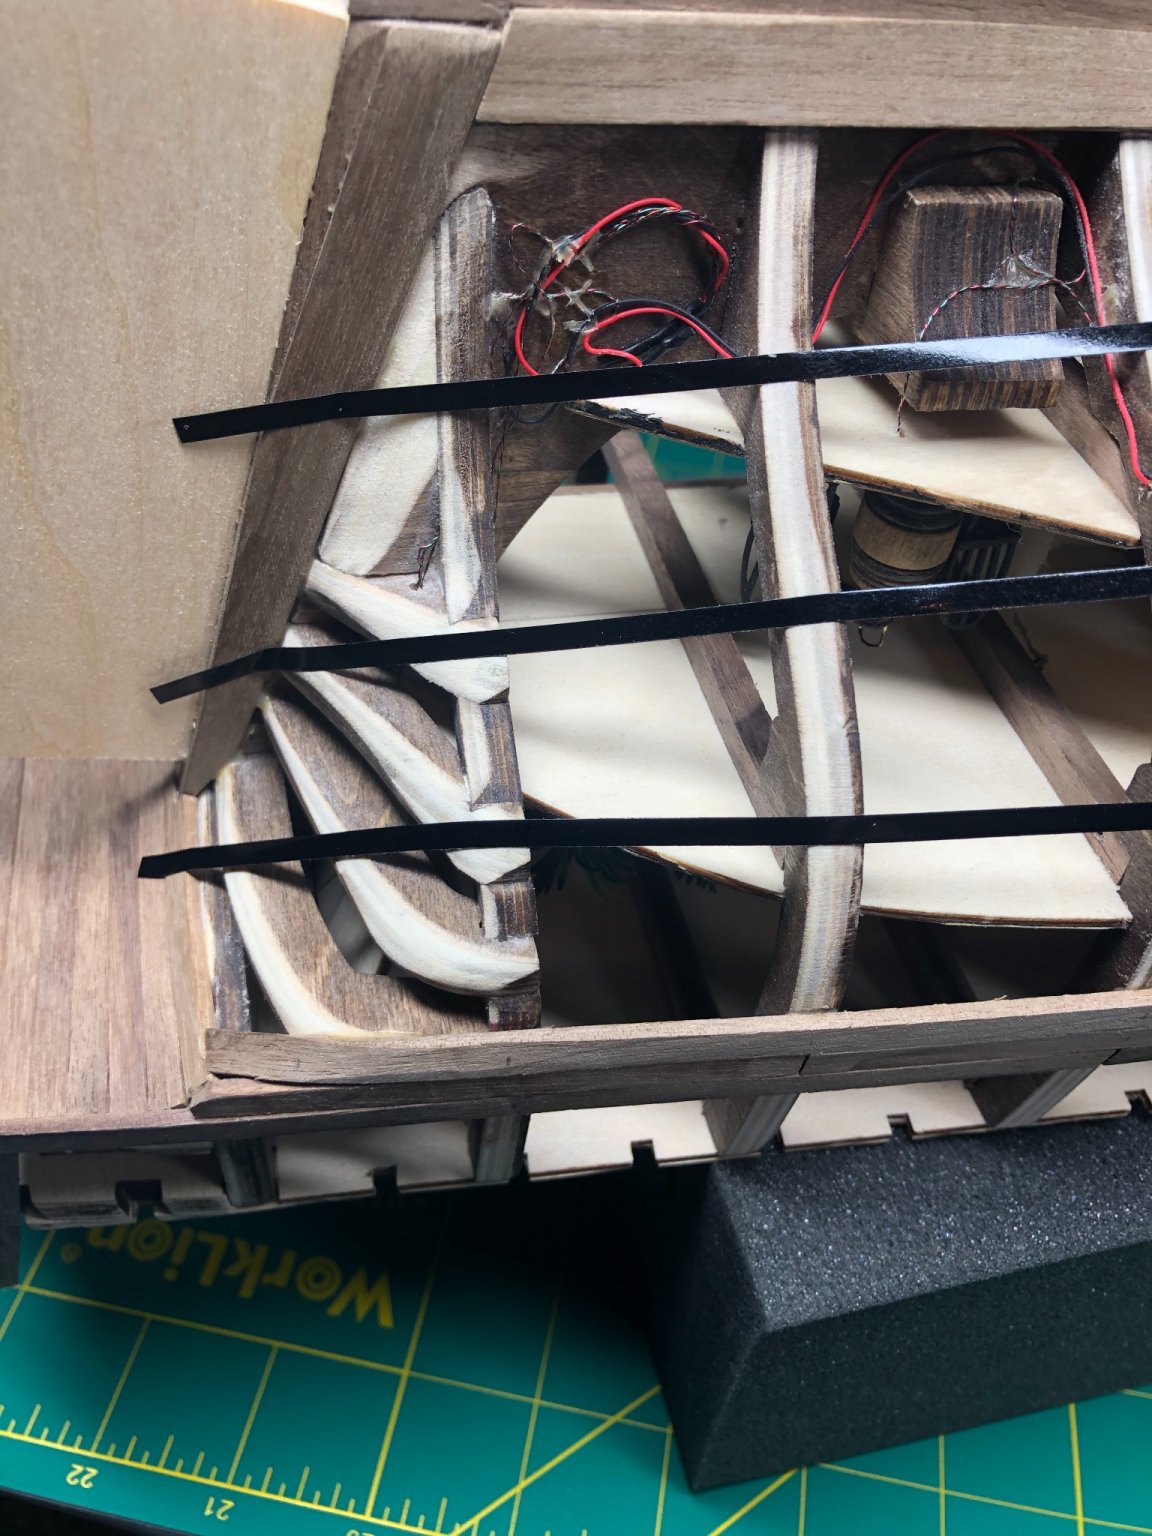
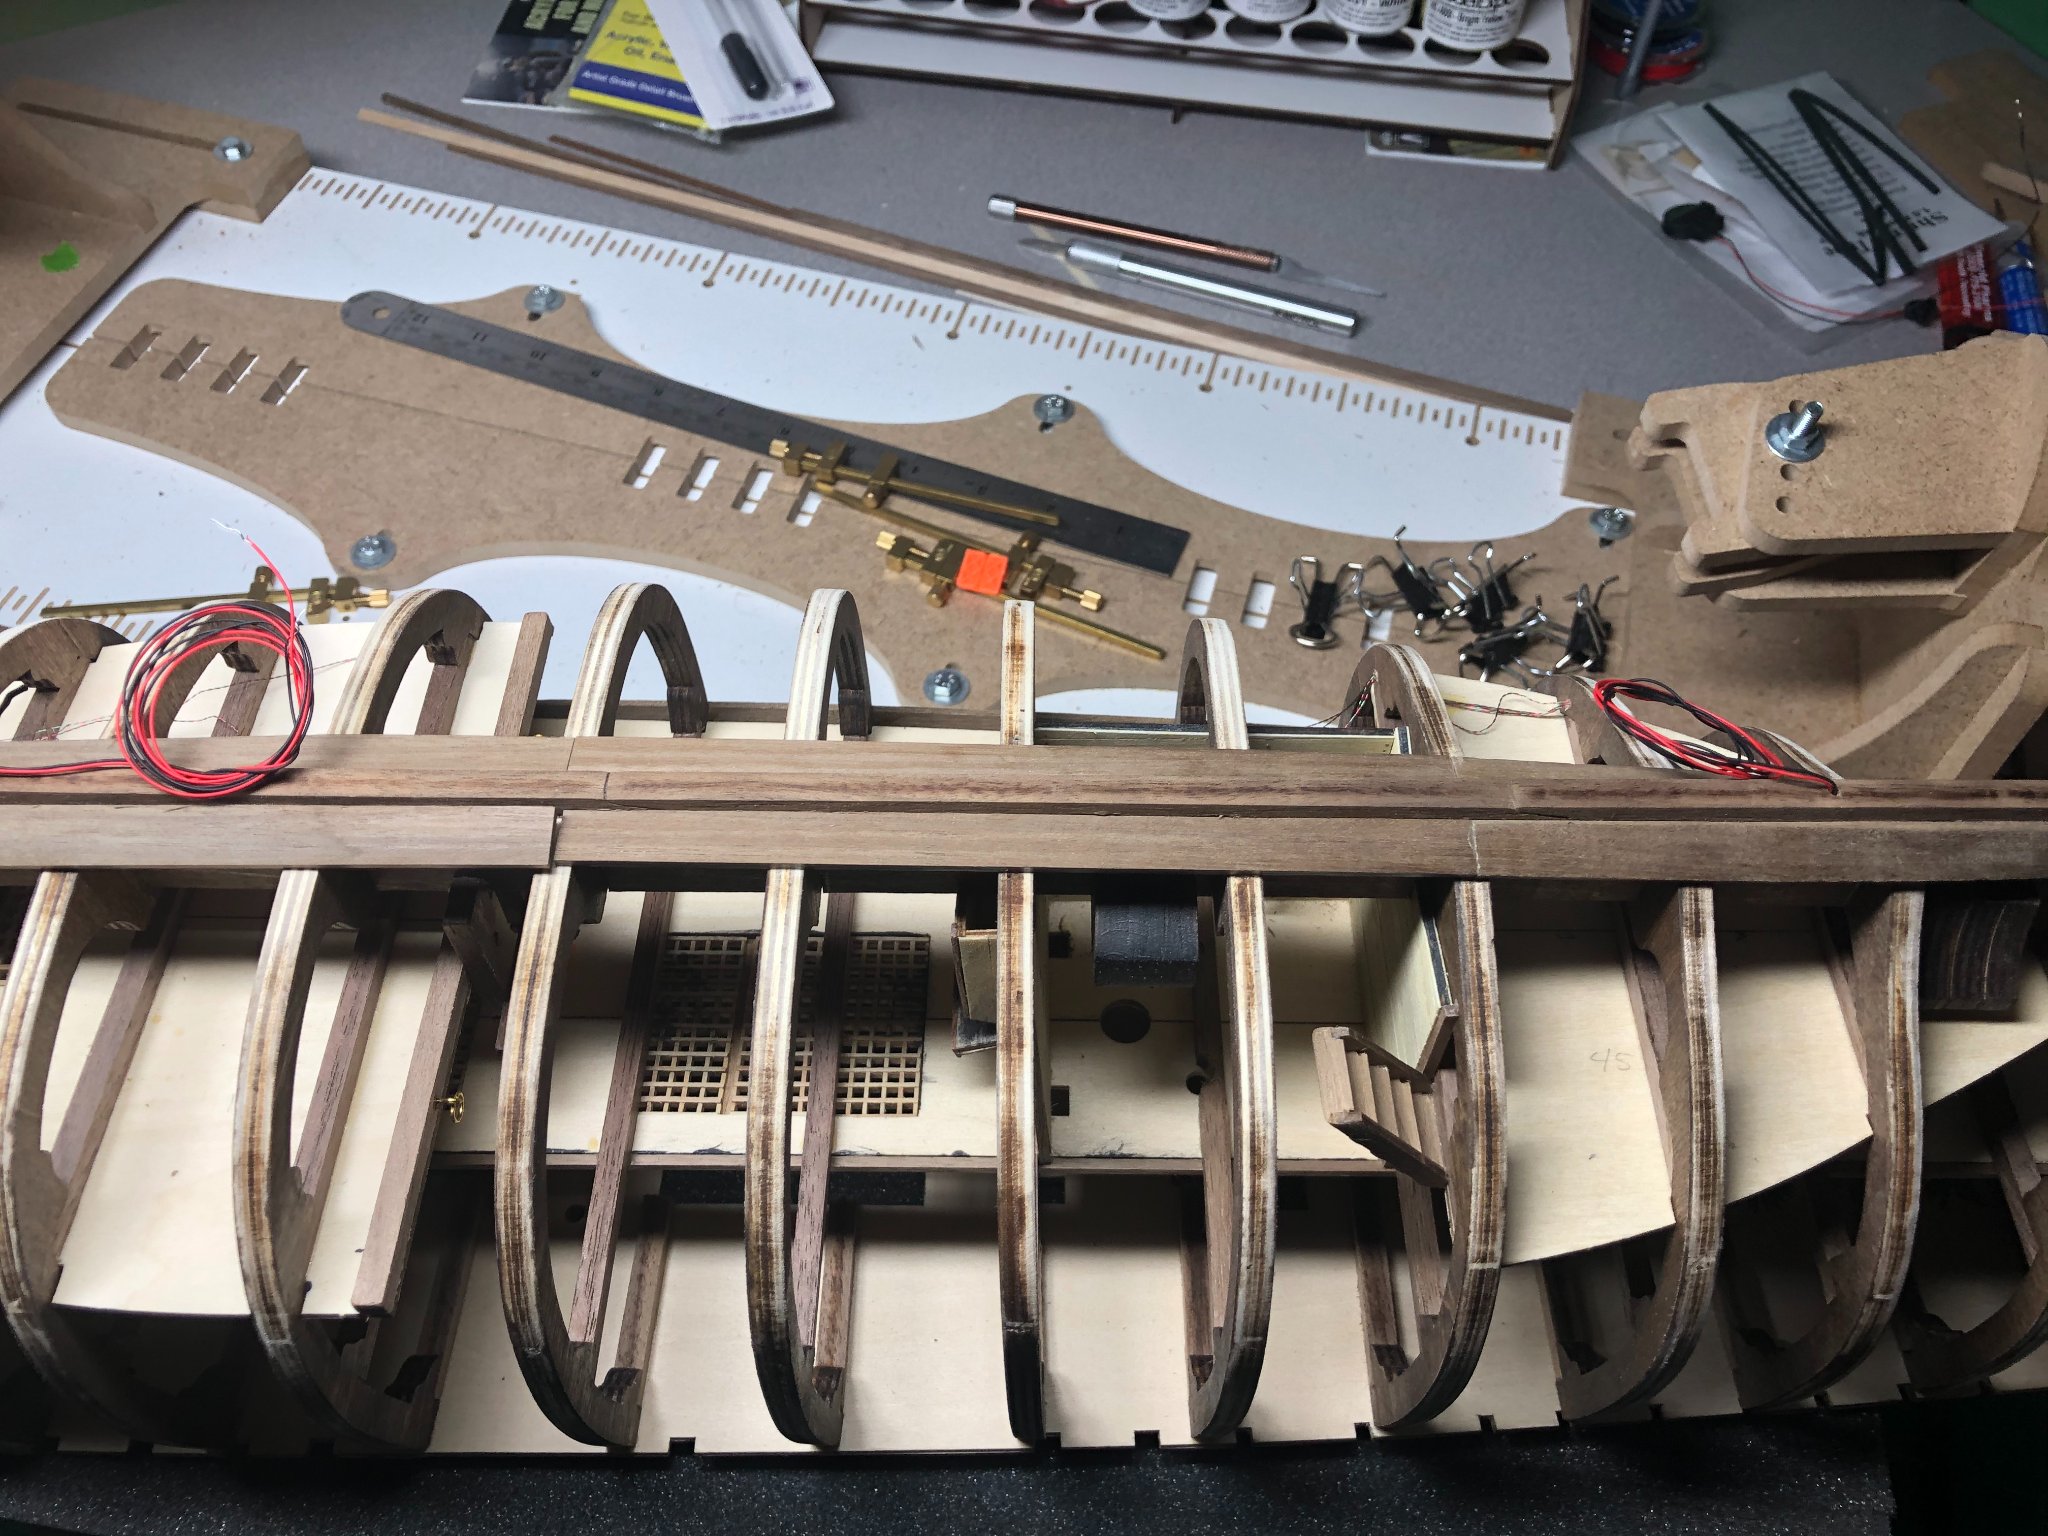
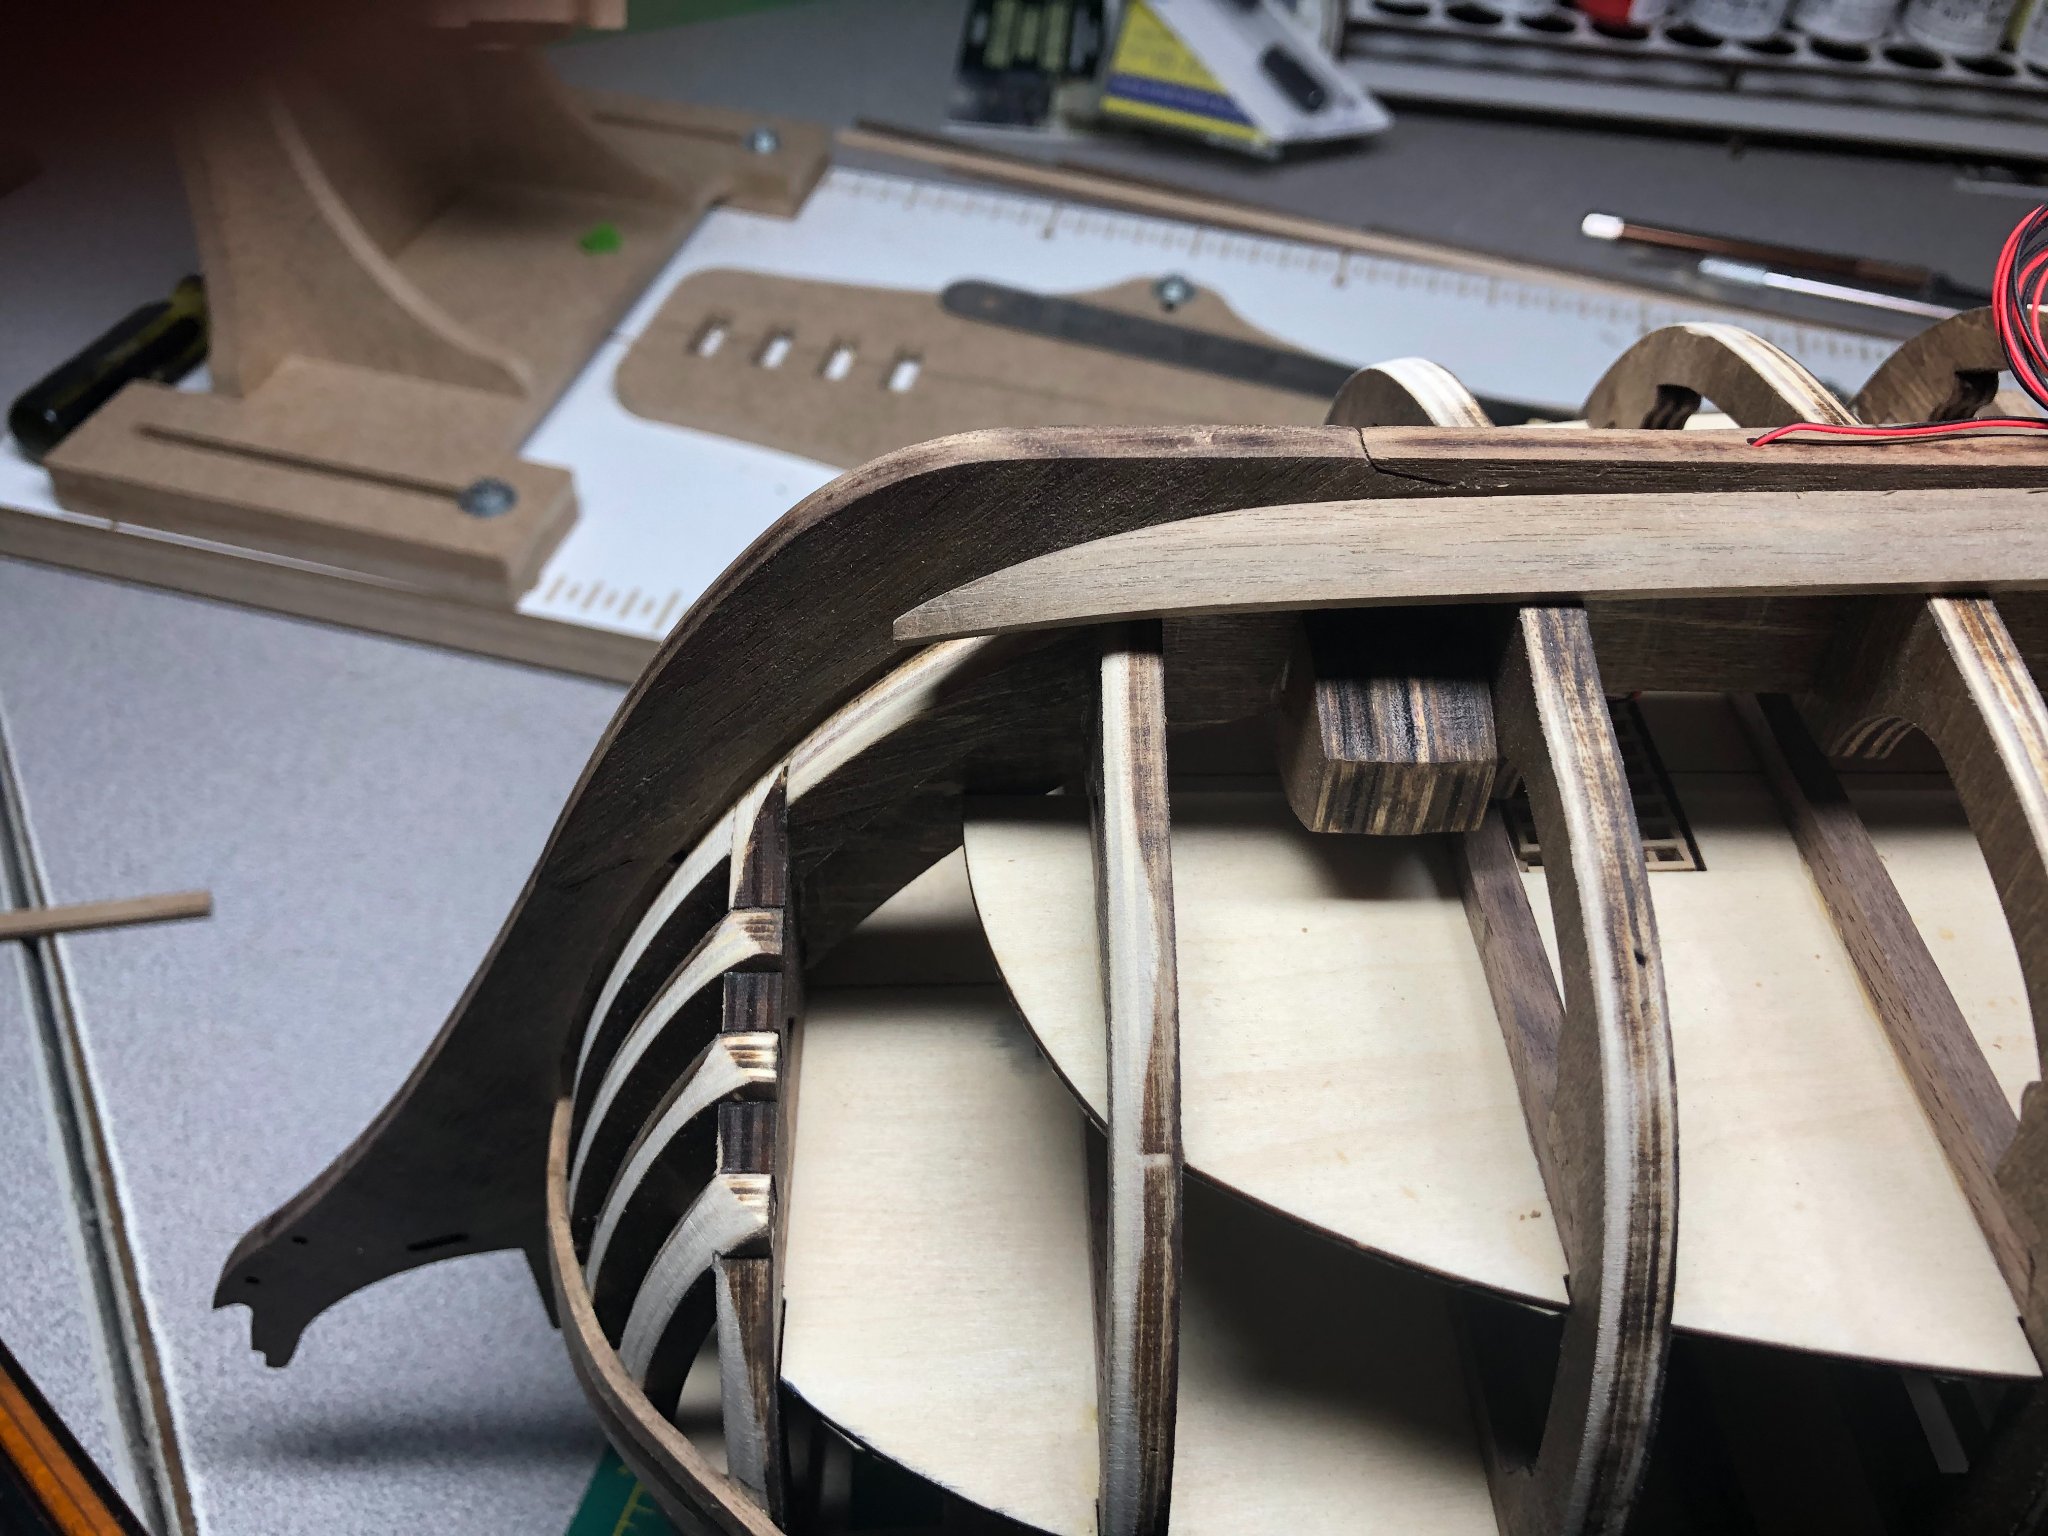
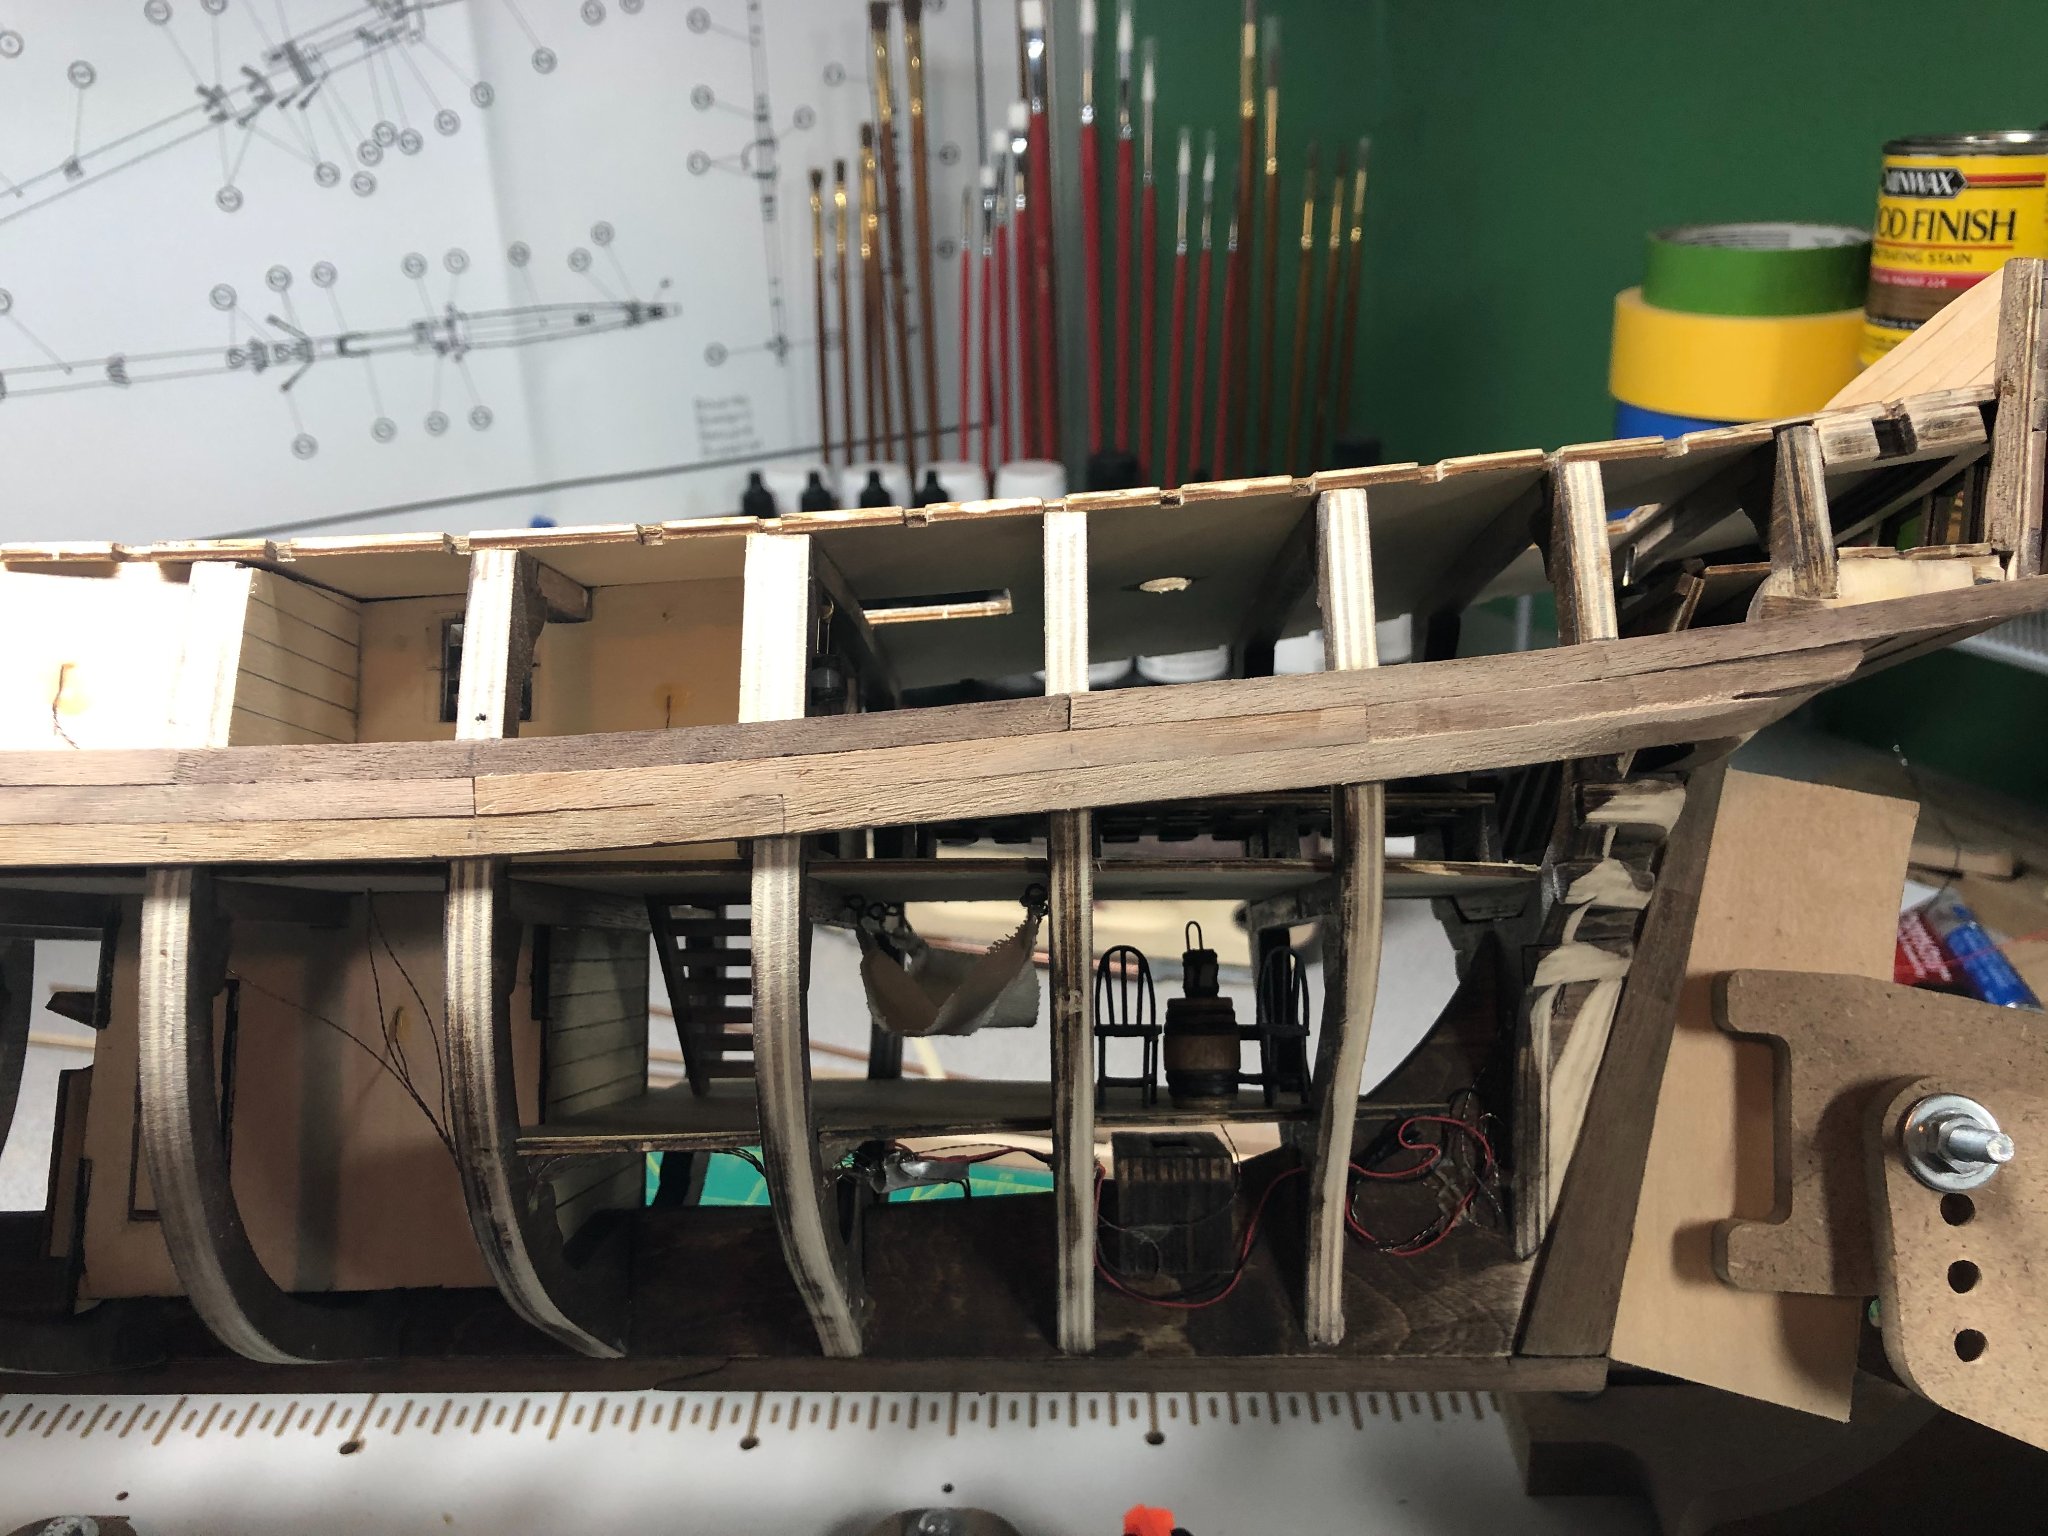
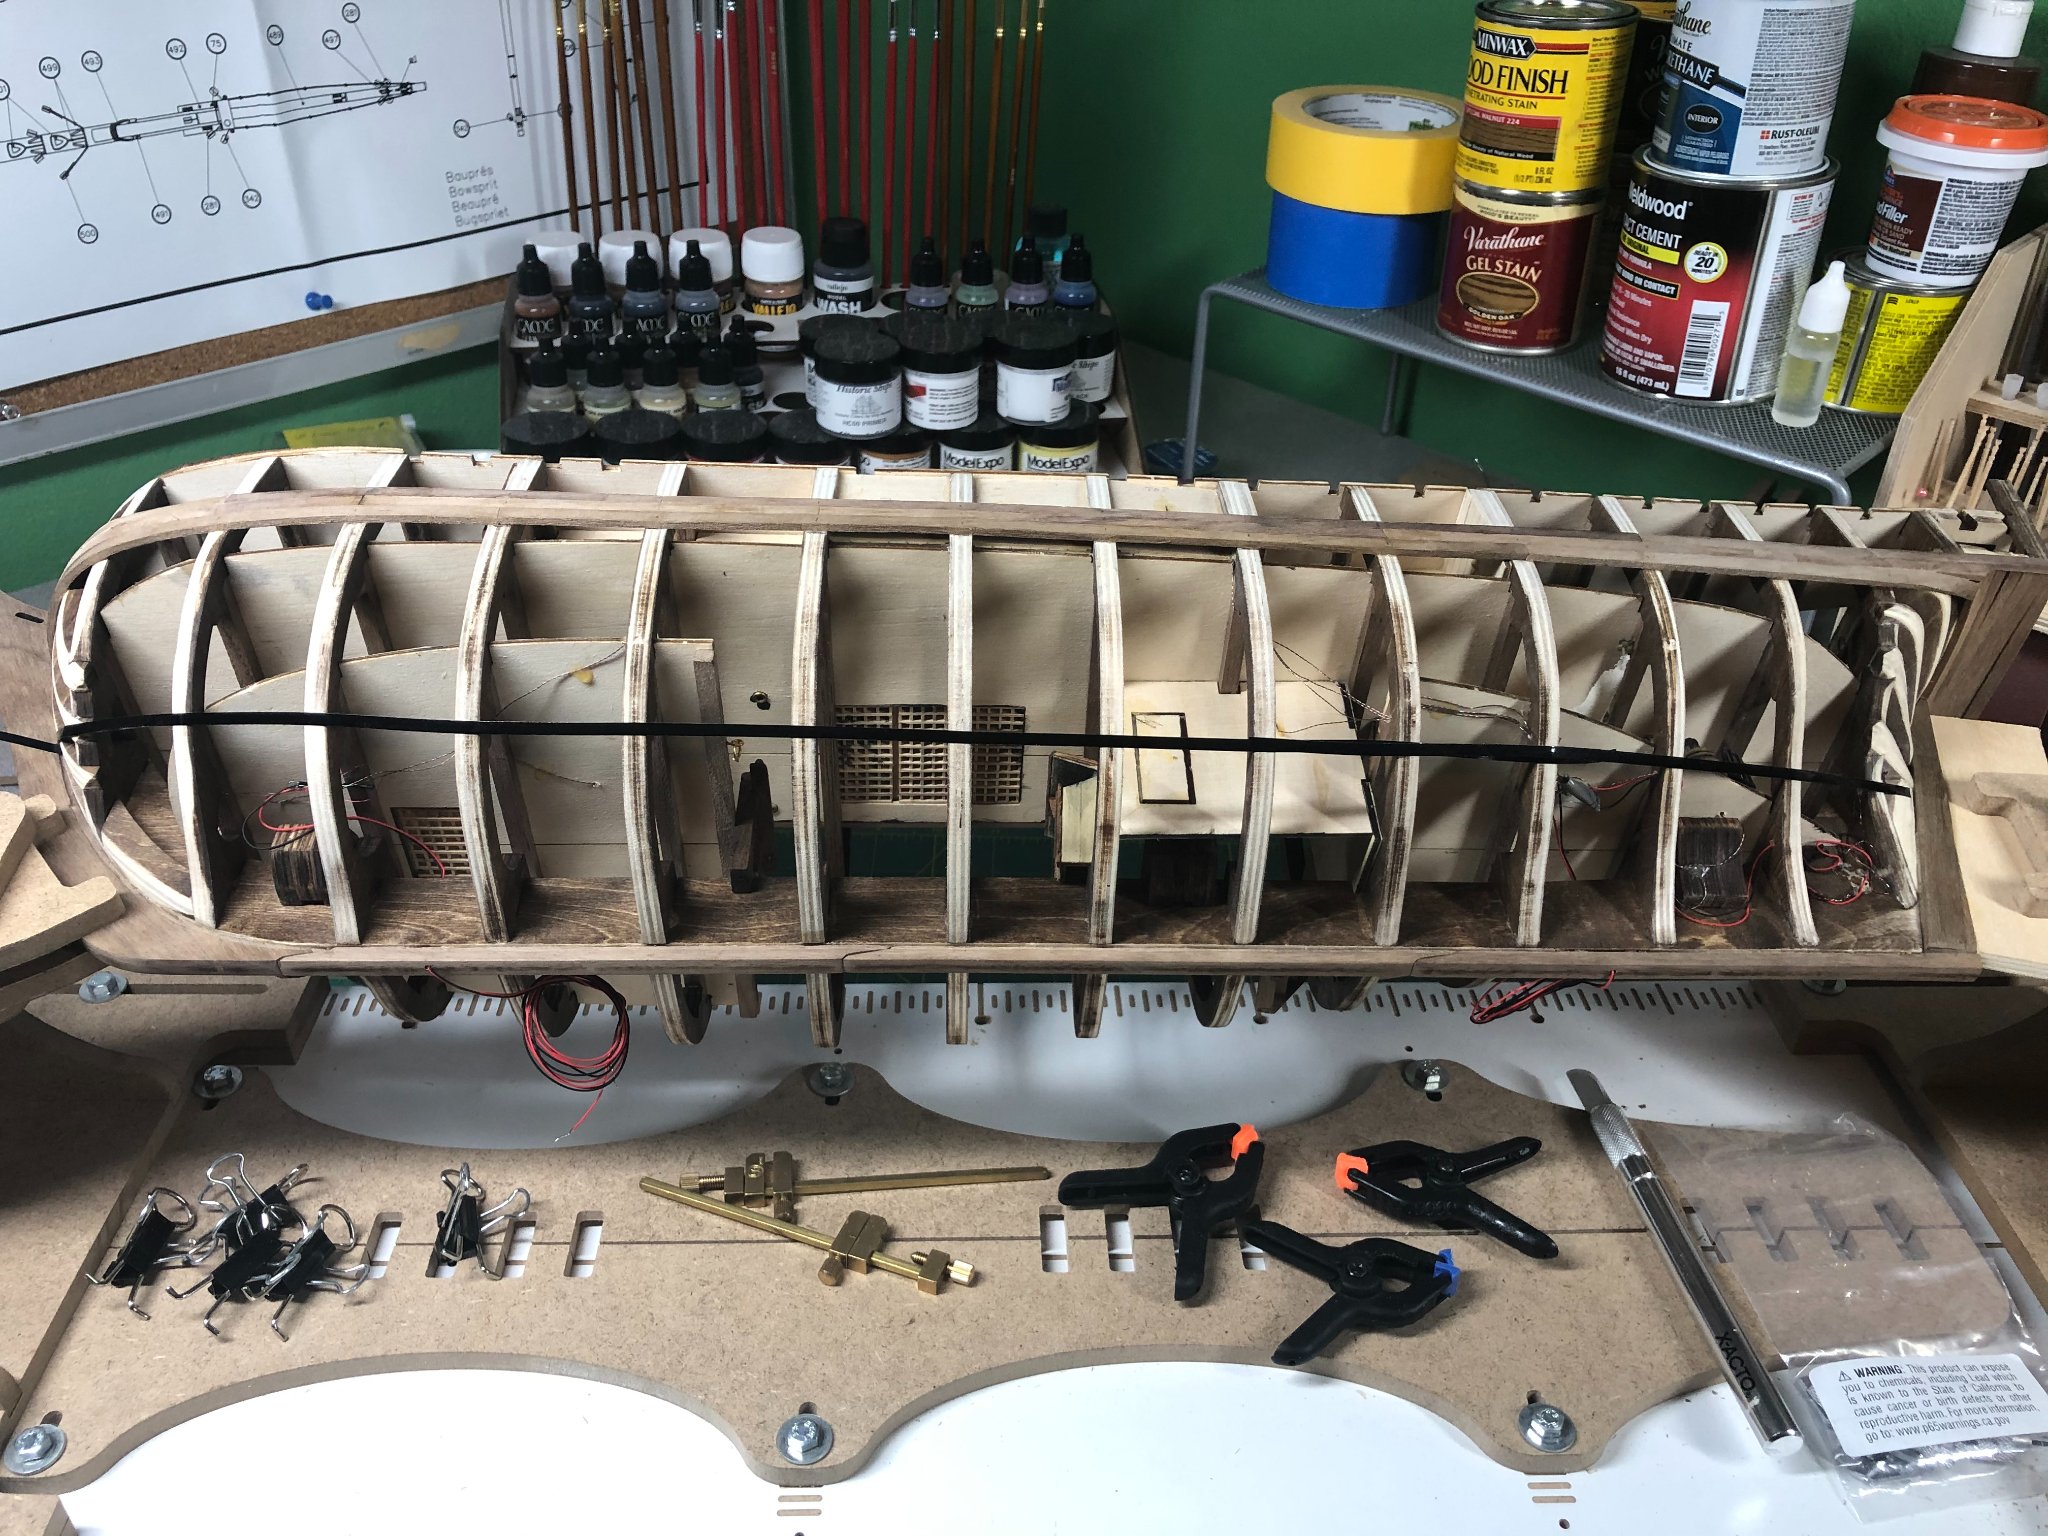
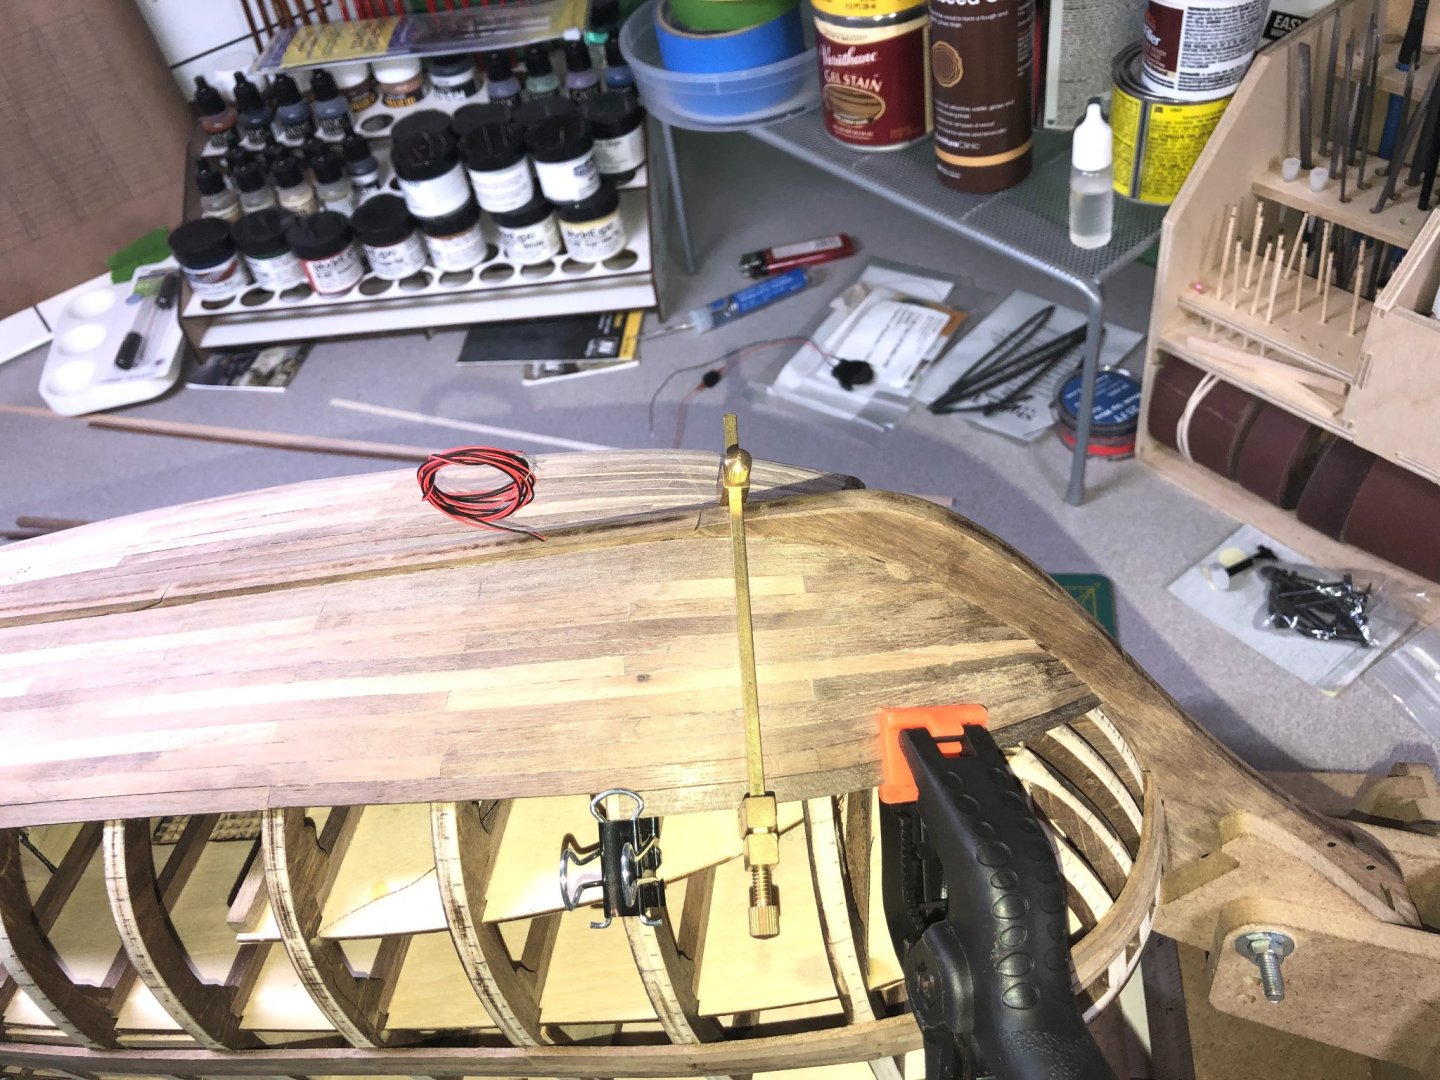
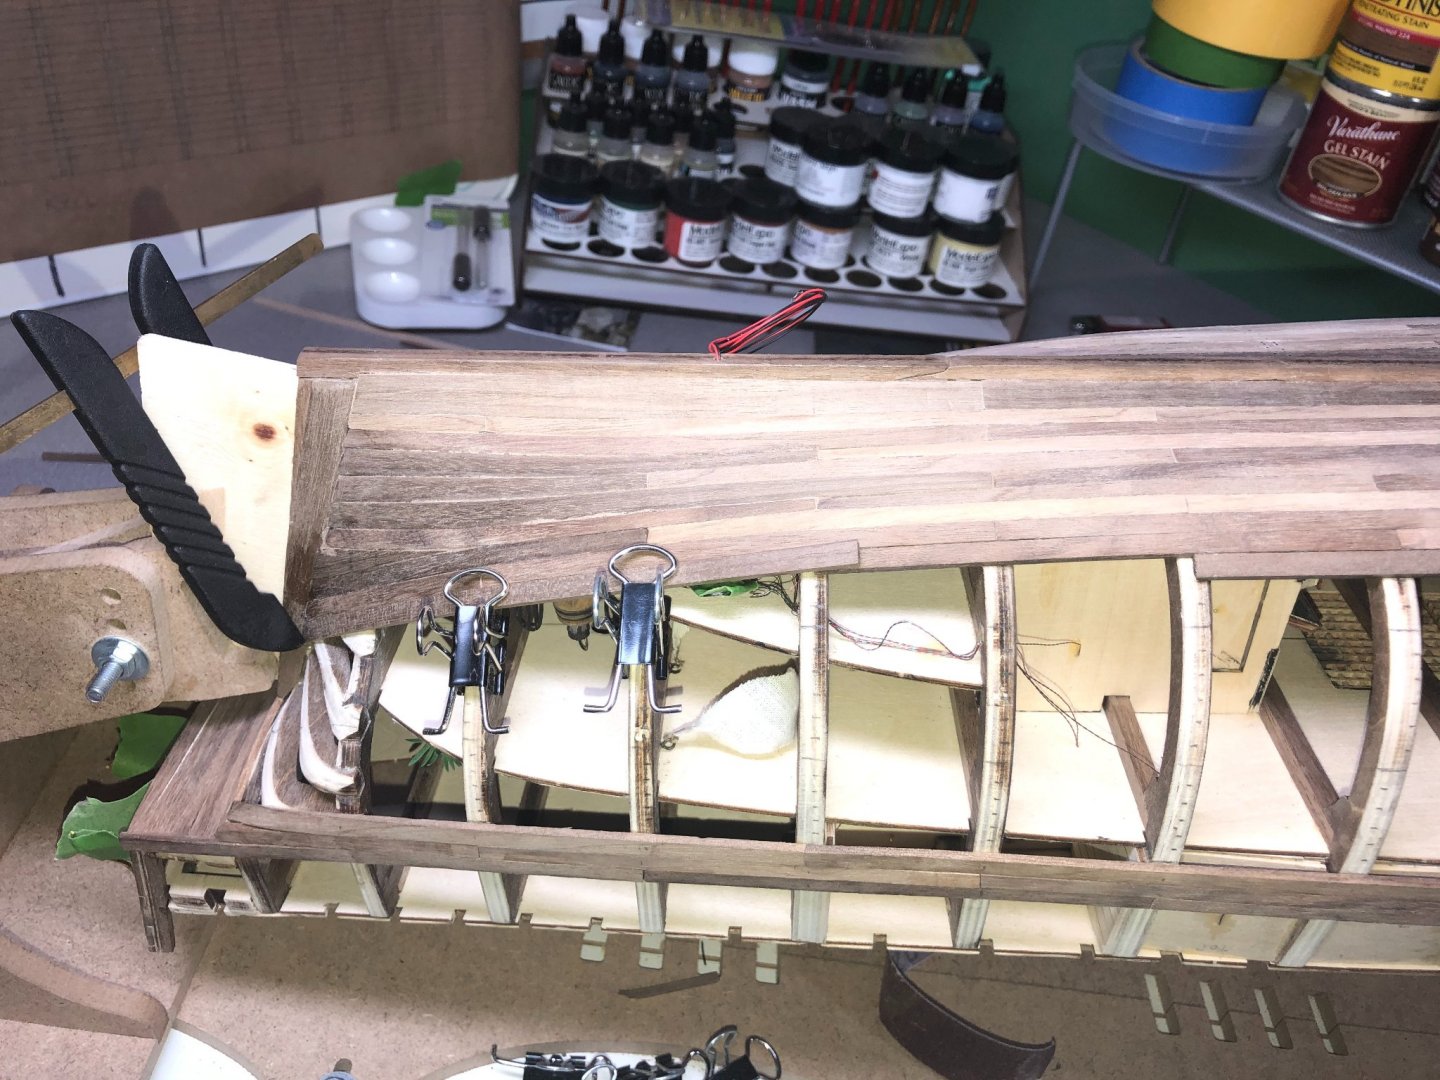
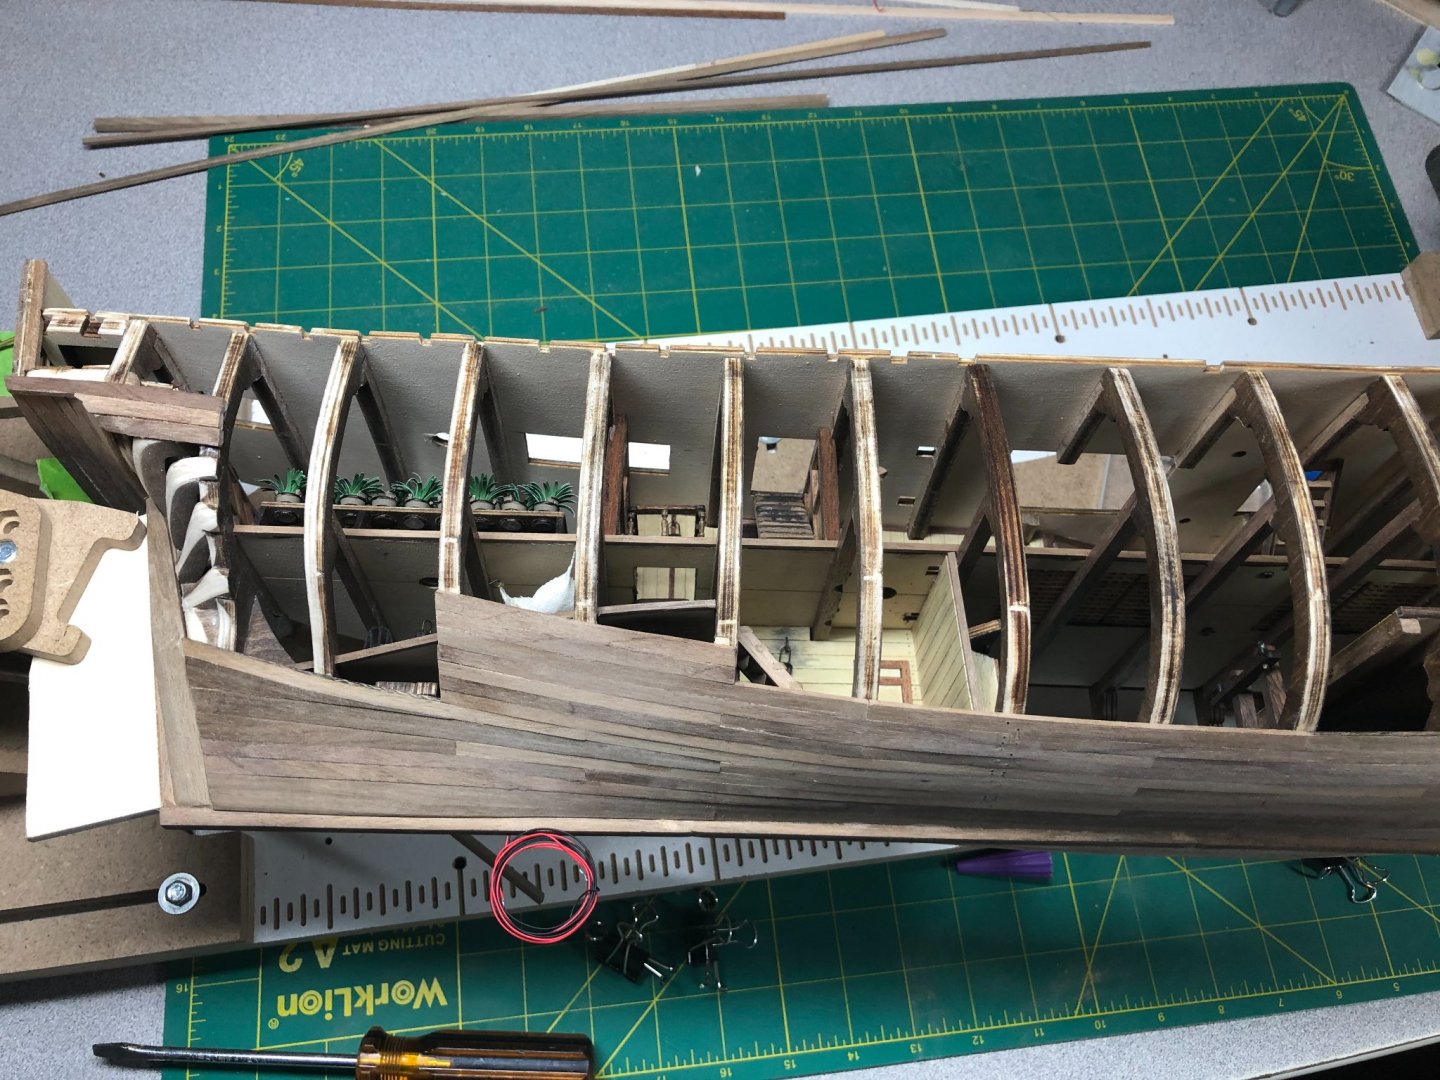
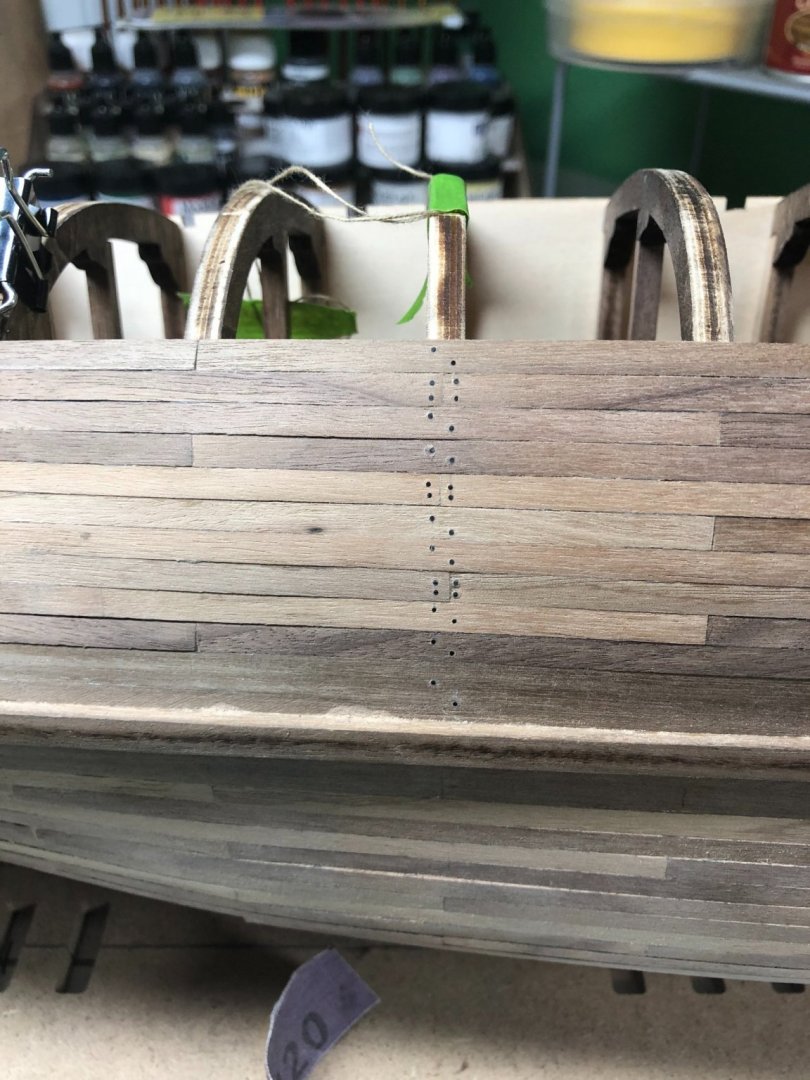
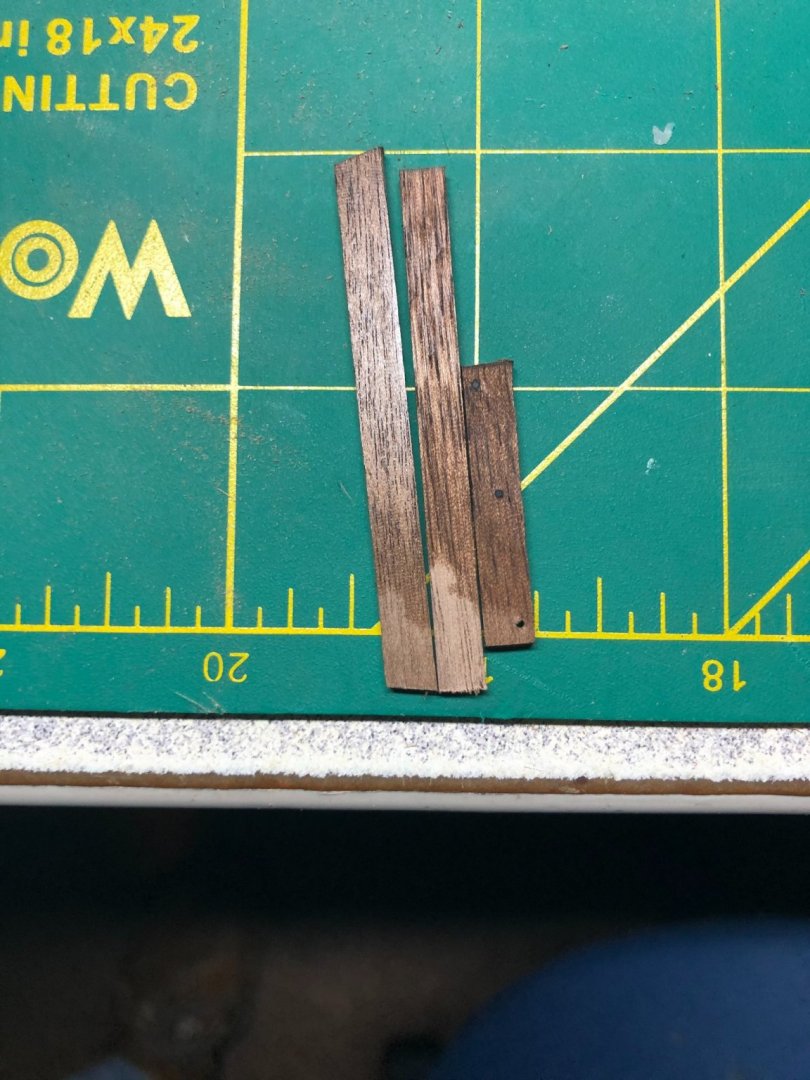
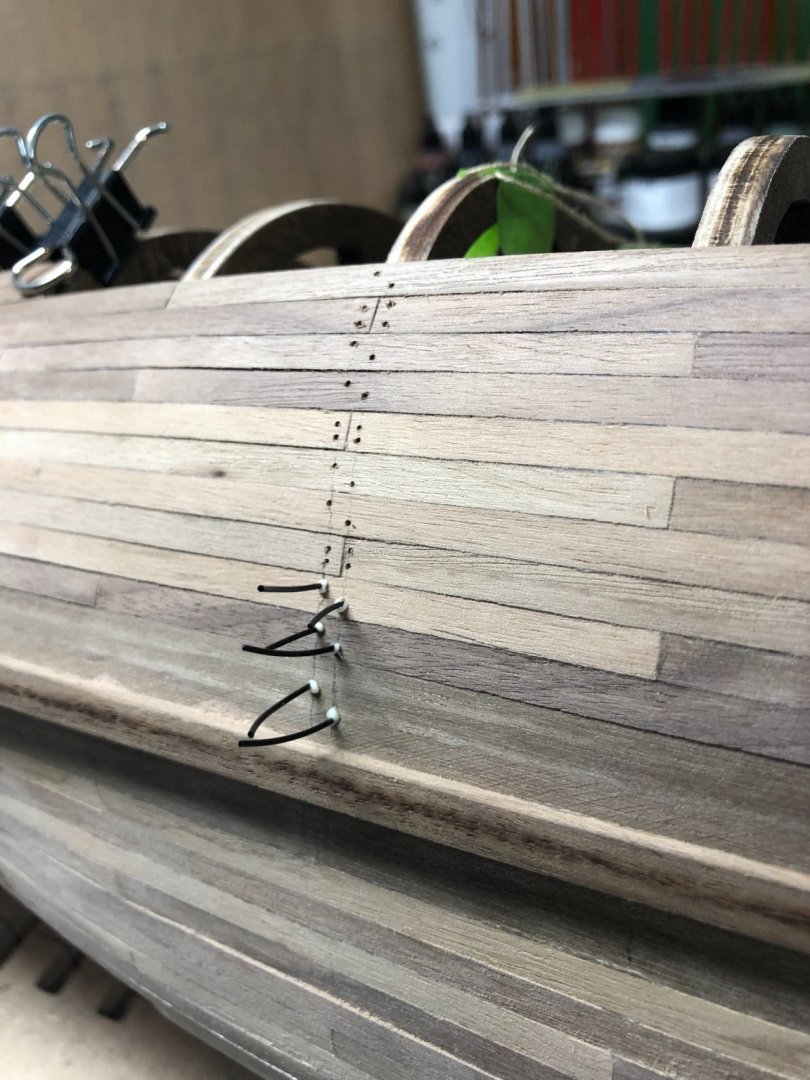
 Progress over the last few weeks... a little slow but progress! After much mulling, decided I didn't like the way the stern post and planking were mating up. So, I pulled off a bunch of pieces and redid it: Looks better! Bow work underway: I've gotten myself into a bit of a jam... I'm off my tick marks more than I should be. I'm guessing I'll need to correct it on the next layer. I have wider wood and will use it to compensate. I did a little trim work on the starboard side along with finishing the lower planks. The trim work was to cover the plywood decking that came with the kit. I used 1mm X 1mm walnut to trim around any exposed edges. The planking above the wales will be done later. I did the planking slightly different to hide the wiring for the lanterns: Tree nails for the planks is my next experiment. I'm not a fan of the brass nails! I decided to try something I saw another modeler use. Unfortunately, I don't recall where I saw it! I purchased some black monofilament (35 lbs. test) that is just over .5mm in width. I drilled holes that matched the size of the line, dabbed the pieces in PVA and pushed them into the holes: Note to self, I need to use the next size up on the drill and less glue! Once dried, I used a straight razor blade and sliced them off even with the wood. The extra glue made the cutting harder than it needs to be. The end result is ok. I definitely have to do better with the layout and drilling of the holes: This is a sample I did with one coat of Danish Oil applied: I think the contrast will be fine. I just gotta figure out a way to make the layout a lot better! More soon!


-
I think it looks good... maybe a little refinement on the letters but overall, good!
-
Hey Trond and Tim, I do things a bit different but close to what Tim does: All planks are cut to historical sizes (4-6 inches), depending on where the plank lands on the frames to follow a three butt pattern. The frame is bent to match the plank adjacent to it. Sanding is done to decrease the width and to match the adjacent plank, as needed. I save the sanding dust. The edges are marked with a No. 2 pencil. I use wood glue (PVA) and I glue to the frames and the adjacent plank. I try very hard not to have any gaps but inevitably, it happens once in a while. If there is a gap, I apply a small amount of PVA and brush in some of my sanding dust to fill and match the color. I find that if I bevel the edge, going against the previous plank slightly, I usually get a pretty tight fit. The pictures show that but there is a ton of sanding to be done and I won't do much until the planking is completely finished. I'm not thrilled with the planks to the stern post... too much of a perfectionist! Hope this helps, Trond.
-
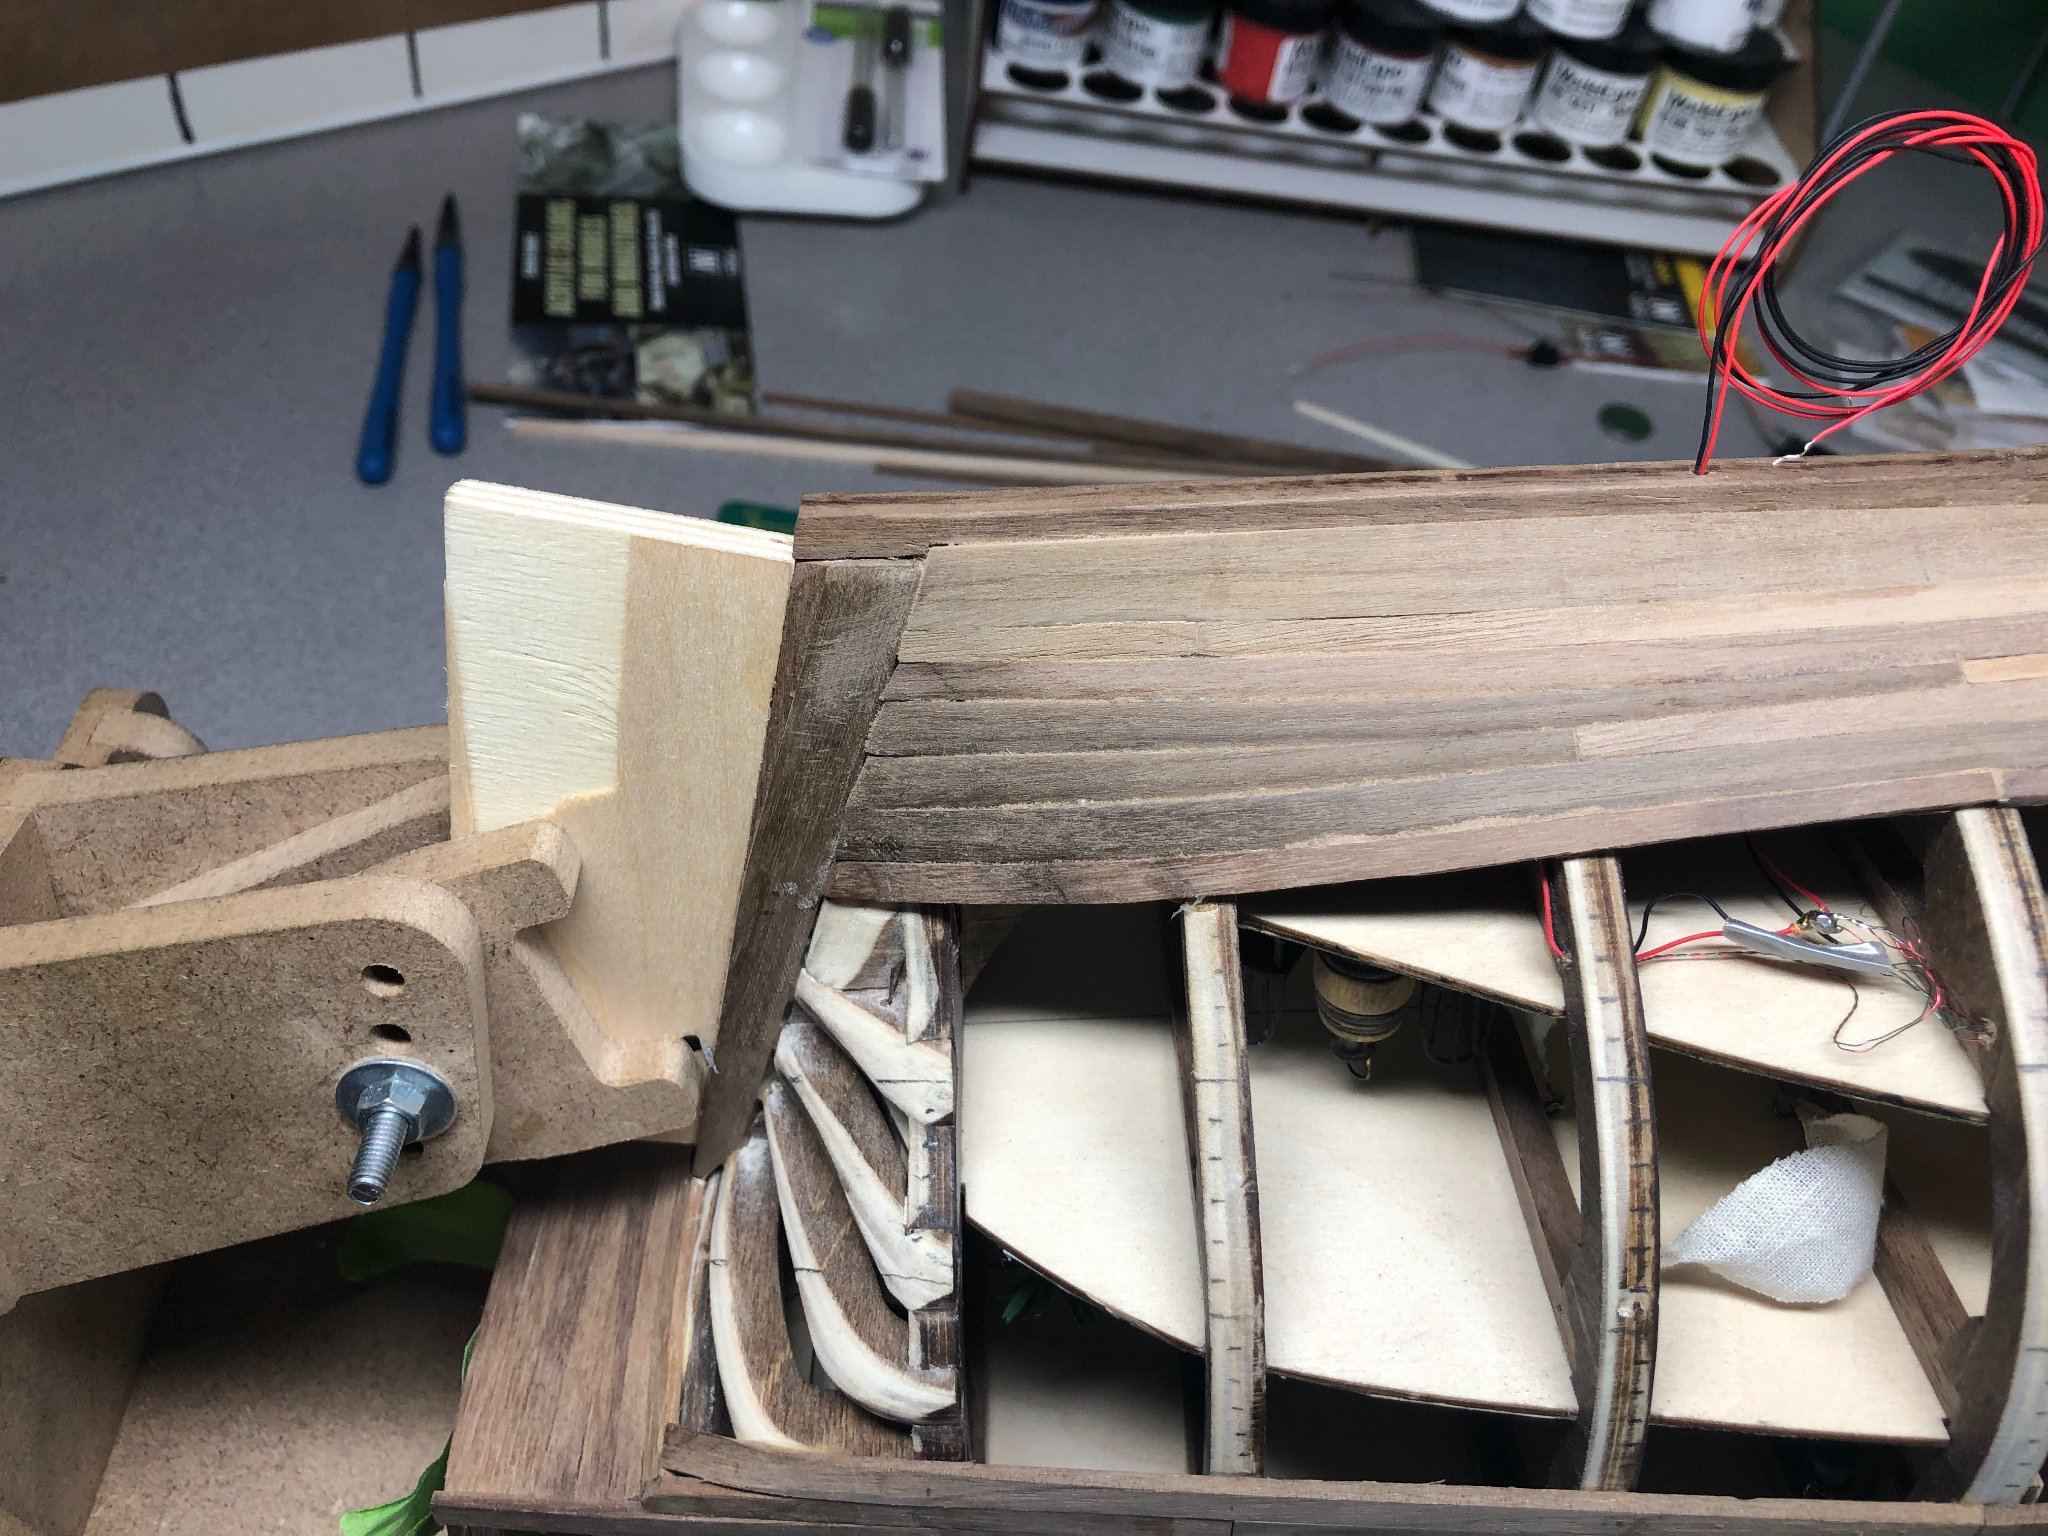
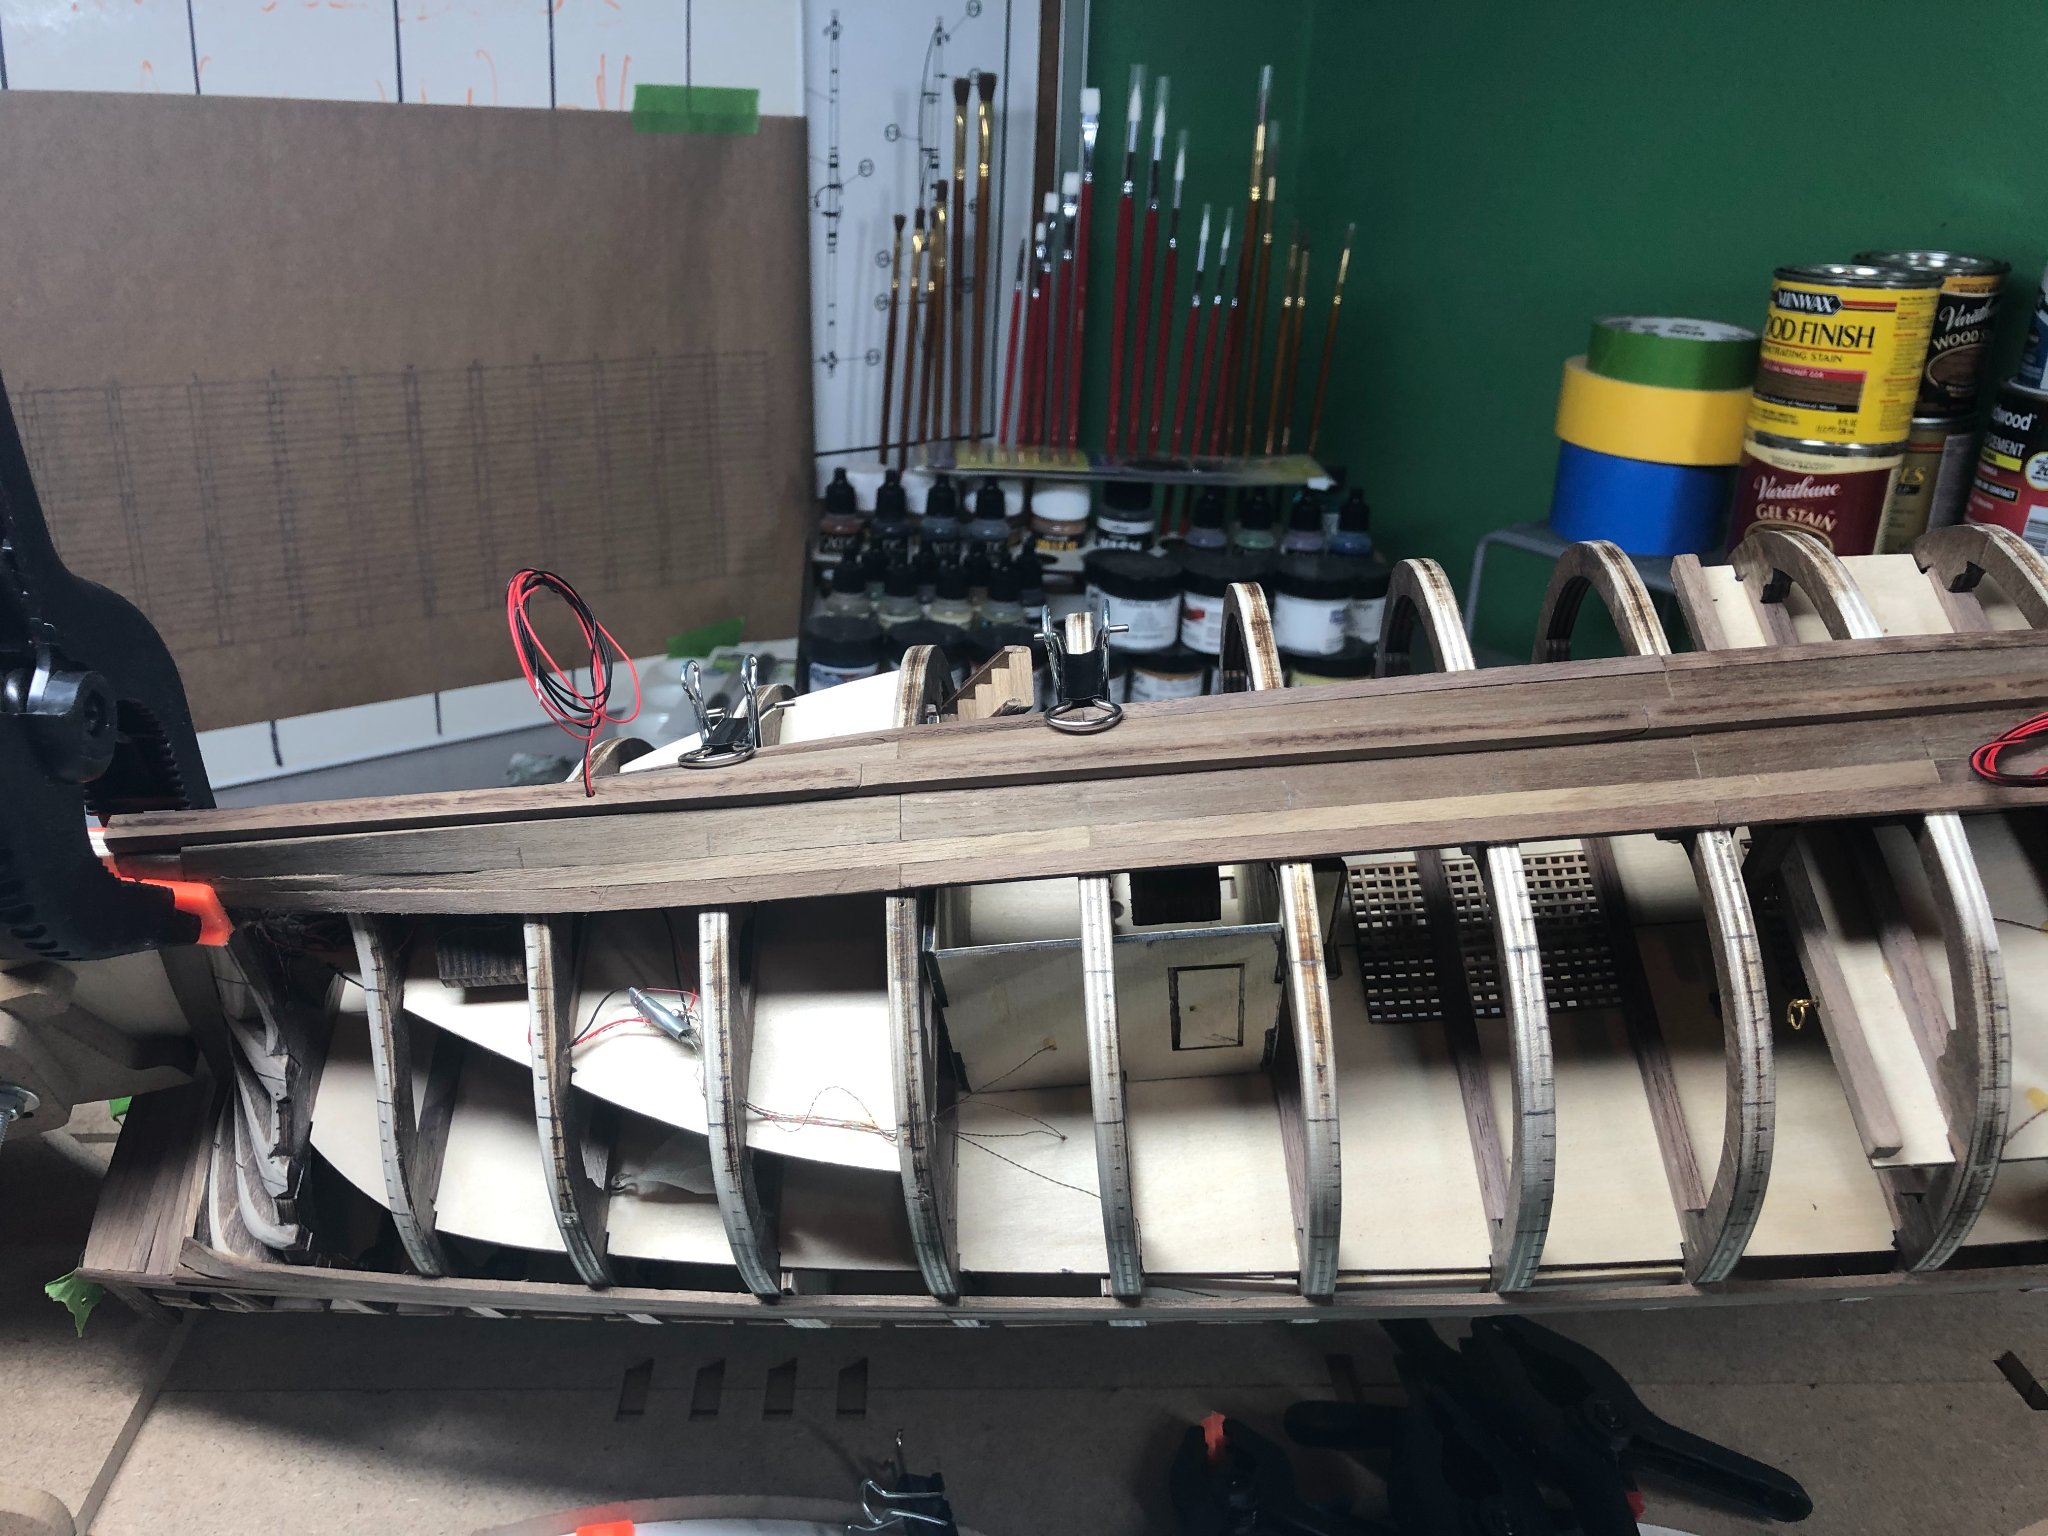
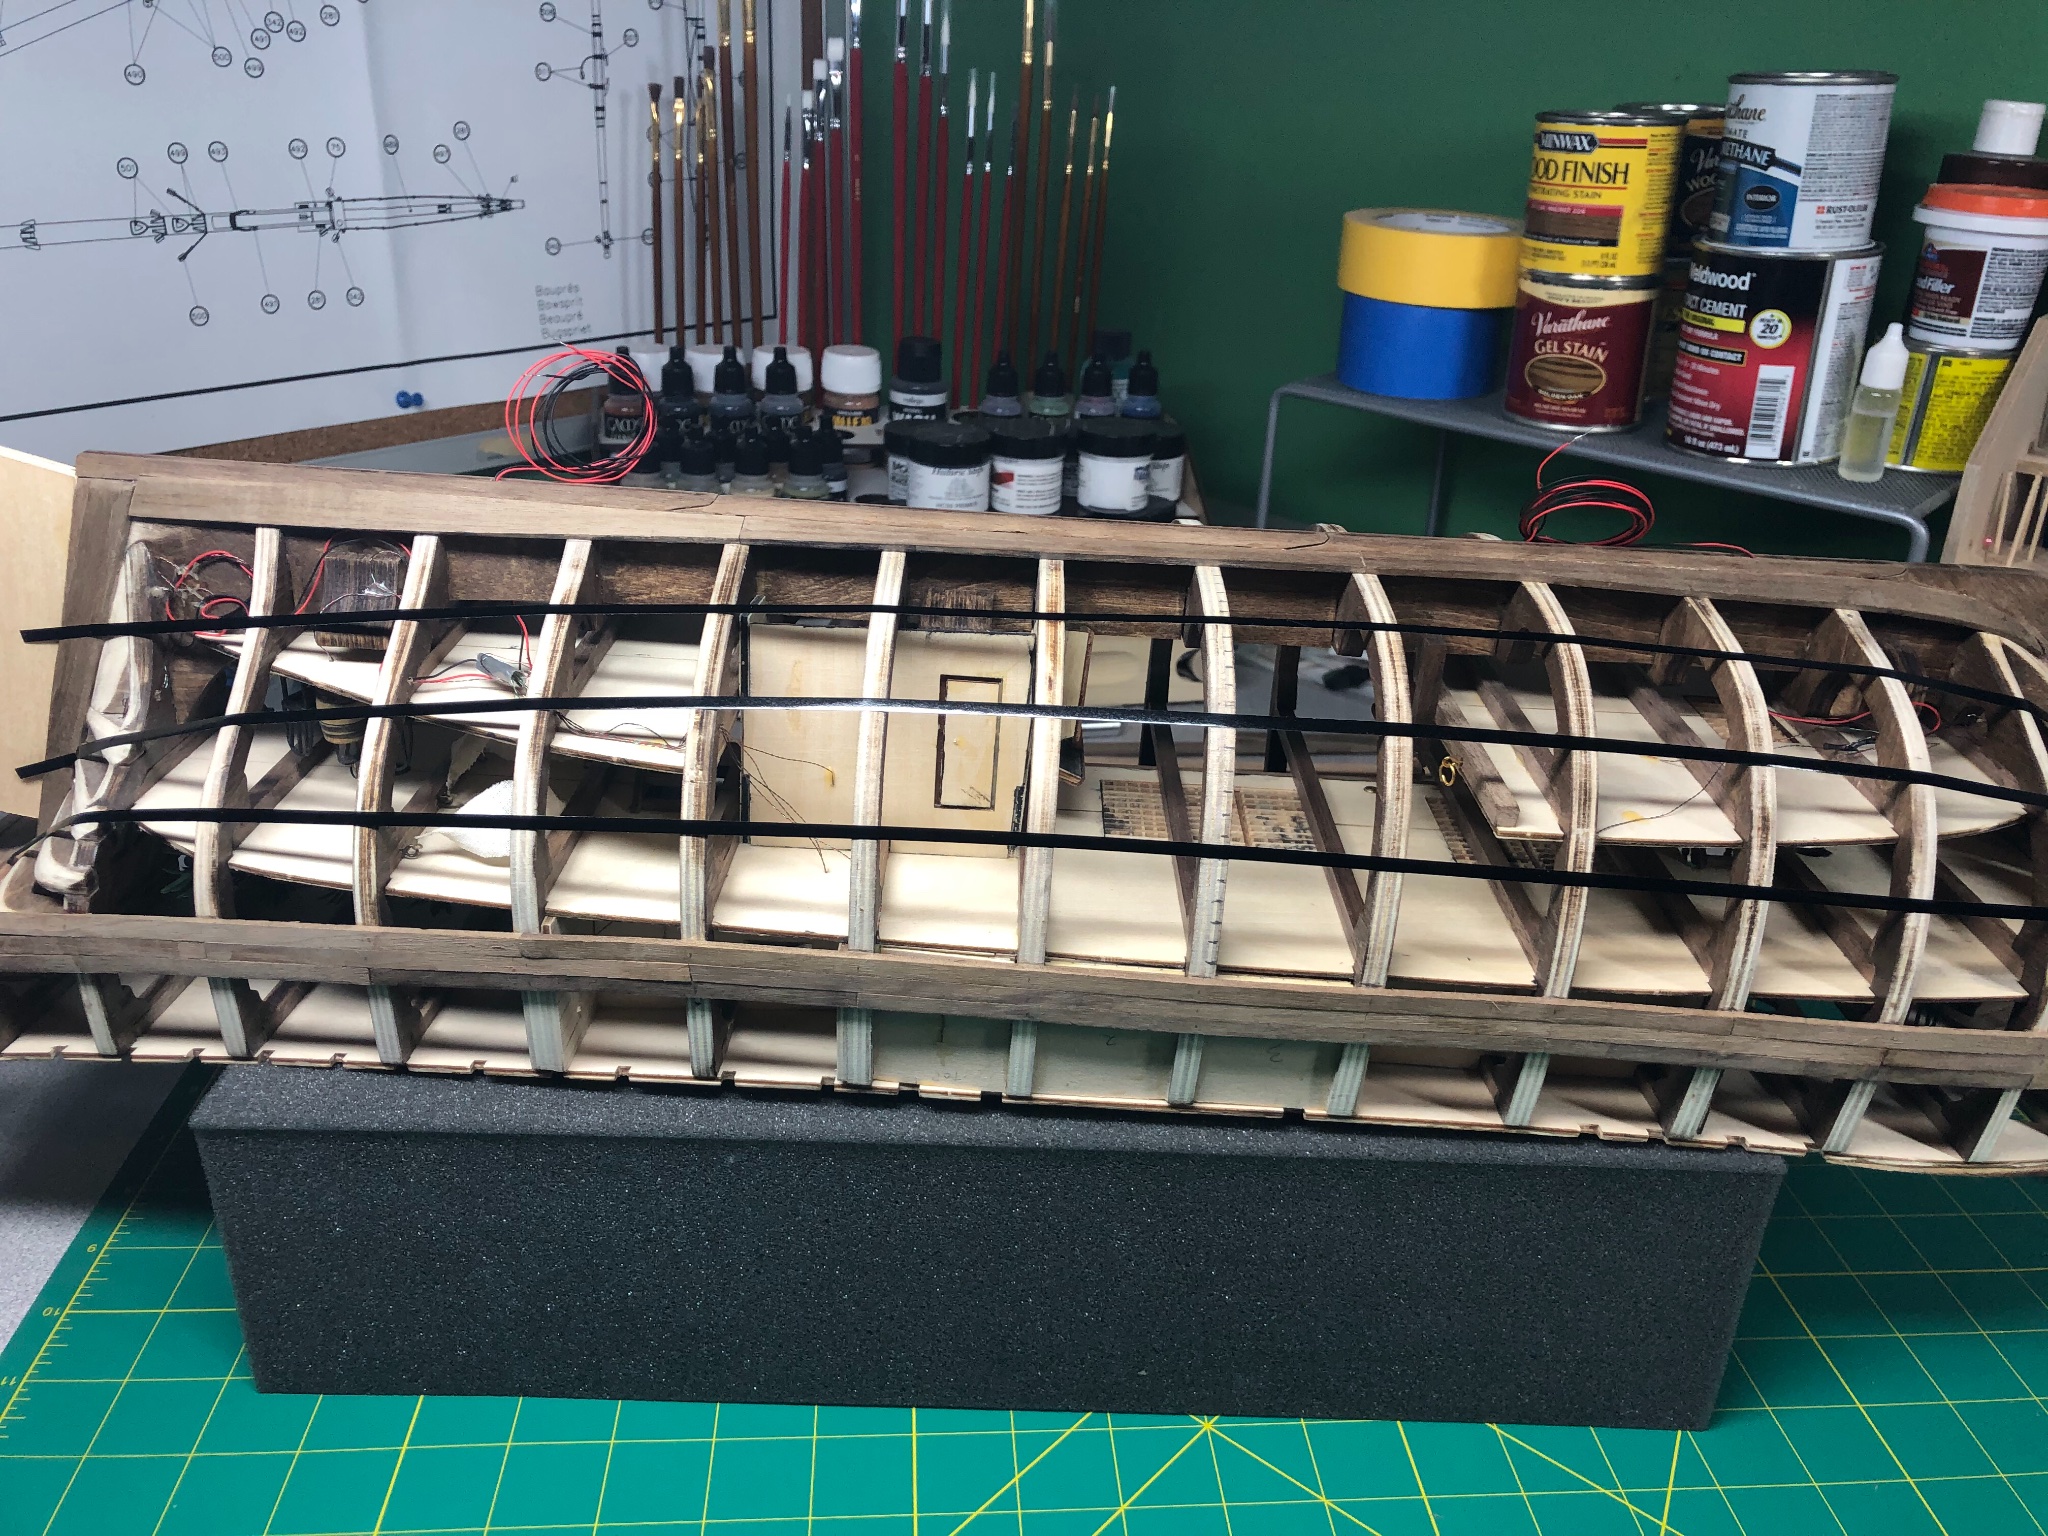
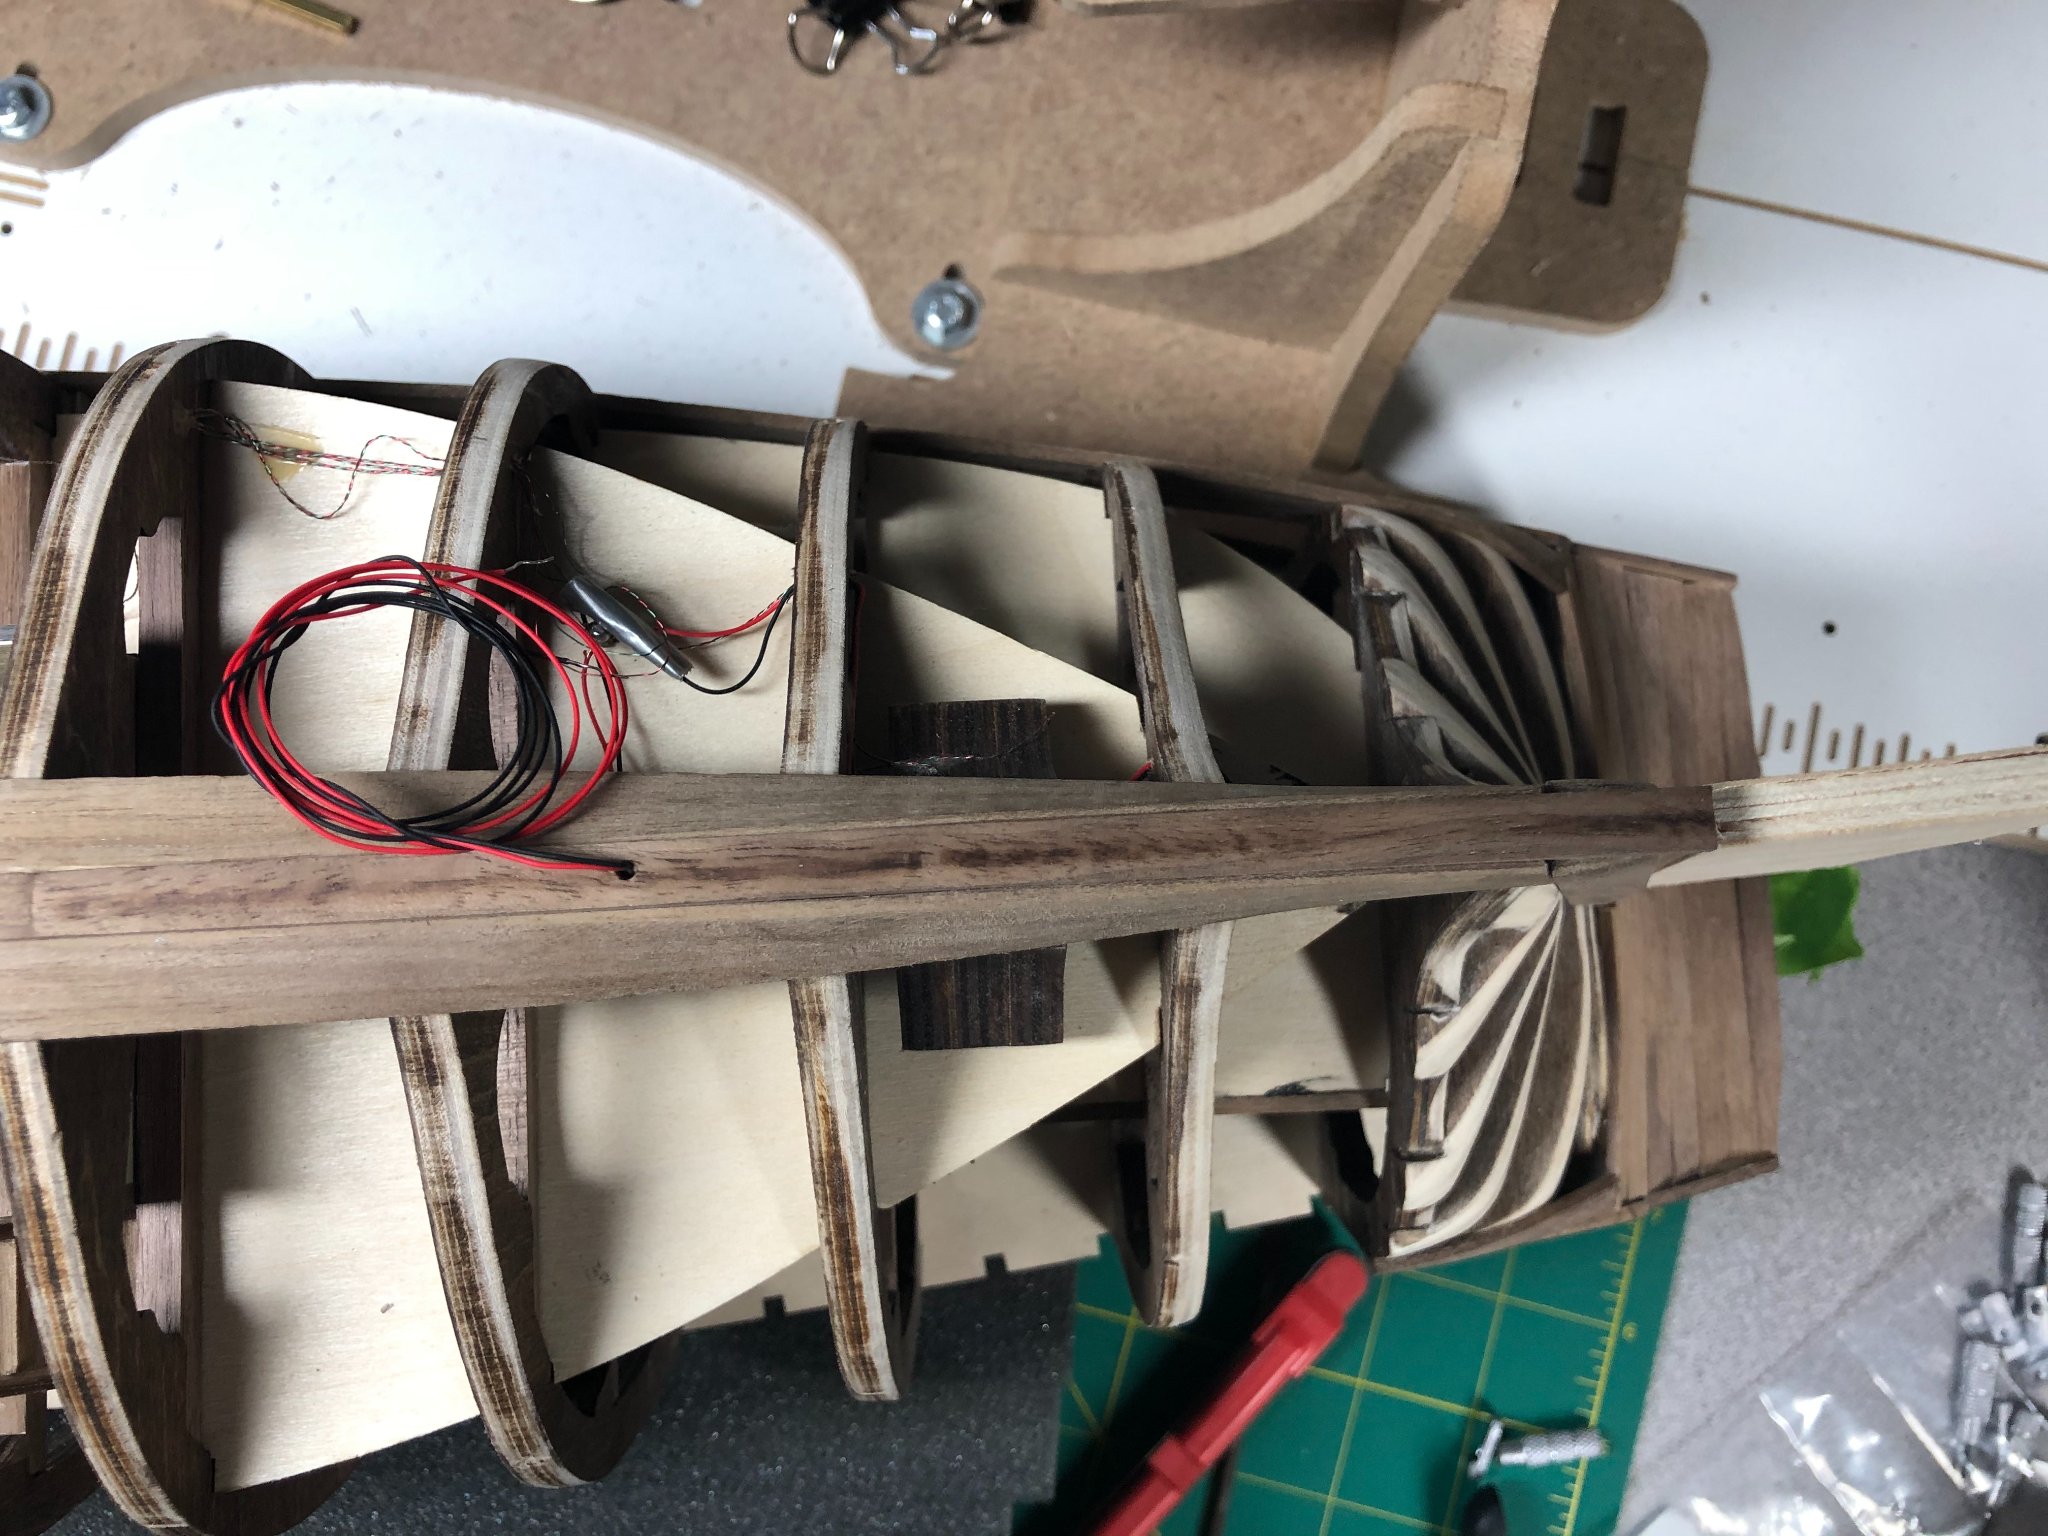
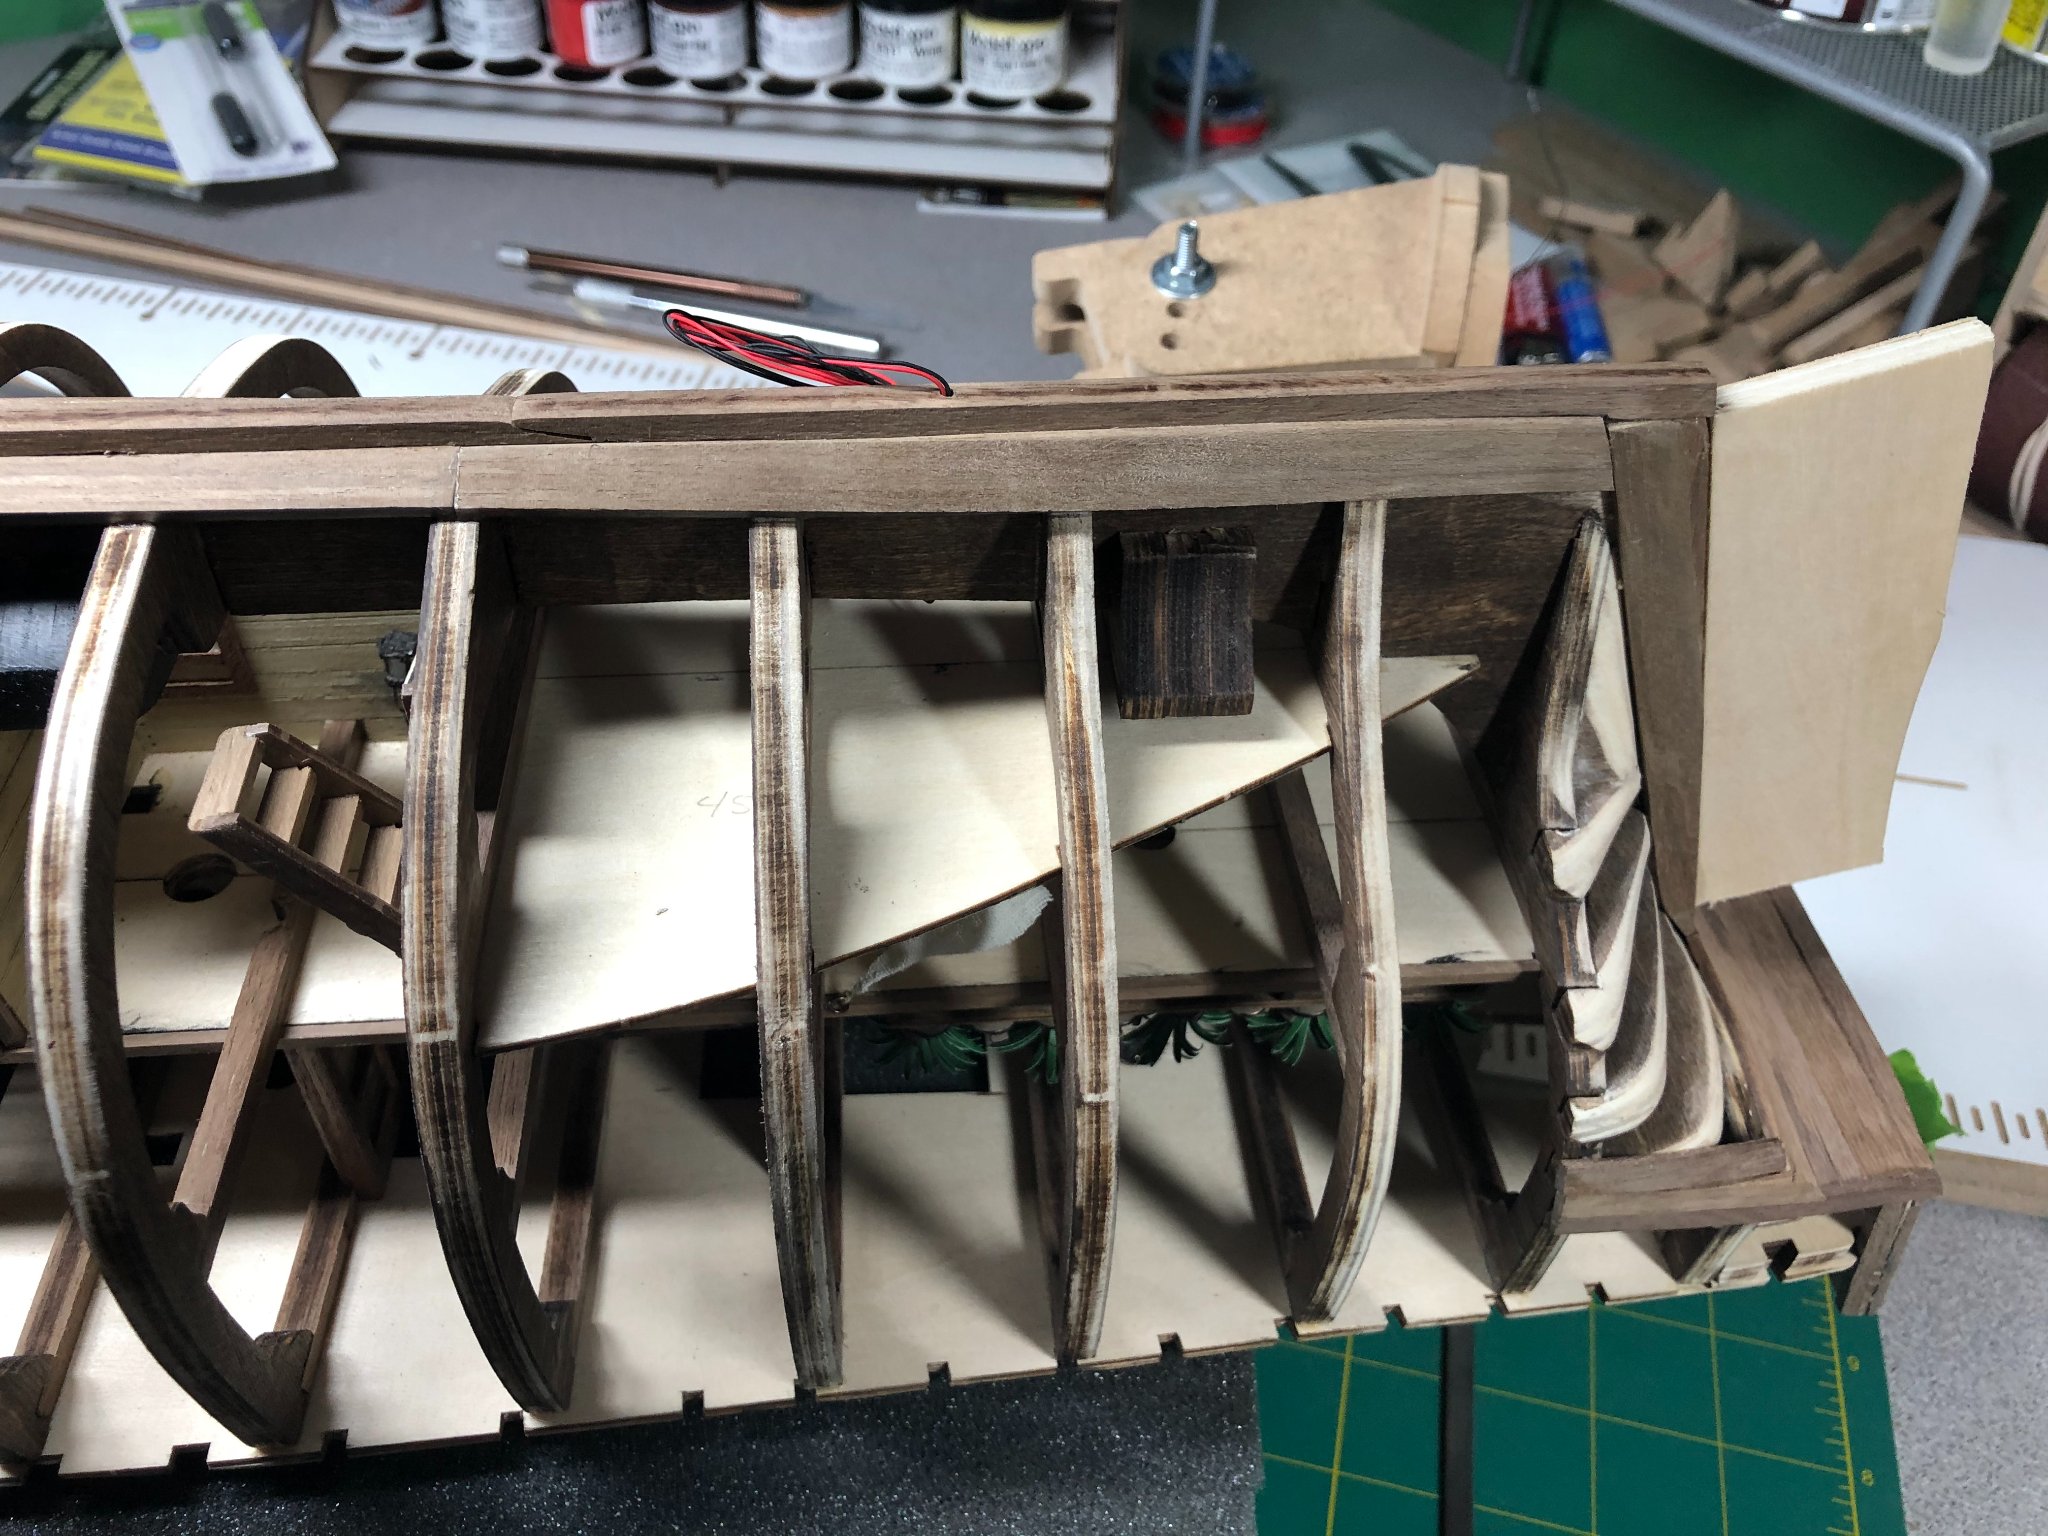
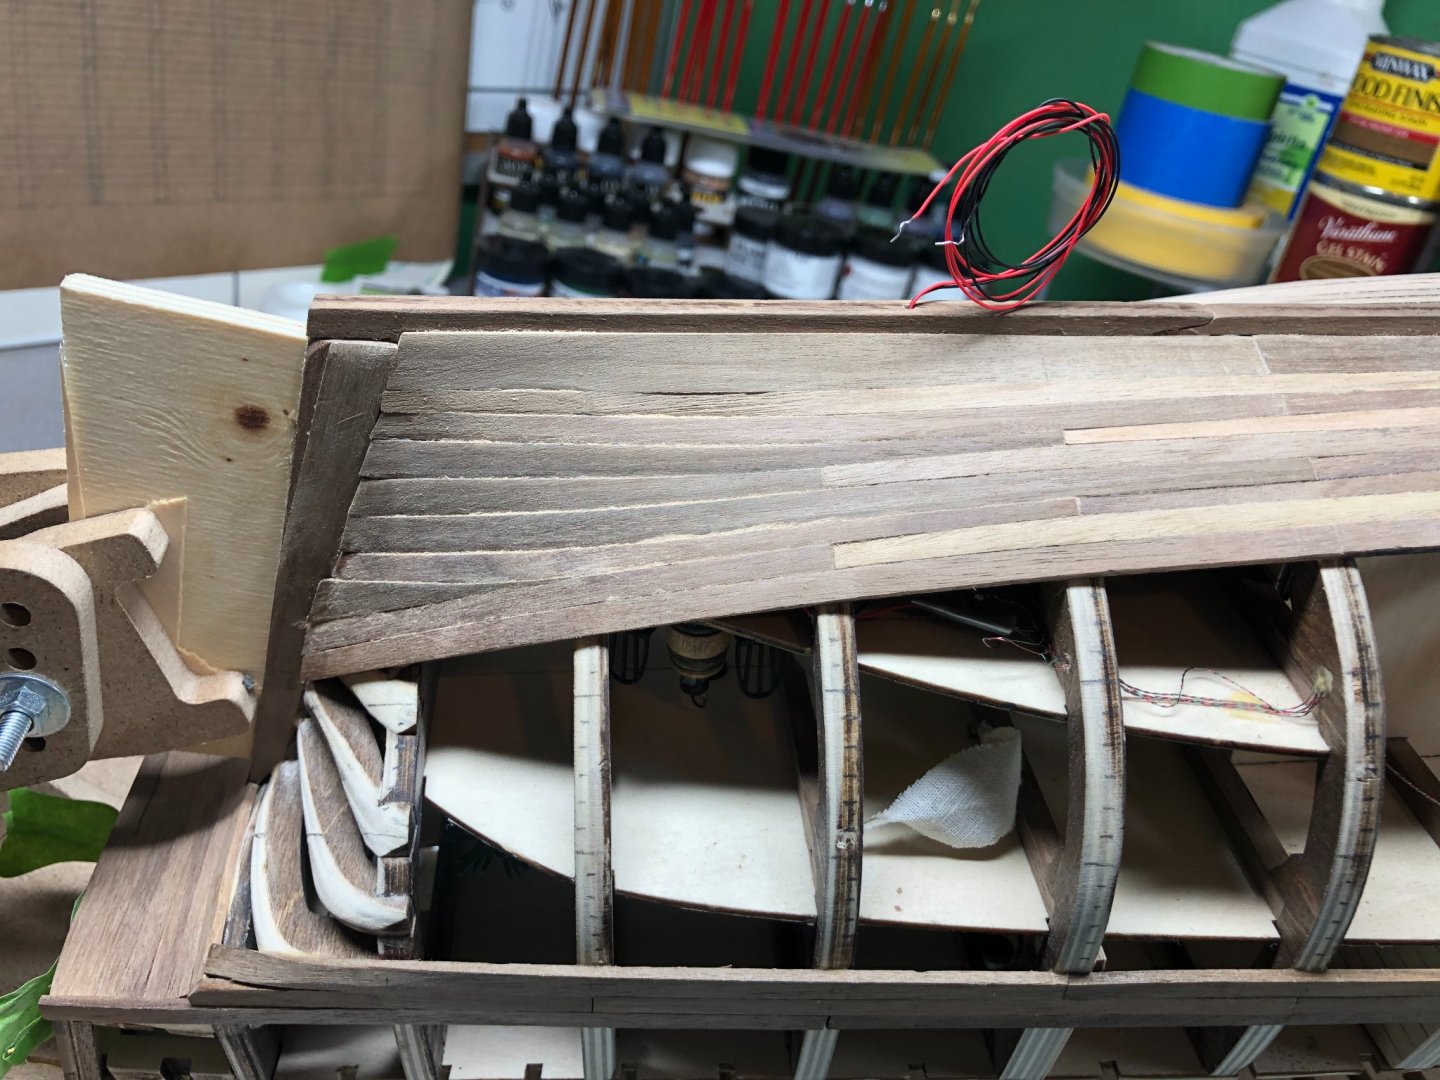
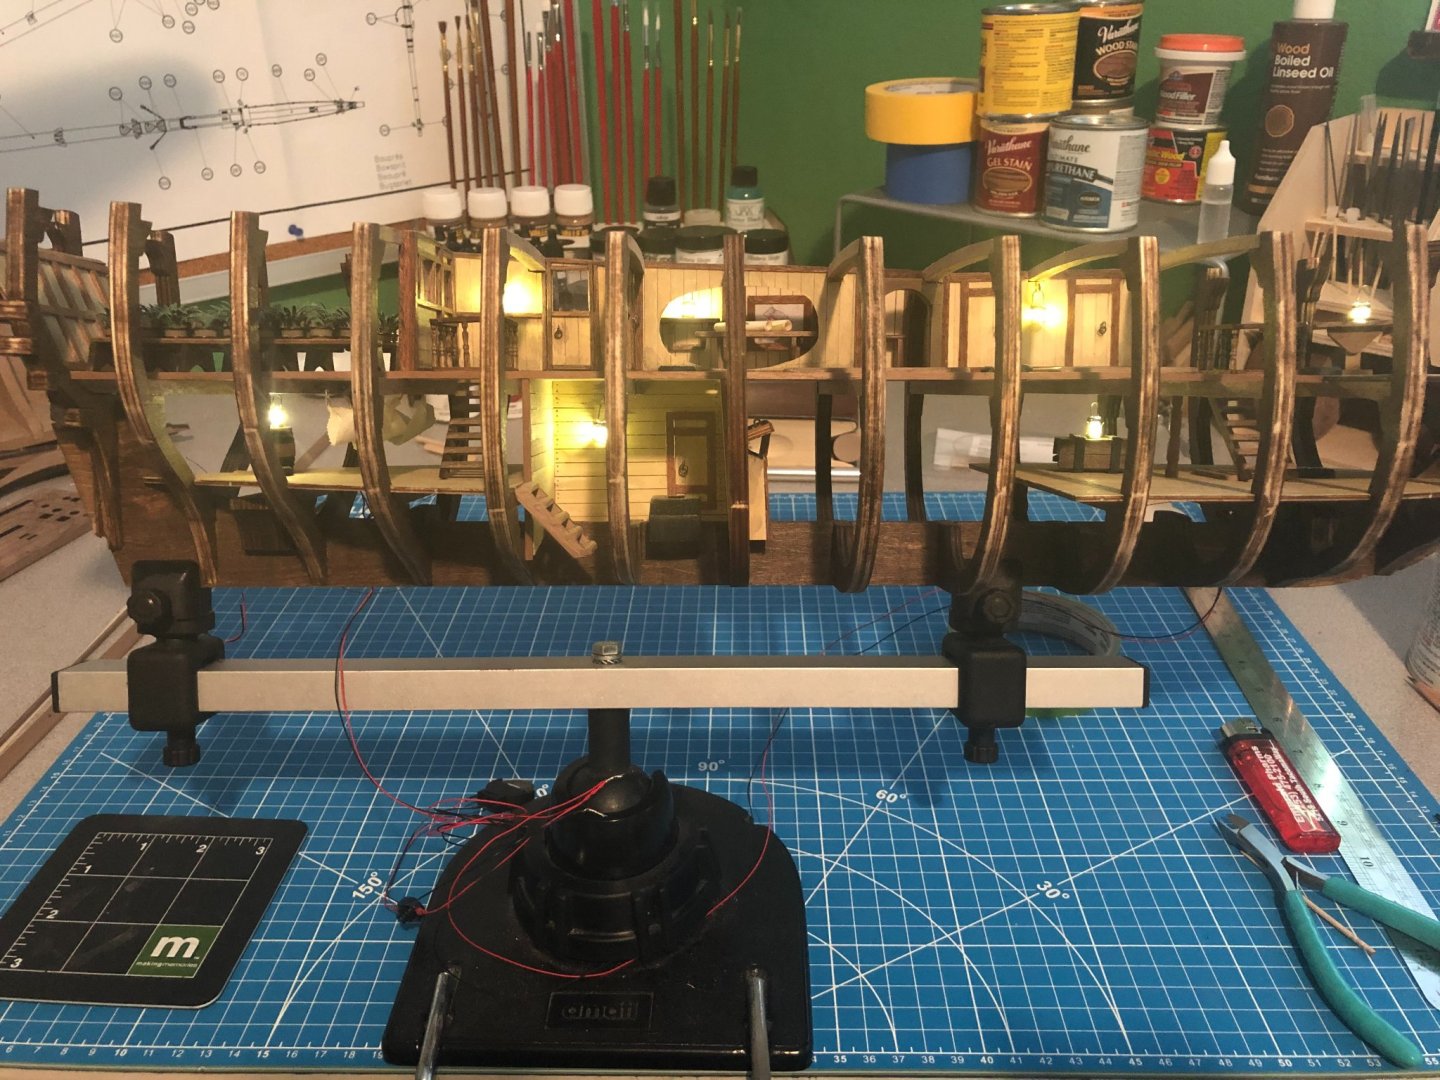
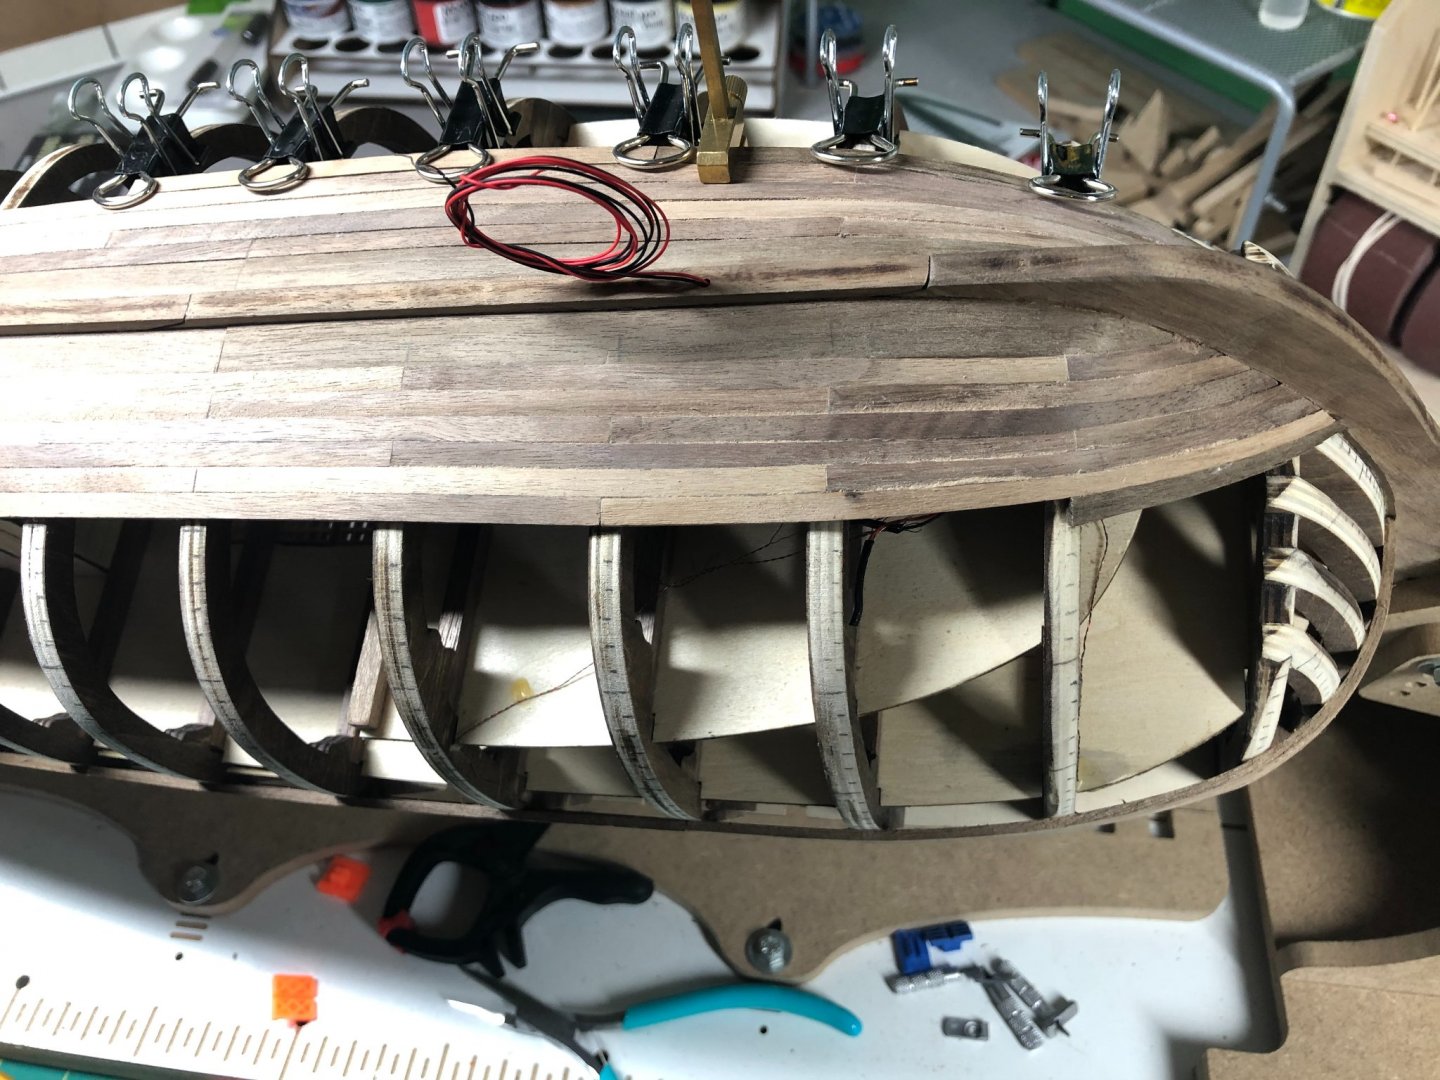
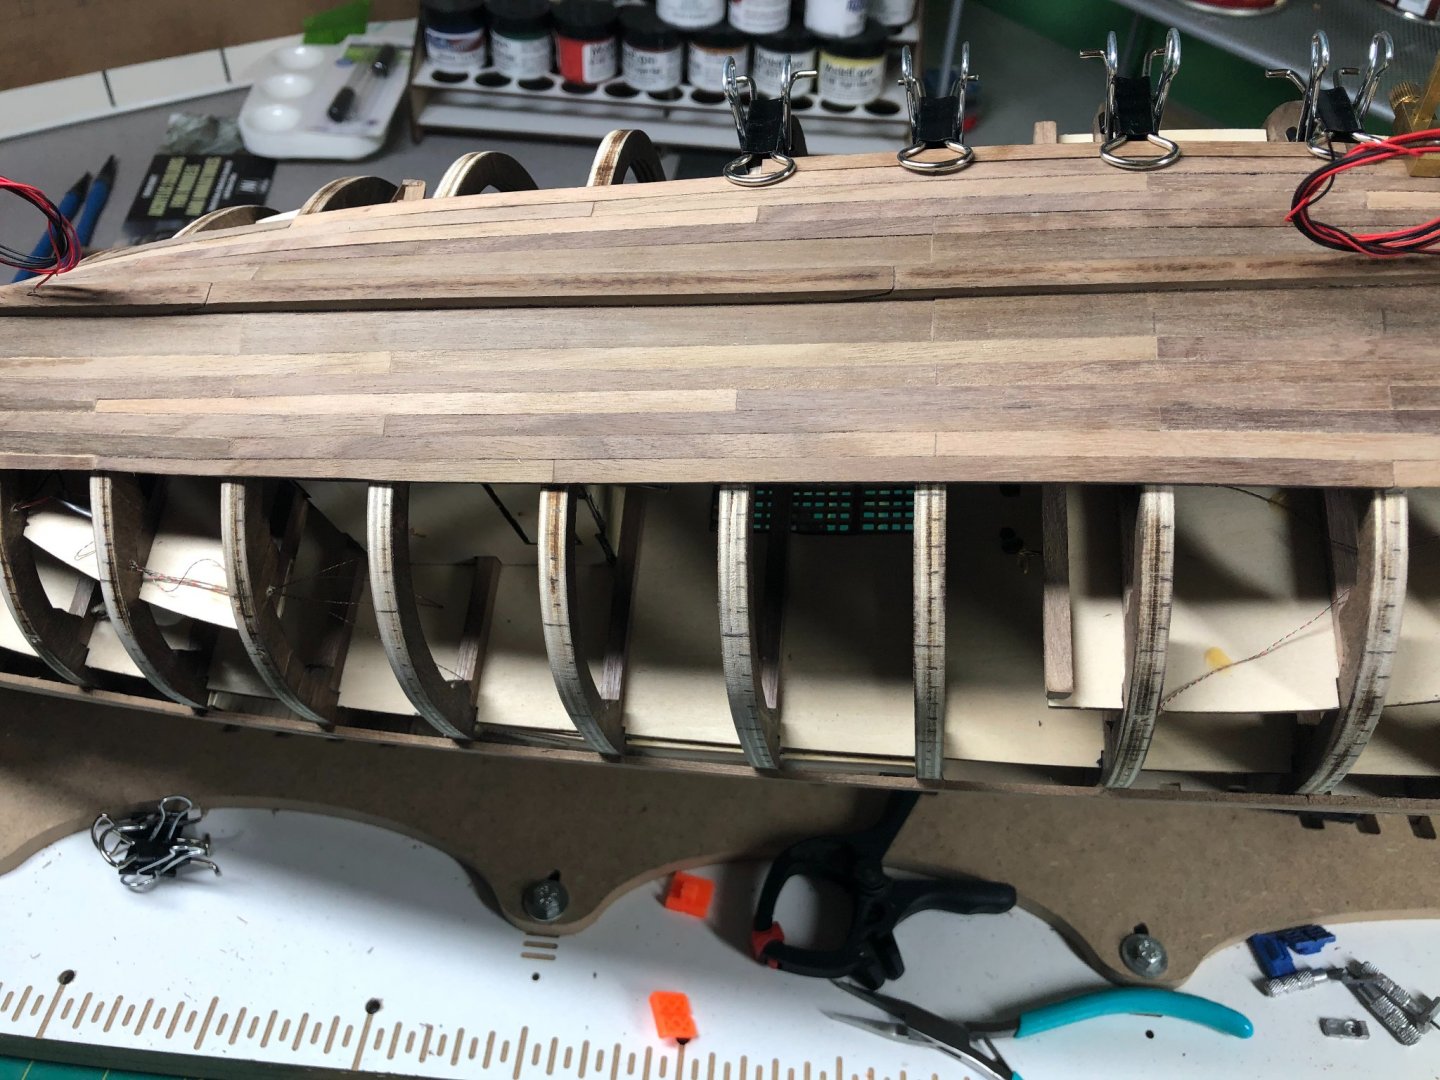
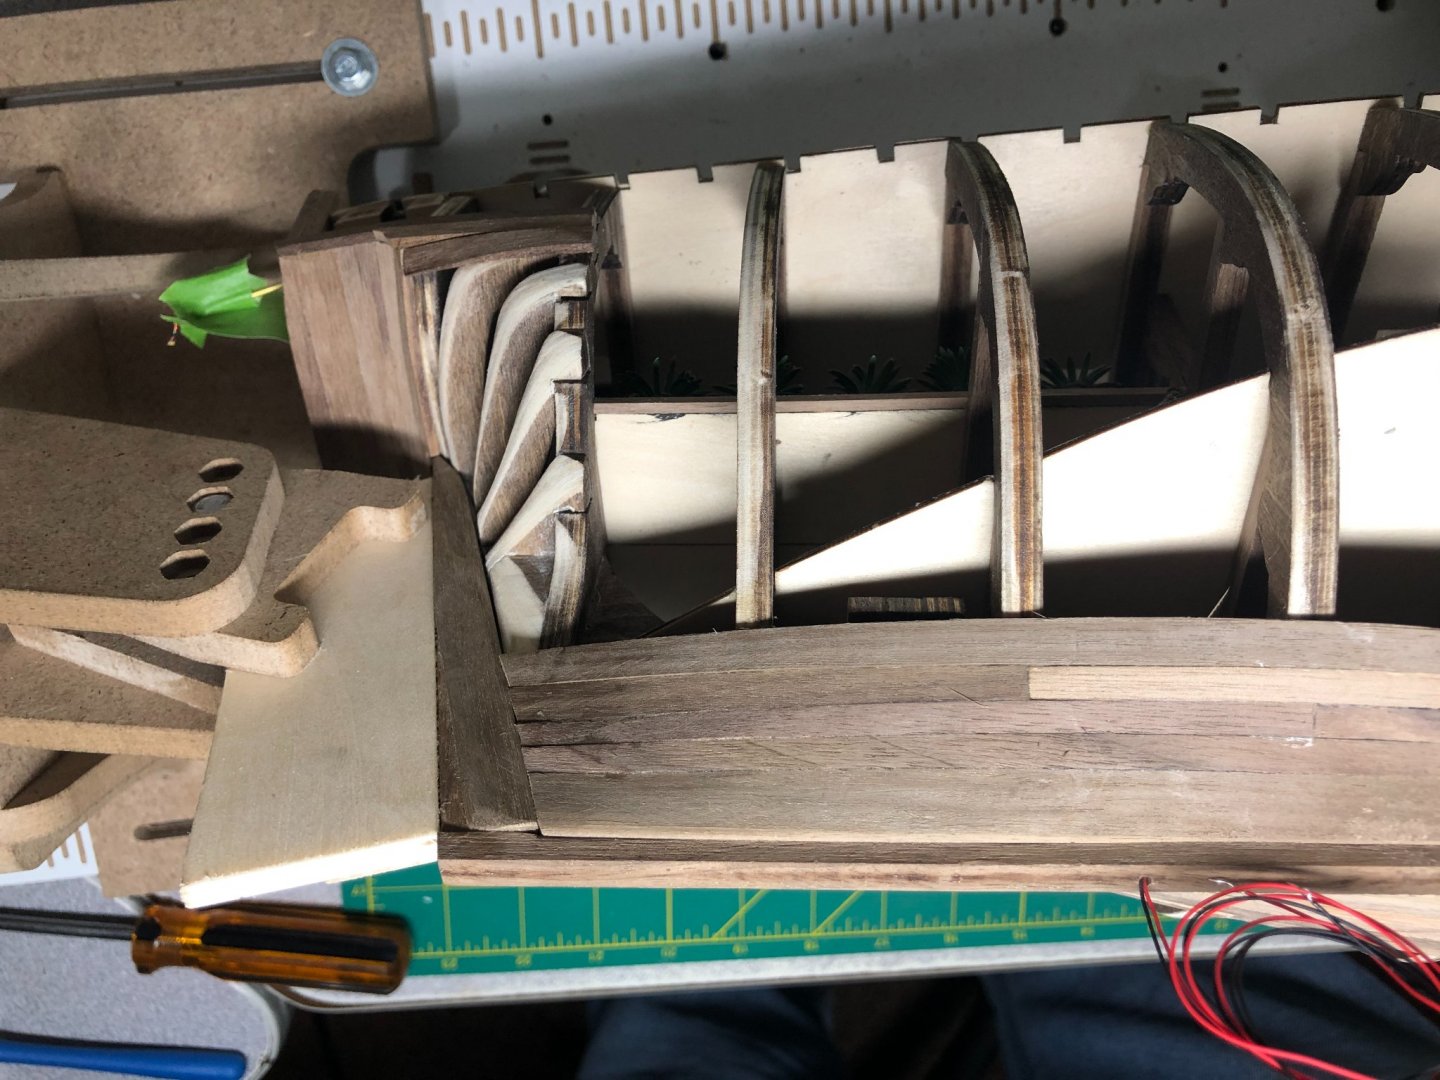
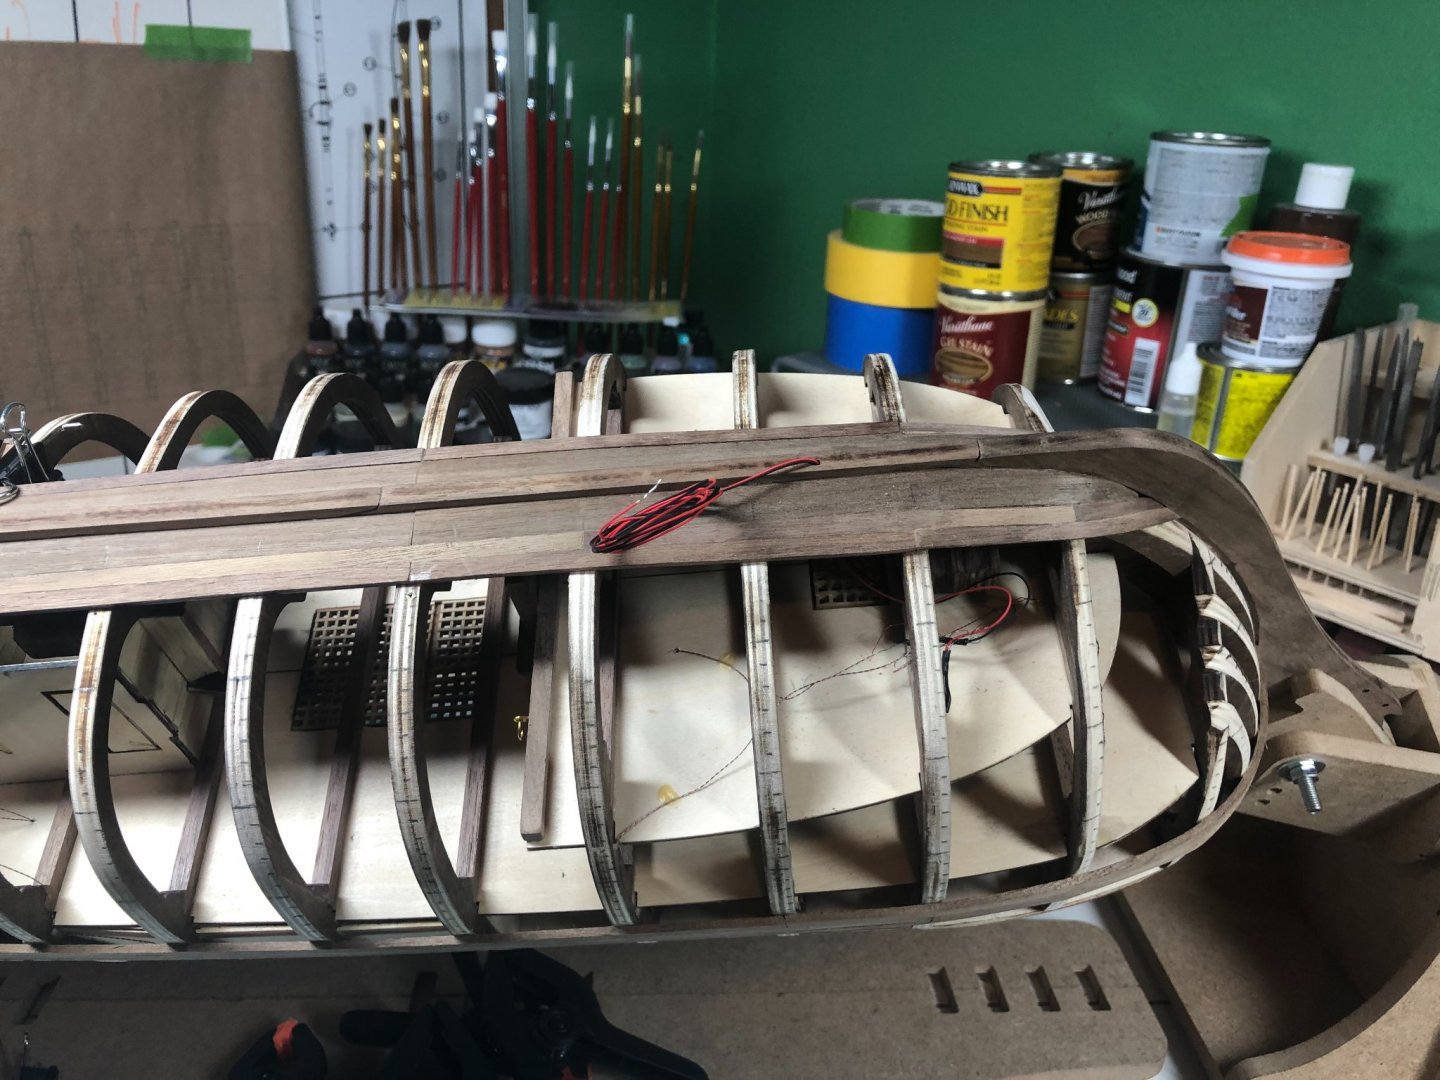
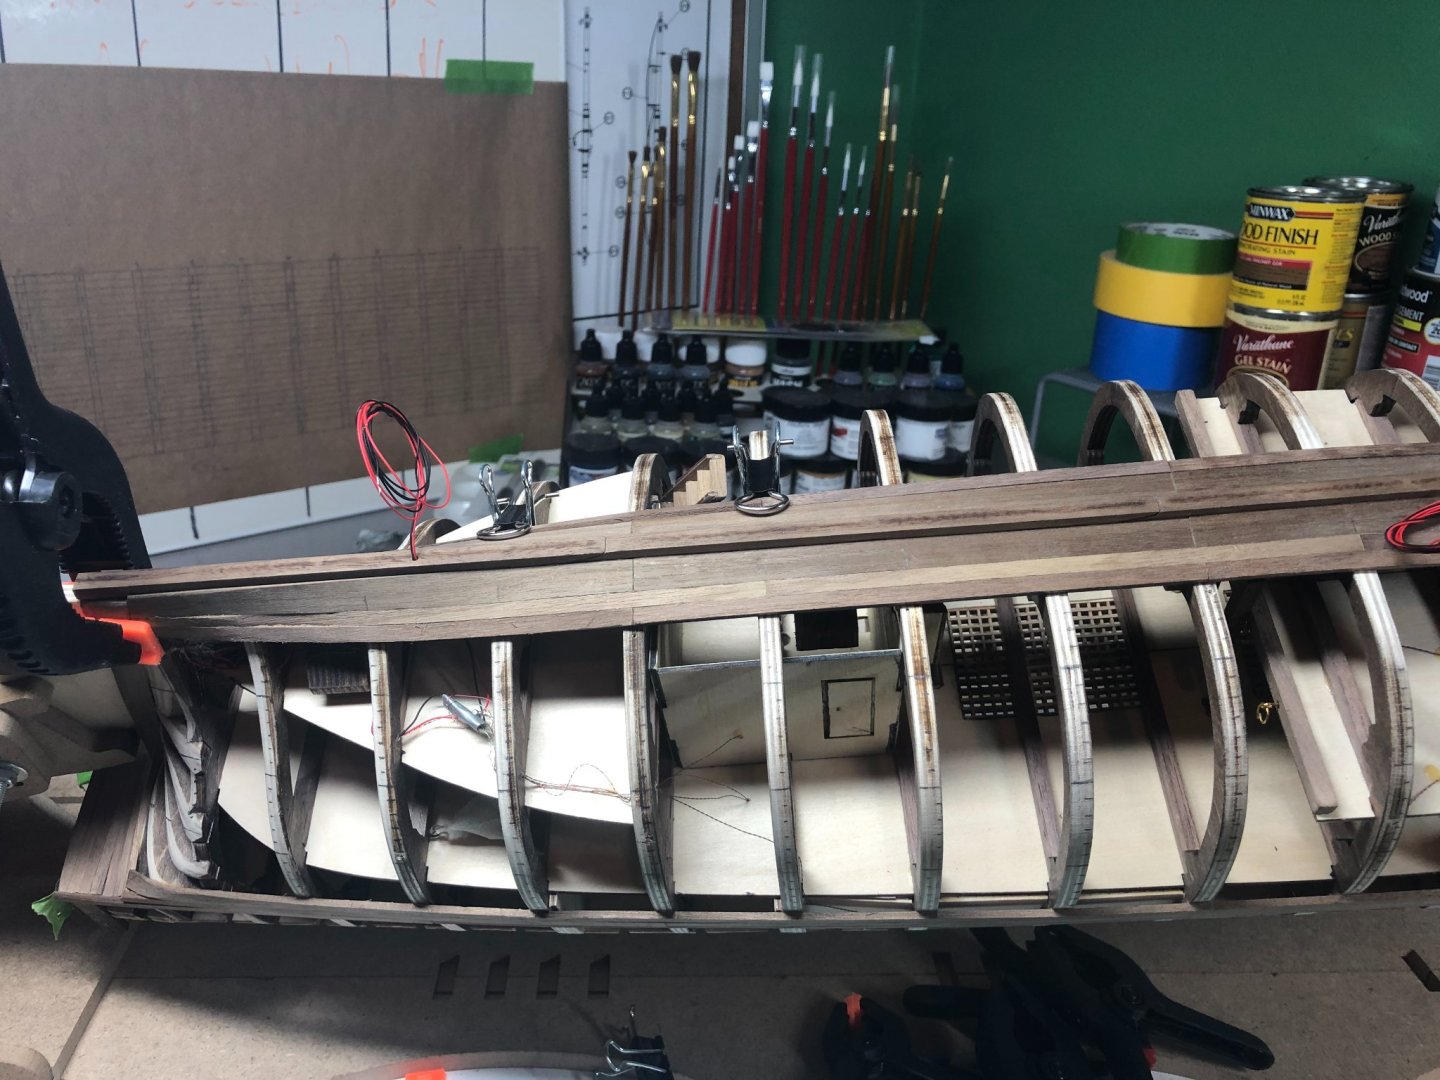
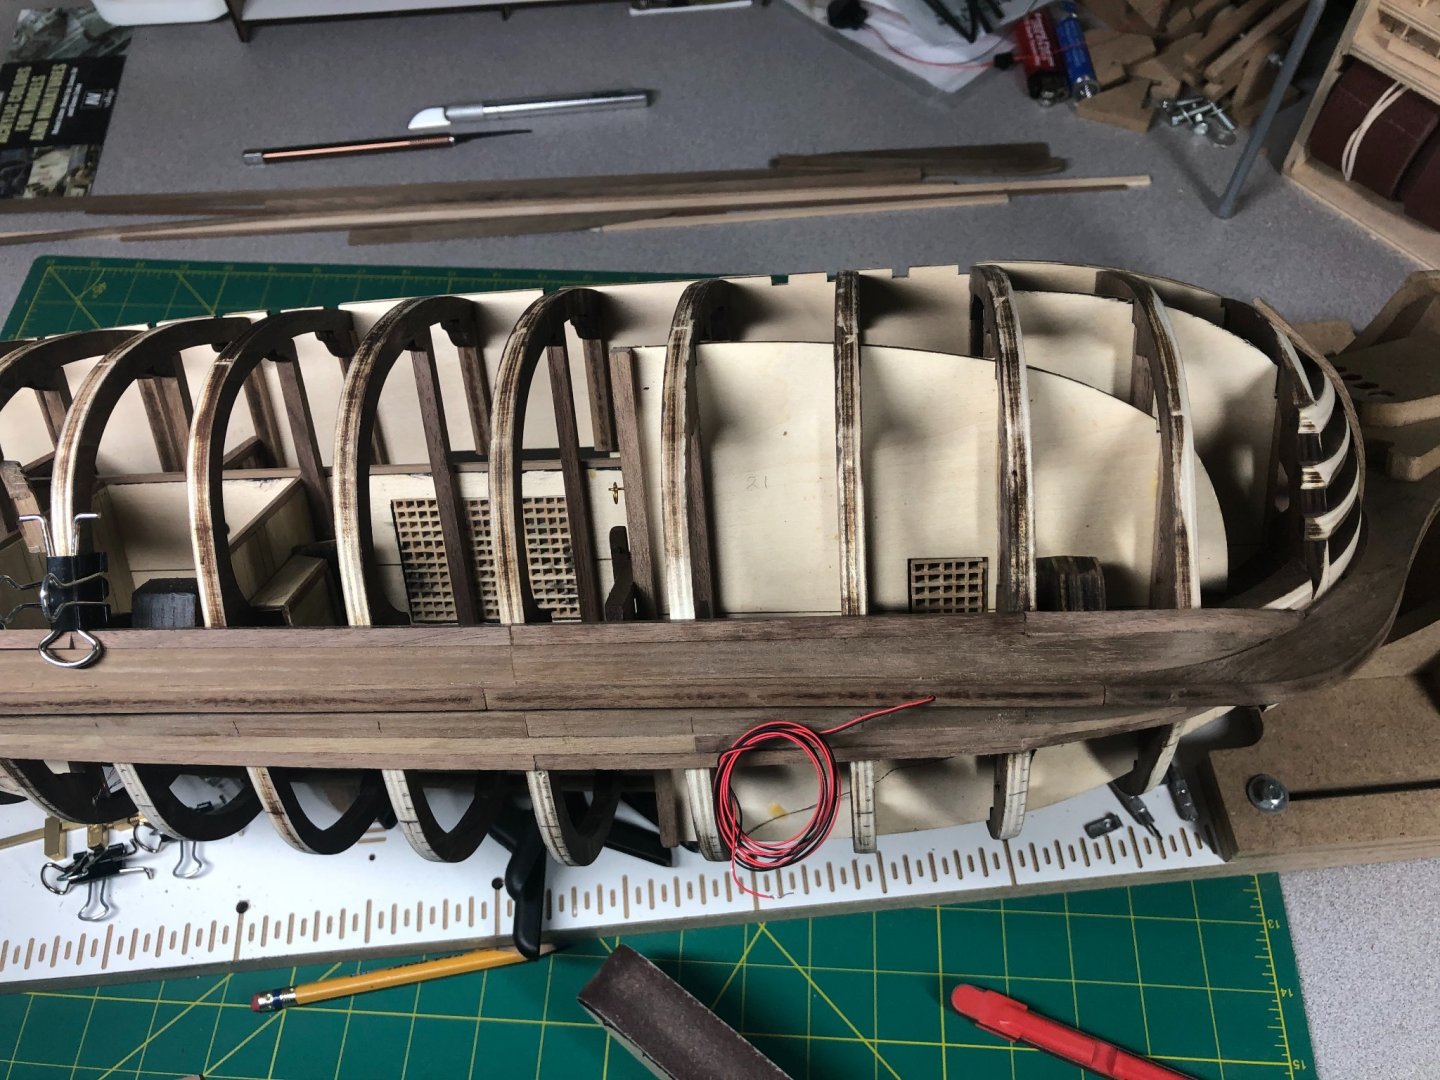
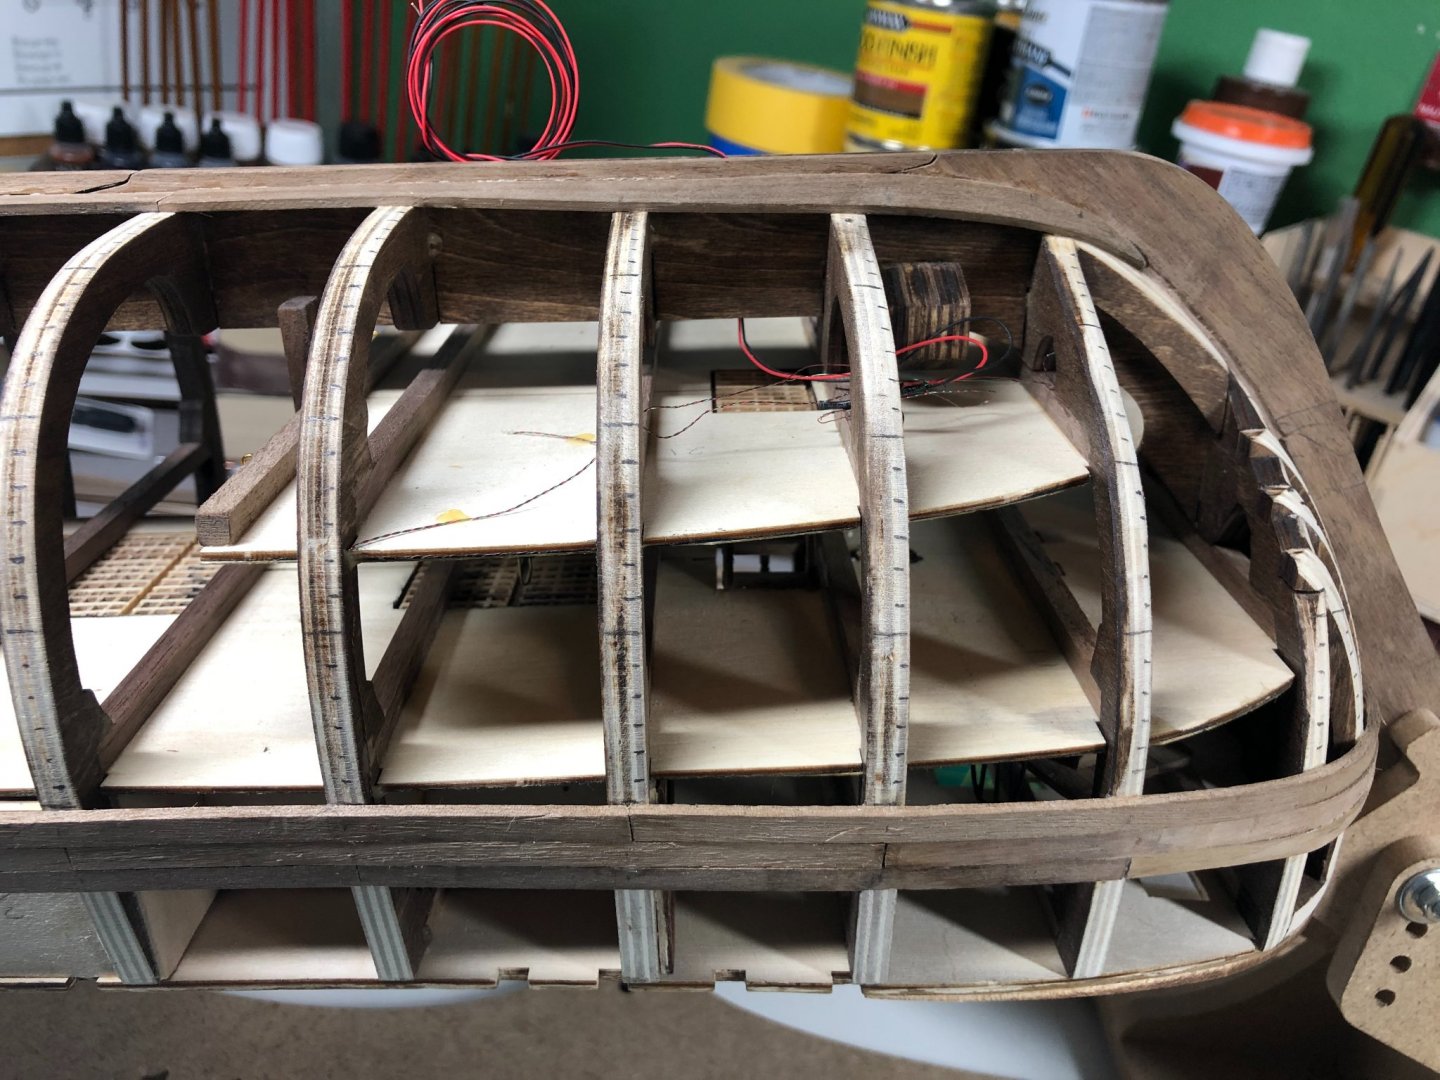
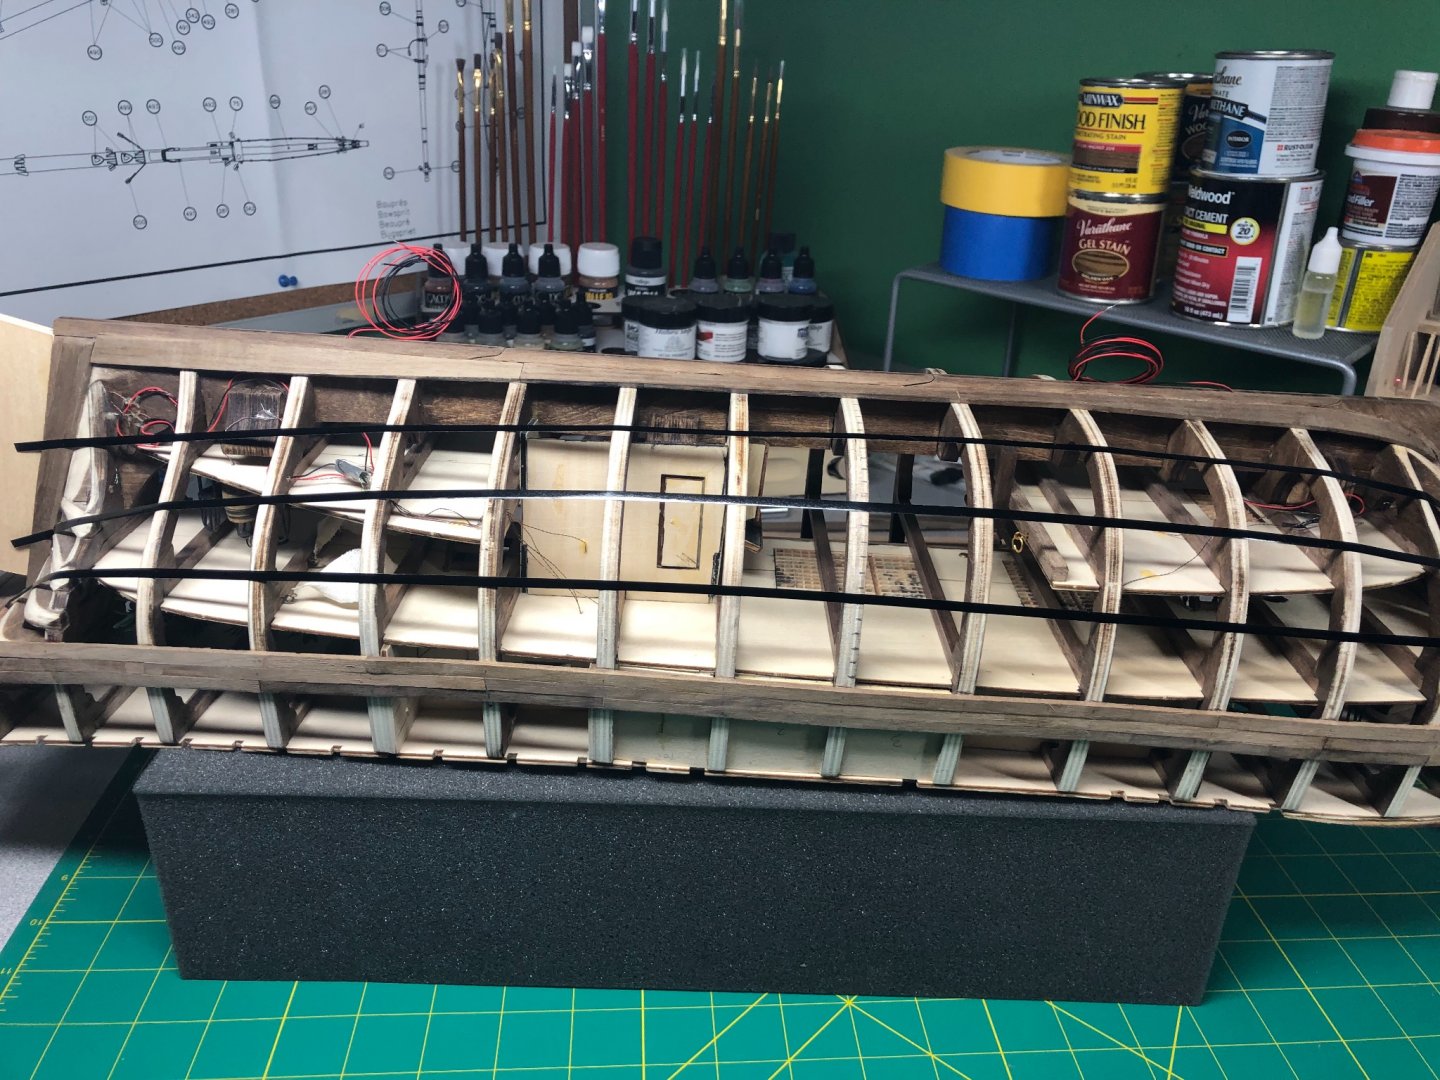
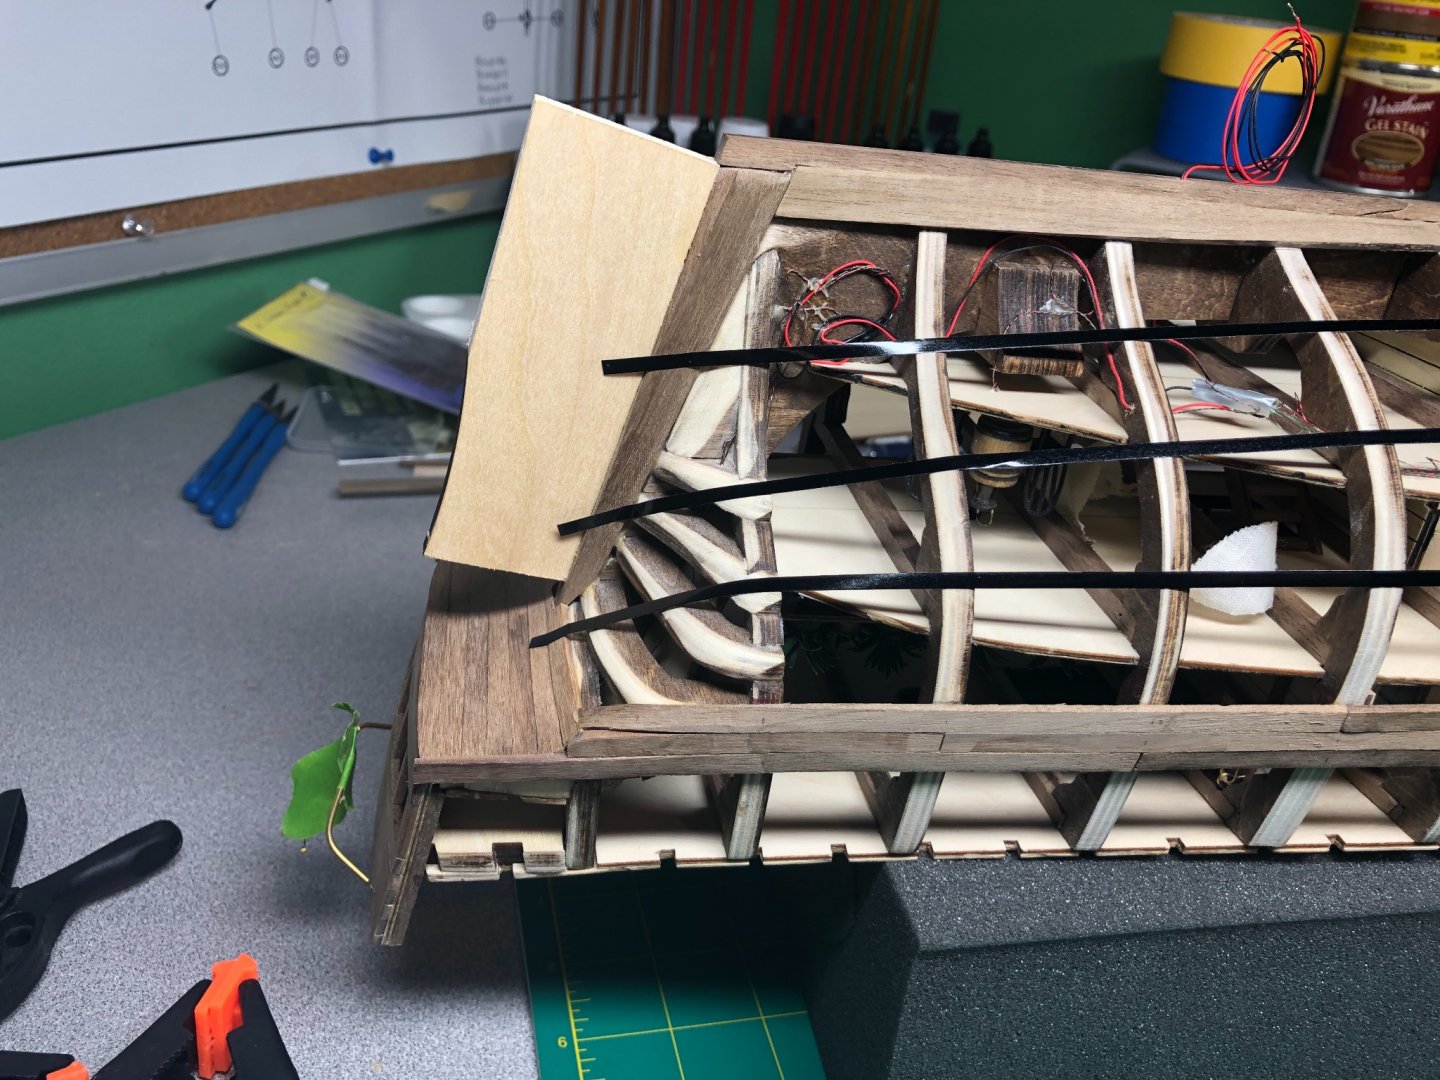
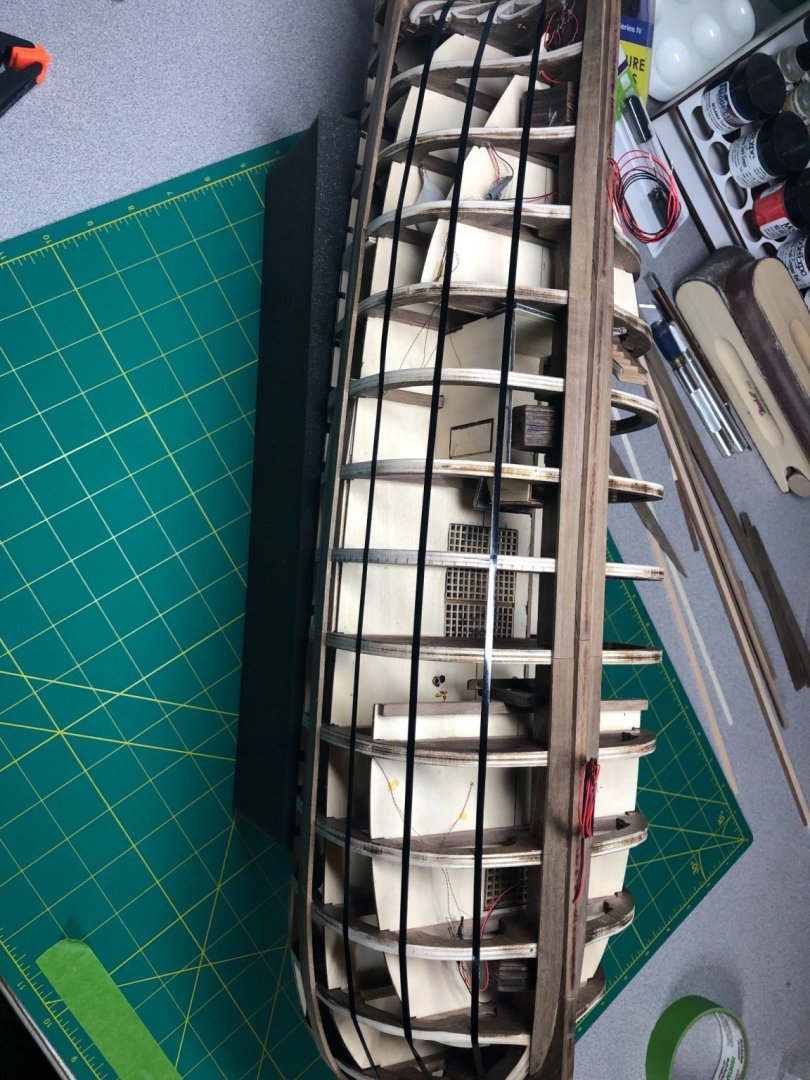
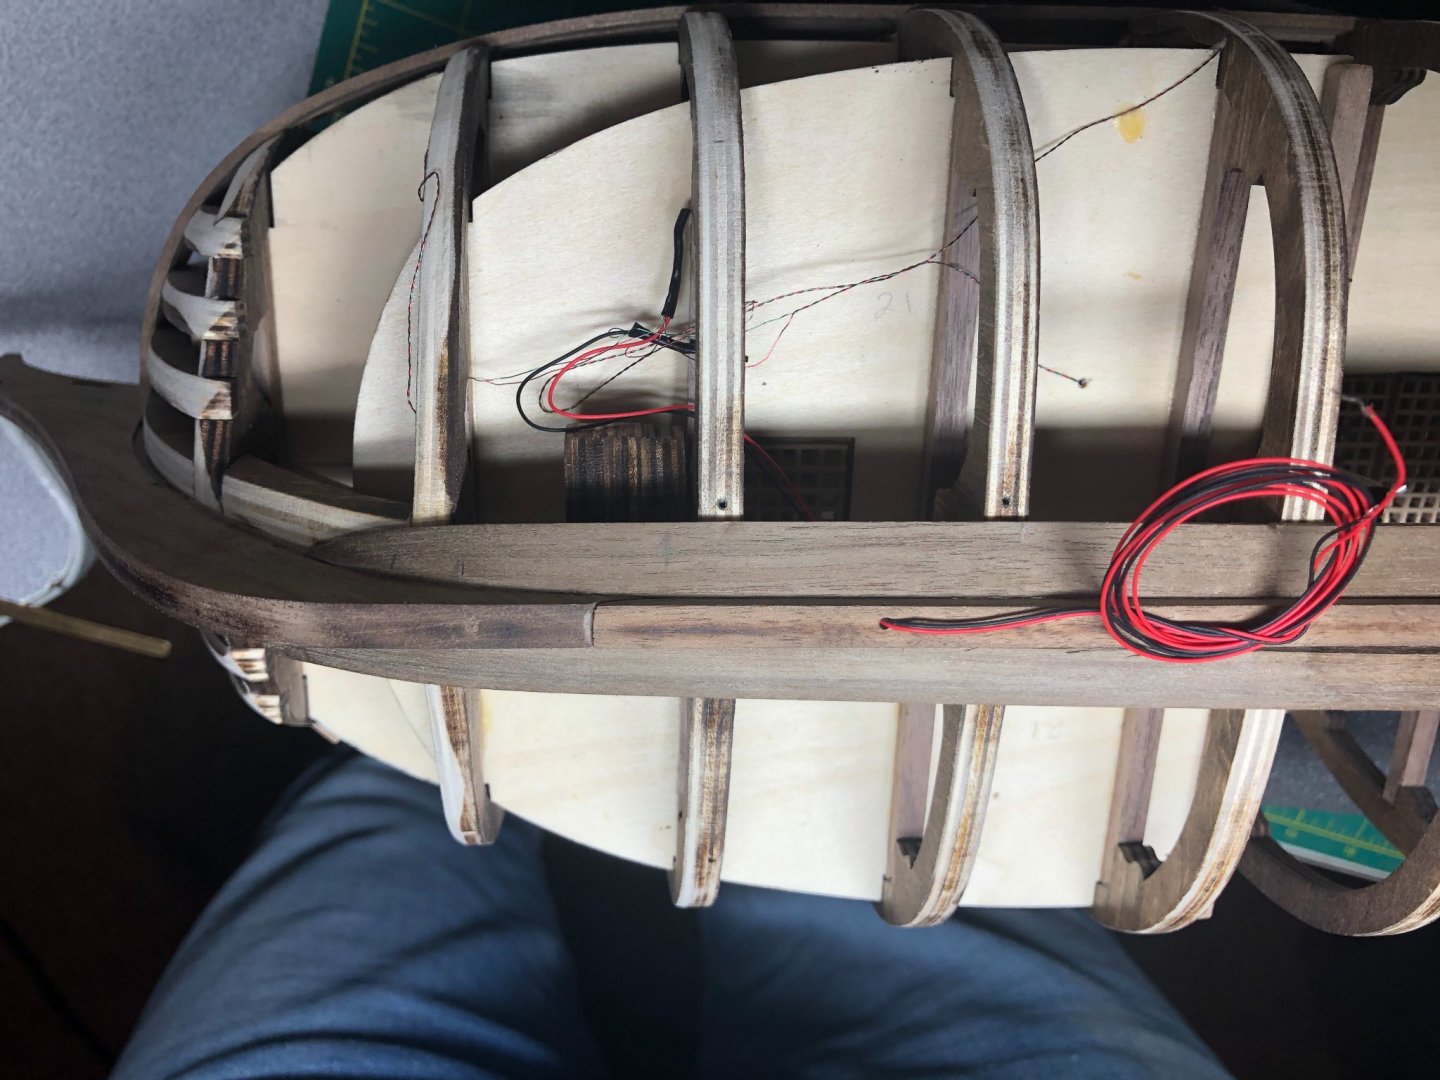
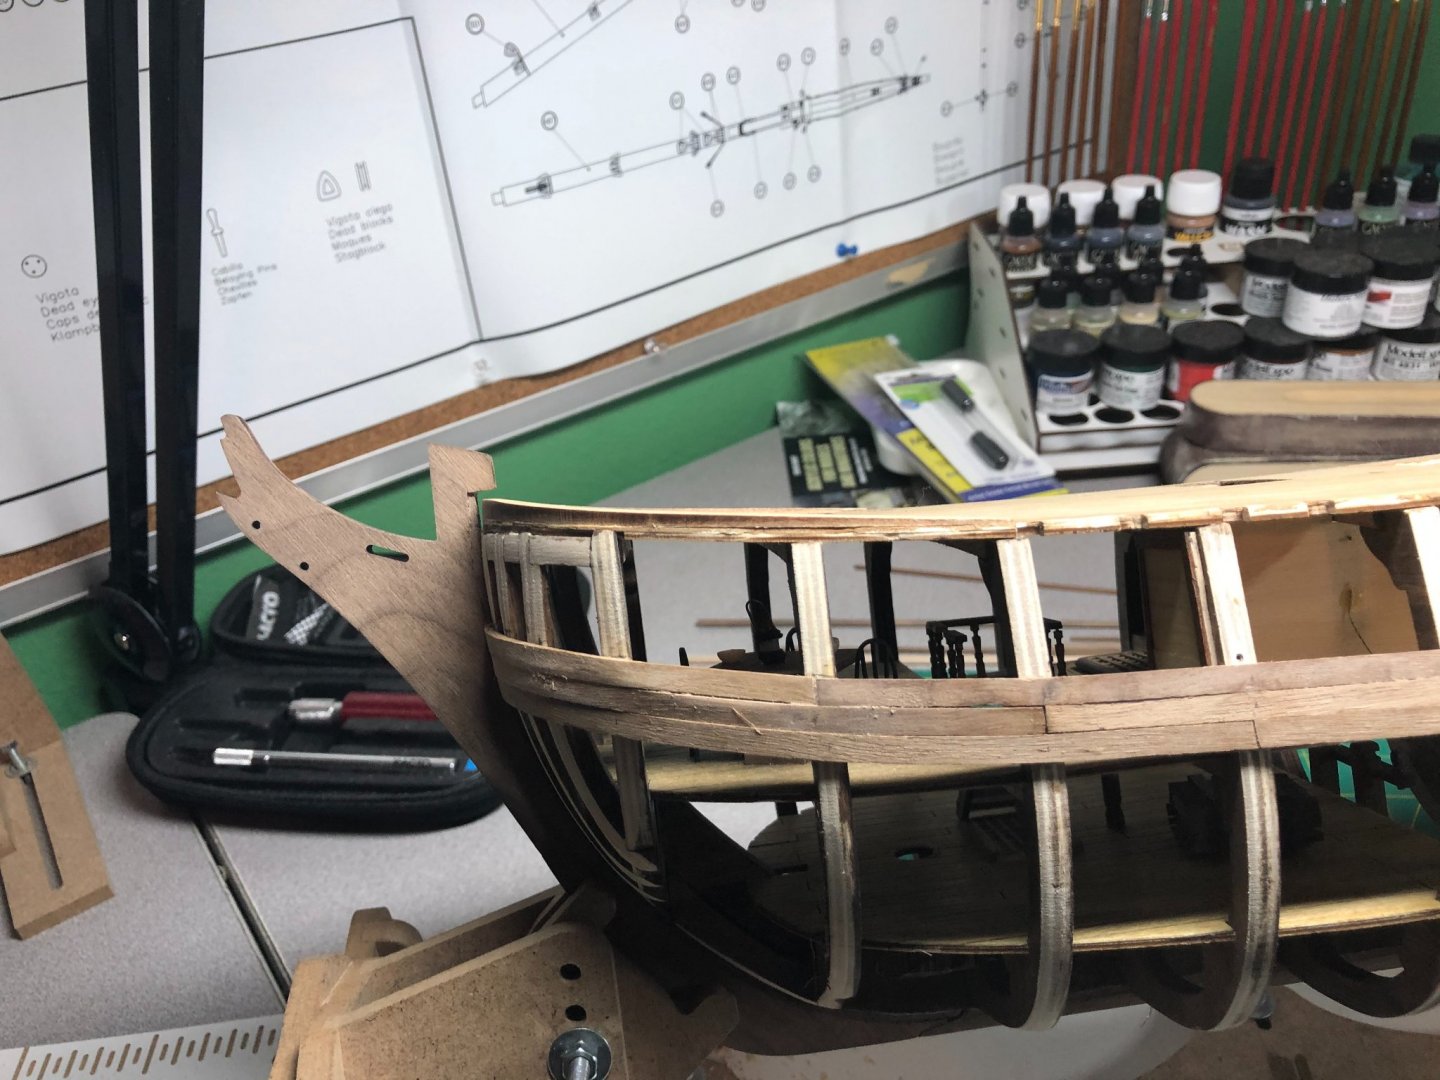
Been a quiet couple of weeks as spring has opened all kinds of other projects! Planking continues: The stern has been the bigger challenge. The first few planks were fine but as can be seen in the picture above, I had to switch from butting against the stern post to butting onto it. Sanding will remove the imperfections. I think the walnut will be interesting to sand! Such a hard wood! The starboard side is mostly done as so much of it remains open. Still have to do above the wales and a few more planks to bring the height up high enough to hide the wiring of the lanterns. Updates as I make progress.


-
I can send you a picture of the decoration from my model... I haven't installed or modified it yet. Let me know if you're interested.
-
I use Jax Blackener... It does an ok job but it does wipe off pretty easy. I tried putting a clear coat over it but it makes it shiny. Not good! Patience is definitely being taught in all aspects of this hobby!
-
How are you keeping the blackening from wiping off?
-
Rope-where to go since Syren is no longer making it?
LyleK1 replied to bear's topic in Masting, rigging and sails
Wasn't planning to use it for anything more than just practicing... Reading others comments (and yours), it sounds like Gutermann is the way to go... Thanks for the advise! -
Rope-where to go since Syren is no longer making it?
LyleK1 replied to bear's topic in Masting, rigging and sails
I too, just purchased the Rope Rocket and the Serving machines from Chuck and Syren. Haven't assembled them yet but will over the weekend. Looking forward to experimenting with both machines. I have plenty of time since I'm just planking the hull on my current build (HMS Bounty). Still deciding on what thread to buy or maybe just experiment with what came in the kit. -
Maybe take it to a print shop and have them blow up some of the shots?
-
Hi Trond, Your build is looking great! I have an electronic copy of the Armed Transport: Bounty. Been a huge help for me too. I recently finished reading a book about the HMS Bounty. It's based on the logs, diaries and letters of Bligh and the crew. It's call Mutiny on the Bounty and was written about 3 years ago by Peter FitzSimmons. Might be of interest to you... I found it an excellent read! I'll be keeping an eye on your progress. Keep up the great work!
-
Hey Trond, Appreciate the compliment! The walnut is looking really good but no, there is zero love between us! I can't imagine how far along I would be if I was using basswood (or something similar). However, I think the experience will make planking easier the next time. The entire starboard side is open! See the pics below, the last one is obviously, not mine!: Thanks for stopping by! I'm headed over to your log next!


-
Thanks Tom. Appreciate the feedback.
-
First planking belt completed! Slow but sure! Have I mentioned how much fun walnut is to work with???


-
Have you tried contacting them? I understand they are back in business.
-
HMS Discovery 1789 by Don Case - 1:48
LyleK1 replied to Don Case's topic in - Build logs for subjects built 1751 - 1800
Don’t worry Don, I’ll never tell! 😉 -
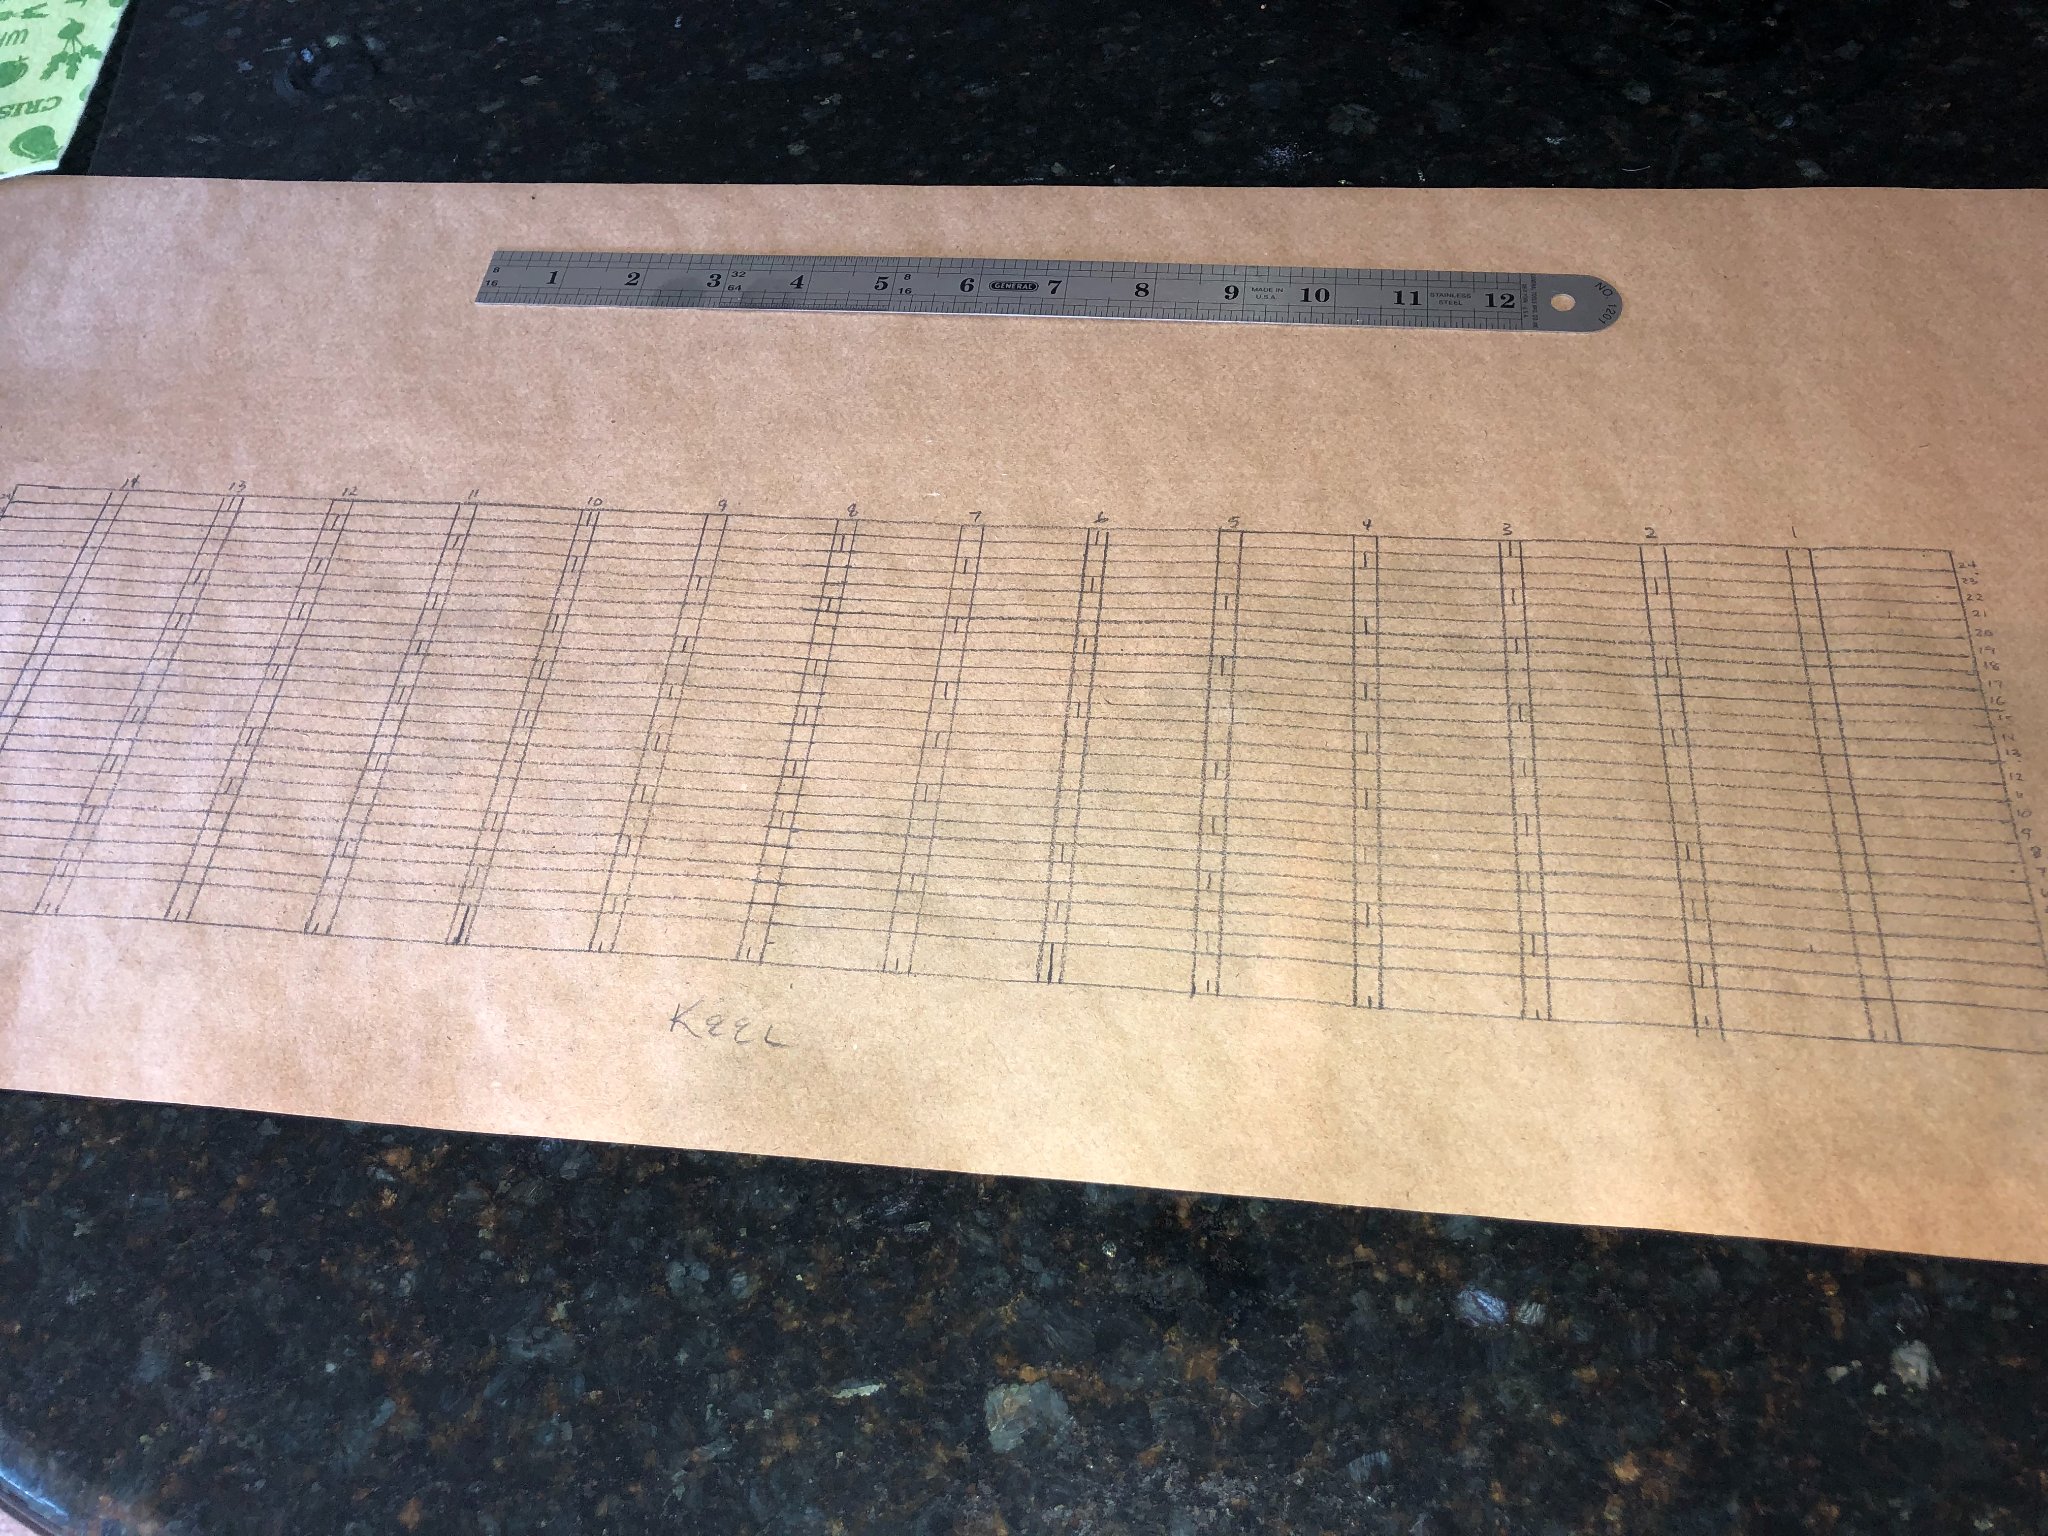
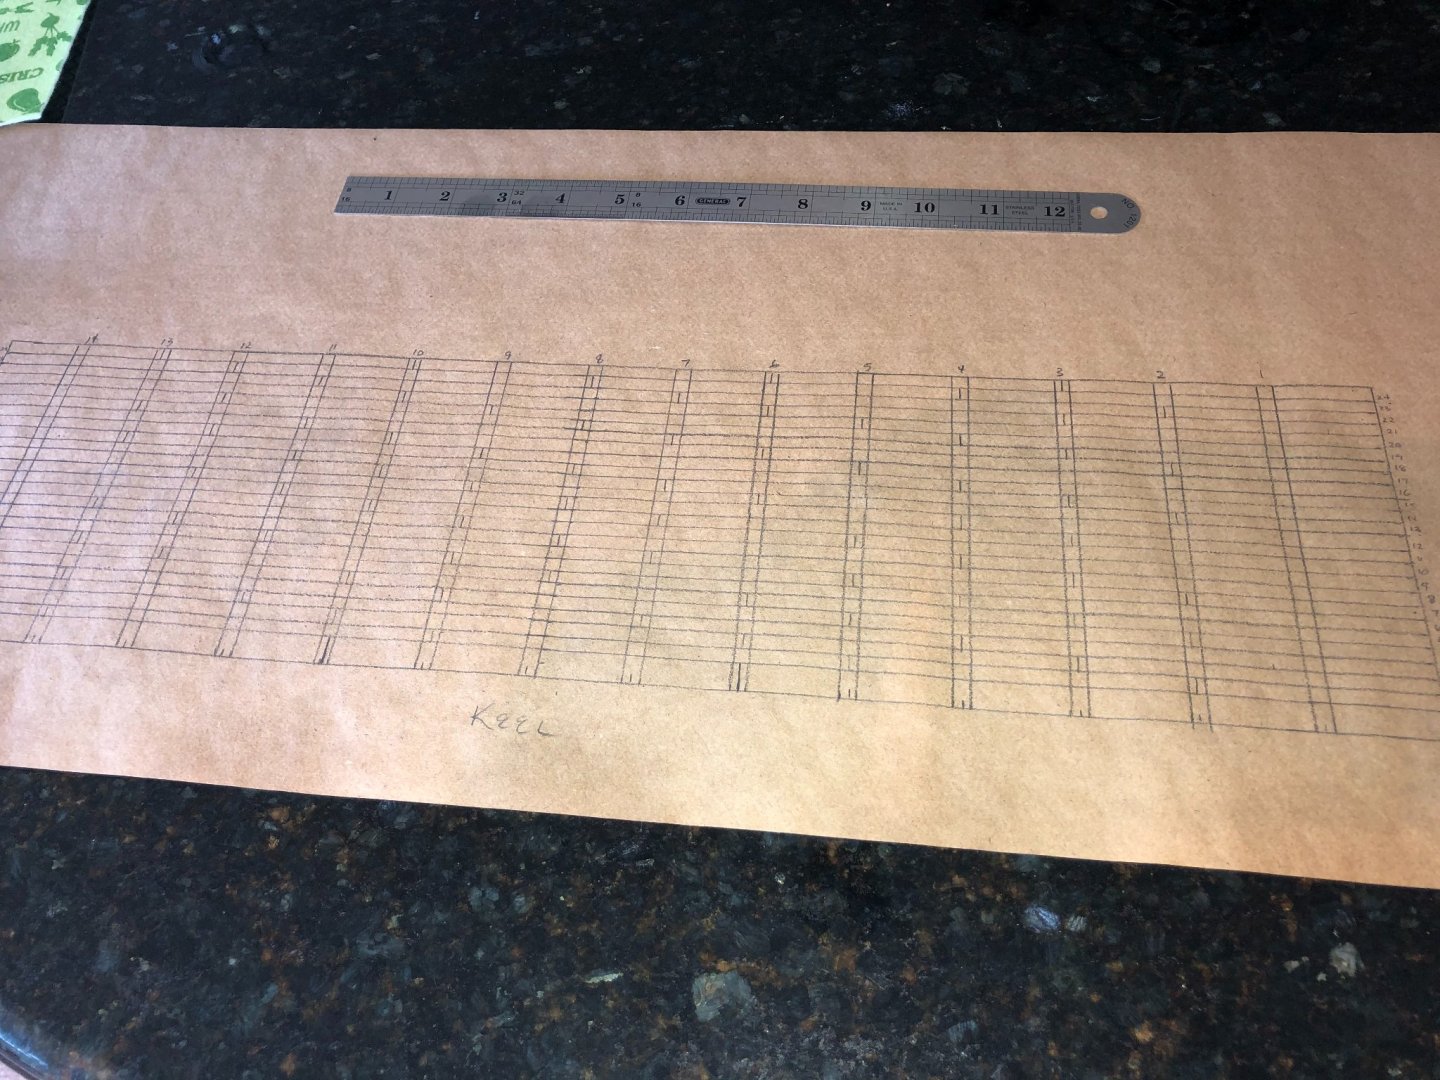
Once I had the planking belts worked out, I went in and marked every frame with the plank locations: Each belt has 6 planks evenly distributed, at least in theory! The next step for me was to map out the plank butt pattern. I decided on a 3 shift pattern. I used a piece of paper and laid out the entire side of the ship: Not perfect but most ships weren't built perfect! Let the planking begin: Walnut is a real challenge but I'm working through it... slowly! Next post when I've made some progress!


-
So, I’d like some input... How do the planking belts look? pretty even? Not too much bow rise? Stern look spaced properly? Appreciate any input!


-
So, I'll jump in here too... I'm building the Artesania Latina version of the Bounty and like both of you, the instructions are pretty useless after the first few steps! I use several build logs (most AL logs) as my help. Between us, we should be able to get through most issues. Feel free to following along with mine as well. I know that each version is a bit different but the end game is the same! Good luck and I'll be watching intently!
-
Upon review, I decided to install the garboard... it's been a challenge! At the stern, the garboard does a near 90 degree twist. You should try twisting10mm X 2mm planks! Not easy. After many ::SNAPS::, I finally did develop a good system and the key to it is patience! And a lot of it... Bends and twists can be made but only incrementally. The port side garboard is in place. The starboard side is almost done... still shaping the bow plank... like I said, very slow work but it will get easier with the 5mm X 2mm planks. Once glued down, I'll get the planking belts laid out. Back with more when I make some progress.


-
First layer of the wales completed: A little rough but nothing a sanding won't fix. The bonus is that I have developed a system for spiling the walnut planks that seems to be working pretty good and the more I use it the better the outcome. On to laying out the planking belts! There will be four planking belts of 6 planks each for a total of 24 planks and the garboard to the wales. This part has to be PERFECT before moving to the actual laying of planks. I expect it will take me several sessions to get the lay-out right. Additionally, I have to figure out the butt pattern... probably a 3 or 4 shift pattern... The picture above is the first step... Finding the center belt. See you soon.


-
HMS Discovery 1789 by Don Case - 1:48
LyleK1 replied to Don Case's topic in - Build logs for subjects built 1751 - 1800
I'll keep an eye out... I am aware of Captain Puget but slightly before my time! I do remember Don McCune on "Exploration NW" though! Whereabouts do you live on Vancouver Island? We boat up in that area every year... when there isn't a pandemic! Look forward to watching you log. -
HMS Discovery 1789 by Don Case - 1:48
LyleK1 replied to Don Case's topic in - Build logs for subjects built 1751 - 1800
Hi Don, I will be watching your log closely. I am very interested in the Discovery too. I live in the Puget Sound area, so I suspect we have the same interests. Good luck! -
Happy shopping!
-
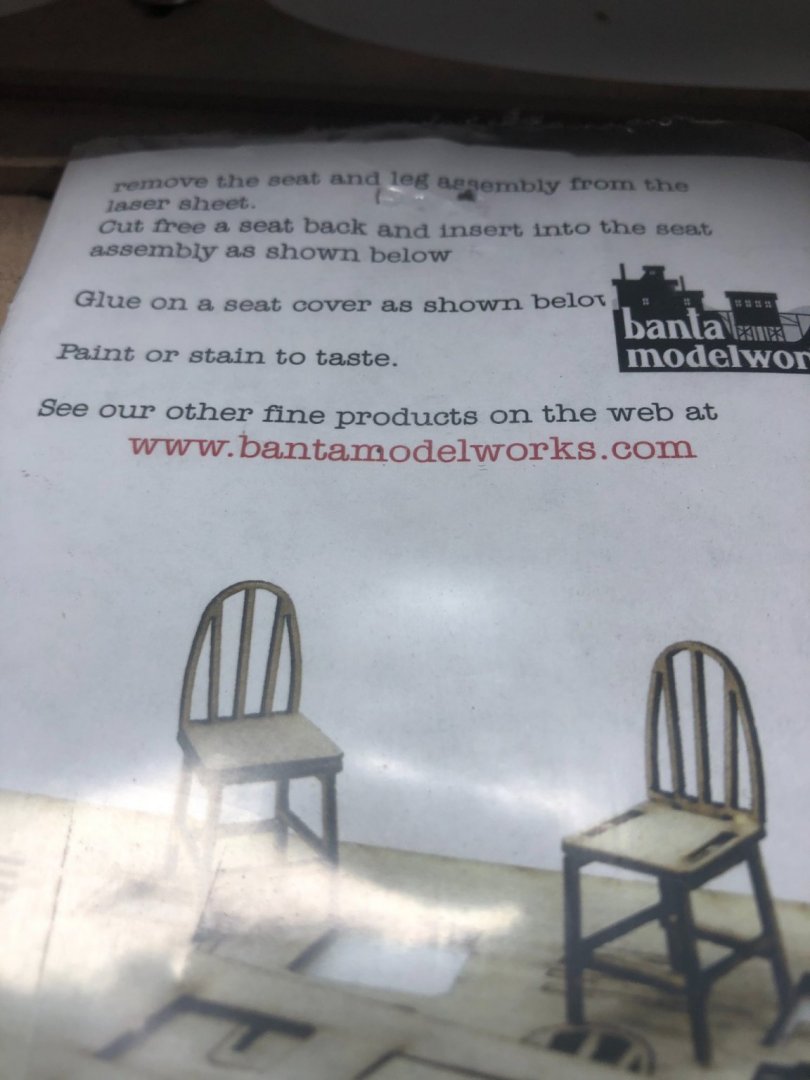
I cheated! I bought them as a kit. I got 10 chairs that had to be assembled. They were all laser cut on very thin basswood. I thought they looked better than what I could build!