


LyleK1
-
Posts
531 -
Joined
-
Last visited
Content Type
Profiles
Forums
Gallery
Events
Posts posted by LyleK1
-
-
8 hours ago, DaveBaxt said:
So far so good . The planks are looking rally good especially at the bow and interesting looking clamps(the brass ones) where on earth did you find them?
Keep up the good work and looking forward to your progress.
Thanks Dave!
After looking at the pictures again, the shadowing makes it look a lot harsher than it is... I should've changed the lighting!
I got those clamps from Micro Mark. The have been my favorites for this part of the build.
-
-
5 hours ago, AJohnson said:
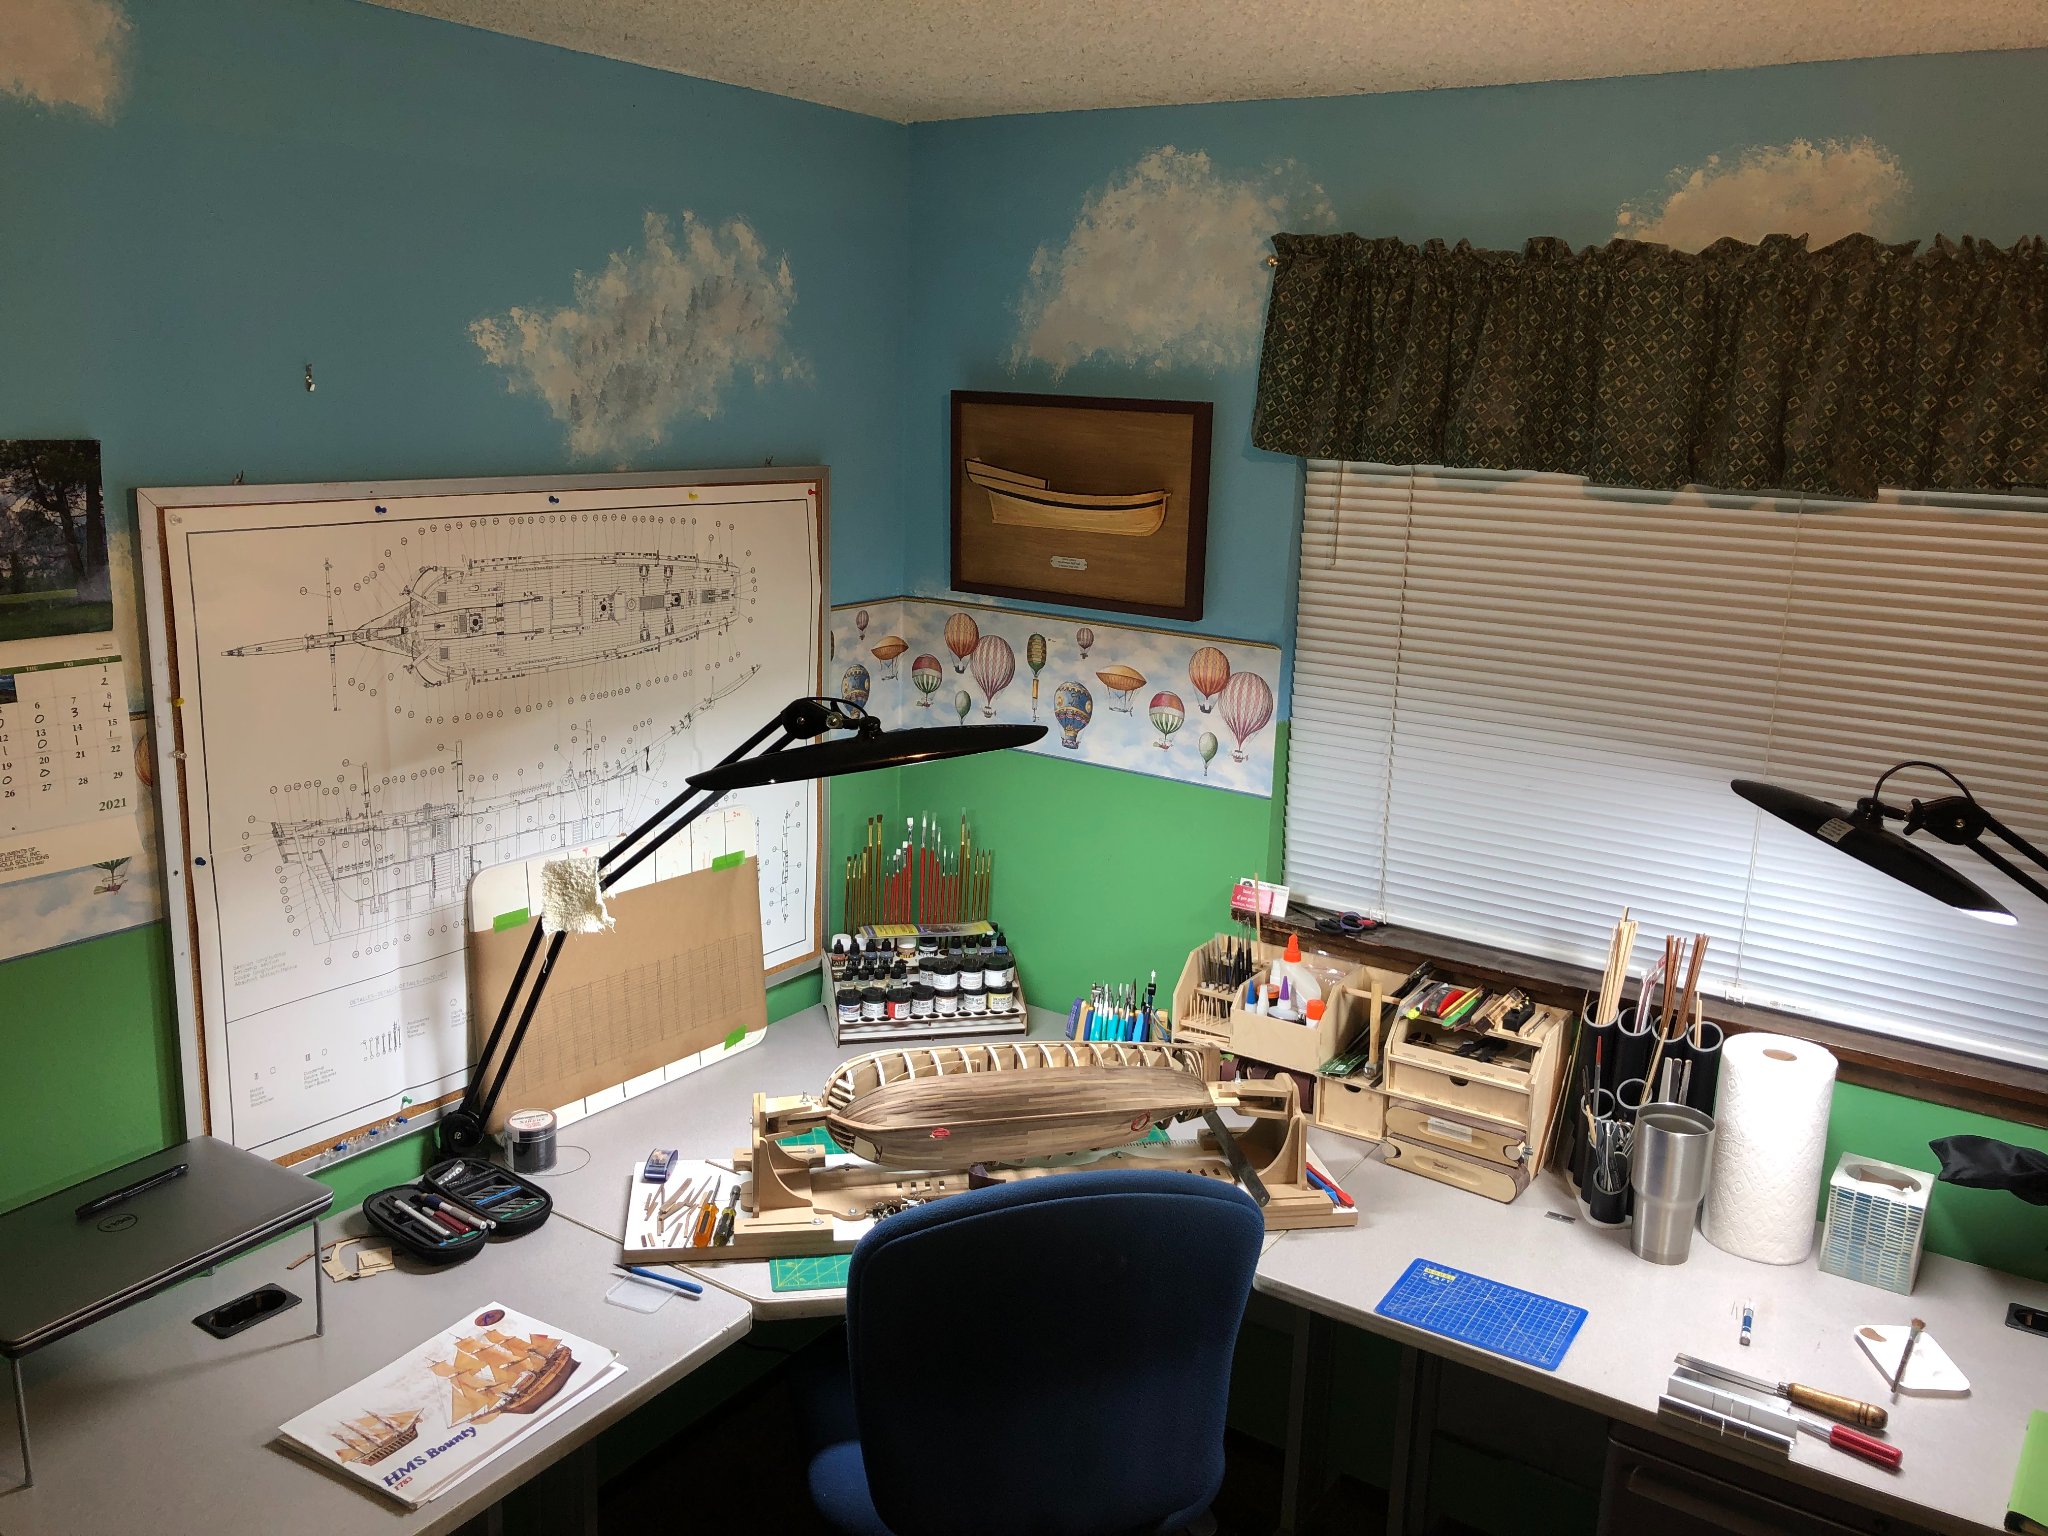
Great work area - and so tidy! 😲 (👽 with envy!)
Don't be to envious... It just got a good cleaning.
But I do like to keep things a bit organized... my wife says I'm annul.
Not sure what she means!? LOL!
-
5 hours ago, DaveBaxt said:
Fantastic looking model with unbeievable detail. I really like the weathering of the decks amongst many other things. Best regards Dave
Thanks Dave!
A lot of work ahead of me but I am enjoying it. It'll be a bit slower during the summer months as the "big" boat gets more use.
Retirement is just a few months away and more time means more fun in the workshop!
-
6 hours ago, TOM G said:
If your still into building stick & tissue. check this out........ home of the very first balsa wood model airplane kit. https://clevelandairline.com/default.aspx
Cool! I'll be perusing this site for some ideas for future projects!
Thanks Tom!
-
5 hours ago, DaveBaxt said:
I definately like your version of the Bounty with the open decks. It is a credit to the hobby. Hopefully one day I will return to the Bounty once again and have a go at the Artesinia Bounty once I have honed my skills a bit more.
I think your skill level is great!
Good luck with your next build and stop by my log once in a while! Always appreciate feedback!
-
On 5/24/2021 at 12:00 PM, PRS said:
I see a covering iron there. You fly also?
Hey Paul,
I thought I responded to your post but apparently didn't!
I used to do R/C models of airplanes and gliders but due to the lack of space to fly near by, I haven't done any in a while.
Works good for bending planks though!
Thanks for stopping in!
-
I wonder how it responds to " Chuck's edge bending method " ?
I've been using Chuck's method on my Bounty build. Considering that I'm working with 5mm X 2mm walnut and in some cases 10mm X 2mm, it works well but it does take a little extra time.
It takes about 20-30 minutes to soak a piece long enough to bend it and you may need to bend it twice to keep it from snapping!
I use almost an exact set-up to Chucks except I use a sealing iron for heat.
Check out my build log for more details and pictures if you're interested.
BTW, Dave, your build is beautiful!
Well done! The Endeavor is on my short list too... I'll be watching for your log!
-
3 hours ago, Trond said:
Does anybody else here on the forum have the problem that the total length of the ship is not correct, in accordance to Armed Transporter Bounty?
Interesting question. I have not questioned the scale of my kit. Just assumed it would be accurate (more or less). Now you've got me wondering too!
I'll do some checking and let you know.
-
2 hours ago, TOM G said:
Nice work area. I like those swing arm lamps, the light look's real bright. Where did you purchase them from ?
Hey Tom,
They are Nearth lamps... 2200 lumens, very bright and LED. I purchased them through Amazon. One more coming for the other bench too.
They are not cheap but worth it!
-
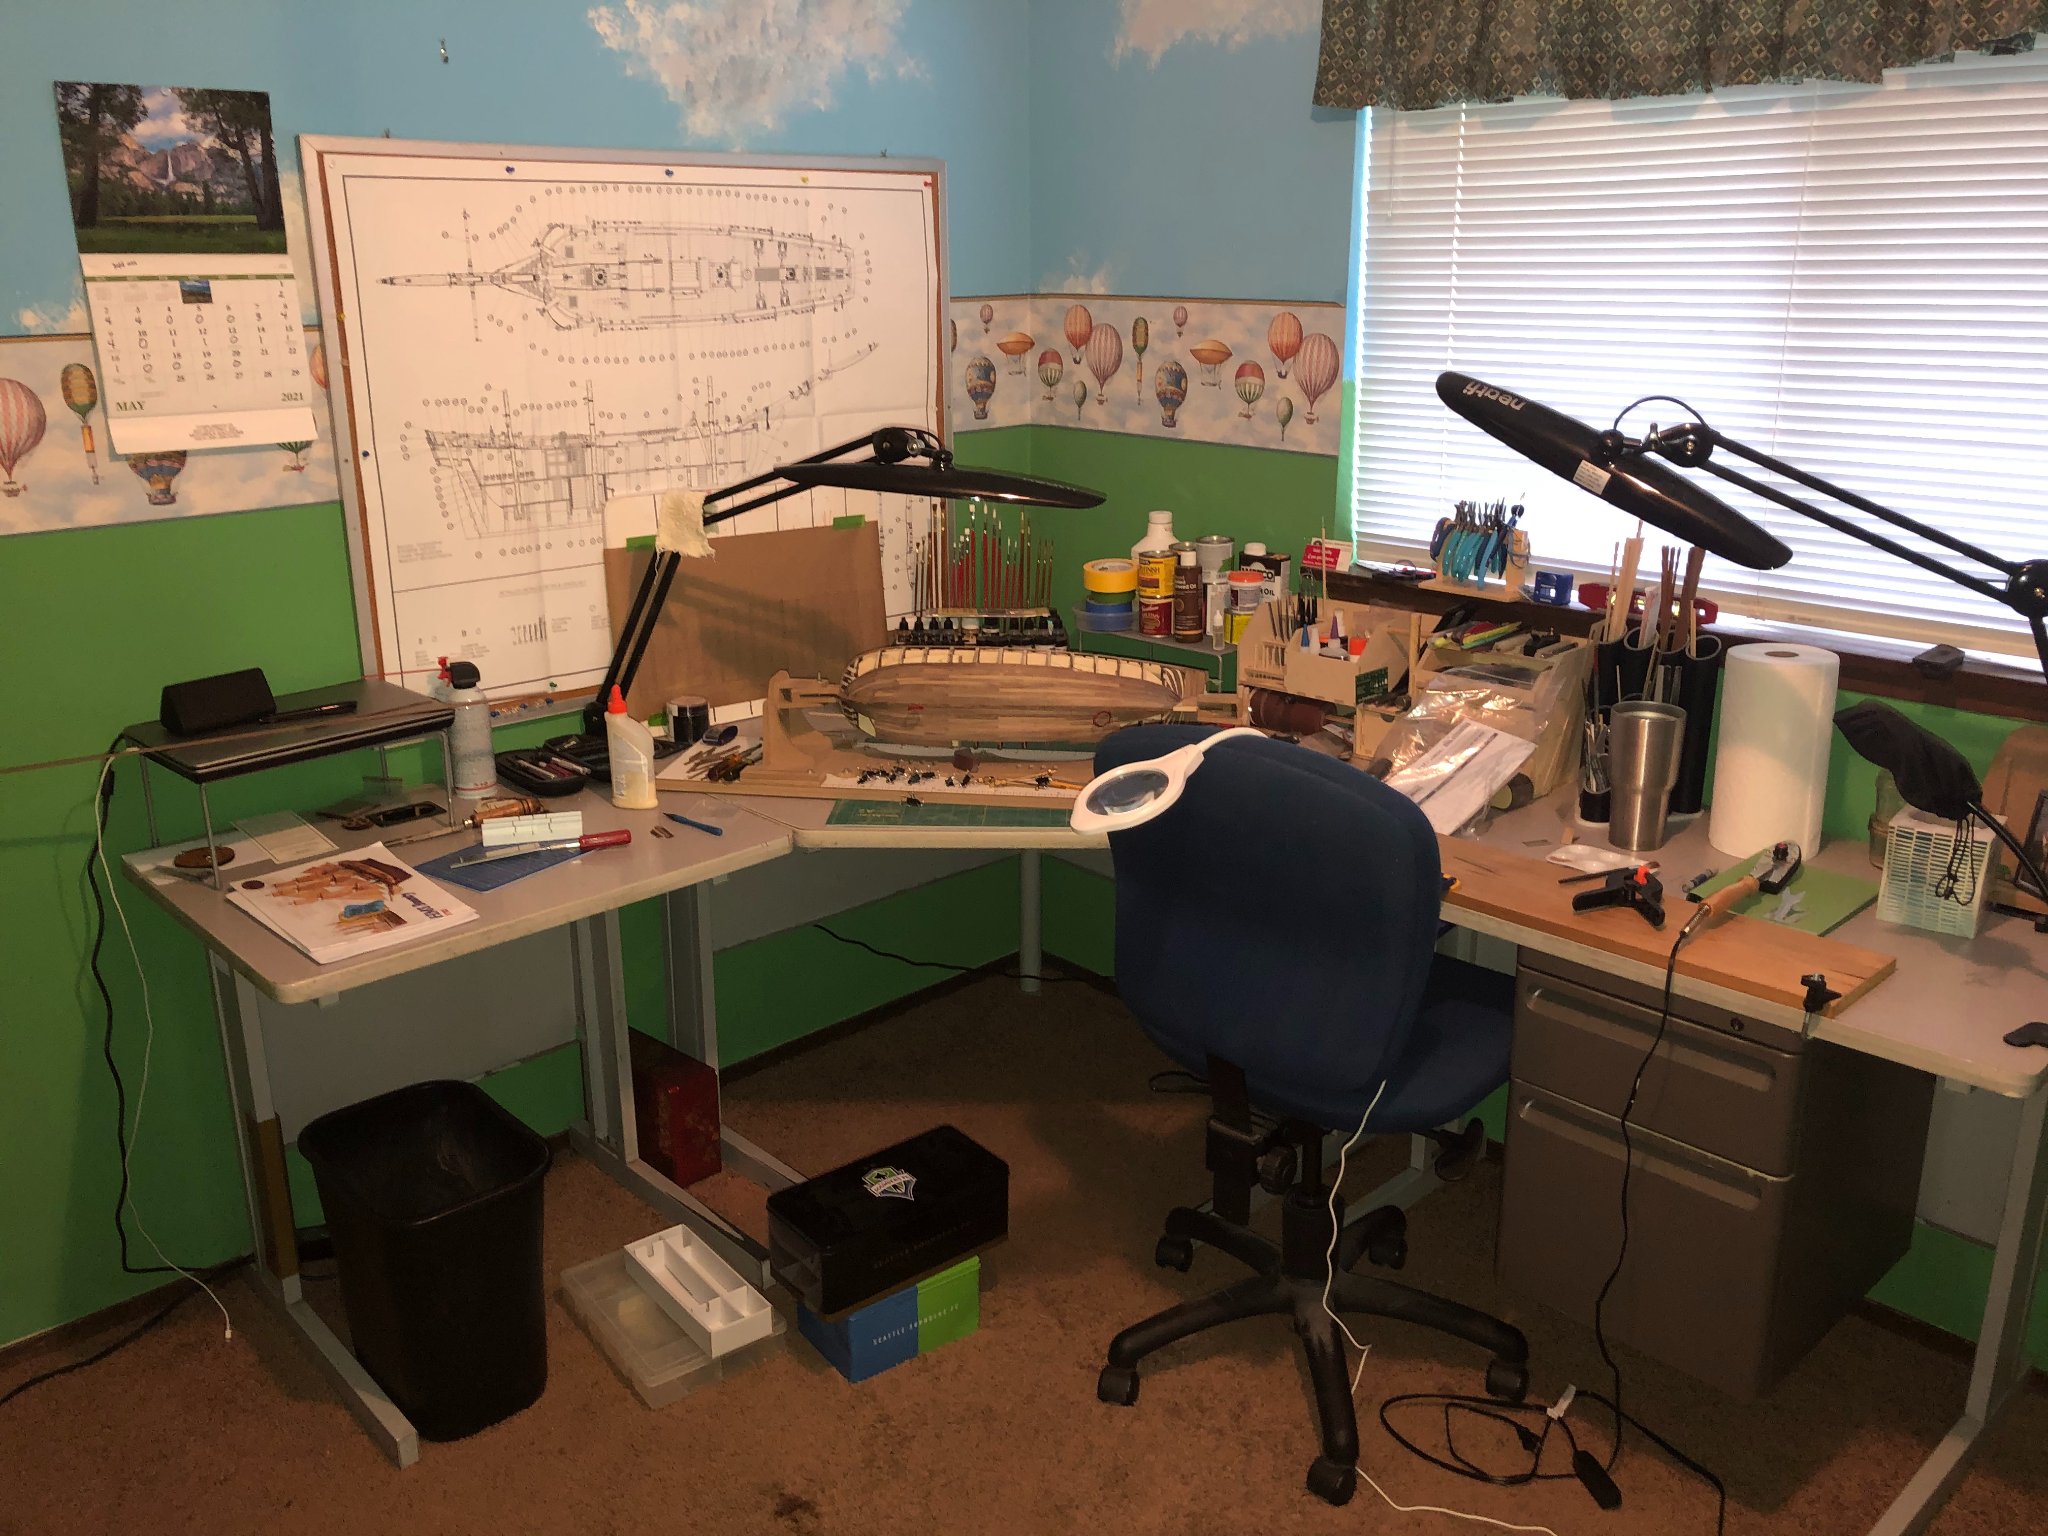
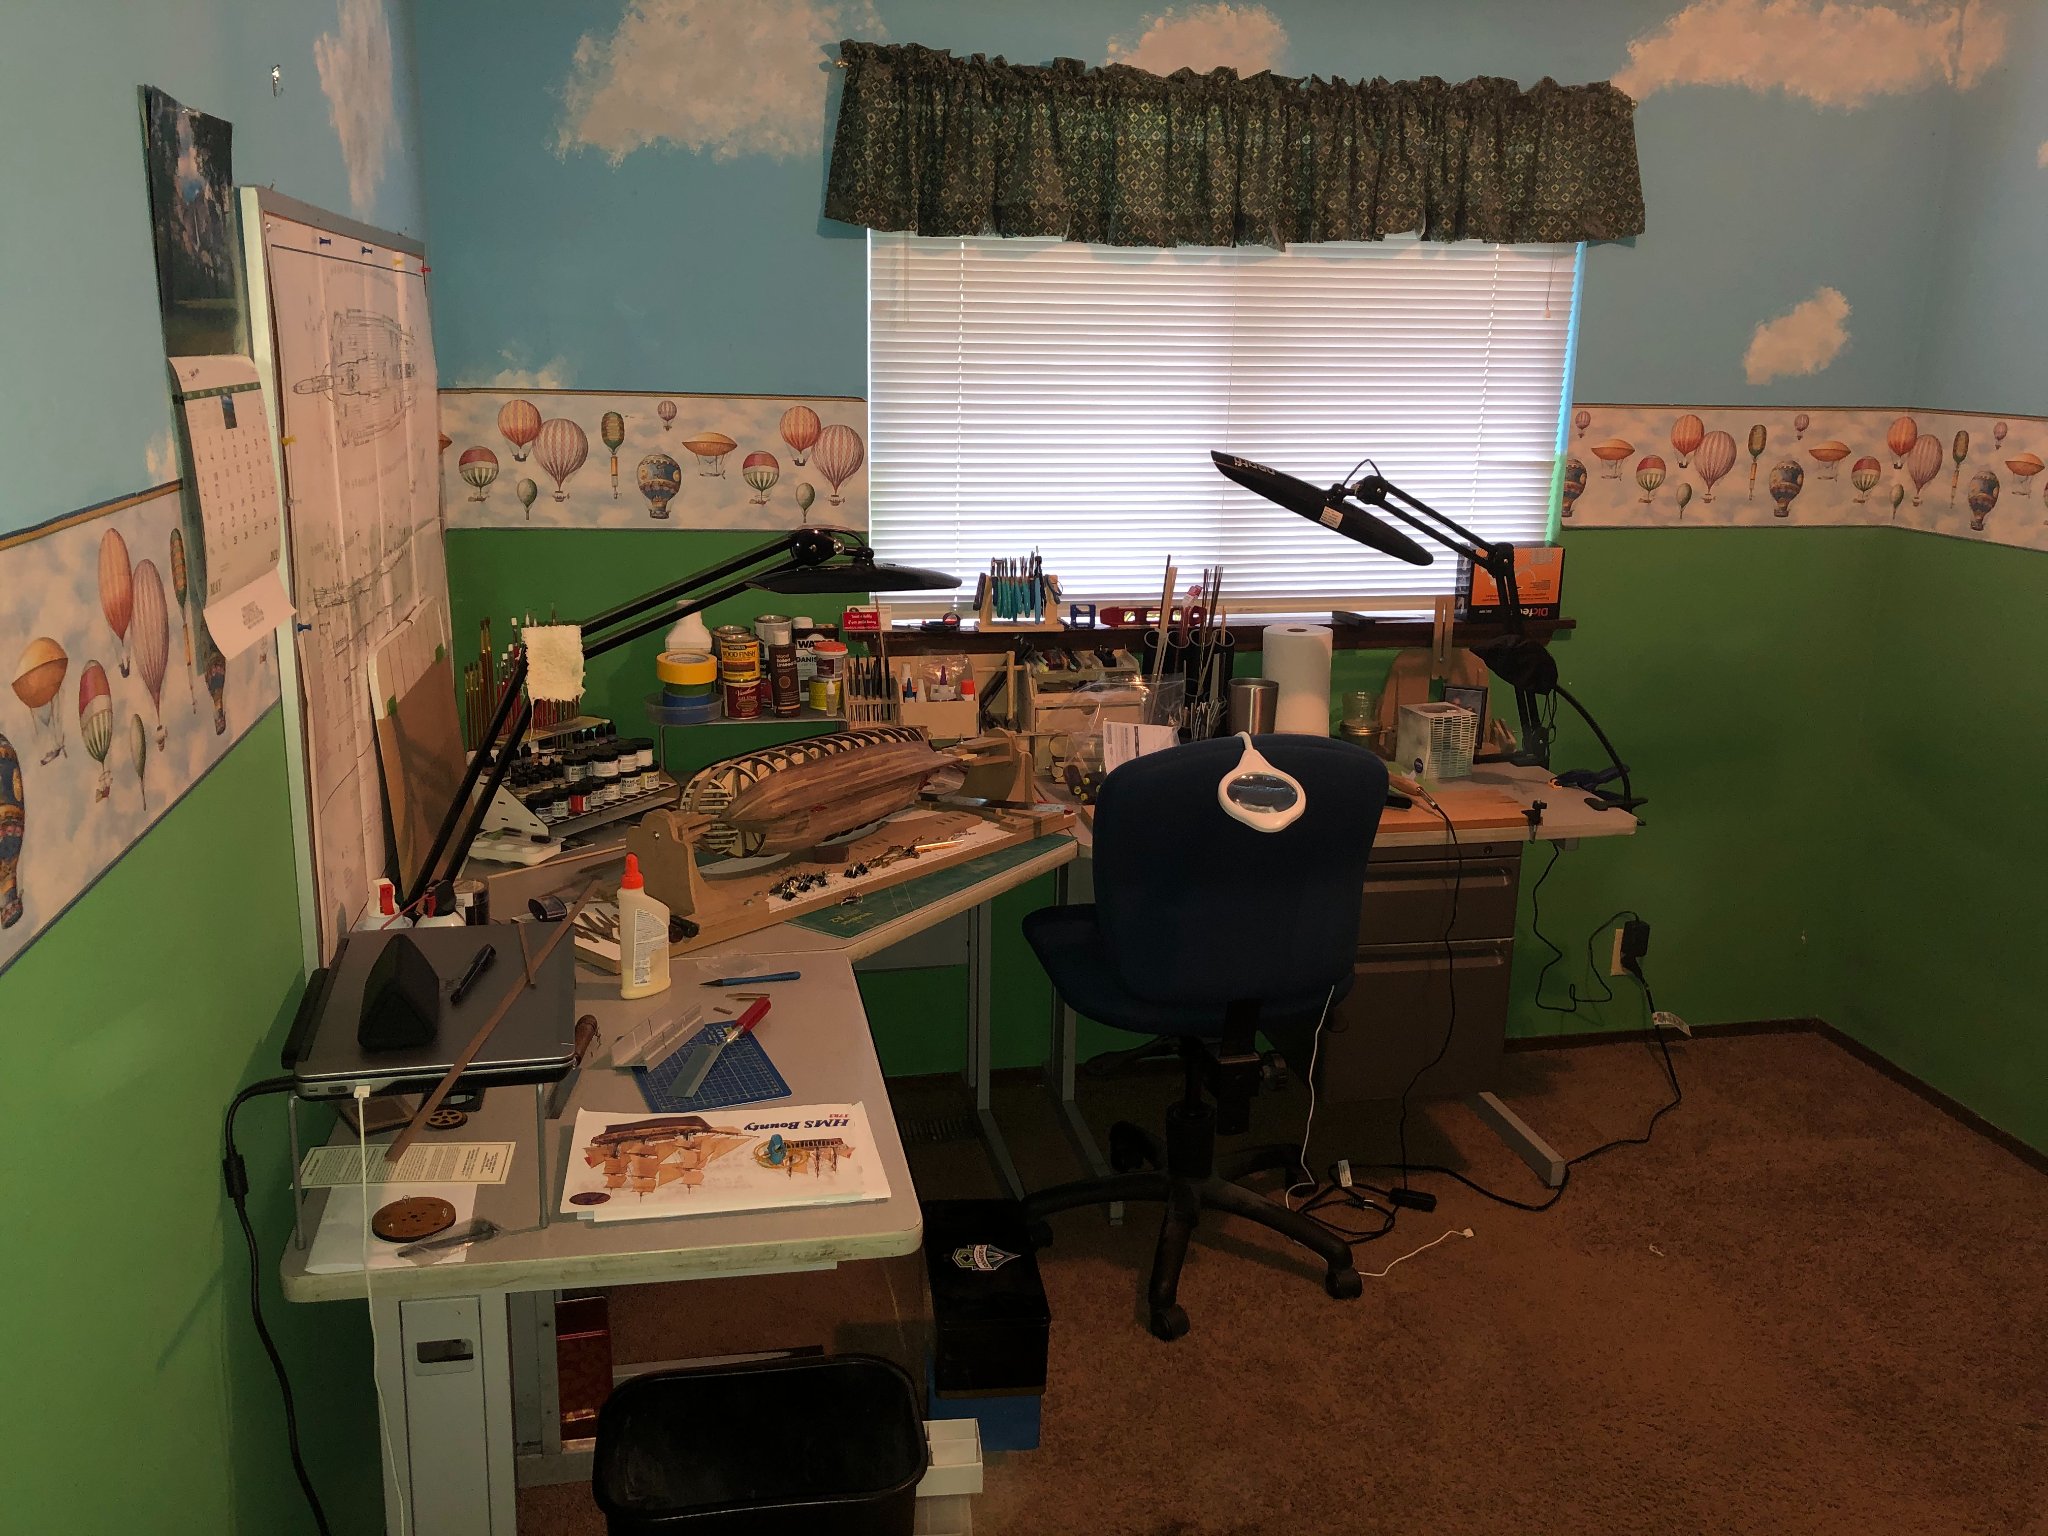
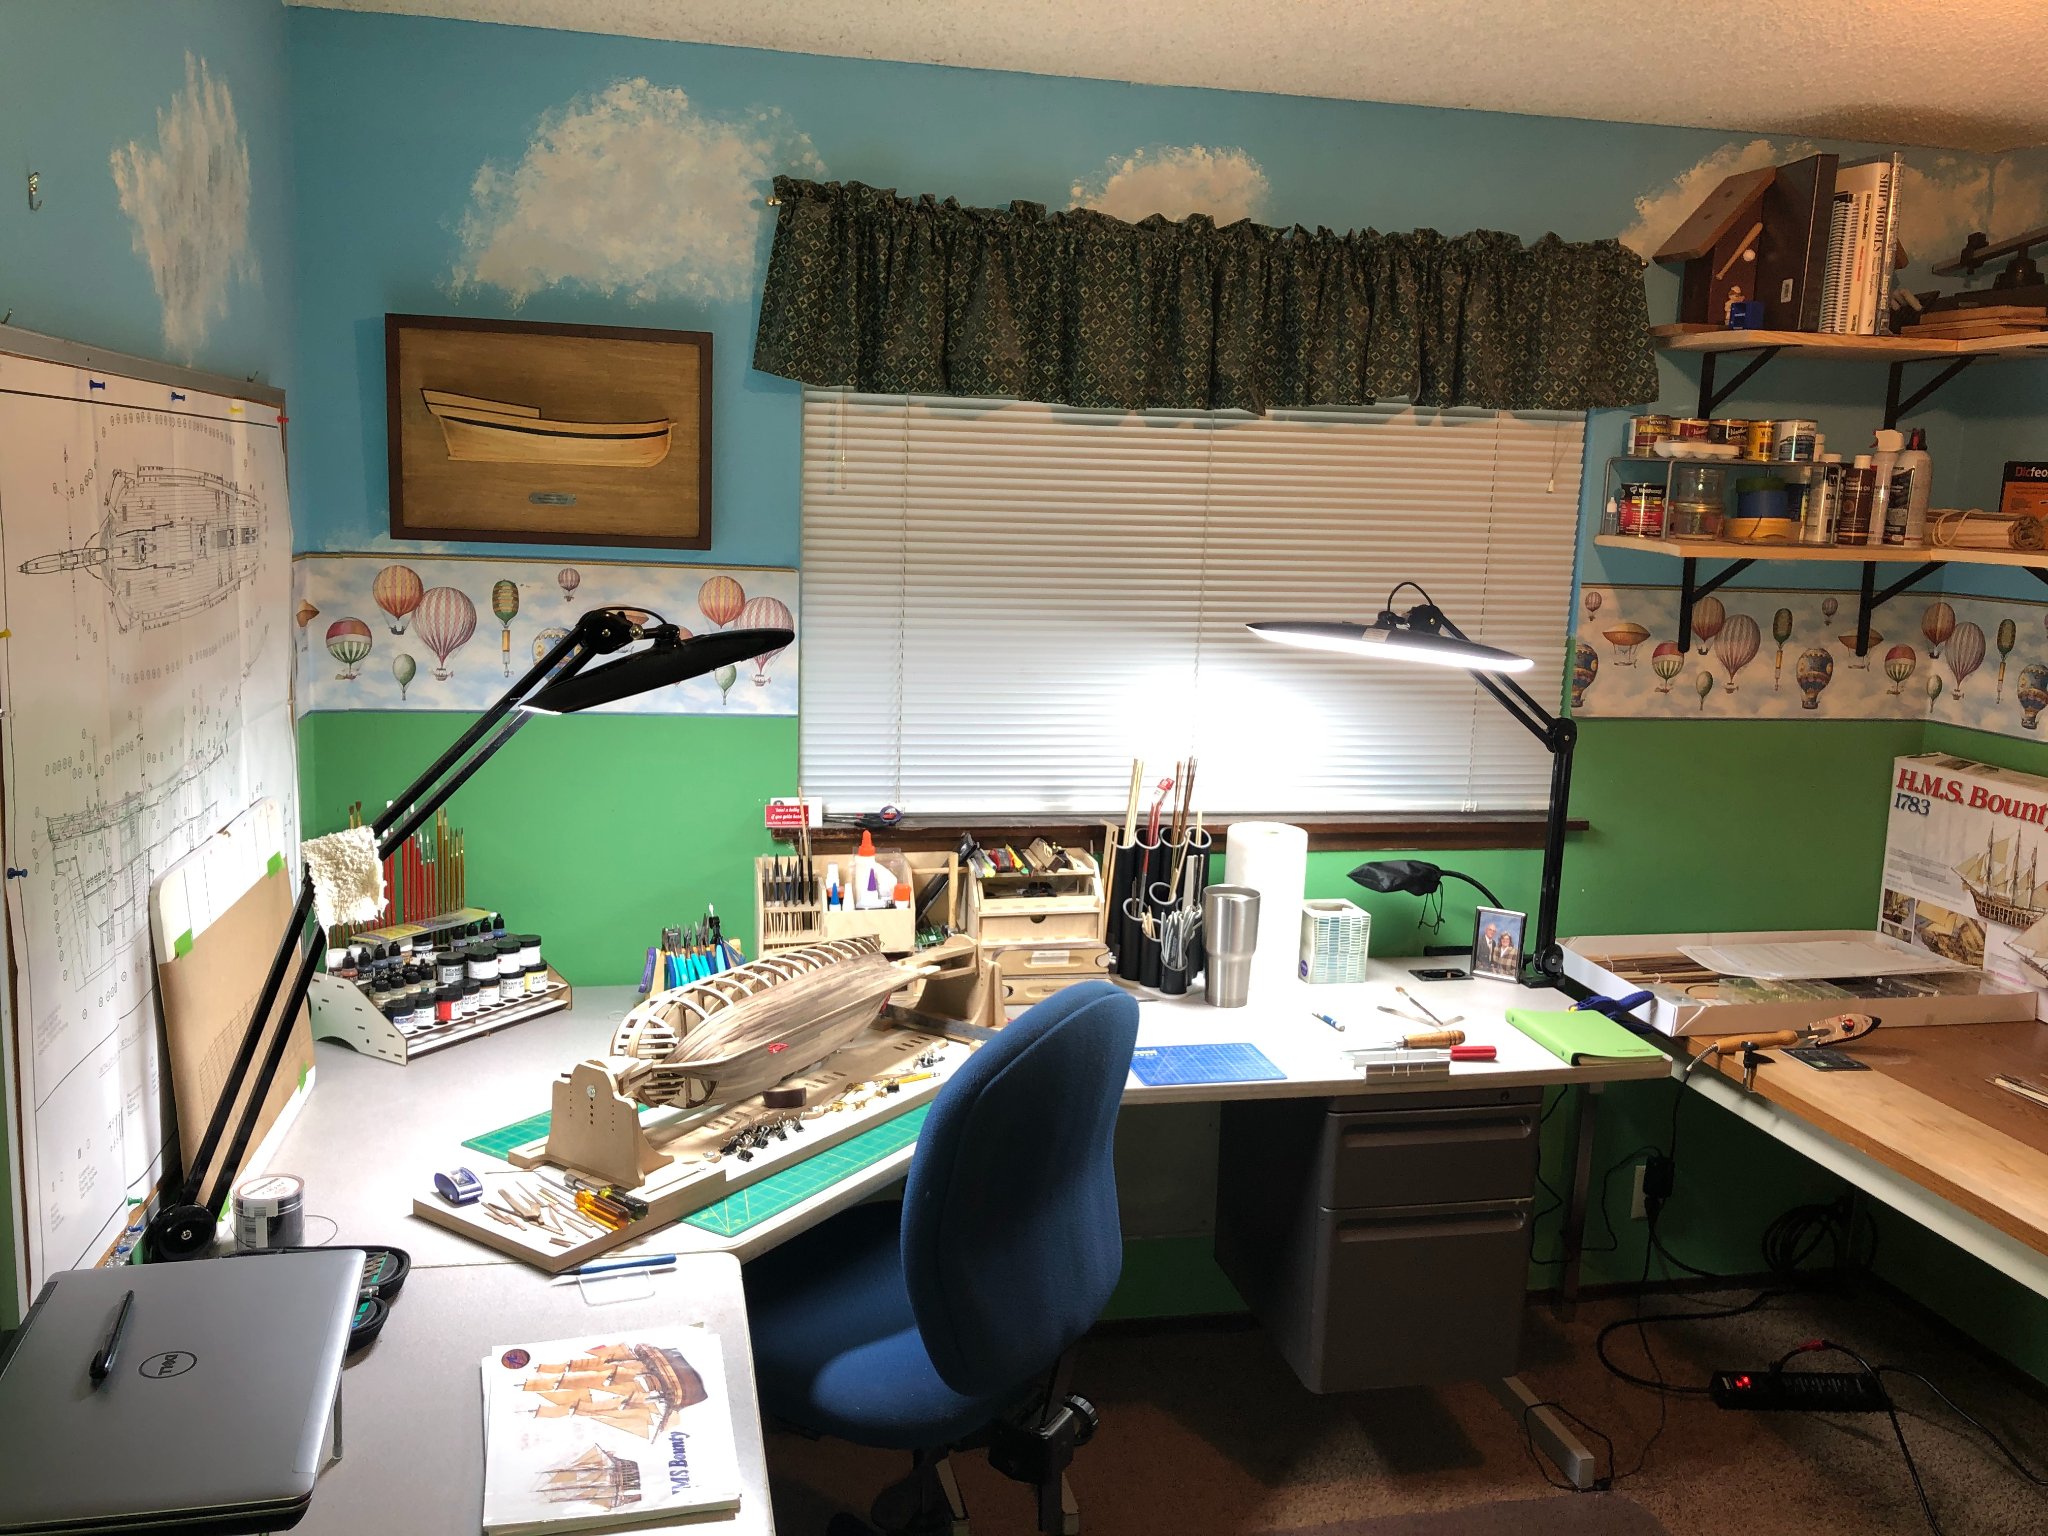
A little off topic...
My workshop was getting cramped and cluttered. I decided to revamp it and install some shelving; here are some before and after shots:


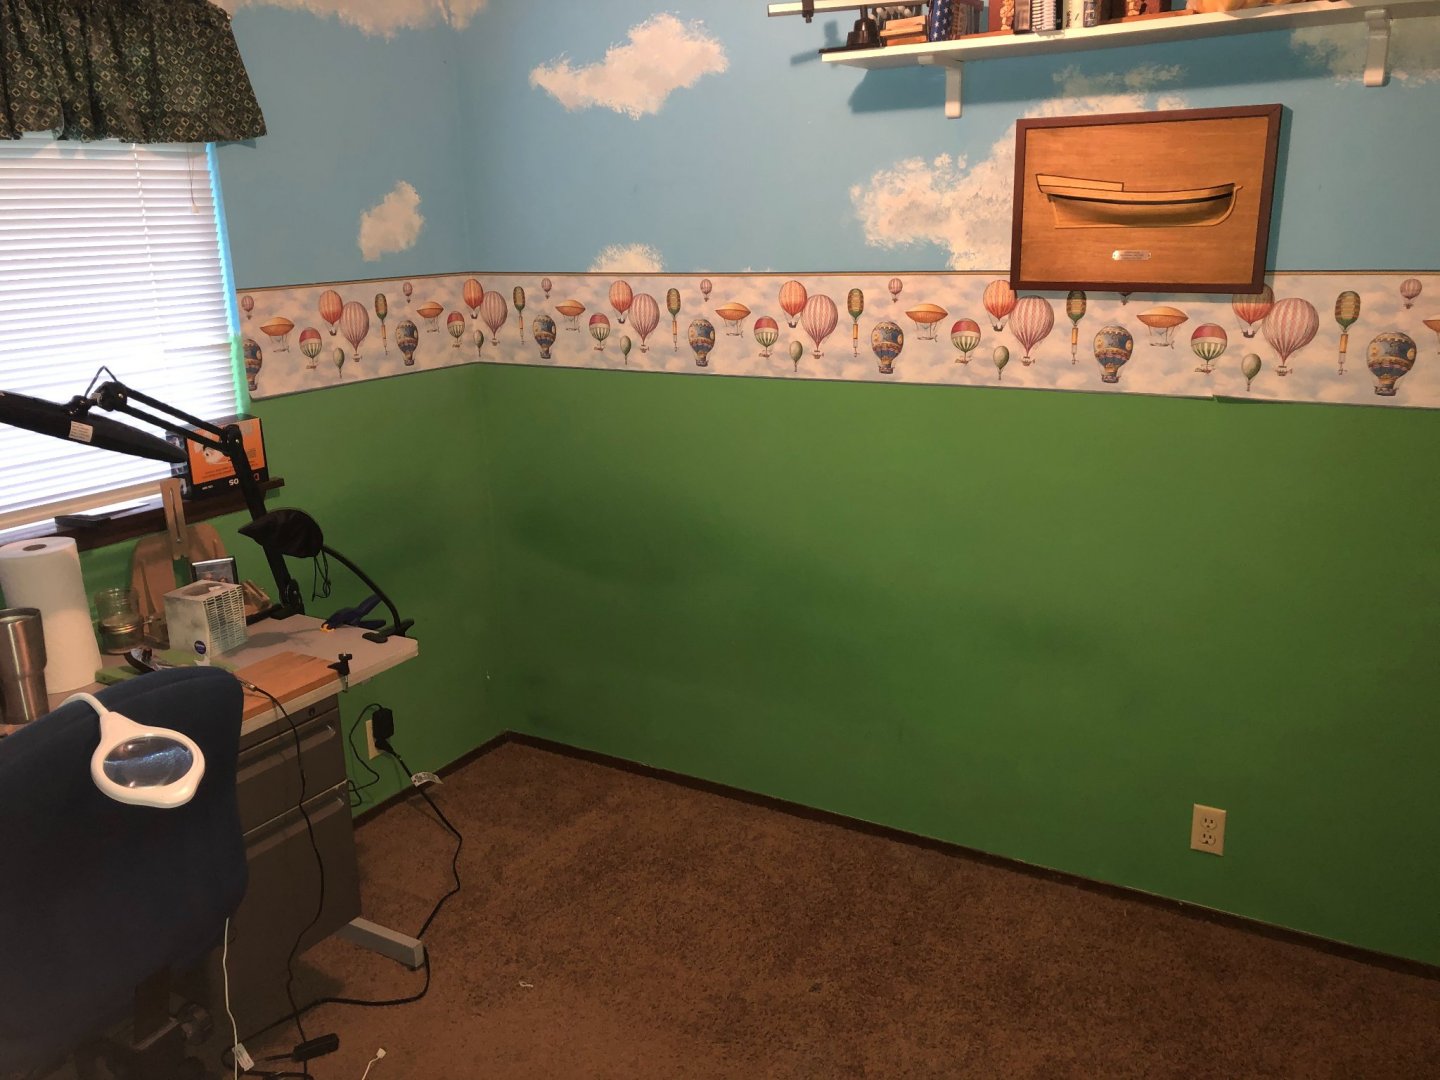
It was a bedroom and had a bed along the wall. Obviously, I removed the bed and added two workbenches.
One has my bending station and sanding area while the other has a scroll saw and drill press. Some extra drawers for storage and the shelves for more storage:
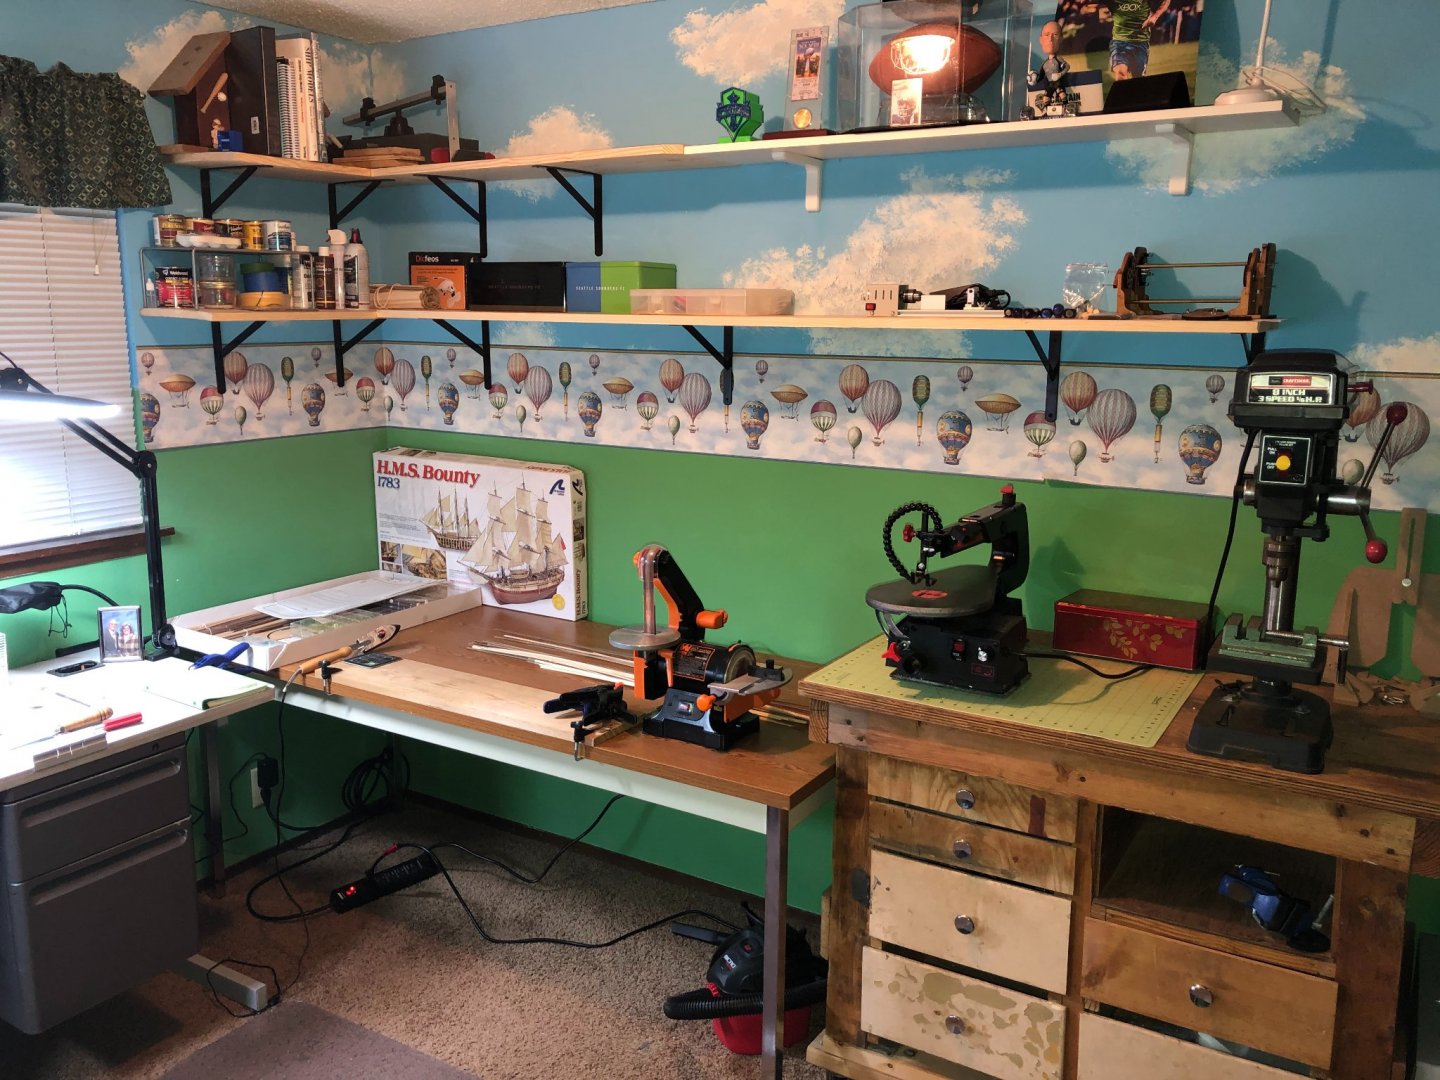

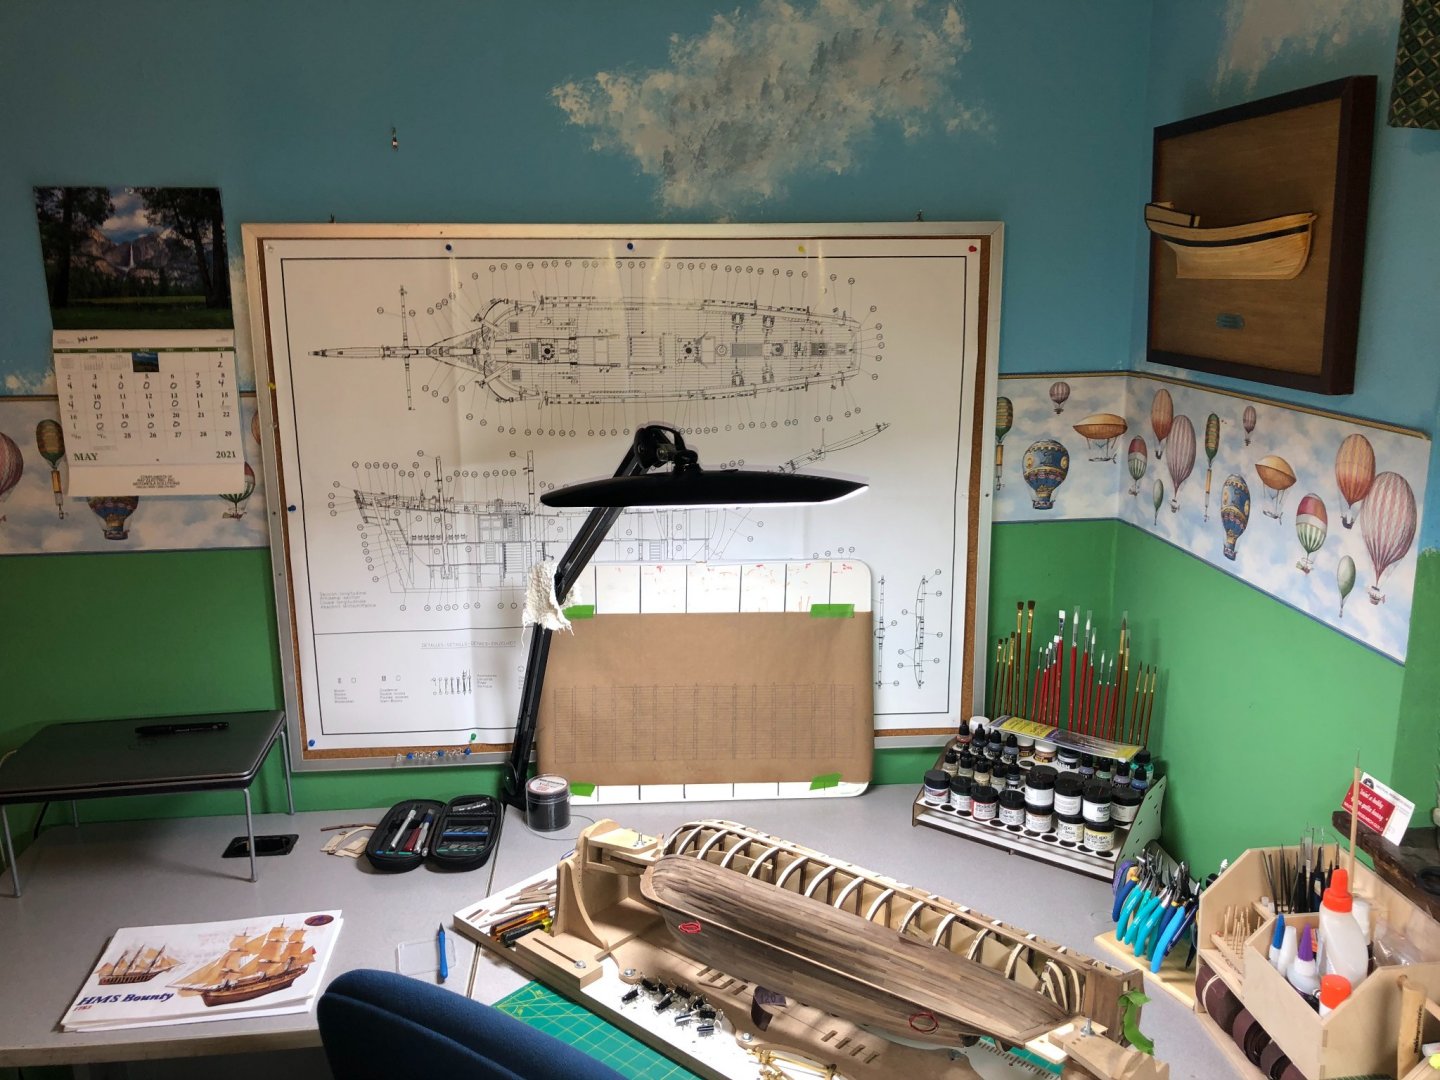

I have another light on order for the other work benches!
Much less clutter and I feel like I have some elbow room!
Back to the Bounty this week!
-
As Keith mentioned above, the decks were regularly holy-stoned using seawater, especially on military vessels. Since Bligh had a military background, one can assume this was a regular duty of the crew.
All that said, I think the one on the right is good but if you can make it a little grayer, even better.
I attempted to do that (check out my build log). Unfortunately, the tests to practice changed even though my procedures did not!
The life of a modeler!
Whatever you decide will be great!
-
8 hours ago, DaveBaxt said:
Here is a photo of the belaying pins with the large heads. Perhaps in hindsight I could have drilled the holes slightly further apart but this would enlarge the size of the pin racks. Another solution would be to source some thinner belaying pins. I have also included a photo of the tool I purchased for belaying the ropes. Unfortunately the slot is too deep and is hitting the back of the bulwark before securing the line underneath. I will therefore need to modify it to suit. Perhaps I should have saved myself some money and made one from the start.

The pins look too big! Sometimes the kit pins are just not the right scale!
I have a similar set of tools and ended modifying a screwdriver for the same reason.
Looking good overall but belaying the lines will be a fun job... insert sarcasm!
-
Trond,
I agree with Keith... besides, in the scale we are working in, the tree nails would be barely visible, if at all. Most from that time period would be covered with a plug of wood either the same as the deck or very similar.
On my build, I did do the lower decks... then after some research discovered what I stated above and I don't plan to put them on the main deck.
The build is looking good! Keep up the good work!
-
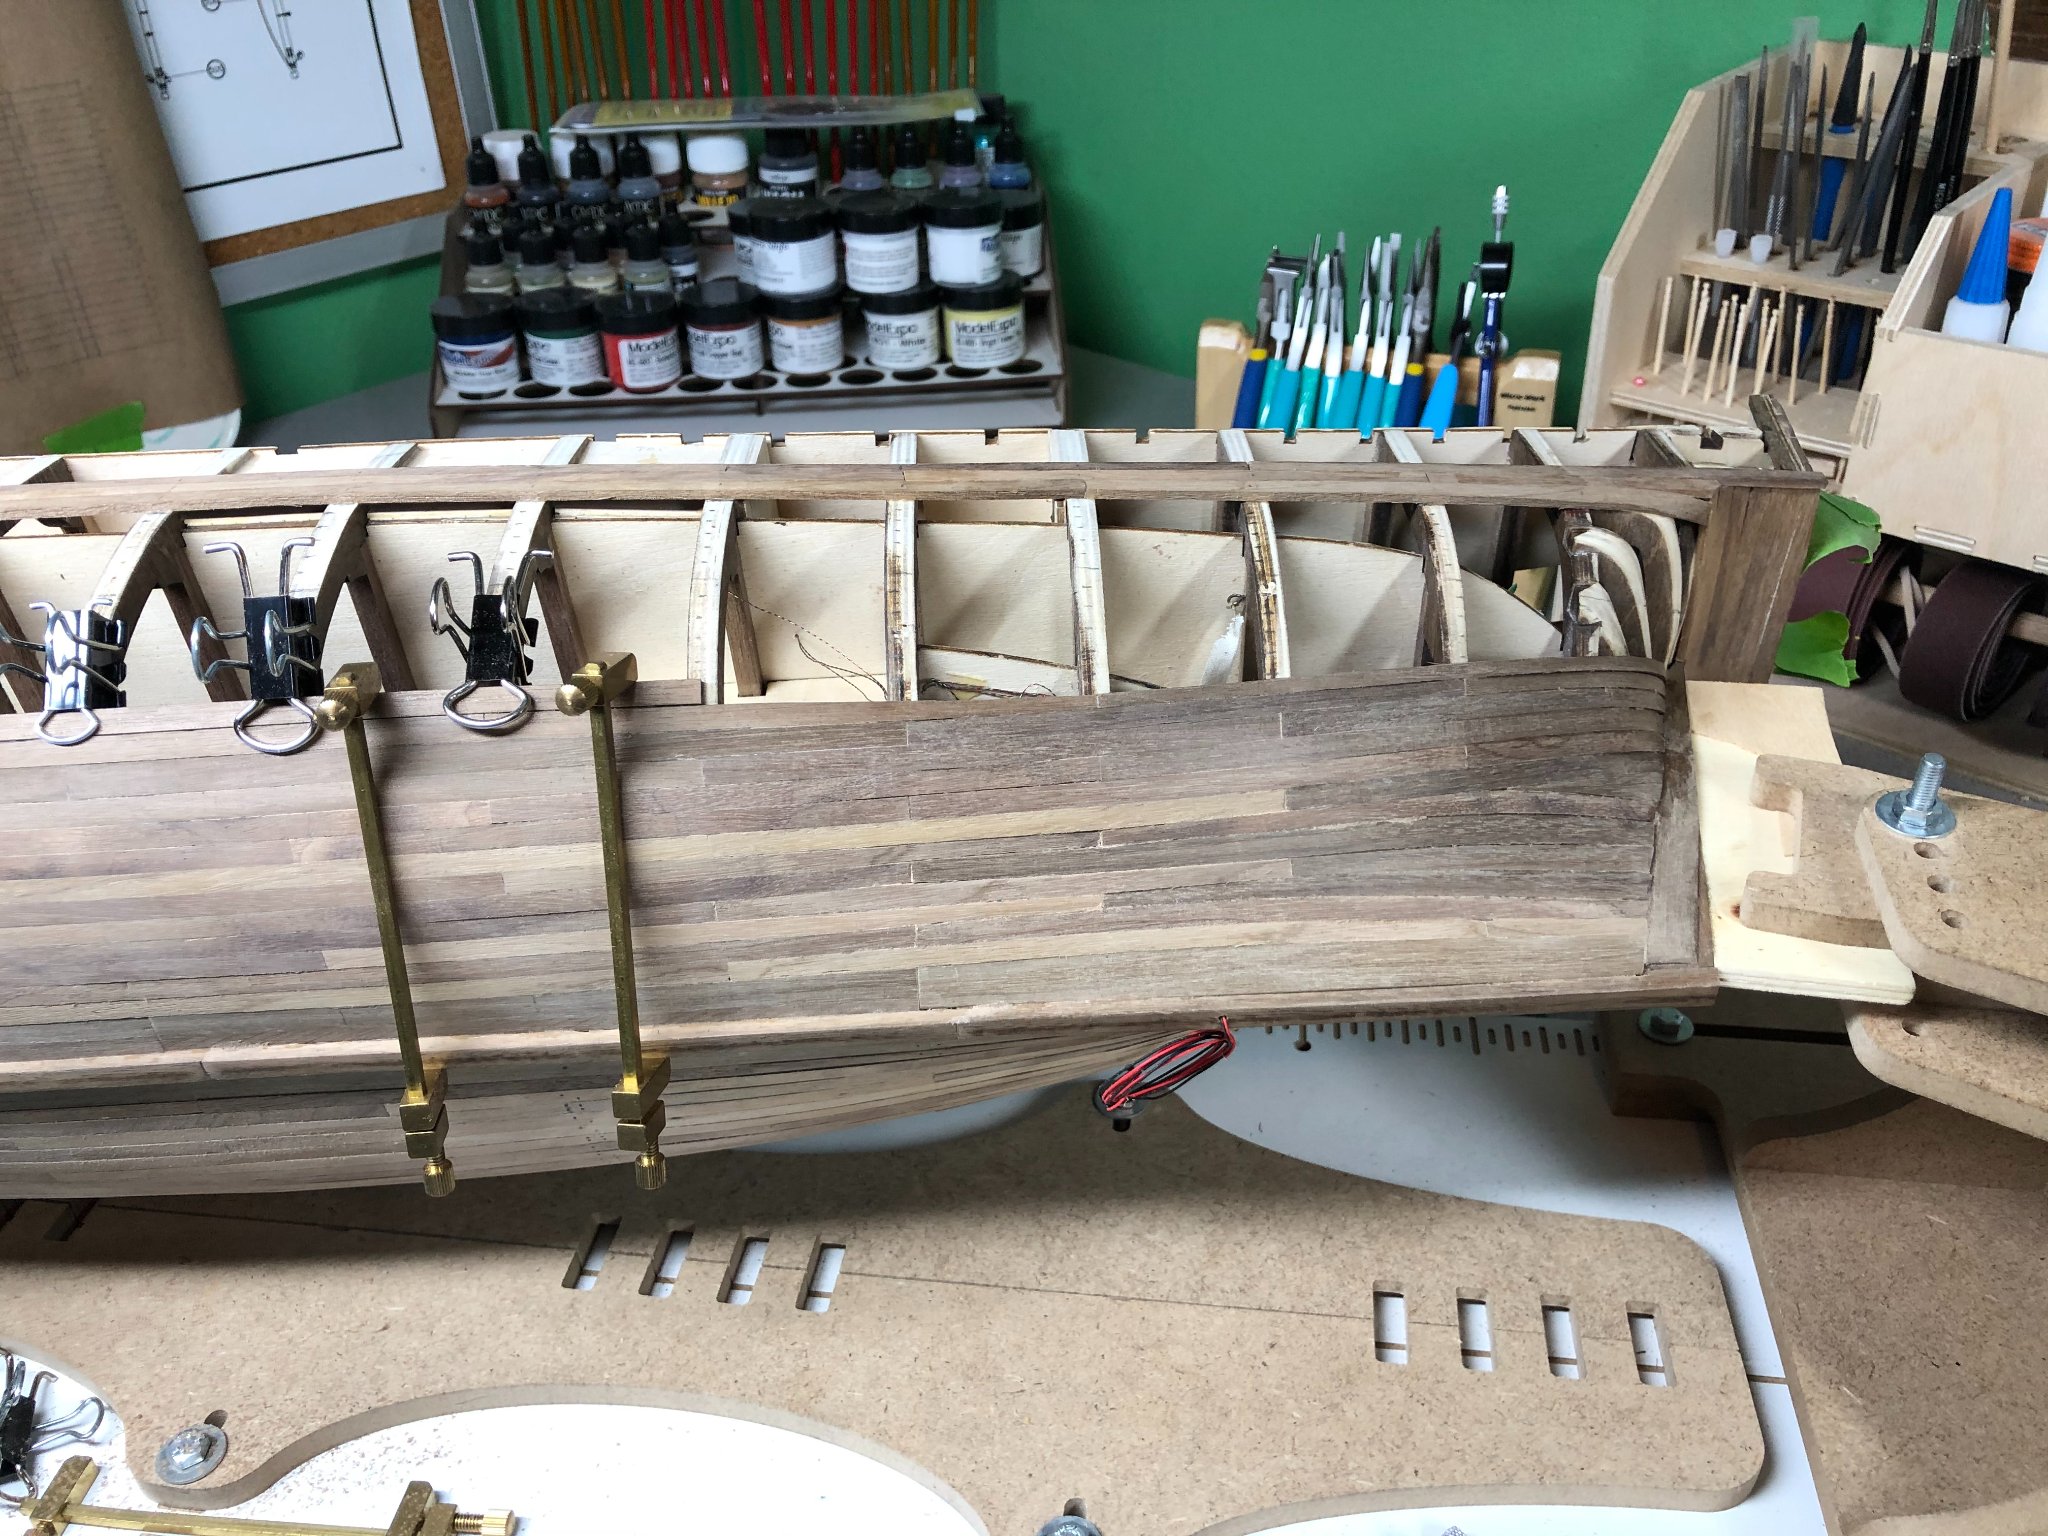
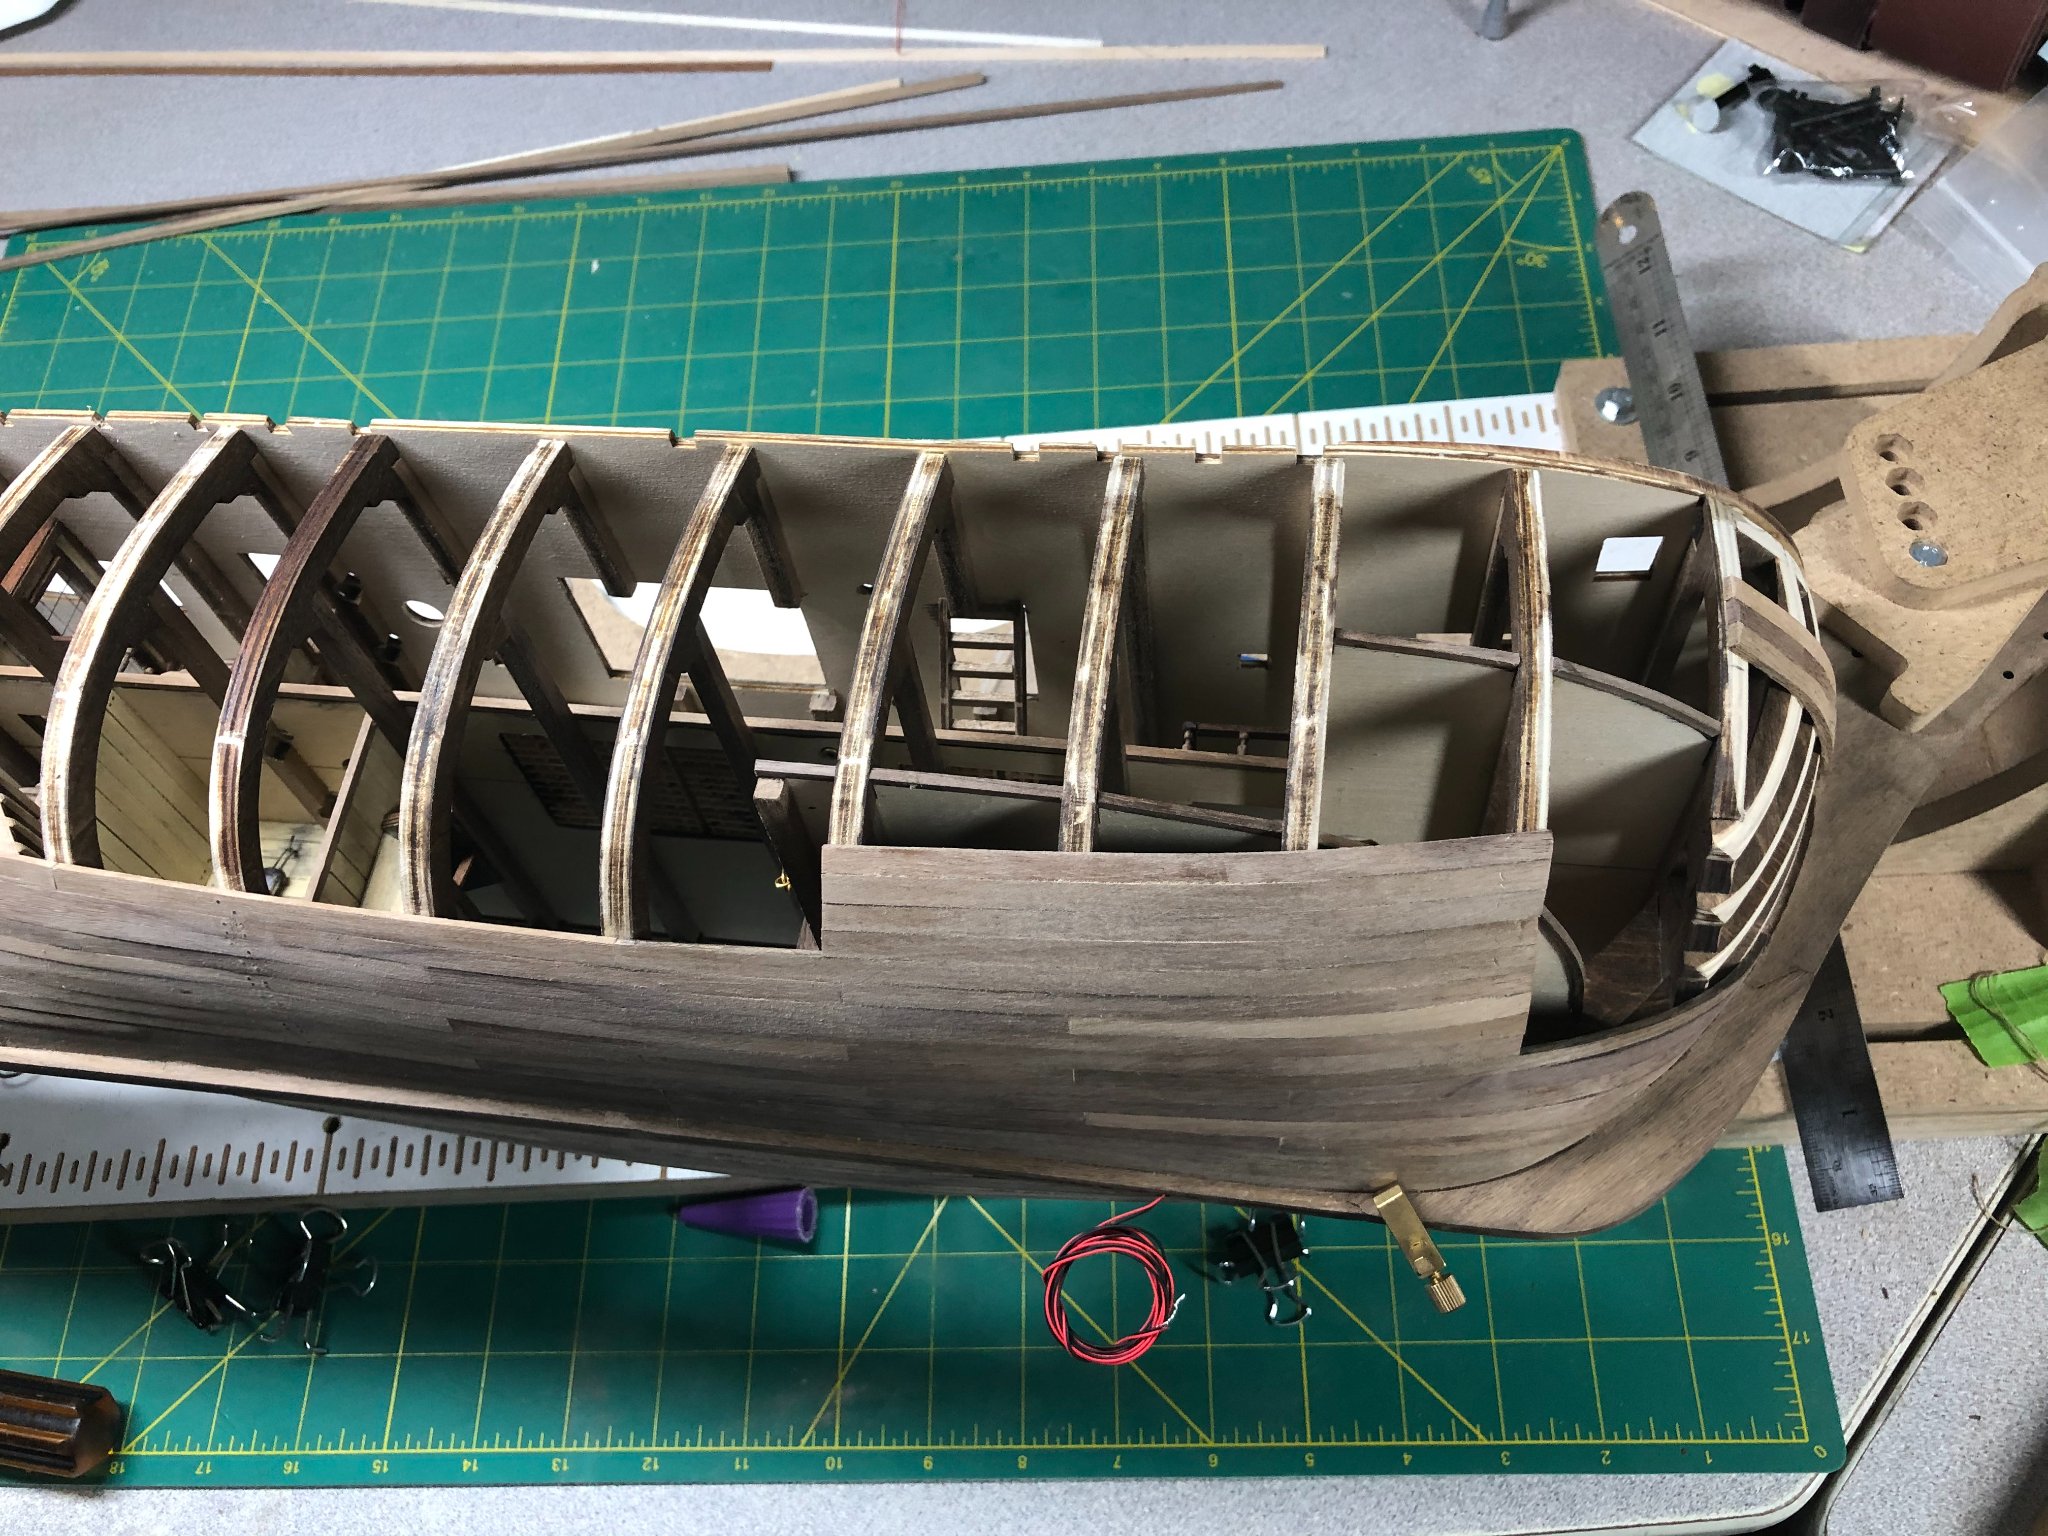
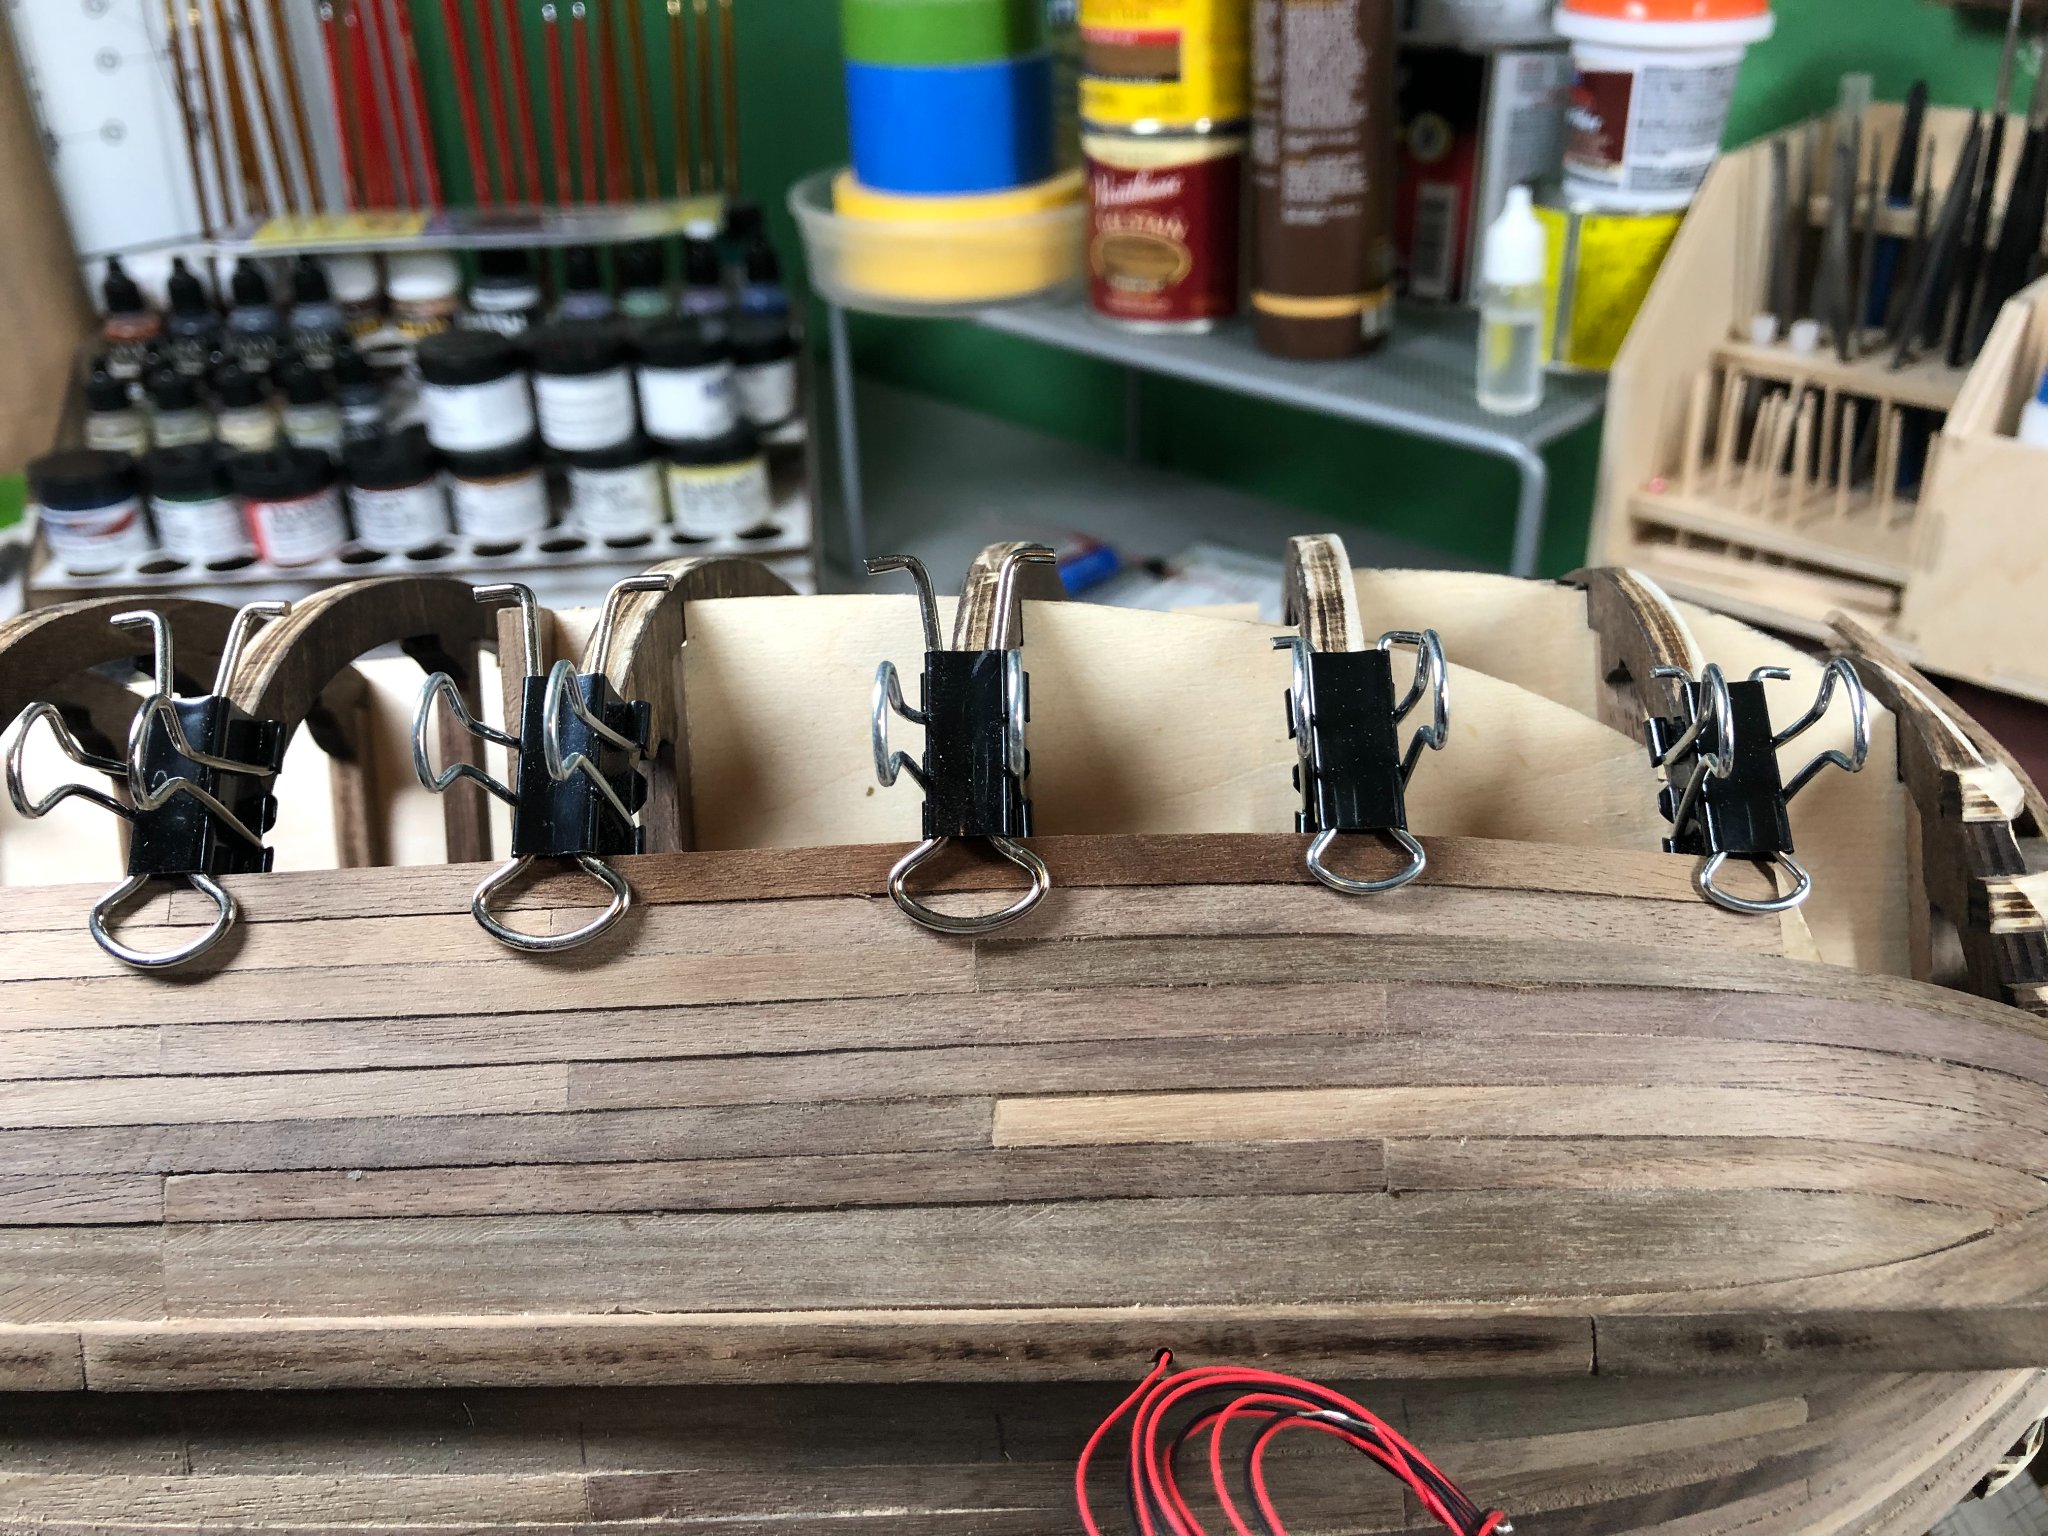
Progress over the last few weeks... a little slow but progress!
After much mulling, decided I didn't like the way the stern post and planking were mating up. So, I pulled off a bunch of pieces and redid it:
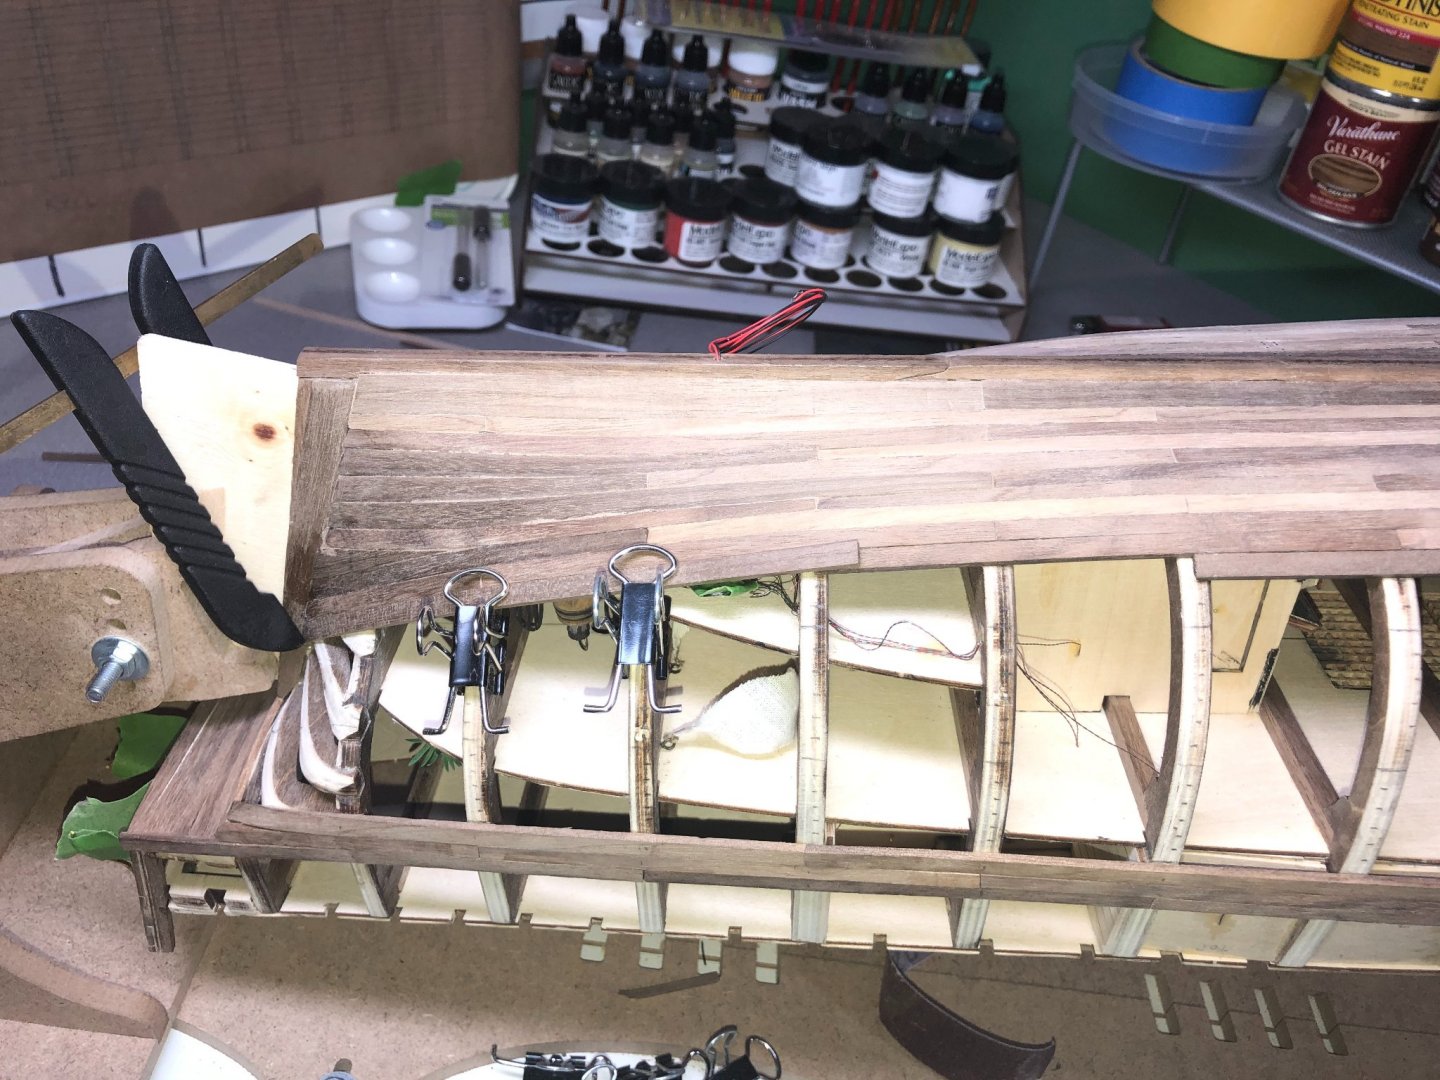
Looks better!
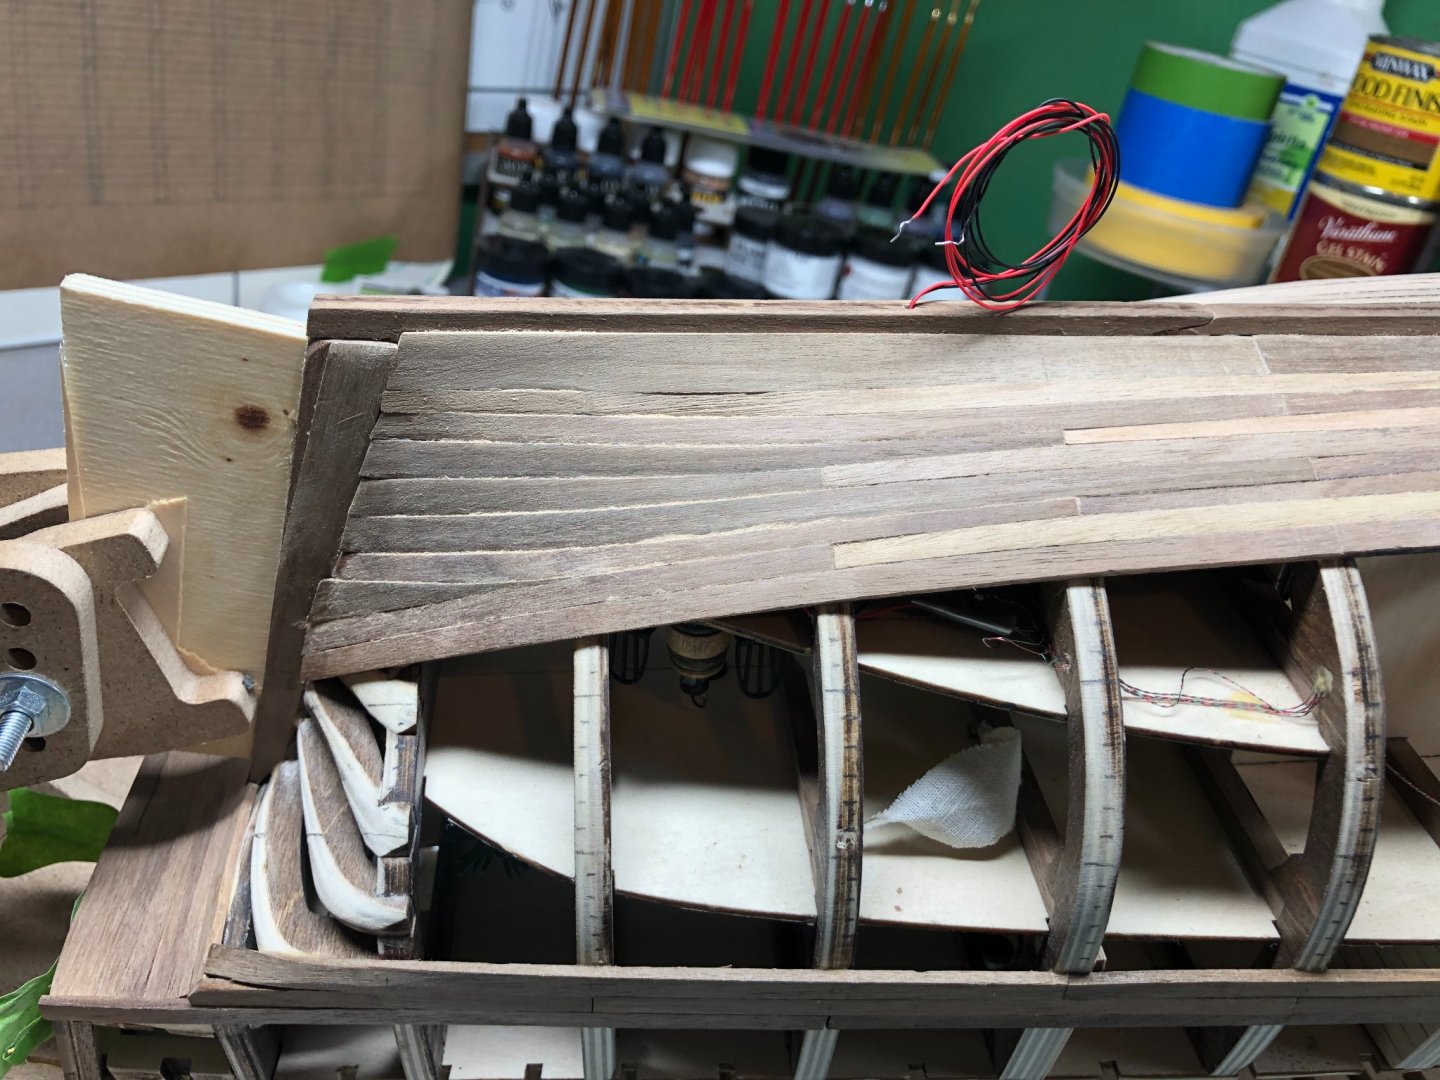
Bow work underway:
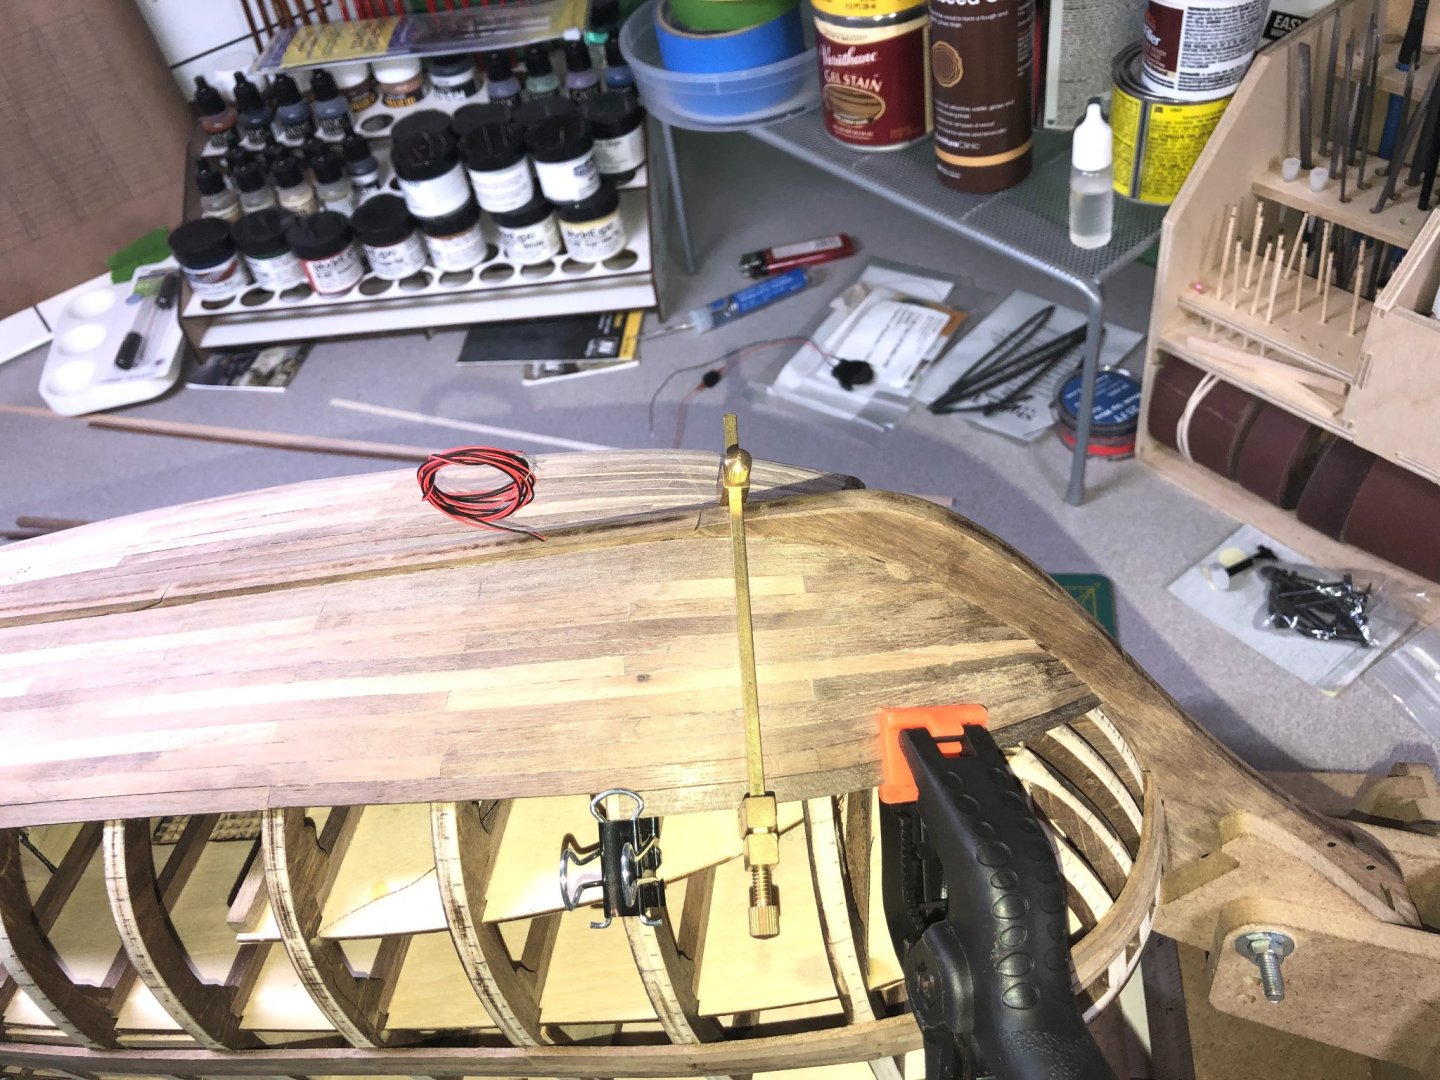
I've gotten myself into a bit of a jam... I'm off my tick marks more than I should be. I'm guessing I'll need to correct it on the next layer. I have wider wood and will use it to compensate.
I did a little trim work on the starboard side along with finishing the lower planks. The trim work was to cover the plywood decking that came with the kit. I used 1mm X 1mm walnut to trim around any exposed edges.
The planking above the wales will be done later. I did the planking slightly different to hide the wiring for the lanterns:


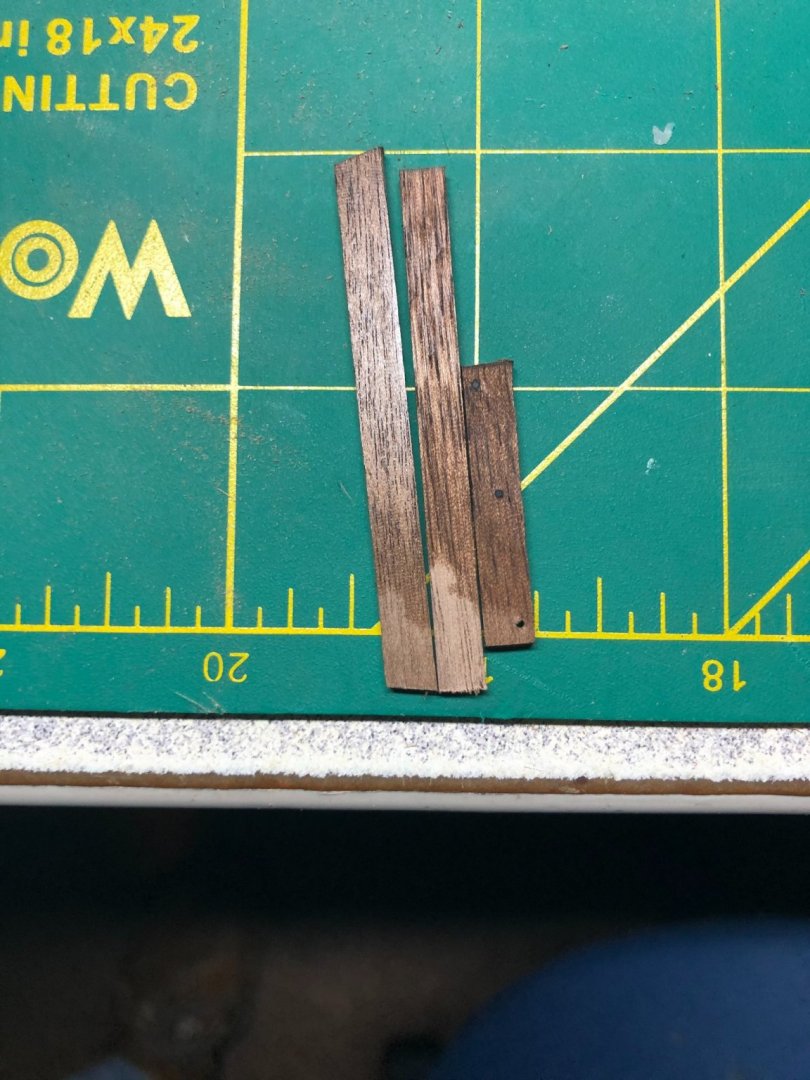
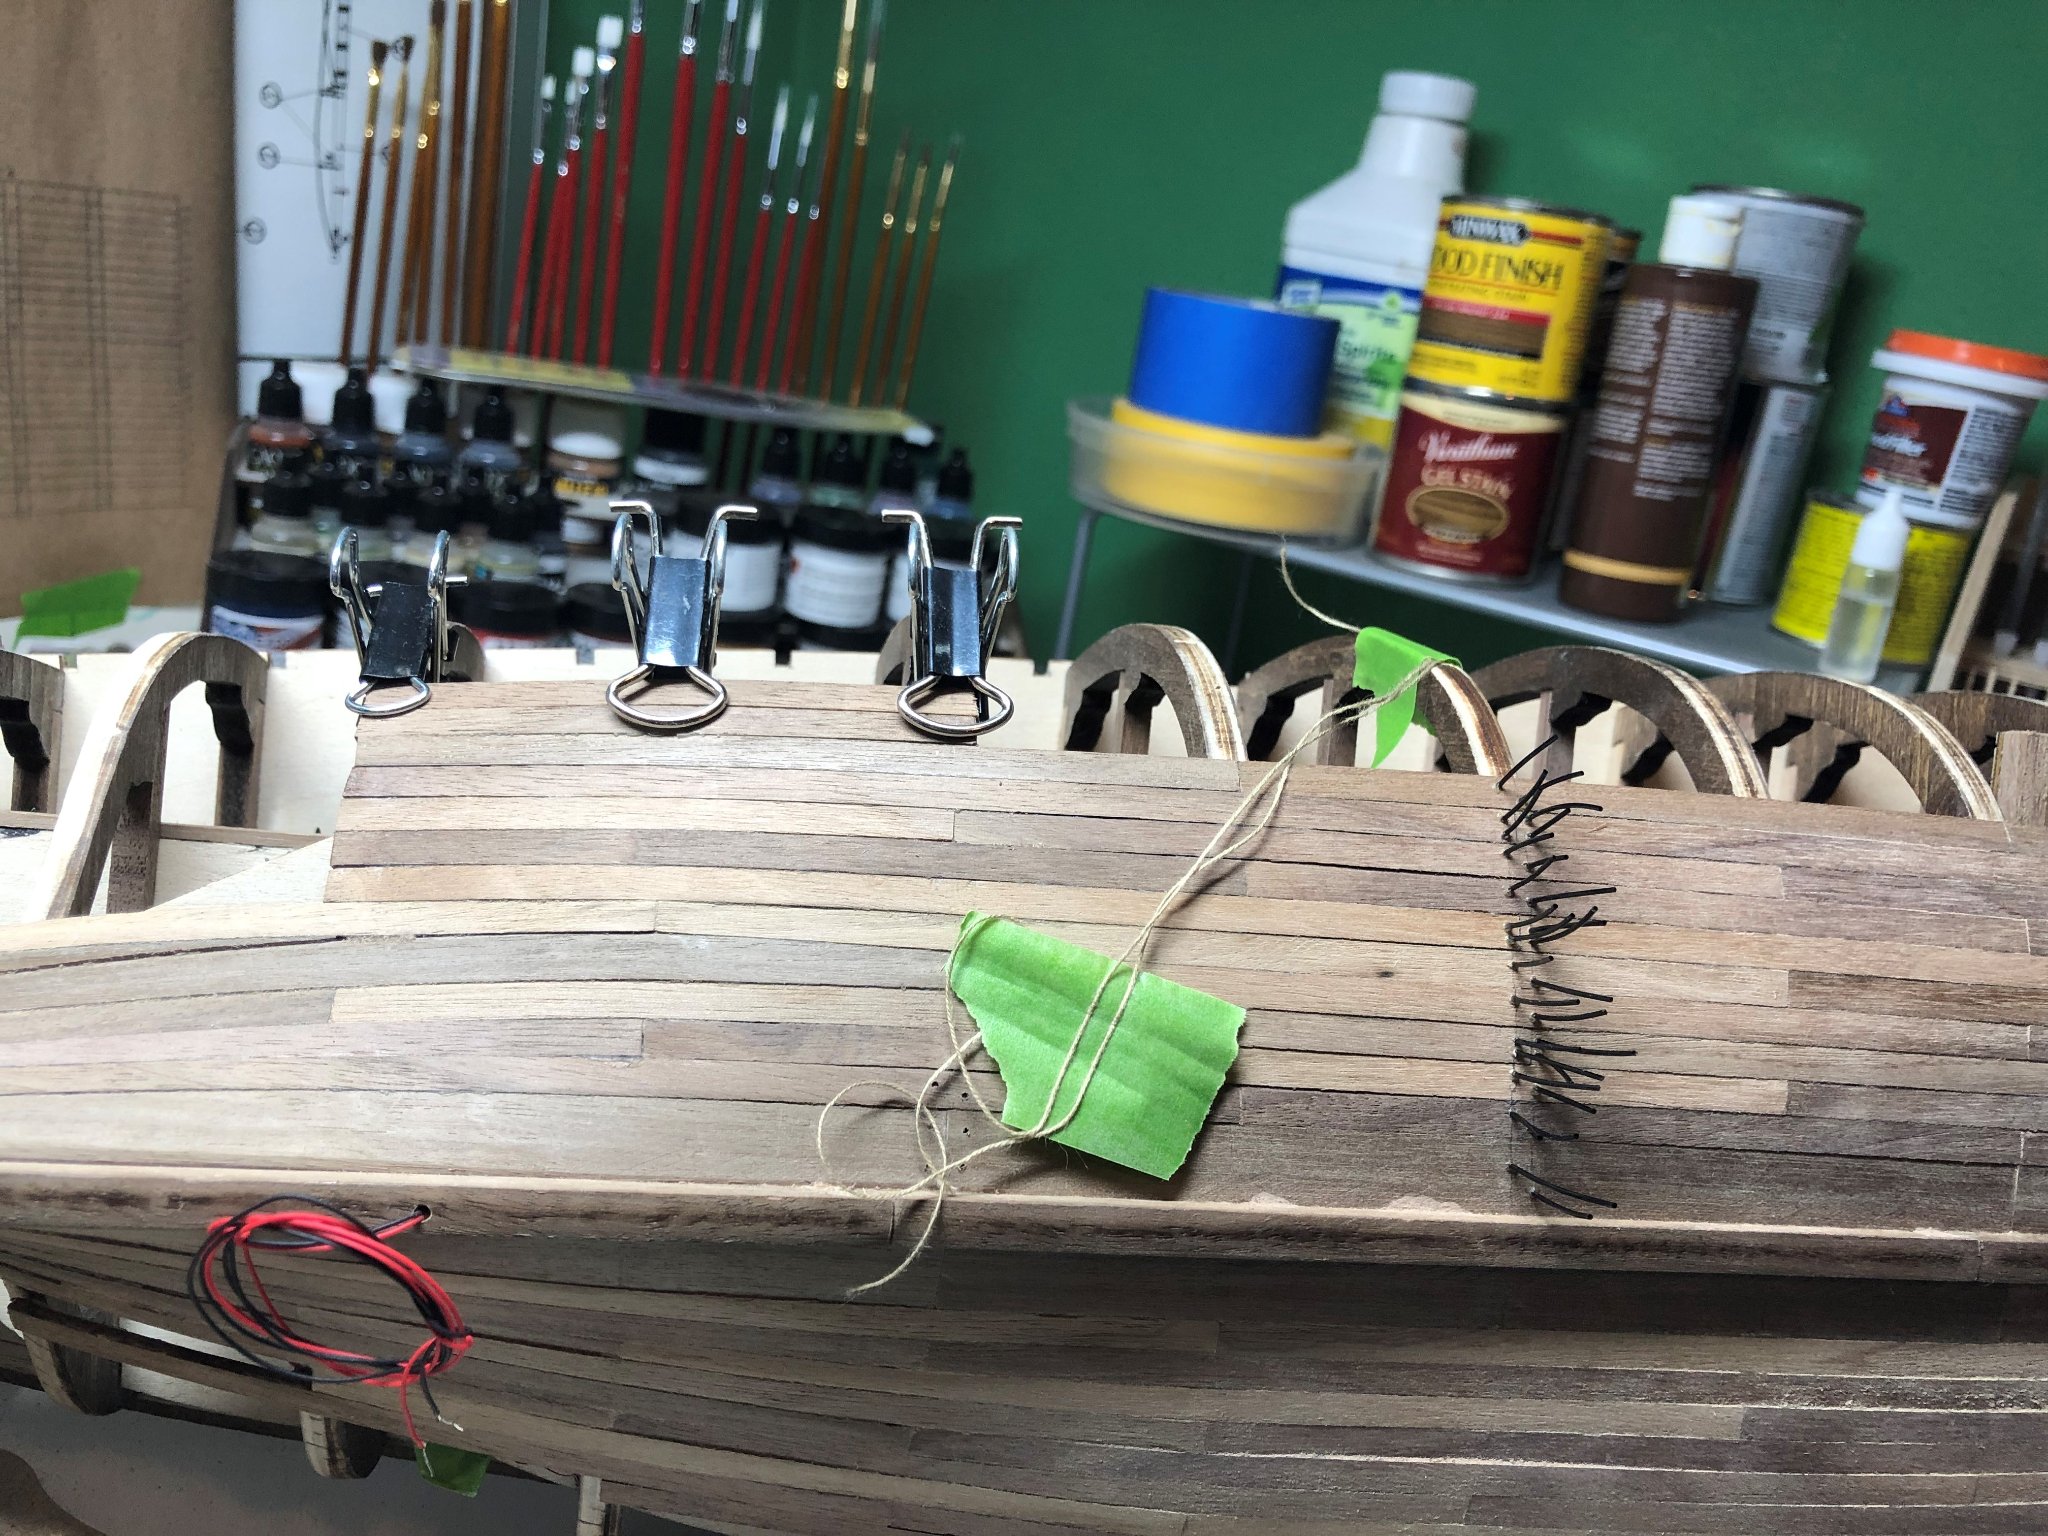
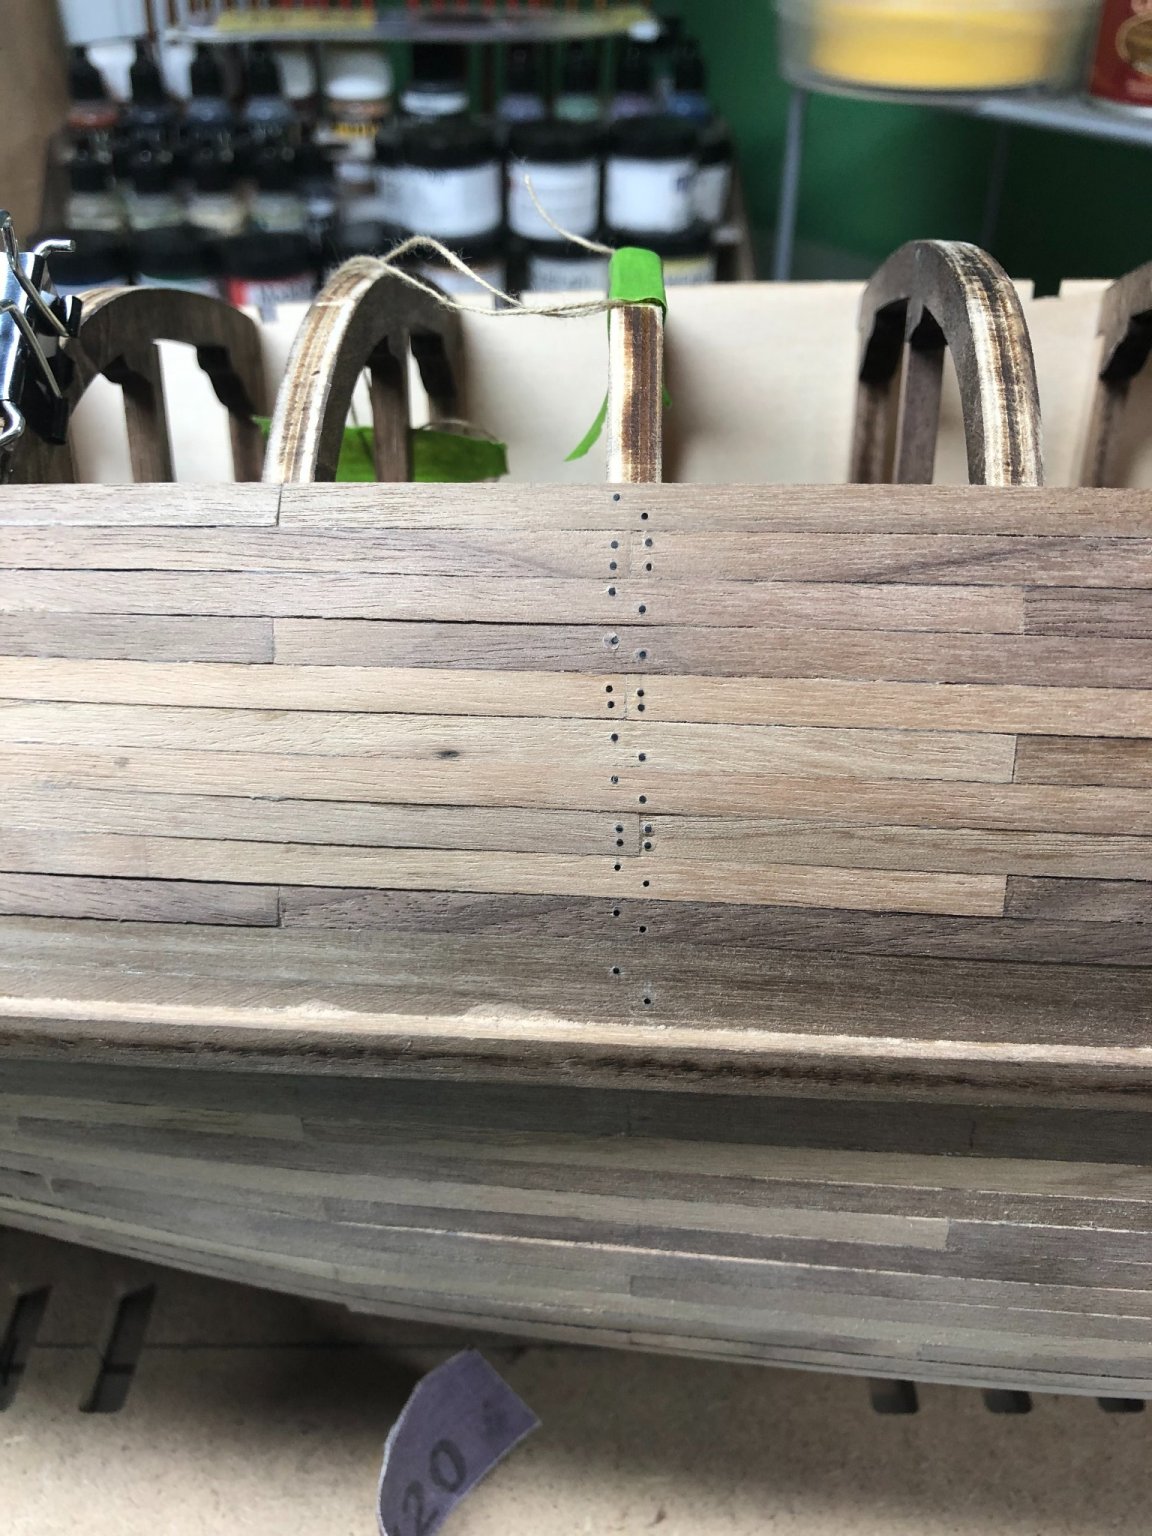
Tree nails for the planks is my next experiment. I'm not a fan of the brass nails!
I decided to try something I saw another modeler use. Unfortunately, I don't recall where I saw it!
I purchased some black monofilament (35 lbs. test) that is just over .5mm in width. I drilled holes that matched the size of the line, dabbed the pieces in PVA and pushed them into the holes:
Note to self, I need to use the next size up on the drill and less glue!
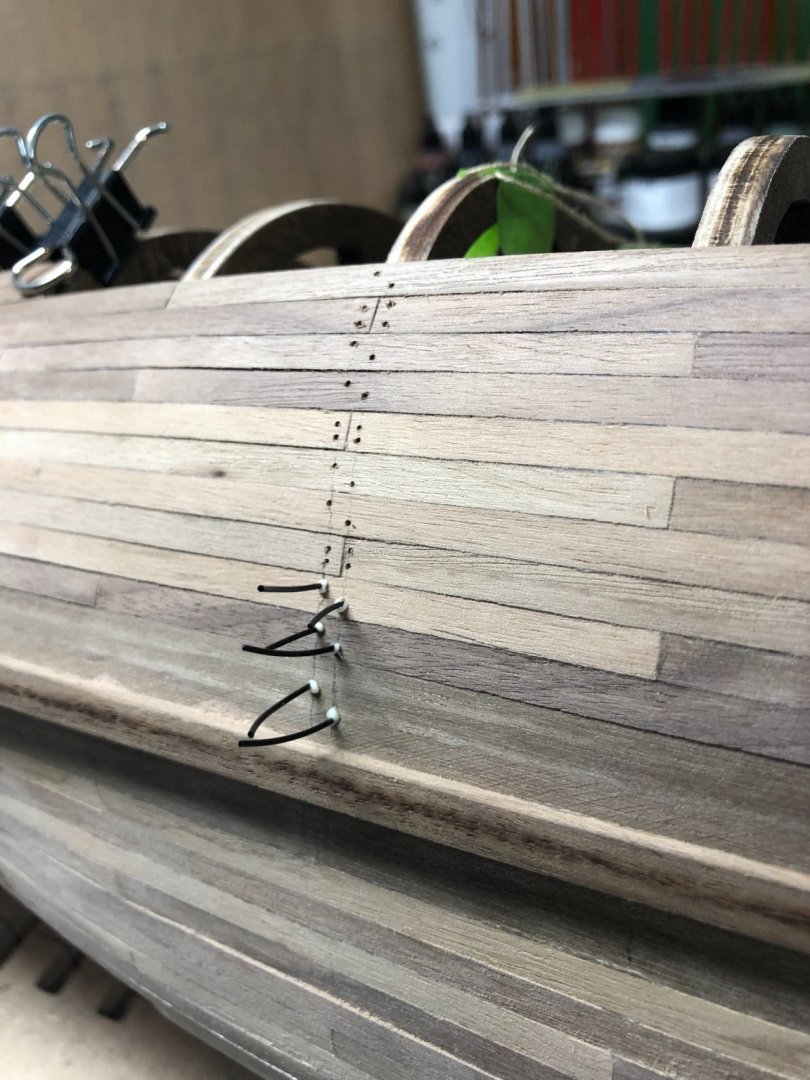
 Once dried, I used a straight razor blade and sliced them off even with the wood. The extra glue made the cutting harder than it needs to be.
The end result is ok. I definitely have to do better with the layout and drilling of the holes:
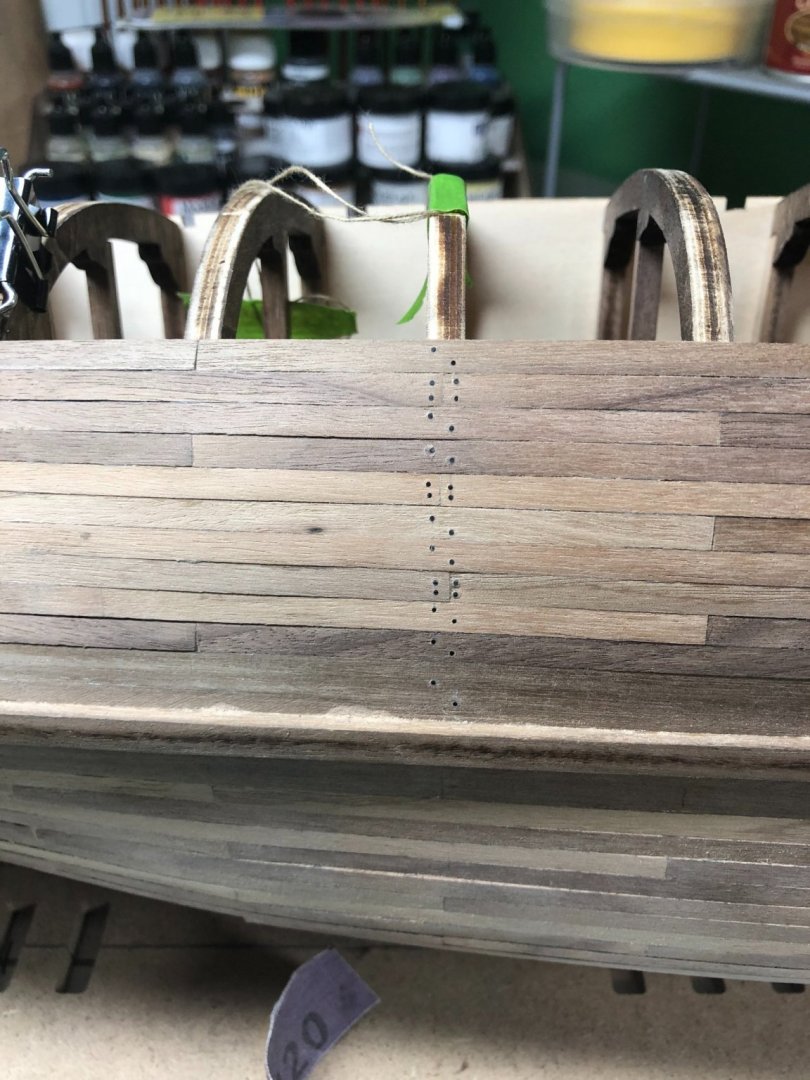
This is a sample I did with one coat of Danish Oil applied:
I think the contrast will be fine. I just gotta figure out a way to make the layout a lot better!
More soon!
-
I think it looks good... maybe a little refinement on the letters but overall, good!
-
4 hours ago, Tim Moore said:
Hi Trond & Lyle: when doing the single planking on my Bounty, my basic process was:
1. back sand the edge of the plank I am fitting slightly along the length so the face fits tightly against the existing plank
2. working at about three frames at a time, glue the plank to both the frame and the plank above with tiny intermittent drops of CA, and pin in place.
3. move along to the next 3 frames
4. fill any unavoidable small gaps with dark walnut or ebony coloured wood filler.
Hey Trond and Tim,
I do things a bit different but close to what Tim does:
- All planks are cut to historical sizes (4-6 inches), depending on where the plank lands on the frames to follow a three butt pattern.
- The frame is bent to match the plank adjacent to it.
- Sanding is done to decrease the width and to match the adjacent plank, as needed. I save the sanding dust.
- The edges are marked with a No. 2 pencil.
- I use wood glue (PVA) and I glue to the frames and the adjacent plank. I try very hard not to have any gaps but inevitably, it happens once in a while.
- If there is a gap, I apply a small amount of PVA and brush in some of my sanding dust to fill and match the color.
I find that if I bevel the edge, going against the previous plank slightly, I usually get a pretty tight fit.
The pictures show that but there is a ton of sanding to be done and I won't do much until the planking is completely finished.
I'm not thrilled with the planks to the stern post... too much of a perfectionist!
Hope this helps, Trond.
-
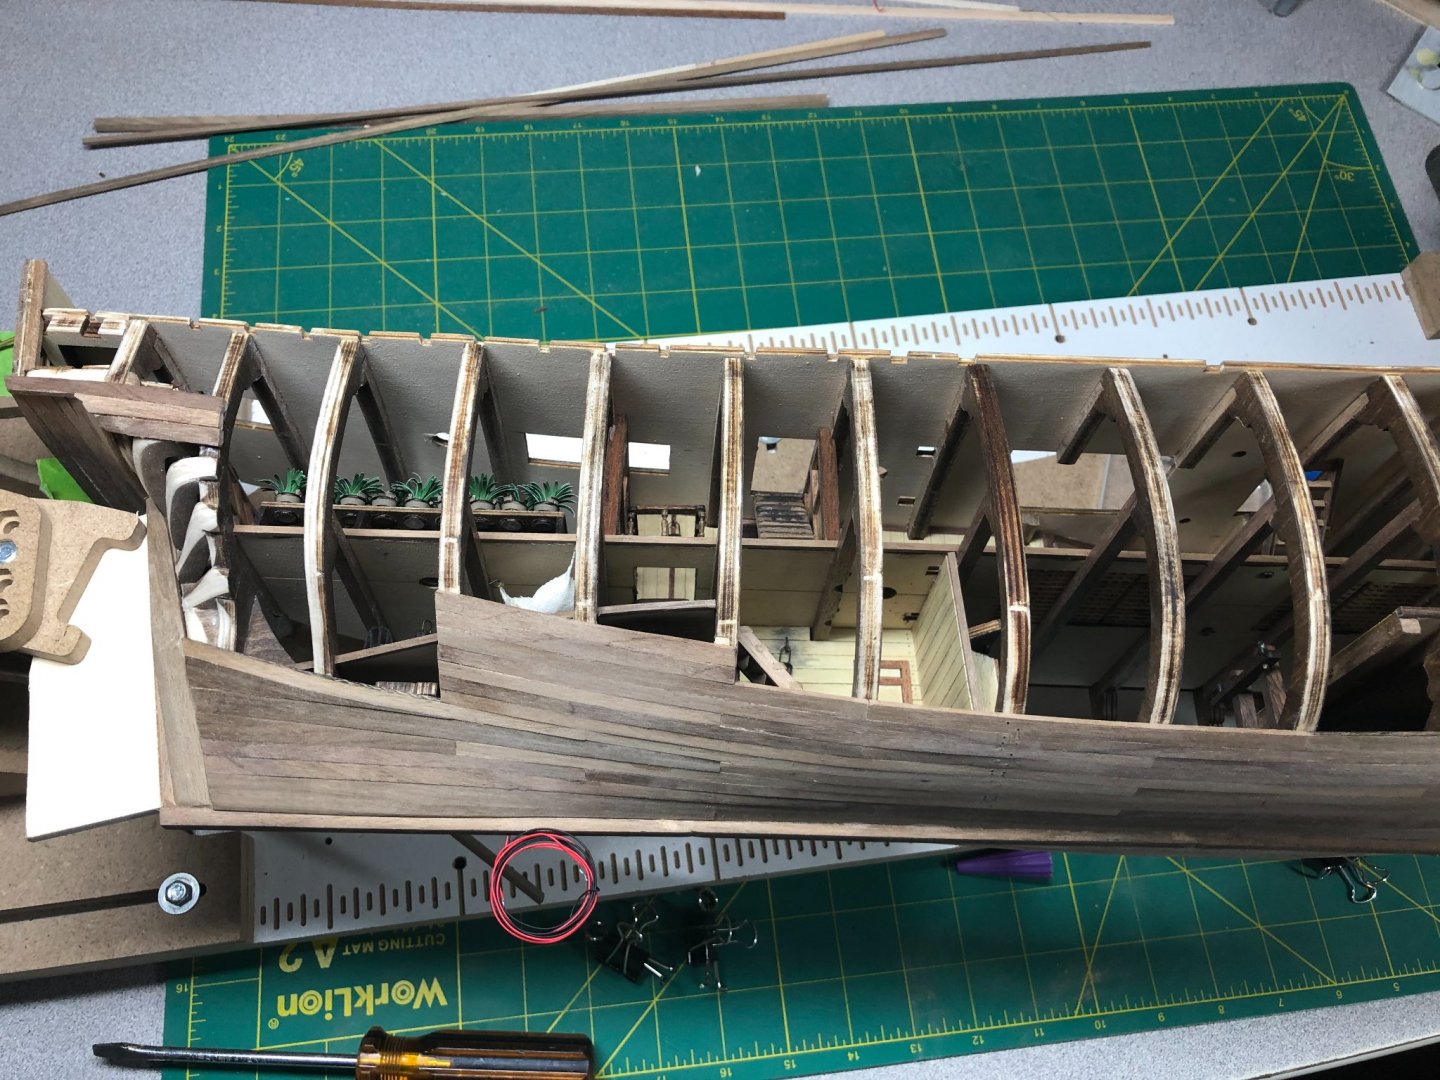
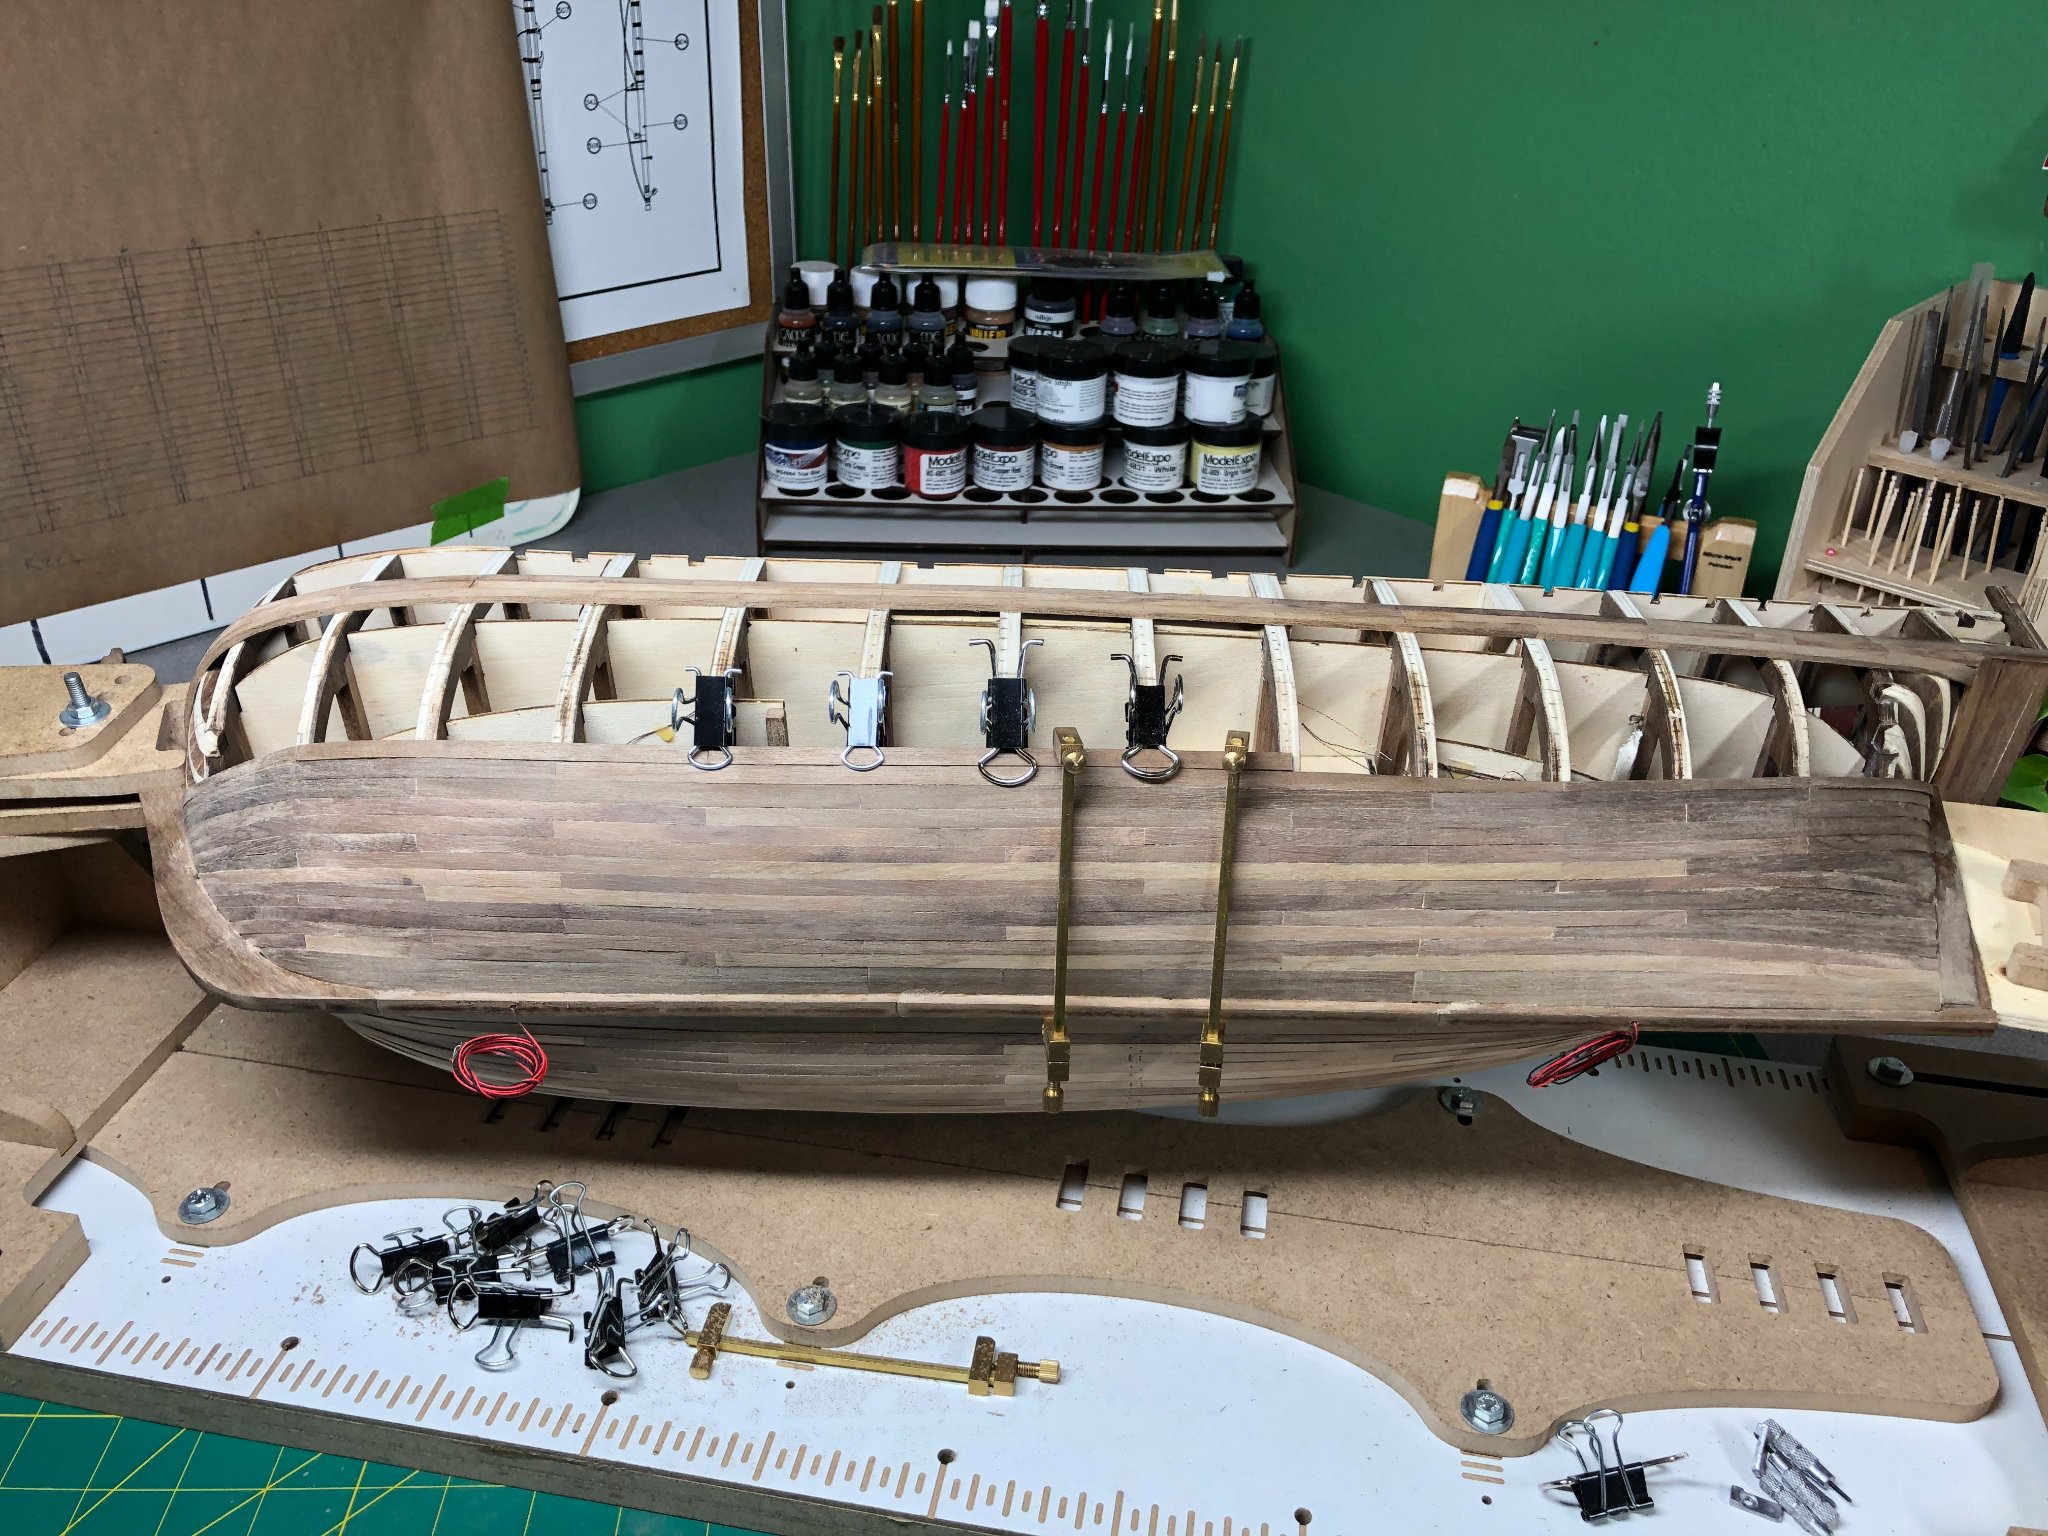
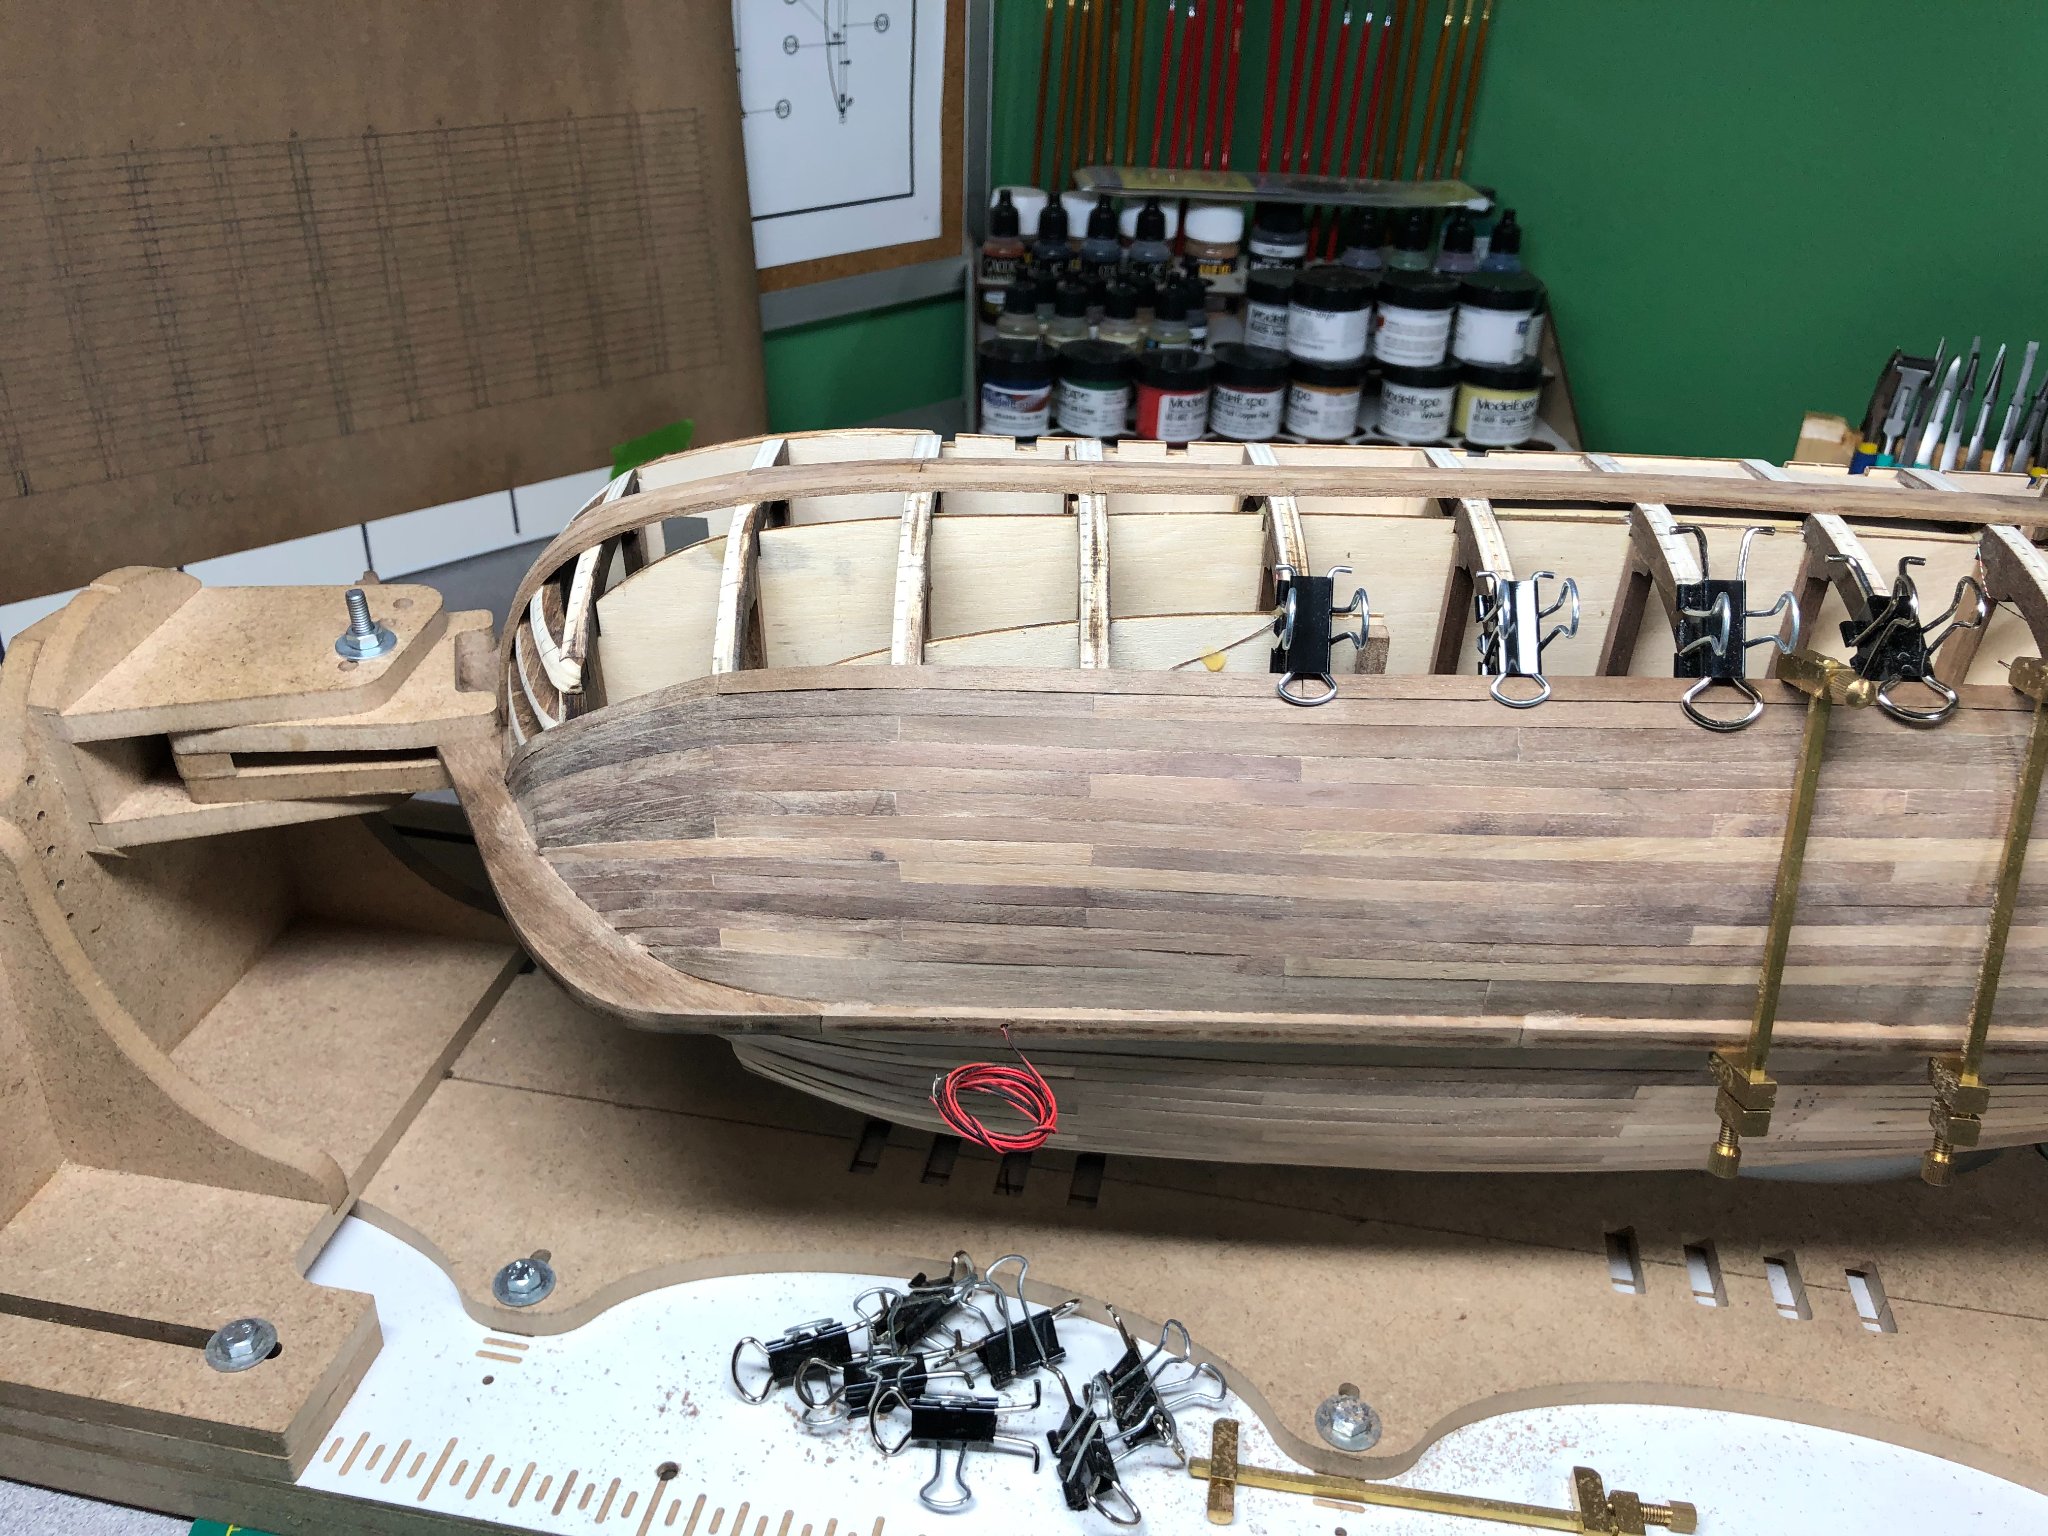
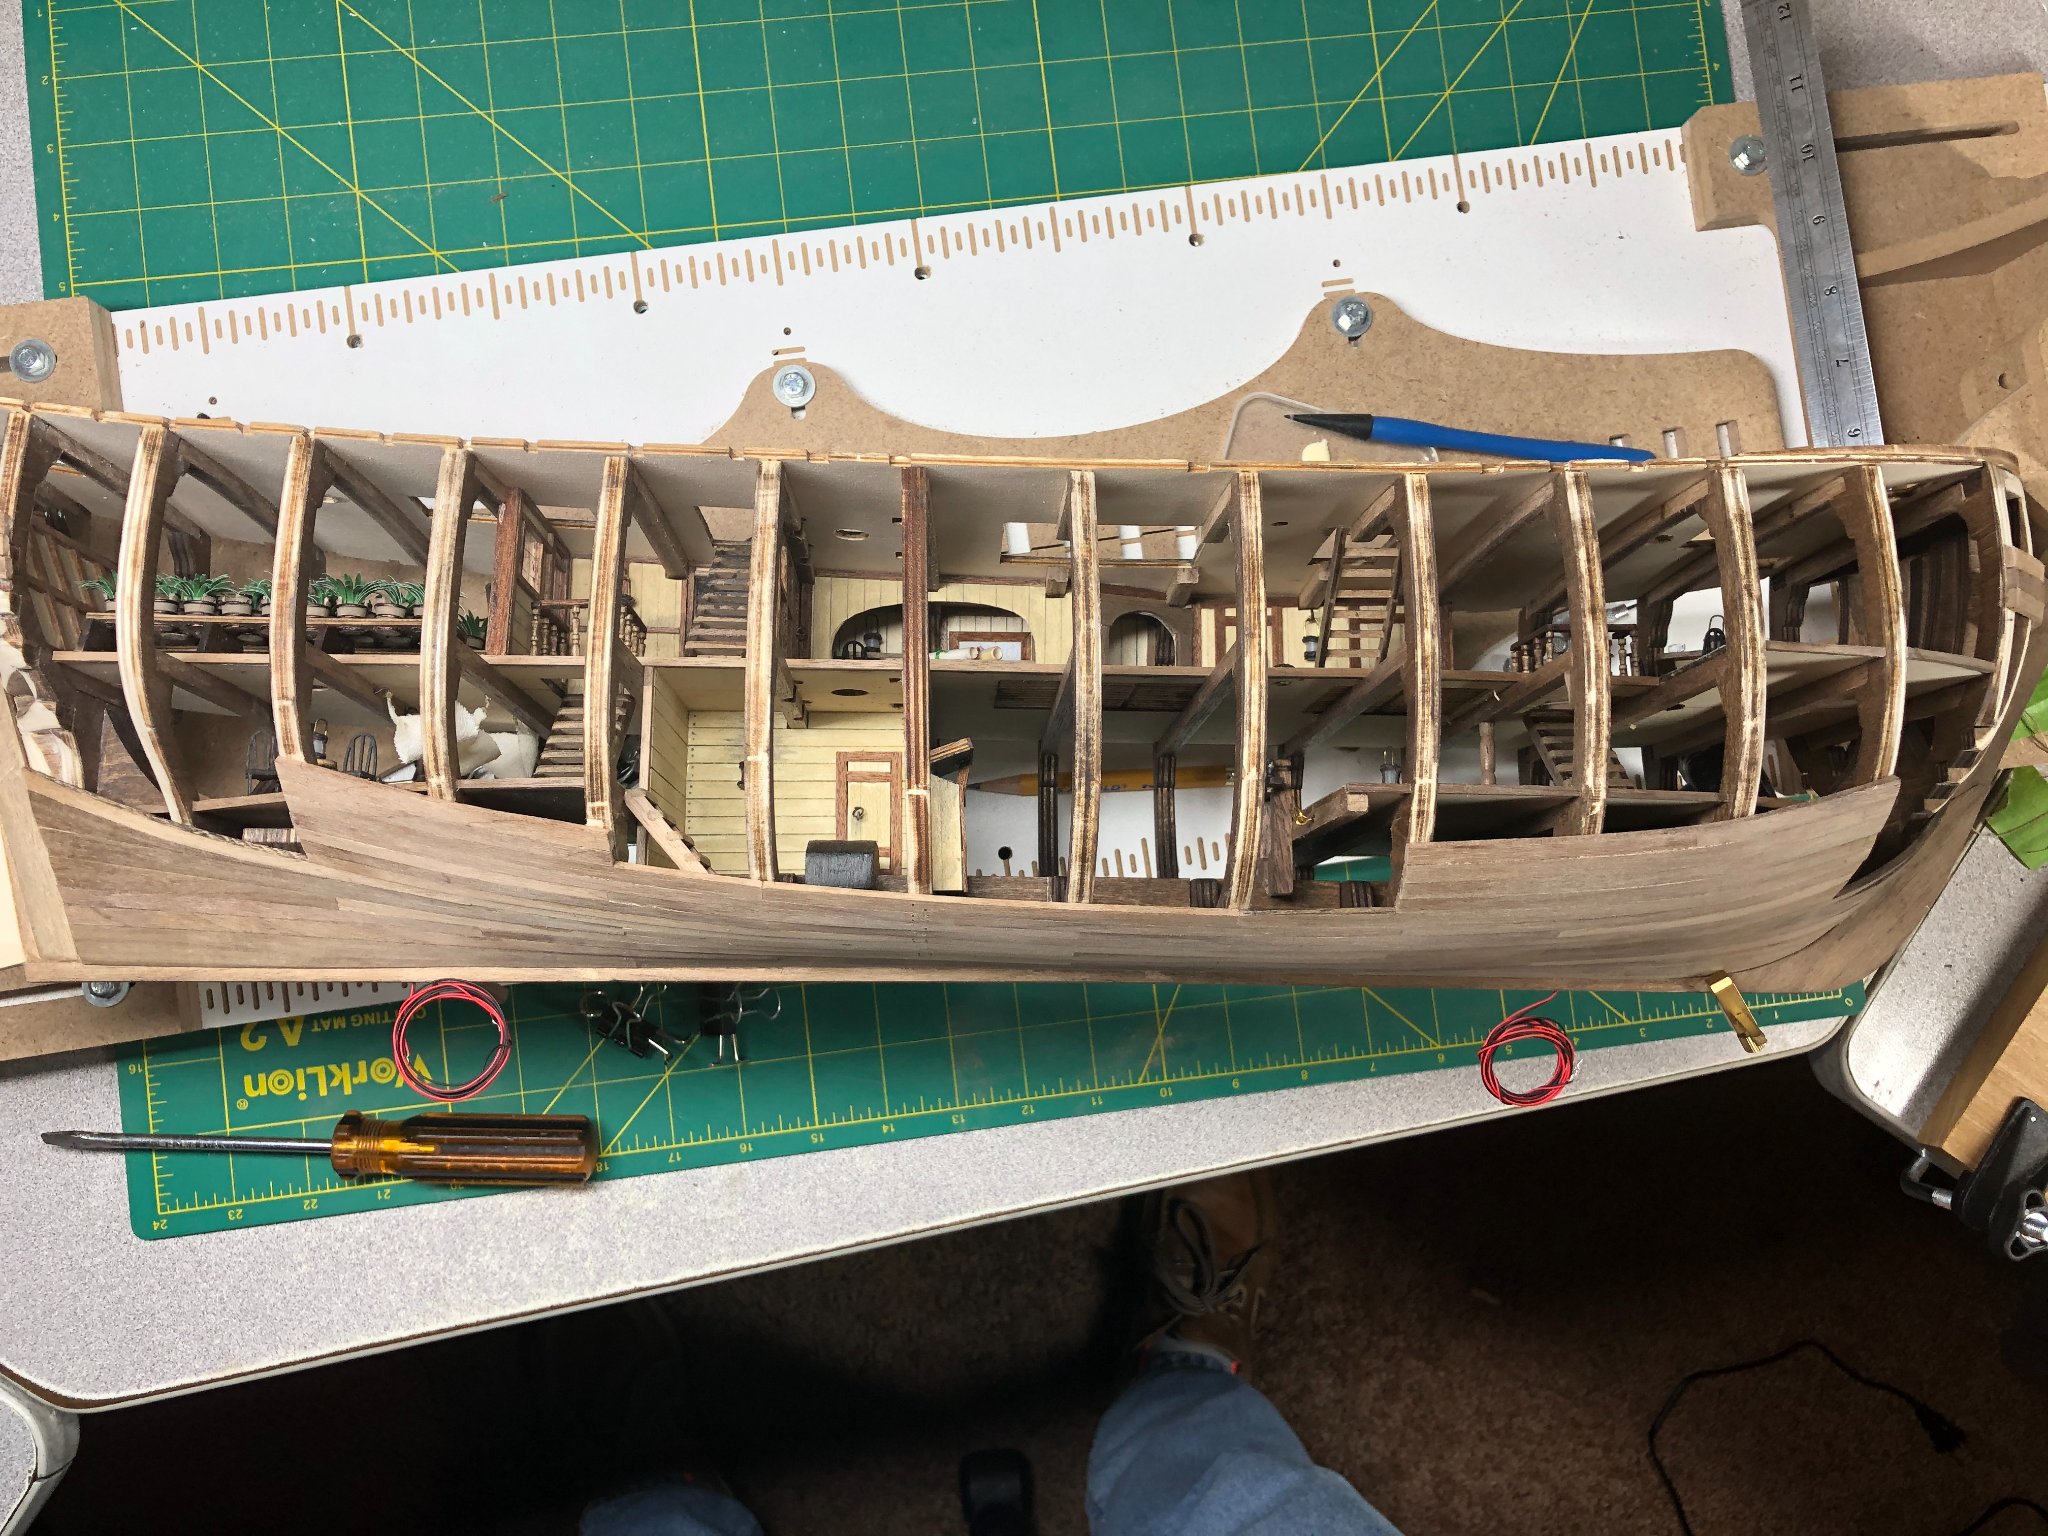
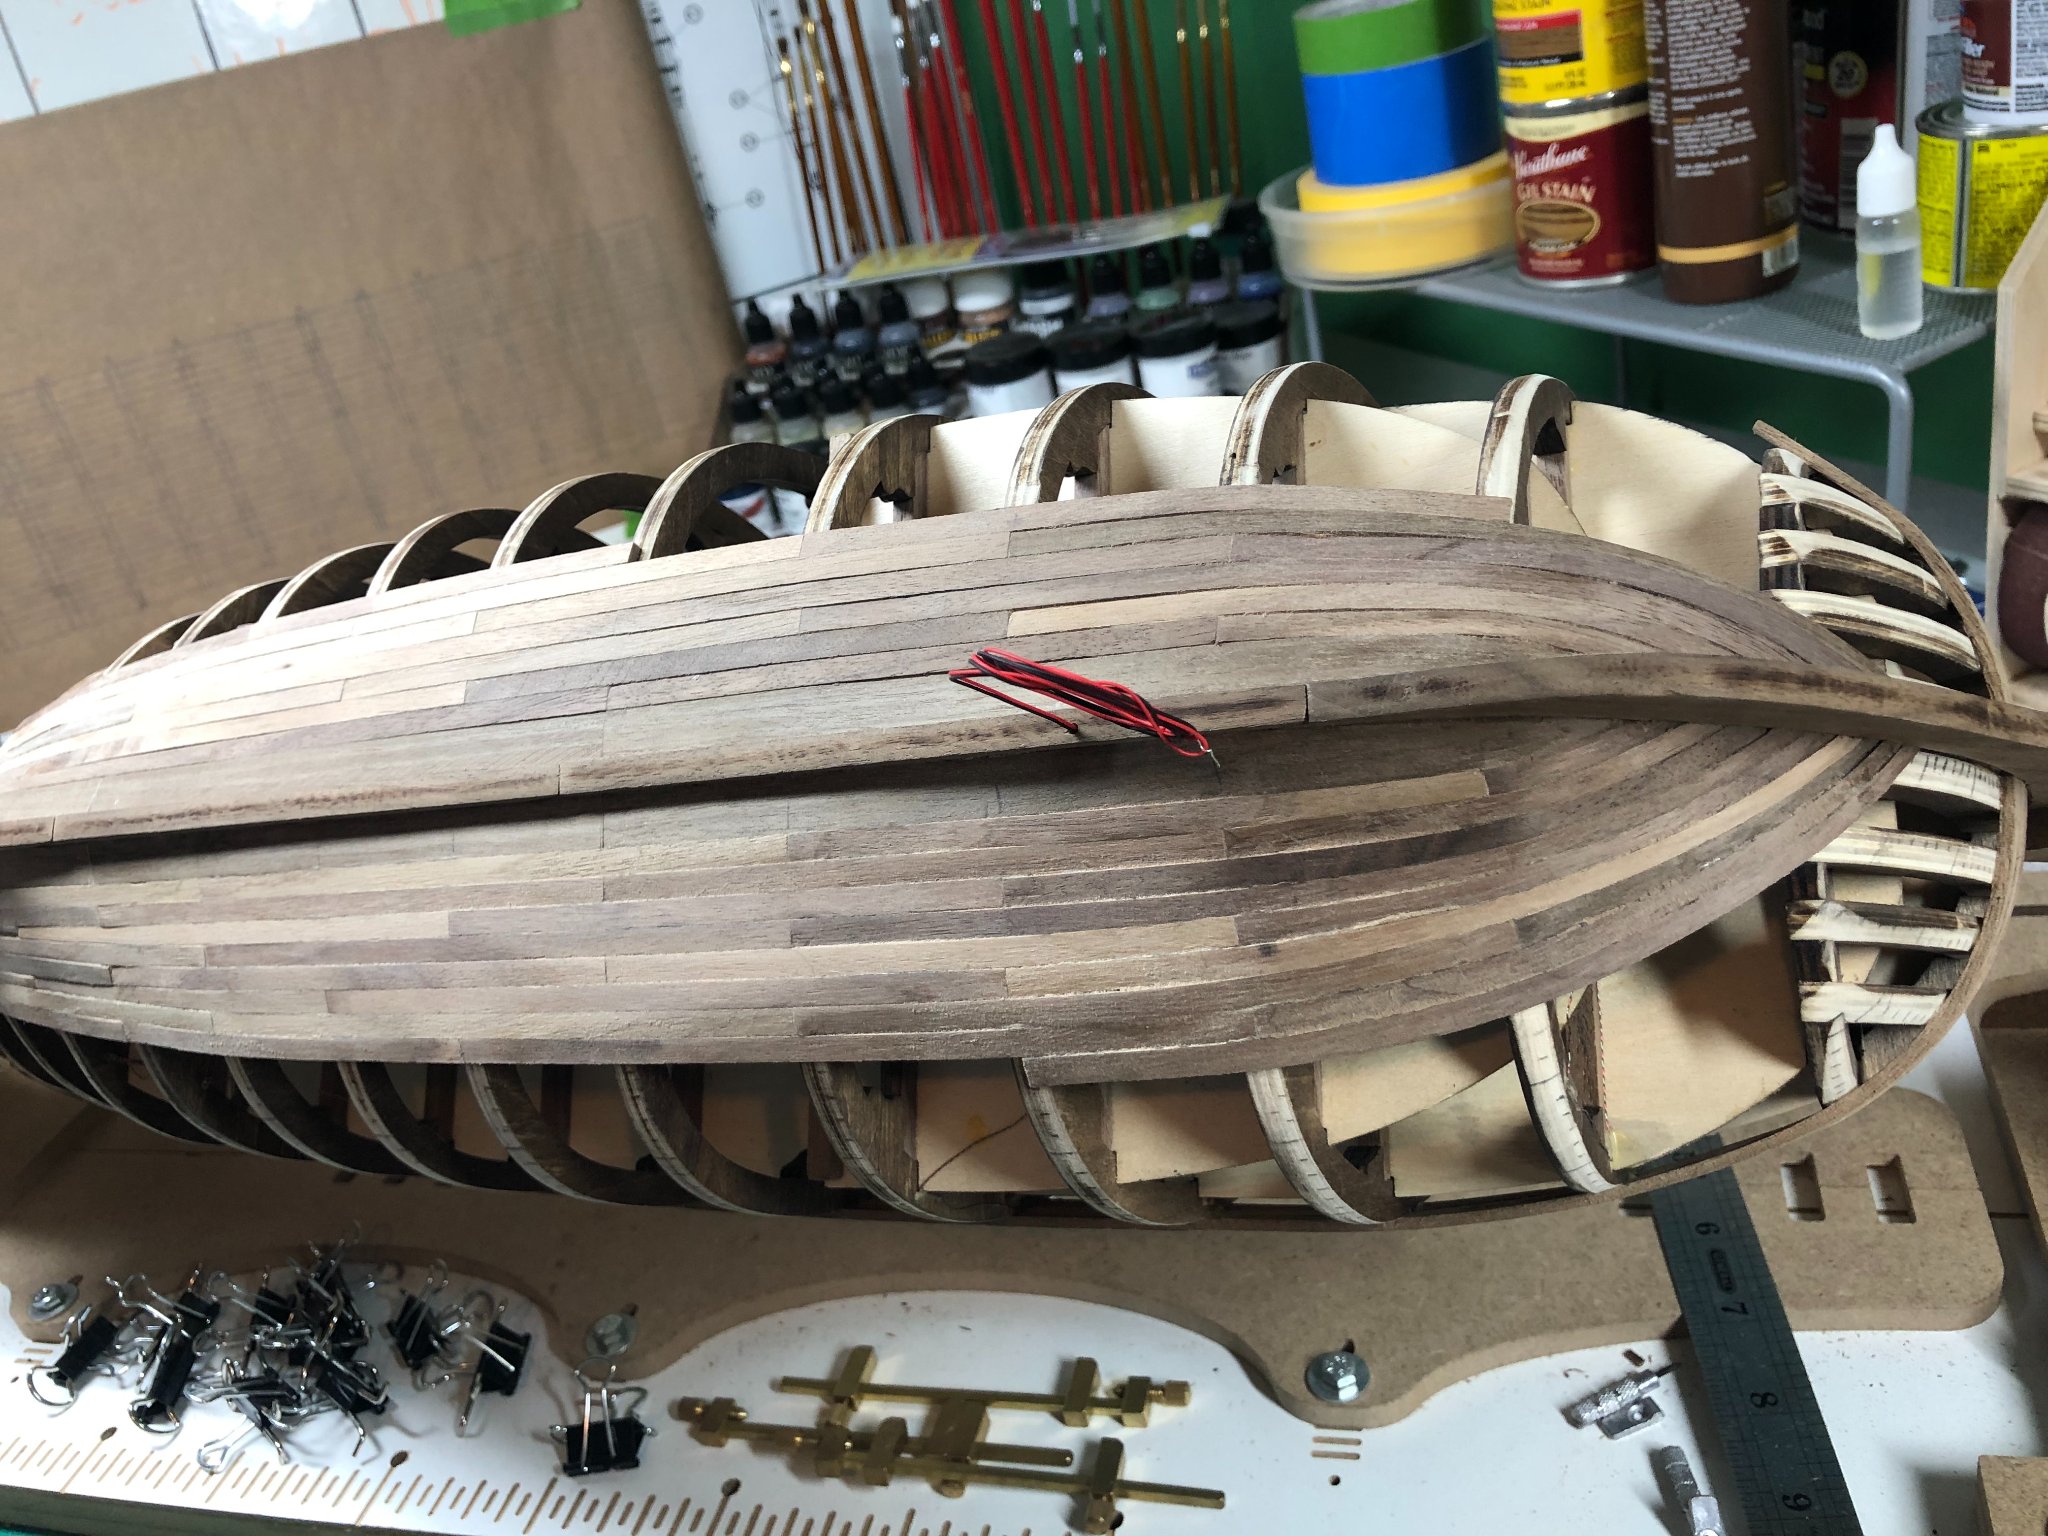
Been a quiet couple of weeks as spring has opened all kinds of other projects!
Planking continues:


The stern has been the bigger challenge. The first few planks were fine but as can be seen in the picture above, I had to switch from butting against the stern post to butting onto it.
Sanding will remove the imperfections. I think the walnut will be interesting to sand! Such a hard wood!
The starboard side is mostly done as so much of it remains open. Still have to do above the wales and a few more planks to bring the height up high enough to hide the wiring of the lanterns.
Updates as I make progress.
-
I can send you a picture of the decoration from my model... I haven't installed or modified it yet.
Let me know if you're interested.
-
-
6 hours ago, AJohnson said:
More block tying today for the cannons, also made some ring bolts for the breeching rope, used some wire wrapped around a cocktail stick. Blackened with Brass blackener...
How are you keeping the blackening from wiping off?
-
26 minutes ago, allanyed said:
Lyle
Don't use the kit string if at all possible. Search the many threads here and on the net on making rope. Gutermann and other brands of materials are reviewed and discussed. You will also need to decide if you want to go with cotton, linen, or poly.
Wasn't planning to use it for anything more than just practicing...
Reading others comments (and yours), it sounds like Gutermann is the way to go...
Thanks for the advise!
-
I too, just purchased the Rope Rocket and the Serving machines from Chuck and Syren.
Haven't assembled them yet but will over the weekend. Looking forward to experimenting with both machines.
I have plenty of time since I'm just planking the hull on my current build (HMS Bounty).
Still deciding on what thread to buy or maybe just experiment with what came in the kit.
-
8 hours ago, Trond said:
What is the best way of getting some large paper copies from the book, to have in my workshop for making notes on?
Maybe take it to a print shop and have them blow up some of the shots?


Books for Sale
in Book, Monograph and Magazine reviews and Downloads. Questions and Discussions for Books and Pubs
Posted
Sent you a message!