HOLIDAY DONATION DRIVE - SUPPORT MSW - DO YOUR PART TO KEEP THIS GREAT FORUM GOING! (Only 24 donations so far out of 49,000 members - C'mon guys!)
×


LyleK1
-
Posts
538 -
Joined
-
Last visited
Content Type
Profiles
Forums
Gallery
Events
Everything posted by LyleK1
-
 I'm interested in the Discovery and Chatham as well. Any updates for those to ships?
 -
Interesting posts. I too, am very interested in building the 1789 version of the Discovery and the HMS Chatham. Both of were involved in the exploration of the PNW waters. I am in the middle of building the HMS Bounty right now but am starting to look into the next build... a scratch build is in my future. My first attempt. So, obviously, research and access to good materials may be an issue when picking the next build.
-
Nice work, Tim. The rigging is always so tedious... but if done correctly (like you are doing) it will make the model standout! Keep the pictures coming!
- 171 replies
-
- 2
-

-
- artesania latina
- bounty
- (and 1 more)
-
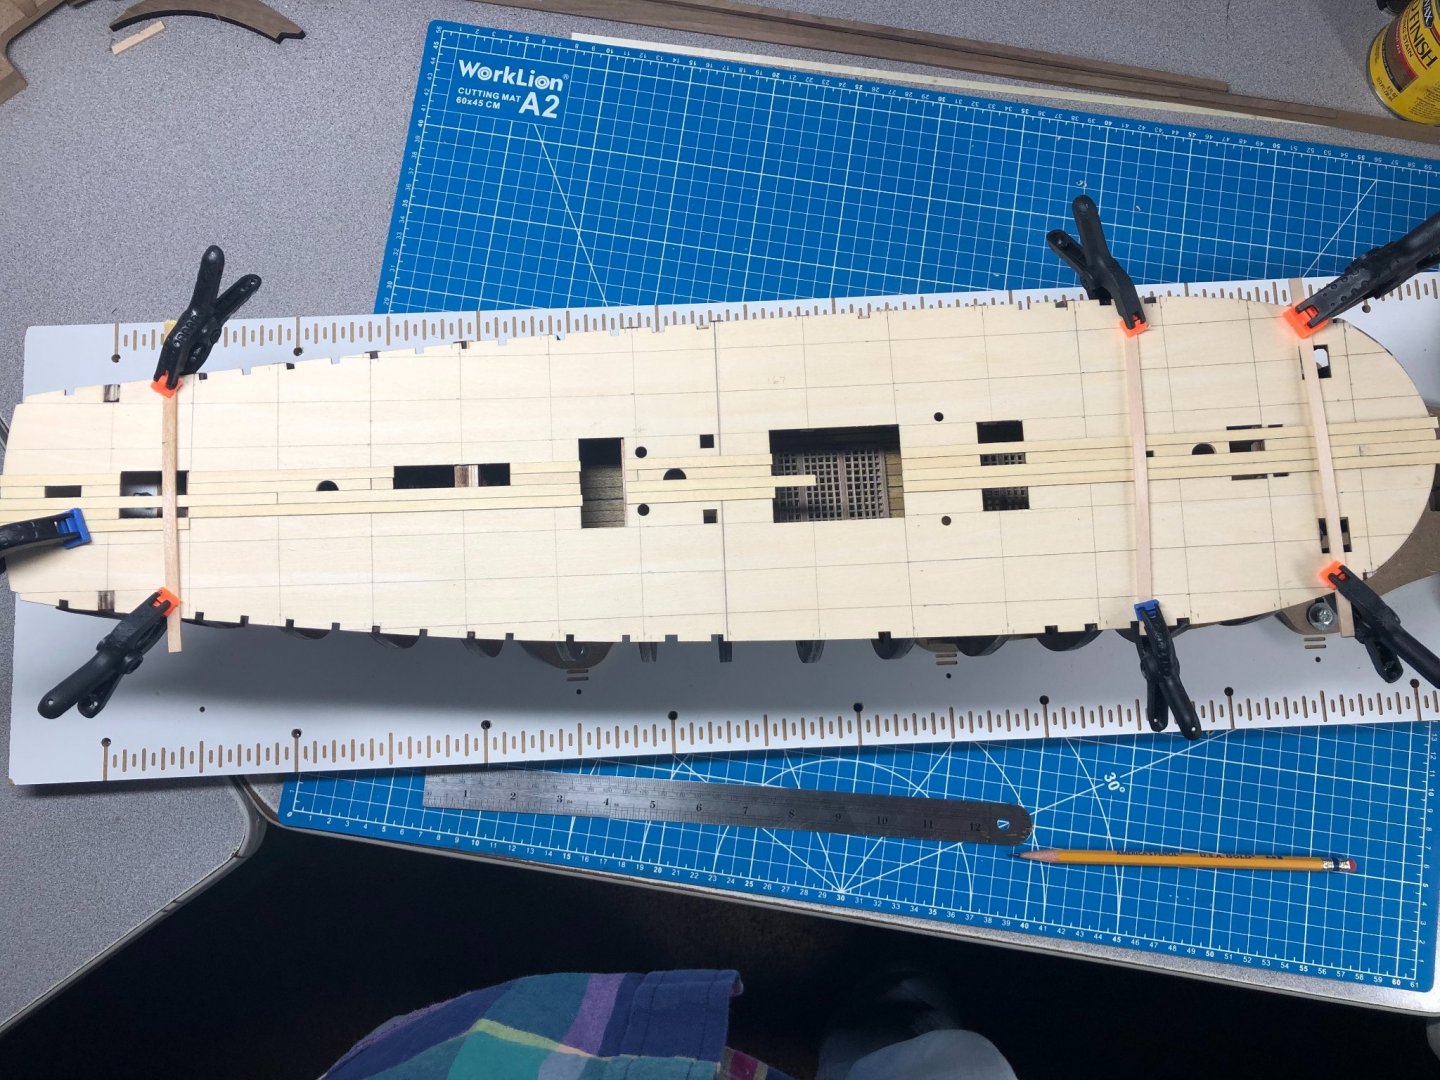
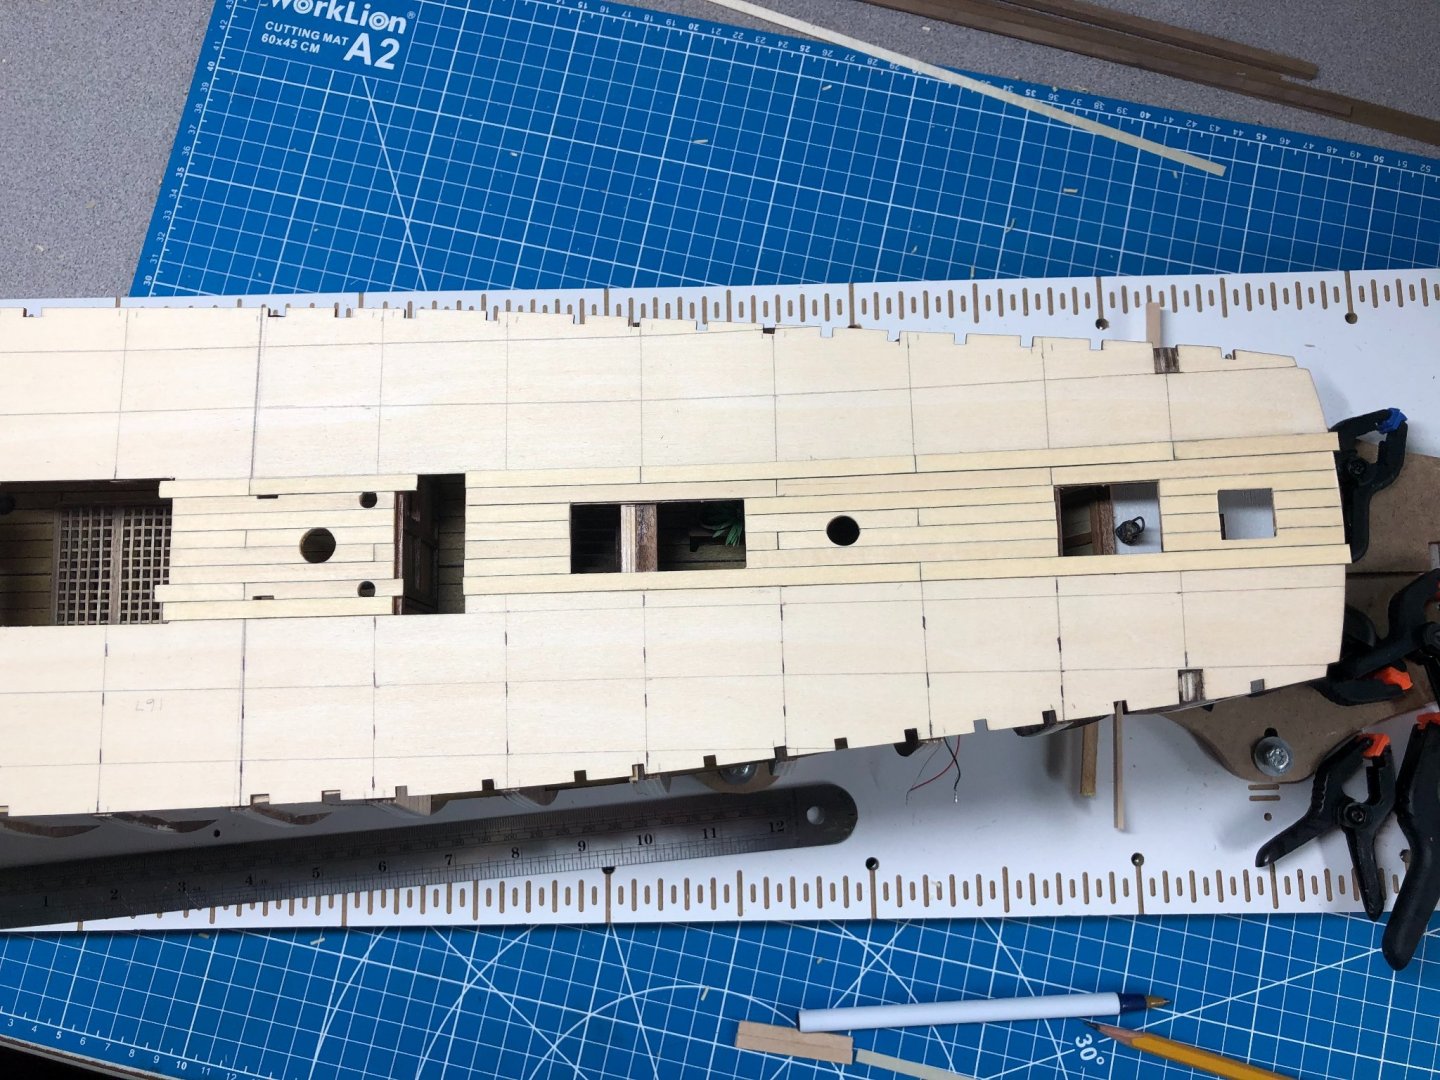
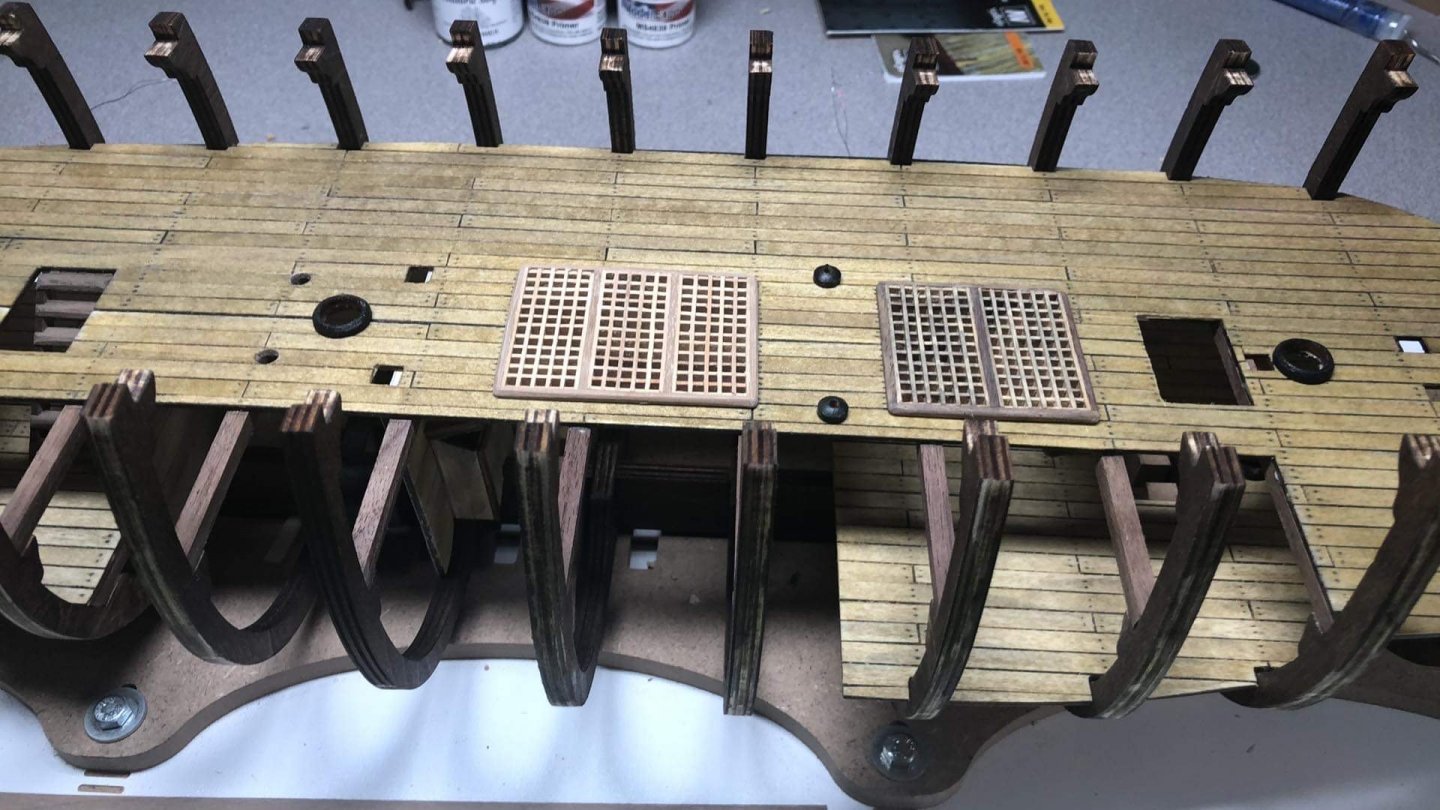
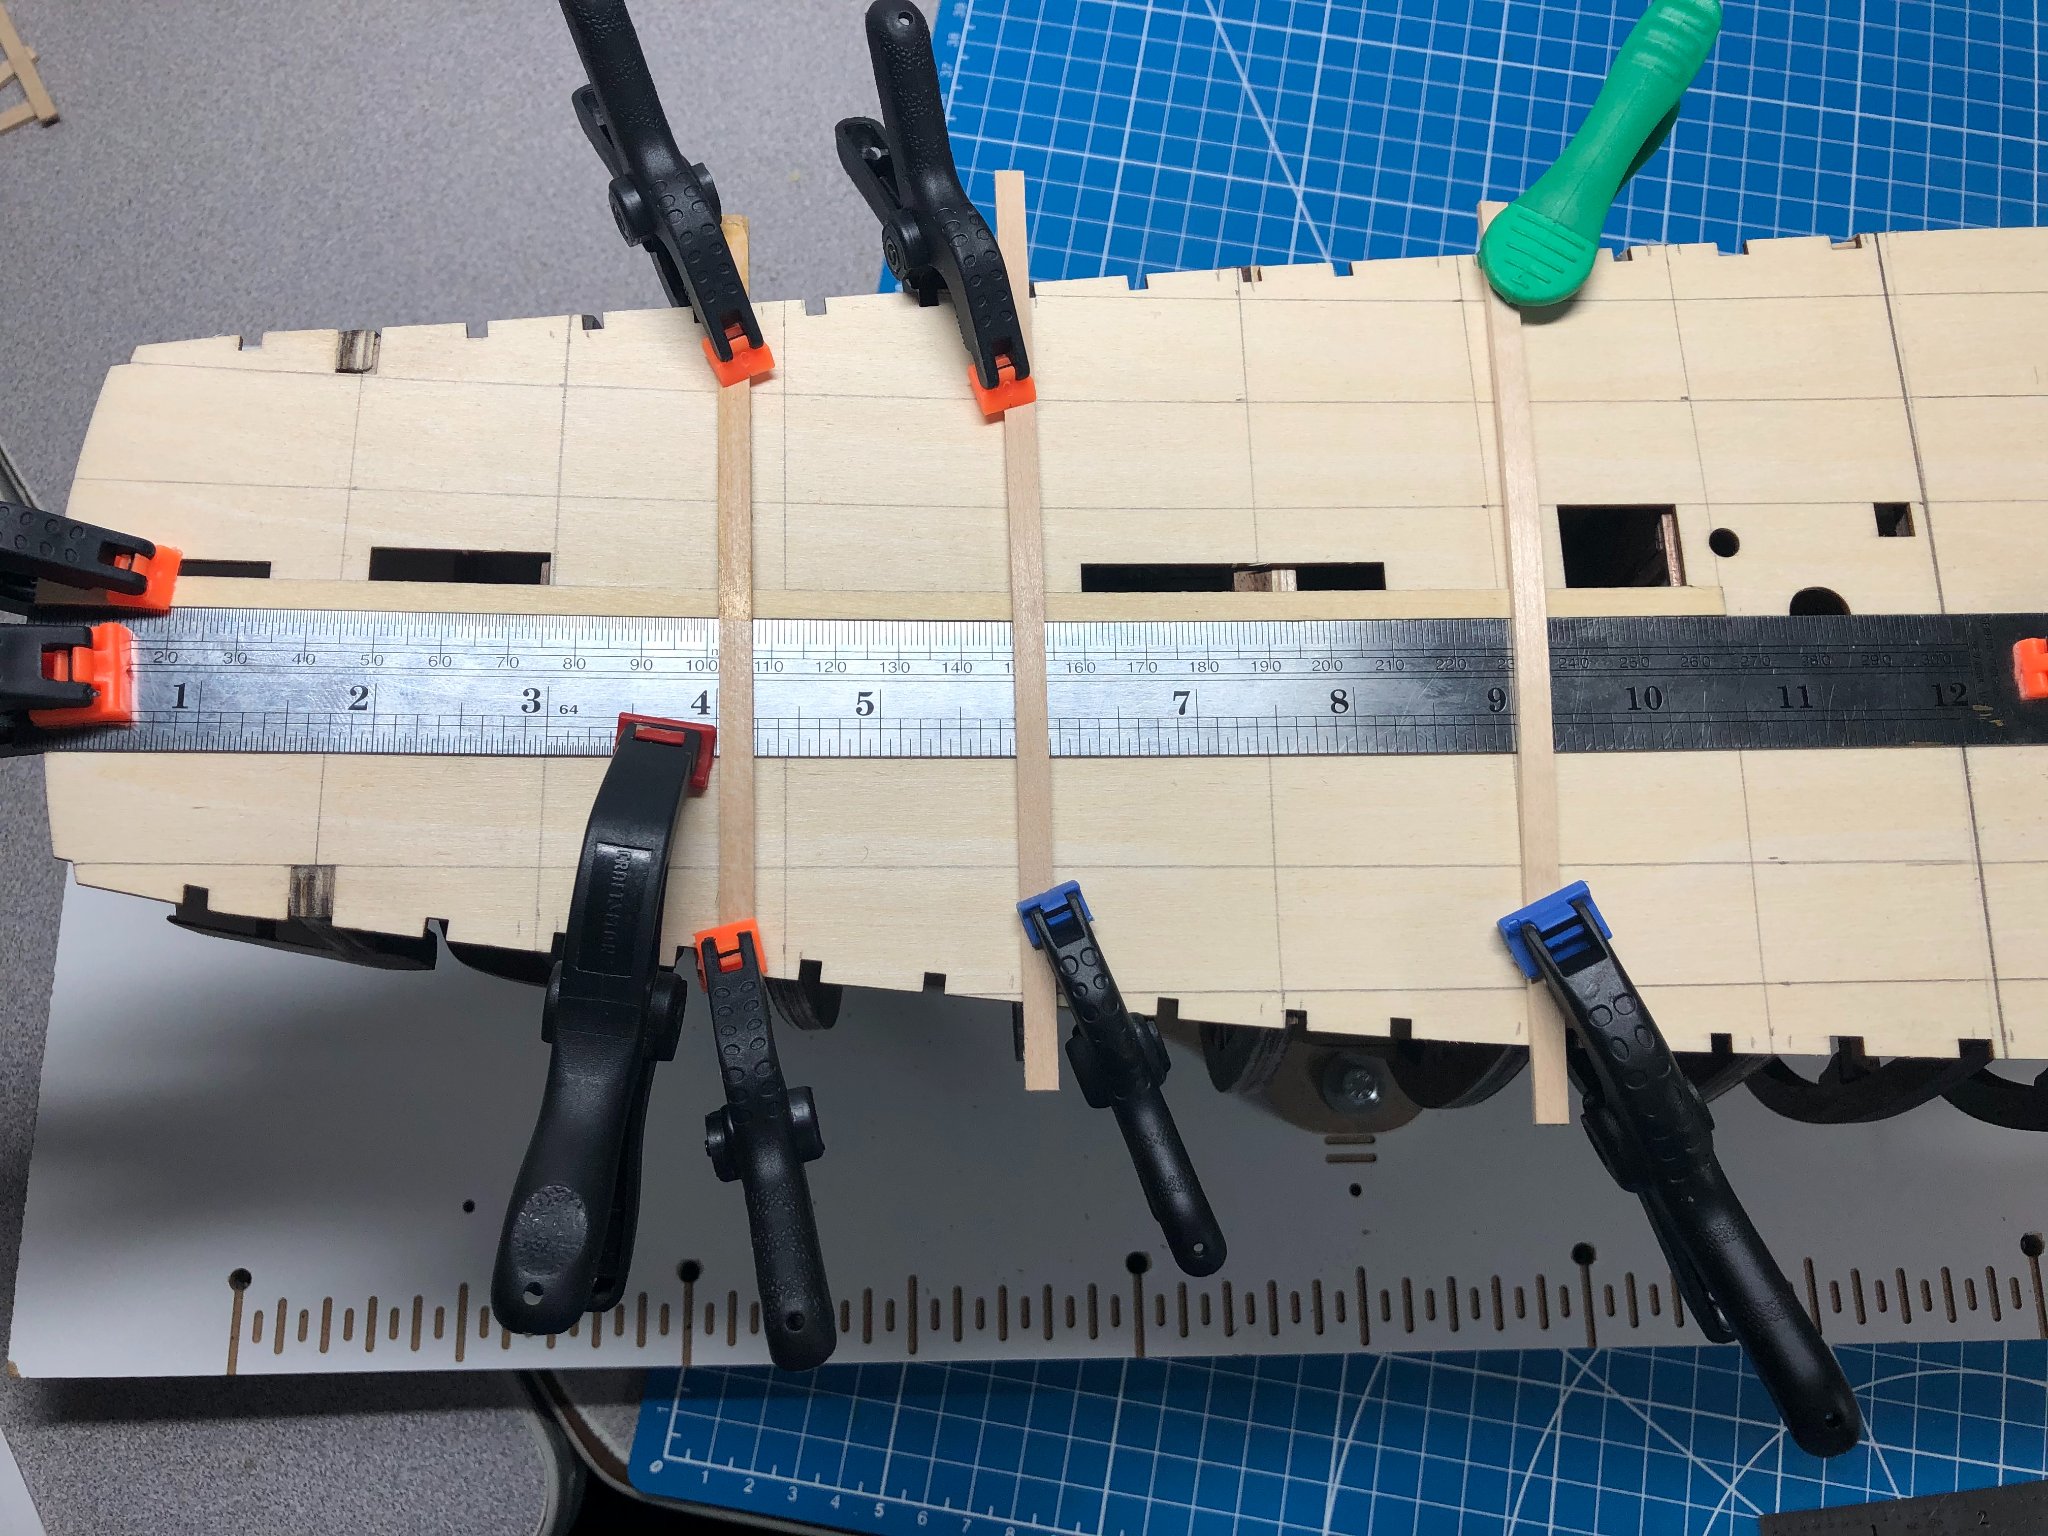
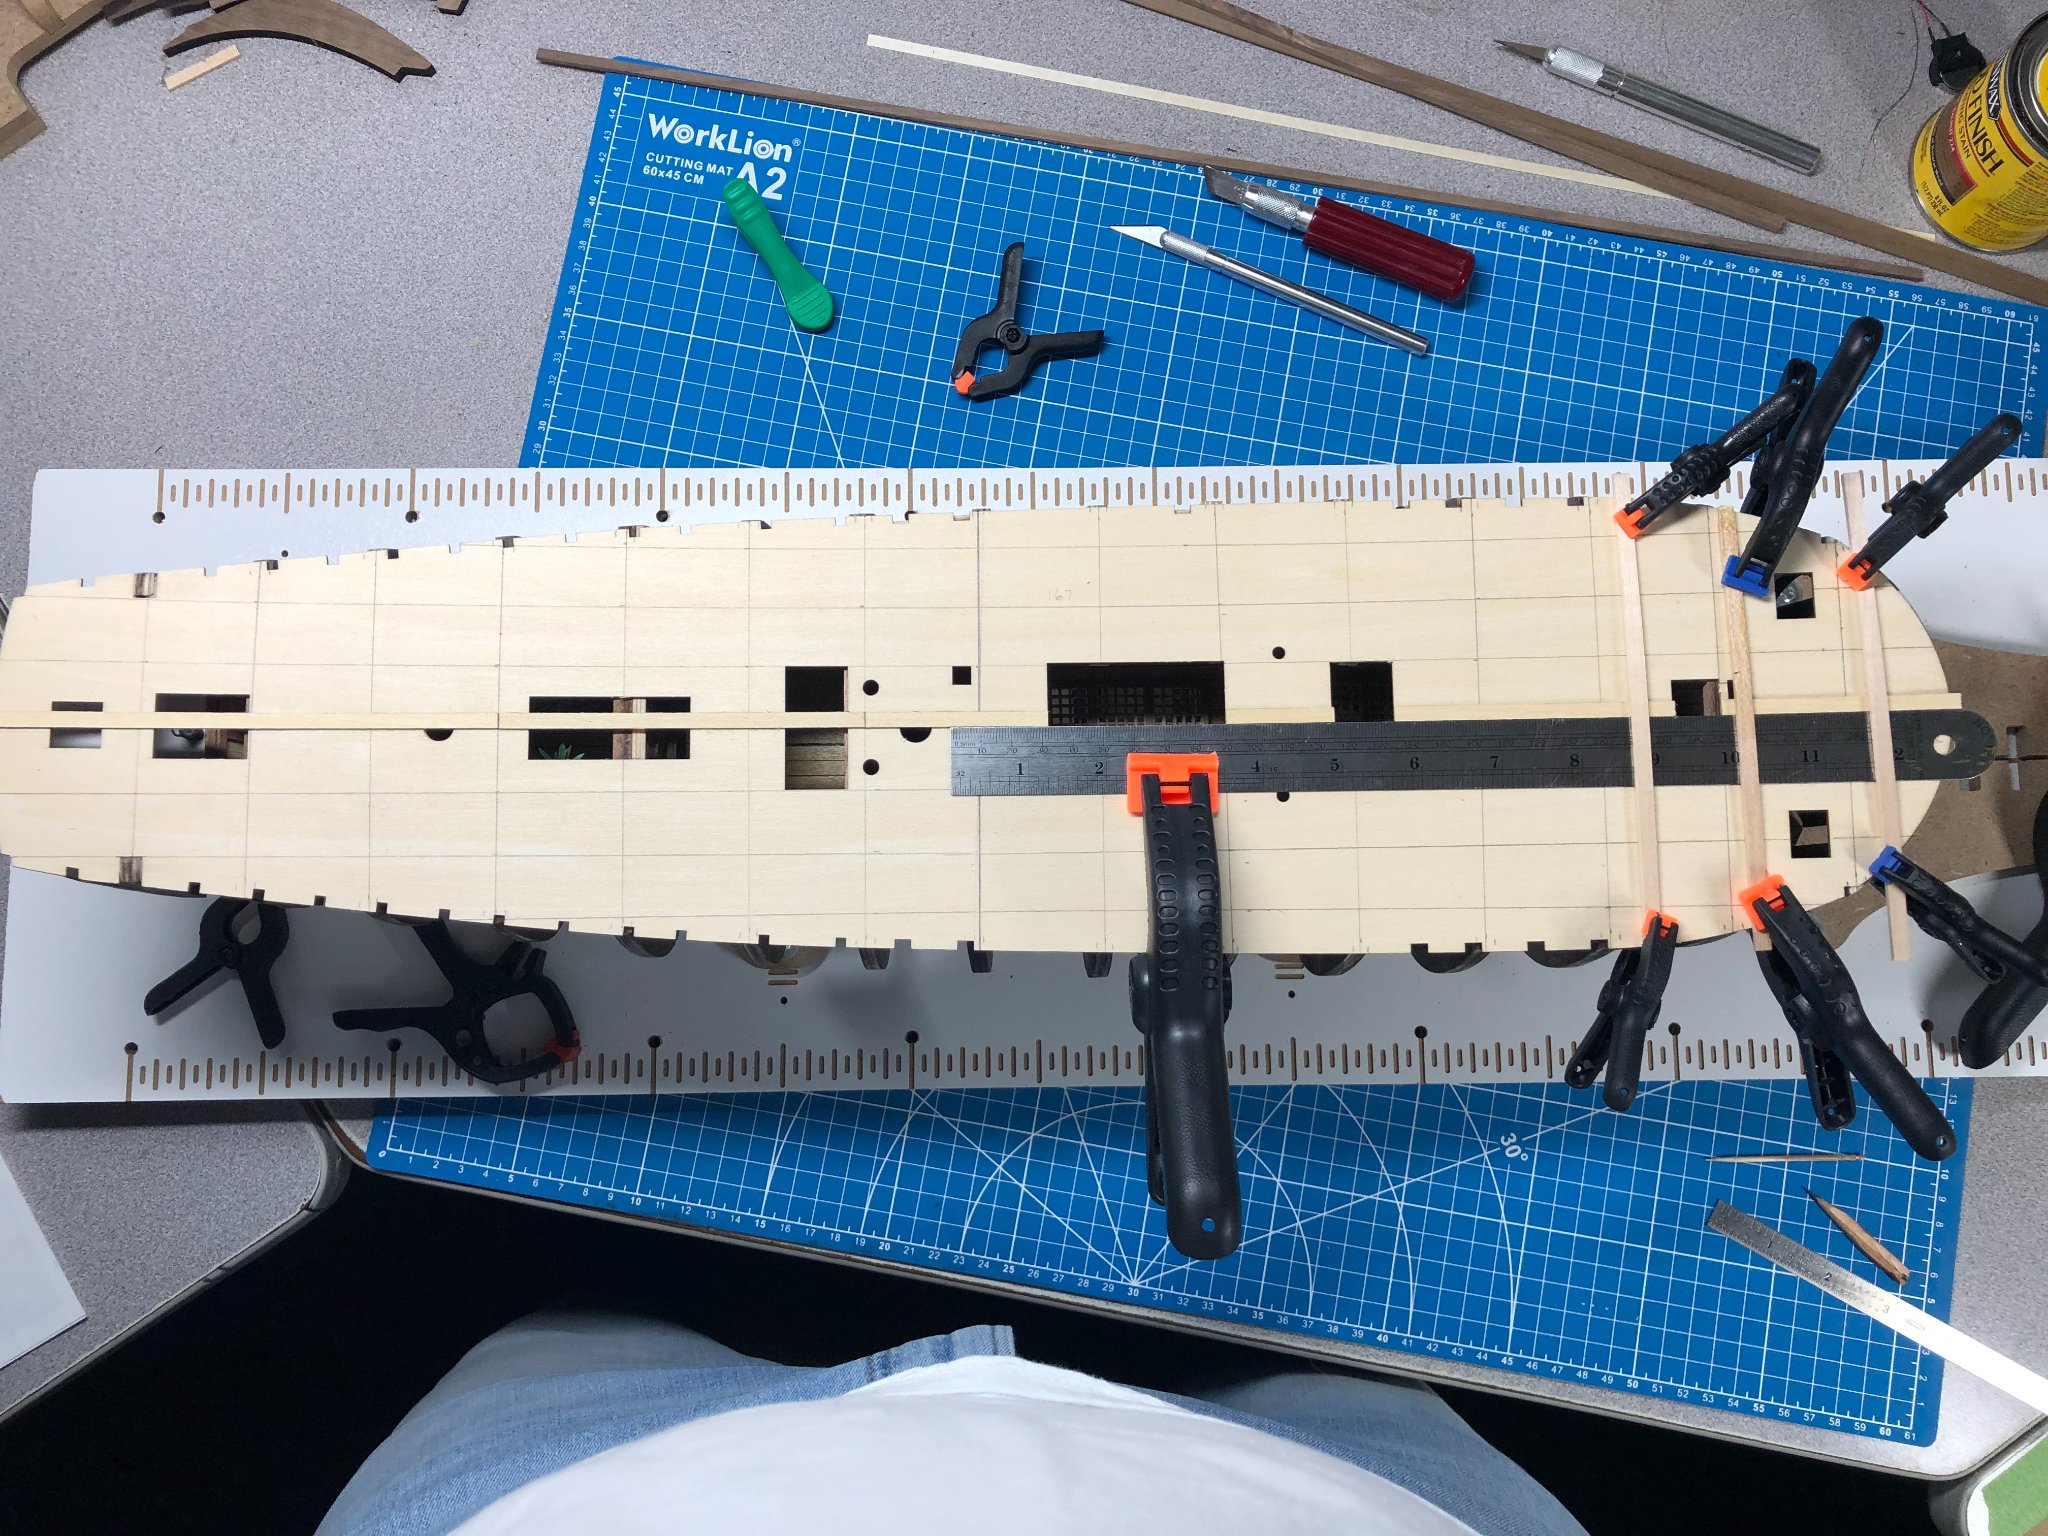
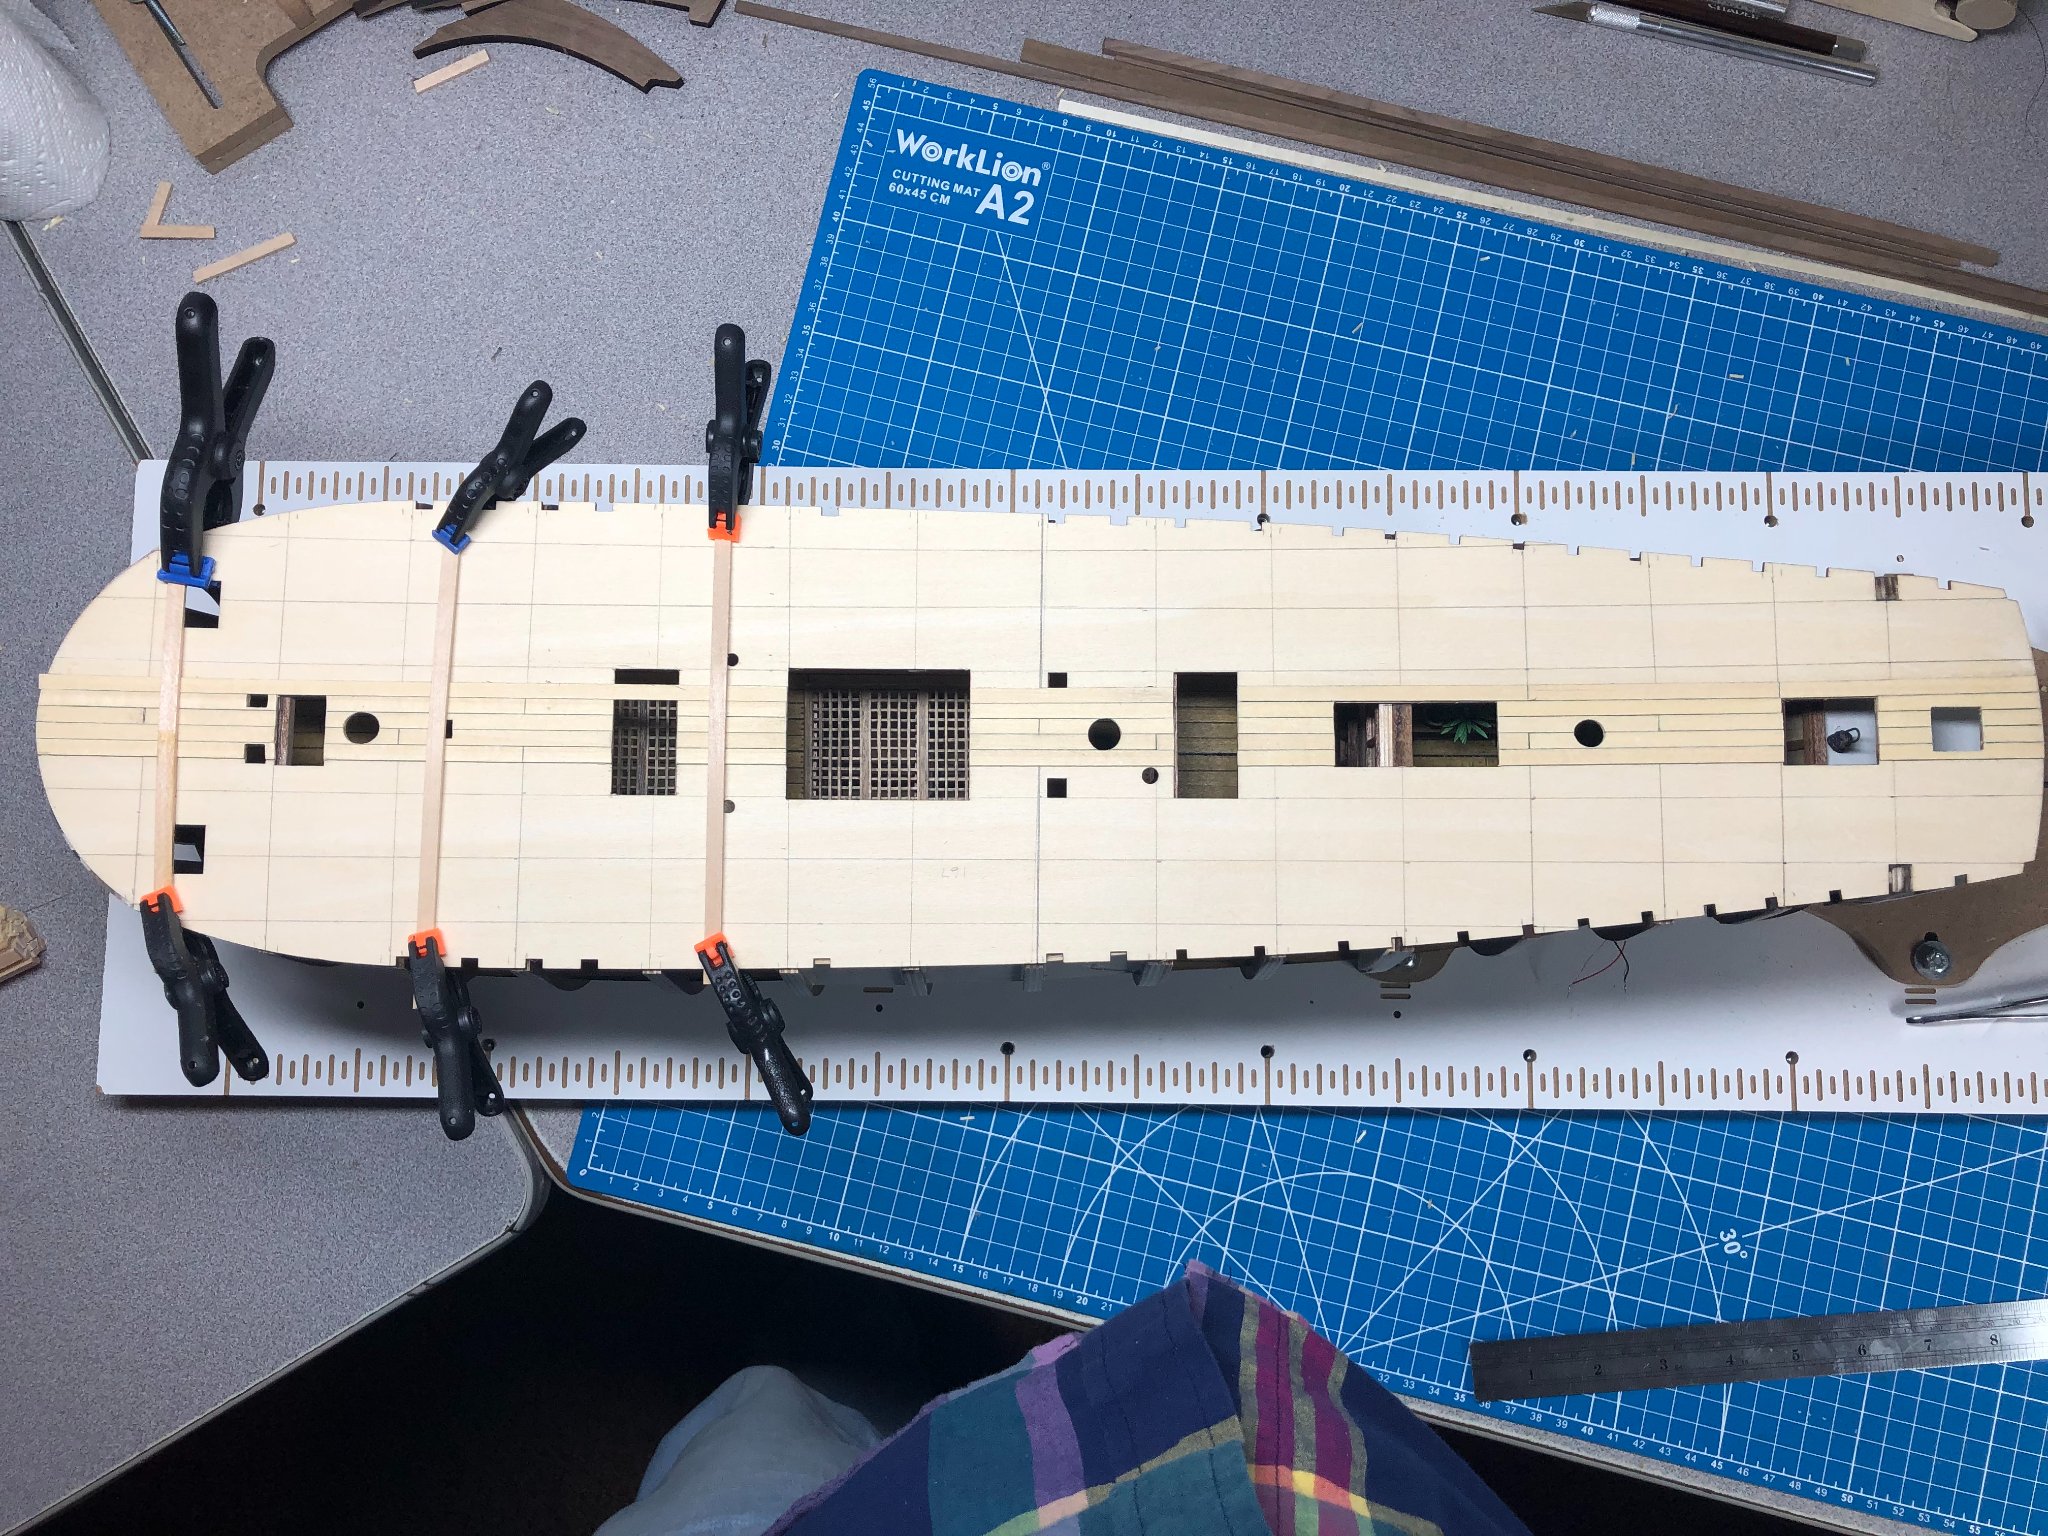
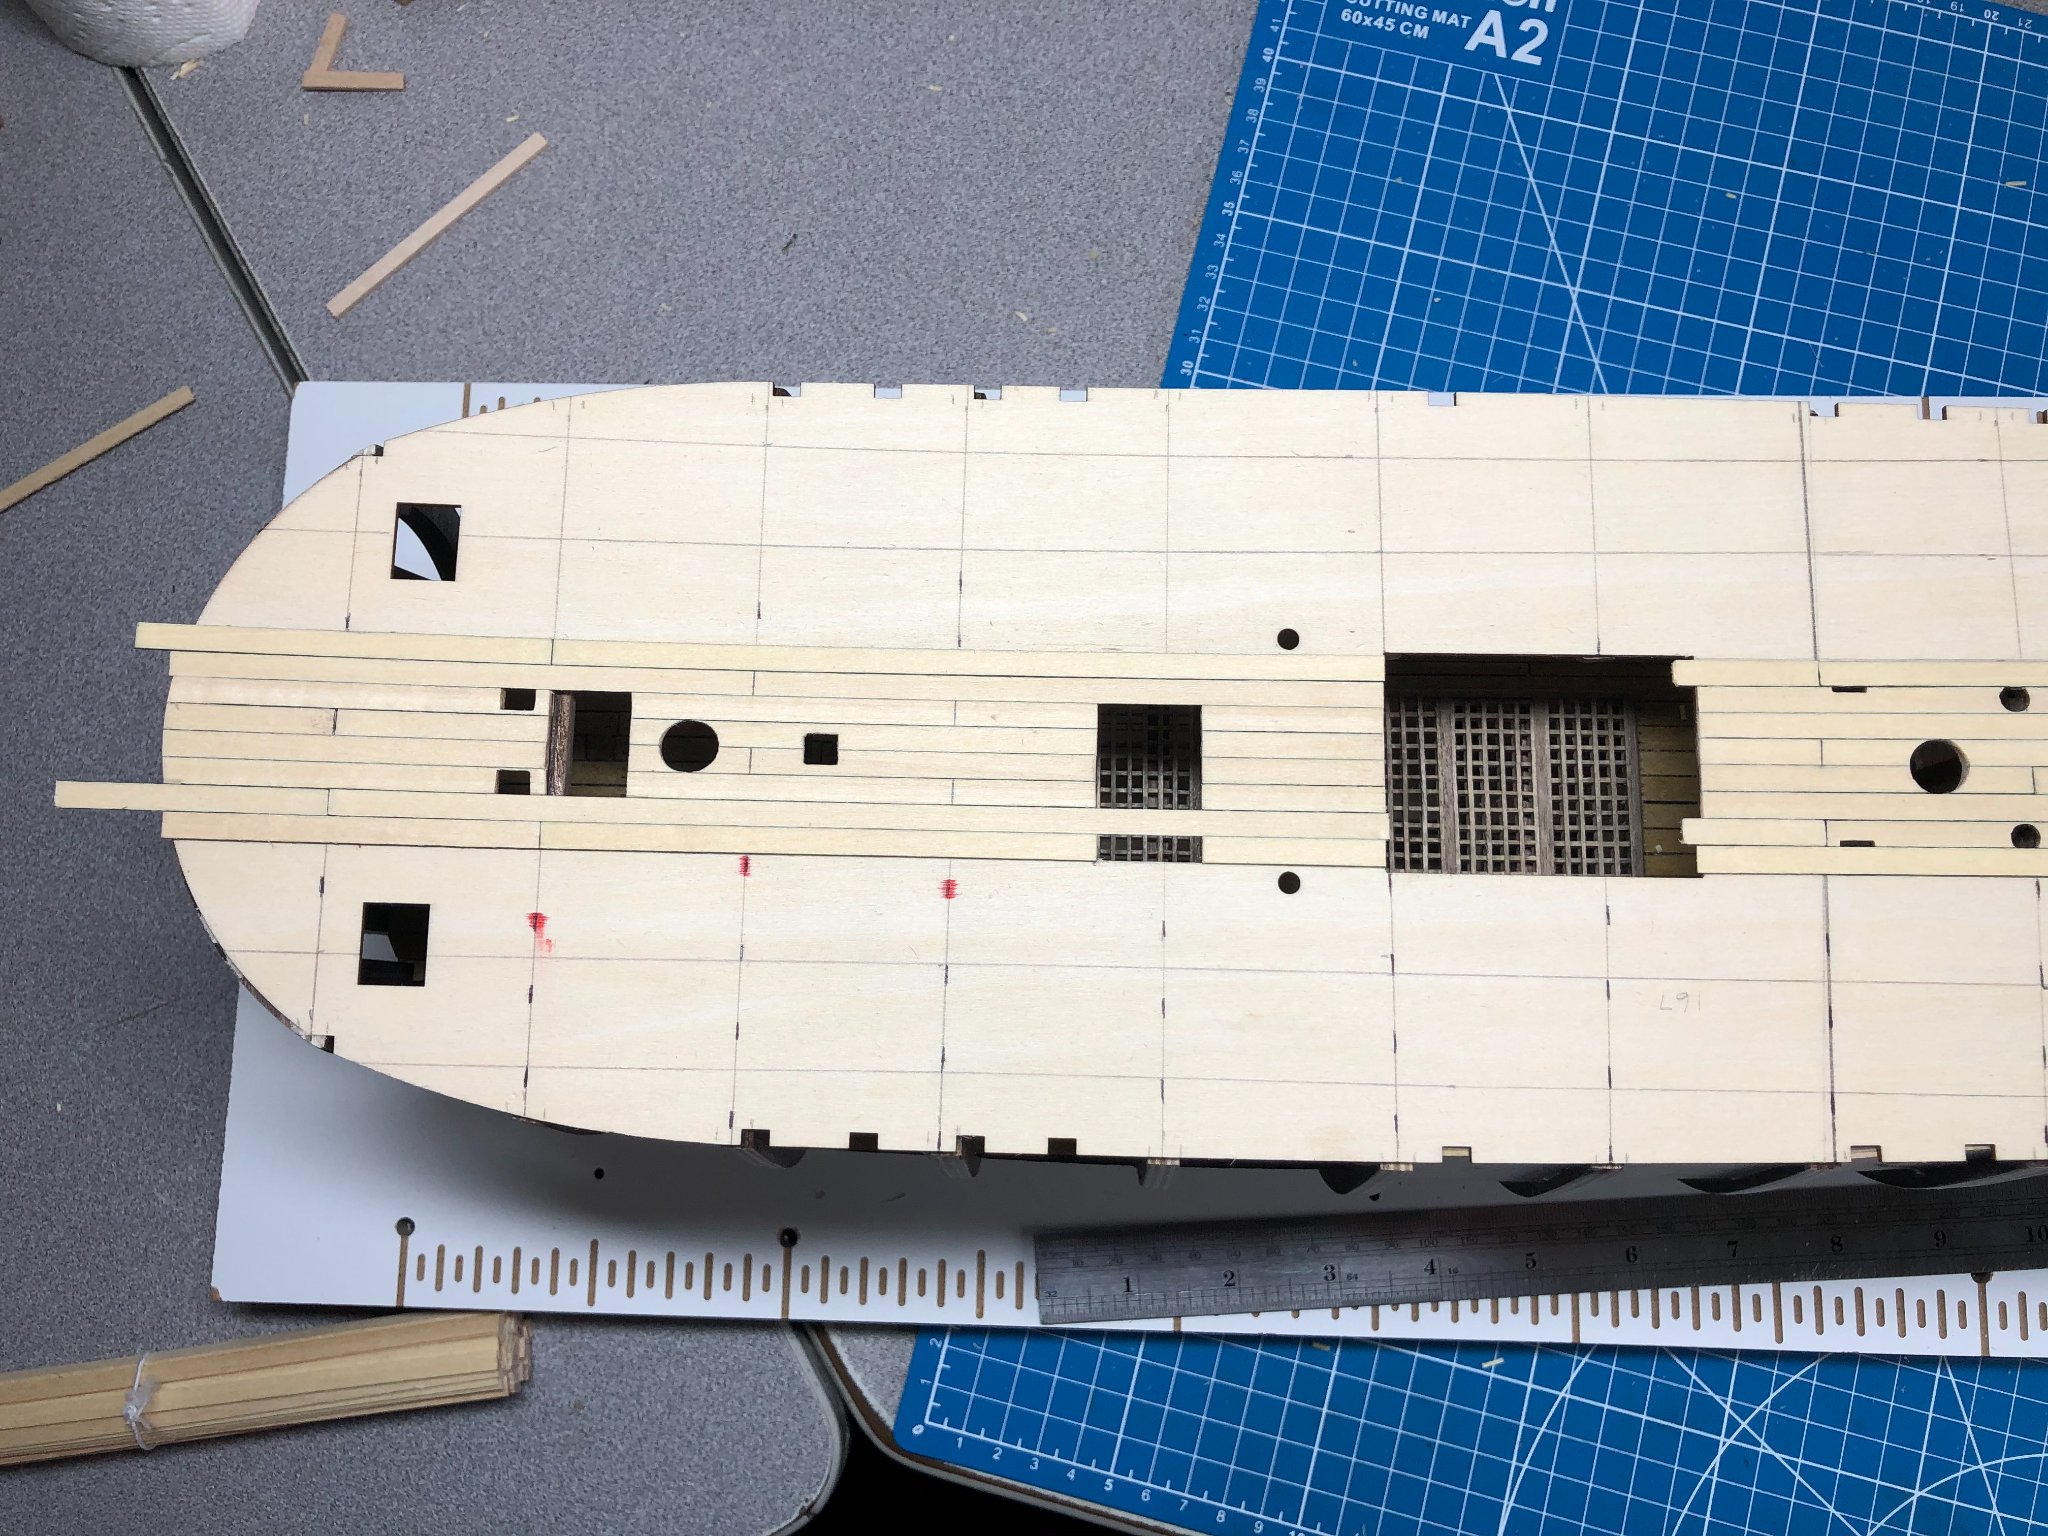
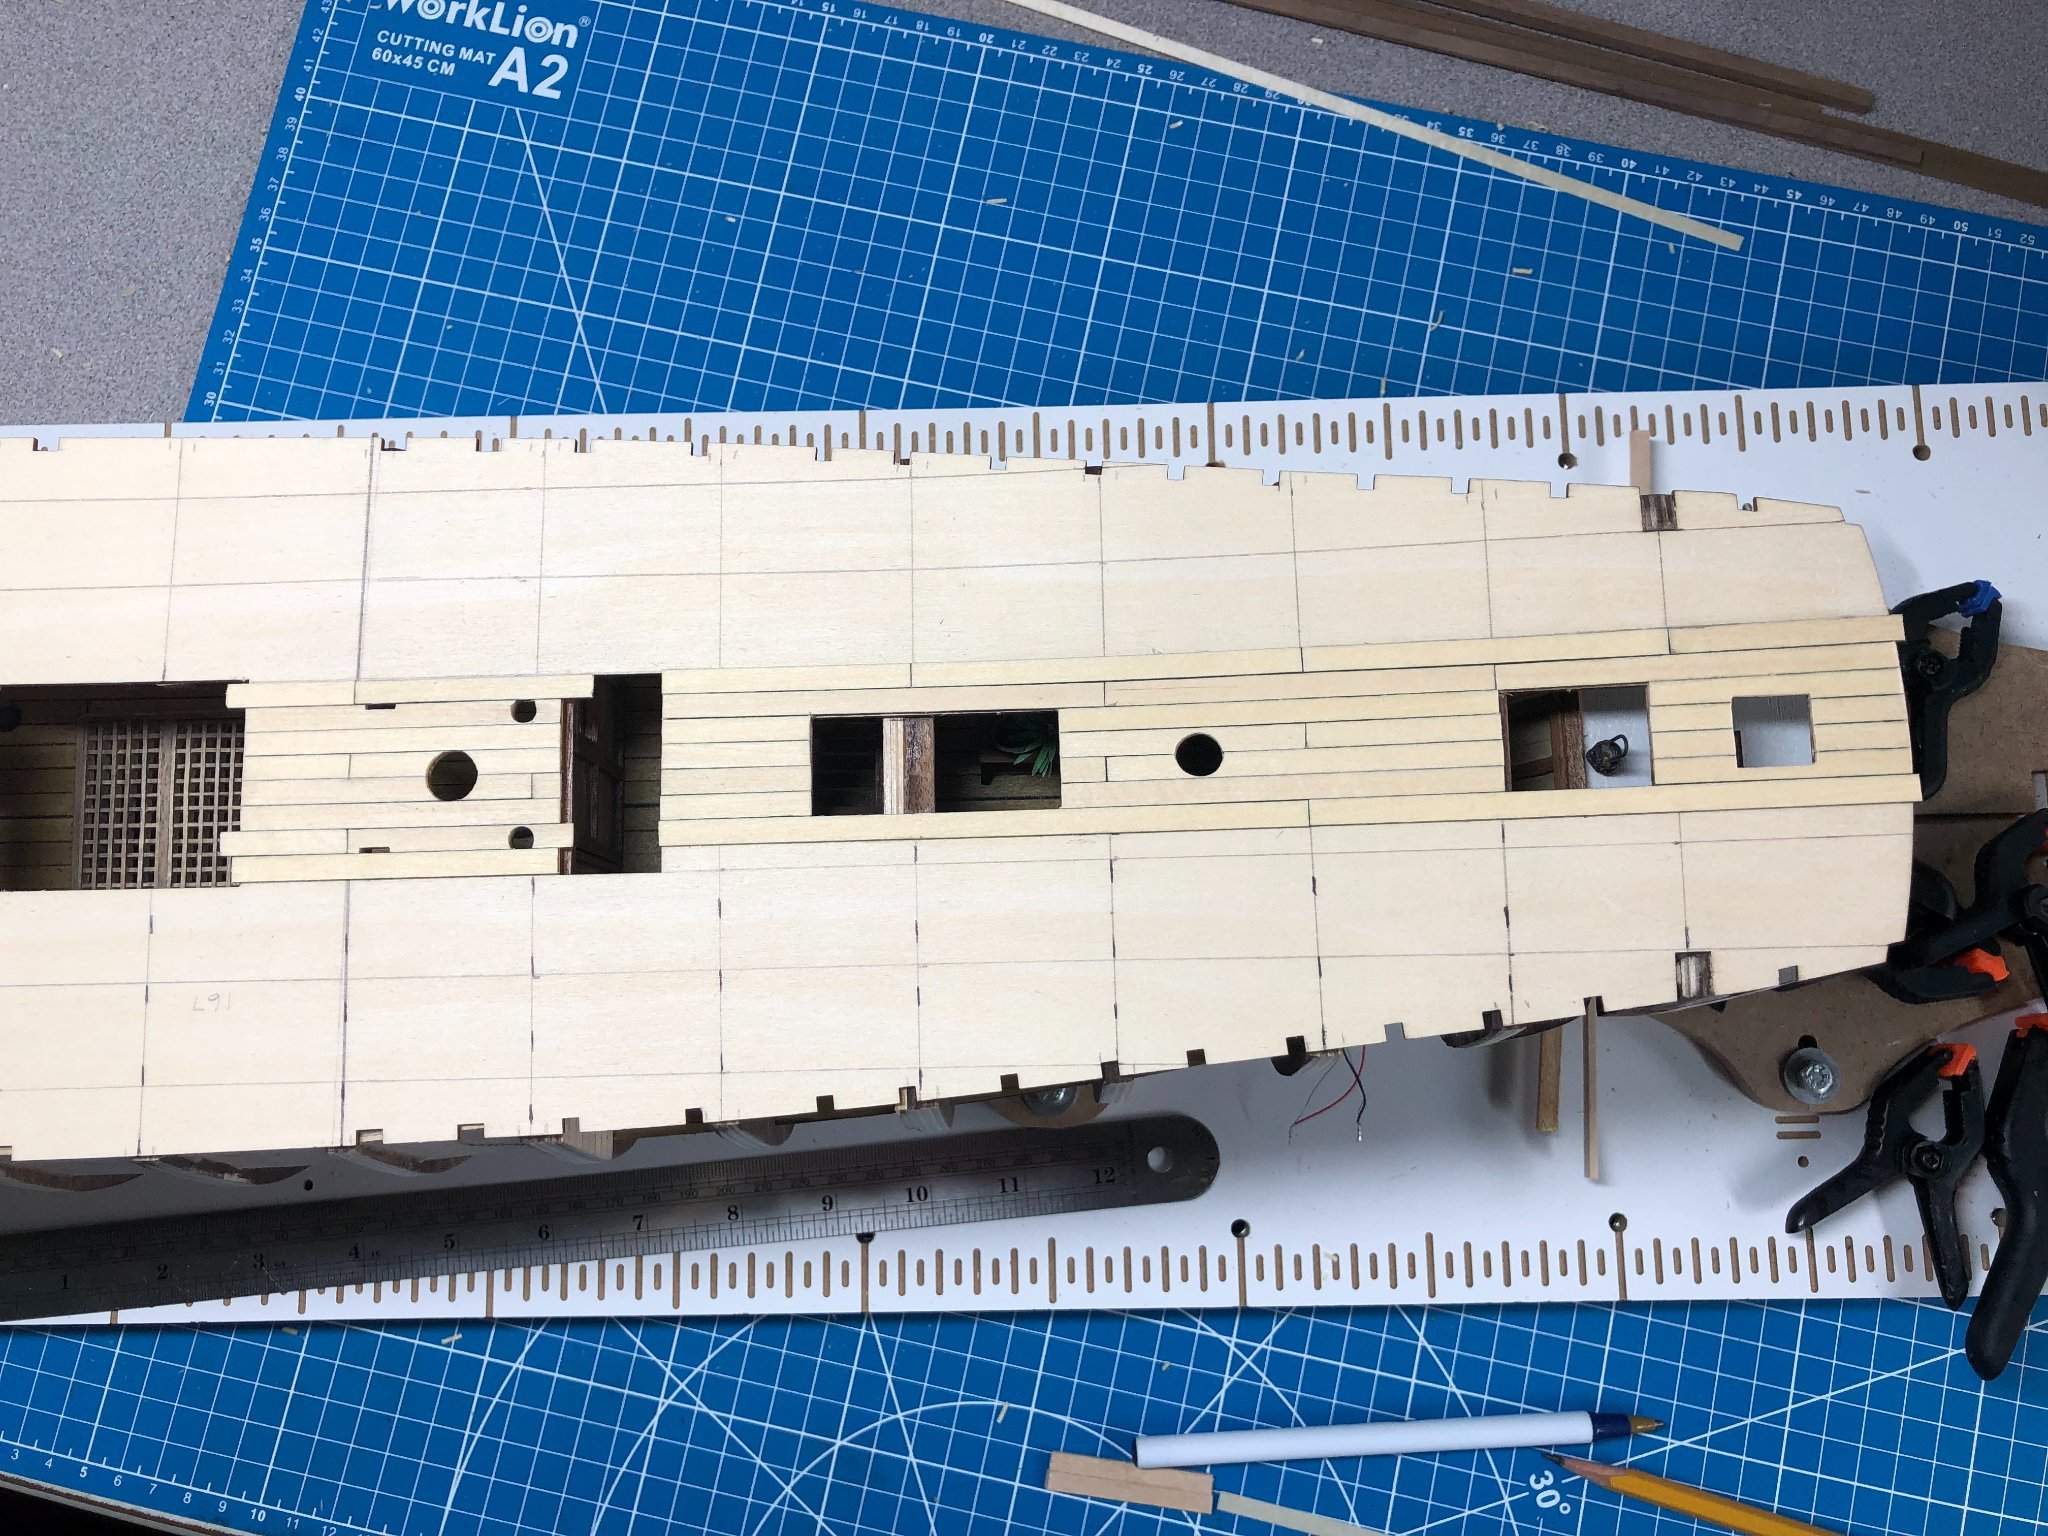
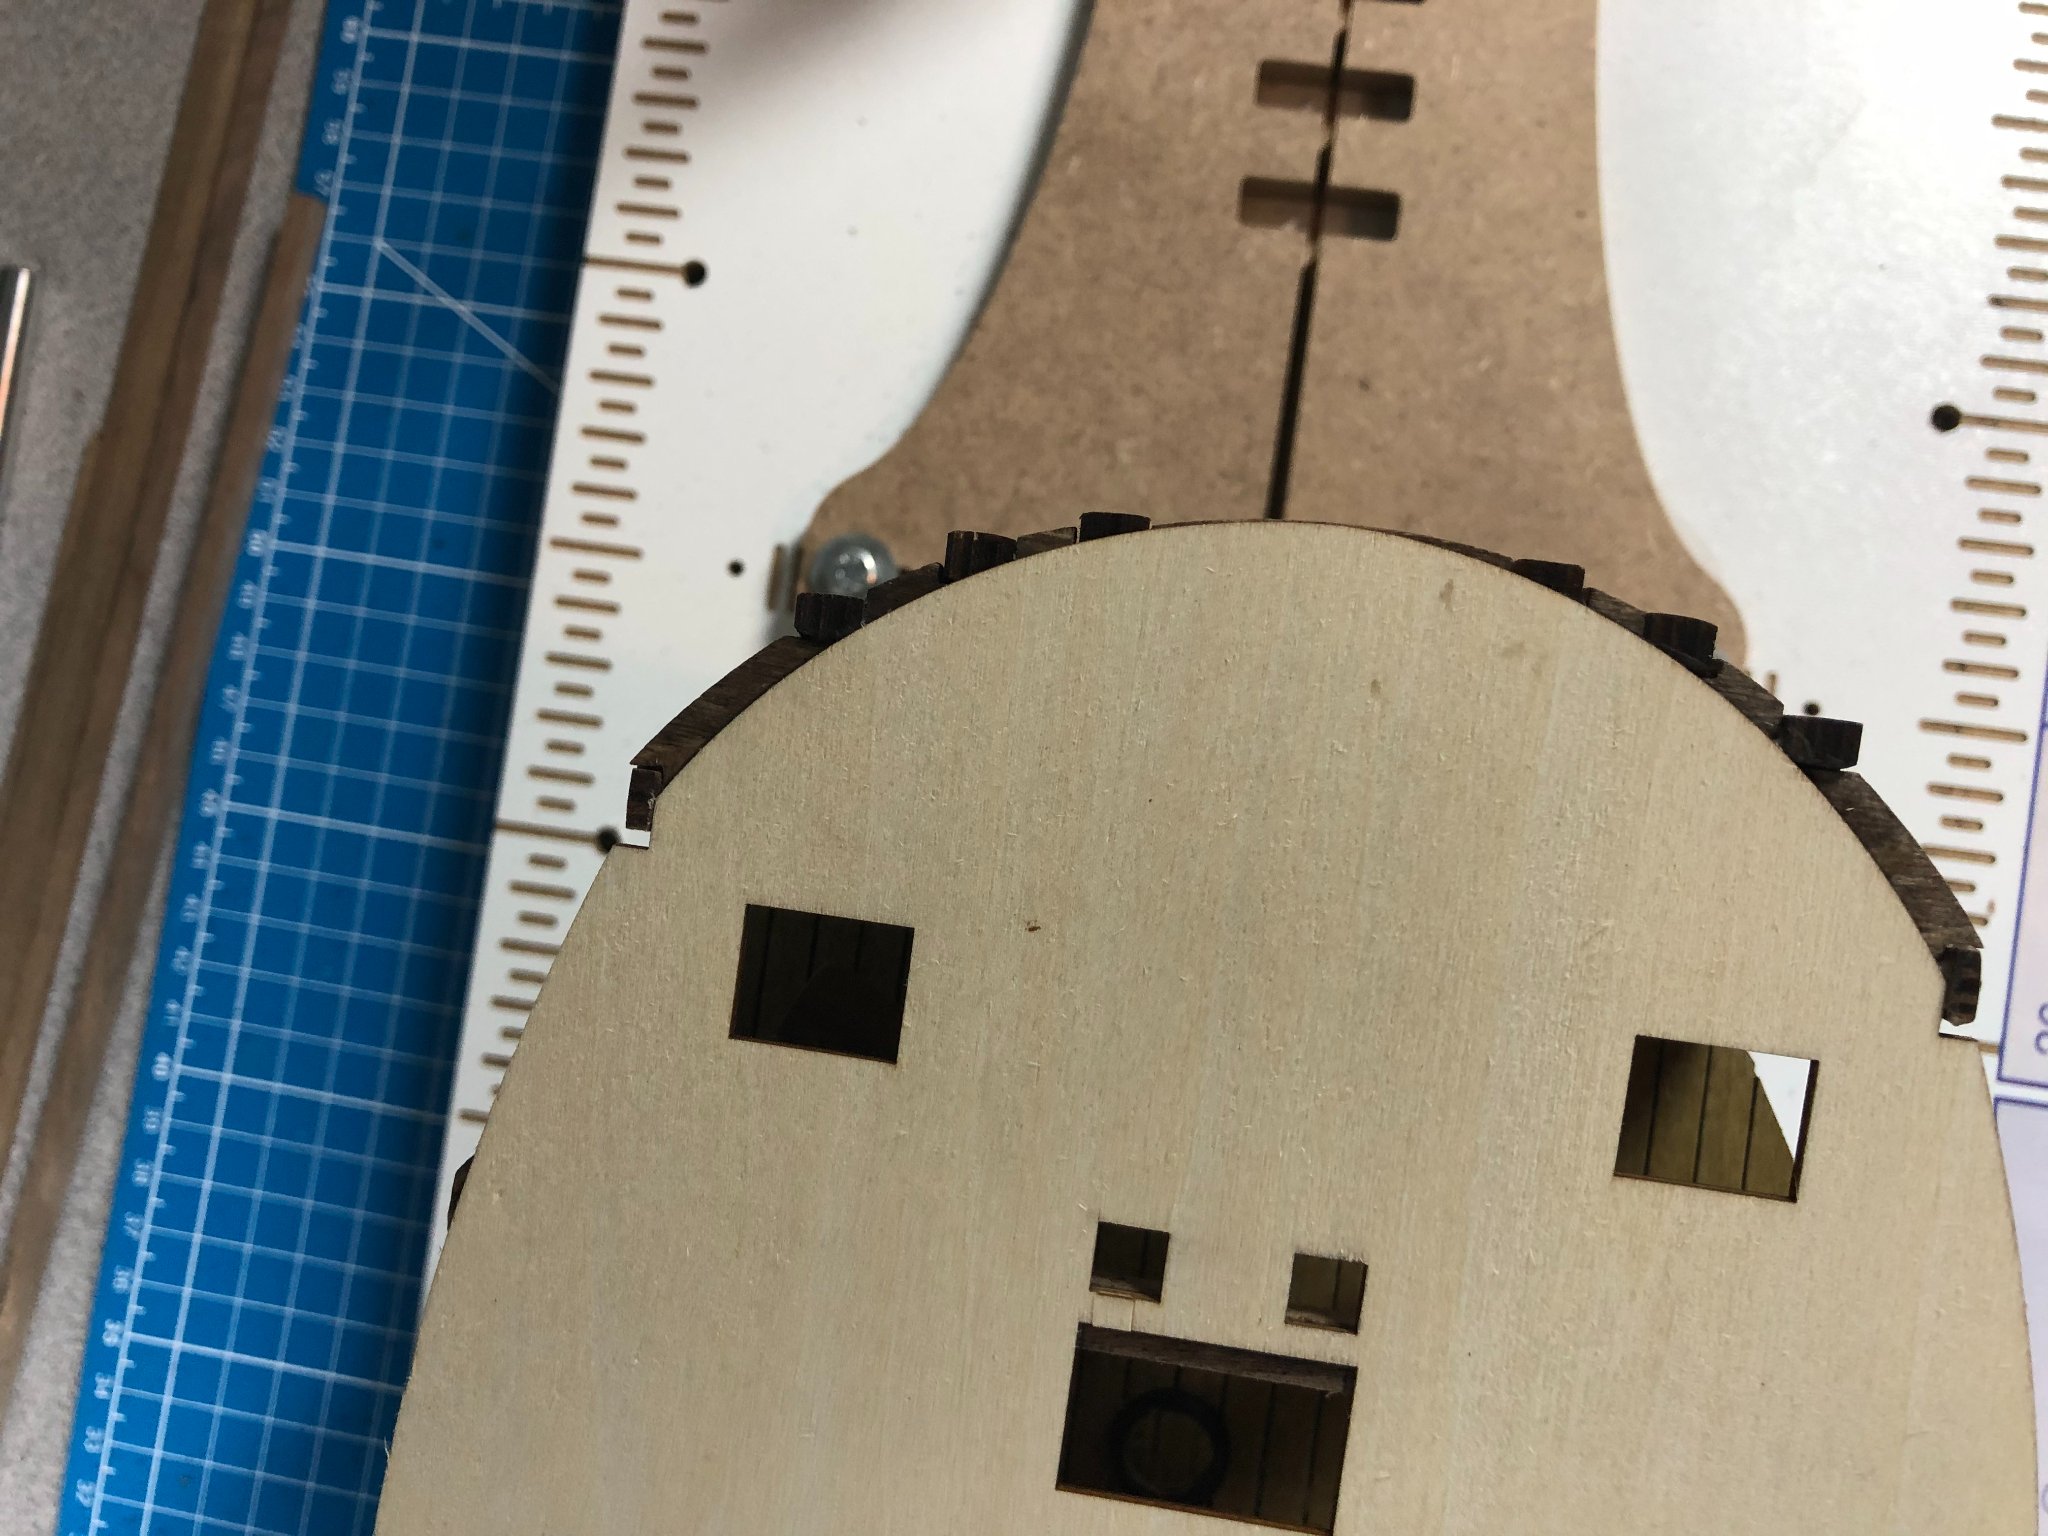
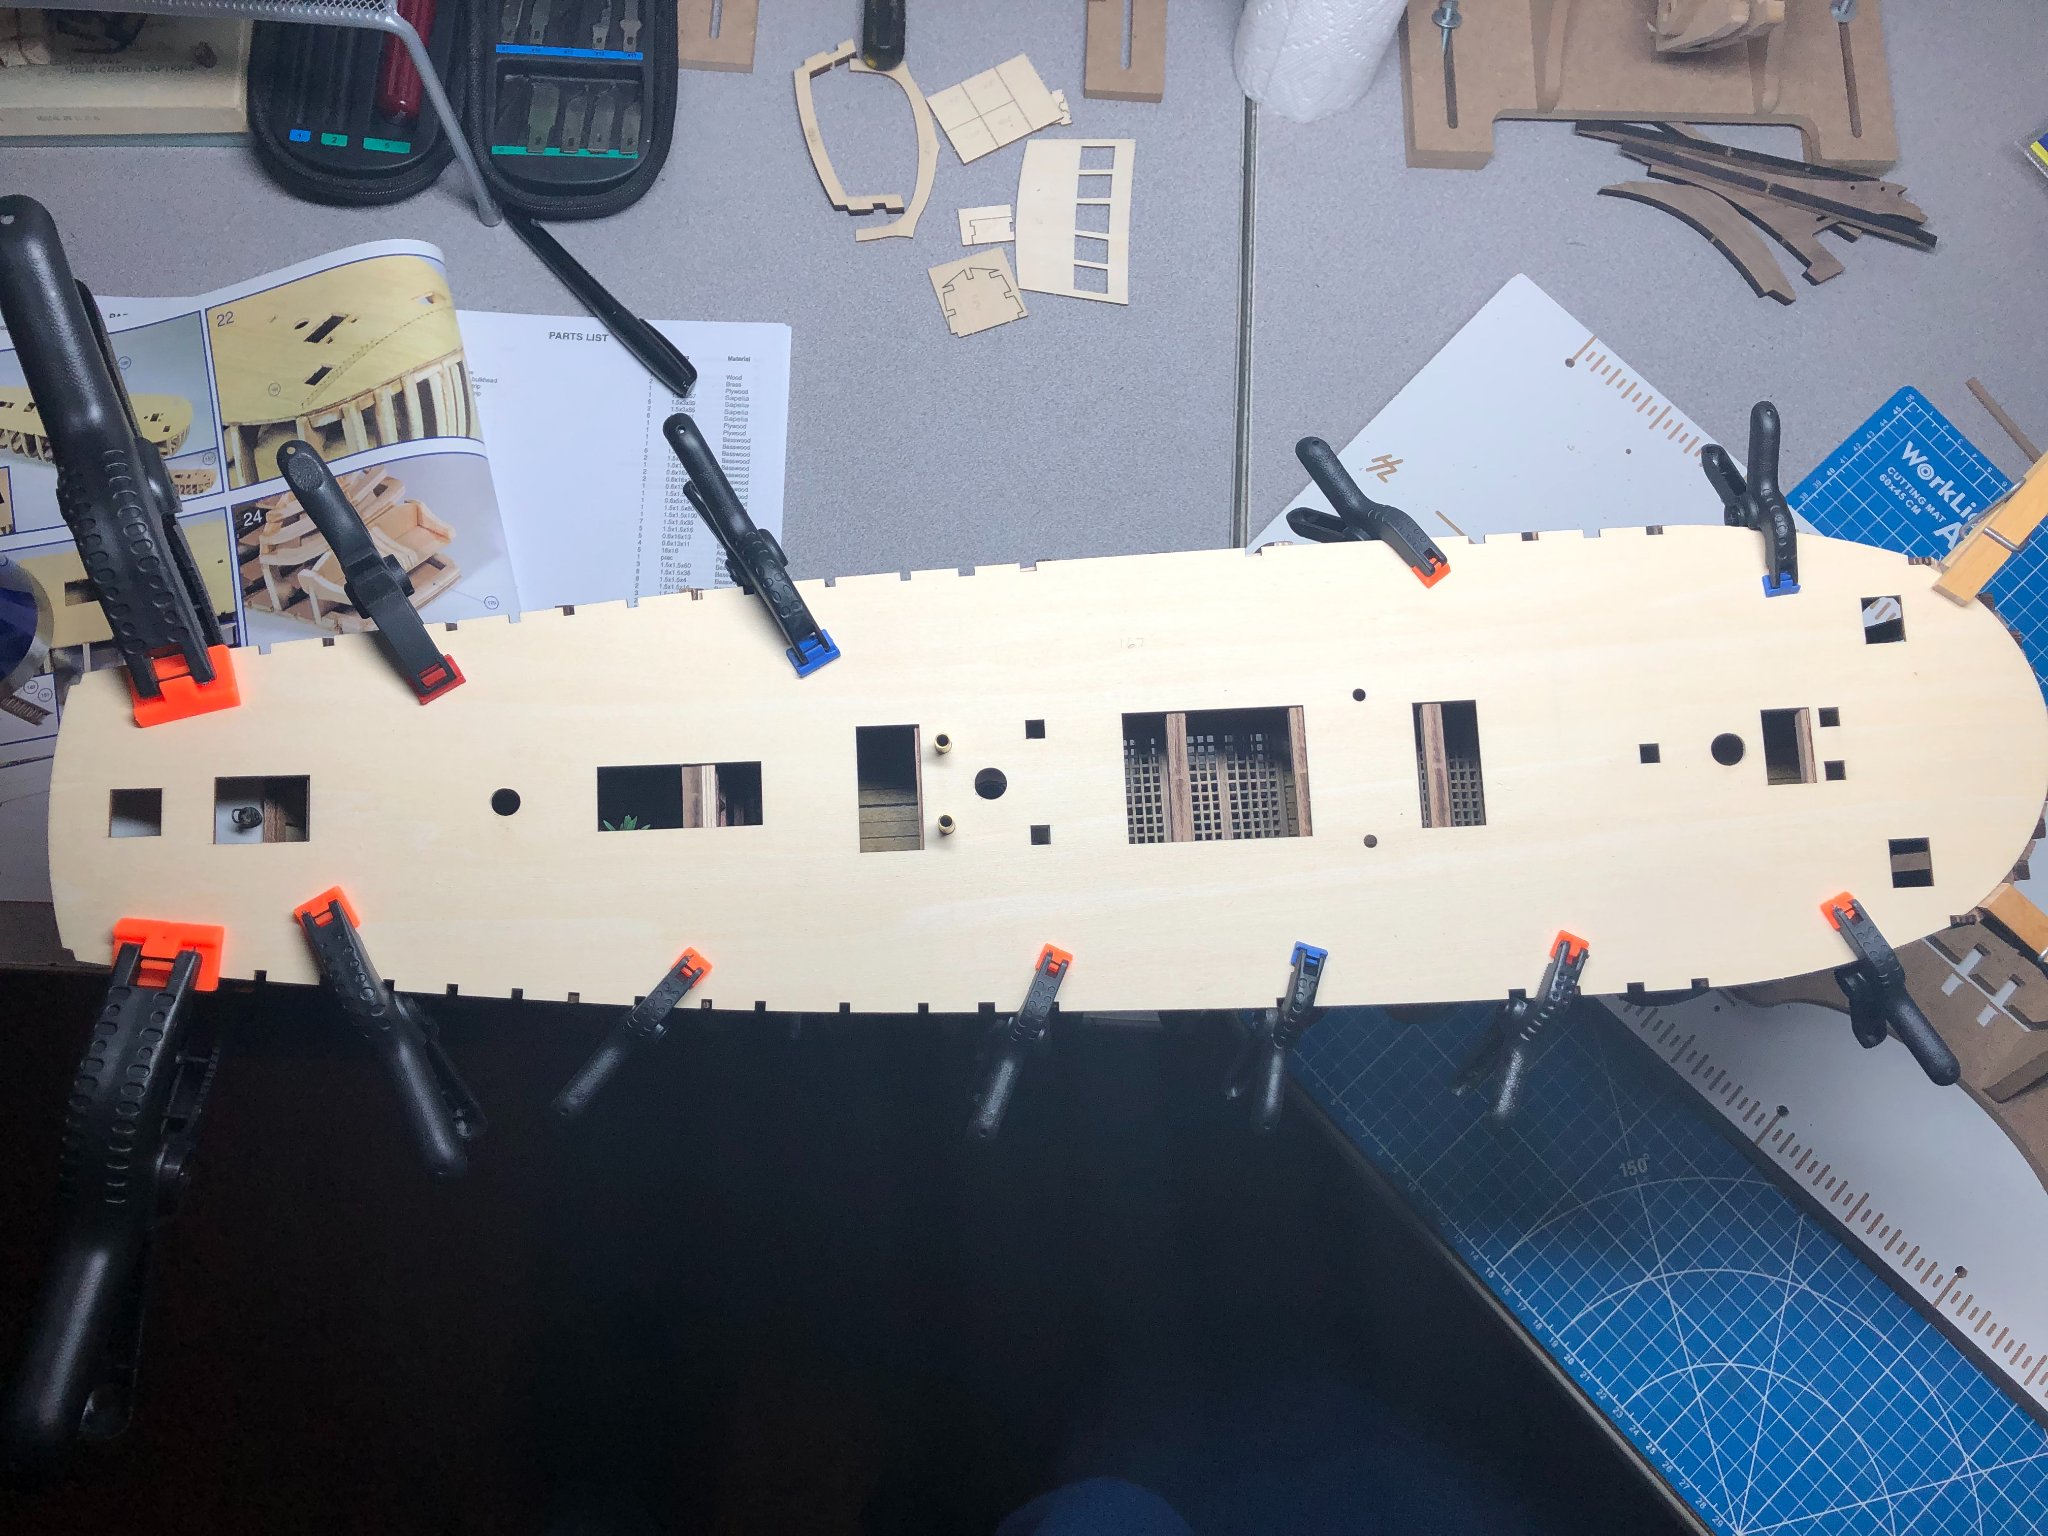
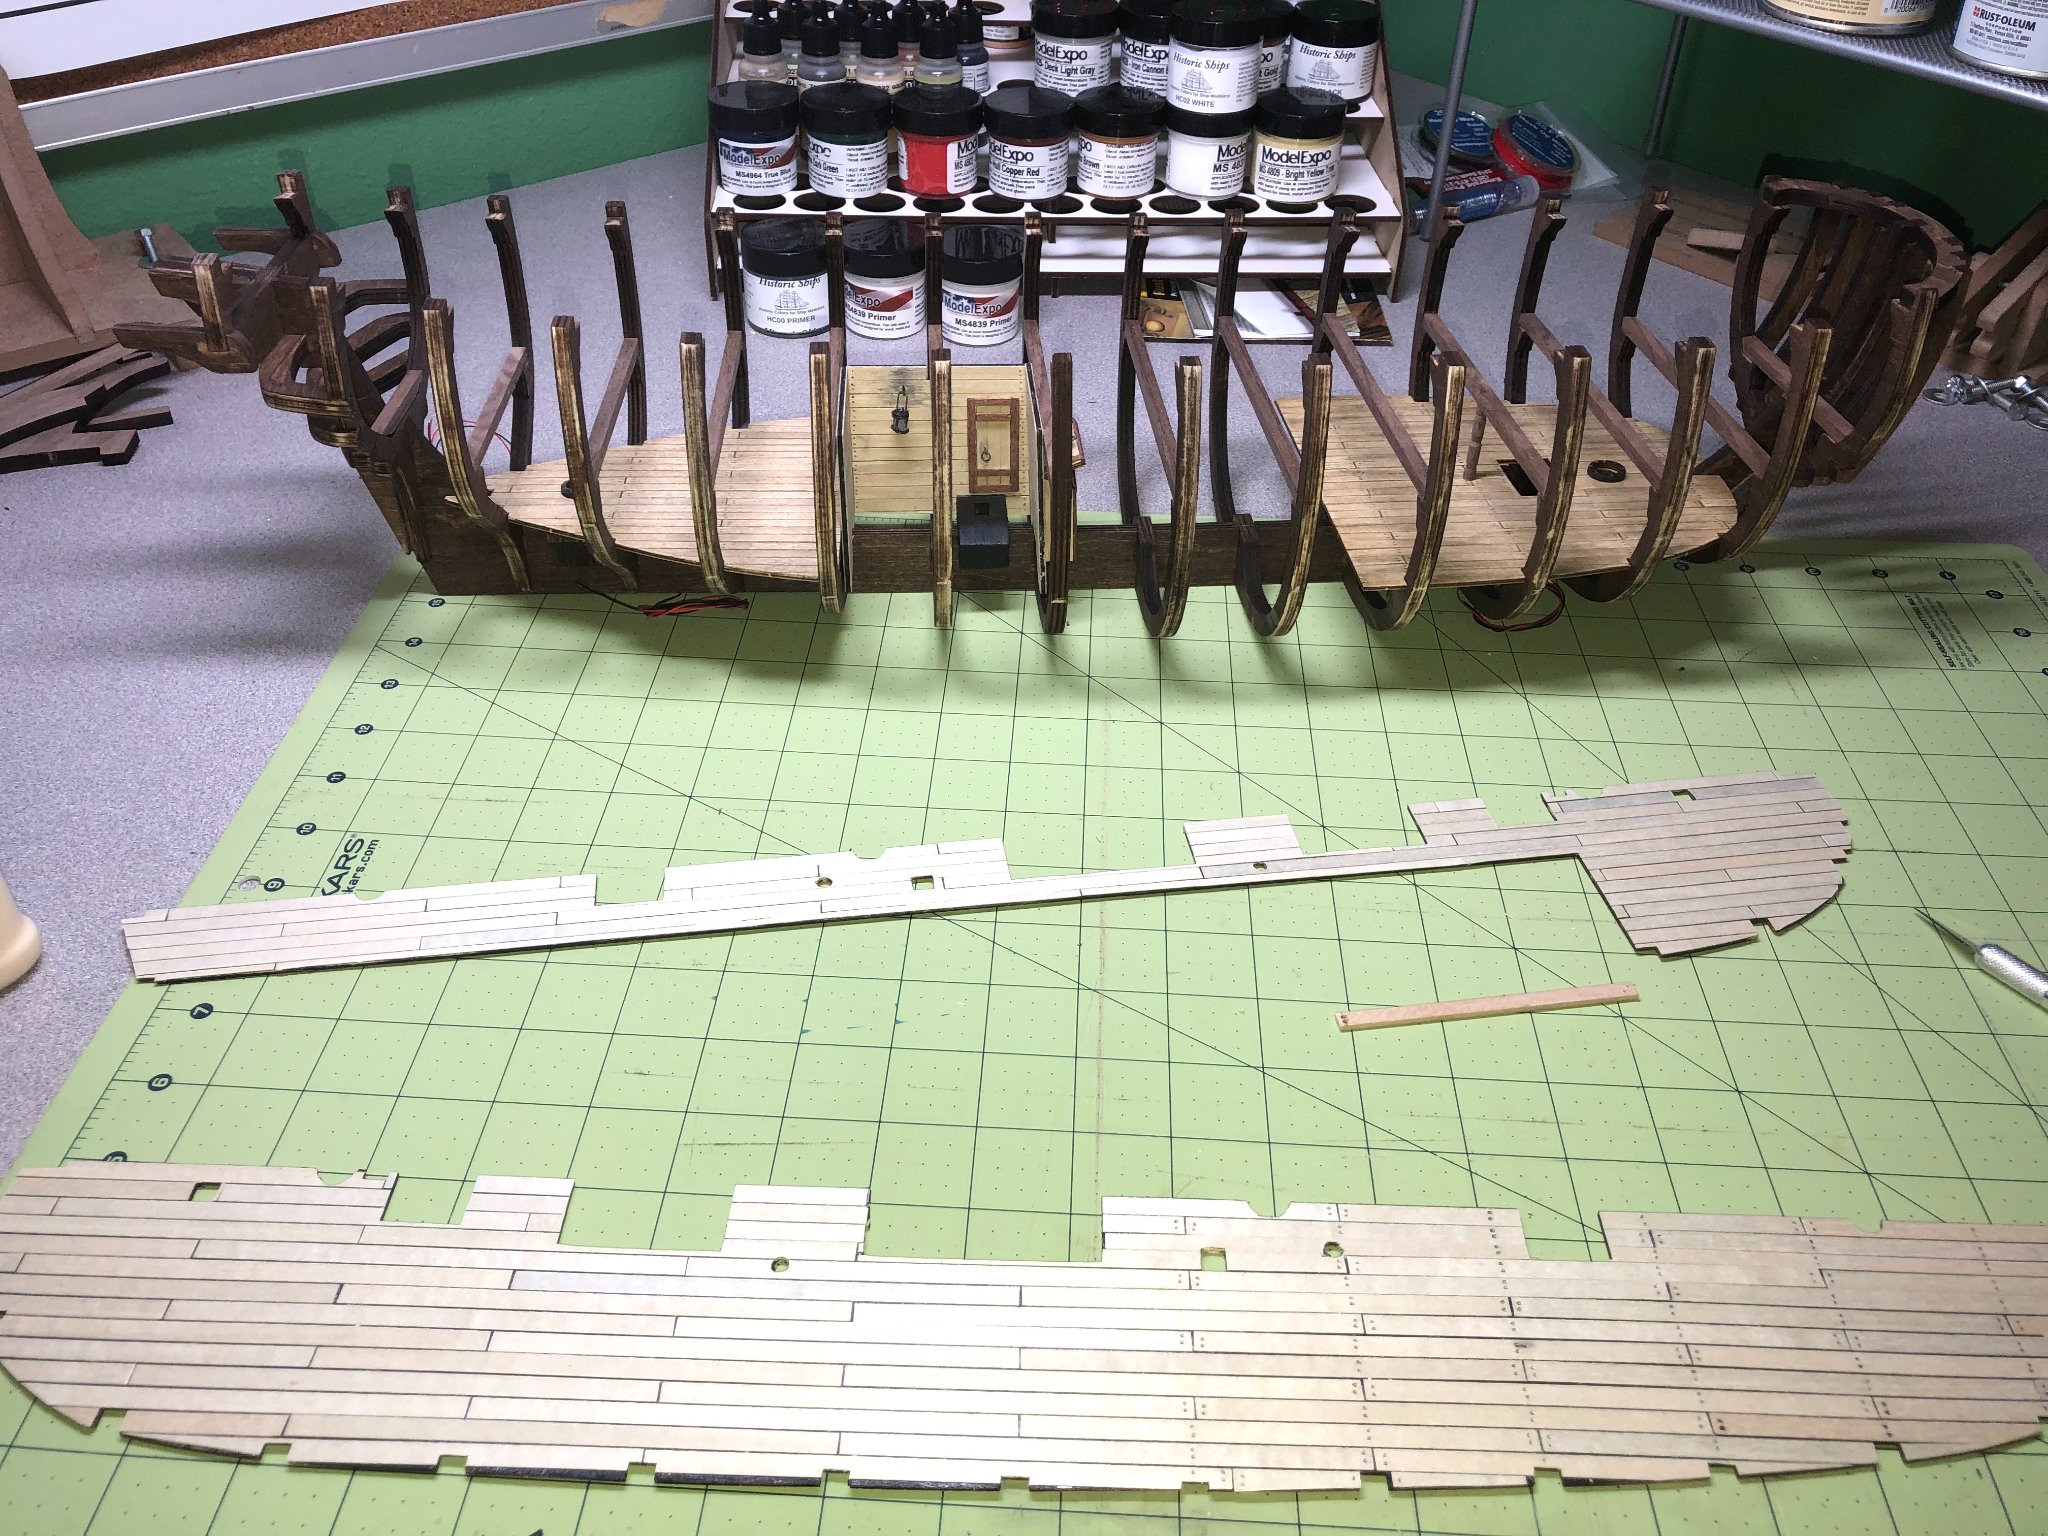
Another week has passed... rather an eventful one at my house. A bad windstorm knocked over a large section of fence in my yard and I spent part of the week working on a full size fence line! Oh well... I did some fairing of the bow and the frames between the bow and stern... mostly just some shaping. Much more to come. Also, sanded down the frames on the port side (still a little more to do) that were protruding out more than they should... upon closer inspection, I found one frame that got out of whack somehow... way too late to fix it now but unless you know where it is (like me!) it's not noticeable. The planking on the main deck is underway! Before starting to lay the planks, I removed the frames that obstructed the cut-outs in the false deck: I used several methods before going out purchasing an Exacto saw blade set... better but not ideal. I'm especially displeased with beams that appear to be hanging out there with no support. Not sure if I can do much about but will see if posts are appropriate for the build. I don't recall seeing any in the plans... Moving on for now... I started by laying out a grid to ensure that my planks ended over a beam and that I stayed straight: Each grid is the distance between beams by 20mm... each plank is 5mm, so 4 planks per grid. My mistake, which you'll see later, was not laying out the 3-butt pattern I intended to use. Next time I'll lay out the entire pattern... Next I clamped down a straight edge to ensure perfect alignment on the first plank from bow to stern: And laid the first planks: The first plank... after cleaning up the false deck cut-outs: Continuing on: Now, you may have notice that there are a few plank butts but because of the multiple cut-out for everything from masts to company ways, there is no pattern... BECAUSE I DIDN'T DO ONE!! I really don't know where my head was but its a minor error and one that makes the model look more realistic than museum made... at least that's what I'm telling myself!! Better late than never: Sometimes, get a little ahead of myself or forget to take that extra step! For the common observer, it would not be noticed... 12 hours into planking the main deck: I expect the outboard planks will take less time, no cut-outs to deal with until I reach the edges. I'll forage onward! Next update soon.


-
Just a quick update... The Main deck glued down fine. I'm a little unhappy with the alignment of some of the frames. I was extremely meticulous when installing them on the false keel, yet: The starboard side is easy cause I planned to veneer the frames at some point to hide the "plywood" look. I think that will work even with some minimal fairing on this side. The port side will require quite a bit of sanding... disappointing but a fact of life! The bow will also need a lot of fairing work but was expected since everything is squared off: ...and a minor problem at the stern. An easy fix: Picture is flipped and I can't get it to rotate 180 degrees! Sorry! I'm sure you can see the issue in the raise deck at the frame. Might be able to press it down with a clamp... maybe a little persuasion from Exacto! Sanding is on the docket and then the planking of the deck. Lots to think about over the next few days!


-
Thanks for the kind words, Tim. Your build log has been an inspiration and a big help at times. You work is beautiful. Thanks for dropping in!
-
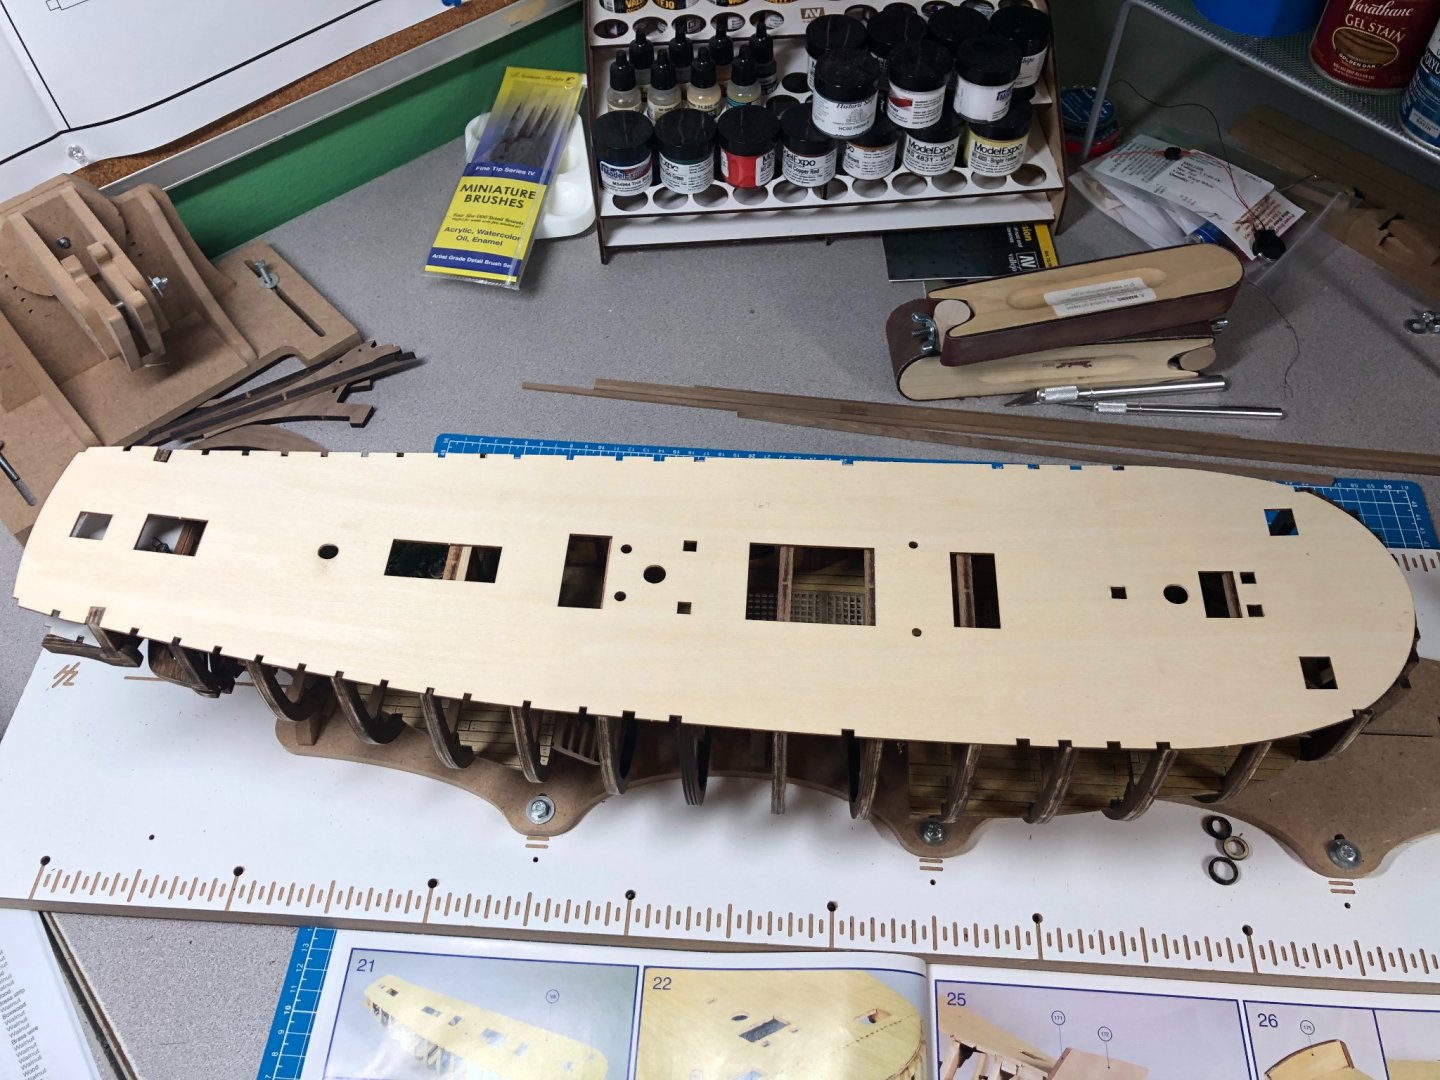
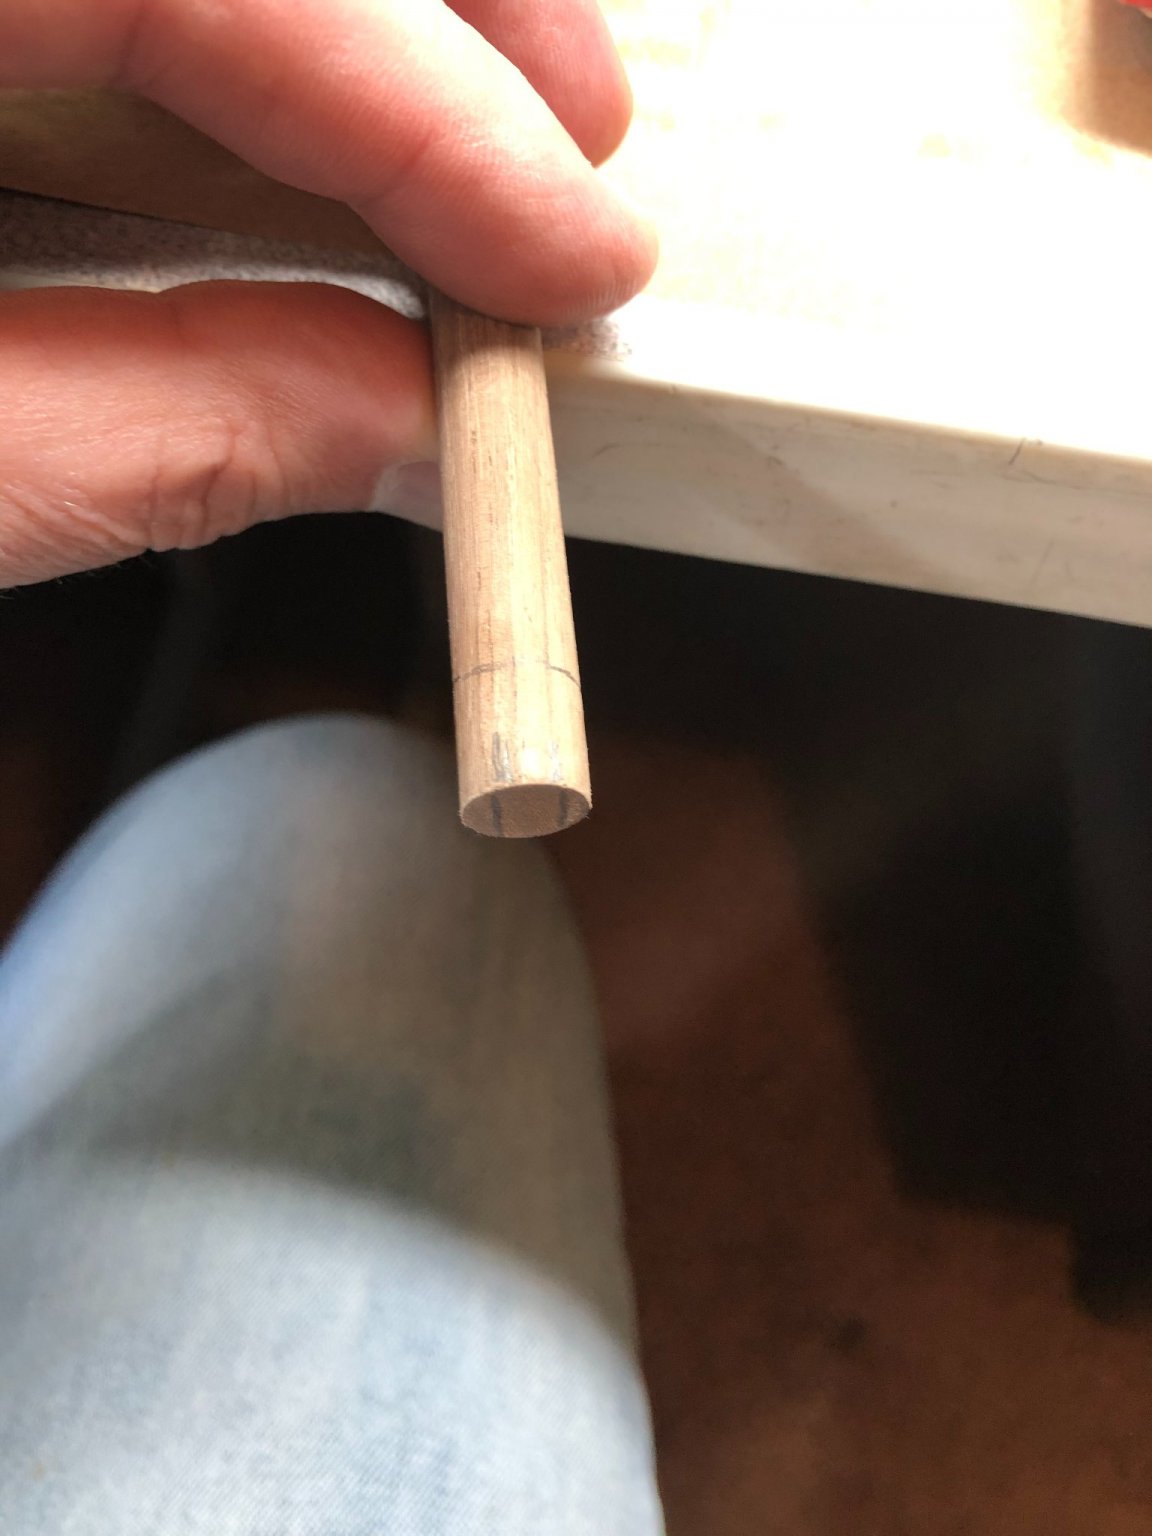
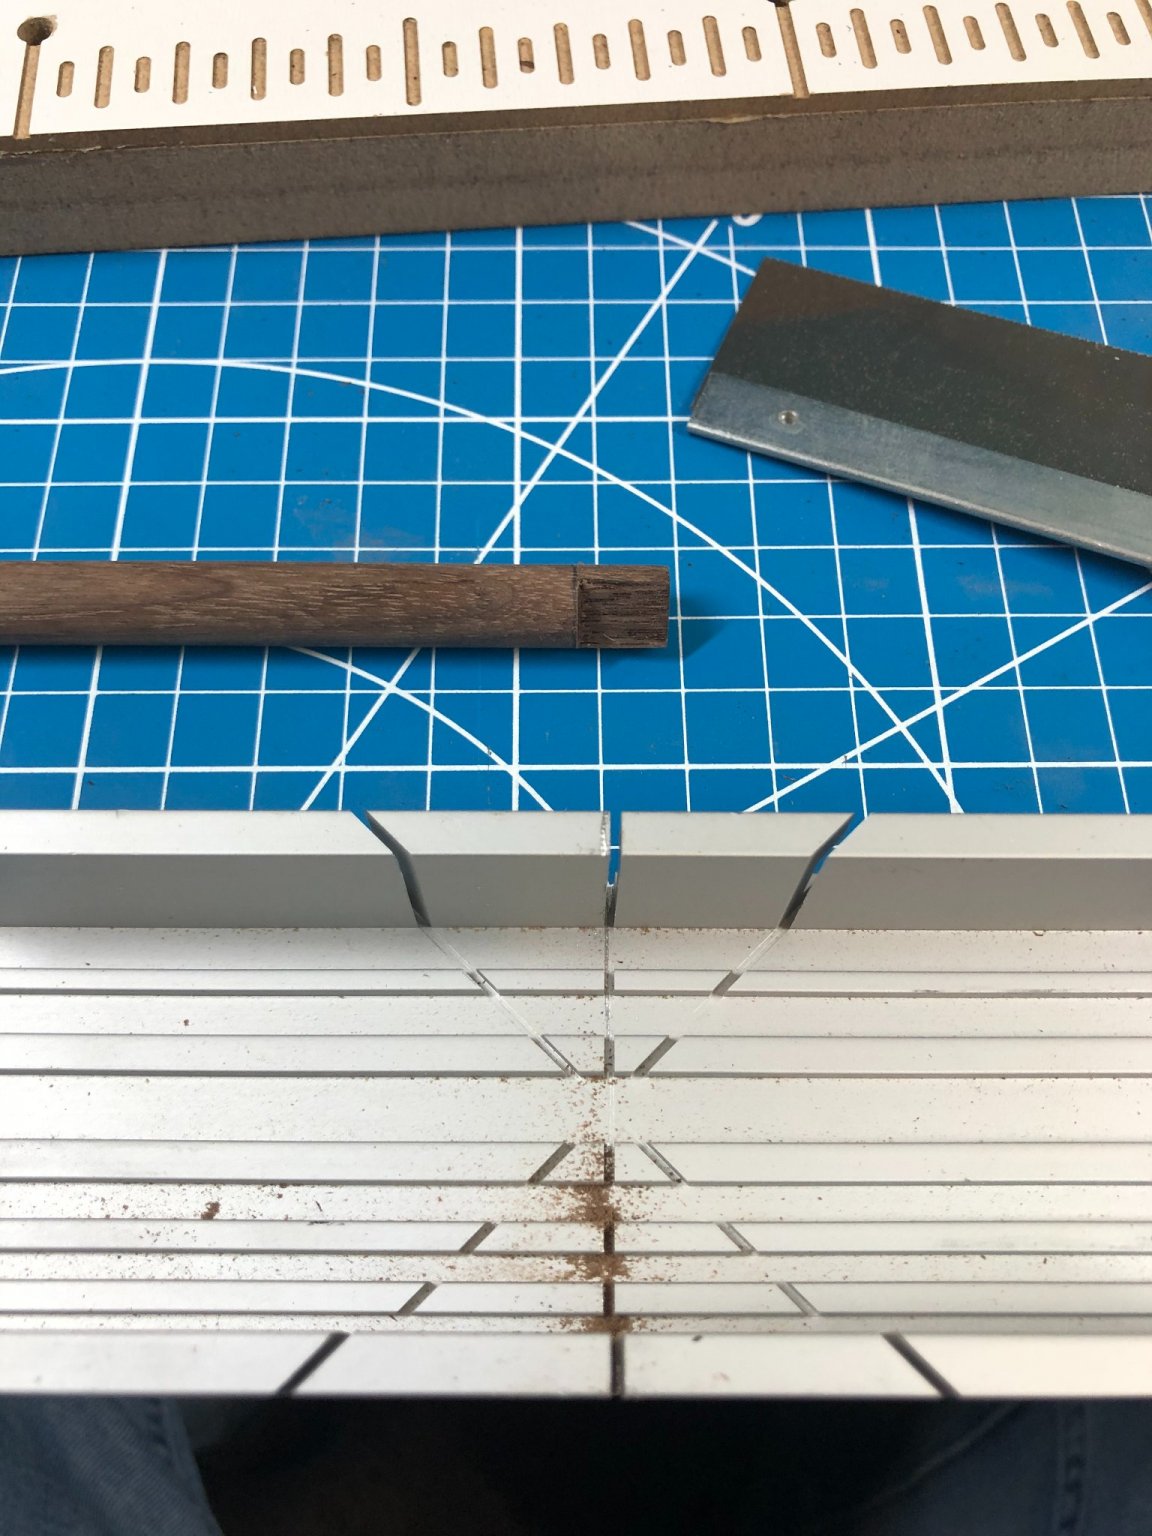
I neglected to mention that although my kit bashing is done on the lower decks, there is some details that I have not done yet. There are several barrels to be painted and added, a stove and its associated duct work and anchor lines. These will be done when I get frustrated with planking or the rigging! I always need a diversion of some sort when things aren't going well or you just need a break. On to the Main deck! As noted in a previous post, the foremast pinrack stanchions were not properly aligned. I kinda took the easy road for a fix. Even though the side is open, you really can't see where the stanchions were to be located on the middle deck. So, I just filled the holes with a small piece of planking material, gave it a little color and moved on: Not a pretty match but this is the last time you'll ever see it from this angle!! When the stanchions go in, I'll glue them to the middle deck, the upper deck beam that they pass right up against and the main deck. I'm sure it will have plenty of support. With that problem solved, I started dry fitting the main deck. As part of that procedure, I also ran any pieces that passed through the decks to ensure alignment: The alignment worked out pretty good. However I did have to make minor adjustments on the mizzen mast and the foremast. As has been mentioned in all the other logs about this particular model, the beams need to be drilled or reamed for the bilge pump piping. Don't forget to do it! The mast were pushed into place (very tight fits, lots of sanding and a little file work) and just a hair above the mast foot. I marked the mast for cutting: Used a miter saw and cut the mast base to the proper depth. I used an Exacto blade and chiseled out the excess wood. A final sanding and my masts are ready to be installed... much later on! Don't forget to mark the top of your mast with the direction to insert it and which mast it is! It's also a great time to check if they are level (foremast), raked back 1 degree (main mast) and raked back 3 degrees (mizzen mast). Be sure to check alignment of the masts from the bow. They should be aligned. I dry fitted everything on the Main deck 4 different times to ensure that I had everything aligned and fitting properly. This was a big step in the model. I put the Bounty back in her building slip to ensure the keel is straight. Carpenters glue was applied from bow to stern on every beam, wall and frame ends. I clamped it down on nearly every beam and checked from the underside of the deck for a tight fit. Before the glue had a chance to dry, I re-insert the masts and all other pieces that passes through the decks and left them in place until the glue dries 24 hours. Good adhesion is important to me on this step because this will solidify the frames and the ship overall to better withstand the beating it will take from the upcoming sanding for planking! That's it for this week!


-
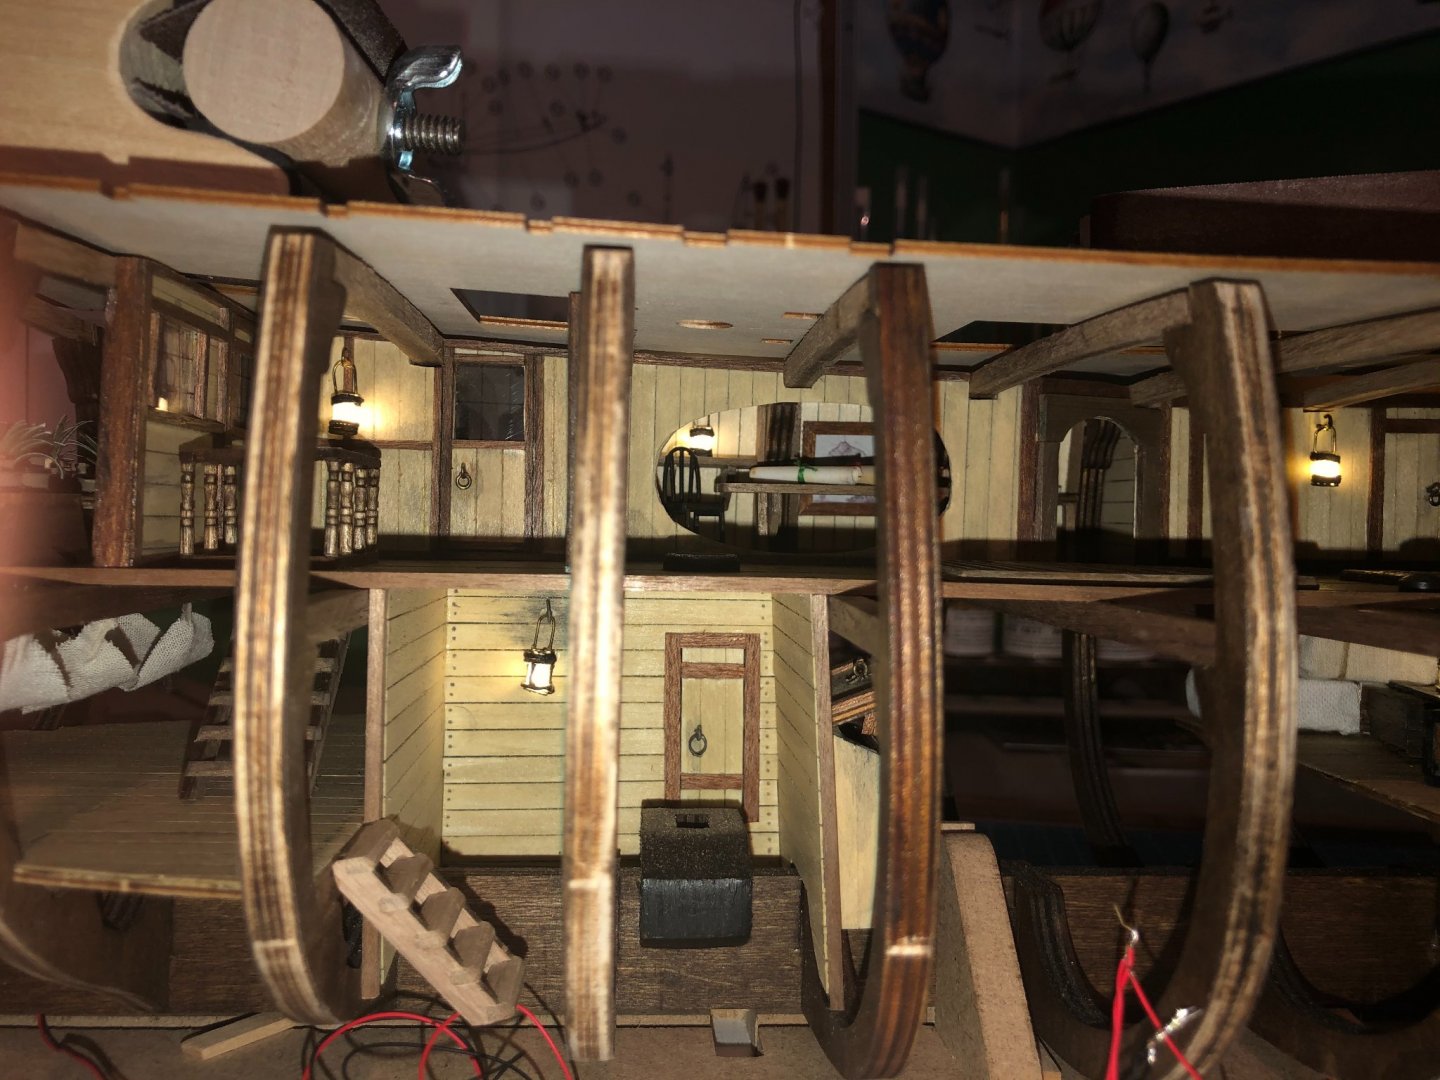
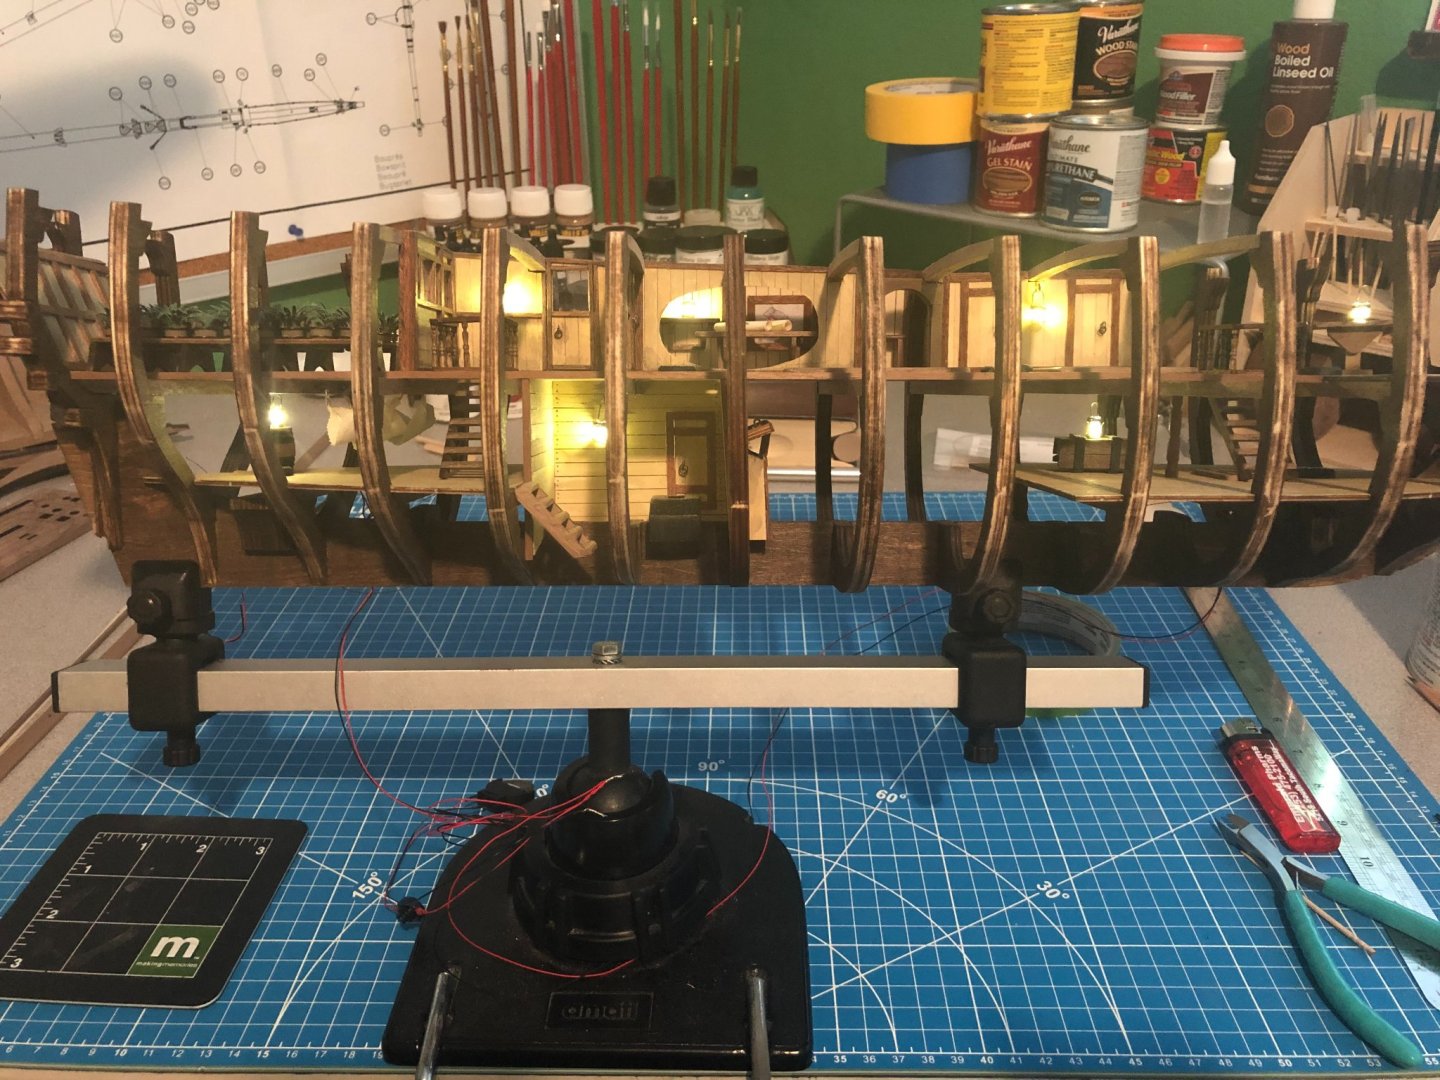
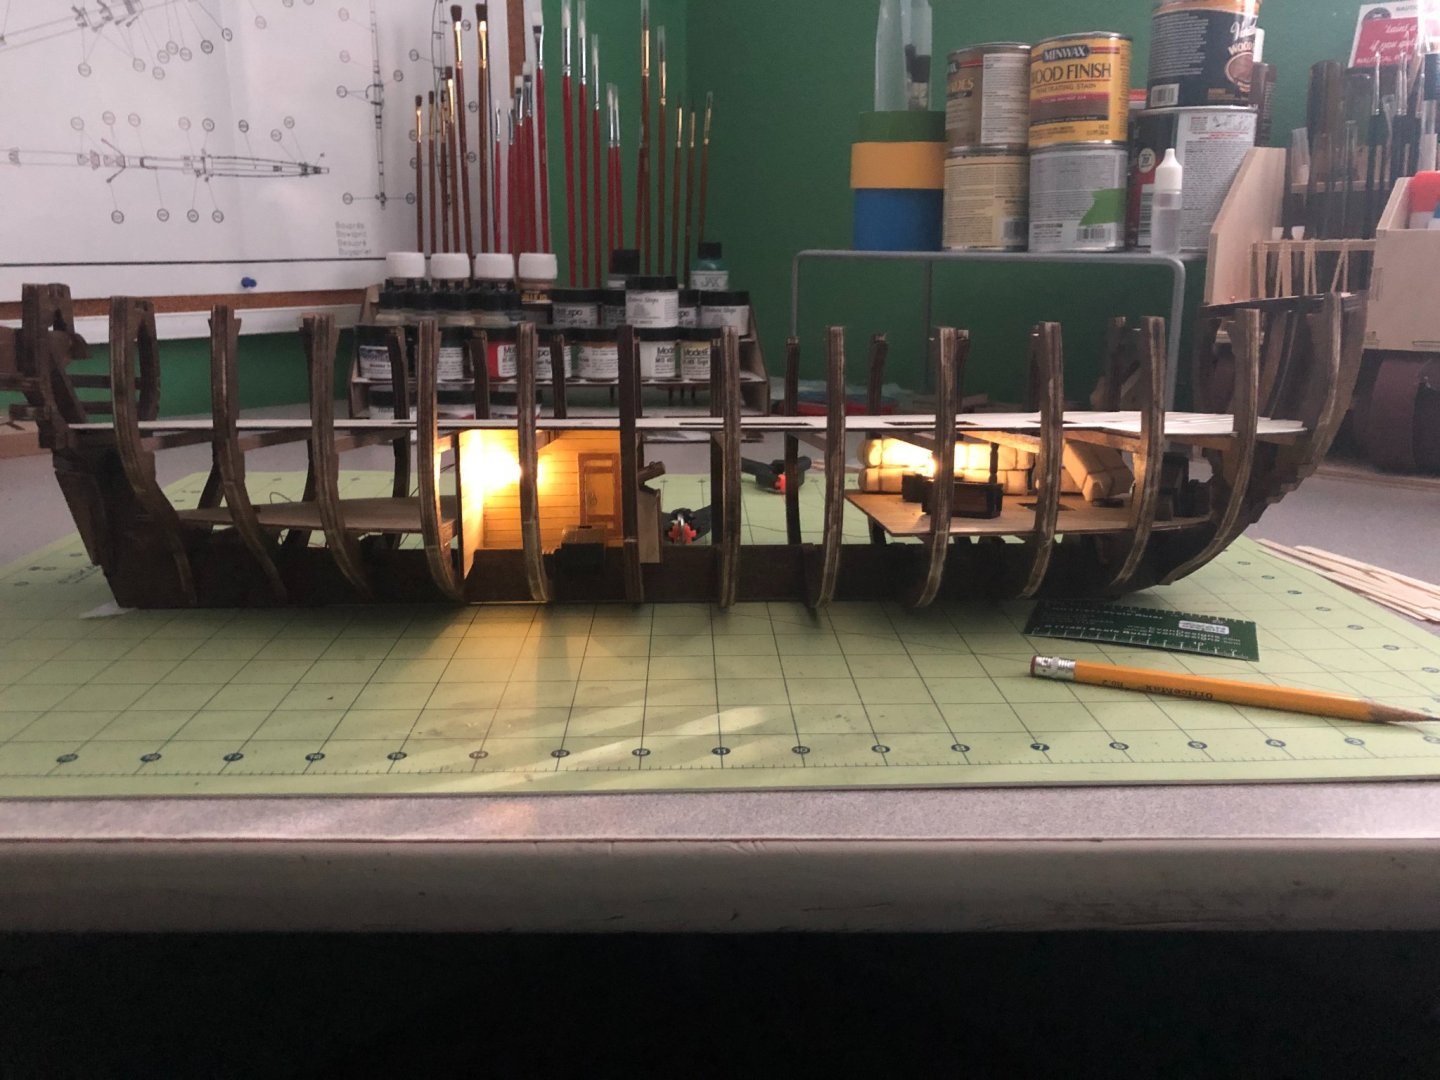
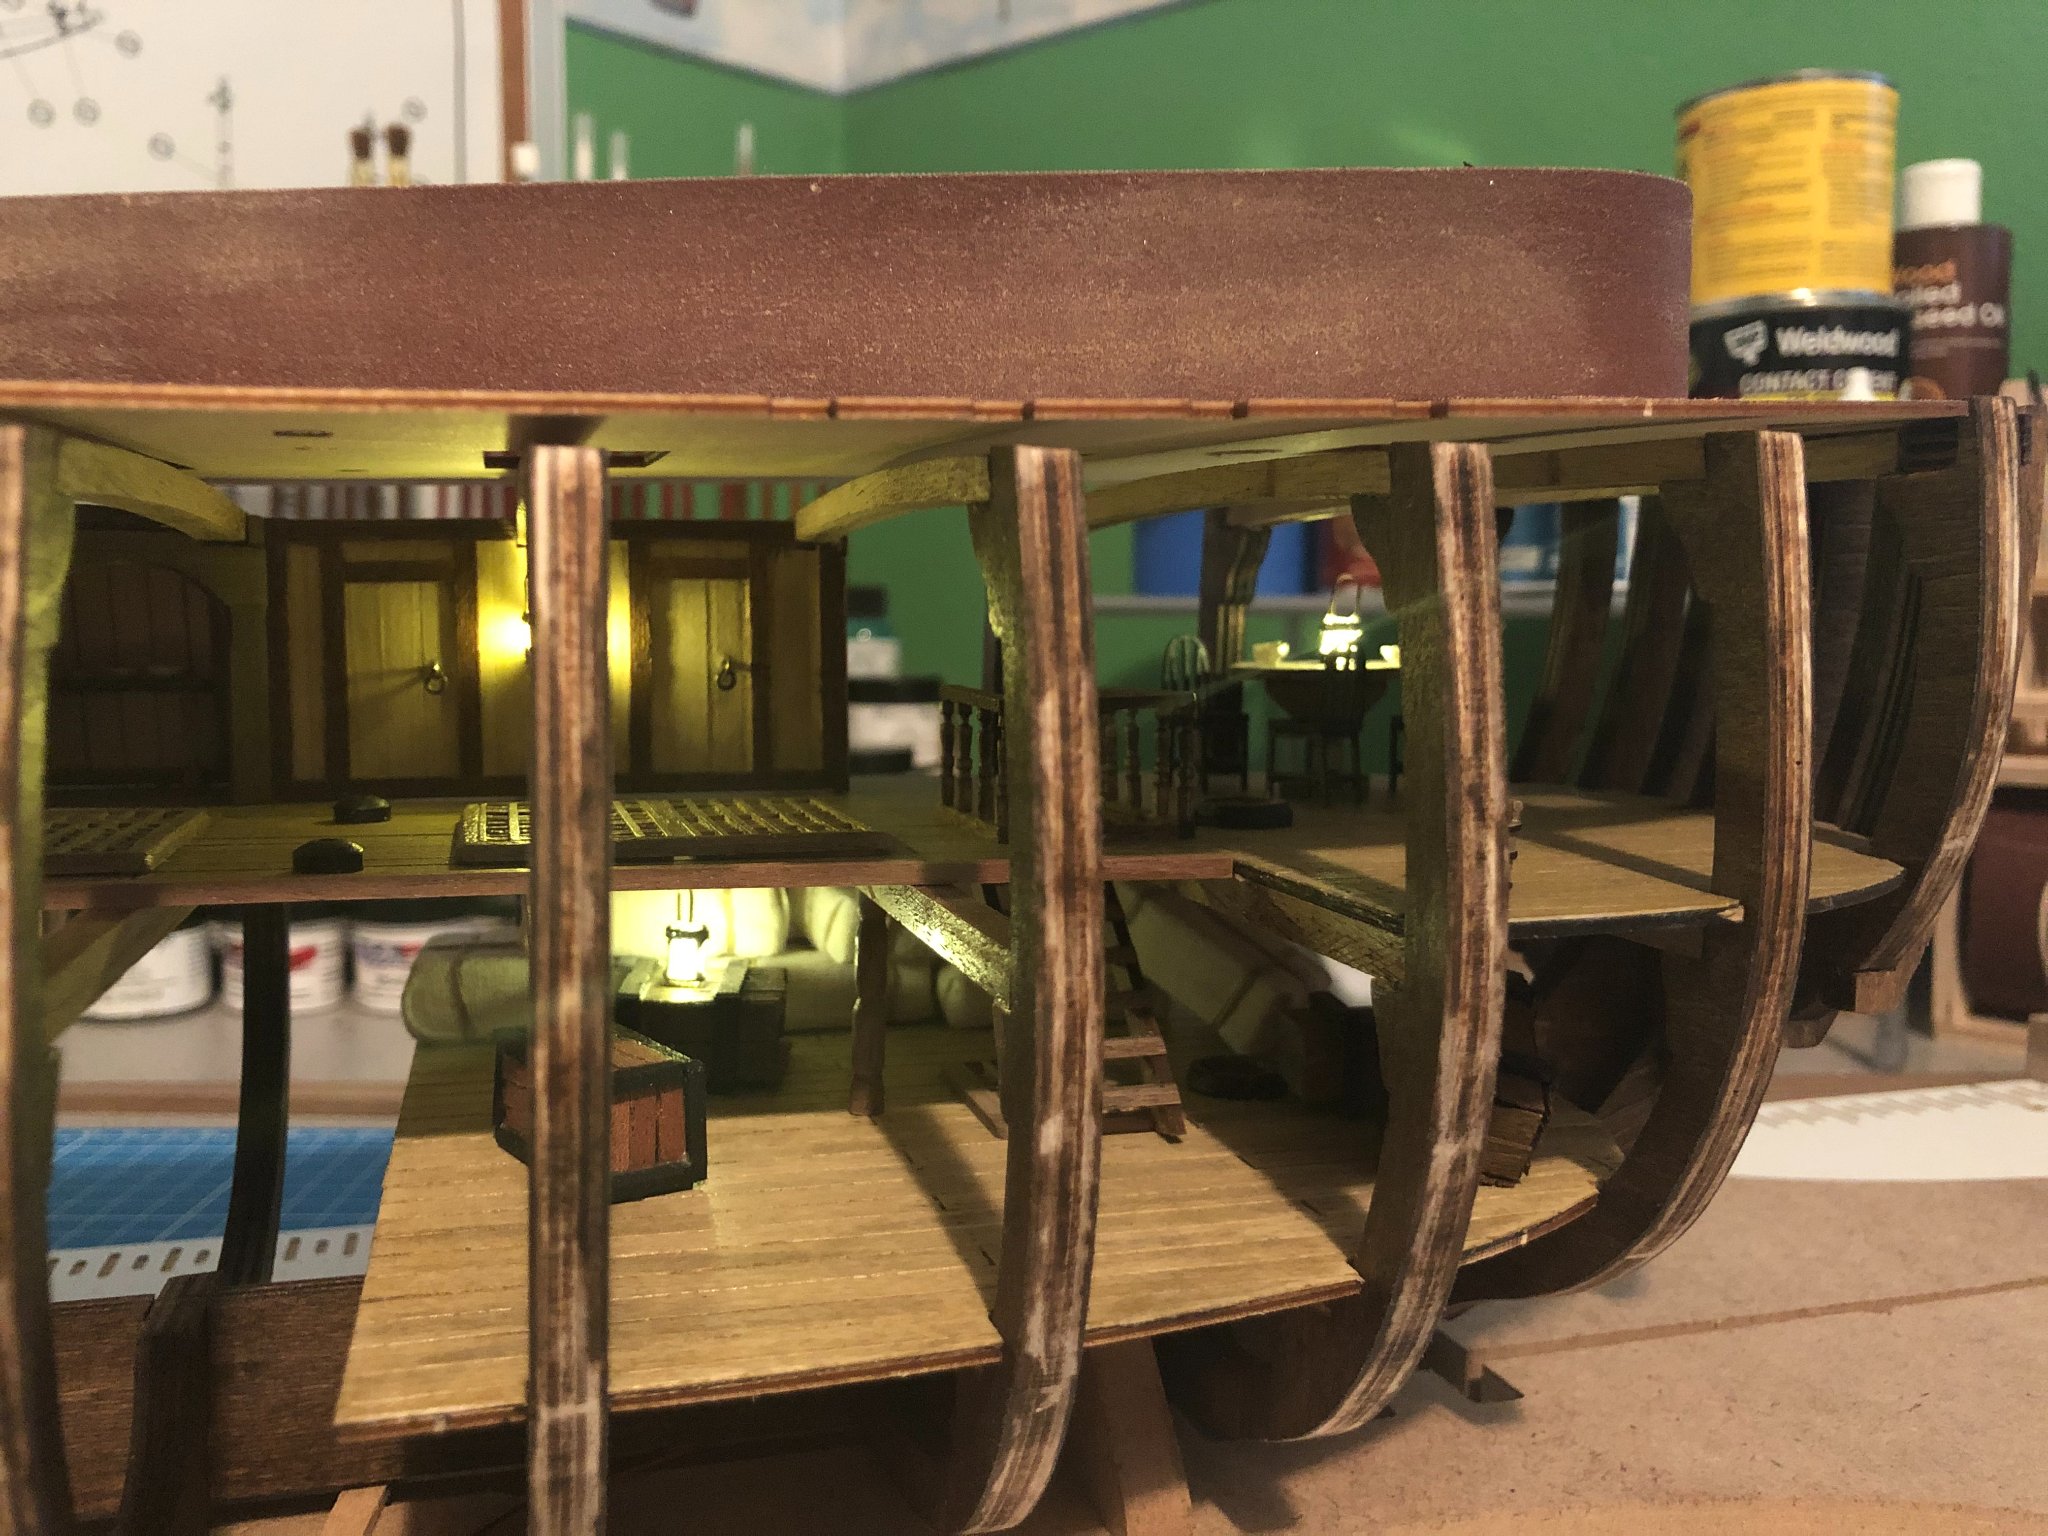
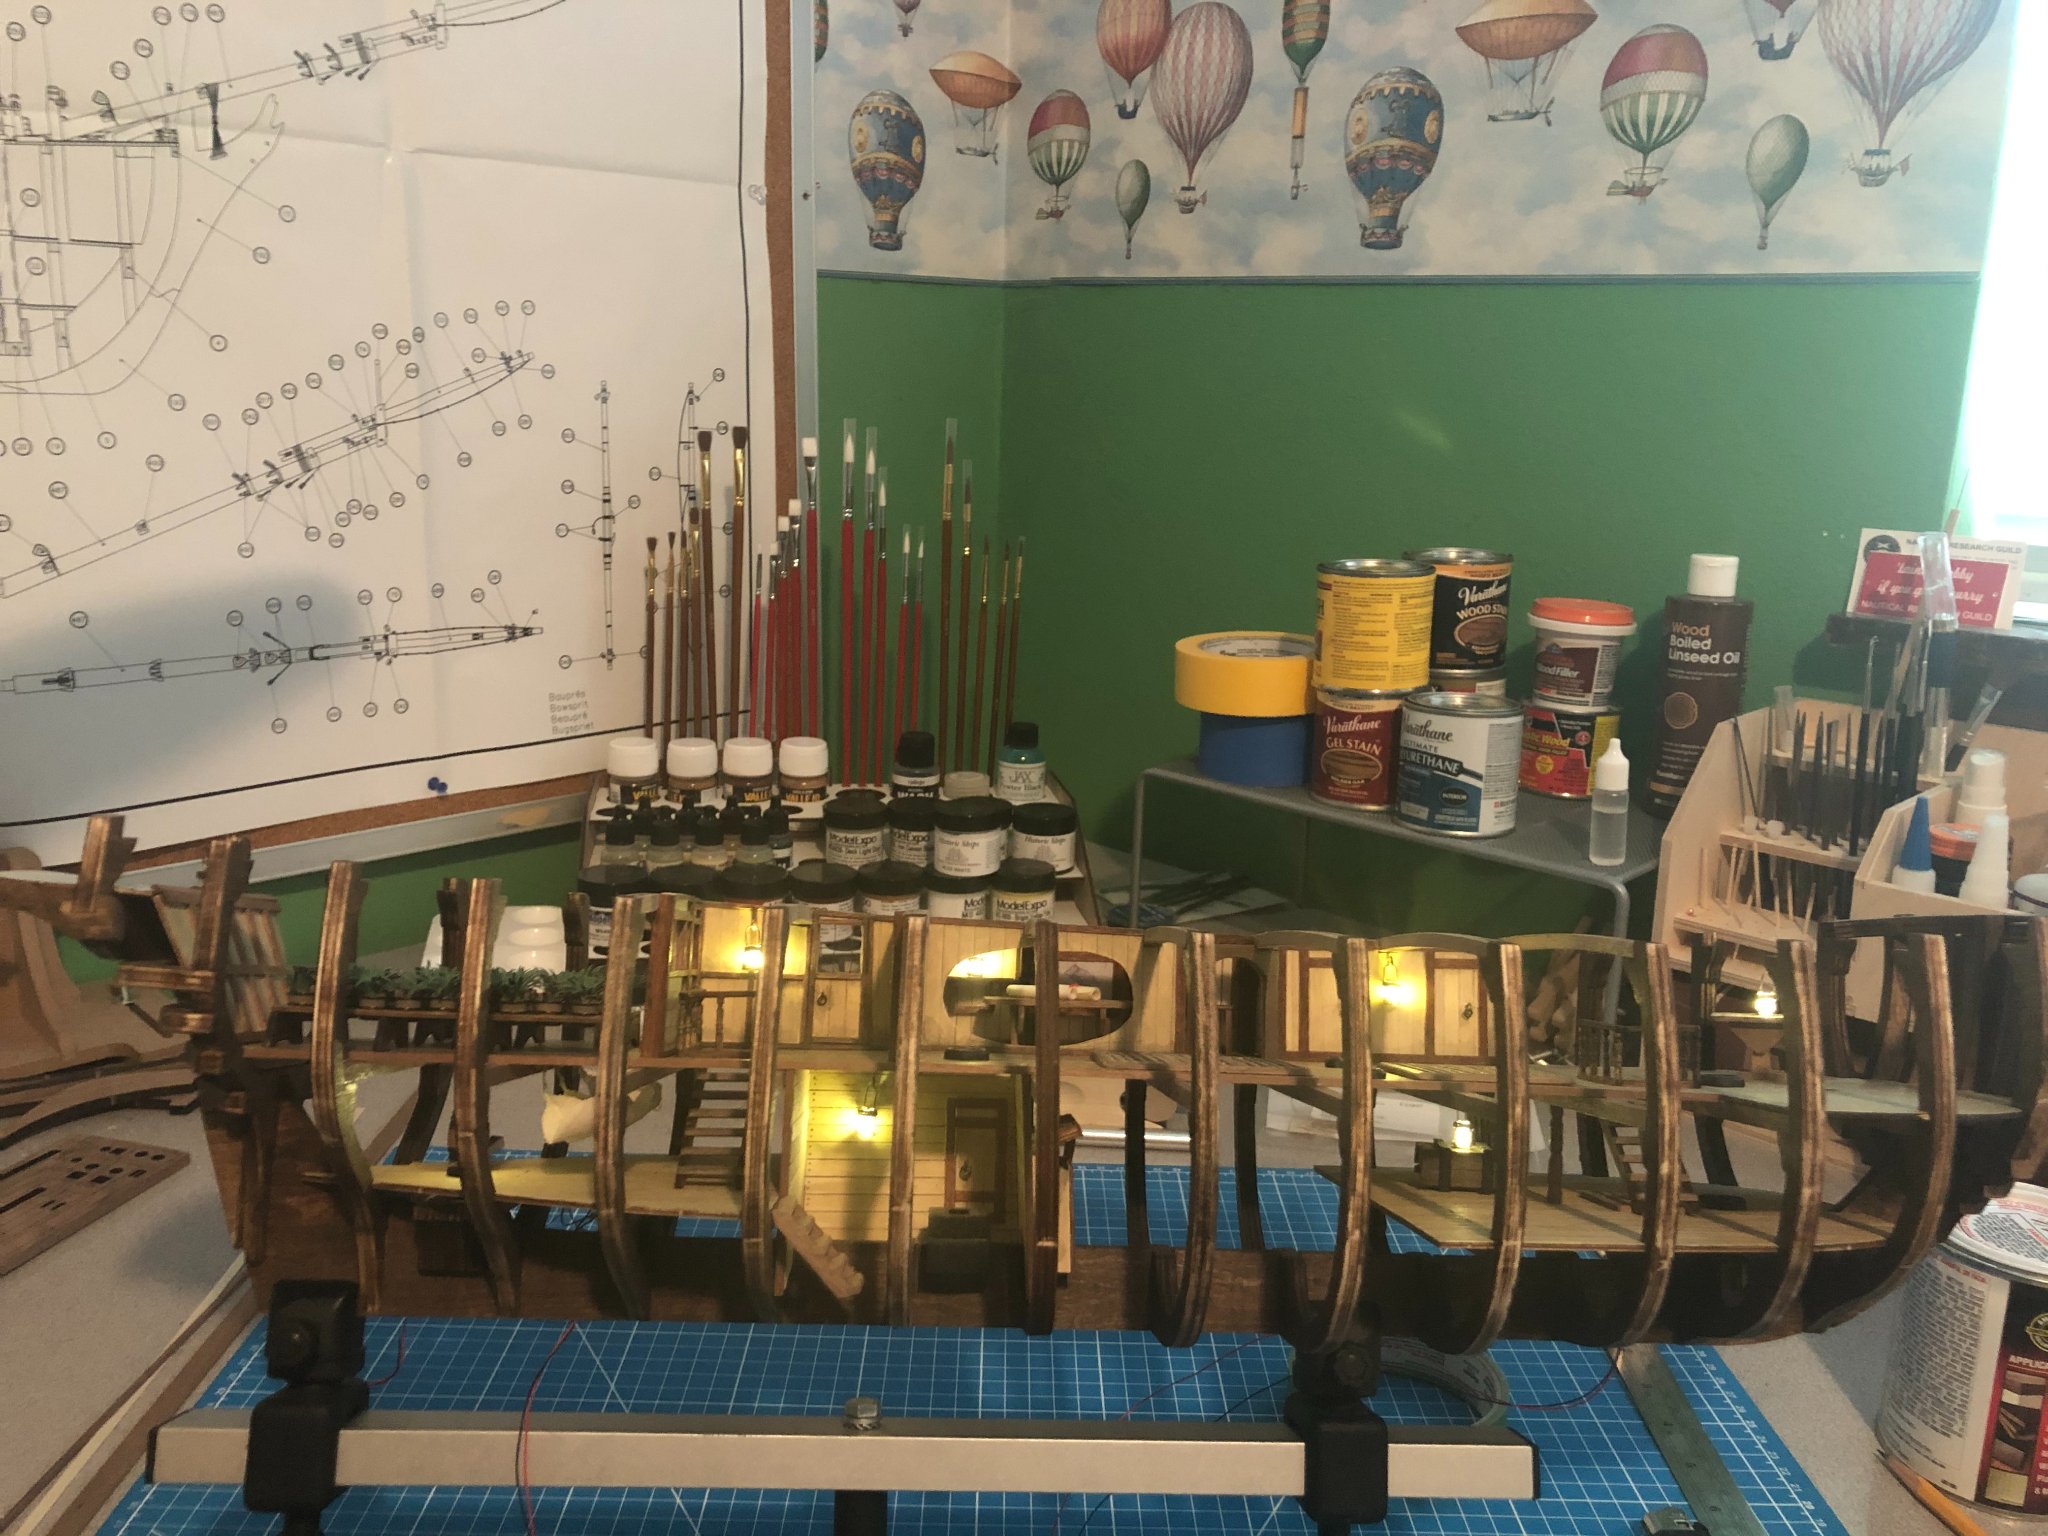
Here are the final pictures of the details and lighting on the lower decks before I get started on the main deck and planking. Many of the details are glued down but not everything... Everything not glued down will be removed and not re-installed until she is done! The wires in the foreground will be hidden in the mounting base along with the battery and switch. Enjoy:


-
Thanks to Craig, I have the masts fitted properly. Obviously, by removing the main deck, things move and change but I'm confident that I can get the masts perfect when the main deck gets glued into place. However, the bow pinrack stanchions are another story! The stanchions go through the main deck and down to the middle deck where they are supposed to fit into holes in the deck. When installed, they actually rake forward and not back as the plans suggest. Everything else on the main deck lines up pretty good, a few minor areas on the frames that don't match up perfectly but real close. SO, why are the stanchions off? The only thing I can do is fill the holes in the middle deck and move them forward about 1/2". This will give it the proper aft rake. Fitting the main deck is a very time consuming part of this build and must be accurate! I'll keep working on it! More soon...


-
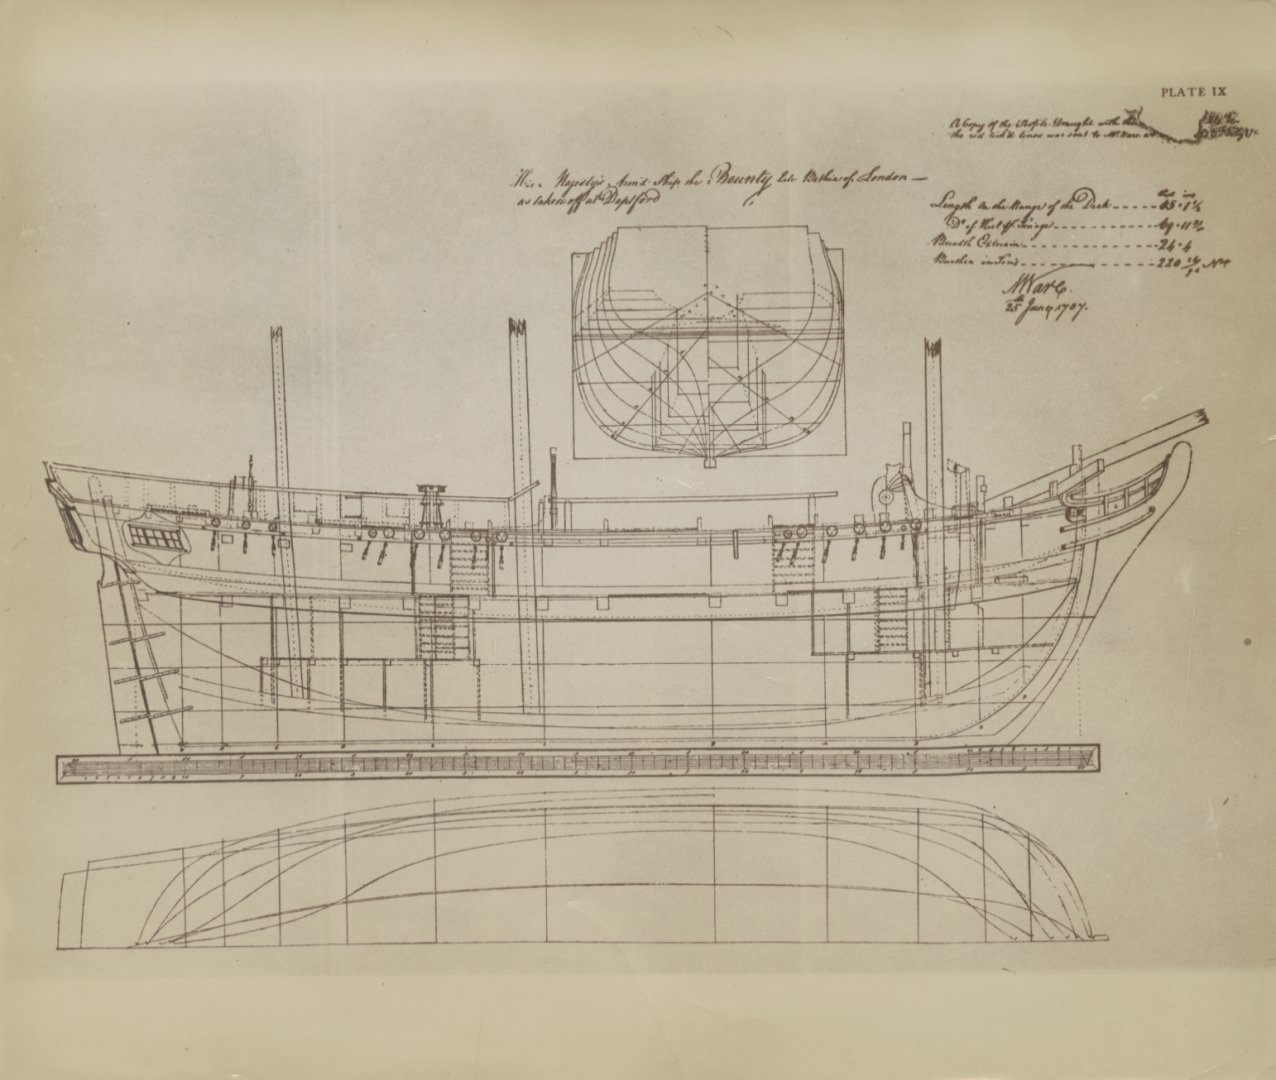
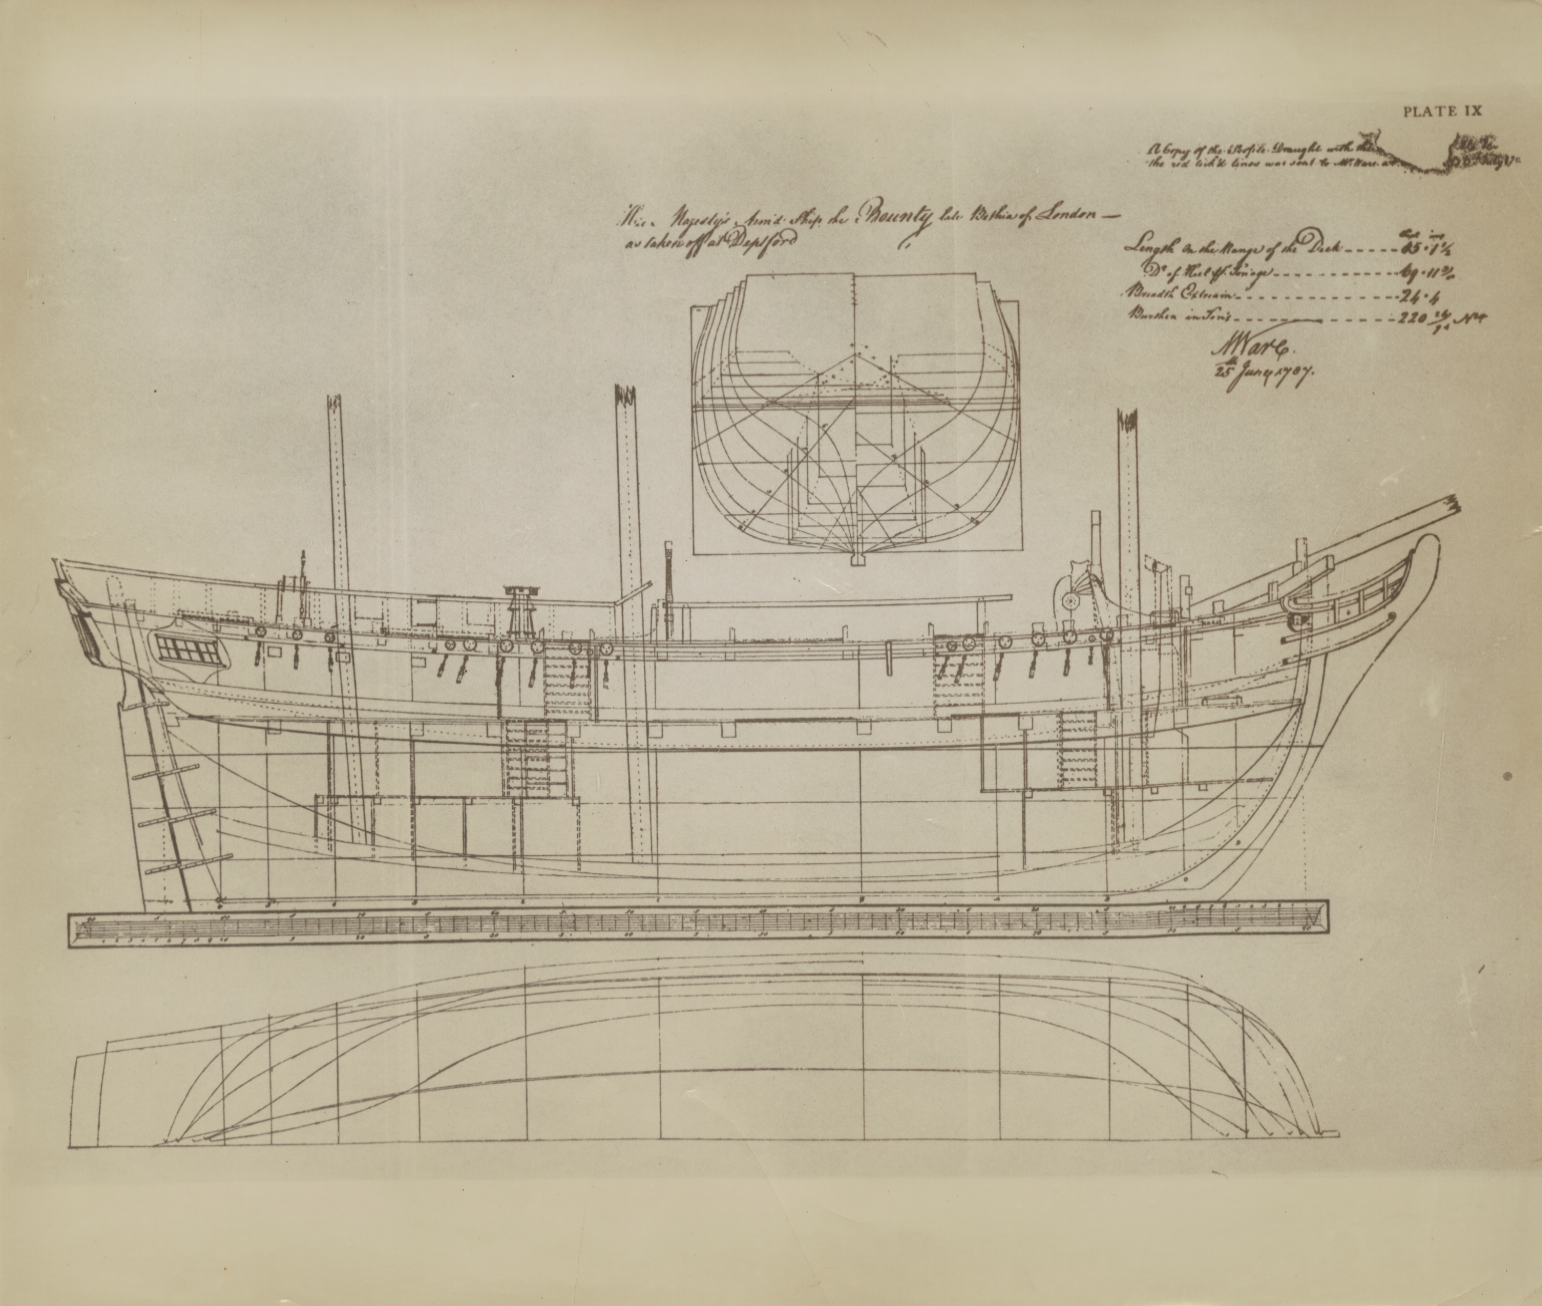
I do have the drawing but not with the red lines and the info. Thanks Craig!
-
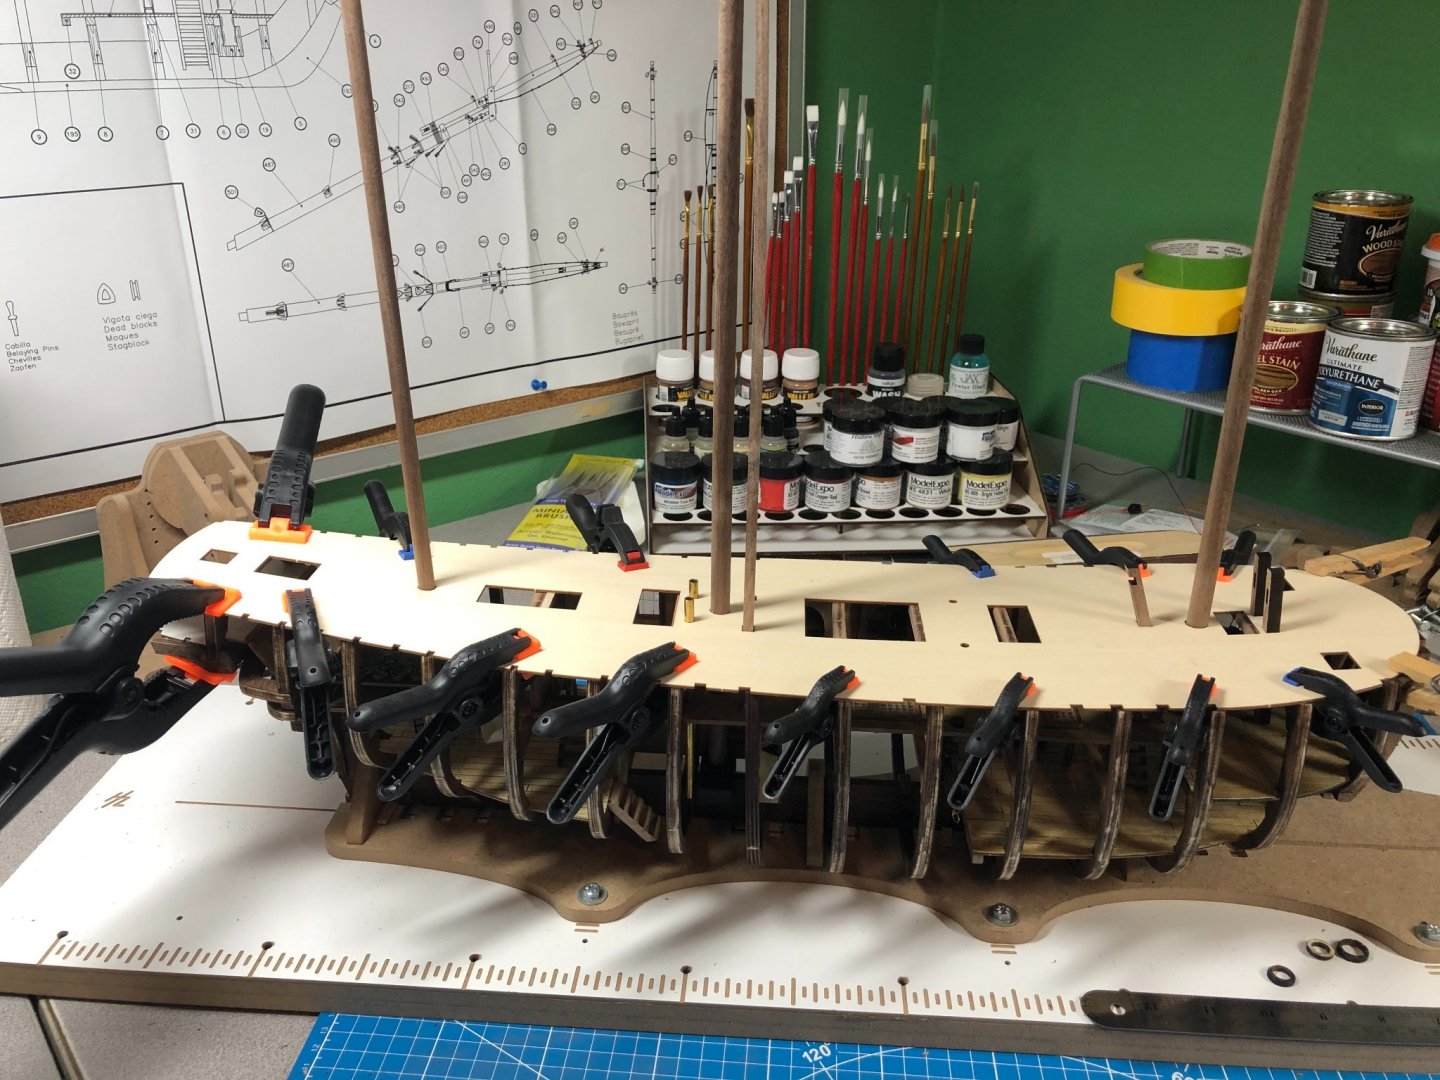
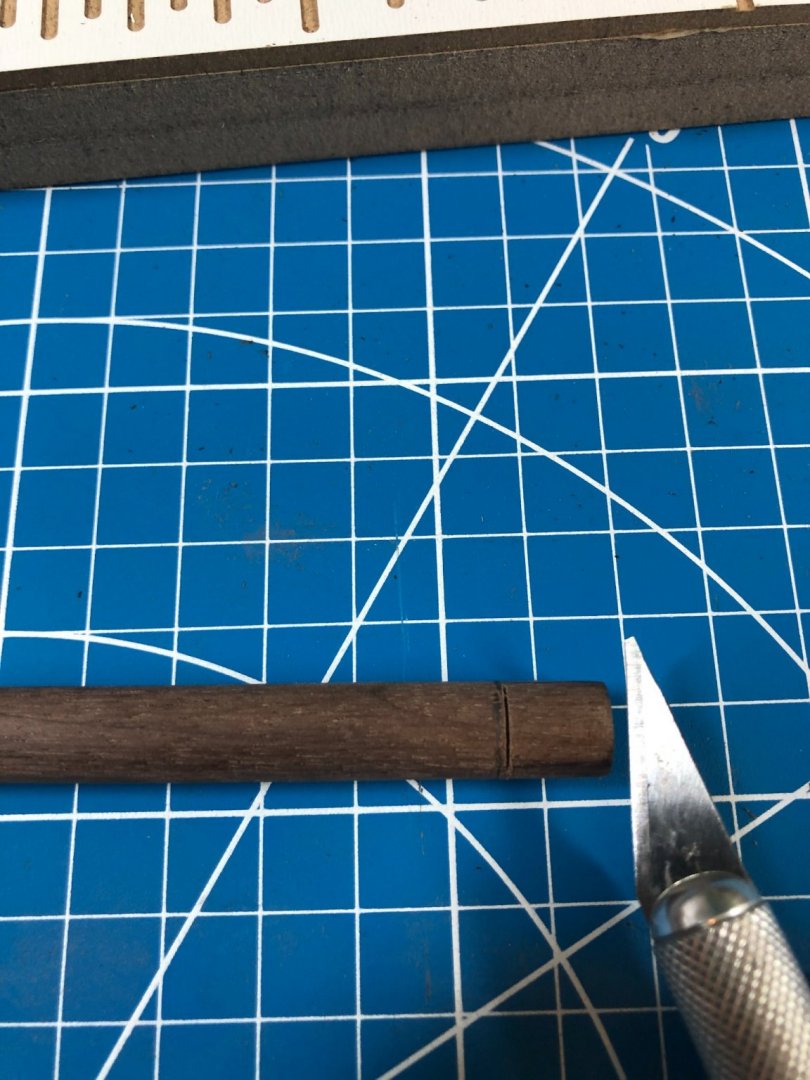
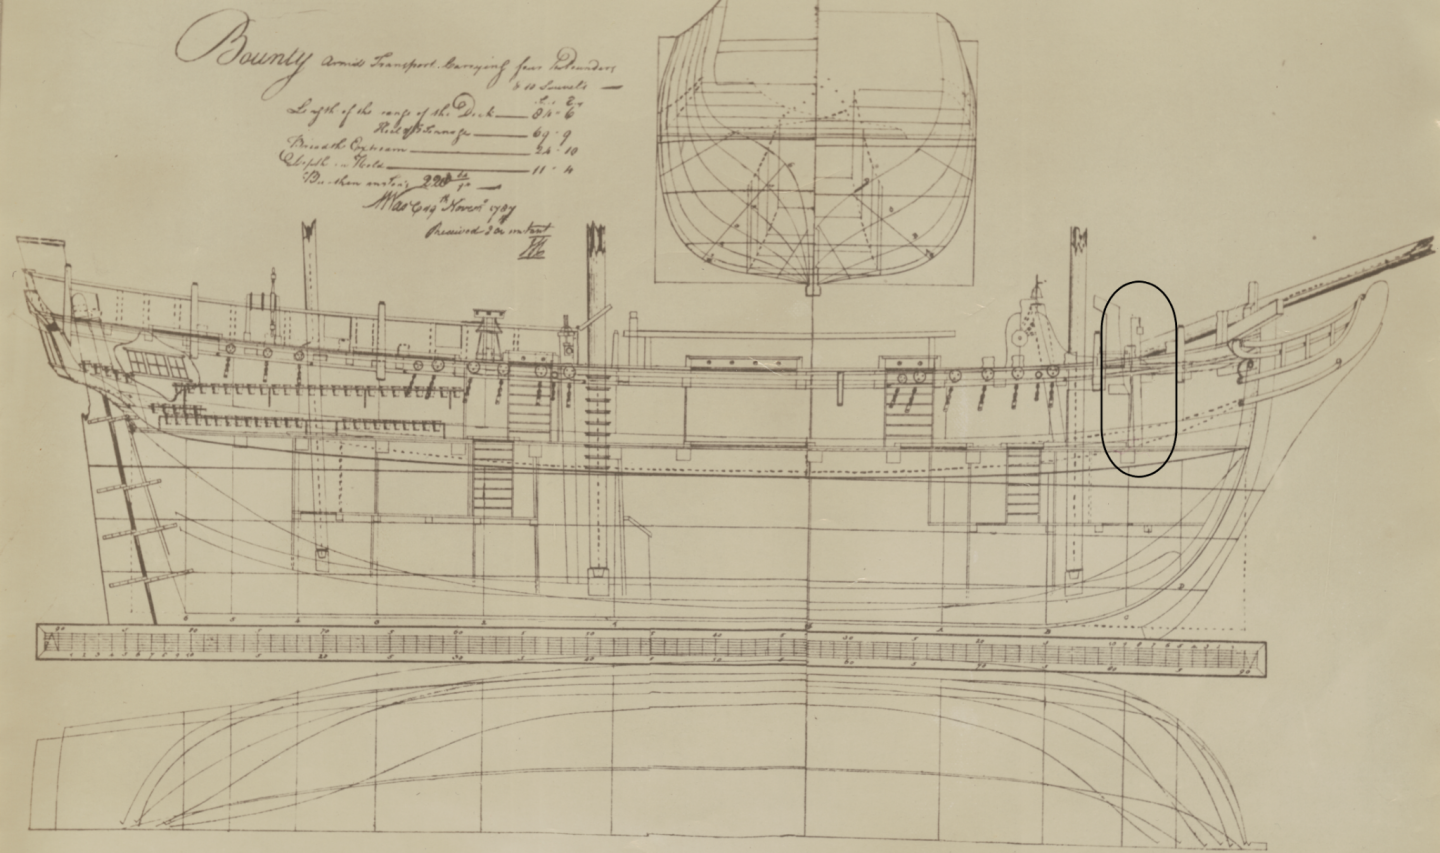
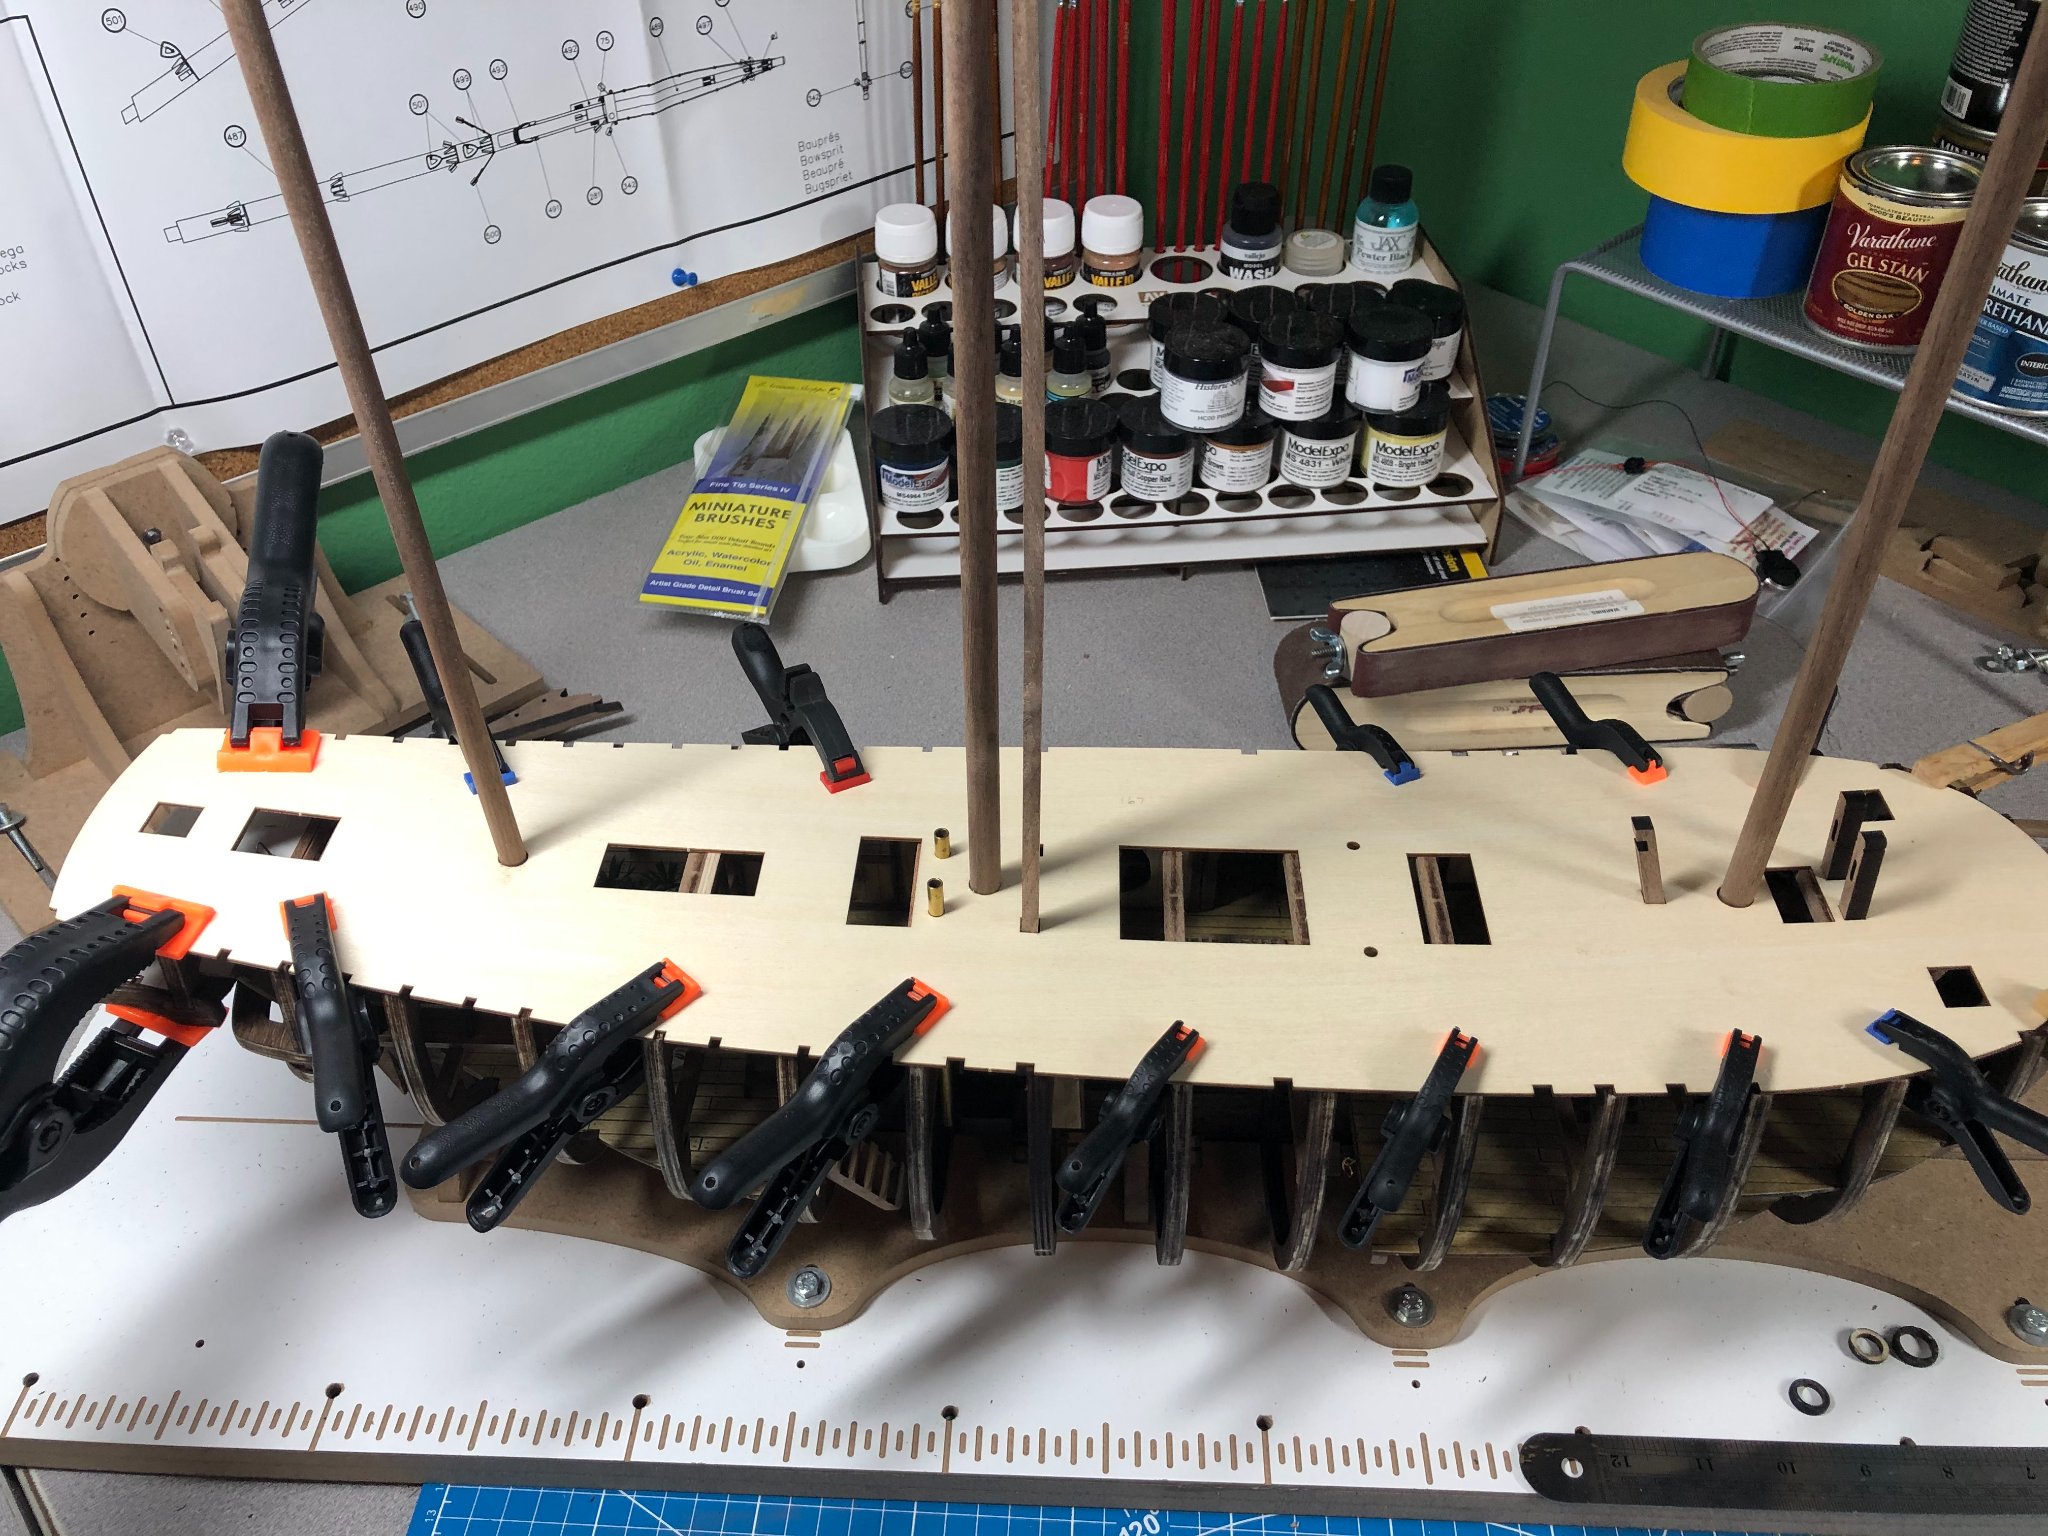
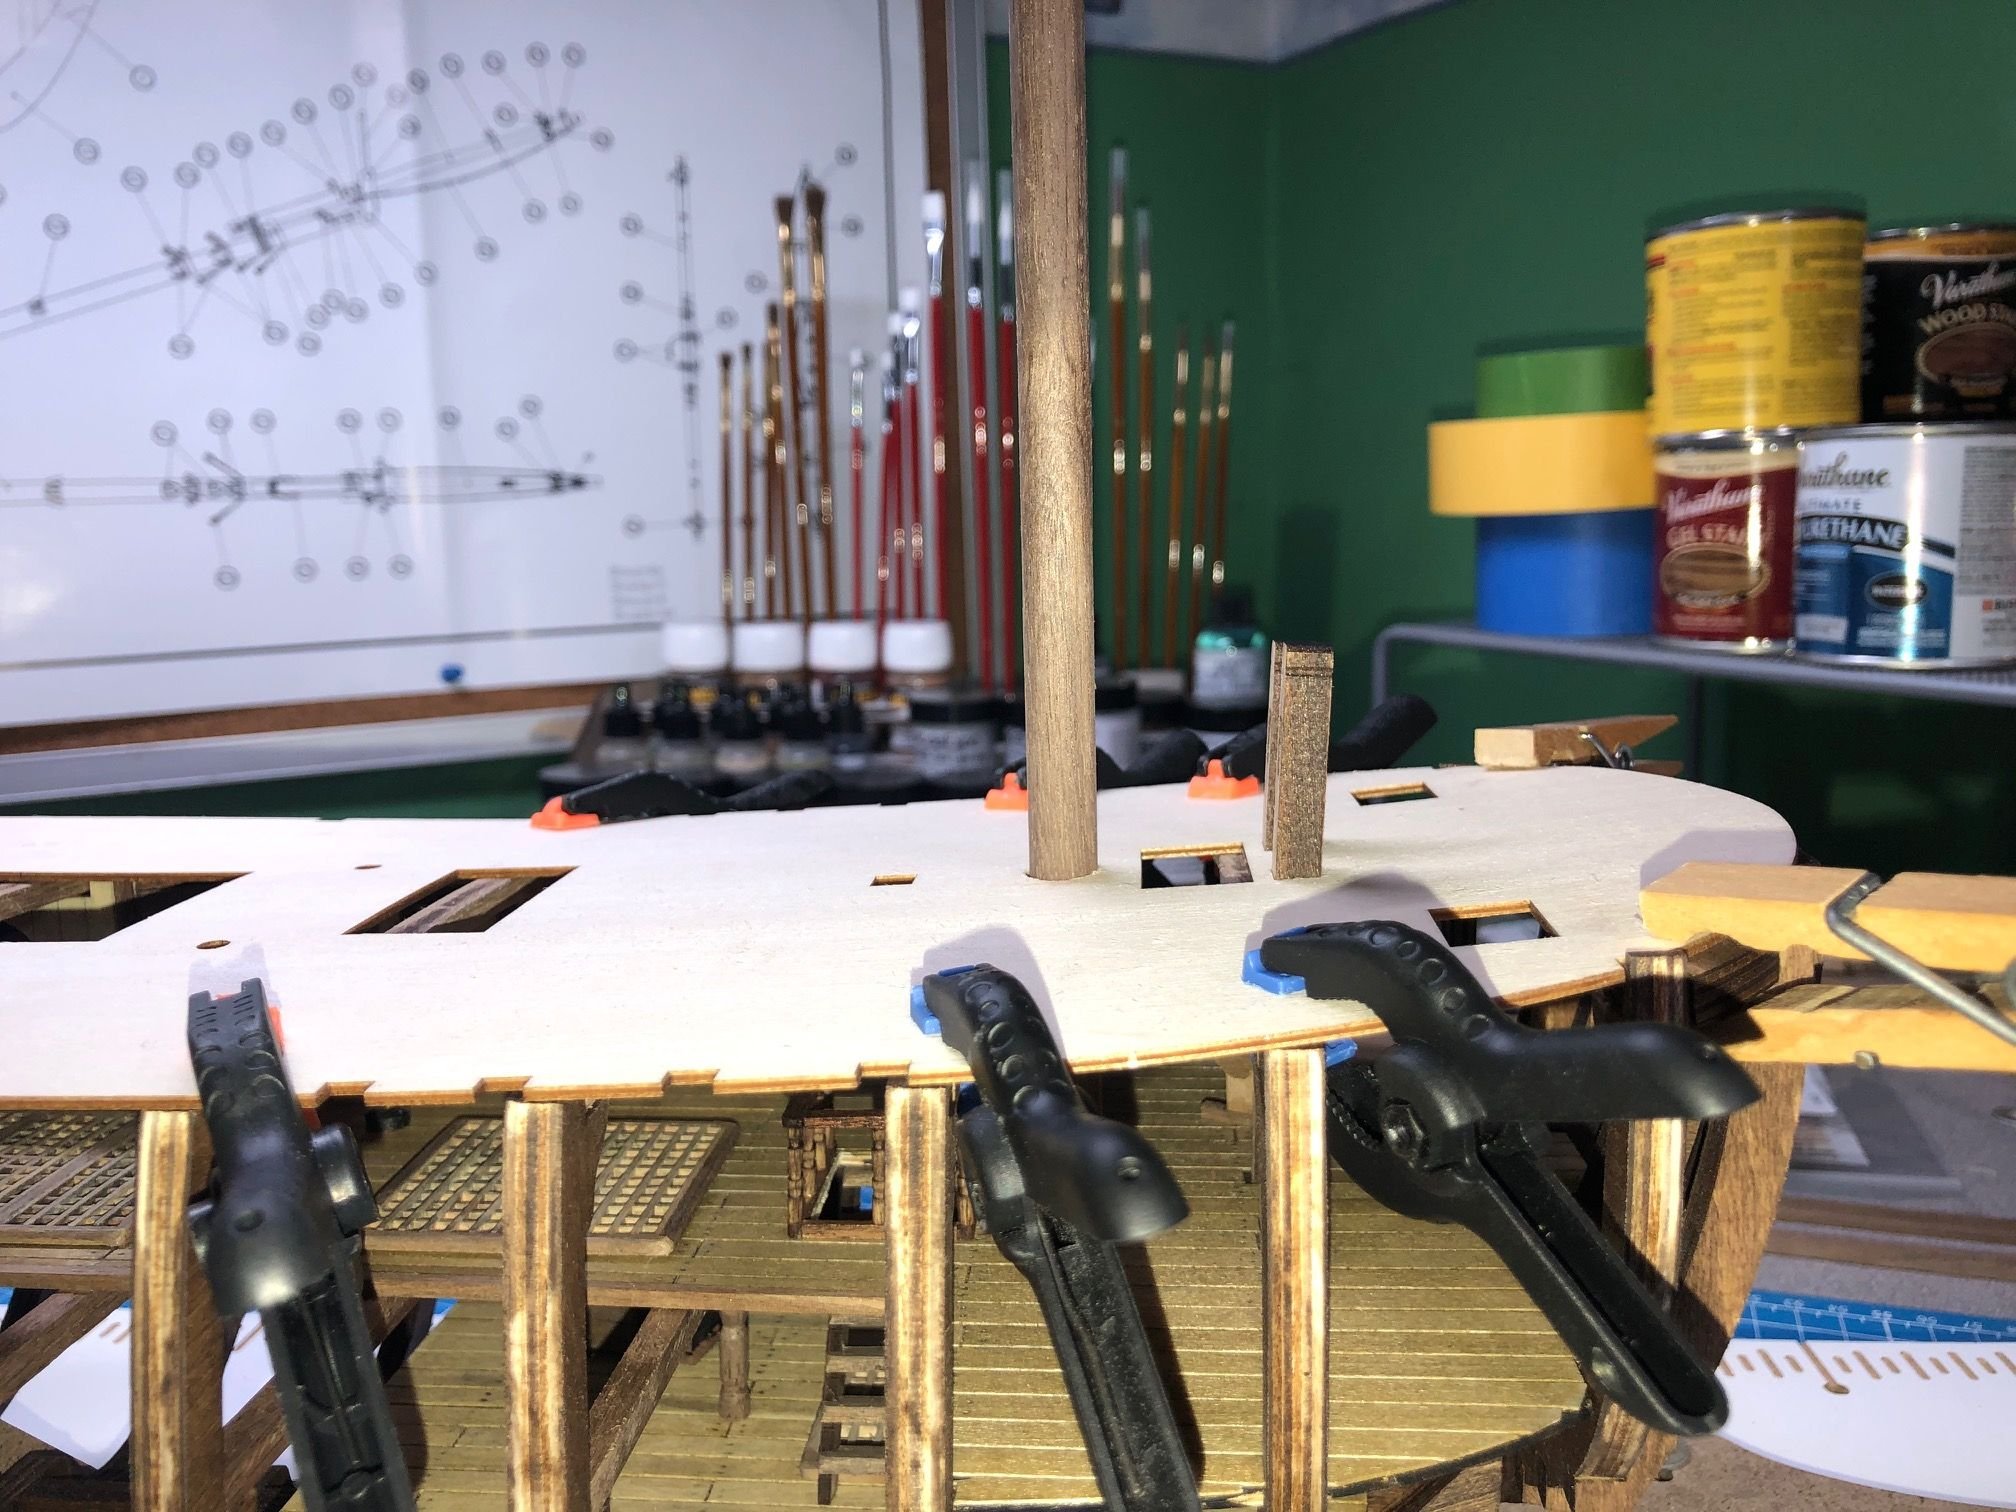
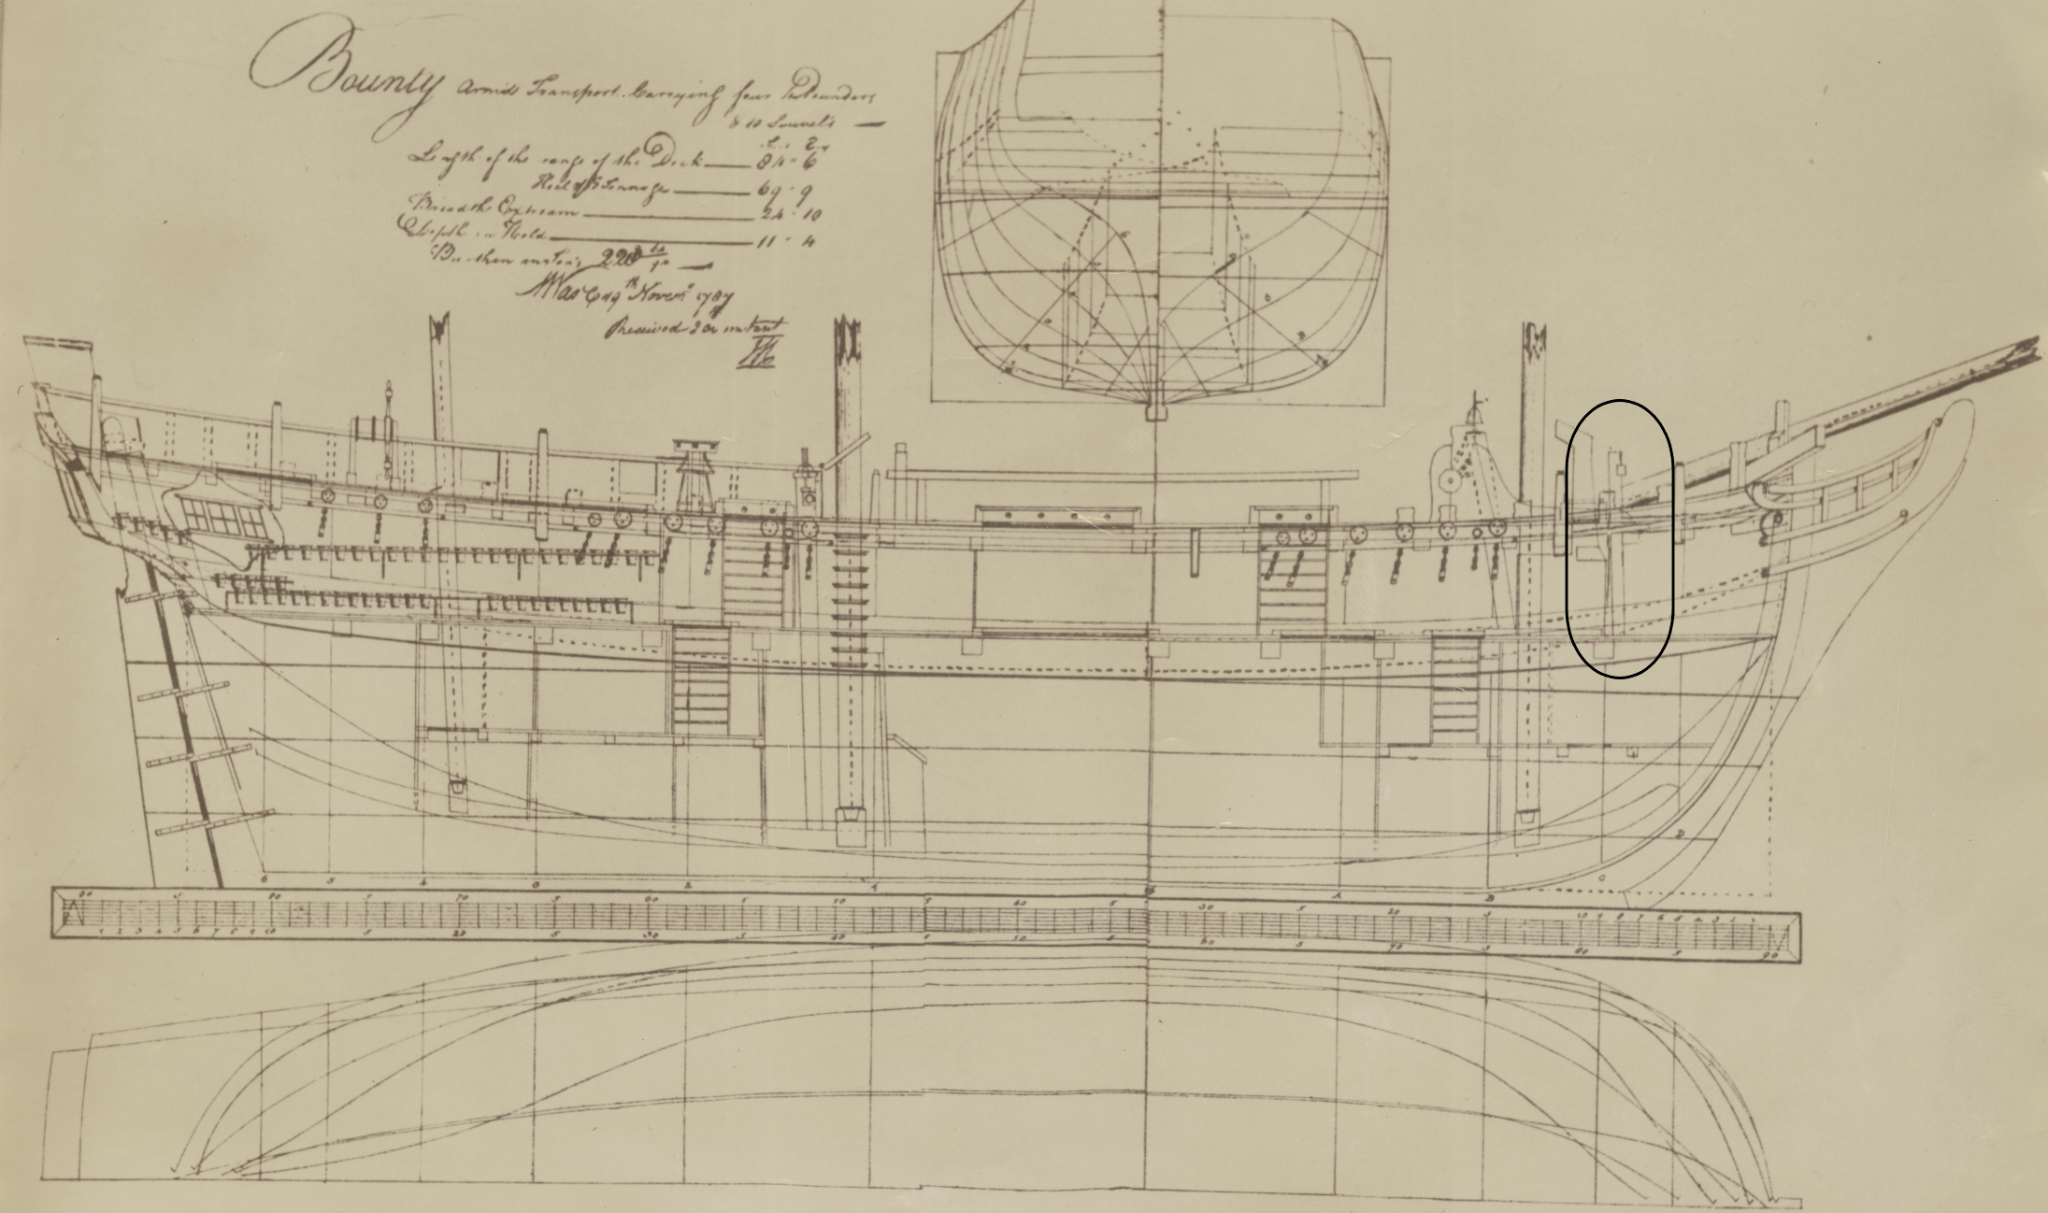
Just a quick update... Not much progress this week with the holidays and everything that goes with them! I did start to fit the upper deck... including checking the masts and other items that fit through the deck and go into the lower decks. Most everything seems to line up but I'm researching a couple of things before moving on: 1. The pinrack stanchions are not perpendicular to the deck, they have a slight lean to them. Is that normal? Or is the deck out of alignment? 2. The fore mast looks to be at 90 degrees to the deck. However the main mast seems to be swept aft a slight amount. Is that normal? 3. The mizzen mast is raked back (that is normal) but how many degrees? After looking over some drawings, it looks like the main mast is not straight and does have a slight rake to the aft, similar to the mizzen mast. I don't remember where I got these drawings, hope its ok to share: For the stanchions, I gotta believe they are correct in being raked to the aft too. In the picture above, it doesn't seem so but in this picture it does: I'm still researching the degree of rake for the mizzen and main masts. Probably not that important to the model if its a degree or three off but I'm like a dog digging for a bone! I gotta find it! More soon!
-
Thanks David. Thanks for checking out the log! A long ways to go. But I am enjoying this build a lot.
-
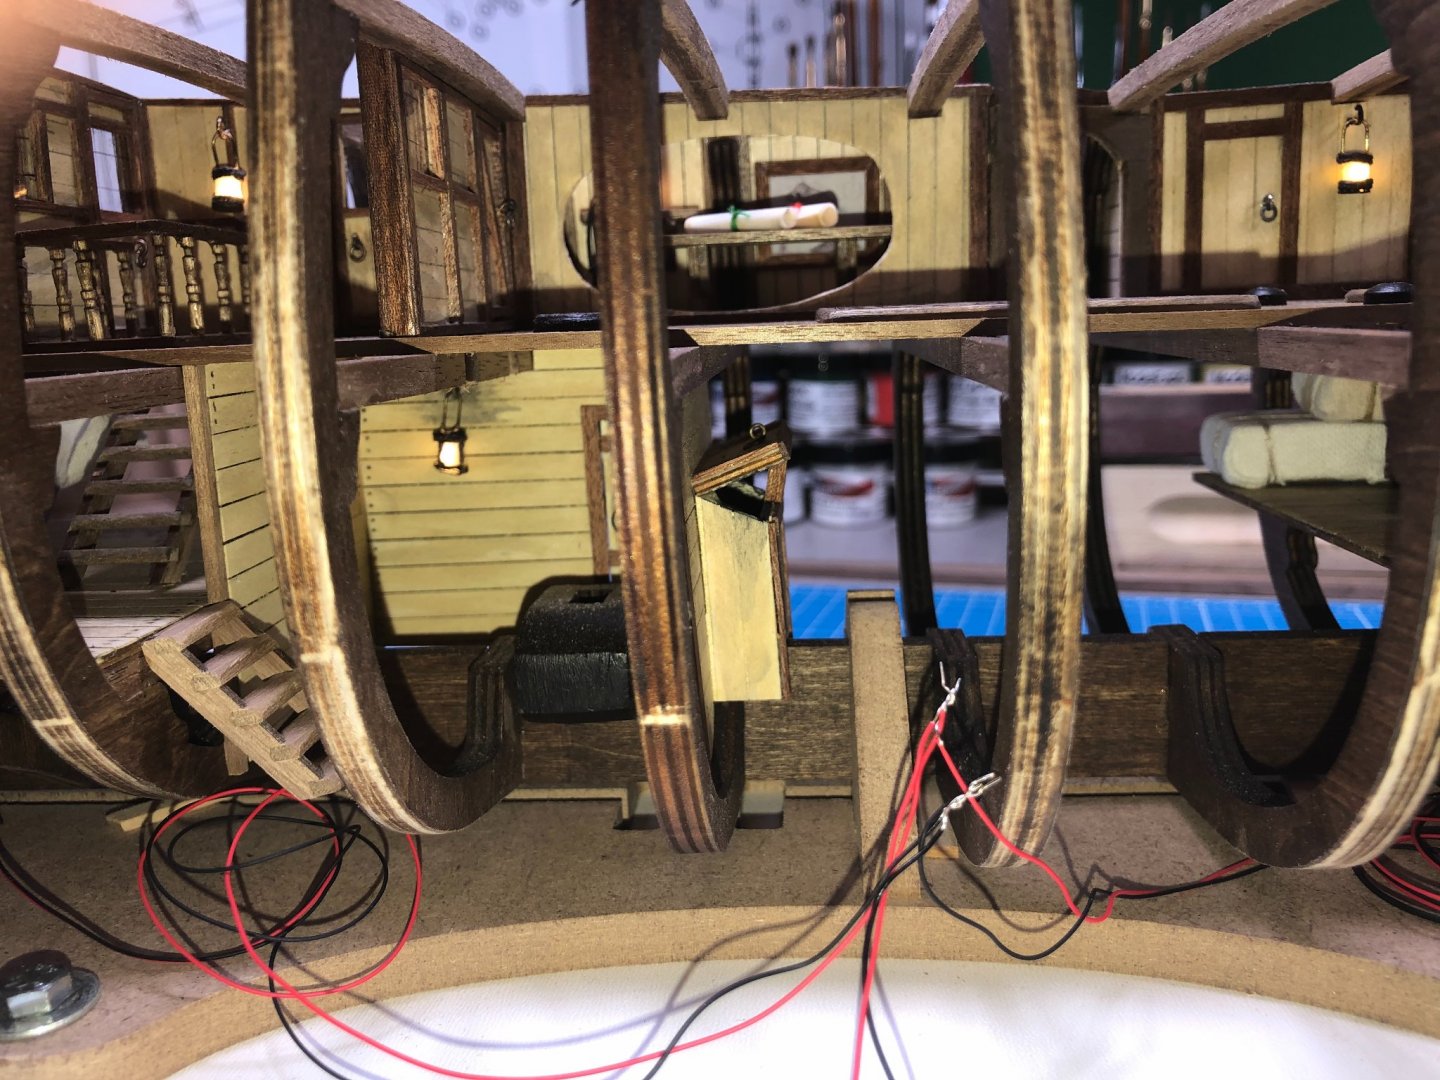
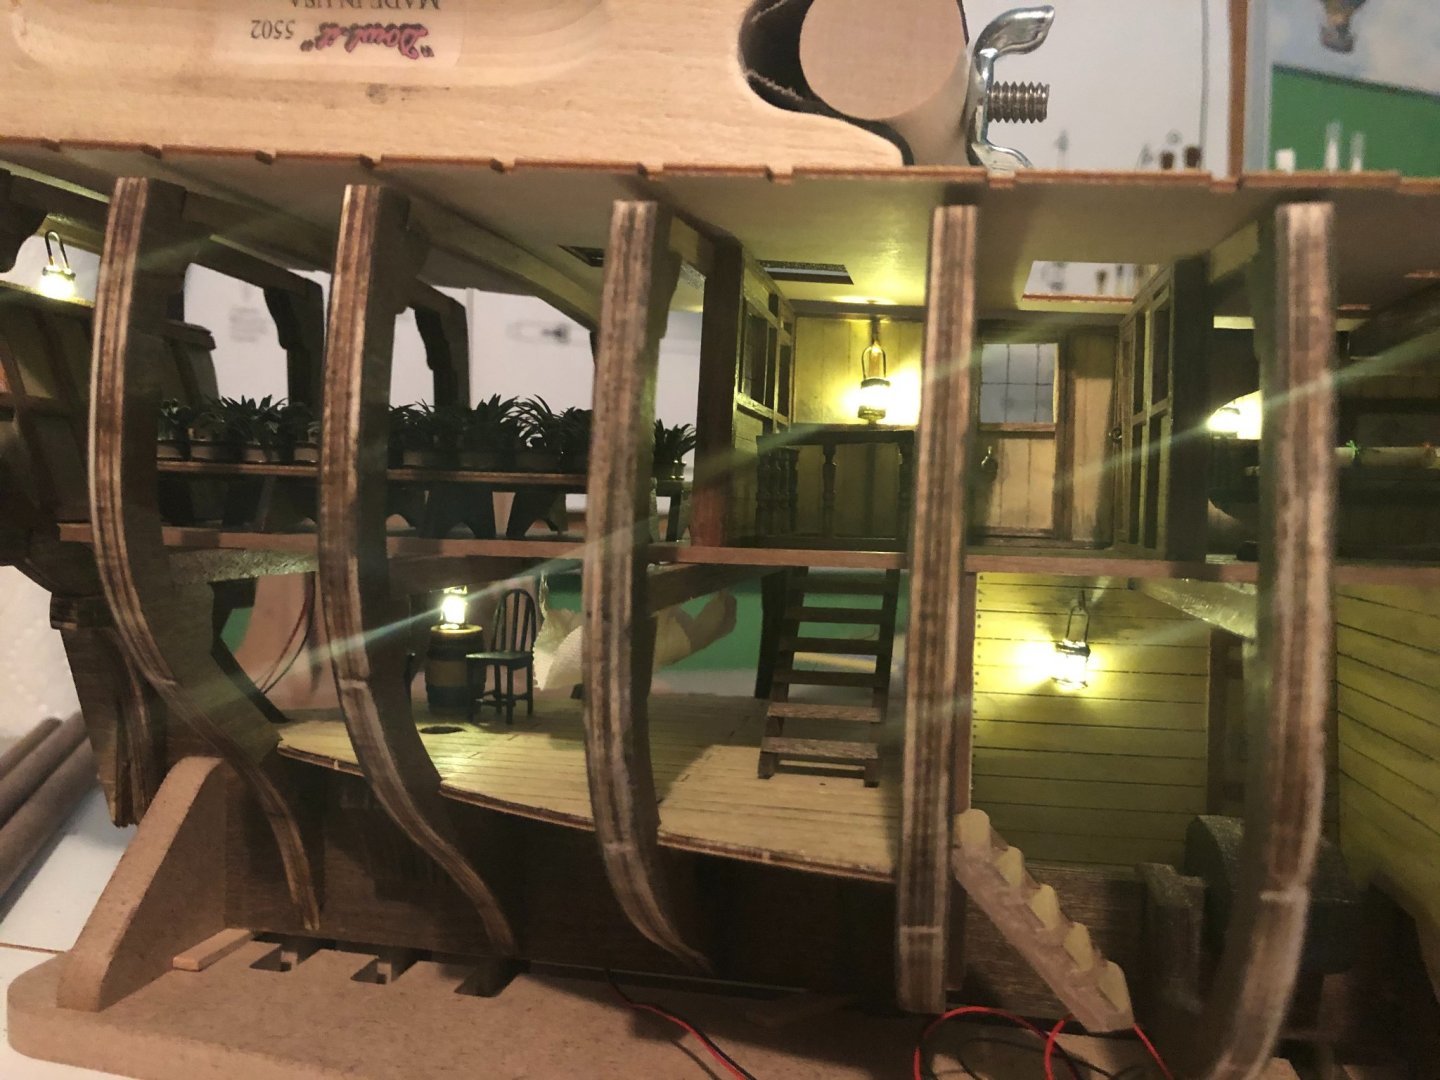
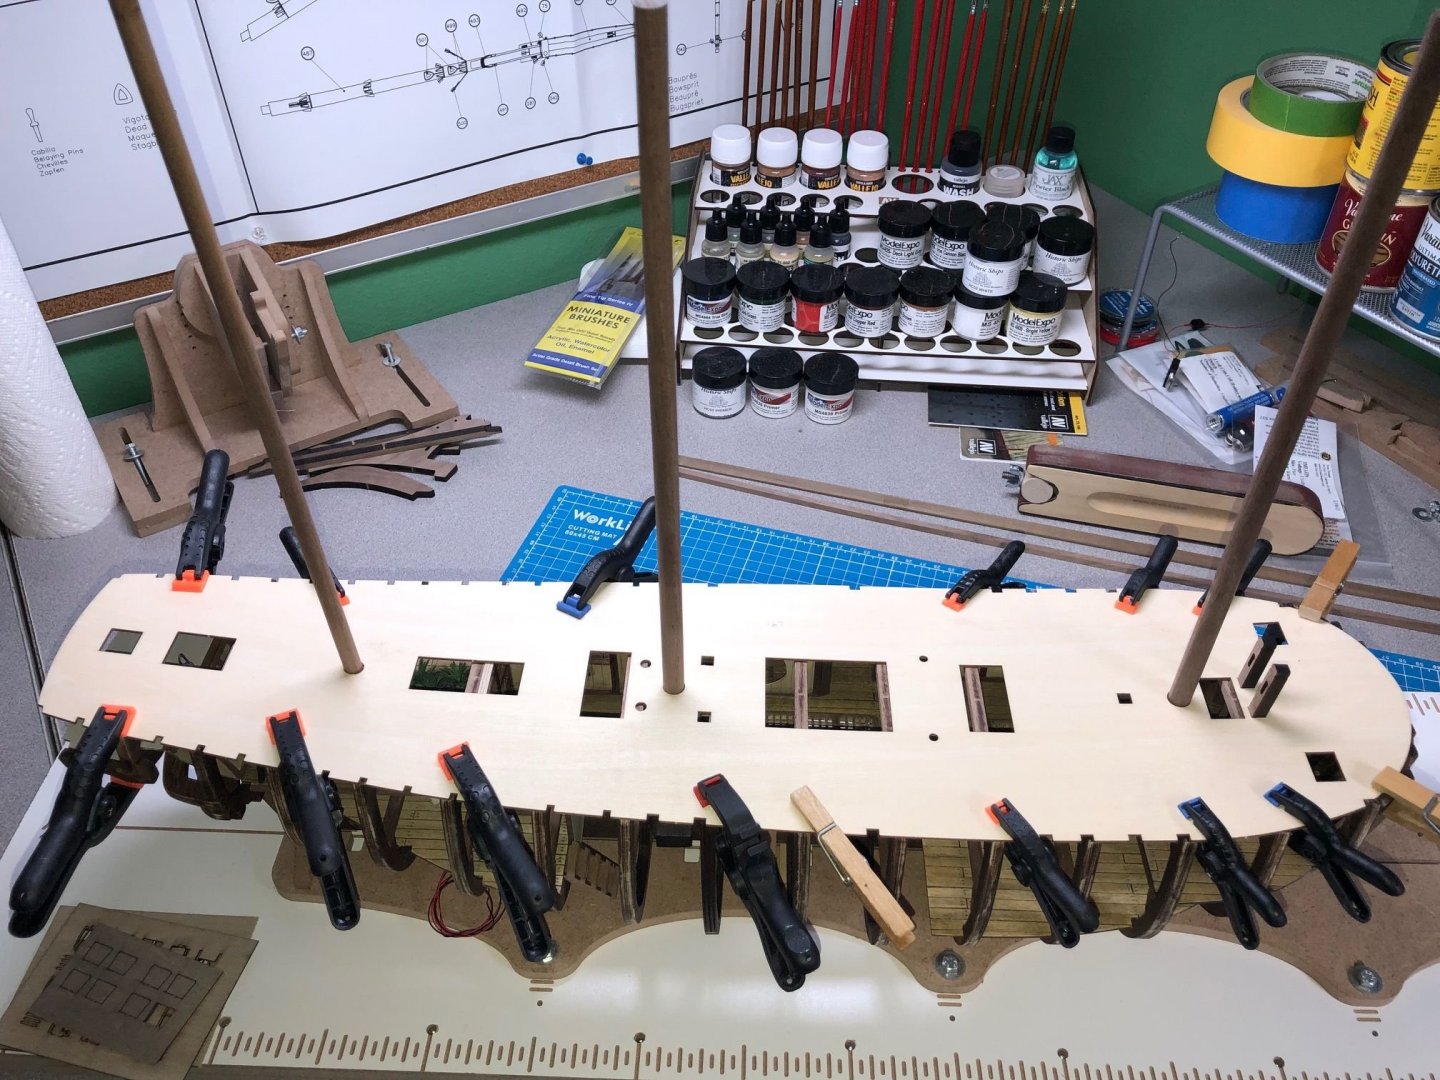
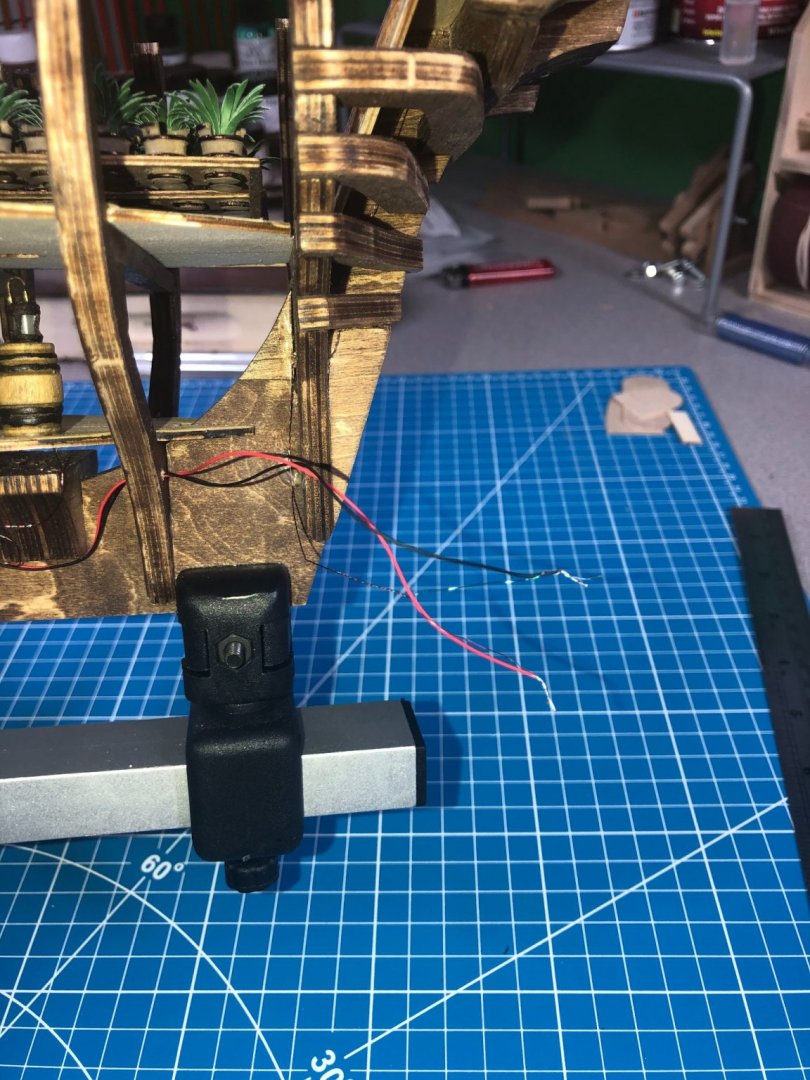
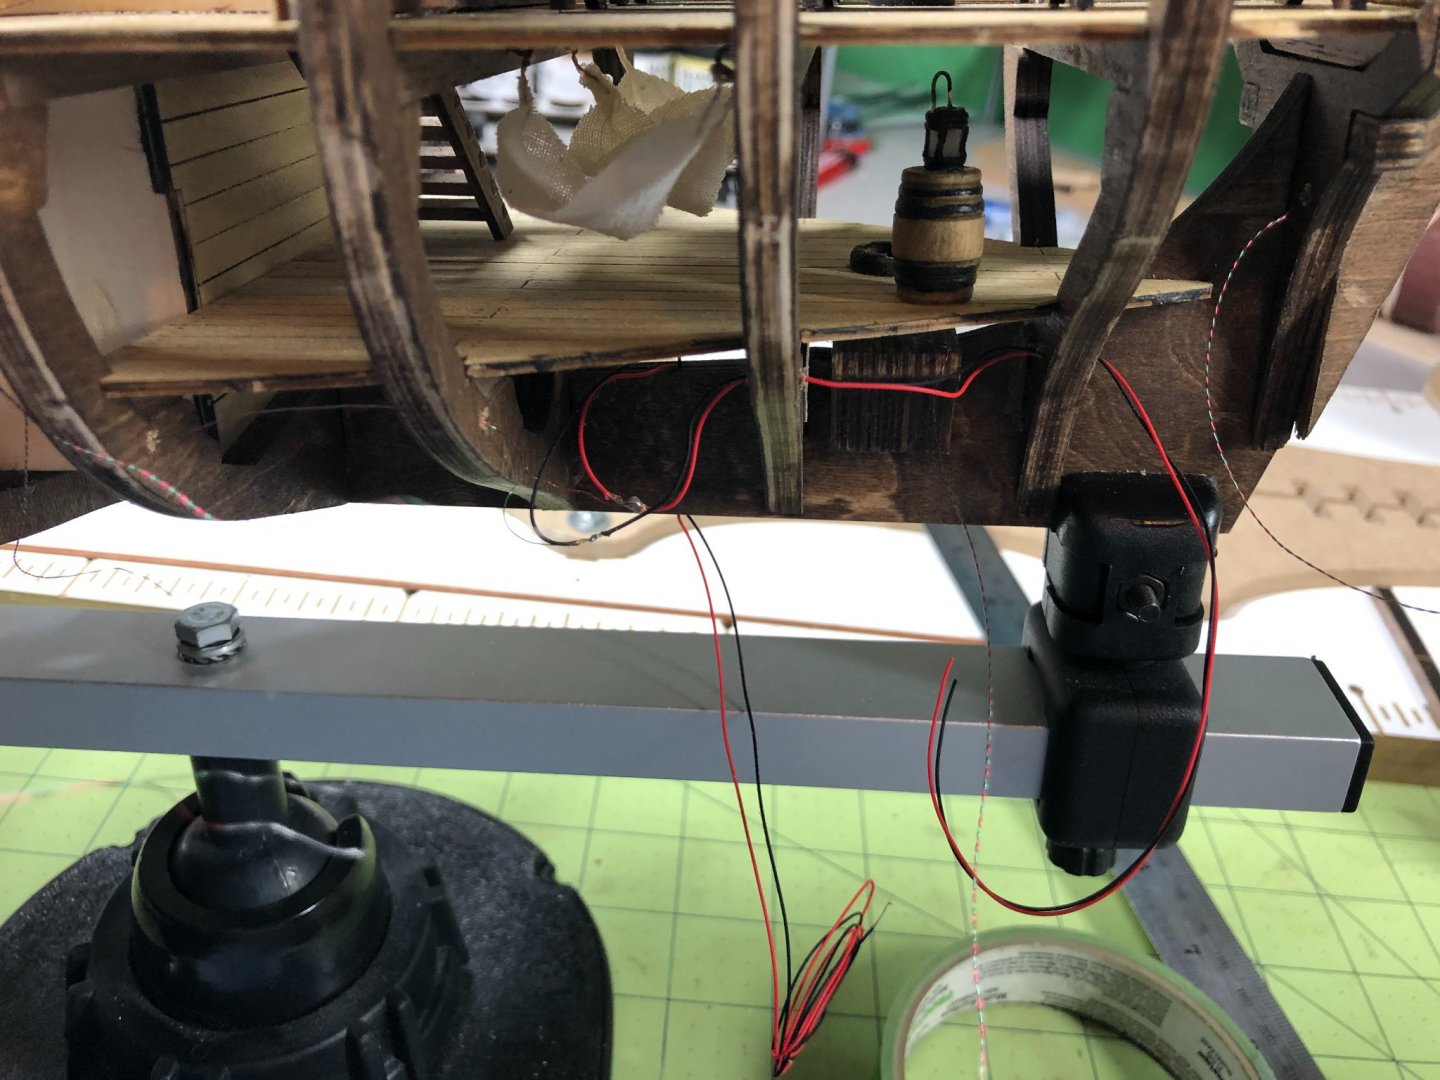
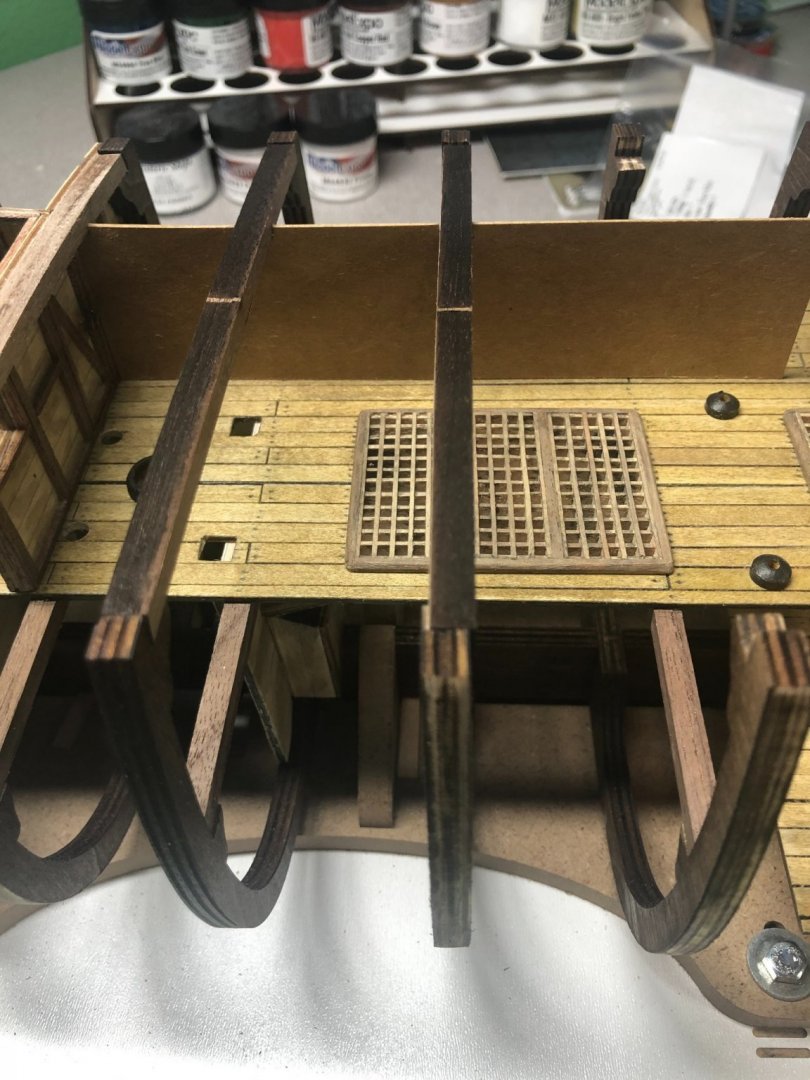
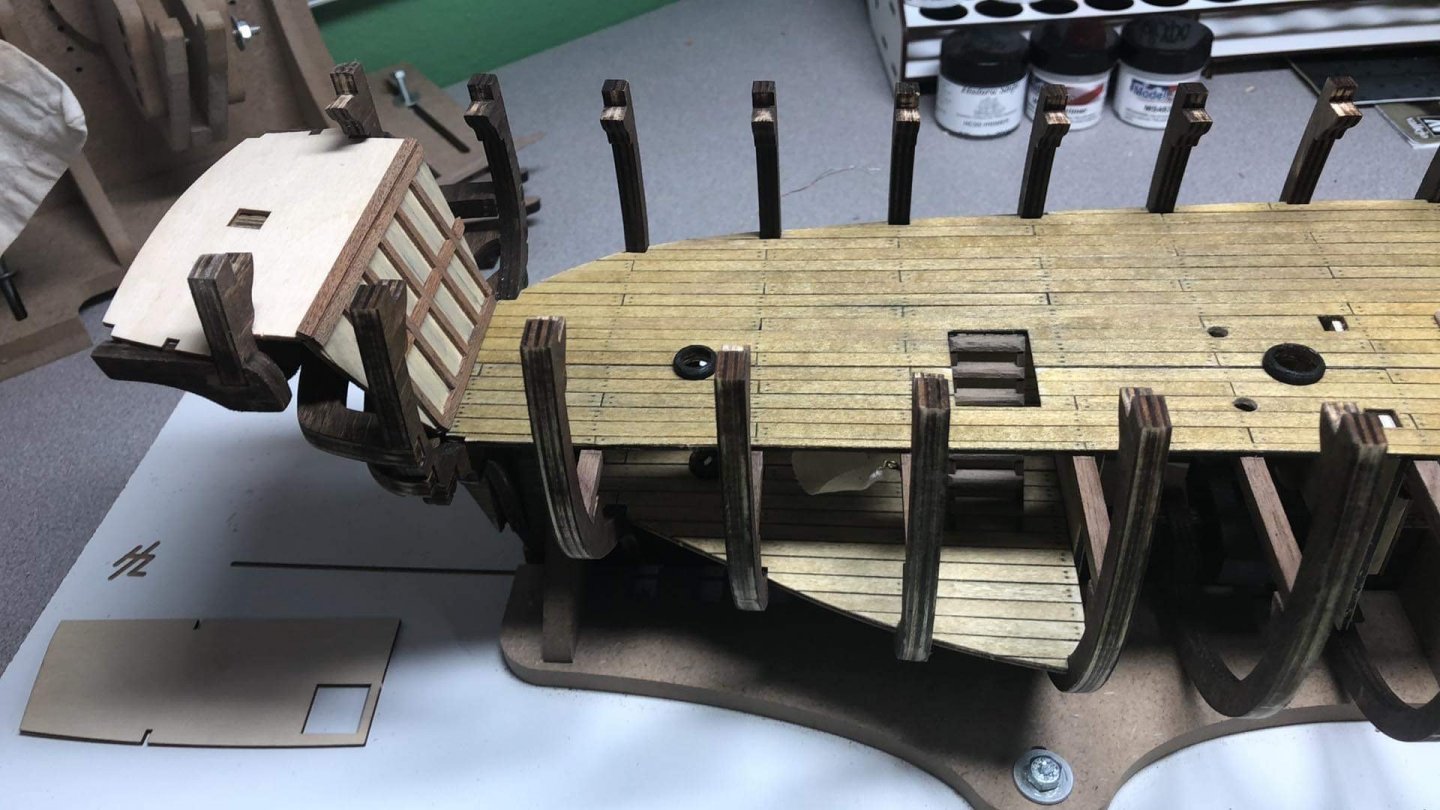
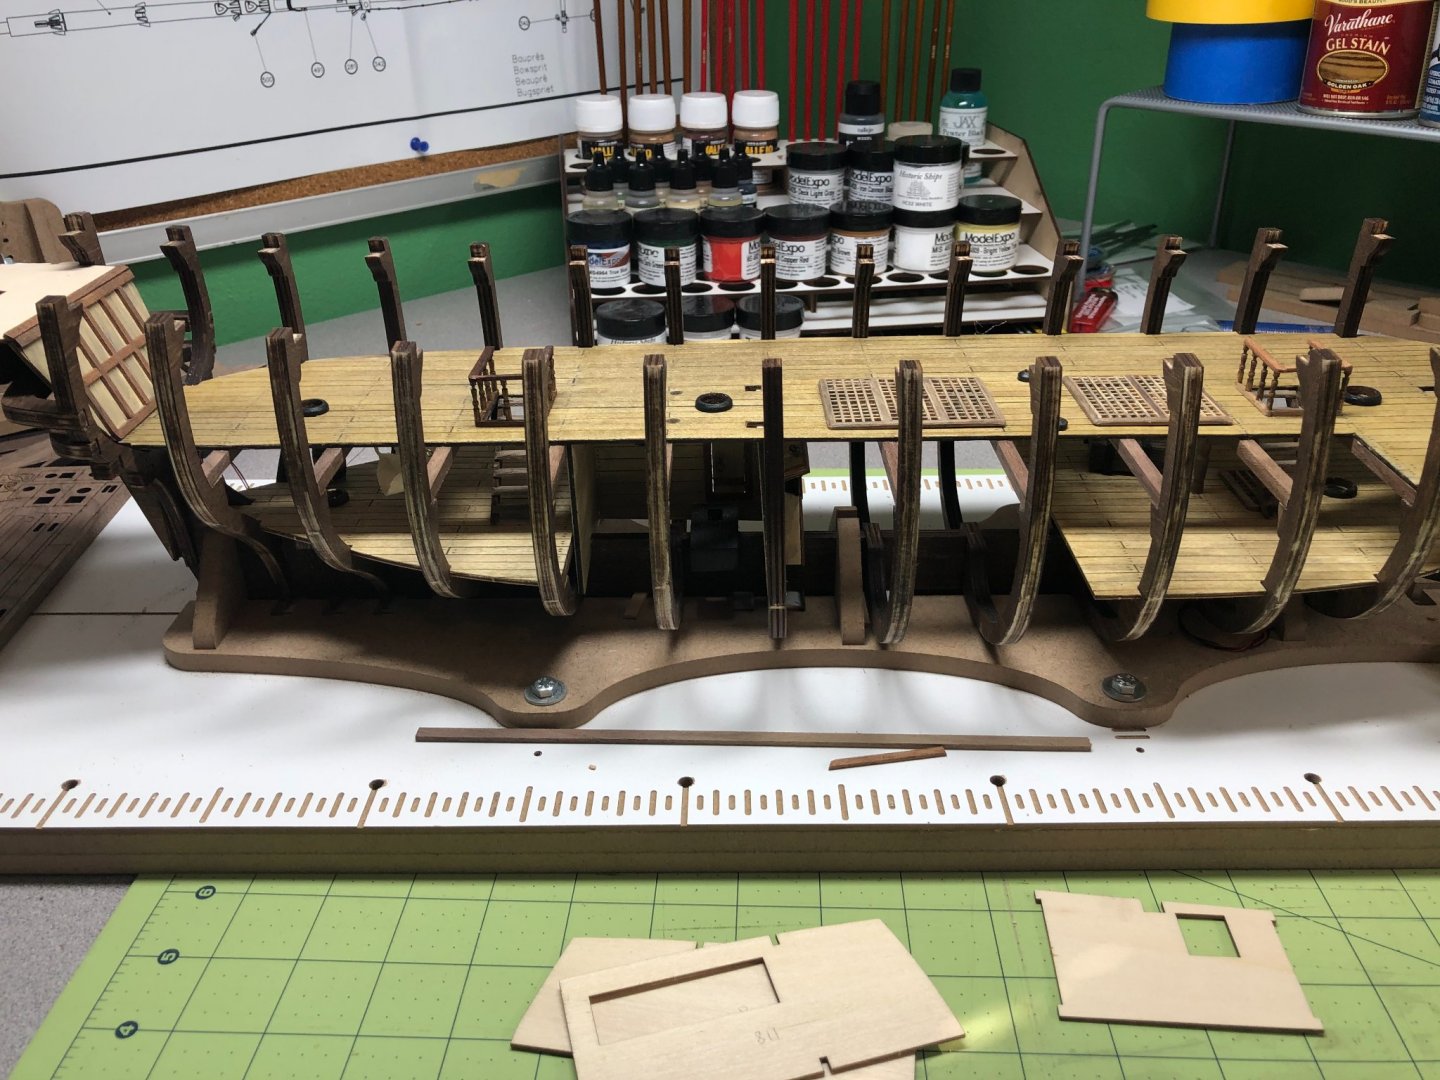
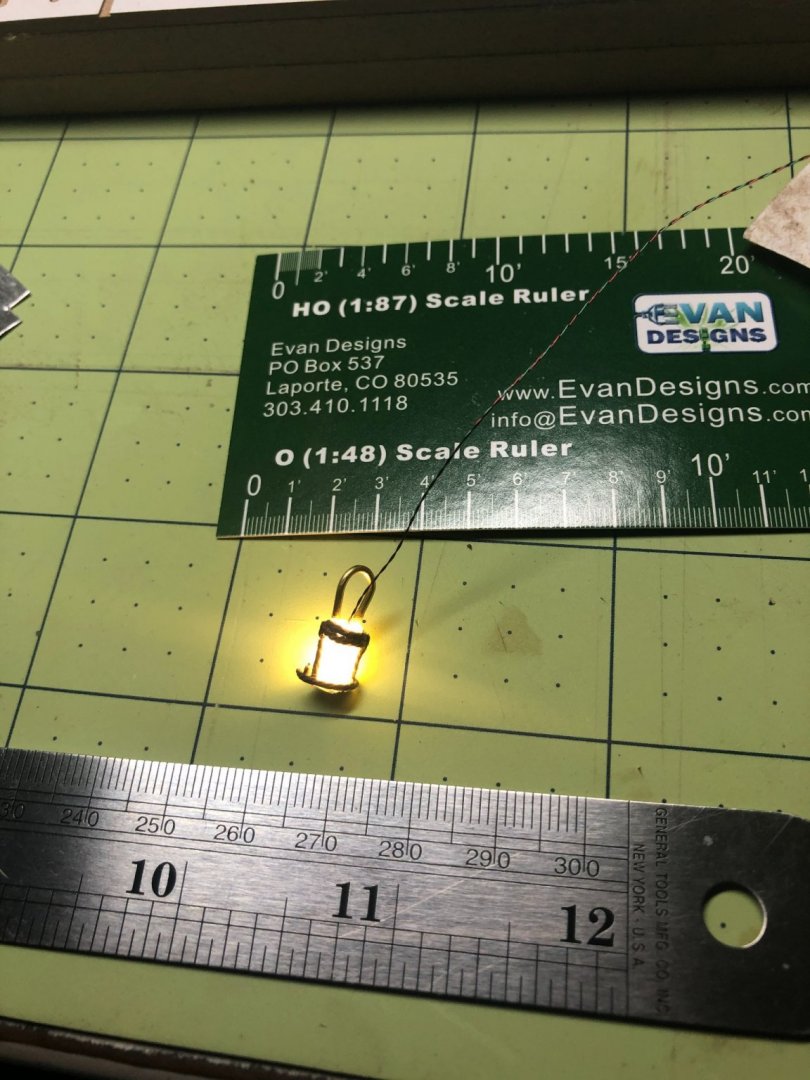
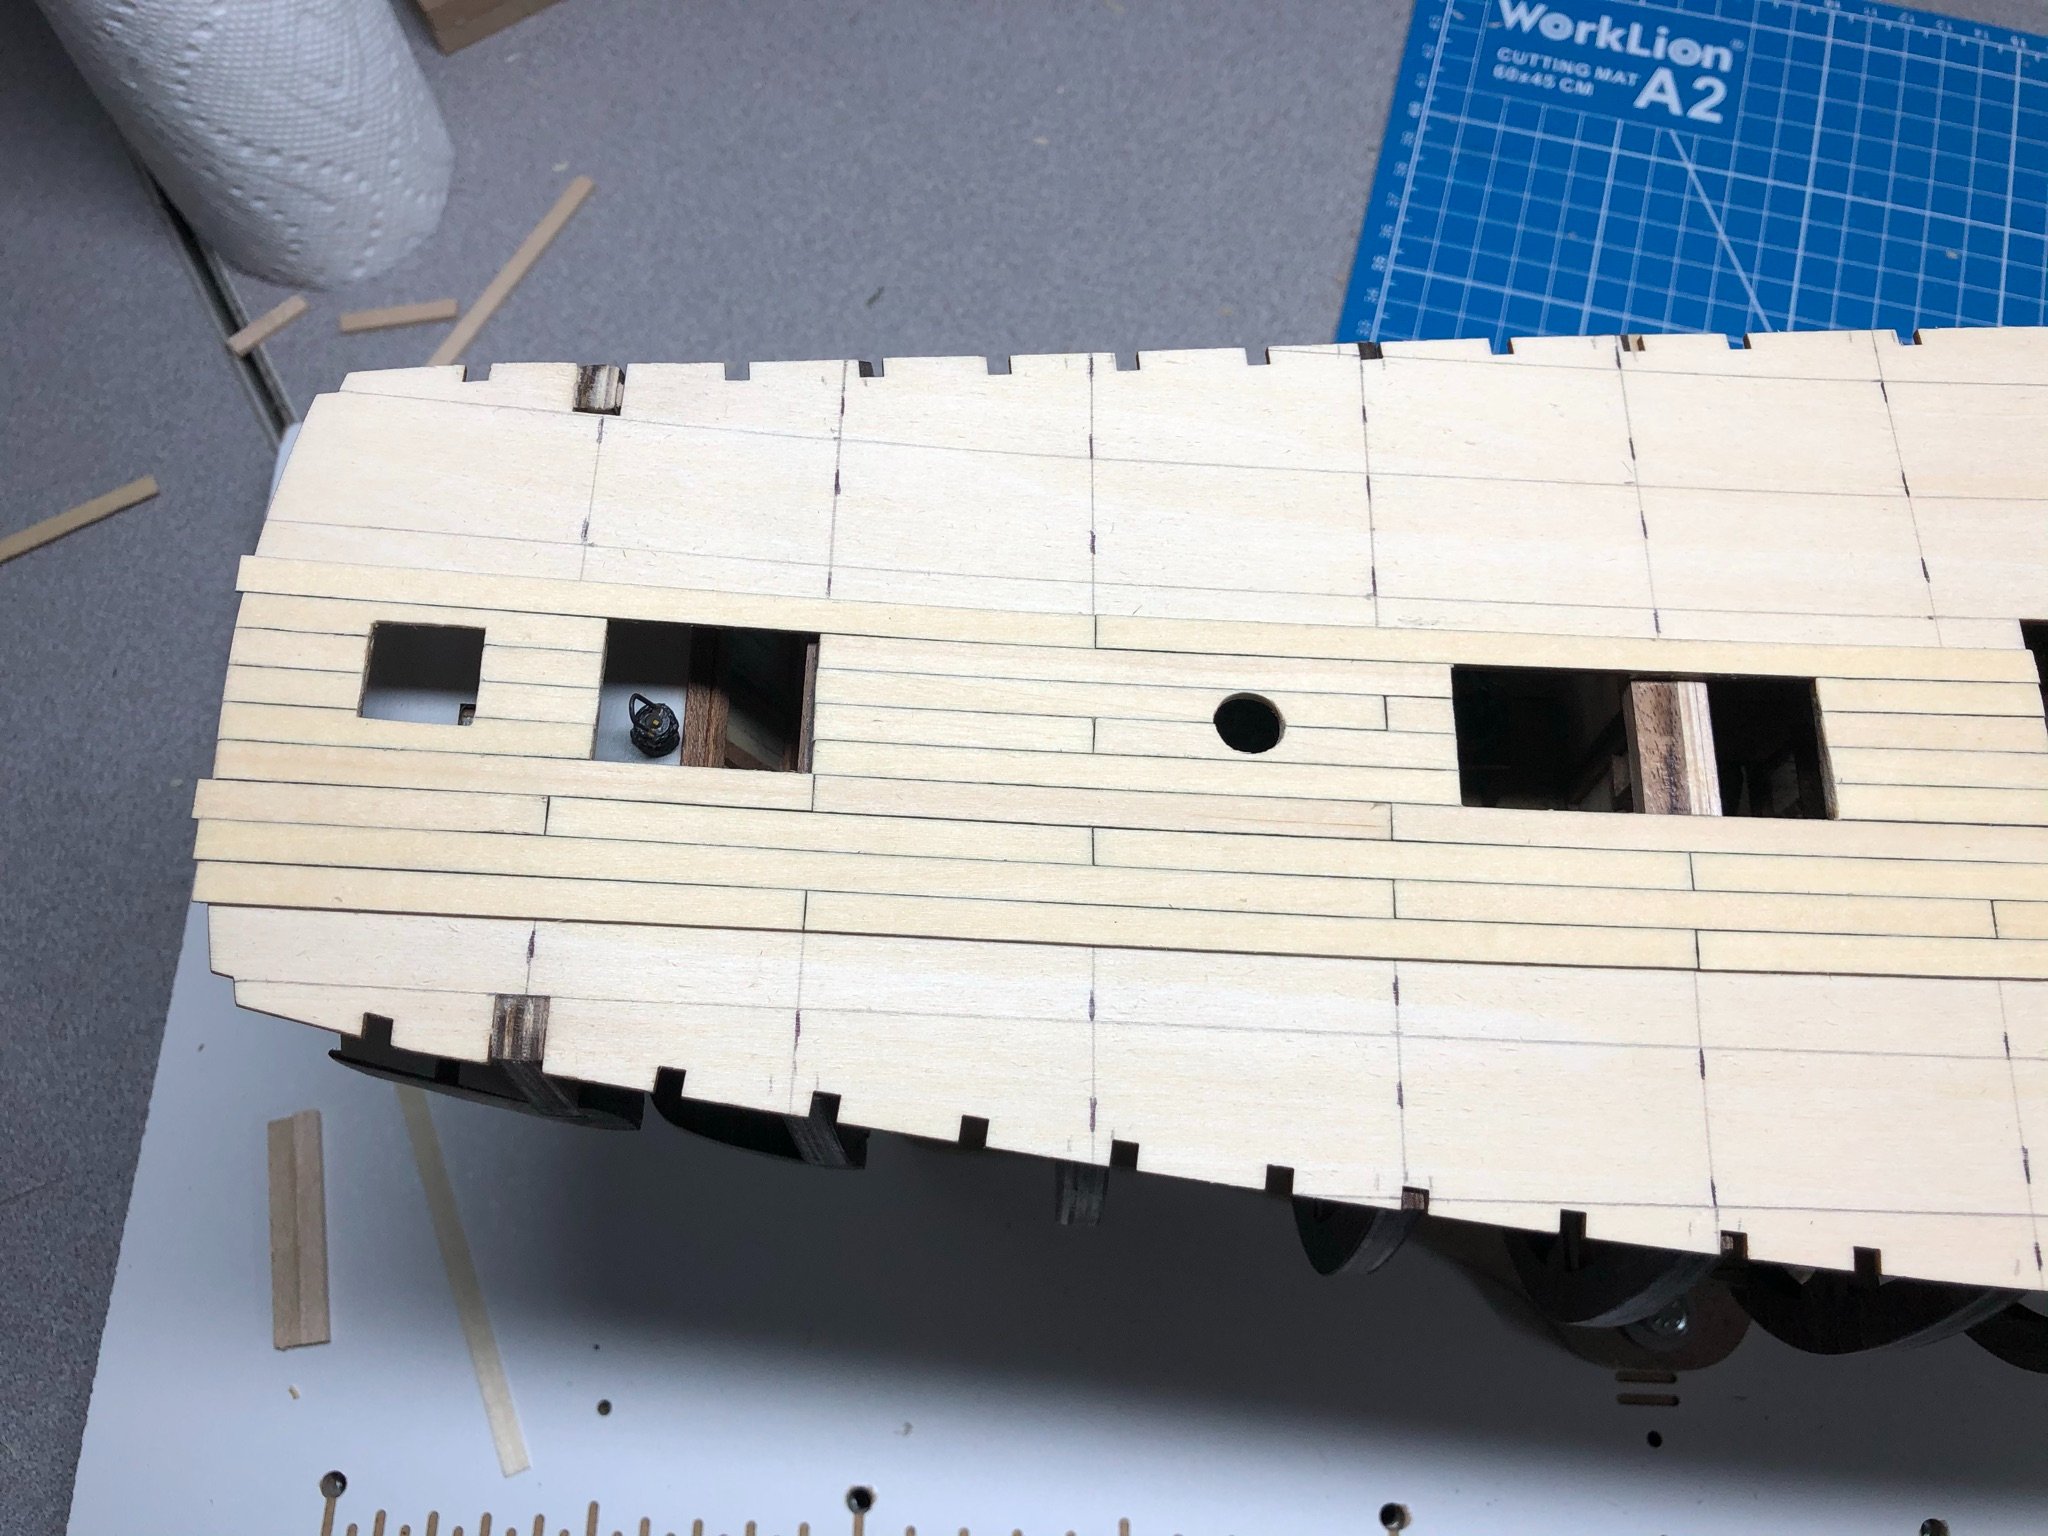
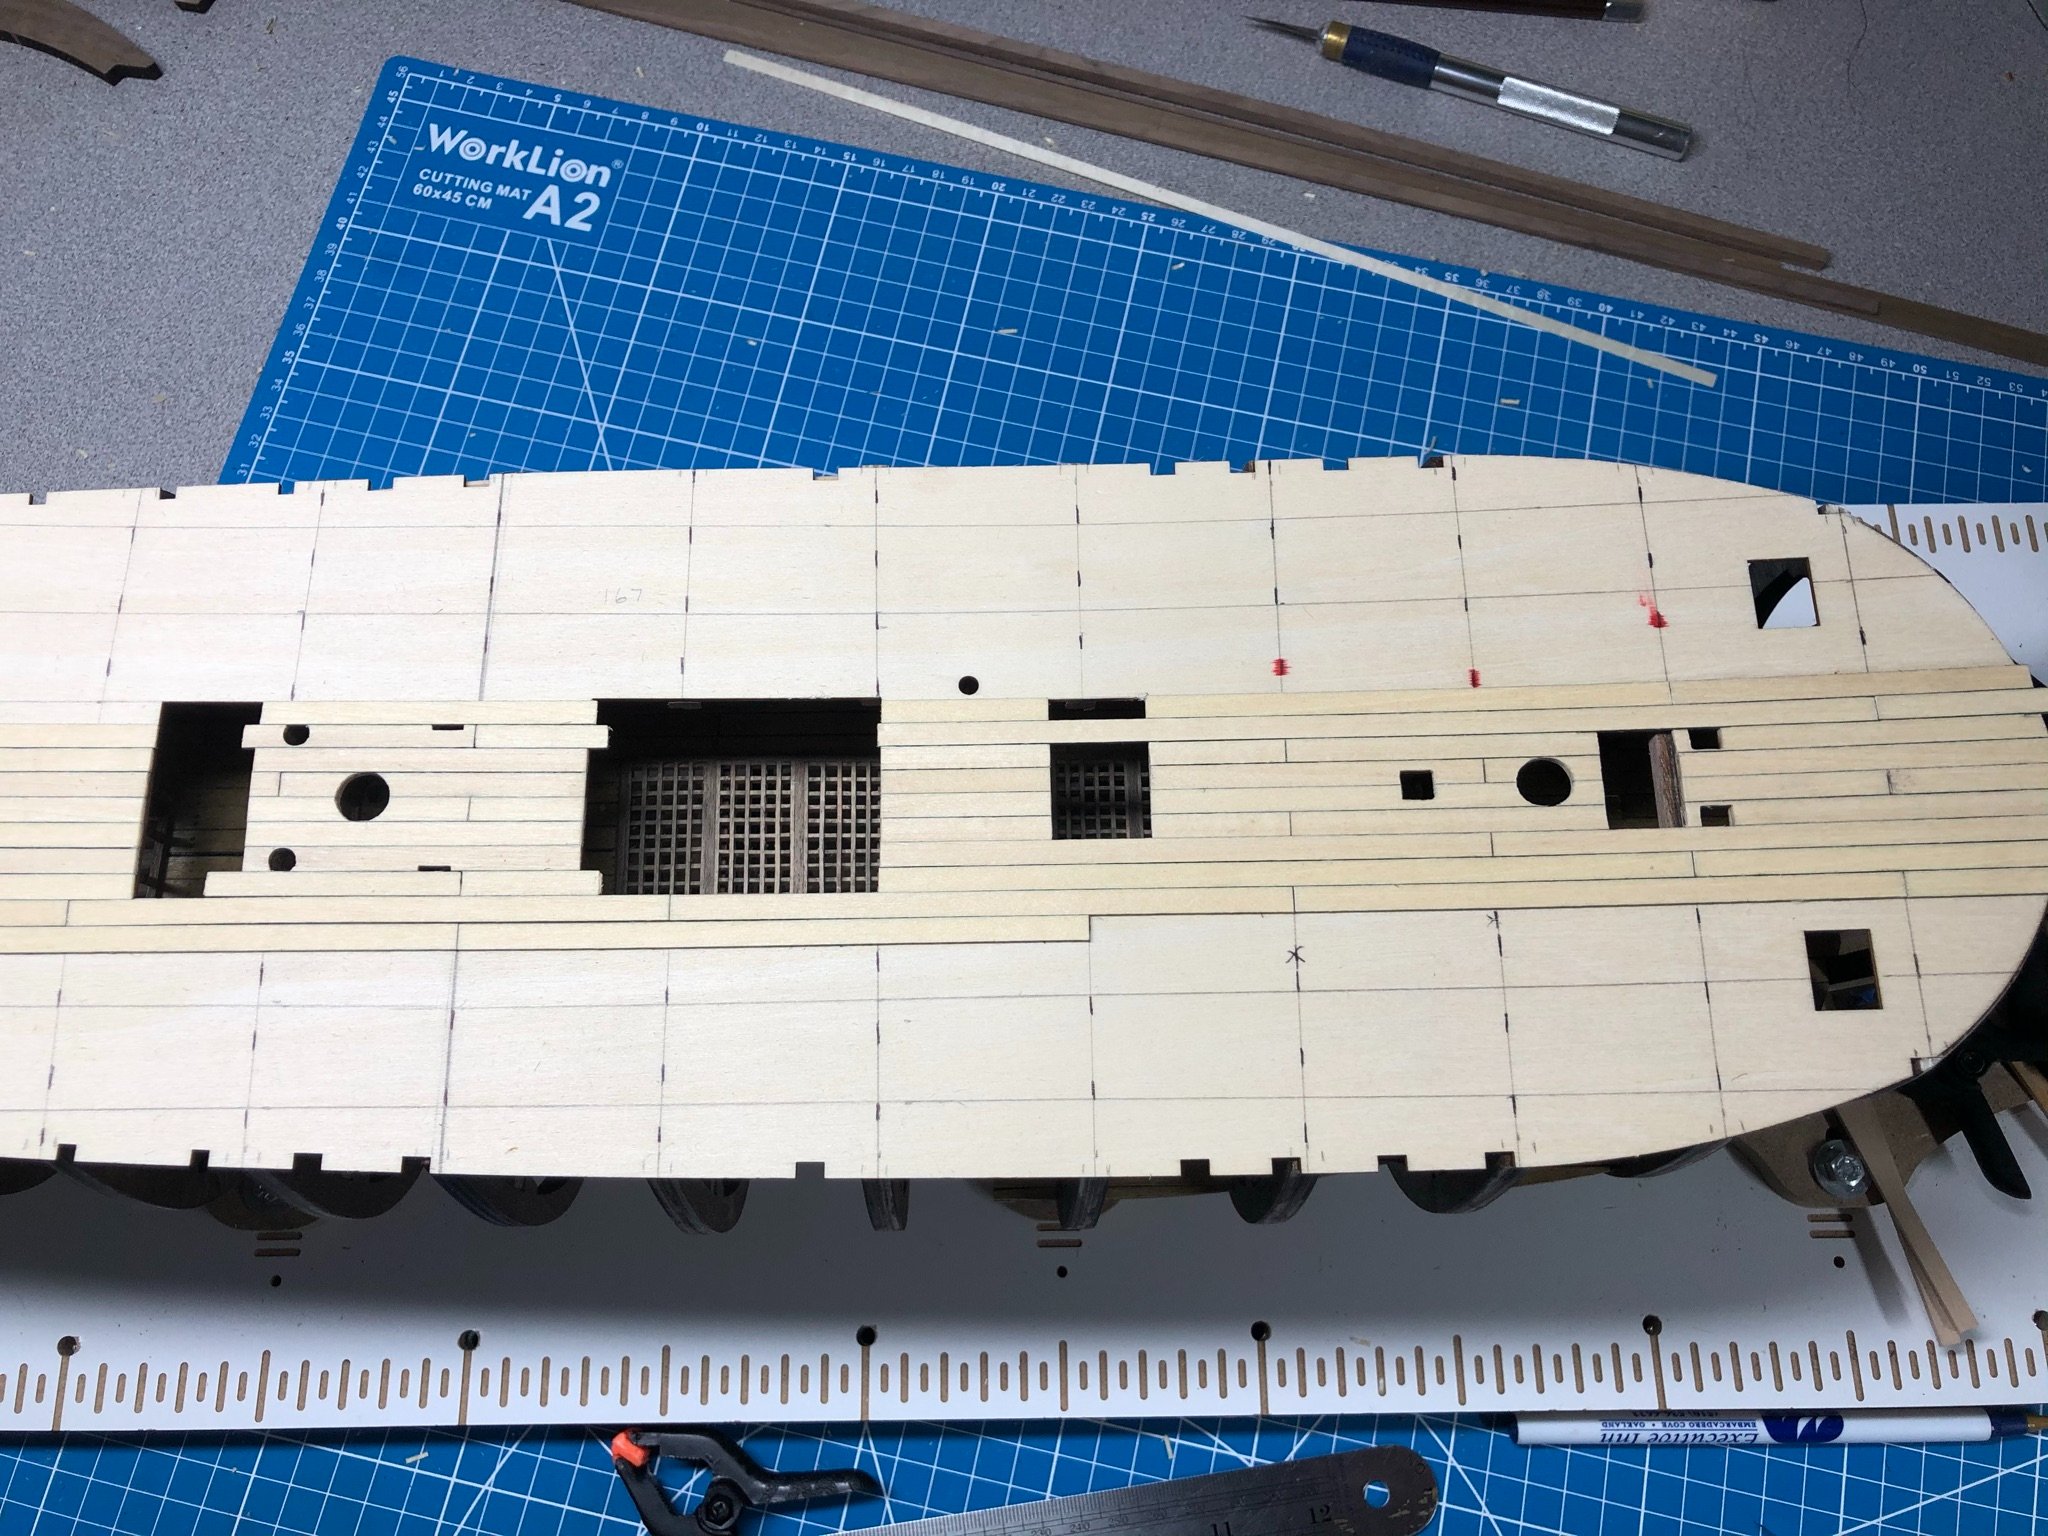
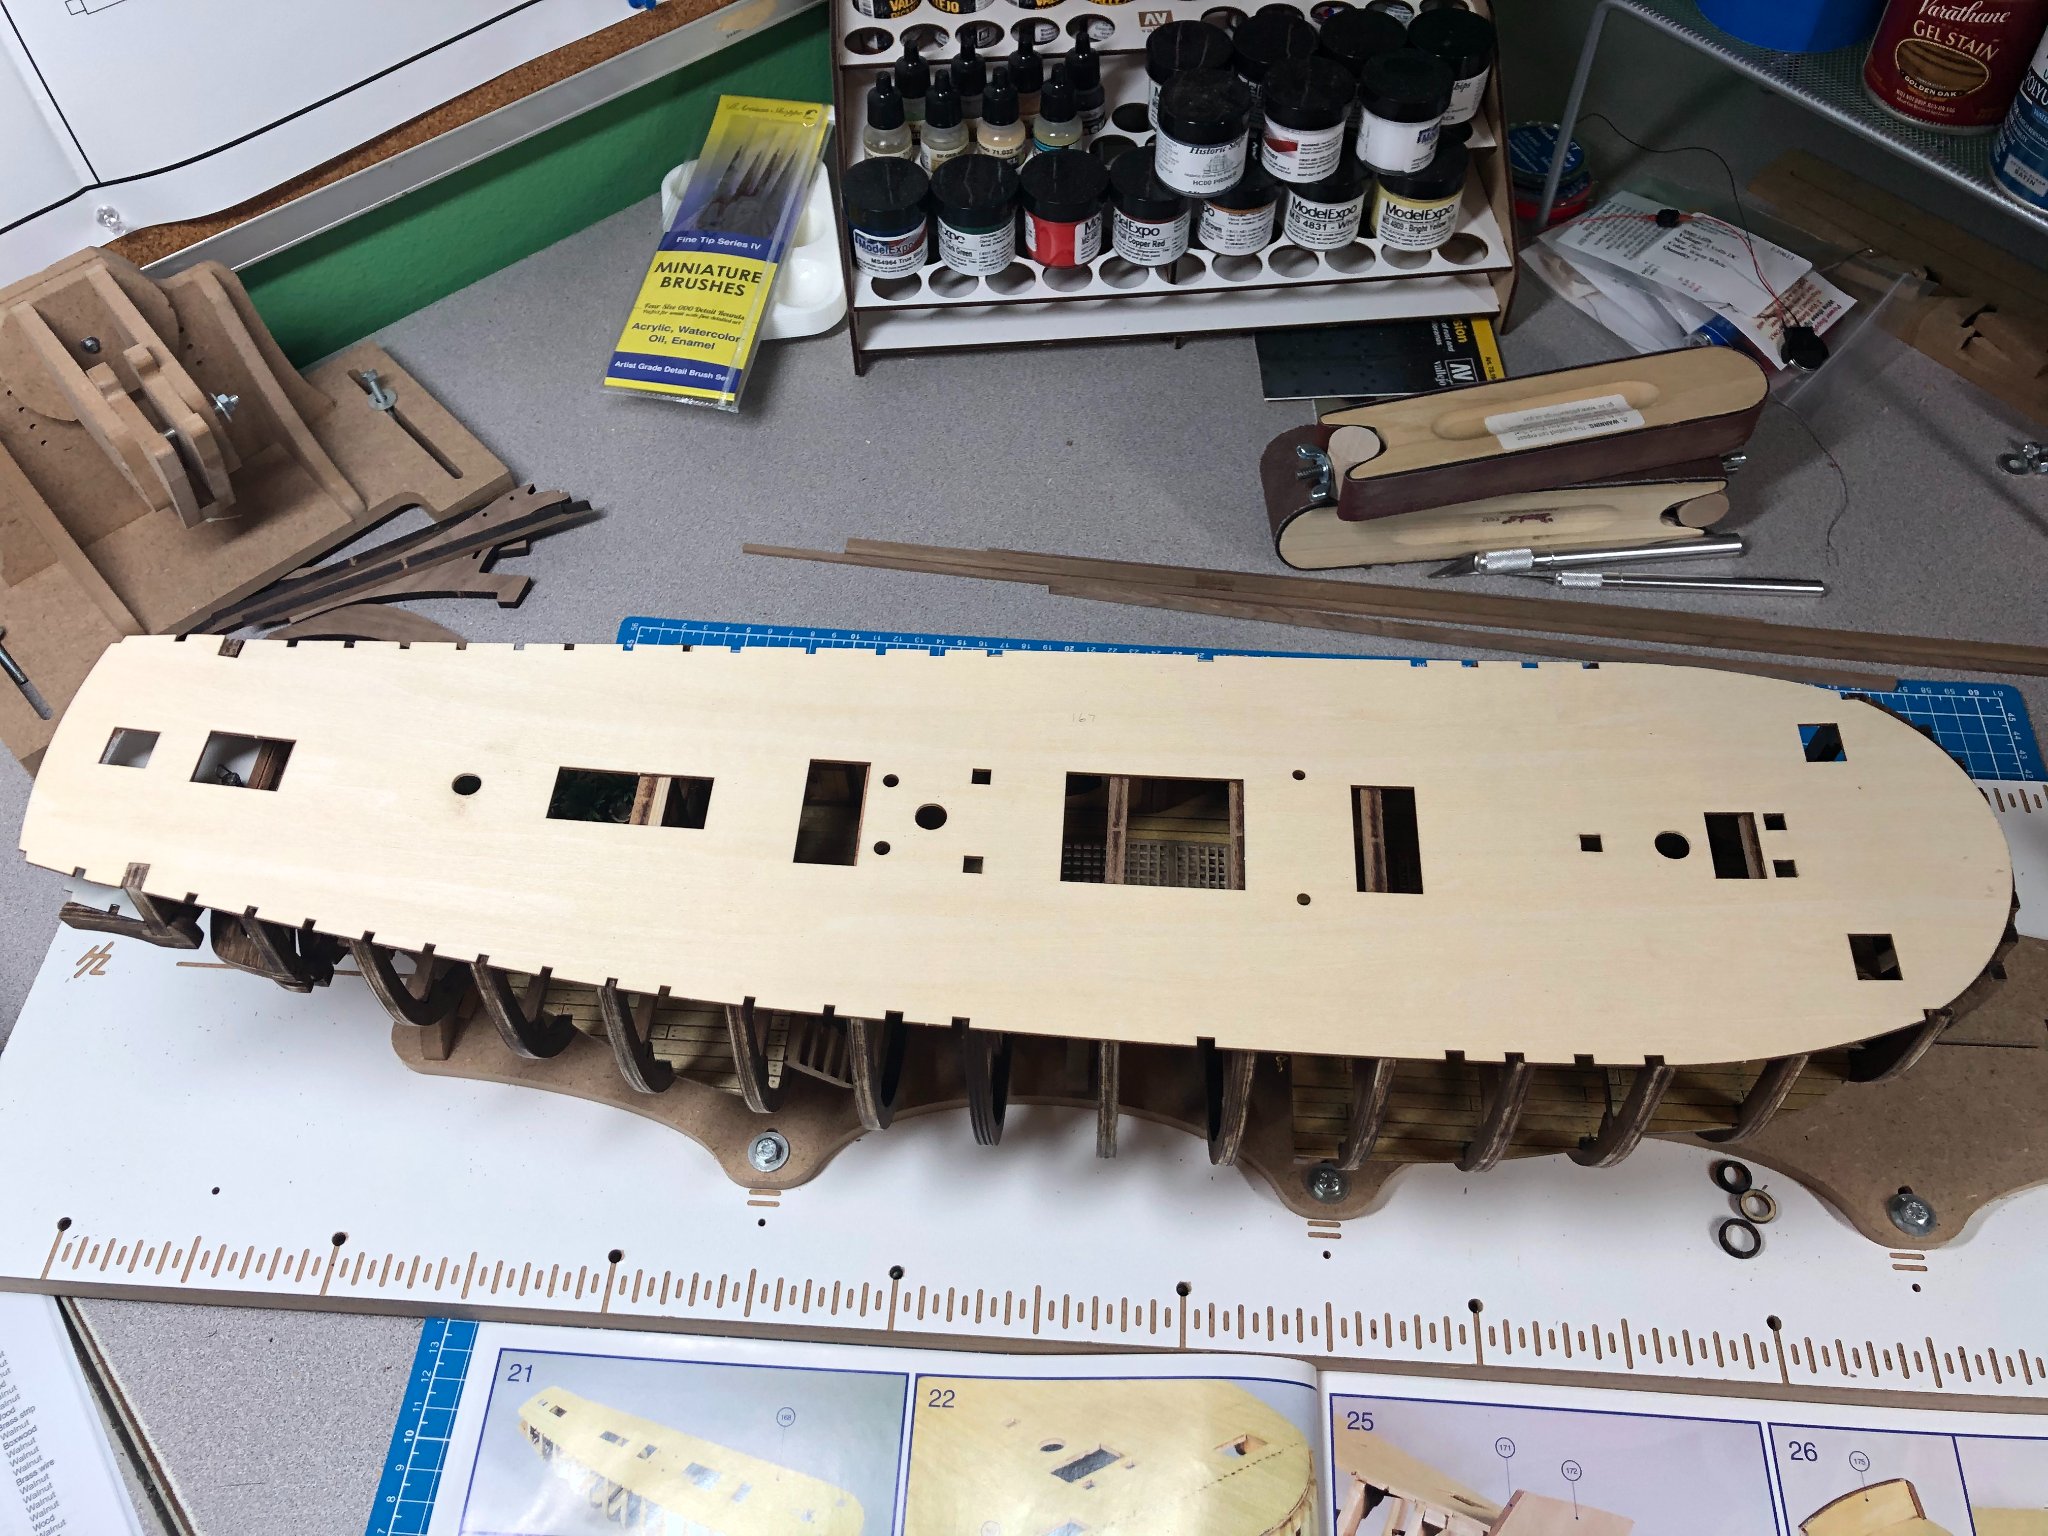
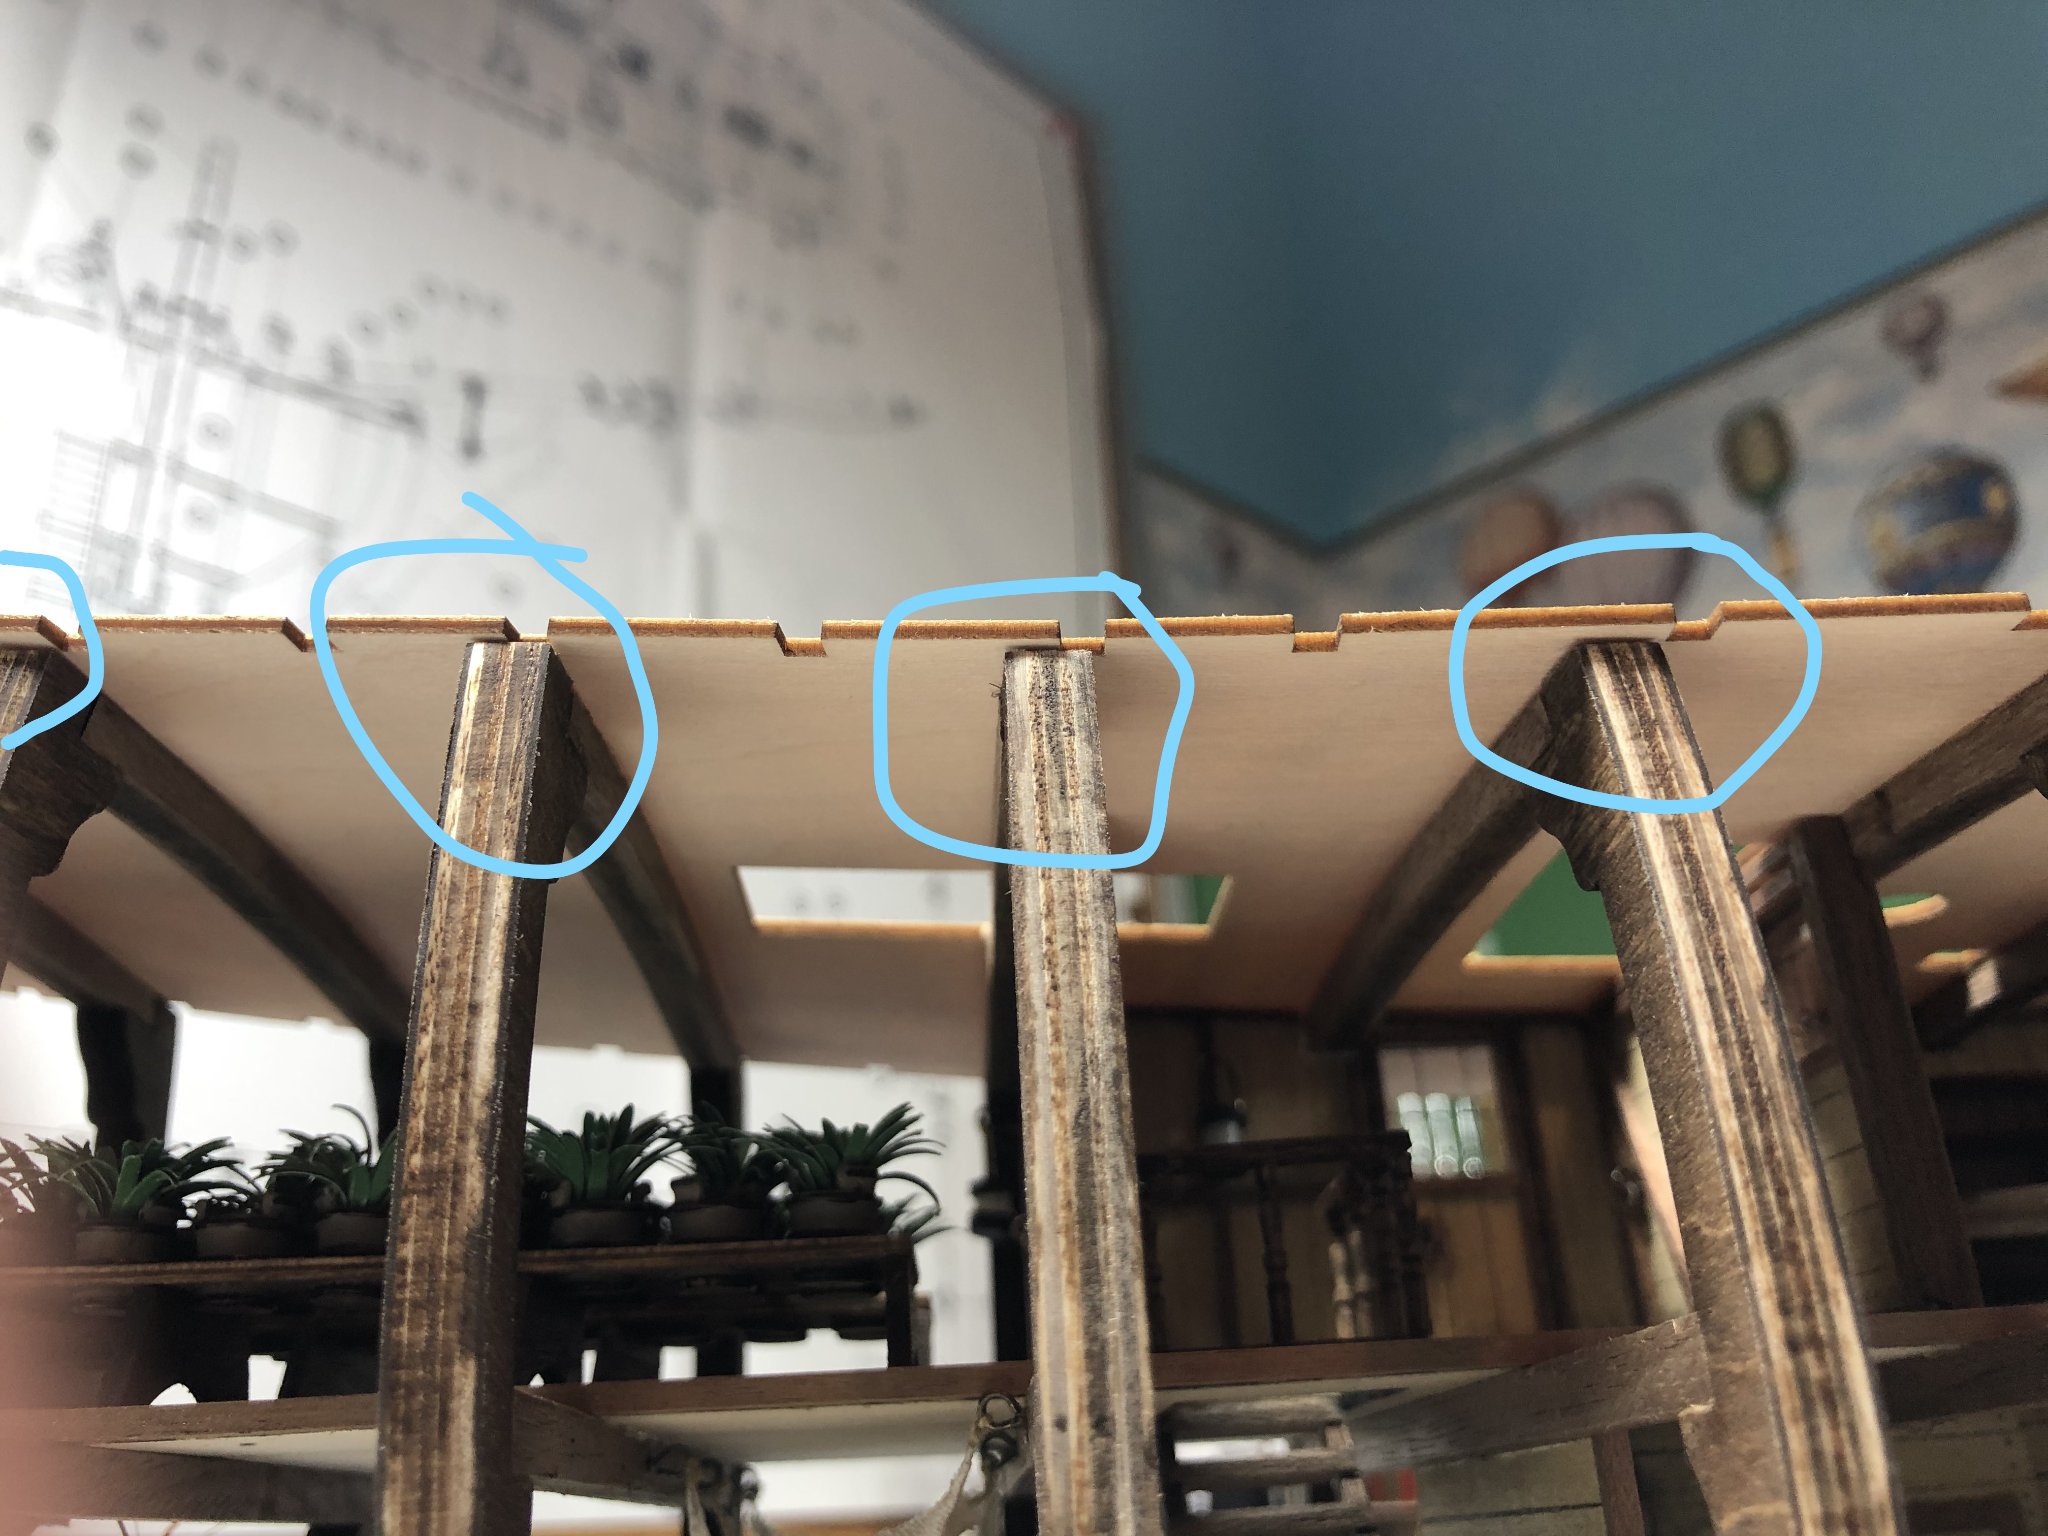
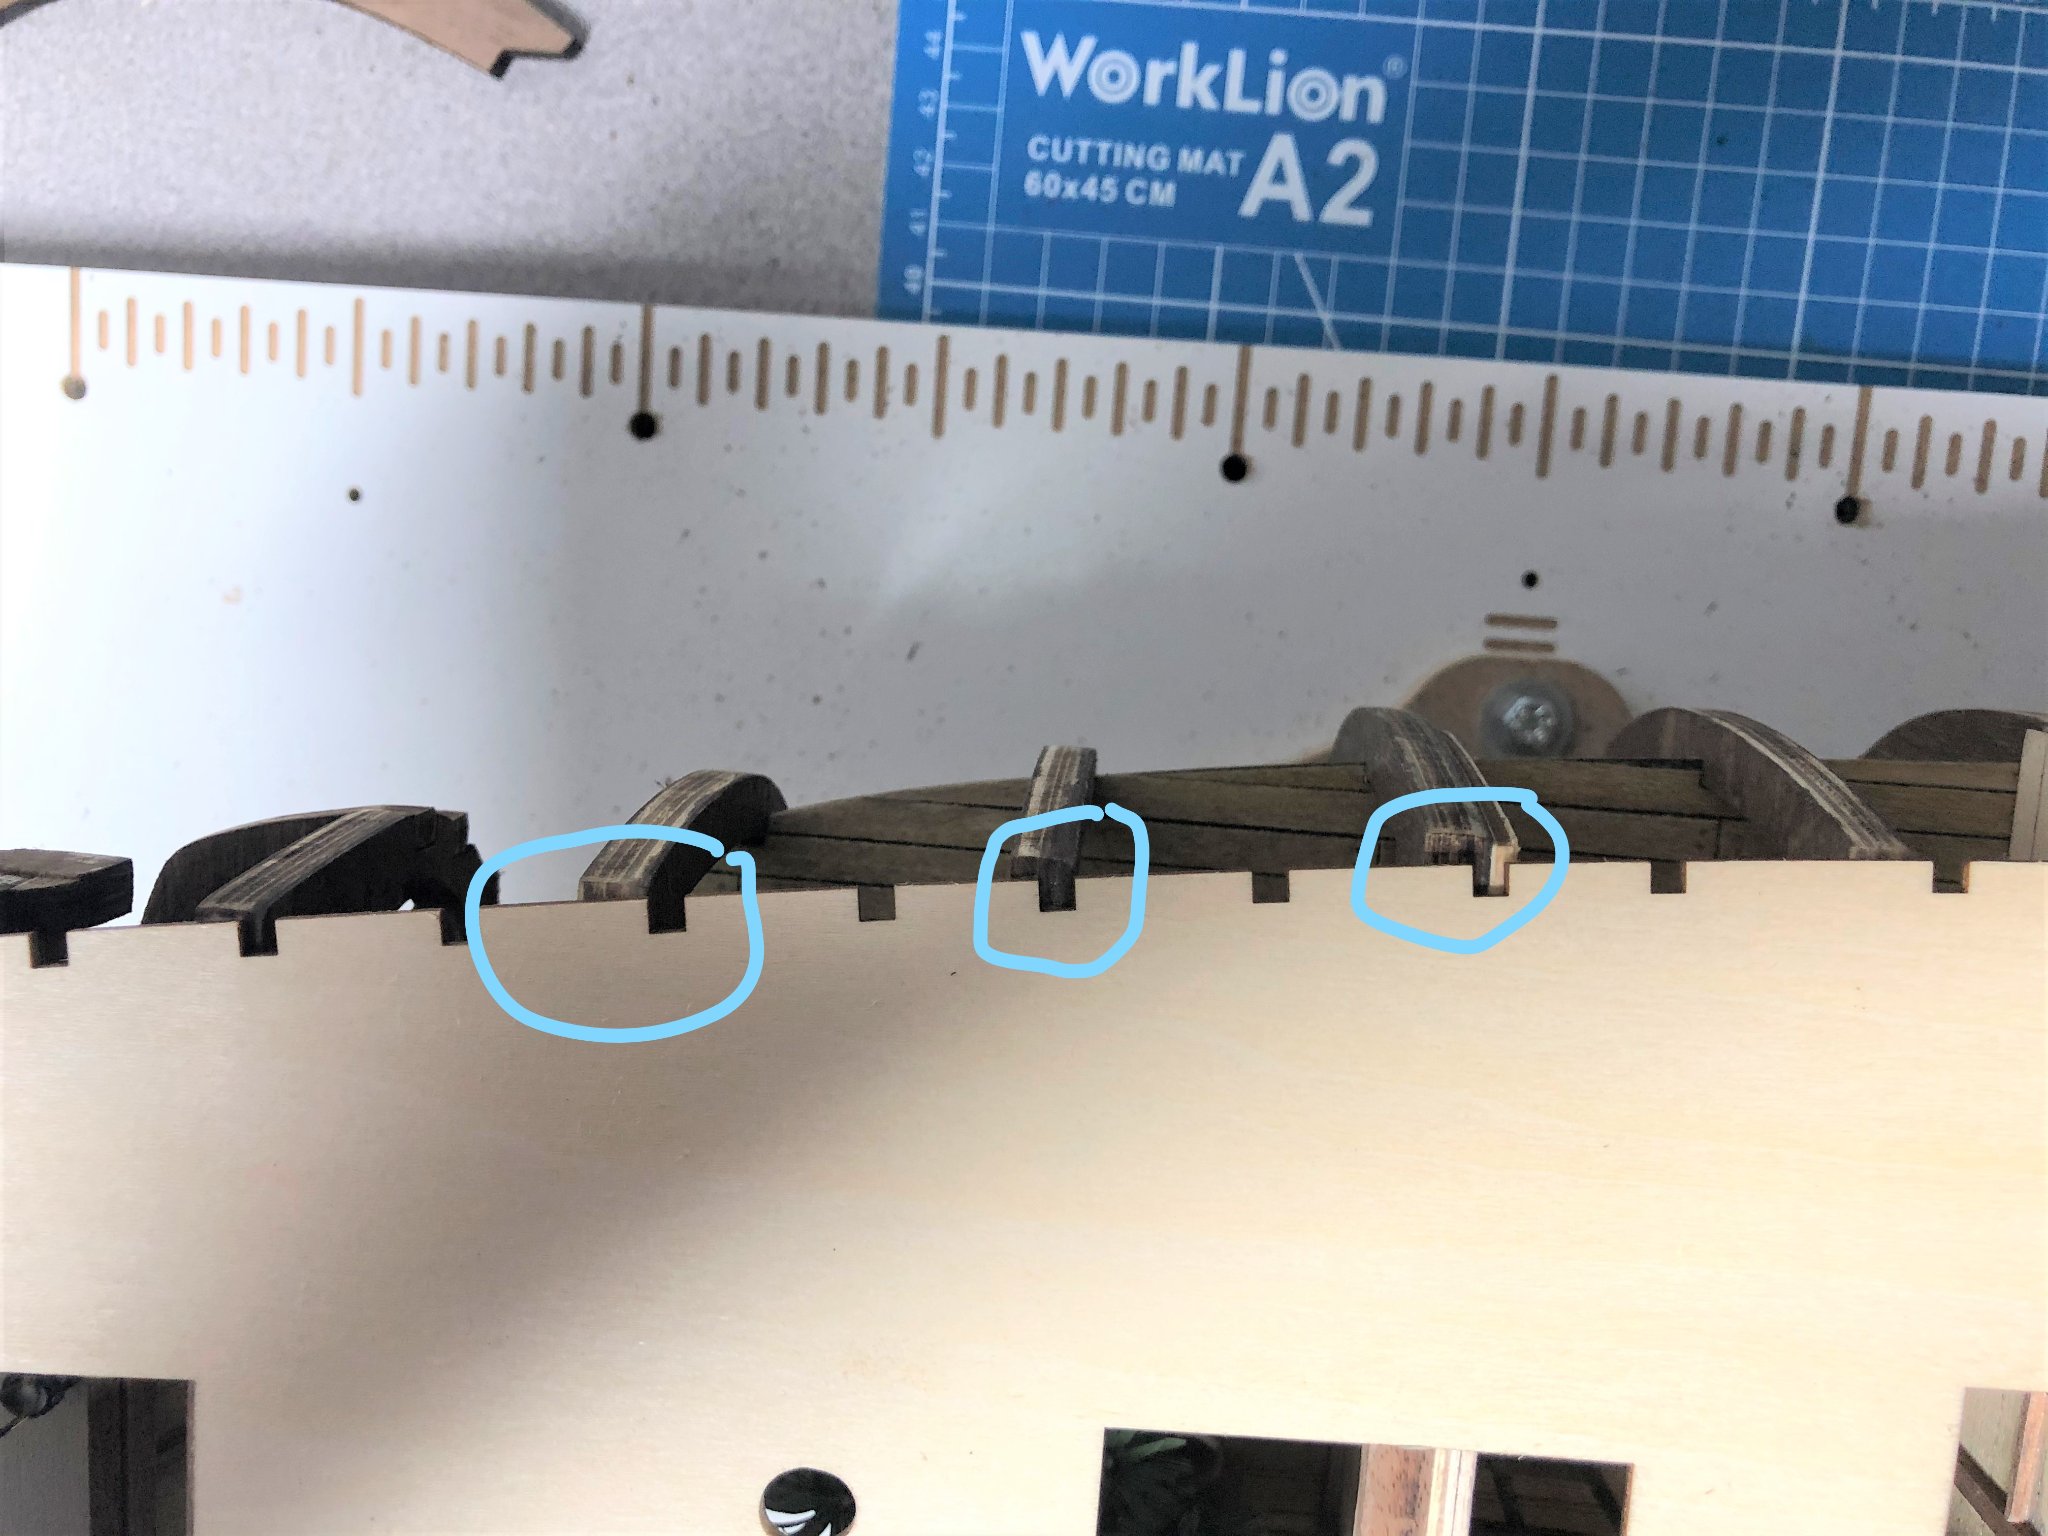
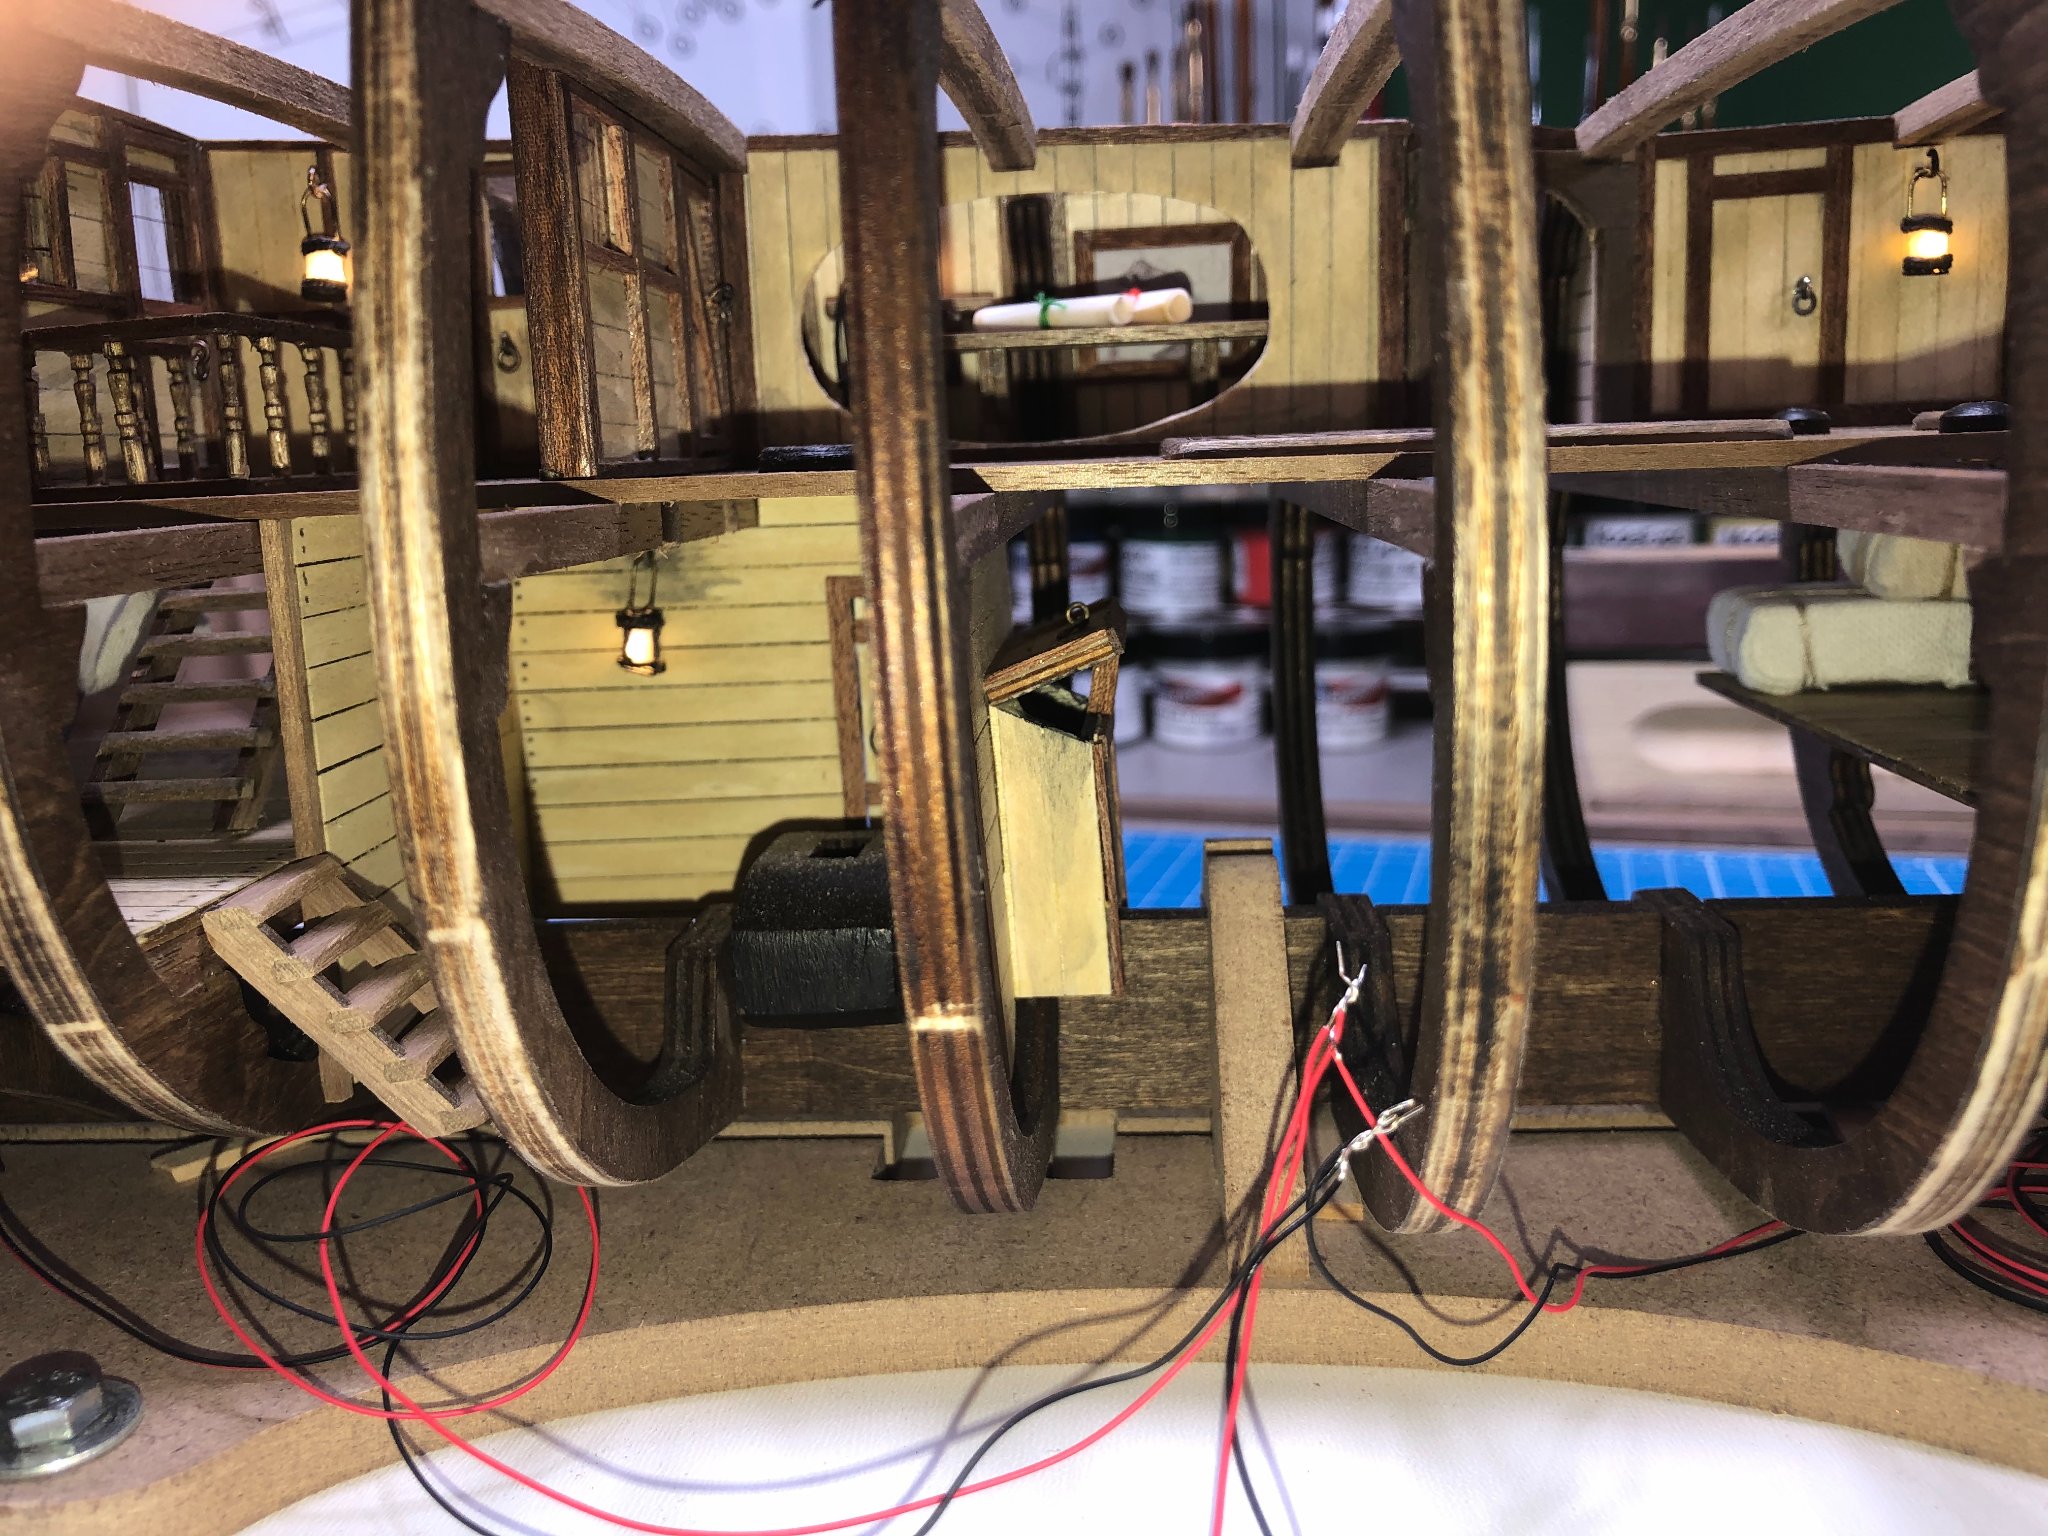
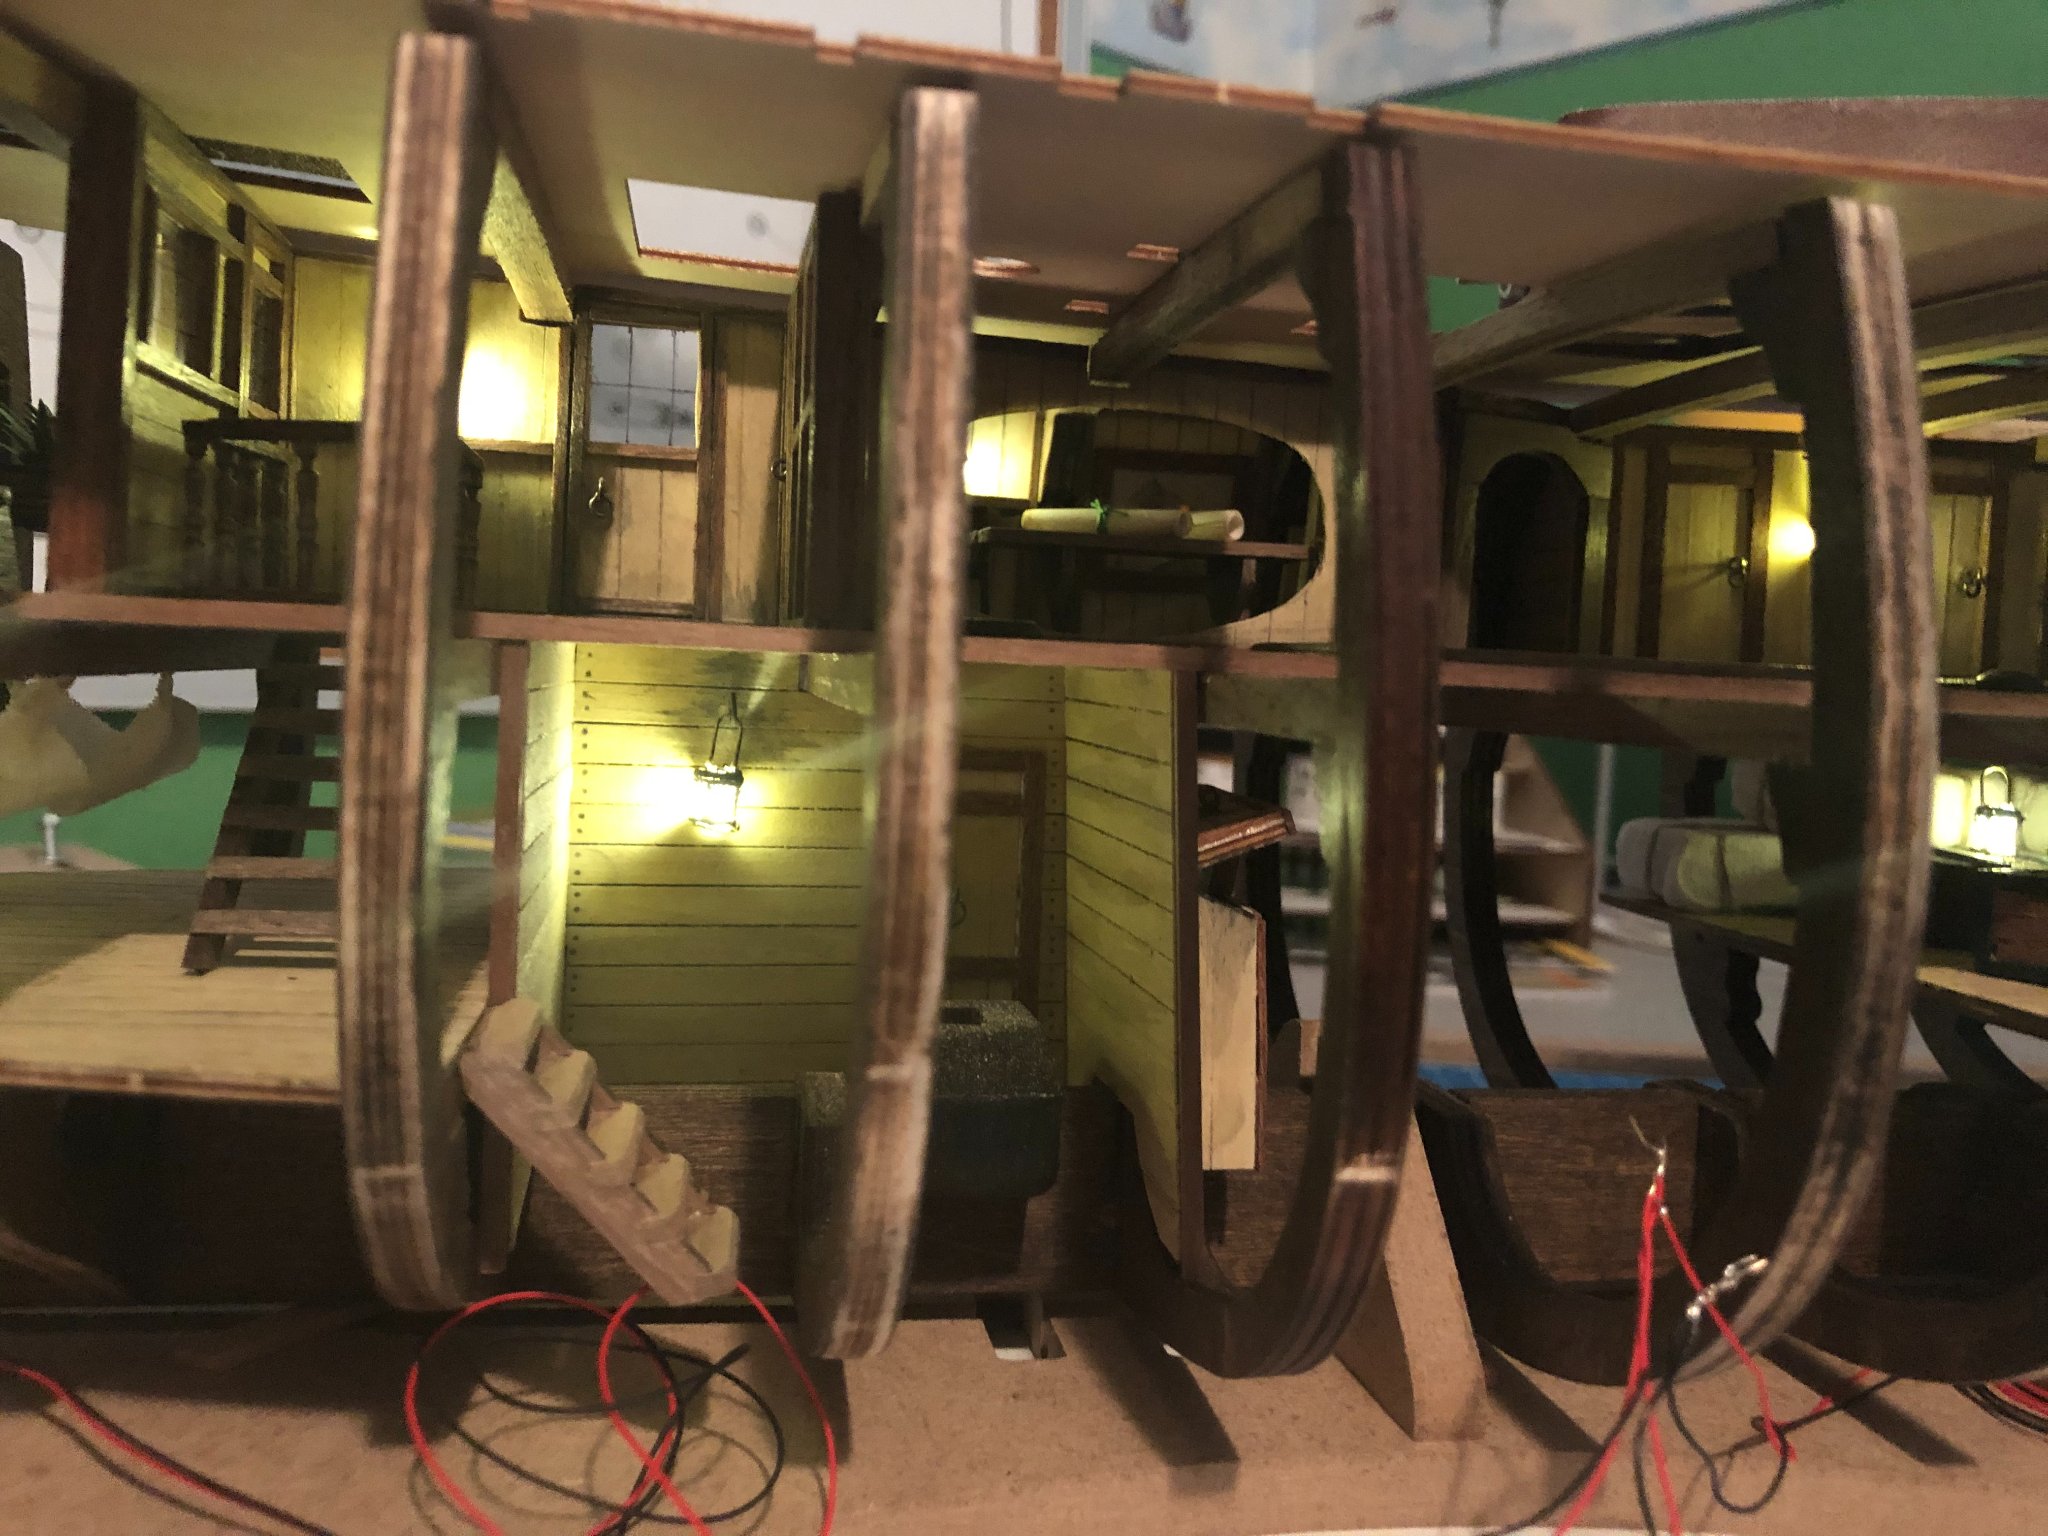
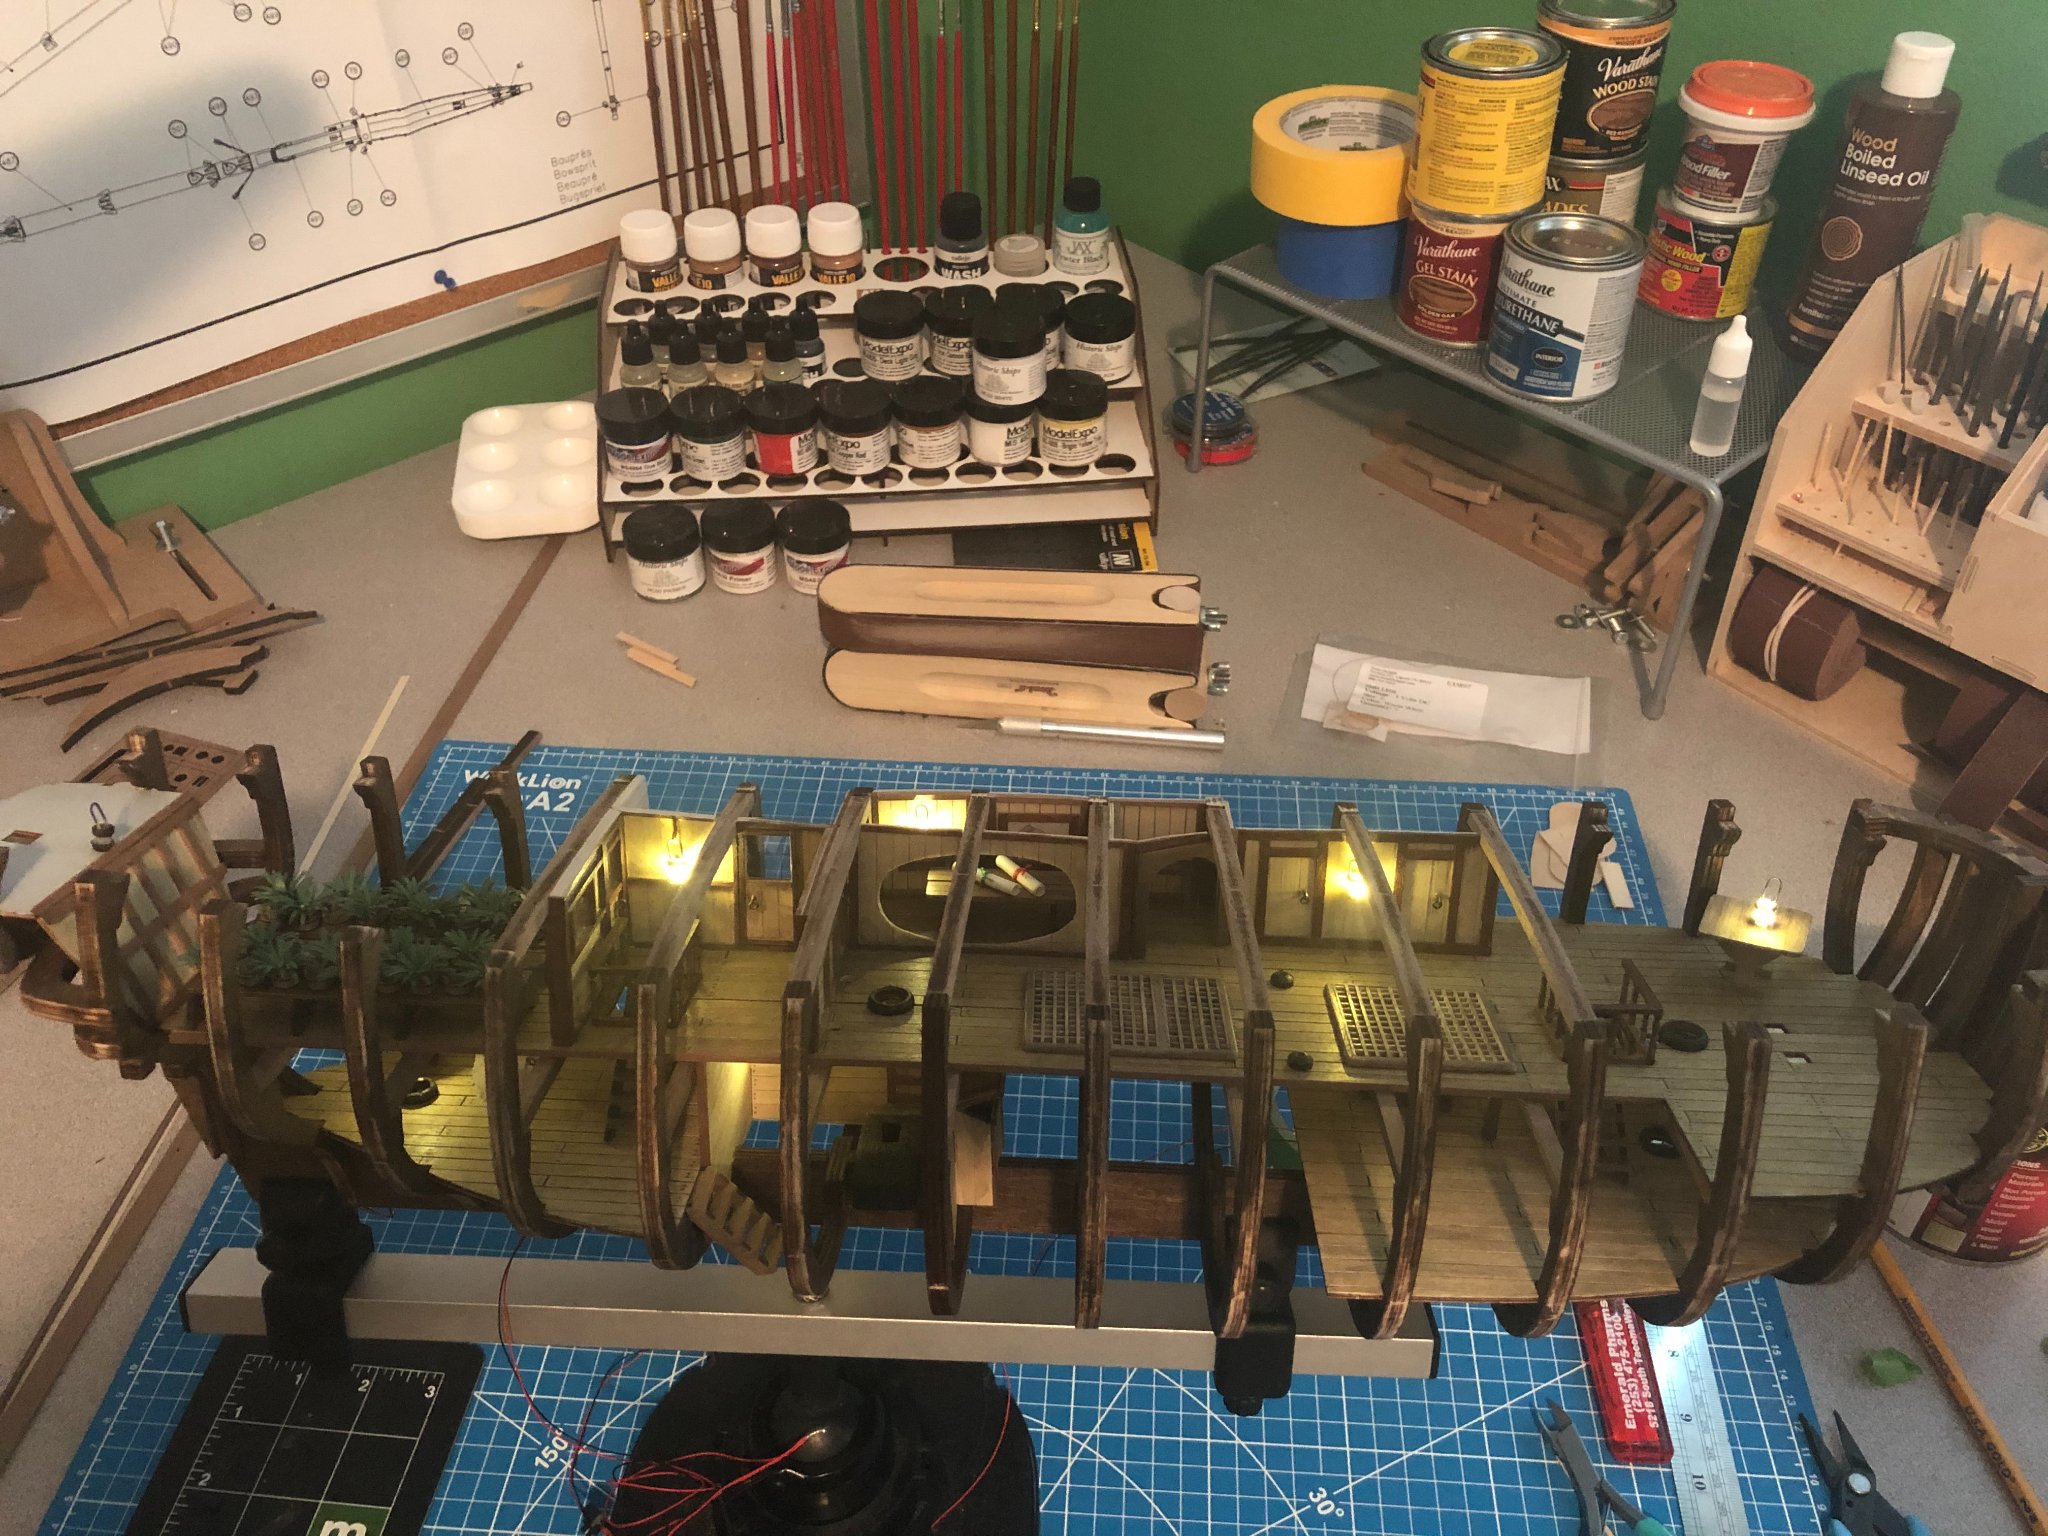
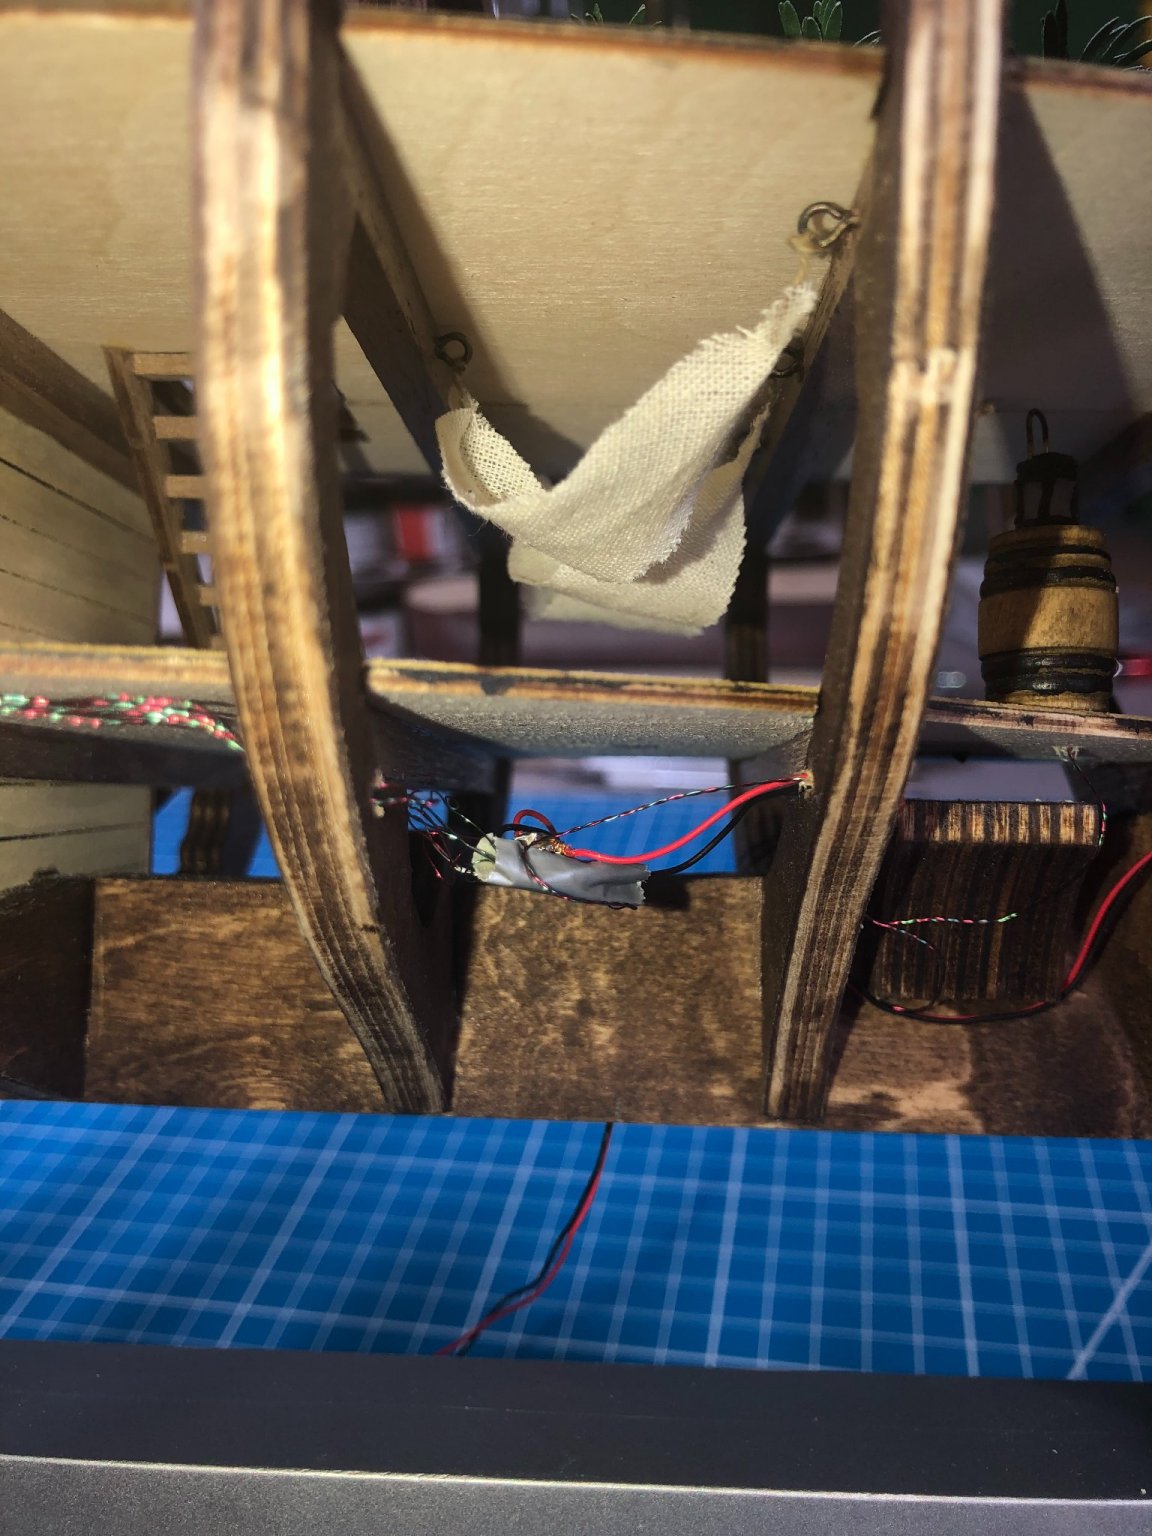
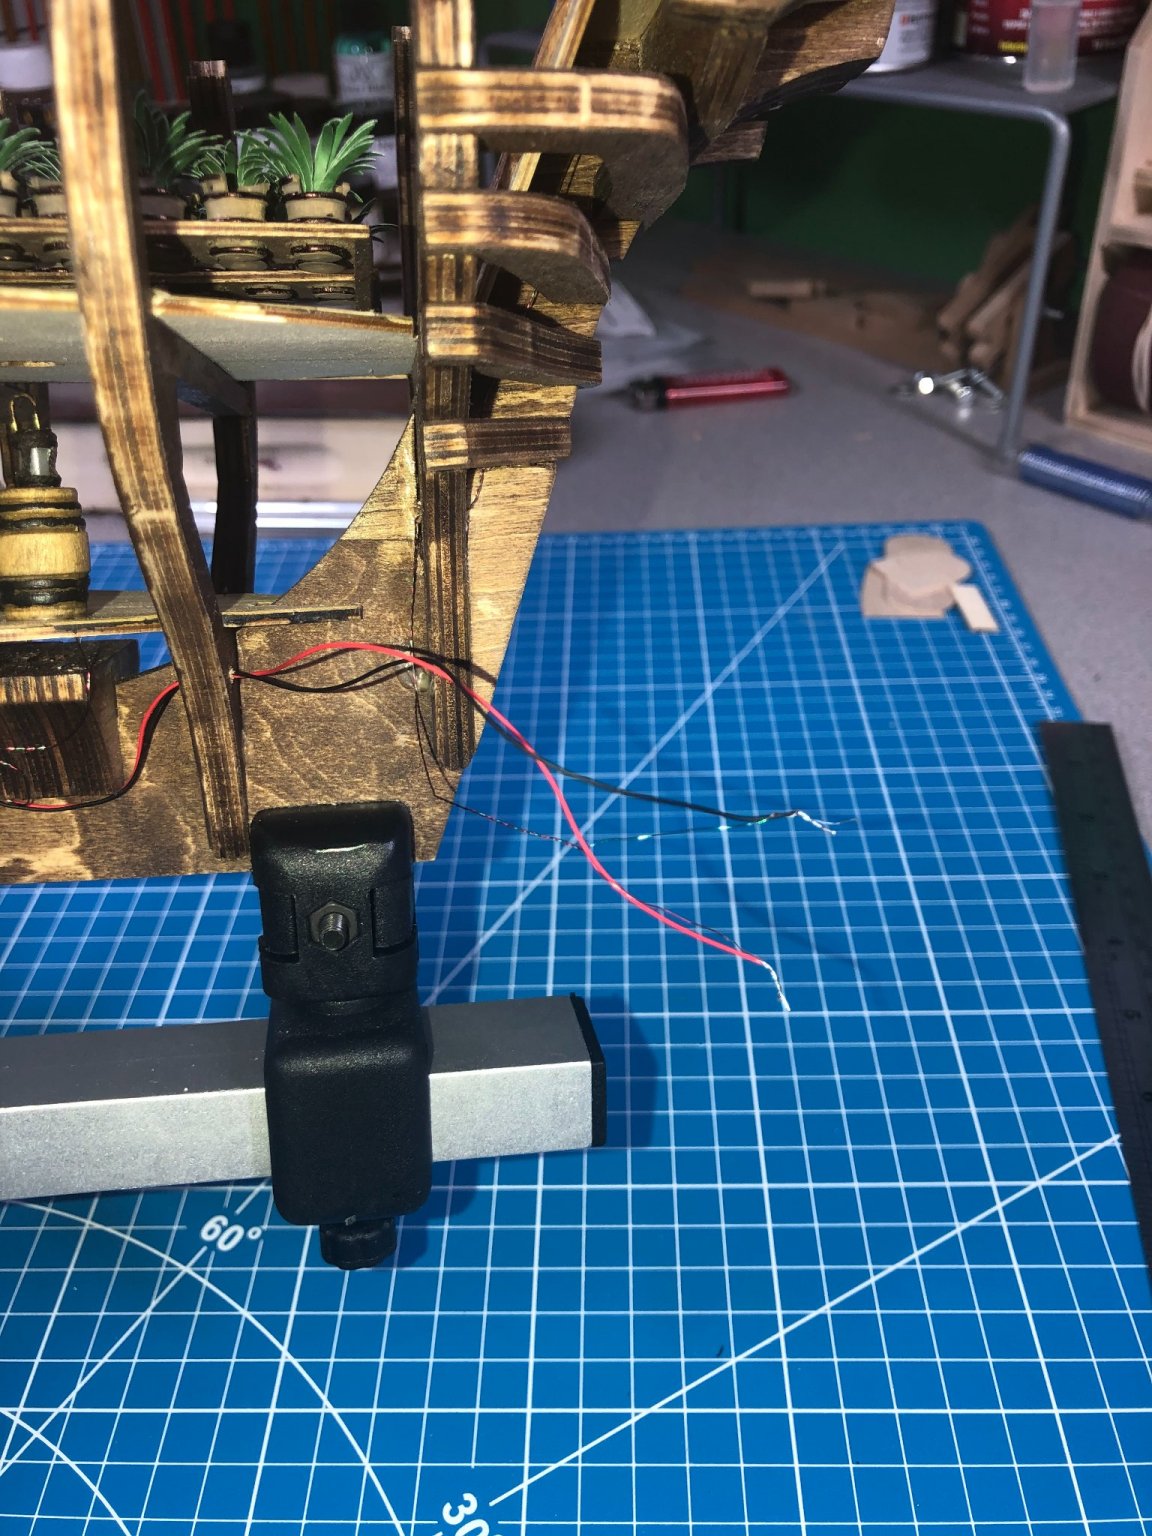
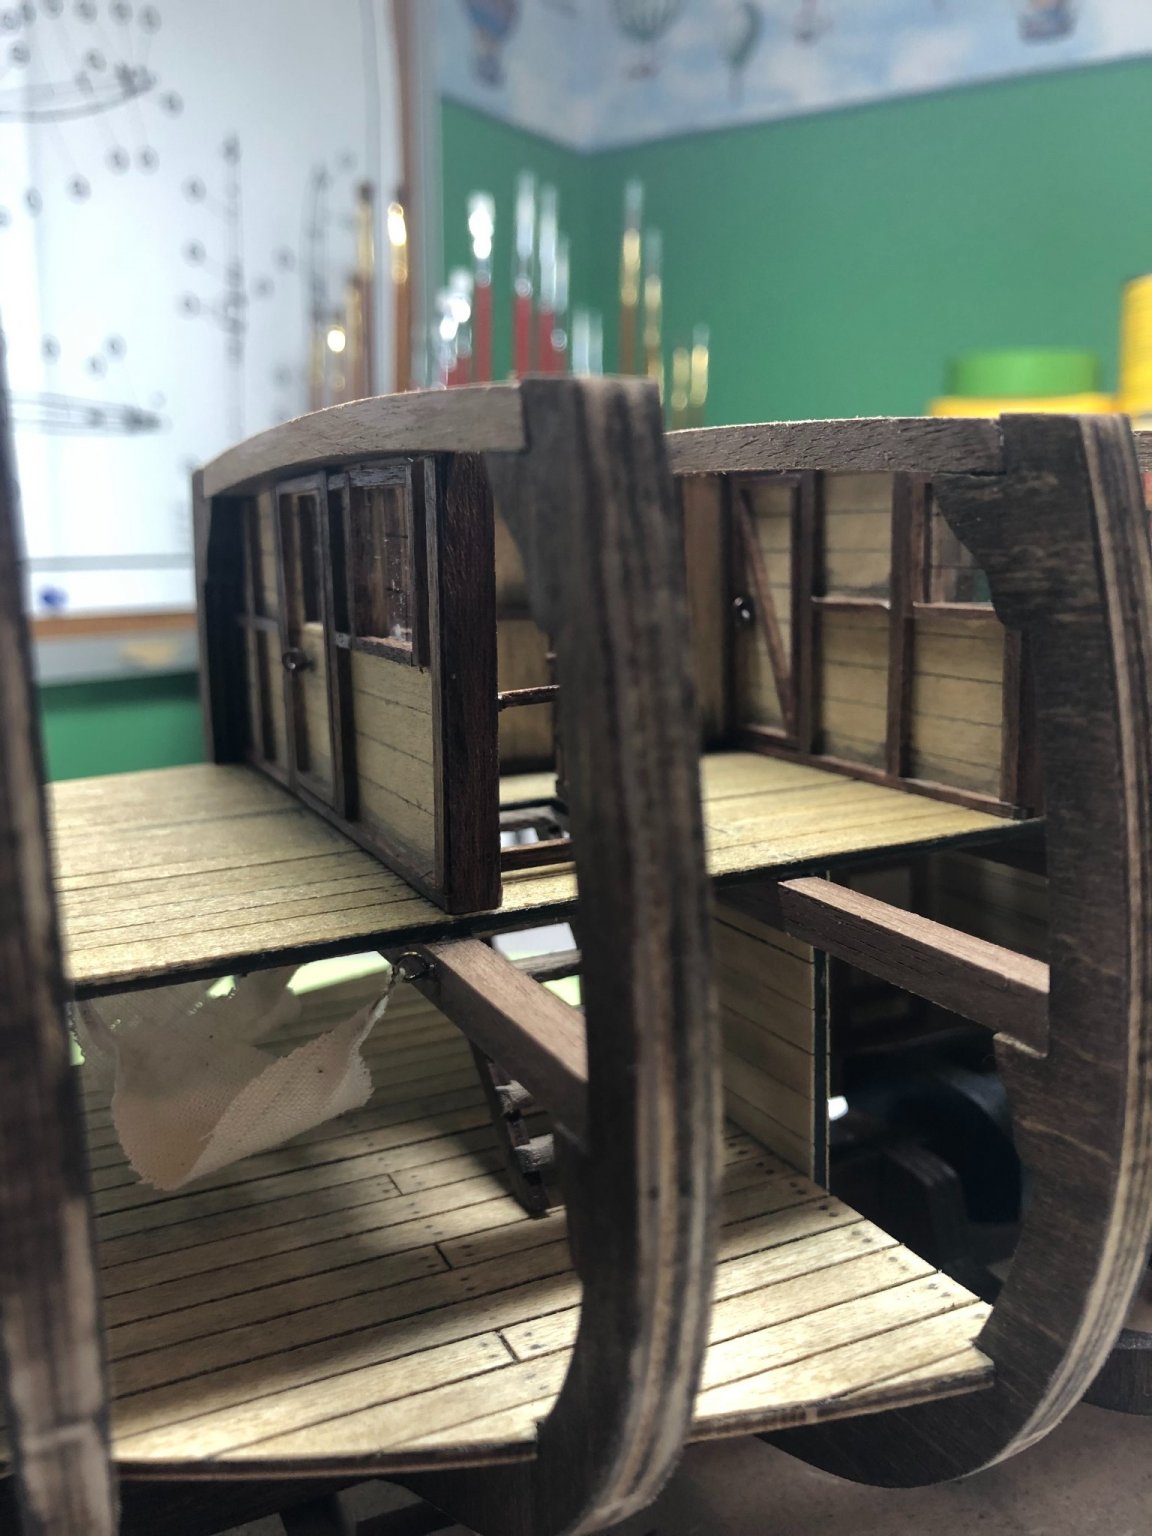
All the wiring is now soldered and all the lights (except the stern lanterns) are now operational: Hiding and tucking in the wires didn't pose too much of a challenge: This last picture is showing the stern lighting wiring. I can't install the lights until the stern section is complete. Moving on! The remaining upper deck beams are installed and I need to add a shim to the ports side of nearly every one of them... not sure why most of them are short by about 2mm. Nothing a shim can't fix. I need to figure out whether I should do the planking on the upper deck before or after installation. Decision time in the next post!


-
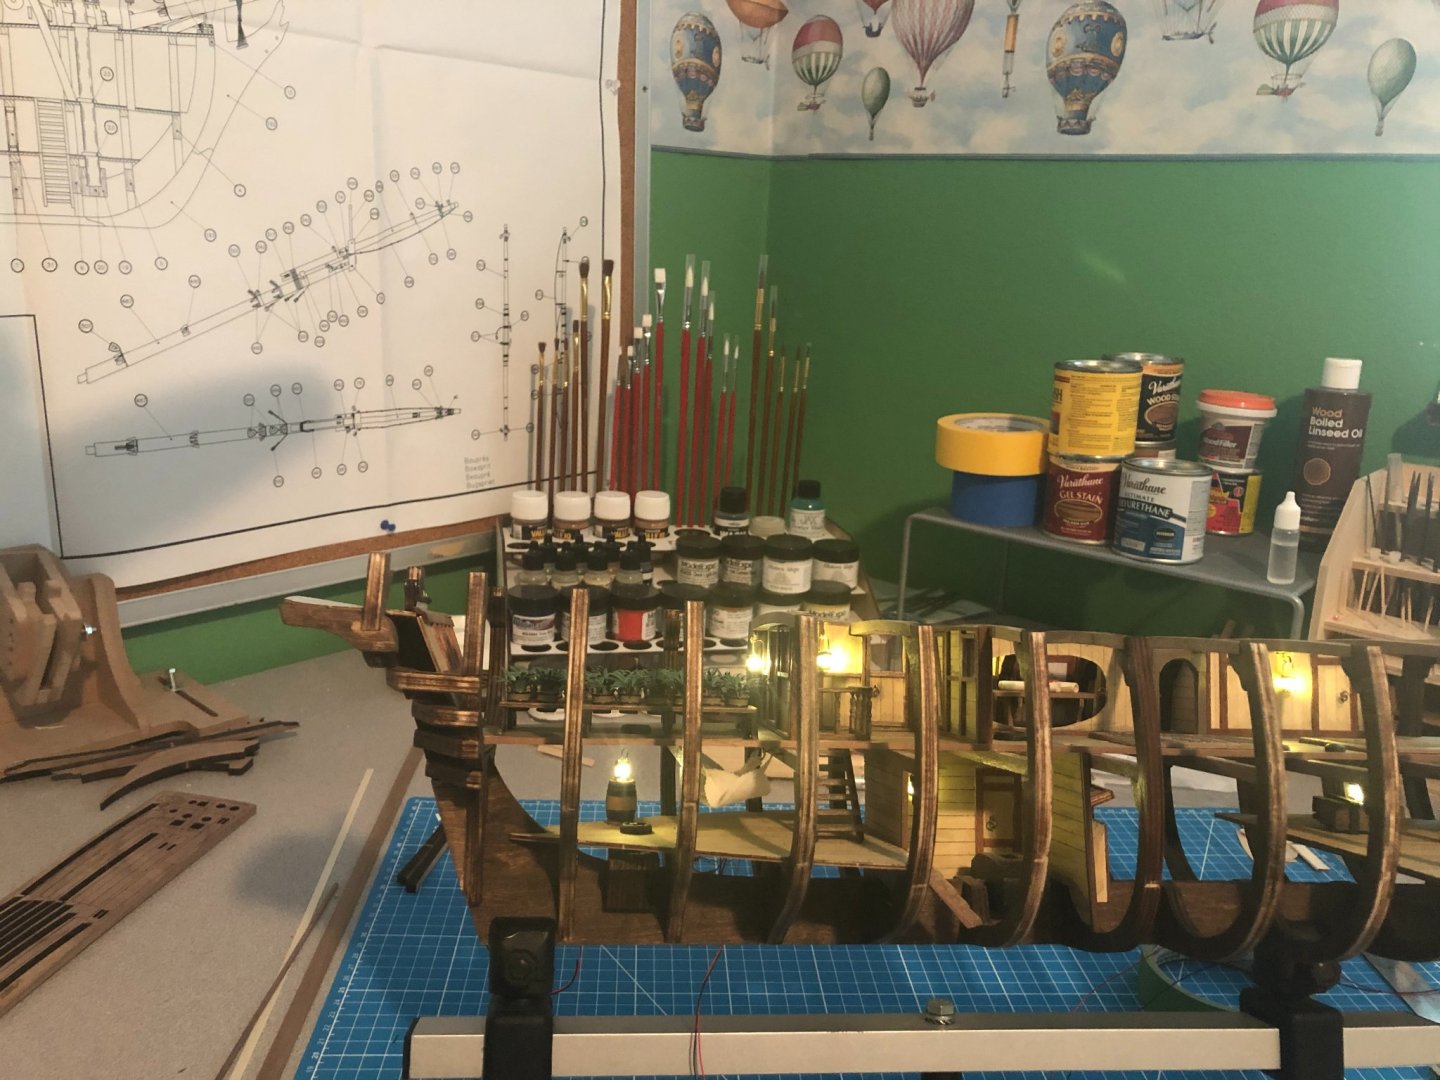
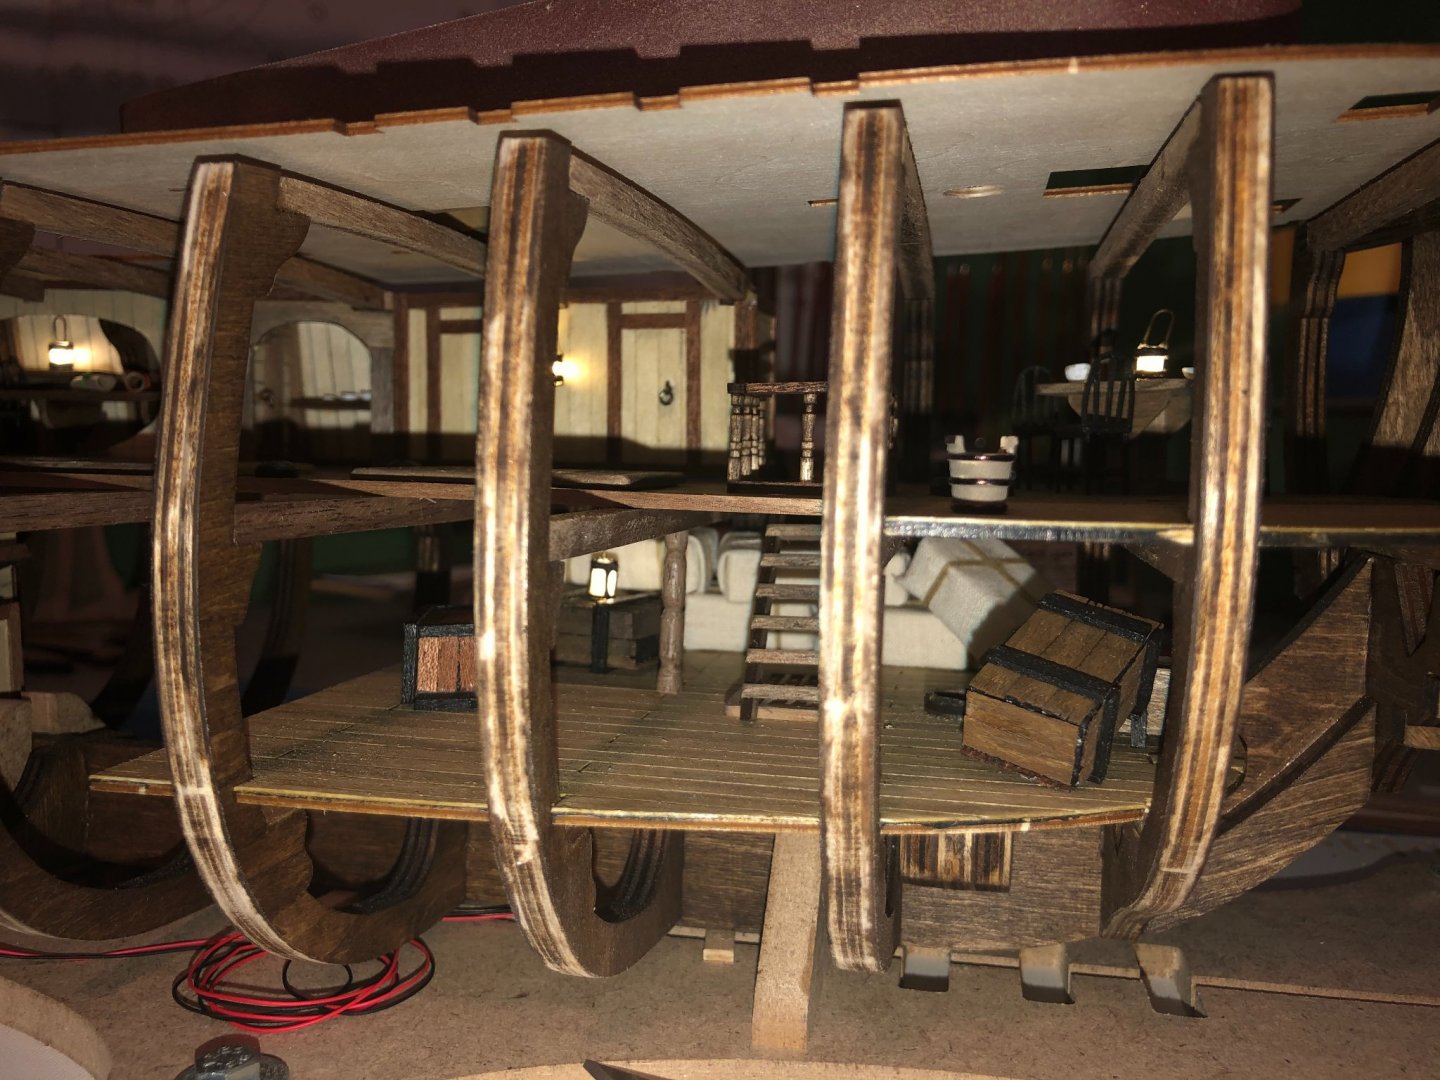
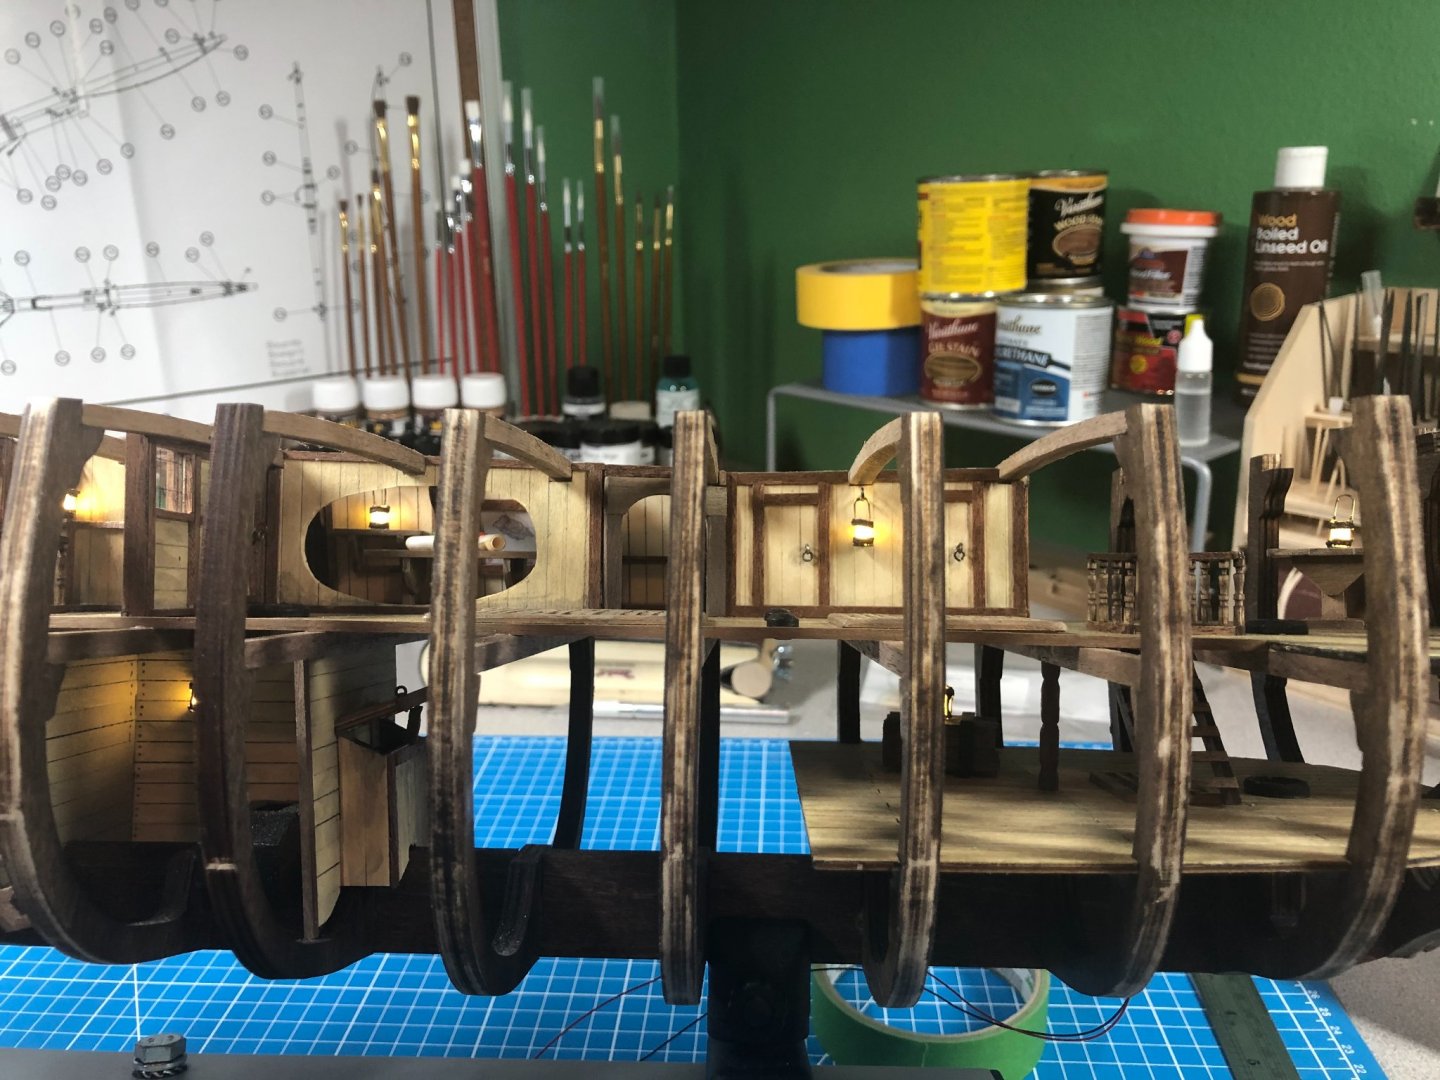
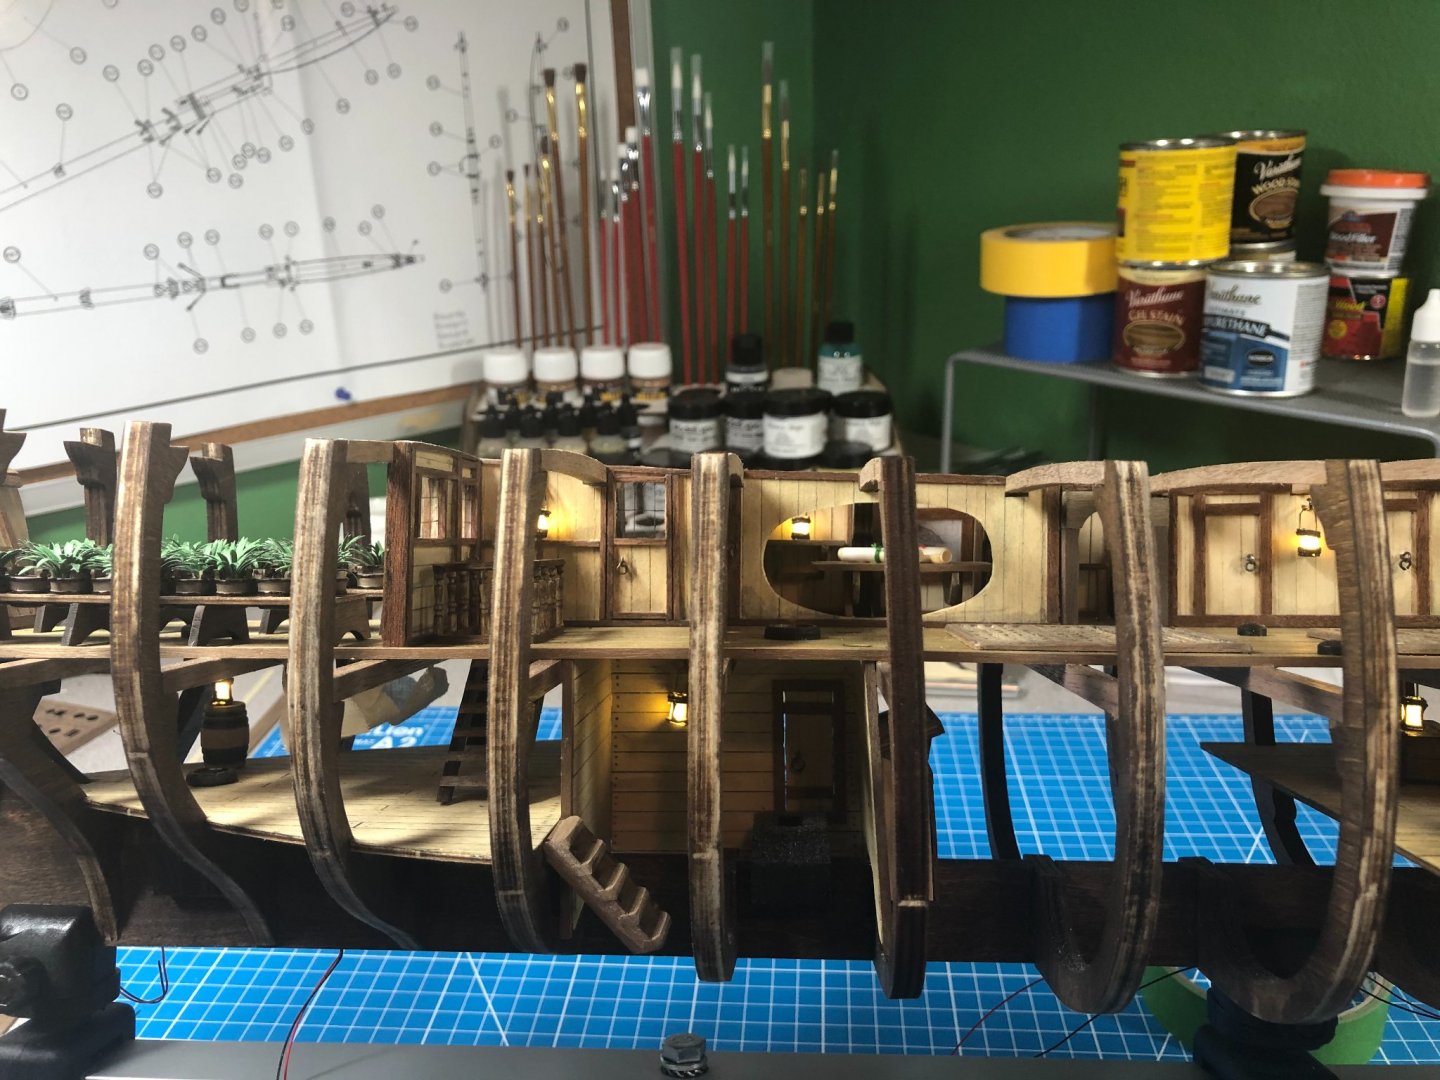
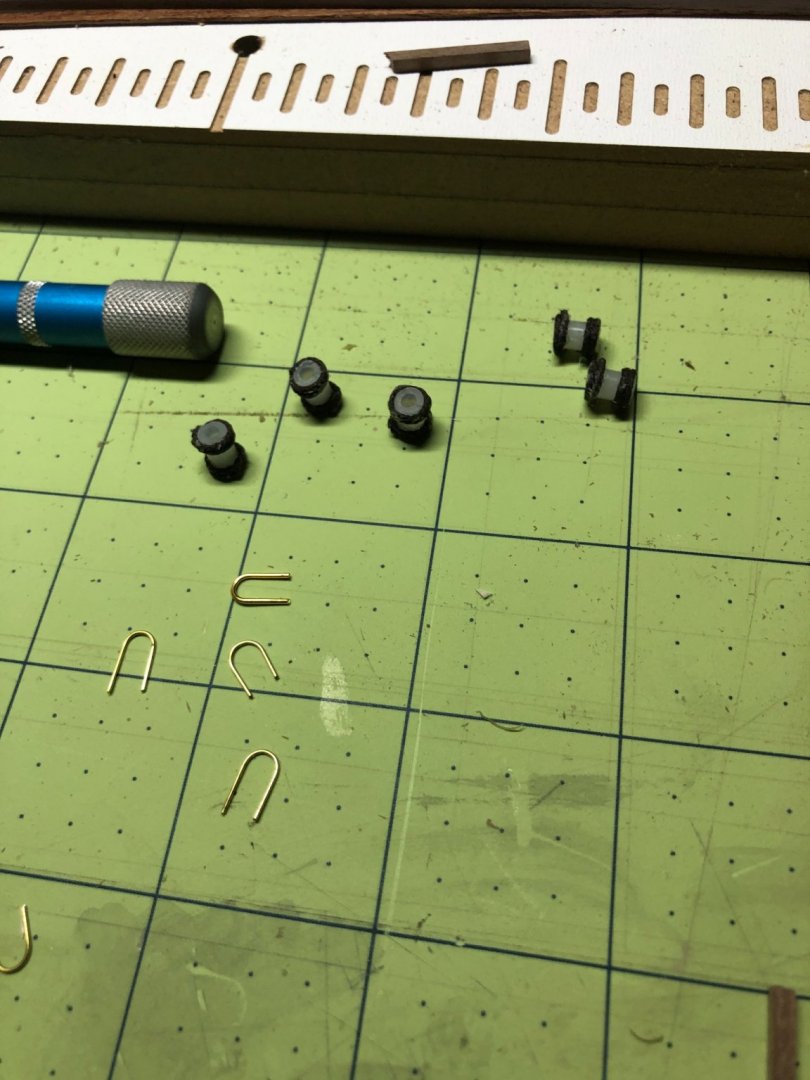
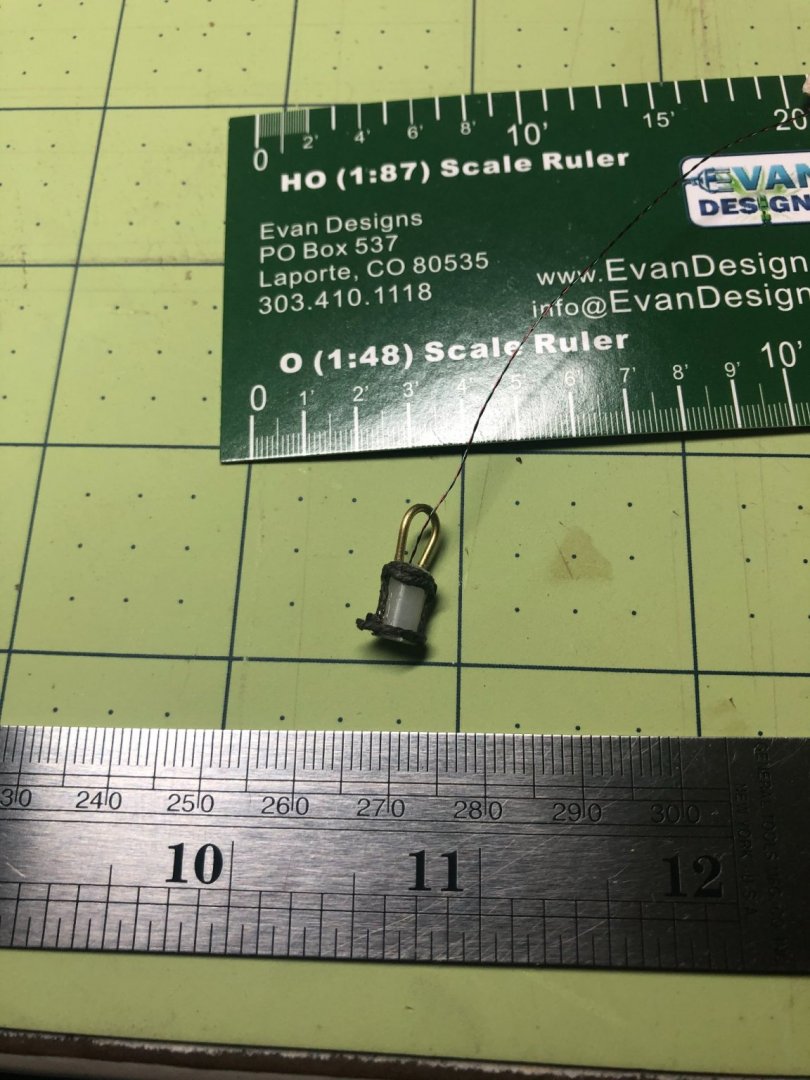
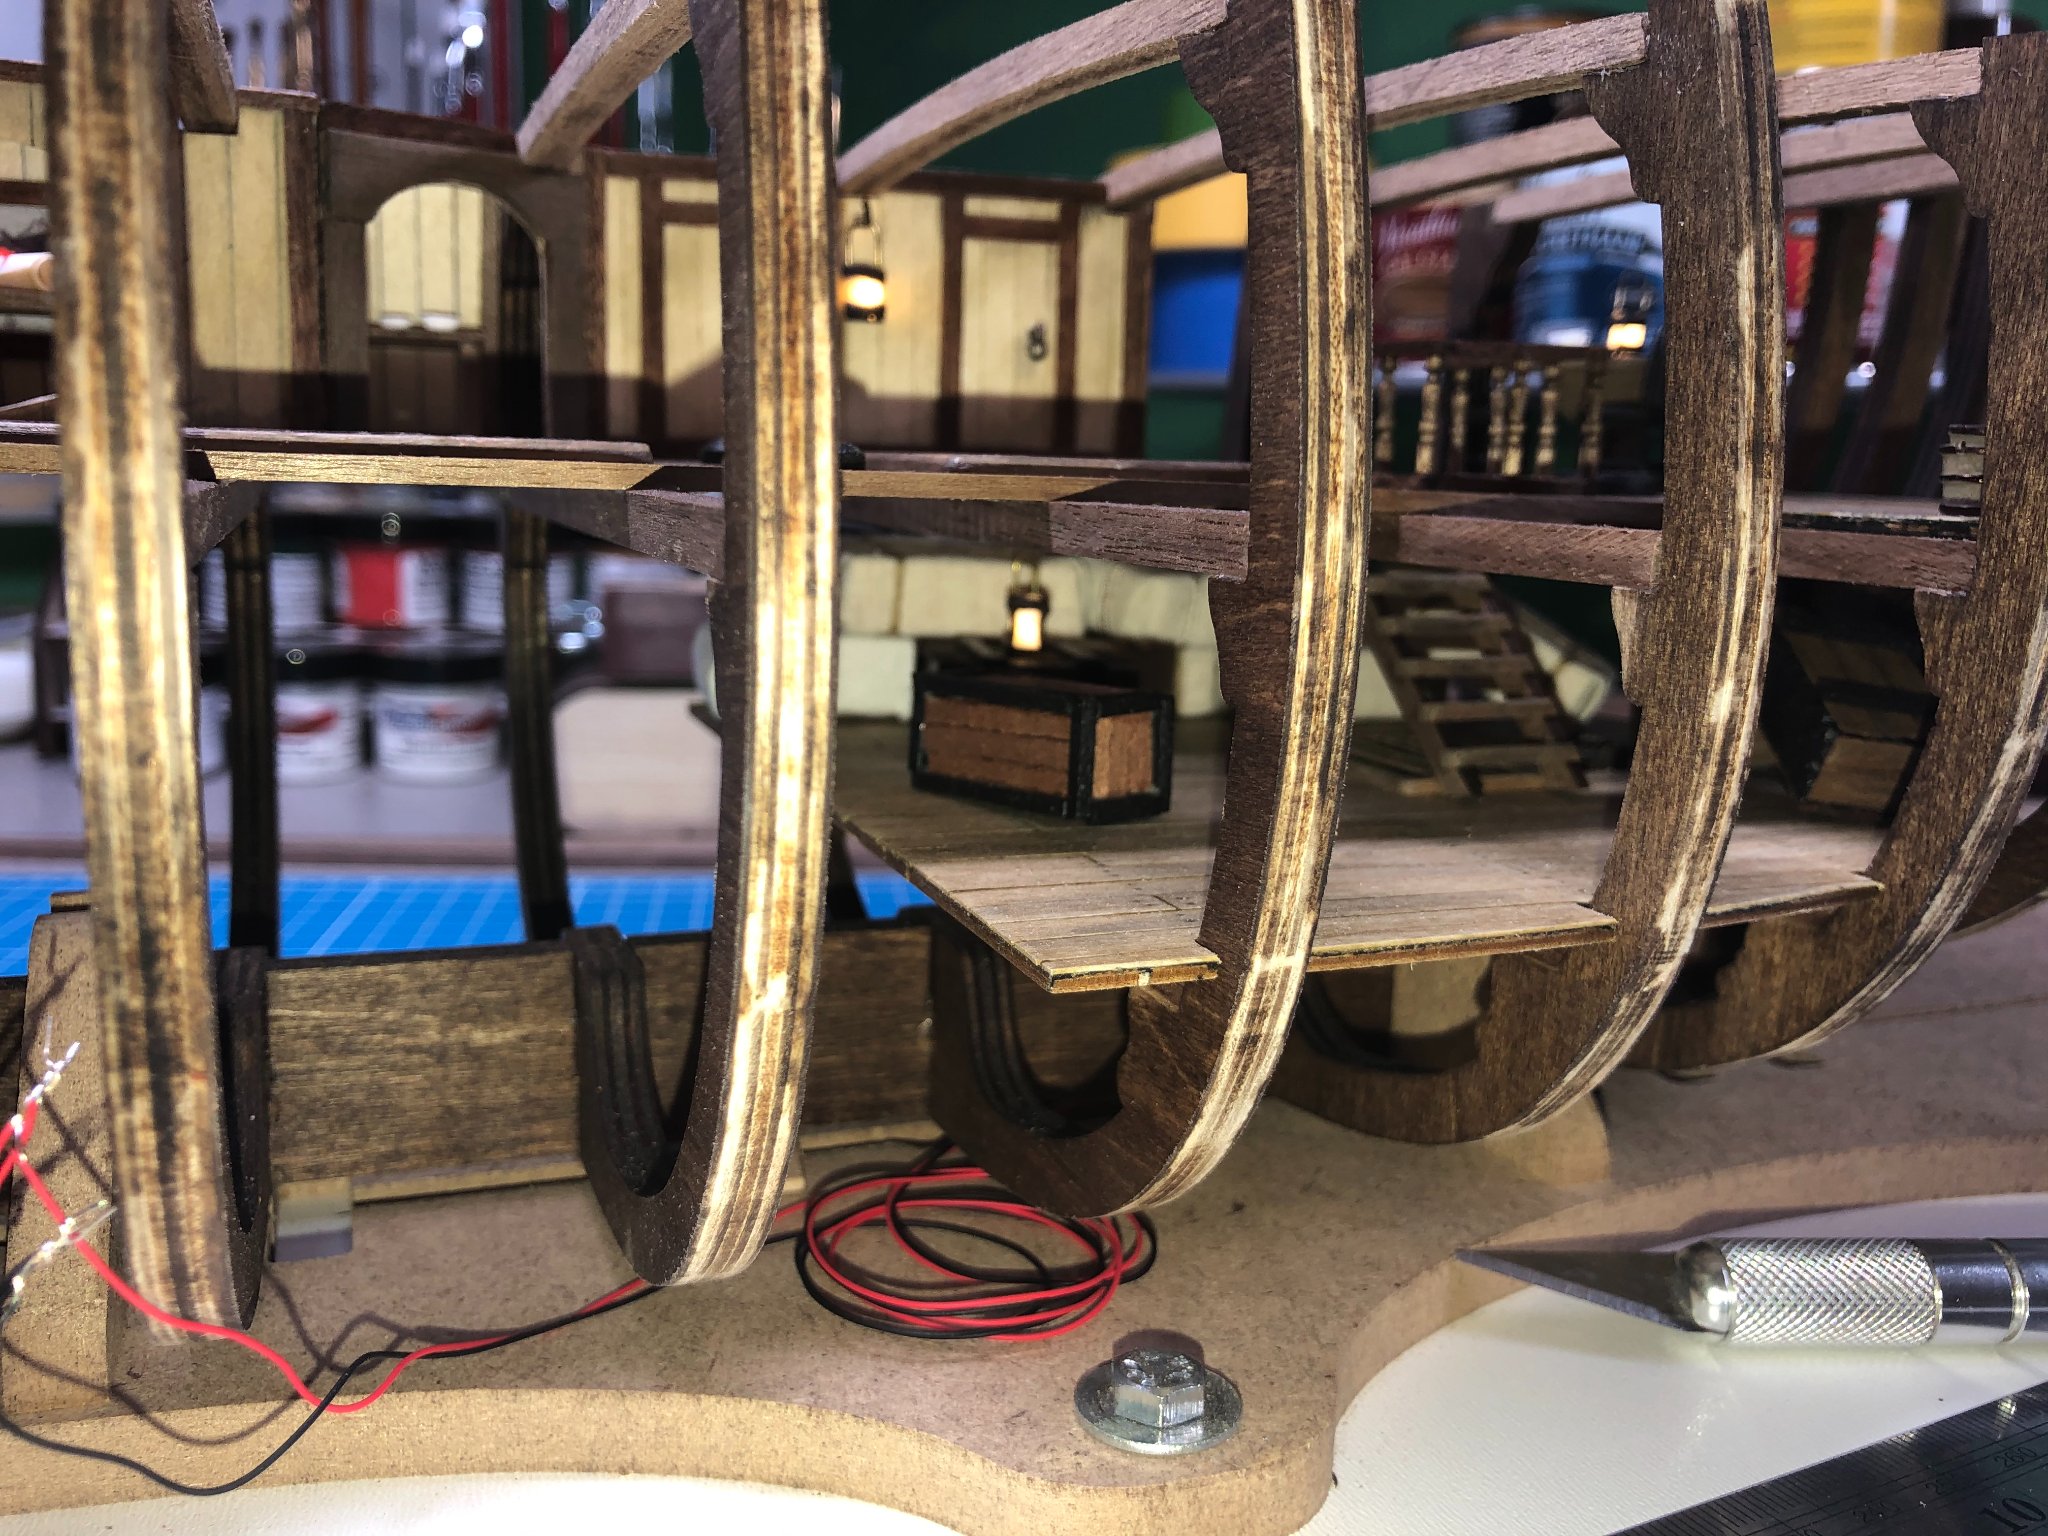
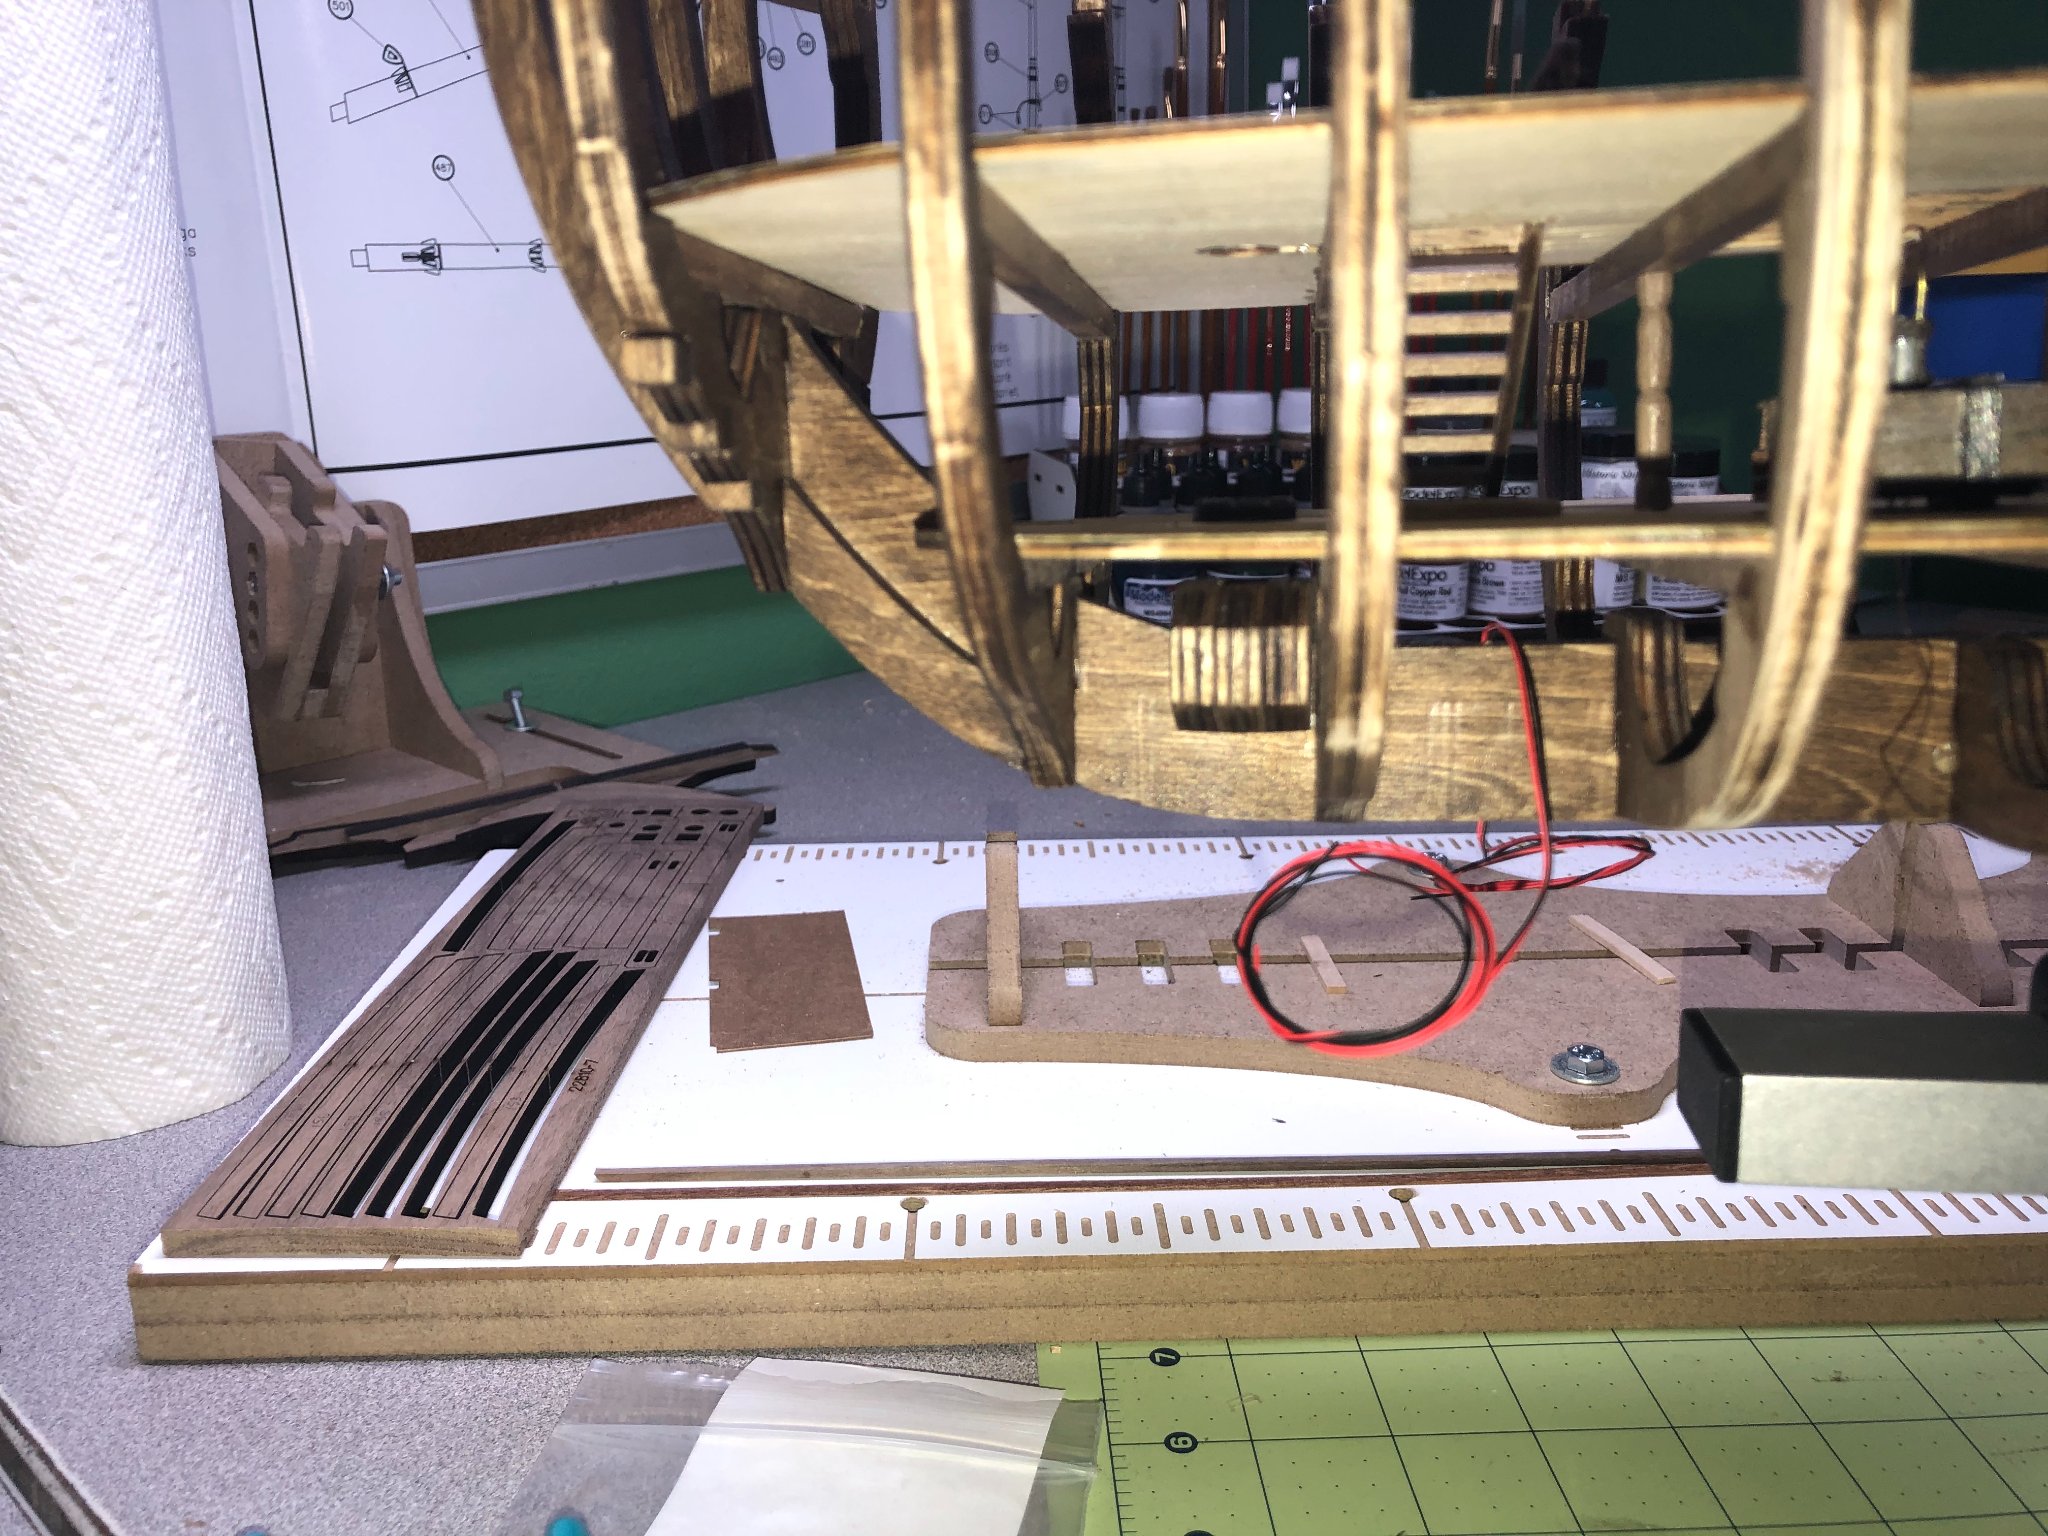
Sections in place: Previously, I had installed three lanterns on the lower deck and I have six on the middle deck. The remaining two lights will be mounted in the stern lanterns. The first concern after making the lanterns, is the placement of lanterns to conceal the wiring. The placement has to allow a wire to run behind a wall or on the port side of the lower deck (won't be visible once the model is complete). The following pictures show some of the process: The wires that will lead to the switch and battery and ask as the conduit for the lanterns to attach for power, are placed where I plane to have pedestals for the final mounting of the model. The false keel is drilled and then I predrilled the keel pieces to match up with the false keel. Need to make sure these are long enough to run throughout the entire ship (if needed). Lantern placement from the backside: The lantern wires are small and delicate. They are glued into the lantern from either the bottom or the side of lantern. Once the wire is run through the wall, I glue the wire down to prevent accident tugs from dislodging the lights. The wires are run strategically to locations hidden by walls. I've only soldered one light, so far: My soldering skills have not been tested in a while! But I think I'll improve with a little practice. More in a few days! Merry Christmas!!


-
It's been a week since my last update and I've put in 18-20 hours this week! The challenge has been to work through the ideas in my head and from other build logs and move them to the model. So, a pantry (of sorts) and a couple more cabins, along with lighting were this weeks' projects. Making the lanterns is a process: I've outlined the process in an earlier log. Once the lanterns were done and ready for installation, I started on the pantry and cabin walls. Again, my process remained the same from previous installations: The sections were aged and then installed. Pictures of the installed sections and the lighting will be in the next post!


-
Hi Dave, Yes, actually, if I set the model up correctly, I can rotate it 360 degrees! Good luck with your latest model!
-
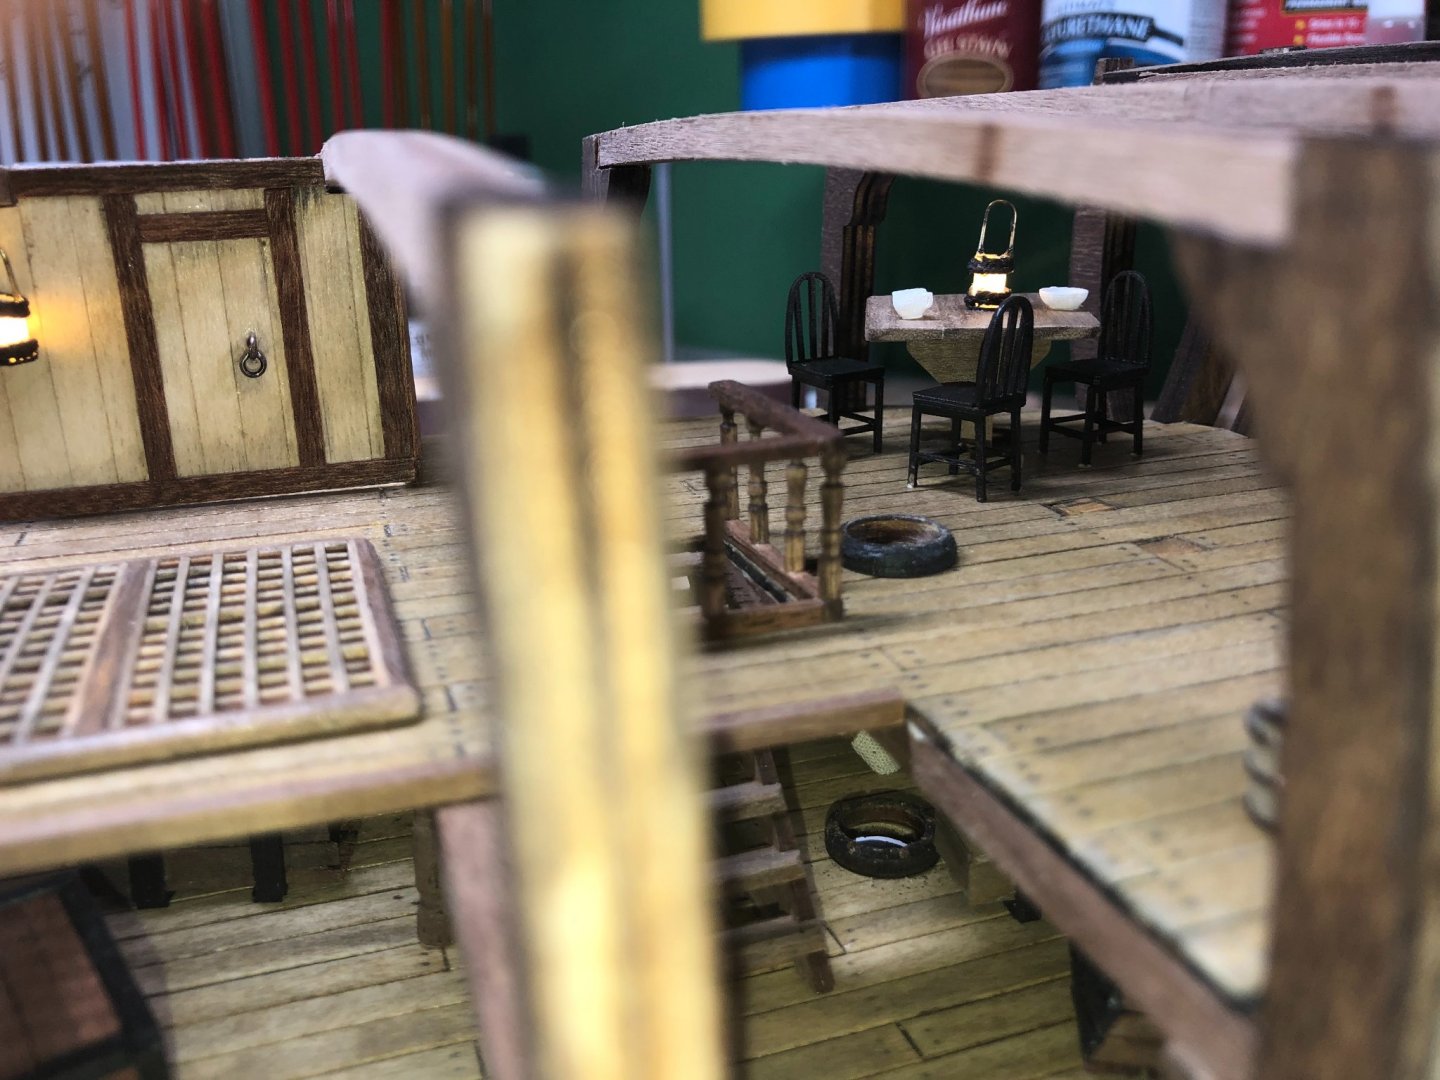
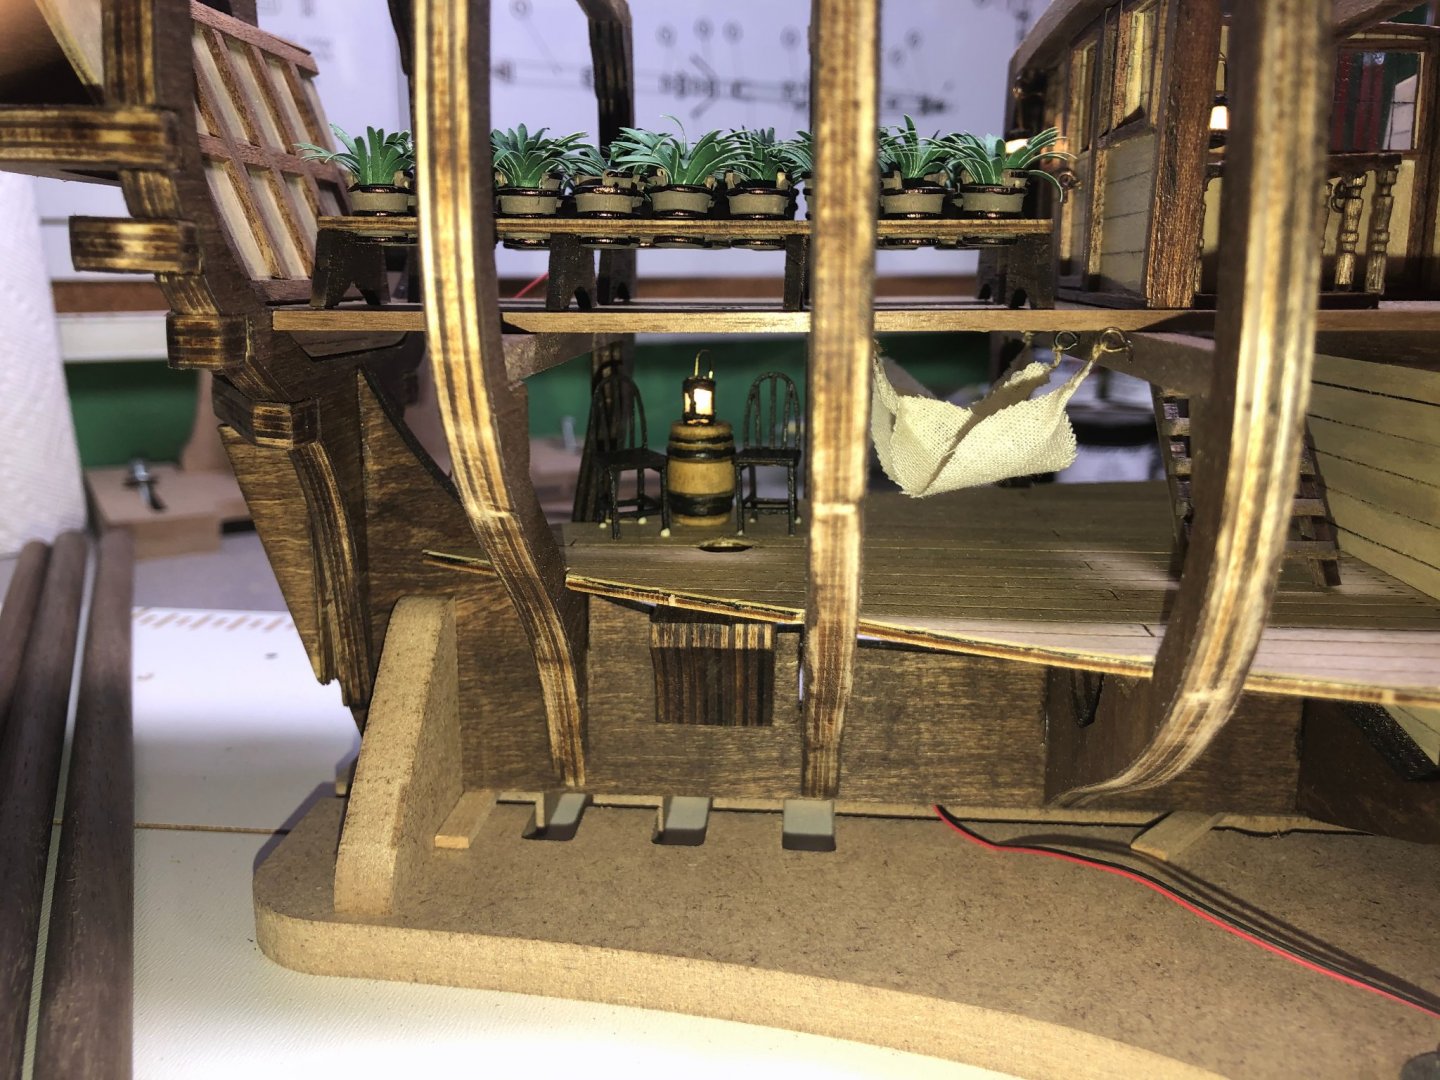
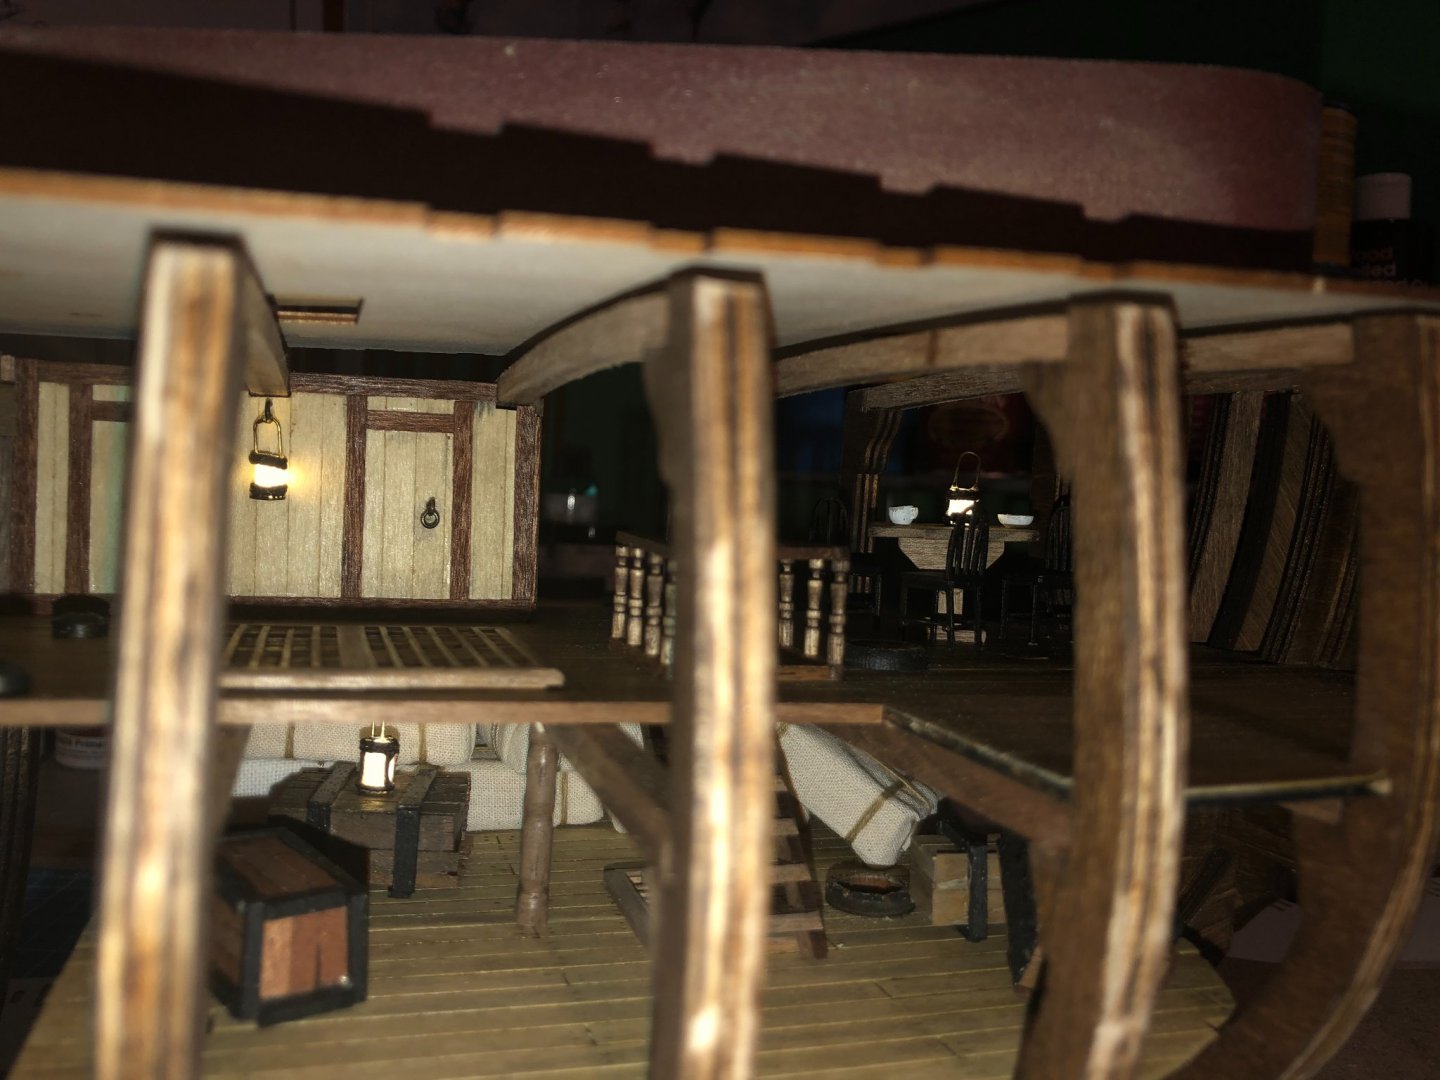
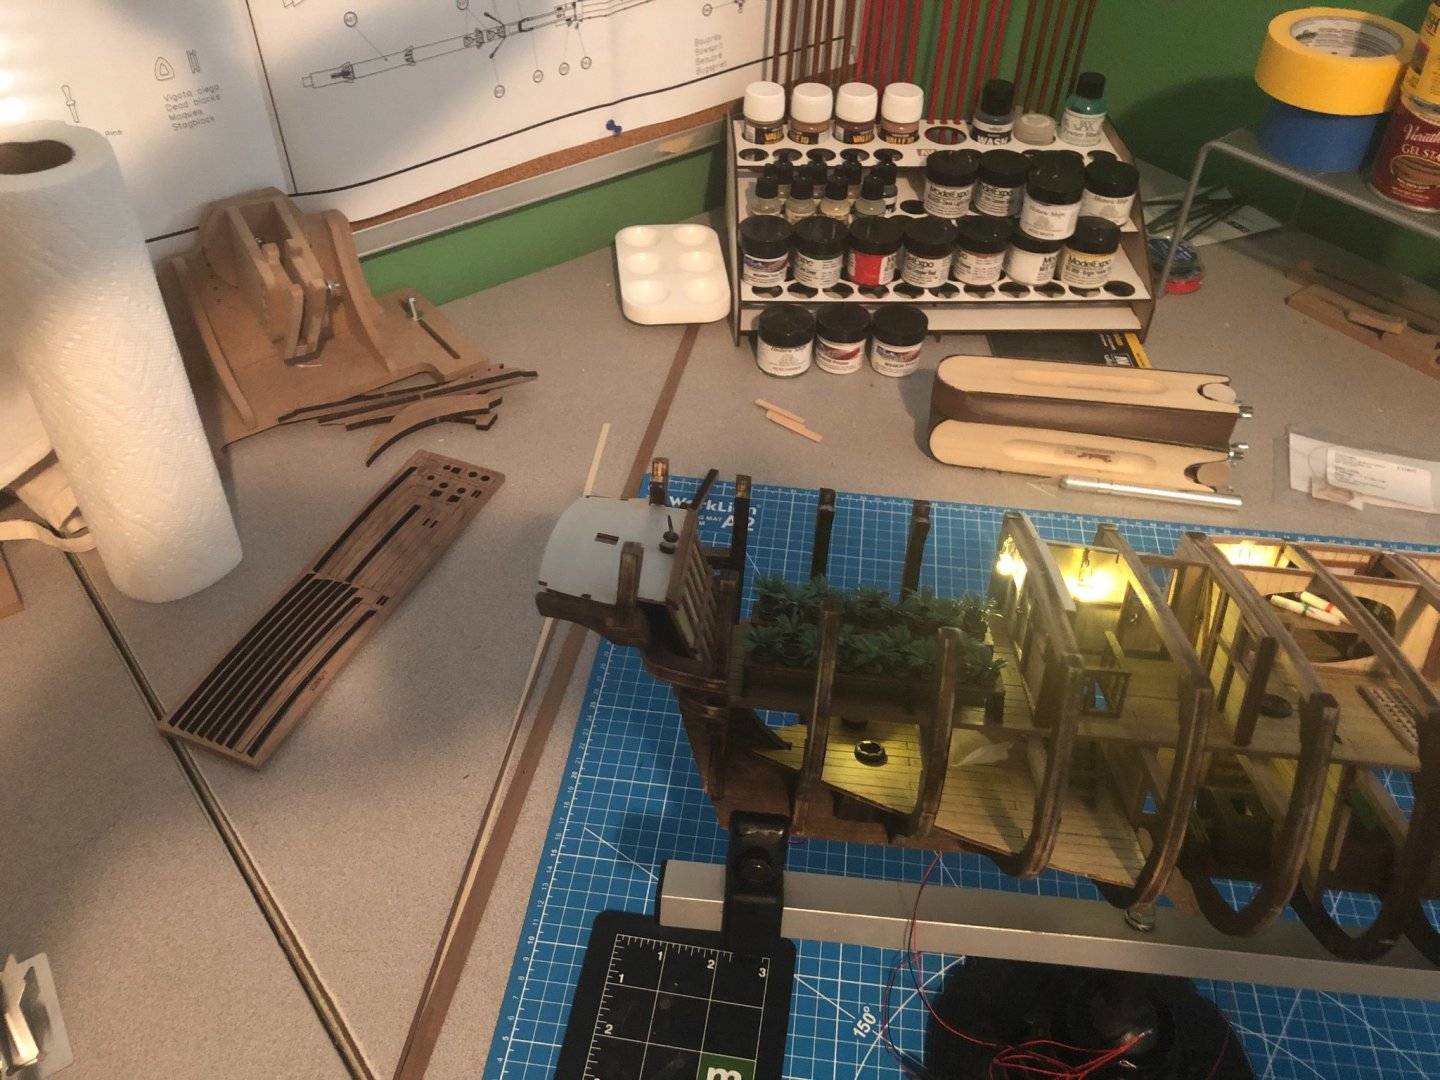
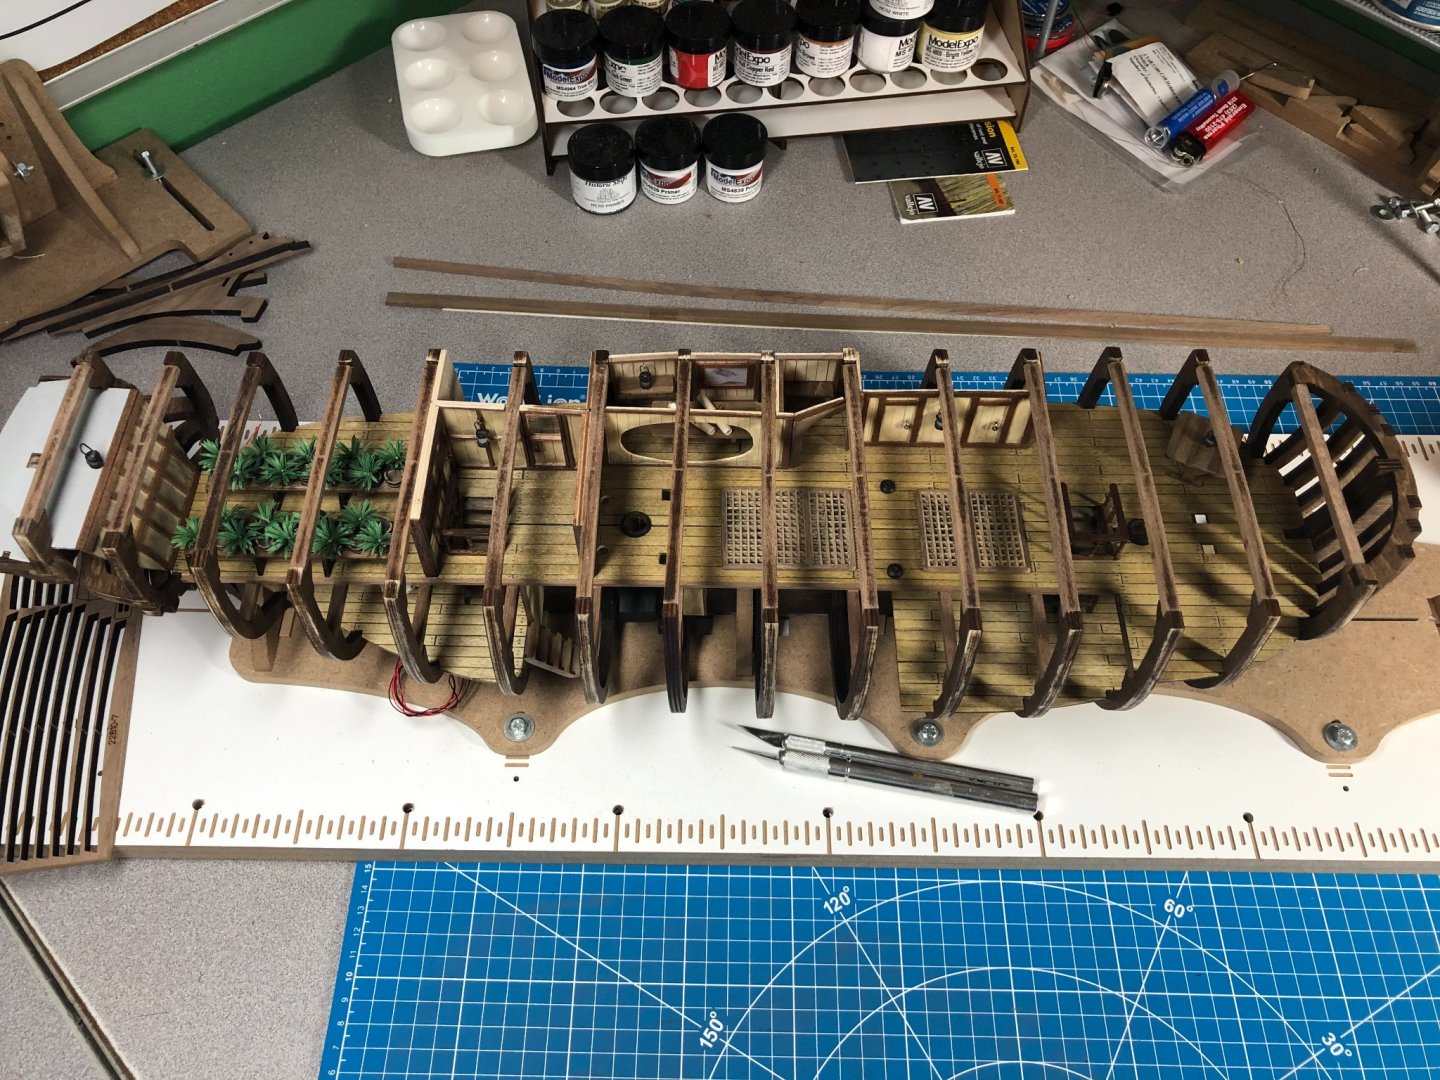
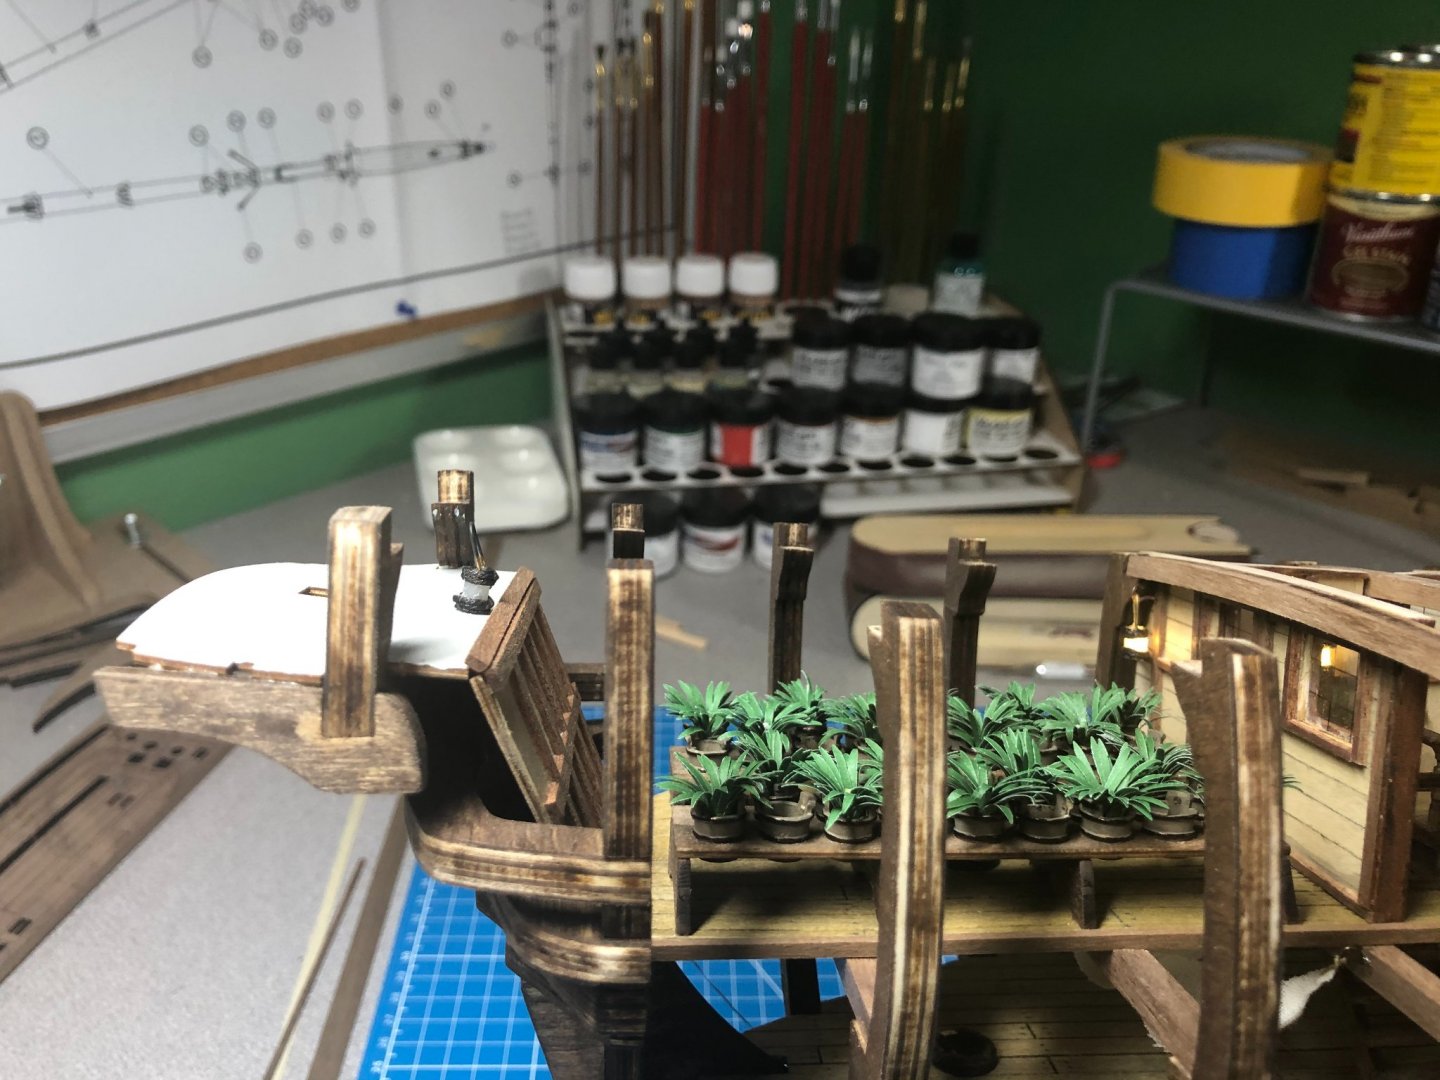
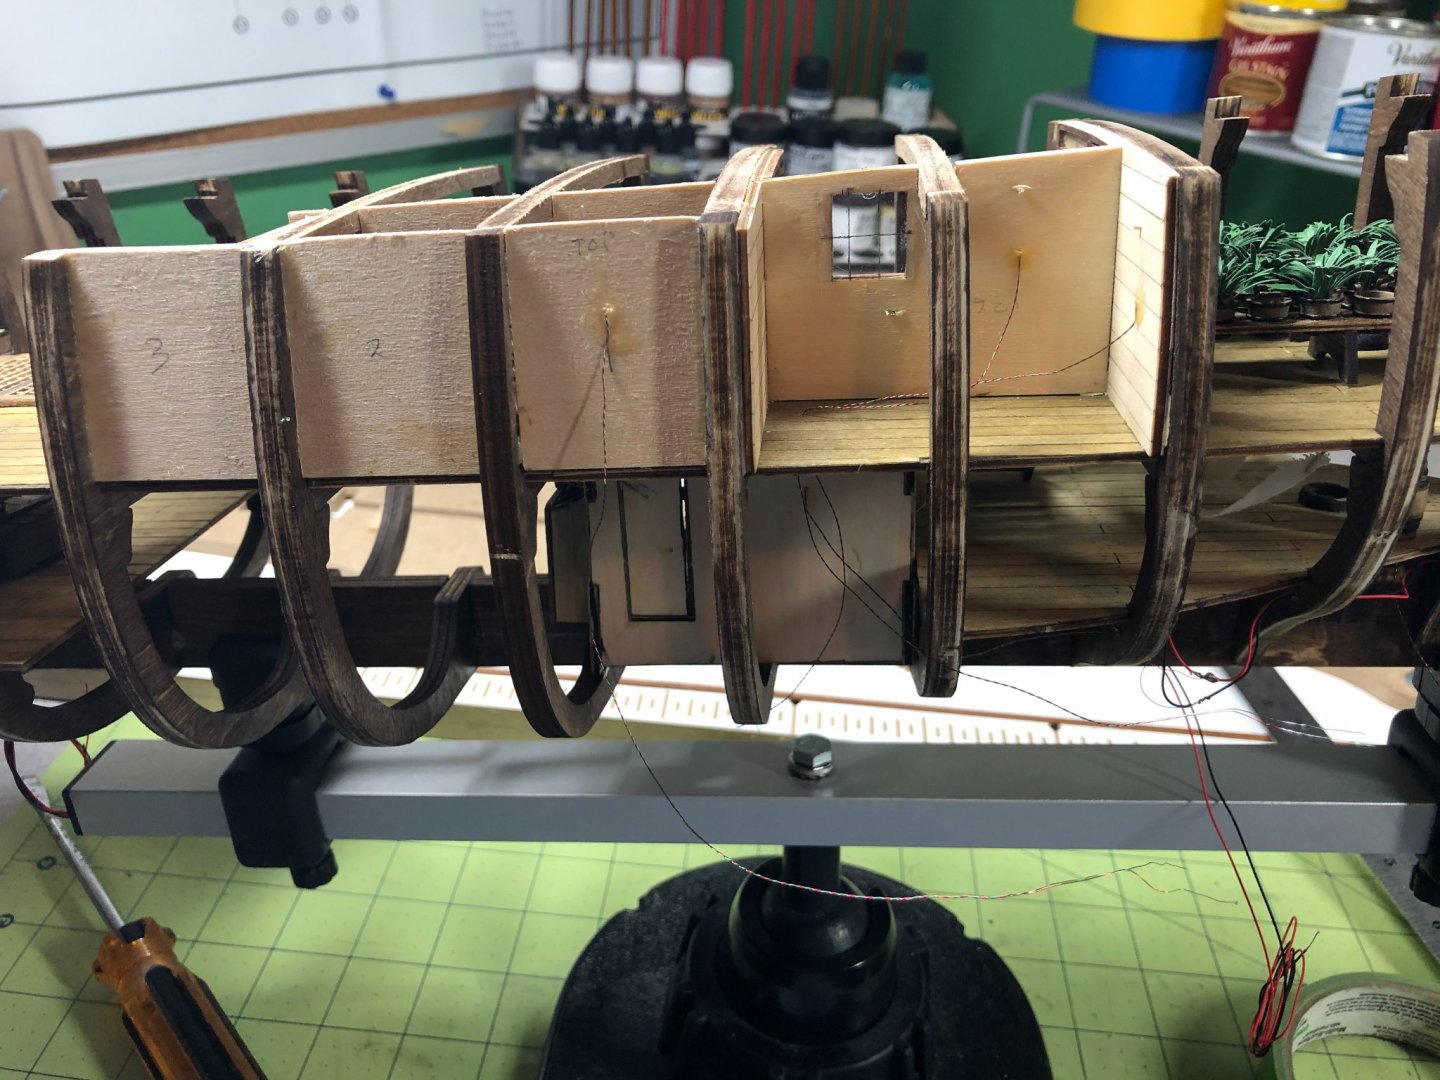
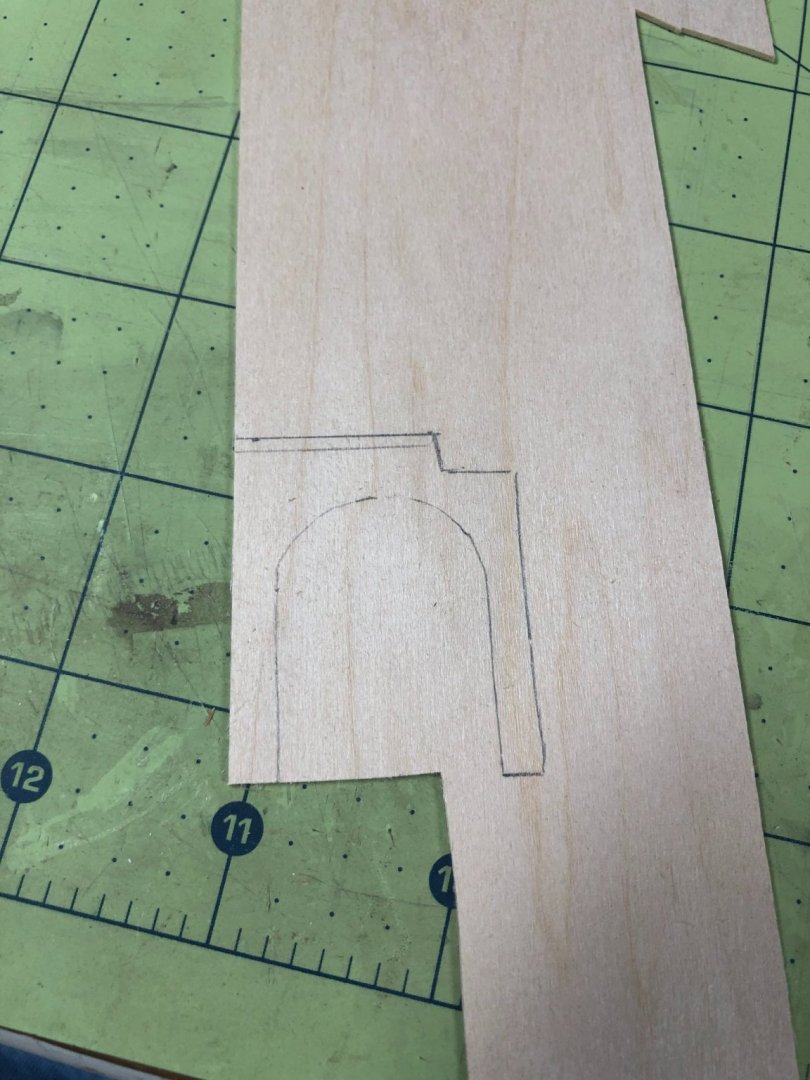
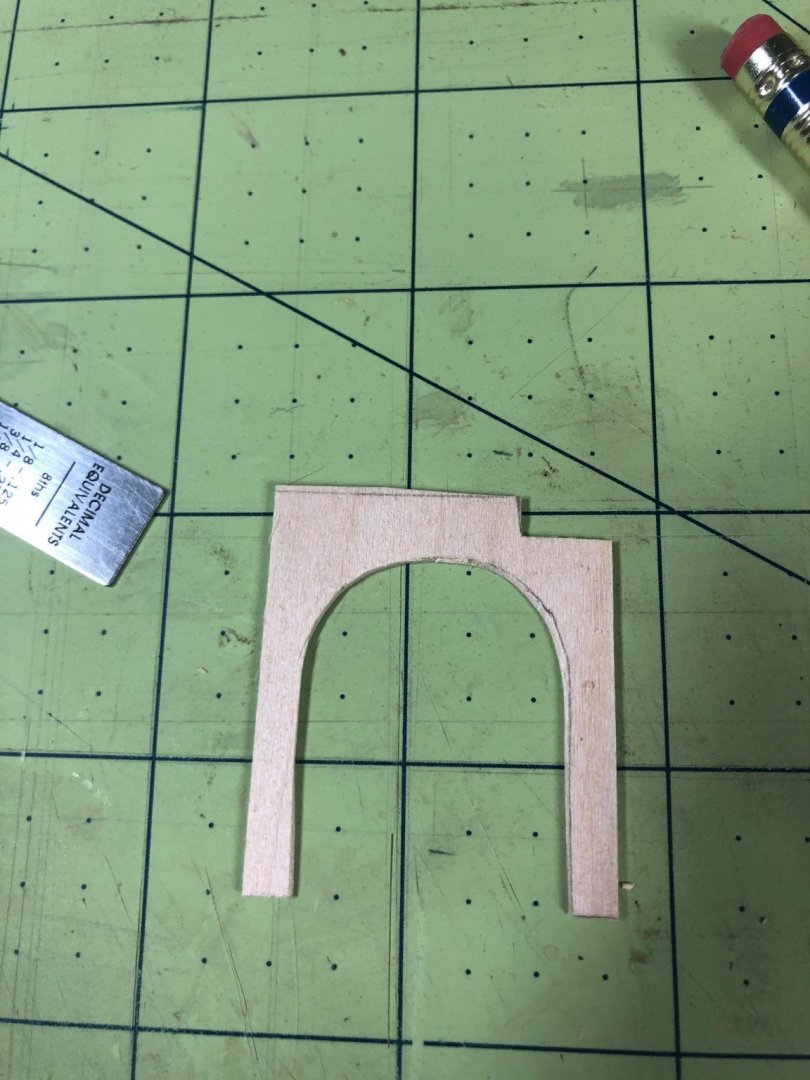
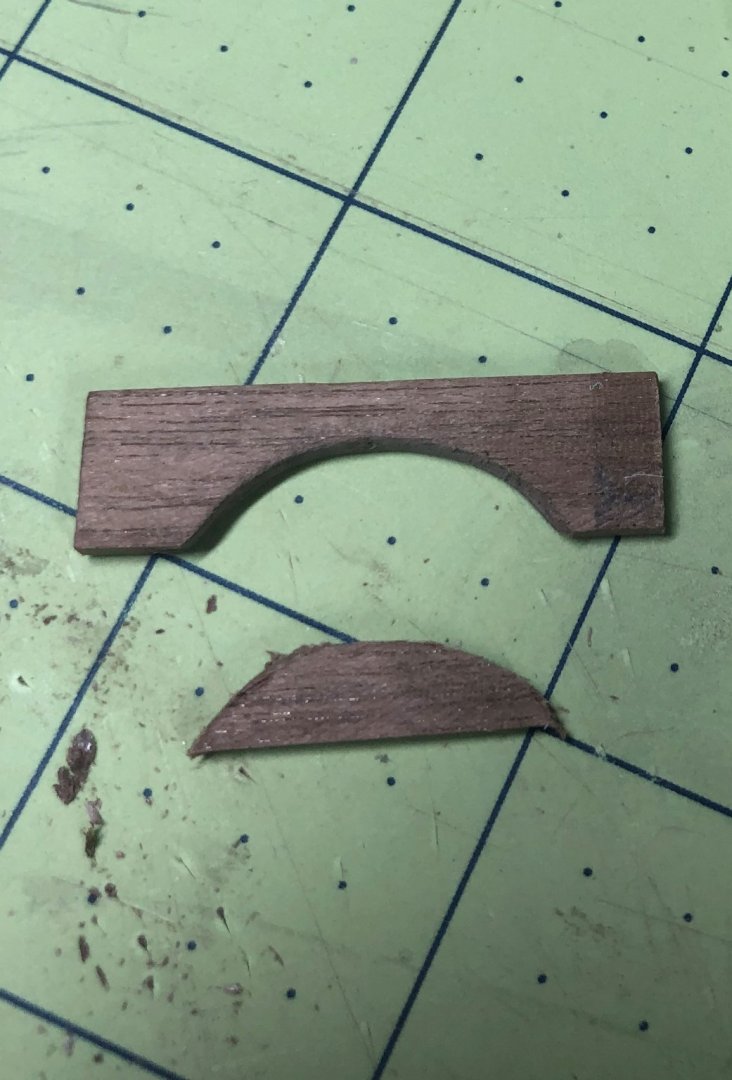
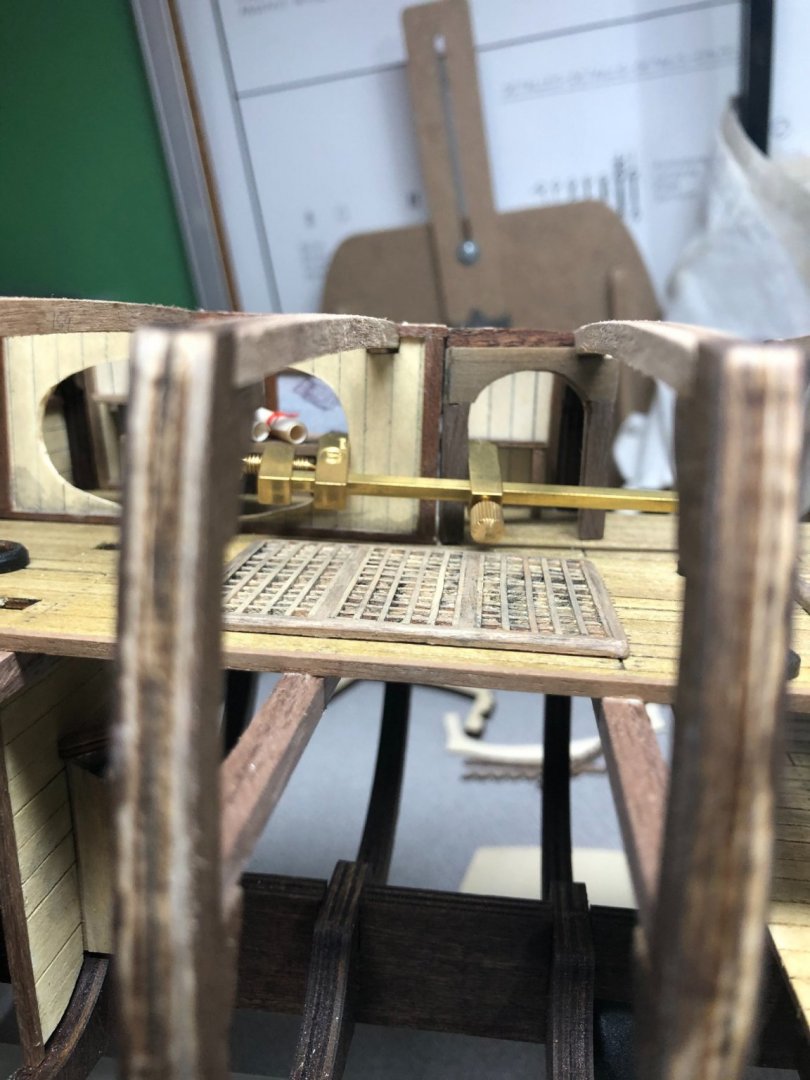
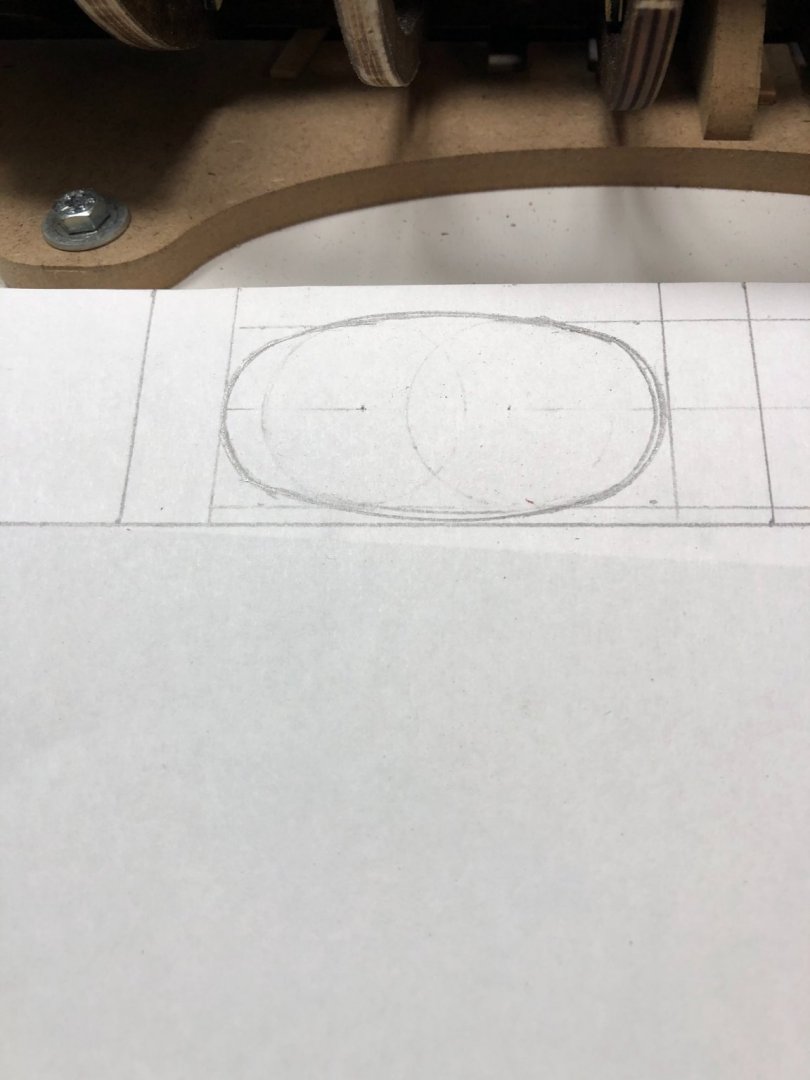
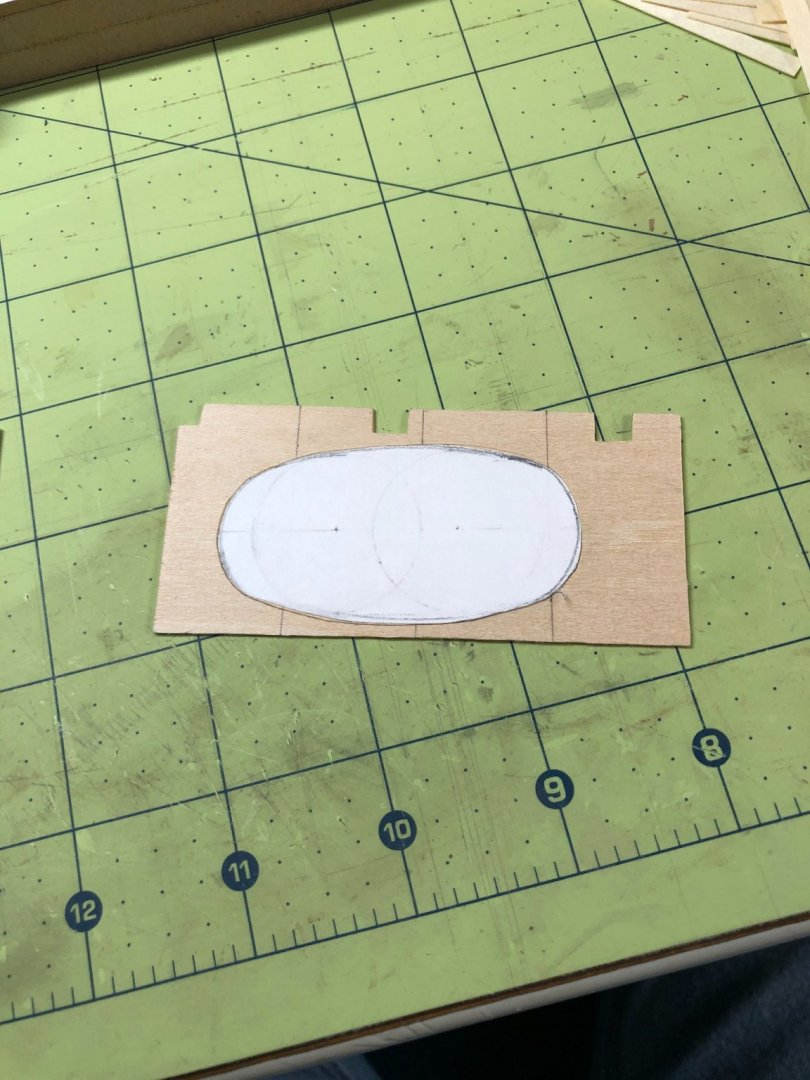
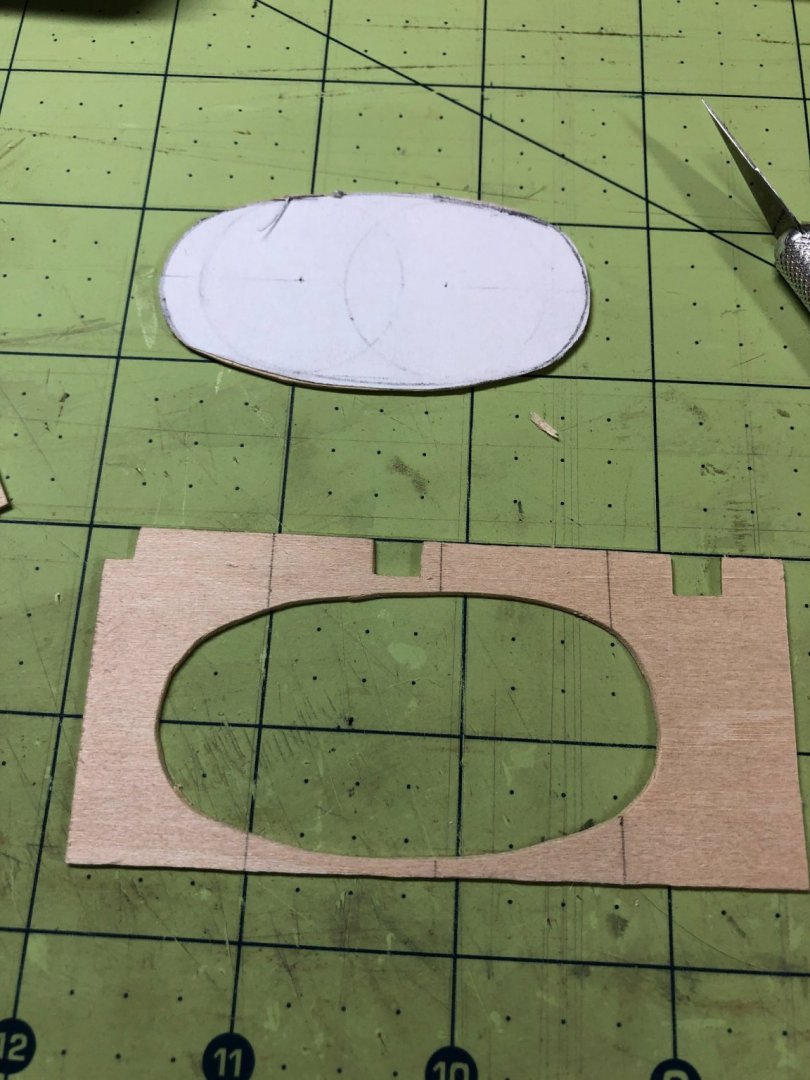
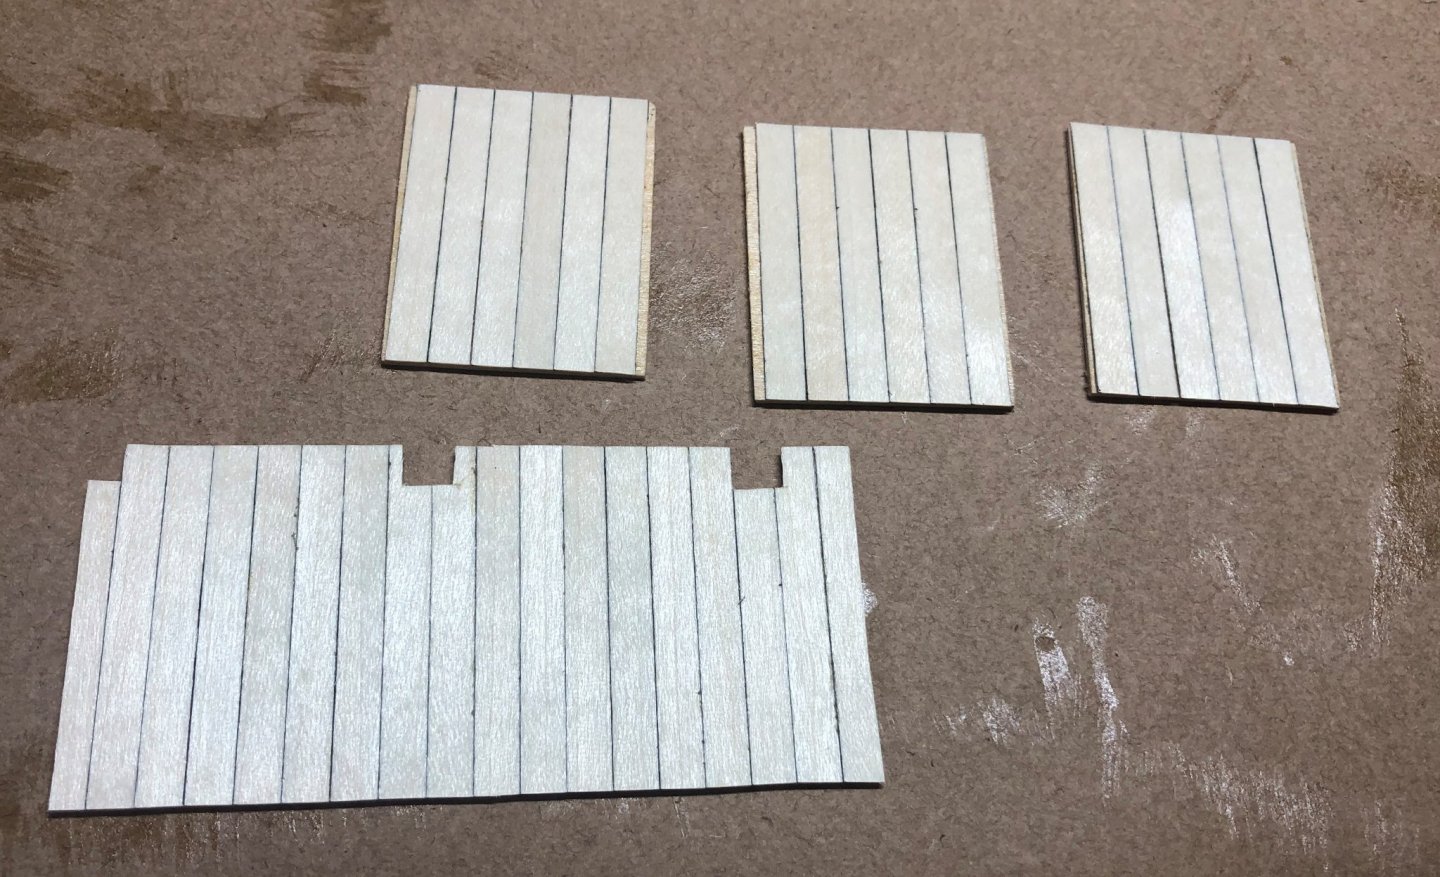
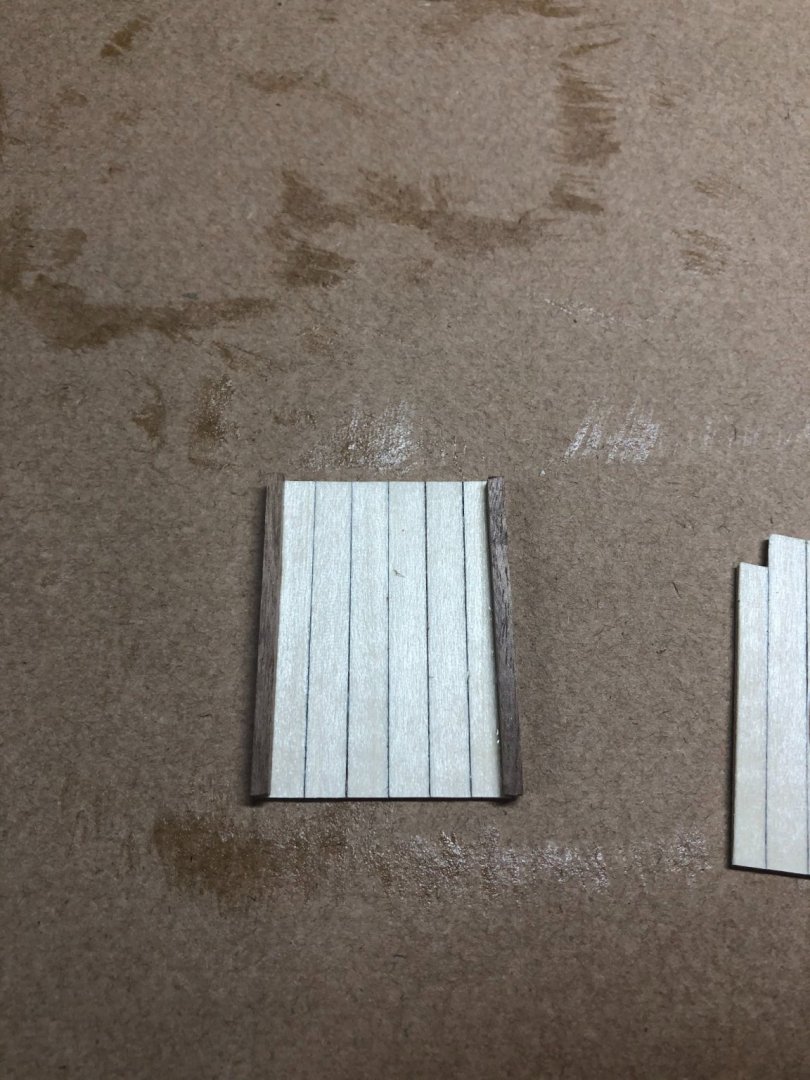
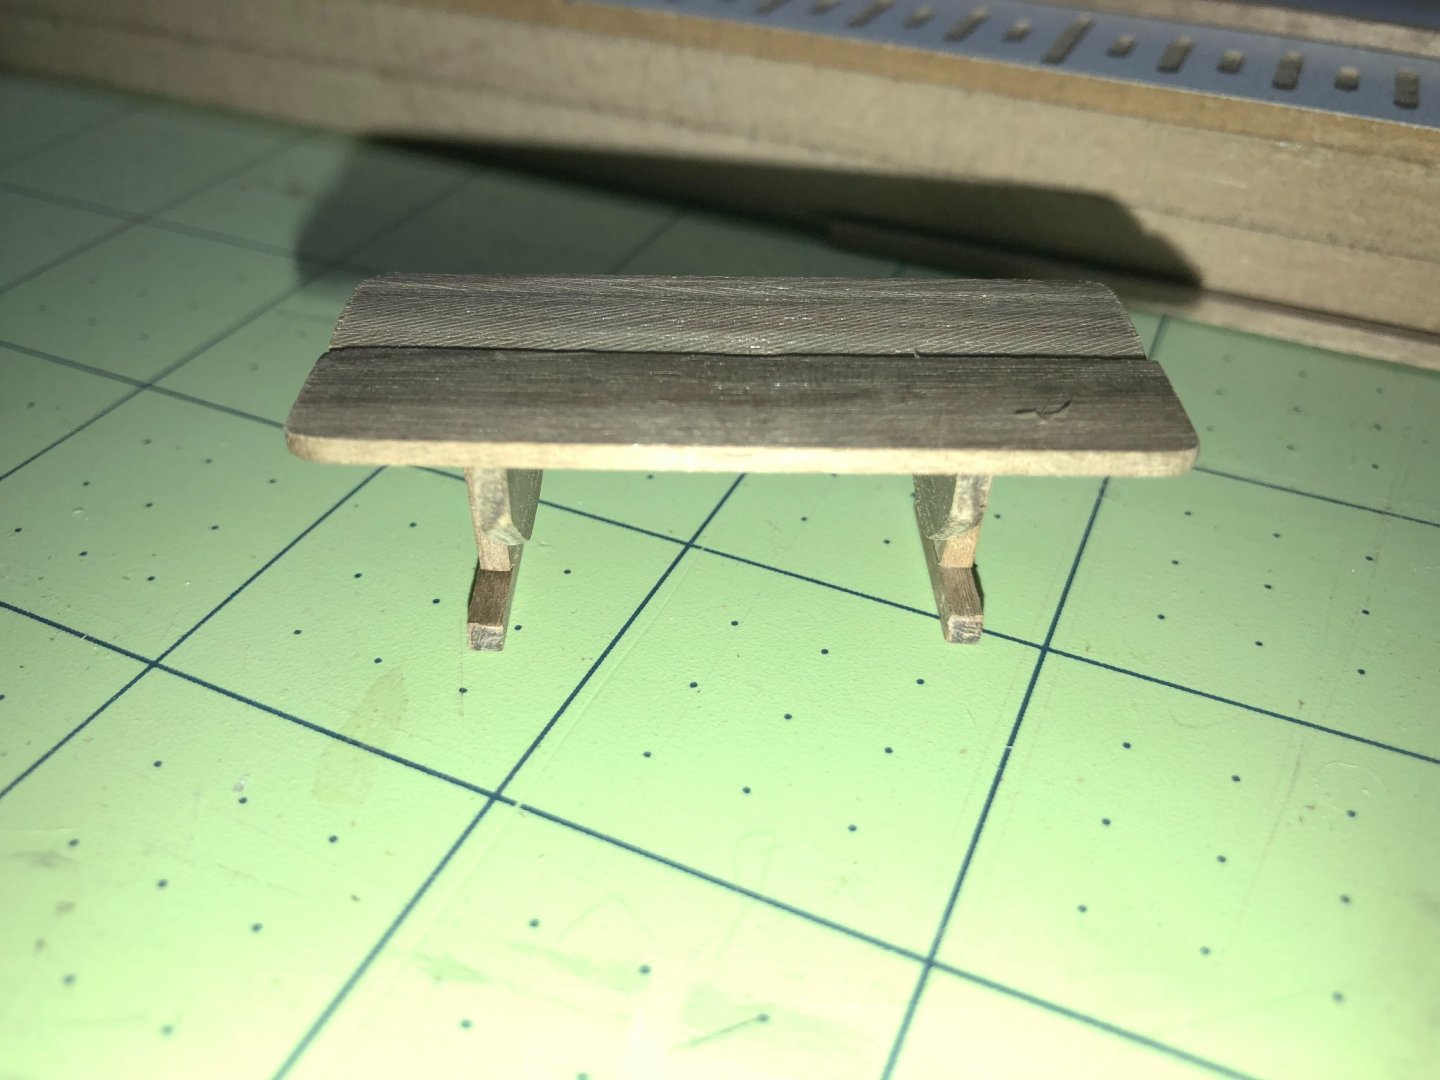
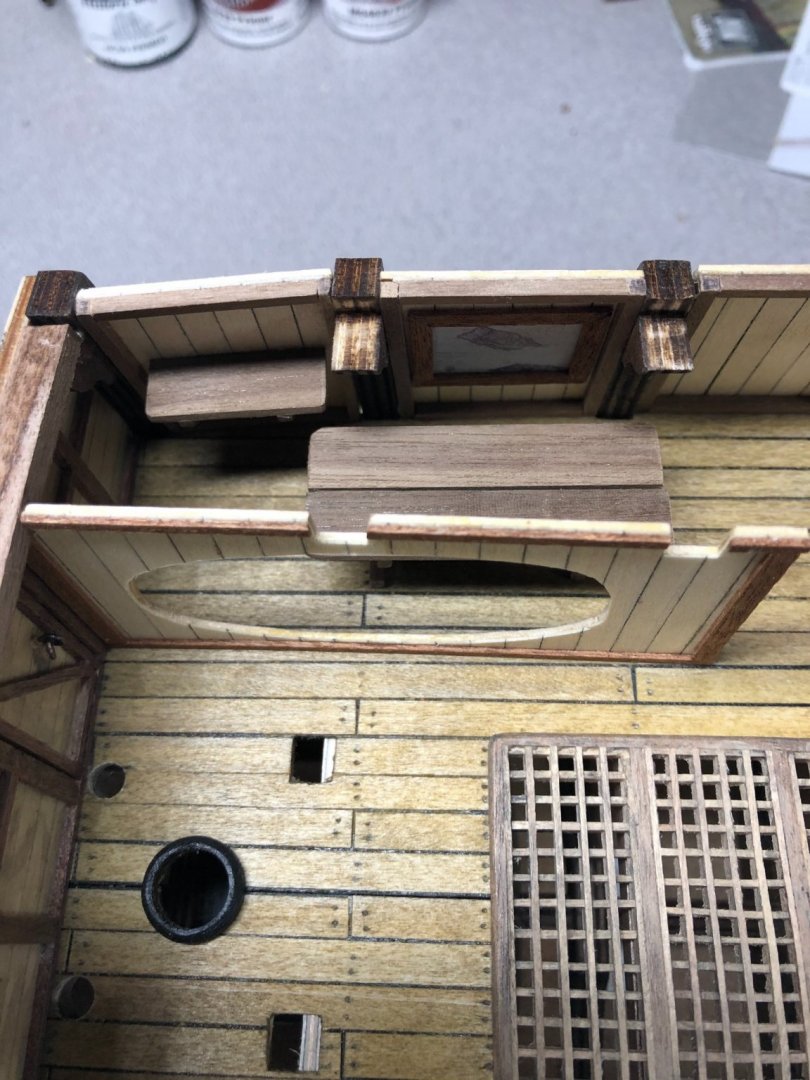
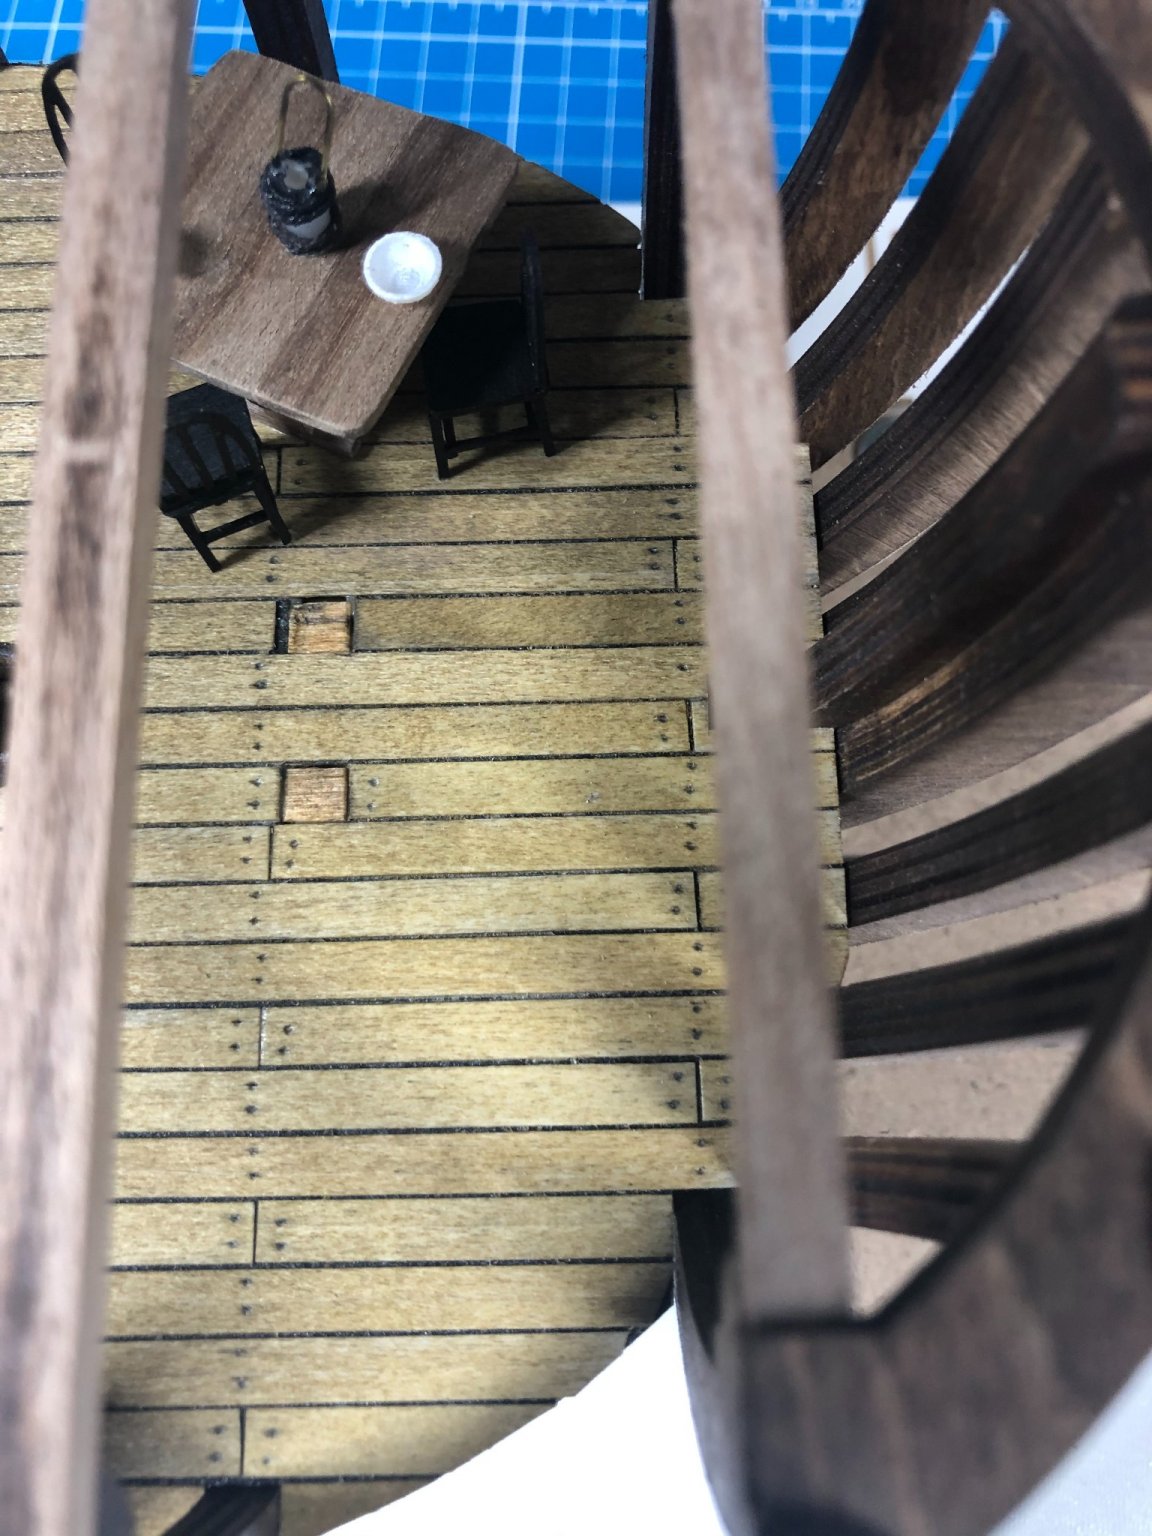
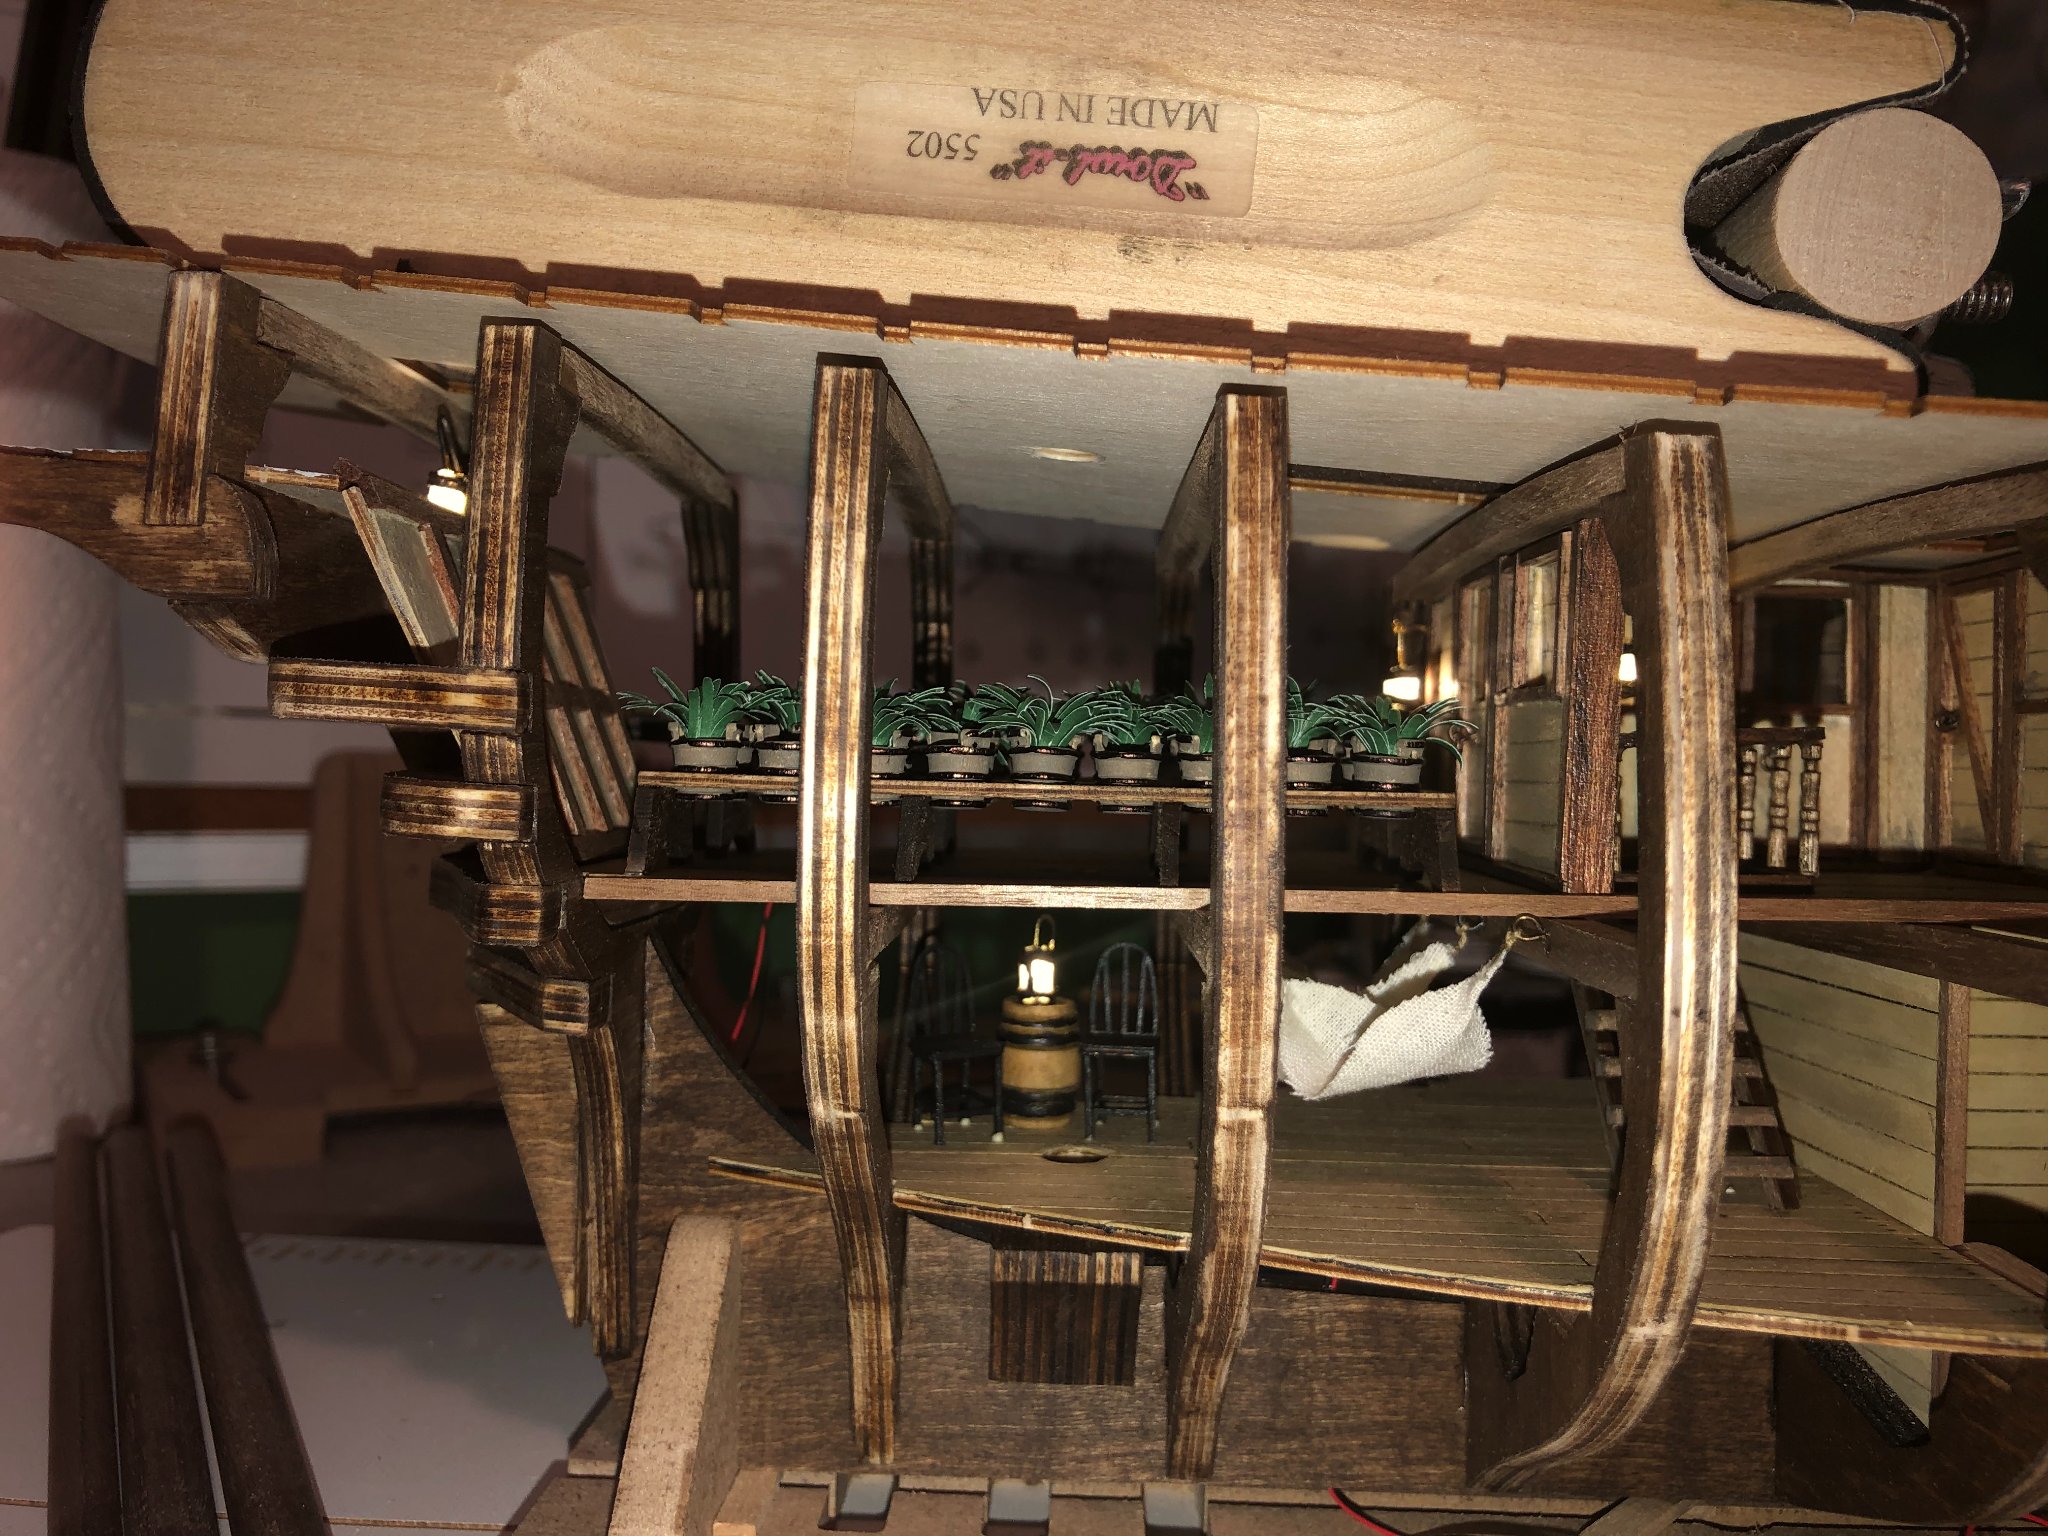
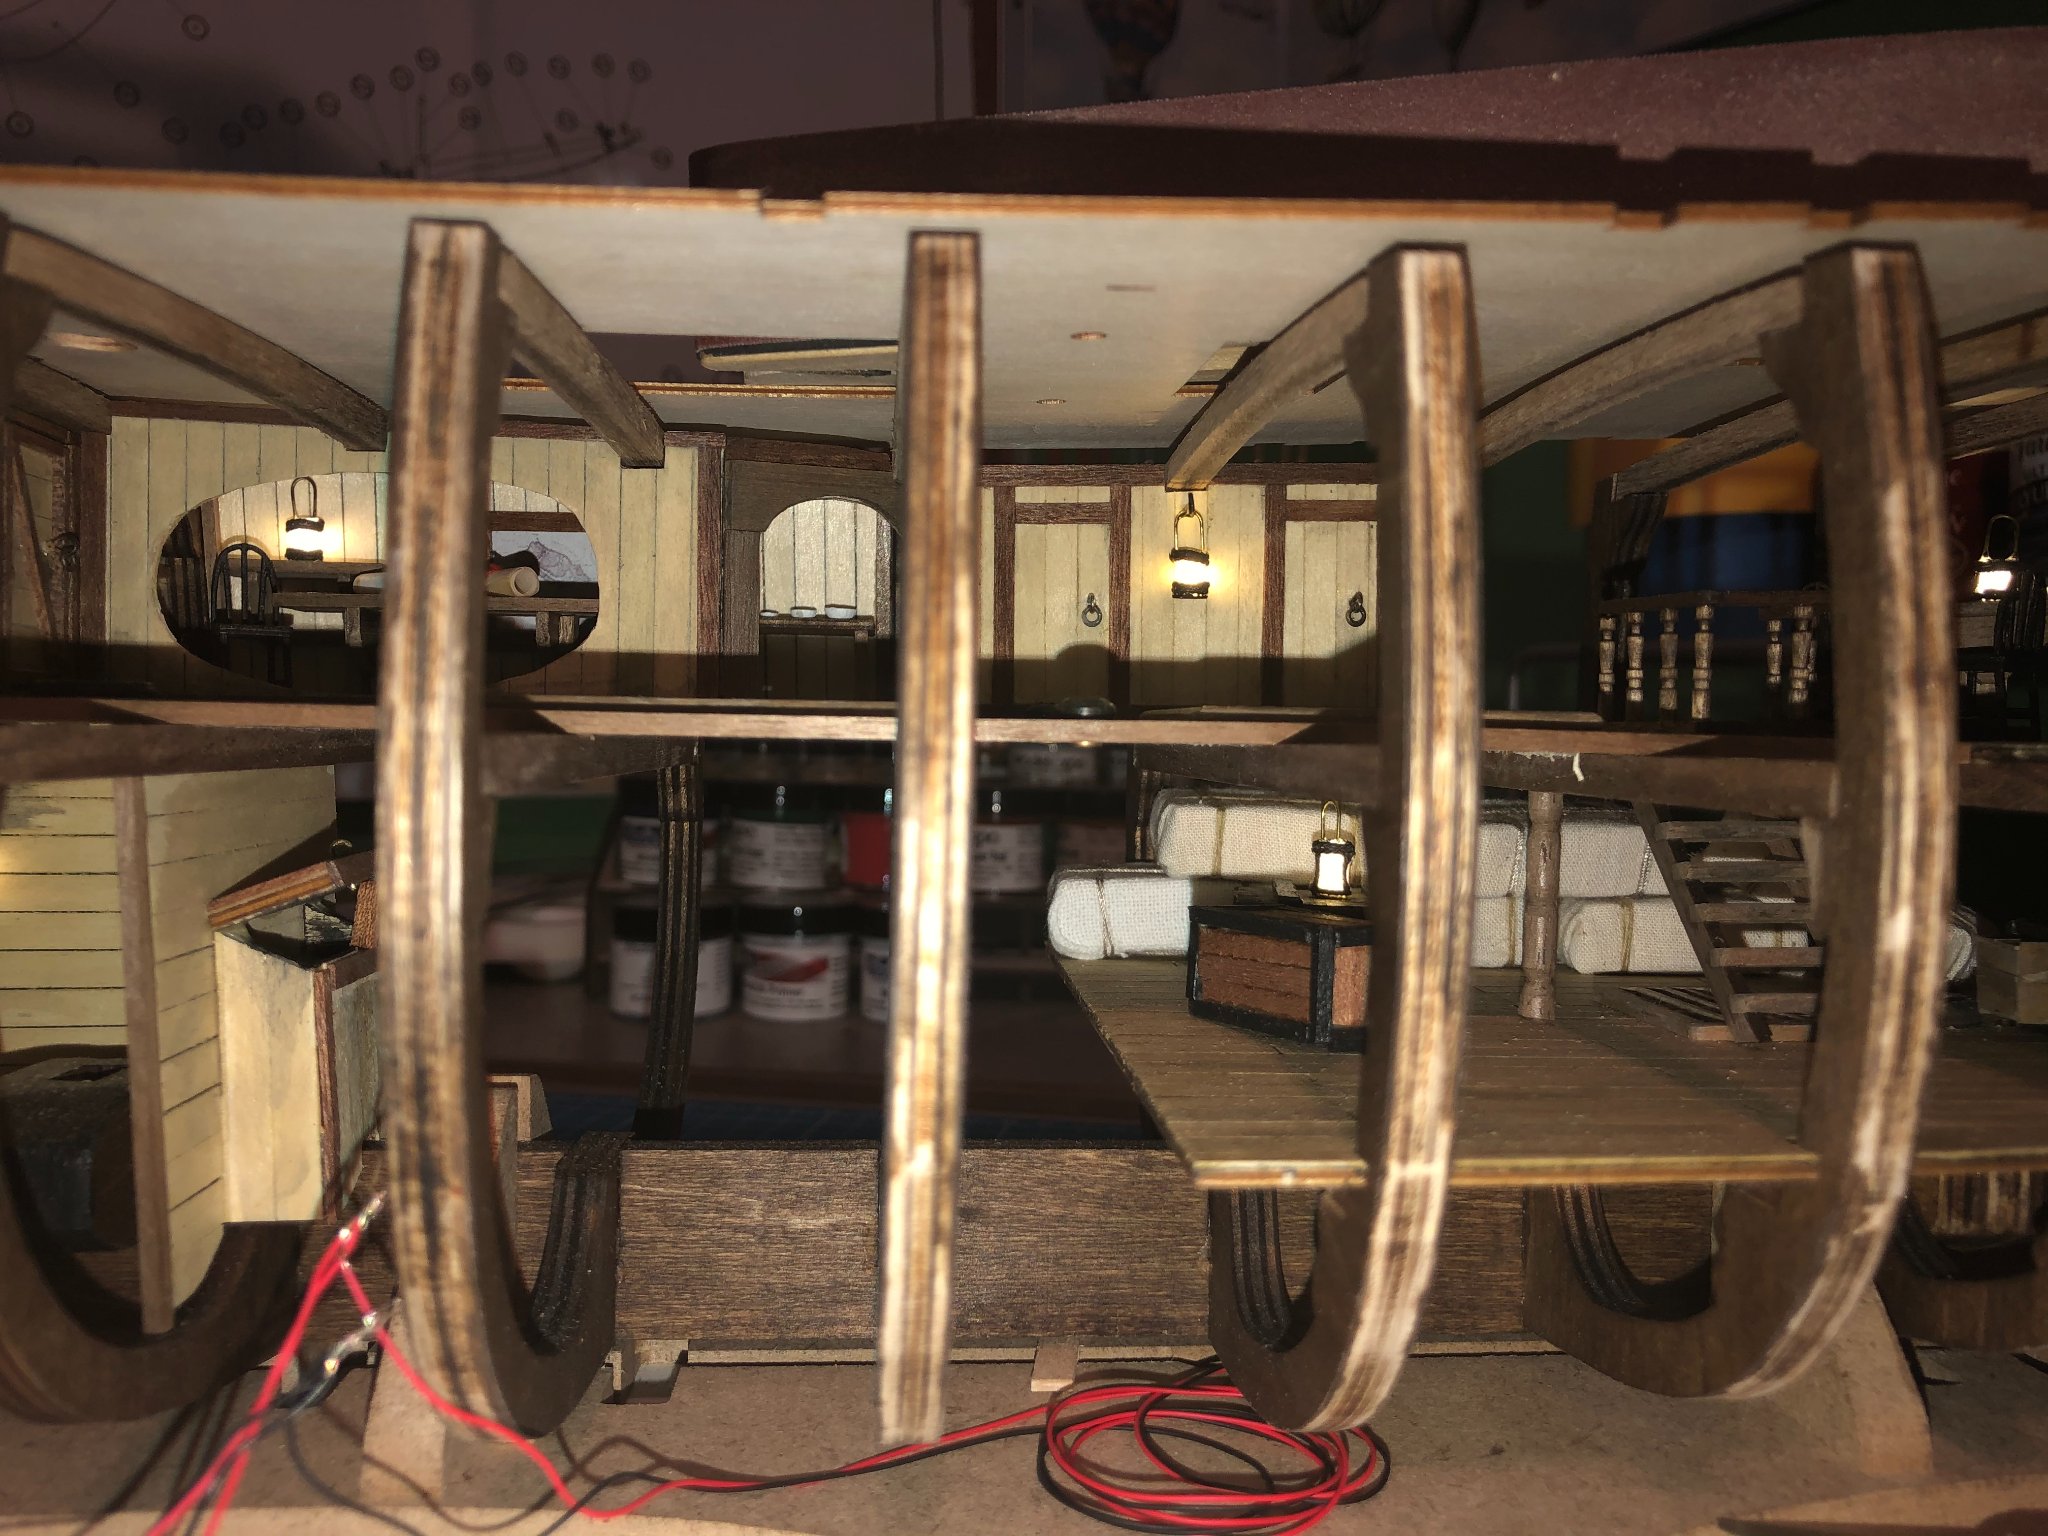
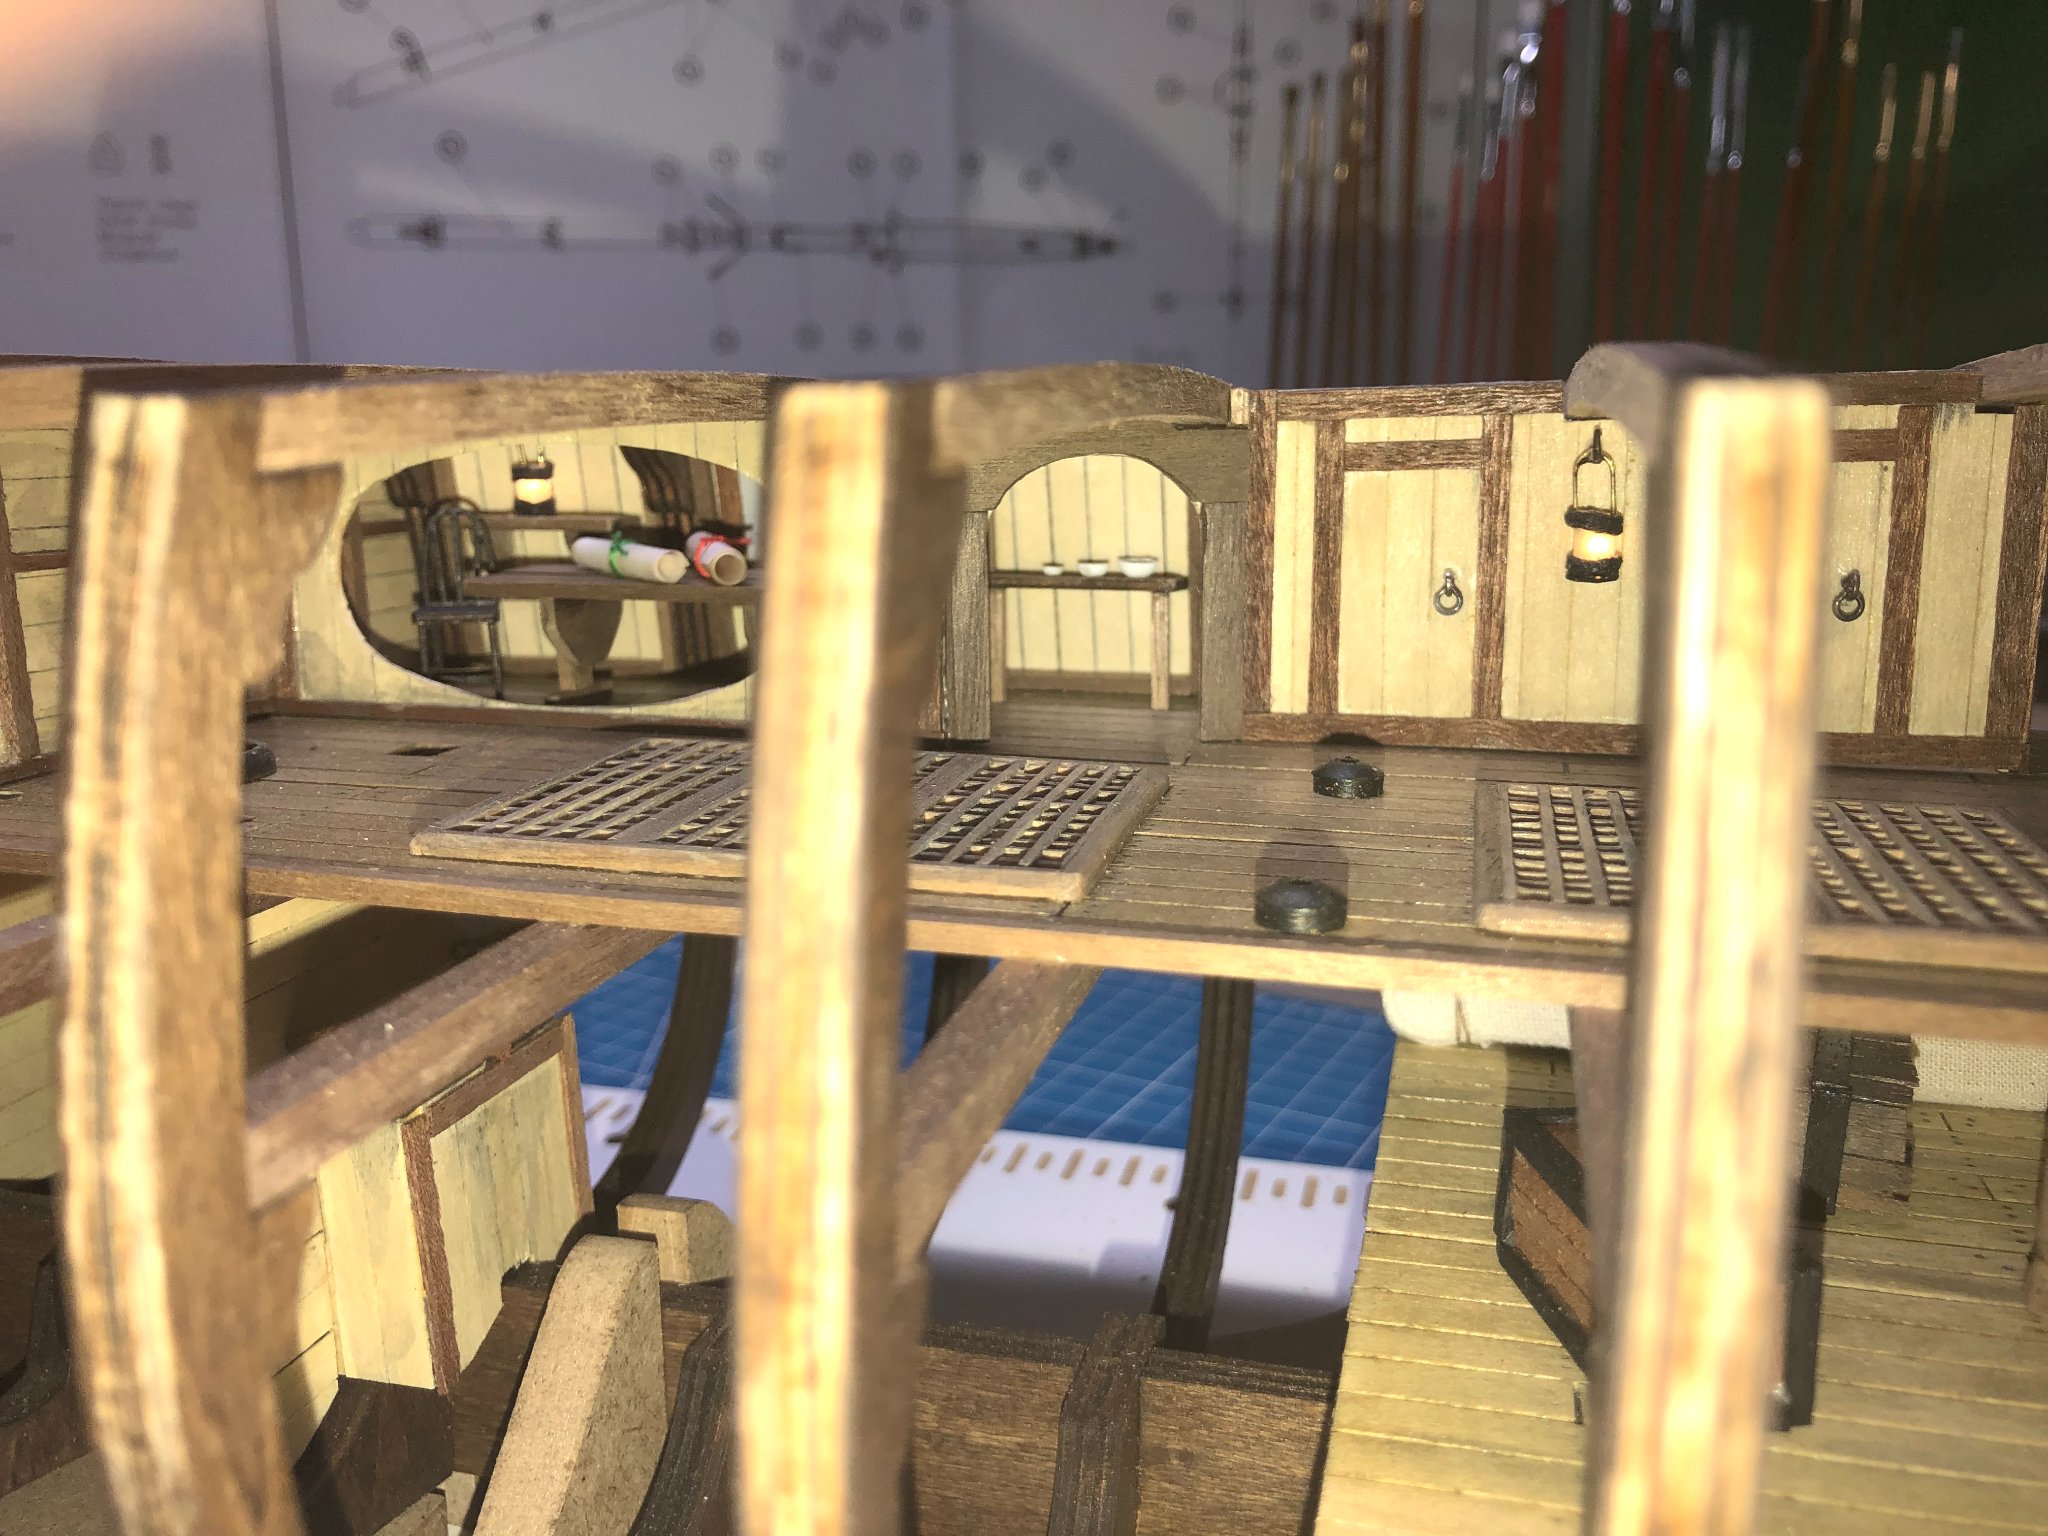
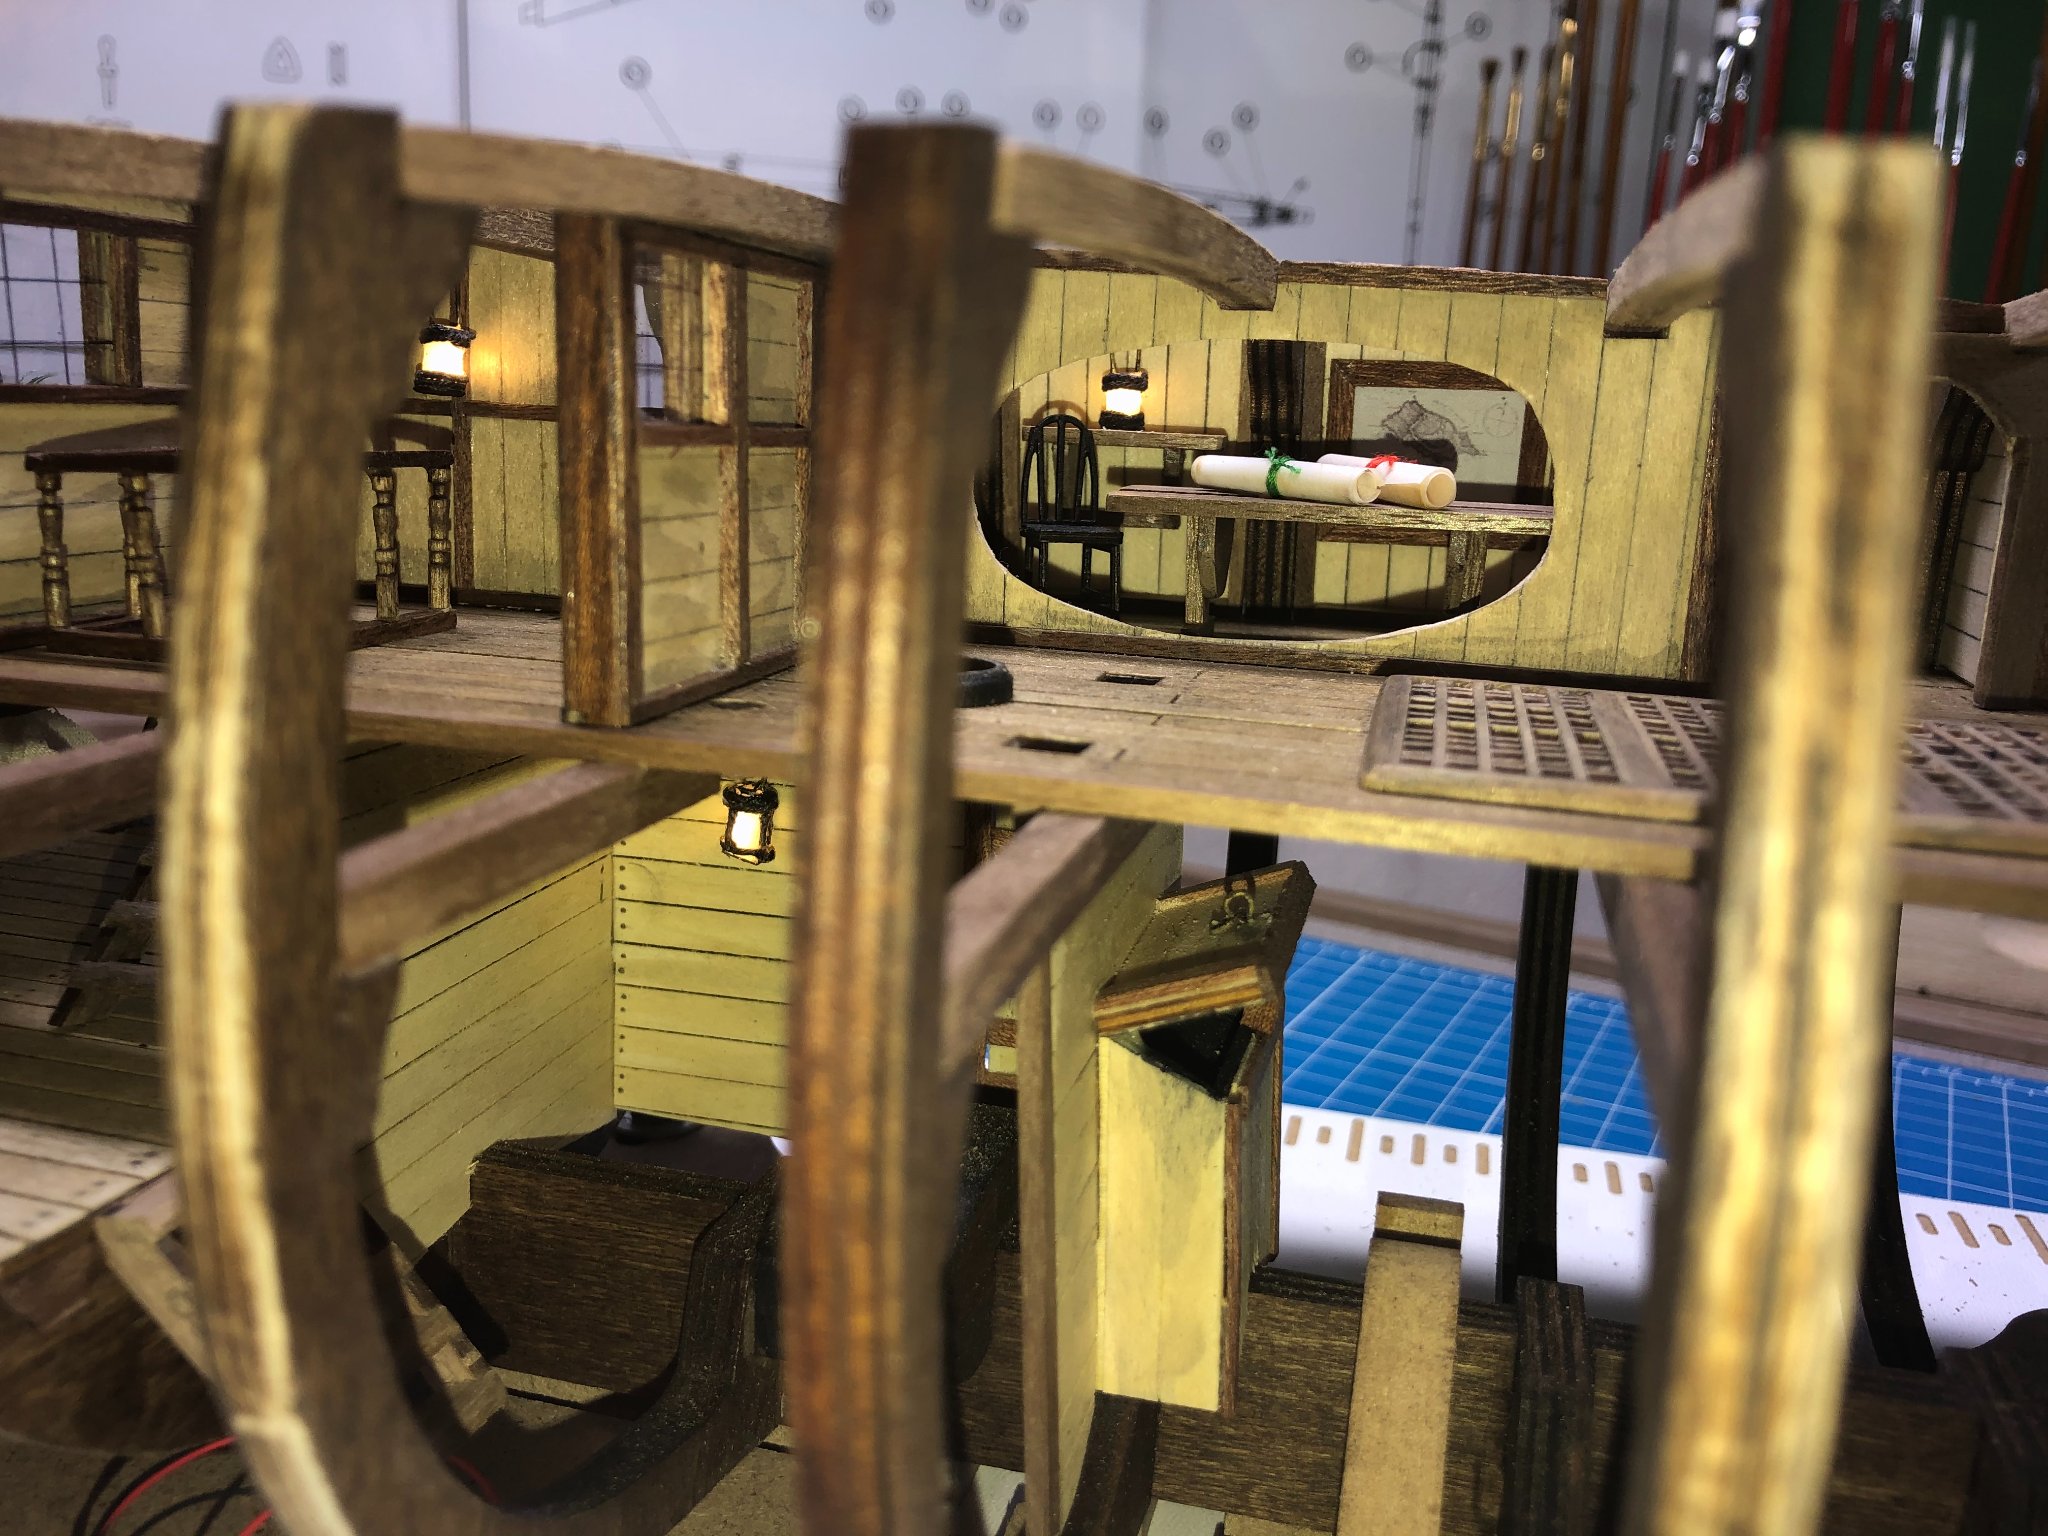
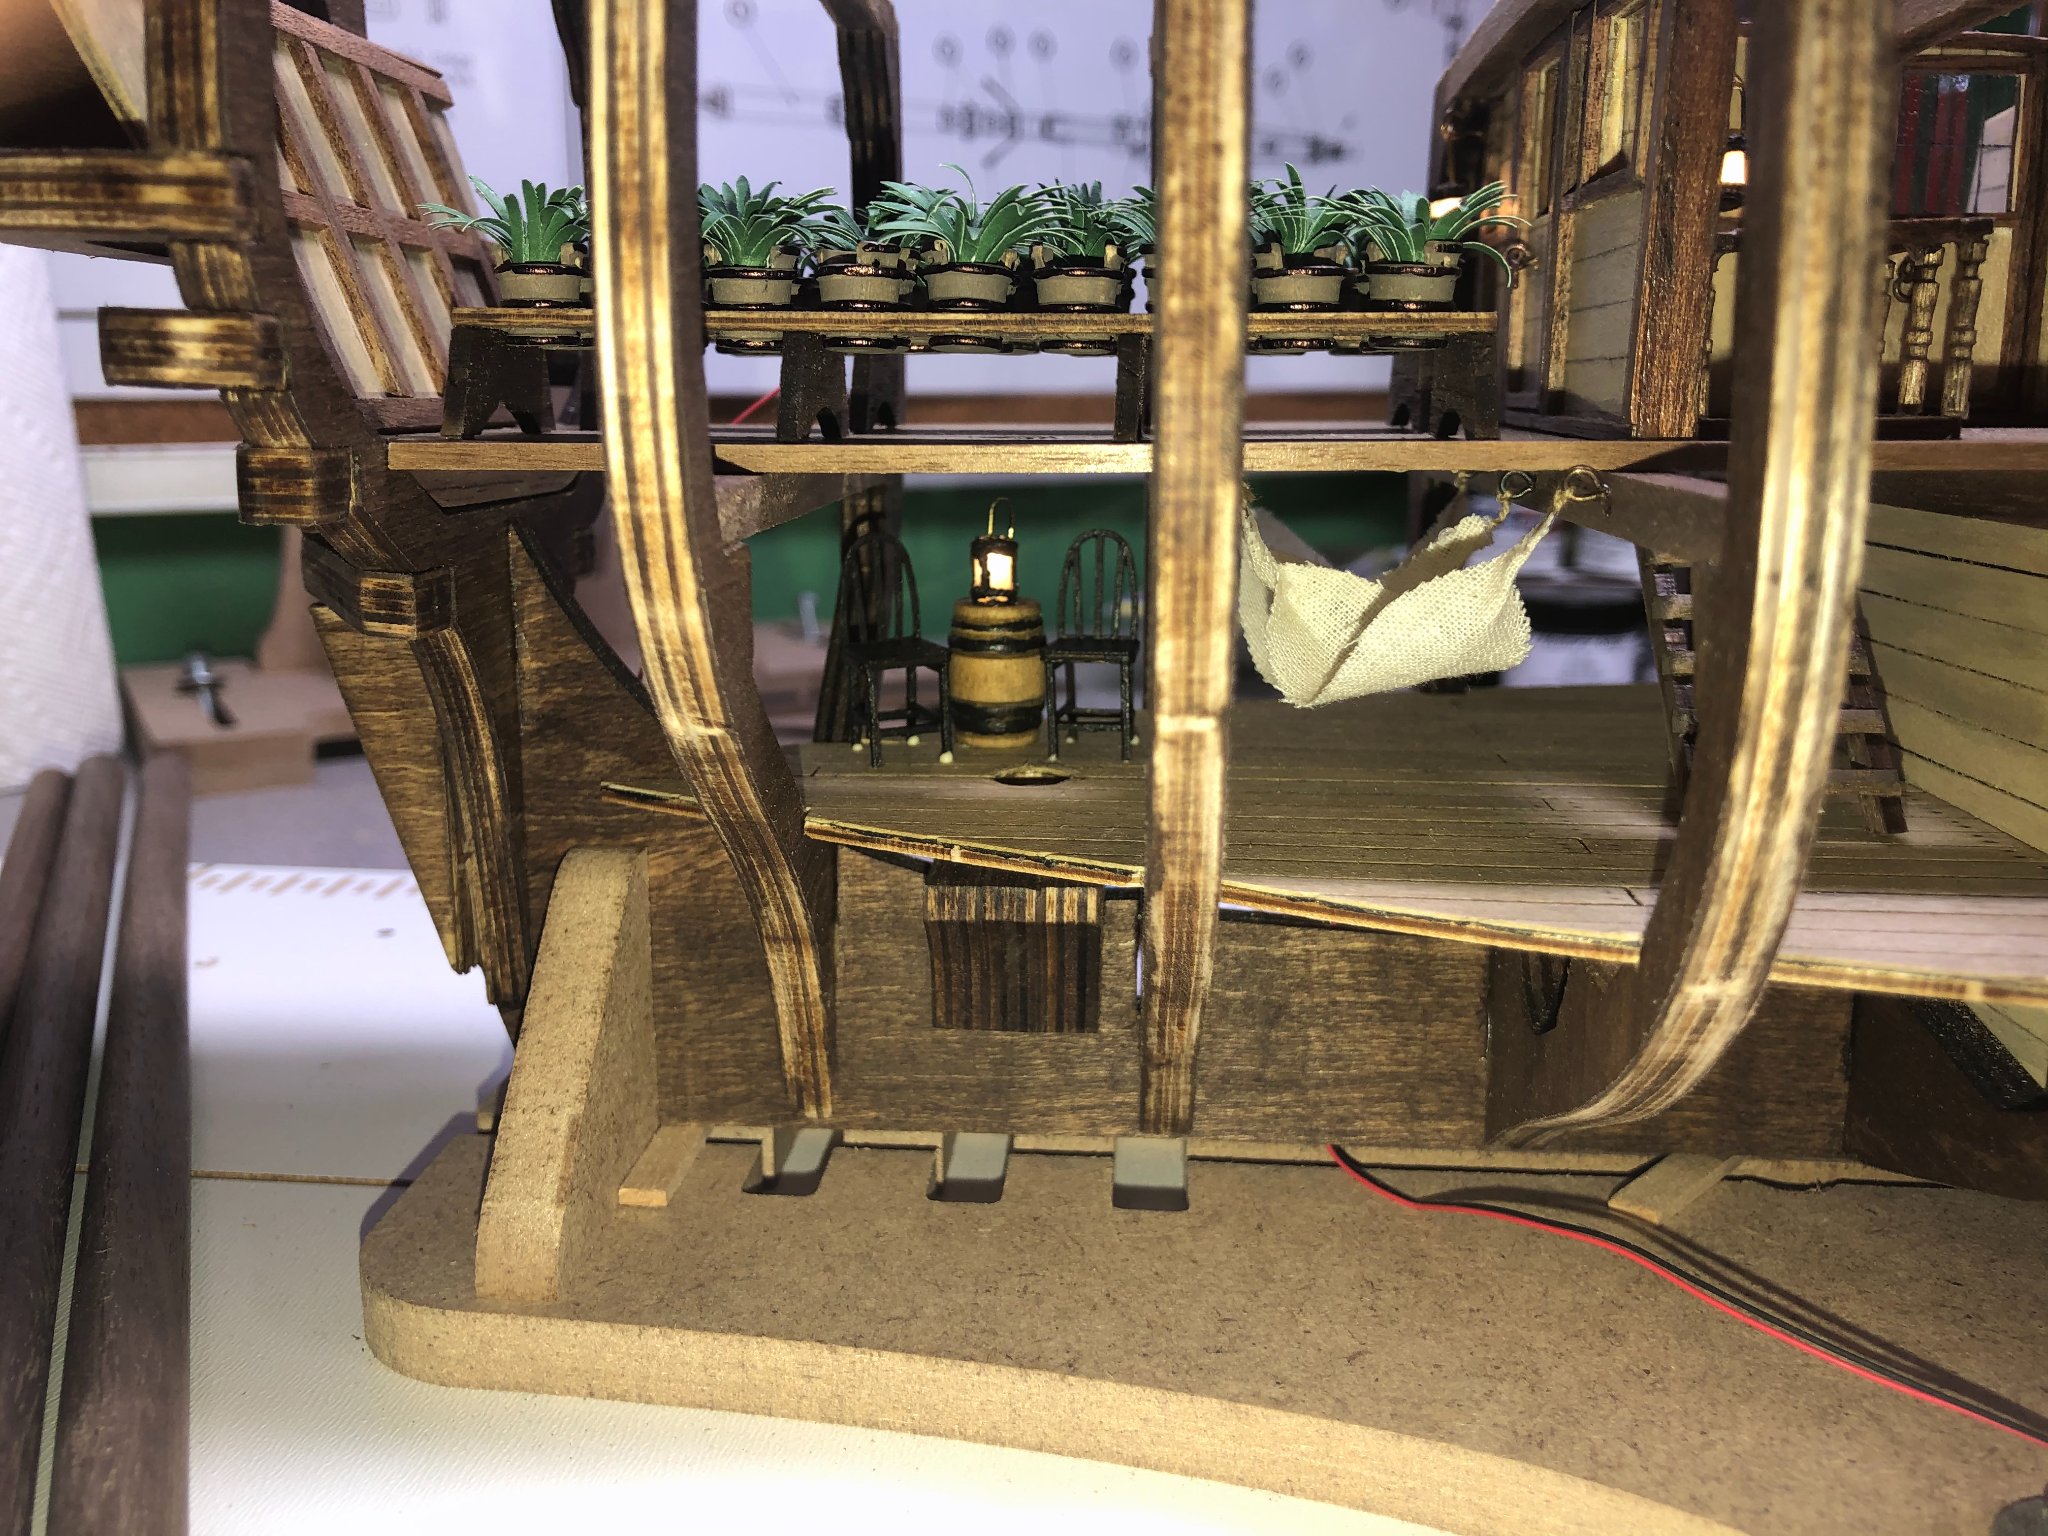
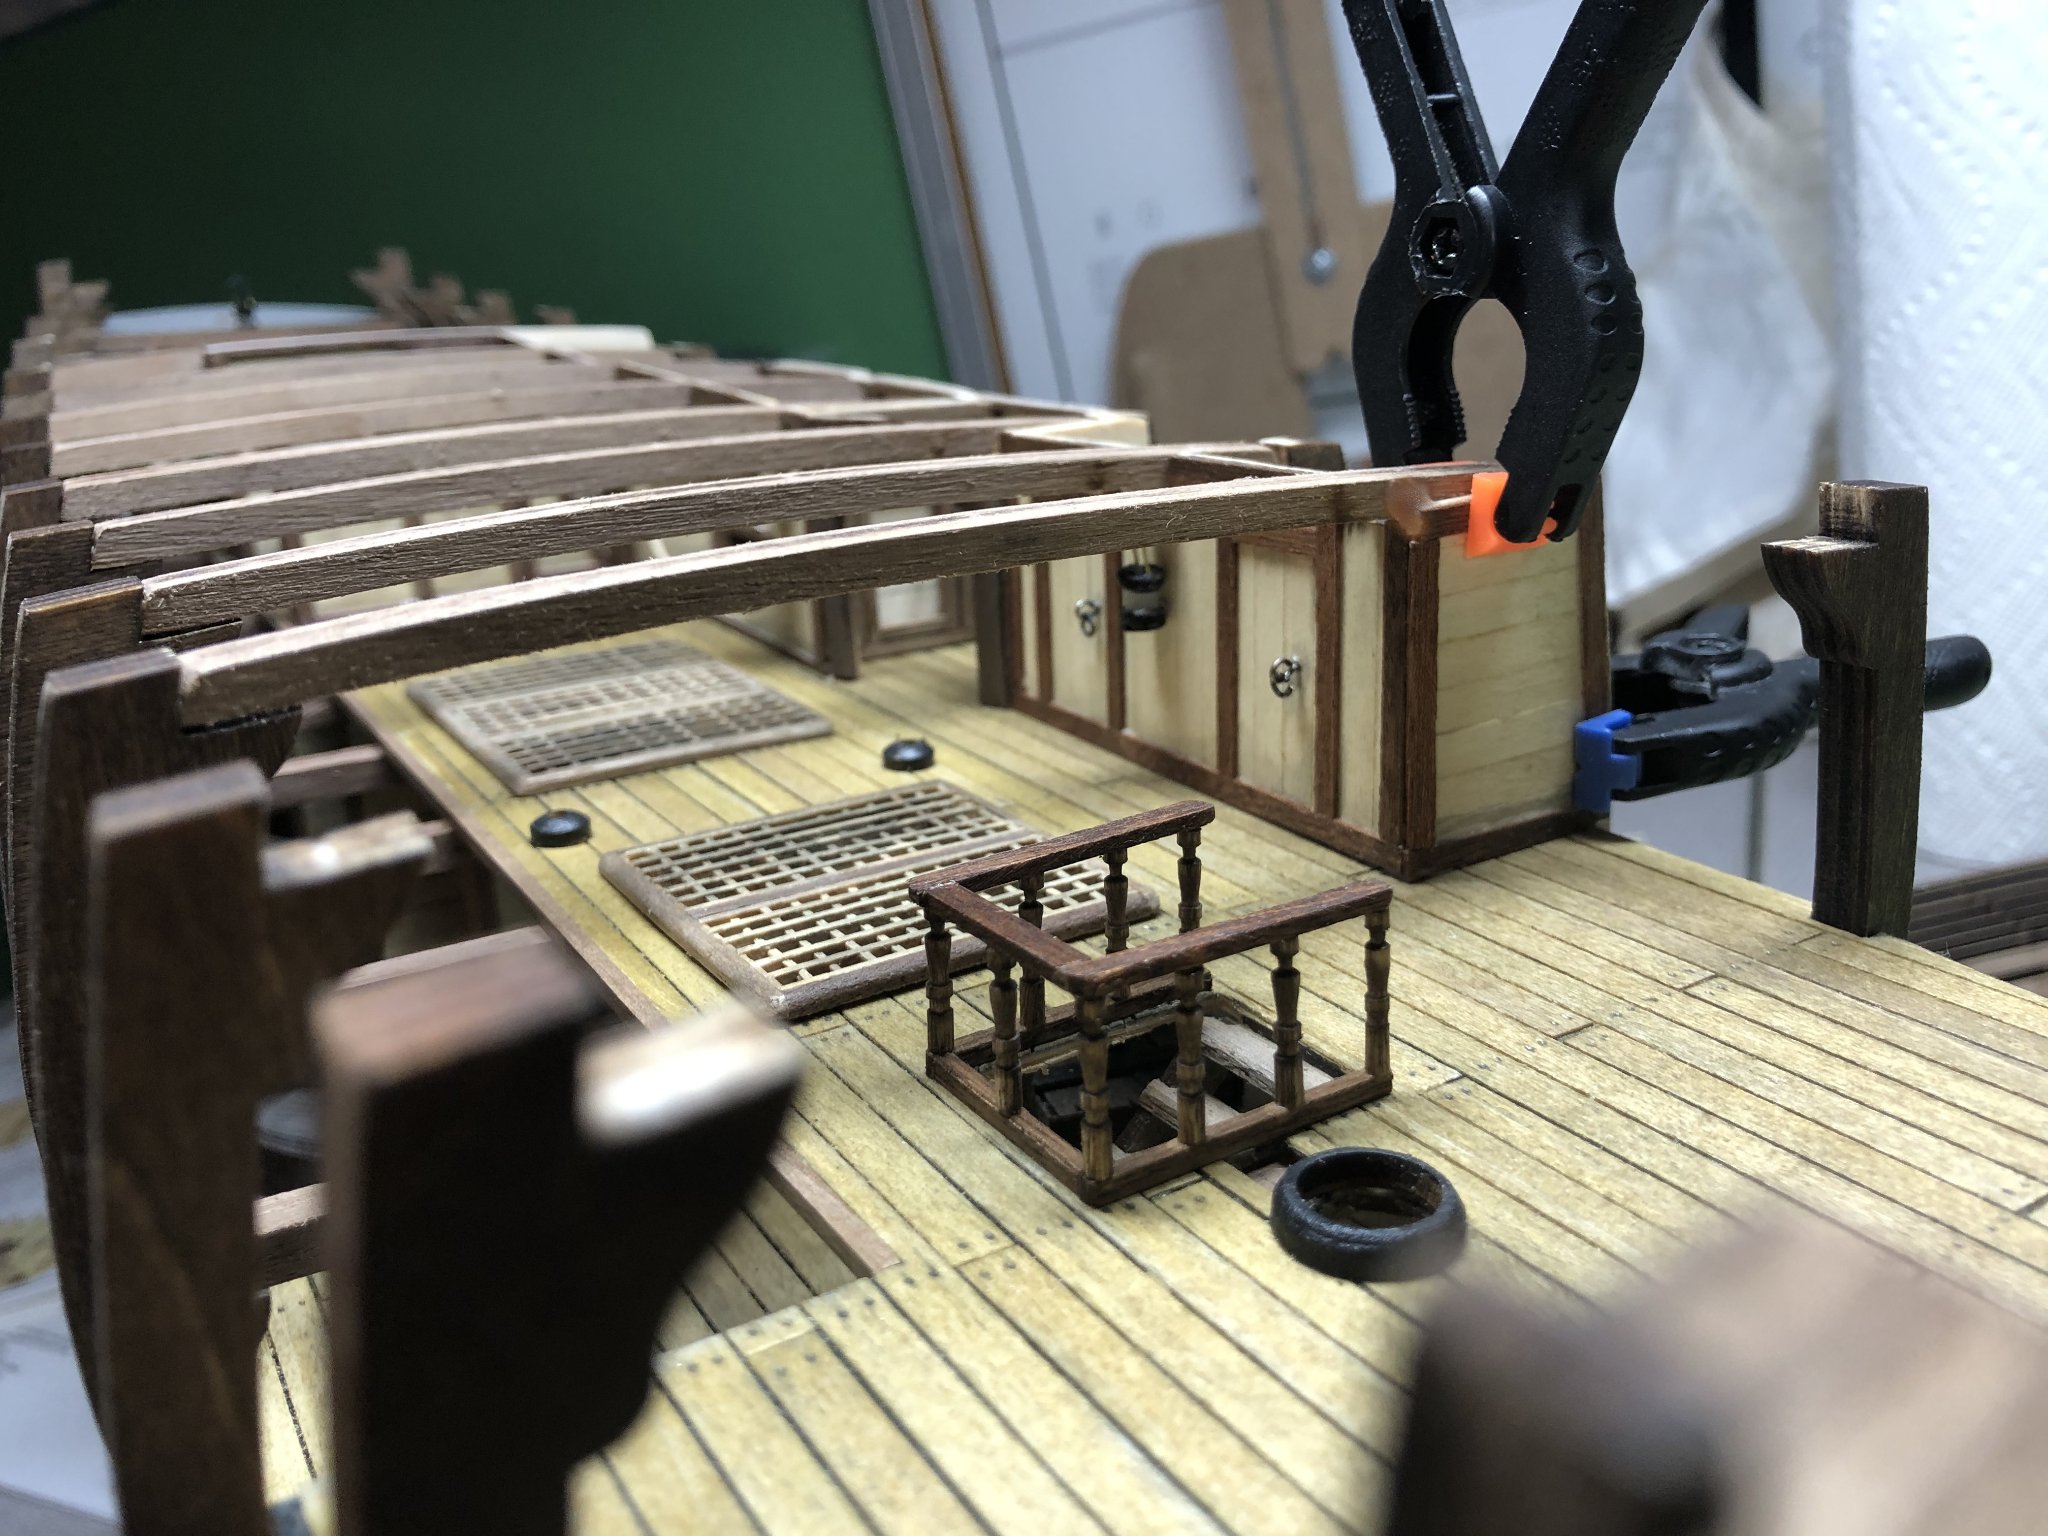
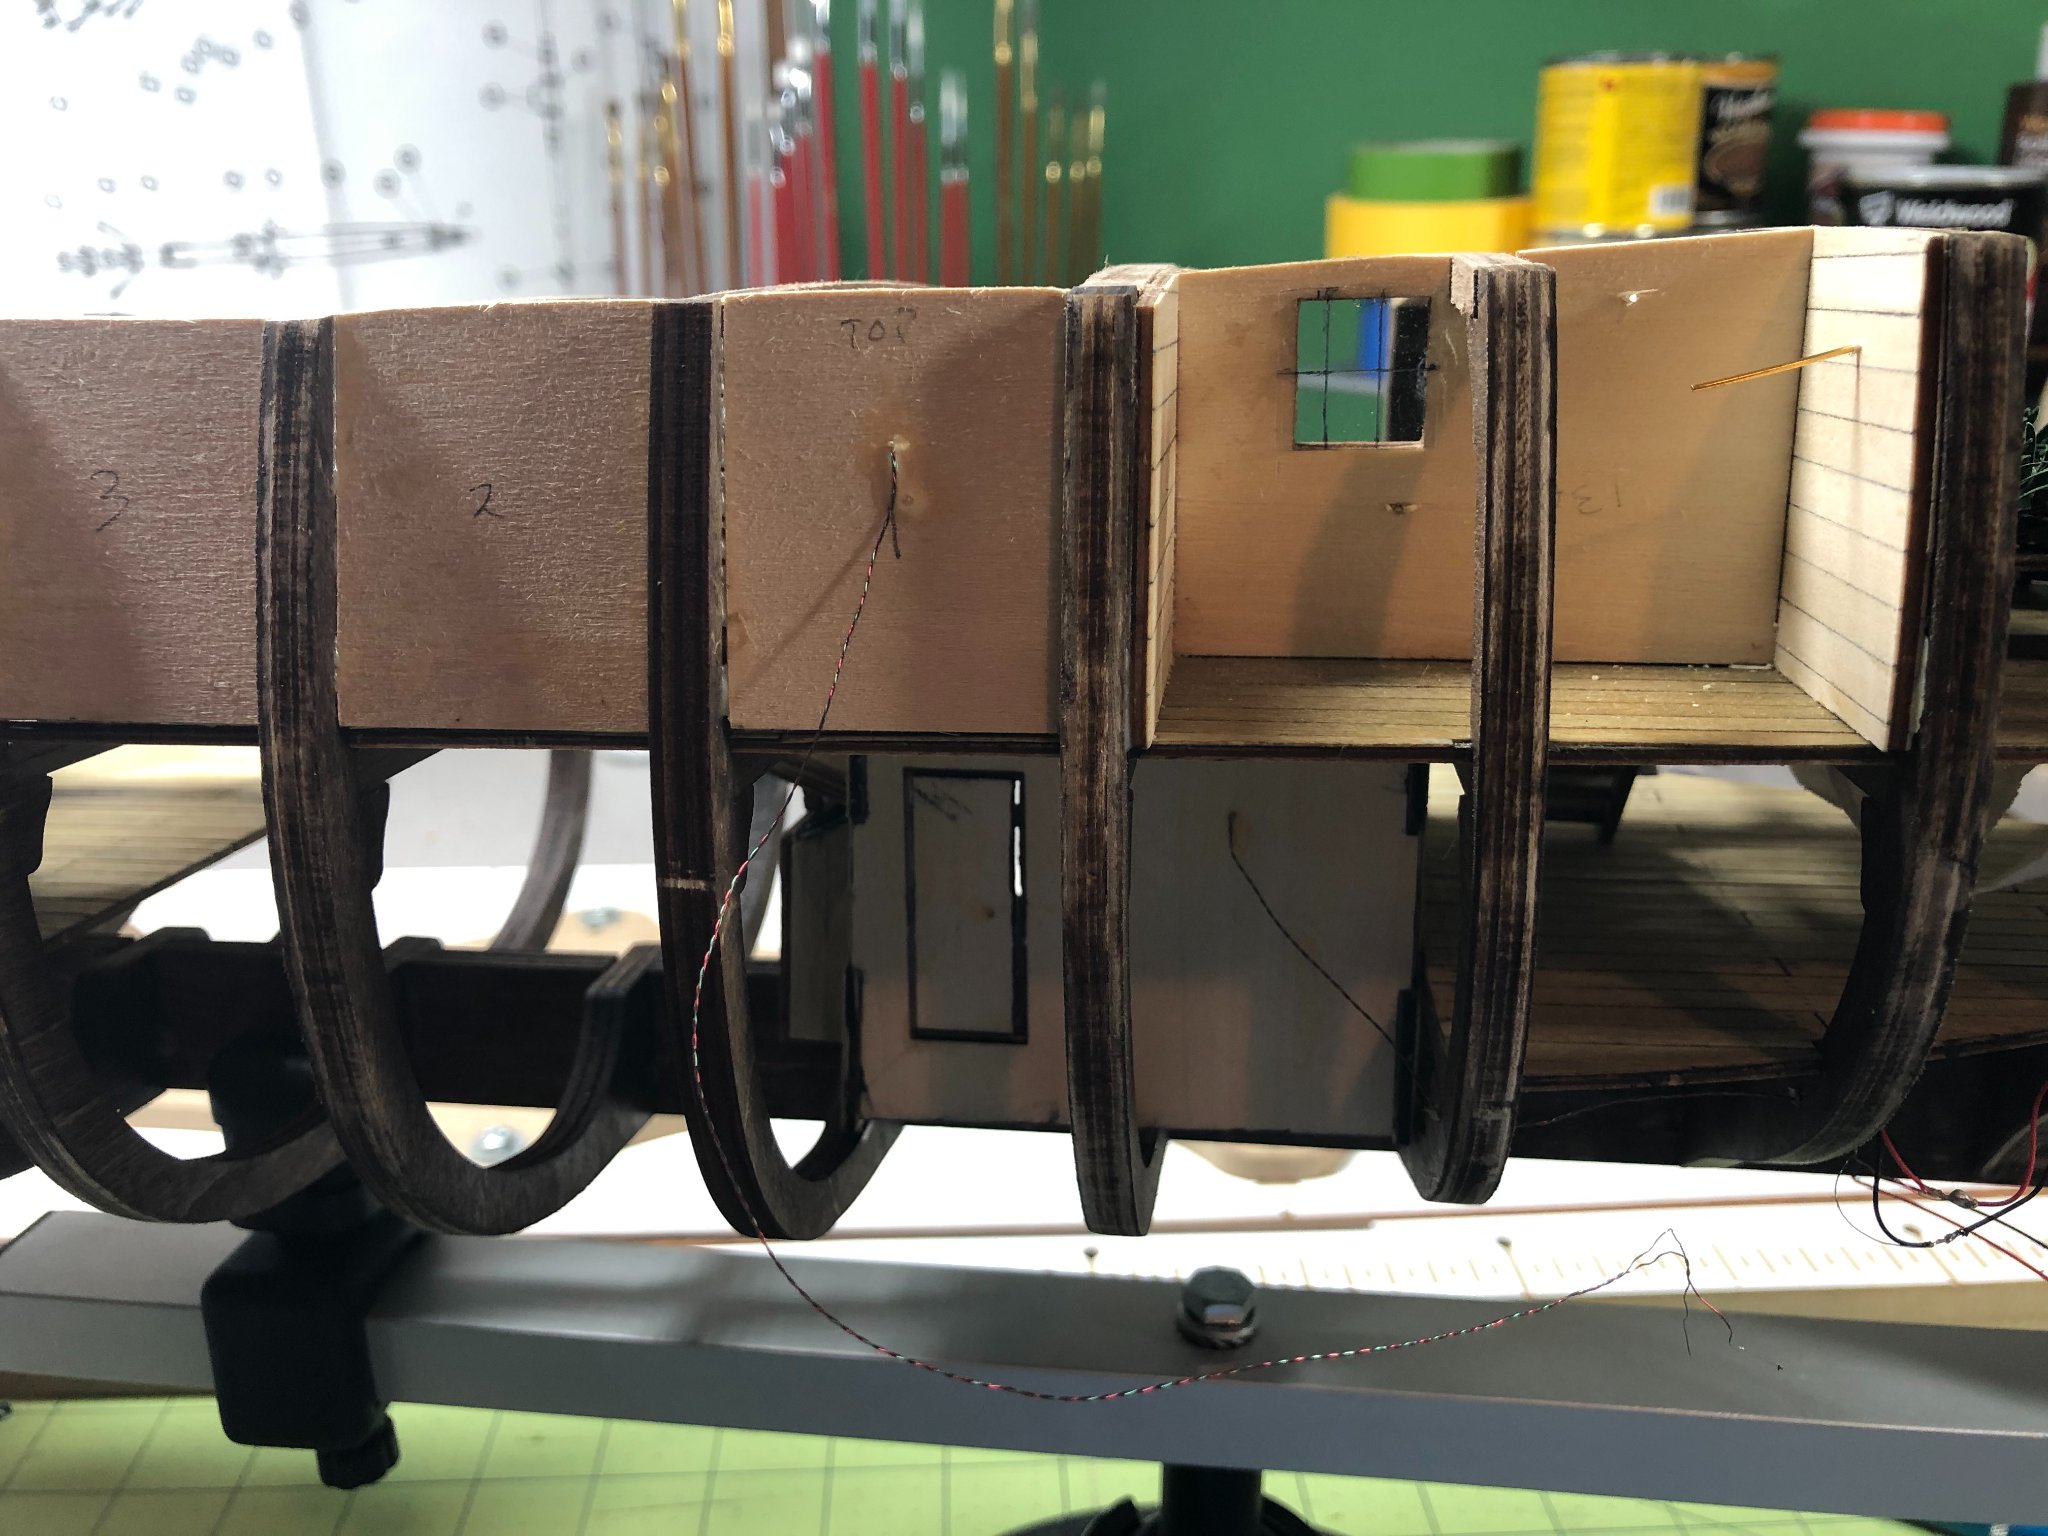
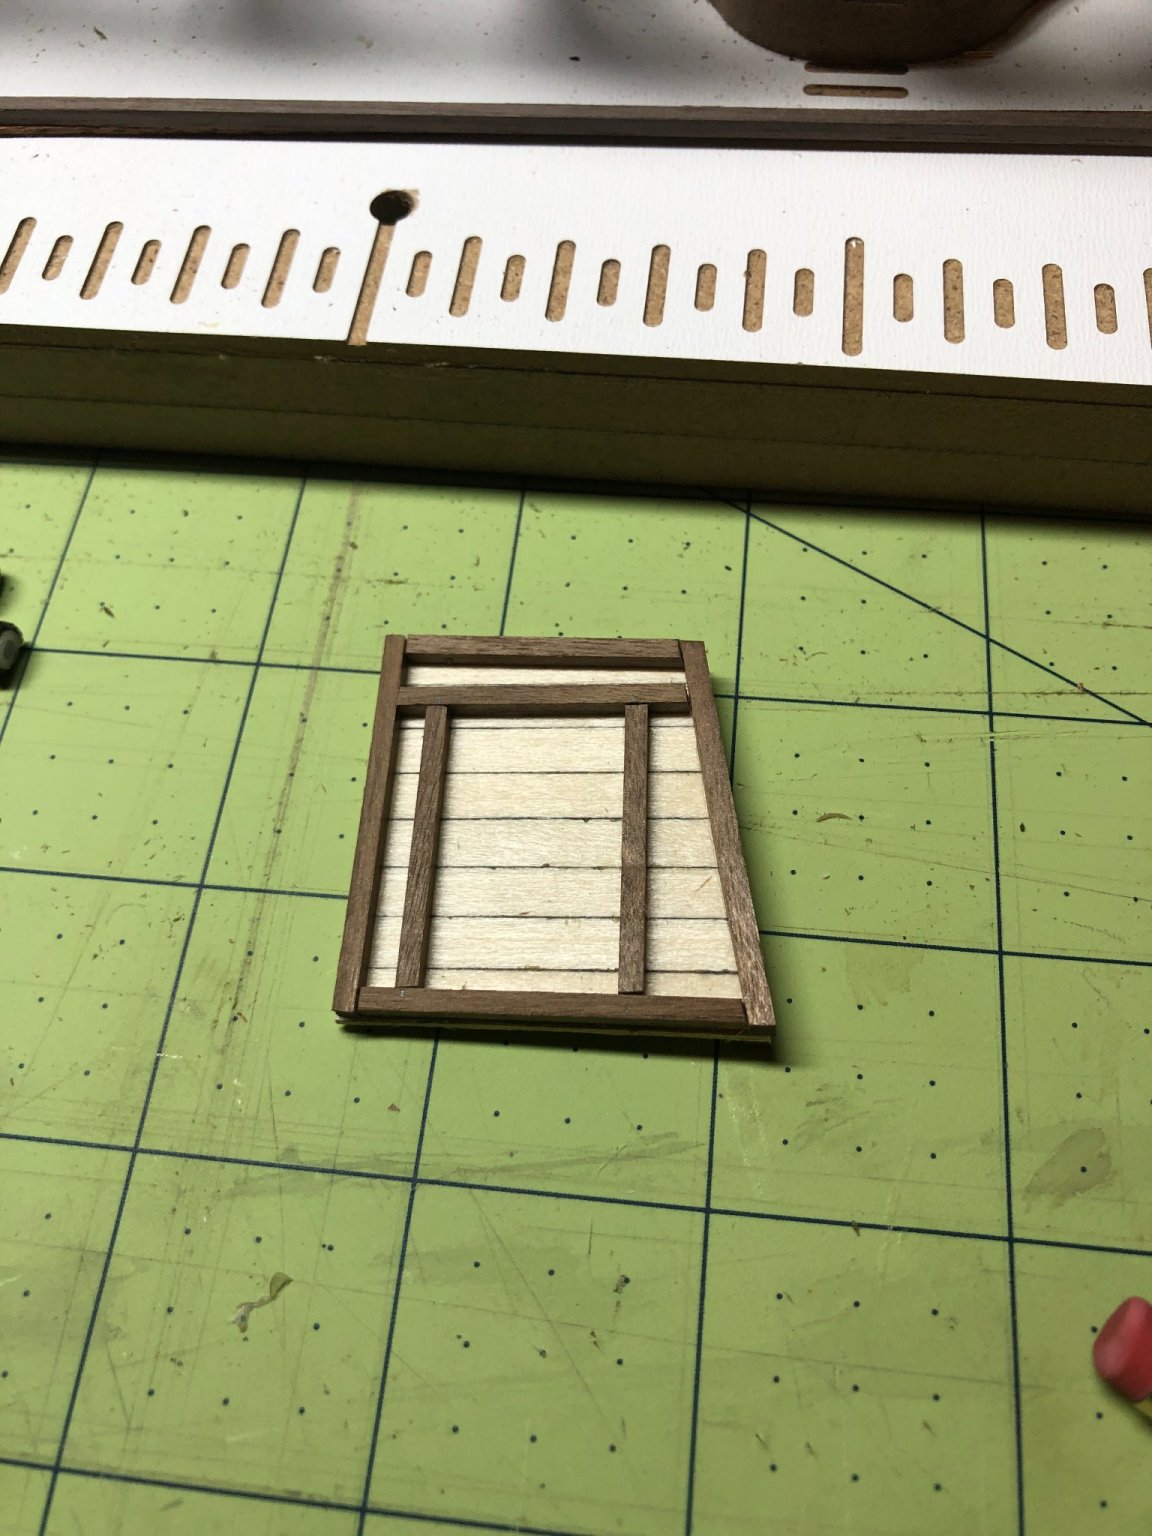
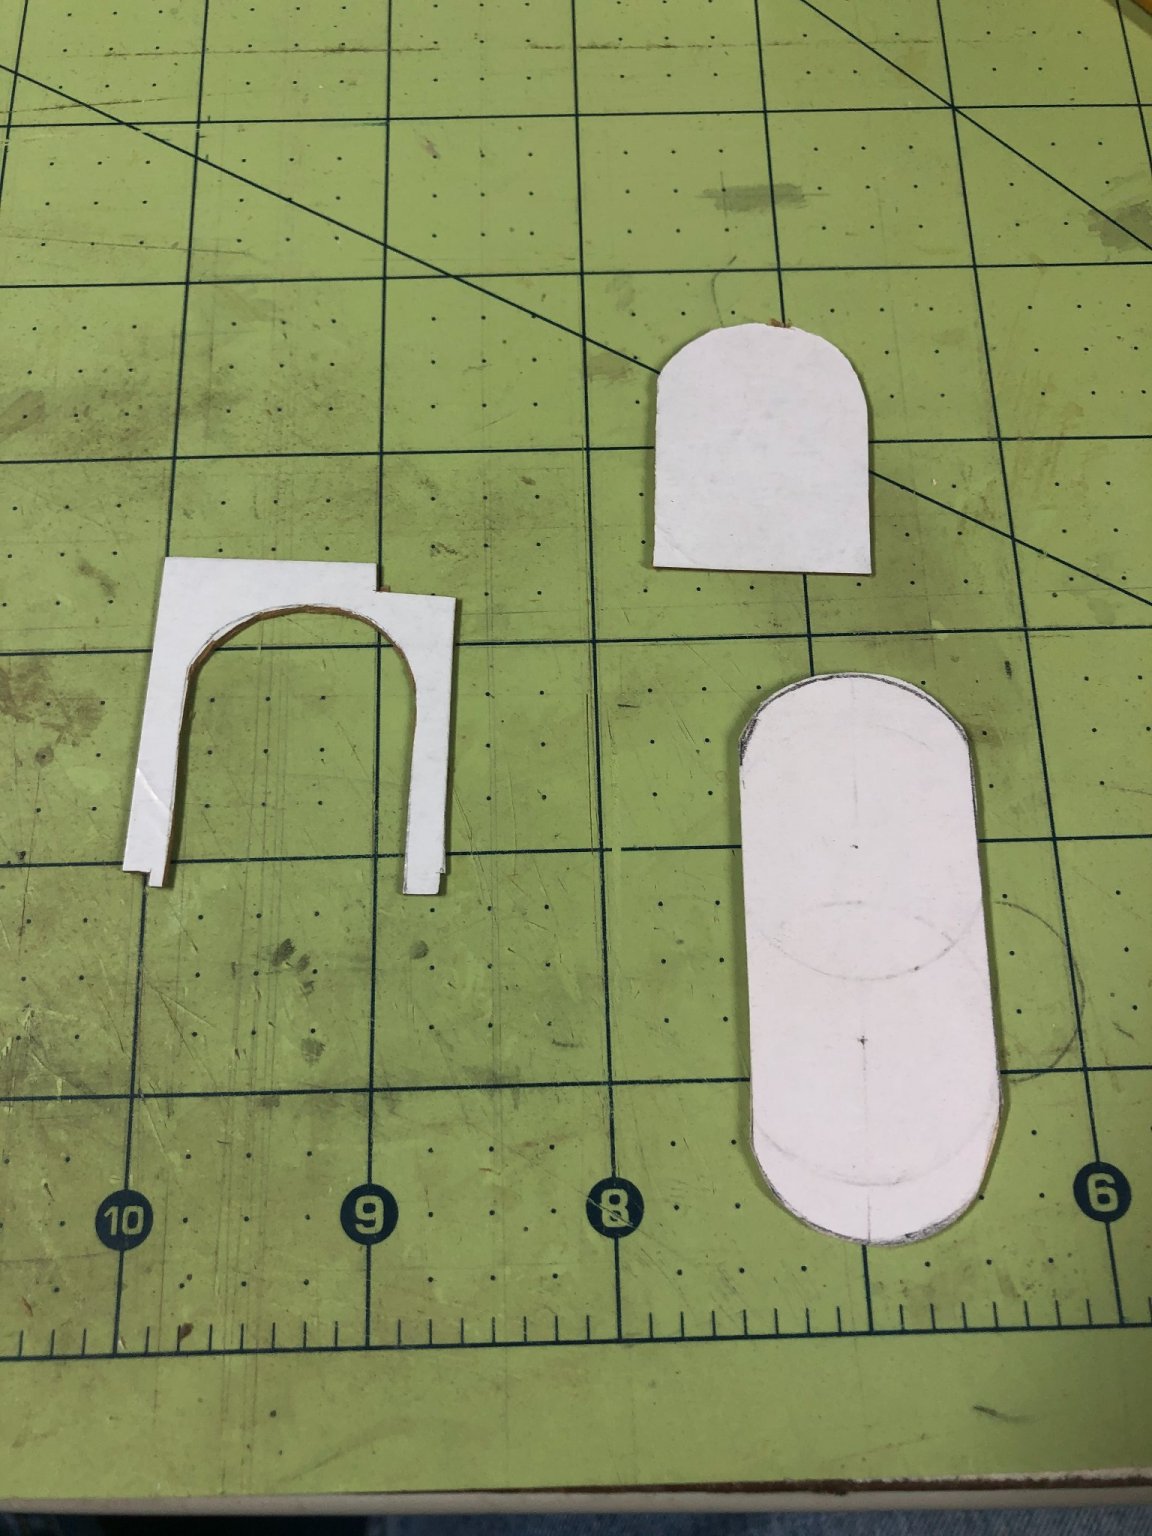
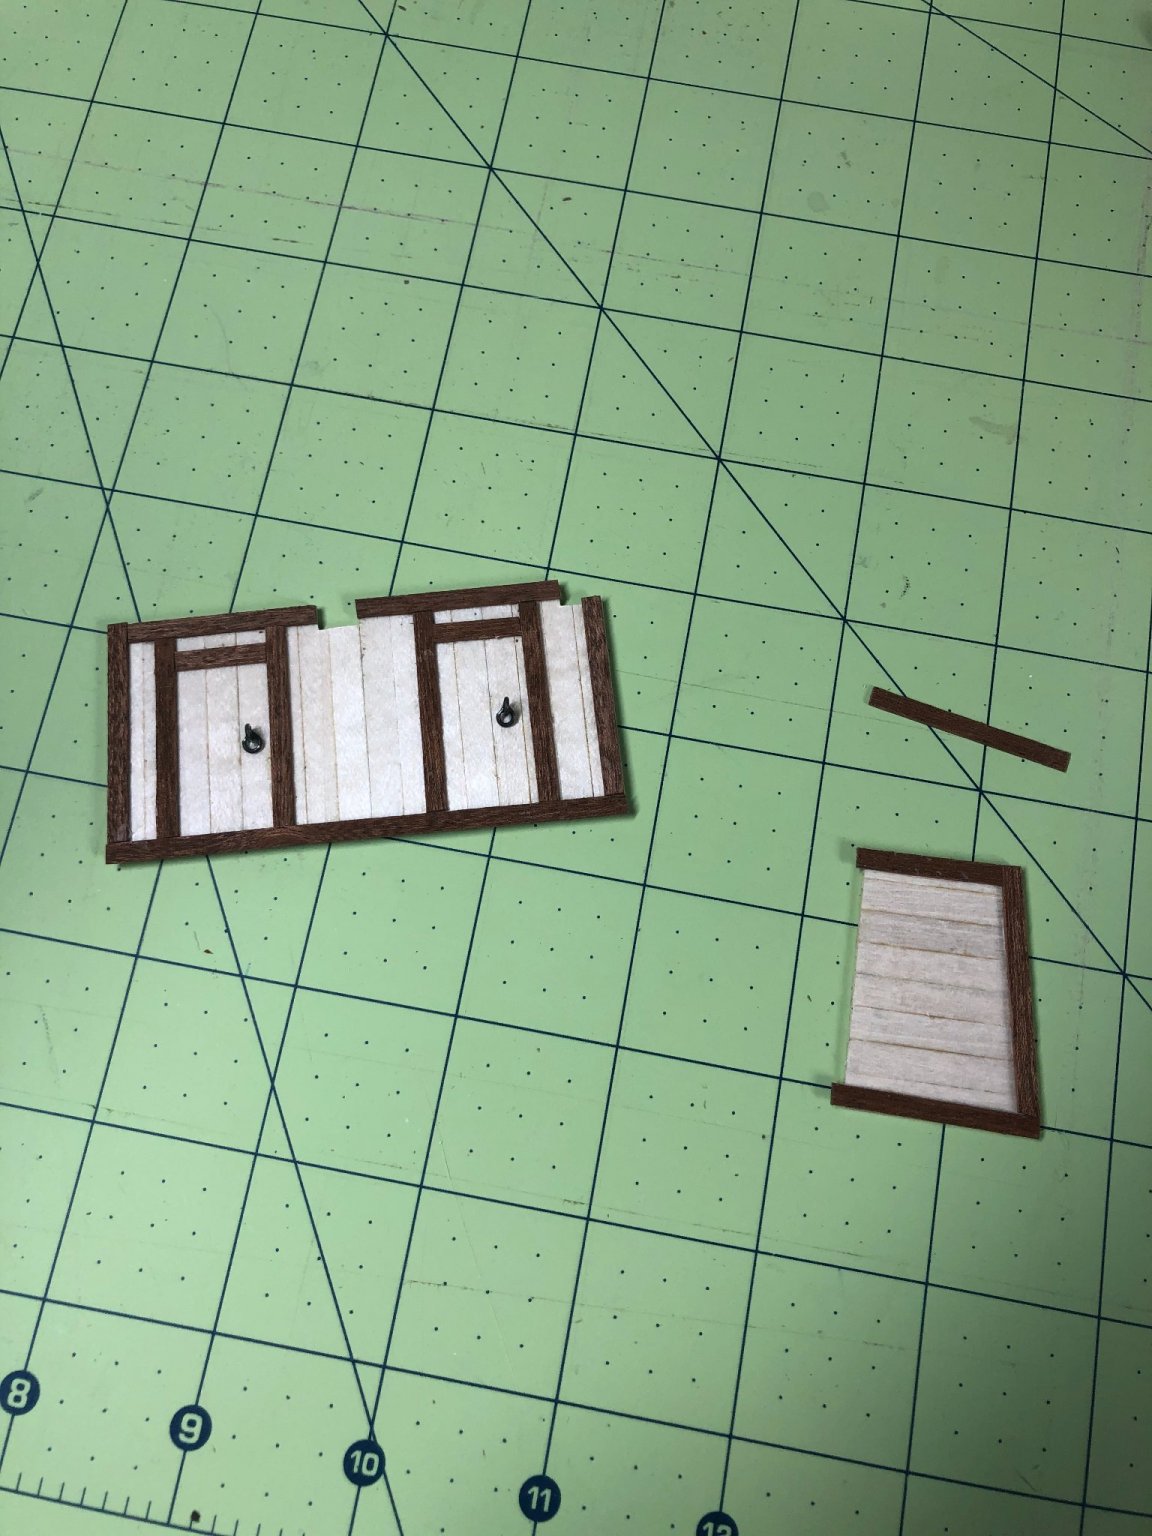
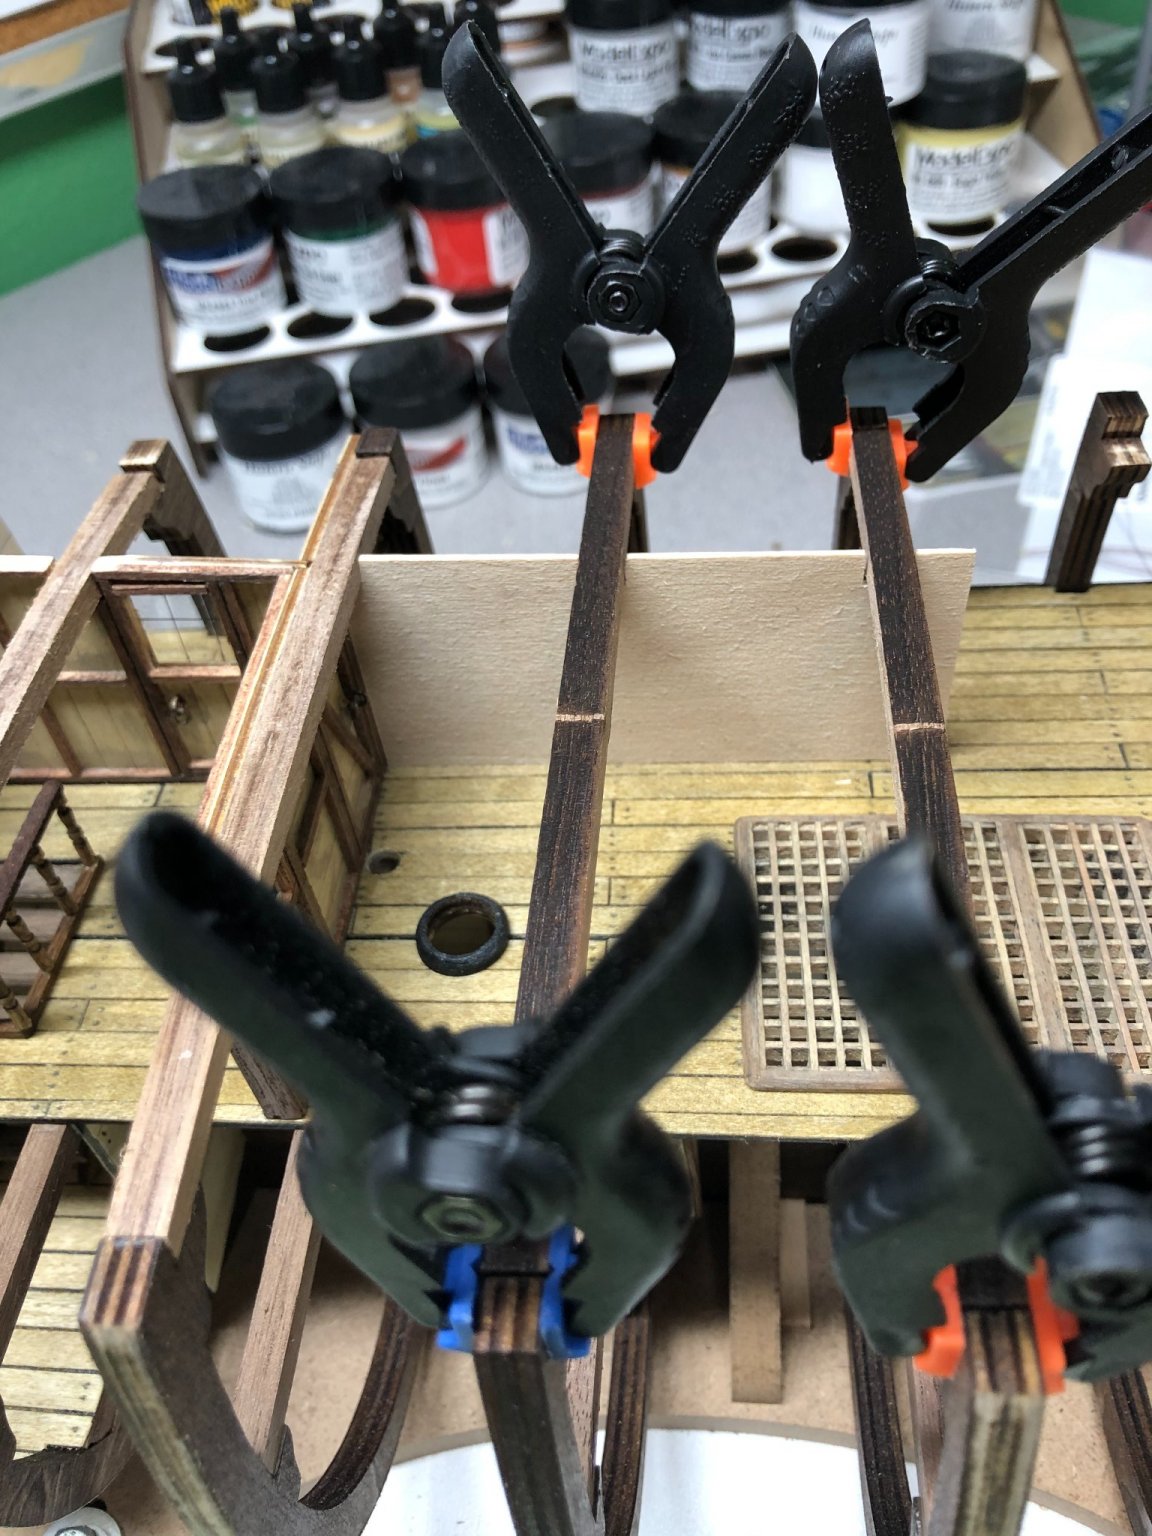
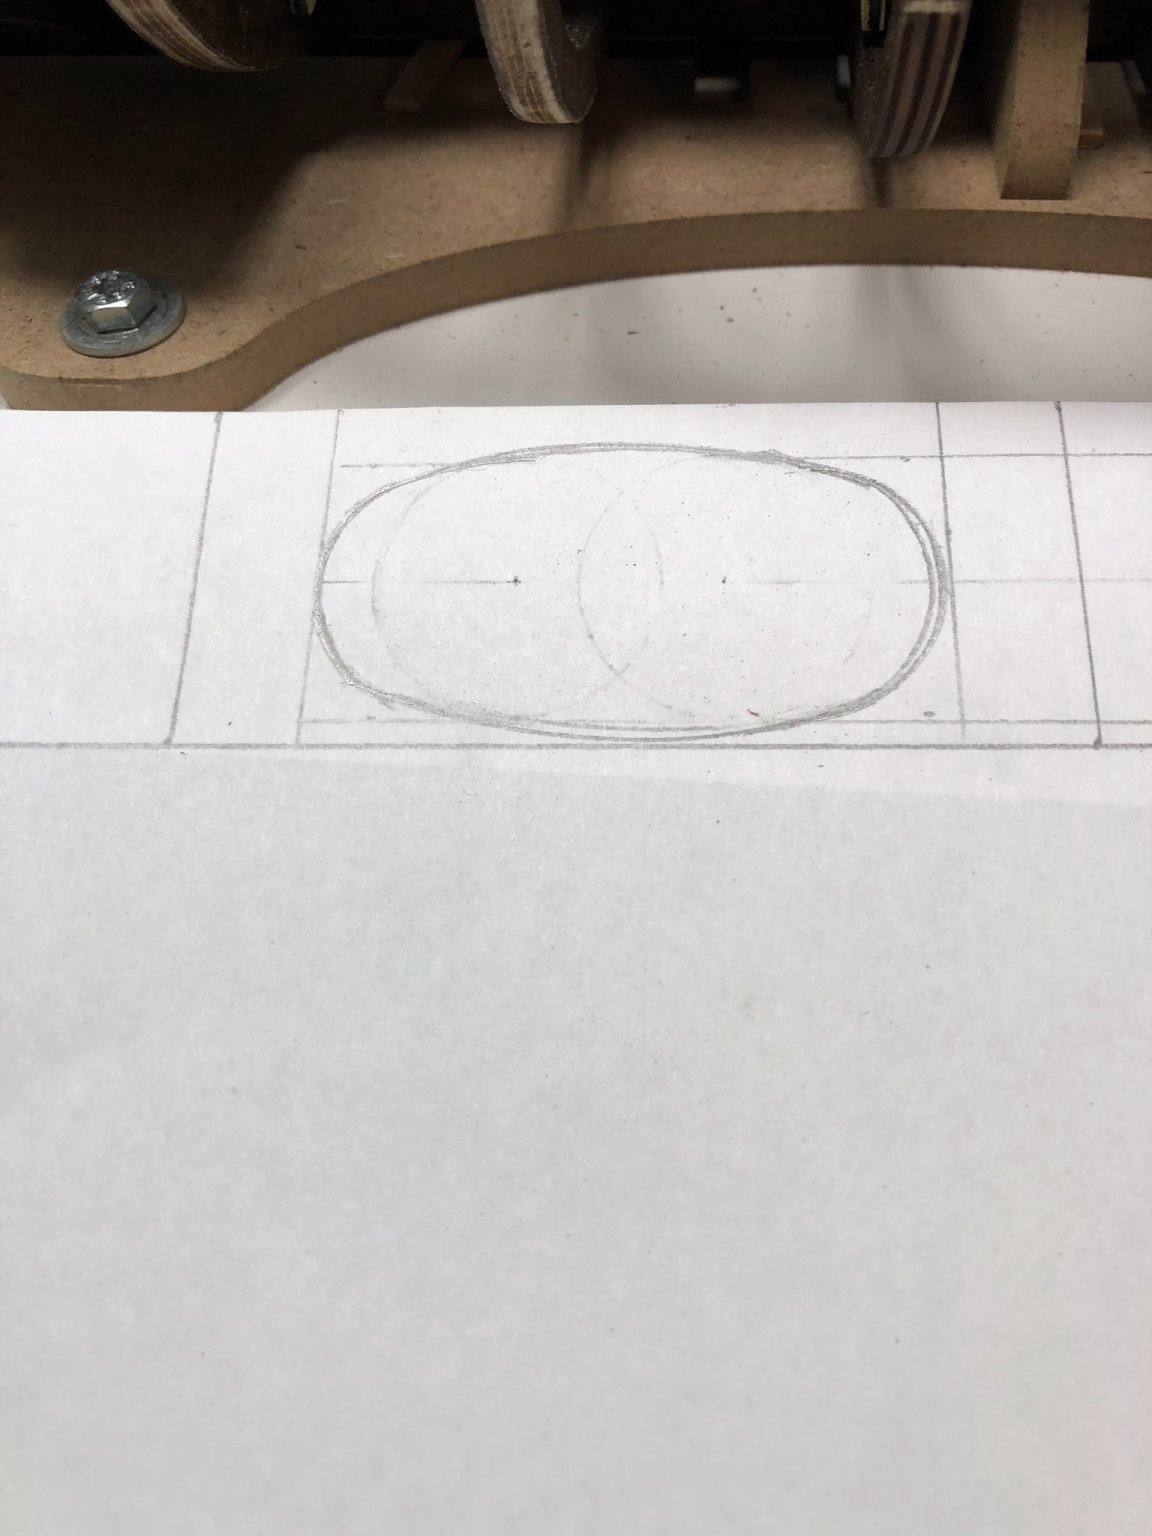
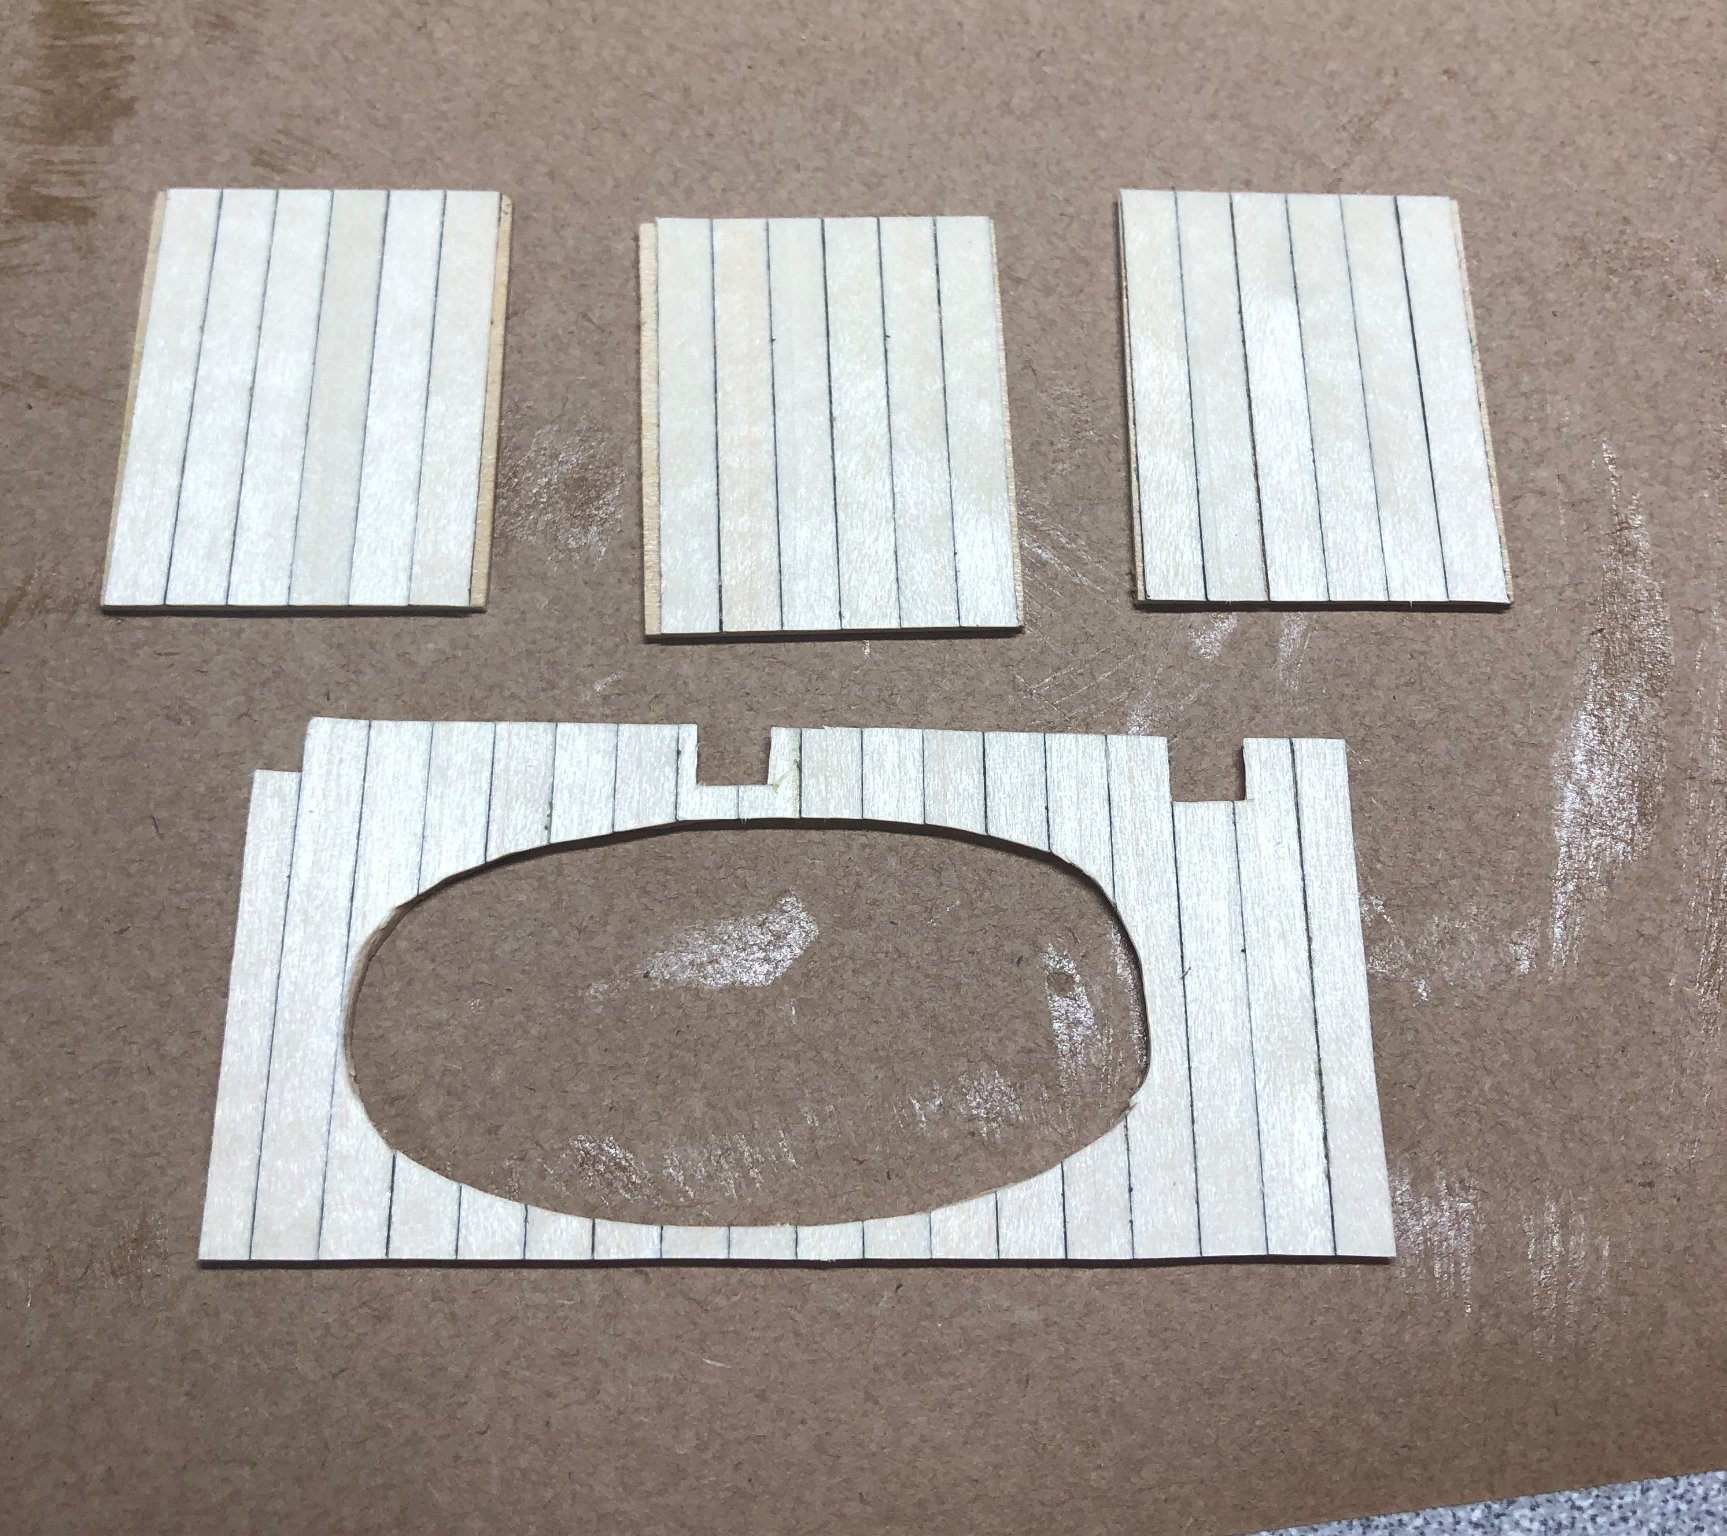
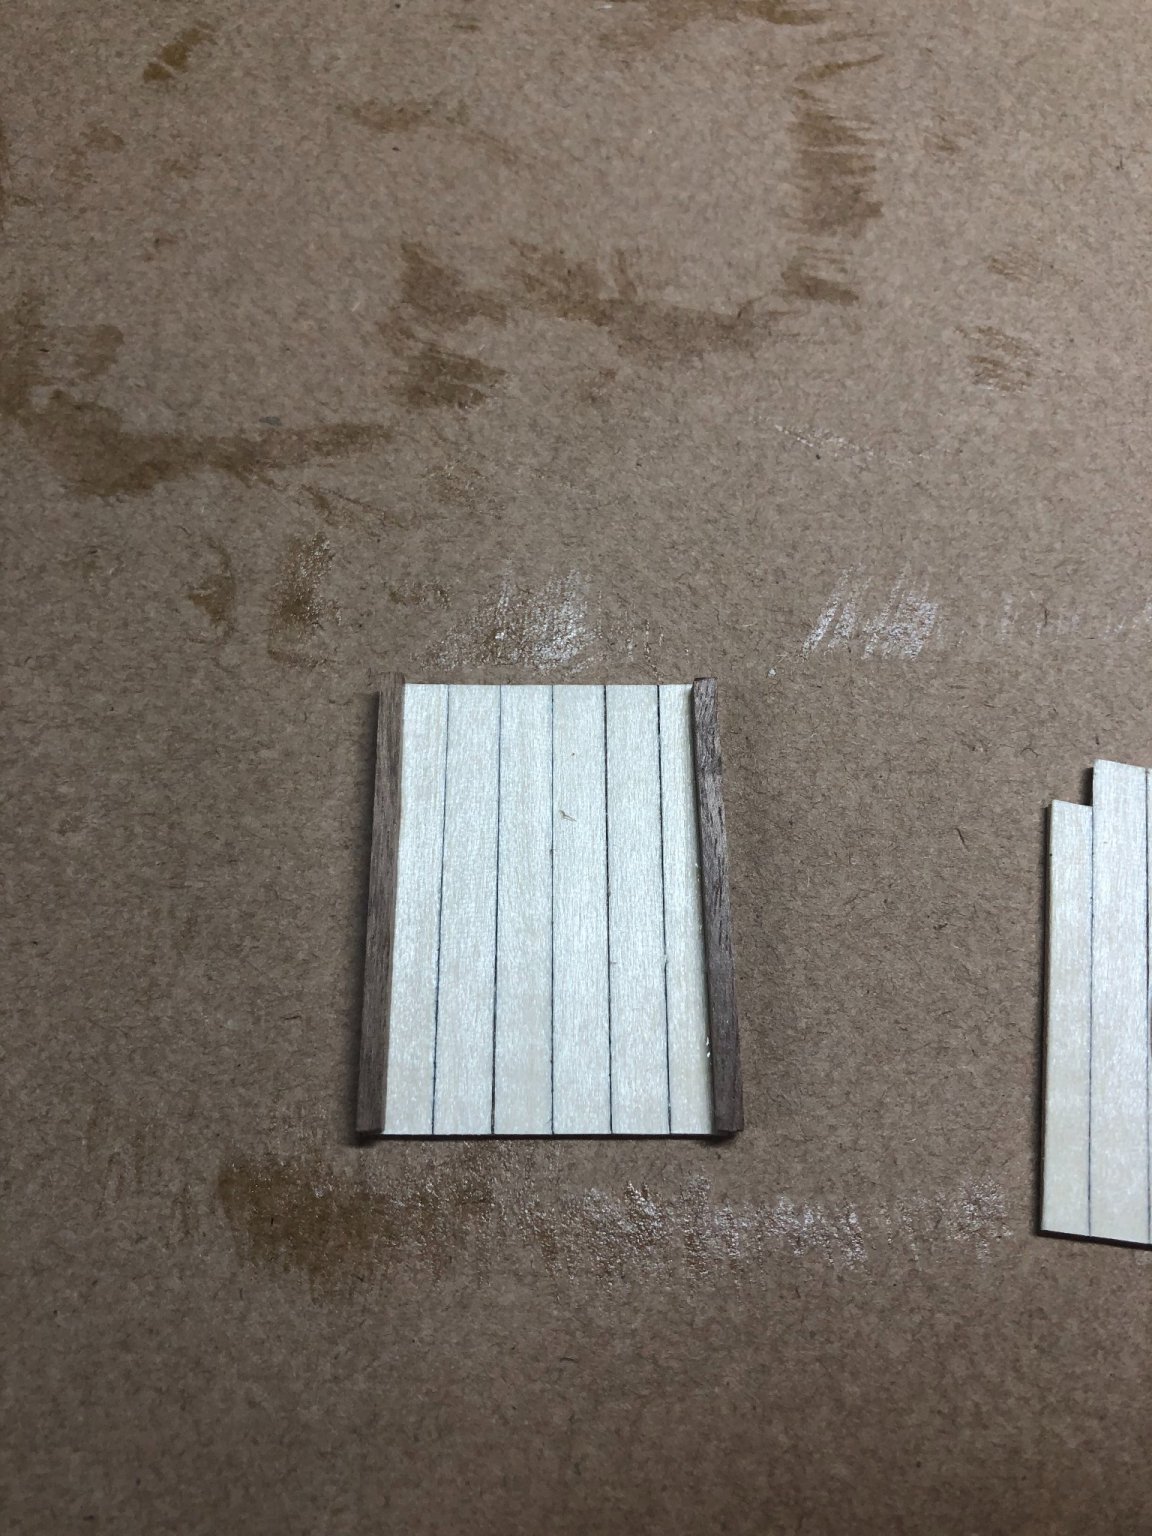
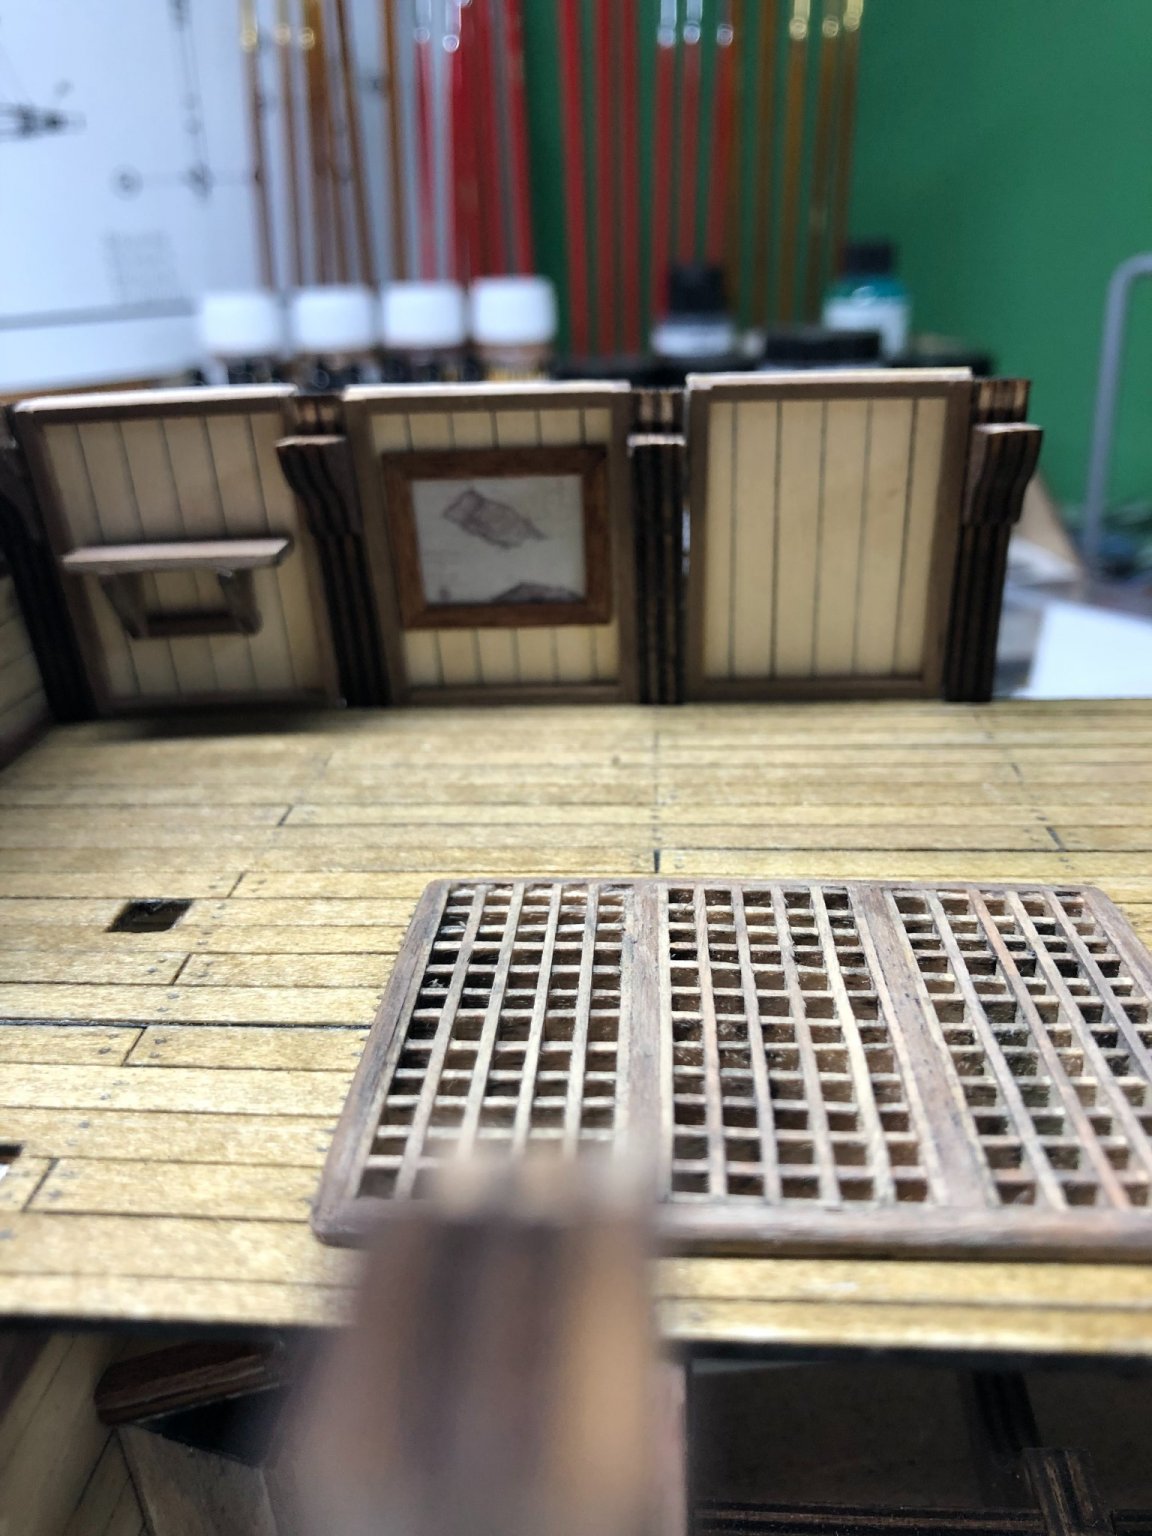
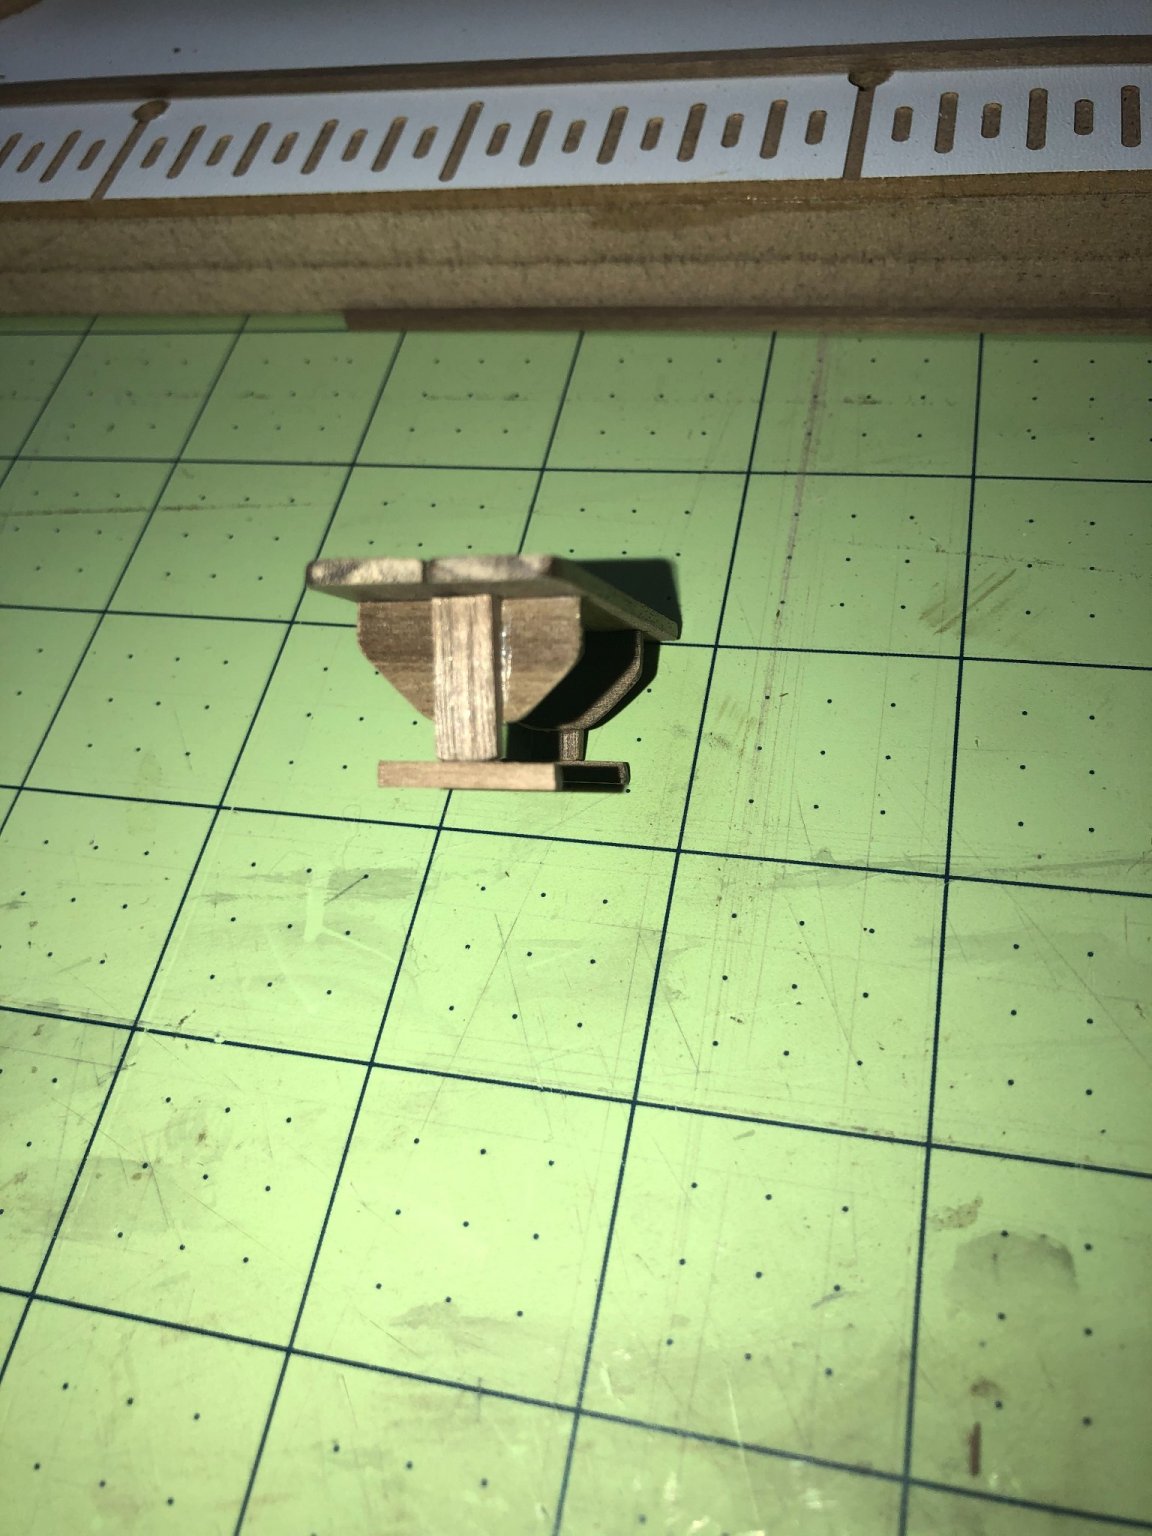
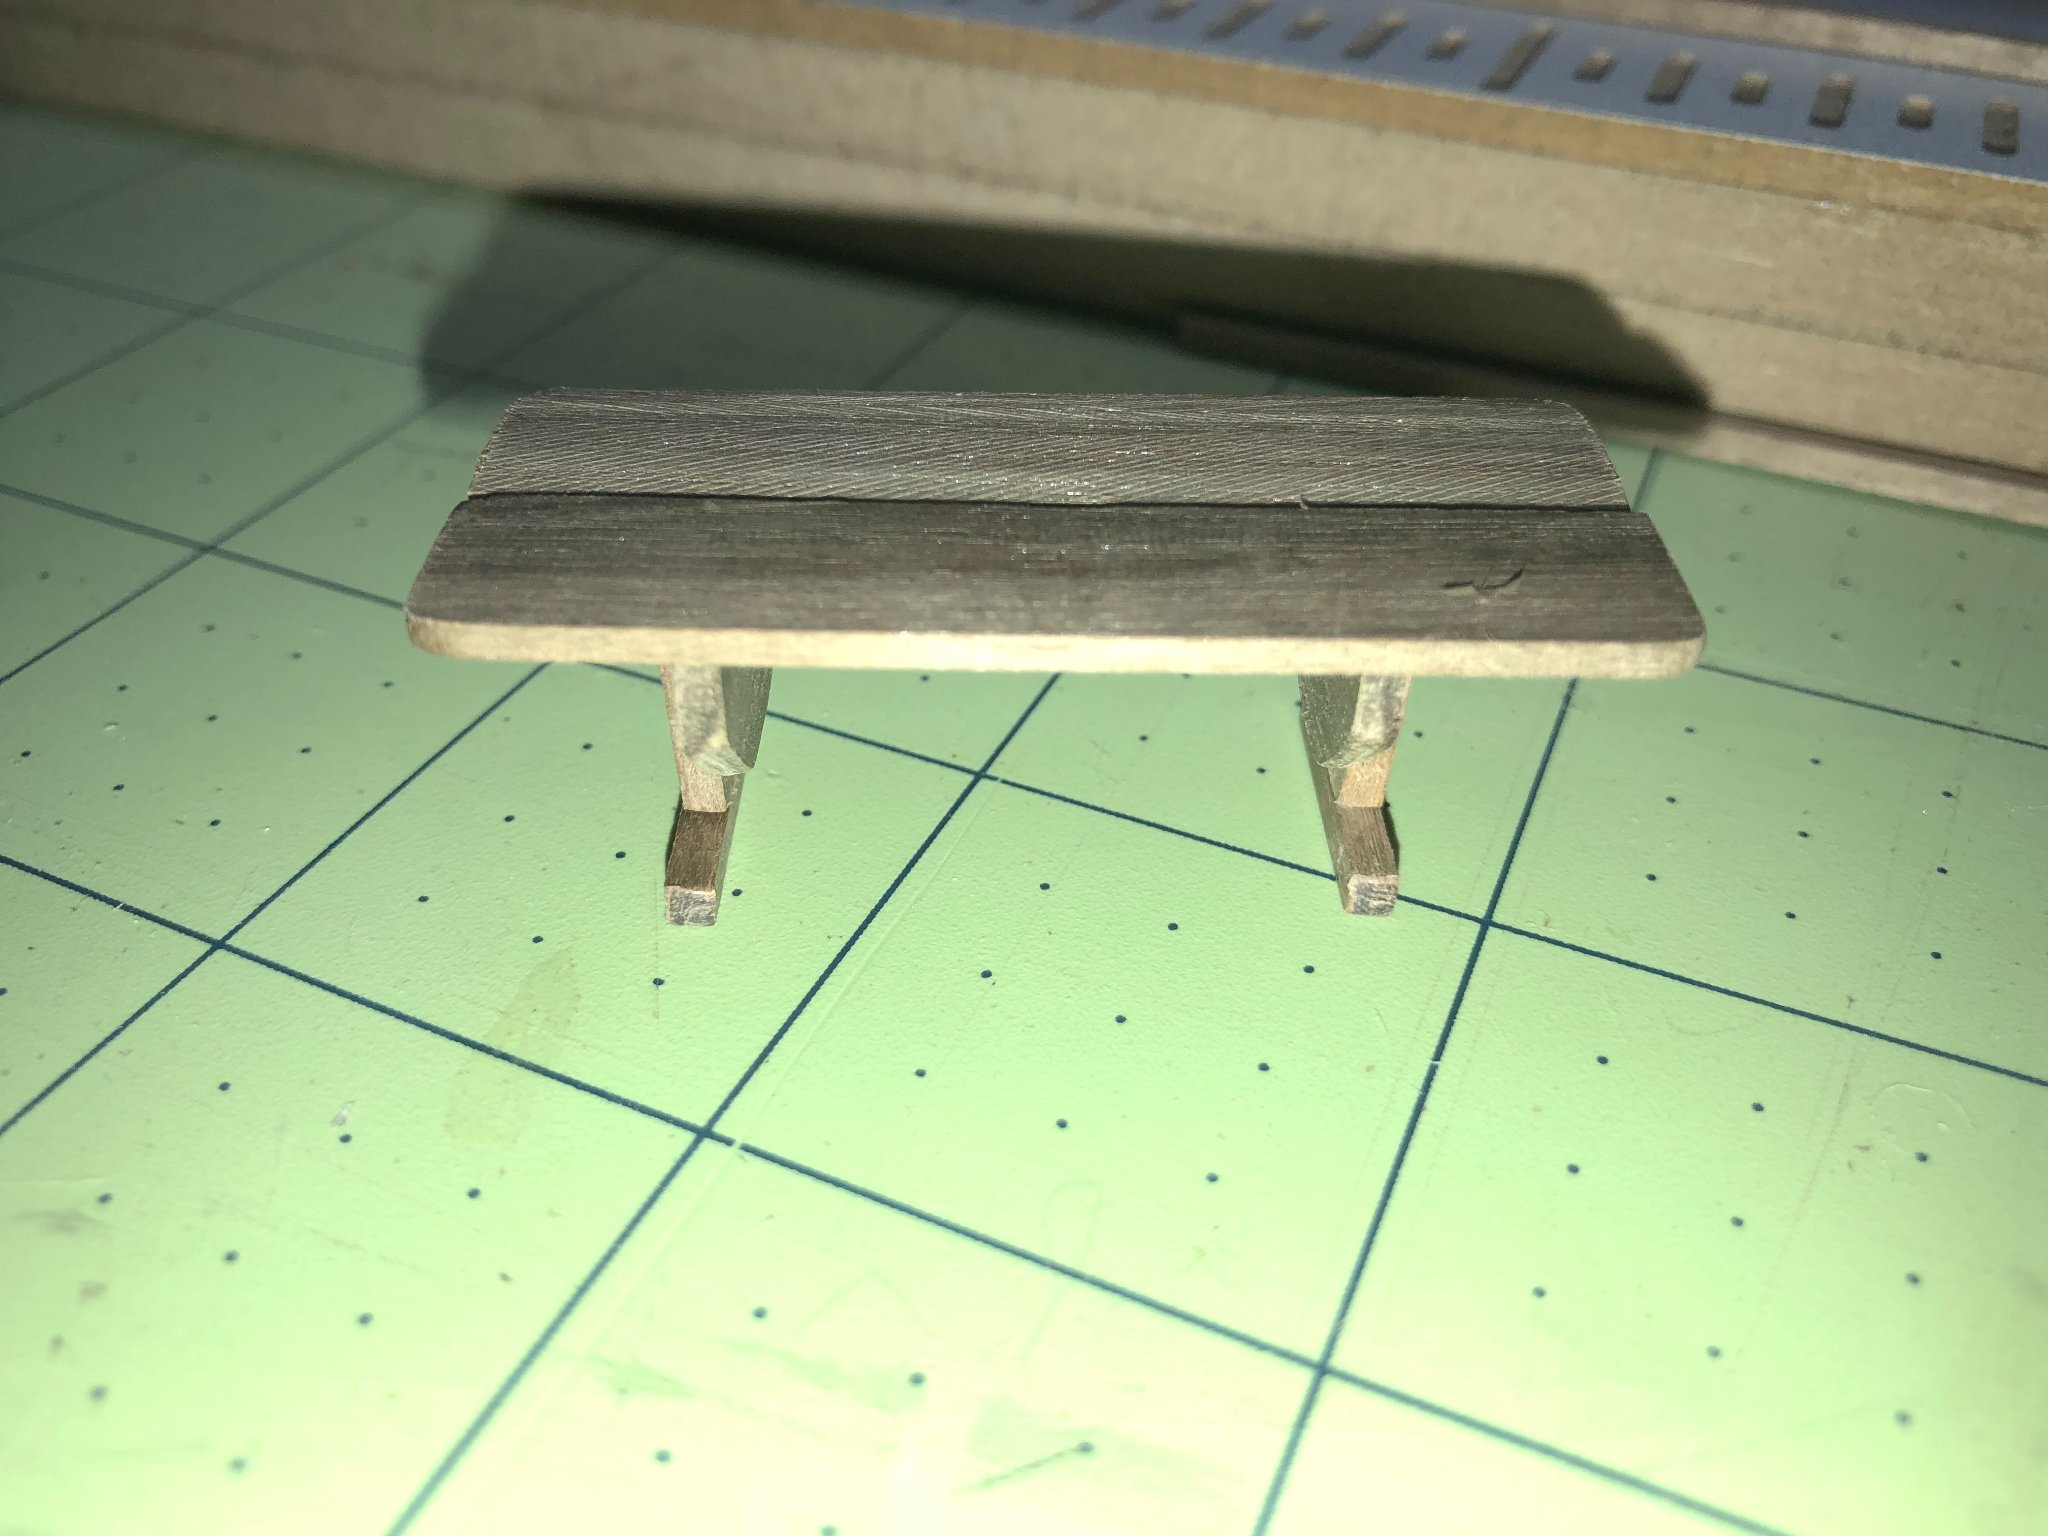
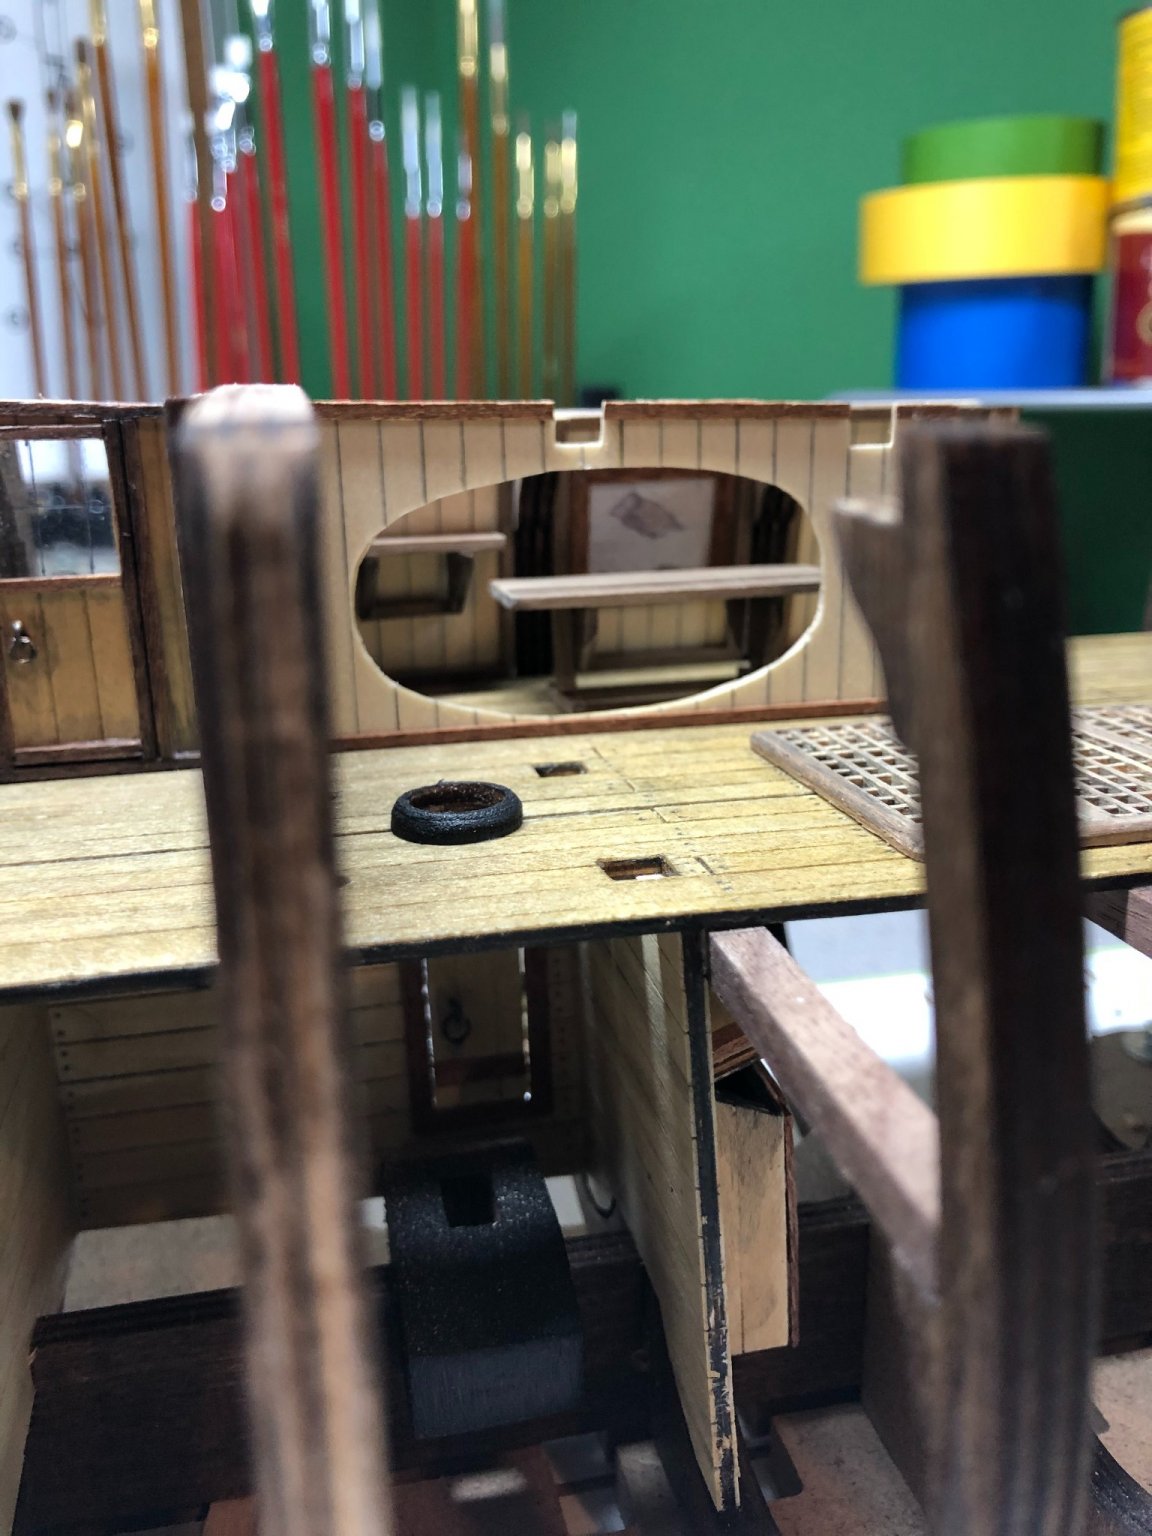
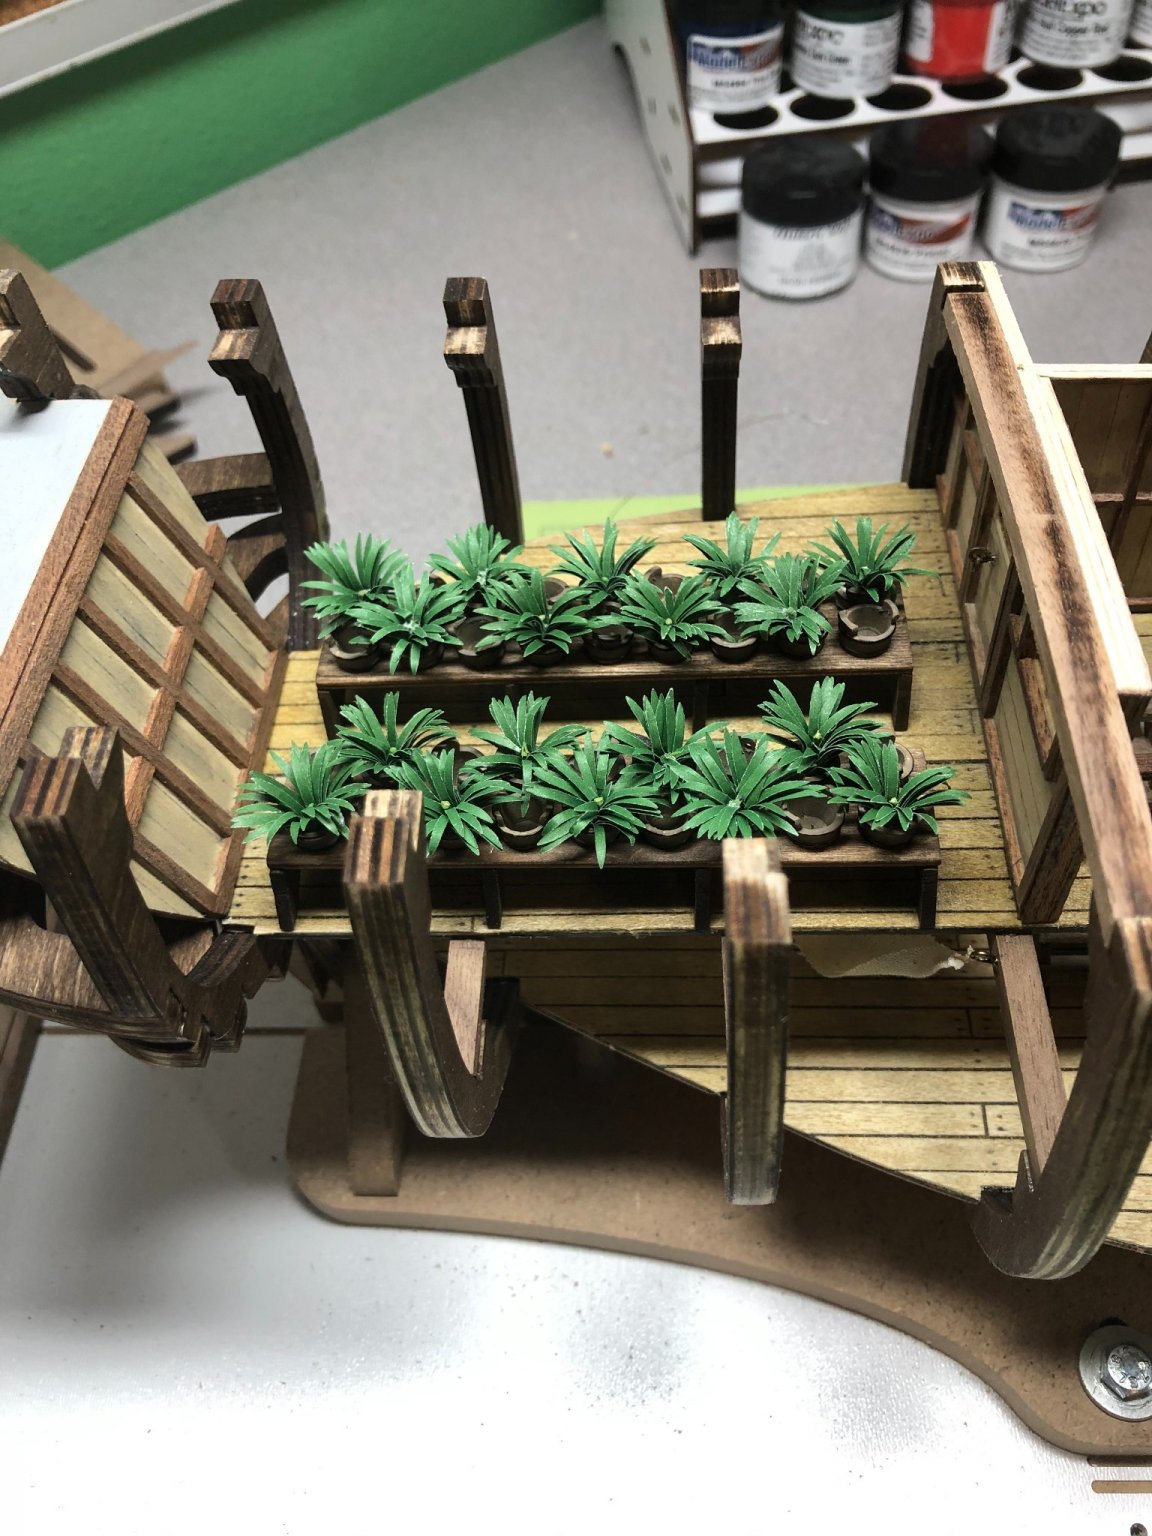
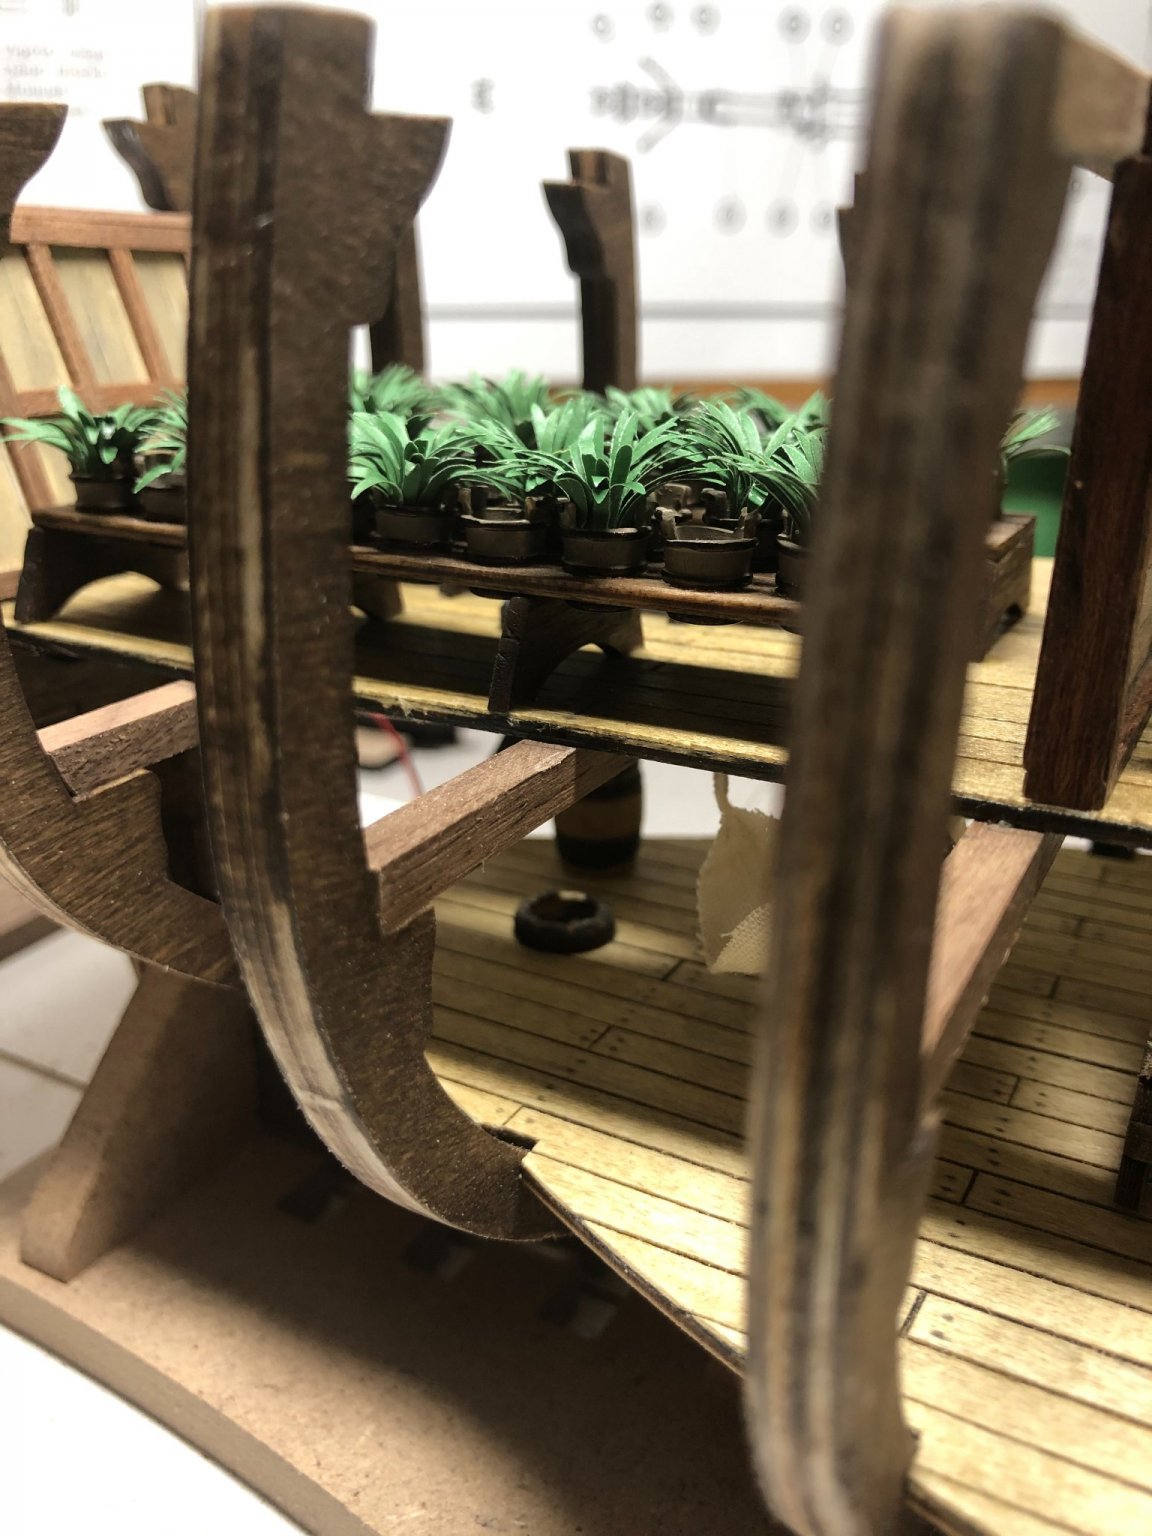
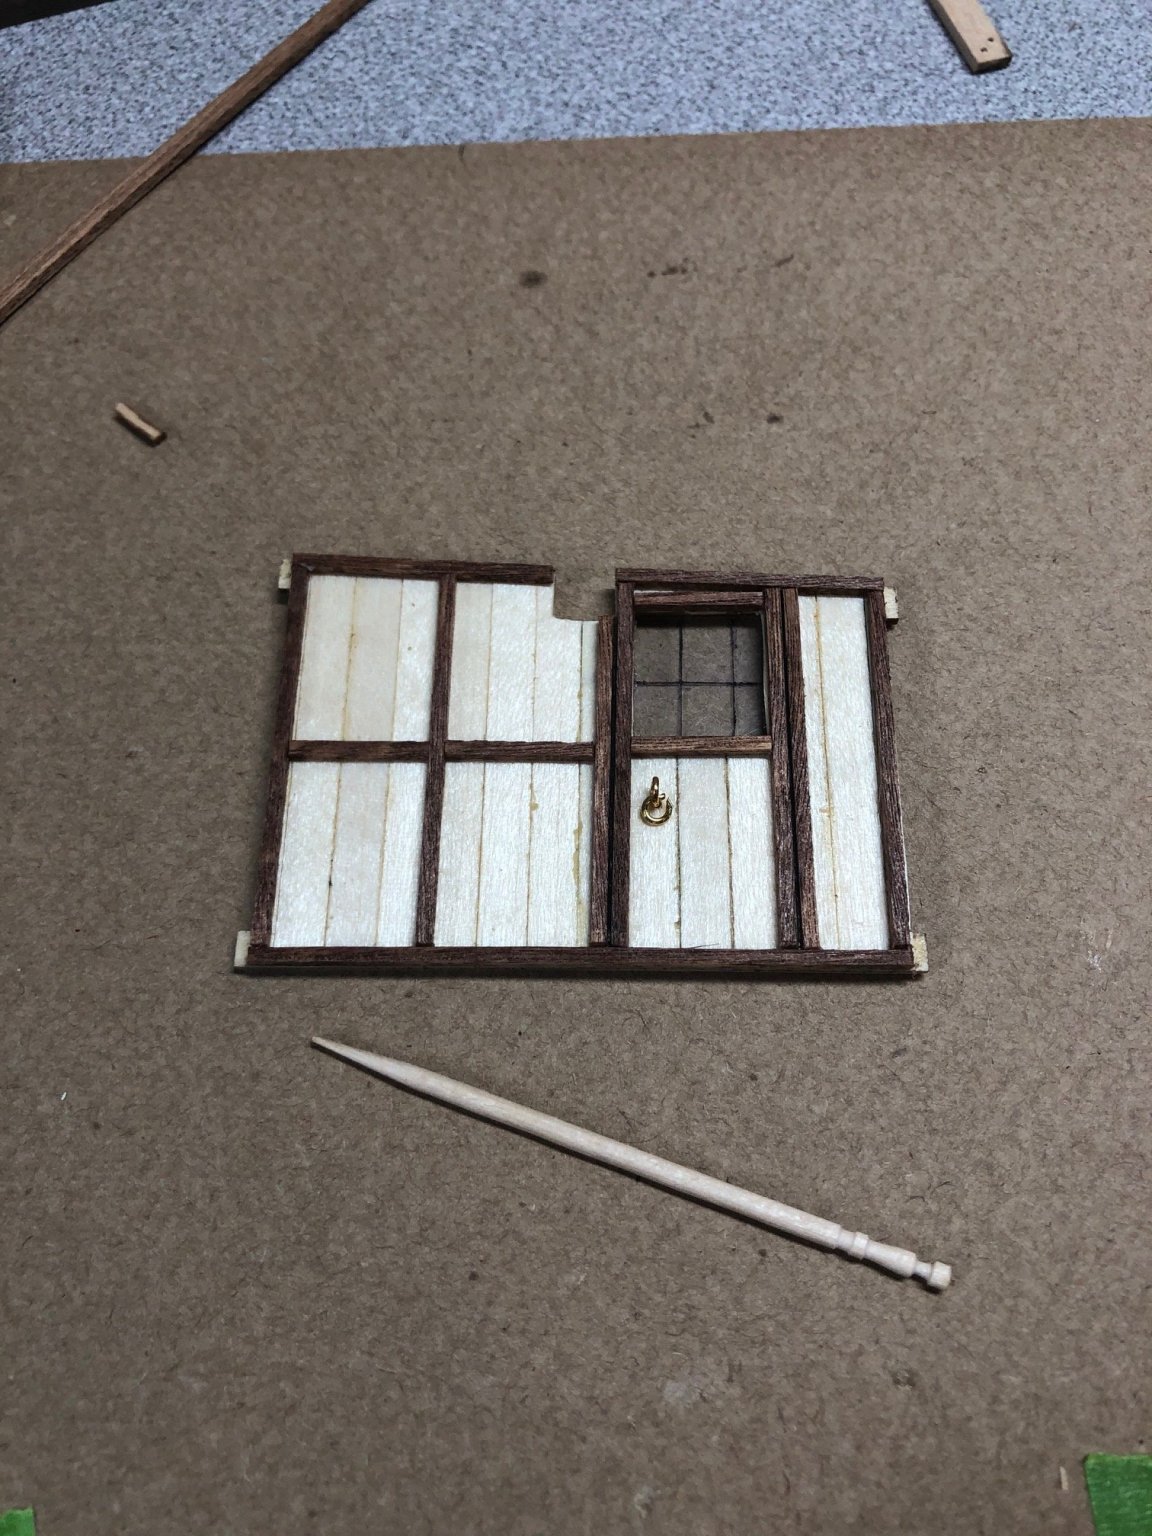
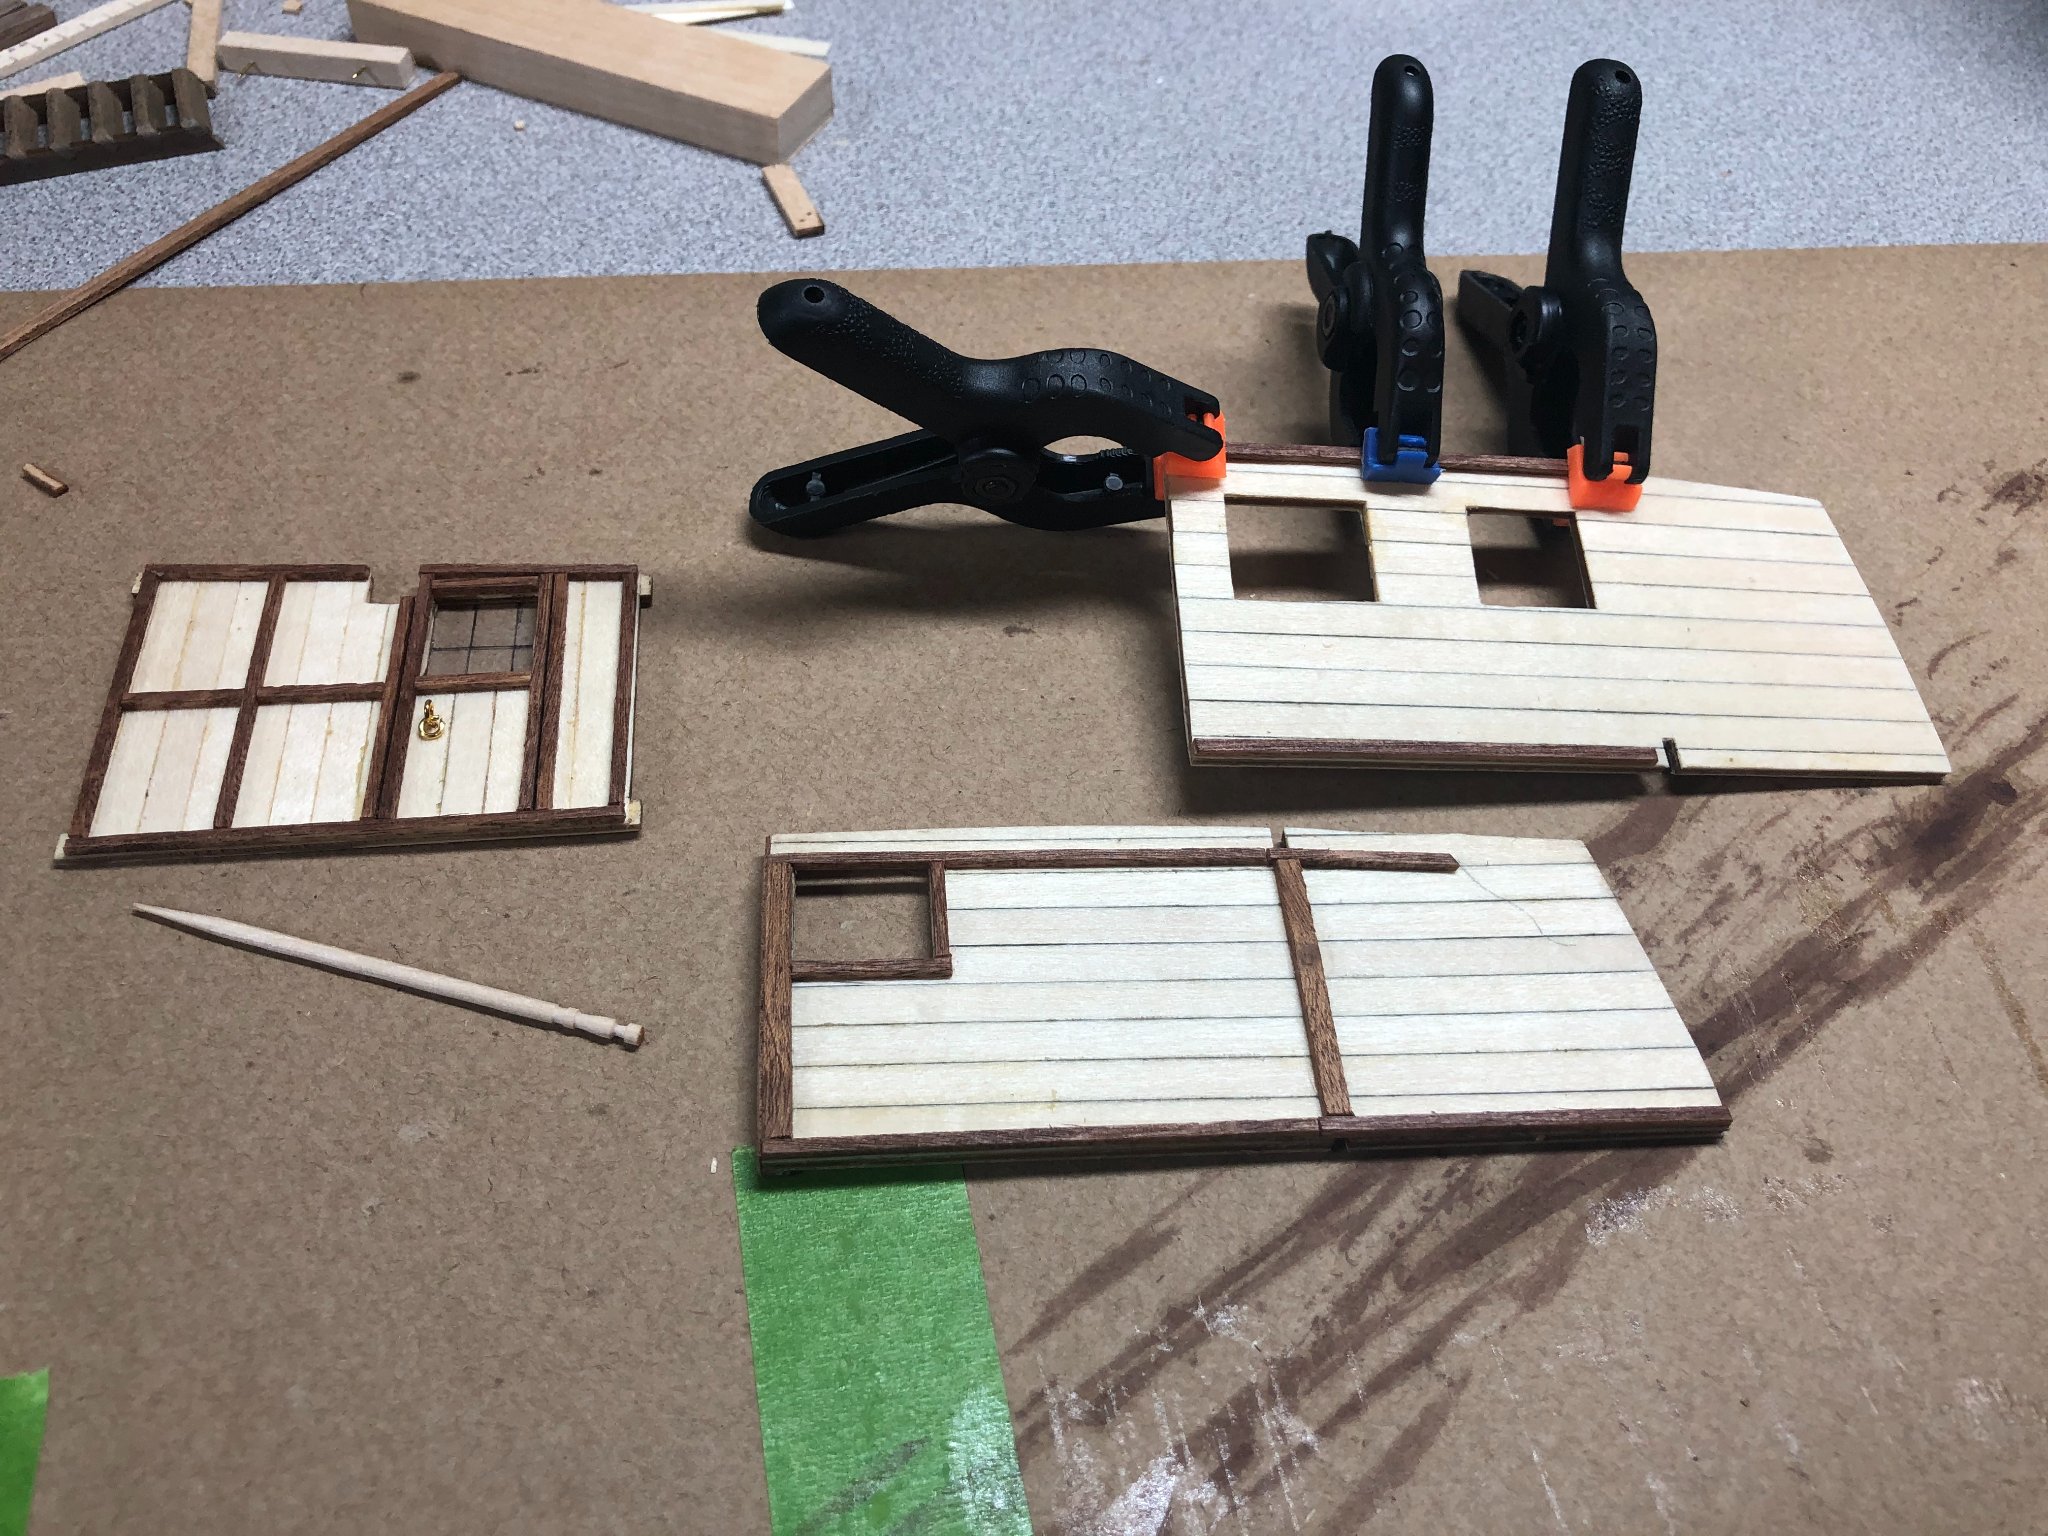
Any time I do any kit bashing or changes to a kit, it takes me a while to think through the process, source other build logs for ideas and direction and come up with a suitable plan. As my last update showed, I was in the process of developing and executing a plan to add more interior cabins on the middle deck. Cutting out carboard pieces to use as templates is the first step. Once I'm happy with the template, I move it to wood: There's not much point in adding walls and doors, etc. if you can't see what's going on inside! So, for this wall, I cut an oval shaped hole in it to give visual access. A simple process that can be seen in the pictures below and really doesn't need any explanation: Additionally, I didn't want the hull planking to be the walls. I made small panels to go between the frames and then I planked all four pieces using the usual methods and marking the edges of the planks with a pencil: And then I framed the pieces with 2mmX2mm walnut stock: On the middle section, I added a map of Pitcairn Island and on the left section I added a shelf that I plan to add a lit lantern. I also made a table: The pieces were glued into place and the outer wall added: I also worked on some finishing work... One thing that was bugging me was the edges of the deck and walls that are open to the view. I decided to give them a better, finished look. Here is a before picture: I took some 2x2mm walnut strips and glued them to the edges: A much better looking finish! And the Breadfruit plants have been added: On to the Pantry and adding lighting next:


-
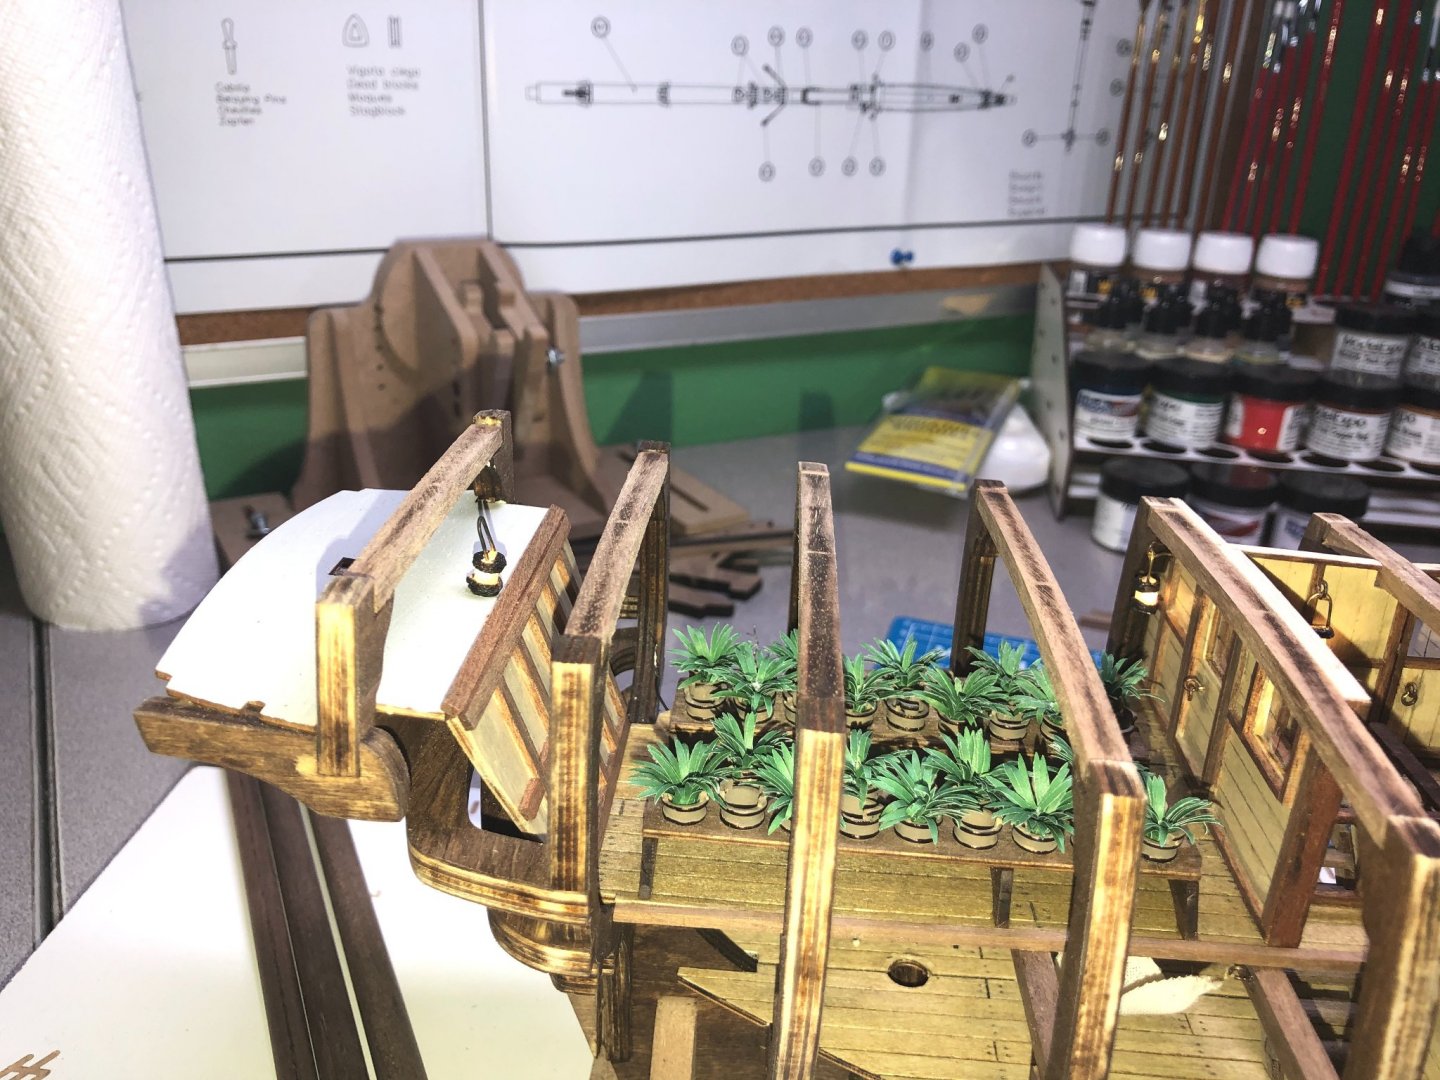
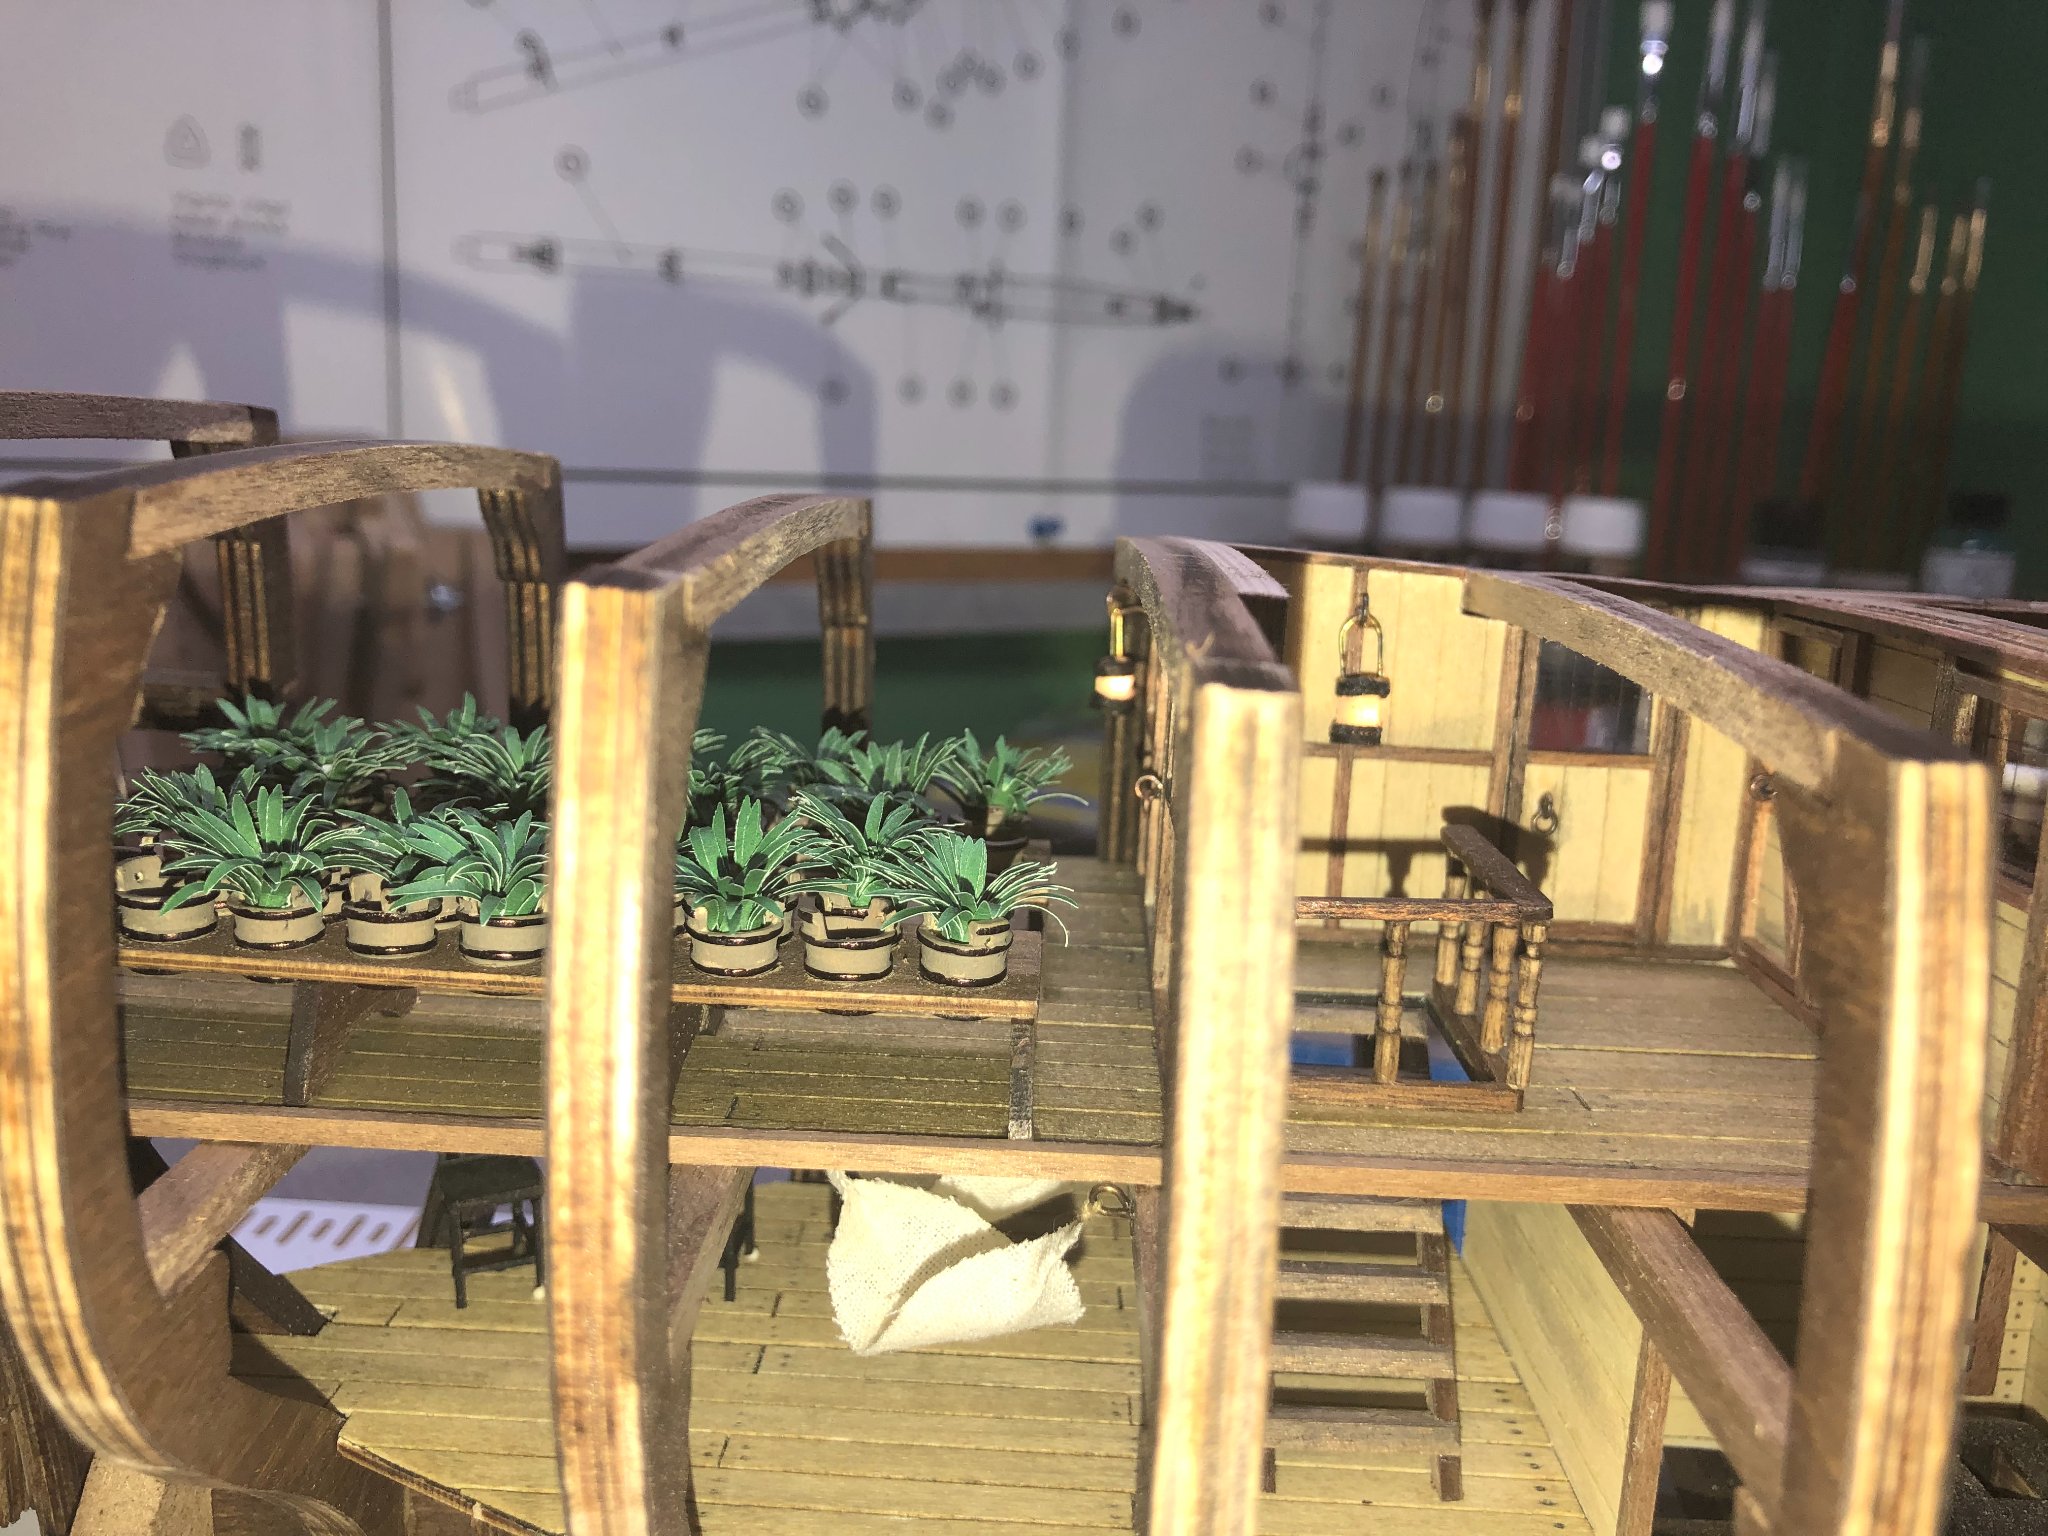
Hey Mort, No plants with the kit. I did a little research on the Breadfruit plant and how it looks. The closest I could find was the Yucca plant. I purchased it from a place called HobbyLinc. Inexpensive... about $12 for all that I needed. I had to cut the flowering part out as it doesn't match a Breadfruit plant!
-
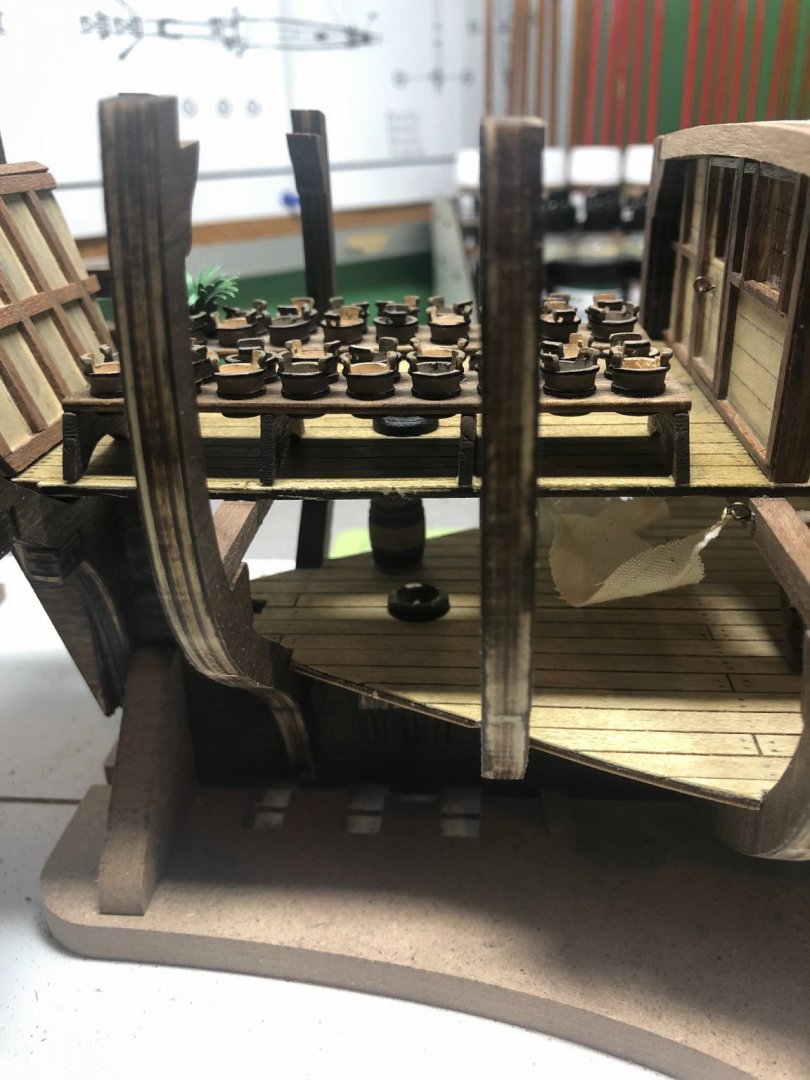
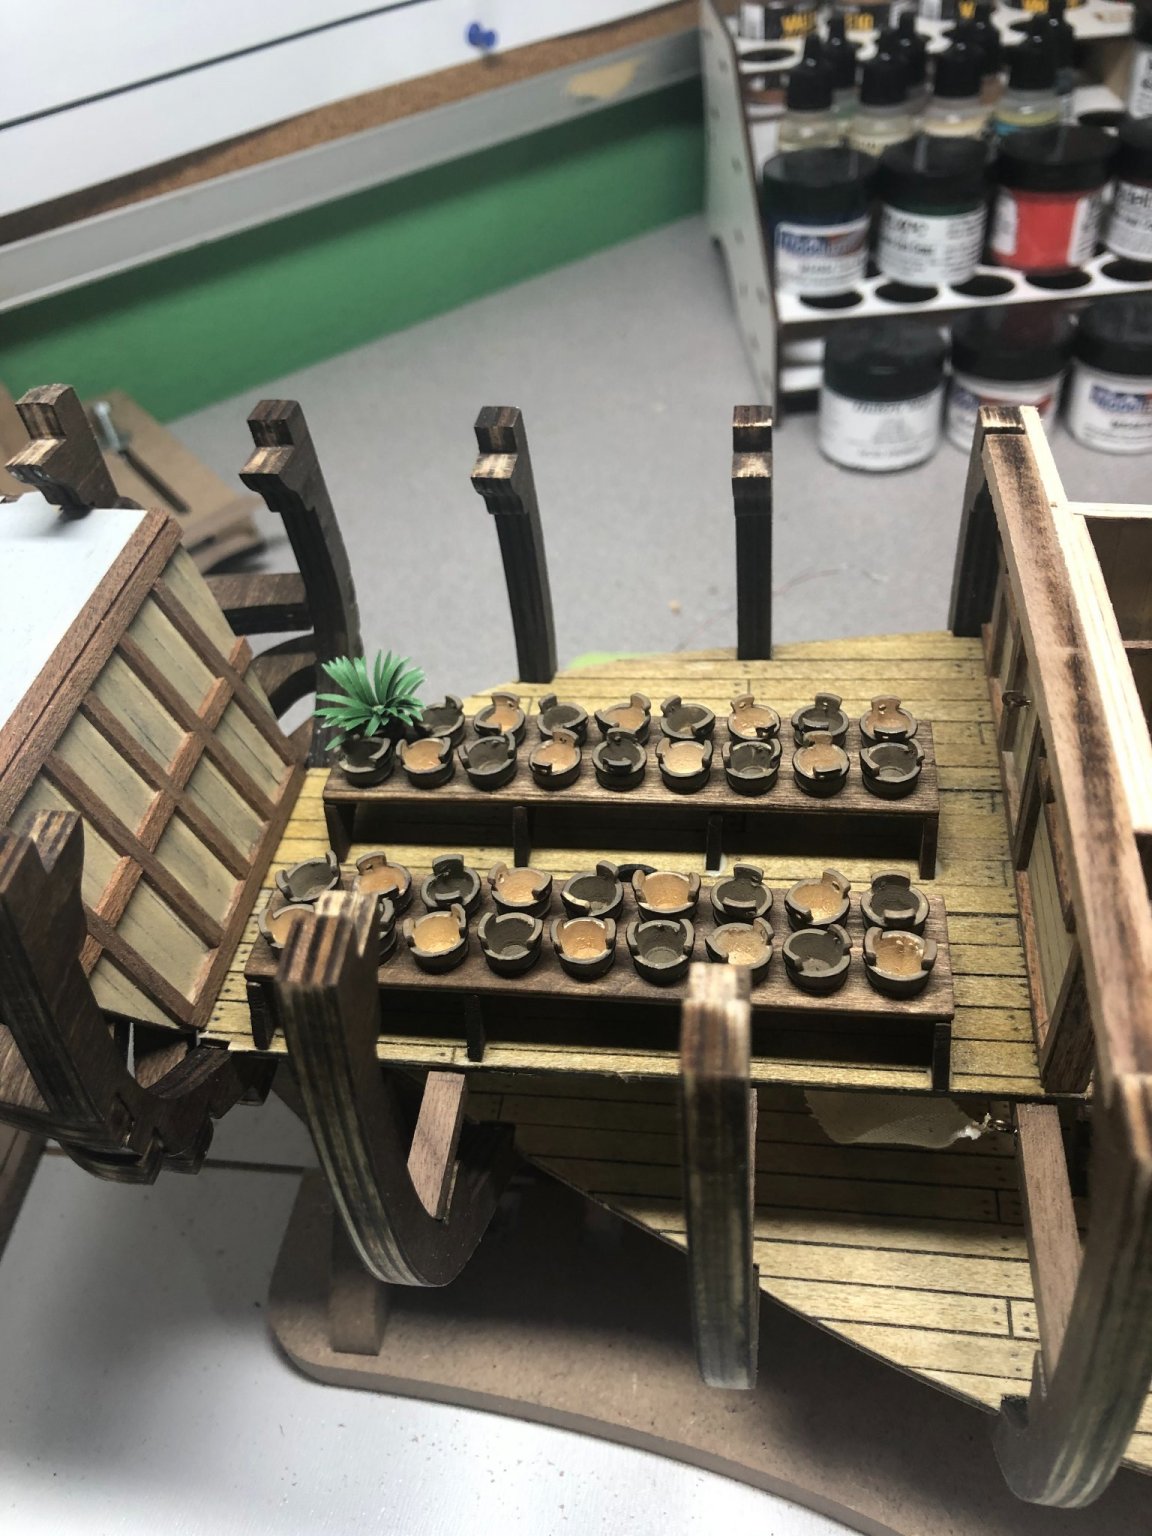
Just a quick update today: I completed the racks and buckets for the Breadfruit plants and installed them in the Great Garden area. These are really way out of scale! I thought seriously about making new racks and buckets to scale but frankly, for the amount you'll actually be able to see, I decided to keep the kits version. I purchased 1/48 scale Yucca plants to use for the Breadfruit plants. I plan to put a plant in every other bucket: Working on the template for my dining cabin and Pantry. I'm using a piece of thin carboard as my template. I'll make all the necessary cut-outs and the transfer to a sheet of Basswood that I have leftover from a previous build. This (for me) is a slow process as I try to flush out all the details, placement of doors, windows, interior components, pattern for the walls and bracings. I am borrowing ideas from previous builders and their logs! Cardboard being shaped and cut above. That's it for now! More in a few days...

-
Thanks Mort! I have the book "Anatomy of a ship: Armored transport Bounty". Additionally, I have collected several drawings from different sources online. Lastly, the build logs (as mentioned in my first post) have been a huge help at times, can't say enough about them!
-
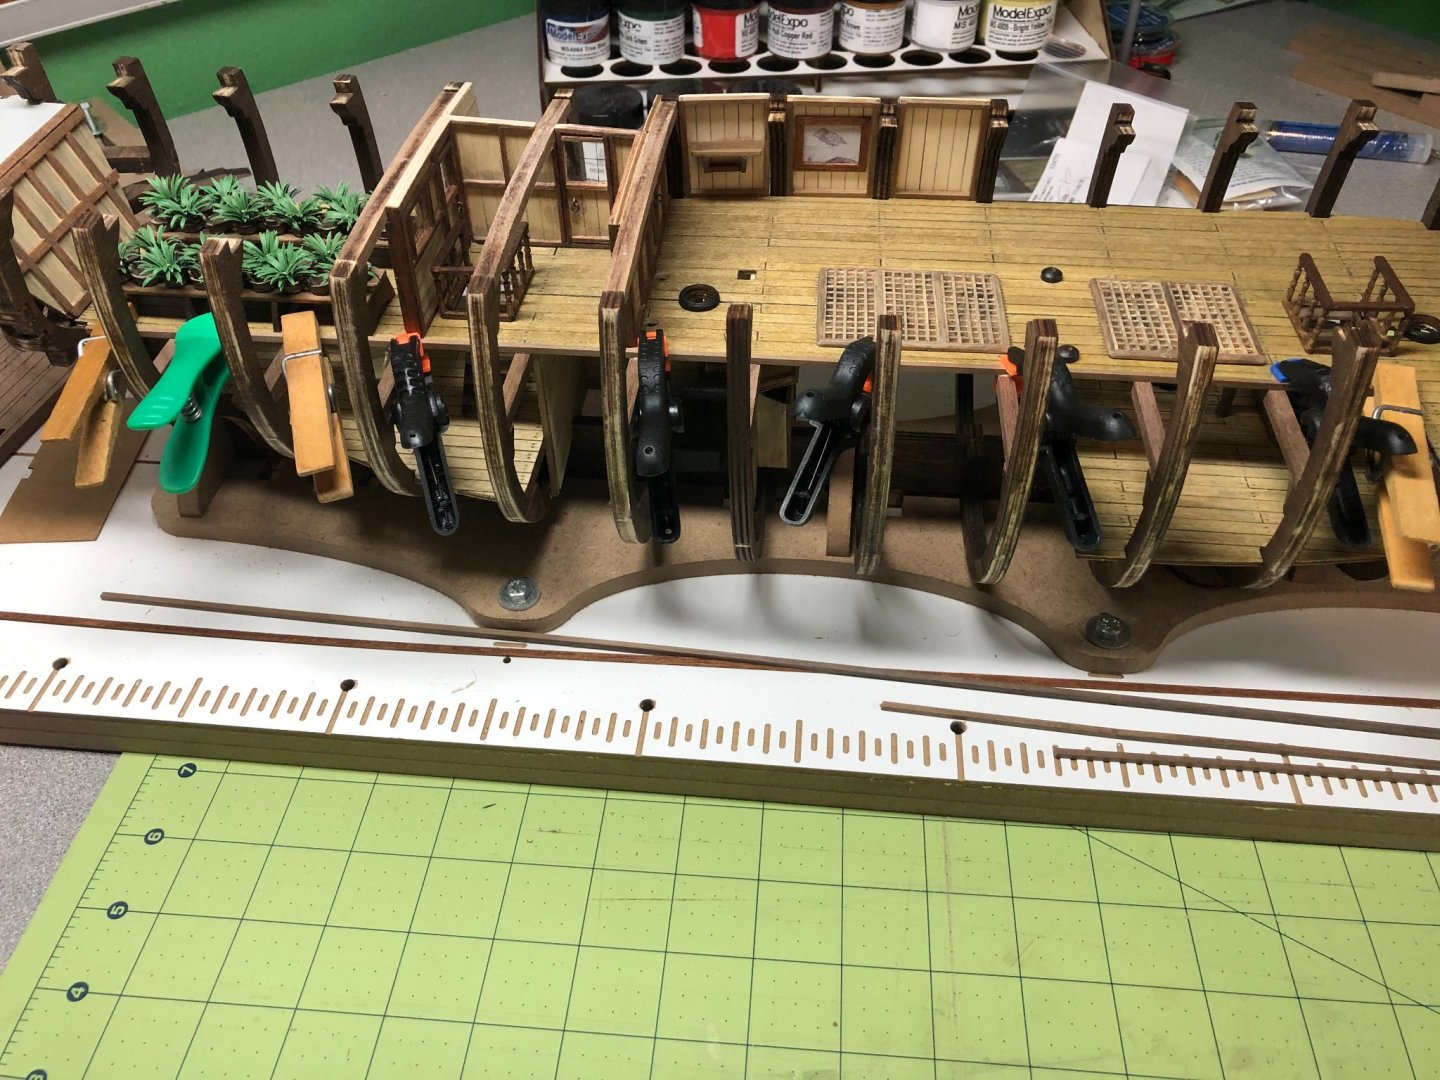
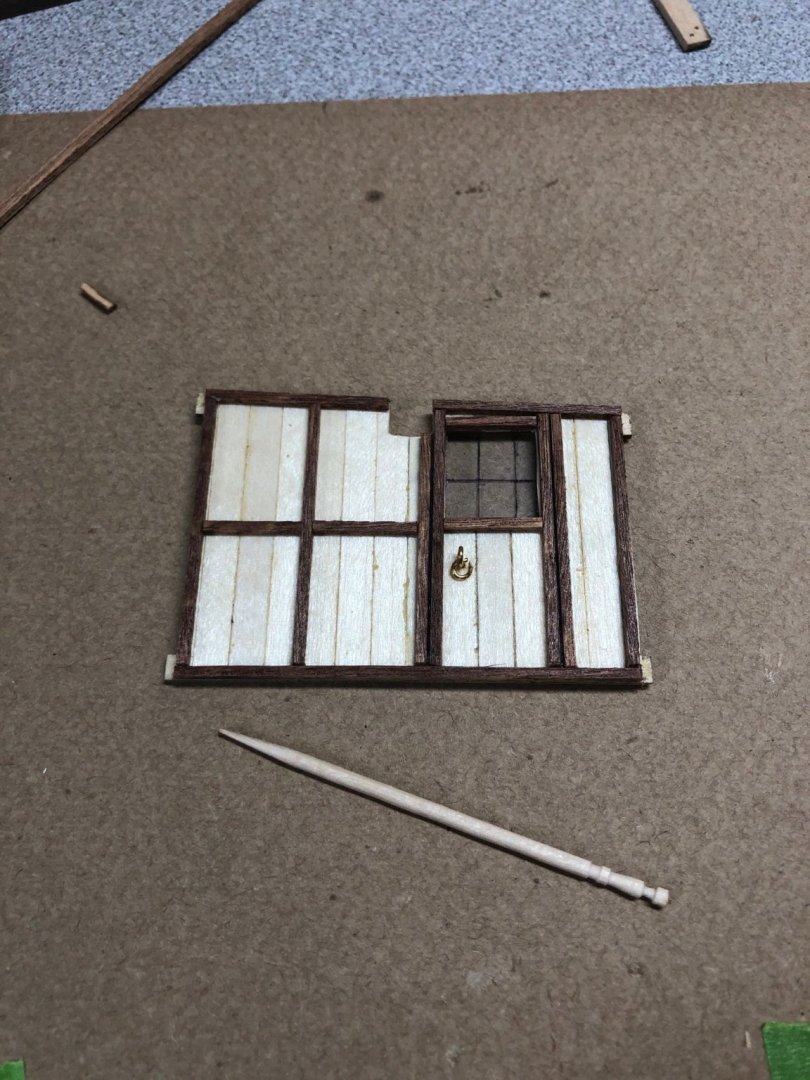
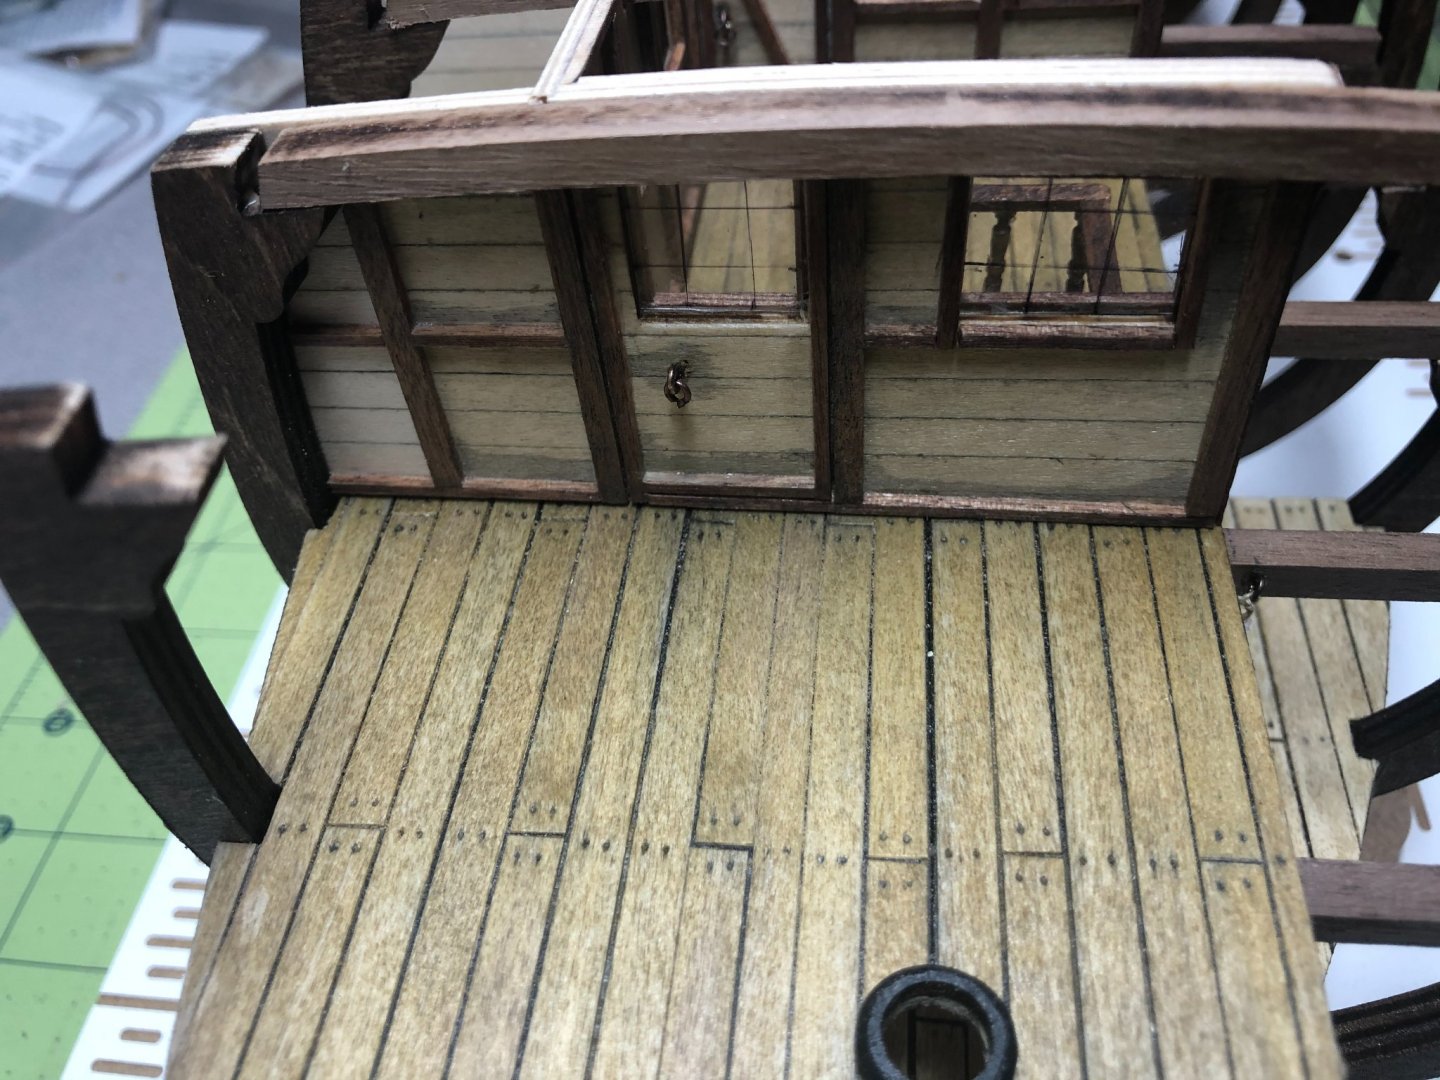
The middle deck cabin walls, doors and windows took nearly two weeks of cutting sanding and fitting each little piece to the walls before final assembly. I didn't take a lot of pictures of the process and frankly, you probably don't want to see a bunch pictures as these walls went together. I have couple: Nothing too drastic to pass along as this is part of the kit. However, the lay-out was funky! One door opened into a stairwell and another into the bilge pump tubes! So, I moved them to be more appropriately located. Aging and installation, again no real issues: I just noticed that I missed a window frame in the above picture! Easy to fix! Painting buckets and preparing the racks for the great garden room: As of today, this is where I am on the model! I have over 110 hours and about three months of work, so far. I will be doing some more kit bashing... There is a "Captains dining cabin" that doubled as a clerks cabin on the port side just forward of the current cabin work. Additionally, there is a "parlor" for the galley that technically is located on the starboard side across from the dining cabin. Since the starboard side is open, I've decide to move it to the port side just forward of the dining cabin. Forward of that, I may make some canvas screened cabins... haven't decided. According to Captain Bligh's logs, many of the crews cabins leaked rainwater, etc. Due to the size of the crew (nearly triple the normal compliment), some temporary canvas screens were put up with hammocks for the crew. I'll do the dining cabin and the parlor, which are not part of the kit, and then decide! The next update will come as progress is made!


-
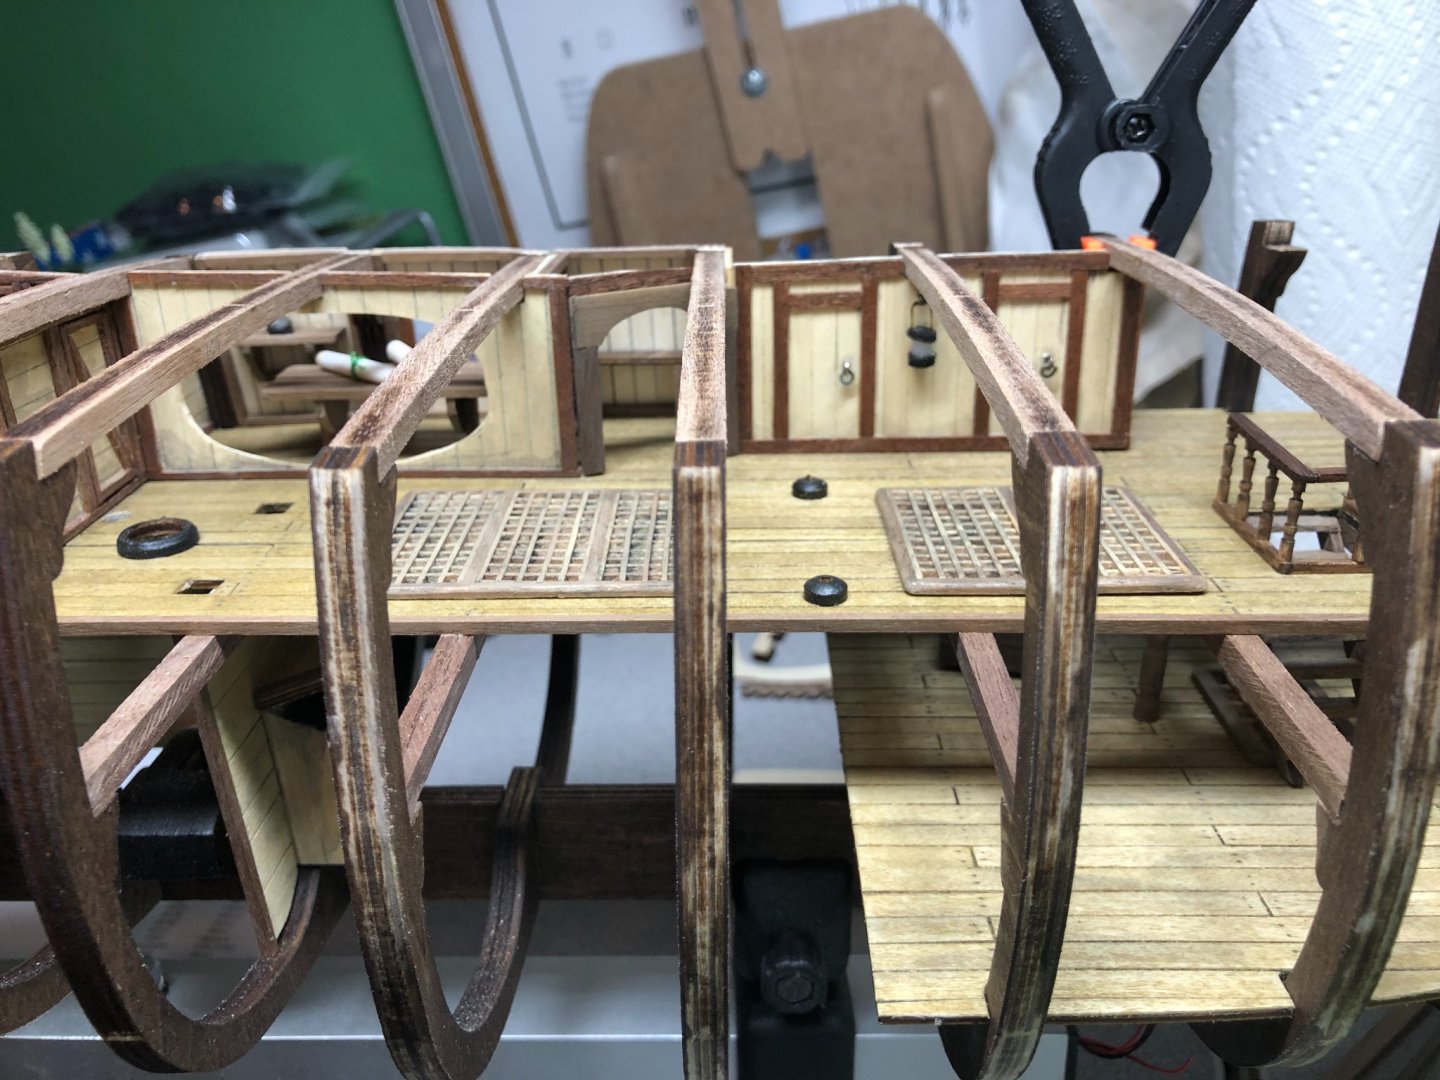
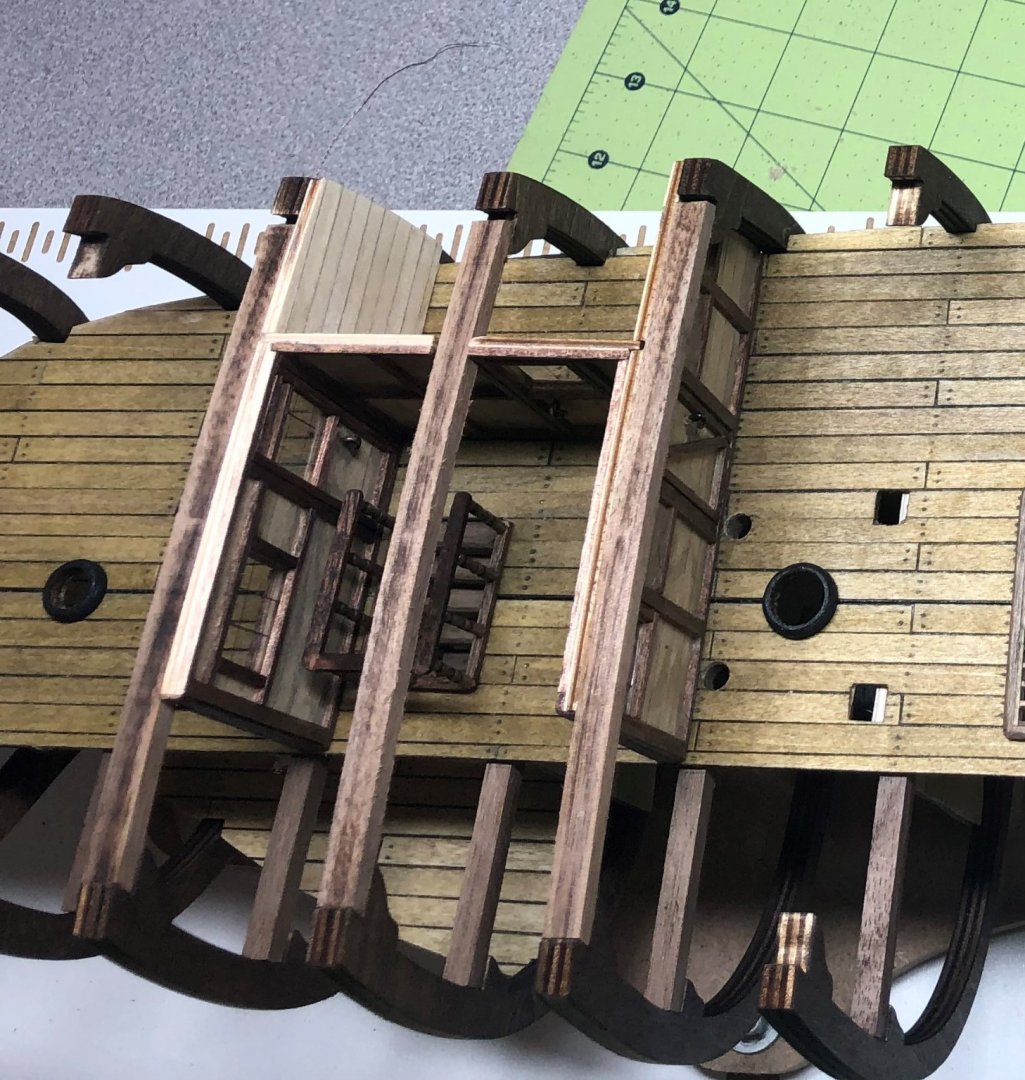
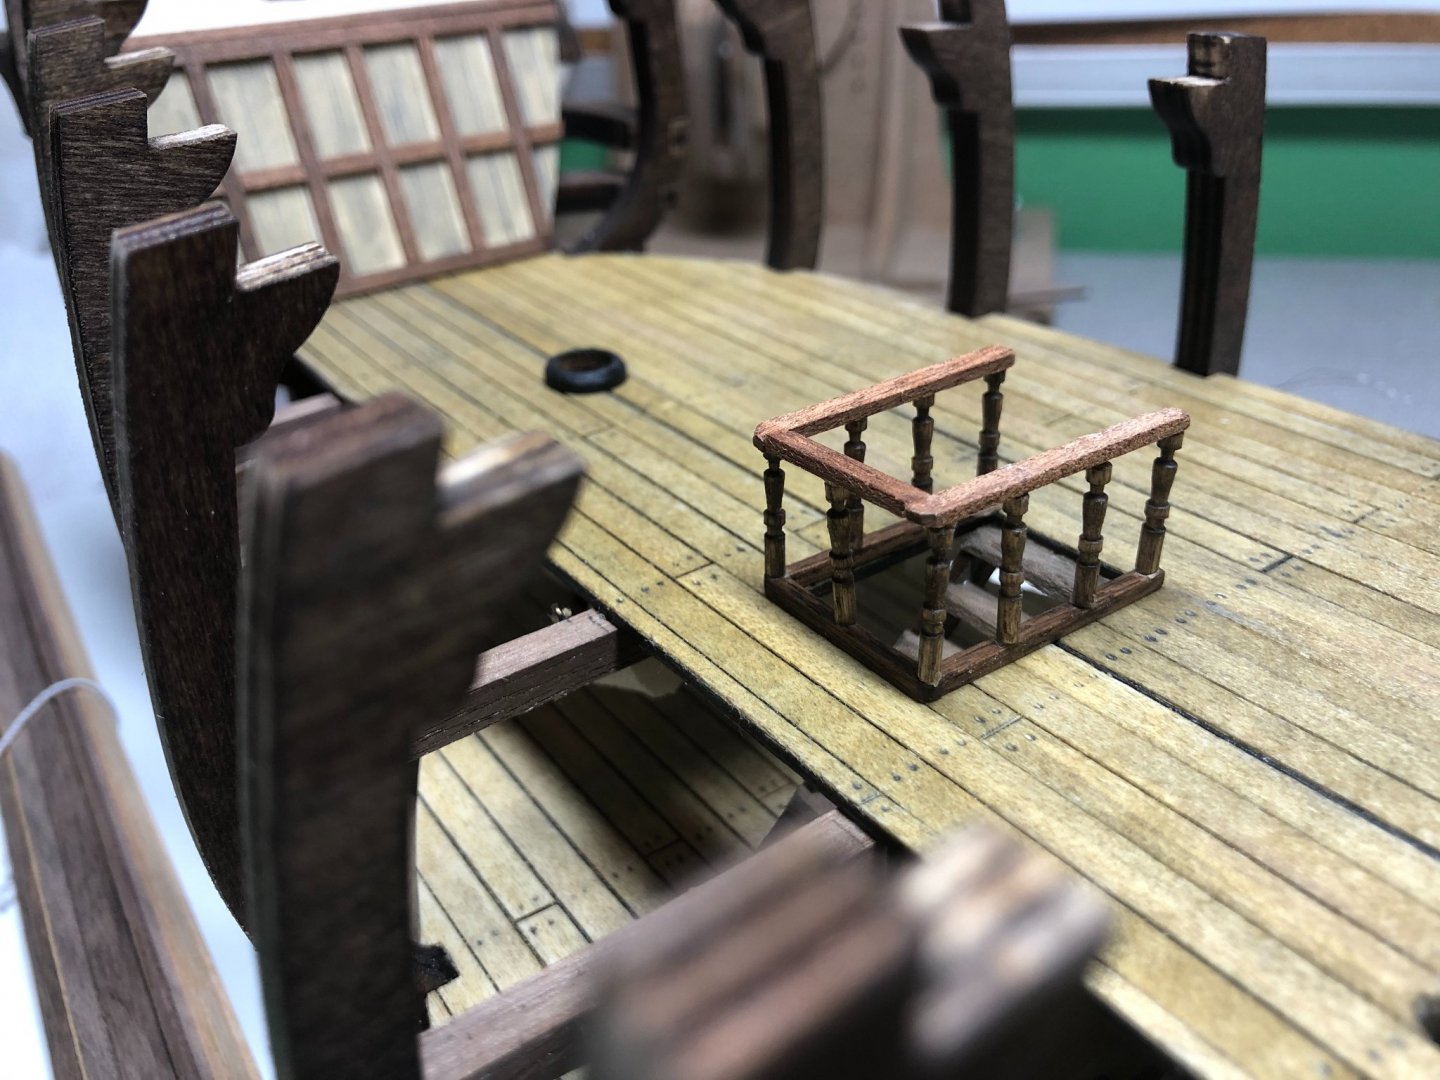
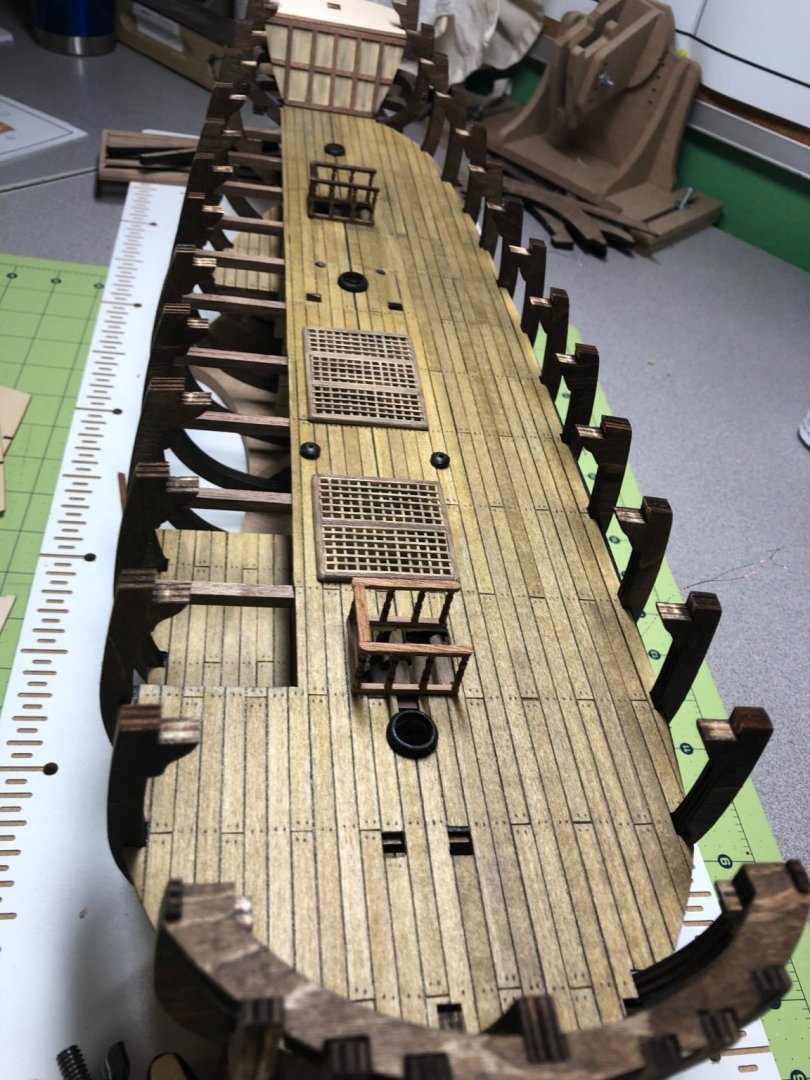
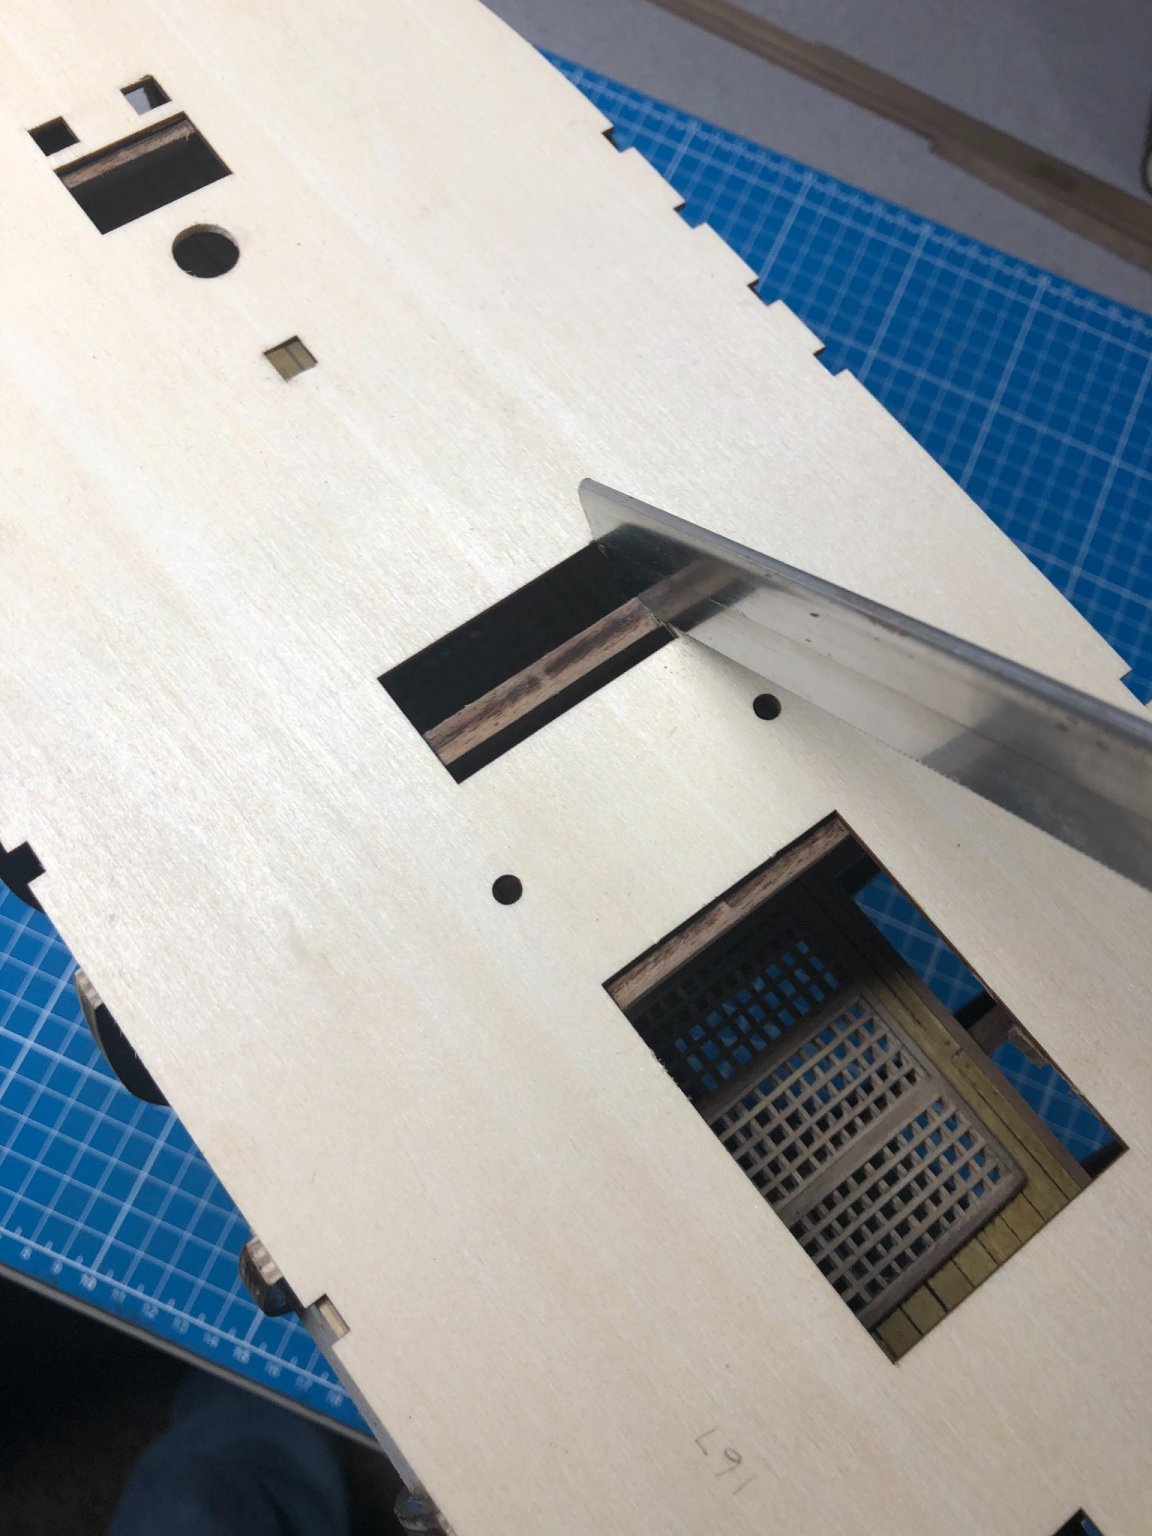
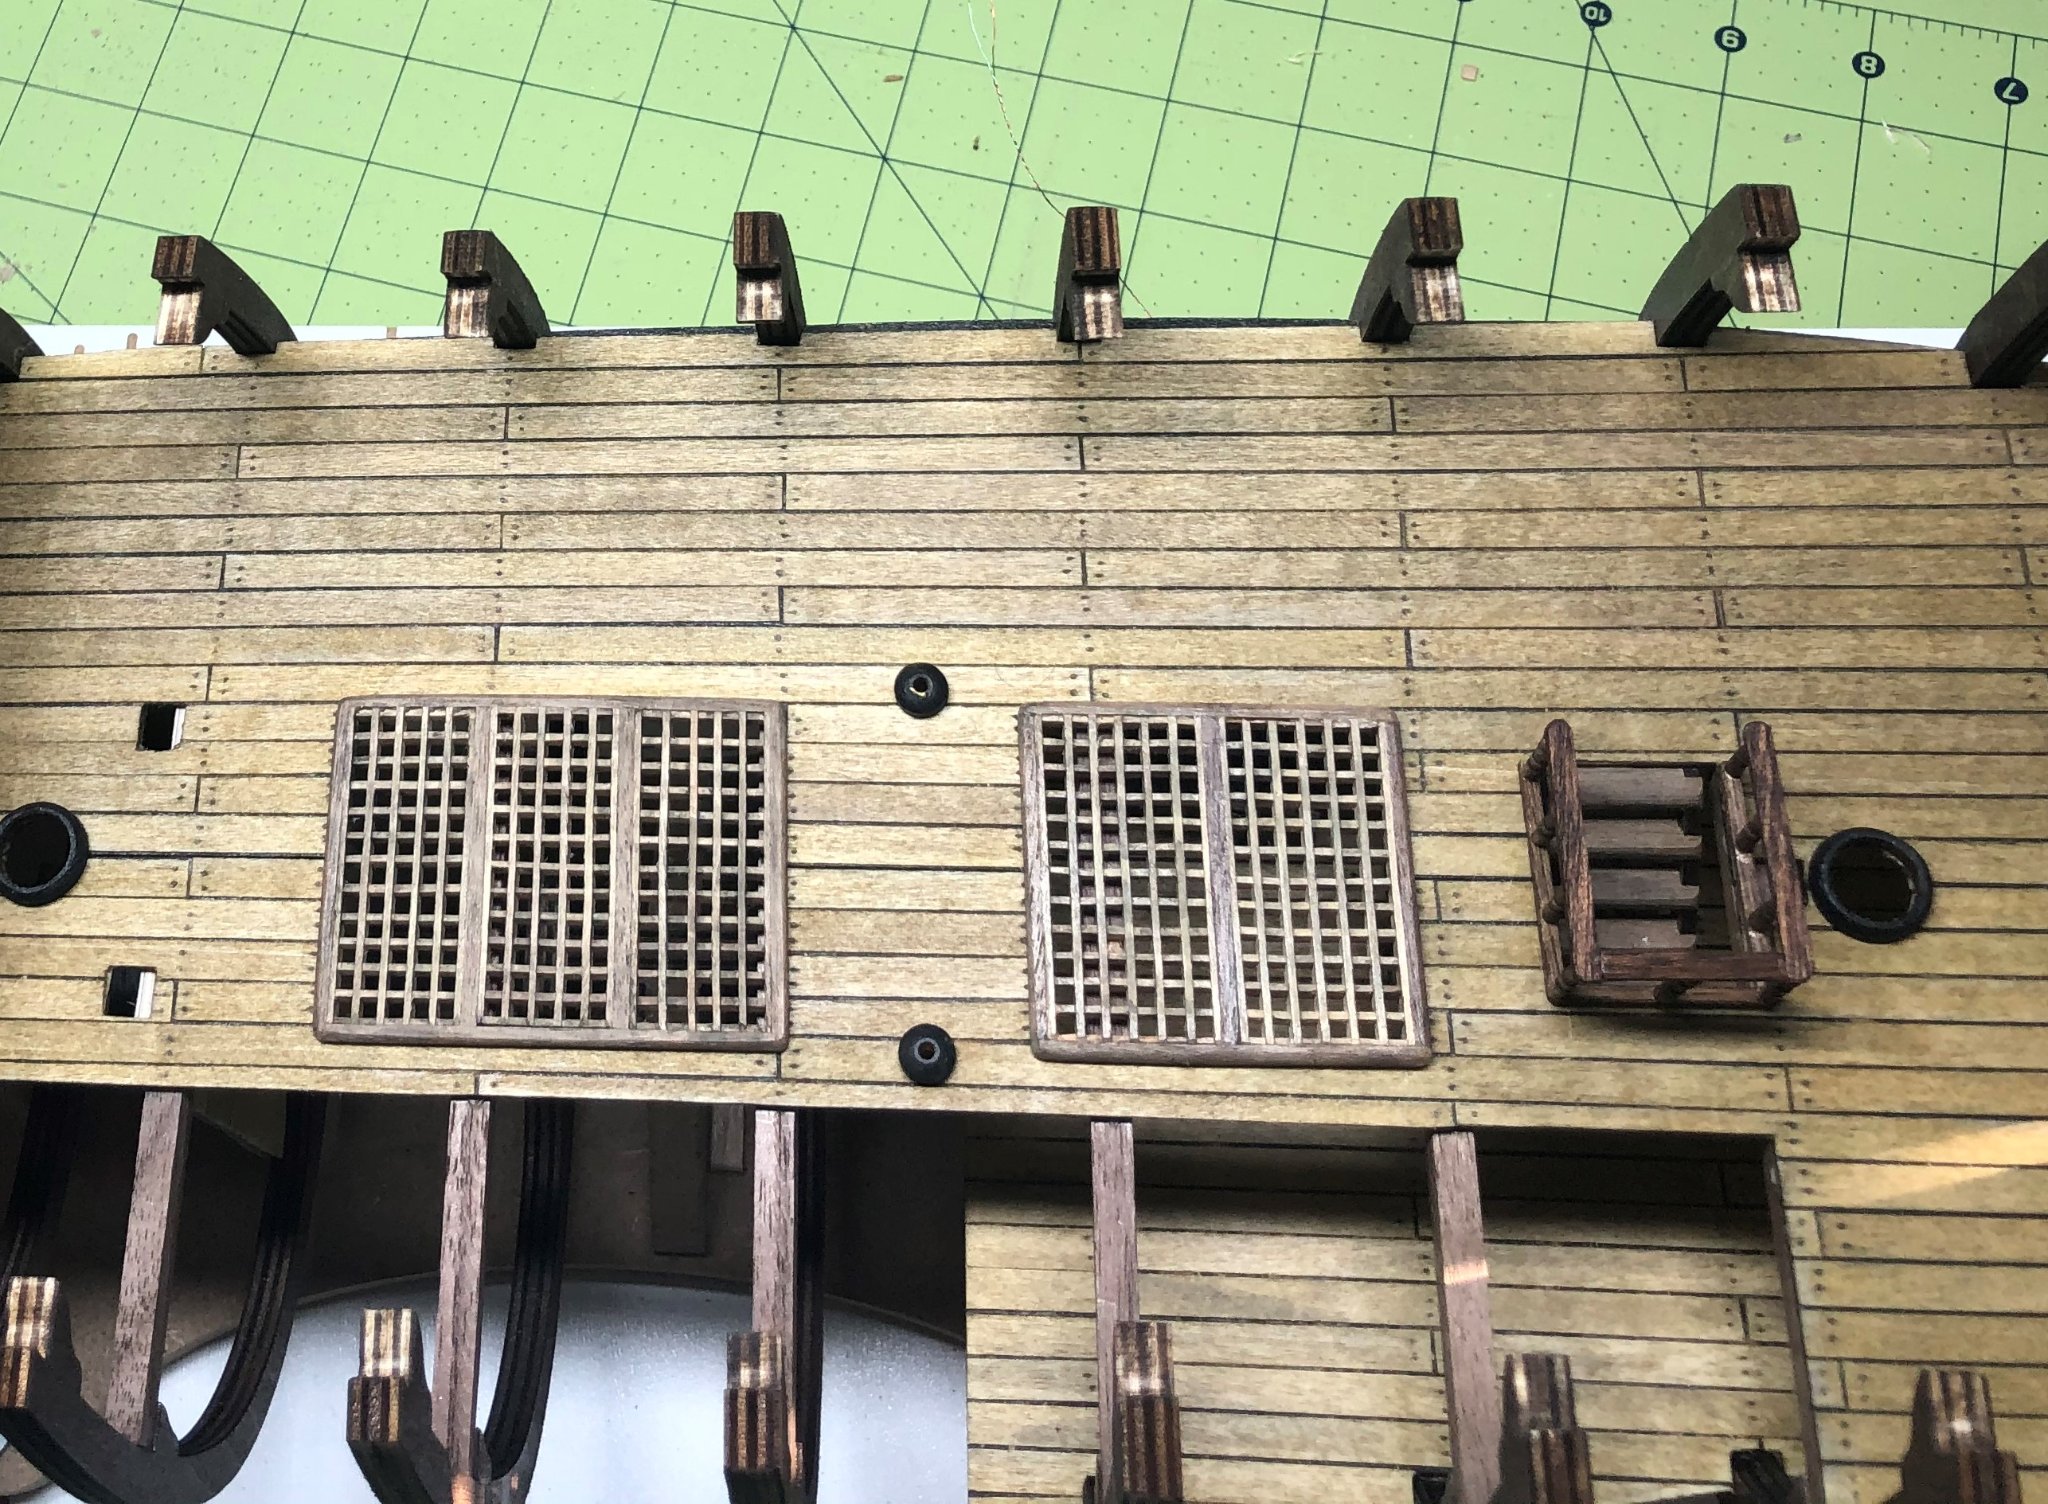
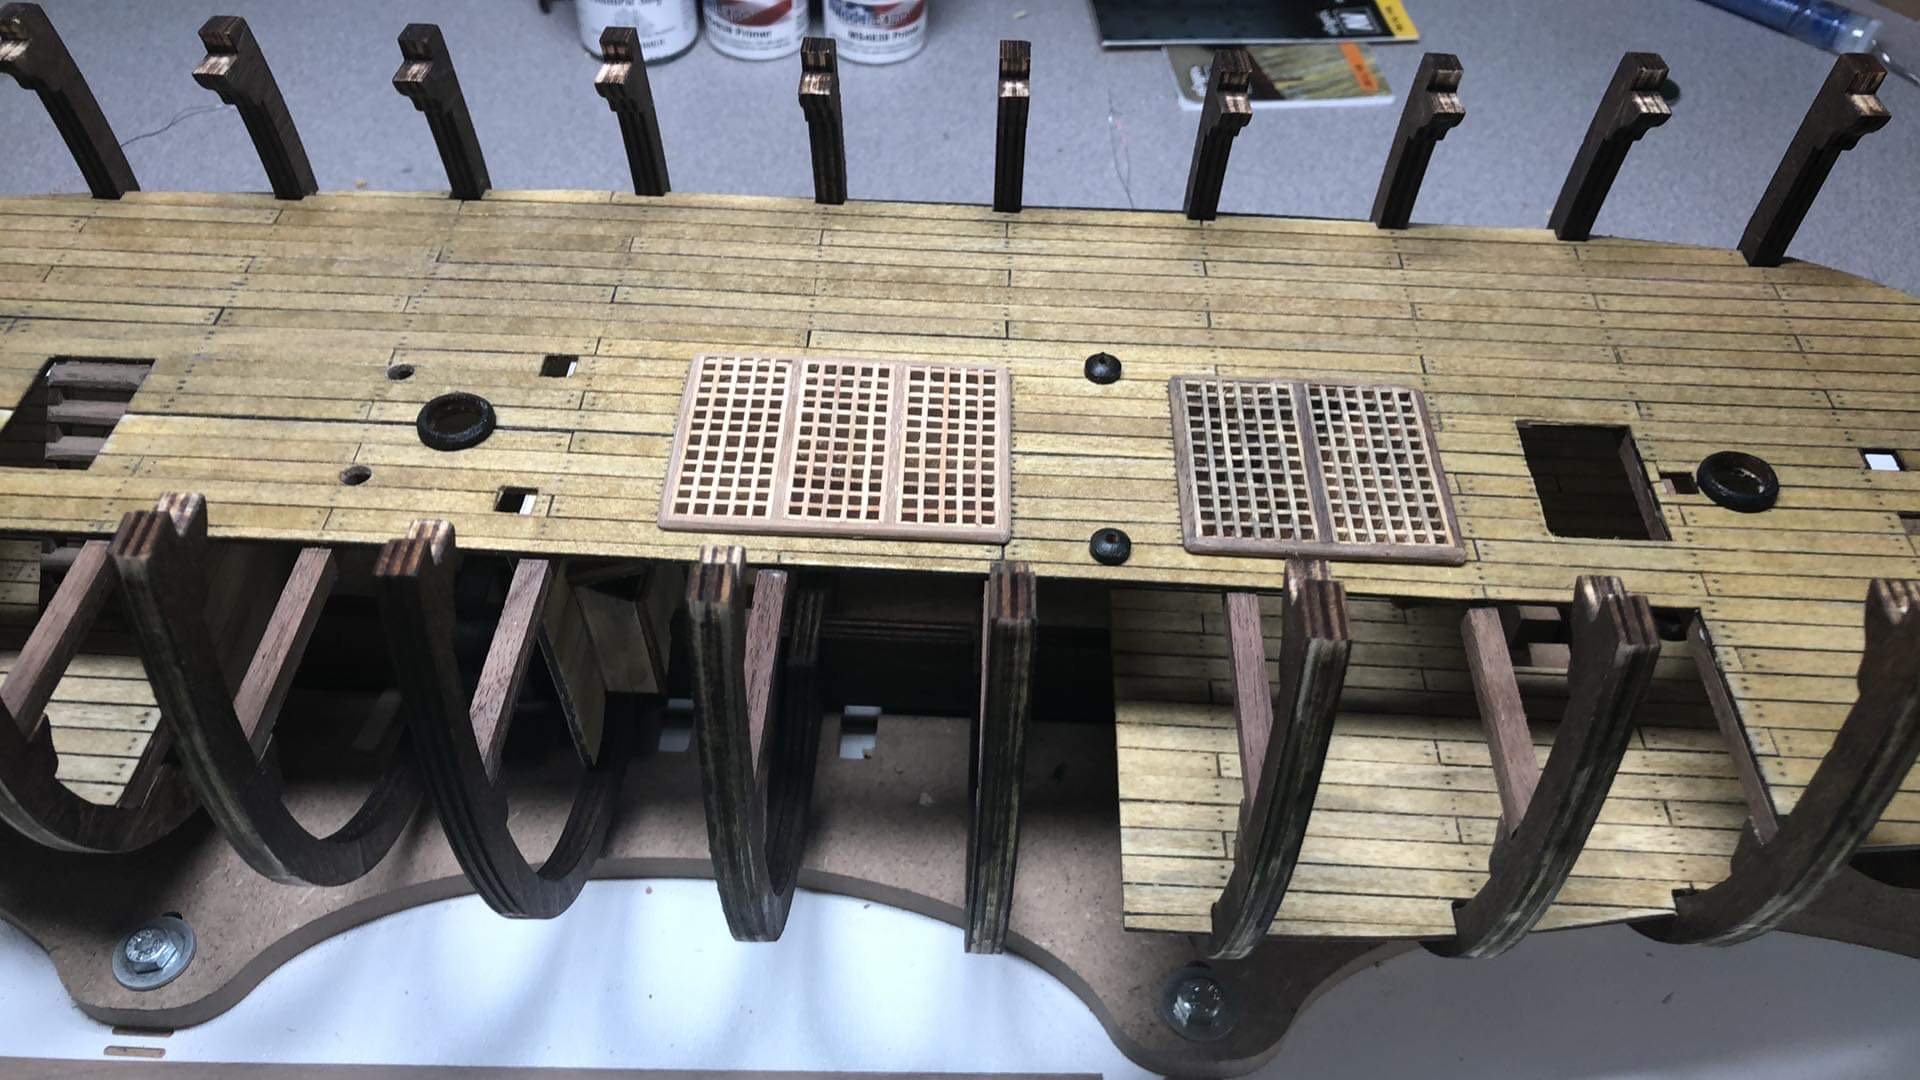
On to the middle deck. There will be bunch of kit bashing on this deck. But first, I went through the same process as the lower deck to plank, age and detail the middle deck and the beams were installed just like the lower deck. Making sure that the fit was tight but not too tight. Also, as mentioned in several other logs, the bilge pump elm tree tubes pass through the decks and unfortunately, through the main deck beams and the middle deck beams. Don't forget to make these cuts now, later will not be fun I don't have a picture of that particular part but it is obvious during assembly if you're aware it! Below the deck is glued in place: Be sure to check the alignment of the mast holes before gluing! The stairs to the lower deck were next for me. Straight forward assembly and aging was done with a black wash: The kit made no suggest to any type of railing and the plans and books didn't show anything either! So, it left it up to me to do what I thought was fitting for the time period; I could've gone with railings down the stairs but chose not to because the stairs would be too narrow for my taste. The banister set up feels right for this model: Fitted but not stained: Next the stern walls for the garden room was made very similar to the bilge well walls which I have been using throughout the model, seen above and here: The next step was to build and install the middle deck gratings. The grating kit has been a topic of discussion with this kit. Some have complained of the quality... admittedly, it's not the best but I was able to make due with the pieces provided. Built and installed: Above shows one aged and the other prior to the procedure. Above, everything from this post installed. And a hint of what's to come! Next, work begins on the cabin walls, doors and windows...


-
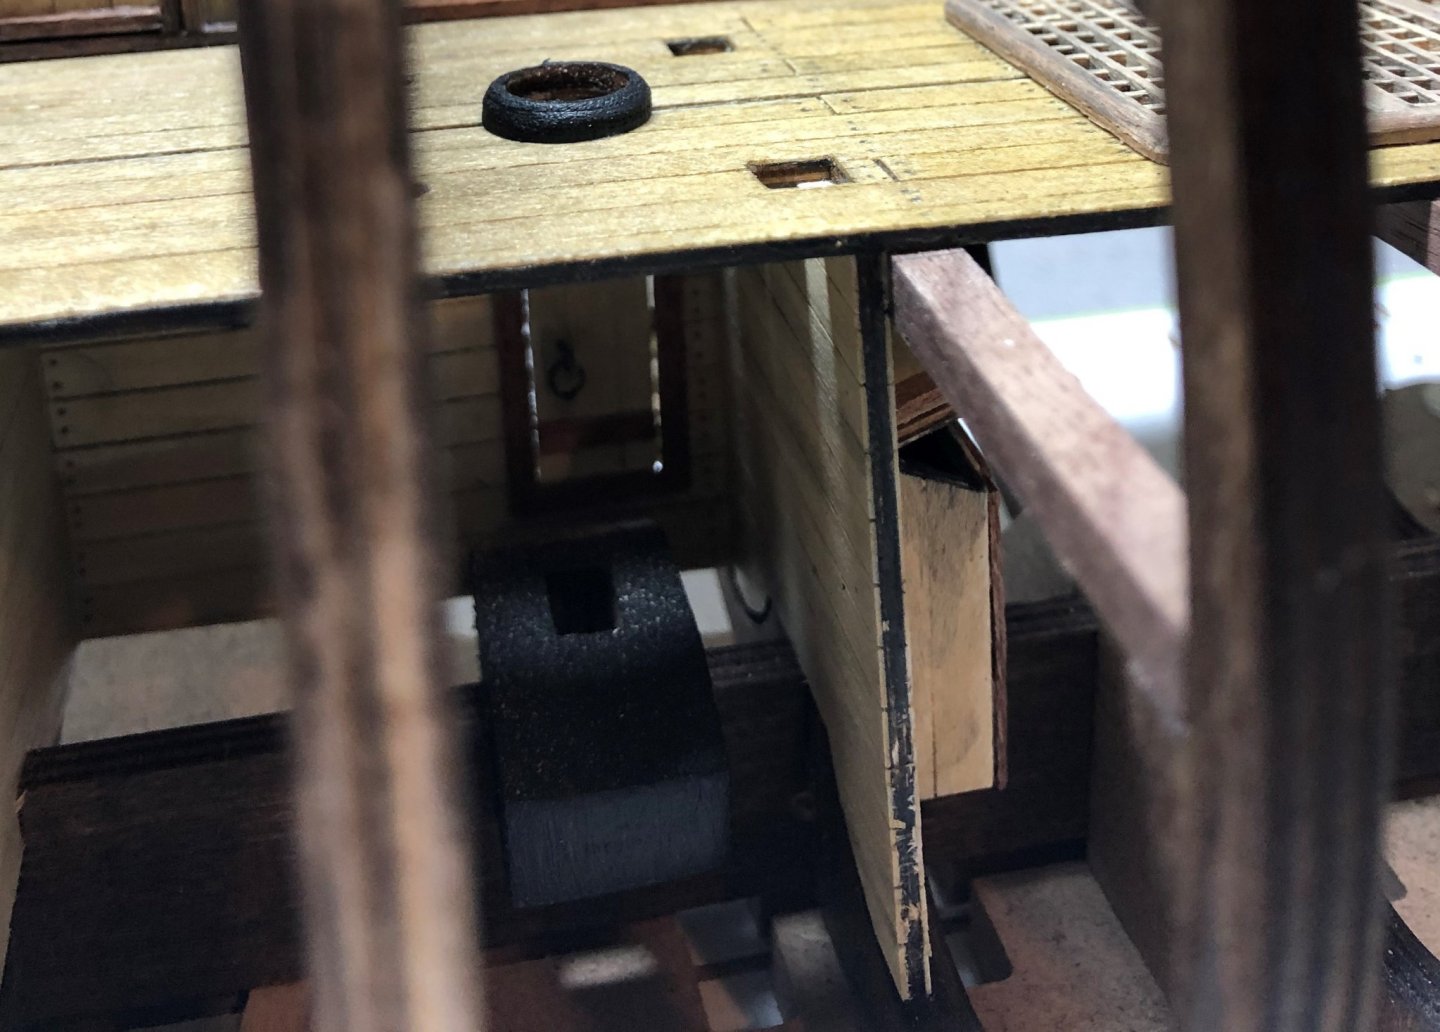
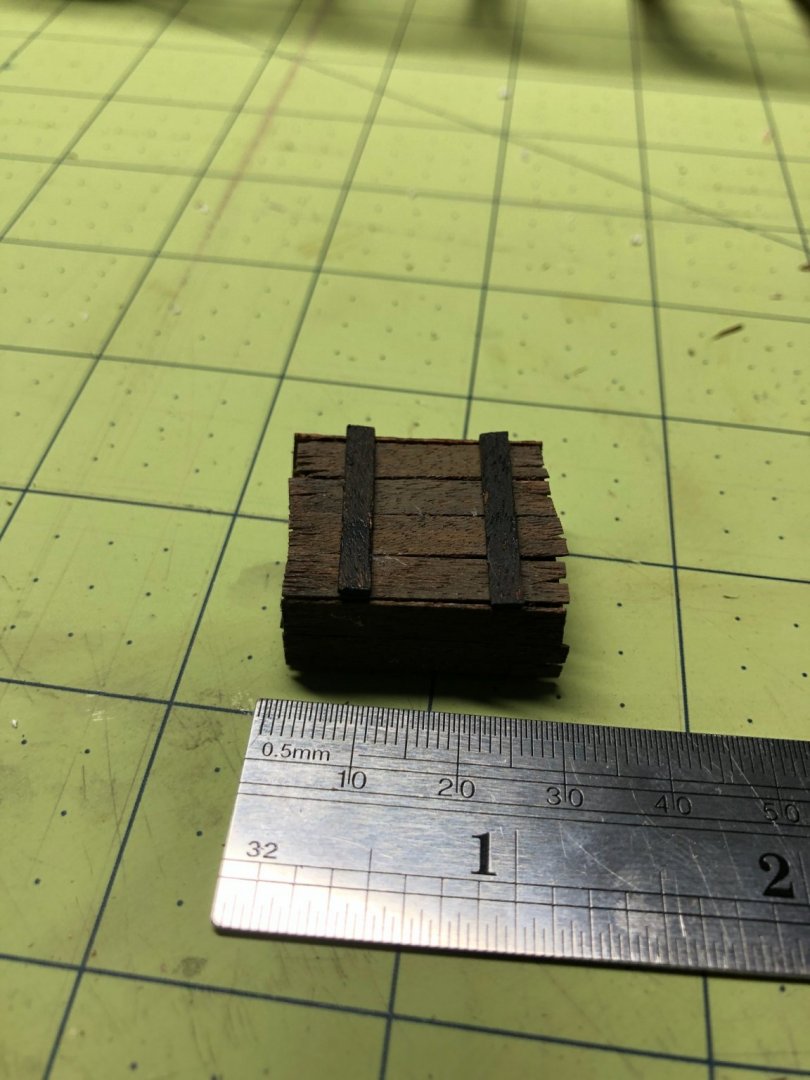
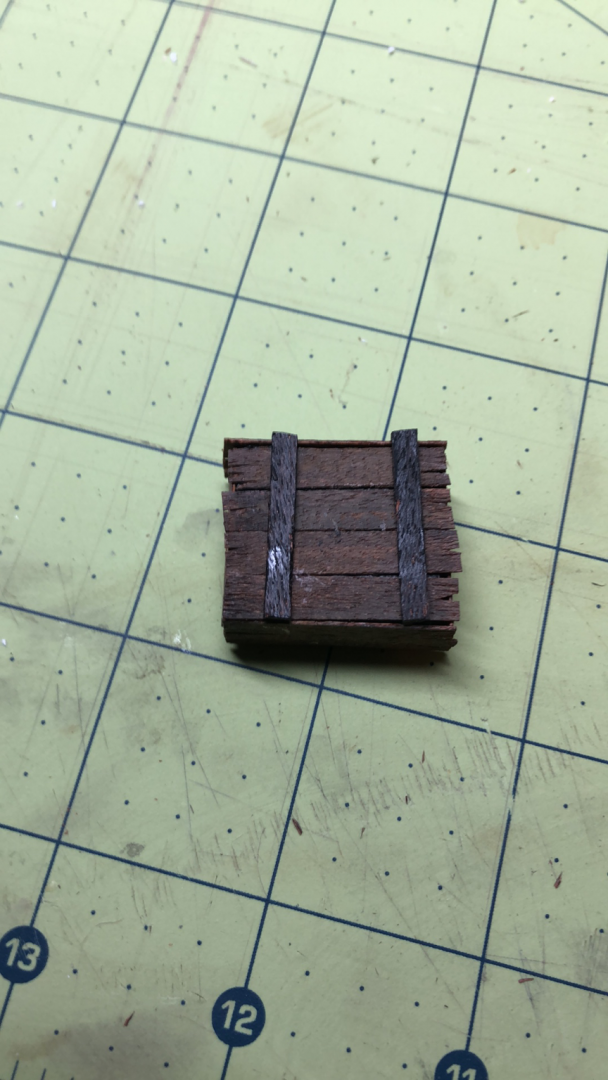
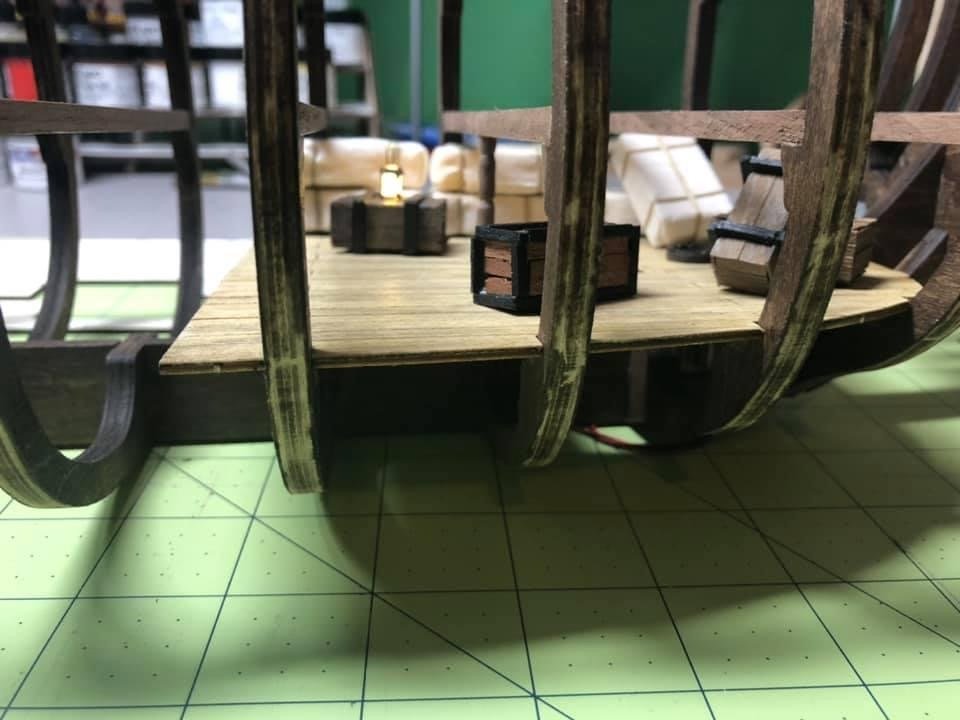
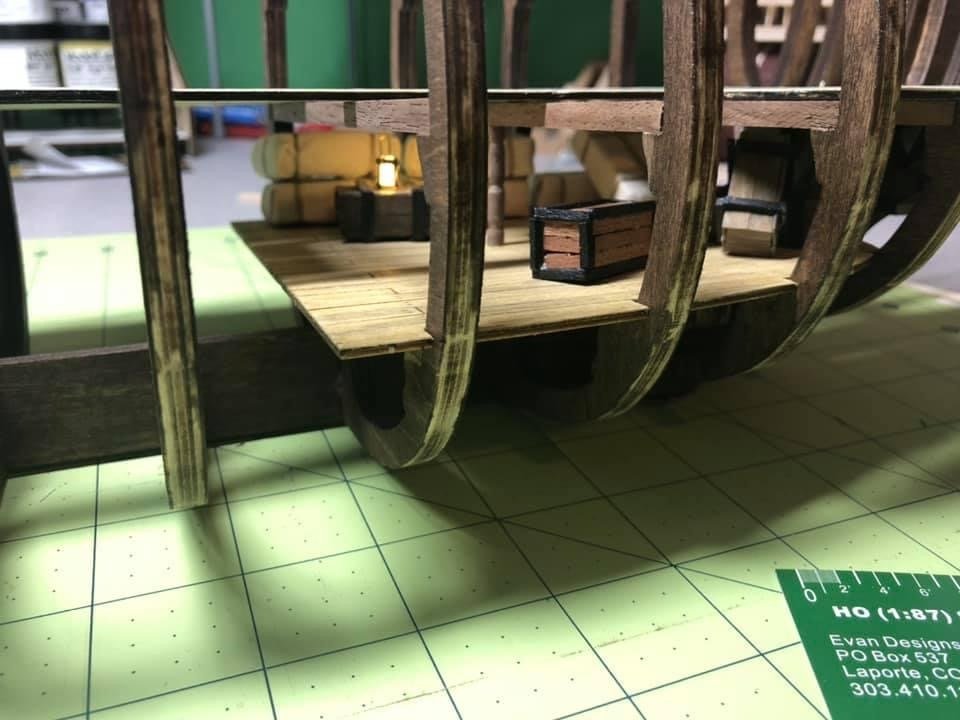
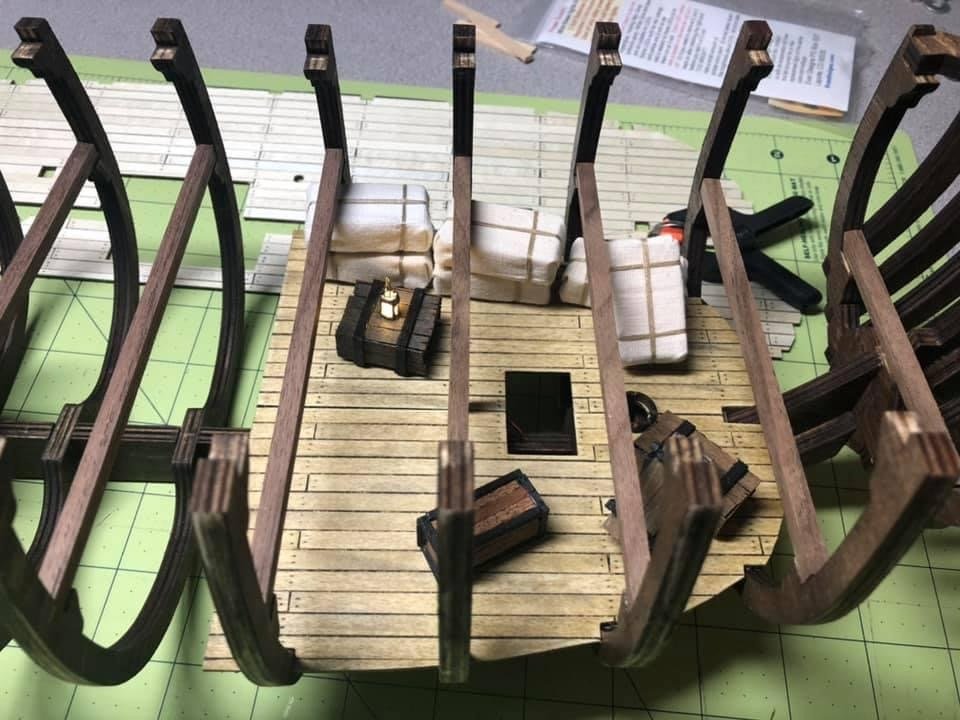
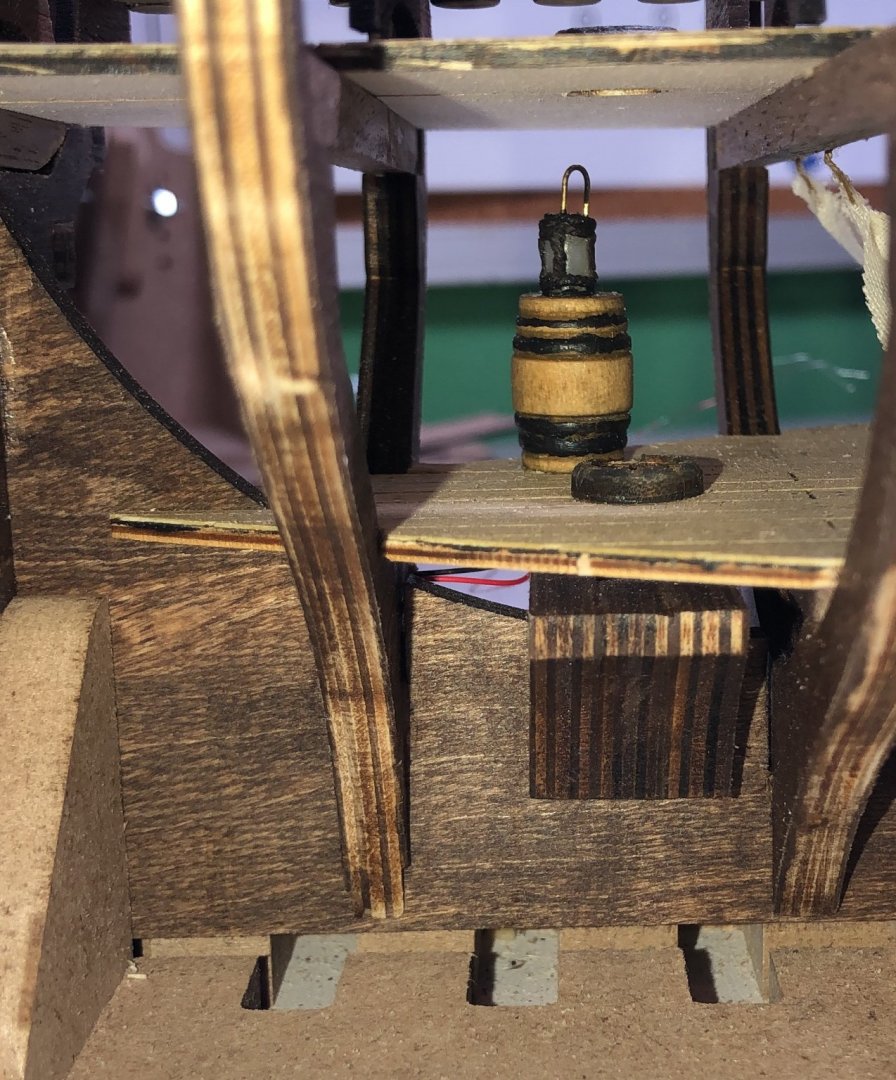
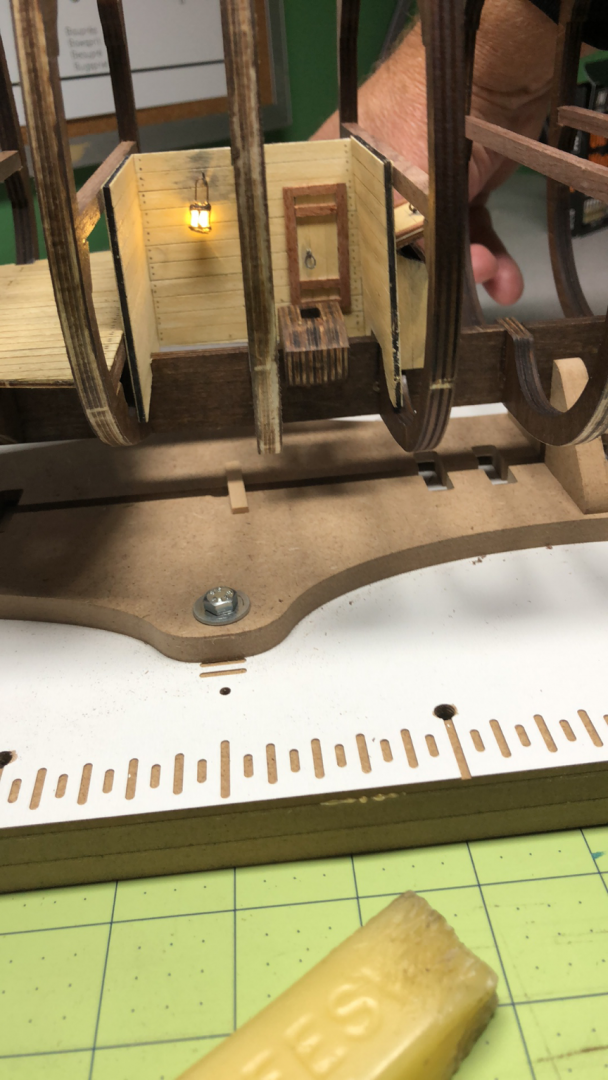
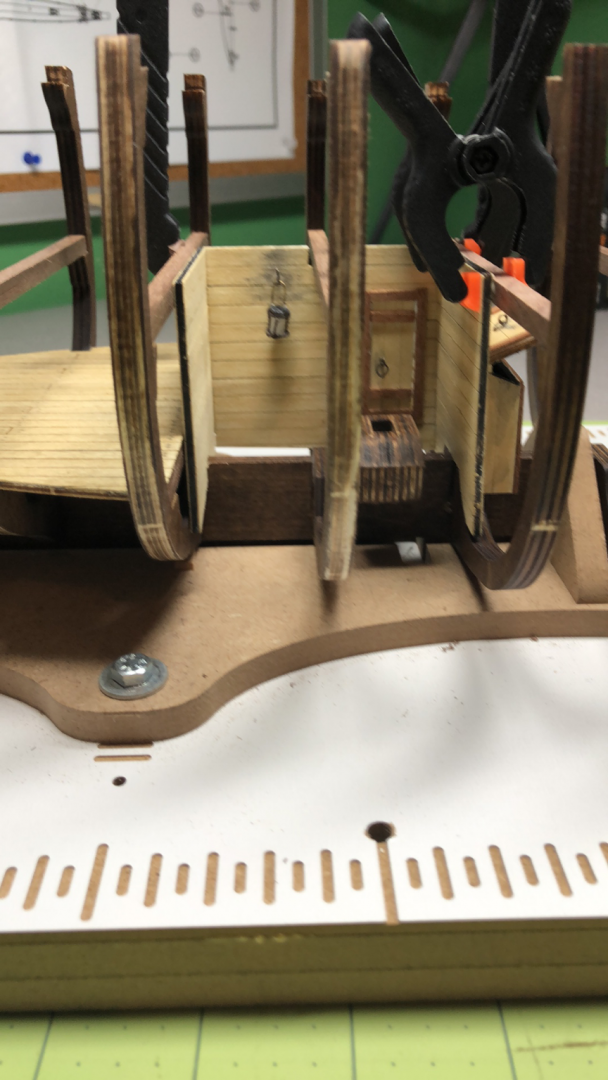
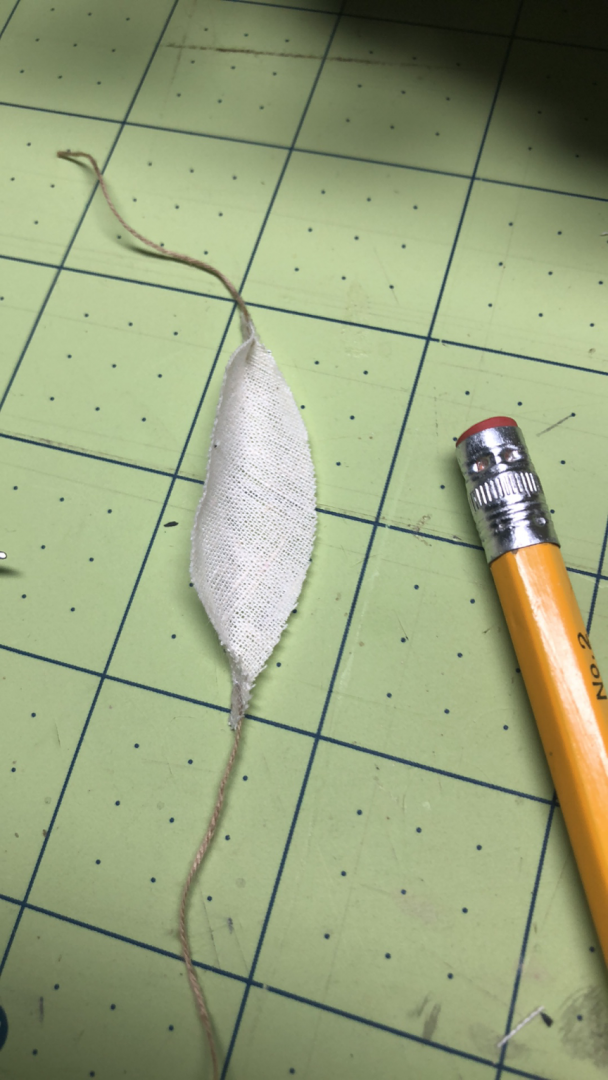
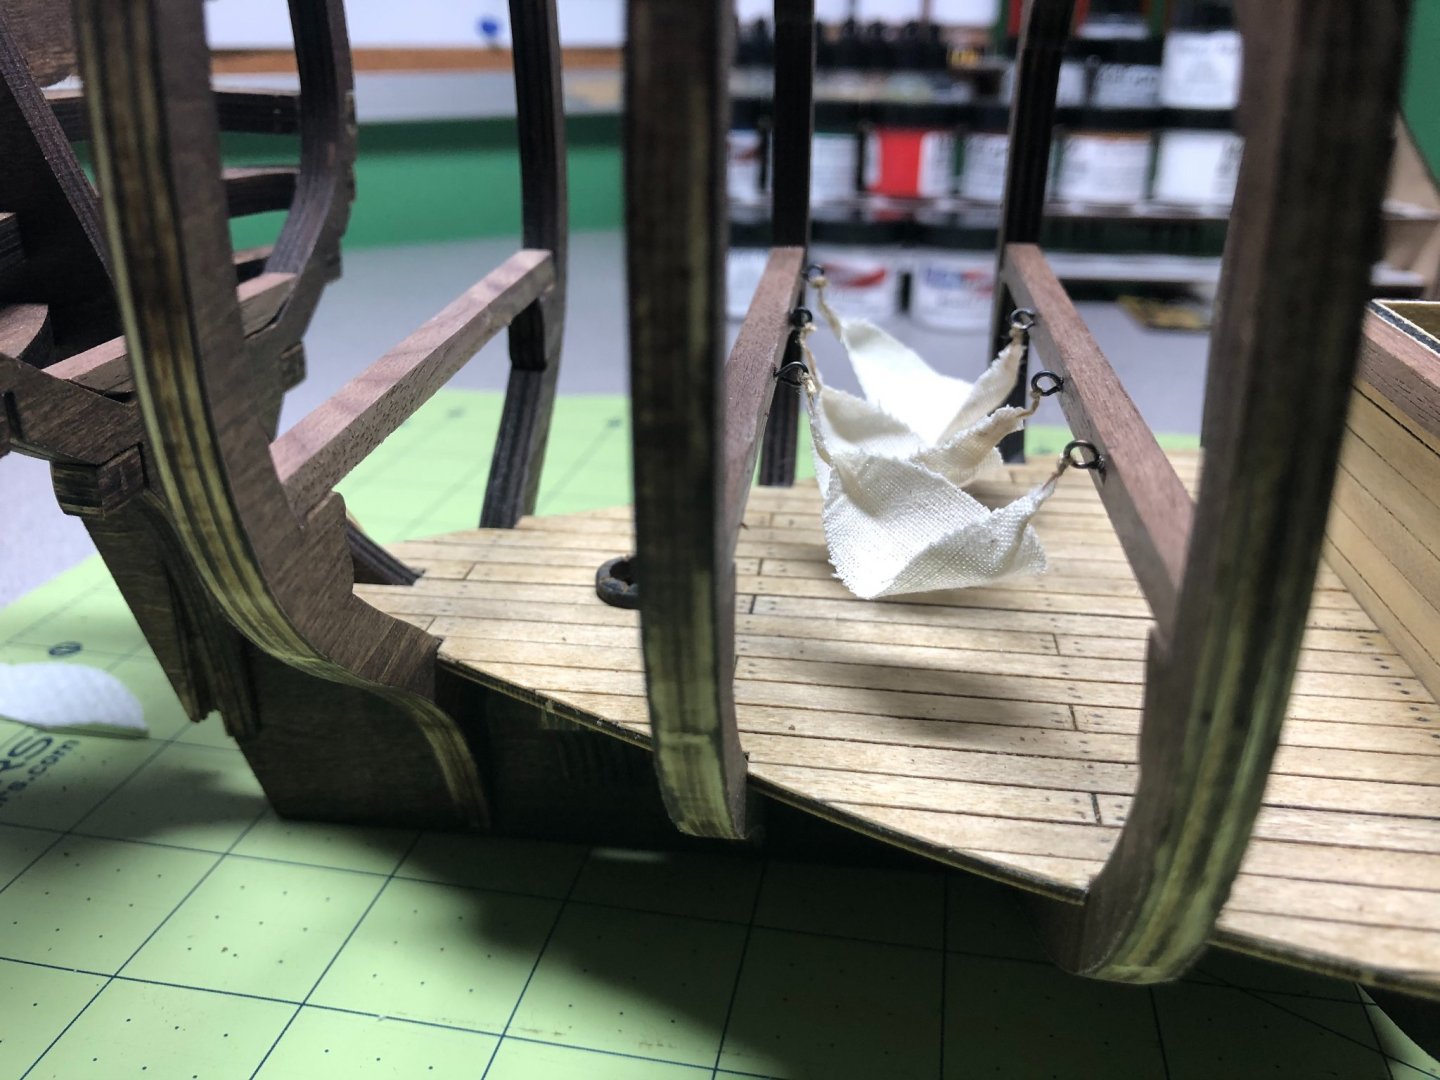
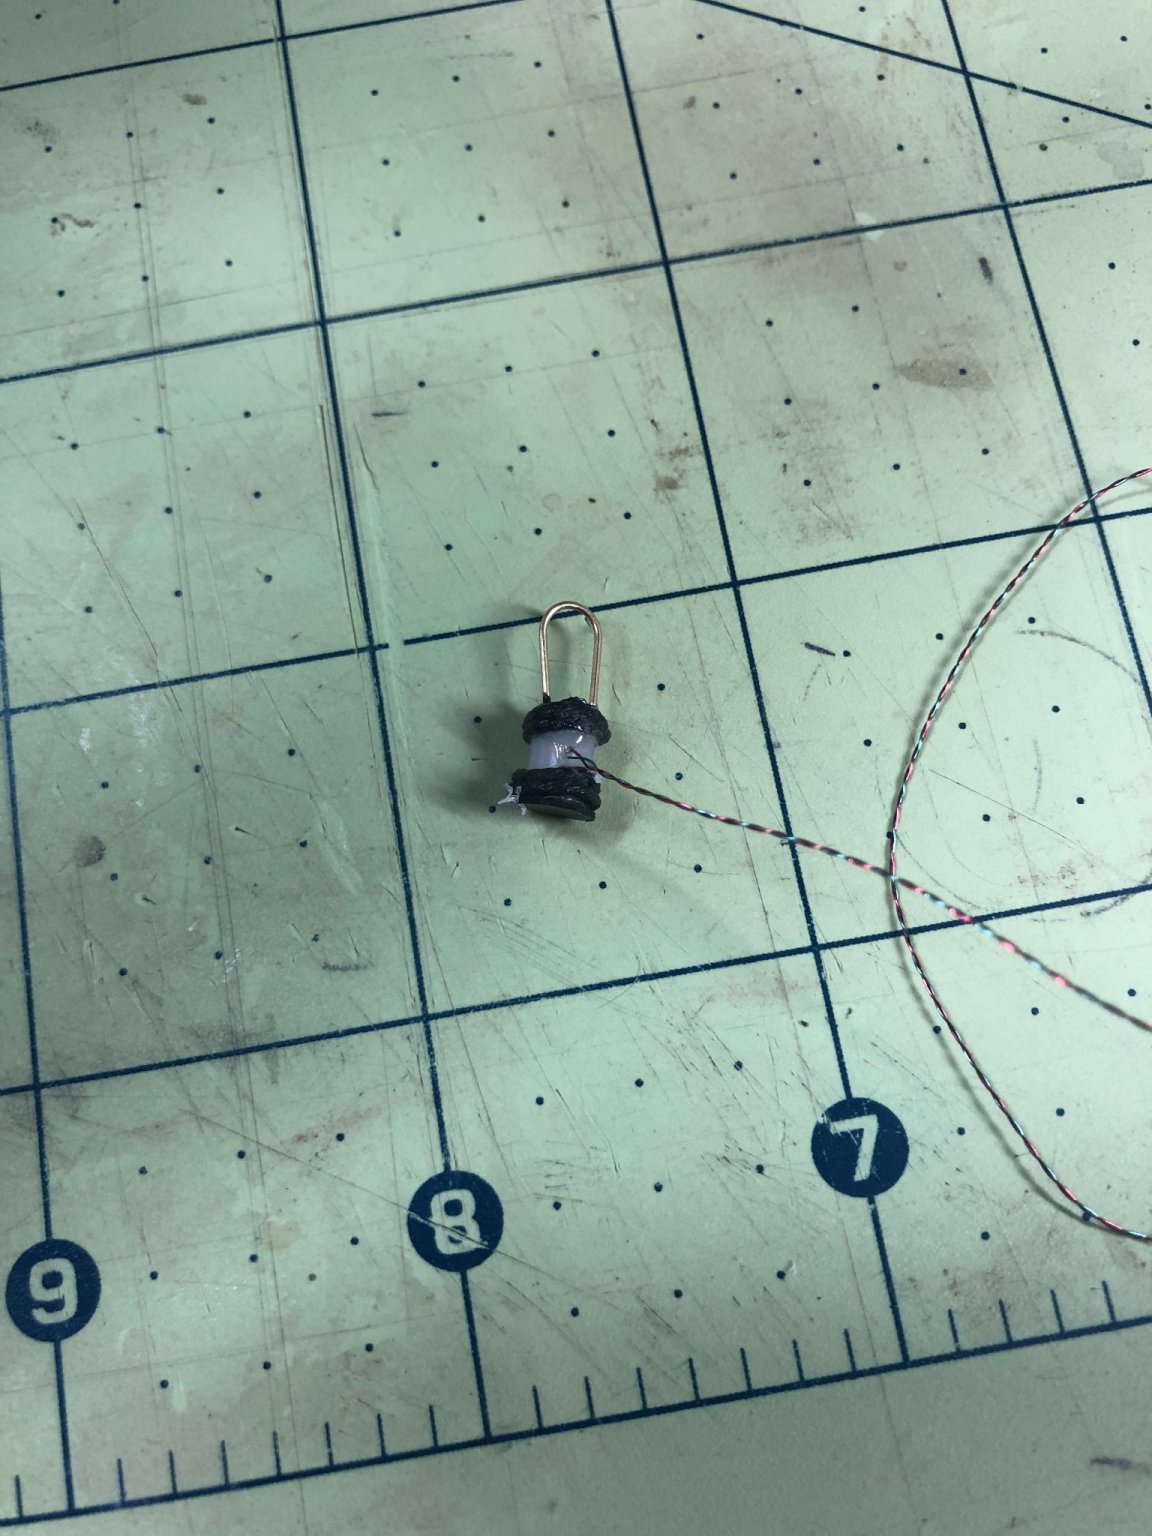
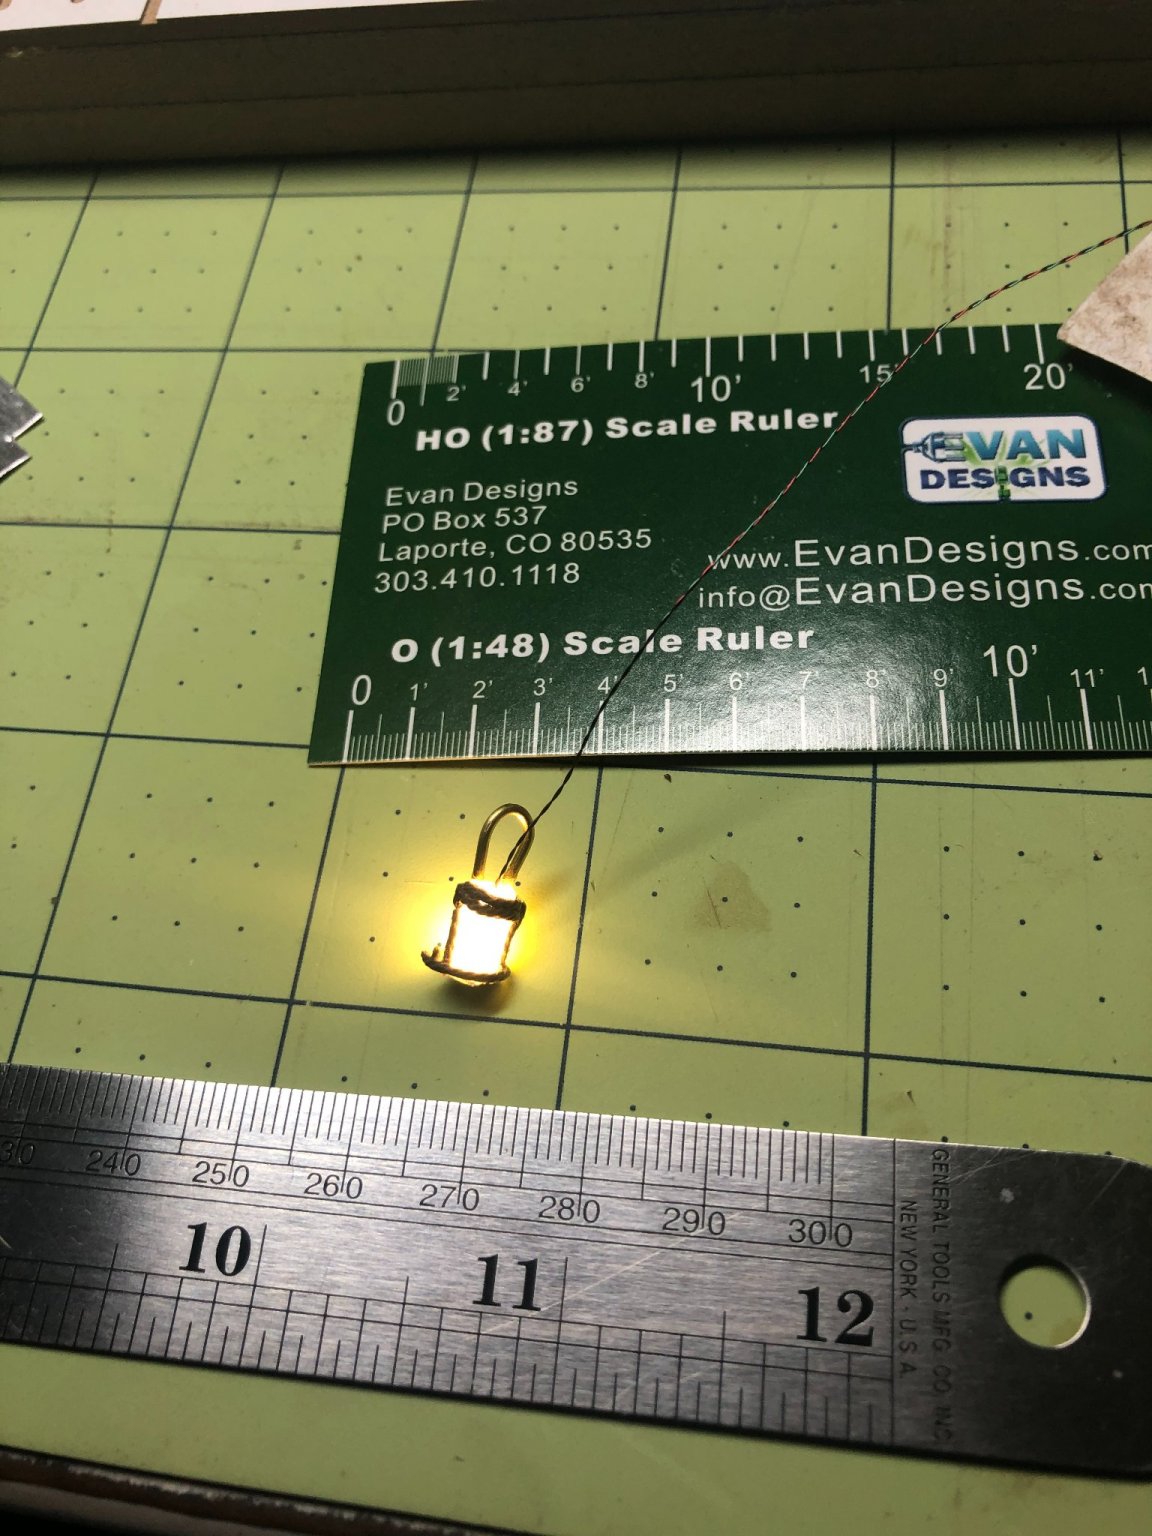
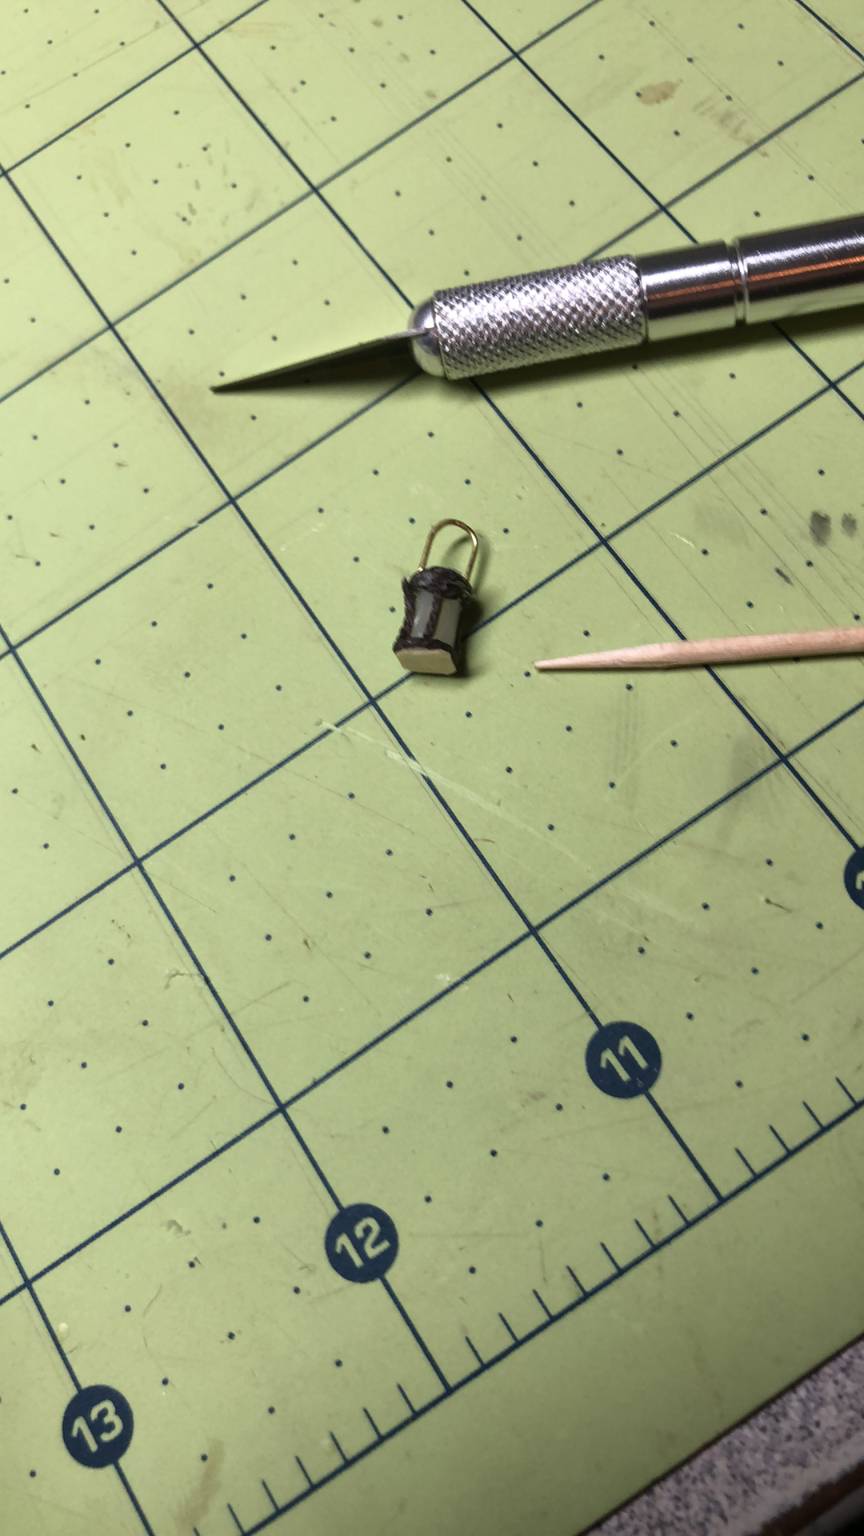
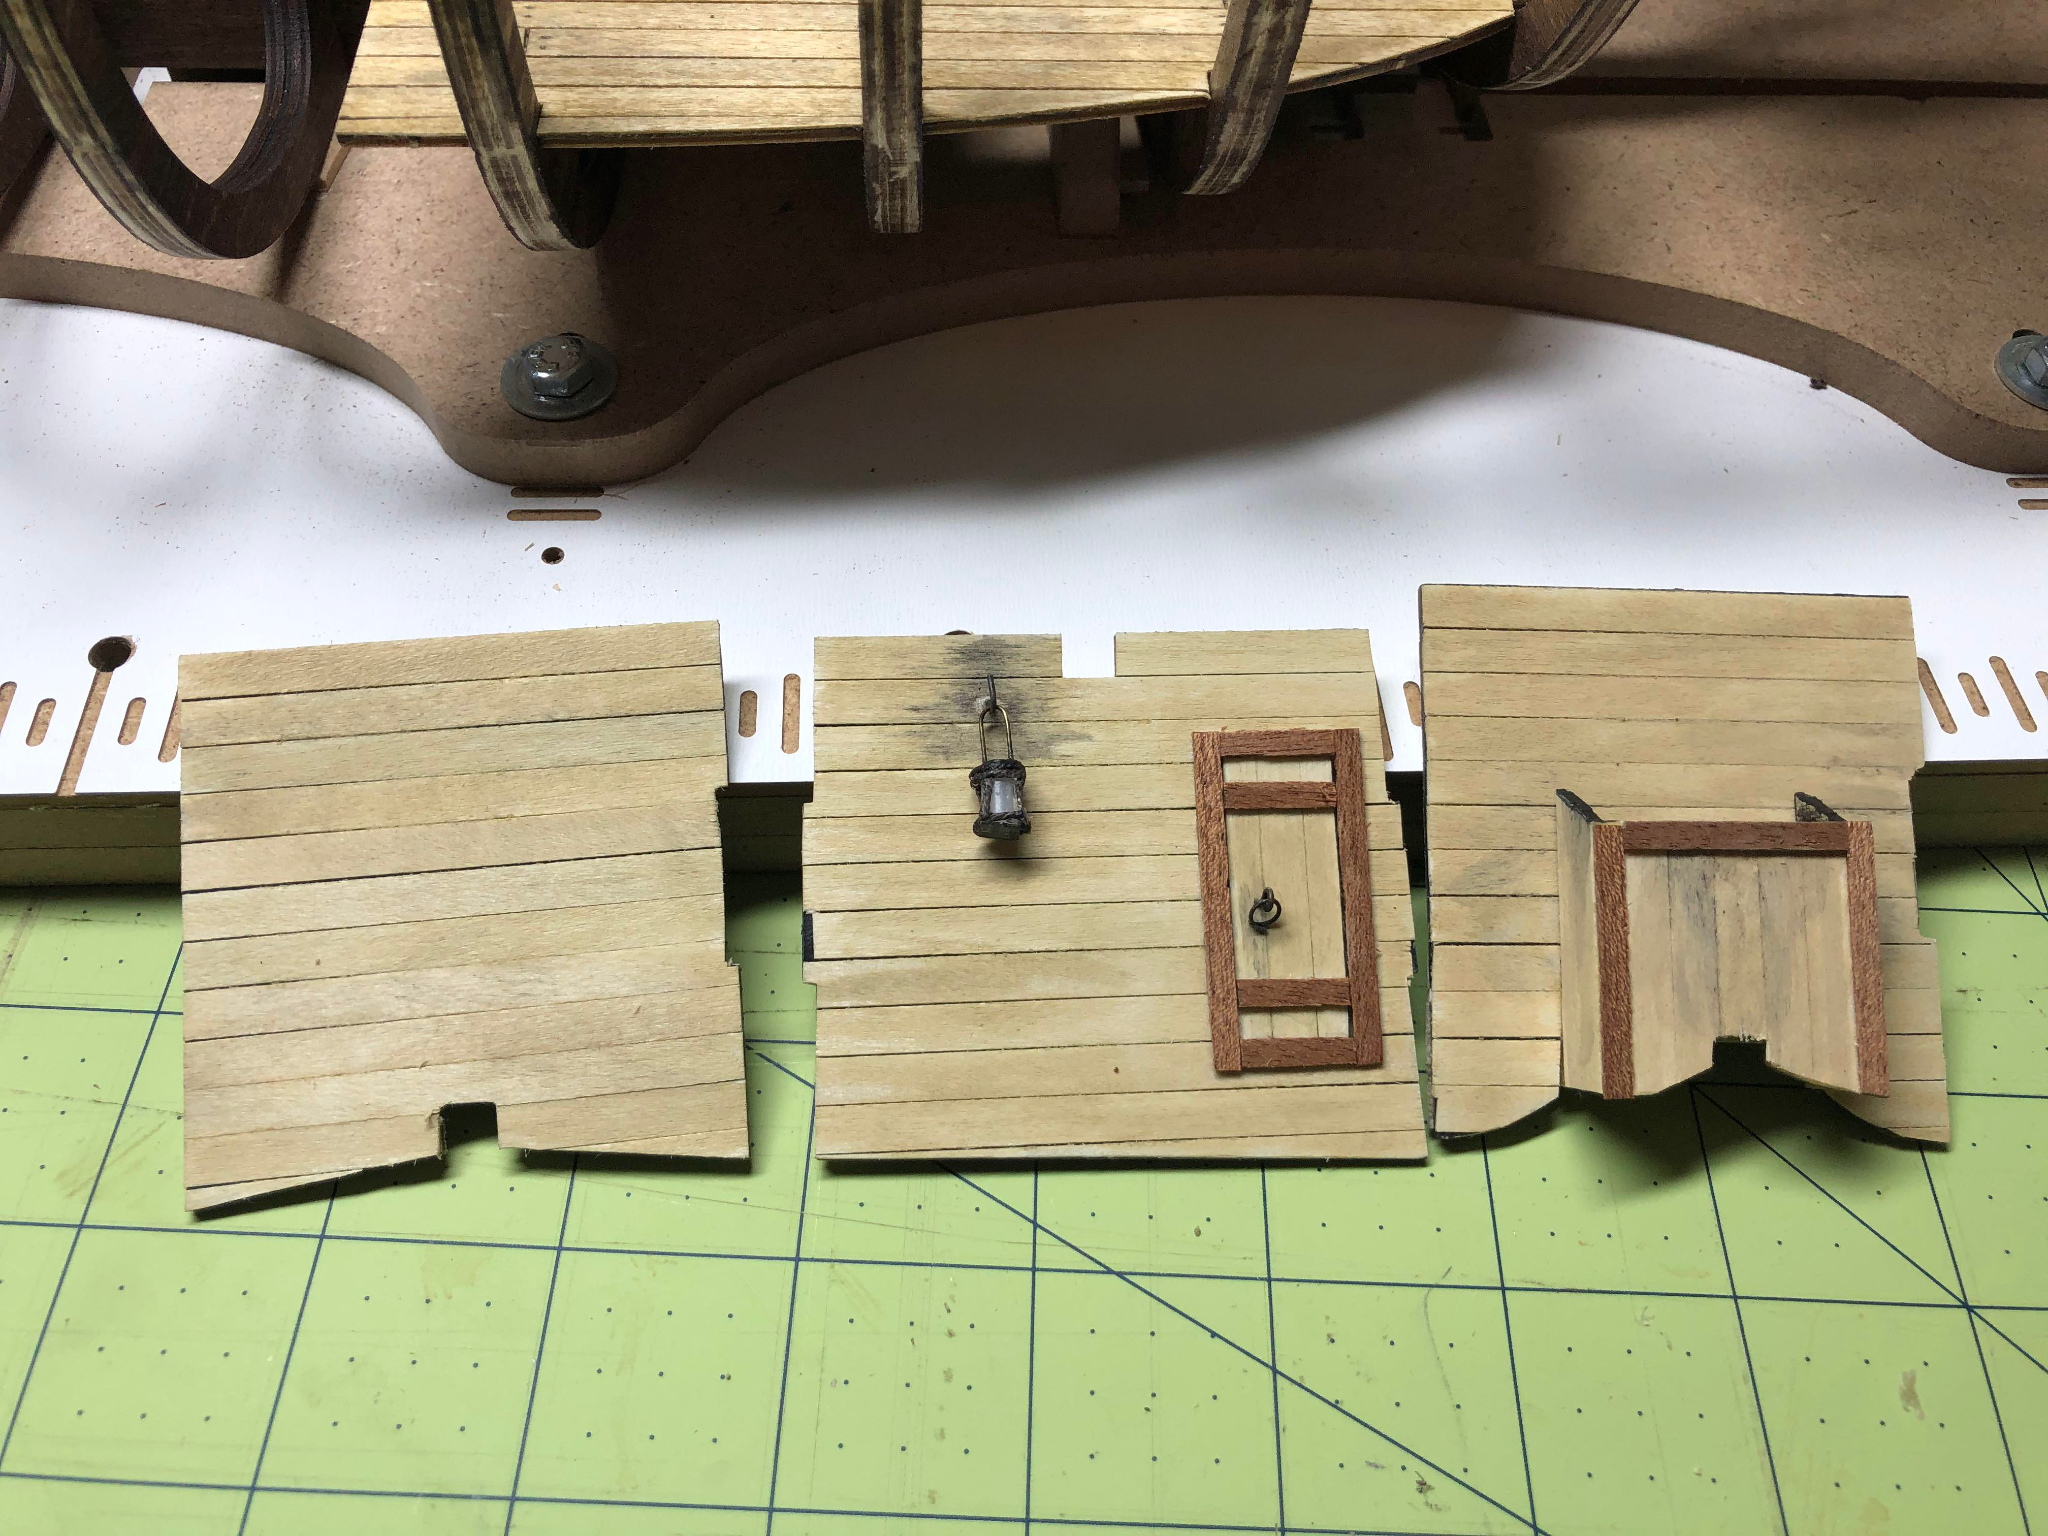
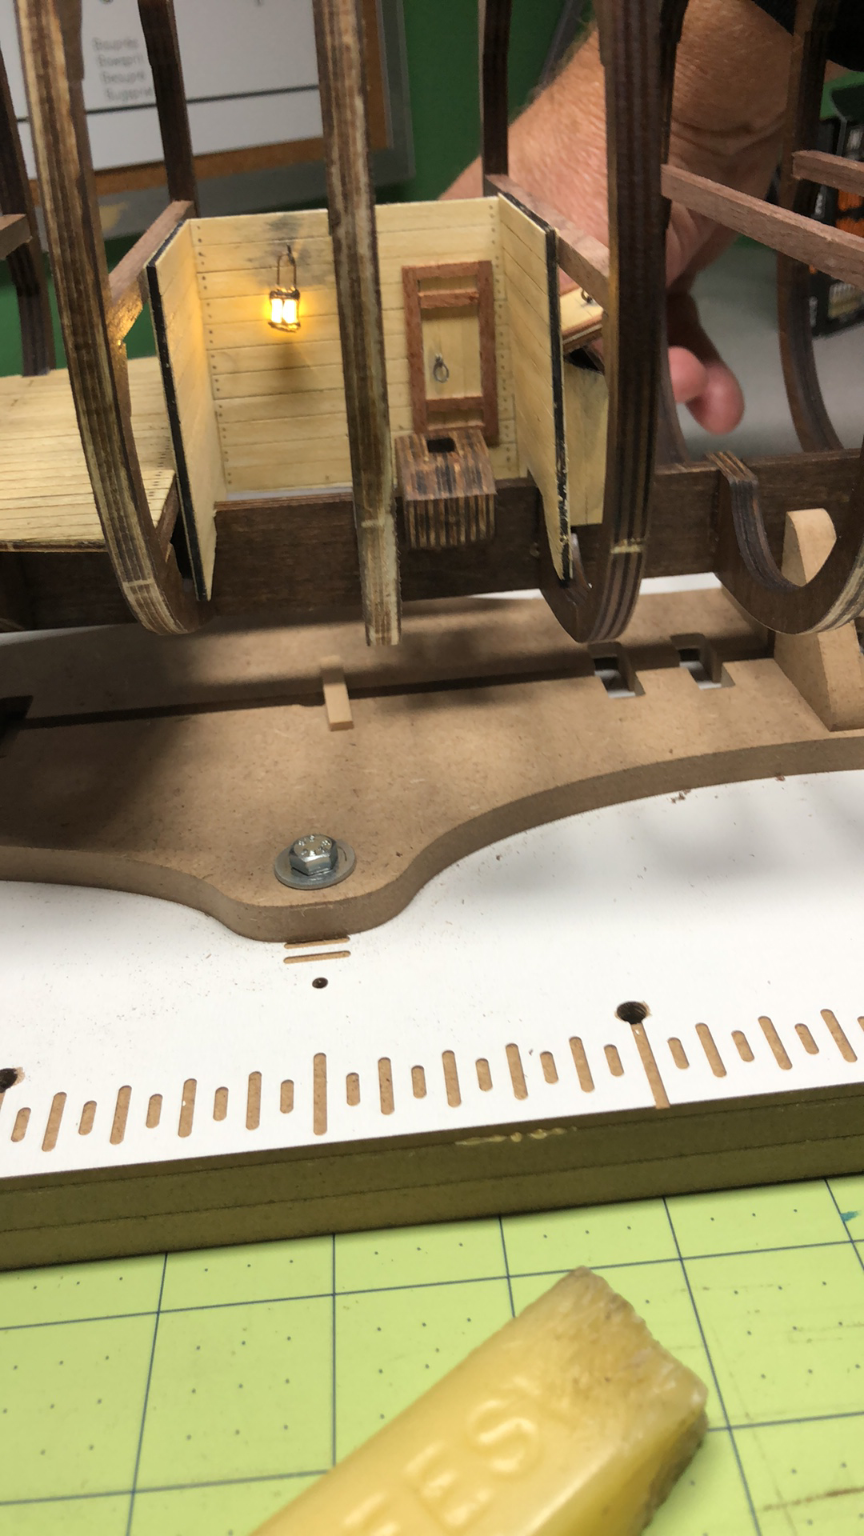
Although the kit comes with some extras, I just thought there wasn't enough and the model looks empty. So, I decided on a few things: 1. Lighting will be added throughout the lower decks and the two stern lanterns, and 2. Detailing will be added to make the model look "lived" in. Let's start with the lighting... Again, something I had not attempted on previous builds. Lots of research and perusing other attempts by other modelers. Technology has advanced to the point that small LED's are ridiculously small! I purchased "Z" size LED's. These are less than a millimeter across, are already wired and very easy to hide. But how to hide them and make the model look realistic...? I decided to make lamps! This is a proto-type of the lamps to be used. I made the lanterns from a piece of very small PVC, brown thread and brass rod. Eventually, I reduced the size of the handle and cleaned up the thread work. This one is done except for some black paint: Hiding the wiring would be the challenge! For the lower deck, I decided to have three lamps. One forward one aft and one on the bilge well (more on this one later). Staging them so that wires wouldn't show was the next challenge. For realism, I made some crates and I used a barrel. First, the crates: Again, lots of experimentation! Aging the wood was a process. The above photos were taken while working through the process and the only shots I own. However, the process wasn't complicated as long as the end product looked like an old crate! infinite ways to achieve the look. I cut small cubes of Styrofoam and glued the wood to it. In the case of the bow section, I ran the wiring for the light through the deck and up through a crate. The I glued the lantern to the crate! The end result: In the aft section, I did a similar trick but I used one of the barrels that came with kit: Ignore more poor painting job on the barrel!! The last one was placed in the bilge well hanging on one of the walls. The bilge well was a simple task to assemble but I deviated from the instructions and made the walls more time period realistic. Of course, aging was done, the lamp was hung, some soot placed above the lamp and the hardware all aged too: The shot box is on the right panel. I decided to open the shot box lid and during final staging, I plan to add cannon balls in the box! I made a shallow false bottom in the box. The panels were easy to install and glue into place. Here is the results: Before the barrel was installed but you gets the gist of it: The final detail for the lower deck until later on - Hammocks! Made from the remnants of past sails, a little thread and a few hooks. I glued the edges with a gluestick... hoping it will keep them from unraveling! Moving to the middle deck next! Almost caught up with my current work!


-
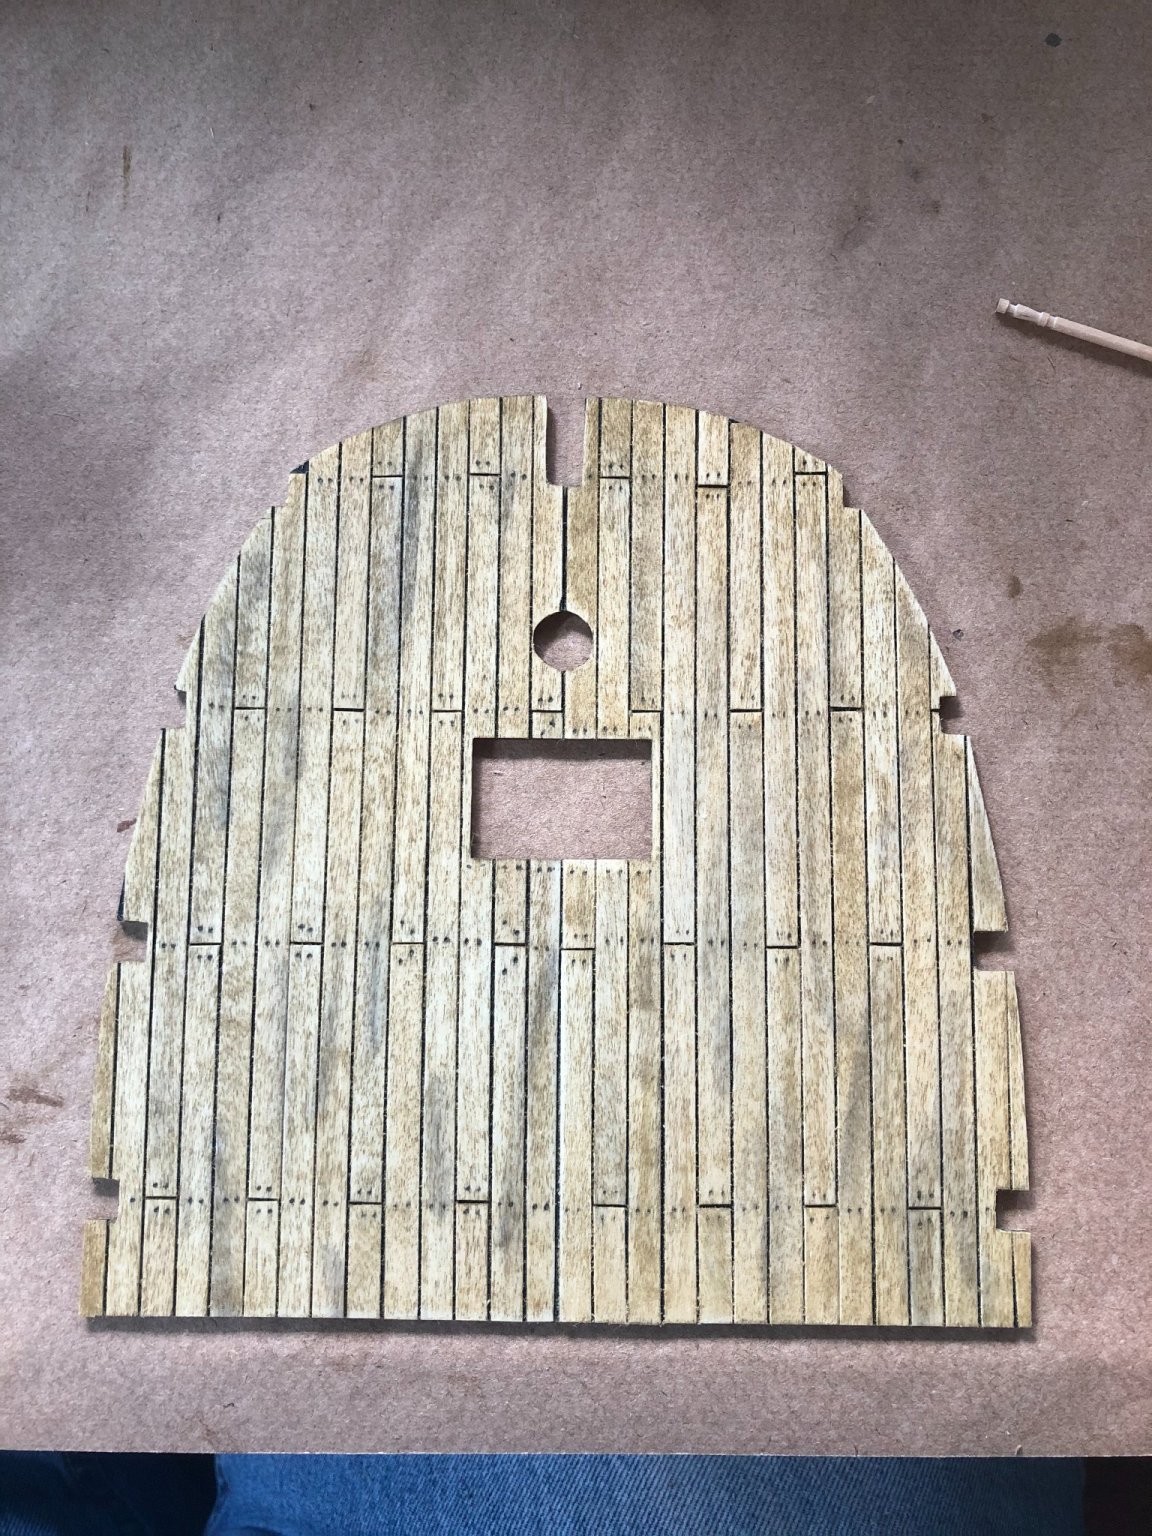
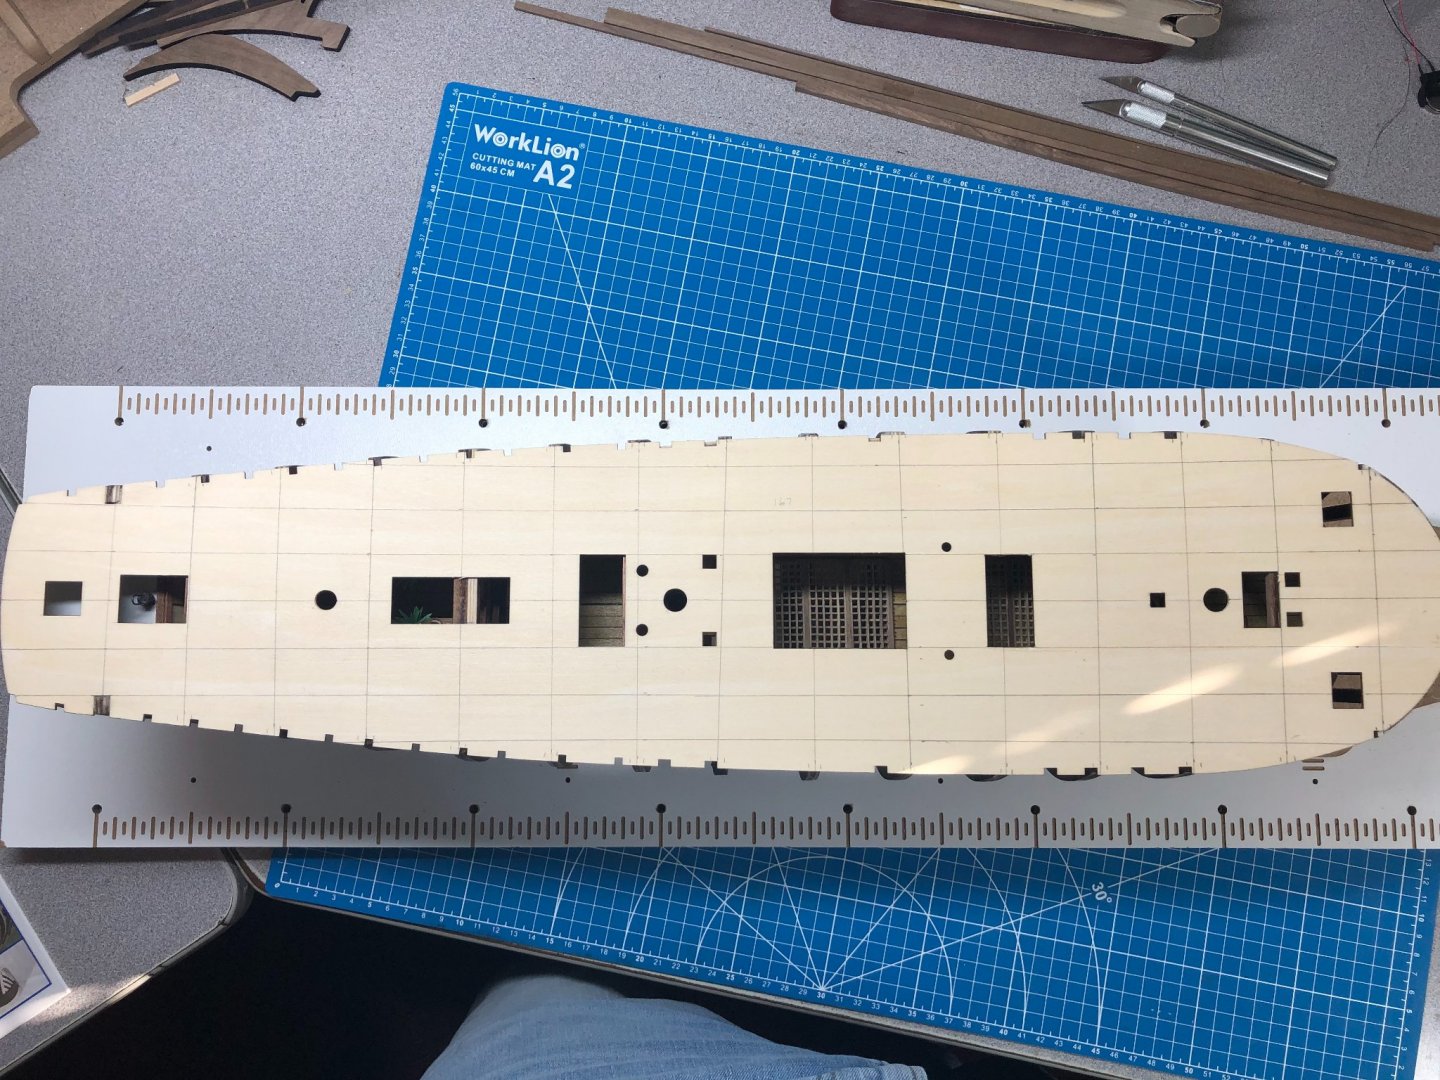
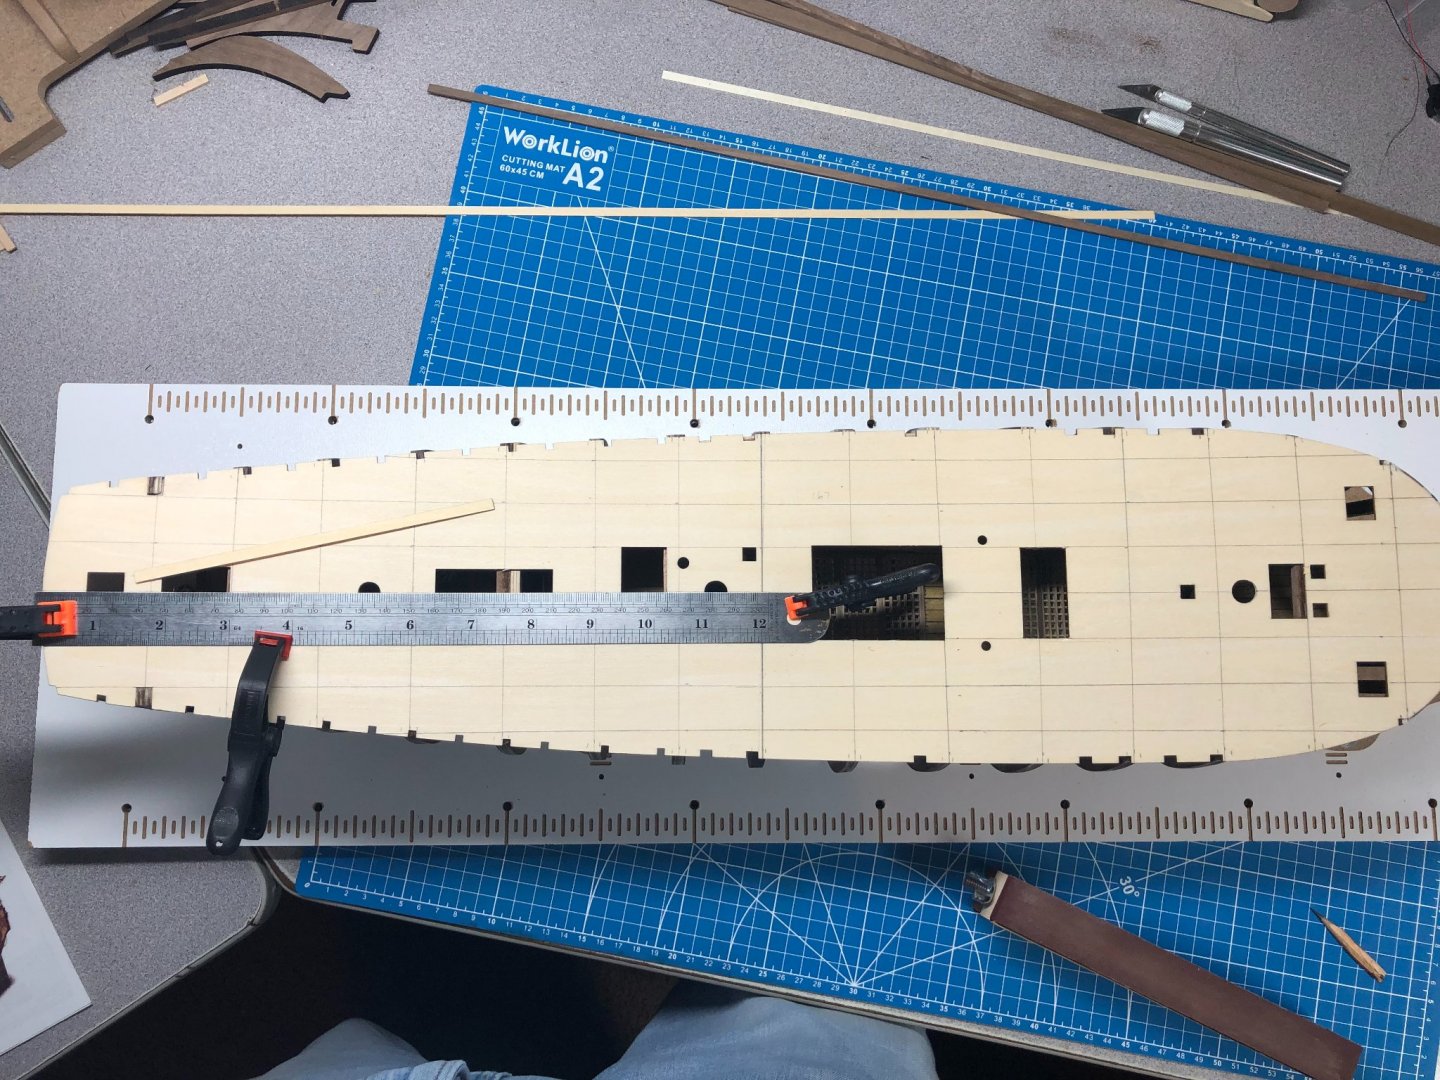
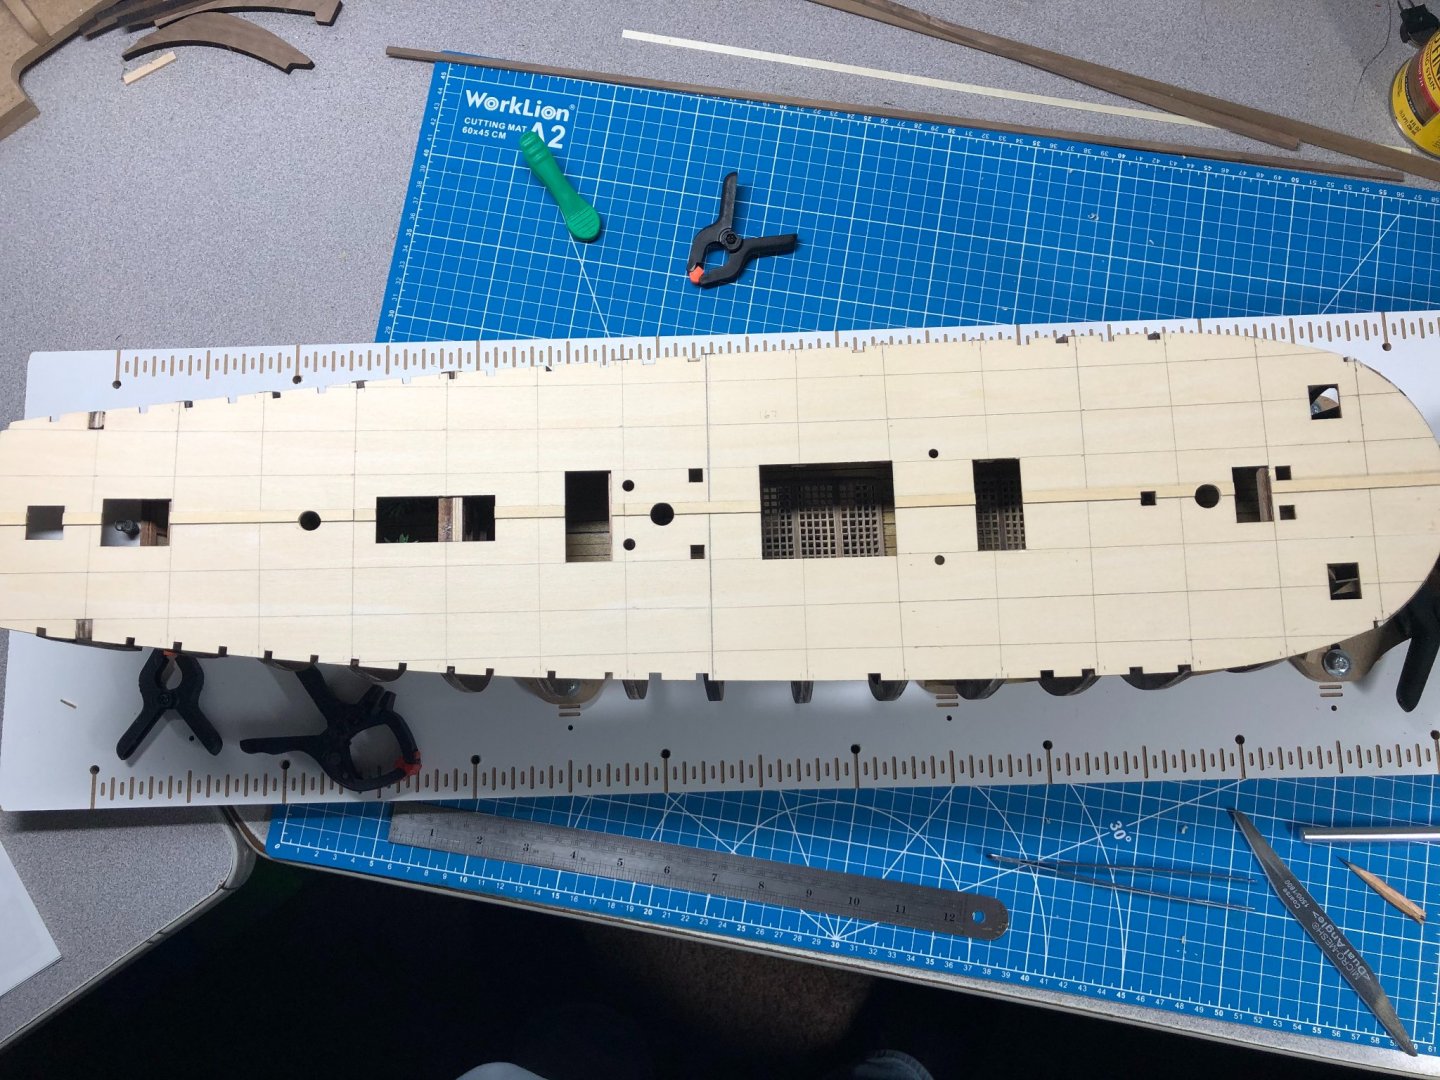
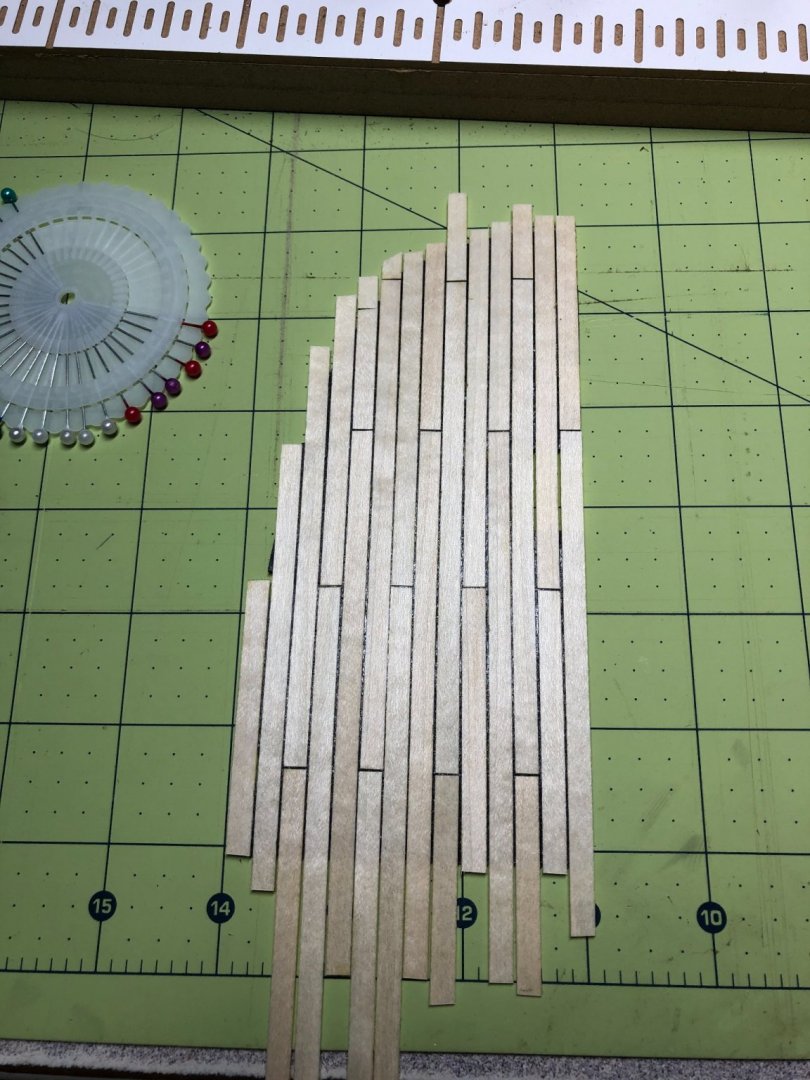
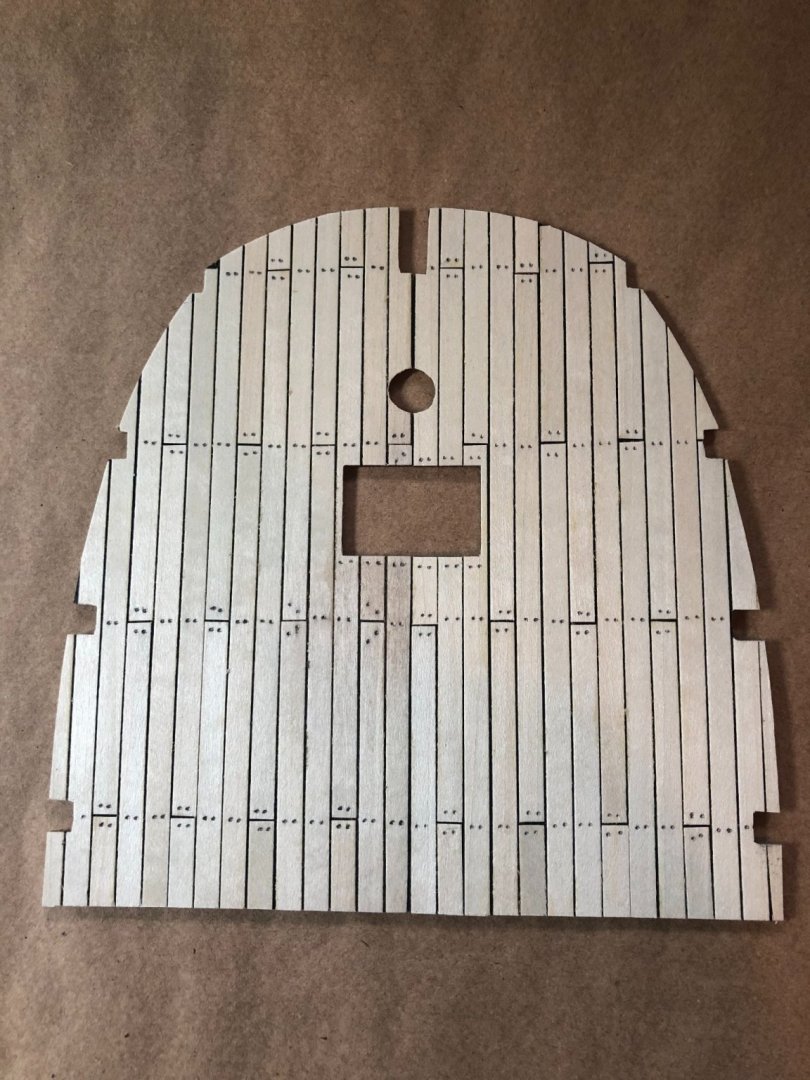
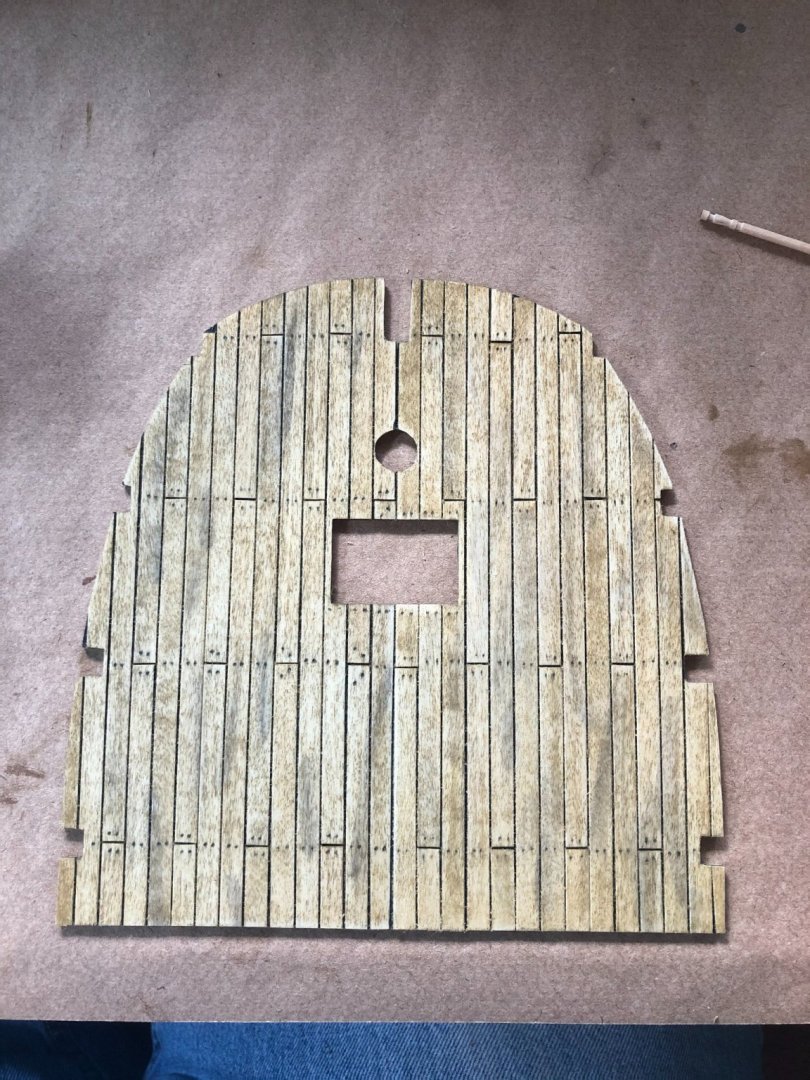
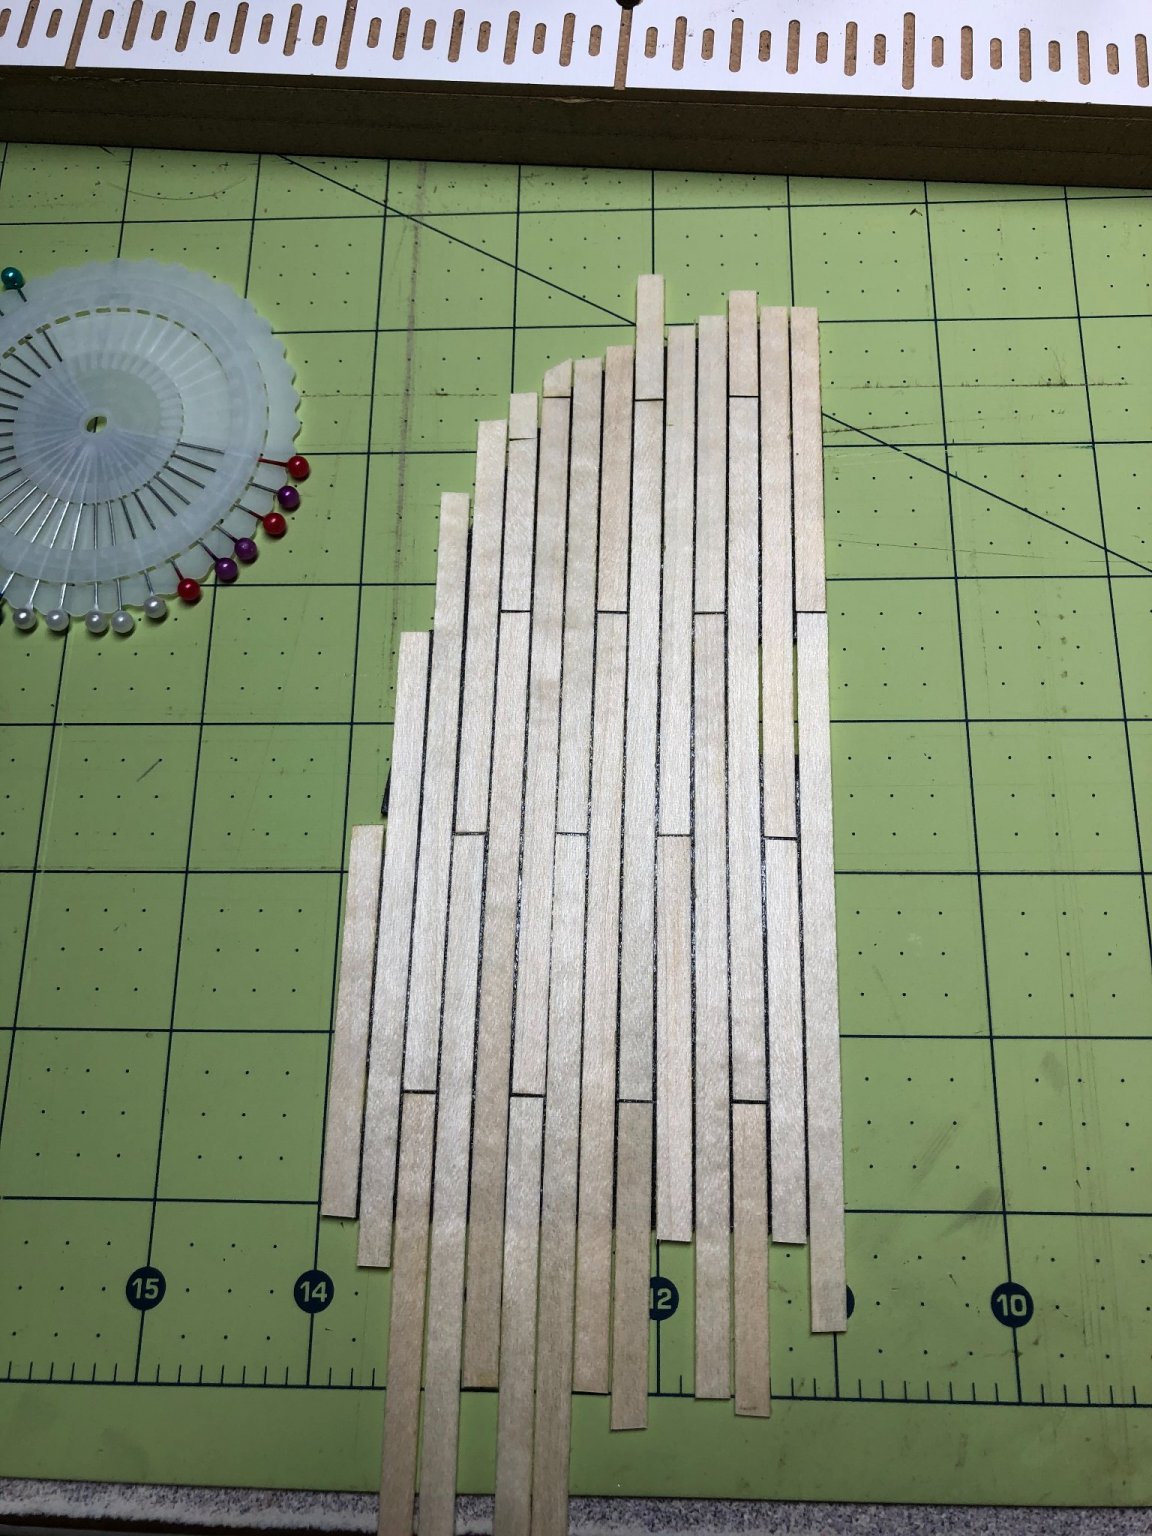
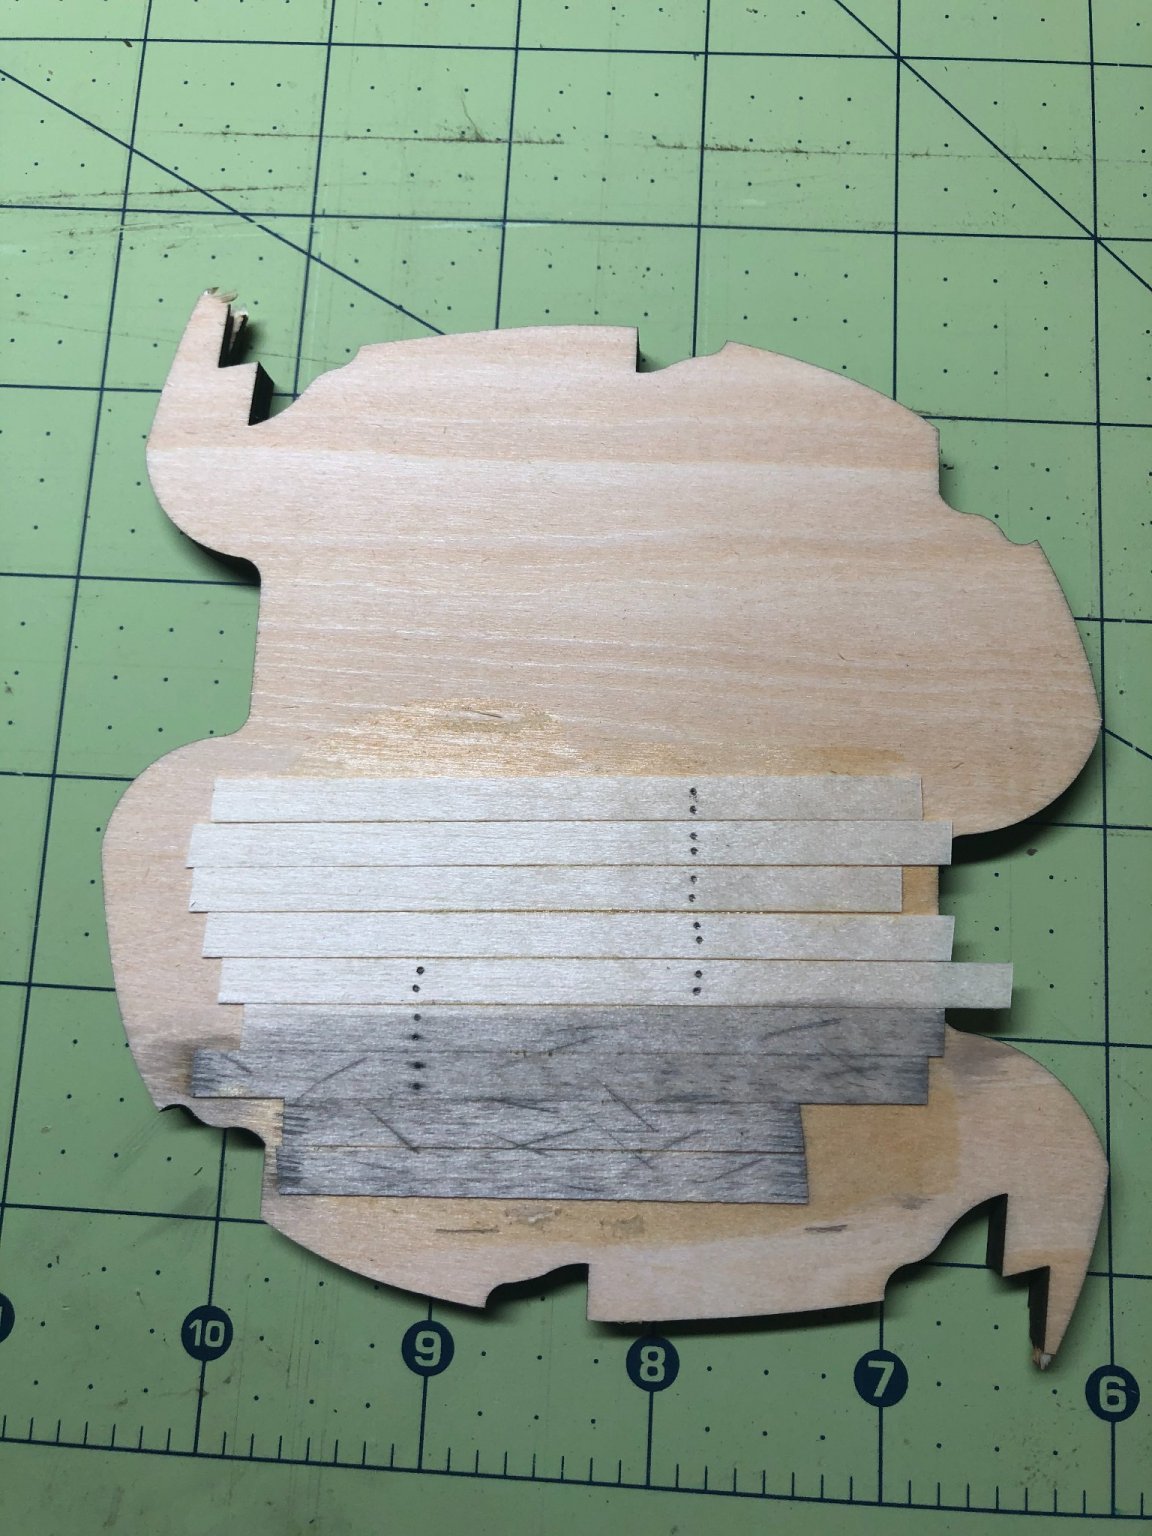
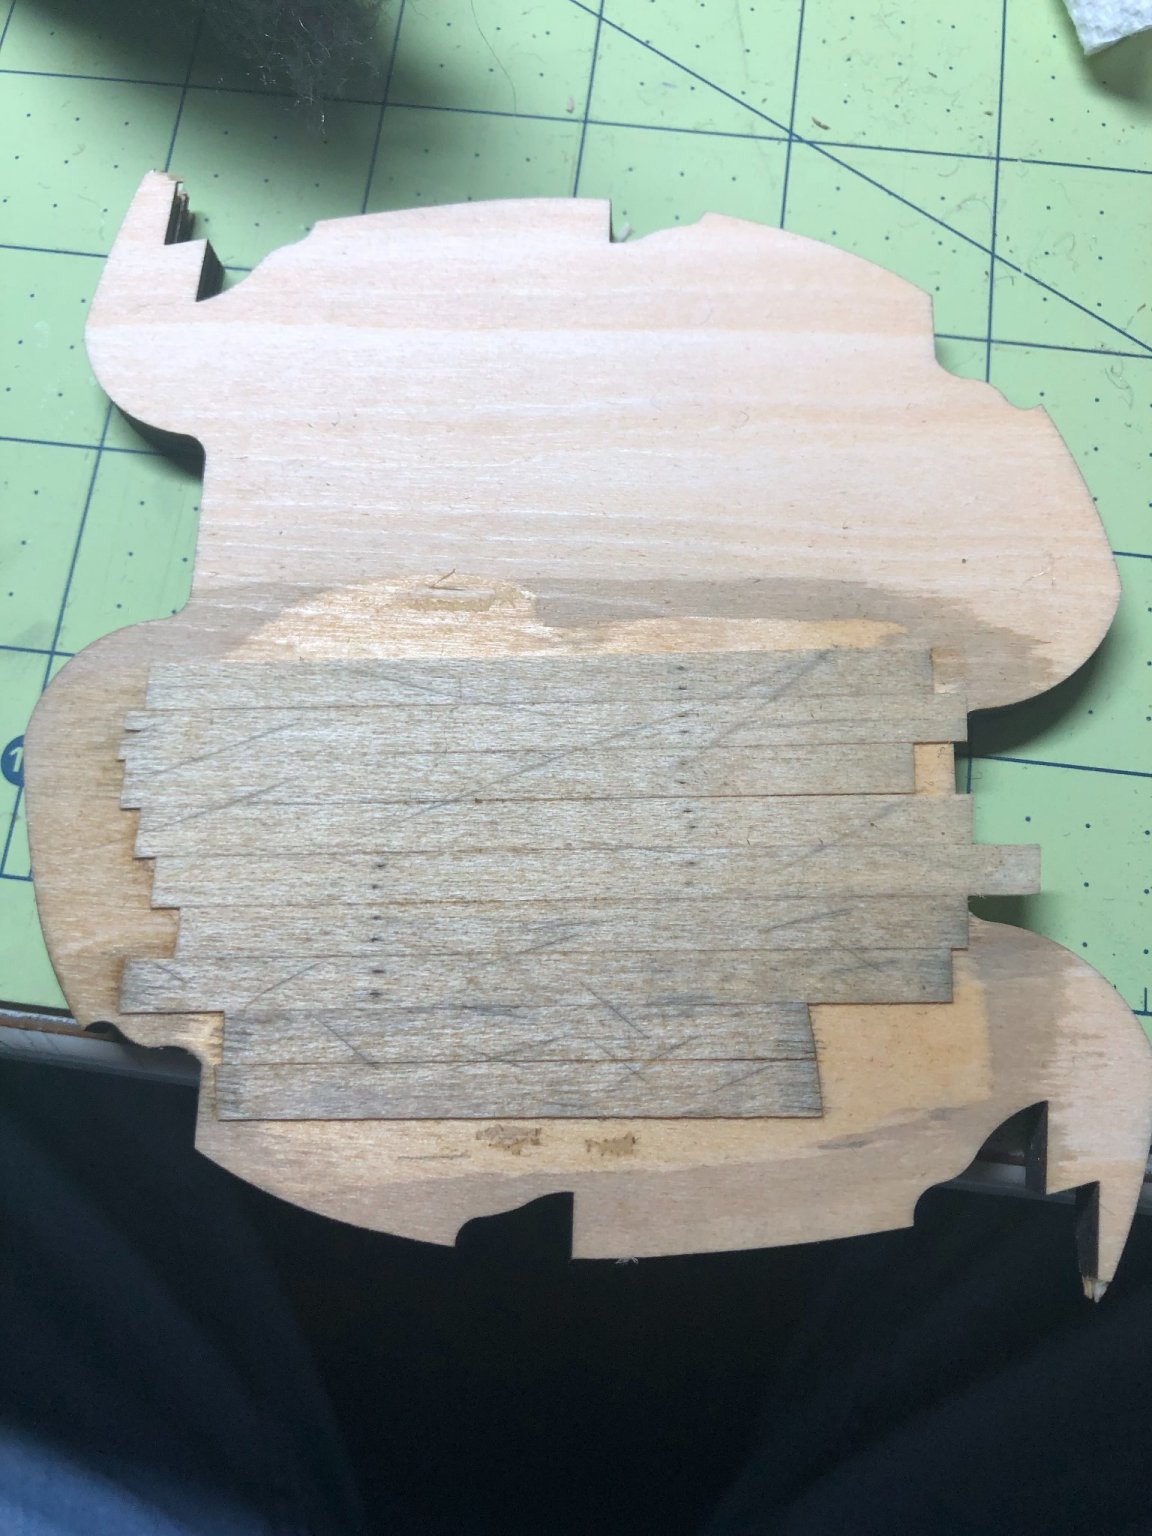
The lower deck section are next! Consistent with many models, there is a false deck that must be "planked" before installation. There are more methods than I can begin to list for performing the planking of the deck. I think the final expected "look" can make a difference on which method is chosen. As I noted earlier in the log, I plan to "age" or "weather" the model throughout the build. This area is my first trip into that realm! I painted the false deck black and spaced my planks approximately .5mm apart to simulate the caulking between planks. I also cut my planks to matched the beams below the deck. Trimming and treenail markings next: I did a some experimenting with how I wanted the treenail pattern to be throughout the ship. Because this deck is hidden enough to be unnoticeable, you can see my experimentation! Obviously, I settled on the side-by-side pattern and the decking on a three butt pattern... not as noticeable on these smaller deck sections. Aging and weather was a completely new concept to me and I did a ton of reading and looking at other work. I experimented with some leftover plank pieces trying for the right "look". Not quite right and I didn't like the "scarring" effect. After much head scratching and wasting a lot of planking material...! I settled on a system that I used on both the lower deck and the middle deck. The main deck will be different since it is exposed to the sun and weather. Here is the system I used and the supporting pictures: I used a Golden Oak gel stain and coated the entire deck with a medium coat and I immediately wiped it off with a clean rag: The wipe down helped reduce the depth of the color but also helped highlight the grain of the wood. After this dried, I added highlights and random "wear" with a black wash: This was allowed to dry and then I coated it with polyurethane. The stern section was handled the same way and I think I got pretty equal results: Once both sections had dried, they were installed on the frames and beams, ensuring proper alignment with the mast steps and the deck mast clamps. I glued the mast clamps with a very small amount of glue in case I need to adjust later. Now for some kit bashing! That's in my next post!


.thumb.jpg.19d97c8ae90ab2d39a0cae37bc70a1a2.jpg)


-
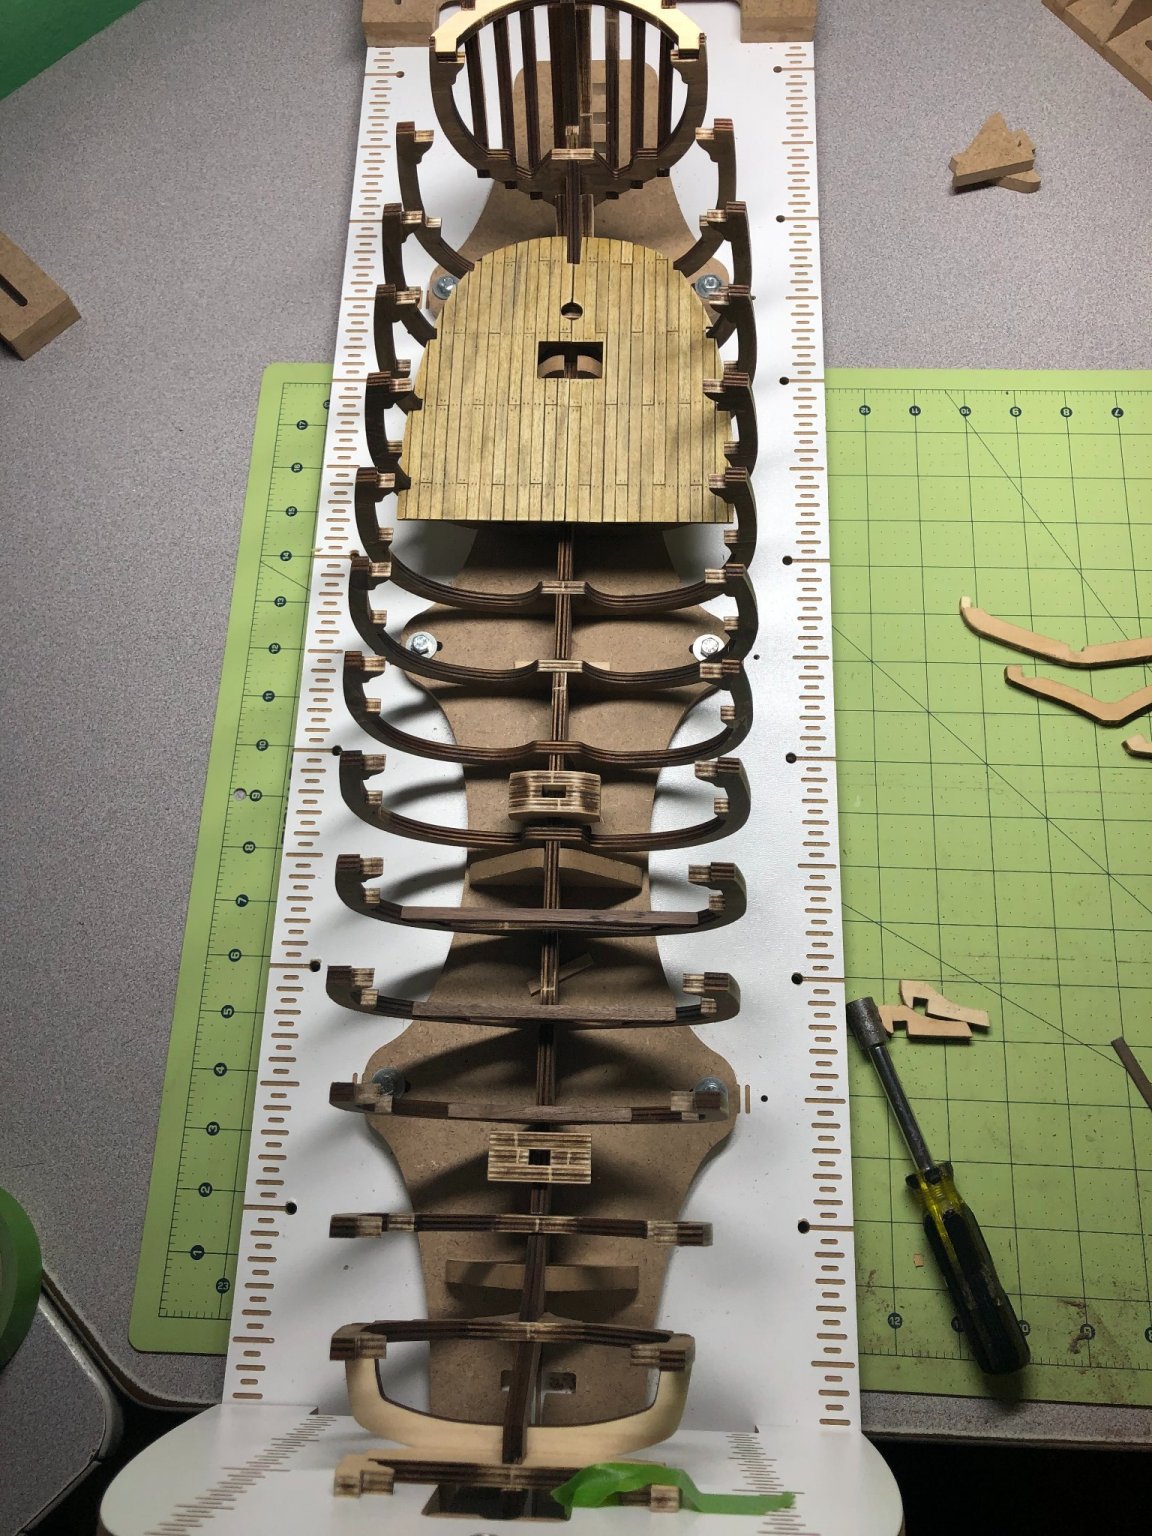
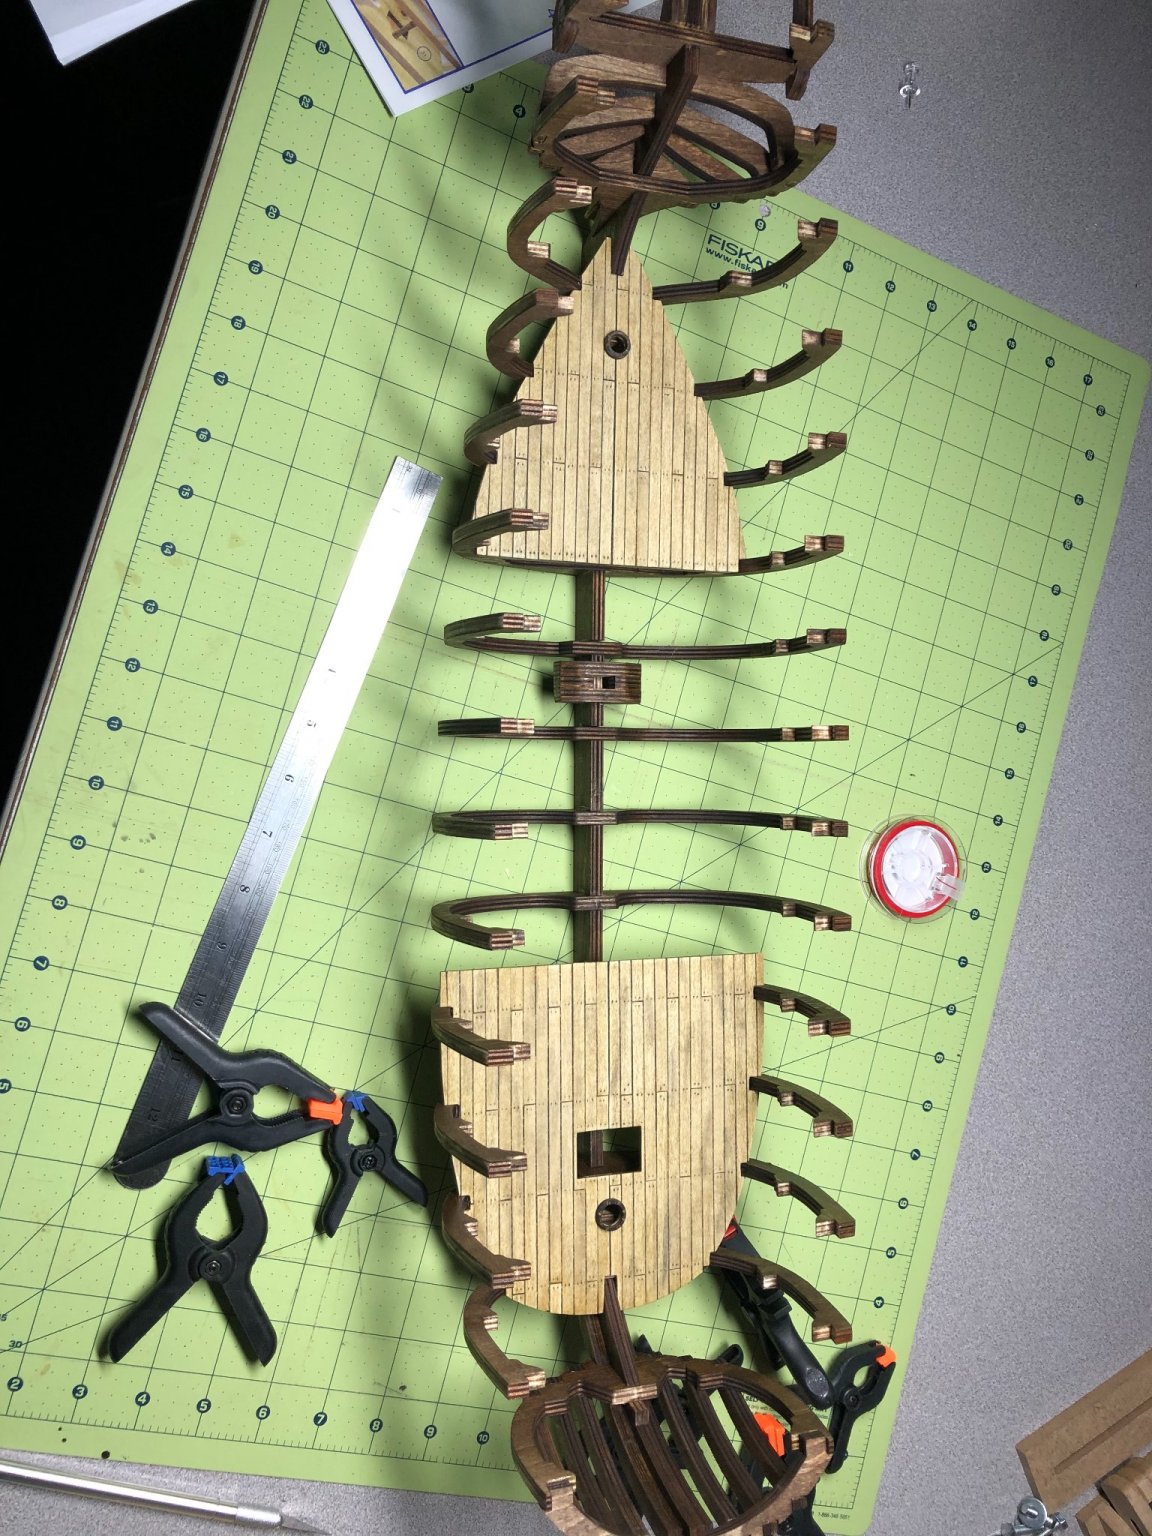
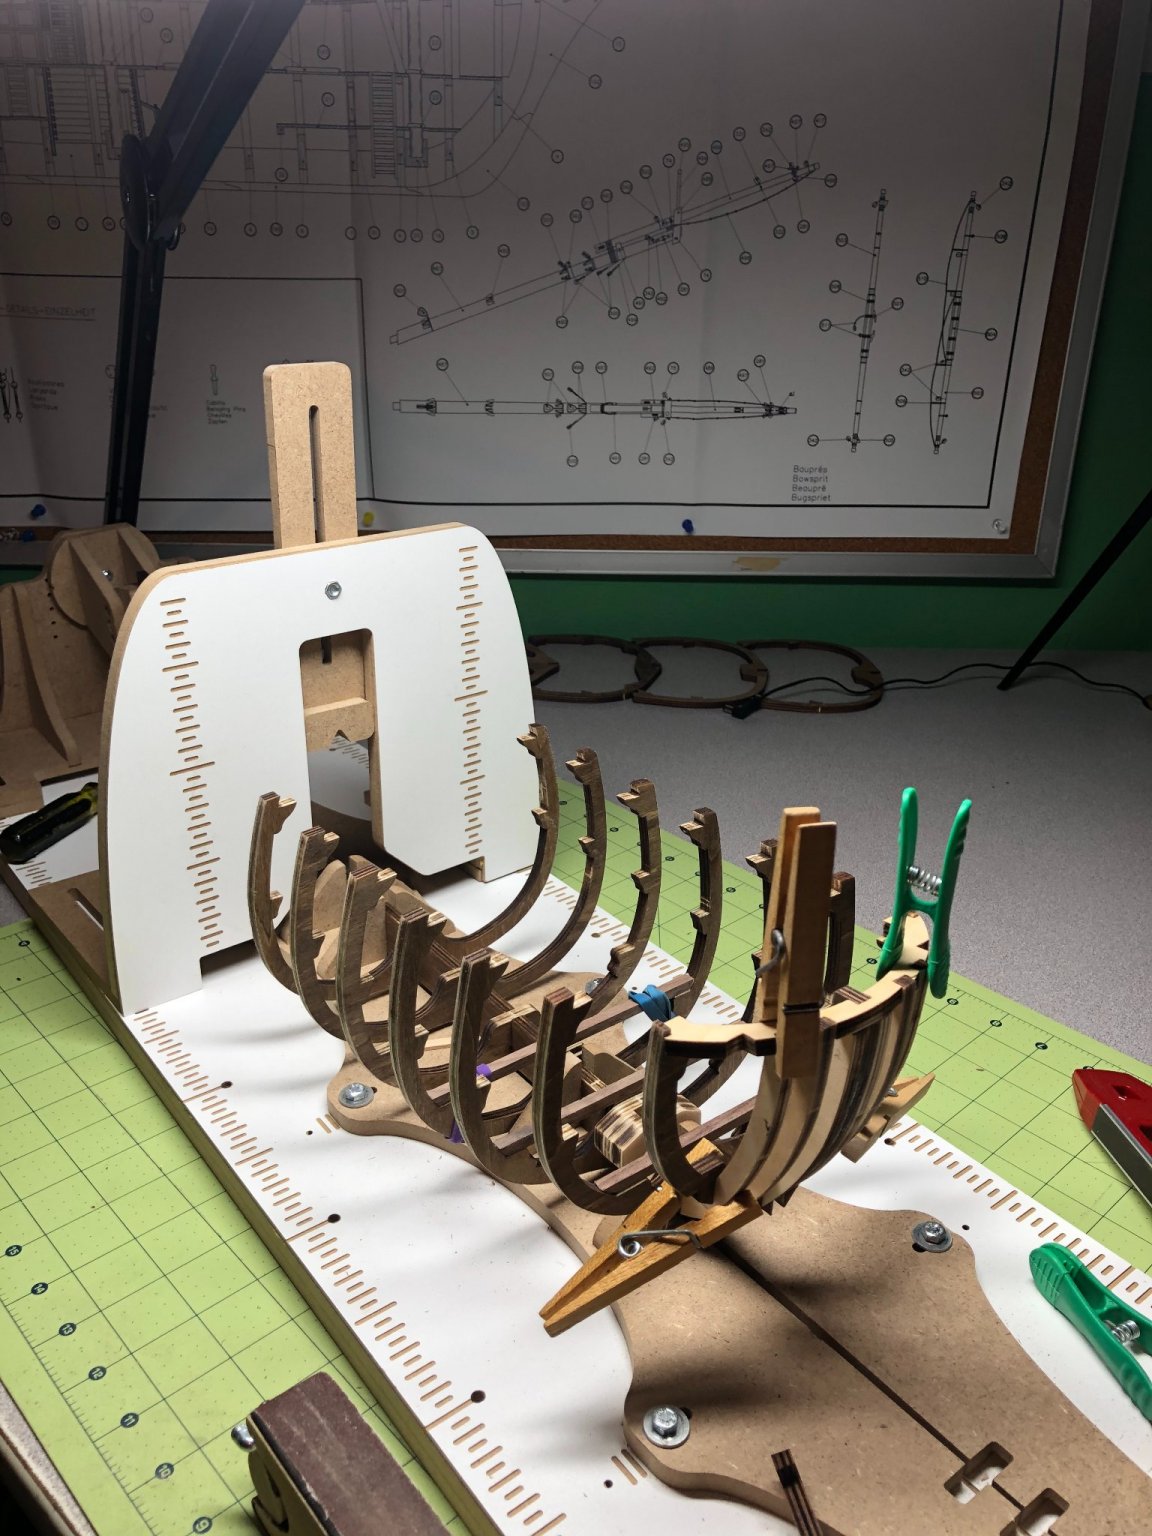
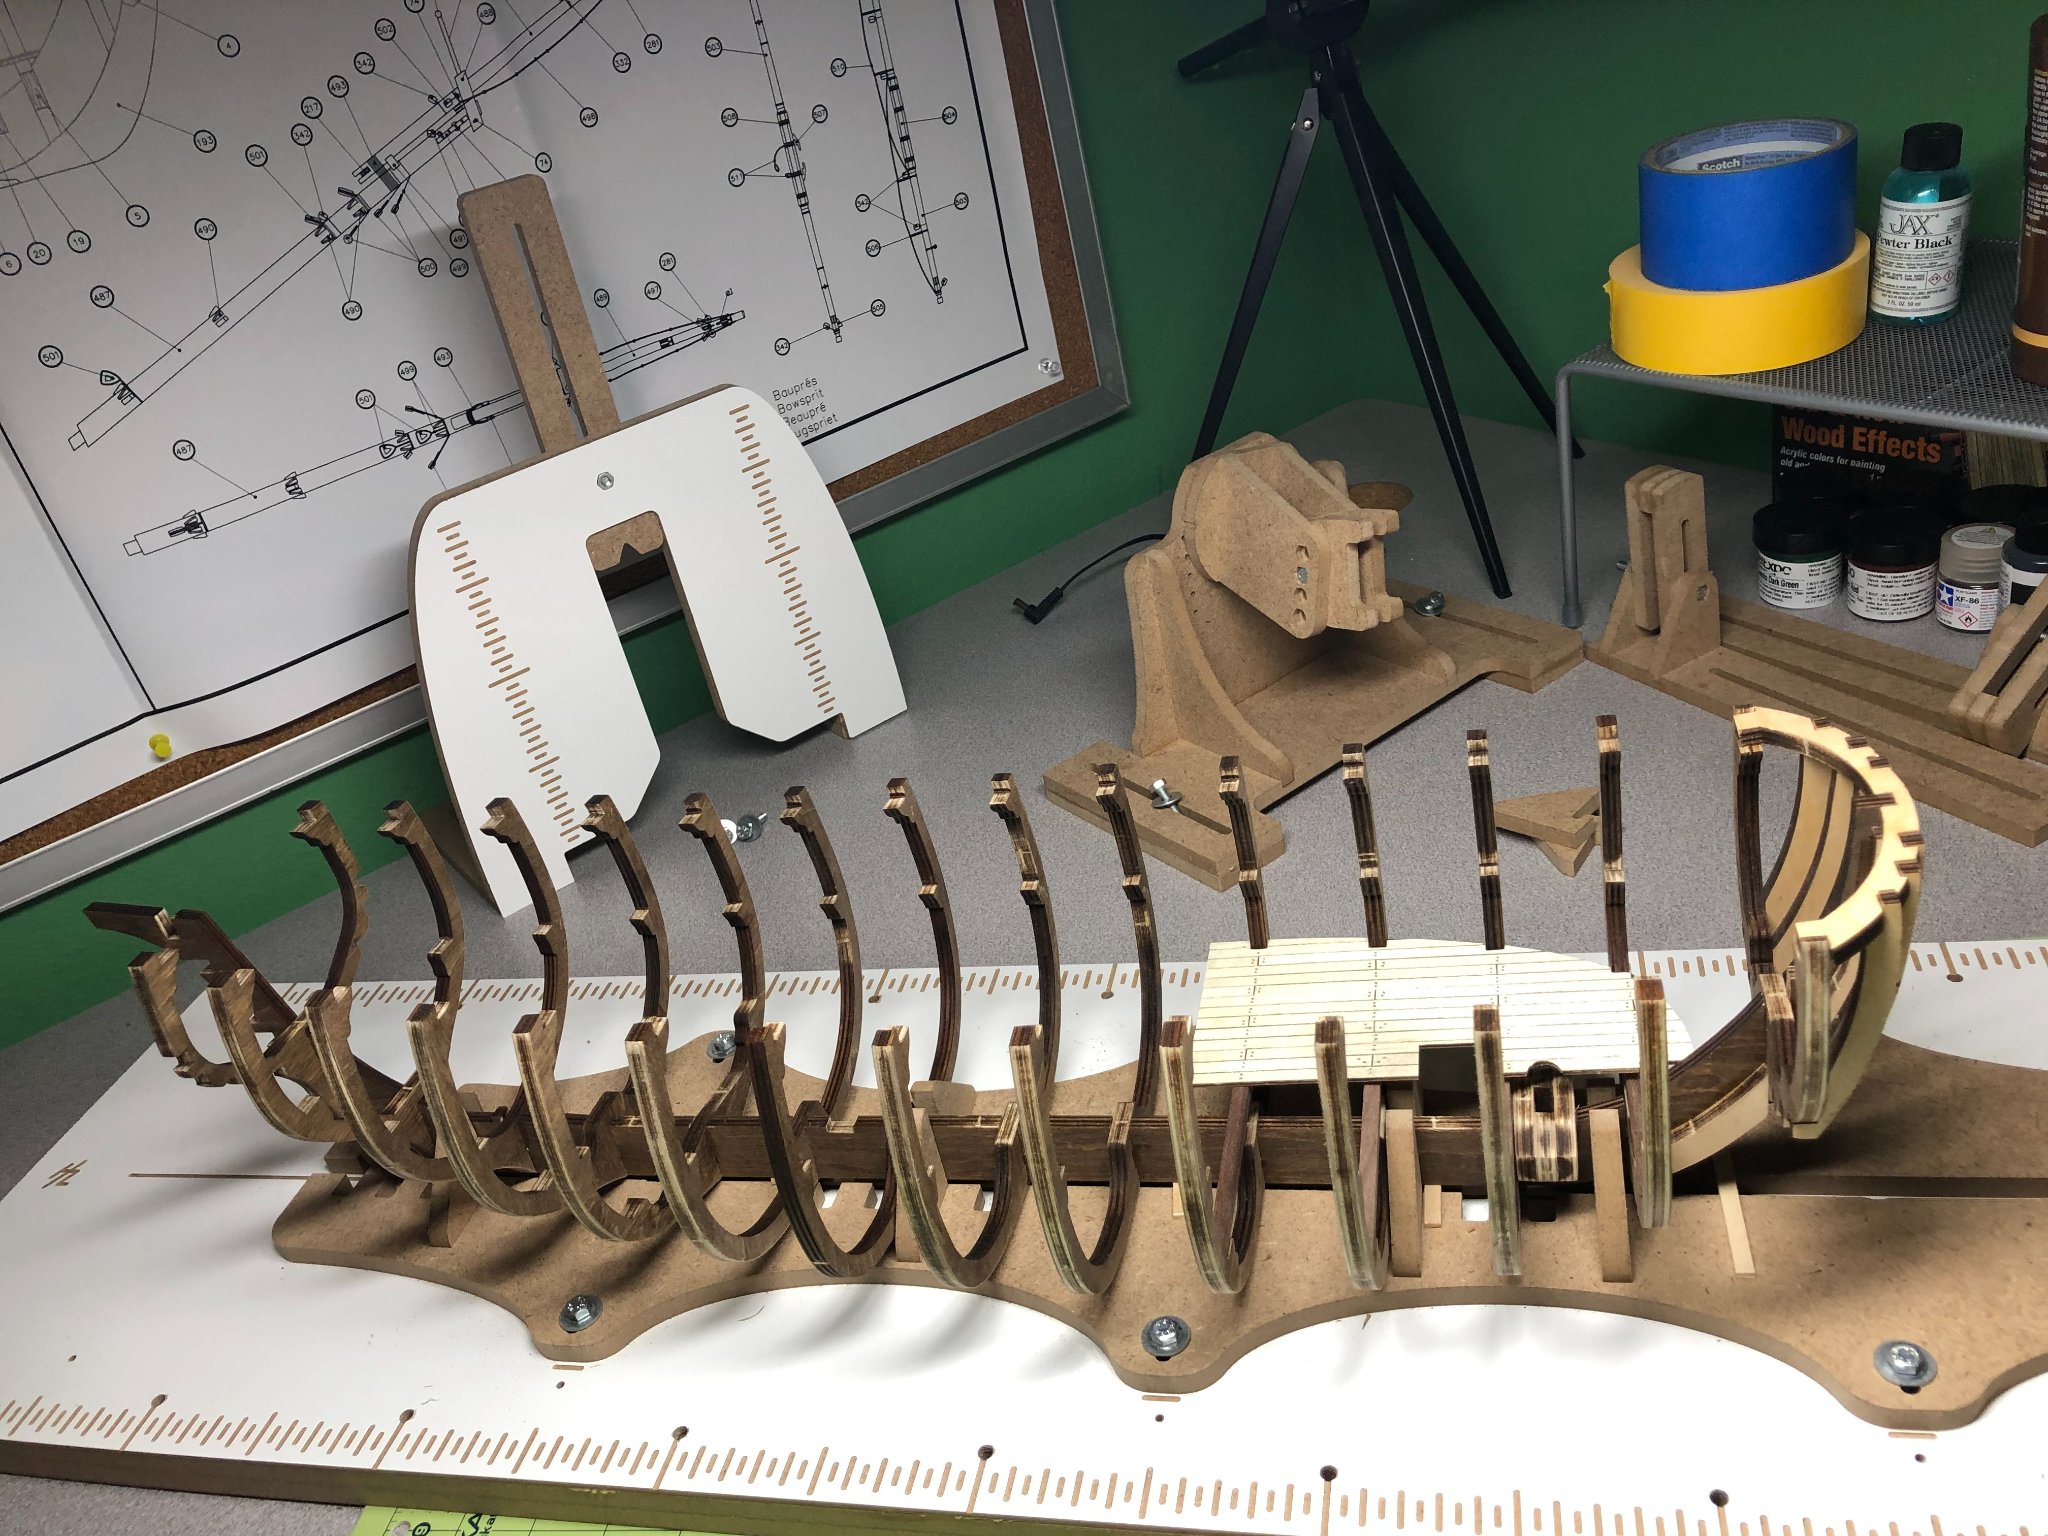
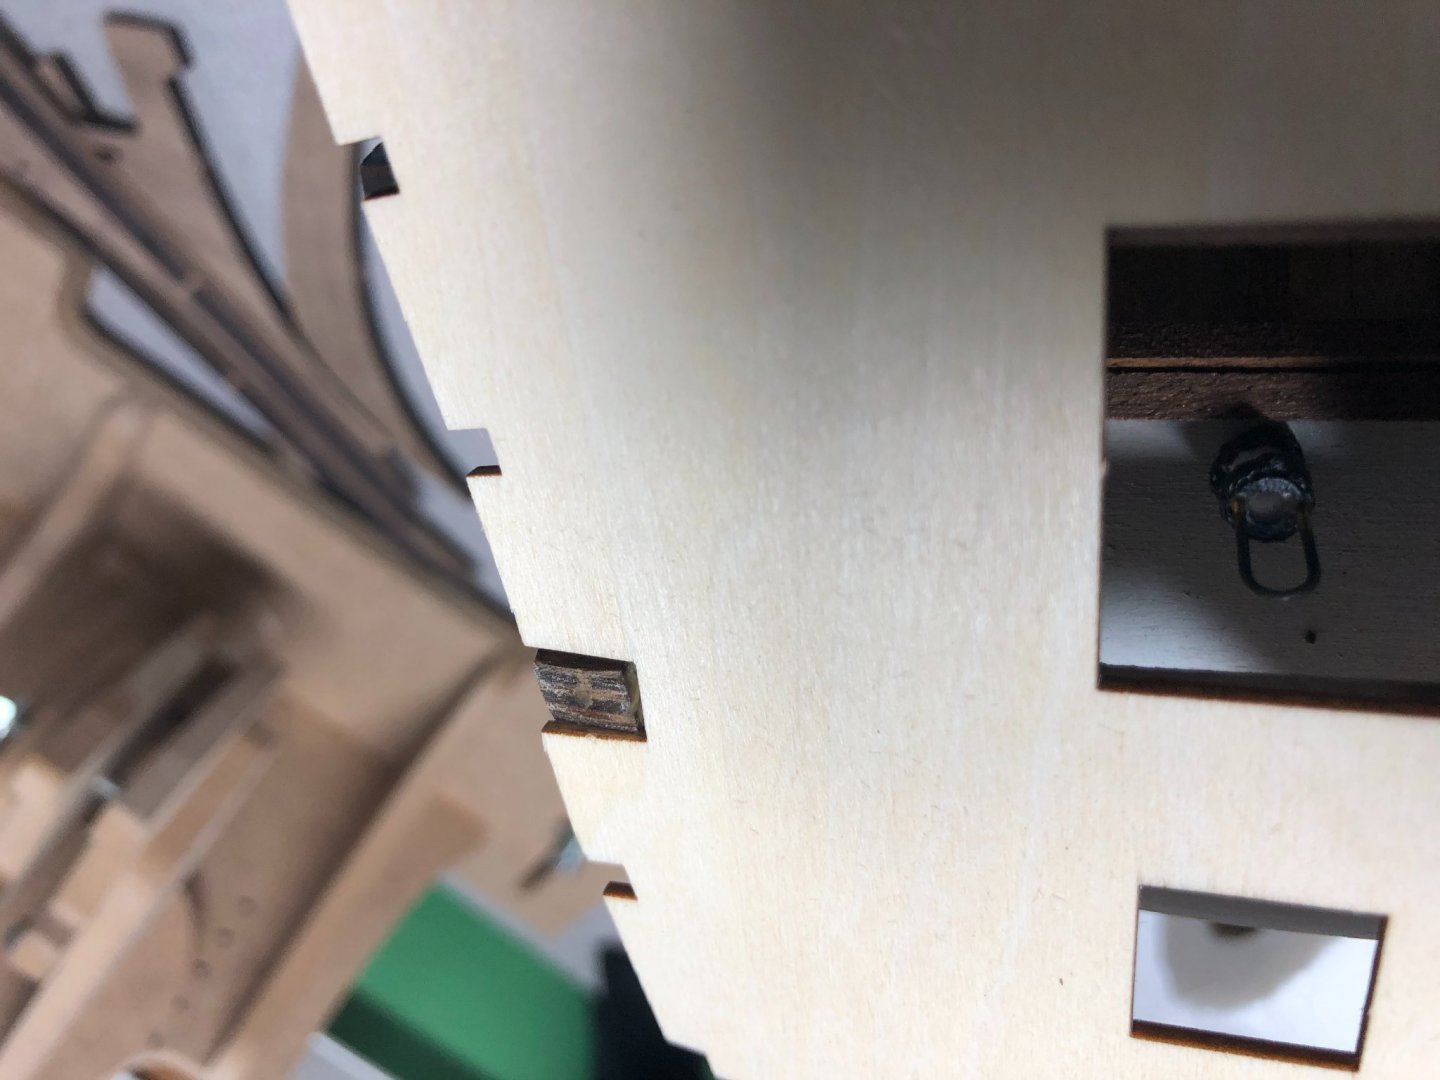
Moving along, a few things to mention regarding the frames and keel... Using the ship building slip helps to keep things straight but it does require a few shims under the keel to ensure the frames fit completely onto the keel section. I dry fitted every frame piece to ensure that was the case. As I stated earlier, these steps are important for the future alignment of the model! Frames going into place and the bow section pieced together: Additionally, the first of three mast steps is in place... disregard the lower deck piece, for now! I didn't have any other pictures of just the frame work! Once the frames are in place, the bow and stern frame work can be accomplished... pretty straight forward work. I had no problems but did have to sand and fit a few tight pieces. Nothing out of the ordinary. The beams for the lower deck are next. Again, straight forward work. A few things to mention, first, in a few logs I noticed some modelers did not take the time to index and inventory the parts prior to work. This could cause confusion during the construction and this is one place for that to happen. The lower and middle deck beams are cut from walnut stock and are not part of the pre-cut pieces (the main deck beams are pre-cut). The beams will need to be cut and sanded to fit, care must be taken to have a good fit but not too tight as a tight fit will spread the frames apart and cause problems later in the build. Also, the mast steps should be finished and placed before doing the lower deck beams. Nothing difficult about the mast steps just ensure that you place them correctly on the keel. The lower deck beams are only installed at the bow section and the stern section per the instructions. Next up is the lower deck sections.


.jpg.94de54f6c0de5afaa30d92b839decbf4.jpg)