


DanielD
-
Posts
624 -
Joined
-
Last visited
Content Type
Profiles
Forums
Gallery
Events
Posts posted by DanielD
-
-
Once I had the first sail done, the next one took a fraction of the time. Here is the mizzen driver.
- Ryland Craze, clearway and HakeZou
-
 3
3
-
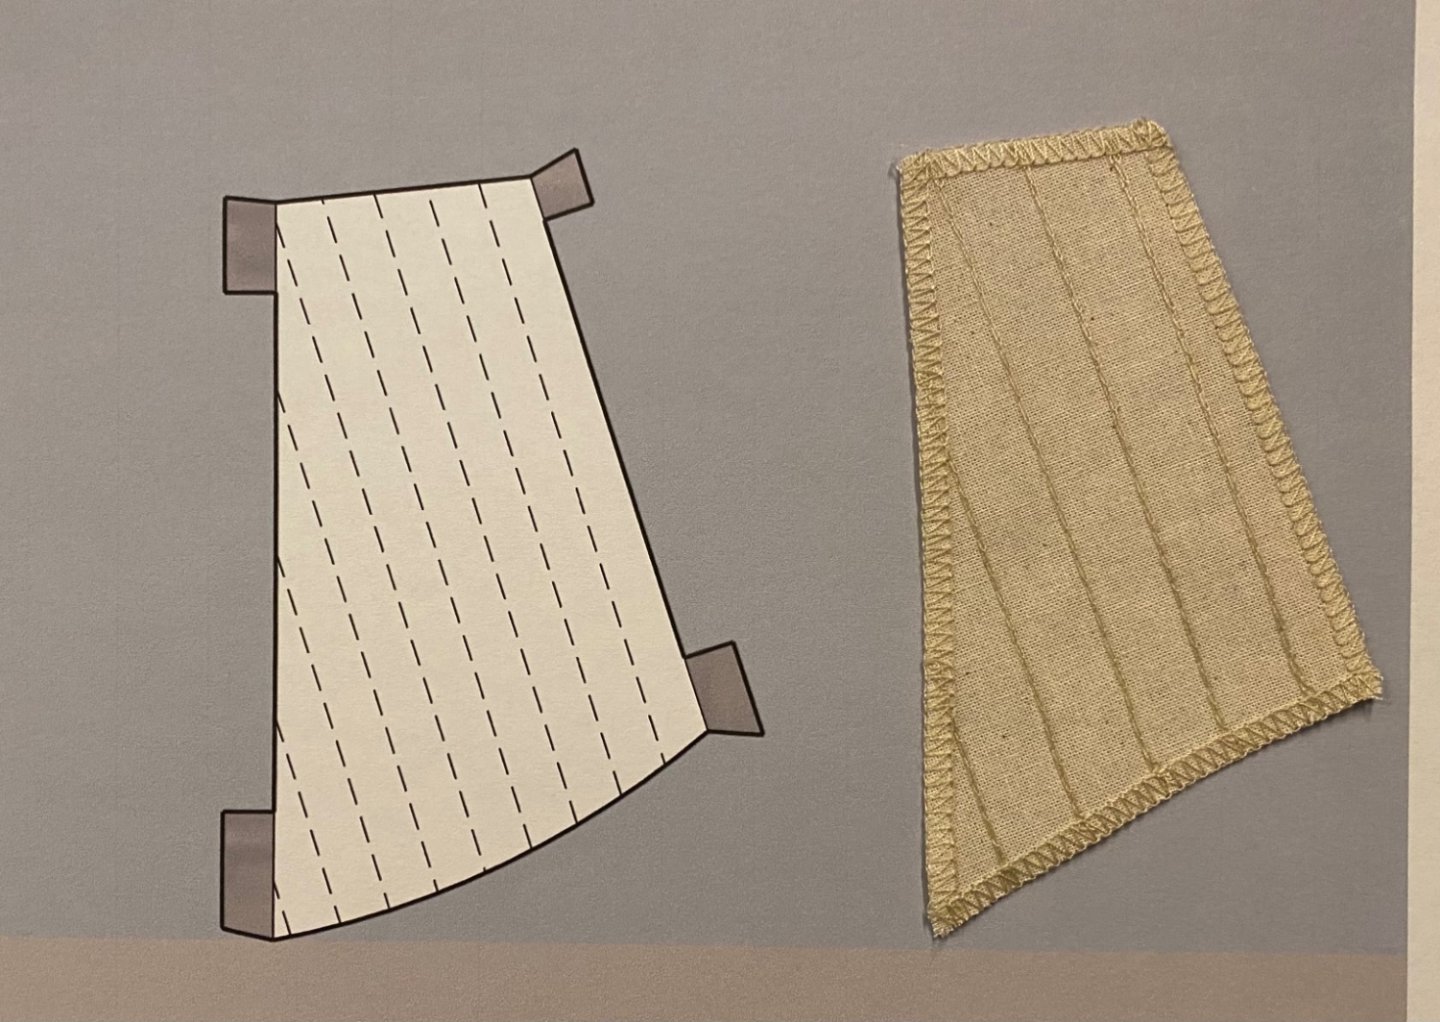
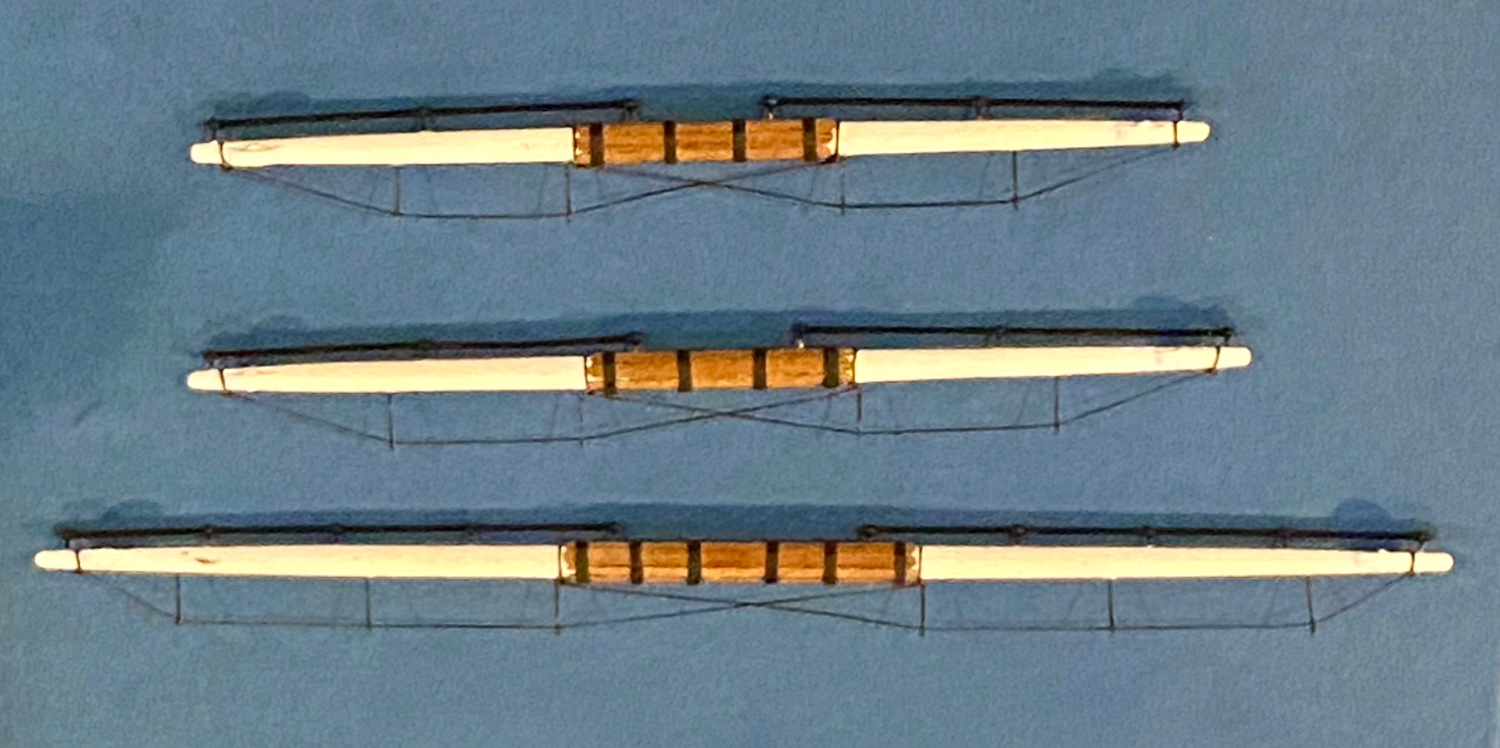
Good evening, today I finished up the yards for my HMS Terror and started on the next project…the sails. I have put so much time and effort into this model to make her as accurate as my skill level will allow, that using the out of scale sails that came with the kit seems like a slap in the face. So, I have decided to make my own sails based almost entirely out of Lees The Masting and Rigging of English Ships of War 1625-1860.
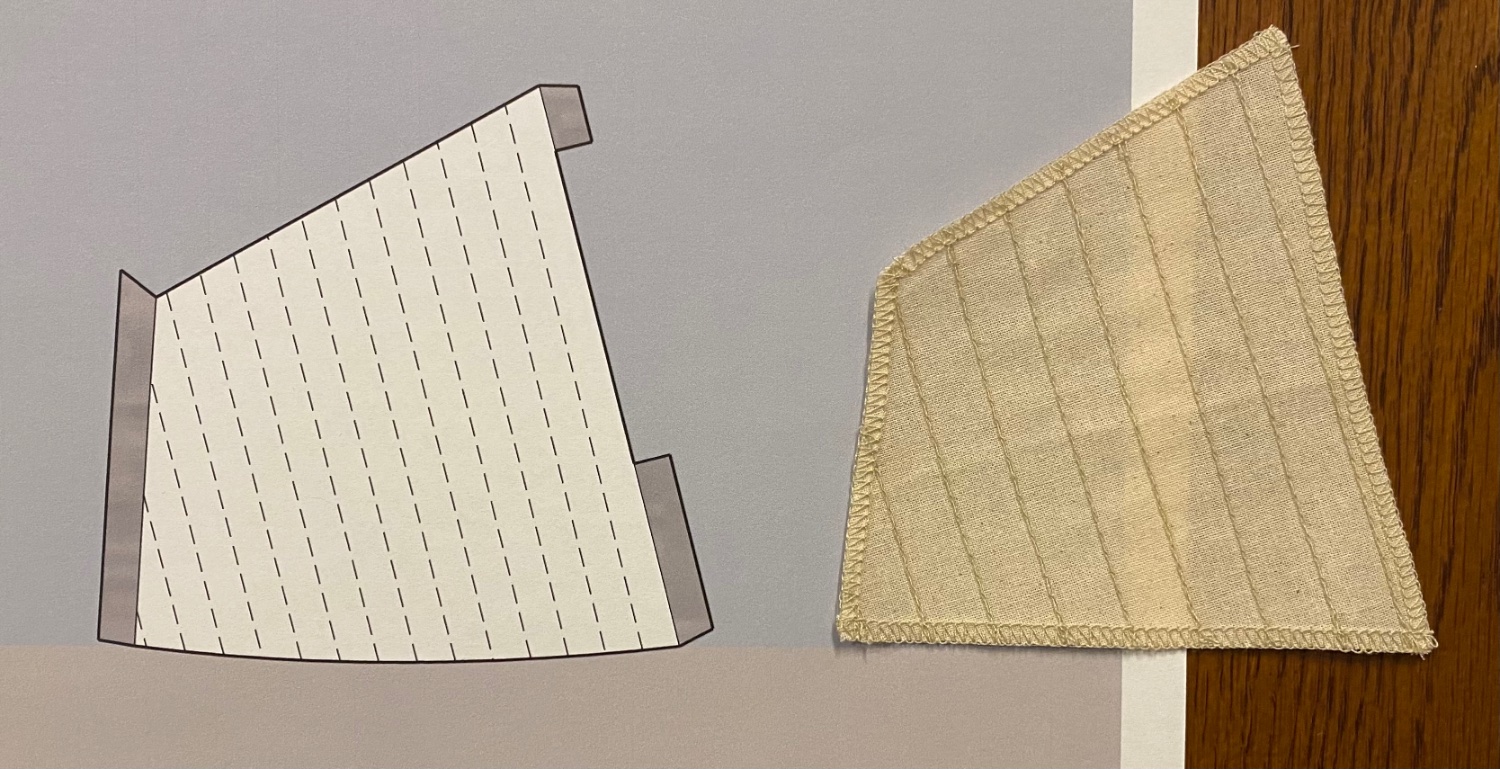
Step 1: create a pattern to scale including the necessary corner or edge reinforcements. Below is my initial pattern for the mizzen driver (spanker) sail as compared to the kit version. The major difference is the panel seams.

- Ryland Craze, clearway and HakeZou
-
3
-
8 hours ago, iMustBeCrazy said:
Strangely I have a Dime sitting on my desk, it's a long way from home, before I picked it up I was visualizing a Nickle 😮 What size is the compass, 1/4" square? I must be crazy but you guys are nuts! All of you.
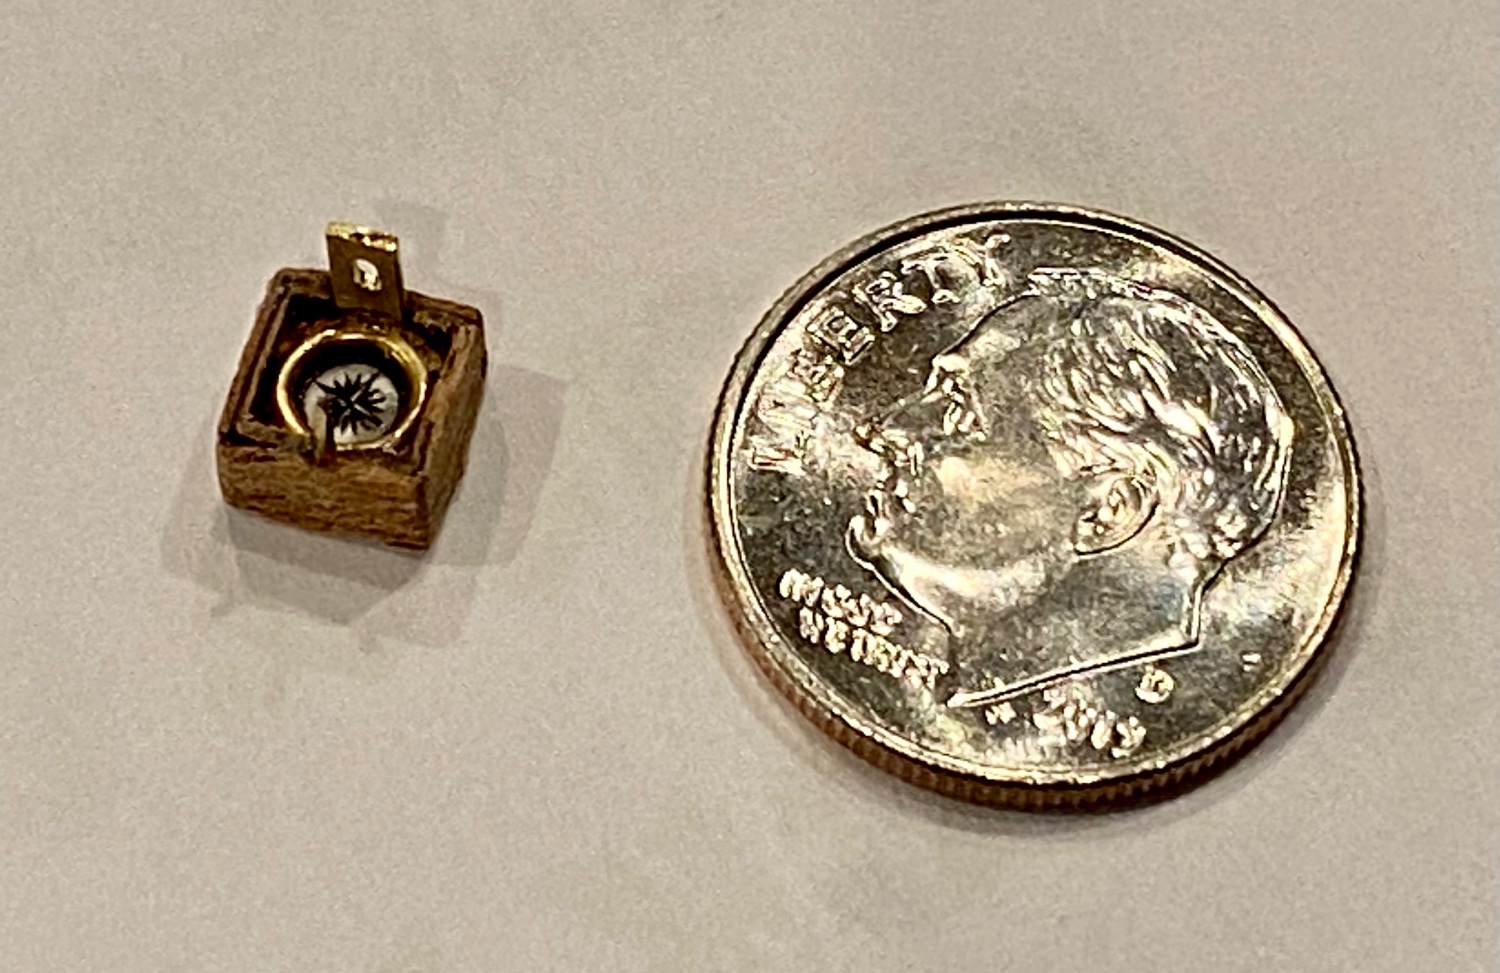
I just might be crazy! The azimuth above is about 4.5-5mm square x 3mm high (3/16” square). To make the compass dial I found a TrueType font of just compass roses and printed one to scale. A little brass work (😂 see what I did there) and some trim pieces…yes, a bit crazy.
-
-
Thanks again to all the helpers in research for this wonderful ship HMS Terror!
Todays task, the azimuth that will sit on top of the mysterious post next to a US dime for comparison.

- clearway, Steven Brand and catopower
-
3
-
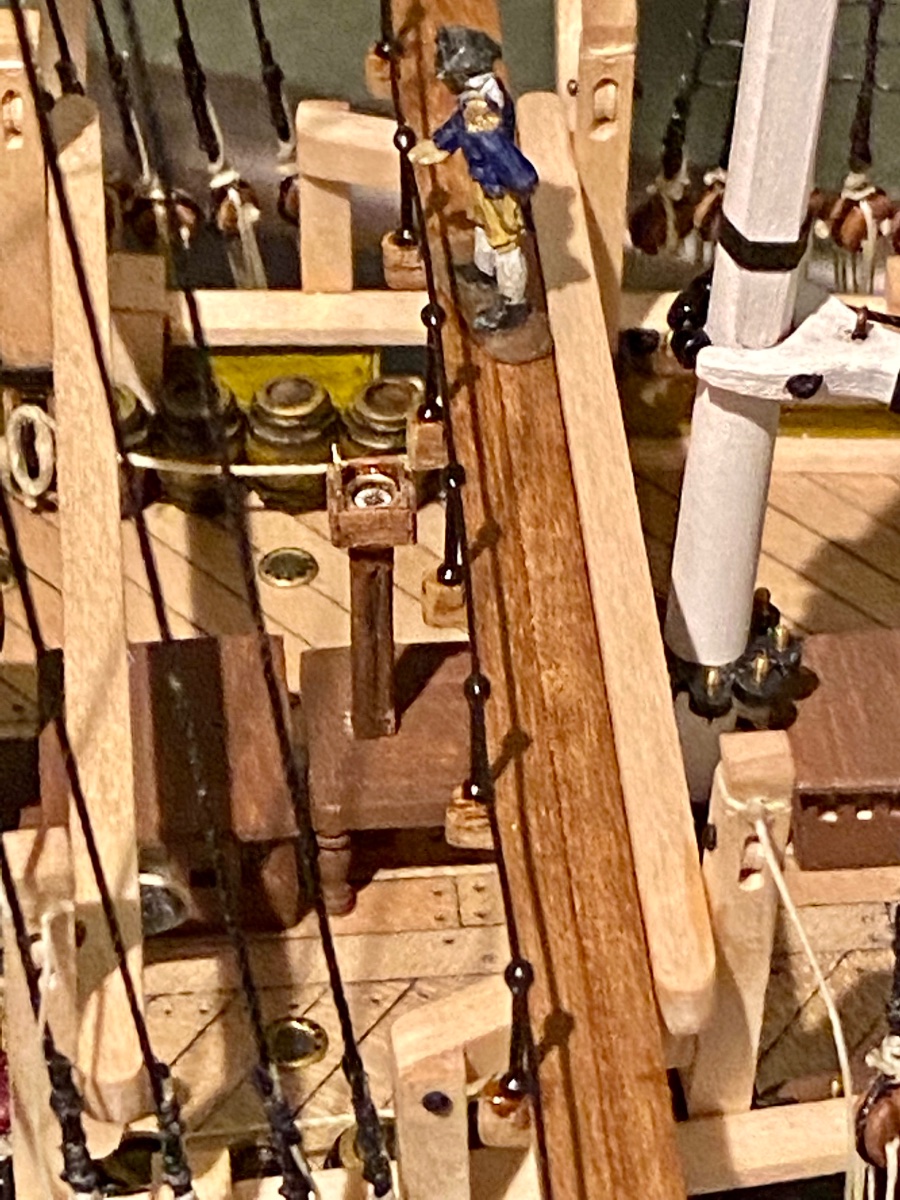
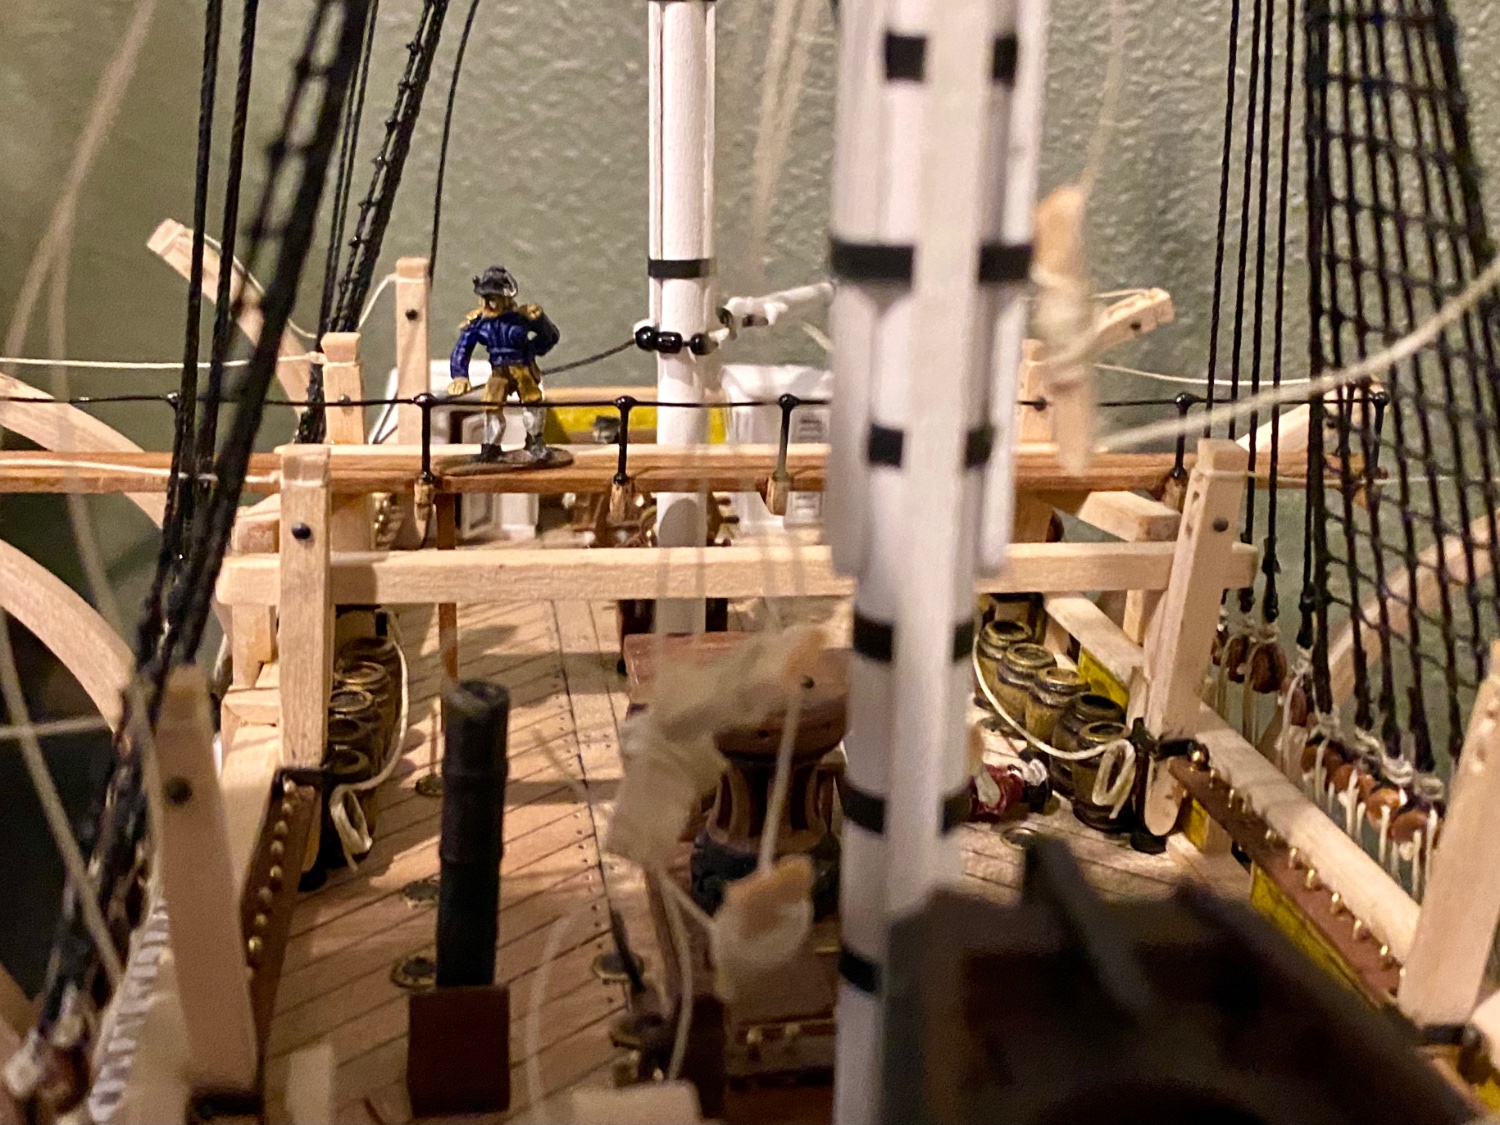
Now to build the strange post with azimuth on top.
-
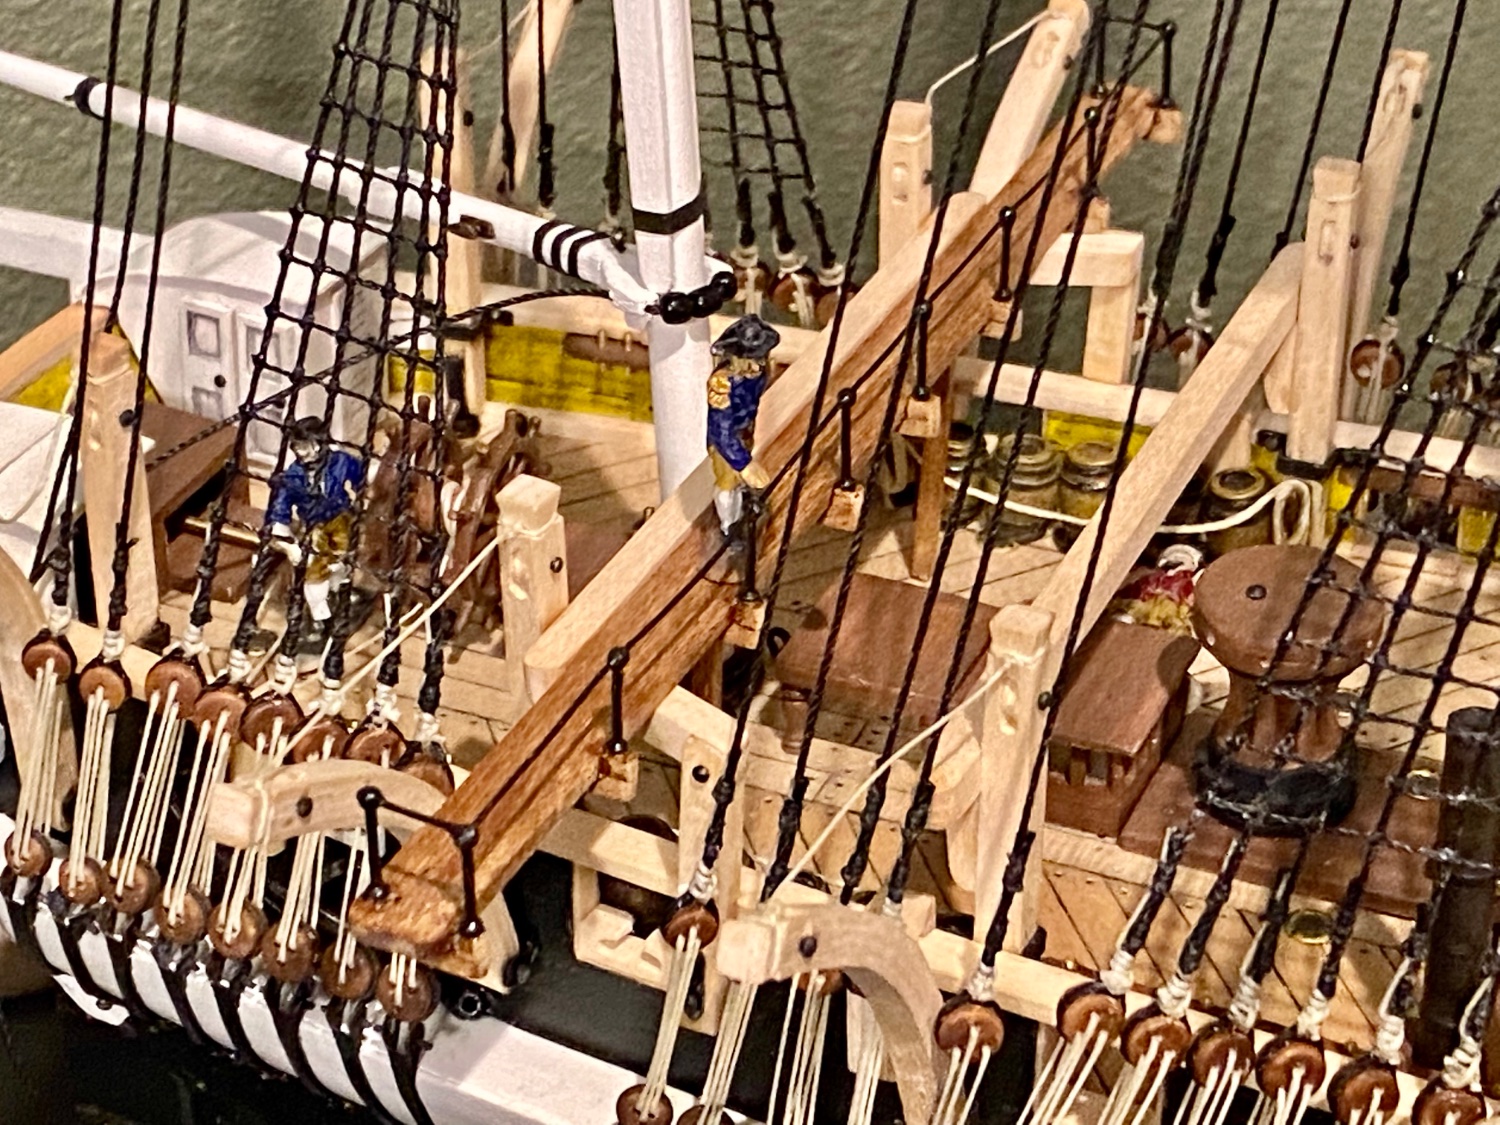
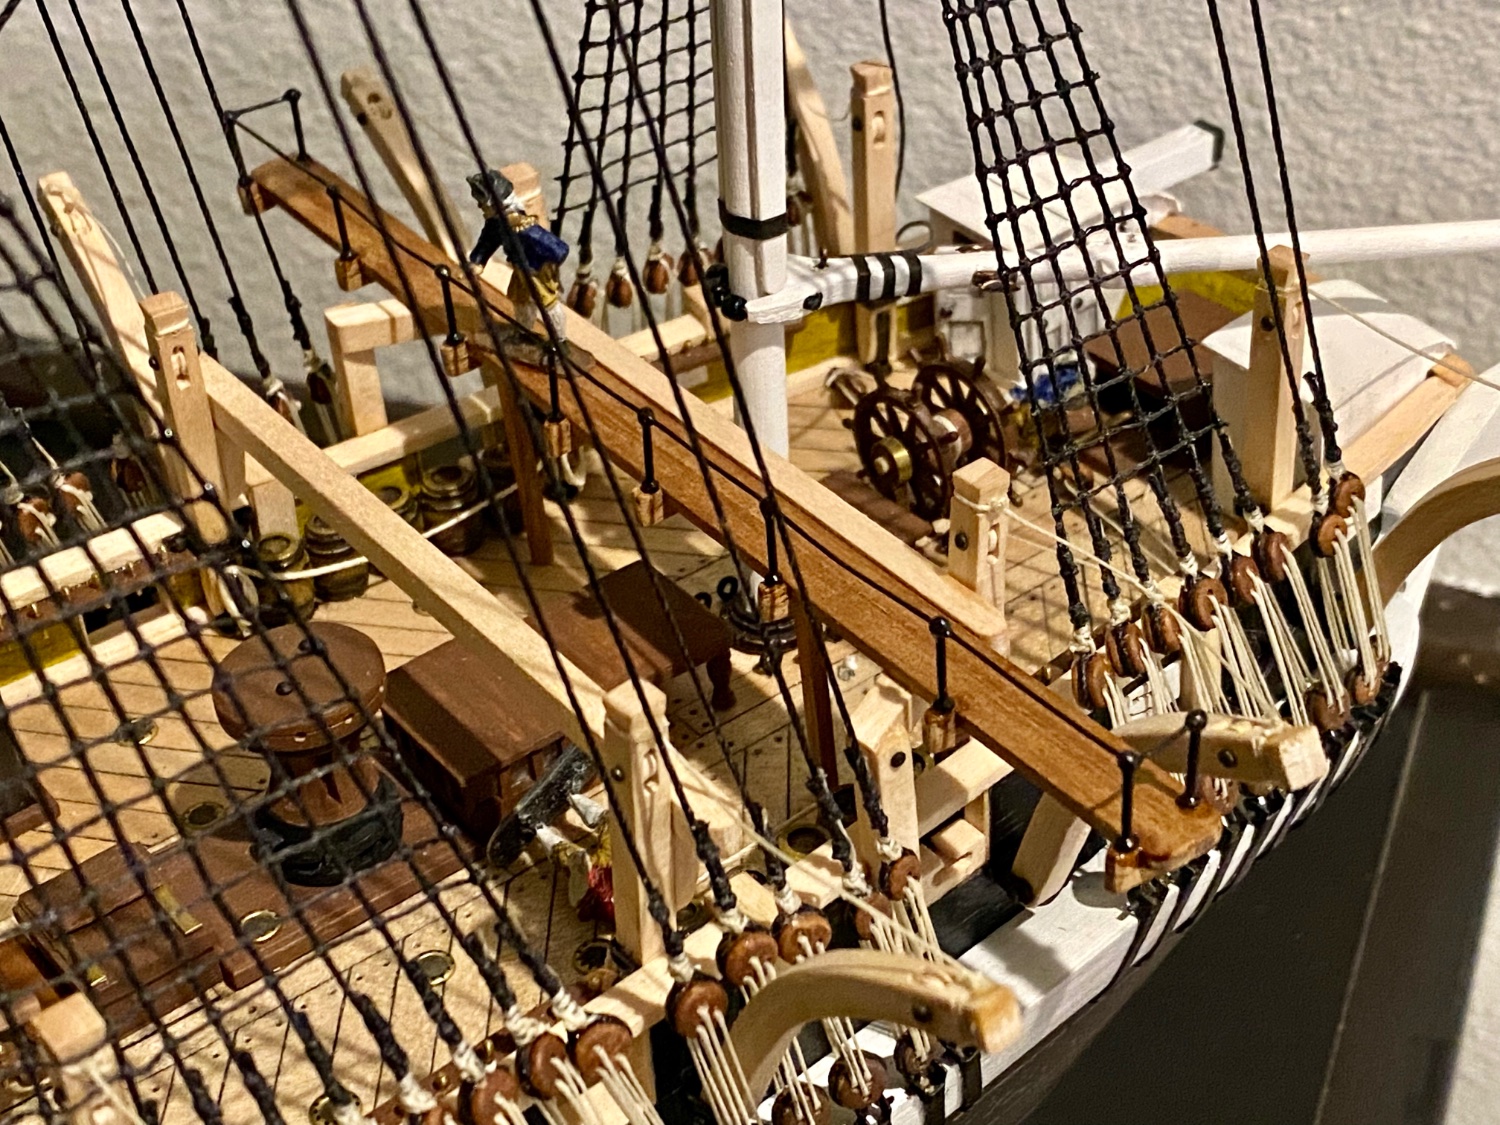
Good evening all. I’ve been working on the sky bridge that somehow I missed in all the time I have poured over the drawings. Thanks to Clearway (Keith), Keith S, Keith Black, and iMustBeCrazy (Craig) for all your work in helping figure all this out.
Here is my interpretation of the Terror Sky bridge.


-
-
An Alexander steering azimuth compass, designed by Baharie Alexander in 1844. Image below is as close as I could find, may not be an Alexander design, but his would have been very similar, c 1844-1845, which would have been the "latest and greatest" design to have on board.
- Keith S and Keith Black
-
2
-
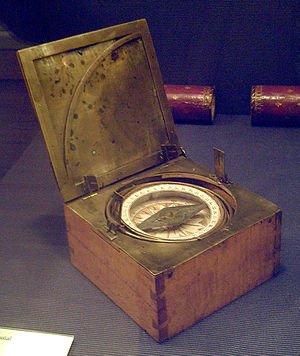
Here is a "prototype" Kater azimuth compass, c 1811, designed by Henry Kater, which incorporates a mirror that allows the reading of scales at the same time as observation of a distant object through the sight.

- Keith Black and Keith S
-
2
-
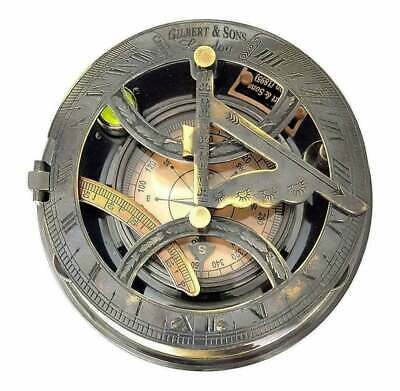
Just some more historical information that is mentioned by Dr. Bets in the pages above.
Gilbert "sundial" azimuth compass, made by Gilbert & Sons London.
-
56 minutes ago, Keith S said:
I feel like I need to think more about it. Can you go through Matthew's book and find the paragraph where he talks about compasses? I tried using "Google" again but since I'm finally no longer trapped in an airport I can't seem to remember what online rabbit-hole I ran down to find it the first time. There might be a clue there.
P.S. Just got a notice that my copy of THE BOOK is on its way.
Keith, here is the page in question.
this is a quote from the book HMS Terror: The design, fitting and voyages of the polar discovery ship, by Dr. Matthew Betts, page 101-102”As was common in many polar expeditions, Terror appears to have shipped two binnacle compasses, one each on the port and starboard, a prudent option in higher latitudes with variable magnetism.15 The 1839 Terror and Erebus upper deck plans show the probable location of these on the quarterdeck, as indicated by gaps in the row of casks lining both sides of the bulwarks. Once the compasses became unreliable at higher latitudes as the magnetic poles drew nearer, these would have been removed. Parry provides a good description of the likely procedure employed: ‘the binnacles were removed, as useless lumber, from the deck to the carpenter’s store-room, where they remained during the rest of the season, the azimuth compass alone being kept on deck.’16 So important were the azimuth compasses for Arctic exploration that five were provided for the 1836 Terror expedition, including two Gilbert and two Kater compasses, and well as an Alexander steering azimuth compass.17 All these models of azimuth compass had been used on previous polar expeditions, and the procedures for using them in high latitudes were well established. Remarkably, the 1839 Terror and Erebus upper deck plan shows that a special charting table was bolted on the quarterdeck and that the azimuth compass was mounted in its centre.18 It is likely that Alexander’s azimuth steering compass was mounted here when in high latitudes, as Ross had experience with this model and its significant advantages from his polar expeditions with his uncle, Sir John Ross.”
-
-
Great work Keith S, Keith (Clearway) and Craig (iMustBeCrazy). You guys are awesome in research and finding the odd piece of information to fill in the blanks. Again, thanks for all your hard work on the Terror project.
-
-
-
Good afternoon Keith(s), all of you…
Great work on all the research on the ice bridge and this compass post!
- clearway and Keith Black
-
2
-
Wow, keeping track of all the Keith’s is a bit of a challenge
")
This ice/sky bridge for the Terror, I’m sure it was rudimentary at best as an early example, anyone have an idea what it might have looked like? I can’t seem to hallucinate this ice bridge in any of the Terror etchings that I’ve seen…
- Keith Black and clearway
-
2
-
-
7 hours ago, clearway said:
Getting nice and busy- the kits bulky anchors are the reason i bought the aeronaut replacements which are a lot thinner (+ you need two smaller anchors near the stern as well).
Keith
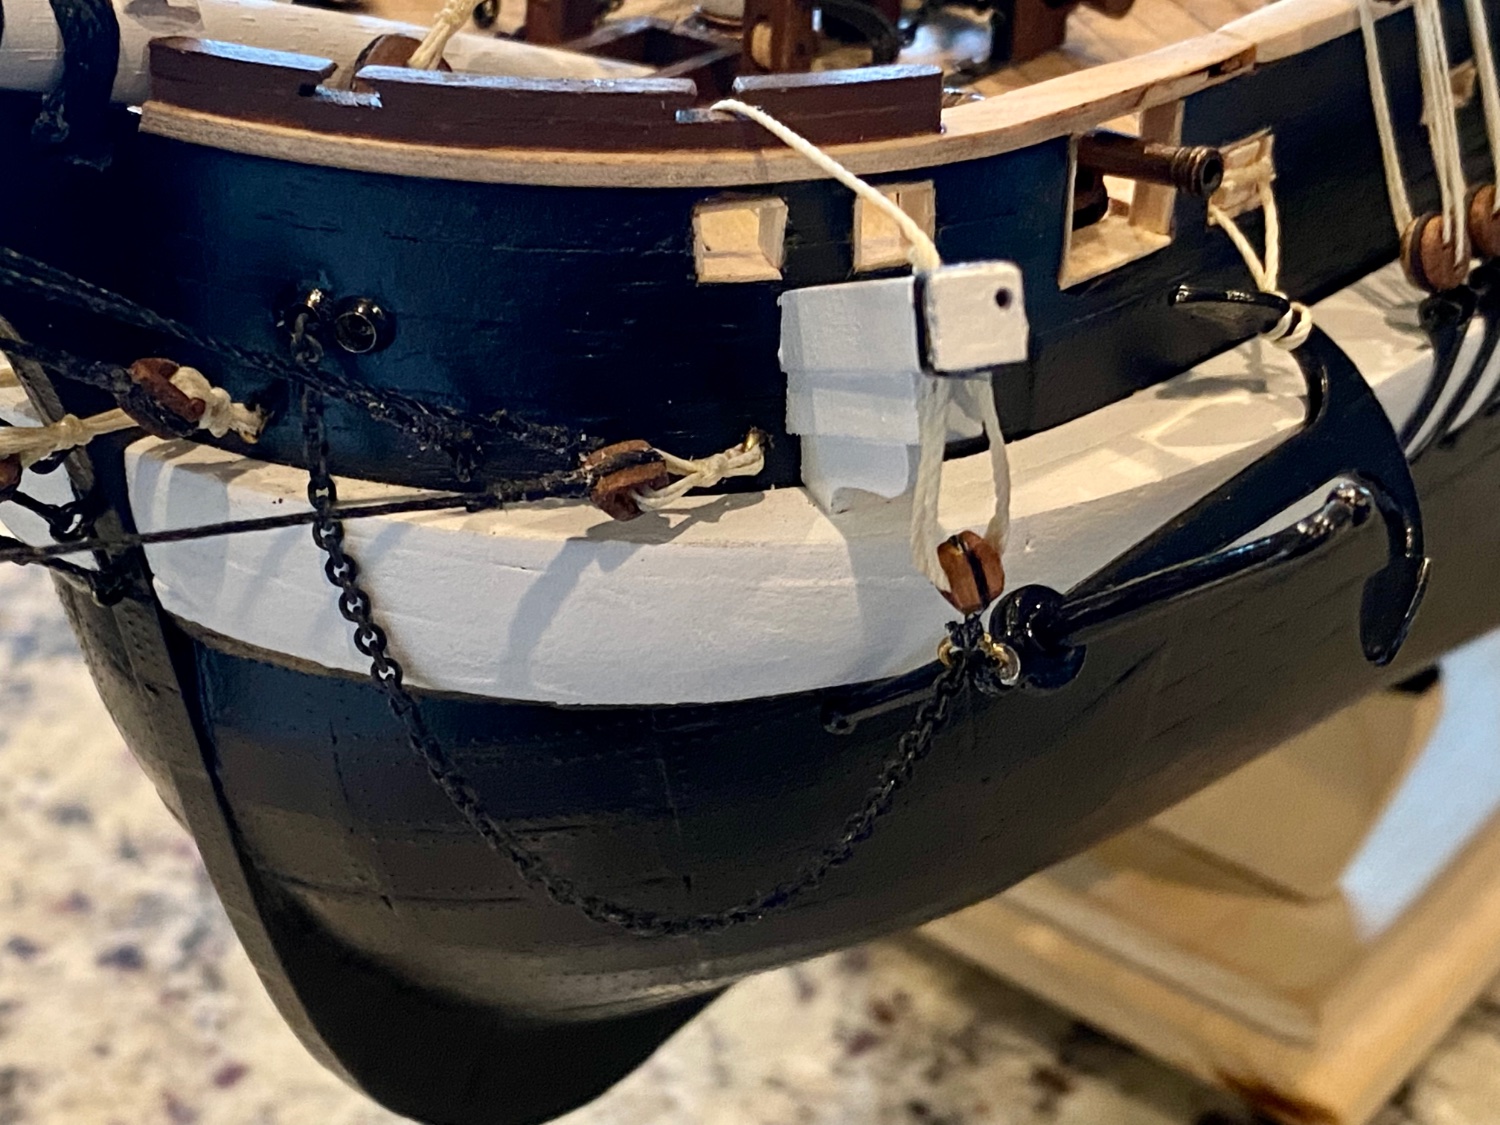
Keith, I did notice that detail and have installed the two near the stern; however, they are black, as I think they should be, the hull is black, and they rest just inside the shrouds of the mizzenmast. All of this makes the detail hard to notice and very difficult to photograph.
Thanks for your help on the boomkins! I’ll post updated image when I finish that detail.
-
4 hours ago, allanyed said:
…I hope you are going to make your own sails instead of using those out-of-scale things from the kit.
Allan
Allen, interesting thought. This is only my 2nd ship build and I know nothing about making sails. On the other hand, I’ve put so much thought, research, and time into making this ship as accurate as my skills would allow, maybe I should tackle the sails.
May I ask, what specifically is wrong with the sails? How could one improve on the kit provided versions? Where is a good source on model sail making? I have Lees rigging book, maybe some information in there. Where is a good source for obtaining sail fabric? Many versions of the Terror are rigged with full sails, maybe I should rig it with the sails furled. So many questions…
-
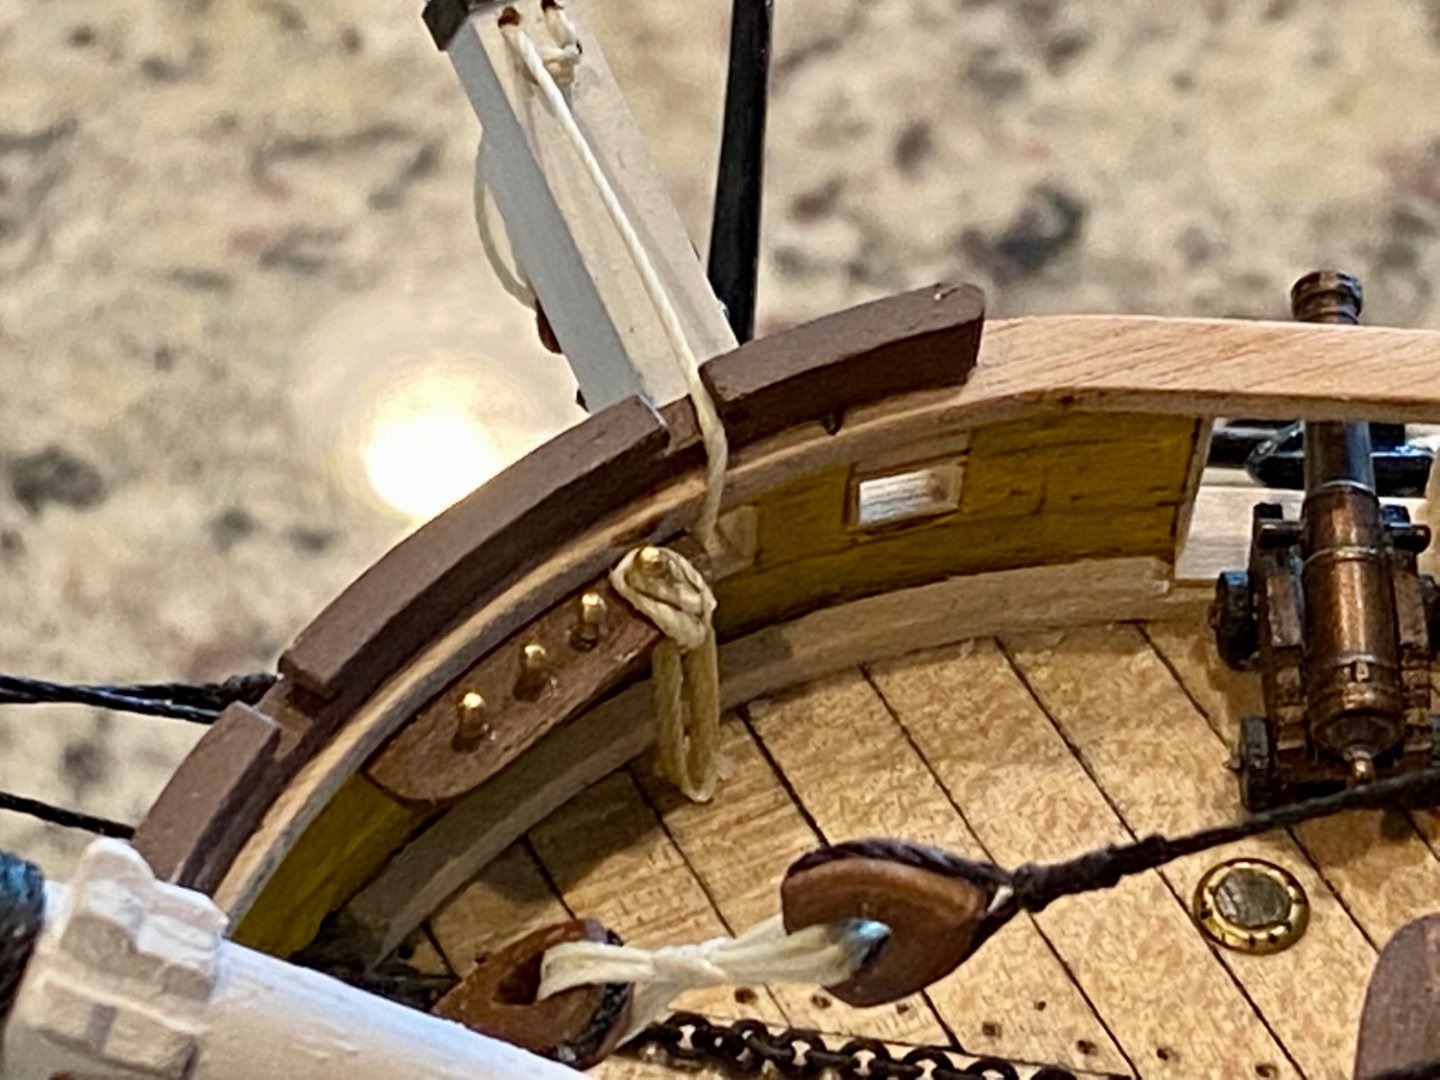
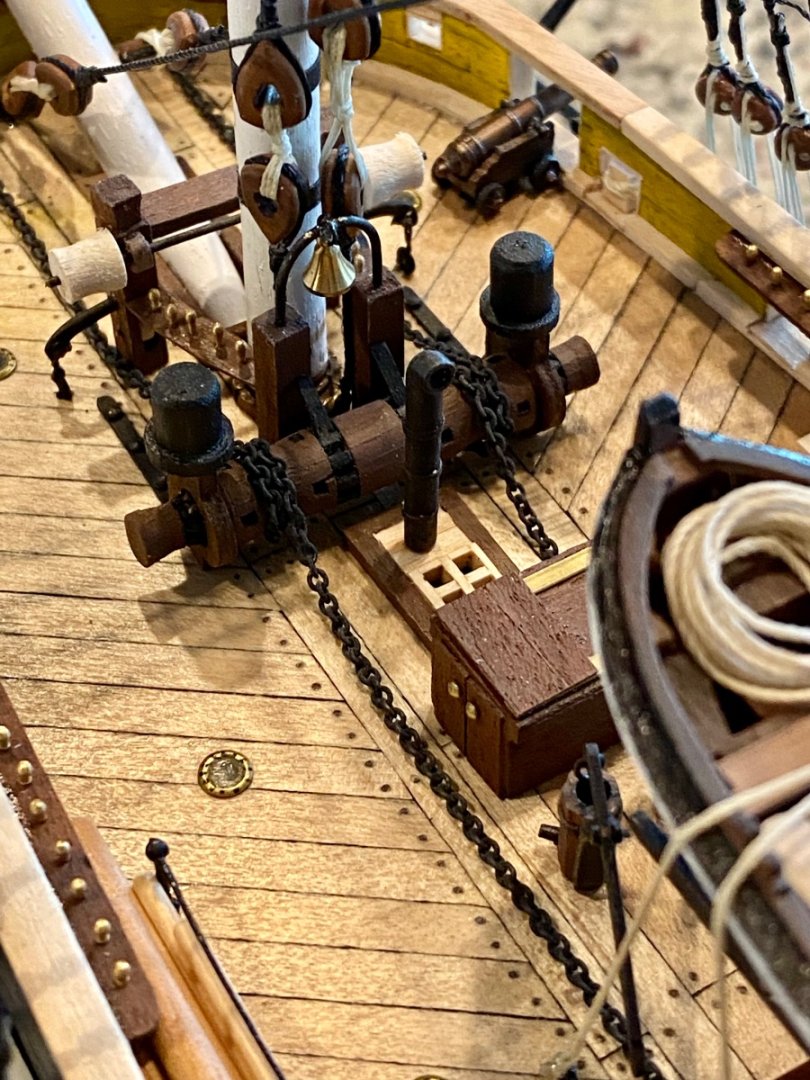
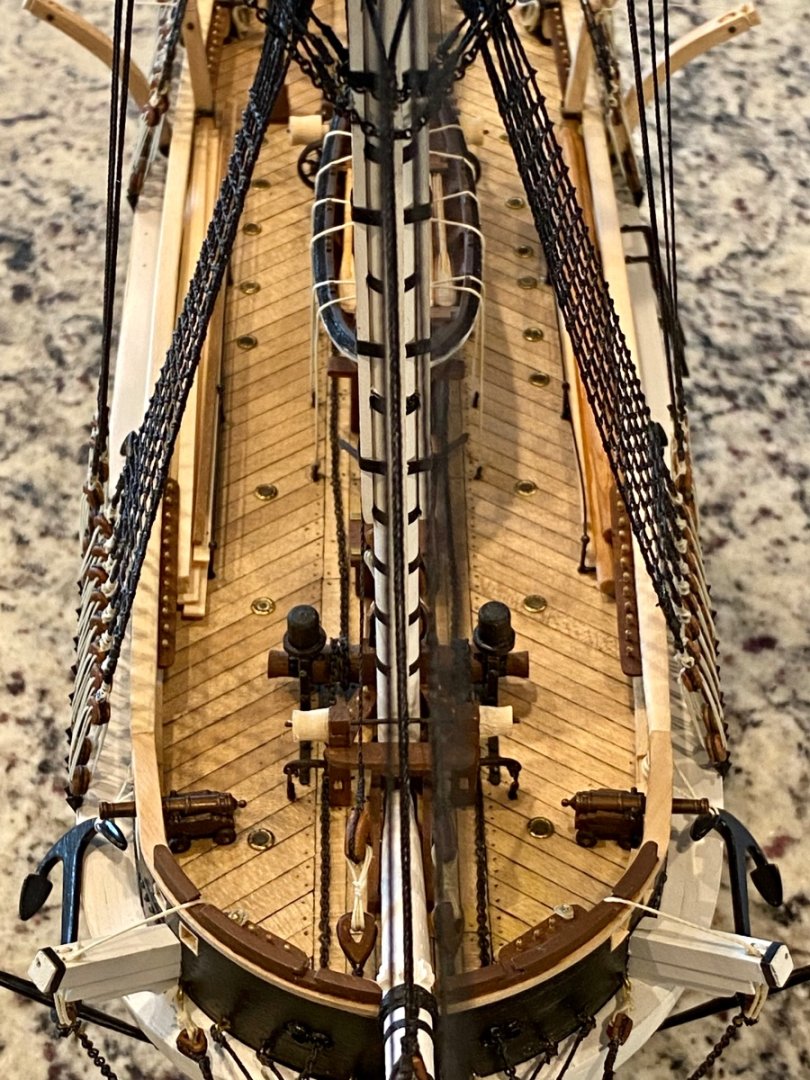
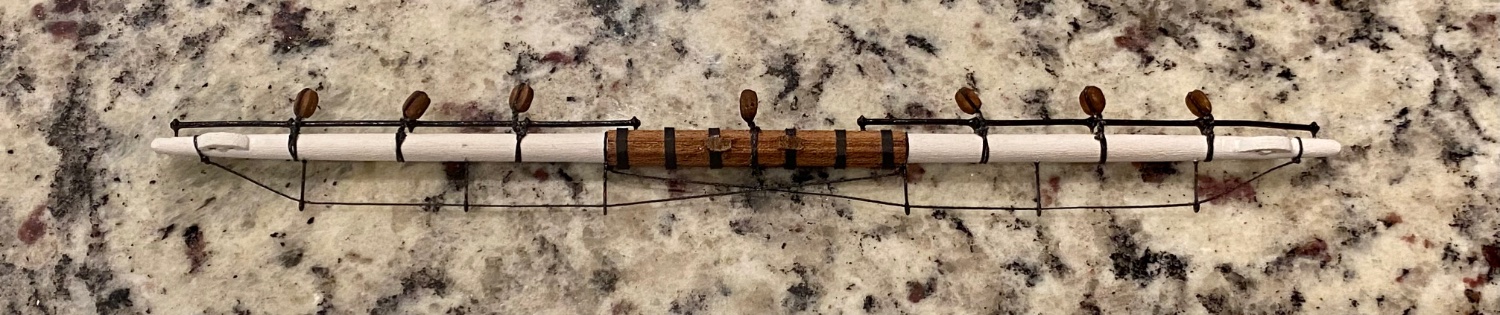
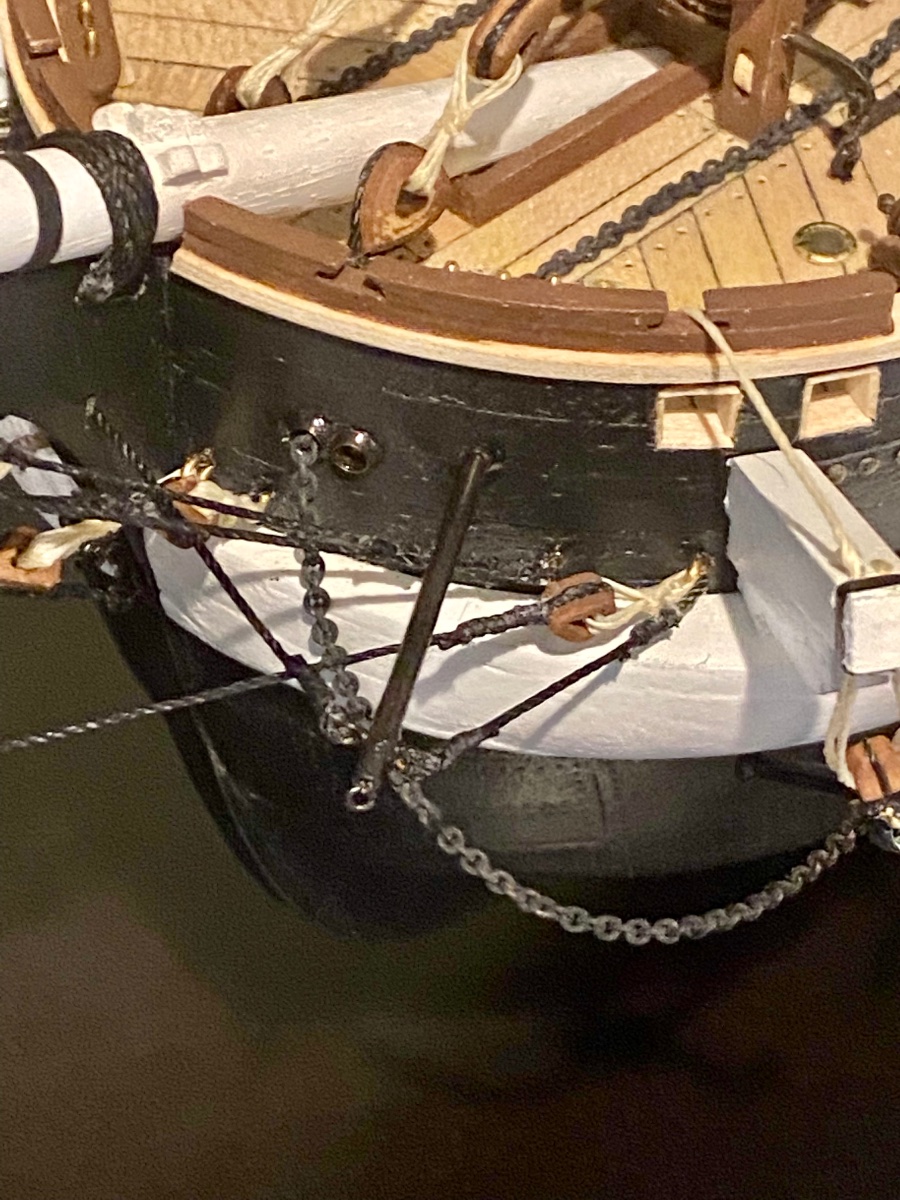
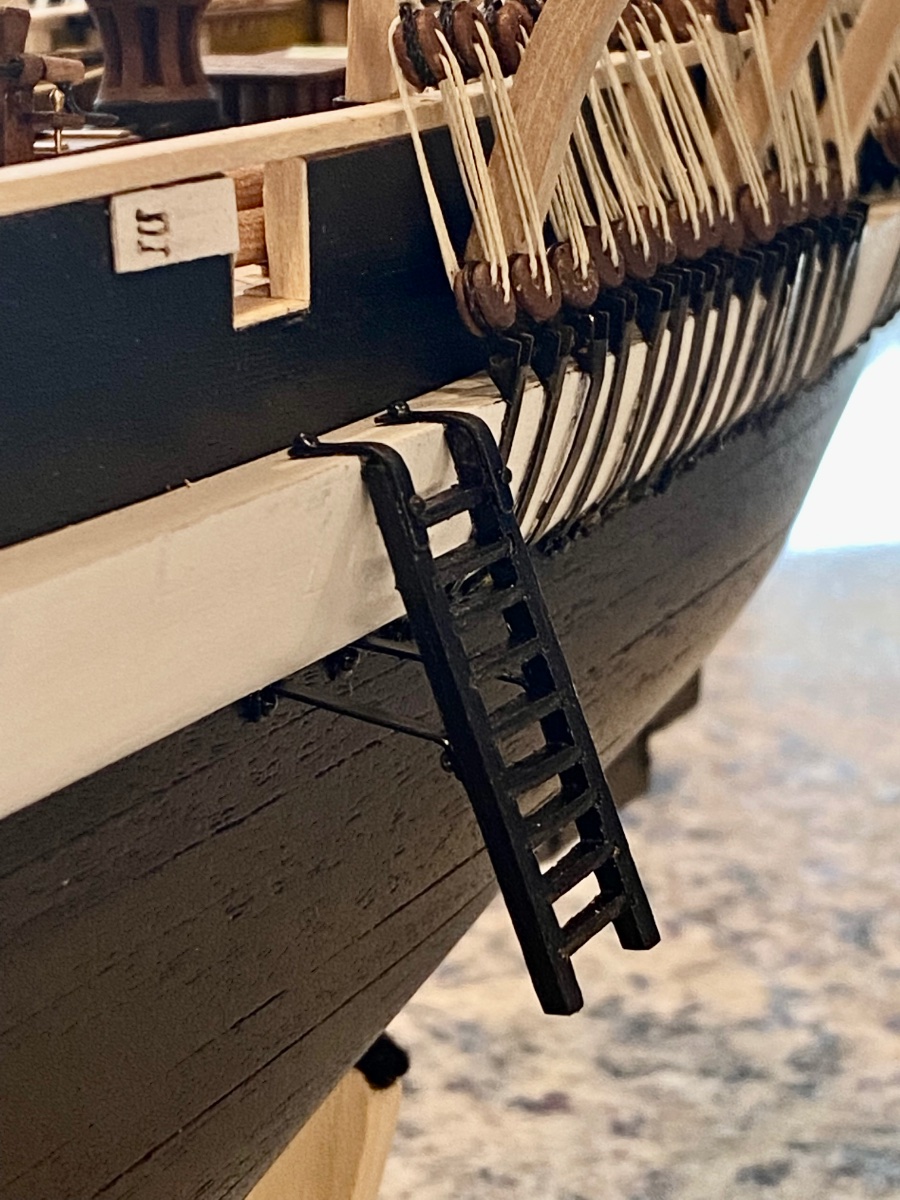
Good afternoon visitors. I’ve not posted in while, but I have been working on some details.
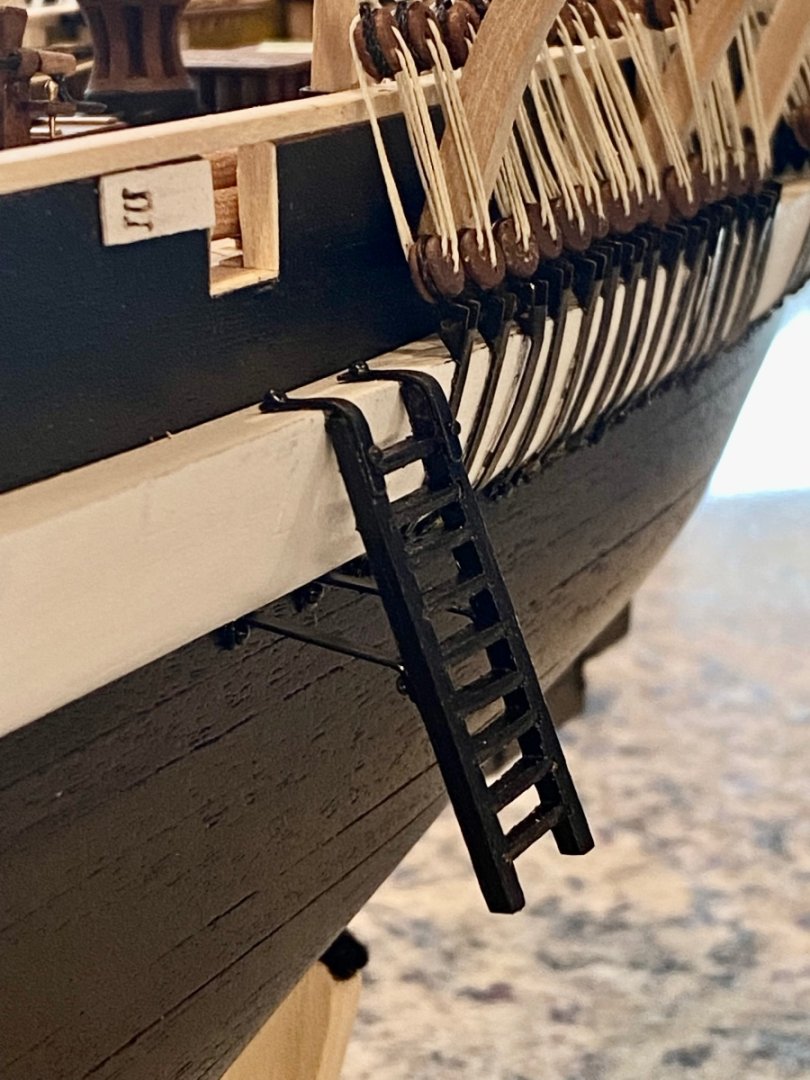
Image 1) Ships ladder, I built one for each side, but currently only have one on the port side installed. Seems to be some differences in opinion about the Terror in this regard. Dr. Betts book on the Terror has only one boarding ladder installed on the starboard side. At least one etching/image from 1845 shows a boarding ladder on the port side and no image I could find shows one on the starboard side. However, and I’m no expert, ships of this period tend to have boarding ladders on both sides…
Image 2-4) installation of the main anchor and anchor chains as they wind around the windlass.
Image 5) Installation of the Terror’s six spare anchors, wish I would have done this before the mast standing rigging, oh well.
Image 6) Building and installing of the spare parts retaining system. Currently I have a bunch of things setting there and the first thing I notice is that the spare parts get in the way if using some belaying pins. Quandary…

-
Keith, I’m starting to think about the ladder on the side of the Terror. In Dr. Betts work on the terror he doesn’t specifically say if there is a ladder on both sides of the ship. In his drawings I see it on the starboard side, but in some of the old etchings of the Terror, I see a ladder on the port side. Is this something that would generally be on both the port and starboard sides?
-
4 hours ago, allanyed said:
The boats are upside down but those on Clearway's are not. I don't recall seeing them upside down on any ship, but was this an exception because of her role or was there some other reason? Handling them from the upside down position would be a nightmare, especially if it was an emergency situation. Hopefully there is some contemporary information on the whys on this one.
Allan
Allan, I’m not a sailor by any means so have no direct experience with these boats, but they are fairly large and I can see the difficulty in moving them around if upside down. The boats I have at the stern are not yet secured, so I have time to think about how to display them. The idea for me came in the form of Dr. Betts blog on the terror and his recent book, HMS Terror ~ The Design, Fitting and Voyages of the Polar Discover Ship. If you plan to build the Terror with upgrades outside what comes in the kit, I would suggest this book.
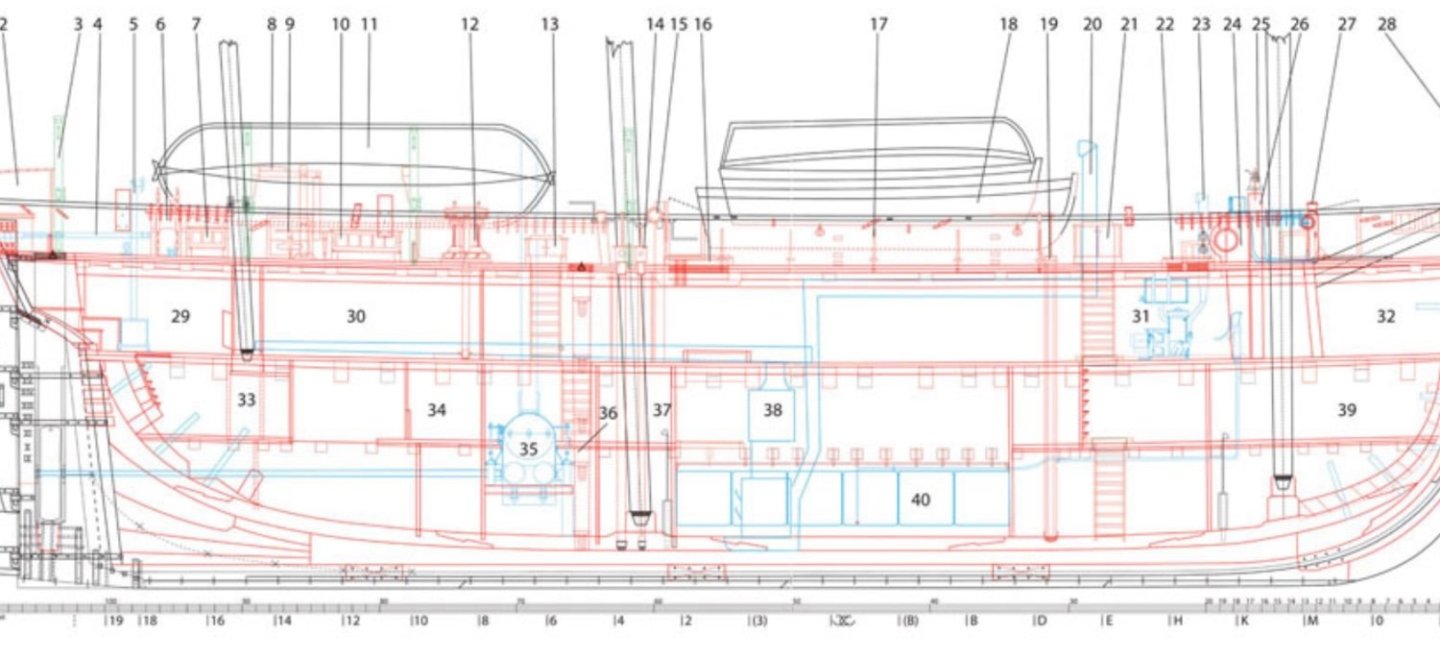
According to Dr. Betts, the Terror sailed in 1845 with 9 small boats, a 28’ Pinnace, a 30’ Galley, two 30’ whale boats, two 25’ cutters, a 23’ cutter, a 22’ Gig, and a 12’ dinghy. I plan to have 4 hanging from the curved davits, one mid deck that I just secured in place, and 4 on the aft deck. Here is a partial drawing from the book, I don’t want to include the entire image so I don’t have any copyright issues, but you can see where I got my idea…


HMS Terror by DanielD - FINISHED - OcCre - Scale 1:75 - Second Build Started 10/4/2020
in - Kit build logs for subjects built from 1801 - 1850
Posted · Edited by DanielD
Good afternoon all. I have completed the templates for all the sails on the Terror.
I have played around with using paper for the sails and I’m not liking the look, even though it may be more to scale as far as thread count. So I will be using some sail cloth from one of the big ship model manufactures.
Here are the templates to date… changes possible once I start assembling.
The grey parts are installed on the forward part of the sail and the red areas are for the aft portion of the sail.