Mirabell61
-
Posts
7,418 -
Joined
-
Last visited
Content Type
Profiles
Forums
Gallery
Events
Everything posted by Mirabell61
-
 thank you Veszett, yes, I did a good stirring upfront and brushed on a trial piece..., result is good Nils
- 313 replies
-
- 3
-

-
- lightship
- Feuerschiff Elbe 1
- (and 1 more)
-
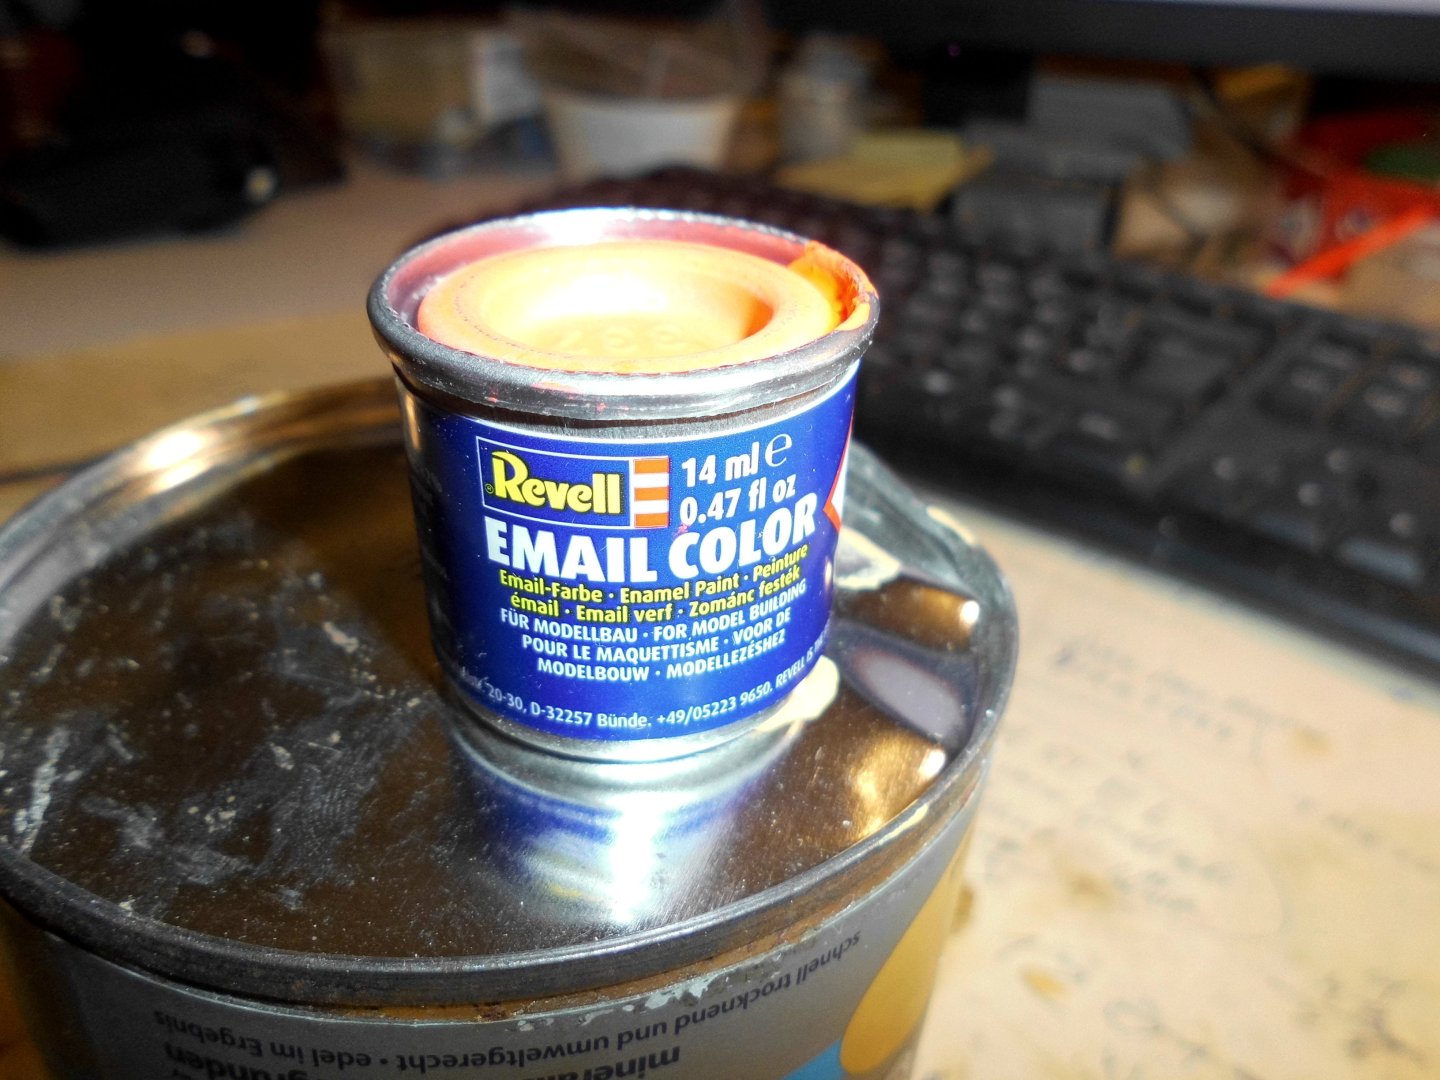
I`m so happy to have finaly found exact the lightship email color, being small 14ml can of Revell SM332 (RAL 2026), for touch up work on the hull. I had experianced trouble with the 400 ml spray can in this color wich caused me many headachs at the time the hull was sprayed. Nils
- 313 replies
-
- 4
-
-
- lightship
- Feuerschiff Elbe 1
- (and 1 more)
-
Many thanks Glen, I took a look at your mini chinese (Zheng He Treasure Fleet) junk models, and I like them very much. I am myself still and ongoing pregnant in mind with a build of the Hainan Trading Junk in scale 1:30 one day . This for example can be seen as what member Crazee Mike had introduced under (search entry : DSCN0044) Nils
- 313 replies
-
- 2
-
-
- lightship
- Feuerschiff Elbe 1
- (and 1 more)
-
thank you very much Keith, I just clicked a follow up of your beautiful Cangarda, its an excellent build I like very much Nils
- 313 replies
-
- 3
-
-
- lightship
- Feuerschiff Elbe 1
- (and 1 more)
-
Super work Paul, lovely details great looking and clean work... Nils
-
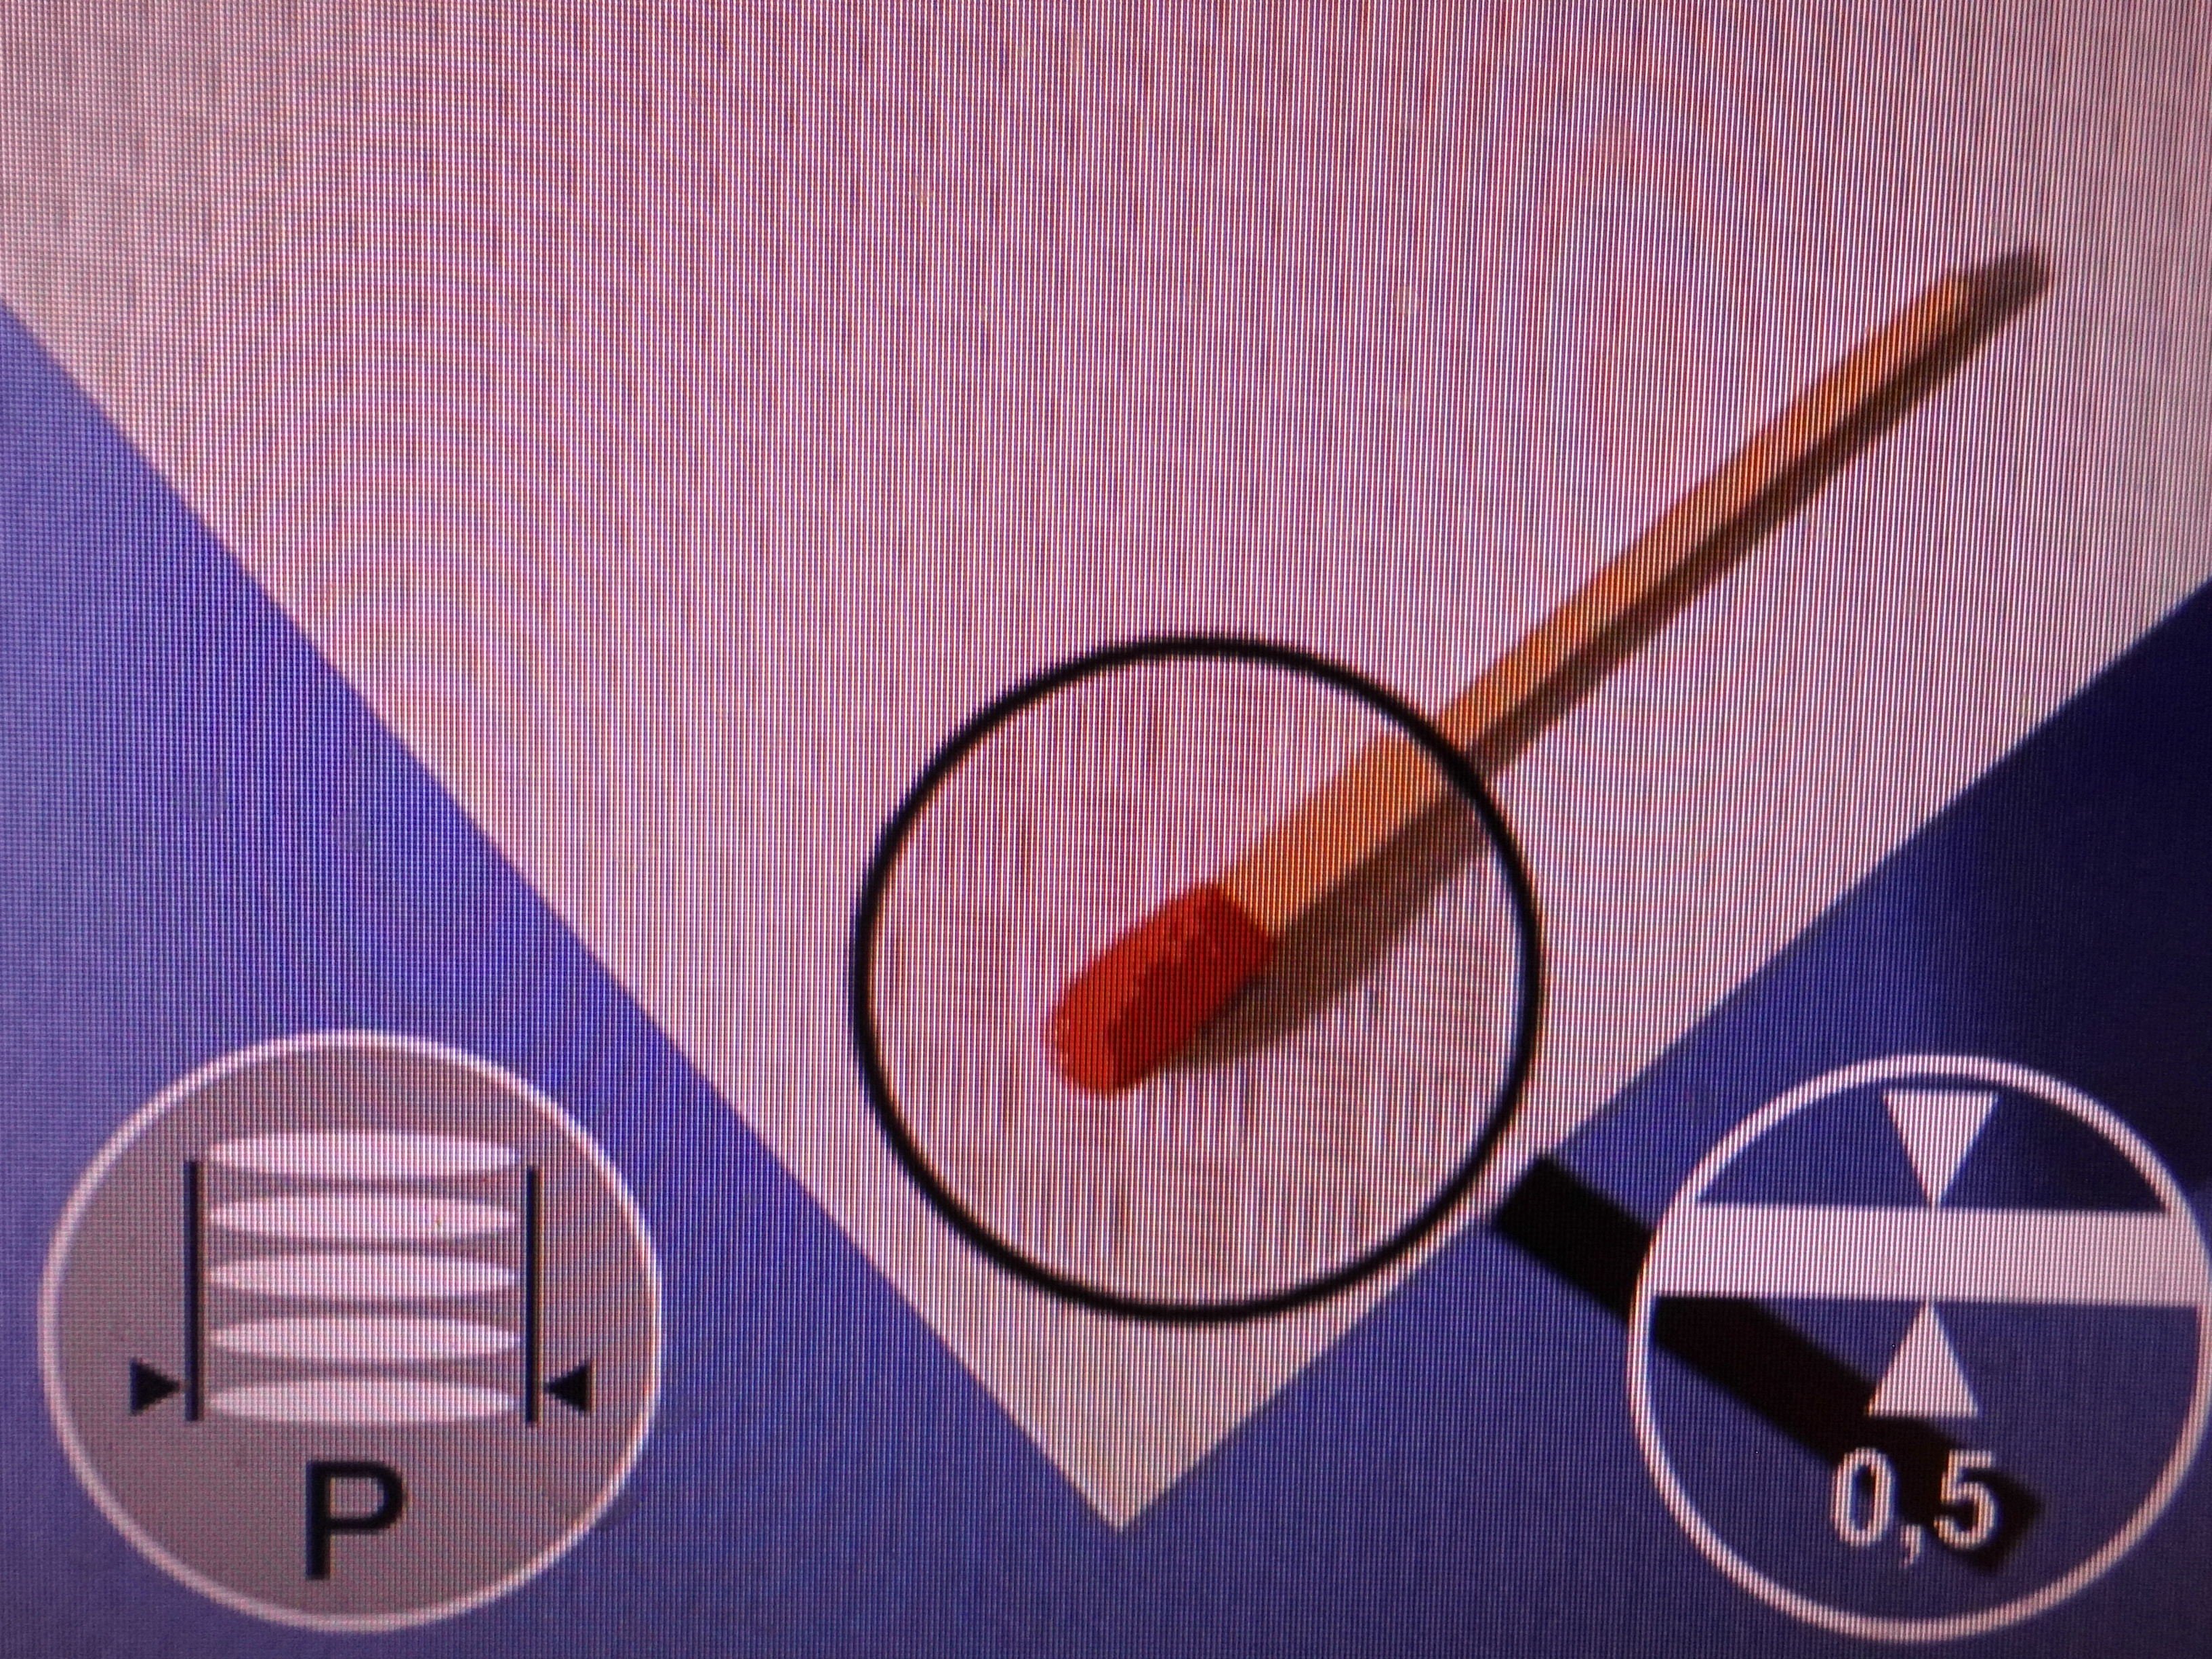
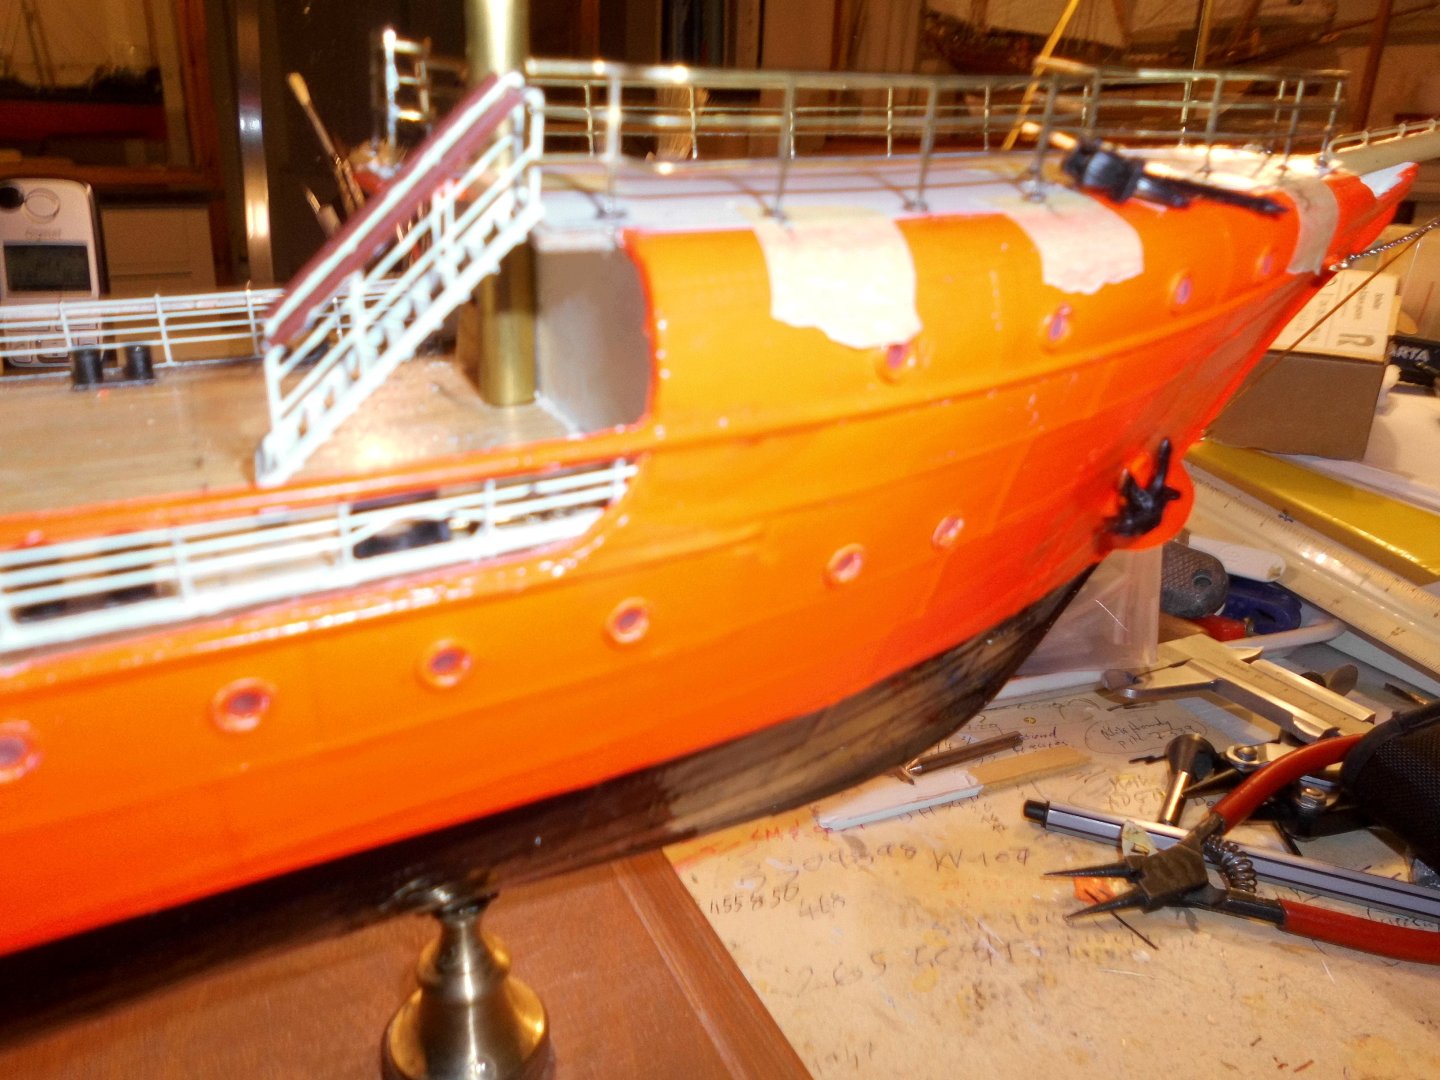
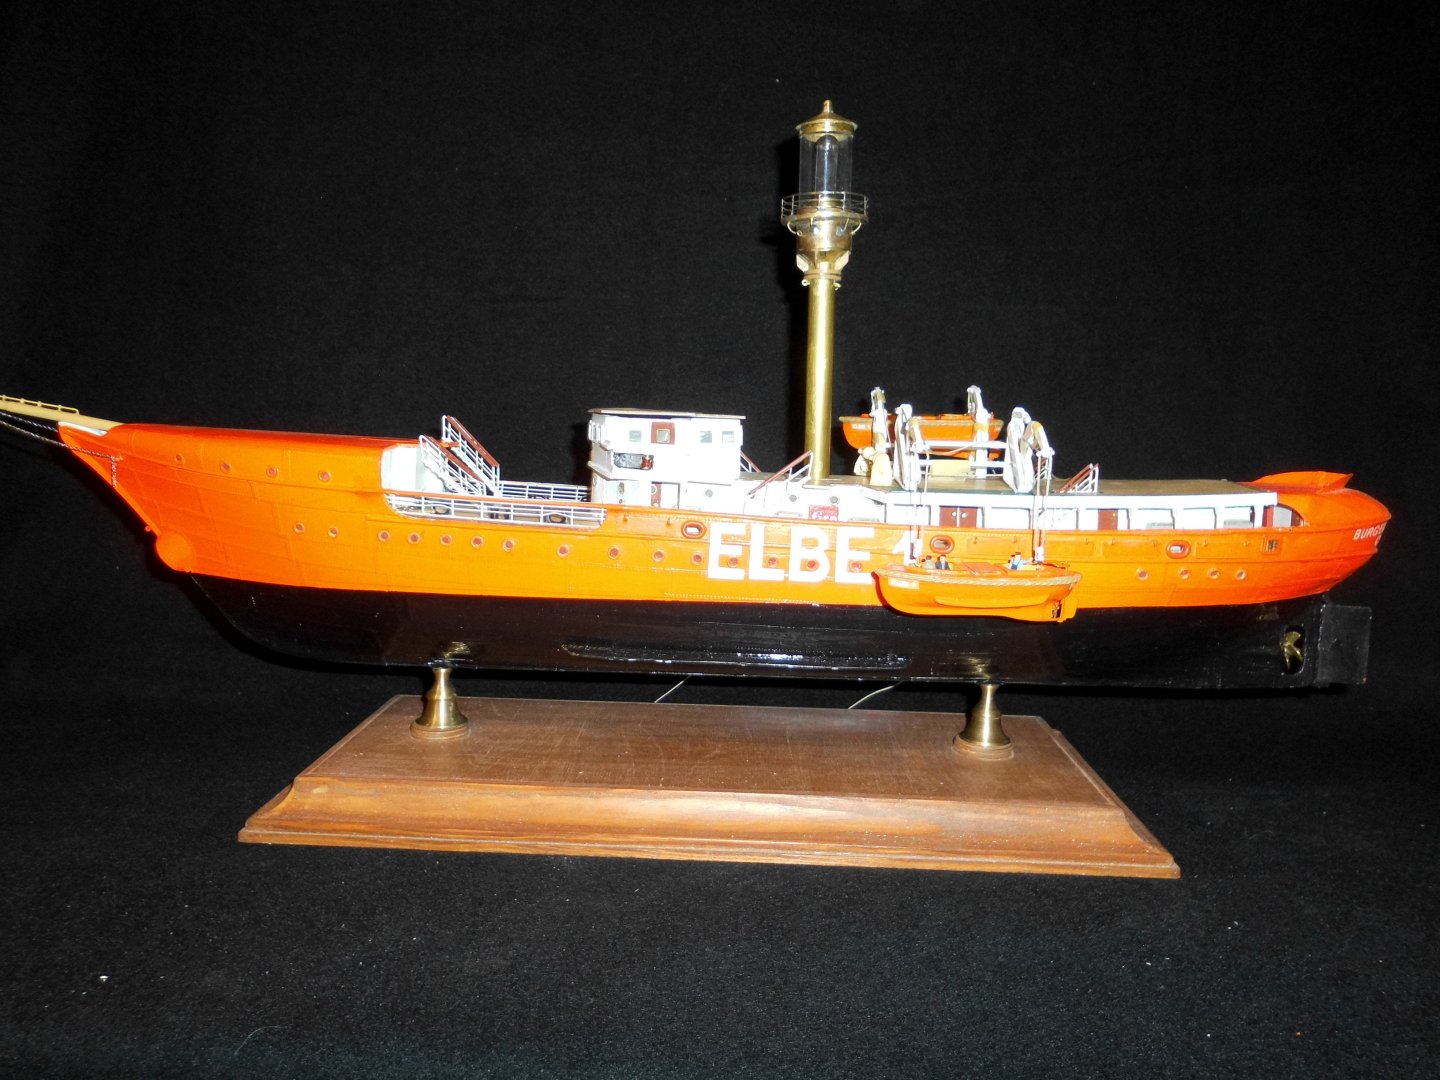
Thanks very Roel and Veszett, I`ve been busy this morning in soldering the missing link together, shall give it a primering and painting coat now..... Nils made from brass wire trust it looks good enough to fill the gap in the railing


- 313 replies
-
- 10
-
-

-
- lightship
- Feuerschiff Elbe 1
- (and 1 more)
-
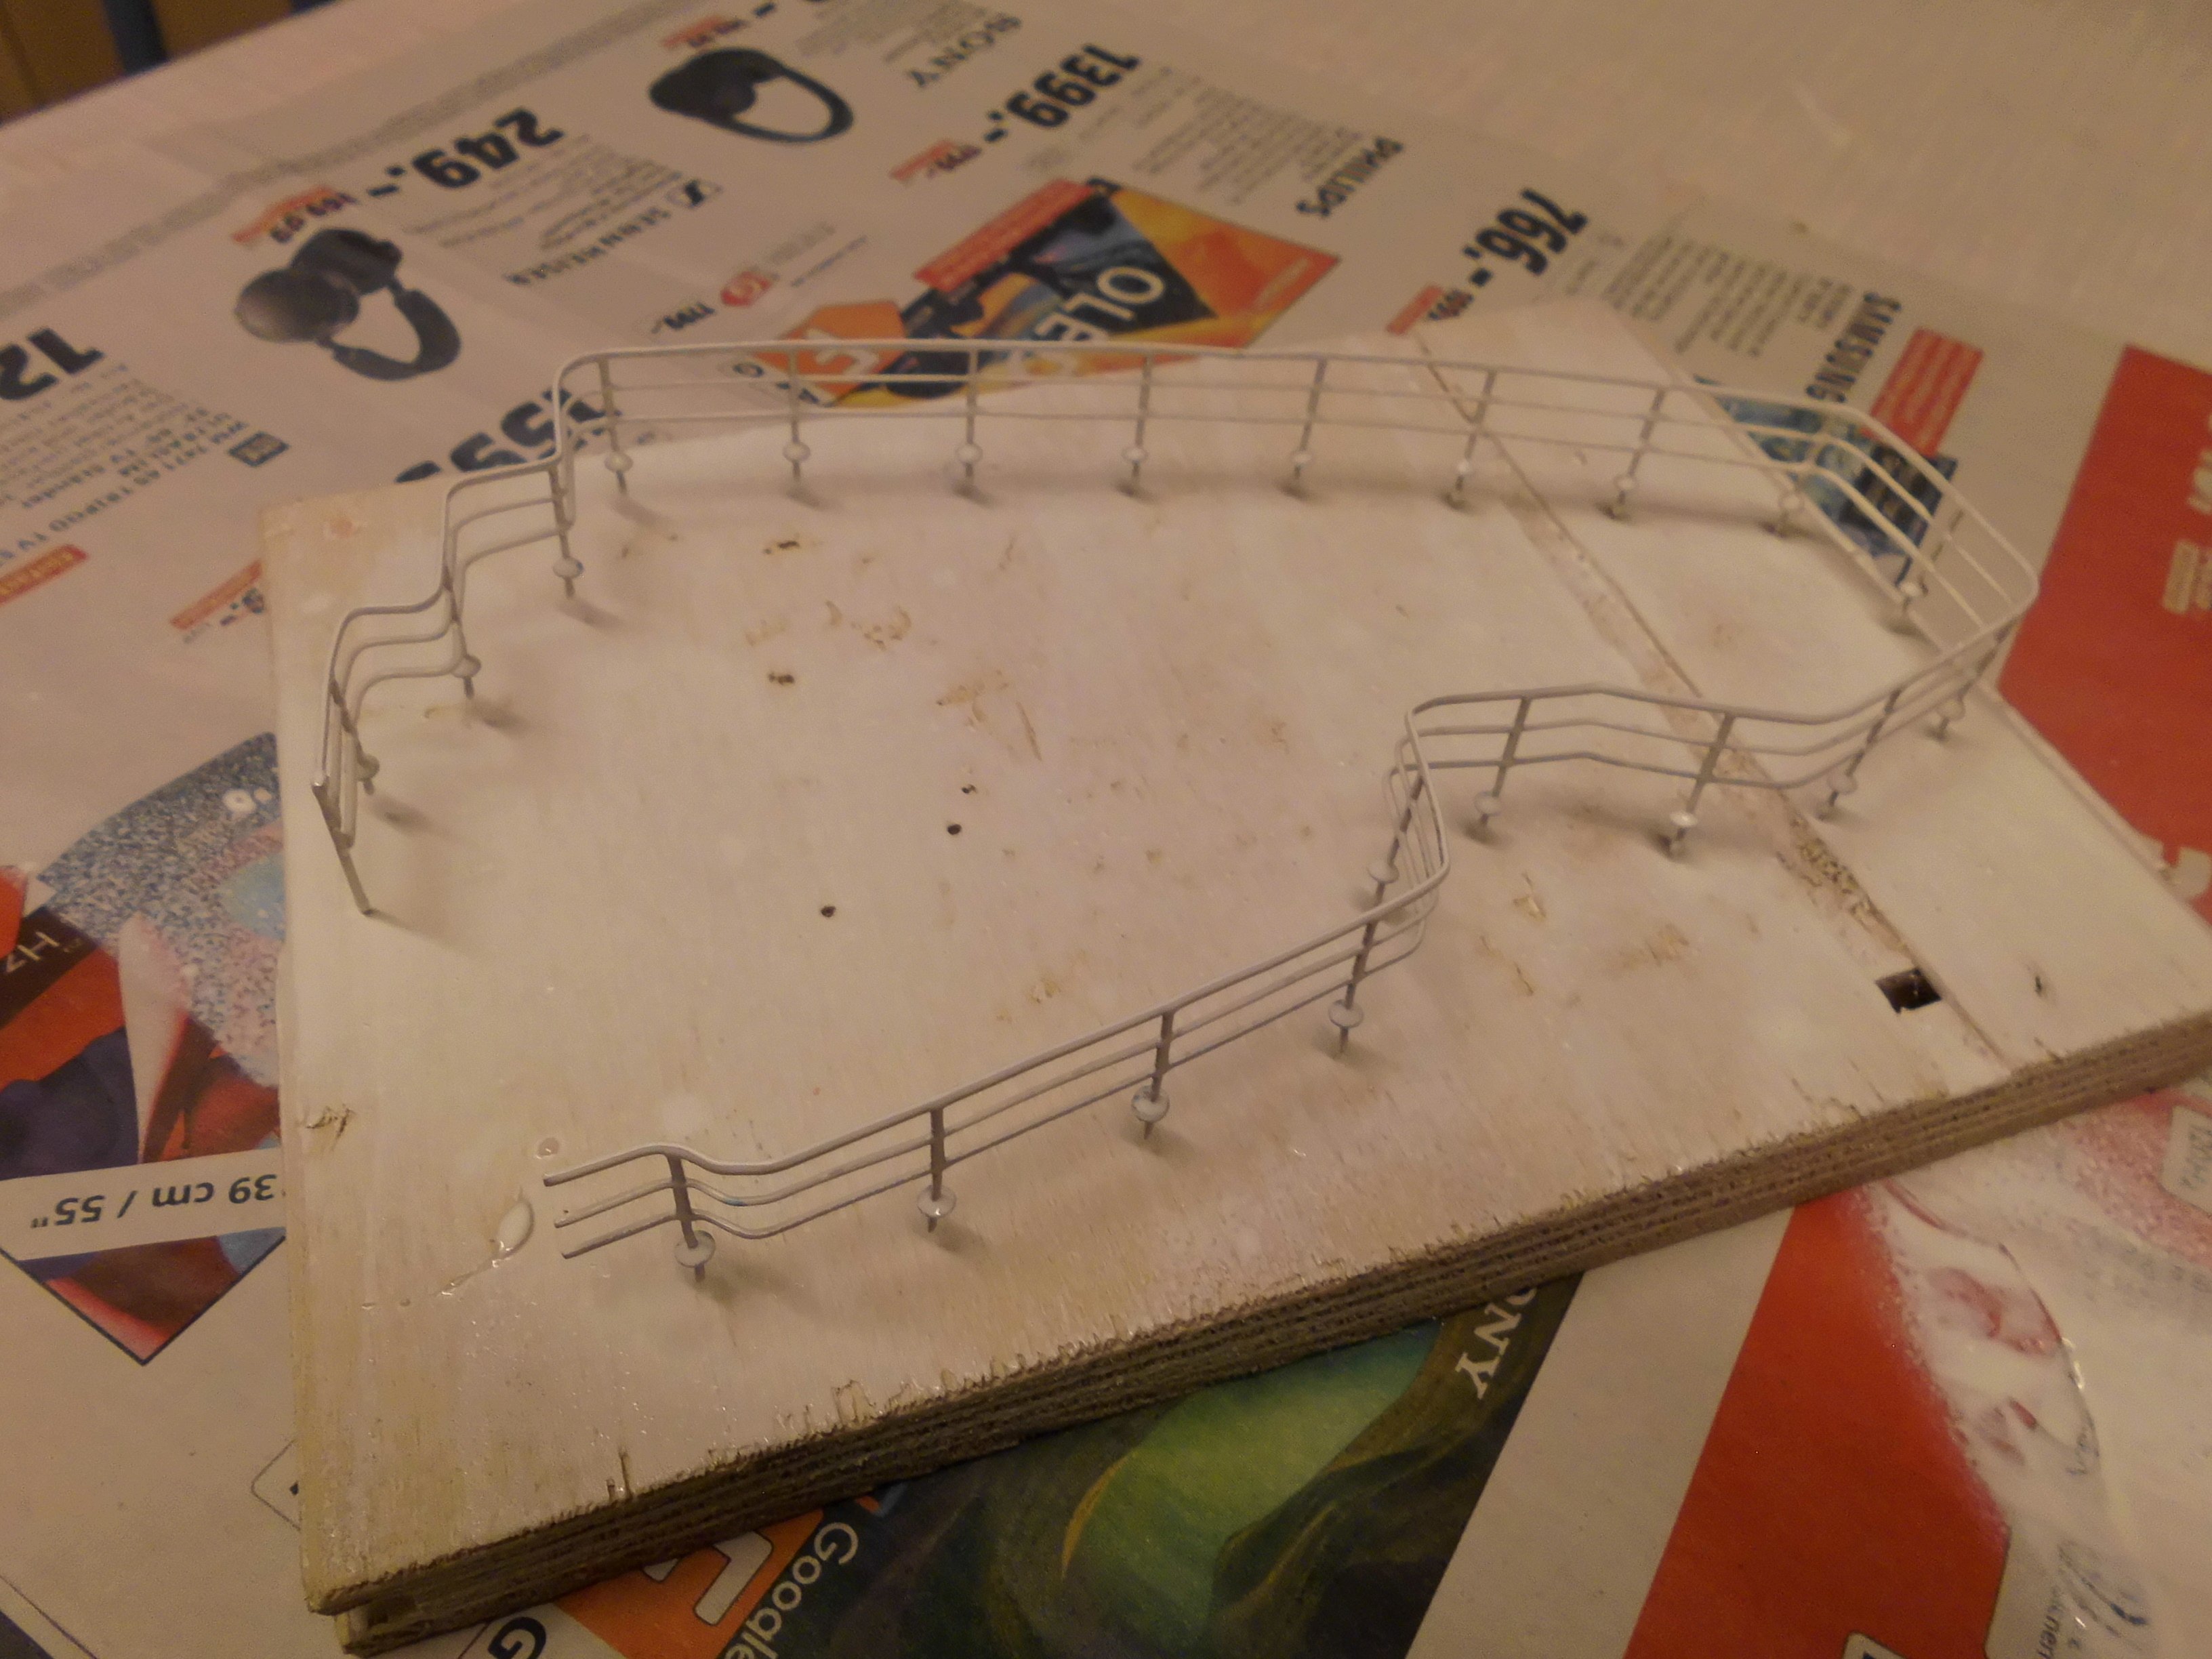
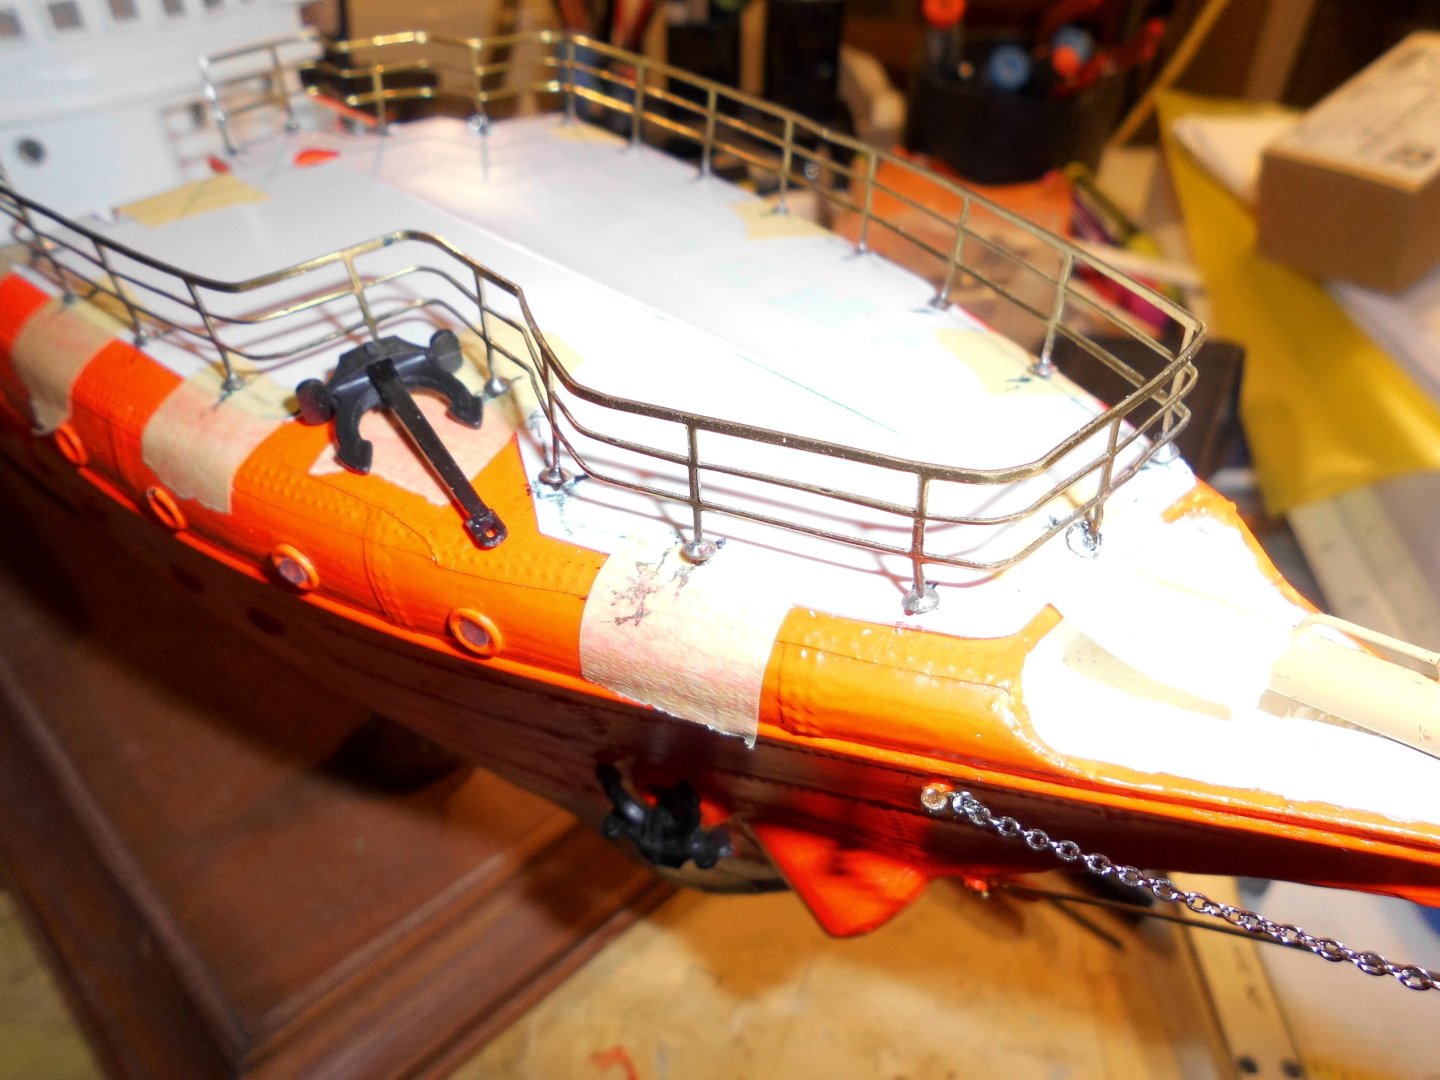
Paul and John, many thanks for your nice words, it was not so easy to get the all of the foothholes into the right position and same time keeping the railing in shape and standing upright. to my regret the etch-railing strip was a bit too short, I`m missing about 4 cm to "close the fence". Will have to do some soldering with brass wire to fix that last bit, and in smooth transmission to the Stb Stairway. Nils

- 313 replies
-
- 12
-
-
- lightship
- Feuerschiff Elbe 1
- (and 1 more)
-
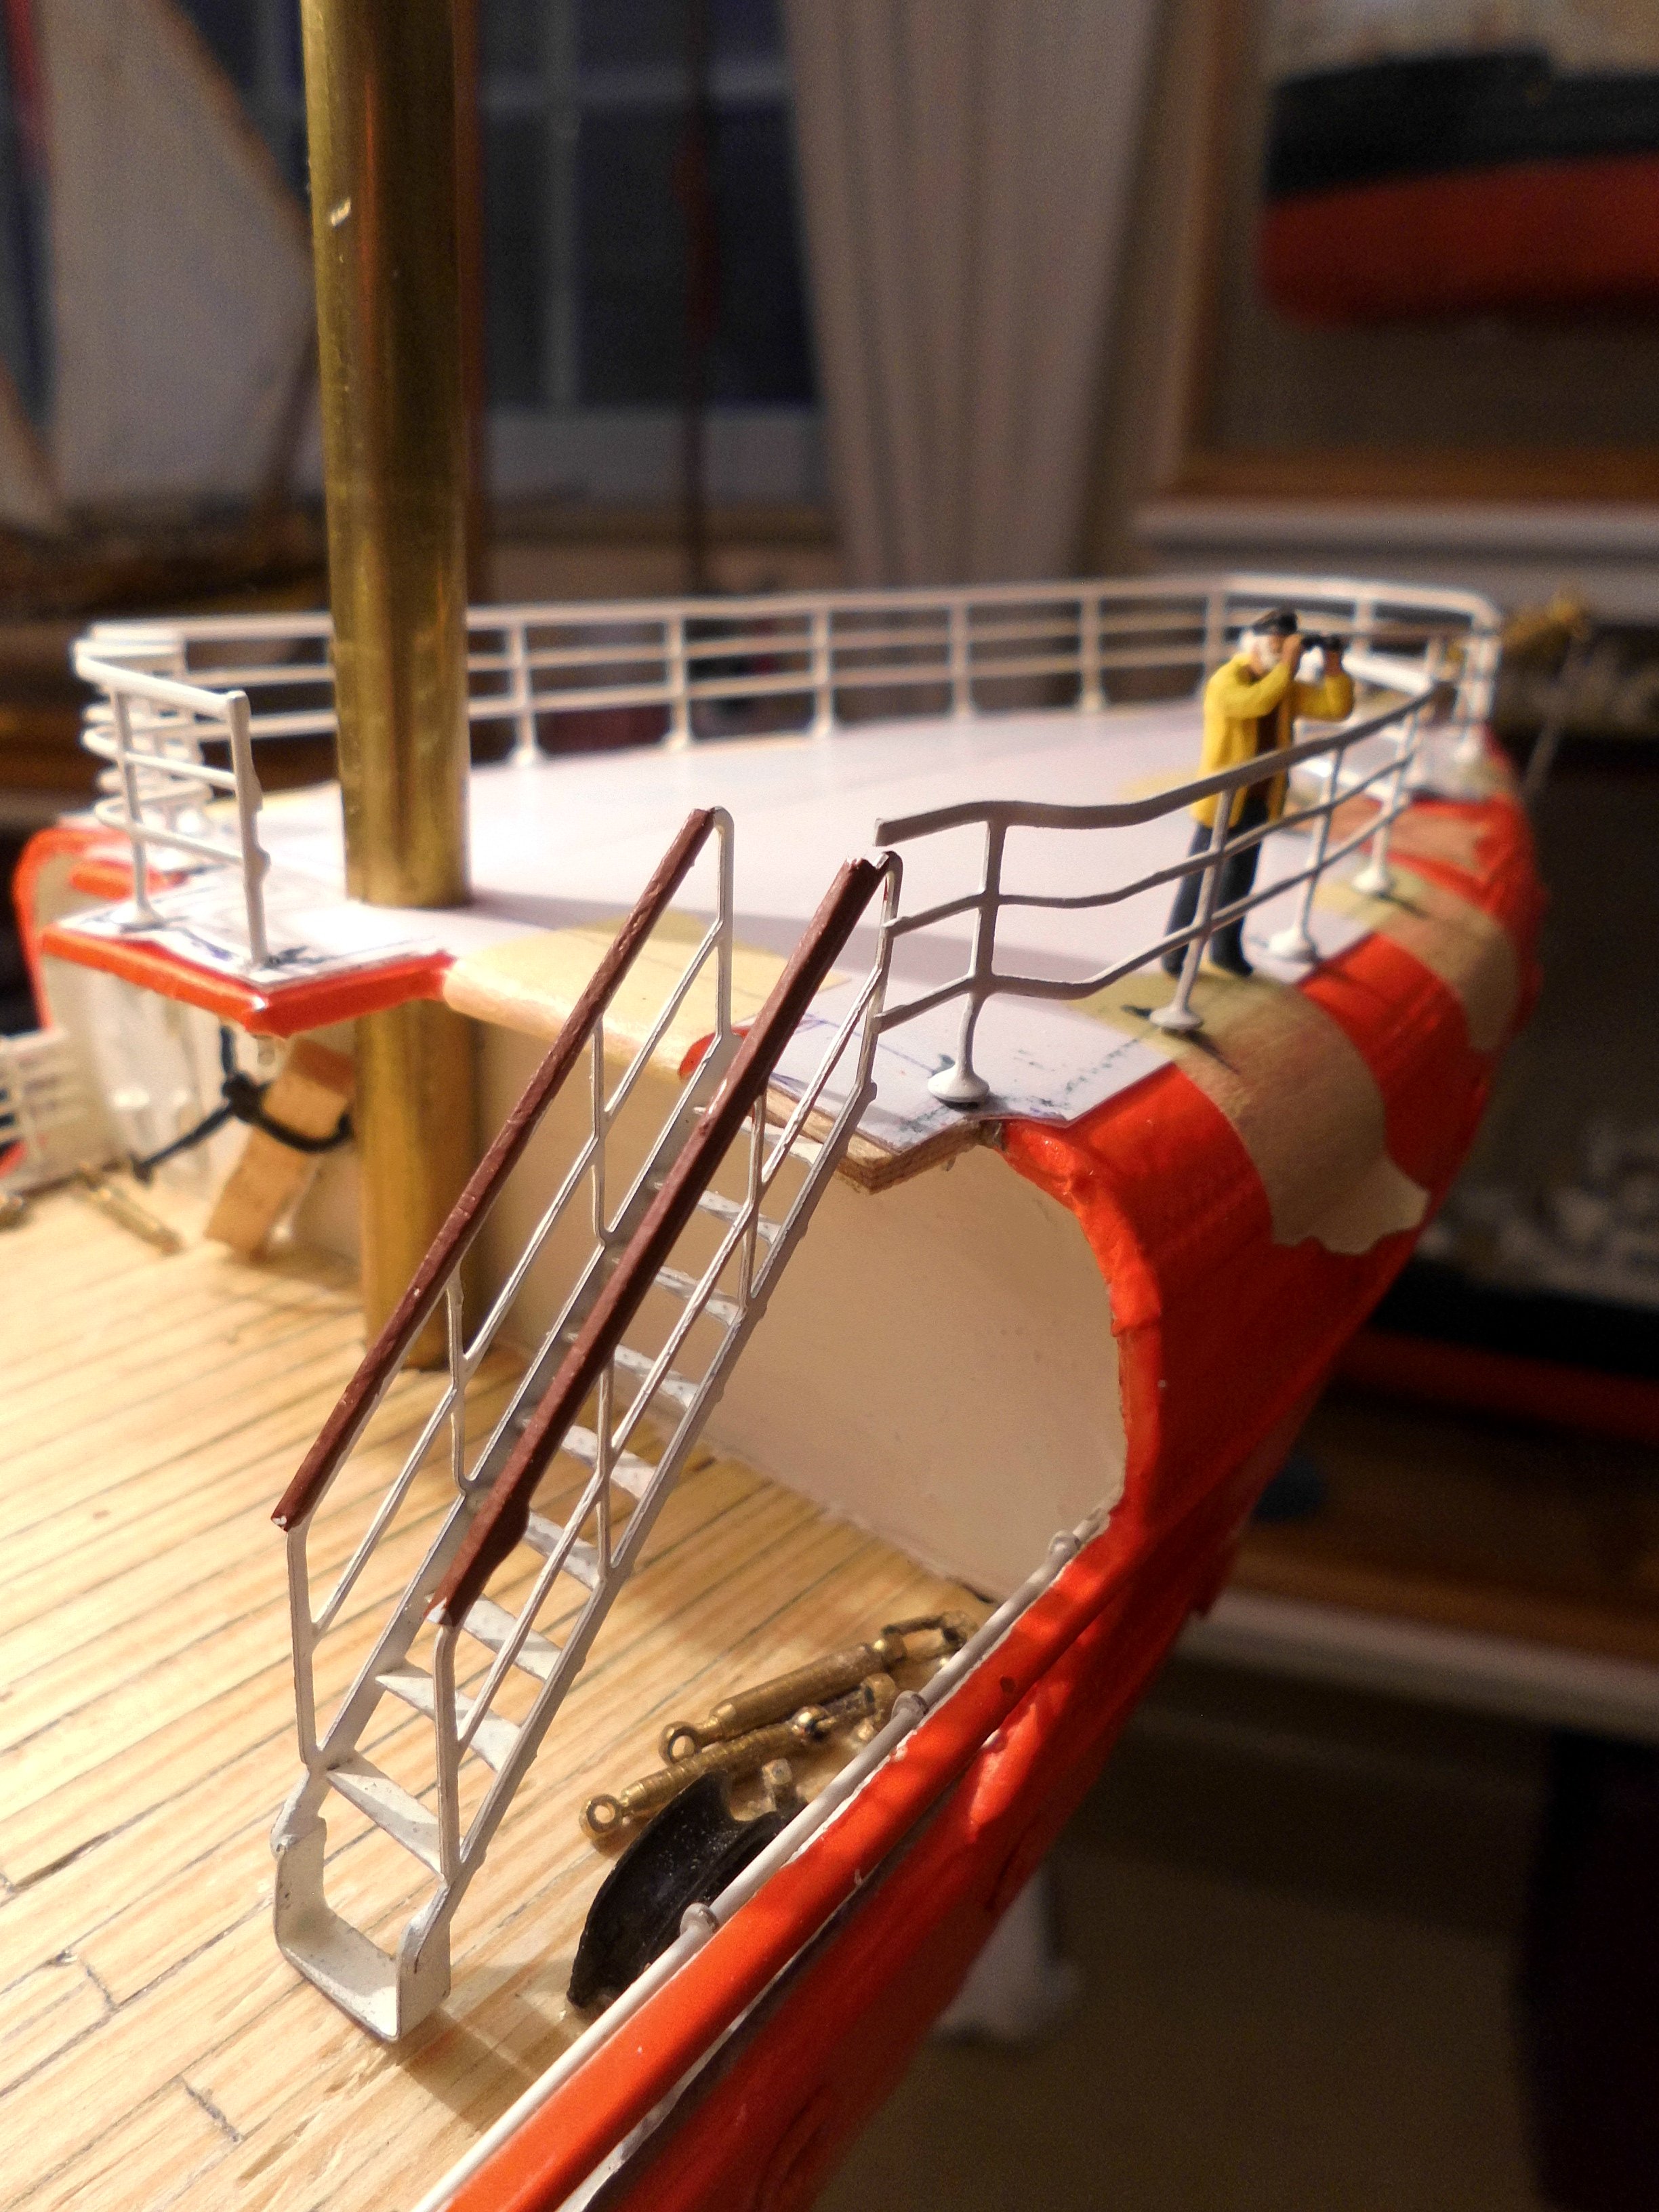
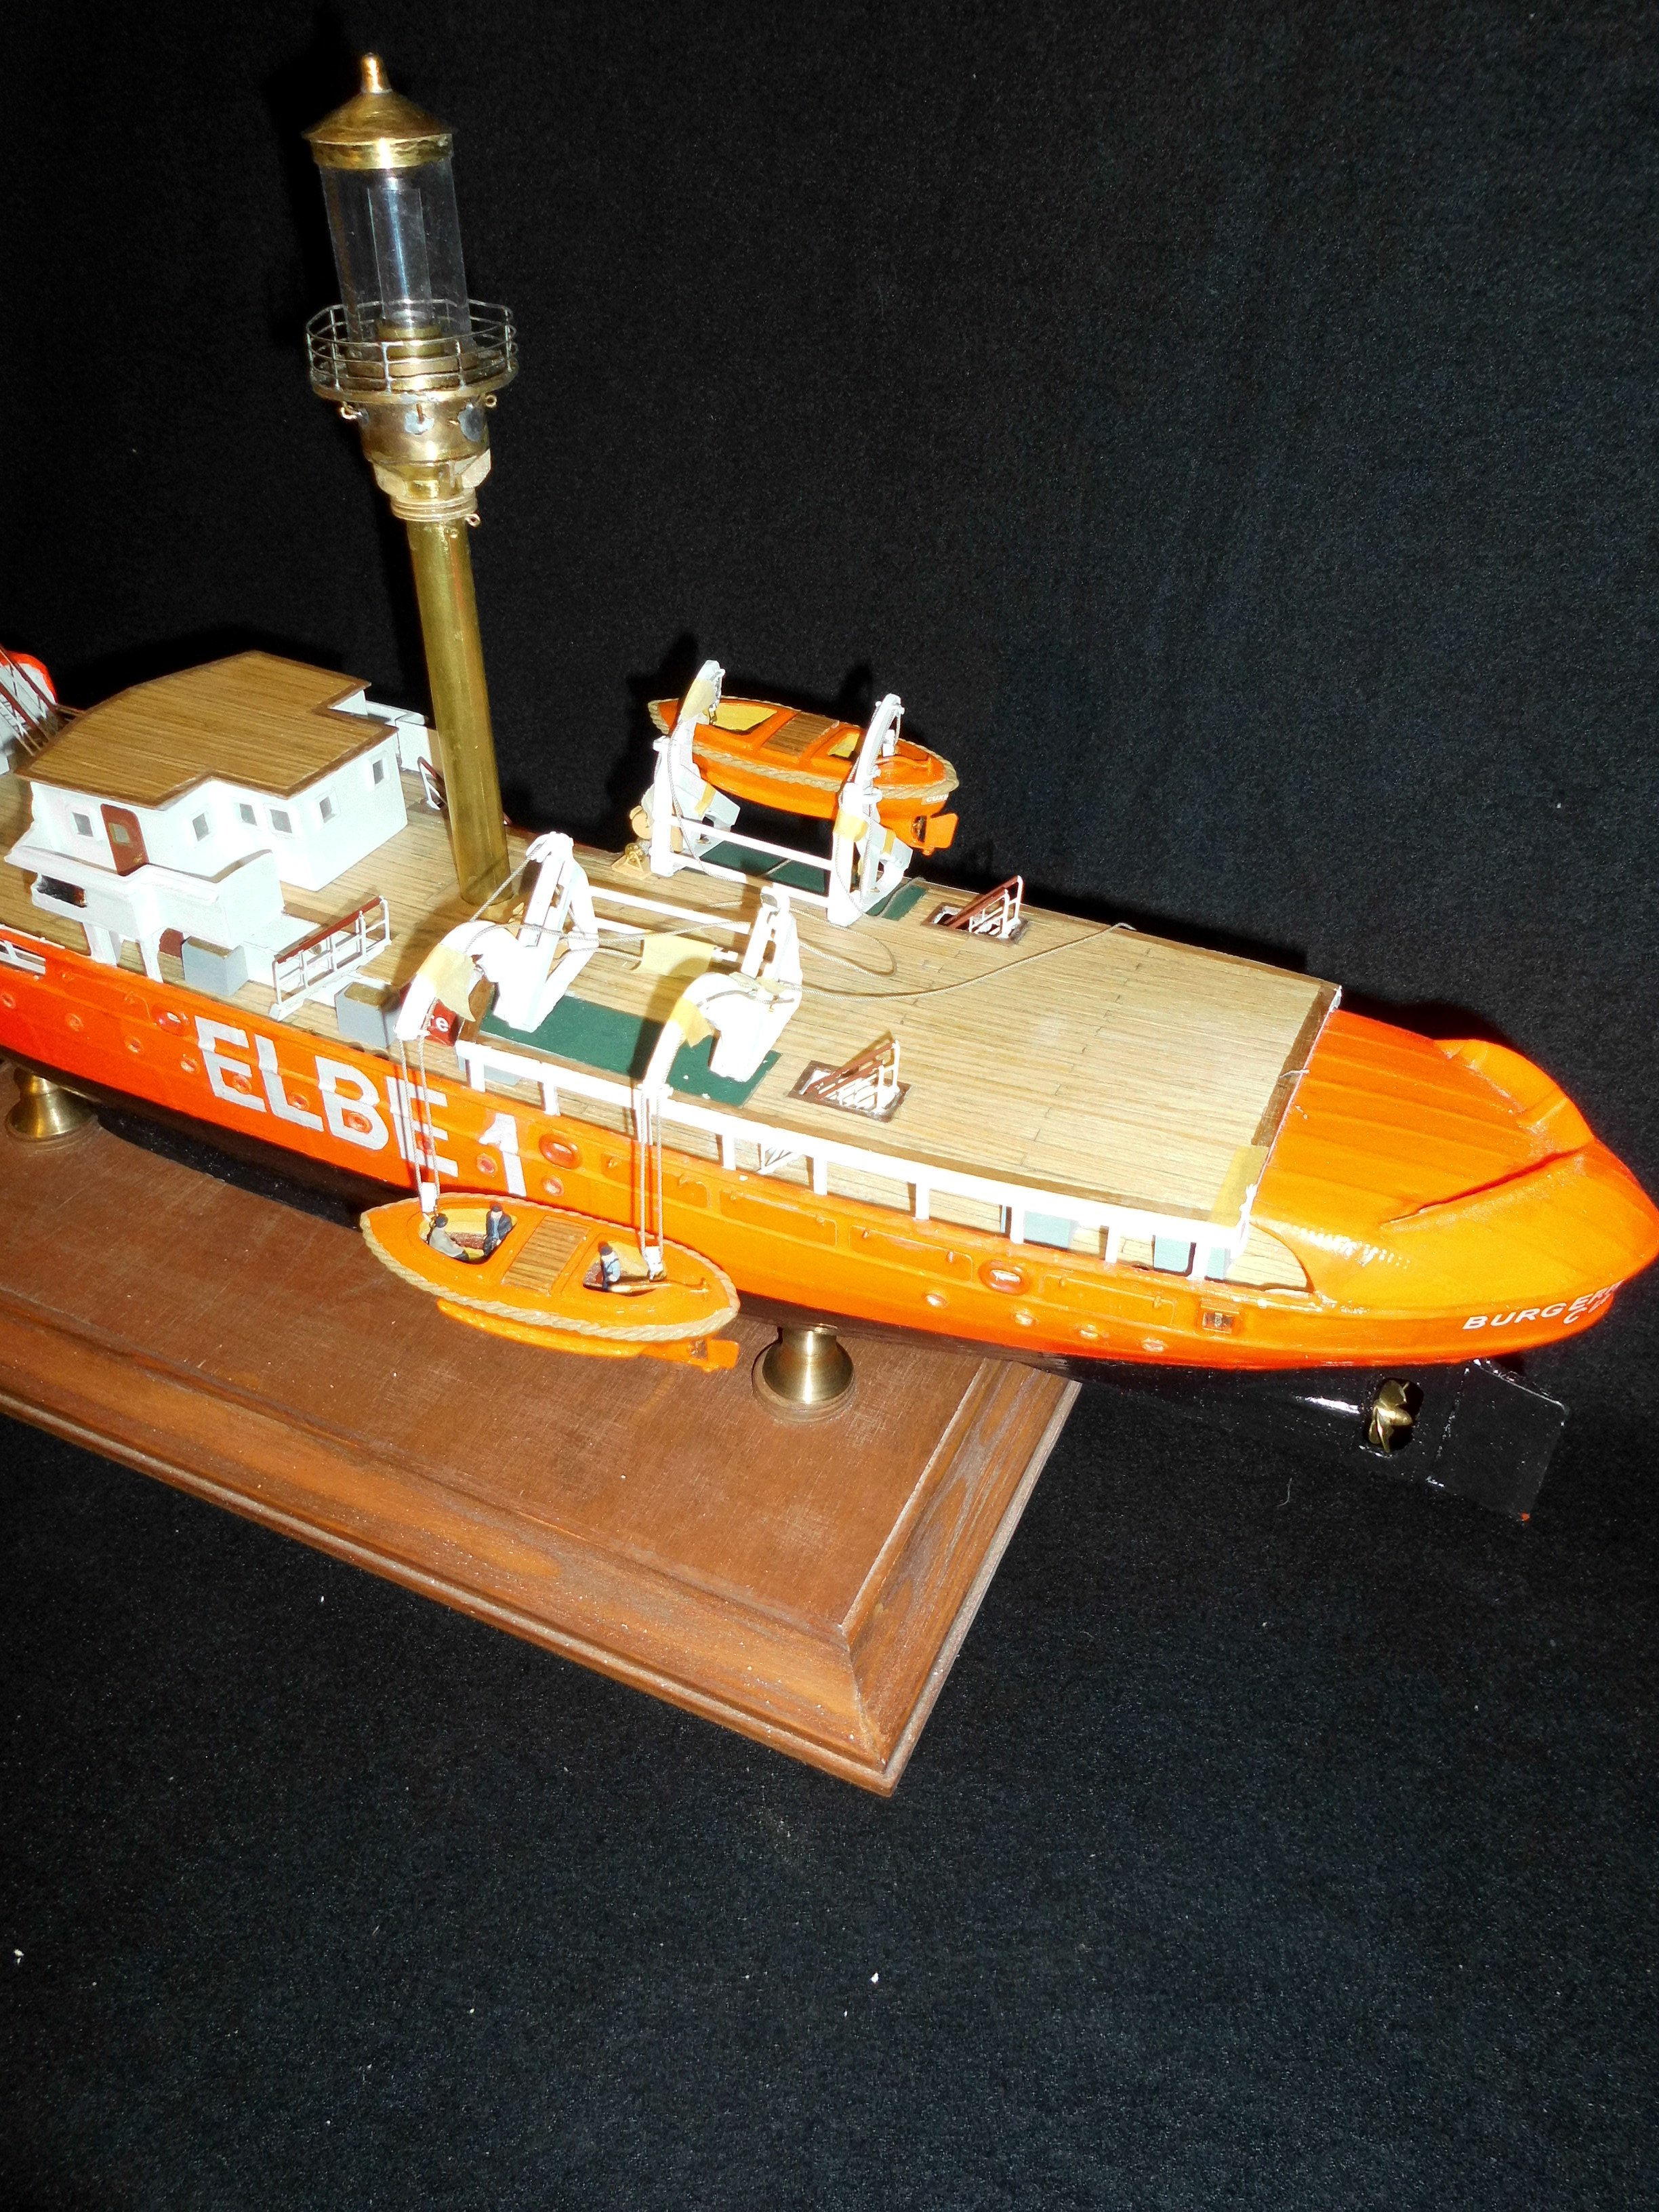
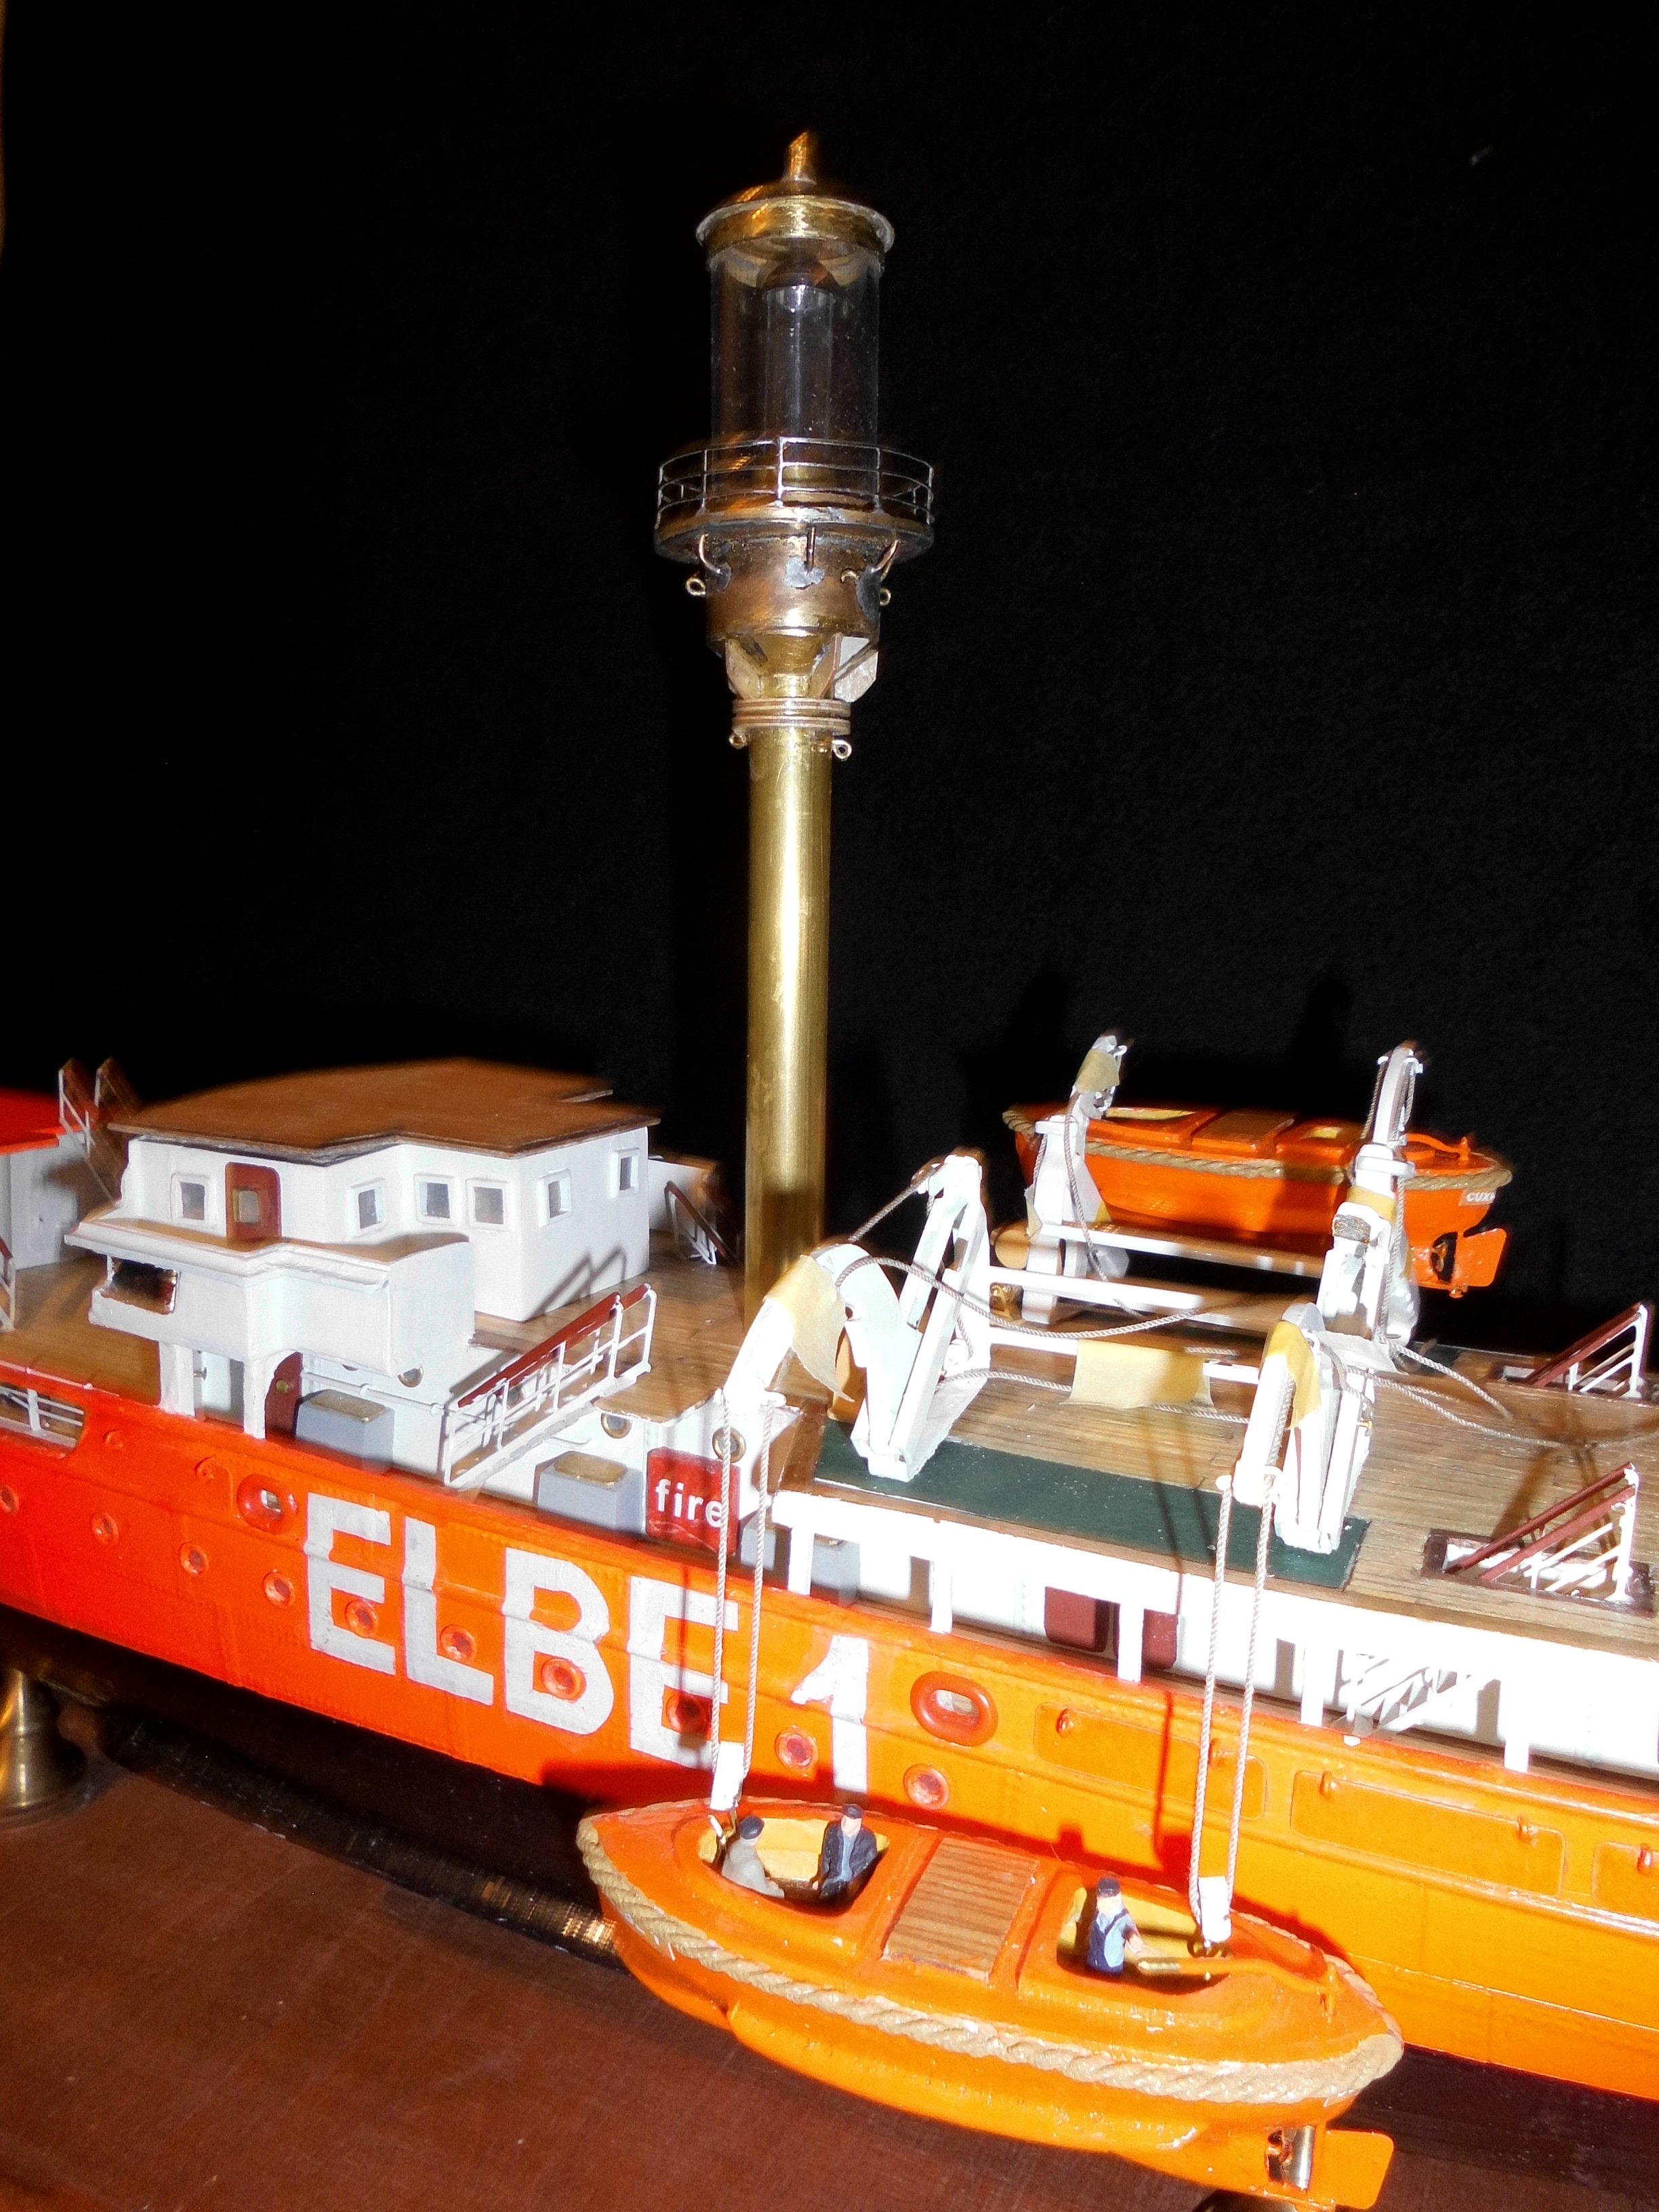
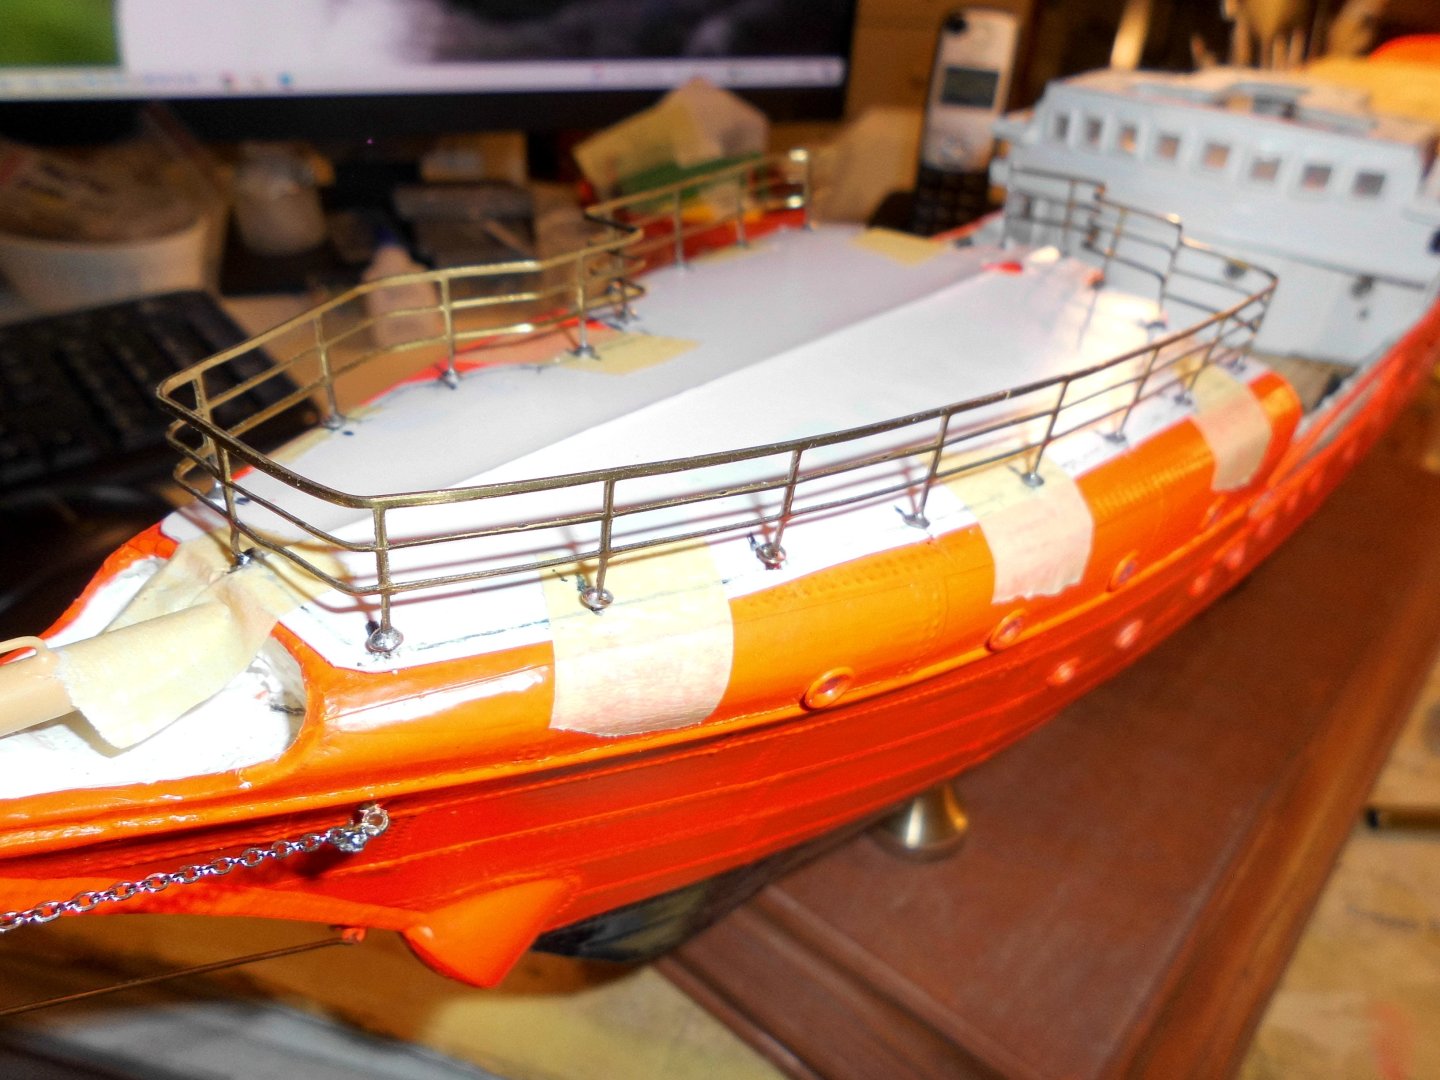
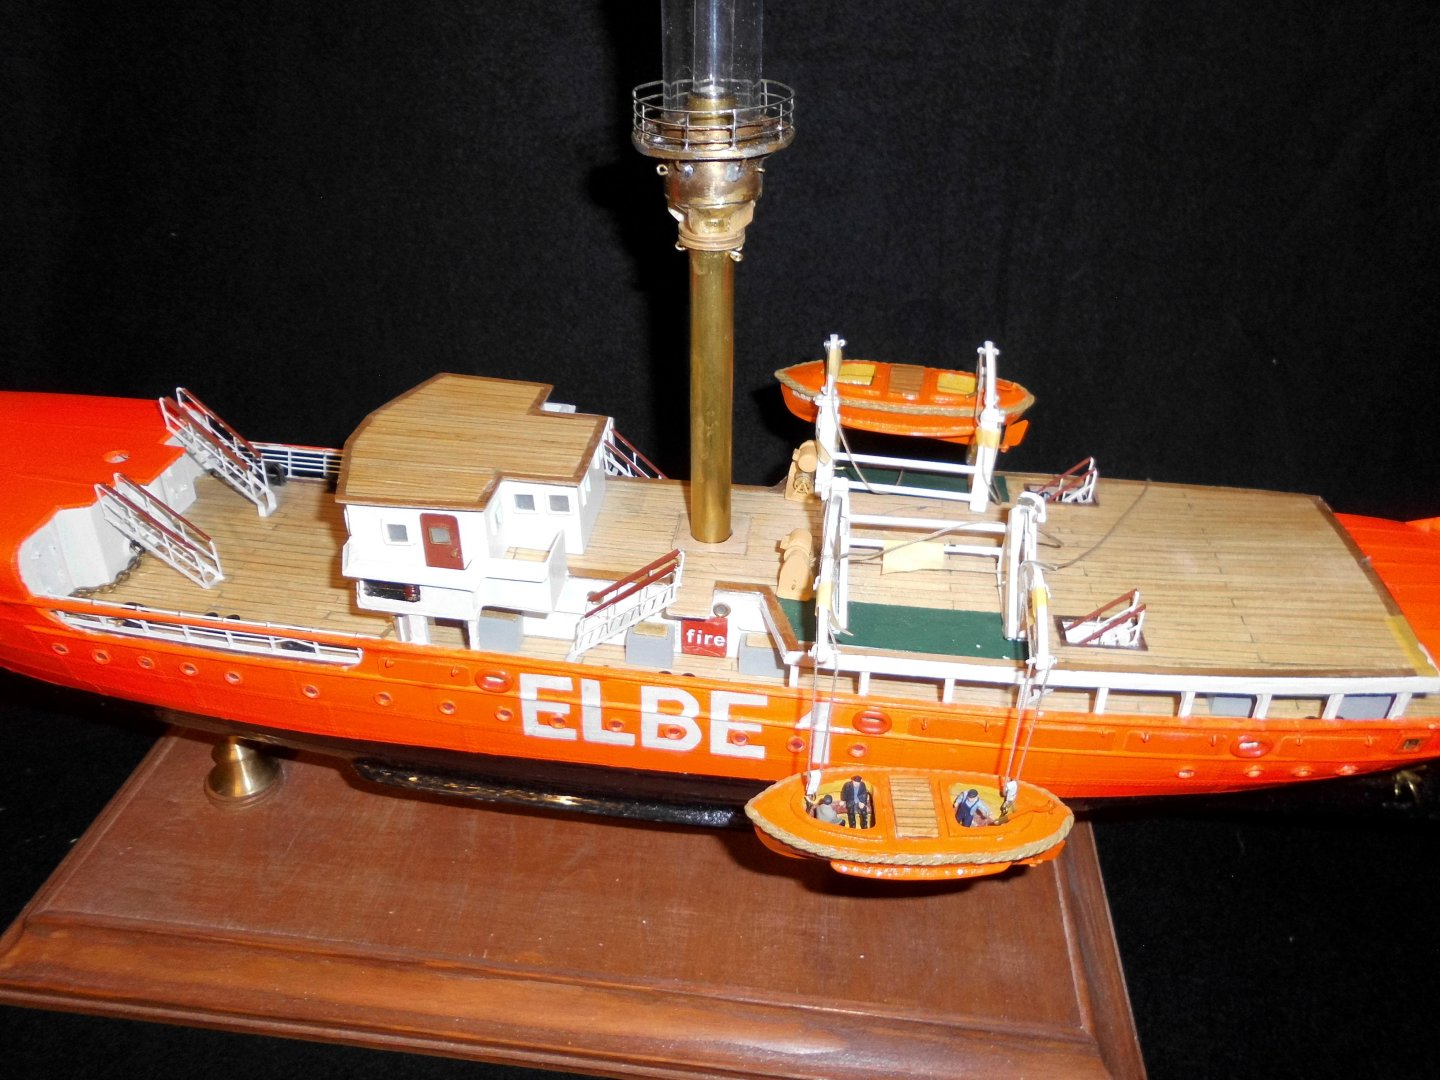
Hello, I`back again, sorry for not posting any updates for quite a while, but there were several health issus to overcome. I trust from now on there will be some more work in the shipyard..... am just working at the forecastle deck and the appropriate railing, also the bow bumpkin with side chains and the water stay. For the railing I found a quite sturdy strip of etched brass in suitable size at Ebay (was the and only the last left- over of an outrunning article ) The deckplate will be structured like shown in the pic. the railing footpoints will go through the edges of the structured plate ind in to the the already built structure of the hulltop below. the railing will allow a space where the spare anchor is placed. the railing will be primered and painted (both spray technique) before monting. Nils bumpkin chains and water stay also the dryfit for the forecastle railing. I made a card template to determin where the holes go for the stantion-feet place for spare anchor finaly all fits well connection to the stb. staircase this is what the polysterol structured plate will look like spraypainting after primering


- 313 replies
-
- 16
-
-
-

-
- lightship
- Feuerschiff Elbe 1
- (and 1 more)
-
nice work Roach, I built her myself many years ago, and I wish you the same fun and success with the ongoing project.... Nils
- 6 replies
-
- 2
-
-
-
- billing boats
- marie jeanne
- (and 1 more)
-
Good work Pavel, its a very nice kit you have chosen, when you got started. Beautuful work, I like to see another chinese junk on this forum Nils
- 22 replies
-
- 1
-
-
- chinese pirate junk
- Amati
- (and 1 more)
-
Hi Valeriy, I just caught up again, and had another run through your build log. This is excellent eye candy and i dip my hat for your skills. I admire the metal work and the soldering you are performing, it is showing how you do the transformation from ideas, thoughts and required techniques to fullfill such beautiful work whilst setting benchmarks for your fellow modelers. This is exciting stuff. WUNDERBAR !! Keep it up and a happy new year, Nils
-
Spendid and fine detailed work Phil, L love your metalwork, a very fine model !! Nils
- 492 replies
-
- 2
-
-
- minesweeper
- Cape
- (and 1 more)
-
a beautiful piece of work John, it reminds me of back of the course when my "Pamir" was under progress ( rigging and sails) at that stage as yourè doing.... Nils
-
Very nice work Paul ! Your buildlog is very interesting to follow, well done Nils
-
Moin Siggi, its a delight to explore your beautiful work to date on this ship, well done... Nils
-
Many thanks Uwe, Paul and John, my wife has become a repair of one of her heart valves, and is now, glad to say, on the way of recovery. For the Elbe 1 I need to sort in the next steps in progress, there are quite a lot of ends to pick up.... Nils
- 313 replies
-
- 11
-
-
- lightship
- Feuerschiff Elbe 1
- (and 1 more)
-
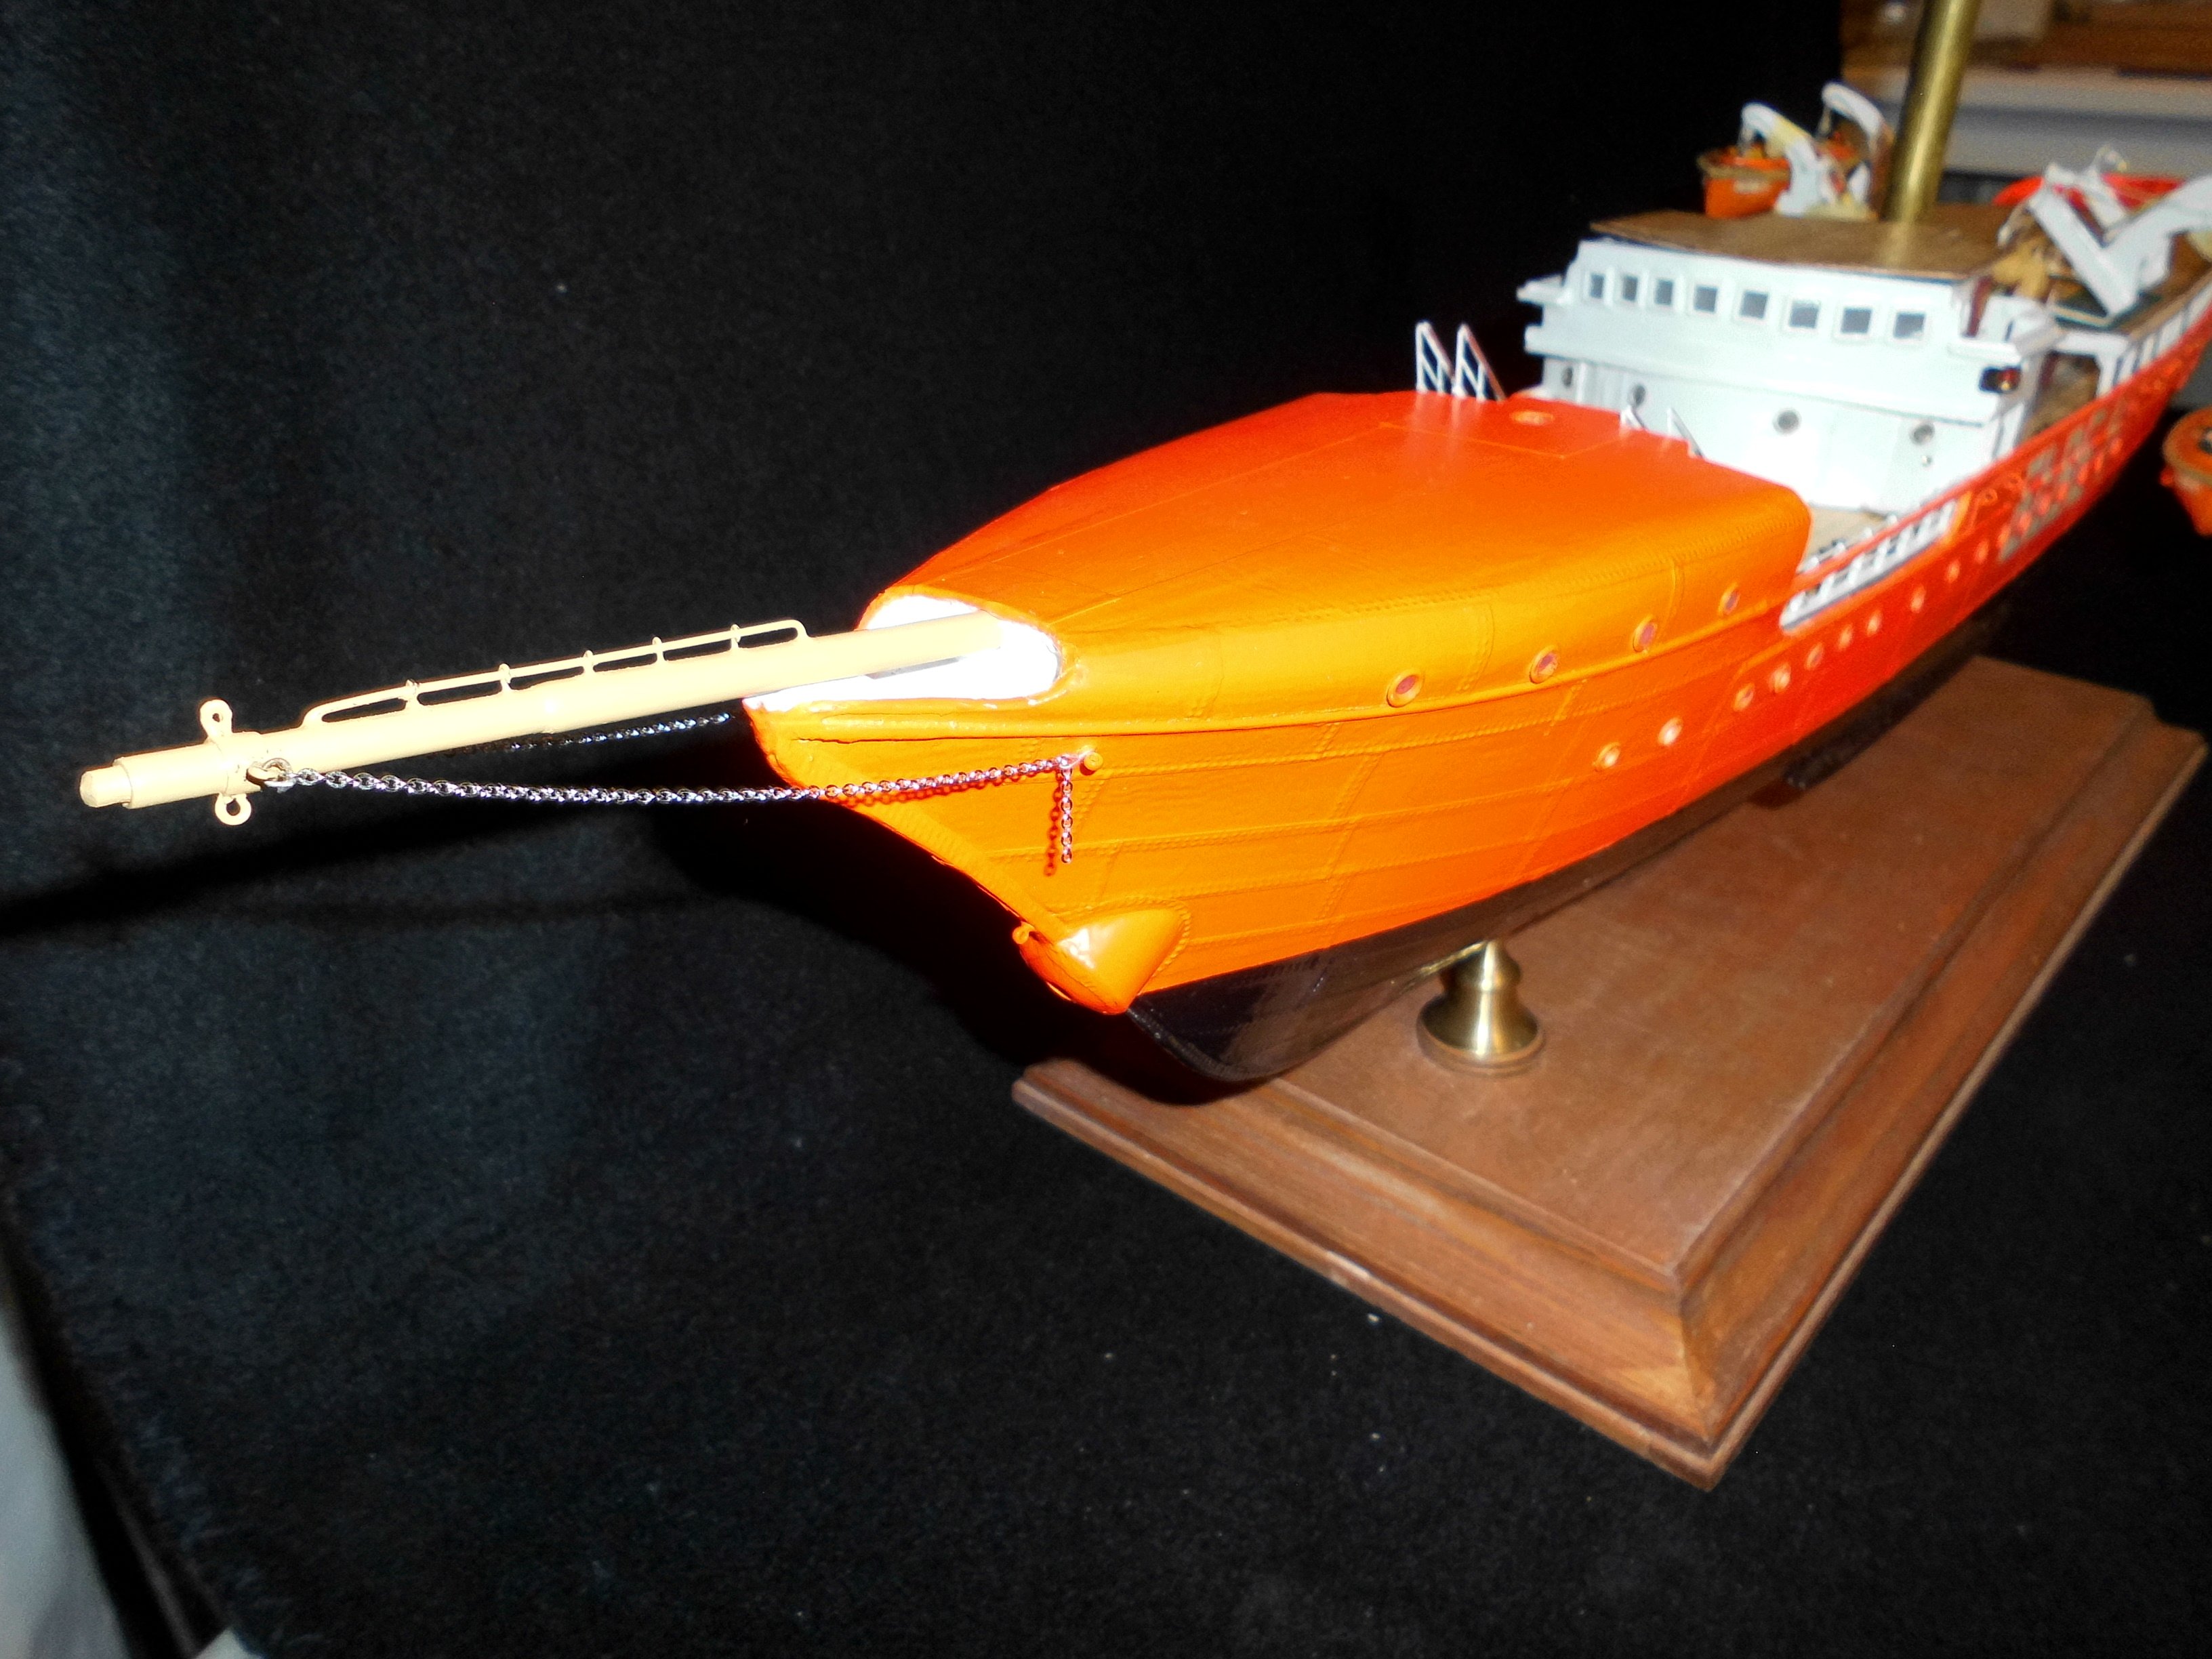
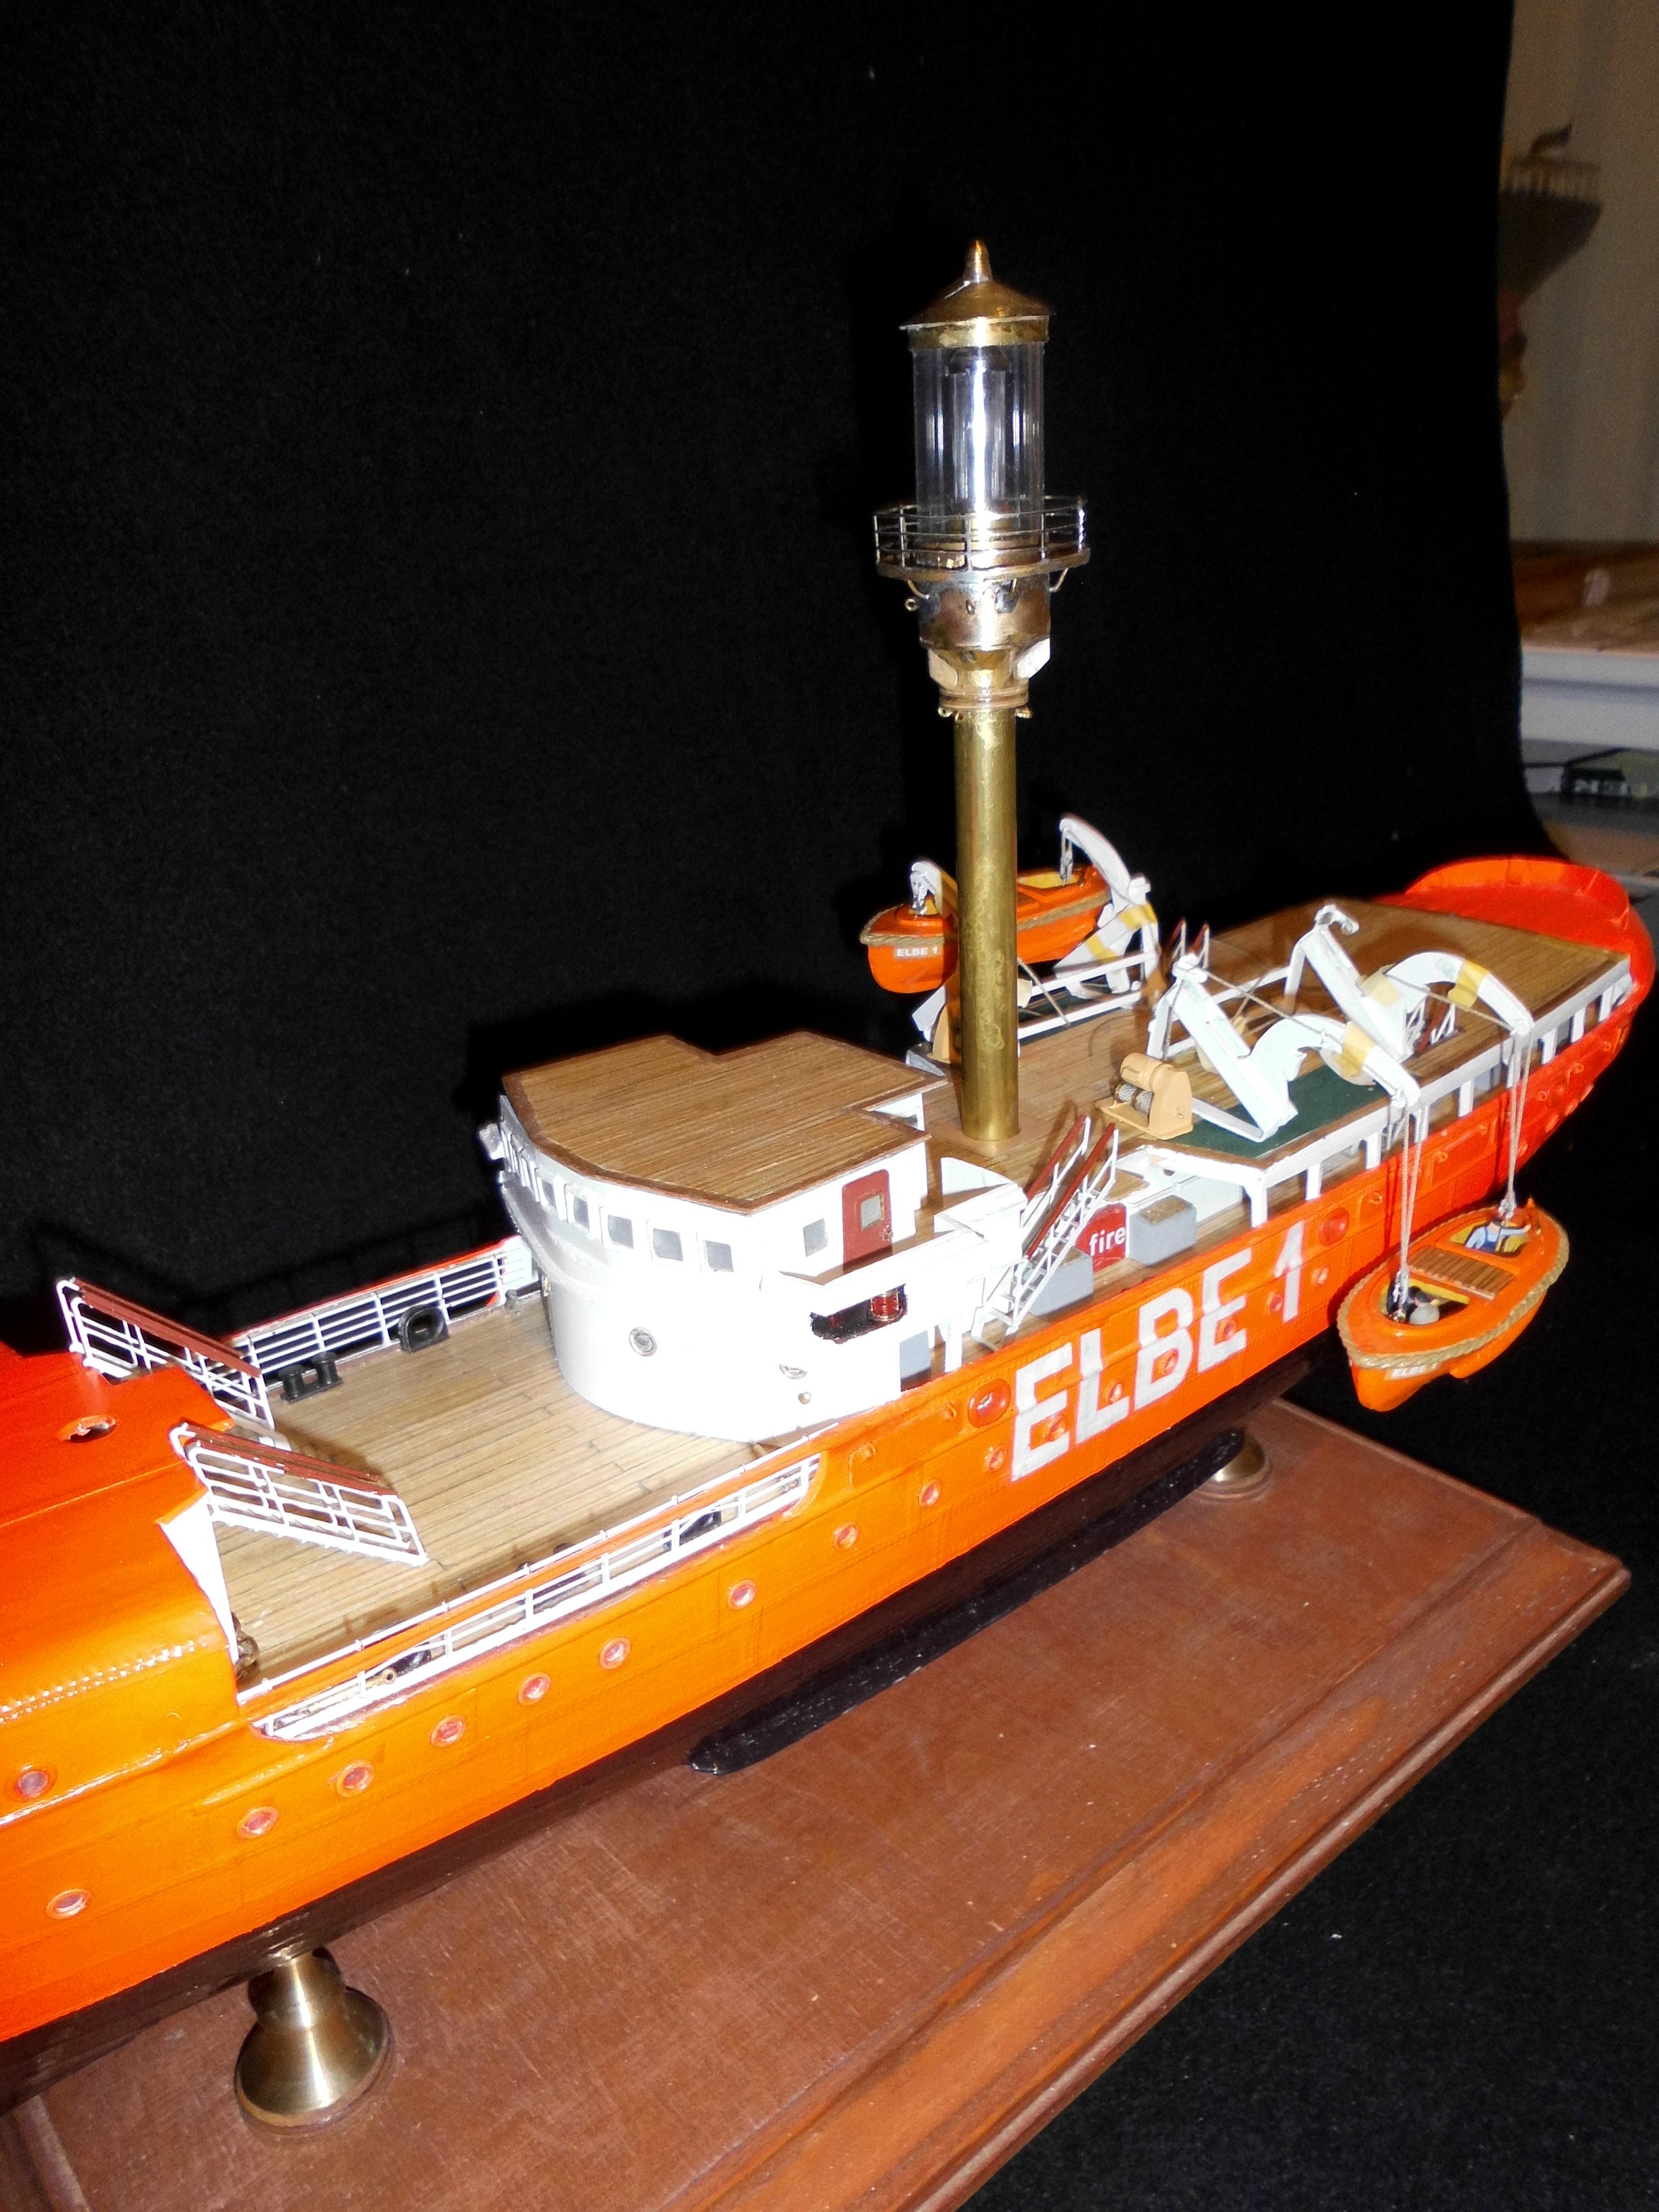
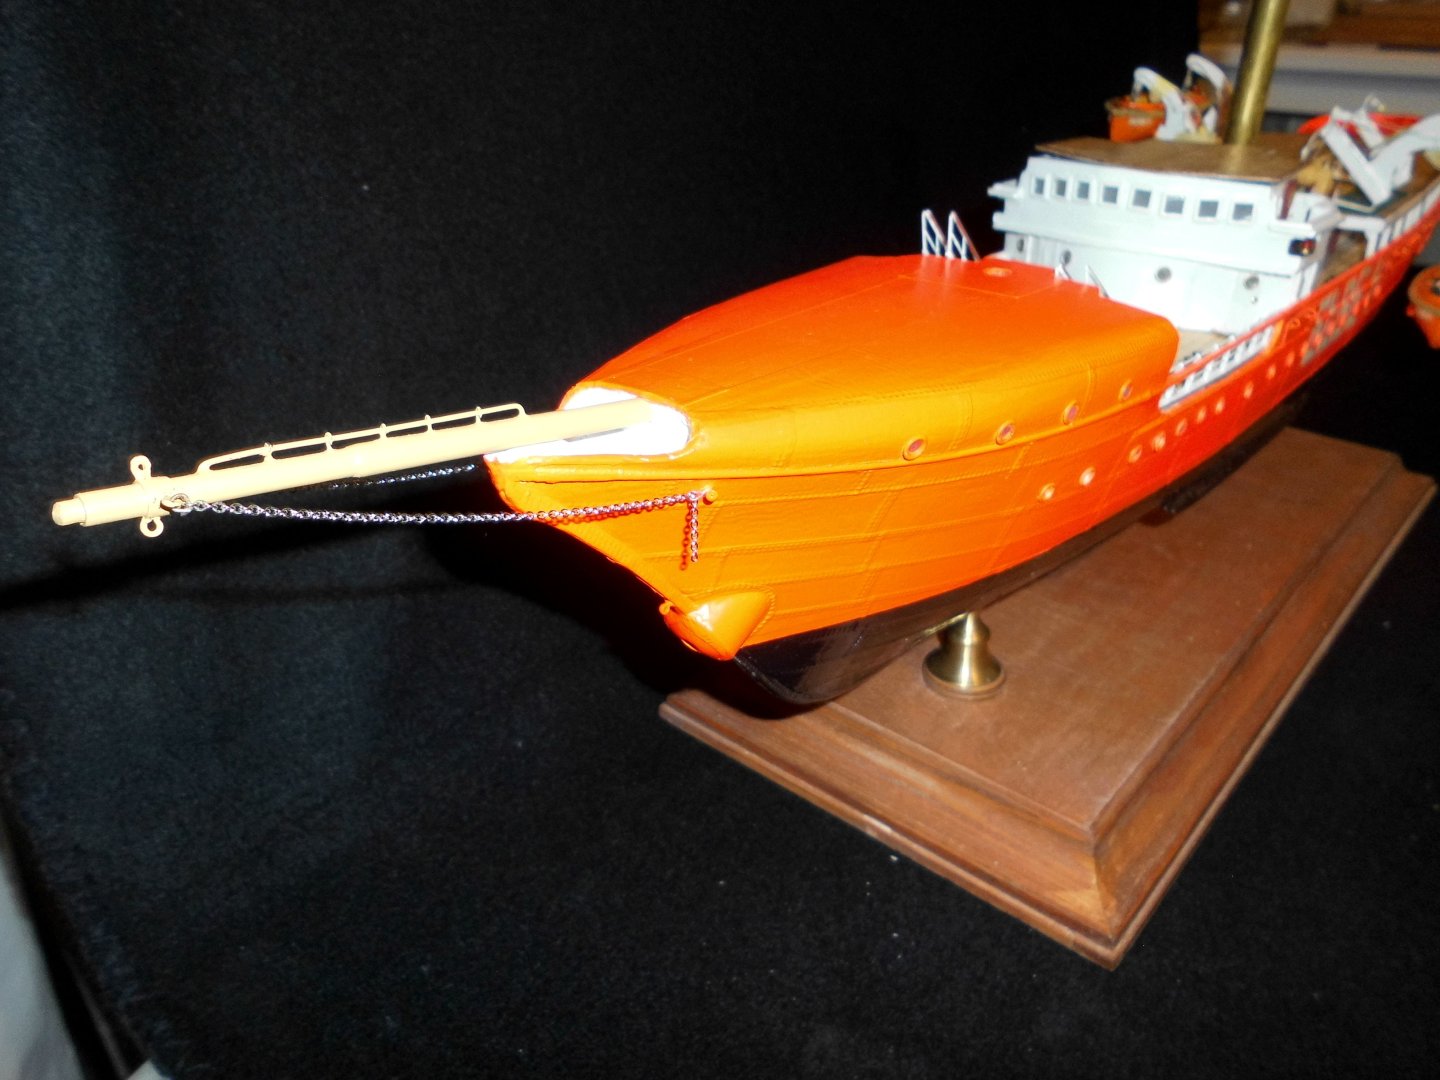
Hello fellow builders, after quite some months, due to the aid for my wife, i find some time again to carry on with the build log. Here some pics of the progress..... Nils --the bow sprit in place wit preliminary attached chains the boats and the boats gear in place, also the raw lightmast in place the stairs in place and the planked roofdeck of the wheelhouse I`ll rigg the portside Boat in lowered position


- 313 replies
-
- 18
-
-
-
- lightship
- Feuerschiff Elbe 1
- (and 1 more)
-
nicejob, well done... Nils
-
Beautíful work Yves, I was allways wondering how the triangle shaped spaces underneath the gundecks were to be cleaned, as there must have quite a smell coming from underneath. I knew thar there were some triangle shaped scuppers to the hull outside in that area. Probably the cleaning could be done from above, after lifting and removing the appropriate gundeck gratings..... Nils
-
looks great Valeriy, Nils
-
Beautiful work Ilhan, I love the techniques you are showing on this build. Very nice painting job, Also great, the aft grating.... in all an amazing build ! Nils
-
Hi Paul, very interesting scratch build, good work ! I wish you much fun an good success for the progress Nils
-
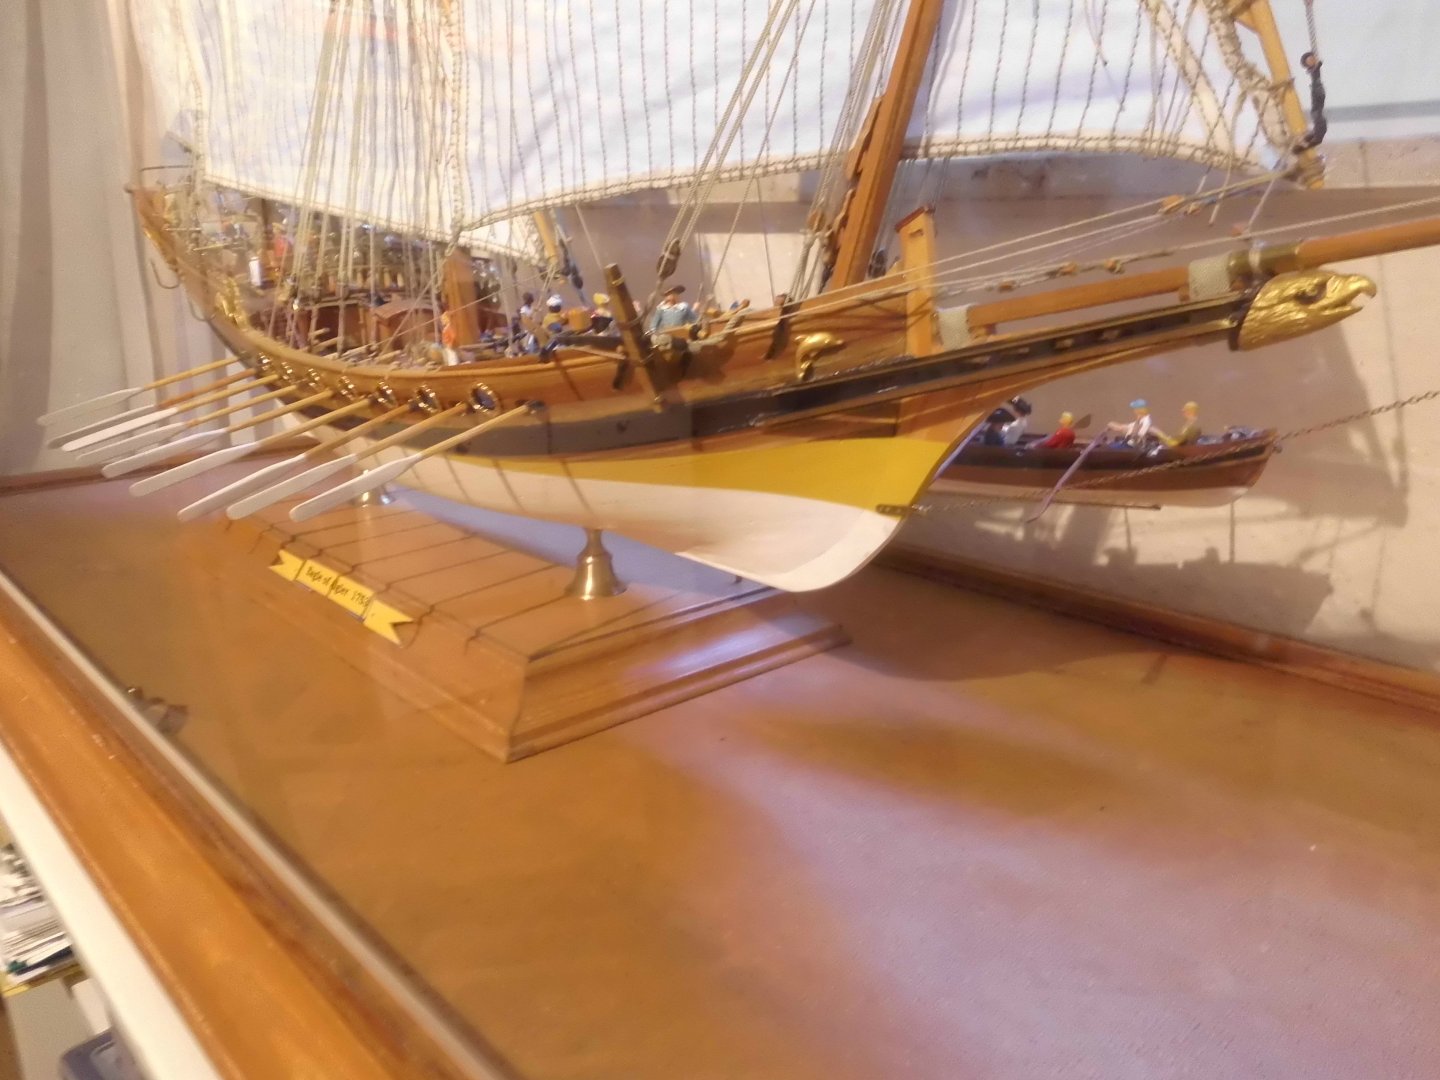
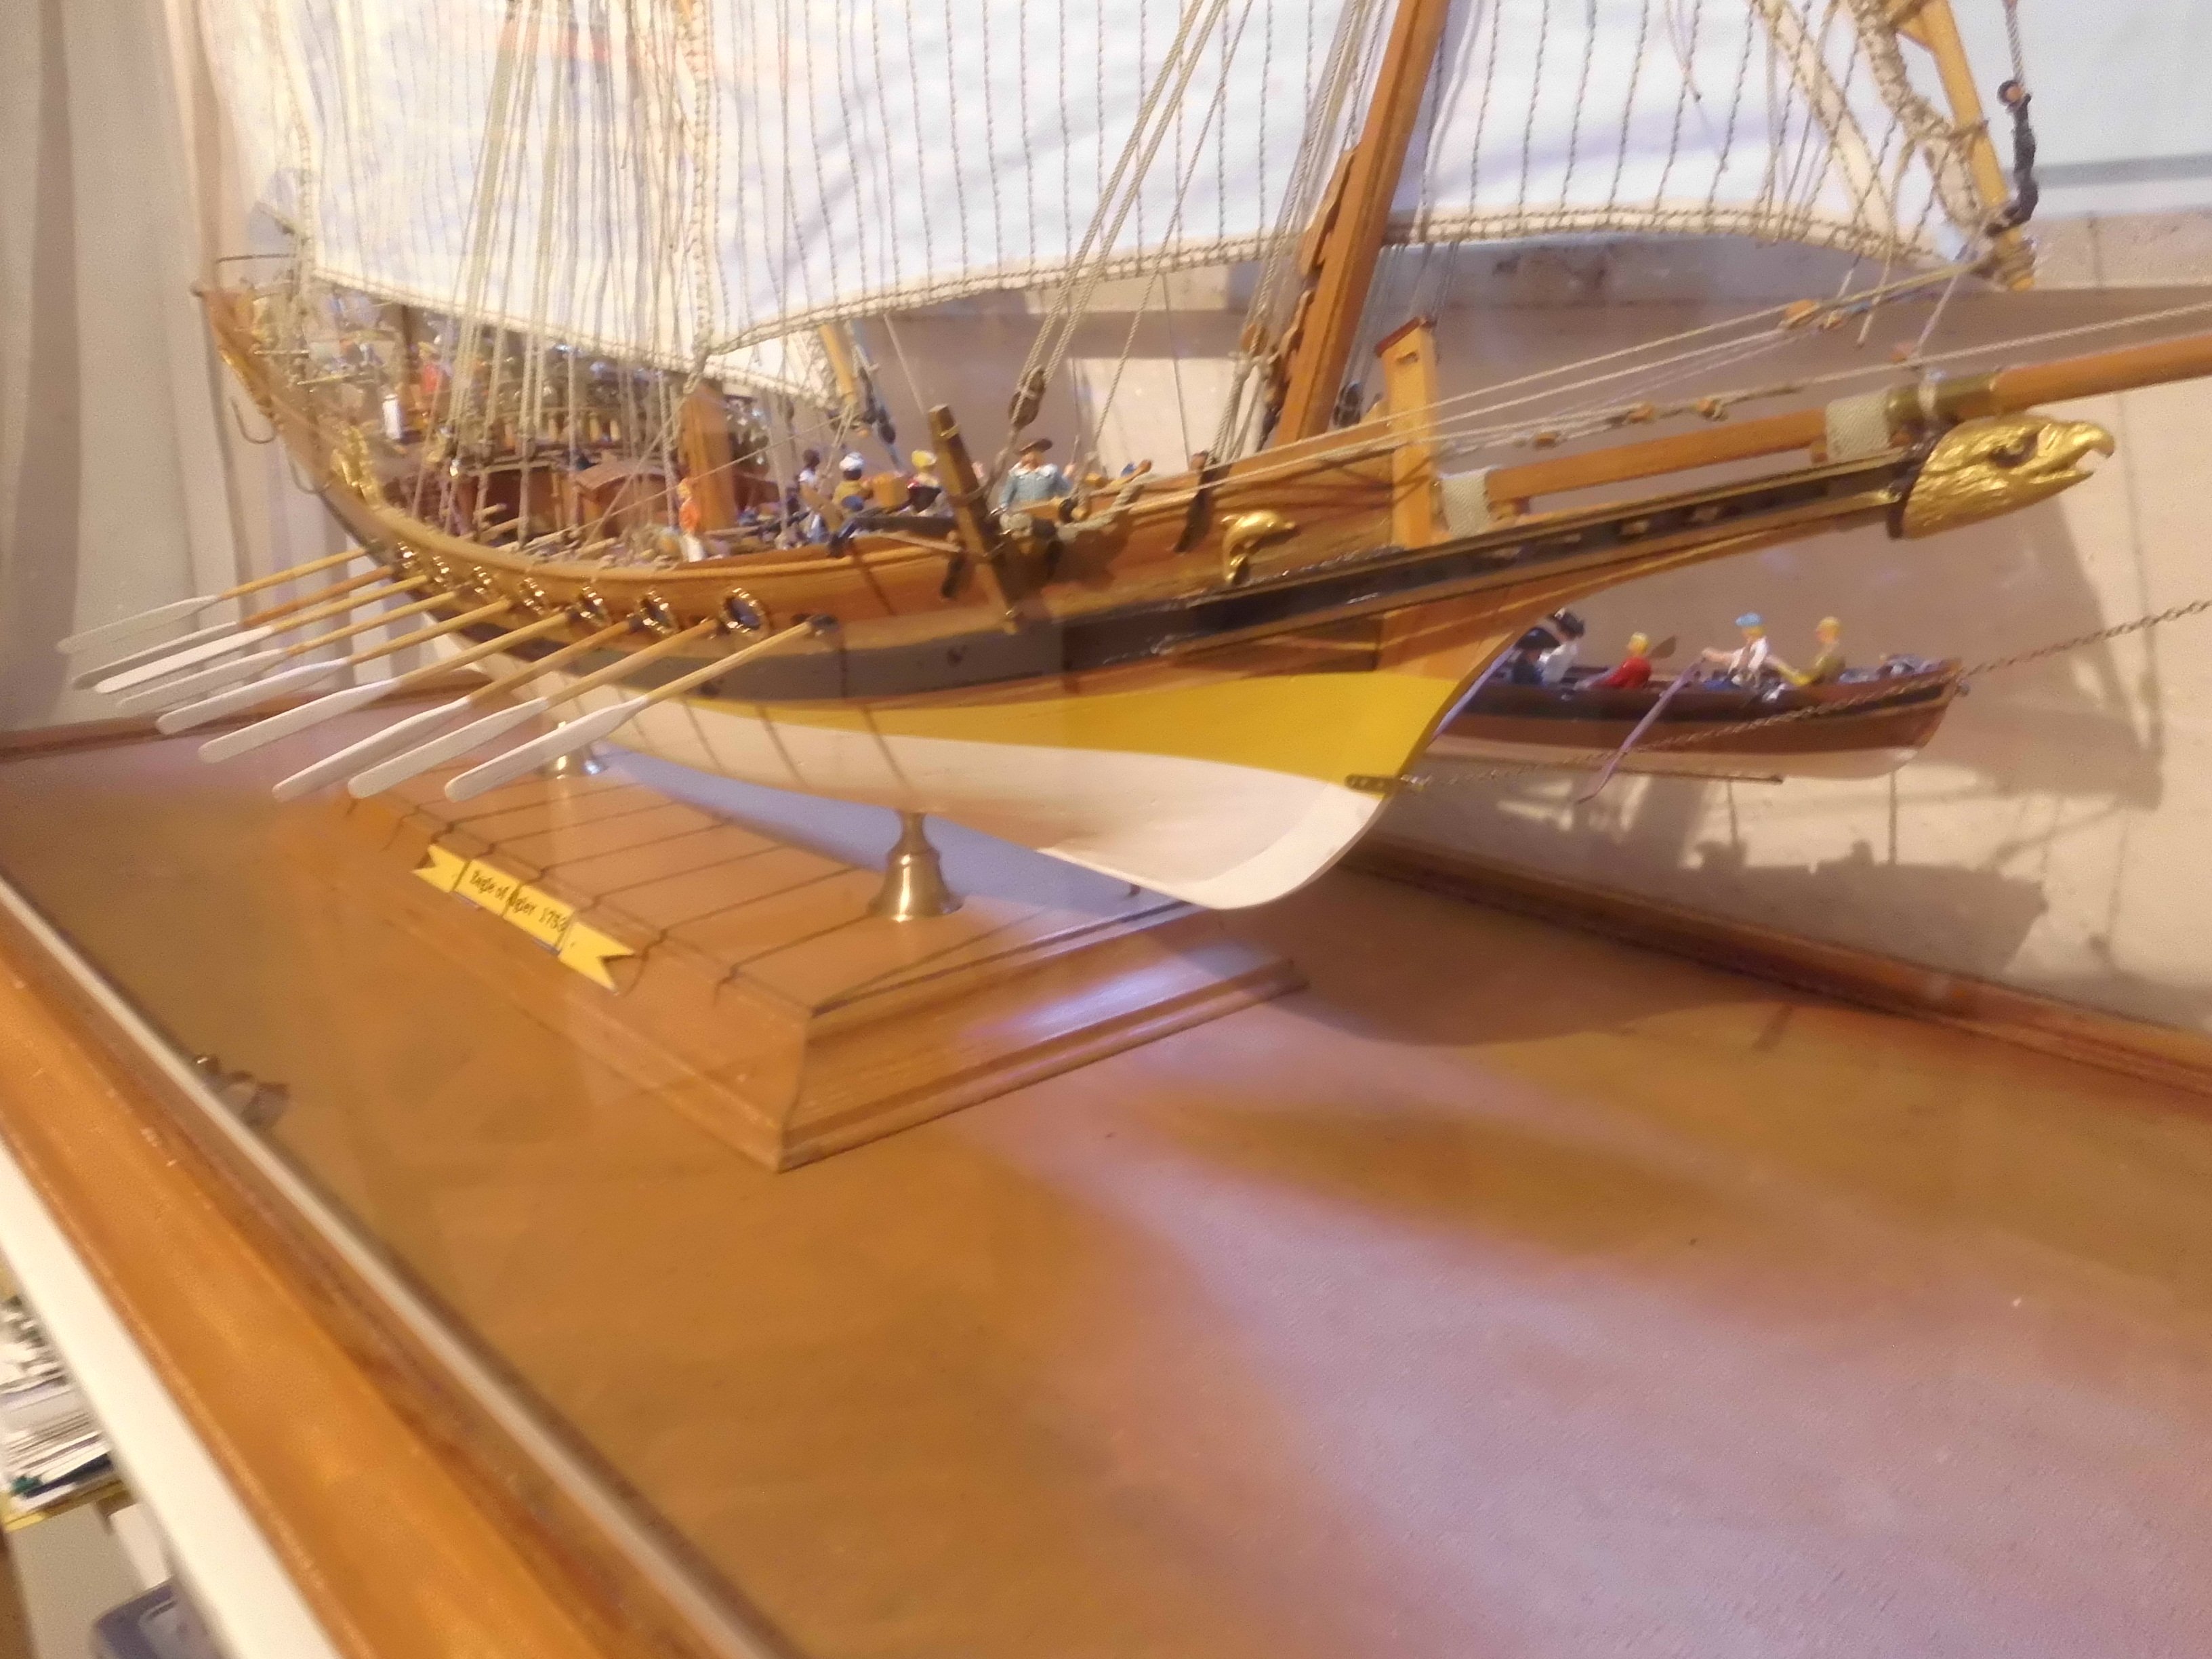
Hi Yves, I have a pic here to show the Eagle of Algier with set sails in a quite broad glass casing. I fitted the starboard side with a set of sweeps whilst the portside is equipped with closed oar doors. A ship`s boat with crew is placed at the waterline, heading for shore Nils