John Ruy
-
Posts
1,600 -
Joined
-
Last visited
Content Type
Profiles
Forums
Gallery
Events
Everything posted by John Ruy
-
 Very nice work! 👍
 -
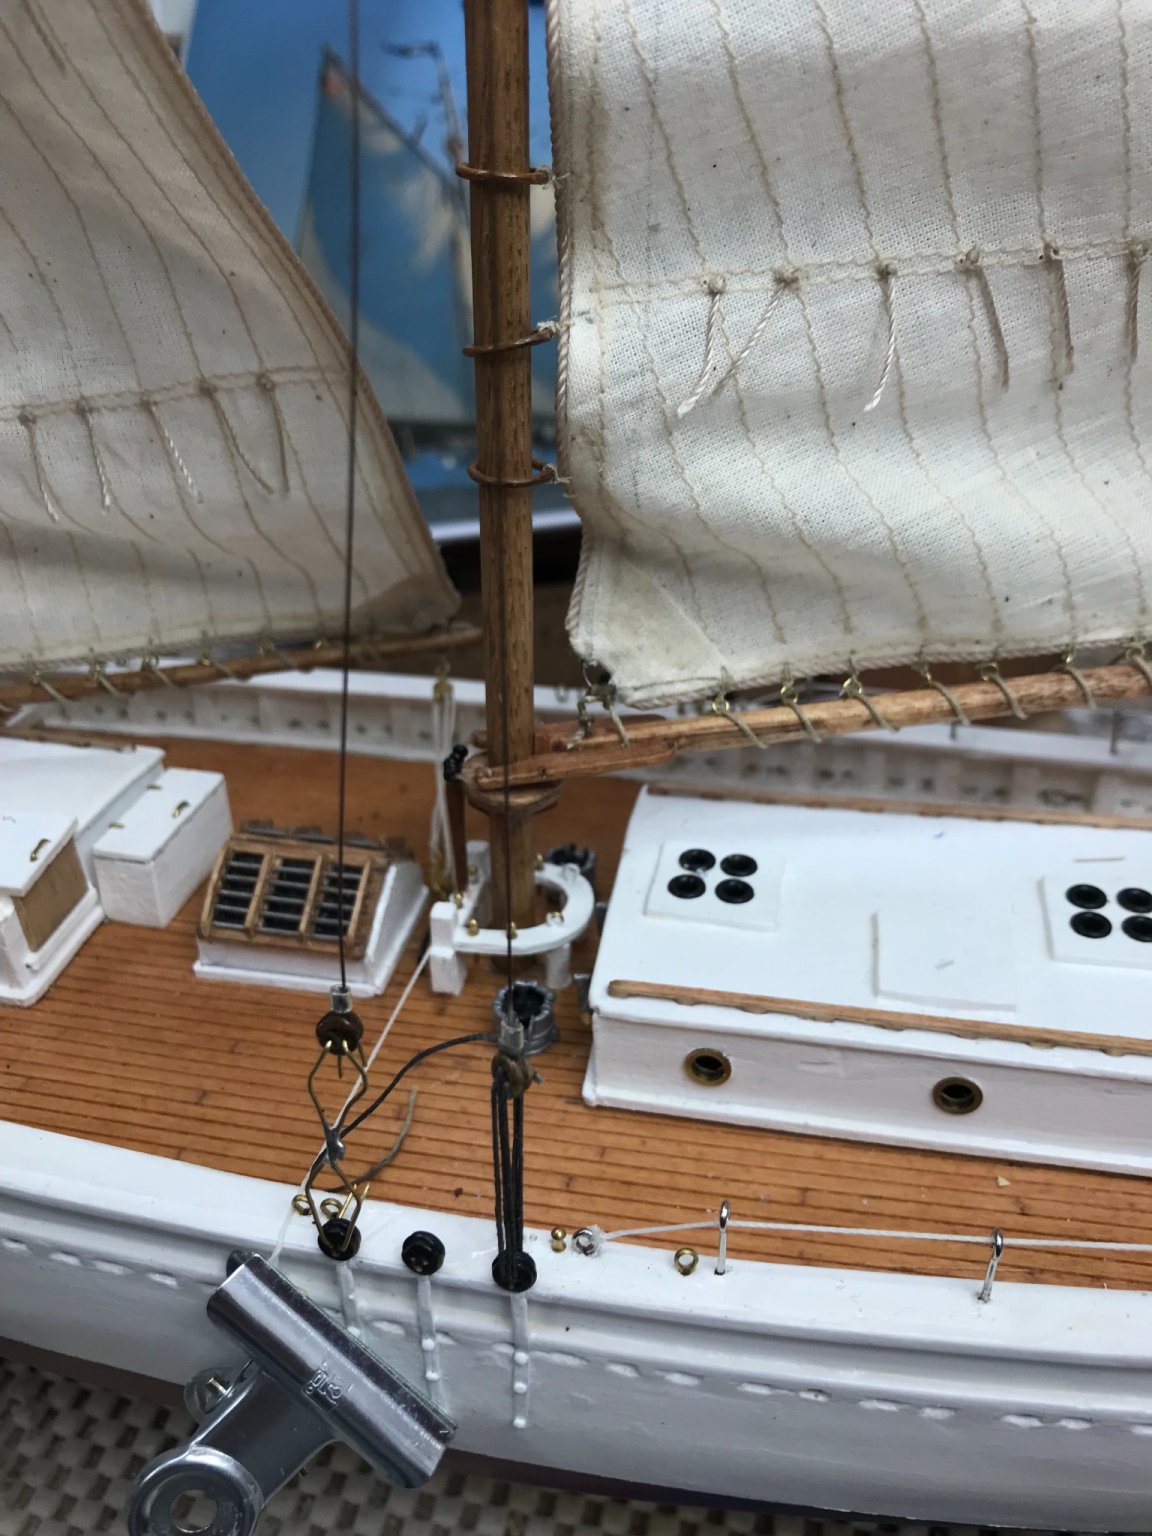
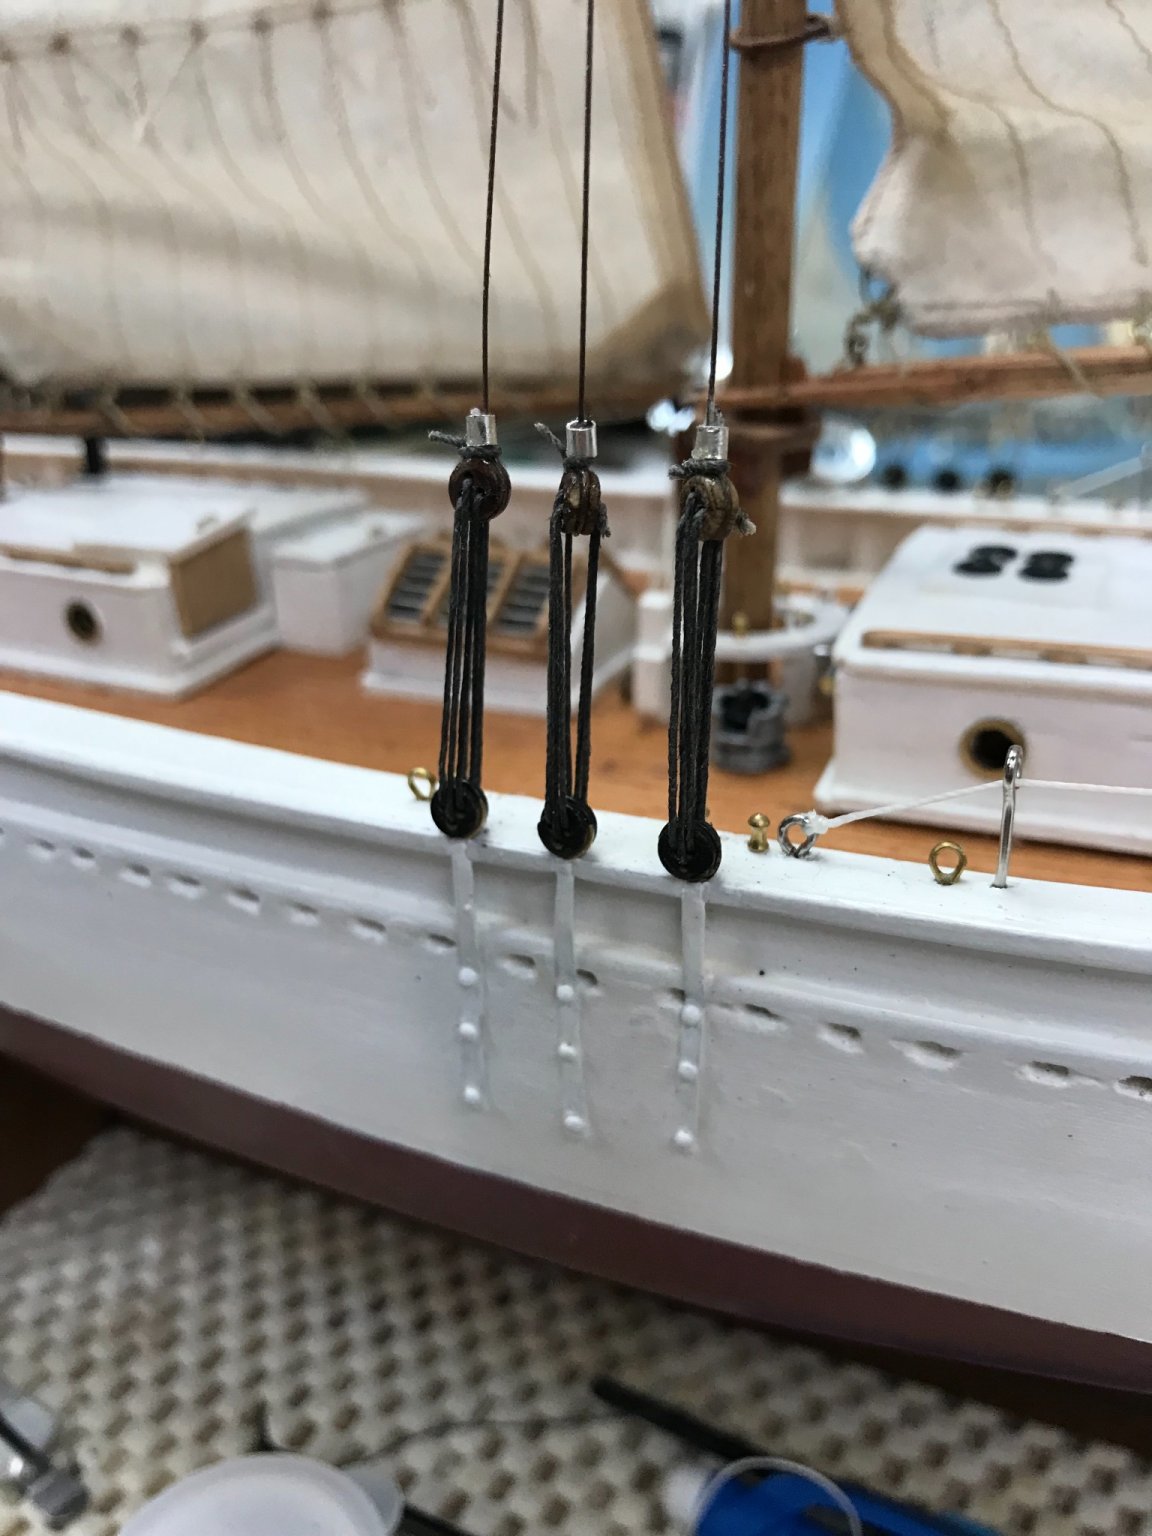
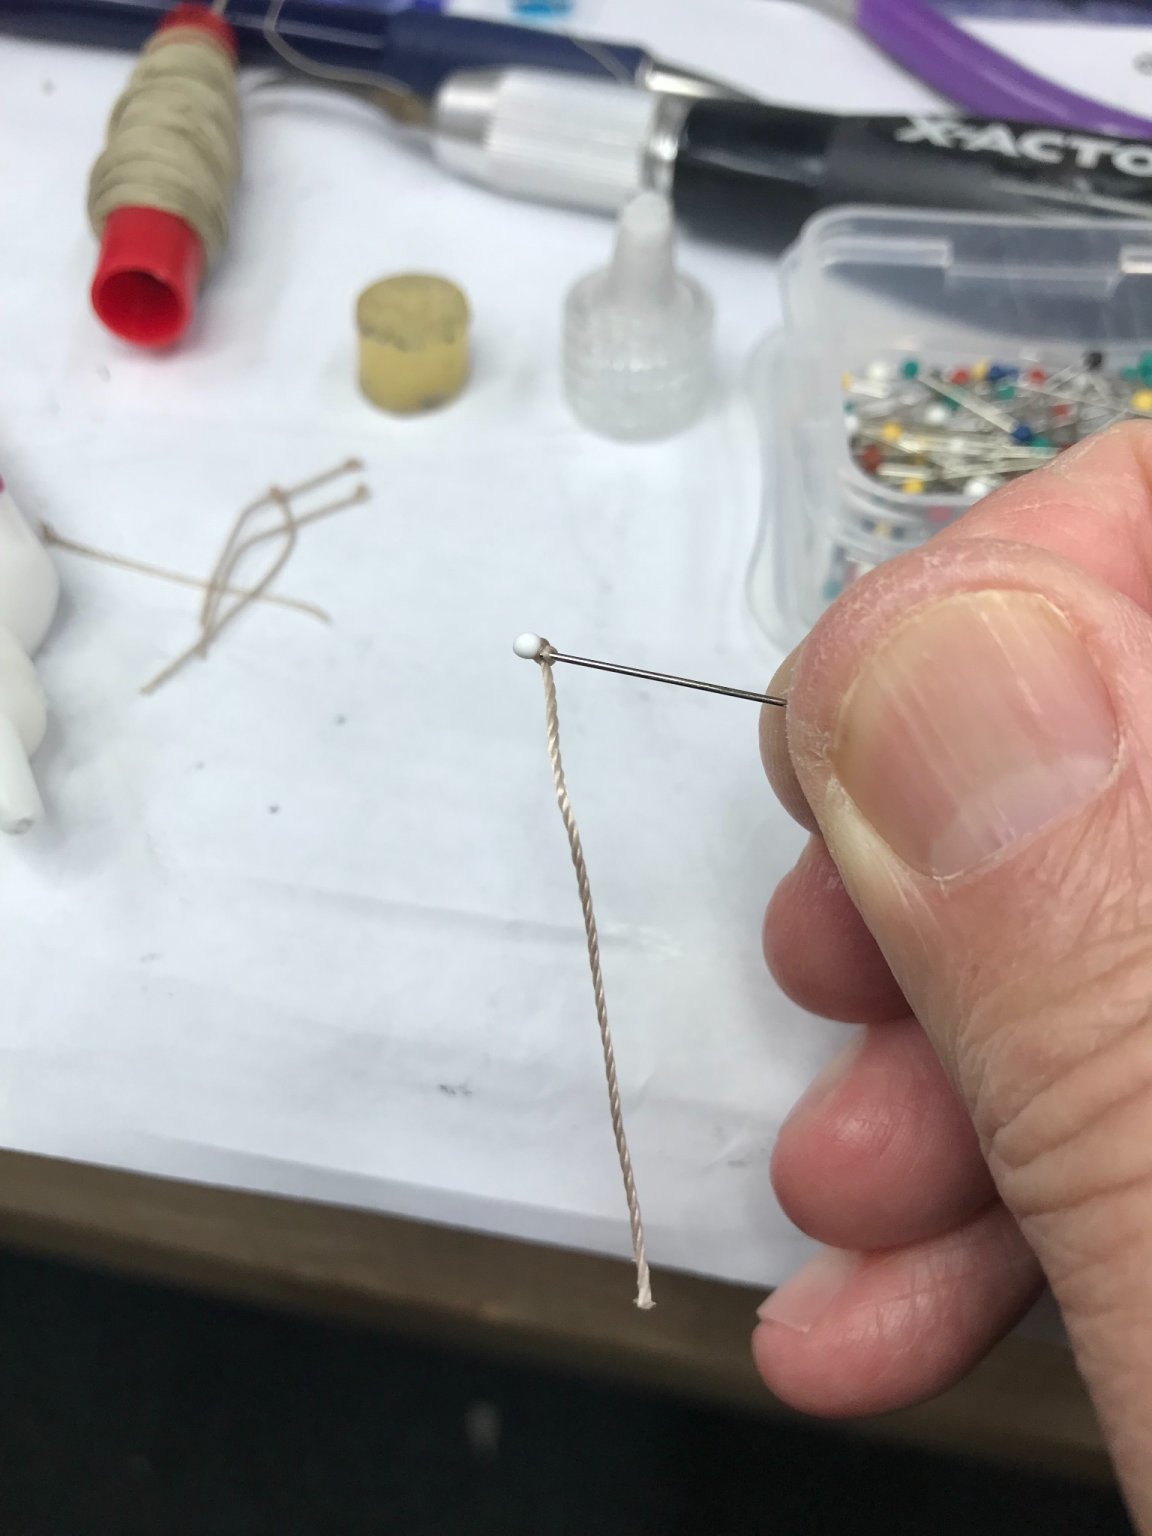
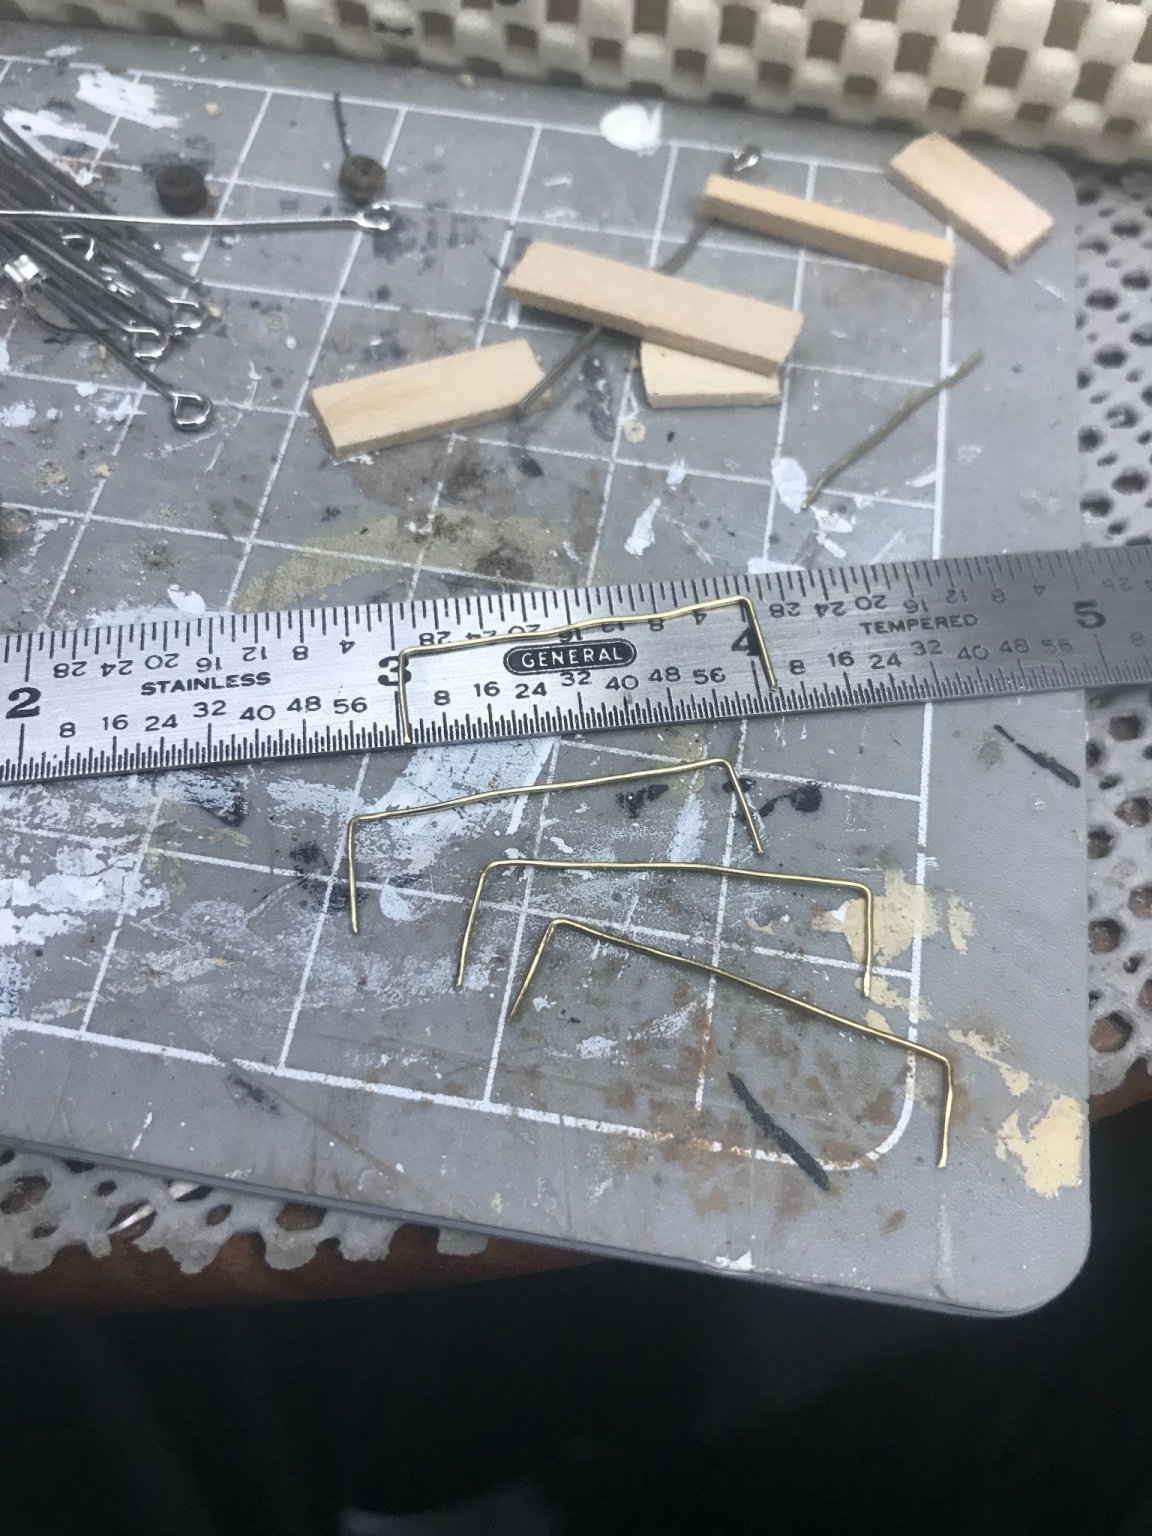
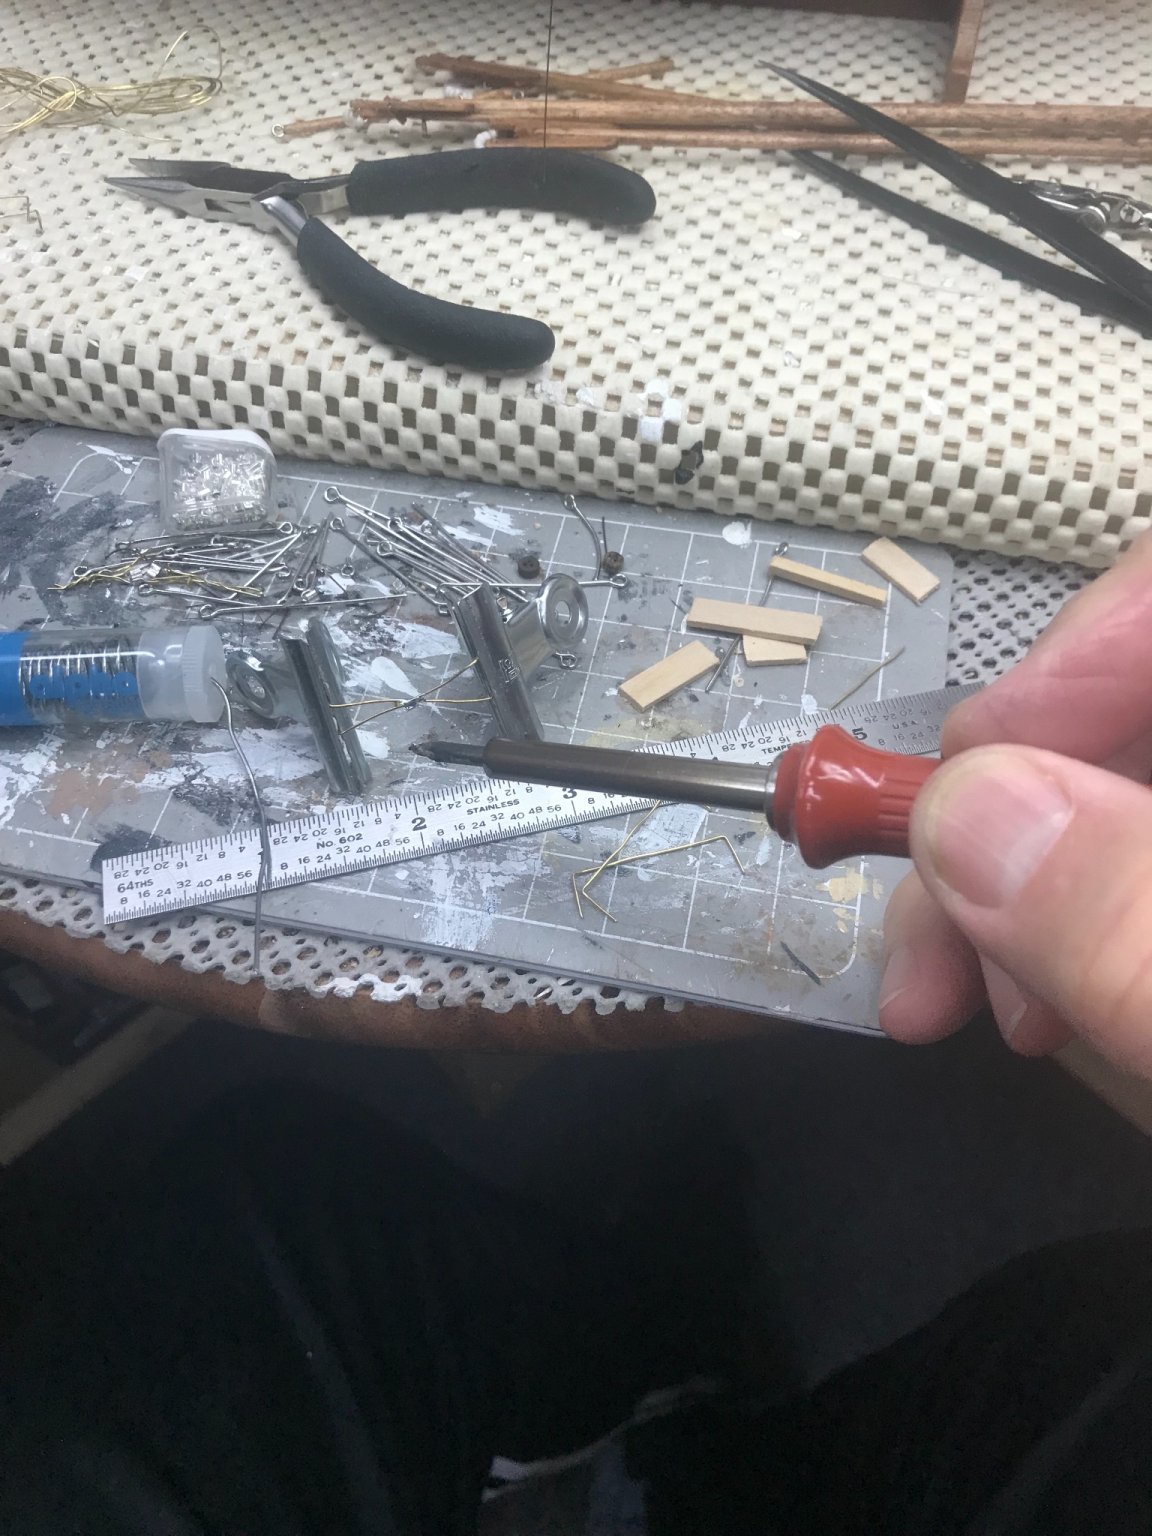
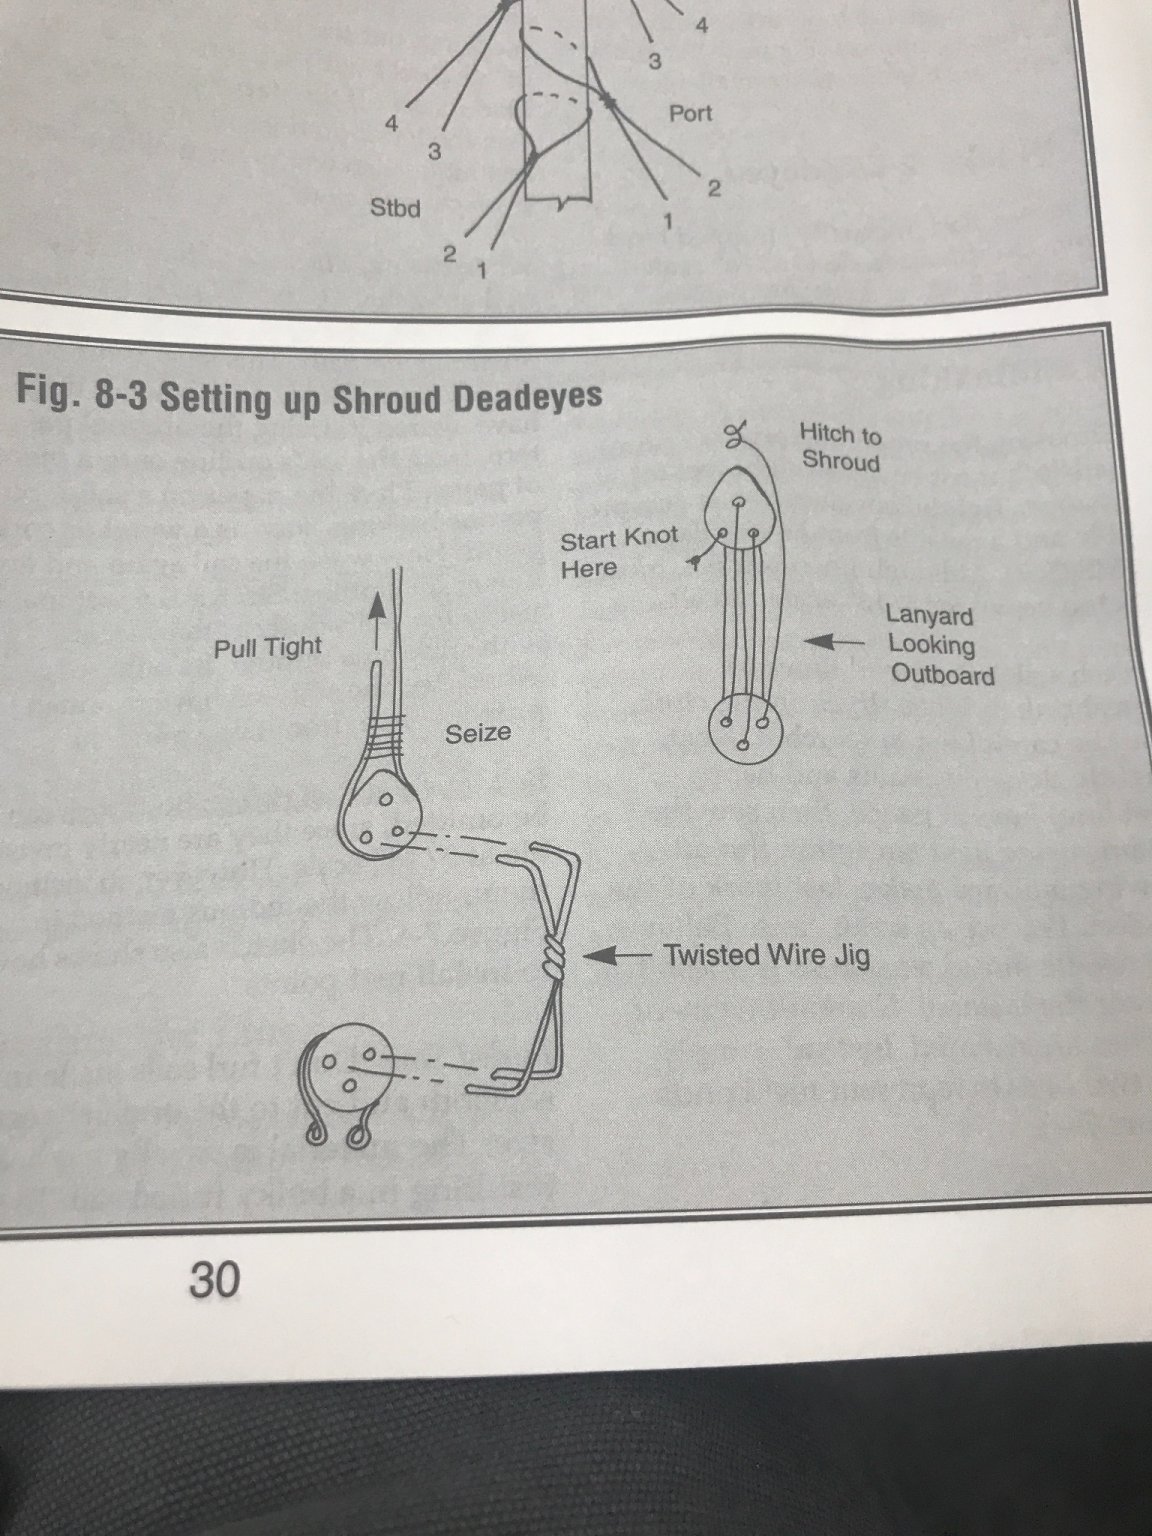
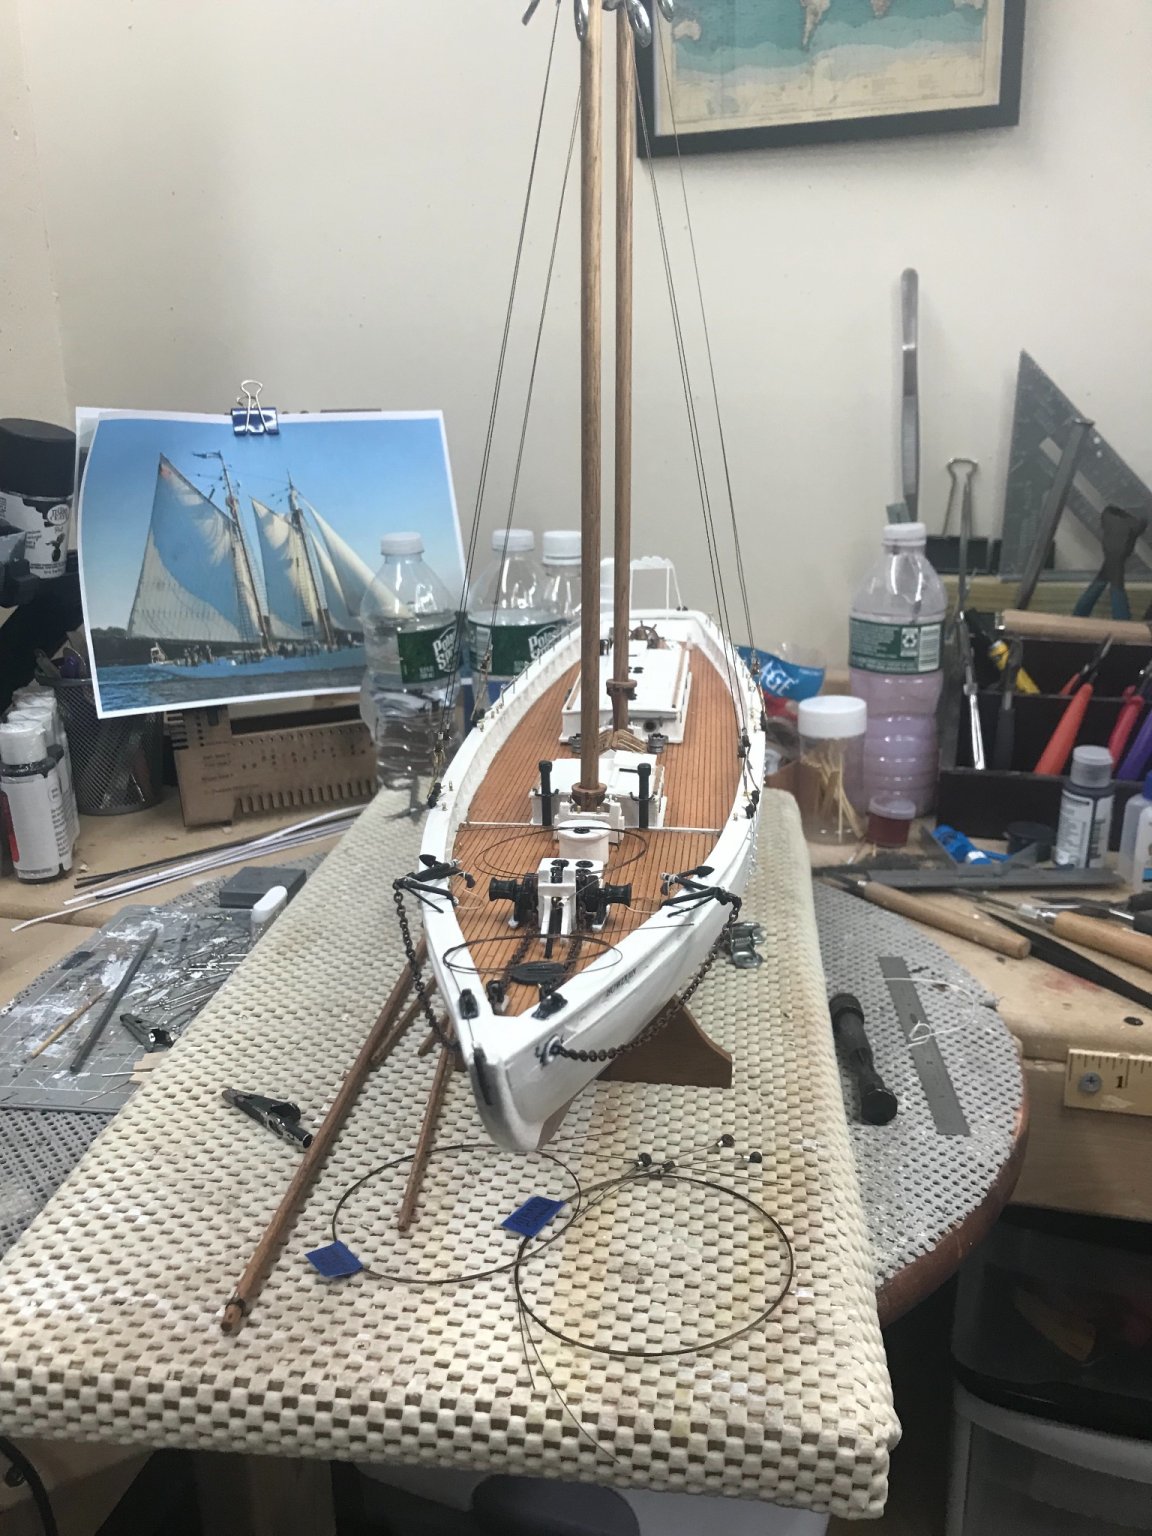
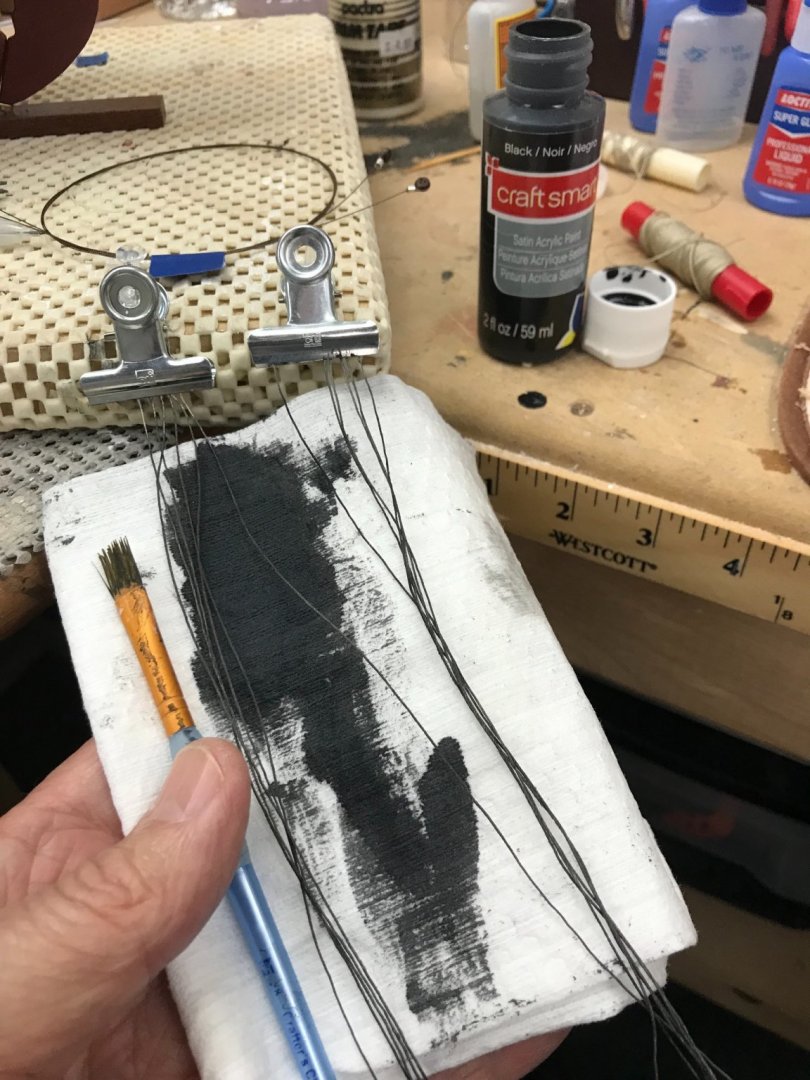
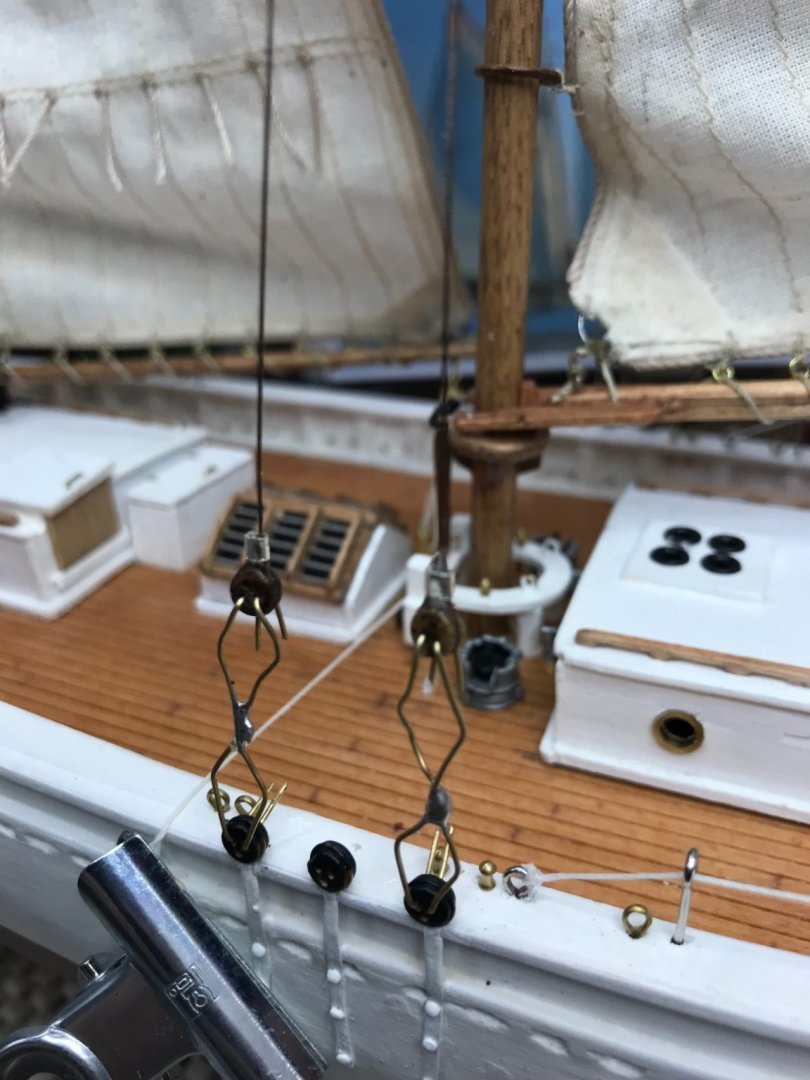
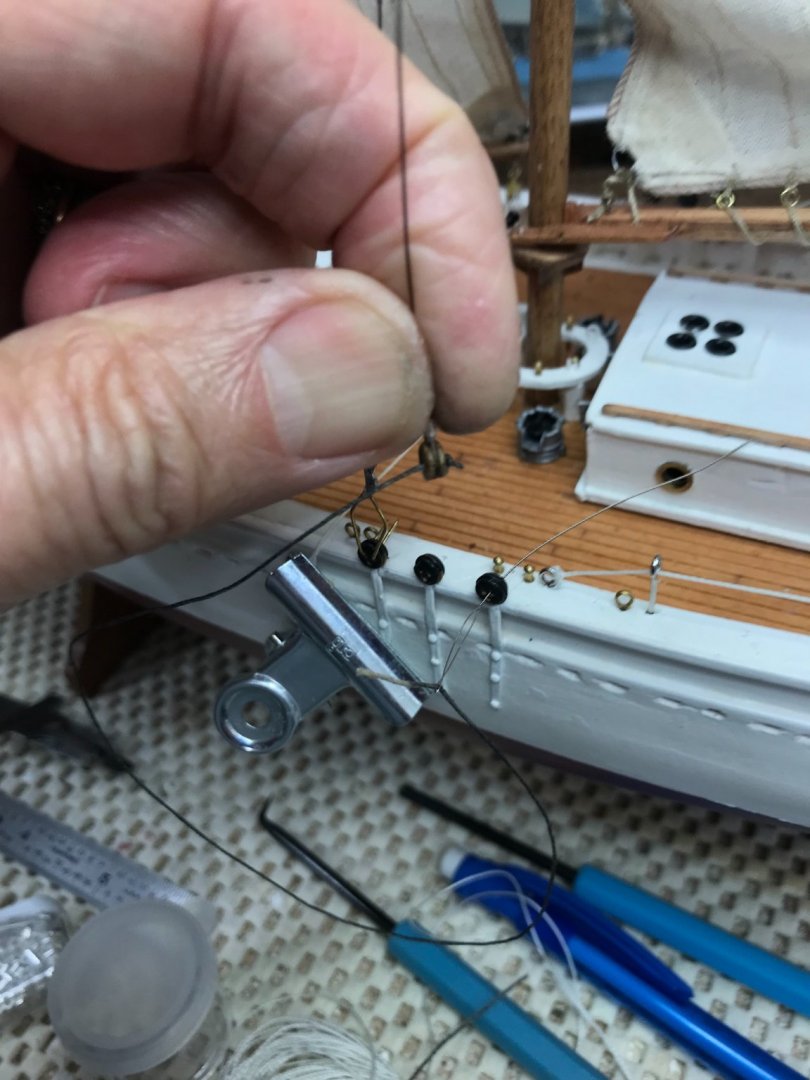
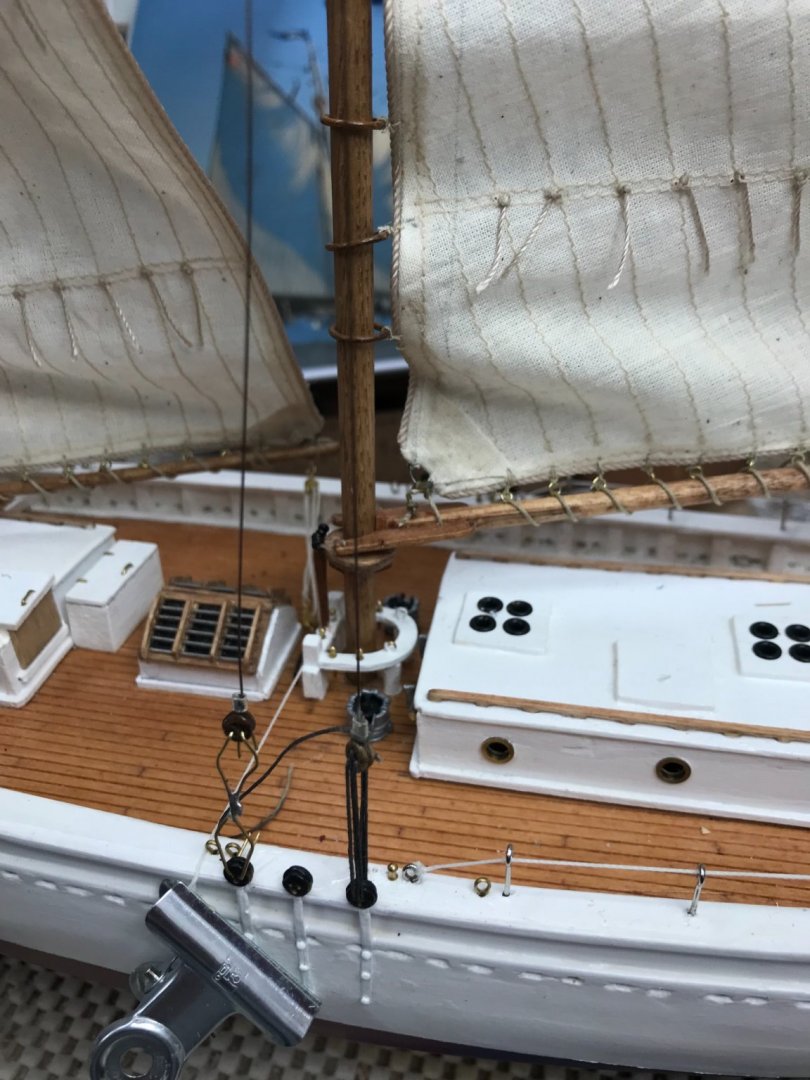
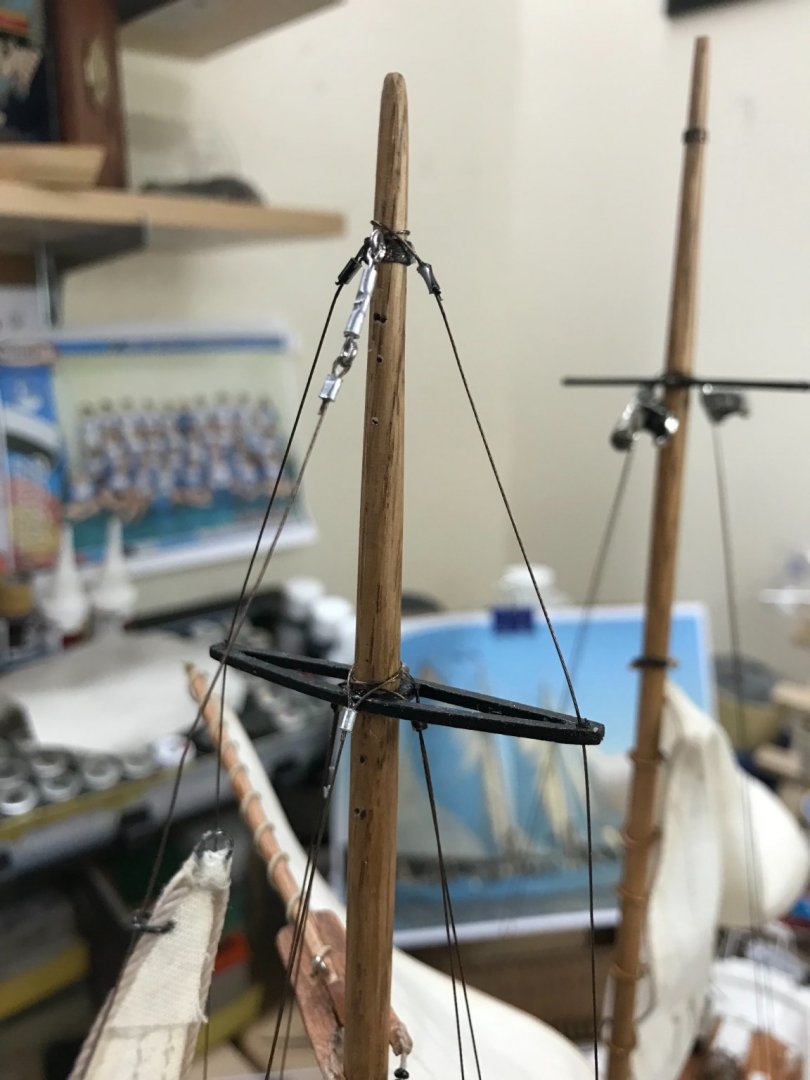
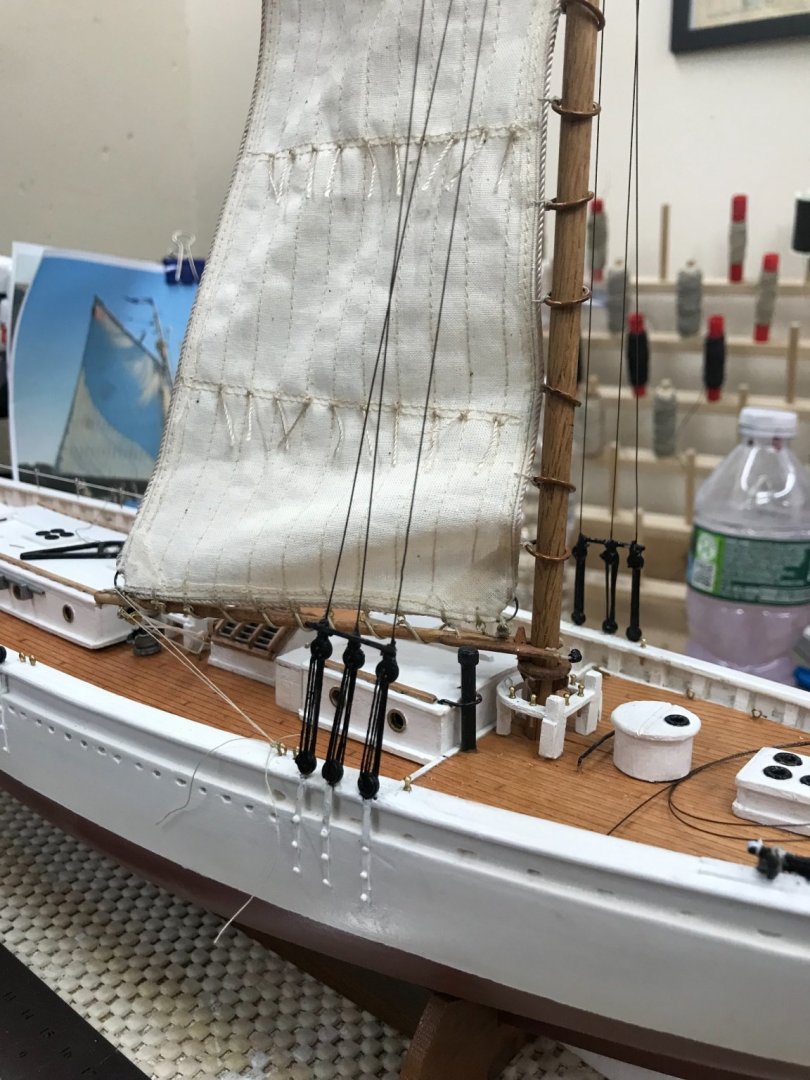
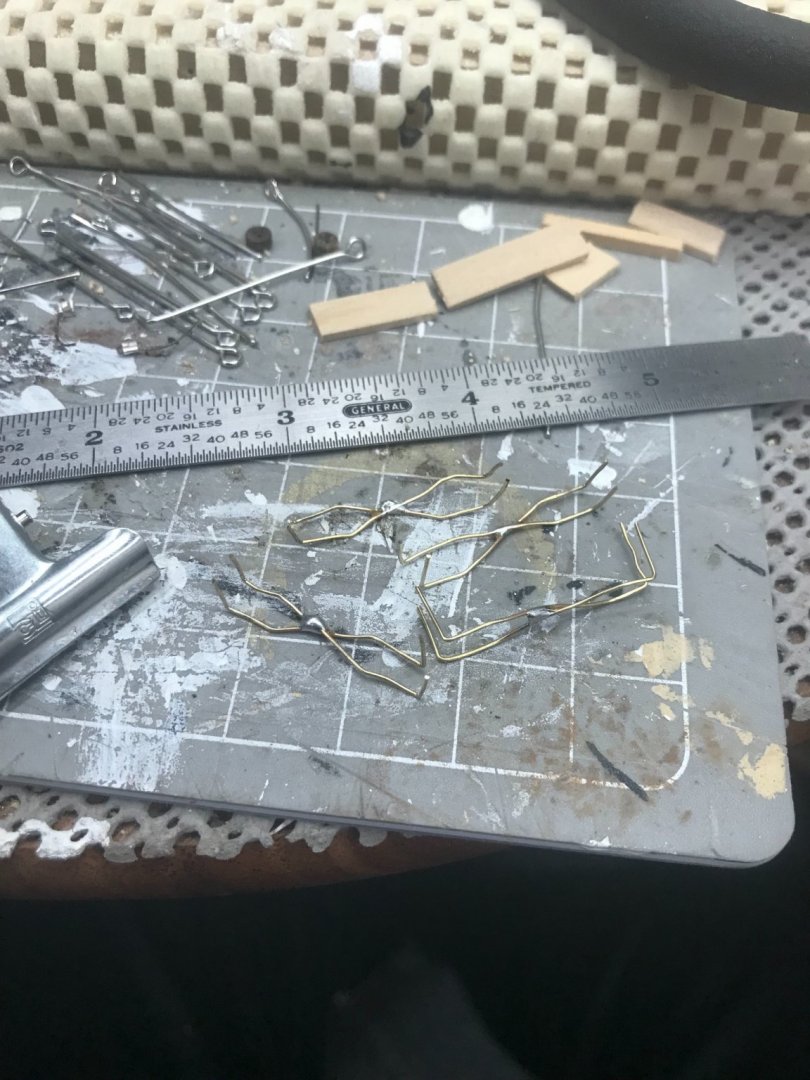
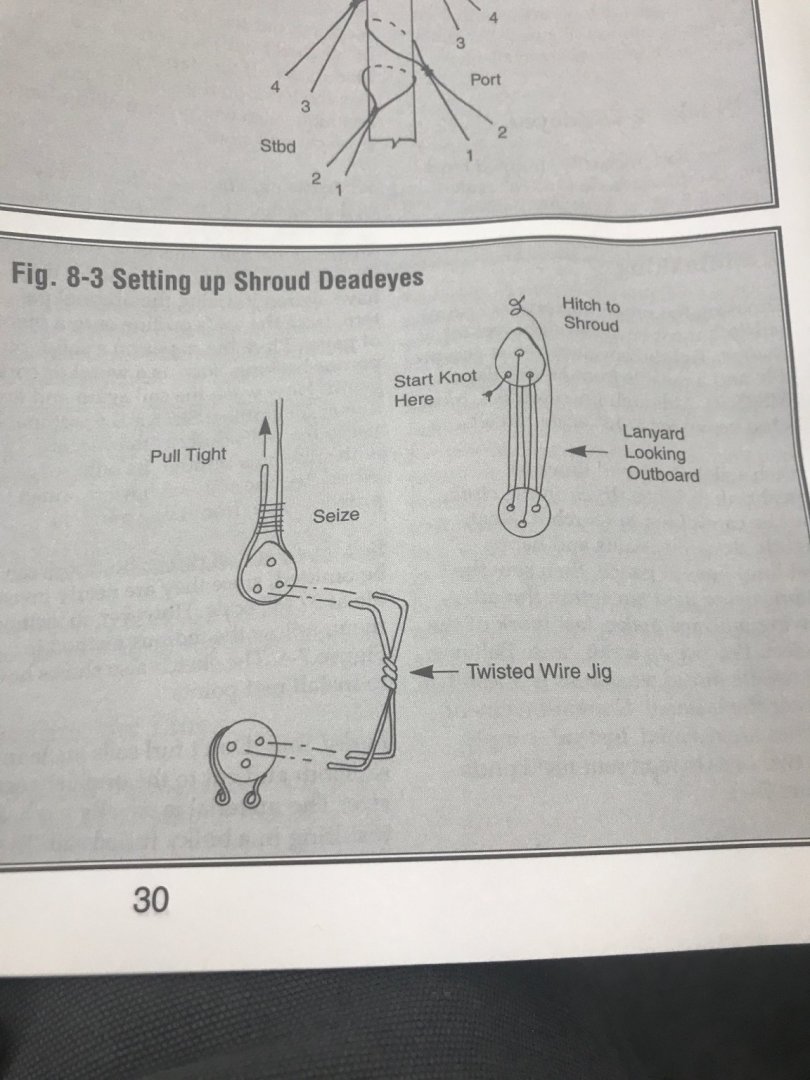
Shrouds… The Bowdoin’s shrouds are cables and the Laughing Whale kit supplies stranded wire and aluminum tubing (1/16” od) for the shrouds. All of which I used to pre-build the shroud cables earlier in this build. This photo shows the wire jigs used to hold the Deadeyes at a proper distance. The rigging for the Deadeyes on the Bowdoin are tarred after installation. I used Acrylic Paint to blacken my rigging thread for the Deadeyes. Using beading needles I thread the Deadeyes. Remove the wire jugs one at a time while rigging the Deadeyes to maintain the tightness. Once the lower shrouds are rigged I then rig the upper shroud. I applied a drop of CA glue to the crimped tubing, per instructions, just to be sure it doesn’t come loose. Upper and lower shrouds now completed on both the Fore and Main Masts. 😎 Its time to get after those battens used as ratlines. 🍻


- 127 replies
-
- 7
-

-
- Bowdoin
- Arctic Exploration
- (and 3 more)
-
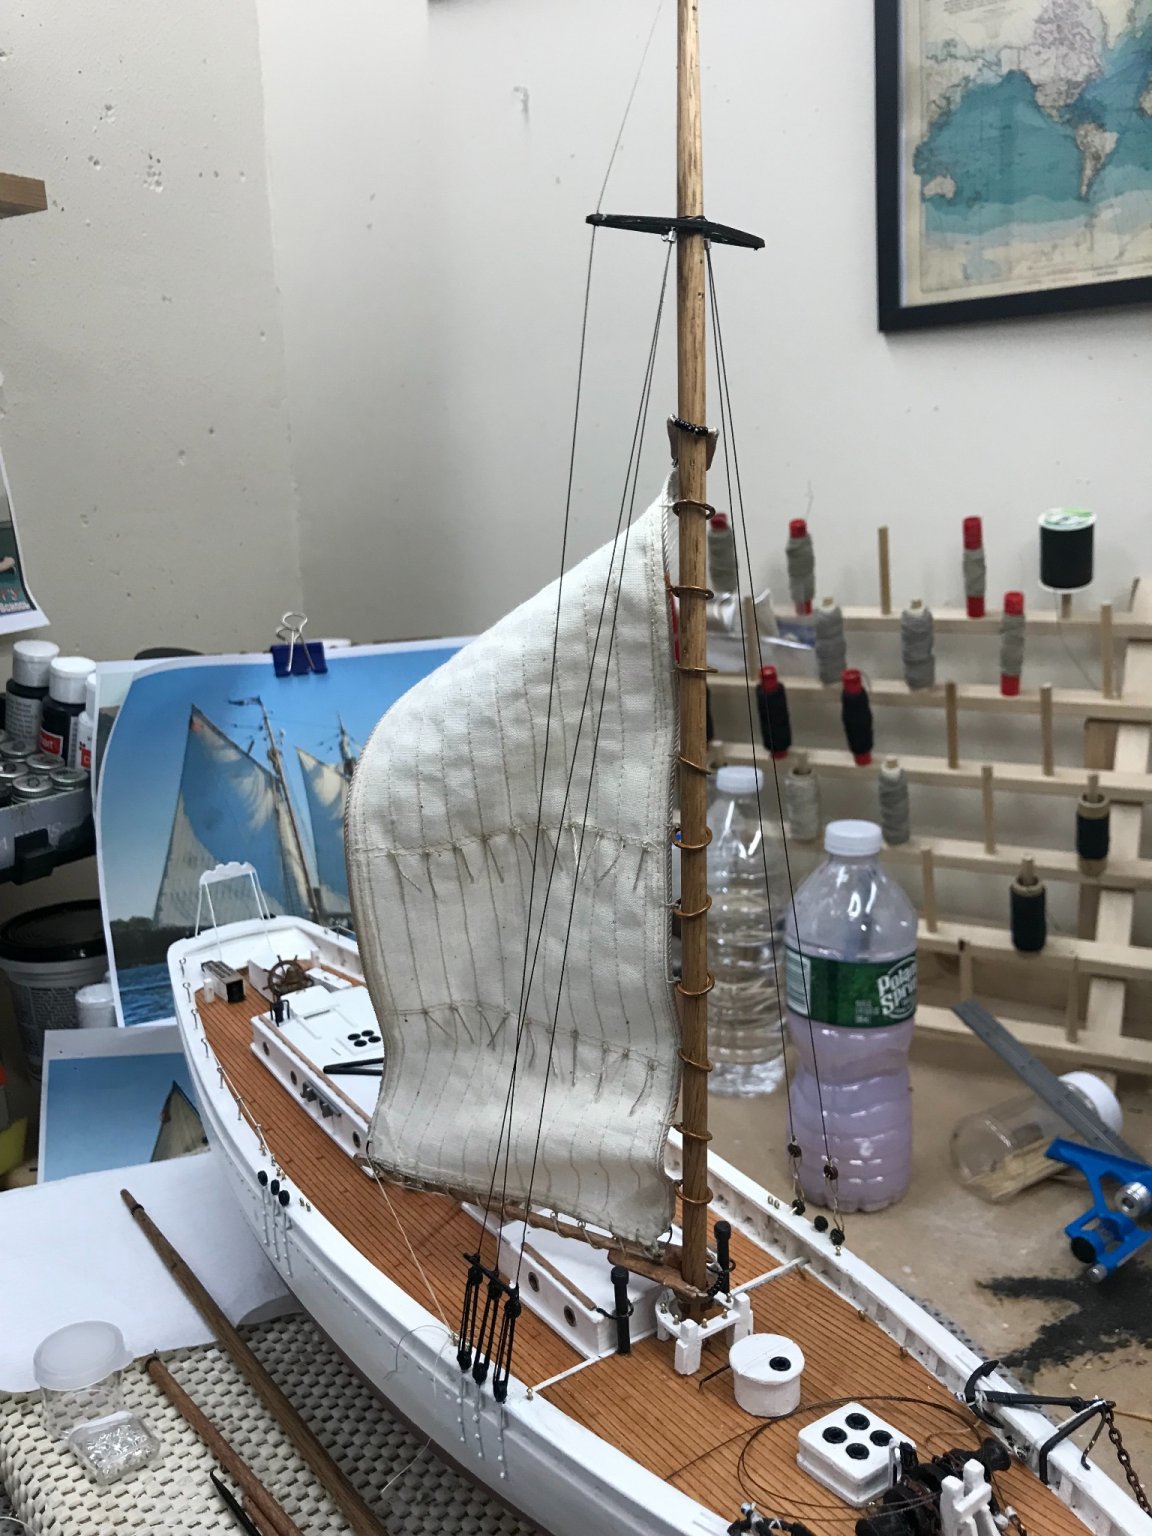
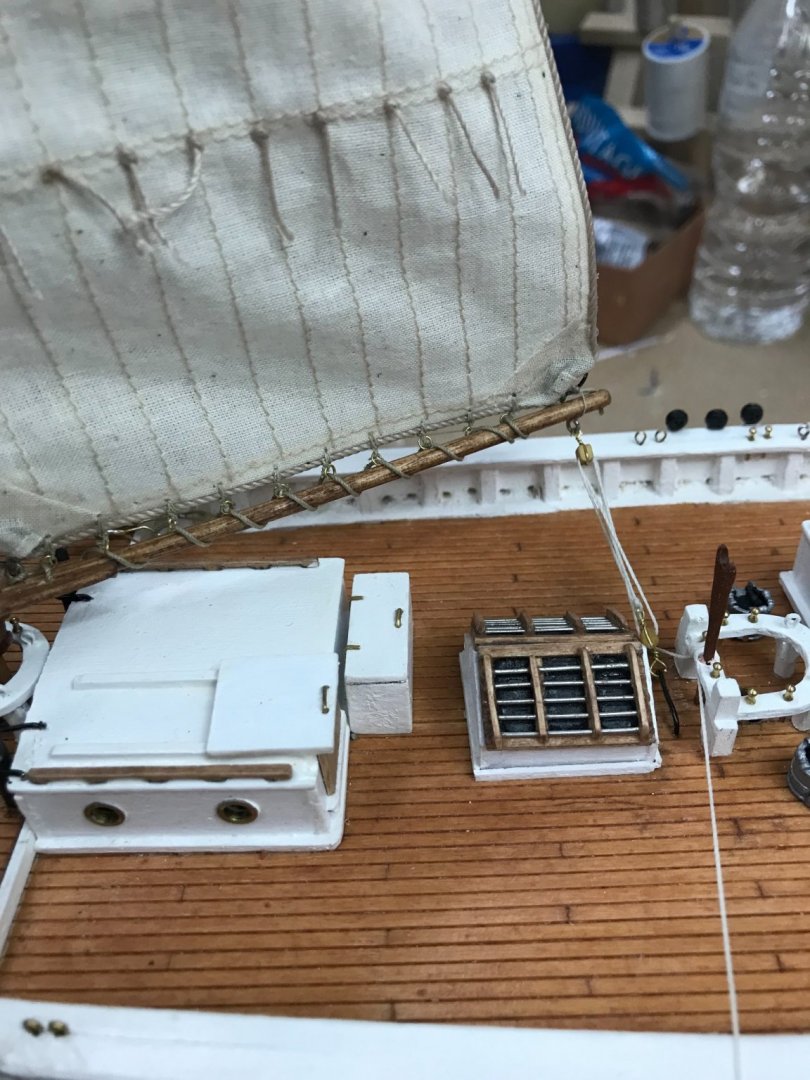
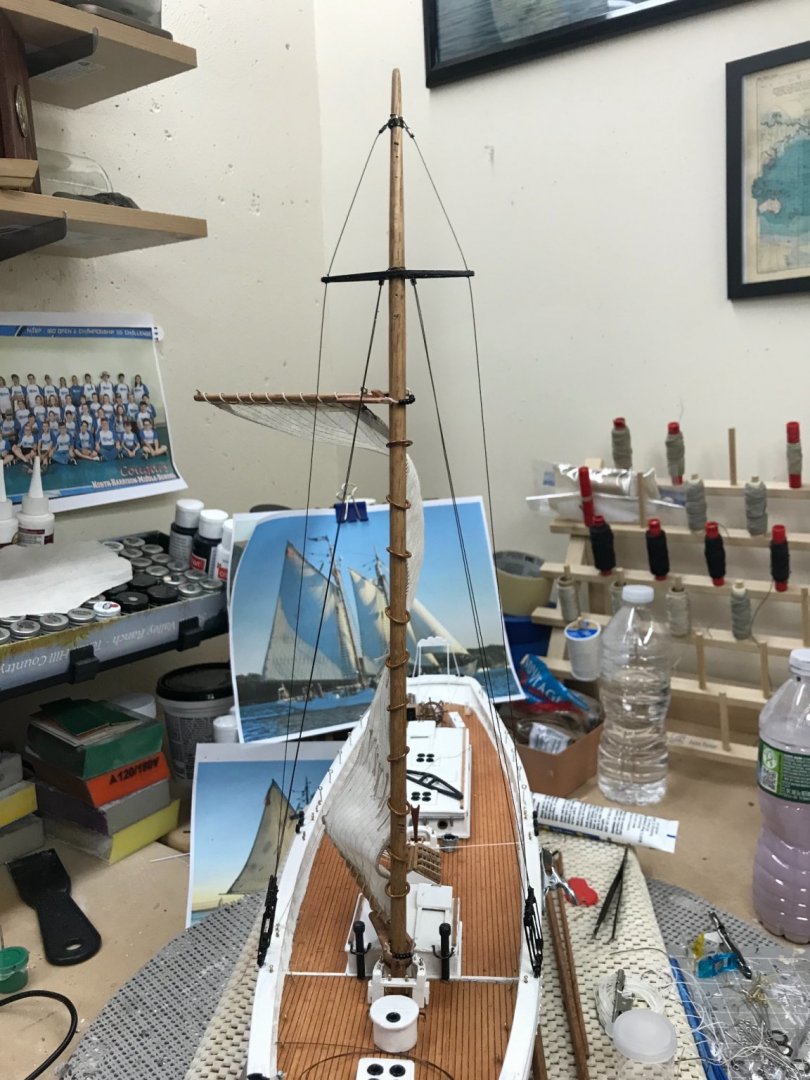
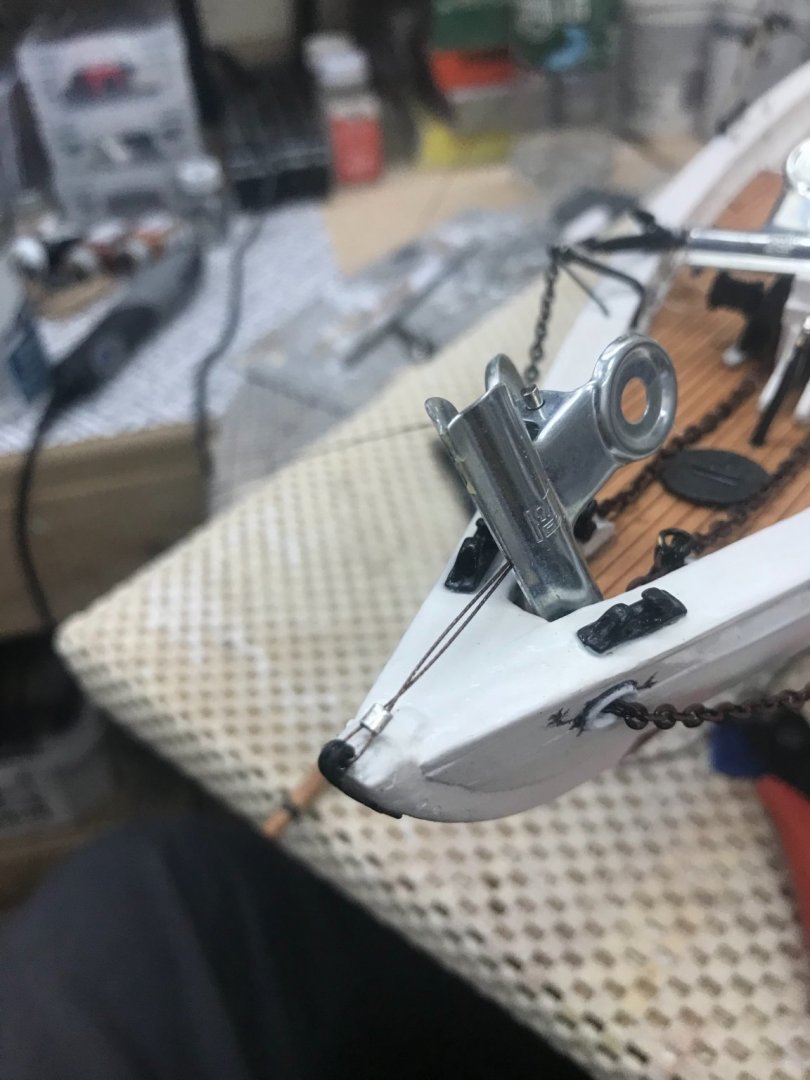
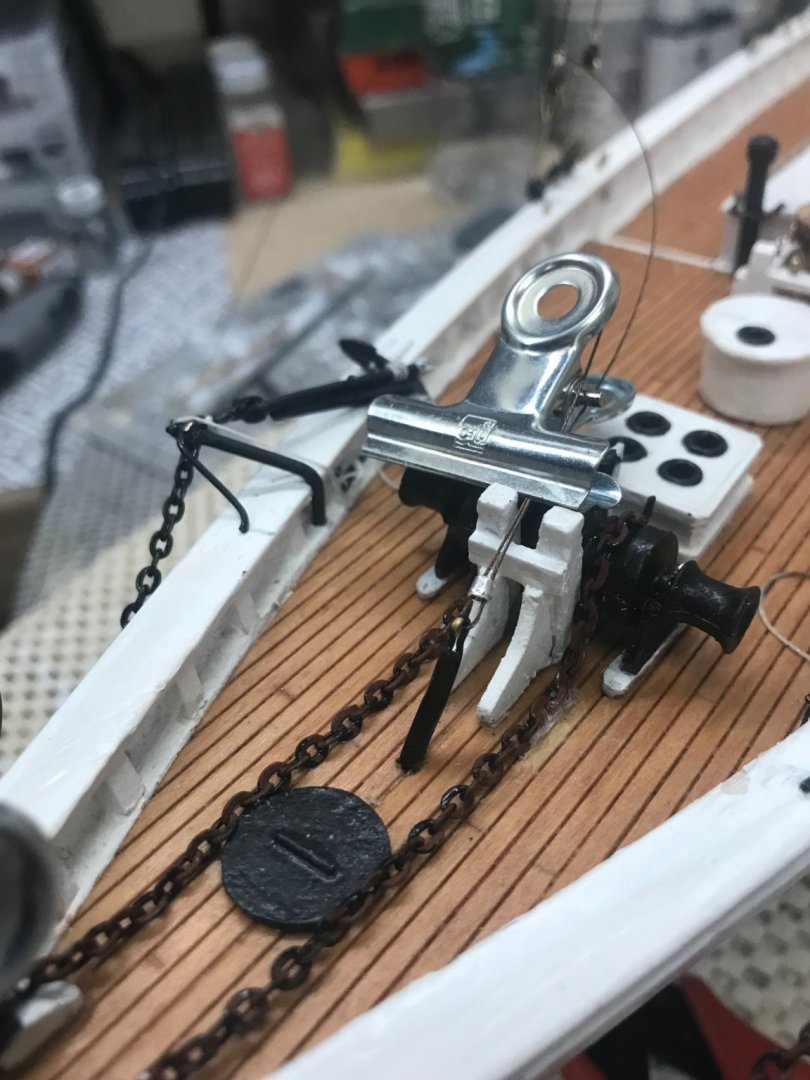
Fore Stays… Fore Stays installed with Jib and Forward Stay Sail. Stay sail Boom… Details… Main Sail Boom… Main Mast ready for Shrouds. 😎 Progress… 🍻

- 127 replies
-
- 7
-
-
- Bowdoin
- Arctic Exploration
- (and 3 more)
-
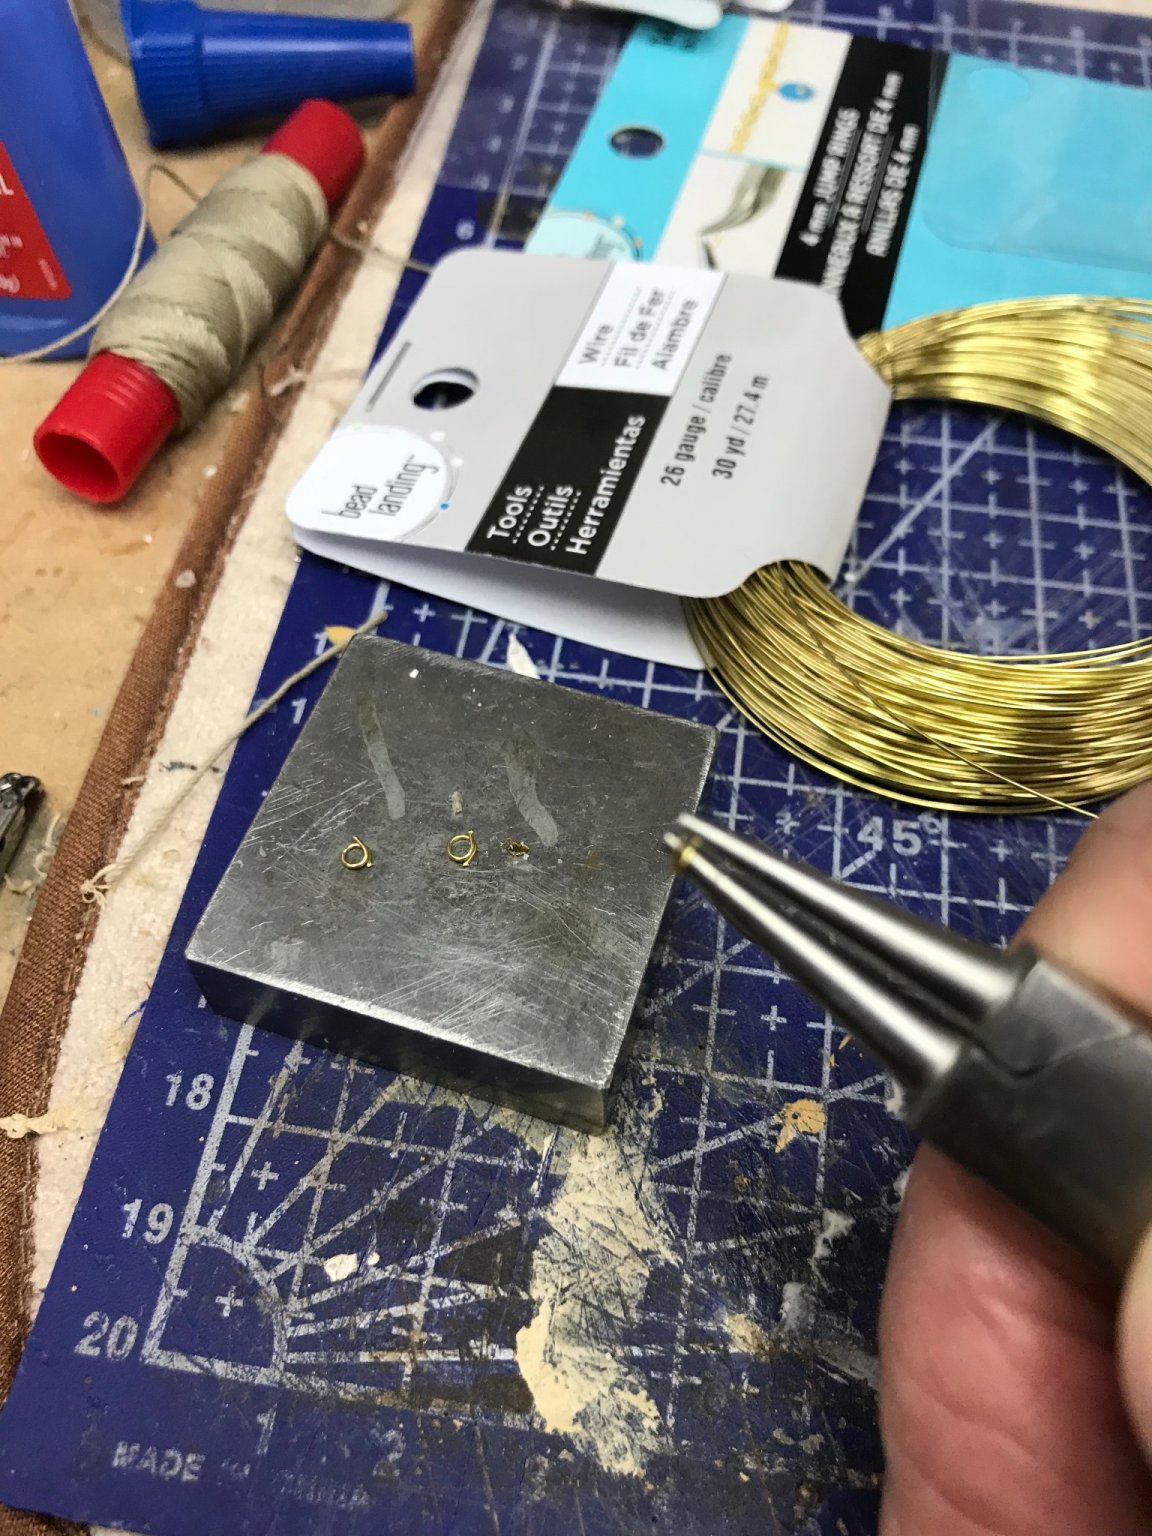
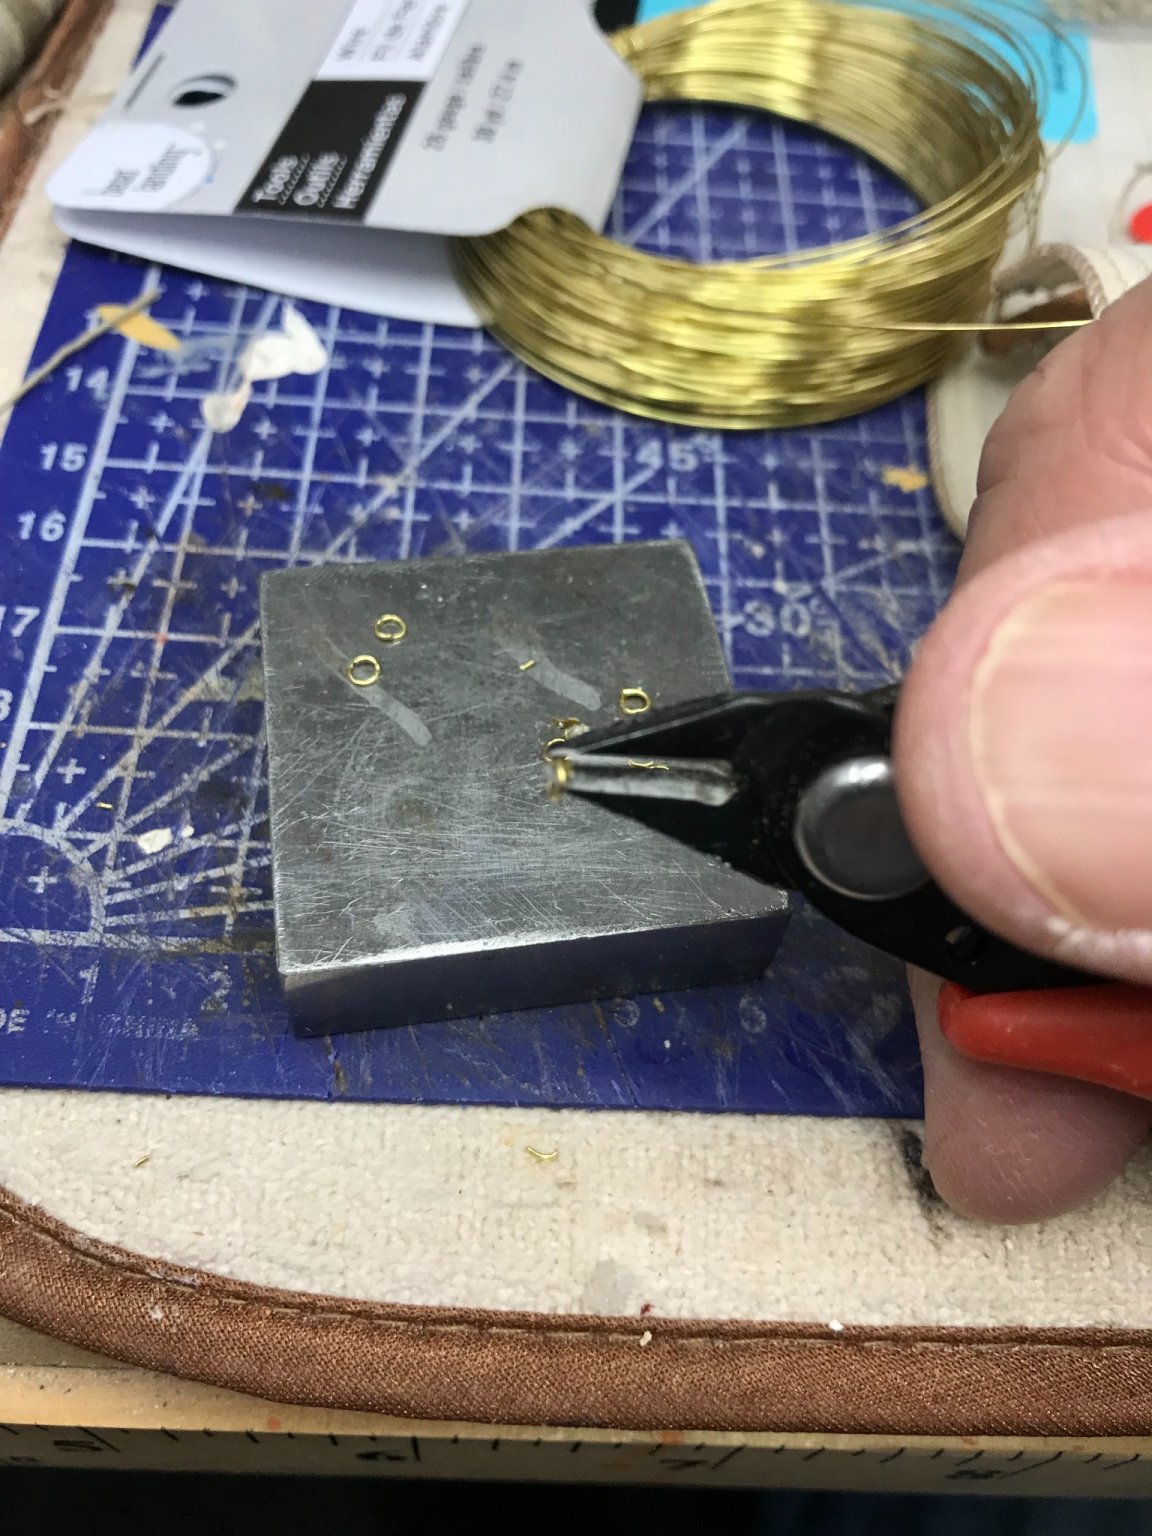
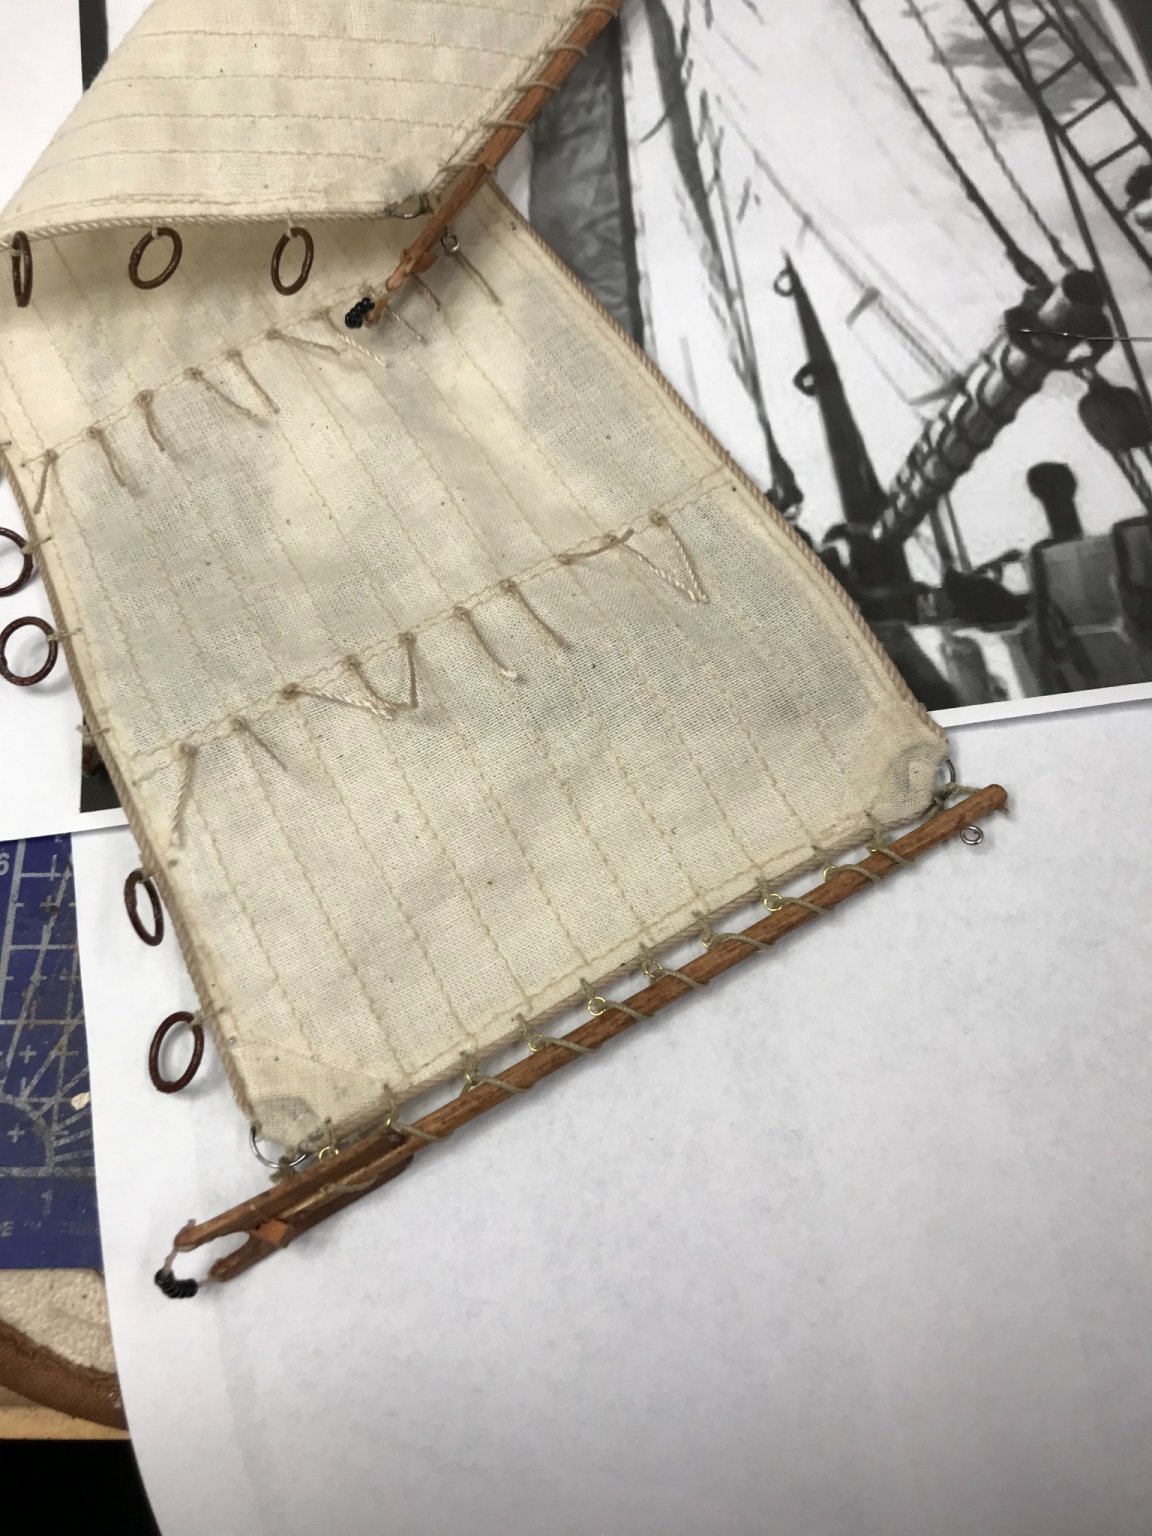
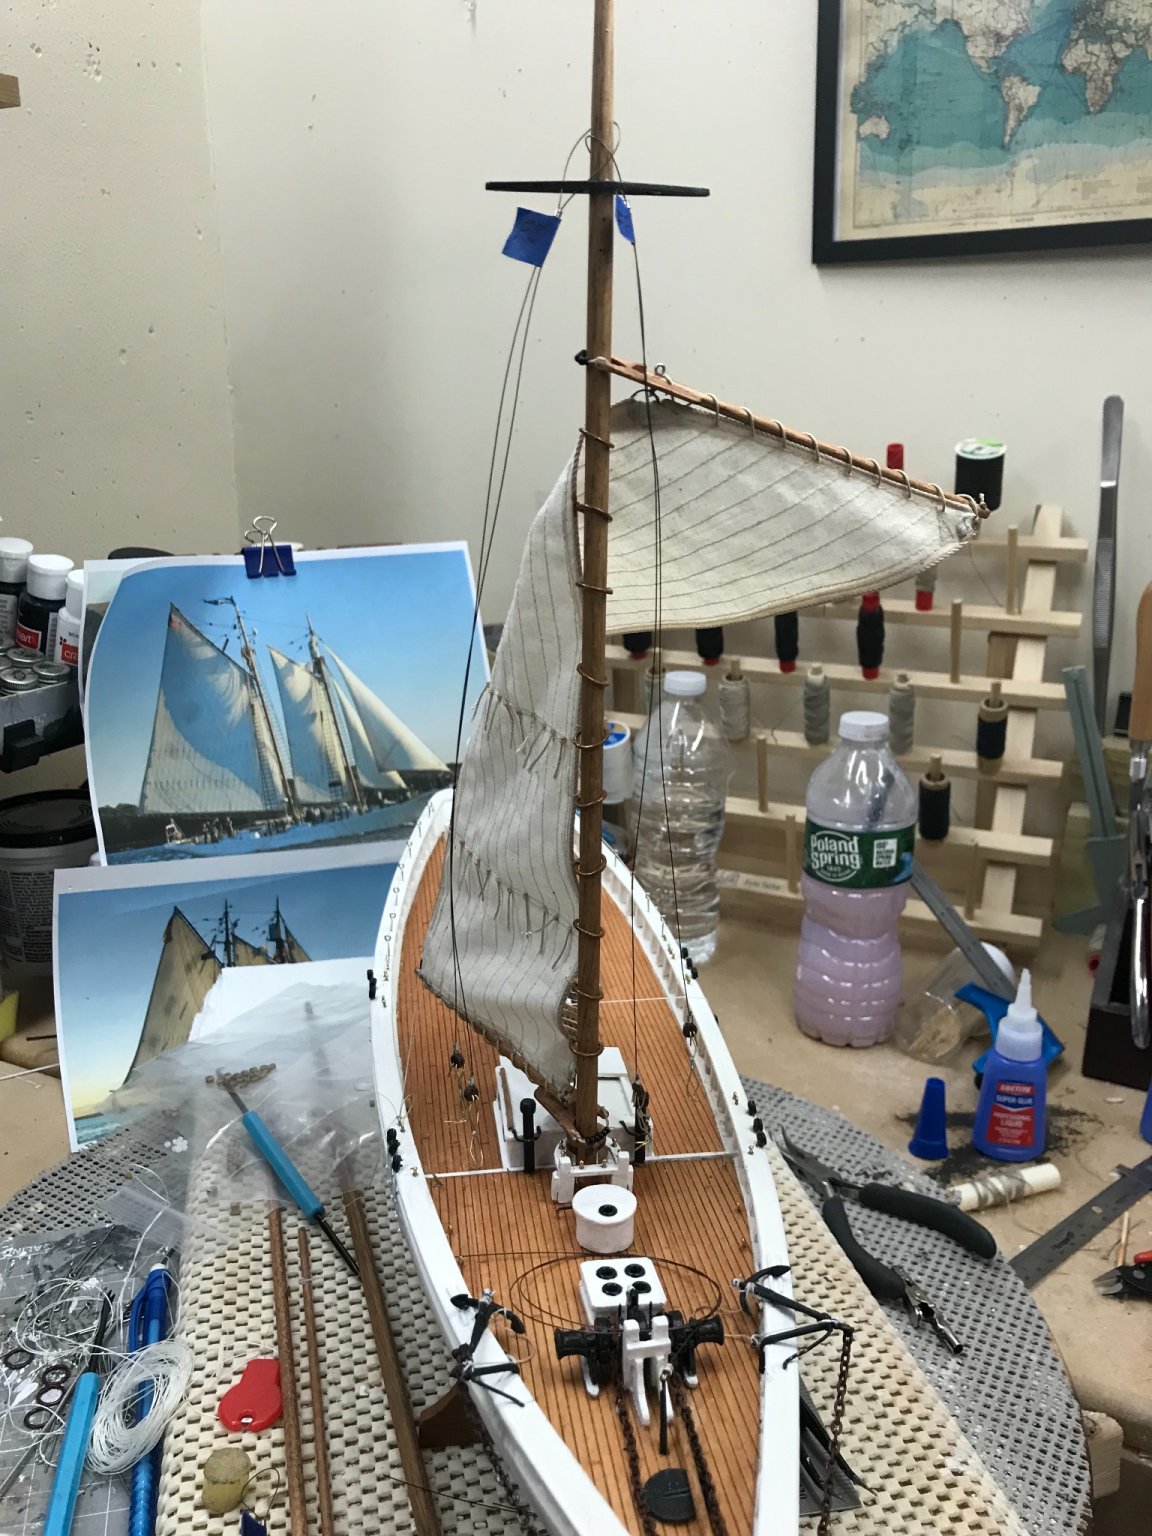
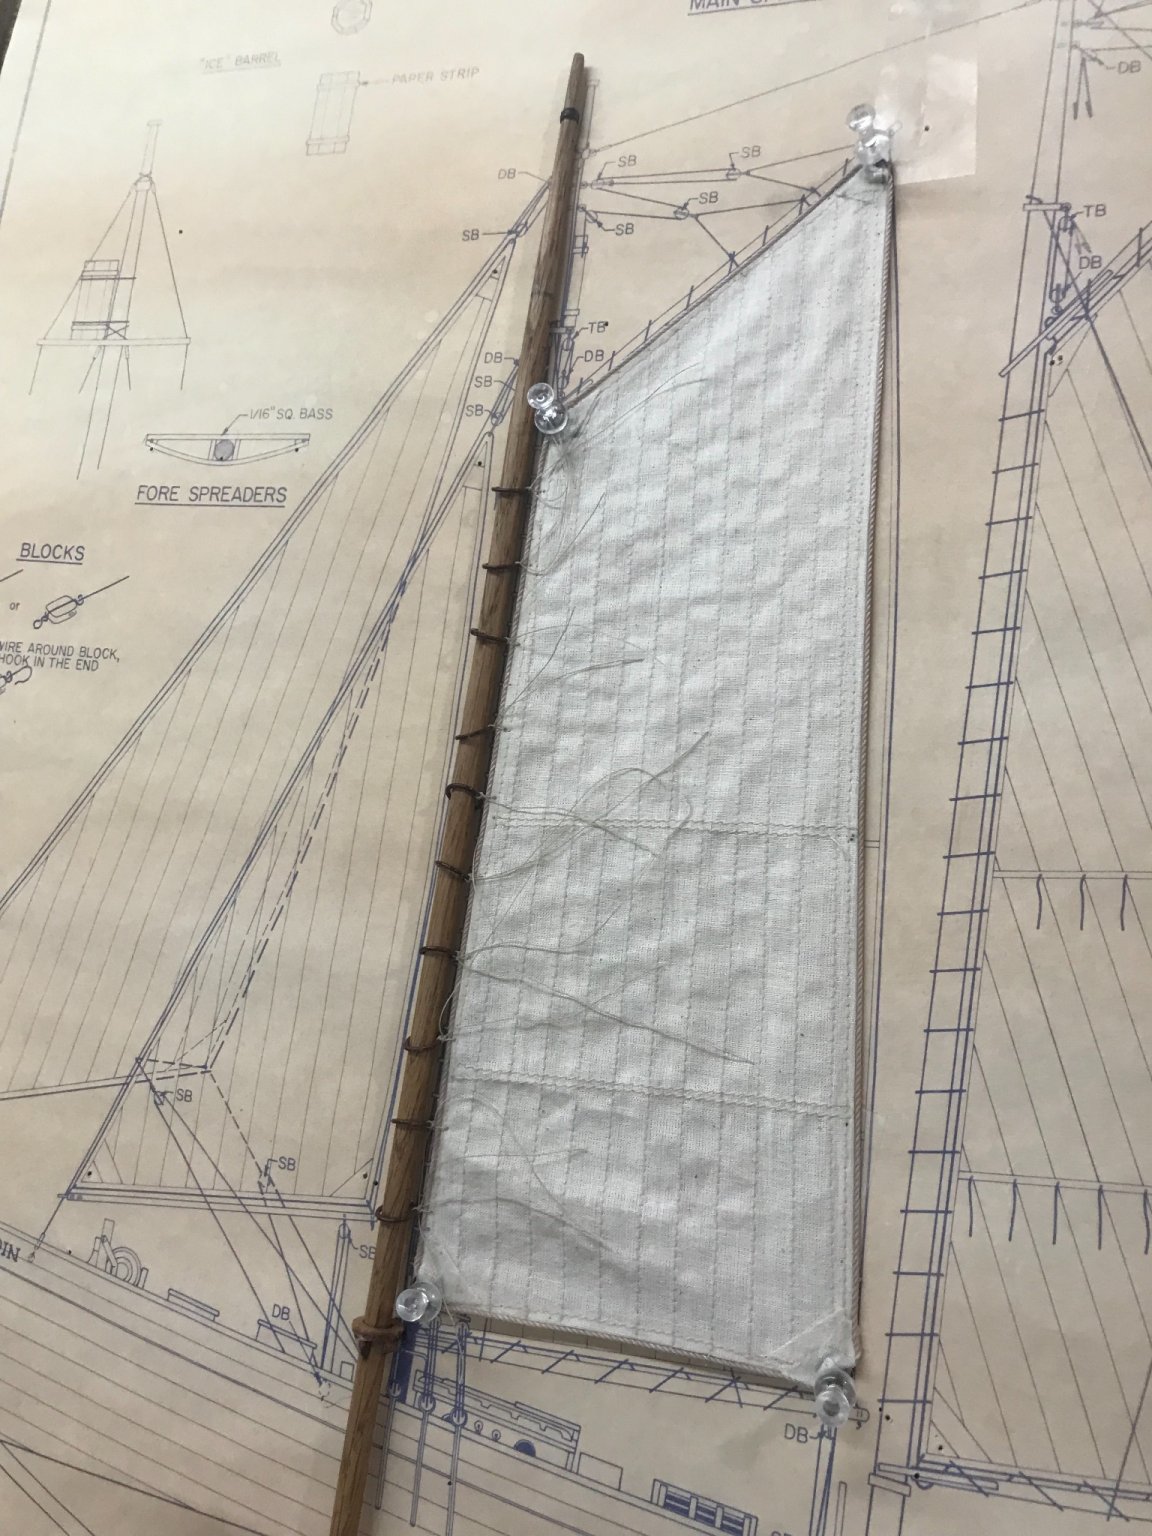
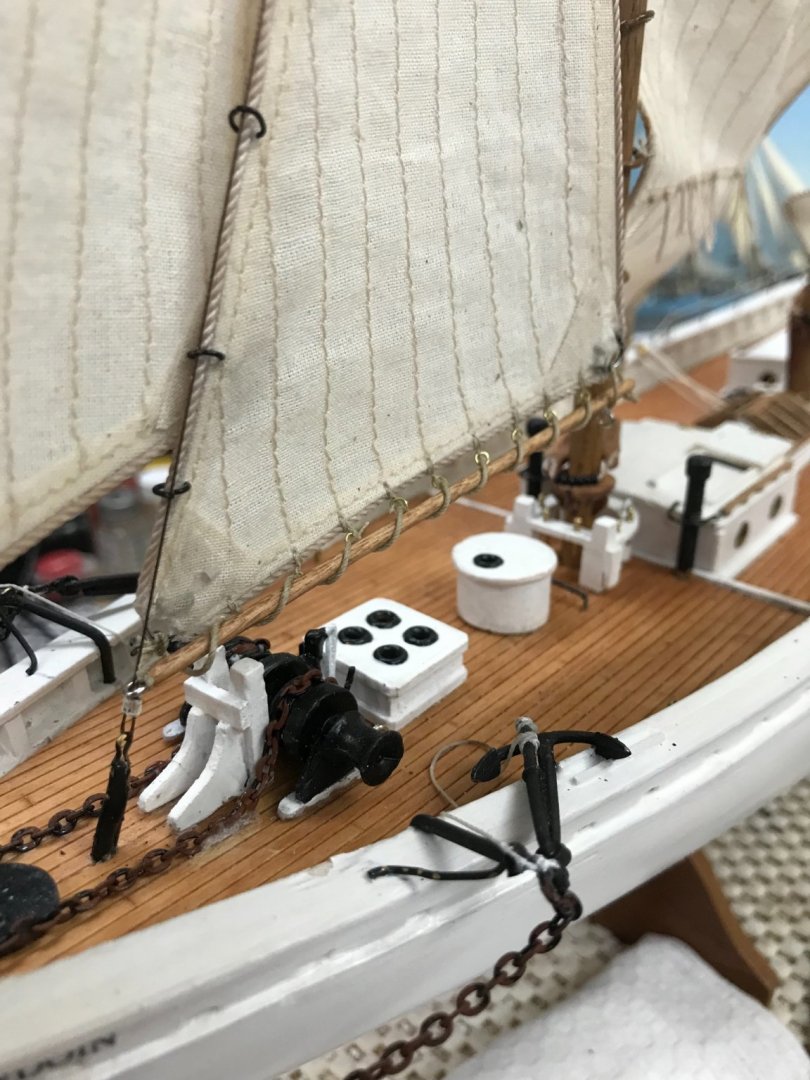
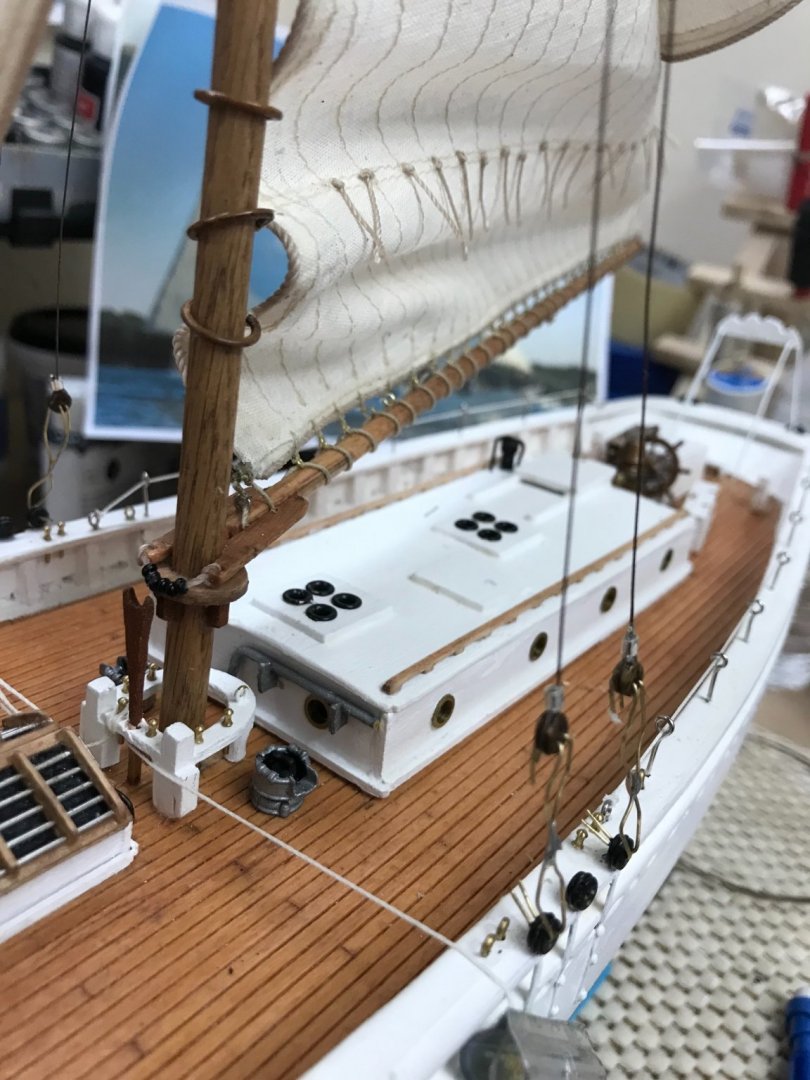
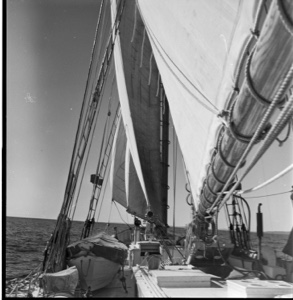
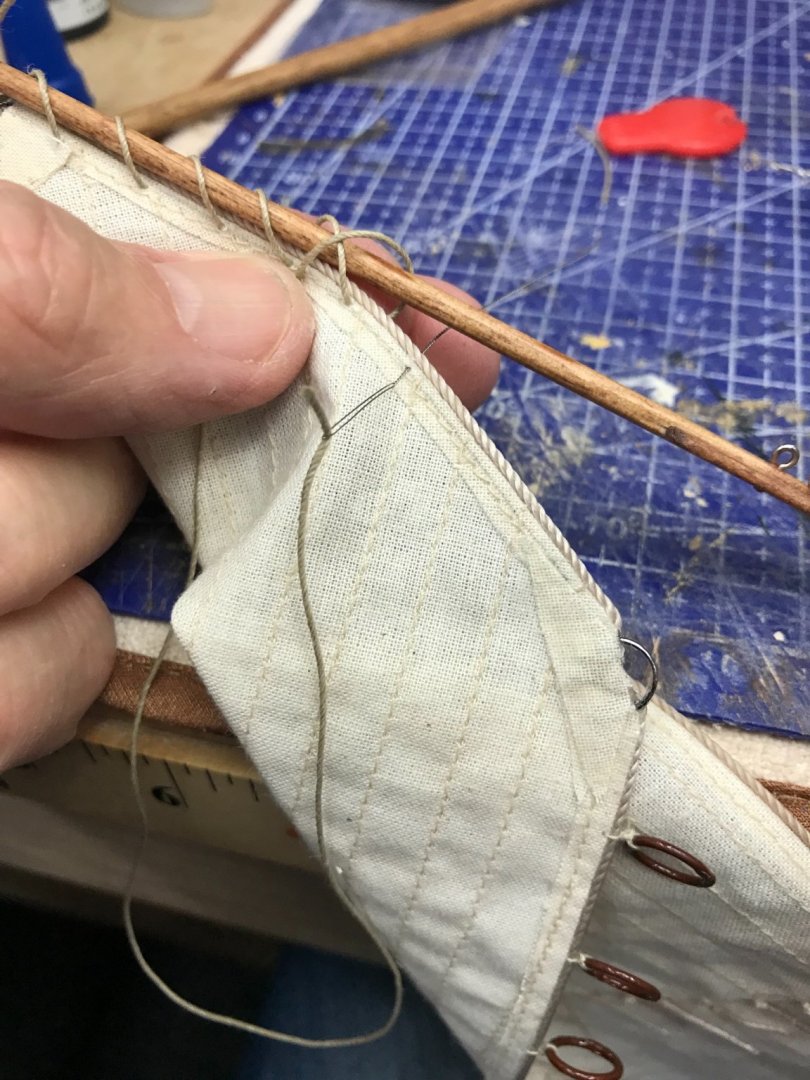
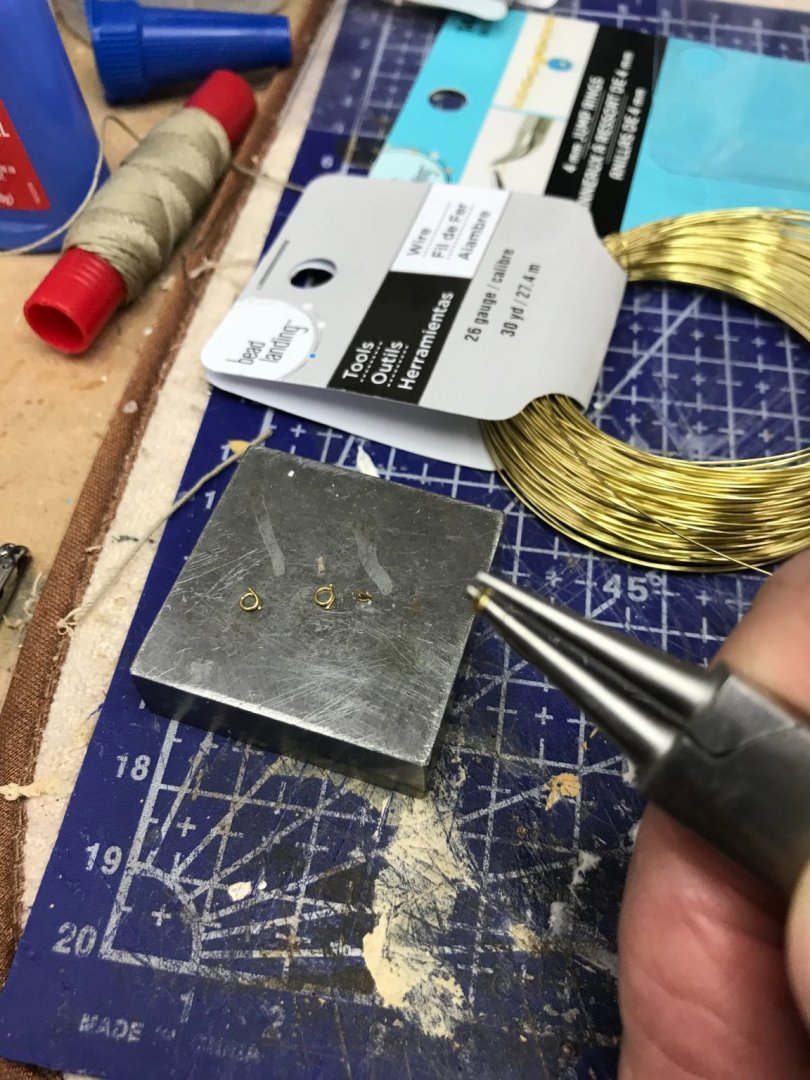
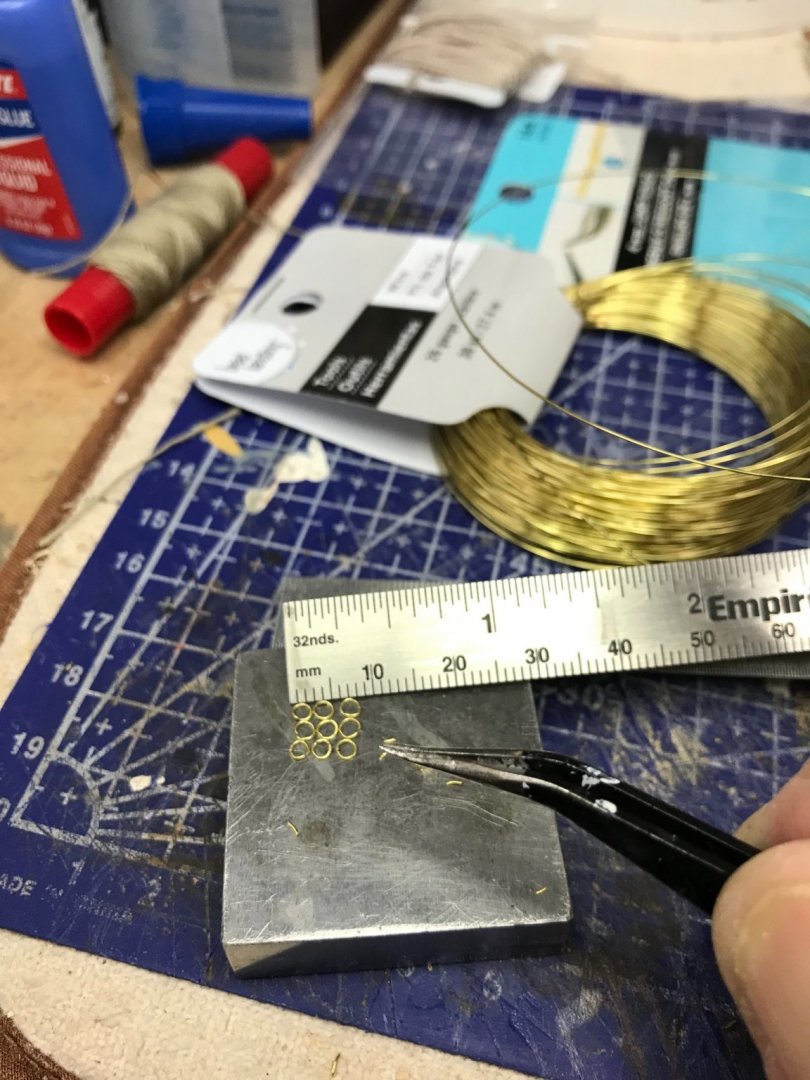
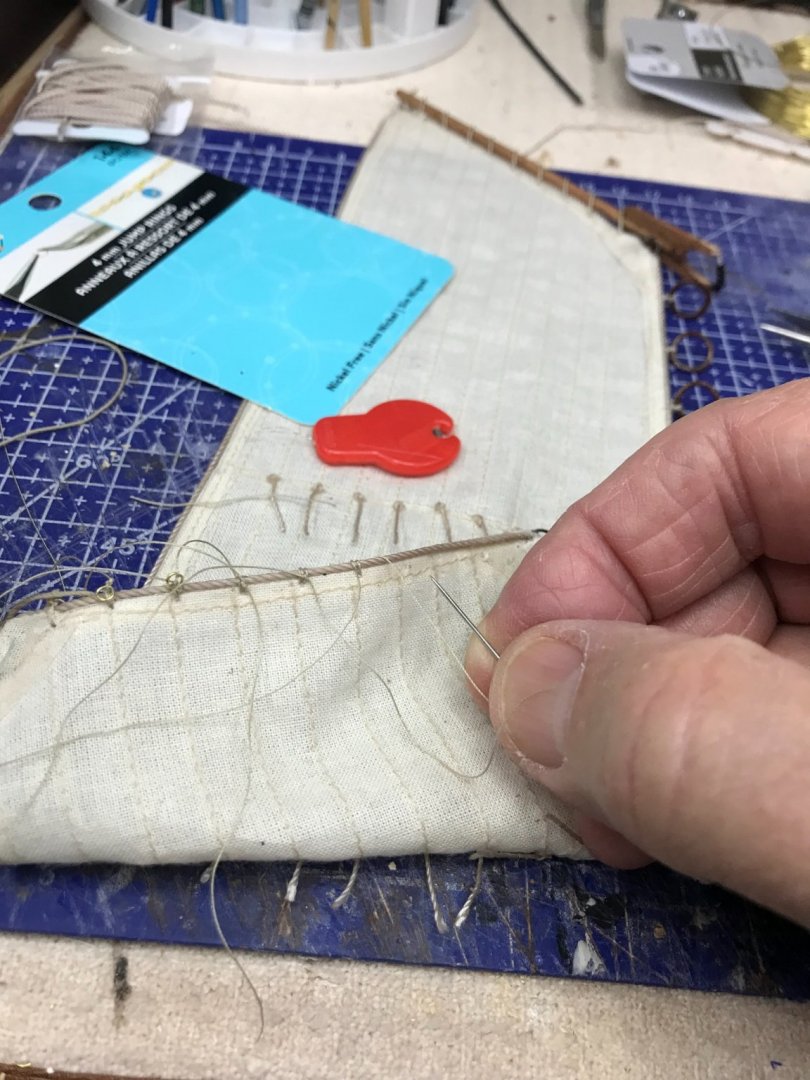
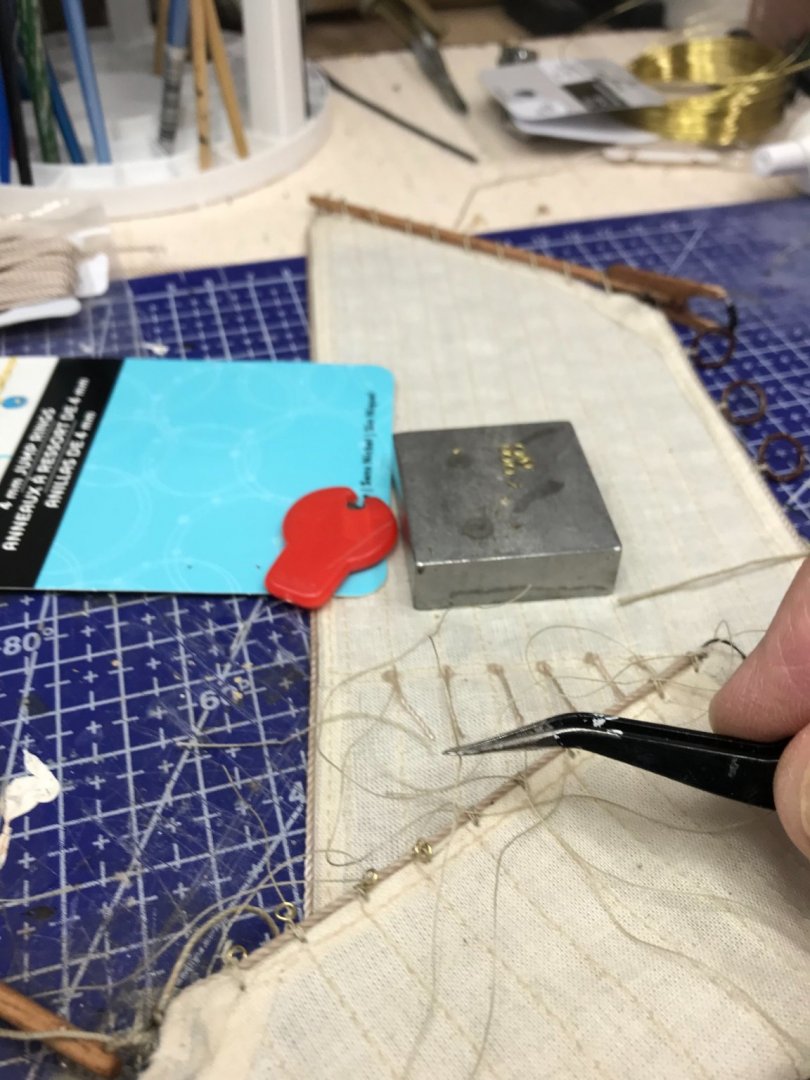
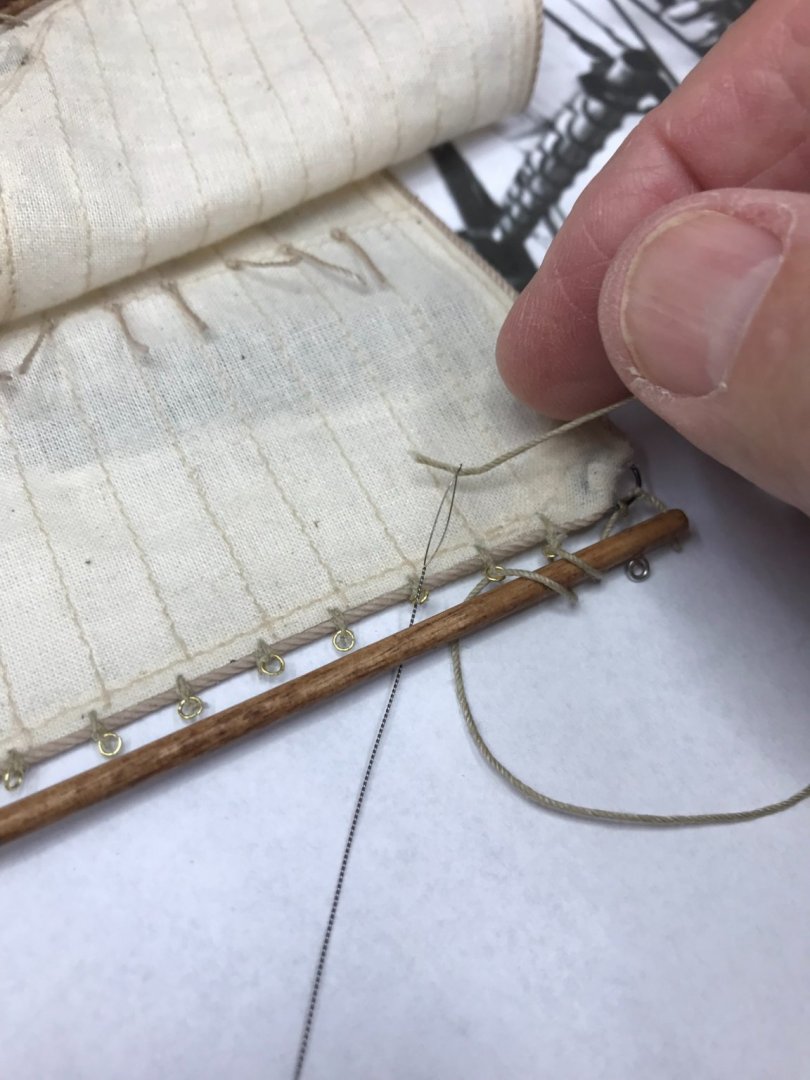
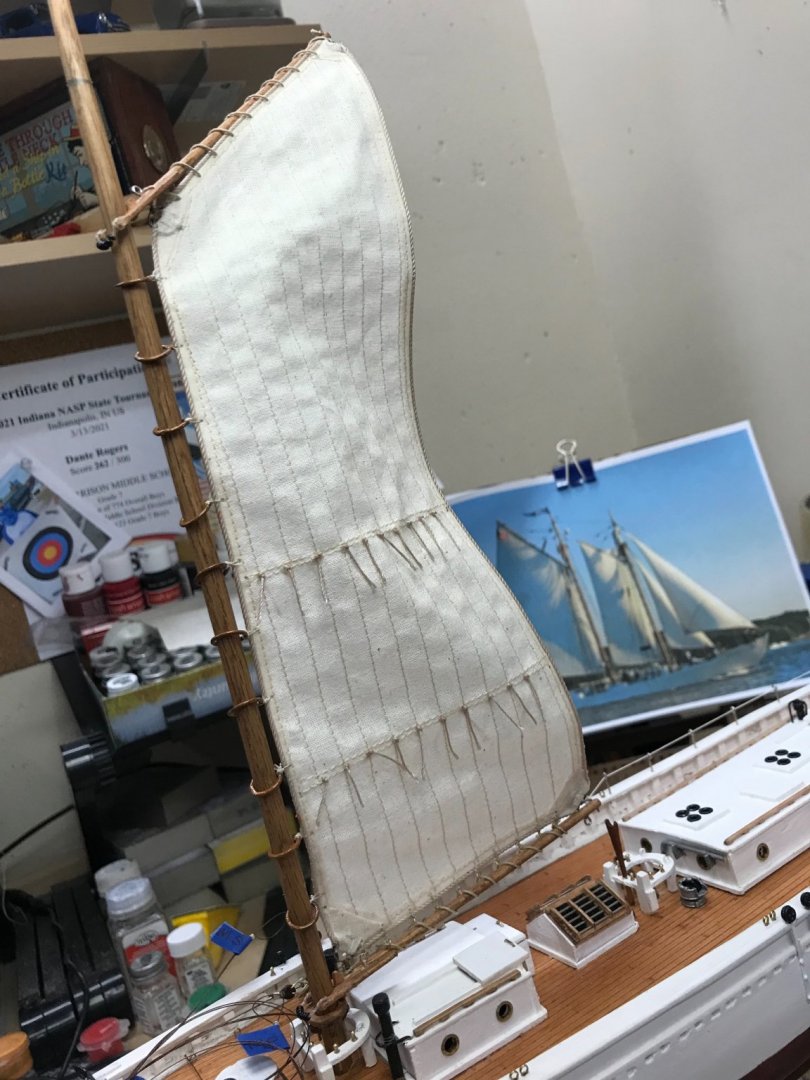
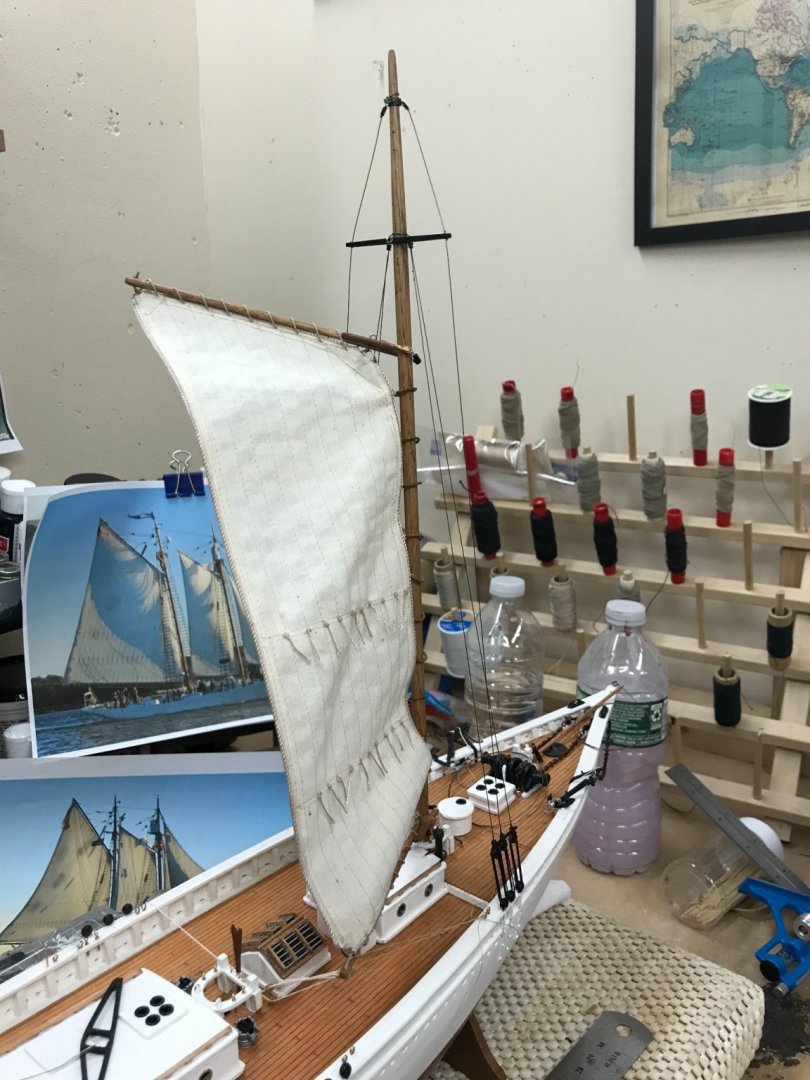
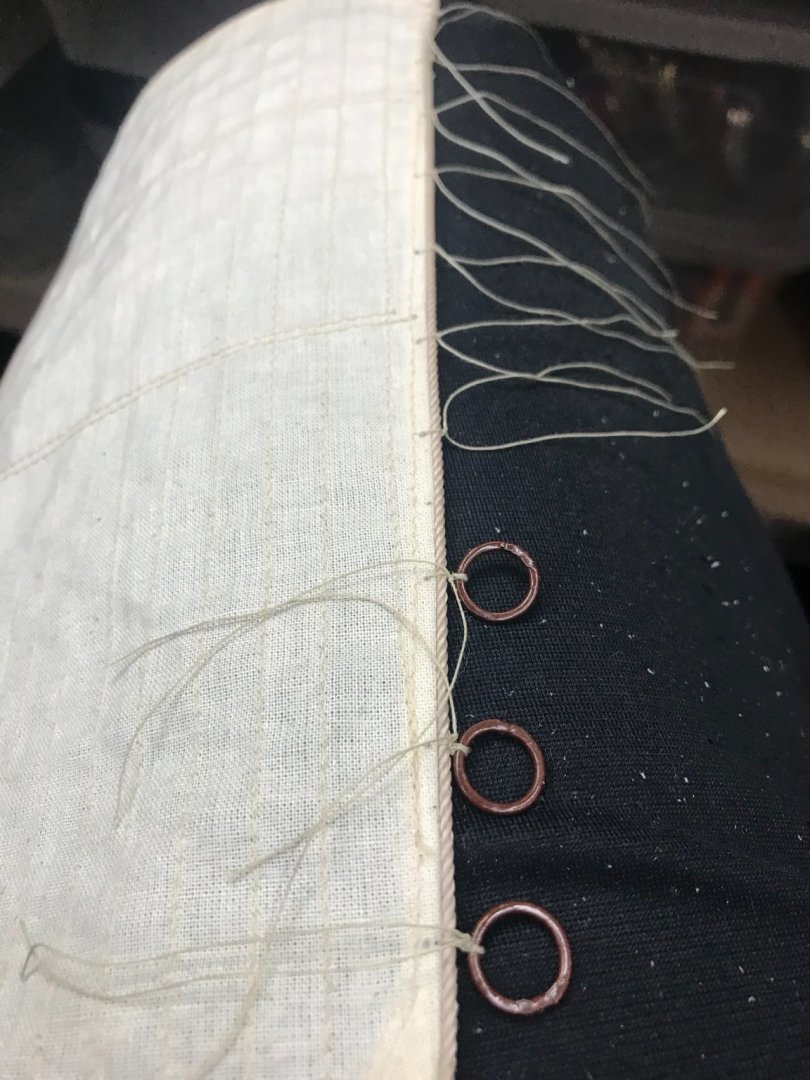
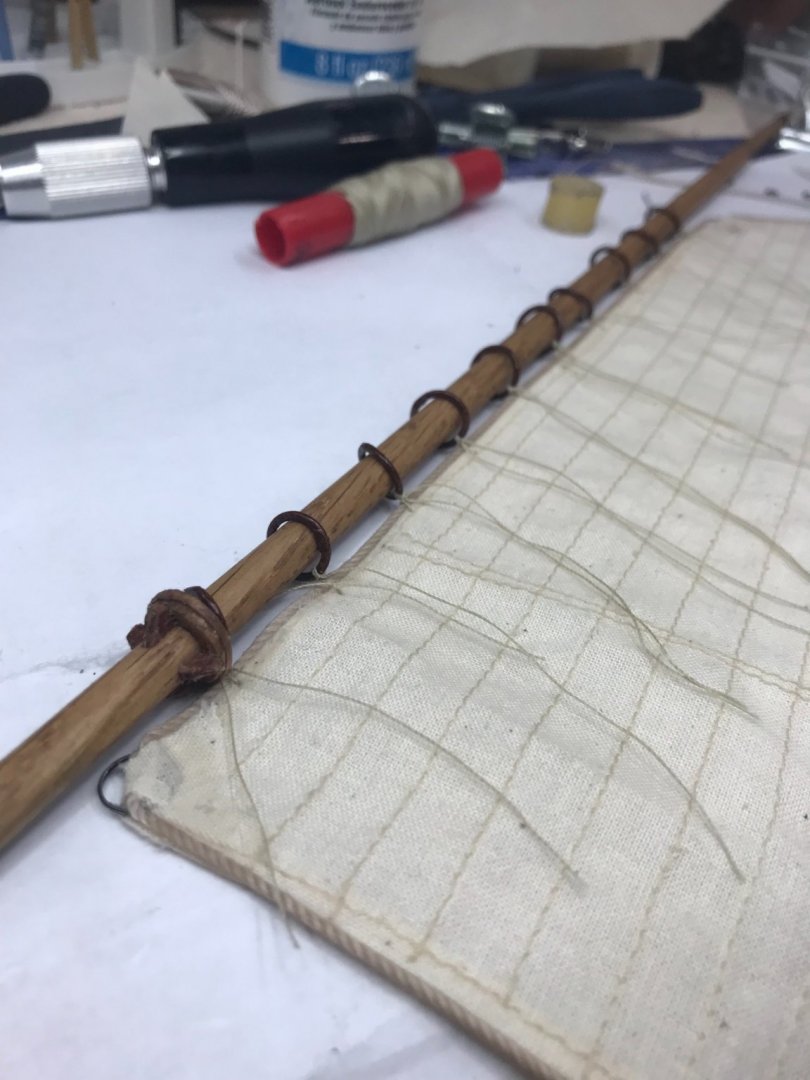
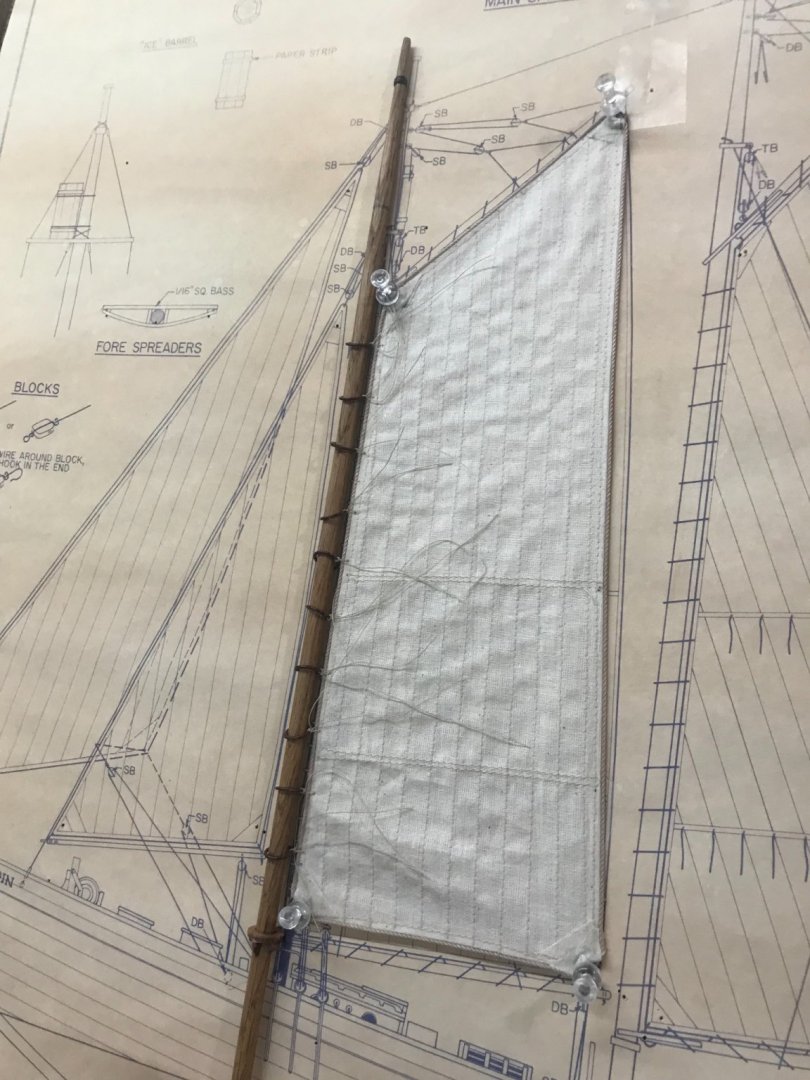
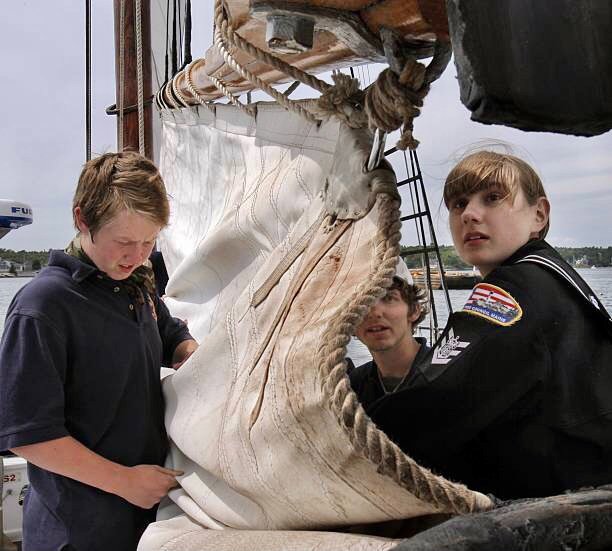
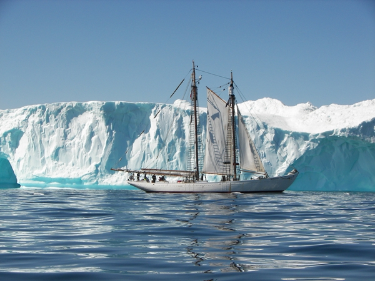
Fore Sail… Photo from Bowdoin College archives. View of the Fore Sail Boom, Stay Sail Club and Jib from the deck of the Bowdoin. Great archive of Bowdoin photos, to get rigging details. Lashing the Fore Sail to the Gaff. The Laughing Whale drawings show this same lashing technique for the boom. As can be seen in the photo above, the boom lashing of the sail will require a bit more detail. In my opinion… there goes my OCD again. 😆 Making up some 2mm jump rings. Sewing the rings to the bottom edge of the fore Sail. Lashing the Fore Sail to its Boom with the rings, makes for better detail. 😎 Mounting the Fore Sail to the Fore Mast. Finally, some Running Rigging. 😆 Standing Rigging… Time to get out the Shrouds I made up earlier in the build. Starboard Fore Shrouds completed. Port Side Shrouds before painting. Upper and Lower Fore Shrouds complete. On to Fore Stays with Forward Stay Sail and Jib. Tomorrow… 🍻


- 127 replies
-
- 6
-
-
- Bowdoin
- Arctic Exploration
- (and 3 more)
-
Yves, This is an awesome project, can’t wait start seeing details. i.e. planking, chainplate and bowsprit. Your doing a great job reviewing this kit as well as laying the foundation. Who knew you were a beginner, like me. 😆 John
-
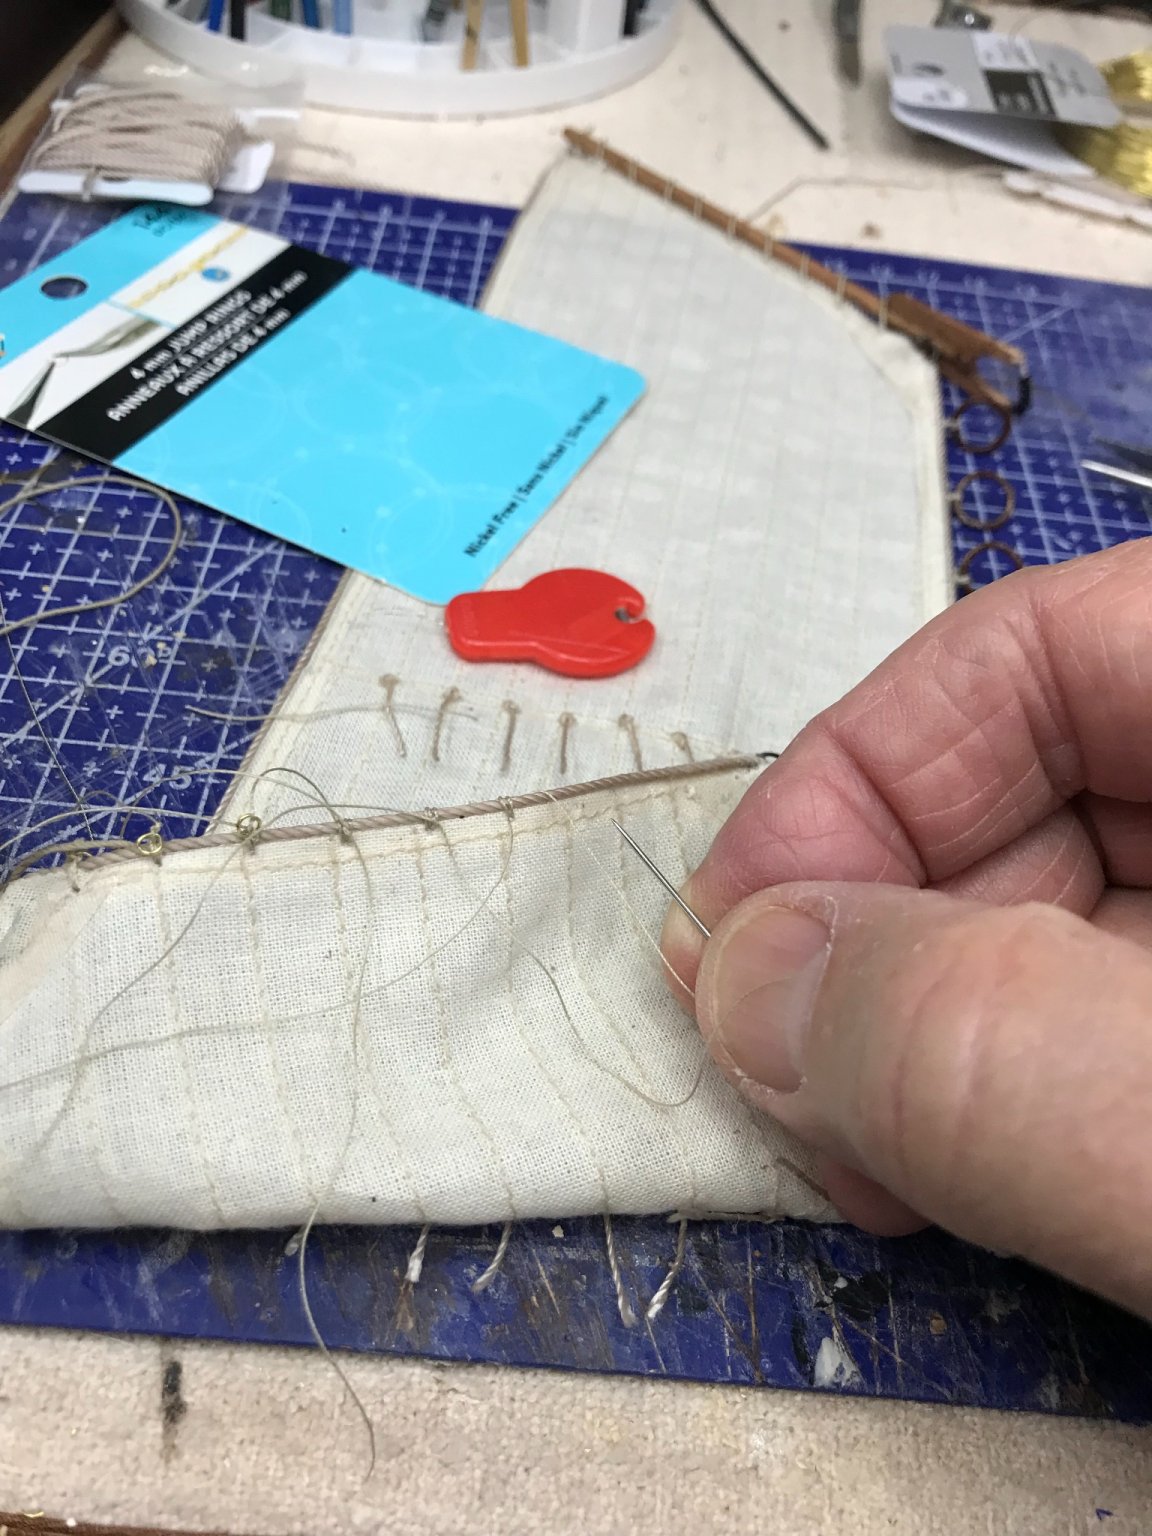
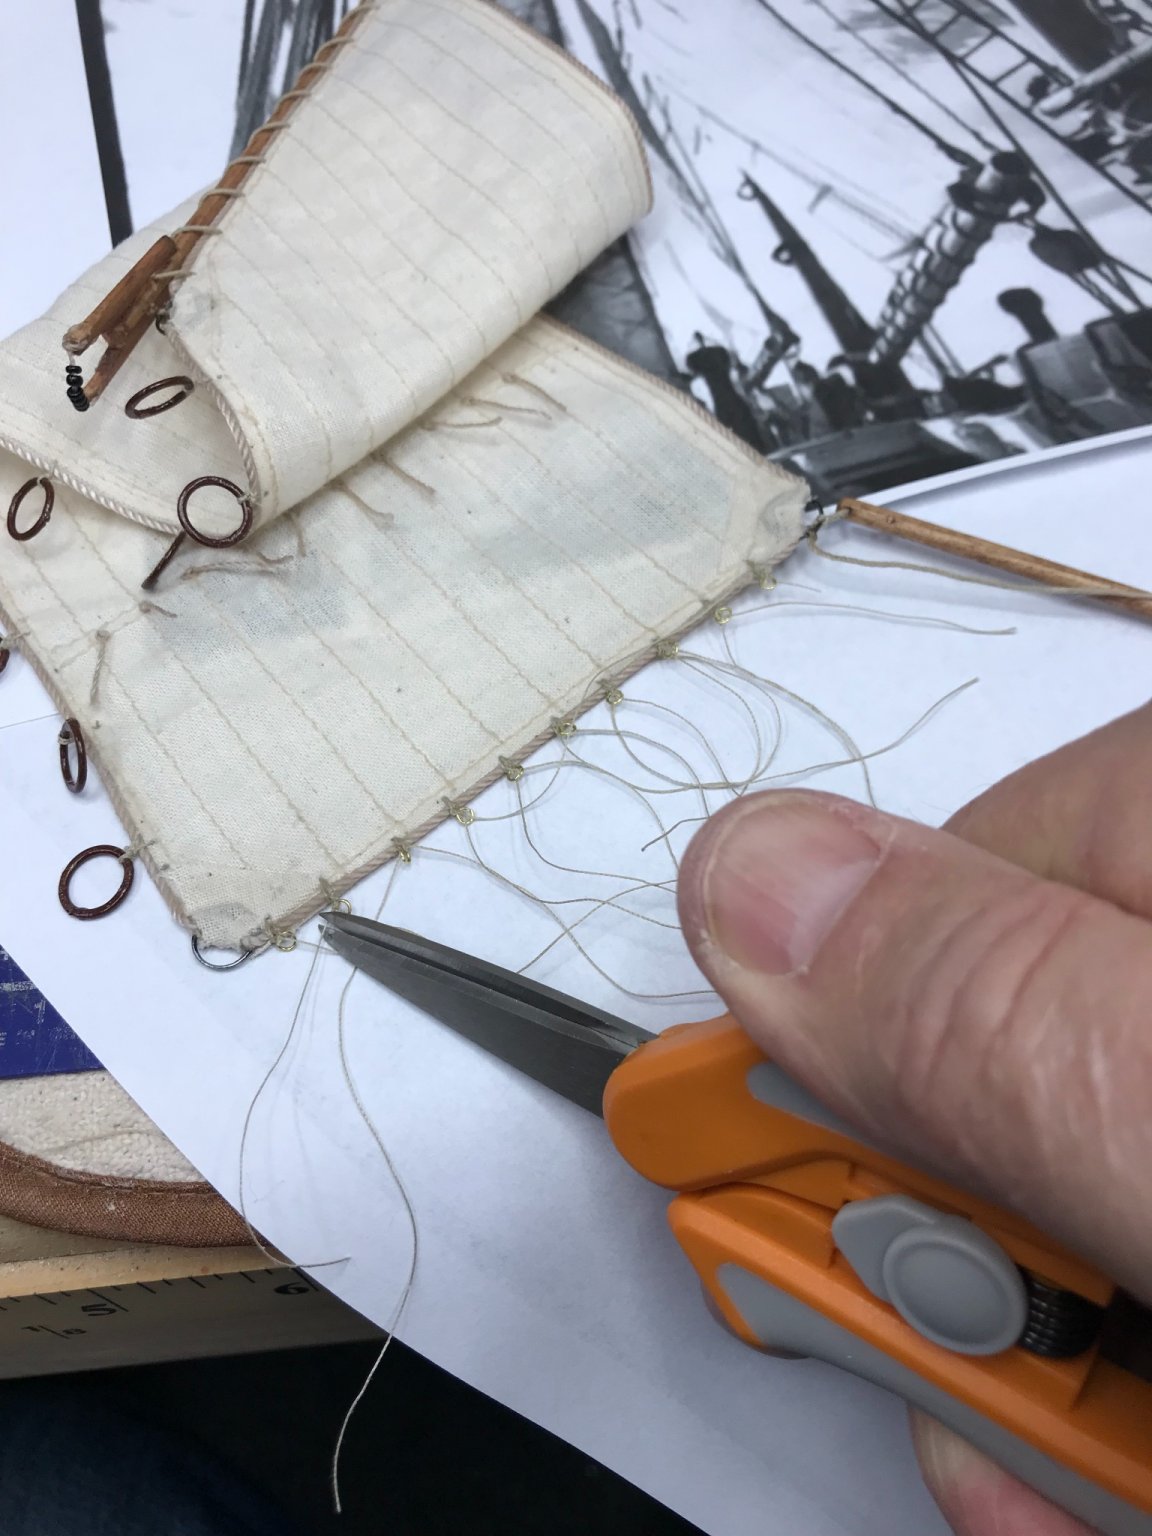
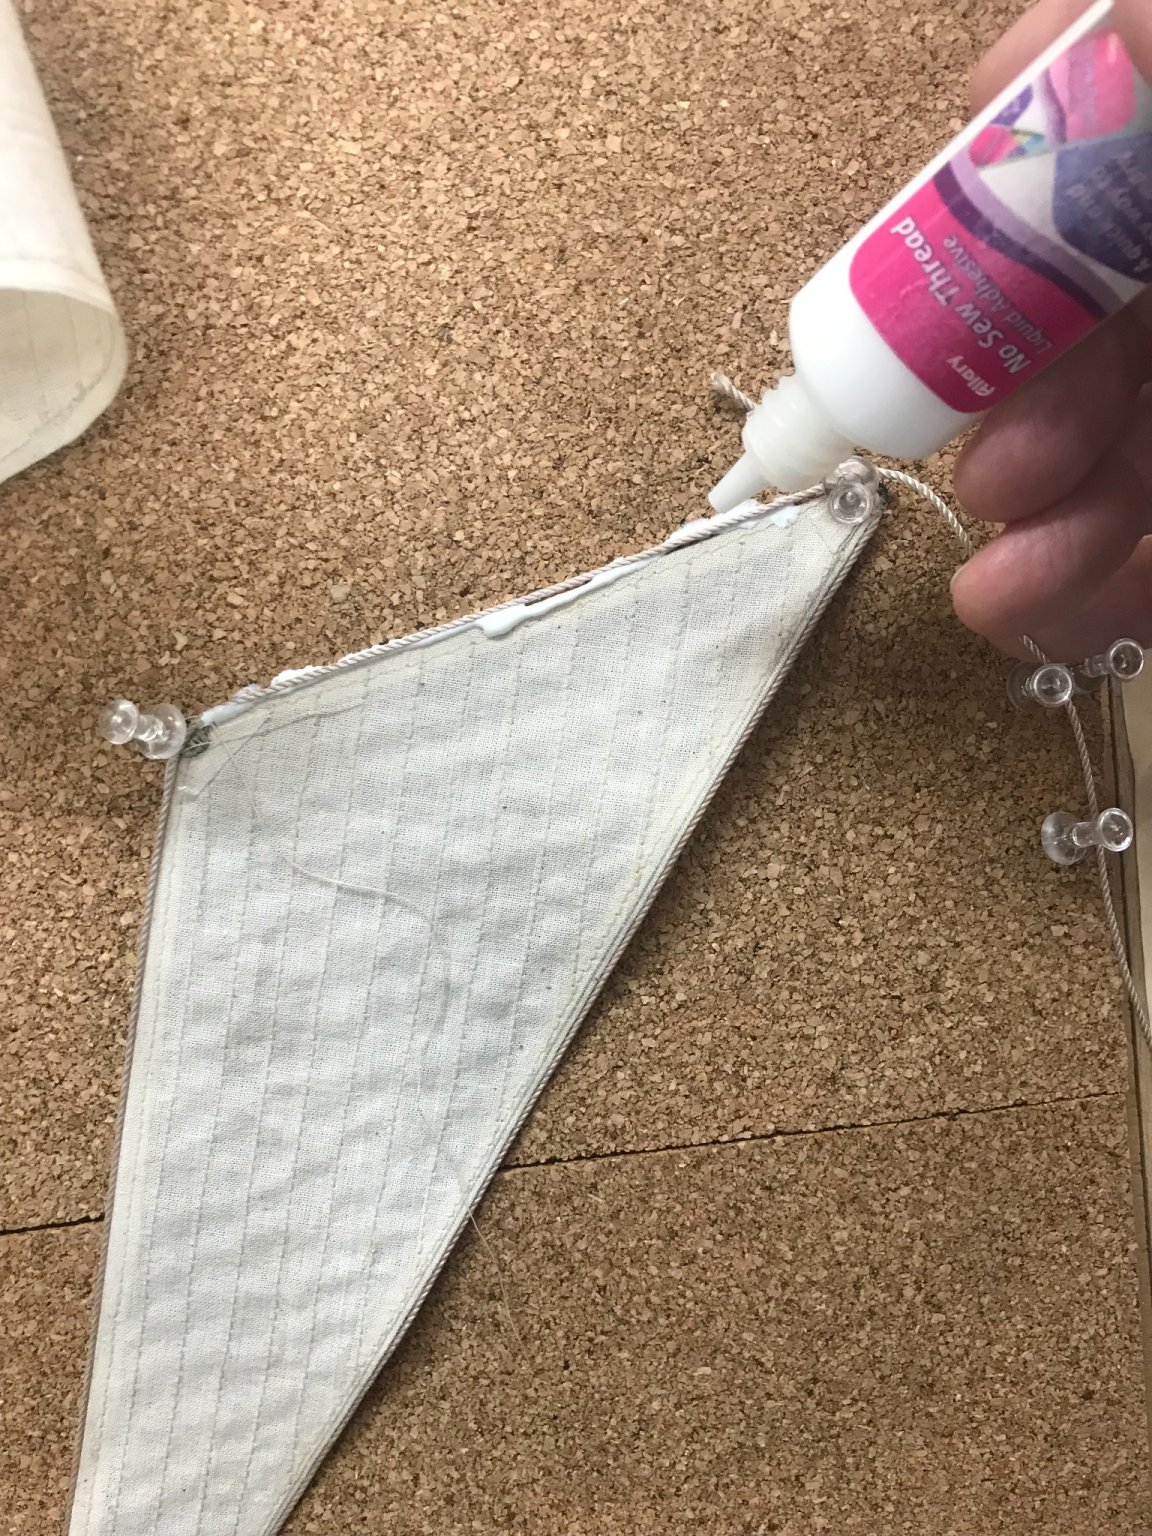
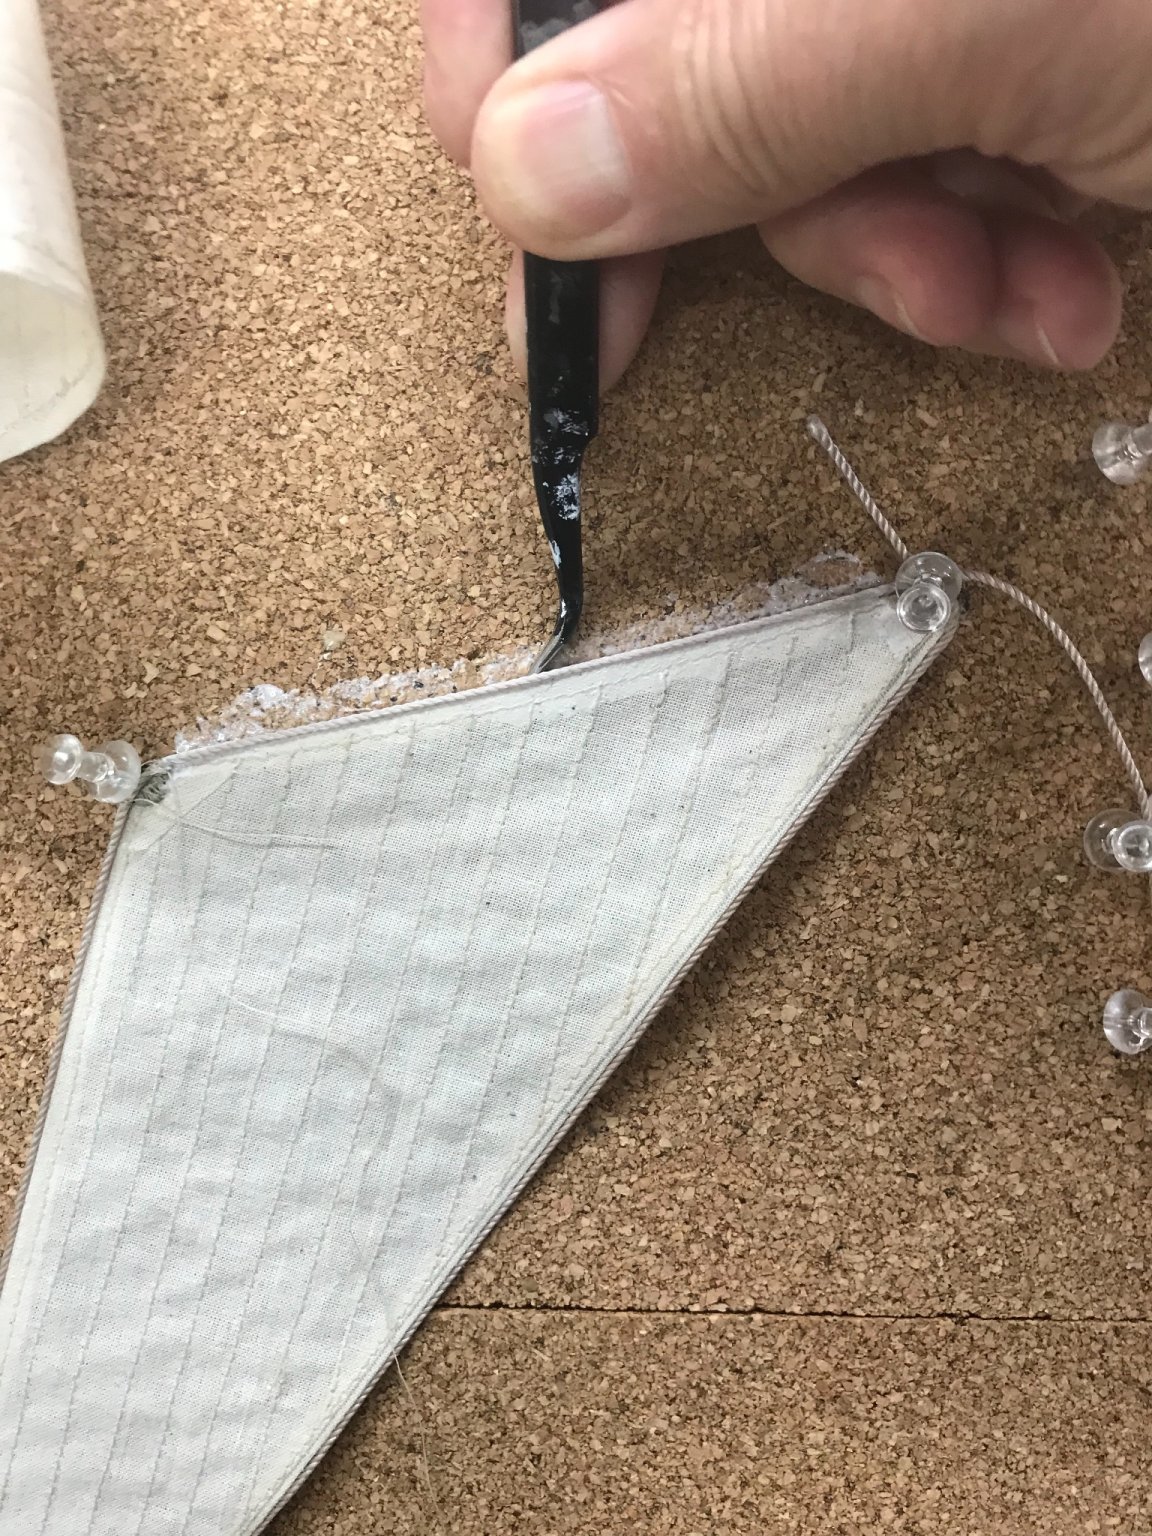
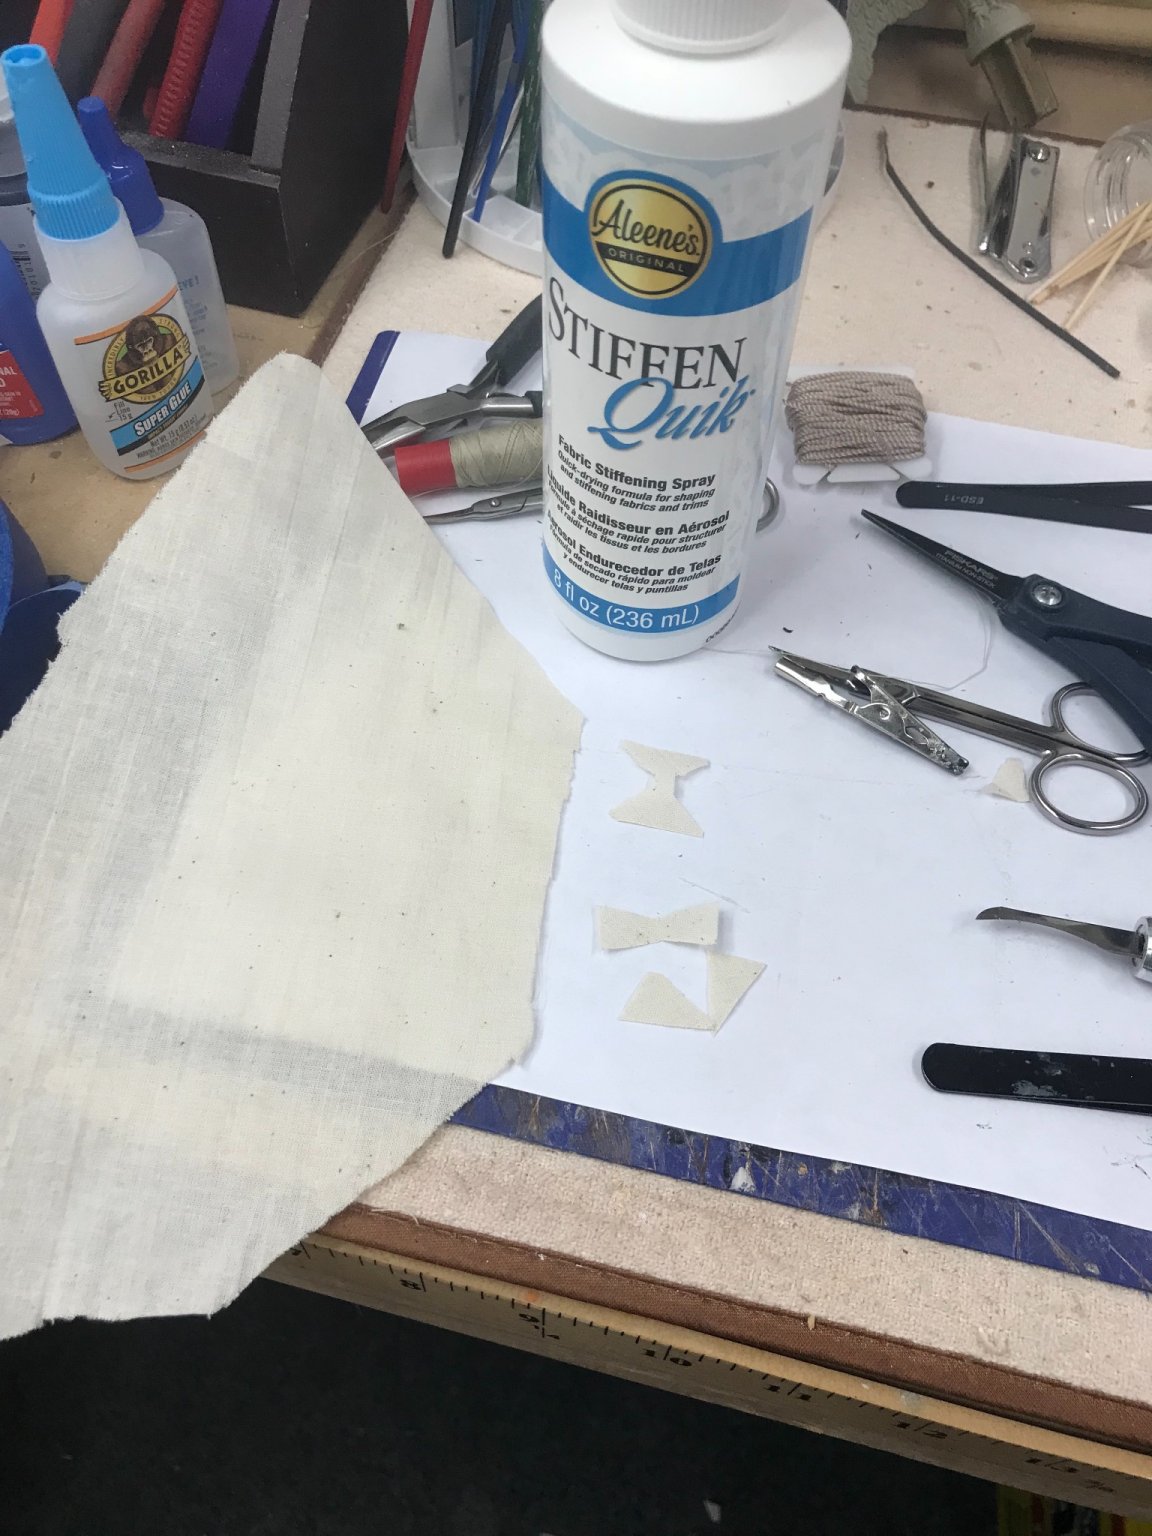
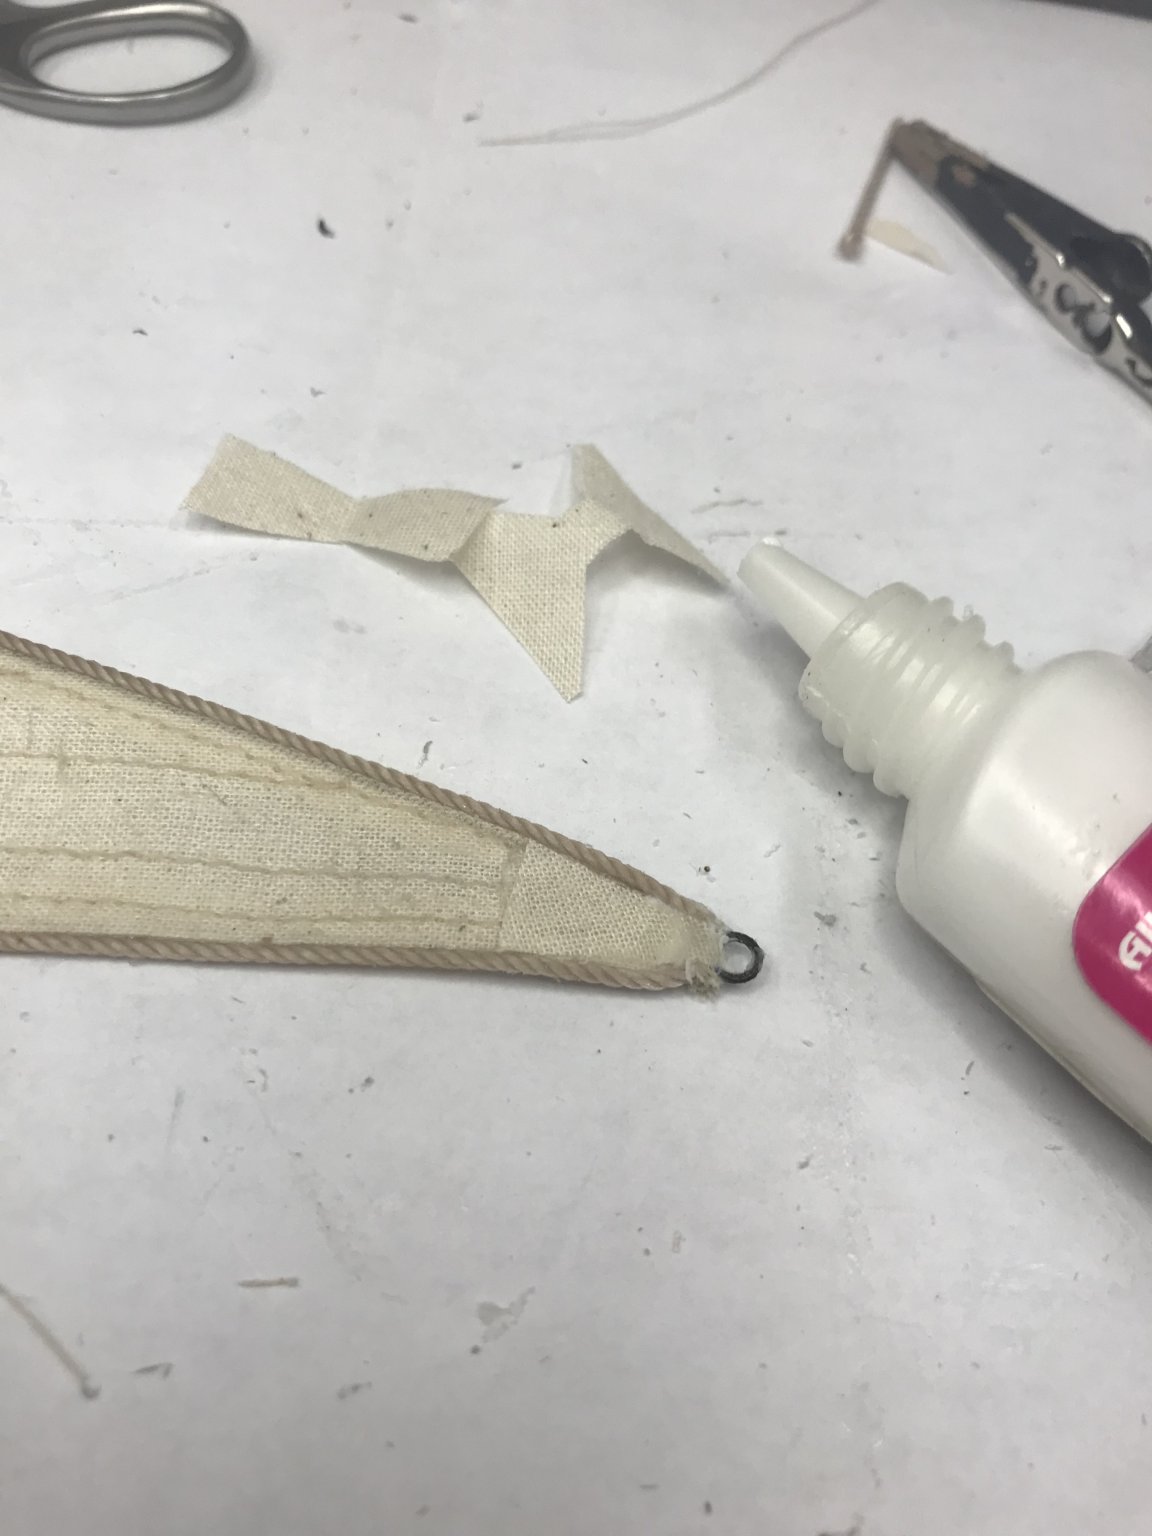
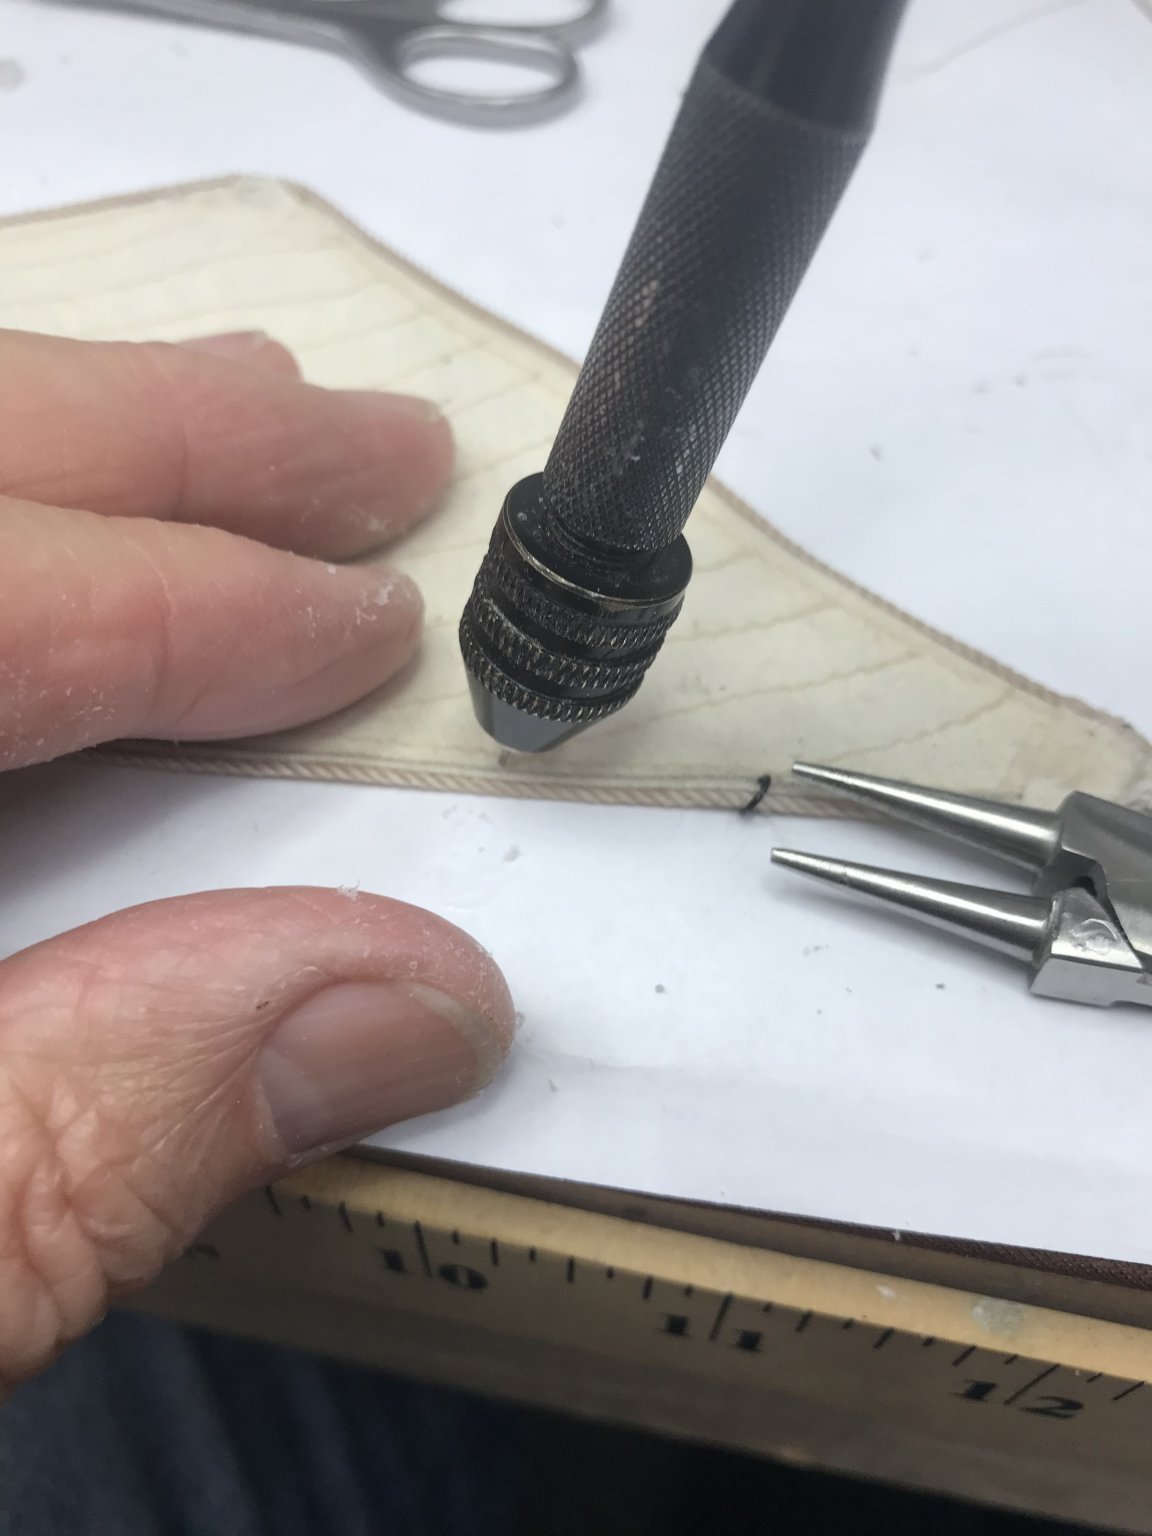
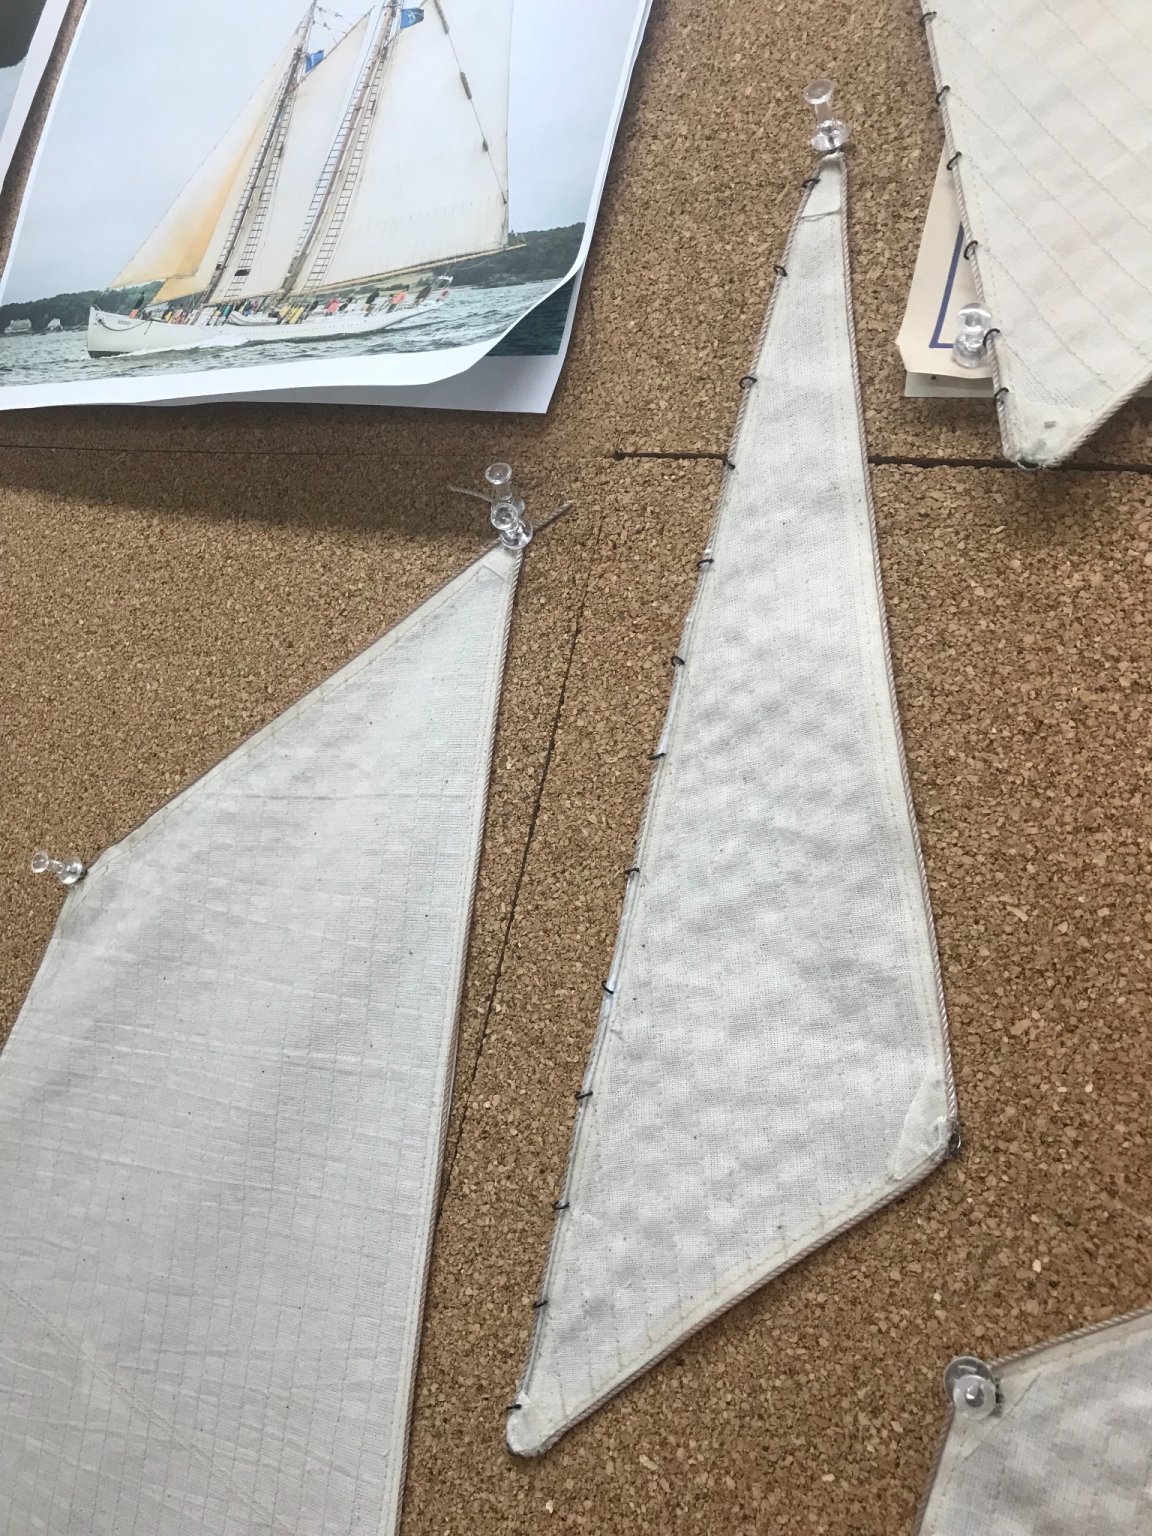
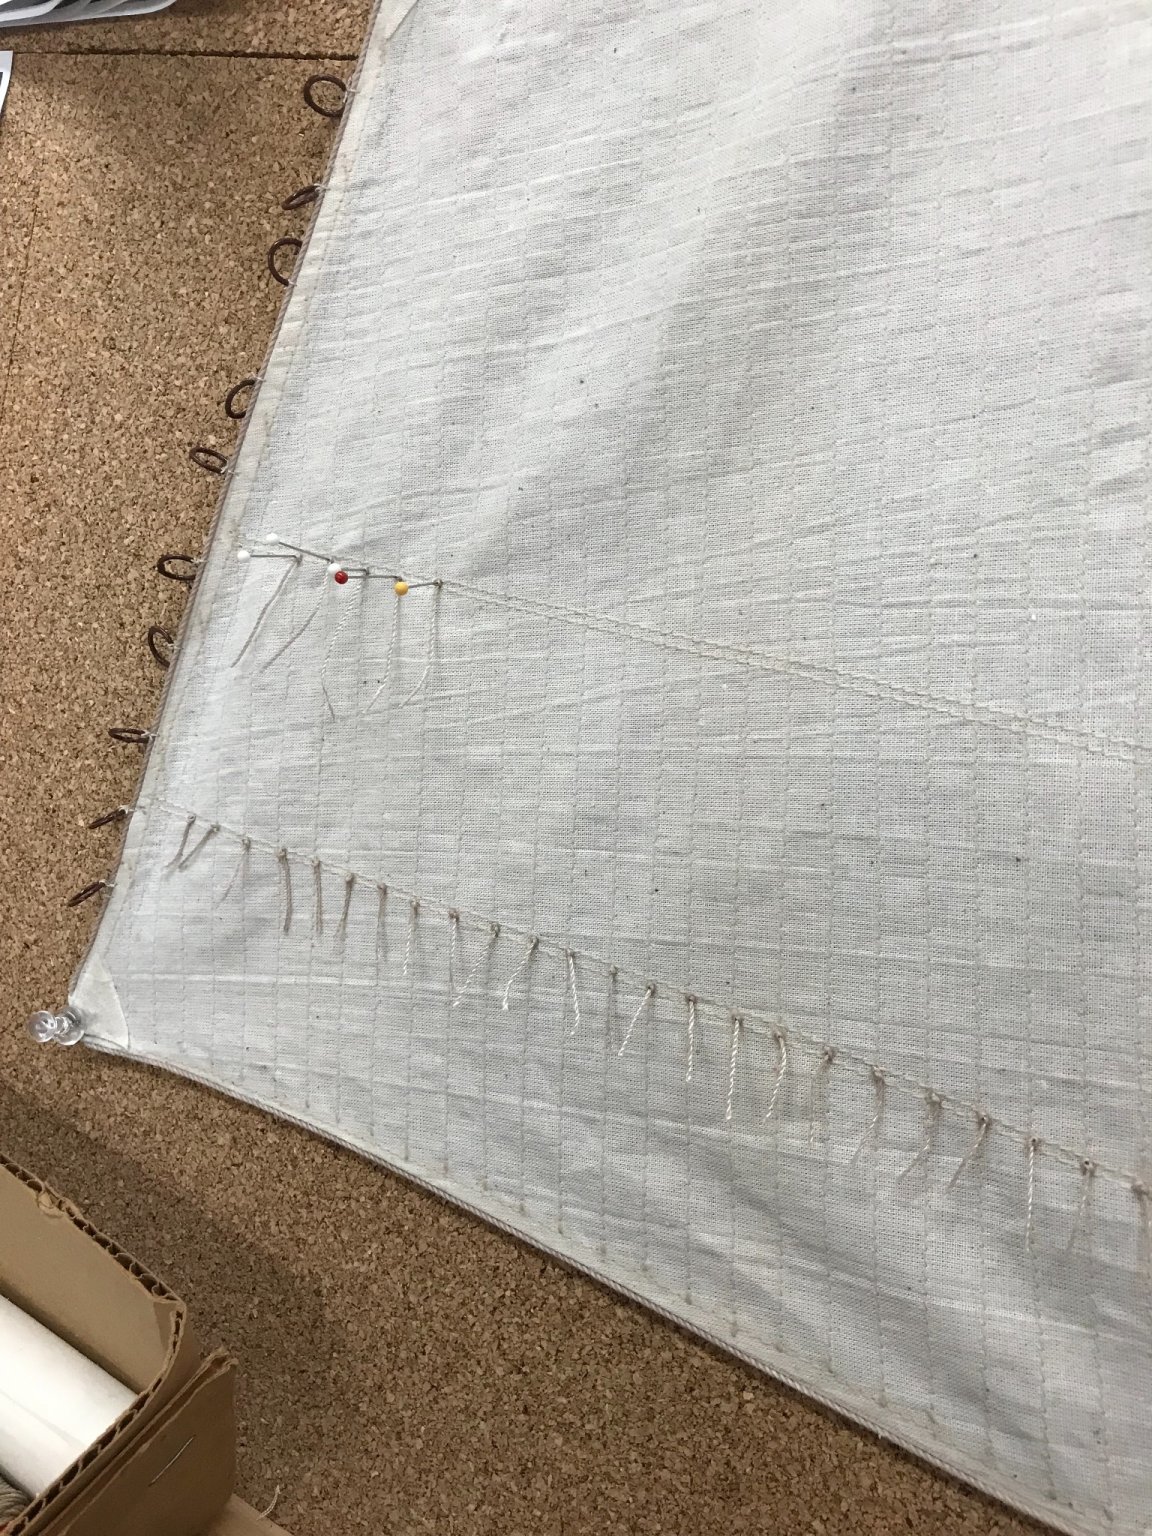
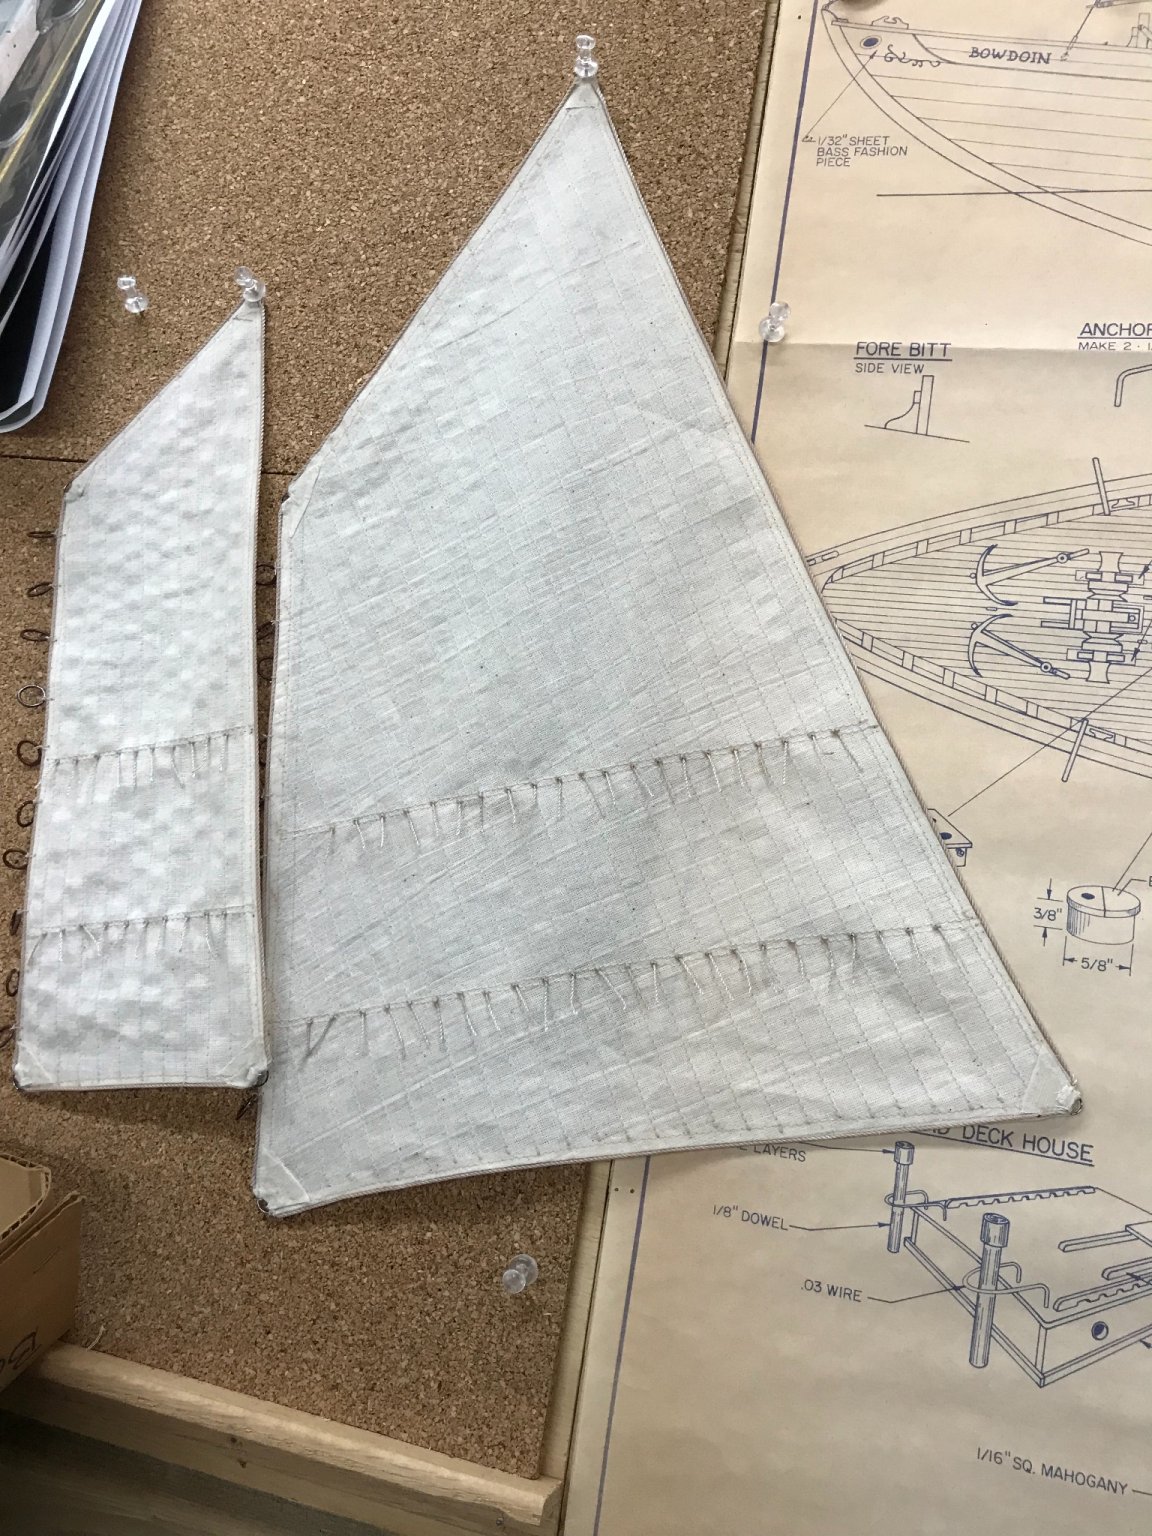
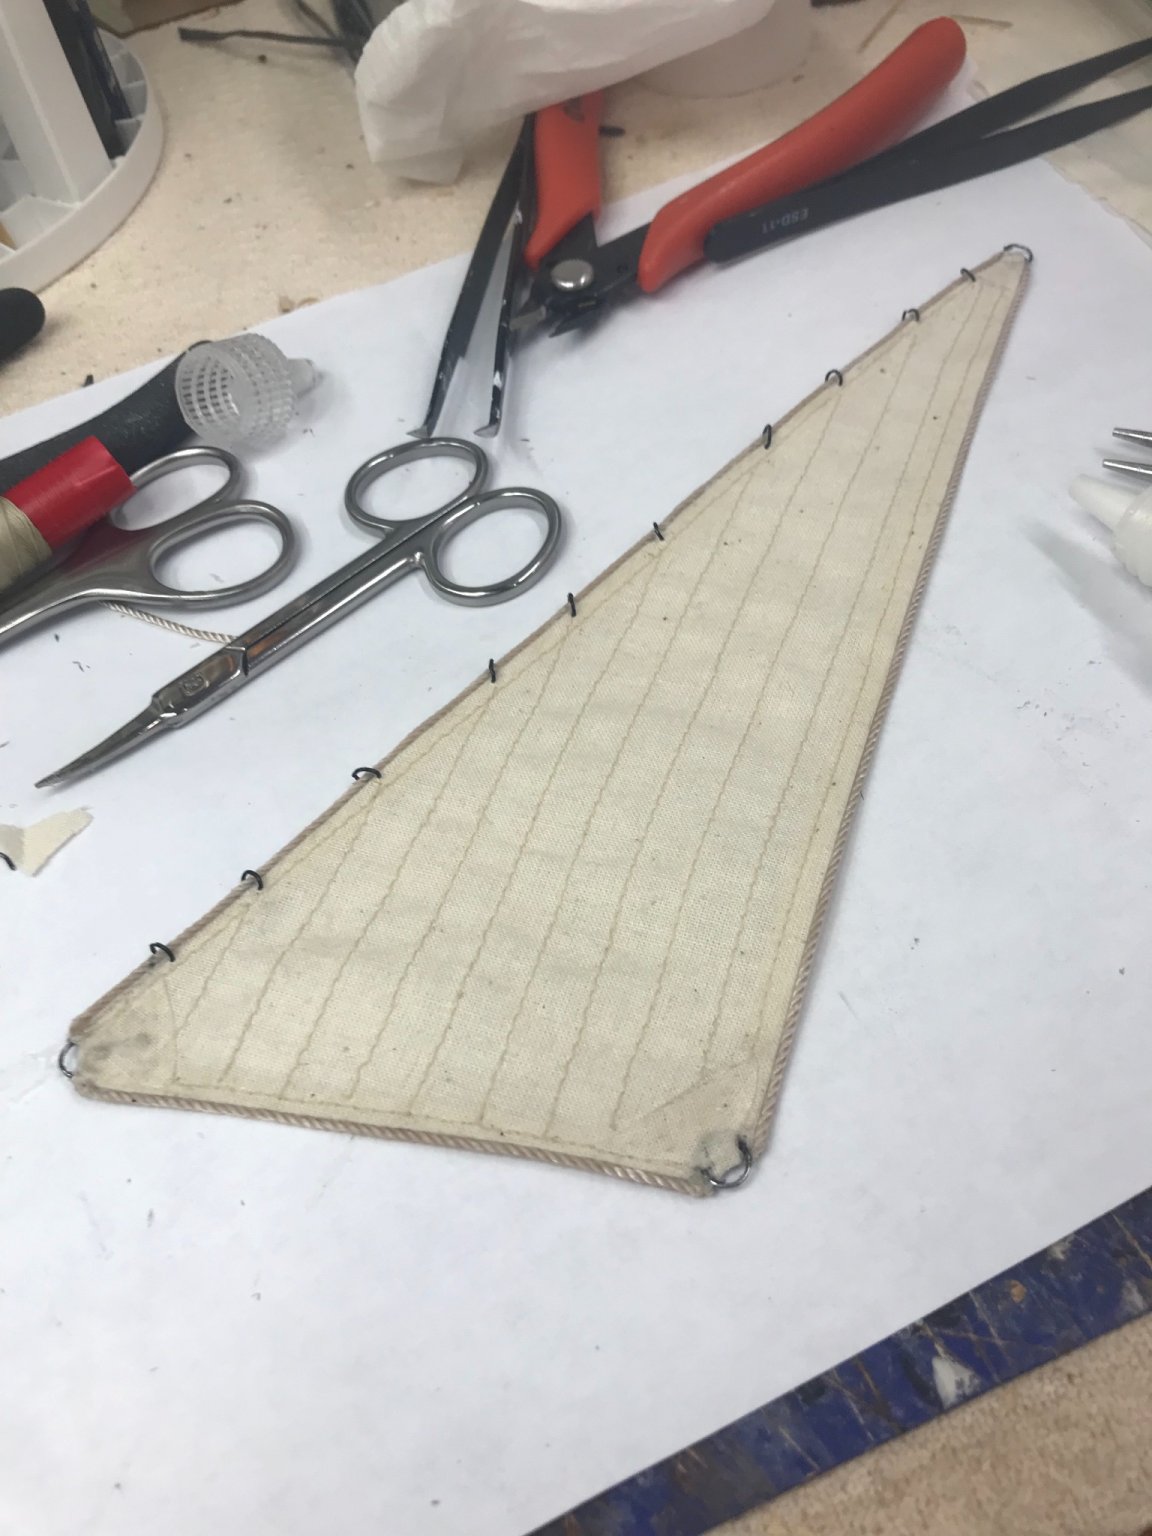
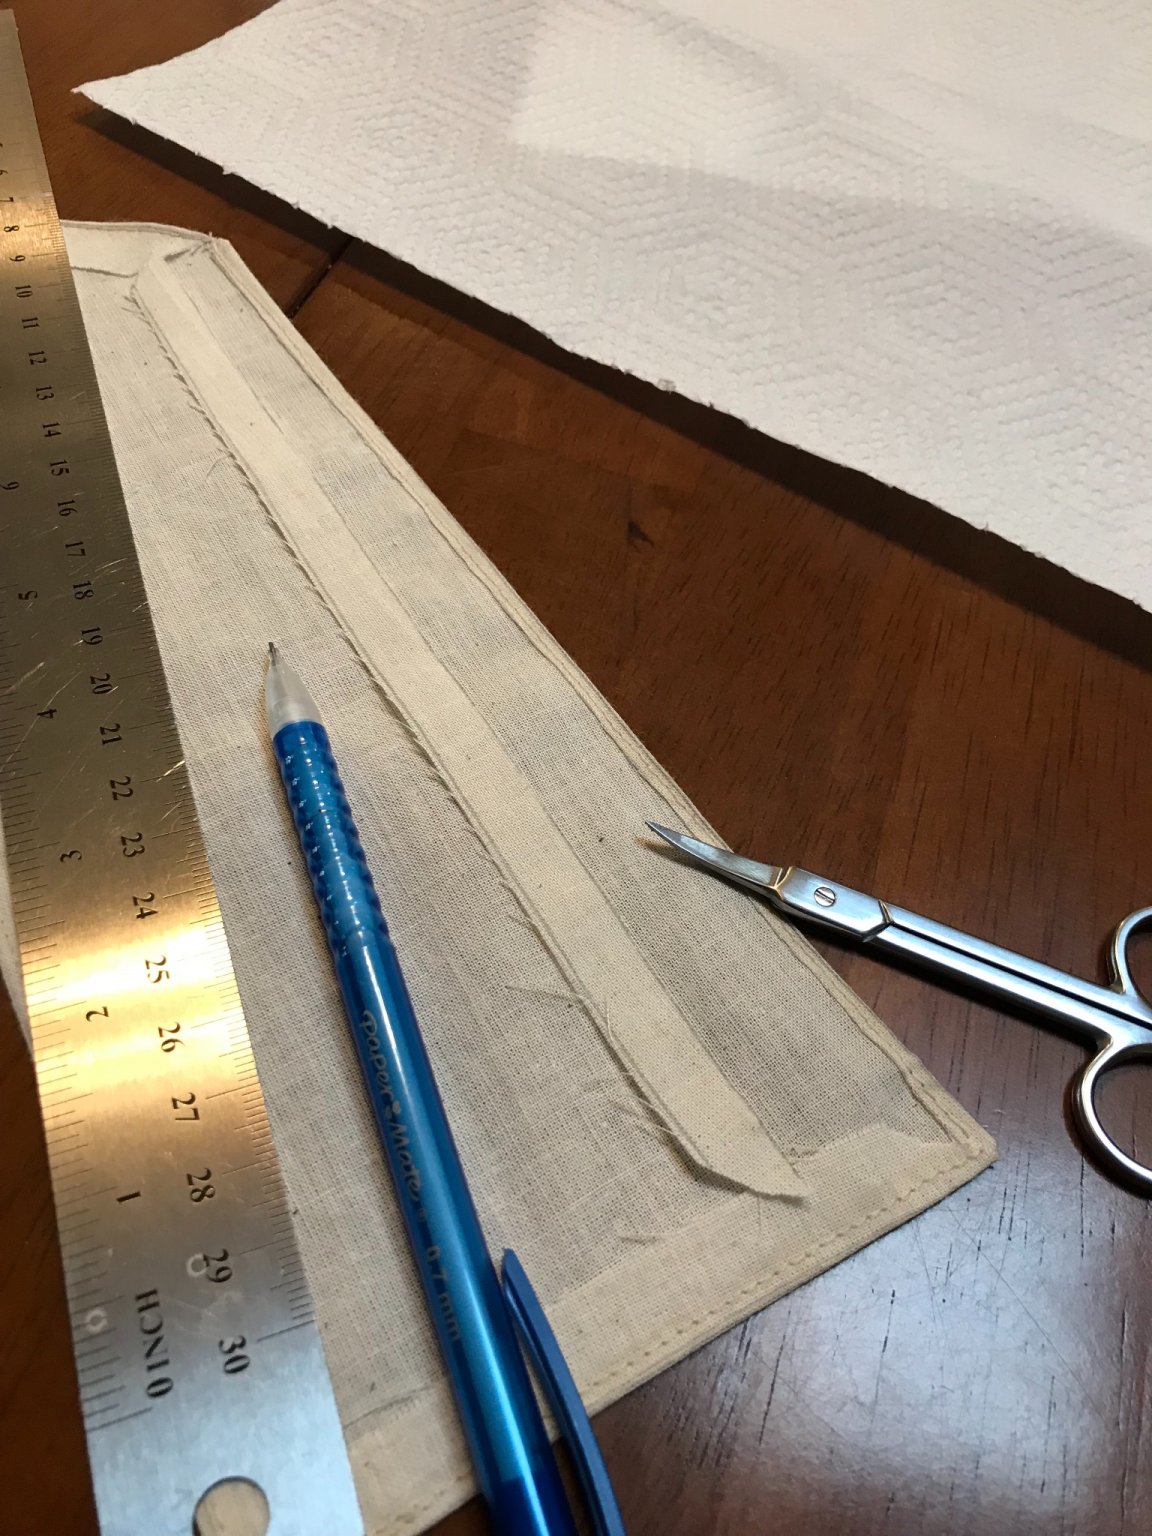
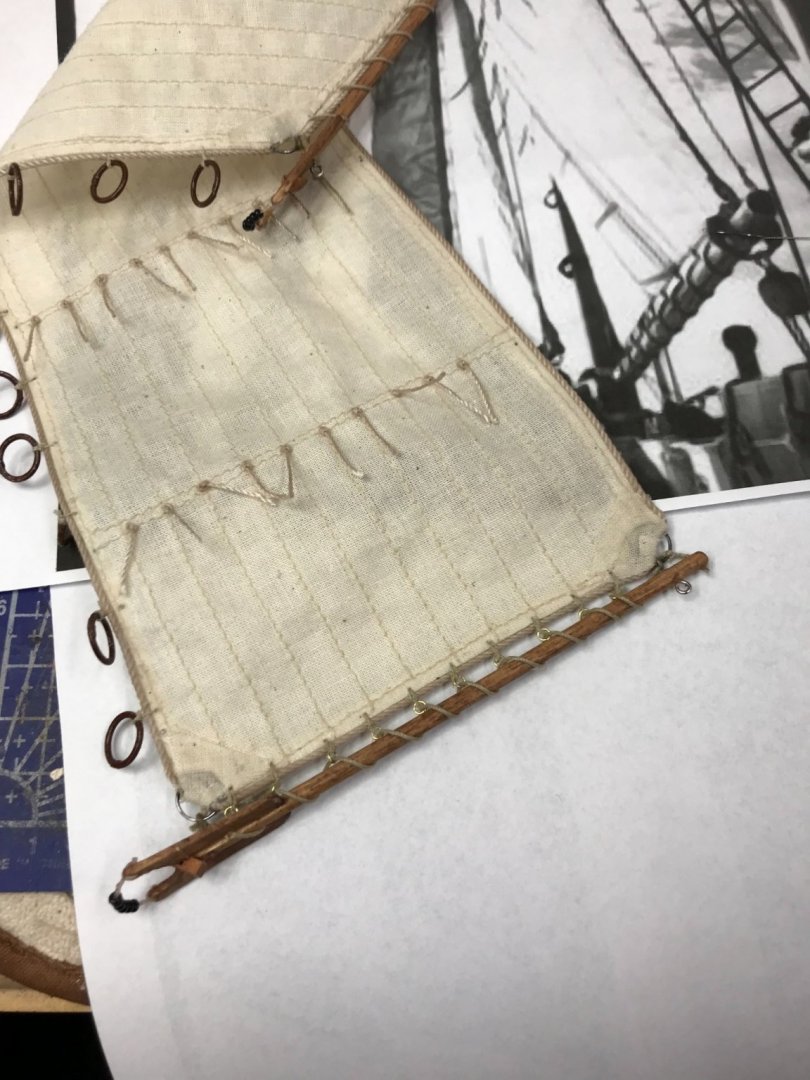
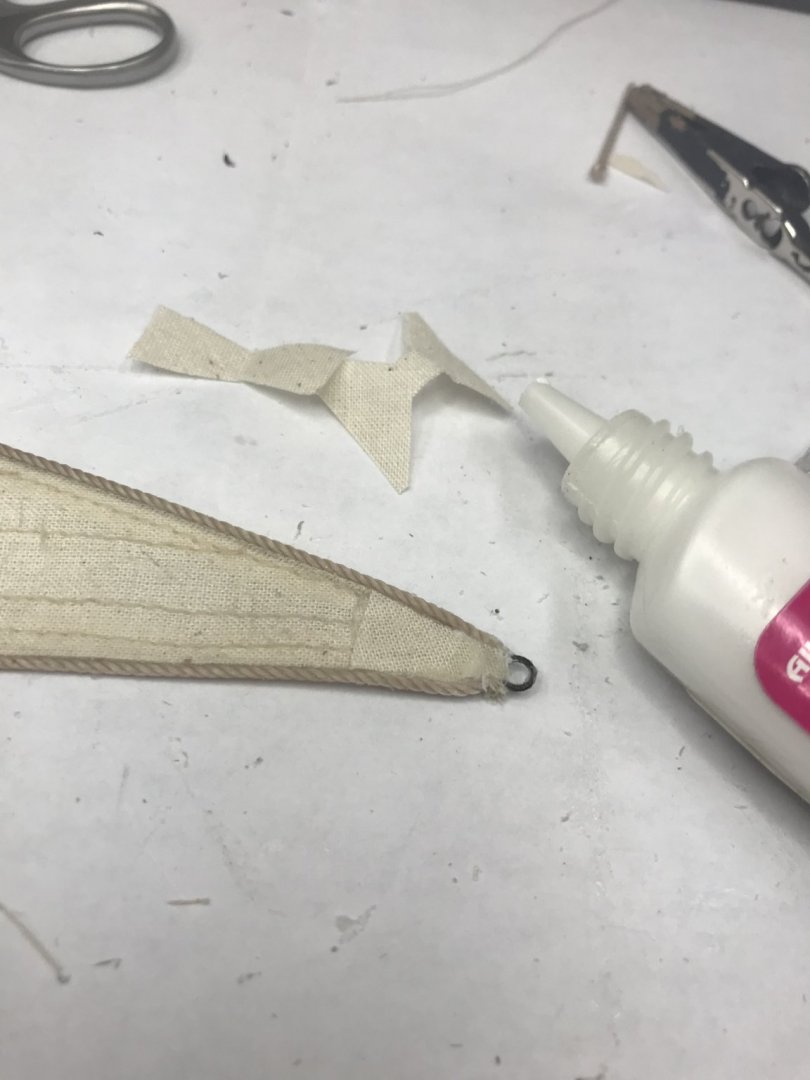
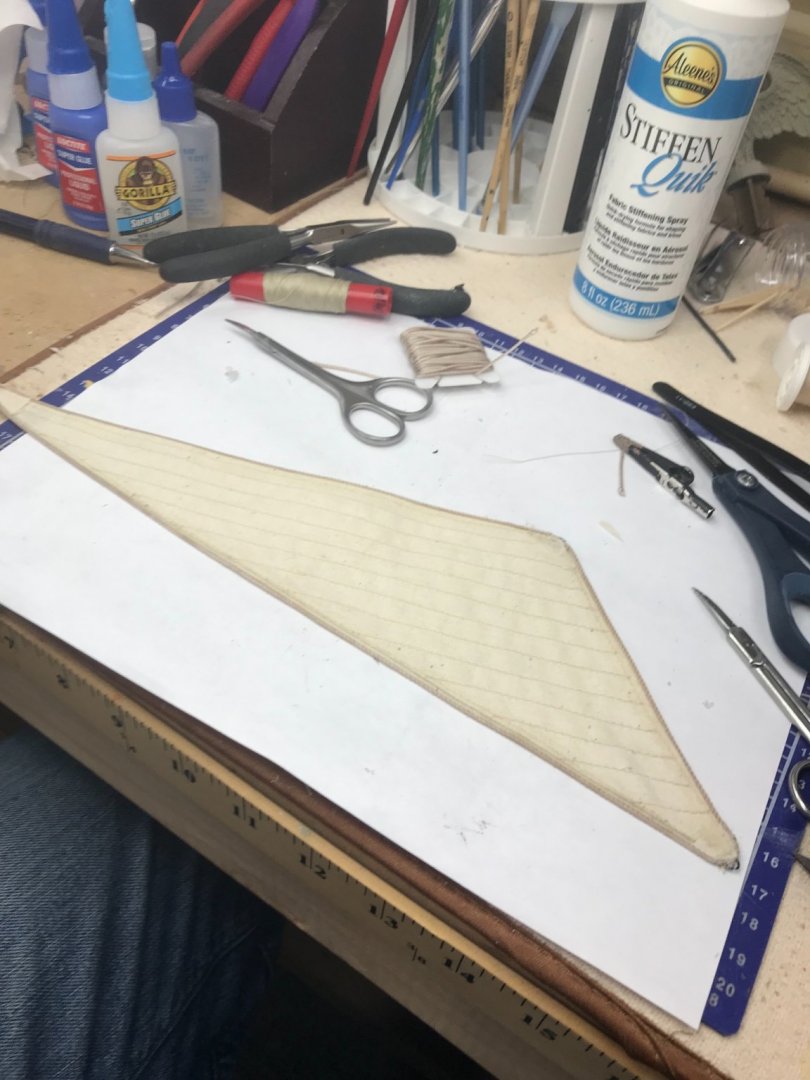
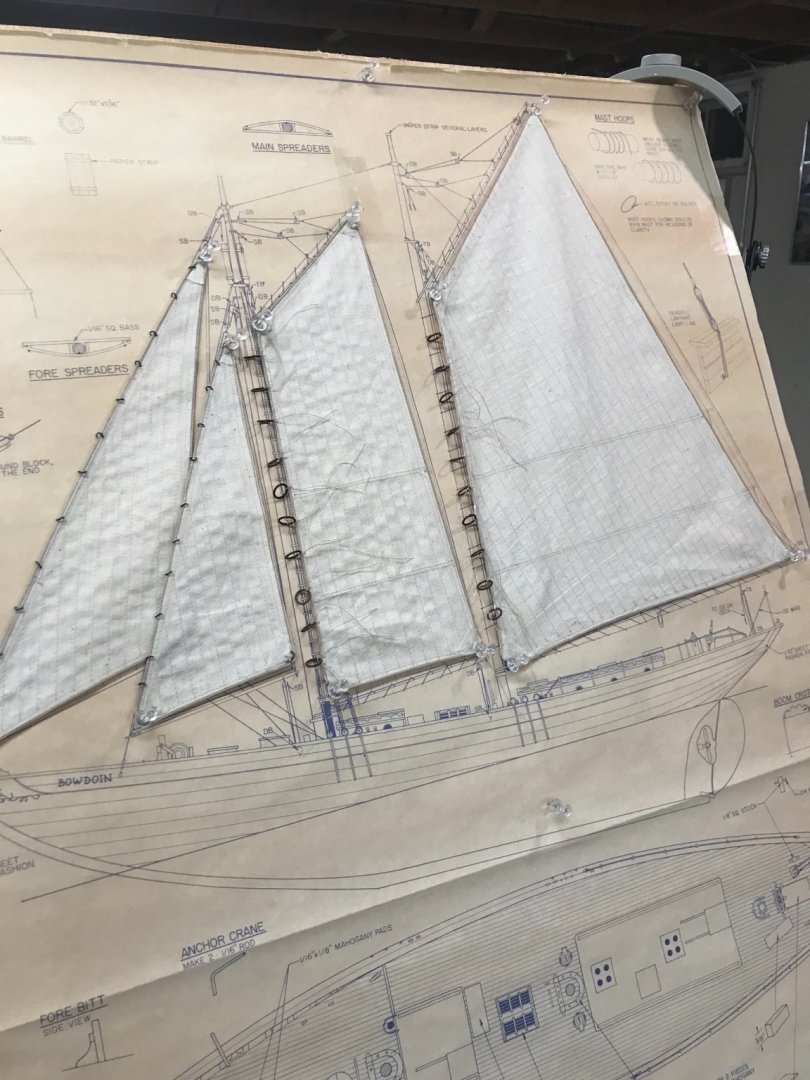
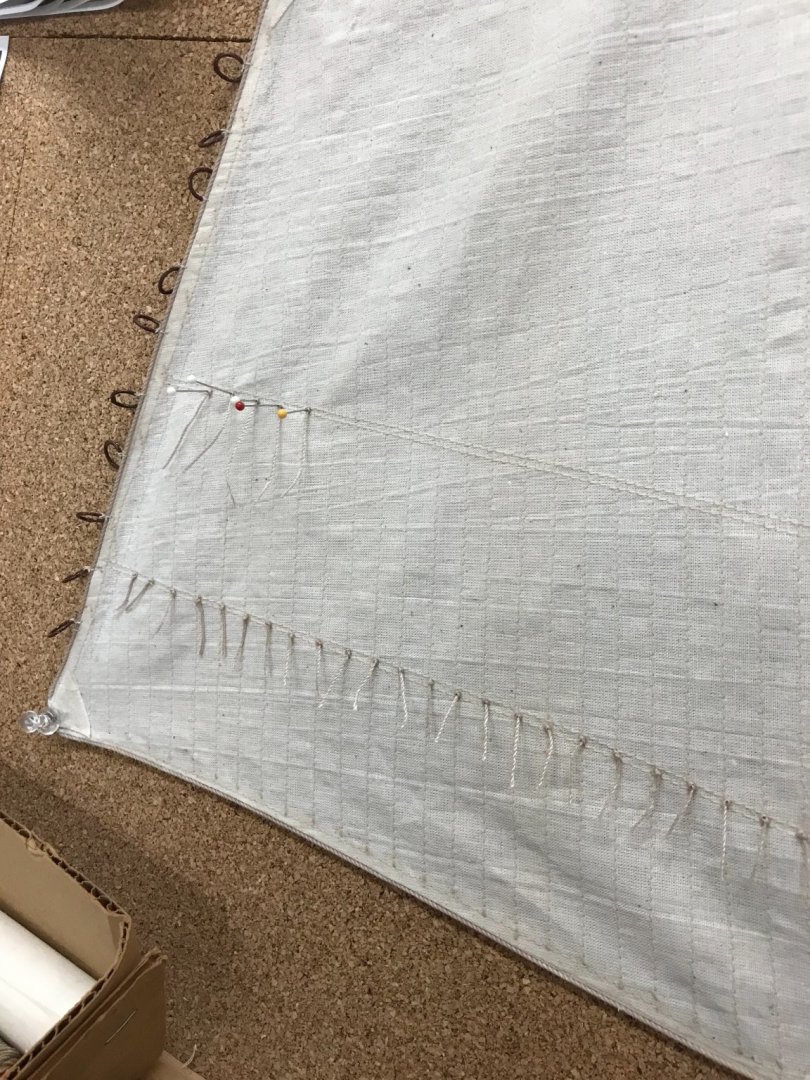
Sail Details… Gluing on Bolt rope, easier said than done. 😆 However, I like the end result vs hand sewing. Making sure it is not glued to the cork board. I made corner patches out of stiffened sail material. Glued the patches in place with fabric glue. Again stitching this is too tedious and appears out of scale. Jib corners completed. Drilling holes for the Jib hanks… Used black split rings. Jib completed… Mast hoops sewn on the Fore Sail. Mast hoops completed on the Fore Sail. All Sails completed with exception of those pestcky Reef Points. 😆 Again decide to try the glue on method vs sewing thru and knotting on both sides. Pinned reef points in place on cork board until dry. Pinned the tail on the sail 120 plus times, had to do it twice this way. I think it was easier than knotting on both sides. Finally, Sails are complete. 😎 Let the rigging begin. 🍻


- 127 replies
-
- 10
-
-
- Bowdoin
- Arctic Exploration
- (and 3 more)
-
Seven hulls in miniature. 😆 You are doing great Ron, I like these better than the metal/lead boats that I had to add wood parts. Took me a month or two to do those as well. Your time is well spent, they look great. 👍
-
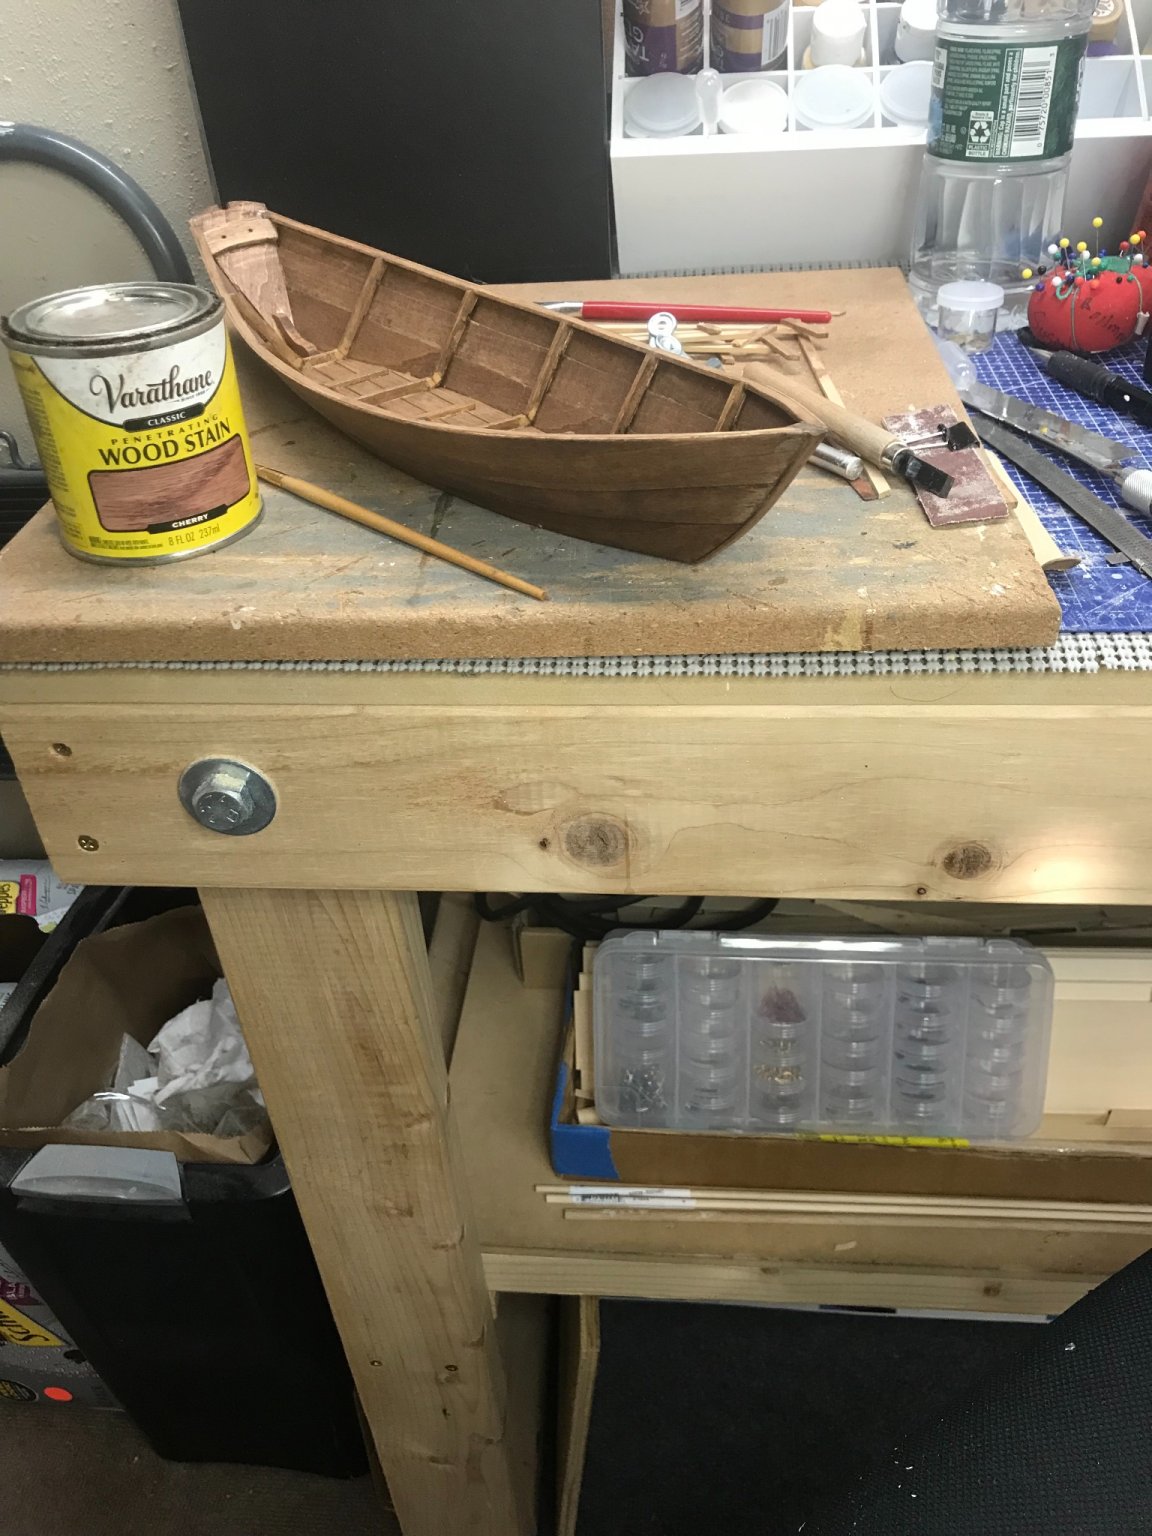
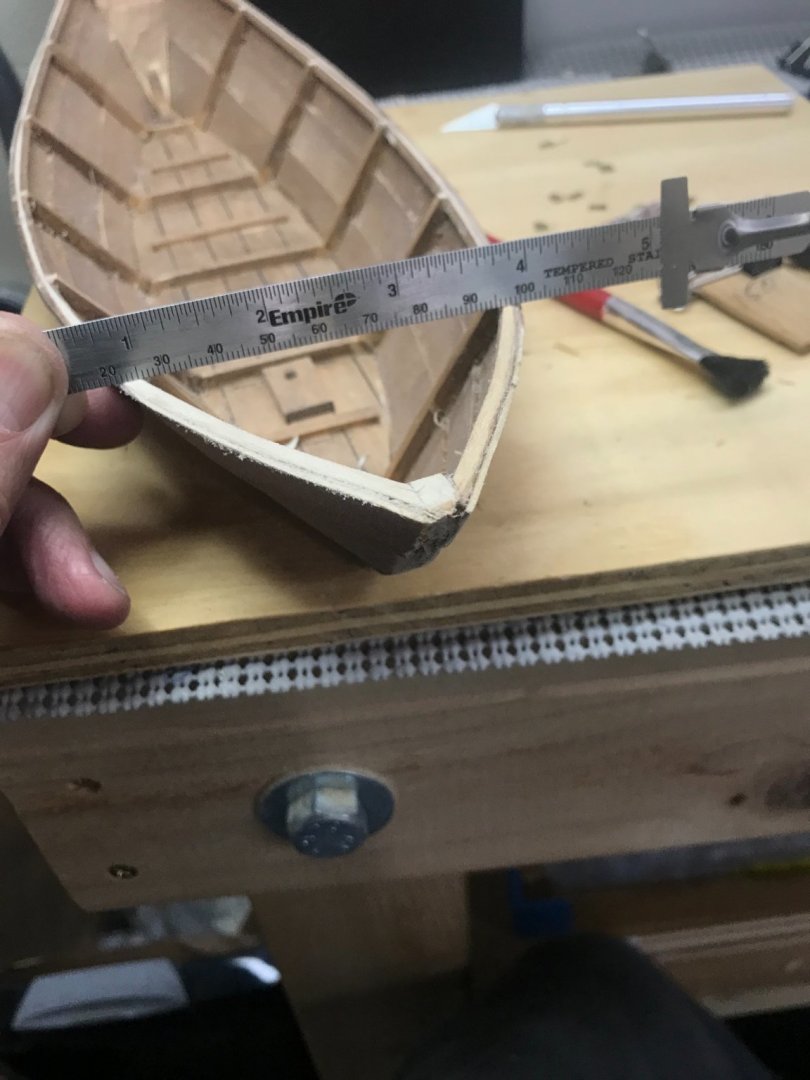
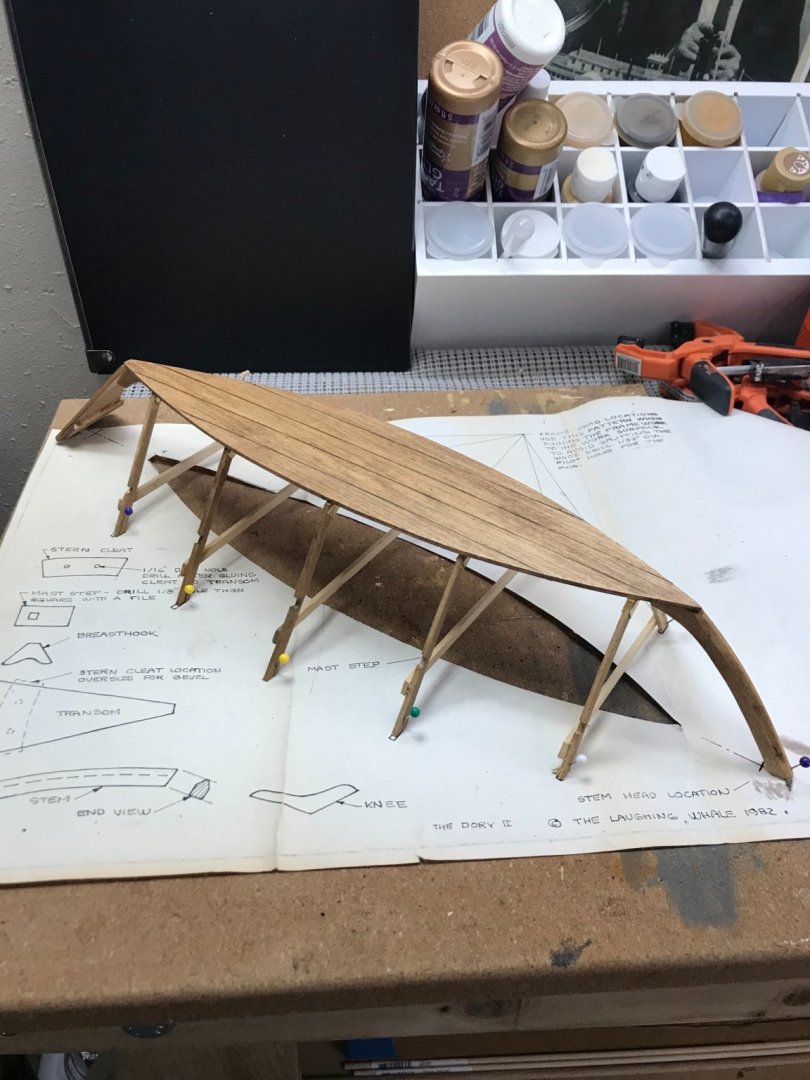
Clean up and re-staining of the hull… Cleaning up the excess glue on the inside was a bit of a pain. A better strategy would probably be to use it’s the right amount. 😆 I also, now know why that call that bent board on the bow a “gripe”. 😊 What a pain that was to get right. 😎 This Dory makes for a great way to get a break from Bowdoin for a bit. Later… 🍻


- 22 replies
-
- 5
-
-
- Laughing Whale
- Dory
- (and 1 more)
-
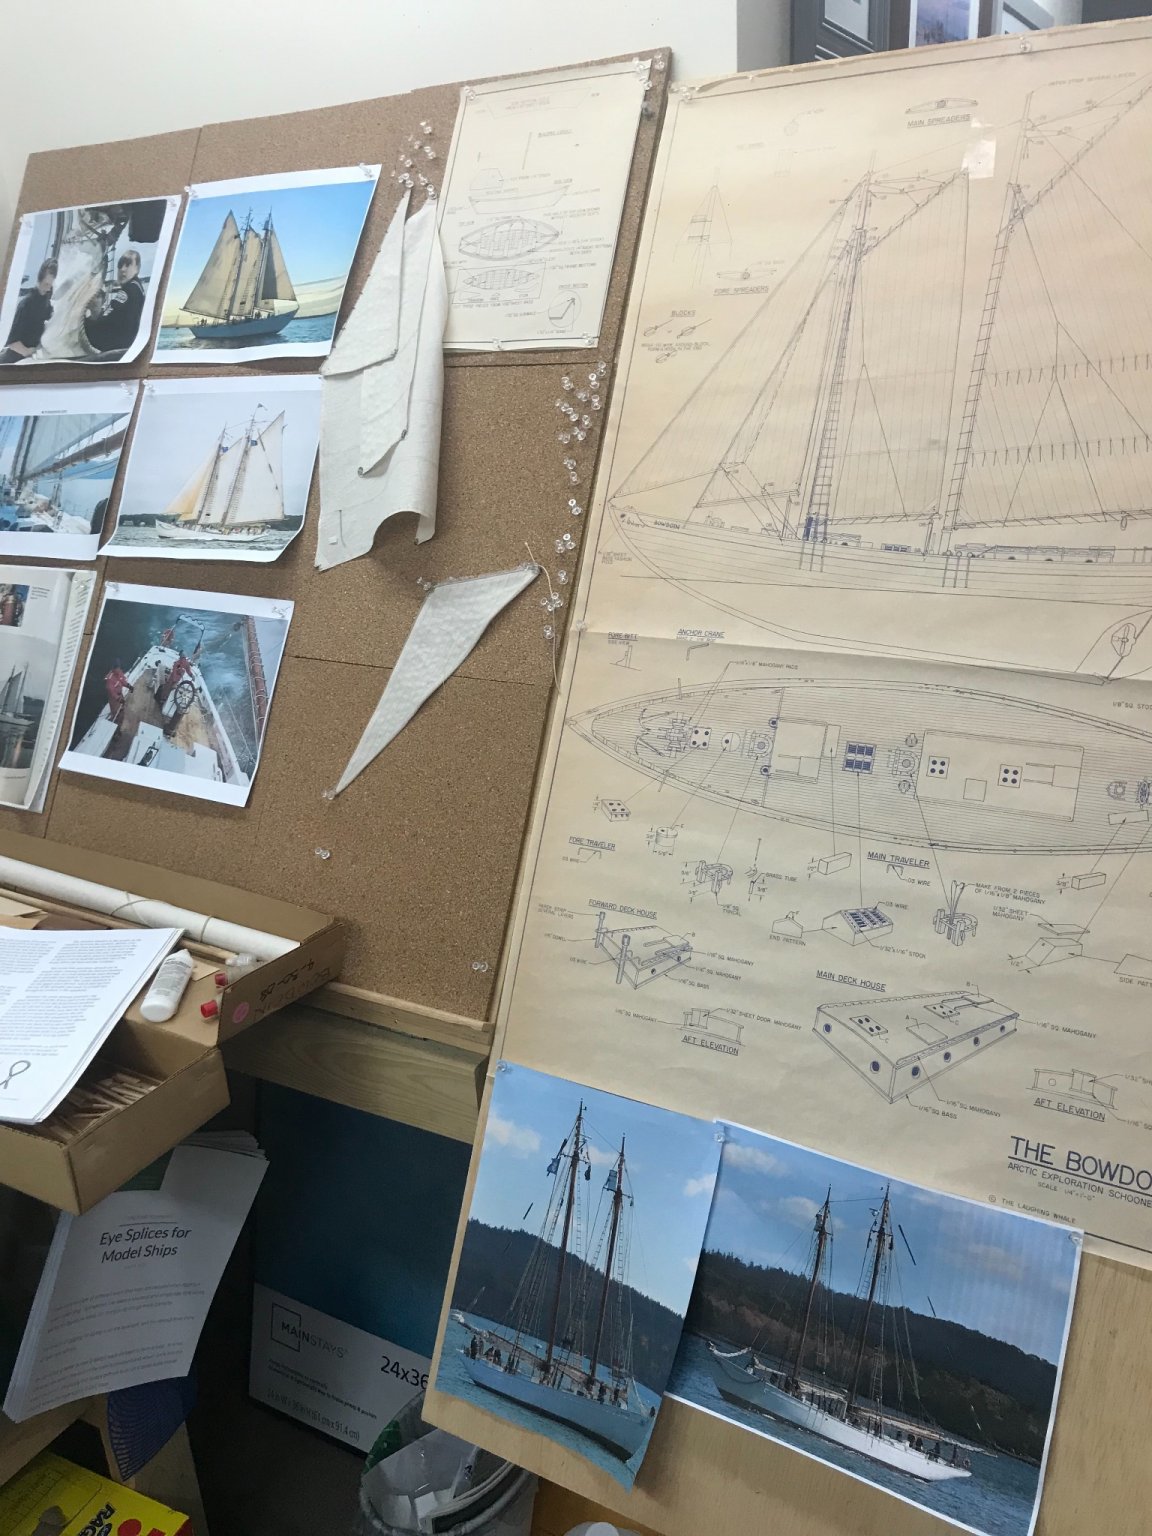
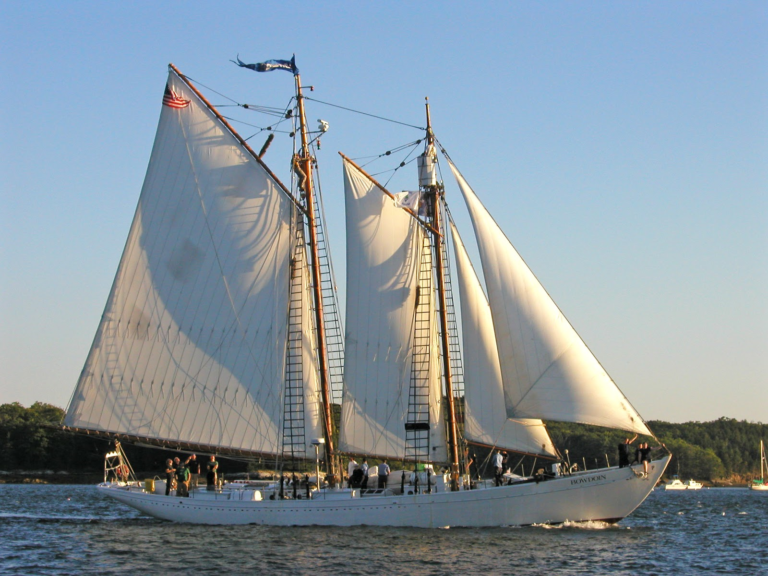
Got that Rope… Here is my inspiration photo for detailing the sails… Fore Sail now ready for mounting. Onwards 🍻

- 127 replies
-
- 8
-
-
- Bowdoin
- Arctic Exploration
- (and 3 more)
-
Thanks David, I have a MS Bluenose in my stash. This should be useful. 👍 Maybe Derek can help me out on this build. 😉 Now you know why I’m following your build, Derek. BTW, VERY nice work…
-
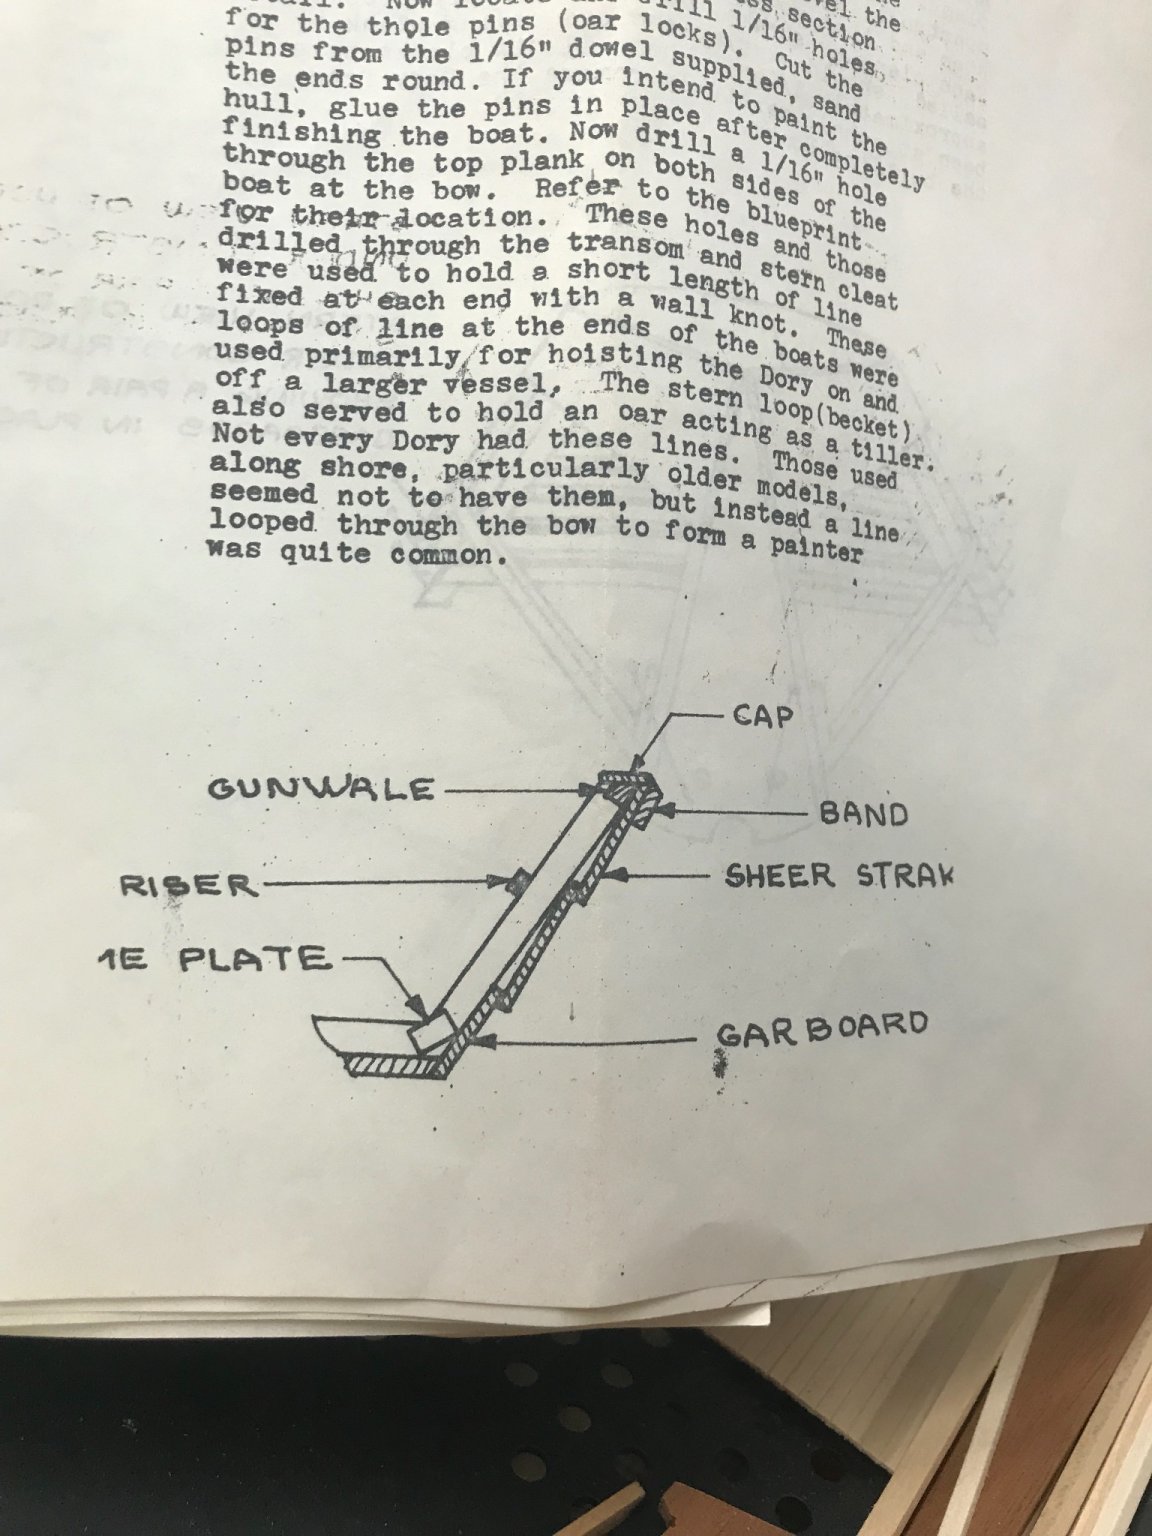
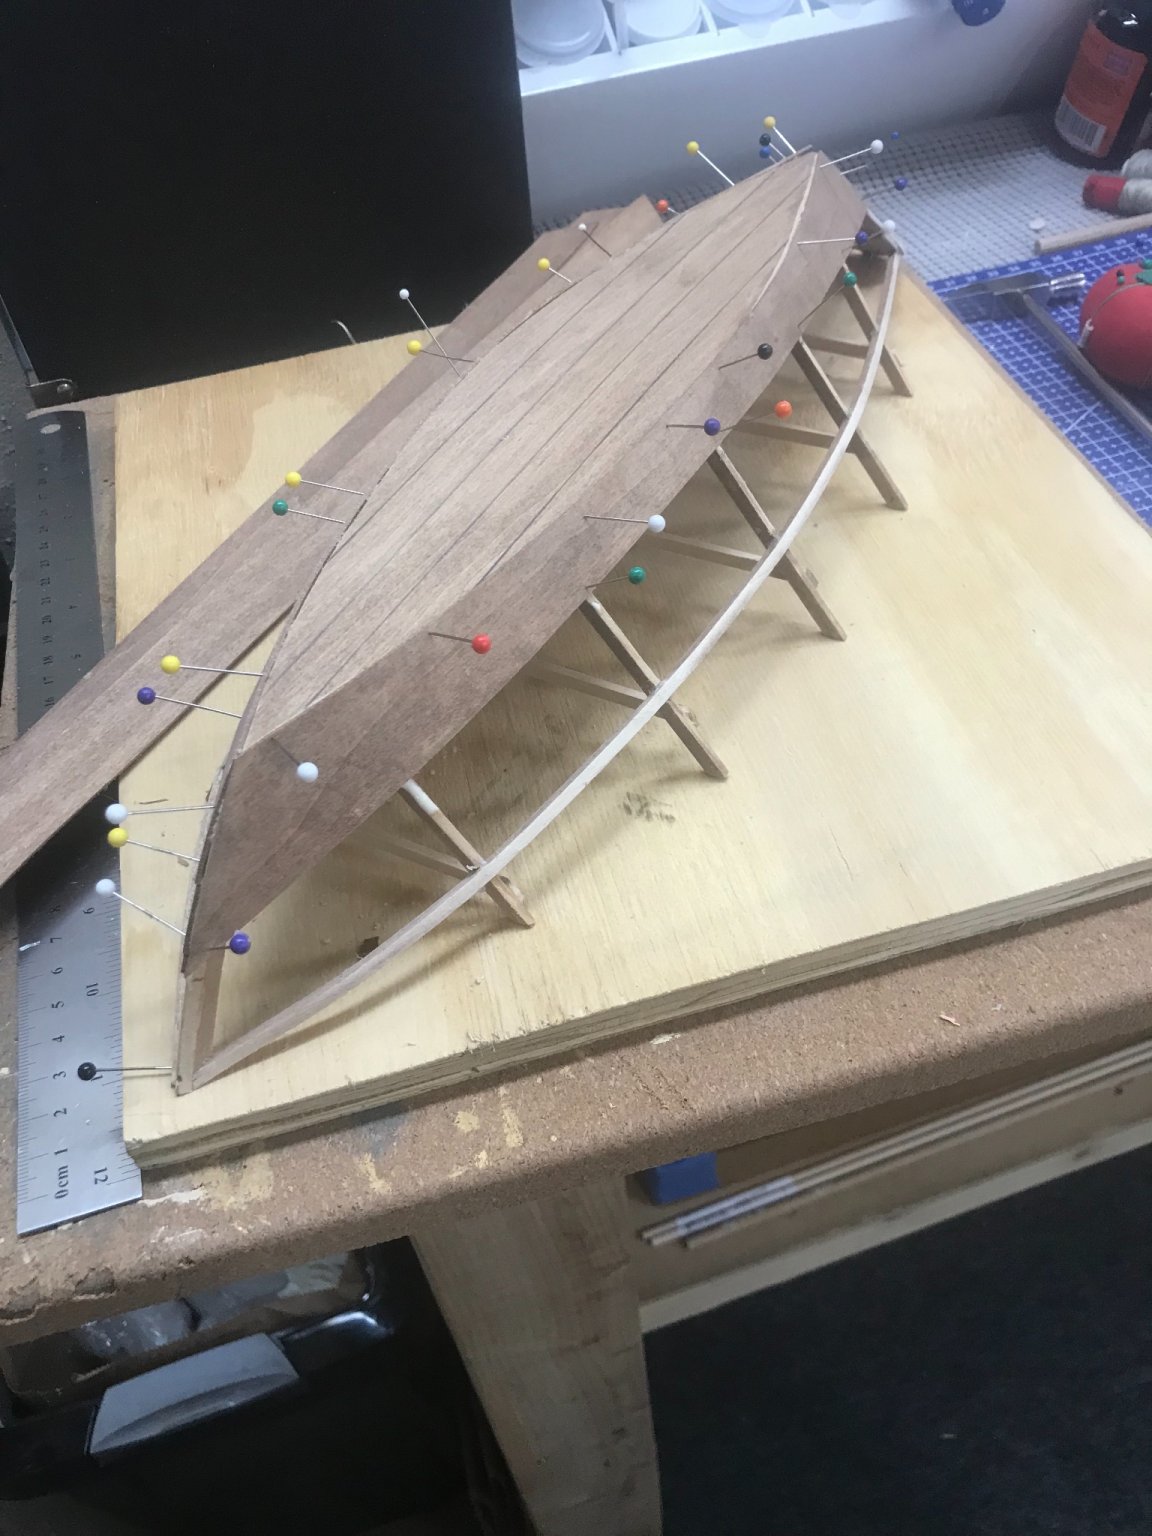
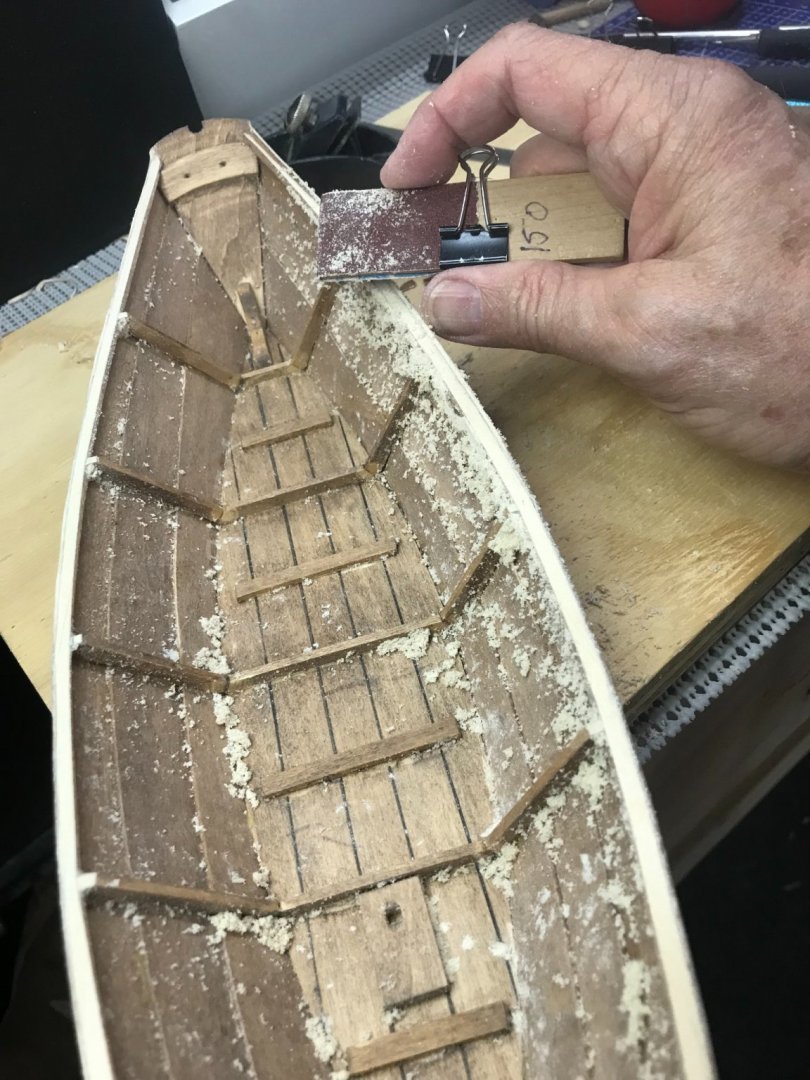
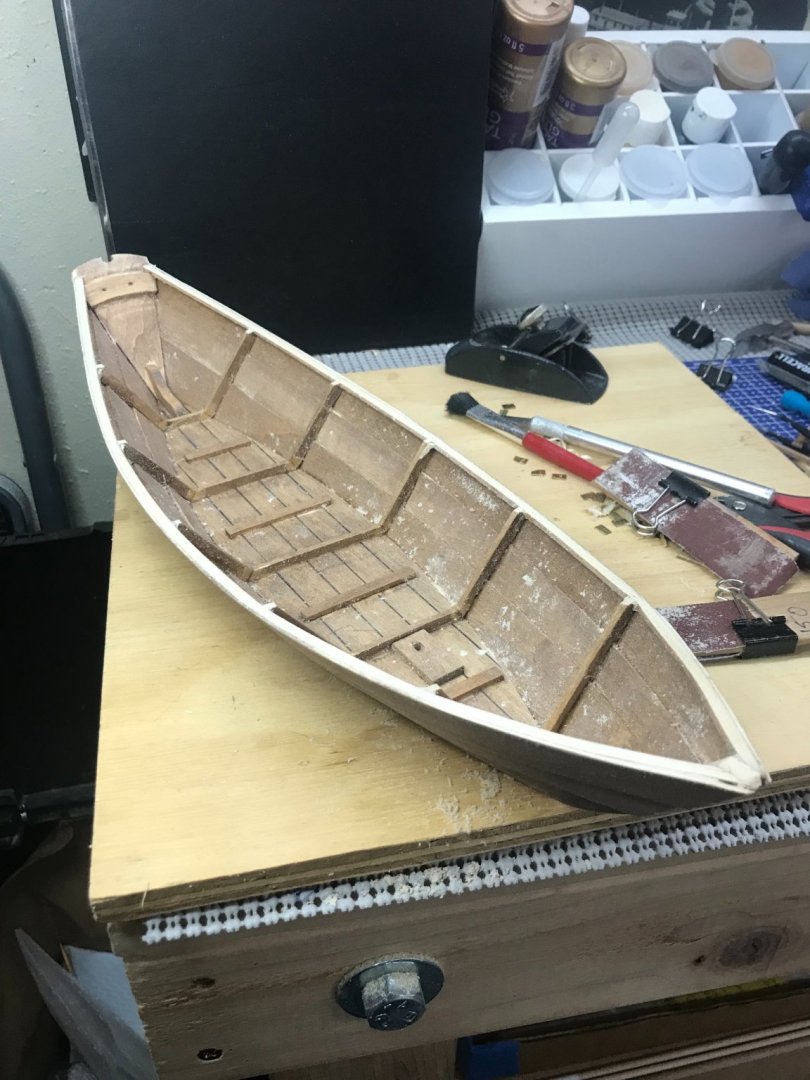
Gunwale Strake… Glue applied… Gunwale Strake set. Removed the frame above the Gunwale. Next, I will need to level the Gunwale in preparation for the Cap. Sanding with 150 grit to level the Gunwale. All set for the Cap Rail, after a once over clean up. I am replacing the brass supports after another coat of stain. I wasn’t happy with the fit and finish of the plates. There goes the OCD again, we will see how they come out. Cheers 🍻

- 22 replies
-
- 4
-
-
- Laughing Whale
- Dory
- (and 1 more)
-
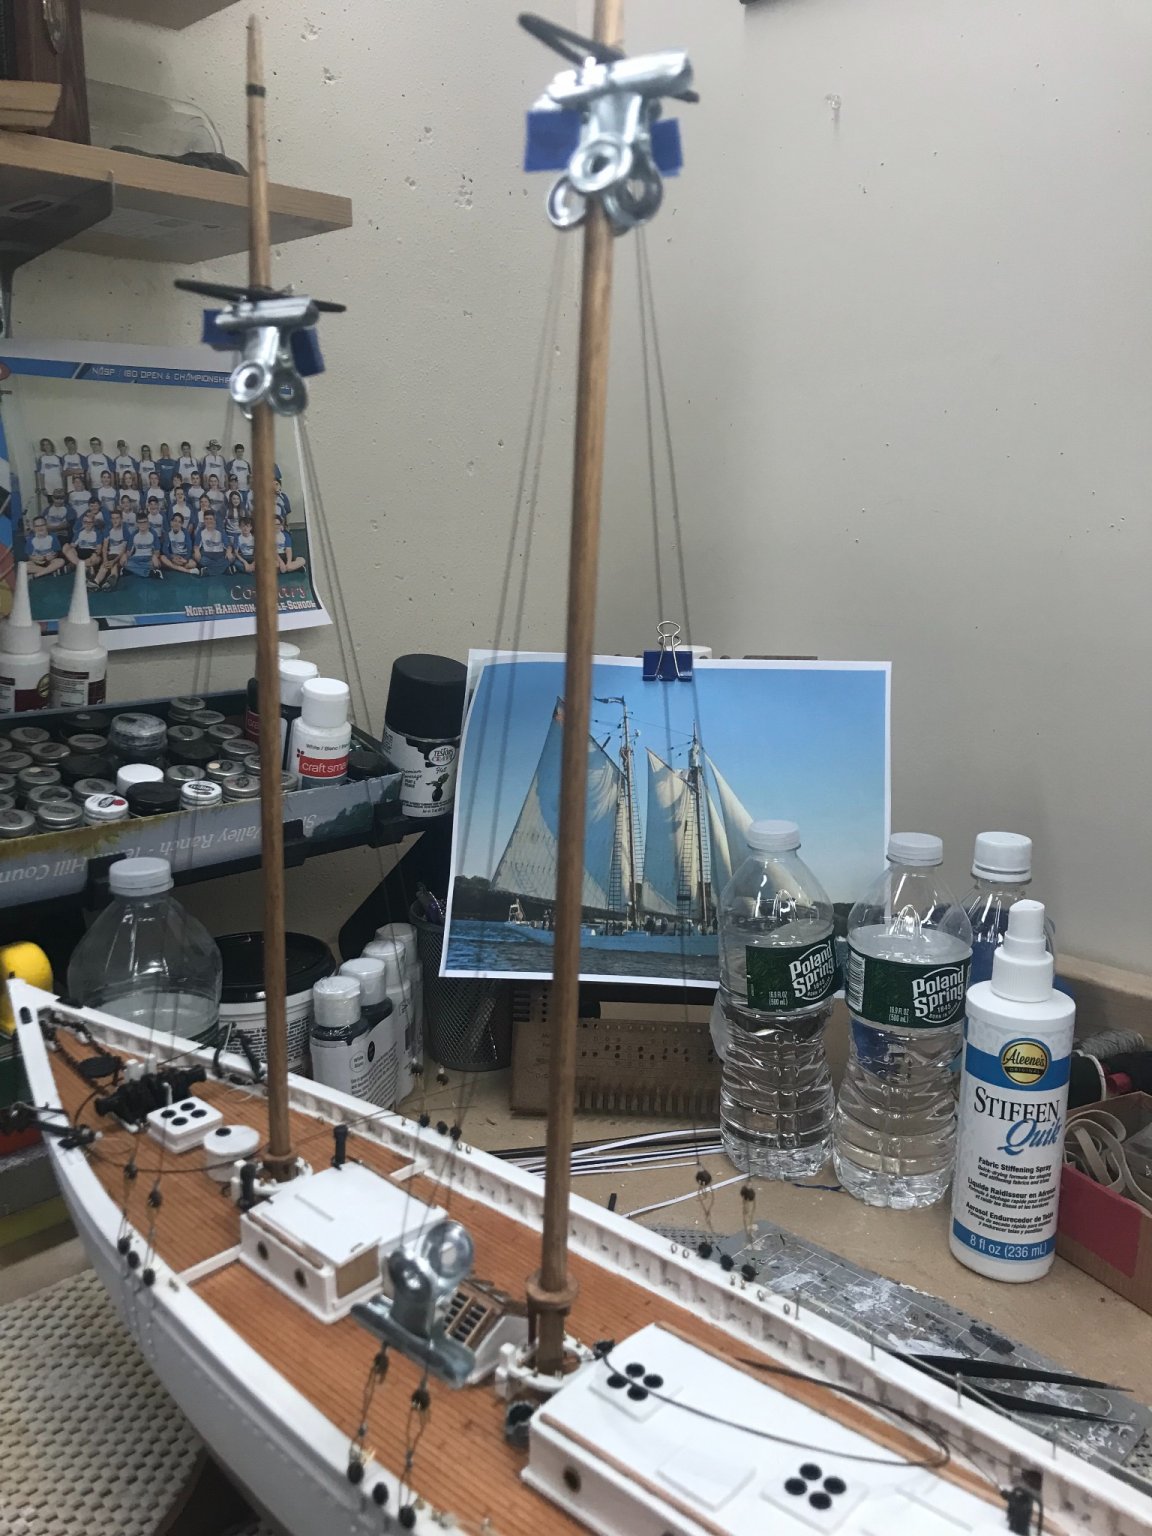
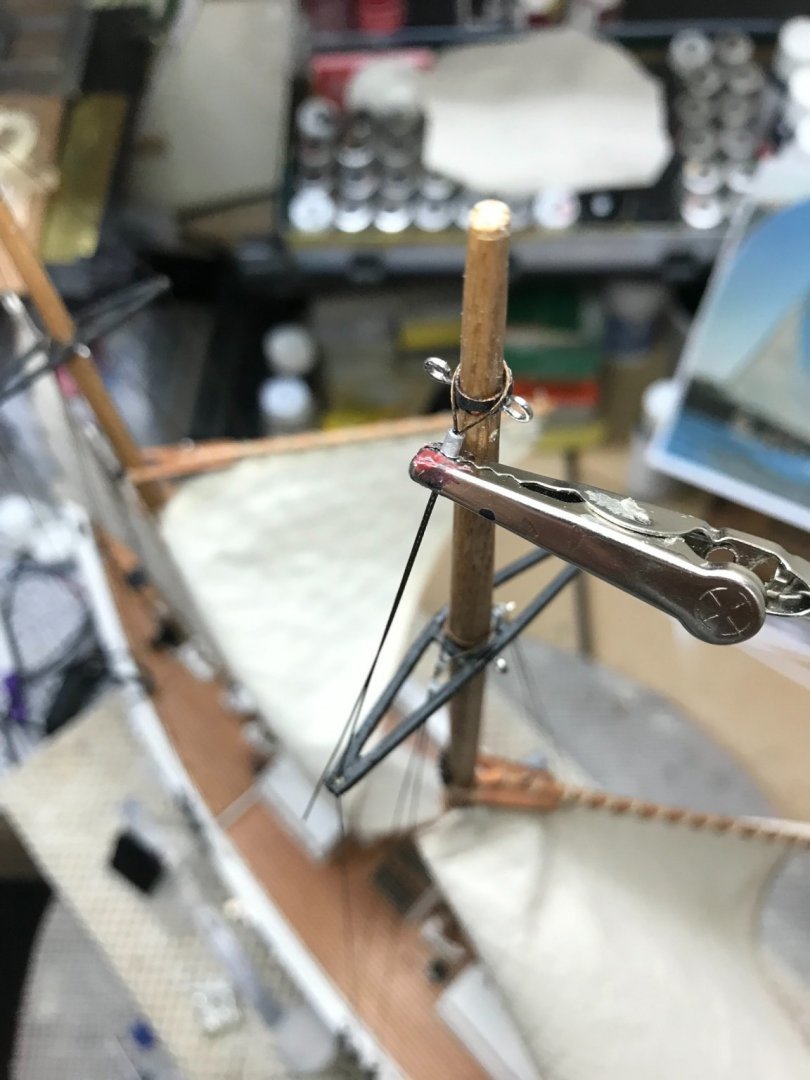
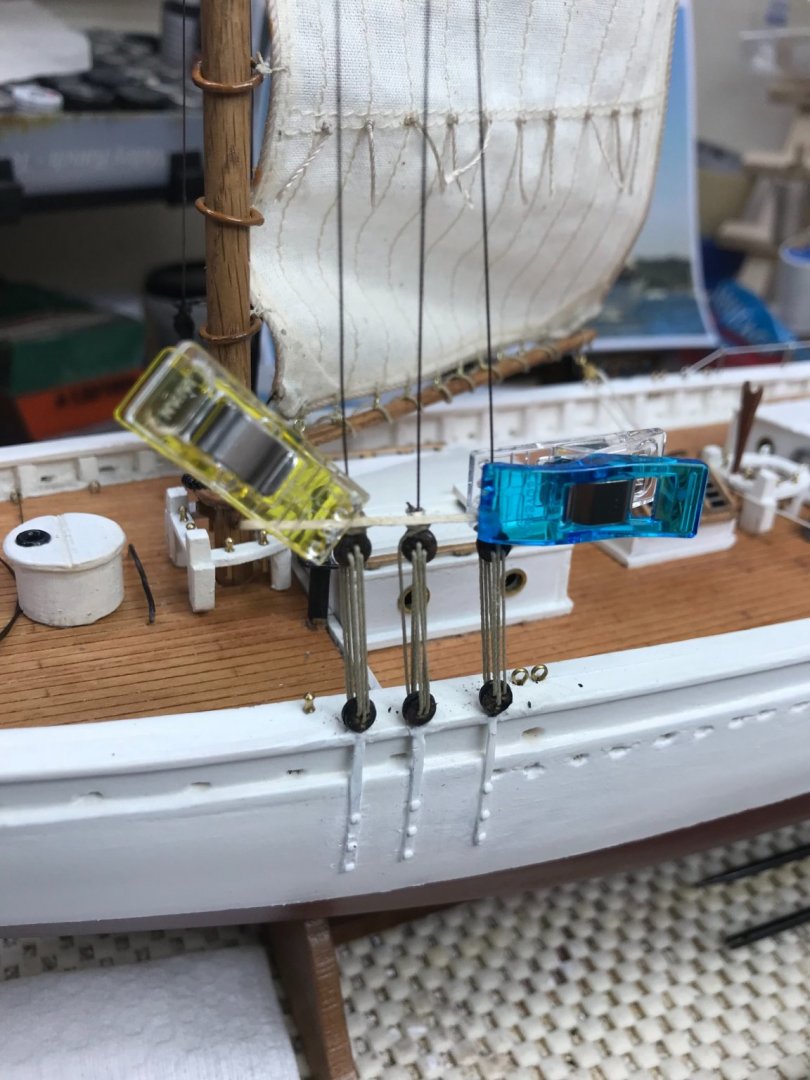
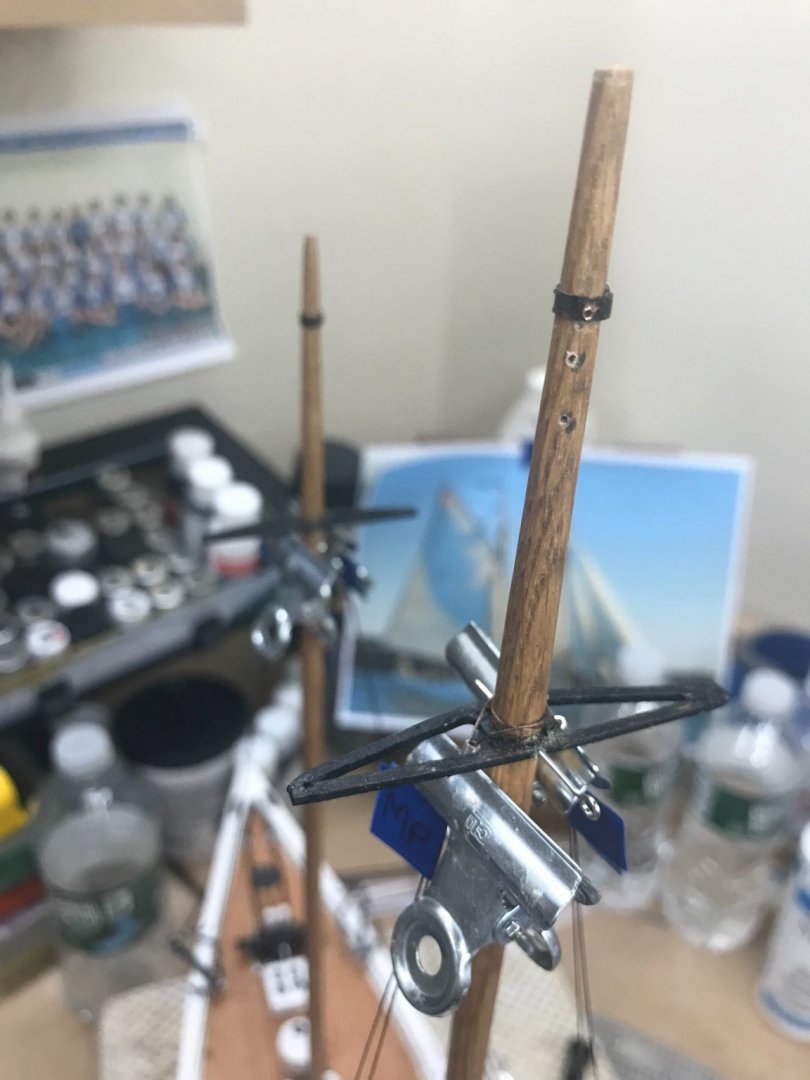
Shrouds and Forestays… While I wait on some rope from Model Expo, I’m going to set up the Shrouds and Forestays. Once rigged they will have to be removed to install the Main and Stay sails. That said, I’m using a jig taken from the Model Shipways Instruction booklet for the Bluenose. (From my, “can’t wait to build” stash. 😆 As easy as that… Fore and Main Shrouds… That was a bit tricky, I’m not going into the sorted details, but I got her done. 😎 Lower end of Forestays terminated. Shrouds and Forestays at the ready. Upper Shrouds terminated on the Deadeye lie in wait. 😎 Now where is that USPS Priority Mail with my rope? 😆 Later…


- 127 replies
-
- 6
-
-
- Bowdoin
- Arctic Exploration
- (and 3 more)
-
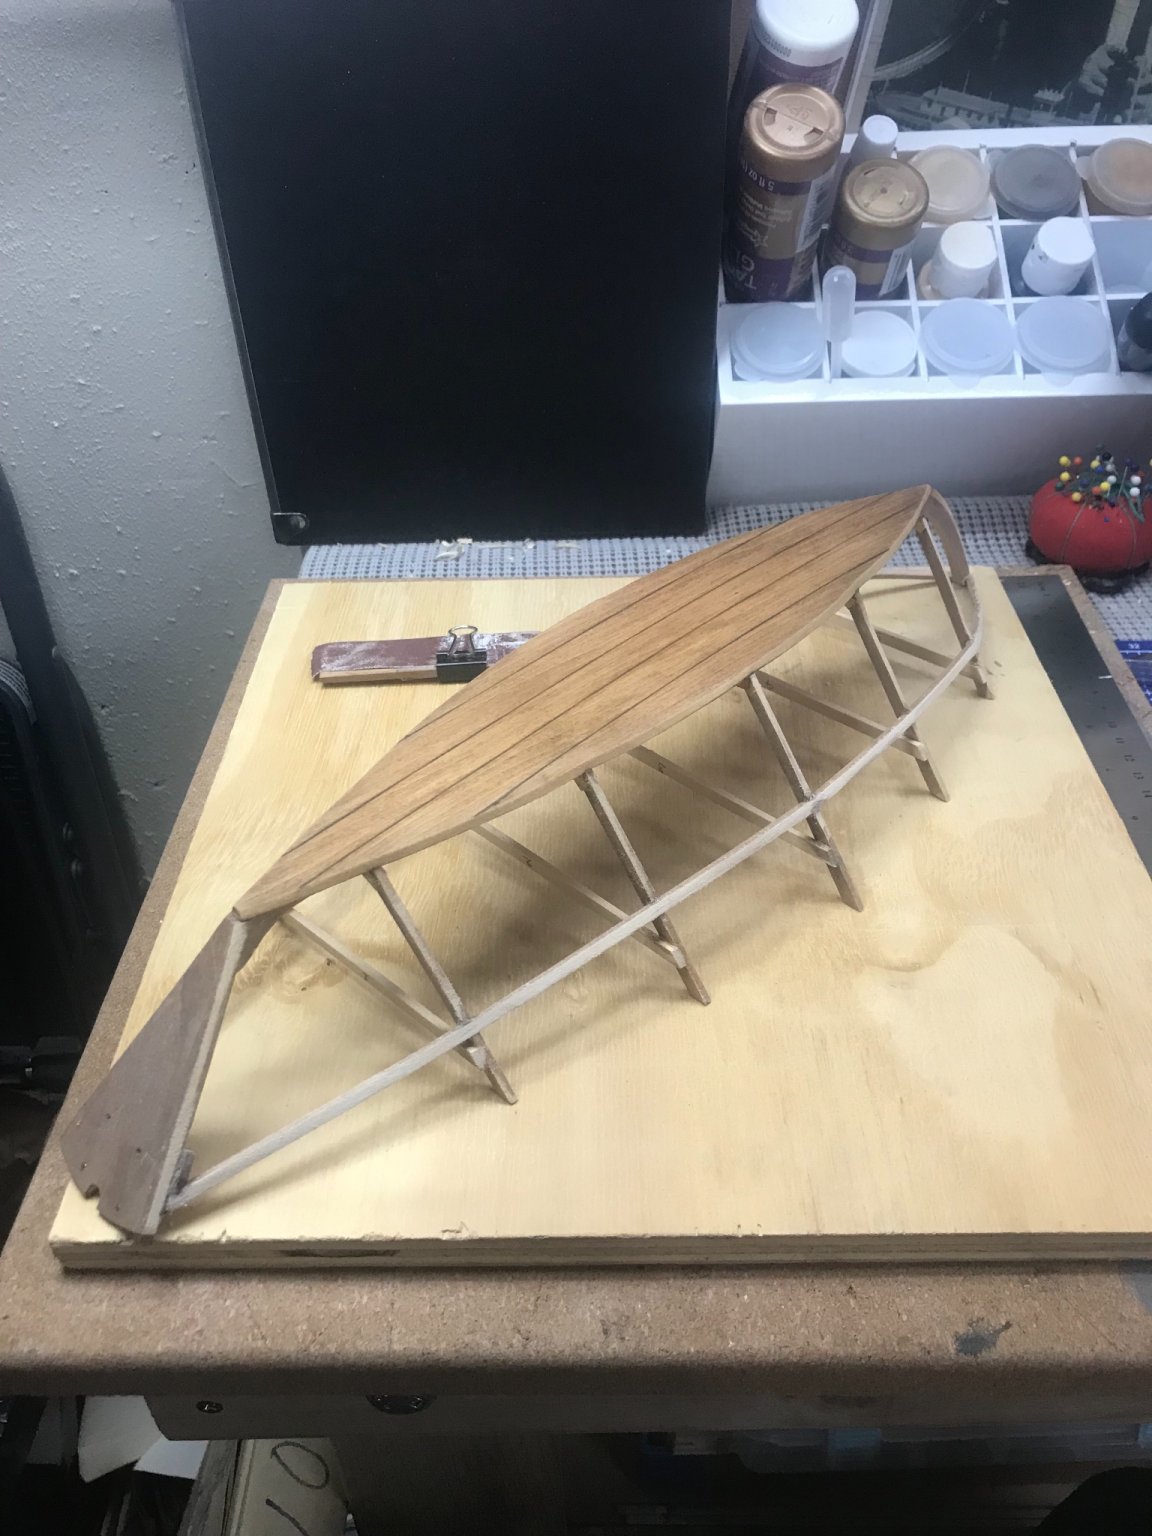
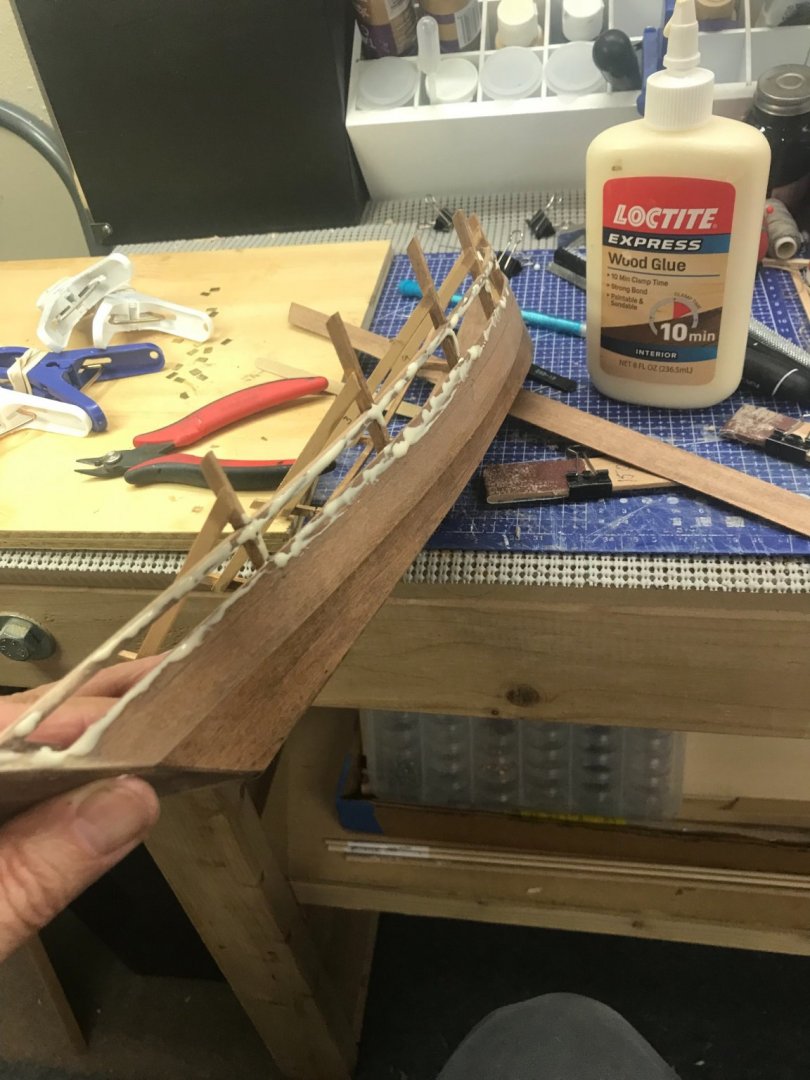
Second strake set, cleaning up some excess glue inside before gluing the last strake on to the Gunwale. later… 😎

- 22 replies
-
- 4
-
-
- Laughing Whale
- Dory
- (and 1 more)
-
That’s why I keep a stash of smaller projects. Sometimes you just need to step away. 👍 I can’t just sit it out, gotta work on another short term build. 😎 You are doing a great job on Victory, she will always be waiting for you. Do you have a build log on Magenta?
-
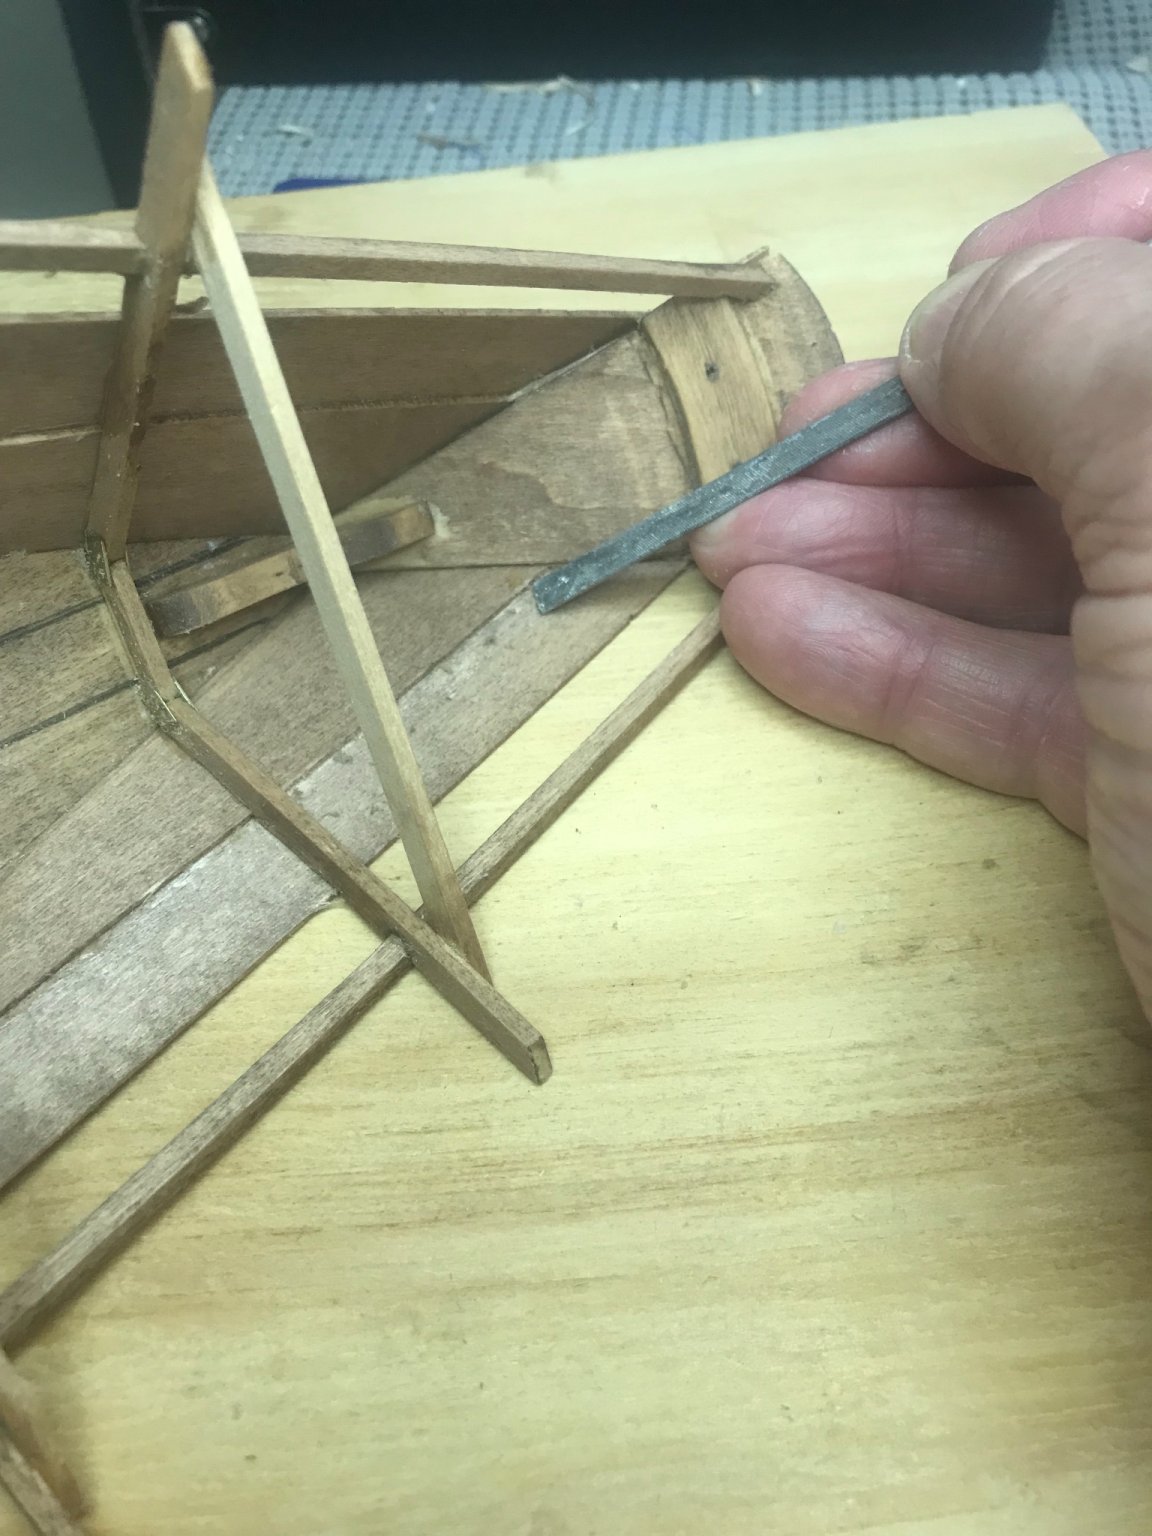
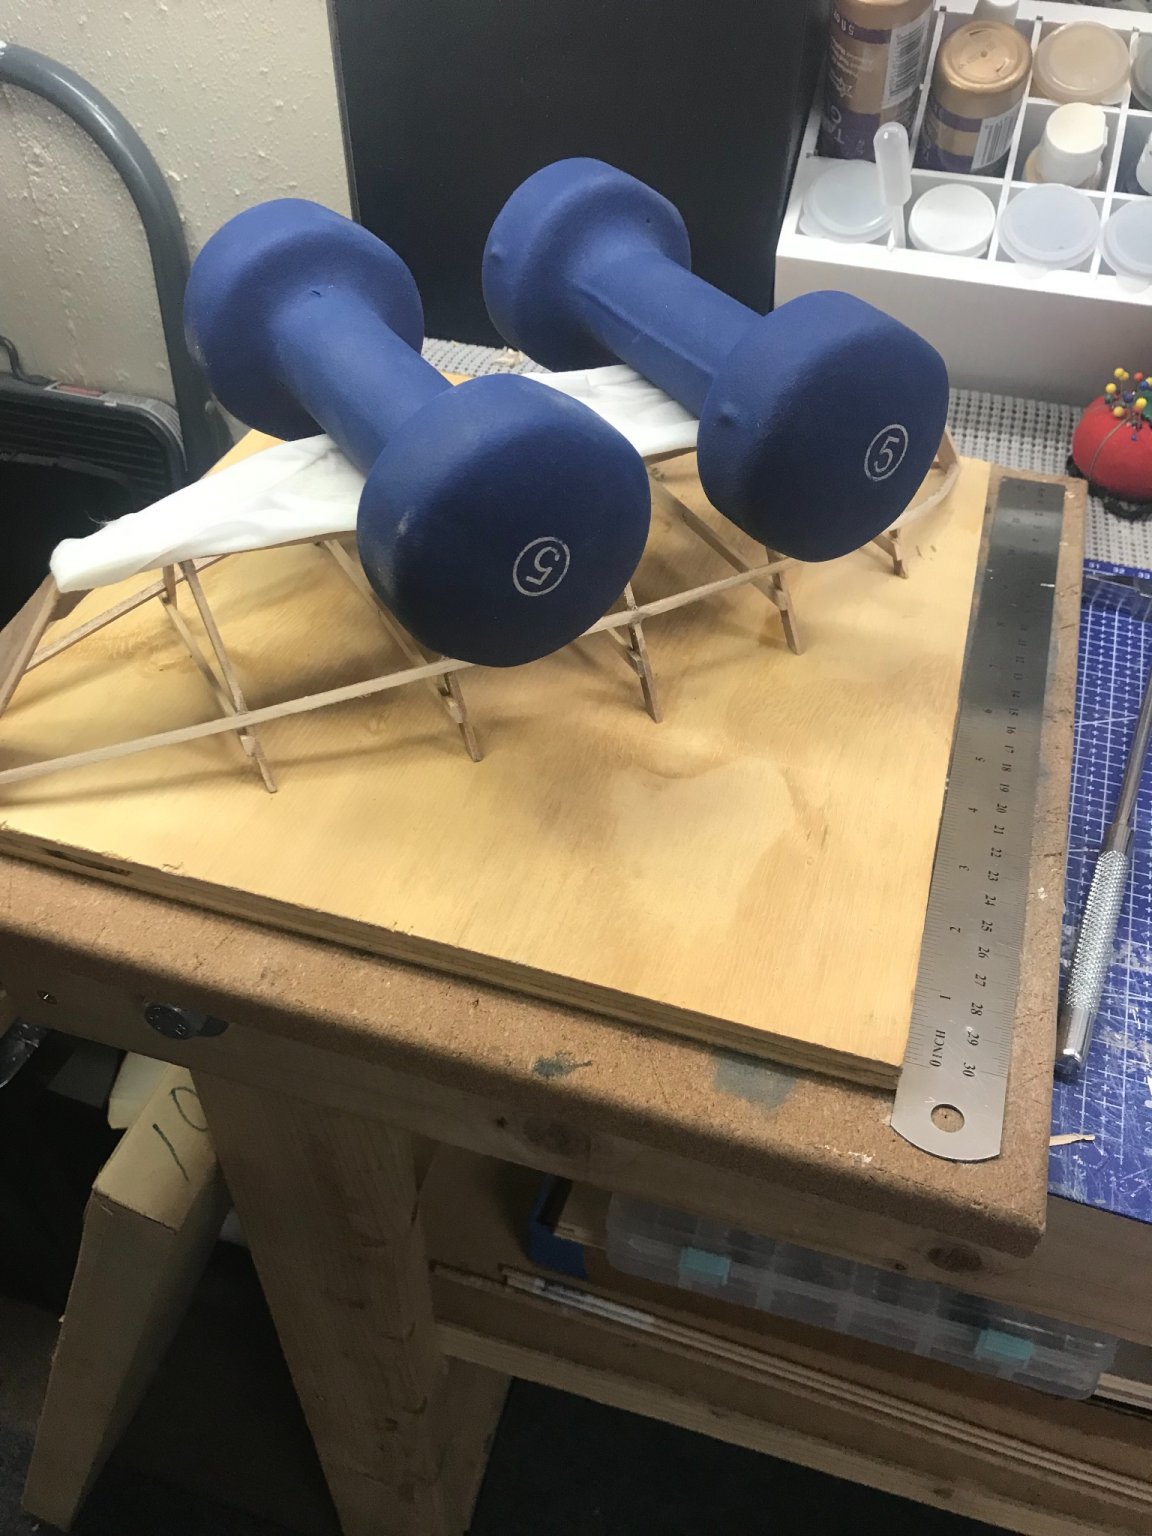
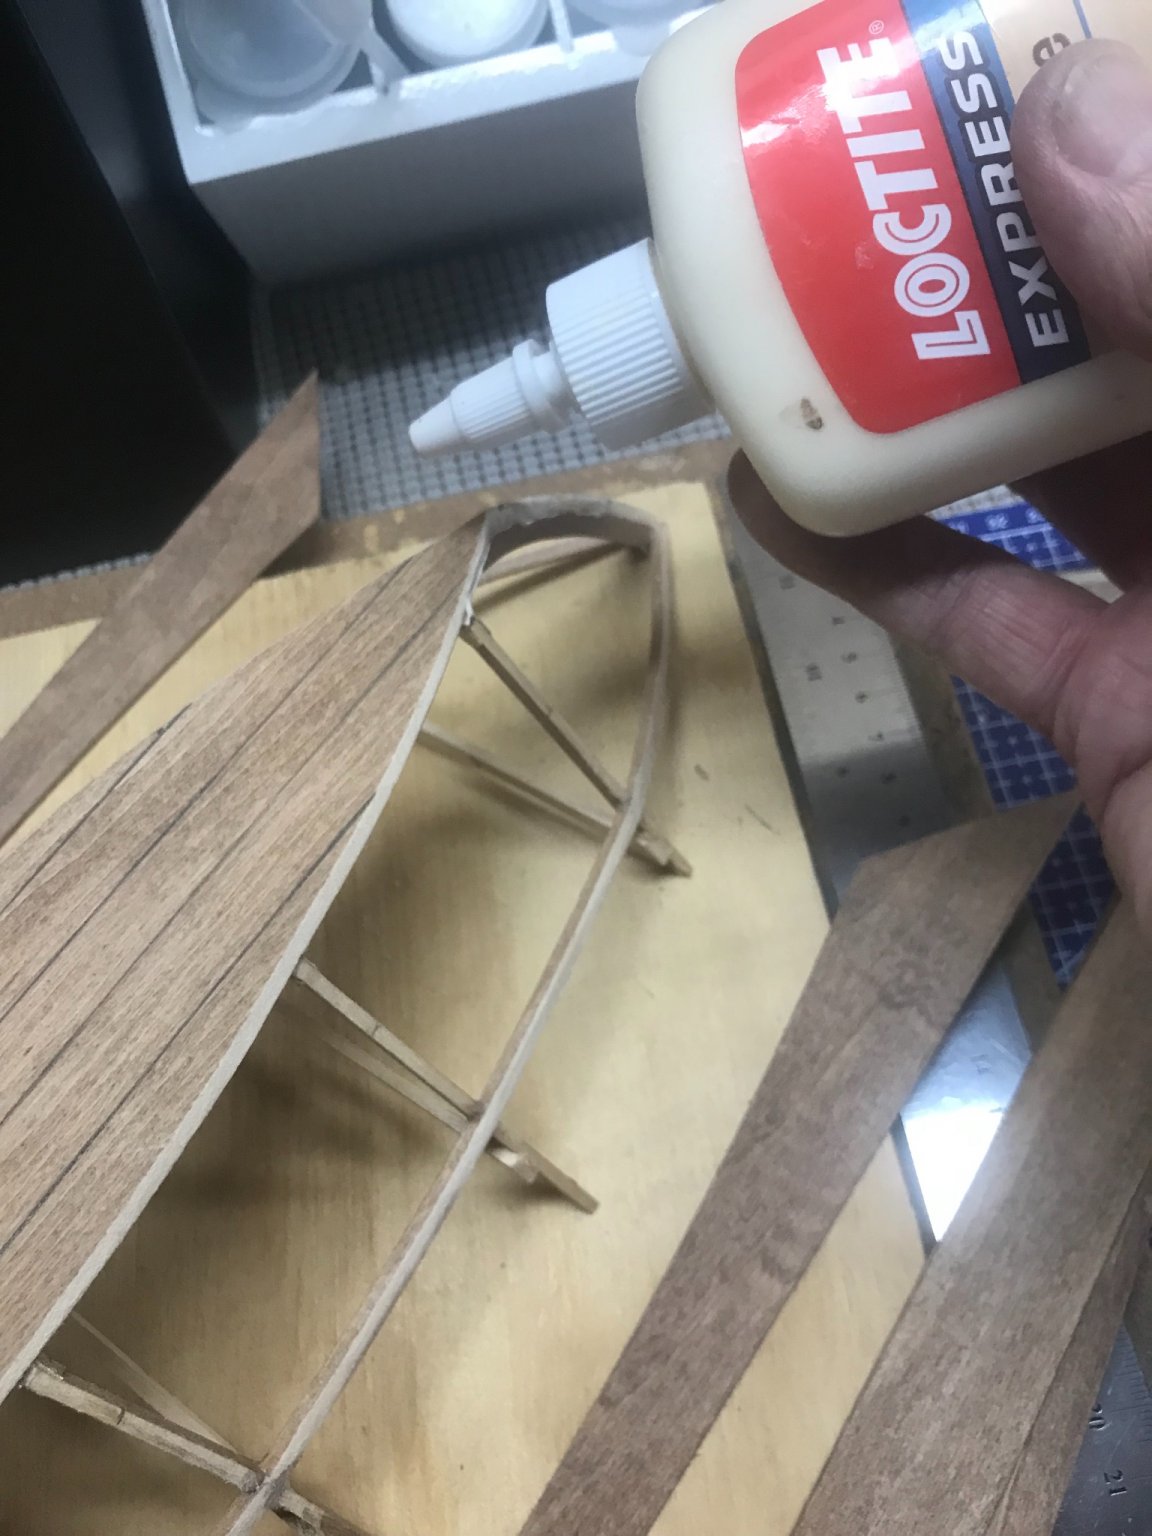
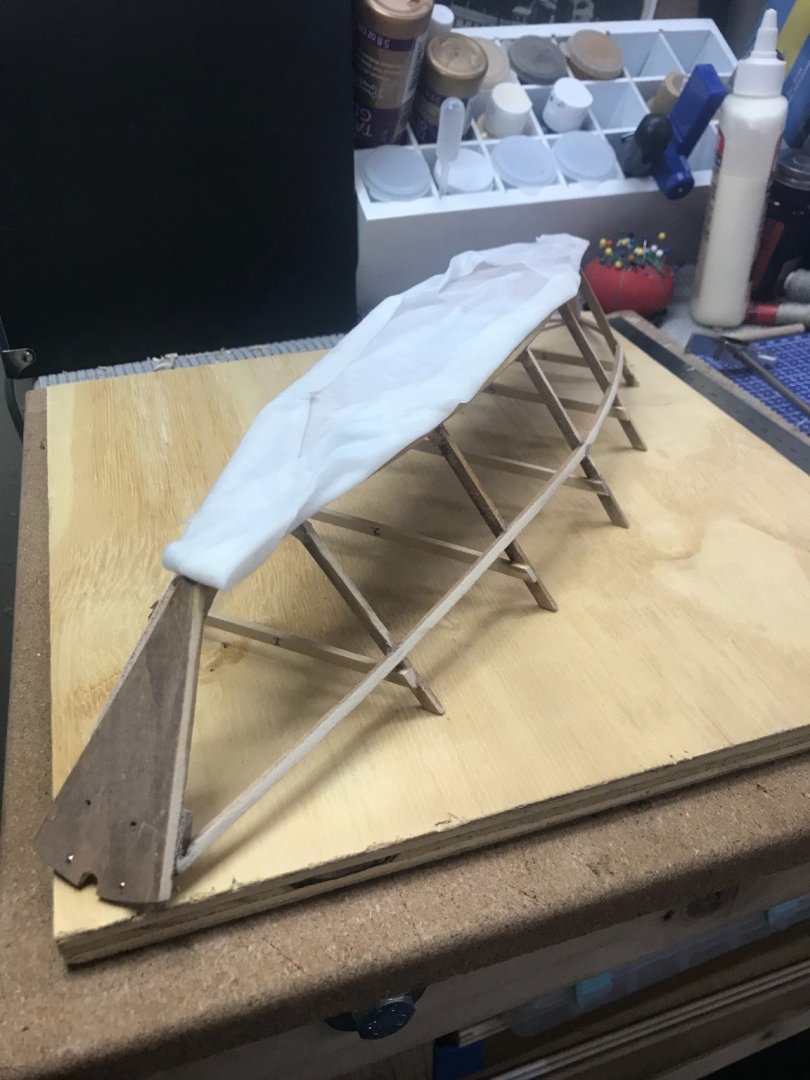
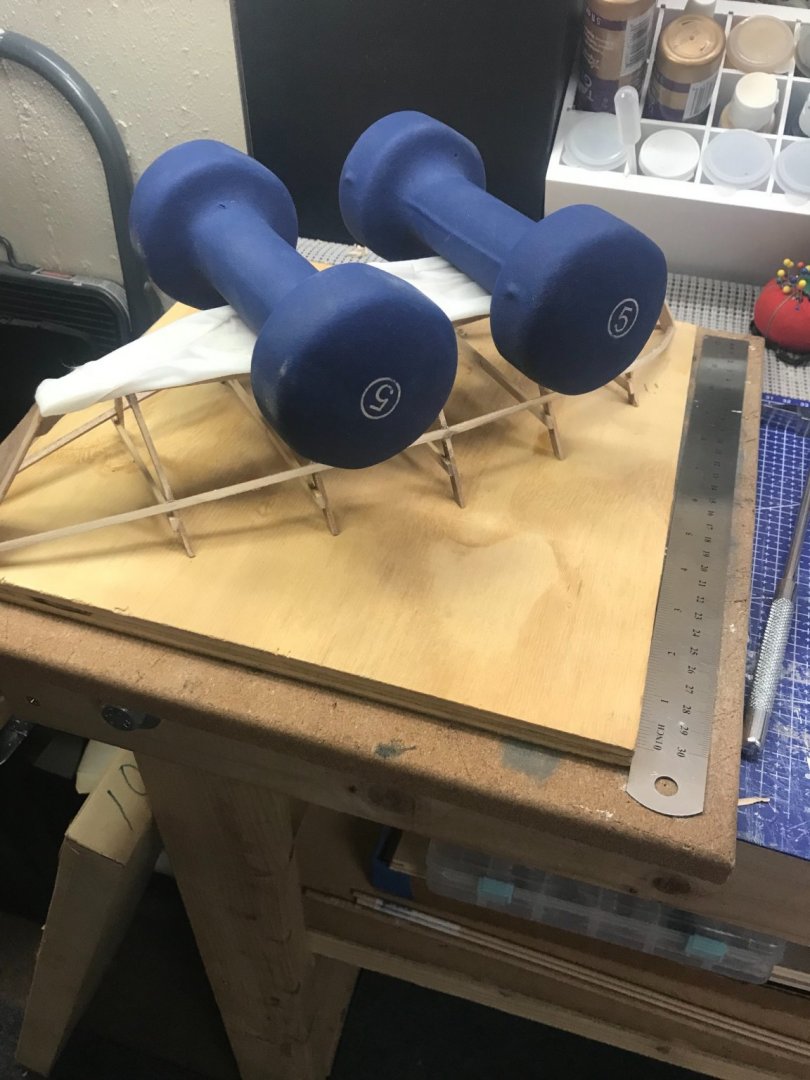
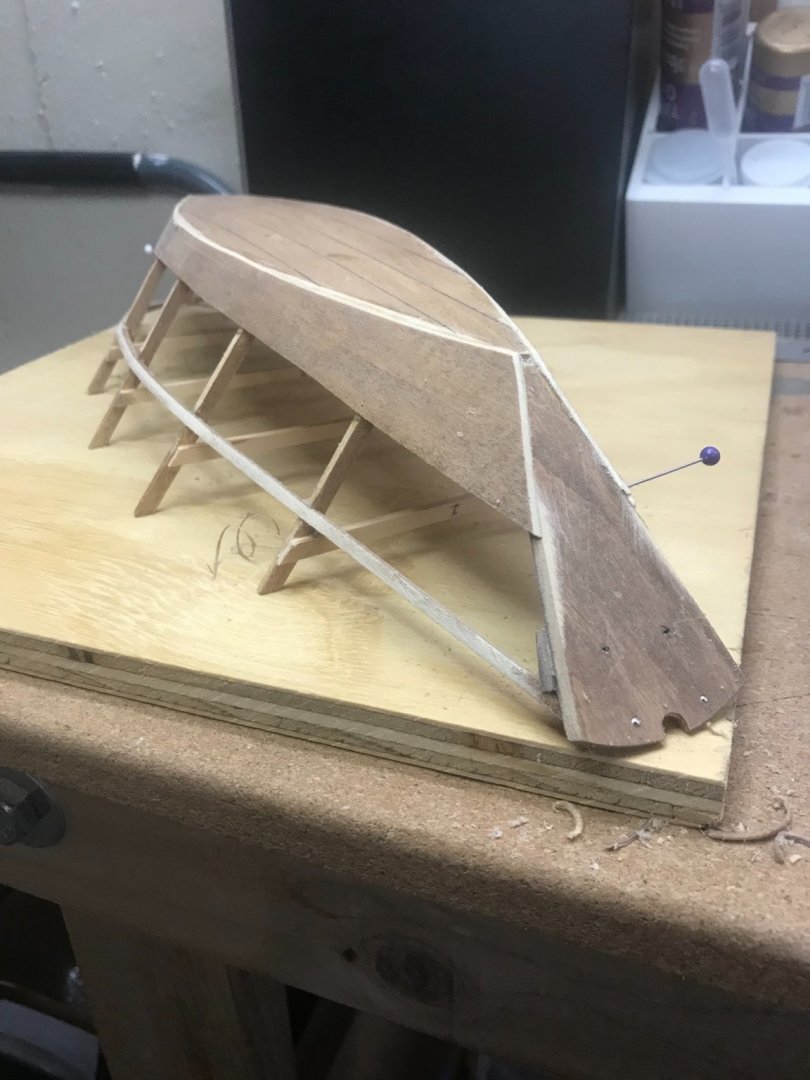
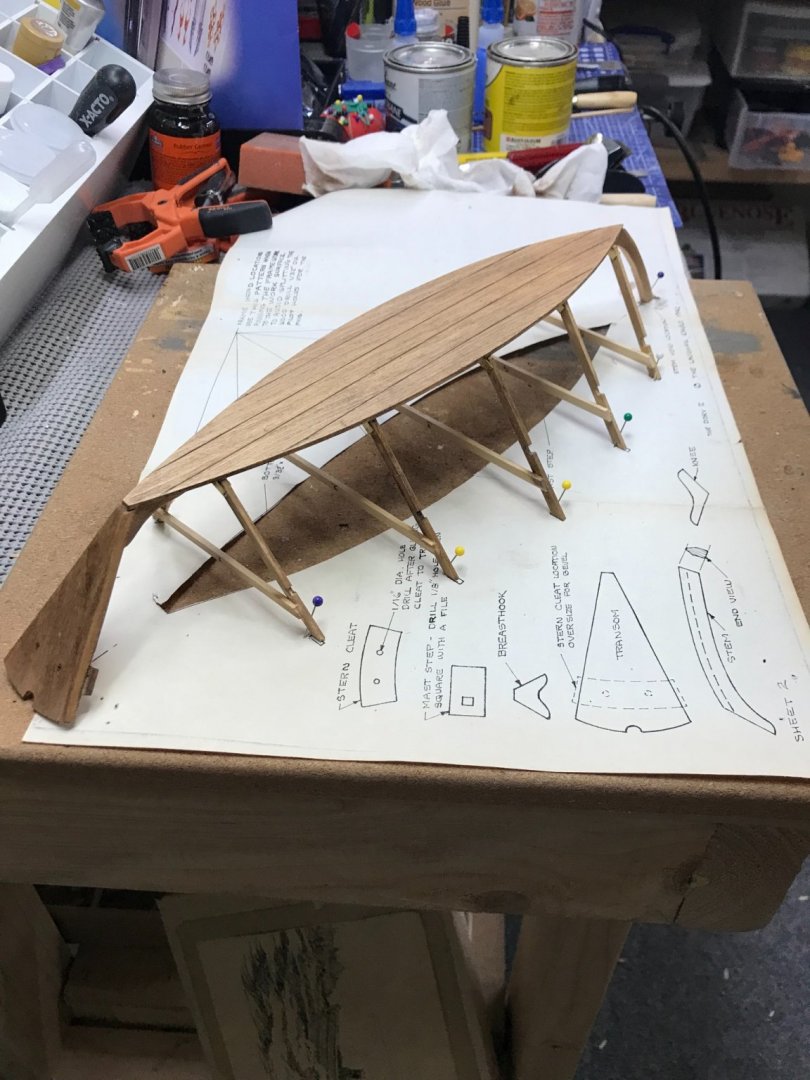
Strakes… I did not have the proper curve on the bottom of the dory. I believe it was the cork board I had it mounted to. I remounted to a good solid surface. Needed to soak the bottom with ammonia/water to get the wood the relax. Then had to use weights to get all off the frames to set down on the board. I let it dry out over night. Fared out the Frames, Gunwale and Deck to accept the strakes. These precuts were done nicely. Ran a bead of glue for the first strake or precut plank. Pinned the planks down… Sanded and/or carved away any excess material. Prepared for next strake to be set after stain has dried. Cheers 🍻


- 22 replies
-
- 4
-
-
- Laughing Whale
- Dory
- (and 1 more)
-
Thank you for the compliment, but I only do this to avoid paying those sailmaker’s prices 😆 Besides, No one could afford my prices. LOL 😂 Thanks, it is getting easier… 🍻
- 127 replies
-
- 1
-
-
- Bowdoin
- Arctic Exploration
- (and 3 more)
-
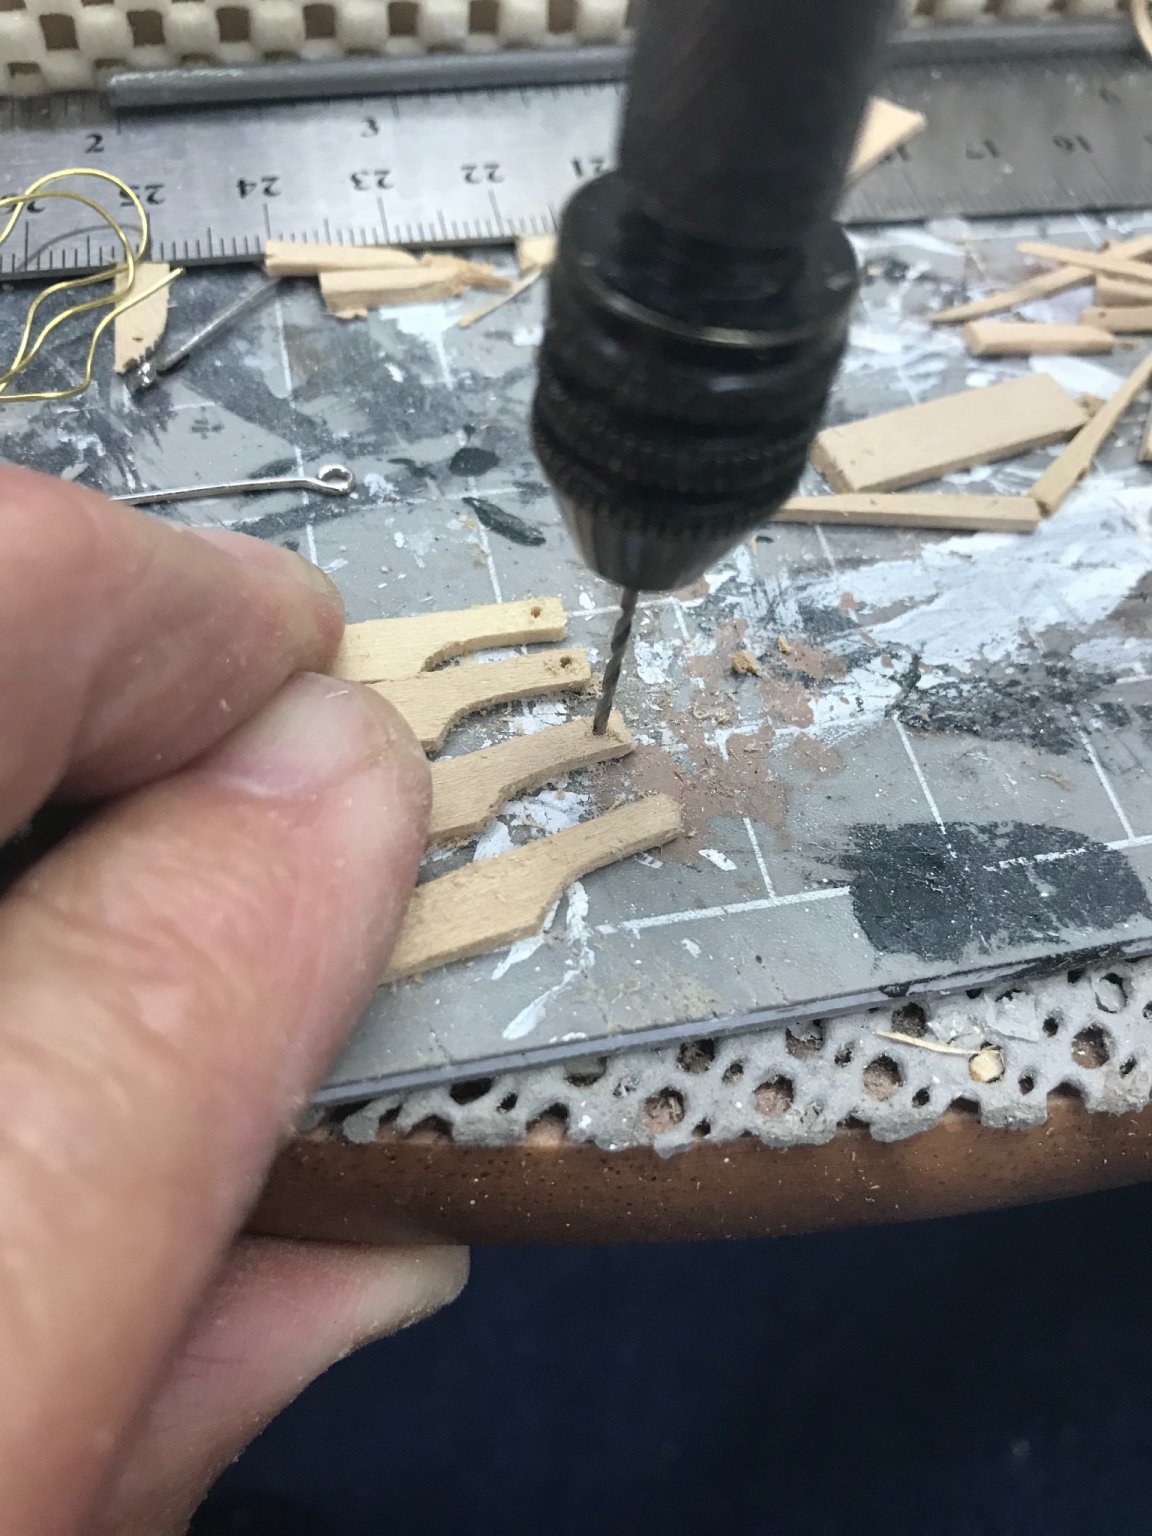
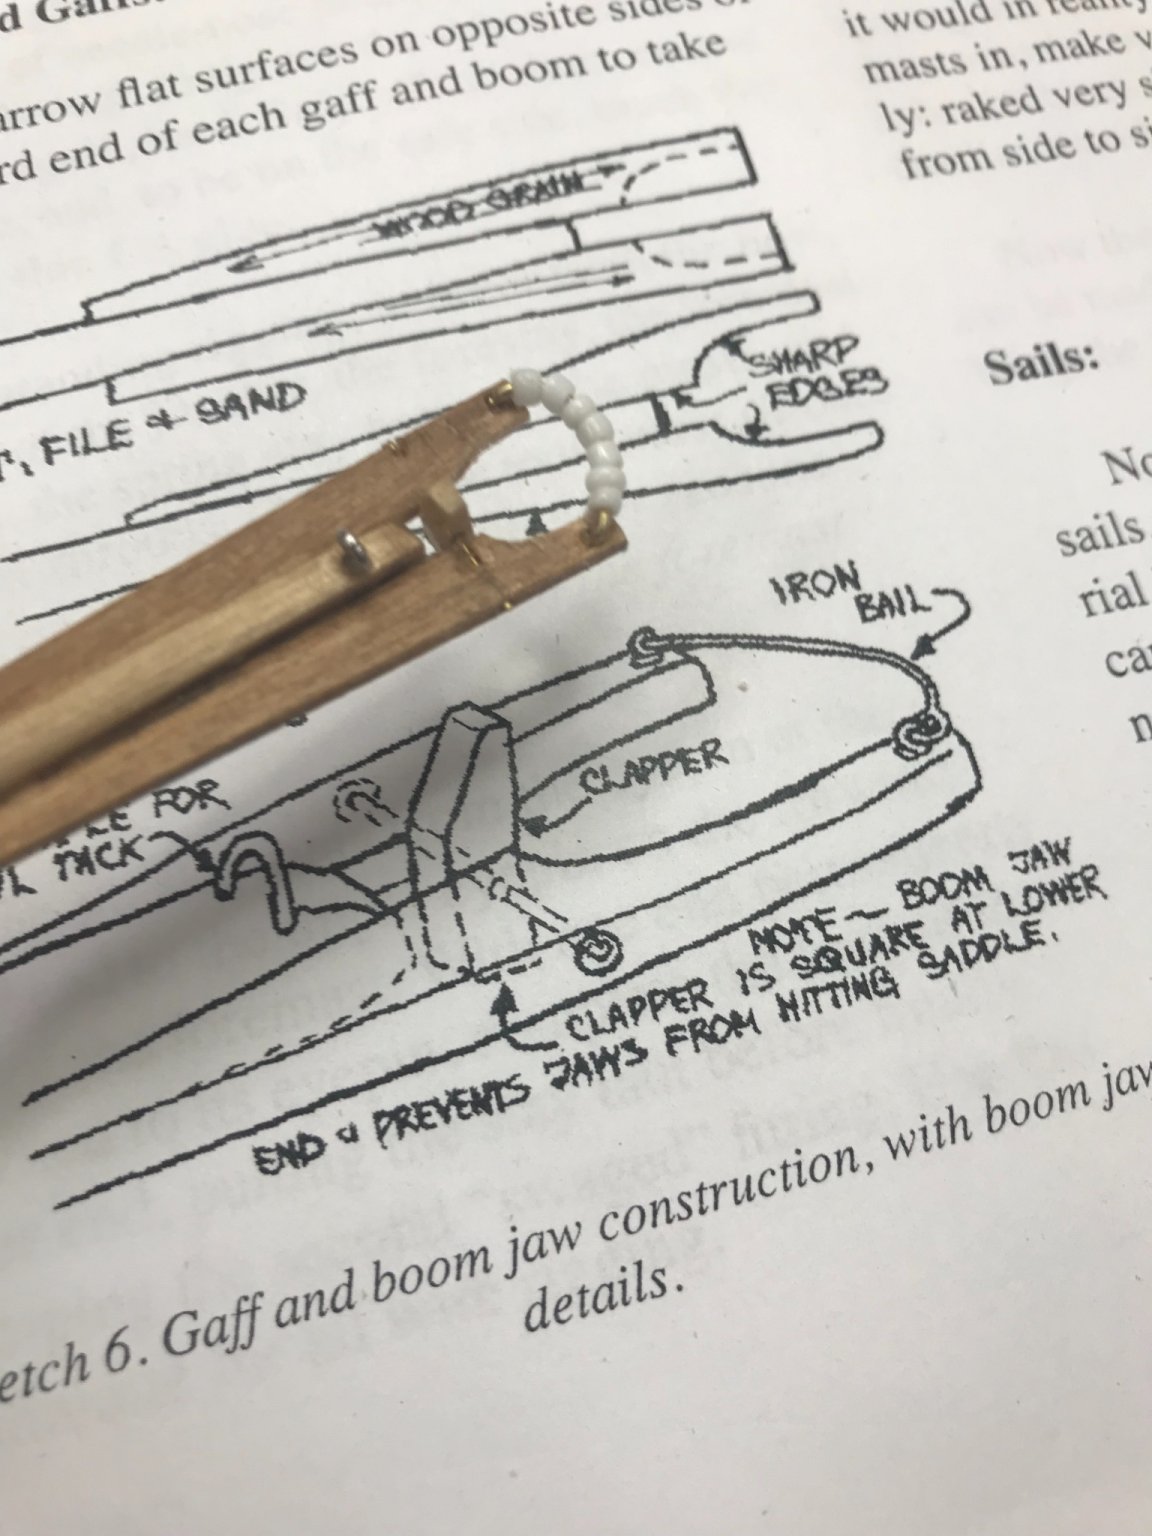
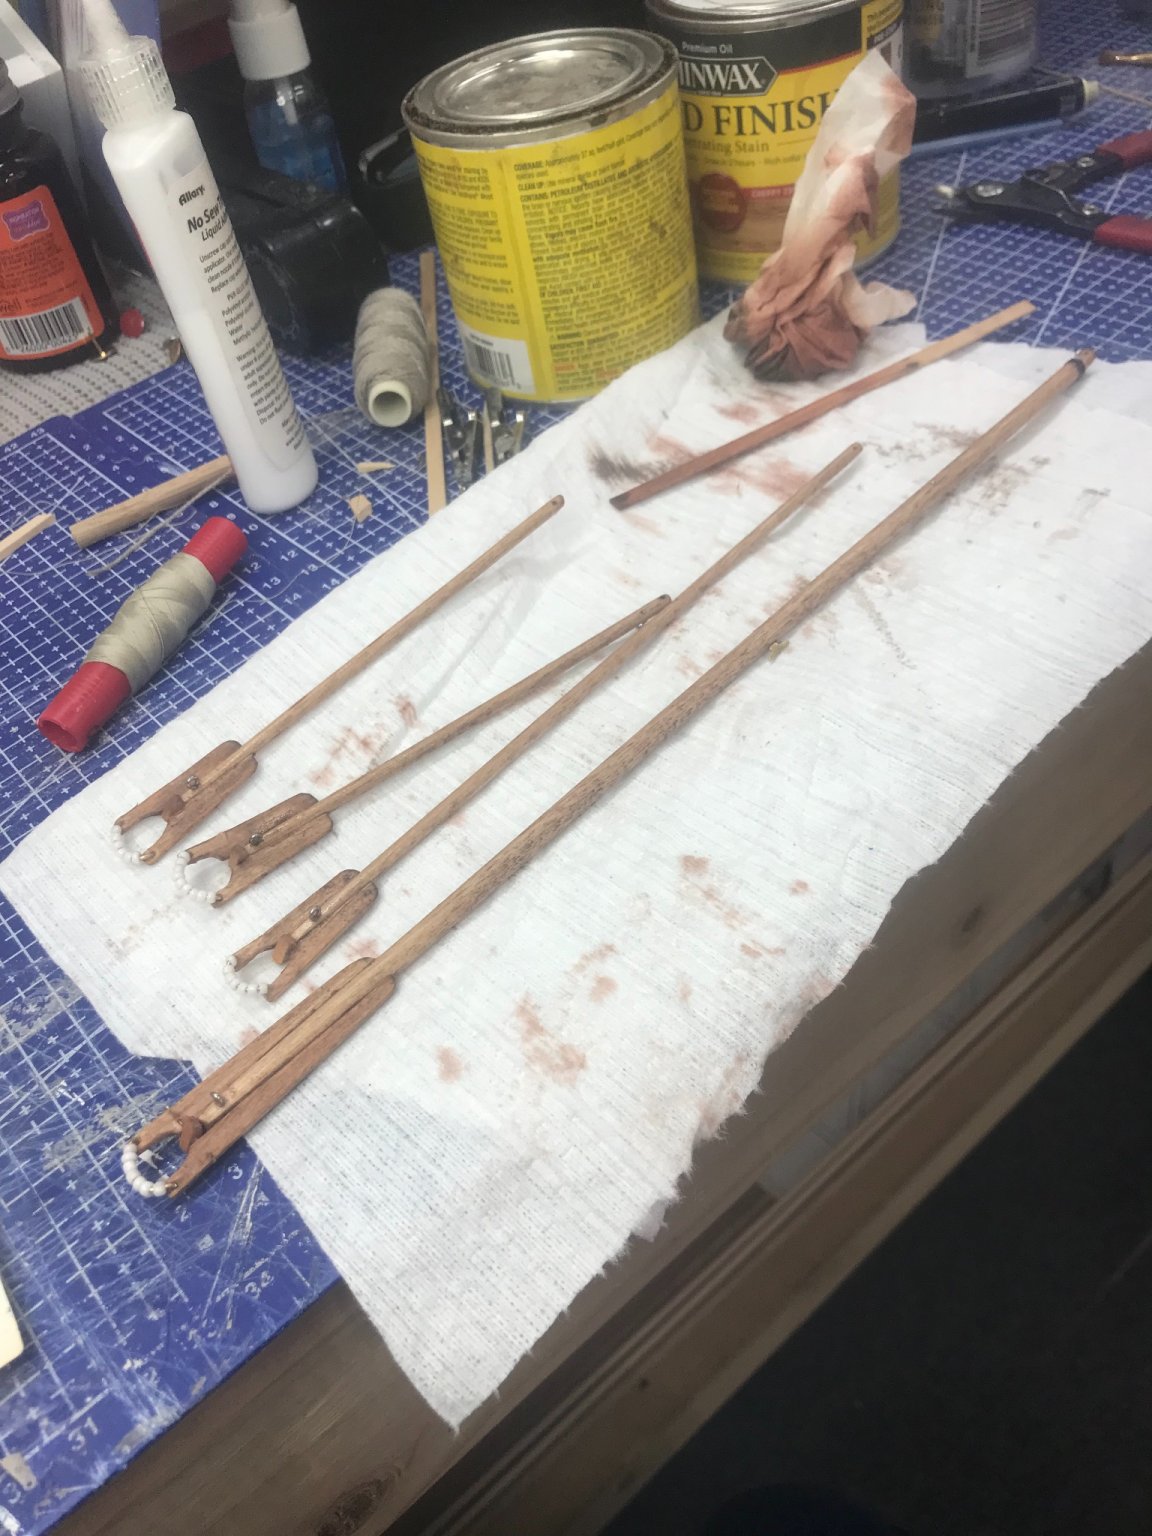
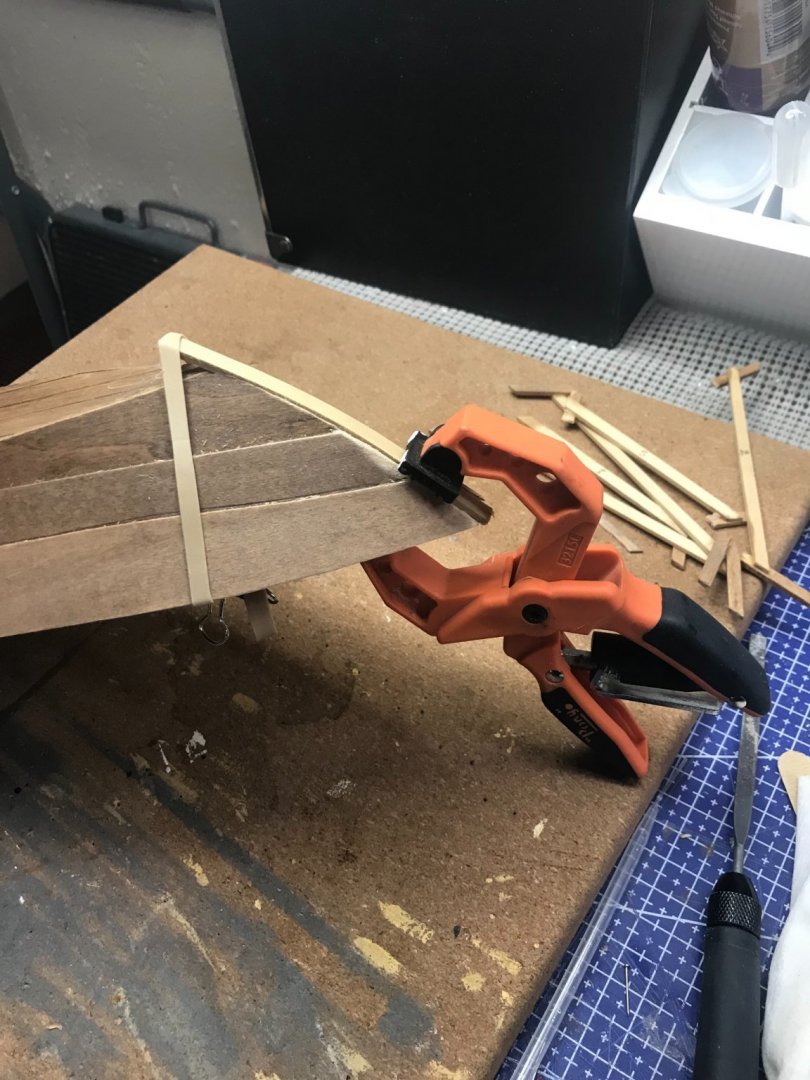
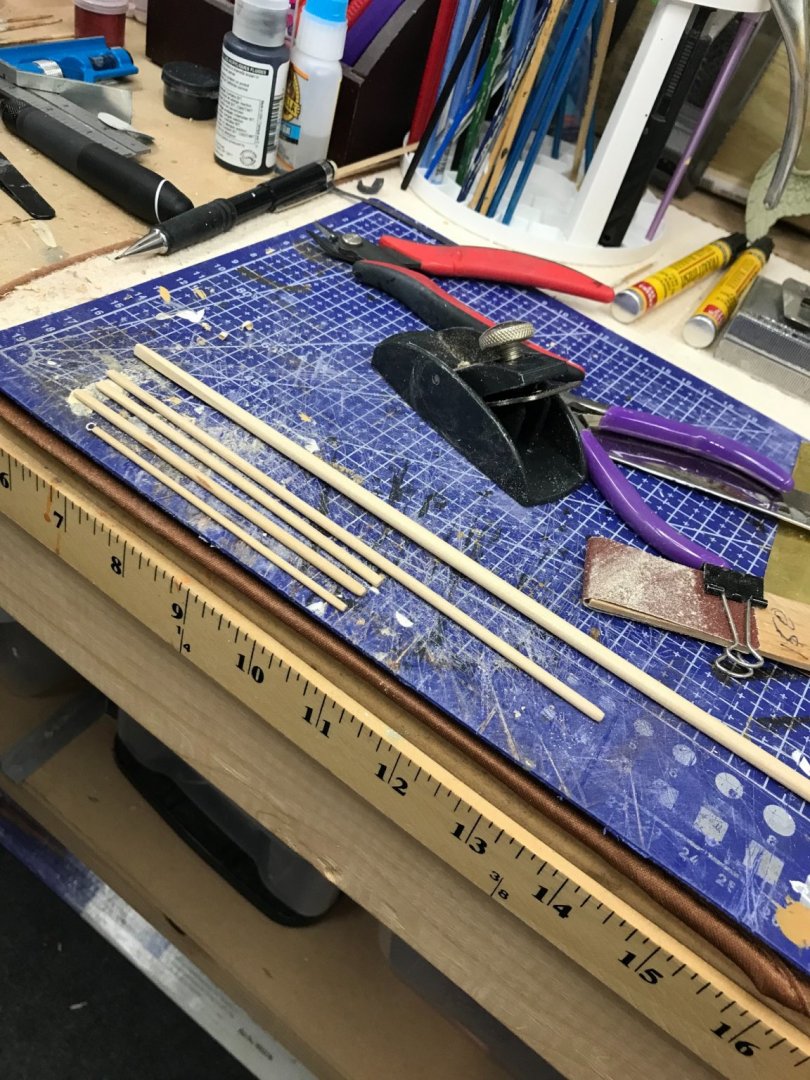
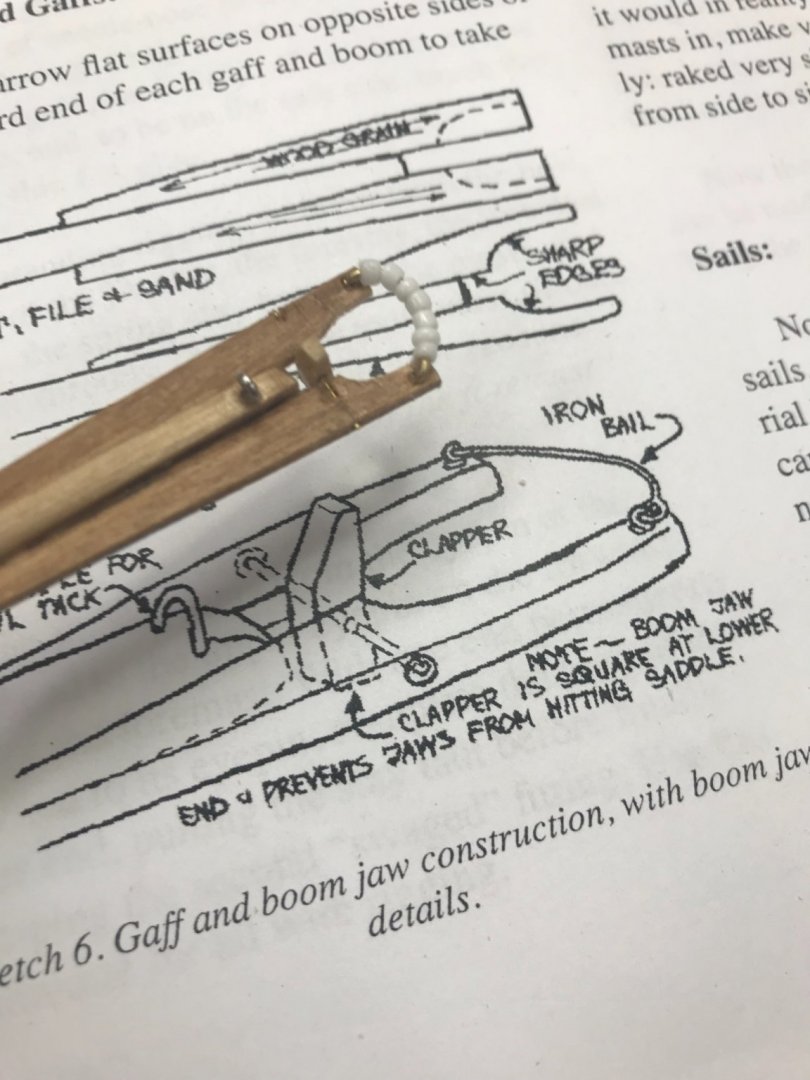
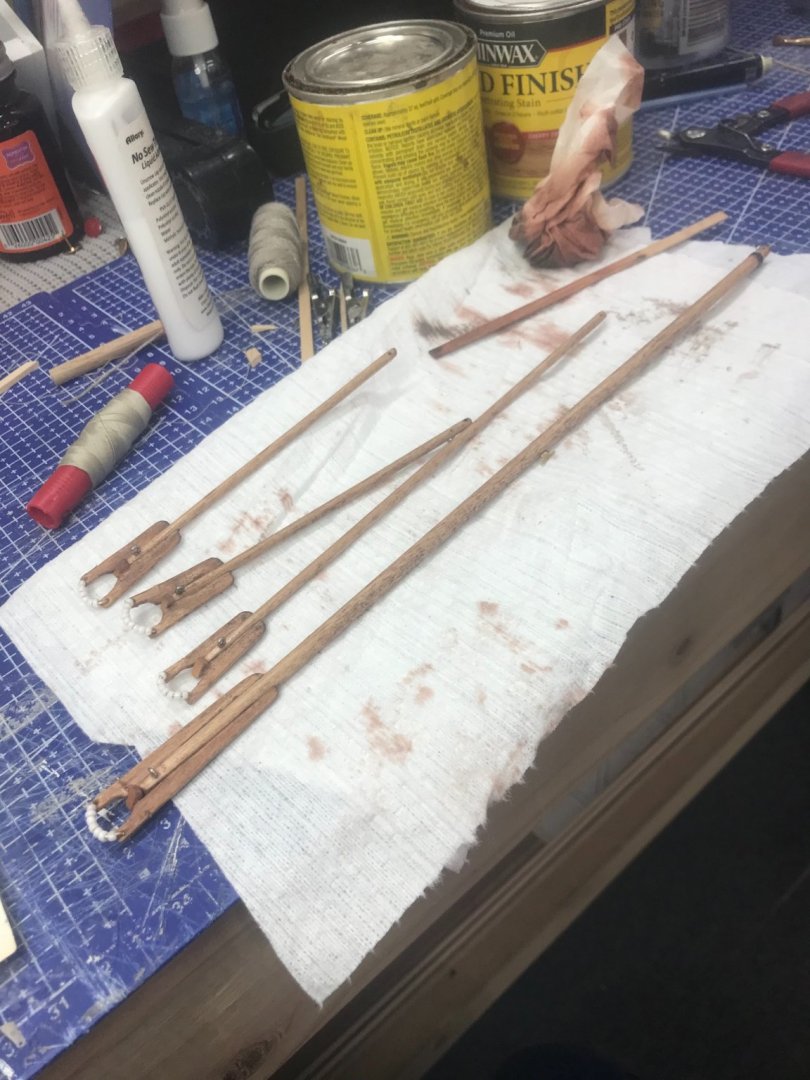
Booms and Gaffs… Booms and Gaffs tapered… Cutting the yoke out of 1/16 left over planking. Main boom completed… All set… Cheers 🍻


- 127 replies
-
- 6
-
-
- Bowdoin
- Arctic Exploration
- (and 3 more)
-
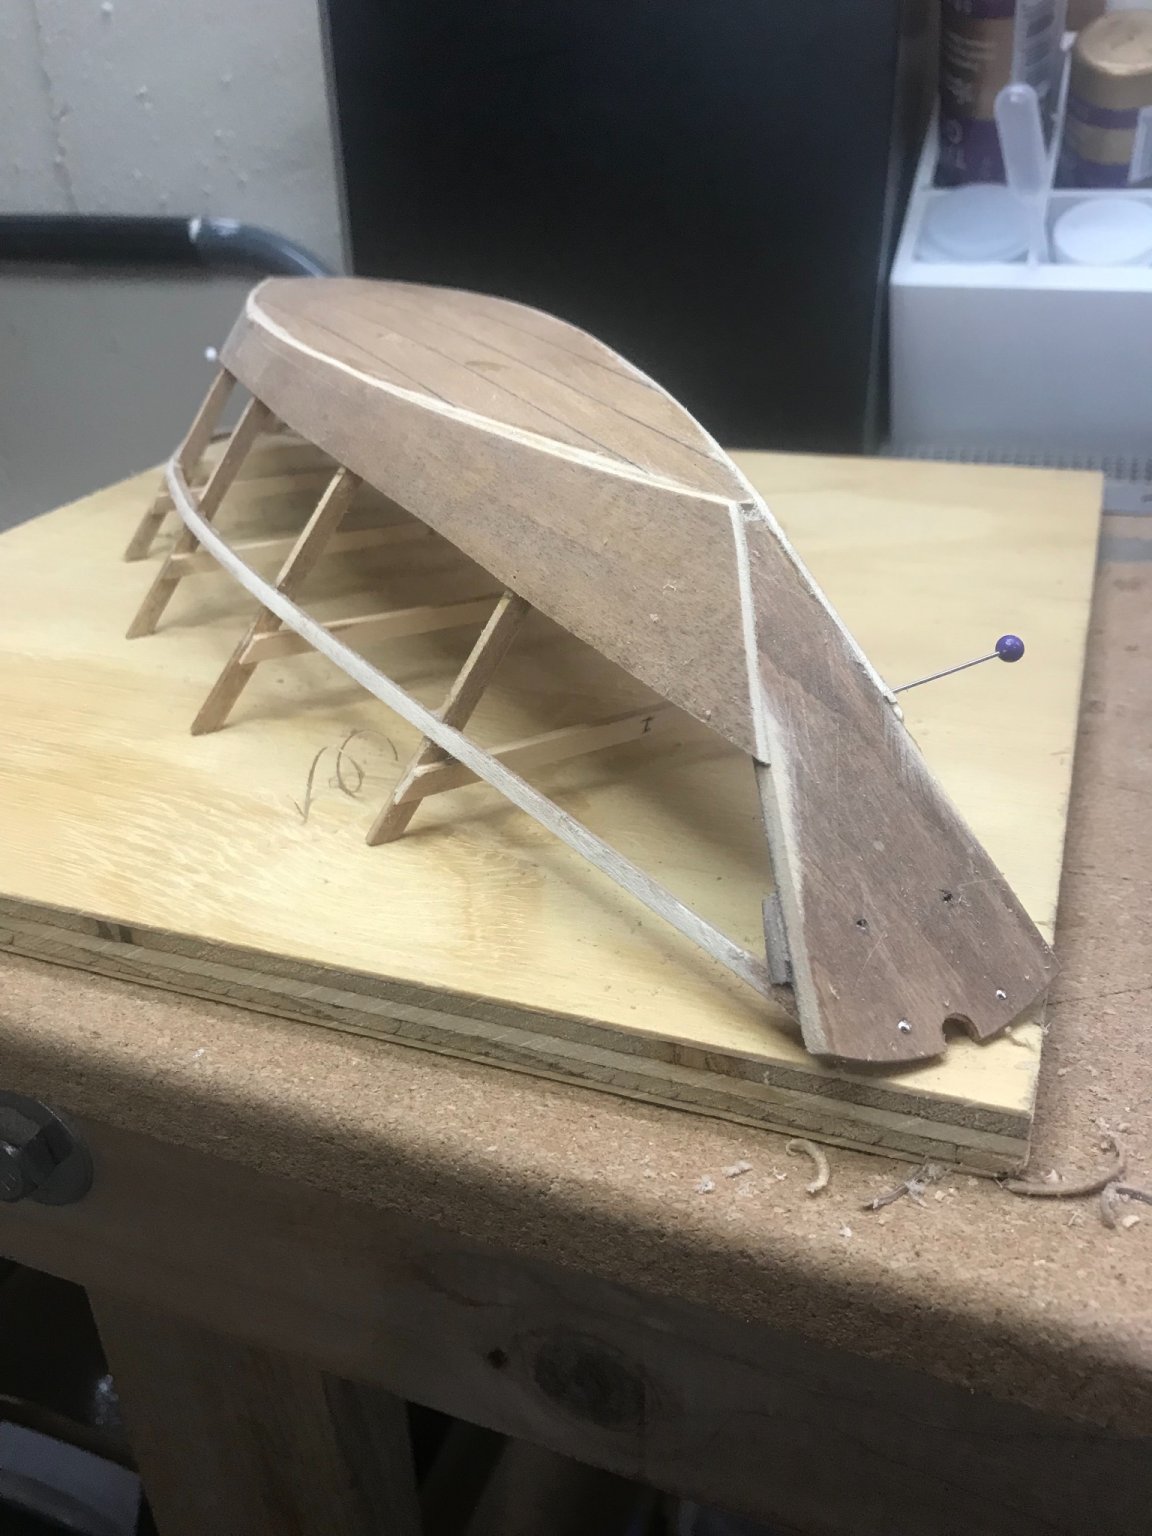
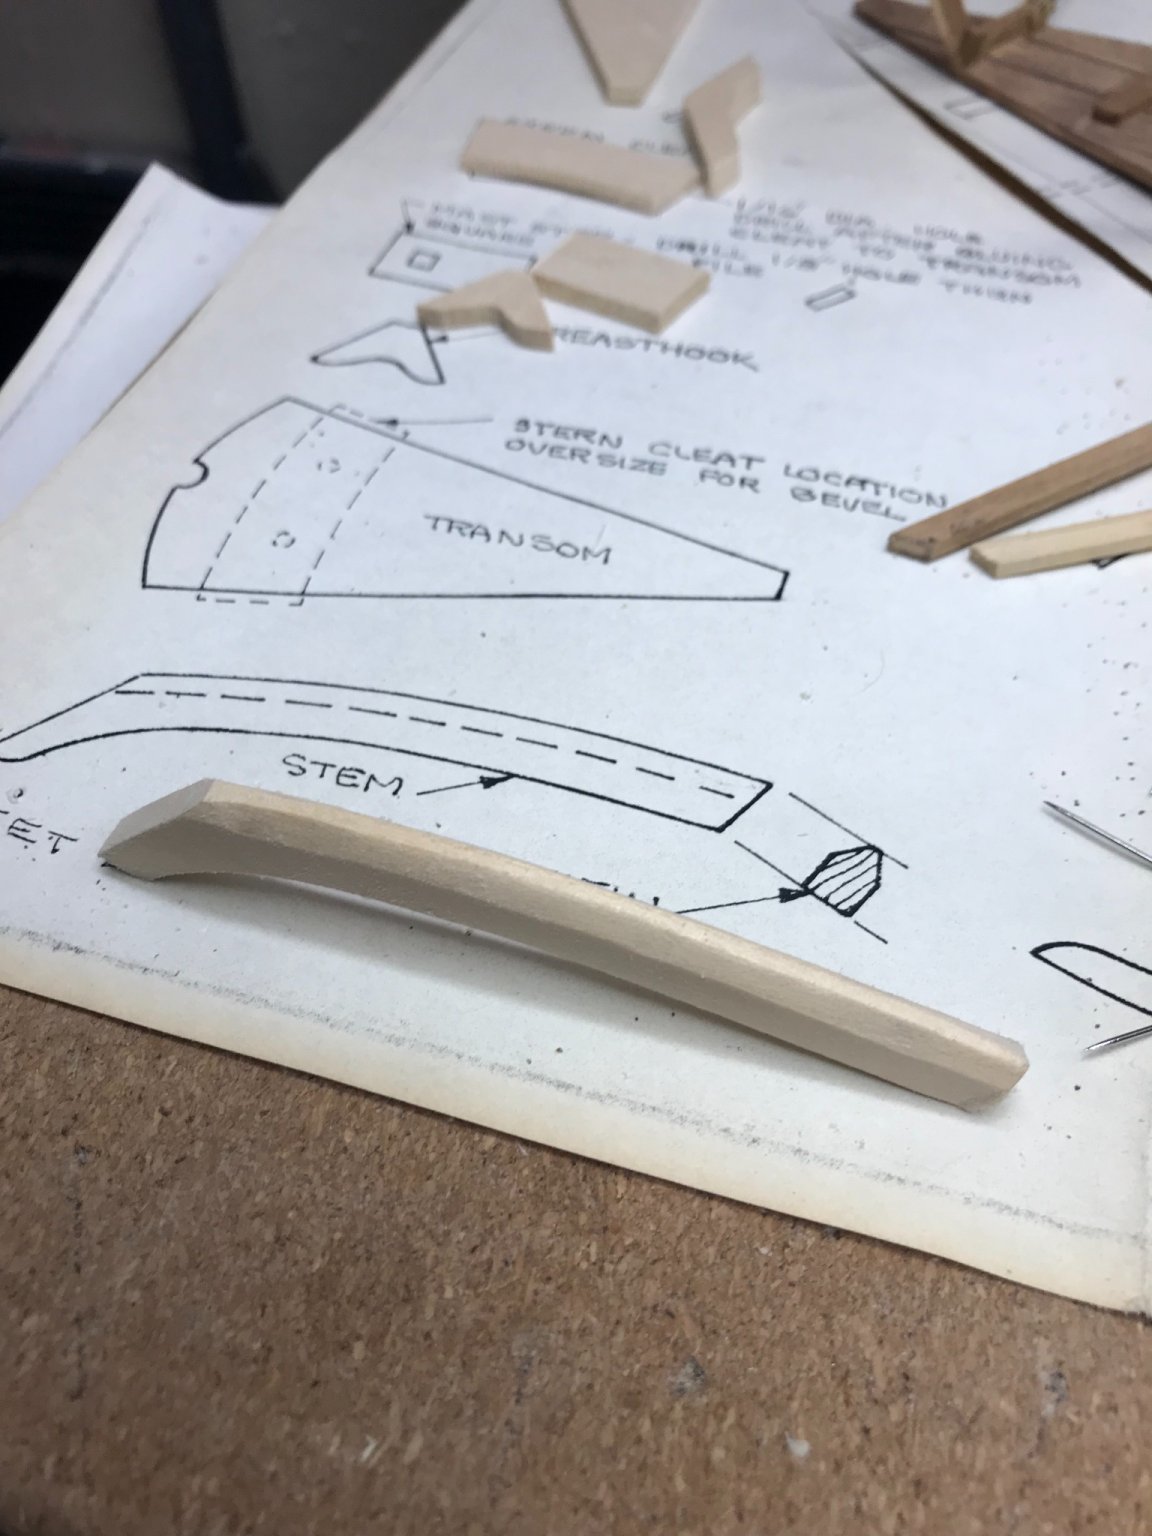
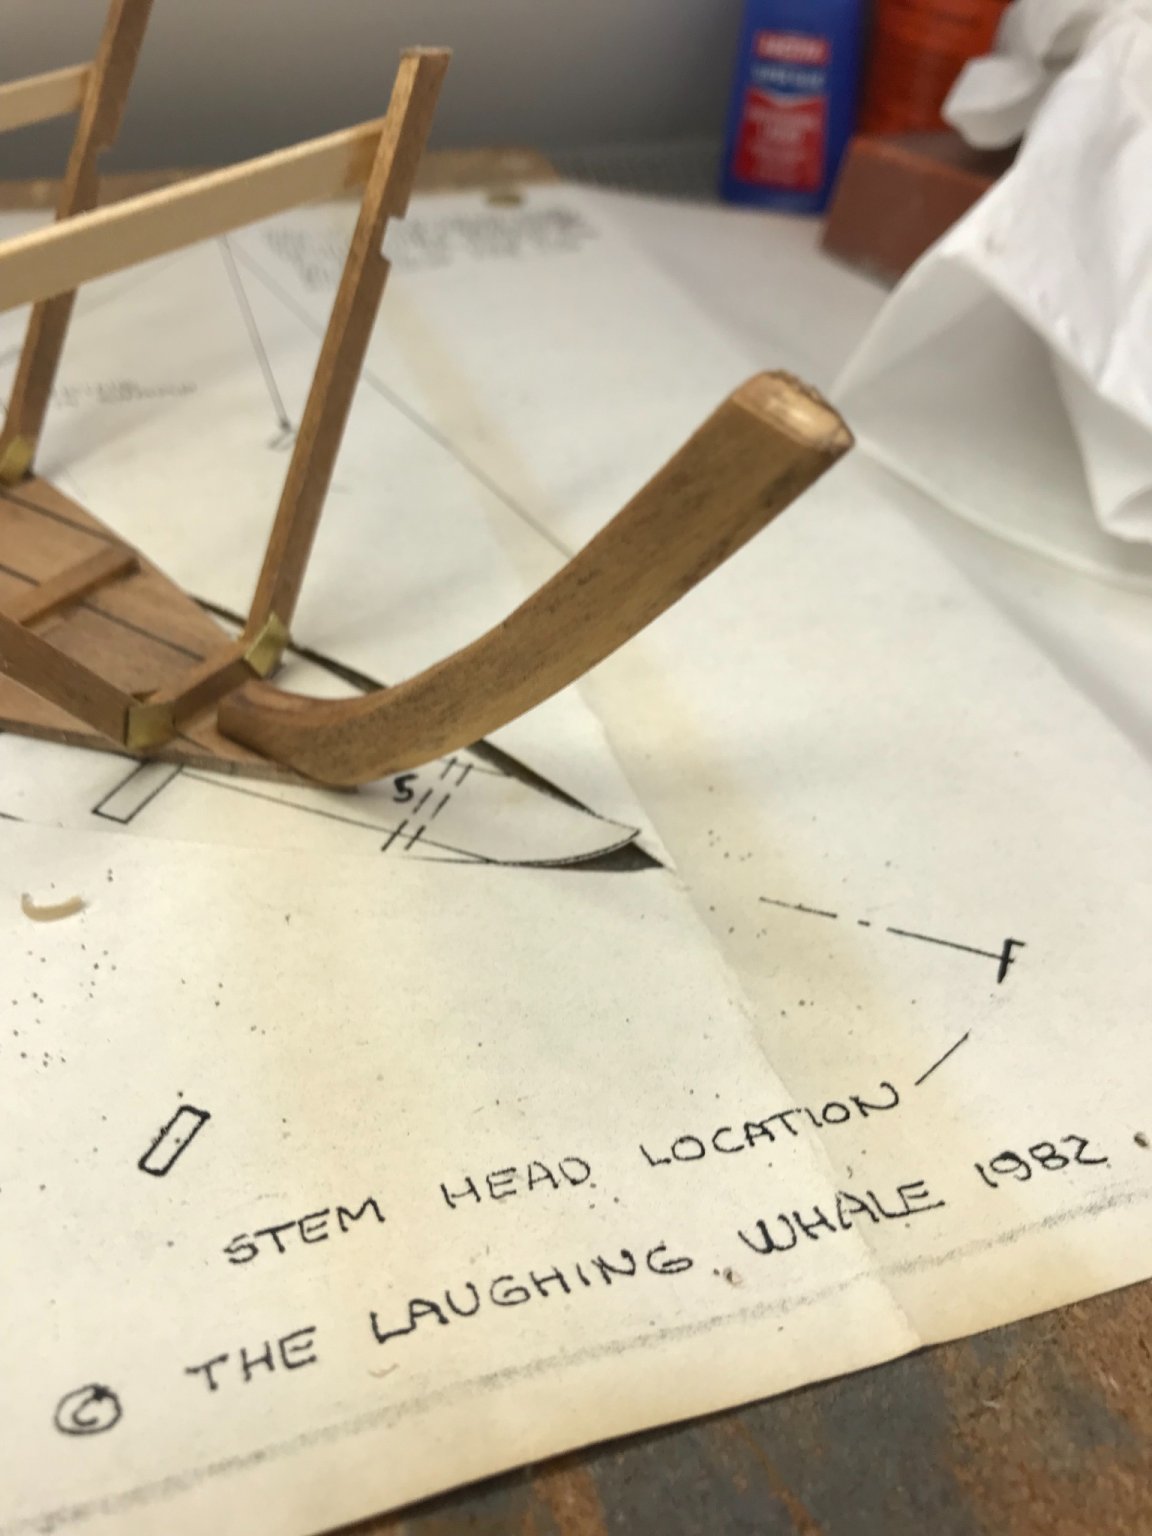
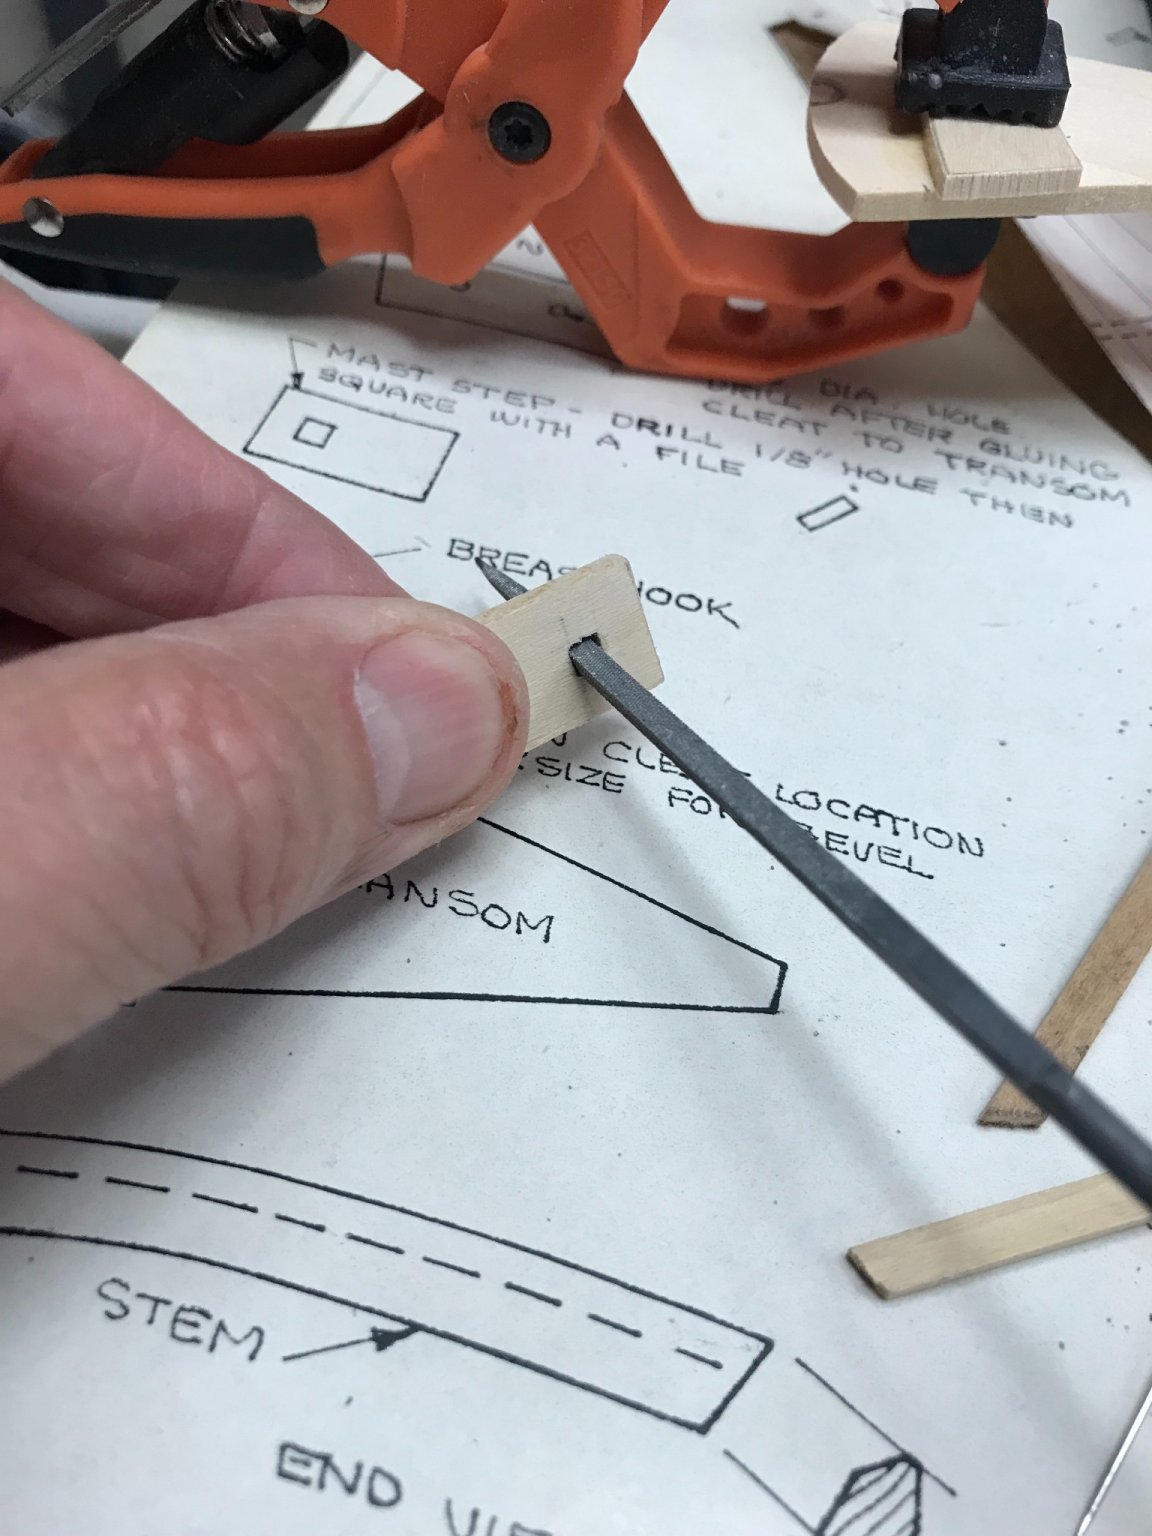
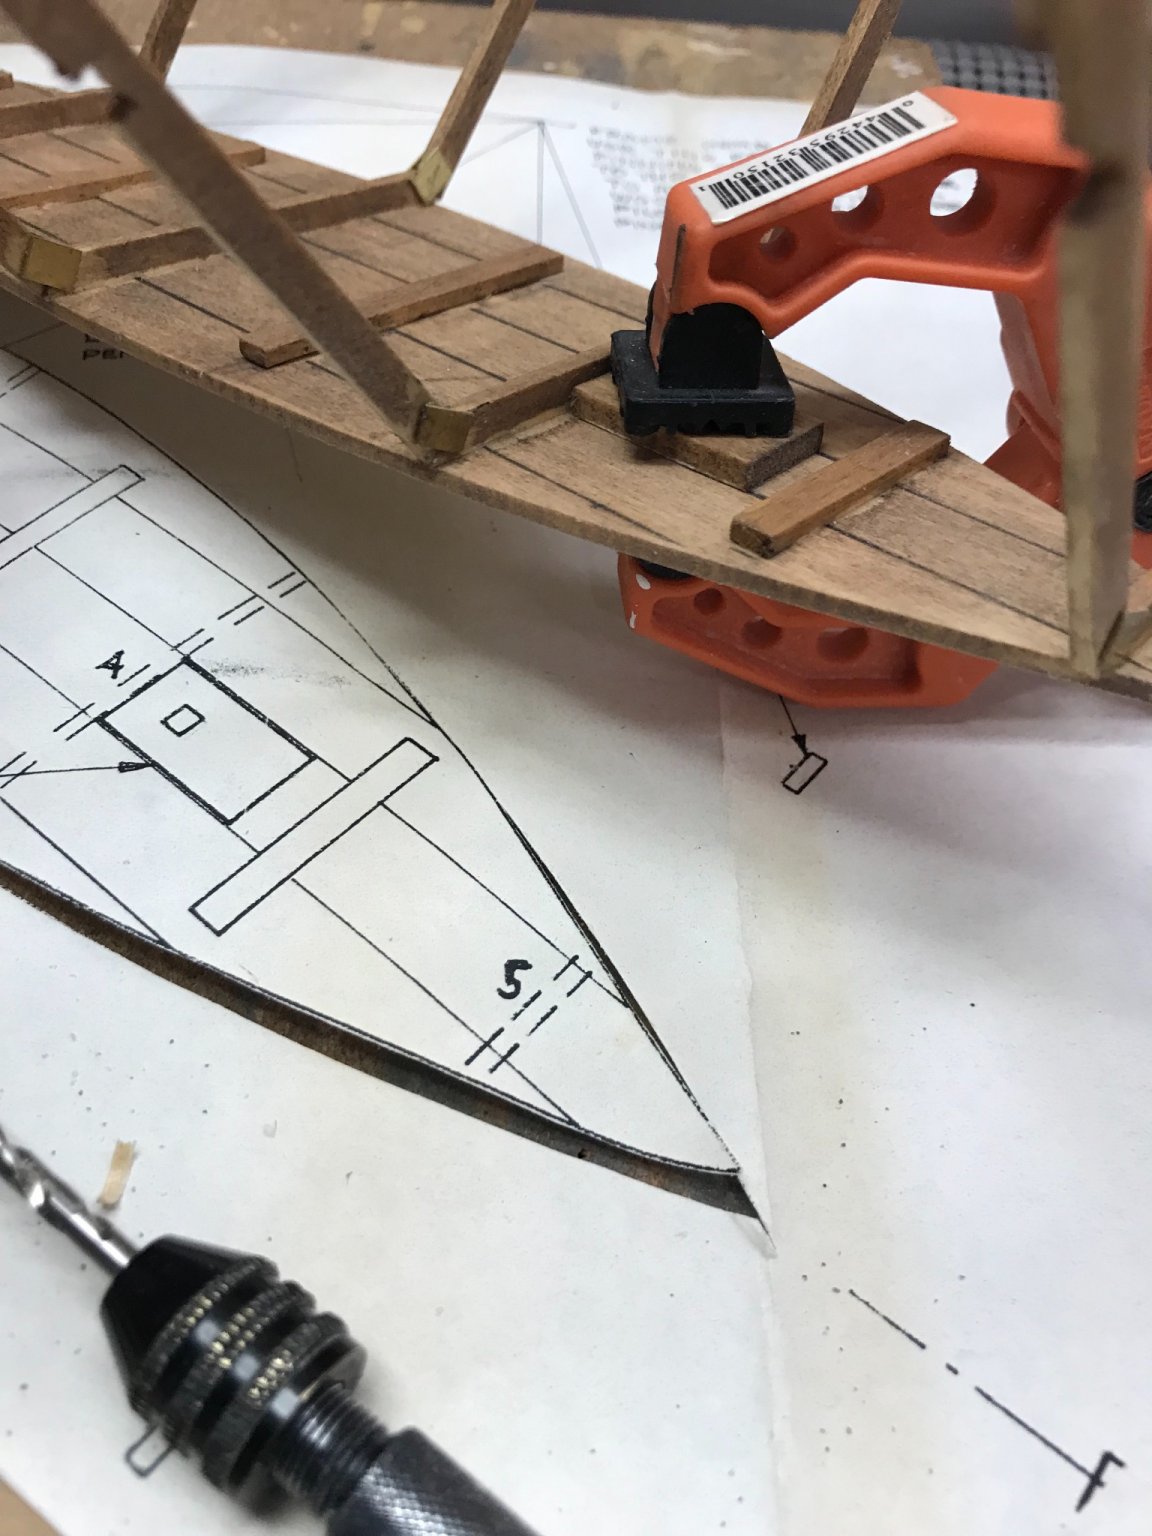
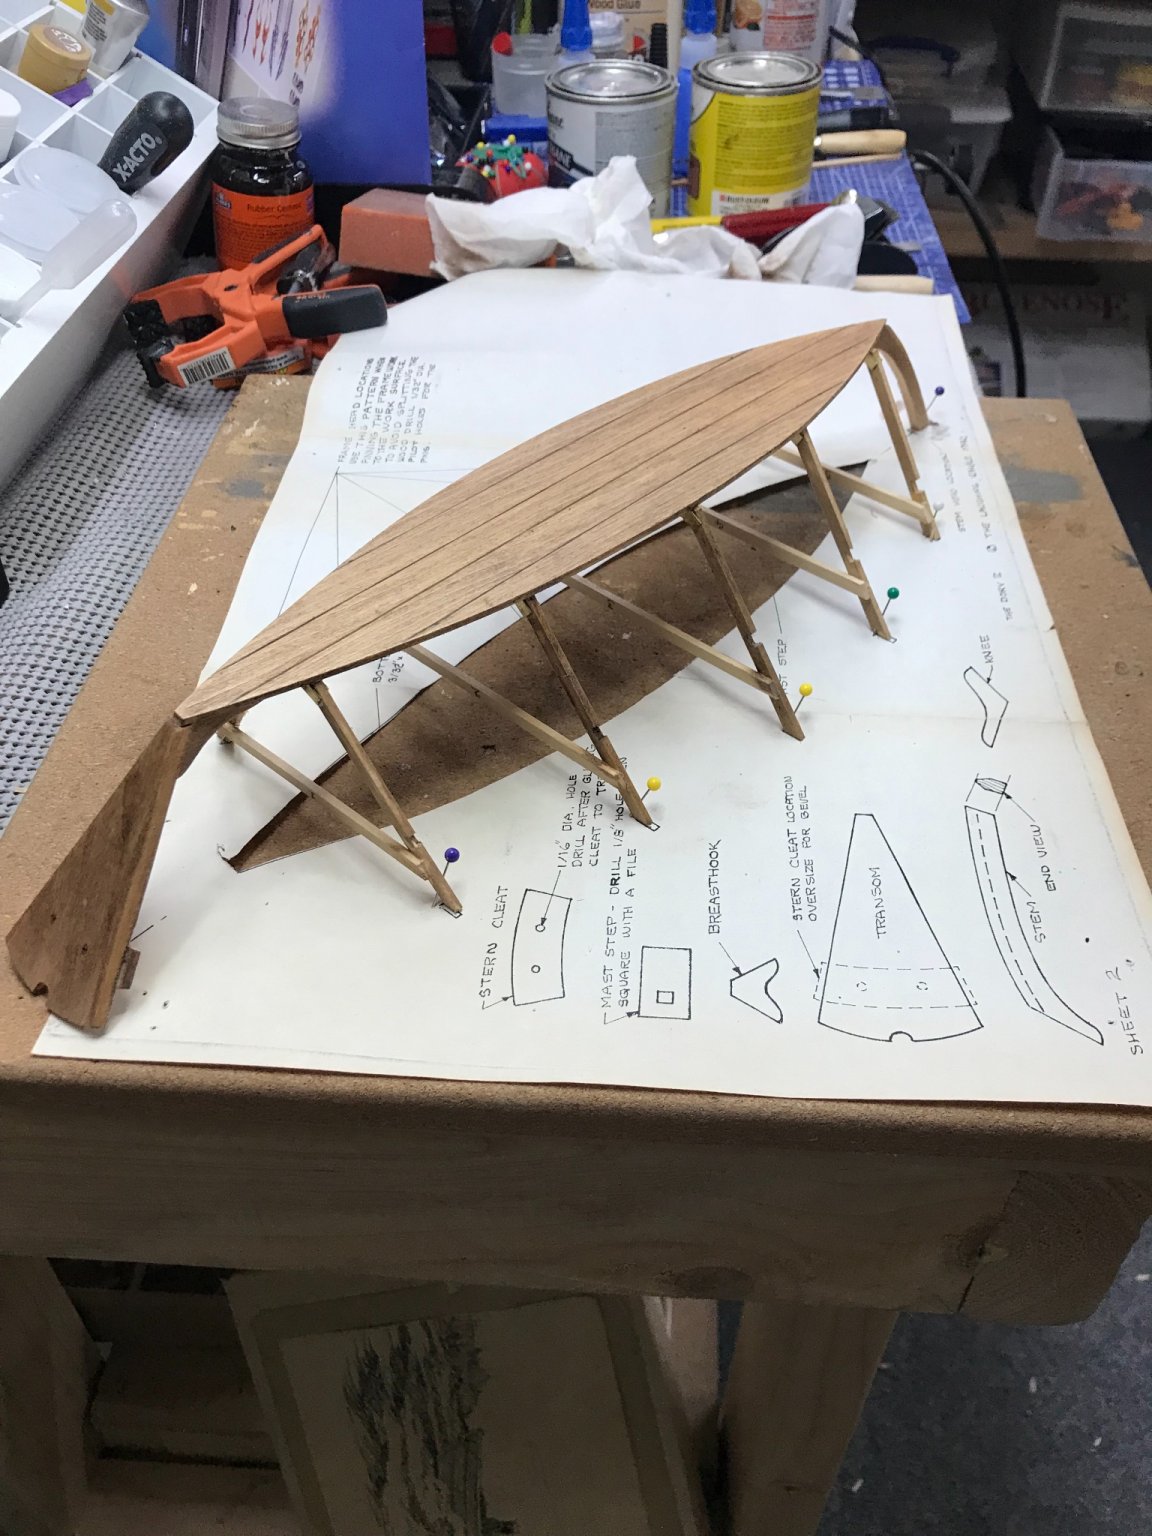
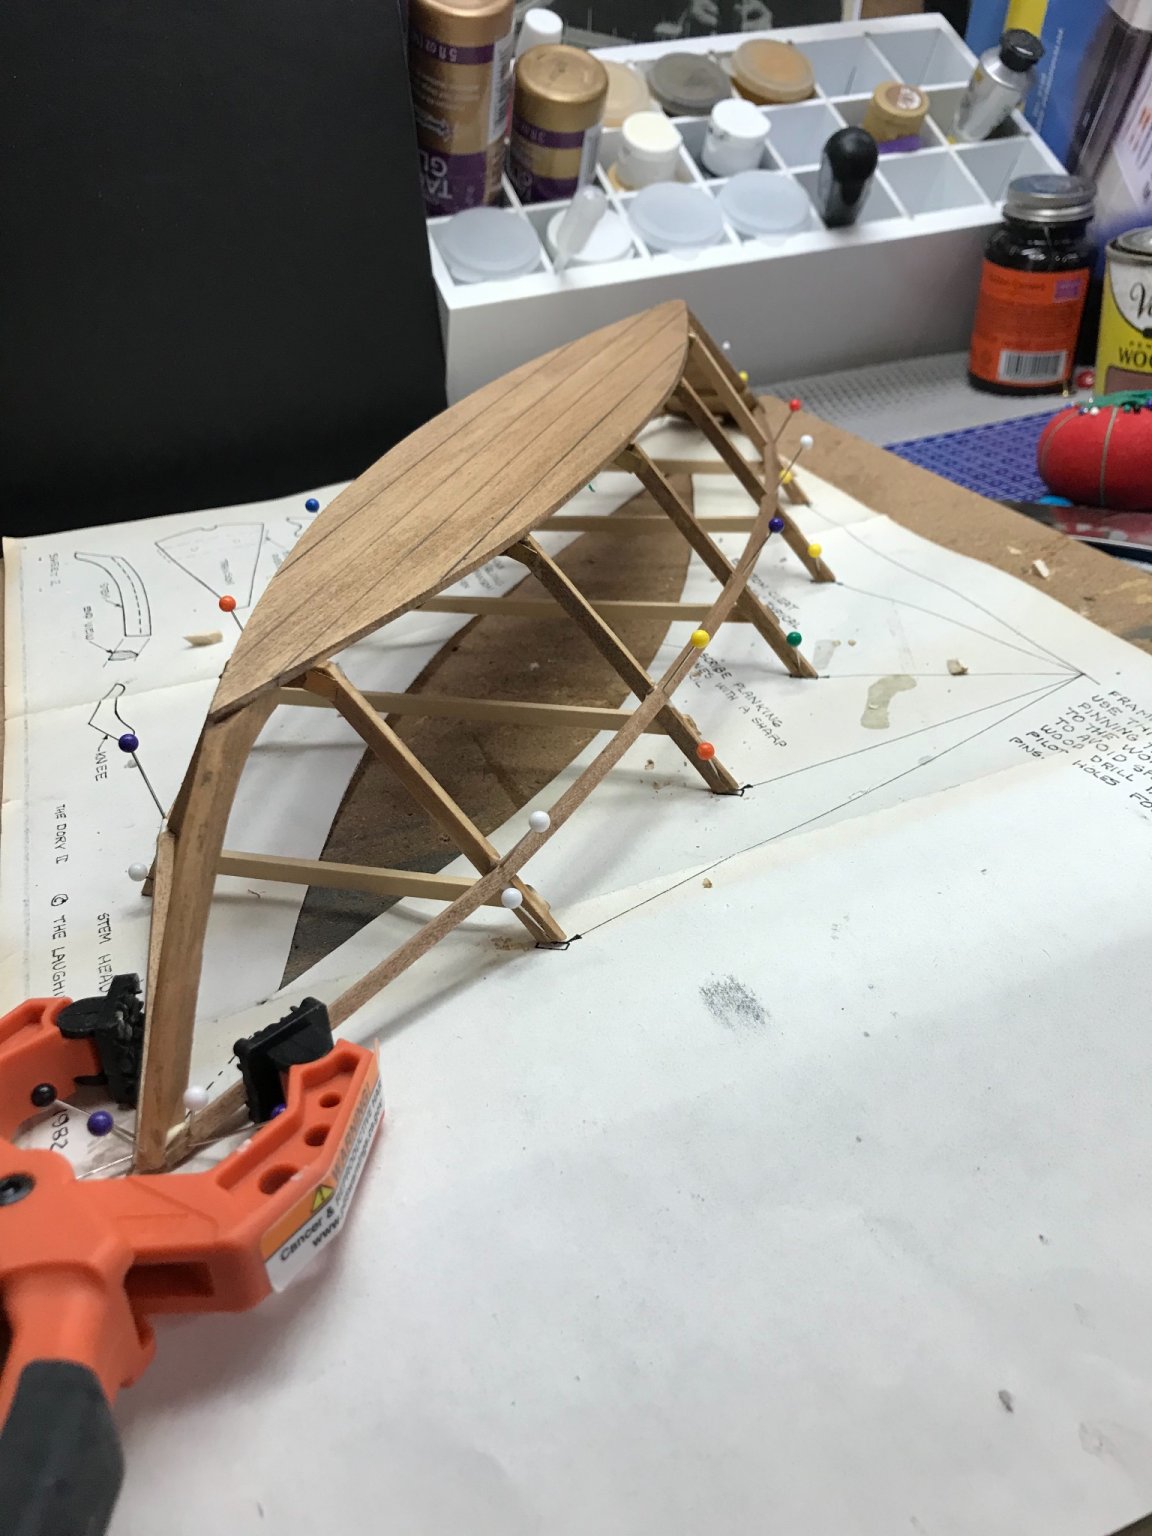
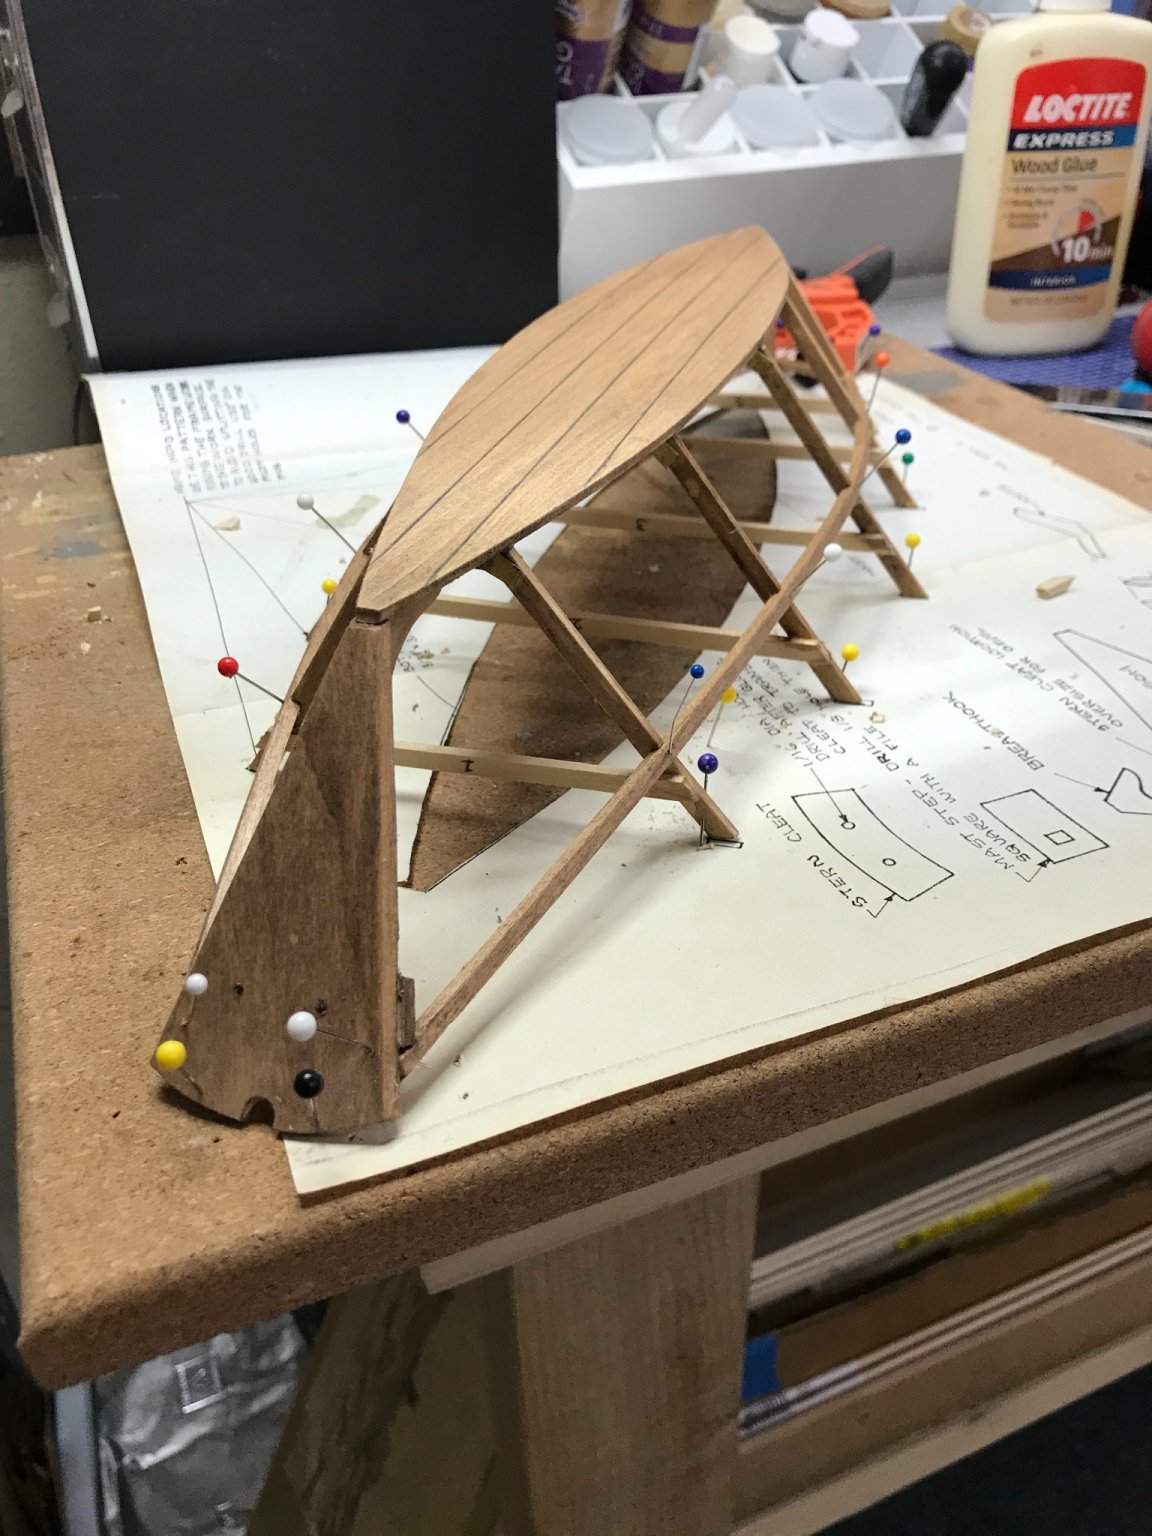
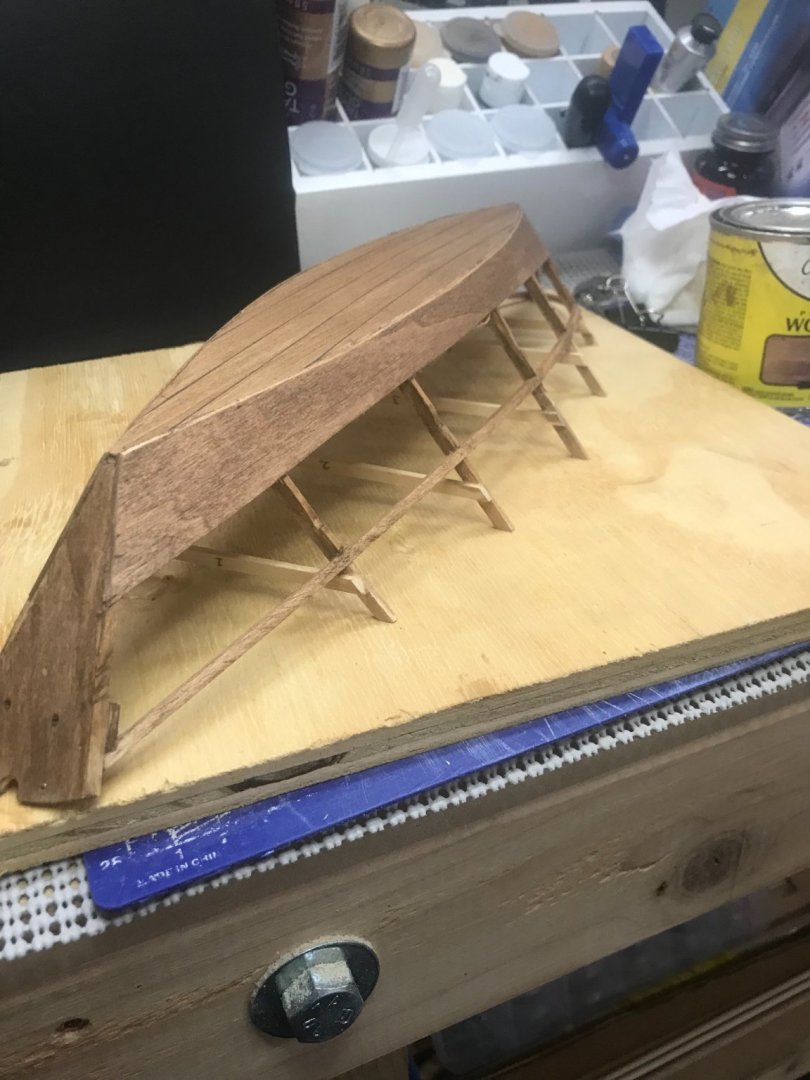
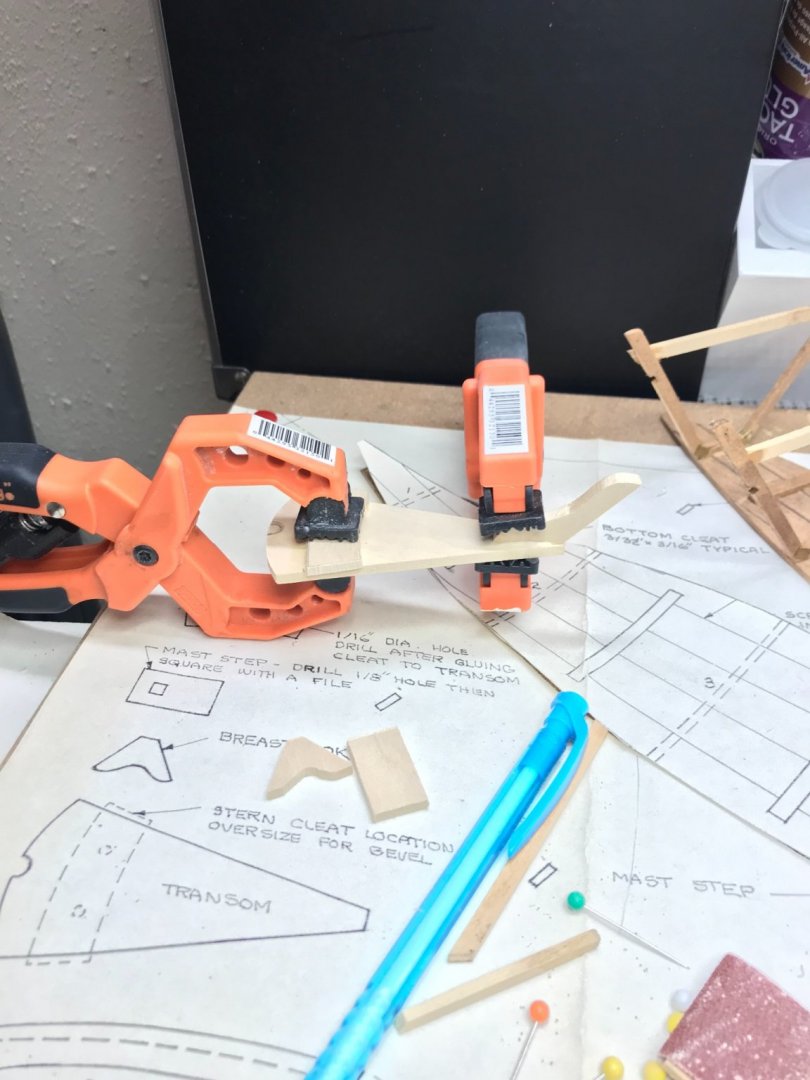
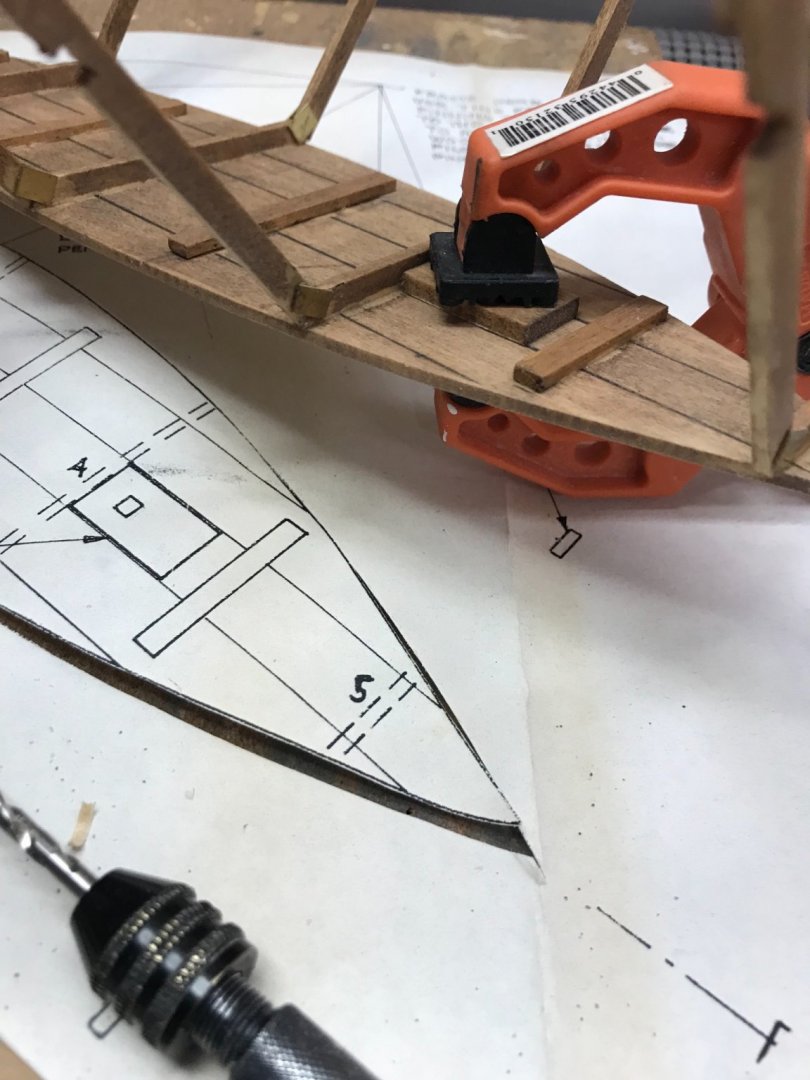
Stem and Stern… Beveling of the stem… Attaching the Stem… Assembly of the Transom… The Mast step… Frame assembly mounted to the construction board. Gunwale glued up, pinned and clamped. Later… 😎


- 22 replies
-
- 4
-
-
- Laughing Whale
- Dory
- (and 1 more)
-
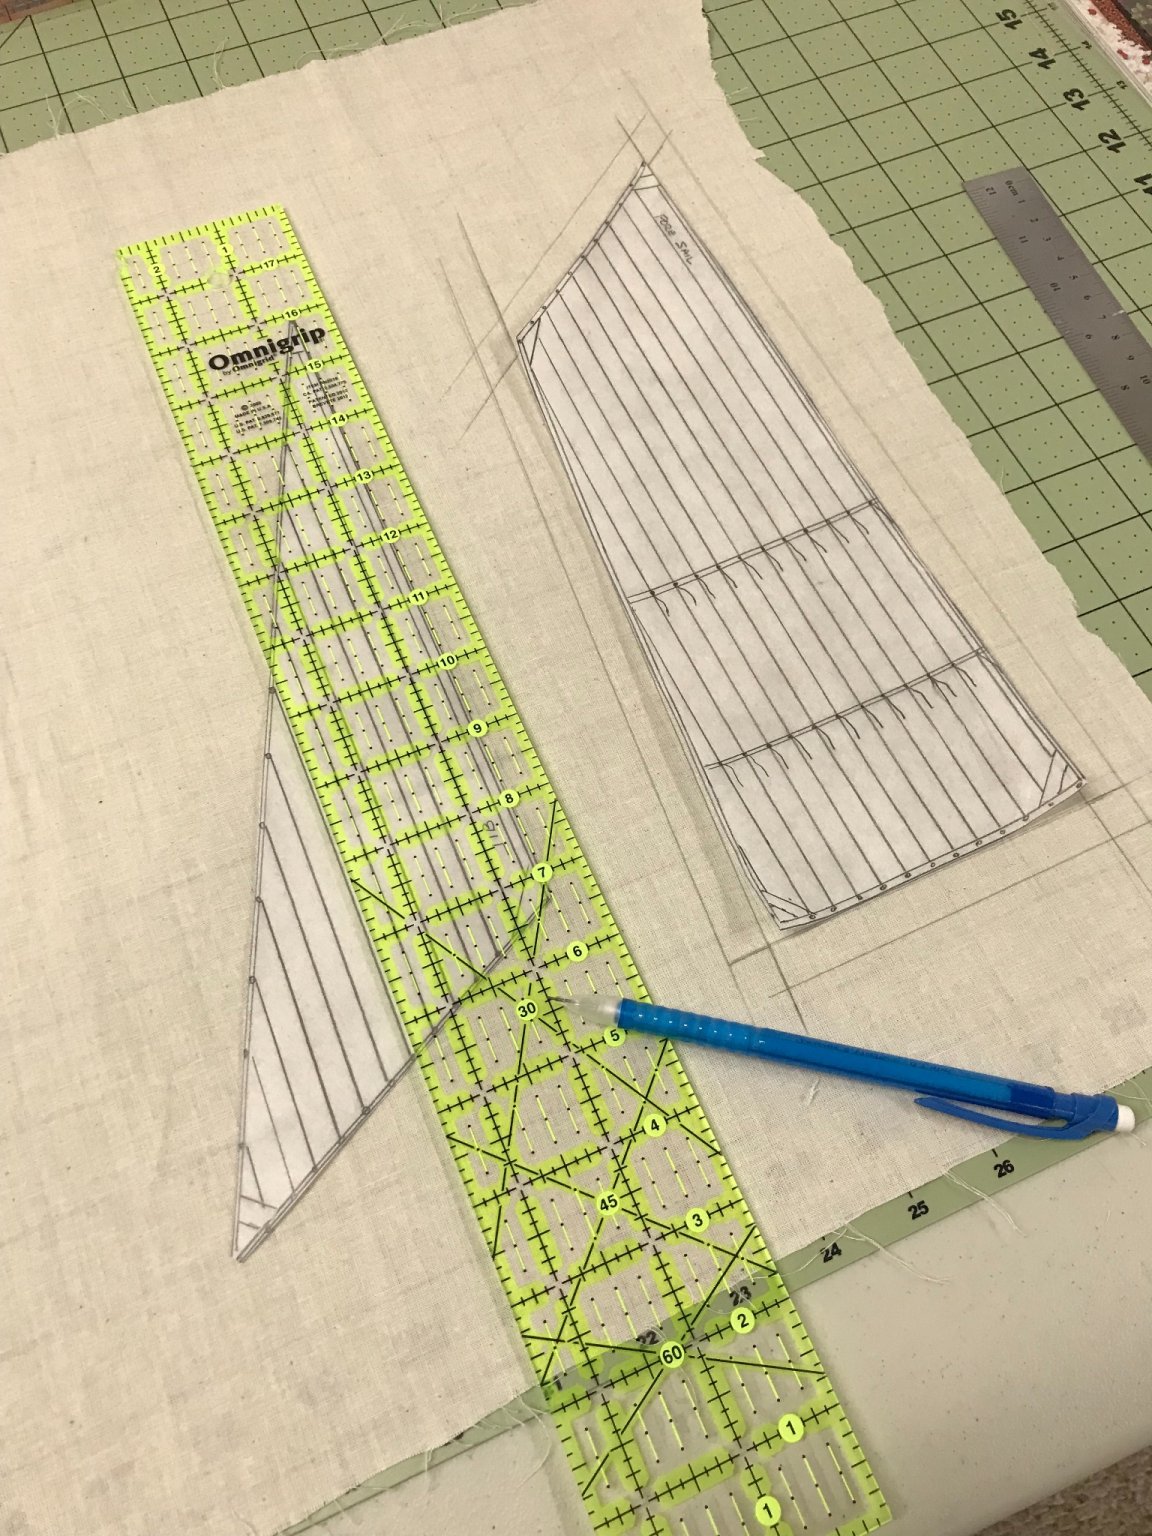
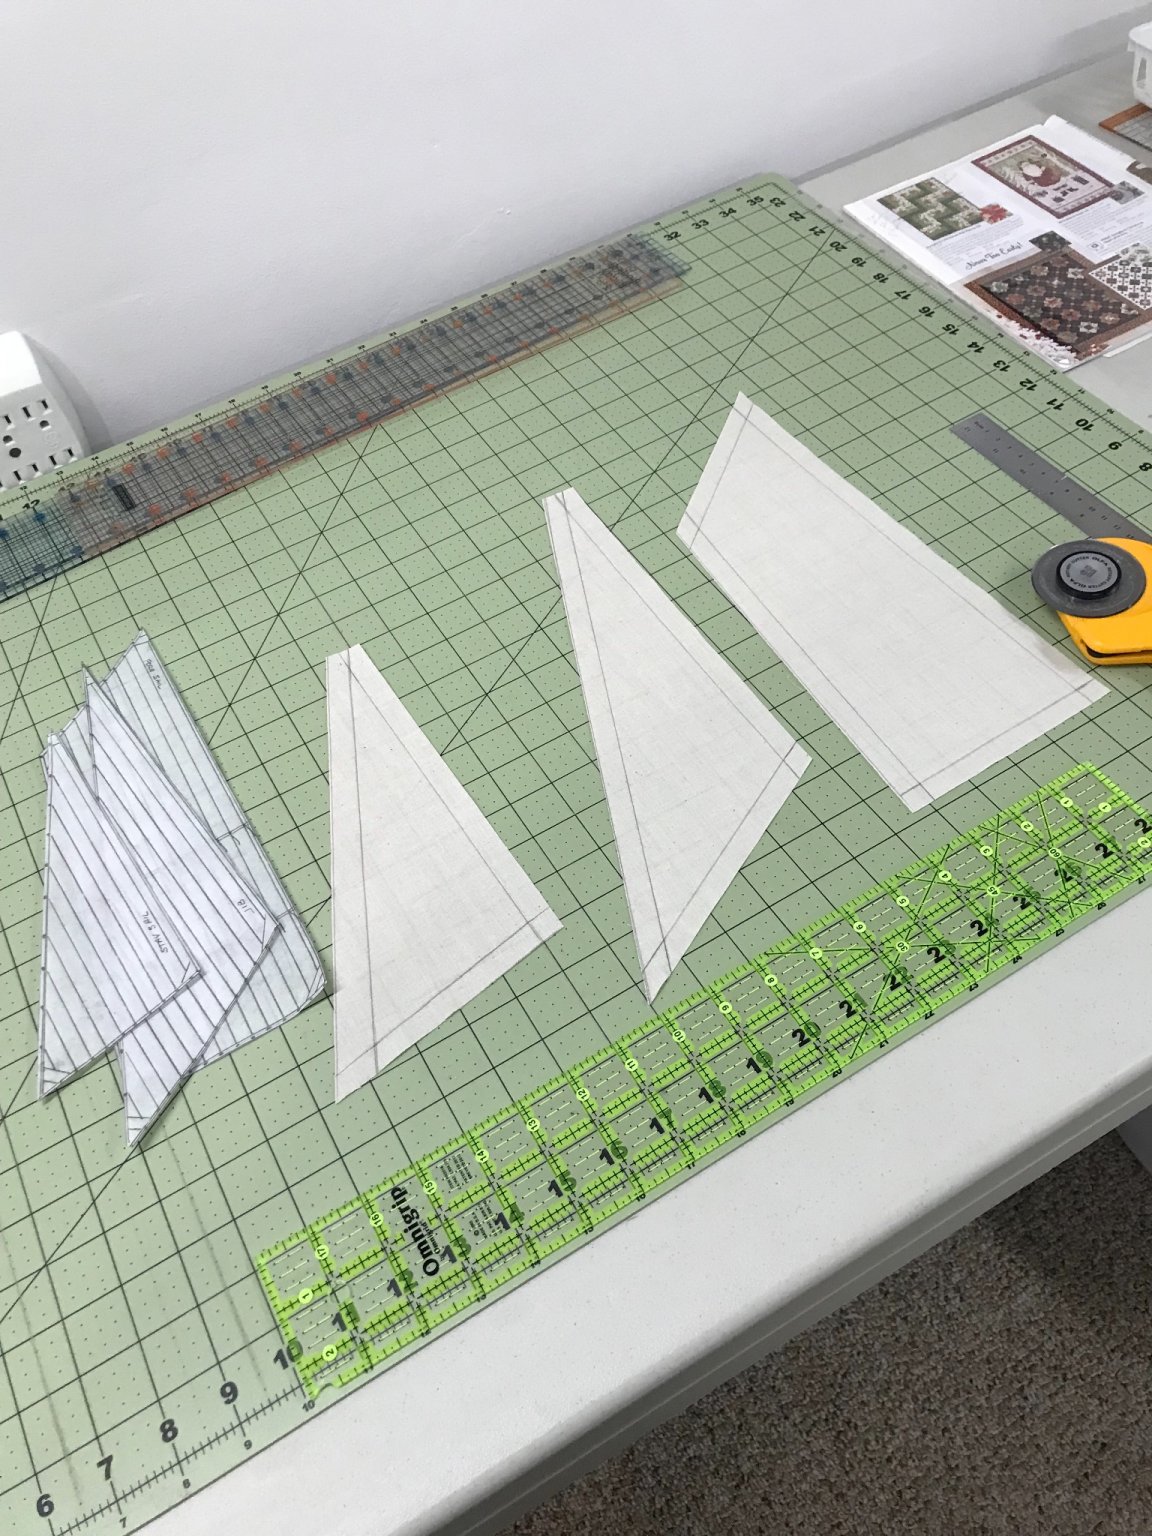
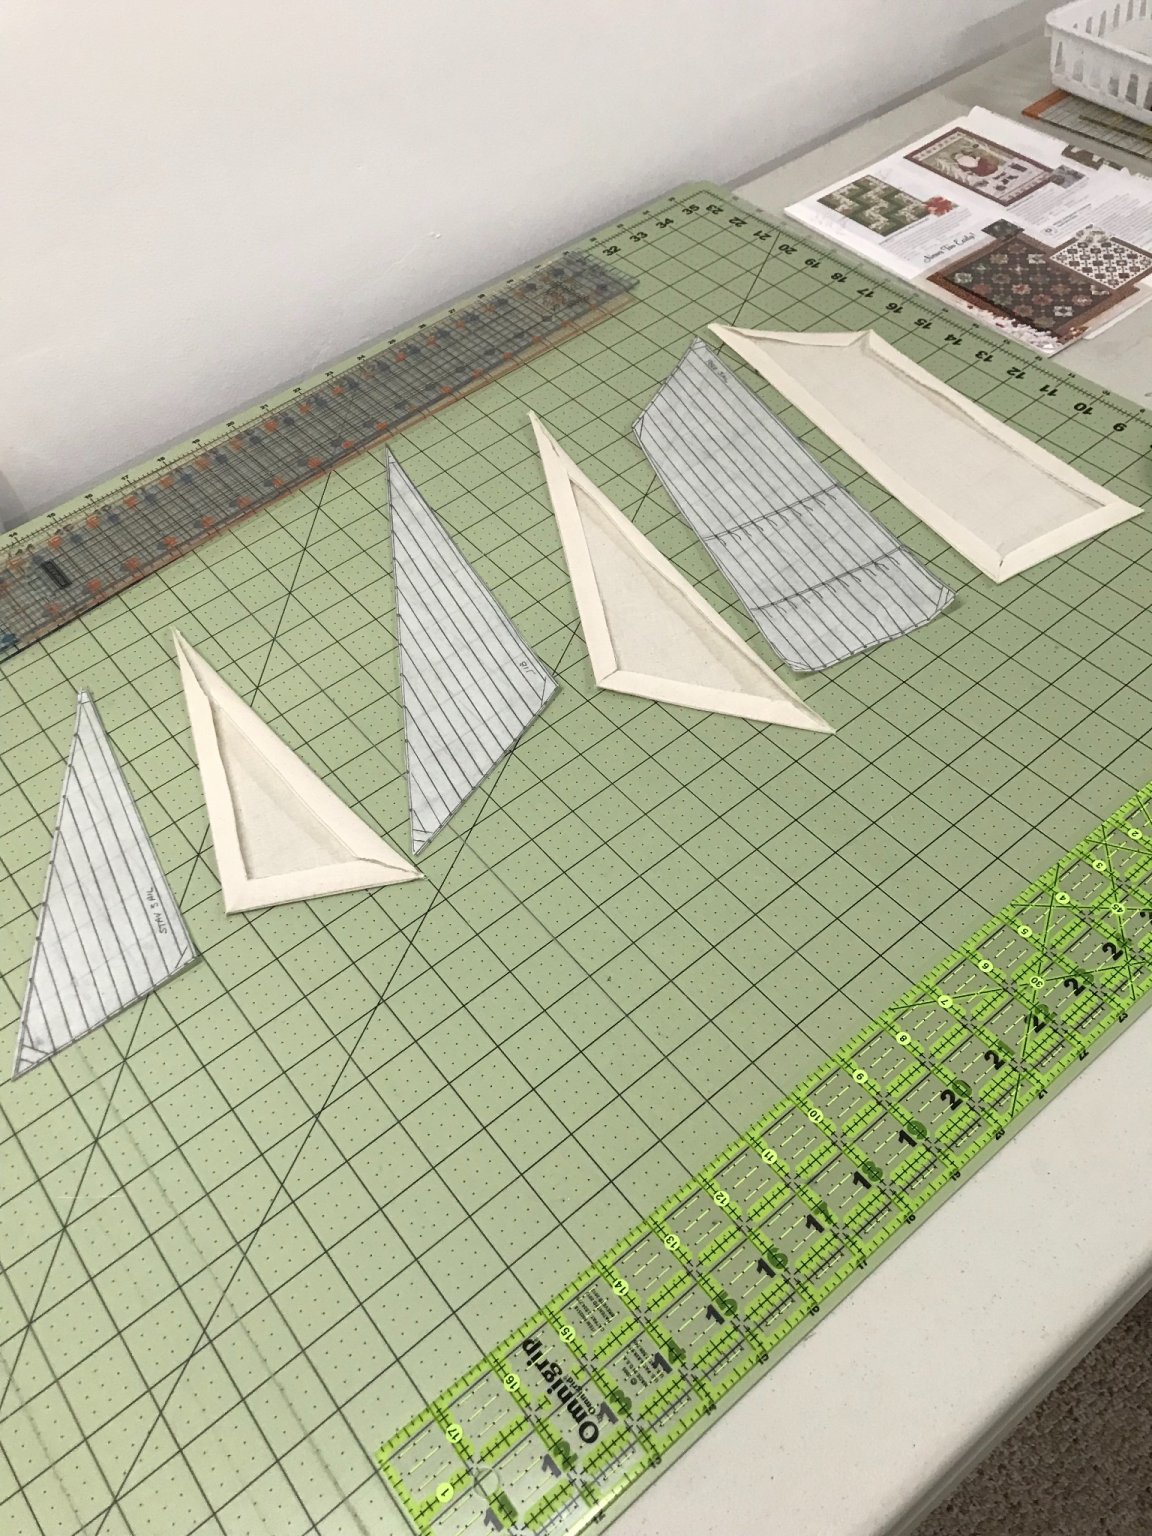
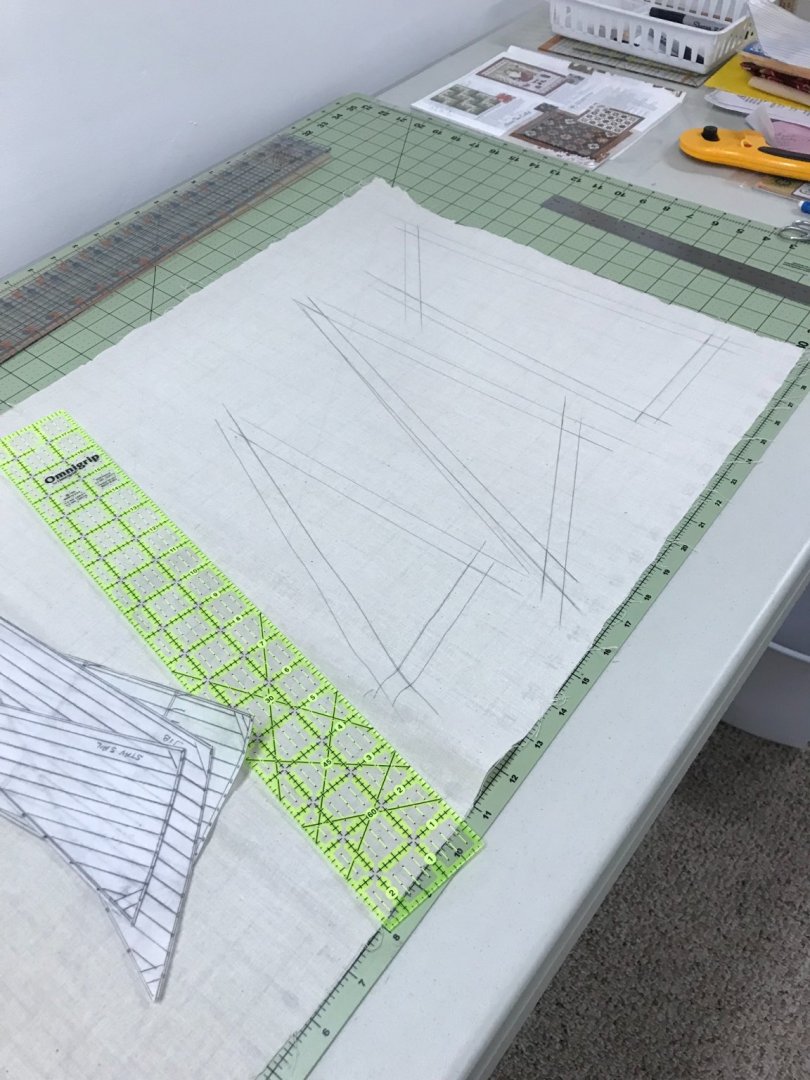
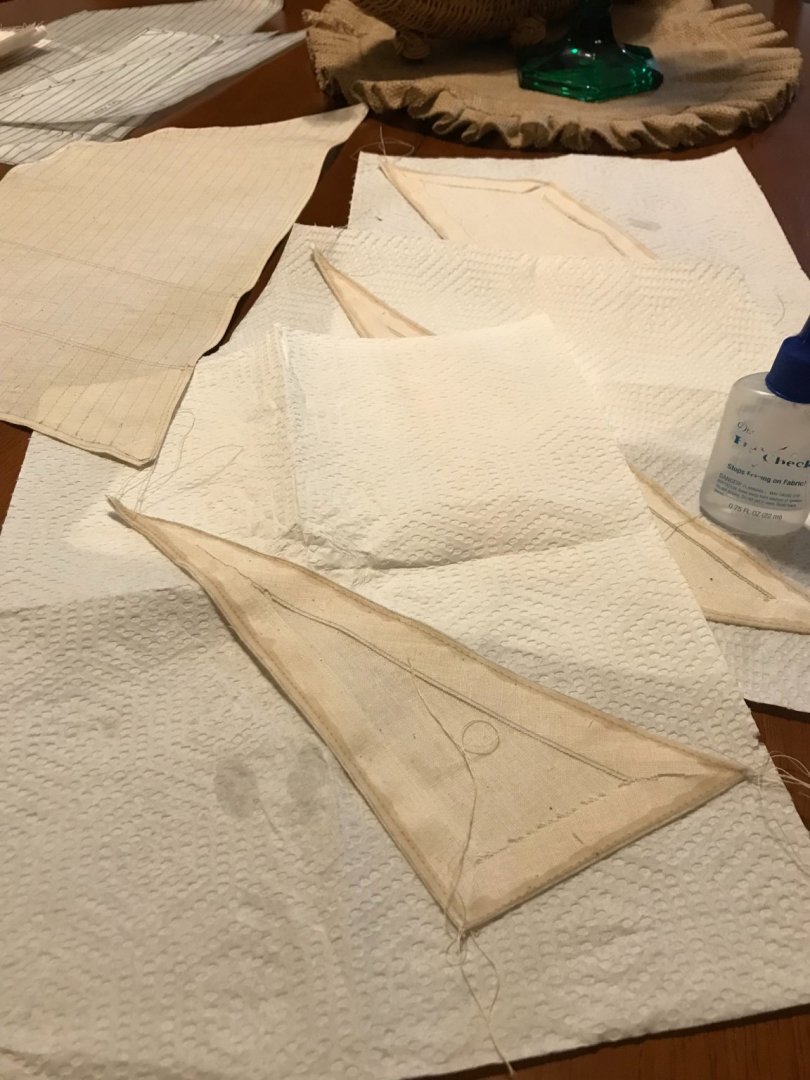
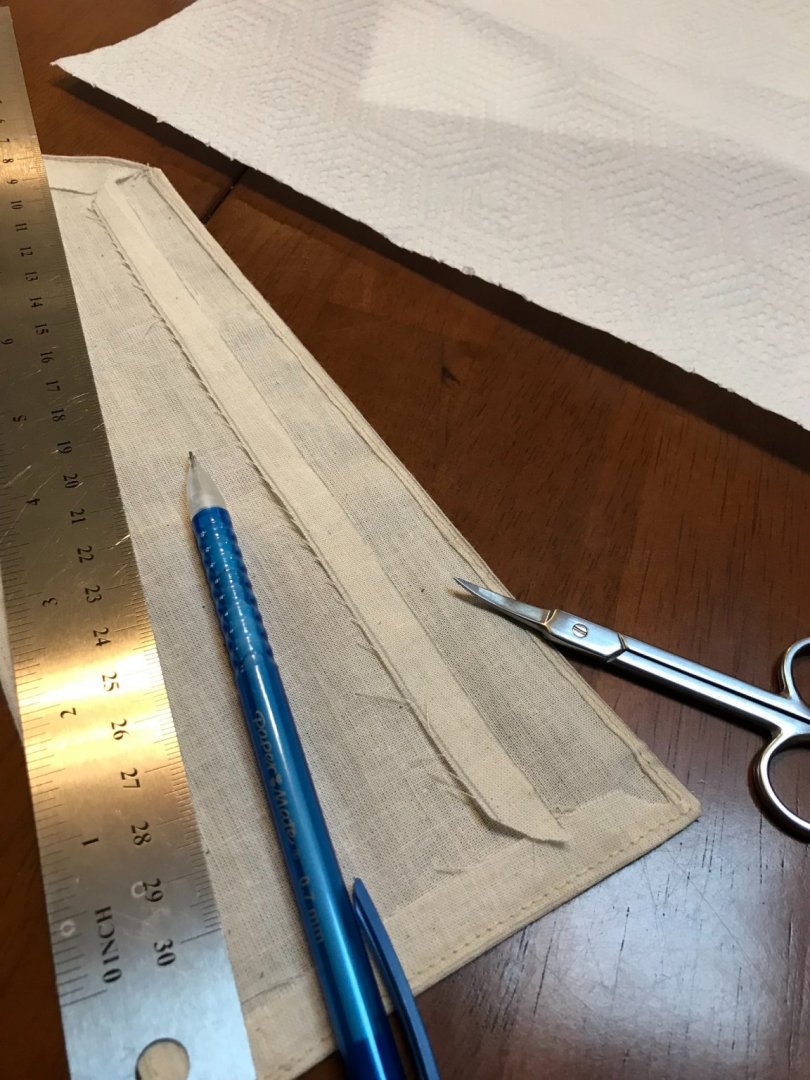
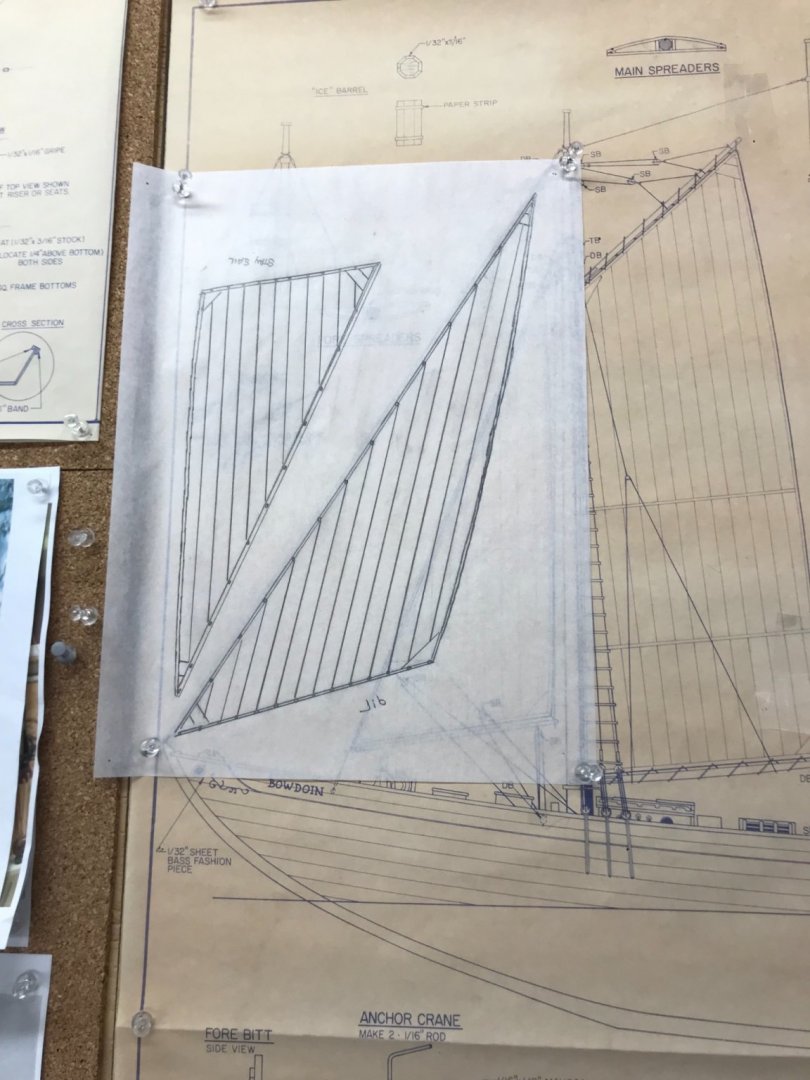
Sails… Making templates from blueprints with tracing paper… Using cutout templates to draw sails on to fabric… Allowing 1/2” to fold over for seams. Cut out sails…. Iron out folds and cut any overlap away. Sew 1/16 inch seams and seal with Fray Check. Allow to dry before trimming. Drawing a line to cut by is very helpful. Trim to 1/16 of sewn seam. Sew panels and reef seams… Sails ready for bolt rope and reef lines. Later… 😎


- 127 replies
-
- 9
-
-
- Bowdoin
- Arctic Exploration
- (and 3 more)
-
I know exactly what you feel, so many things to do. Then, another detail we can do a bit better. 🧐 Carry on sir… 🍻
-
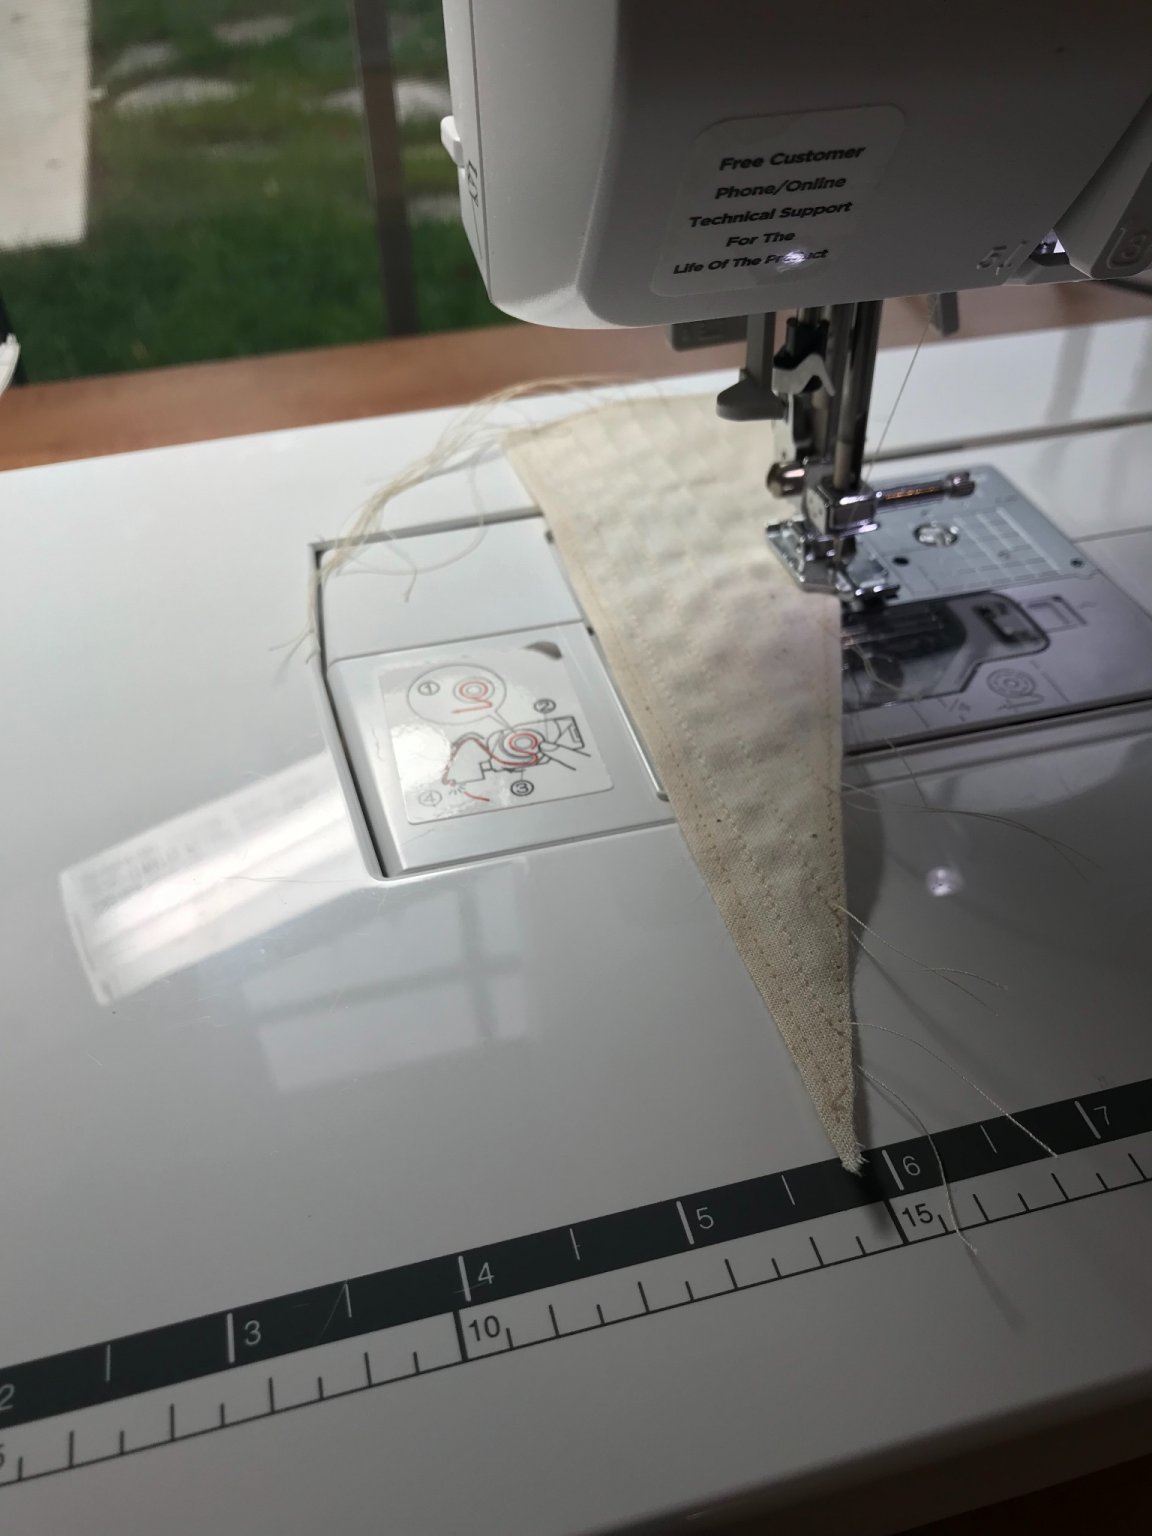
Sneak Peak at the sails… Spending time on the wife’s machine. Cheers 🍻

- 127 replies
-
- 6
-
-
- Bowdoin
- Arctic Exploration
- (and 3 more)
-
Ron, I don’t recall any time line specified for any projects on this site your work is looking great. One of the things I like about this hobby is “who cares” how long it takes? We are in it for the end results and you are looking good. 👍
-
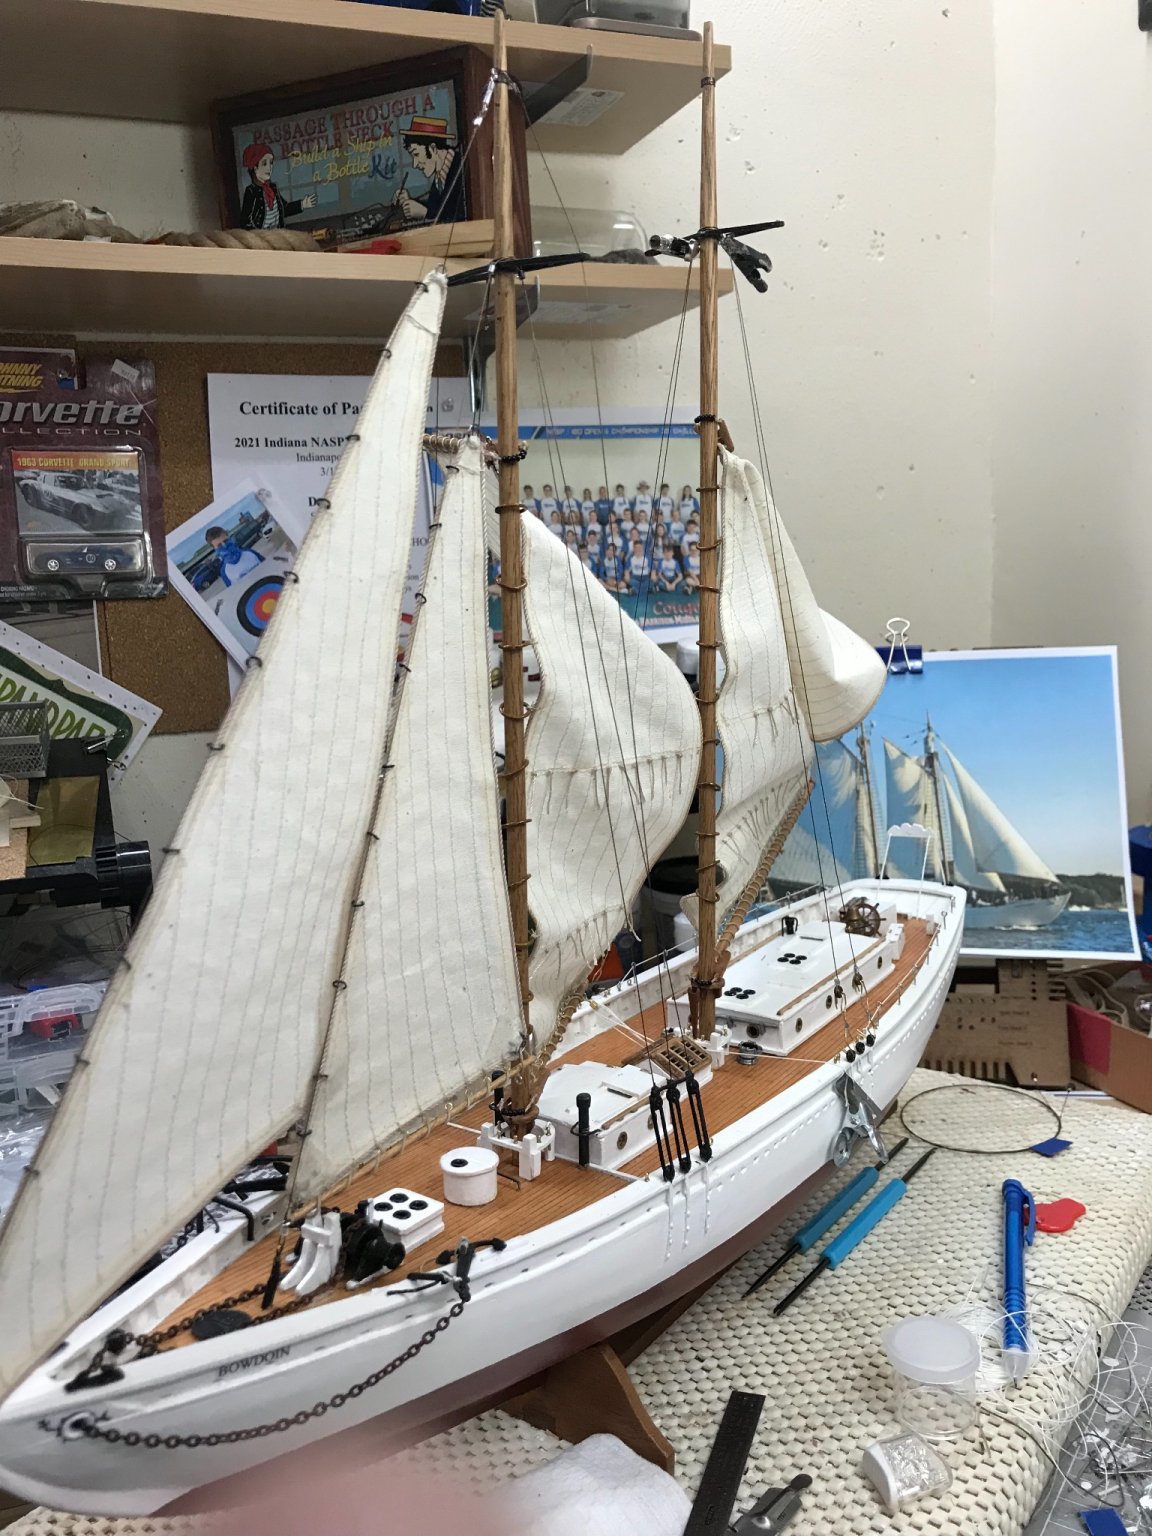
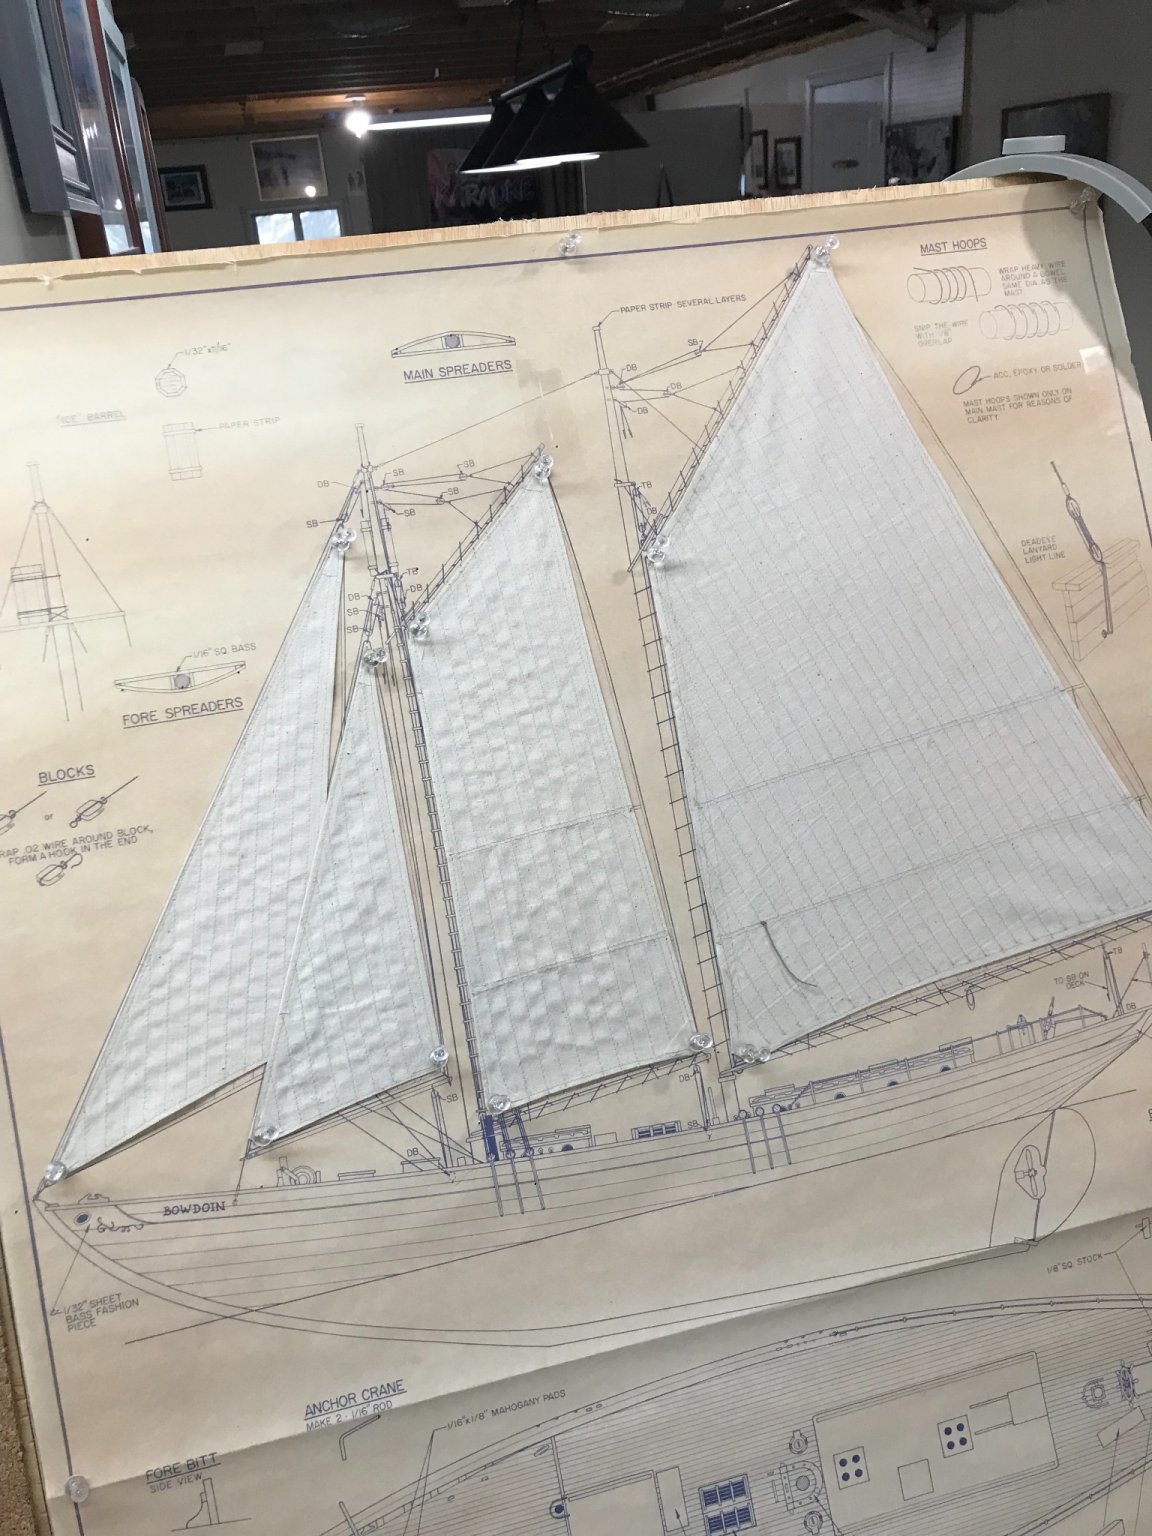
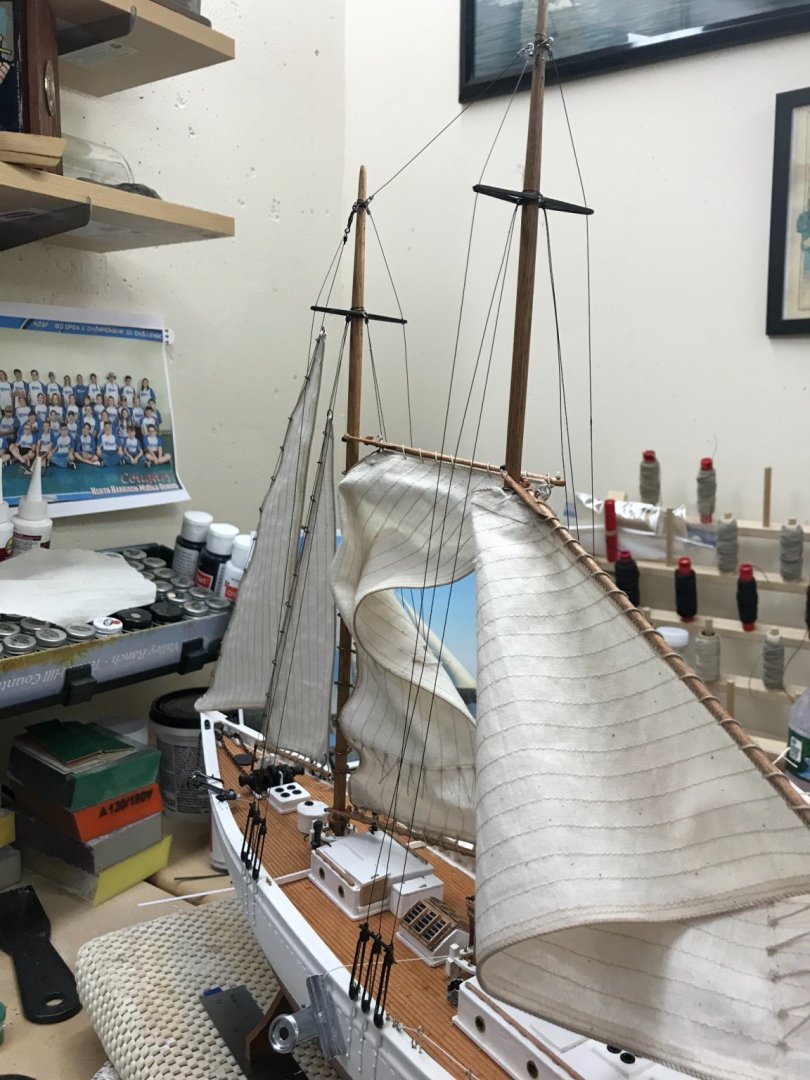
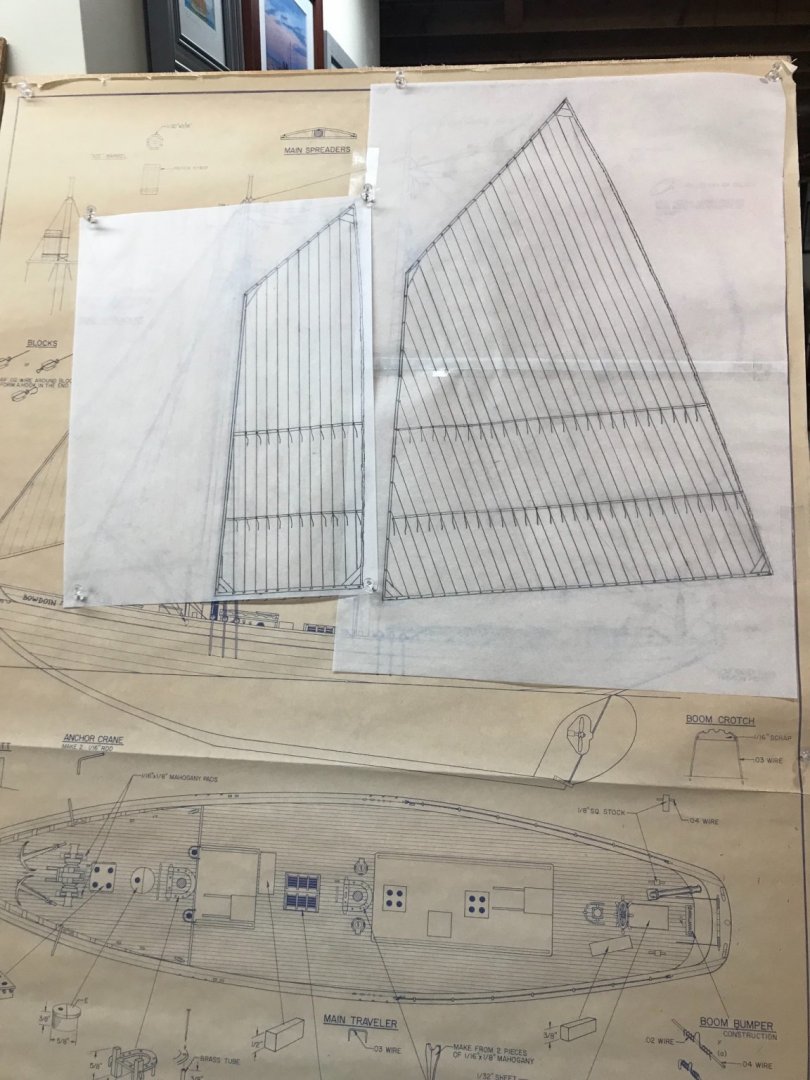
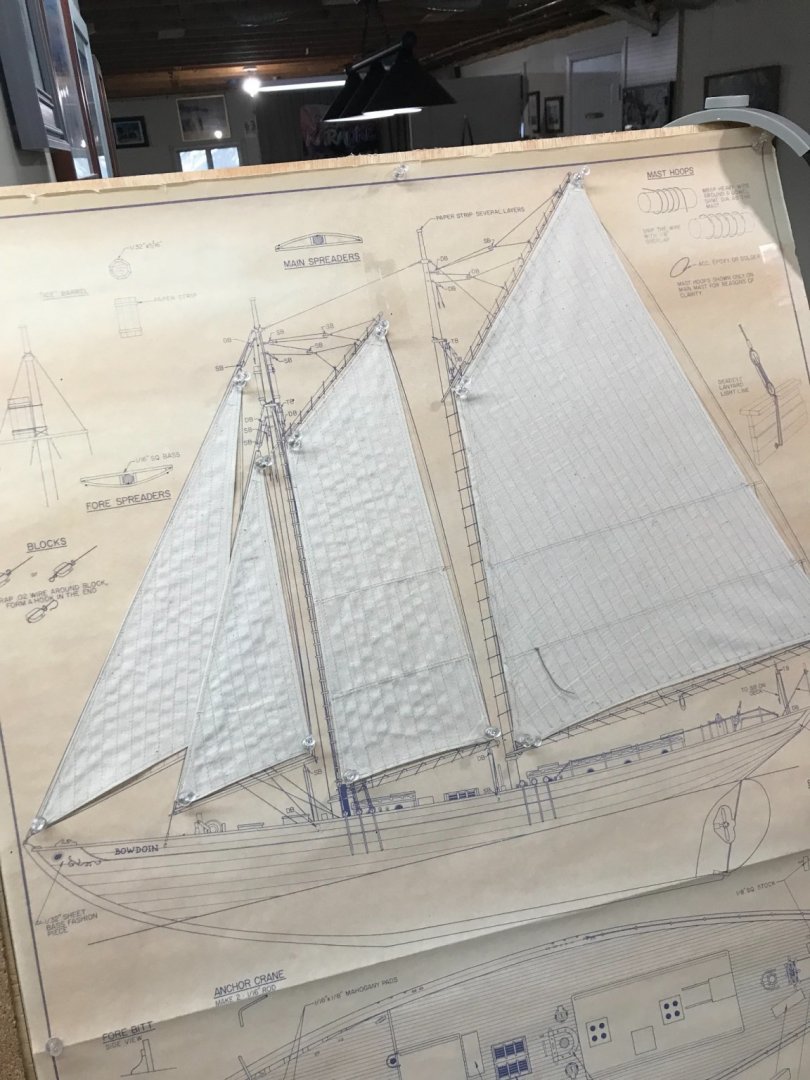
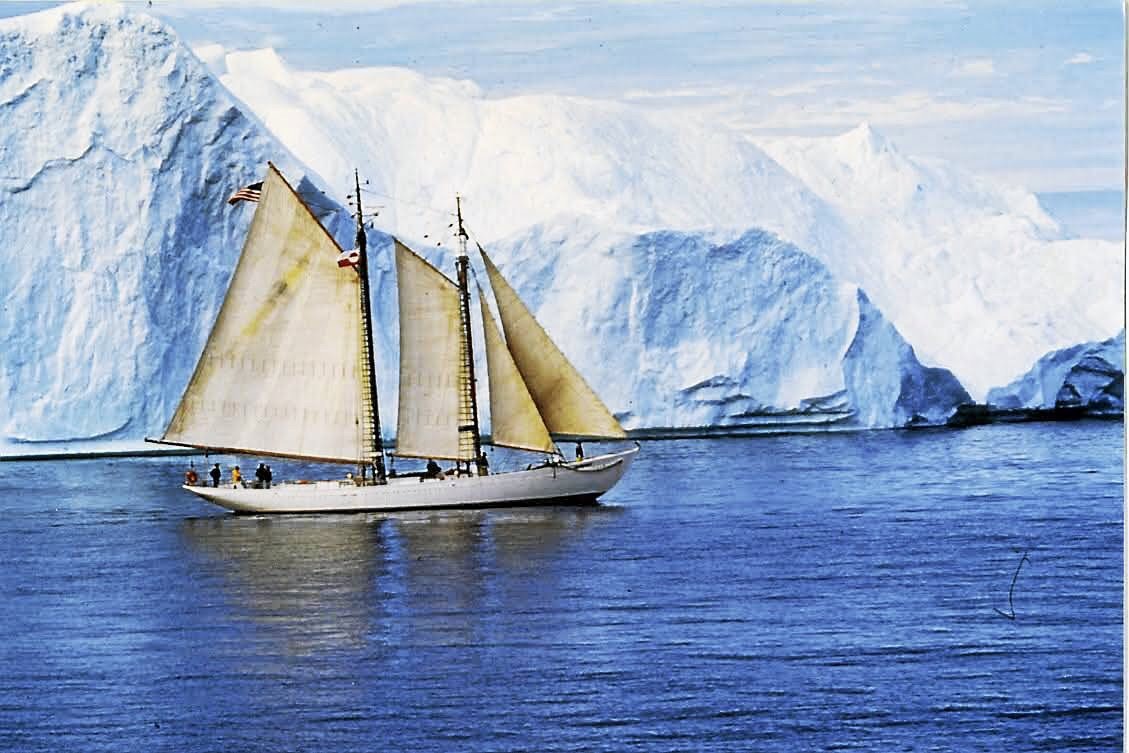
Here is my inspiration photo… Fully set full suit of sails 😎
- 127 replies
-
- 7
-
-
- Bowdoin
- Arctic Exploration
- (and 3 more)
-
I agree, that’s where I am headed. We will see how it goes, I’ve gotten pretty good with the wife’s machine. I think I will lay out sails and build the booms and gaffs. I’ll rig them on the bench then set the mast and shrouds. Thanks for the confirmation @clearway 🍻
- 127 replies
-
- 1
-
-
- Bowdoin
- Arctic Exploration
- (and 3 more)
-
Yep @clearway the mast are not glued in yet either, so I can set the sails before dropping the masts in and setting the standing rigging. I’m still considering how to present the sails. 🧐 I’m thinking silk span rather than sewing, it would be a first for me. Although, at this scale I might use cloth, I am just not sure how it would look some furled and some set. I am leaning towards fully set suit of sails with sewn cloth, saving the silk span for smaller scale. Opinions please. 🤔
- 127 replies
-
- 8
-
-
- Bowdoin
- Arctic Exploration
- (and 3 more)