John Ruy
-
Posts
1,598 -
Joined
-
Last visited
Content Type
Profiles
Forums
Gallery
Events
Everything posted by John Ruy
-
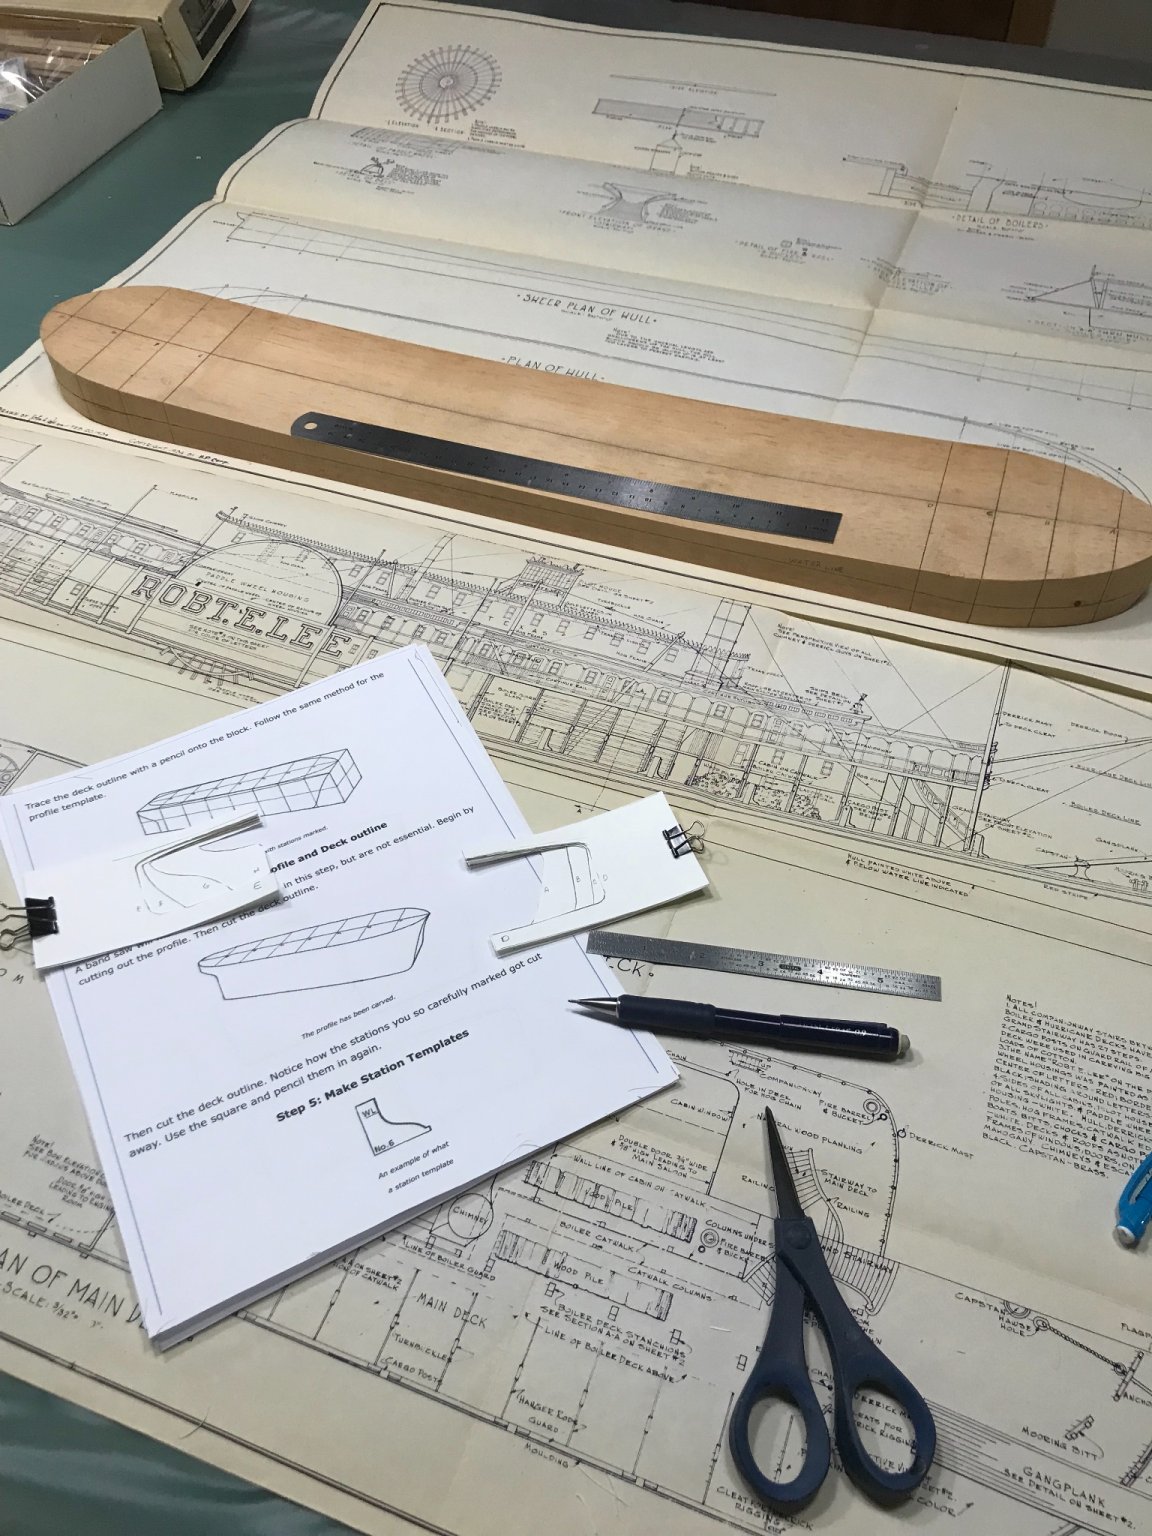
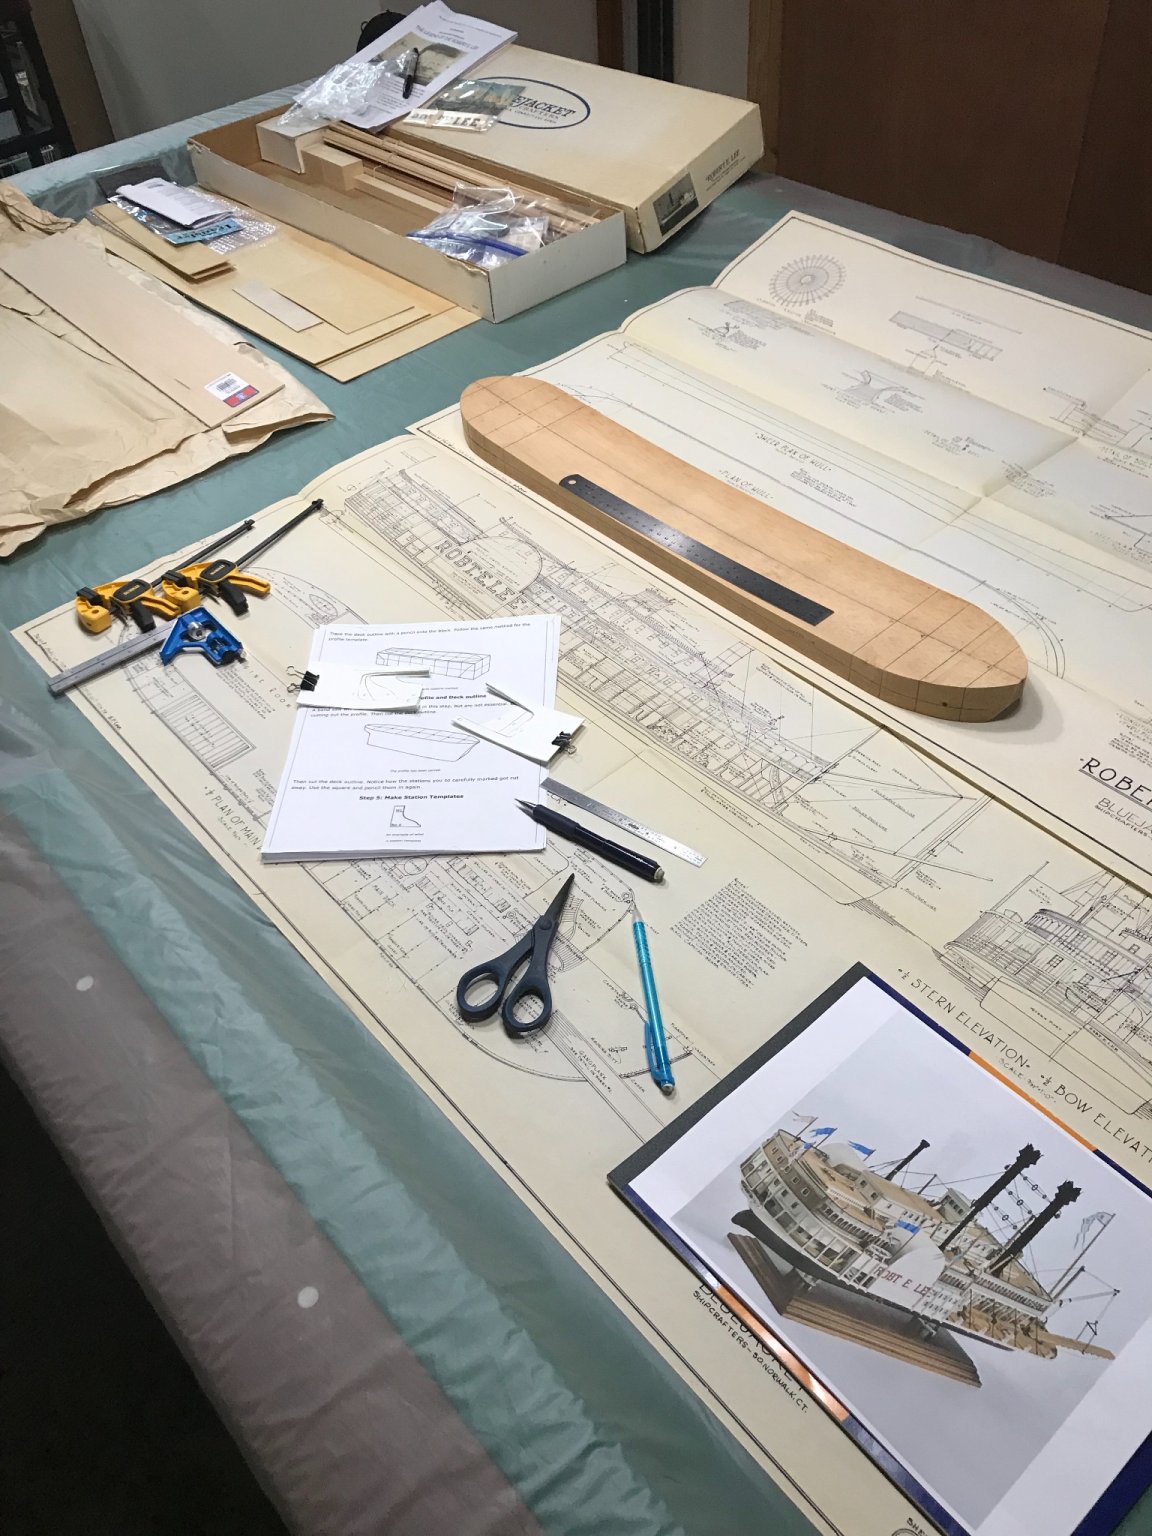
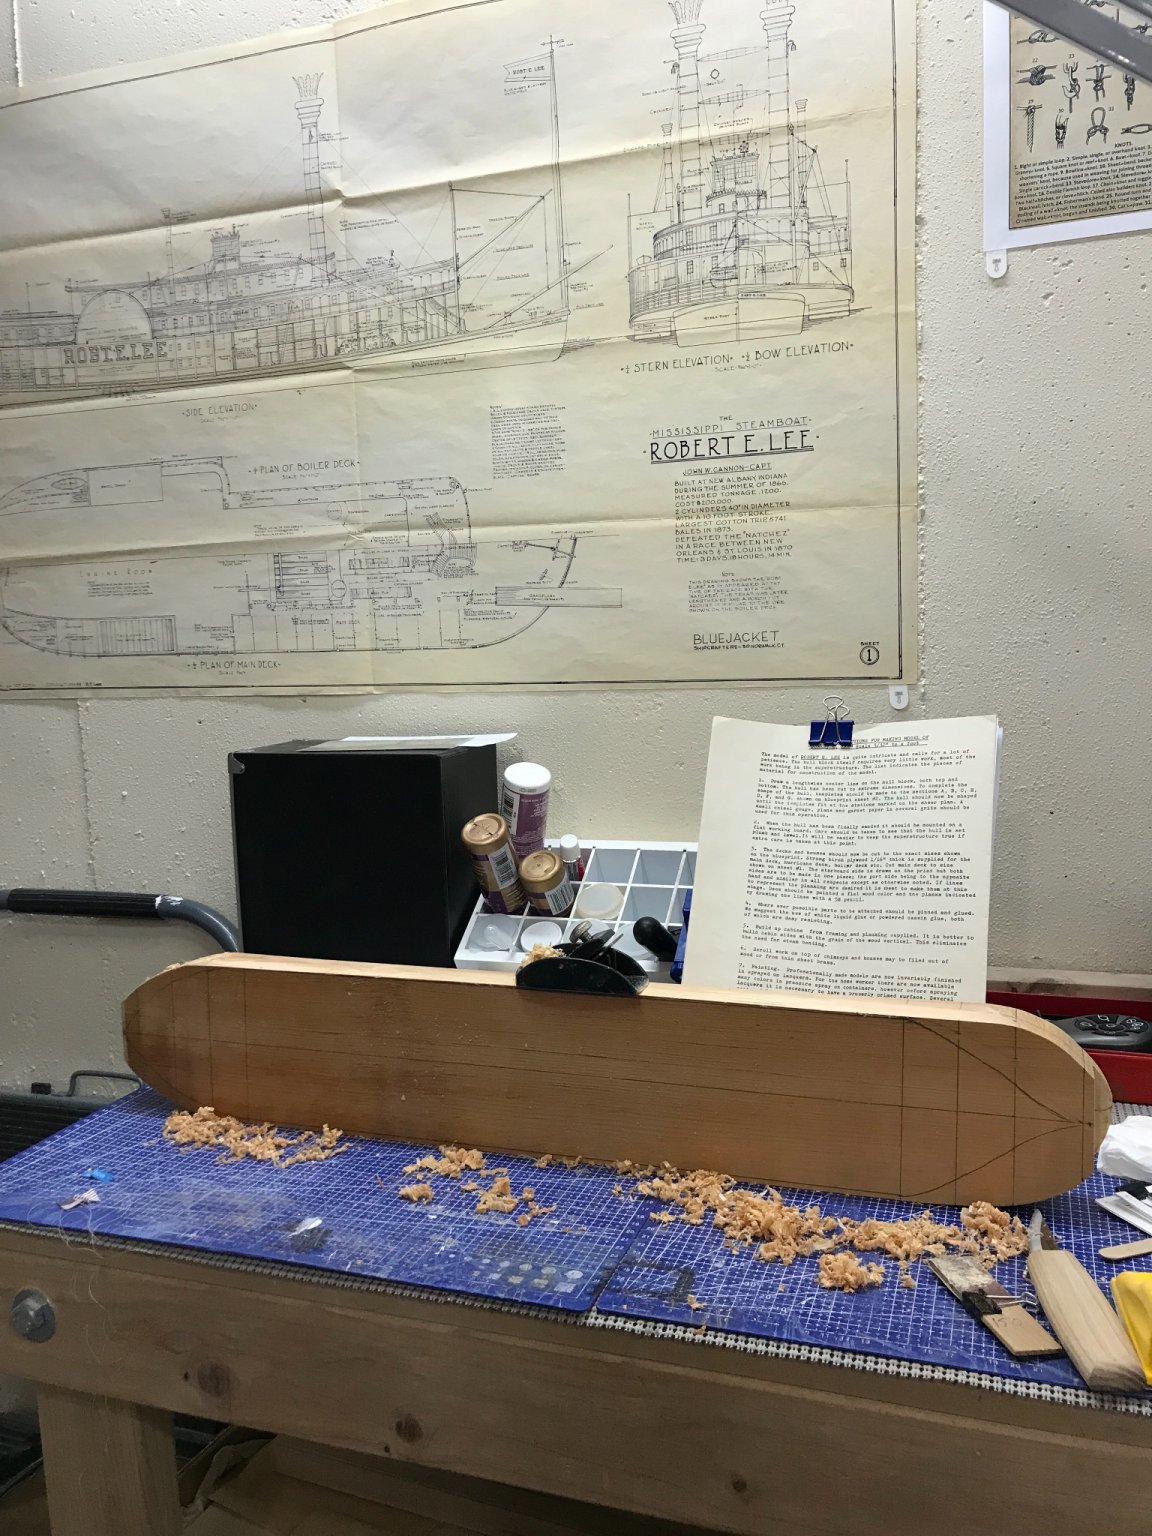
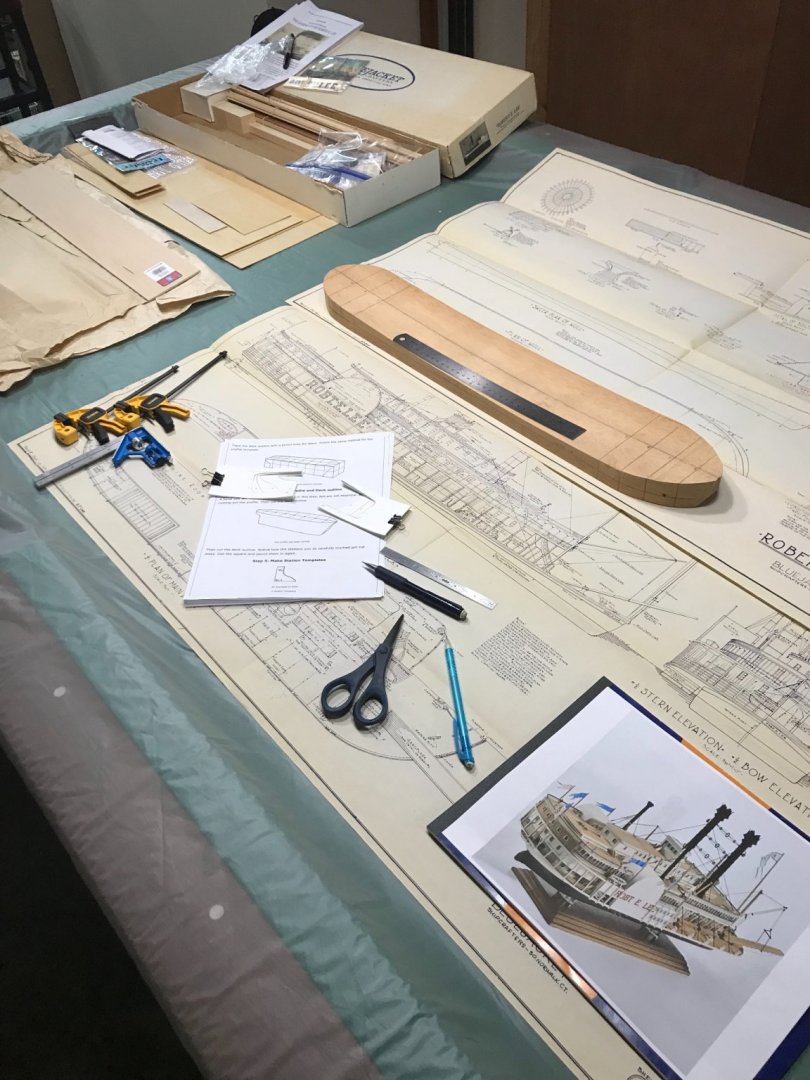
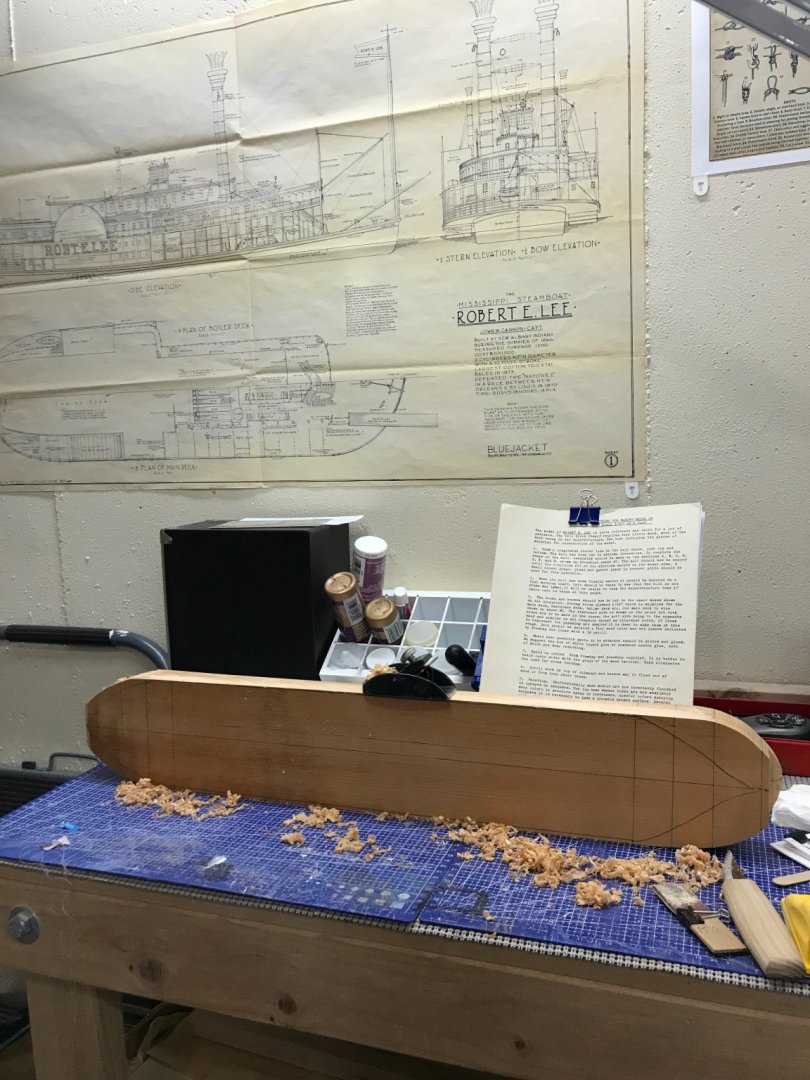
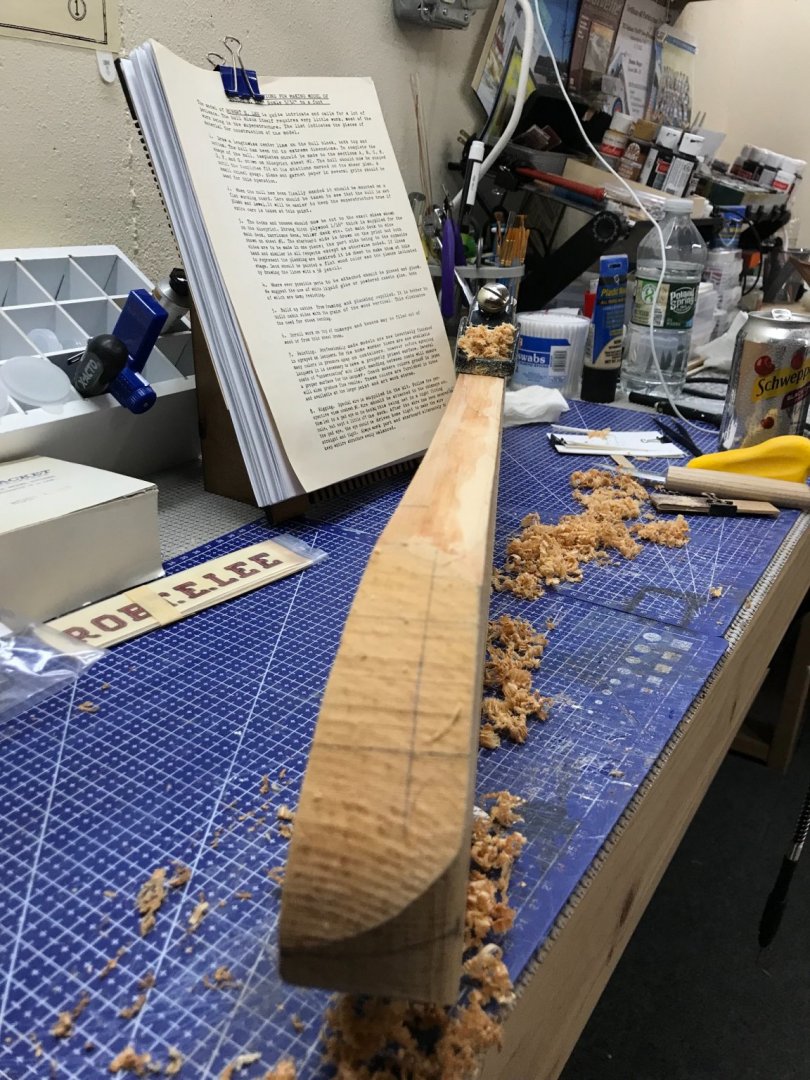
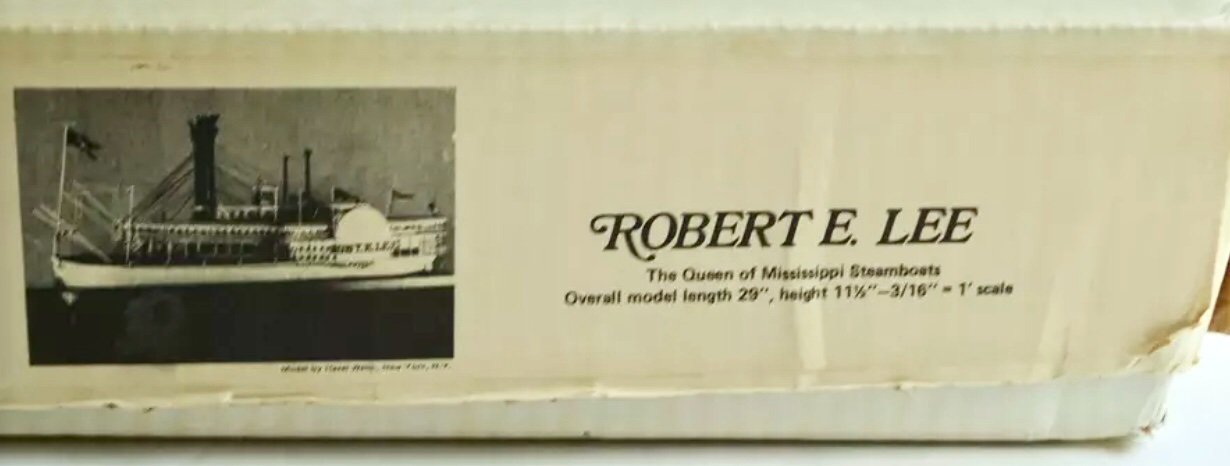
 THE LEGEND OF THE ROBERT E. LEE The Robert E. Lee Steamboat was nicknamed the "Monarch of the Mississippi" and built in New Albany, Indiana in 1866 for a price of $200,000. The grand steamboat was 297 feet by 49 feet. While the name was being painted on the ship it was moved over to the Kentucky shore as some Hoosiers resented the name of the rebel leader being used. On June 30, 1870 the steamboat left New Orleans in a race against the Natchez to St. Louis. At the time the Natchez was the then-current speed record holder. The Henry Tate, MayFlower, Mary Alice and Tahlequah preceded the two steamboats up the river for a way with excursionists in order to be able to view the race. The Robert E. Lee won with the time of 3 days, 18 hours, 14 minutes. She was eventually dismantled in Jeffersonville, Indiana, in the spring of 1876, to build the Robert E. Lee (2nd). https://www.explorenewalbany.com/index.php/downtown-new-albany-history/new-albany-history/30-the-legend-of-the-robert-e-lee Another vintage kit rescue from eBay. This should be fun, but aren’t they all. 😆 Solid Hull shaping… Marking the solid wood hull and cutting out templates from profiles on sheet 2. Ready to start shaping. This is going take a bit of time. 😆 I will be back. 🍻
- 238 replies
-
- 10
-

-
- Robert E Lee
- steamboat
- (and 3 more)
-
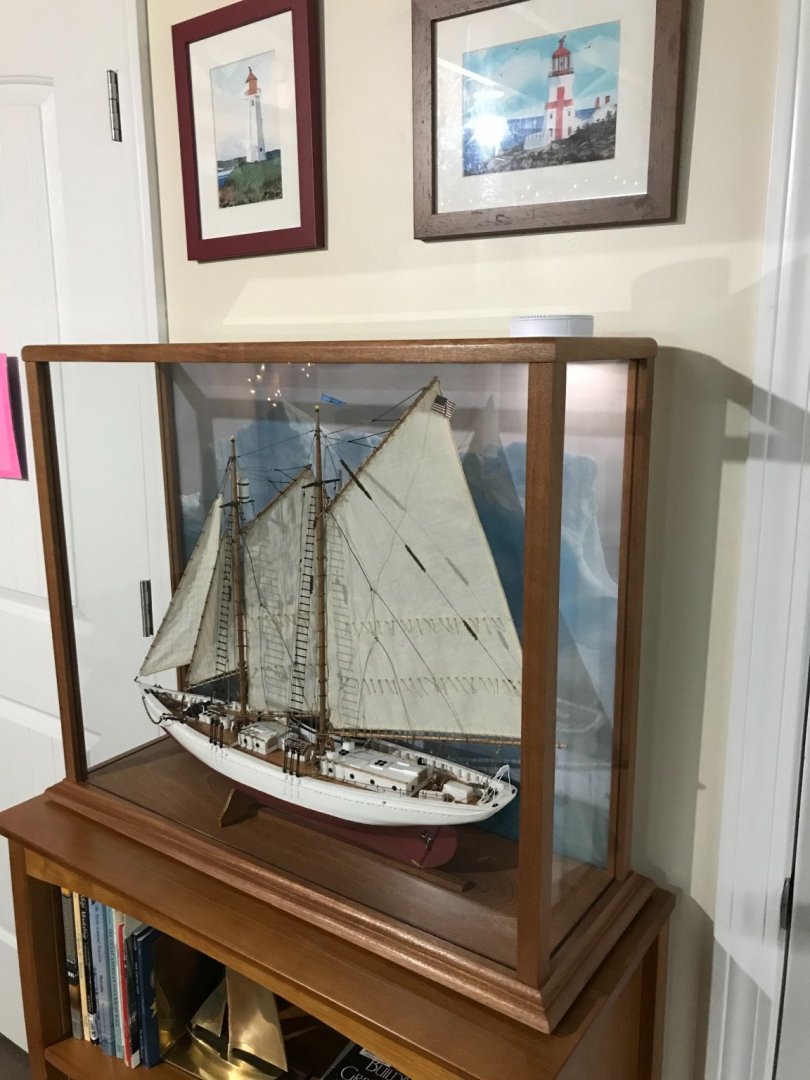
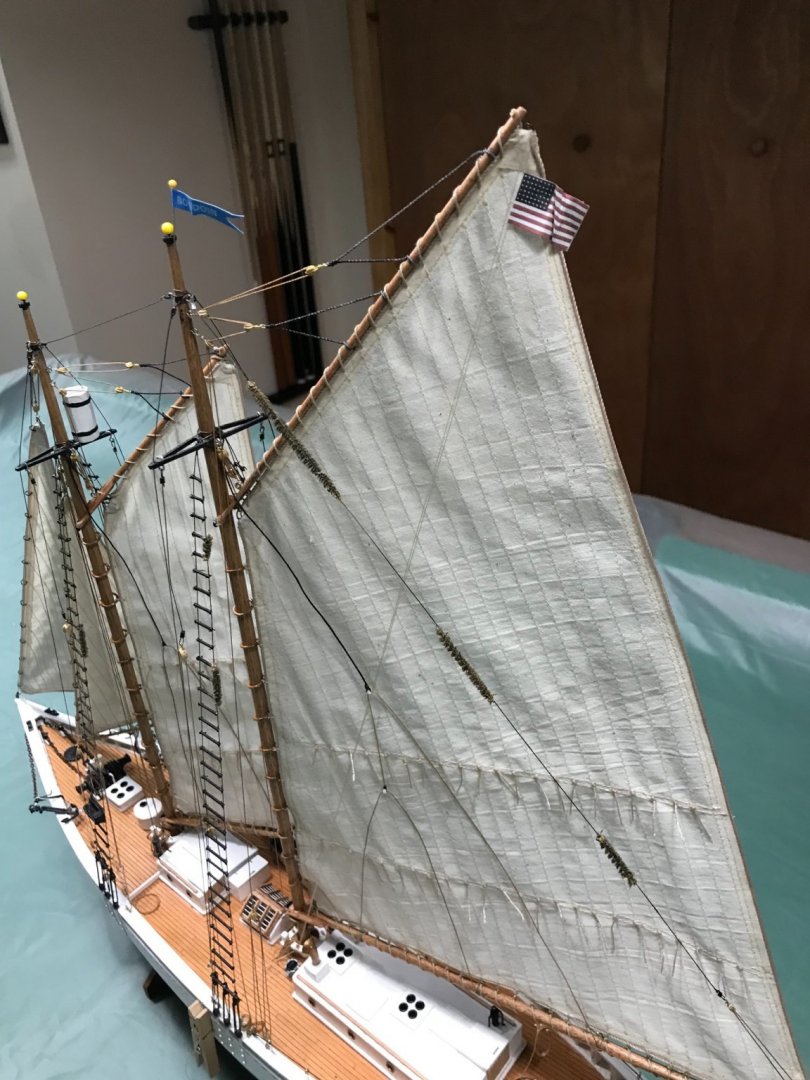
Flags… Placed the Bowdoin Pendant and an American Flag. Now she is complete. 😎
- 127 replies
-
- 10
-
-
- Bowdoin
- Arctic Exploration
- (and 3 more)
-
That makes a lot of sense and reminds me I still to put flag halyards and flags on her. The detailing never ends. Tanks
- 127 replies
-
- 2
-
-
- Bowdoin
- Arctic Exploration
- (and 3 more)
-
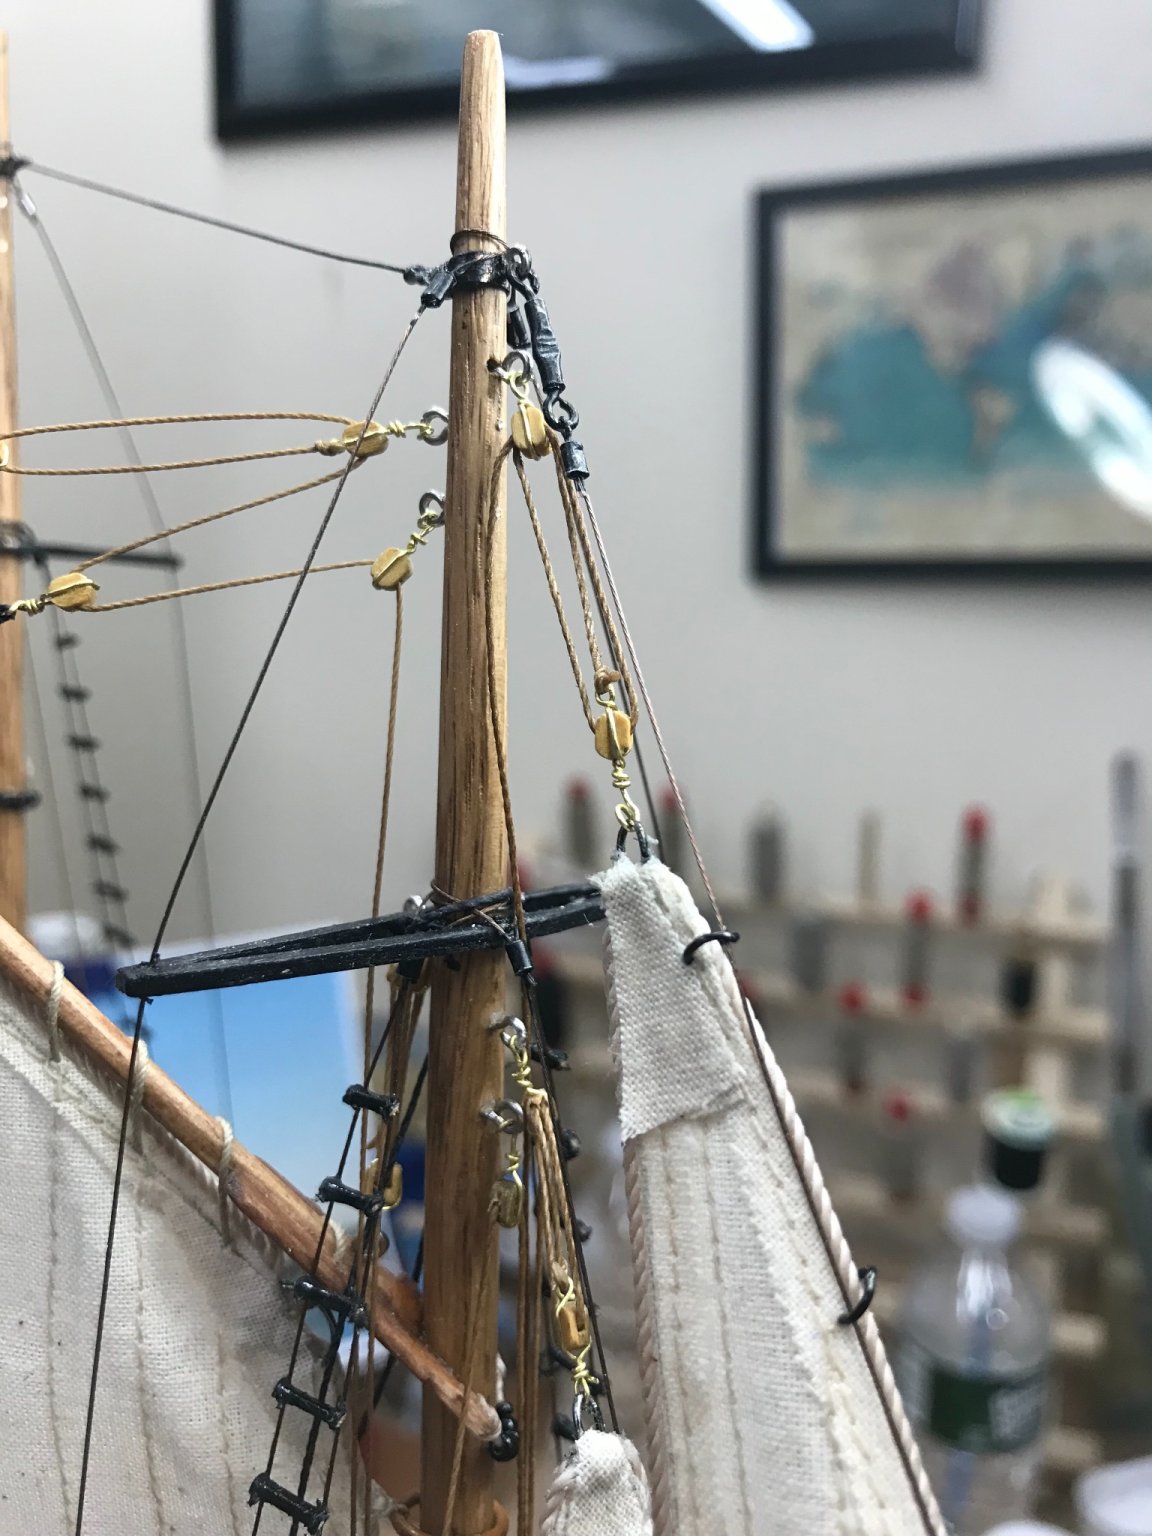
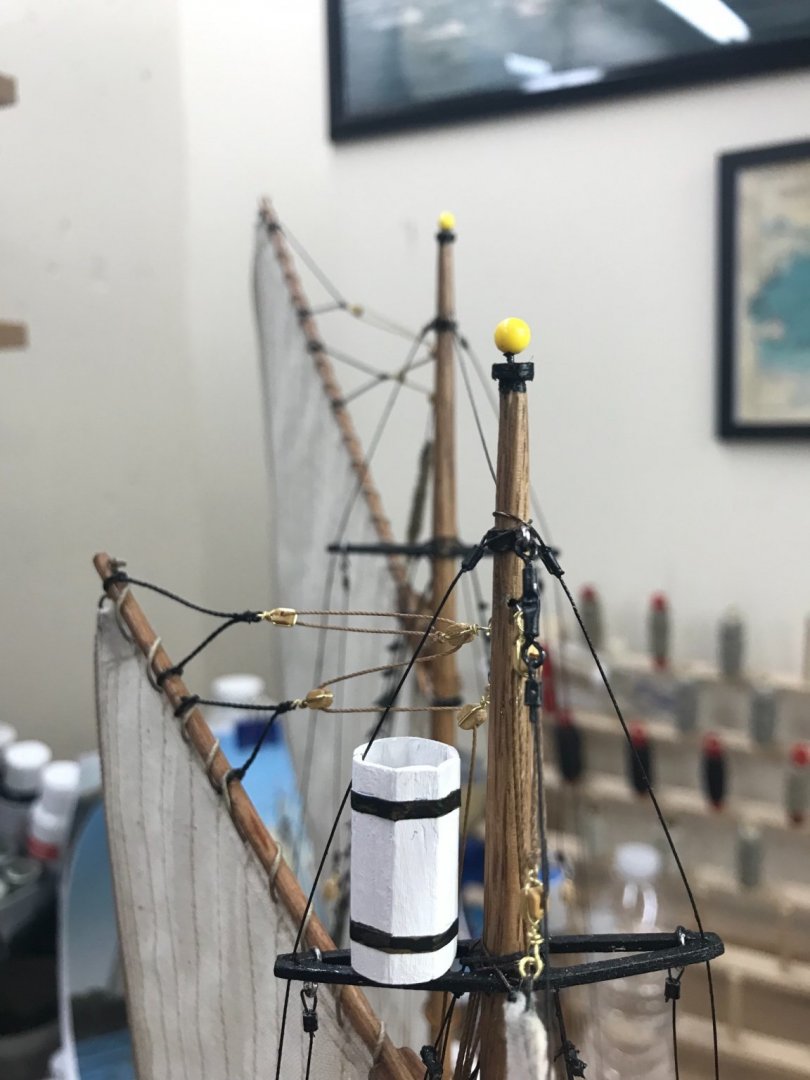
That was my thought, but I haven’t been able to verify that. Could just be Mast Caps the Seagulls can’t land on. 😆
- 127 replies
-
- 1
-

-
- Bowdoin
- Arctic Exploration
- (and 3 more)
-
My Gallery Images Thanks for riding along… Here is a link to my Glamour Shots of her, she is a beauty. My wife says it’s beautiful and my best. I am getting better at this, but I think the Bowdoin is one beautiful schooner. My Gallery Images
- 127 replies
-
- 3
-
-
- Bowdoin
- Arctic Exploration
- (and 3 more)
-
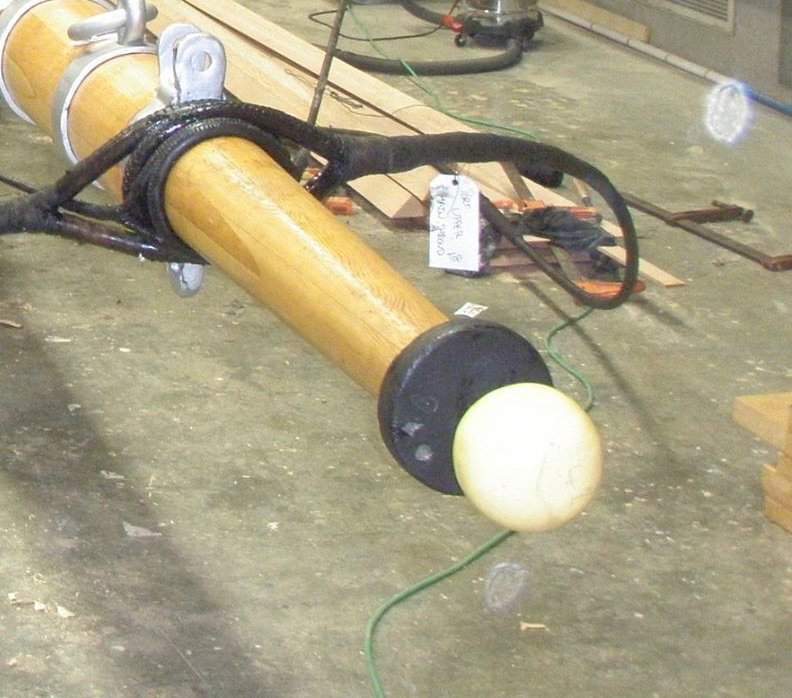
Mast Caps and Ice Barrel… Still trying to find out what the yellow balls are all about. I am officially calling this model finished. 🍻 Thank you all for your comments, encouragement and 👍 along the way. It has been fun… See you all on the flip side. Onwards 😎
- 127 replies
-
- 10
-
-

-
- Bowdoin
- Arctic Exploration
- (and 3 more)
-
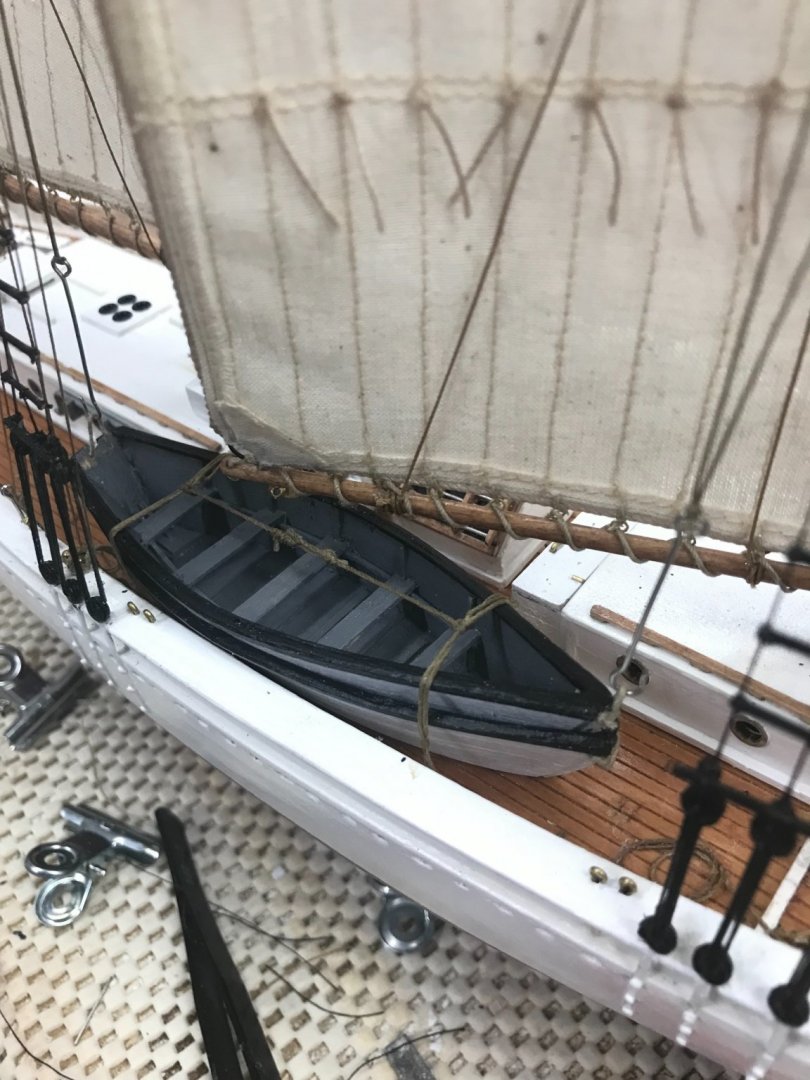
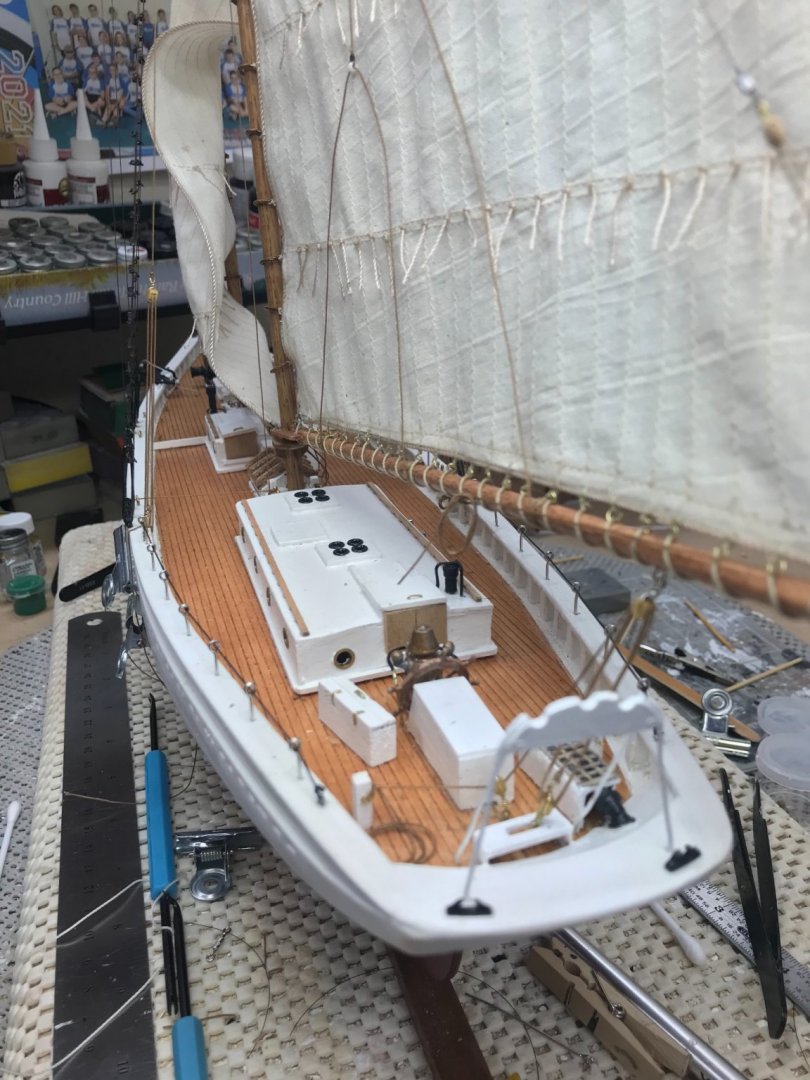
Dory Hooks… Dory Hook rigging tied off to stowed Dory on the Starboard side. Dory Hooks tied off to eyes on the Port Rail. Stowed Dorys tied down to the deck. General question… What purpose do these balls on top of the masts serve? I do know they are to be installed and that they were white before the last restoration and are now yellow. I cannot find anything regarding there function. I wouldn’t think they are decretive, everything on a ship should have a purpose. You would think. 🤔 I sent an email off to the Captain of the Bowdoin at the Academy, but I thought I would crowd source an answer and see if anyone is actually reading my build log. 😆 Thanks

- 127 replies
-
- 4
-
-
- Bowdoin
- Arctic Exploration
- (and 3 more)
-
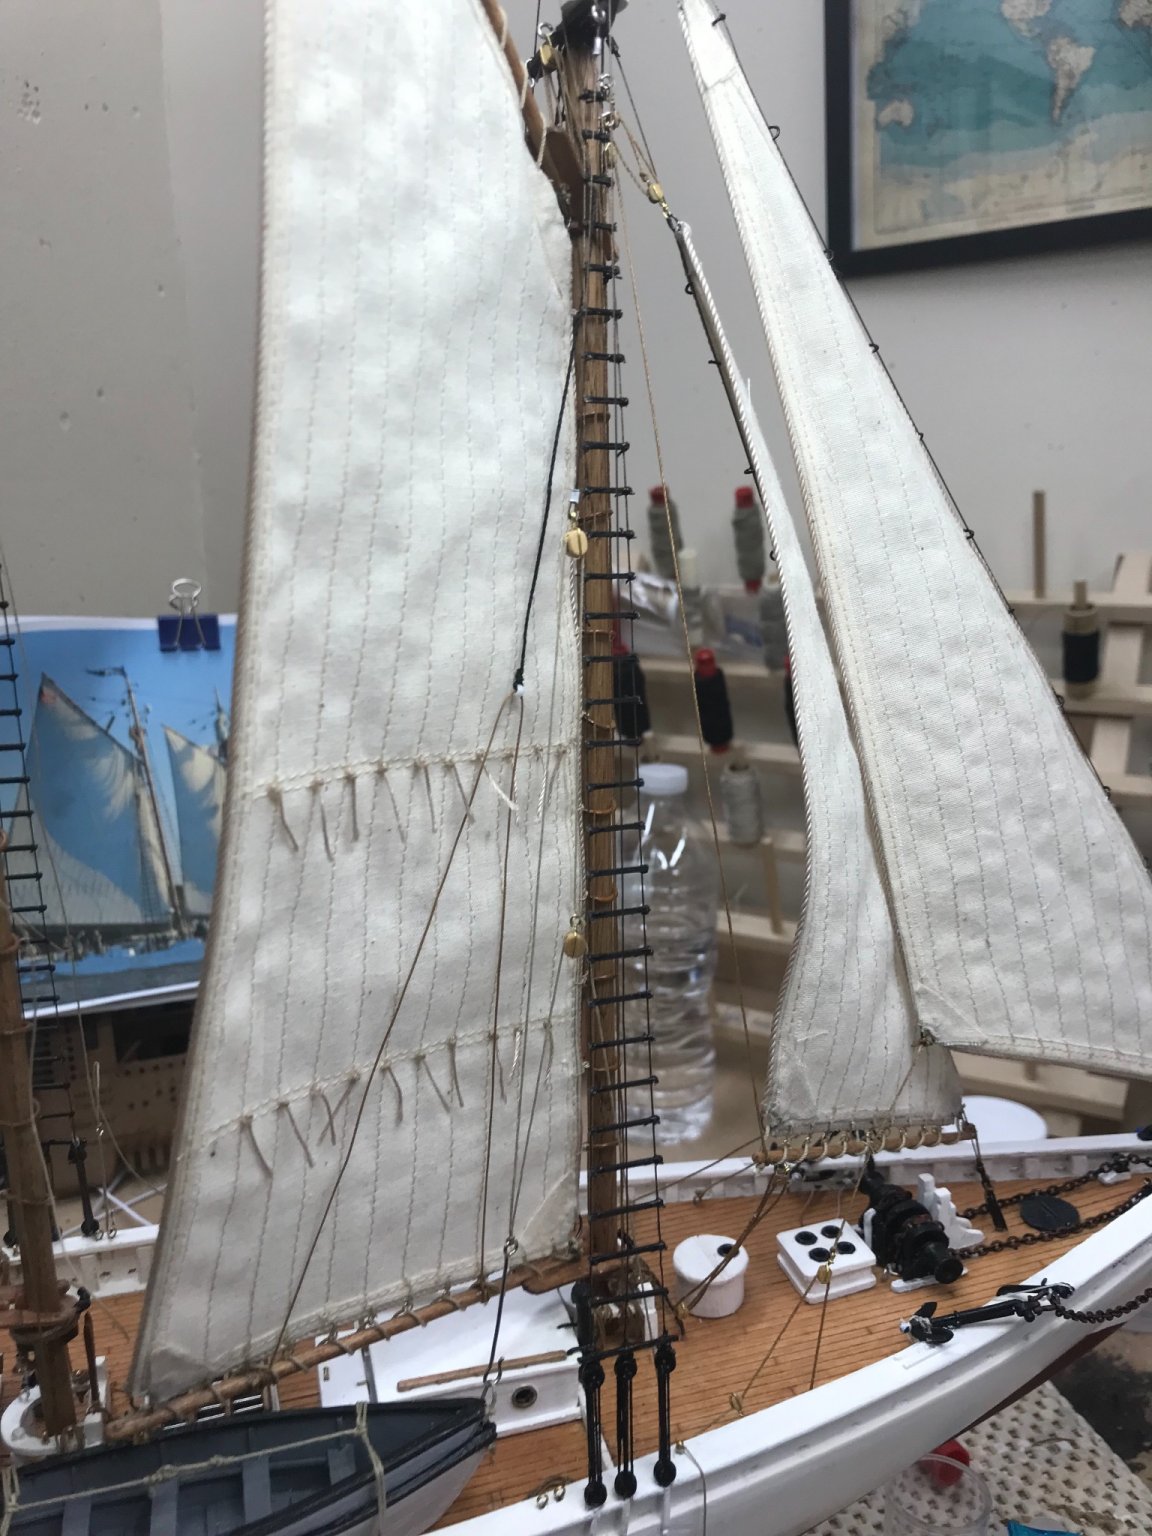
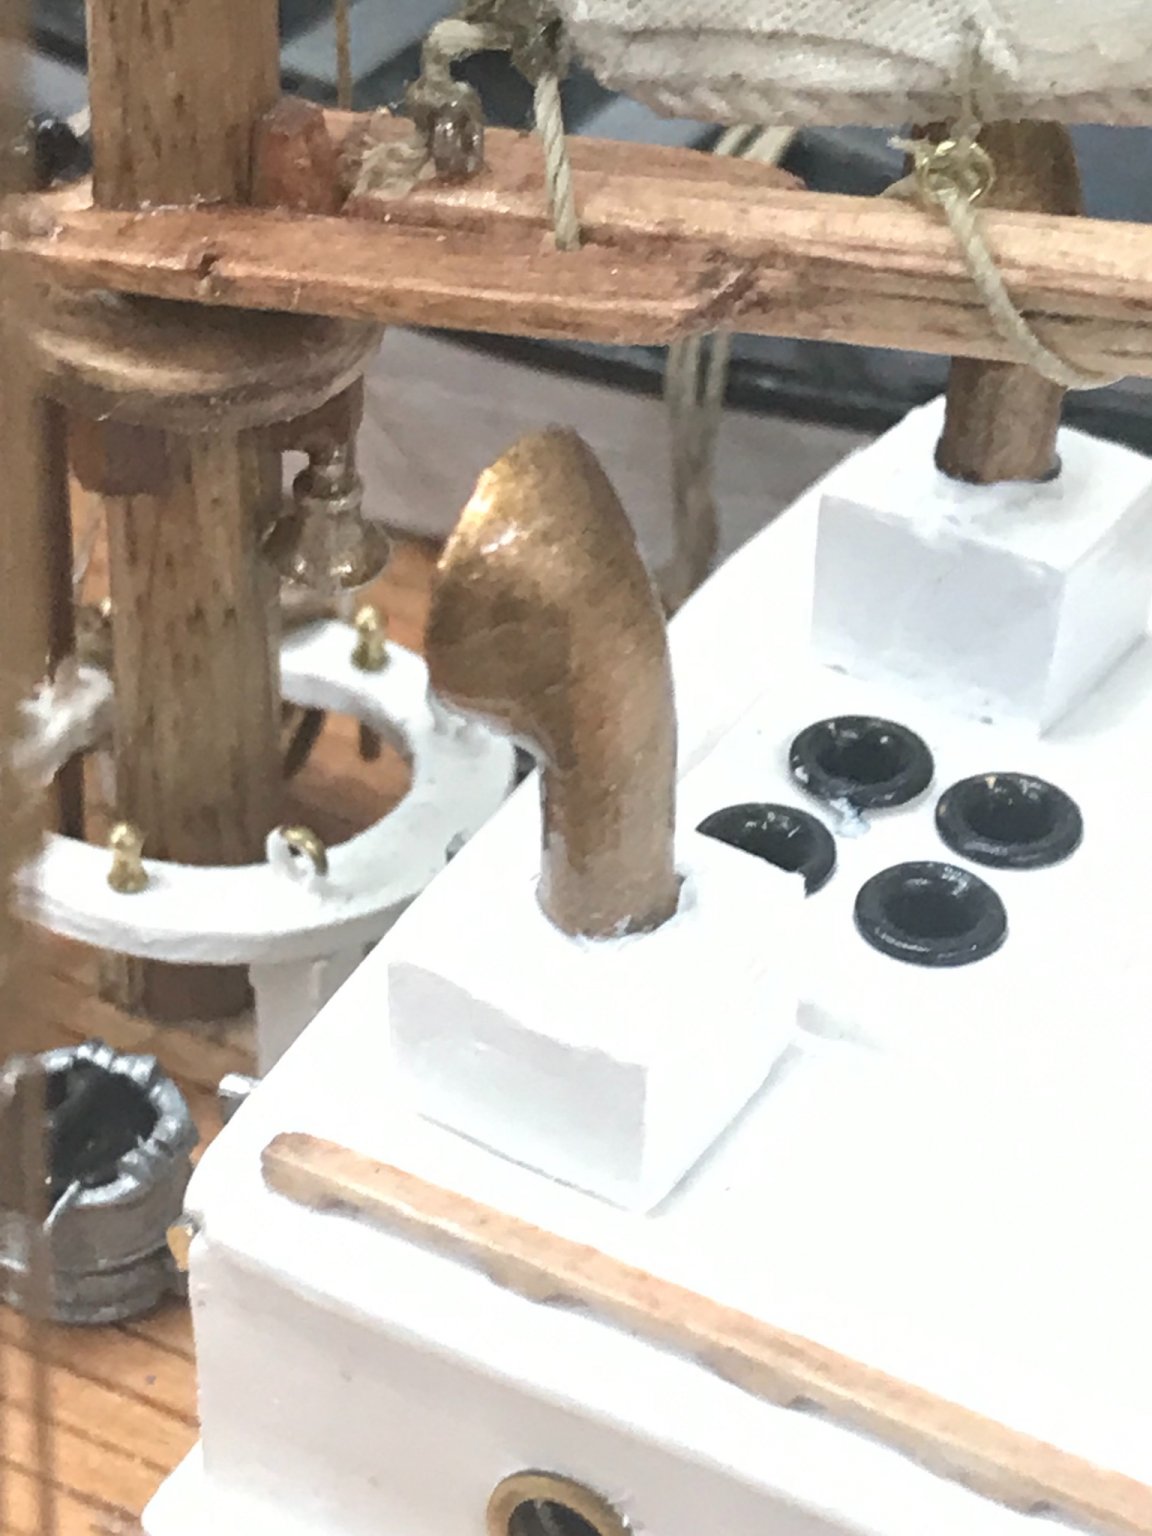
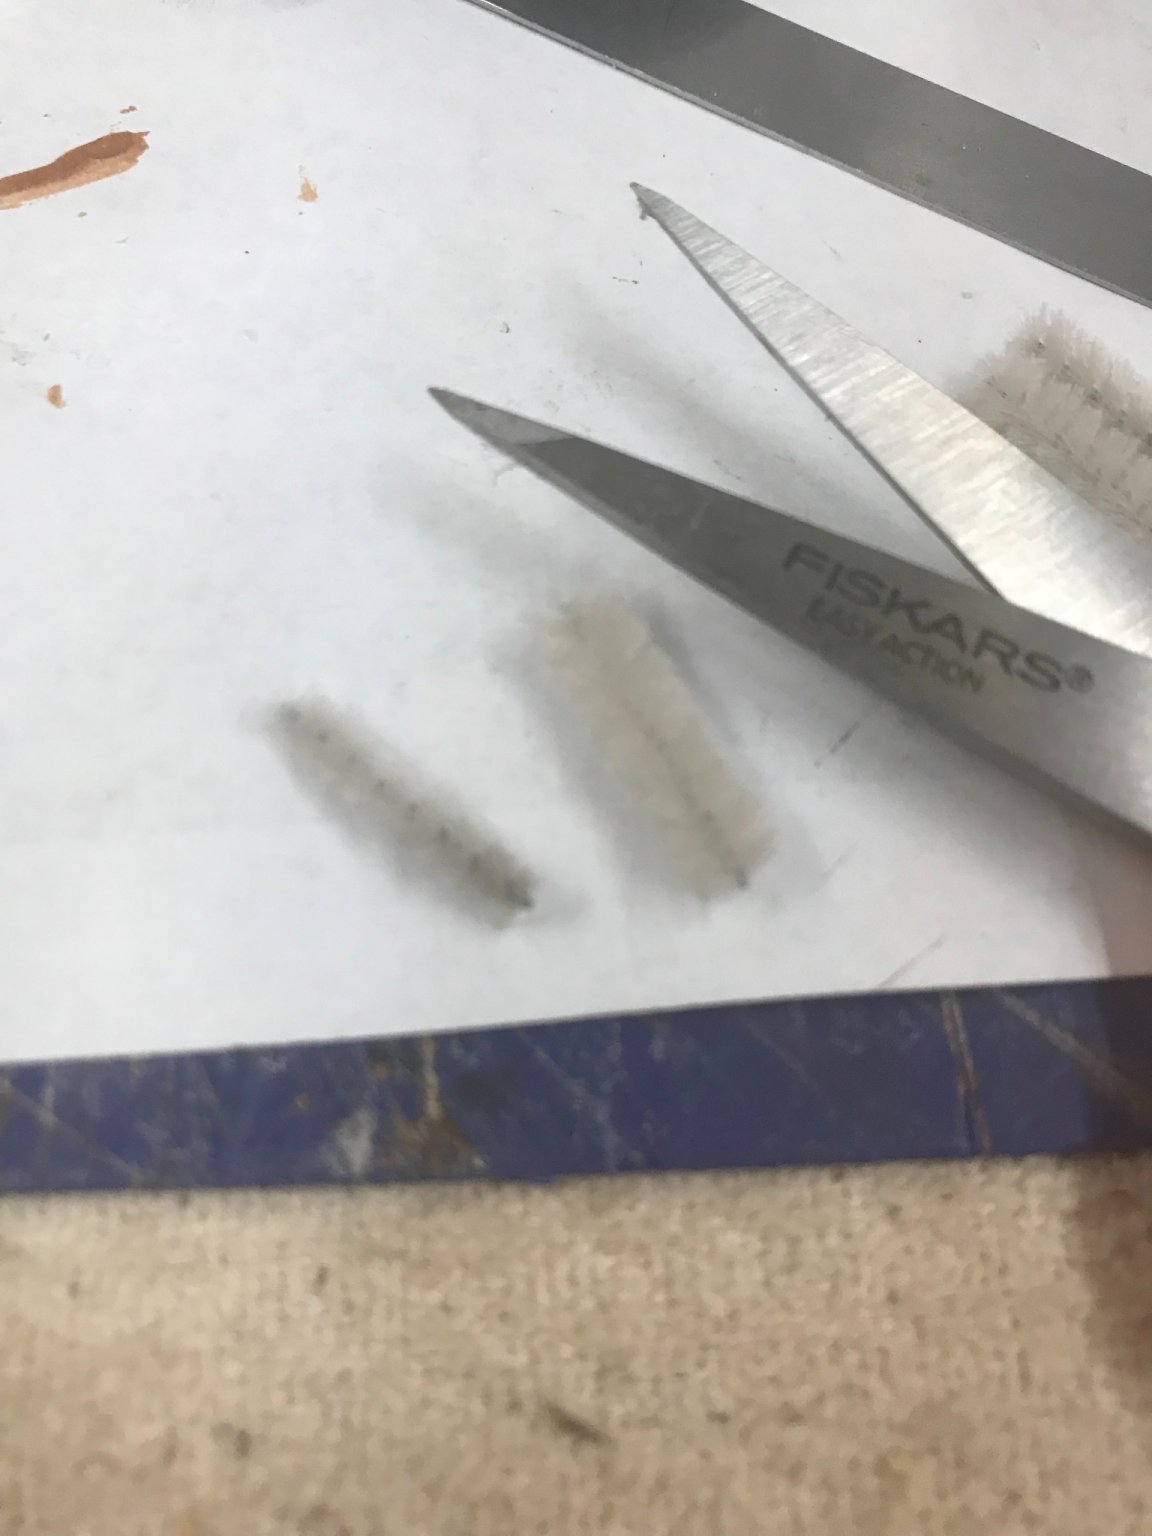
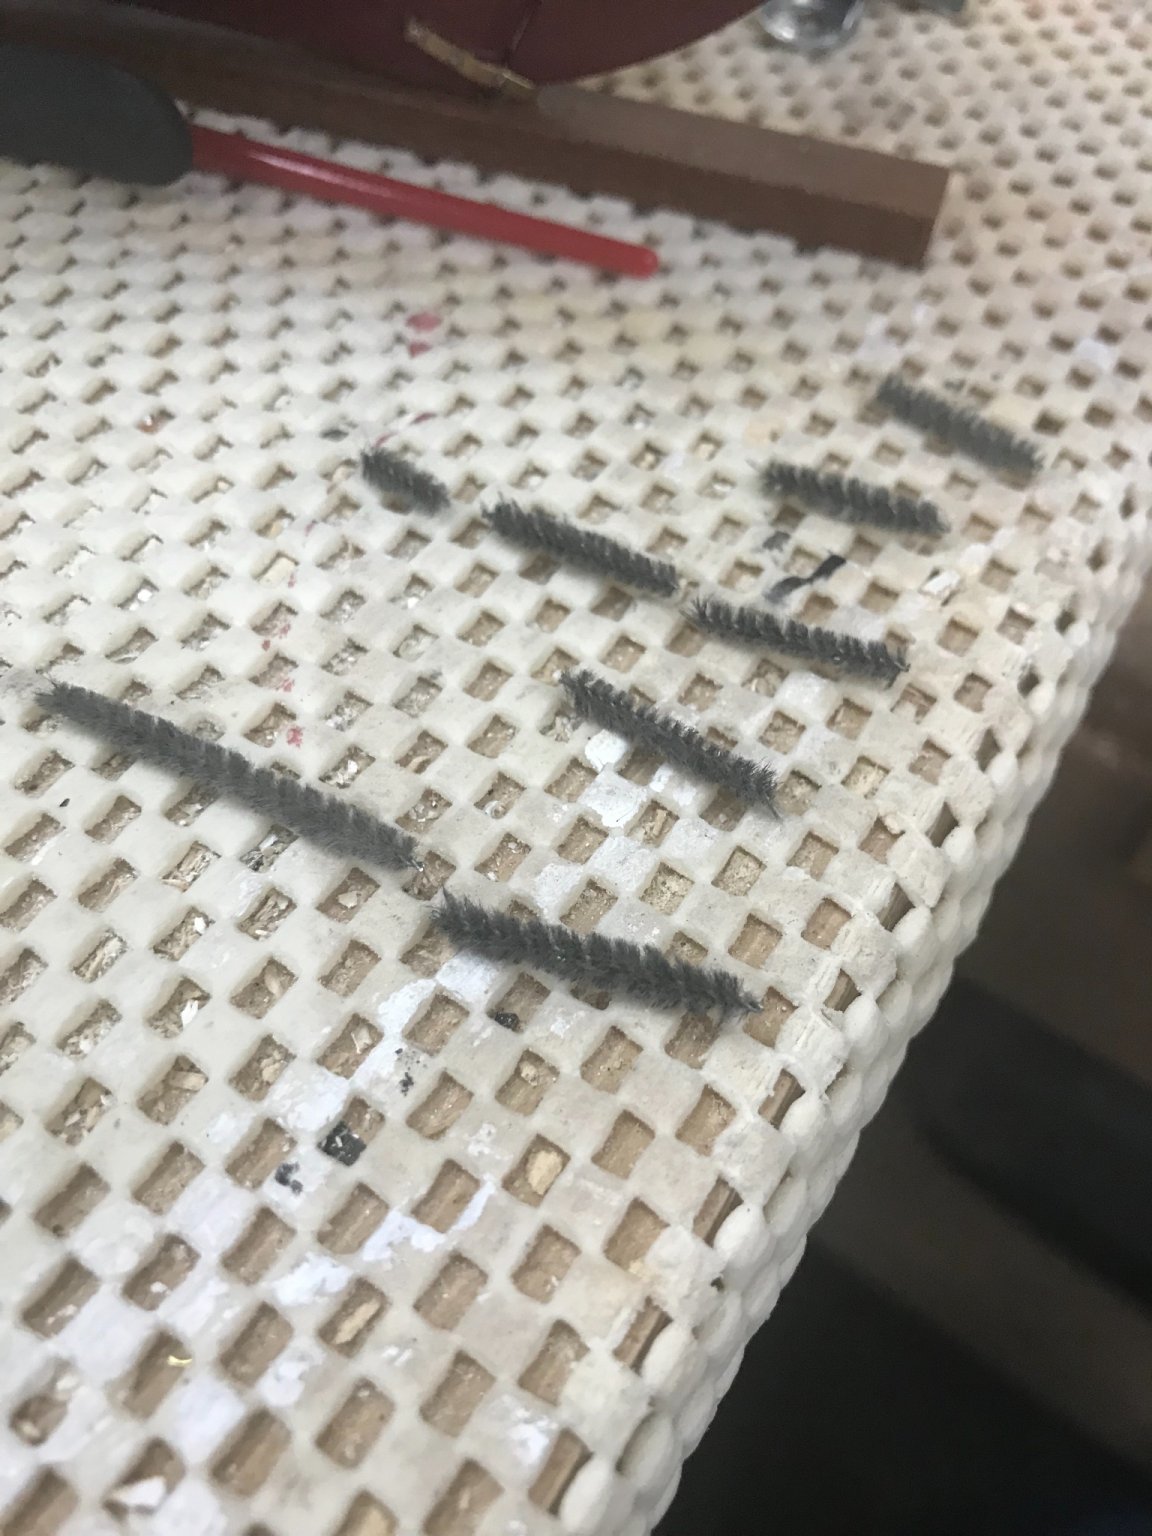
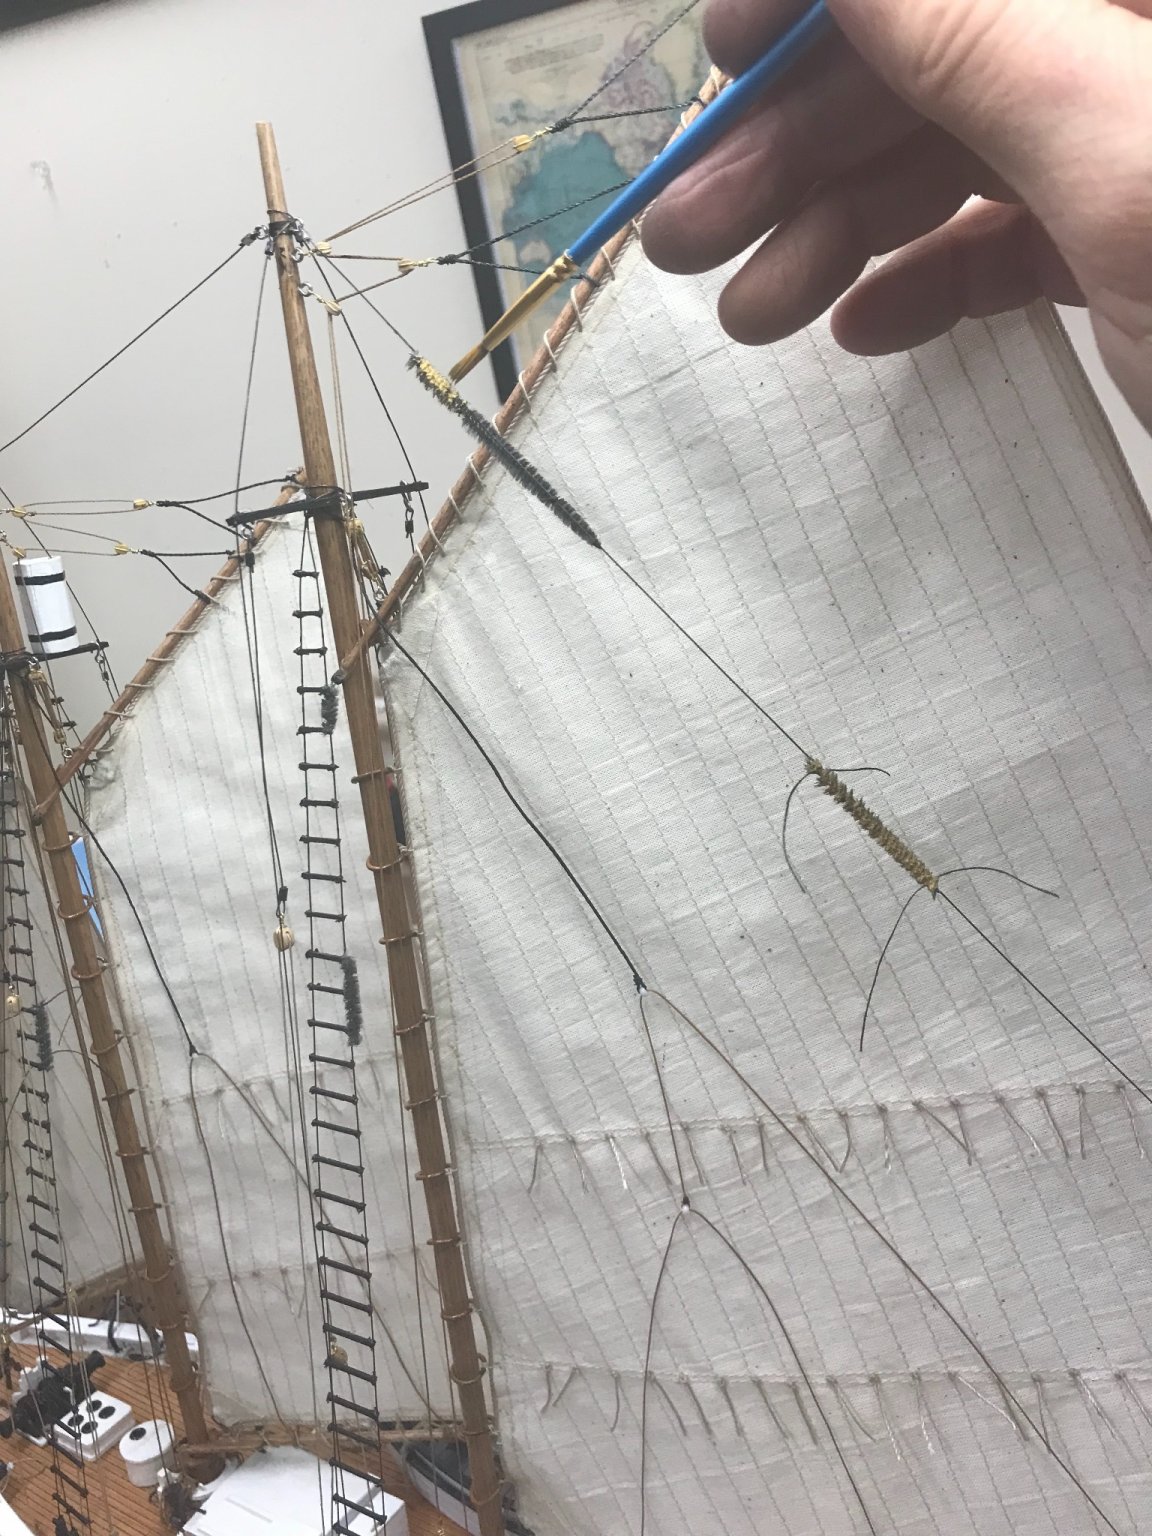
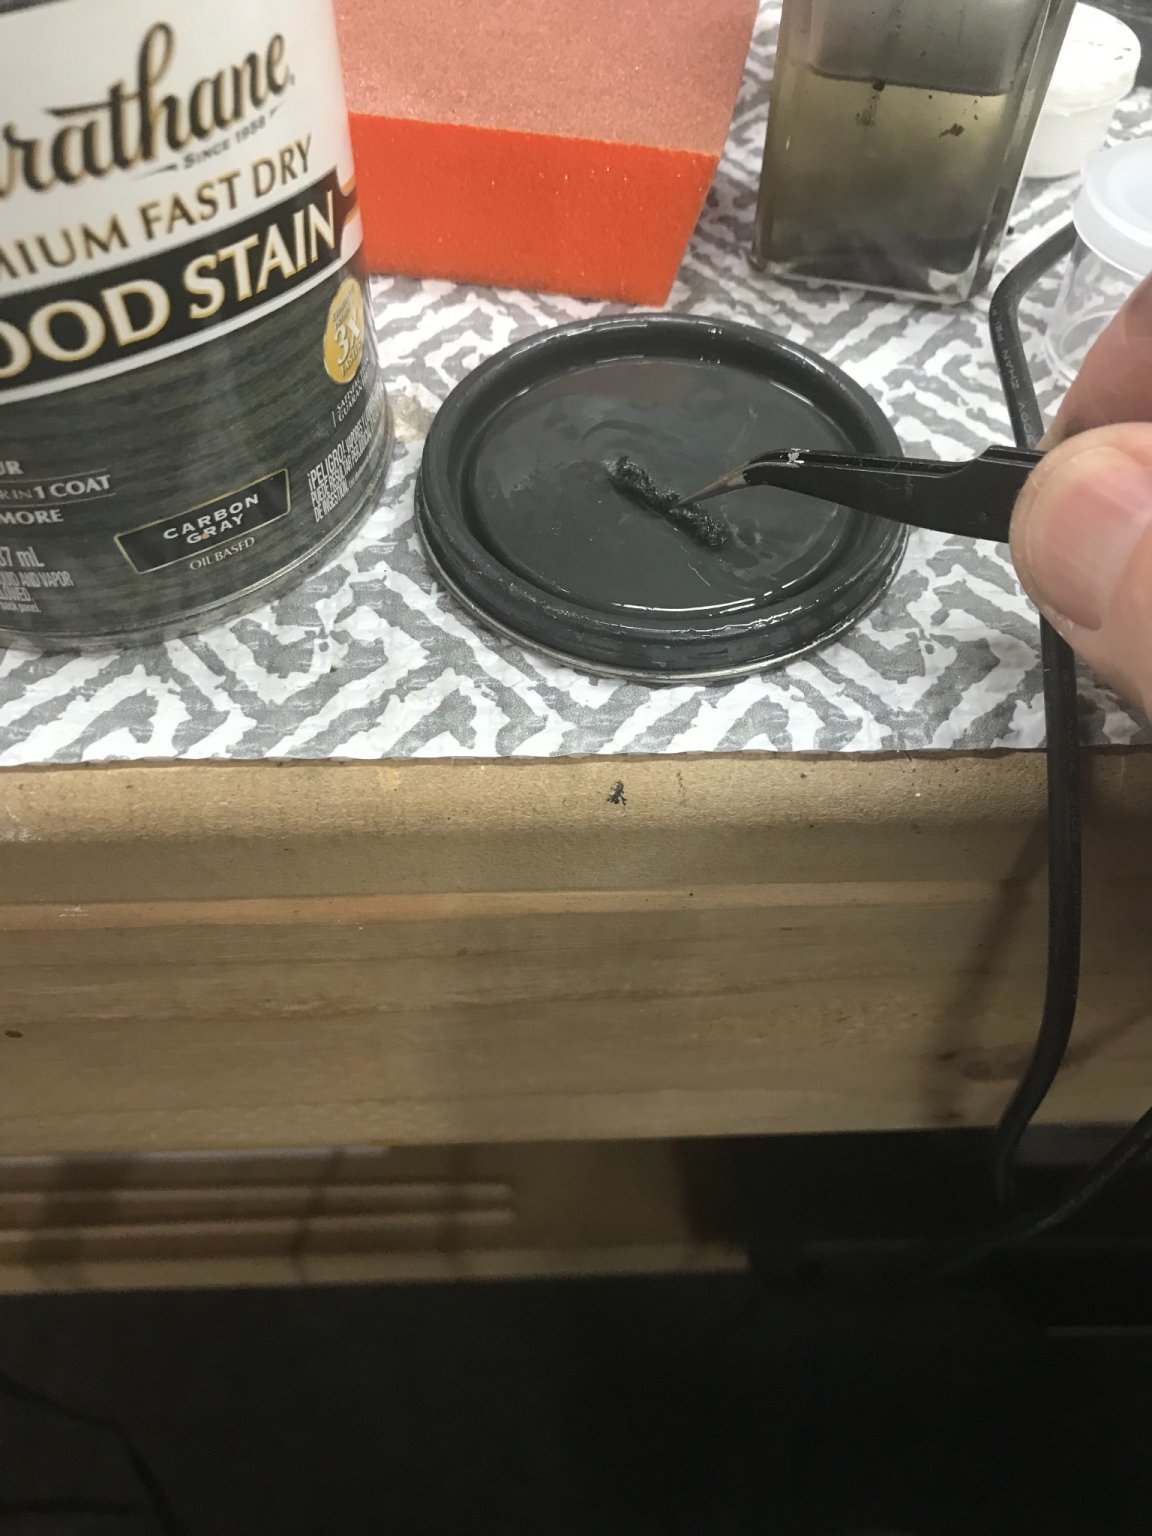
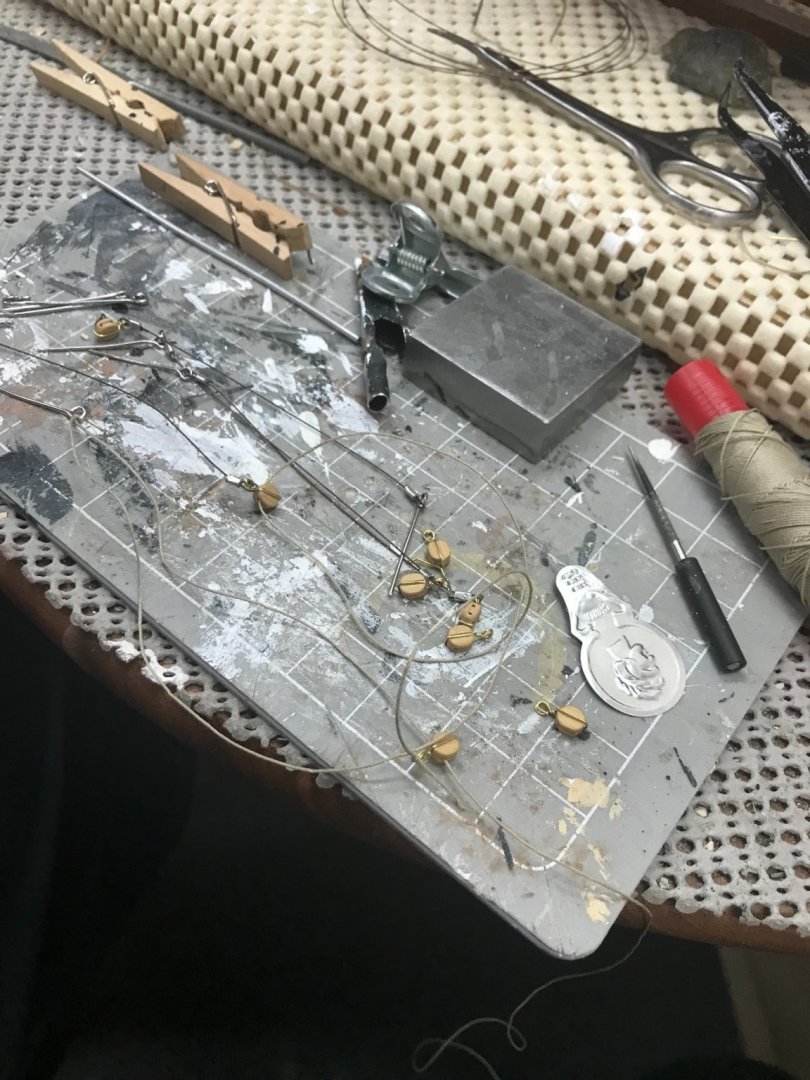
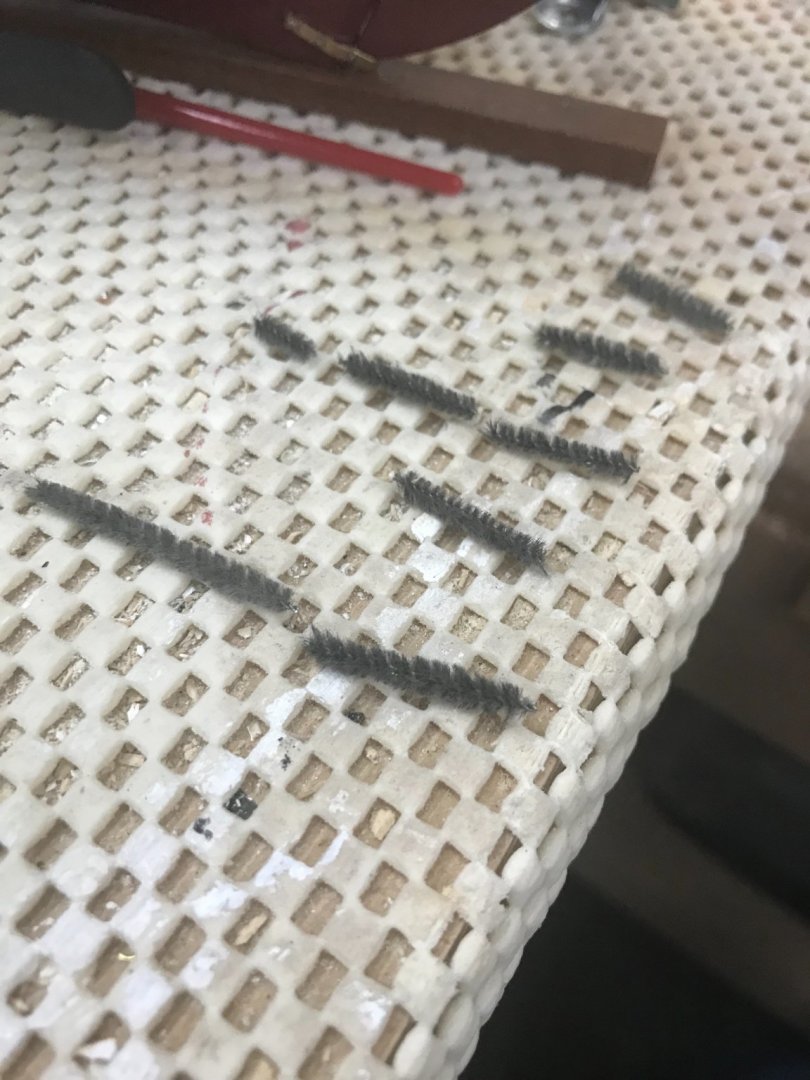
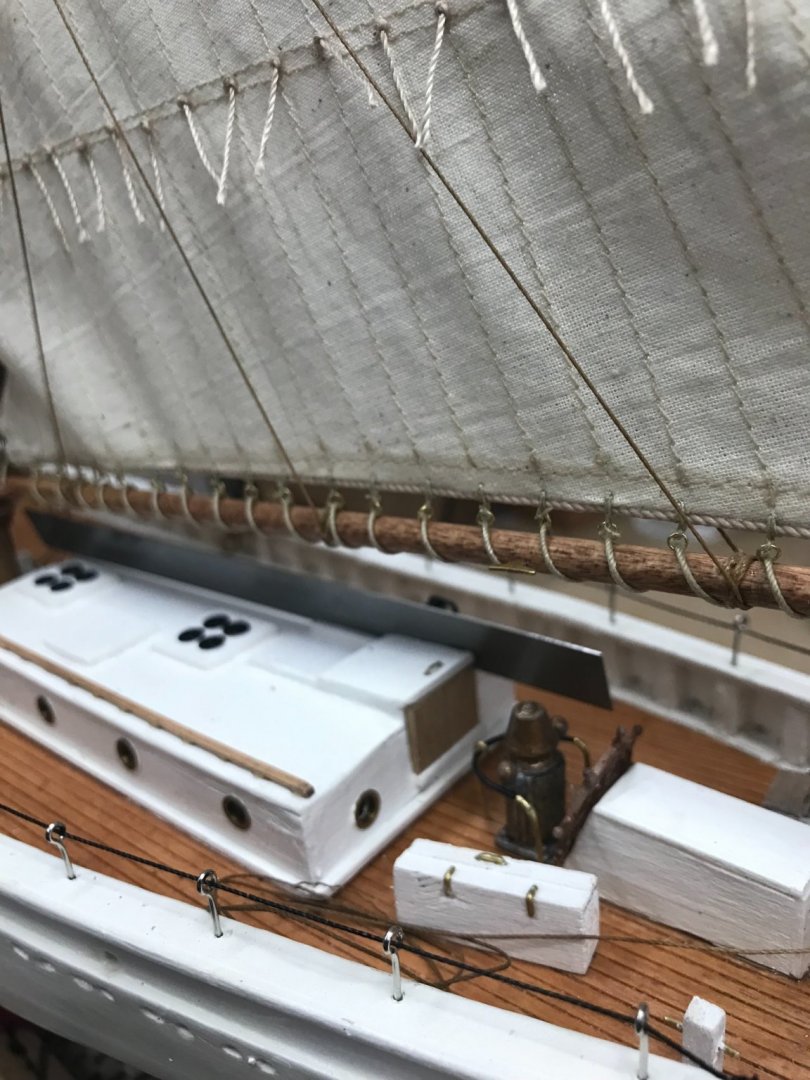
Dory Hooks… Four Dory Hooks rigged. Some more details… Ventilators and the Ships Bell installed. Baggywrinkles… Had to research this one. 🧐 I wondered what those fuzzy things were on the rigging. I found mention of the in @Jond diorama build log. Baggywrinkle is a soft covering for cables (or any other obstructions) to reduce sail chafe. There are many points in the rig of a large sailing ship where the sails come into contact with the standing rigging; unprotected sails would soon develop holes at the points of contact. Baggywrinkle provides a softer wearing surface for the sail. https://en.m.wikipedia.org/wiki/Baggywrinkle I have not seen them on any other build of the Bowdoin, other than jond’s. But then I haven’t seen Sails up full set, either. So, I had to find a way to make it right. 😆 Give a pipe cleaner a close cut. A quick dip in Carbon Gray stain… BaggyWrinkles… Tie them on with black thread a d paint then with Acrylic Yellow Ochre. More detailing coming up… 🤔


- 127 replies
-
- 8
-
-
- Bowdoin
- Arctic Exploration
- (and 3 more)
-
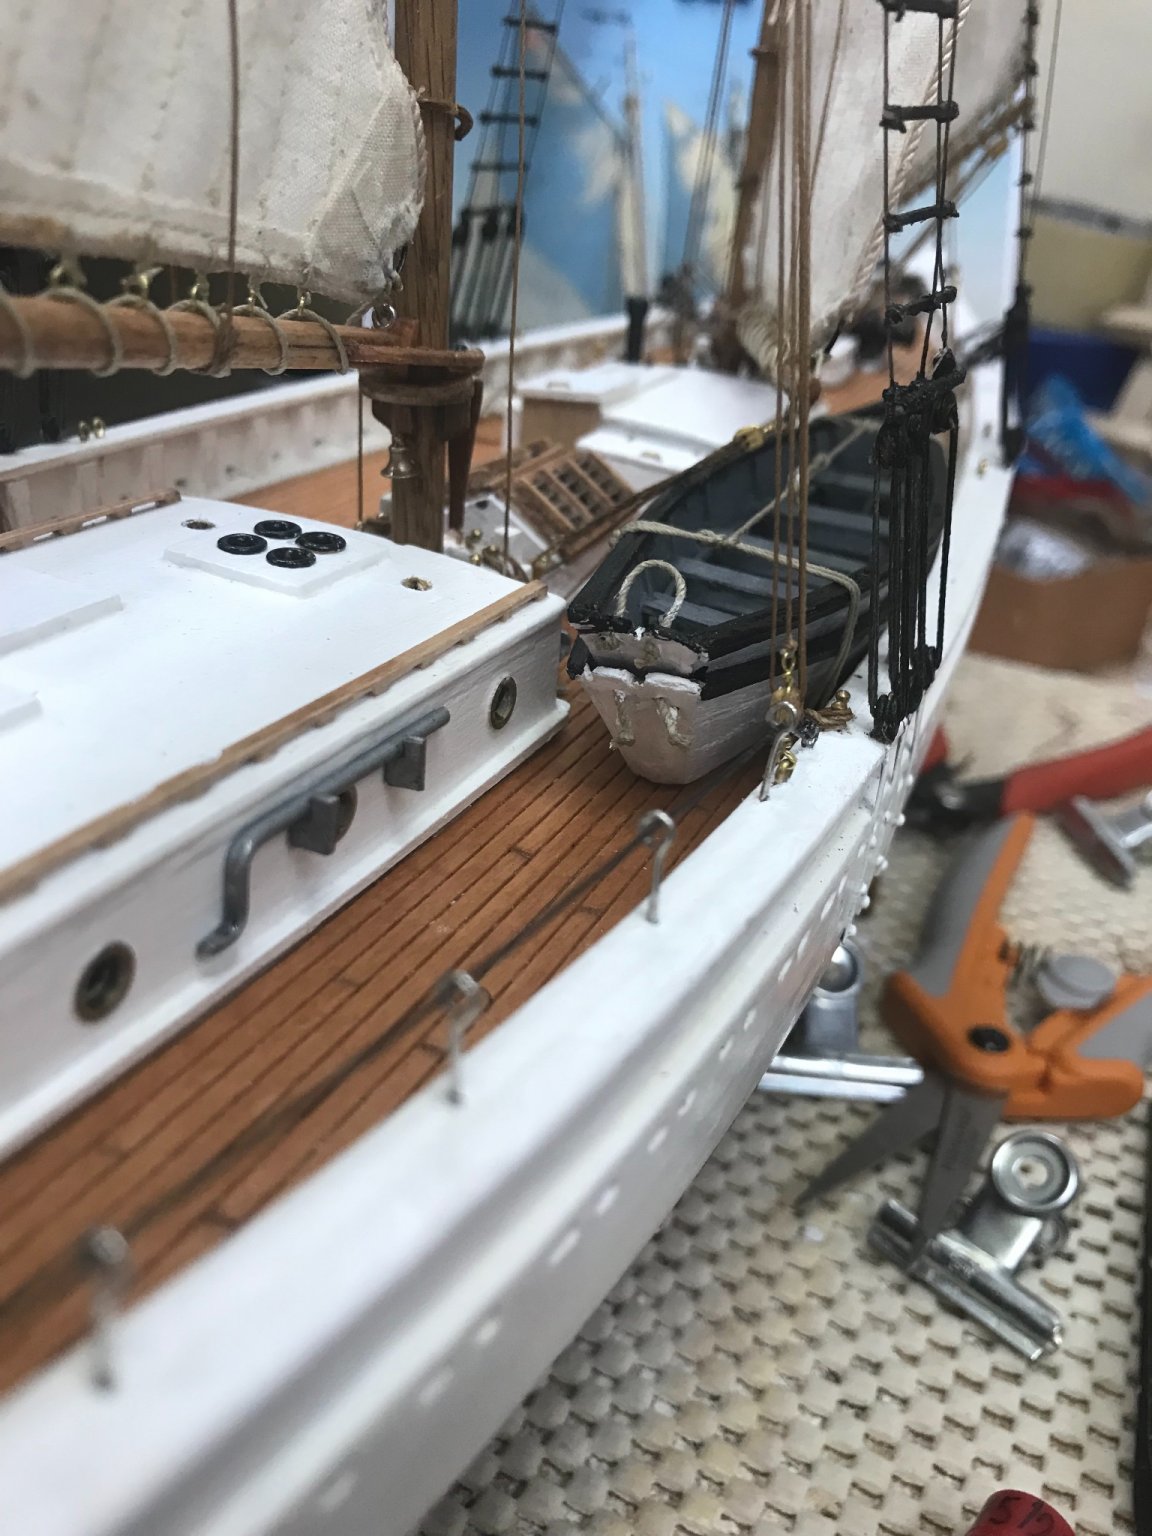
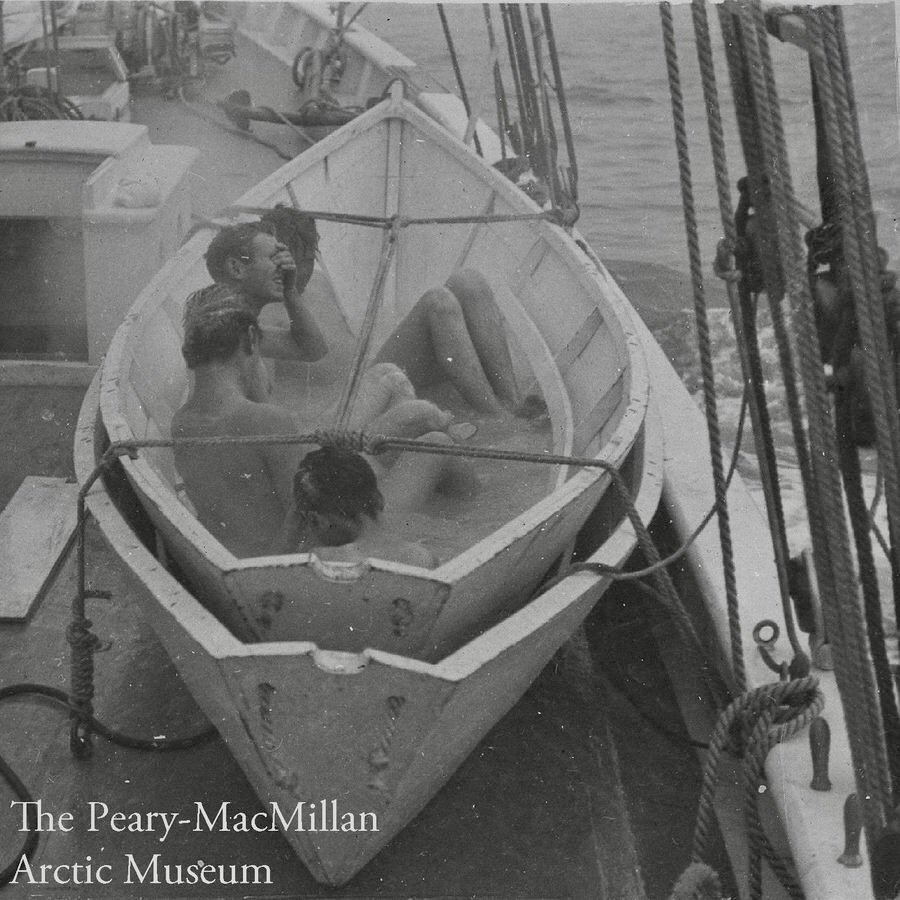
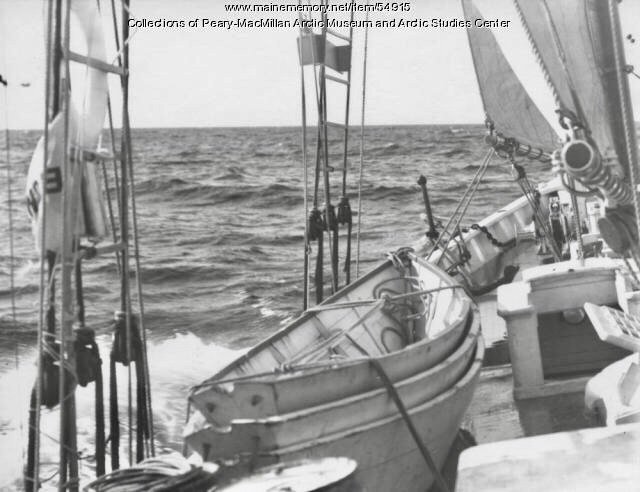
Dory’s stowed on deck… Researching Dory Stowage, yielded these photos from the Arctic Museum at Bowdoin College. Interesting, 1930 bathing while out to sea in the Arctic. Dorys now properly stowed on deck. Onwards. 🍻 Next up Dory Hooks…

- 127 replies
-
- 7
-
-
- Bowdoin
- Arctic Exploration
- (and 3 more)
-
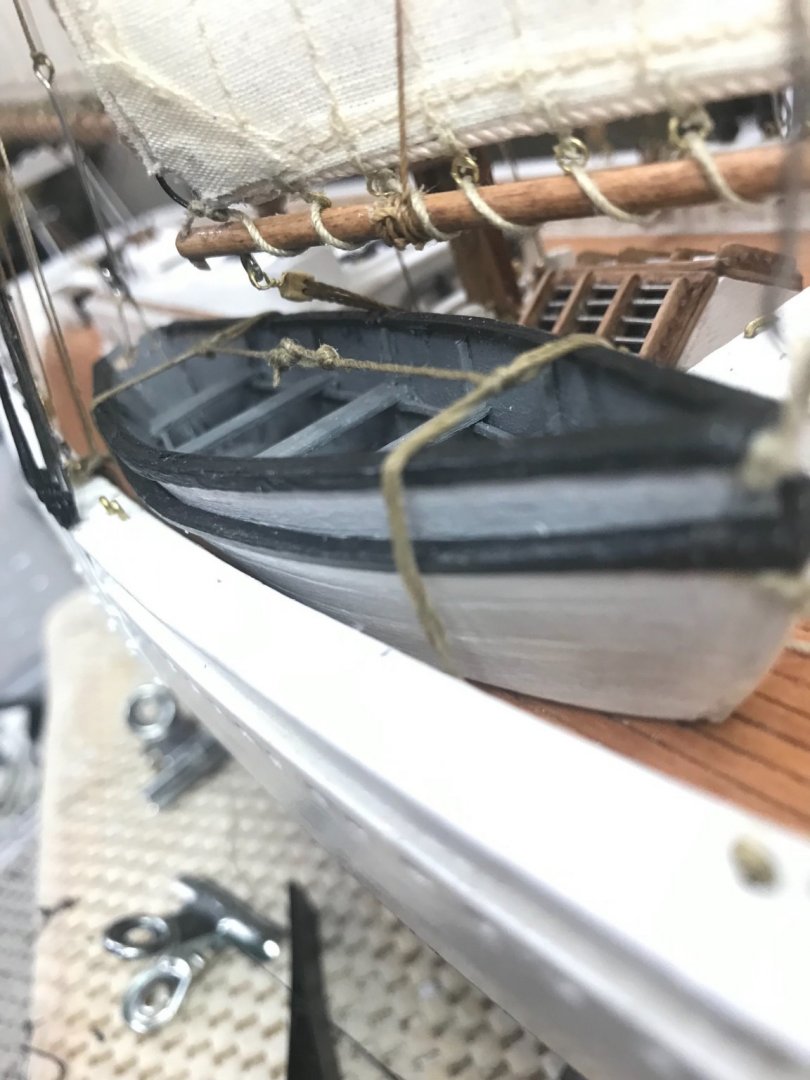
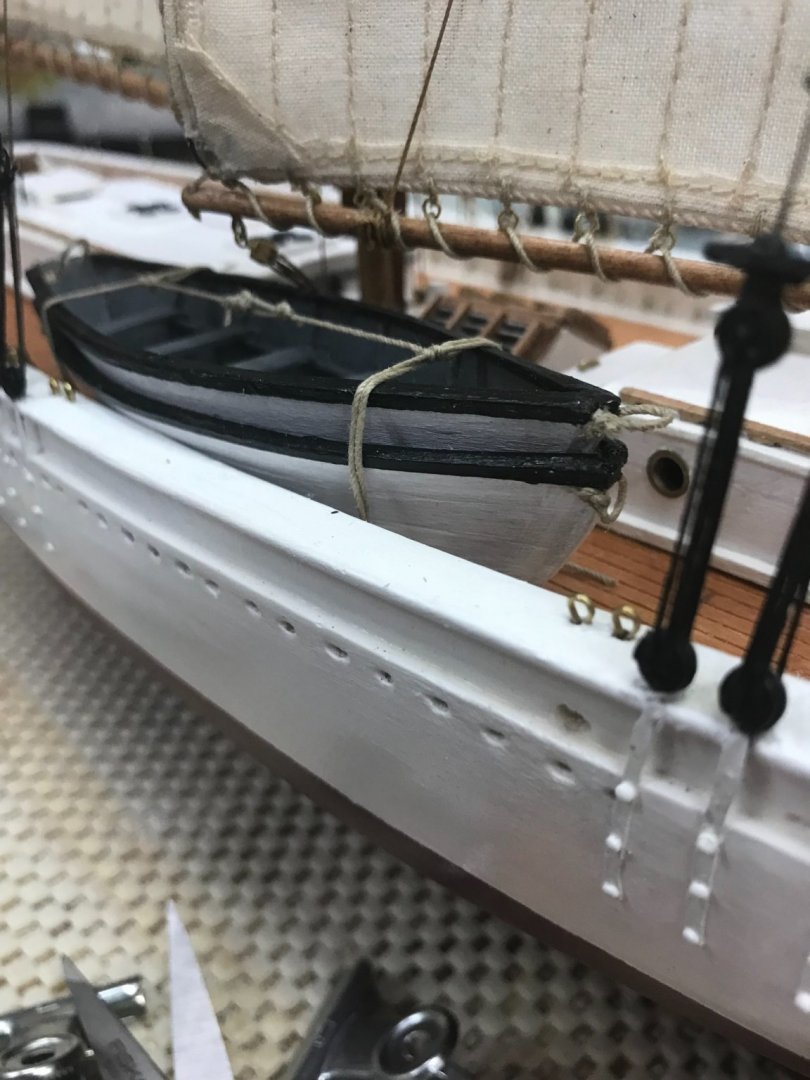
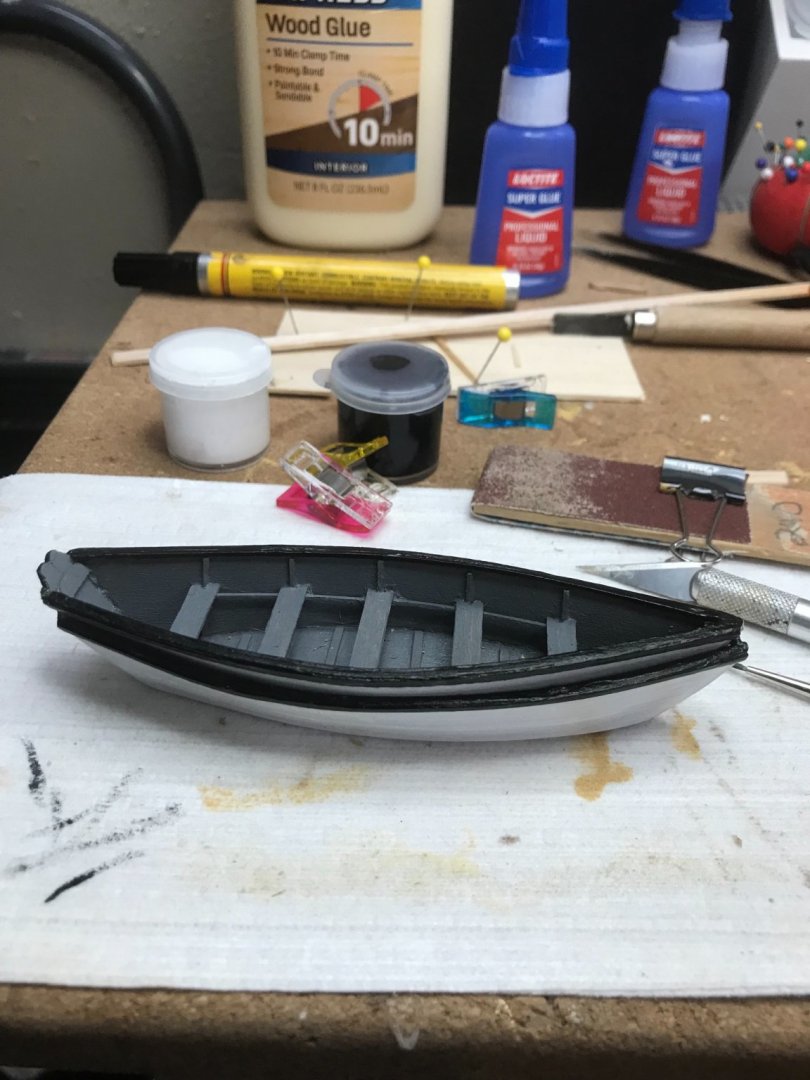
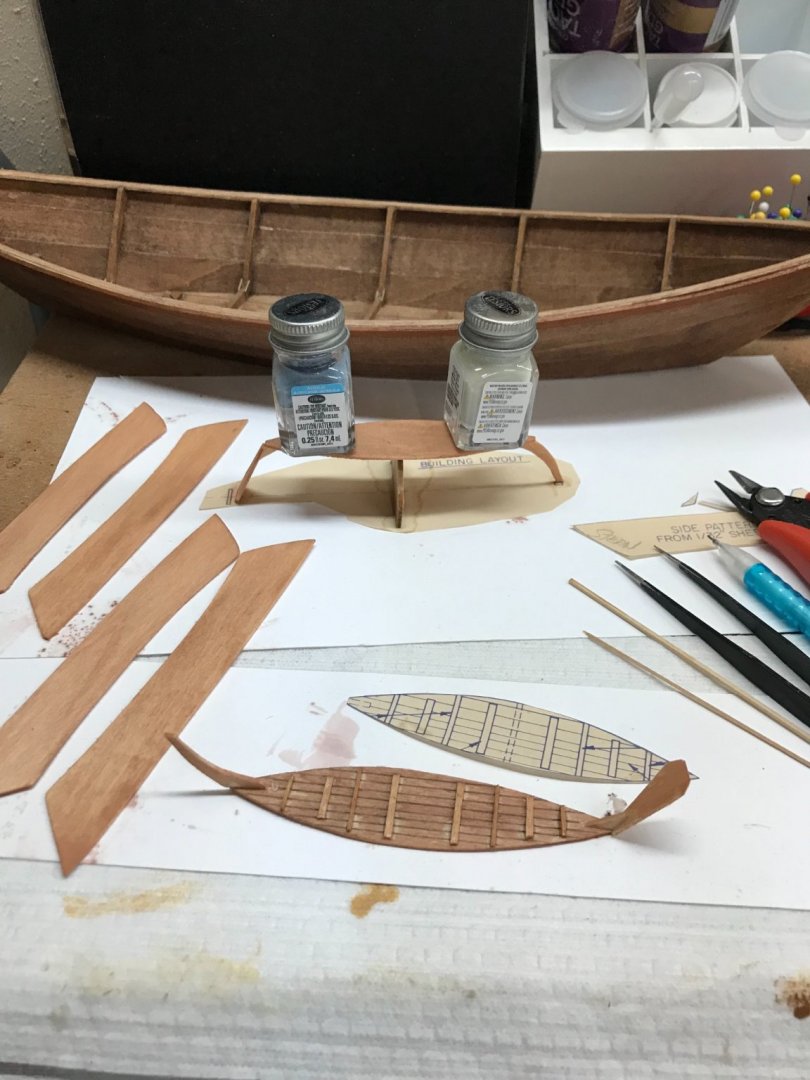
Dory’s continued… Two nested Dory Hulls, easier said than done. Micro Carpentry indeed. 😆 Nested Dory’s completed… 😎 On to the final details. Cheers 🍻
- 127 replies
-
- 6
-
-
- Bowdoin
- Arctic Exploration
- (and 3 more)
-
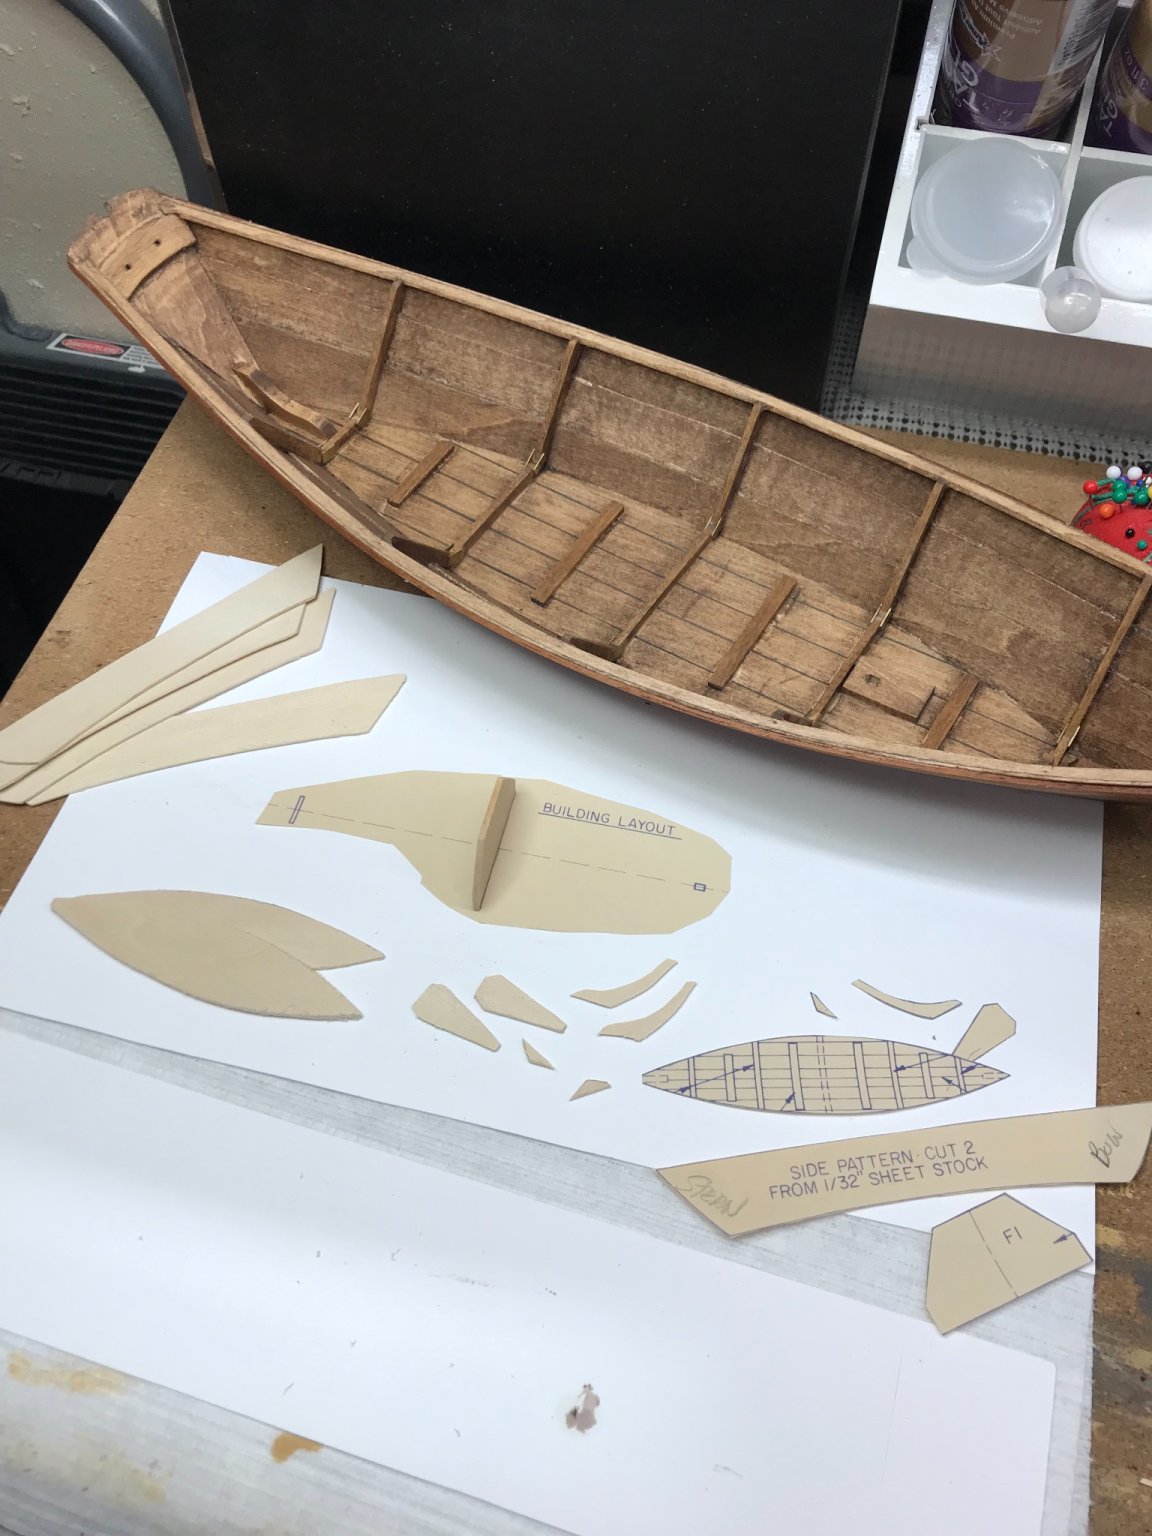
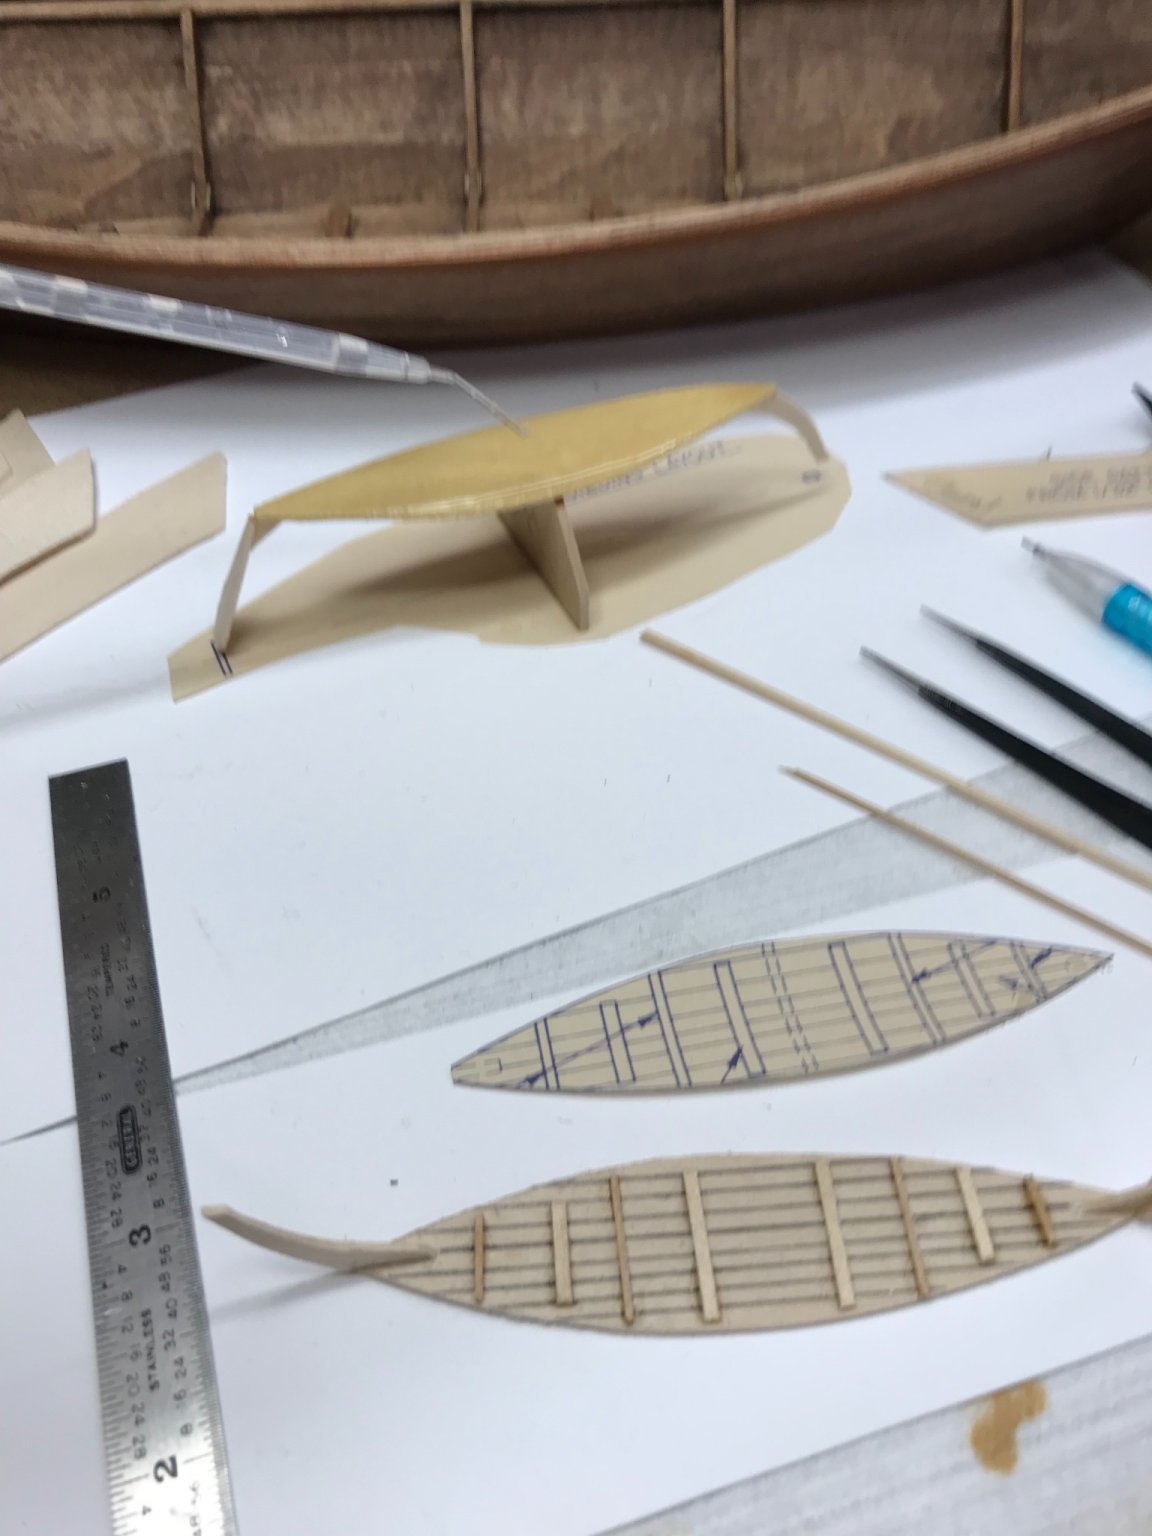
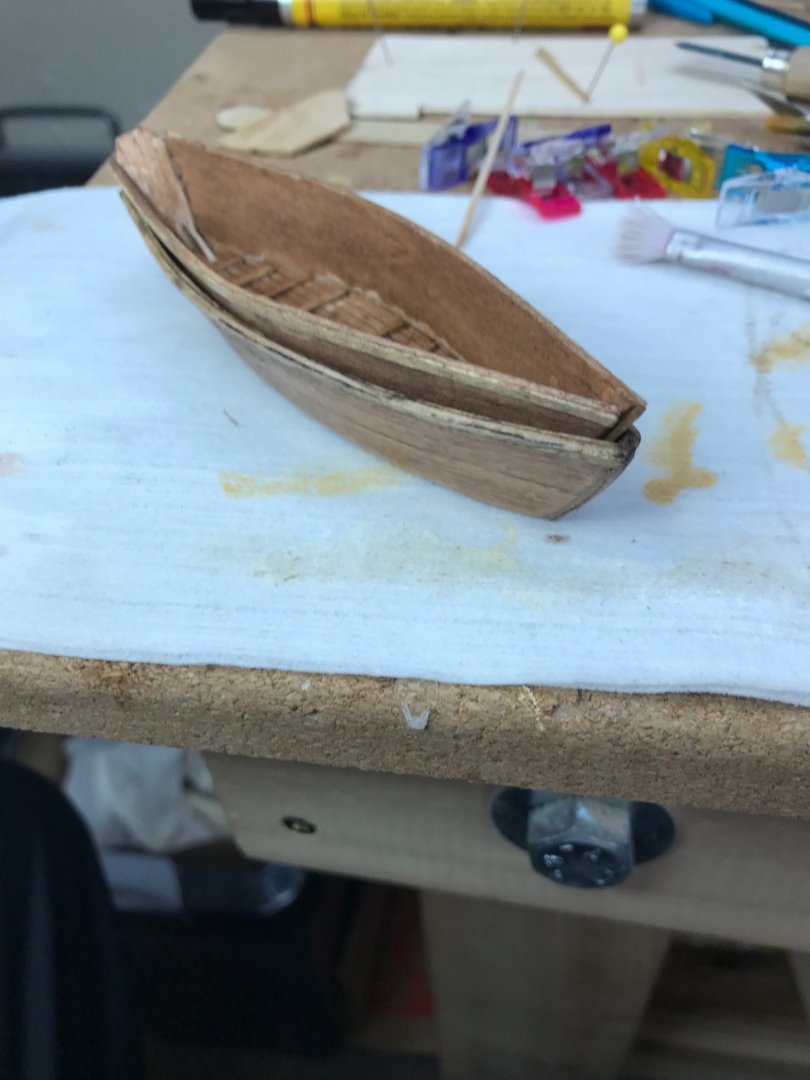
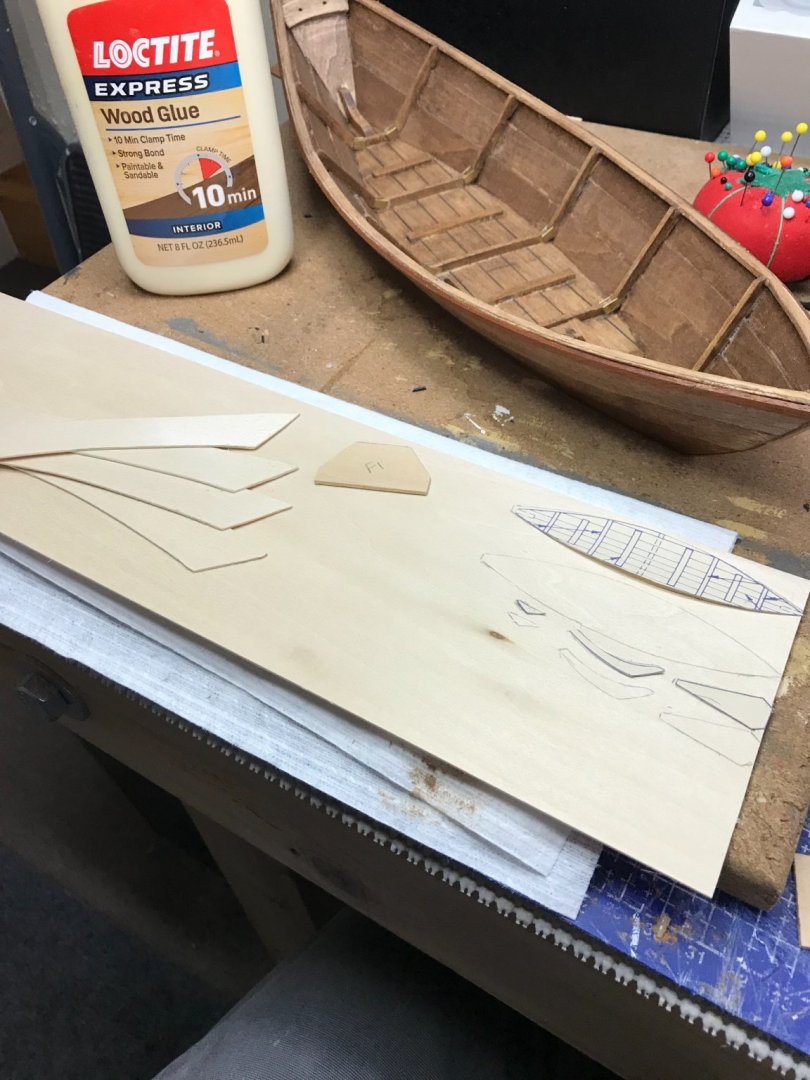
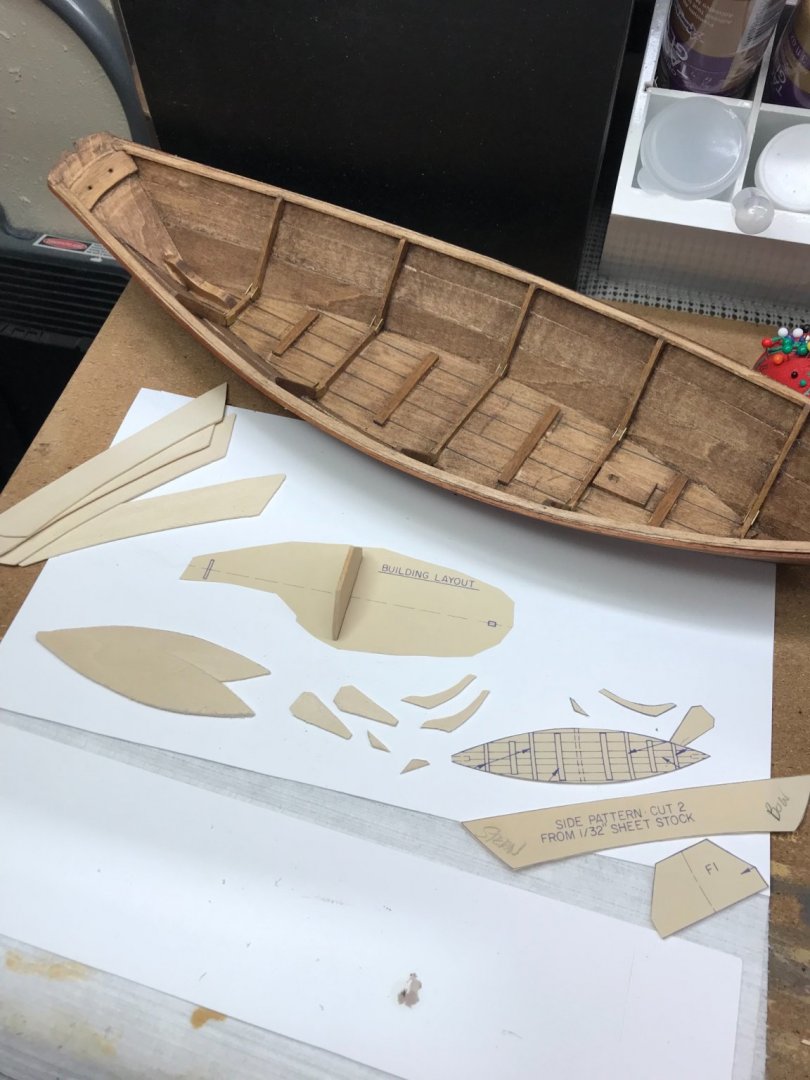
Dory’s… Building a couple of MiniMe 😆 Dory’s to nestle in on the deck of the Bowdoin. Cutting out pieces from 1/32” basswood stock. Using templates from instructions. Pieces ready for assembly. Wetting with Ammonia/Water… Staining of Dory pieces prior to assembly. I will only need to detail the top Dory of the two stacked on deck. Micro Carpentry, for sure. 😎

- 127 replies
-
- 7
-
-
- Bowdoin
- Arctic Exploration
- (and 3 more)
-
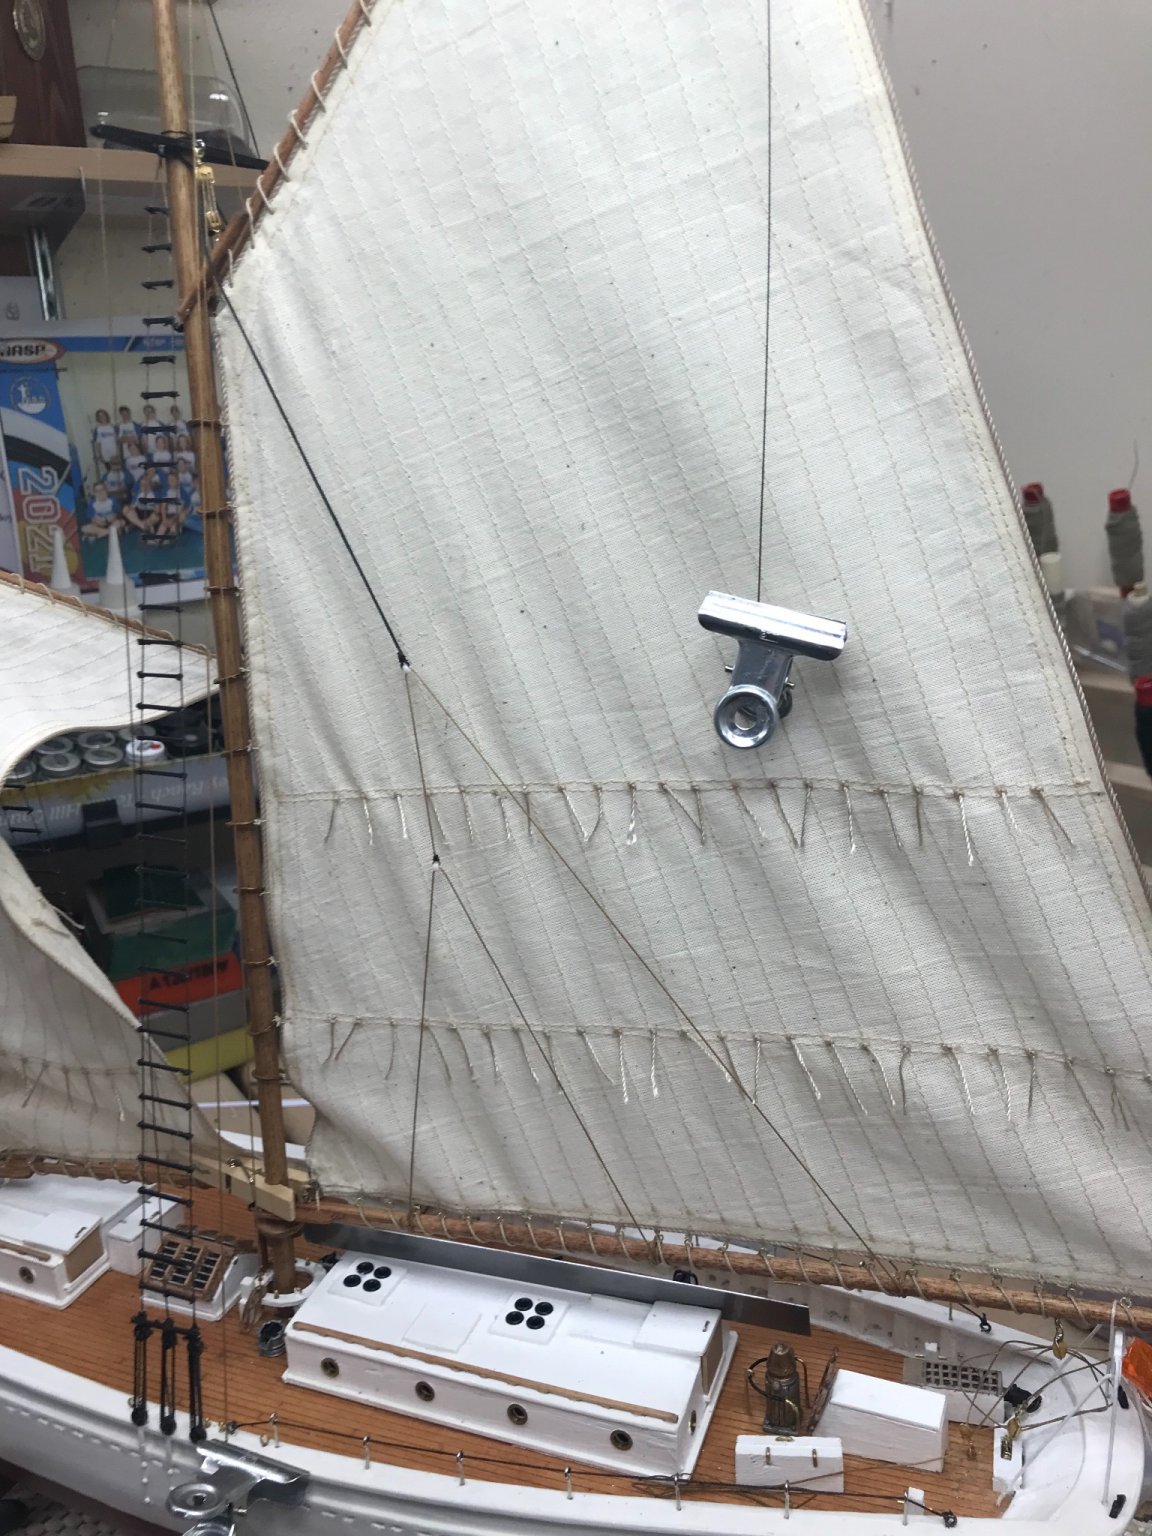
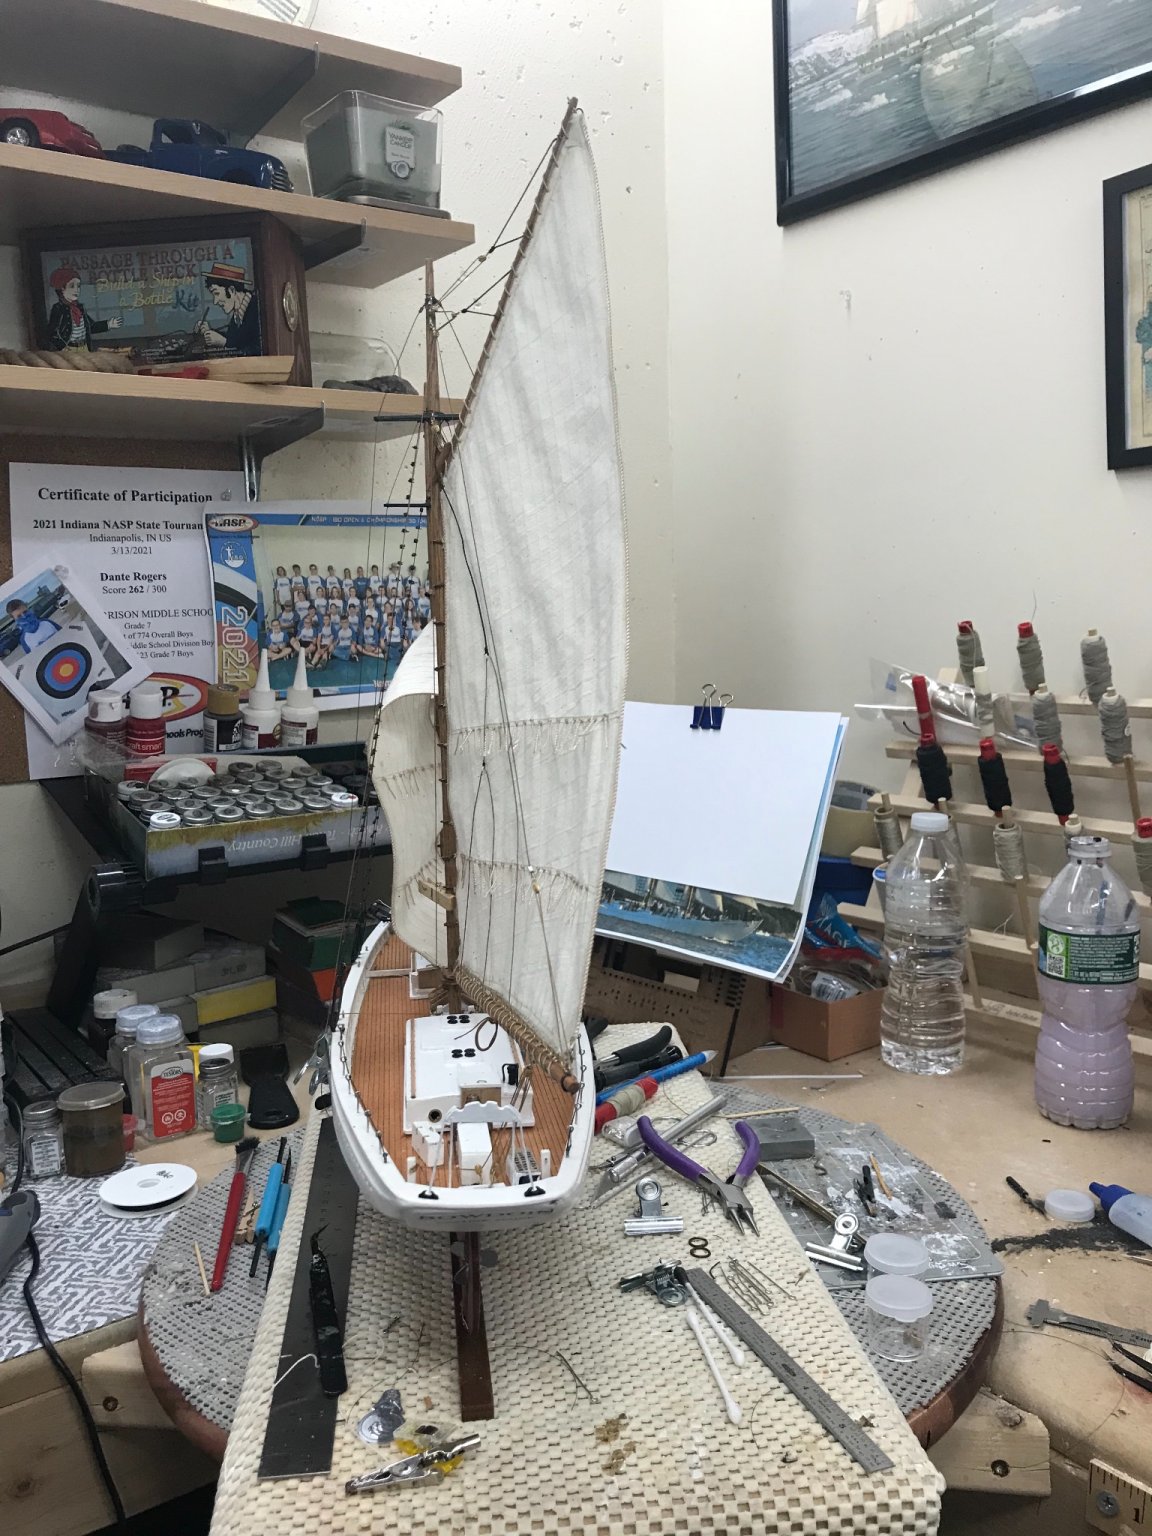
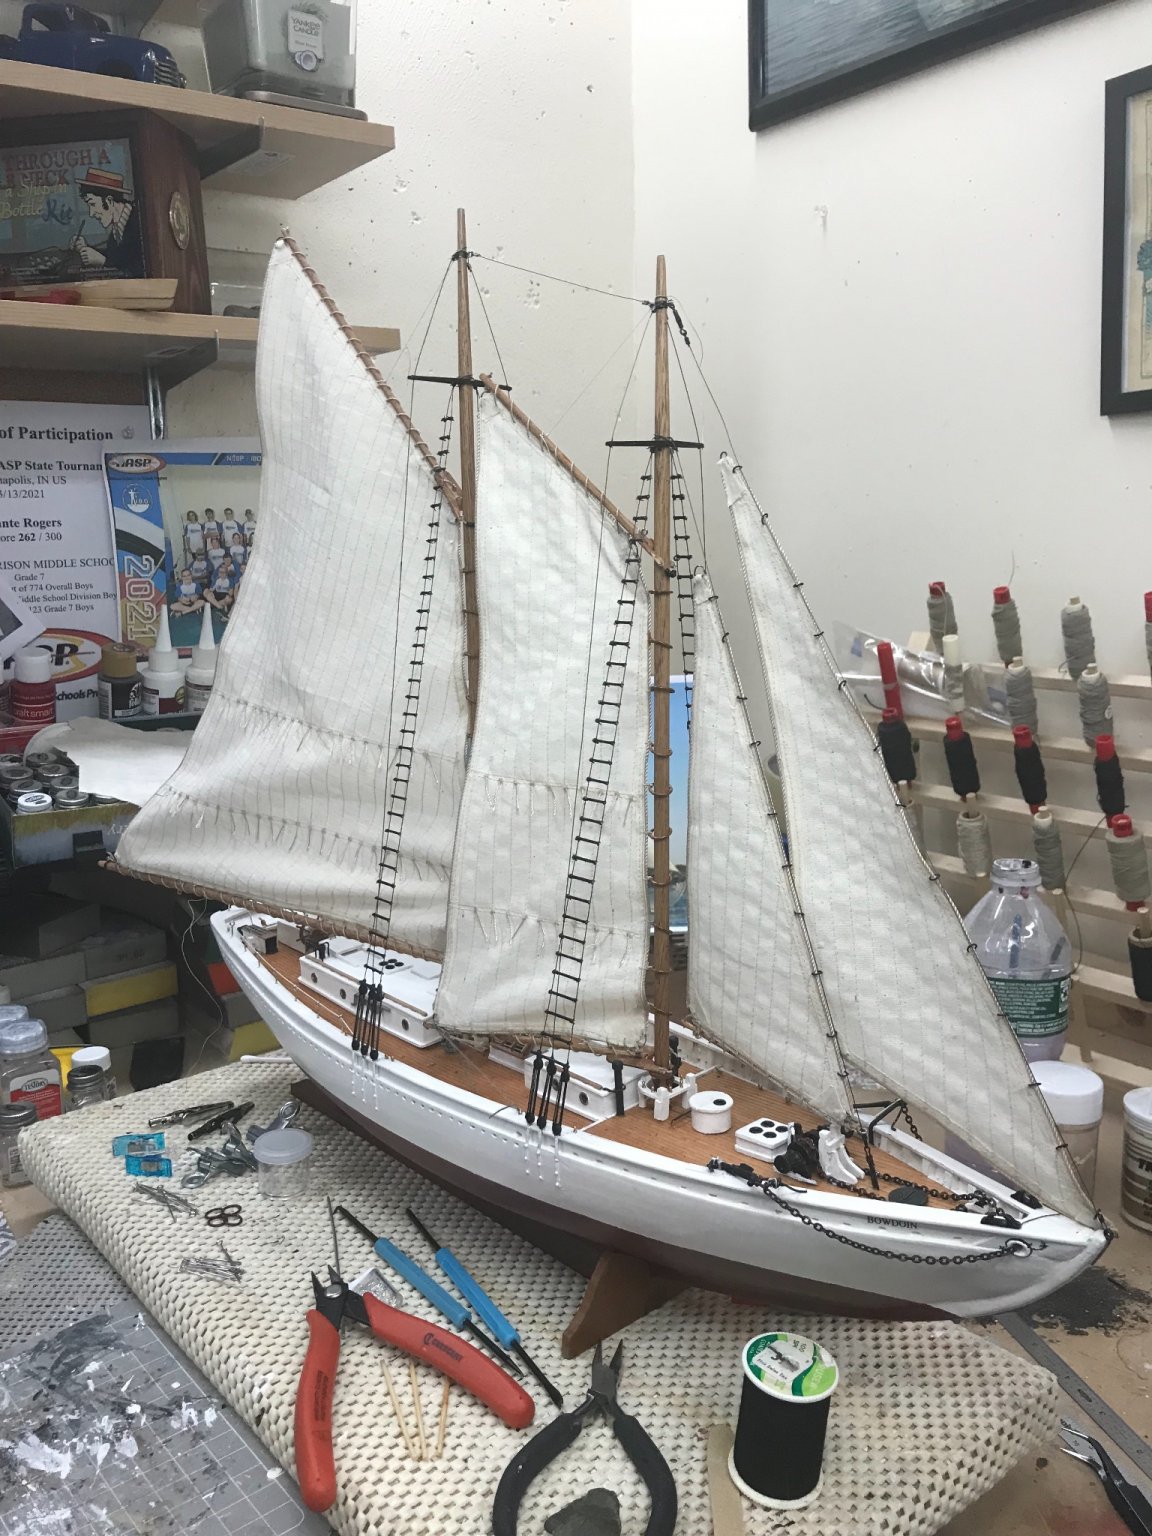
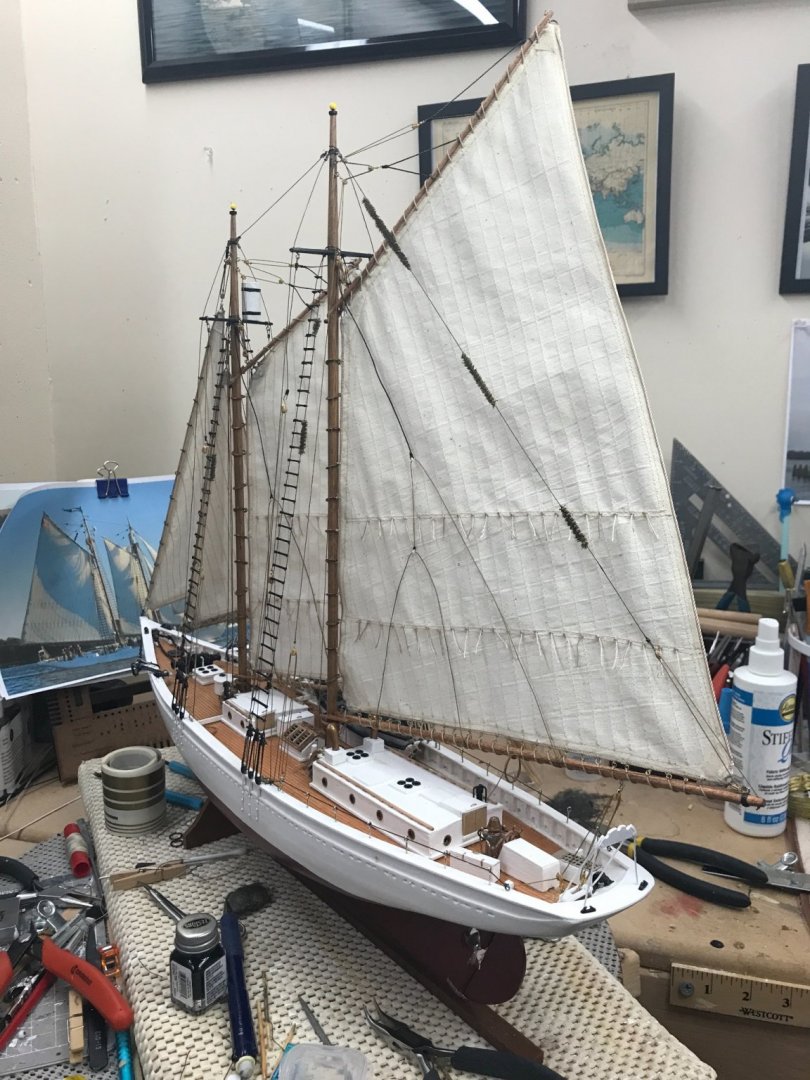
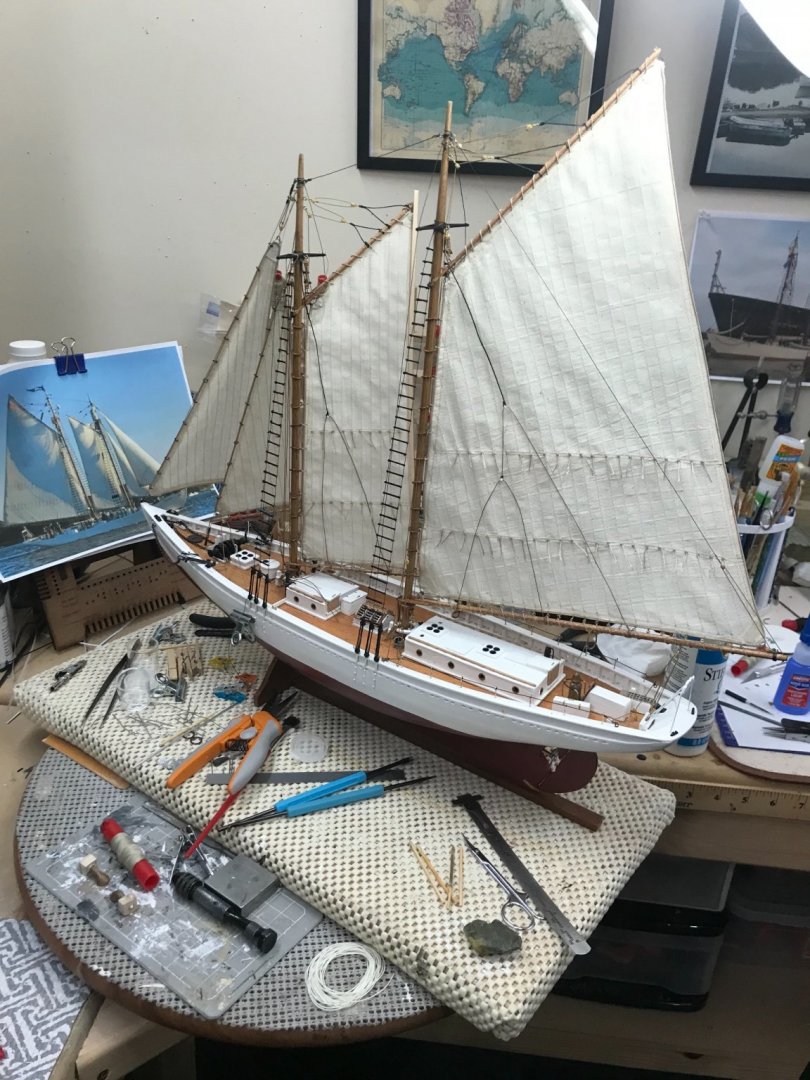
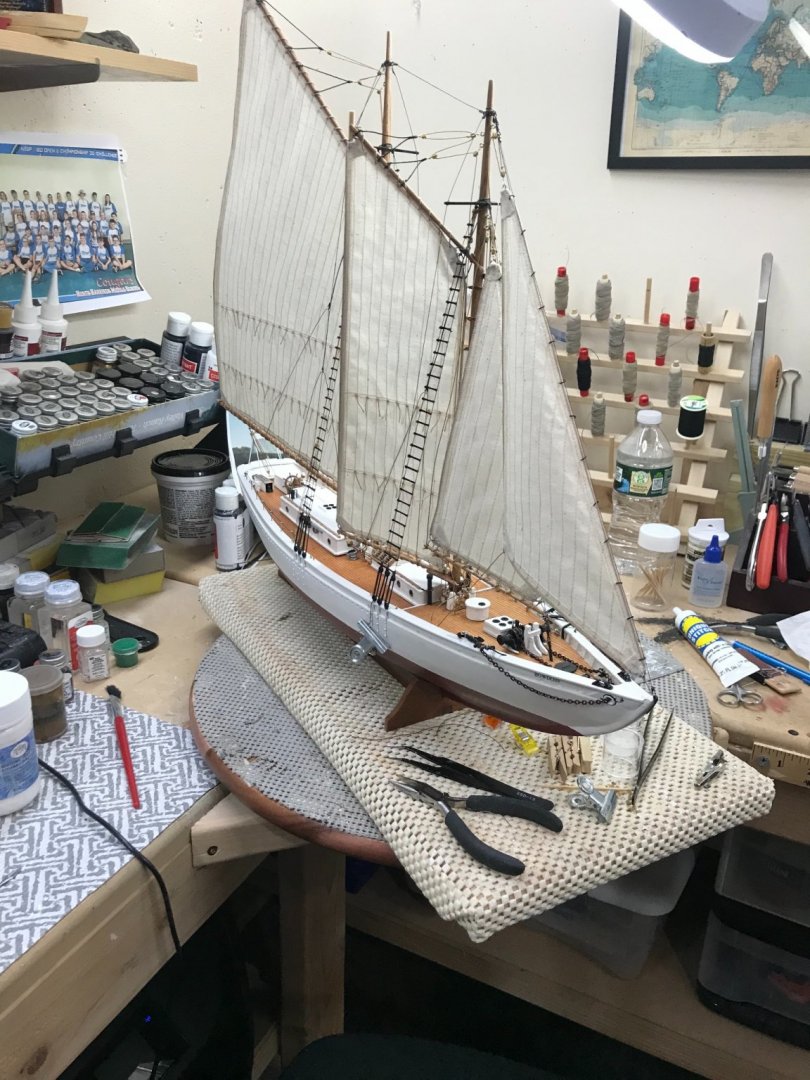
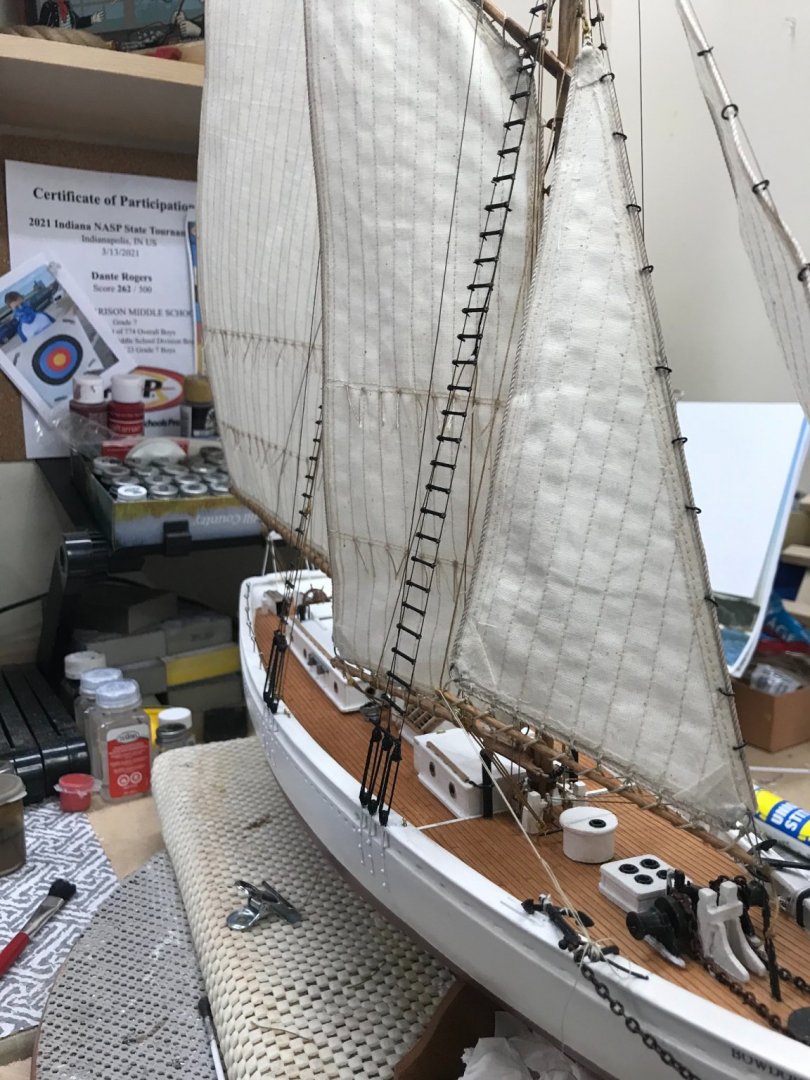
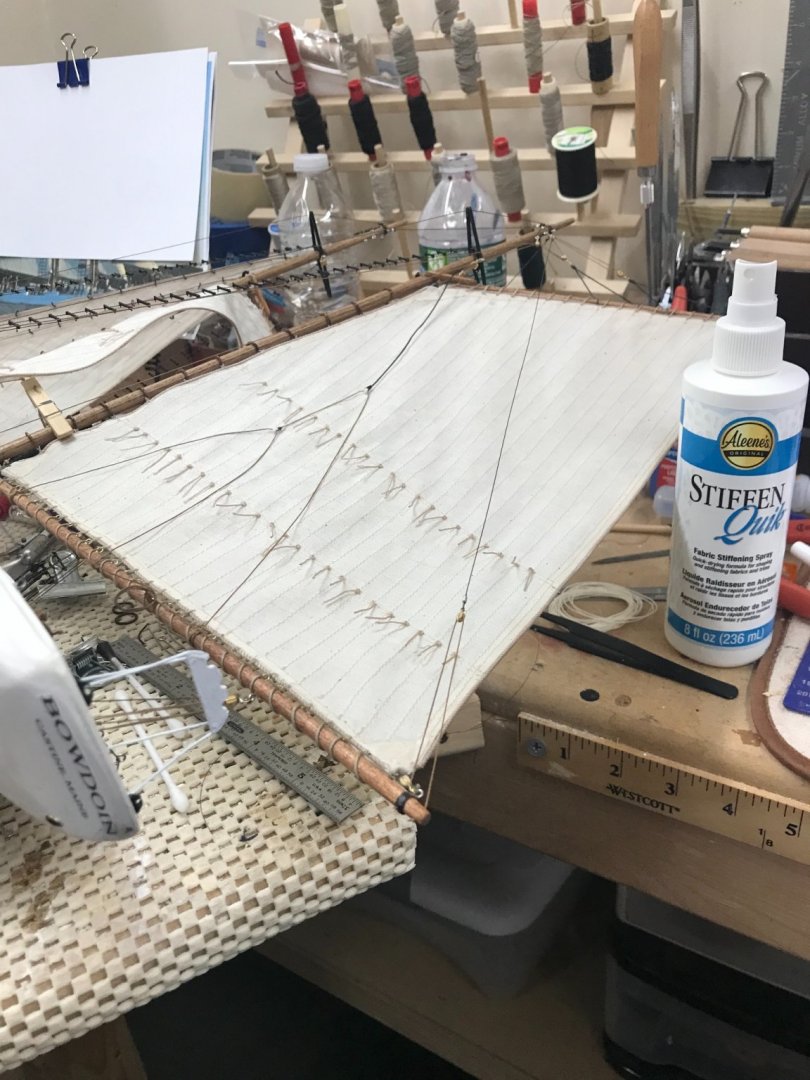
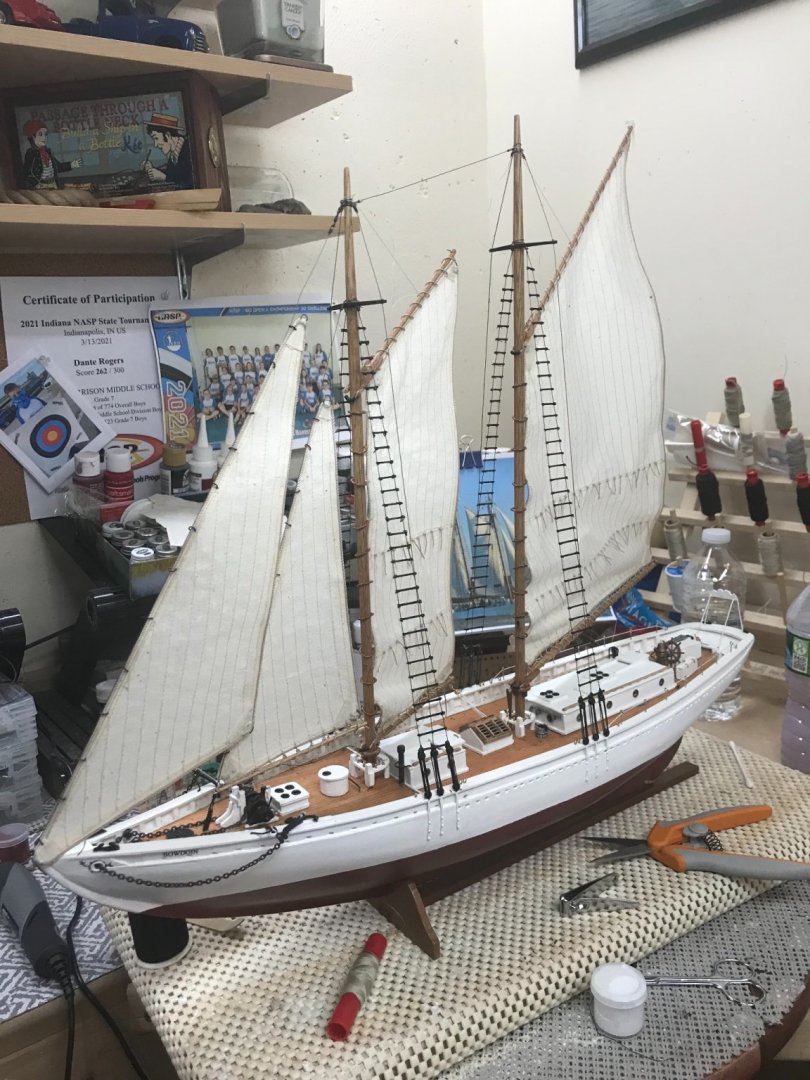
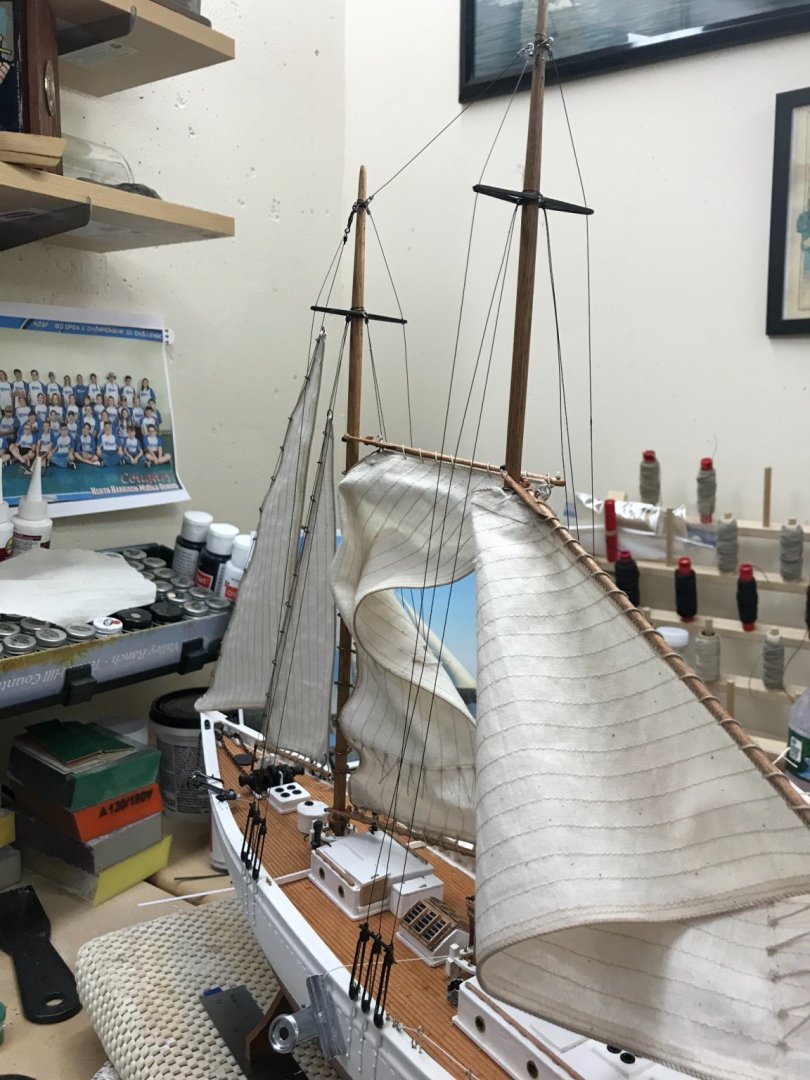
Sails now stiffened. I think she is looking pretty good. 👍 Still have have a few details to add. Almost there… 🧐
- 127 replies
-
- 13
-
-
- Bowdoin
- Arctic Exploration
- (and 3 more)
-
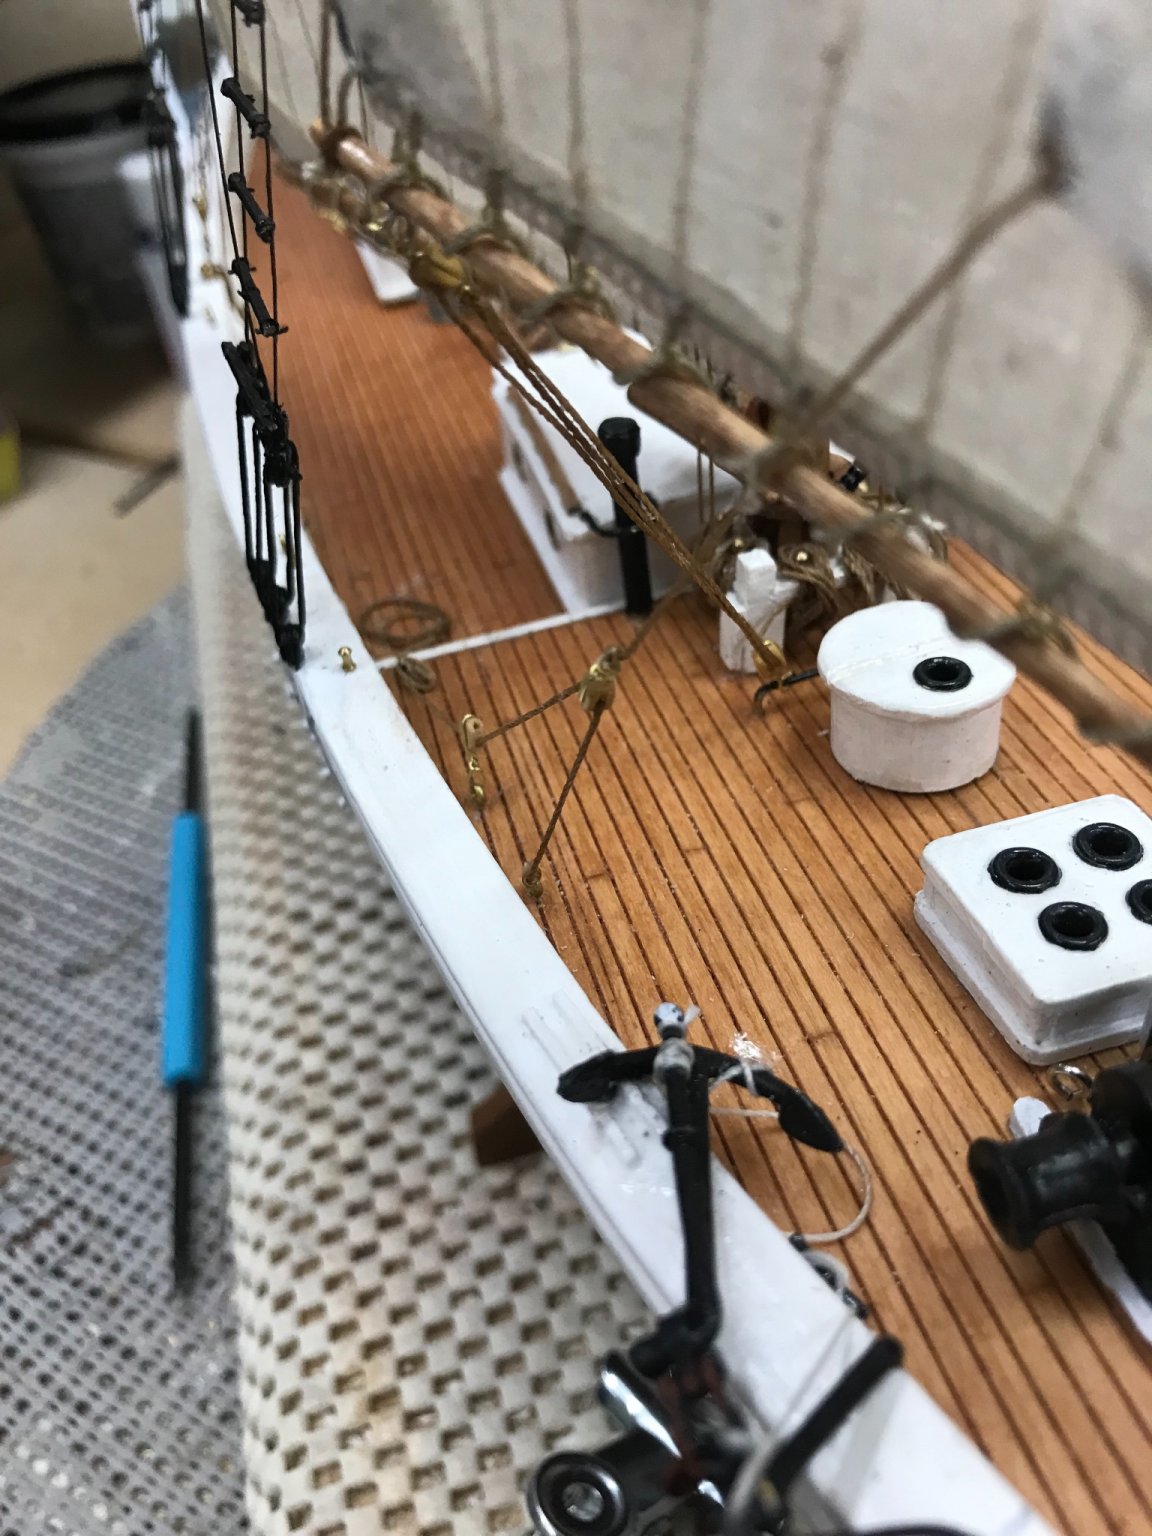
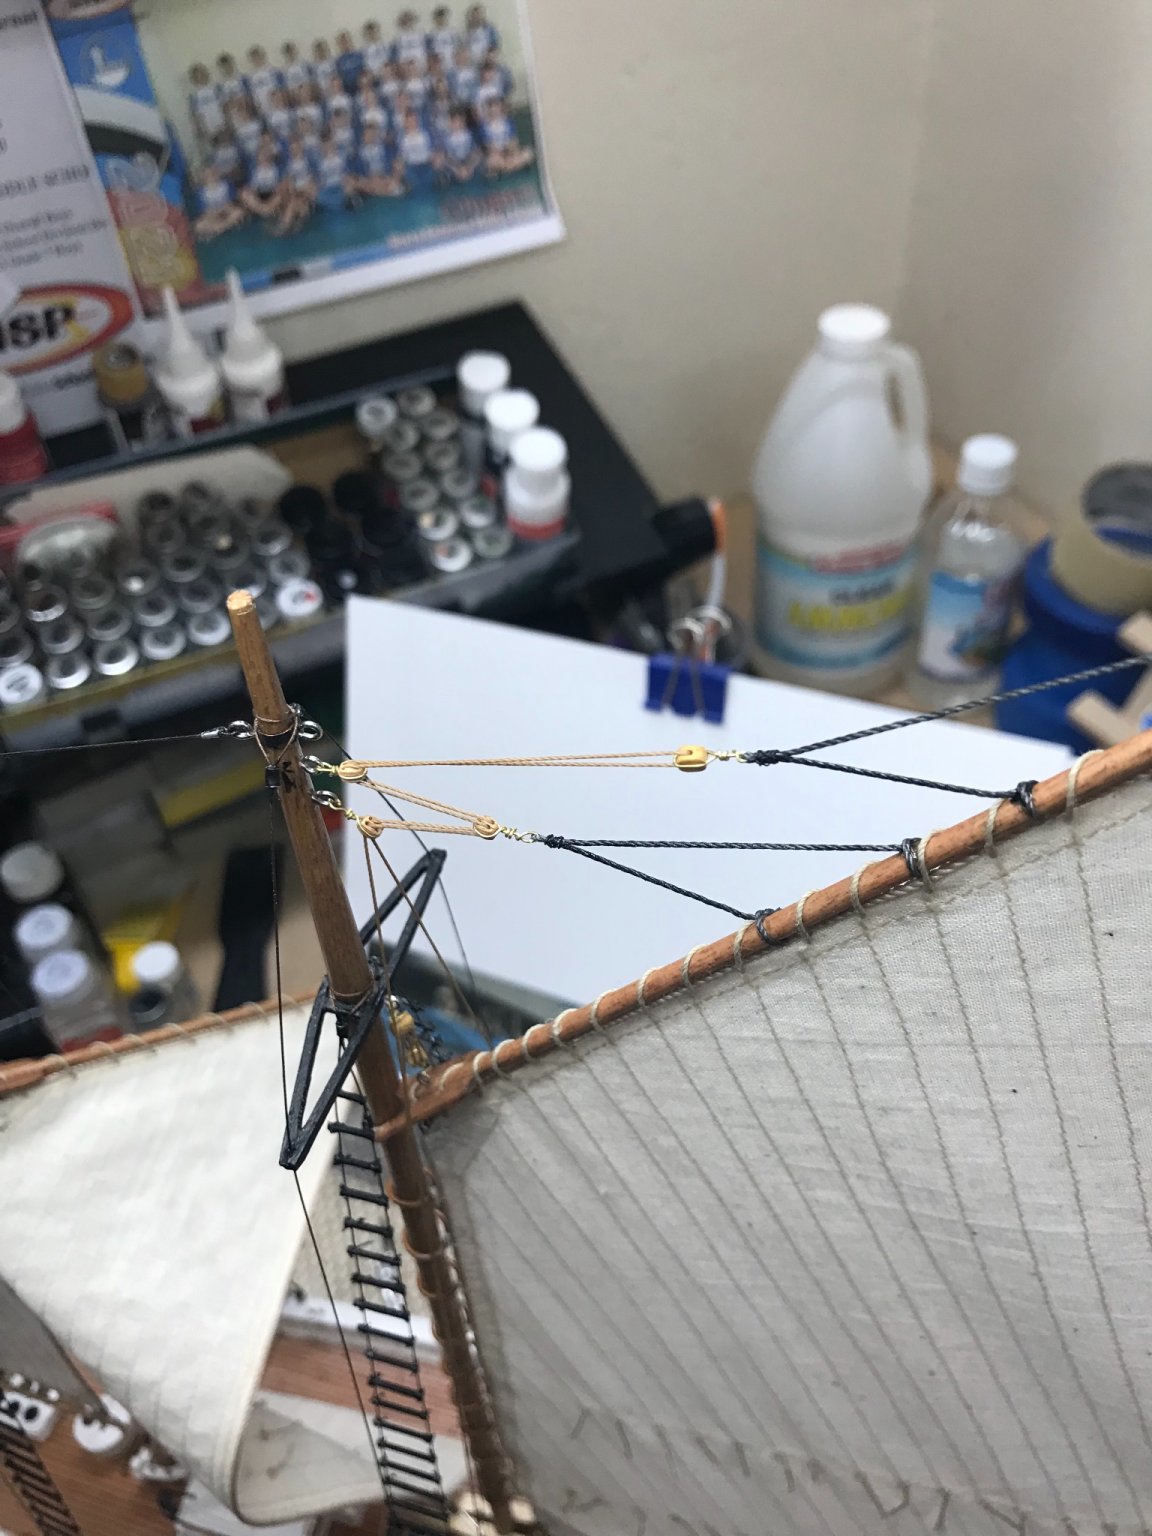
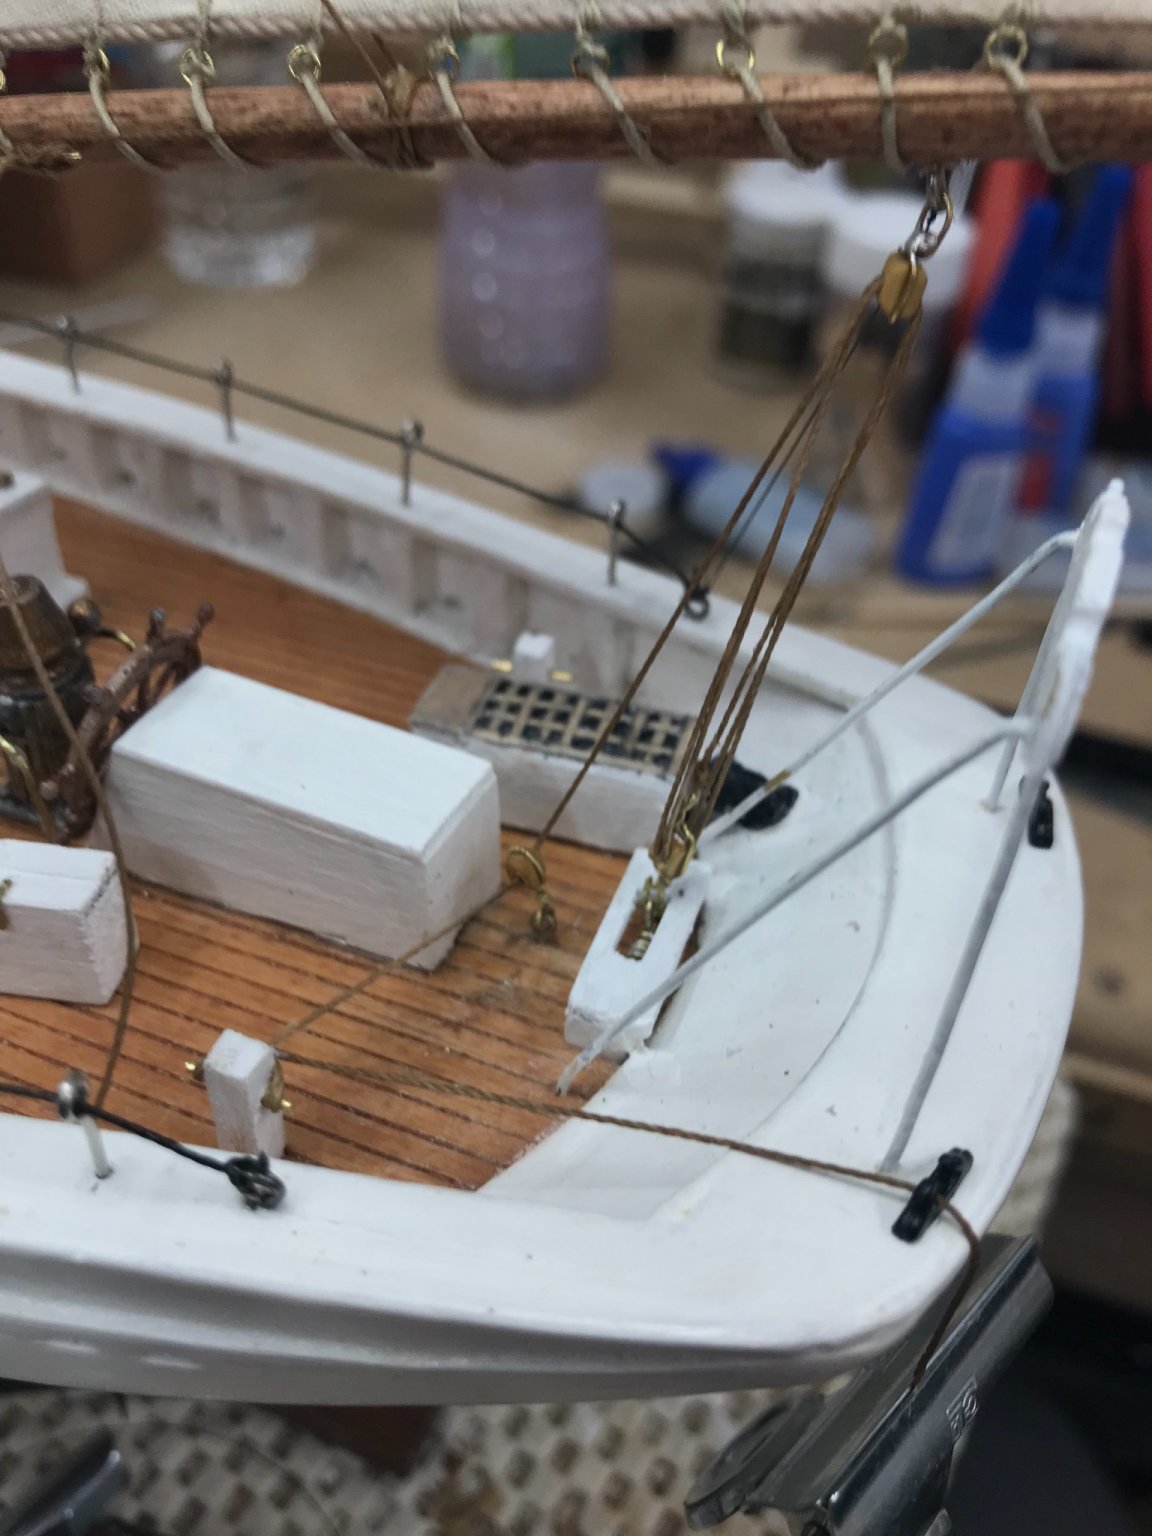
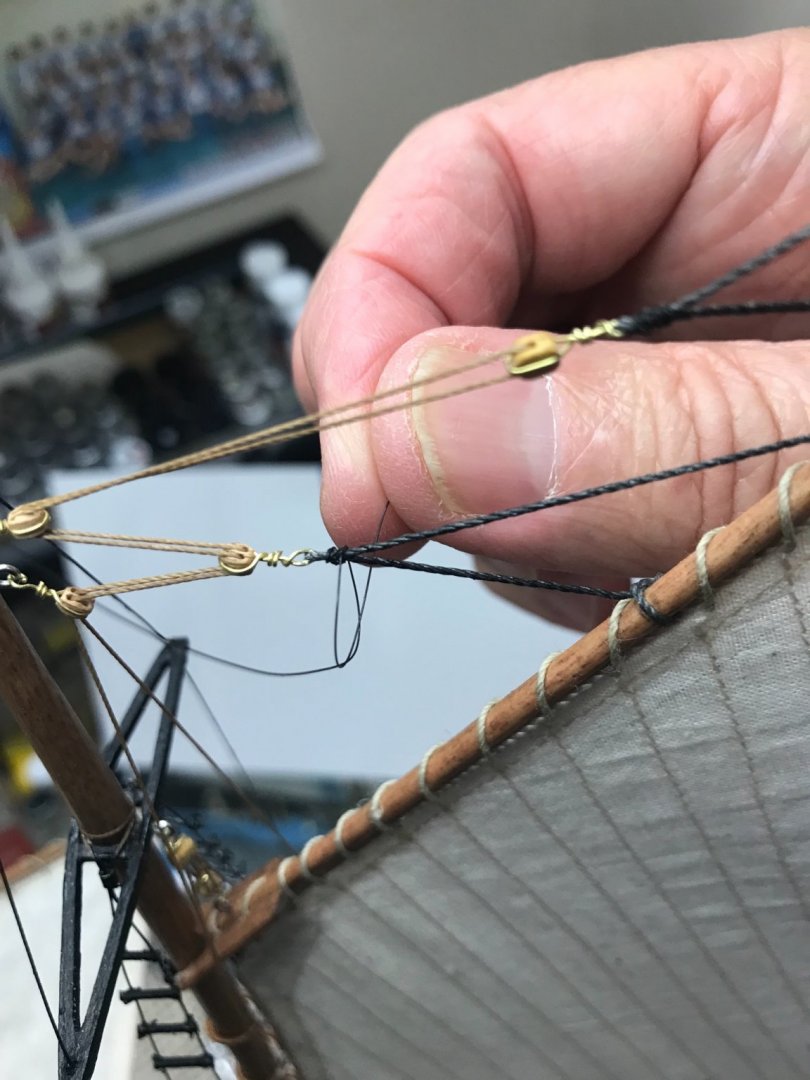
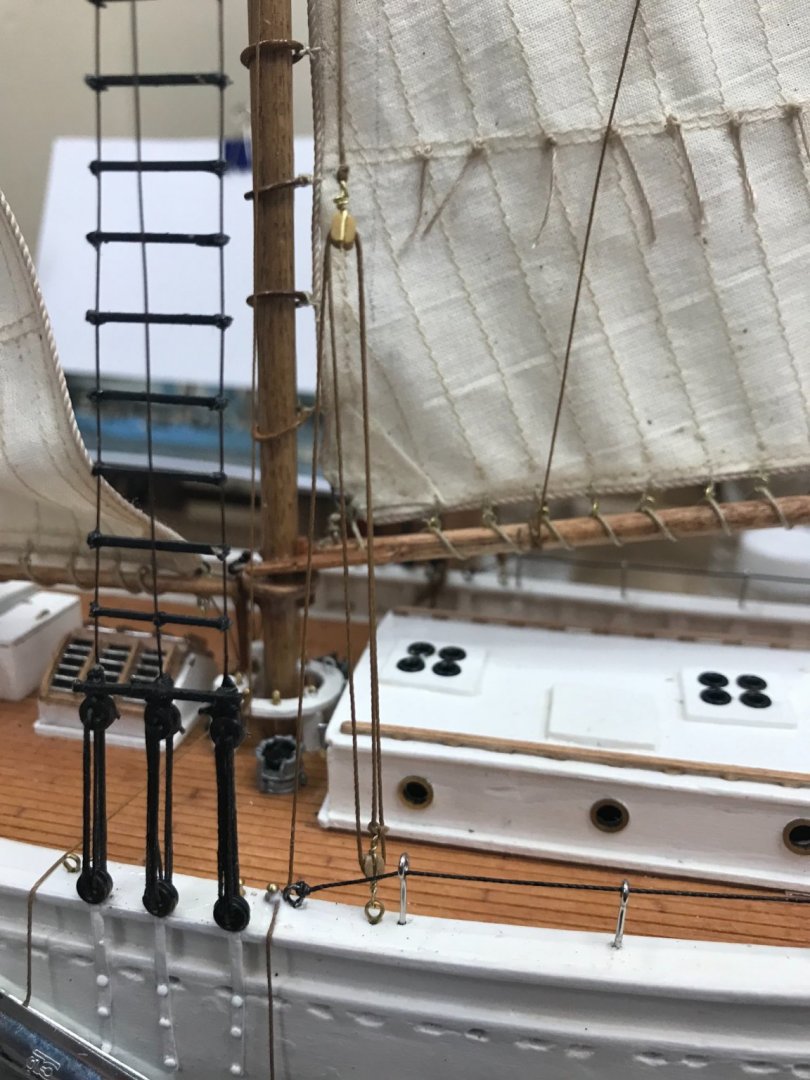
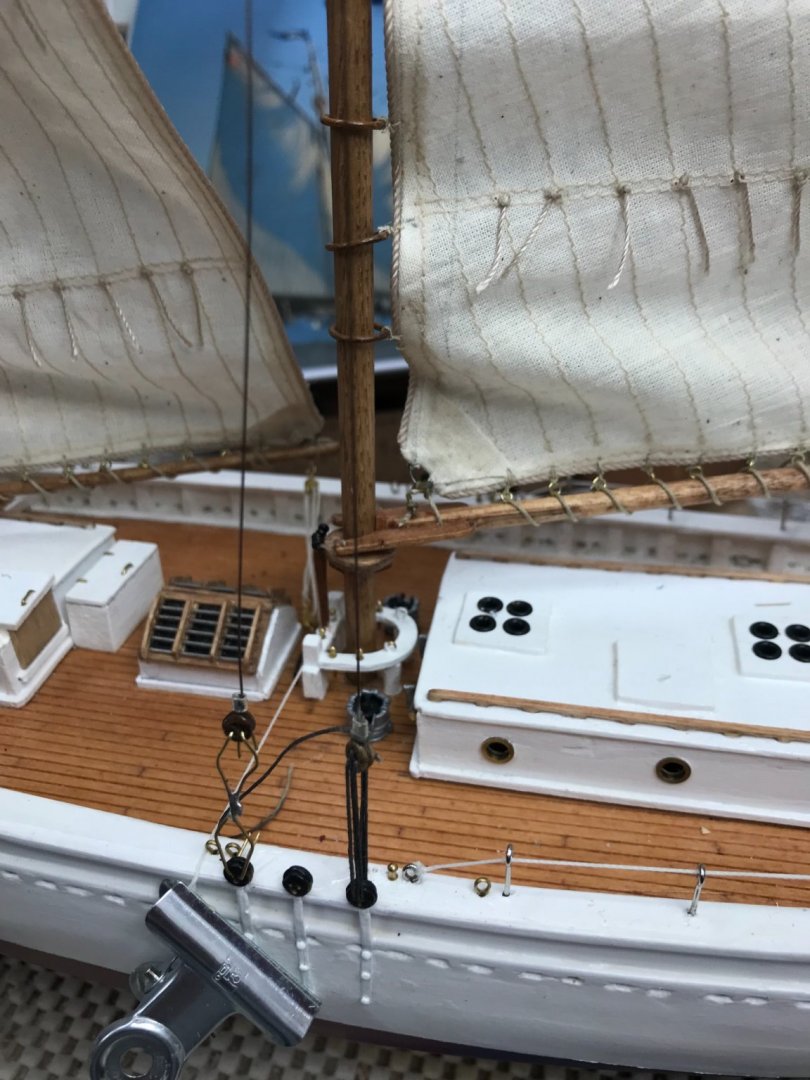
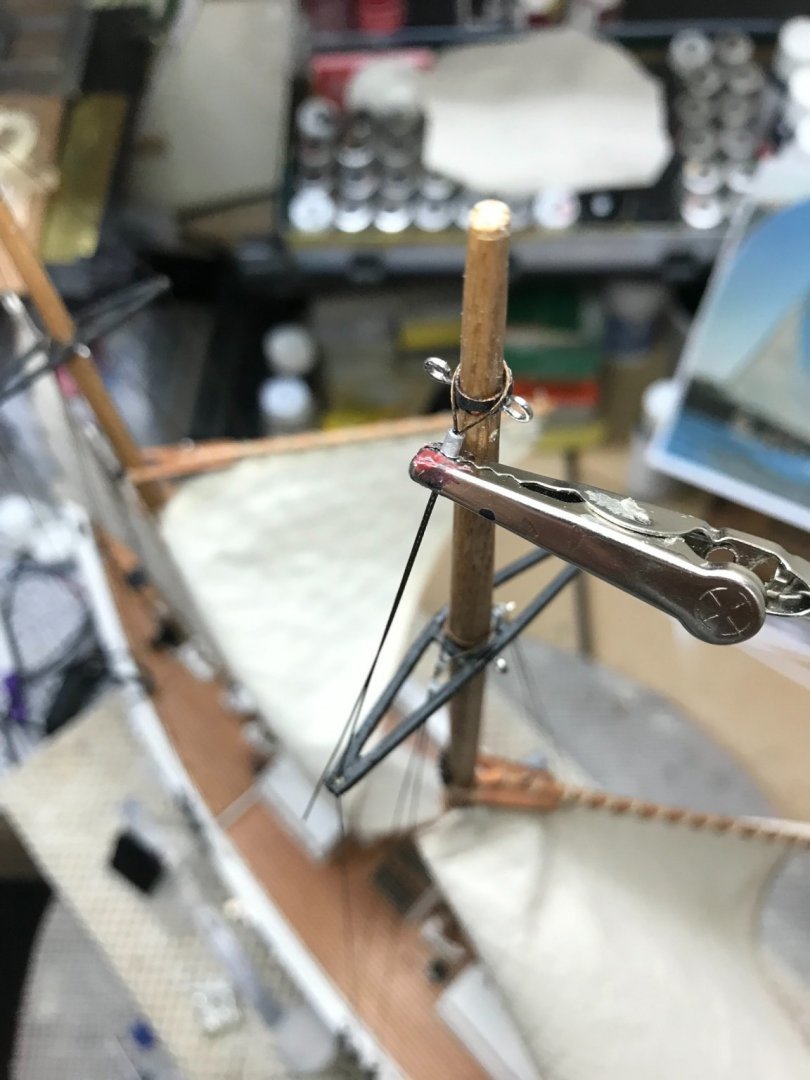
Stay Sail and Jib Rigging Stay Sail Sheet rigging on the traveler. Note: Temporary tie to hold the Boom out. Another view of the Sheet rigging. Stay Sail Halyard and Boom Lift in place. Jib Halyard in place… Jib Sheet lines completed and Lines Belayed on the Deck Cleats. Running Rigging Completed. 😎 Now, on to the final details.


- 127 replies
-
- 5
-
-
- Bowdoin
- Arctic Exploration
- (and 3 more)
-
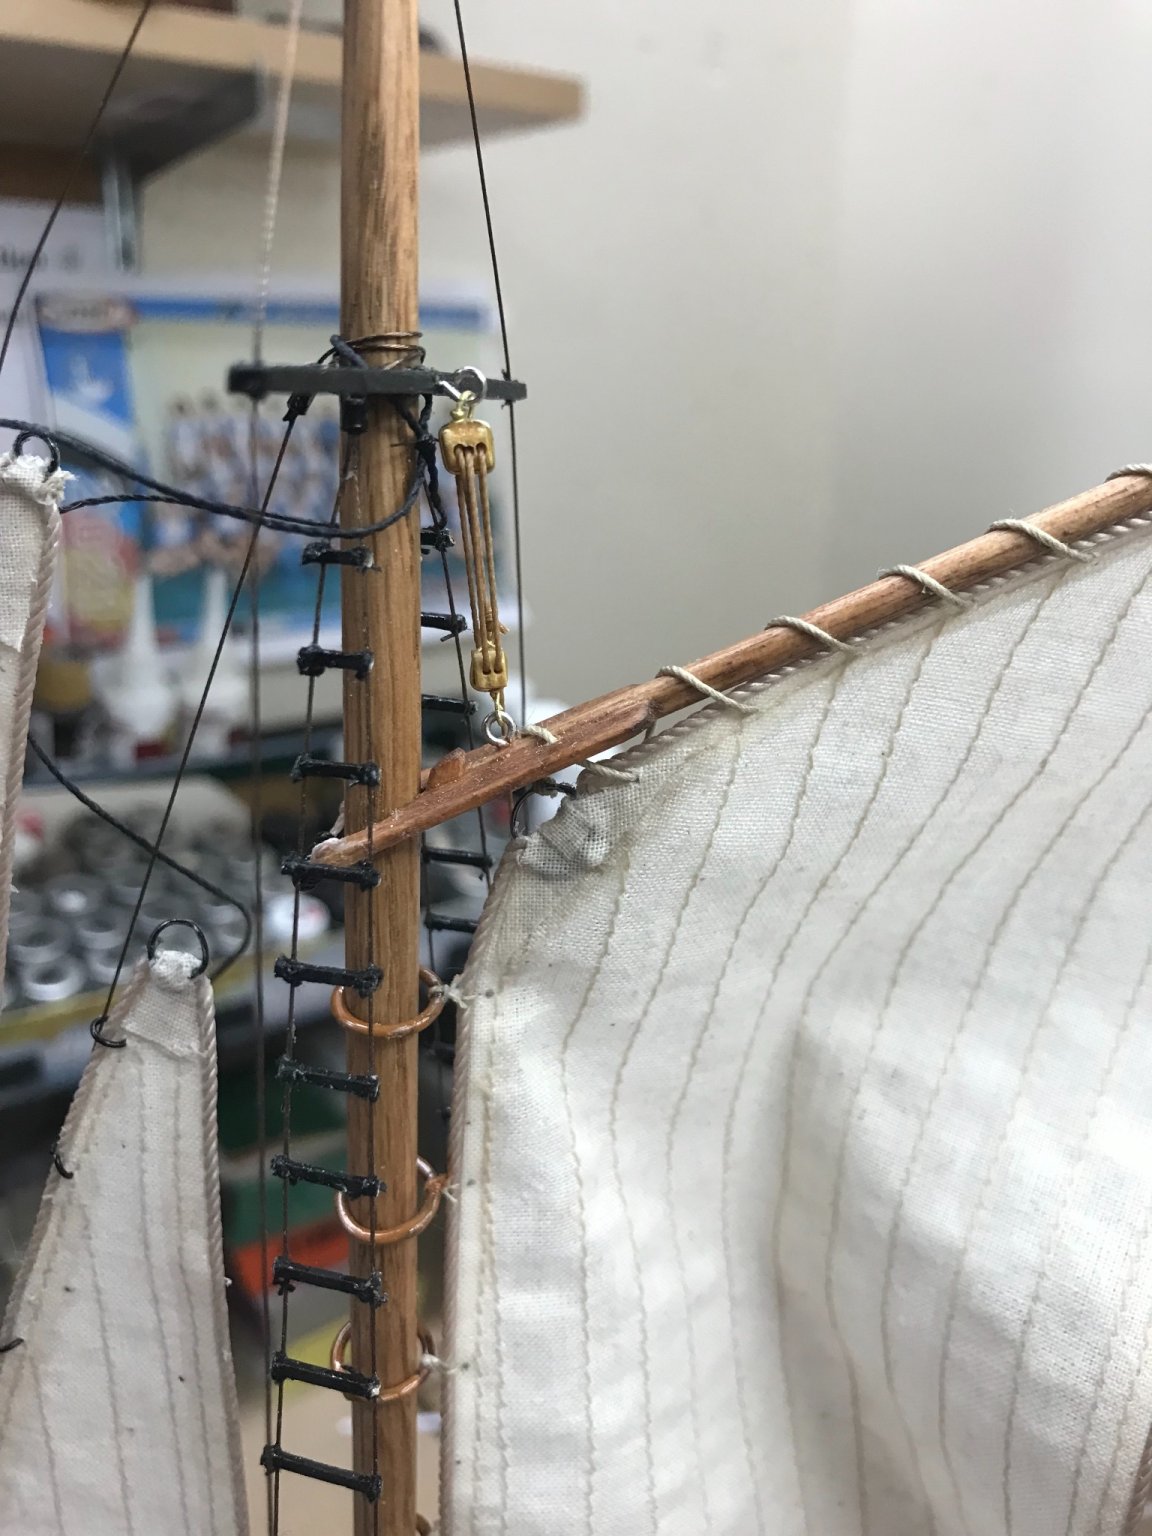
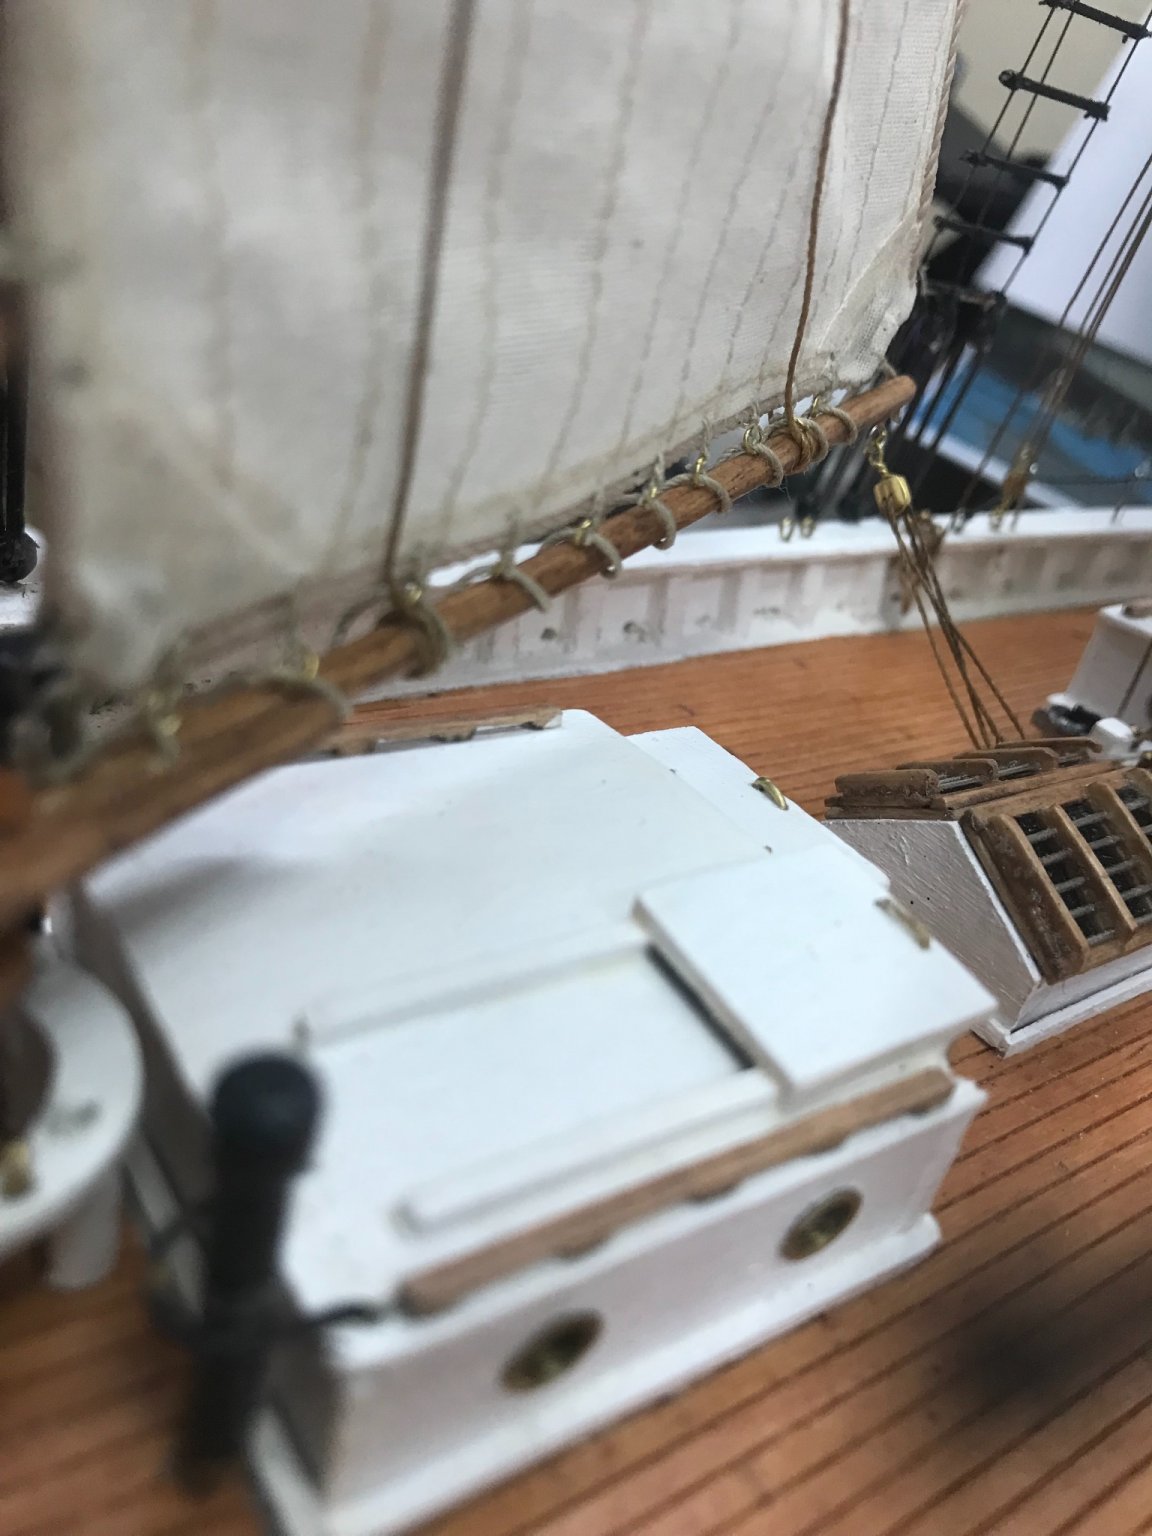
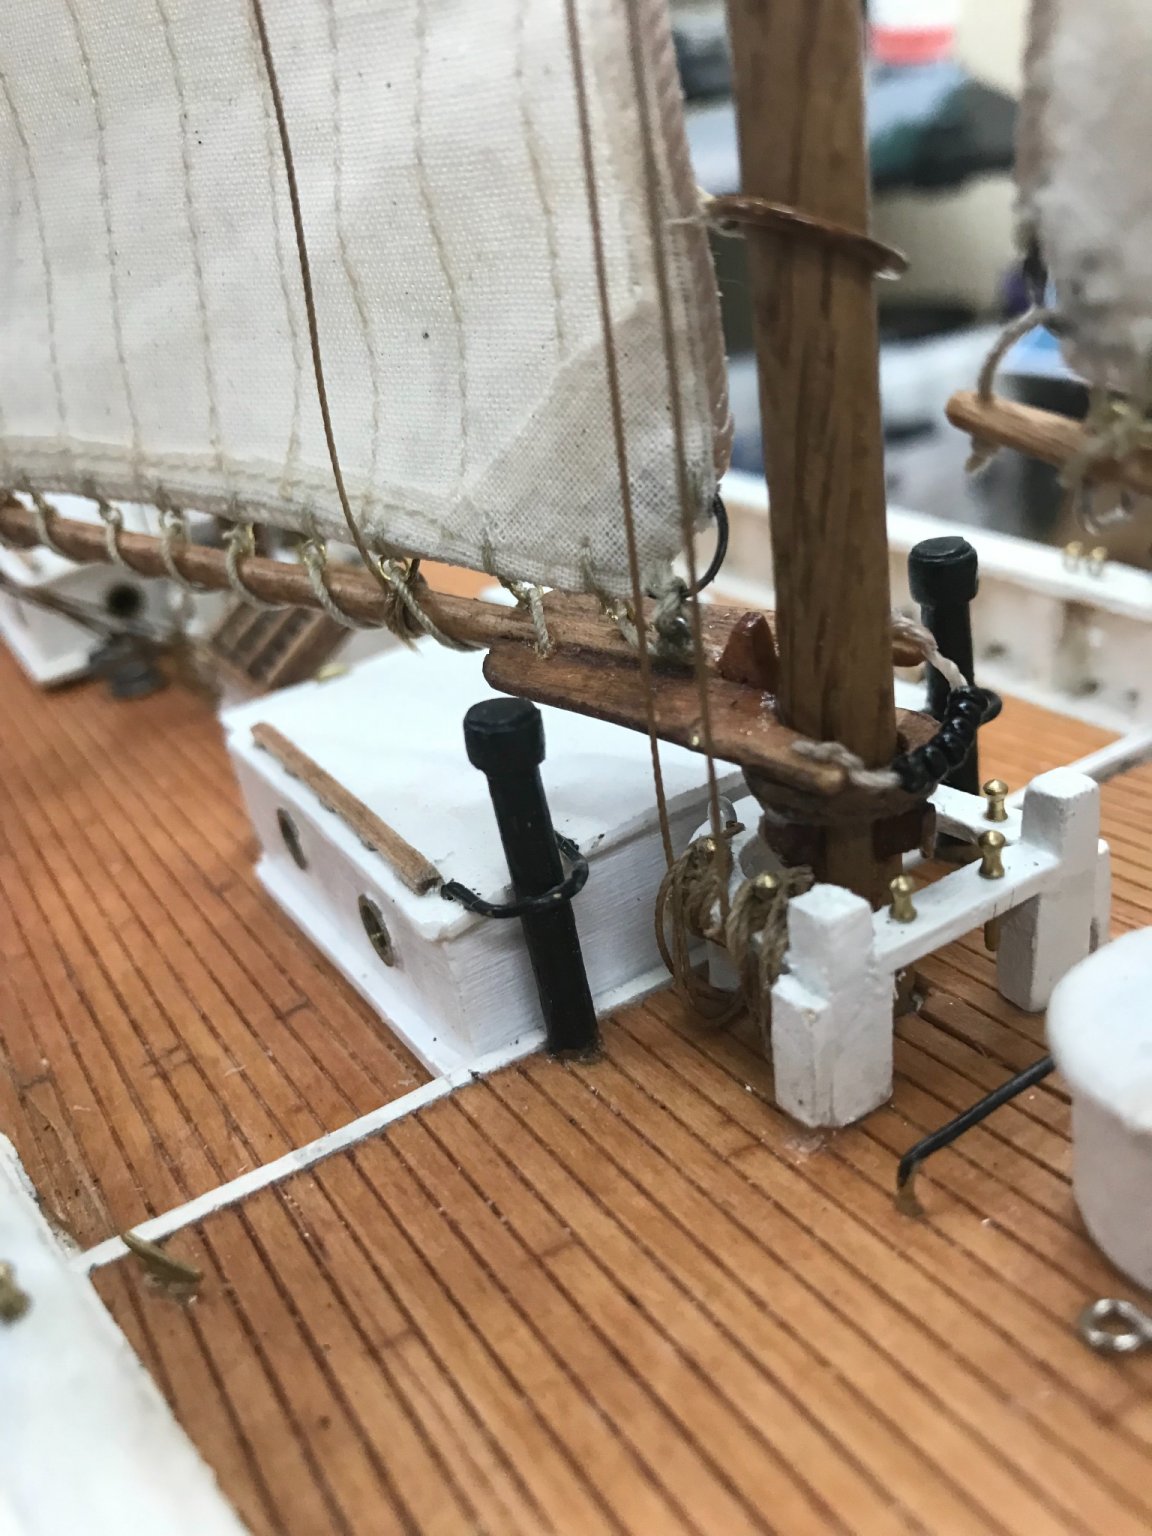
Fore Sail… Throat Halyard on Fore Sail. Tying off the Lazyjacks for the Fore Sail. Belaying of the Throat and Peak Halyards at the Fore Fife Rail. Peak Halyard rigging of the Fore Gaff. Next up the Jib and Stay Sail Halyards. 🍻


- 127 replies
-
- 4
-
-
- Bowdoin
- Arctic Exploration
- (and 3 more)
-
Very nice build on the classic lobster boat. I will follow along, I would like to see your finished product. 👍
-
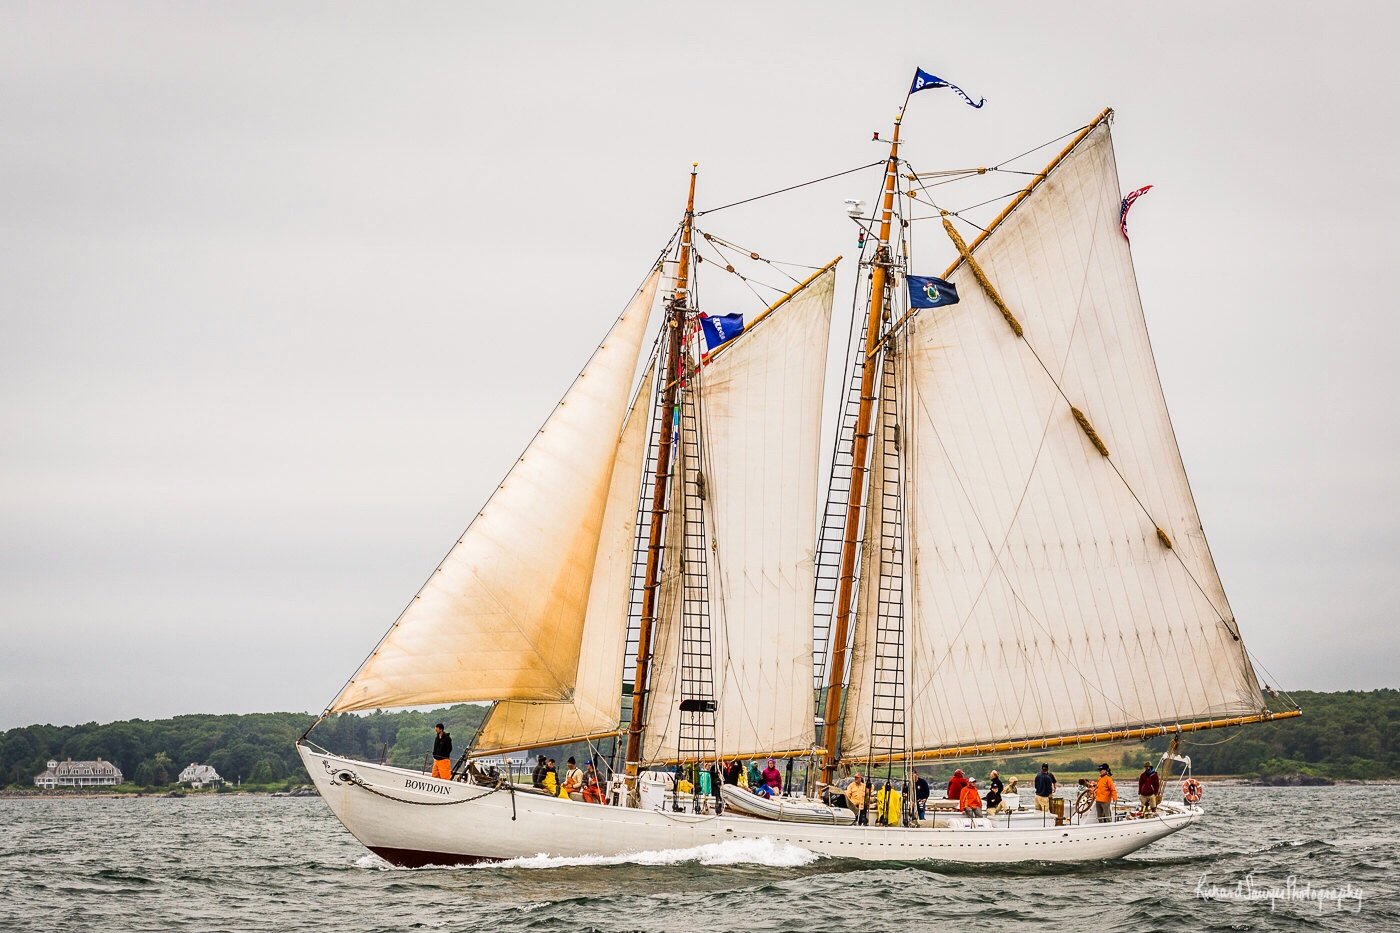
Thanks for stopping by and taking a look. I am currently building the Bowdoin myself. Bought a vintage Laughing Whale kit in the Bluejacket Shop last year, up in Searsport. Using Bluejacket’s instructions. Visited the Bowdoin Arctic Museum last week. Great college, nice campus. Here is a link if you would like to take a look. It’s a great kit and fun build. Cheers 🍻 My build Log for the Bowdoin
-
It’s more like really thick acrylic paint, in fact you can mix acrylics for a custom color paste. Made by Testors. https://www.michaels.com/testors-craft-dimensional-craft-paste-4-pack/10566664.html?r=g&cm_mmc=PLASearch-_-google-_-MICH_Shopping_US_N_Craft+%26+Hobbies_N_Smart_BOPIS_N-_-&Kenshoo_ida=&kpid=go_cmp-9972406265_adg-99939223639_ad-433378147590_pla-1354477352600_dev-m_ext-_prd-10566664&gclid=Cj0KCQiA4b2MBhD2ARIsAIrcB-QsEkj-zVQIbkiZnvTLm72pLtLodtCbCT8m-jSefKX5aUhIyg3y7kkaAhsTEALw_wcB
-
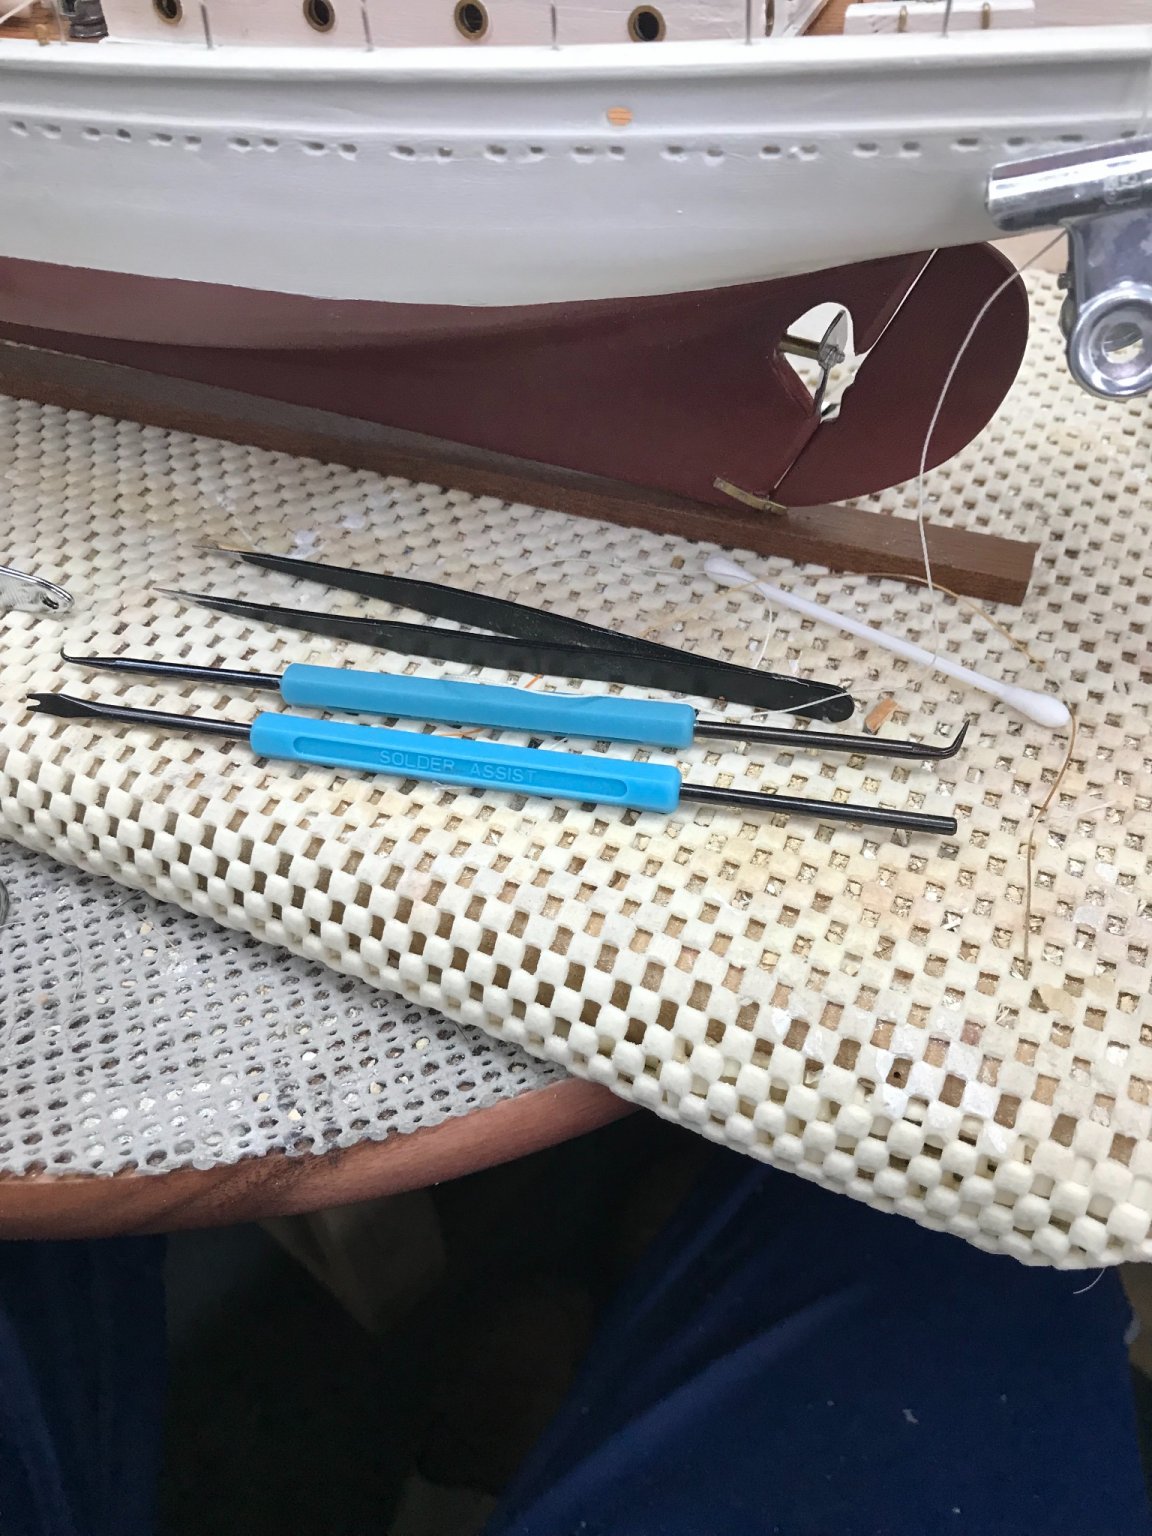
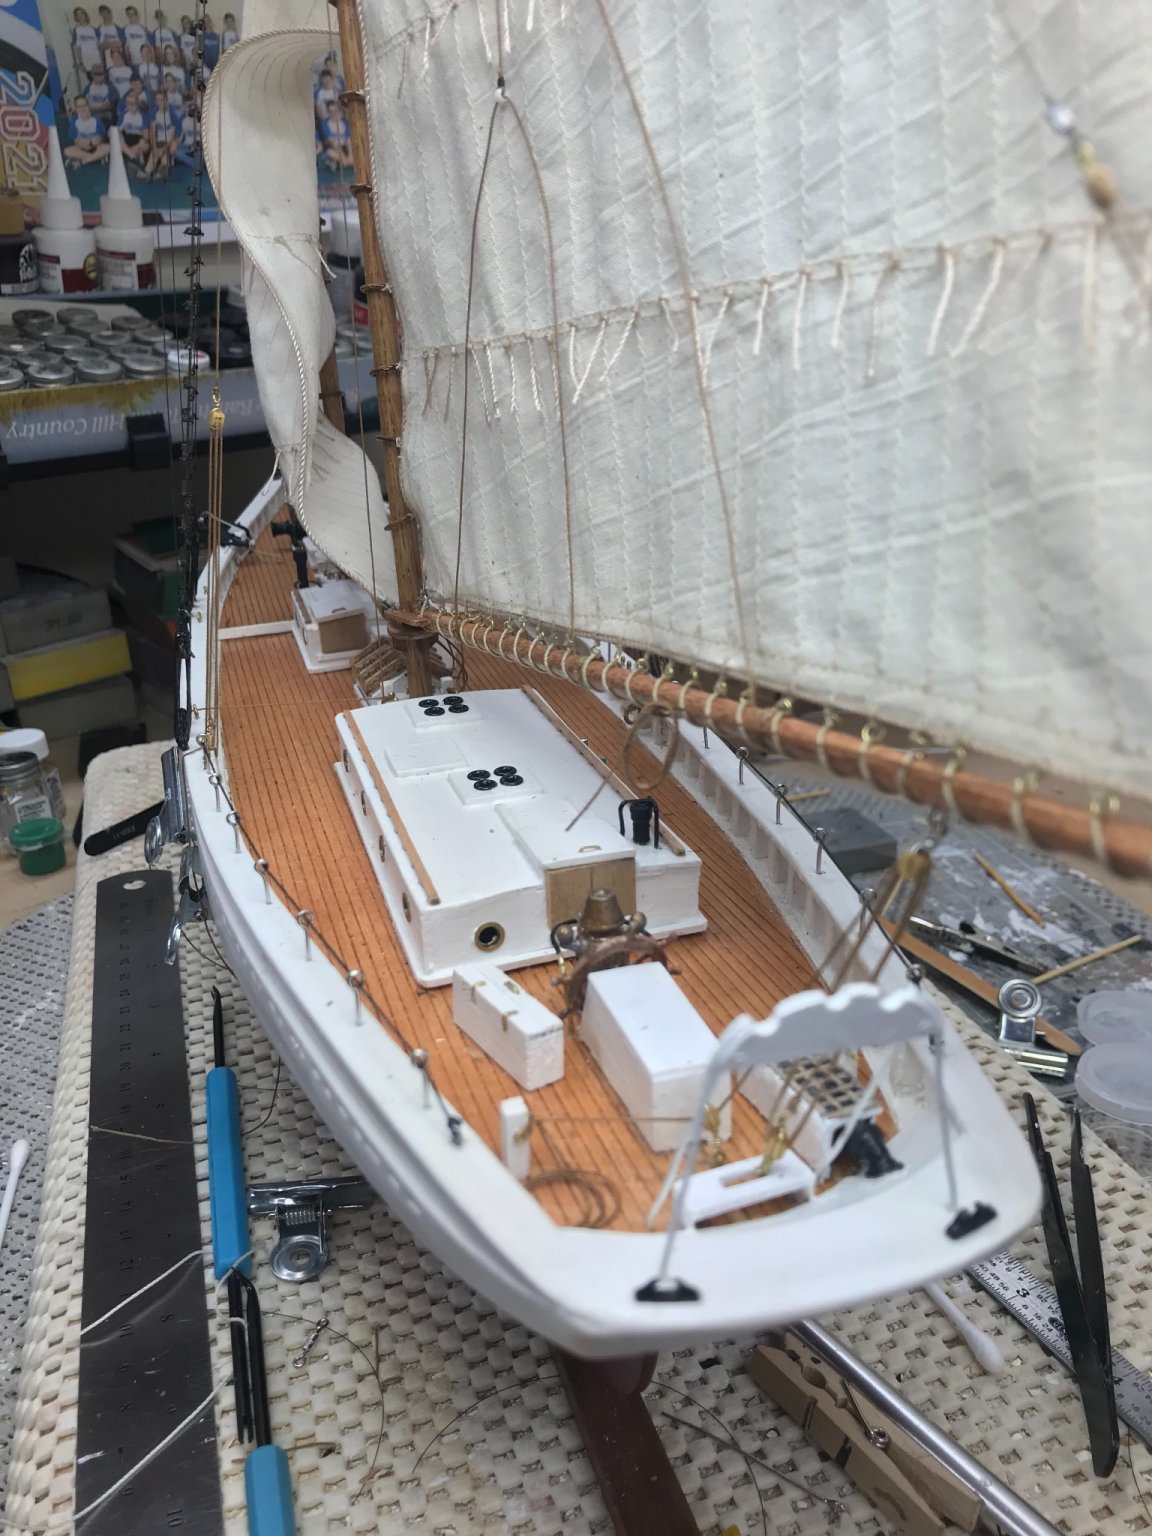
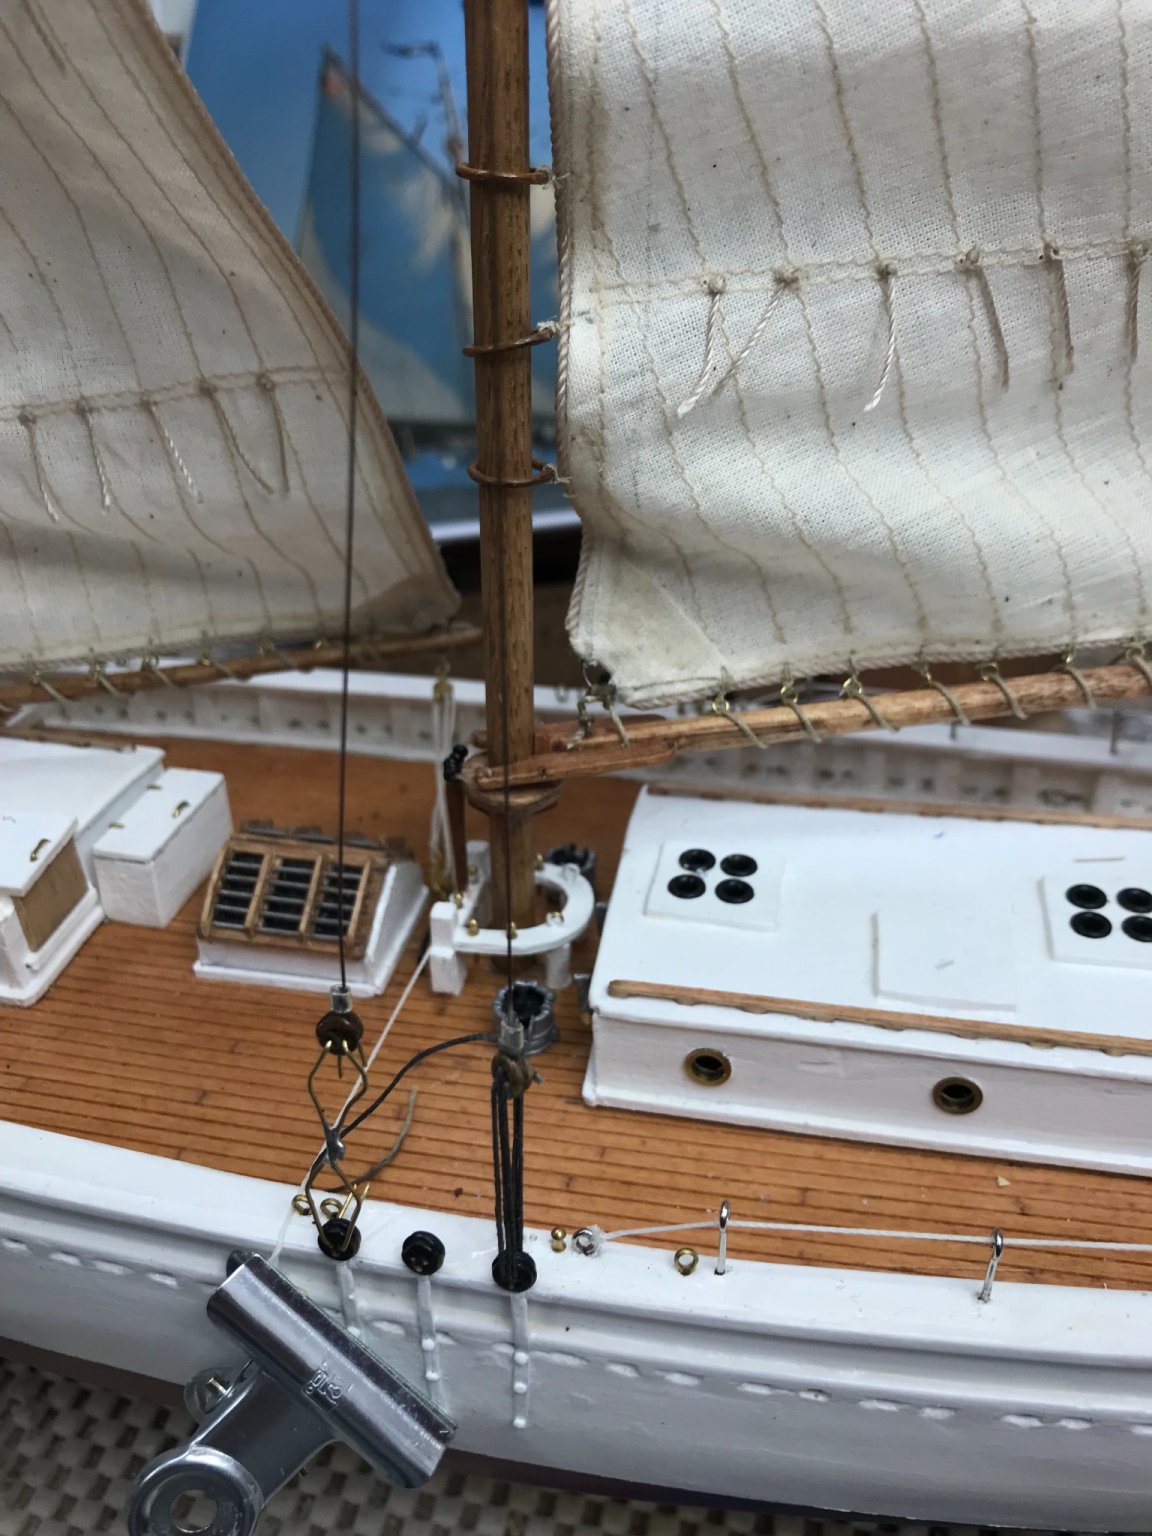
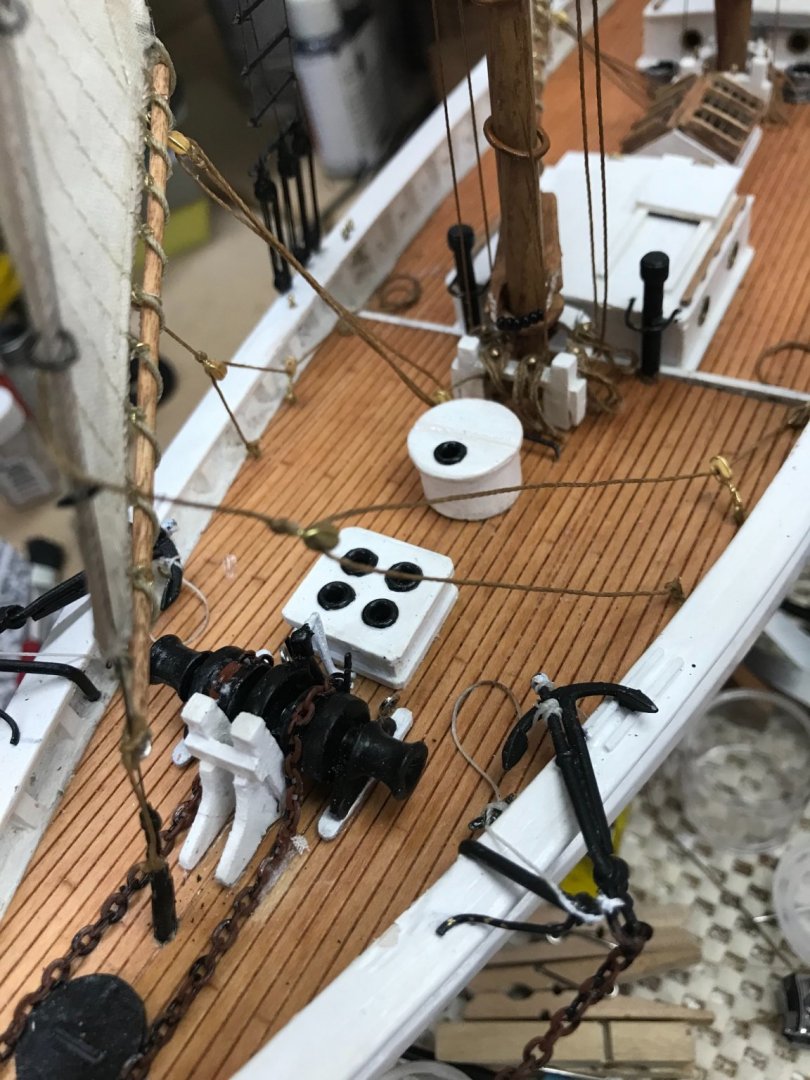
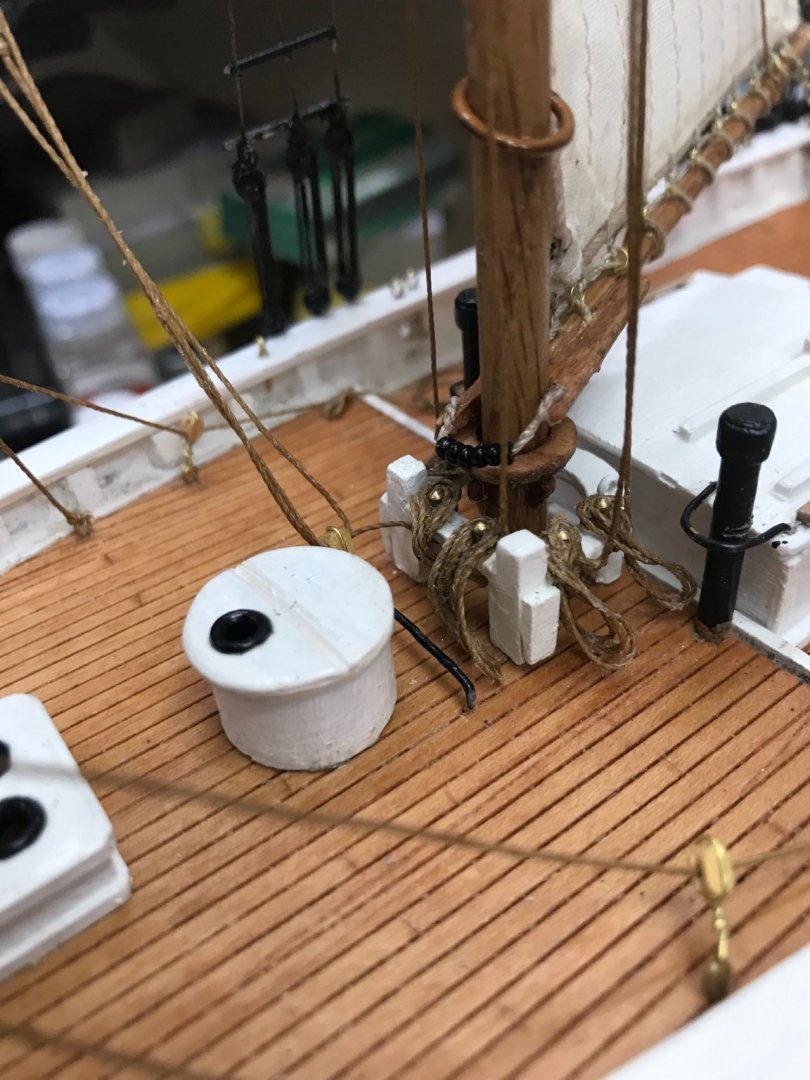
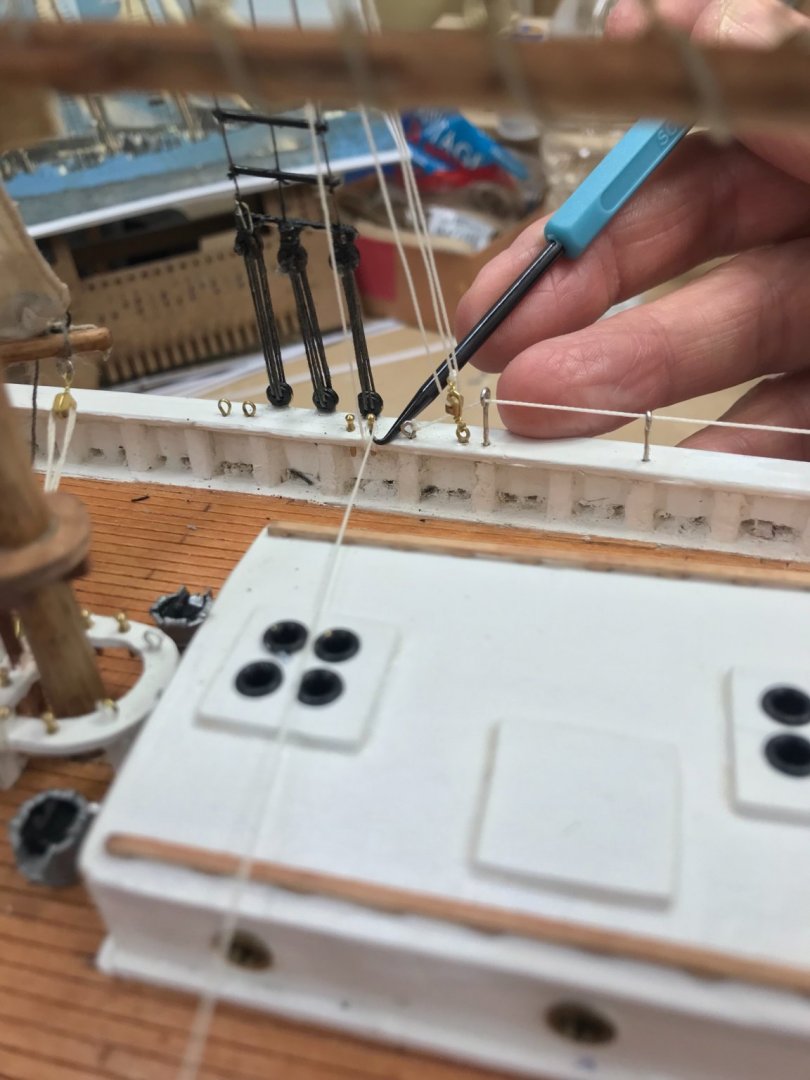
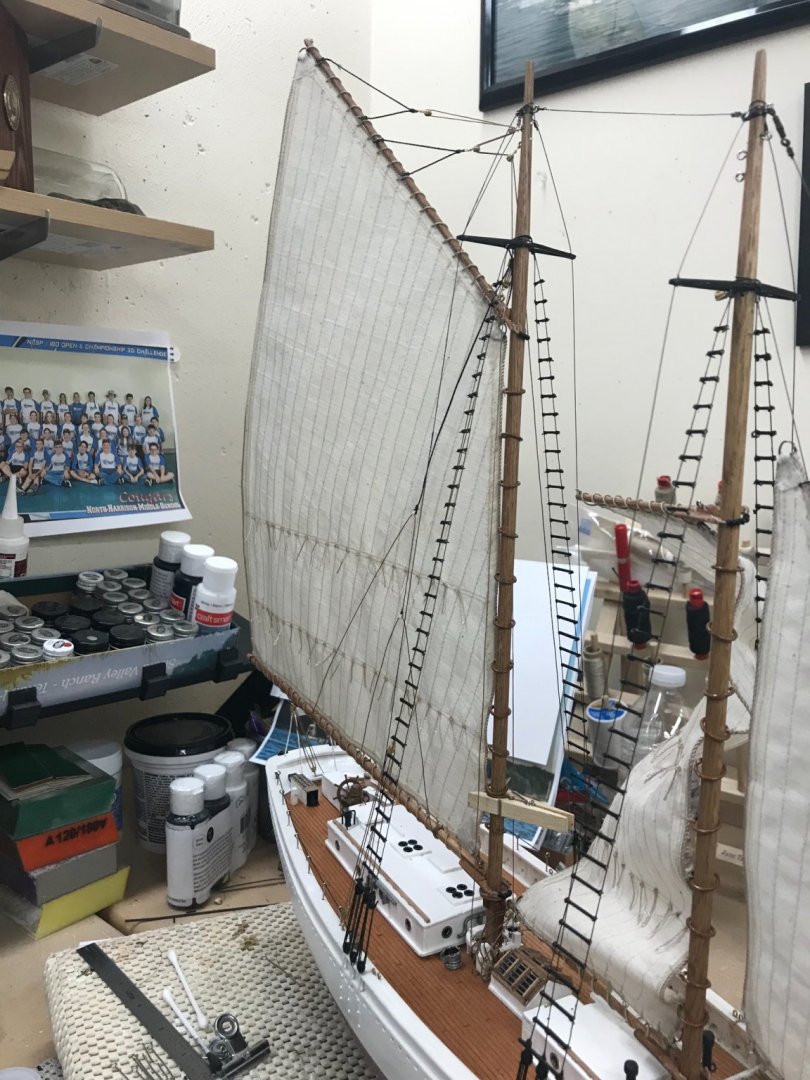
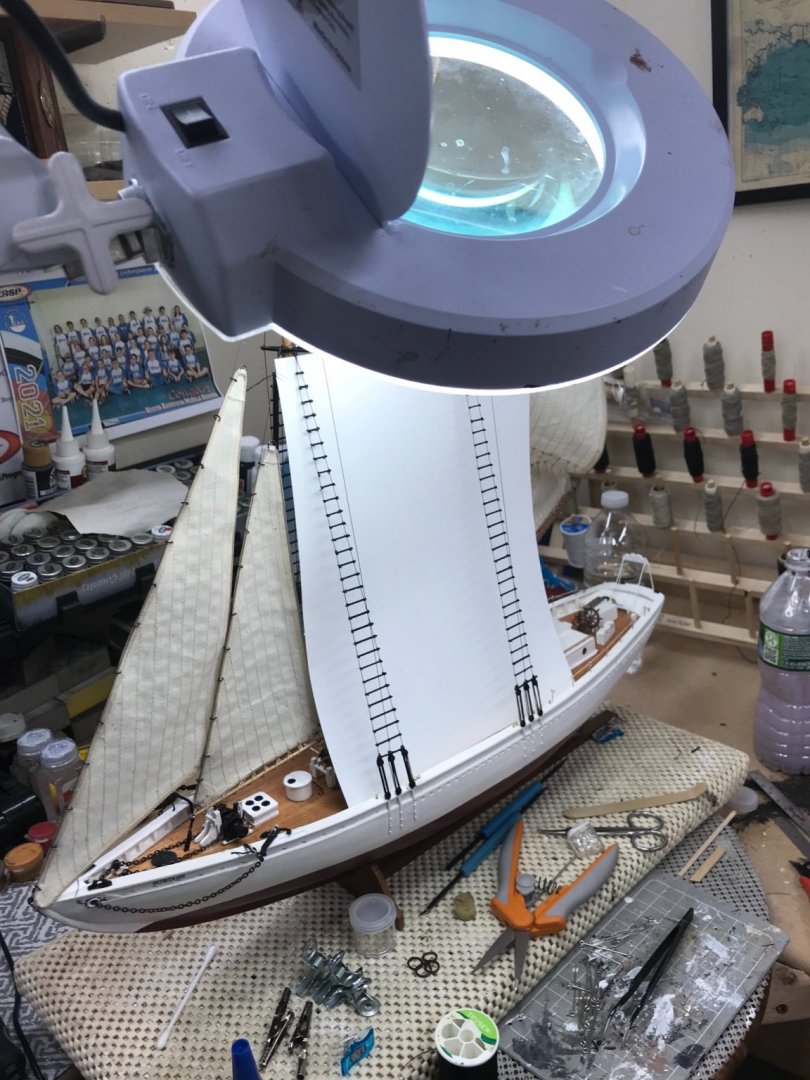
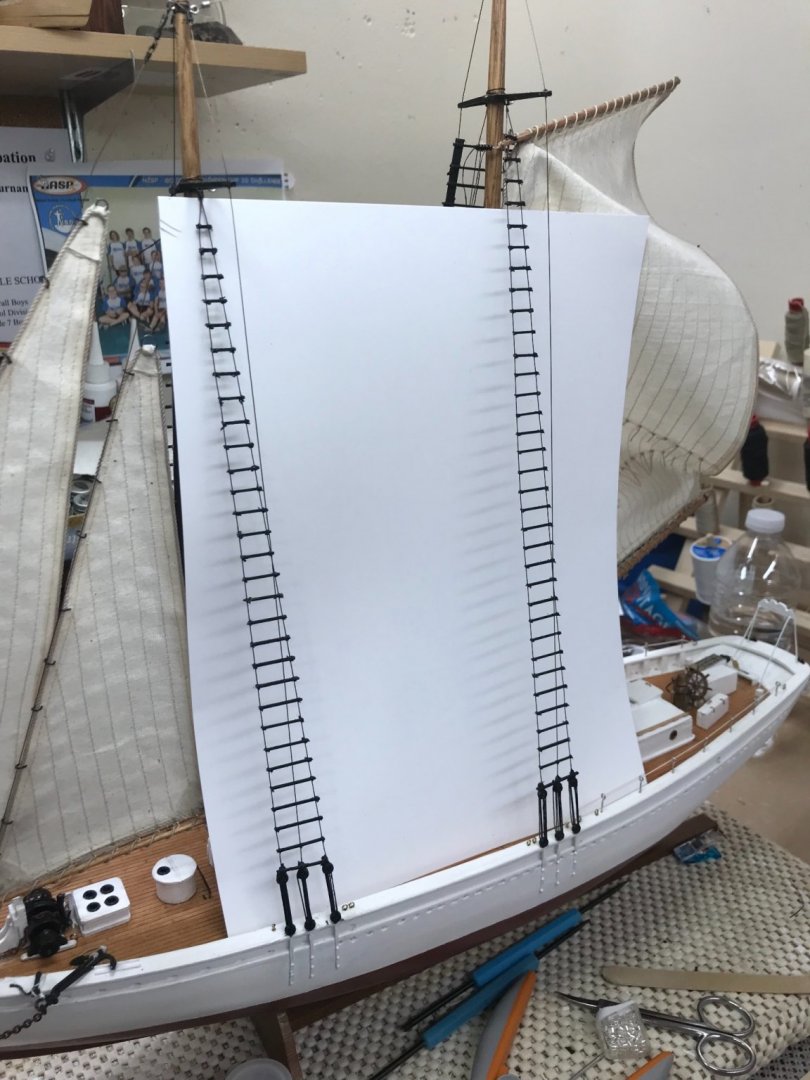
Running Rigging Main Sail… Main Throat Halyard… Belaying the Main Throat Halyard to the wrong side. 😑 Fixed it later… 😆 Main Throat Halyard Whip… Belaying the Whip… These tools were well worth the 10.00 I paid on eBay. Main Peak Halyard Tip: Stage white card in the back ground, gives better visibility. Less squinting. 😆 Lazyjacks going in with the boom tied down. Tied off the LazyJack pendant, behind the Throat Halyard Blocks. That was fun. NOT! 🧐 Termination of the LazyJack ropes on the Main Boom. Main Sheet Tackle… Topping Lift tackle… Time to put some wind in the Main Sail. Wow! That actually worked…. I glued the Mast, Boom and Gaff in to position. Then laid her on her side and soaked the Main Sail down with Fabric Stiffener. Let her dry overnight. 😎 Peak Halyard Whip installed. View from the stern down the Main Boom. Main Sail Running Rigging completed. Cheers 🍻


- 127 replies
-
- 11
-
-
- Bowdoin
- Arctic Exploration
- (and 3 more)
-
Yves, I vote for the natural look. Give it a few more coats to be sure you like the darkening of the poly. Having said that, what is the historical coloring of the ship? That probably doesn’t help your decision. 😆
-
Standing Rigging completed… Those battens were painful 😖 Just as they were on my Charles W Morgan Let the Running Rigging begin. 🍻

- 127 replies
-
- 9
-
-
-
- Bowdoin
- Arctic Exploration
- (and 3 more)
-
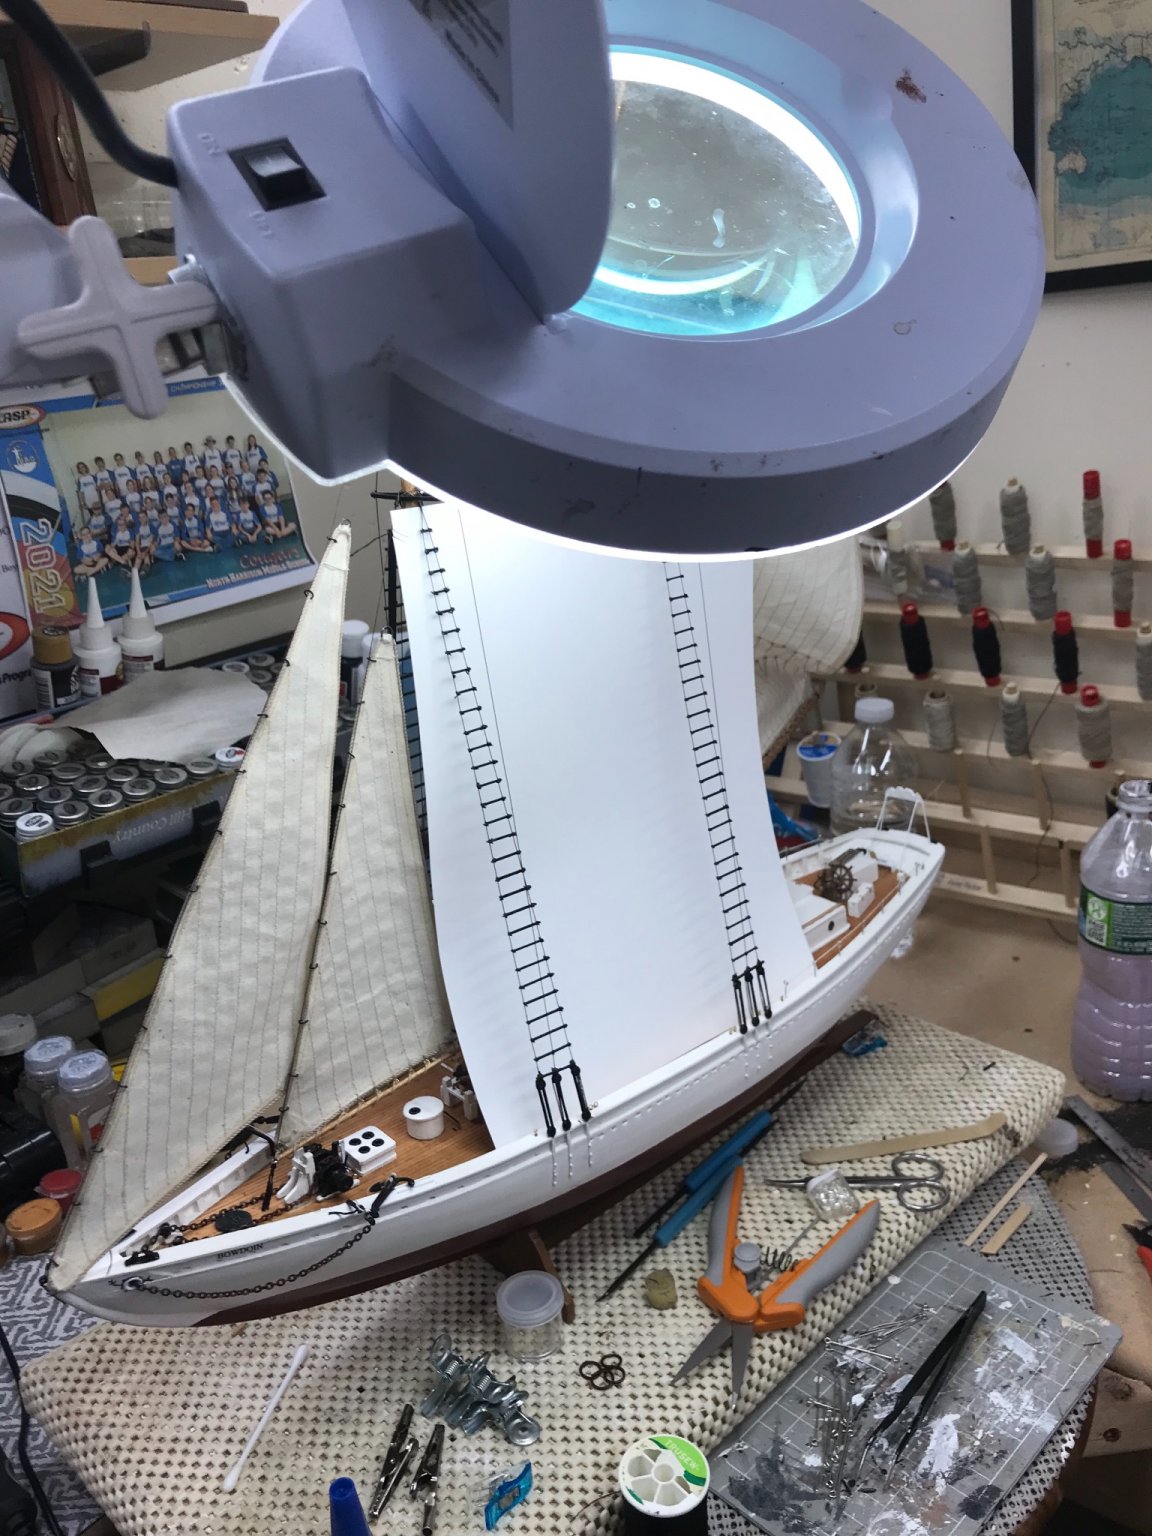
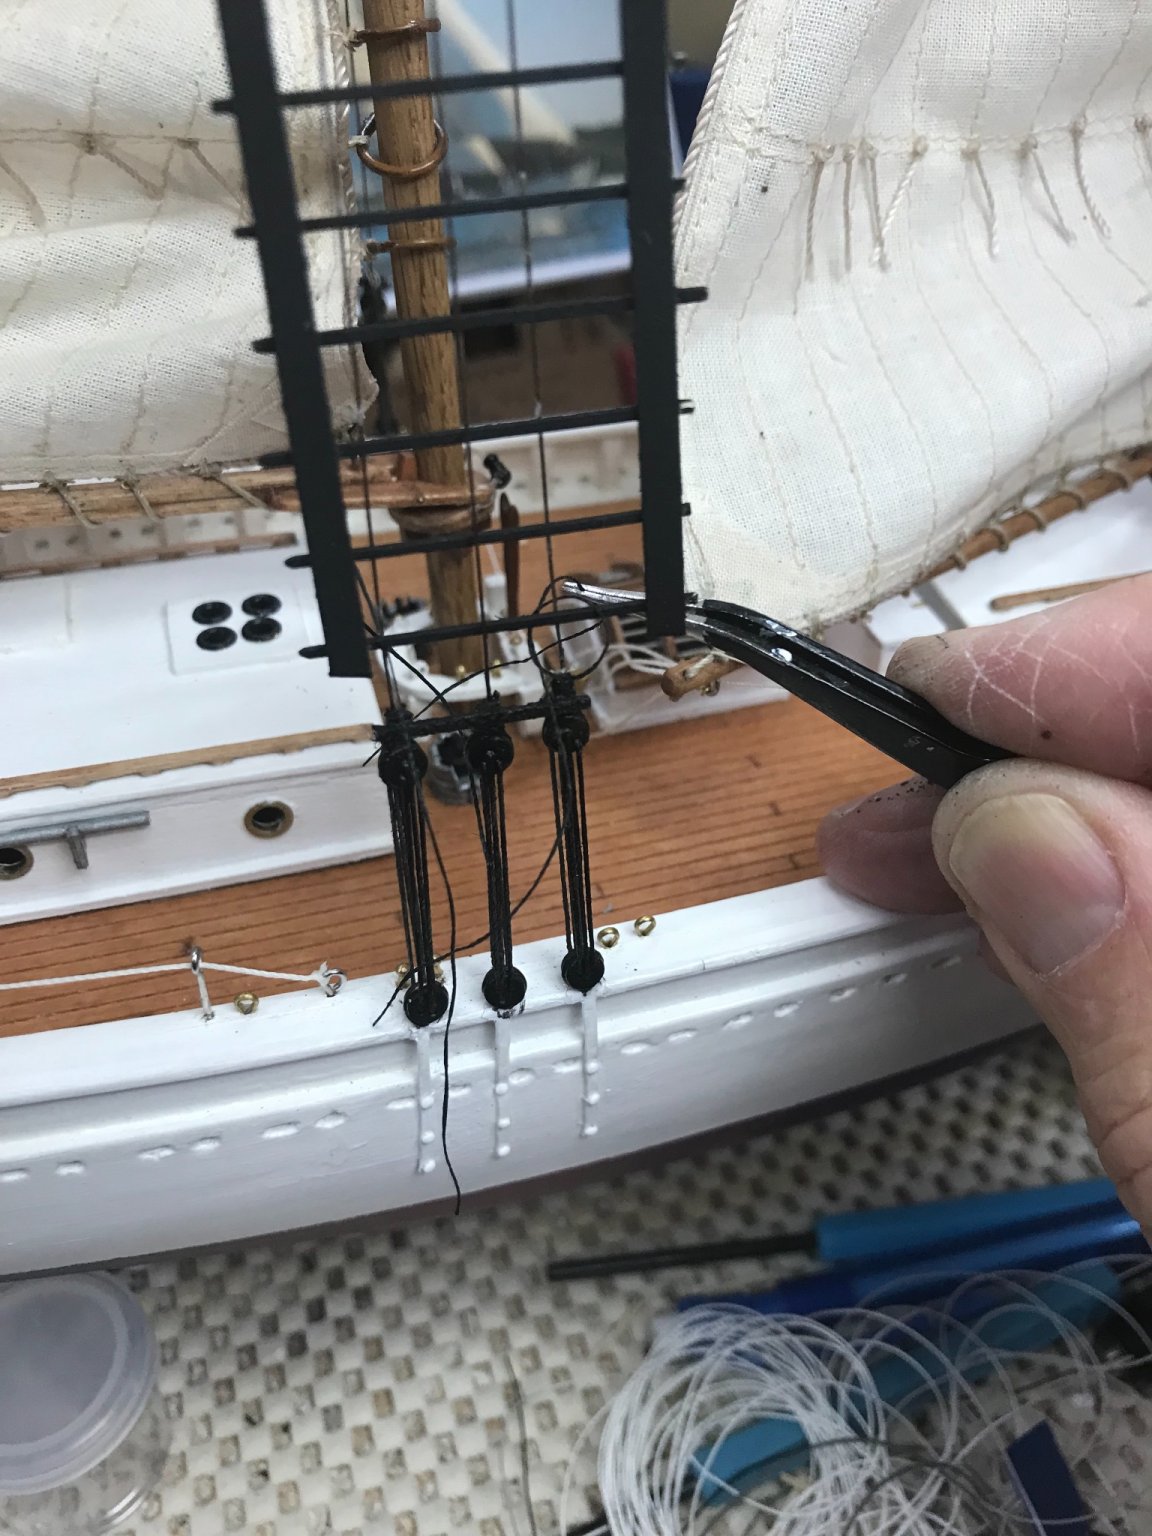
battens continued… Portside done… Thought I would report a couple of learnings. 1. Using white card behind the shrouds helps to see the knots you are tying. 2. Lots of light and a magnifier. 🧐 Cheers 🍻
- 127 replies
-
- 8
-
-
- Bowdoin
- Arctic Exploration
- (and 3 more)
-
Yep, it is a very good way of doing this. I’ll use it on the Bluenose I have in my stash. 😆 Not my idea though, got it from @ahb26 his battens were laser cut that he had gotten from @MrBlueJacket . This technique may be in the current Bowdoin kit from Bluejacket Shipcrafters. Very nice kit they have. 👍
- 127 replies
-
- 1
-
-
- Bowdoin
- Arctic Exploration
- (and 3 more)
-
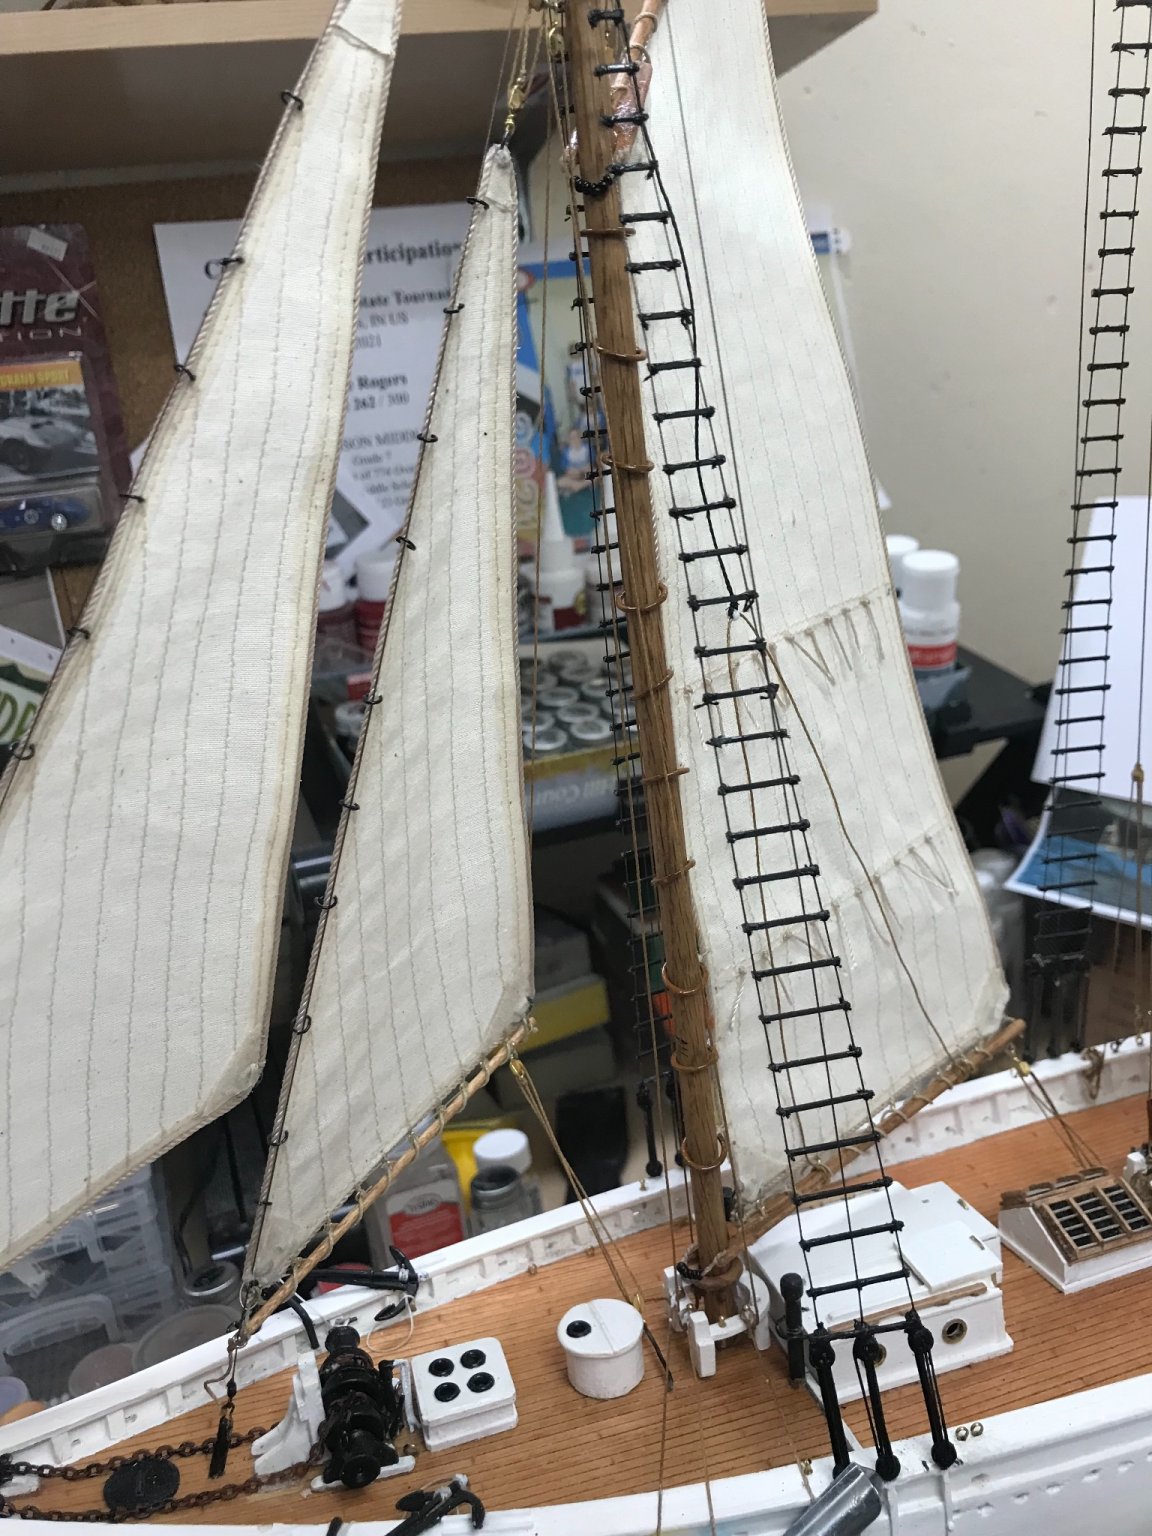
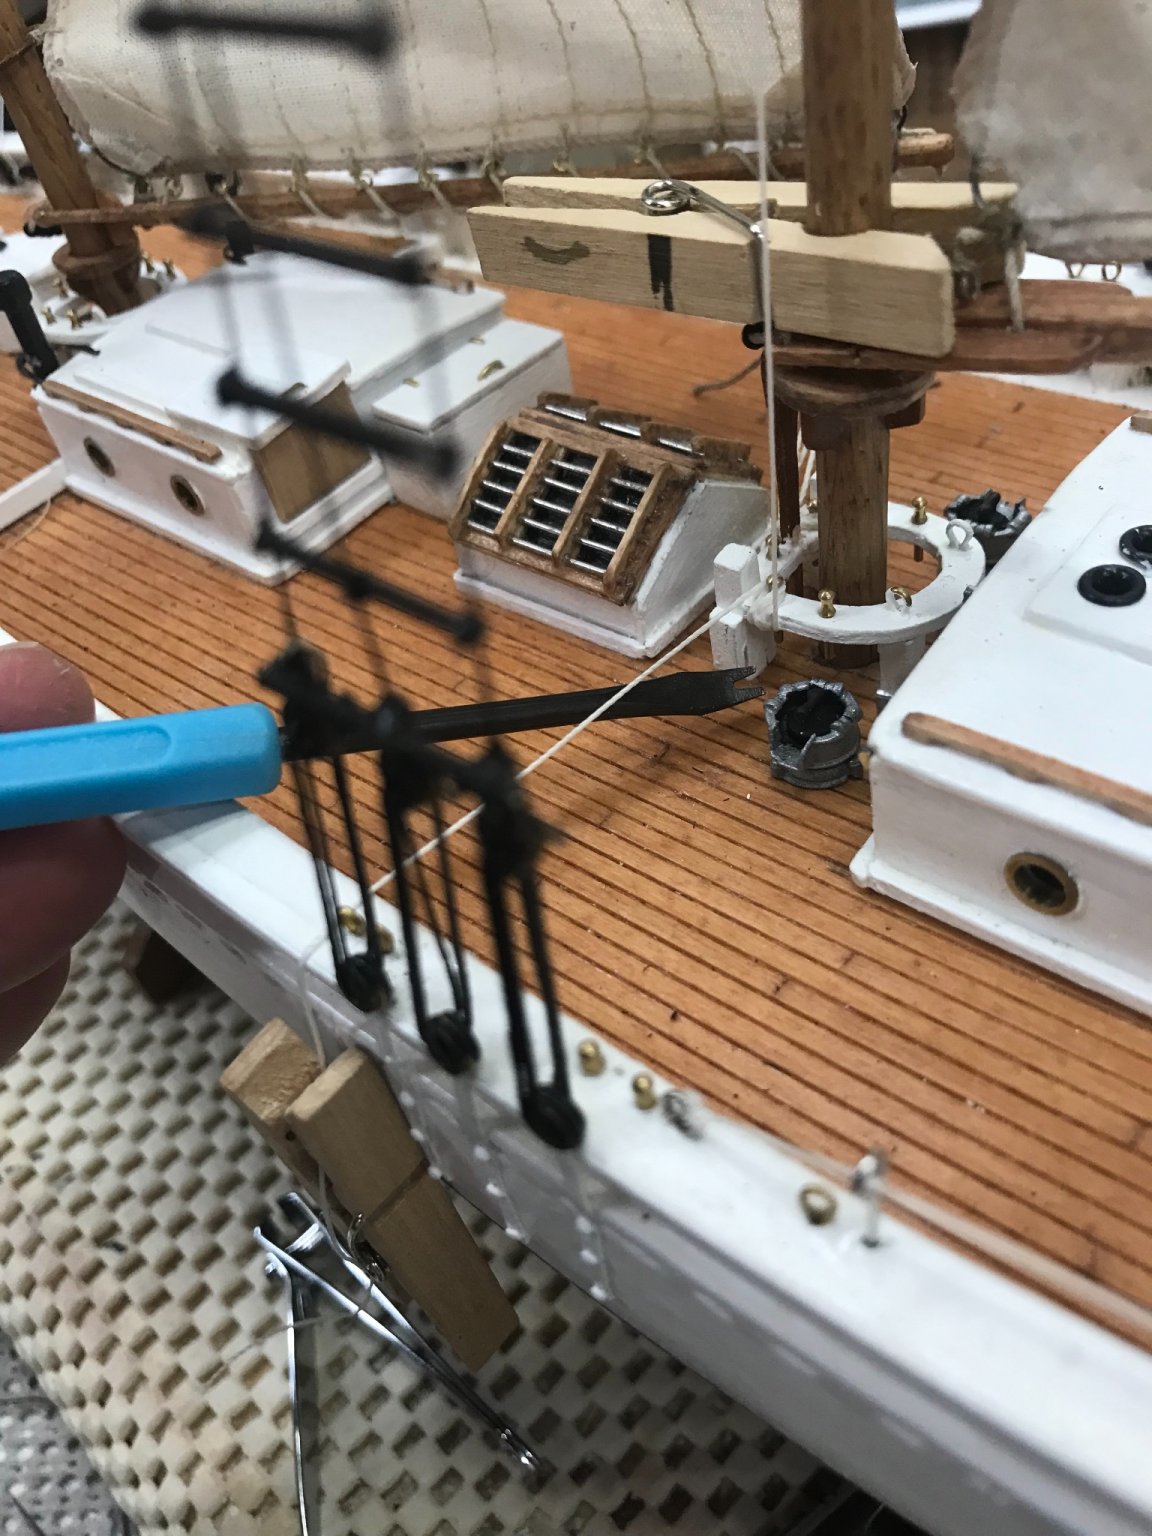
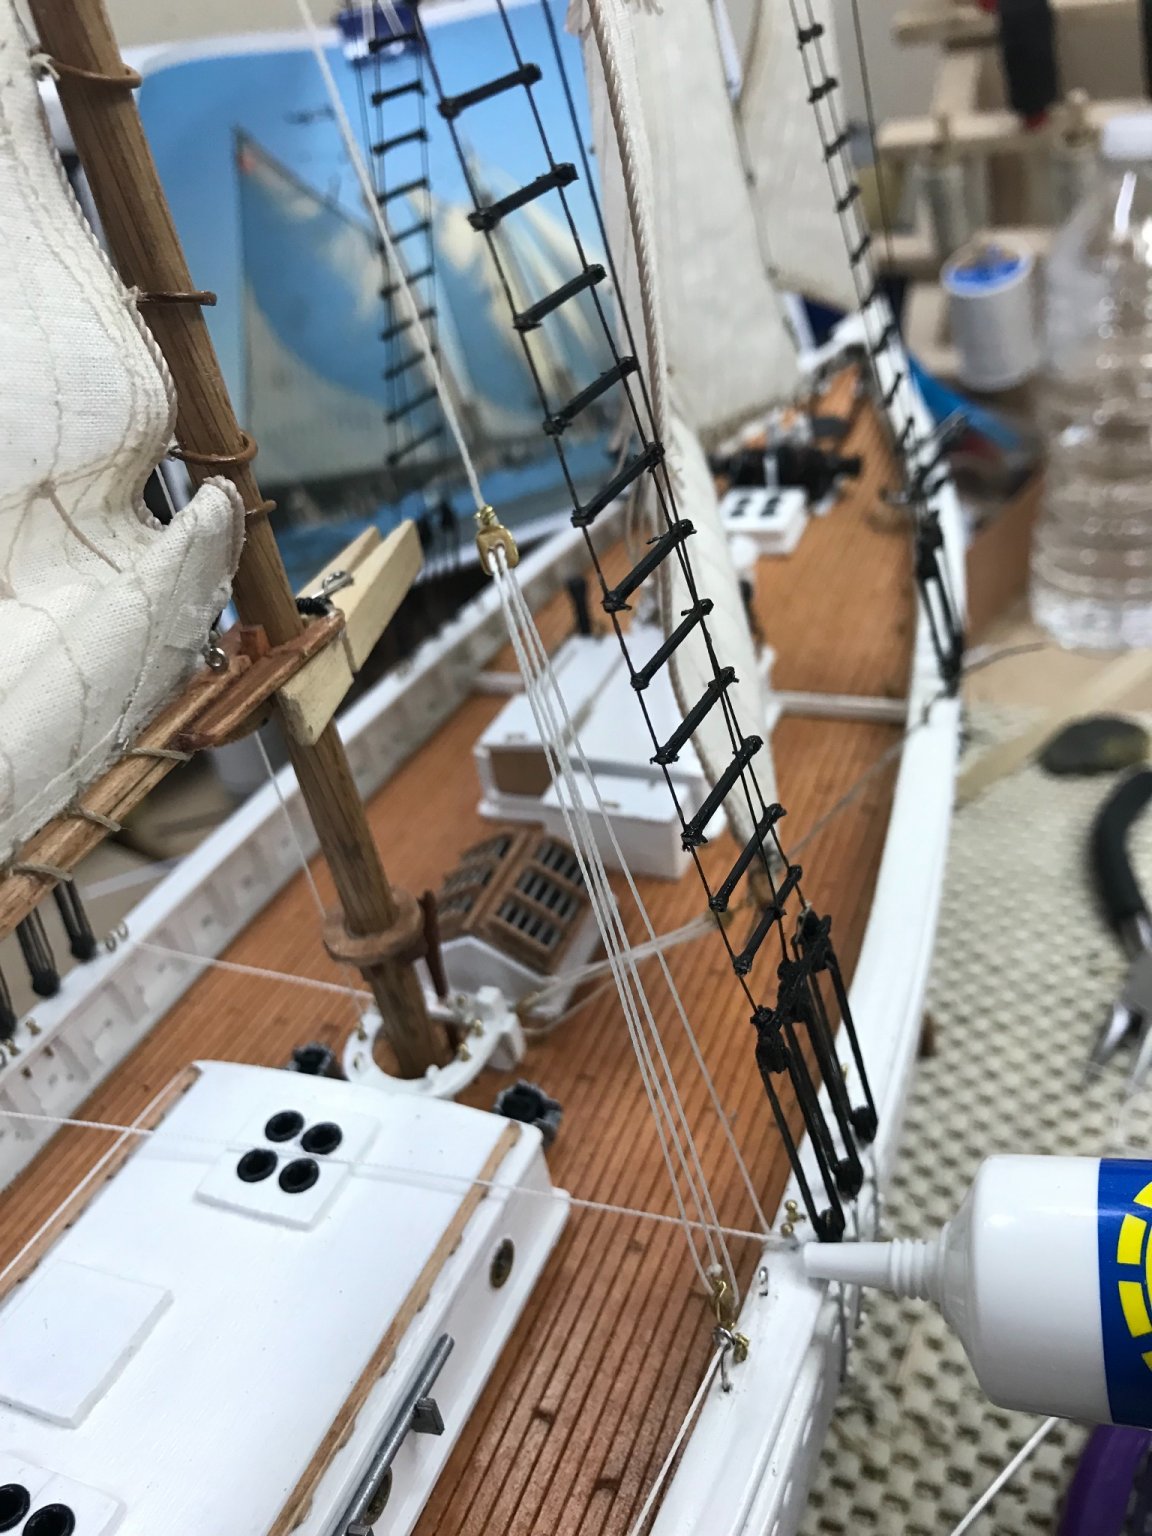
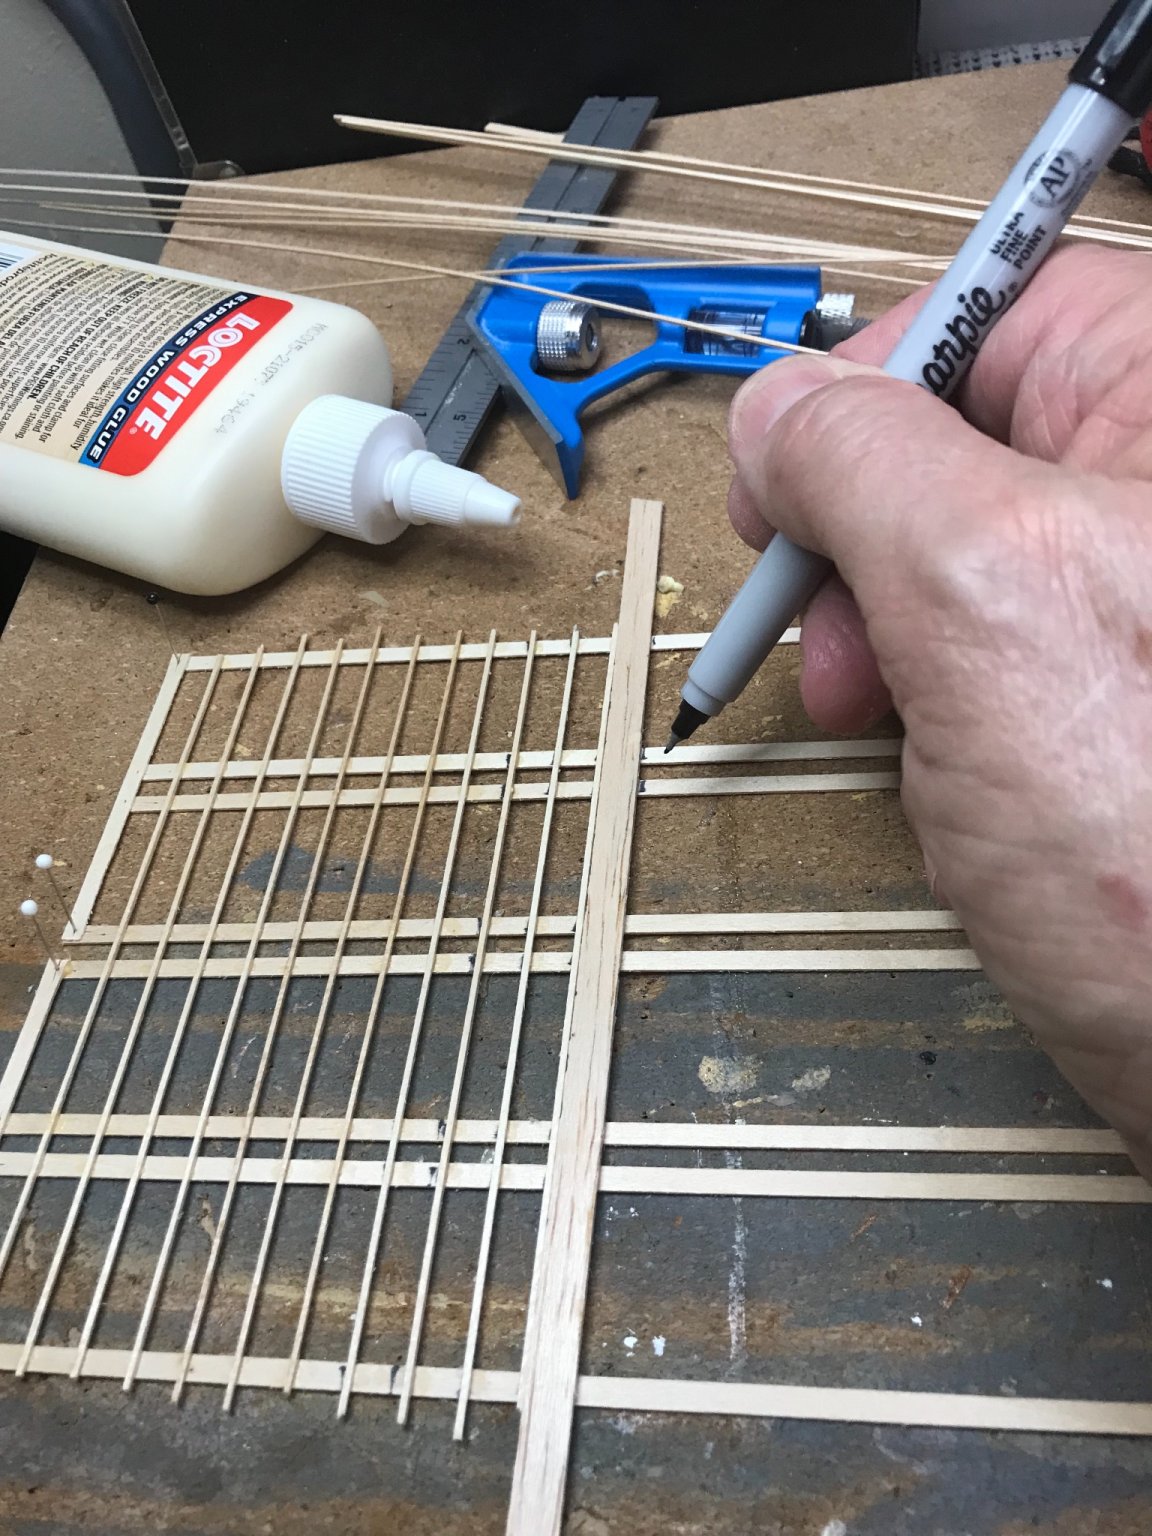
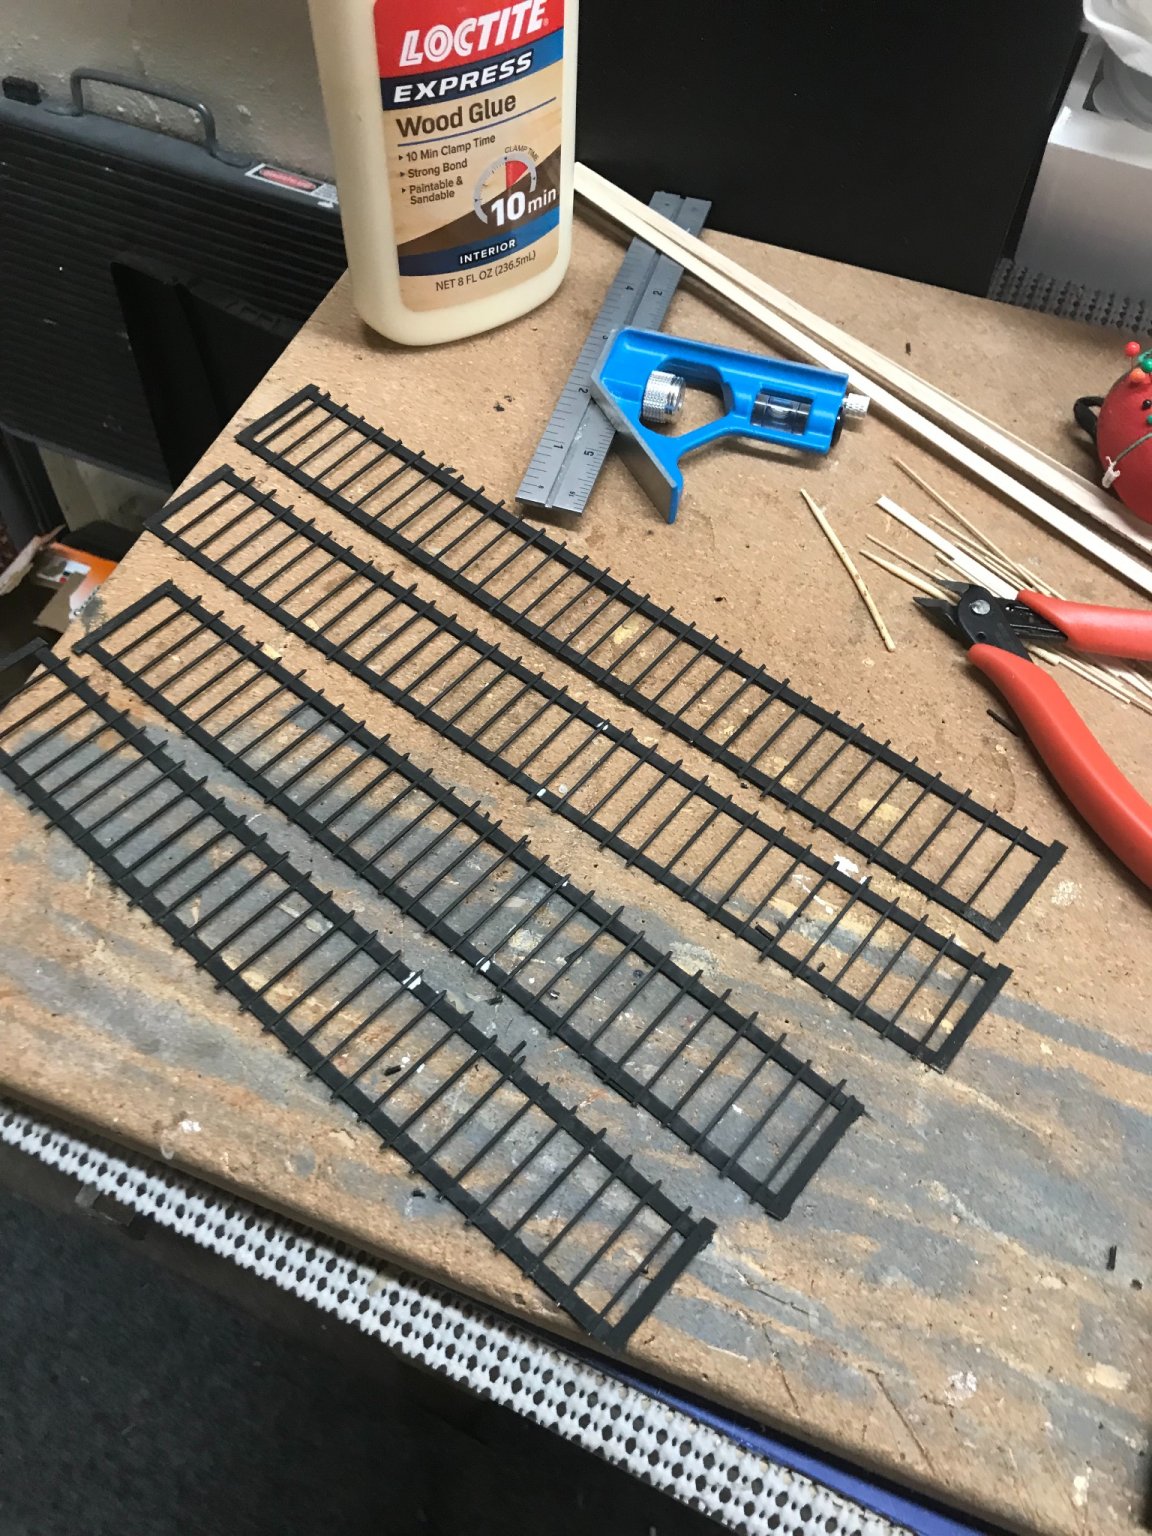
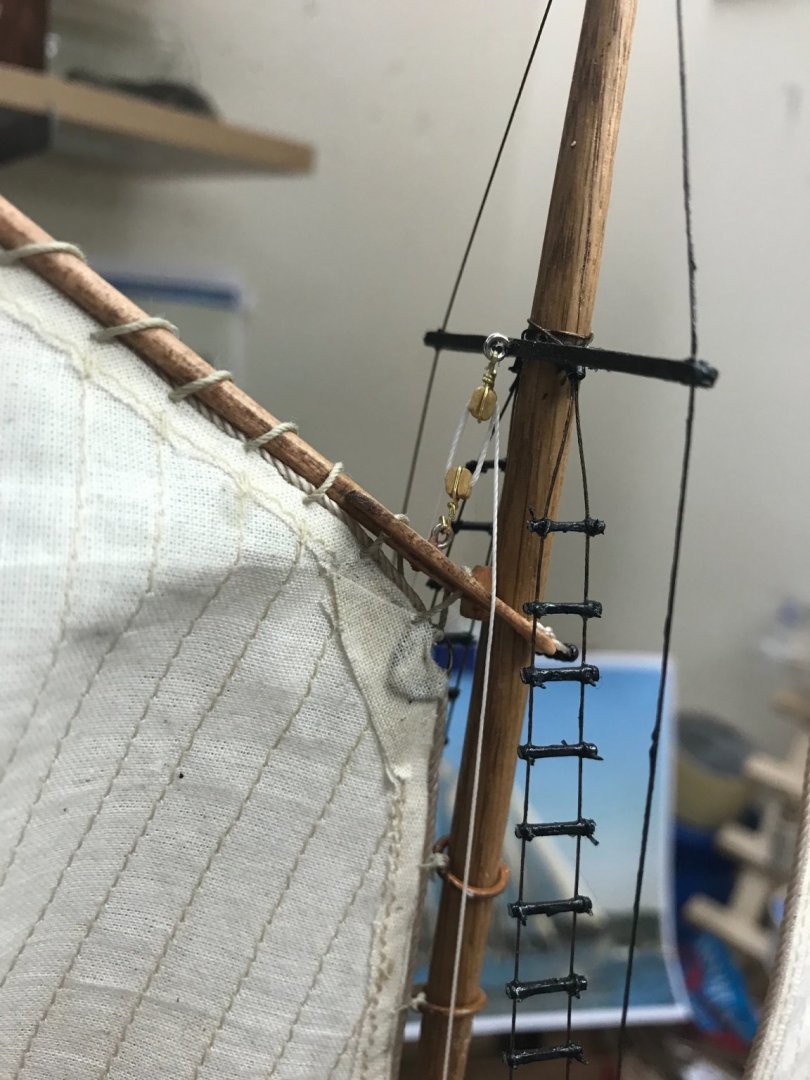
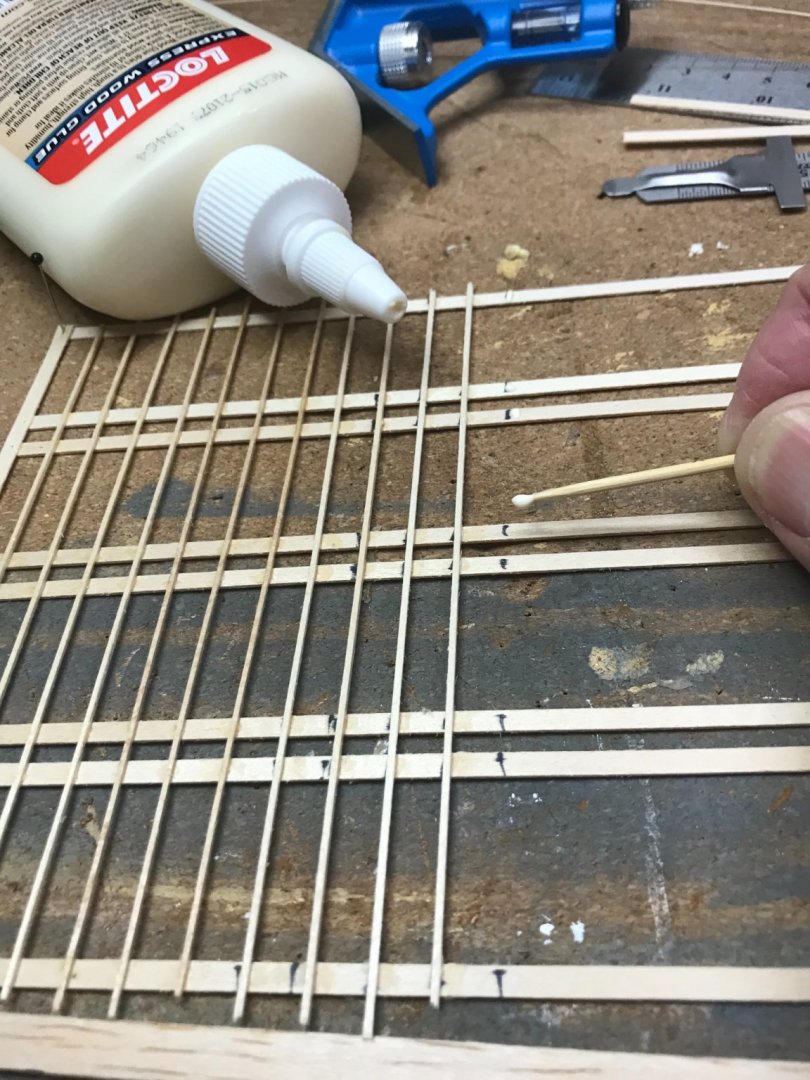
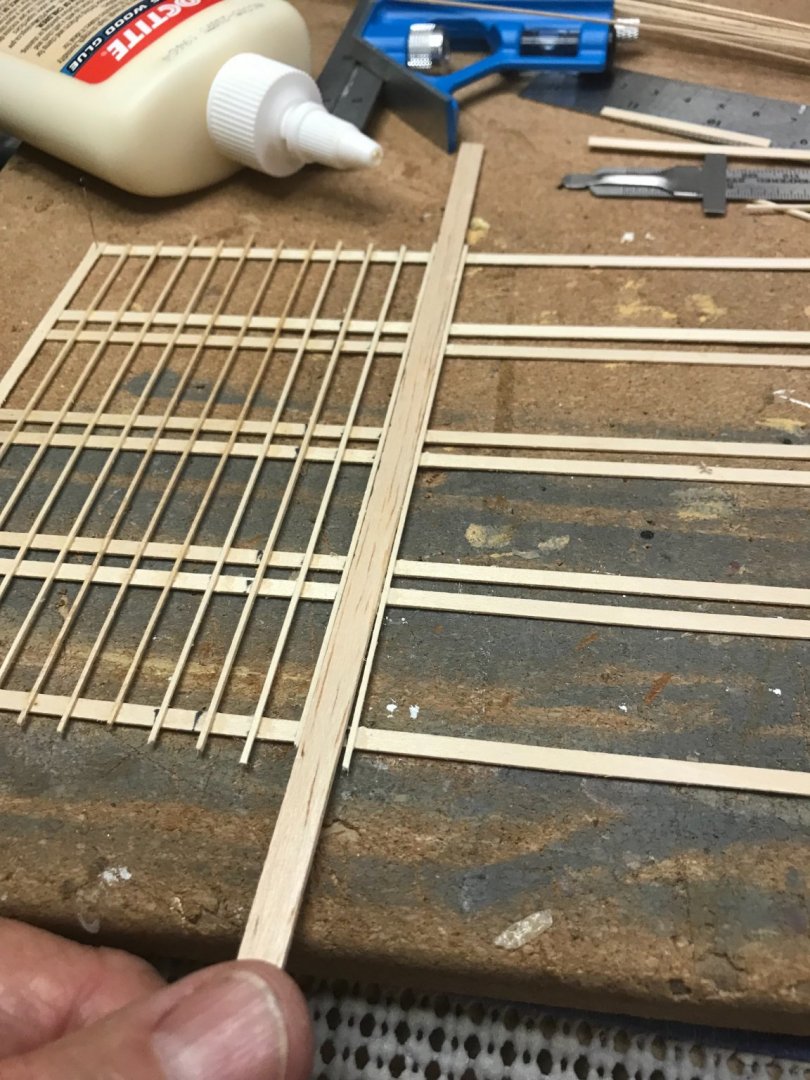
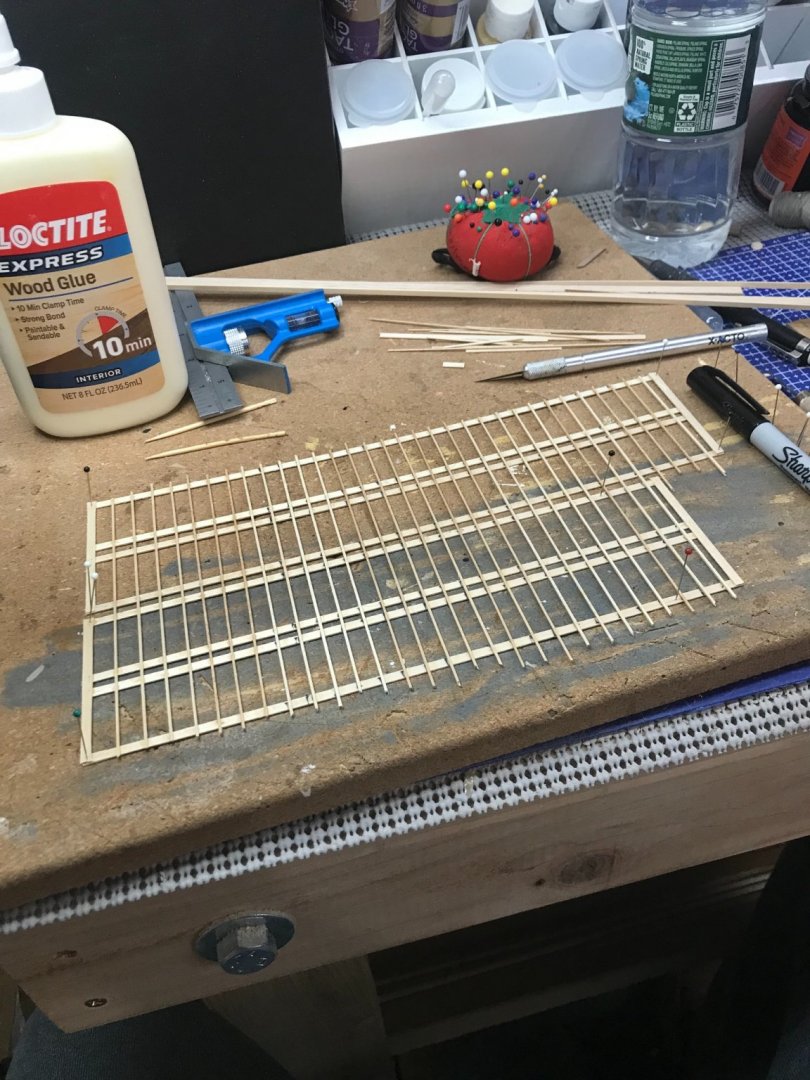
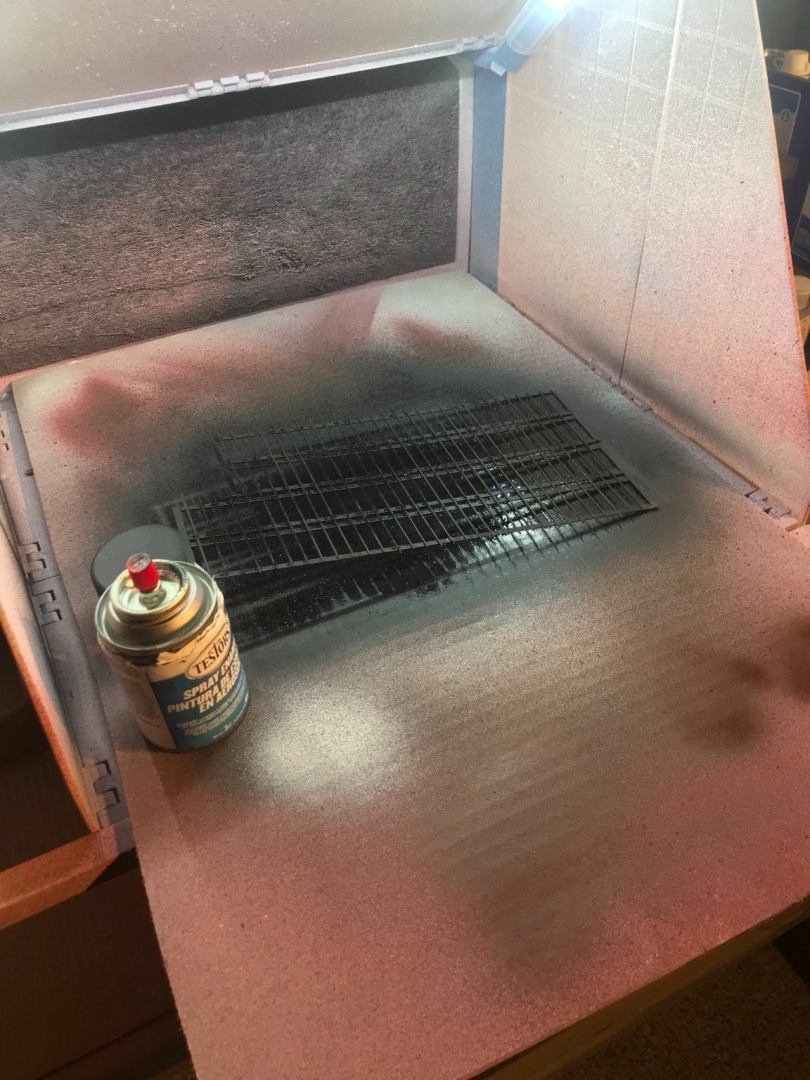
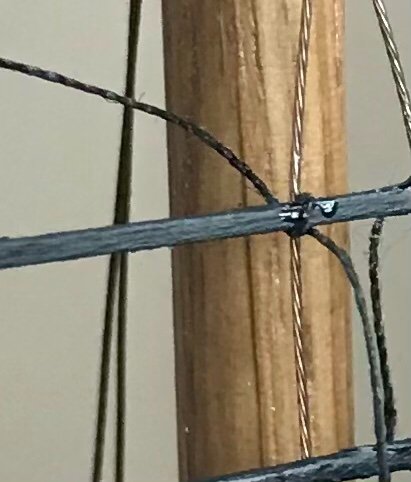
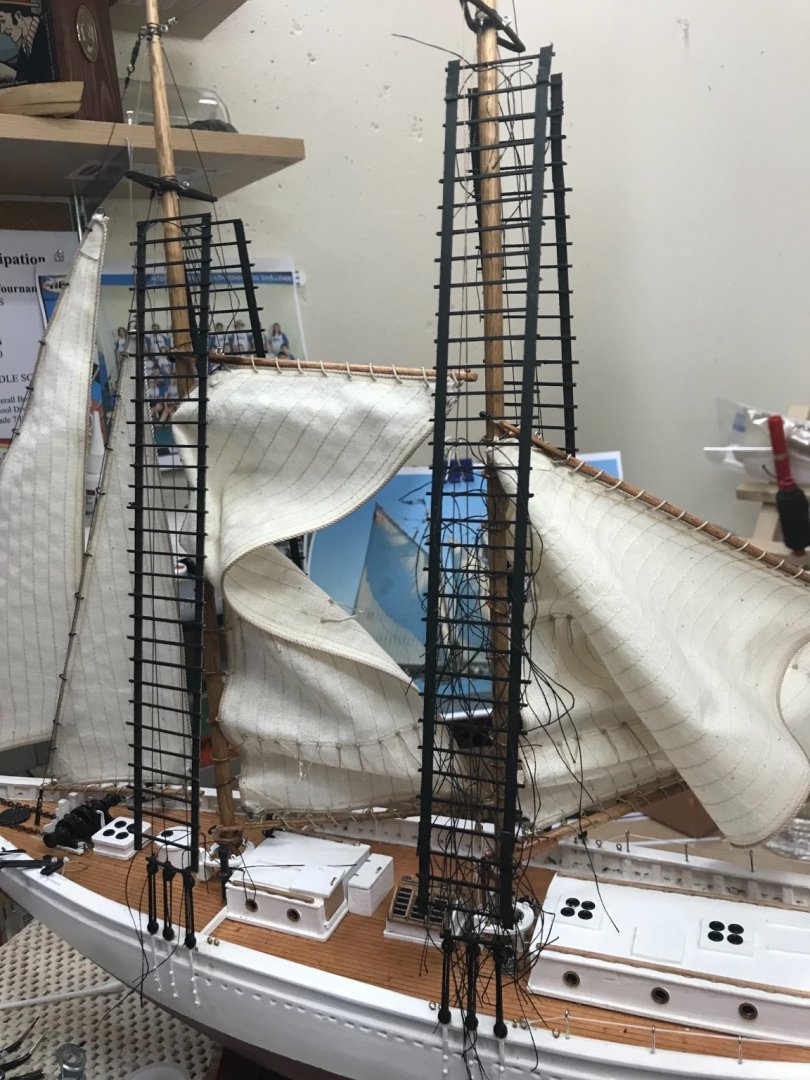
Battens… Taking a cue from newer kits, I am creating evenly spaced battens. 8 mm separation to be exact. 😆 Te frames will be cut away, once the battens are tied in place. White glue for this application. Verify spacing, one piece at a time. Battens with framing completed. Painting flat black before mounting. Separate each shrouds batten set. Battens clamped into place. Tie each one to shroud… Just a tiny drop of CA glue to secure the knot. Got to say I like the outcome. 😎 Only 252 of these knots to tie. But who’s counting. Half a shroud in 2 hours, only 14 hours to go. 😆 But who’s counting, no deadlines here. 👍 Tails to be trimmed later. Onwards… 🍻


- 127 replies
-
- 11
-
-
- Bowdoin
- Arctic Exploration
- (and 3 more)
-
Very nice work! 👍
-
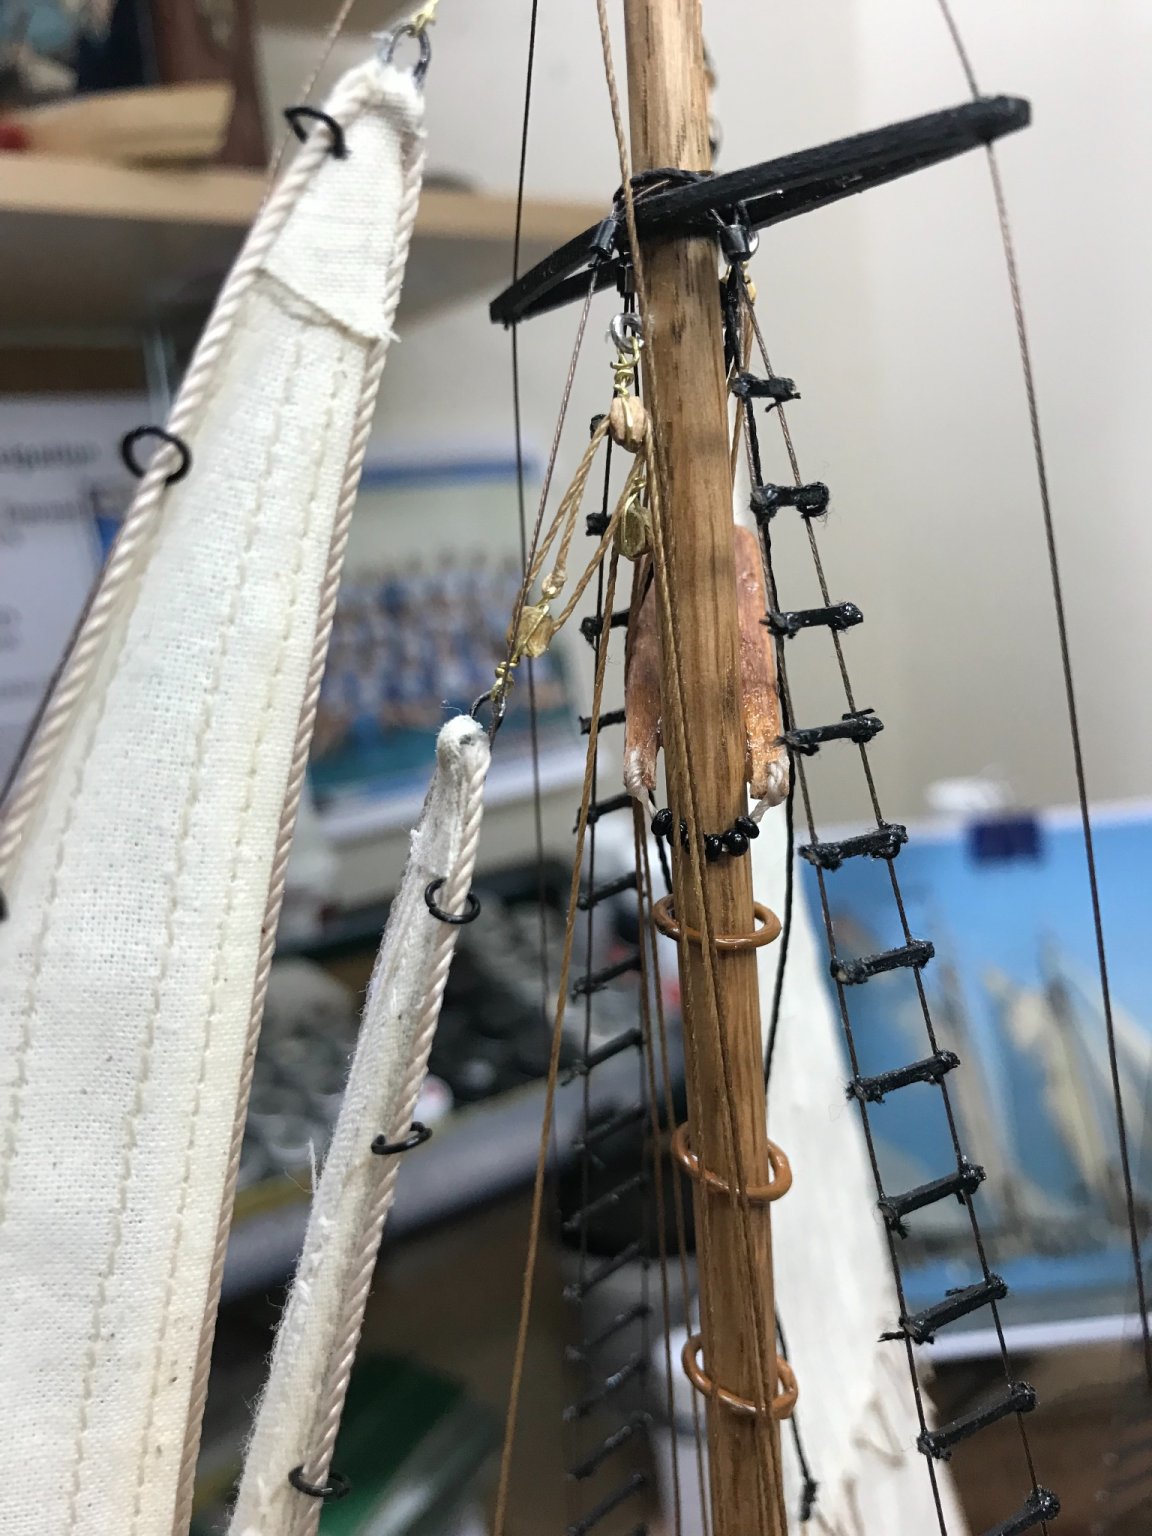
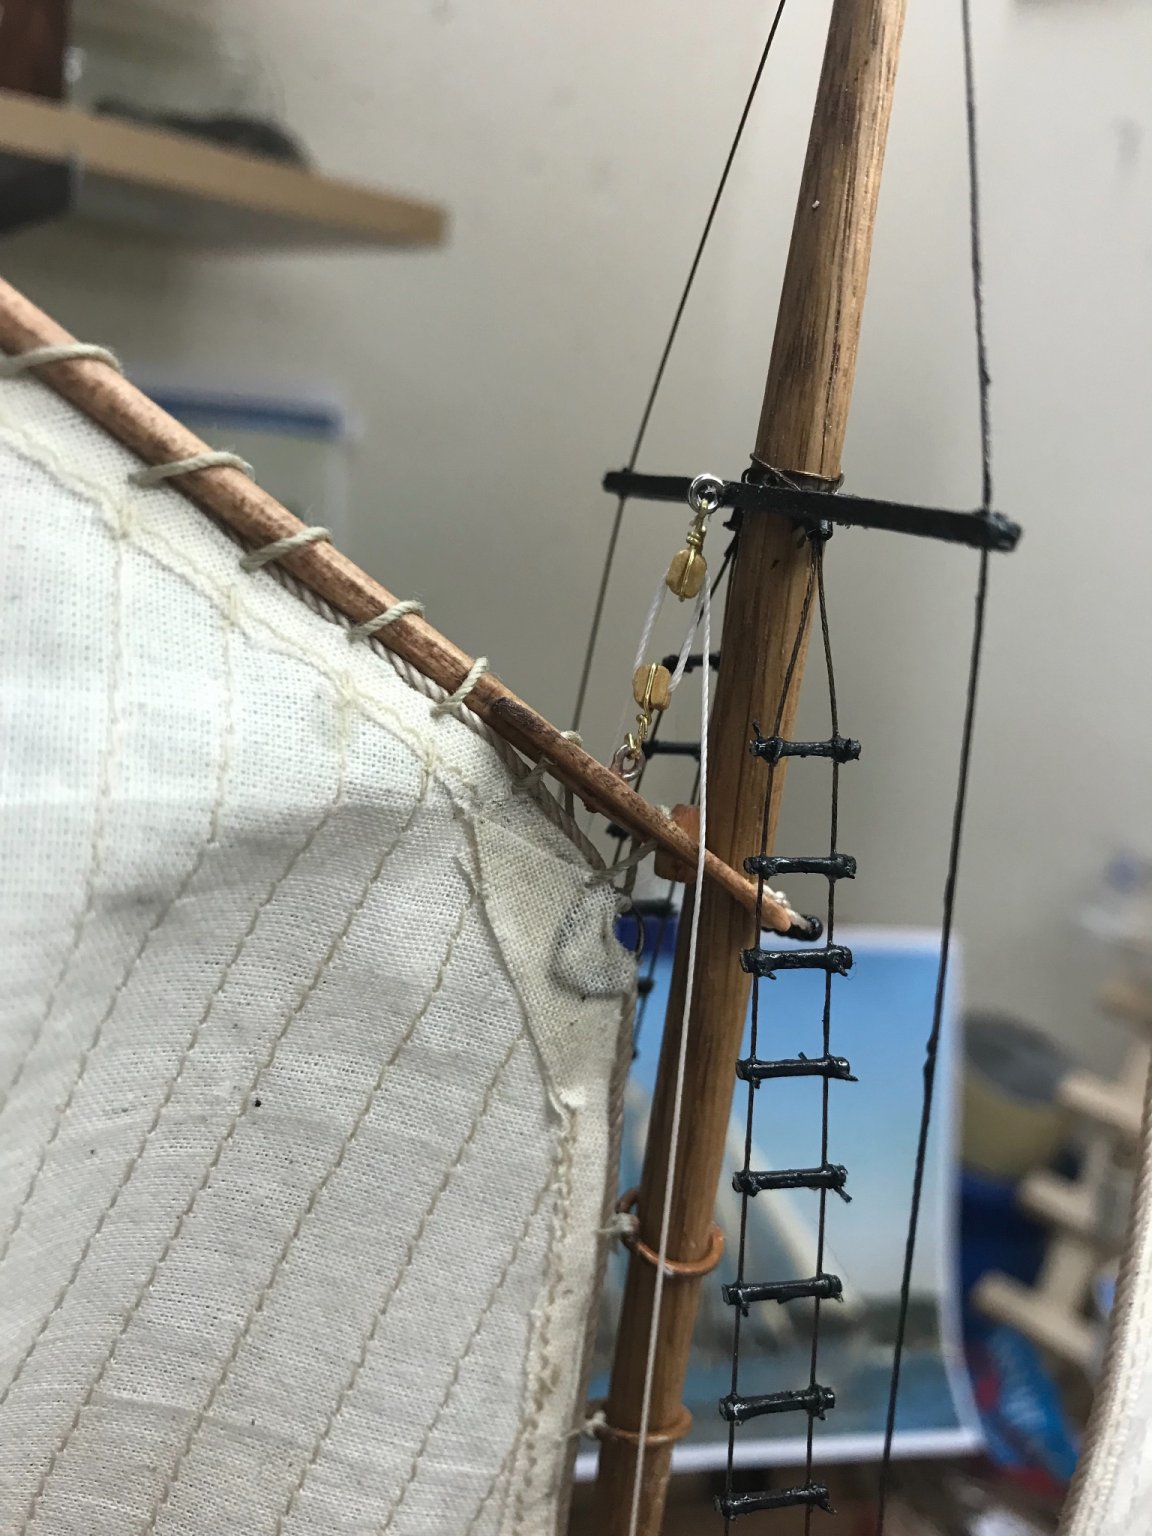
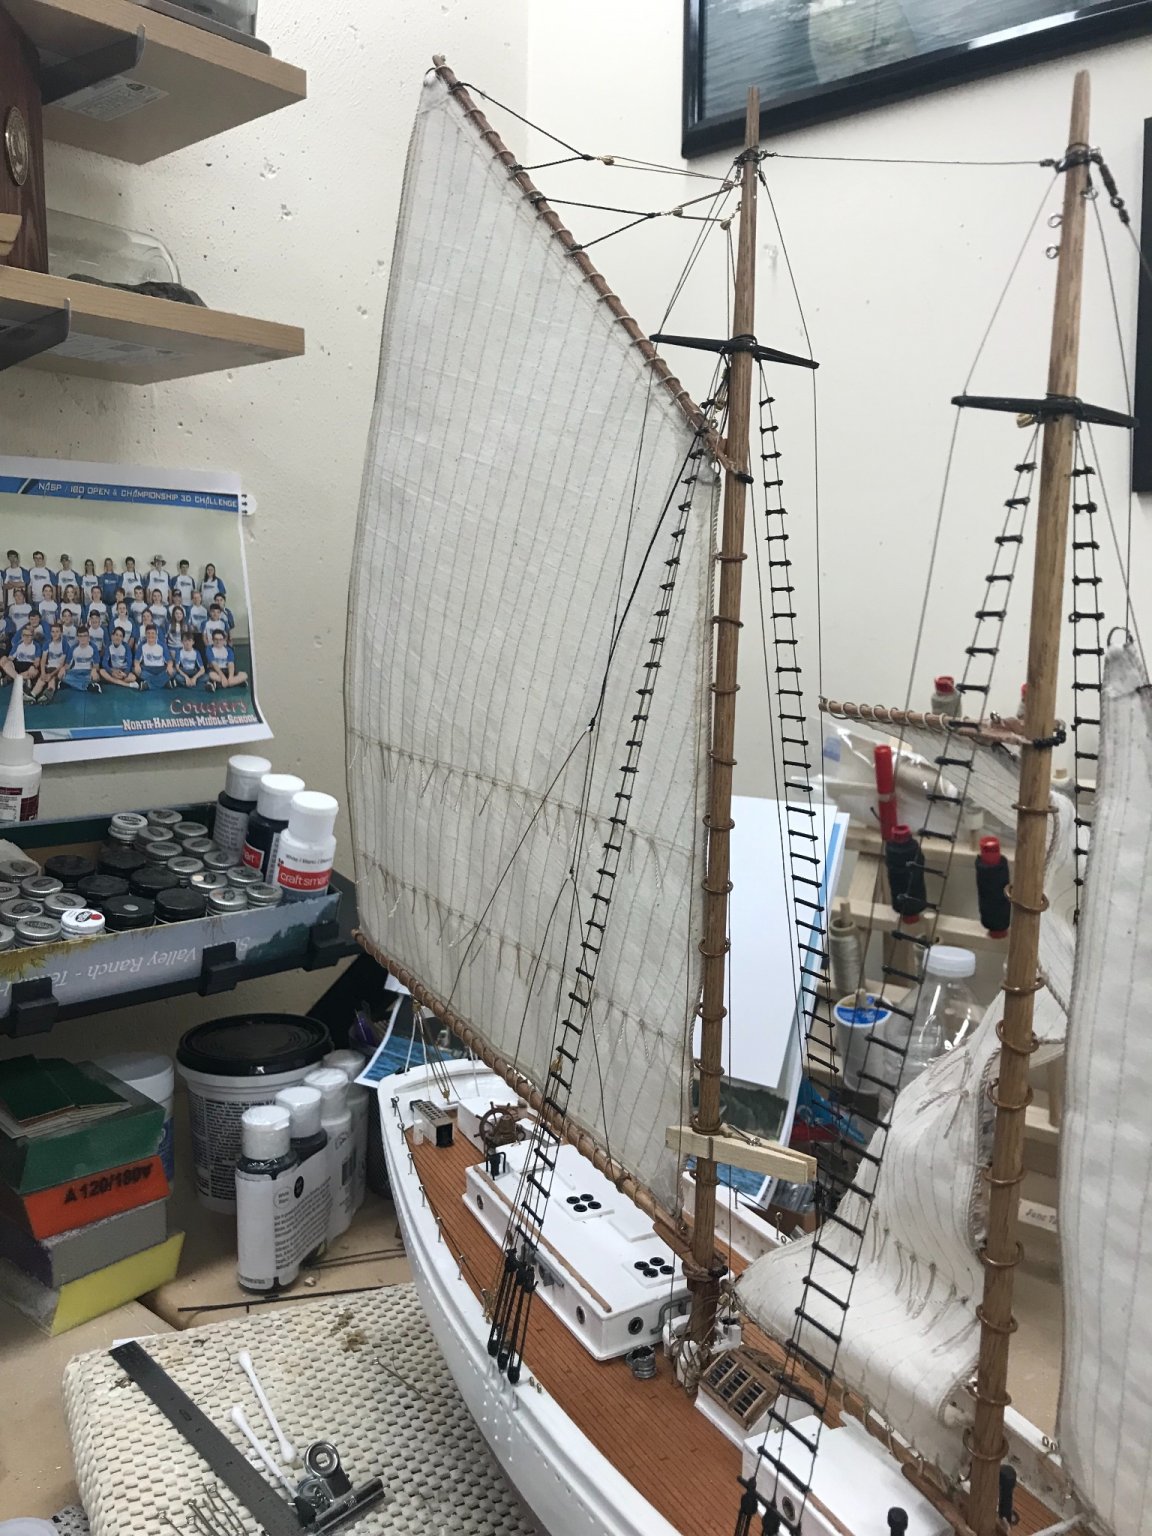
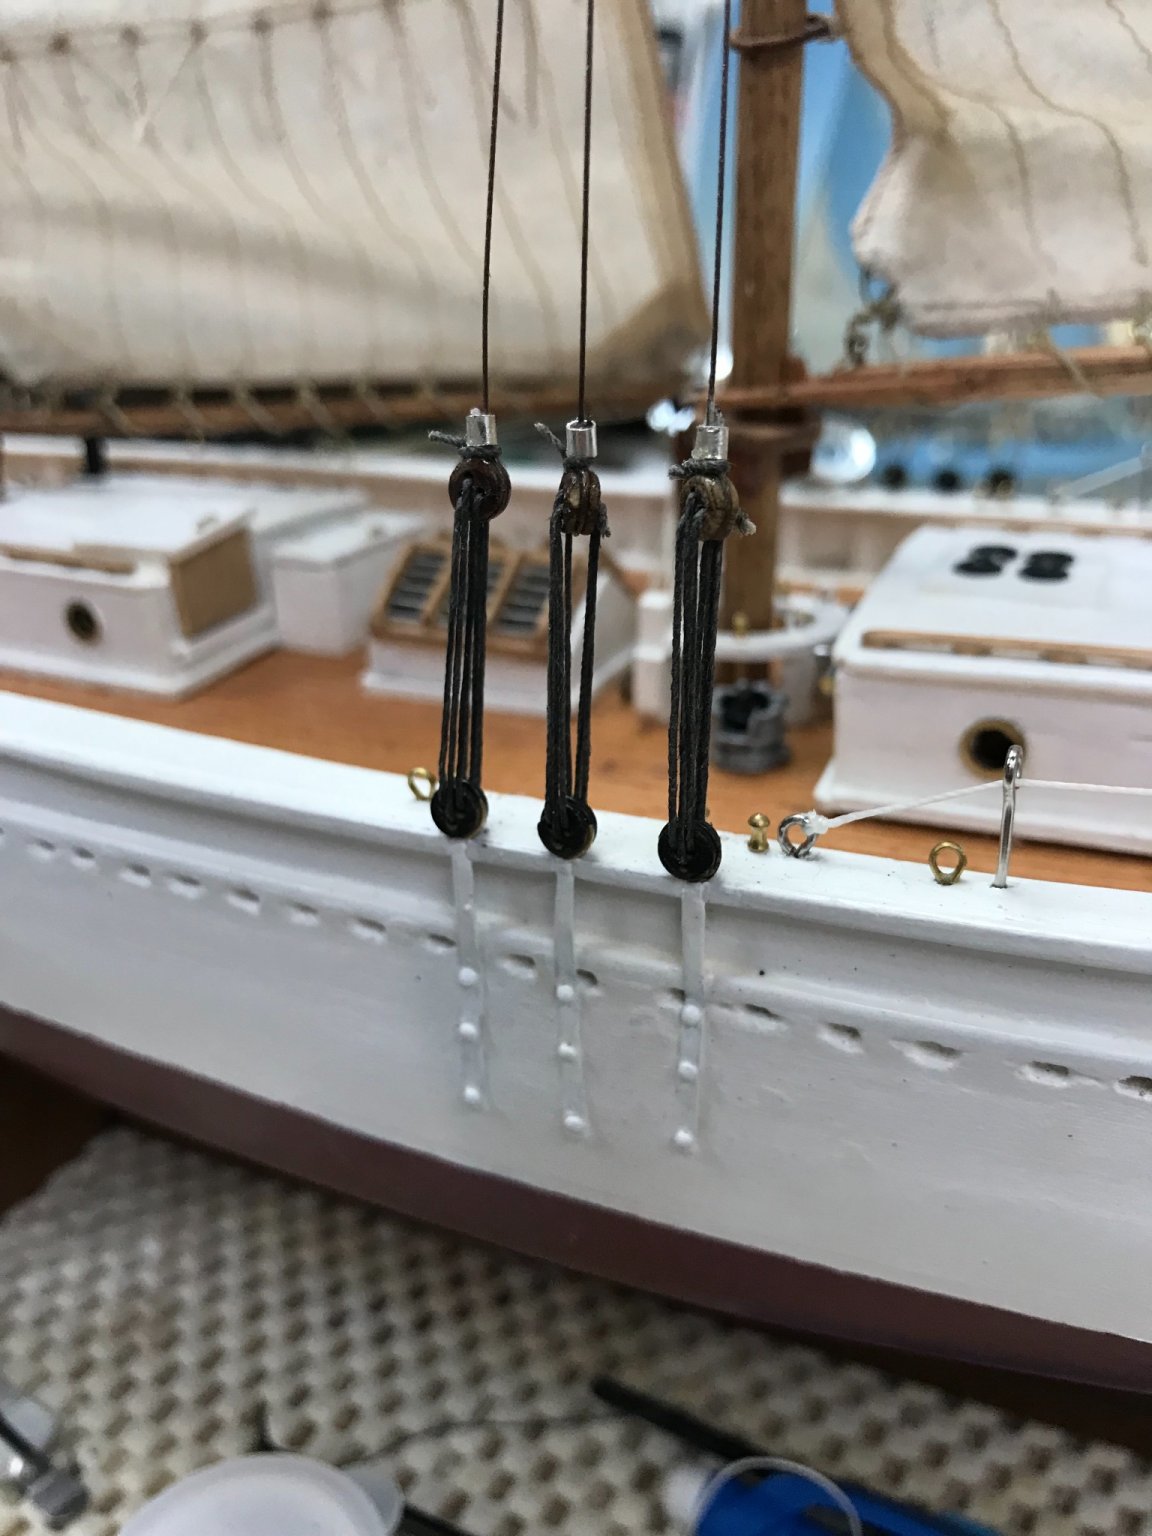
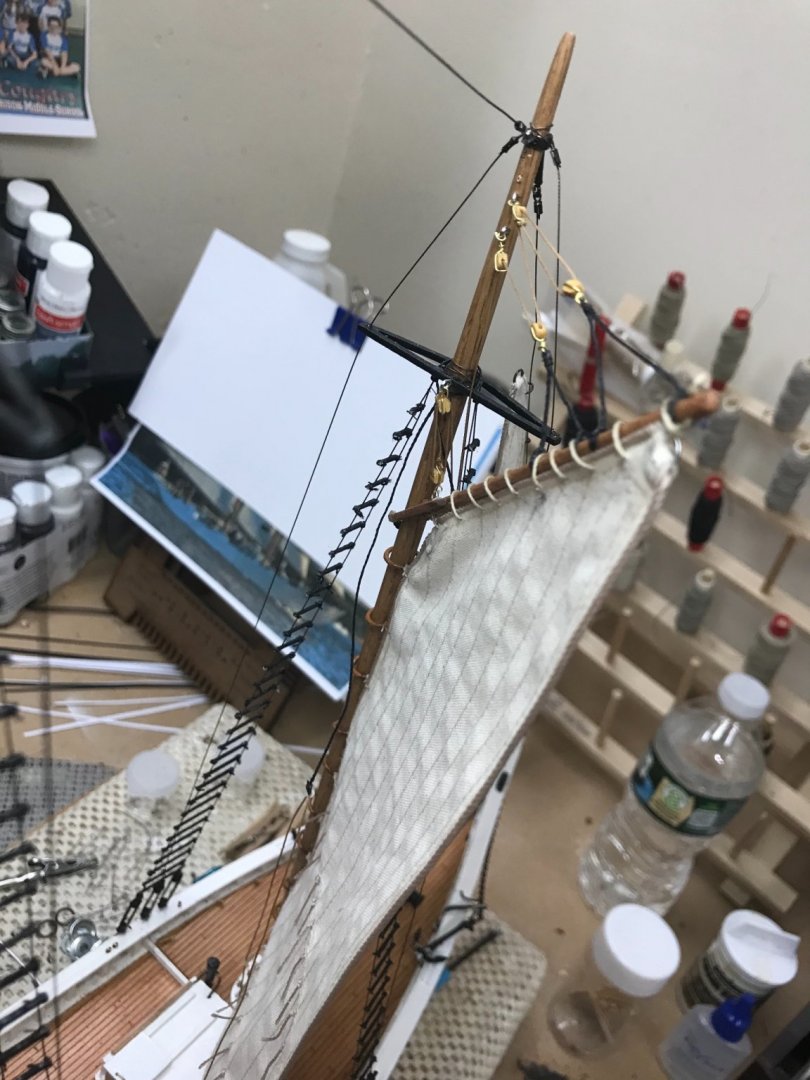
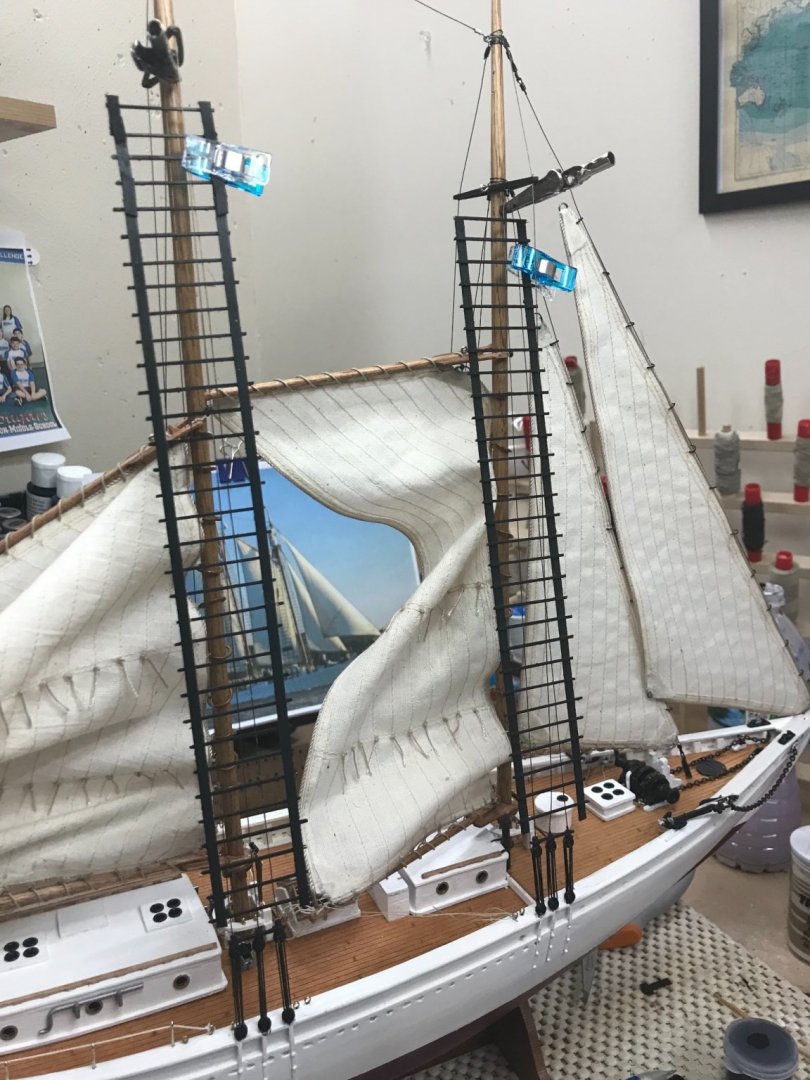
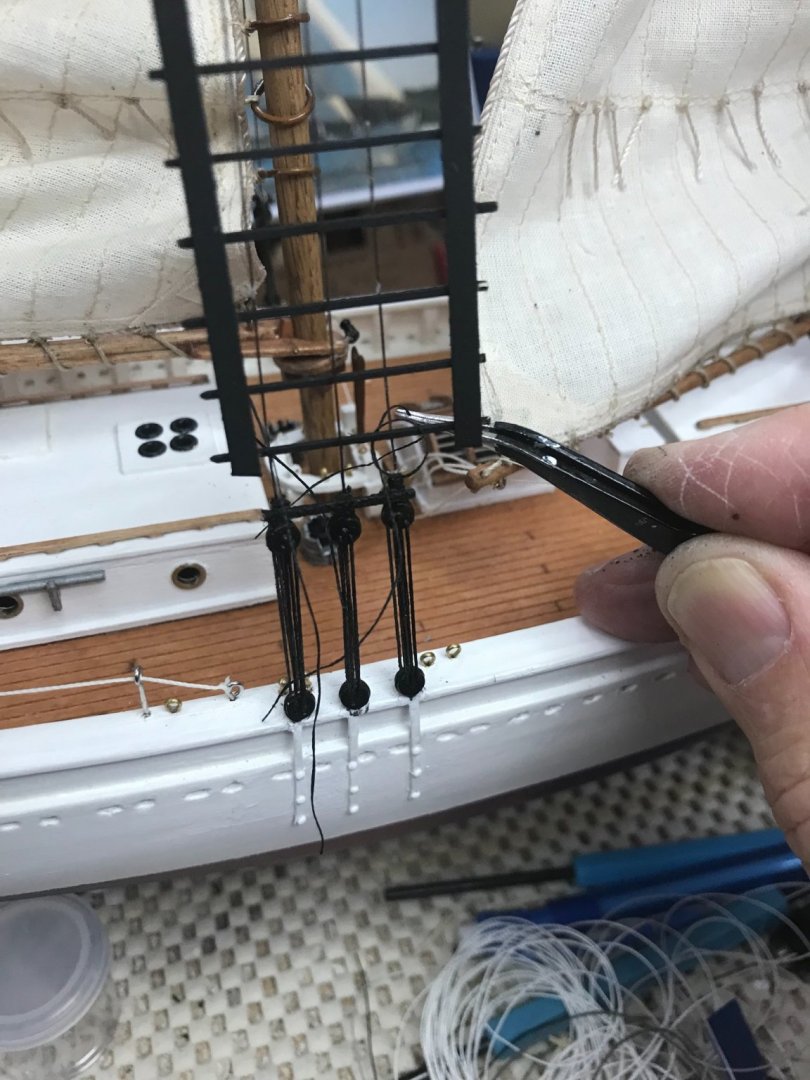
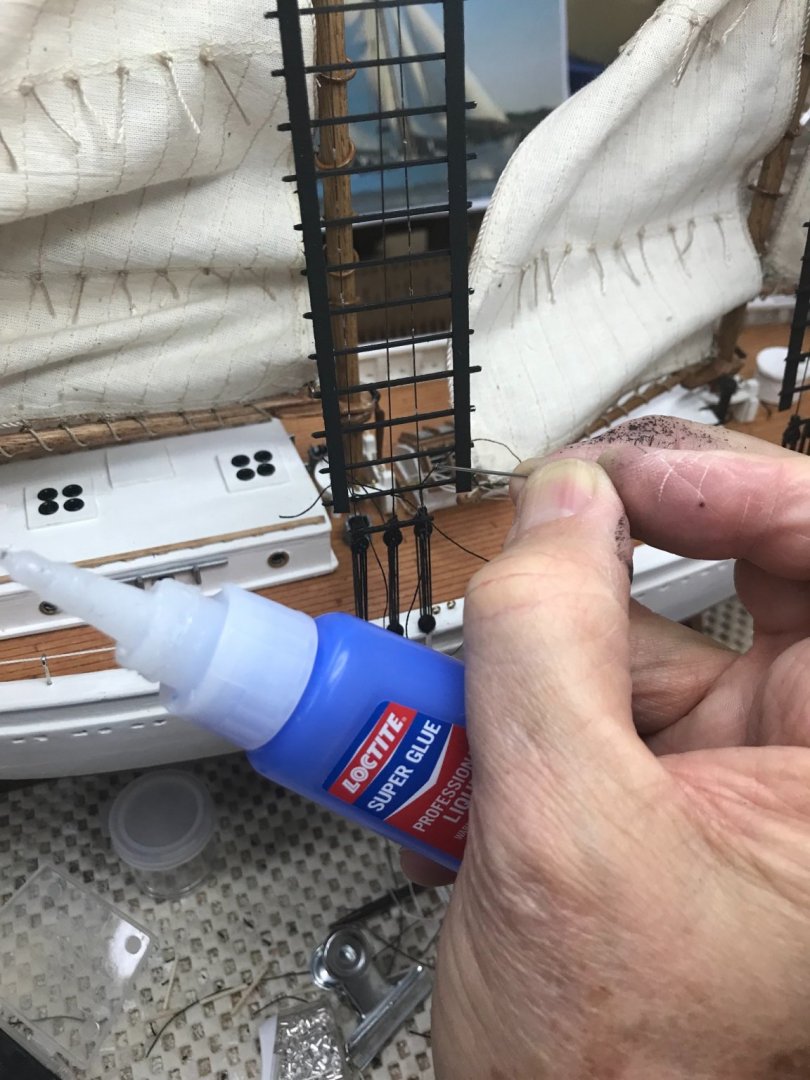
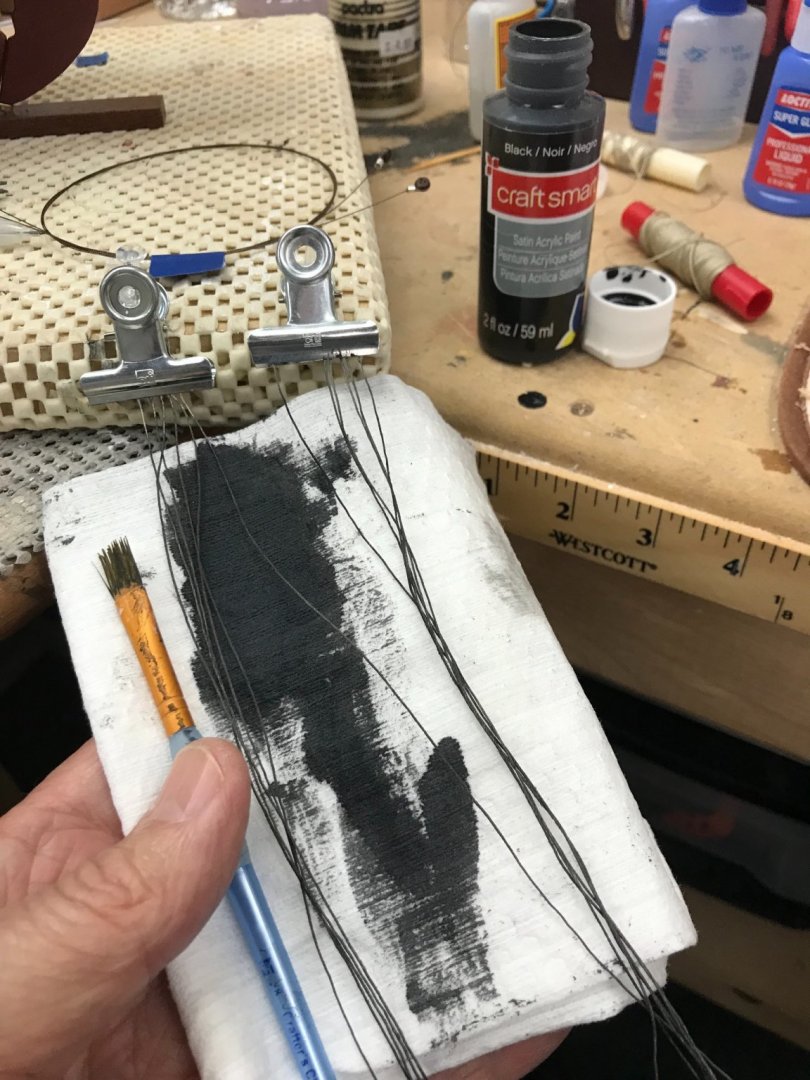
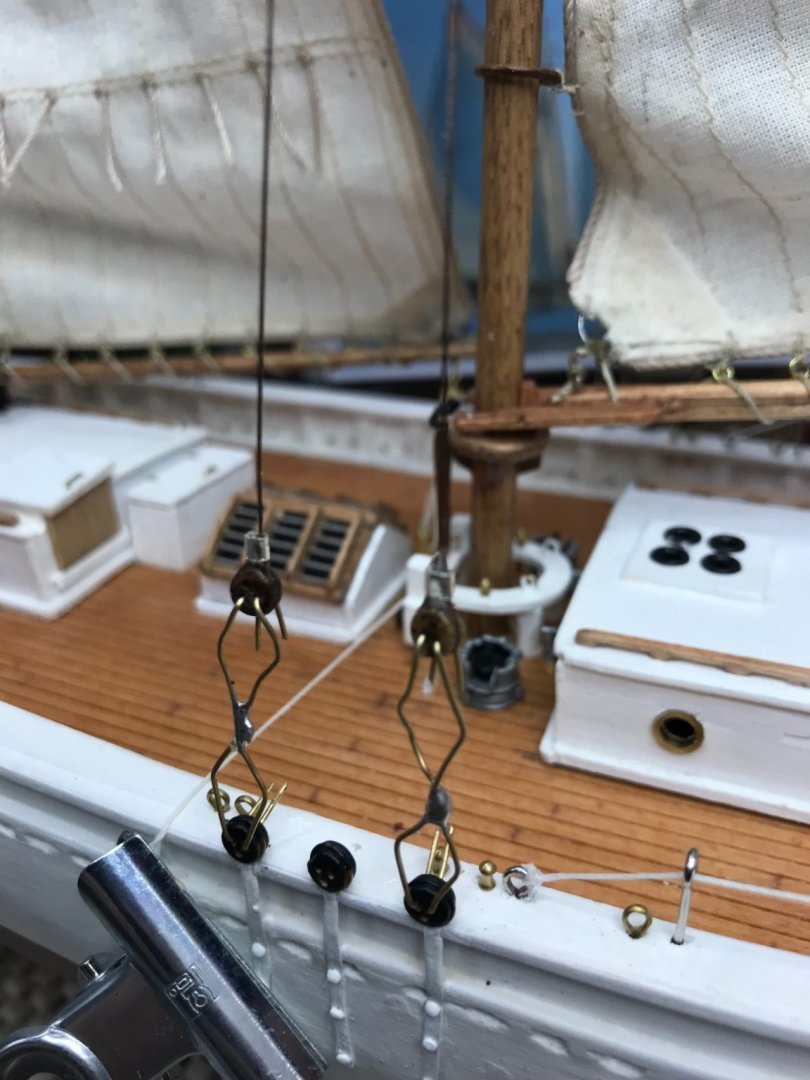
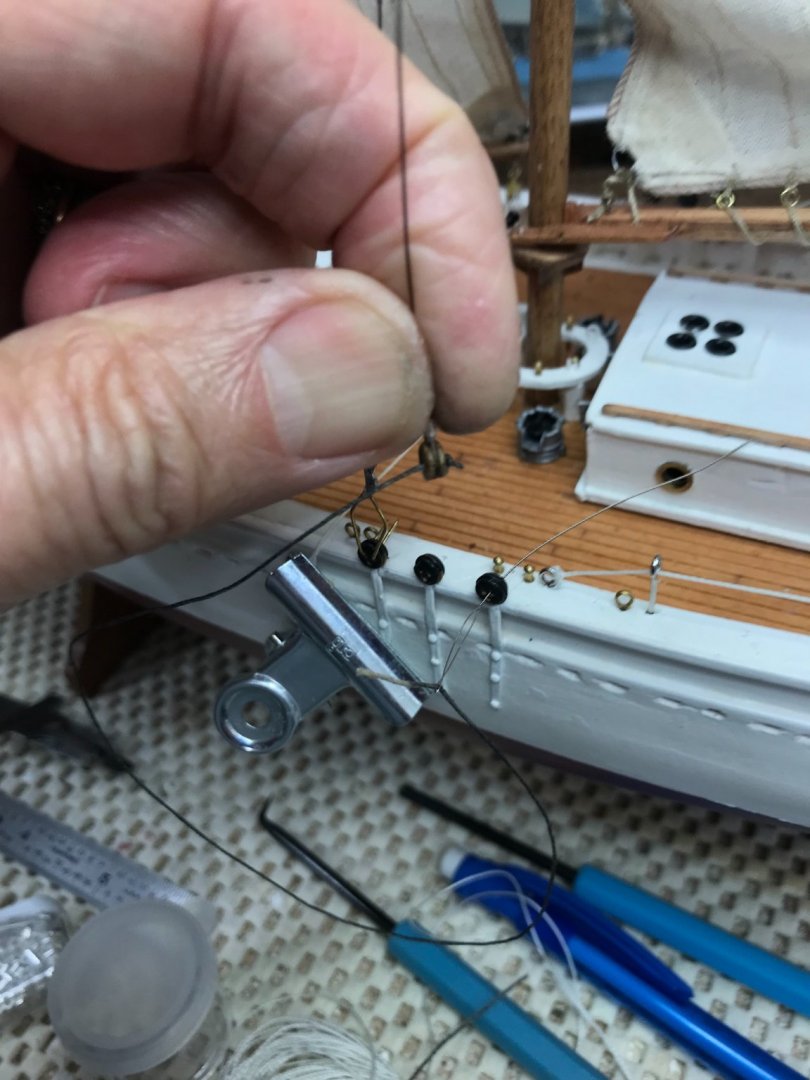
Shrouds… The Bowdoin’s shrouds are cables and the Laughing Whale kit supplies stranded wire and aluminum tubing (1/16” od) for the shrouds. All of which I used to pre-build the shroud cables earlier in this build. This photo shows the wire jigs used to hold the Deadeyes at a proper distance. The rigging for the Deadeyes on the Bowdoin are tarred after installation. I used Acrylic Paint to blacken my rigging thread for the Deadeyes. Using beading needles I thread the Deadeyes. Remove the wire jugs one at a time while rigging the Deadeyes to maintain the tightness. Once the lower shrouds are rigged I then rig the upper shroud. I applied a drop of CA glue to the crimped tubing, per instructions, just to be sure it doesn’t come loose. Upper and lower shrouds now completed on both the Fore and Main Masts. 😎 Its time to get after those battens used as ratlines. 🍻


- 127 replies
-
- 7
-
-
- Bowdoin
- Arctic Exploration
- (and 3 more)