Check out our new MSW Sponsor Innocraftsman
×

ZyXuz
-
Posts
429 -
Joined
-
Last visited
Content Type
Profiles
Forums
Gallery
Events
Everything posted by ZyXuz
-
 Thanks for your compliments! Yea, I've got some good luck on my colours and thus navy blue is my fav!
 -
wow! she is neat! The unicorn had been in my list for a while!! (to welcome the year of horse in Chinese Zodiac ) your build log is certainly my good reference!
-
Thanks John!
-
wow!! your works always neat! I followed the way you made your Race Horse by viewing from the other from in Czech (I don't know Czech, I just watch all pictures ).. It really helps me alot Can't wait to see you finish your FLY!
-
Day 14 Since my ship's color turned darker after 2nd staining, I've decided to give my Race Horse a Navy Blue coat to give better contrast. Result after 7 hours!!! Setting the wales really time consuming.. Starboard Port If you look closely, you can see that I've overdone the lower stripe to black.. -End of Day 14-
-
Day 13 After fixing the stain, I continued on the deck planking while waiting the stain to dry. Same method as the hull planking is used, I scribed one side of the woods using an 8B pencil to give better details. Deck Planking Top View Treenails are also added using mechanical pencil, and finally a natural stain on it to provide protection. Inboard plankings are also done up till now.. Treenail Now the Bulwark.. I will need to cut the gun ports out before I can apply colour on it. I transferred the distance between gunports from the full scale plan provided, mark them on a piece of long cardboard to get better accuracy. Bulwark's Gunports I drilled around 4-6 holes at both sides first, to help cutting them out. Gunports - End of Day 13 -
-
Thanks Anja! I've searched through the link you suggested here, and googled for more options.. and seems like I've no way to repair it, but to resend it and stain again.. Before this I've already learned that pre-stain conditioner will help on staining, but I didn't purchase it because the smallest size in my local store is way too big for me! 30+ Oz!! Well, here's the result... still not so satisfying, but at least it already covered those major defects especially those corner parts.. Port Starboard There will be 2 blue stripes running along the middle part of the hull. Let's hope it can help on 'covering' the remaining defects..

-
thanks!! hope my build log helps!
-
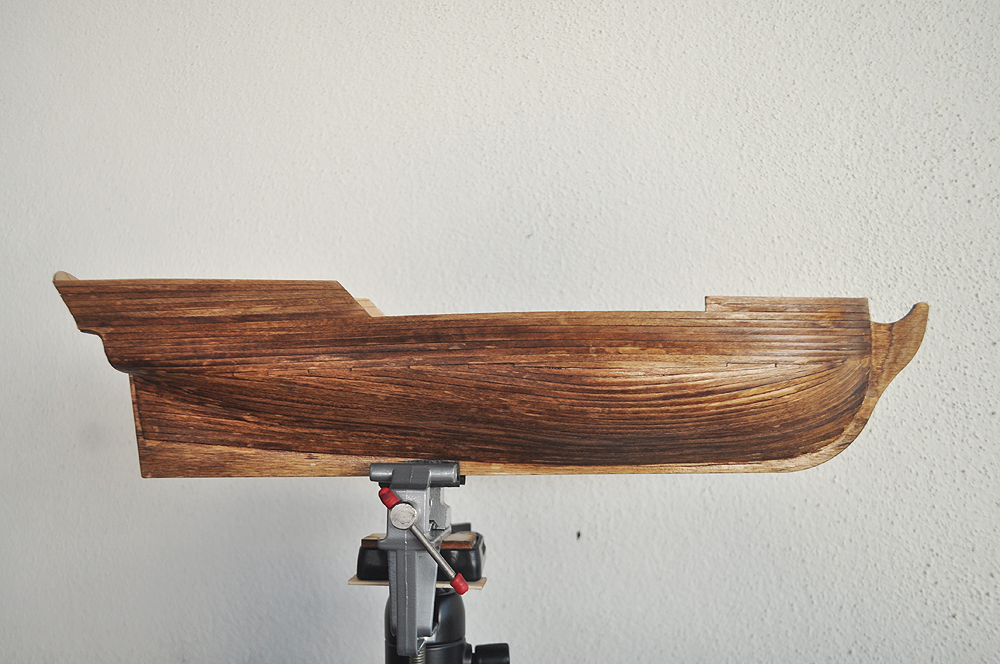
No too big issue here on the 2nd layer planking, since I was just following the 1st layer.. Anyway, I think that I forced the wood strip a bit and caused a 'flaw' at the middle part.. Port Side (A Flaw Can Be Seen at the Middle) I also scribed the wood strips using a 8B pencil, that's why you can see obvious black between woods. Stem Starboard Here you can see the flaw more obvious from the picture below.. Anyway, comparing to the full scale plan.. the wale will just cover it! Wale Will Cover That Flaw After sanding with 320 and 600 grit, I then continued on staining my ship. I bought a Dark Walnut, and a clear gloss stain in order to get my desirable color.. As shown in picture below, from top to bottom: Dark Walnut, 50/50 Mix of Dark Walnut + Clear Gloss, Clear Gloss. Second One as My Ship's Colour I chose the 2nd one as my ship's stain colour, which look pretty similar as the picture on the box... anyway, a nightmare began!! When I swiped my brush across my ship, some portion just didn't 'bite' the stain!! And cause all these big freckles on it.. HELP!!! I think they are caused by the excessive glue that applied earlier, and I tried sanding them and stained again the next day.. however, it still return me the same result.. Any suggestion?
-
yea, and I just bought a new adhesive.. just done sanding and filling.. now working on 2nd layer
-
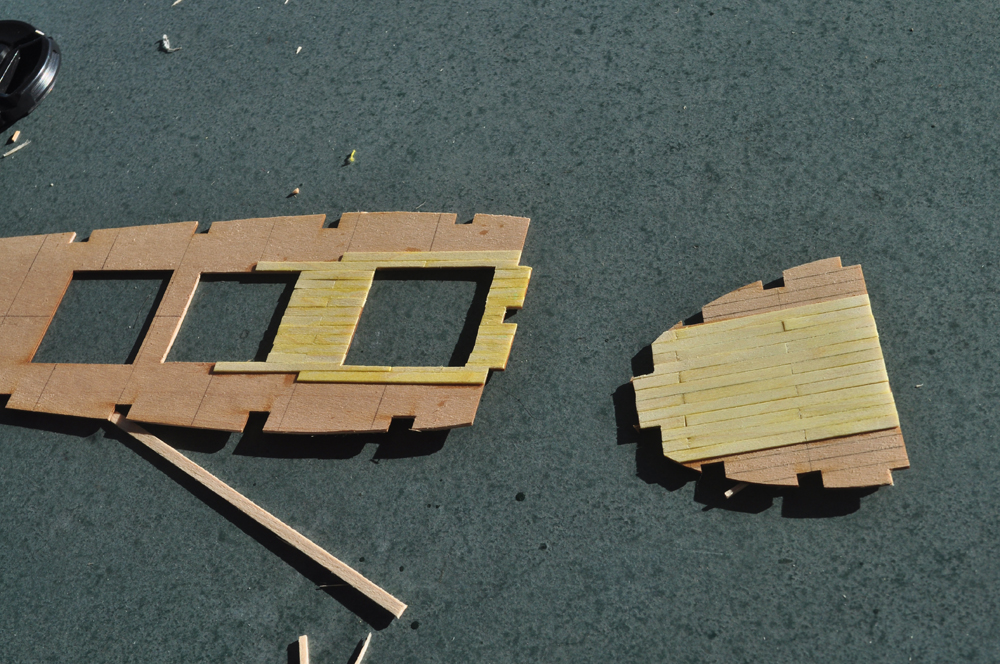
I started my 1st planking since last Sunday, and it took me around 20 hours!! Anyway, it's so much fun!! First Temporary Batten Front View I don't think I started it real smoothly.. here's one example I've over tapered here.. Anyway, it can be easier covered by wood filler.. Over Tapering Aftermath Worrying the result turns worse, I stopped here and continued on the garboard plank part.. Garboard Planking Same step is carried on until they touched each other at the bow side.. So, now it's time to fill up the center part.. Well, I saw this picture from another forum.. it's in Czech I followed the method above, since the Rule of Thumb says tapering cannot exceed half of the plank original width... and the result is quite satisfying Following the Rule of Thumb This method really took me some times.. Stem side Then, the stern I filled them up using some stealer planks, full and half.. 20 hours after the 1st plank is positioned.. You can actually see a 'hole' there at the stern side!! LOL I trimmed the woods too early before I know they will need to cover that part!! Stem Side Stern Side Just when I about to start the wood filling, I found this.. zzz This is the deck planking I done last time during my spare time, and see? They turned yellow!! It is caused by my cheap adhesive.. 3 pieces (9g) for just RM1.20 (less than US$0.40!!!) And since the deck planking is using thinner wood strips (0.5mm), so it made the result more obvious.. I think I'll need to change a better brand before I start my 2nd planking

-
Thanks!!
-
Day 4 As mentioned in the previous day, the cabin sits between bulkhead #10 and #11 where only very limited space for me to design it. I drew plan to make sure everything sits right: Draft on Captain's Cabin So, I've only 49mm * 25mm of space for me to include everything into the cabin!!! This is going to be very challenging!! I started with the table first. Since I still kept all leftover wood pieces of my Black Pearl making, it makes my work easier... No big issue on making the table.. around 20mm * 8mm. And then, the chair.. The Chair, Tiniest Among All Making the chair is the HARDEST part!!! To make sure all these furnitures looks in ratio, the chair's seat needs to be only at 4mm * 4mm, and its legs at 1mm * 1mm!! The tiniest wood strips I have is only 1mm * 2mm, in which I'll have to cut them in two!! It took me around 30 minutes to complete this, with few breaking wood strips.. The Map! 'Map' Dip with Coffee to Give Vintage Effect I've also made a map (ok, just a paper.. ) to fill the table. In order to give it a vintage effect, I added some flavours (IPOH White Coffee) on it I canceled my cabinet planning, and replaced it with a mirror. This idea came out when I was eating snack for my breakfast, which the inside of plastic bag is a good reflective body. Mirror with Stands Using Previous Ship's Material The stands are the leftover pinrail material from the Black Pearl, which I think suitable for this too. To fill up the big empty space on the port side, I added another pole hanger. It is made by using one copper nail as its pole, and copper rings as the hangers. It really took me sometimes to glue the hangers on the pole... Pole Hanger Beside the Table For the bed.. Too sad that I've forgotten to take photo on its progress.. It's done by using a 4mm thick wood piece, and few small pieces to tissue papers. I put a folded tissue beneath first, to make a 'bulge' effect, and then only 'wrapped' the whole thing up as a bed sheet. For the pillow, I cut out a long 'tissue-strip' and wrap it up at one end of a wood strip. Glued it, and then cut off the end of the strip. Captain's Cabin As Seen to Stern Side Take a close look, and you'll see a pen in a container on the table!! :lol: The container is made by a spanker bead from my Black Pearl; while the pen is made by a refill of mechanical pencil! Take a clear look again!!! YES, I made another chair to fill up the space!!! Now left only a door to complete.. It's done by using the removed part from the half deck.. I added planks on it, and drilled a hole as sash of door, and then a nail as door knob! Door to Captain's Cabin So, it's how it looks like now!!! ^^ The Captain's Cabin I can finally proceed to the most fun part of ship modelling... PLANKING!! - End of Day 4 -
-
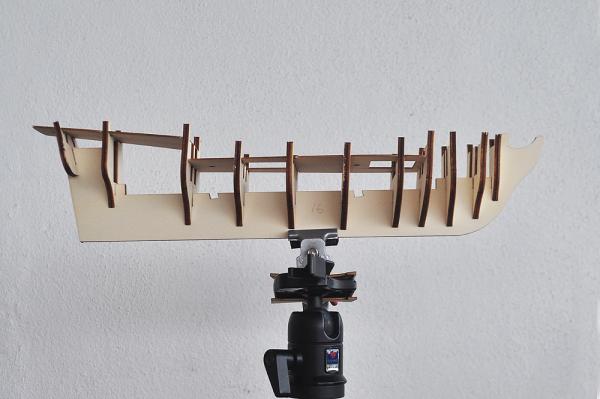
Day 3 Before I started Race Horse building, I've been thinking of making the interior of Captain's Cabin. So, I searched through the net to find one good example.. and here it is!! Interior of Captain's Cabin Of course that's no way that I can make such complex cabin, this is just for a reference!! So... Here's the plan!! Draft on Making Cabin The red shaded area are region that need to be cut off. Part between bulkhead #10 and #11 will be the cabin; while part between #11 and #12 will an empty space between the cabin and the stern window. Full Size Plan Comparison Comparing to the full scale plan, the window is right within the area.. So, it's workable!! Now, the stern window part.. which is much more difficult to handle. The reason I remove the area on #13 is because they are blocking the view from the stern window. However, if they are removed, it will cause minimum area for me to apply glue on it, which makes me no way to hold #12! Removing Shaded Region of #13 Now you can see how small is that area to hold #12. To solve it, I'll need to make another wood piece increase the surface to stick on #12. Extra Wood to hold #12 This extra wood will be placed between the tips of #13. Holding Firm #12 On Position DONE!!! Anyway, #12 is actually temporary.. Because there is no 'holes' to allow people to see through it. I haven't had a clear plan on it yet, maybe I'll need to drill a 3 big holes on it; or I'll directly put the cast metal on! The purpose to put #12 on position temporarily is to give body planking a set point. However, there's another issue here... the cast metal stern window doesn't fit perfectly! I have currently no idea on solving this. Anyway, I think that the double planking will cover that empty part. Let's put it aside first. This Is So Not Good So, after all these planning and cutting I can finally put my bulkhead on!! In my case, I used a rubik's cube pieces to help them set in right angle. Rubik's Cube Pieces to Help Positioning Bulkheads How it looks like now All Bulkheads in Position O.K. - End of Day 3 -
-
wow! They're neat!! I'm making a bomb vessel too!! now i've a reference for my ship! Looking forward to see your progress!!
-
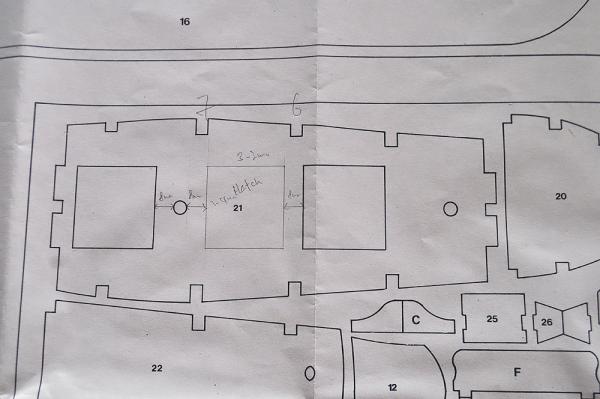
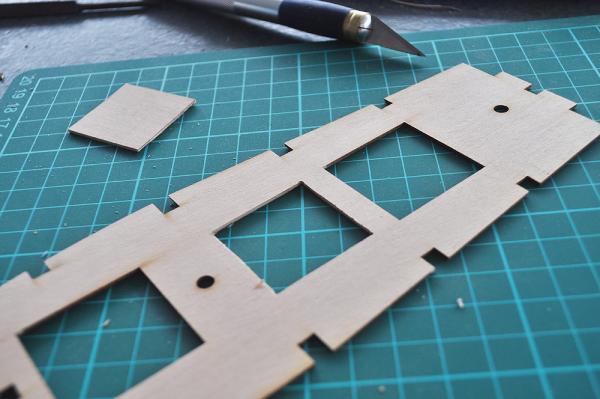
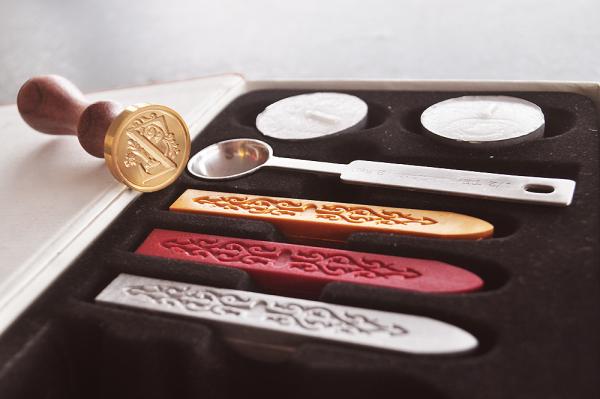
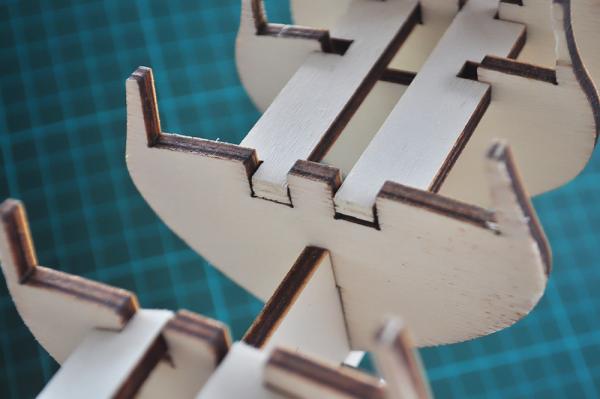
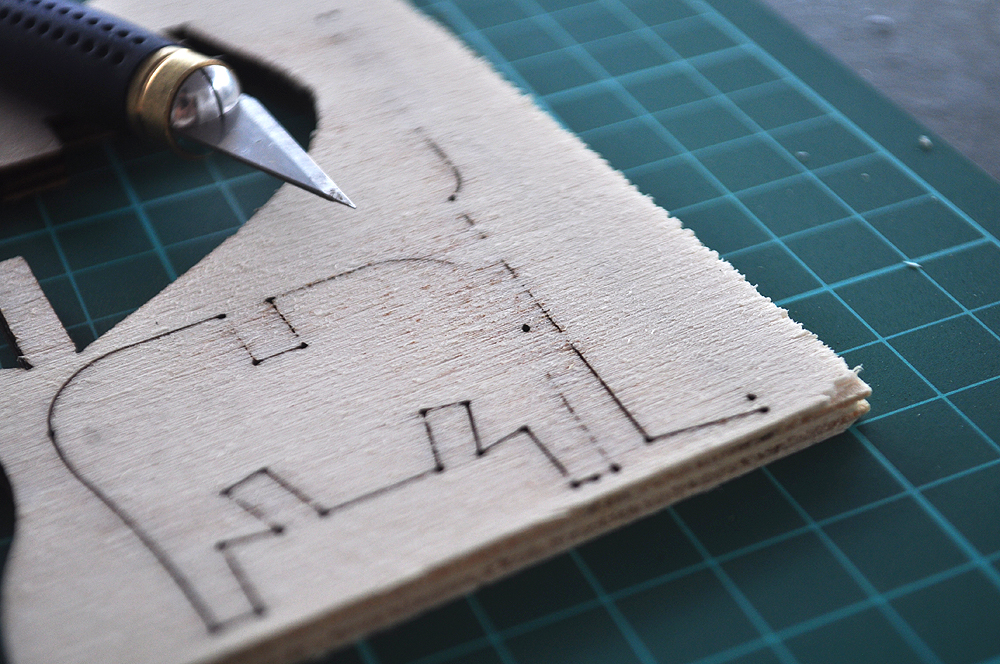
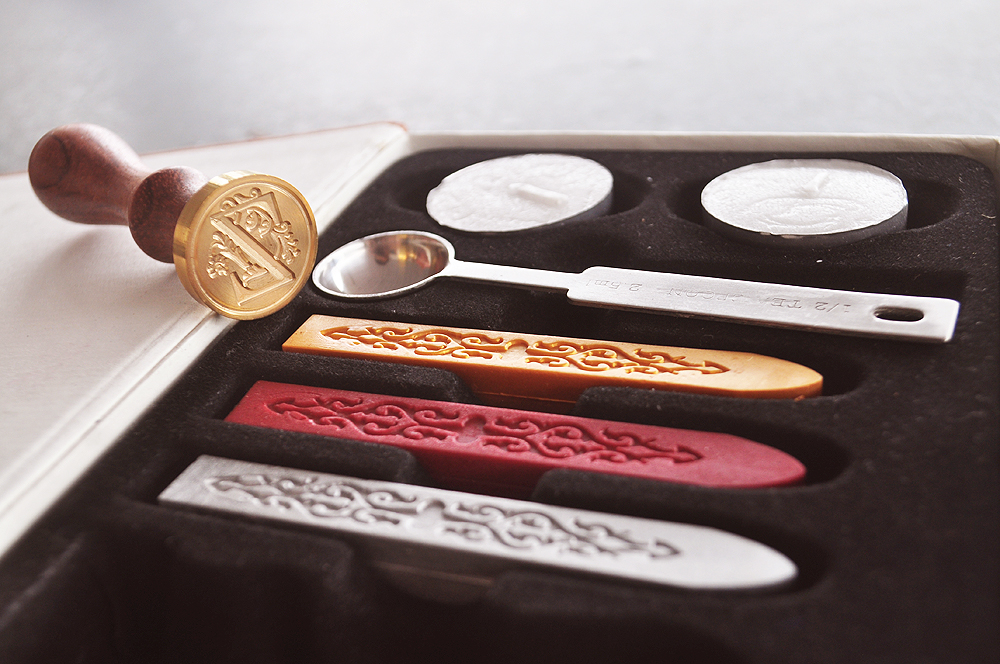
After healing from that silly cut, it's time to get back to work! I almost miss out the bulkheads beveling part which is so much important in ship modelling. So, this is what I've done. The Sergal instruction shows only first few bulkheads need to be beveled, but I personally think it's best to do all. It doesn't take even 30 minutes after all!! OK, Let's get back to the signature! Which cost a scar on my big thumb!! I'm placing that right beneath the extra hatch that I make, which is between bulkhead #6 and #7. To make it looks better, I've also made planking within all visible area. The rectangular board is where the signature will be! The stamp seal comes with 3 colours: gold, silver, and red. Since it will be dark inside, so I chose more shiny colours.. gold and silver!! A breath on the copper seal head + a slight press on wax... oh ya, and a drippy drippy I named it "Planet Z and Its Moon" XD So, it's basically how it looks like now.. Didn't have much time on weekdays.. this is basically the progress in one night
-
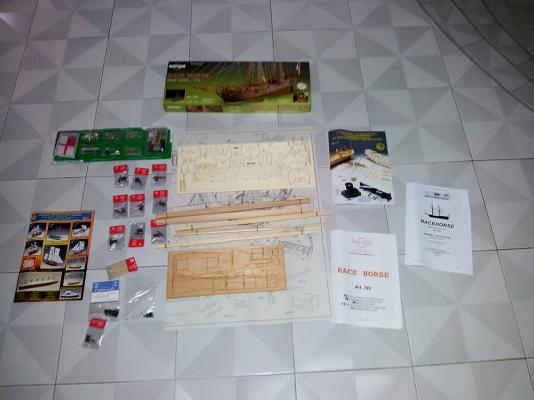
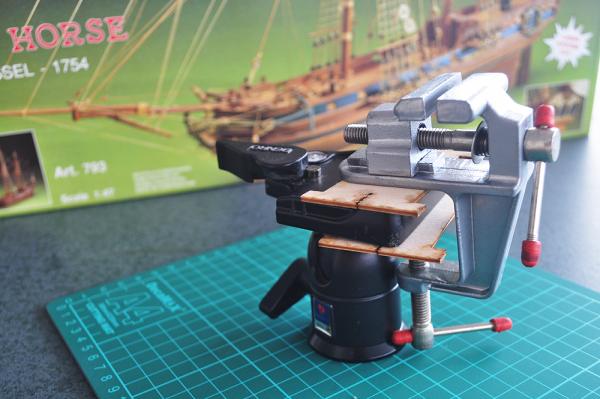
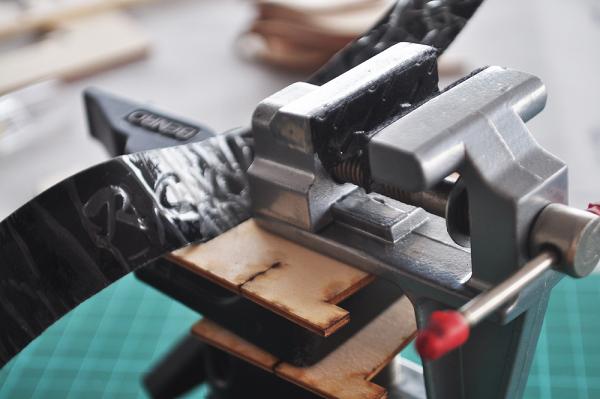
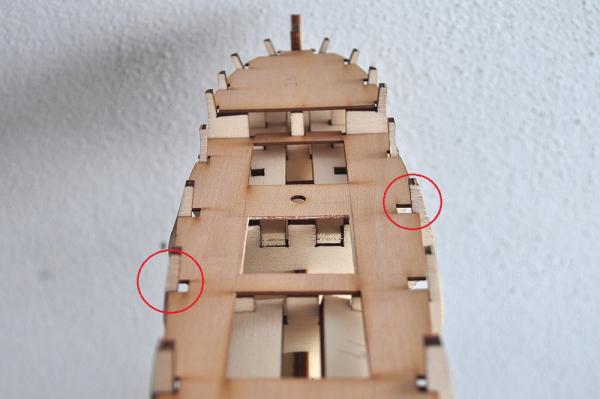
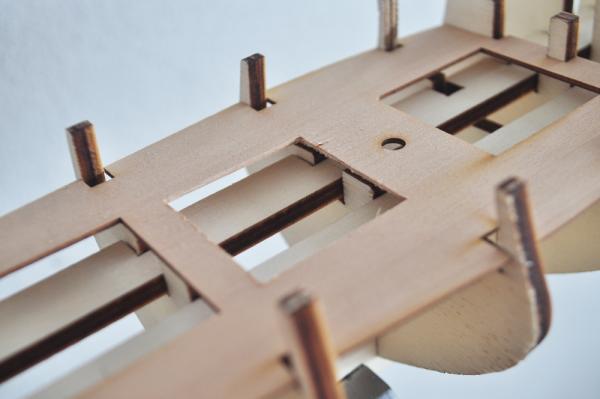
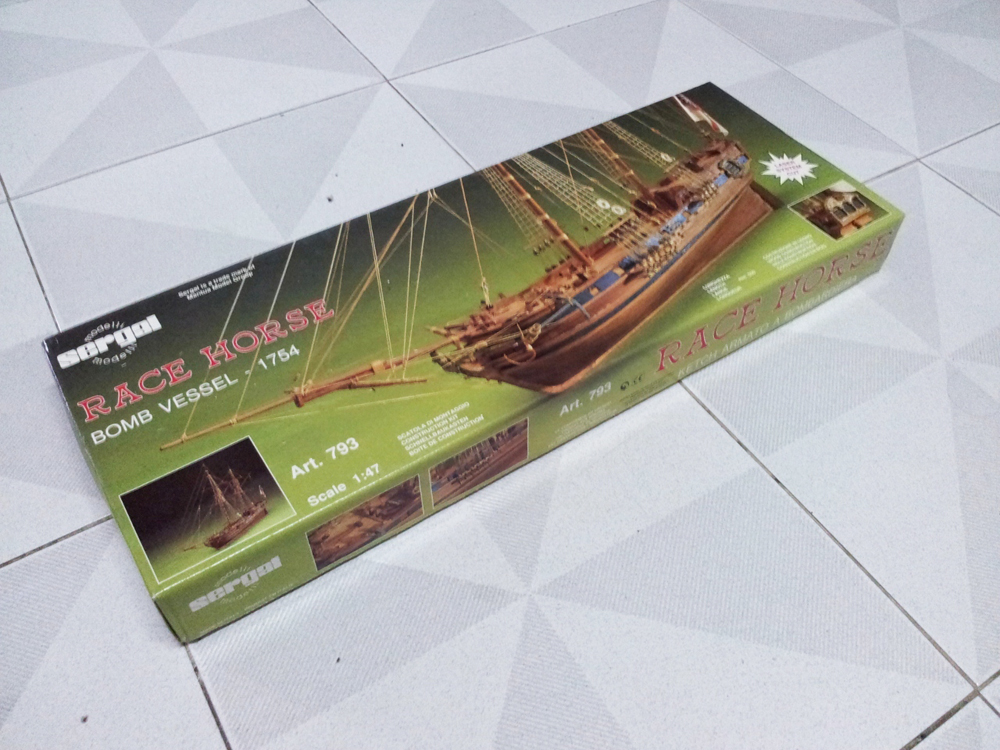
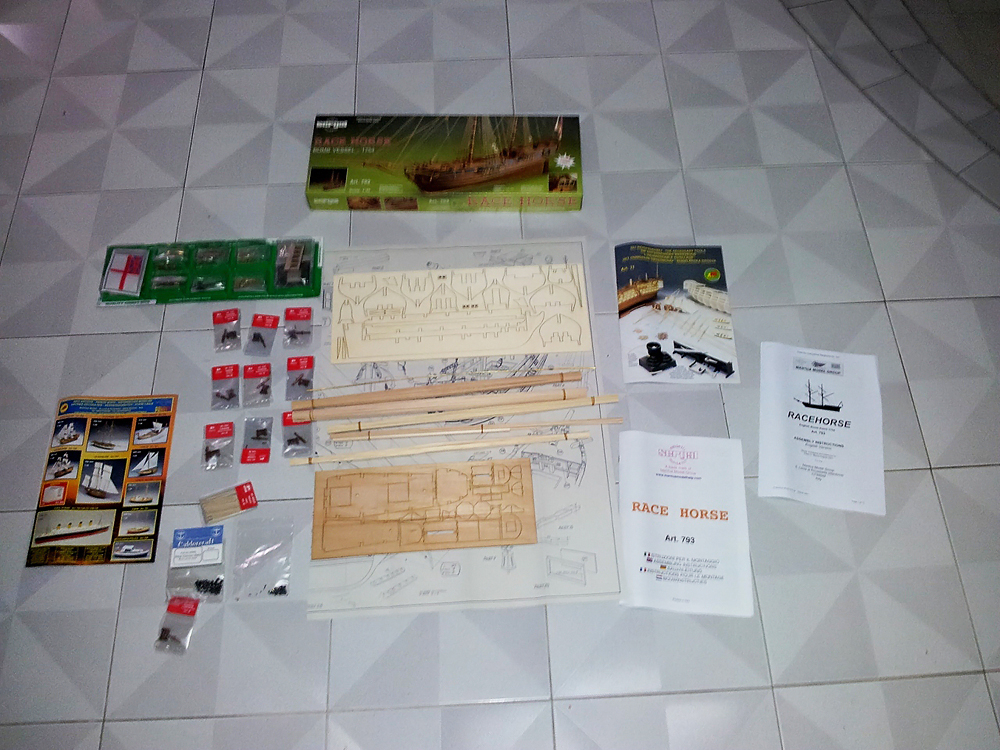
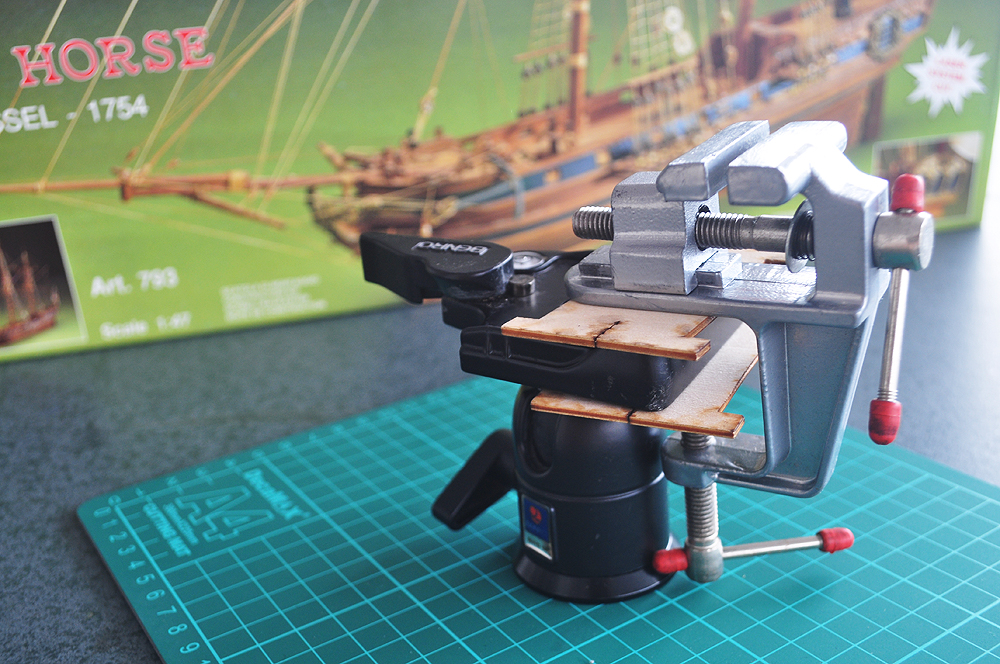
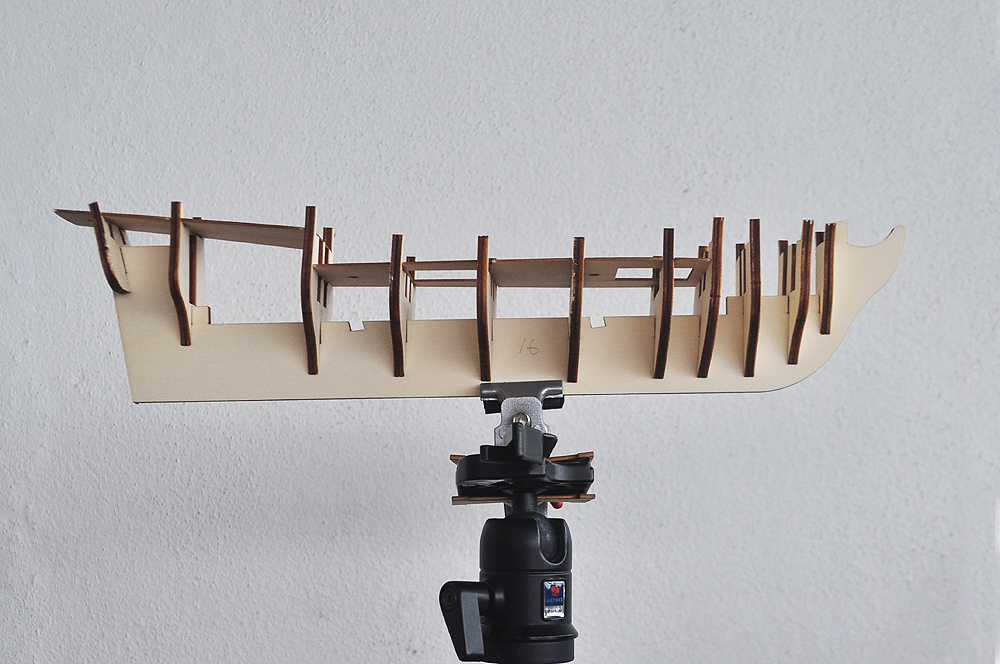
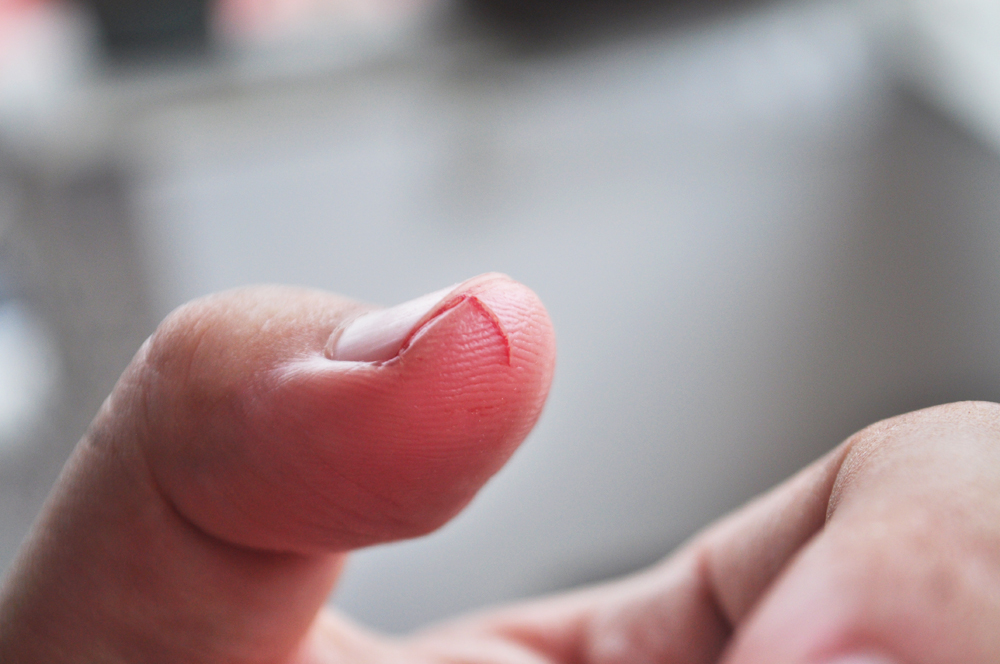
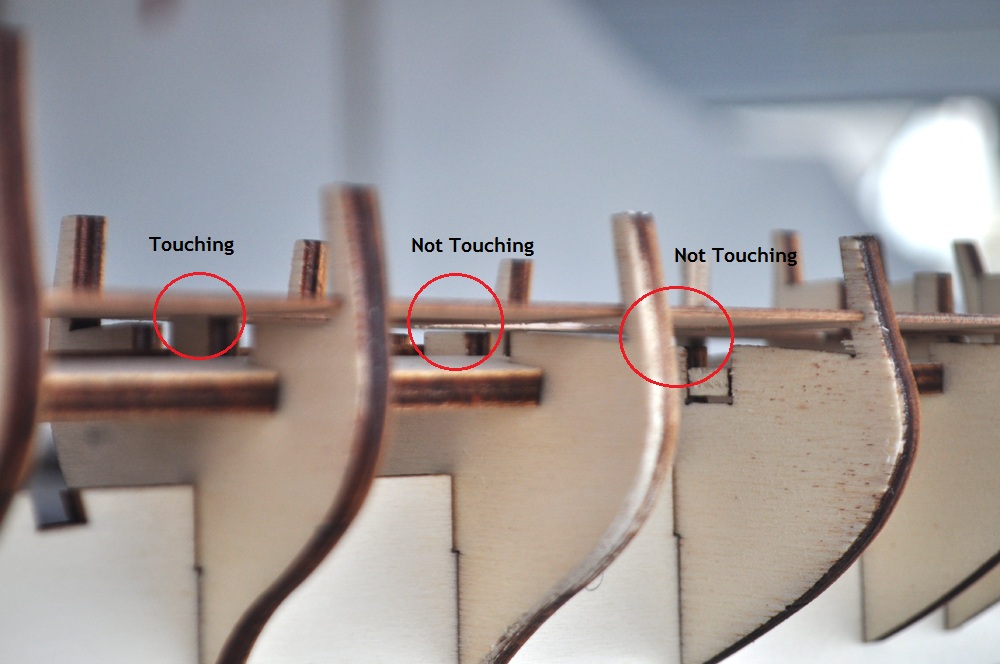
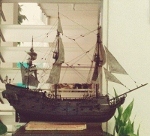
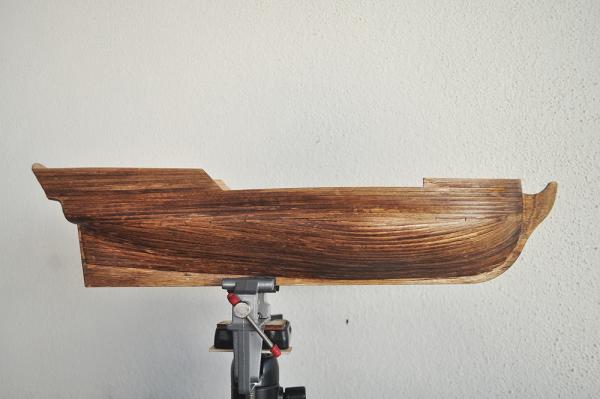
This ship has a long story to tell I ordered it from Cornwall Modelboat, and it was shipped immediately, and reached Malaysia 2 weeks later.. However, when the postman send it to my house there wasn't anyone at home! So, he left a notification message of my parcel.. BUT, in a different mailbox :mellow: which my dad actually sealed it with duct tape (because bees love to nest there..). I've really no idea how he break it.. Since we don't use the mailbox anymore.. I thought CMB lost my item, and contacted them several times.. and gave up... Until 3 months later, I saw a notification message in my mailbox (this time the correct one), with a BIG red "REMINDER" on top!! I was like "WOW!! Miracle!!", and quickly went to my local post office and pick up my item... I sent the same 2 pictures back to CMB to clarify everything!! Anyway, it's here finally.. Here it is!! And everything is good I added 10 sets of Cannon with carriages, some Cannon balls, 1 set of gratings, and a bell! My DIY clamp! not really diy actually.. just added a clamp on my tripod ballhead!! And added racquet grip to protect the false keel! This is how it looks like First problem... Although laser cut, but still not so through.. I haven't cut out the ruddle (on the most right, in case u can't figure out ), will take it out next time when I am in a good mood So, here's my plan.. I want to make an extra hatch on deck, since there's a big empty space! So, I cut off another 'square' there which is parallel to the bombard docking area.. Here it is The main purpose of the hatch is not jz for decoration!! But I want to make a 'signature' in my ship!! By using this!! An old Stamp Seal A 'board' will be added inside the ship, to hold my signature However, when I again put the deck on the bulkhead only I noticed that the half deck (alignment bar) is actually blocking it to see through.. So, I removed that part that blocking.. within bulkhead 6 and 7.. Hope this won't cause a big deal in future.. since I can't rely only on the alignment bar to secure all my bulkheads in position Then when i decided to make the board for my signature... I cut myself.. =.= ON THE VERY FIRST DAY I MAKE THIS SHIP!!! THIS LITTLE INJURY WILL NOT STOP ME FROM MAKING MY SHIP!!! Ok, anyway... I'll have to stop today... it's really hurt So, I started posting here.. Okay, enough for story telling... now I've some question to ask Does anyone of you encounter this problem also? The deck doesn't sit perfectly to the bulkhead.. Let's take the right circle as example.. The 'hole' can be easily covered by deck planking, but what about the extensive space created by the bulkhead? It seems hard to be covered by deck planking... Any suggestion? Another one.. How do I solve this? It looks serious... bevel the touching one??